peteski
-
Posts
9,226 -
Joined
-
Last visited
Content Type
Profiles
Forums
Events
Gallery
Everything posted by peteski
-
 Thanks for checking again and for the correction. I was surprised because I have couple of Zvezda airliners kits and while I have not built them yet, just from examining the parts they look like high quality kits, with fine details and engraving (do I dare to say "almost Tamiya quality"). I might change my mind if the fit is poor, but I don't think that will be the case. I suppose I could look for online build reviews for them to see what others (who actually built them) think.
 -
That would be fine by me, but the big problem is that they affect lives (and deaths) of other people.
-
I use all sorts of recycled containers. Apple sauce cups, Chinese food condiments containers (for hot mustard or duck sauce), etc. I also use some blister packs (if they are tub shaped with flat bottoms). Sometimes I also use liquid medicine measuring cups, and other containers I can't remember now.
-
That Revell kit is a repackaged Zvezda kit? I thought it was a Revell original.
-
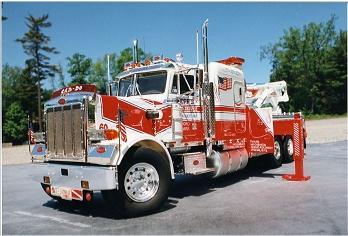
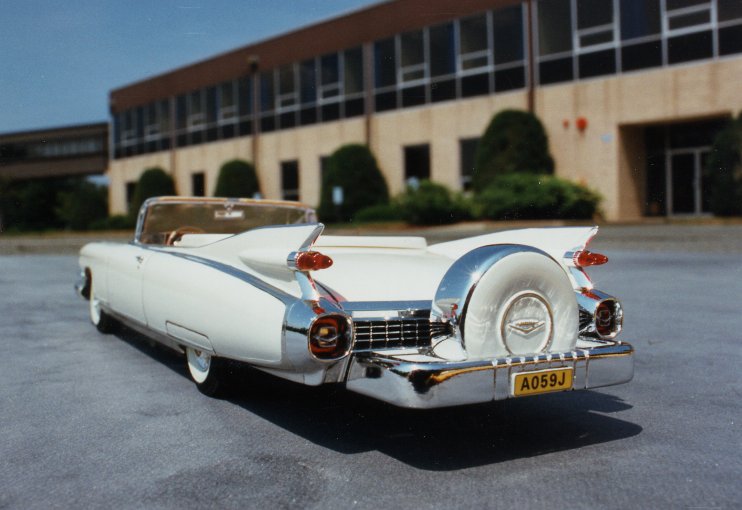
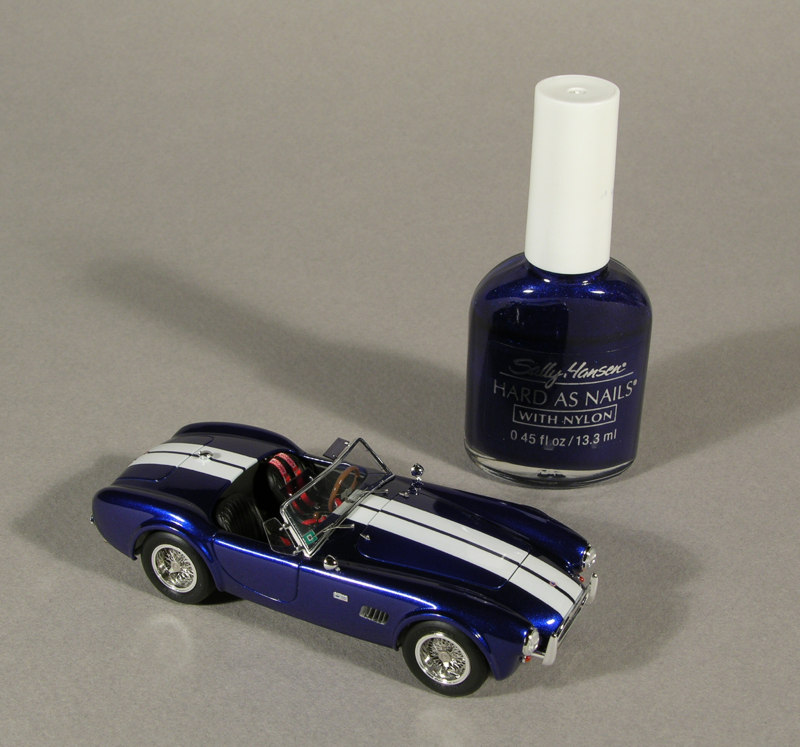
Welcome Blake, I noticed that most of the hints are for priming everything. Well, as a counterpoint, I very rarely prime my plastic models. But I also use paints designed for plastic models (Testors, Tamiya, etc.). I don't think I have ever primed any non-body plastic parts, but I do wash the plastic (either with dishwashing detergent and warm water, or 95% Isopropyl Alcohol). I only prime the body when the plastic is much darker color than the paint I'll be using. So if the body is white plastic - no primer, but if the body is dark blue or red for example, and I want to paint it white or yellow, I prime it for better pain coverage (primer I use will be white or lt. gray). These models featured below were built by me between 20-30 years ago. Built over 30 years ago. It is 1:12 scale. I used all Testors and Pactra paints (spray cans, before I owned an airbrush). Body was white - no primer needed. But the fender flares were black plastic so, I sprayed them with white primer before gluing them to the body, then sprayed everything red. No clear coat. Wheels came with gold "plating". I sprayed them silver without removing the "plating". If you are wondering about the photo quality, this was before digital cameras - it is a scan of a paper snapshot photo. This is 1:8 scale Pocher Mercedes 540K kit. Body was black plastic and I sprayed it with black Epoxy Enamel appliance paint from a spray can. No clear coat. Again, built around 30 years ago, scan of a snapshot photo. This is more recent kit (built about 10 years ago). 1:160 (N) scale, tiny etched brass kit. No primer. Airbrushed the bare brass body with Scalecoat Black enamel paint. Tyres and wheels were airbrushed with Floquil enamels. The 3 cars above are 1:32 scale Gunze Sangyo models. Molded in white plastic. No primer. No clear coat. Airbrushed with Testors paints decanted from spray cans. The Cadillac's Stainless steel roof is Metalizer paint (now part of Testors line). Revell "Can-Do" wrecker. White plastic body - no primer. Testors white paint airbrushed. I did clear coat it (airbrush) with Testors clear, but it yellowed a bit after several years. So, as you can see, some decent models can be built using no primer, plastic compatible hobby paints, and almost no sanding. I do sand all the visible seams, then polish the plastic using a piece of cotton cloth so it has sheen close to the unsanded plastic. But occasionally I do use "hotter" paints and primer. This one was built few years ago. 1:43 scale Monogram Ultimates AC 289 Cobra kit. As you can see in the photo, I airbrushed it with a nail polish. The body was yellow plastic and nail polish is "hot", so I did use Tamiya fine white primer. It also has a Testors Wet Look clear coat. It is nice ans shiny, but it stays soft for a very long time (you can dent it by pressing a fingernail tip into the clear coat). Model building is a lot of fun (even though I haven't been building any automotive models lately - busy with my other hobby: N scale model trains).

-
Johan 1962 Chrysler 300 convertible hood
peteski replied to ChrisR's topic in Car Aftermarket / Resin / 3D Printed
Ah, separated by a common language . . . -
Foil Under "B"?! "P" maybe?
-
You got me Mike - you are correct of course! And I even used theavengersforever.tv link! I must have been half asleep. ?
-
If you have some funds available, and you are willing to bid on eBay (when these kits are ready), you can own one. I would love to get my hands on one too (I owned a '77 T-Bird). NEO also made a built-up 1:43 resin model of a '79.
-
Wait til the big online merchants start using their own drones for deliveries. Postal Services will likely suffer. I heard that even UPS is looking into using drones.
-
Well Hermann, we have proven you wrong. Personally, I'm interested in all sorts of cars, trucks. bikes, airplanes, ships, etc. American and foreign. Any miniature model is interesting to me. But what captivated me here is the documentation of your scratch-building efforts. Anybody can put together a plastic model kit. It takes a real talent to scratch-build a very detailed, and what looks like accurate, model. I'm also impressed how you create complex 3D surfaces using simple lamination of flat plastic parts. Reminds me of paper models I used to build as a kid. How are you sizing the parts? Do you have blueprints, or just using photographs of the 1:1 truck? Amazing job!!
-
Fishing line for use as pin stripe material?
peteski replied to swede70's topic in Model Building Questions and Answers
True. That is why I mentioned "some clear coats". Not many automotive modelers use Future (or as the FinescaleModeler Magazine calls it :PFM). -
According to http://theavengers.tv/forever/index.htm and specifically http://theavengers.tv/forever/cars.htm none of the main characters drove a Lotus Europa. But maybe some of the bad guys did? That website is a great resource for the Avengers info.
-
Looking good Mike! I've had one of these kits in my stash for years - I'll build it some day. I love the looks of that car (and I do like the JPS scheme, but I wonder how it would look with UPS-brown instead of black, with gold pinstripes of course?). Funny thing is that one of my friends from the model railroad club (whom I have knows for years), owns a 1:1 Lotus Europa! I guess we never discussed cars at train shows. I found out about it couple of years ago when we elected him a president and we held out annual meeting at his place (in Hollis, NH). His is a medium metallic blue. Beautiful car! I know where to go for reference if I ever want to super-detail my model.
-
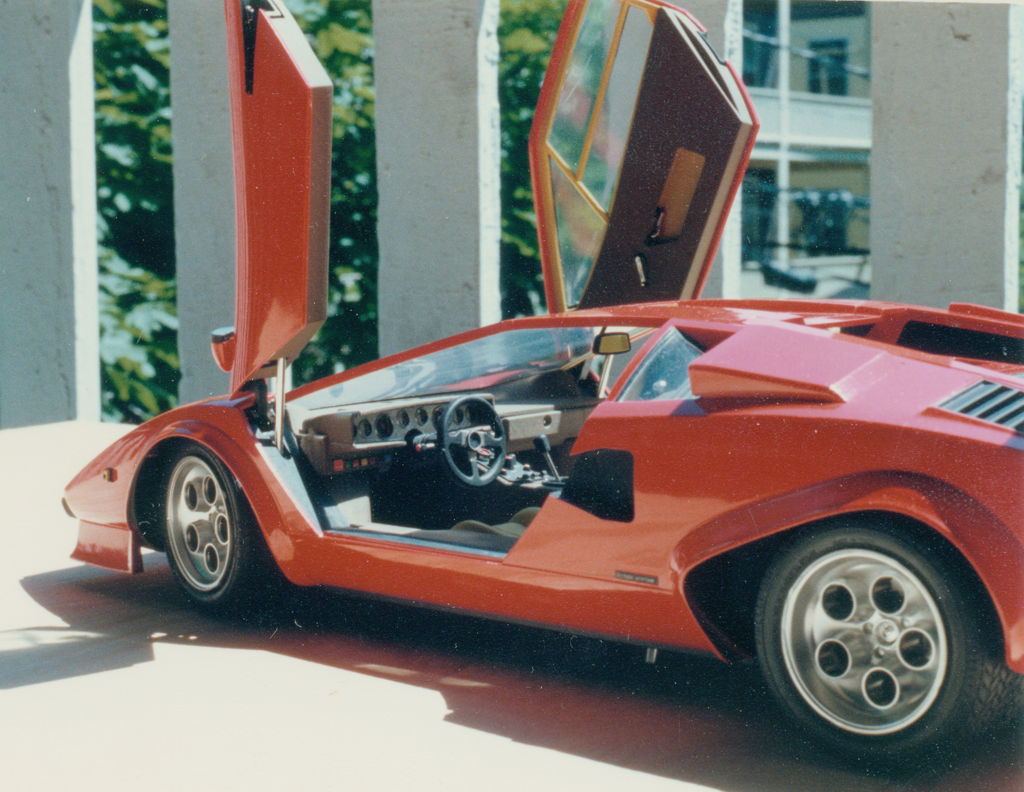
Otaki 1/12 Lamborghini Countach Twin Turbo...Mission Statement
peteski replied to Dann Tier's topic in WIP: Model Cars
?? -
Fishing line for use as pin stripe material?
peteski replied to swede70's topic in Model Building Questions and Answers
Caution! If the model will be clear coated, some clear coats make Sharpie ink run. Like Ray mentioned, test it on something other than your model first. -
Otaki 1/12 Lamborghini Countach Twin Turbo...Mission Statement
peteski replied to Dann Tier's topic in WIP: Model Cars
Dan, I have question about the spark plug wires (BTW, wires and the looms look great): why are those wires are all go into what looks like the differential case? On my model I routed them to distributors. -
Fishing line for use as pin stripe material?
peteski replied to swede70's topic in Model Building Questions and Answers
For this example what might work is getting come clear film decal paper then using one of the Sakura Micron fine line blue permanent markers to draw the stripes, then cut them out of the decal sheet and apply to the model. Since the body is white, the blue stripe doesn't need a white undercoat. Those markers are available as thin as 0.005". -
Frog/amt mercedes 300sl gullwing
peteski replied to stitchdup's topic in General Automotive Talk (Trucks and Cars)
Looks like 2 kits are now being discussed: The gull-wing hard-top and the convertible are different kits. Scalemates seems t o have them lumped together. I have the AMT Trophy Series gull-wing kit, and Testors (Italeri) convertible. They come f r o m different molds. -
I owned 2 mid-70s Pinto station wagons as winter beater cars in the late 80s. Paid about $200 for each. They got me from work and back during the winter (while I had my Camaro put away). They were what one would expect from a $200 car (rotted floors, no heater, broken turn signal stalk fixed with a piece of aluminum tube, etc.), but back then I was young and I didn't mind. One of them I think had a broken modulator valve (automatic tranny), and when I floored it (or maybe when I quickly stepped off the gas pedal - I don't remember now), it would suck the transmission fluid into the intake manifold, creating a large, dense, white cloud of smoke! What fun that was! I felt like double-oh-seven!.
-
I thought that the first axiom of styrene model building was to make sure that both glued surfaces are bare styrene (no "chrome", no paint). That will assure a good bond. Otherwise, the bond is only as good as the weakest layer being glued (usually paint or plating).
-
I also use a strip of Bare-Metal Foil, or sometimes a piece of (stripped) 30 AWG wire-wrapping wire (because it is silver-plated, not copper color). on models 1:24 and smaller (down to 1:43). I have some photoetched hose clamps but I feel they would look more in-scale on larger scale models (like 1:16 and larger).
-
Why go to Google when you can do this using any basic 4-function calculator? Or just do it longhand (of you still remember how). This is 1st grade math. Just take the 1:1 dimension (in inches), divide it by 25 (or whatever scale you need to use), and you get the scale dimension (still in 1:1 inches, which you do need to fabricate the part). I have couple of those tiny cheap calculators (keychains) from Staples (or Dollar Store) hanging around my workbench, just for this purpose. 8" / 25 = 0.32" I also own a $20 digital calipers from Harbor Freight, so I can dial 0.320" directly on the calipers to measure out the part I'm making. Those are couple of (very inexpensive) tools I find indispensable in this hobby.
-
Head set magnifier recommendations???
peteski replied to 2zwudz's topic in Model Building Questions and Answers
While useful, single-eye magnifiers do not give you 3D vision. That is why I much prefer a stereoscopic magnifier (and microscopes). Nice feature of the Optivisor is a replaceable padded leather band for the headband. SO leather (not plastic) is in contact with your forehead. That makes it more comfortable, even during long modeling sessions, than the less expensive ones. -
Yes, these are contemporary locos that are currently being used - you are correct. They use a 3-axle truck from a larger locomotive and a diesel engine with small generator. One of my friends build an N scale model of it. But the model Lee restored has the hood and cab parts from a larger Diesel switcher like SW9 (from the 50s and 60s). The other thing that makes it a fantasy model is that (as mentioned by Warren earlier) it rides on a passenger truck (which in 1:1 scale has no traction motors), so it would not be able to travel under its own power.