peteski
-
Posts
9,226 -
Joined
-
Last visited
Content Type
Profiles
Forums
Events
Gallery
Everything posted by peteski
-

Painting over Molotow chrome?
peteski replied to Ben's topic in Model Building Questions and Answers
While that is true (Tamiya is an acrylic lacquer), I'm really surprised. Why? Because both Molotow and Tamiya paints seem to use alcohol as solvent. I would have expected that Applying Tamiya over Molotow would slightly dull the chrome-like shine. -
Brush painting meme :^(
peteski replied to 89AKurt's topic in General Automotive Talk (Trucks and Cars)
I;m like Kurt too. But it is not that I hate brush painting - I just suck at it! -
I would call that "jumping the shark". Some artists seem too get too creative. But then again, there is plenty of "art" out there that looks like it was created by a finger-painting gorilla, and it fetches huge amounts of mullah!
-
I agree. Either that, or make the door longer by lining up the door's rear edge with the new window opening (and skip the B pillar, just like on 2dn gen. Camaros). To me it looks odd with the B-pillar. But I'm still in awe of what some modelers can do (all the cutting and fitting is amazing). It takes talent to have the vision and the skills to pull this stuff off!
-
I see that you use Parafilm-M Bill - that is great stuff, especially for protecting large areas!
-
This is great info about Alsa Chrome - it should really be in its own thread. I wonder if we could ask the Mods to split the last dozen or so posts into Alsa Chrome thread?
-
I wonder if applying some bittering agent to the wires would discourage them from chewing on them? Assuming that their tongues have bitter taste receptors . . . Other than that - take your model indoors (or build a mini-garage for it).
-
How to apply "transfers" (not decals) to tyres
peteski replied to Funkychiken's topic in Model Building Questions and Answers
This type of decoration is called "dry transfer" (for obvious reason). -
This one is reaching, but there is a steering wheel in the artwork.
-
Thanks for the info. I sure hope that you cast the taillight lens in clear resin. That way it will be easy to mask and keep the backup light portion of it clear, while painting the rest of it clear red. Or (probably too much work) split the taillight into 3 pieces: 2 clear for the backup lenses, and the other one clear red for the taillights. I really dislike when a model lens is cast in clear red even though there is an integrated clear backup lens in it. Painting that backup lens area with white or silver paint doesn't look good at all.
-
Tricky one - the familiar appearance is deceiving. Found it!
-
Styrene rod will not retain a set shape like a piece of solid copper wire inserted into the "hose". Or maybe a piece of solder.
-
AMT FIretruck Vinyl Tires not fitting the rims
peteski replied to Stryker3285's topic in Model Building Questions and Answers
You could also glue couple of rings on the rim, slightly inwards of the rim's edge (the distance of the tire's sidewall thickness). Those rings will hold the sidewalls at the edge of the rim, preventing them from pulling inwards. The rings can be made from some strip styrene wrapped around the rim. Probably around 0.030" or 0.040" thick strip. Or maybe you just need one ring in the inboard side of the rim? -
I wonder if he is talking about the individual "glass" panes which fit from the outside of the body, not the more common "glass" insert which gets installed from the inside?
-
Sharpie markers come in a rainbow of colors (including metallic silver and gold). But they also rub off metallic foil fairly easily.
-
Street Racing Tires - Need I.D. help
peteski replied to Mike Dobrzelecki's topic in Model Building Questions and Answers
Those sets also came with other types of tires, but the MTs (even though a bit odd looking) to me seem to be the best representations of what Mike is looking for. -
Thanks Jim! Yours is coming along great (even with some setbacks). I'll get back to mine . . . one of these days.
-
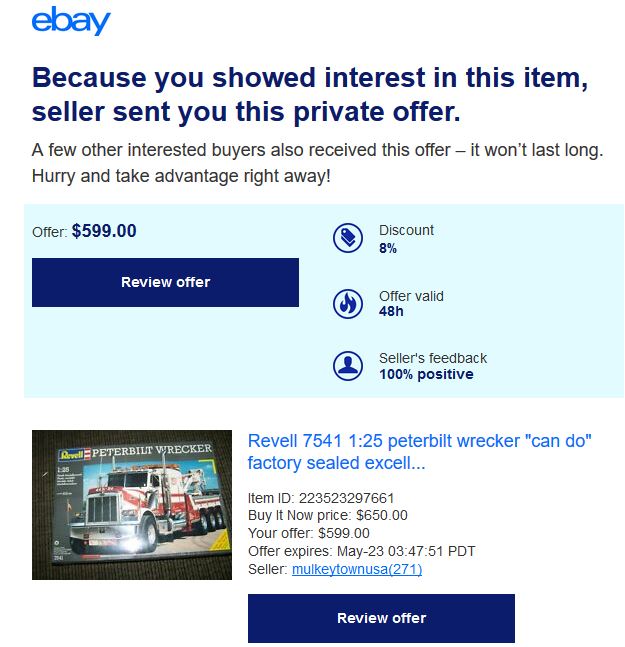
Fake eBay "Special Discount" email -
peteski replied to ChrisBcritter's topic in General Automotive Talk (Trucks and Cars)
I am "watching" that listing, so they know I'm interested. But I'm not interested in buying it - just whether someone will take the bait and buy the kit for that outrageous price, and/or watching for how long the listing will stay active. I watch quite a few listings. -
LOL, that sure brings back some memories. Back before digital cameras, when I was using my 35mm Nikon SLR, I figured out what distance (with specific lens) I had to be from the plate to get the correctly sized plates on a 4 x6 photo. I did that for all the popular scales from 1:8 to 1:43. It was not 100% perfect (becuase of the way the lab set up their enlargers), but it was close. I still have bunch of 4 x 6 photos with those plates, ready for use. But nowadays, computers make this task so much easier, more accurate, and repeatable. Here is one of those photo-reduced license plates with a Detail Master photoetched frame.(in 1:43 scale).

-
Street Racing Tires - Need I.D. help
peteski replied to Mike Dobrzelecki's topic in Model Building Questions and Answers
Sure am! You're welcome Michał. -
Otaki 1/12 Lamborghini Countach Twin Turbo...Mission Statement
peteski replied to Dann Tier's topic in WIP: Model Cars
Thank you Dann! -
I see it all - awesome! Thank you Steve! Also thank you for "do not quote" request - it is so annoying to repeatedly have to scroll though the same photos over and over.
-
Fake eBay "Special Discount" email -
peteski replied to ChrisBcritter's topic in General Automotive Talk (Trucks and Cars)
Here is one I got today. These are not scams - they are real. But the price of this kit is ridiculous!
-
Those instructions are great resource (I'm also gathering this info for when I eventually start the Black Magic car)! Not only they provide "plumbing" info, they also describe what each component is! Too bad that the Fotki site is missing few page scans.
-
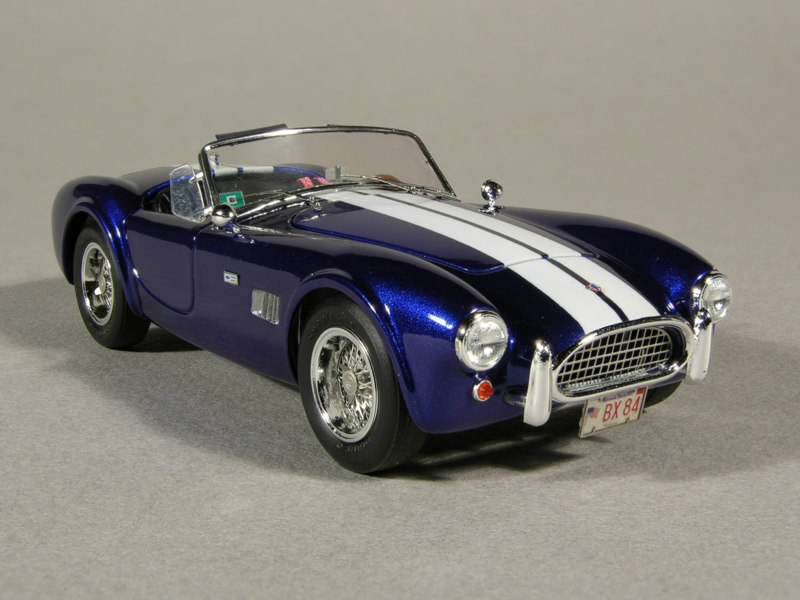
Wow! Natural sunlight really brings out the beautiful color!