stitchdup
-
Posts
7,139 -
Joined
-
Last visited
Content Type
Profiles
Forums
Events
Gallery
Everything posted by stitchdup
-
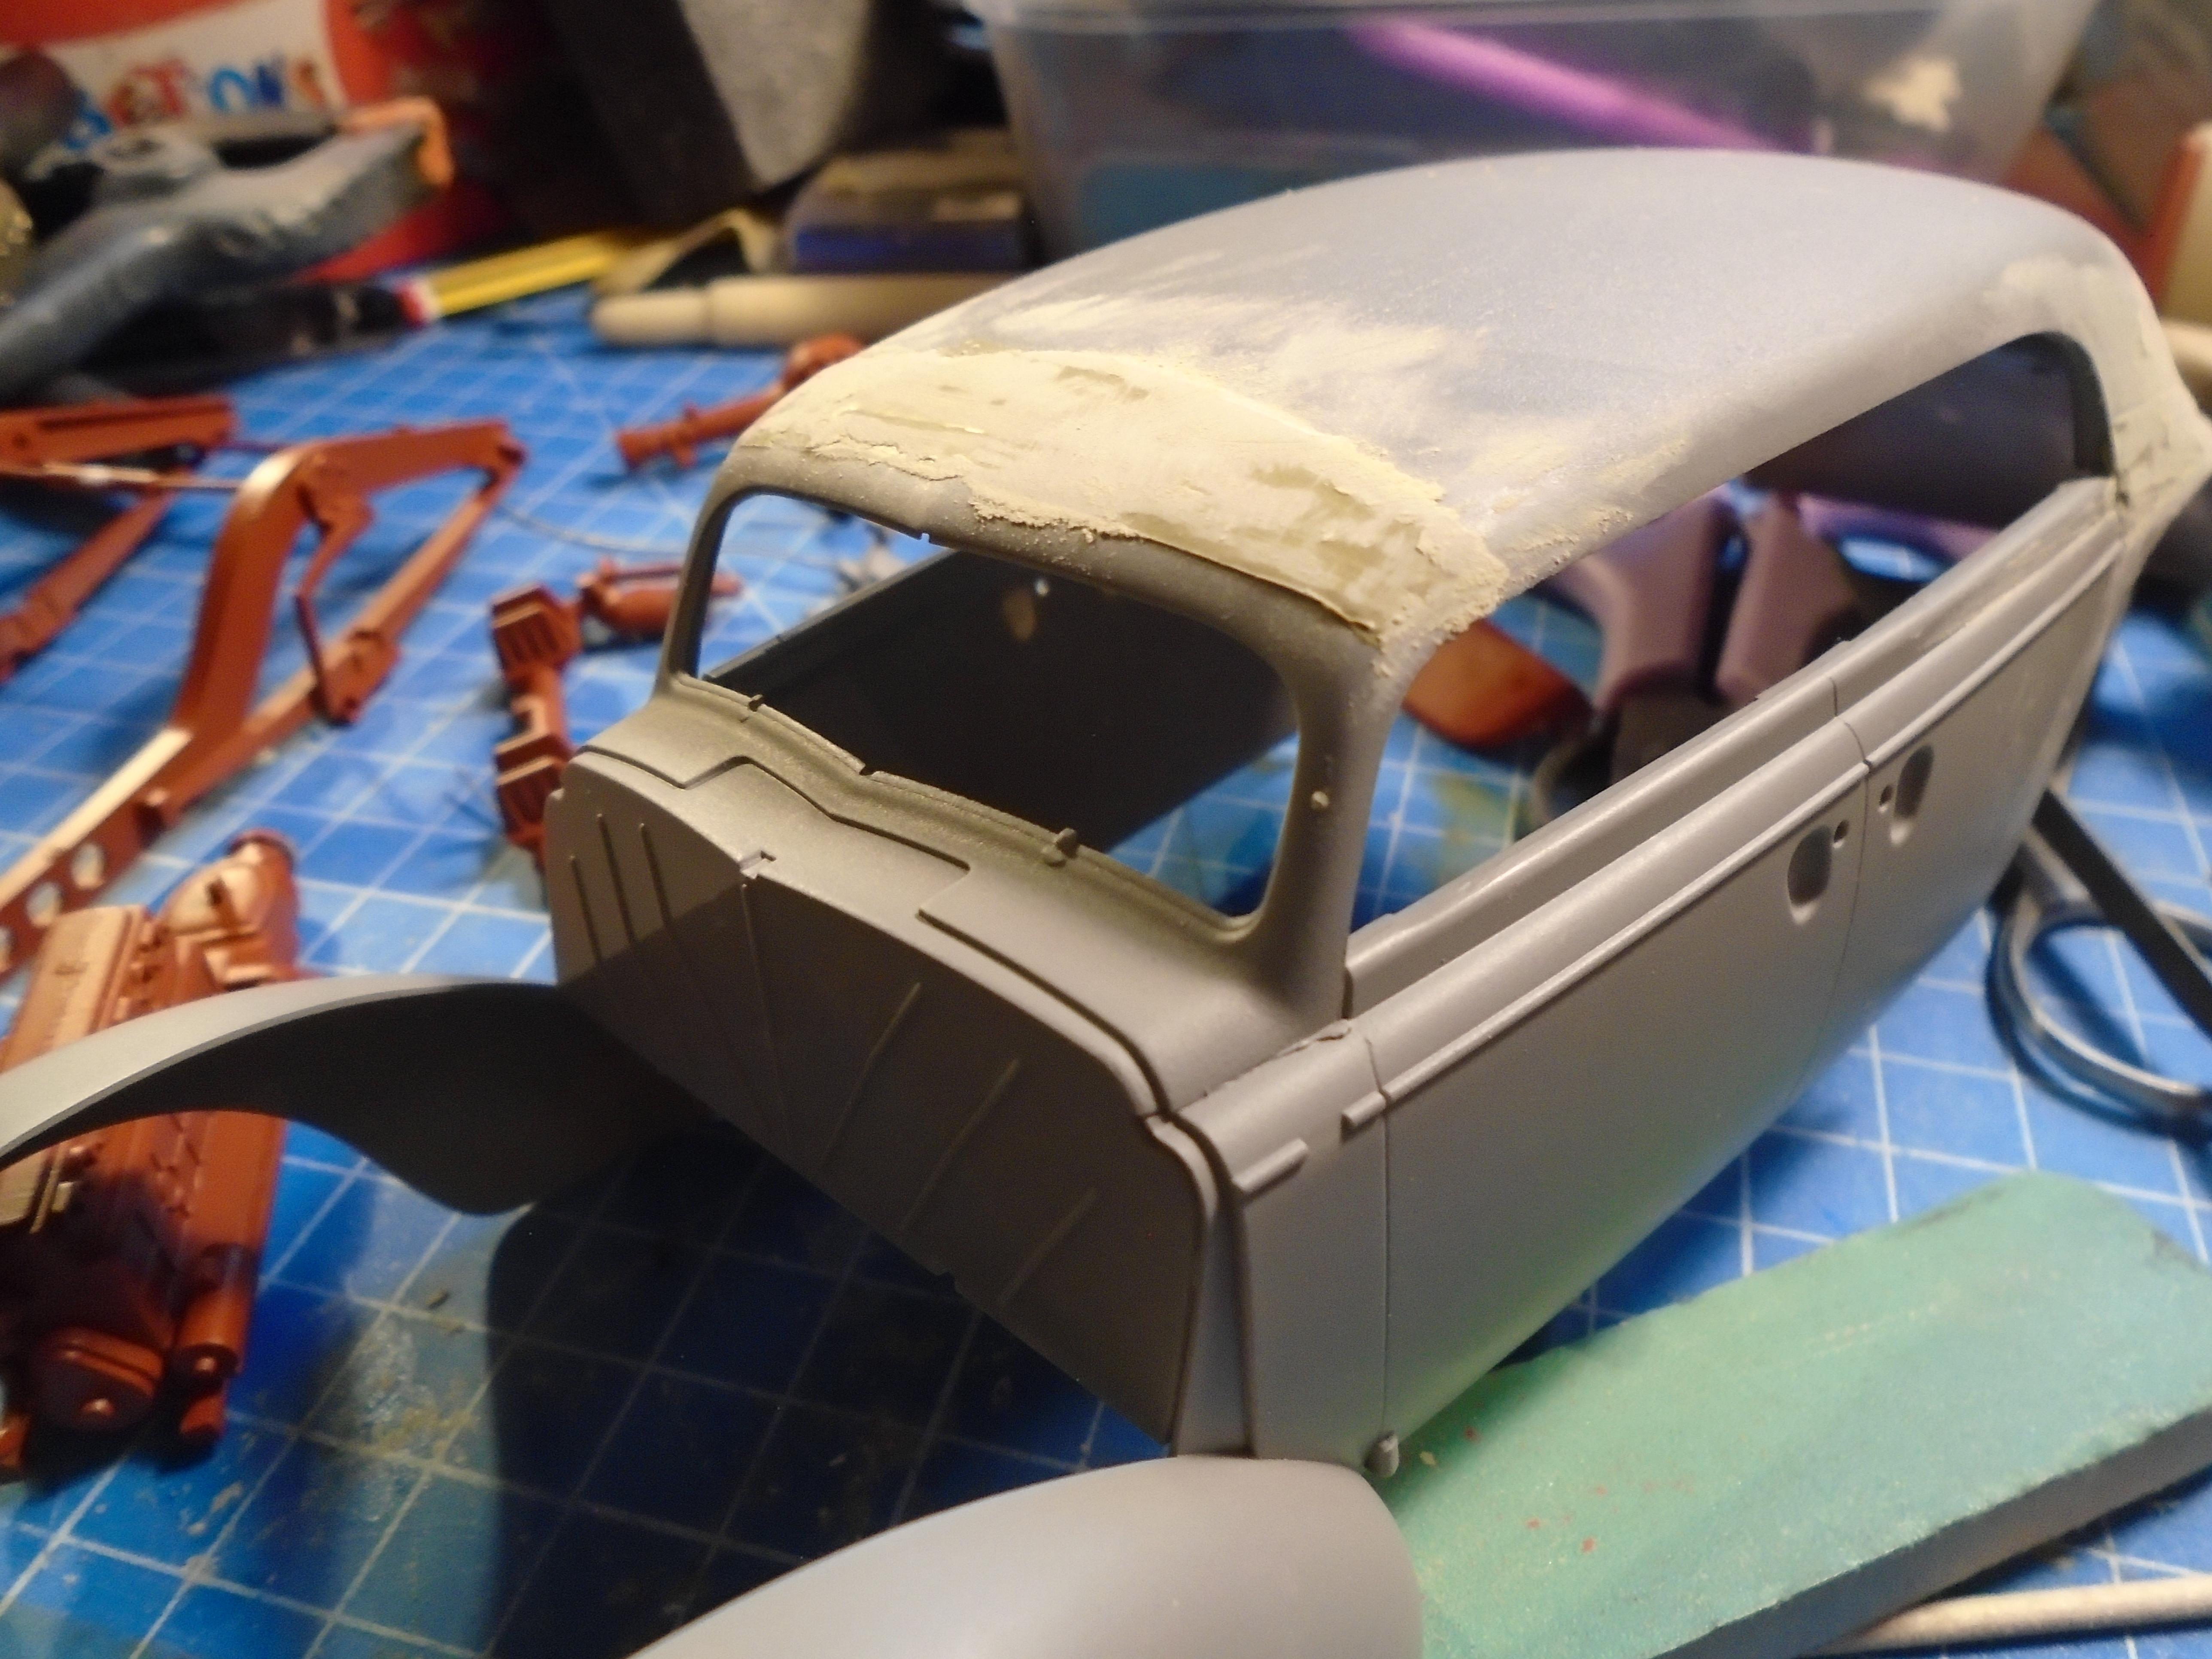
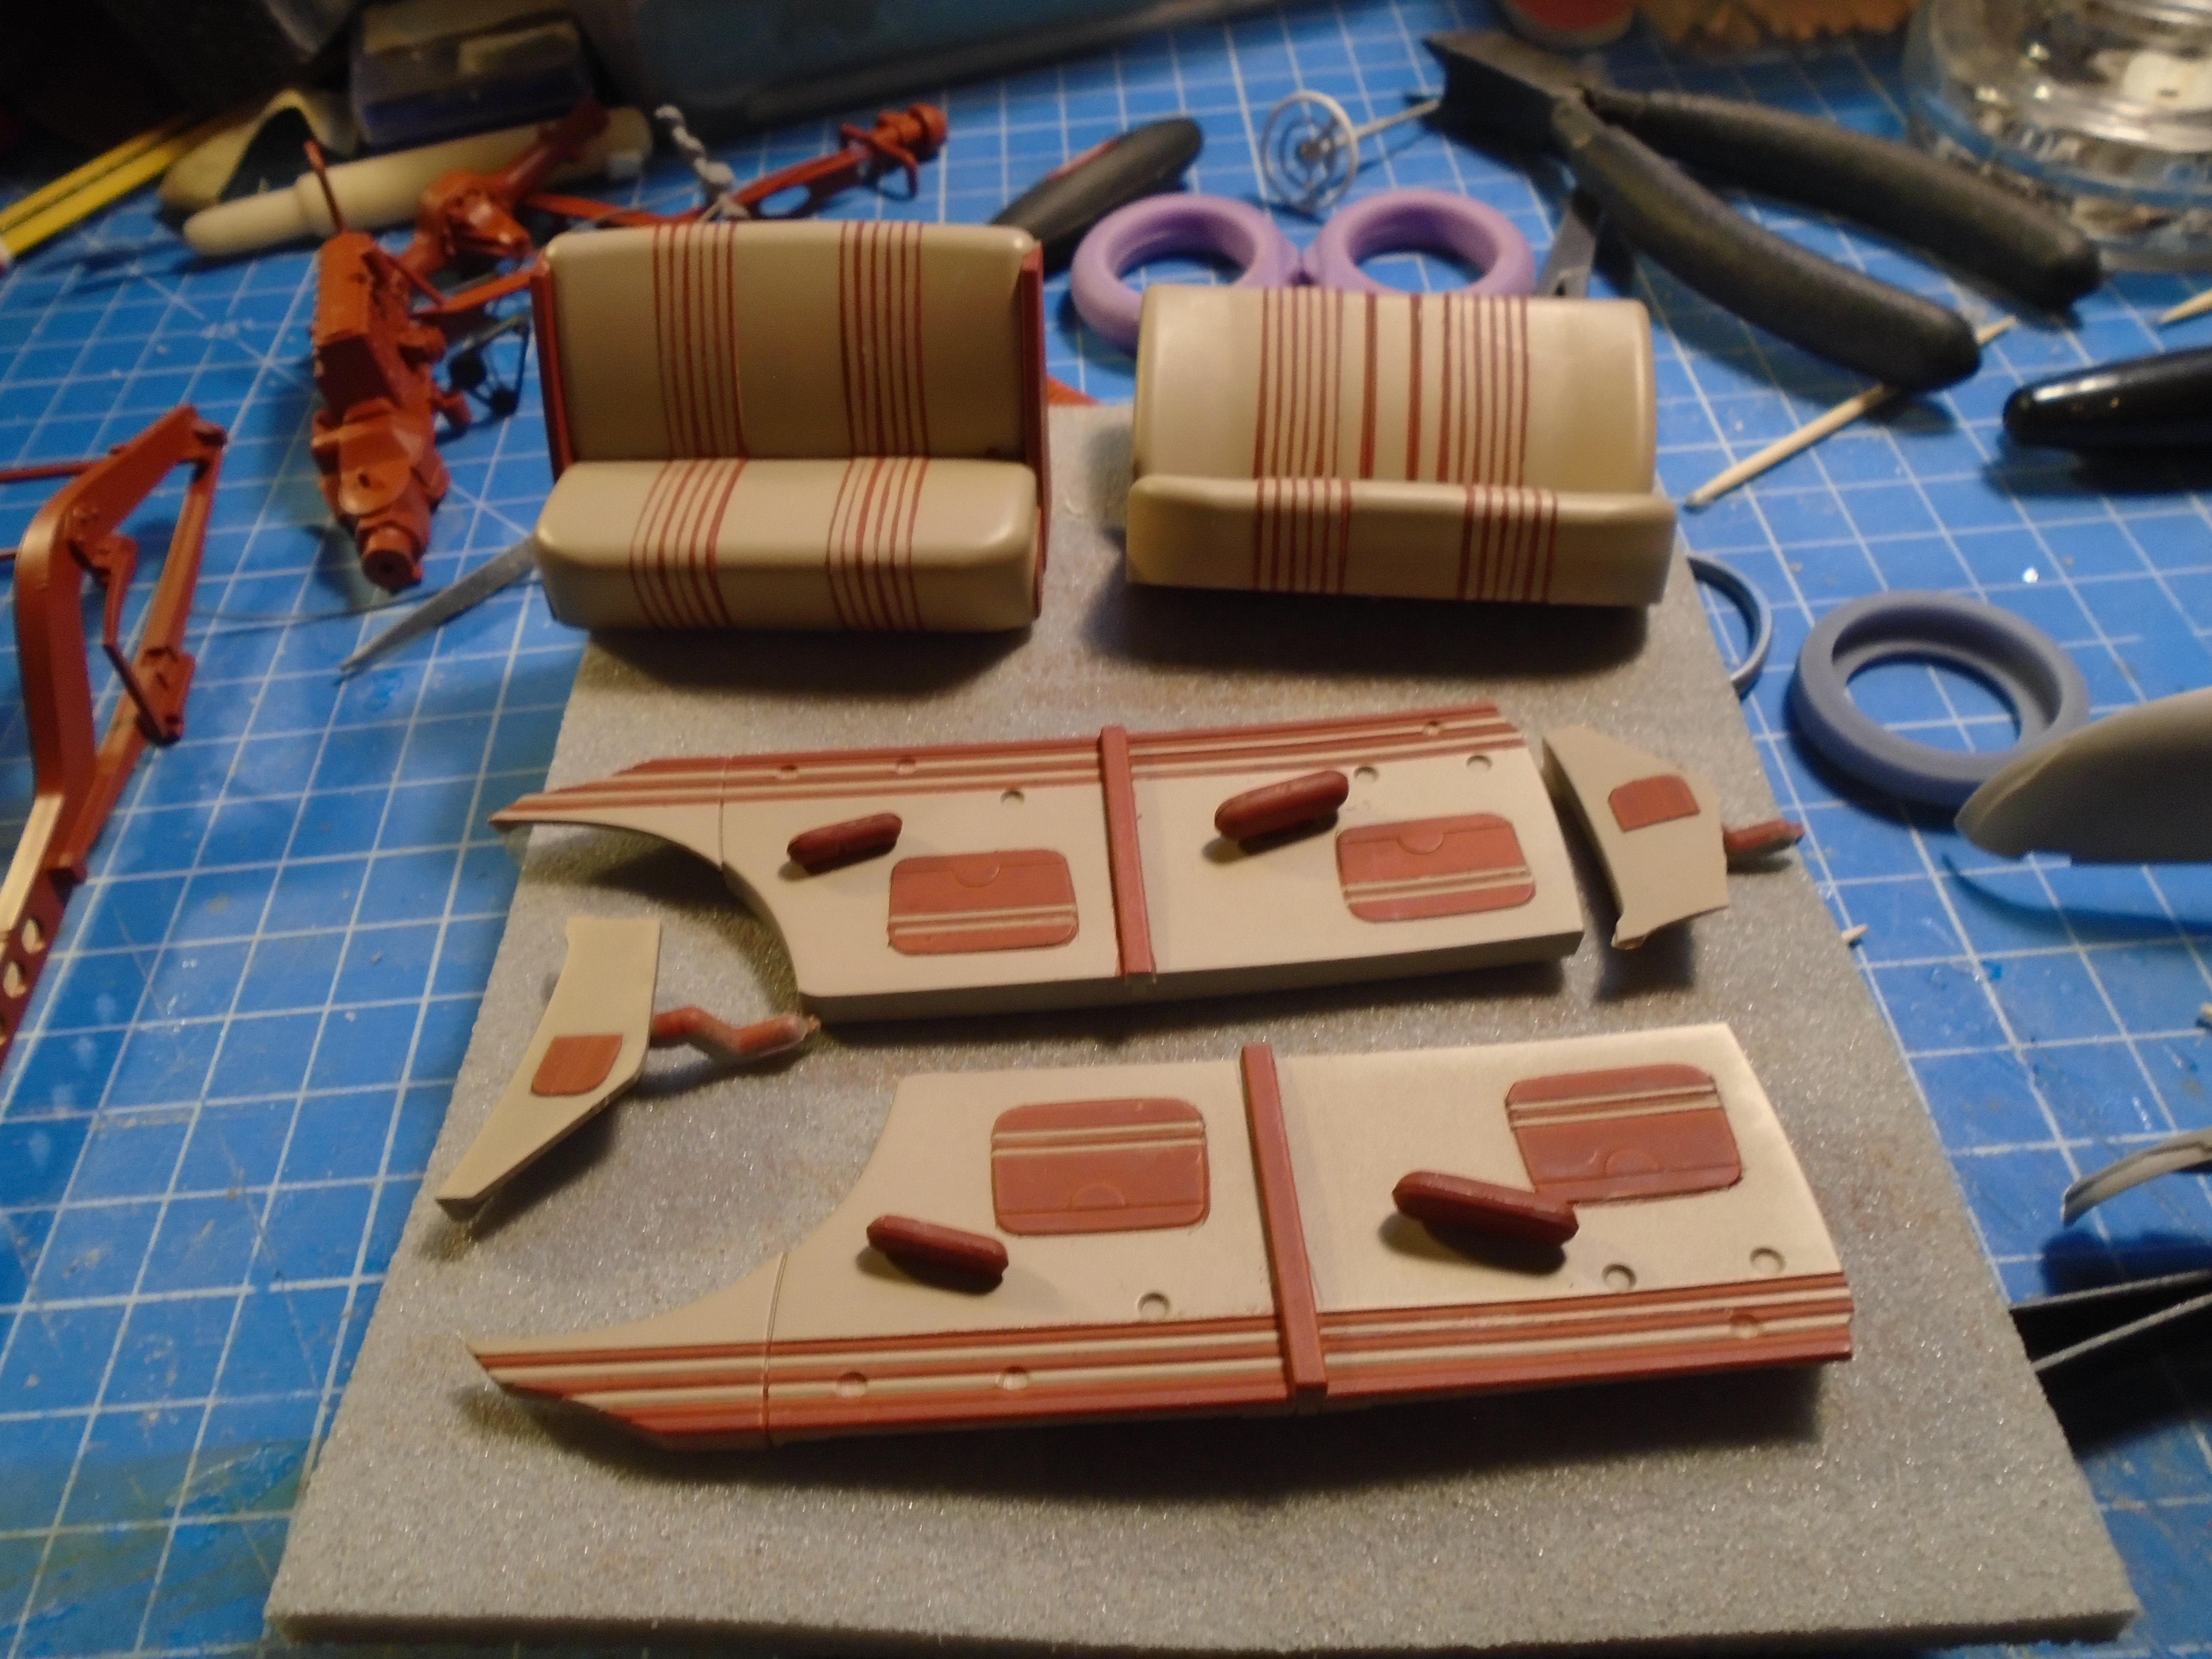
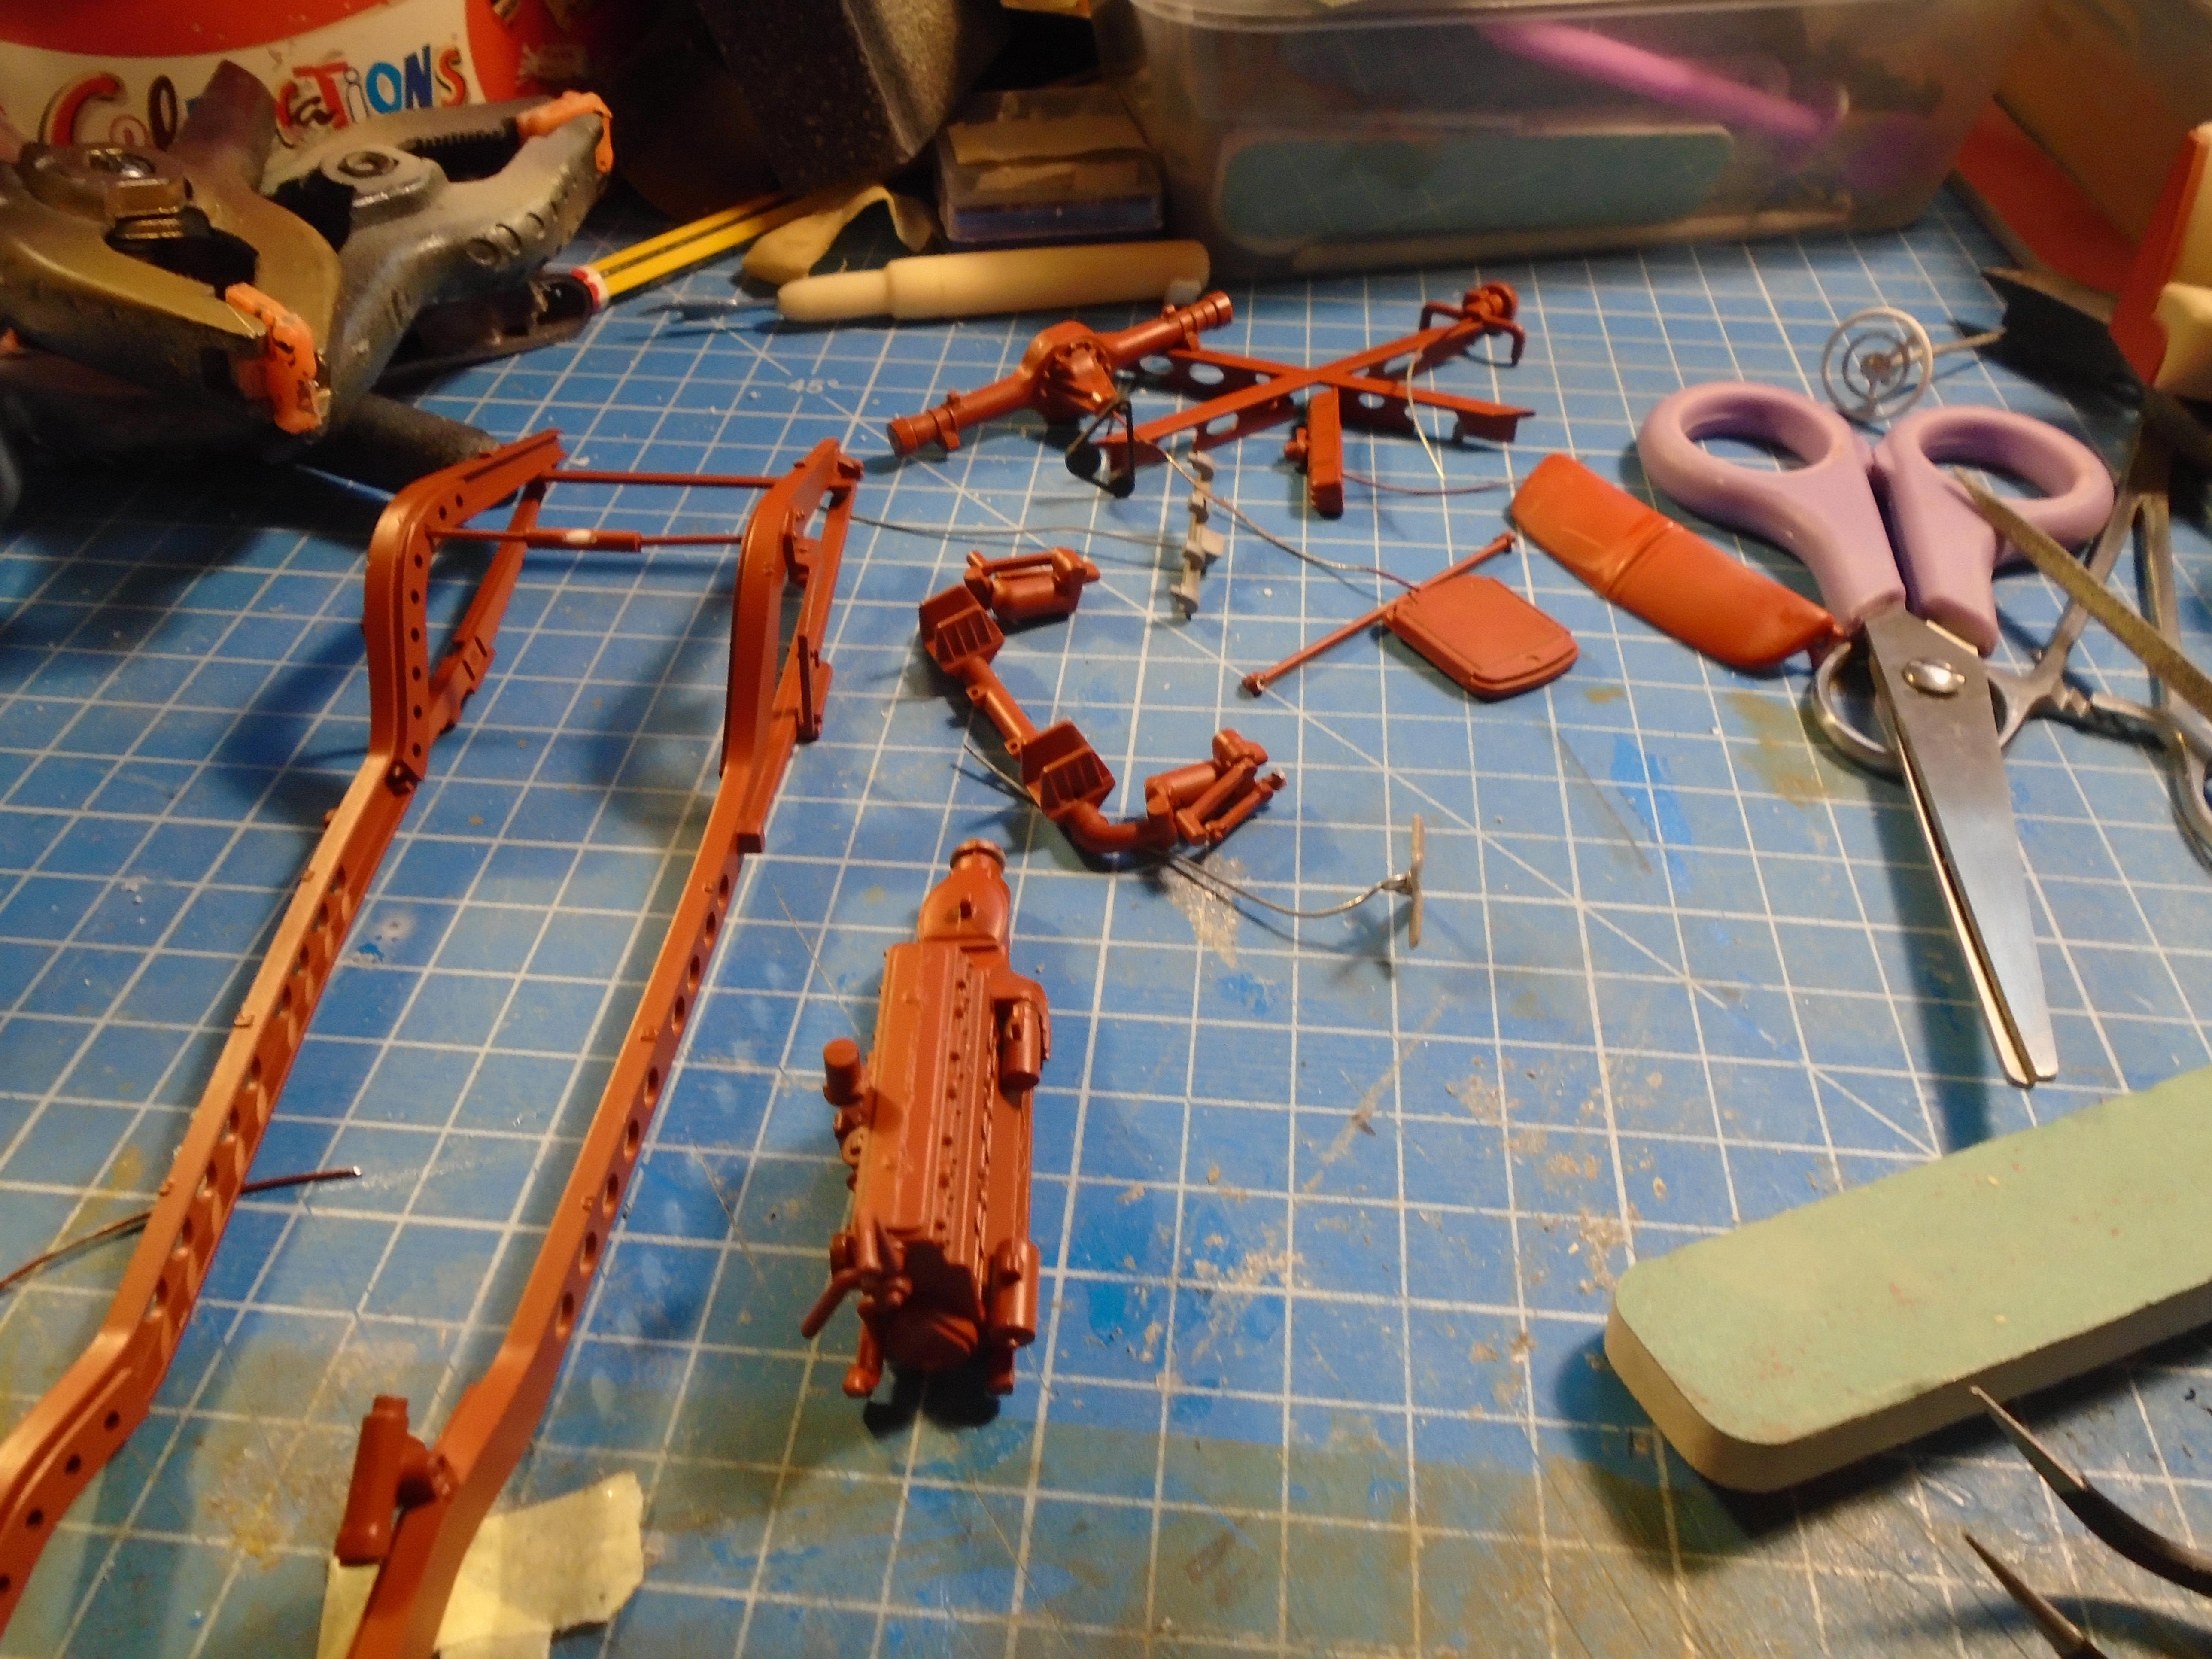
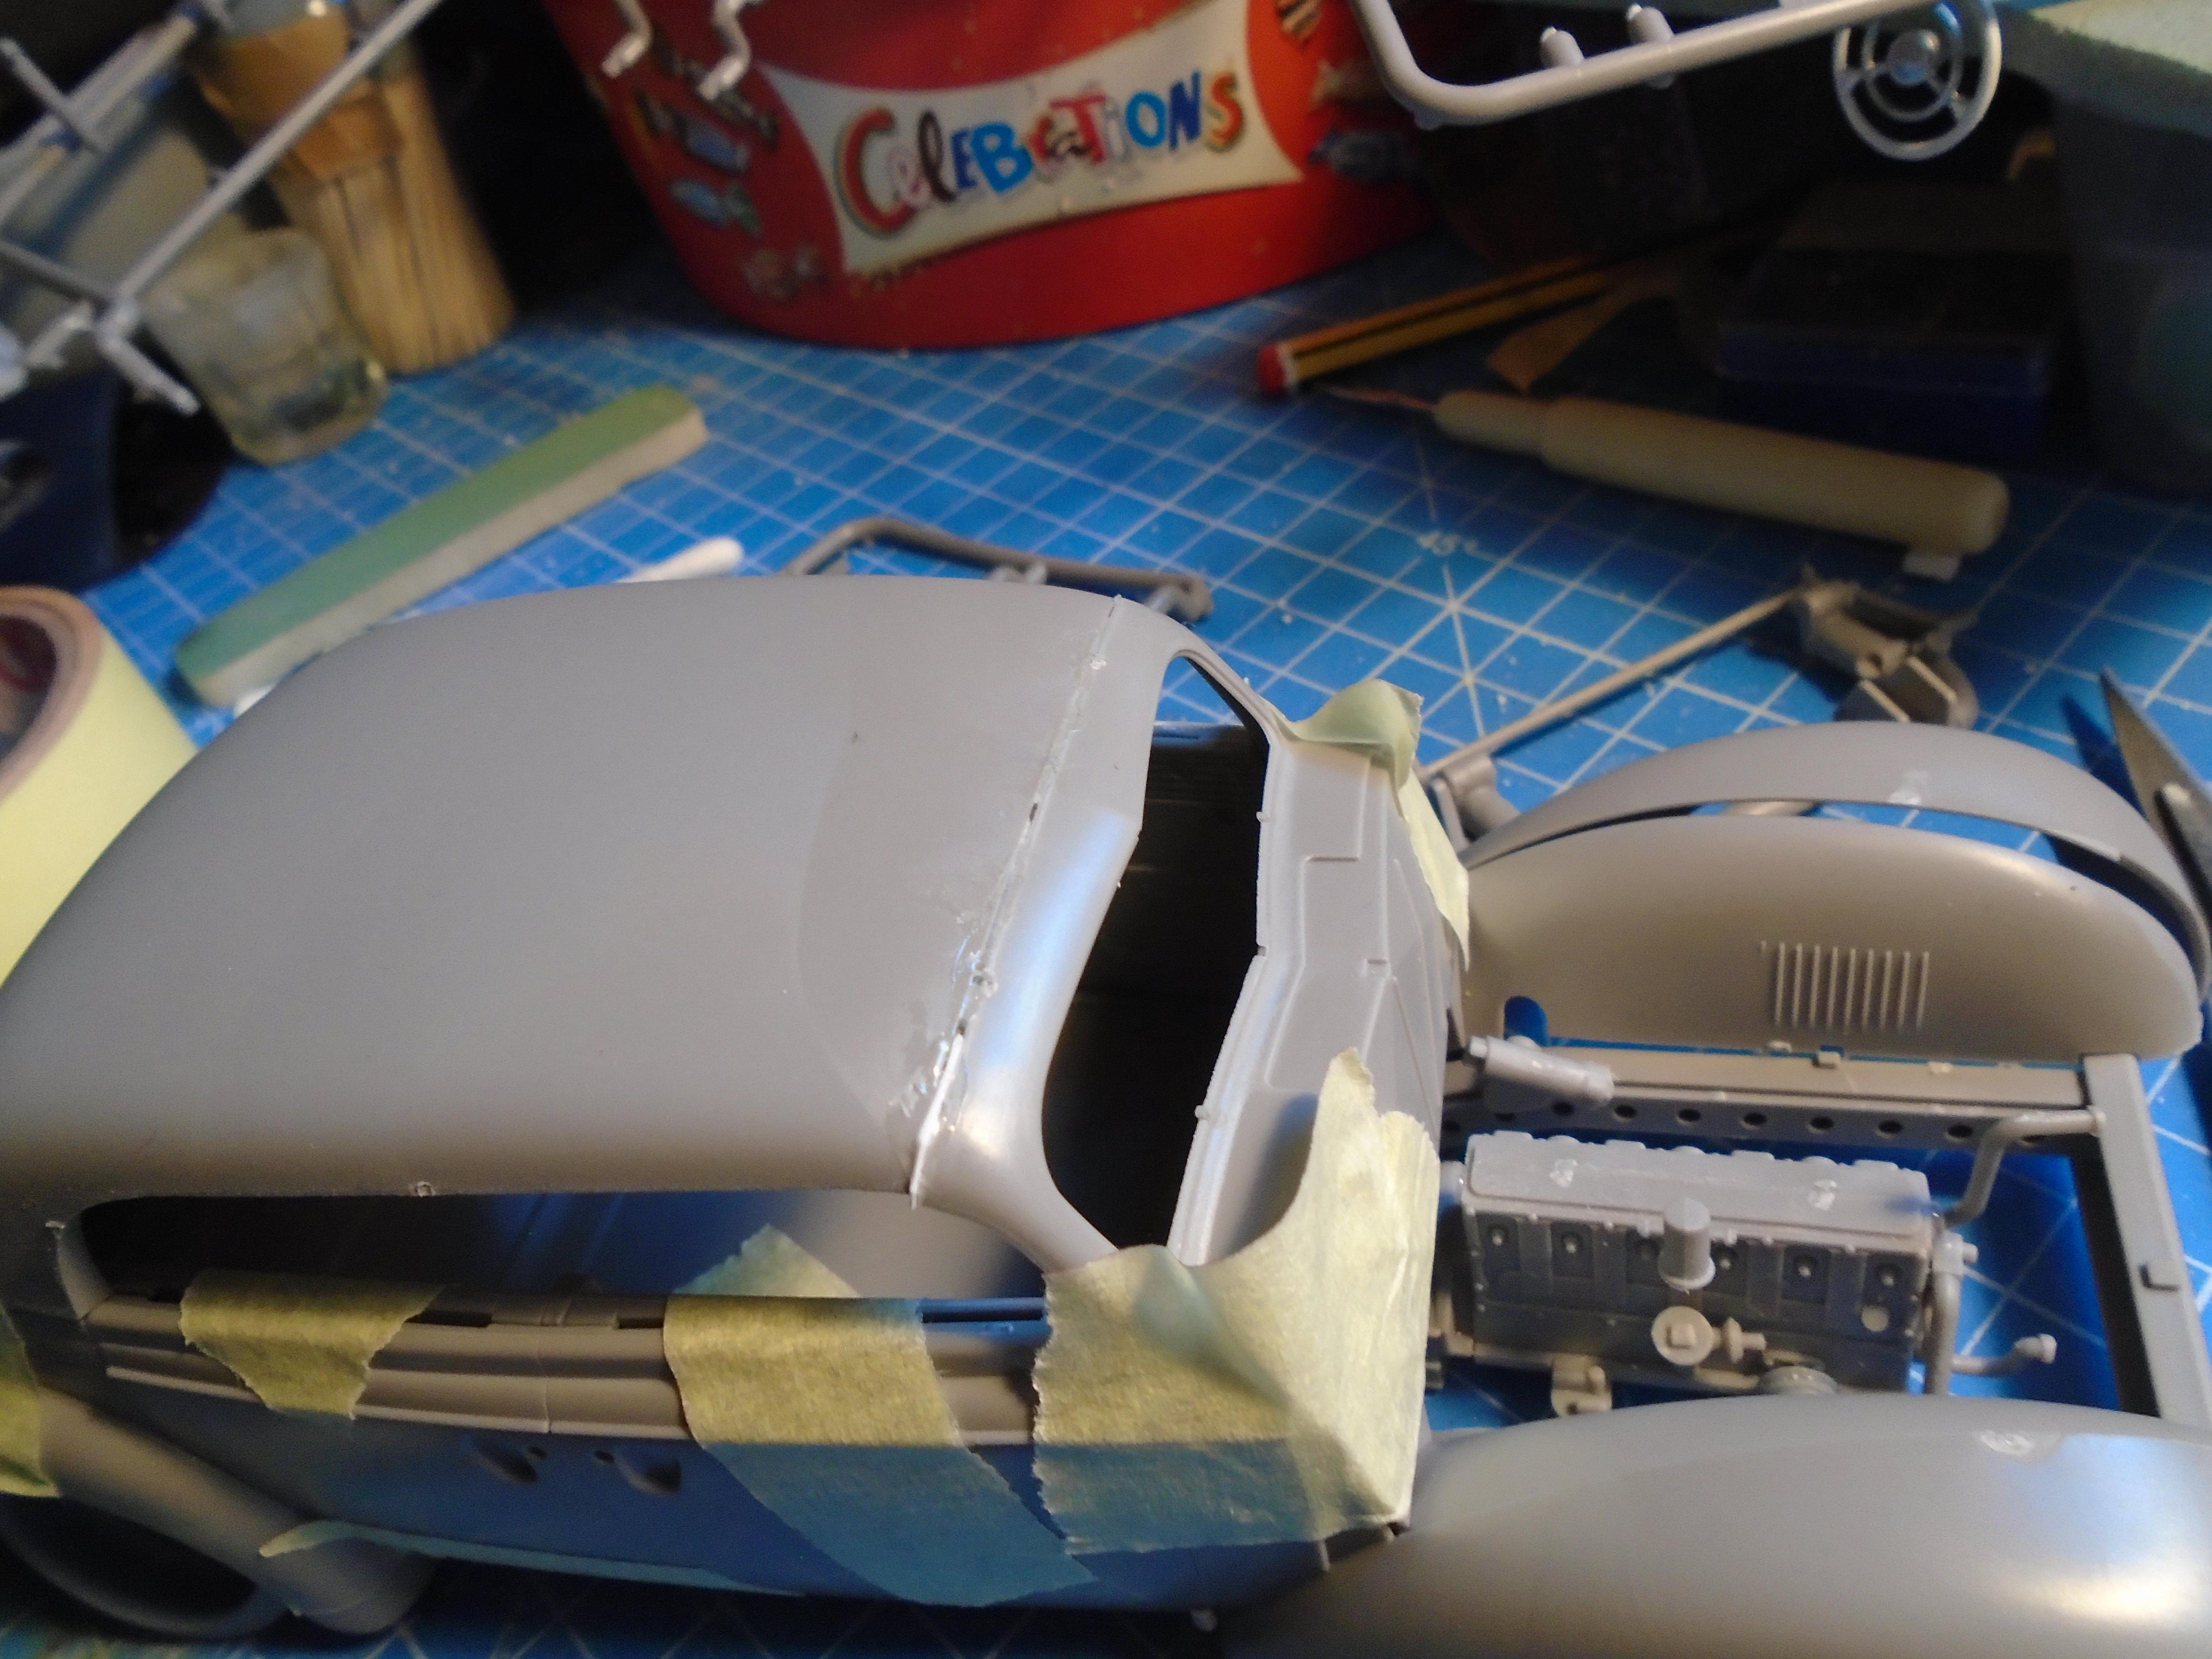
i got the interior parts painted over the last couple of days. I've gone for a stockish look but i haven't seen this in any opels but i did see it in humobile bomb so thats where its from. I've not added the chrome parts yet but the paint is done other than a couple small touch ups. I'll be foiling the top edge of the door panels, again for that lowrider style. I've got a visor from the amt chevy street machine 49 pick up that fots pretty well to go on this. I also got the chassis and engine parts primed and i removed the steering rod from the front axle to allow it to sit much much lower than stock. speaking of the lowering part of it will come from the smaller wheels and tyres as the stock wheels just wont lower it enough for me. I've also primed the roof of the main body to allow my filler to work better but i masked the area where the trim goes first to save work later. I have found there is some distortion somewhere on the body, chassis or floor parts as they dont quite line up. I'm hopeful it will be fixed once its all glued but it could be due to me assembling the body too soon, but how else couldi get the roof smooth?

-
 its not what it seems, https://www.magnetomagazine.com/proposed-eu-chrome-plating-ban-isnt-what-it-seems/
 -
is there a phone repair shop near you? ask them for their old screen packaging. its 0.5m thick and the android packaging is crystal clear, the apple stuff has a little distortion and is a little more flexible. chances are they'll just give you it. Its a little tougher to cut but works well. My friend works in a repair shop so i get as much as i need
-
For the tyres tamiya rubber black is my go to. As for fitting those wheels it looks like you might be lucky enough that the axle ends fit into the holes on the back of the wheel, but if it doesn't you can enlarge the holes by drilling them out. If you do need to drill out the hole its best to step up the size of the drill bit slowly. I've had wheels break when i tried to use too large a bit too soon. Another option is to use plastic tubing inside the hole to reduce the size of the hole. When you get down to a fairly small size, you can then put a piece of rod in the centre to mount the wheel to the hole in the ends of the axle. On the front you might need to do the bits of tubing to make the hole smaller but you might also need to use the tubing to extend out from the wheel so it is spaced away from the front mount as it looks like the back of the wheel will not fit over the suspension without having it spaced out a little. but before you do any of this try putting the body on as there might not be enough space for those wheels at the rear without doing some mods to the rear suspension. you might need to move the spring in towards the centre a little to ge tthem under the arches
-
thats been happening a lot in the uk but then we got bombed plenty. For over 50 years there was a live torpedo just sitting on the beach near my mums house. when we were little me and my riends used the torpedo as a firebreak for bonfires. My dod had us half convinced it was an old farm roller. when it got blown up by the army it left a crater 15ft deep in the rock. the bang was heard on the scottishmainland as well. But the beach is next to scapa flow which was the northern naval base in britian, and it was heavily bombed many times, and one of these raids led to first civilian death from an air raid. the ww1 german fleet was scuttled here too so it might surpsise you how much of it is still in use. The majority of the pre nuclear metals used in the early space program came from these ships as they were sunk before them so were uncontaminated and ideal for space stuff.
-
Dupli-Color Hi-Build Primer
stitchdup replied to ewetwo's topic in General Automotive Talk (Trucks and Cars)
if you think duplicolour primer is bad, then simoniz are saying hold my beer, but the beer would probably be a better primer. -
very cool, my dad used to have the vauxhall version in almost the colour you painted yours. He had a darker blue 4dr saloon version with a ford v6 too and a van for work in babypoo brown with white panels on the glass line.
-
Propping open a hood for an Out-of-the-Box build?
stitchdup replied to SDC's topic in Model Building Questions and Answers
how thick can you paint? on the hinges and holes they go into only. it might hold for one show but would damage the paint when repositioned. maybe the hoods are off to let the judges get a closer look though as i dont think they would want to handle them too much -
1:16 Gunze Sangyo 1937 Rolls-Royce Phantom III Sports Saloon
stitchdup replied to Anglia105E's topic in WIP: Model Cars
its been cold since the start of november but i can still paint as i have my hobby room heated. Its the wind direction that stop me painting as most of the time its blows up the hose which kinda defeats the purpose of the booth, lol. Having said that we seem to have a lot less strong winds than we used to and its not for as long when we do get it. I remember week long storms and now they seem barely a day long. -
could be a fun custom, 49 chevy truck grille, shorten the rear fenders slam it and its done?
-
Lamborghini LM 002 - 3D print
stitchdup replied to 89AKurt's topic in Car Aftermarket / Resin / 3D Printed
I dont have experience with the printer but i have files from the designer. having looked at it on cults that one might be a solid model as its scaled from 1/87 and there are other versions available. You might be happier if you find someone to print one of these for you https://cults3d.com/en/3d-model/game/lamborghini-lm002-pickup-1986-printable-car-in-separate-parts https://cults3d.com/en/3d-model/game/lamborghini-lm002-pickup-1986-printable-car the printing hub one is 1/10 but they rescale most of their files if you ask. It might not scale down very well in the slicer and i've had them do it for their files for me which they didn't charge for. The hora80 files are a little toyish and usually need everything scribed and the usual cycles of primer and flatting but their not bad for the price and they have somethings nobody else has -
Dupli-Color Hi-Build Primer
stitchdup replied to ewetwo's topic in General Automotive Talk (Trucks and Cars)
if you still have the paint try and test it some scrap sprue from another kit. it could be something between the primer and plastic and it would let you know if its a bad can. I've got a tin of their filler primer that sprays out fibres of primer instead of what i would call paint. its not even the same colour as filler primer usually is -
thinking about how i spent my childhood climbing tall cliffs without ropes its a wonder i survived
-
1:16 Gunze Sangyo 1937 Rolls-Royce Phantom III Sports Saloon
stitchdup replied to Anglia105E's topic in WIP: Model Cars
The gold would be a more unusual colour scheme. The two tone on the fenders is something i might borrow for something else. I haven't seen it done that way before -
1:16 Gunze Sangyo 1937 Rolls-Royce Phantom III Sports Saloon
stitchdup replied to Anglia105E's topic in WIP: Model Cars
given how few cars were in my area at that time, any number over 1000 is a more recent plate. its also one of the last you can still get new andpreviously unused from the dvla. bs1 through 6 were all owned by billy smarts circus at one time. I did a bit of research on the bs numbers for the local vintage club when they did a display of original orkney cars. -
facts have seemingly joined the dodo bird in extinction
-
1:16 Gunze Sangyo 1937 Rolls-Royce Phantom III Sports Saloon
stitchdup replied to Anglia105E's topic in WIP: Model Cars
fv would be preston, lancashire i believe. my local plate was bs but the dvla say its aberdeen but its not, it is only orkney -
Dupli-Color Hi-Build Primer
stitchdup replied to ewetwo's topic in General Automotive Talk (Trucks and Cars)
the only way to be sure is to read the cans. the info you want is the overcoat times, some are overcoatable within a couple of hours or wait a week, while others are more general and just leave to dry overnight. does it work any better if you use a different colour of primer? the non grey cans (red/brown/white/black) tend be the general primers. The primer itself is forgiving if you are recovering with primer so timing isn't as important with it unless you switch colours. also, does your paint need clear maybe? it could be worth testing that if the paint is just flat. but then humidity could play a part too and cause the paint to go flat. it might be worth trying a colour restoring polish on it too. it says the type of primer on the front of the can. the can you posted has it about a third down the tin and it should say on each tin in roughly the same place. -
Dupli-Color Hi-Build Primer
stitchdup replied to ewetwo's topic in General Automotive Talk (Trucks and Cars)
some of the duplicolour primers have a fairly tight time for overcoating them or else you have to leave them for a few days. with some of them if you dont apply the final colour within 2 hours, you'd have to leave it around a week to fully gas. but since duplicolour like to have continuity in their packaging you have to read the tin to find out which primer it is. my local shop only carries the one with no time limit as they had a lot of complaints when they had both (because who reads the label?) -
Dupli-Color Hi-Build Primer
stitchdup replied to ewetwo's topic in General Automotive Talk (Trucks and Cars)
I haven't used it for a long time but since its a fleet enamel its likely it wont have the finish you're used to. fleet enamel is more about a quick covering paintjob than a nice finish so it will cover well but you may find it has a lot more orange peel. we only used it for trucks and plant when i was in the bodyshops. I'm not saying you cant get a good finish with it but you can find better options unless using it as a filler primer. Does it say if its sandable on the tin? the stuff we used wasn't and gummed up wet n dry unless you used a lot of dish soap -
not sure of the scale but its should be easy enough to rescale it if you have access to a 3d printer https://cults3d.com/en/3d-model/various/golf-bag-printable-plus-set-of-clubs
-
I assembled the body today. I've added some small tabs of 0.1 sheet for strength as the butt joints looked like they would fail. My reason for assembling the body was there is a big uglt seam across the top of the roof and assembly after paint would not look good so i'm 5 steps ahead of where i should be but it should work out. I used the floor and door panels to help with aligment of the panels. other than the roof it all went together pretty well but there are a couple of areas where the 2 parts are different thicknesses so some filler will be needed. I took a couple pics with the same scale 39 chevy to show how big this car is.
-
Tim Boyd hasn't posted his detroit autorama pics yet. I always look forward to his coverage as he seems to be more open to designs that are outside the norm. The magazines/blogs all show the same 6 cars over and over again while Tim shows everything, good or bad
-
Looking For A Special Glue
stitchdup replied to oldcarfan's topic in Model Building Questions and Answers
yeah, they appeared just as i hit submit, lol. thanks -
Looking For A Special Glue
stitchdup replied to oldcarfan's topic in Model Building Questions and Answers
I hope you do, everytime i've tried using epoxy i find i have less control over it. I do use it reinforce behind things where it wont be seen but i'd like to learn more uses for it. Theres one kit in particular i think it would work for me on as superglue and hobby glue have both failed on it so epoxy seems the way to go