-
Posts
6,636 -
Joined
-
Last visited
Content Type
Profiles
Forums
Events
Gallery
Everything posted by Can-Con
-
Started in depth on this one today. The truck was gifted to me by a friend who passed a couple years ago. Sat in limbo until now as I'm missing the stock bumpers, which another friend may have a set to replace them. As you can see, she's a bit rough. So far I've done a bit of cutting and a mockup with the wheels and tires to check the planned stance. Going with the fleetside bed as it will be 2-tone with the chrome trim separating the colors. Looks like all I'll be using from the original kit will be thee cab.
-

USPS starts to ship to Canada !
Can-Con replied to Mr mopar's topic in General Automotive Talk (Trucks and Cars)
Yea, that's Canada Post. The rules were changed a few weeks before they went on strike but they weren't as strict about listing everything in the box separately . They didn't get their way with the strike and were ordered back to work so now they're doing everything strictly "by the book". Just think, some kits have upwards of 1000 parts. Great fun. I think this will make Canada Post virtually unusable for parcel mail. No one's gonna want to go to that much extra effort just to send a model somewhere. -
Thanks everyone. starting to feel better now.
-
Um, Pretty sure it's Quebec north of Maine, Ken We're east of Maine. 😉
-
Feeli'n kinda under the weather right now so I'm just posting some pics for now.
- 26 replies
-
- 15
-

-

My builds finished in '24 [OOPS, forgot one, added it]
Can-Con replied to Can-Con's topic in Model Cars
Good luck finding one though. A lot easier finding one of the '32 roadsters. Same kit except for the body so the same stock wheels. Sounds like you want a set for a rod with the slicks though. Personally, I'd get a set of the printed ones. The stock wheels in the '32 kits scale out to about 18 or 19 inches. I doubt you'd find those slicks that big. -

What is your NUMBER 1 favorite movie car
Can-Con replied to Thedragsterdude's topic in The Off-Topic Lounge
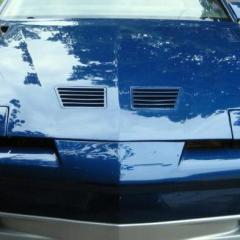
I know how you feel. When people see my T/A there's about a 50/50 chance they tell me I should paint it black. 🙄- 174 replies
-
- 1
-

-
- moviecar
- days of thunder
-
(and 2 more)
Tagged with:
-
Ray's has them.
-
They're the stock wheels that came on the kit but I widened them with some resin rims I cast years ago.
-

My builds finished in '24 [OOPS, forgot one, added it]
Can-Con replied to Can-Con's topic in Model Cars
Hi, Steve. Thanks, Those wheels. They're actually the stock wheels that the kit came with but I widened them with resin rims. -
I kinda figured it was just a misunderstanding, Les, It seemed a bit out of character as I know you're usually not like that. Personally, I'm one of those who usually never watch model car videos on YouTube unless I want to see what's in the box and his videos are useful for that. But I do watch them with the sound off. 😉
-
No worries Steve, I know you can take care of your own house but I'd have said that no matter who it was aimed at. I just read it as downright rude and there was no need of it.
-
Picked this up with a gift certificate at my local shop today. Pretty plain looking kit but what it doesn't say on the box is there's a nice set of Watanabe wheels[think Minilights] and provisions for lowering it right in the box. Just add some school bus yellow paint and instant attitude. 😉
- 39,081 replies
-
- 9
-

-
- johan
- glue bombs
-
(and 1 more)
Tagged with:
-
Wow, Les, That line goes right up there with "I know you are but what am I ?" and "Why did you punch me, I was just joking". I don't know if you meant it that way but it looks to me like you just told him to be quiet and mind his own business if he doesn't like it. I think I'd rather watch Steve build models then make videos about building models. Pretty sure it's a better use of his time.
-

Rare/unusual auto options.
Can-Con replied to Chuckyg1's topic in General Automotive Talk (Trucks and Cars)
I have a cassette holder like this for my T/A. original equipment to the car. I don't use it because it doesn't hold enough tapes for the space it takes up. -
-

Rare/unusual auto options.
Can-Con replied to Chuckyg1's topic in General Automotive Talk (Trucks and Cars)
I never could get 8-tracks to work good ,,I don't smoke. -
Some really nice builds there. I always know I'm in for a treat when I open your posts.👍
-
Oh, now that's WICKED !!😈
-
Like DCI Hunt used to say , "Time to fire up the Quattro". 😉
-

Geez! Another Stocker! 70 Formula Firebird B/SA
Can-Con replied to R. Thorne's topic in WIP: Drag Racing Models
I'd usually go that way too, Bill but I don't think the contours at the front of the smaller hood will match up with the contours of the larger nose. That's why I recommended the graft.


