CabDriver
-
Posts
5,109 -
Joined
-
Last visited
Content Type
Profiles
Forums
Events
Gallery
Everything posted by CabDriver
-
I like that car too - still looks good today! I’ll be watching! Bodywork you’ve done already looks good ??
-

Can we see your model stash?
CabDriver replied to Fifer's topic in General Automotive Talk (Trucks and Cars)
Nice stash! Got some nice showrods on the showrod shelf there! -

-
I like those salsa containers too - my wife bought me a bag of a hundred or so of them, and they’re SUPER useful!
-
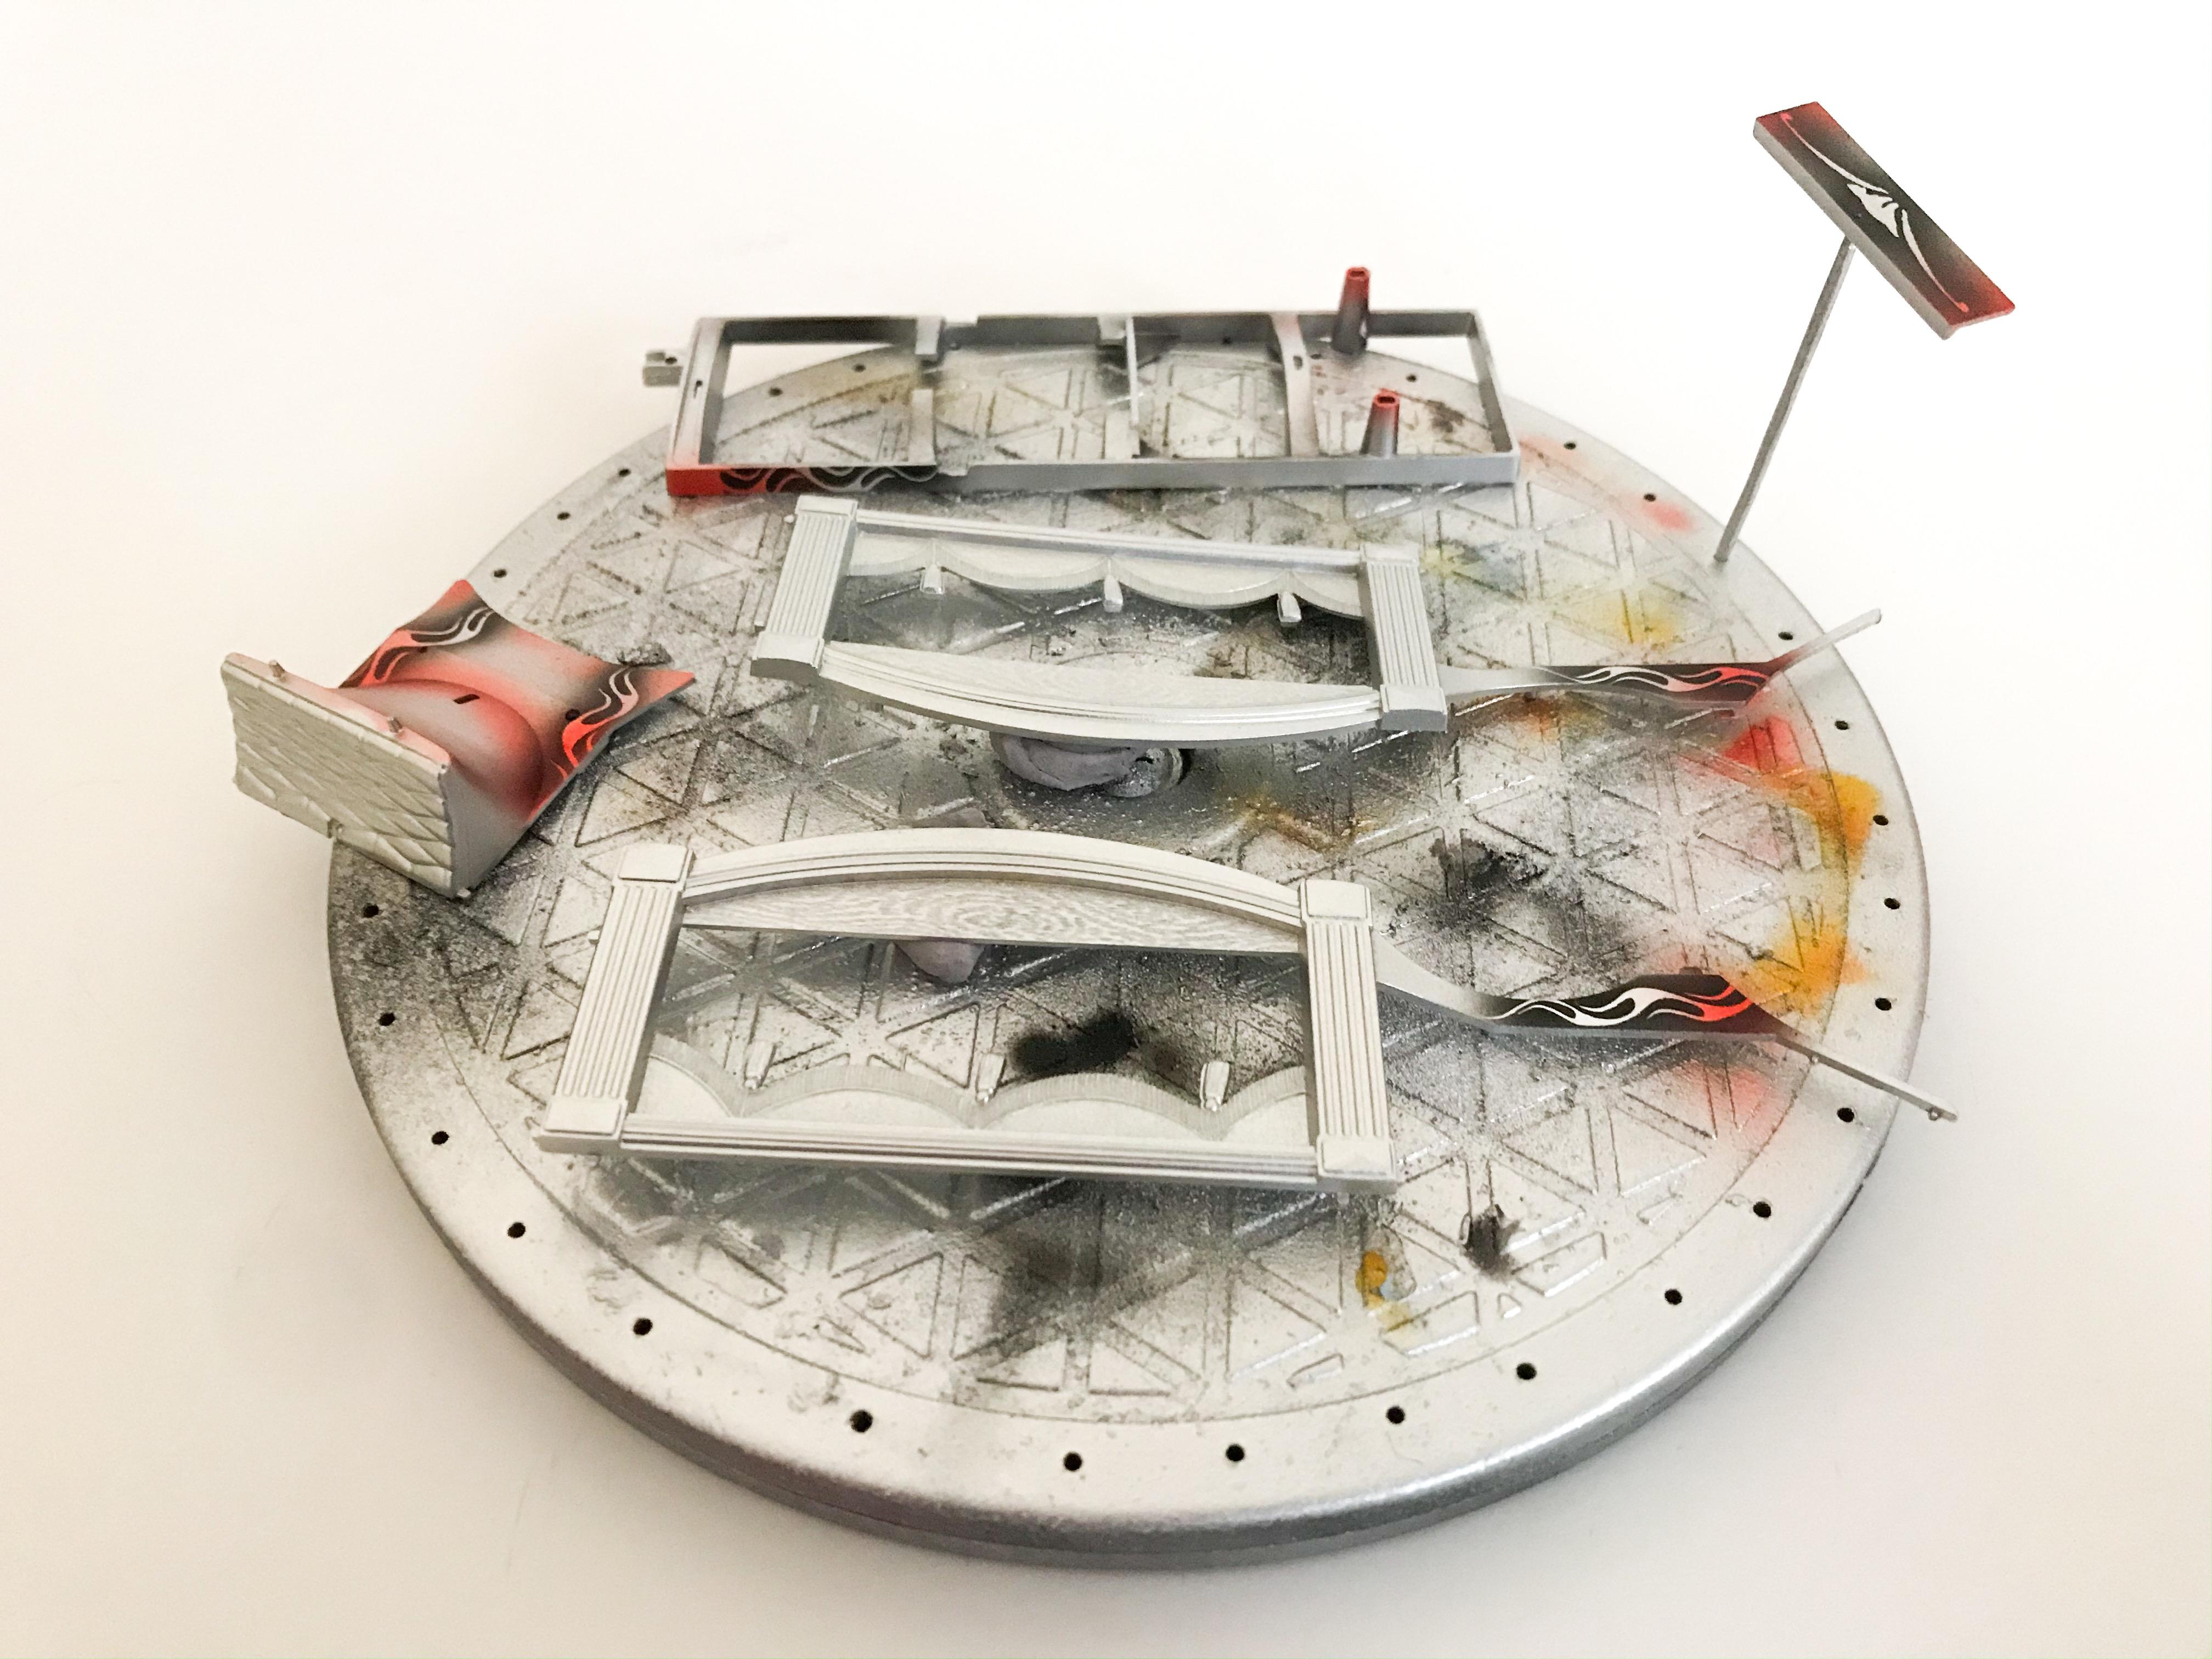
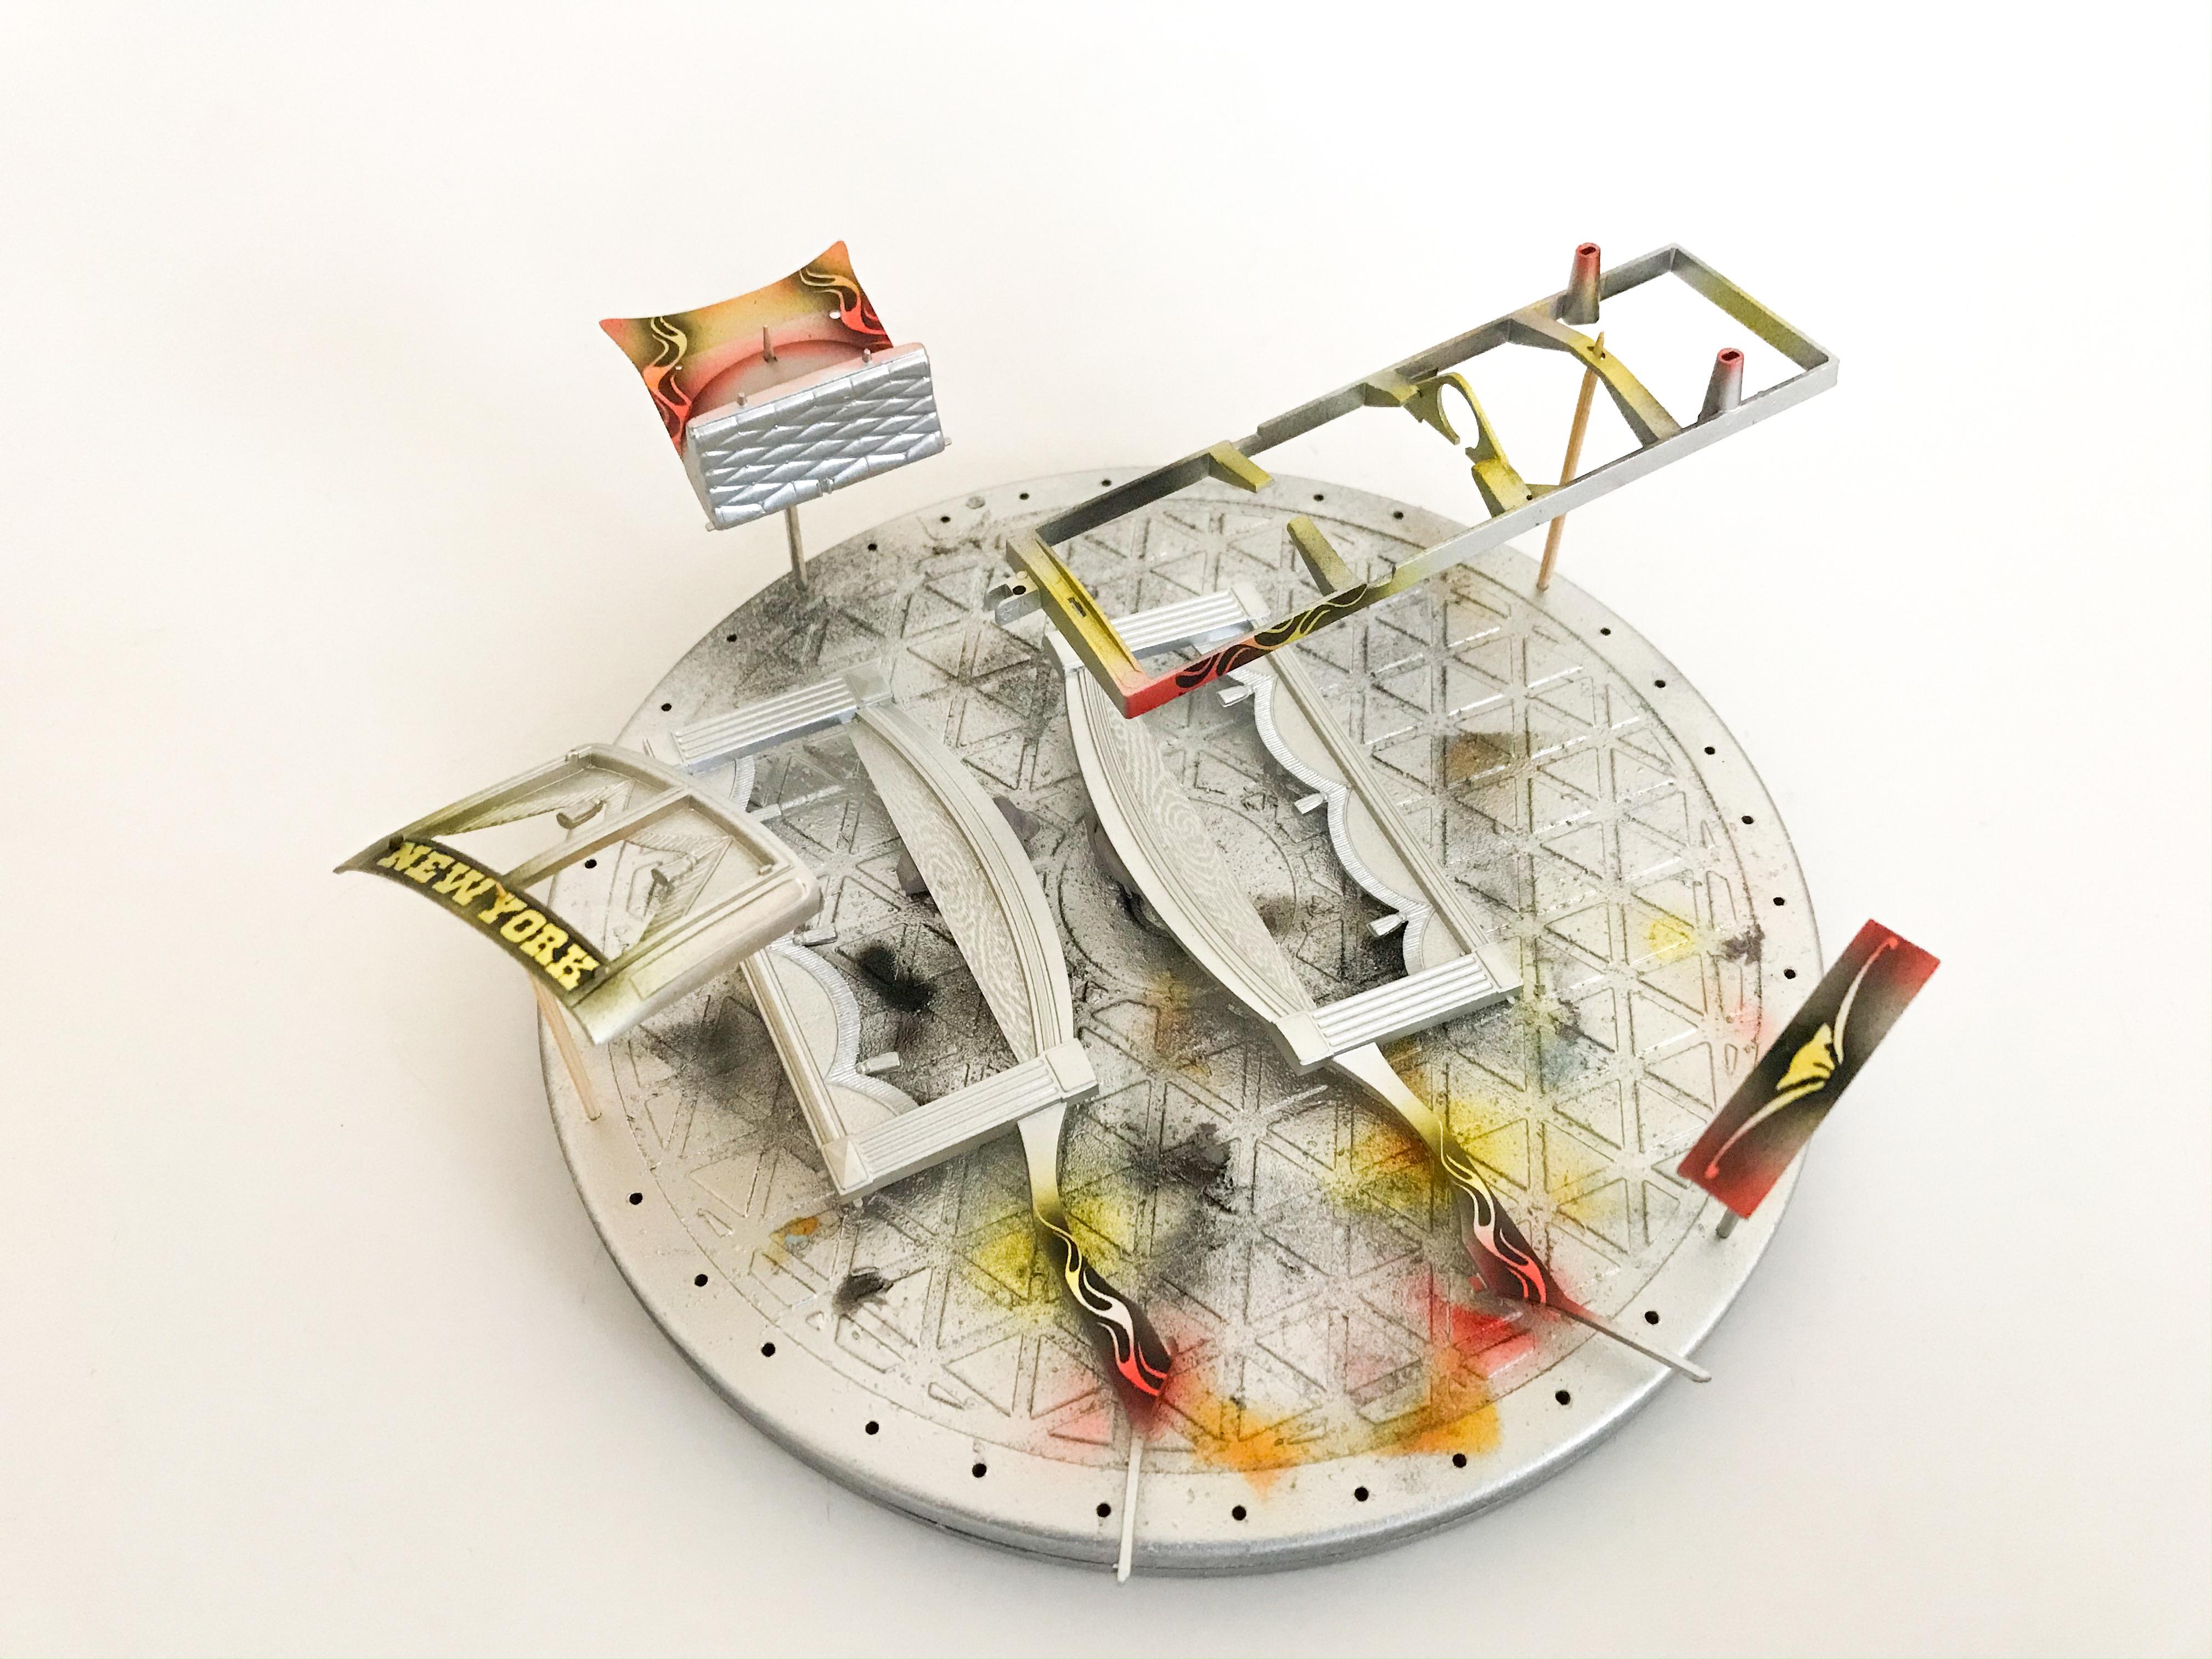
Thanks for all the comments and helpful pics guys - really useful! I’m not going for an exact replica but seeing all those details and pics is really cool! Cut some more masks to add a little detail to some of the body parts and frame today: Then gave them a little red candy: Then some yellow: And then the main color - pleased with how this candy orange looks on there! Got a bunch of clearing to do now! More soon, soon as I’ve done more!
-
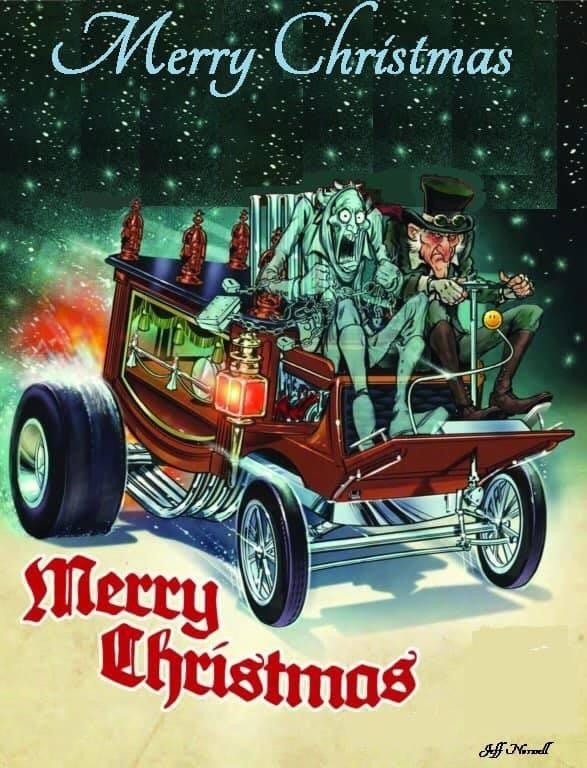
AMT is bringing back the LiL' Gypsy wagon ?
CabDriver replied to Mr mopar's topic in Car Kit News & Reviews
Like “Hey! Cool ride bro!”? -
Ohhhhh! Intriguing!!
-
Thanks Dave!
-
Olds W-30 Intake Tubing
CabDriver replied to StevenGuthmiller's topic in Model Building Questions and Answers
Oh wow, beautiful work Steve! Looks brilliant! -
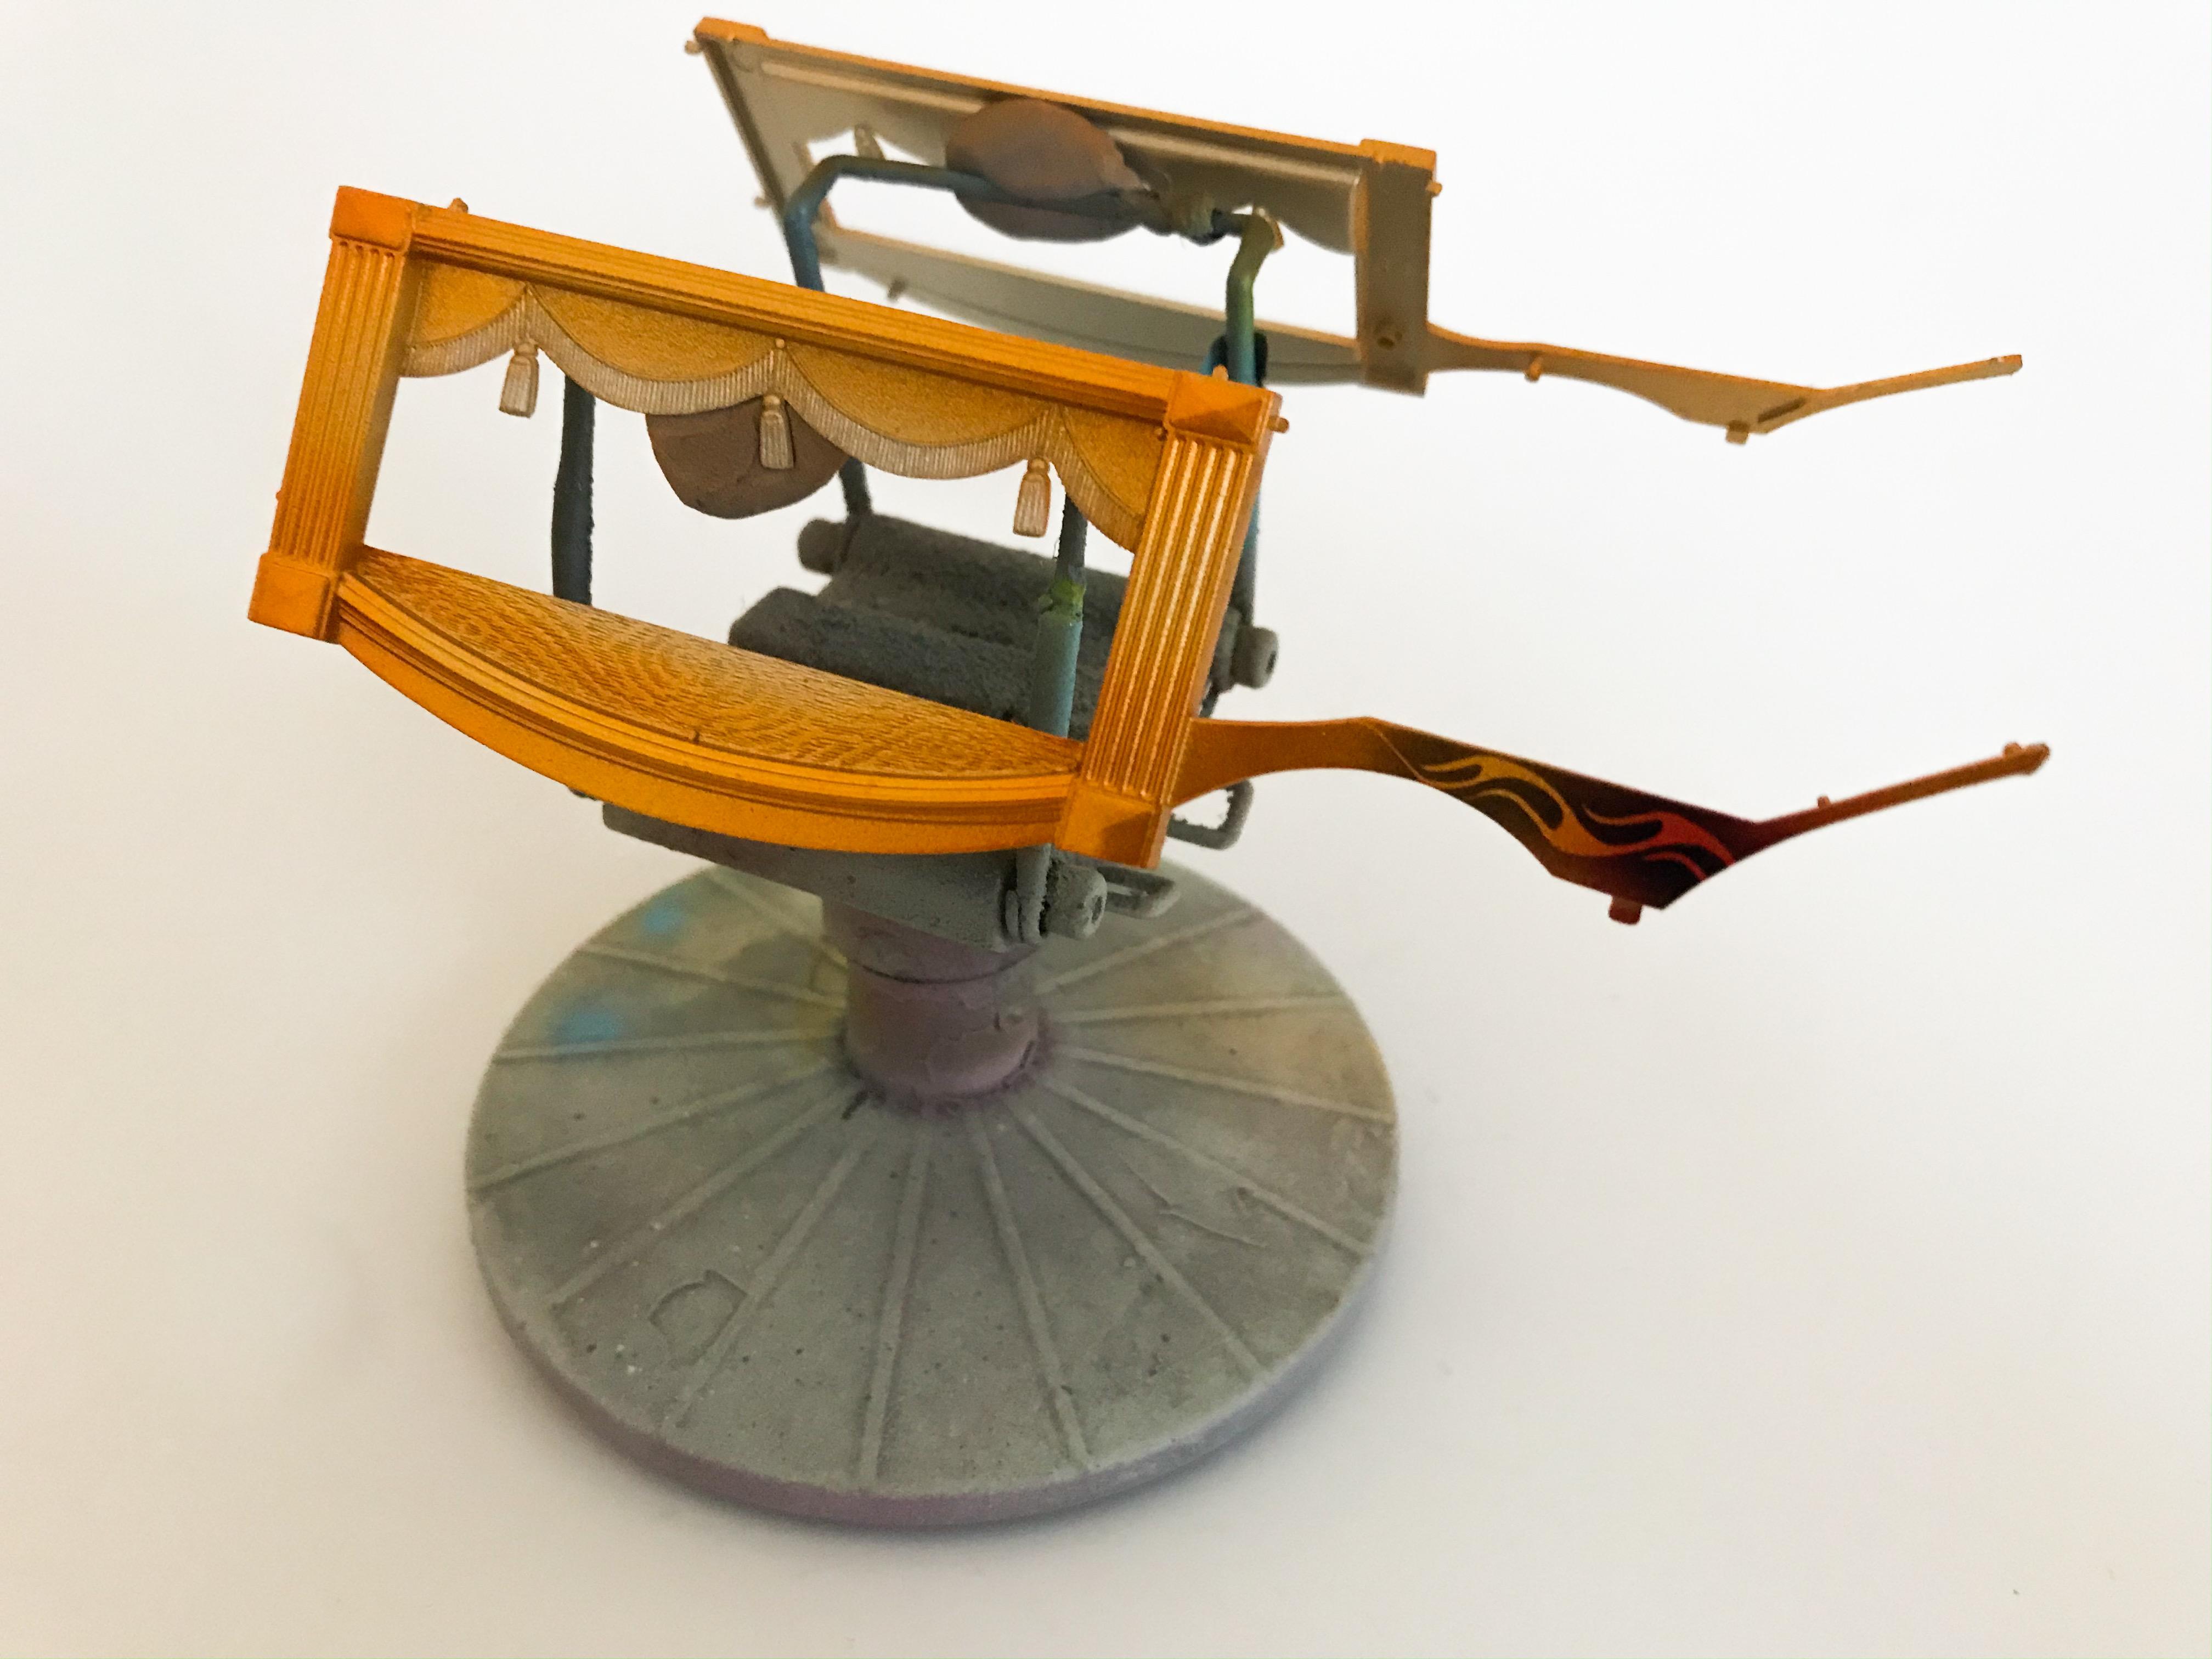
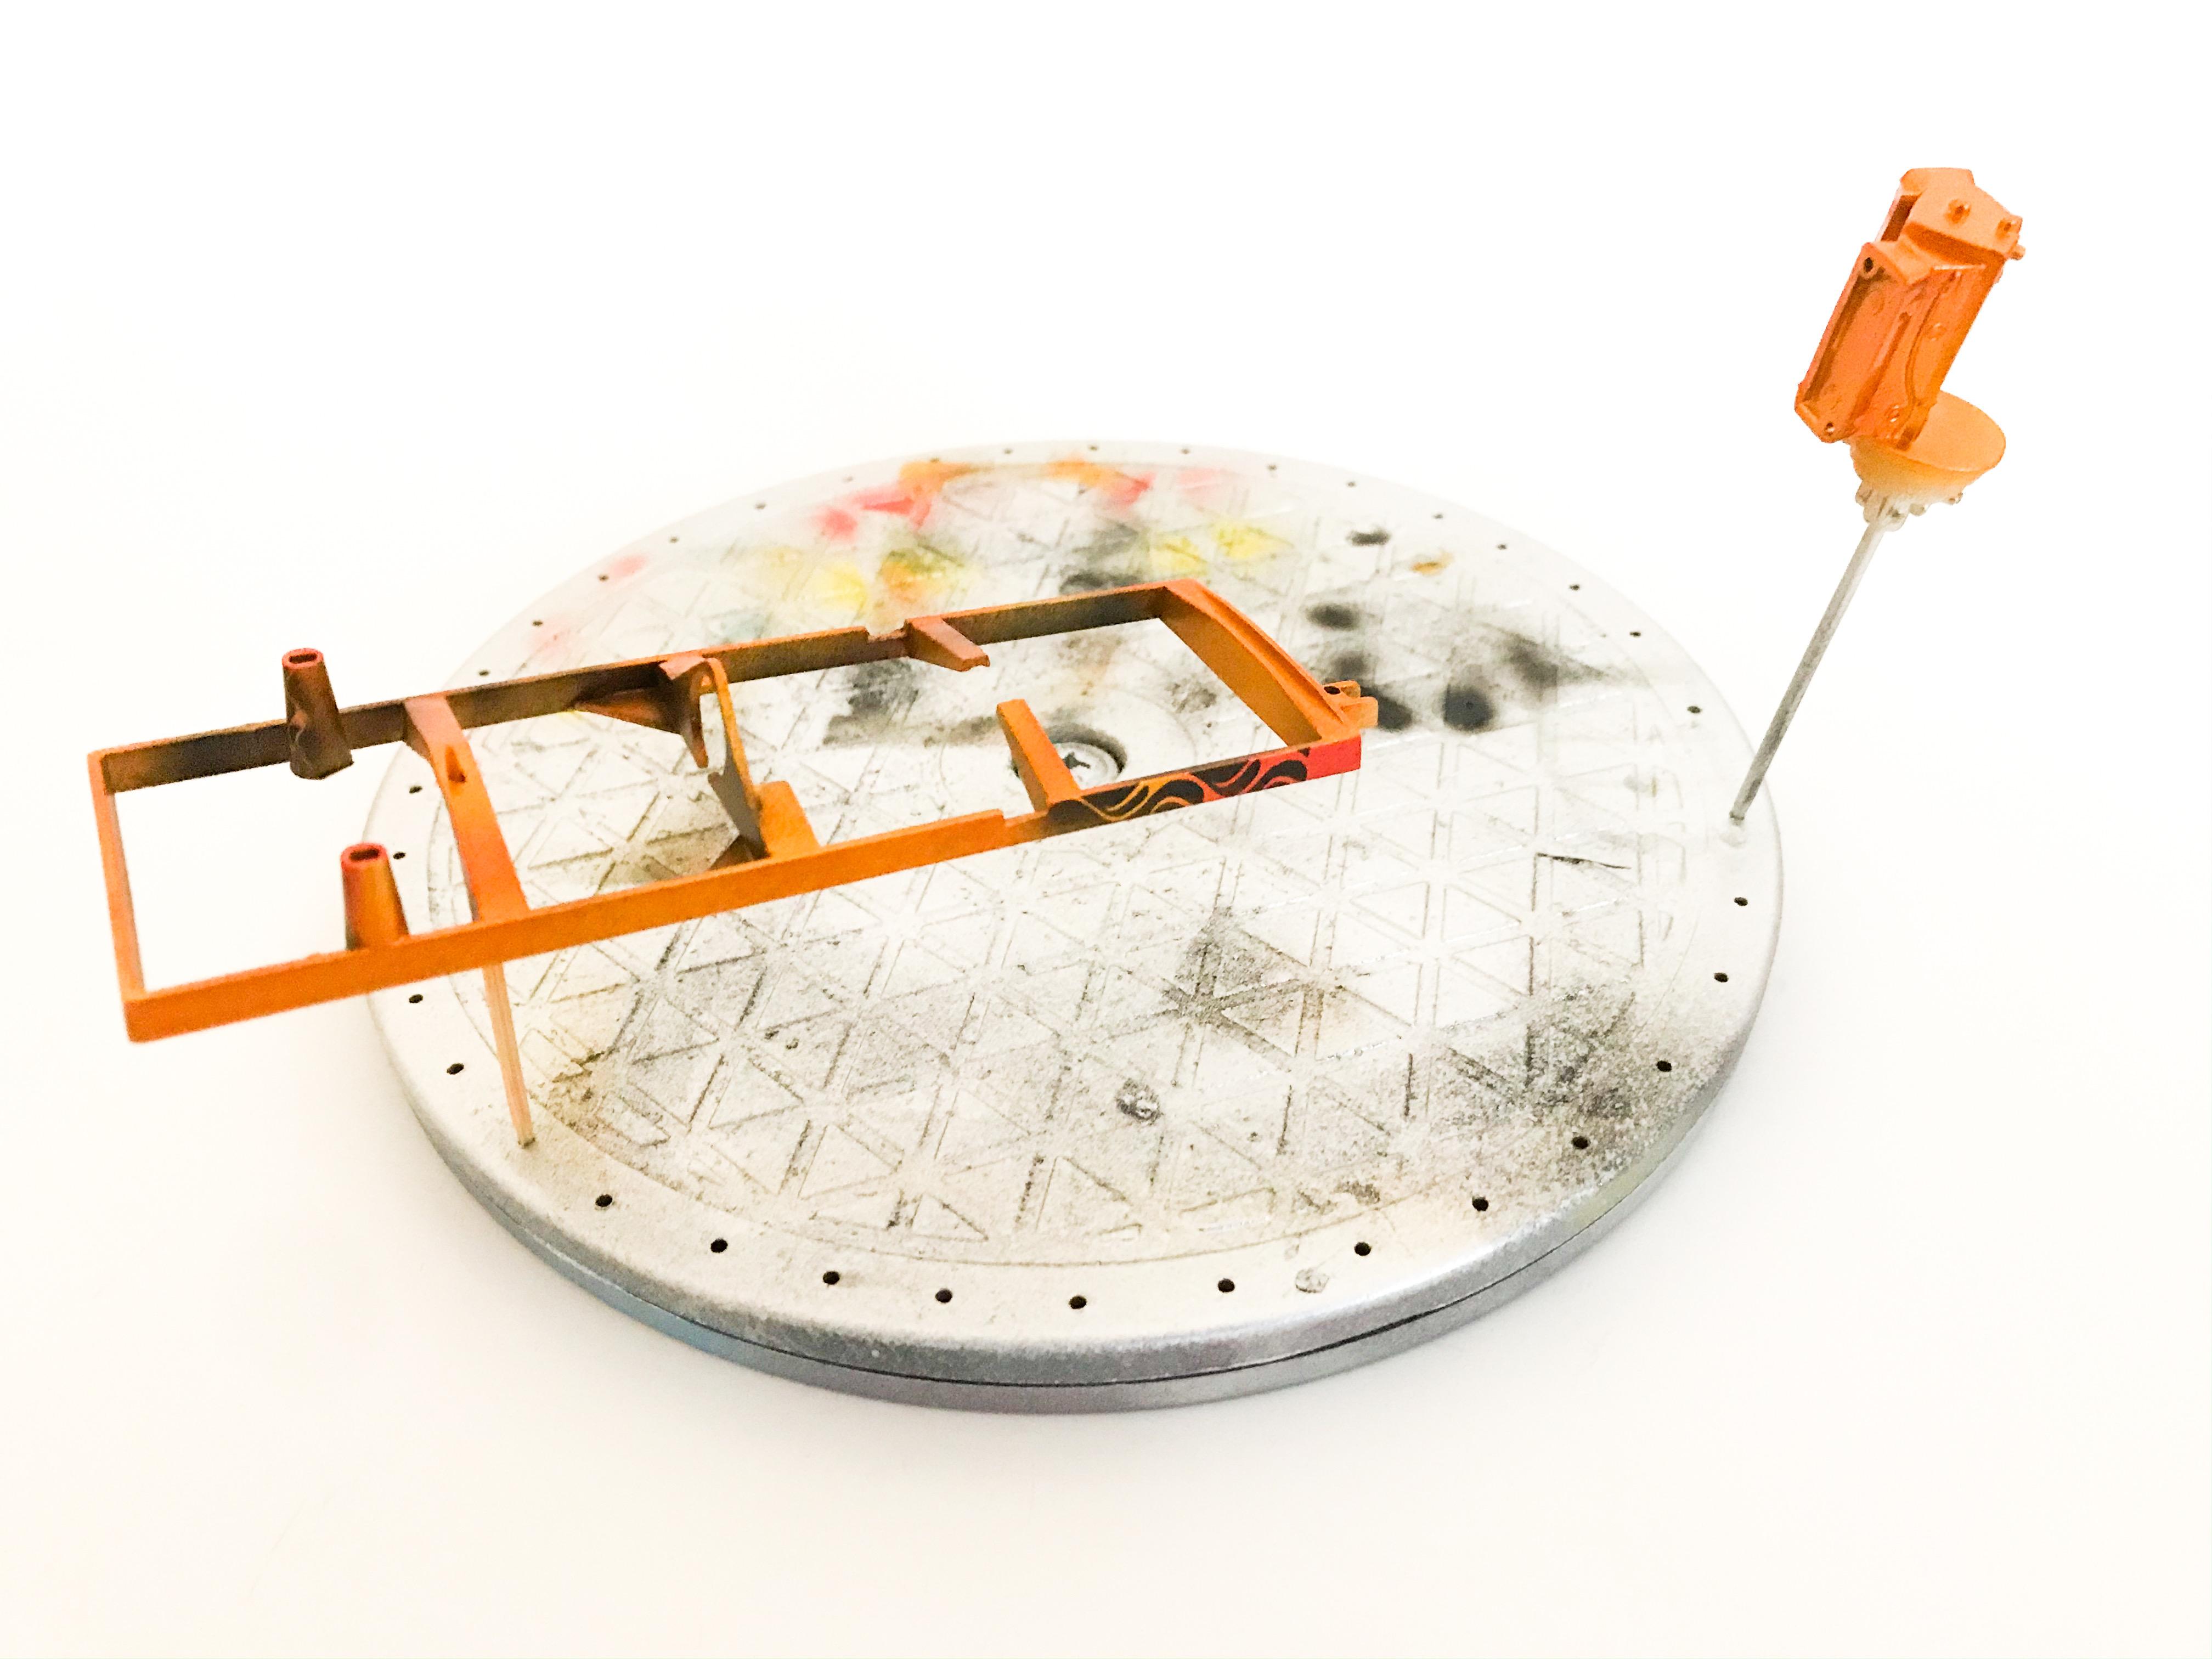
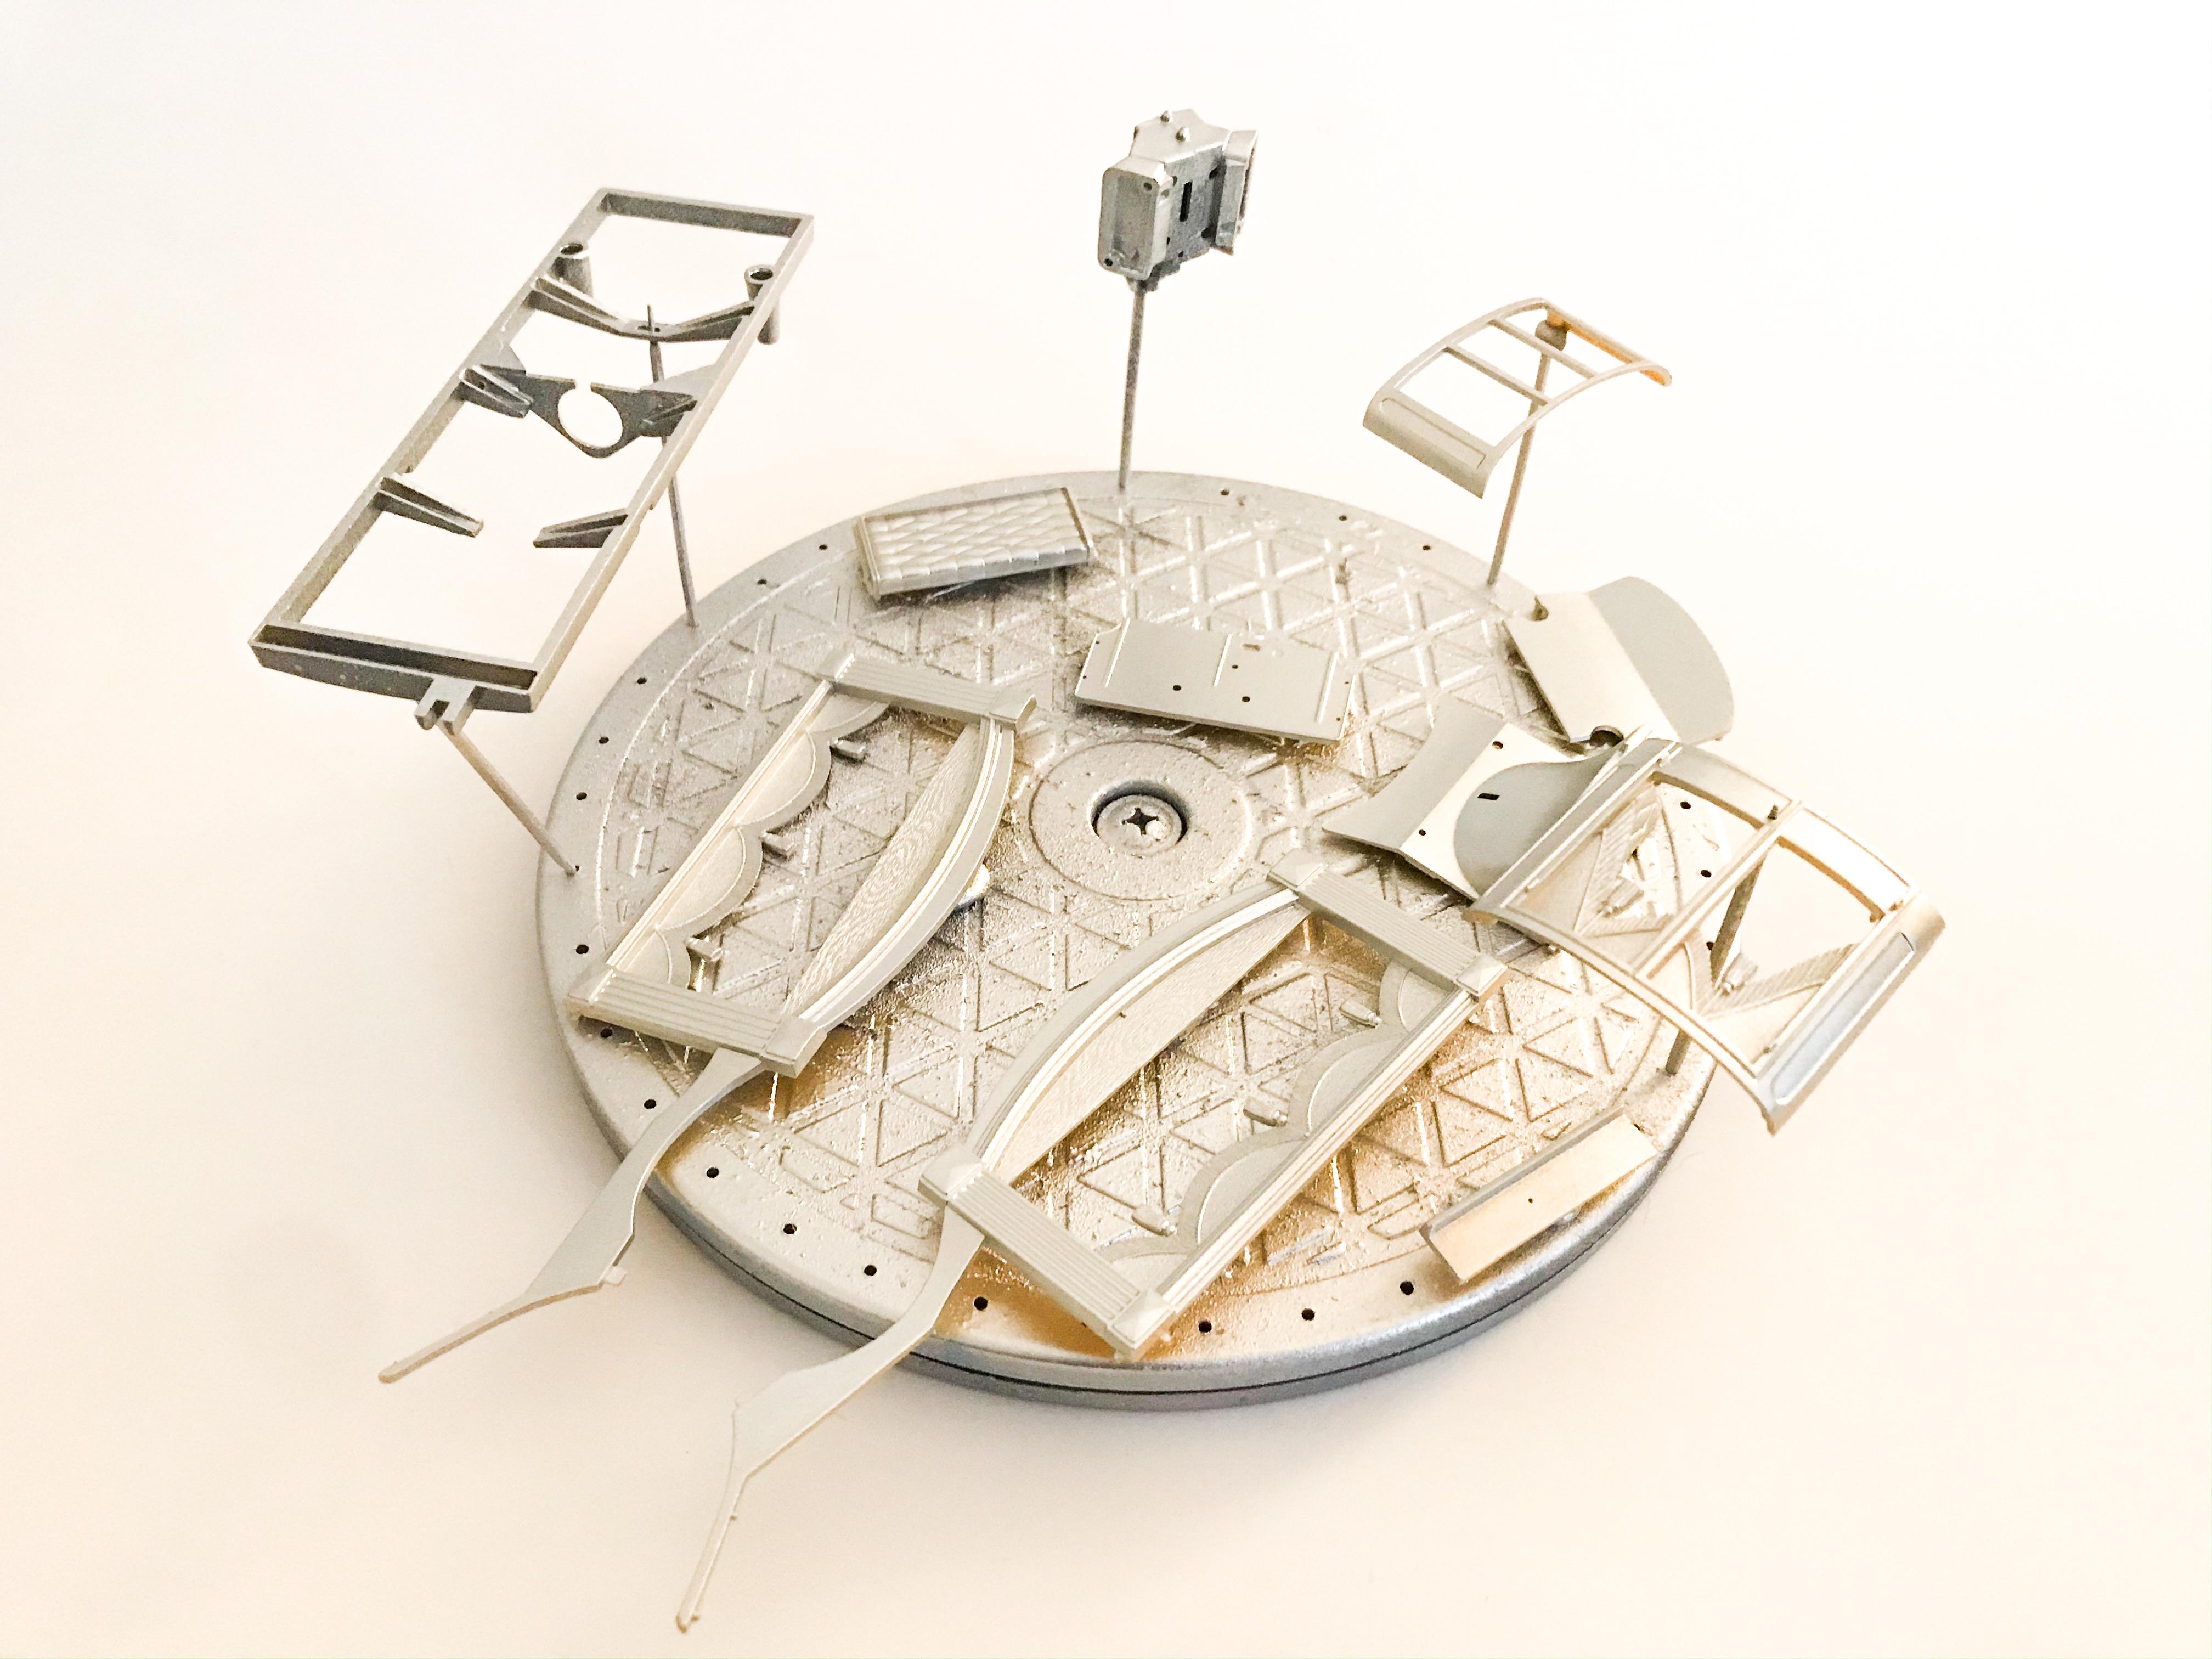
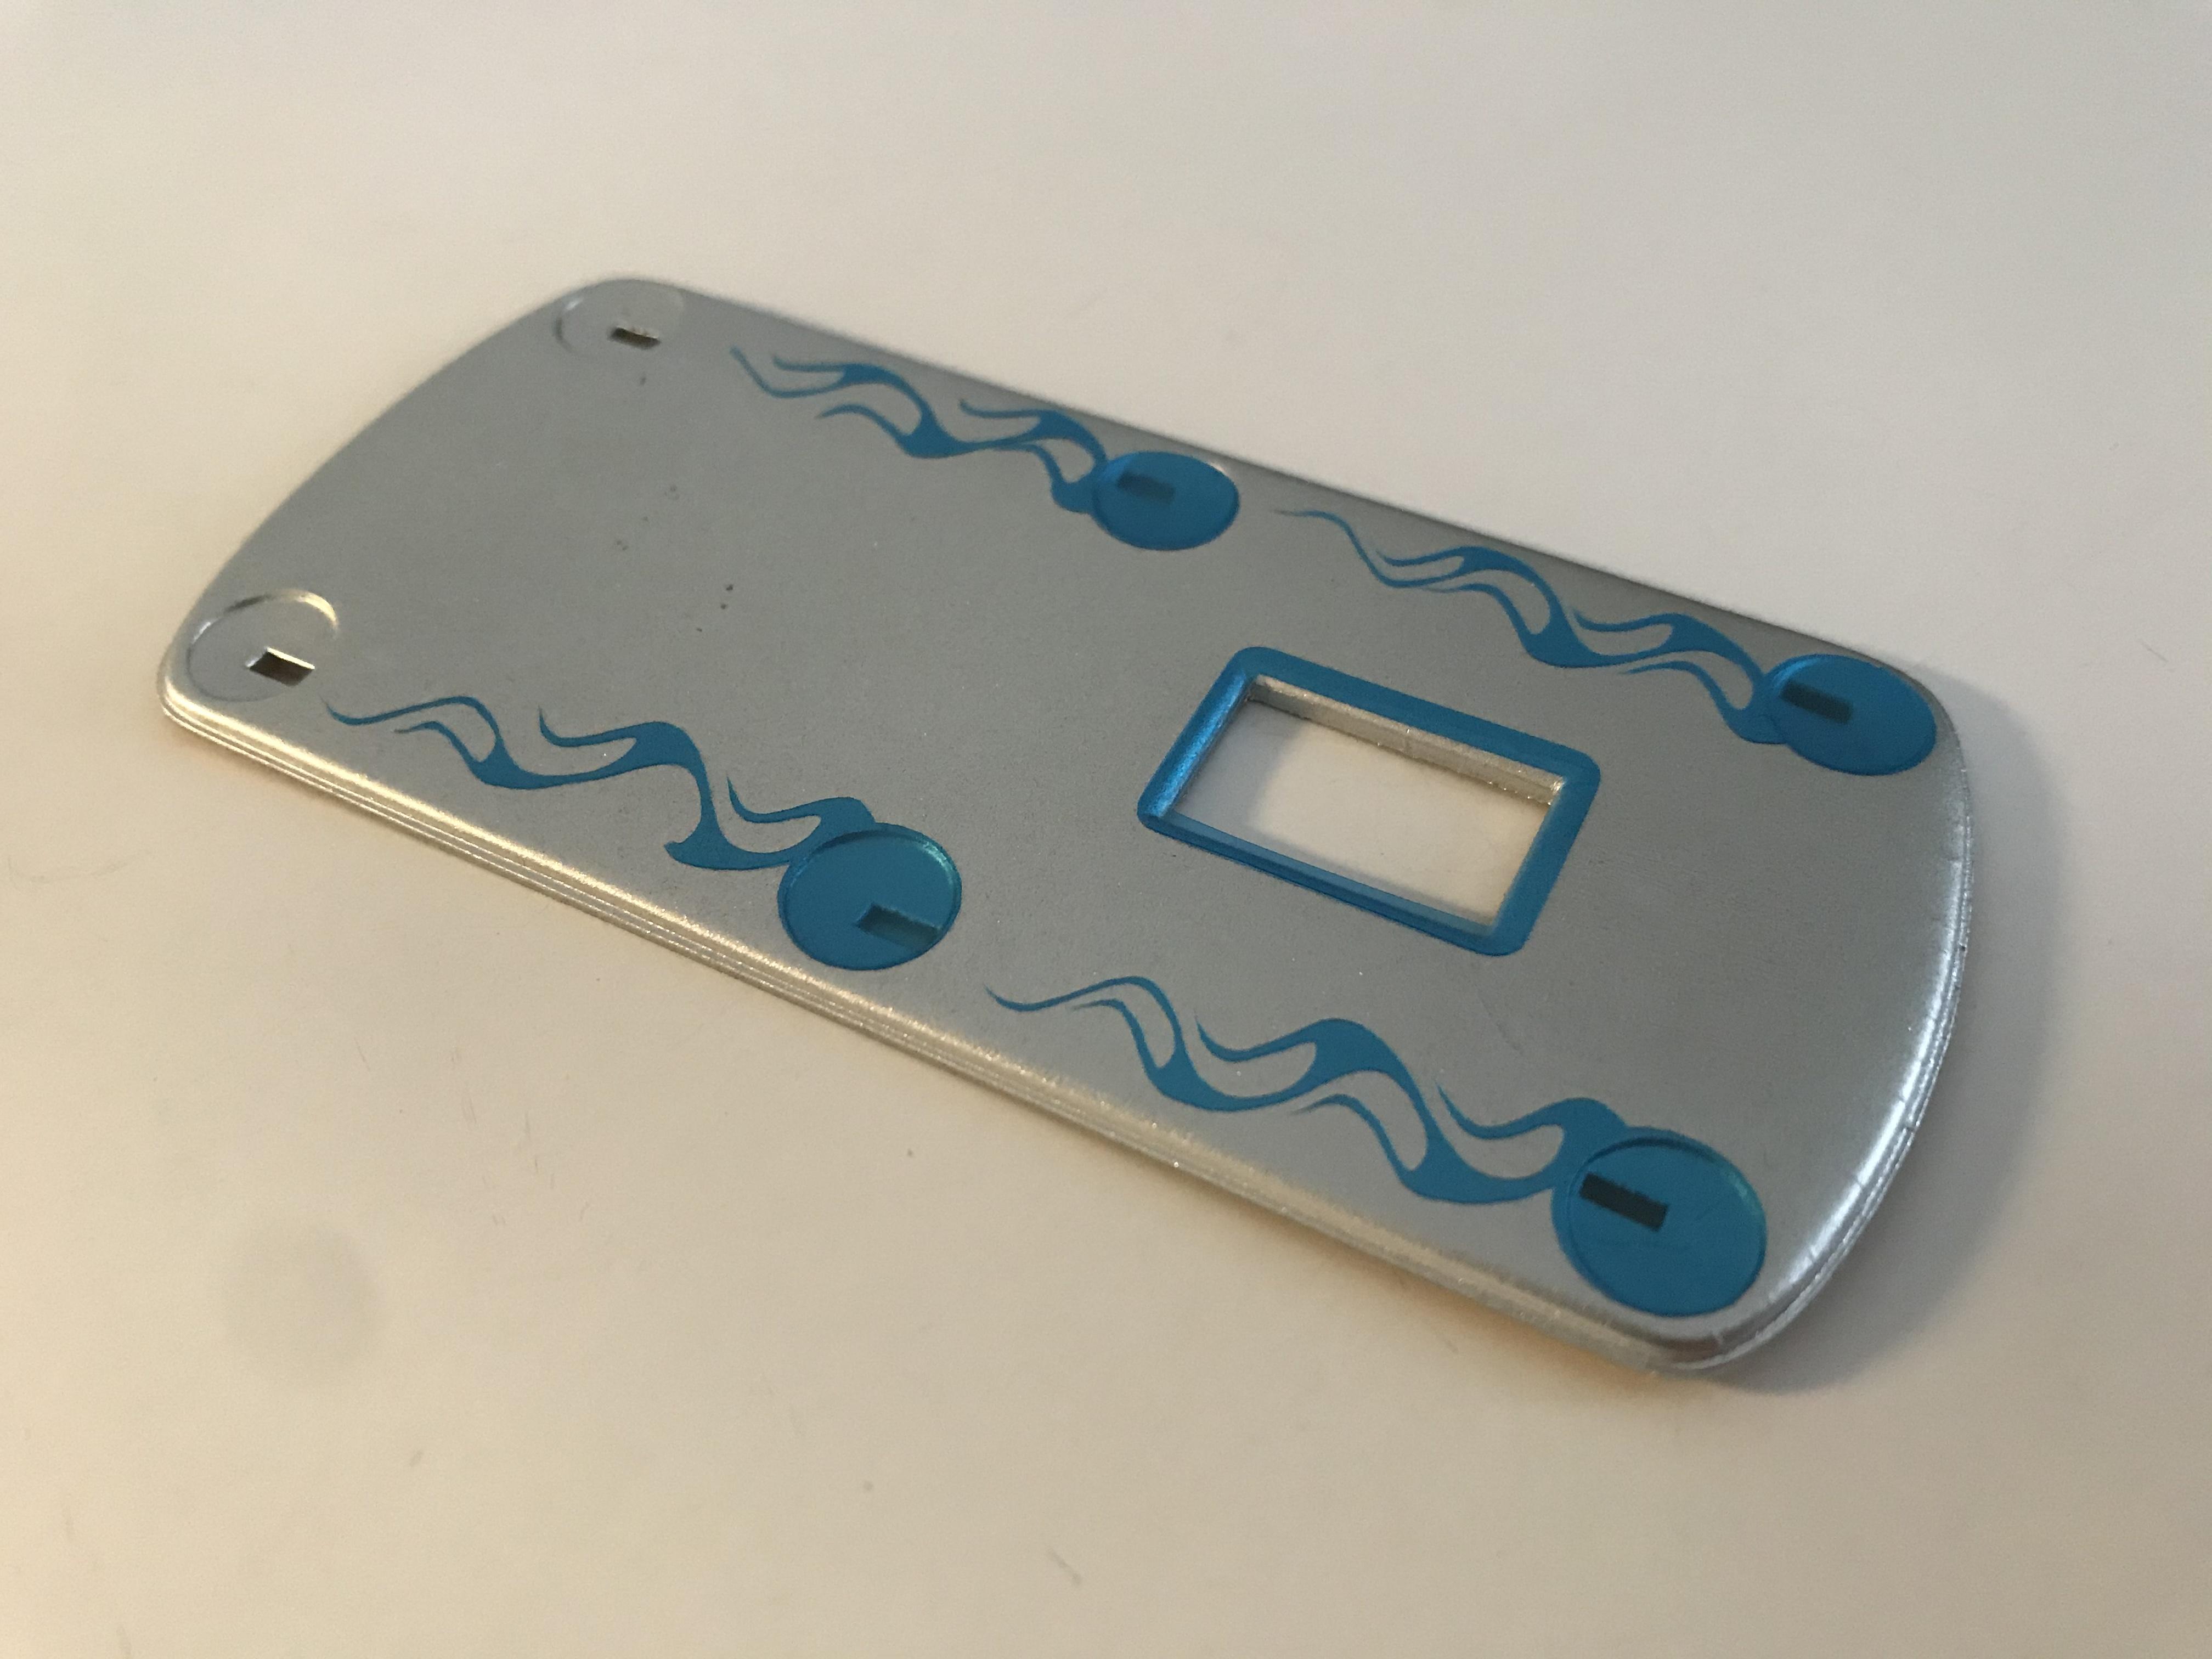
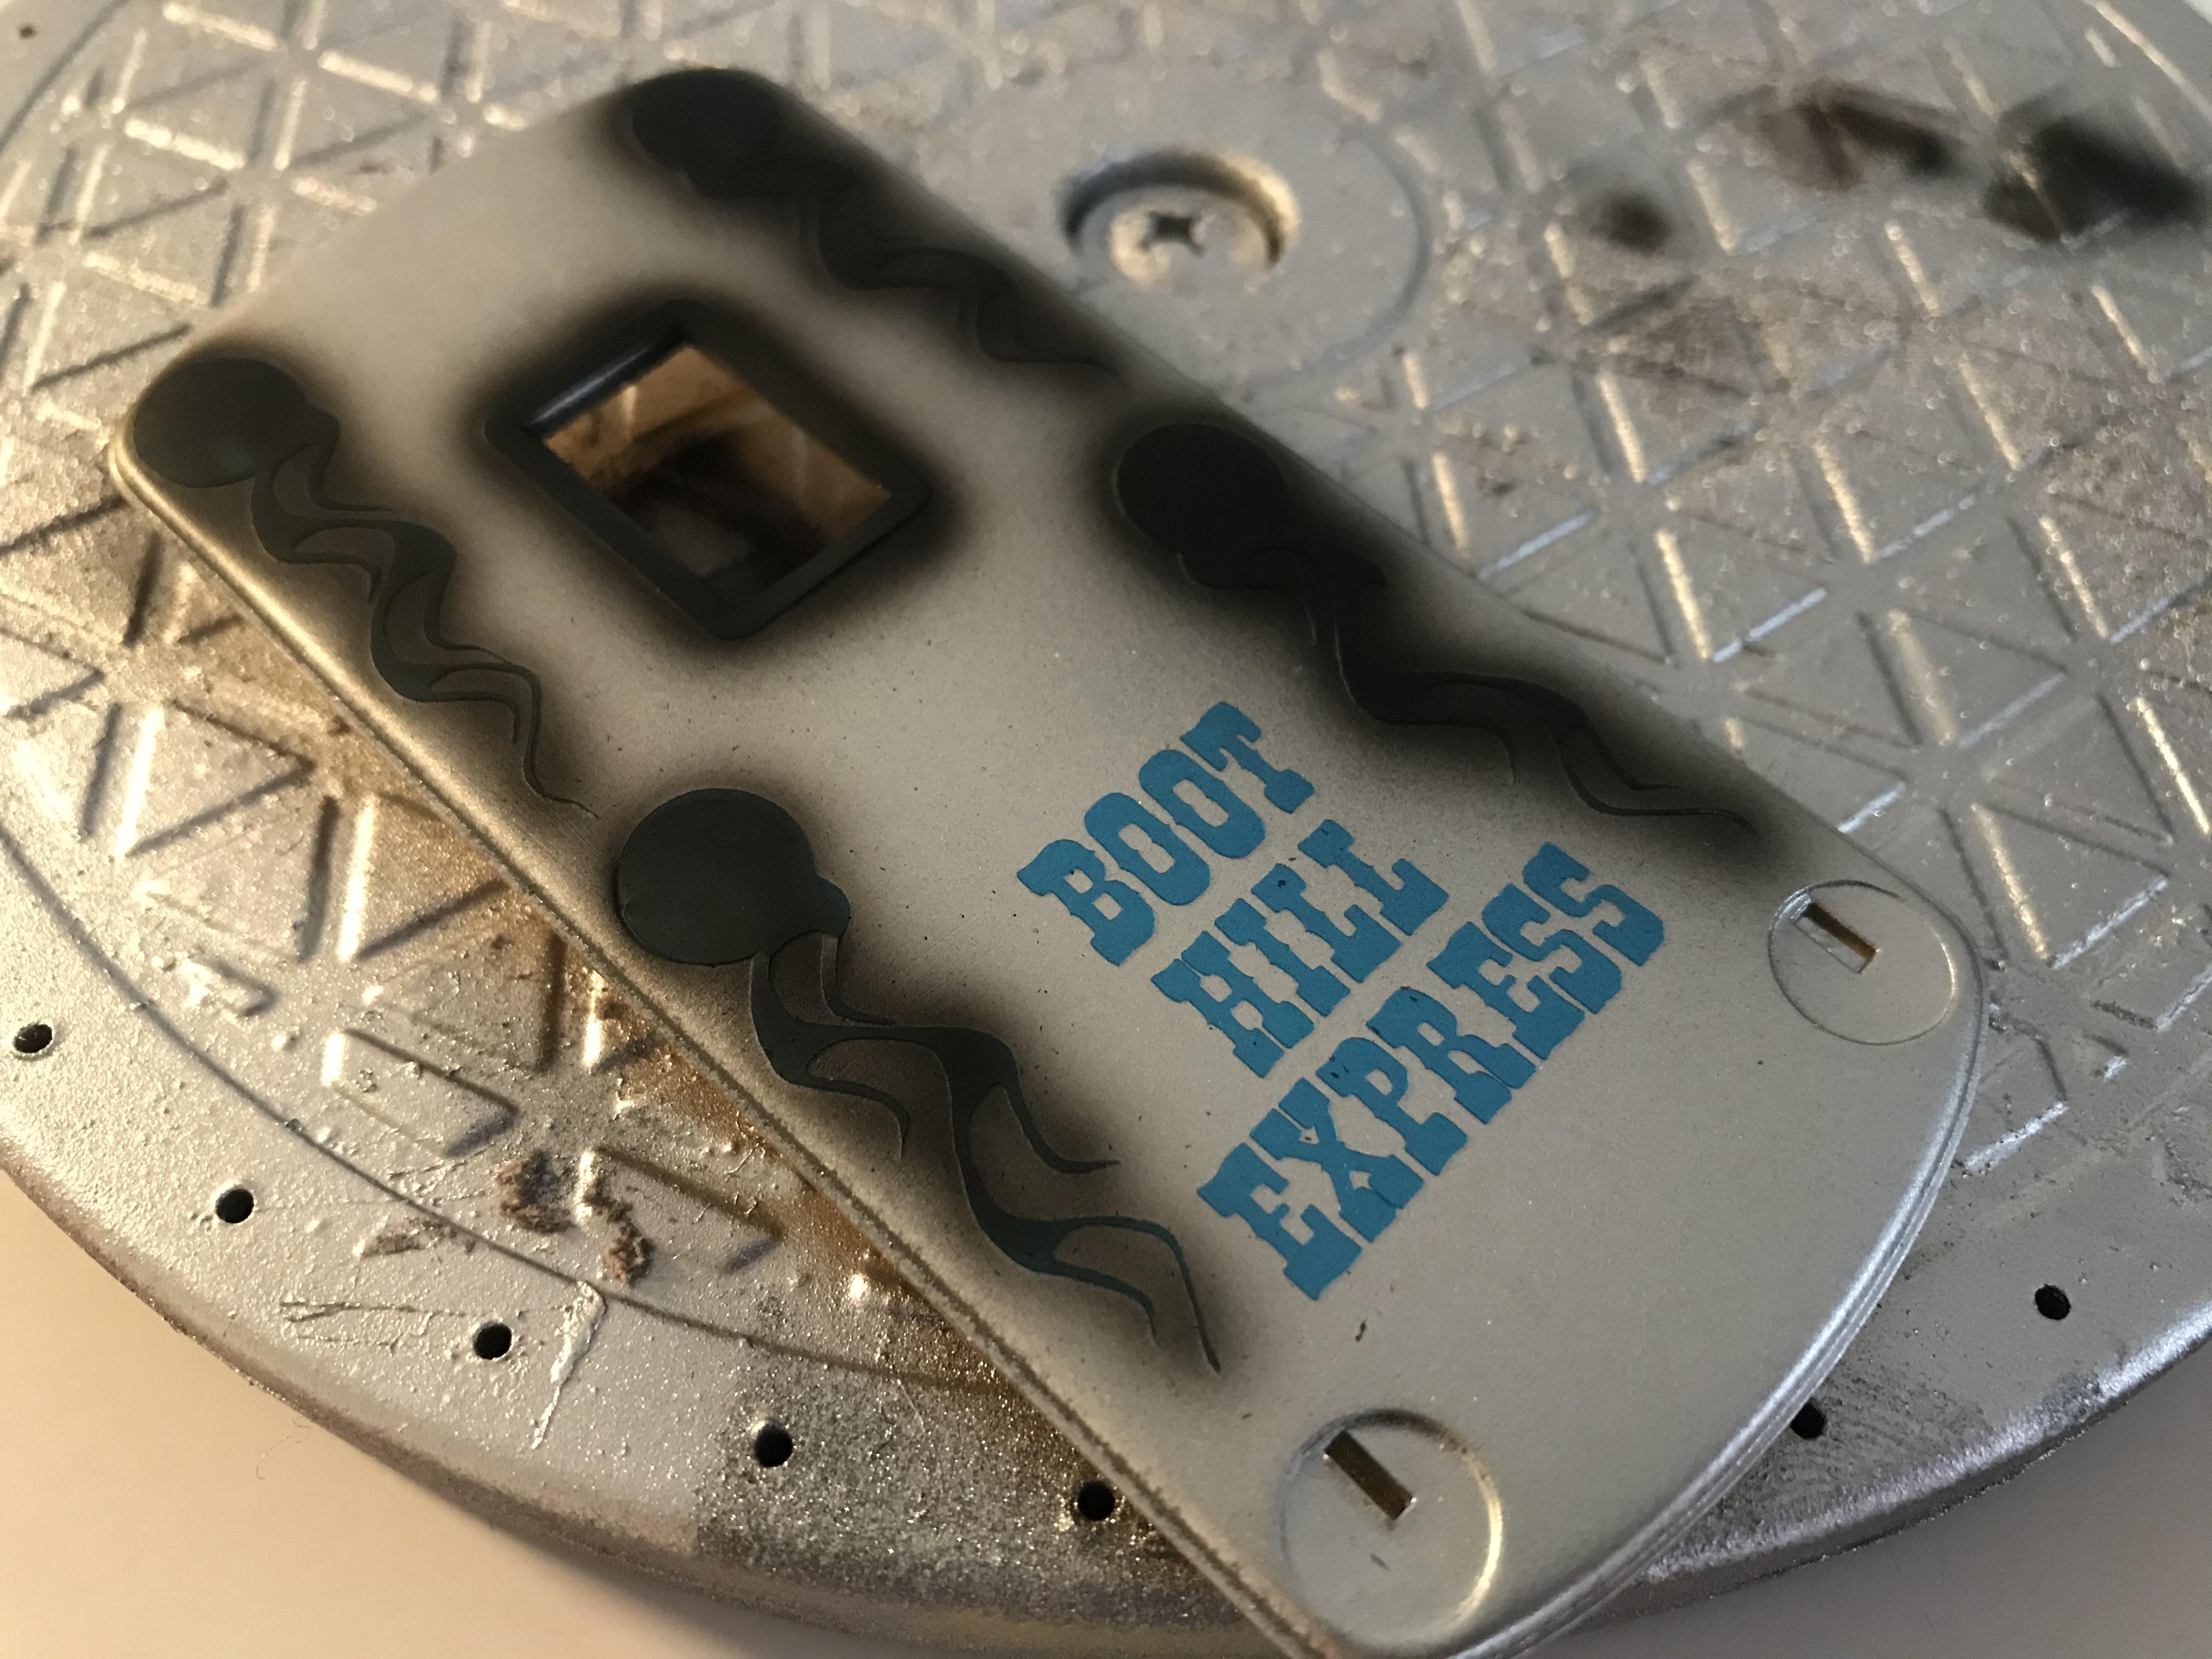
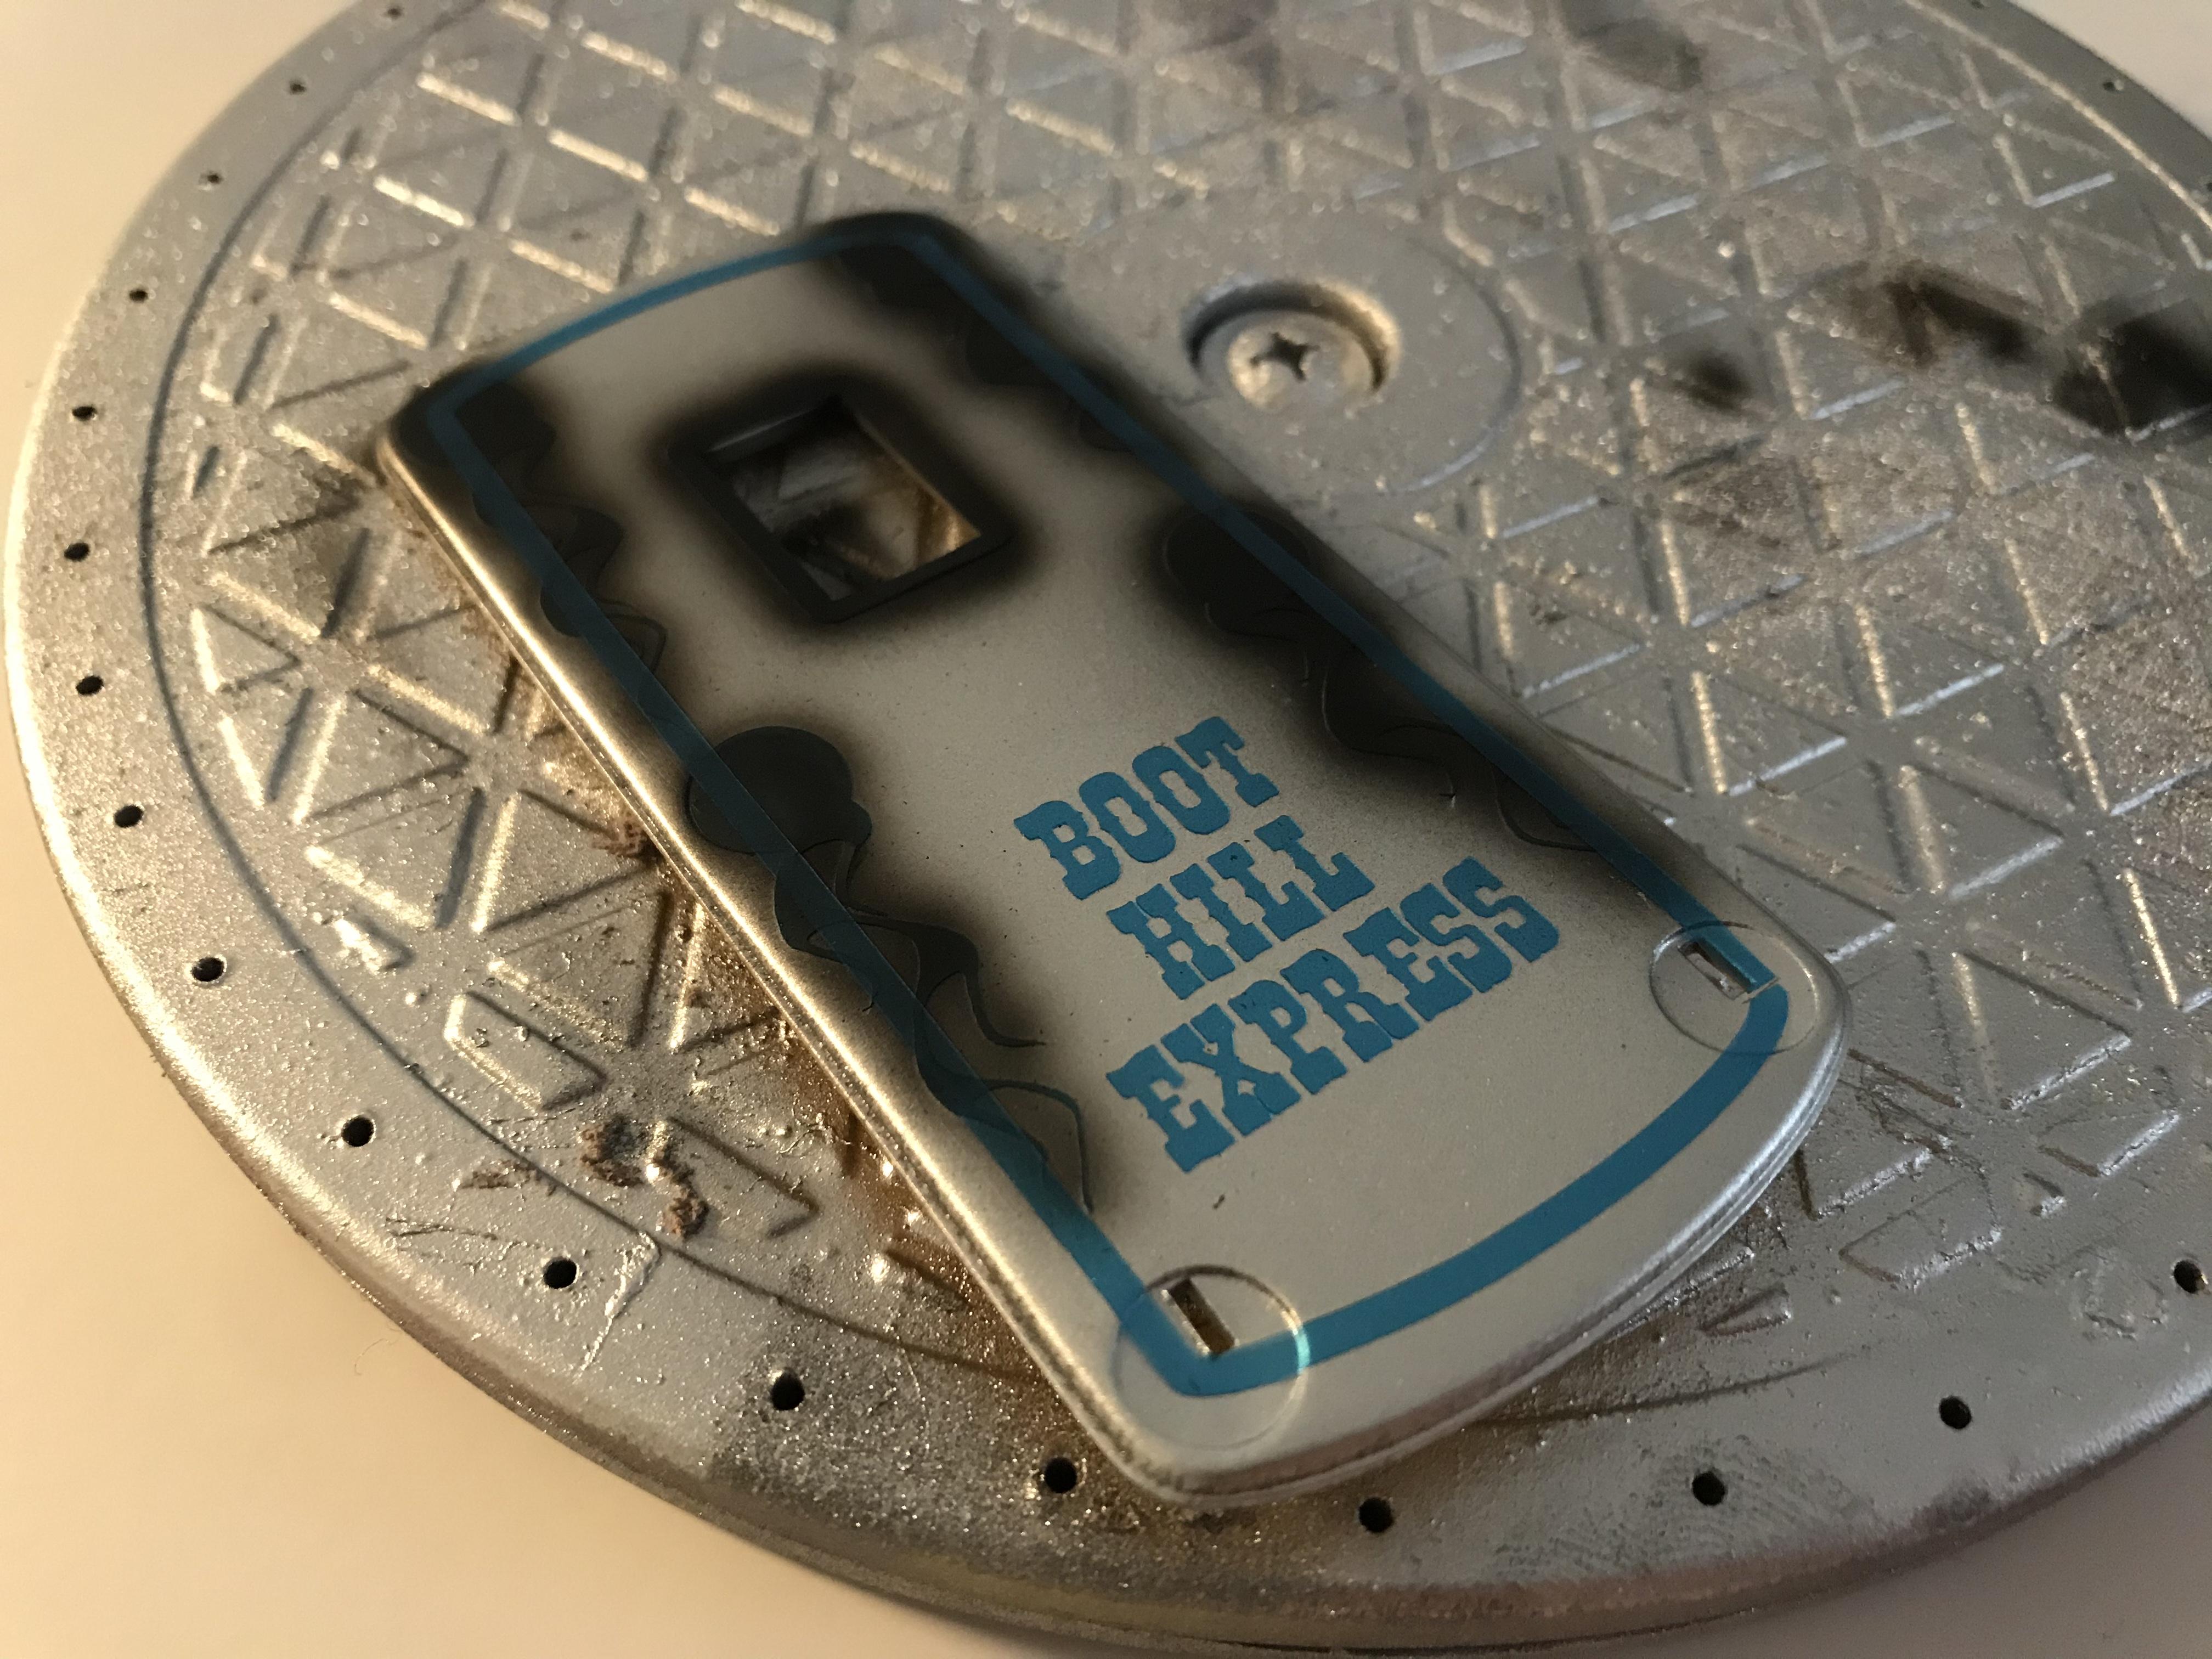
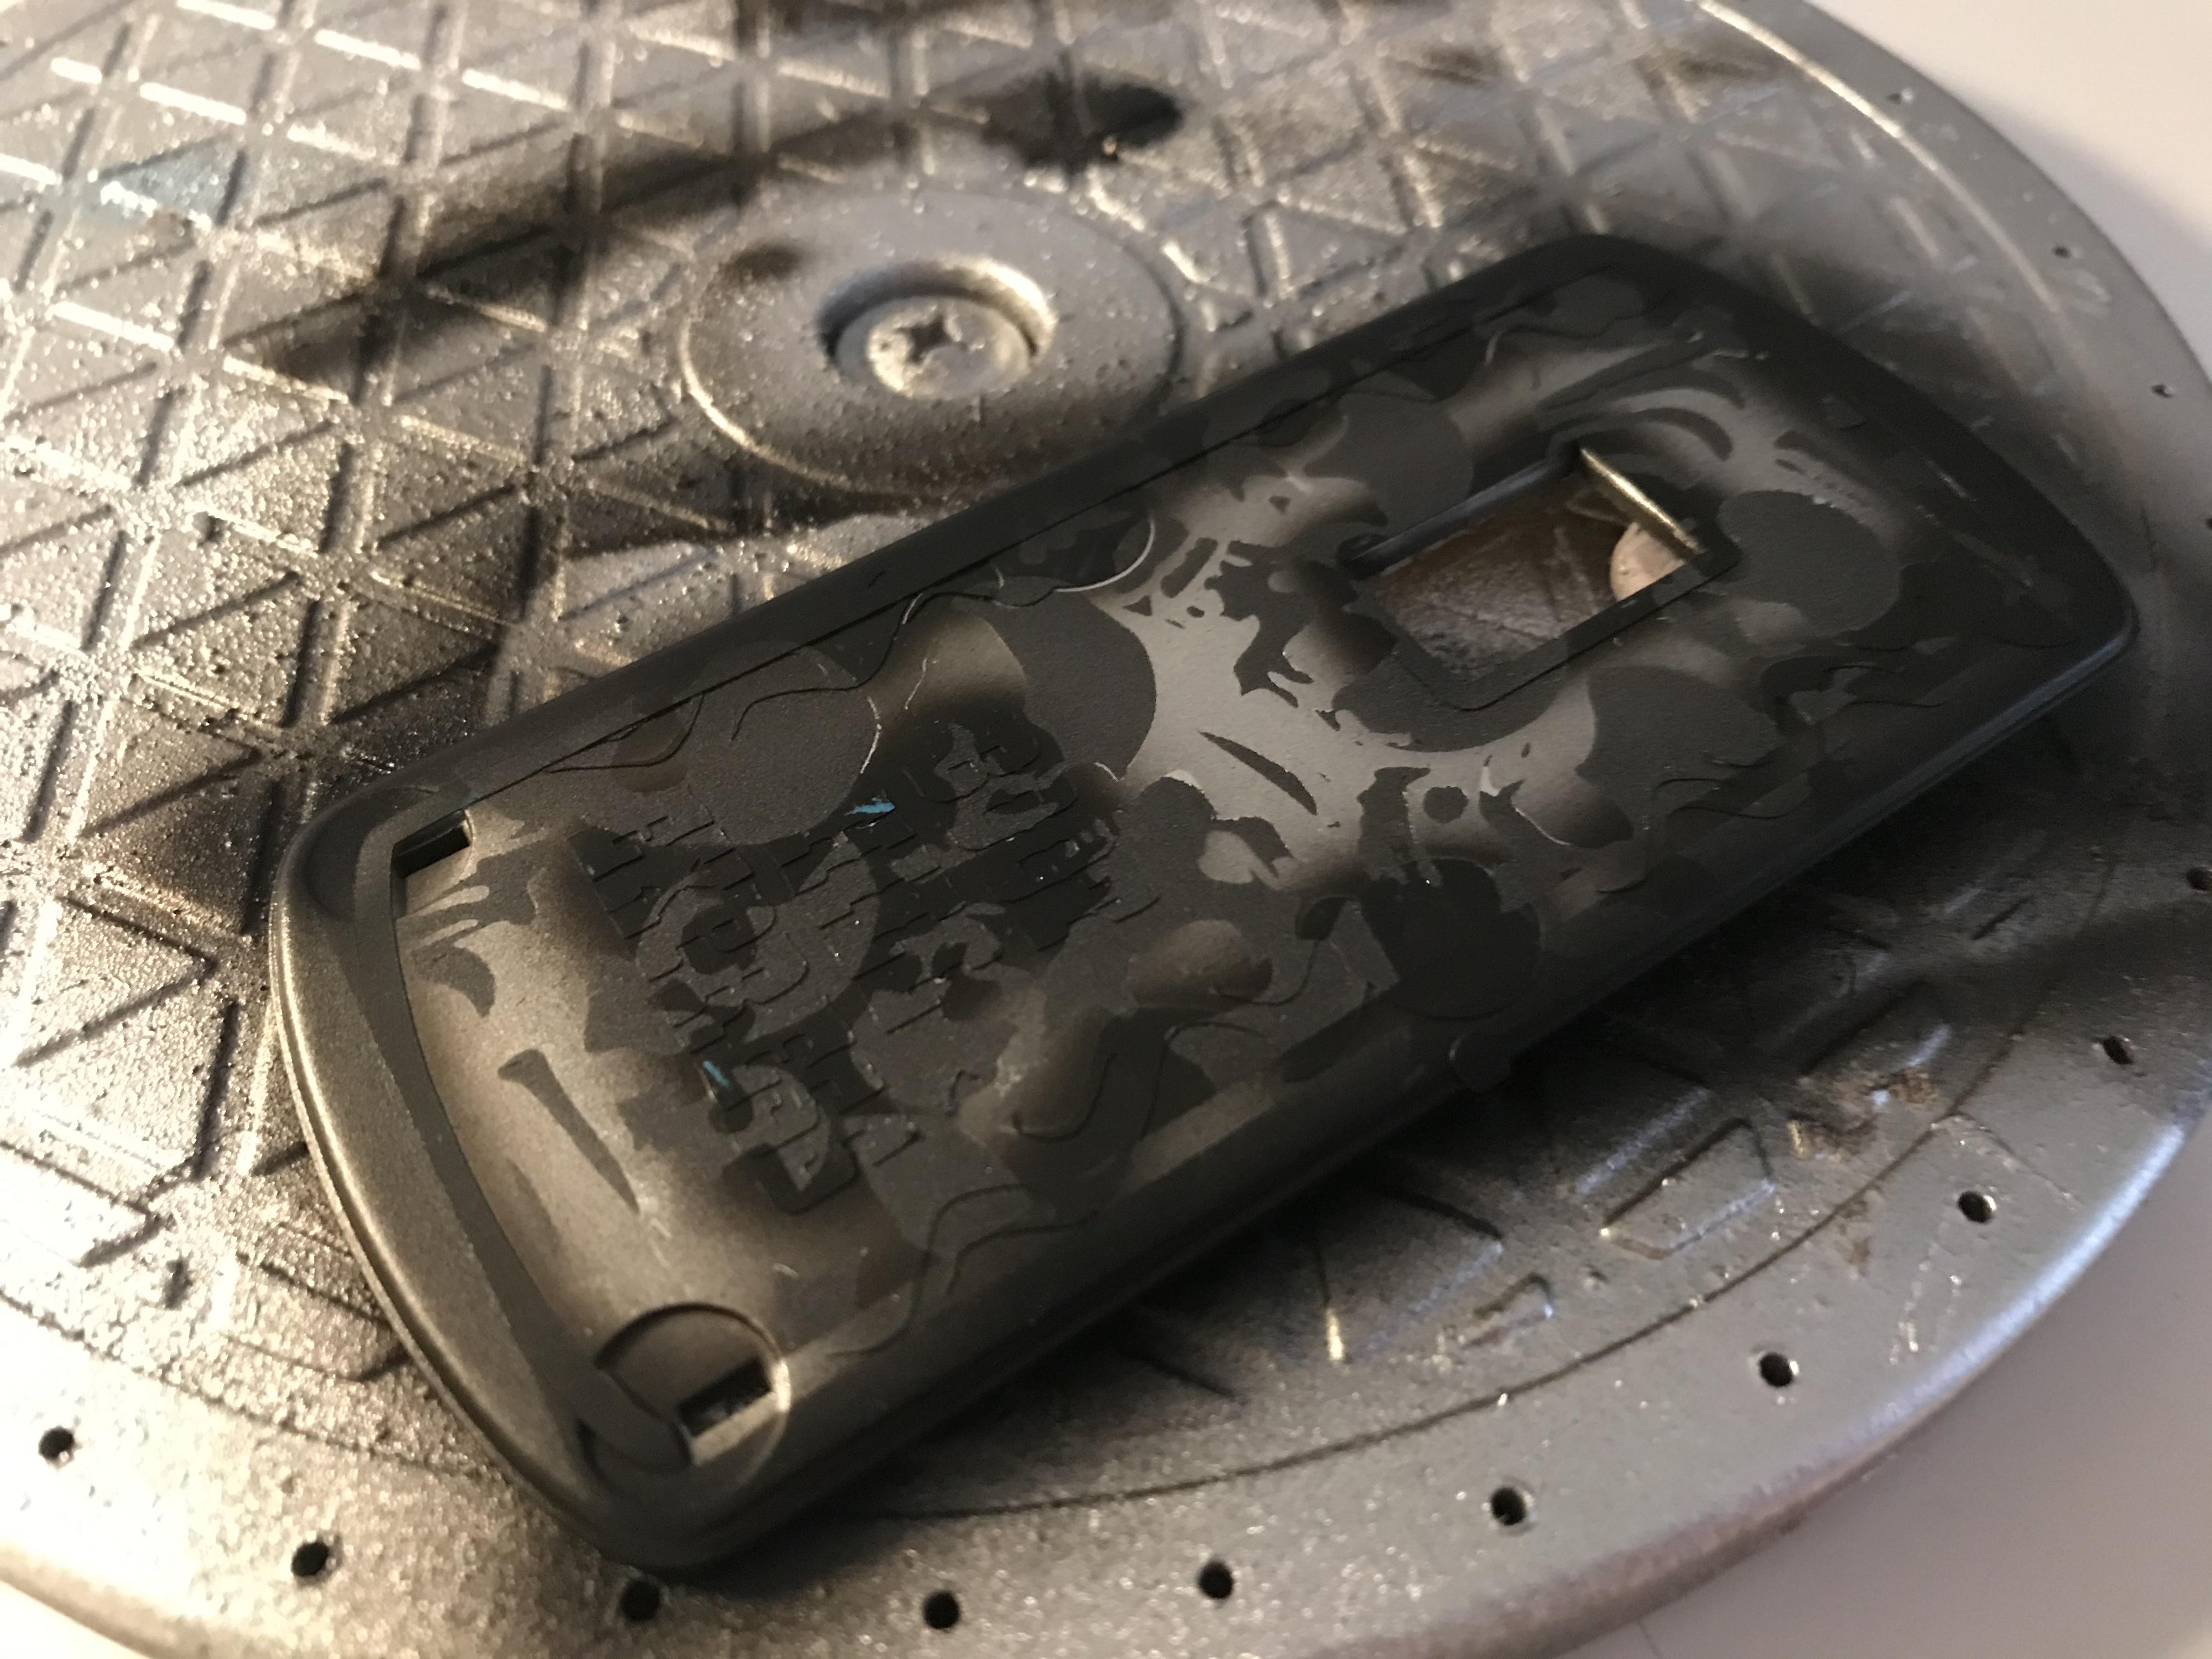
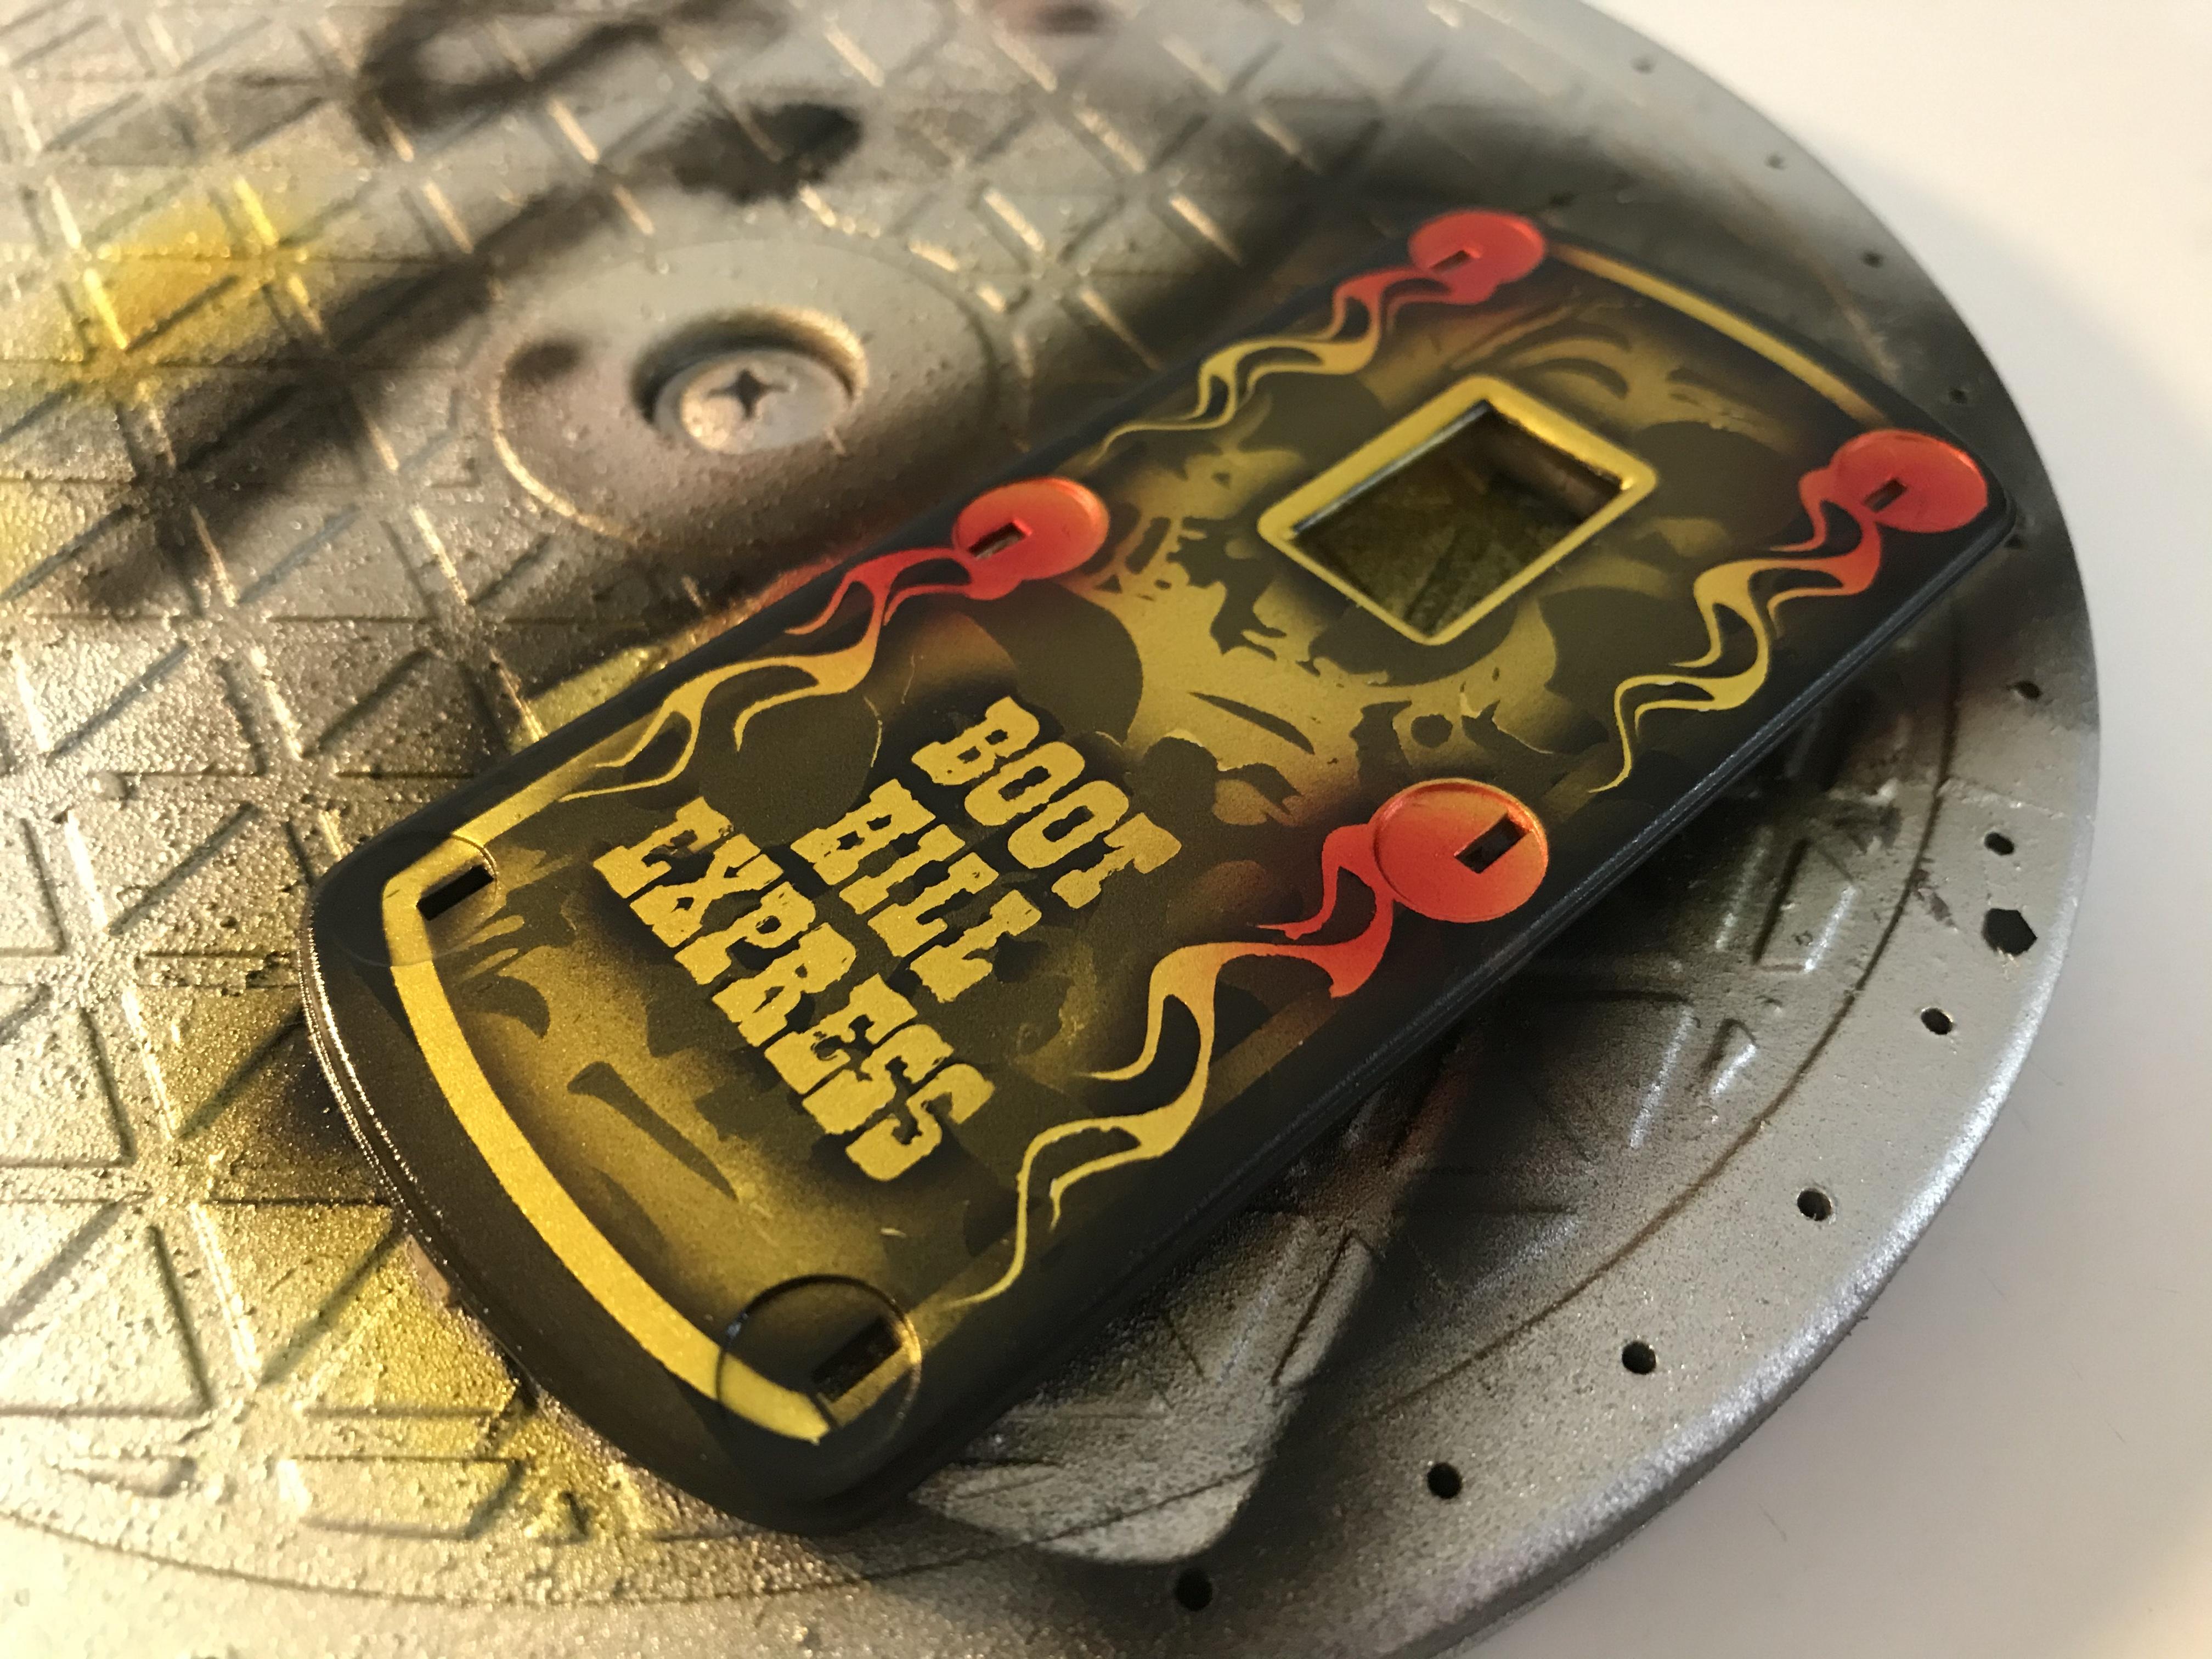
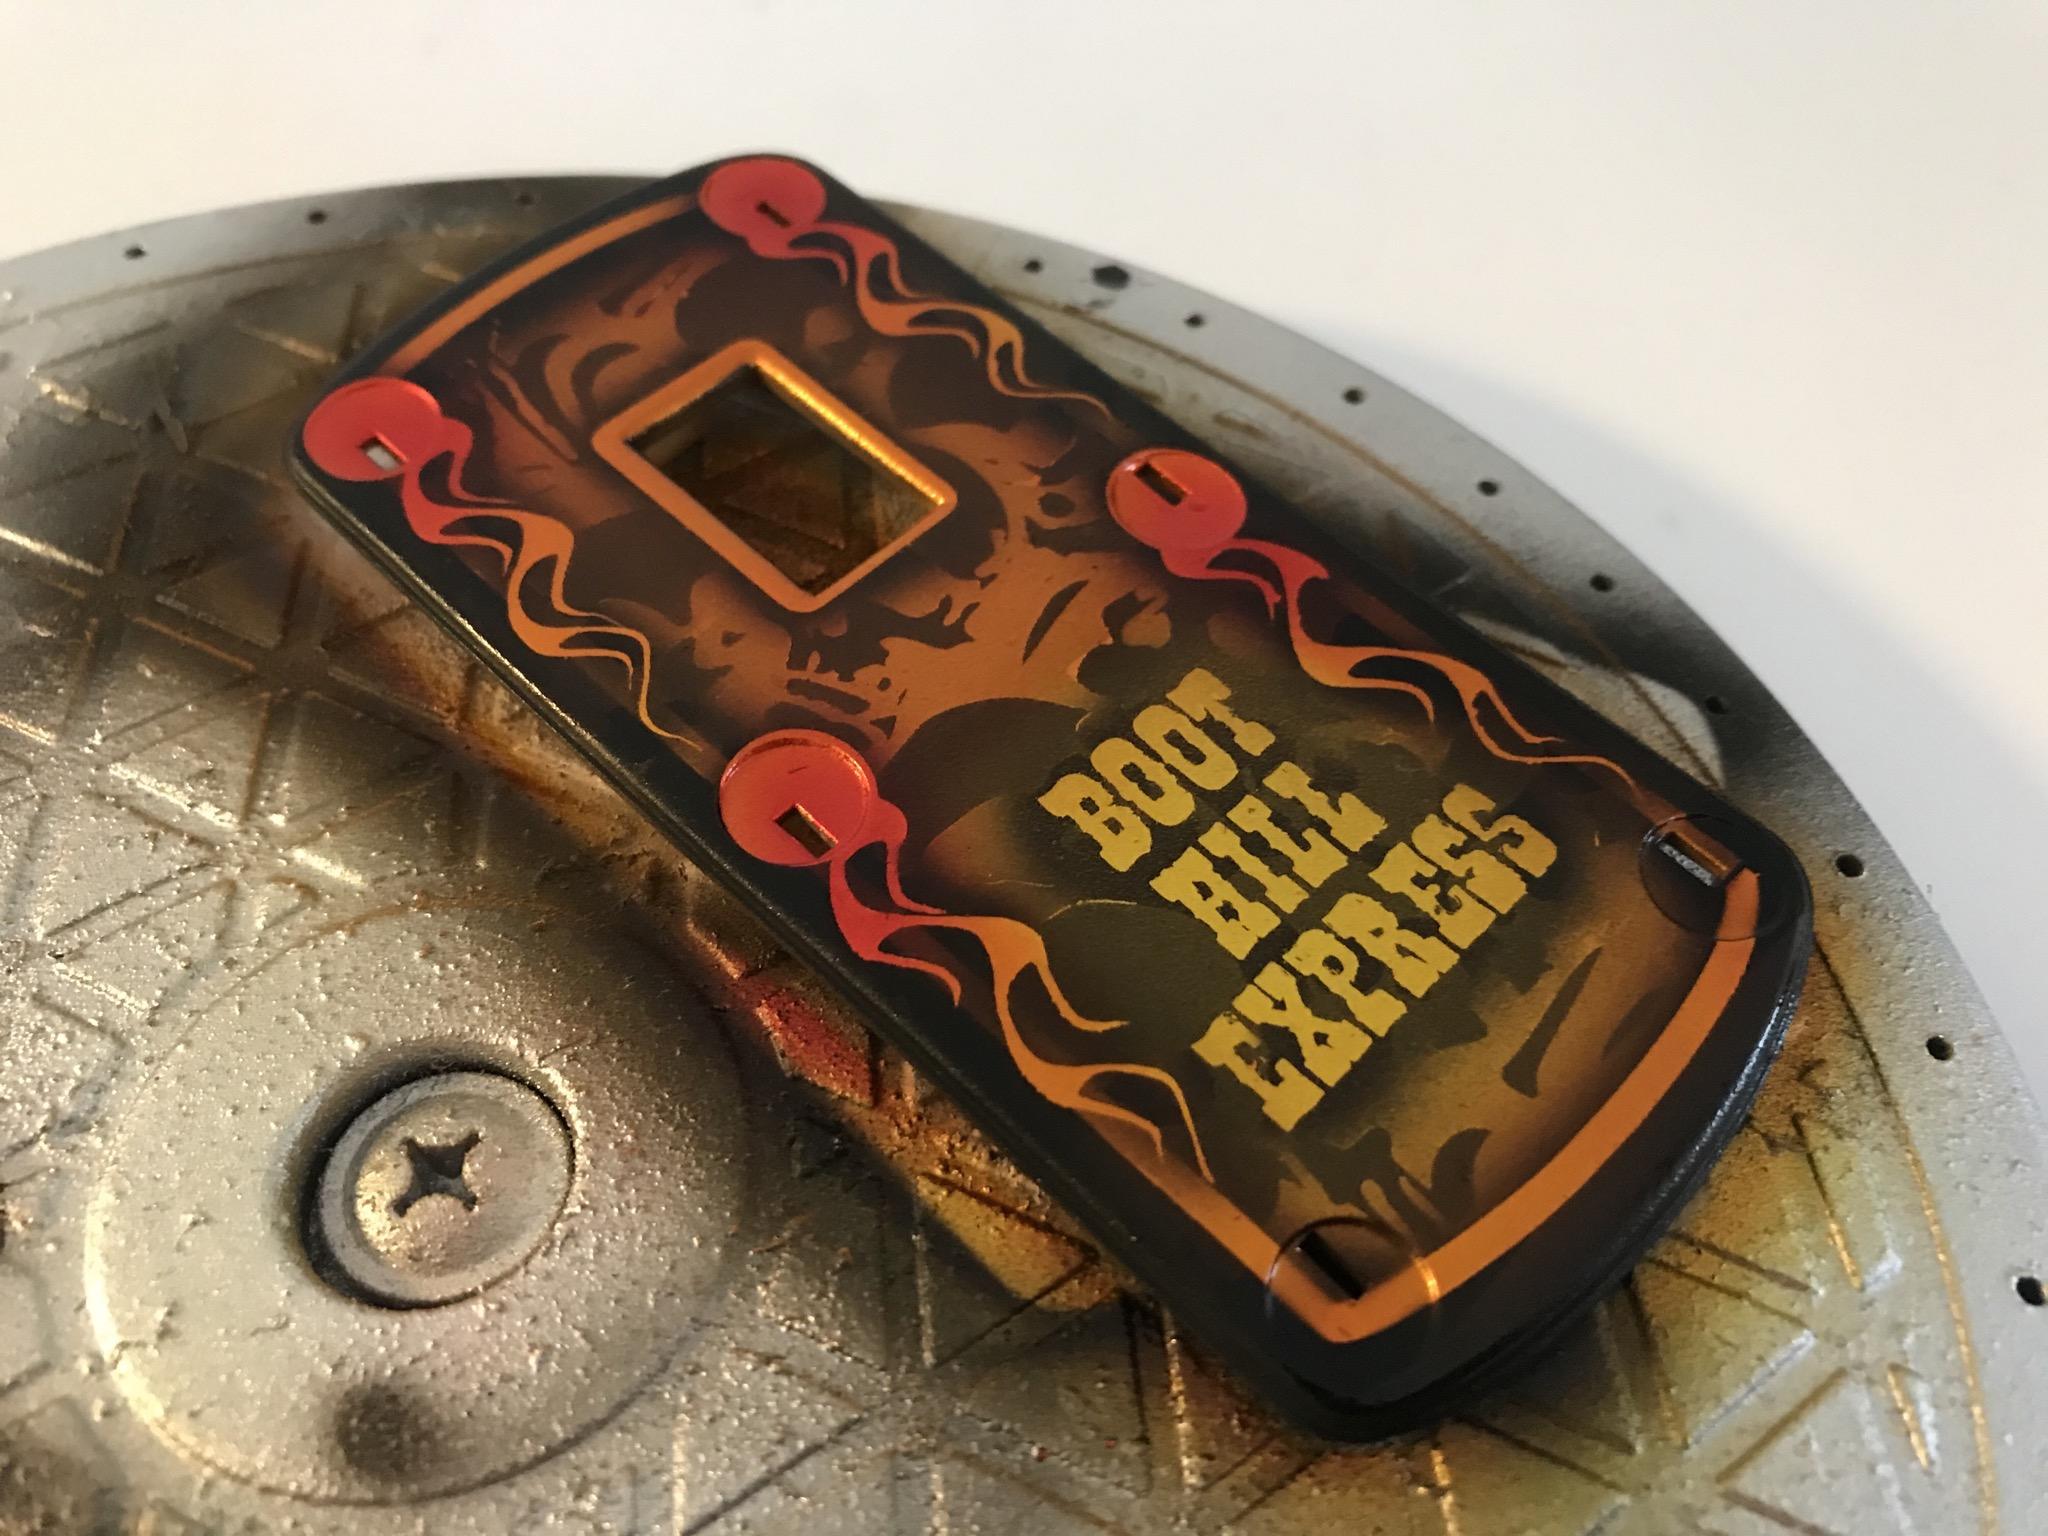
So, into some paint! I wanted to do a nice candy paint job on this one - still kinda looking like the 1:1 but less wood and more sparkles ?. So, first up, I shot the body, frame and roof with a chrome silver to act as a base: I had an idea I was excited to try on the roof panel, so I’m starting with that. First up. Some flames: Next, I gave them an outline - I’m going to run a kind of wide pinstripe around the edge of the roof but I wanted it to look like the flames were sitting over the top of it so I needed to add some depth with a light outline of black: Next up, I added the stripe and some lettering that I designed (using a font called ‘Boothill’, appropriately enough)... I did the same trick with the lettering as I’d done with the flames, and then cut a skull pattern mask and overlaid that...now, this pattern won’t be super obvious or easy to make out on this panel but I’ll be replicating it elsewhere on the car so I wanted it here too so it all ties together: I shot some Tamiya gunmetal through that to give some contrast between the bright chrome and the dark black - the gunmetal is somewhere in between so it works well for this part of the process. Then; we’re left with this: Finally, I fogged a band of flat back around the edge of the roof to cover those masking lines and then peeled off the masks: Super pleased with that! Next up, some candy yellow - I wanted the lettering to look gold so it stands out, but I added some shading to the whole roof with this color anyway: Then, some little bursts of red on the flames - I would normally do this after the last color but I didn’t want them quite as bold and bright as they would be if I did that... Then, finally, candy orange! I’m happy with how that turned out - I need to let it sit a couple of days to harden up before attempting to clear it...actually, I probably DON’T need to leave it that long but I’m cautious of ruining that work! Plenty more to do in the meantime though... More soon, soon as I’ve done more!
-
Krylon’s Colormaxx metallic silver is a nice match for that sort of finish - it has just enough shine and reflective quality to not look like silver paint but is tougher than Alclad and lays down really easily. It’s my go-to now for a matt aluminum kind of look, and gives a convincing finish - especially if you give the parts a light black wash afterwards too
-
Awesome! I love that color green, with the tan interior!
-
NNL East 34, Wayne New Jersey April 25, 2020
CabDriver replied to Tom Geiger's topic in Contests and Shows
I can’t wait! I was sorry to miss the Christmas meeting (wife had the flu, which actually made me want to attend even more but I decided I like being married, for the time being)... I just need to build something! ?? -
1/25 MPC Don Prudhomme Wynn's Winder TFD
CabDriver replied to Casey's topic in Car Kit News & Reviews
Also, how cool is that little rubber belt! Killer! Not a new thing, I know - but I never saw one before! -
1/25 MPC Don Prudhomme Wynn's Winder TFD
CabDriver replied to Casey's topic in Car Kit News & Reviews
Thank you for always posting these insights Tim - they’re always interesting and informative and I’m sure a tonne of us appreciate the effort that you go to! -
I love these things. Whatever they’re called ? Good start!
-
Past Projects in 1:1 scale
CabDriver replied to restoman's topic in General Automotive Talk (Trucks and Cars)
Didn’t paint that one huh? ? -
I’ve been looking forward to seeing some more on this one! I saw the one pic on Instagram this morning but I’m glad to see more! I really like the side panel detail on the inside of the interior tub, plus the shift linkages are a brilliant touch...LOVE seeing your work Eric!
-
Olds W-30 Intake Tubing
CabDriver replied to StevenGuthmiller's topic in Model Building Questions and Answers
I bet, for someone with resin casting supplies, you could find a machine screw of the right diameter, make a mould of the thread then cast a rubber version and get something pretty close to the 1:1 part. Might have to dig through a few nuts or bolts to find one that looks right but it’d be cool to have the part actually made of rubber! -
Would it be possible to stop the naked lady adverts? I’ve had this one come up a LOT even after manually blocking it
-
Christmas ornament
CabDriver replied to 89AKurt's topic in General Automotive Talk (Trucks and Cars)
Haha, I just made my own budget version of one of these and then saw this thread...I like those Hallmark ones though! I need to go check out their selection too!
-
Looking for Diesel engine for a GTX???
CabDriver replied to 2zwudz's topic in Model Building Questions and Answers
Shoulda called it the Coal-vette ☁️☁️☁️ -
Bare metal Foiling recommendations
CabDriver replied to drodg's topic in Tips, Tricks, and Tutorials
Not in Australia ?? -
You’re absolutely right David - the engine should mount leaning towards the center yolk more, yes! It actually does lean more when I have the oil pan on there too, and the suspension is all droopy and tacked together at this point making it look even worse...I couldn’t find much in the way of pics of the real car with the ‘body’ off (or indeed a model version in progress) so I’m making it up as I go along here a little! Thanks for all the nice comments everyone! I had a fairly unproductive Sunday except for a trip to one of our local hobby stores for some of the Tamiya clear paints - I can see myself needing some of their clear orange and yellow on this one!
-
These drills look like a useful tool! Weird that you have to assemble it yourself...but I guess it IS for modellers, so... ?