R. Thorne
-
Posts
1,276 -
Joined
-
Last visited
Content Type
Profiles
Forums
Events
Gallery
Everything posted by R. Thorne
-
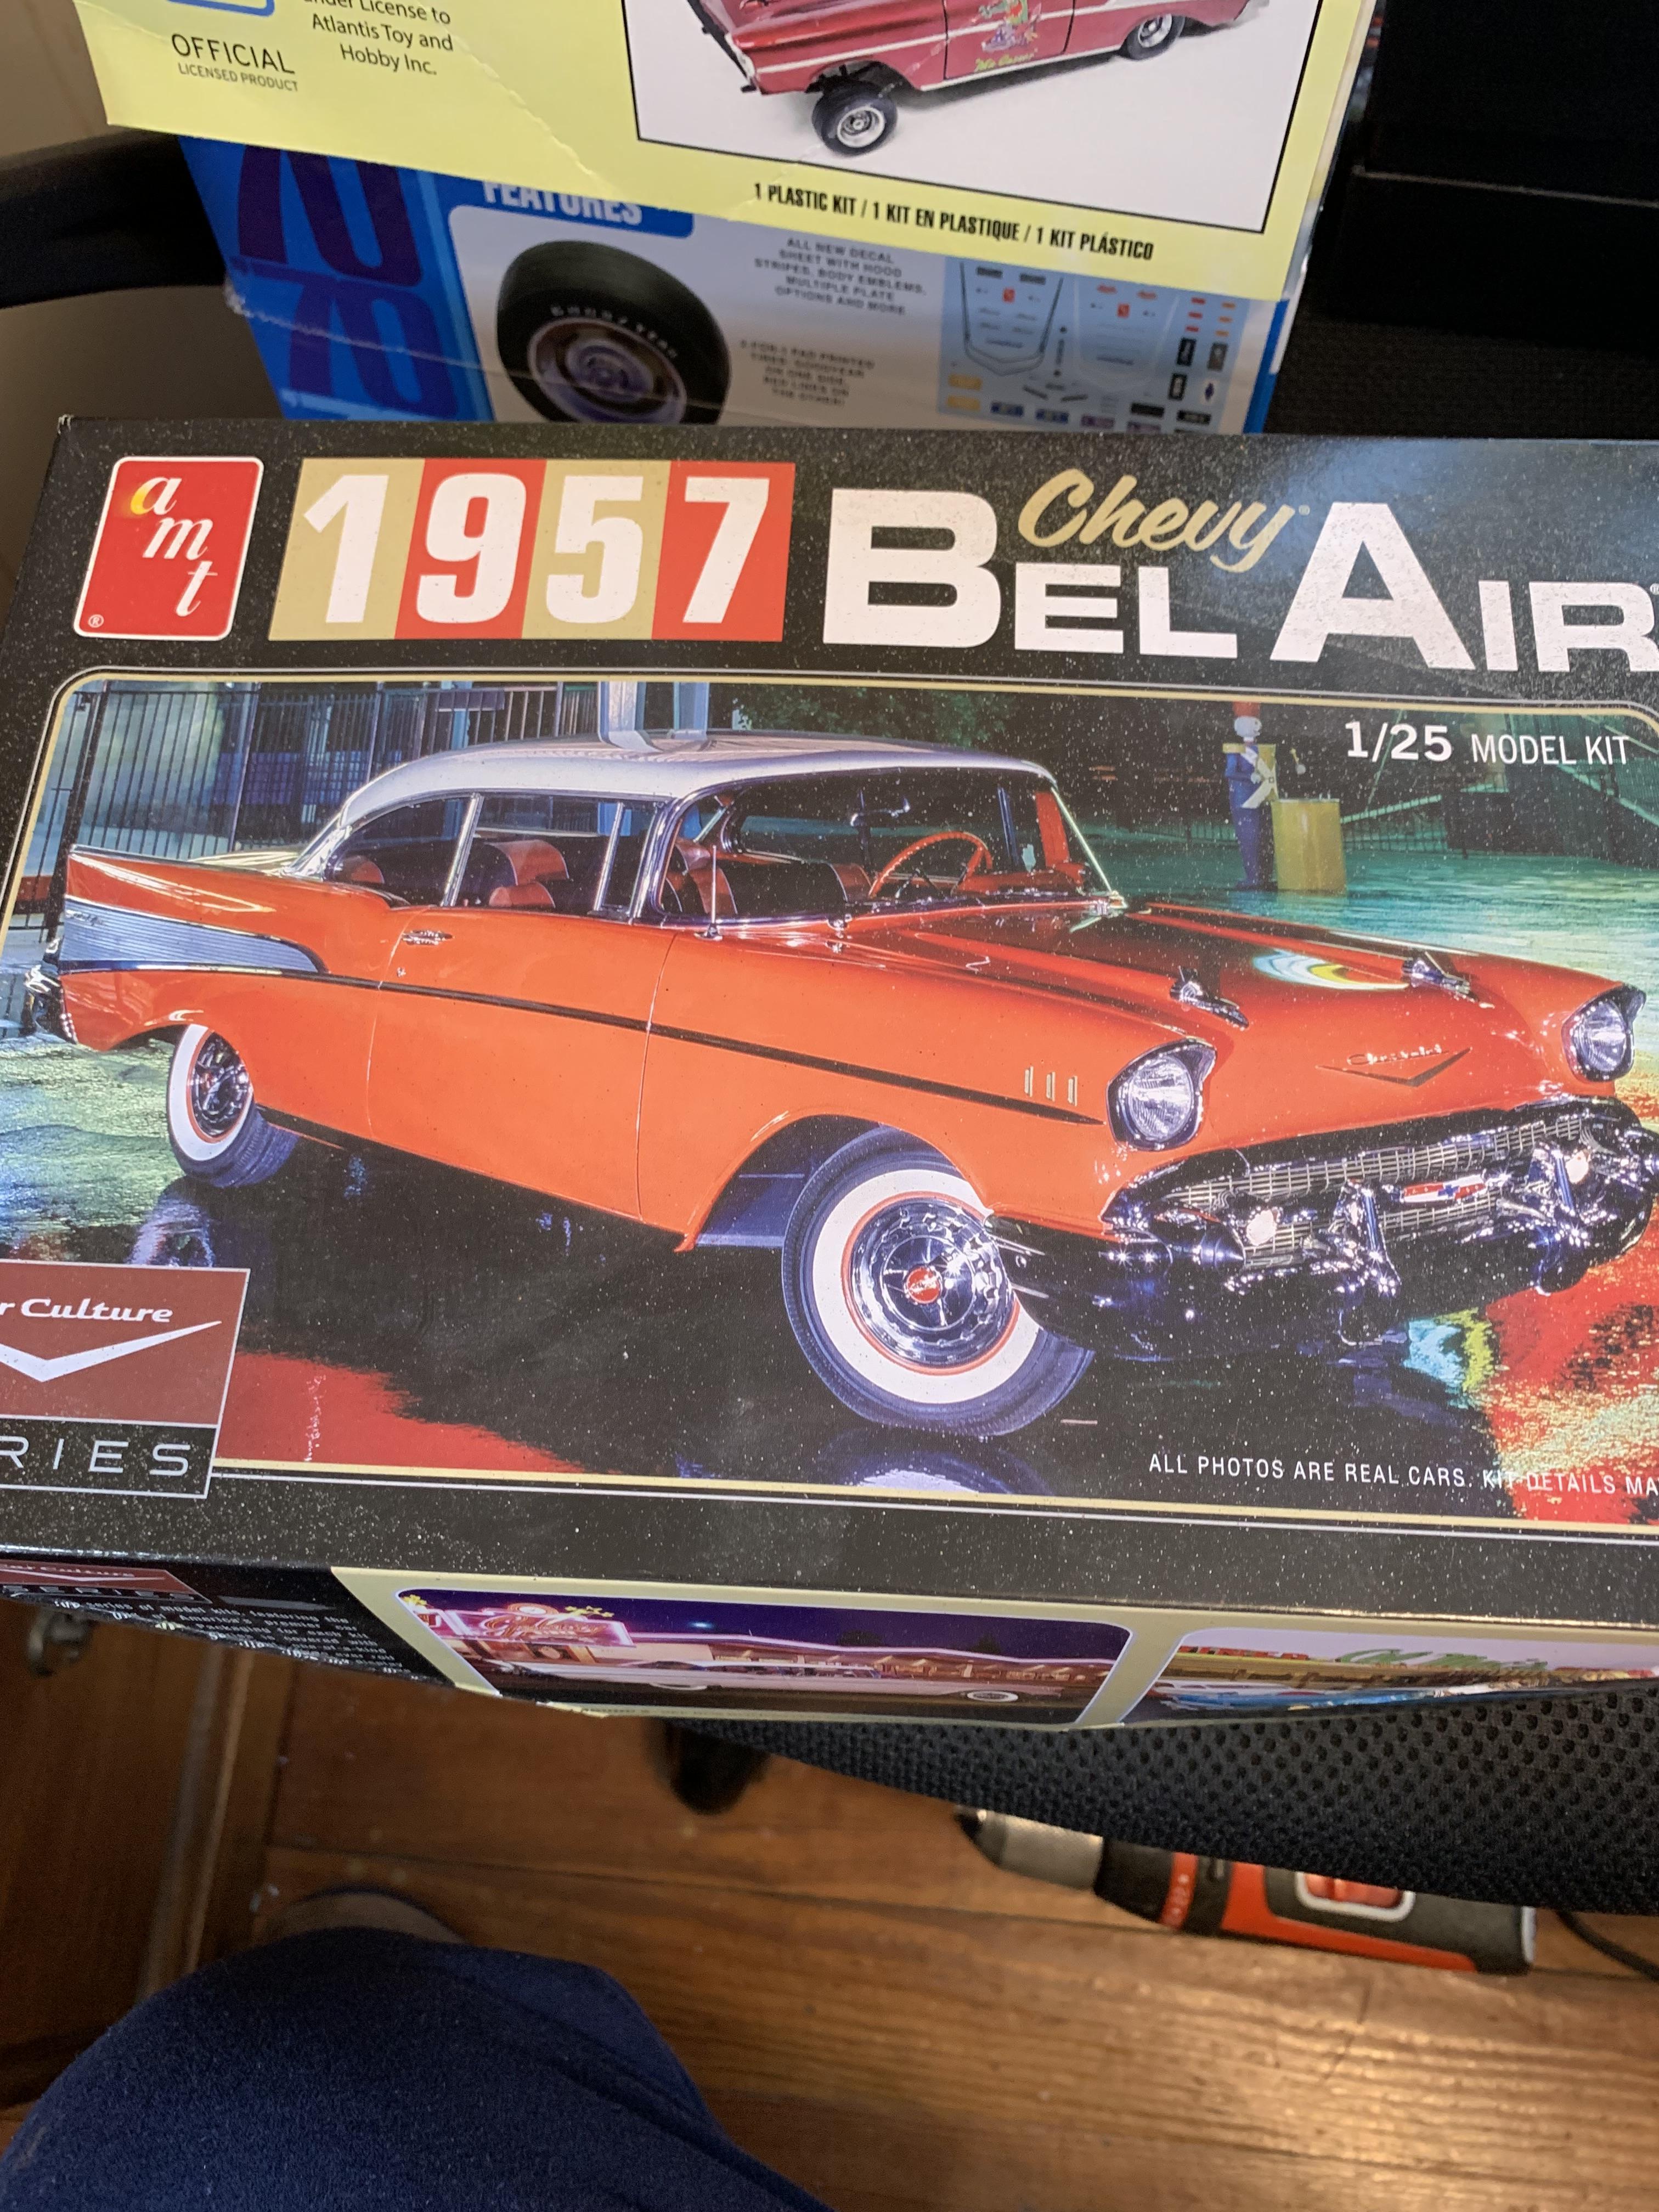
Holloman & McKinney 57 Chevy C/MP circa 1964
R. Thorne replied to R. Thorne's topic in WIP: Drag Racing Models
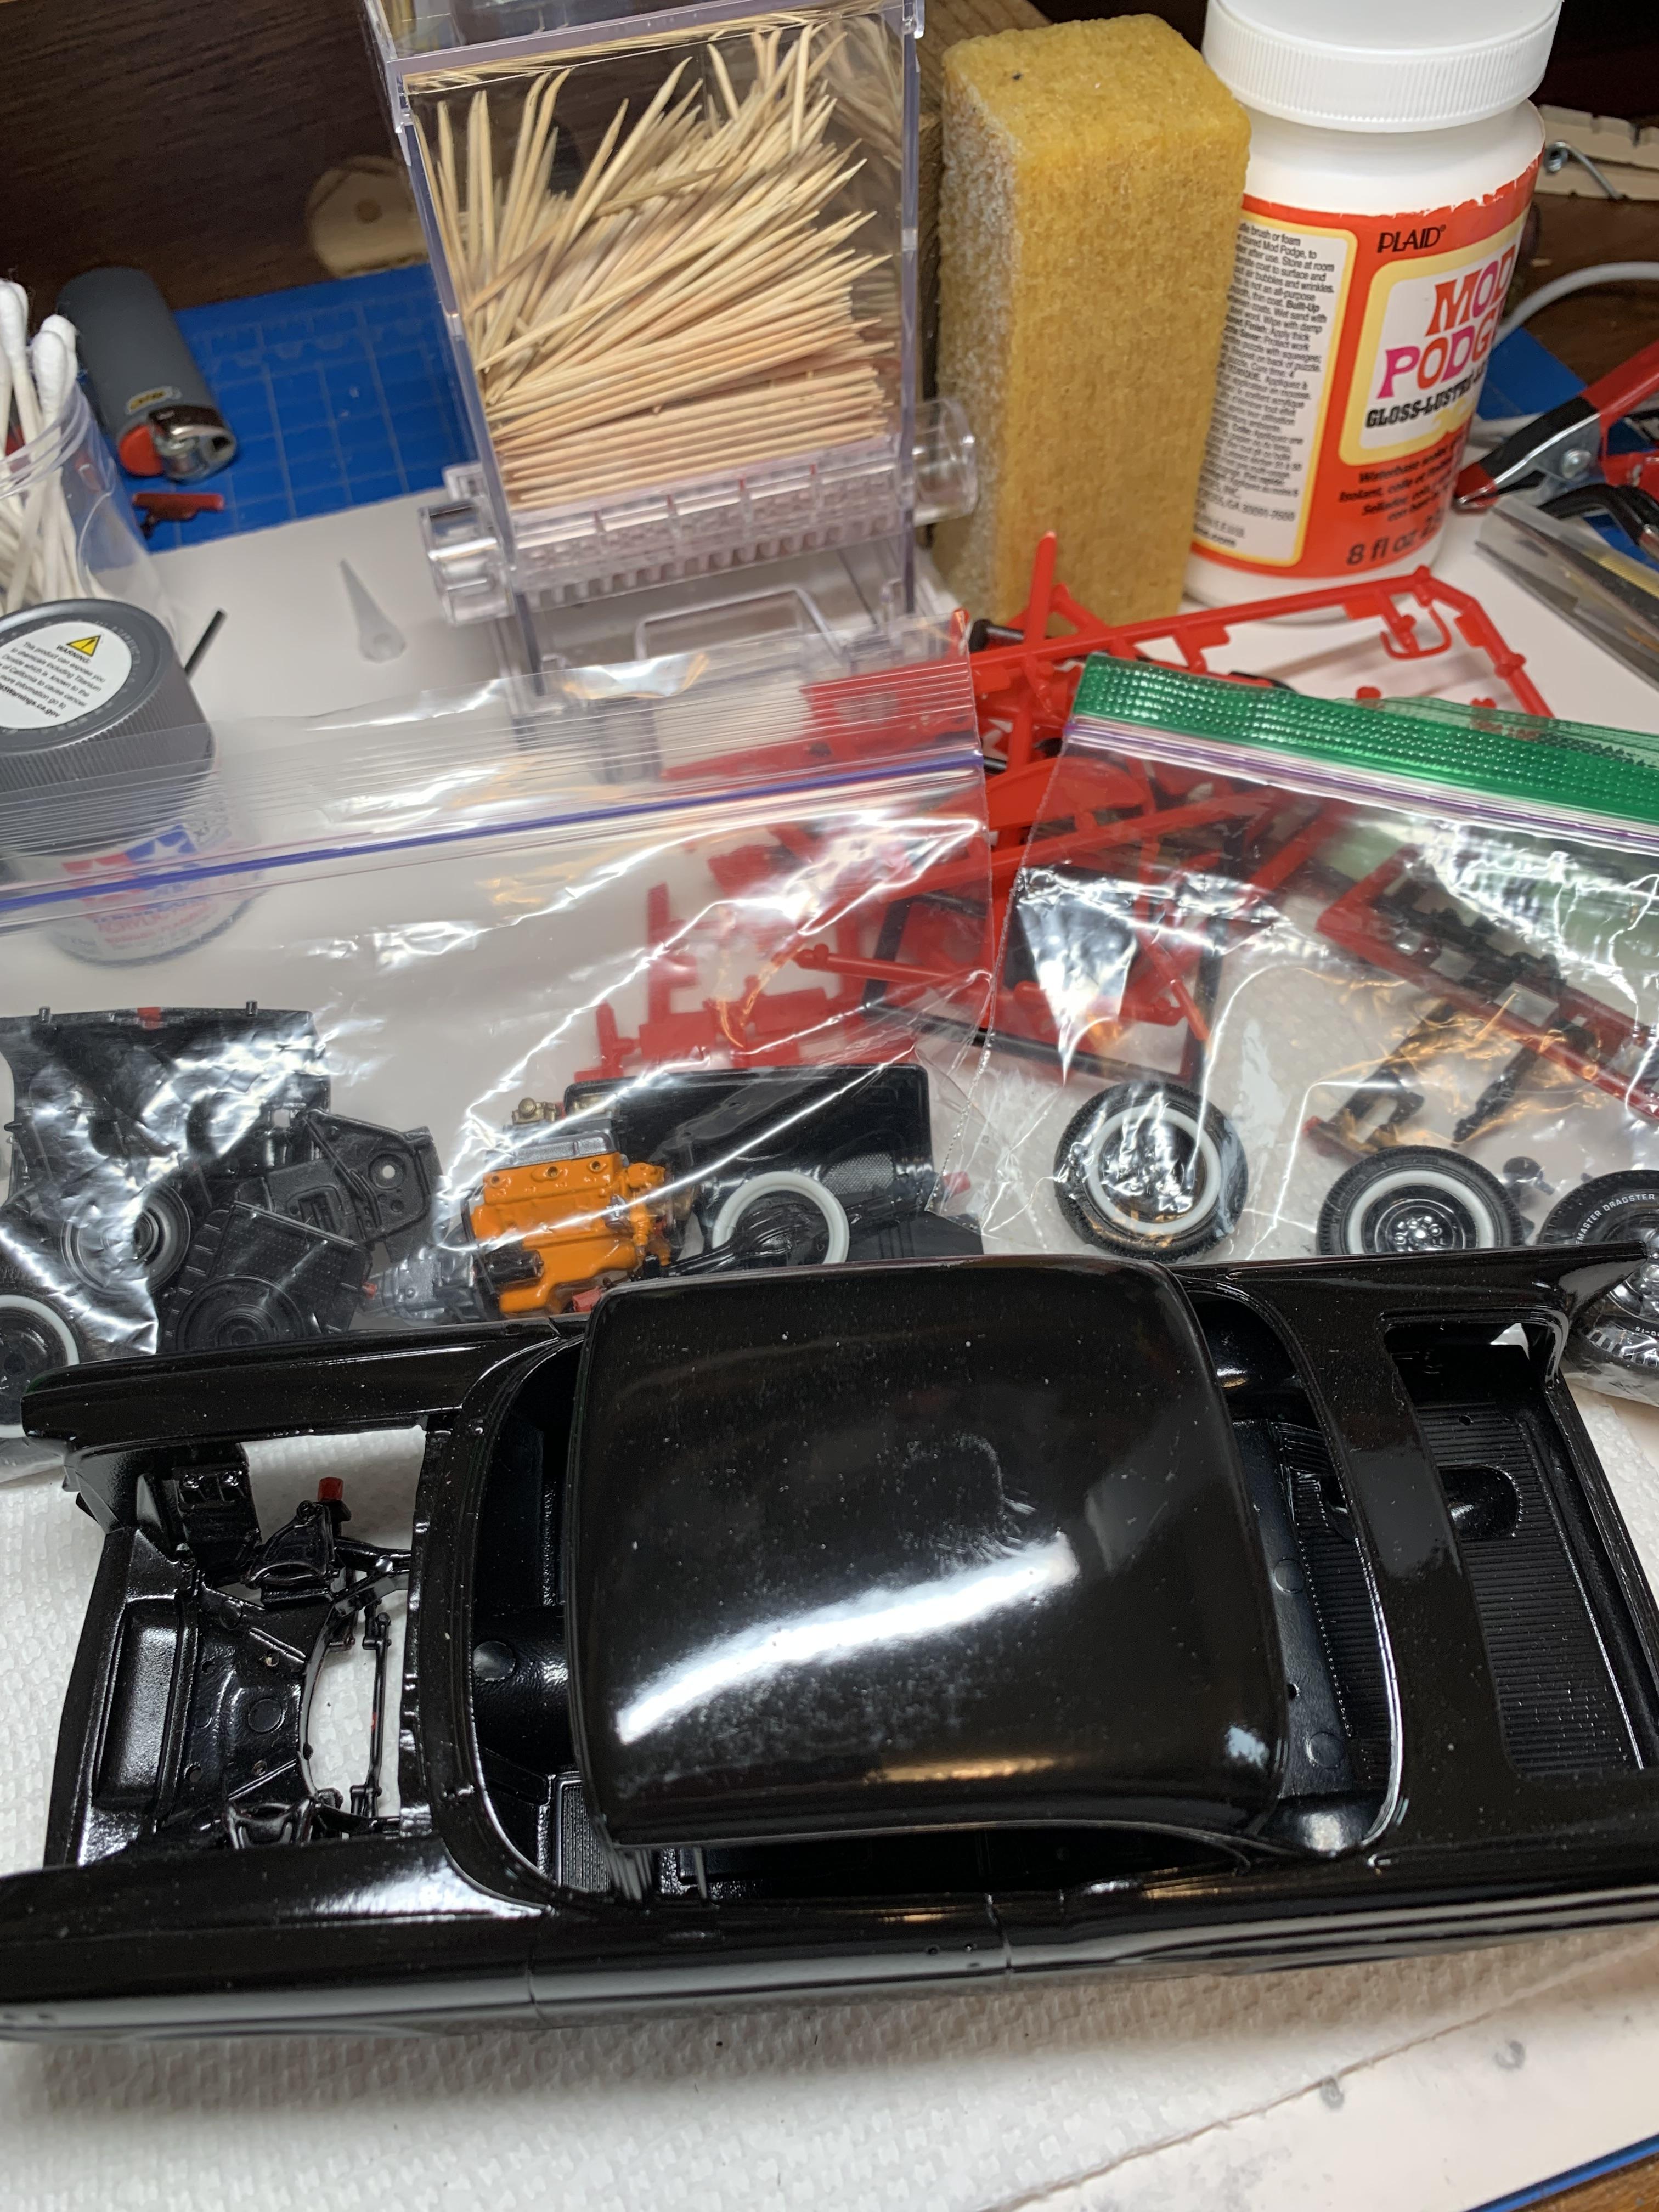
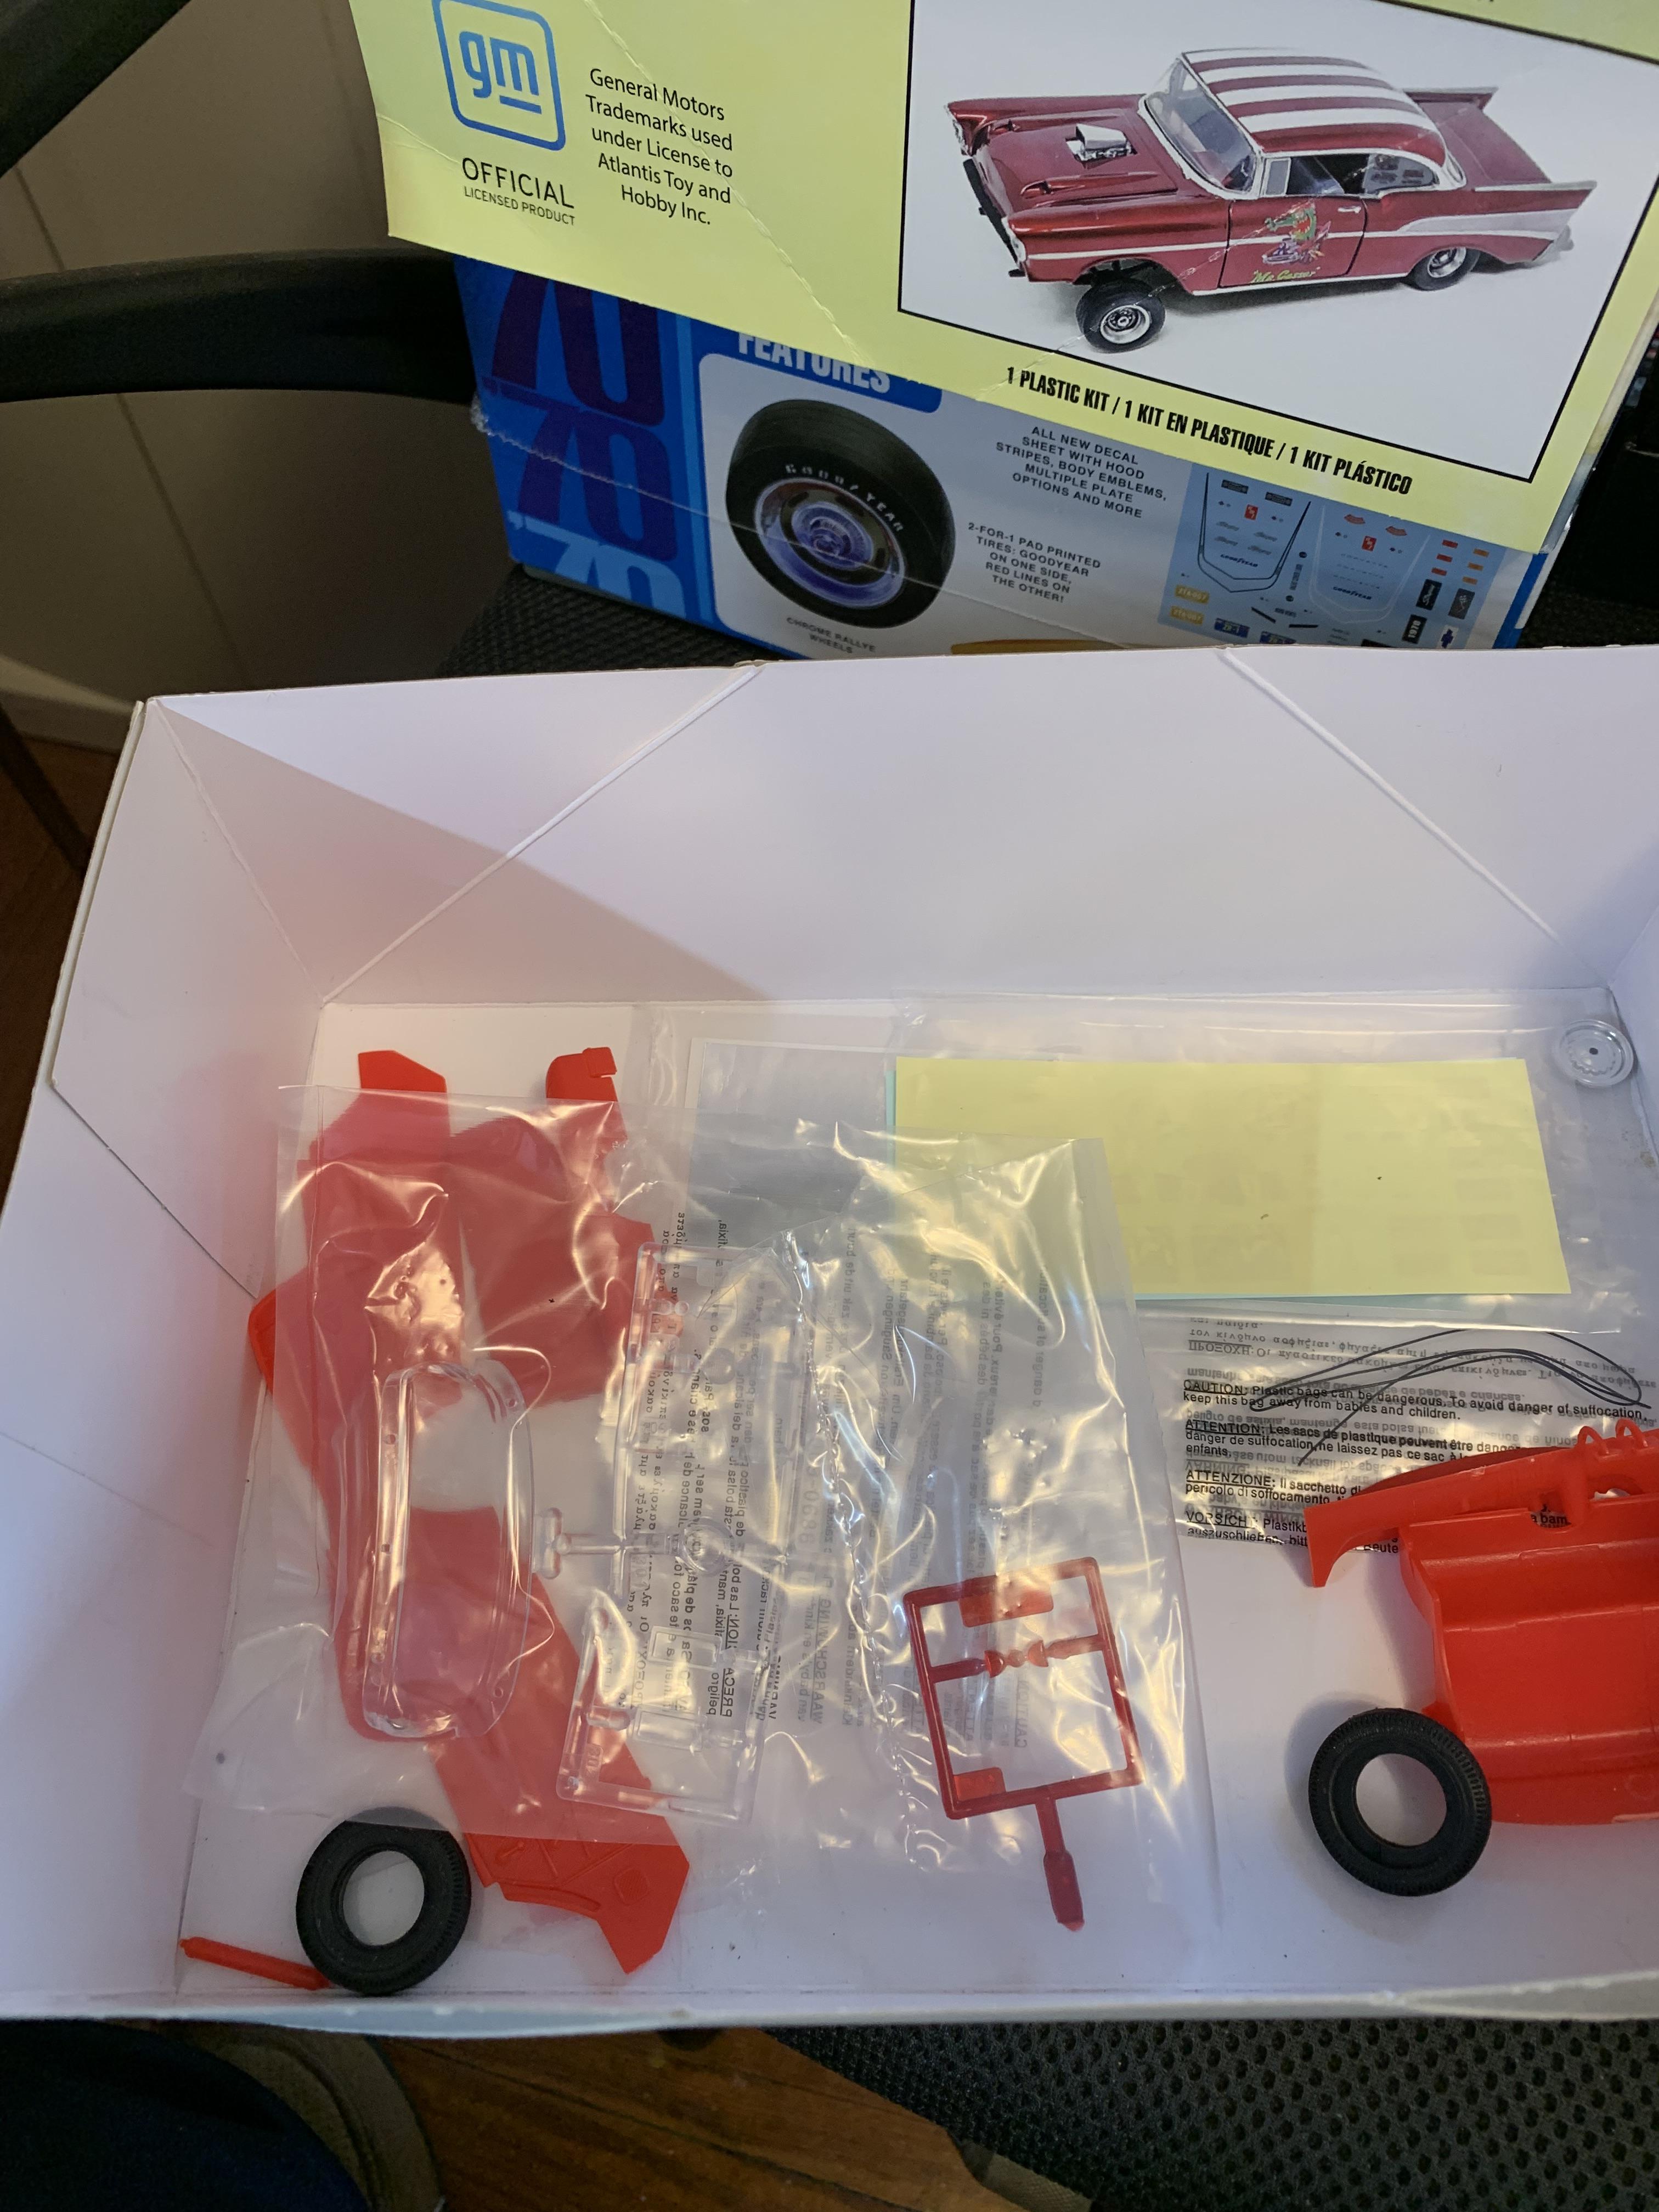
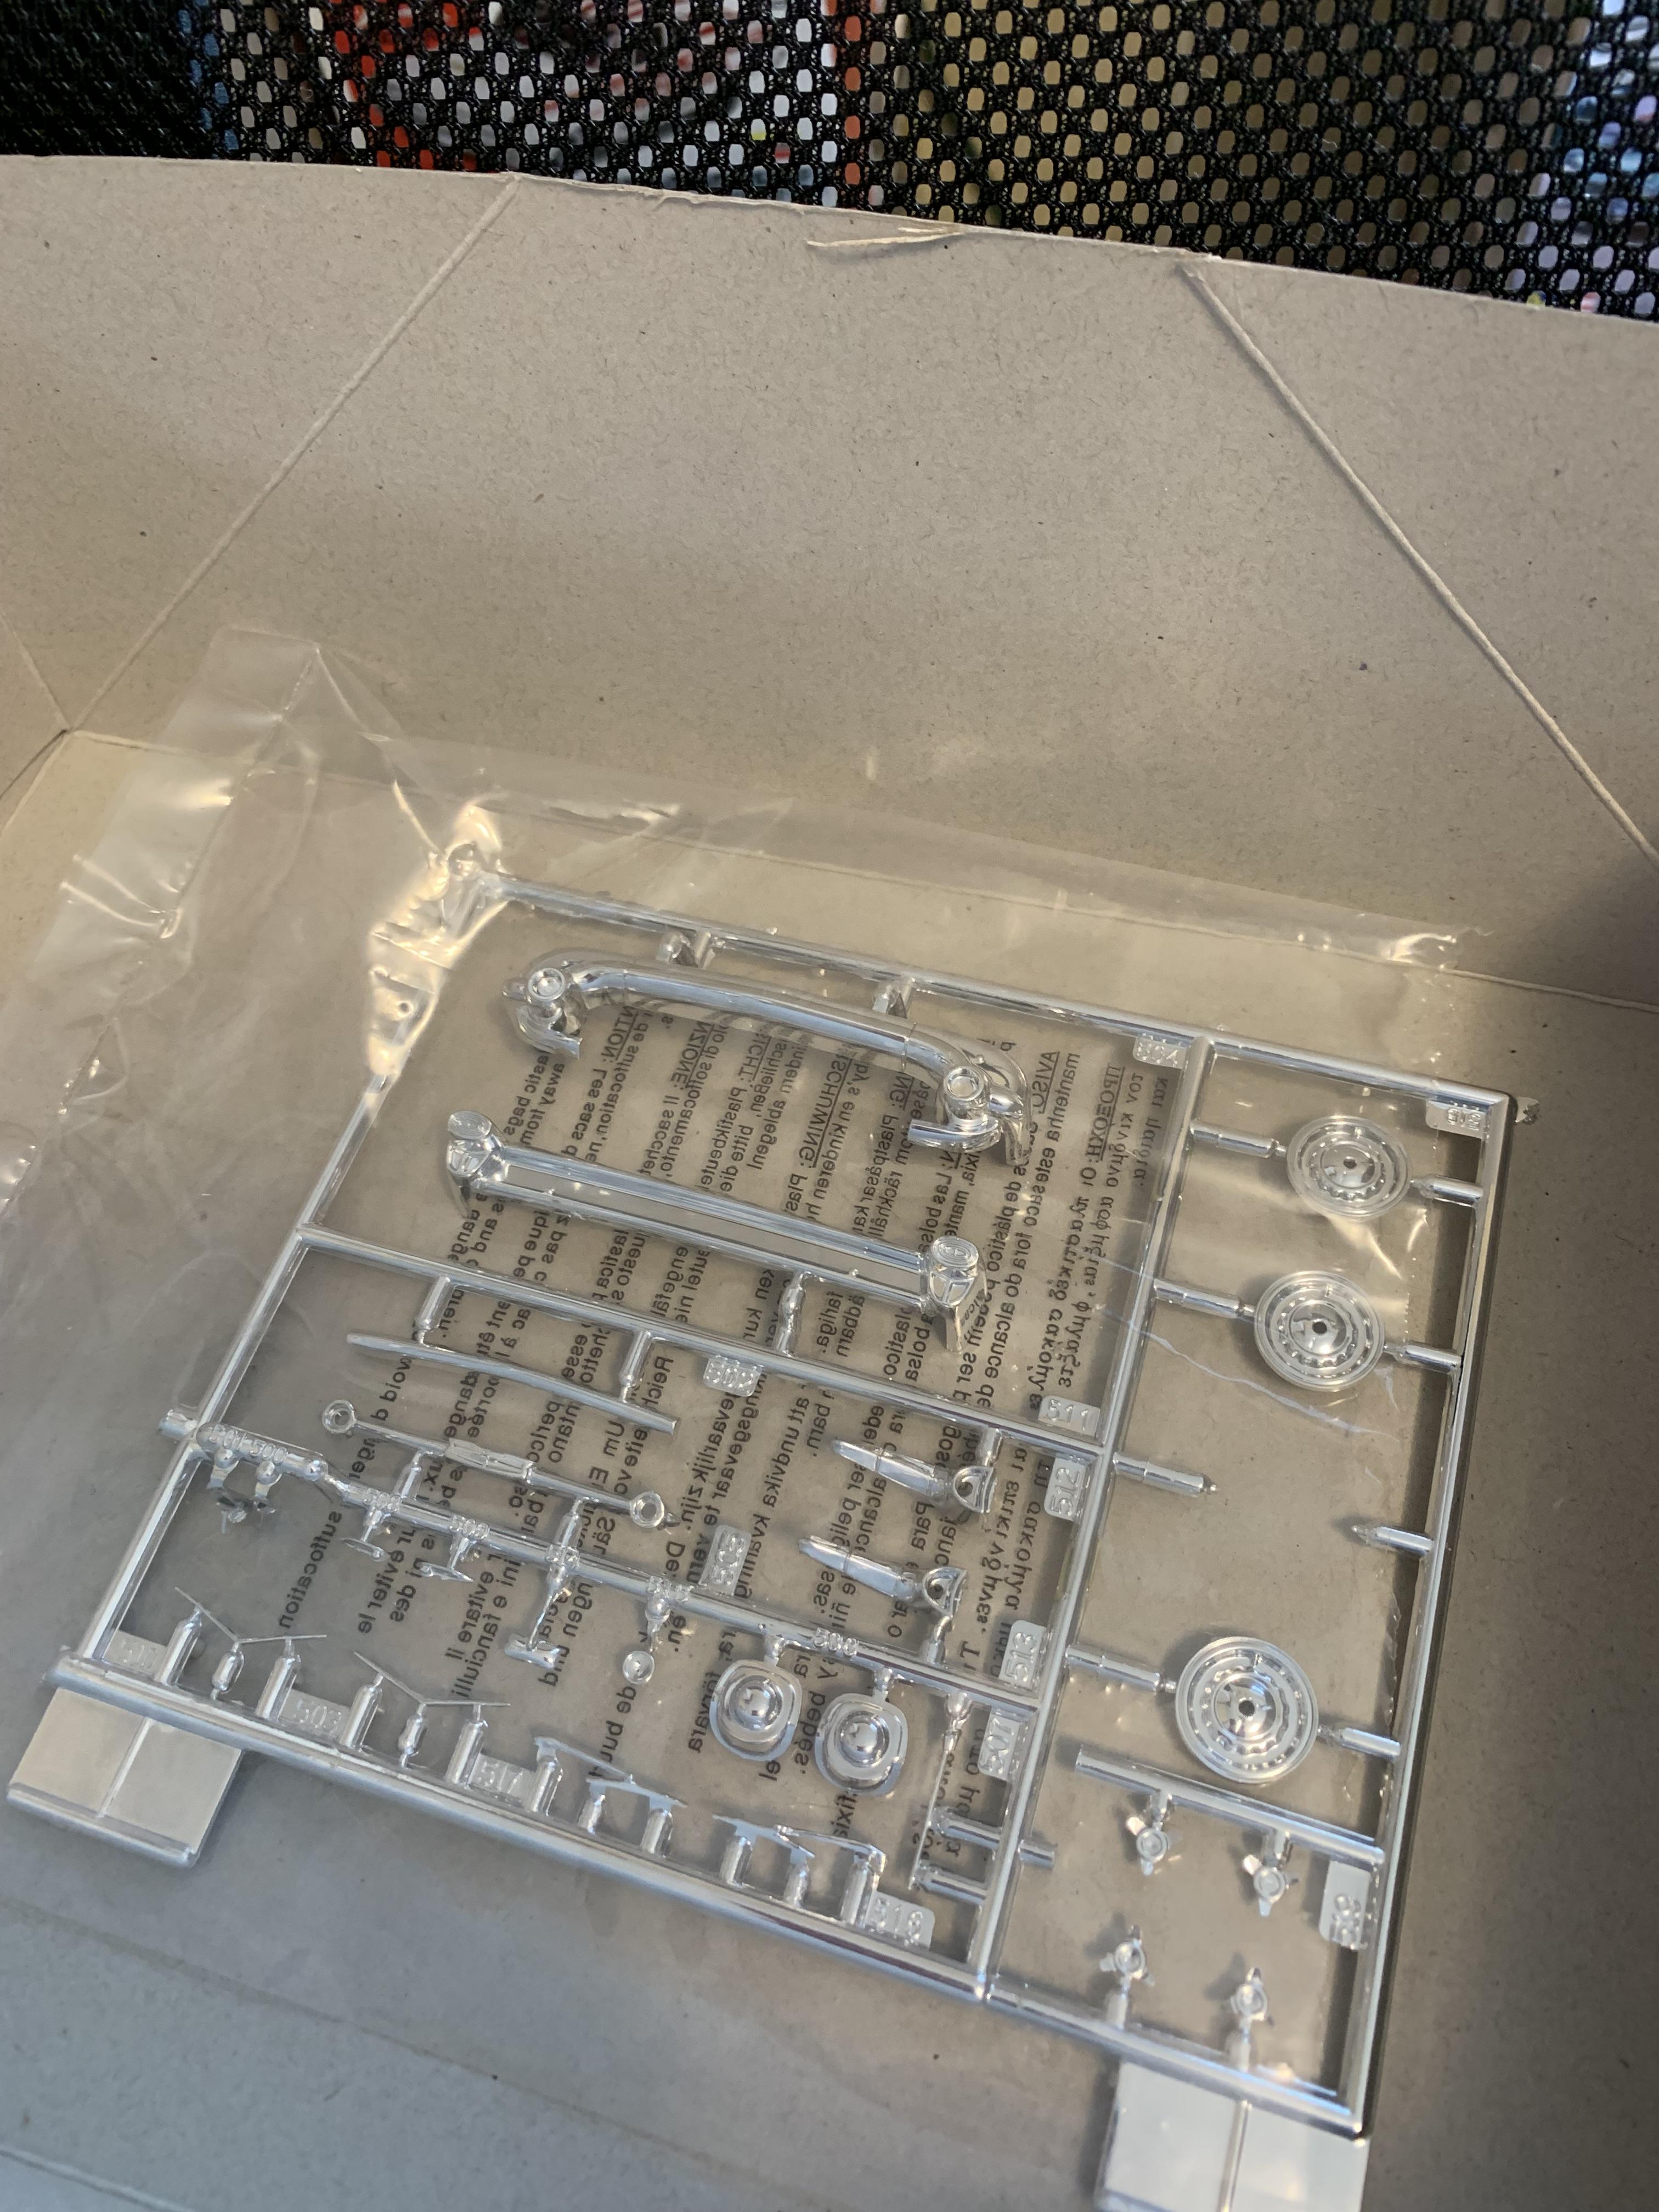
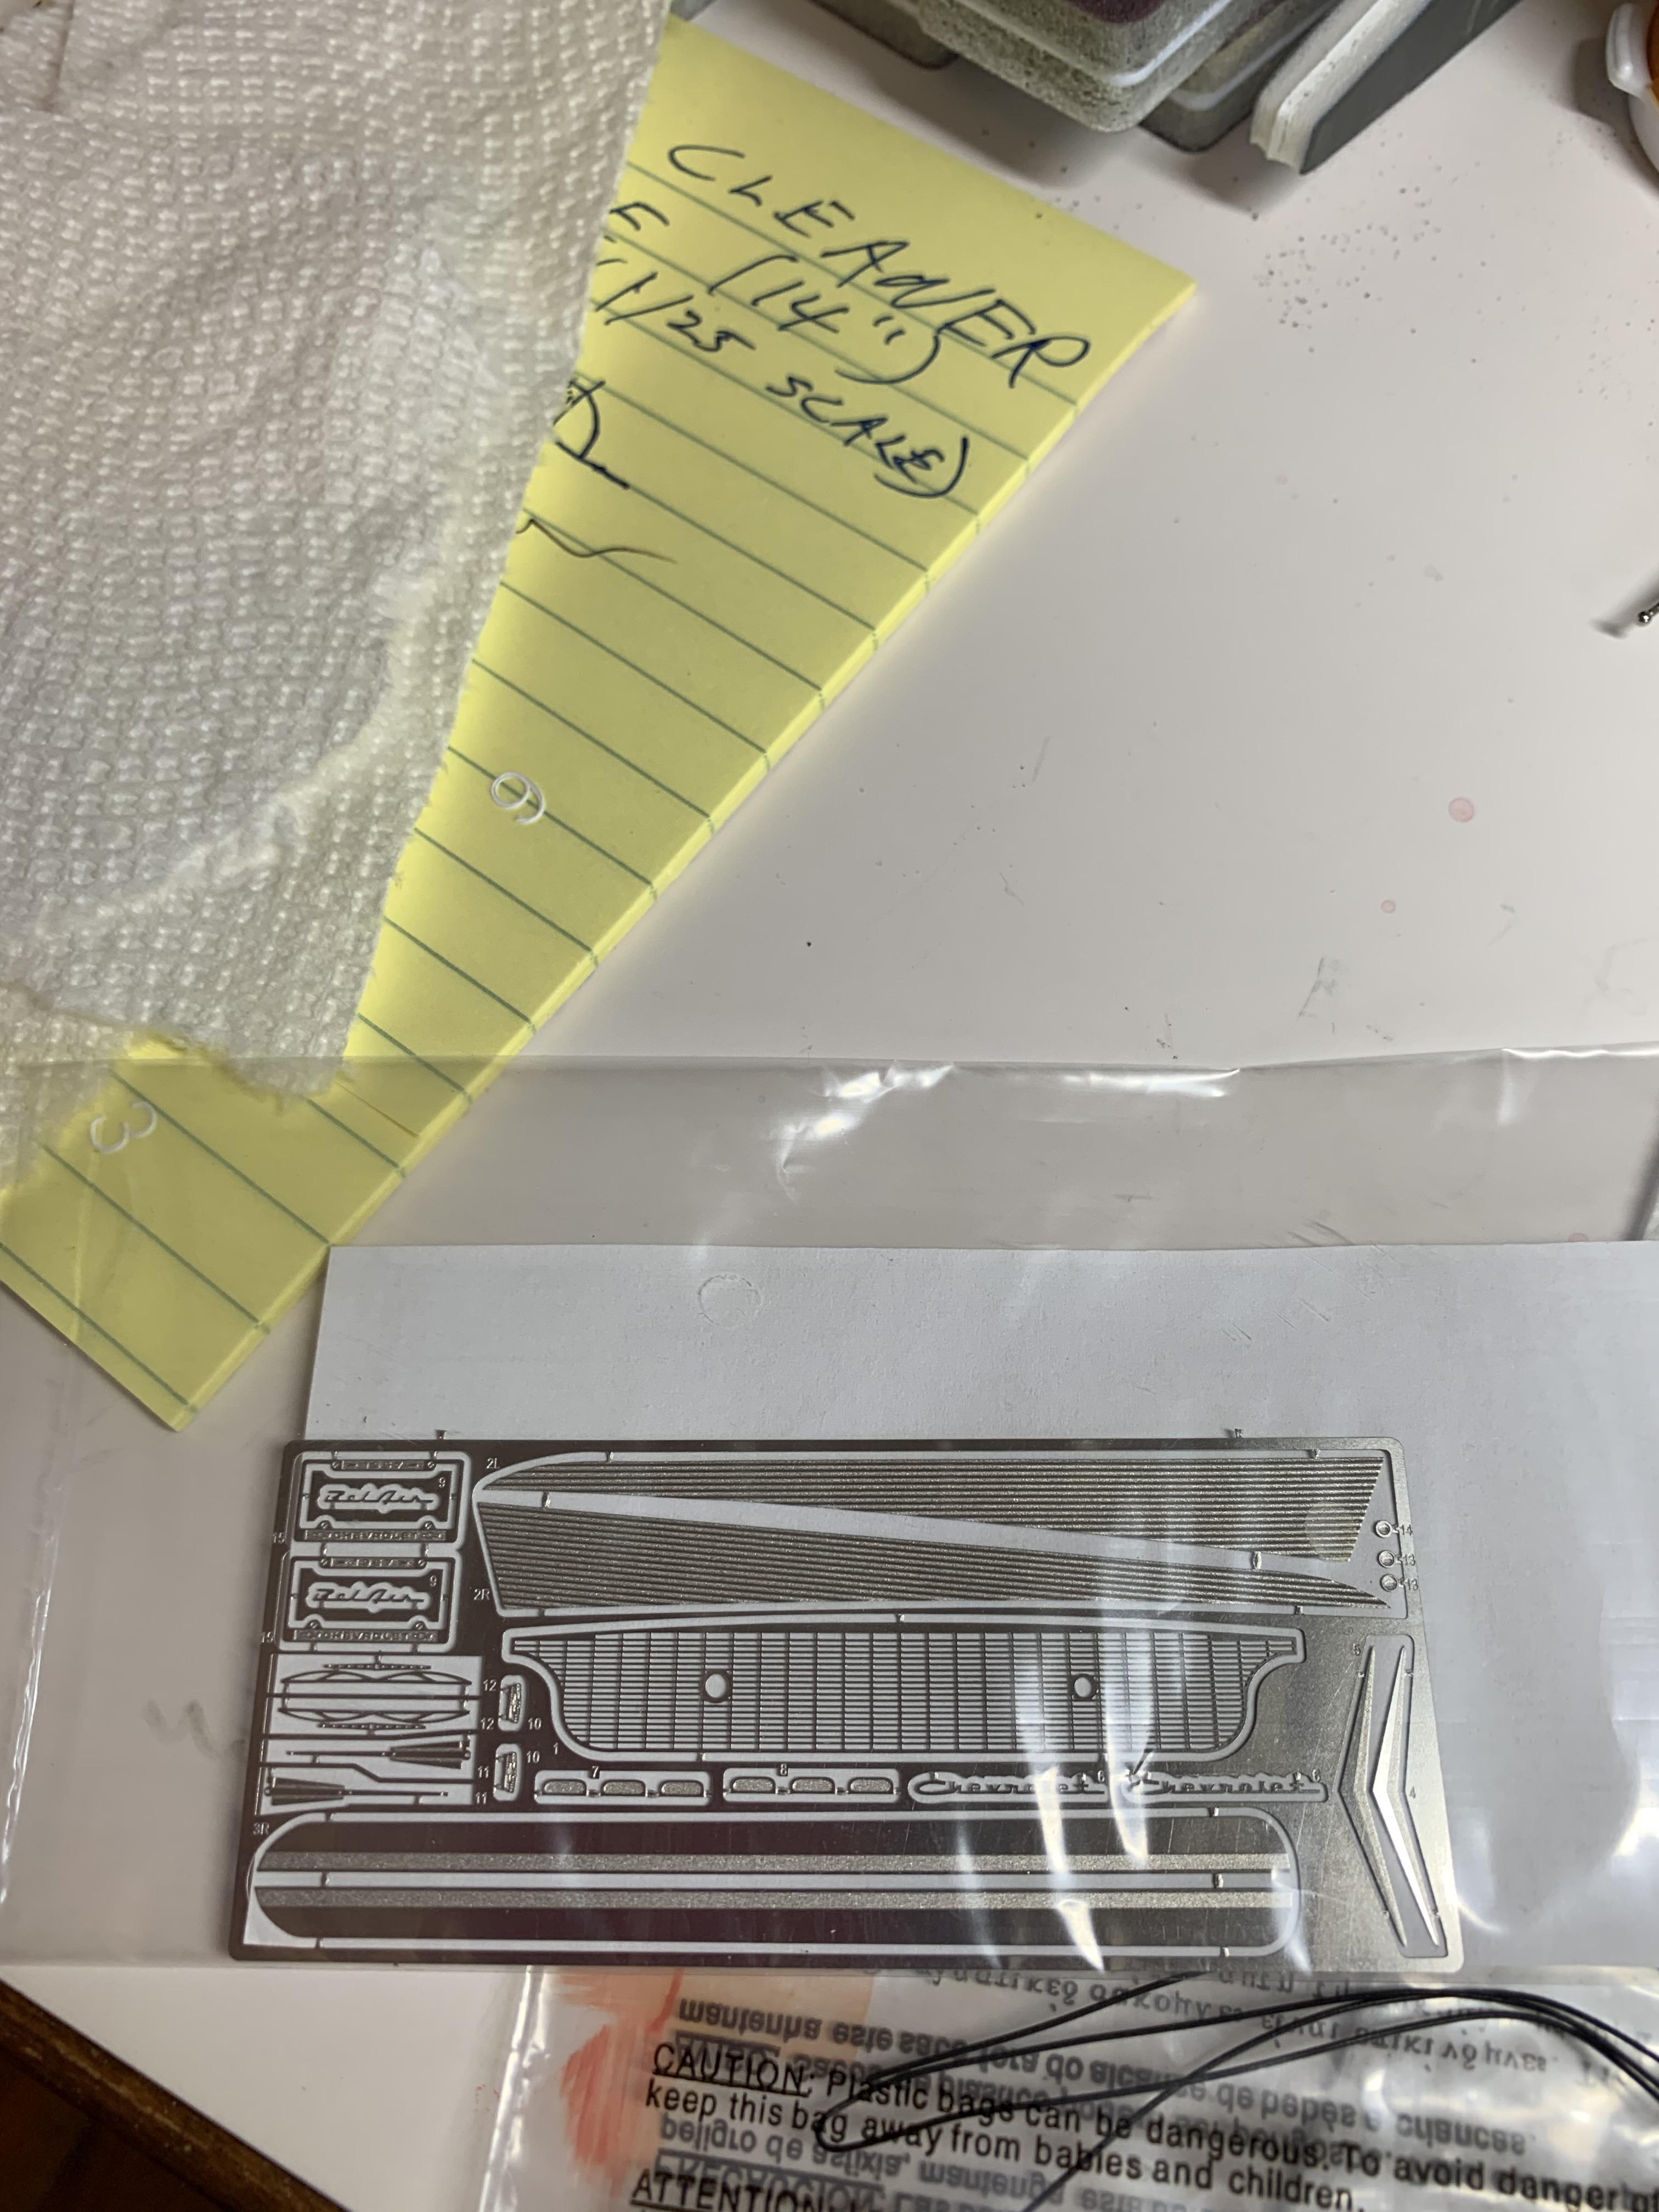
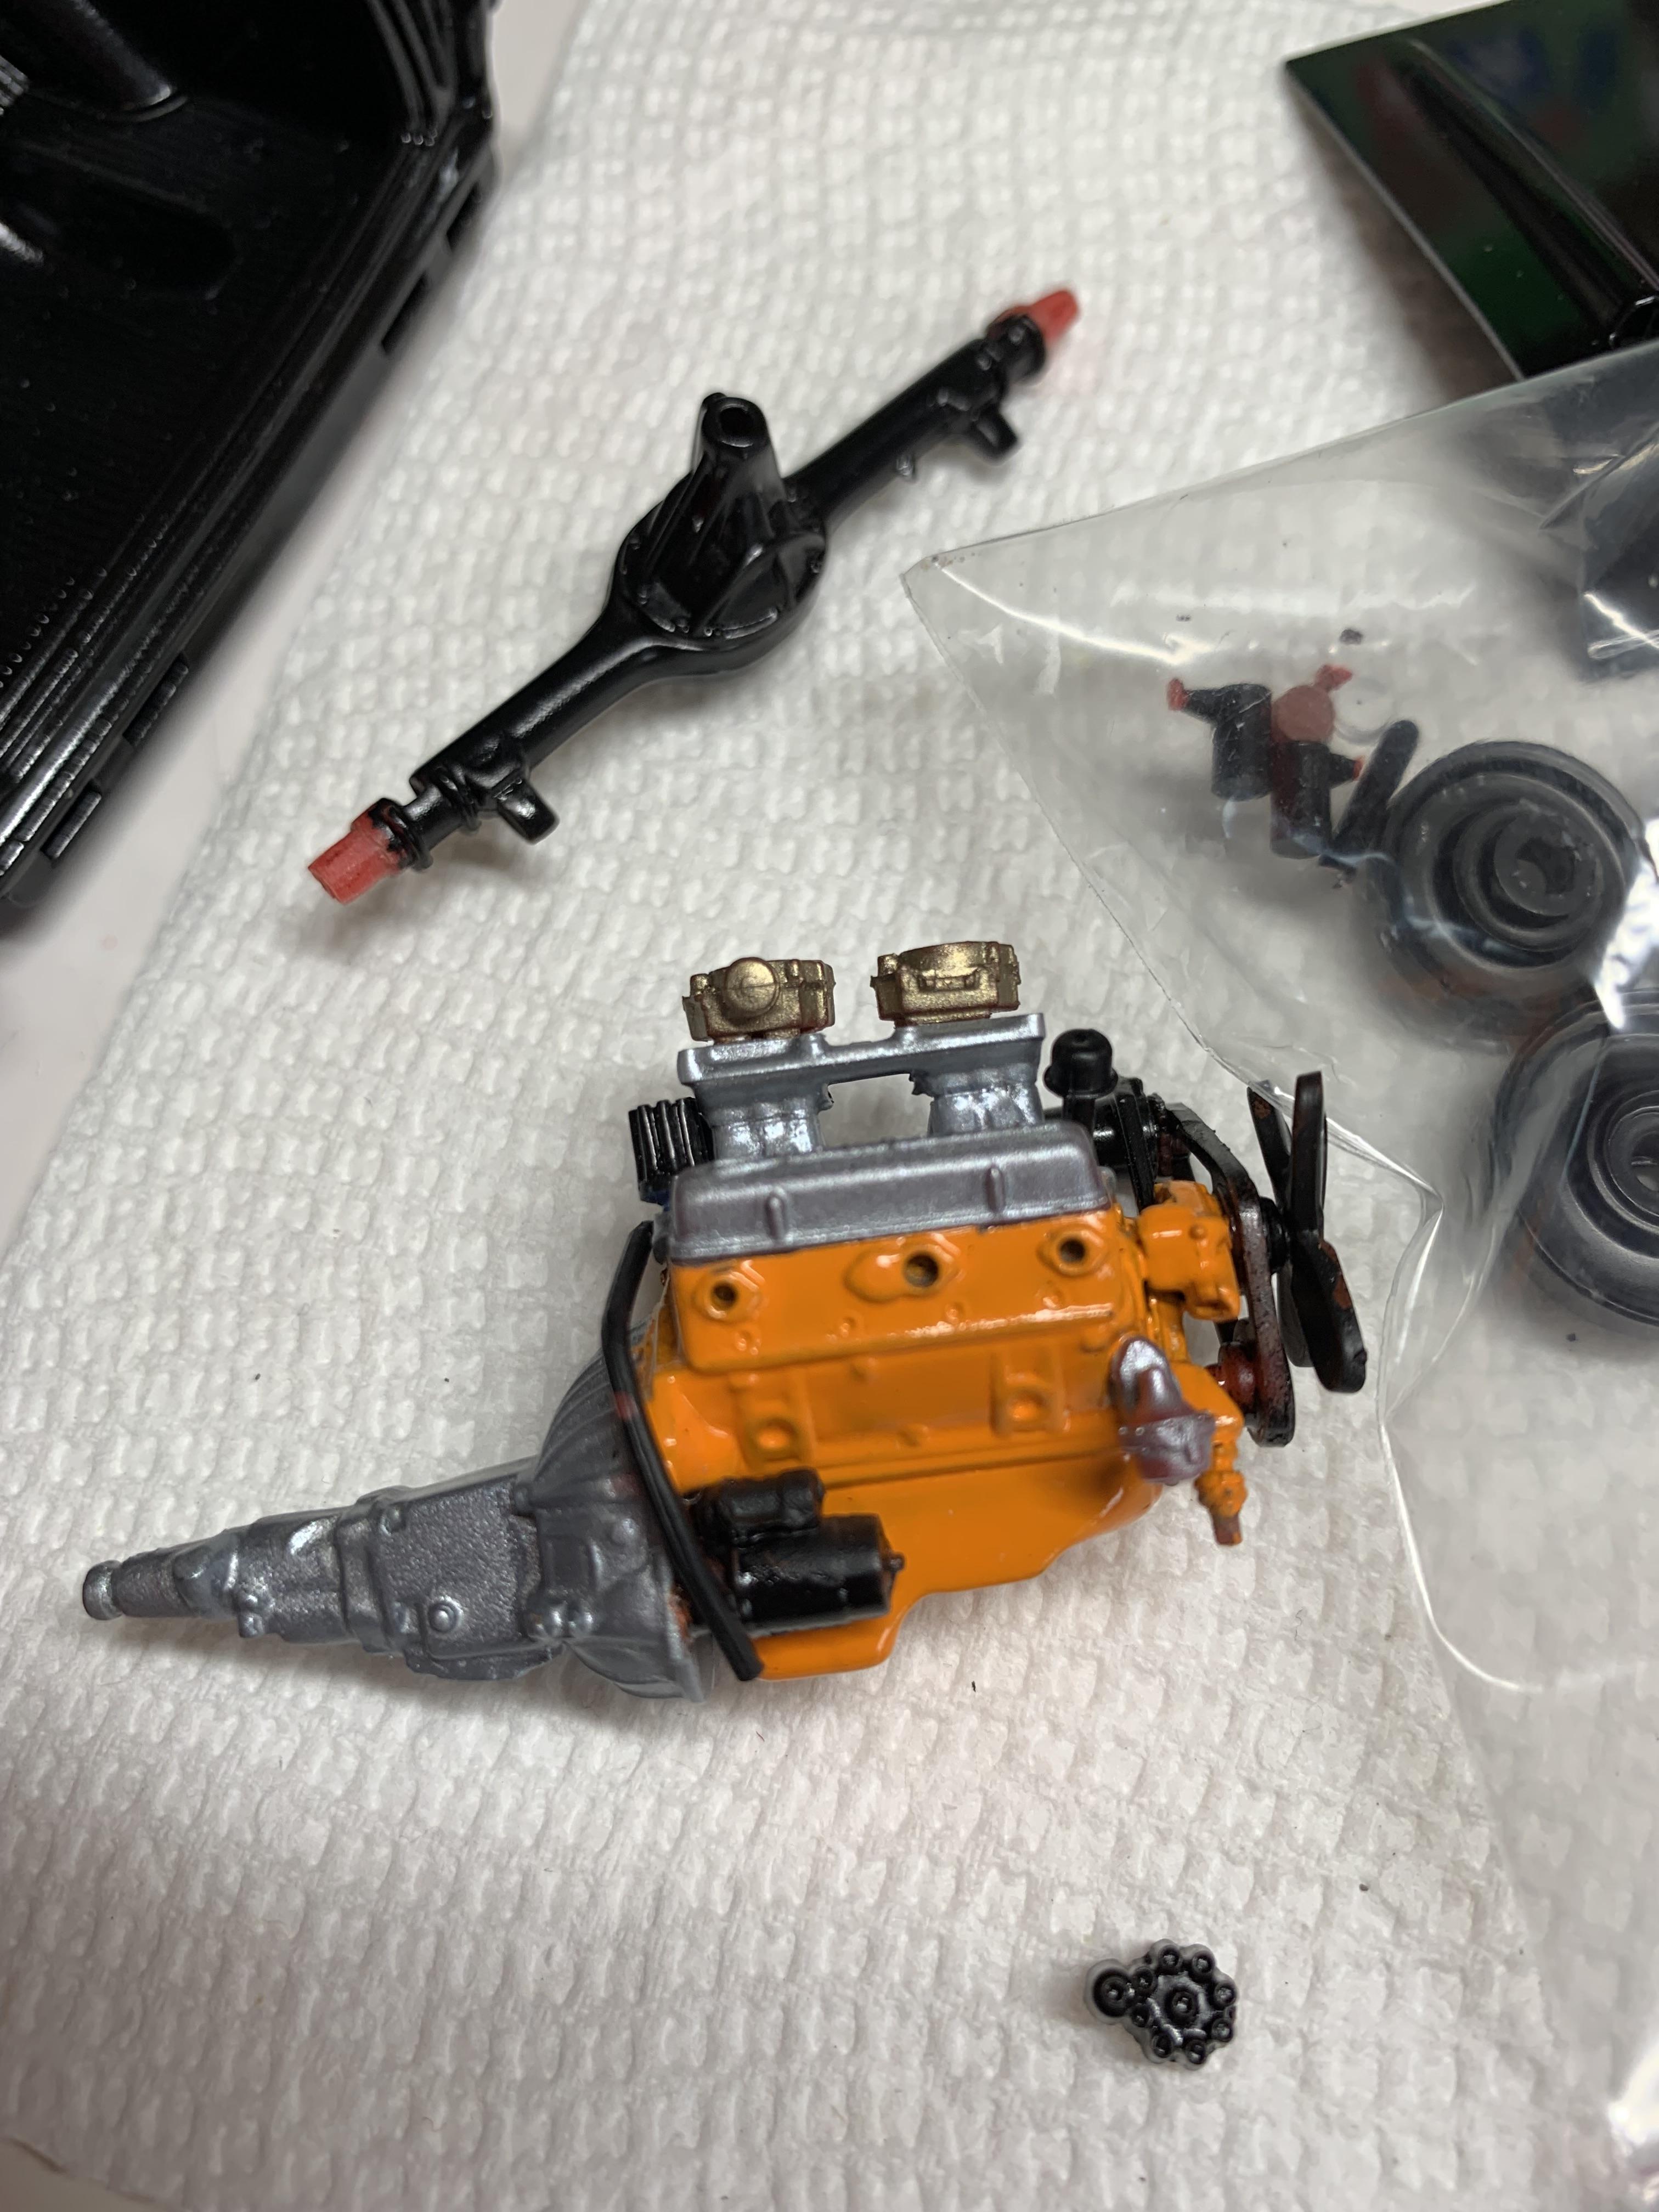
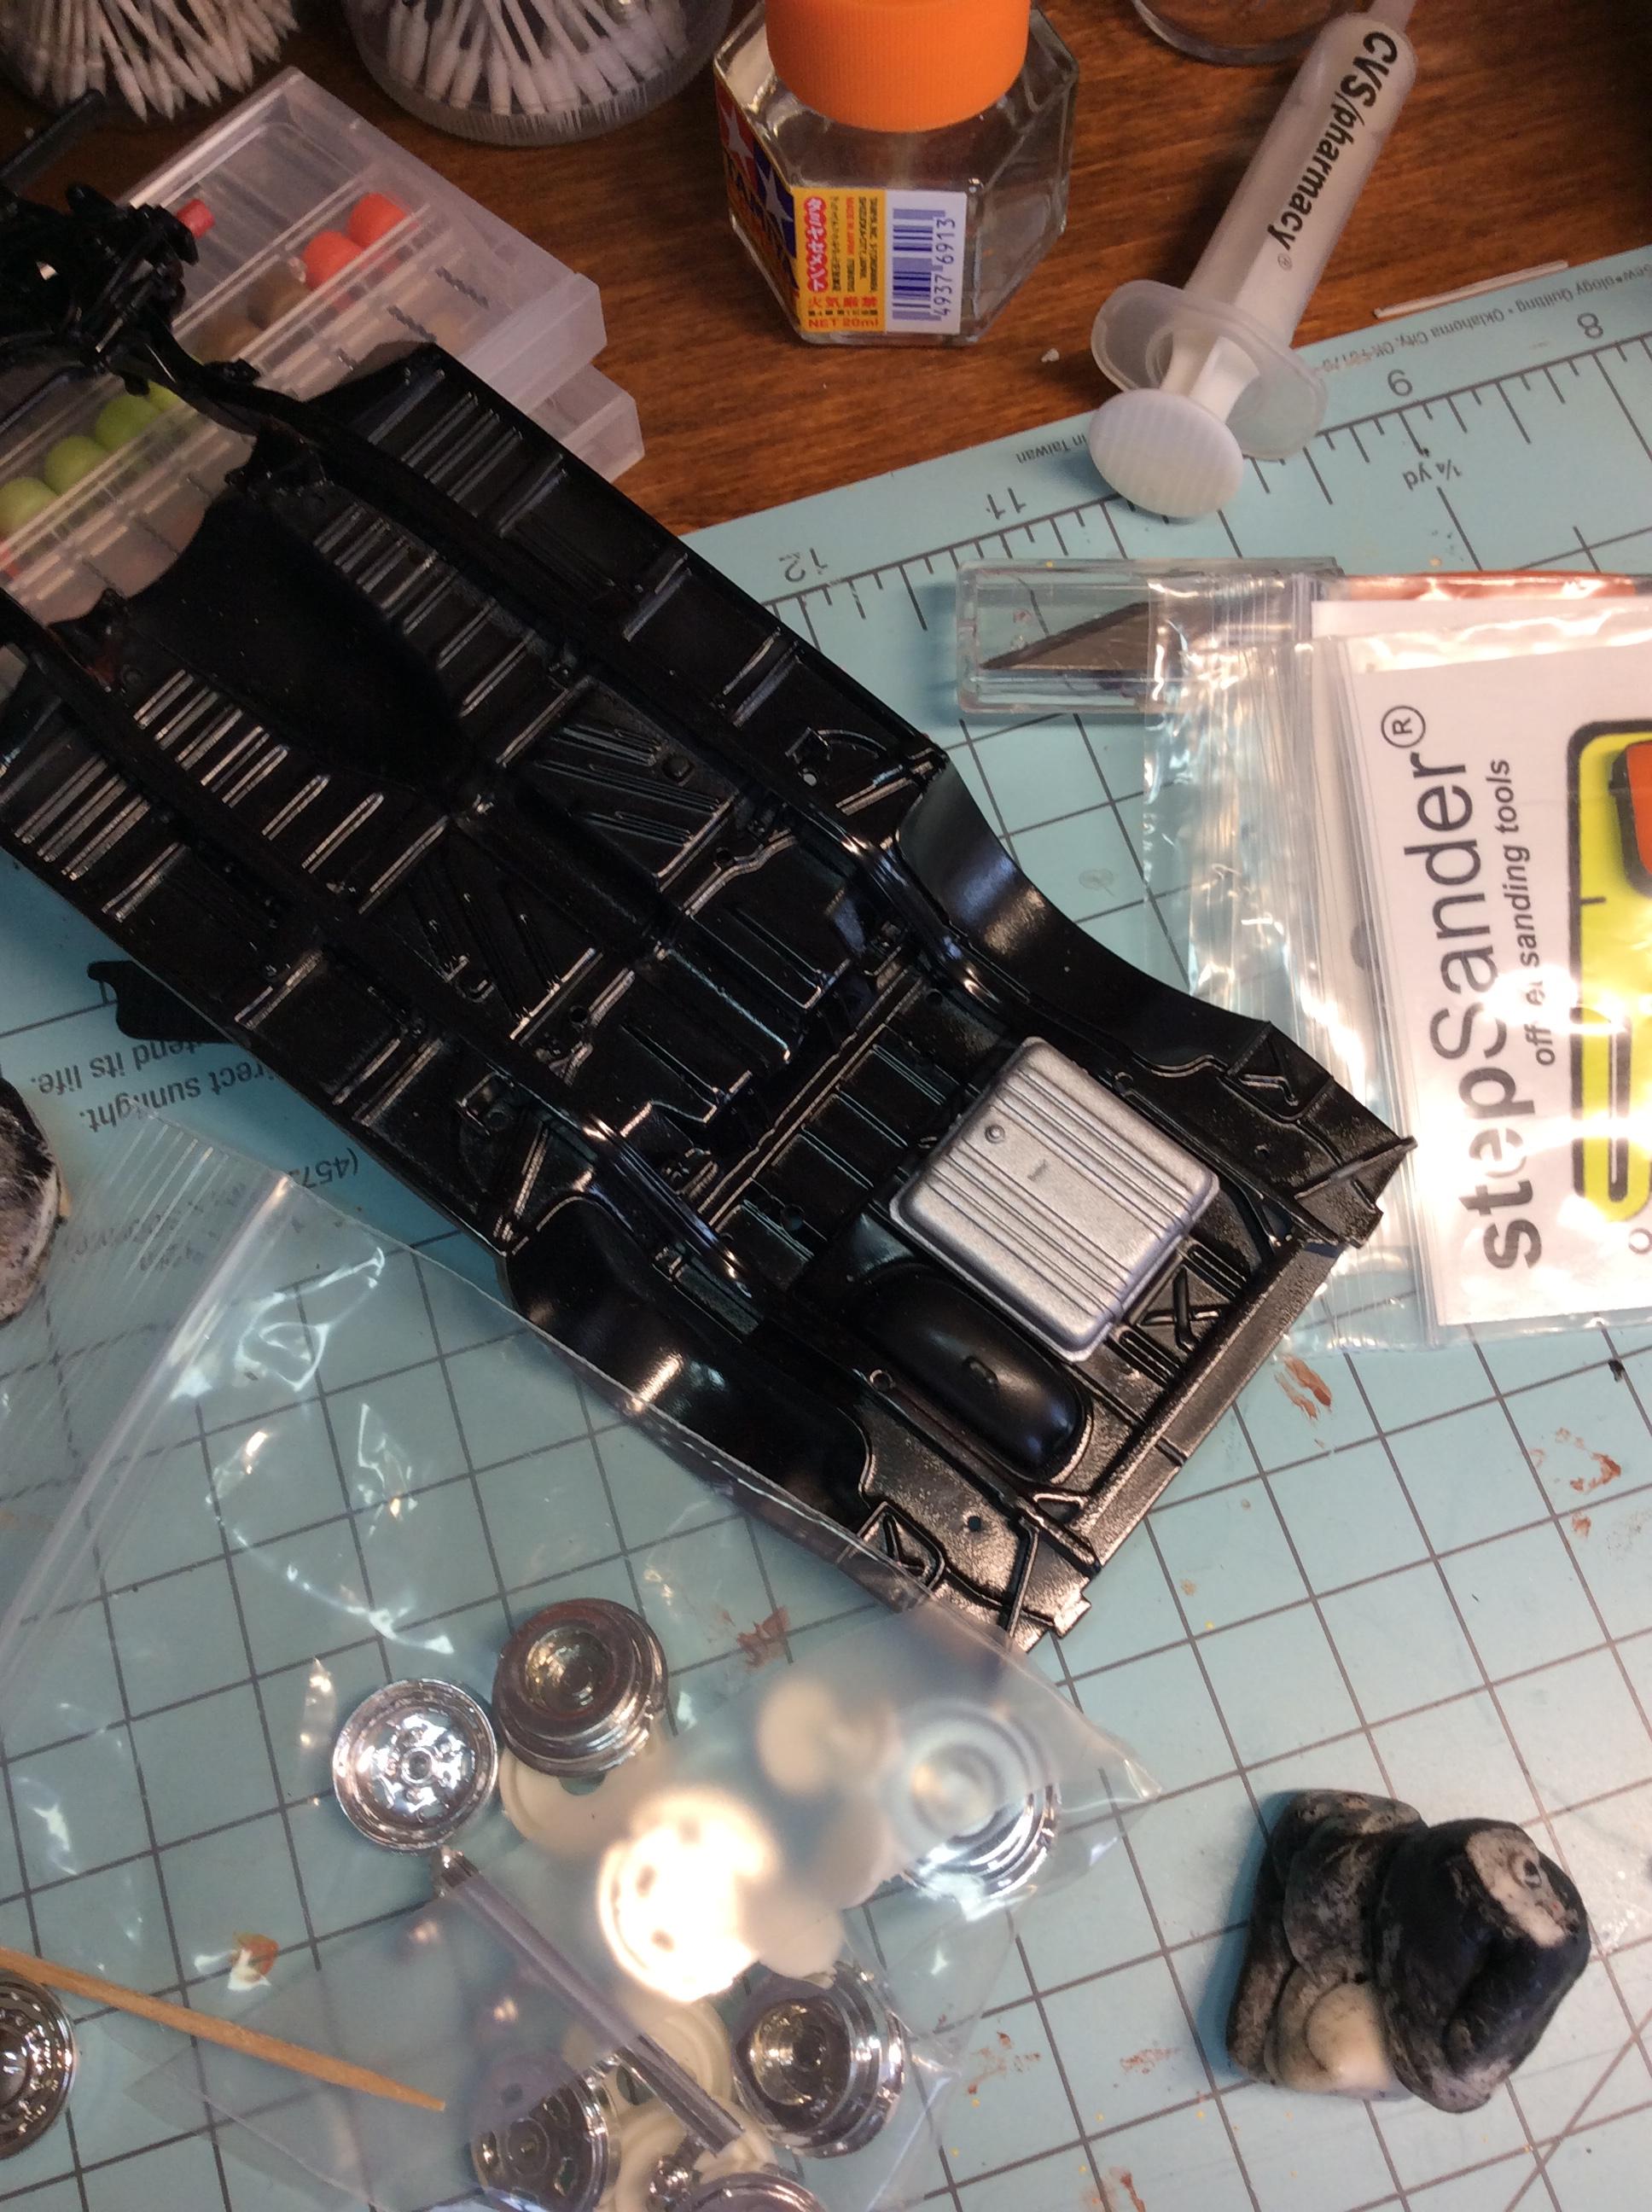
This is what I drug out of storage in the kit box. This kit came with plug wires, photo etch parts, and even bare metal foil type material.
-
Holloman & McKinney 57 Chevy C/MP circa 1964
R. Thorne replied to R. Thorne's topic in WIP: Drag Racing Models
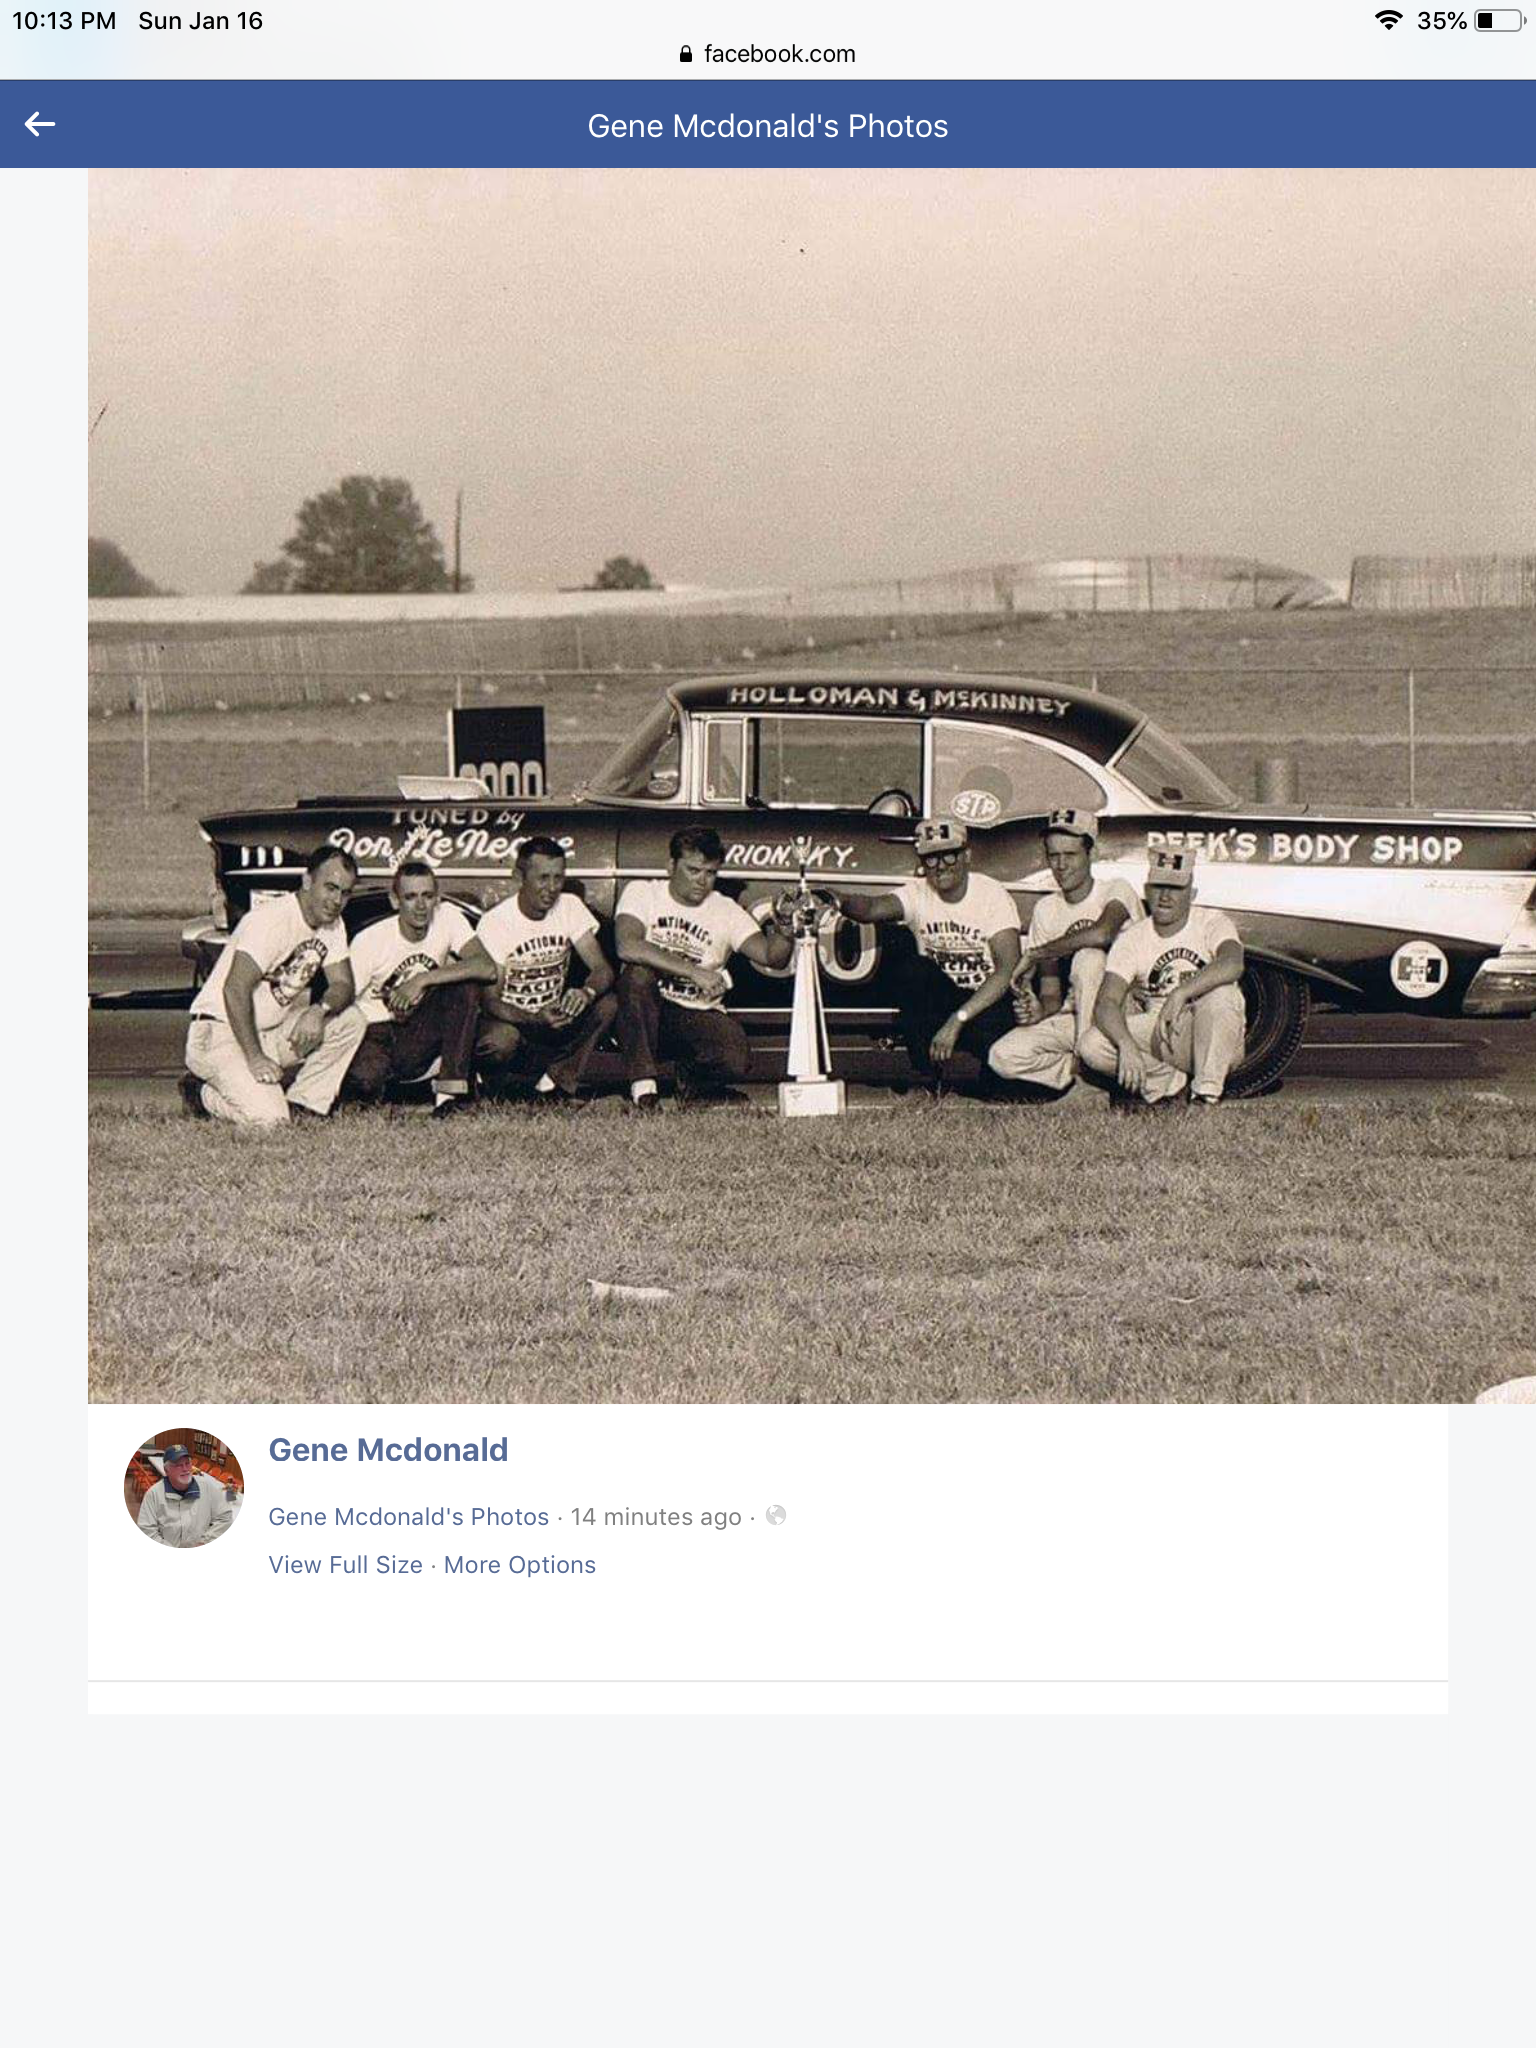
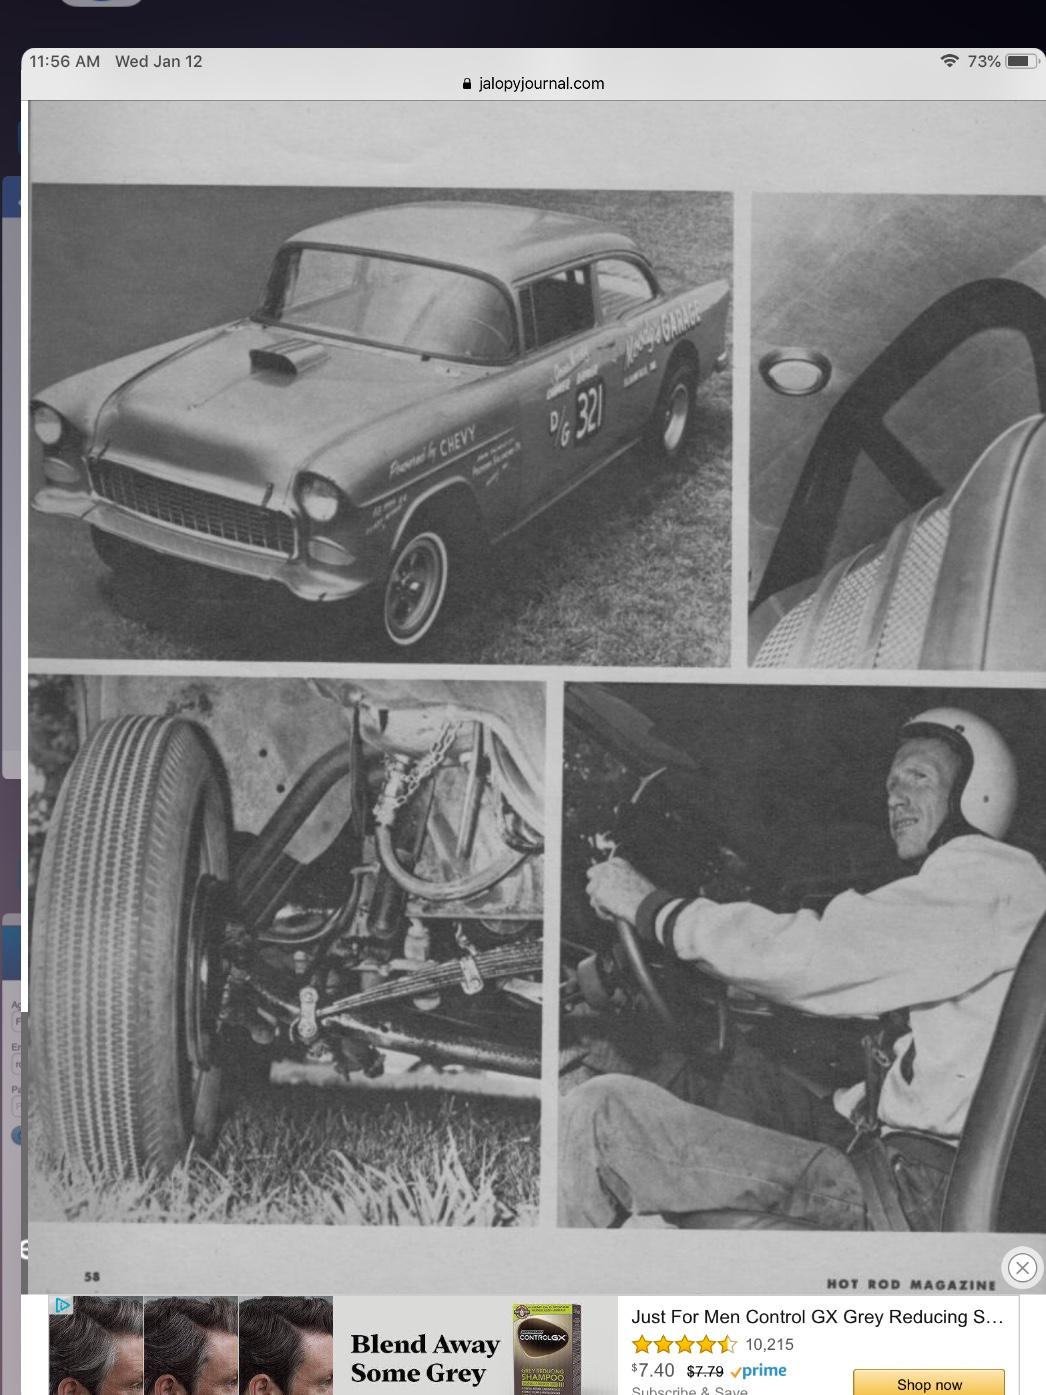
This car was runner up to Joe Lunati in Street Eliminator in 1964. A couple years ago, thanks to a local Facebook site and some internet searching, I obtained some more pictures of this car.
-
Holloman & McKinney 57 Chevy C/MP circa 1964
R. Thorne replied to R. Thorne's topic in WIP: Drag Racing Models
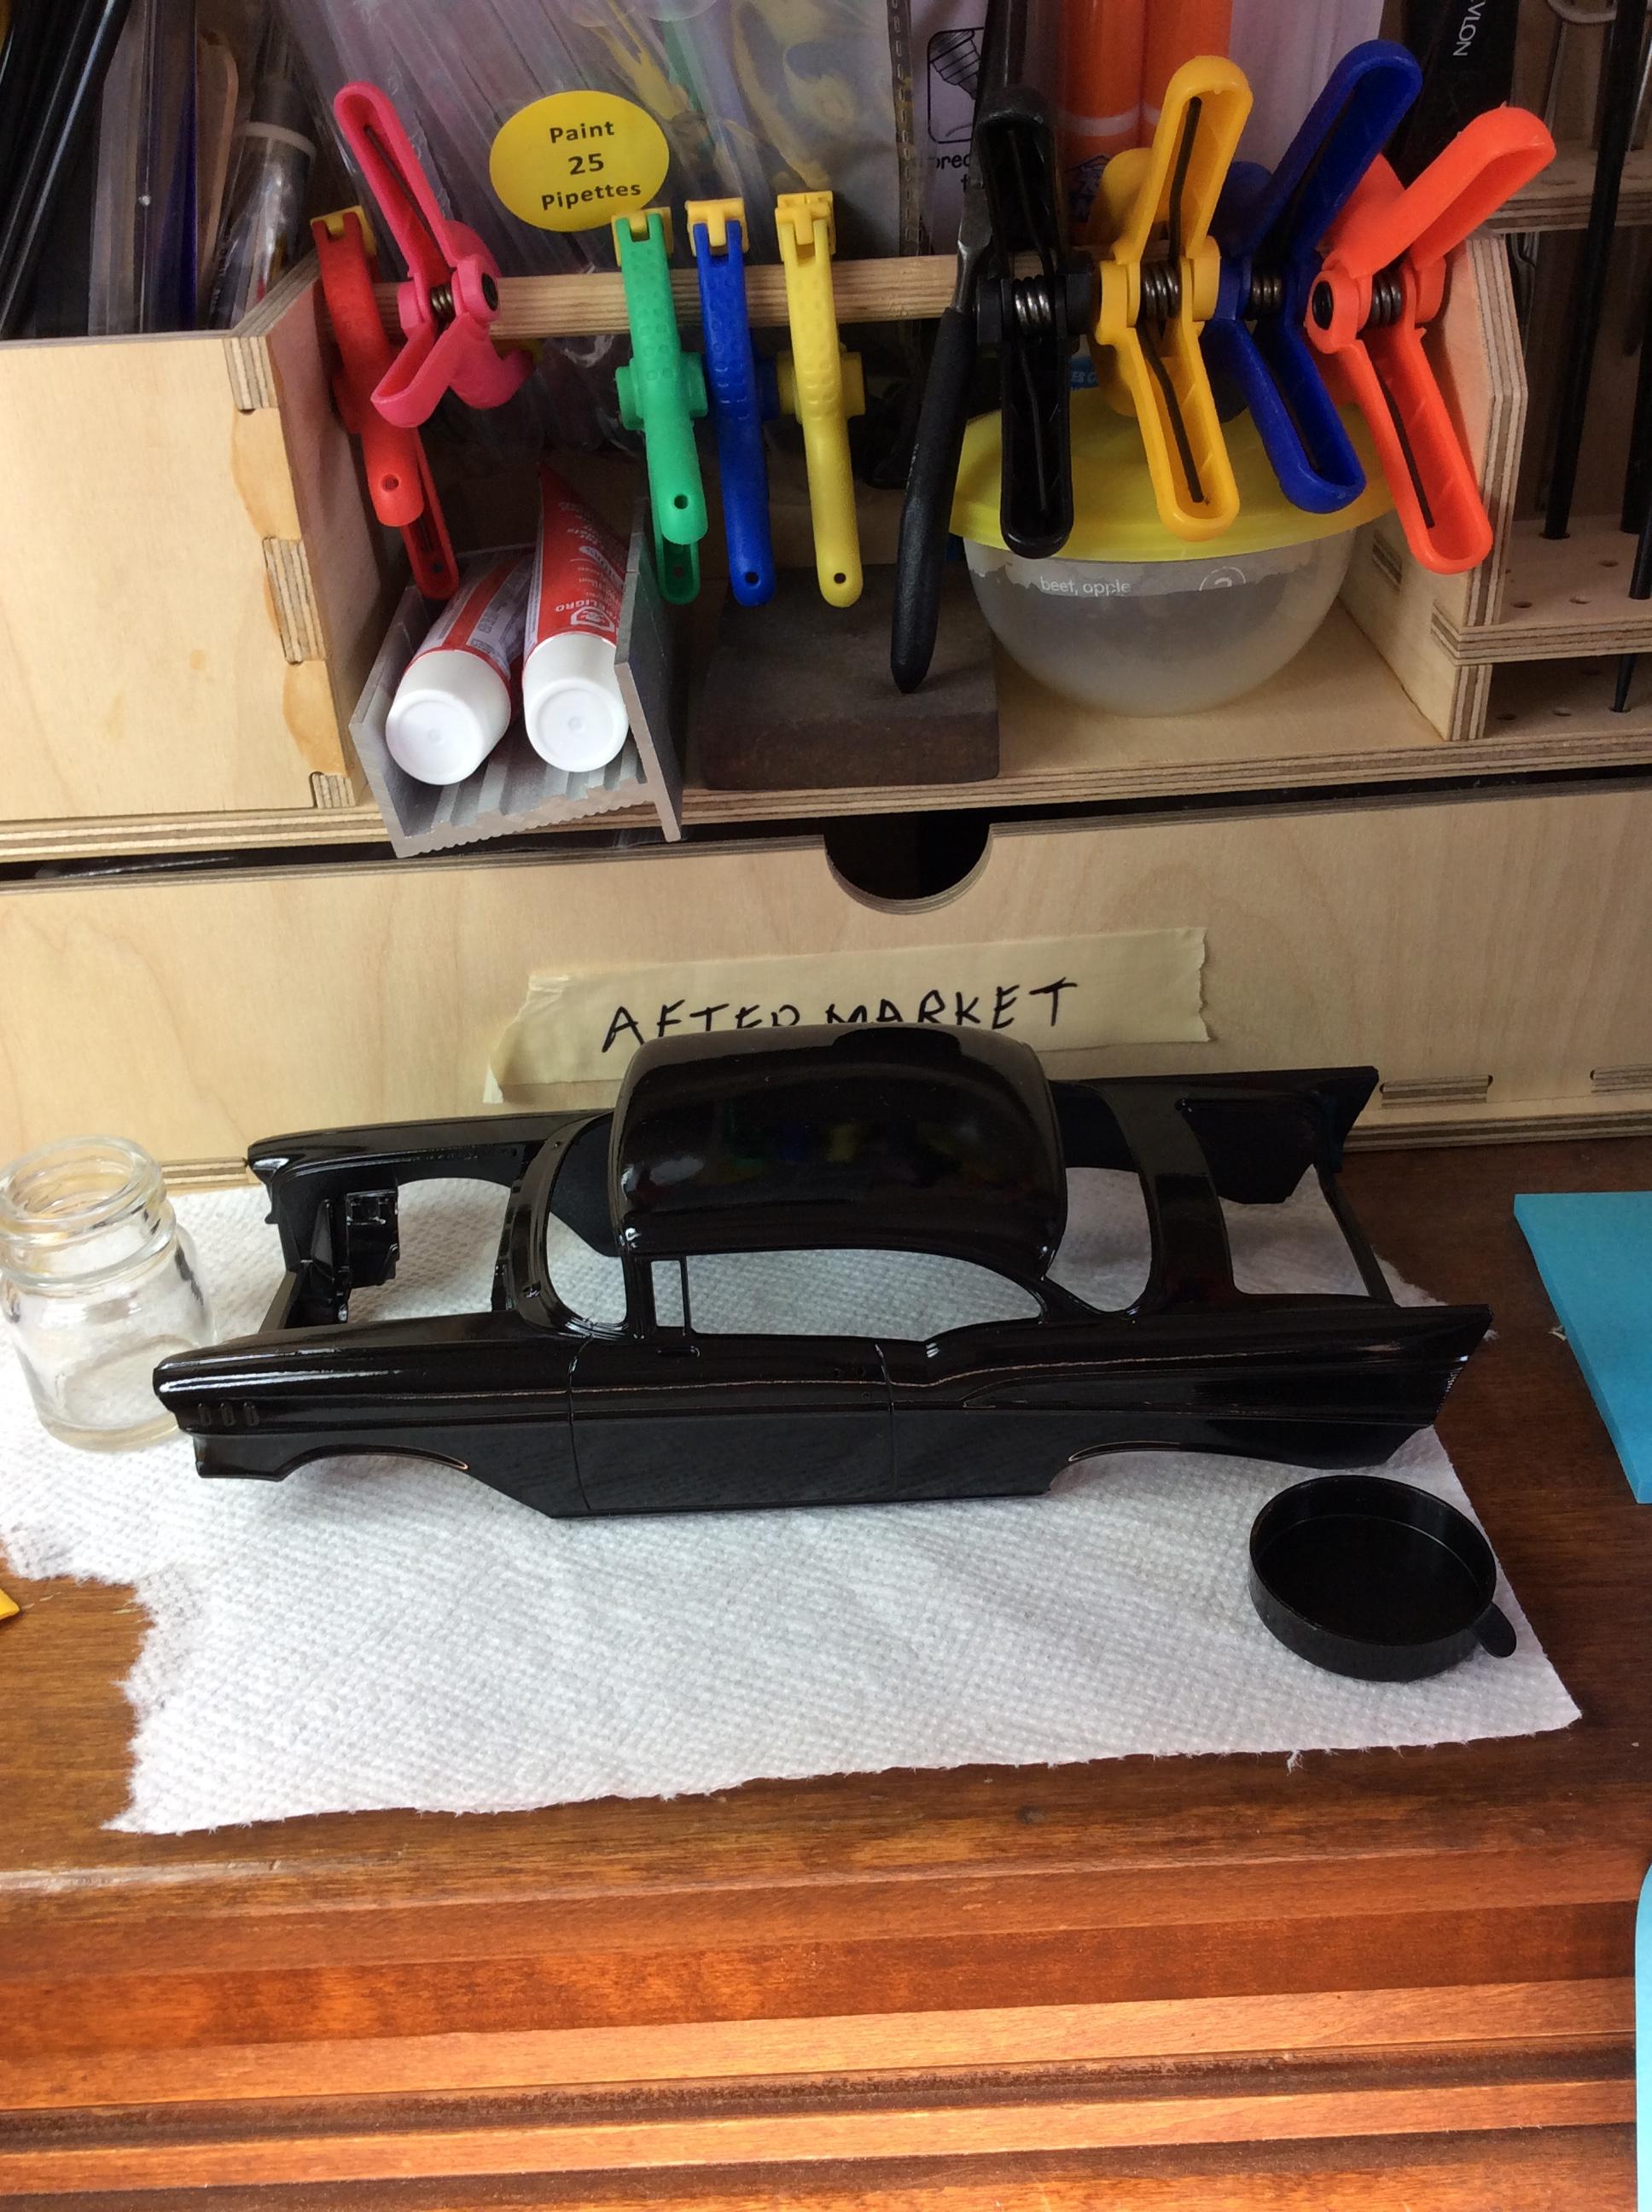
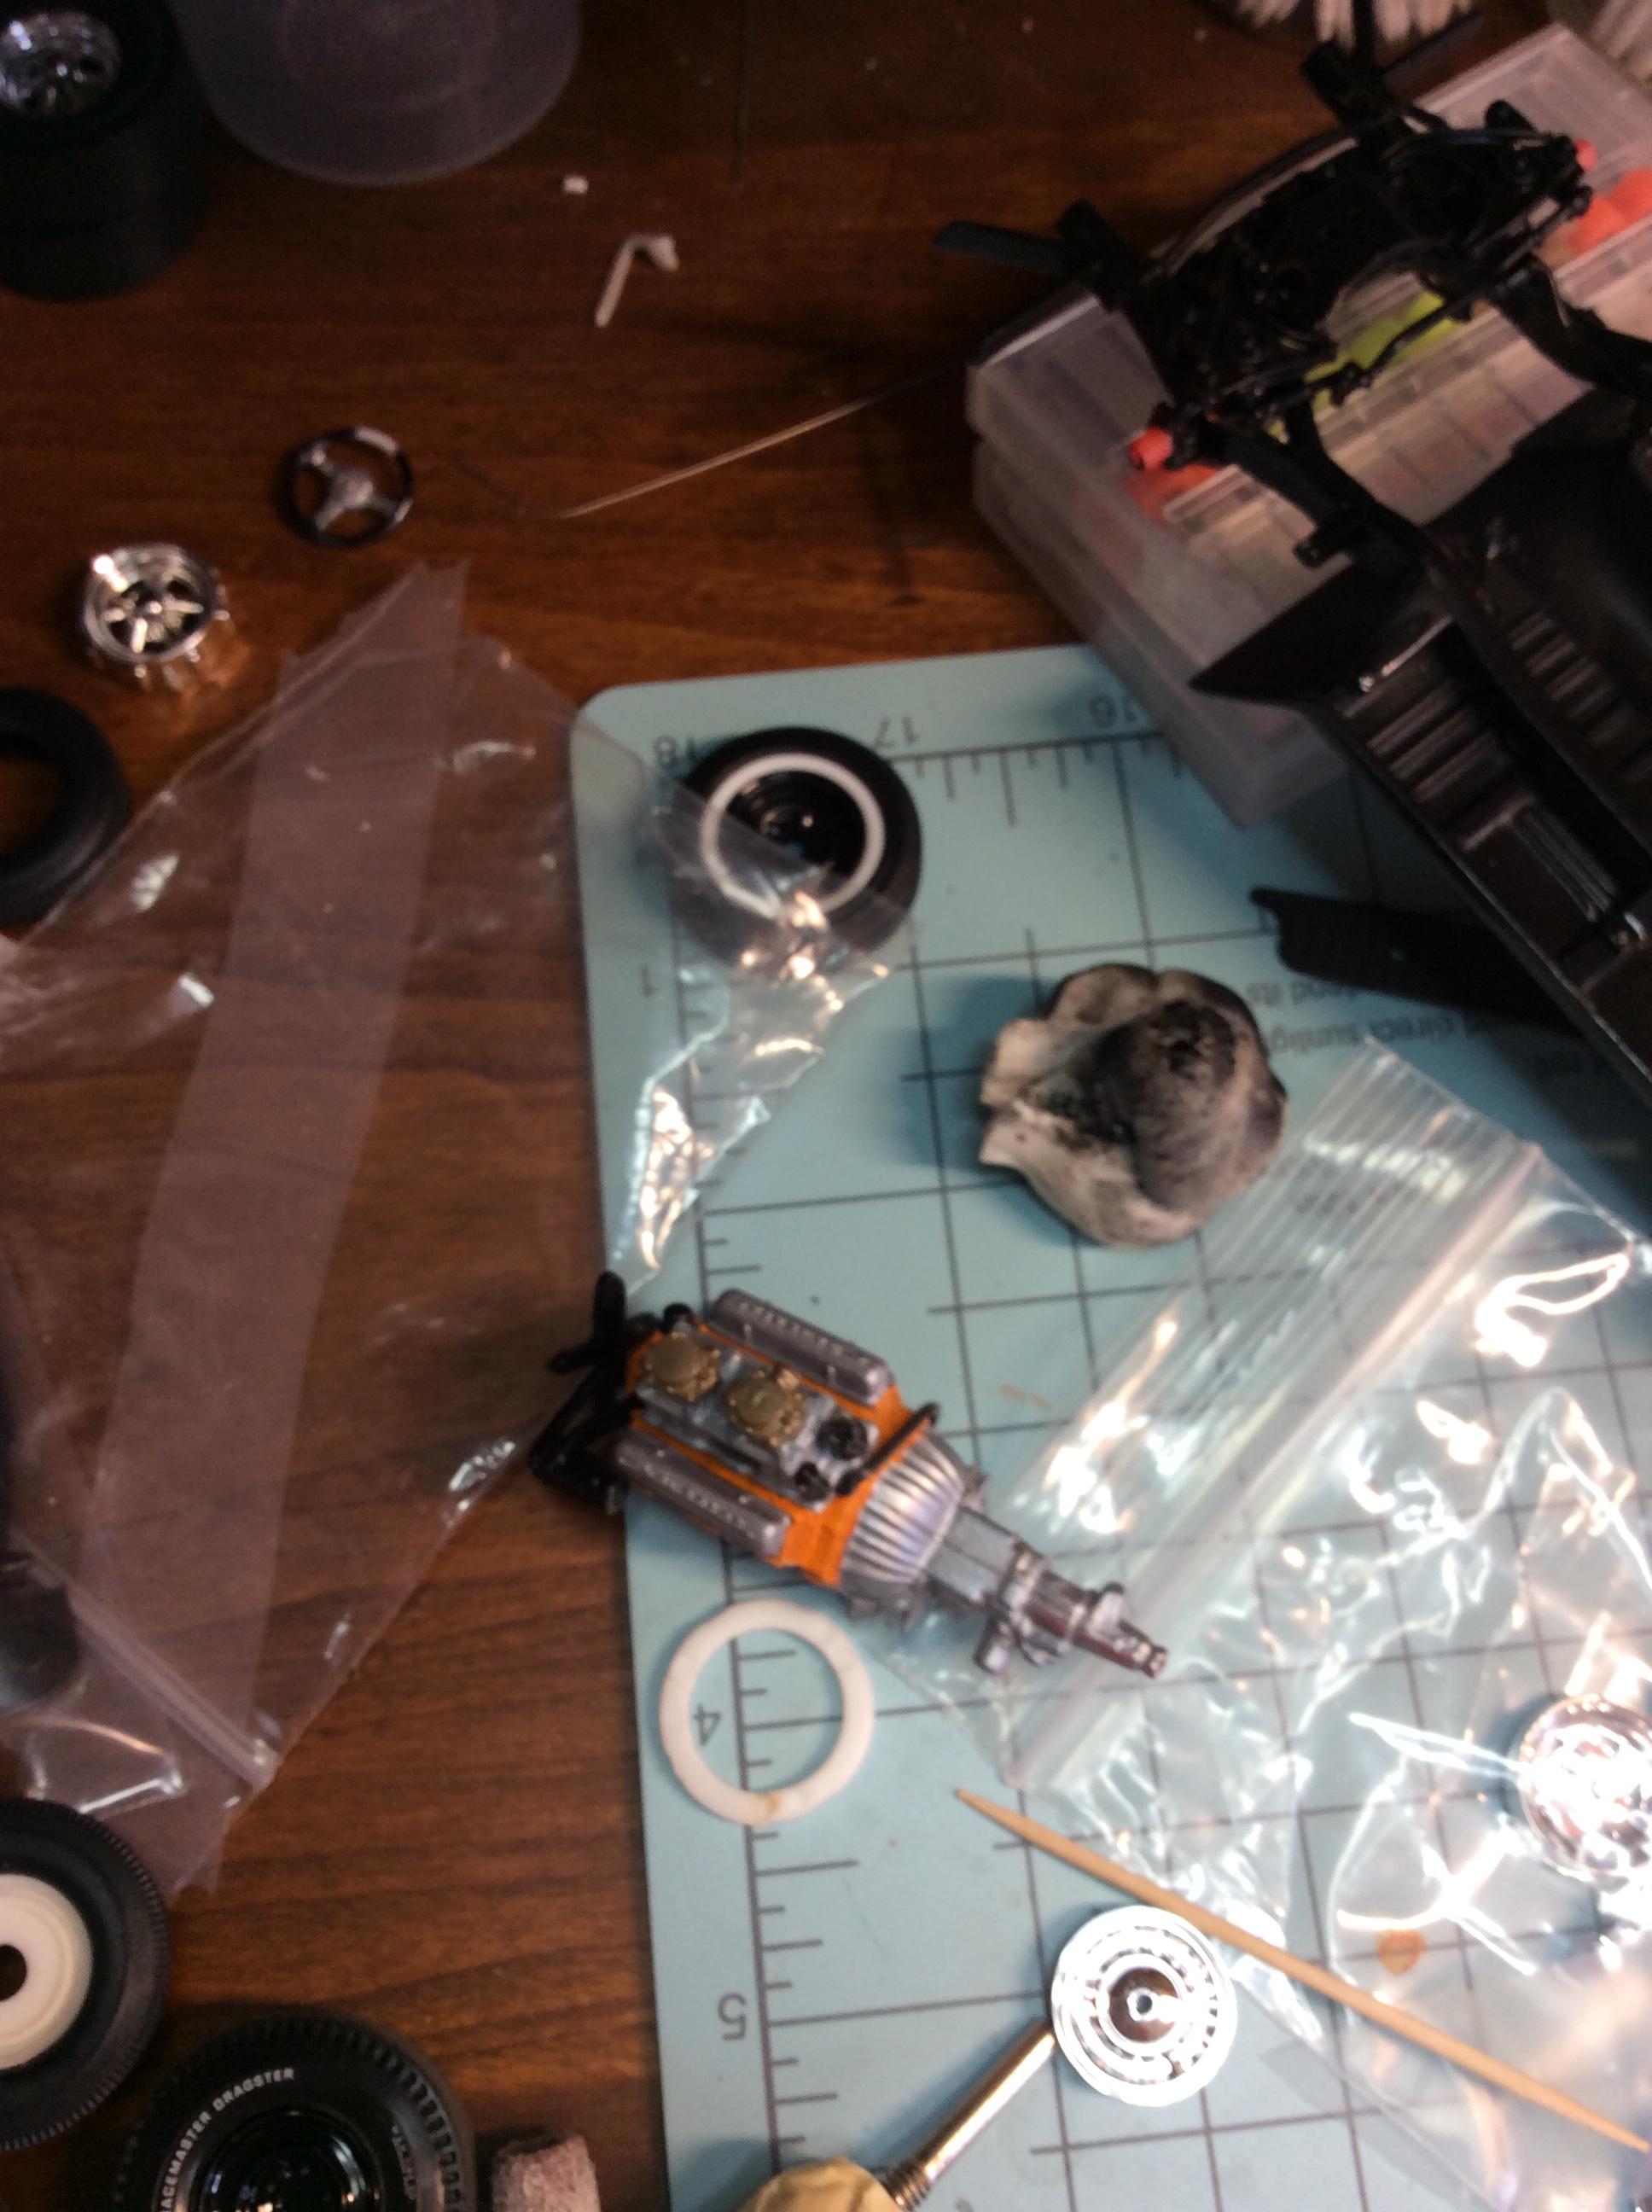
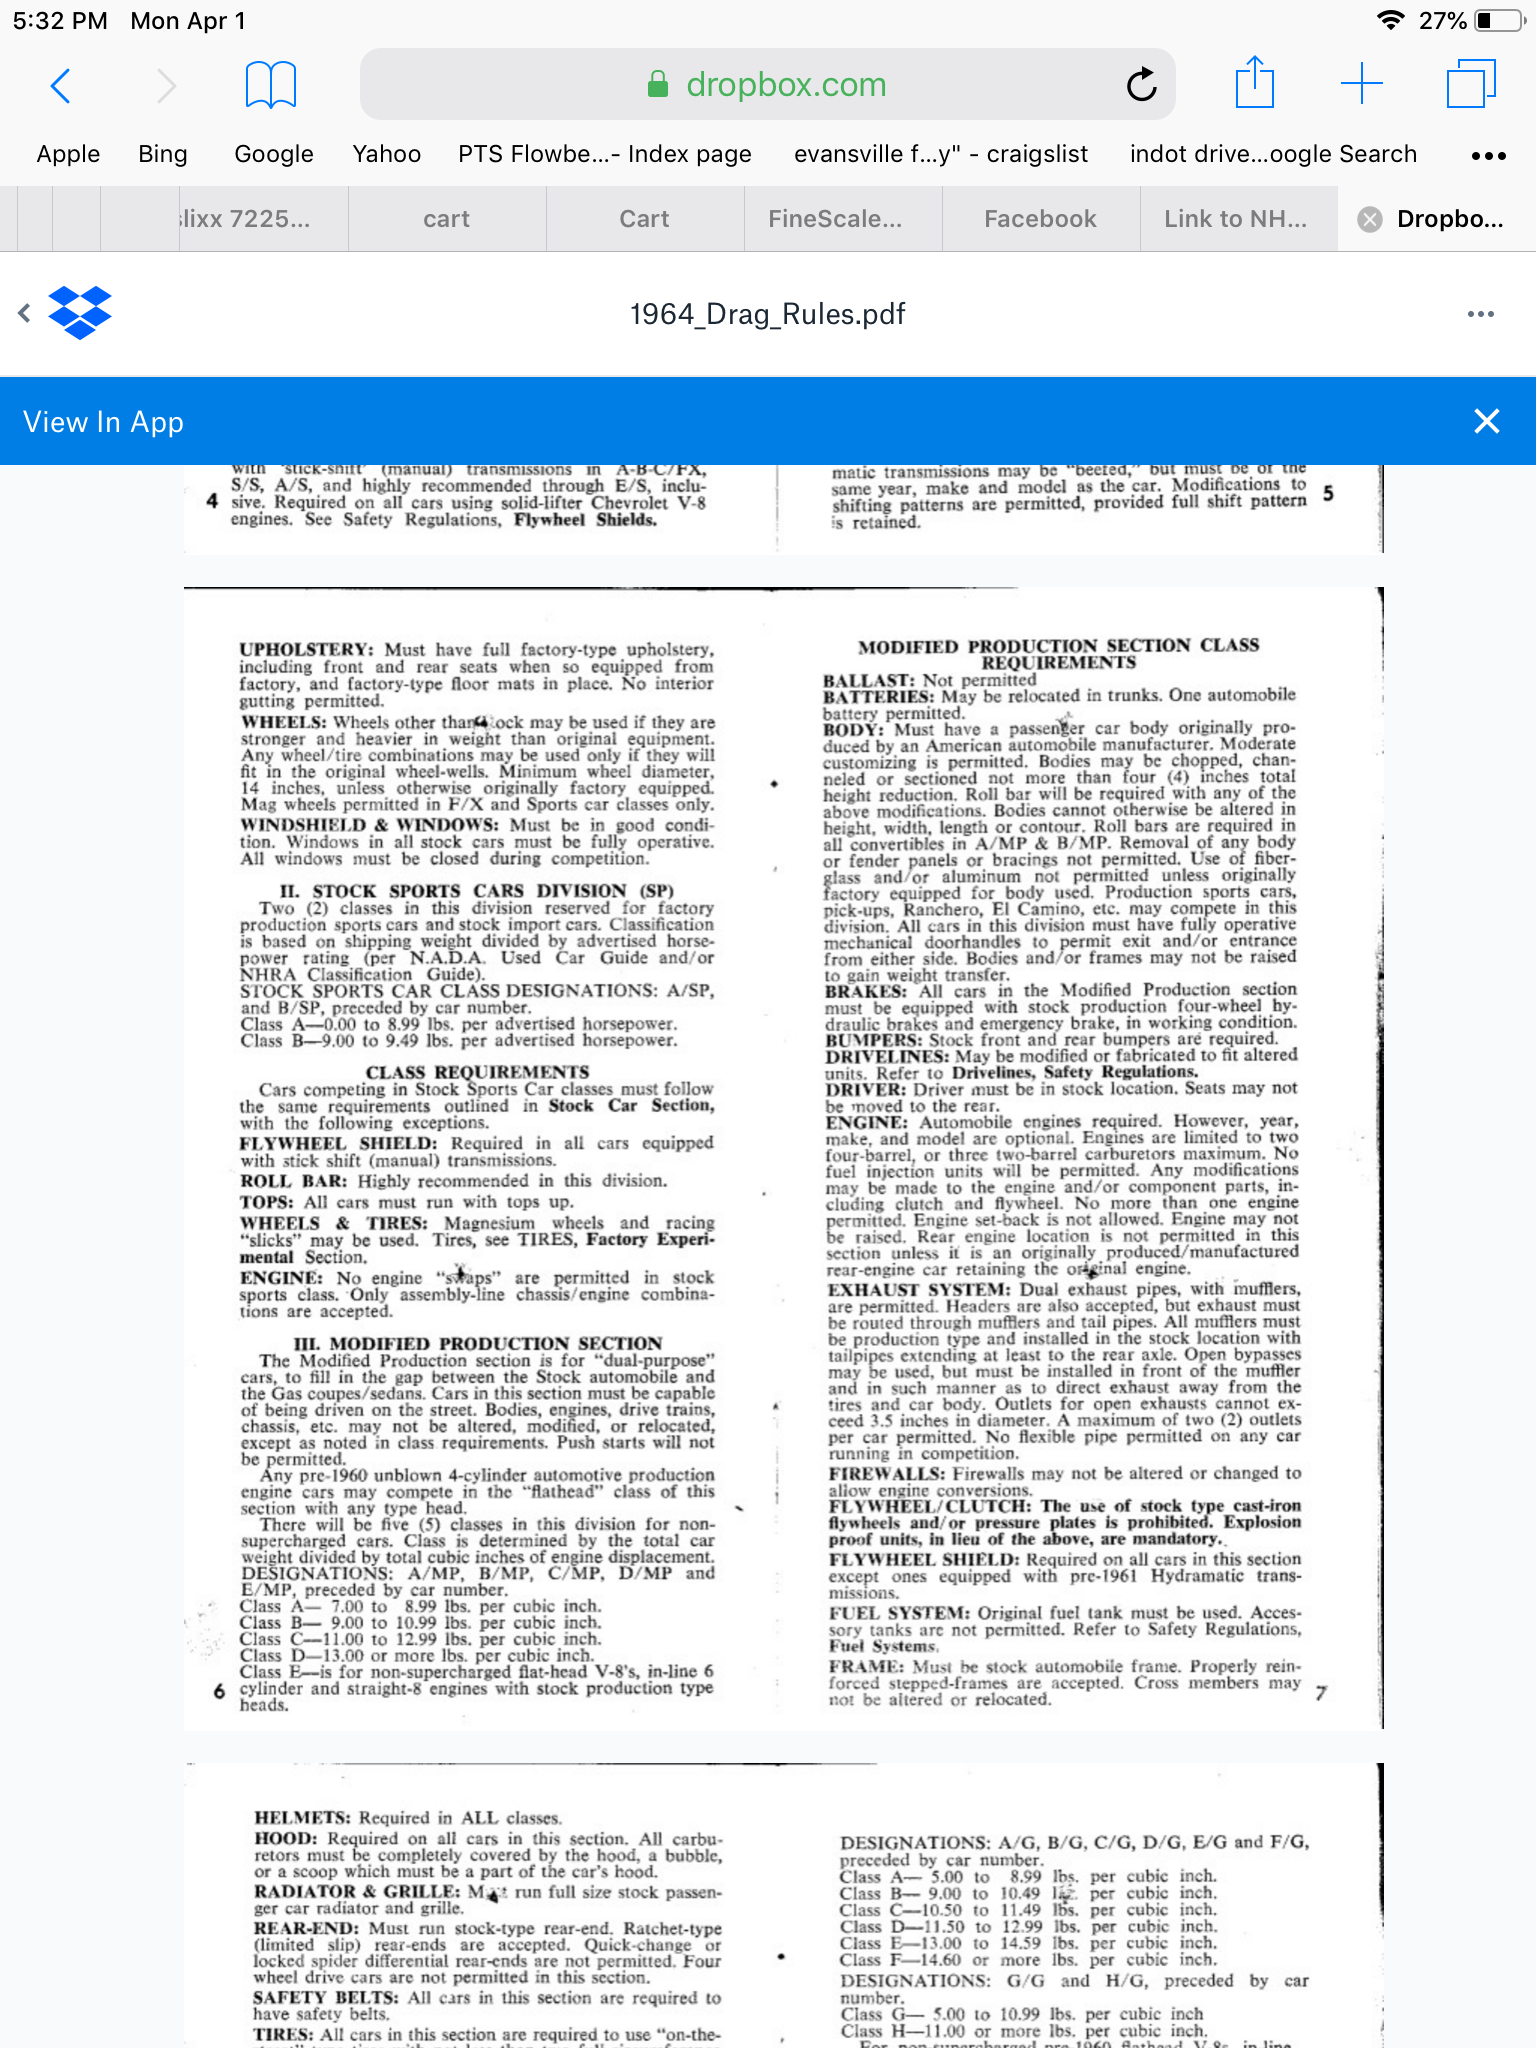
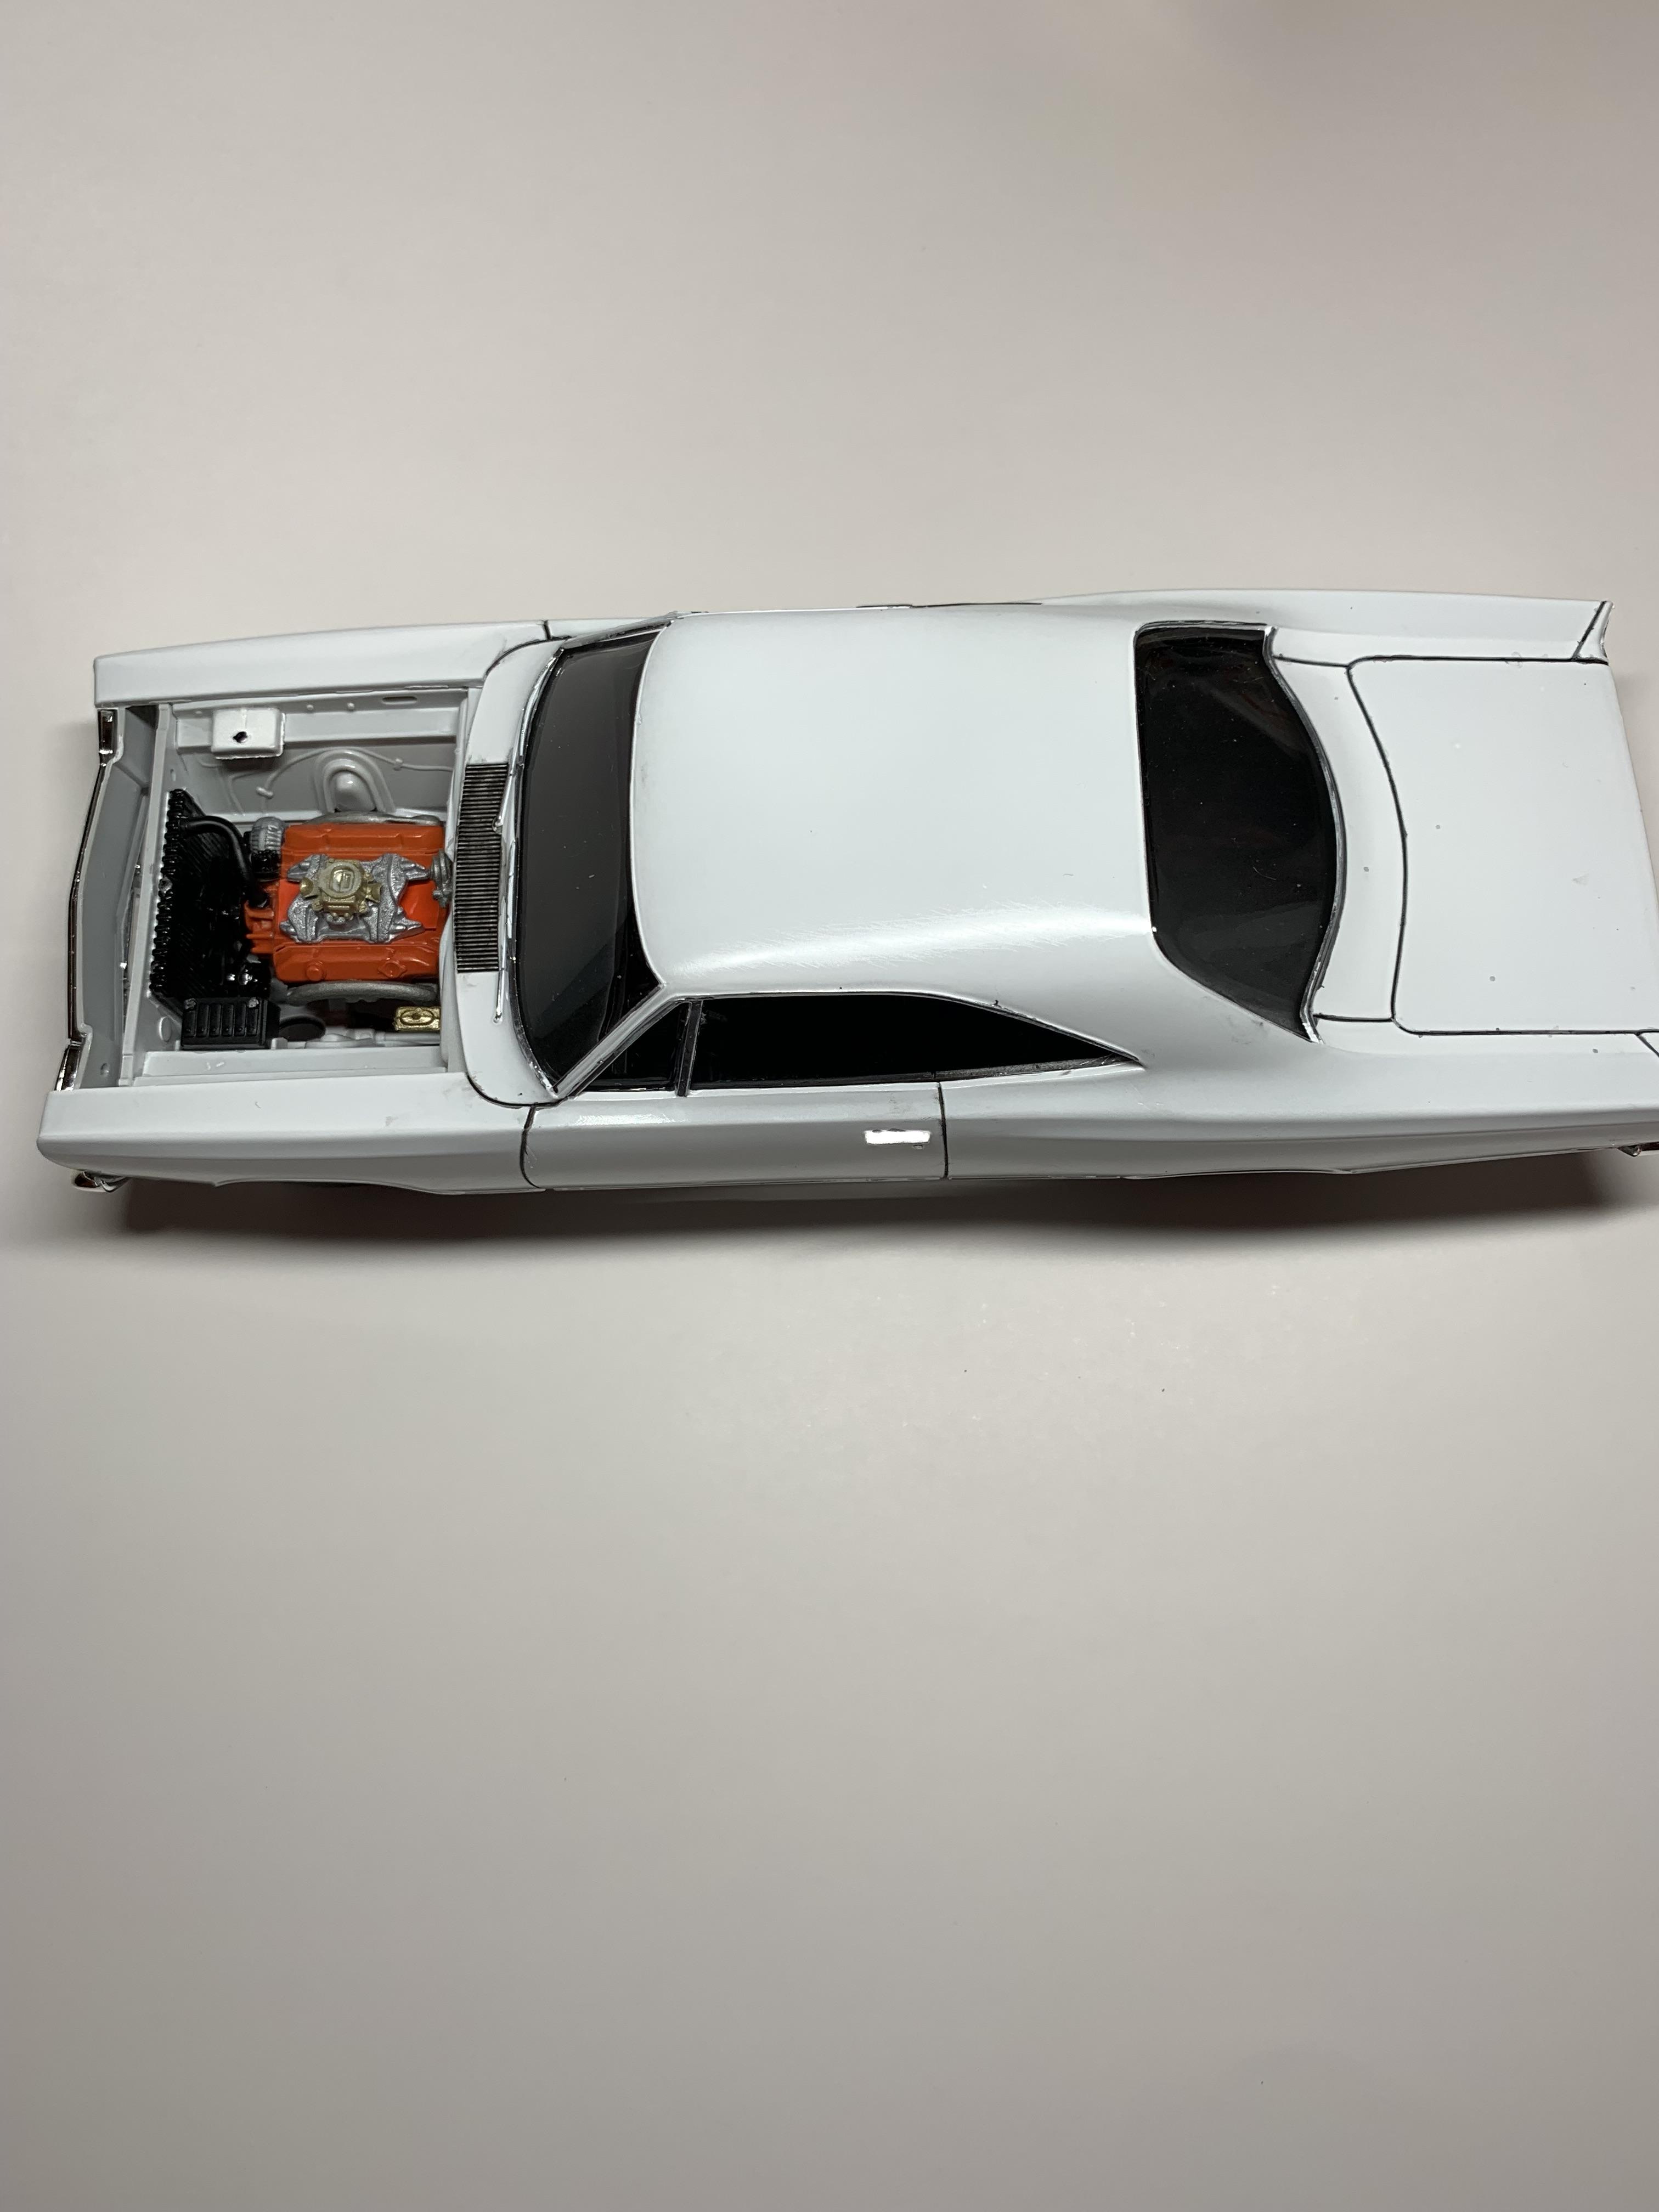
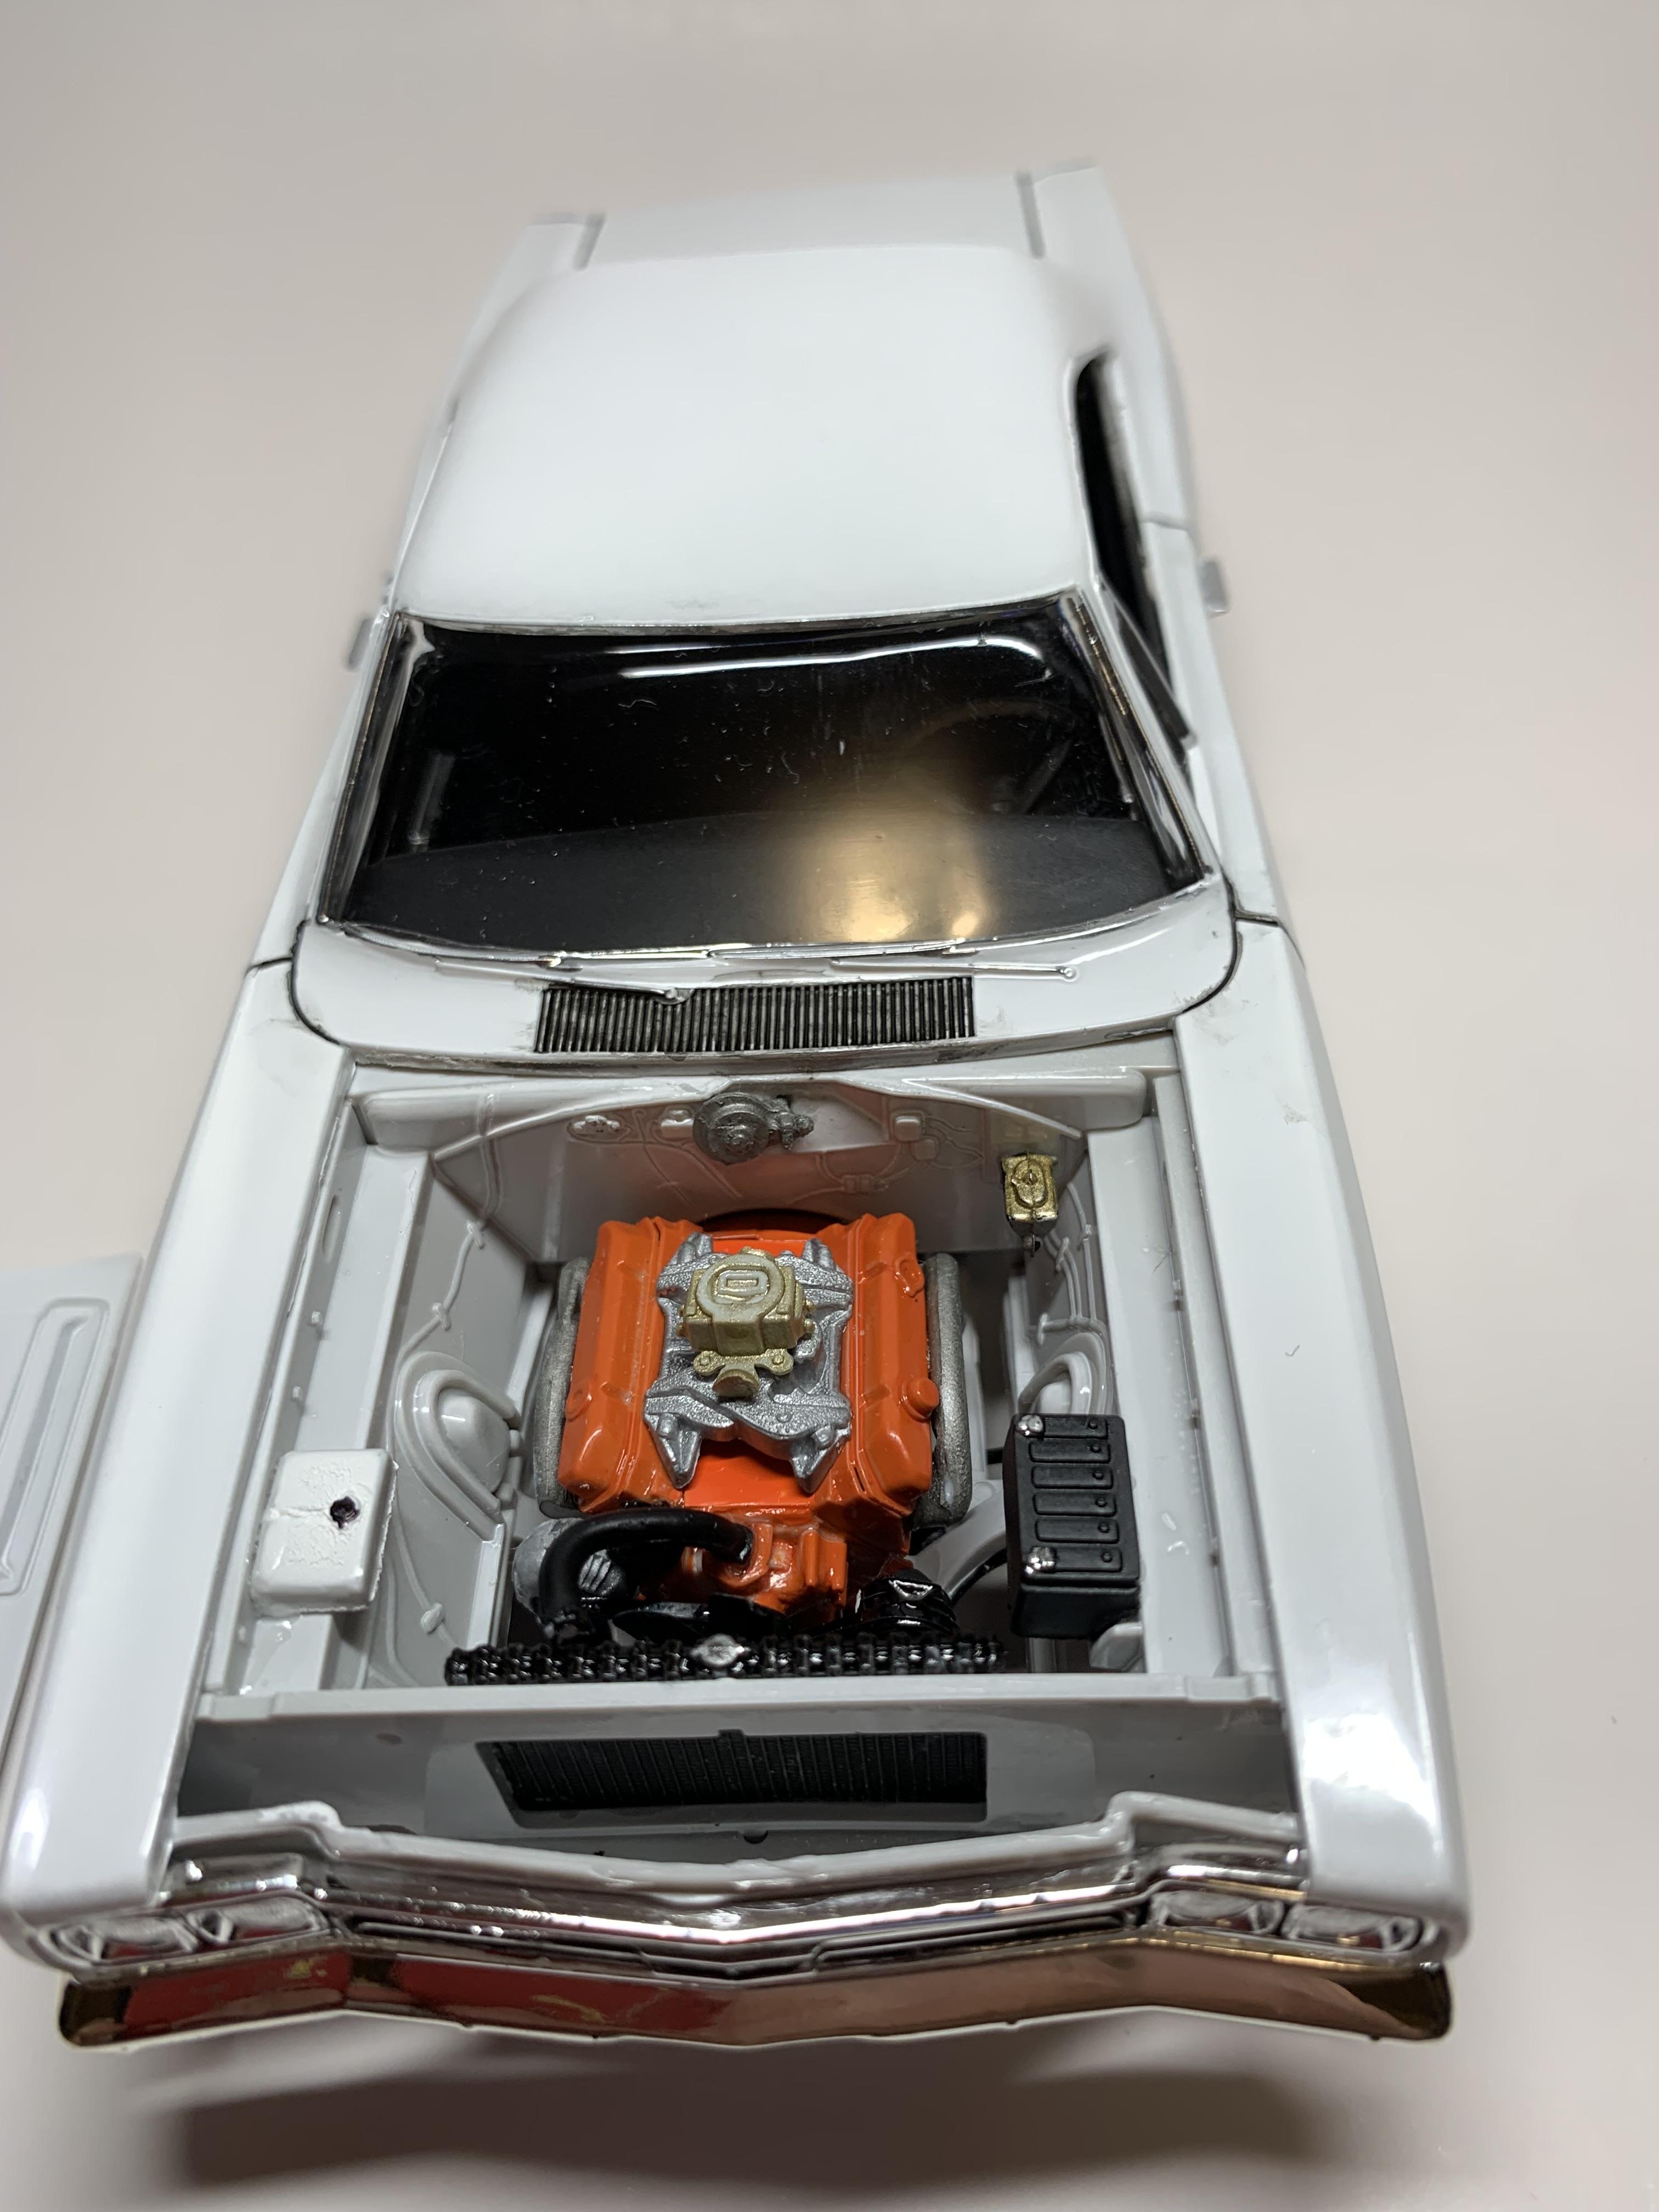
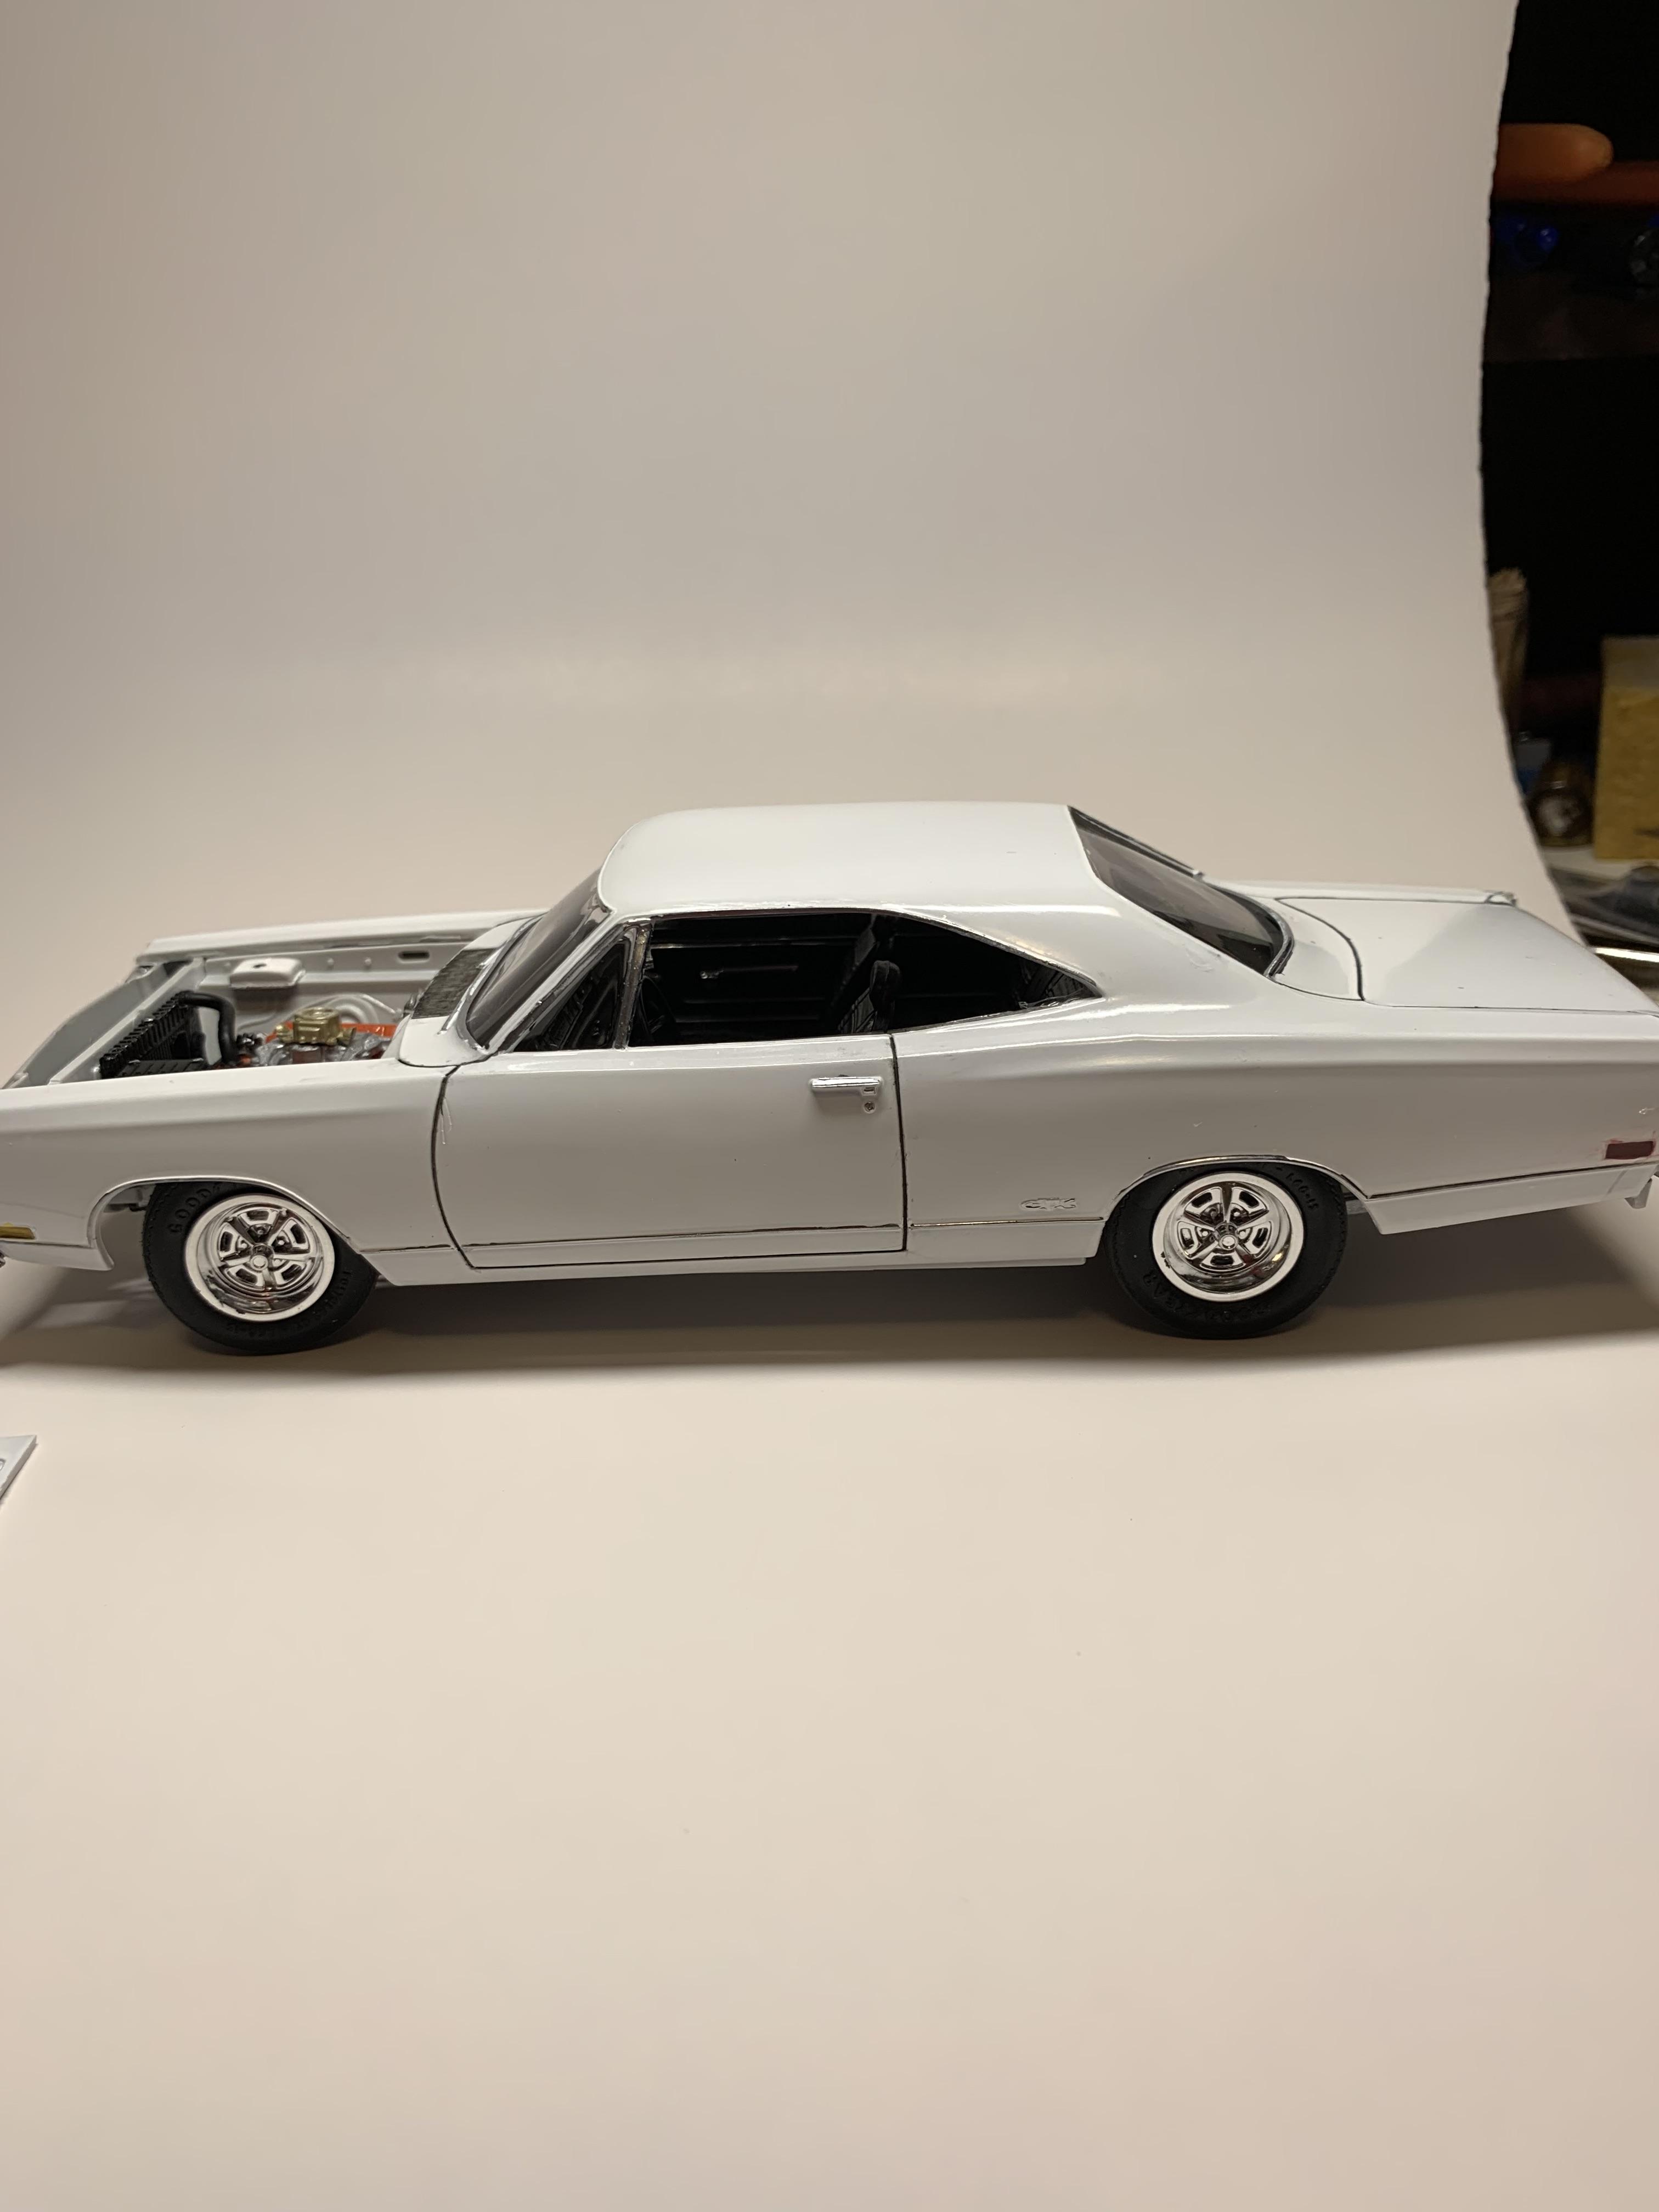
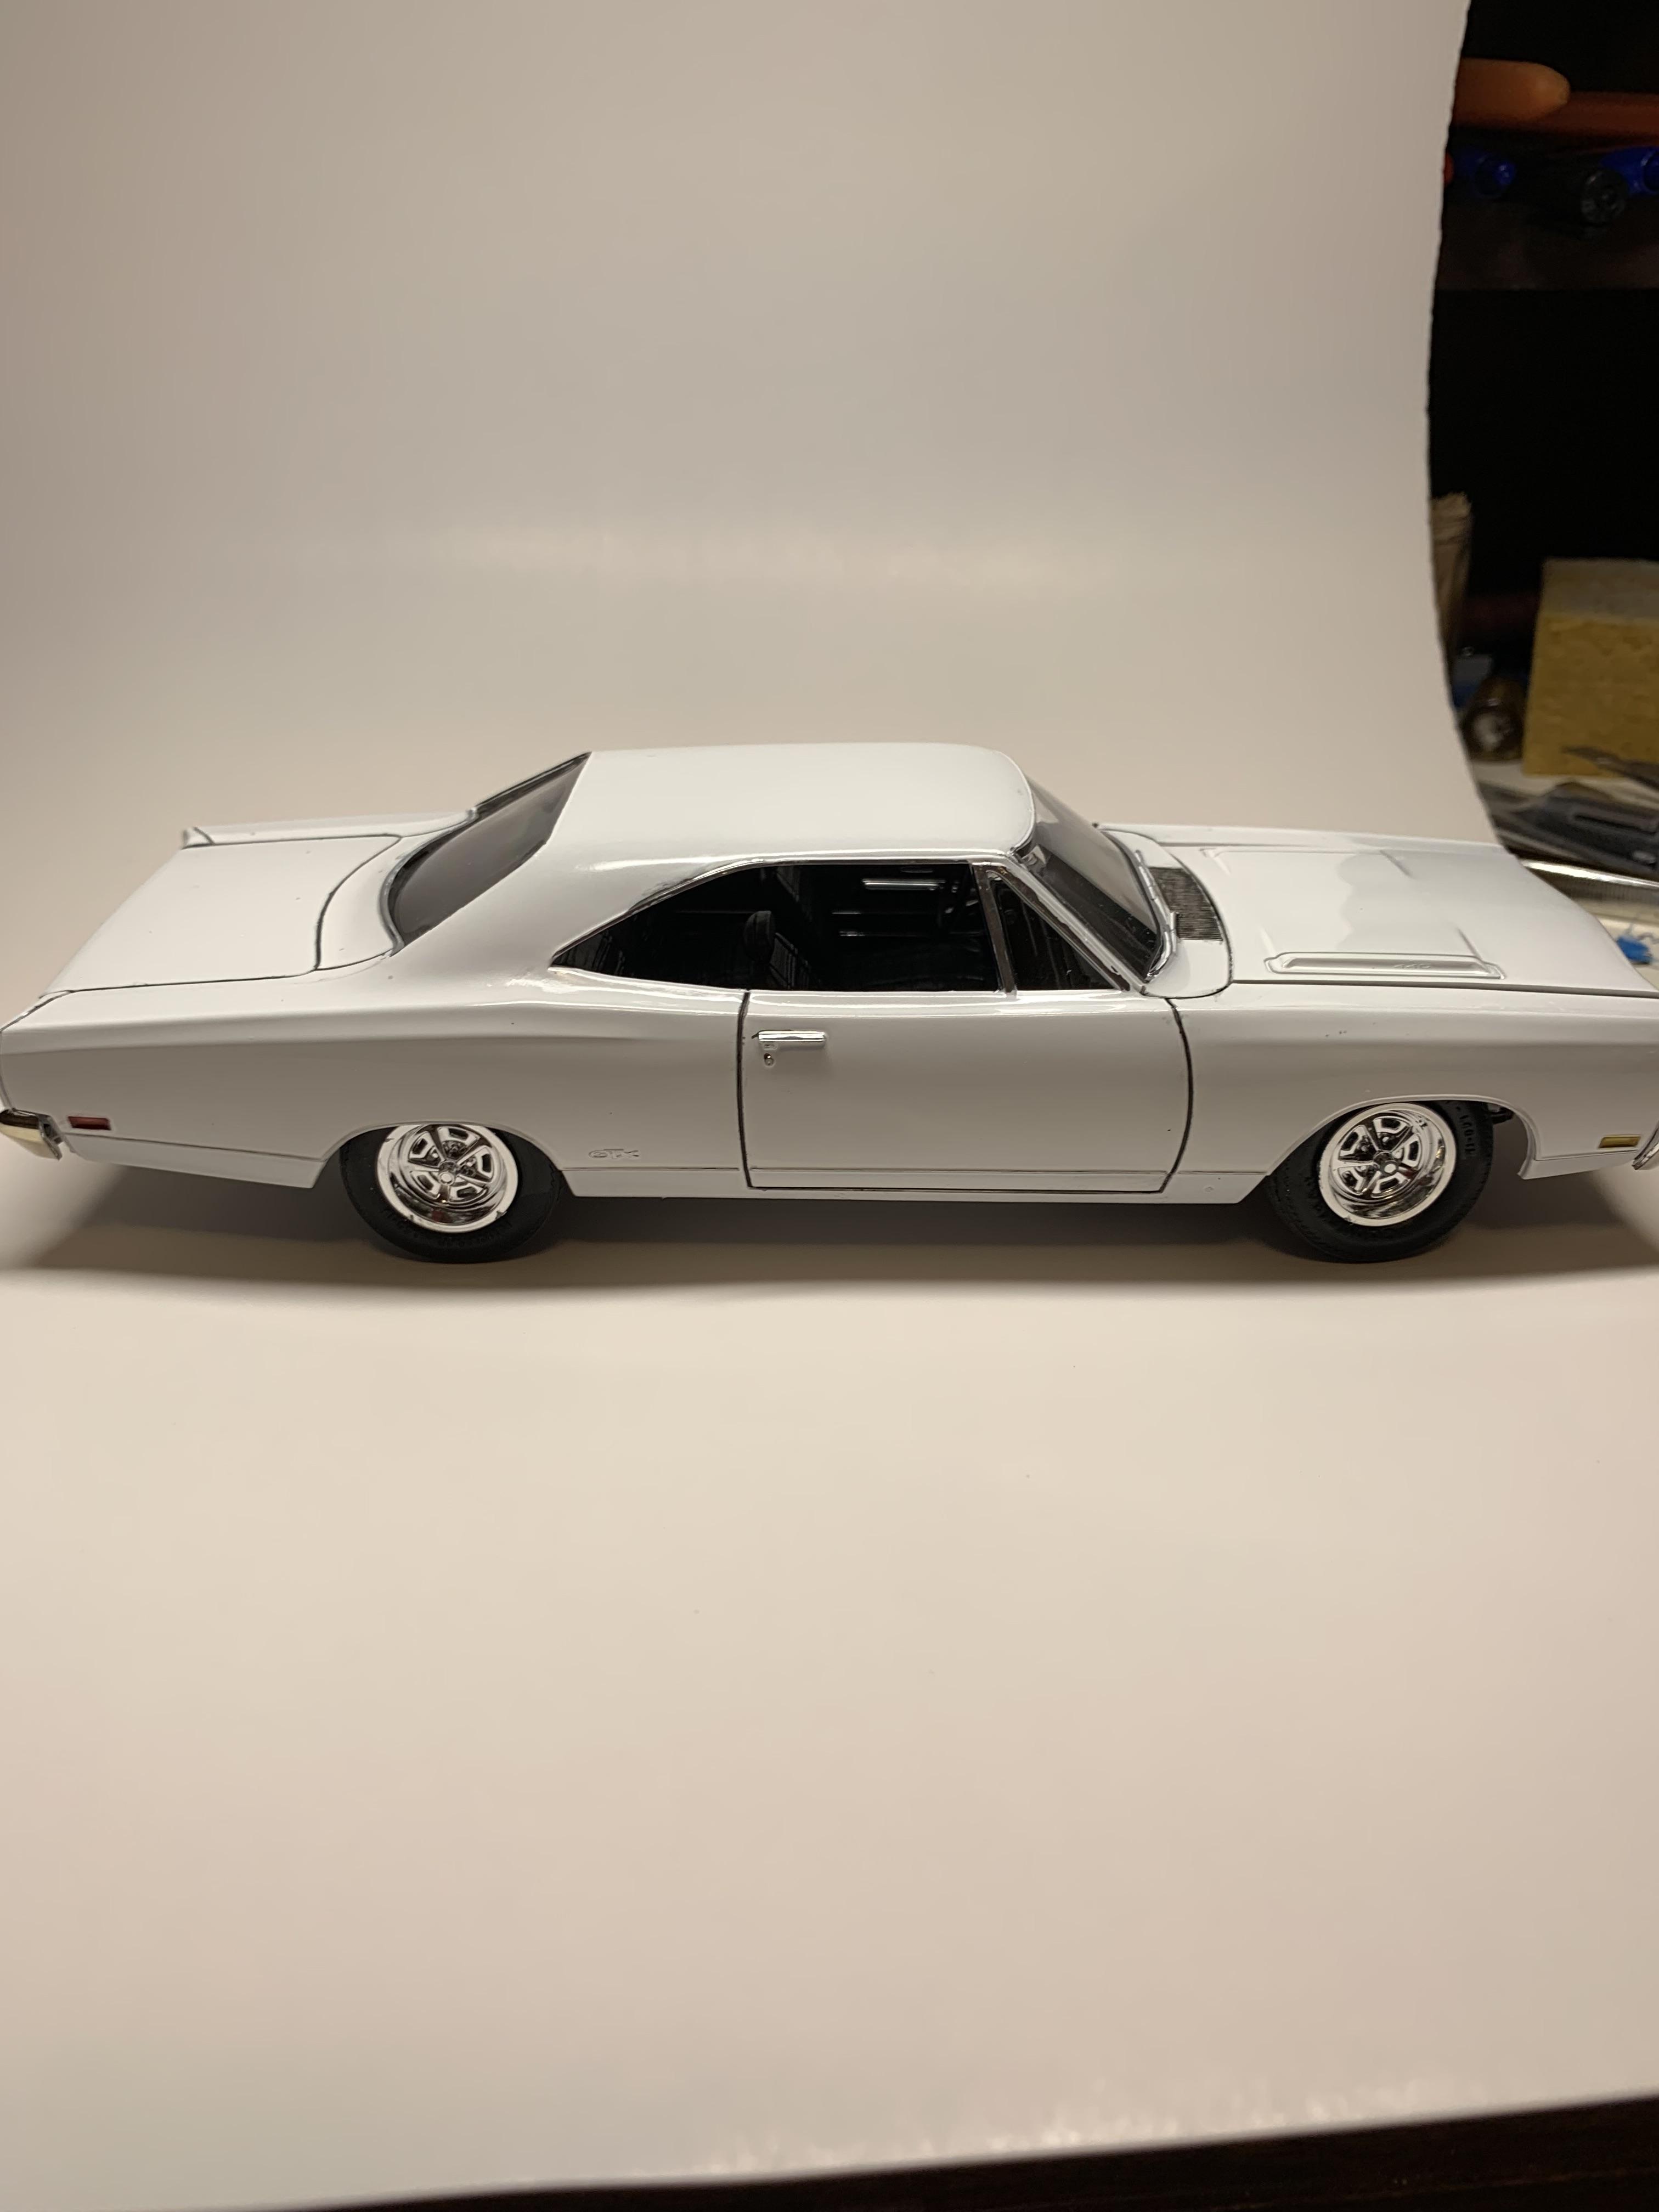
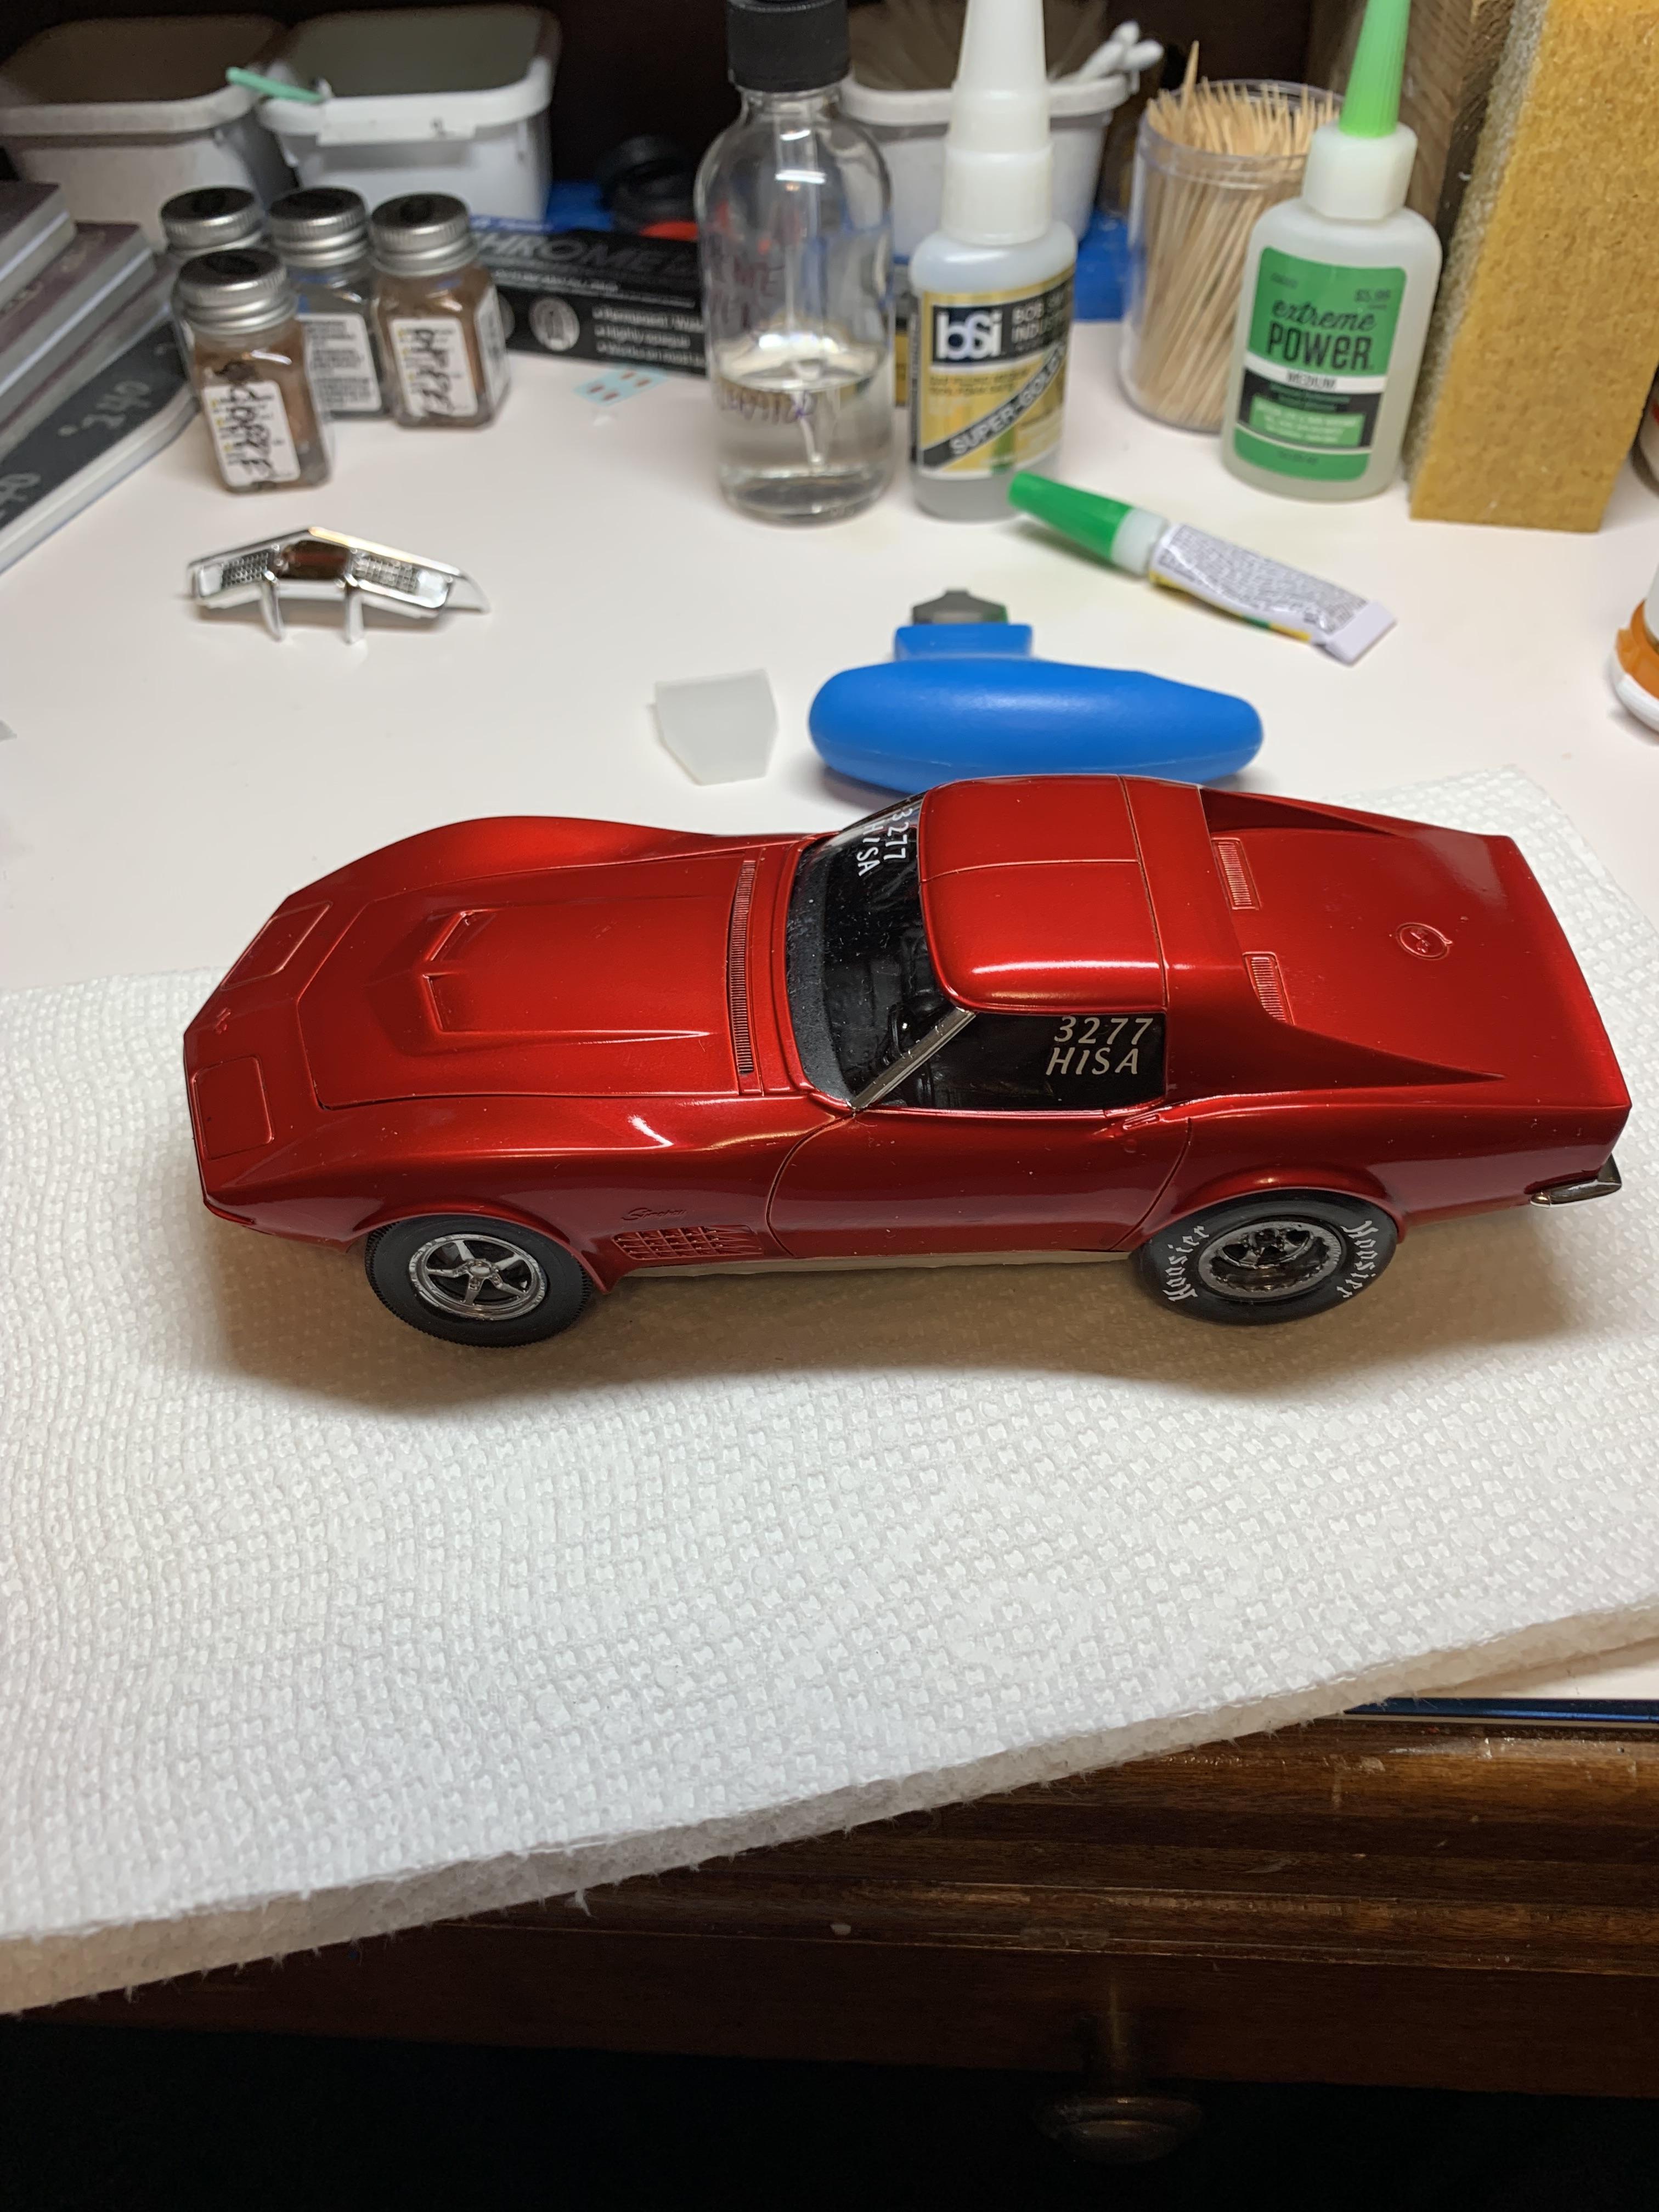
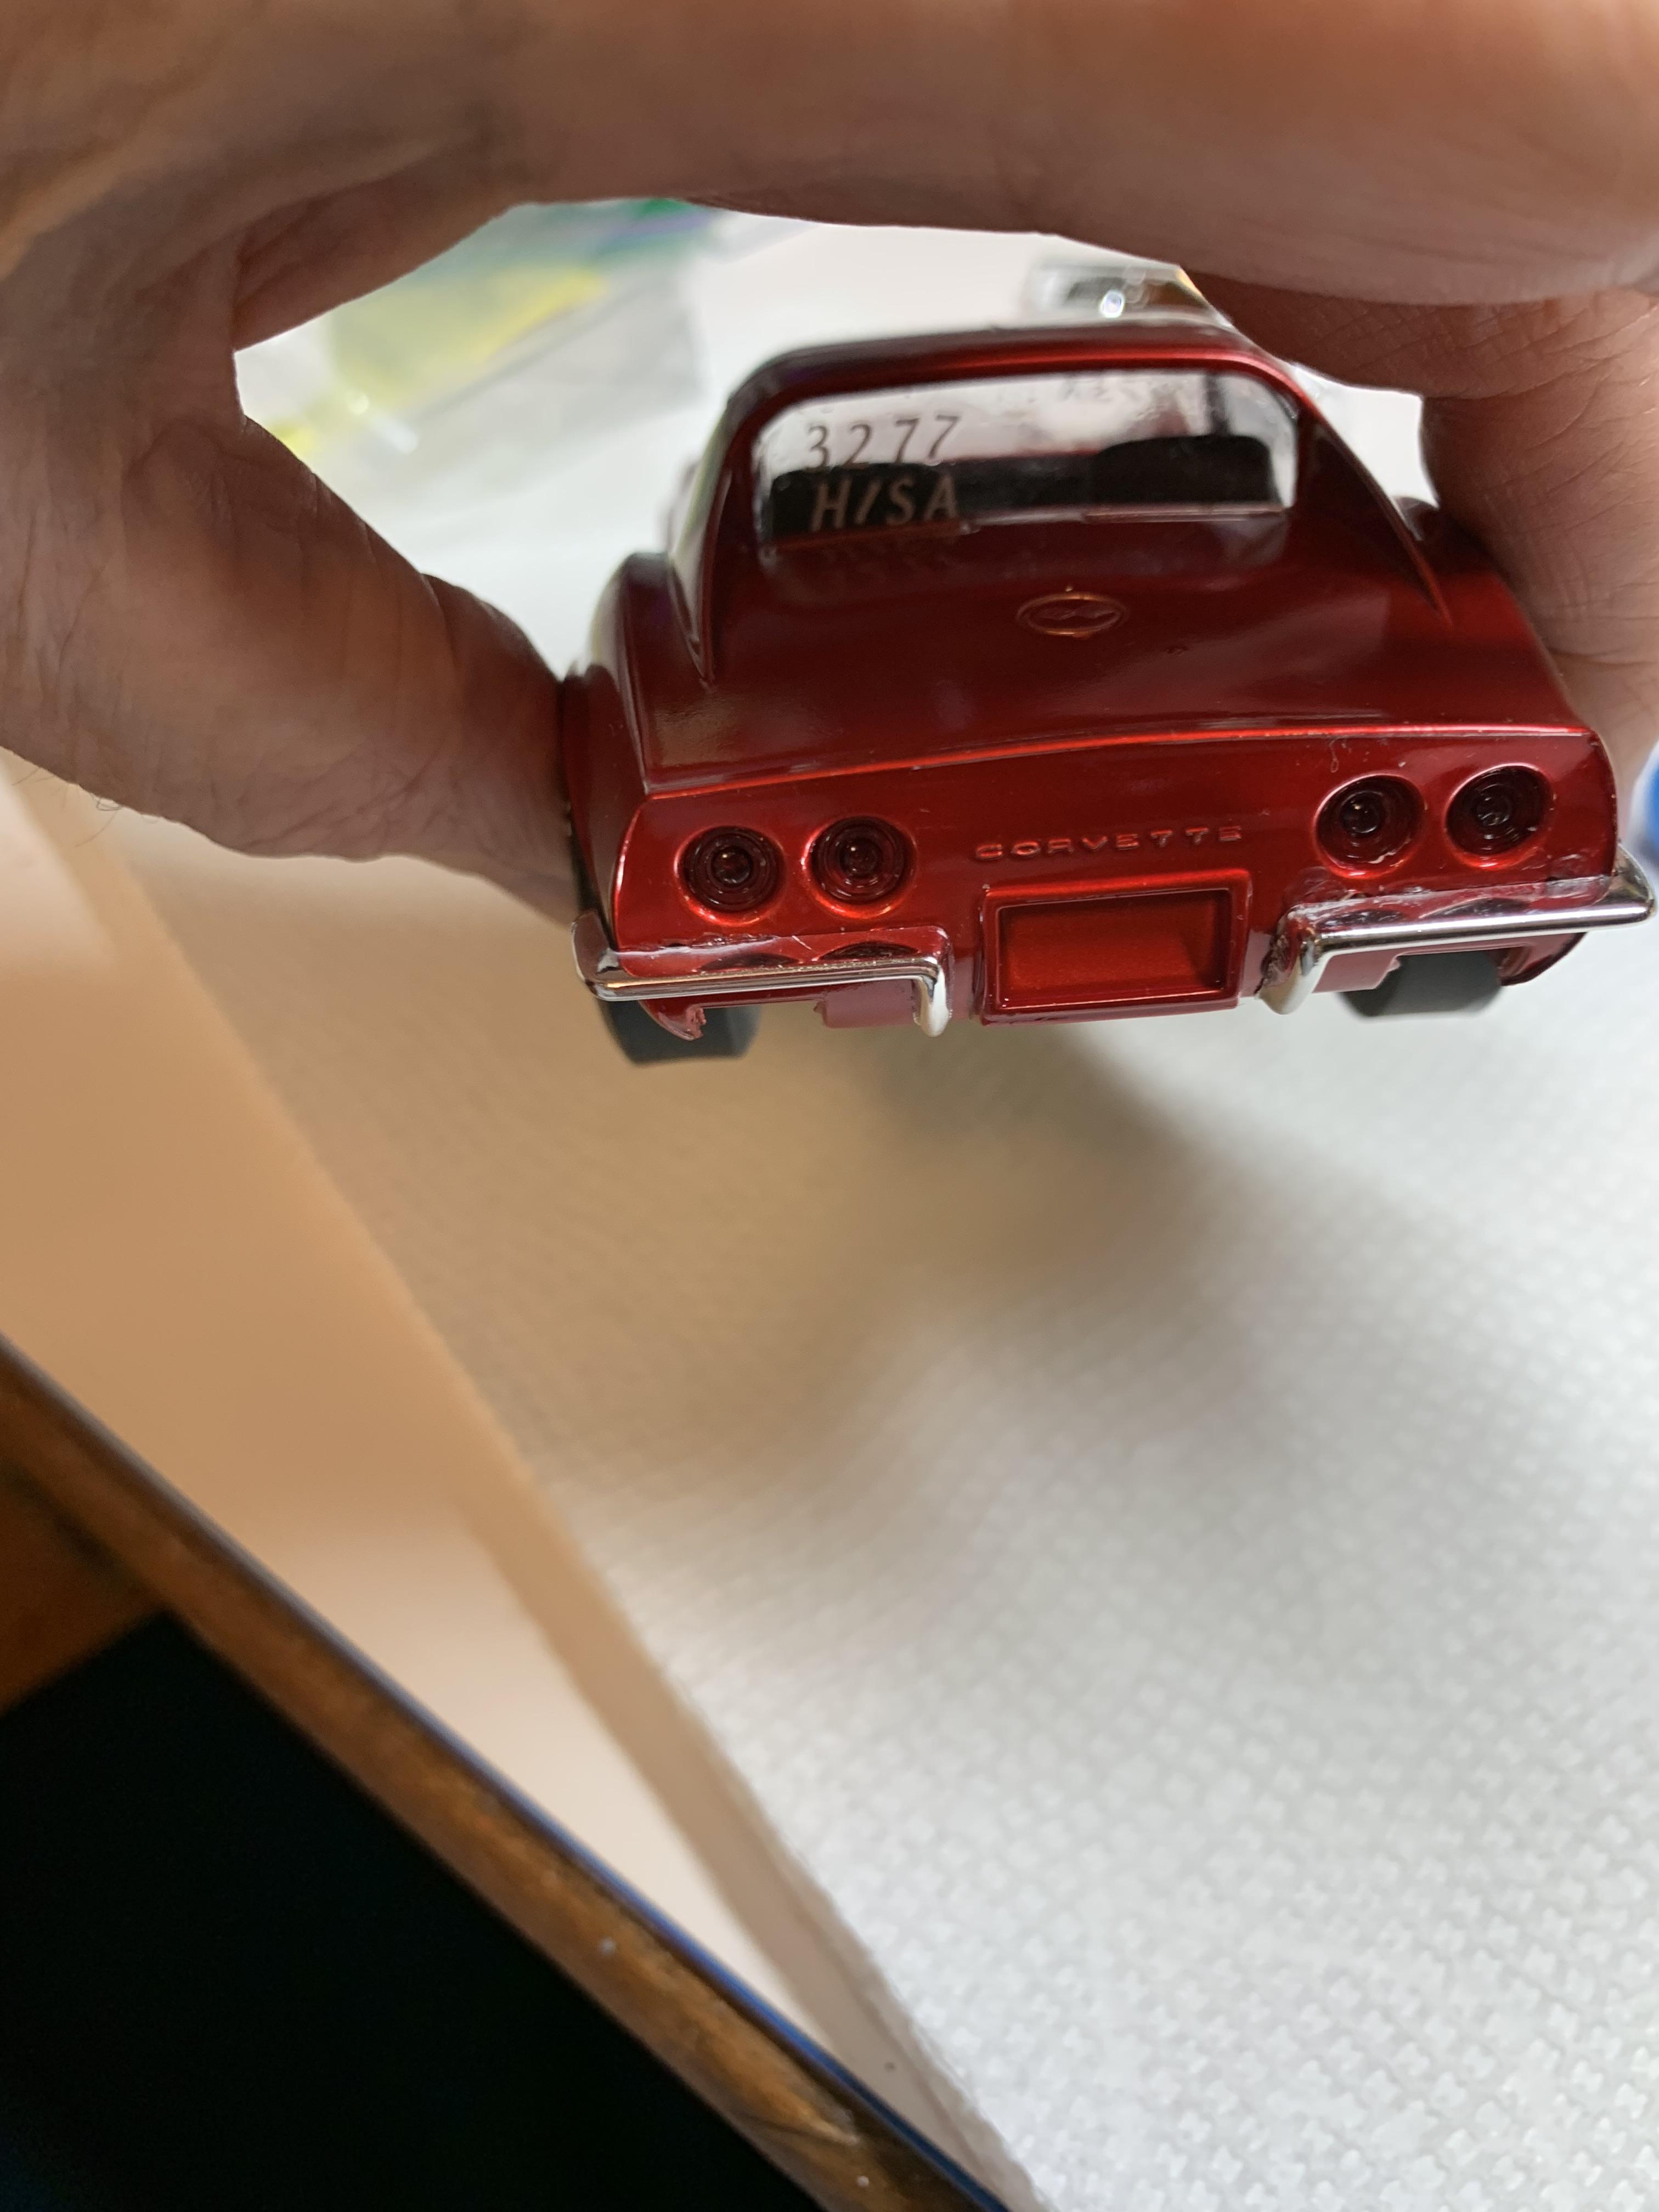
I had painted the car with some Testors gloss enamel thinned with lacquer thinner in my new paasche gun. I believe this was the first paint job with an air brush and it turned out “ Ho hum” okay, but I was dissatisfied with it. I built the engine (283 type) with a tunnel ram and 2 fours. I case you are interested, here’s a copy of the rules for Modified Production classes.
-
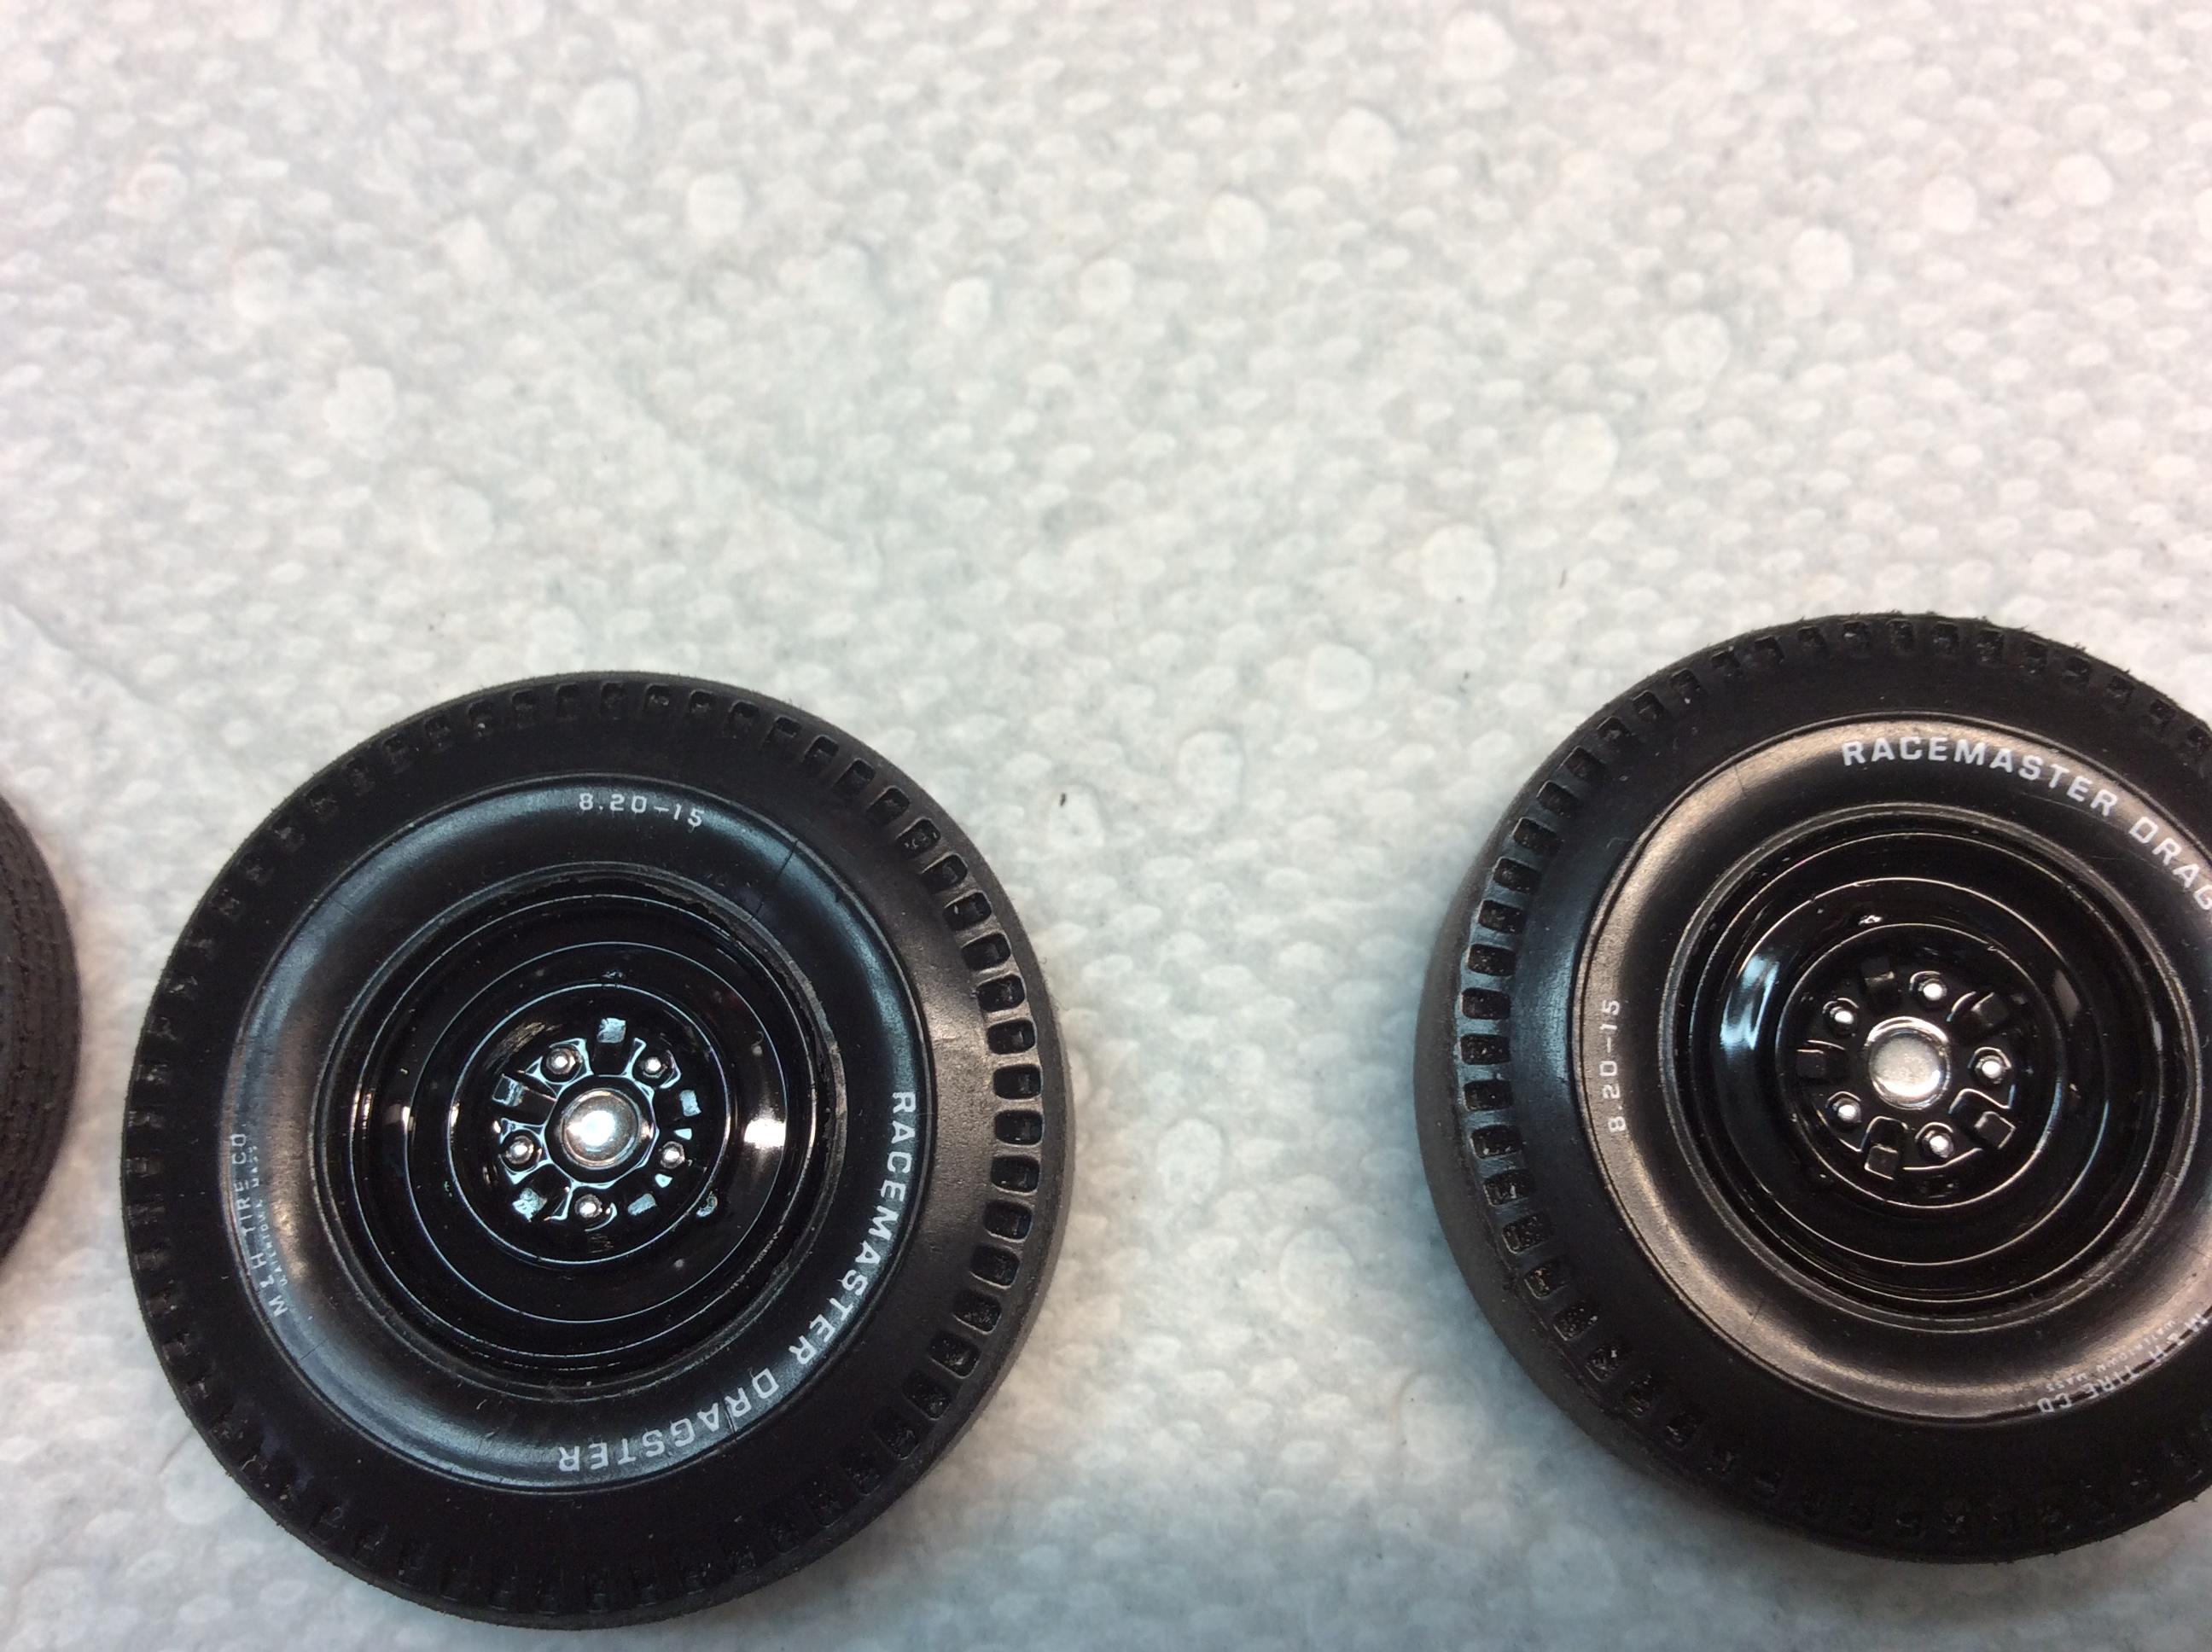
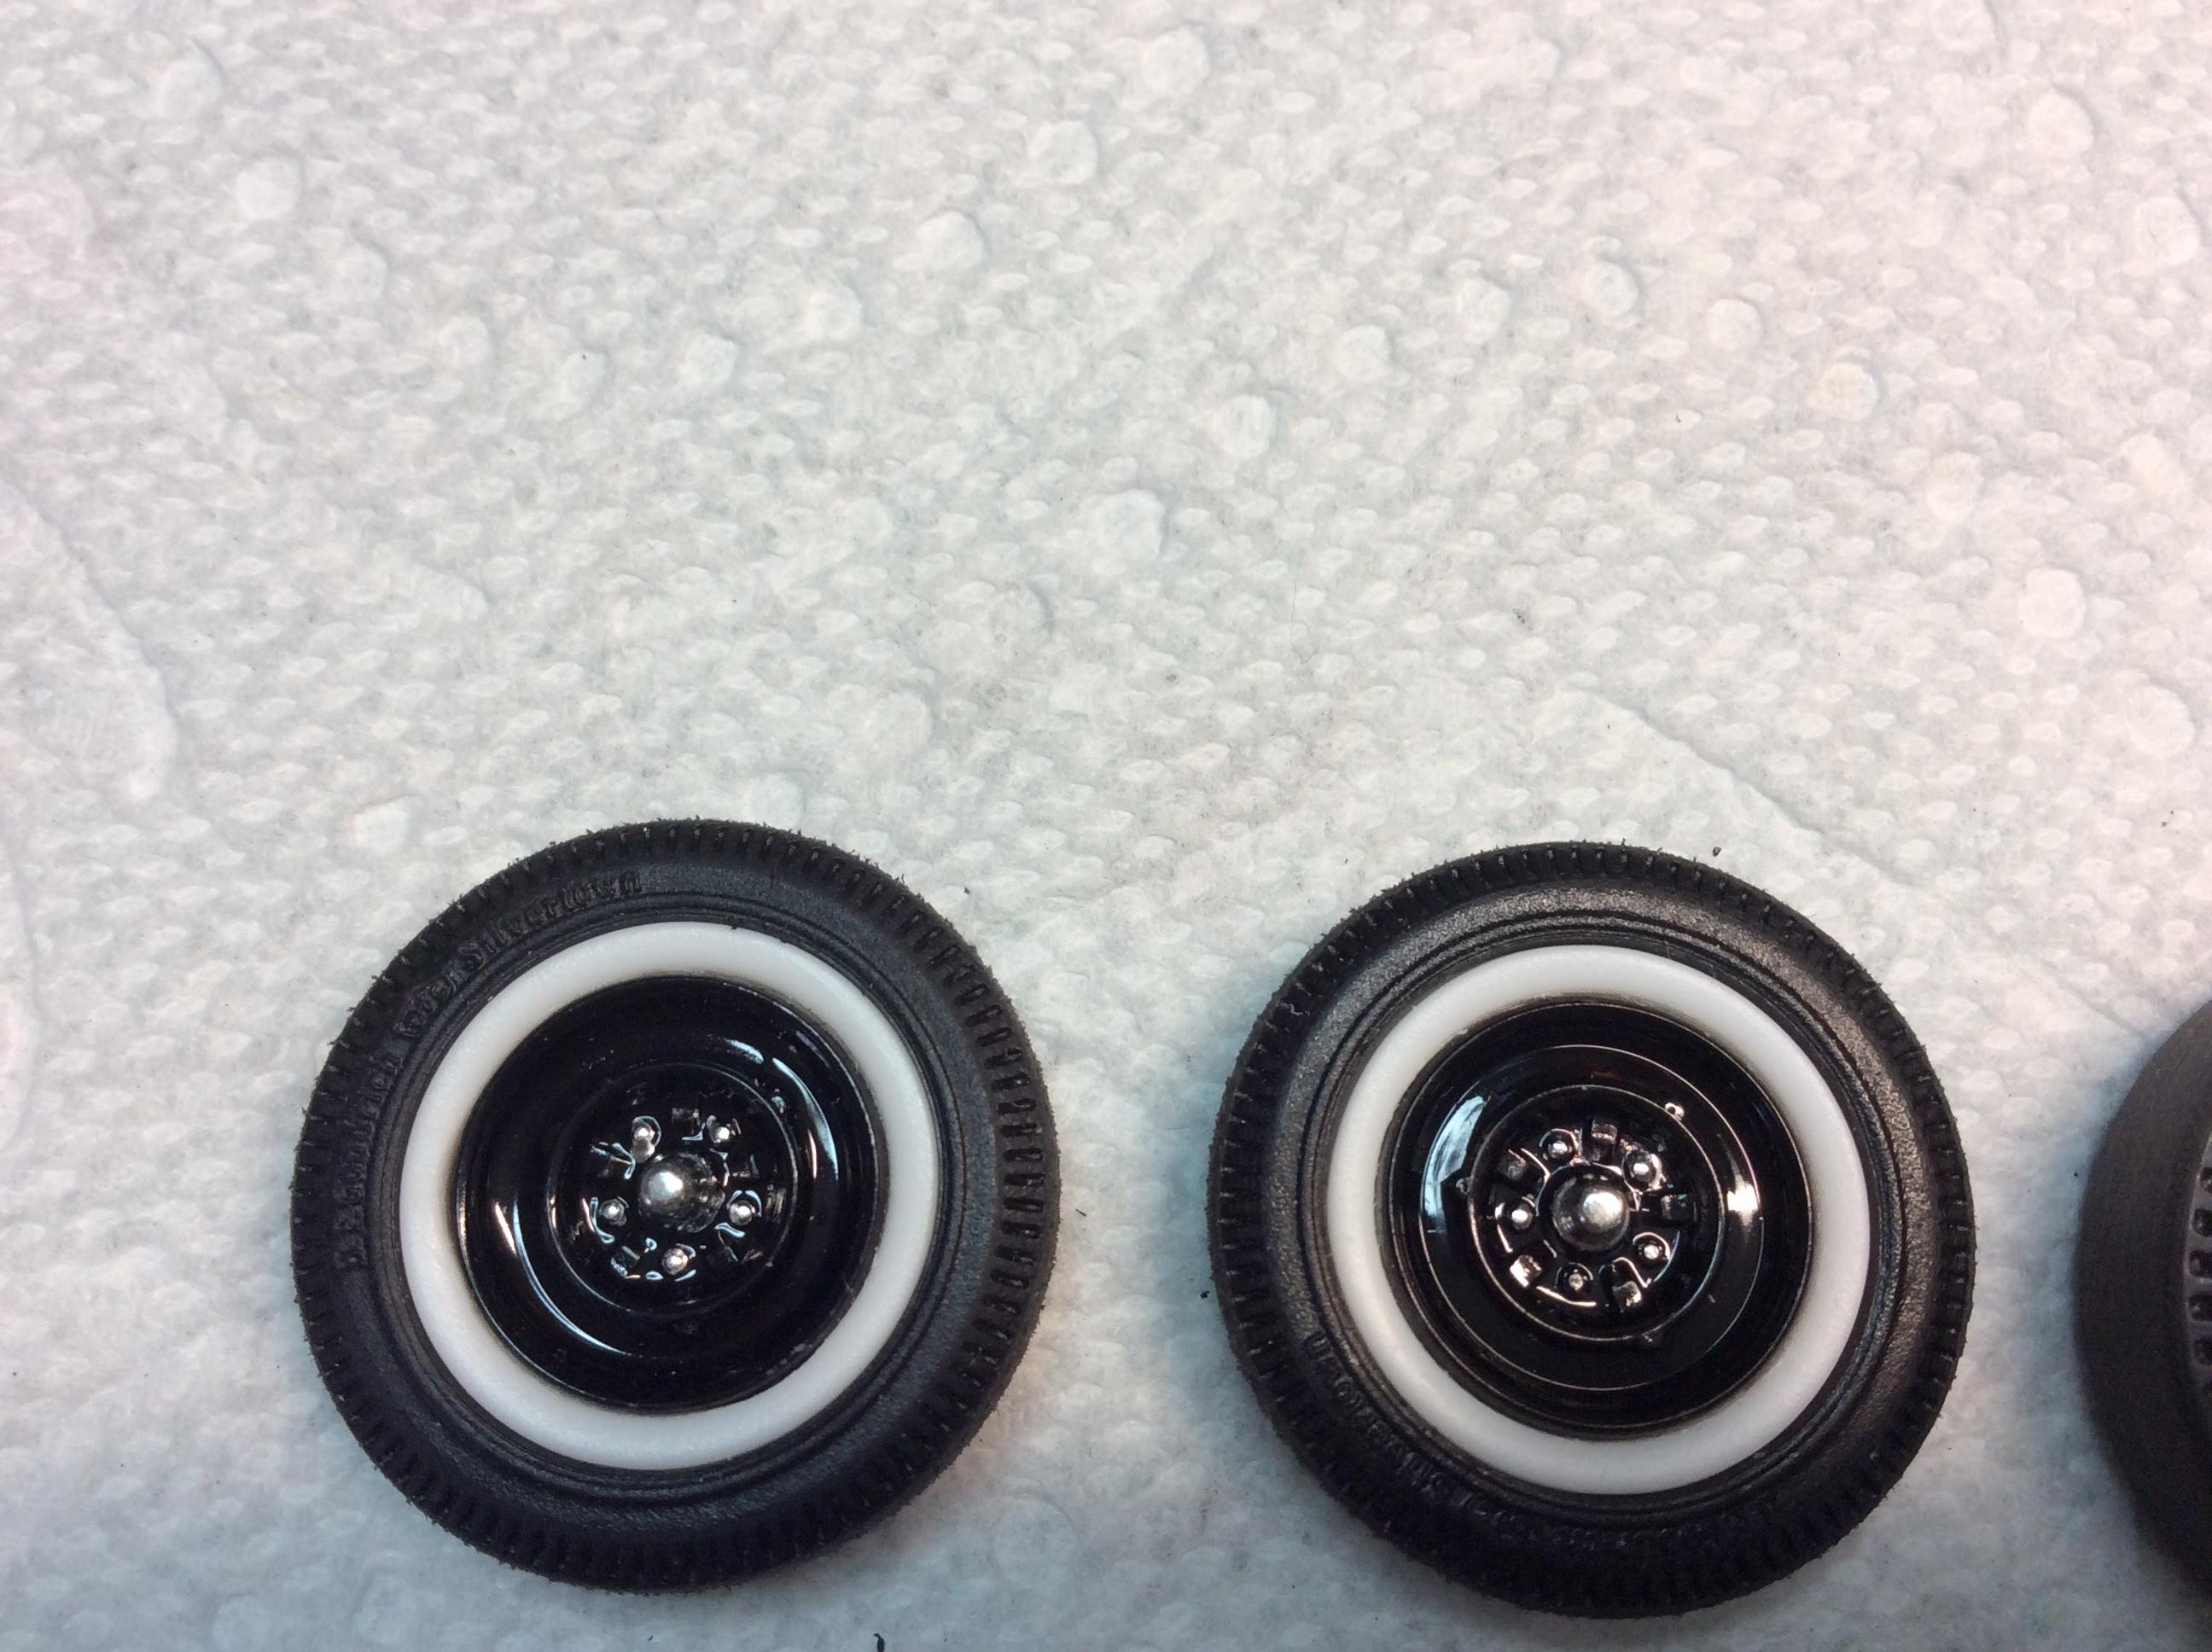
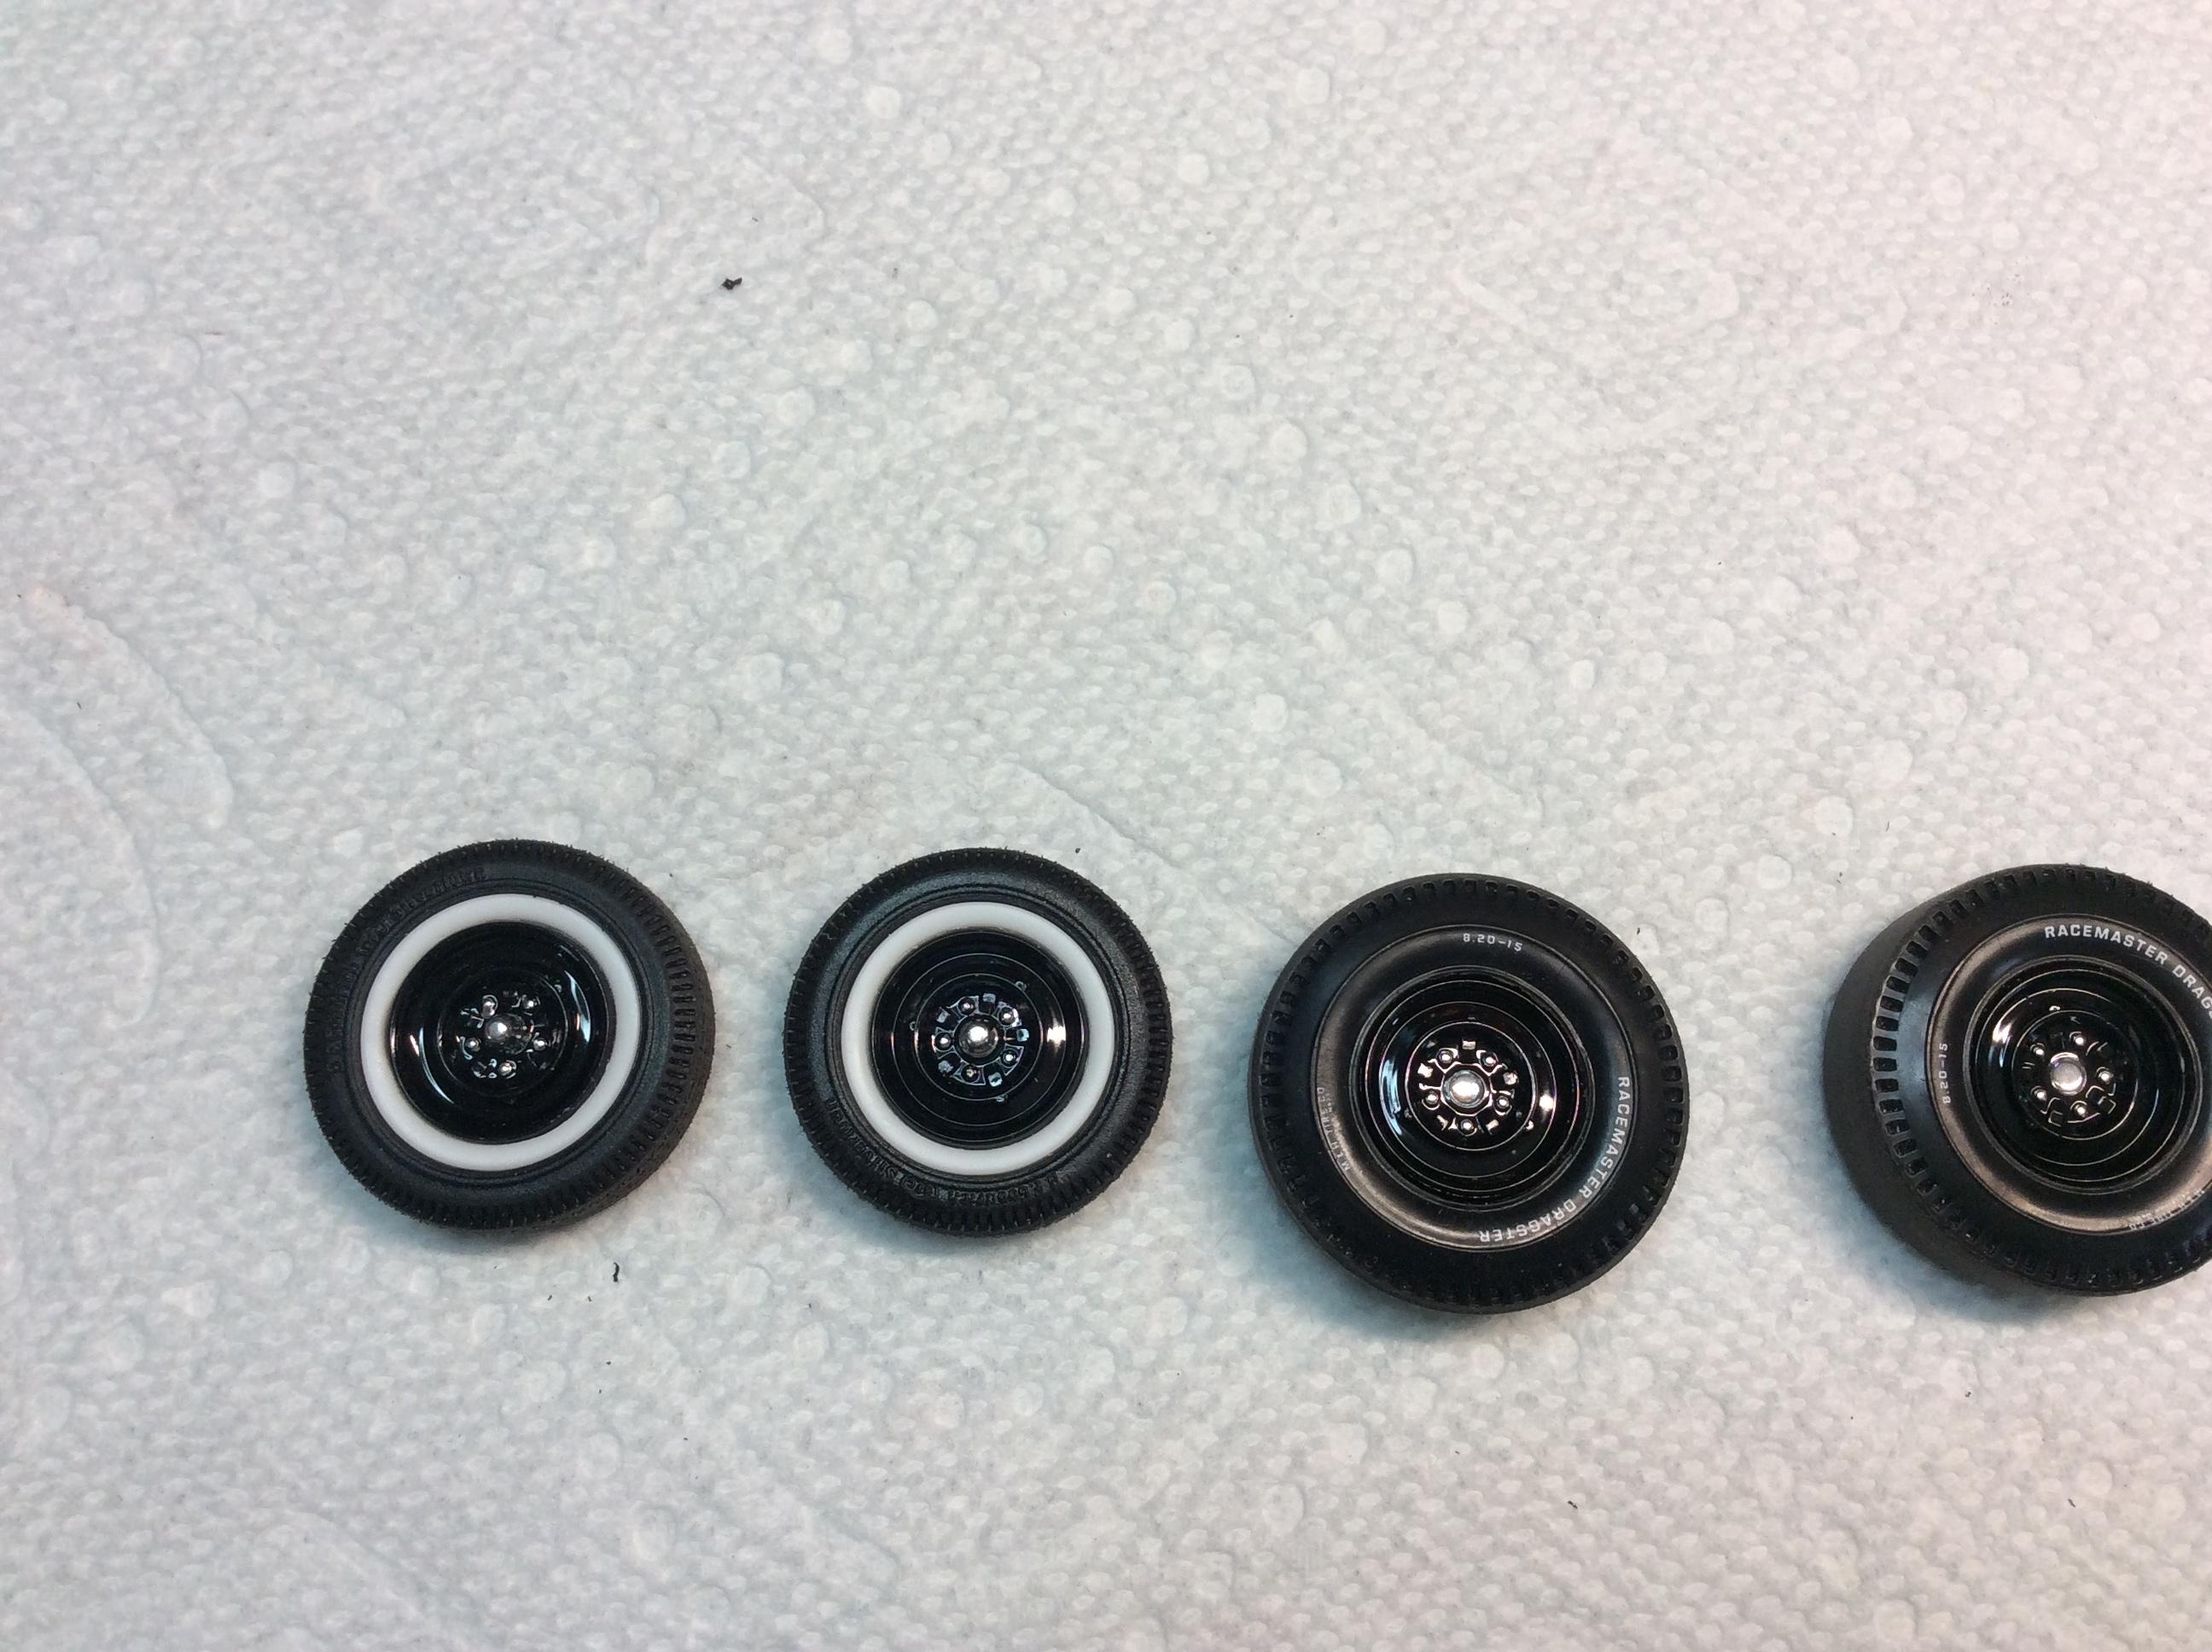
Looking for some wheels like this with 10 holes.
-
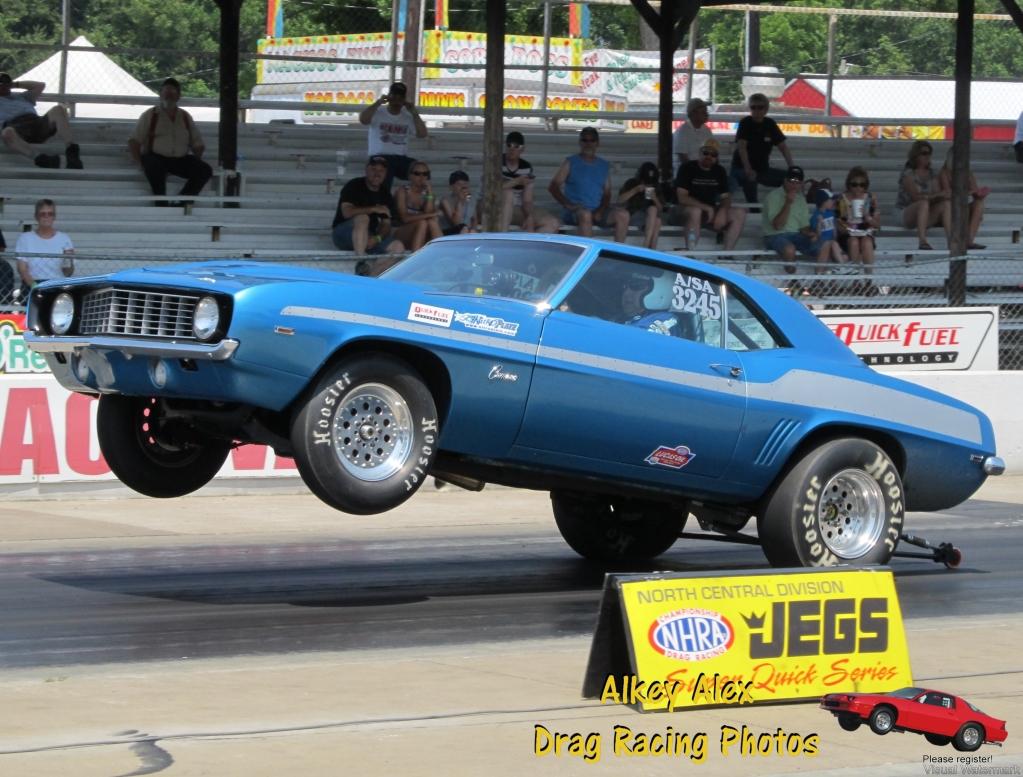
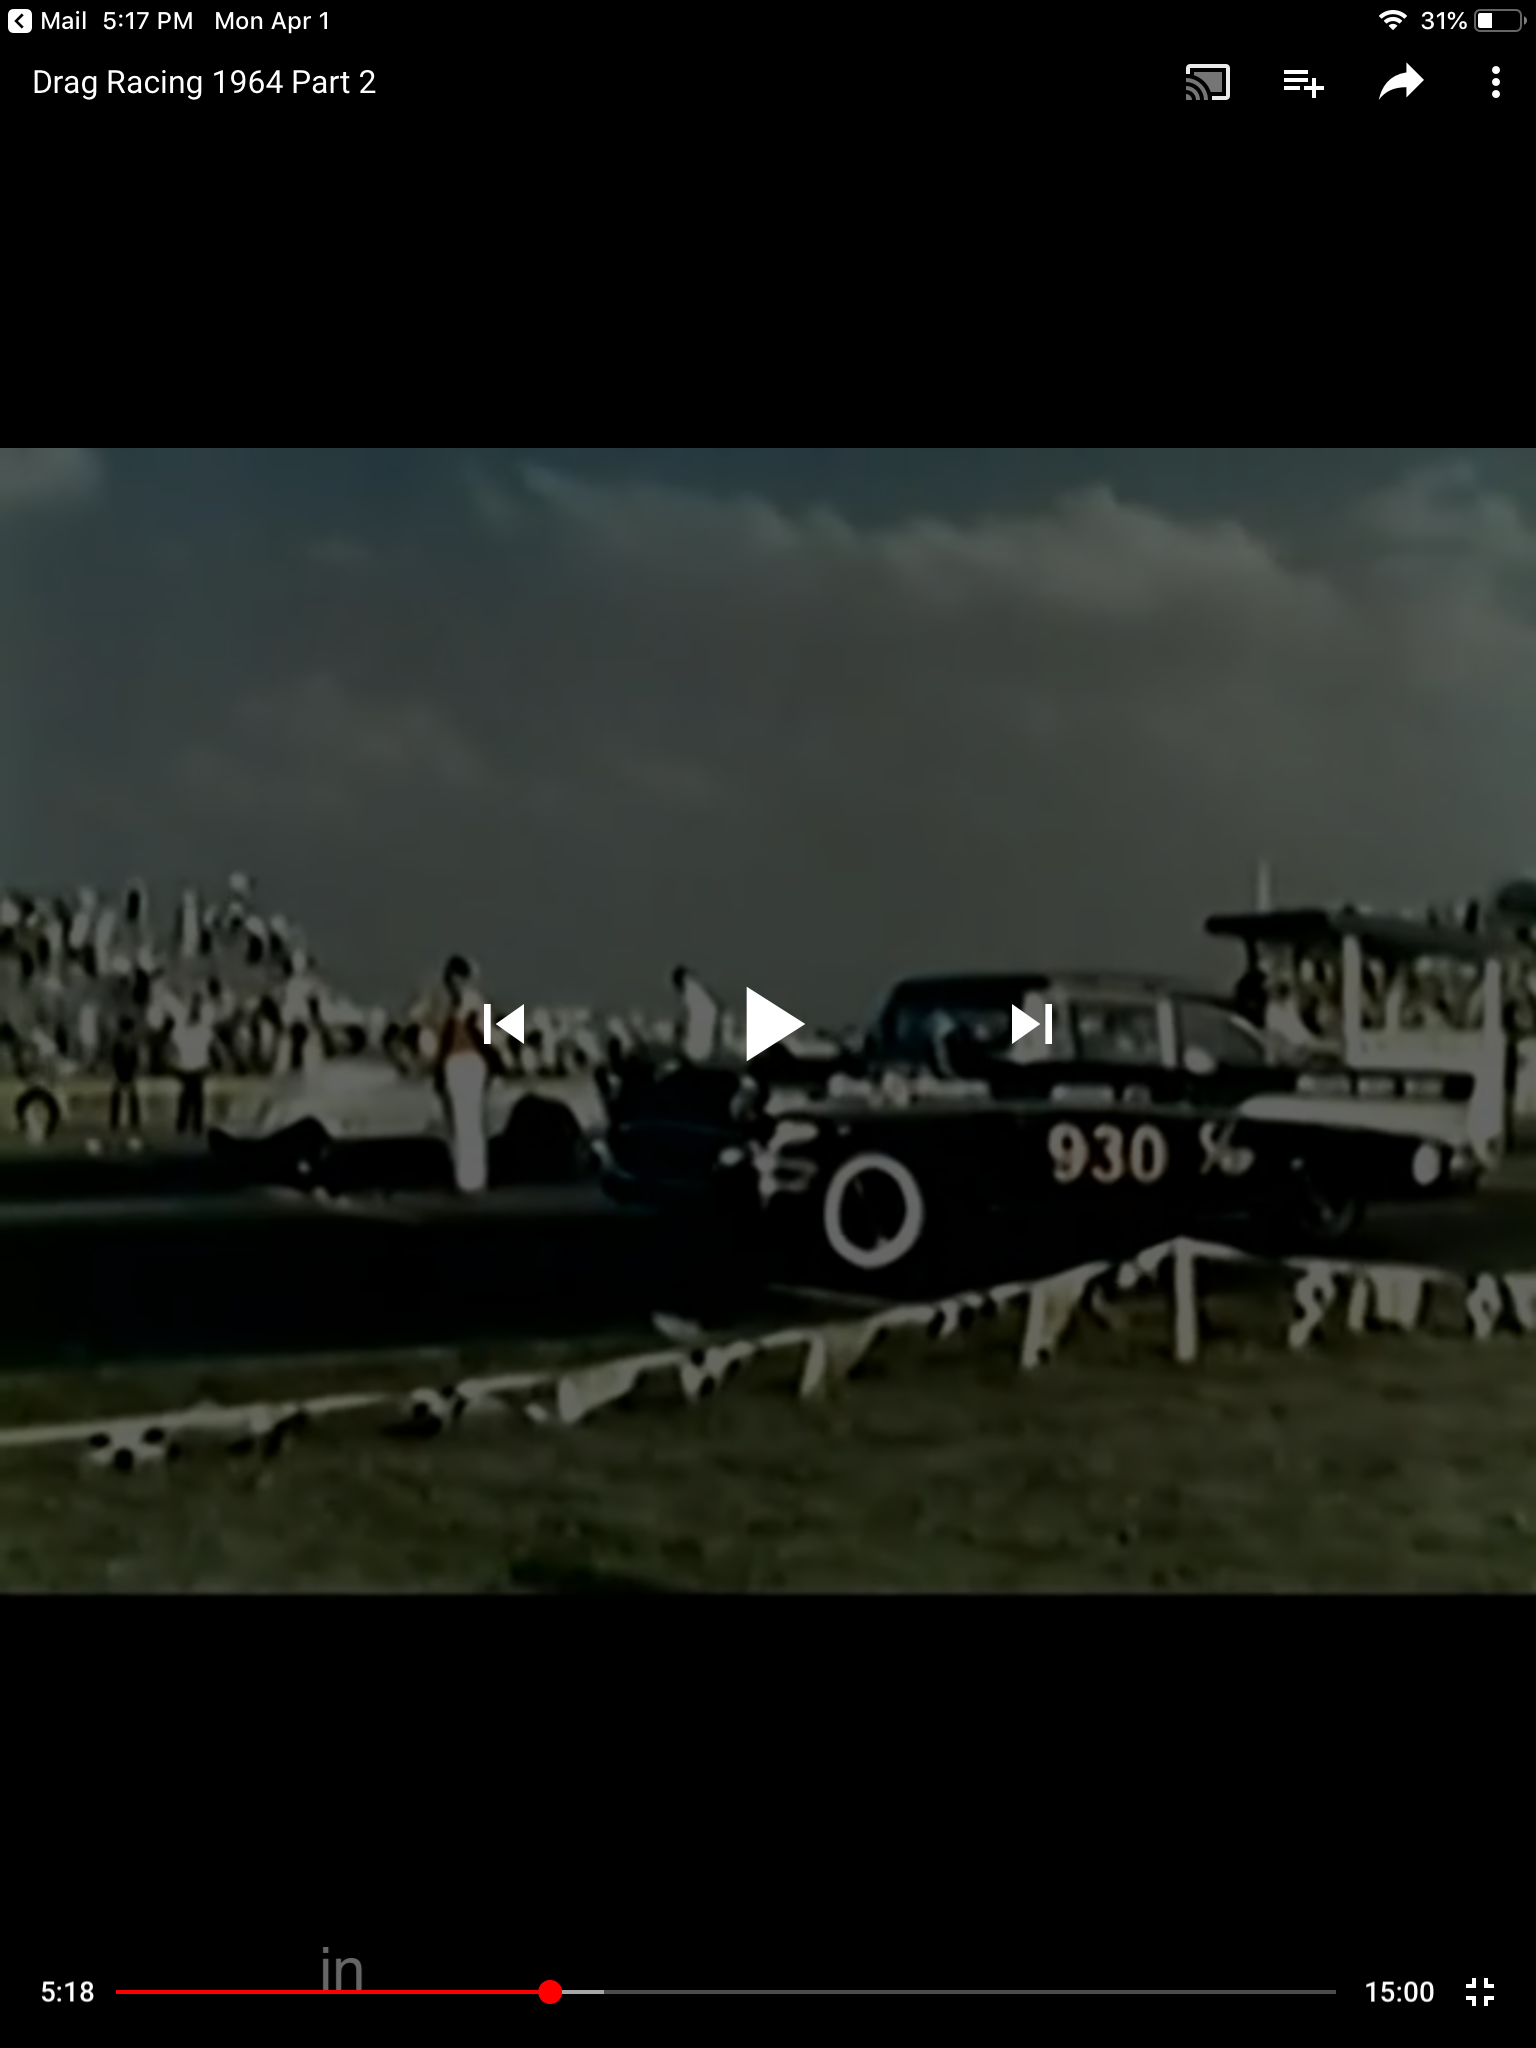
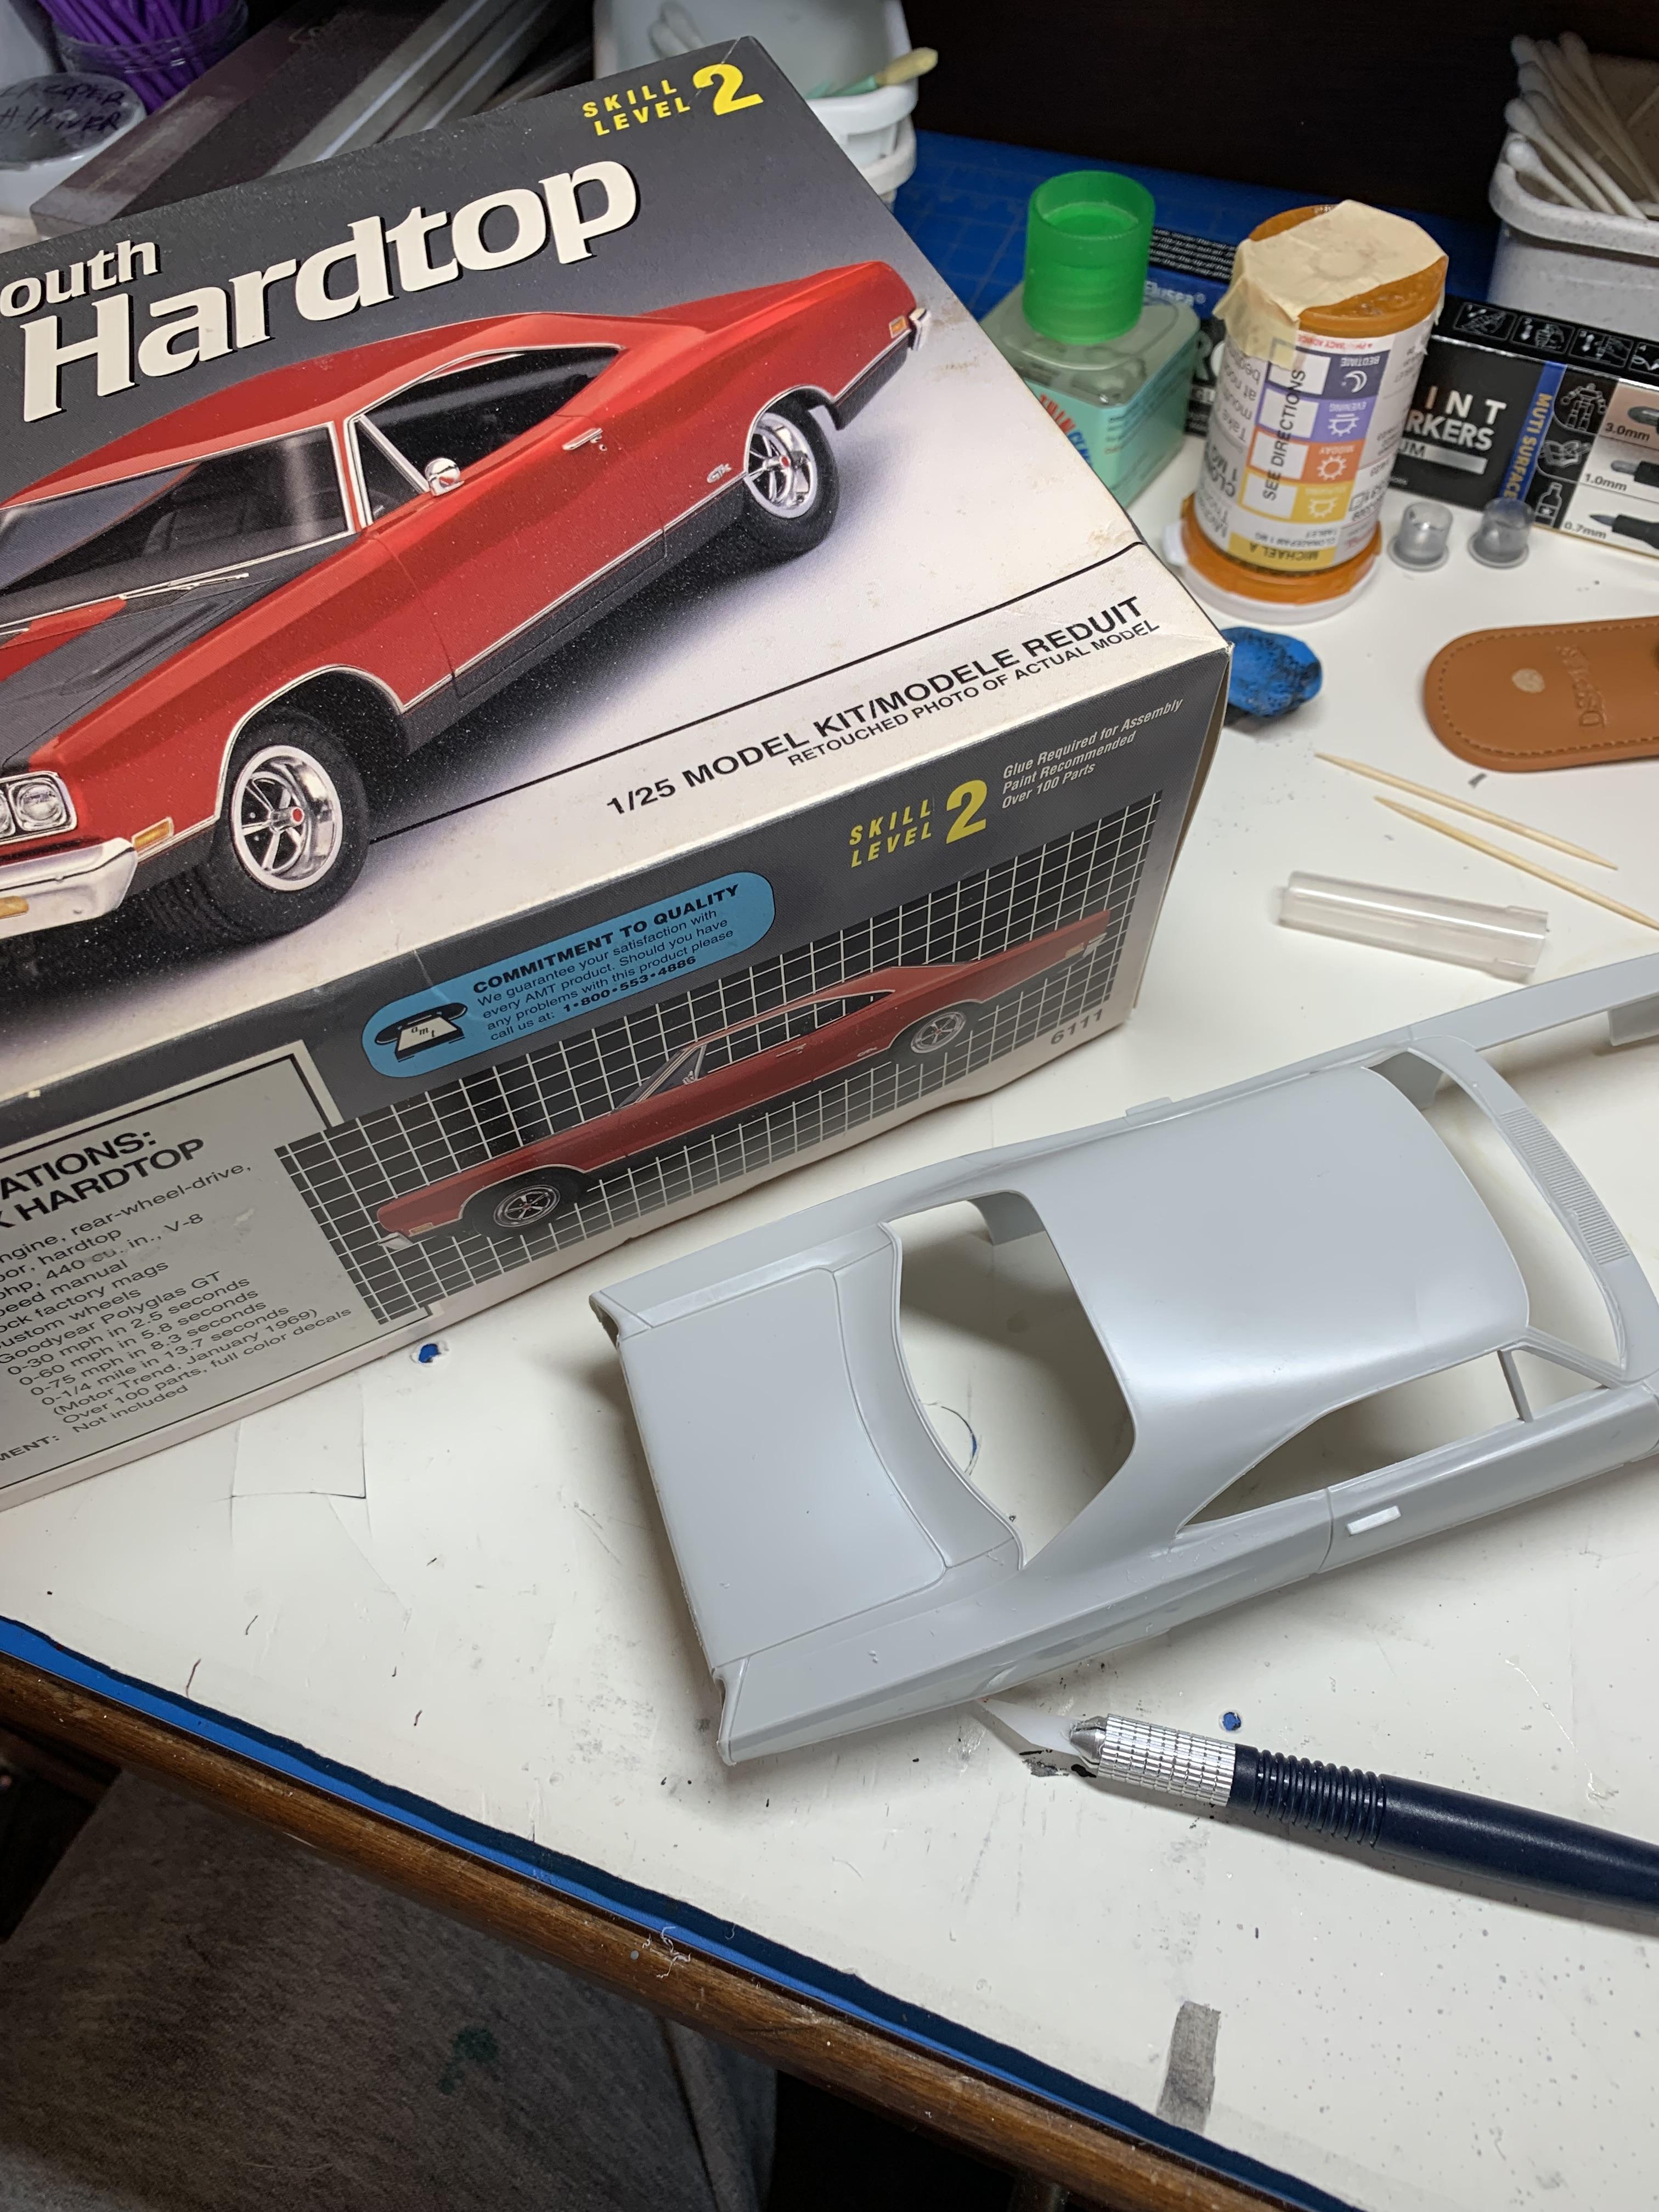
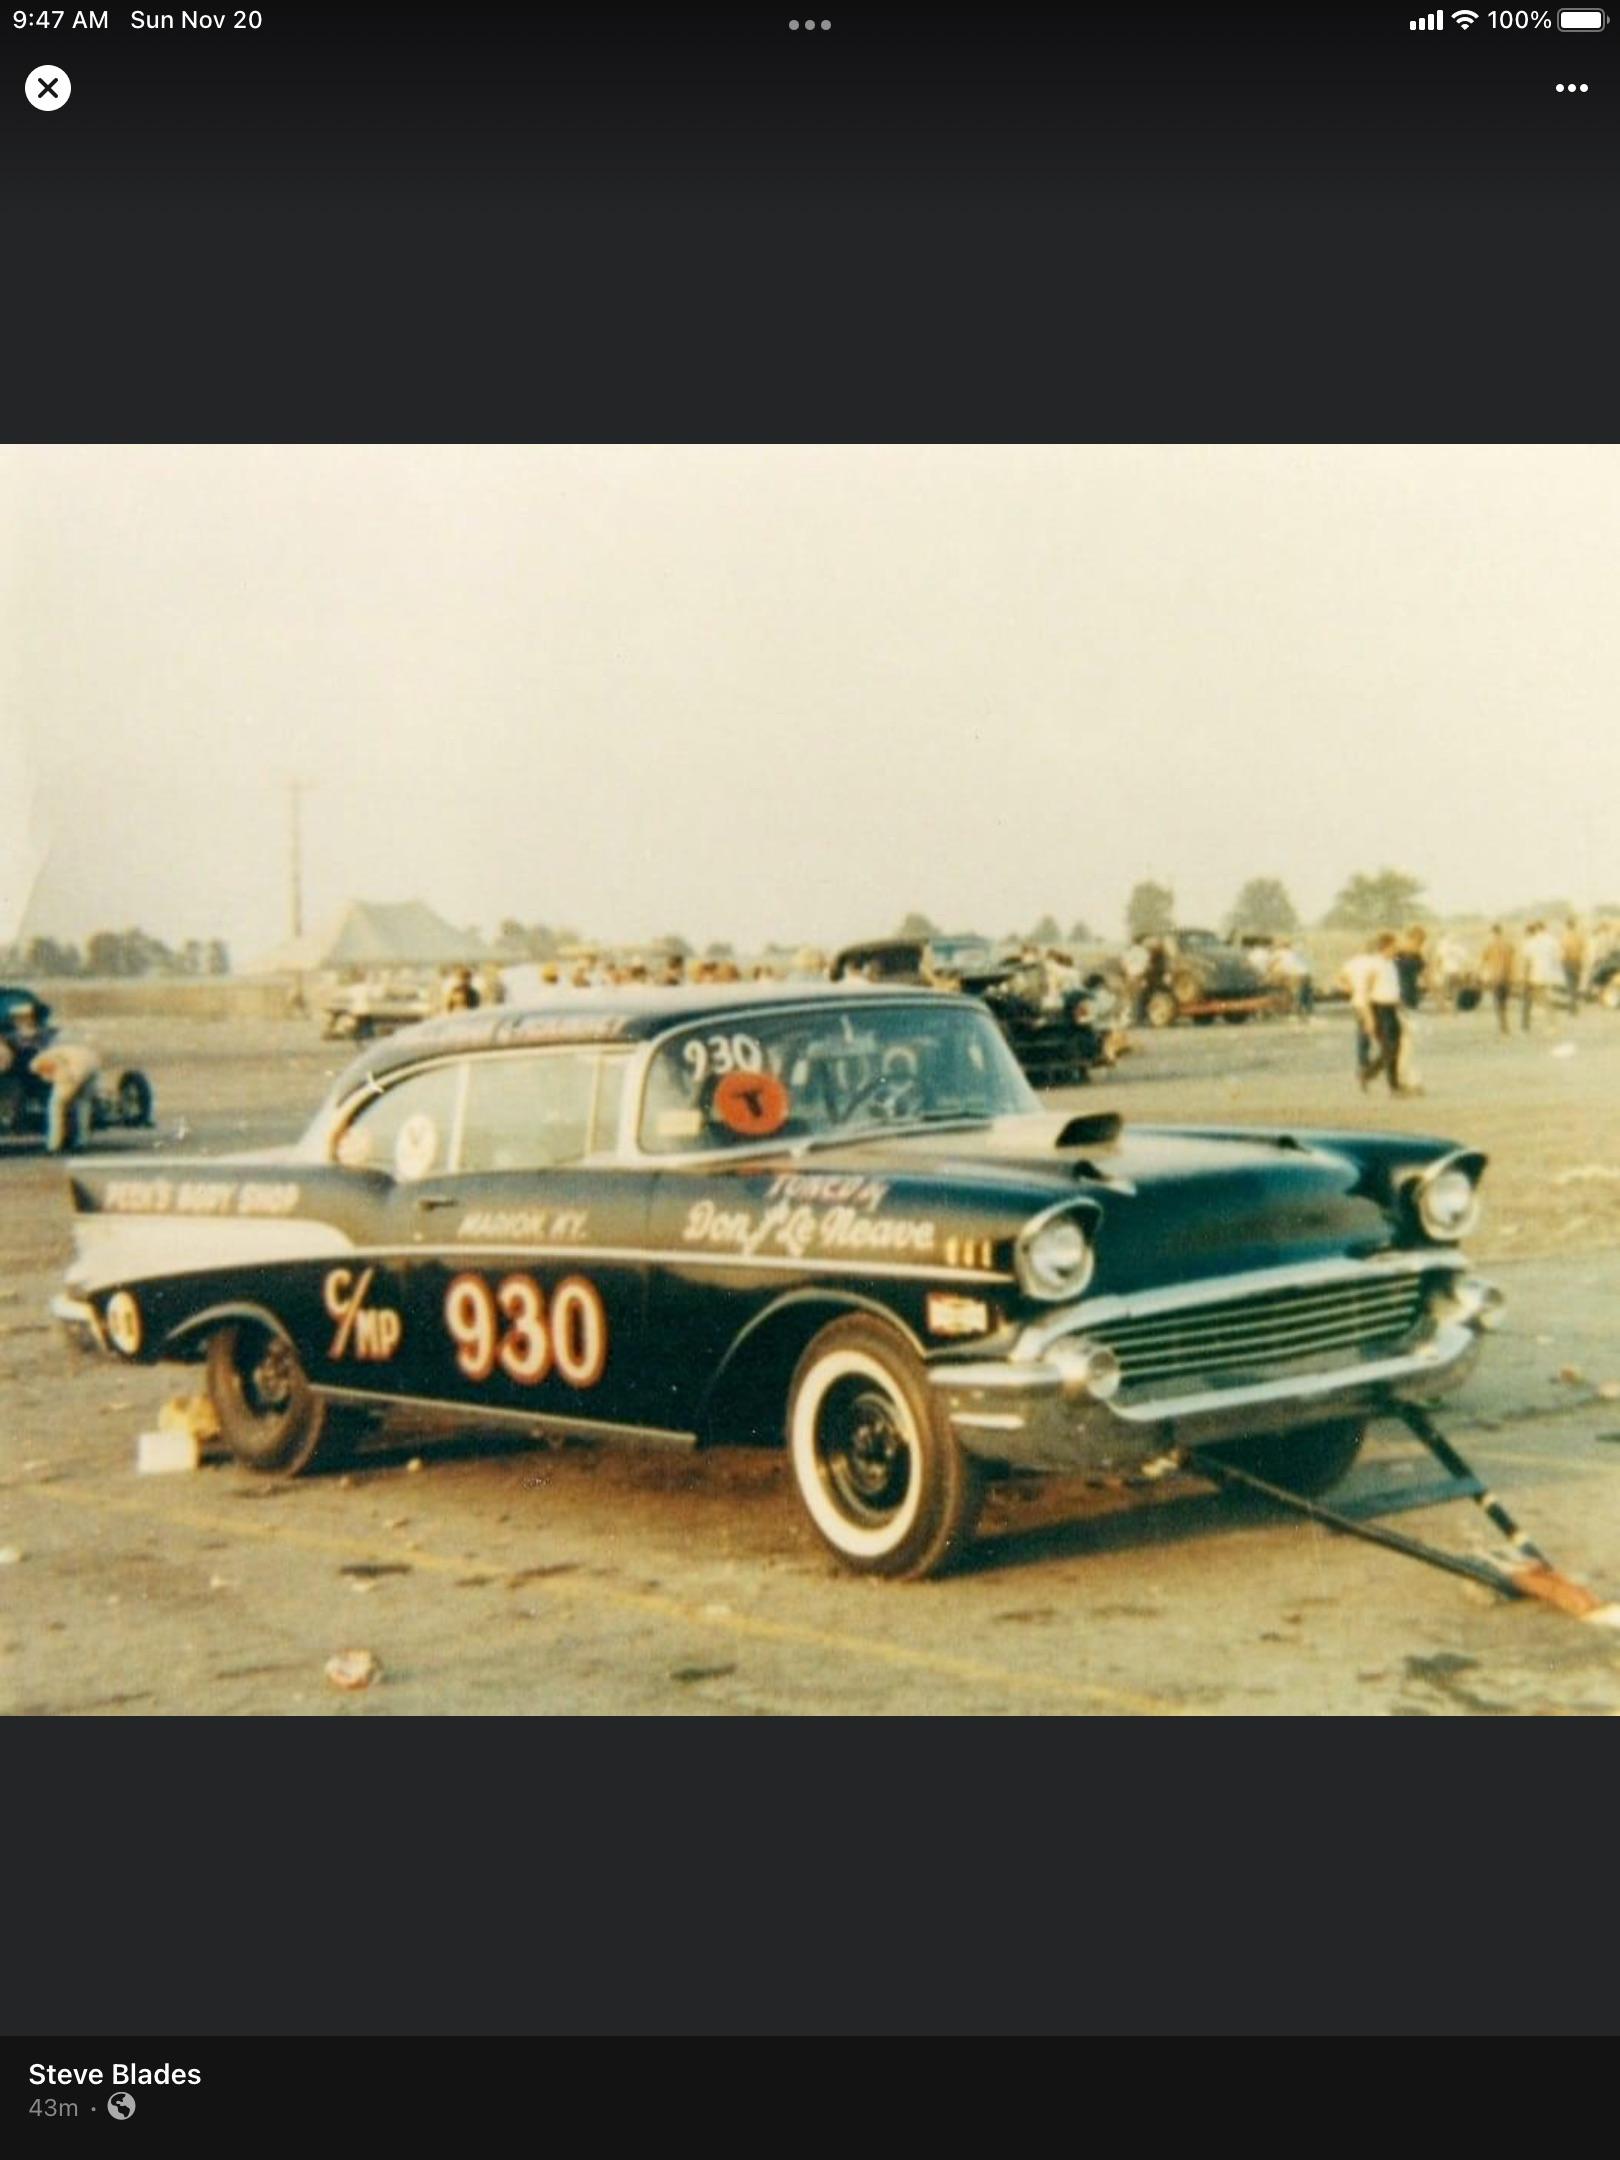
This project was started and stalled almost 5 years ago. This was a car I watched at my local drag strip in Chandler, Indiana in the early 60’s and was one of my favorite cars. I decided to build a model of it using only the pics I took off the television while watching coverage of the NHRA 1964 Indy Nationals. This is the kit that I used and the tires and wheels I came up with then. More later.
-
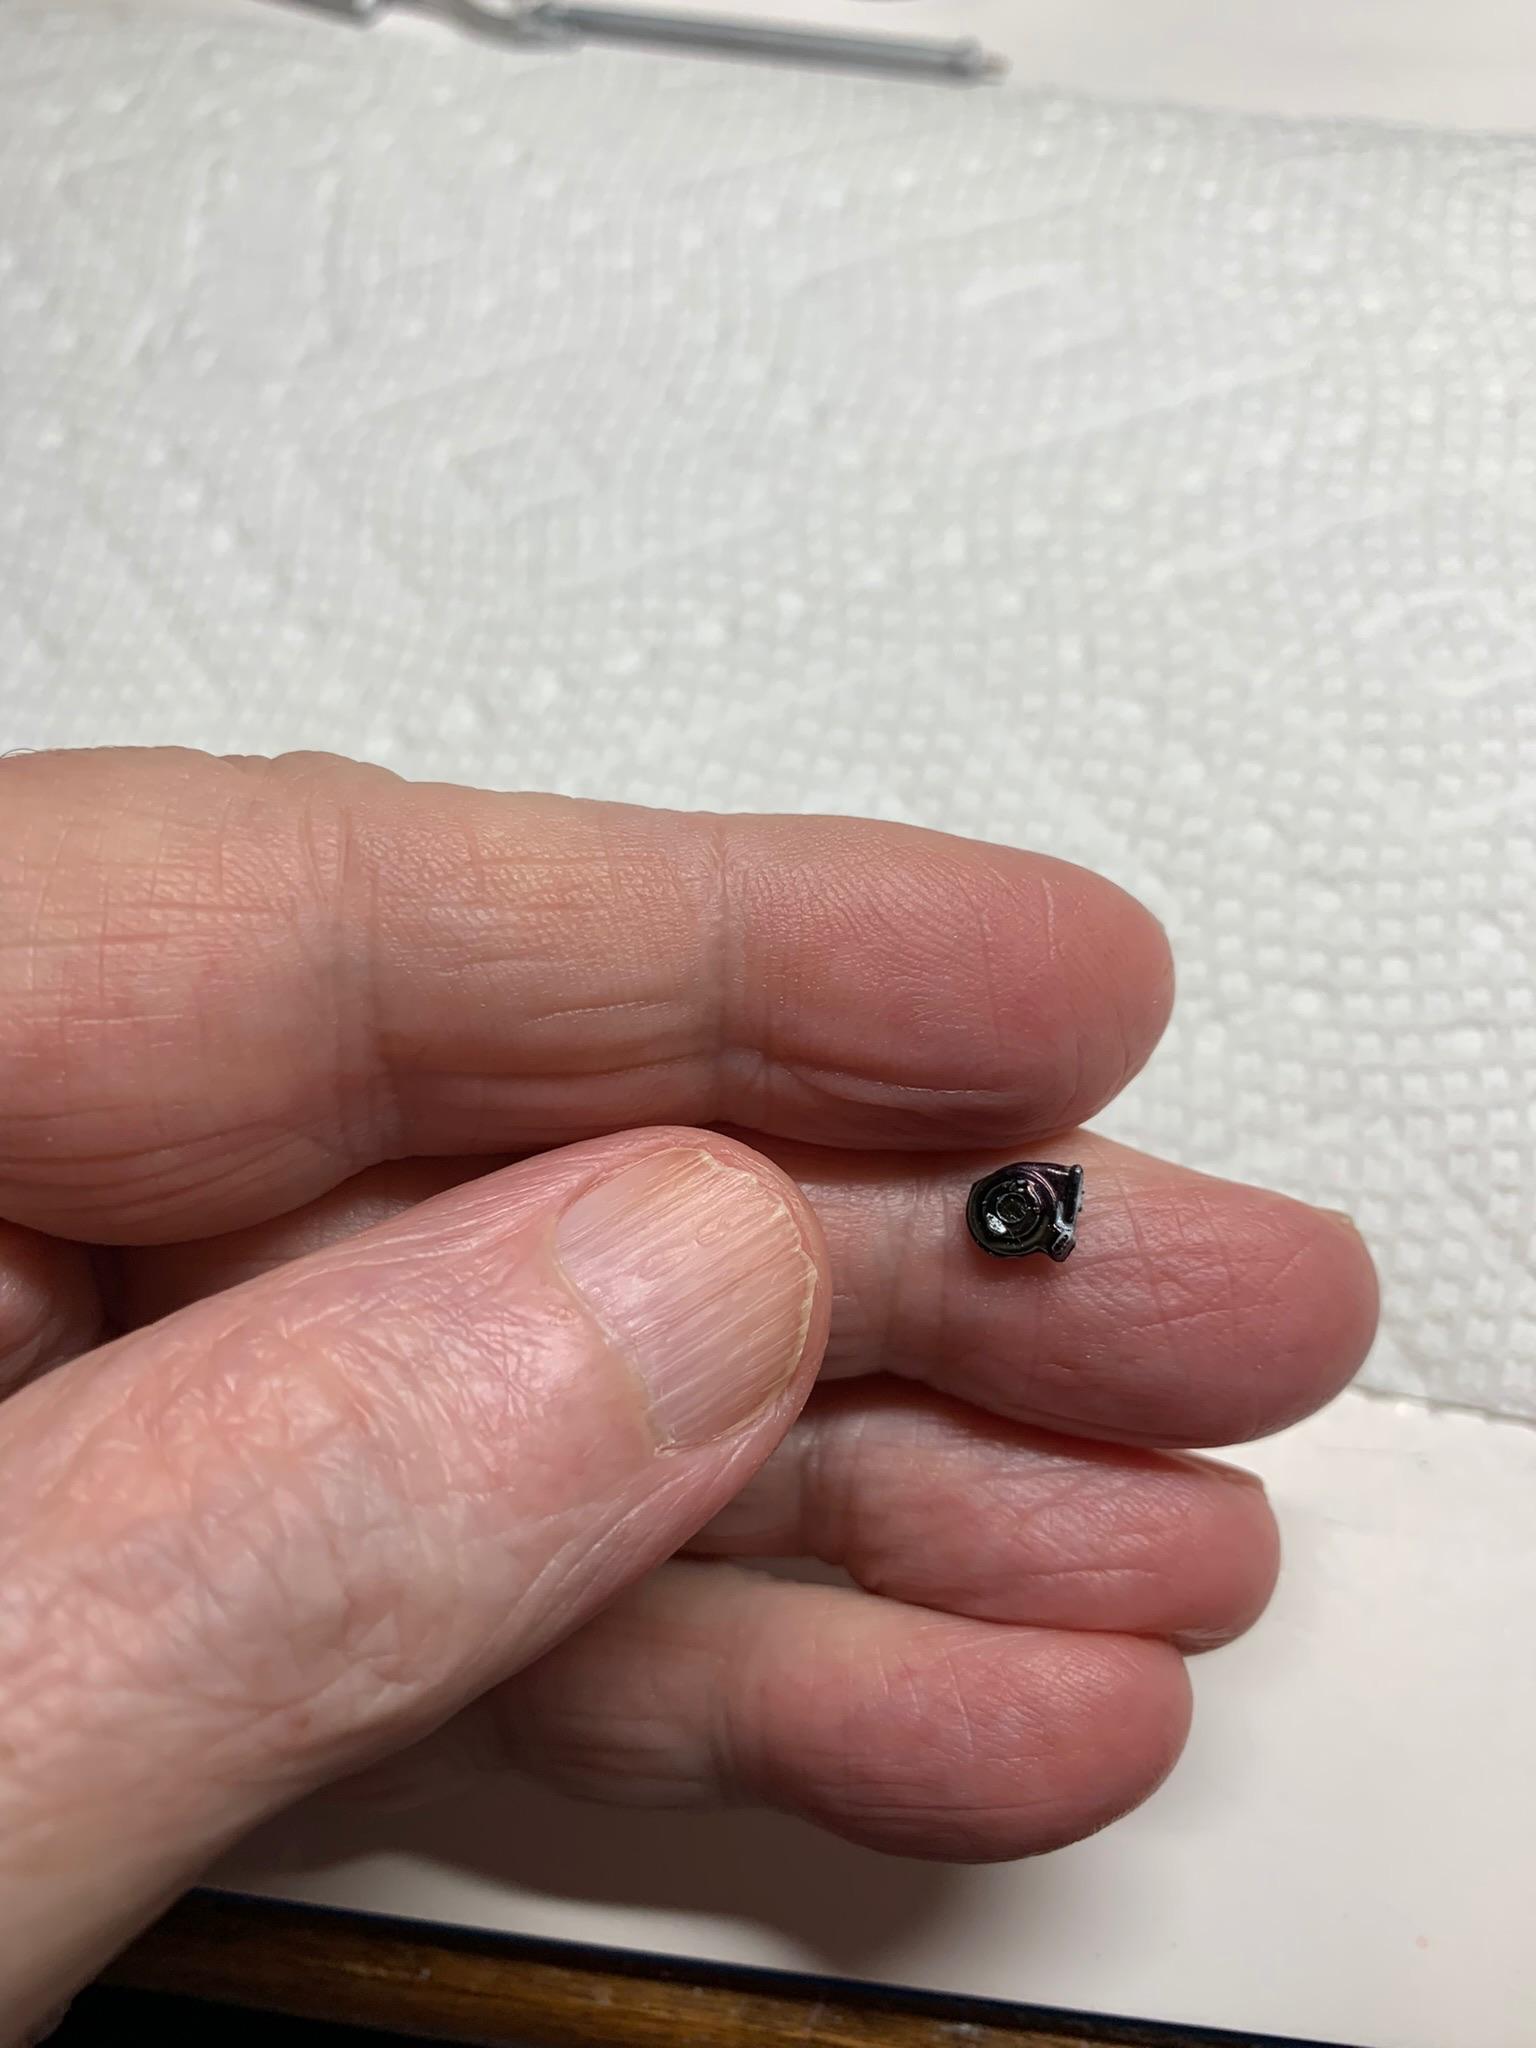
Almost forgot, I was kindly informed on my WIP post that I had installed a Road Runner horn on the firewall (according to the instructions) instead of the wiper motor. I fixed that.
-
Sorry for being so late to the party and thanking you all for your kind comments. I appreciate ALL comments (good, bad, indifferent) as they help us to grow and do better next time. Posting my builds on this forum helps to keep me motivated and moving forward. Thanks again. You people are the best.
-
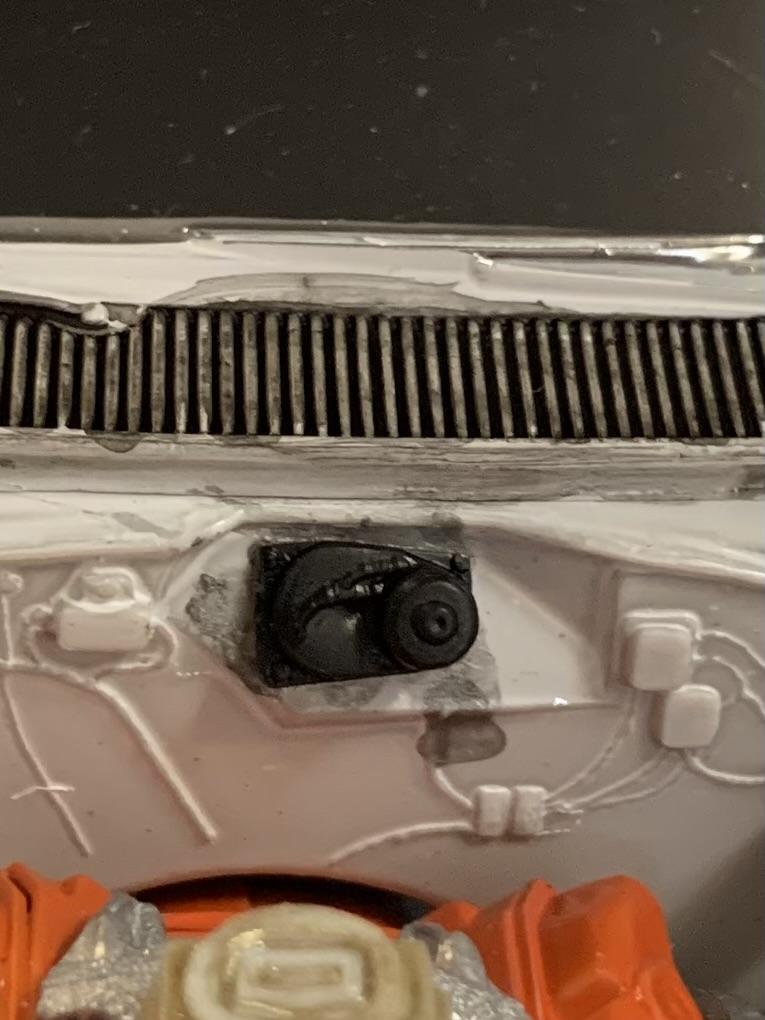
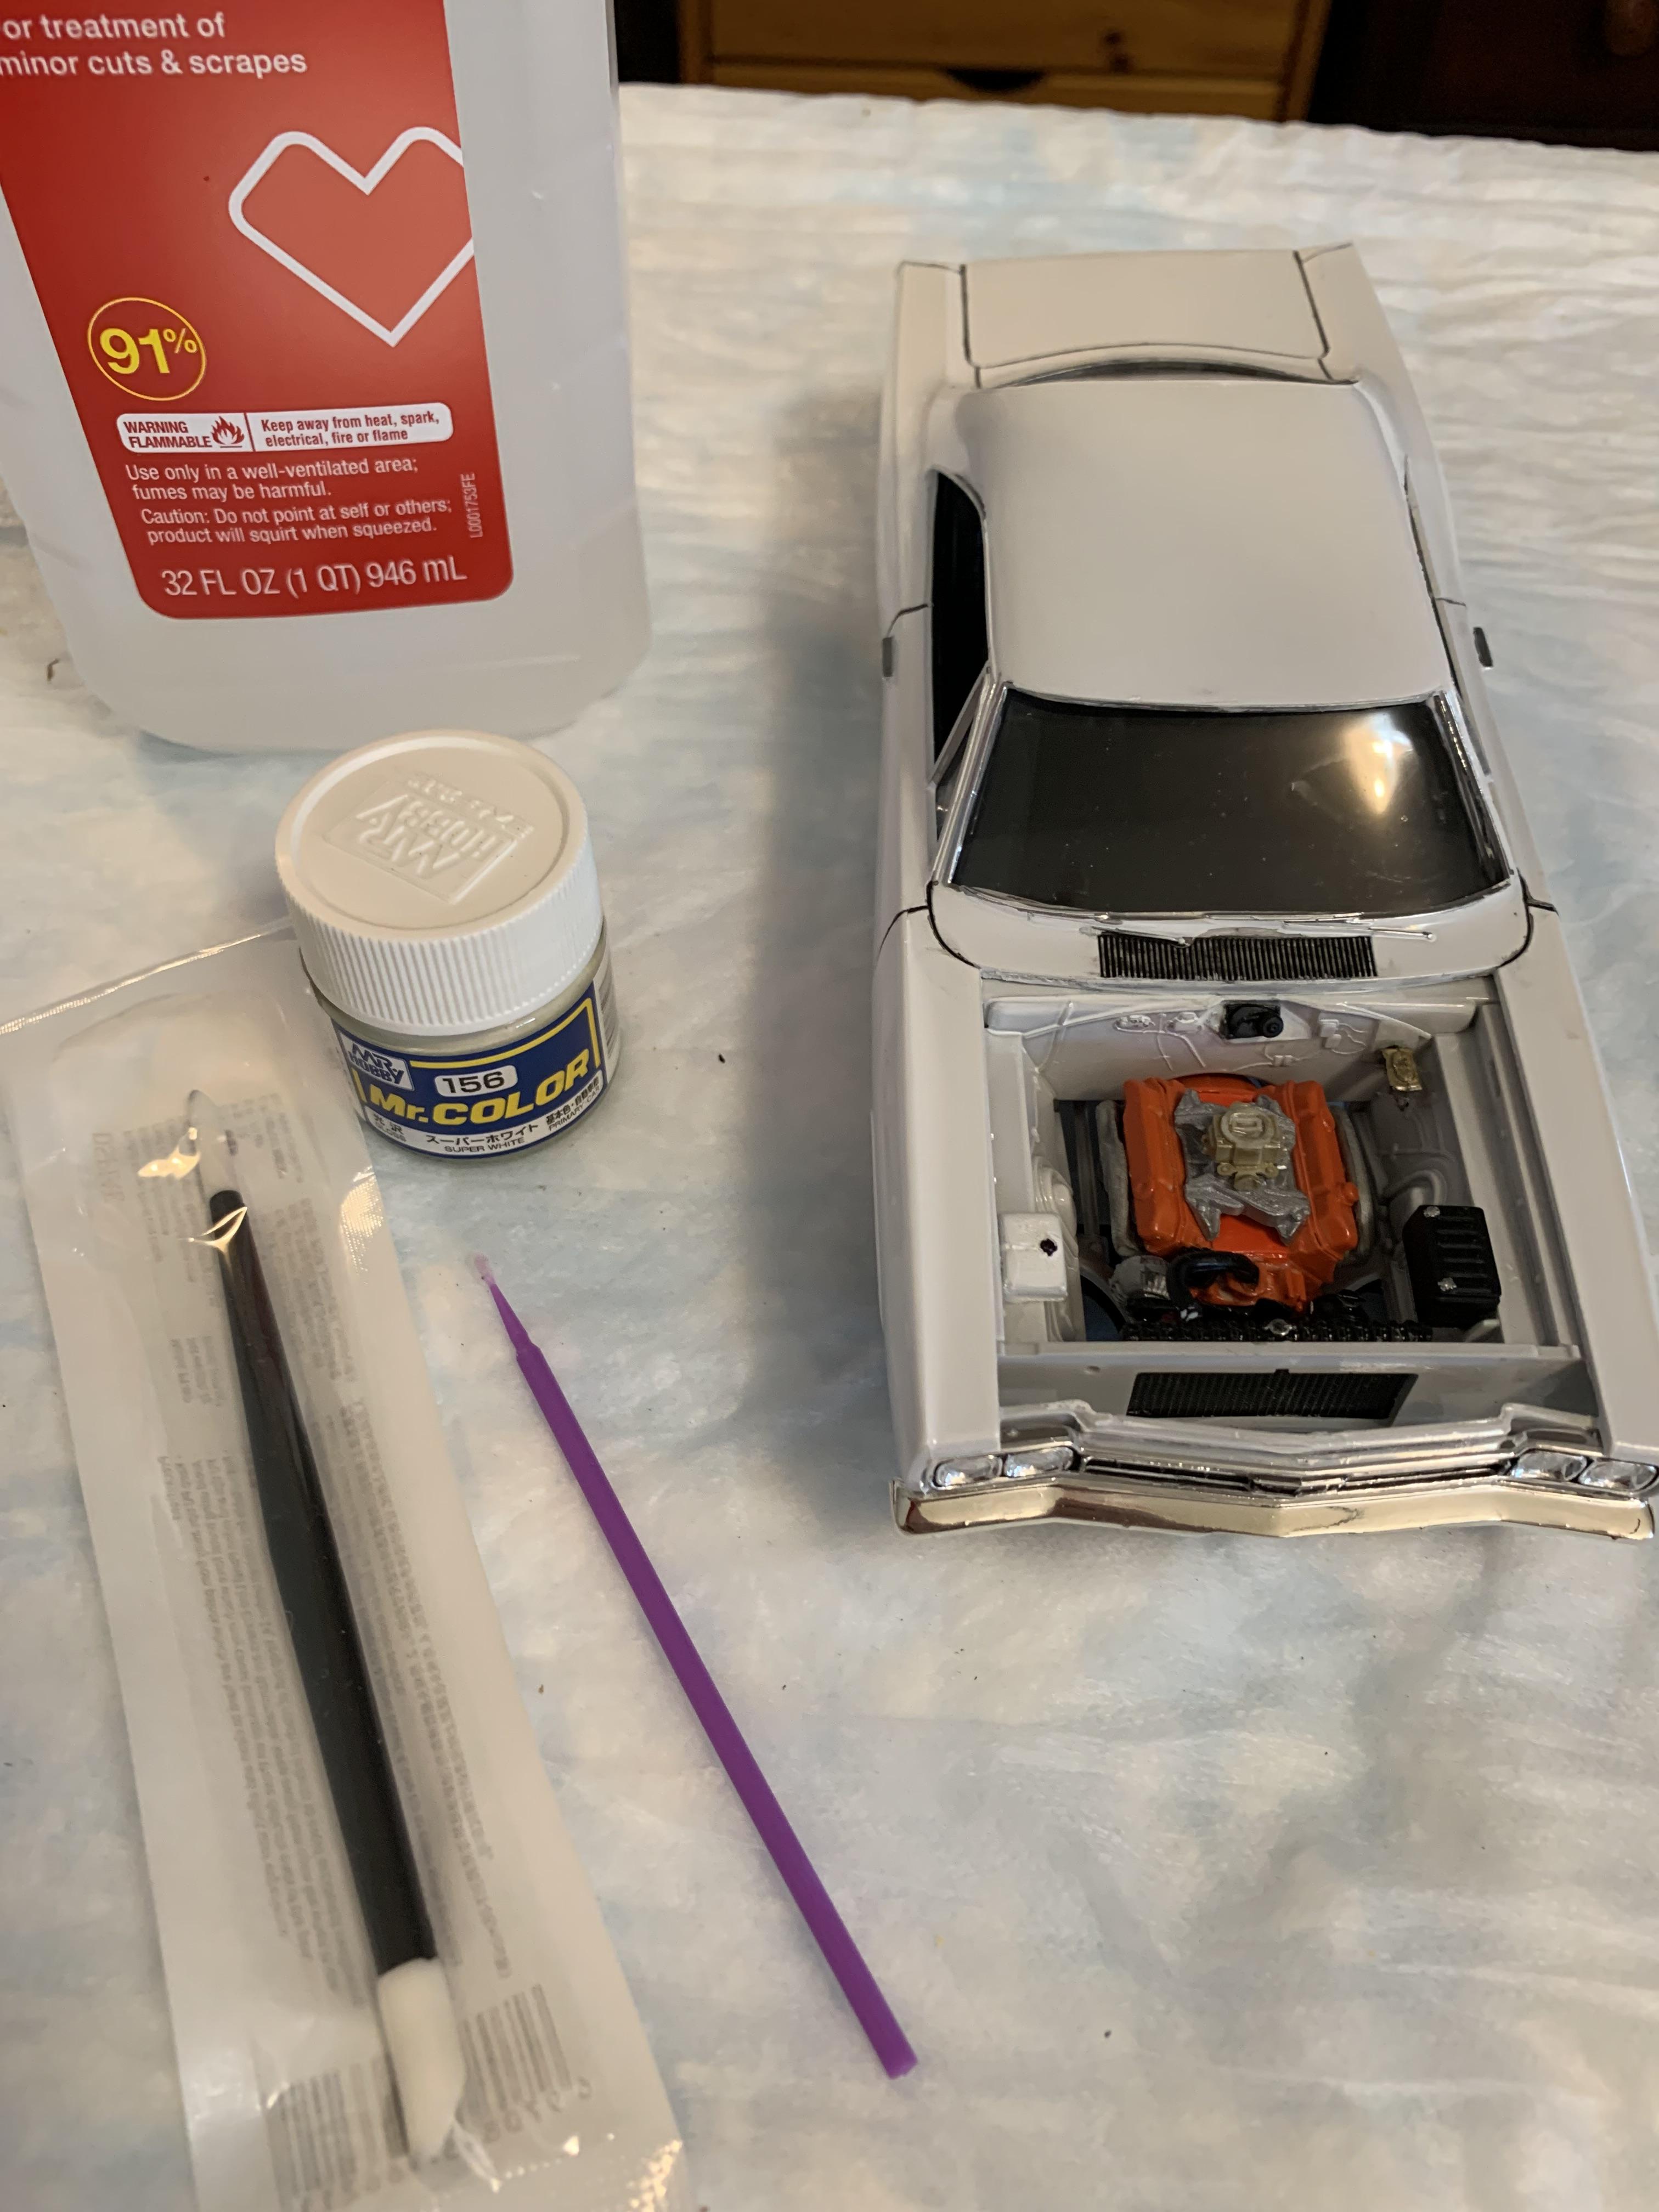
Glued it on with Tamiya extra thin after prying horn off. I knew better than using Tamiya on painted surfaces, but got in a hurry. Smeared the black paint around as I was not using my good neoprene coated tweezers (still another dumb mistake I won’t (hopefully) do again). Anyway, considered this an opportunity to try a new tool designed to remove panel line smudges. Used some 91 IPA and it didn’t faze the smudge and was not impressed with the new tool as it was way too soft (silicone type material). Finally ended up with some Mr. Color pure white and a micro brush. Not perfect, but it’l do. The wiper motor still looks small in scale to me, but, hey, thanks, guys, for pointing out the error of my ways (well, one of ‘em anyway).
-
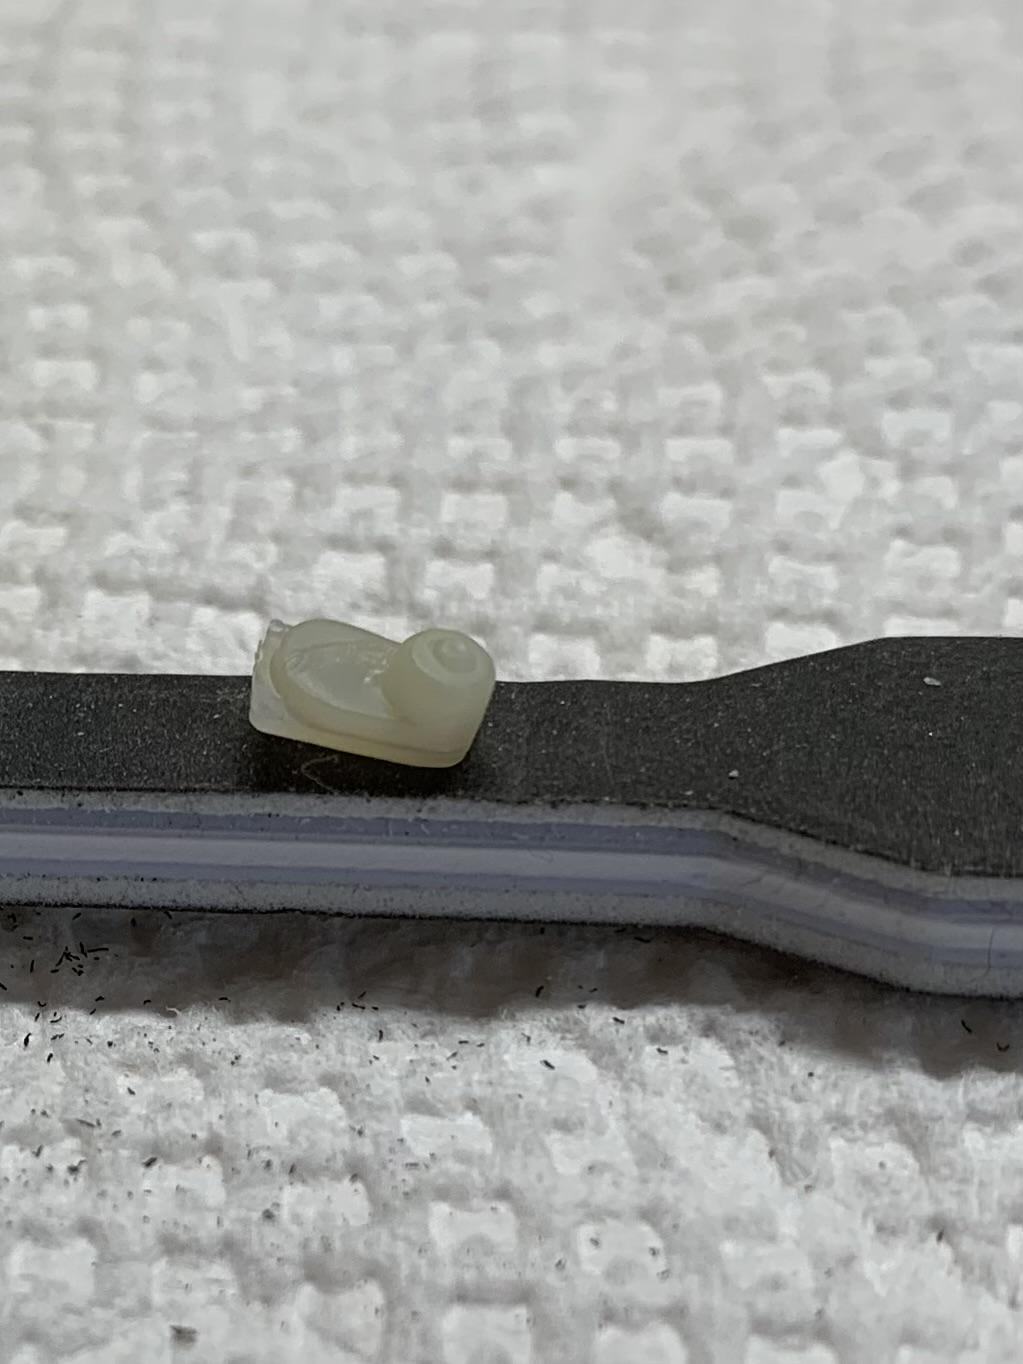
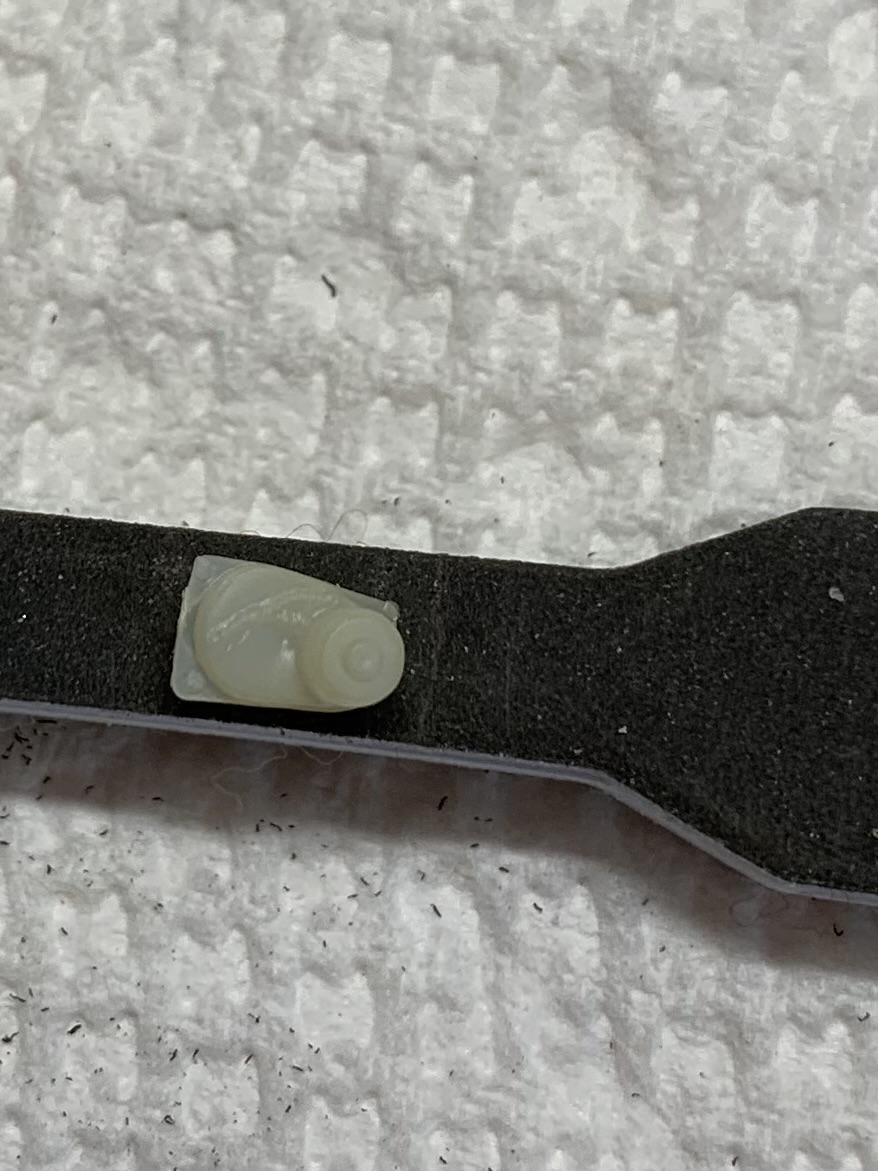
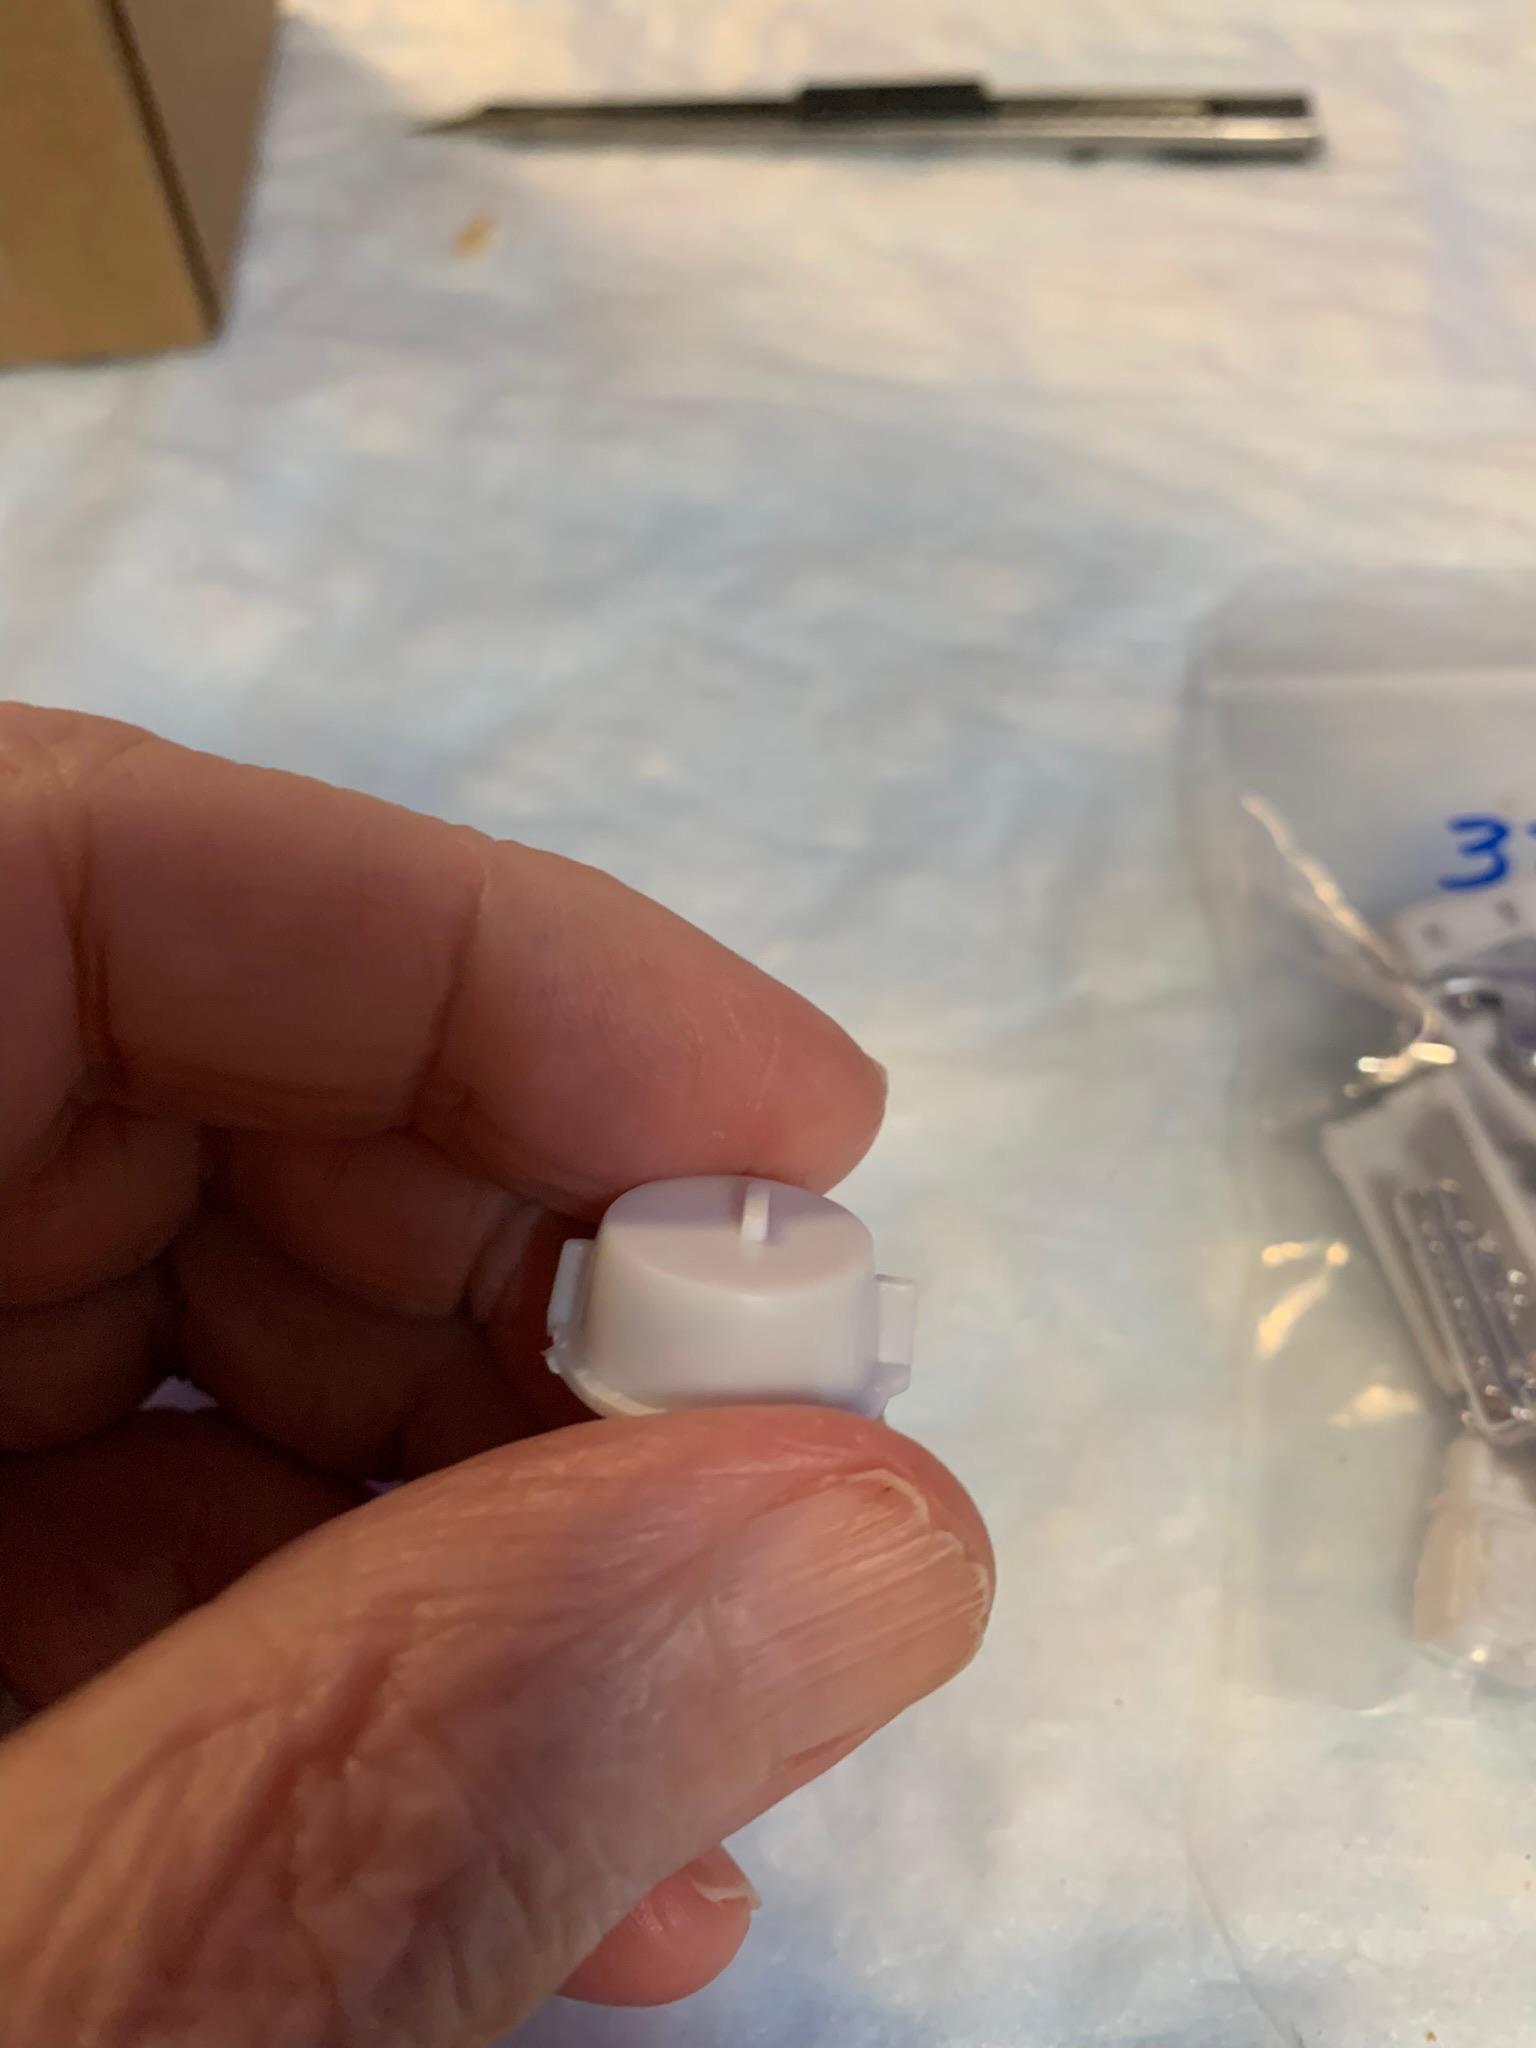
Found it. It was smaller than I thought it would be. Pardon the blurry picture. It’s in the SuperClean container soaking and will be installed on the car. I ALWAYS appreciate comments, suggestions, critiques, etc., to improve the product. I will post a pic later. Thanks, again, to you two gentlemen.
-
Great info. I stand corrected and duly humbled. I could not find anything else on the chrome trees that resembled the description given by Oldscool. I shall dig through the box again later. Thanks to both of you for pointing out my error.
-
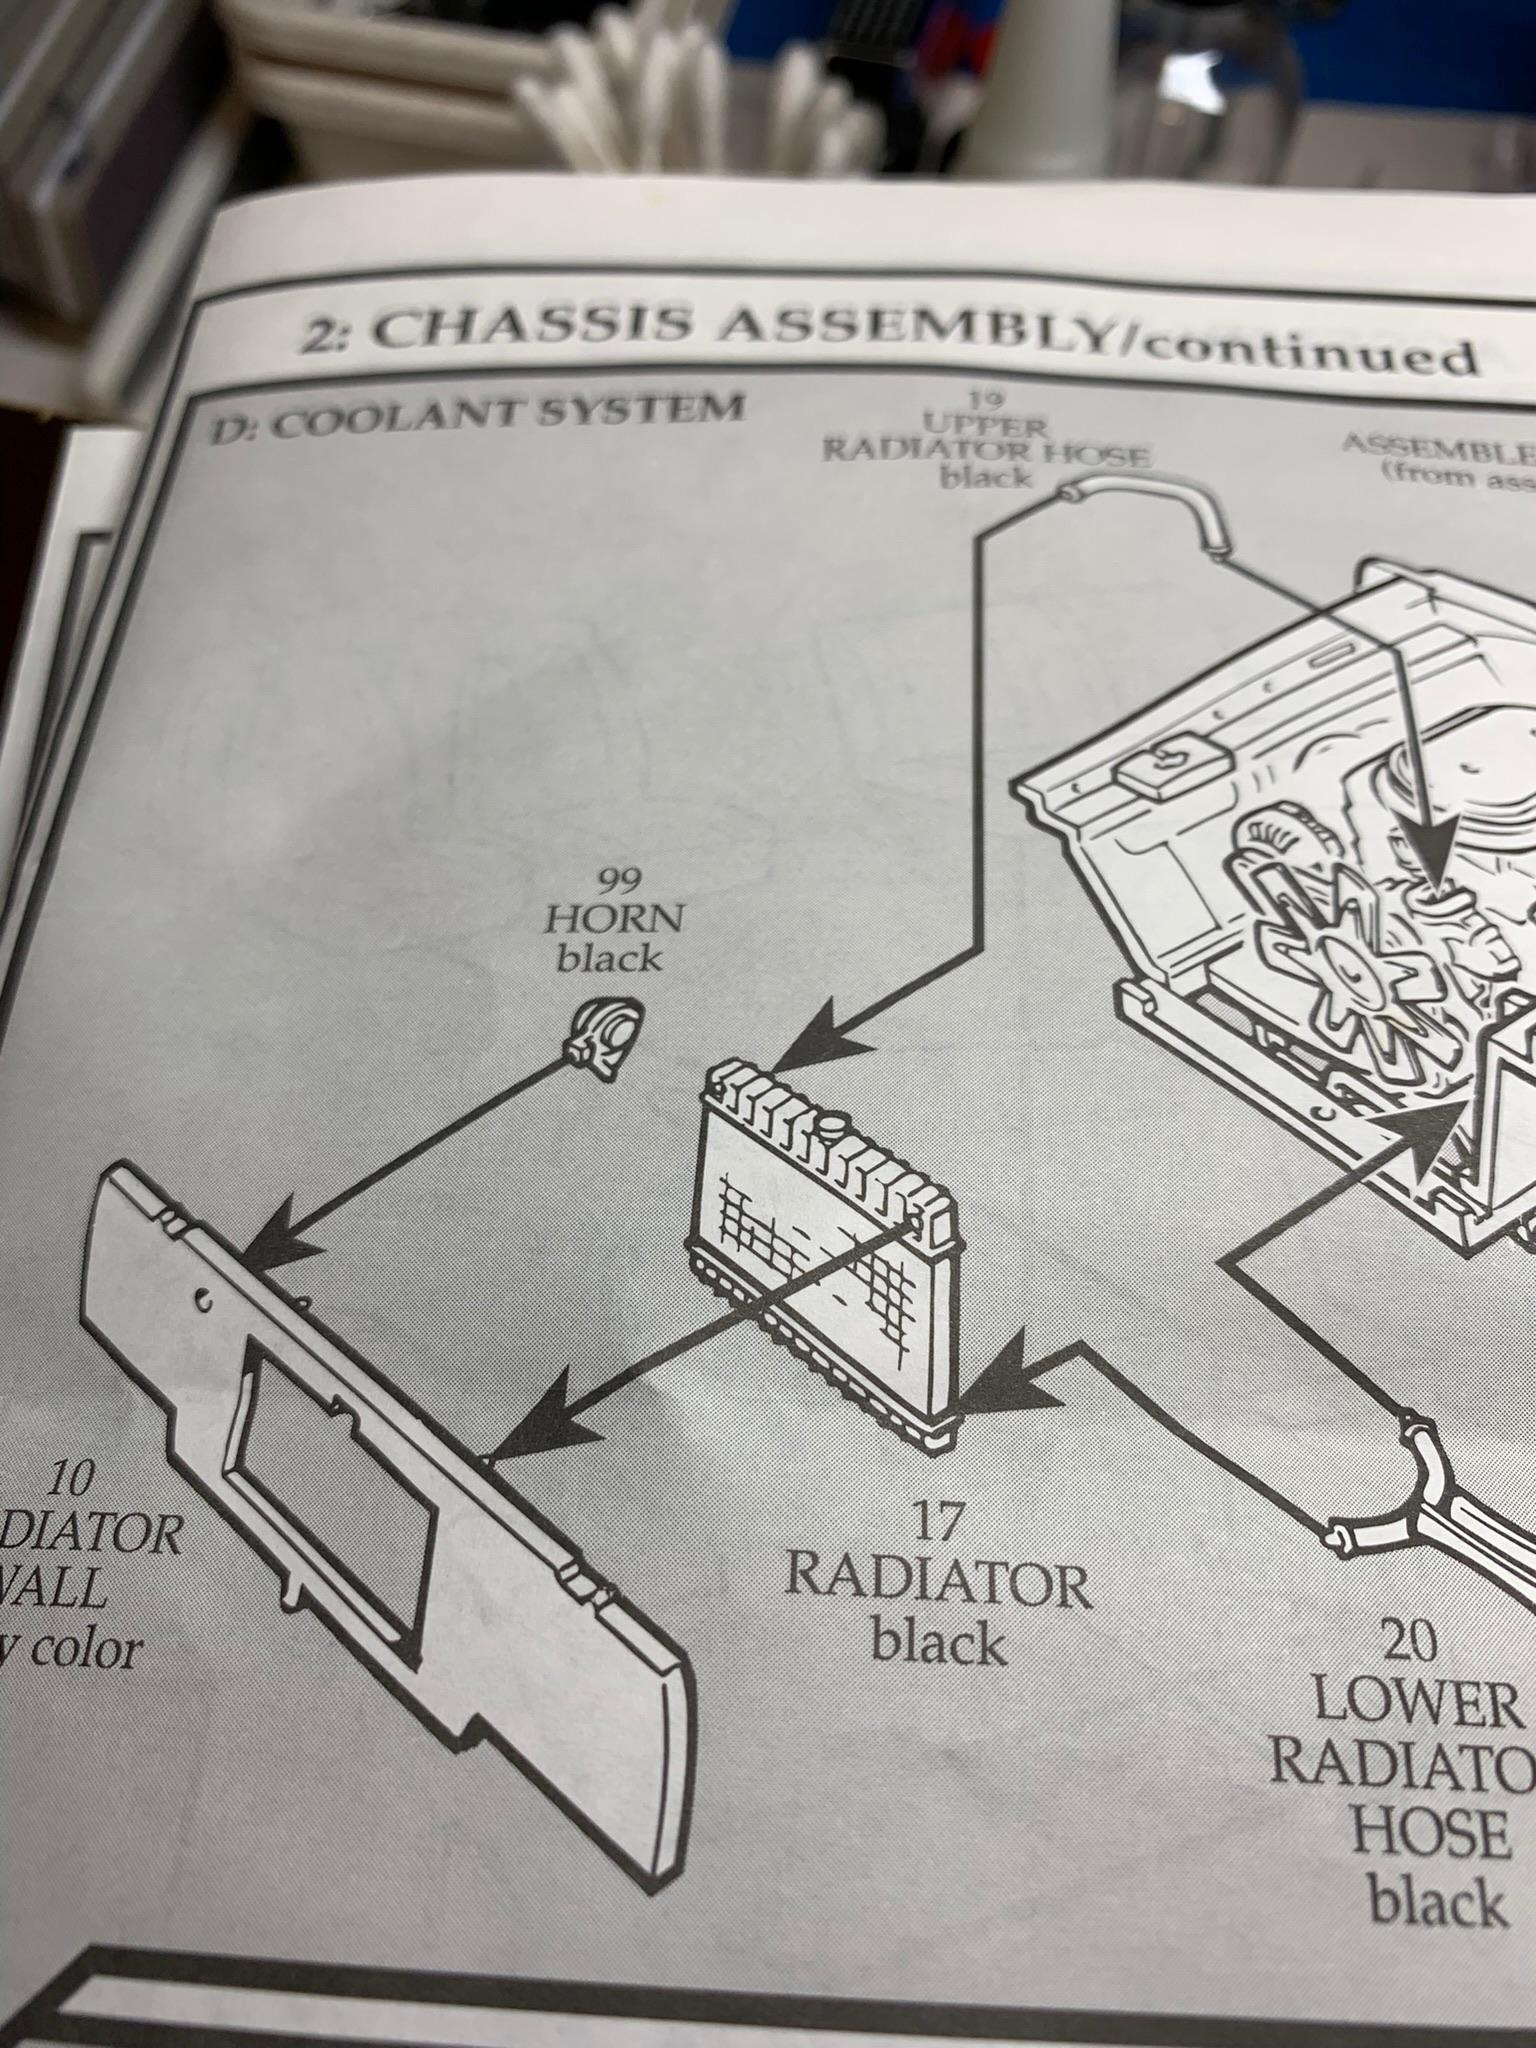
First of all, thank you all for responding. Second, I always welcome critiques, questions, and suggestions. Lastly, while I admit the wiper motor is a bit of a blob, it certainly doesn’t look like a horn, Road Runner or not. In perusing my box, indeed, the horn is still in there. Painted it but did not install it (my bad). As far as the hood, I have no idea.
-
Best chrome to brush paint
R. Thorne replied to 1hobby1's topic in Model Building Questions and Answers
Well, I’m kinda partial to the GreenStuffWorld (non air brush version). Daubed this on with a micro brush.
-
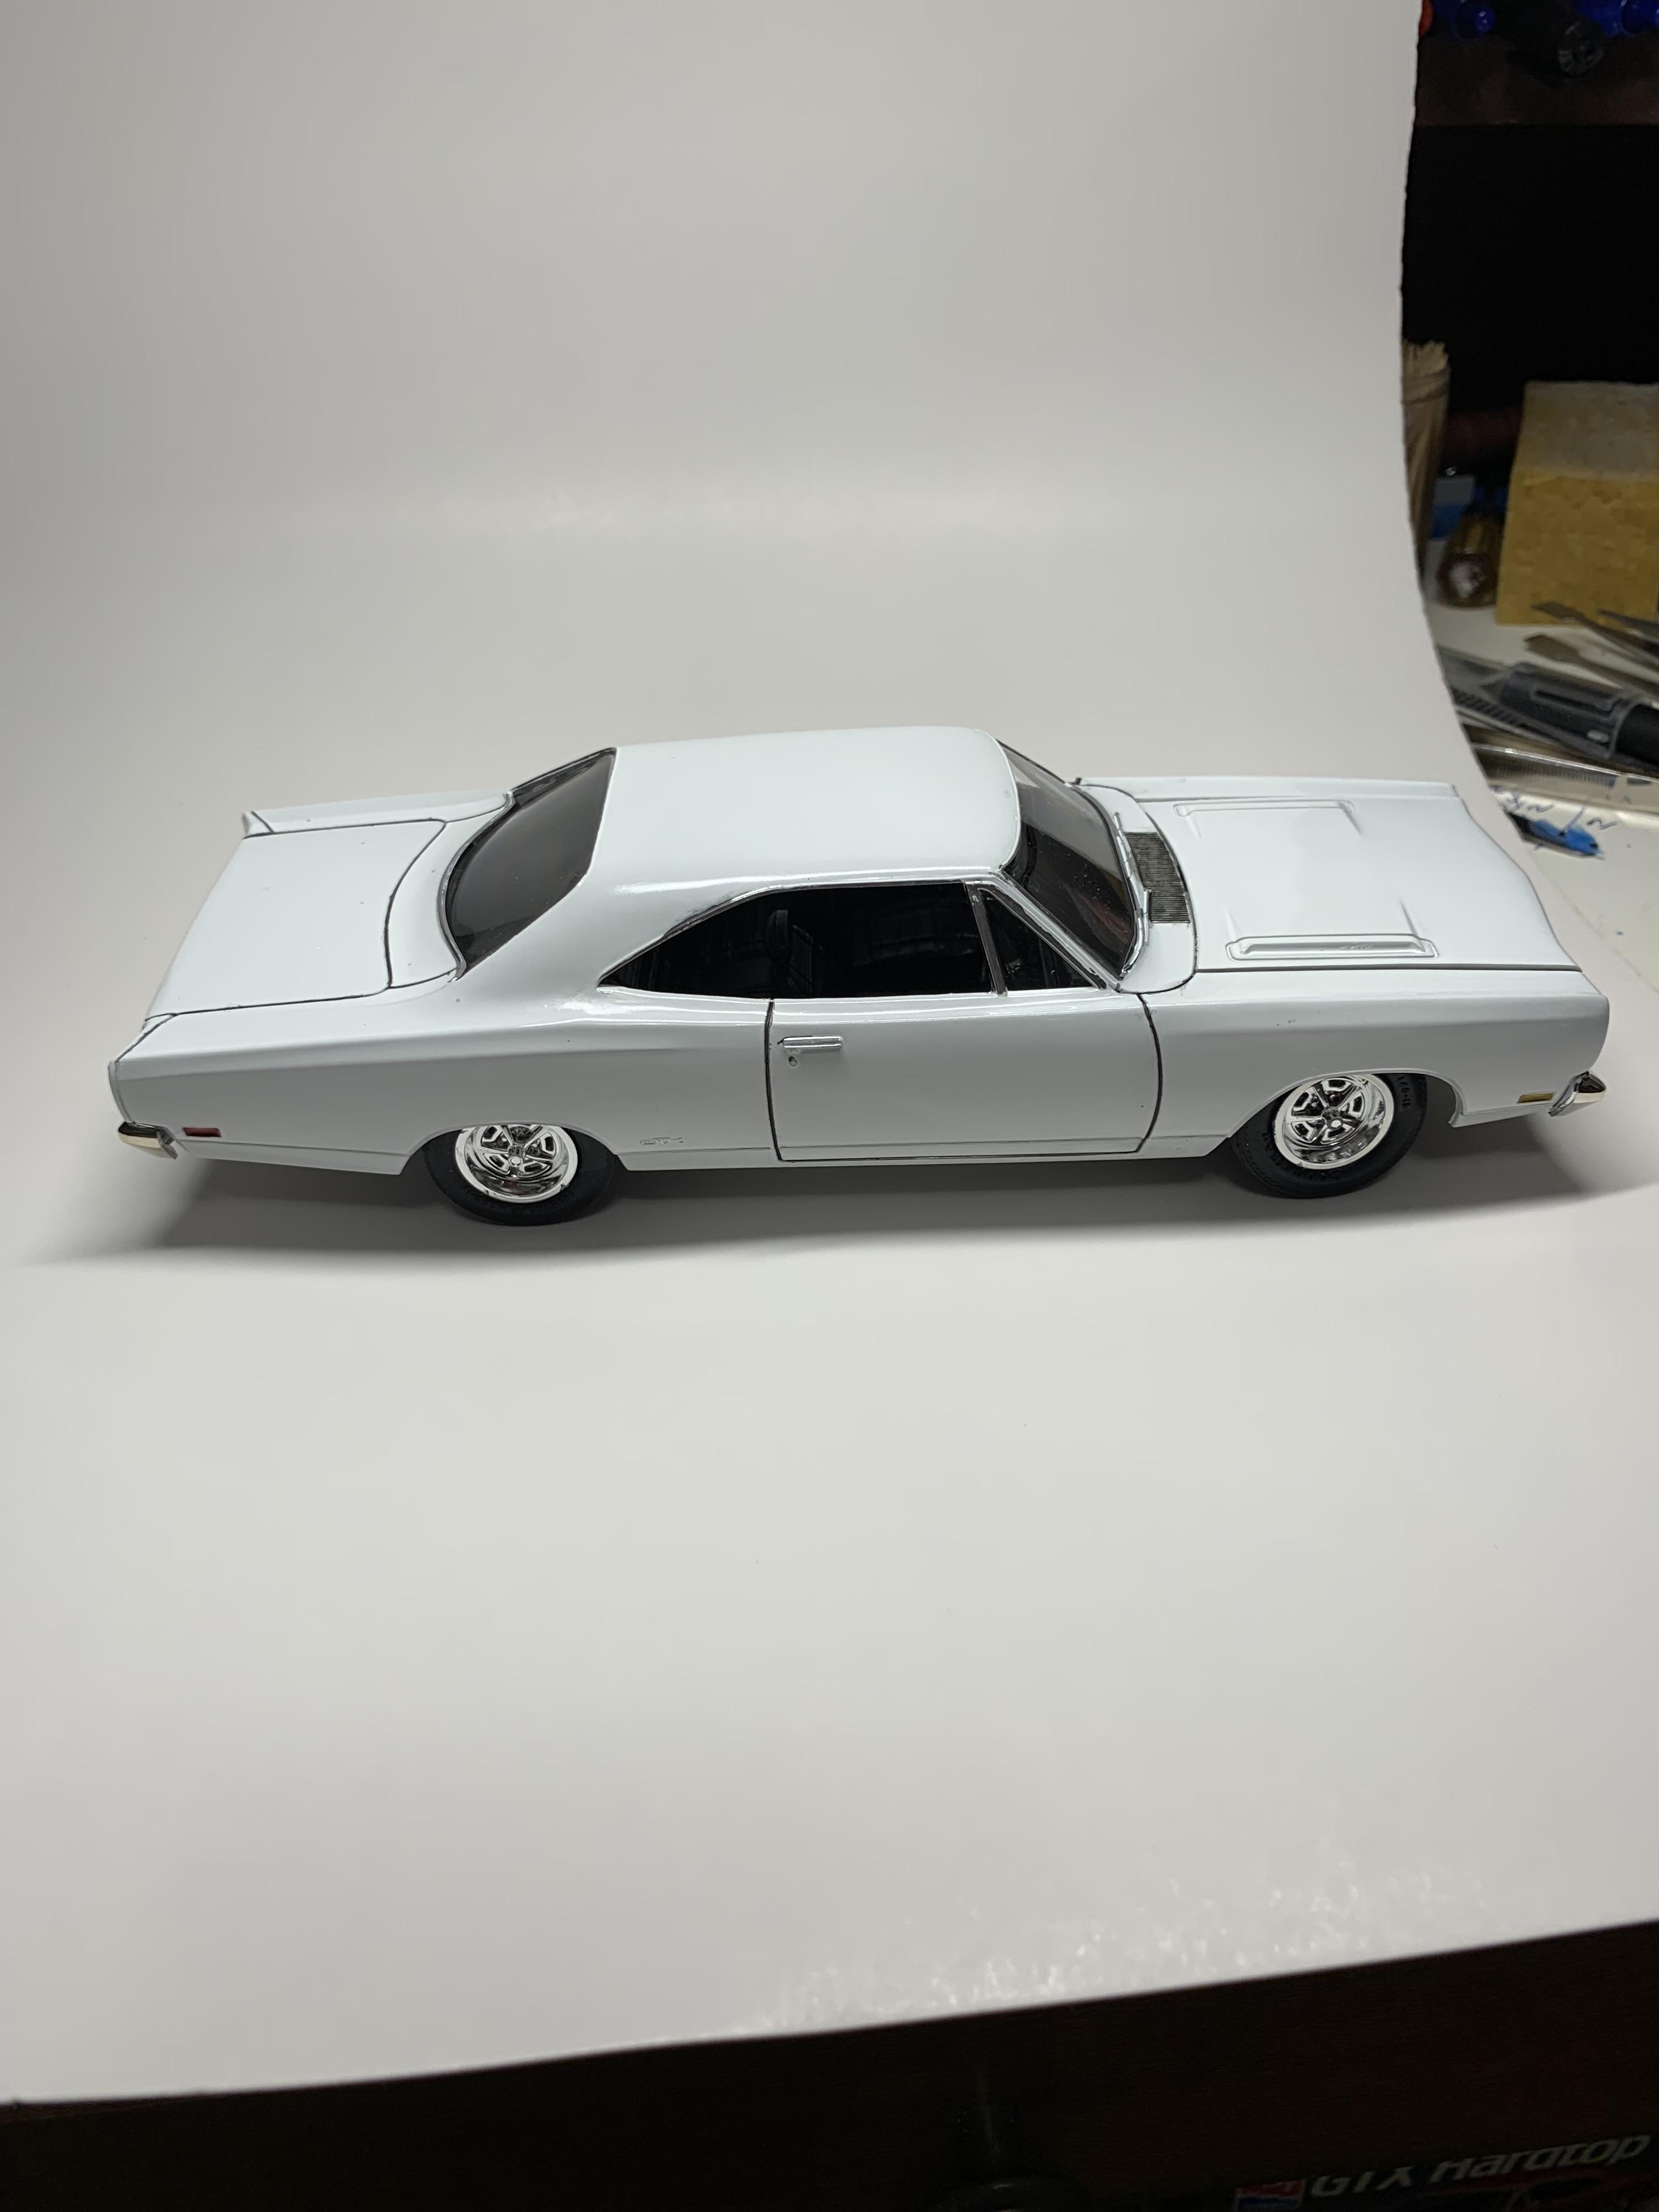
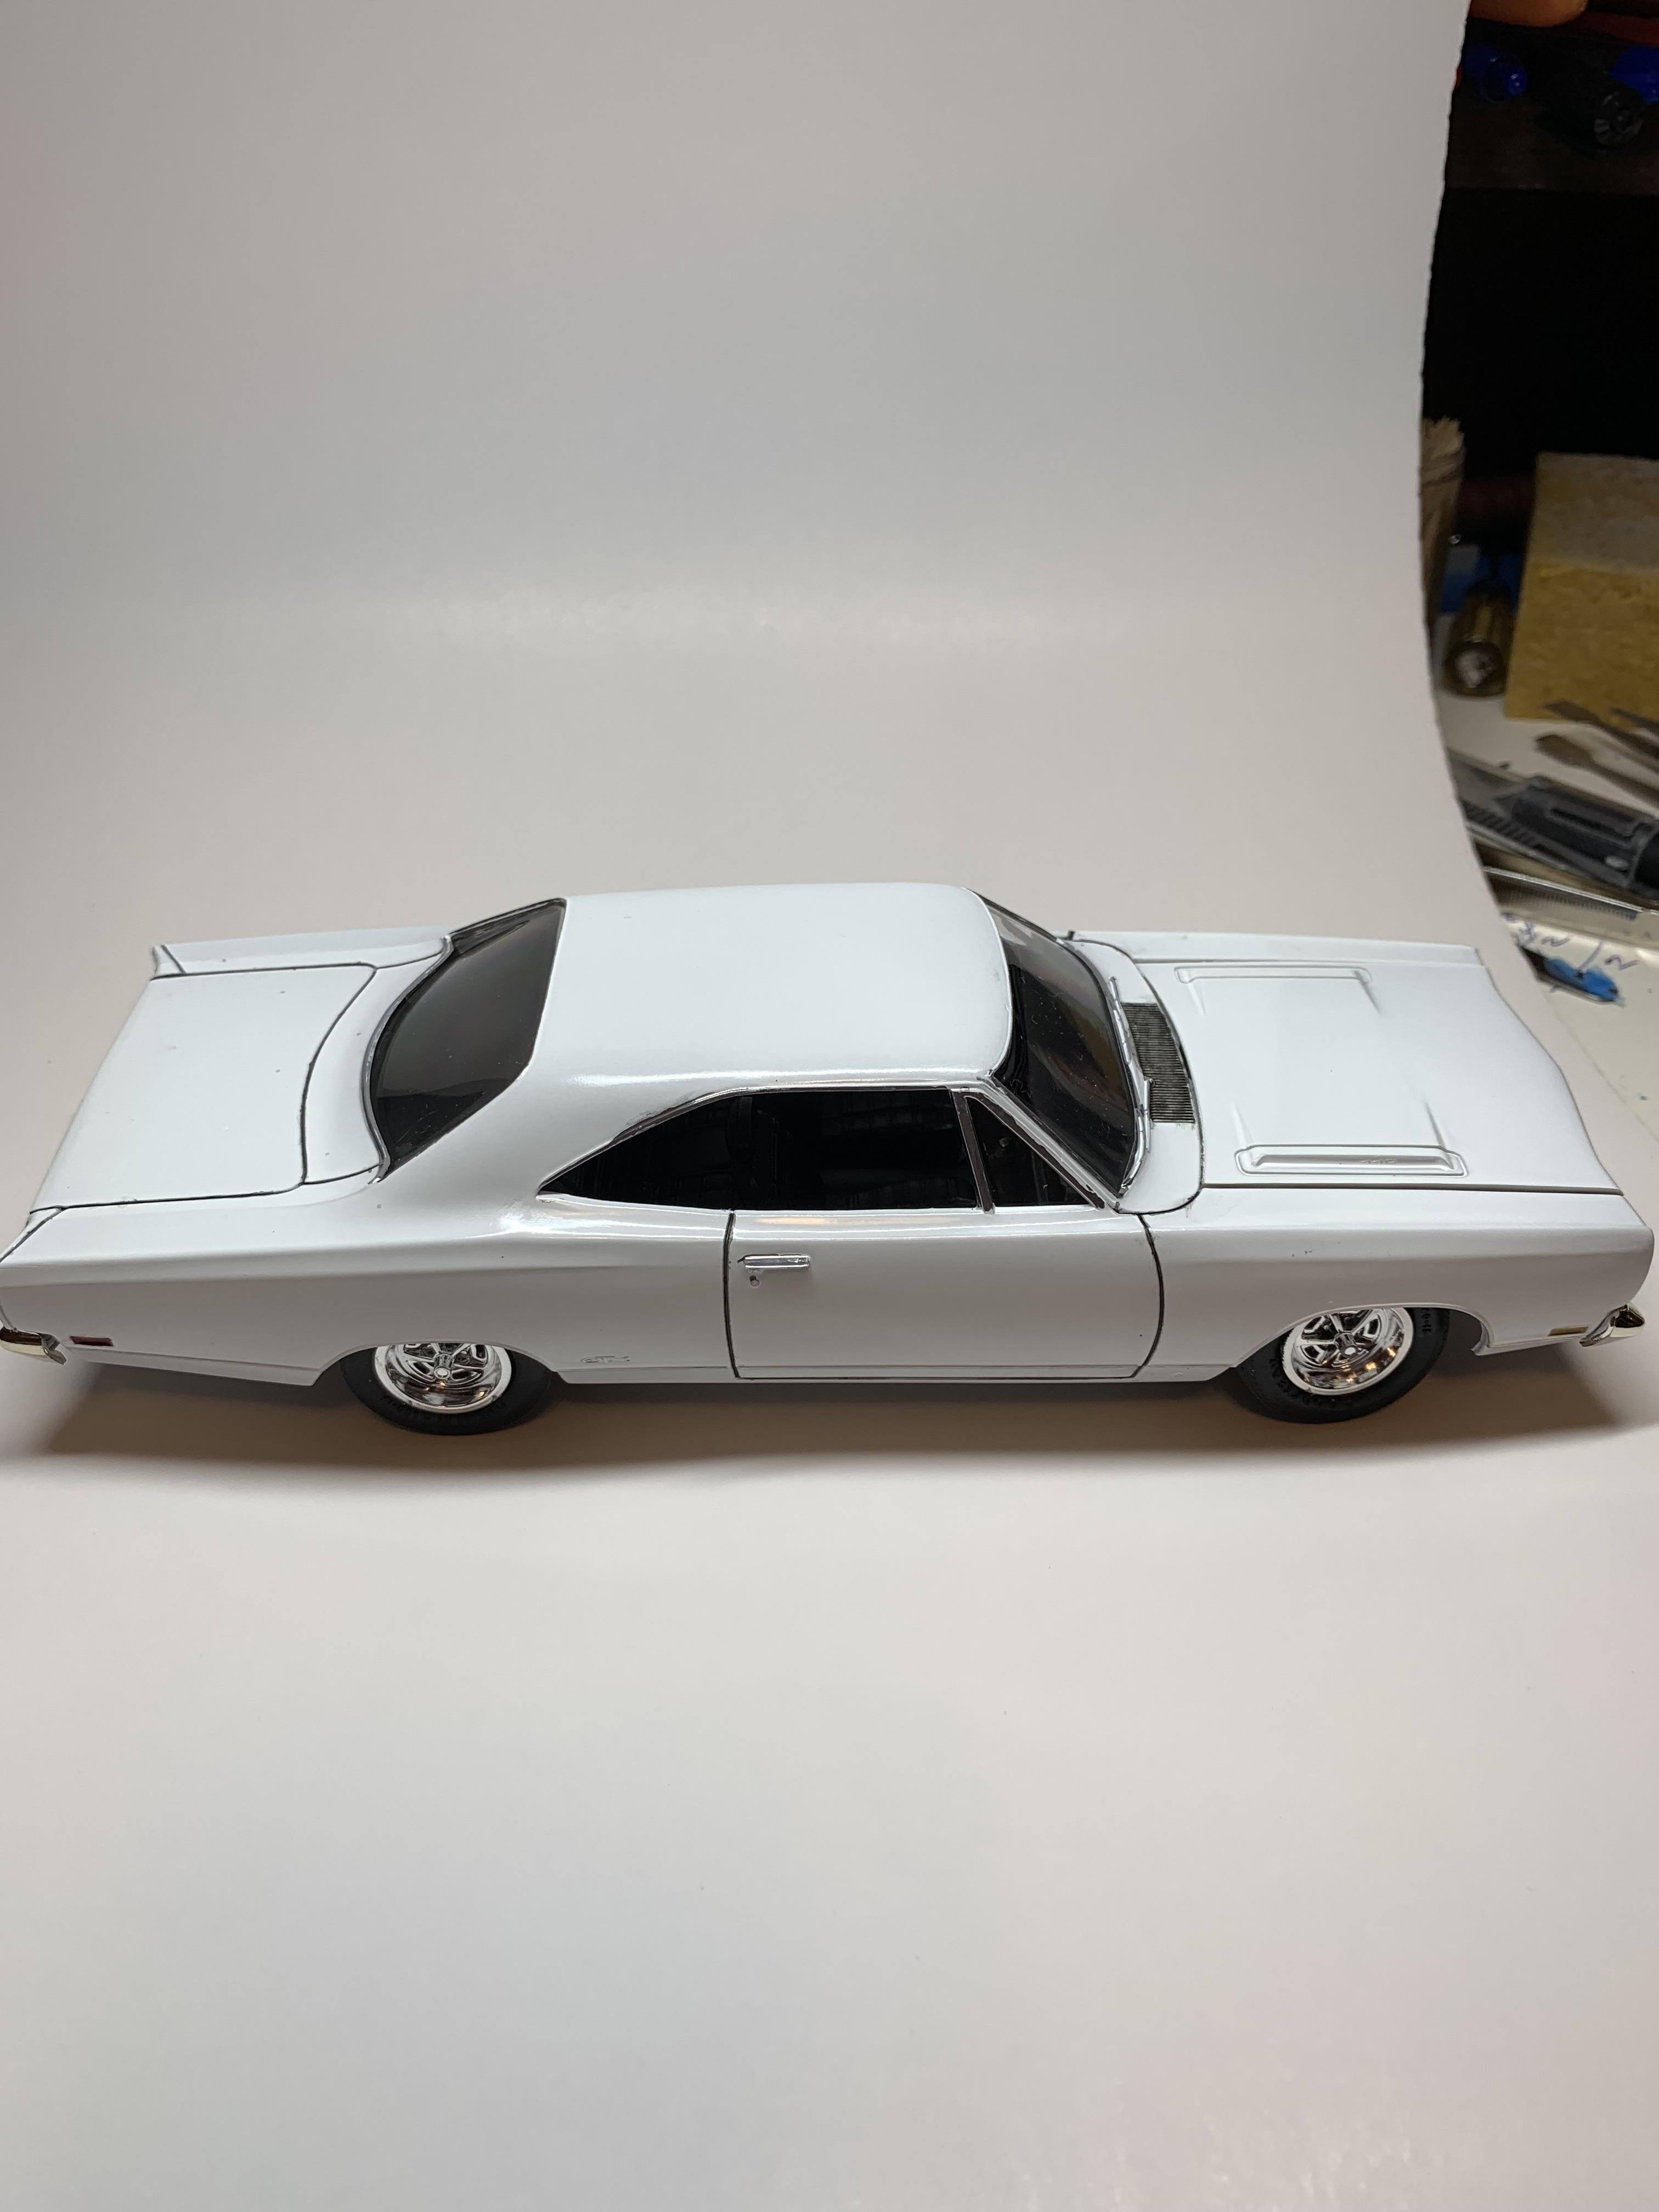
As explained in my WIP posts, this was a quickee build in between other more “serious” builds. It was built to emulate a car my 1970-1971 Army Buddy, Joe Bowen, had when we were stationed together. Nothing particularly detailed about this build, but, every time I see it, it reminds me of those days. Almost forgot, I used this kit.
-
Thanks, guys. Finally got around to posting some finished pics. That’s what I get for working on 4 models simultaneously. Sometimes, one or two suffer from lack of effort. The chrome work was less than average, didn’t even notice the back glass fitment until I posted these pics, and the front wheels placement seem off, but that could be because the wheels are posable. Anyway, it’s done and on the shelf, and every time I walk by the display case, I think of my 1970-1971 Army Buddy, Joe Bowen, and that’s what I built it for. So, mission accomplished. Thanks for looking, guys.
-
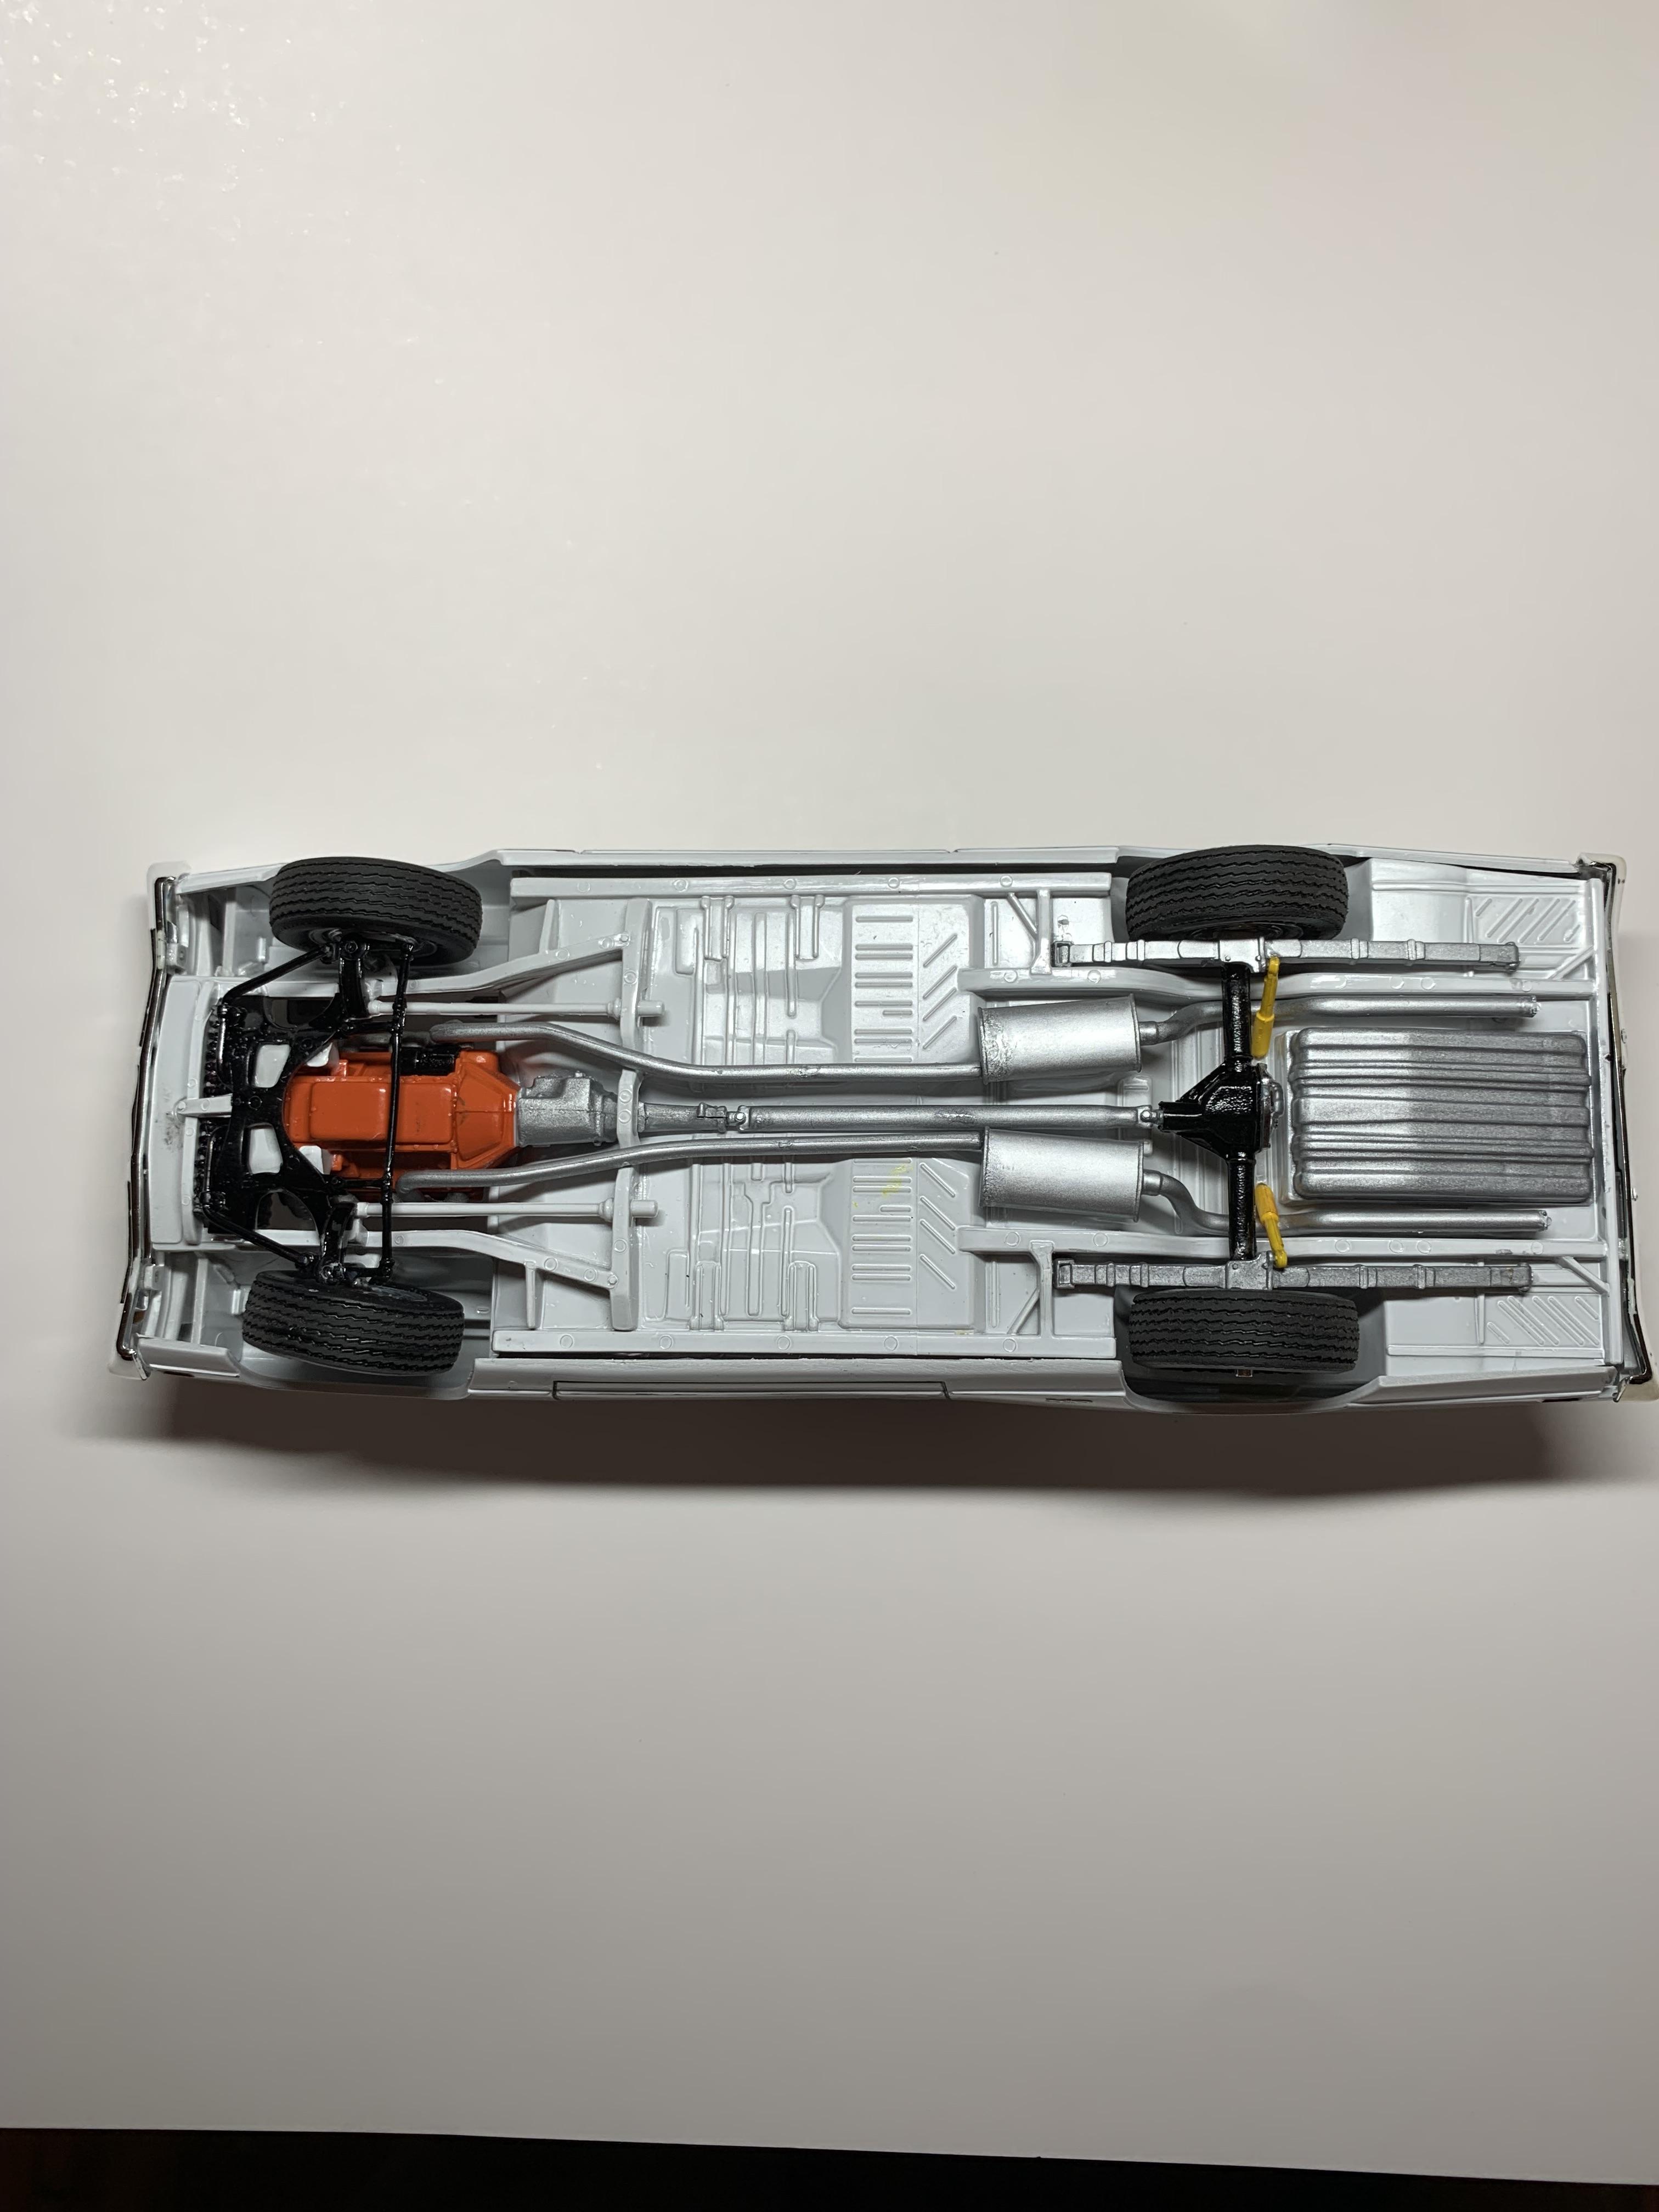
Glued wheels on, trial fit of chassis, installed tailights.
-
Thanks, you are much too kind. Finally back to finishing this one up. Call me lazy, but with the stock fuel tank molded in and limited room, I decided to forego the singular wheelie bar (perhaps at a later date). That, plus i was unsure how to mount it so that a scratch built one would be sturdy enough for handling. Anyway, another project for a later date to emulate one of these. I have not seen any resin or 3d types offered like these.
-
Procrastination is the mark of superior intelligence. At least, that’s what I keep telling myself (and my wife).
-
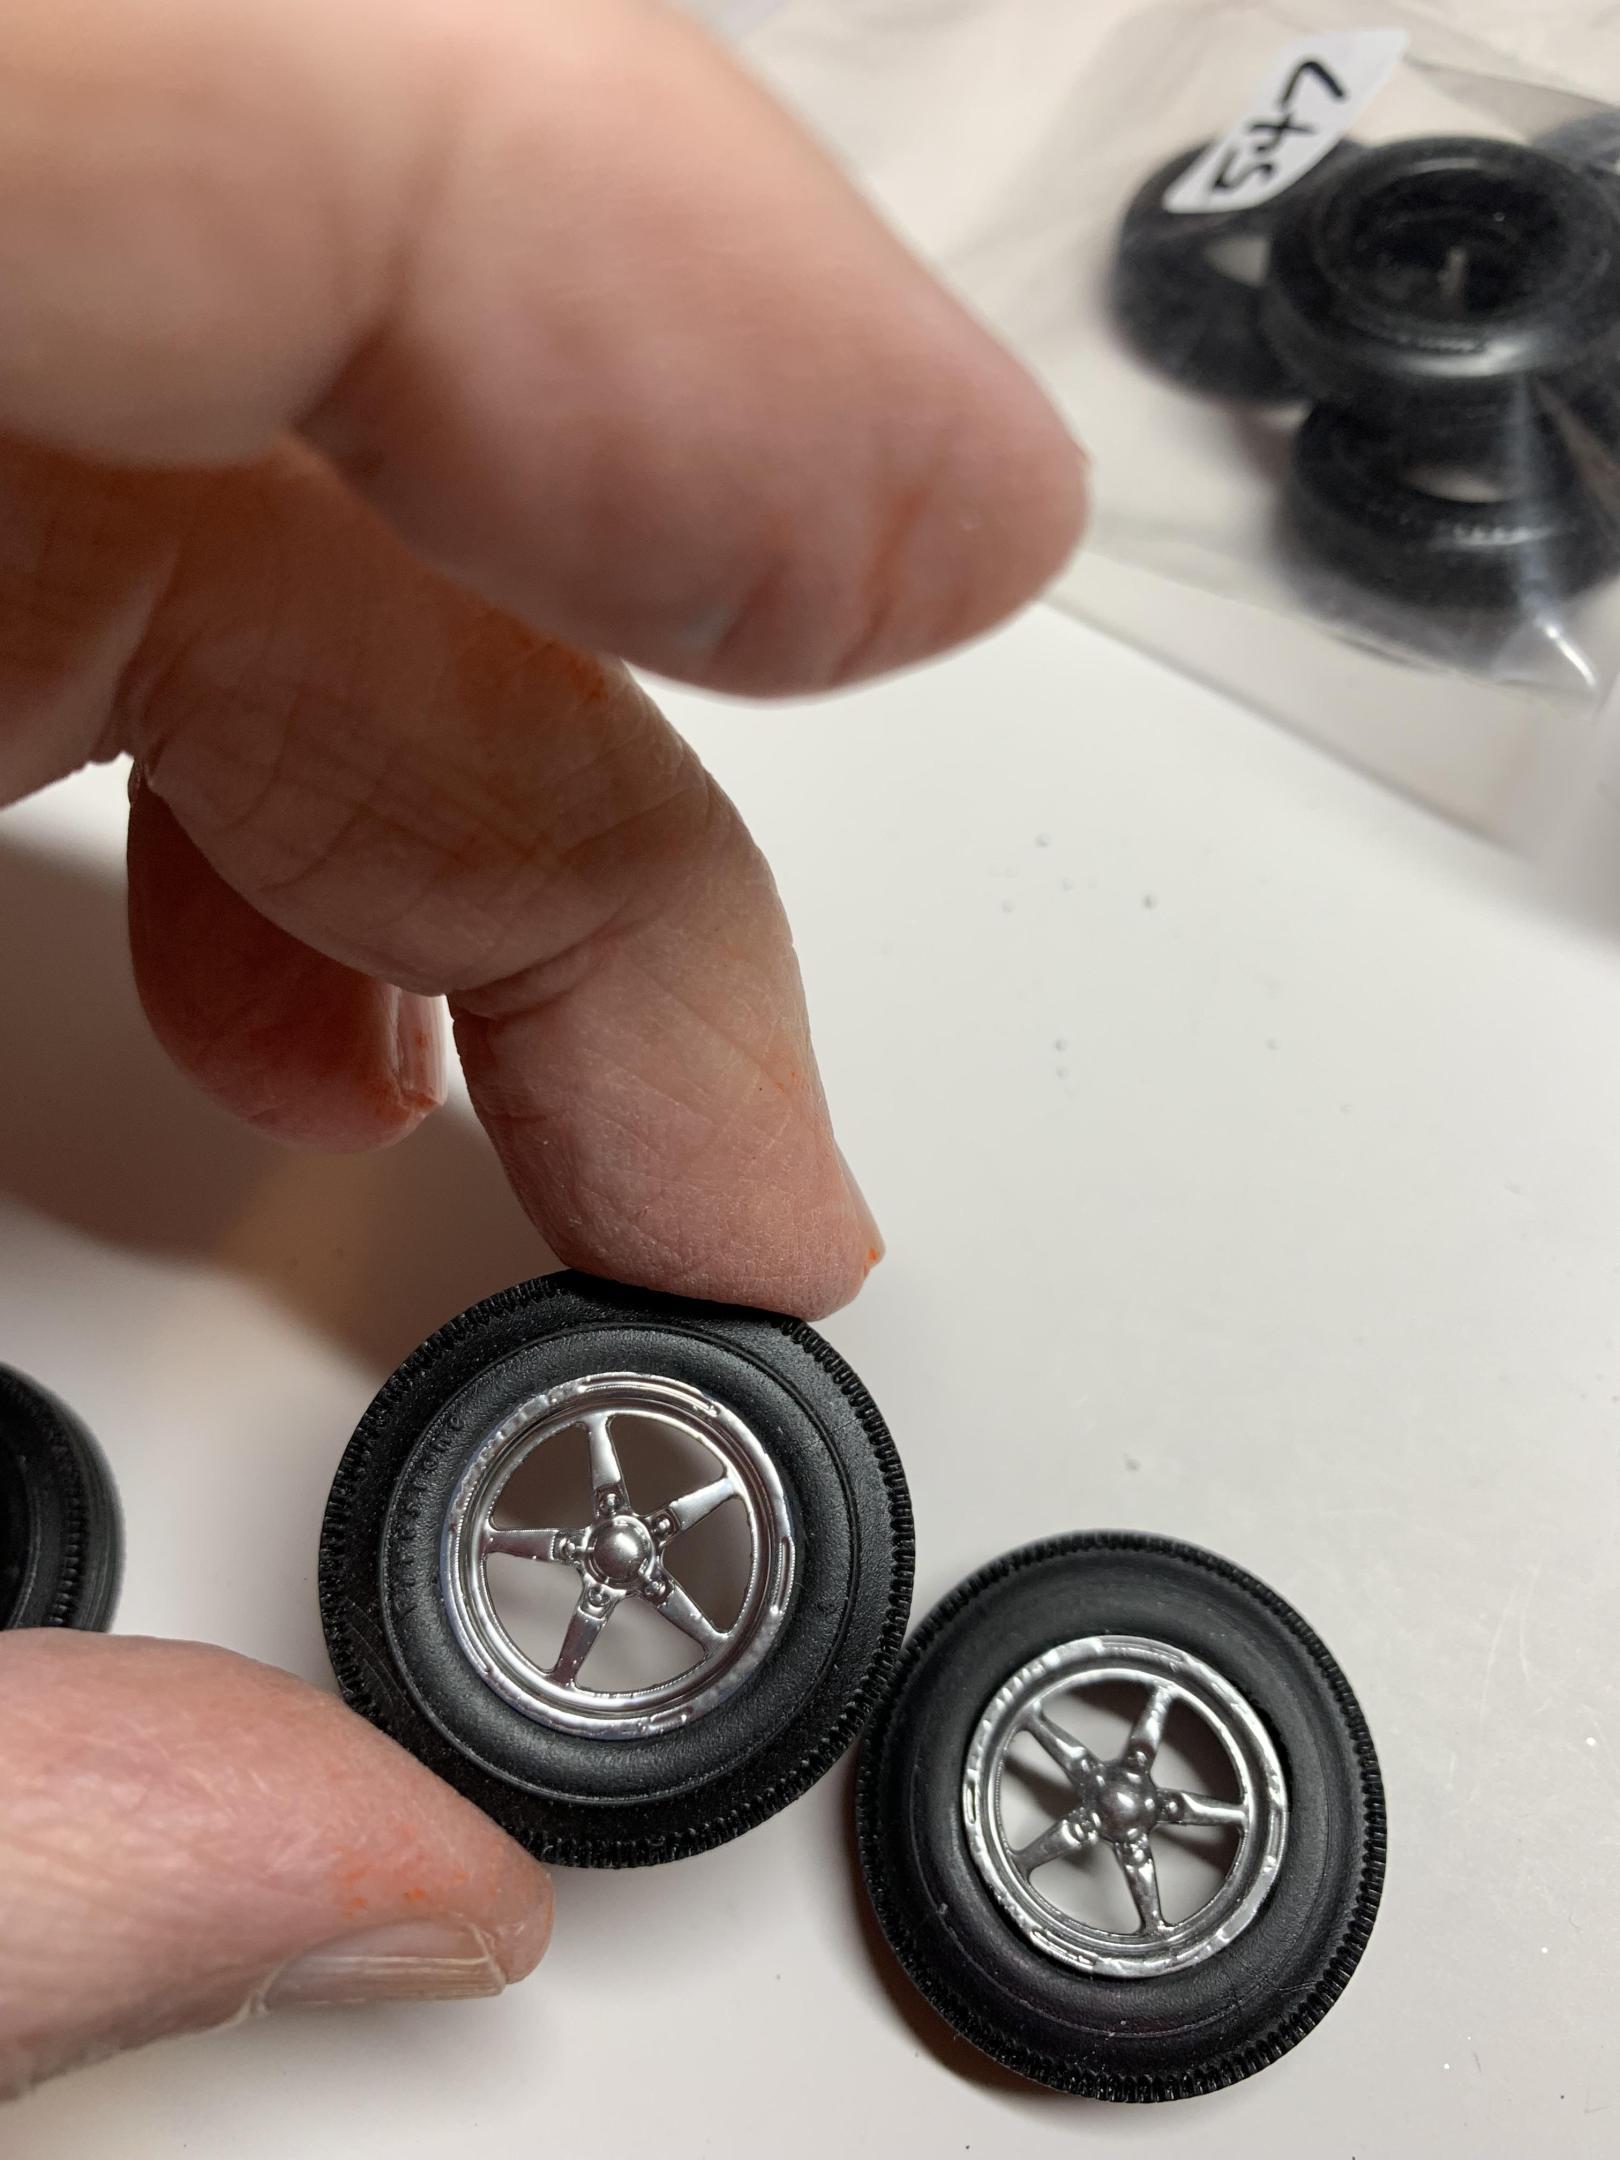
Sharp eye. Got these Alumastar wheels for Mike McDonald’s F/SA build that I posted on this forum. Since they are pretty close, I decided to use them on this one (my ocd not withstanding). Please post a pic and, if possible, the o.d. Of the wheels you ordered. Most are designed to emulate full size 17-19 inch wheels, unfortunately. Most of the cars I build use 15” wheels. Thanks for the input and, by the way, on all my builds I appreciate honest critiques, questions, and suggestions. That is how we learn and improve. Almost forgot, your Nova chassis and engine looks sweet.
-
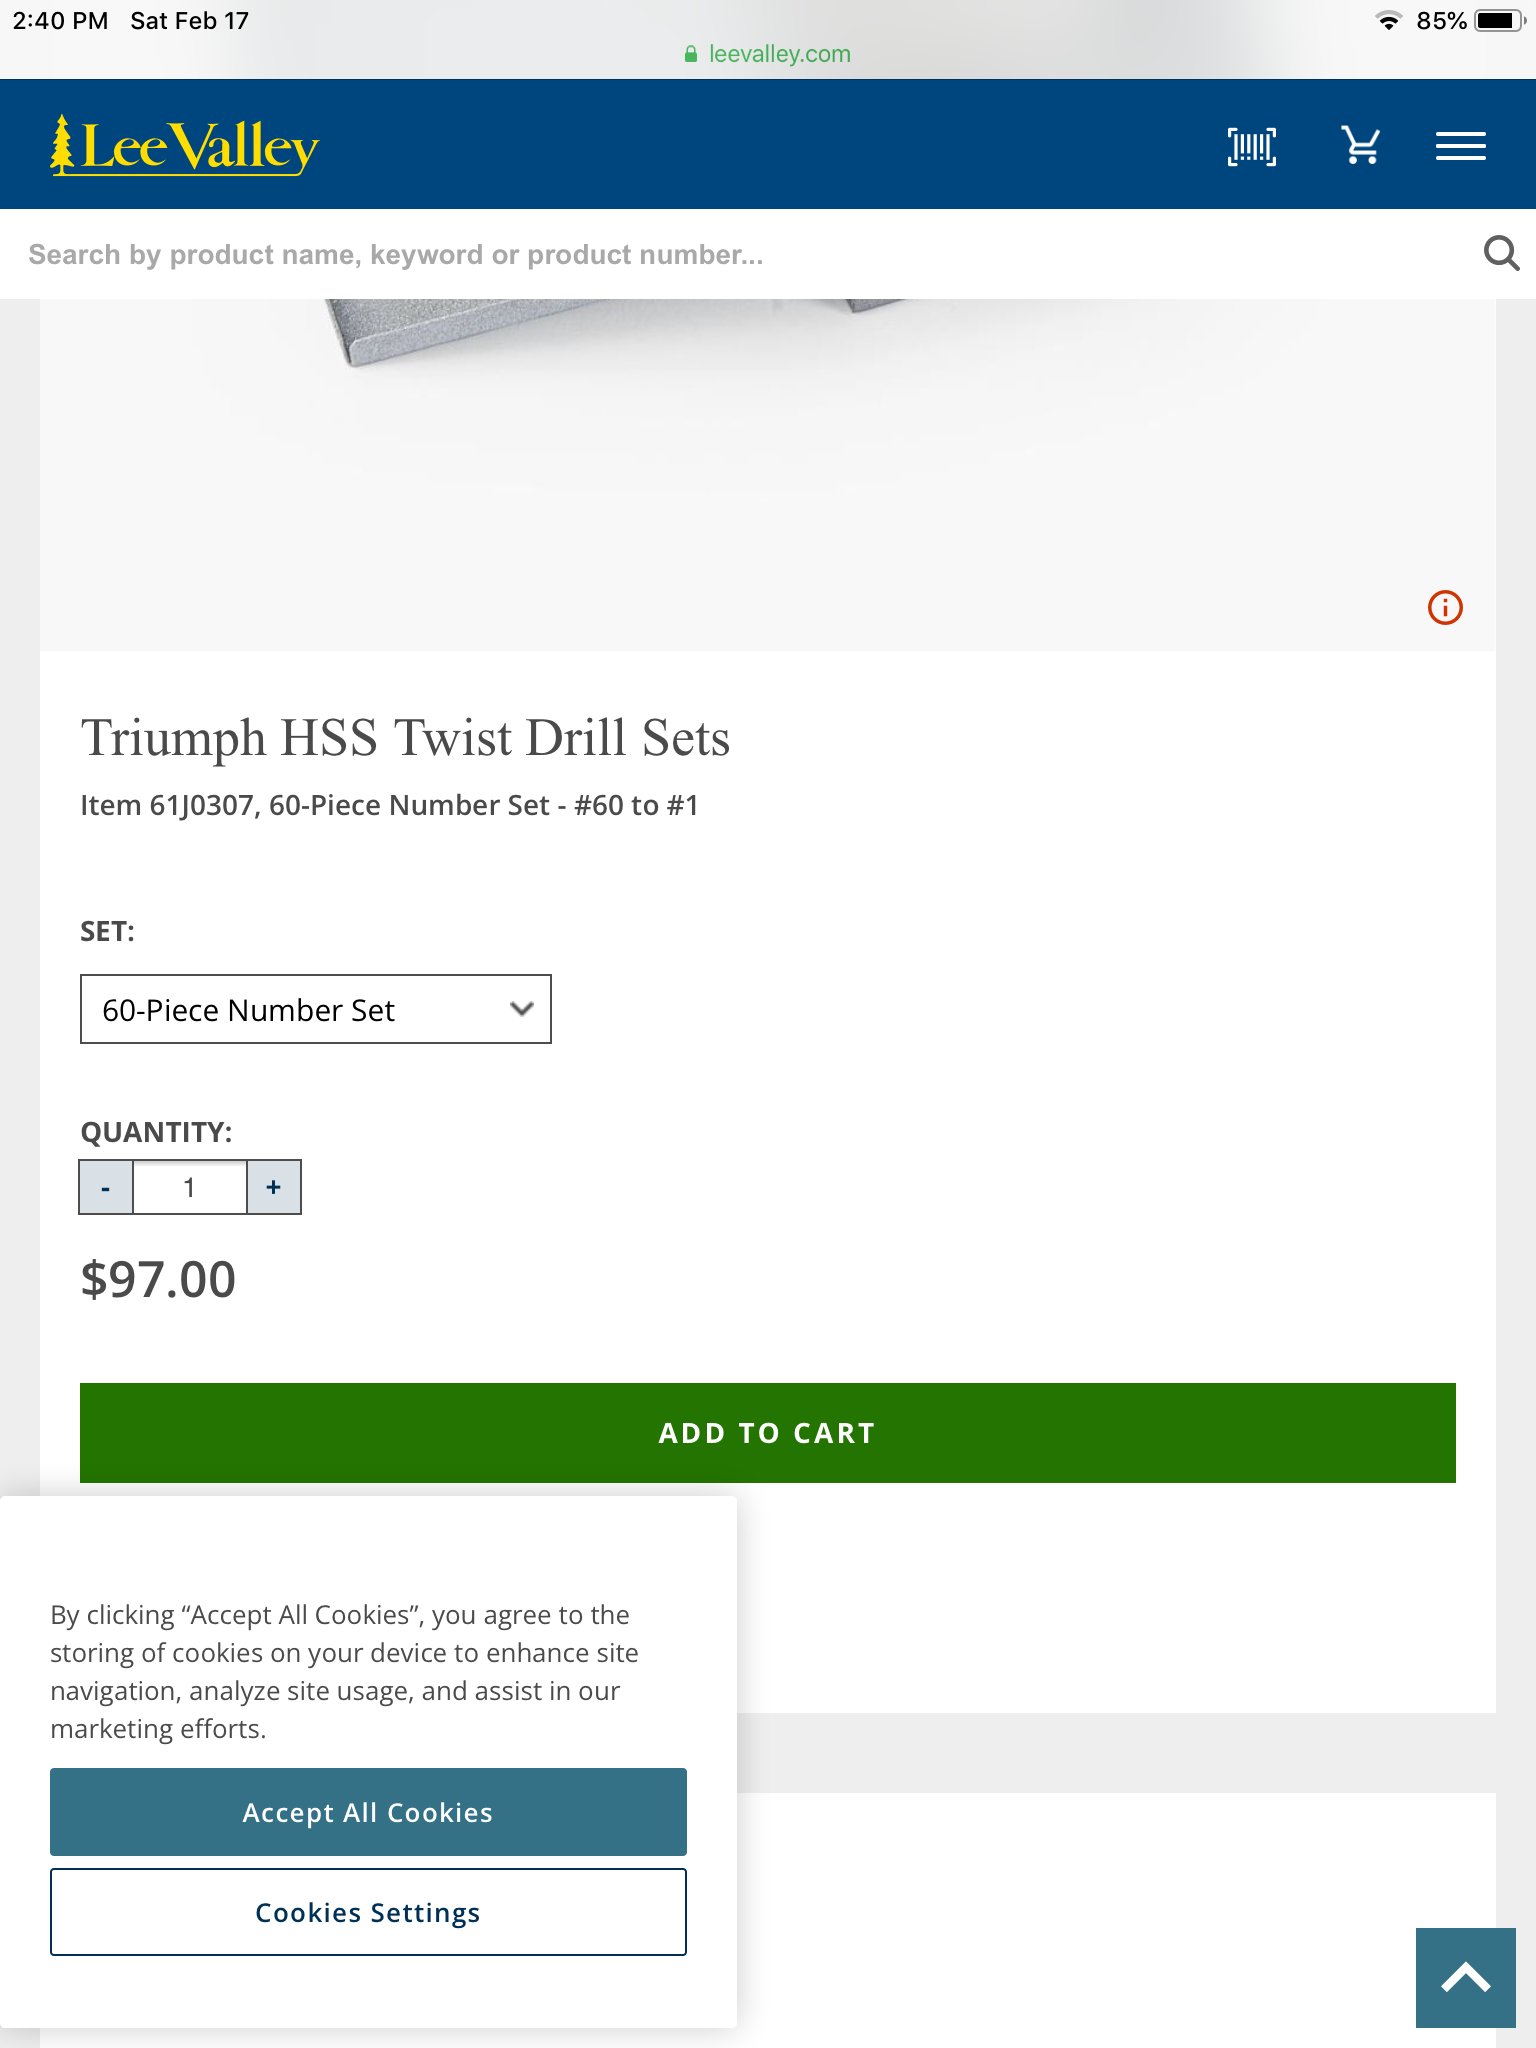
Probably a tad prejudiced, but the Triumph hss bits that I have used in the garage for the past 50 or so years and in modeling for about 7 years are gonna be tough to beat. I have broken 0 of these in modeling. Are the newer bits as good as my old ones? Probably not, but still? As for the price, I am confused about your pricing of 5 to 20 dollars apiece. A quick search revealed this 60 piece number set from LeeValley that averages a buck and a half apiece.
-
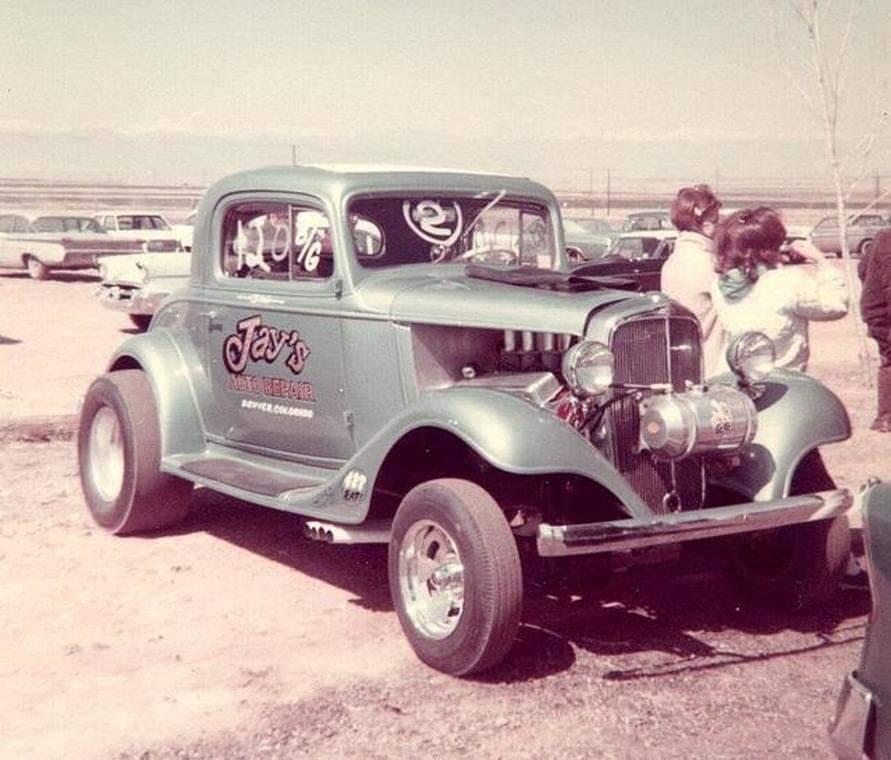
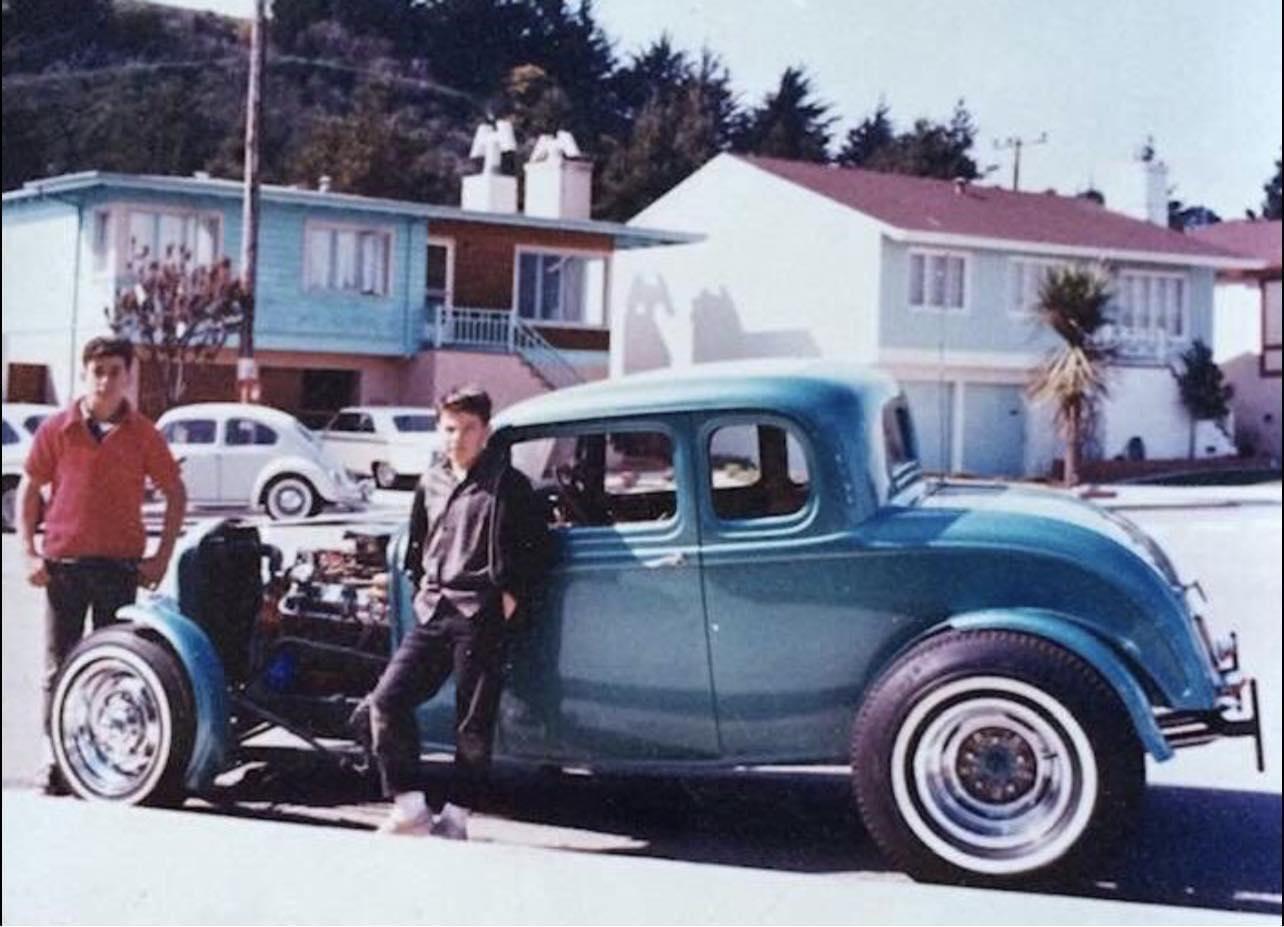
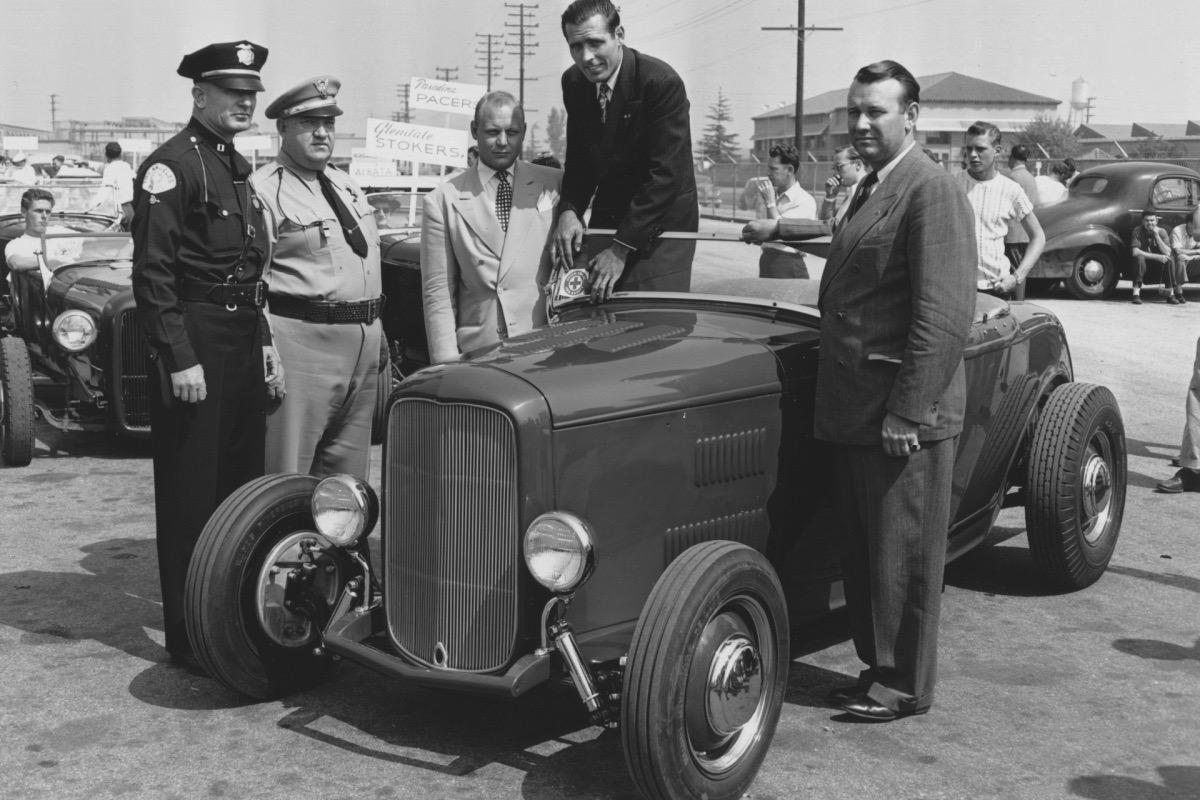
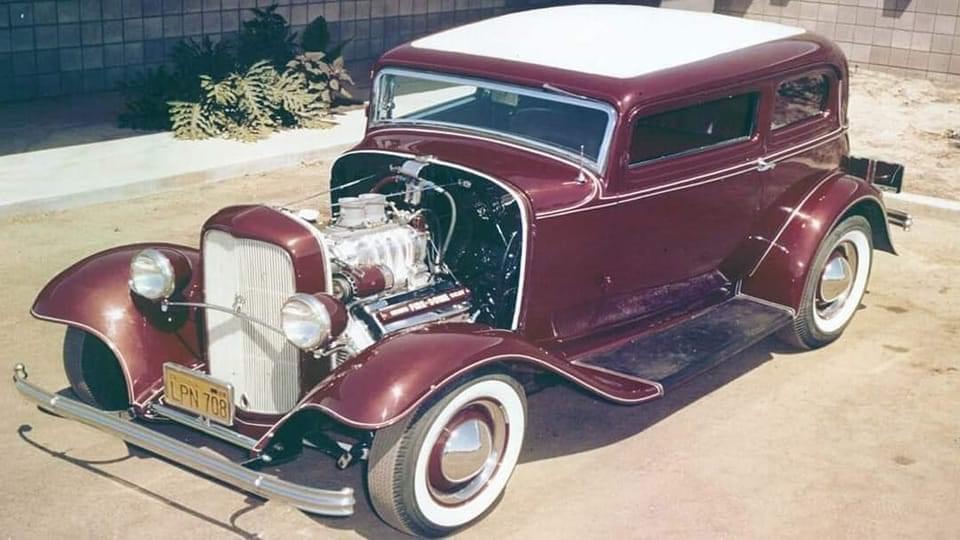
Thought you might like some eye candy from Dragcitycastings site. He posts some great pics every day.
-
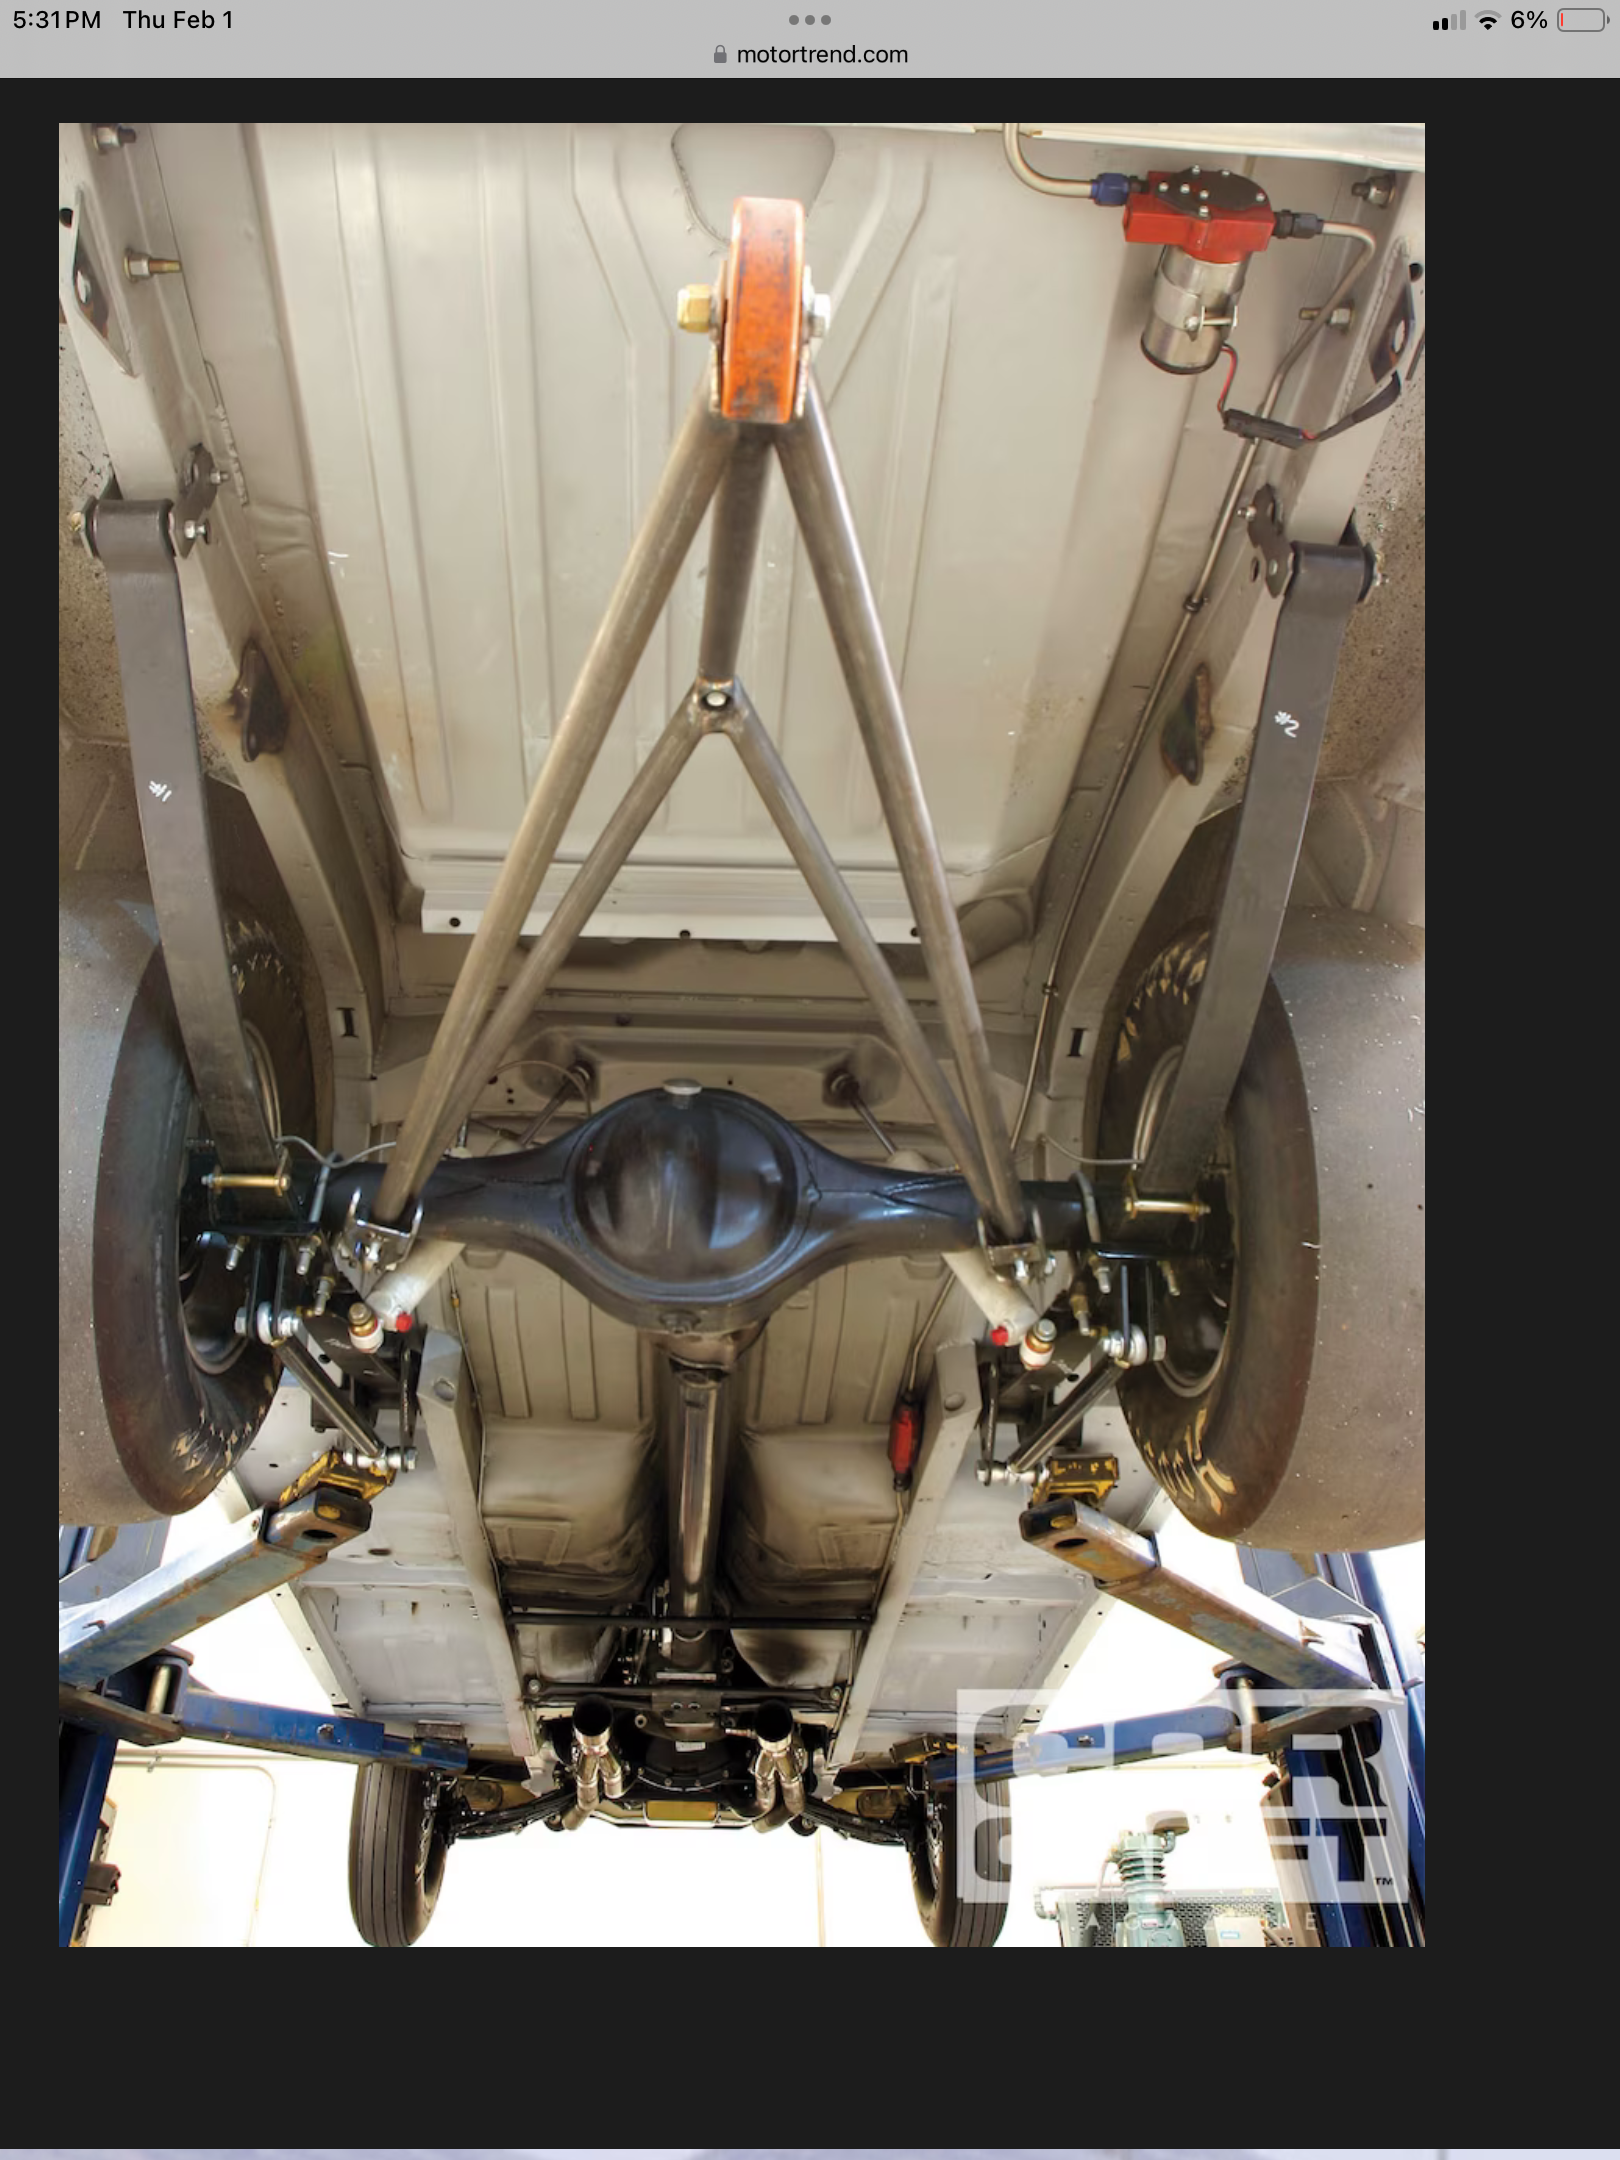
1930 Model A Five Window Coupe Full-Fendered B/G Project
R. Thorne replied to tim boyd's topic in WIP: Drag Racing Models
Thanks, Tim, for the pictures and further info. That certainly looks like an early style scattershield. I made a mistake on the later style Lakewood bellhousing that I used on my 55 Nomad stocker. I referred to it as coming from a parts pack, when ,in fact, it came from a 57 Nomad model kit. I just received today from eBay some engines from a 57 Nomad model kit that verifies this. The 55 Nomad that I built came with extra parts from a 57 Nomad that I forgot about. Anyway, it is a nice later 60’s Lakewood scattershield. Thanks again.
-
Cal Custom hood scoop
R. Thorne replied to R. Thorne's topic in Model Building Questions and Answers
Yes, Trevor, that looks like it. Do you know what kit it came from? -
Tired of switching chucks in my pin vise
R. Thorne replied to Camaro lover's topic in Tips, Tricks, and Tutorials
Good tips Rick and Pete. I have had this set for 3 or 4 years and really like it.
-
Cal Custom hood scoop
R. Thorne replied to R. Thorne's topic in Model Building Questions and Answers
Thanks, Mark. Probably too pricey for me just for the scoop. The top of the Mustang ram air is similar. Probably just make one. -
As the title says, looking for a reasonable facsimile. I think it may have come on some Monogram 55 Chevy kits and others, but I am not sure of the specifics. Something like these pics, but there may be other variations.