89AKurt
-
Posts
8,429 -
Joined
-
Last visited
Content Type
Profiles
Forums
Events
Gallery
Everything posted by 89AKurt
-
You're killing me! ? Is that cigar wrap mahogany? I have a bunch of that.
-
Thanks! Shakesbeer wrote, brevity is the soul of wit. ? Merci pour le commentaire aimable. ? Appreciate that! Thanks! Not my idea, was inspired by someone else who dared to spend a fortune. Thank you my friend. Always enjoy your WIP. It was a I-have-to-do-this for a long time, thank you. Thanks! Not bad for common (whoops, been discontinued, what the heck am I going to do?) Testors yellow with Model Master pearl clear. ?
-
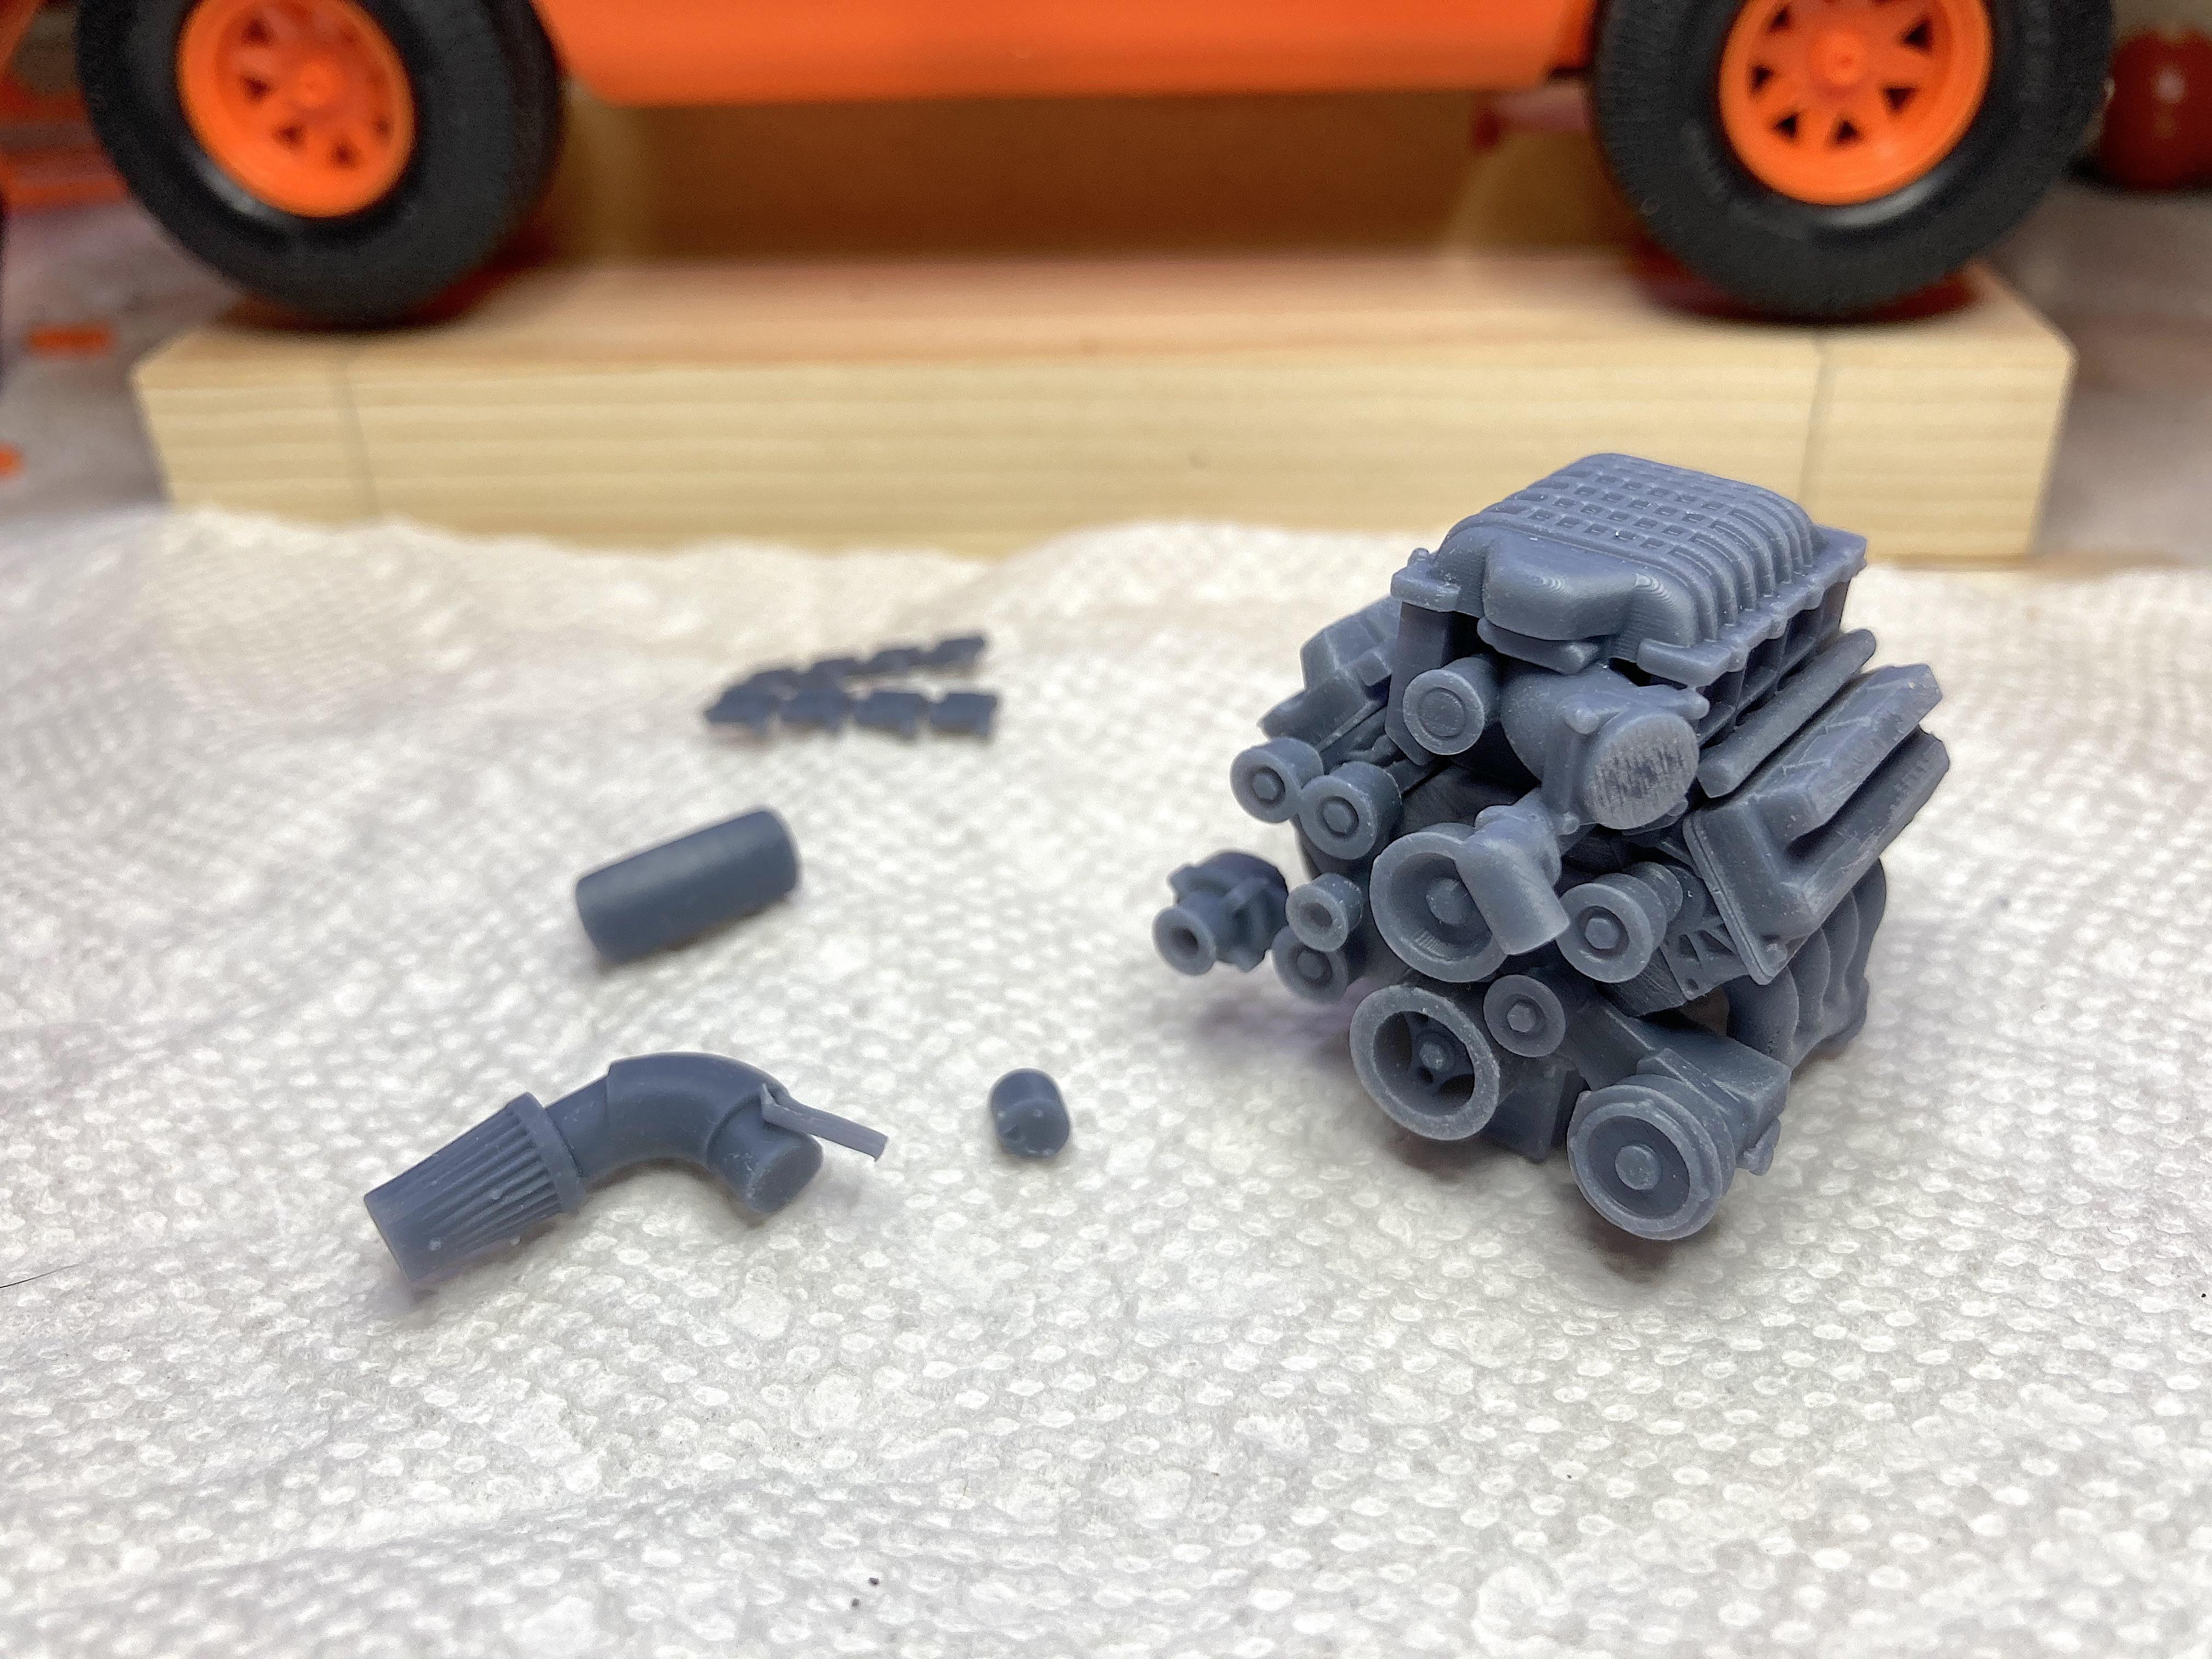
If you can stand eBay, put in a search 'resin engine 1/24' and most of the time it will be Iceman Collectibles offerings. The Hellcat engine looks good, really don't need any cleanup. You have more than the hood to worry about. The frame rails might not be wide enough, but I never did this transplant, just basing on the real thing. The steering box clearance is an issue.

-
chicken marinade, boiling
-
There have been times I wanted to try this. Good tutorial, thanks for posting.
-
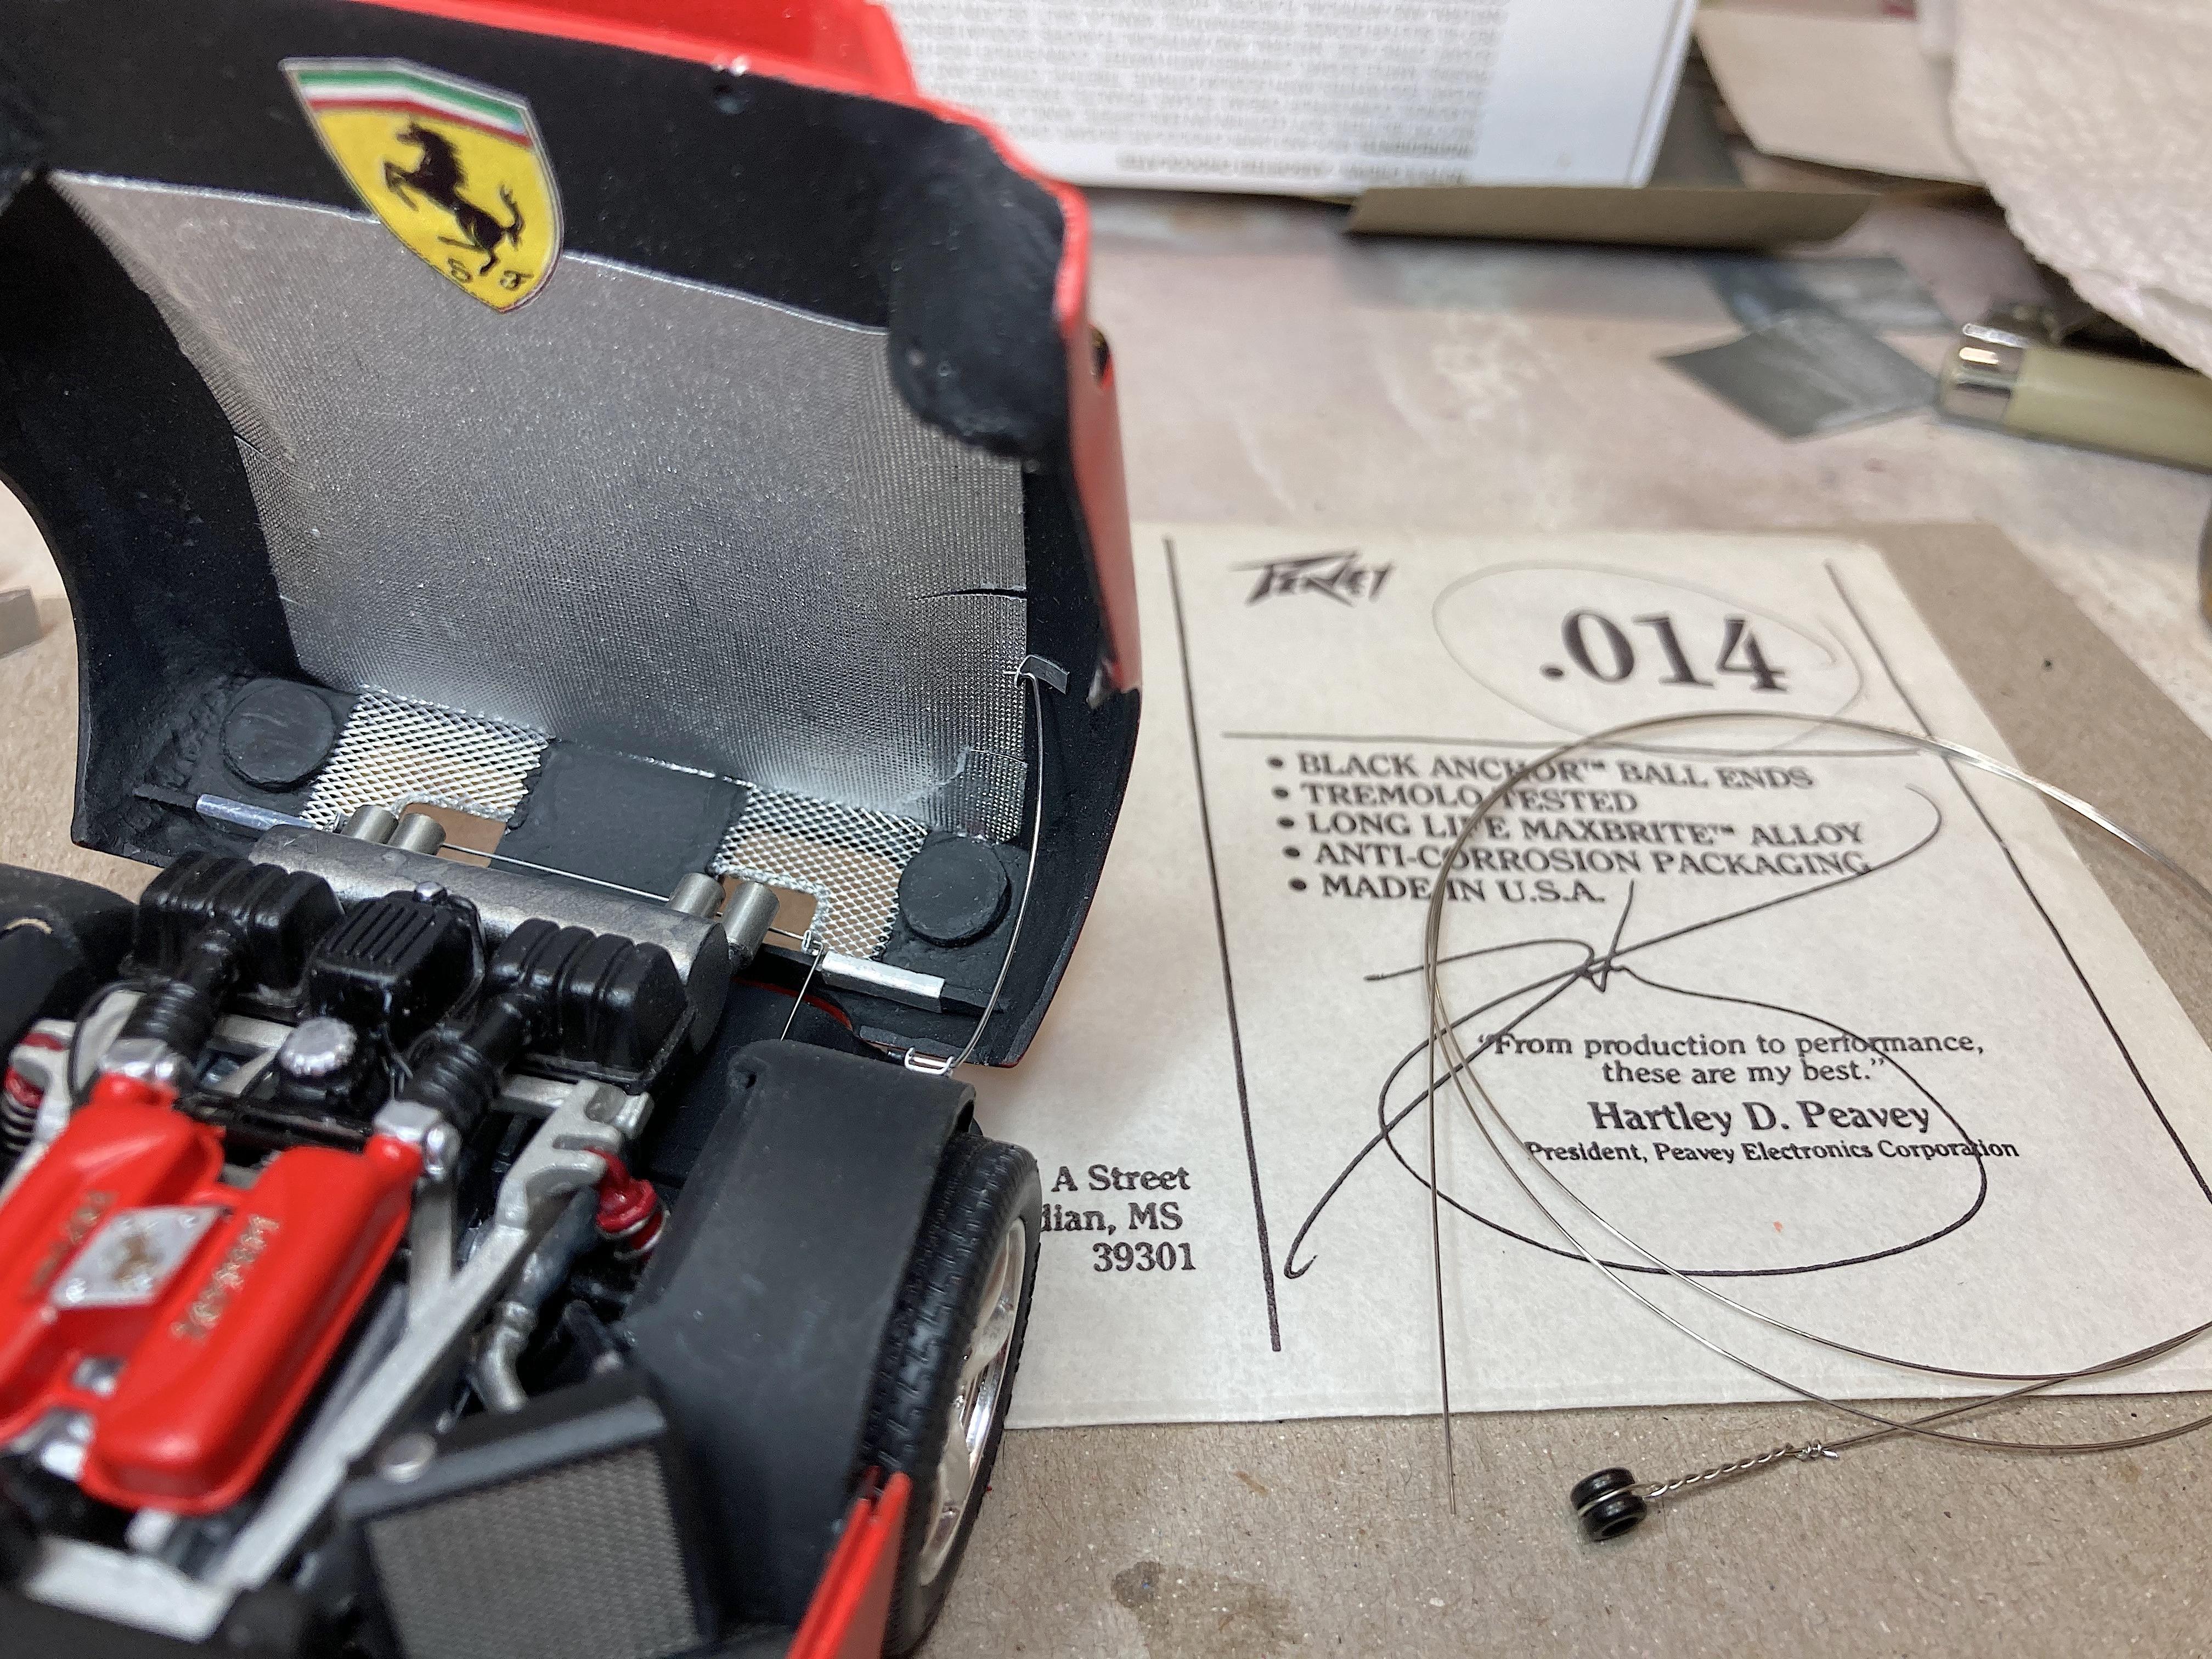
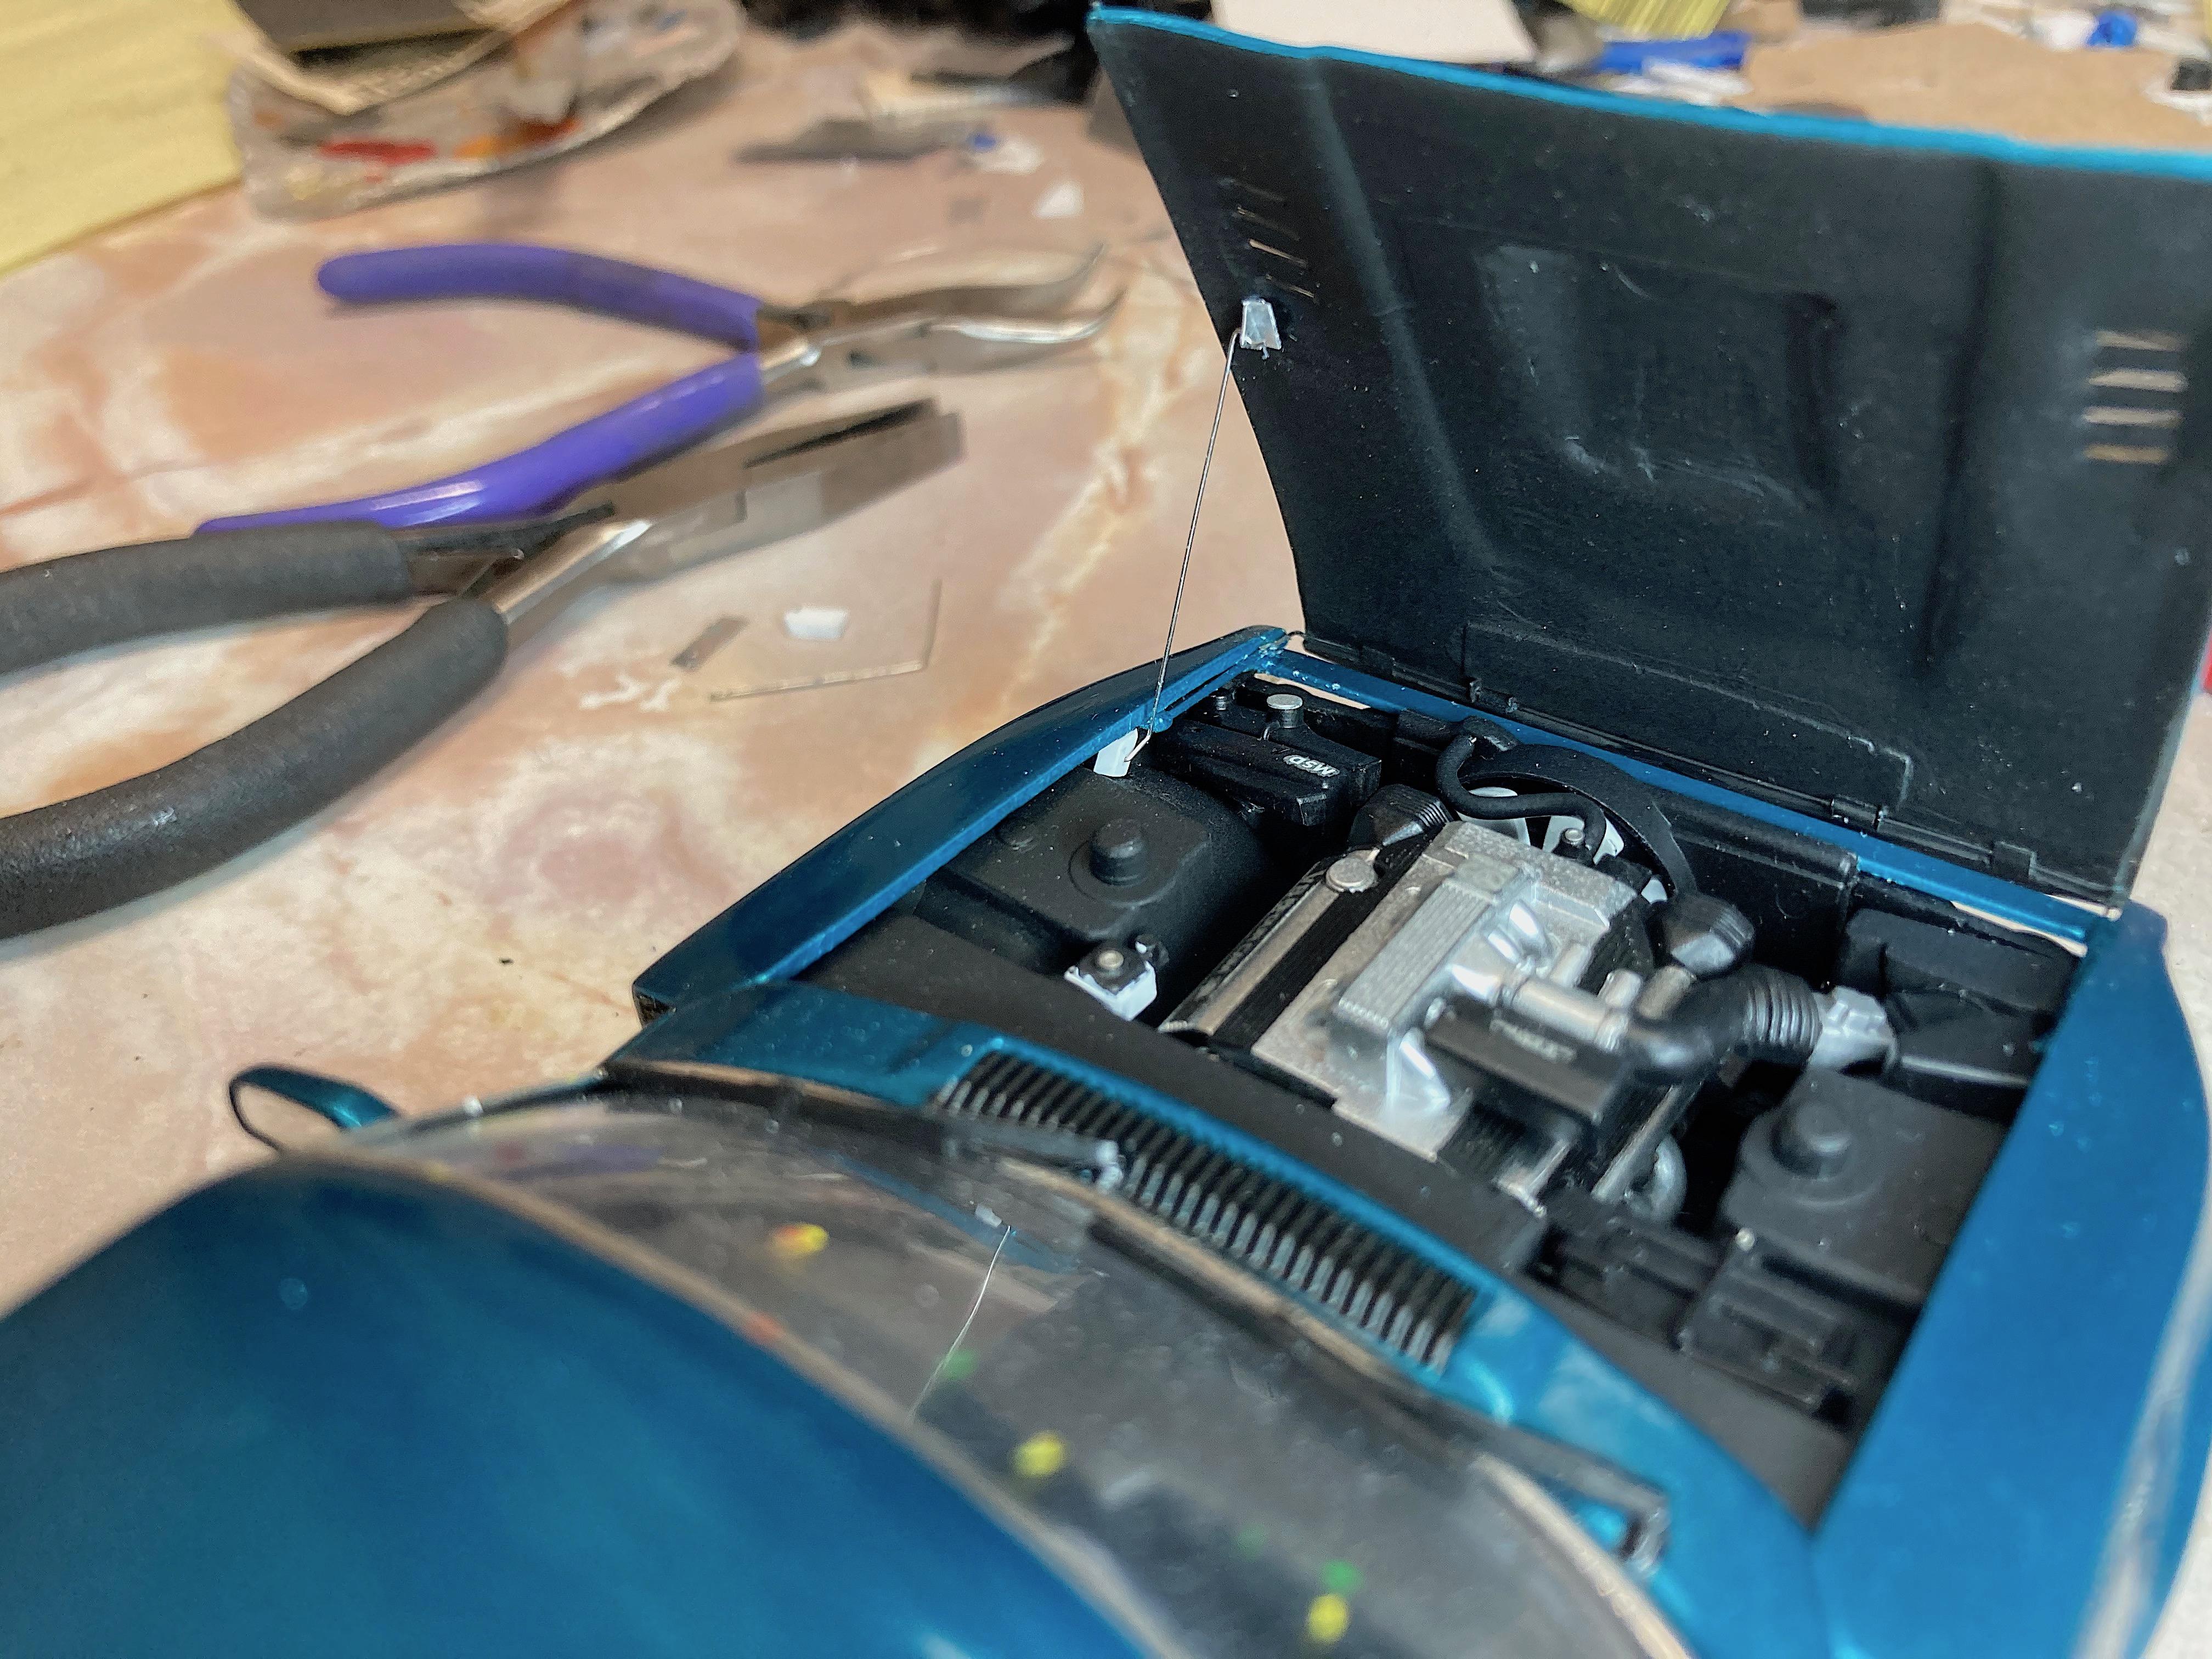
~bump~ Thanks Dann! All this time, it was bugging me that the hood was flopping back too far when opened. So I fixed it tonight! Bent aluminum plate, bent guitar string, which is held on with wire insulation "nut". I'm just going to make prop rods for every project from now on! Unless I make hinges that hold the hood up.
-
 Something that bothered me, for almost two years, was the hood flopping too far back when opened. Made a prop rod tonight. Another project was the same thing, hood was falling down when I thought it was balanced, fixed last month. So from now on, I'm just going to make the prop rods!
-
dropped by UFOs
-
Me too. One reason I got this, was because Subaru doesn't have a WRX coupe. I can understand costs of having several body shells, but not everyone has a family to haul around.
-
I was checking out videos, am amazed at how complex these race cars are getting. Knowing how some model builders love to put on carbon-fiber decals, one of these would be a blast to make, eh? I can hear it now, #235 goes where? The mirrors have wings. Are the brakes drums now? I'm so out of touch..... ?
-
Thank you Dann, means a lot from you, my friend. Ok okay... ?? ? Does it work with glasses?
-
Excellent! It's simple enough to not be cluttered, but the attention to weathering is amazing. I have a diorama idea that could use this for inspiration.
-
was spilled on
-
I'm surprised how many GTOs are being replicated. Thank you. ? Appreciate your comment. ? Thank you!
-
Making Detail Master DM 2260 Racing Harness with paper
89AKurt replied to 89AKurt's topic in Tips, Tricks, and Tutorials
Hobby Design, and Studio 27 have them. -
Thank you! I've done a few, this Vehicross was more of a challenge. The Mercedes 170V Roadster was more challenging. So this was really a piece of cake. Thanks Curt! Much appreciated. ?
-
Making Detail Master DM 2260 Racing Harness with paper
89AKurt replied to 89AKurt's topic in Tips, Tricks, and Tutorials
Thank you. Hope it make sense. -
Hate to admit I need it. ?
-
Arizona really needs that moisture! We got a dusting of snow, just enough to make the weeds grow soon, which will exacerbate the exceptional drought conditions.
-
(HRM) Shelby Cobra Daytona Coupe
89AKurt replied to Venom's topic in WIP: Other Racing: Road Racing, Land Speed Racers
Coming along beautifully! Love the tape idea, why didn't I think of that? ? -
Making Detail Master DM 2260 Racing Harness with paper
89AKurt replied to 89AKurt's topic in Tips, Tricks, and Tutorials
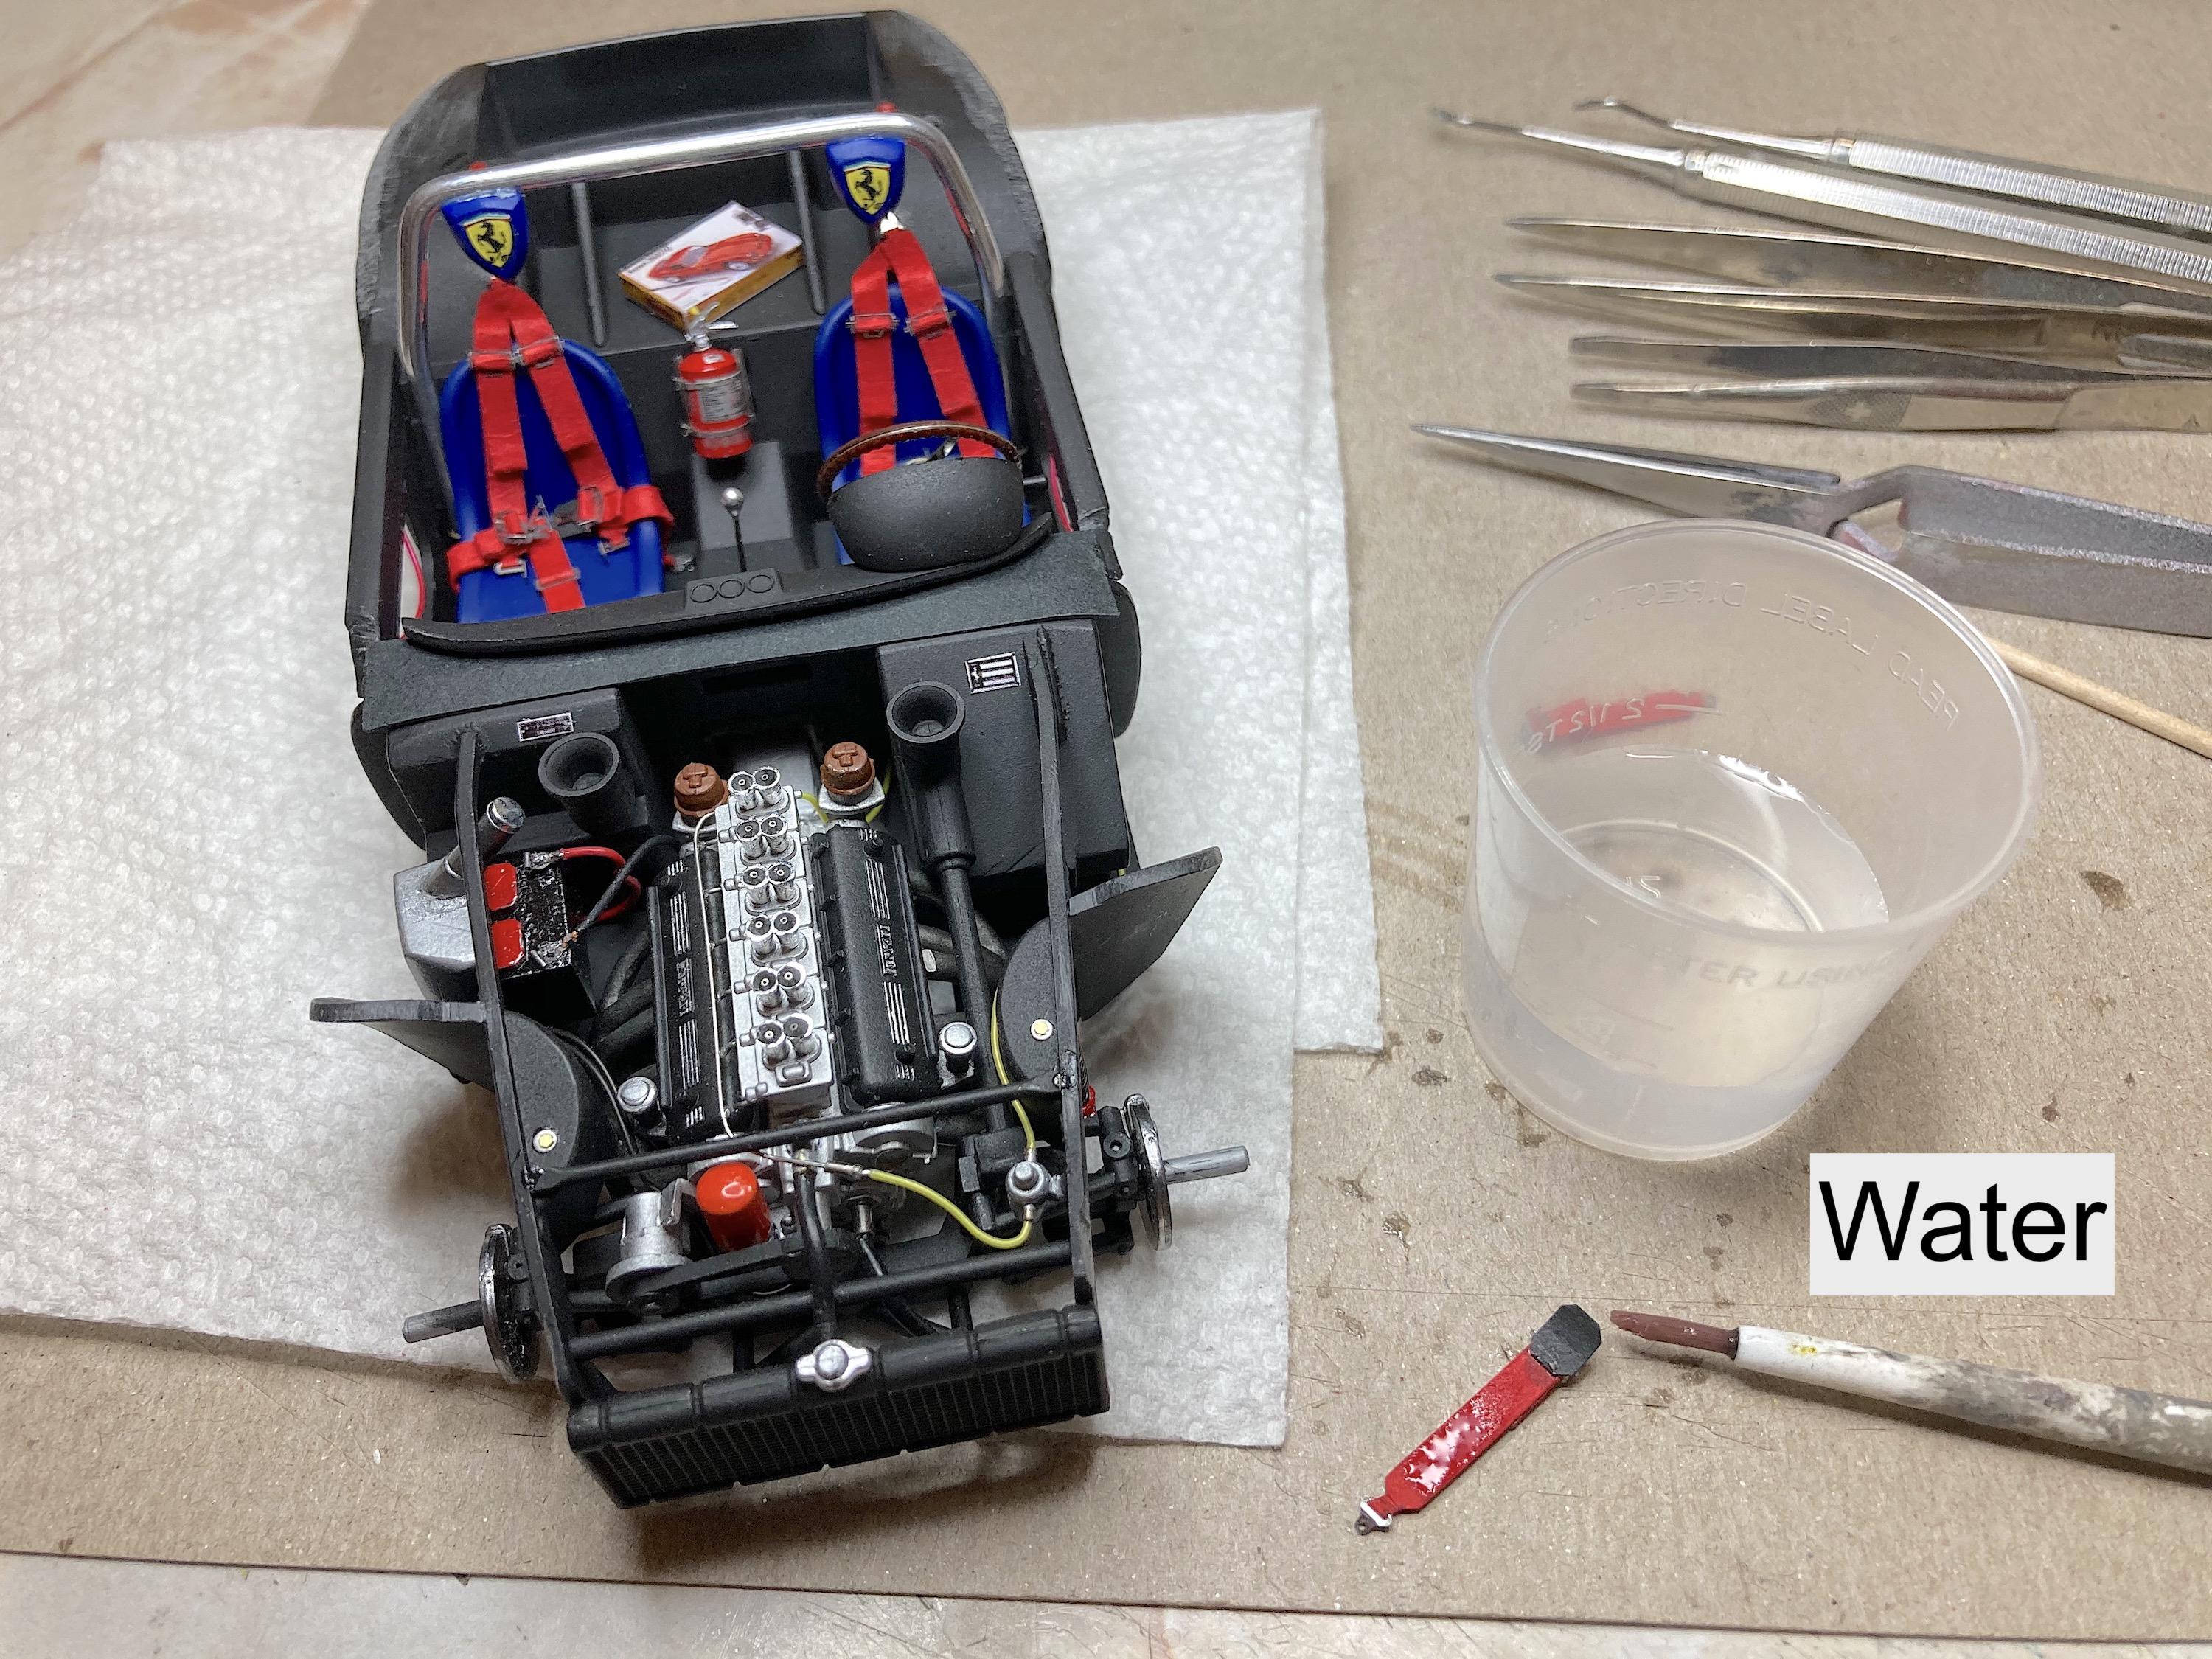
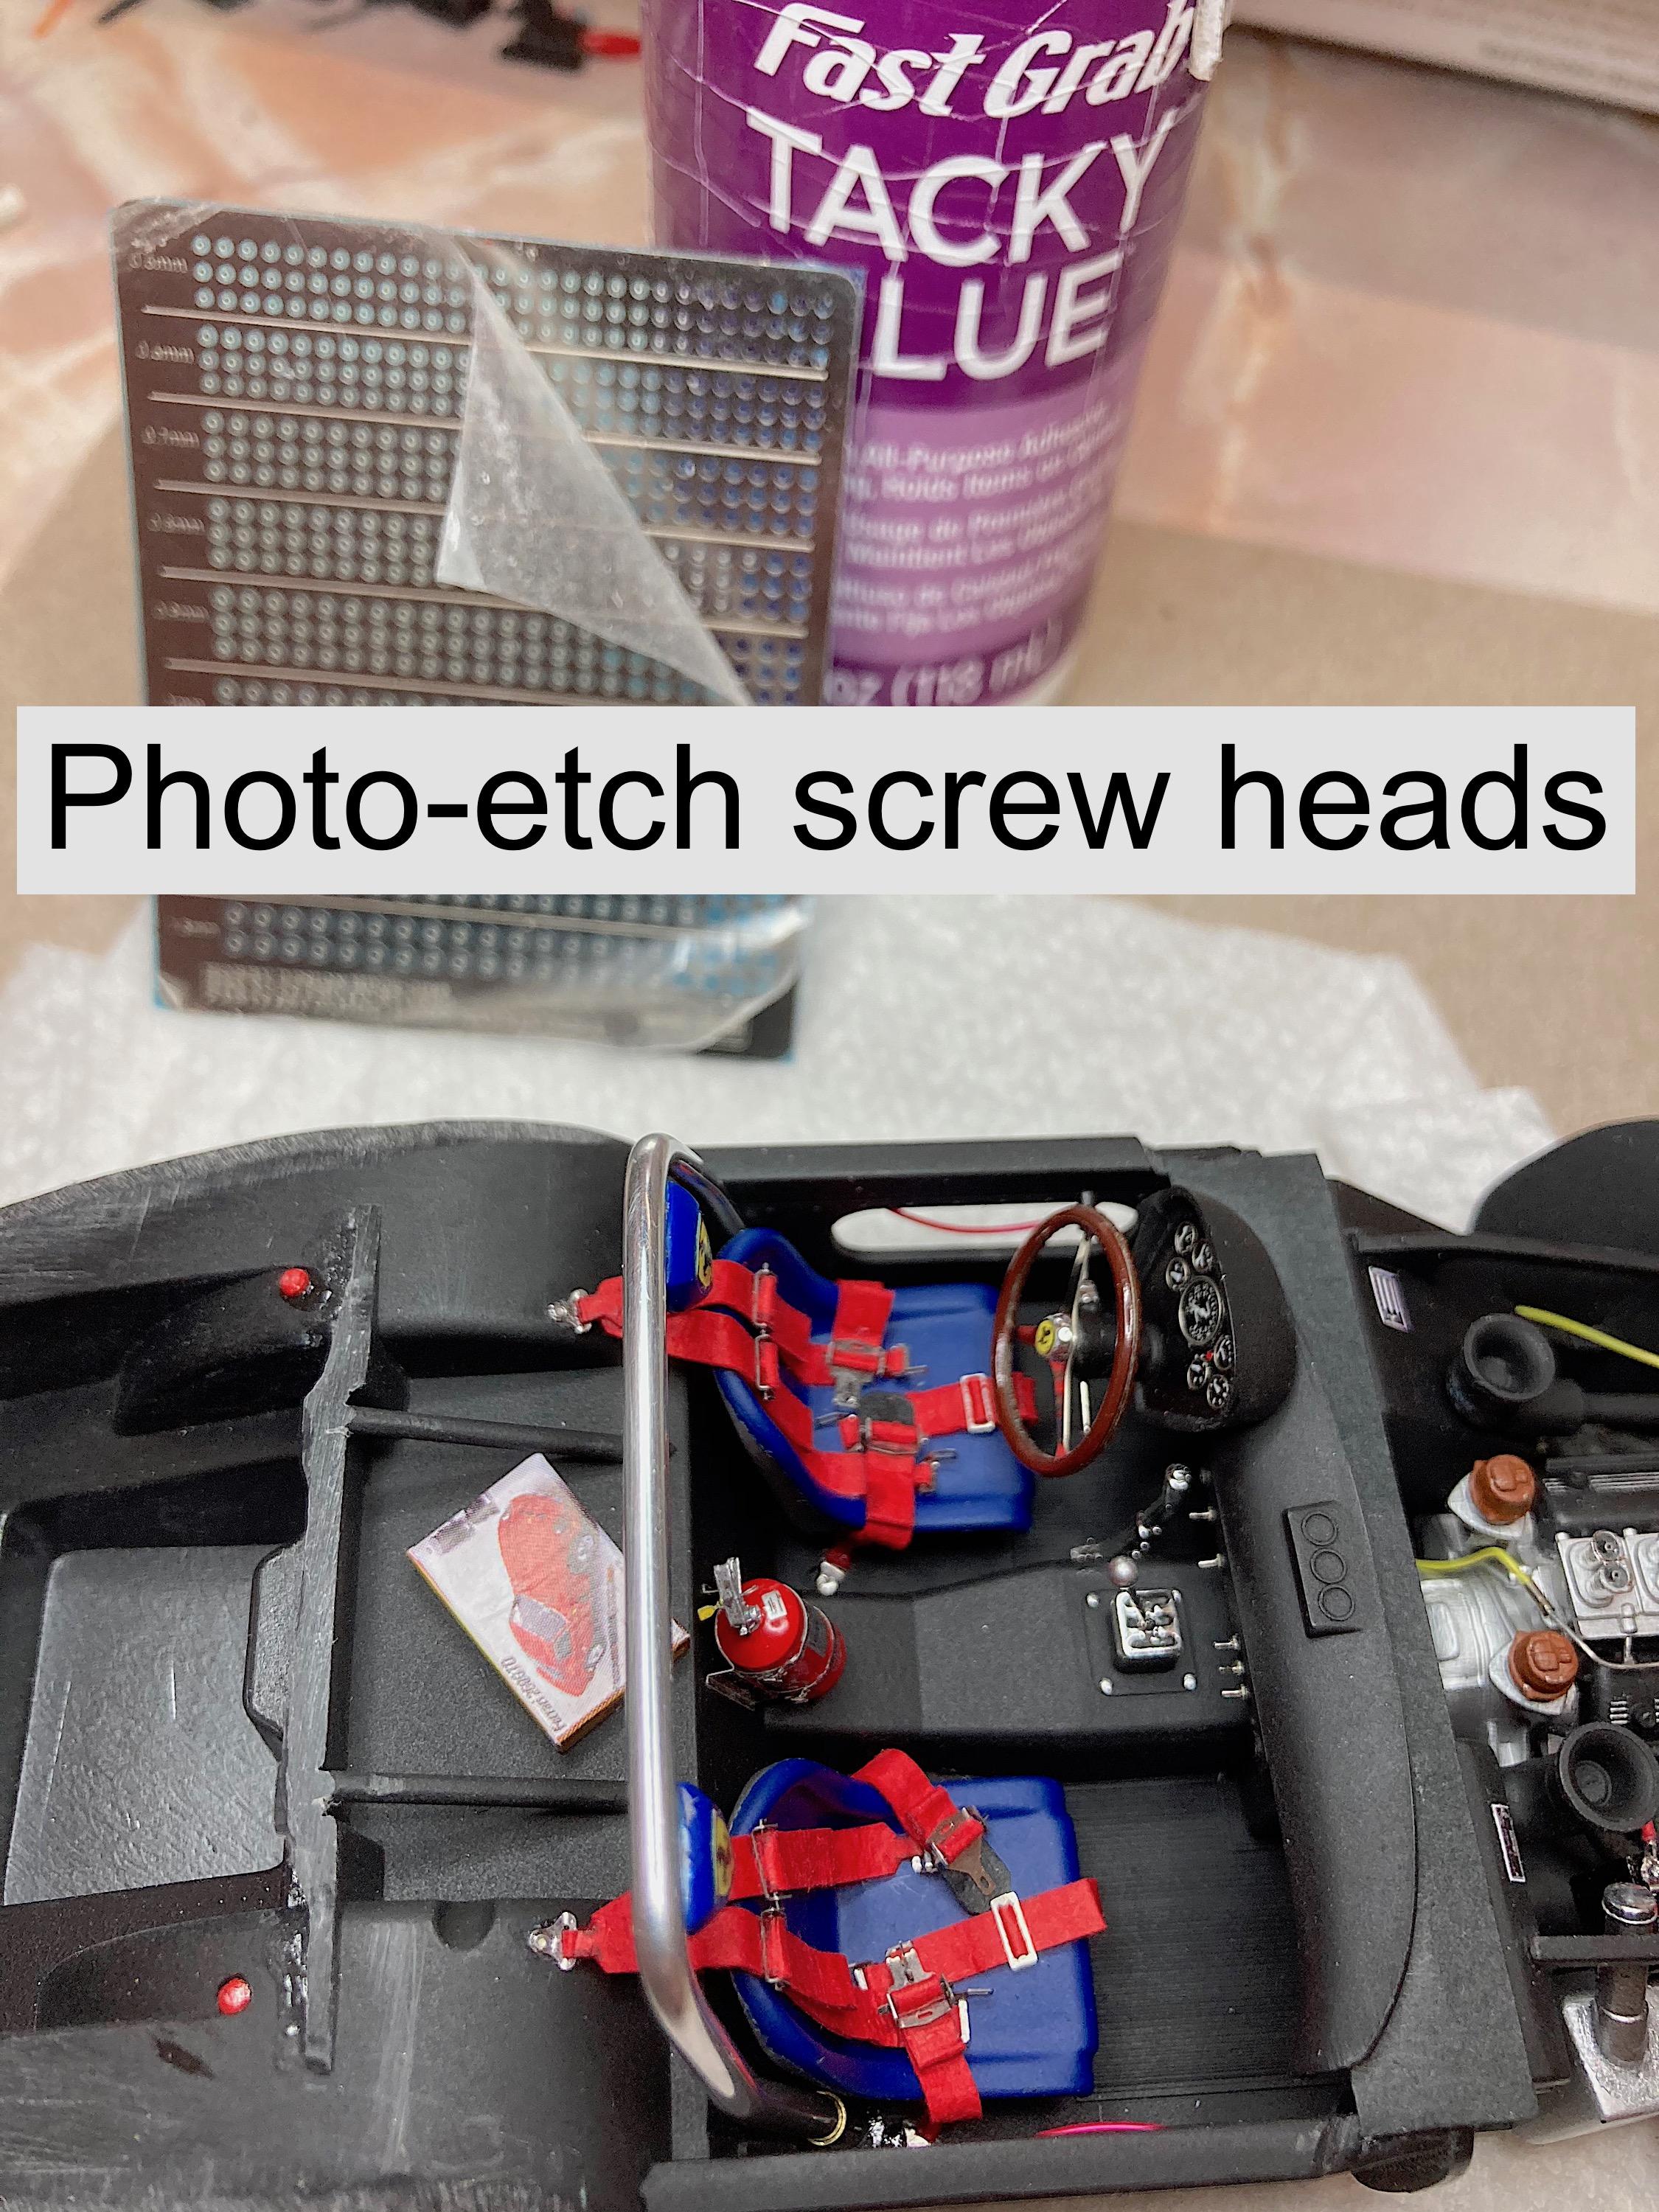
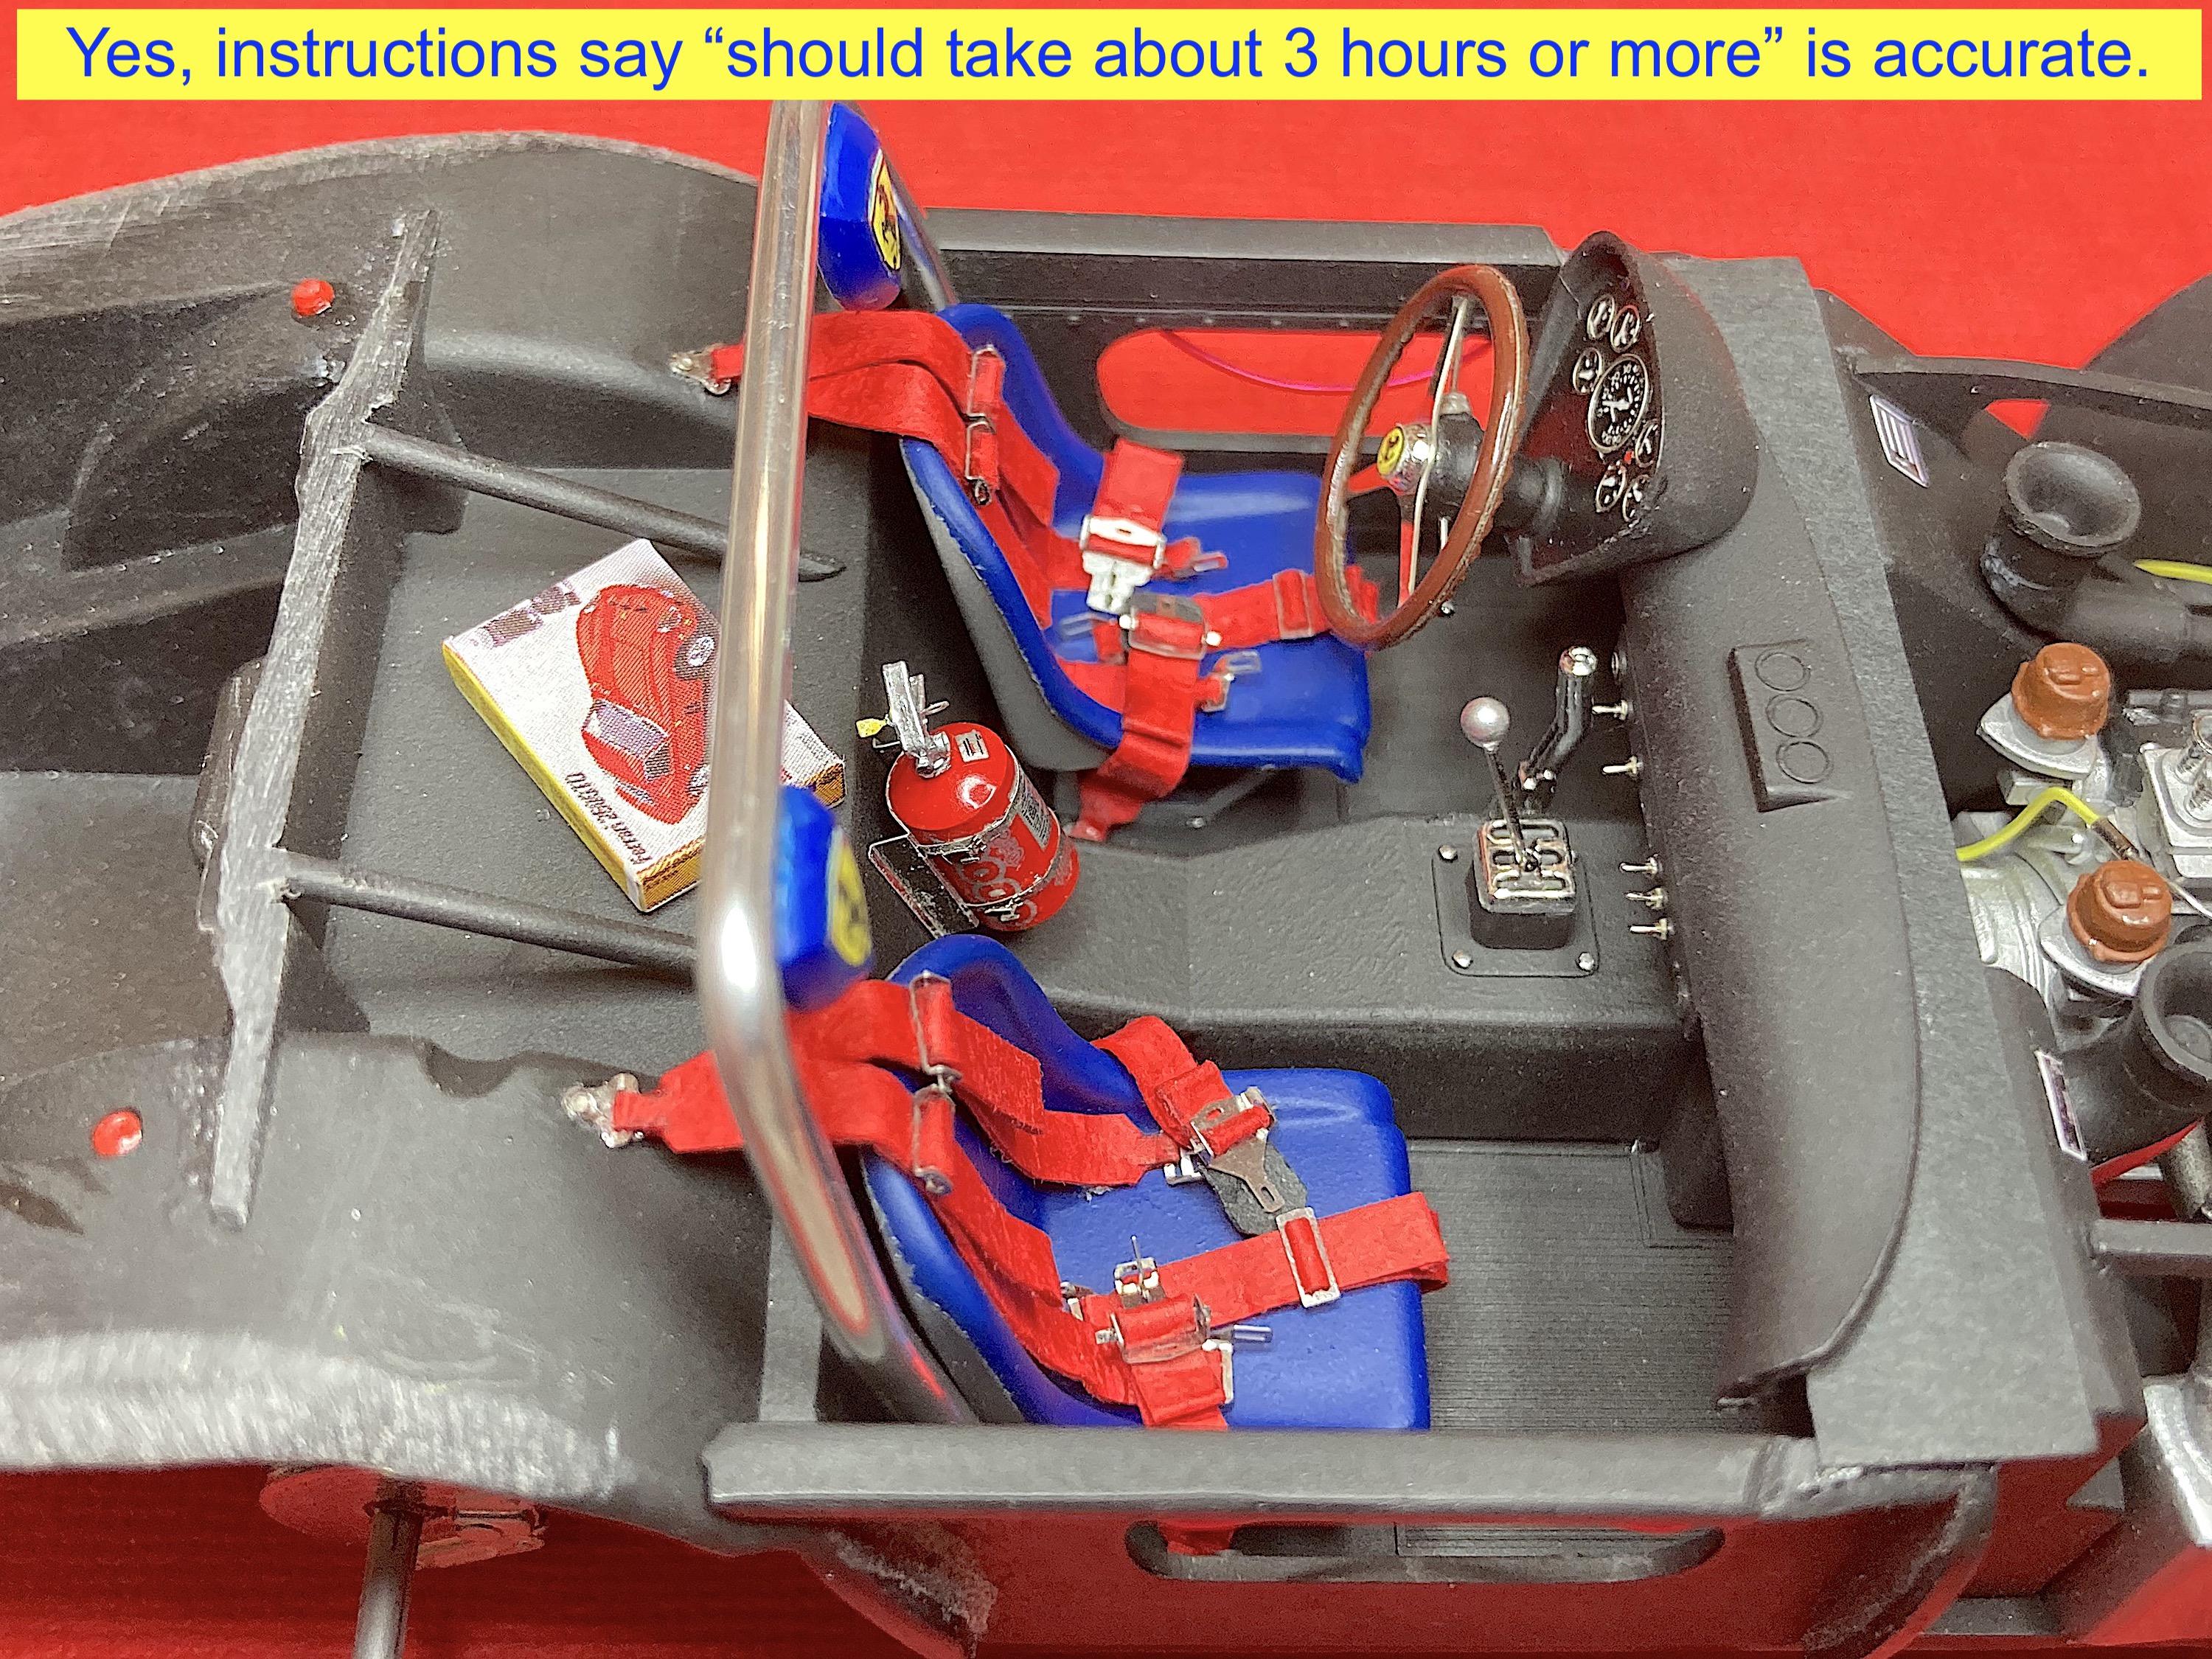
At the time it's very frustrating, but in the end, it's worth it. Someone in my model club gave me this set, wanted me to make a set for his stock car. I said his will be the guinea pig. ? Still not sure if the lever is in correctly. What I learned: What they look like up close. Water is used because it softens the paper, and when dried it stays pretty much in place, unlike ribbon. Brushed on both sides. I suggest planning ahead, leave the door panels off if you can. One more thing to drive yourself nuts (pun intended), add photo-etch bolt heads. Needed a little Tacky glue to get the belts on the bottom cushion. Most racing belts have the manufacturer name on the shoulder belts. I'm guessing the thing to do, is sand most of the paper off the back of the patches, and glue on with Tacky glue, to avoid breaking the decal. Hope this helps someone who has been daunted by doing this.
-
Making Detail Master DM 2260 Racing Harness with paper
89AKurt replied to 89AKurt's topic in Tips, Tricks, and Tutorials
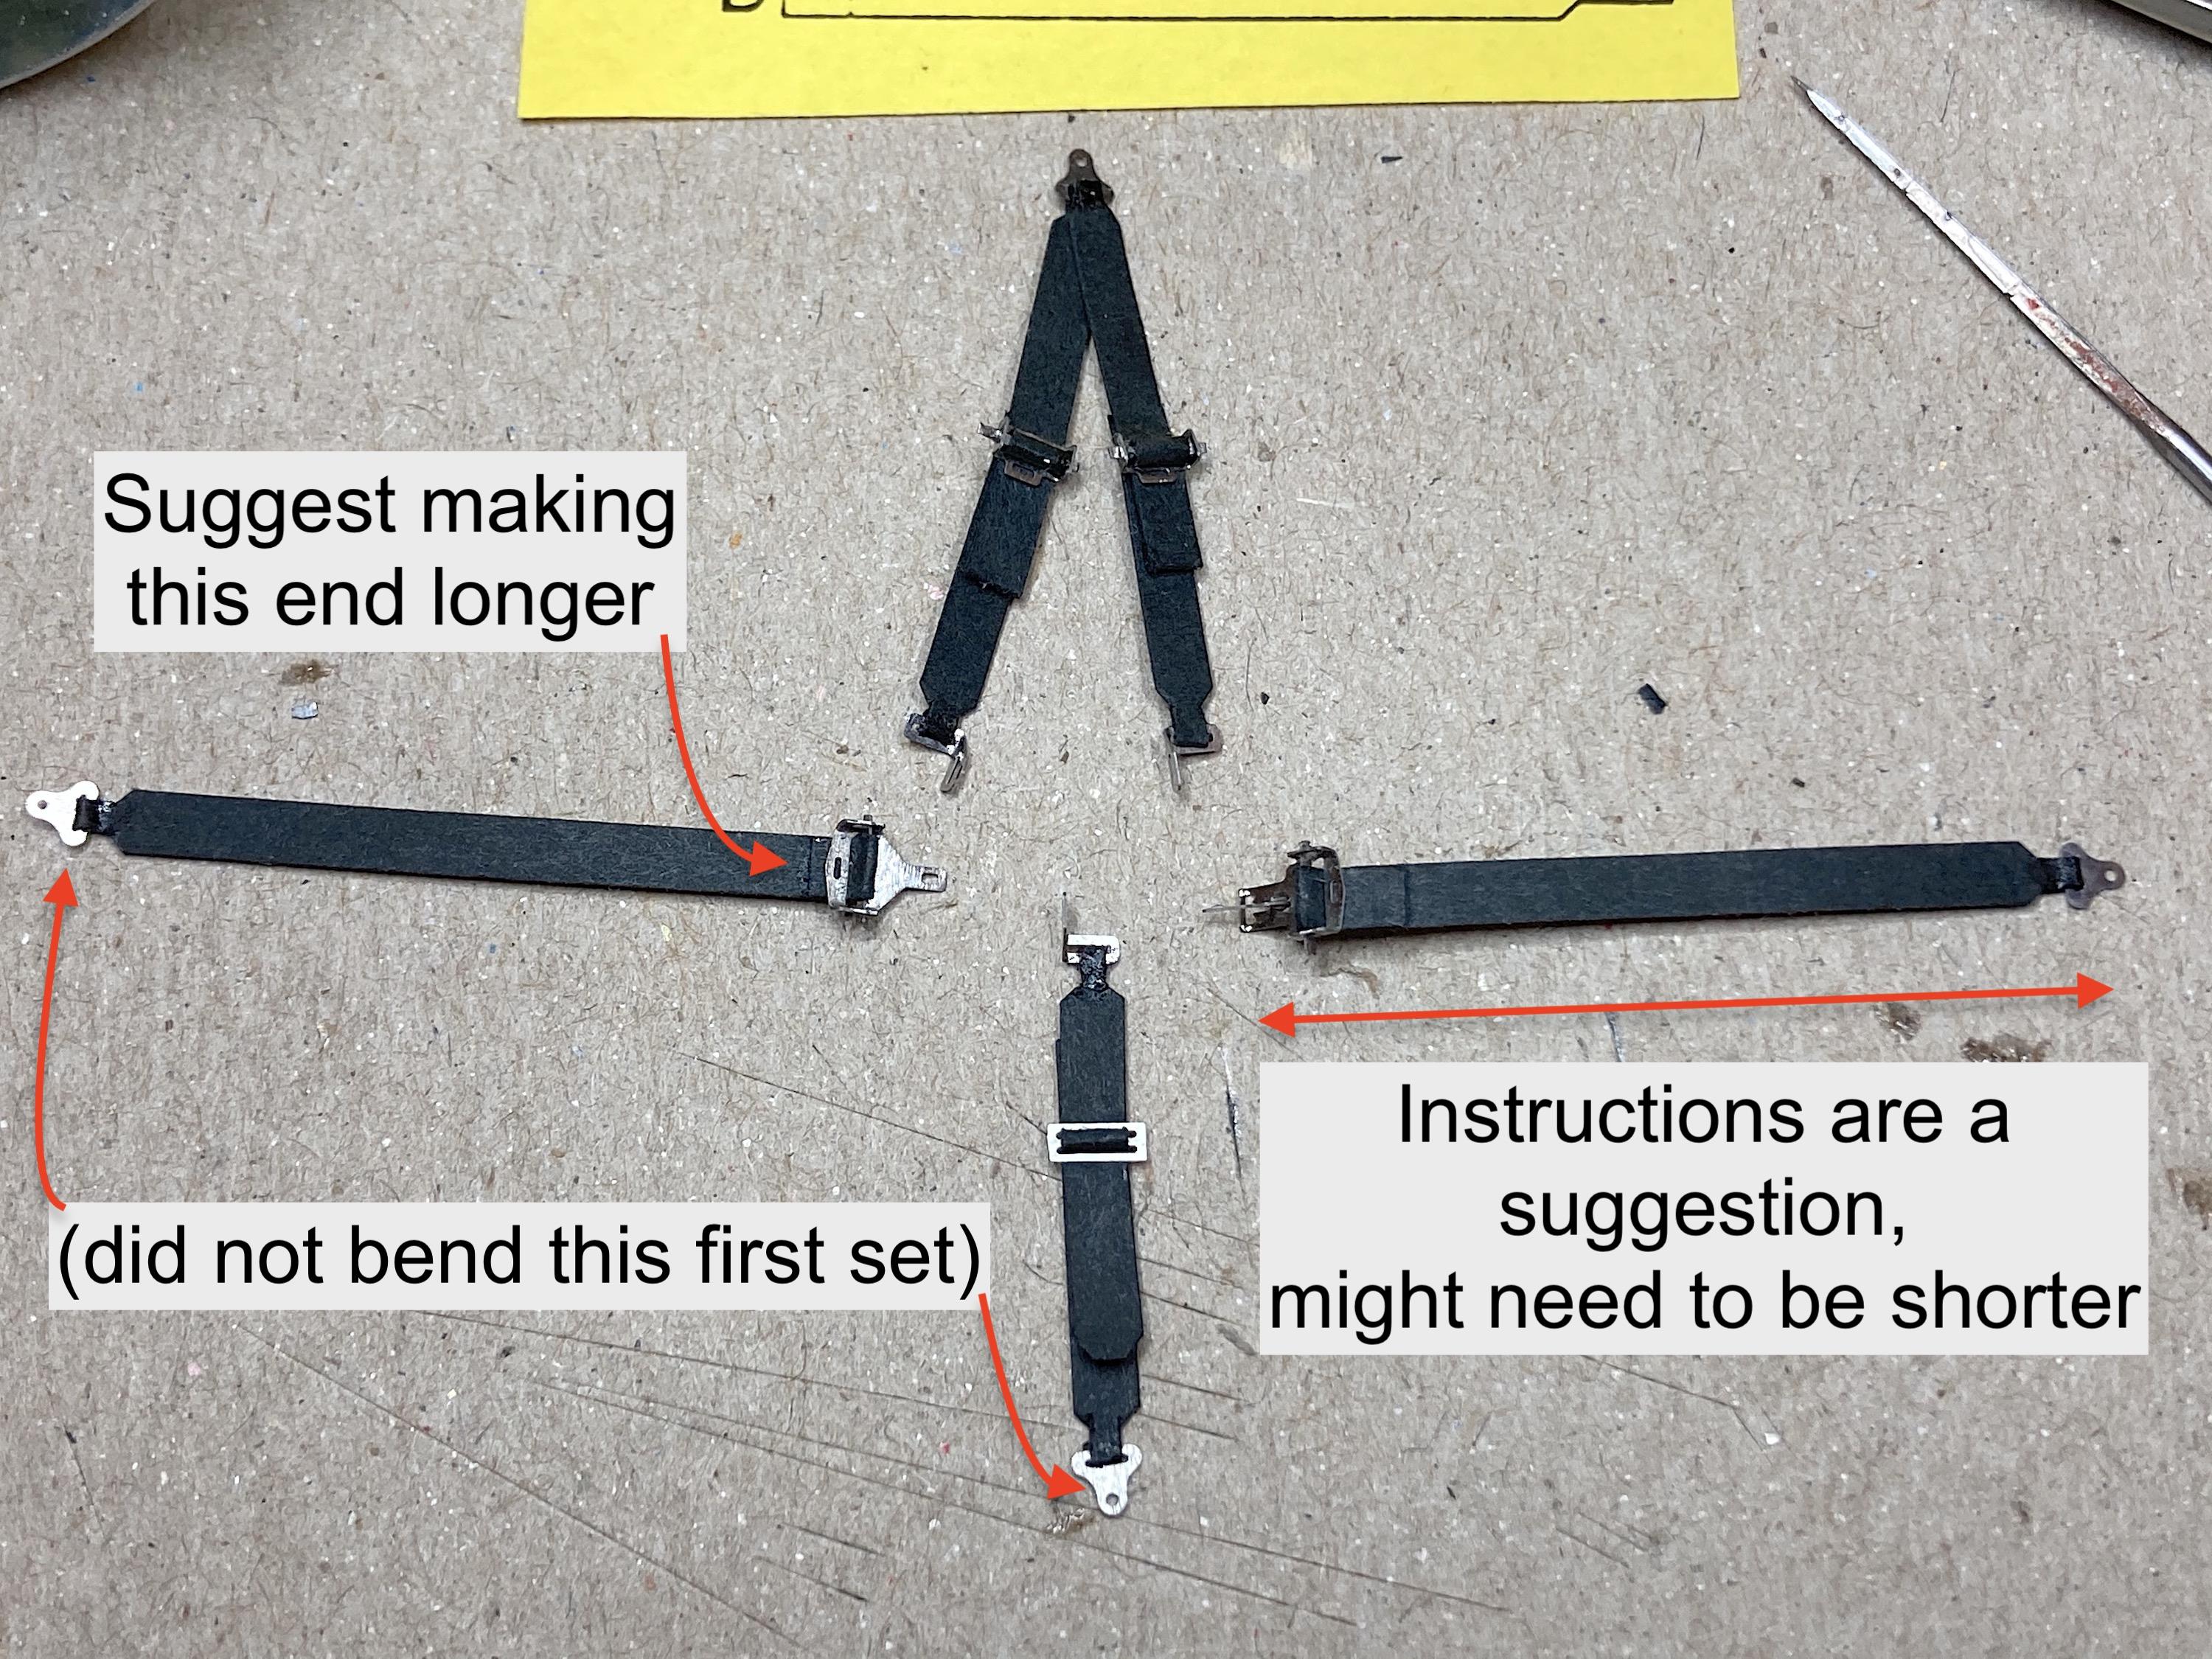
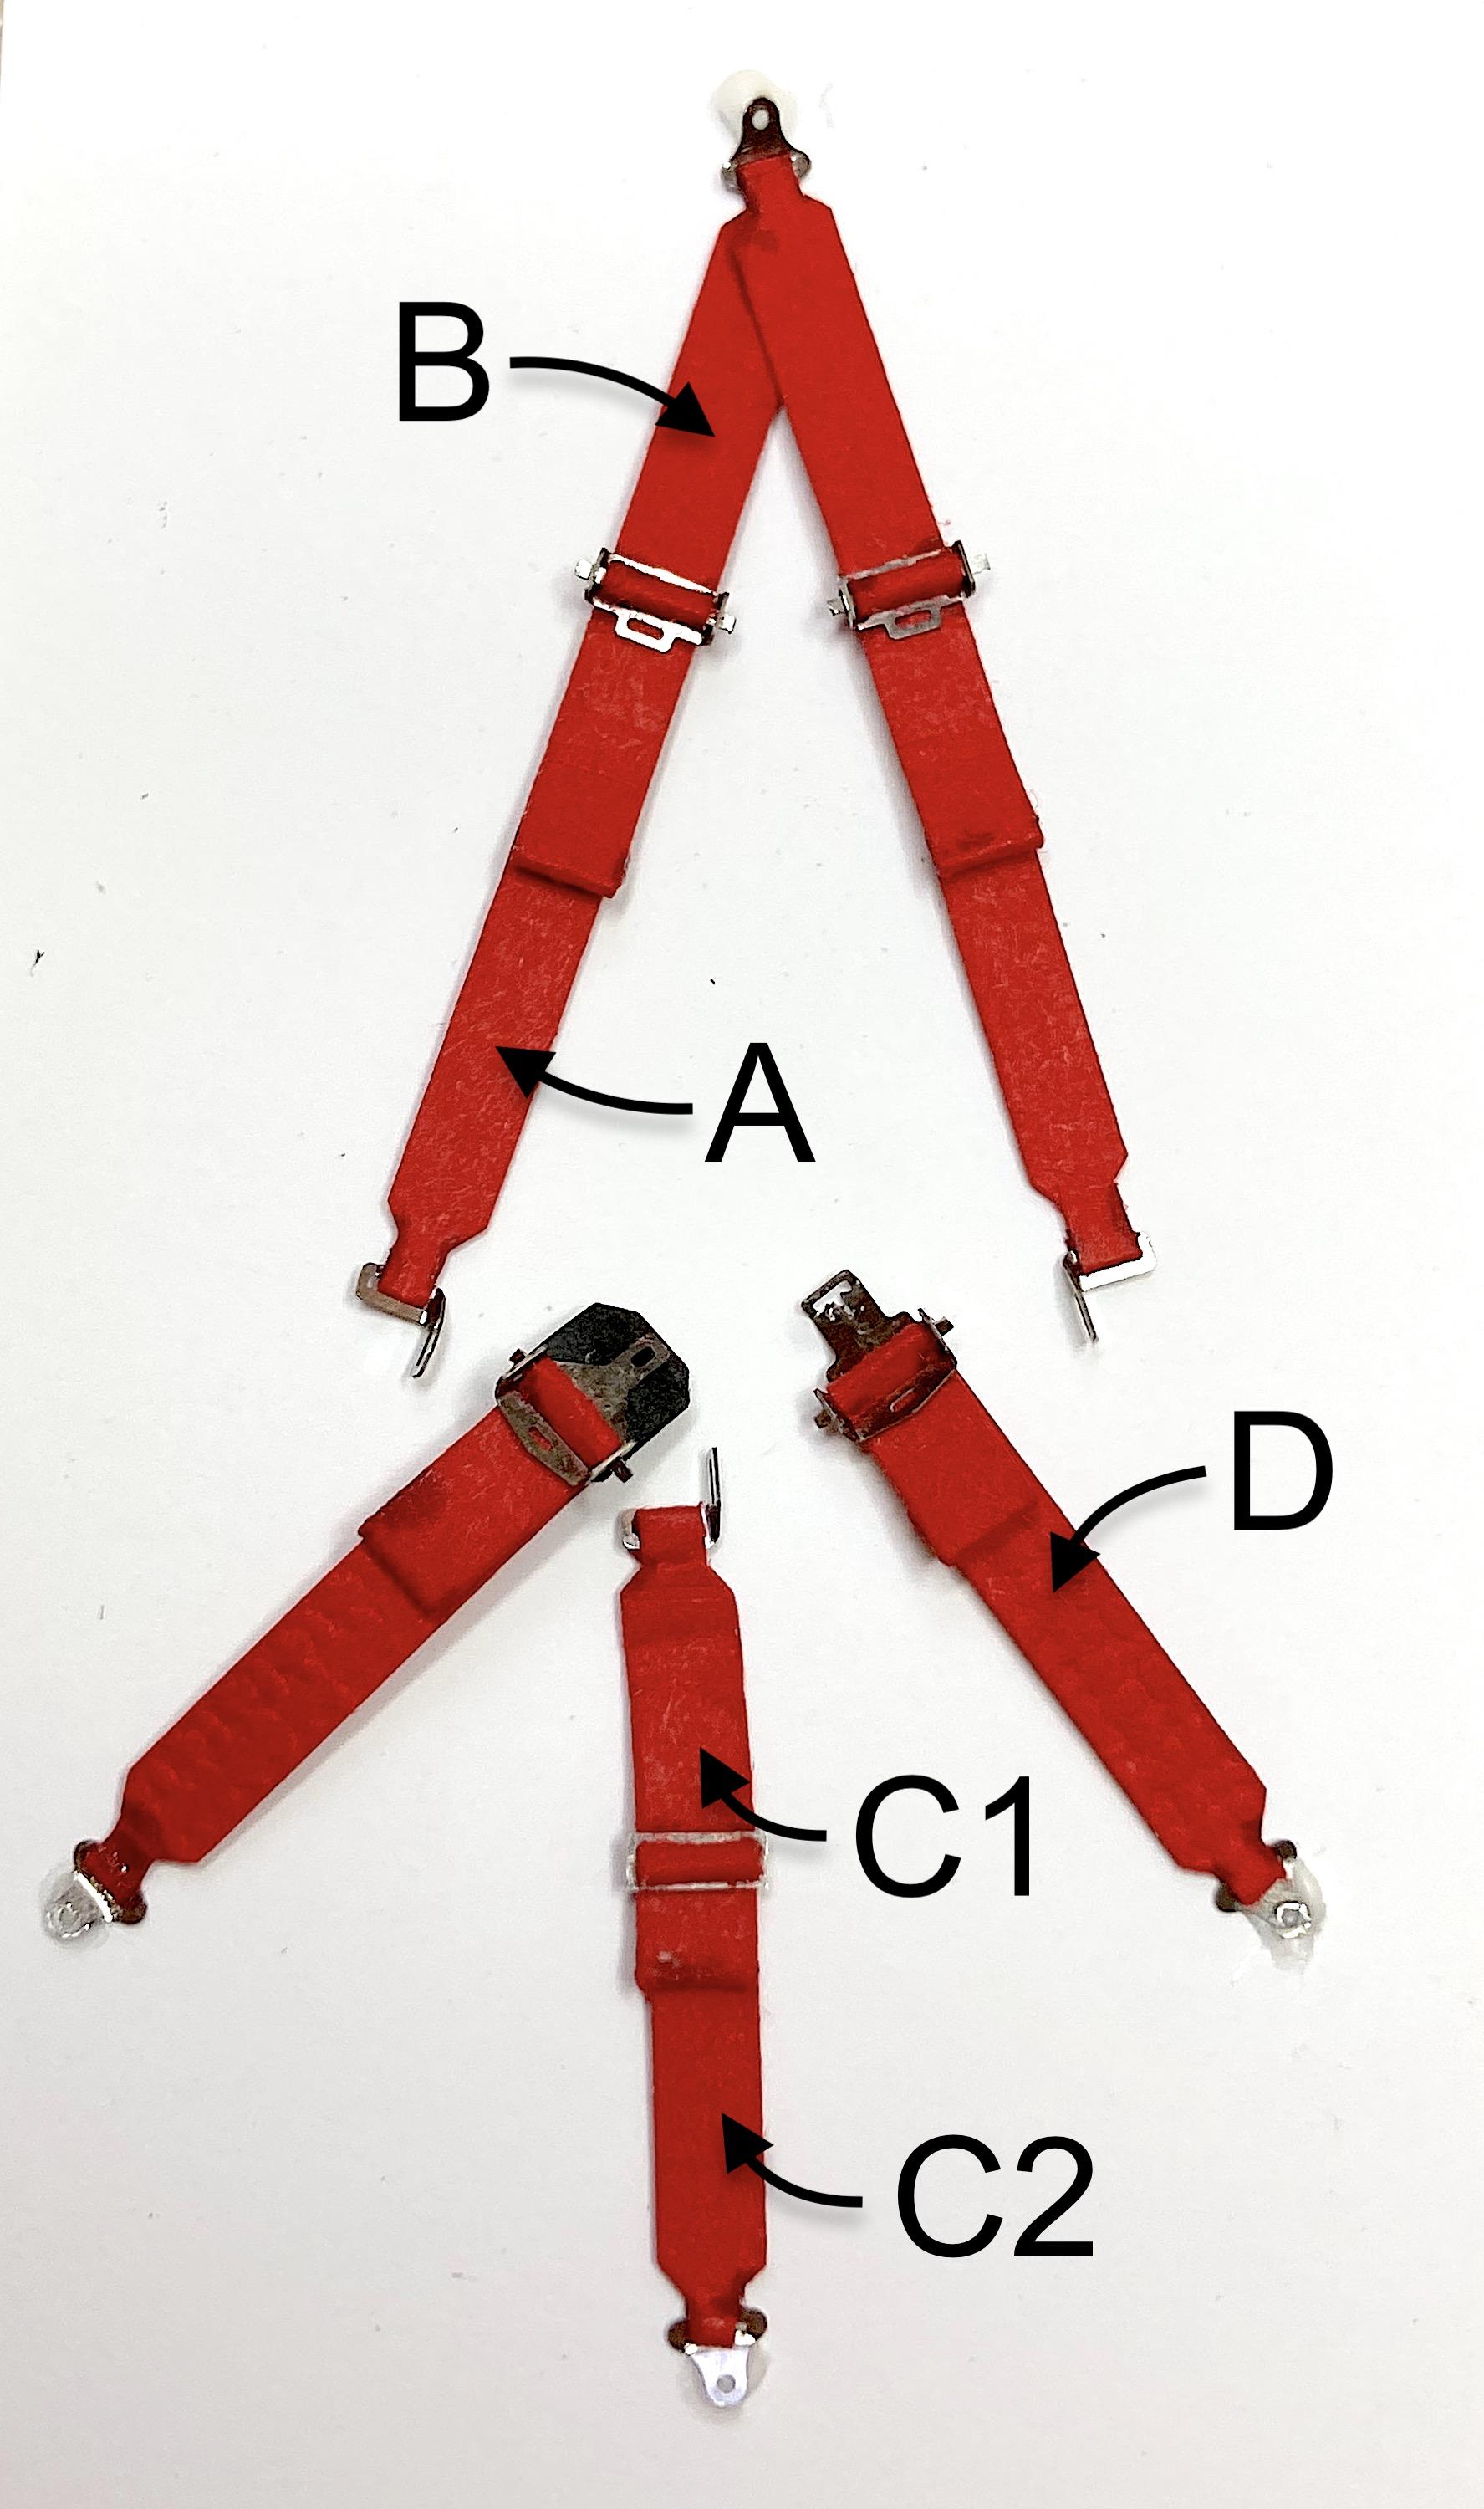
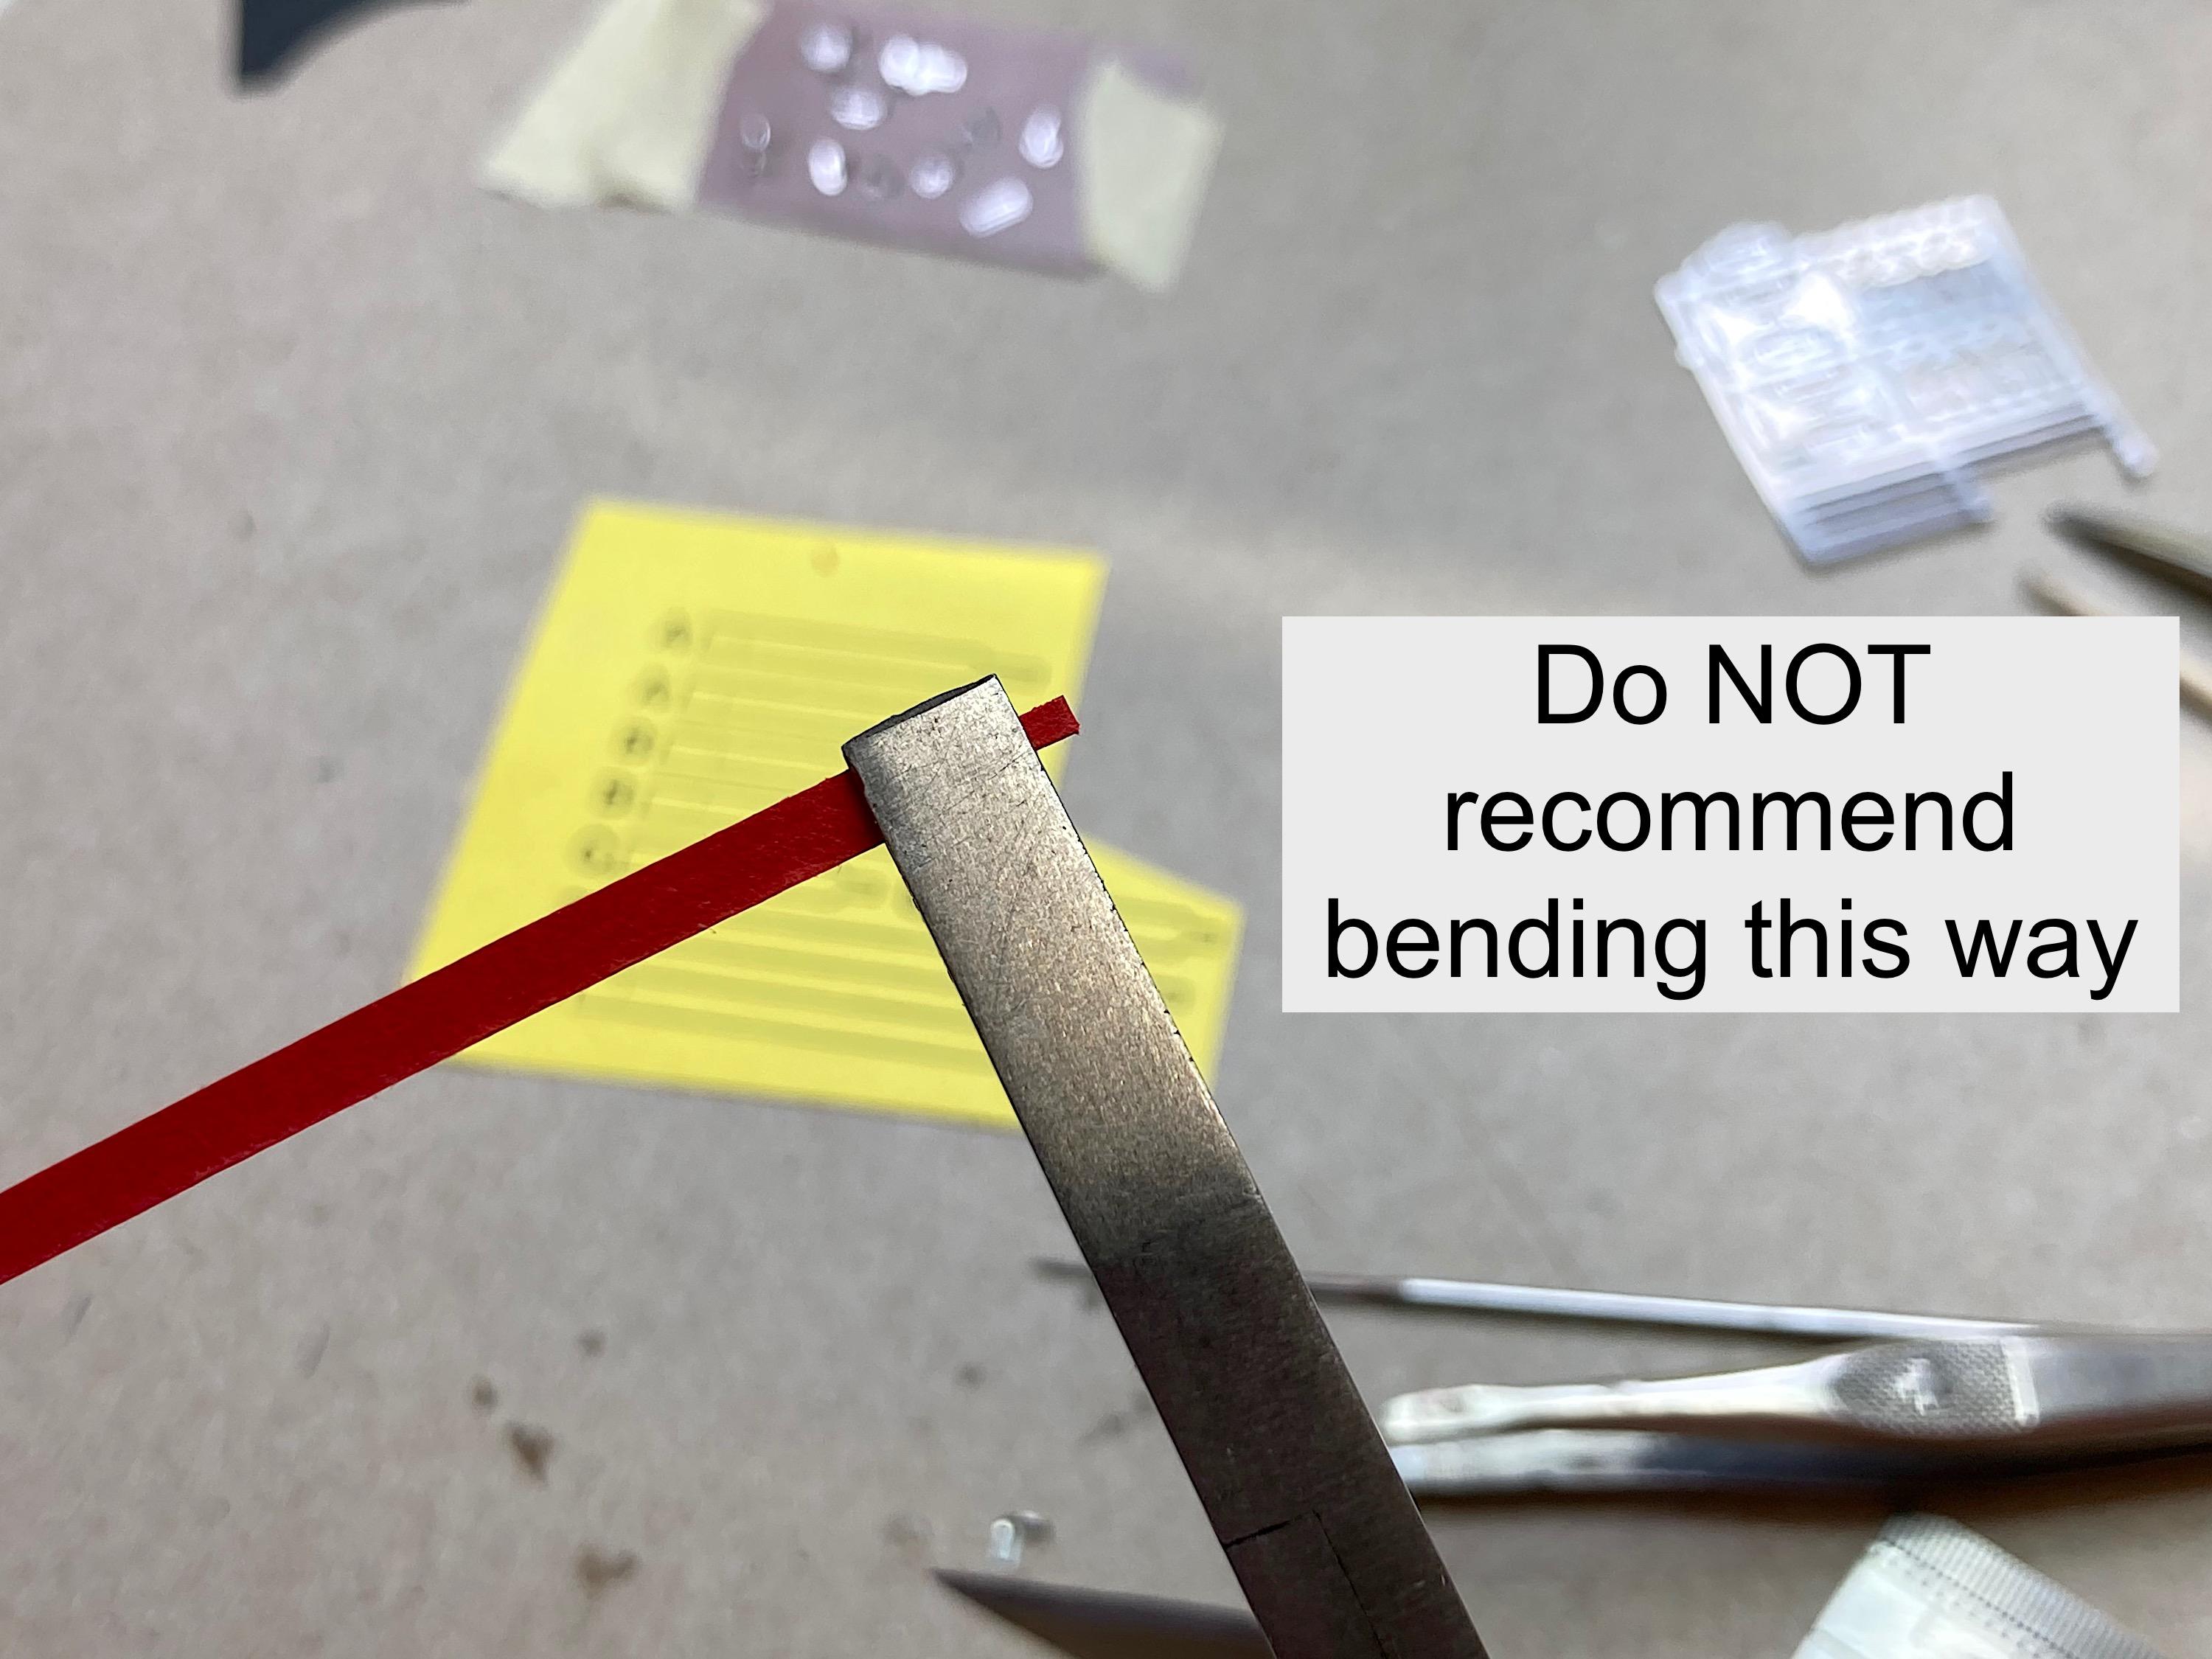
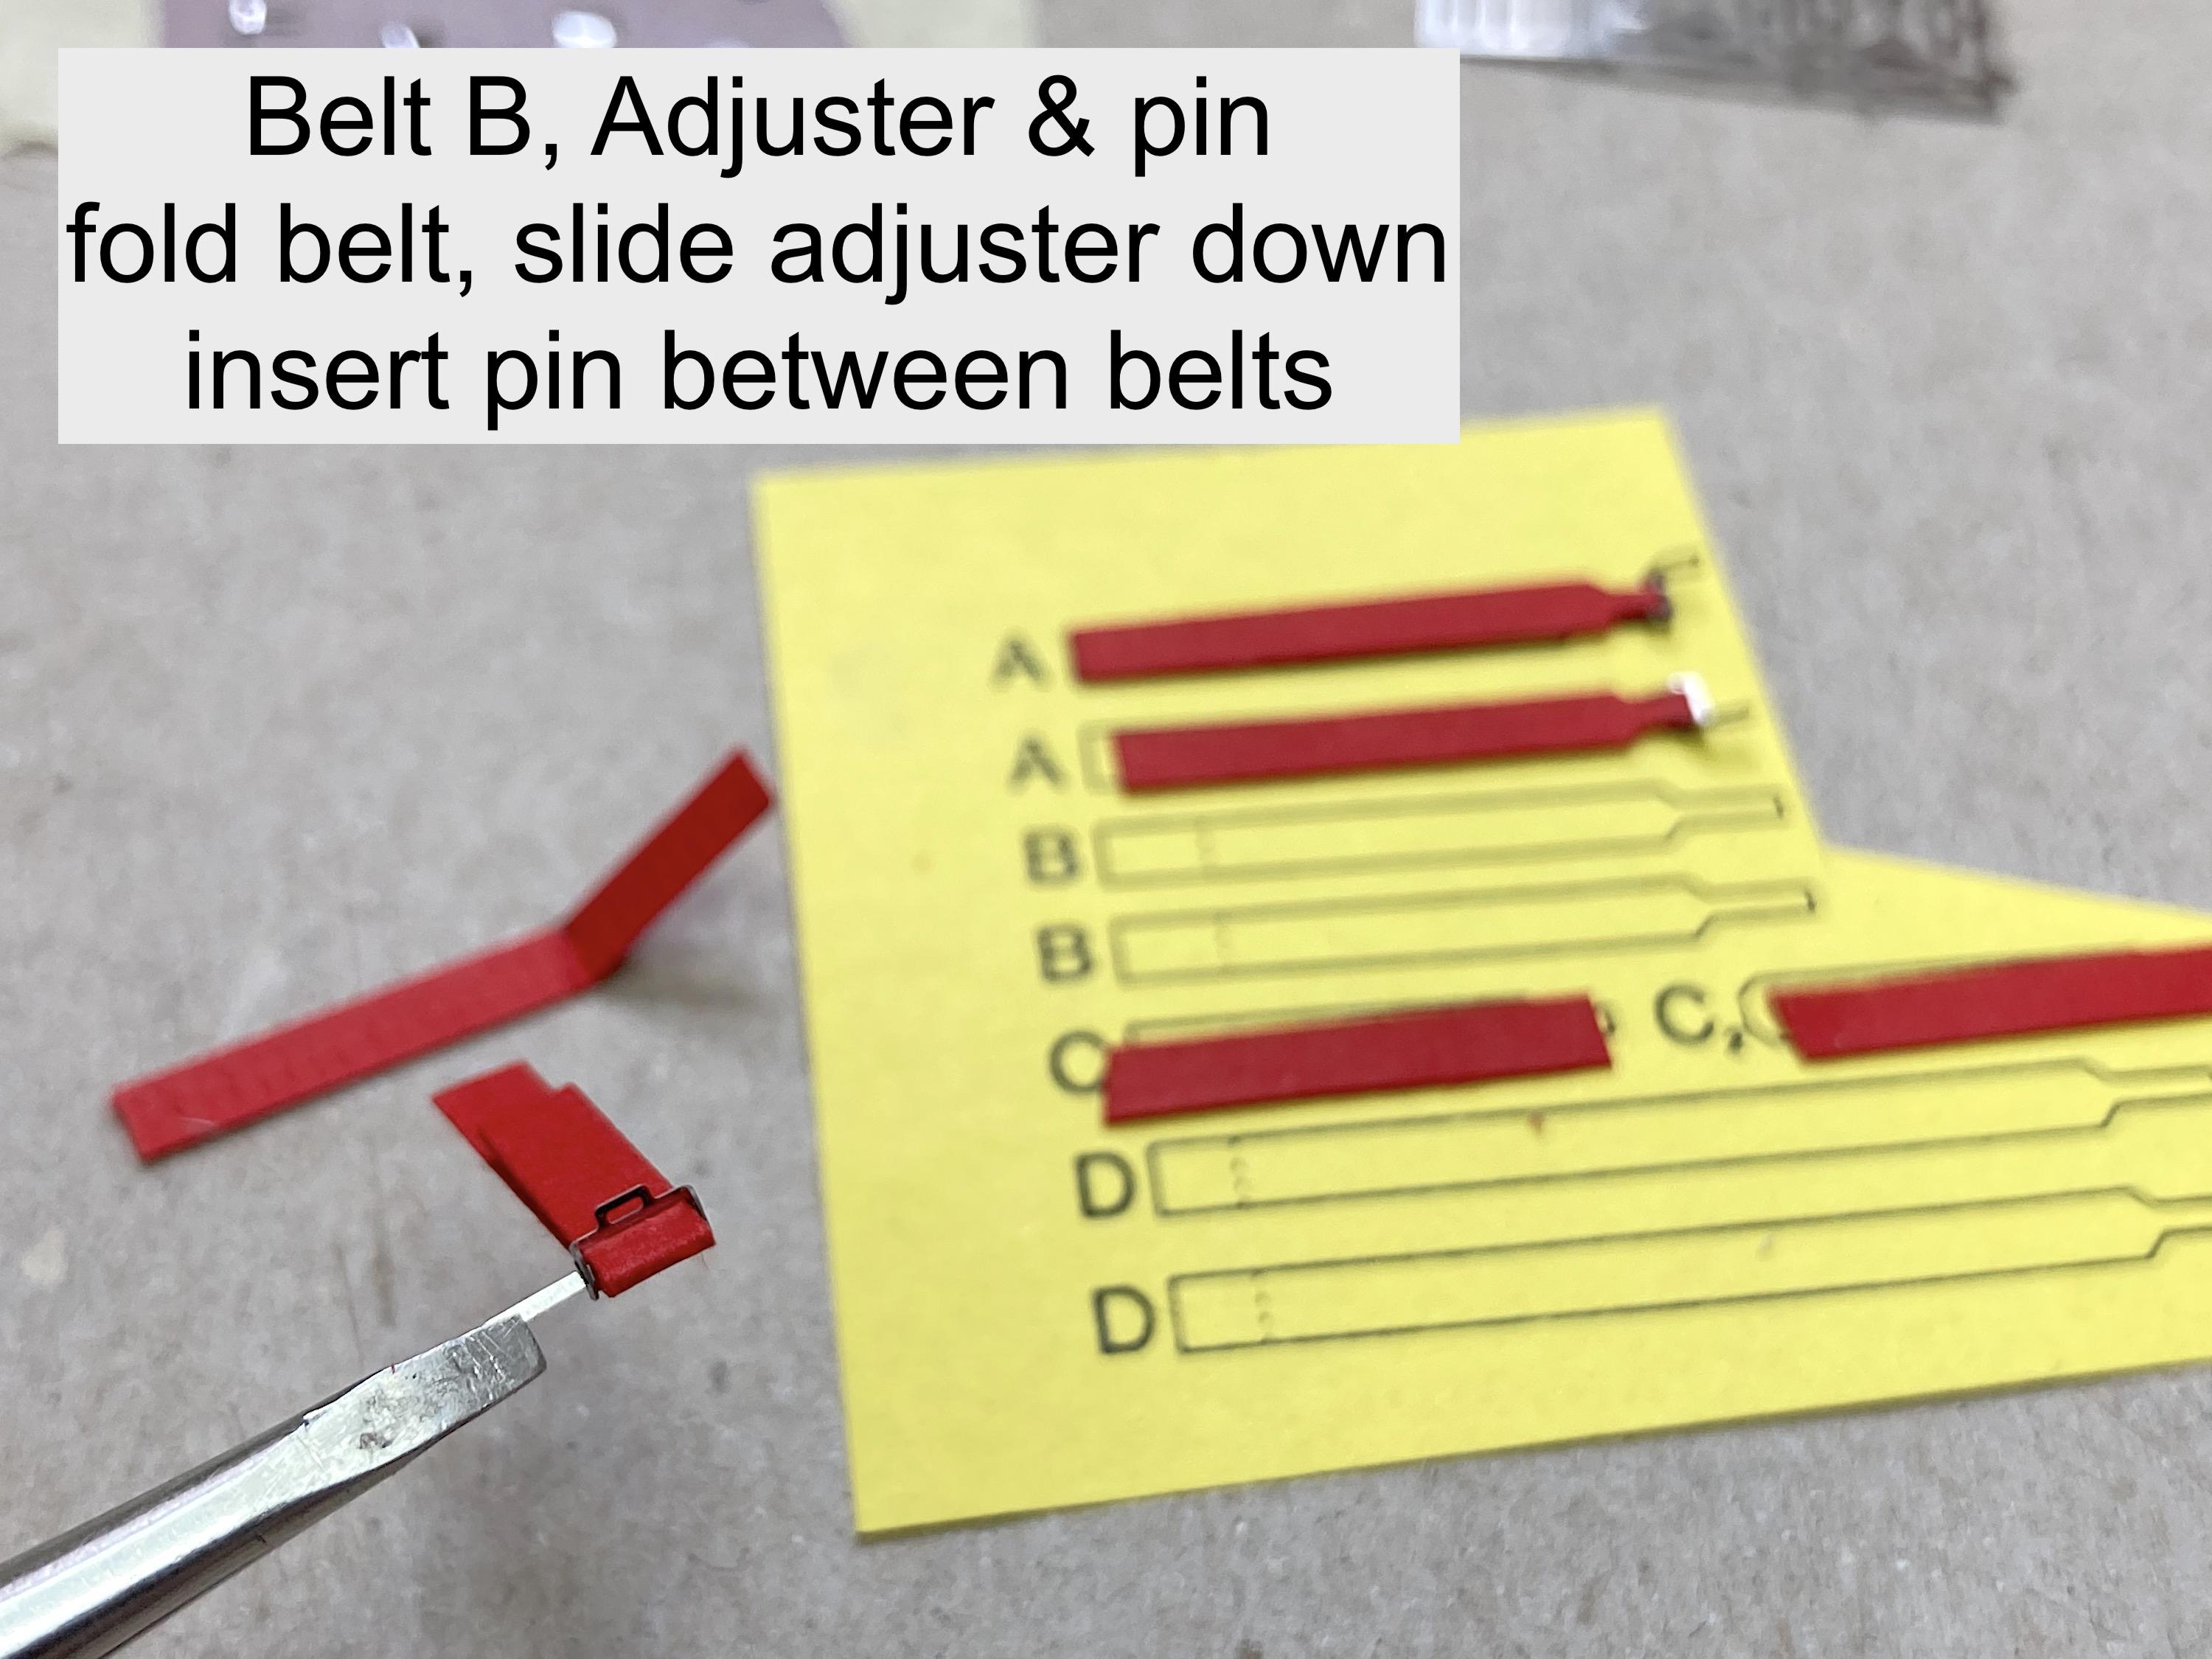
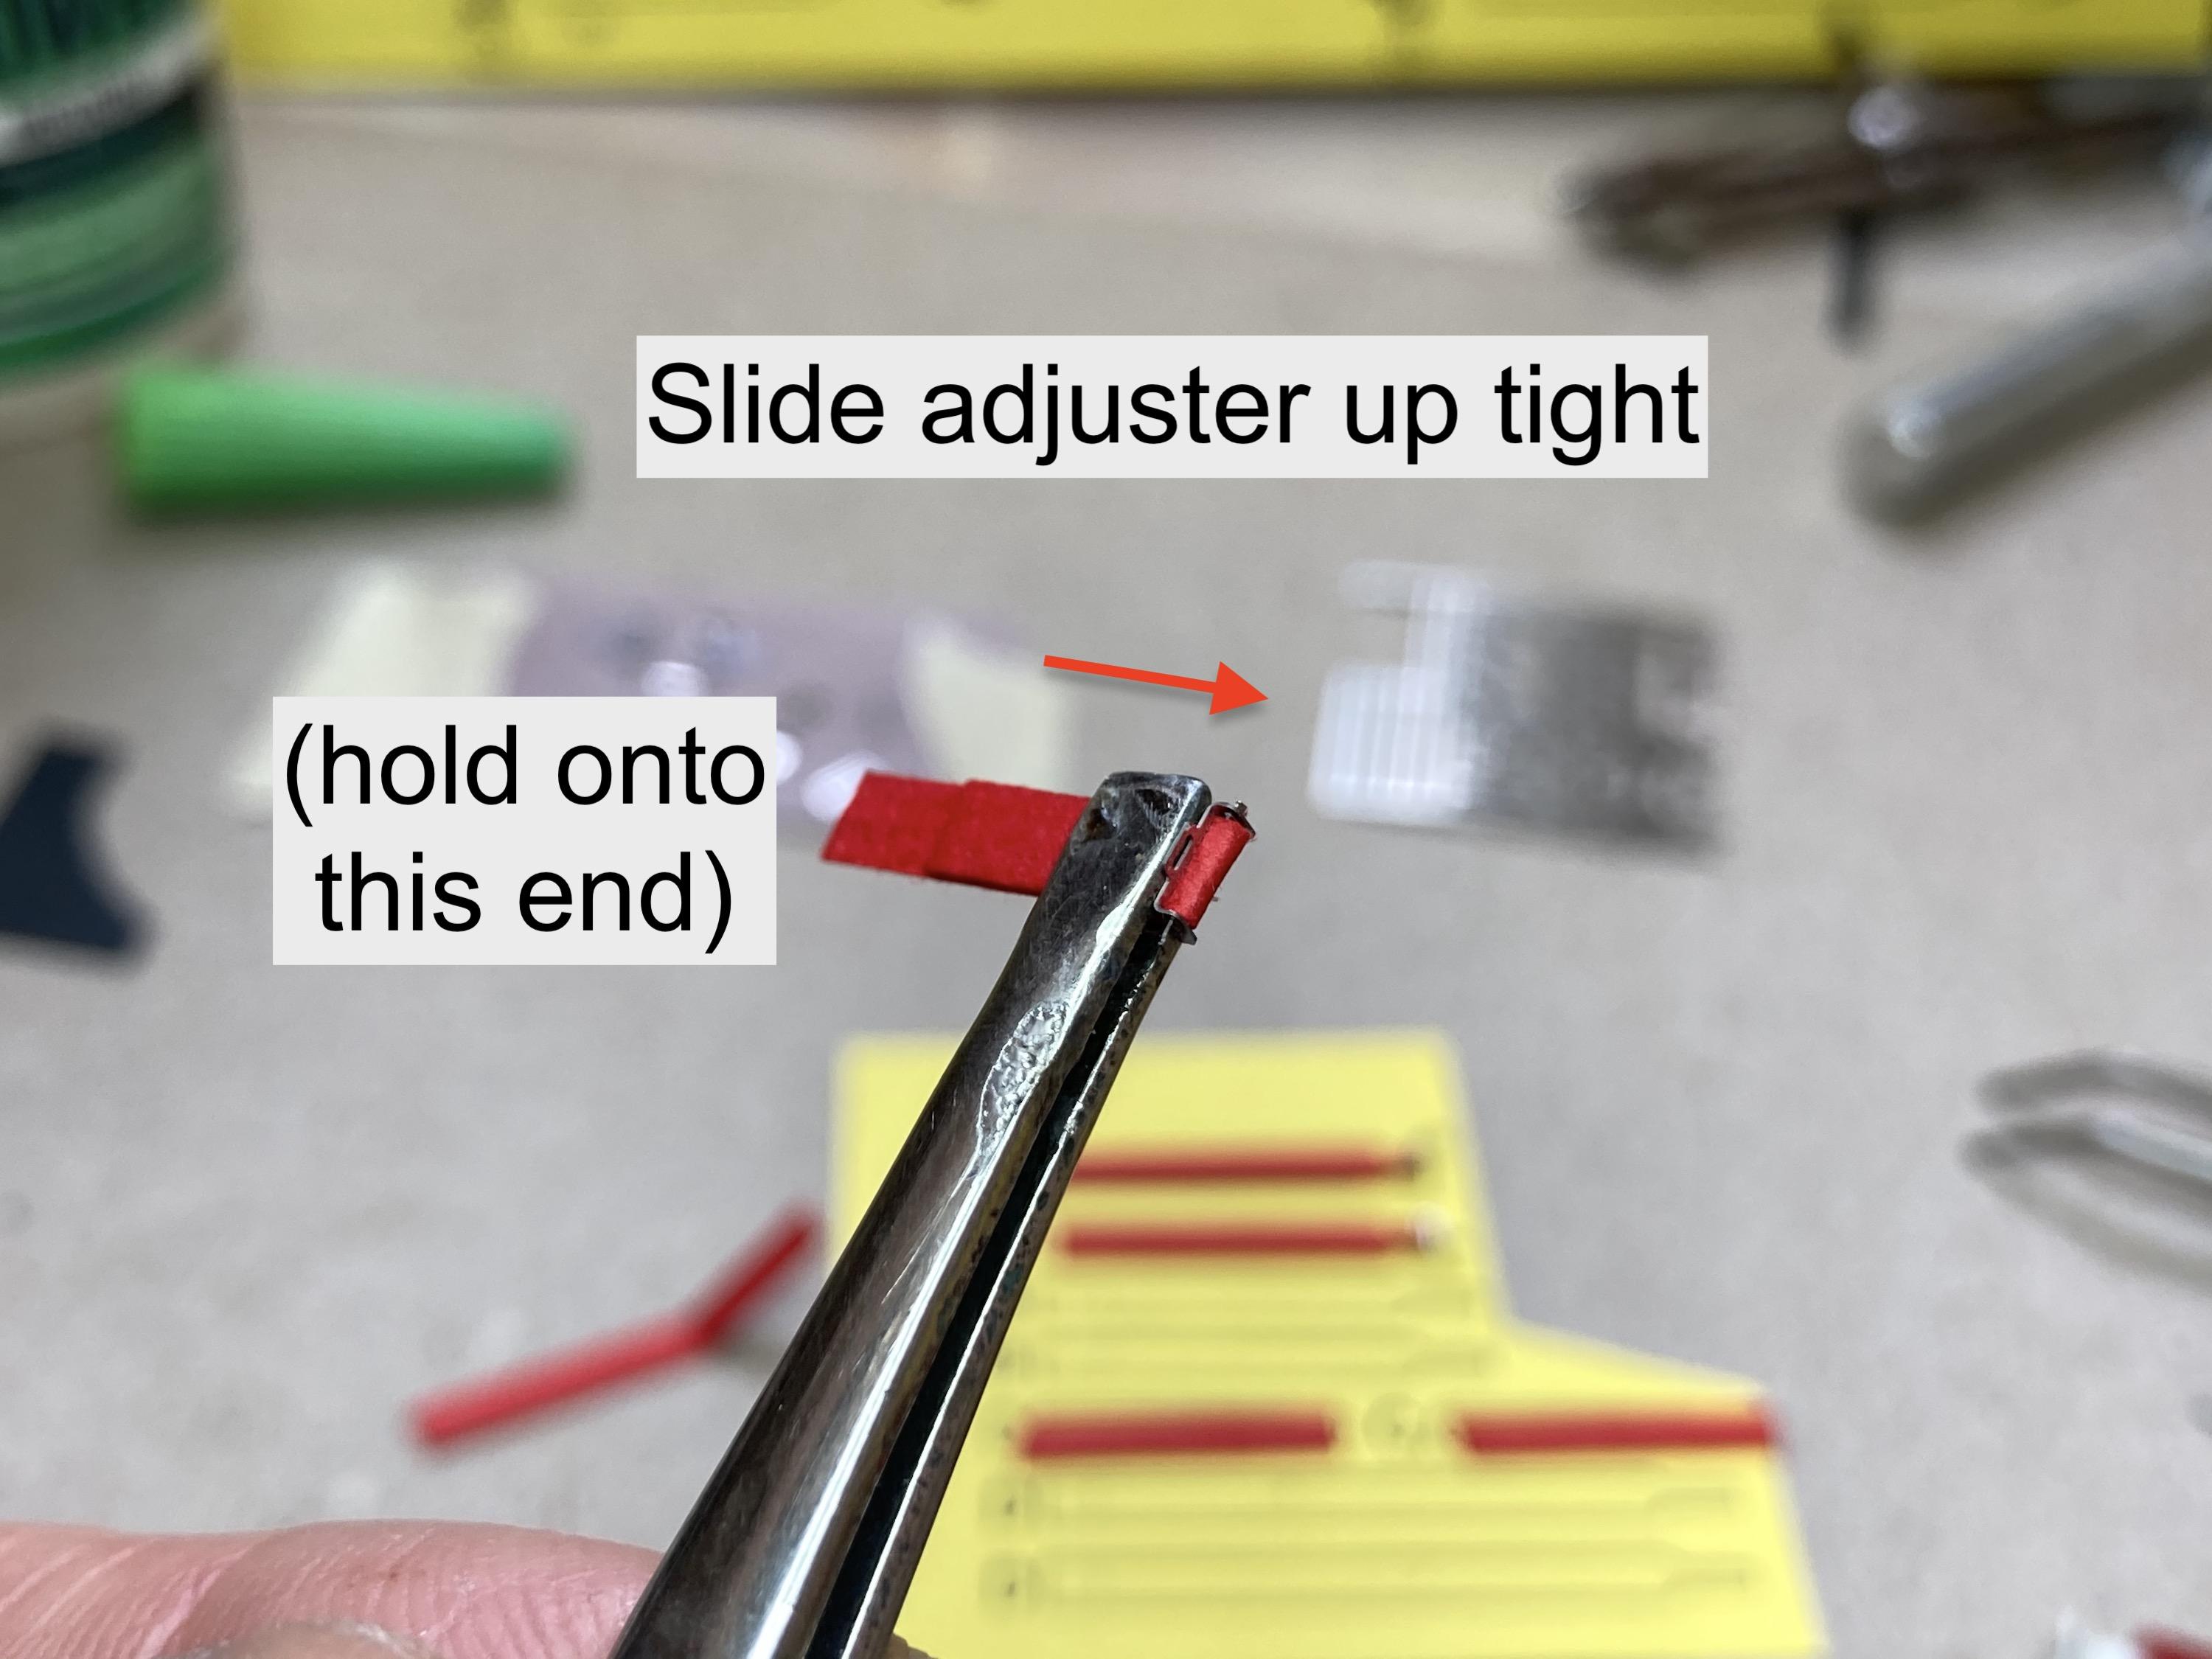
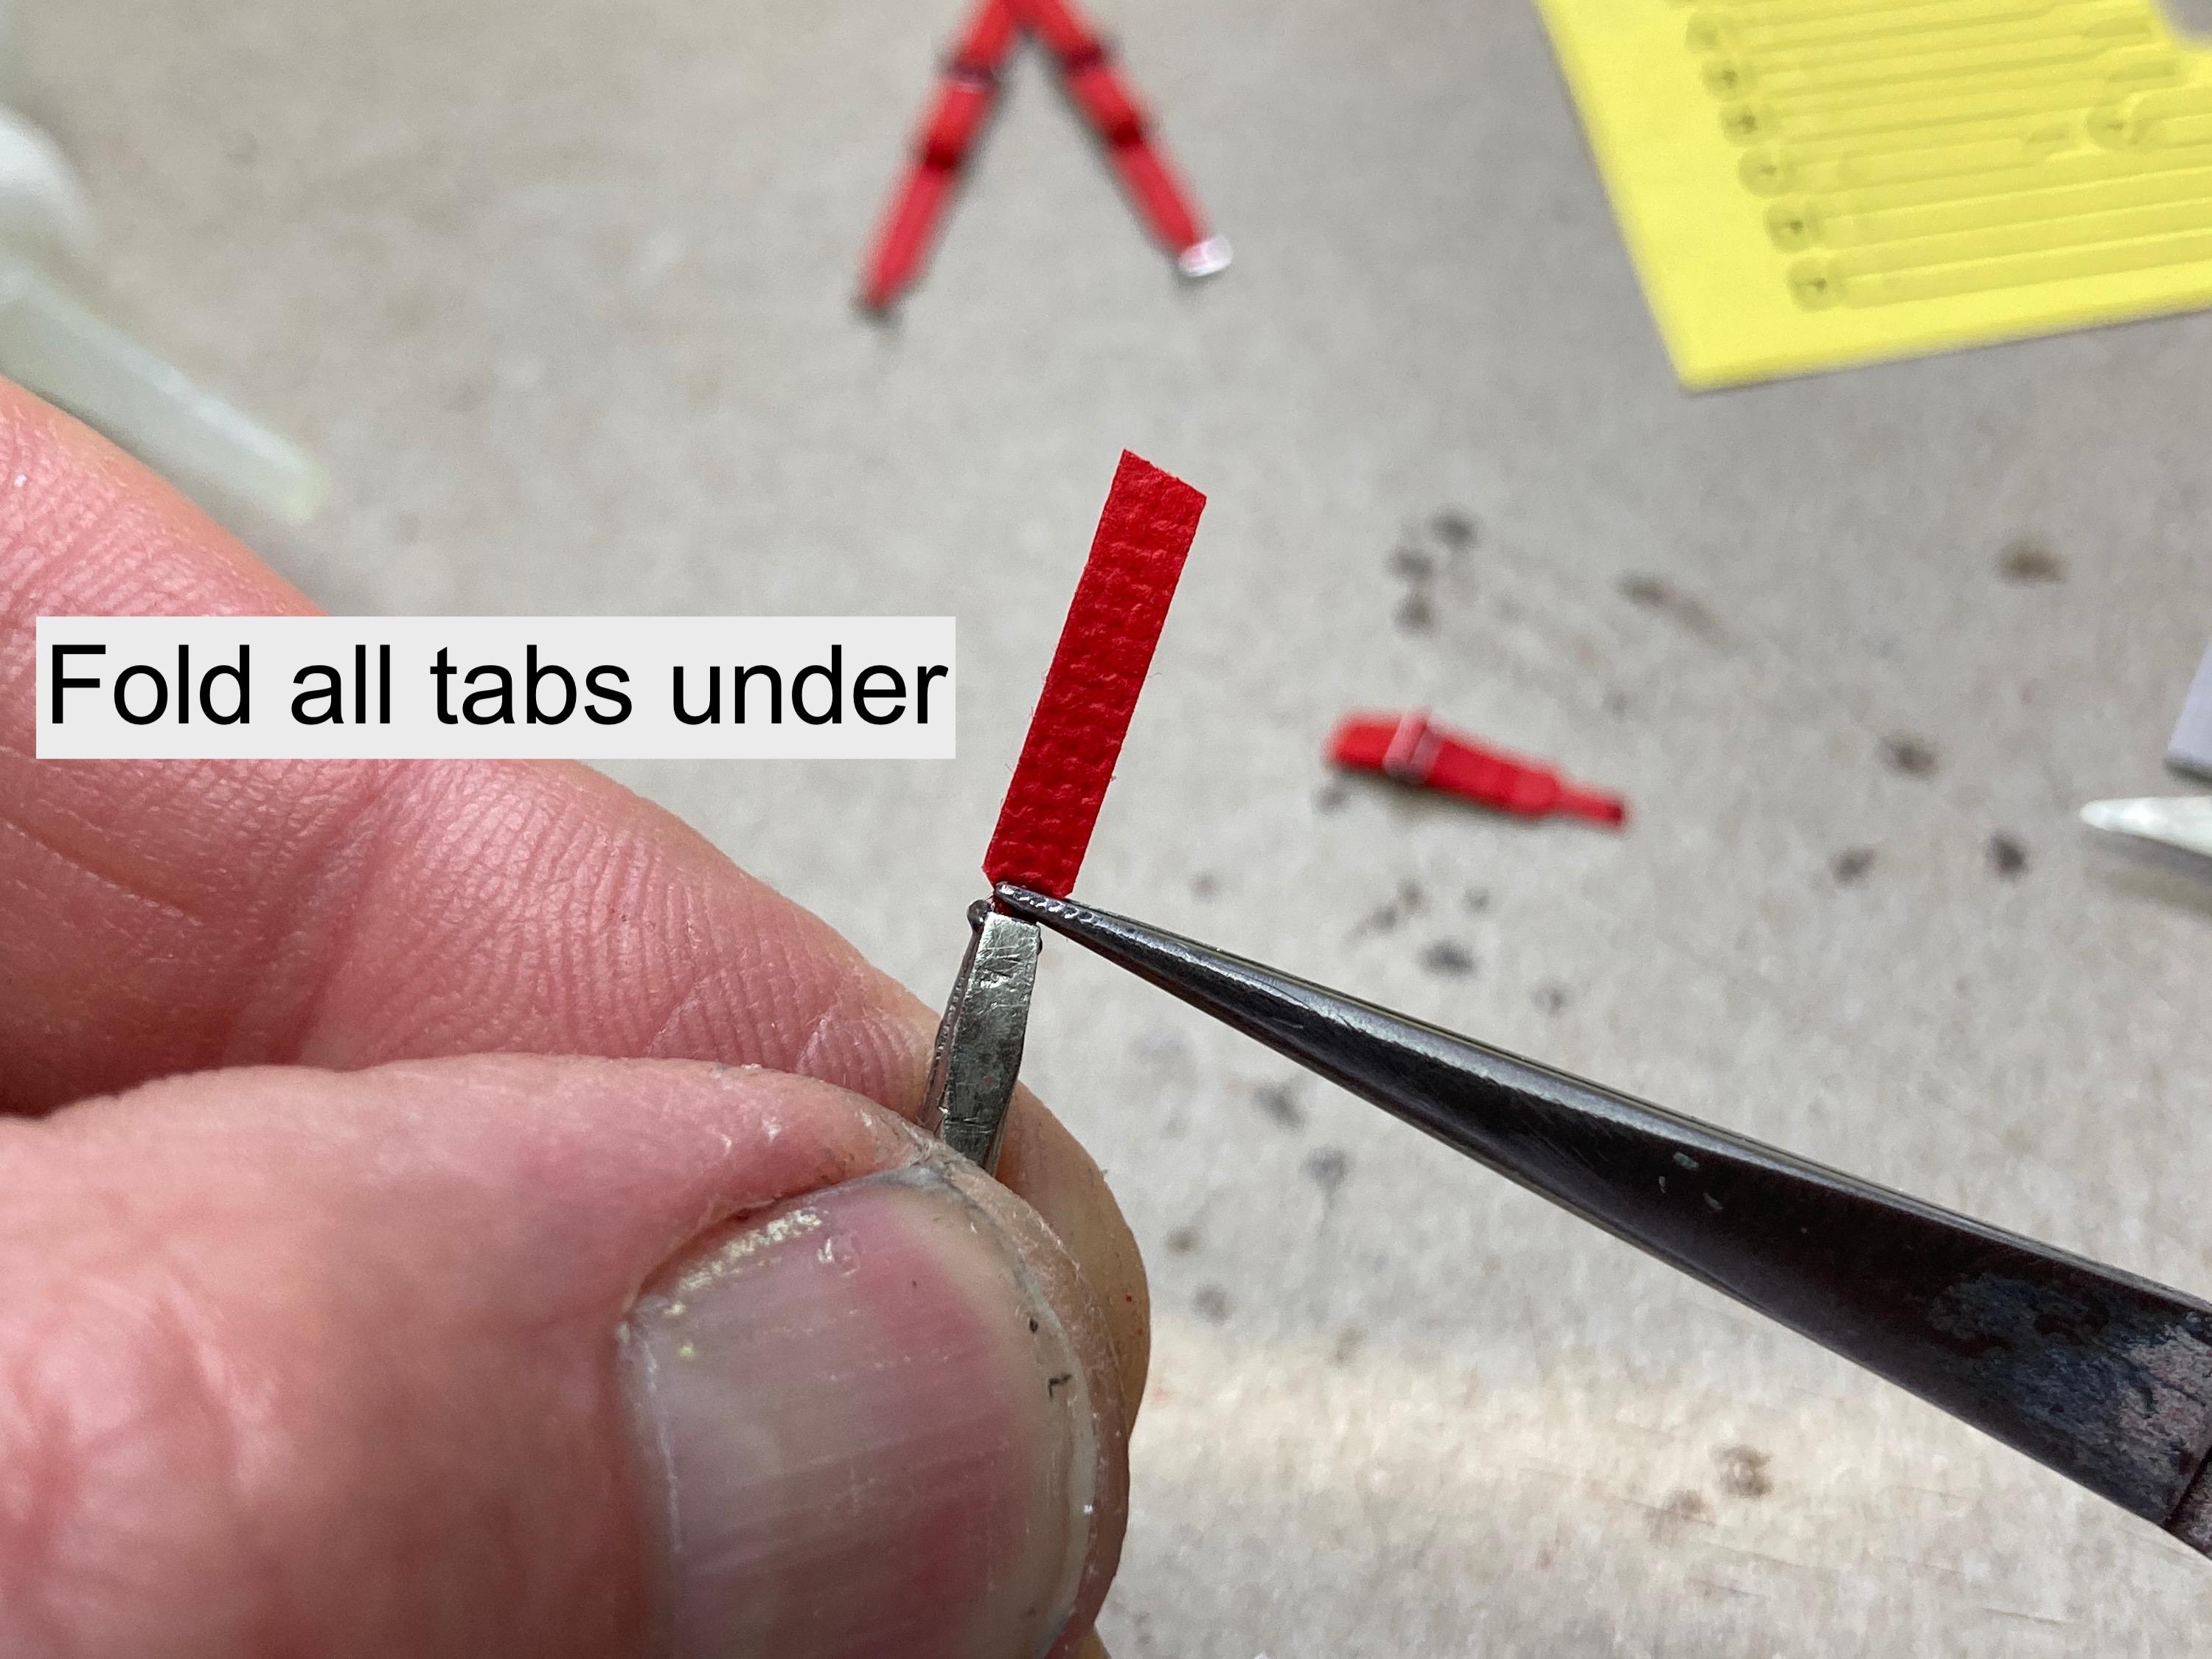
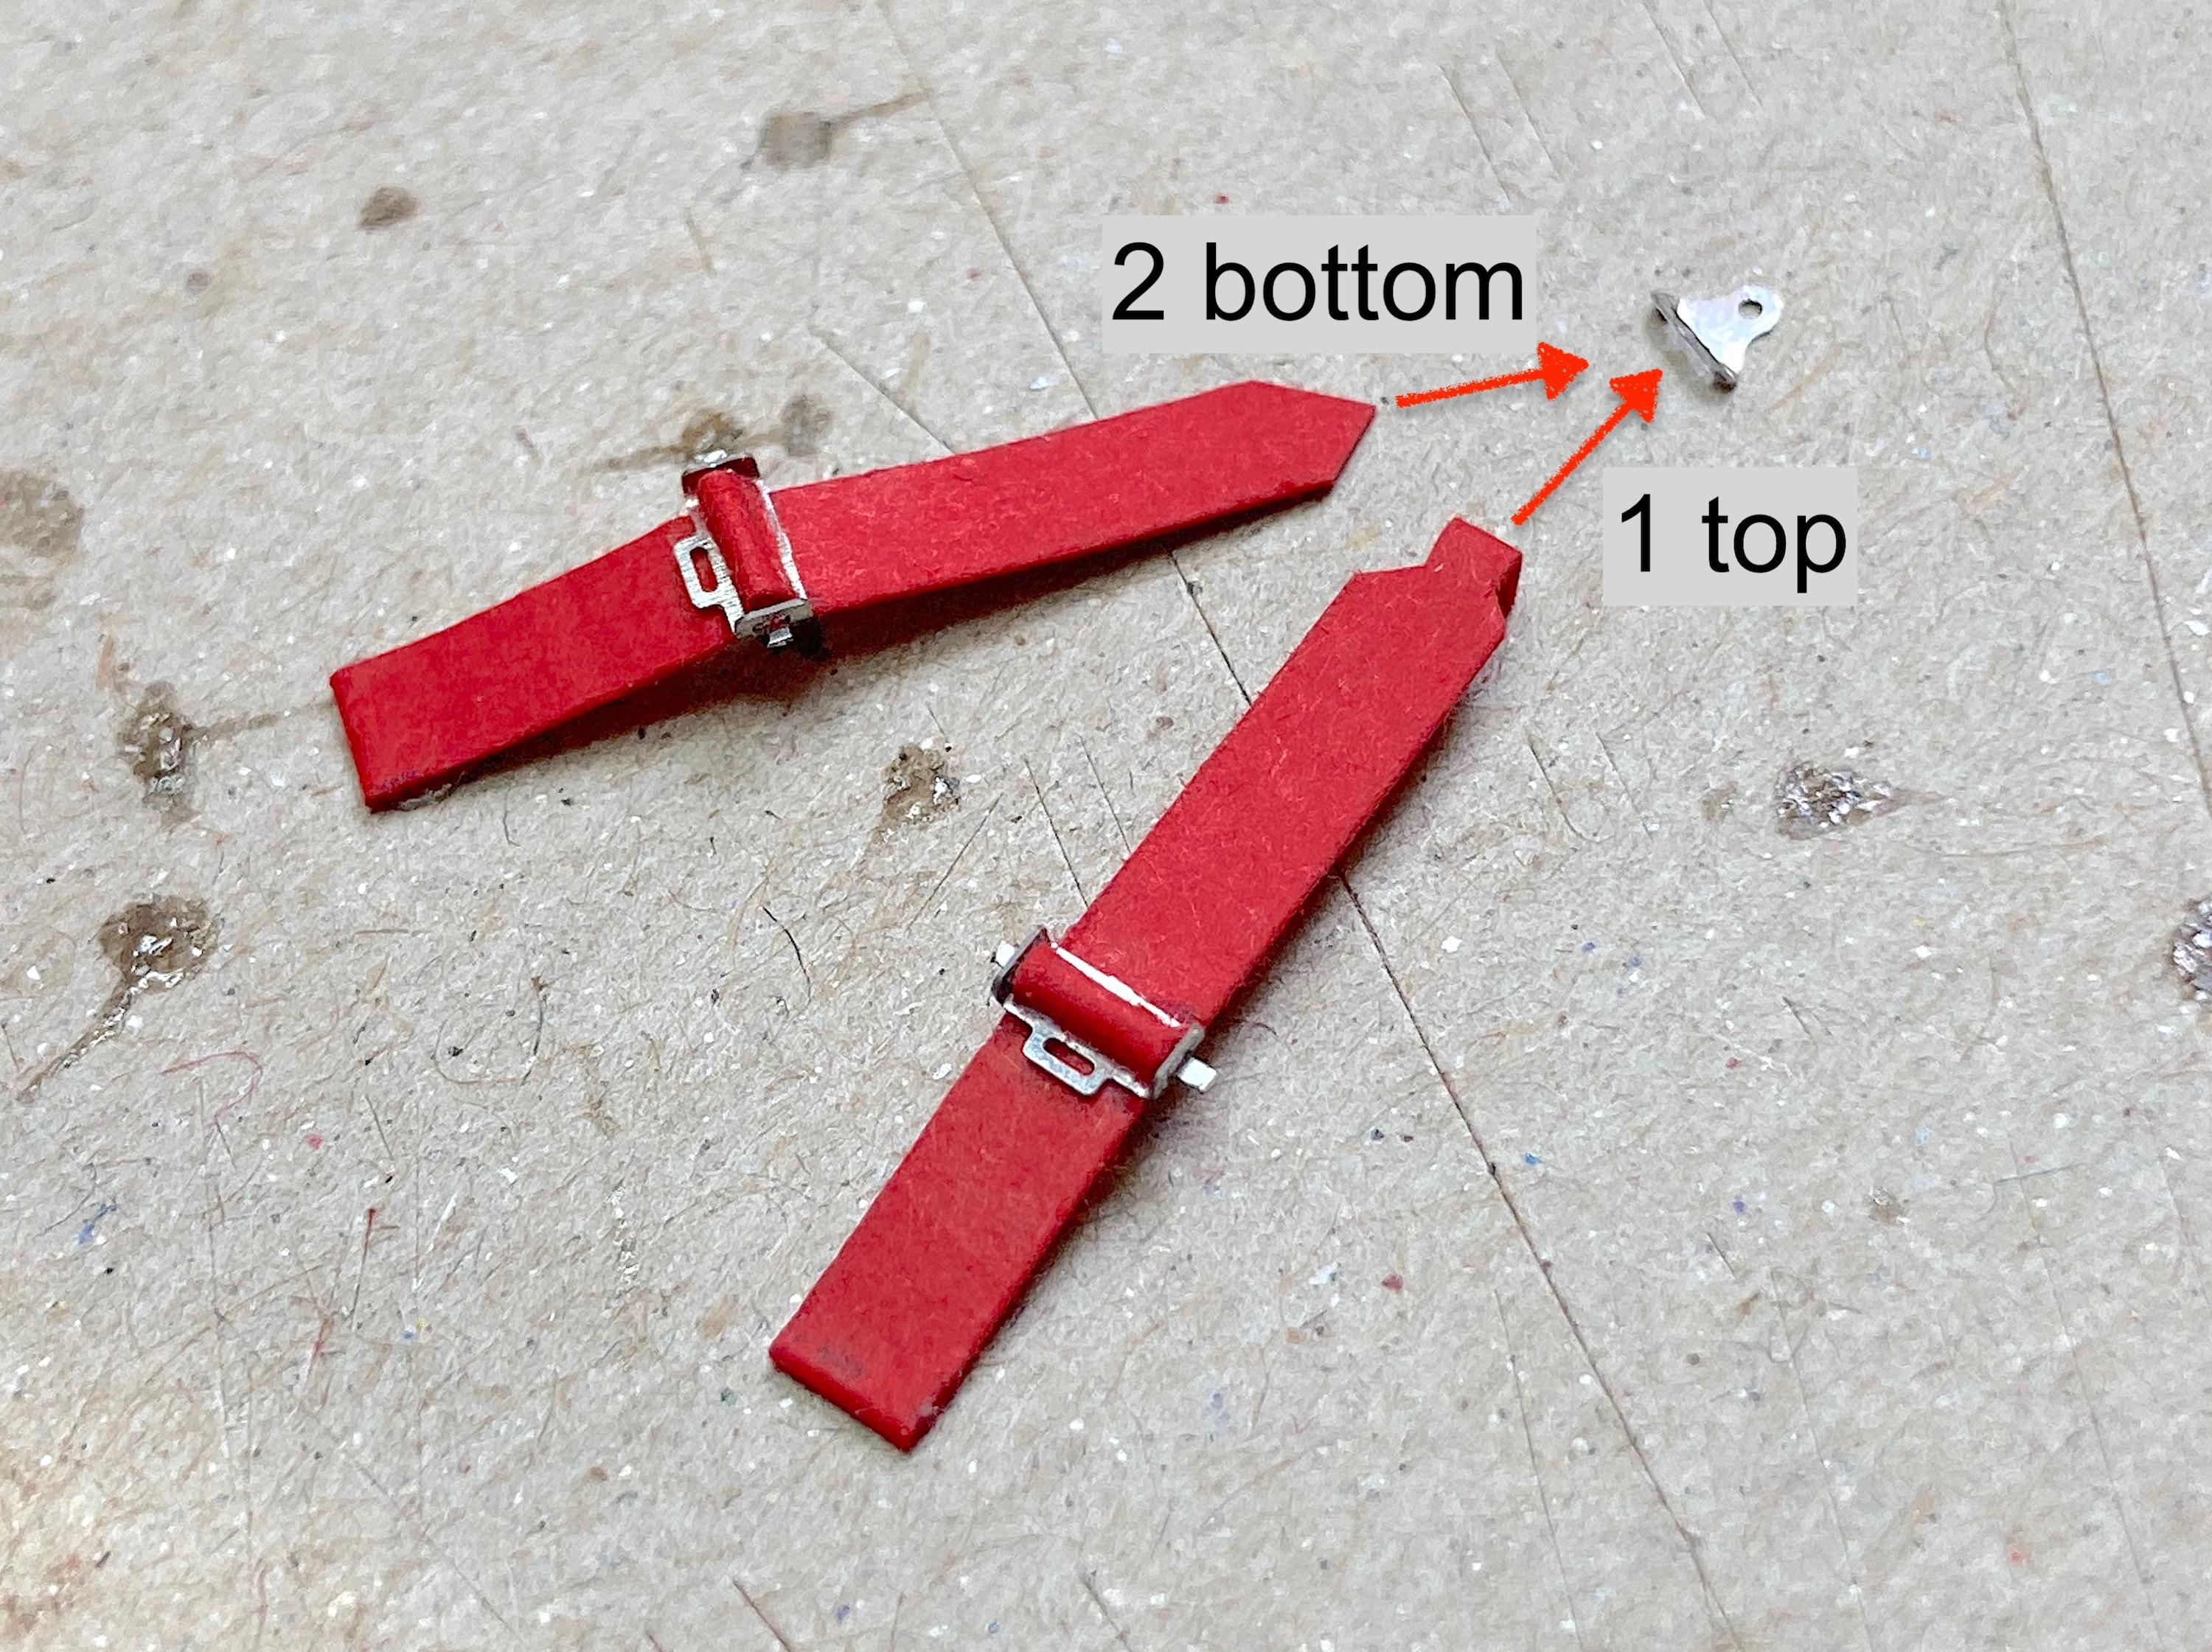
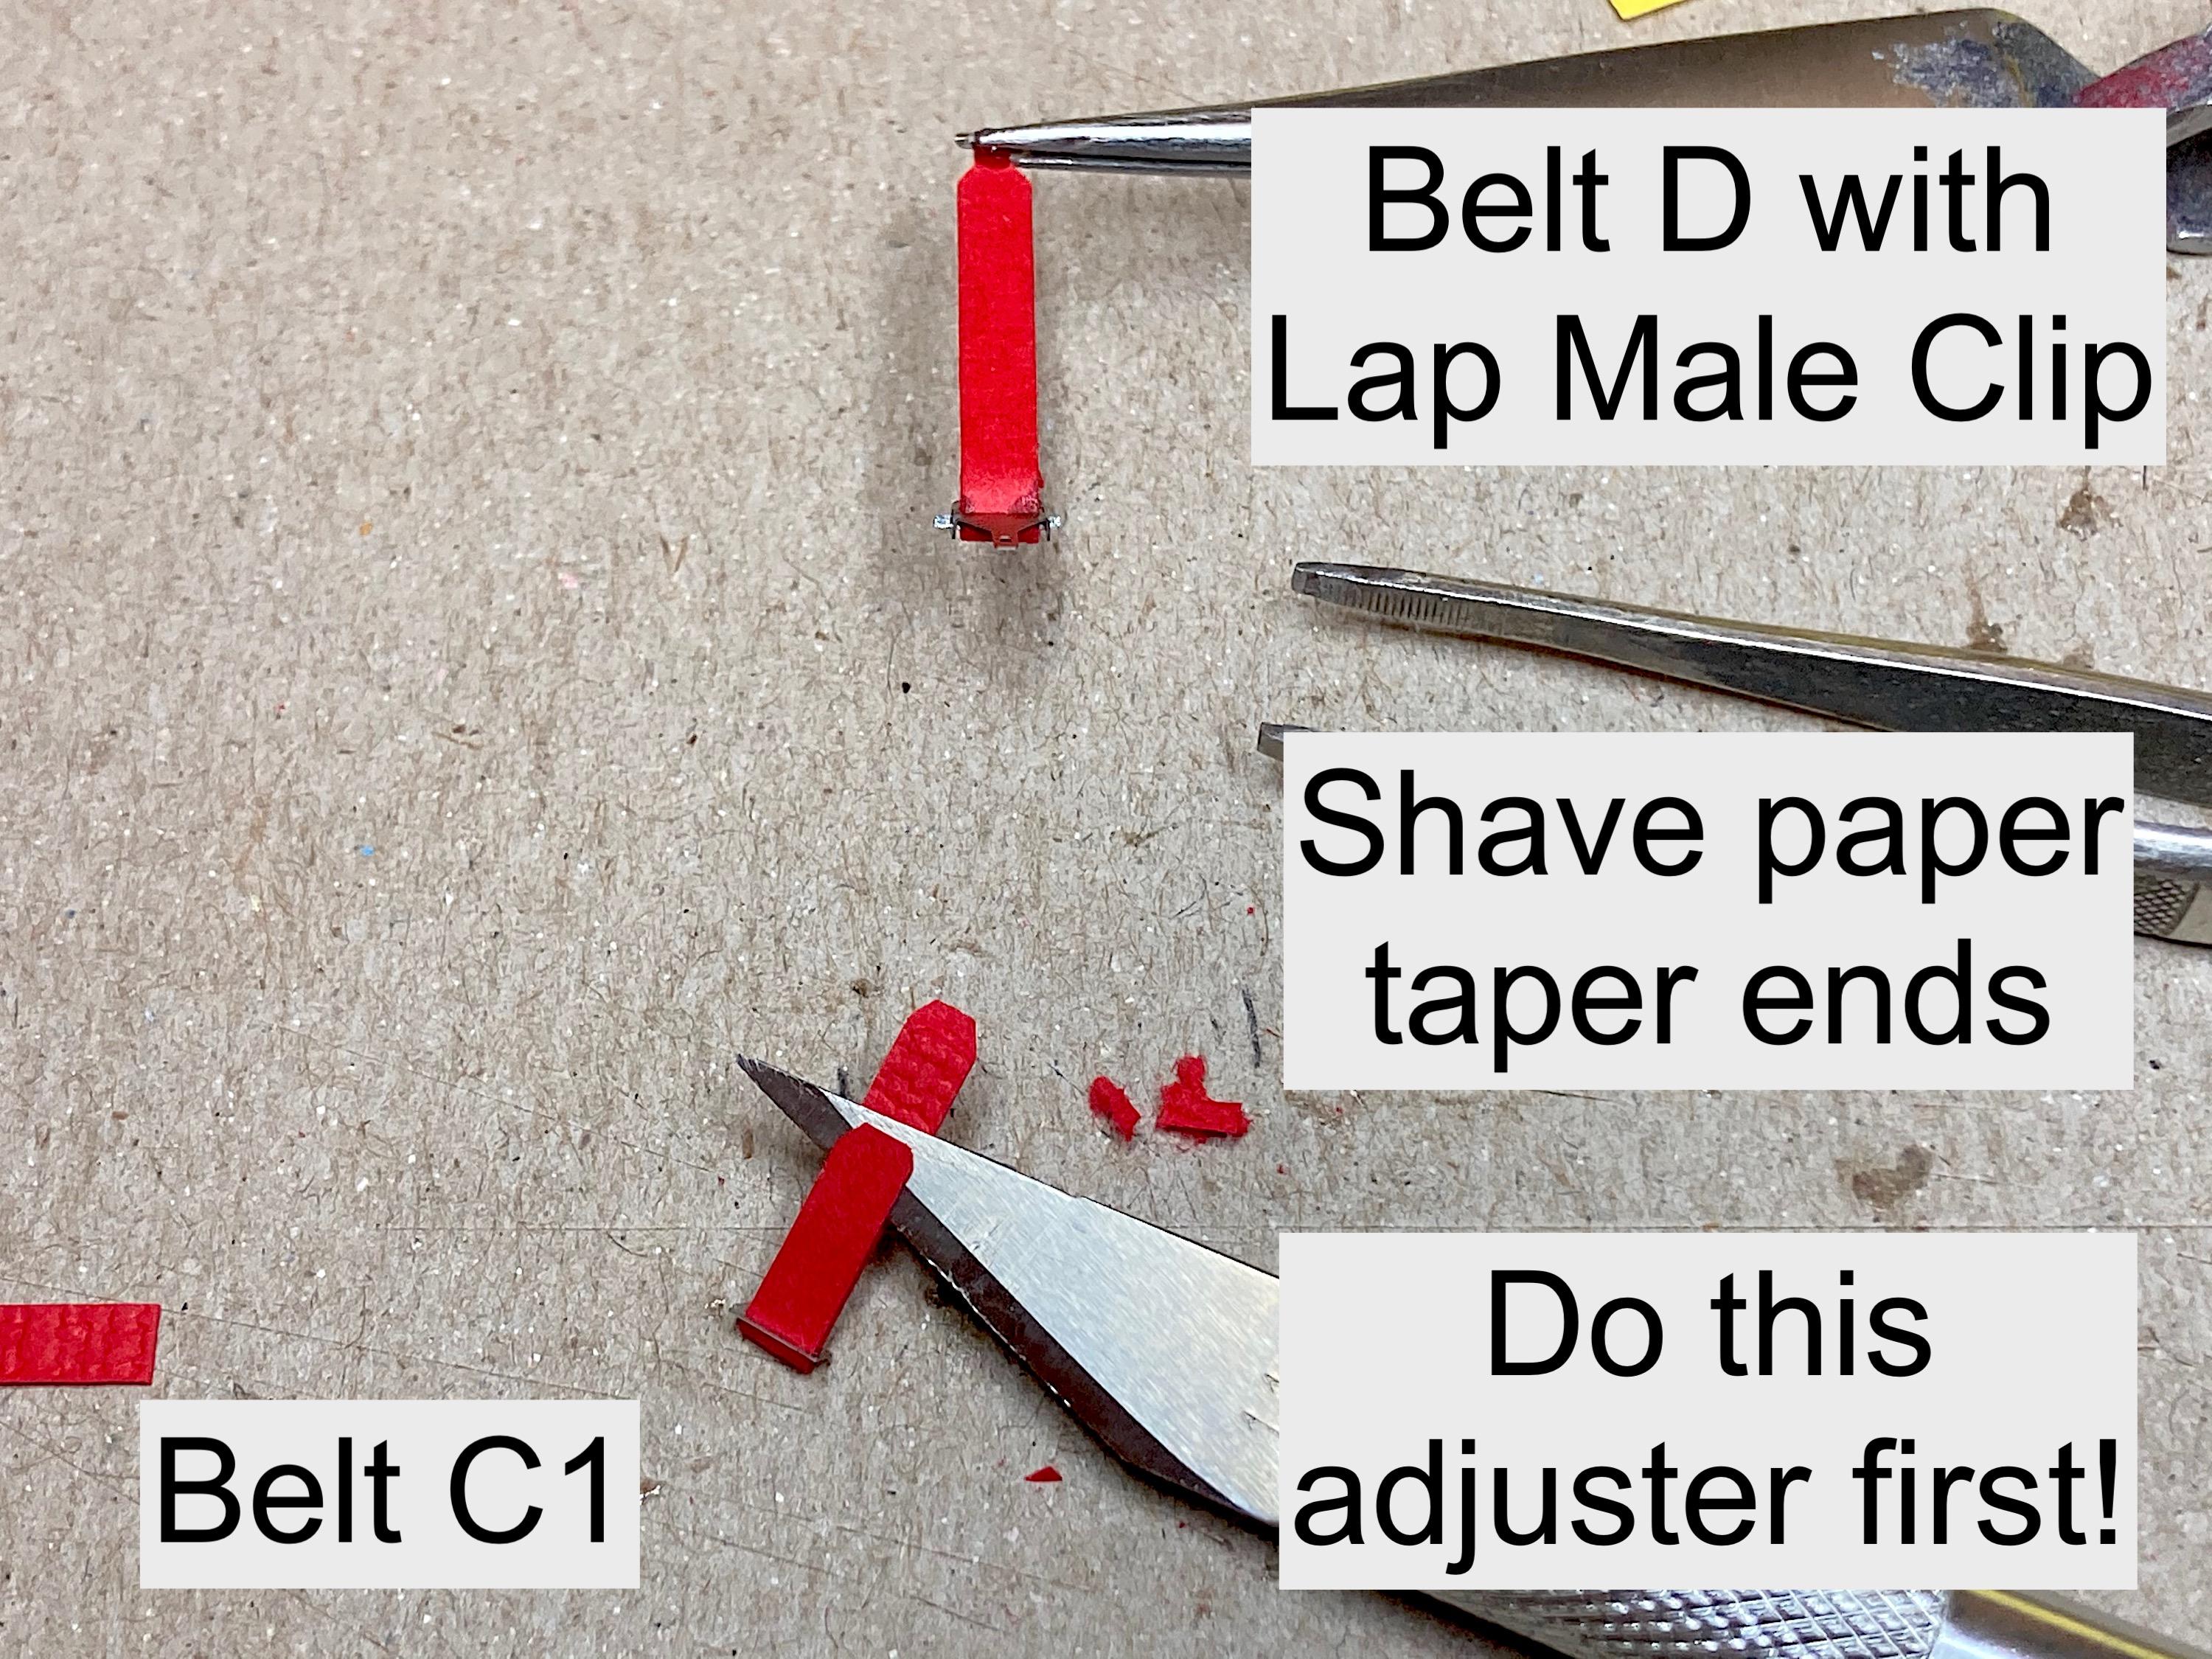
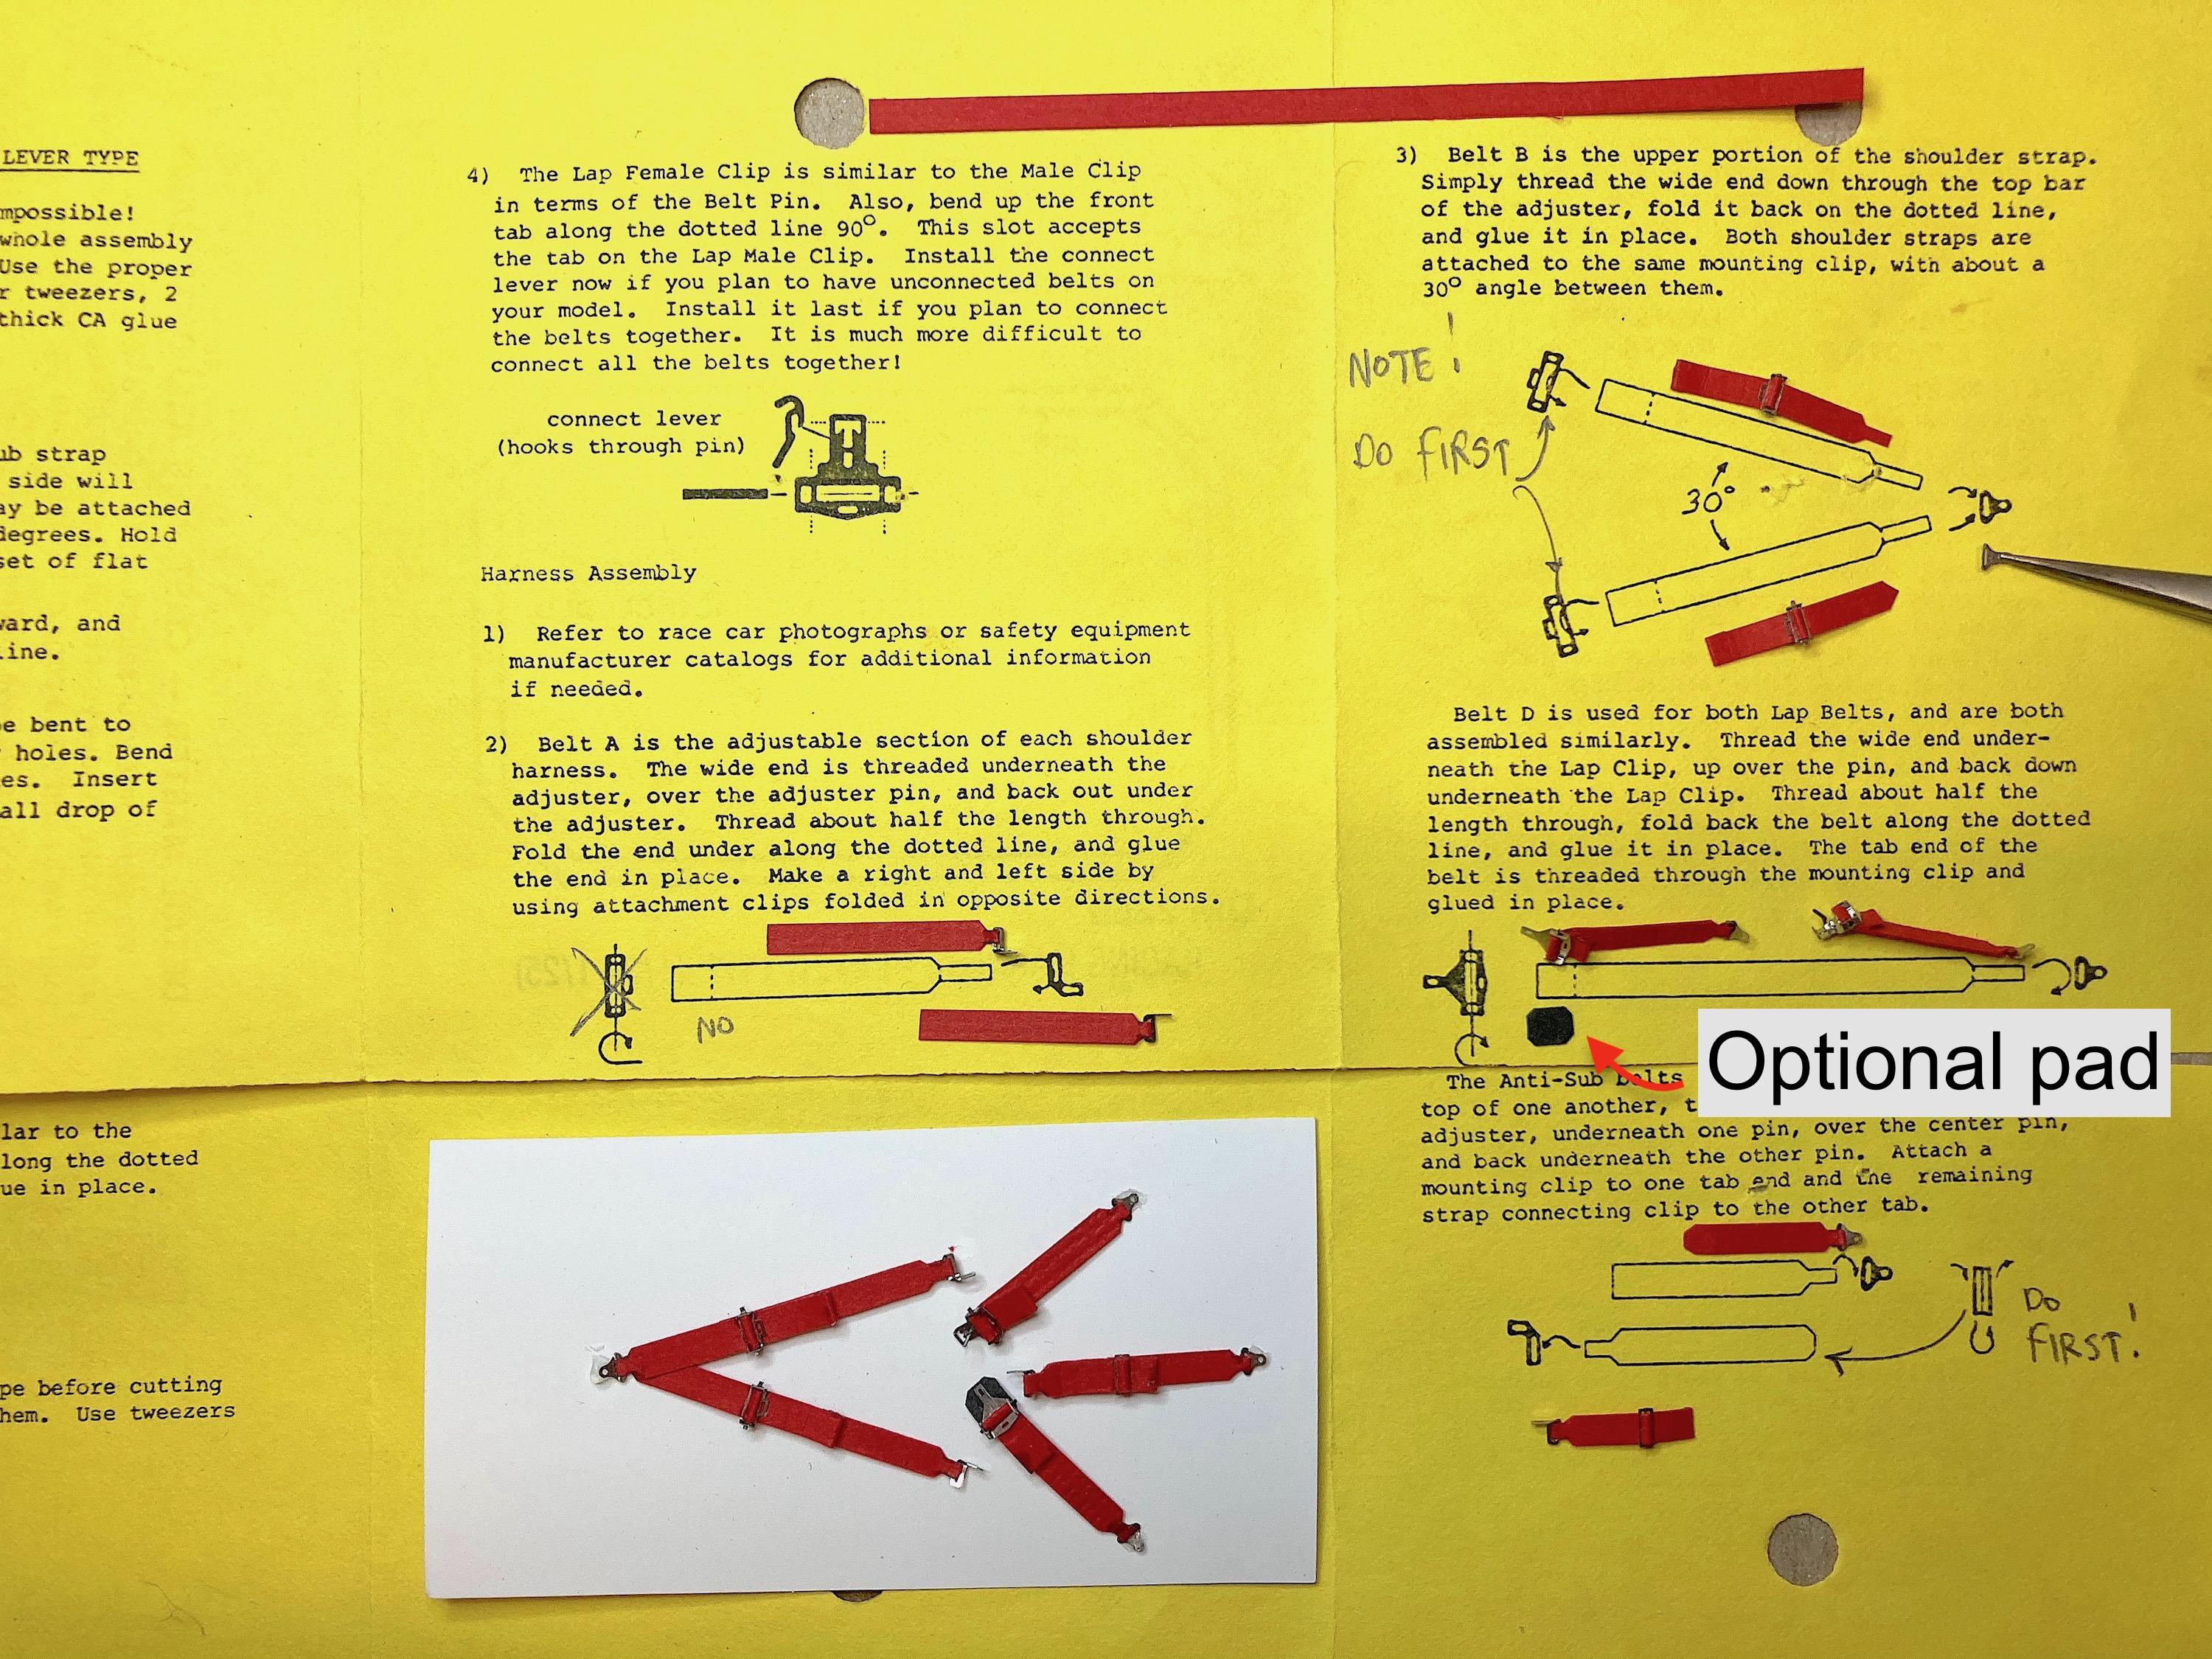
I bend the paper with the flat pliers. I found that doing it like this, delaminates the paper, which makes it difficult to push through the slot. So I held the pliers on the end, and dealt with a little hump at the fold. Up, down, left, right, same difference. Important to have clean tweezers, I cleaned with thinner, and sandpaper before starting. Patience..... I screwed up a few times, easy enough to remove the offending paper, but did scratch the metal. It was almost impossible to put one belt through this part! It was important to do all the adjuster parts first, before the ends. I folded the paper, slipped the part down about 1/8", then wiggled the "rod" in between the belts. As I'm typing this, am thinking wire could have been used. The top belt gets the adjuster. Holding the cut ends, I pulled up with the flat wide tweezers to get the part into the fold. Then pulled opposite ends to get the belt somewhat flat. It's a trick to not let the tweezers get stuck on. Remember to put the end parts on after the adjusters. Another part that had two belts, I faked it by putting the top belt through, then glued the other one without the tab underneath. Since I butchered the first red belt so much, this time I shaved the ends, and tapered them, to get through the tight slots. You might want to do that on all ends, add just a tiny bit of glue and squish down with the flat tweezers. So here is the first complete set, with the parts laid out near the instructions. I added the black pad under the buckle. Now take a break, take a walk, eat dinner, post on this forum, anything to take a break! ?
-
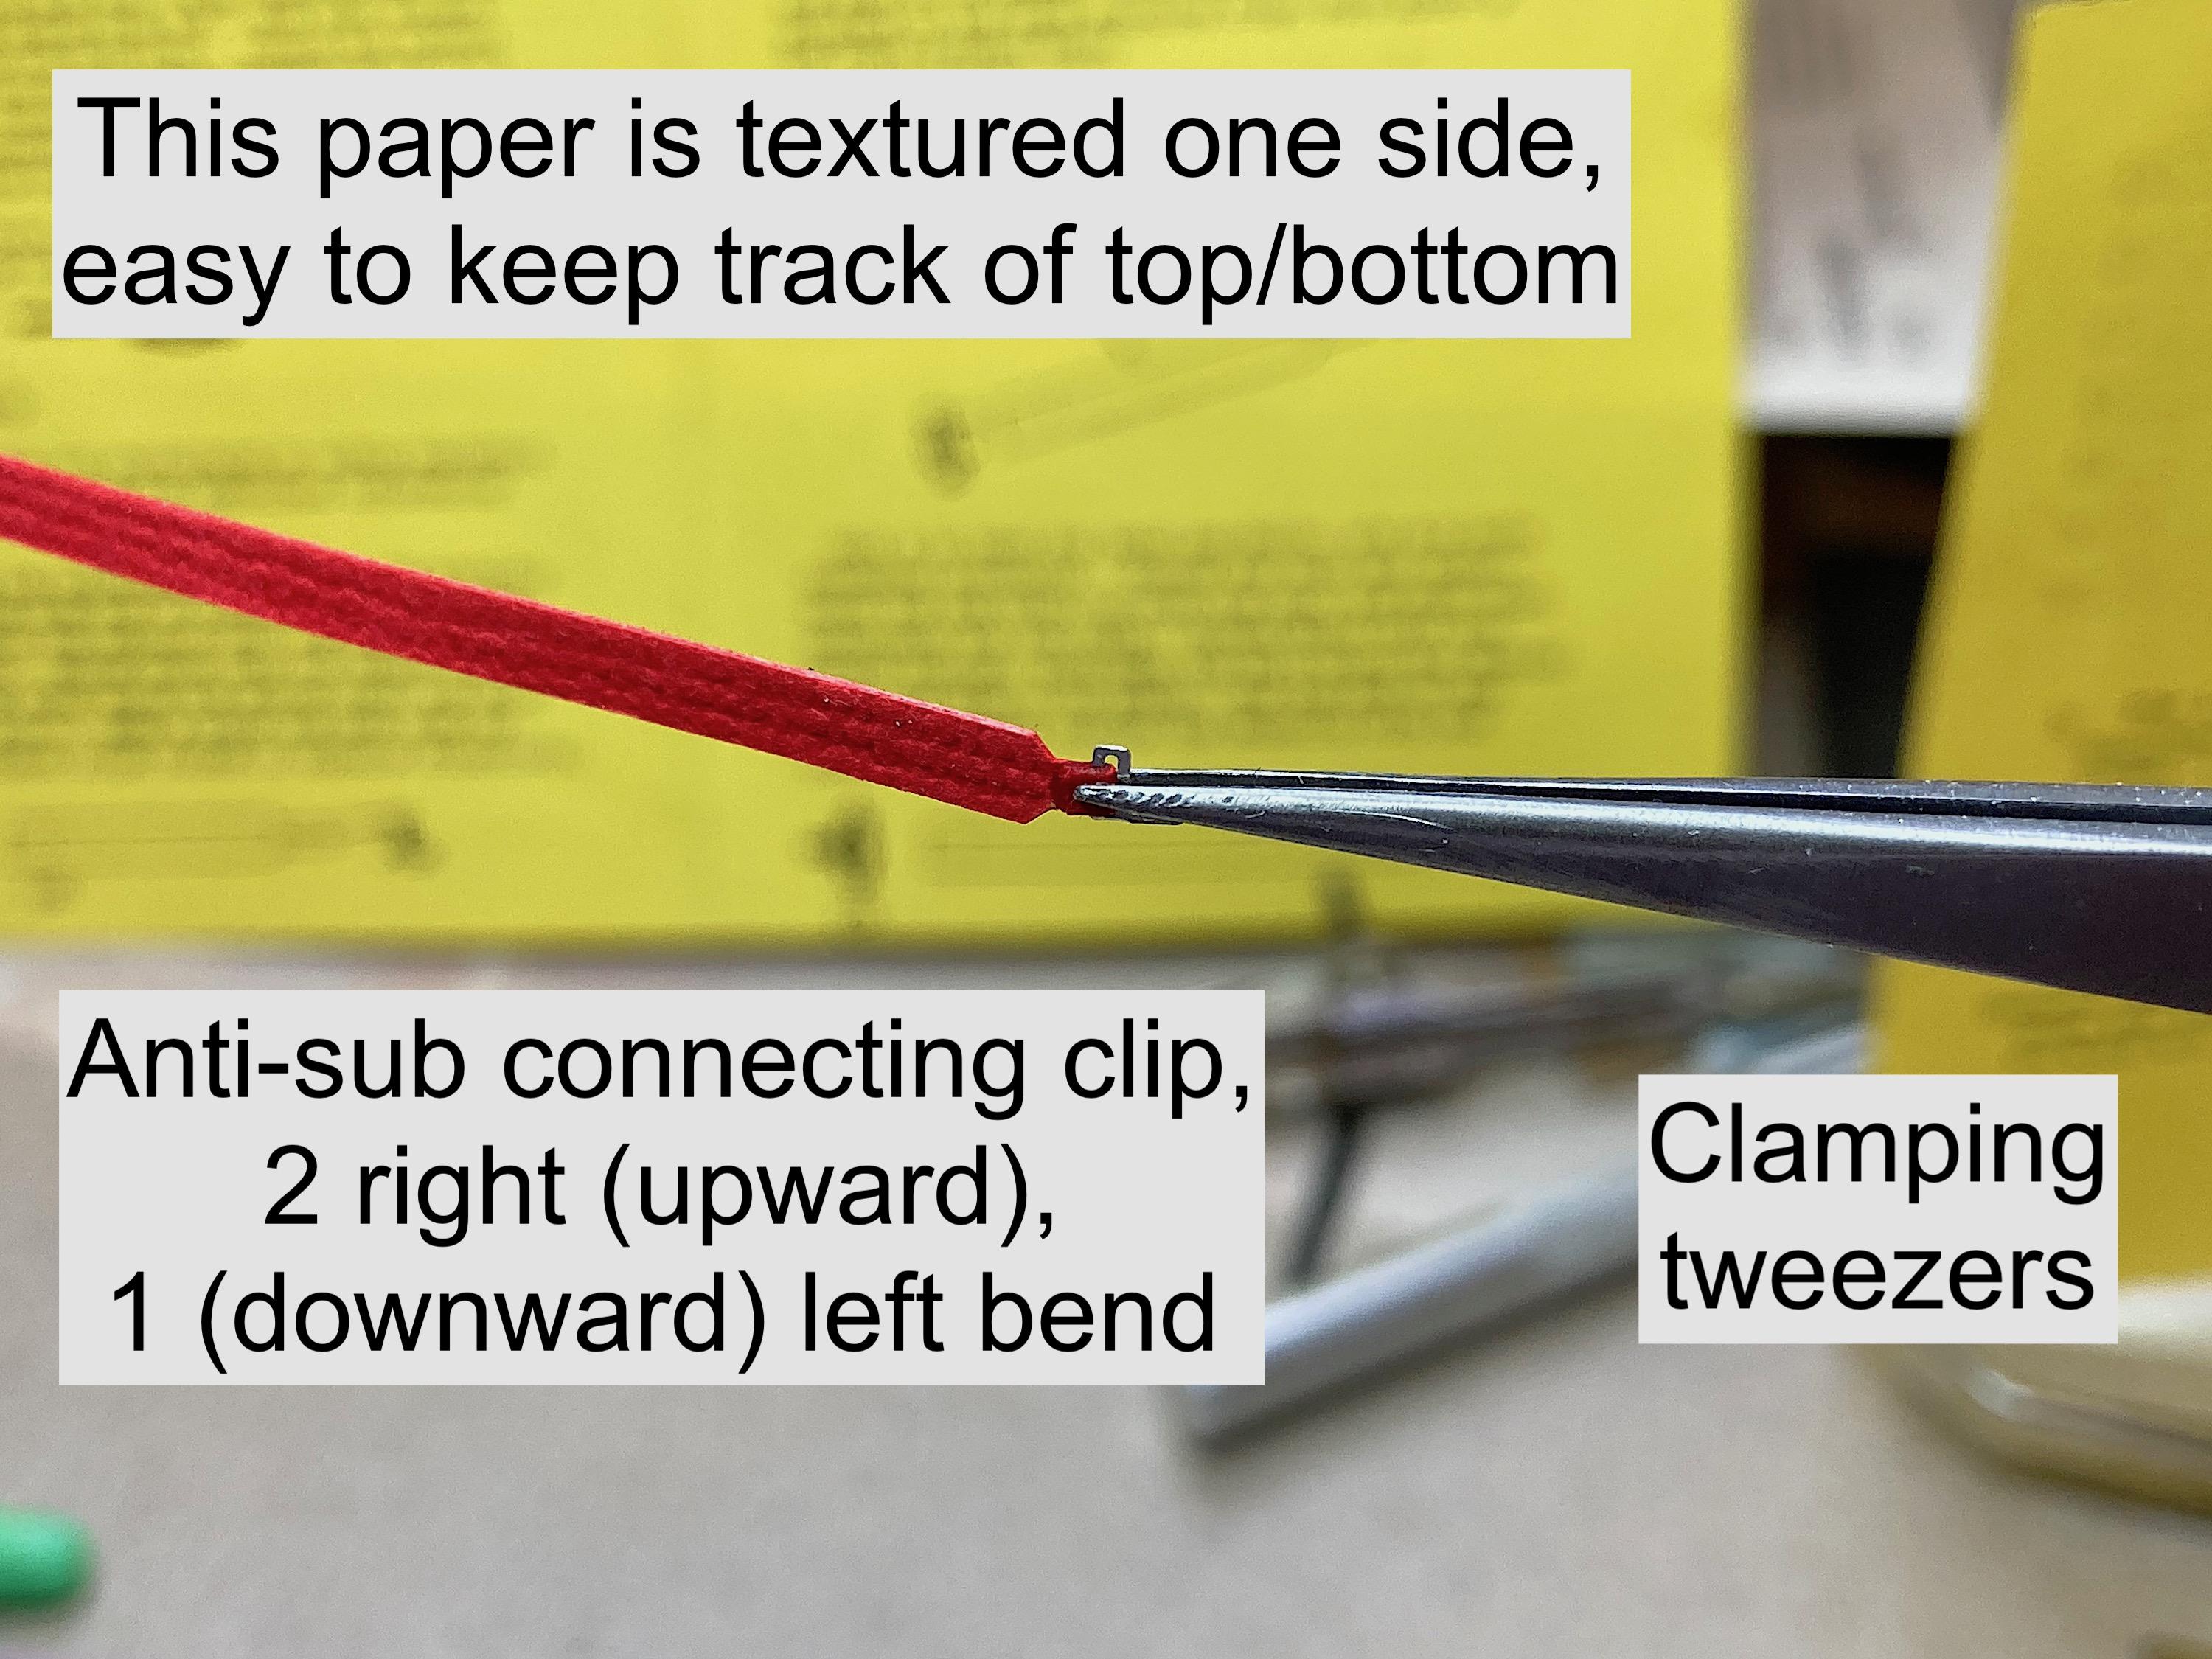
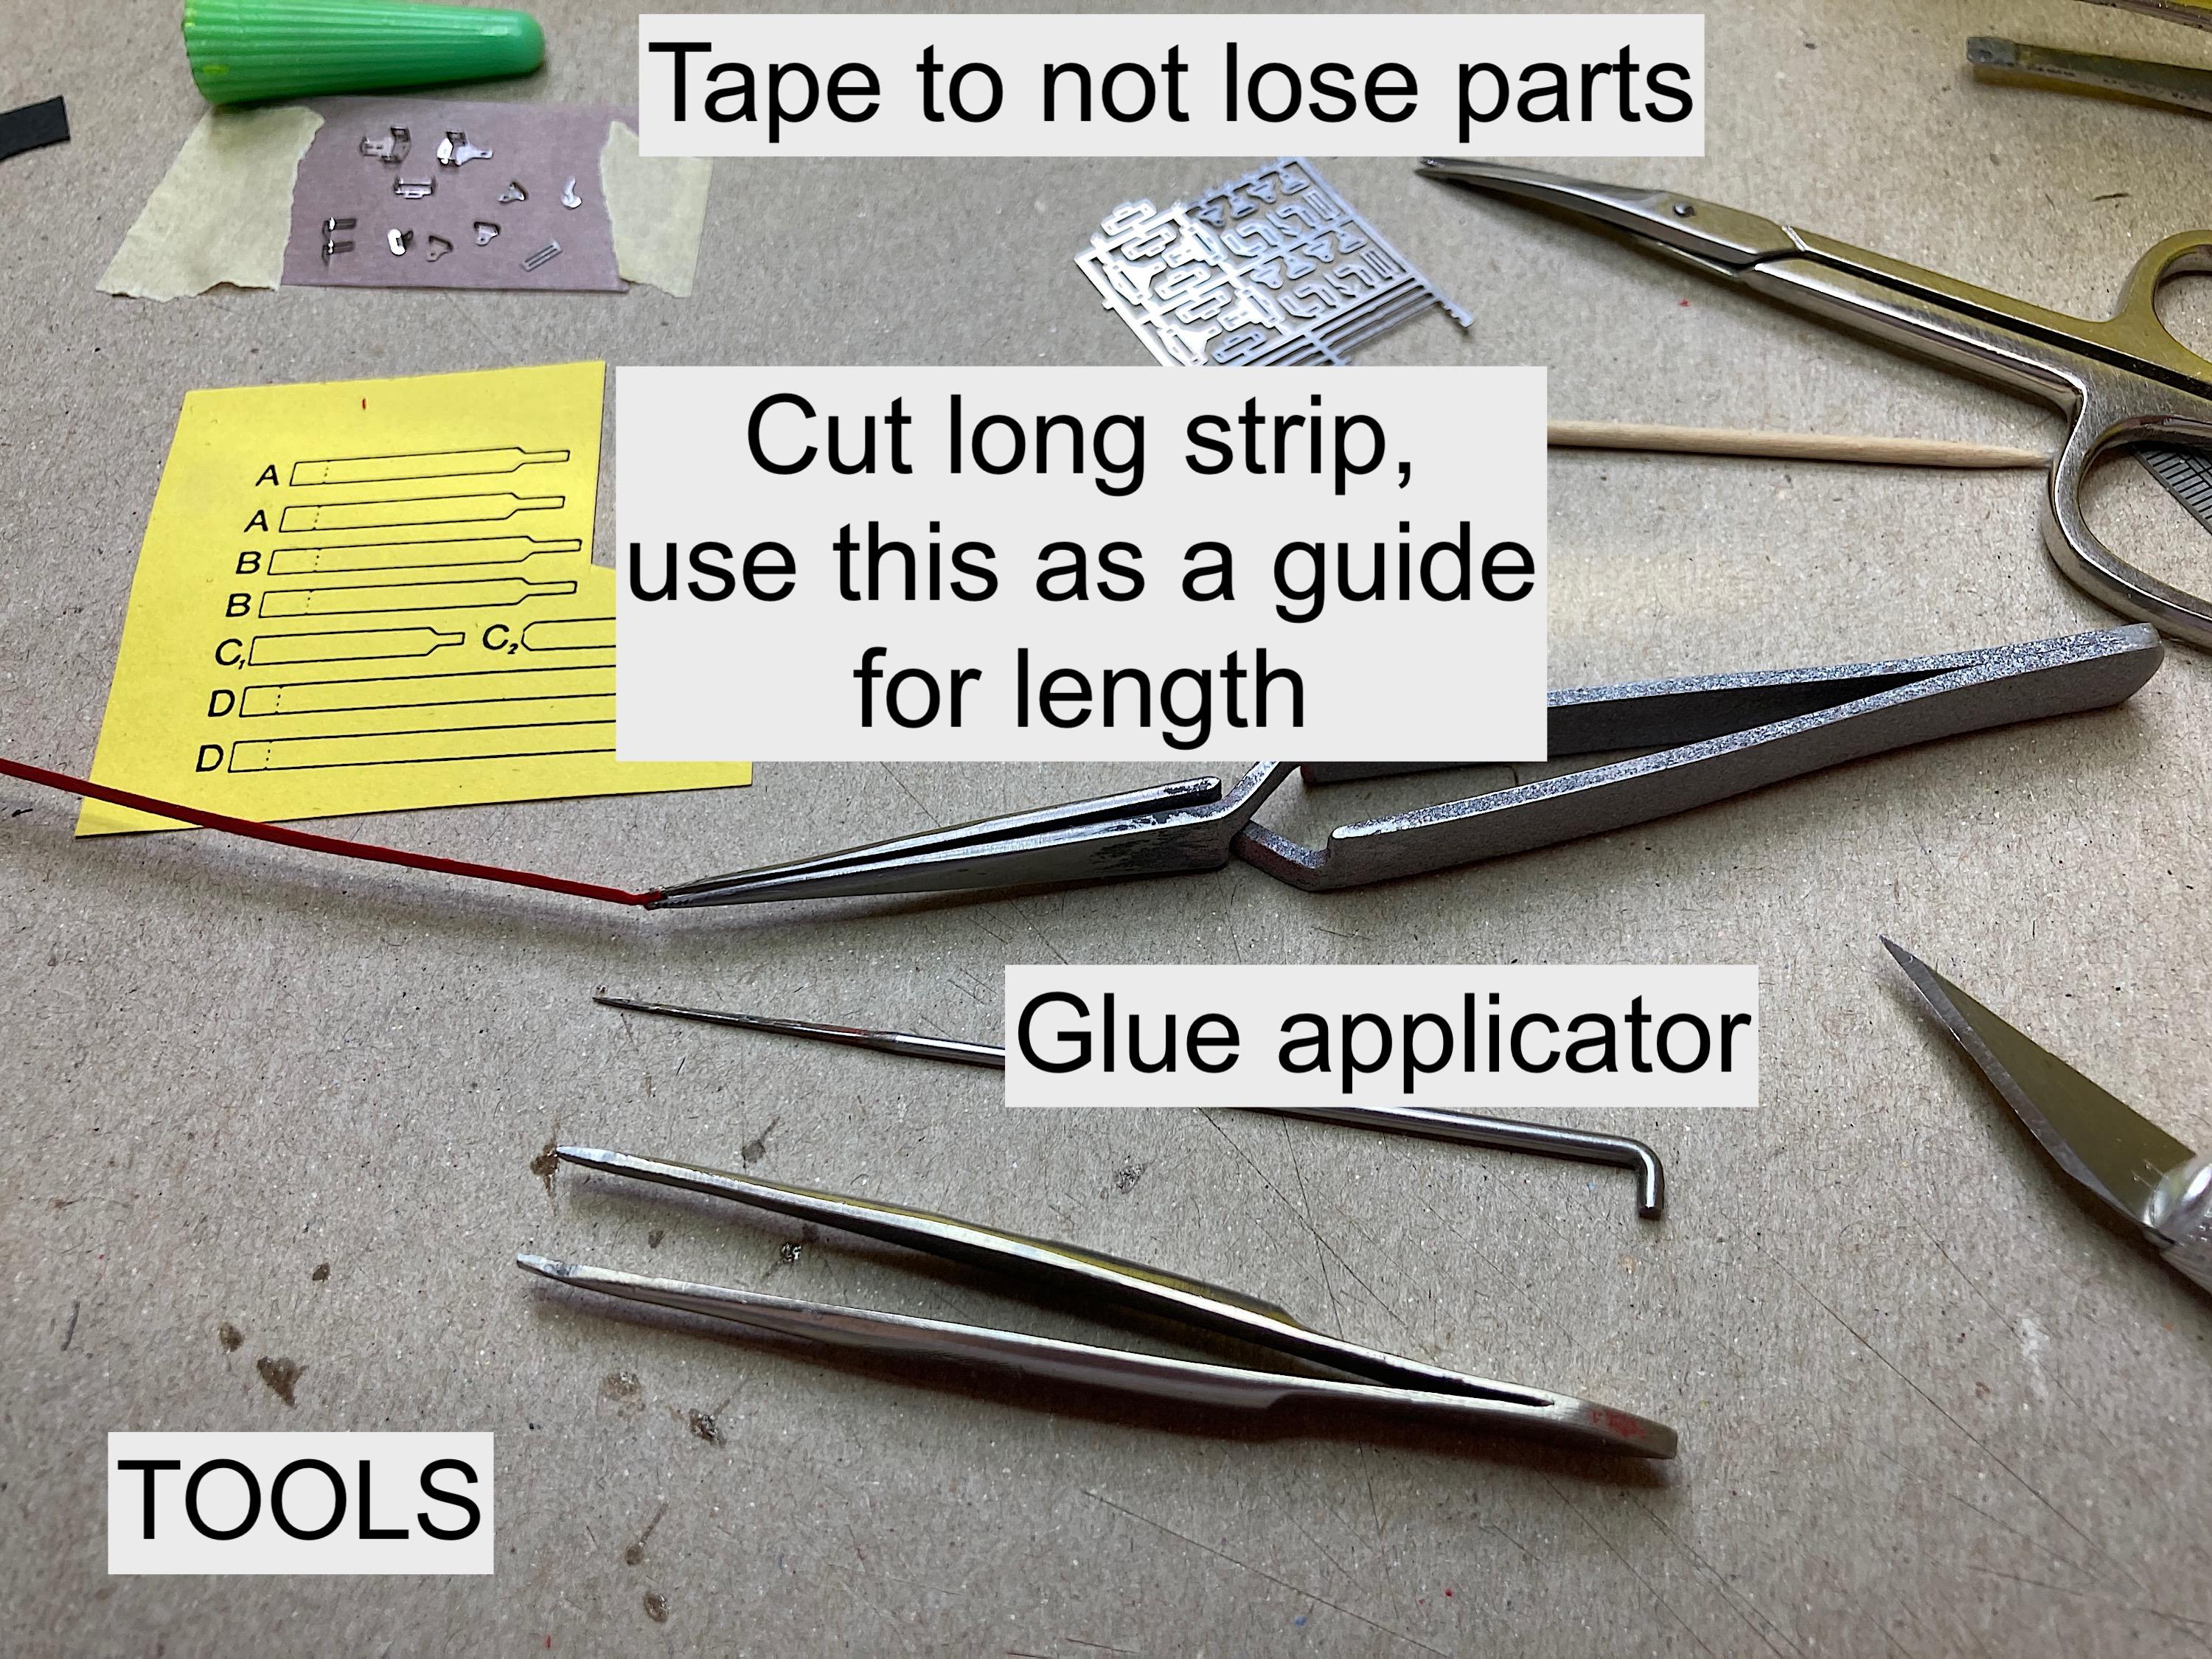
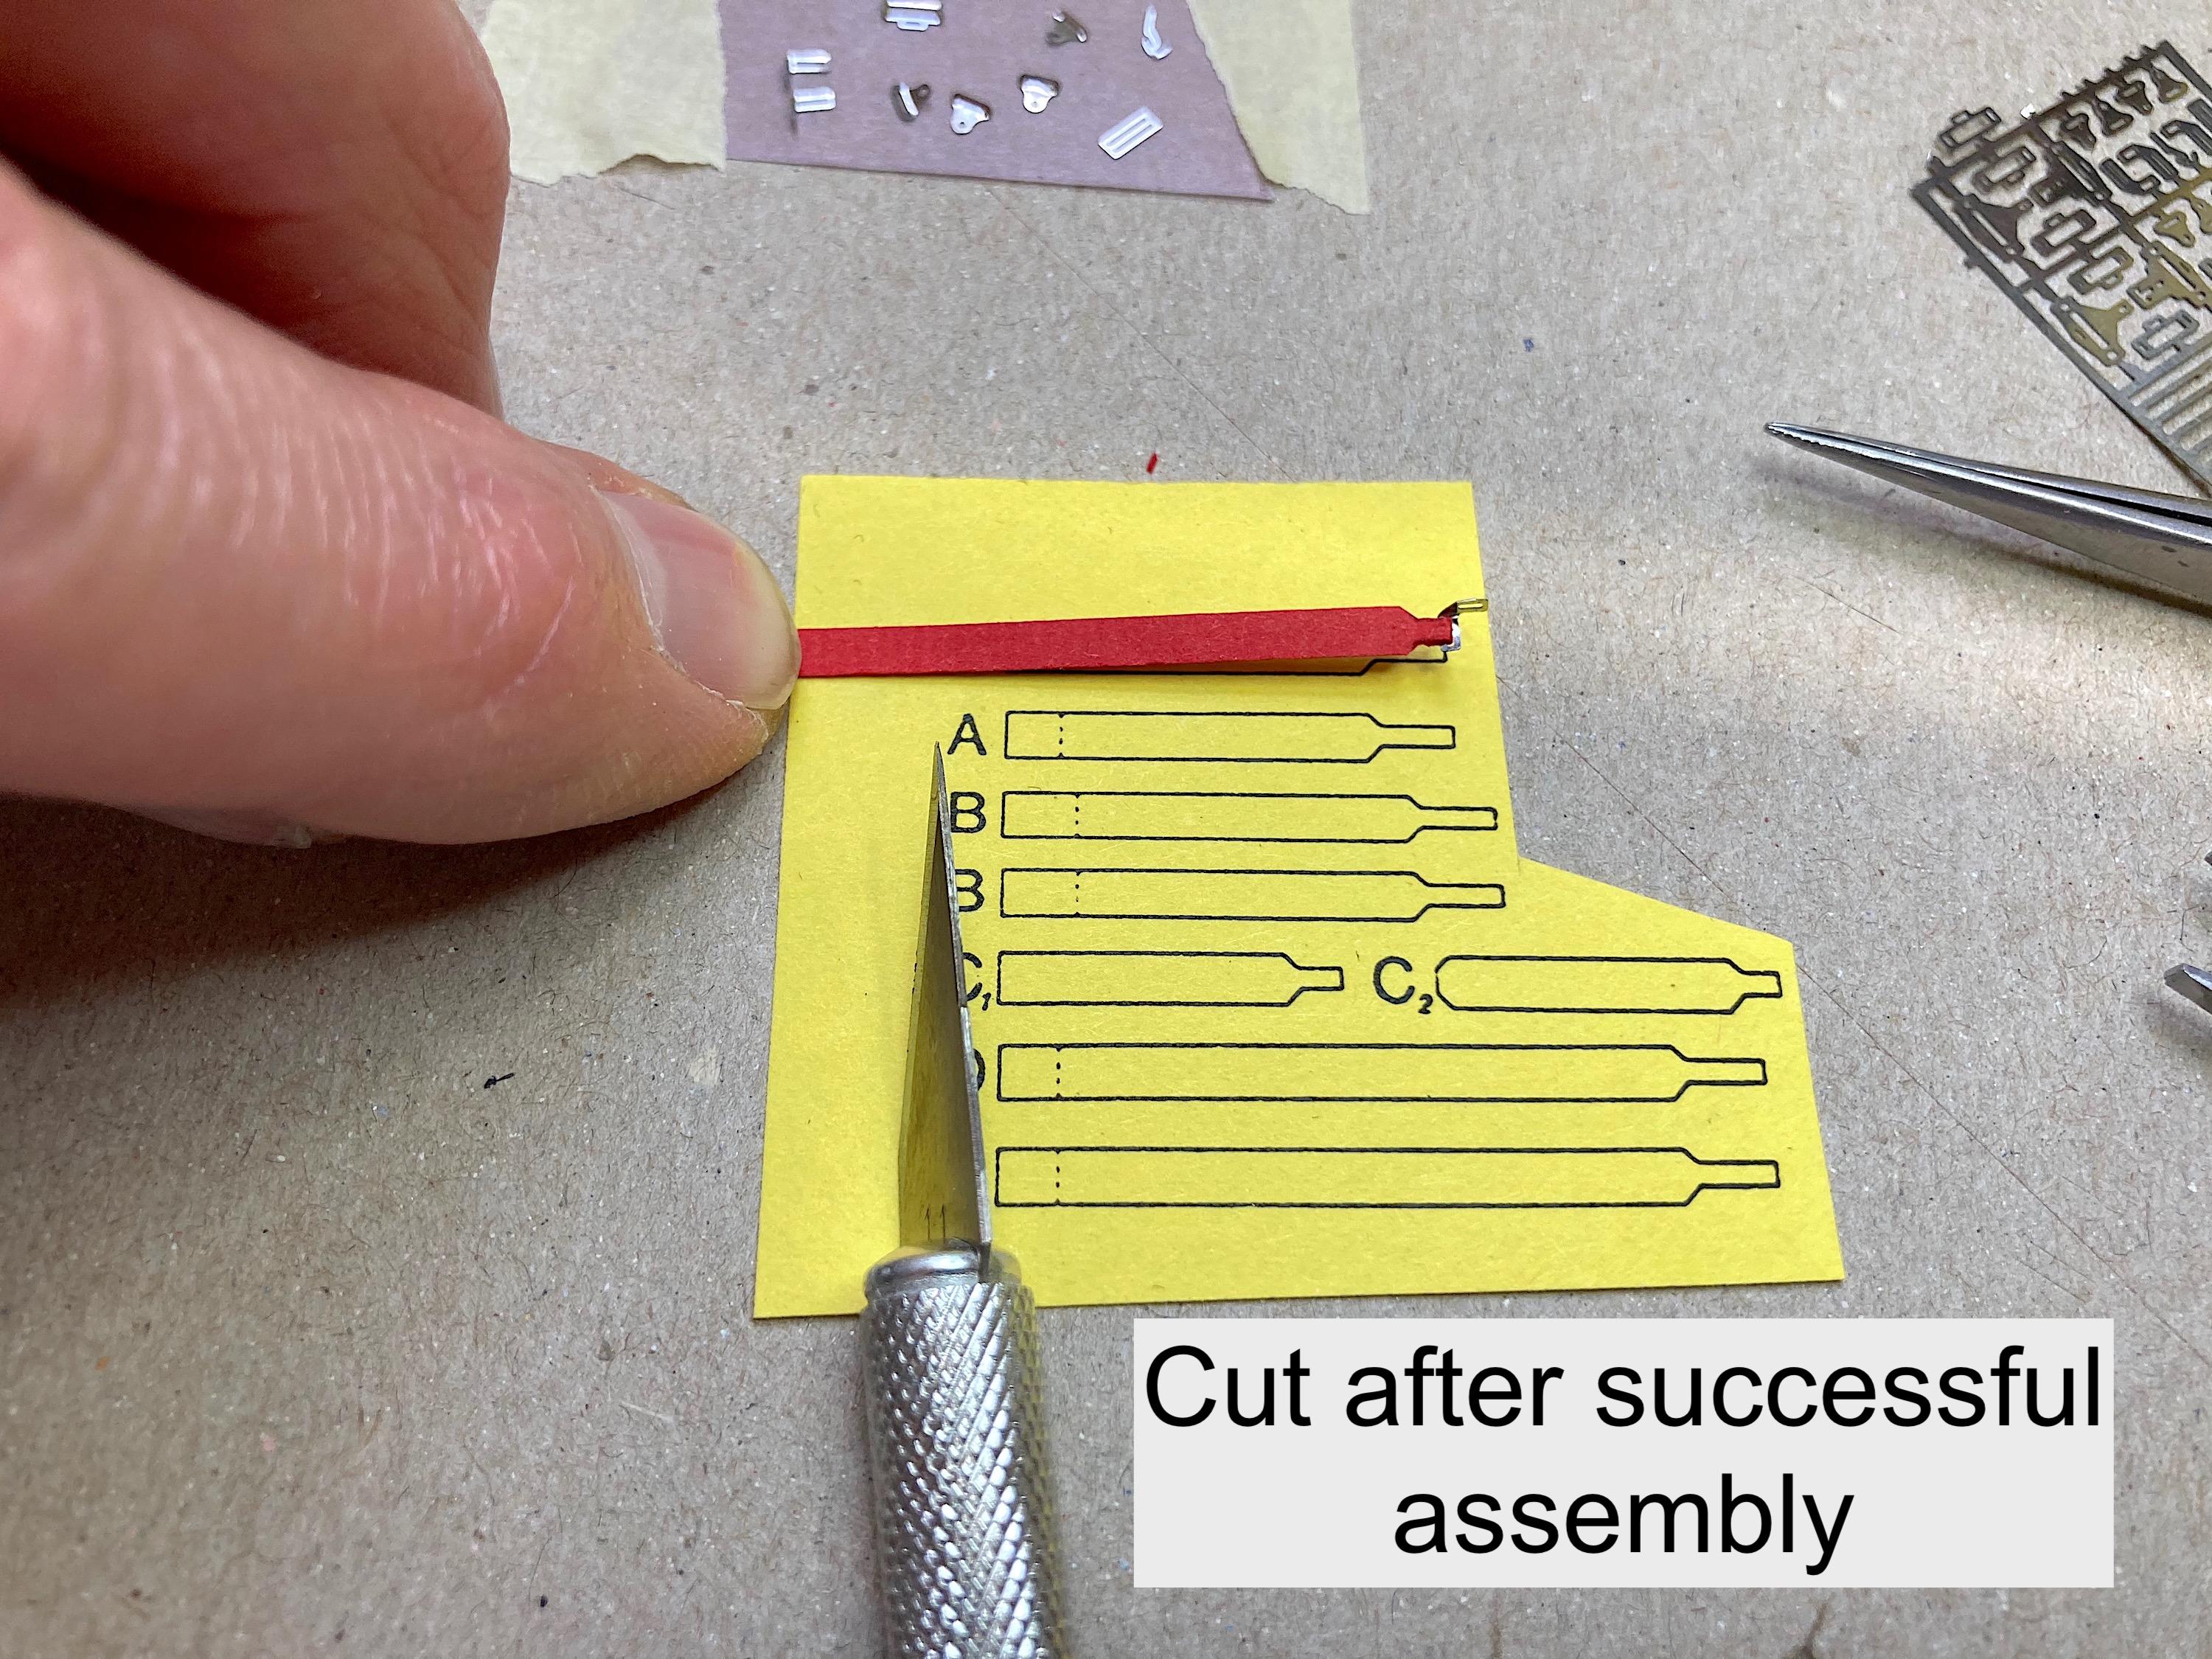
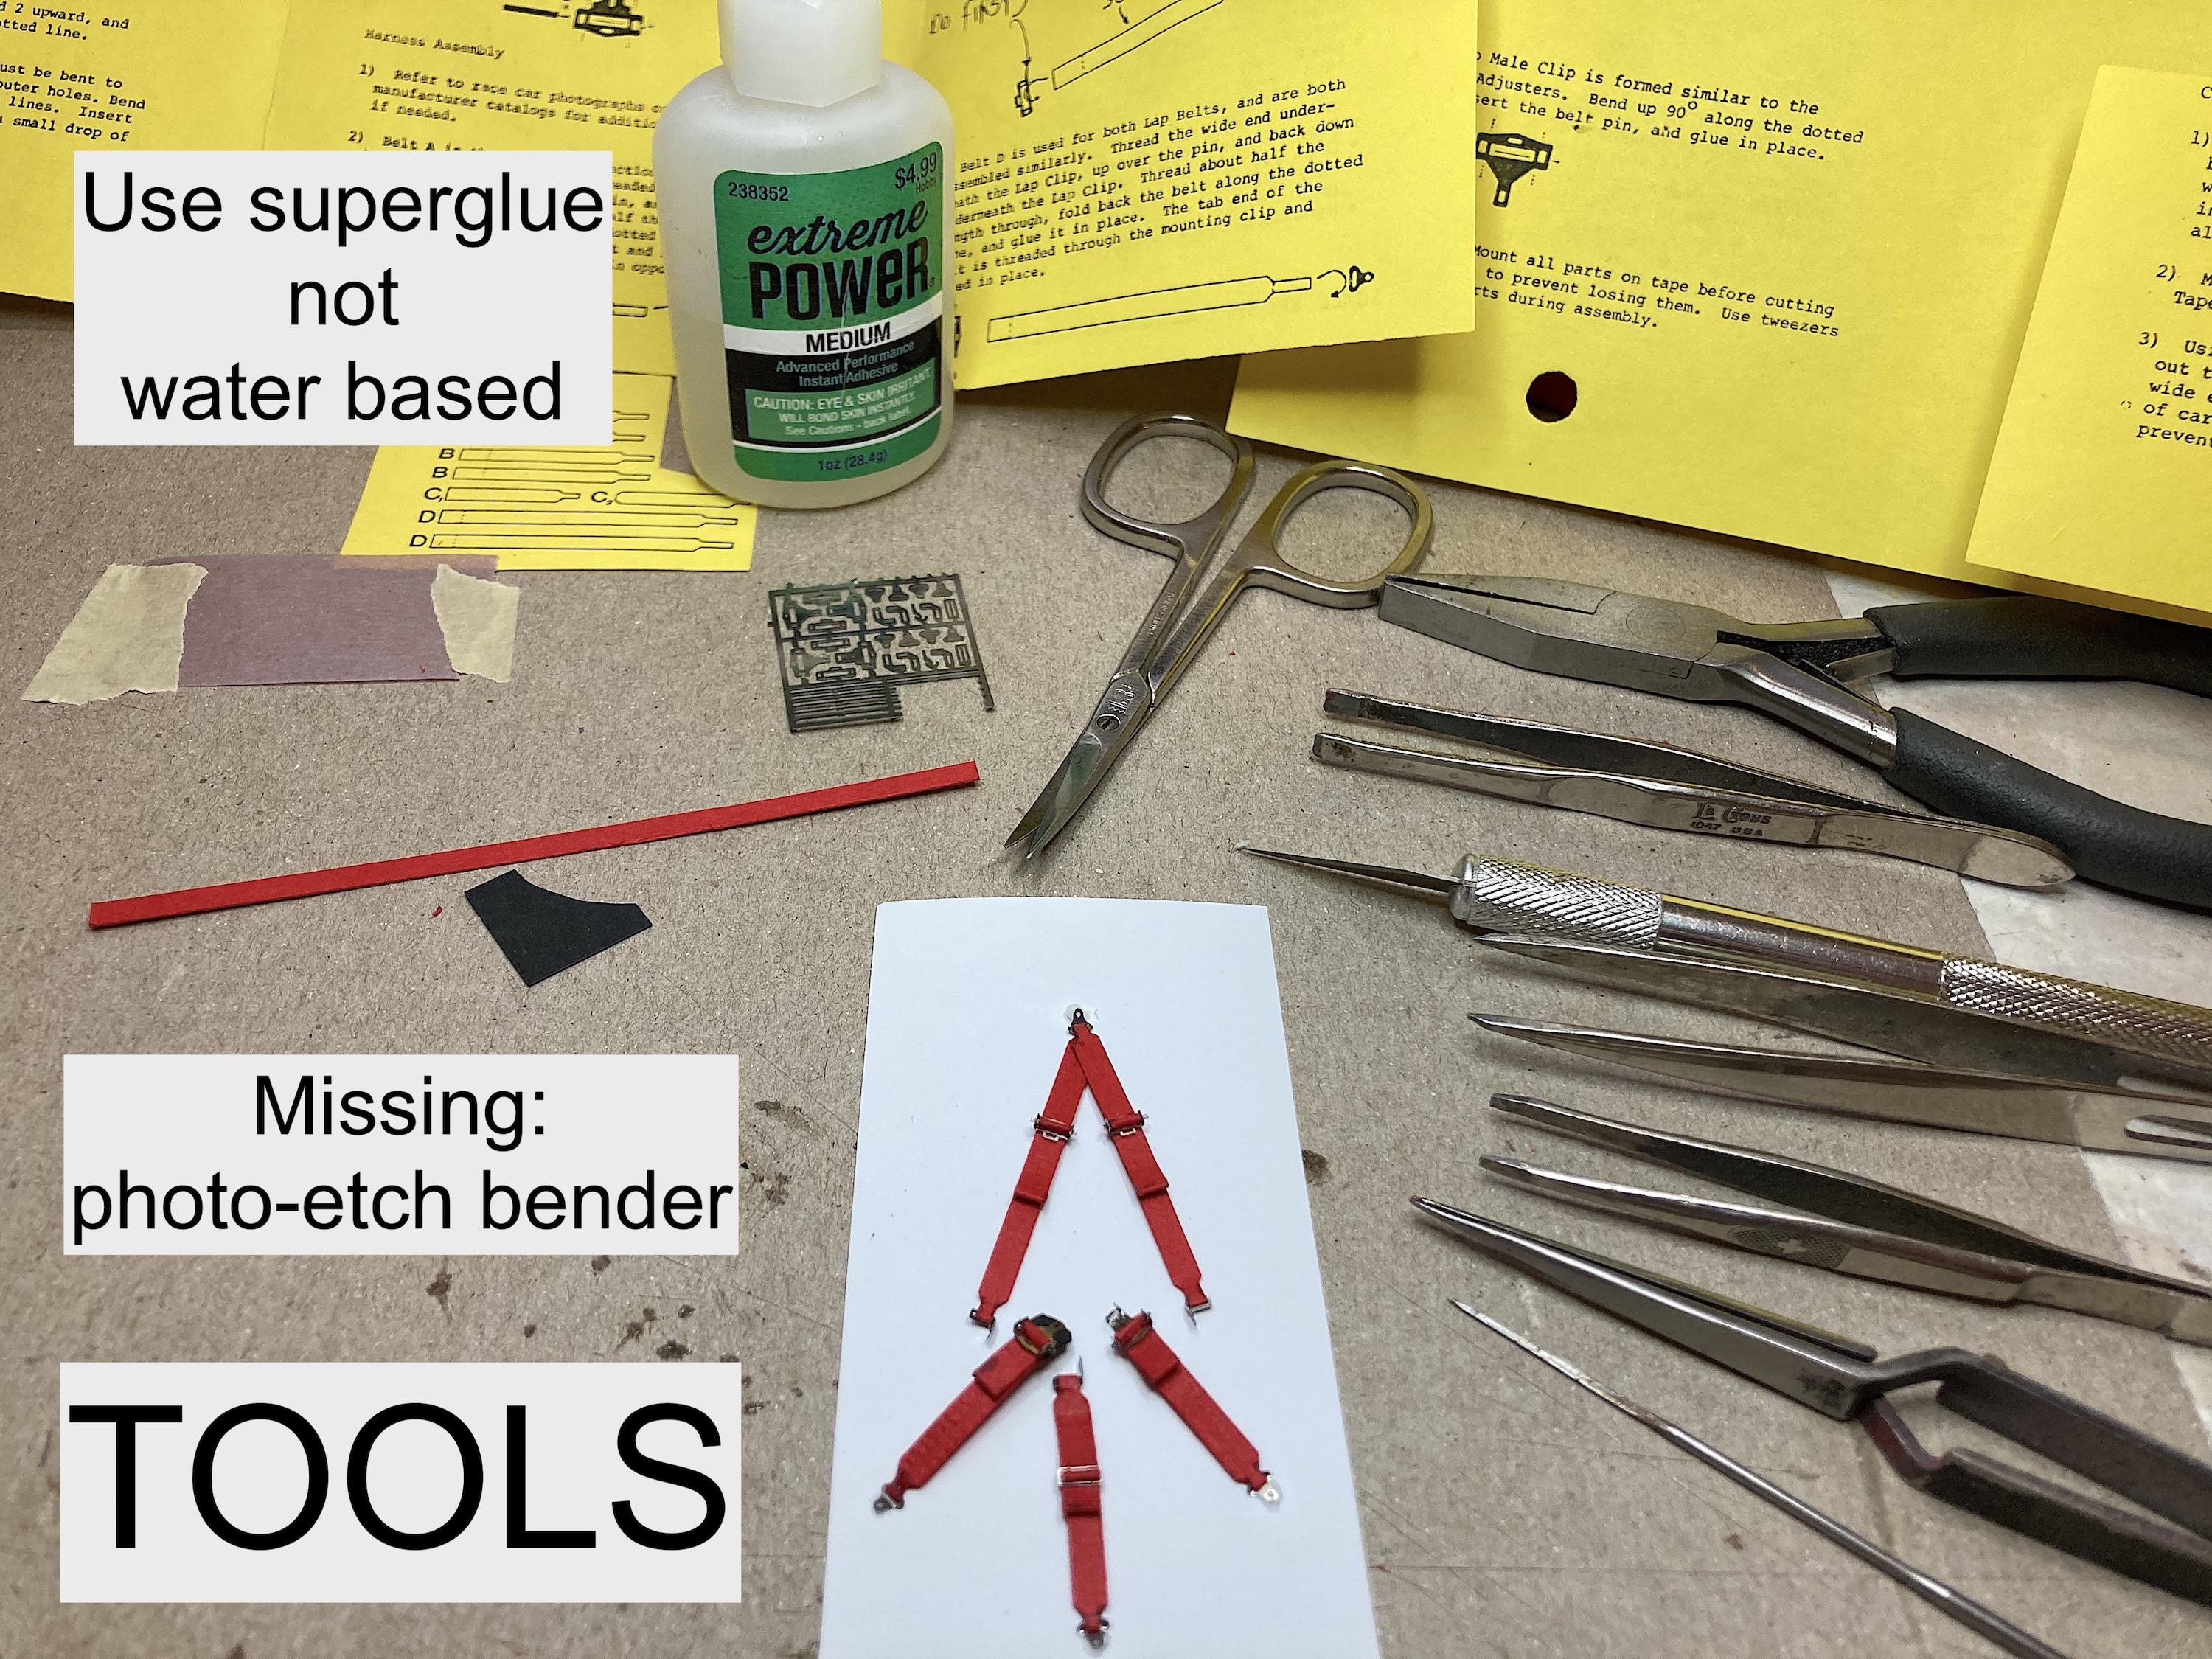
I tried to find a tutorial on this forum for doing the Detail Master racing harness (seatbelts), and other places, but no luck. This was an early set, had thin tissue paper that was supposed to be painted. I see the current offering has the sewing ribbon, which IMHO would be impossible to use with this. I also don't like the fuzzy look after it gets crammed through photo-etch. I also don't like the belt material in Studio 27 seatbelts, the back side is not the same color, and it gets fuzzy. I now prefer using color paper from the craft section (Hobby Lobby, Michaels, etc.) My first pass was using regular black paper, with no texture it's tricky to keep track of which side is up. The later sets use textured red paper, not exactly to scale, but other colors have a finer and more consistent linen texture, and it's slightly thicker than plain paper. I had trouble with the sequence of assembly using the instructions, had to modify to work, and not having pictures but tiny one dimensional images was a challenge. This is my method of assembly that was good enough for government work. As with anything, having the right tools is key. I used superglue because the last stage uses water, and it's faster. Having tiny scissors is better than trashing the knife blade. Need to have clamping tweezers. Whatever glue applicator tip that works for you is fine. The first set, I cut the belts as shown in the pattern, don't do that! Each one had a slight variation in width. Just cut an 8 1/2 inch (width of the paper) strip, you might use it up. On some steps, you can cut the end after screwing up a couple of times with the photo-etch. In fact, I cut all belts longer, and trimmed after the photo-etch was done. This is optional. You could sand with 1000+ grit first, then polish too. Scale Motorsport photo-etch is awesome shiny to begin with. I found that using my finger worked best, wash really good before proceeding. Instructions say to use tape, I prefer using the tweezers. Just a suggestion: Just like cleaning plastic parts when removed from the sprue, I think this step is essential. I didn't know that I needed this tool until recently. I don't know what all the notches are for, the two screws work to hold the part in place, that's all I care about. I position into place with a toothpick, lessens scratches. It's hard to get the razor blade under a short part sticking out, you need a minimum of this dimension (IMO). Like this... Sure beats using pliers. One of the clips has 3 bends, tool worked great. For this part, putting the slot under the bender kept it flat. This is where I modified from the instructions. Look at the real thing before taking my word for it. I bent all the photo-etch before adding the belts. The most confusing step in the instructions was dealing with the adjuster, looked like there are four, but there are only two. There is no way to push two belts through that slot, so I did only the top belt. Again, first pass with cutting the belts per instructions, waste of paper. Take a break, do breathing exercises while doing stretches, use eye drops if necessary. ?
-
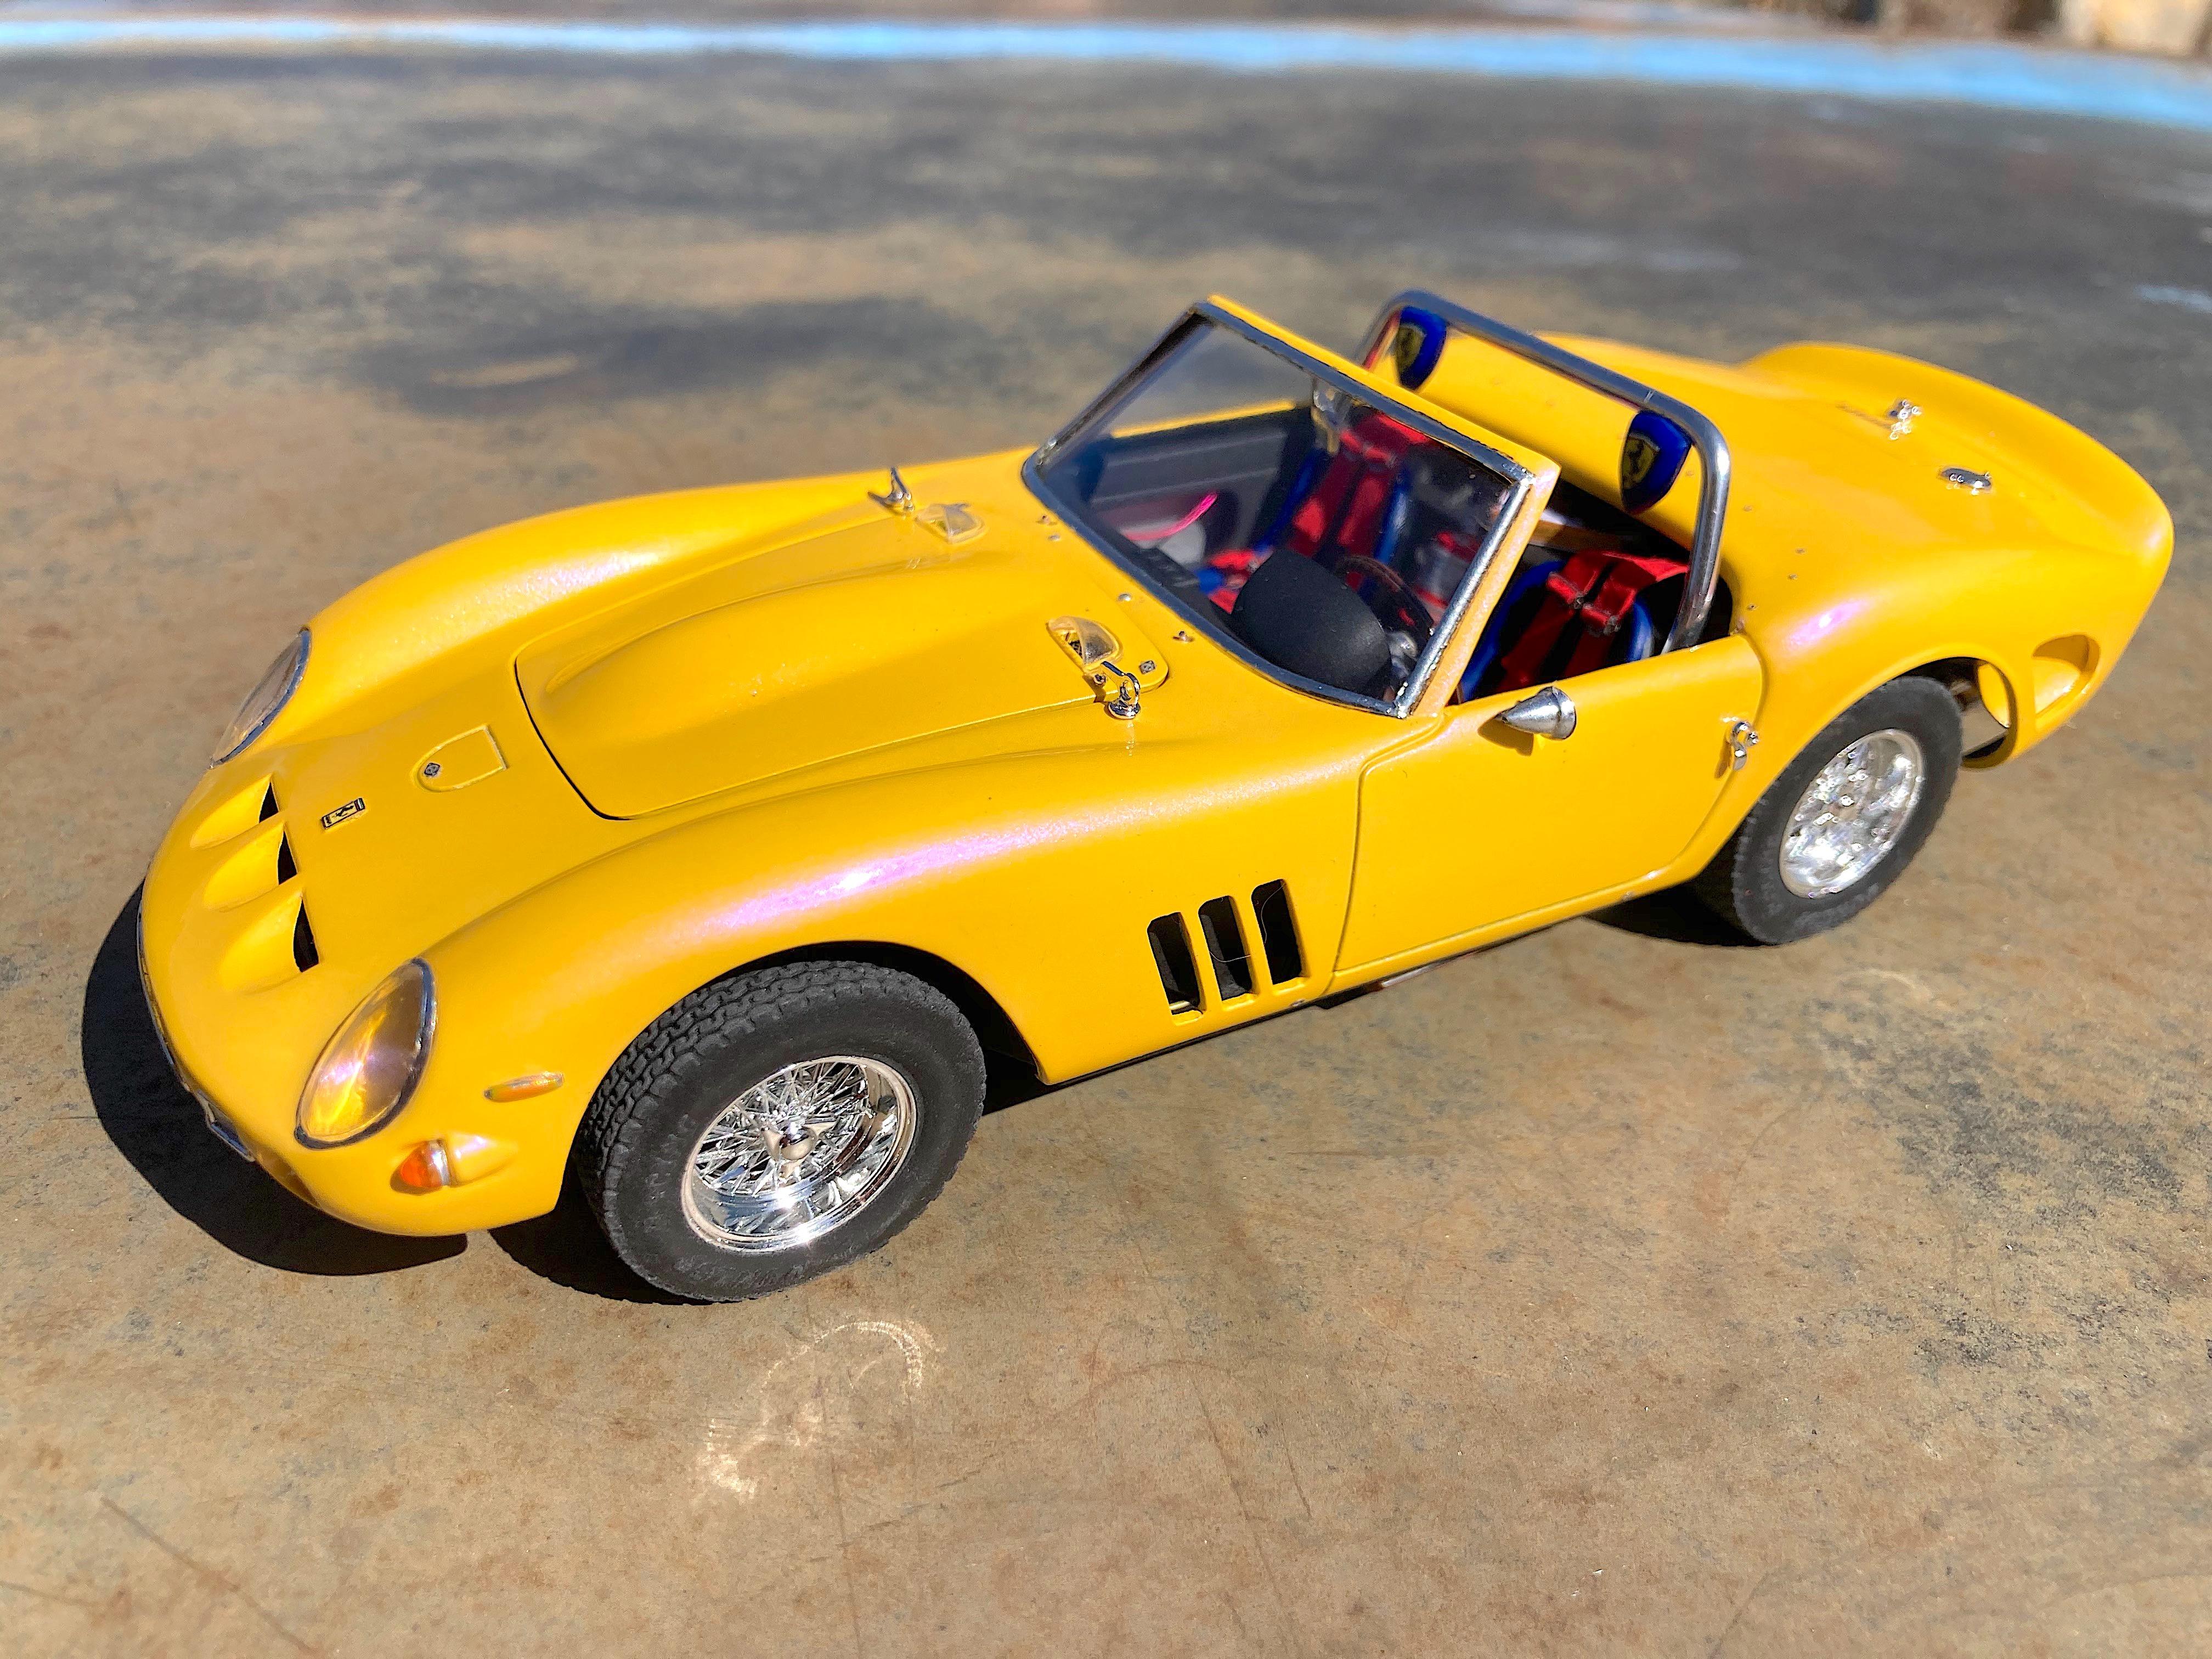
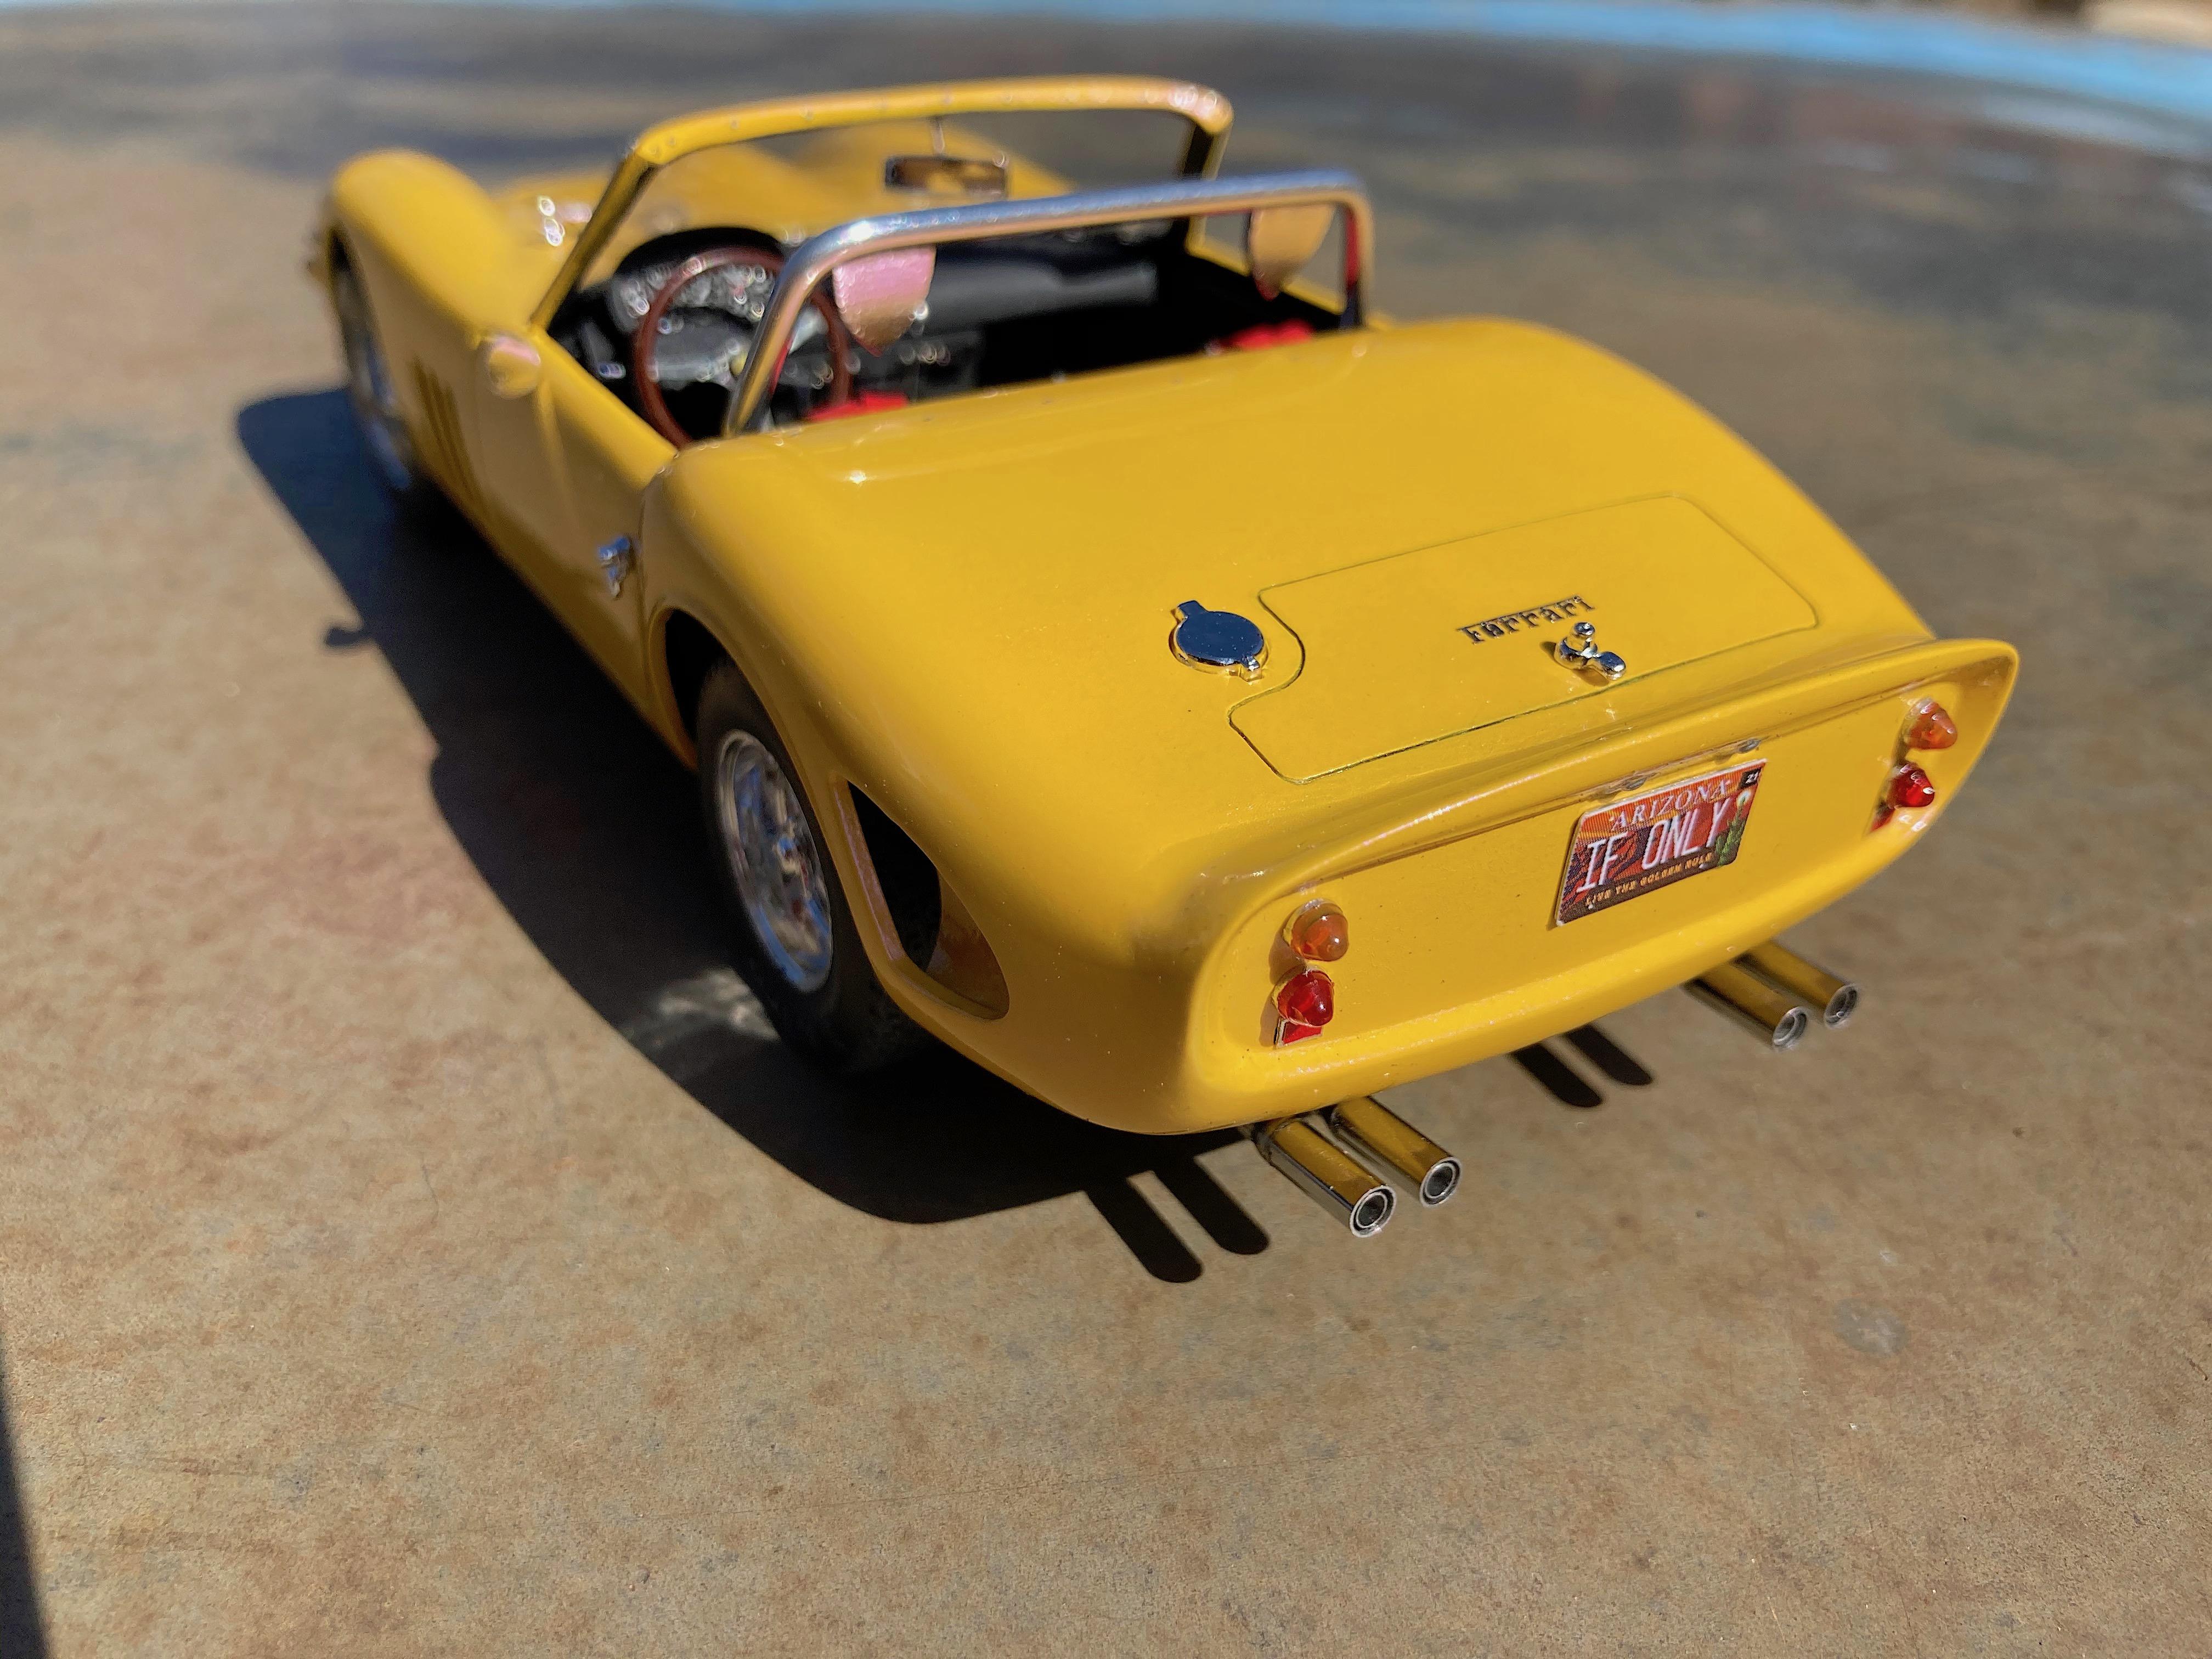
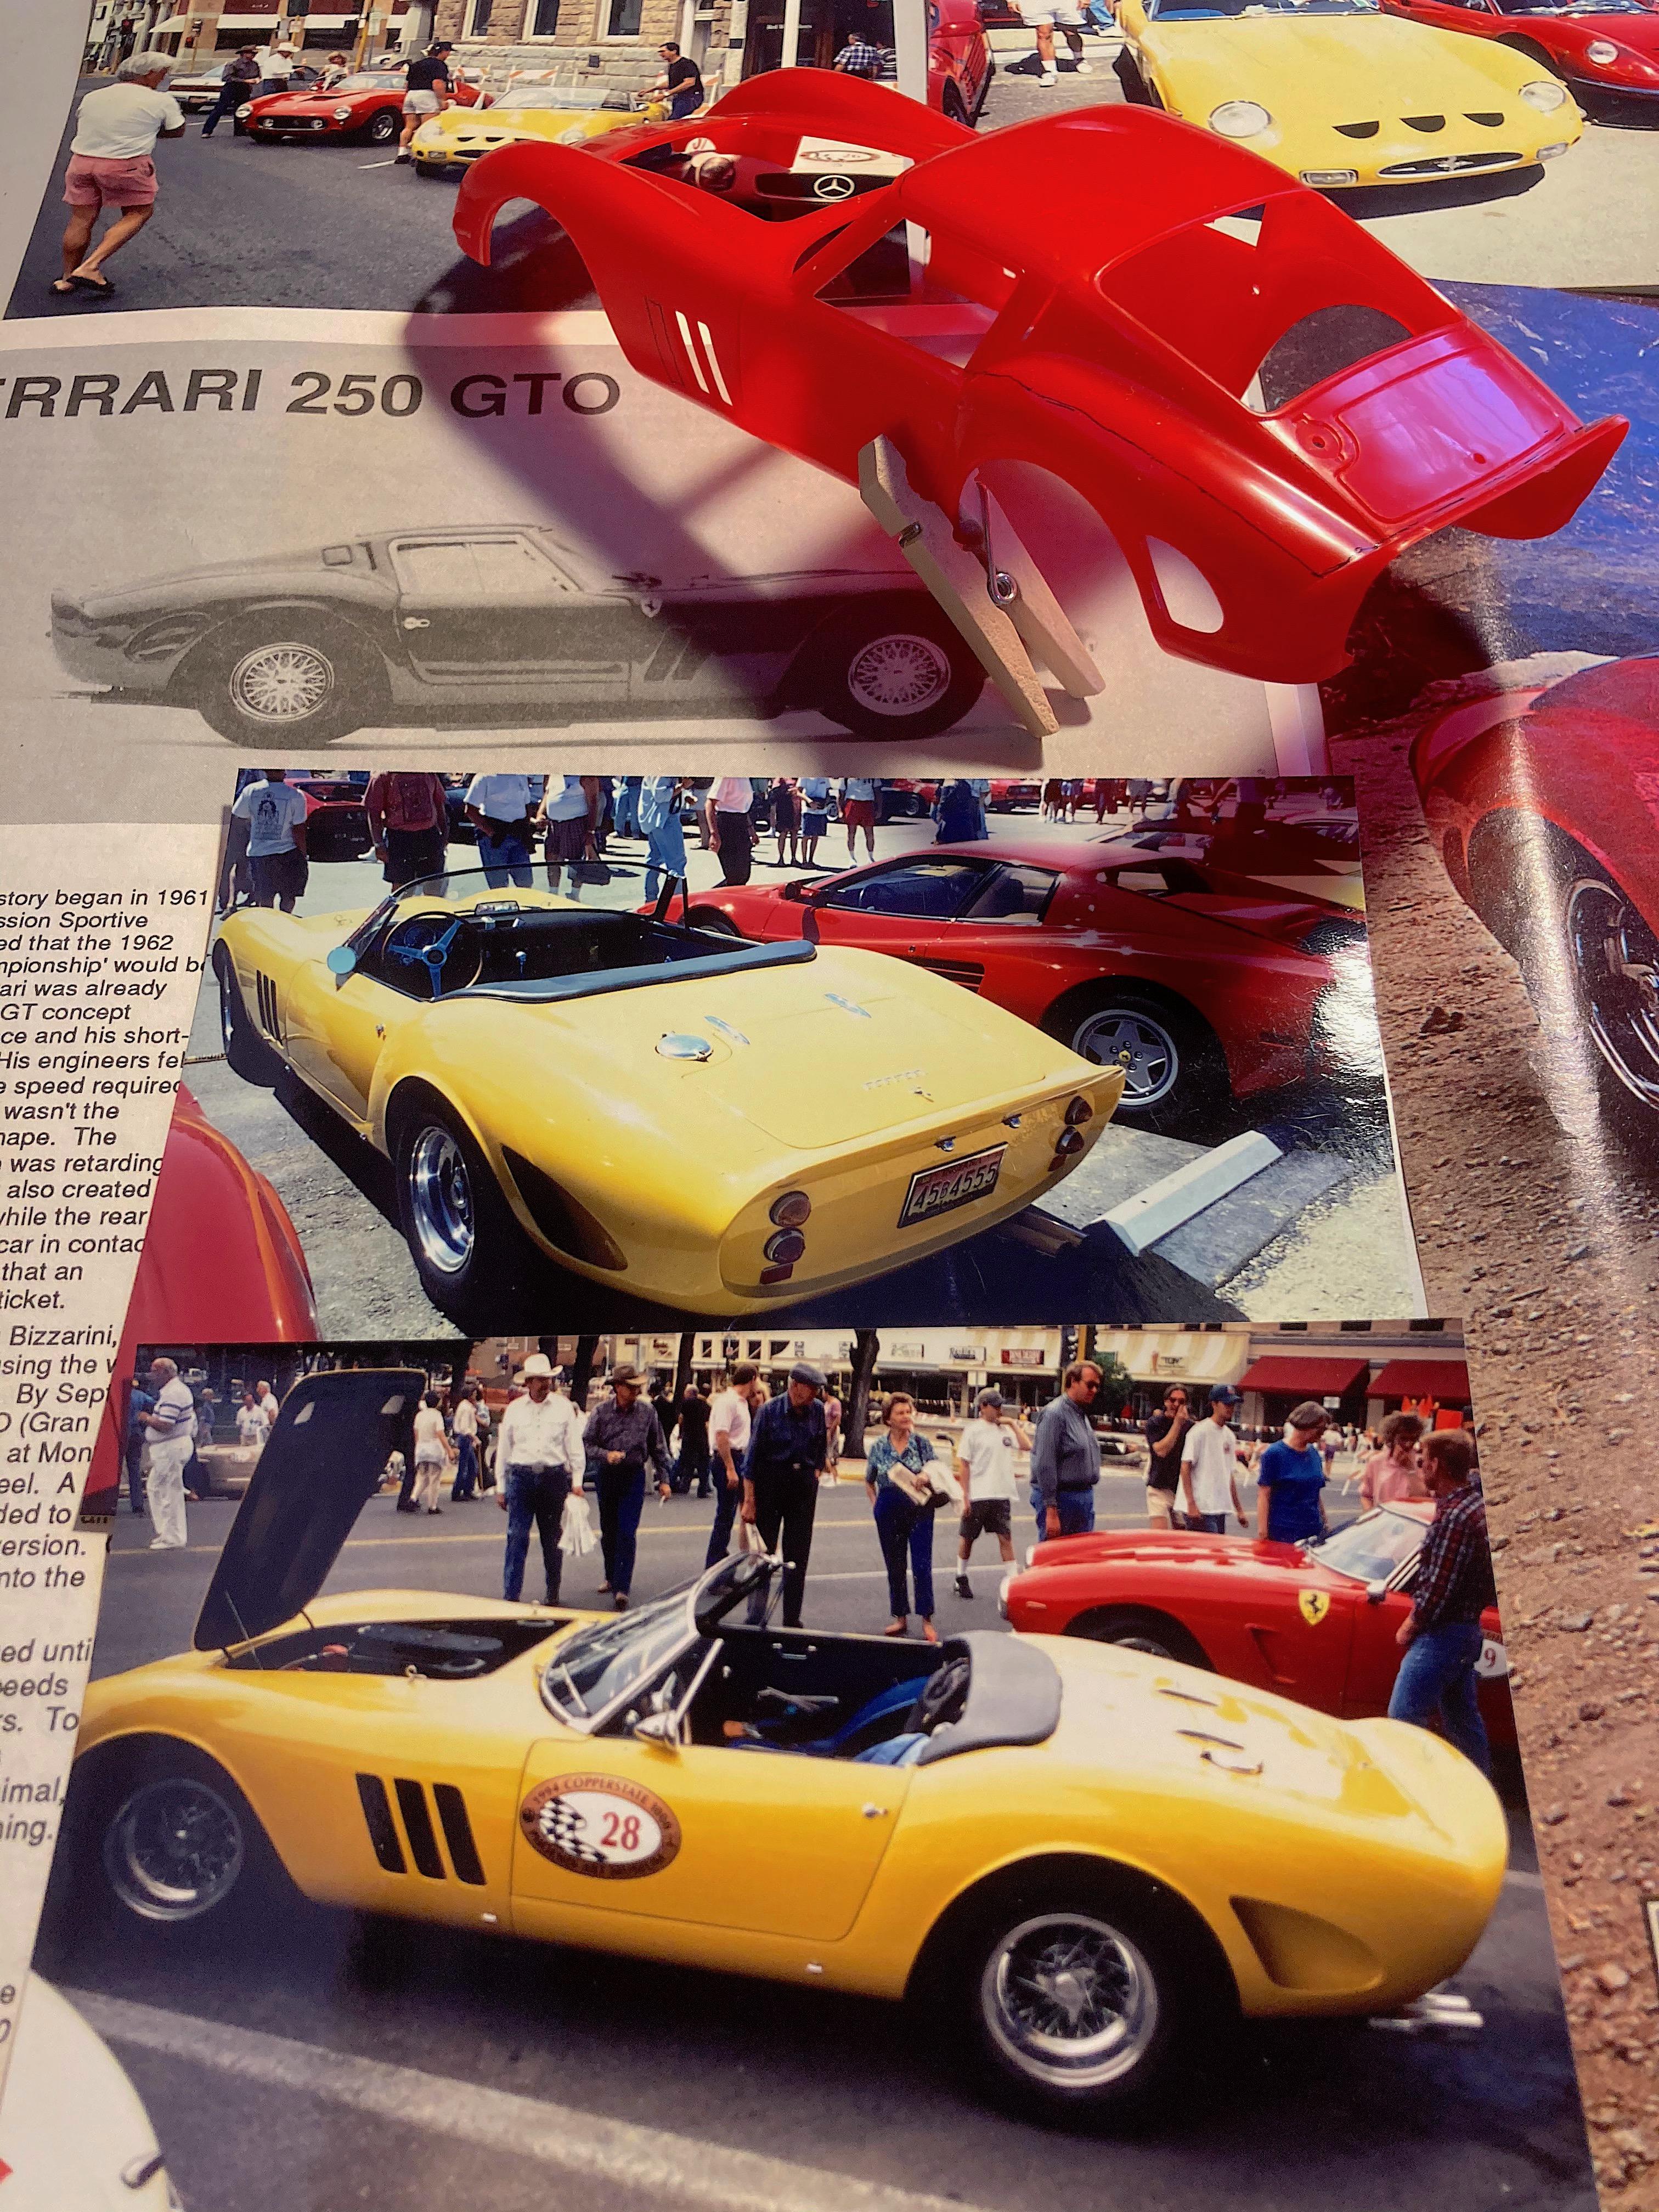
Unofficial reveal, of the Italeri (Testors) Ferrari 250 GTO Spyder. WIP: Italeri/Testors Ferrari 250 GTO Spyder The factory never built a Spyder of the famous GTO, two cars were coach built on average Ferrari chassis (is there such a thing?). I saw the convertible twice, once in my town when the Copperstate Rally parked downtown, and at a Monterrey Historics. This is not an exact replica, added some features such as the roll bar. I will take better pictures when the weather cooperates.
-
?️?............?