89AKurt
-
Posts
8,429 -
Joined
-
Last visited
Content Type
Profiles
Forums
Events
Gallery
Everything posted by 89AKurt
-
When I was scanning my topics list, found this, thought it was a good excuse to dredge up. ?

-
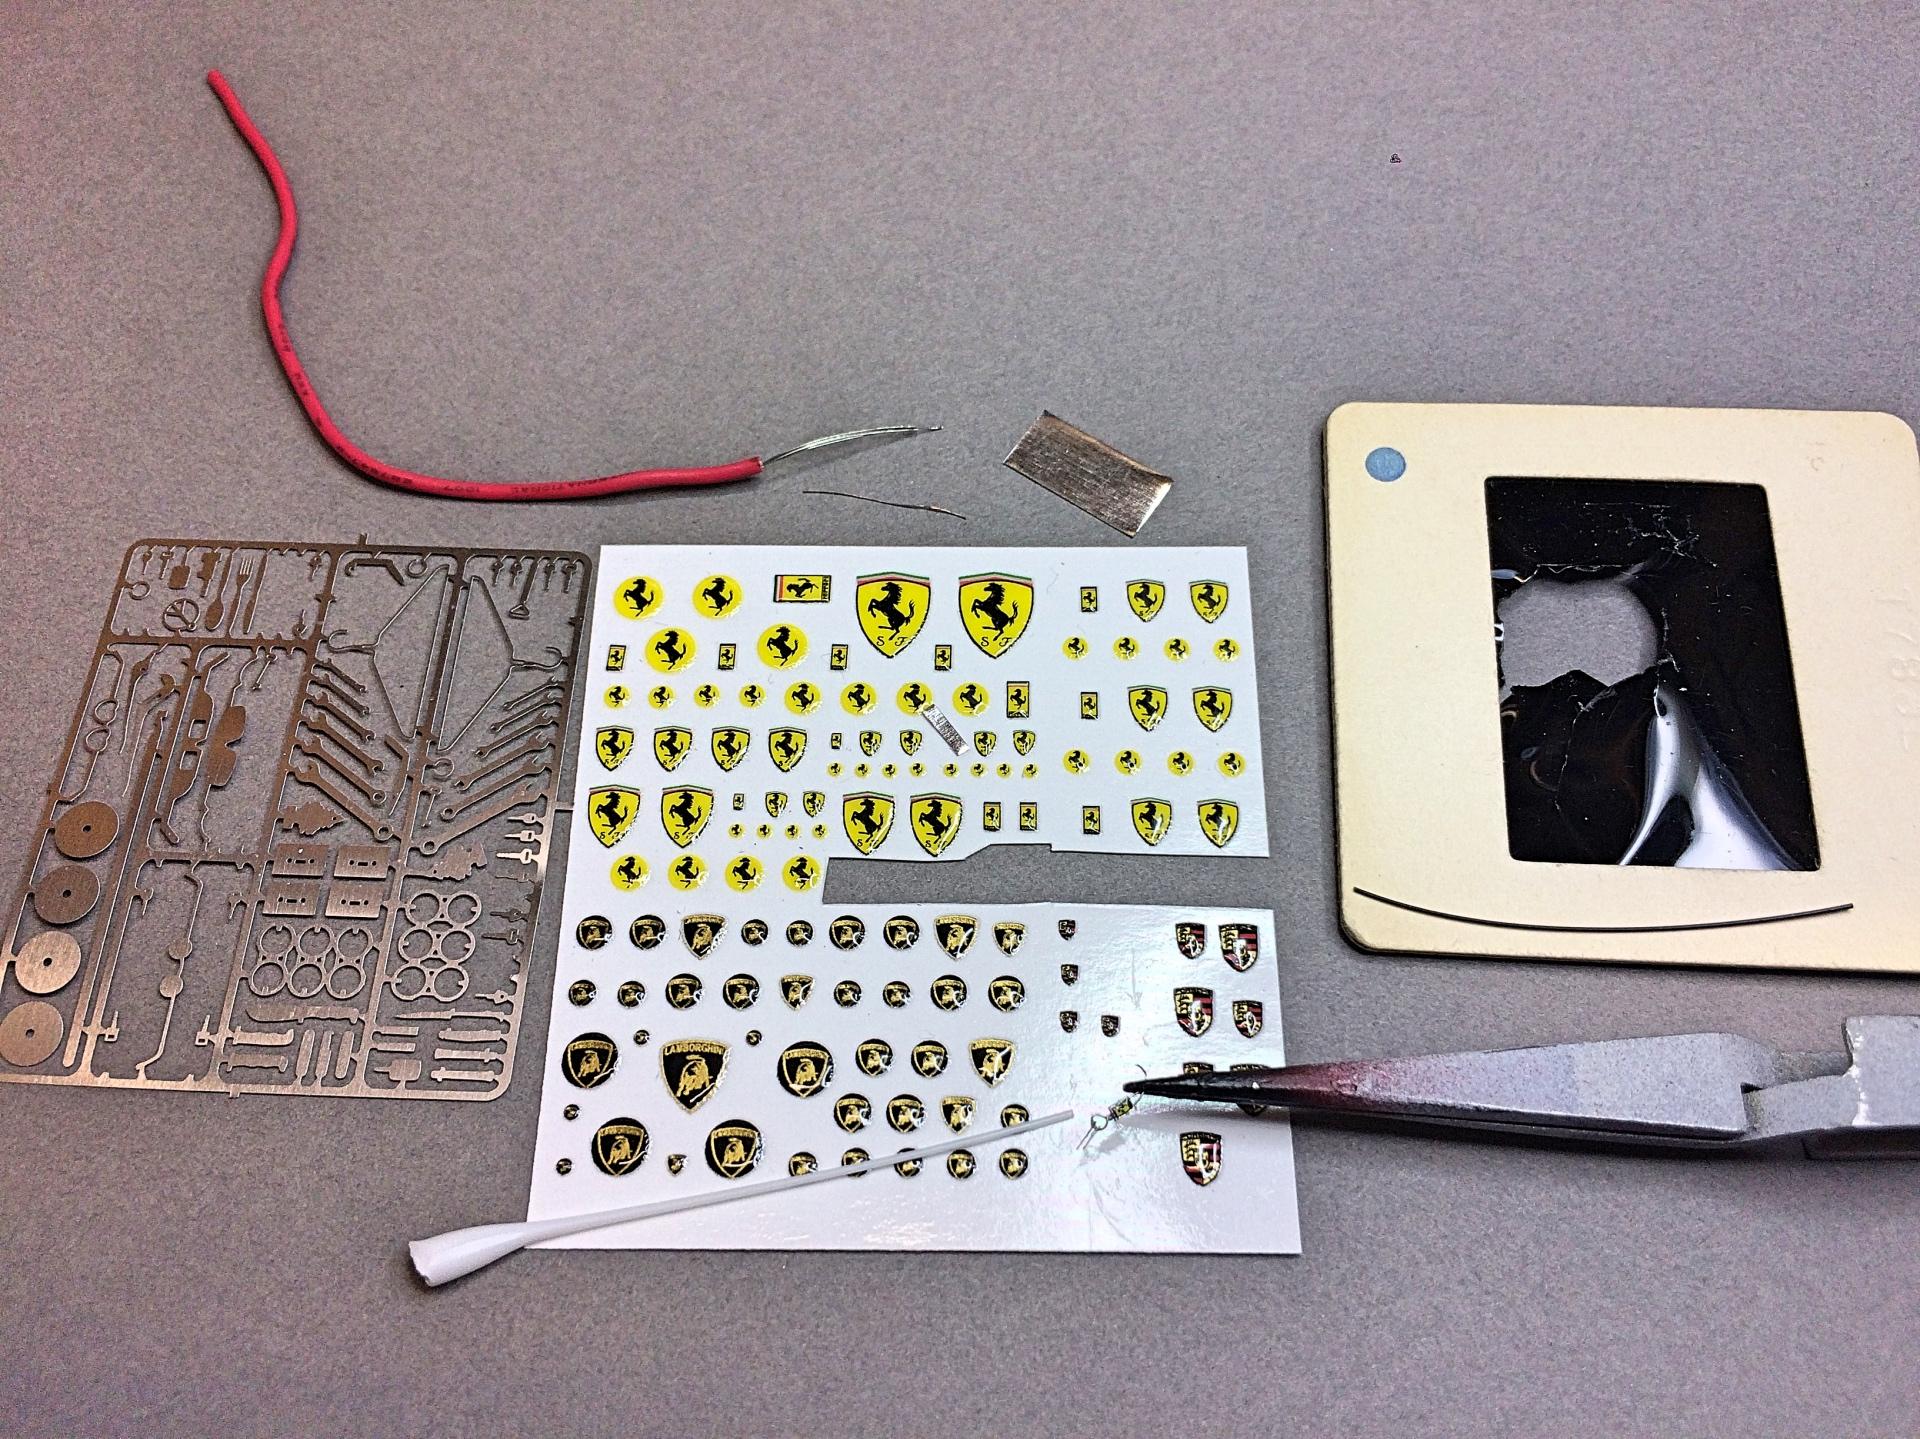
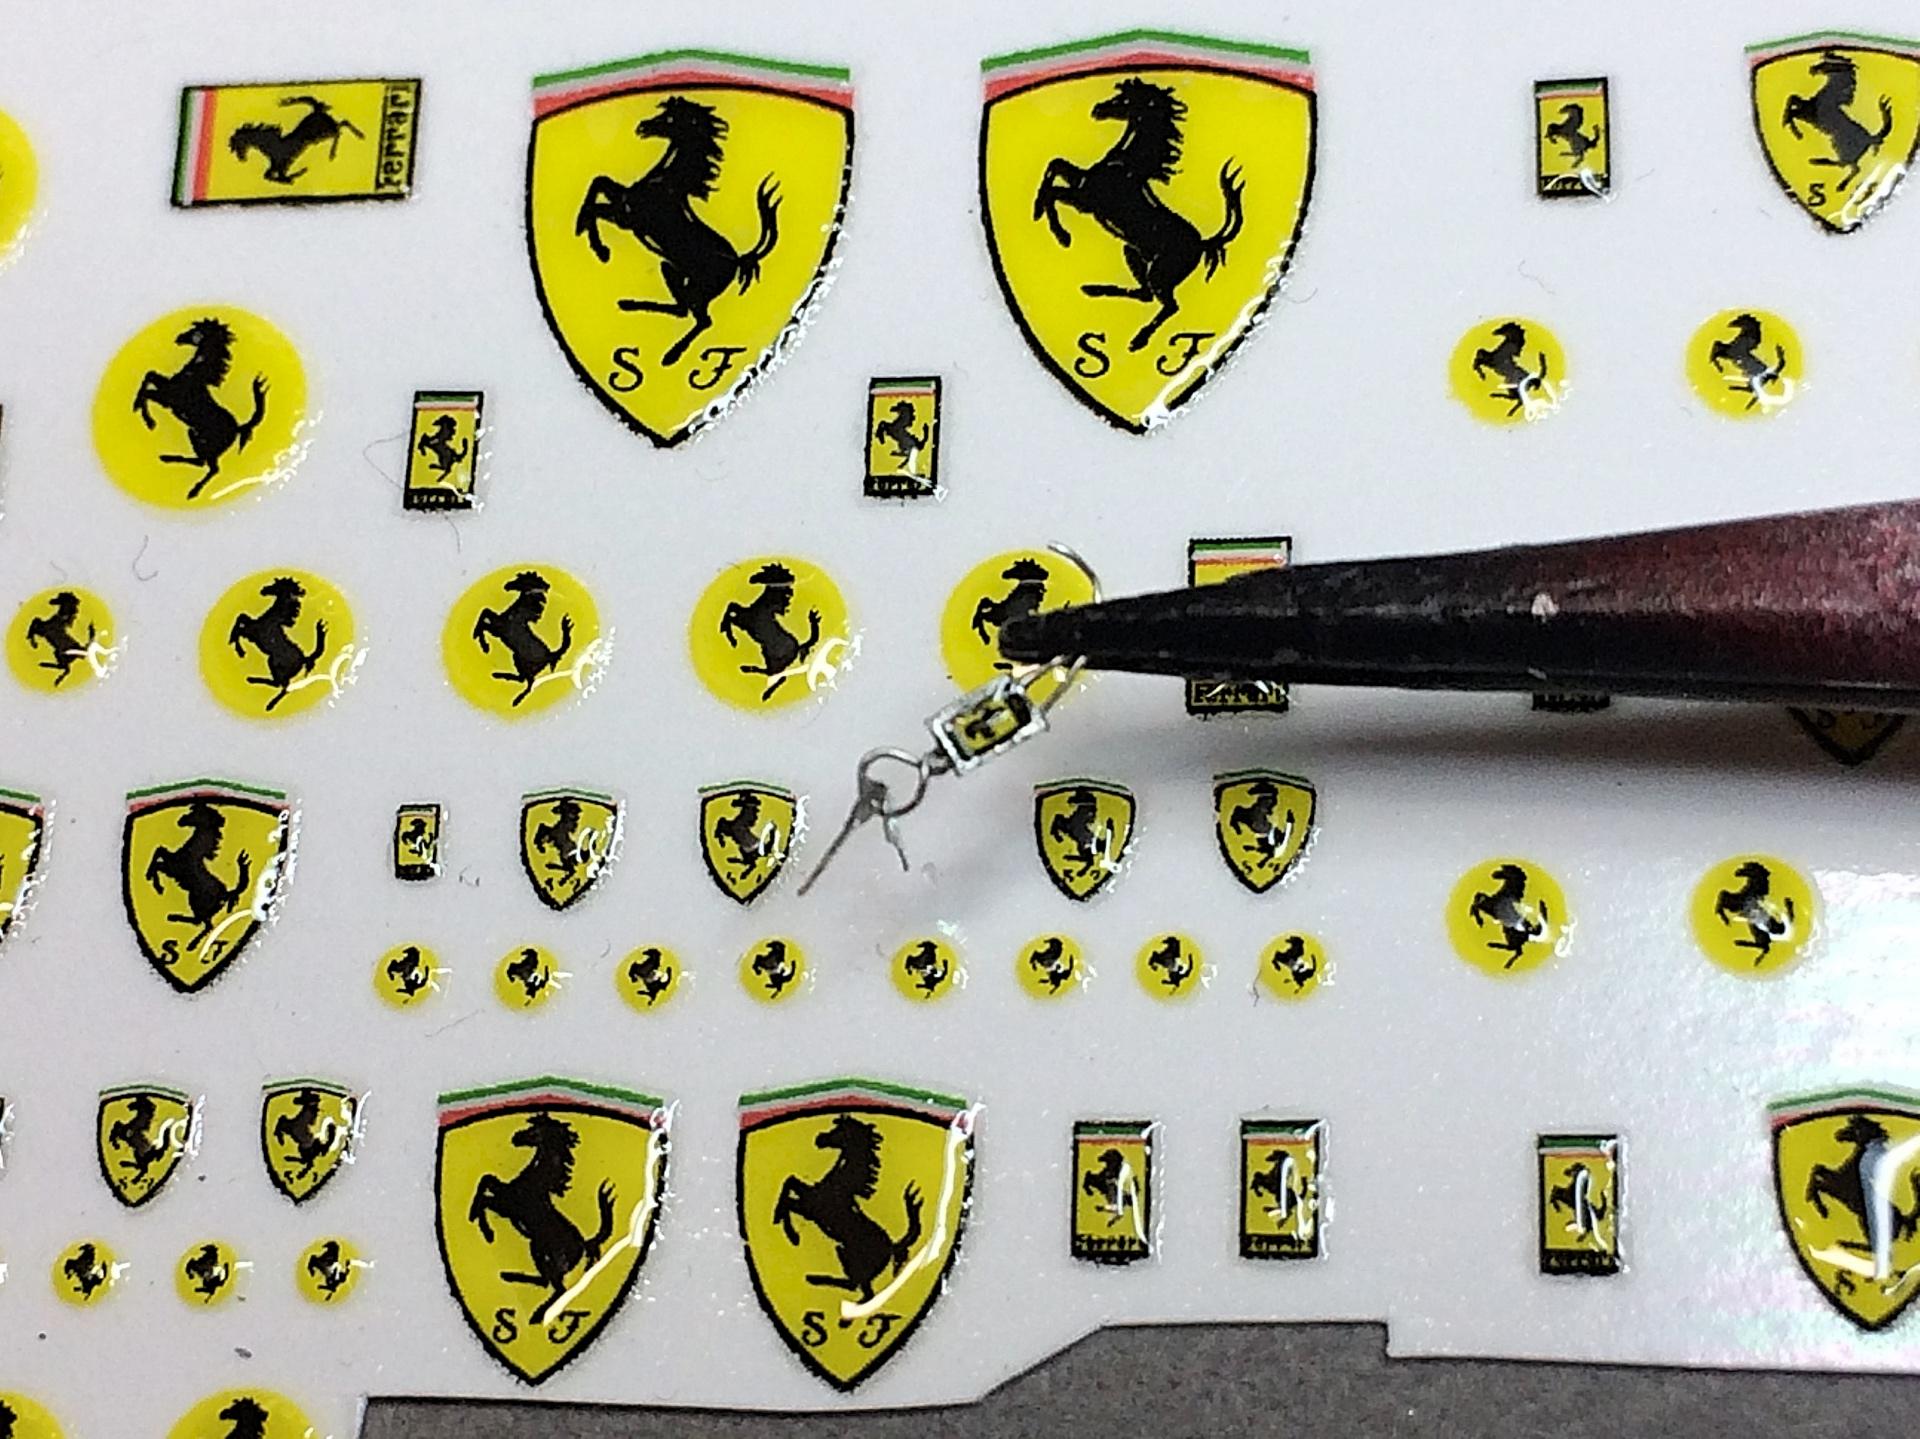
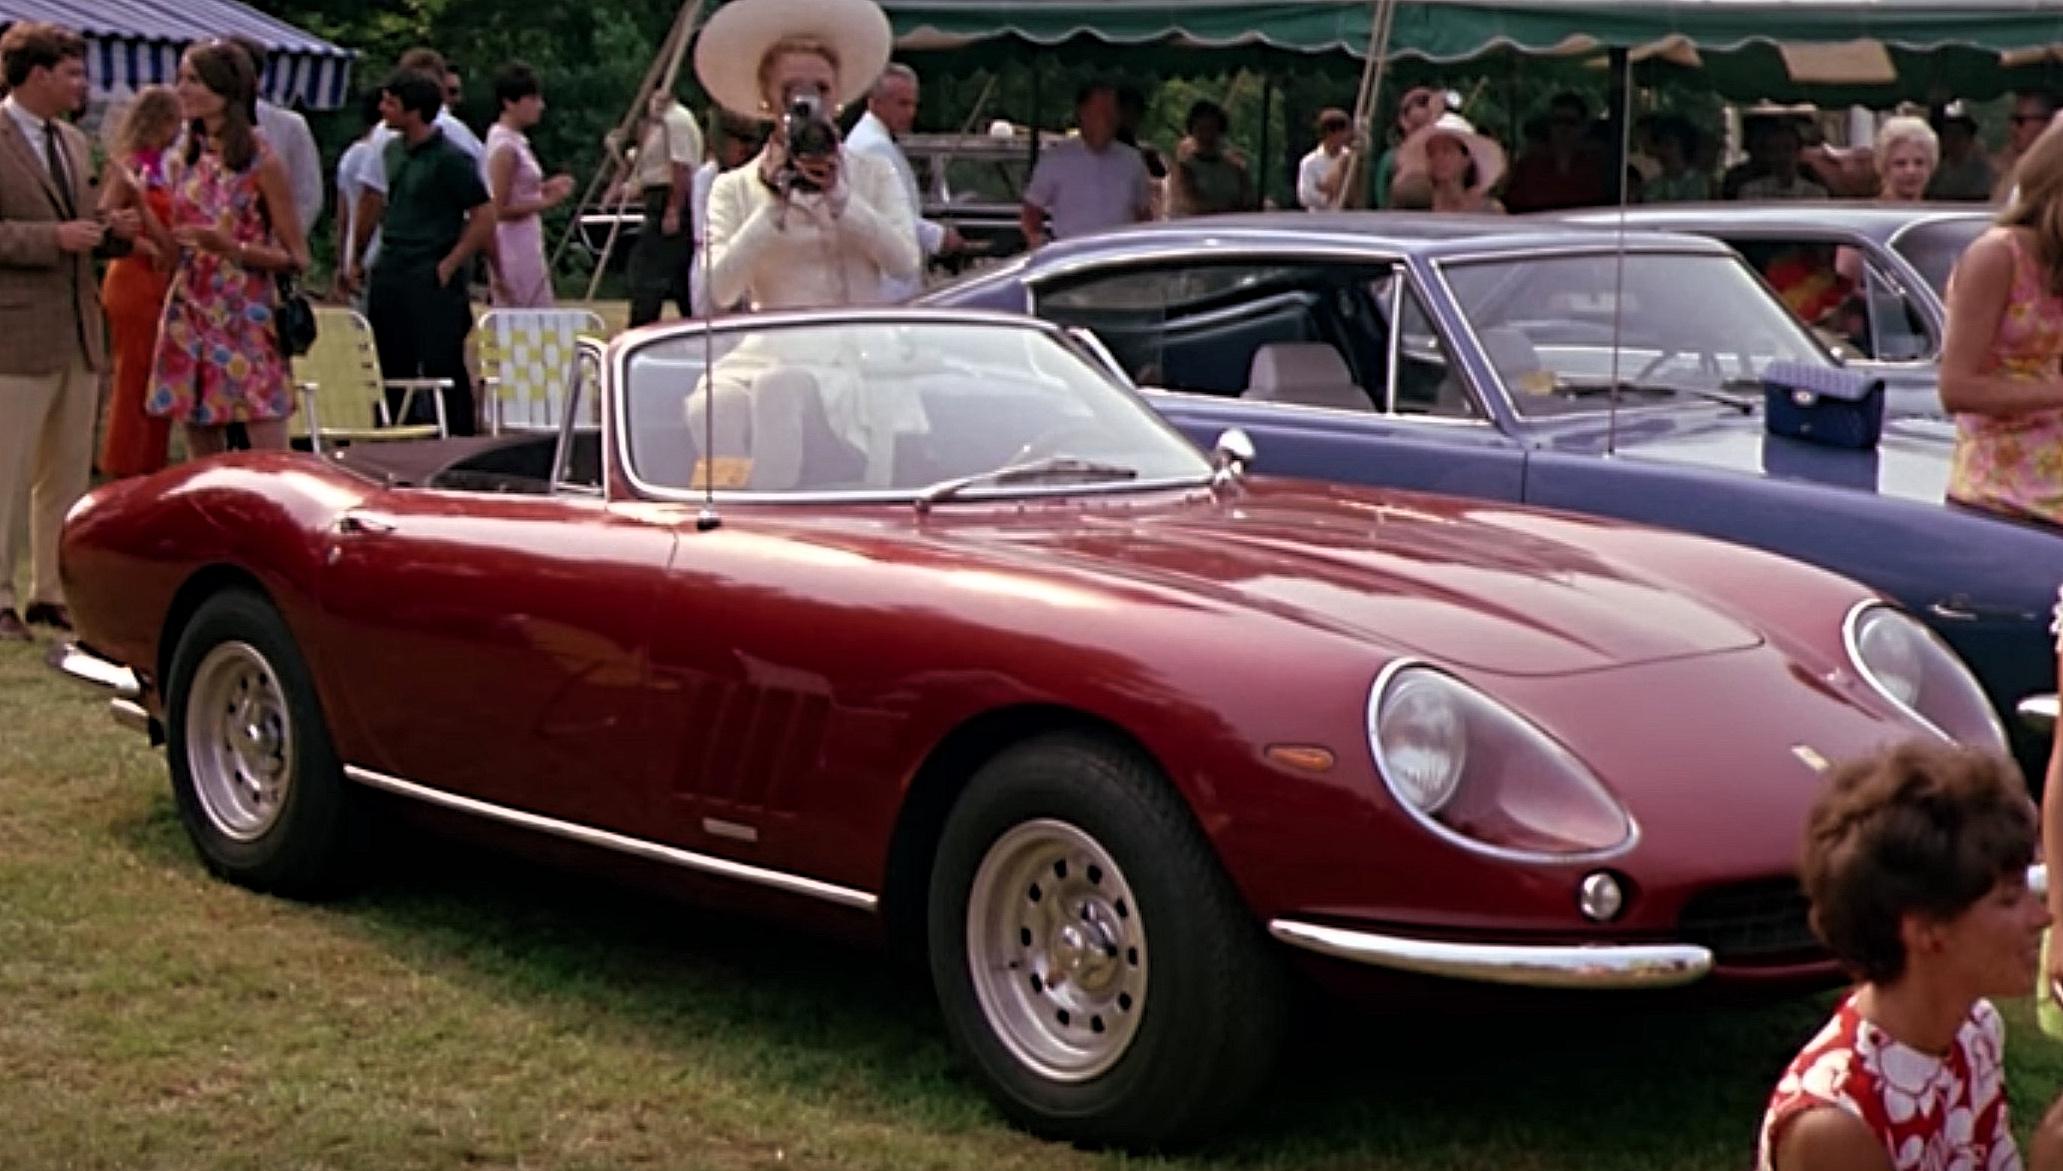
The driver is done! Dullcoat didn't really kill the gloss, but helped. I looked for Rayban sunglass images, and found Ferrari special, with a special case with red stitching and a certificate to go along with it, so this fixed the eye issue for me. ? Made the keys with a strand of wire, coffee can lid scrap, blank film slide, the teeny tiny badge, and Detail Master keys. Guess I need to make a pair of driving shoes now, eh?
-
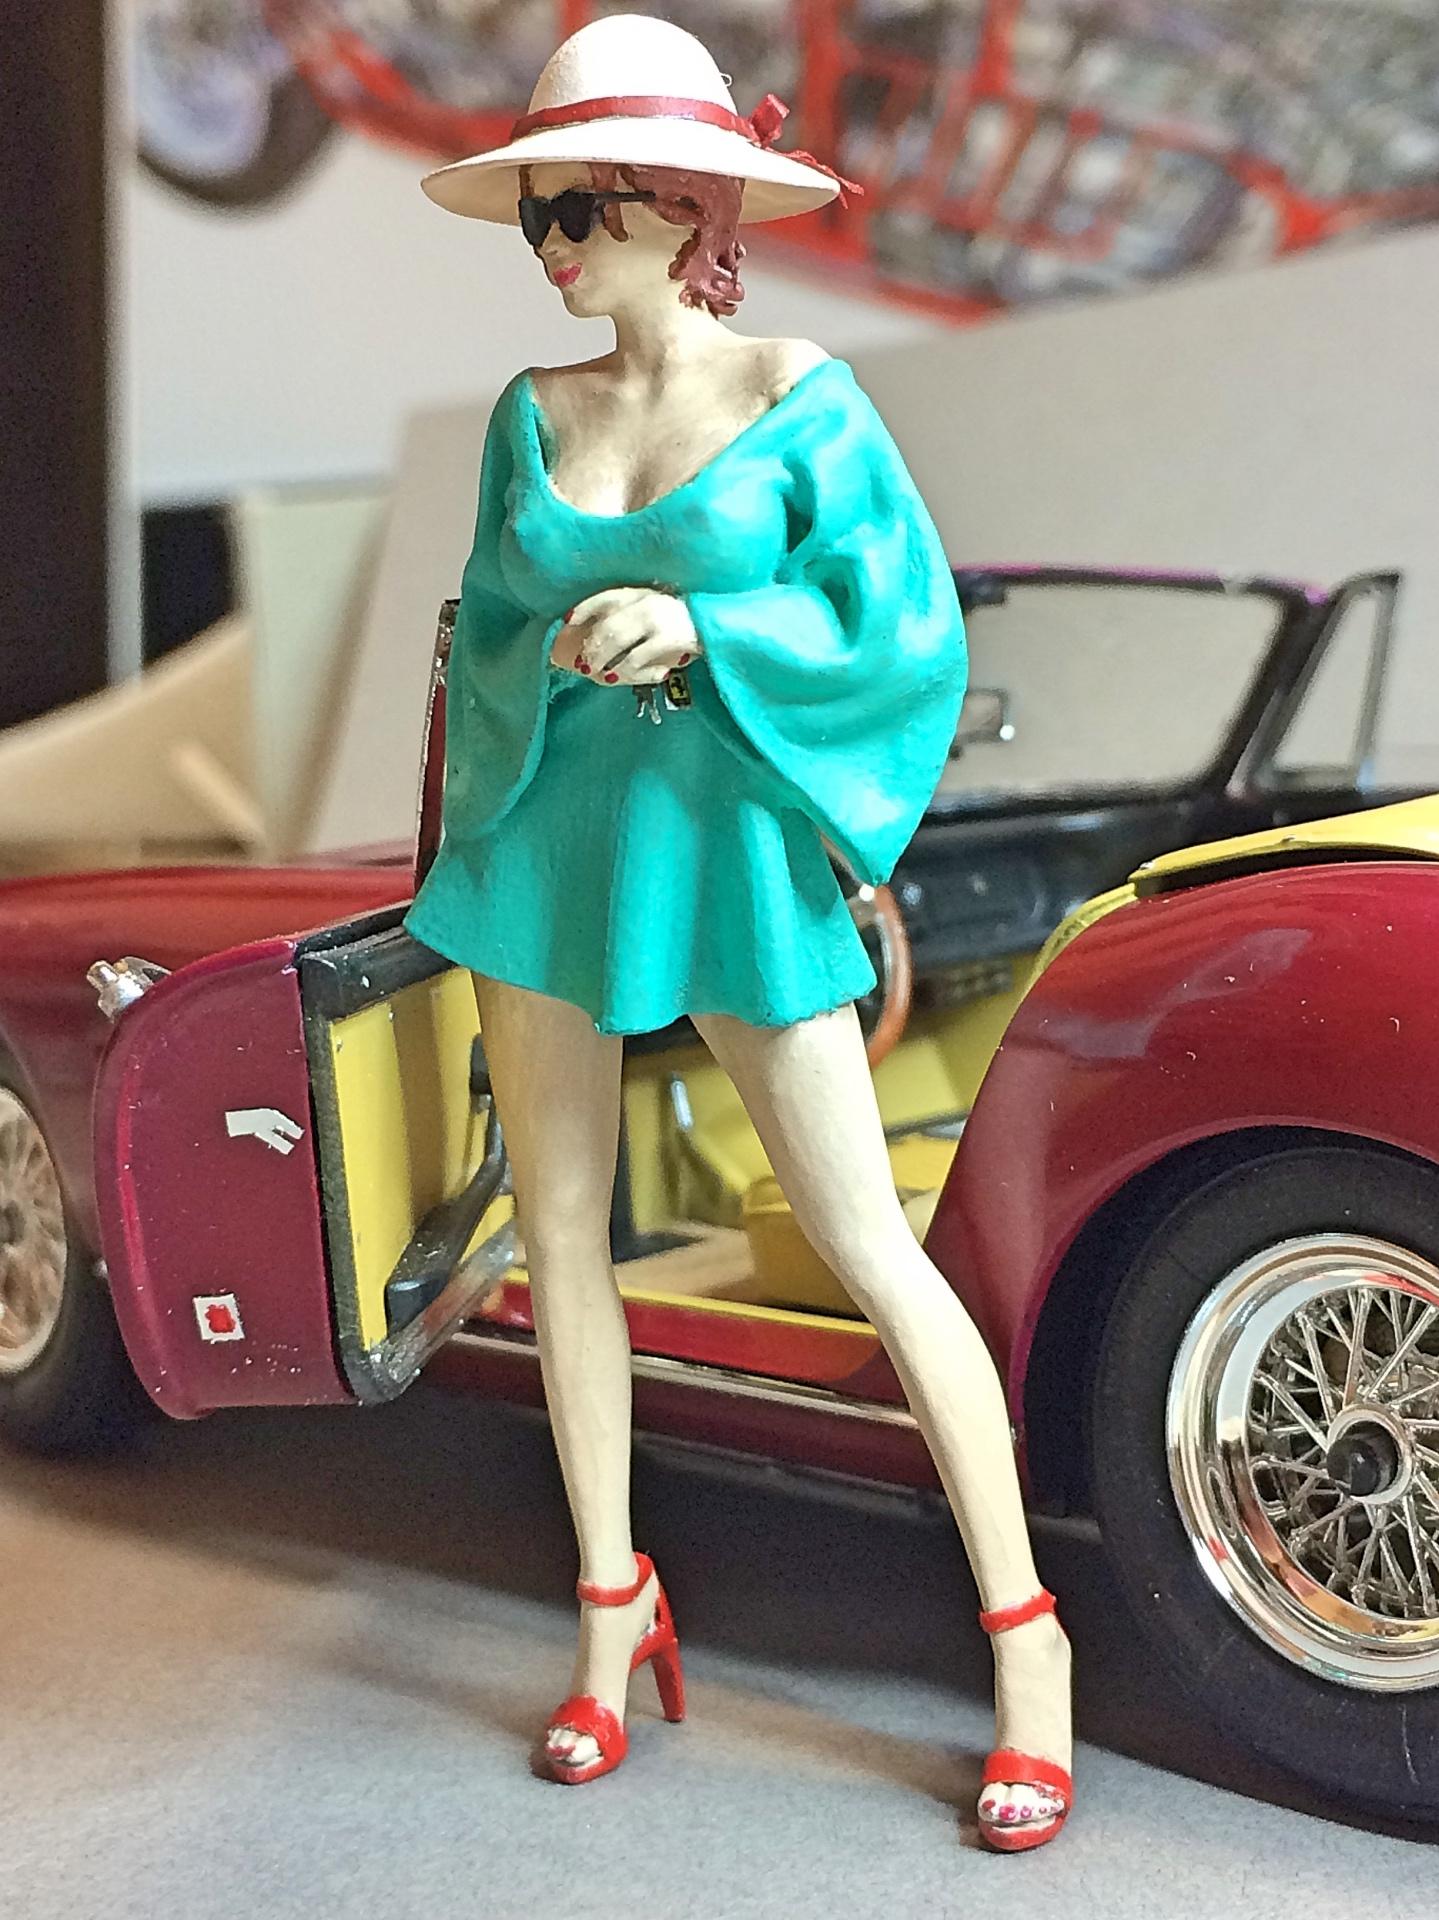
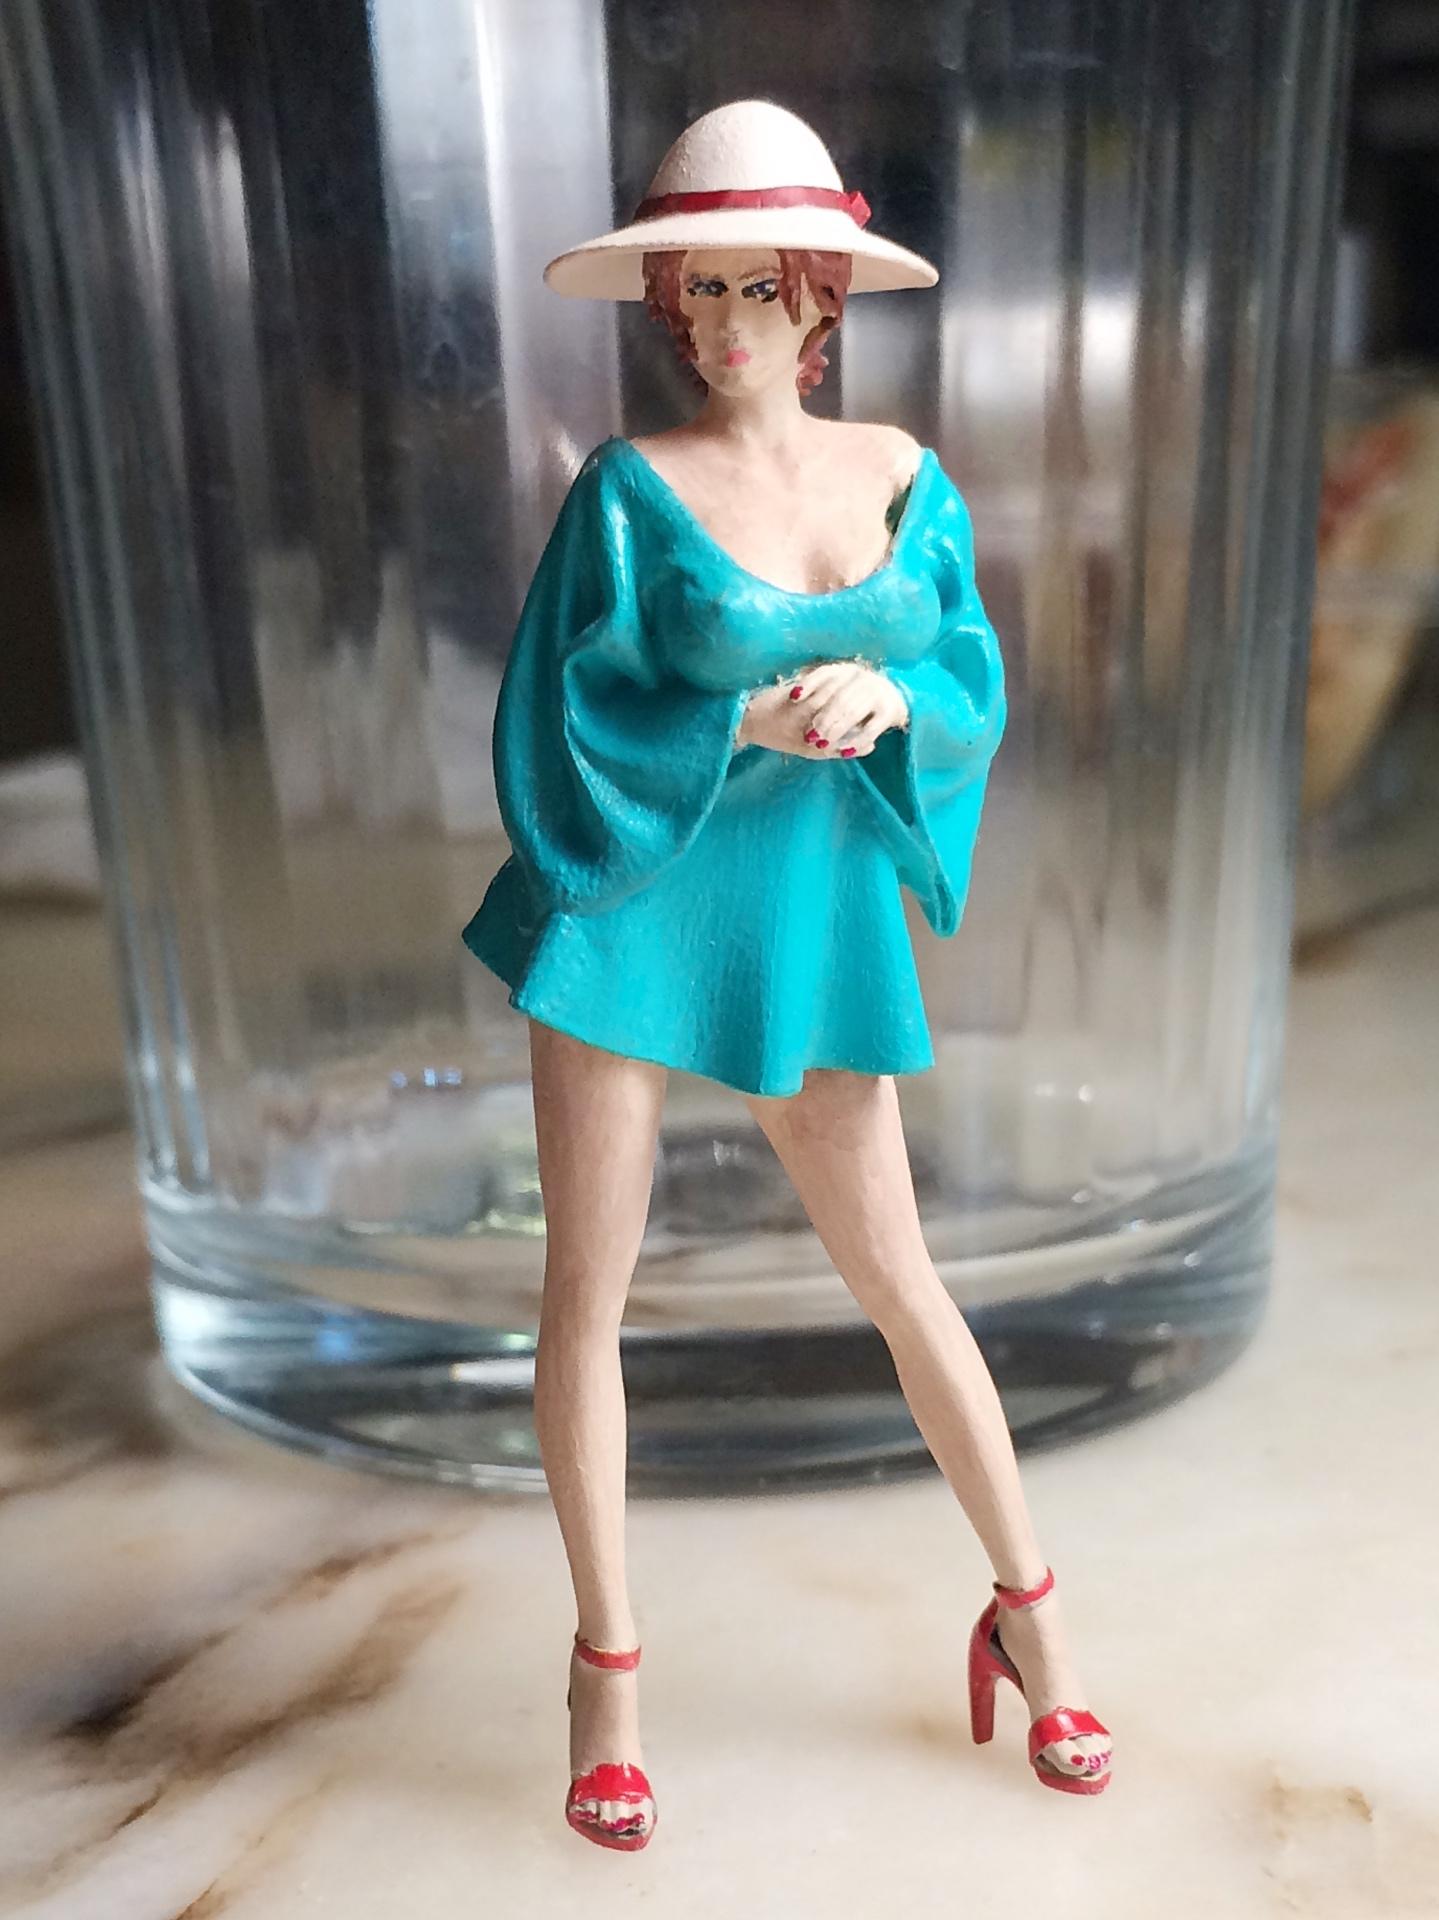
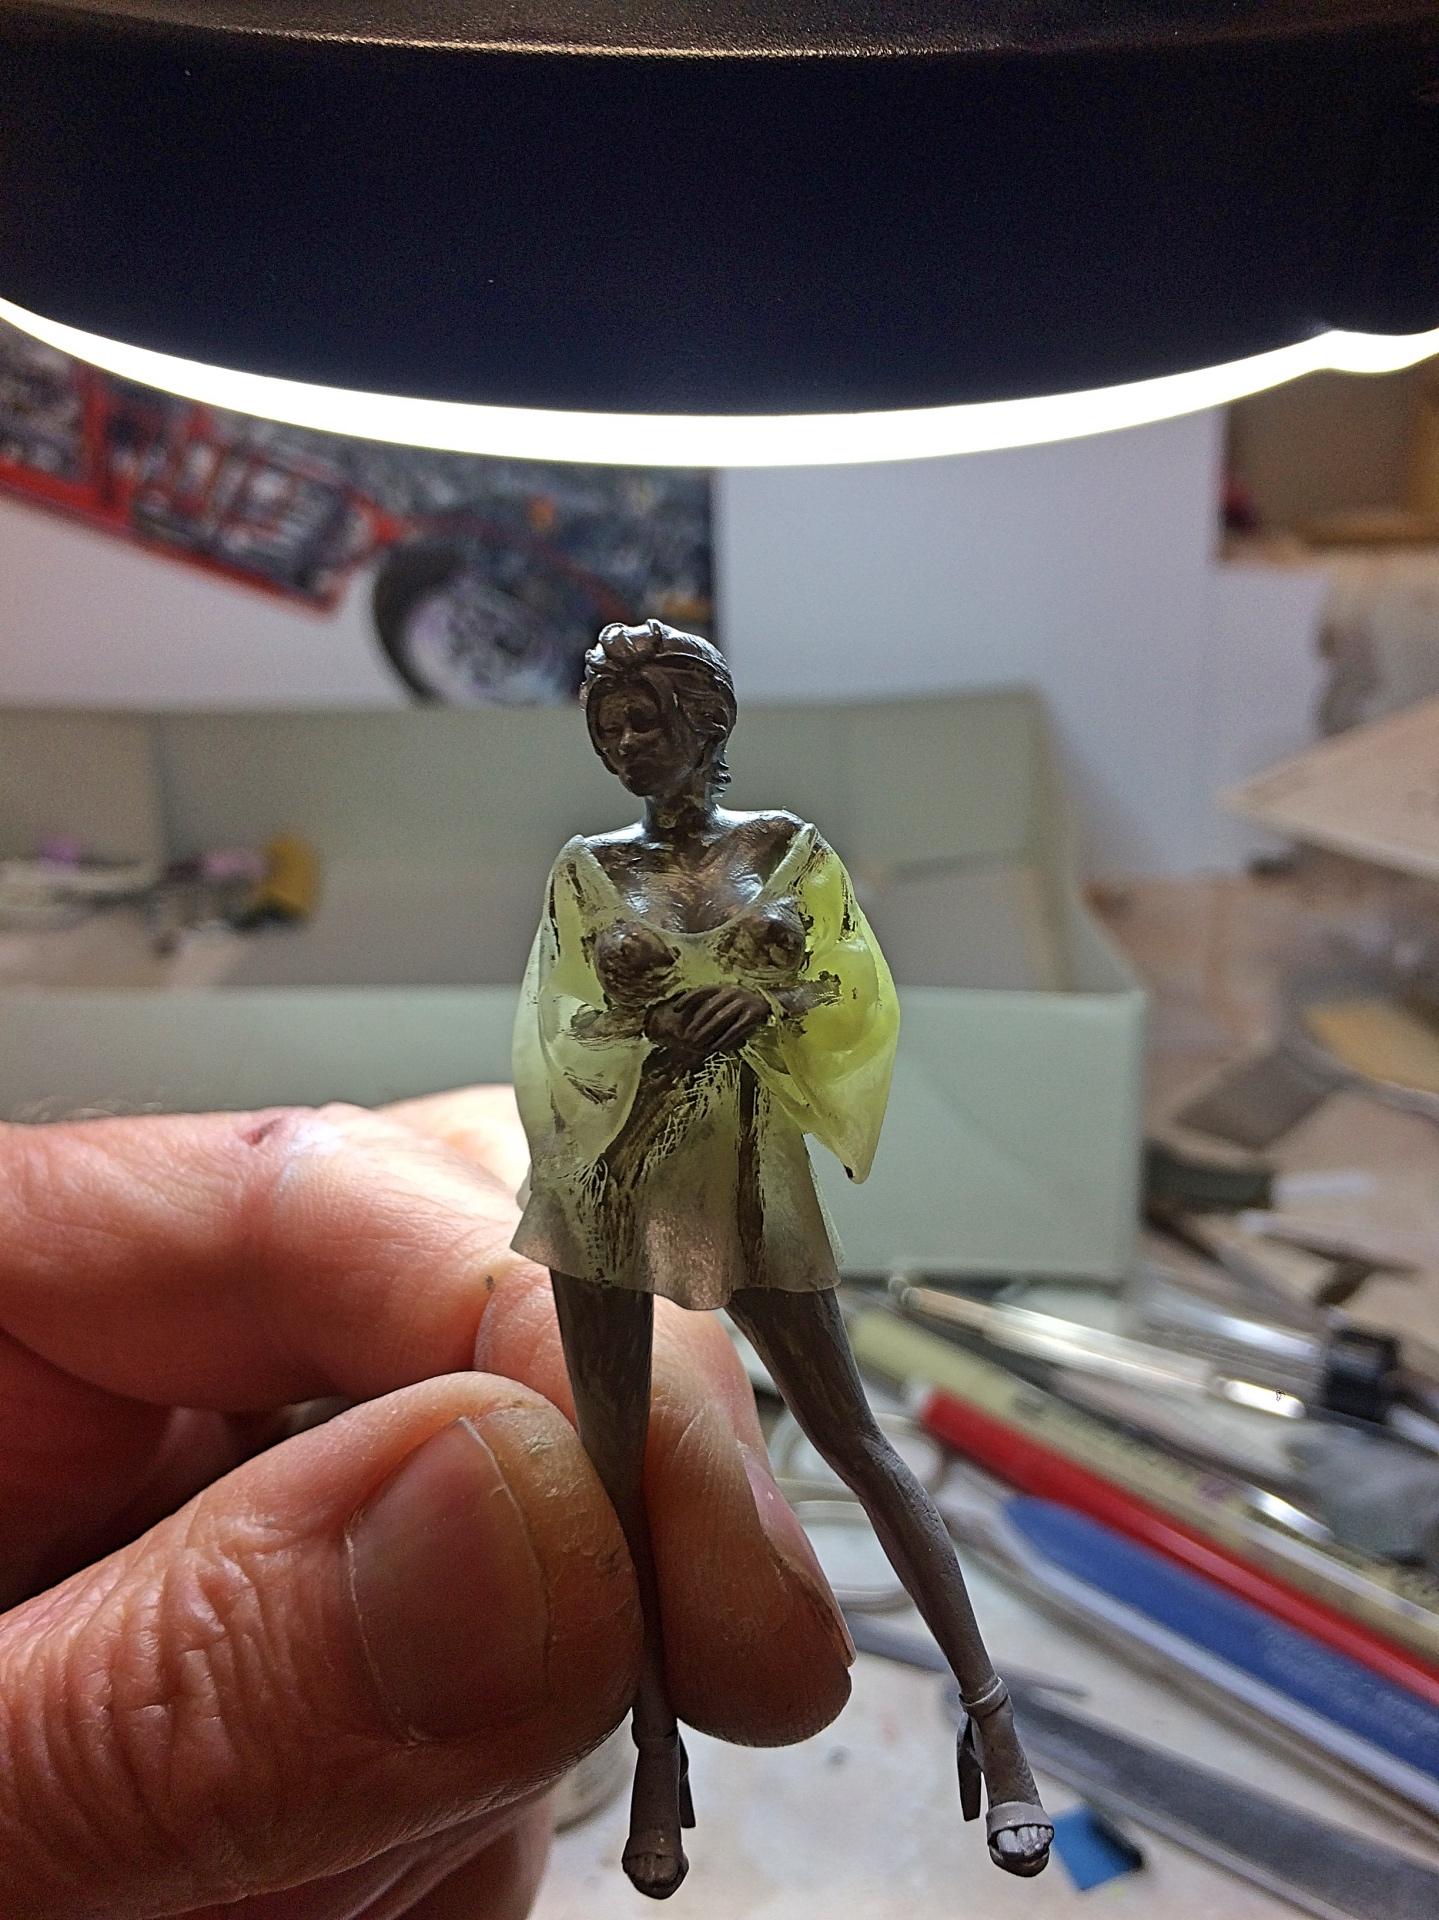
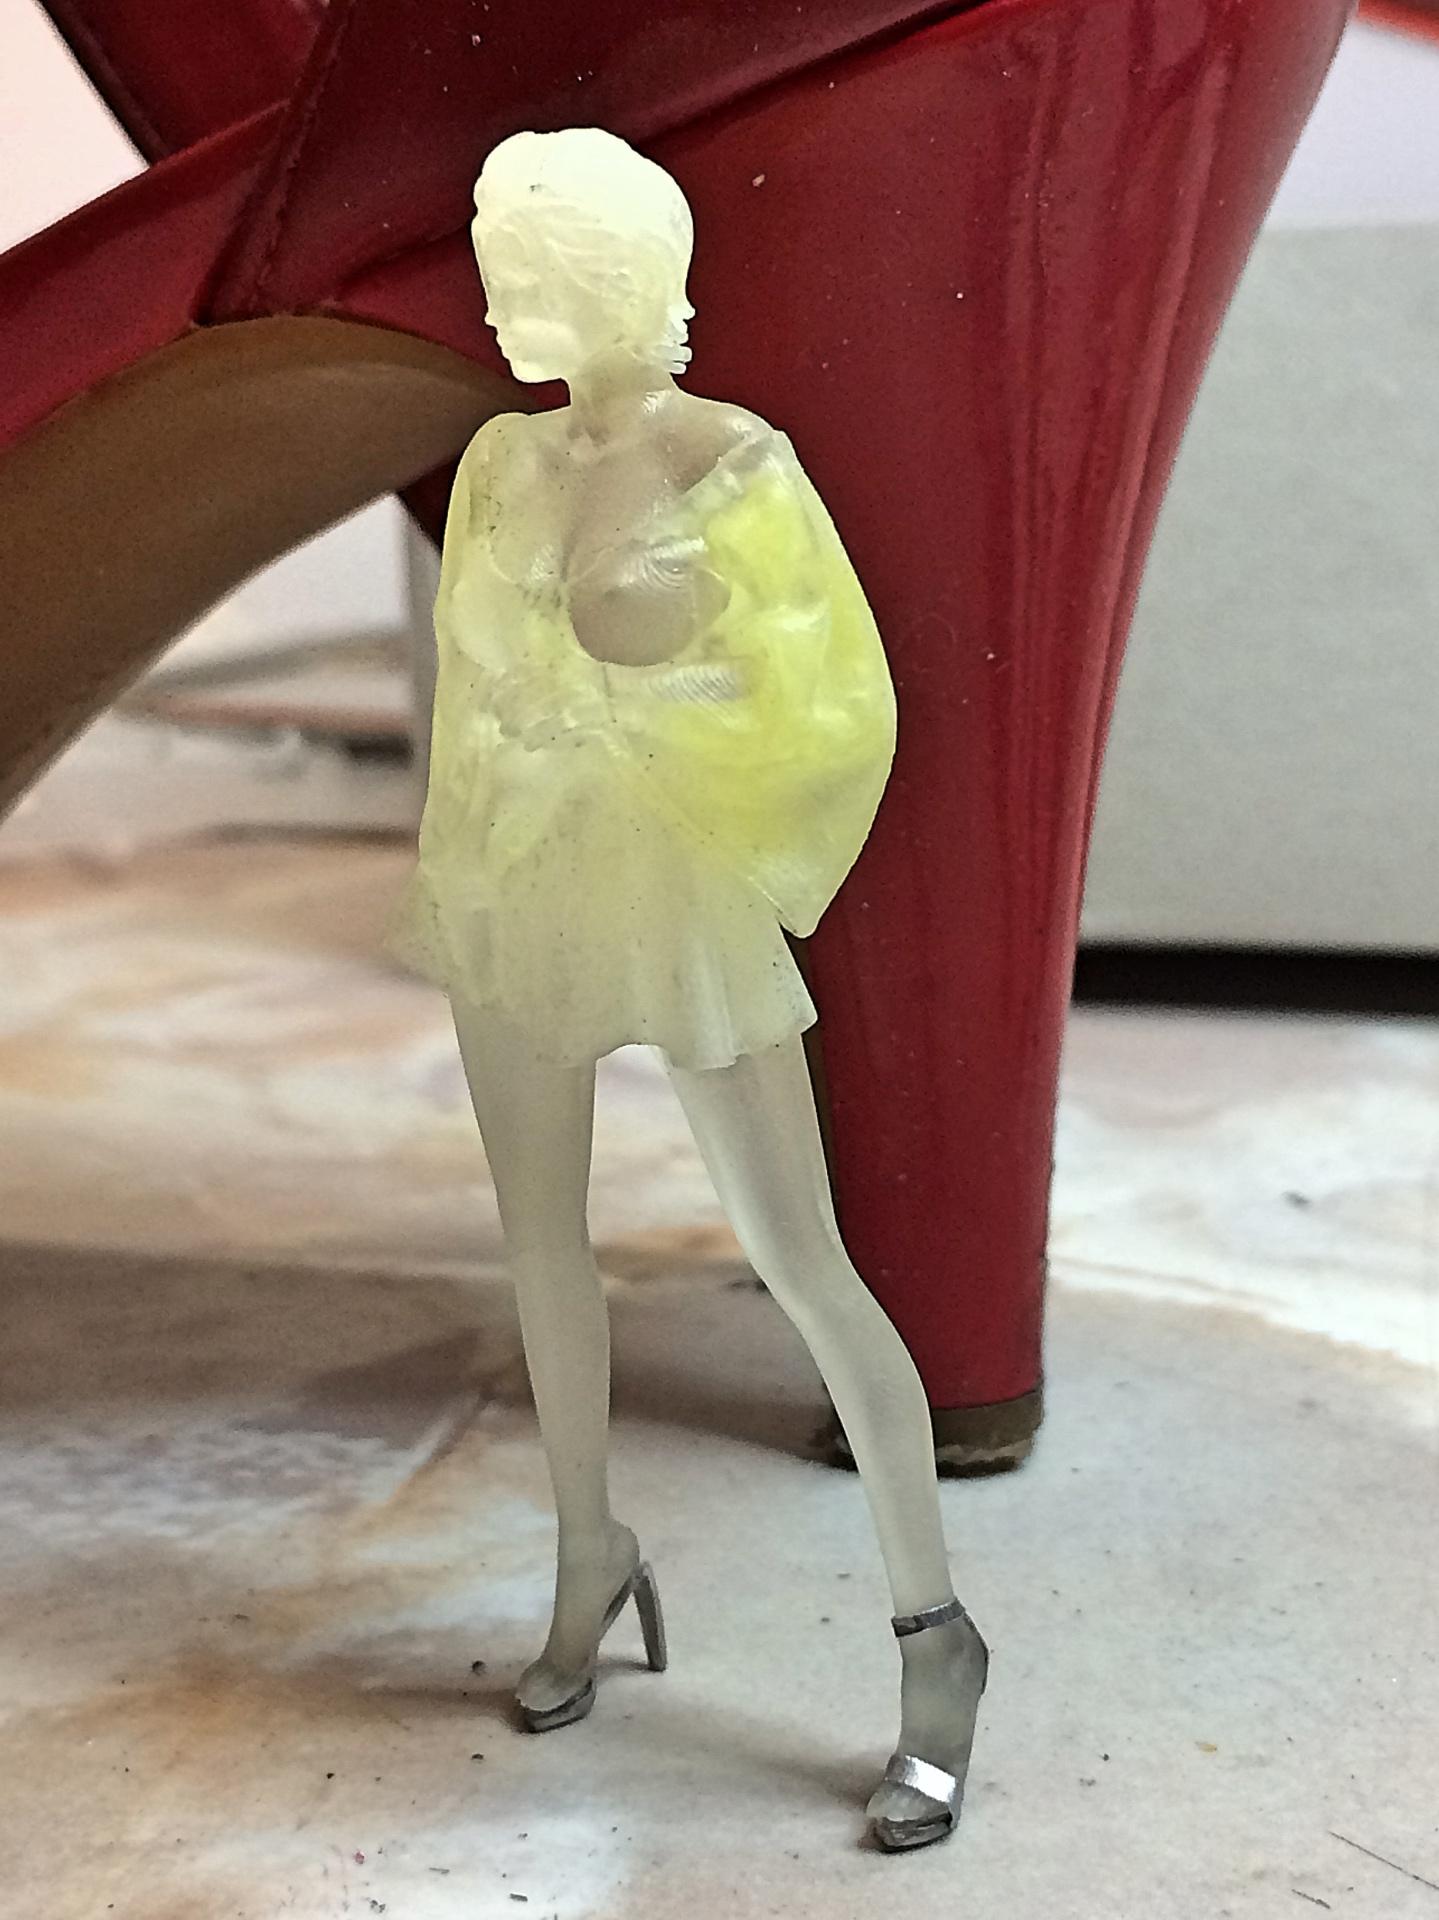
Oh heck ya, totally different art, all without touching the airbrush, which is really hard for me. Skipping the flesh stage, sort of pornographic. ? The dress is artist paint that I got for the Grand Canyon Roadster diorama. It wasn't as transluscent as I wanted. The hat is vacuum-formed over Corian pattern, turned on the drill press. Basically done, but will refine a few things (eyes suck!), then spray with Dullcoat. Nails are painted with the same 'polish' used on the car. Photo-etch key with Ferrari badge for 1/43 models will be the final touch.
-
Much like how turning airplane propellers get frozen in wild arcs? Thanks for that info. I was able to reduce it, by changing the angle of the light, but not much.
-
I'm always amazed about the quality of pictures taken with the iPhone 5. I used the Nikon SLR with a telephoto awhile back, was a pain to get a decent shot. I take pictures of important steps, does not effect my flow. Sometimes I put the project on paper, makes a difference what color, black with white parts washes out the parts, needs to be about the same value, so grey works really well. I was also having a venetian blind effect with an LED bulb in the light, weird phenomena. Now I'm using a circular CFL light. The iPhone allows you to point to focus on the part, annoys me seeing out-of-focus pictures posted. I have the cluttered bench with tools used for the process, and just to annoy neat freaks. ? The iPhone has a zoom feature, too much and the picture is pixelated, acts like a magnifying glass and I catch things after posting here, yikes! ?
-

41 Chevy Pickup Hovercraft
89AKurt replied to Daxman's topic in Model Trucks: Pickups, Vans, SUVs, Light Commercial
This is wicked COOL! ? I want to try this patina look on my Canopy Express, it's outstanding. -
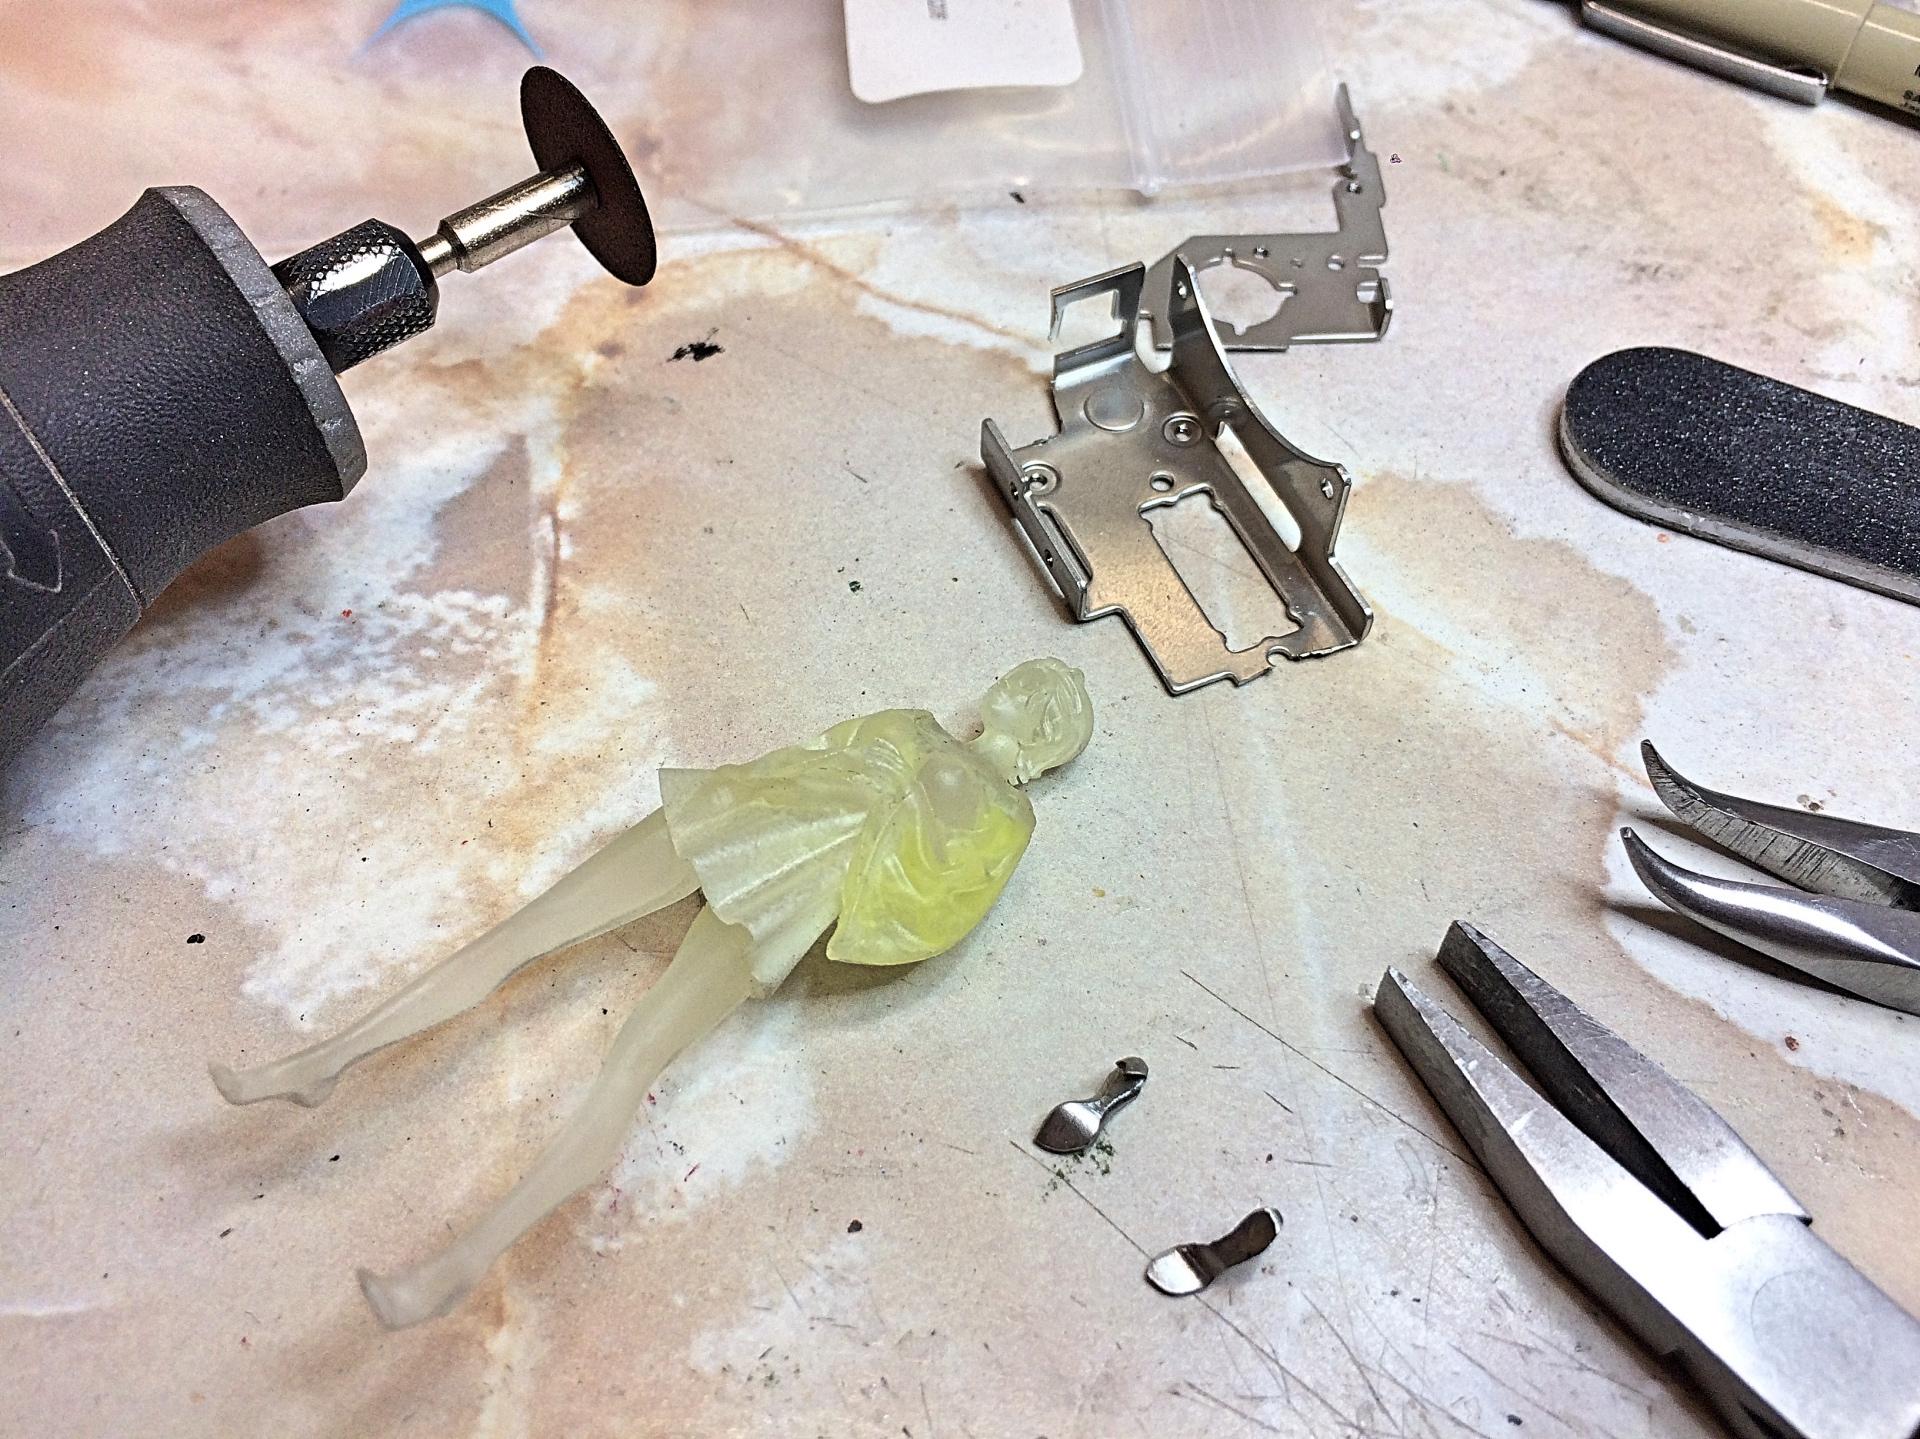
Doing this steel (might not be stainless) is not difficult, the abrasive disk does great, files and sanding sticks, and the best part is being able to hold with pliers and not worry about ruining the piece. You noticed the detail, eh? ? Well thank you! I can hardly wait (thanks to the chrome process) to take pictures with the Texaco diorama. Stepping into new territory, with this Shapeways figure done in translucent plastic. Brush painted the Tamiya primer on the body, including where the dress contacts the body. I'm amazed how many hollow spaces there are, so used the tiny brush to get only where needed. Also scraped off edges of the primer with the knife, and tried to blend in a fabric texture. Next color will be the skin, which will be done lightly on the dress contact to body areas. I'm hoping the dress color will look consistent with light on it, but when backlit it ought to be translucent. Don't think it would be a good idea to paint flat black, would ruin the light colors, should get away with several layers of the color to prevent light coming through areas such as the arms and waist. Who knows, never tried this before. ?
-
Someone in my town has a collection, this is a replica that Mercedes produced, I took the pictures.
-
If you need reference pictures:
-
with nuclear rating
-
BTW: This VW is tastefully done with the stance, after looking at this article with extreme examples, it looks normal. ? https://jalopnik.com/how-the-hell-does-this-car-drive-5918475
-
I owned a MINI Cooper, an '03 and '06. The rear has a built-in negative camber, which helped for handling, had fun doing track days with the '03. The bigger MINIs, think it's the Clubman, the negative camber is really severe. For some reason, I could not get over a year out of the tires. ? I like the lowered look, with tires barely missing the fender, I know they roll the fender lip to accomplish that. But would like to see them drive my favorite mountain roads.
-
Tamiya Primers, Liquid vs Aerosol
89AKurt replied to NOBLNG's topic in Model Building Questions and Answers
Correct. I screwed up with the color layer. I was a bit concerned when airbrushing, appeared lumpy orange peel, but when it cured, leveled out. I have a little project to brush paint this primer, so will give a report if you want. BTW: the old Jeep in your icon picture, story? -
the sewer pipe
-
Tamiya Primers, Liquid vs Aerosol
89AKurt replied to NOBLNG's topic in Model Building Questions and Answers
I just started using this, but the grey version in the bottle, with lacquer thinner. Hobby Lobby does not have the white. I'm posting this disaster to show how brake fluid does not exactly have as much effect as other paints. I was very impressed how it stuck to the body. So far, so good!
-
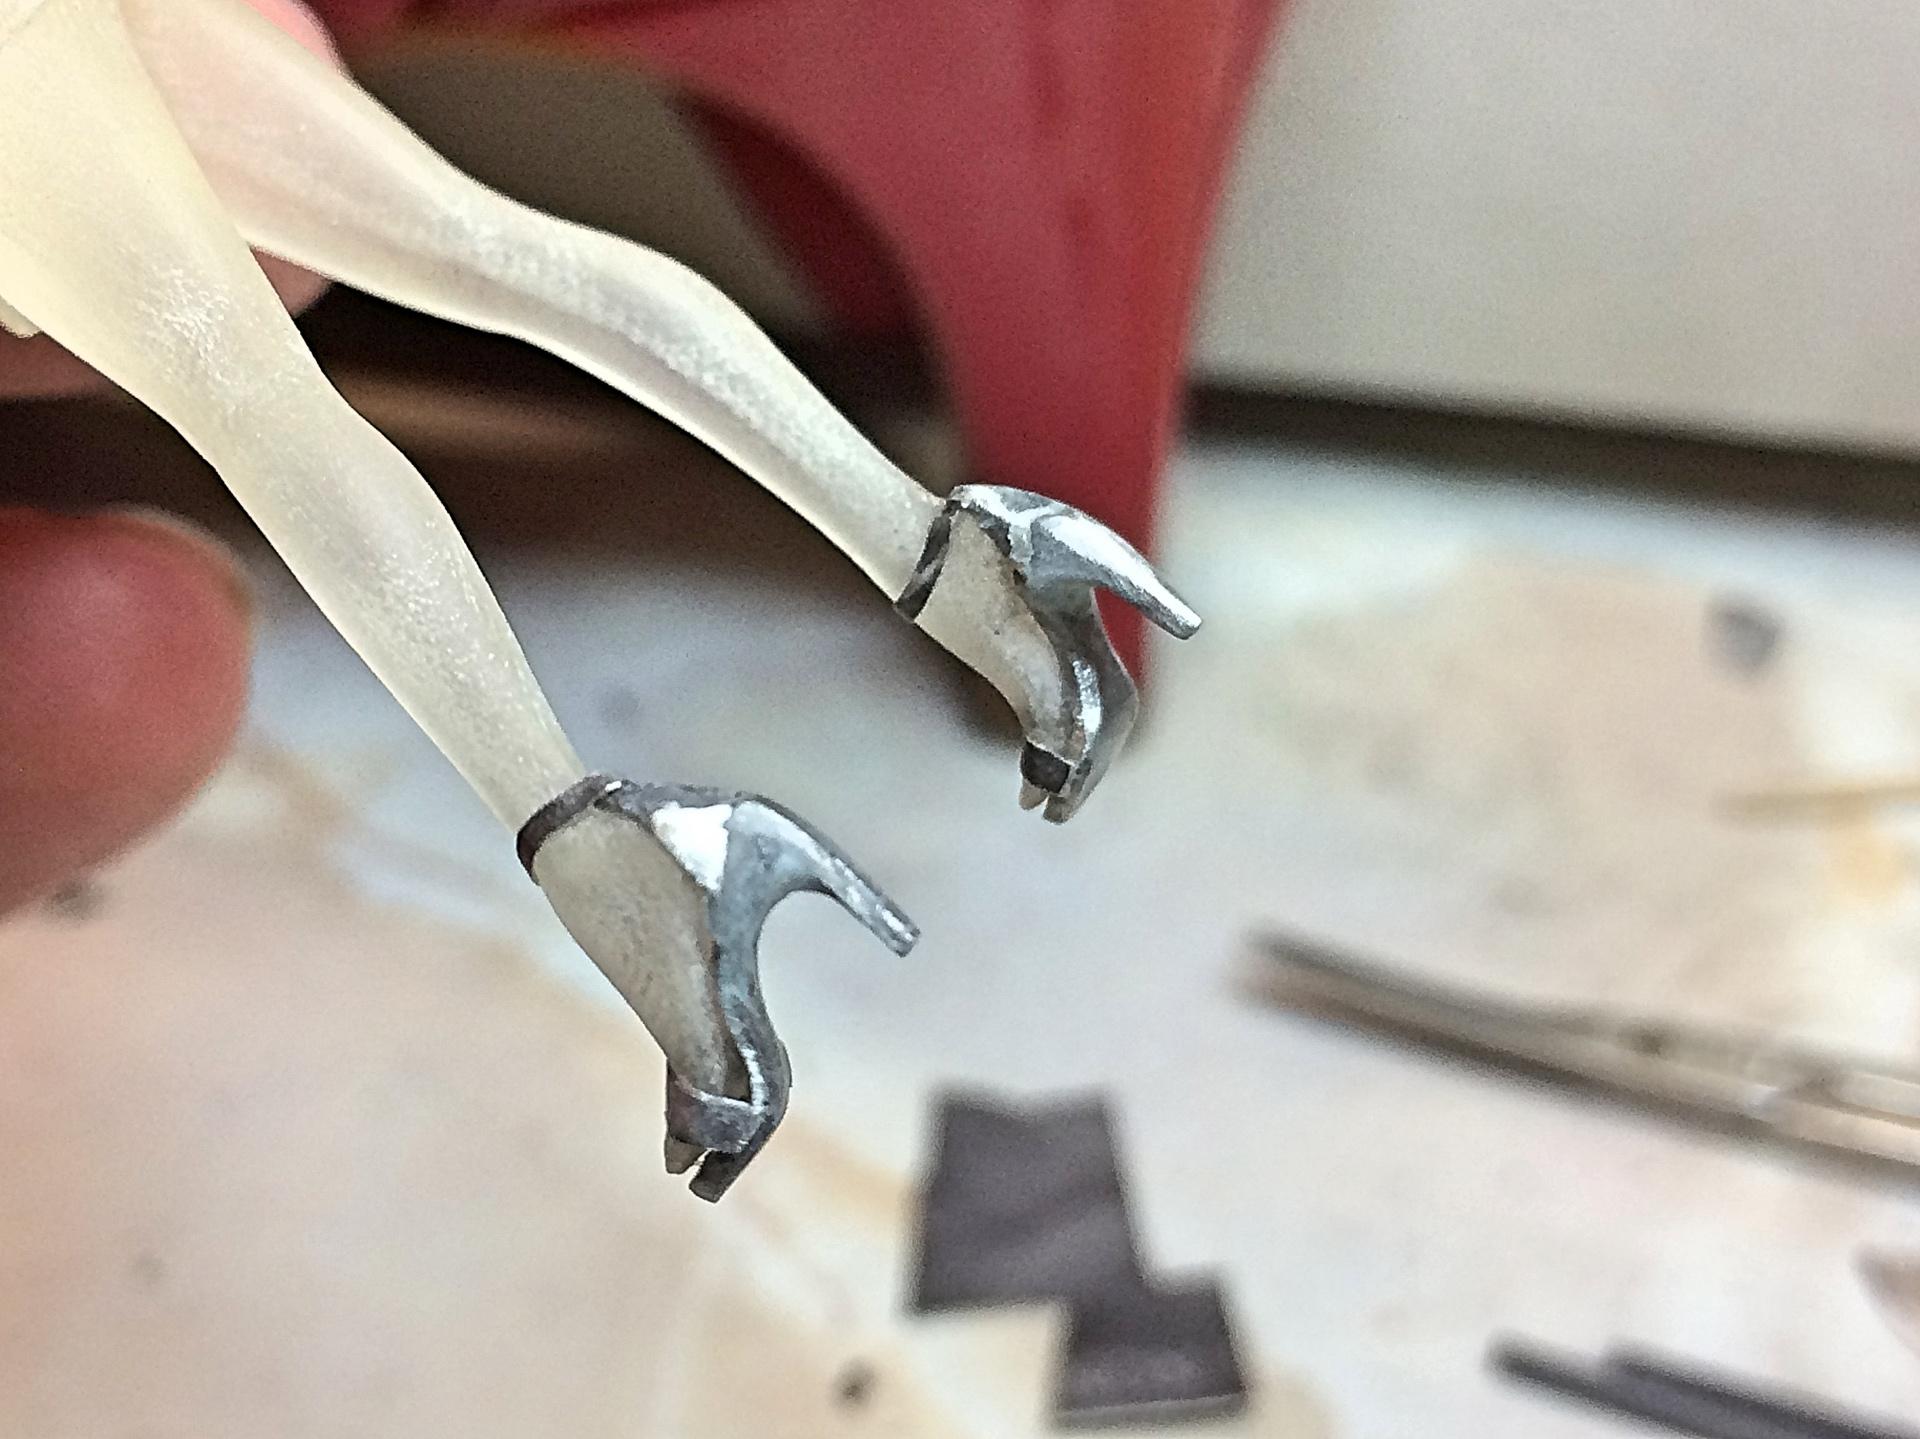
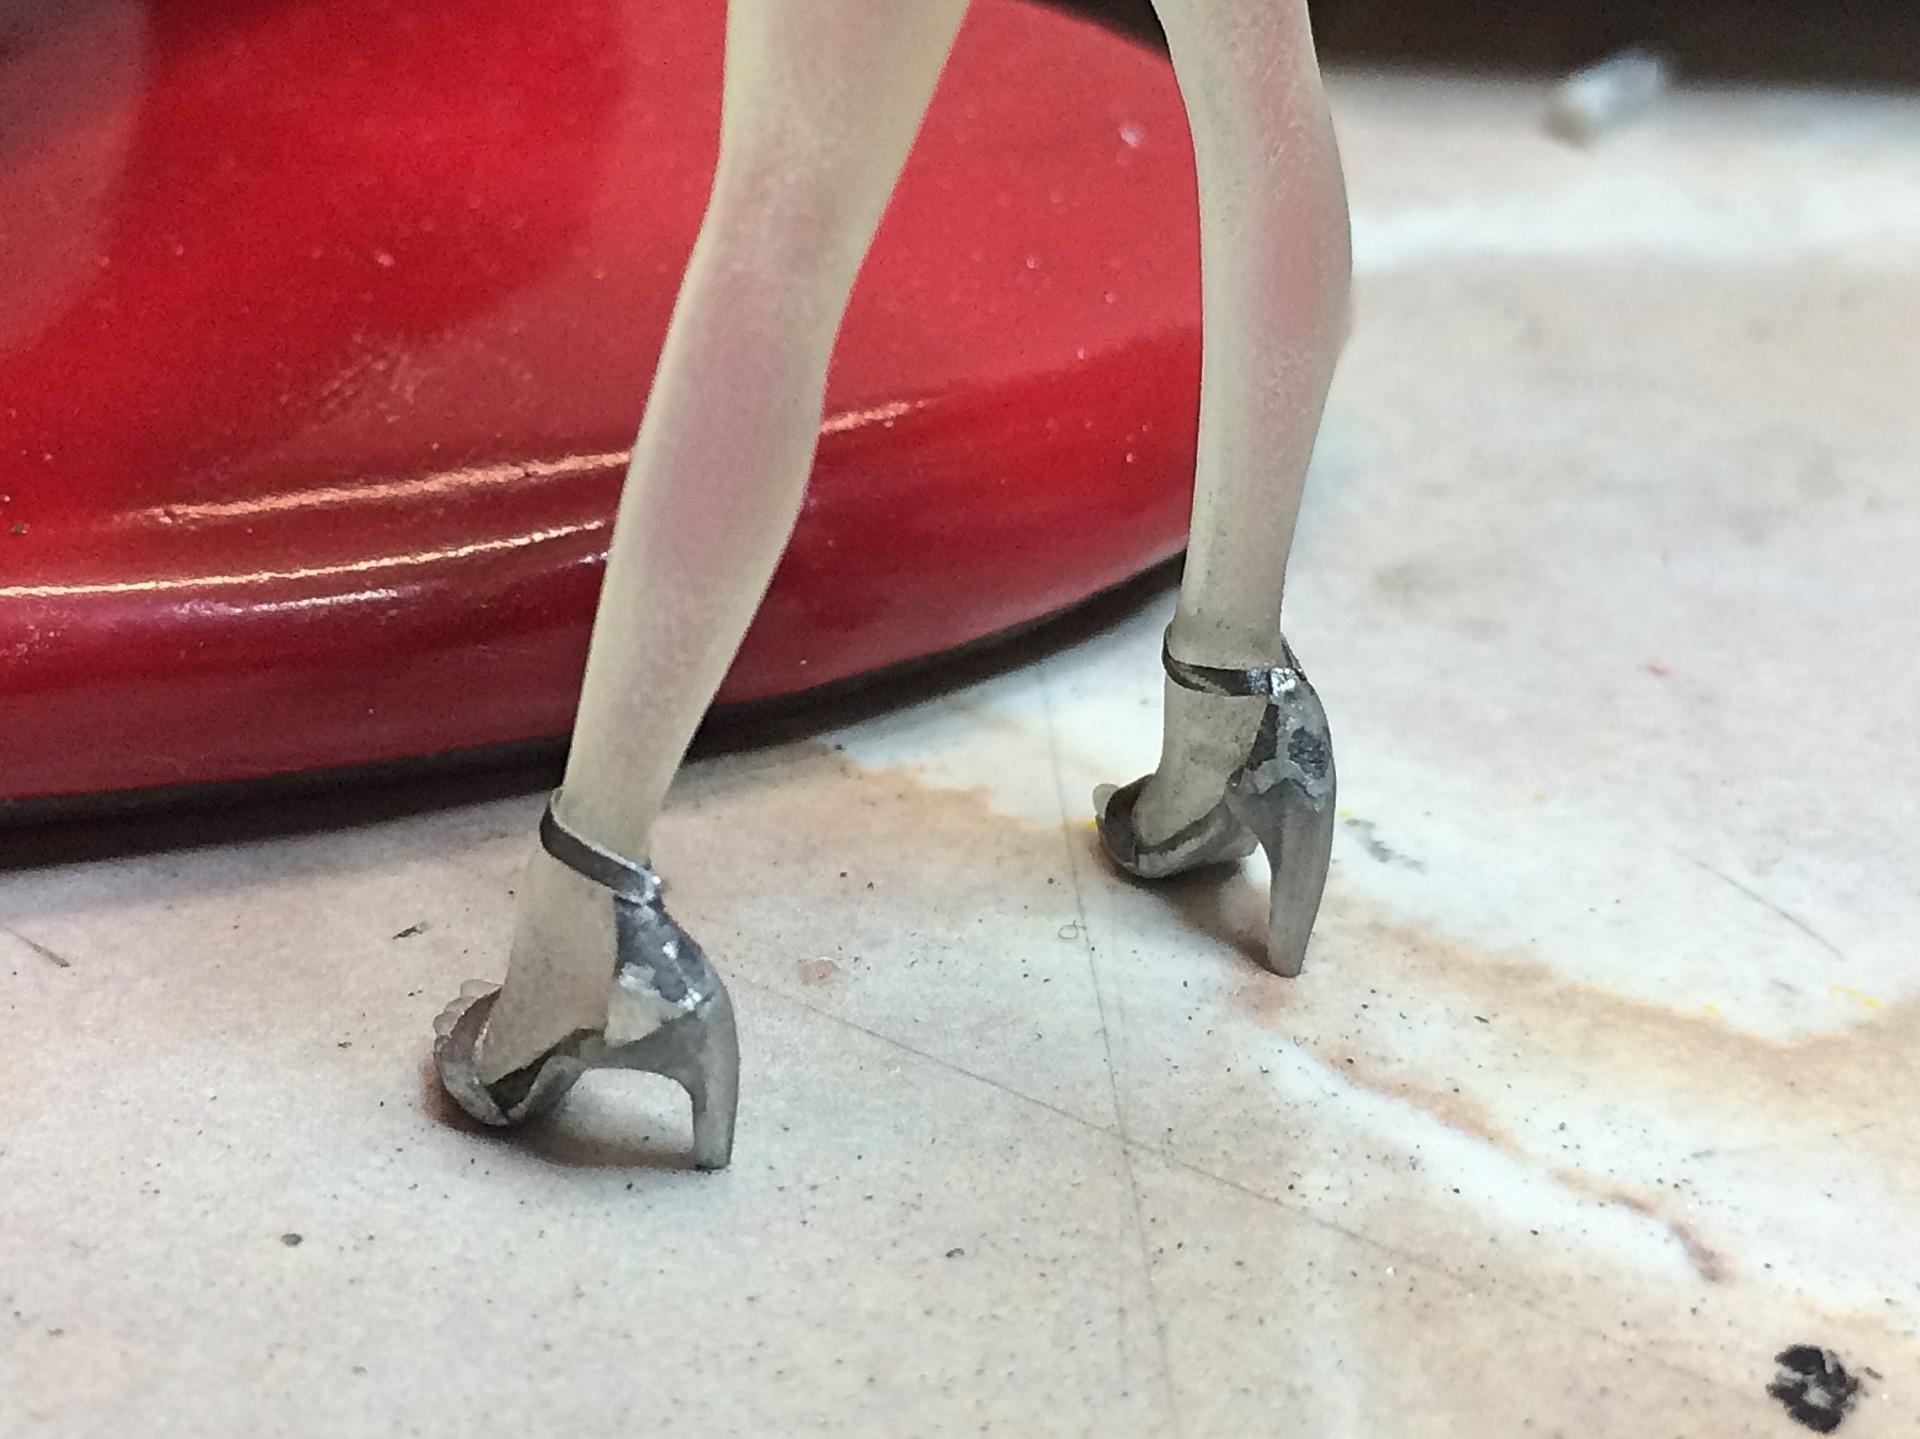
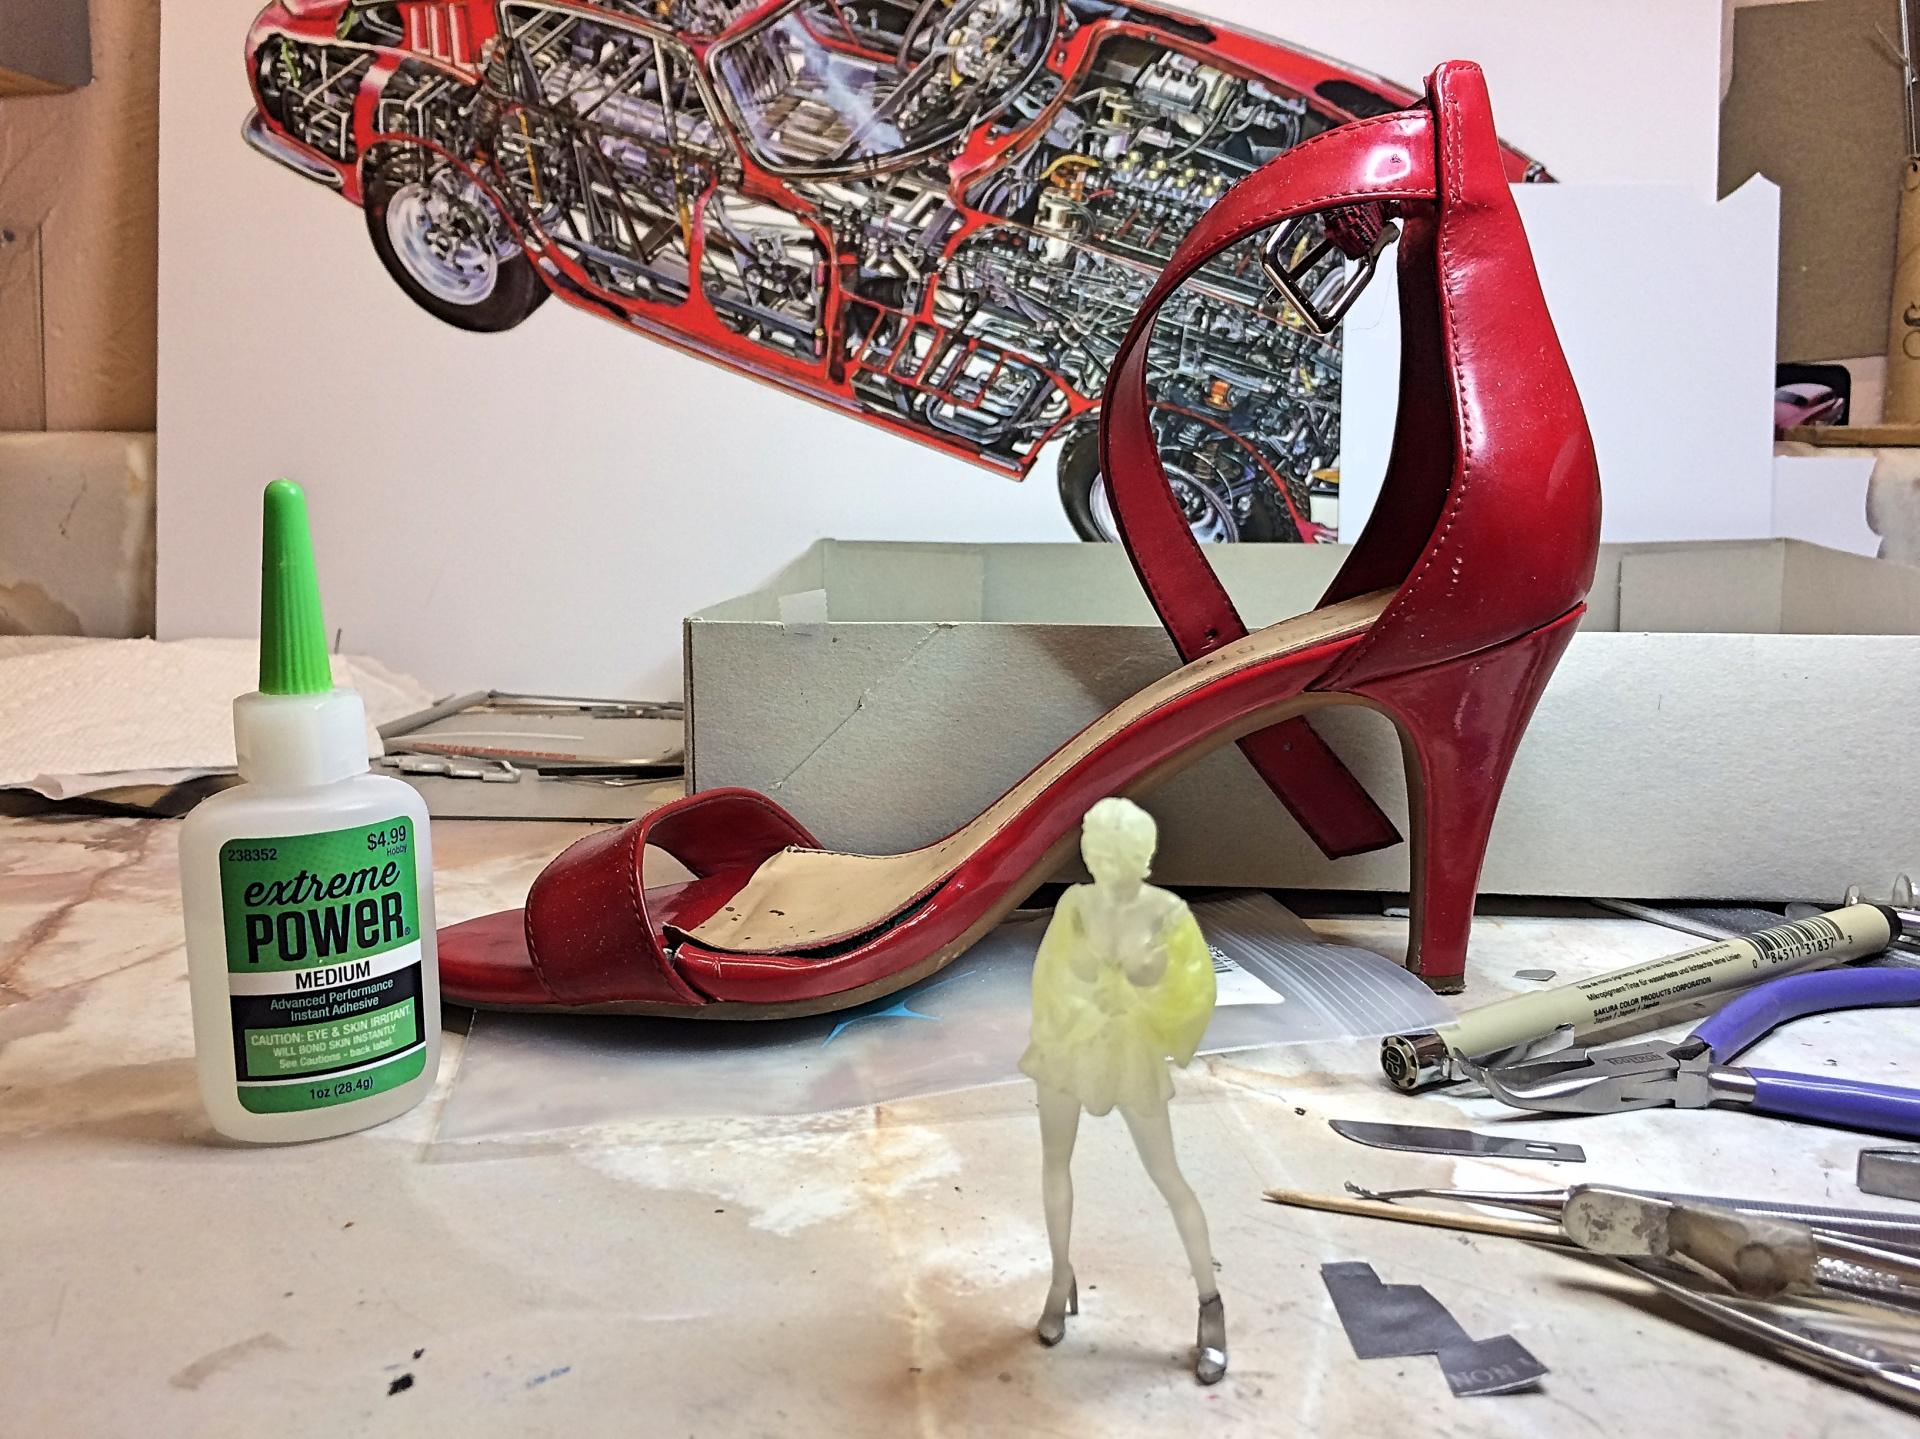
Started on the drop dead gorgeous part. ? I got this Shapeways figure with the intent of adding to such a project. Started by sanding down the print lines off the legs and shoulders, but keeping the texture on the dress. It's funny that no shoes are on the feet, so making steel toed heels, with the plan of using magnets in a base. Cut them out of salvaged electronic device, bent a little more to fit the feet. Used the wife's heels for reference. Wine bottle foil added to the left foot. I'm planning to make a vacuum-formed hat like what Faye wore in the movie. Have another color for the dress in mind.
-
than Blazing Saddles
-
That's sort of cool. Need two parking spots.
-
Very well executed Golf! I owned a '91 Jetta GLi, loved the engine sound, had fun auto crossing it. I have another roof carrier, Fujimi parts kit, would like to do something like this. Nice stripe graphics, simple and clean. Personal subjective opinion, hate the wheel stance, but to each their own; in my town the roads are rough, and I don't follow dudes with Miatas like this, when a dip is coming, they have to slow down to 3.5 MPH.
-
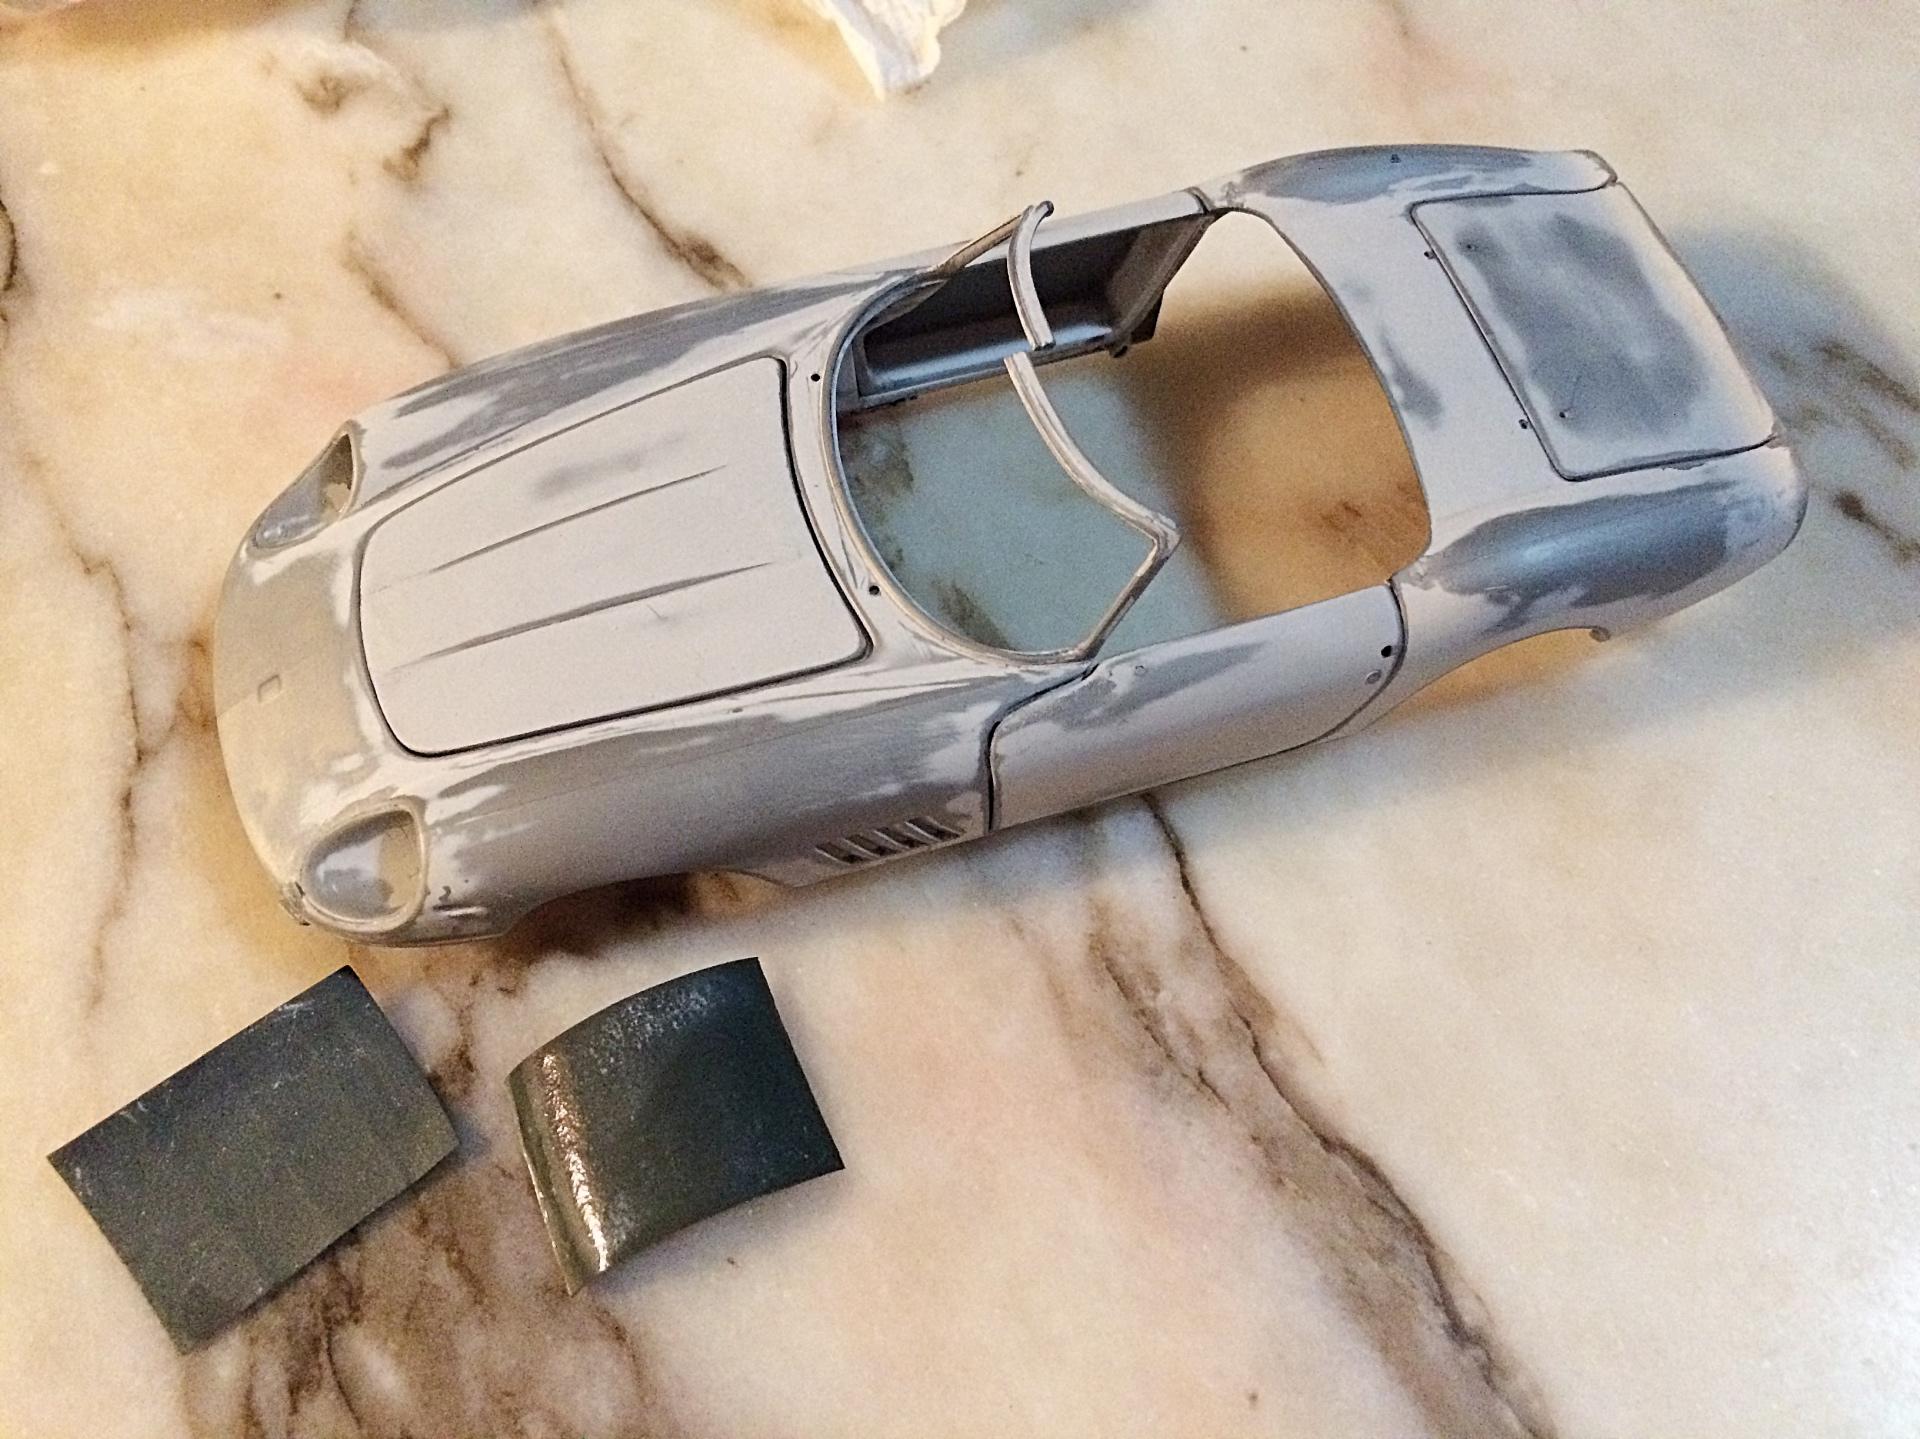
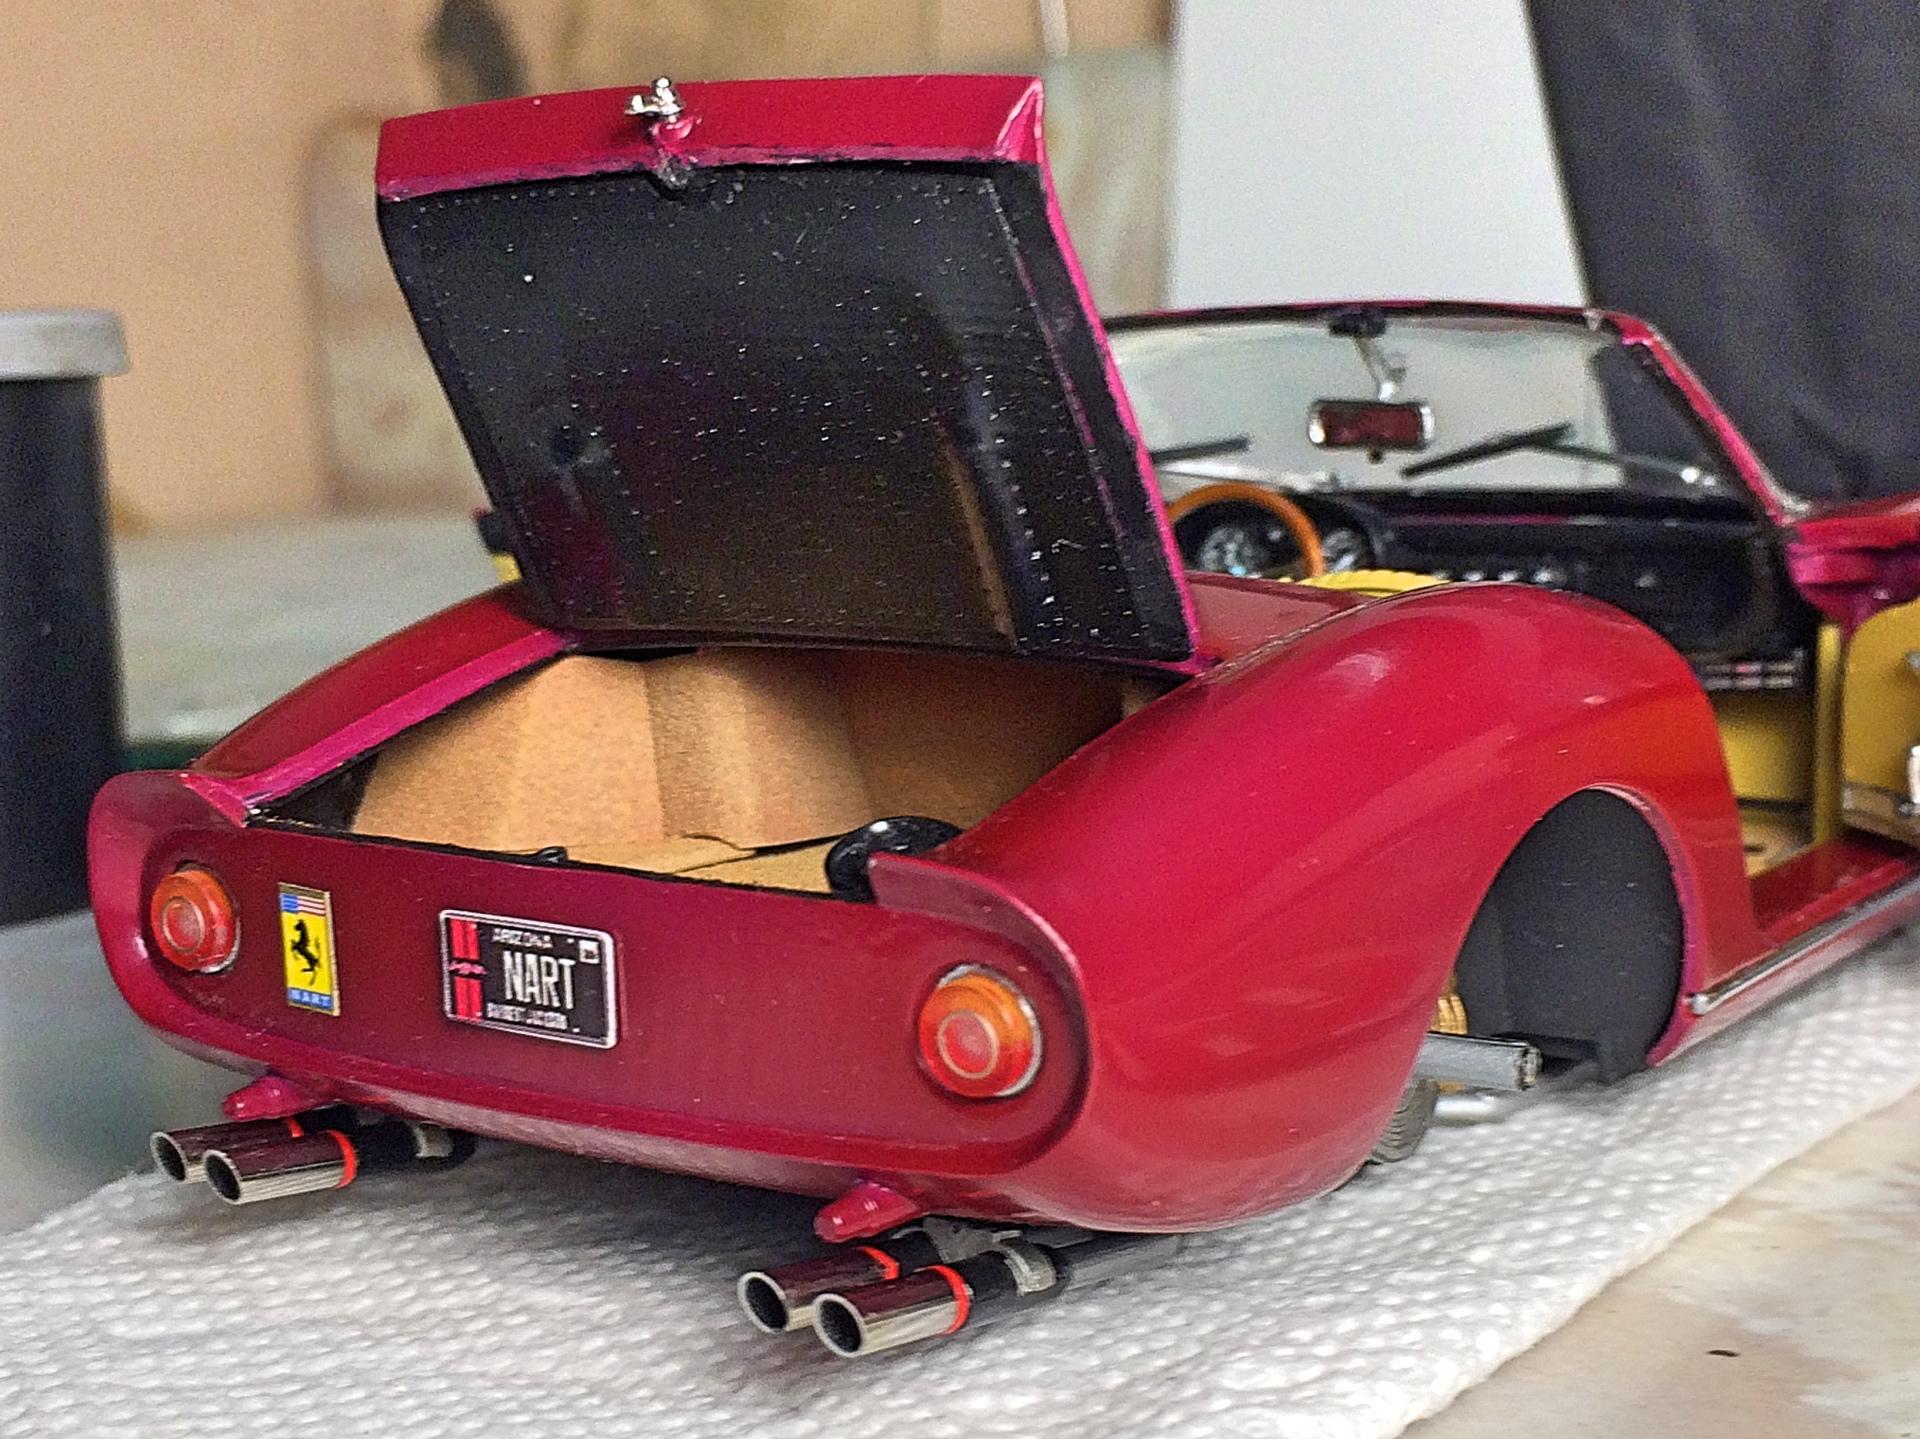
I'll be tweaking them, I hate floating wipers. Some things I'm making up, will admit. Pet peeve is lack of under hood detail (trunk too, but that as opened). Engine hood is cigarette package foil, painted flat black. Trunk is wine bottle "foil", it's layered with plastic so it's not like the lead foil used for the tool bag, has a subtle texture like vinyl. Used the ponce wheel on the edges too, just to bling it. Also had to put red lines on the exhaust tips, not factory original but see it on many Ferraris, I just think it looks cool. Glued on the door vent windows, drilled and used wire for reinforcement.
-
Thank you. I'm impressing myself, and I'm my worst critic. ?
-
Came out great! Looks good in the color. Different wheels? Did you leave off the bumpers? I got this kit at a swap, but the chrome tree is missing, was planning on doing a resto rod.
-
Since you mentioned photo-etch, I dug out the Detail Master wipers to take a look. Obviously the street rod version is way too basic. Trouble with the super fine version is too long, with the Z bent arms. I vaguely recall trying to make one, what a royal PITA making those, I tossed the one attempt. If anything, I could see using p-e frame edge to put between the base and blade. Otherwise, these are parts that Italeri did well on.
-
Very cool! Did you make the mirrors? I ask because I need to make a pair. Very well done body mod.
-
Love it! But not a long trip type of vehicle, is it? ?