Oldmopars
-
Posts
2,058 -
Joined
-
Last visited
Content Type
Profiles
Forums
Events
Gallery
Everything posted by Oldmopars
-
That would be great, I will PM you
-
B.R.B.O. Freightliner FLC update 2/7
Oldmopars replied to k100's topic in WIP: Model Trucks: Big Rigs and Heavy Equipment
I have build several of the Italeri kits, and every one of them is a multi piece cab. It is a pain because they want you to build the cab around the interior. This means you have to paint first them assemble. However I have found that with some creativity you can build most of them by putting the cab together and paint it, then shove the interior in place. However, you need to do a bunch of test runs to be sure you know exactly how the puzzle goes together. After I figured this out, I love the Italeri kits. The fit and details are in a whole different league than anything from AMT/MPC. Just be aware that they are not always accurate. They are known for using old engines in newer kit, adding new looking parts to old engines to "simulate" newer engines, and wheels with the molded in axle hubs are generic, not accurate to the different trucks. However, most of these things can be fixed or are not noticed by most builder and so they build up into great looking trucks. I have 4 on the shelf now and looking for several more. -
How is this progressing? I have been watching for updates. If you are like me, the Van is on a slight hold due to the B.R.B.O. having a much shorter deadline. Anyway, look forward to seeing more.
-
BRBO Mack R685ST
Oldmopars replied to gotnitro?'s topic in WIP: Model Trucks: Big Rigs and Heavy Equipment
I don't know if this will help any as its from the DM600, not the R, but this is how the rear trunion looks on it.
-
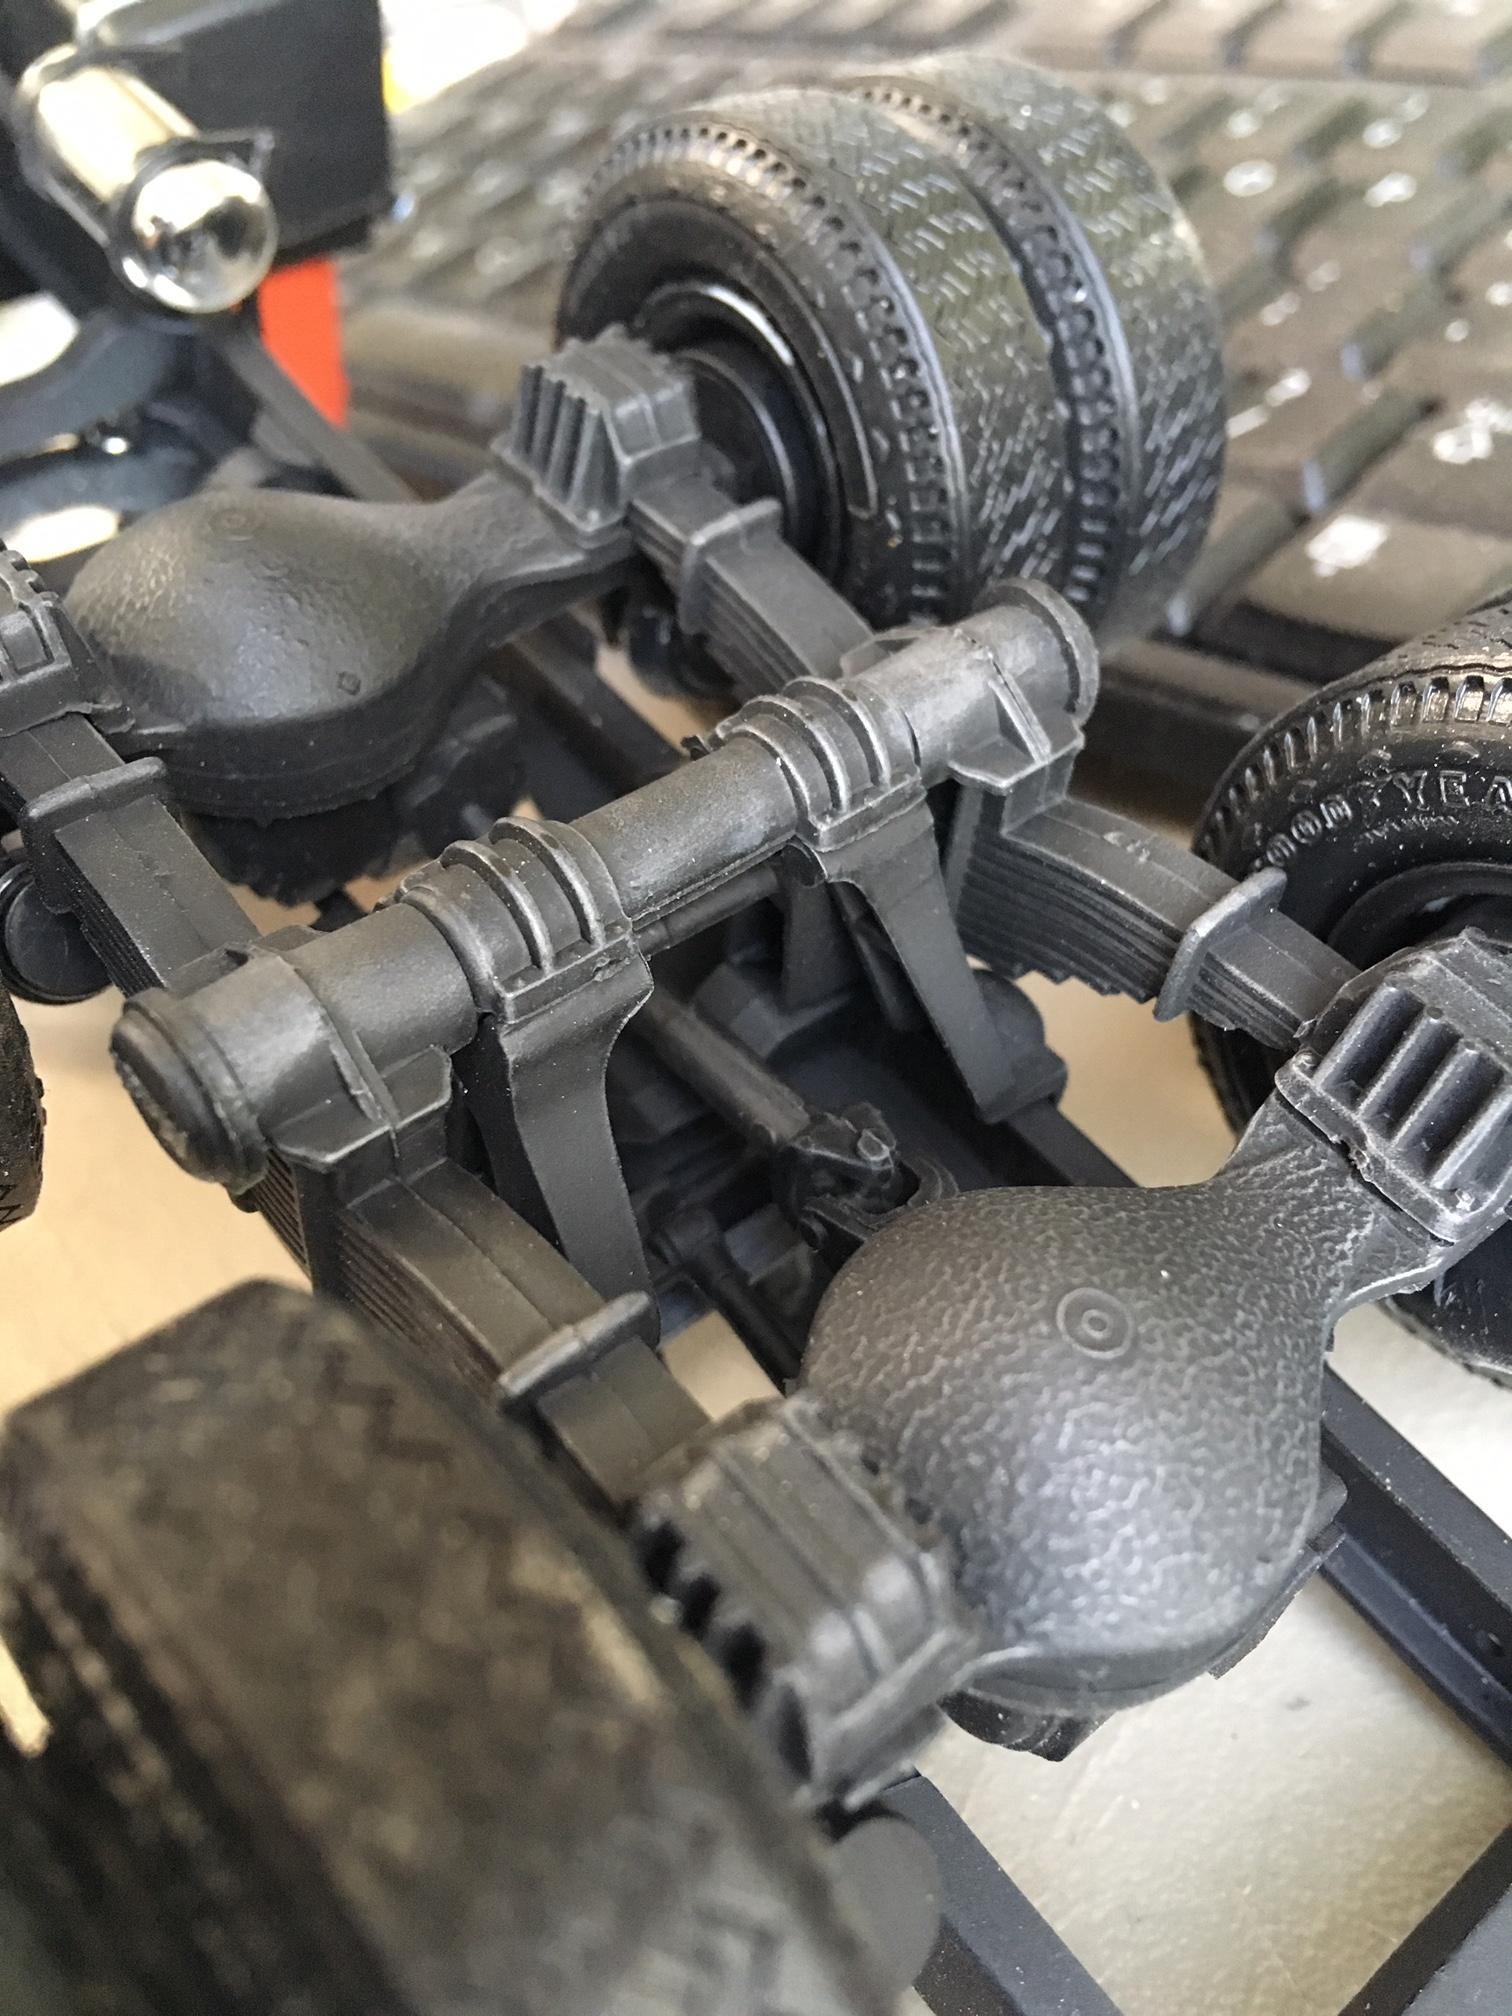
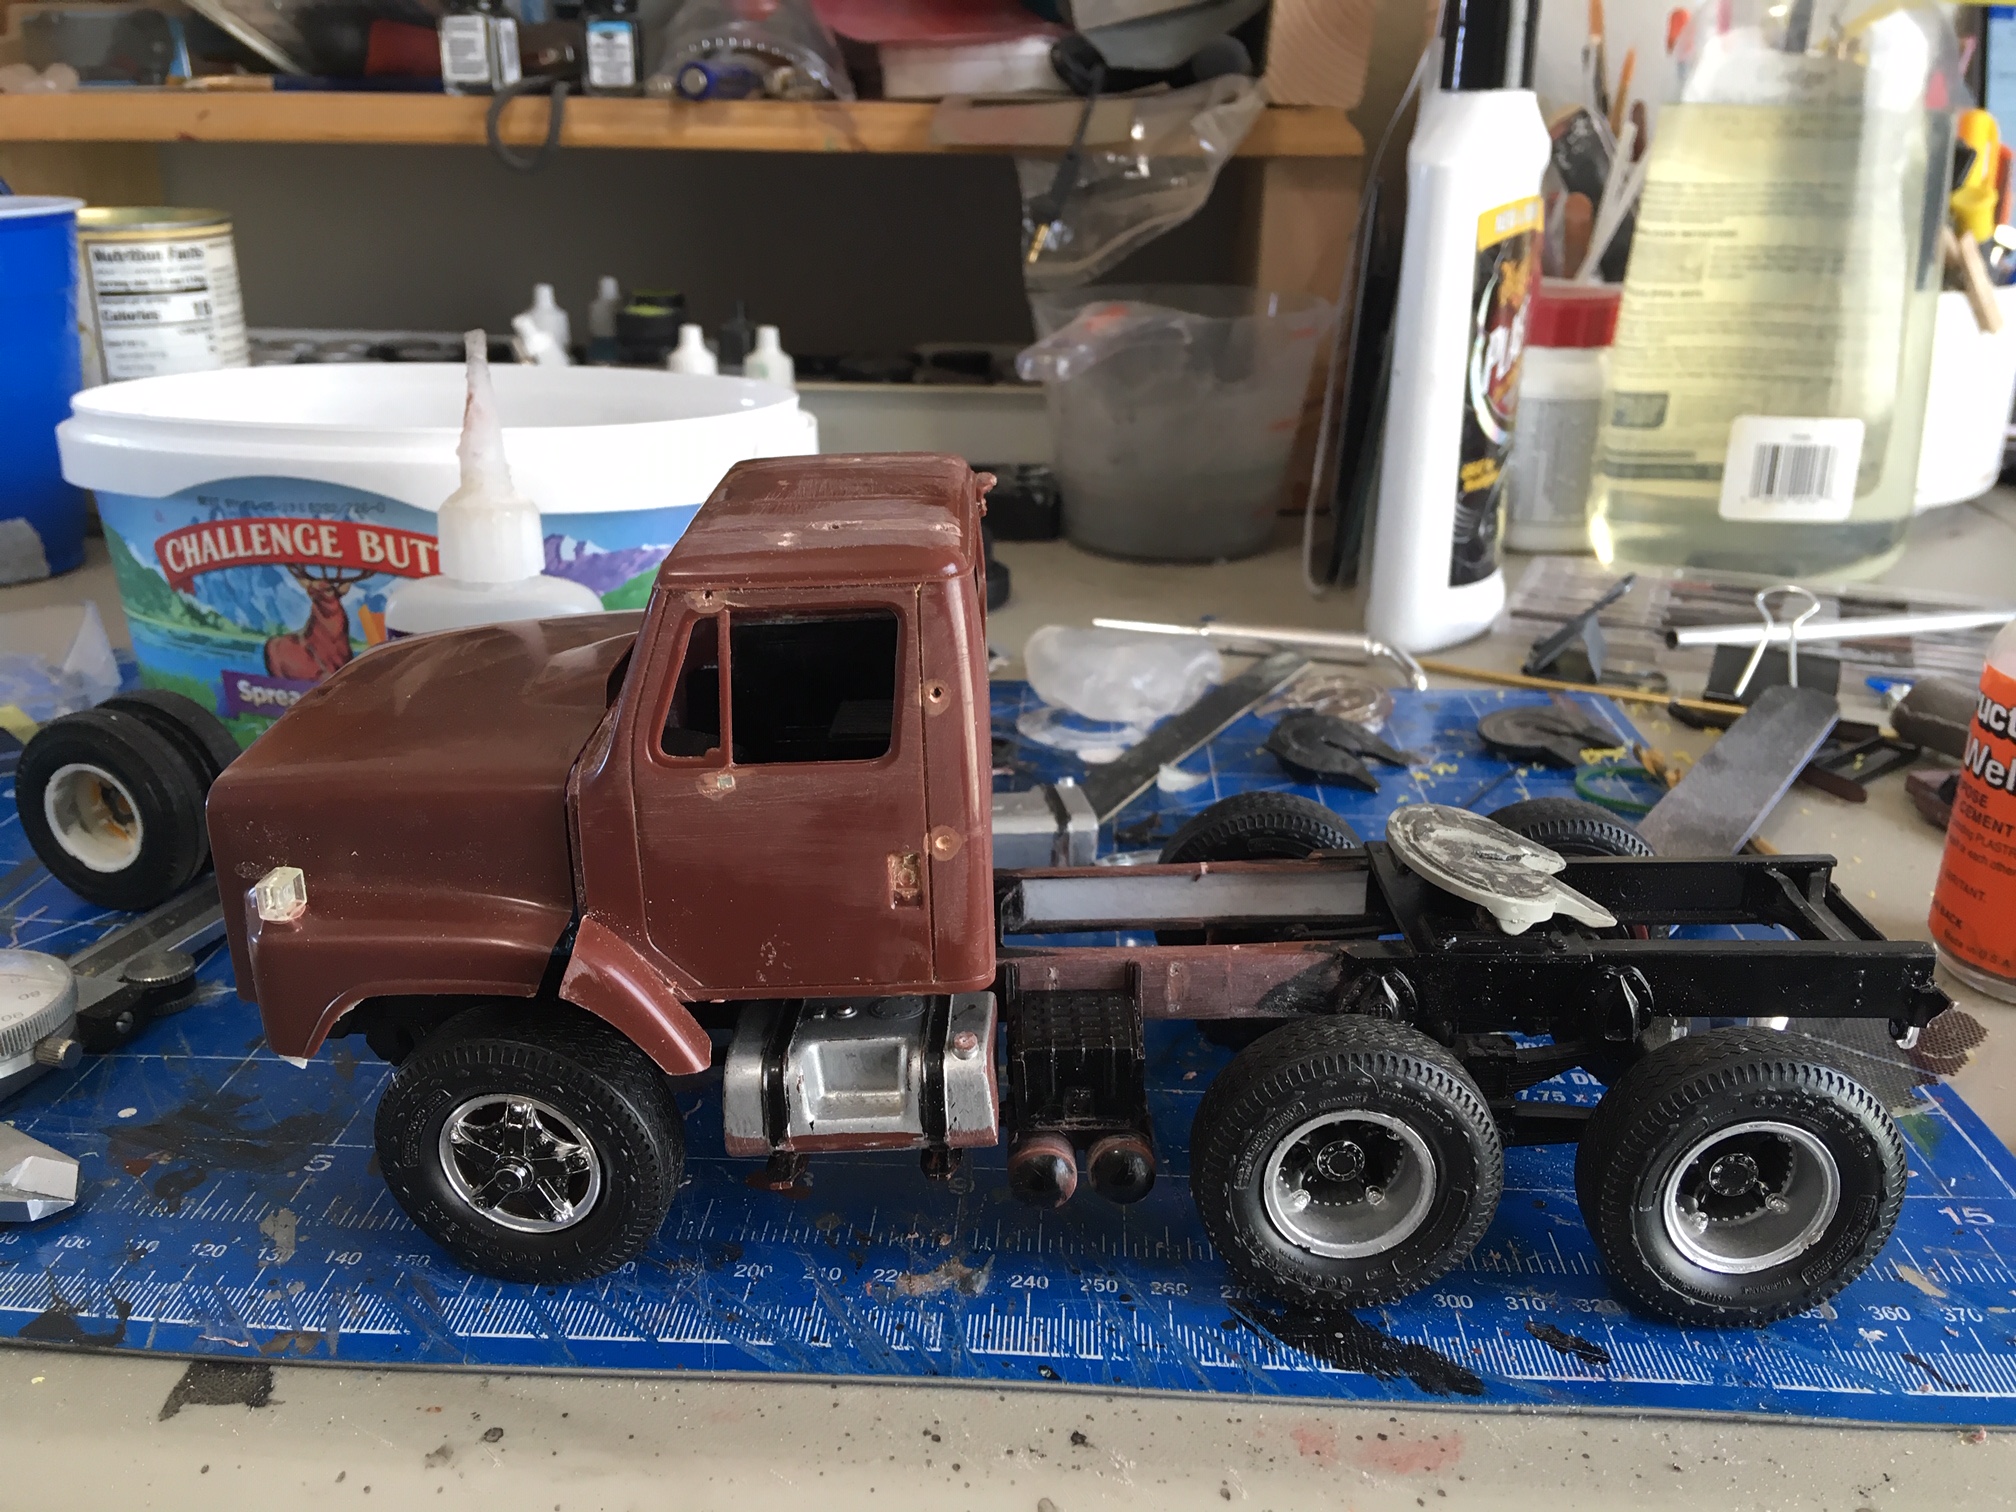
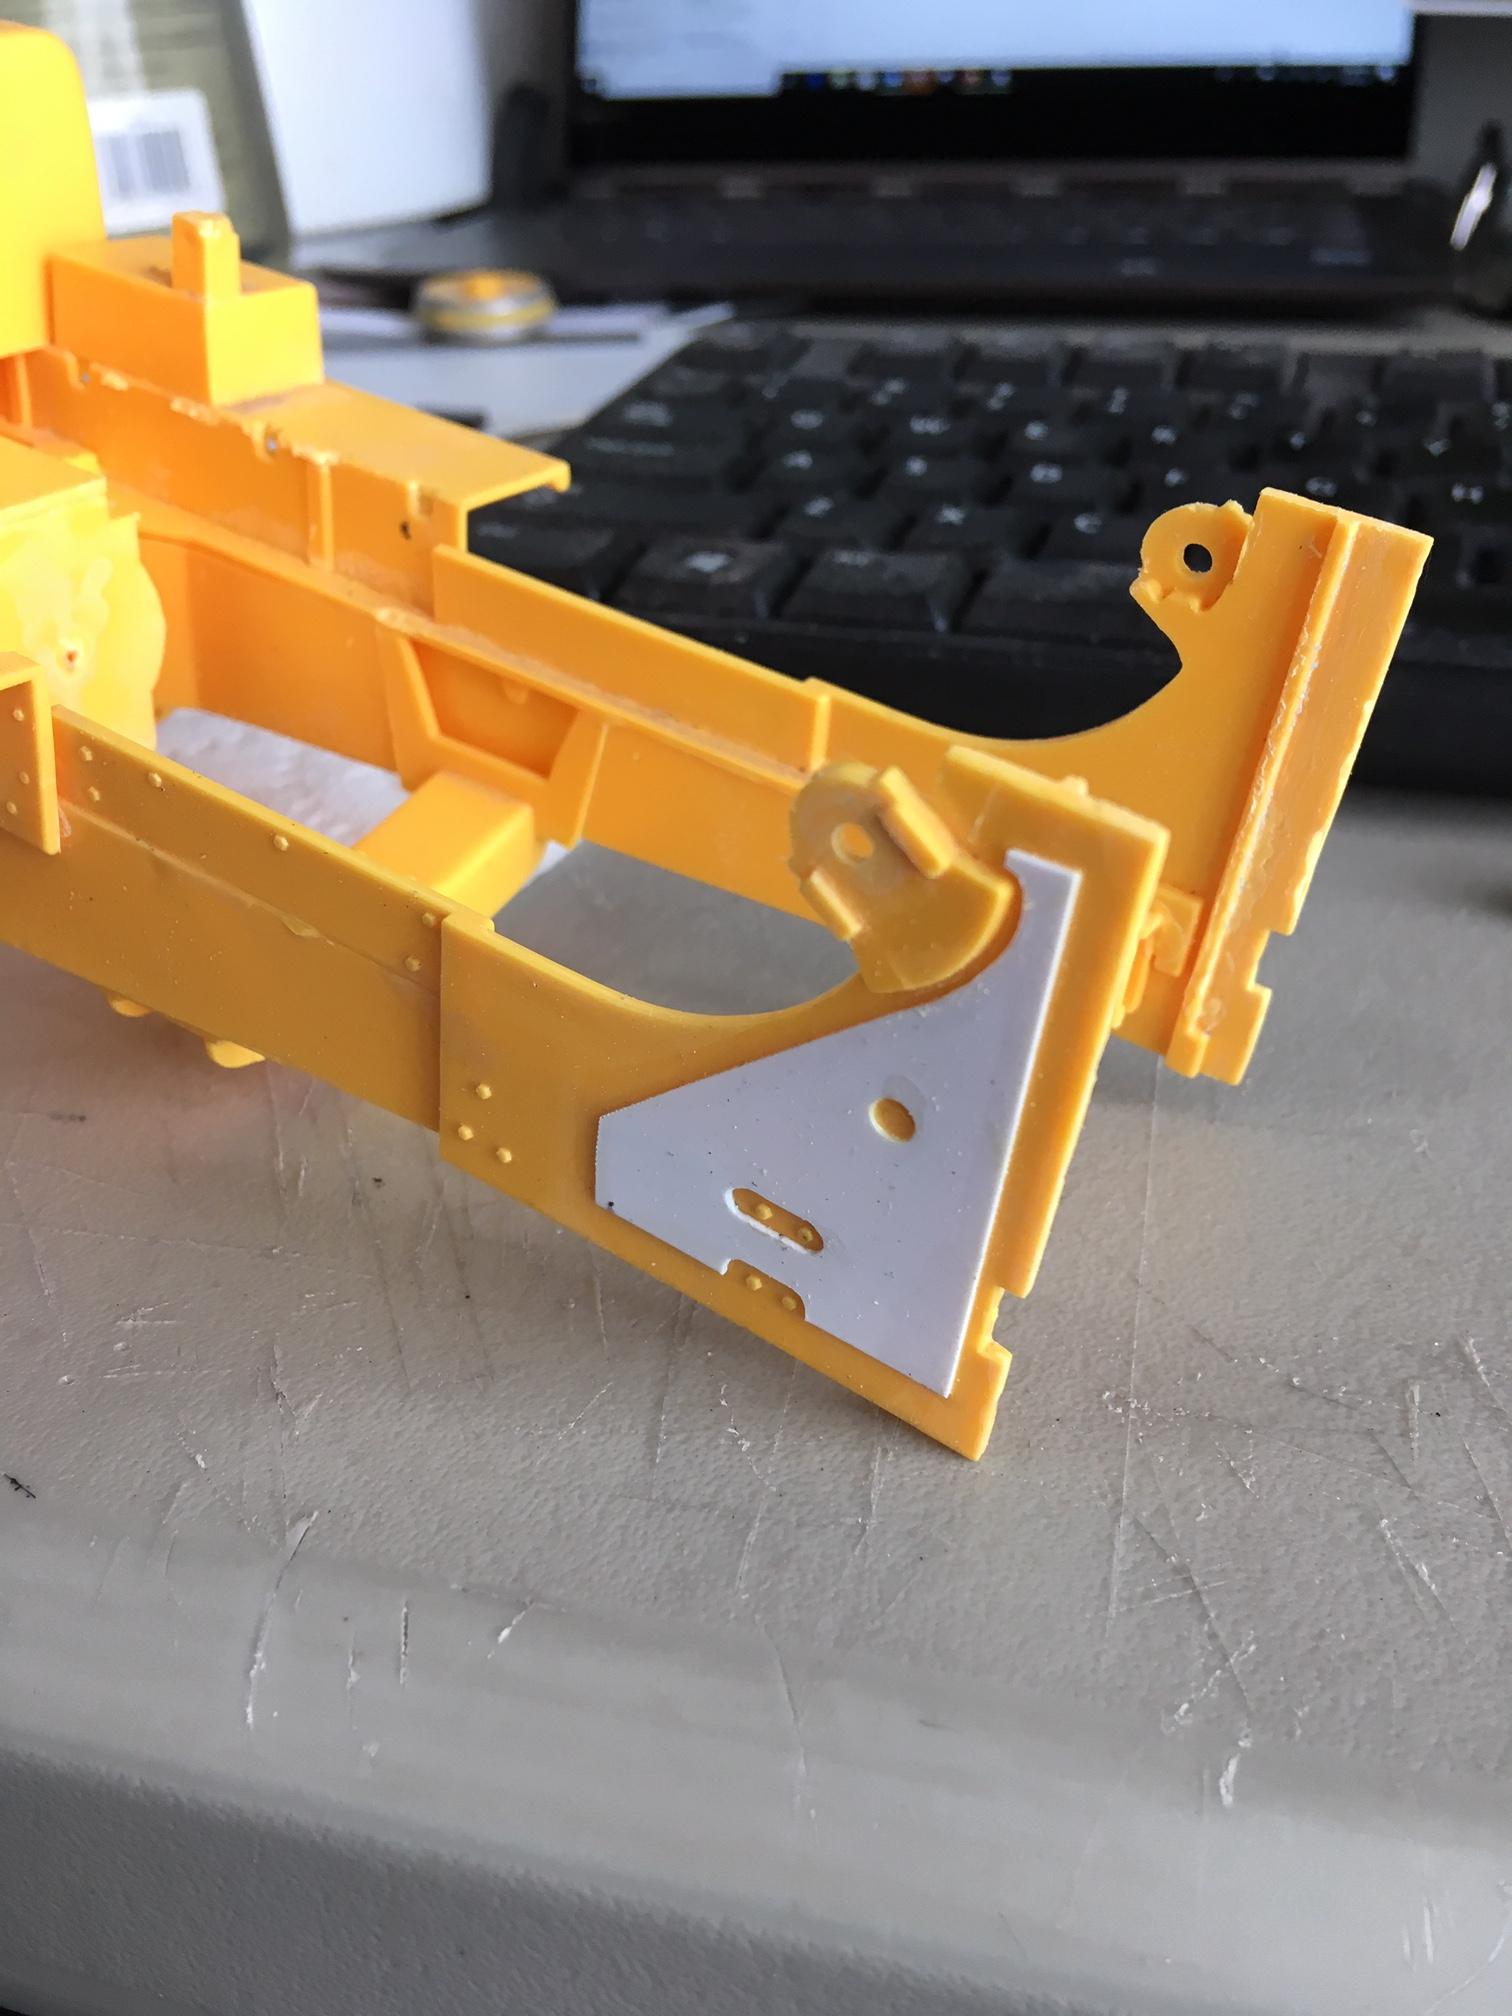
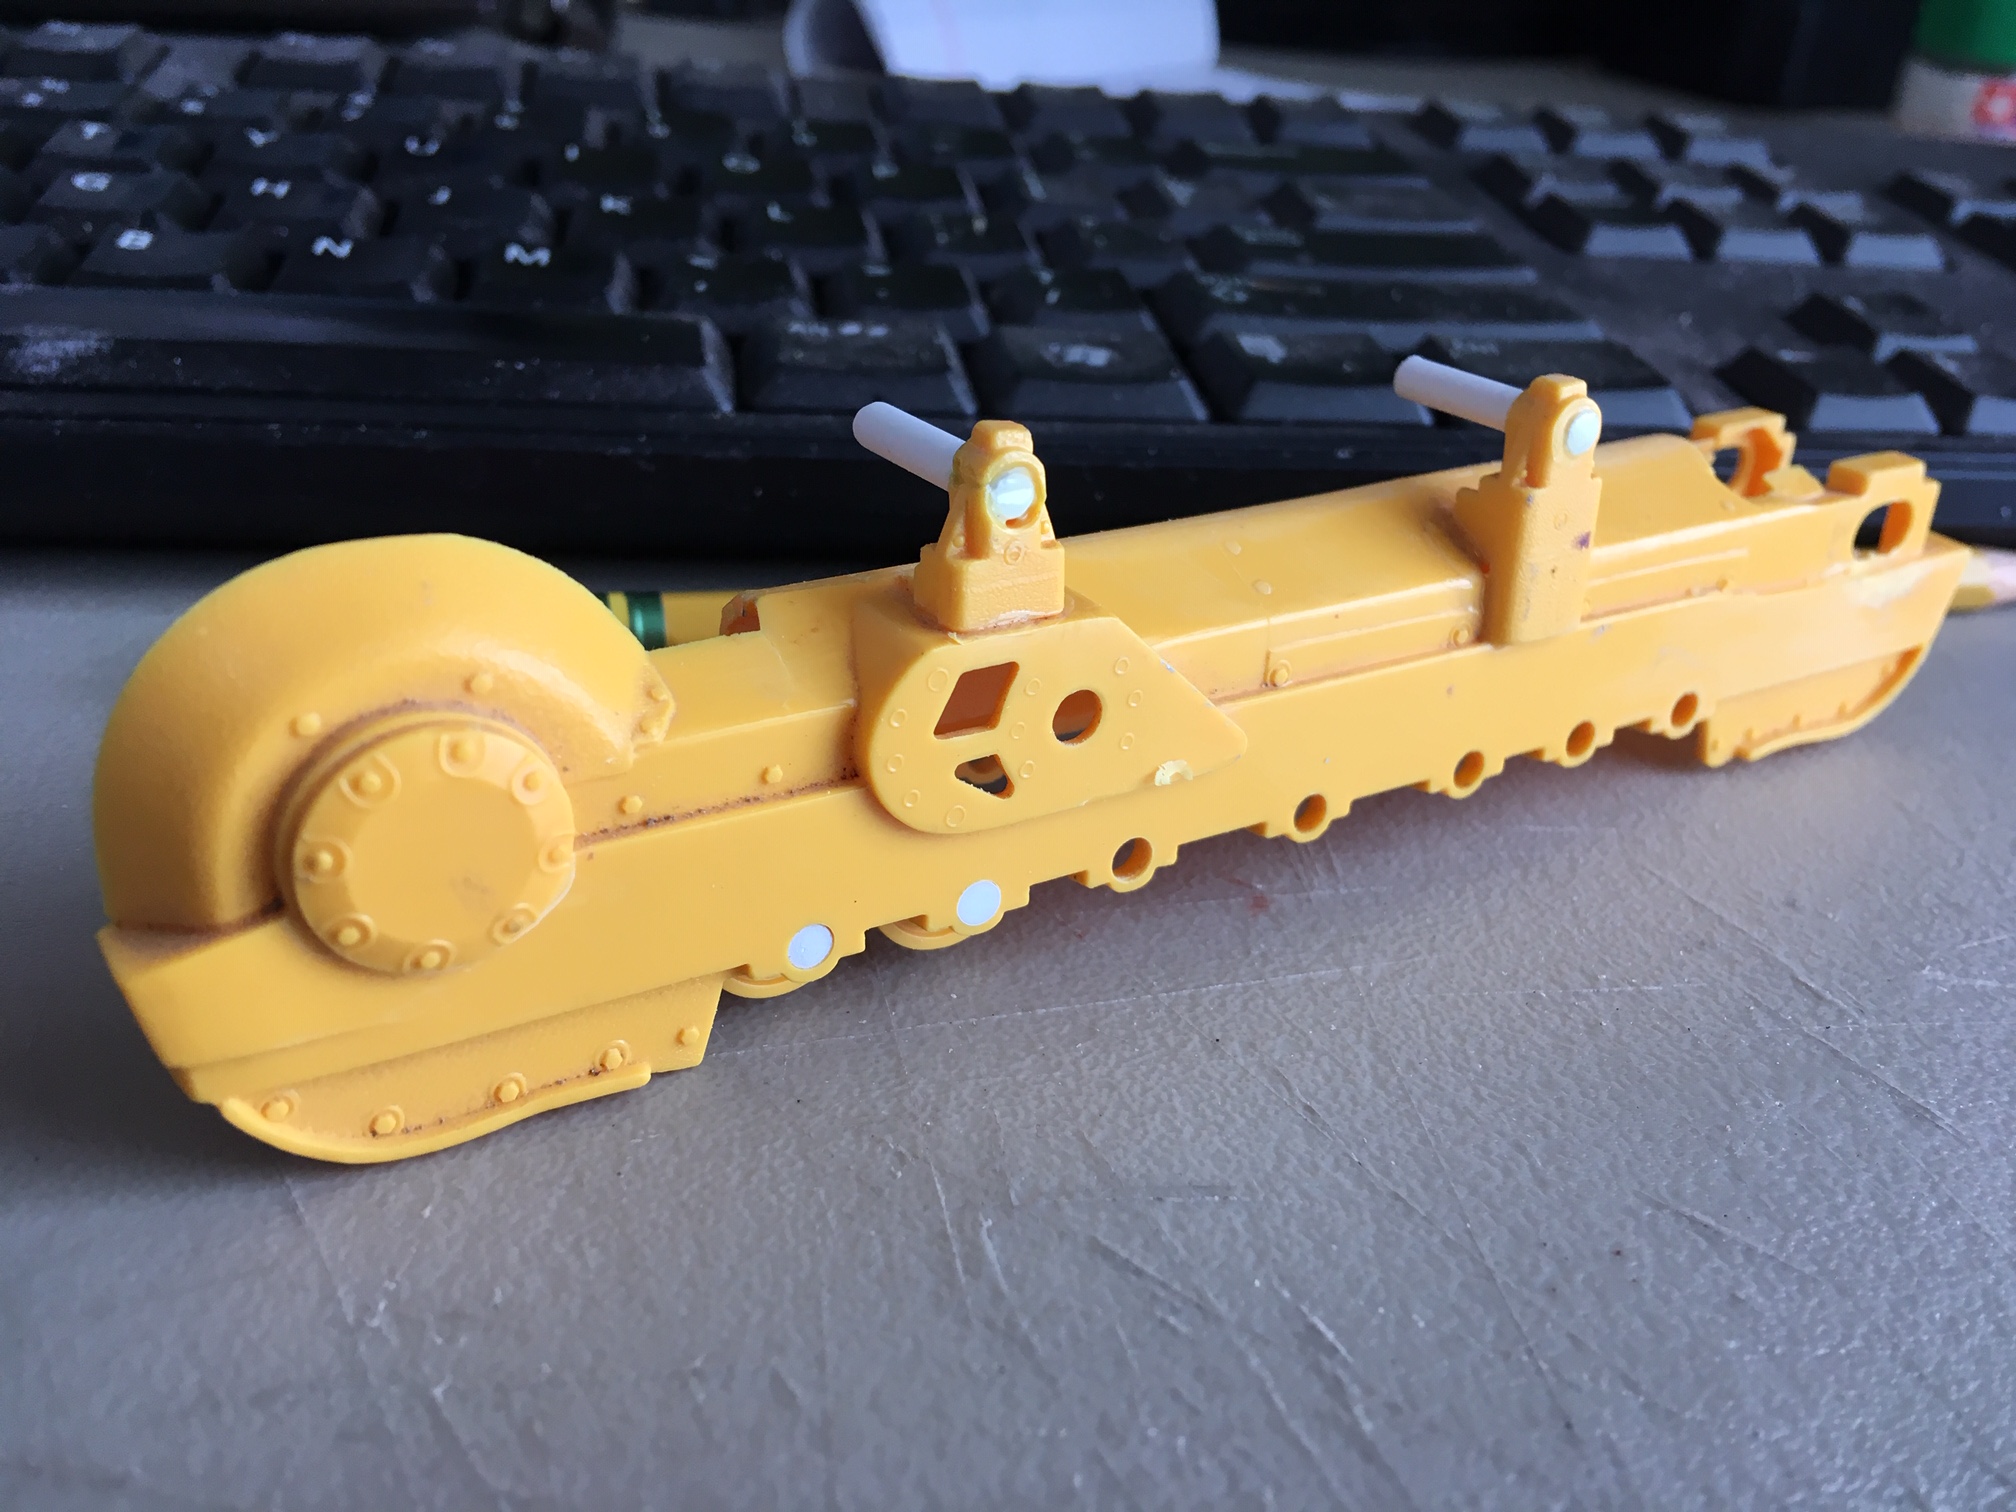
So, work has been moving ahead on these, however it is evidence of my ADHD, or schizophrenia. A little here, a little there. For the truck, I have shortened the frame, it was way too long. I took out 2.5in. Had to repair the frame from the damage it suffered being in storage. The front spindles were broken off and the wheels were glued on solid. I had to drill out one of the axles just to get the wheel off and make a new axle stub. I then had to drill out the king pins and make new ones so the wheels will steer. Everything on this truck has needed major clean up. I am not fond of glue bombs, but I can't buy one of these, so I have to fix it. The front wheels are way too wide for the tires in the kit. I too 1/8in out of them to narrow them up and make the tire fit correctly. For the dozer same thing has been happening. Its a glue bomb too. I had to make a new track link as it was missing one. I made the mold from a good one using the thermo plastic that you heat in water, then some epoxy resin from Ace Hardware. It turned out almost perfect, just a few air bubbles that will not matter, its a track and should look a little chipped up. I added the weight plates on the front, the kit only has an outline of it. I am also fixing the track rollers. The holes where the bearing go is way bigger than the shaft on the rollers so they just flop around in there. I have been drilling each roller out and inserting a 1/8in rod, the same size as the hole. I have also done some work on the drive gears. The edges are very sharp, but in real life they are never sharp, but very rounded and worn. So, I have taken all the sharp edges off. I will also be adding a ring of bolt heads and cutting the segment lines into them. Other than that, it has been a lot of cleaning up glue and flash and mold lines.
-
Thanks, I found this a few days ago and have been pouring over it as the D8H is part of my B.R.B.O.
-
Just under 12 hours (less if you are on the East Coast) to go, itching to get started on this one. I will be spending my afternoon clearing off the build bench of current projects.
-
B.R.B.O. Mack DM 600
Oldmopars replied to Spruslayer's topic in WIP: Model Trucks: Big Rigs and Heavy Equipment
I had the same issue with my DM600. I clipped off the horns, lights and exhaust and everything else went in the pond. What were they thinking? It's a working truck, construction, truck, it would never have any chrome on it. Just leave it in the pond till tomorrow. -
BRBO 2019 Dodge W500
Oldmopars replied to Aaronw's topic in WIP: Model Trucks: Big Rigs and Heavy Equipment
Now that is cool. However I would be so distracted by the 1:1 that the 1:25 would never get done. Good luck on this, I look forward to seeing it progress. -
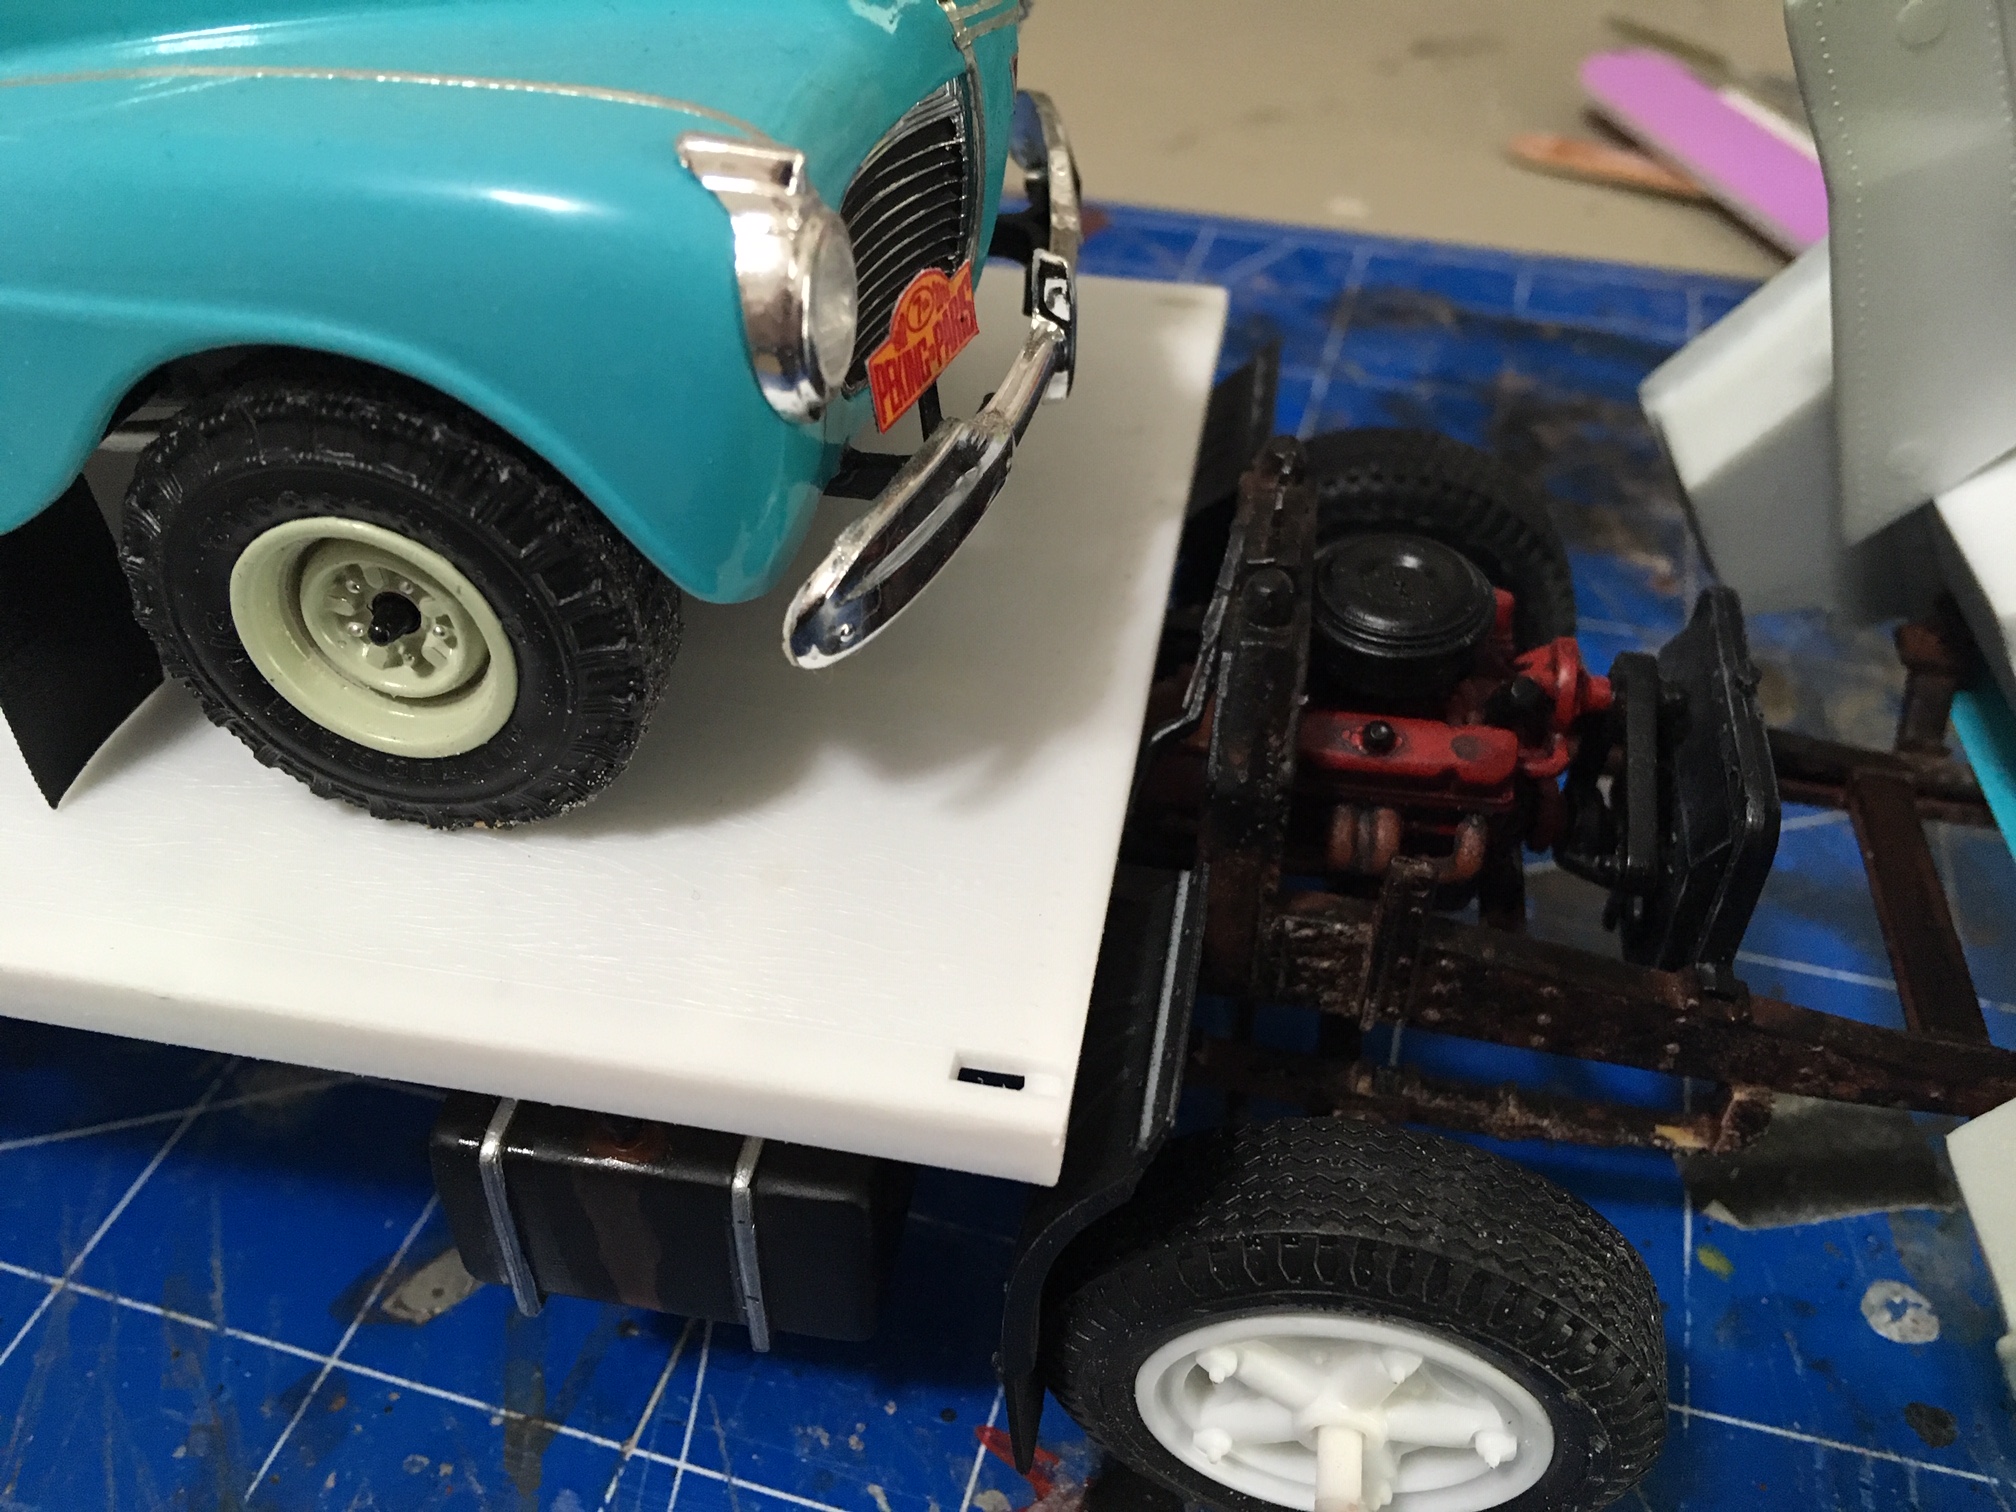
Well, I got my build done a bit early. So, I decided that what it really needs is a truck to haul it to the rally. So, this truck seemed like the perfect vintage truck to do the hauling. Paint will also compliment the P2P car and I will use the extra decals.
-
Firetruck?
Oldmopars replied to Pat Minarick's topic in WIP: Model Trucks: Big Rigs and Heavy Equipment
Now that is too cool not to build. Add it to my list of stuff I want to build in the future. -
What a deal, free shipping!
-
Well, great job. I am the one that asked Ricco to make the grill. My 74 Trailduster is just waiting on decals. I like what you did, it looks great. Glad to see someone other than me wanted these.
-
Why not just go with these: https://scenesunltd.com/products/s16 Unless you are looking for high trim level. Then you could get away with the Belvedere caps, but I am not sure they are 100% right. If you are a rivet counter, No, but 99% of people would look at them and not know the difference. BTW, there were other options, several caps were offered. First picture is the Coronet, second is the Belvedere.
-
What v 8 engine is in the 41 AMT Plymouth
Oldmopars replied to my66s55's topic in Model Building Questions and Answers
I have that engine in my parts box, and probably where it will stay. It is a poor representation of about anything. I am a Mopar fan, and I could not ID it as a LA small block. If you just need a generic engine for a build where it will be mostly hidden, it could work. But if it needs to be right, find something else. -
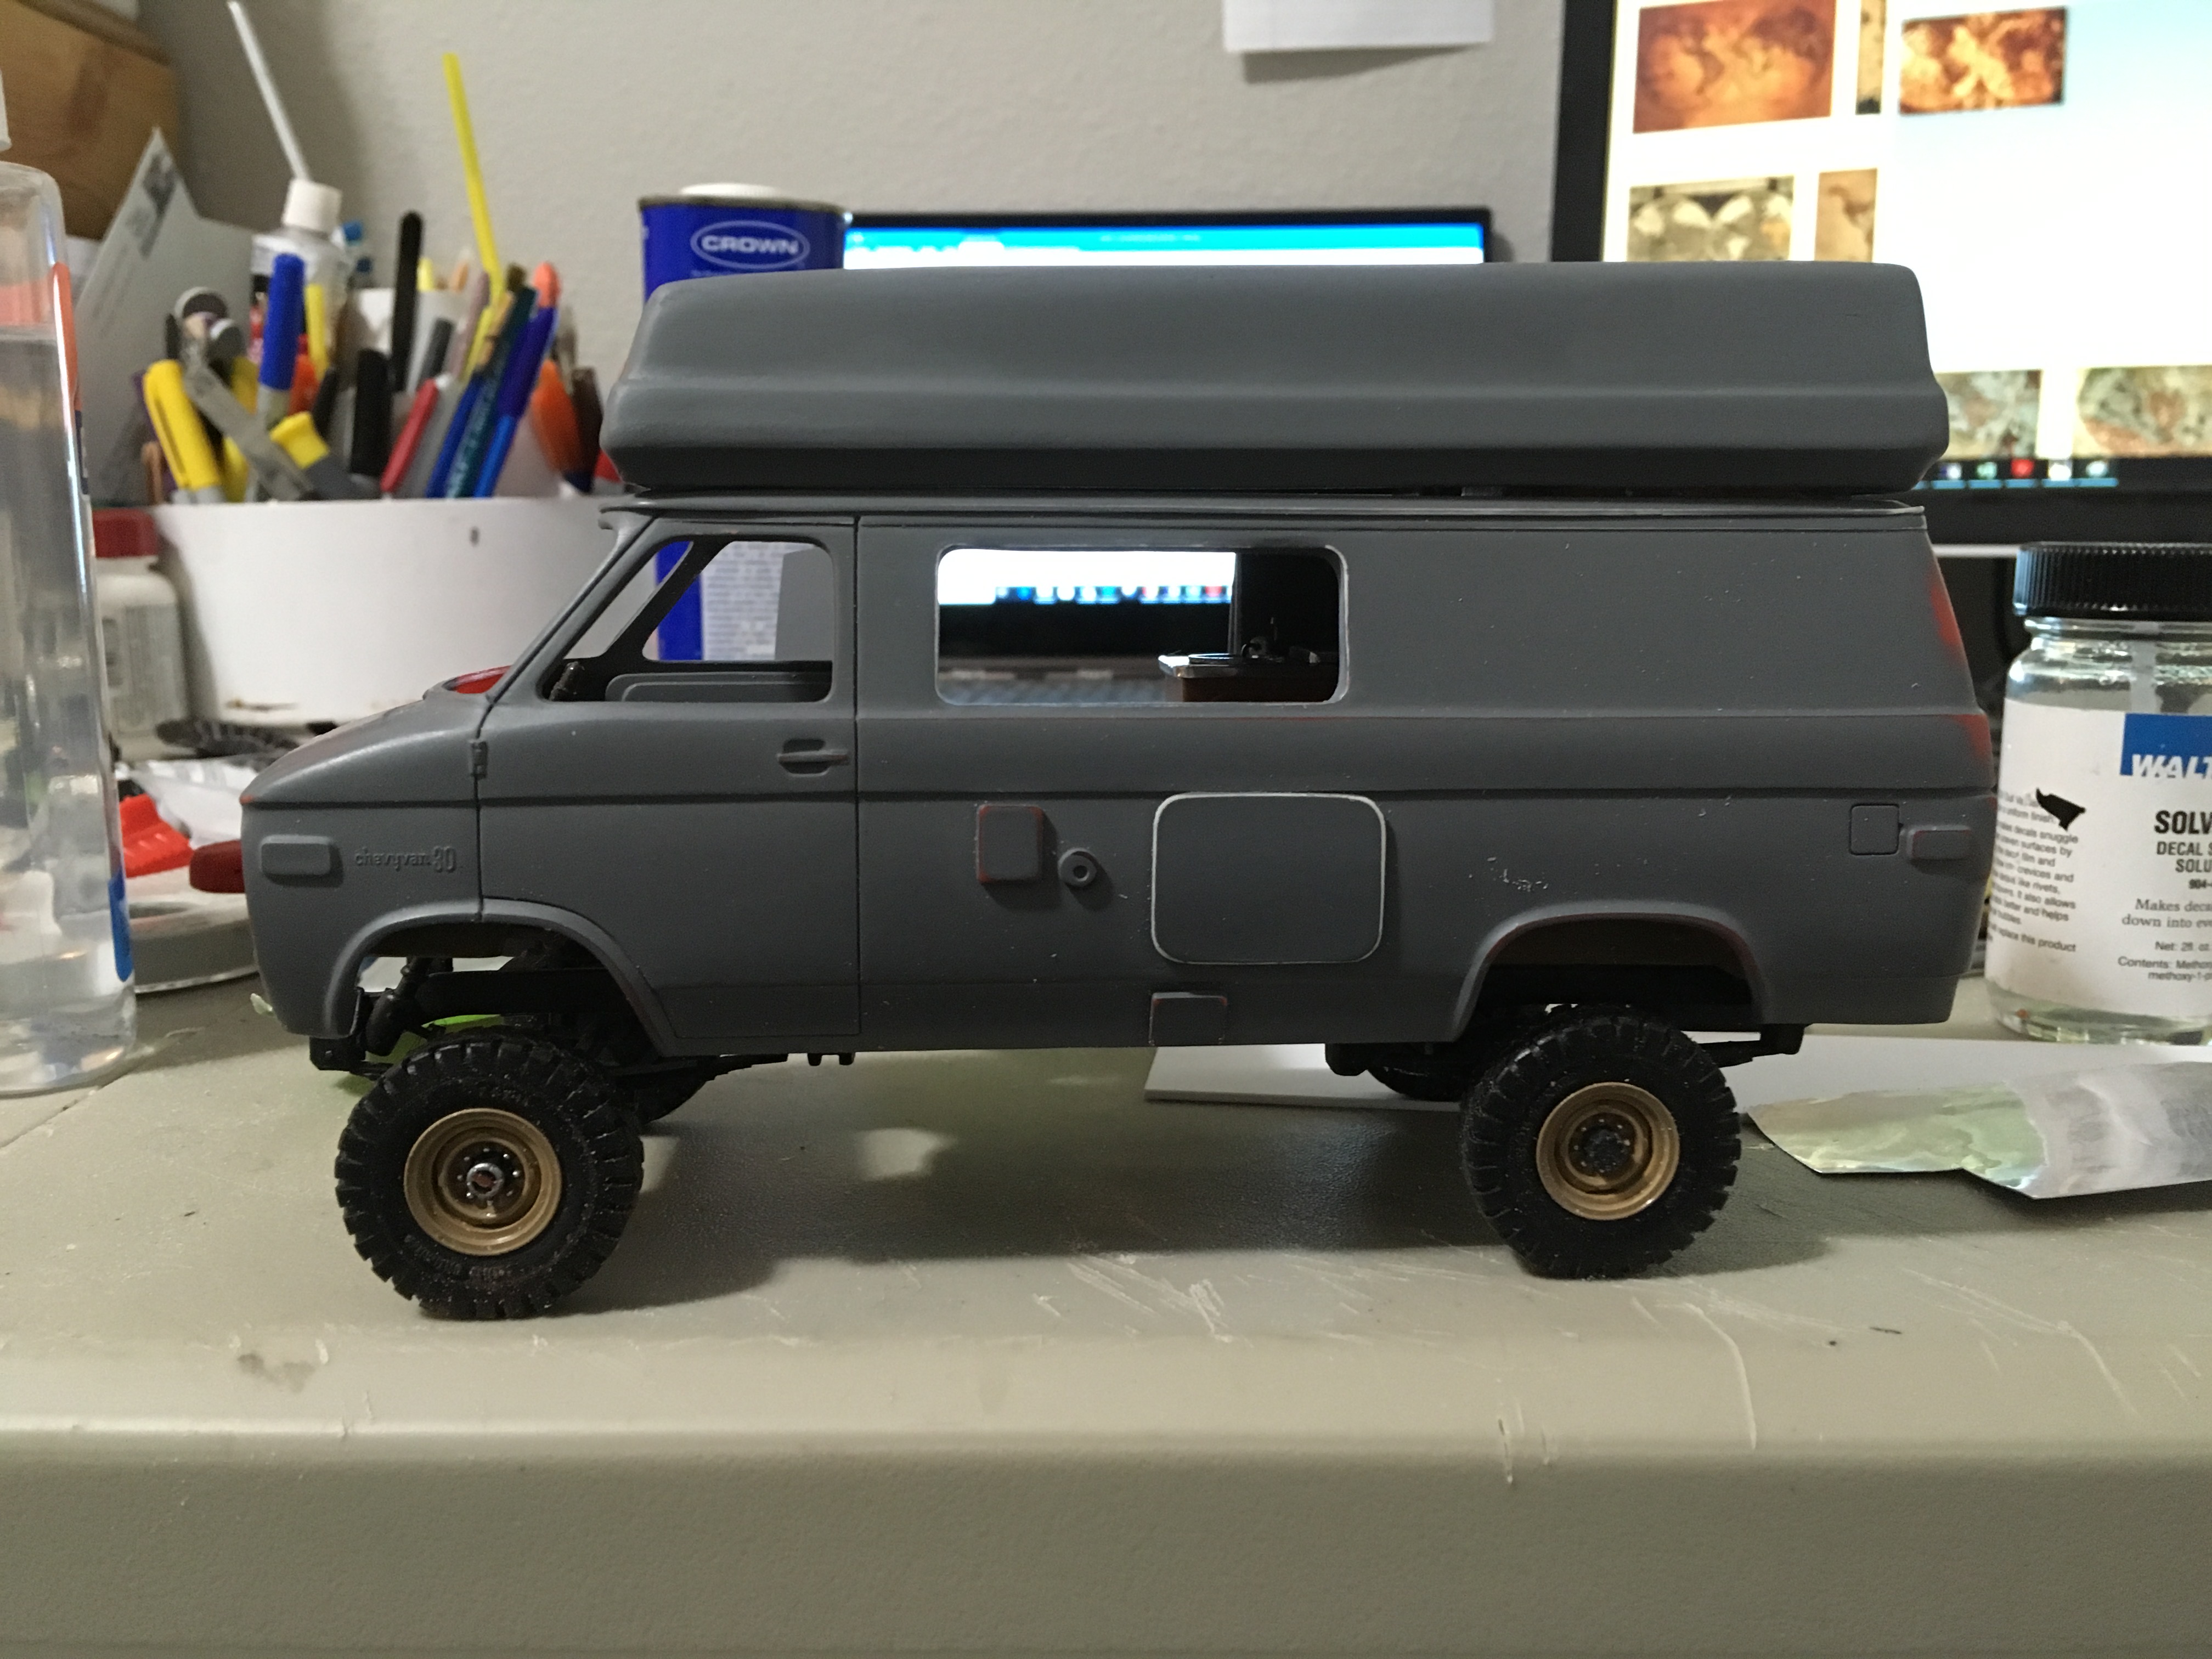
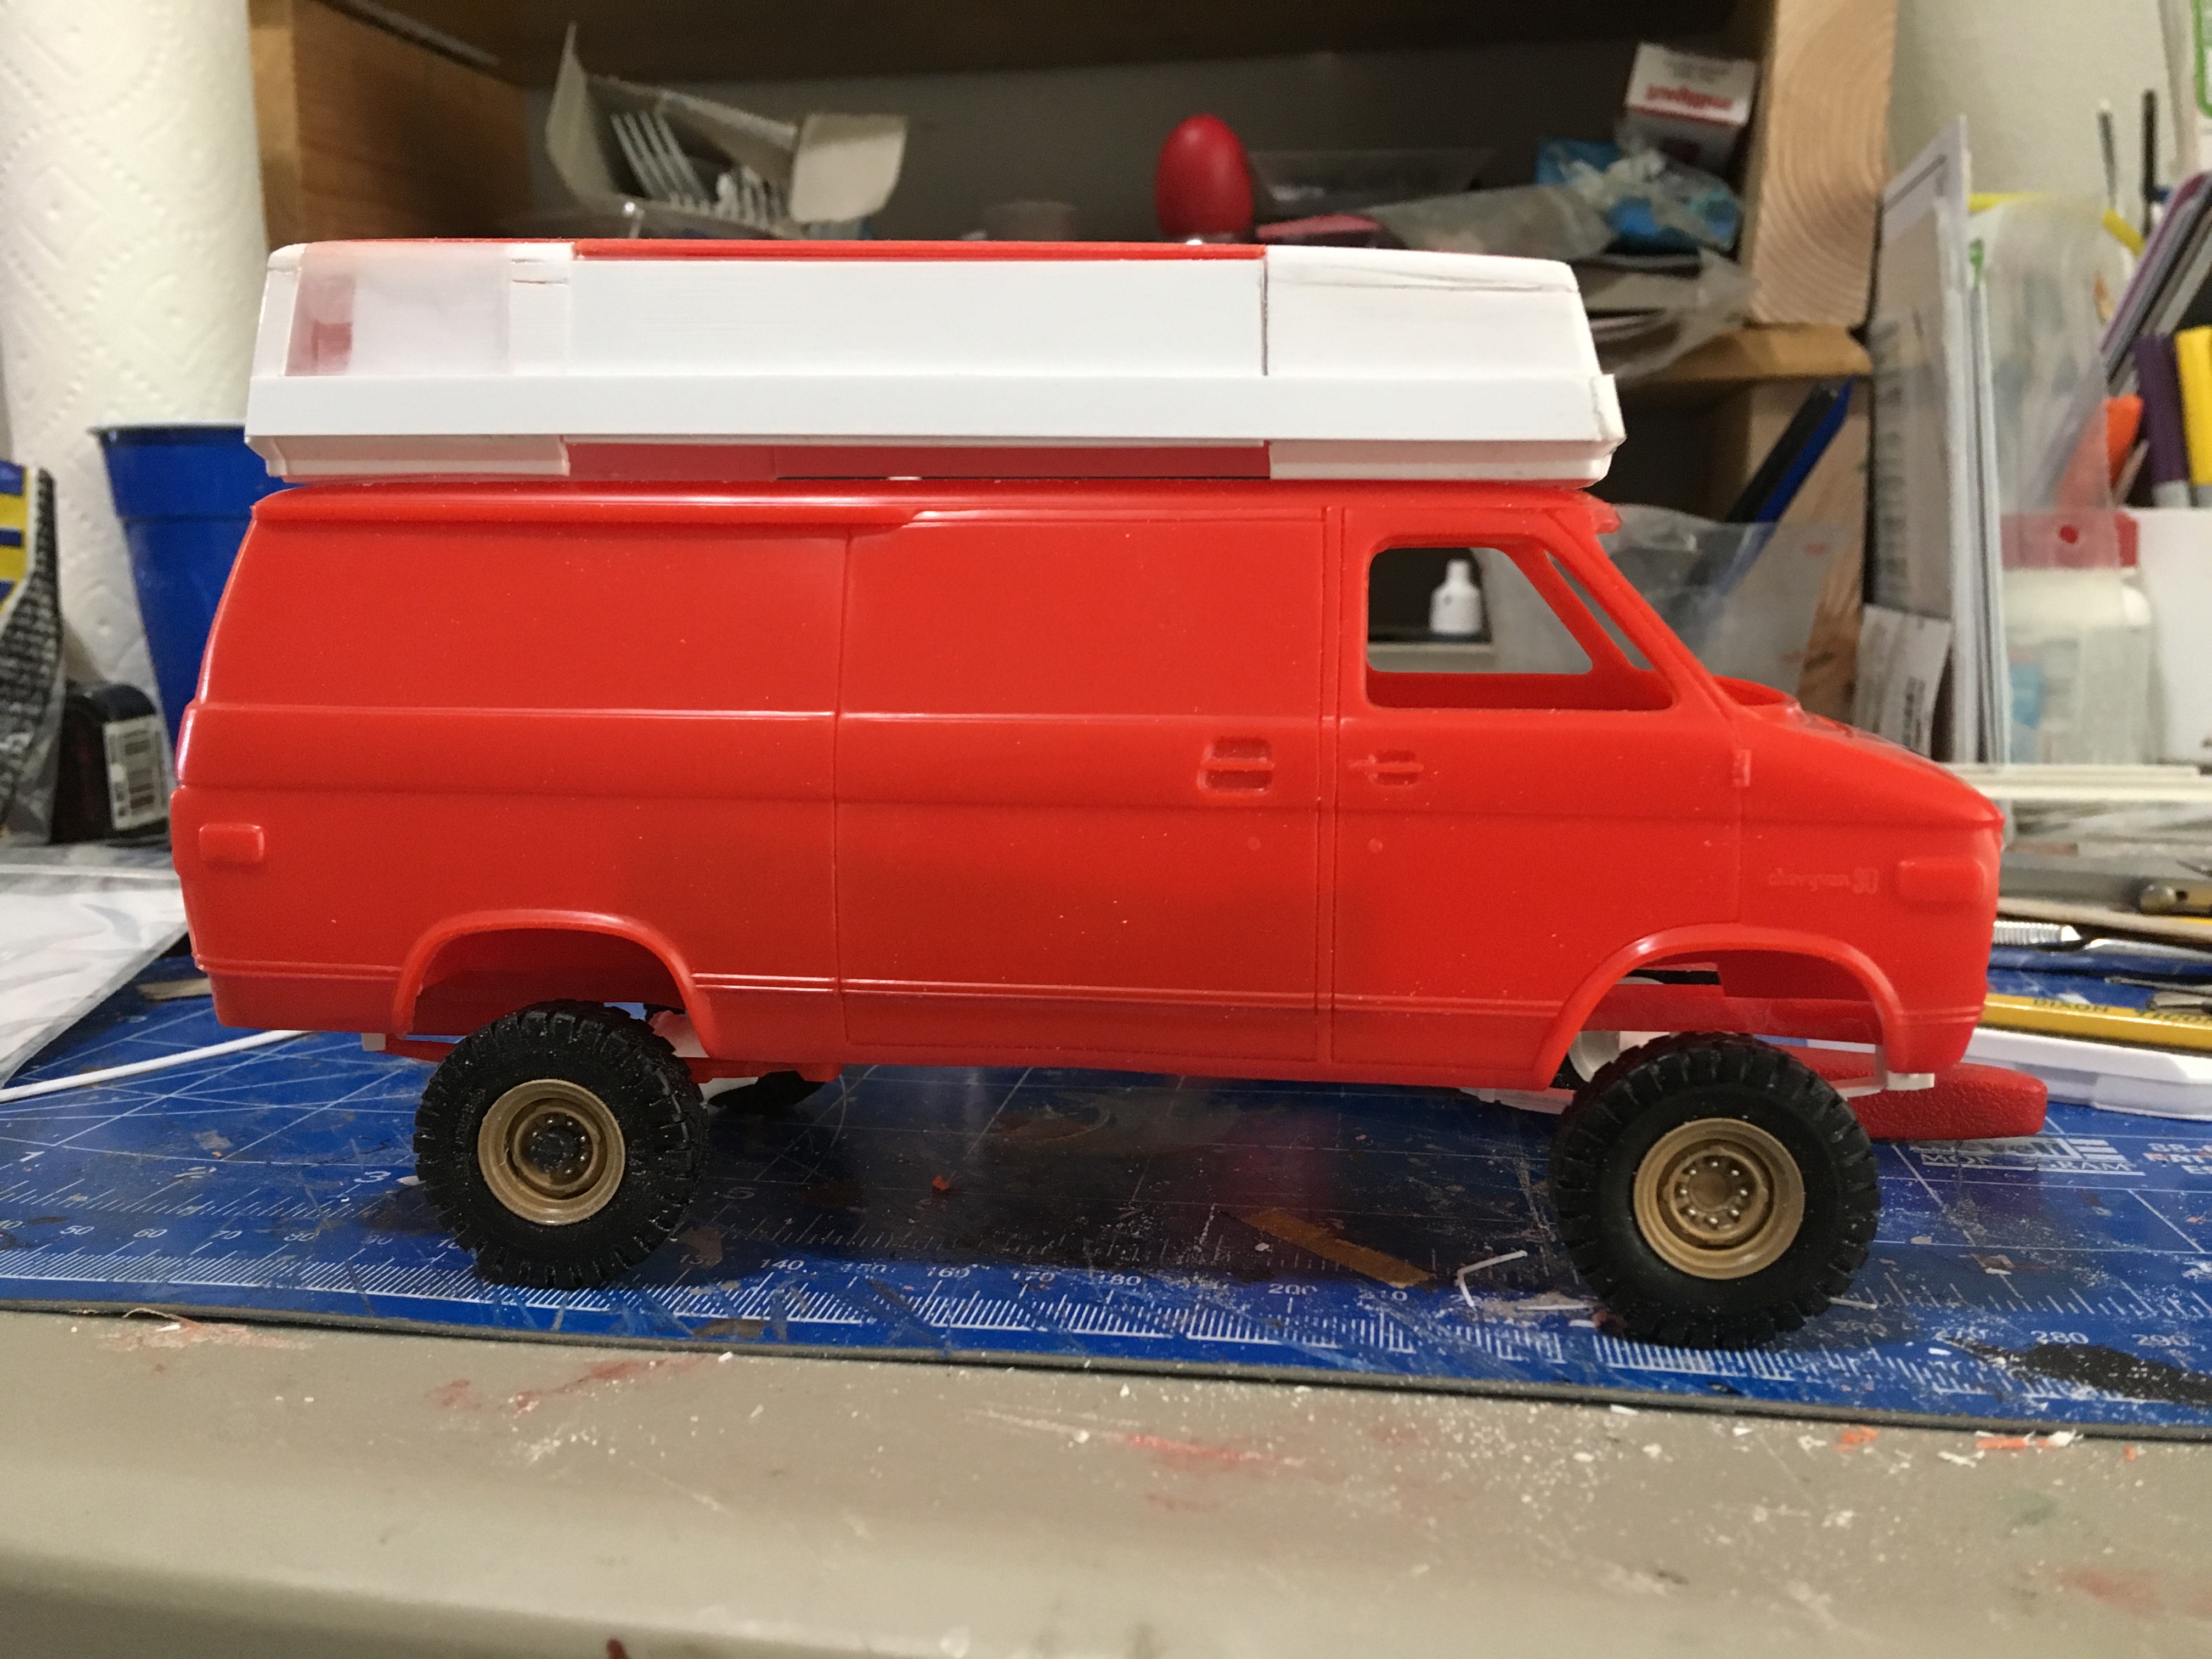
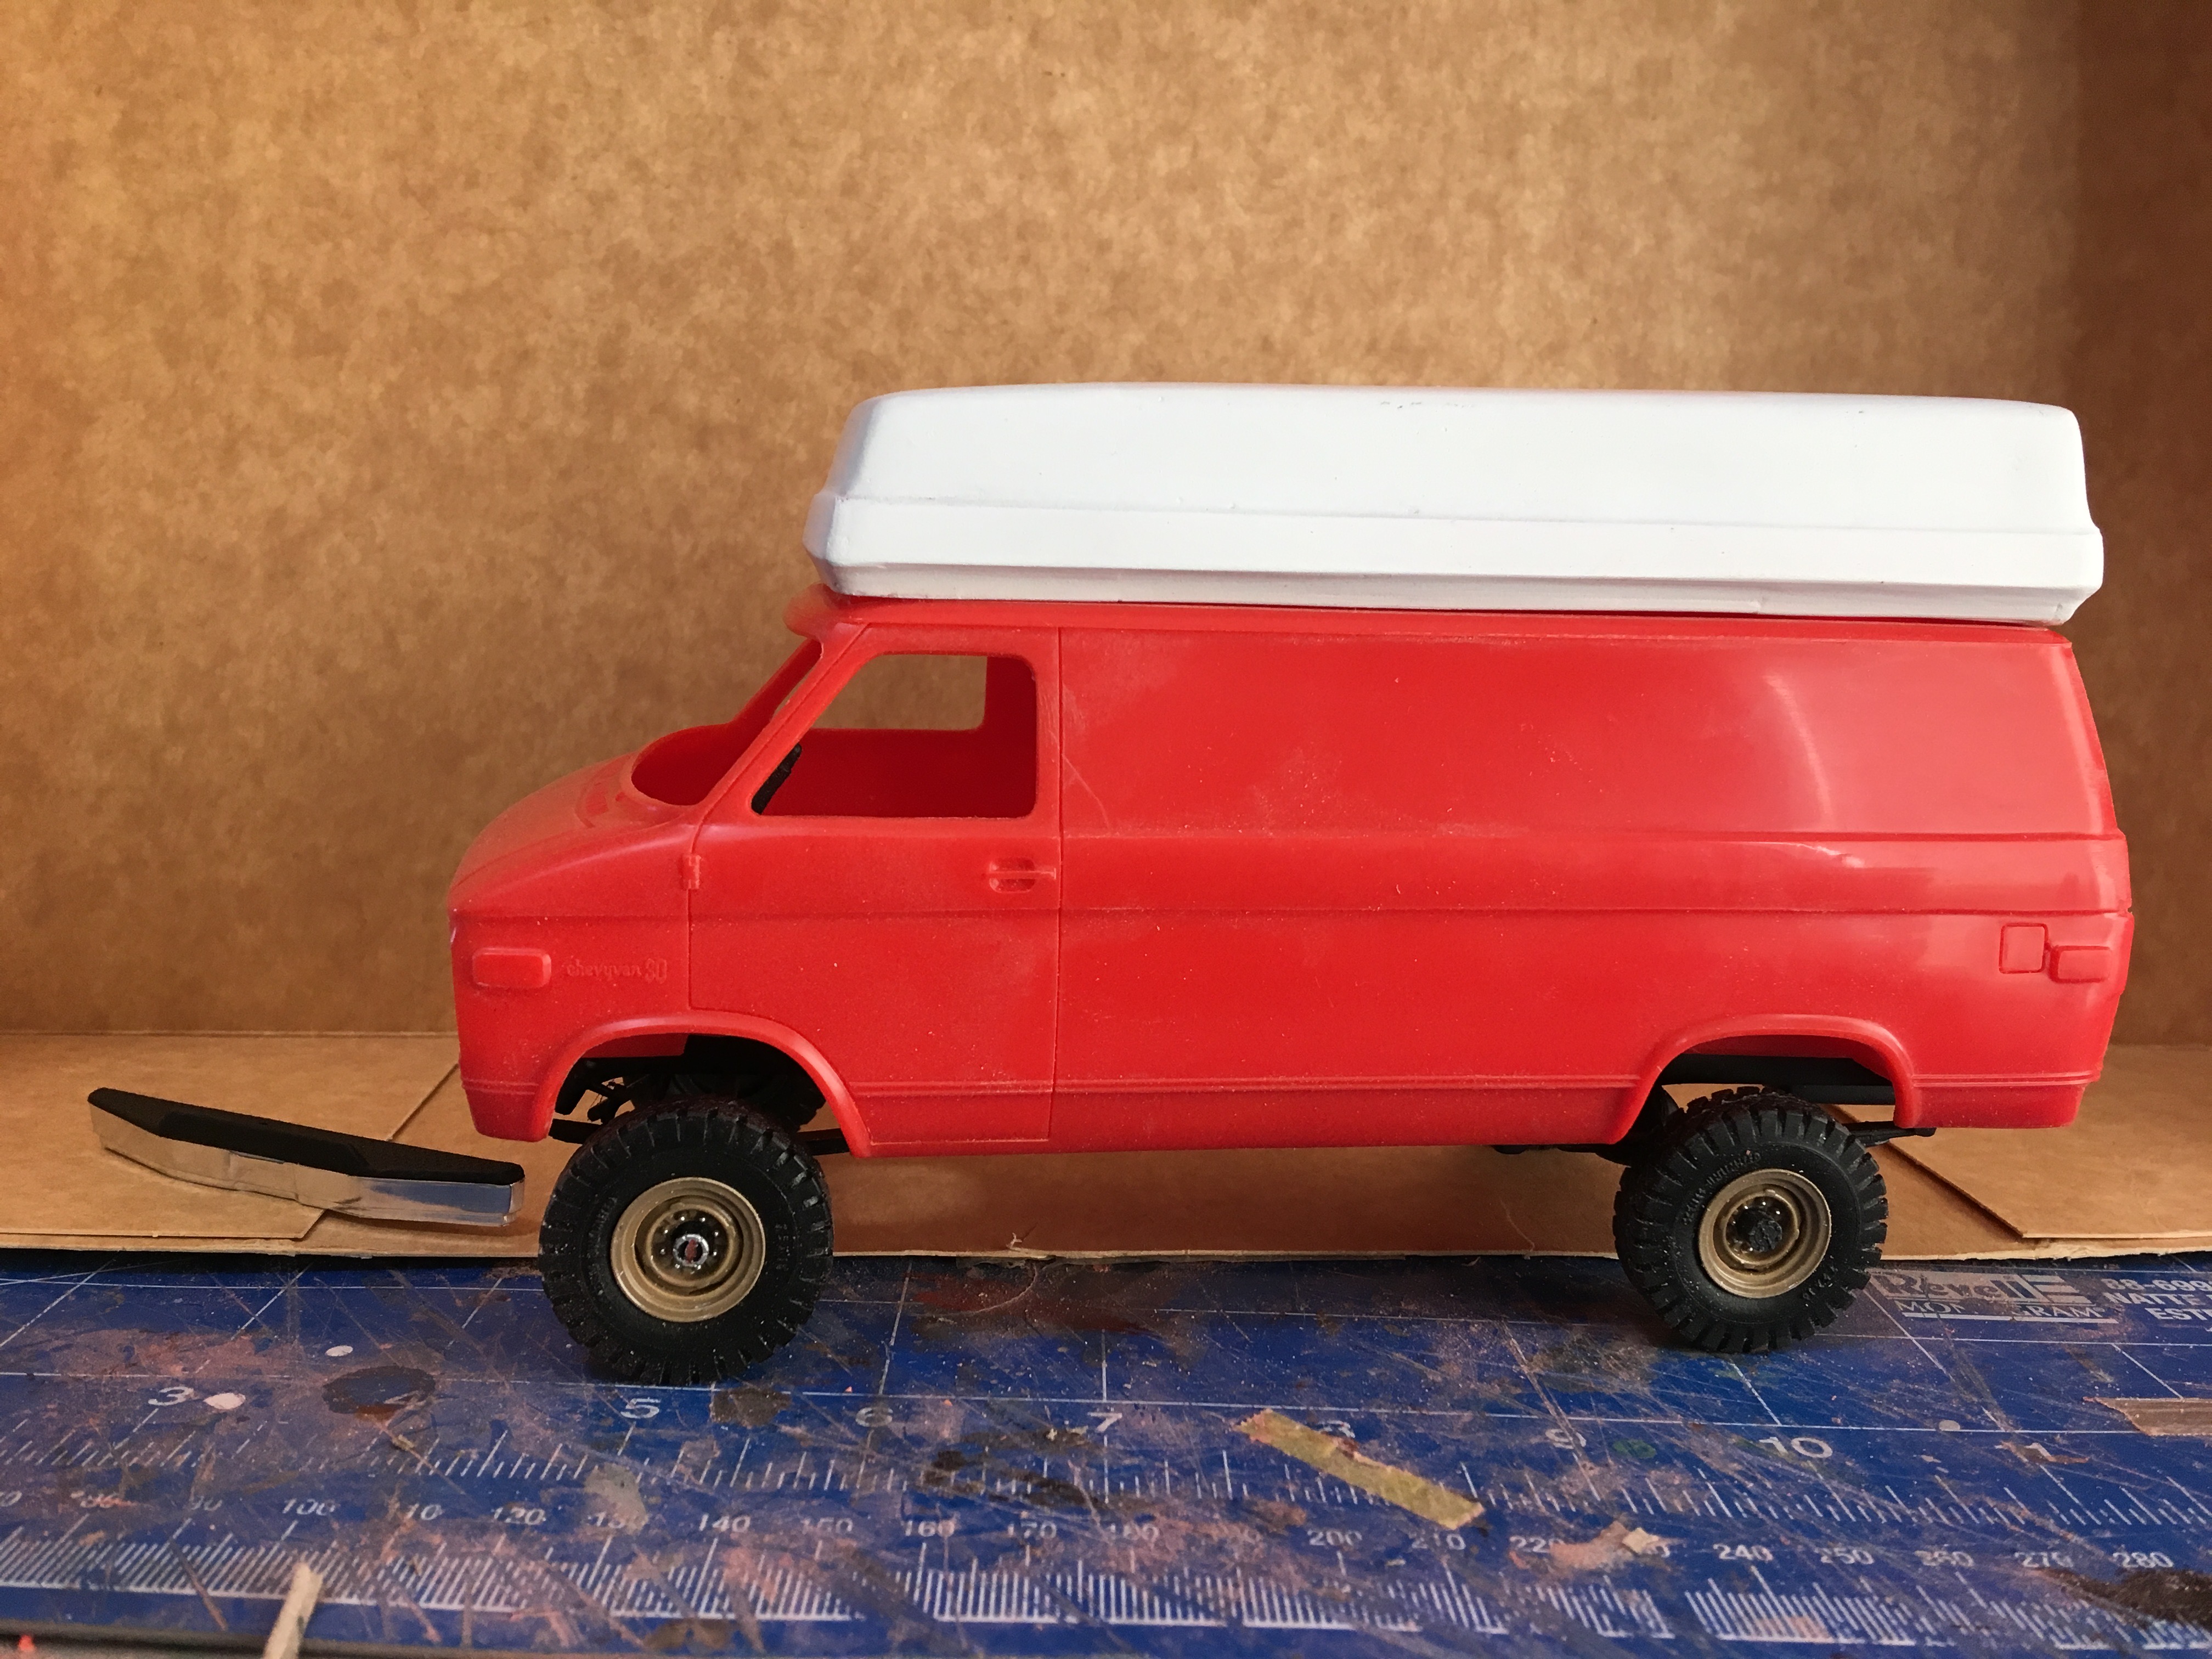
So, this is the current look of the van. I have the top and body in primer. Interior is about 80% complete. Front seats are TBD as well as the floor covering. Looking for a vinyl or wood pattern to print and put down. As for the paint, it will be a very 70's brown to match the era of the van. I have a trick up my sleeve for the door hinges, but waiting to see if it works out the way I want it to before I paint it. Oh, and one more mod, I took the sliding side door and converted it to 2 swing open doors. Better for a camper.
-
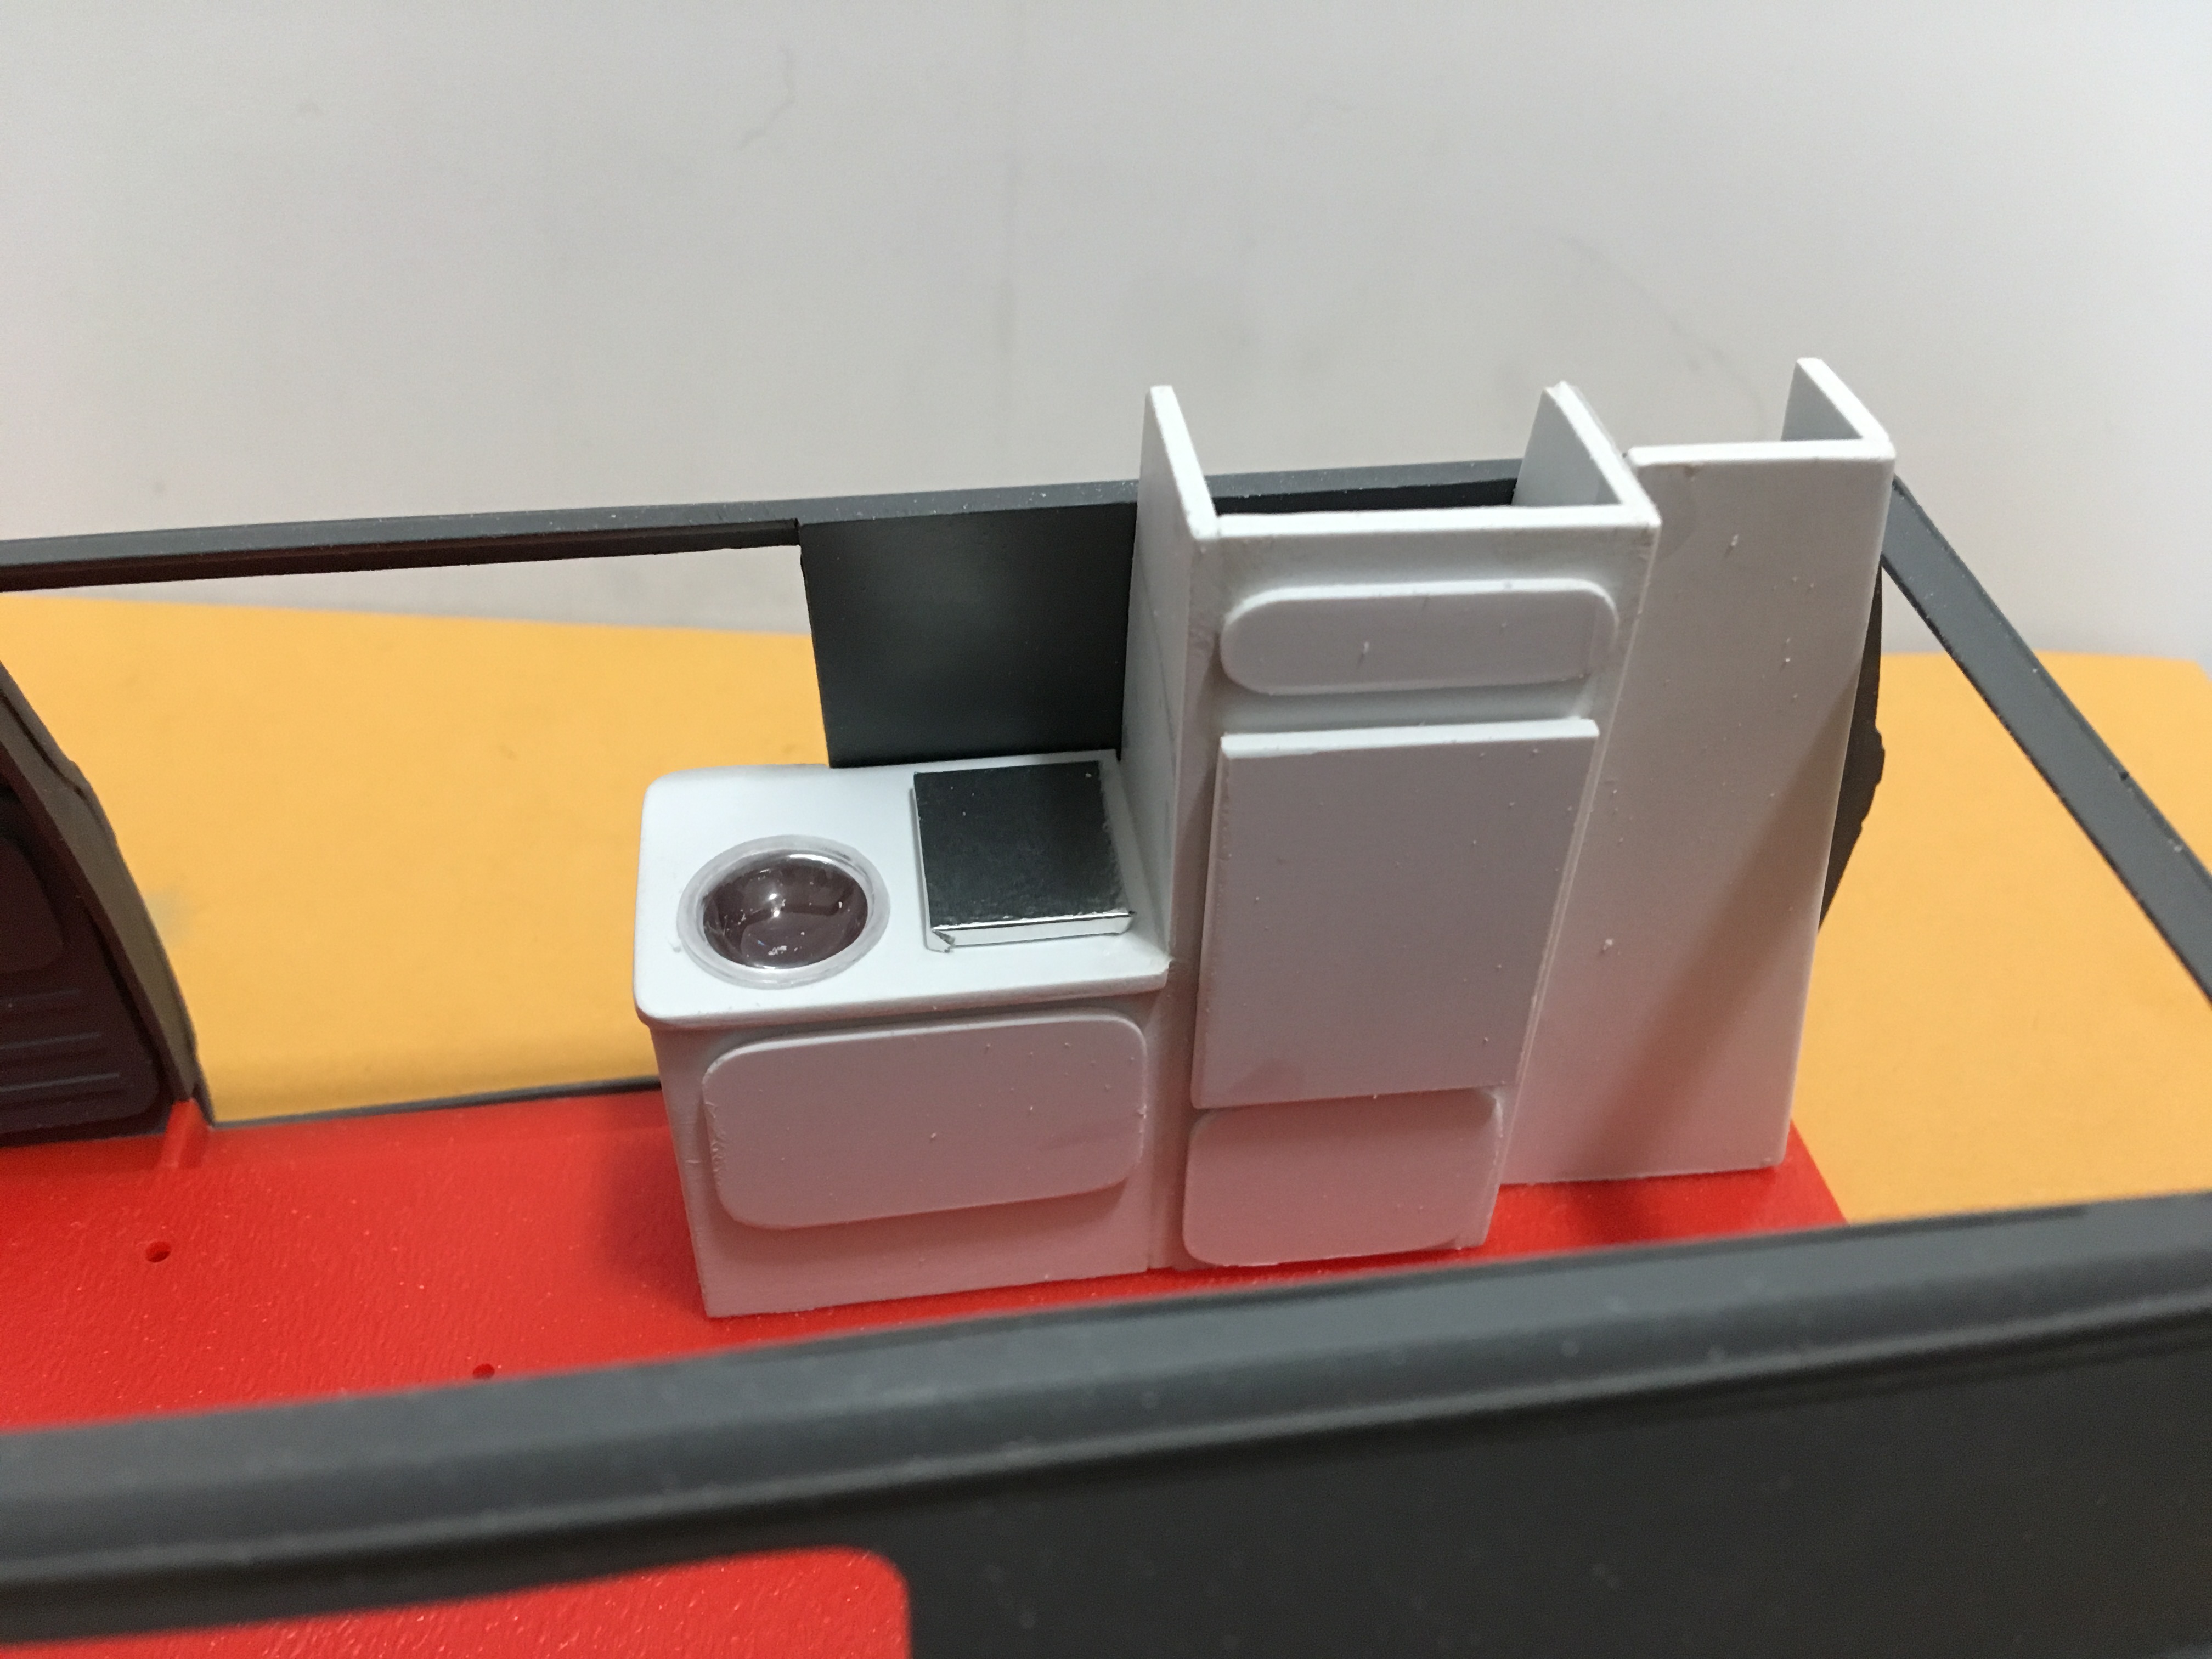
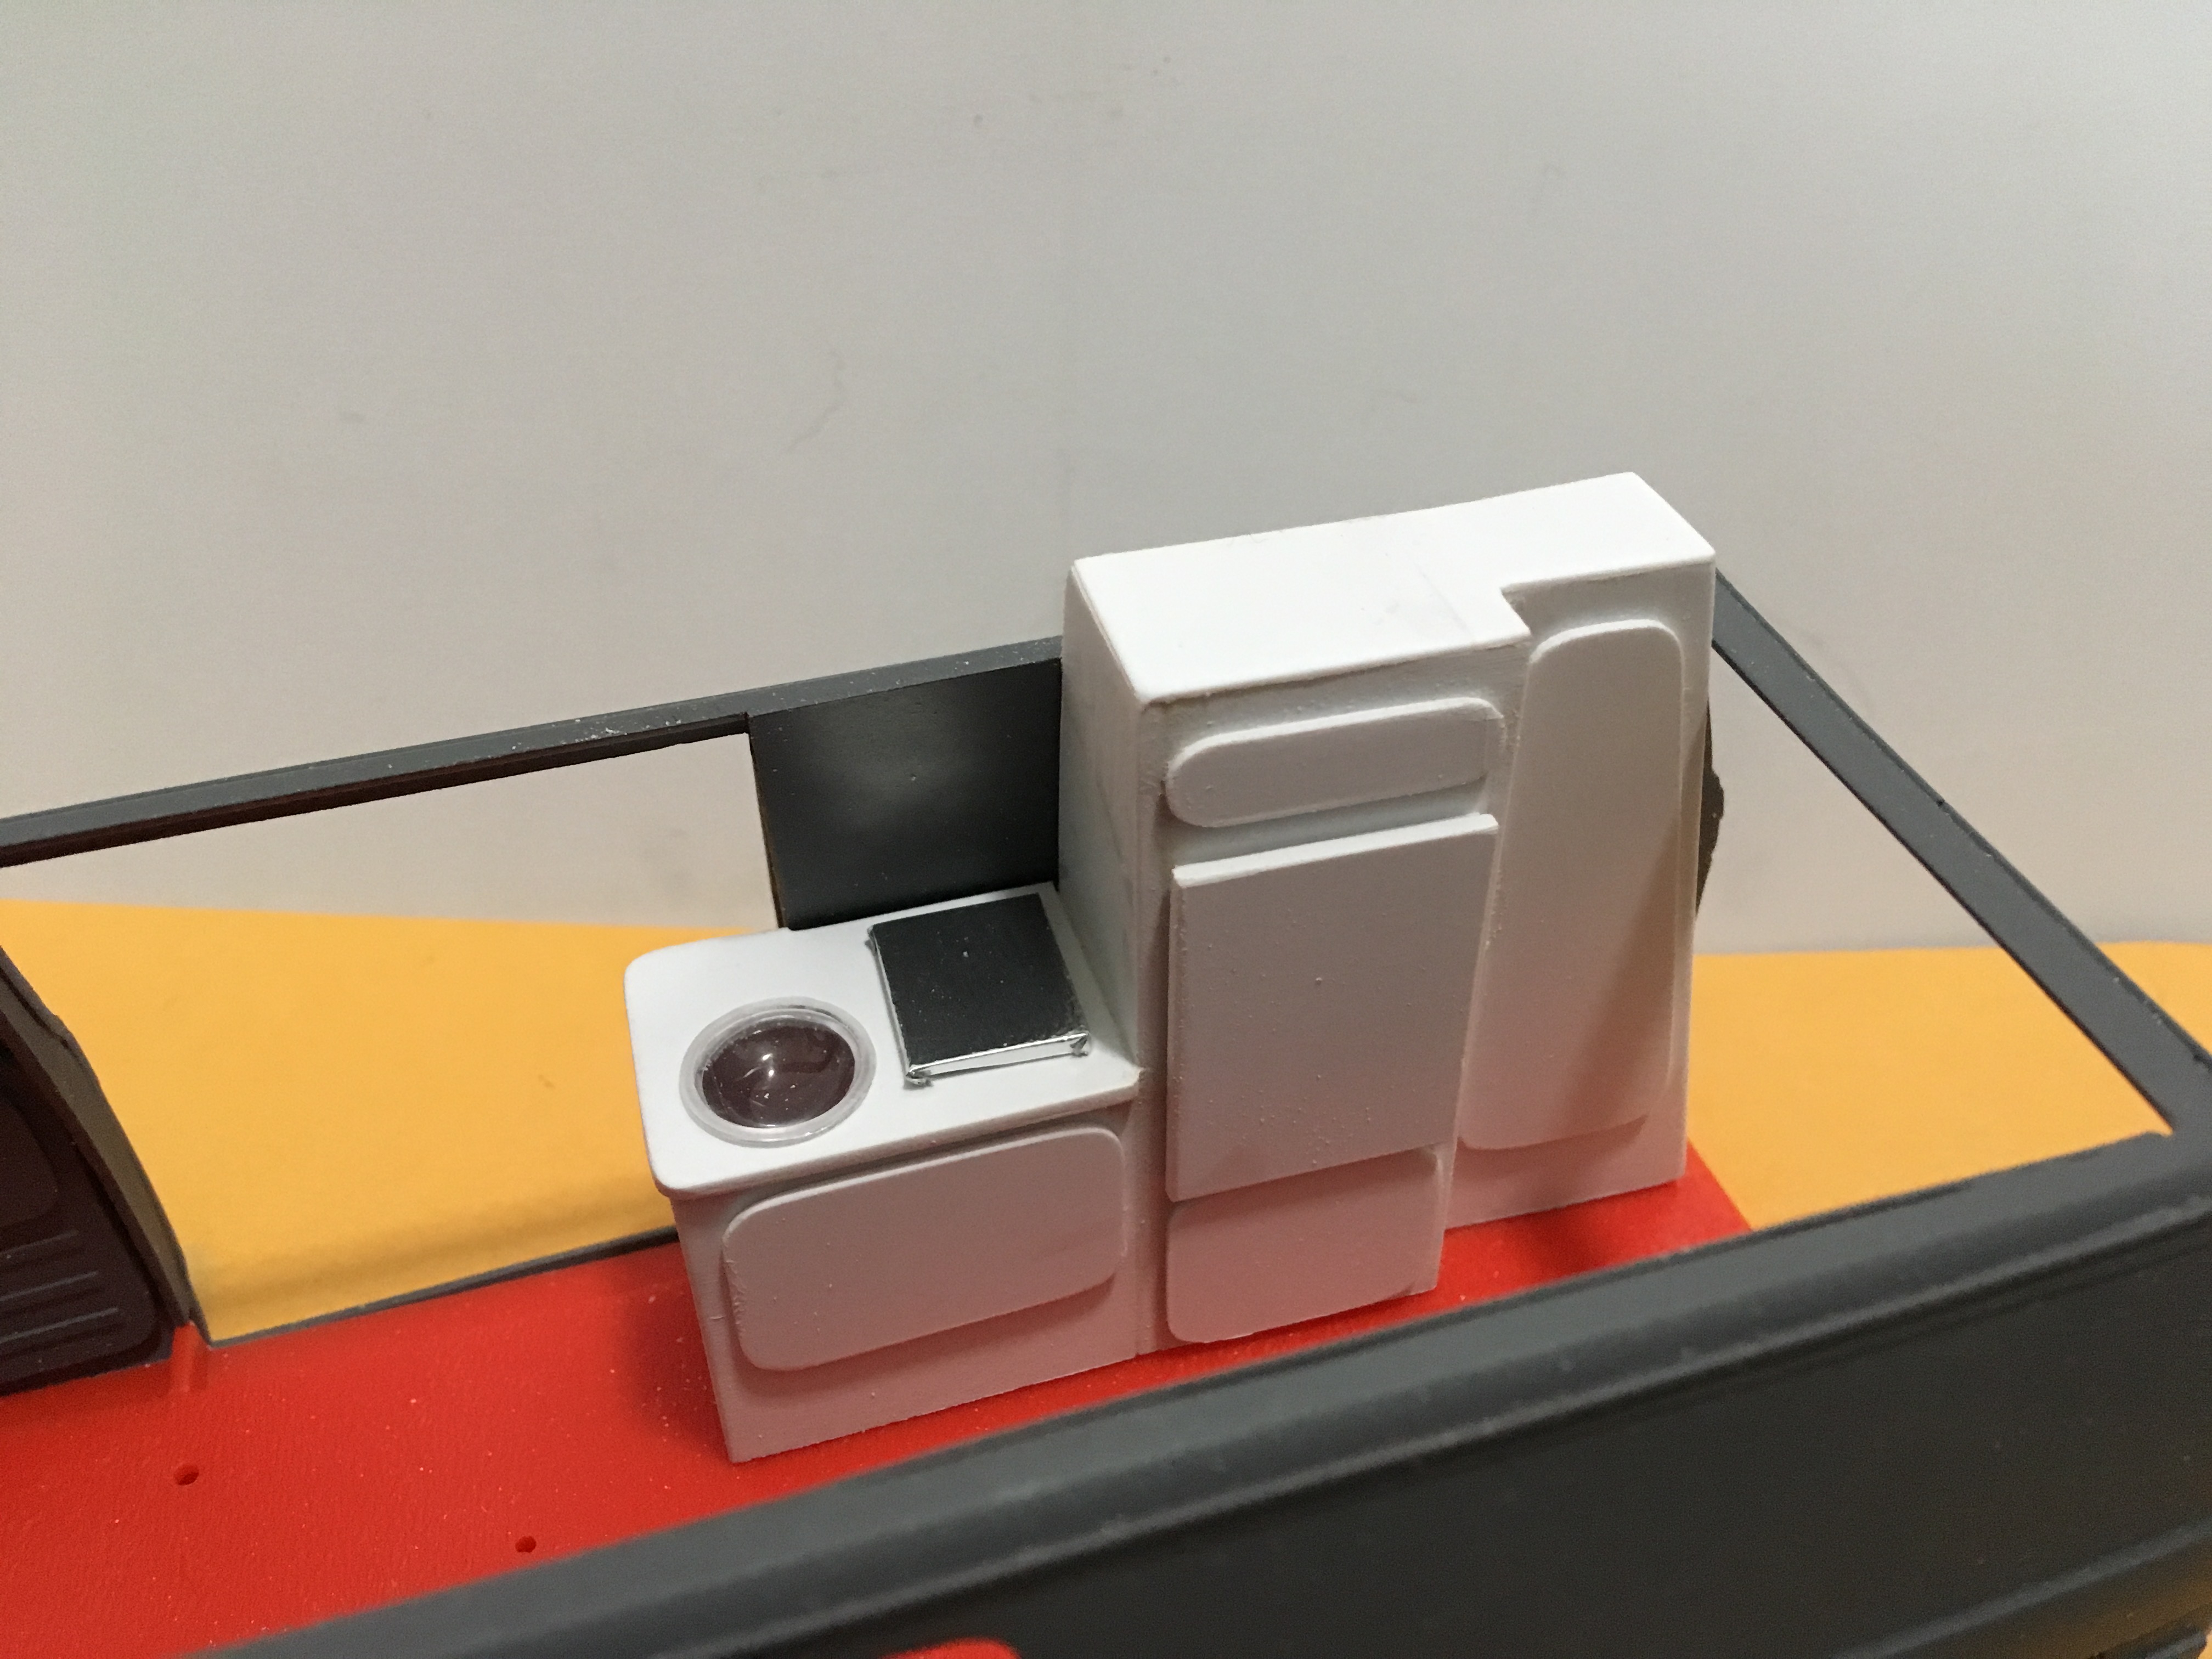
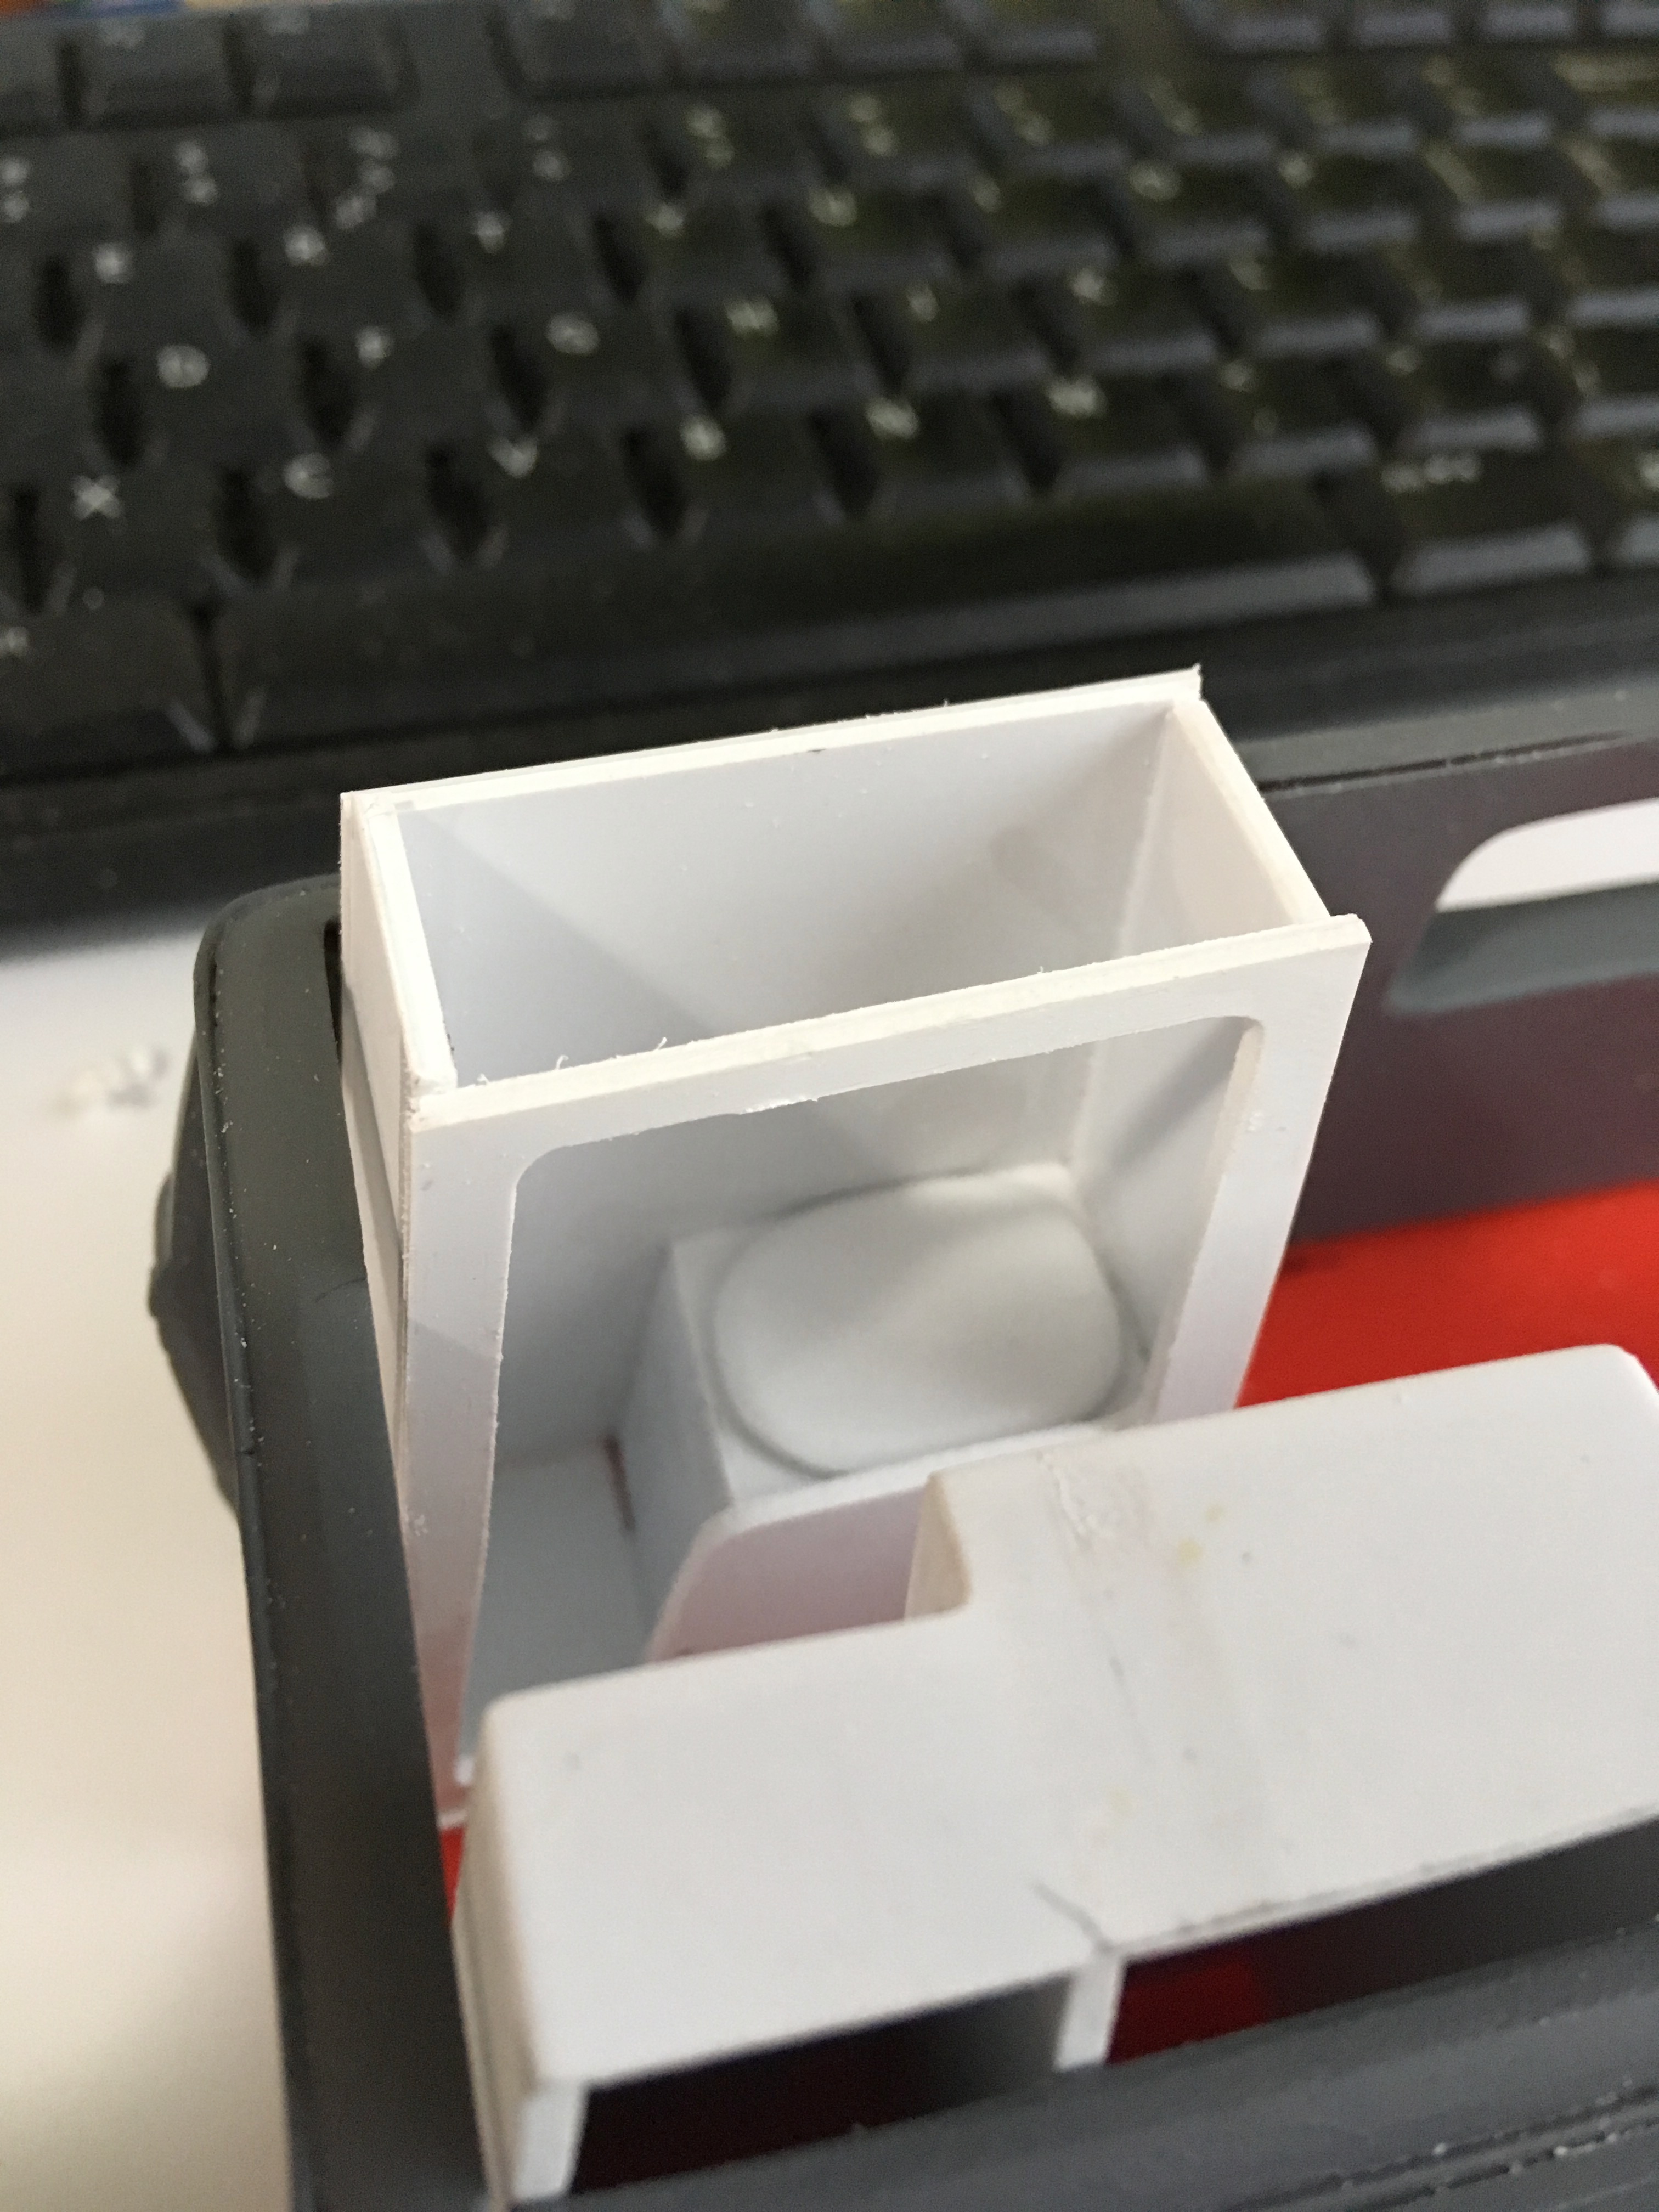
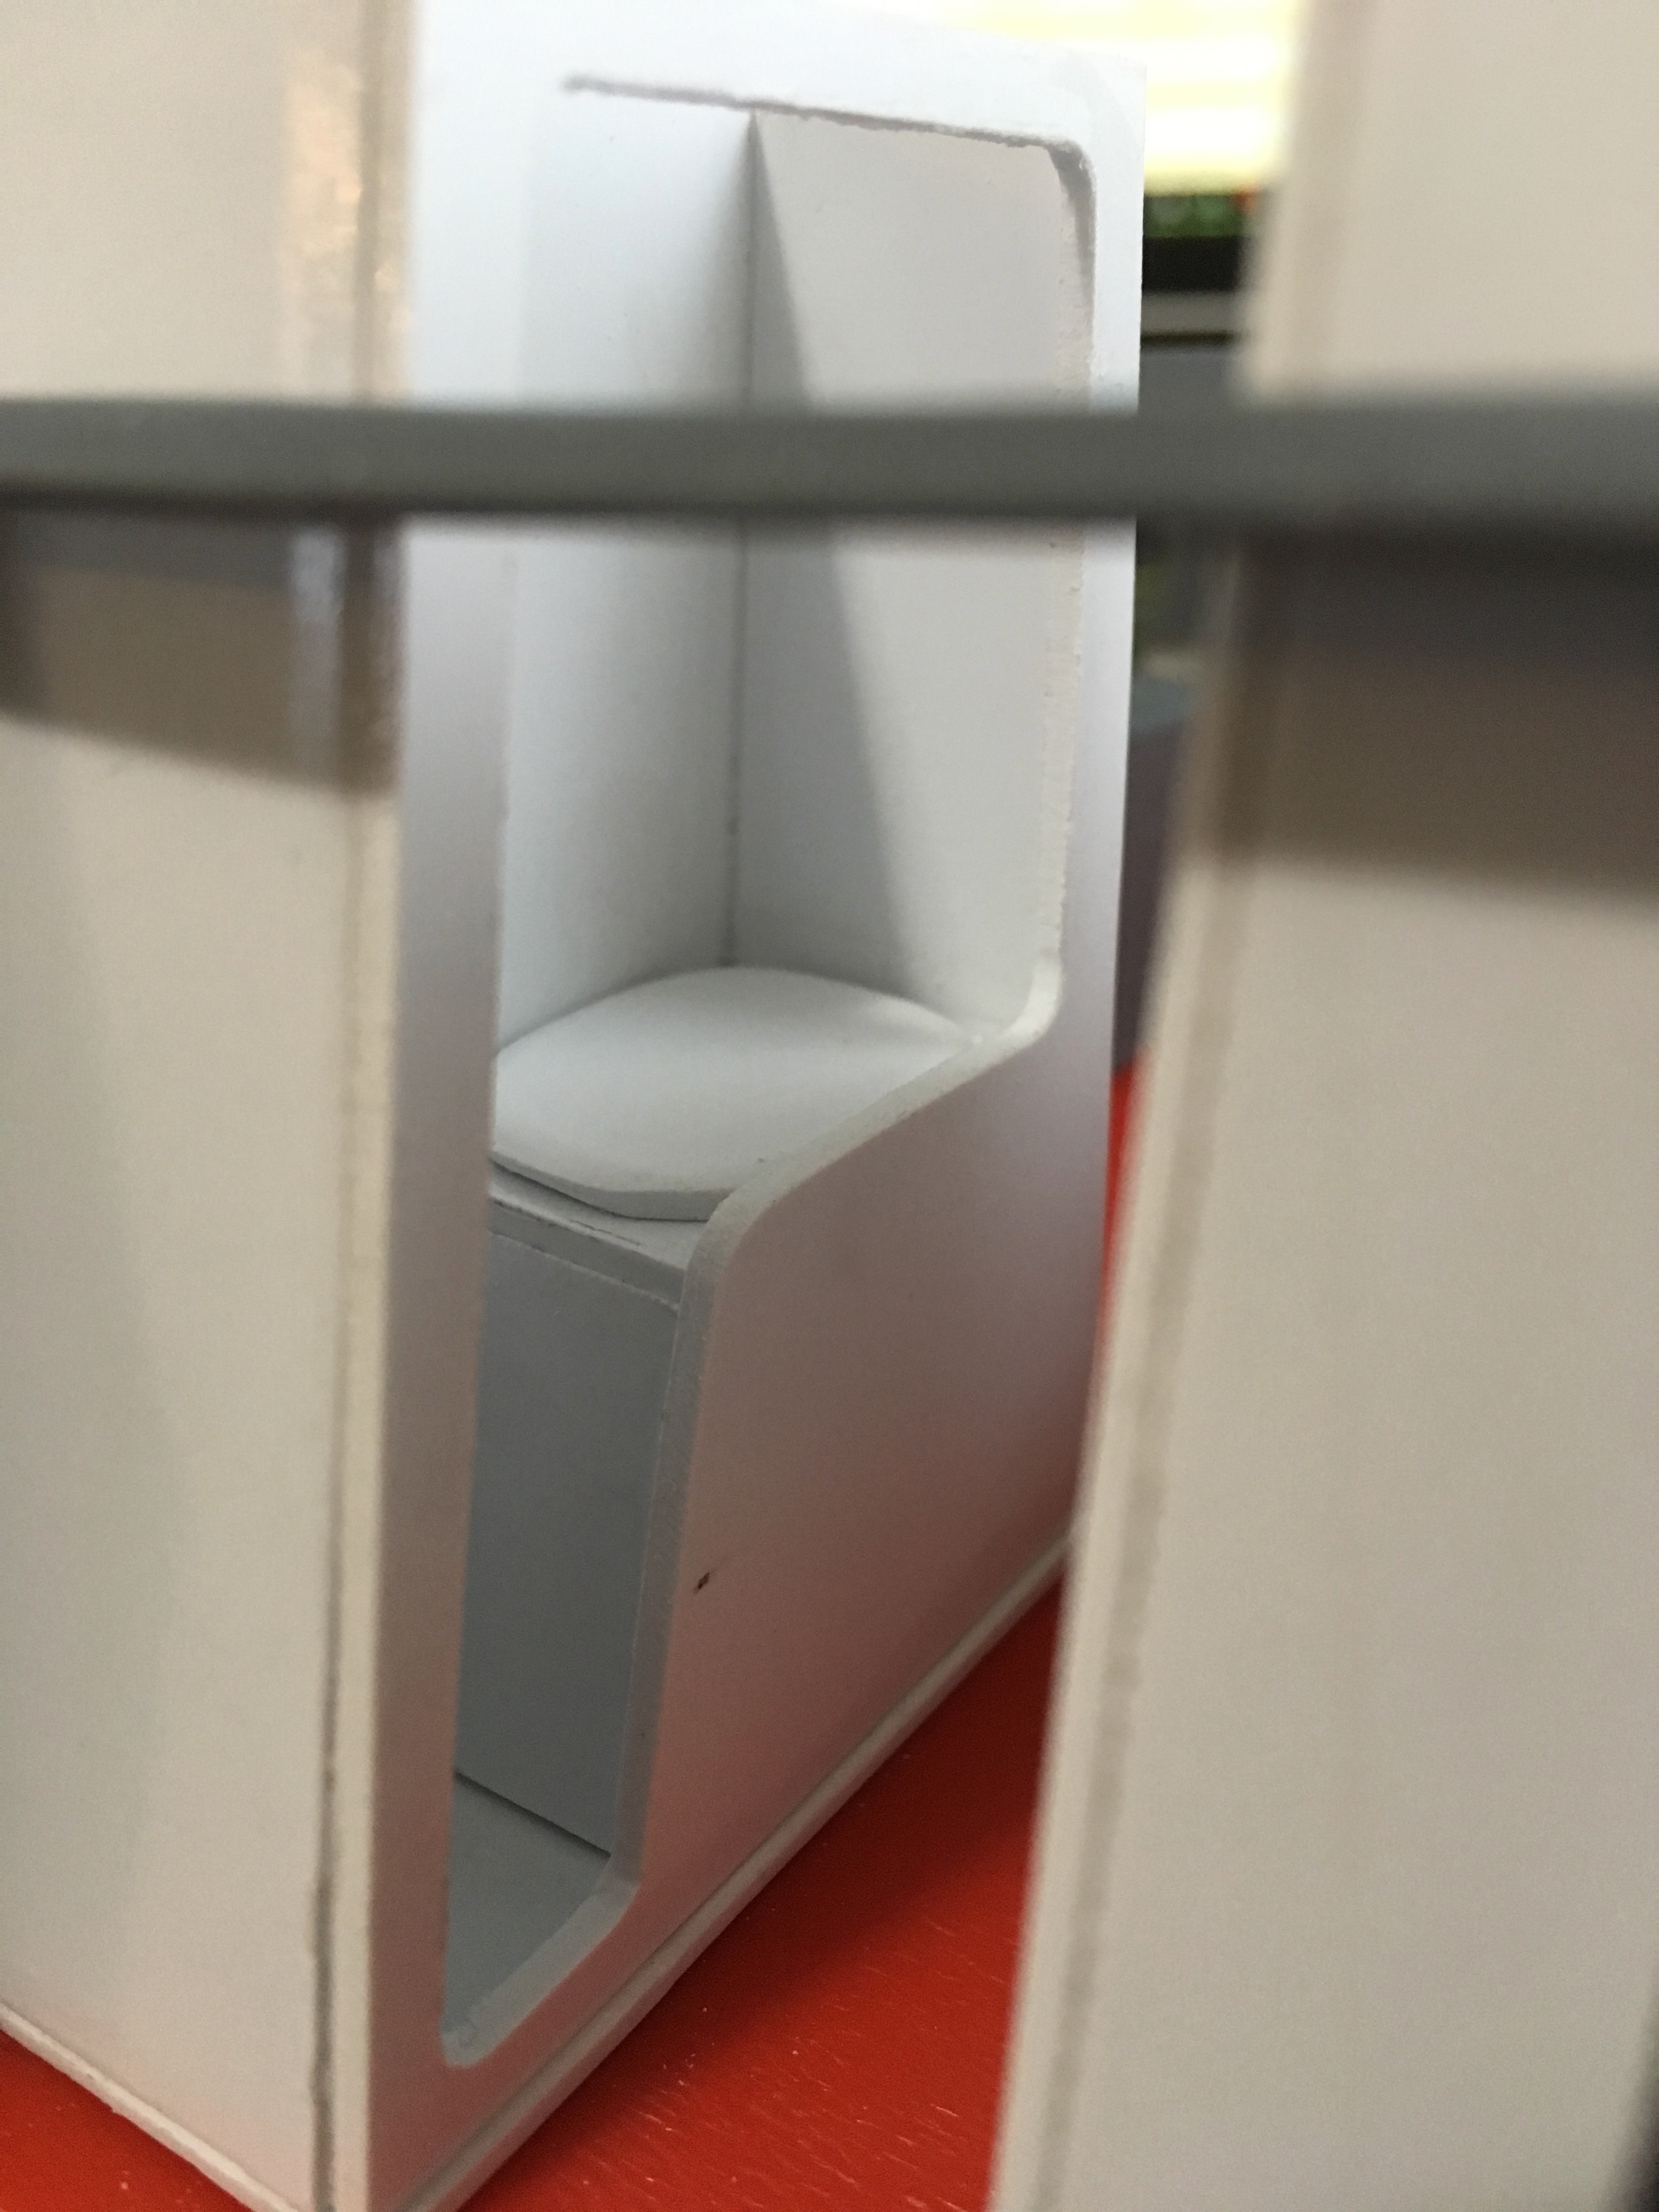
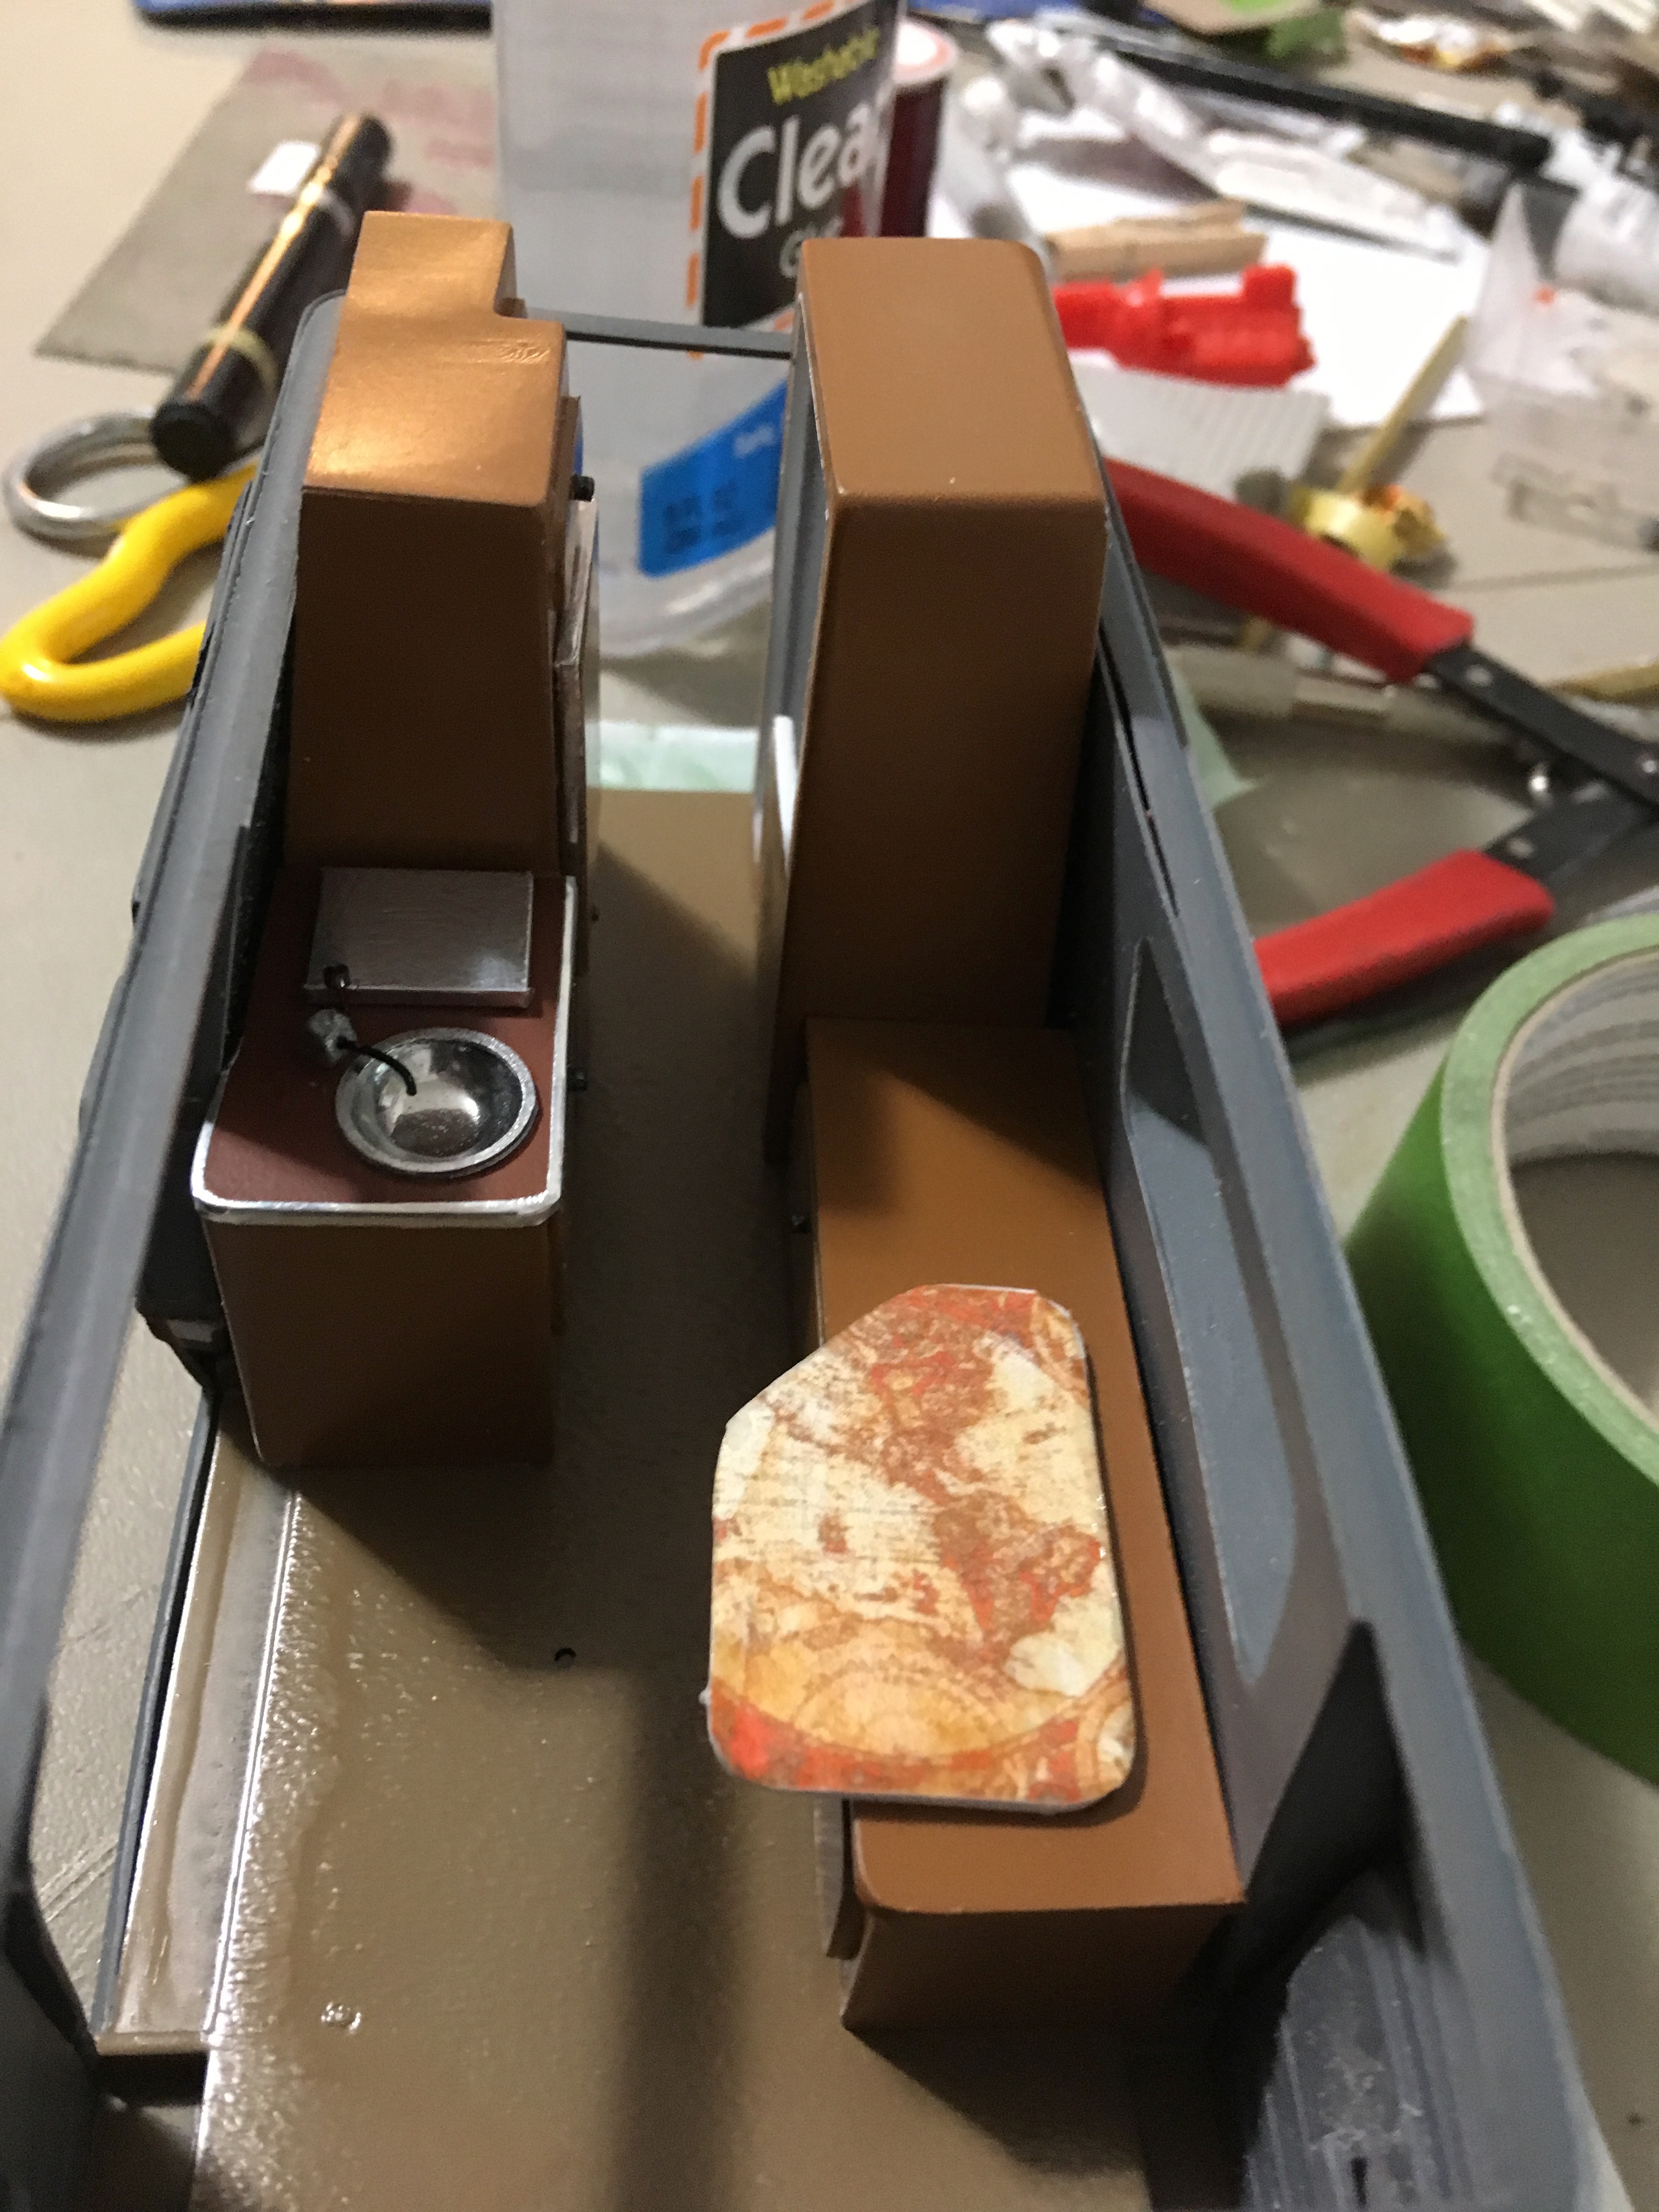
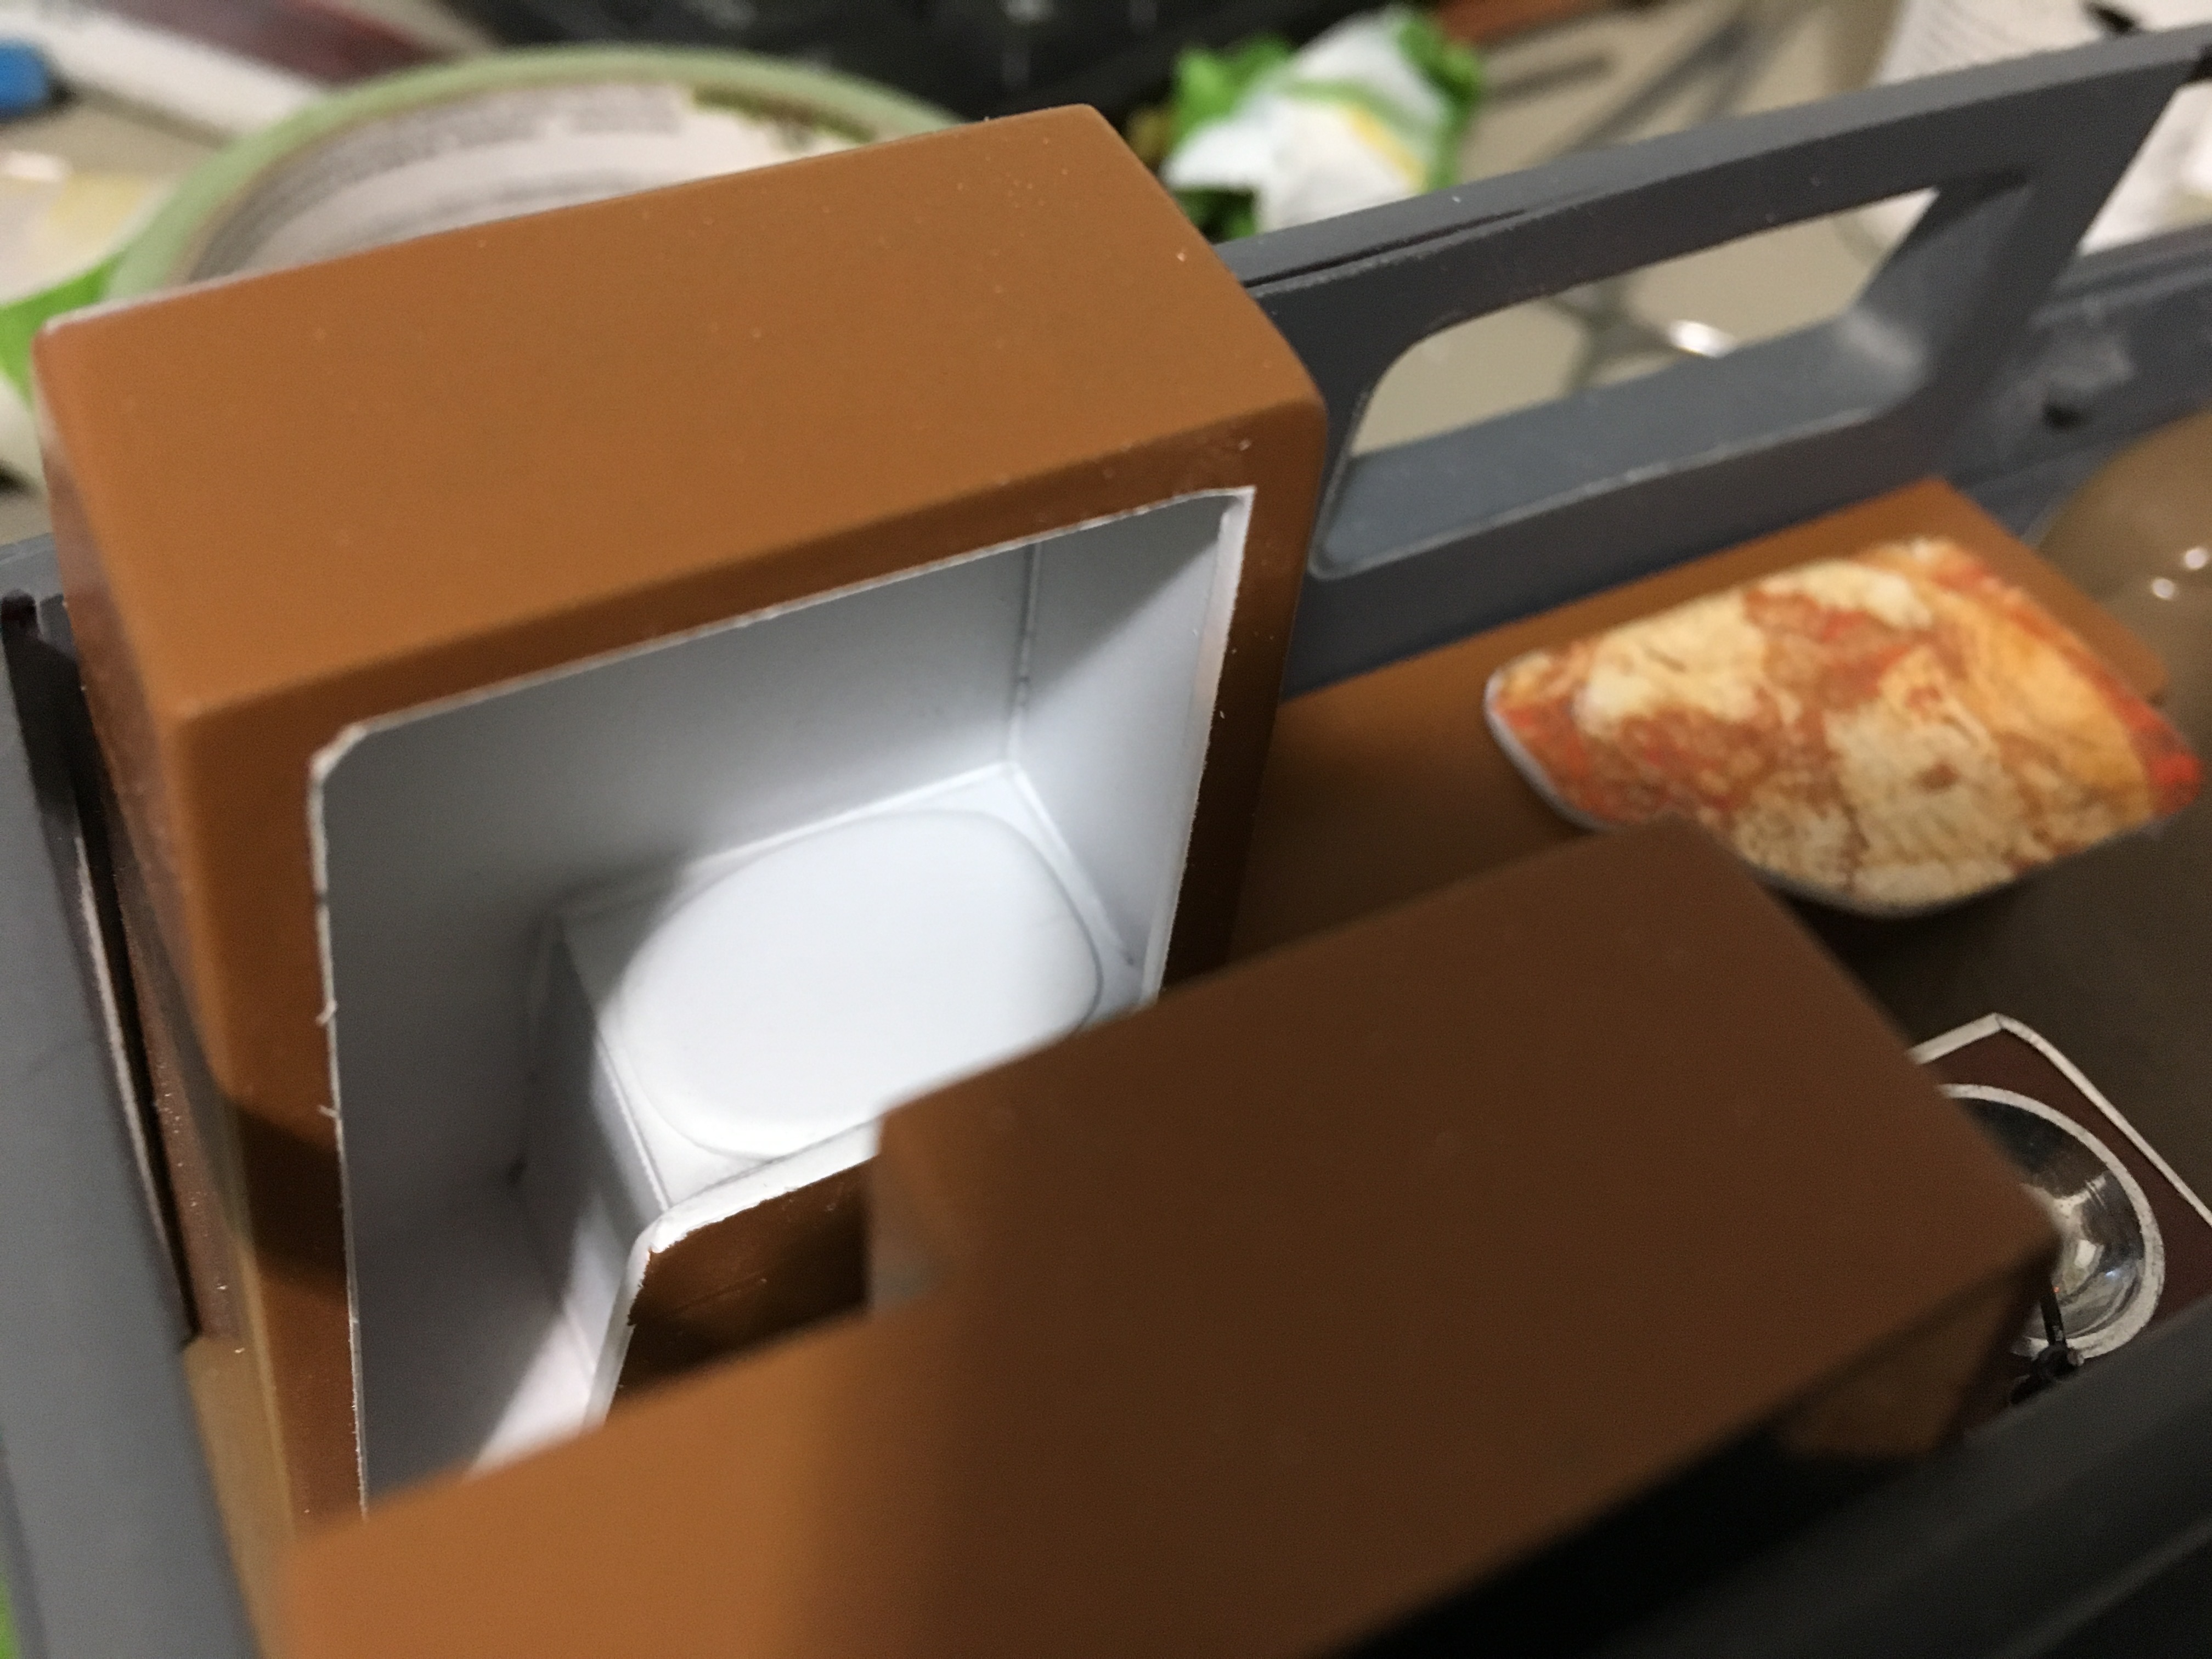
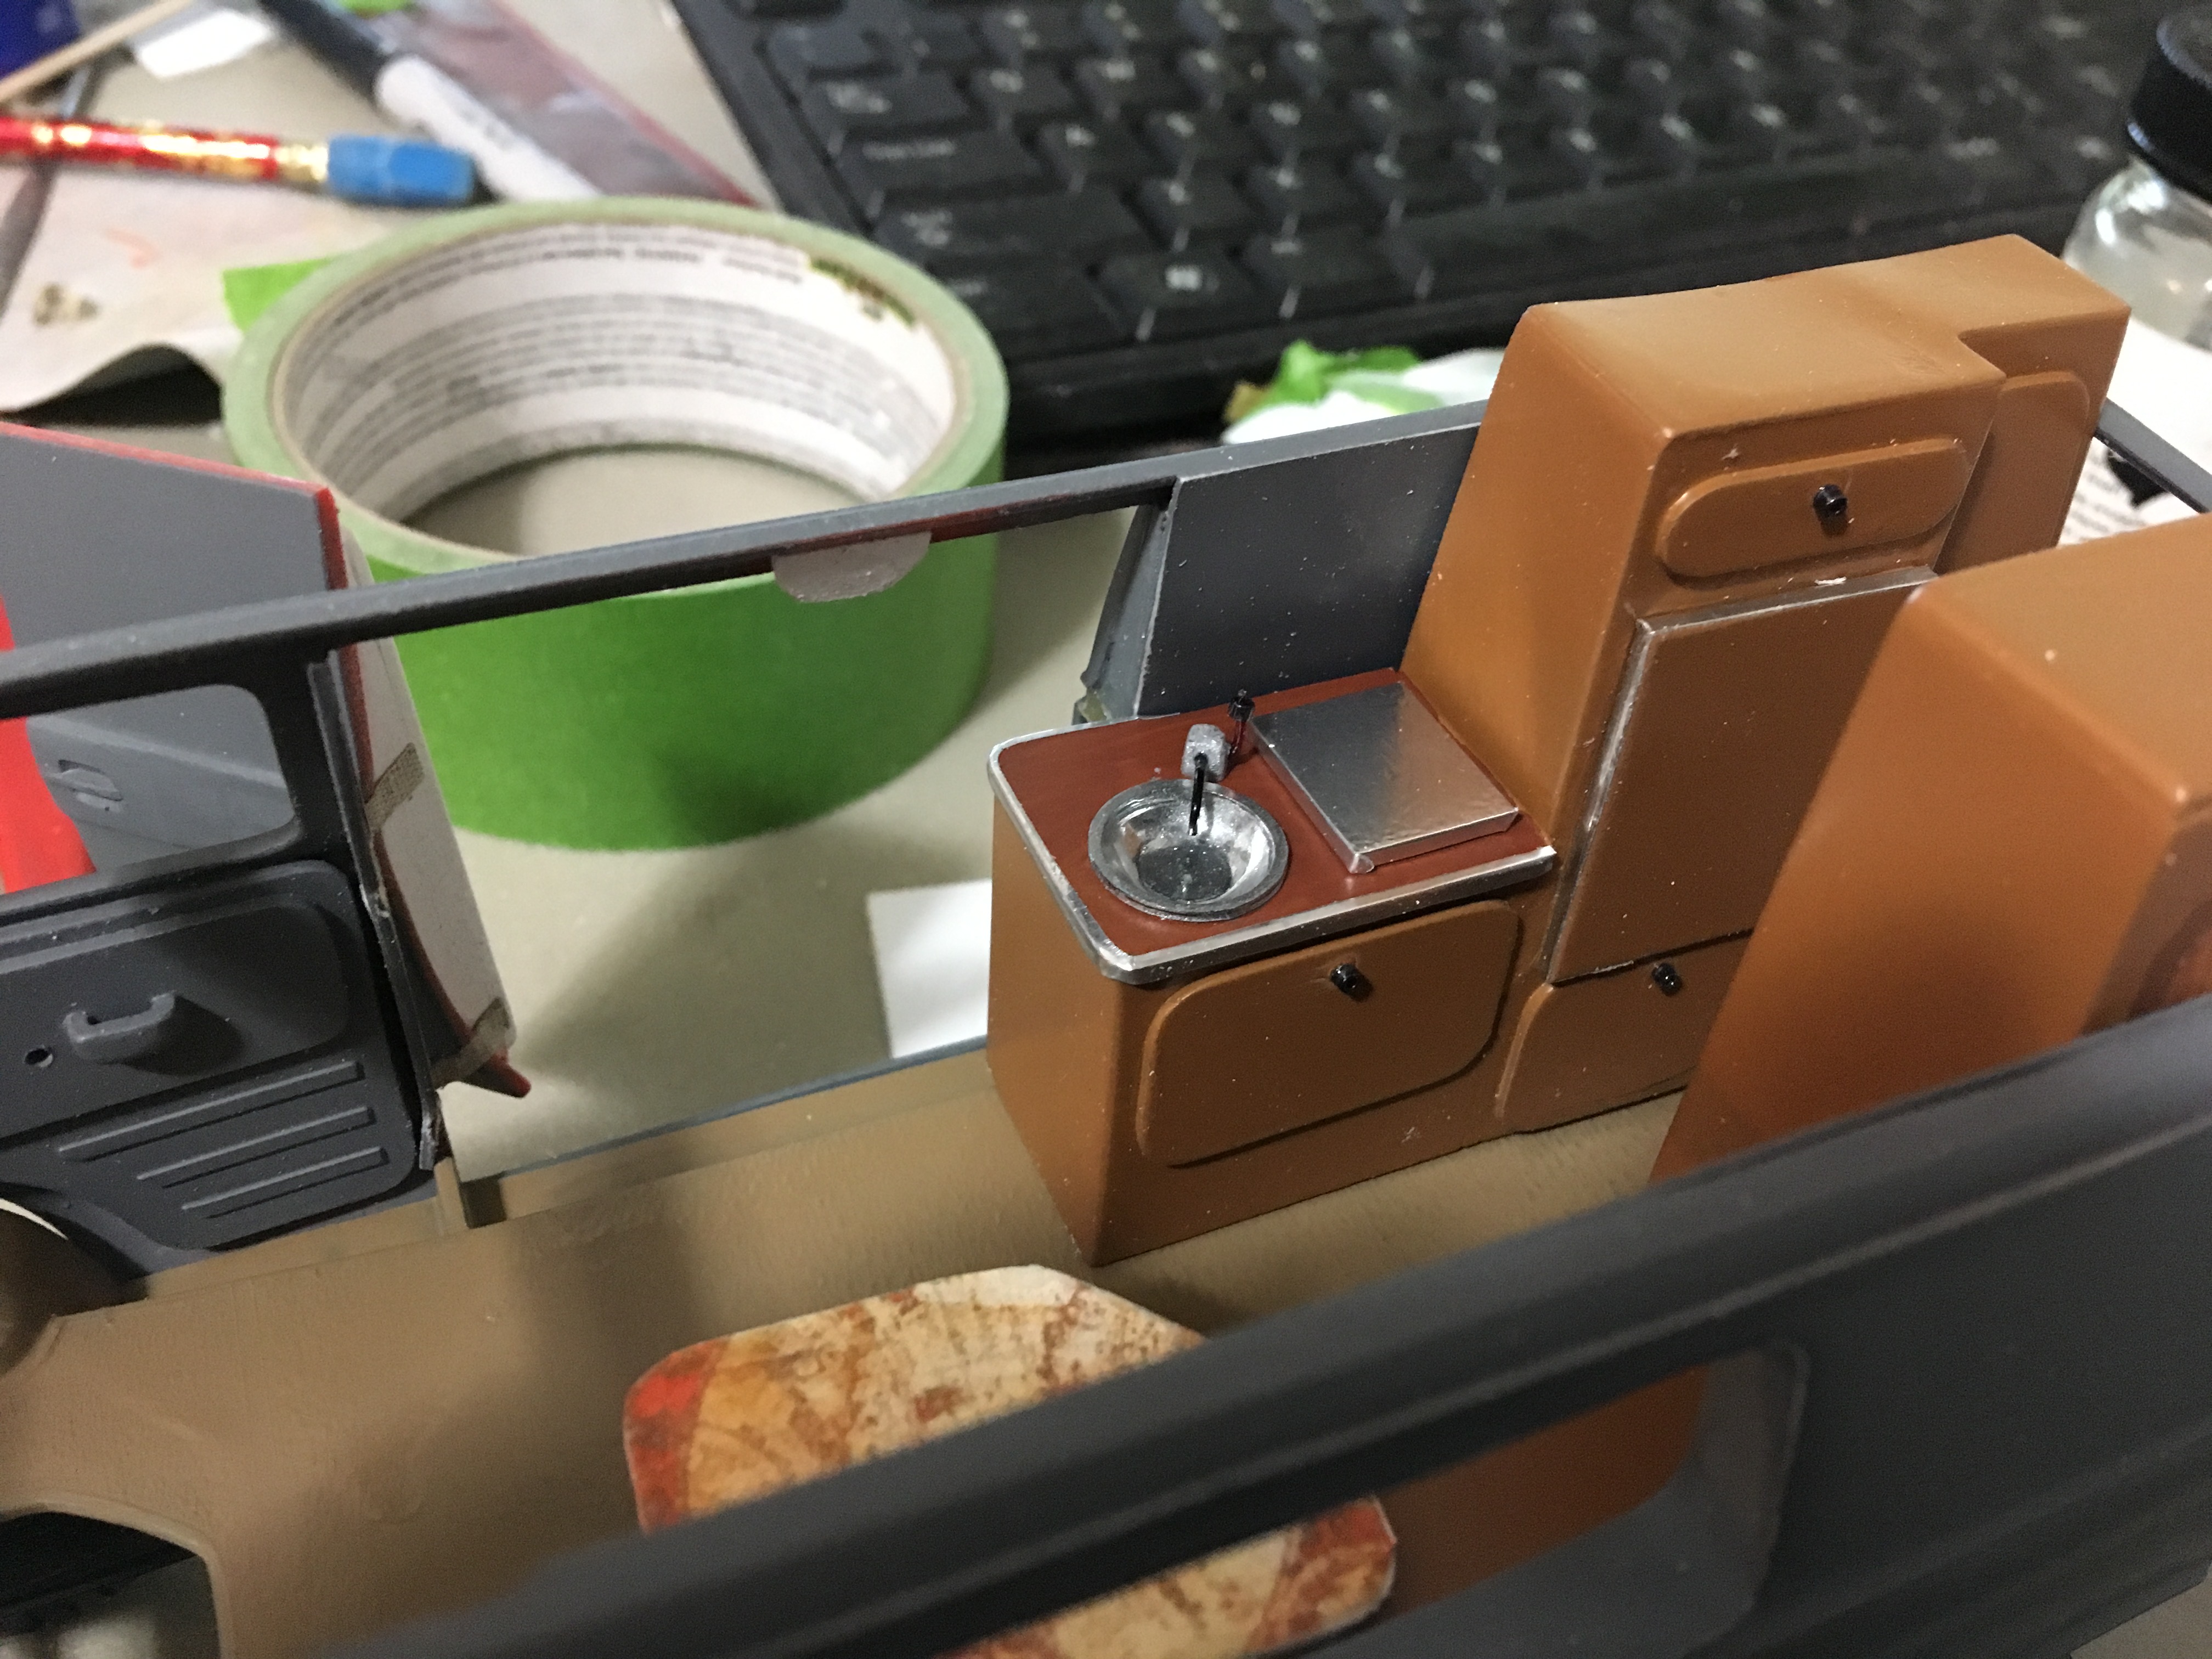
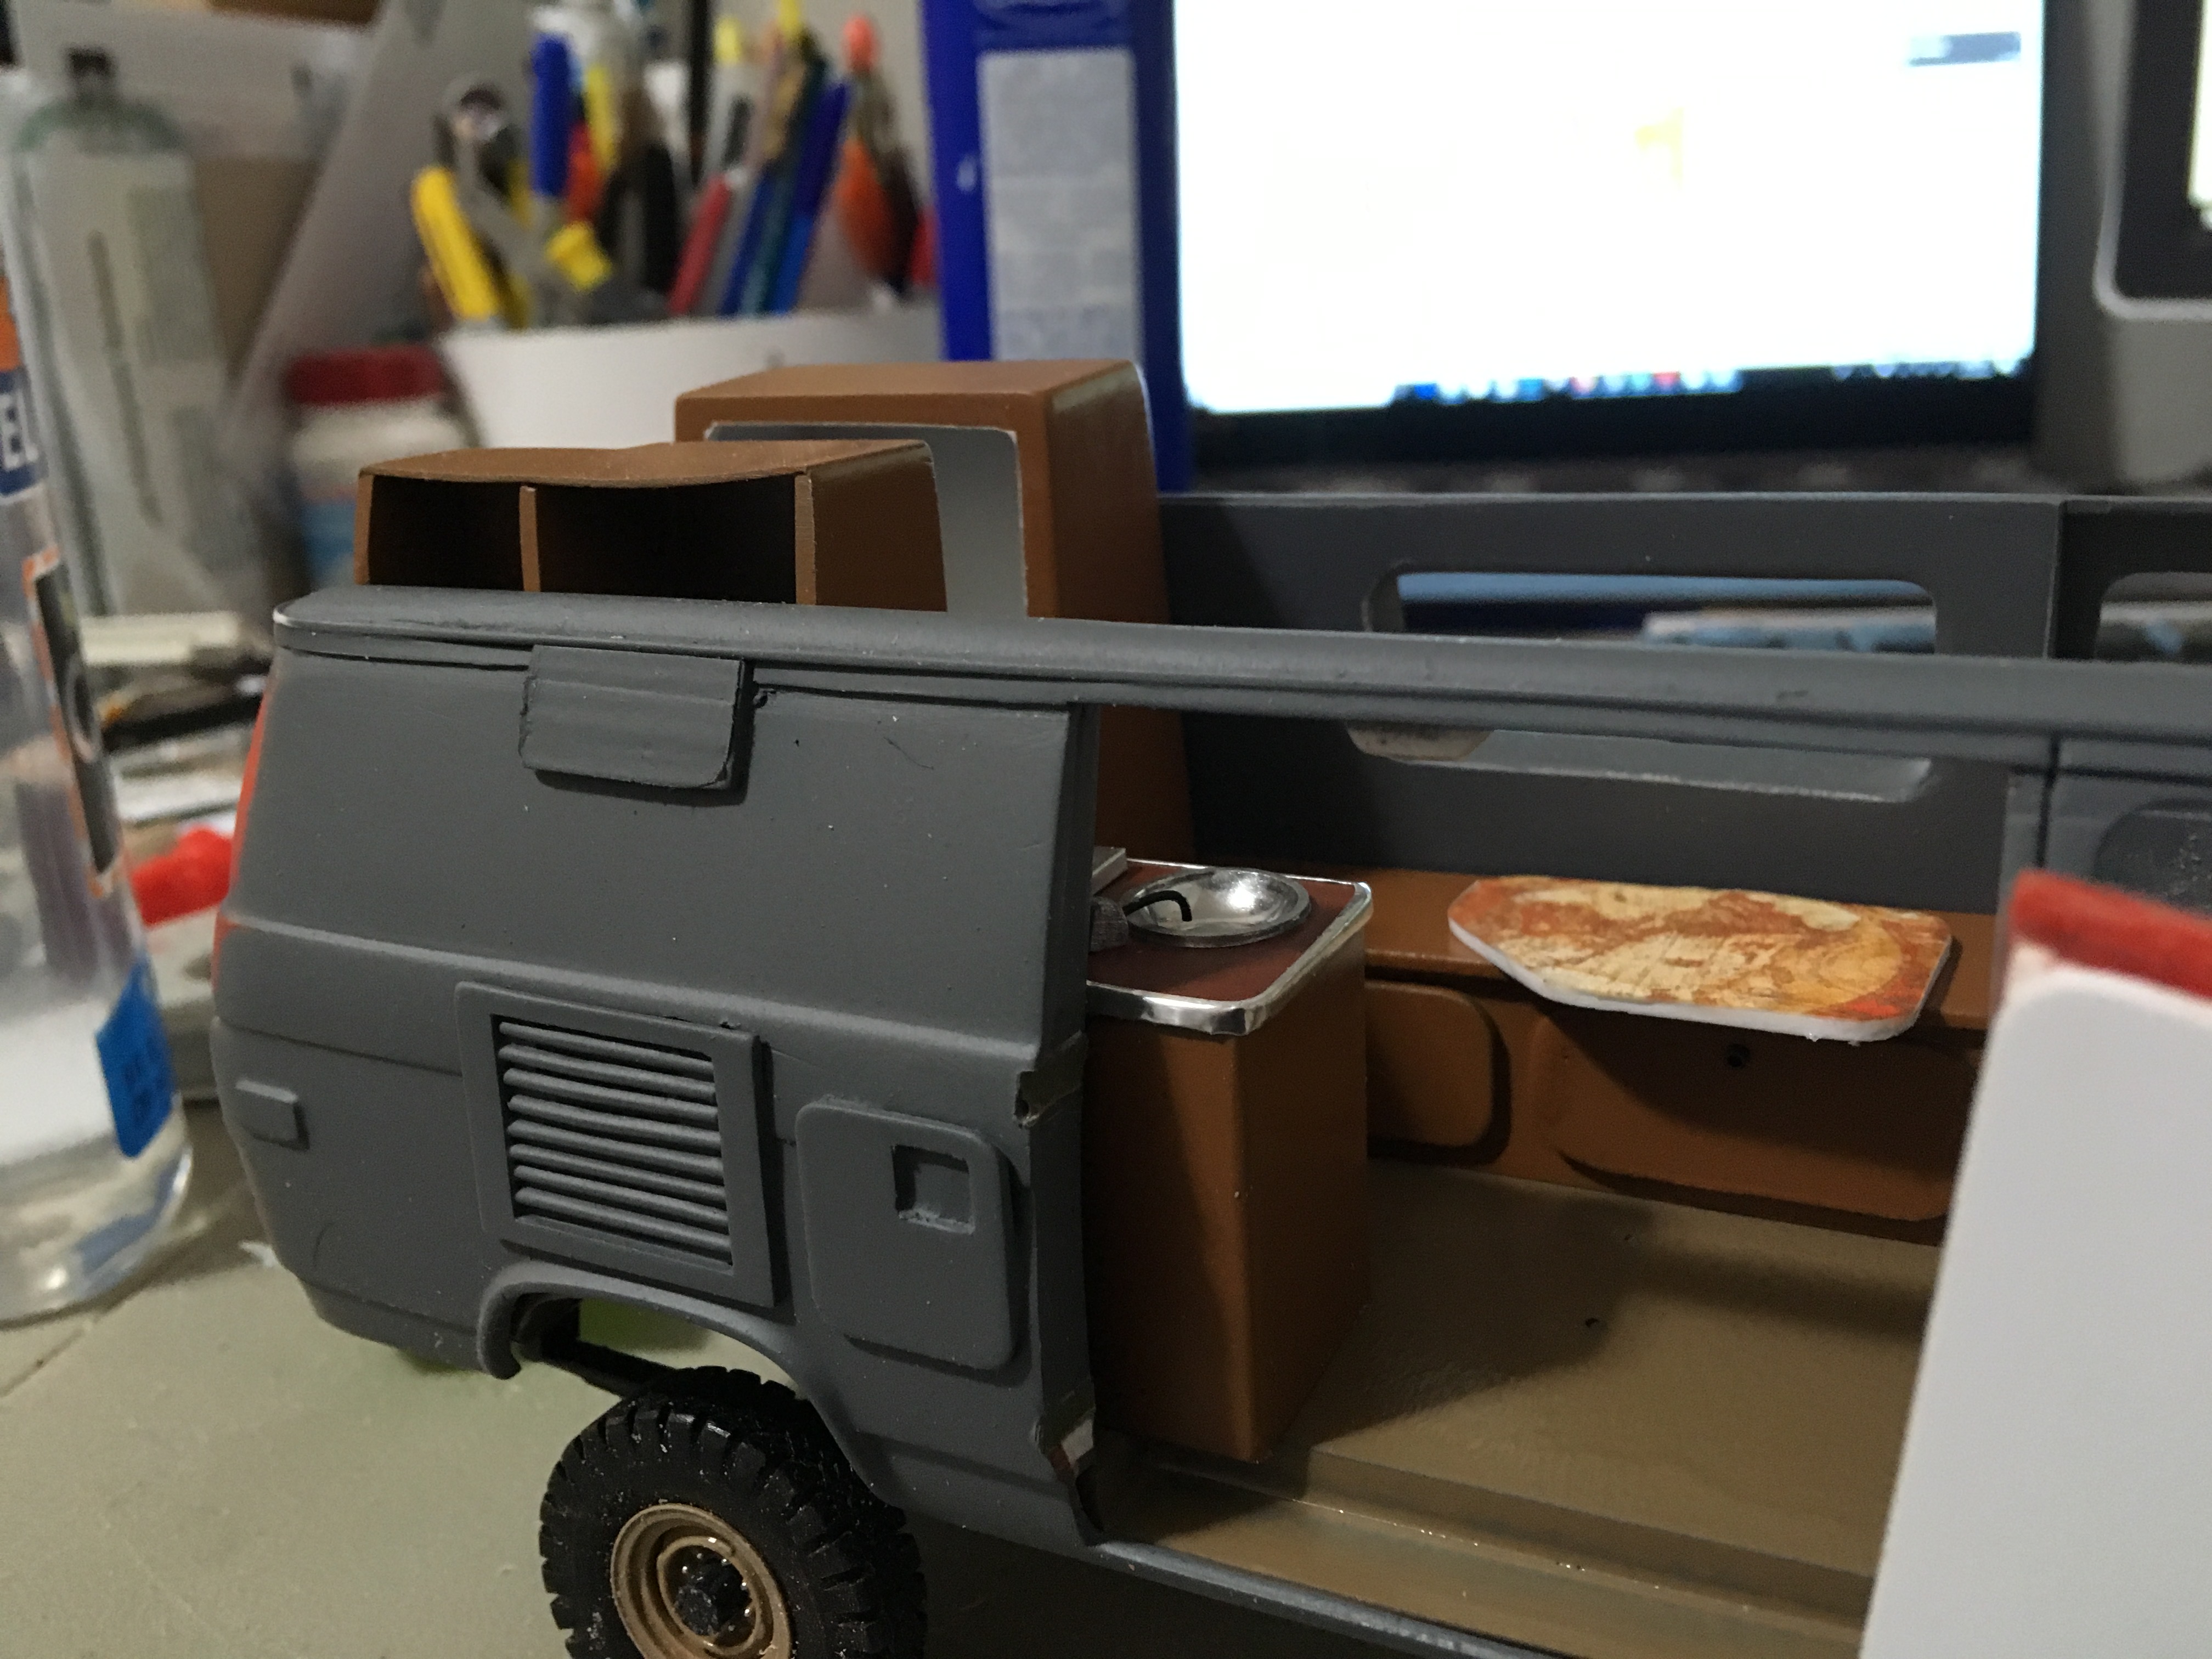
On to the camper interior build. I made some patterns and built up a camper interior in the style of the VW camper vans of the same vintage. All the cabinets are rounded, the one with square edges is the refrigerator. The passenger side has the sink, stove, fridge, and storage. The left side has the toilet/shower and the bed/couch and table. The table has a printed map of the world on it with a foil edge, the leg is not shown yet. I still need to make some cushions for the bed/couch.
-
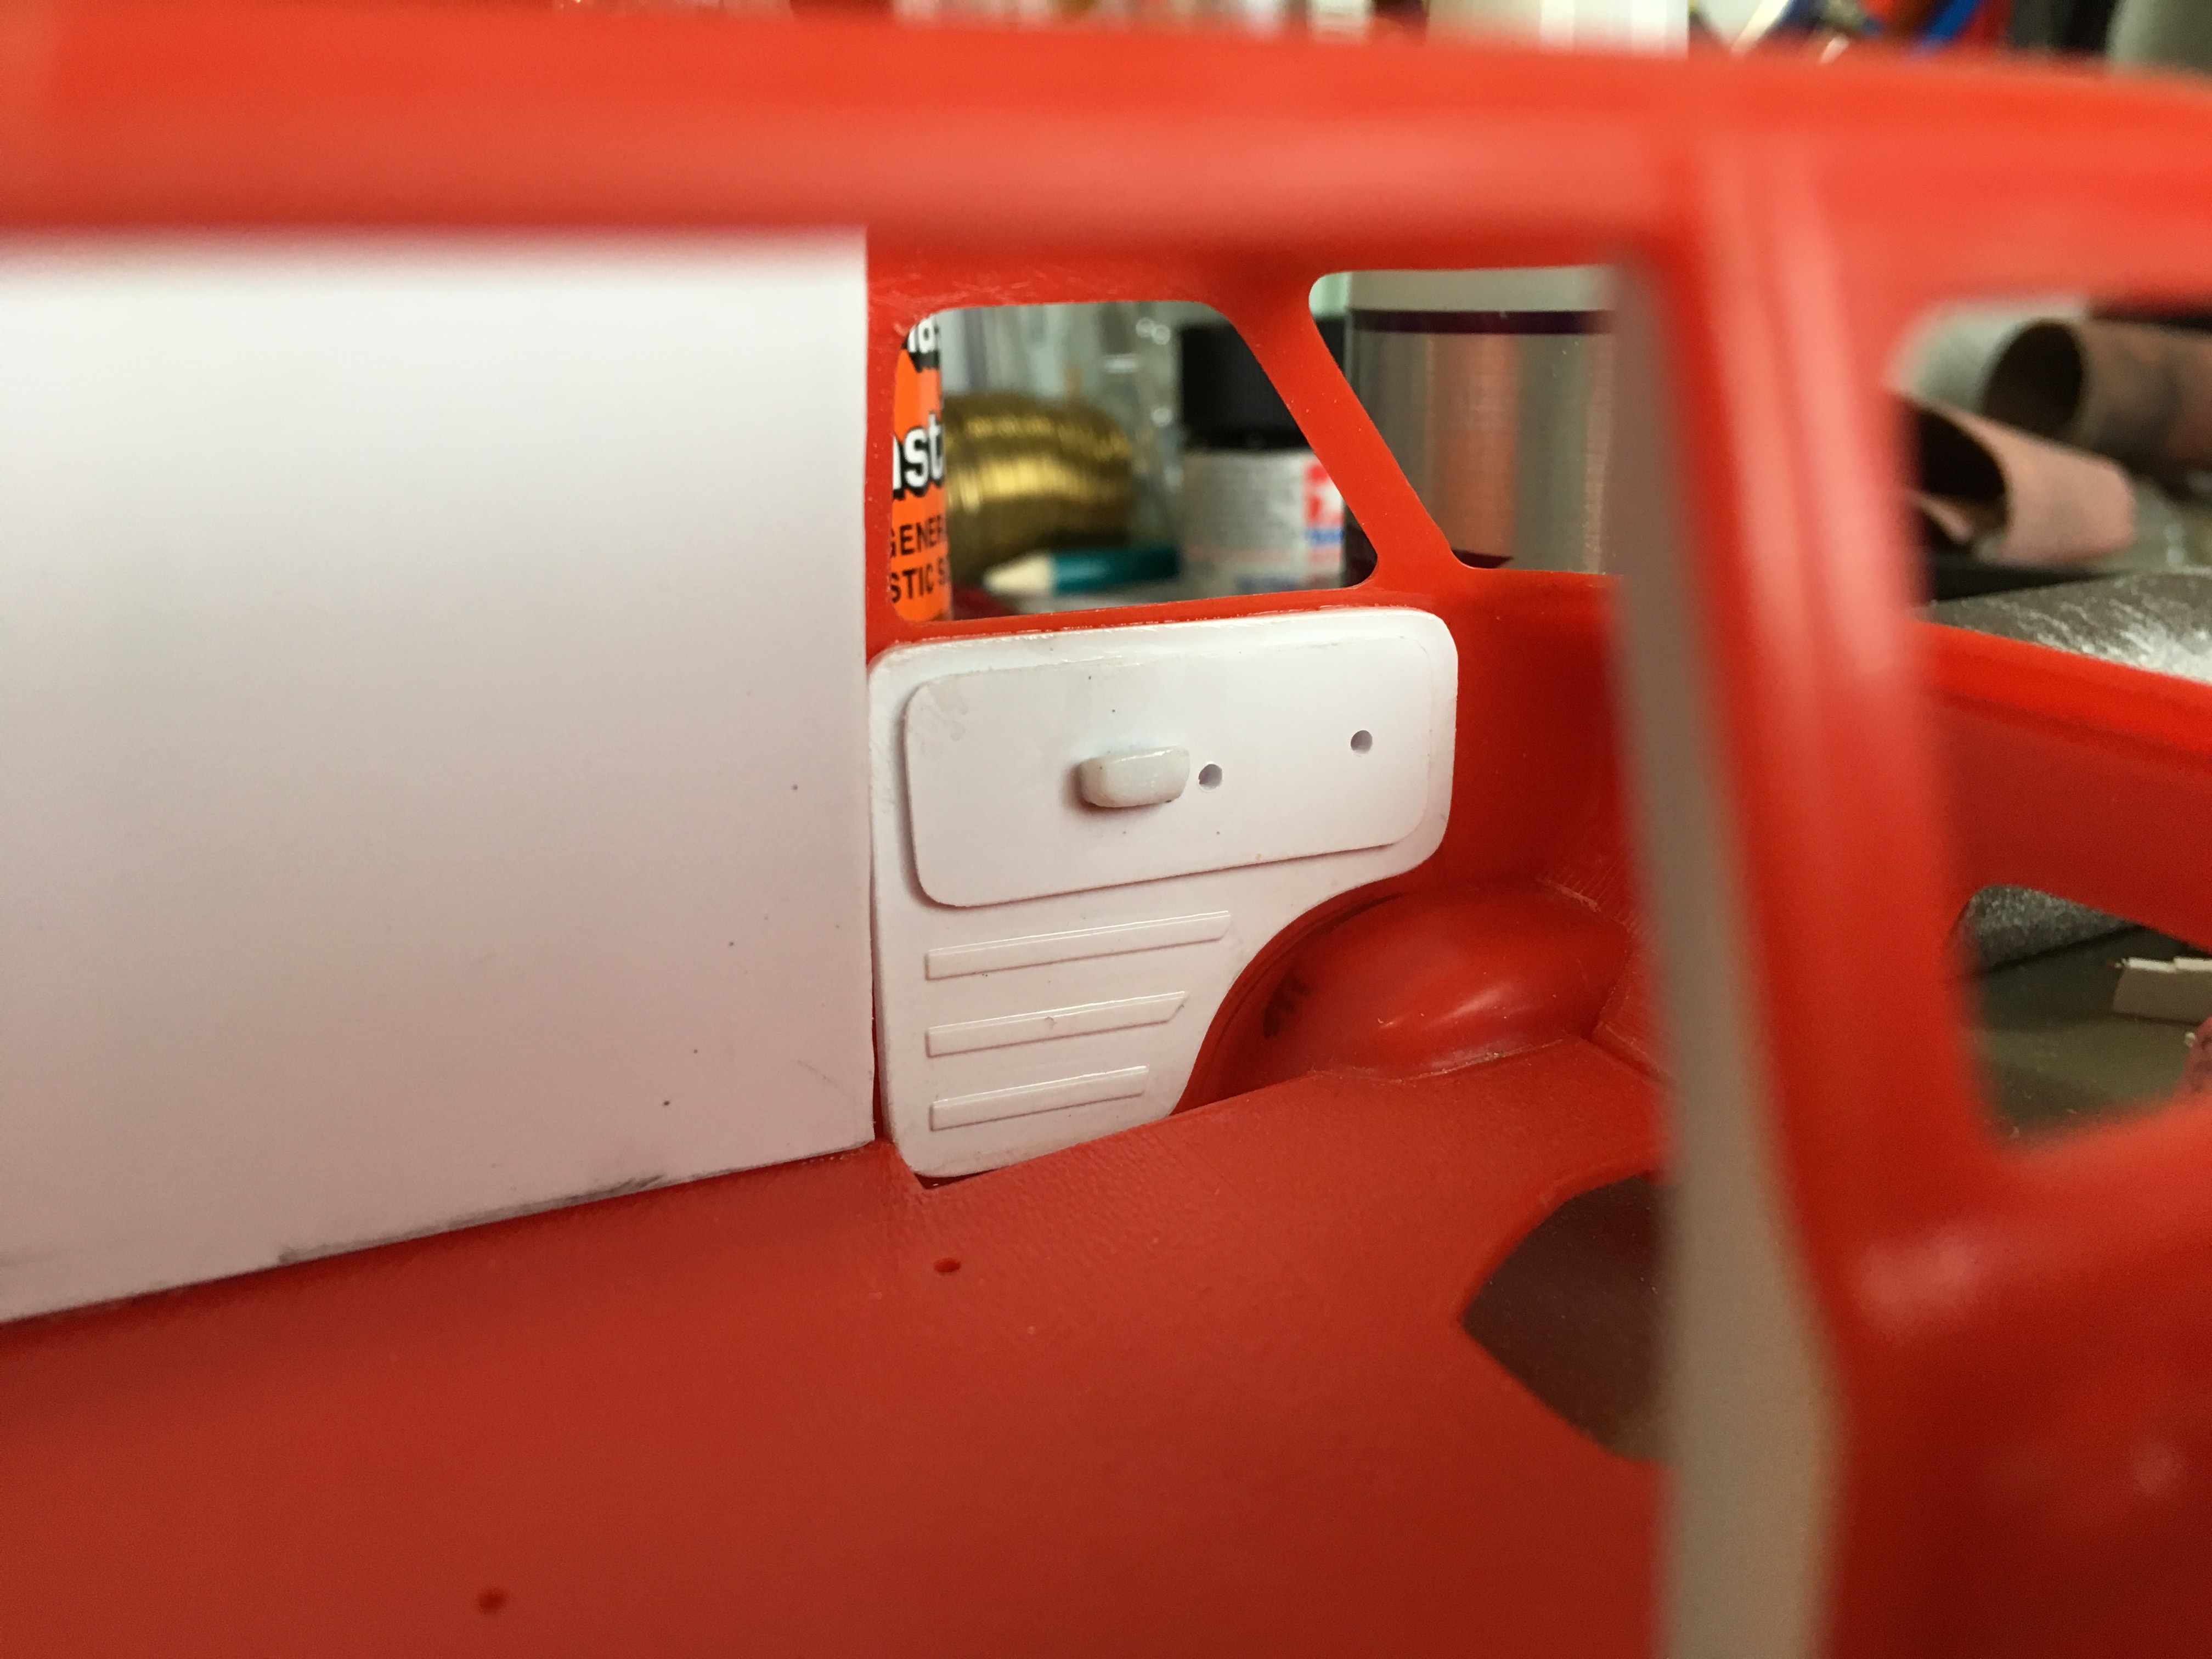
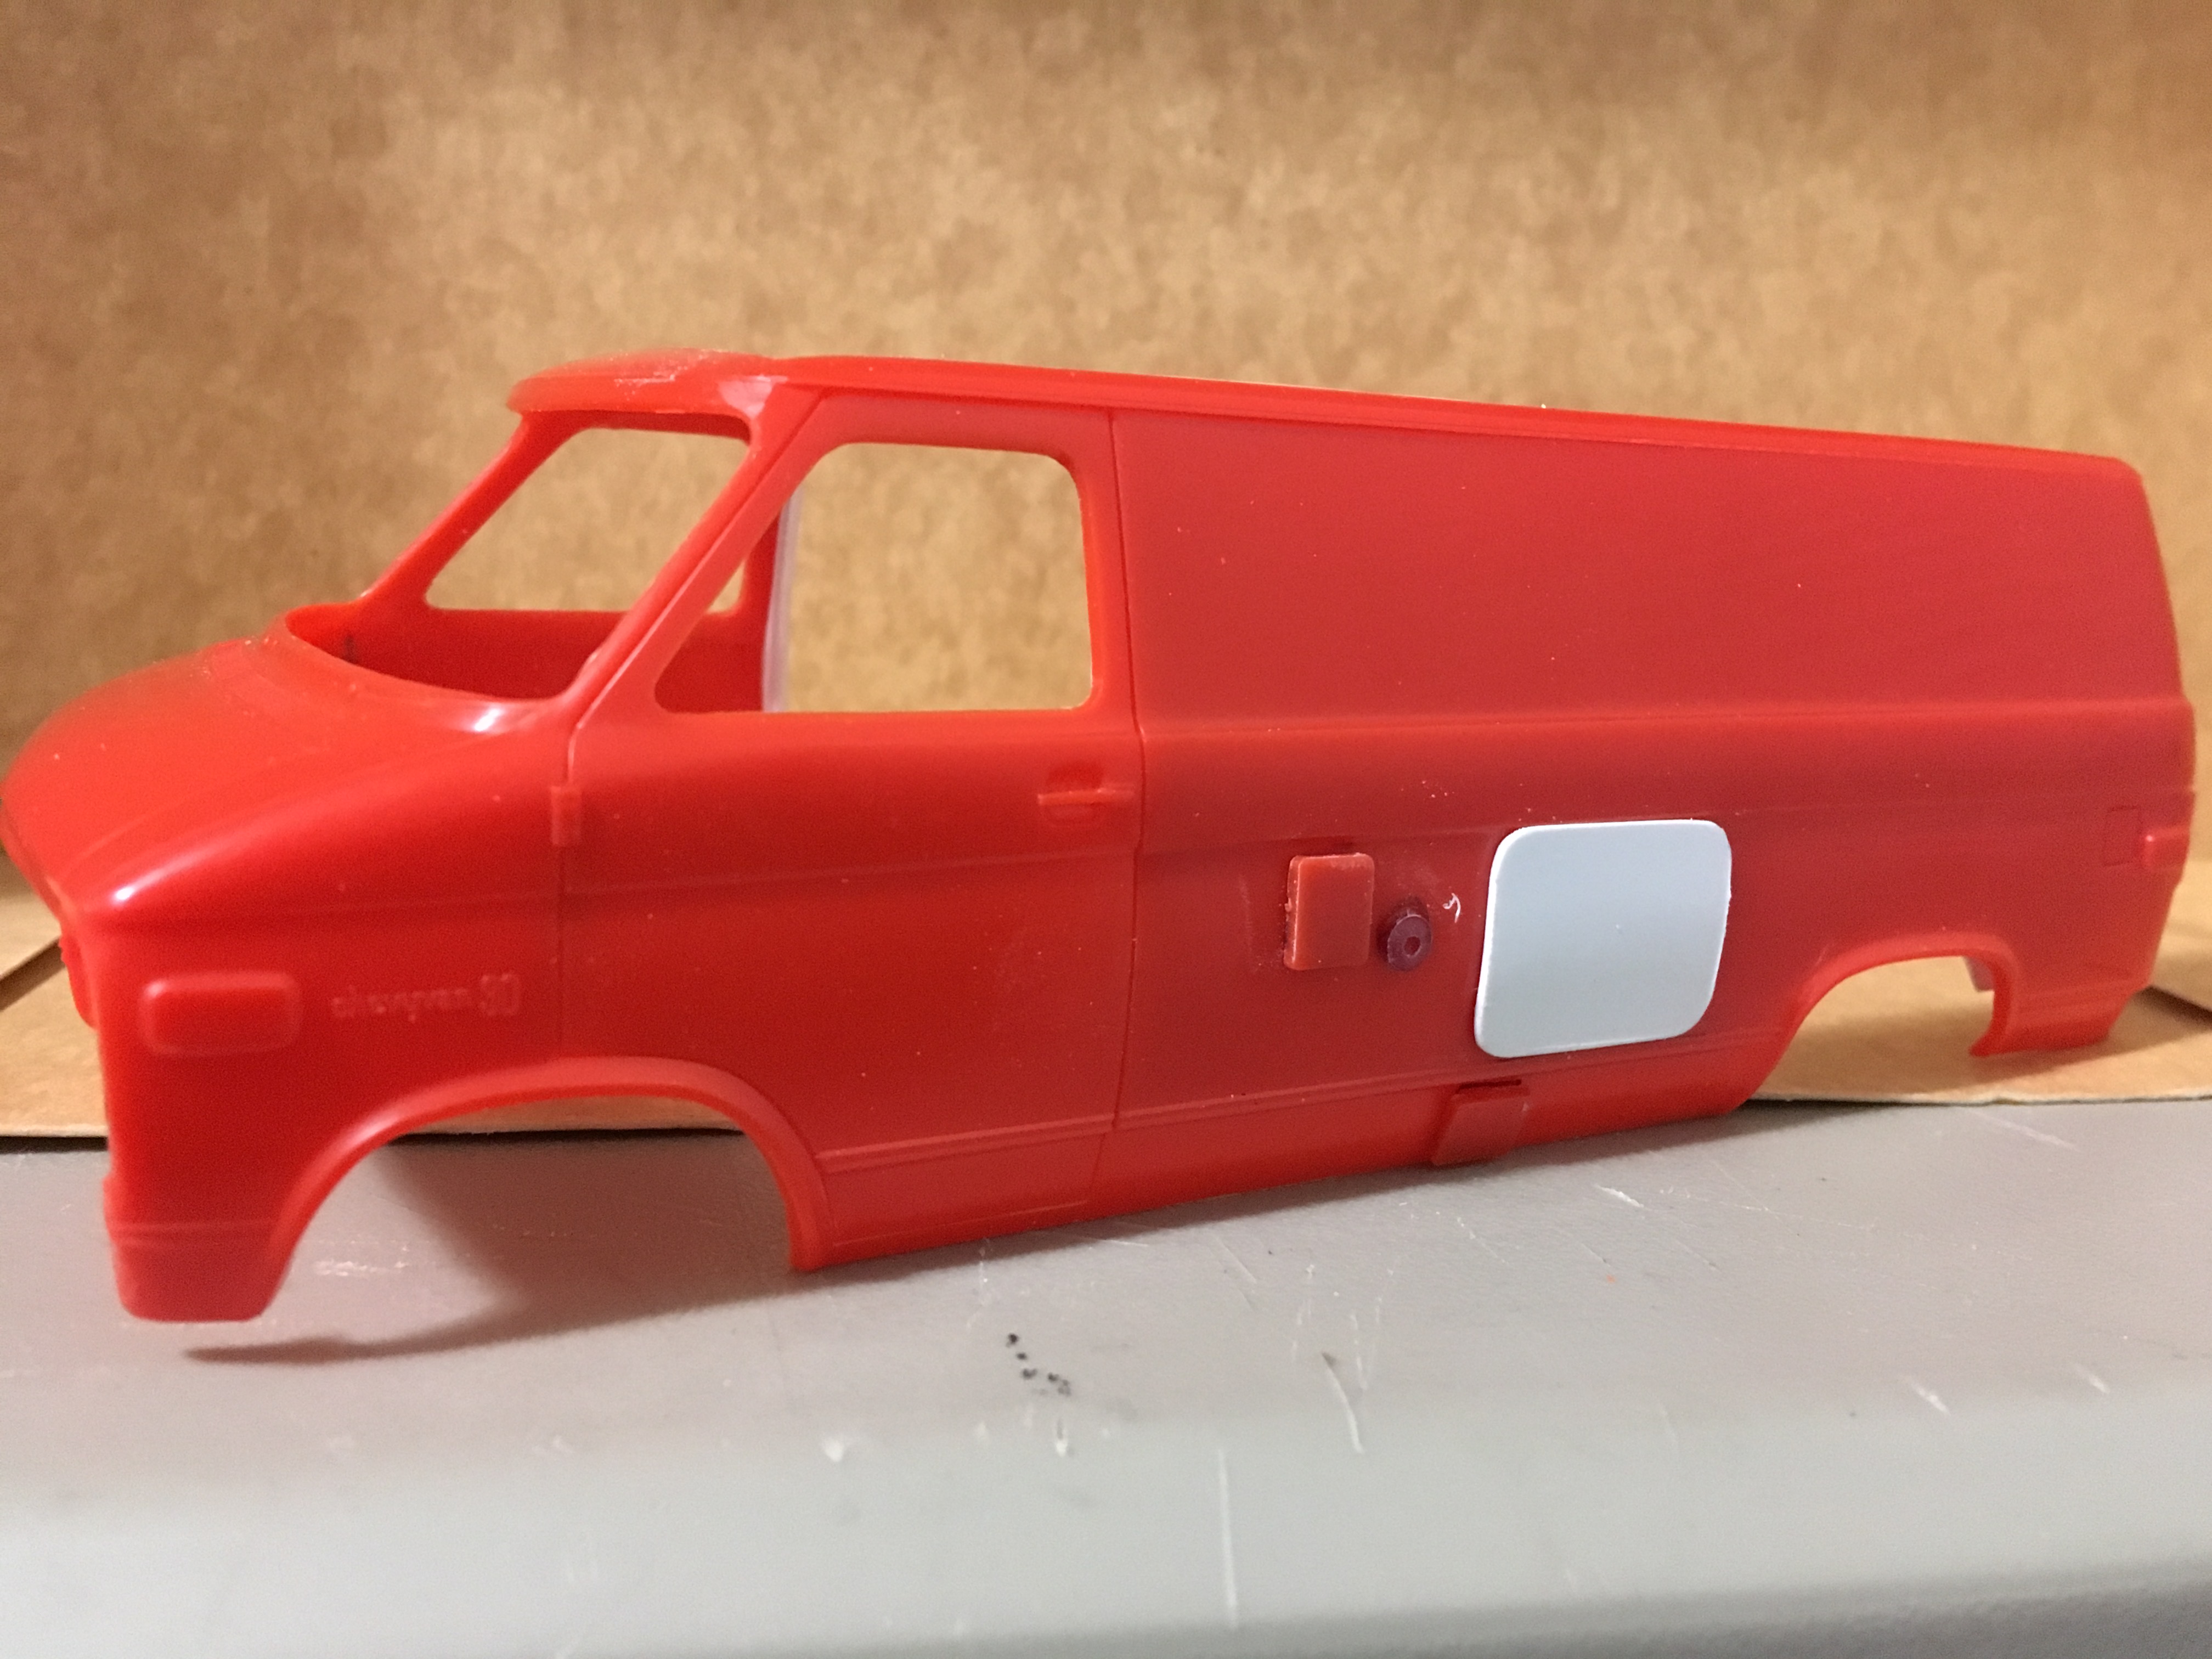
As you can see in some of the previous pictures, I did some work to the interior. I wanted to have interior panels to replicate what the real van would have had on the inside, so I added rib to the walls and sheeted the inside with .020. I then made some front door panels because the kit came with nothing.
-
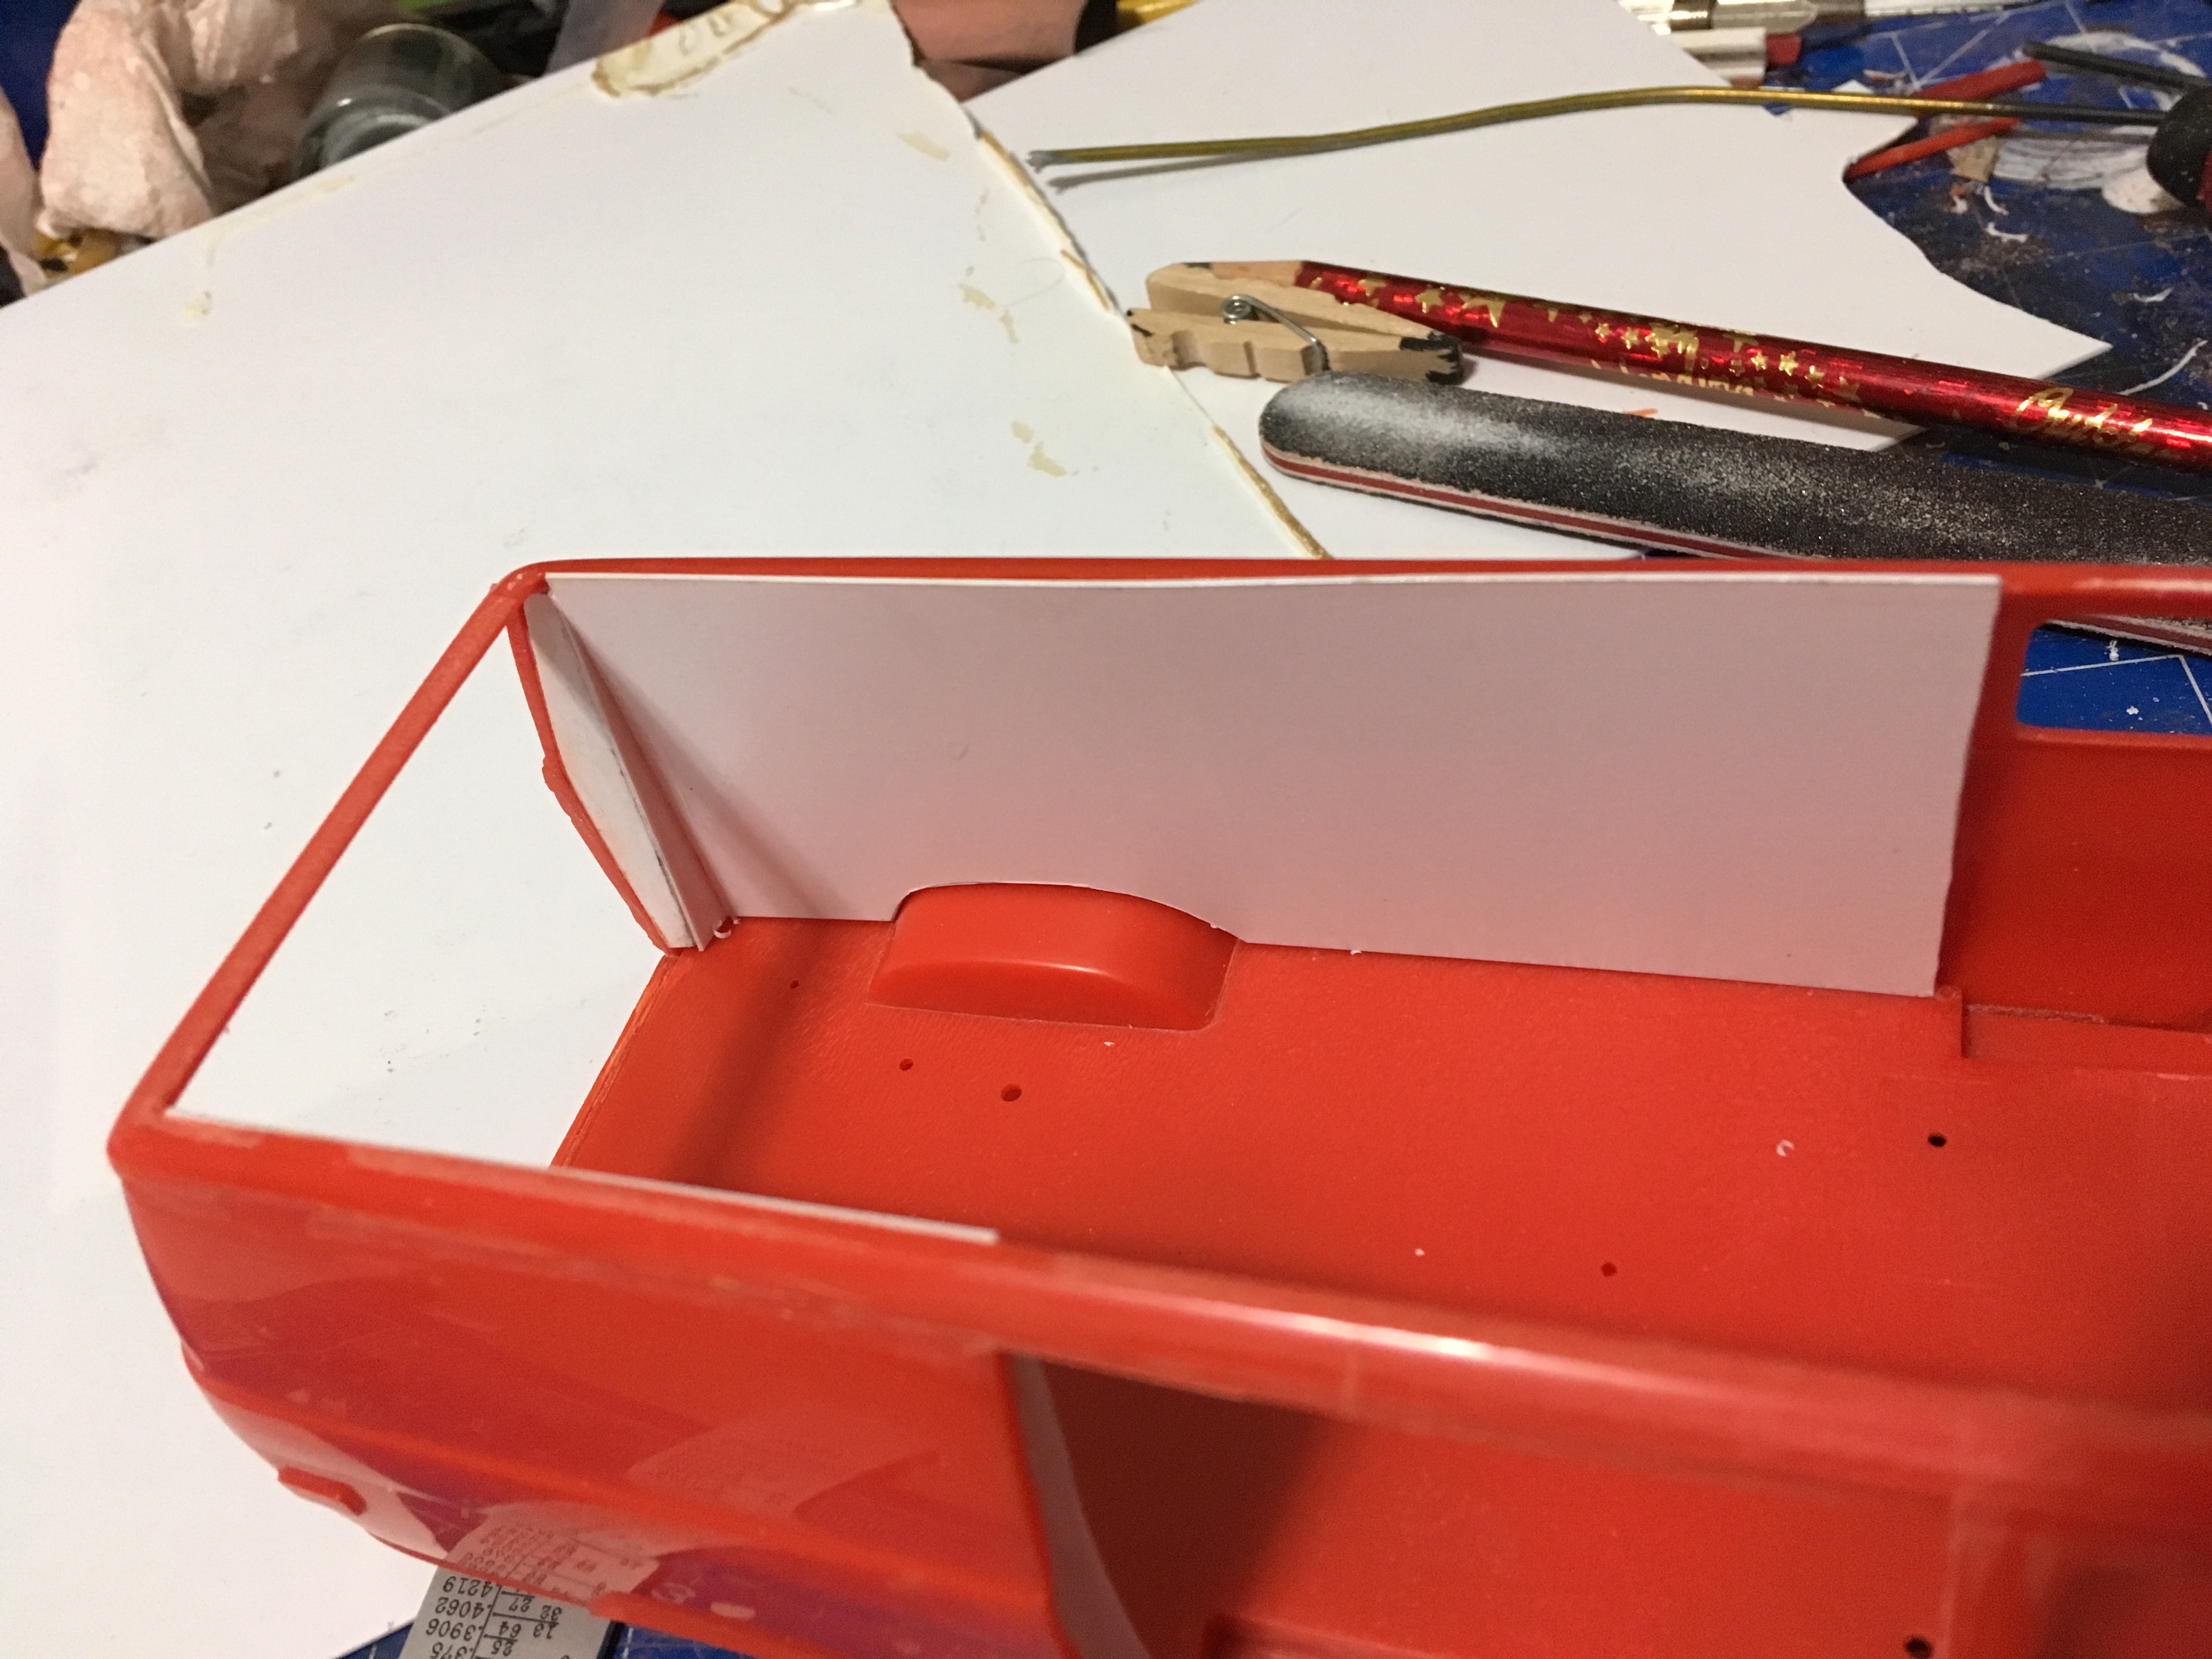
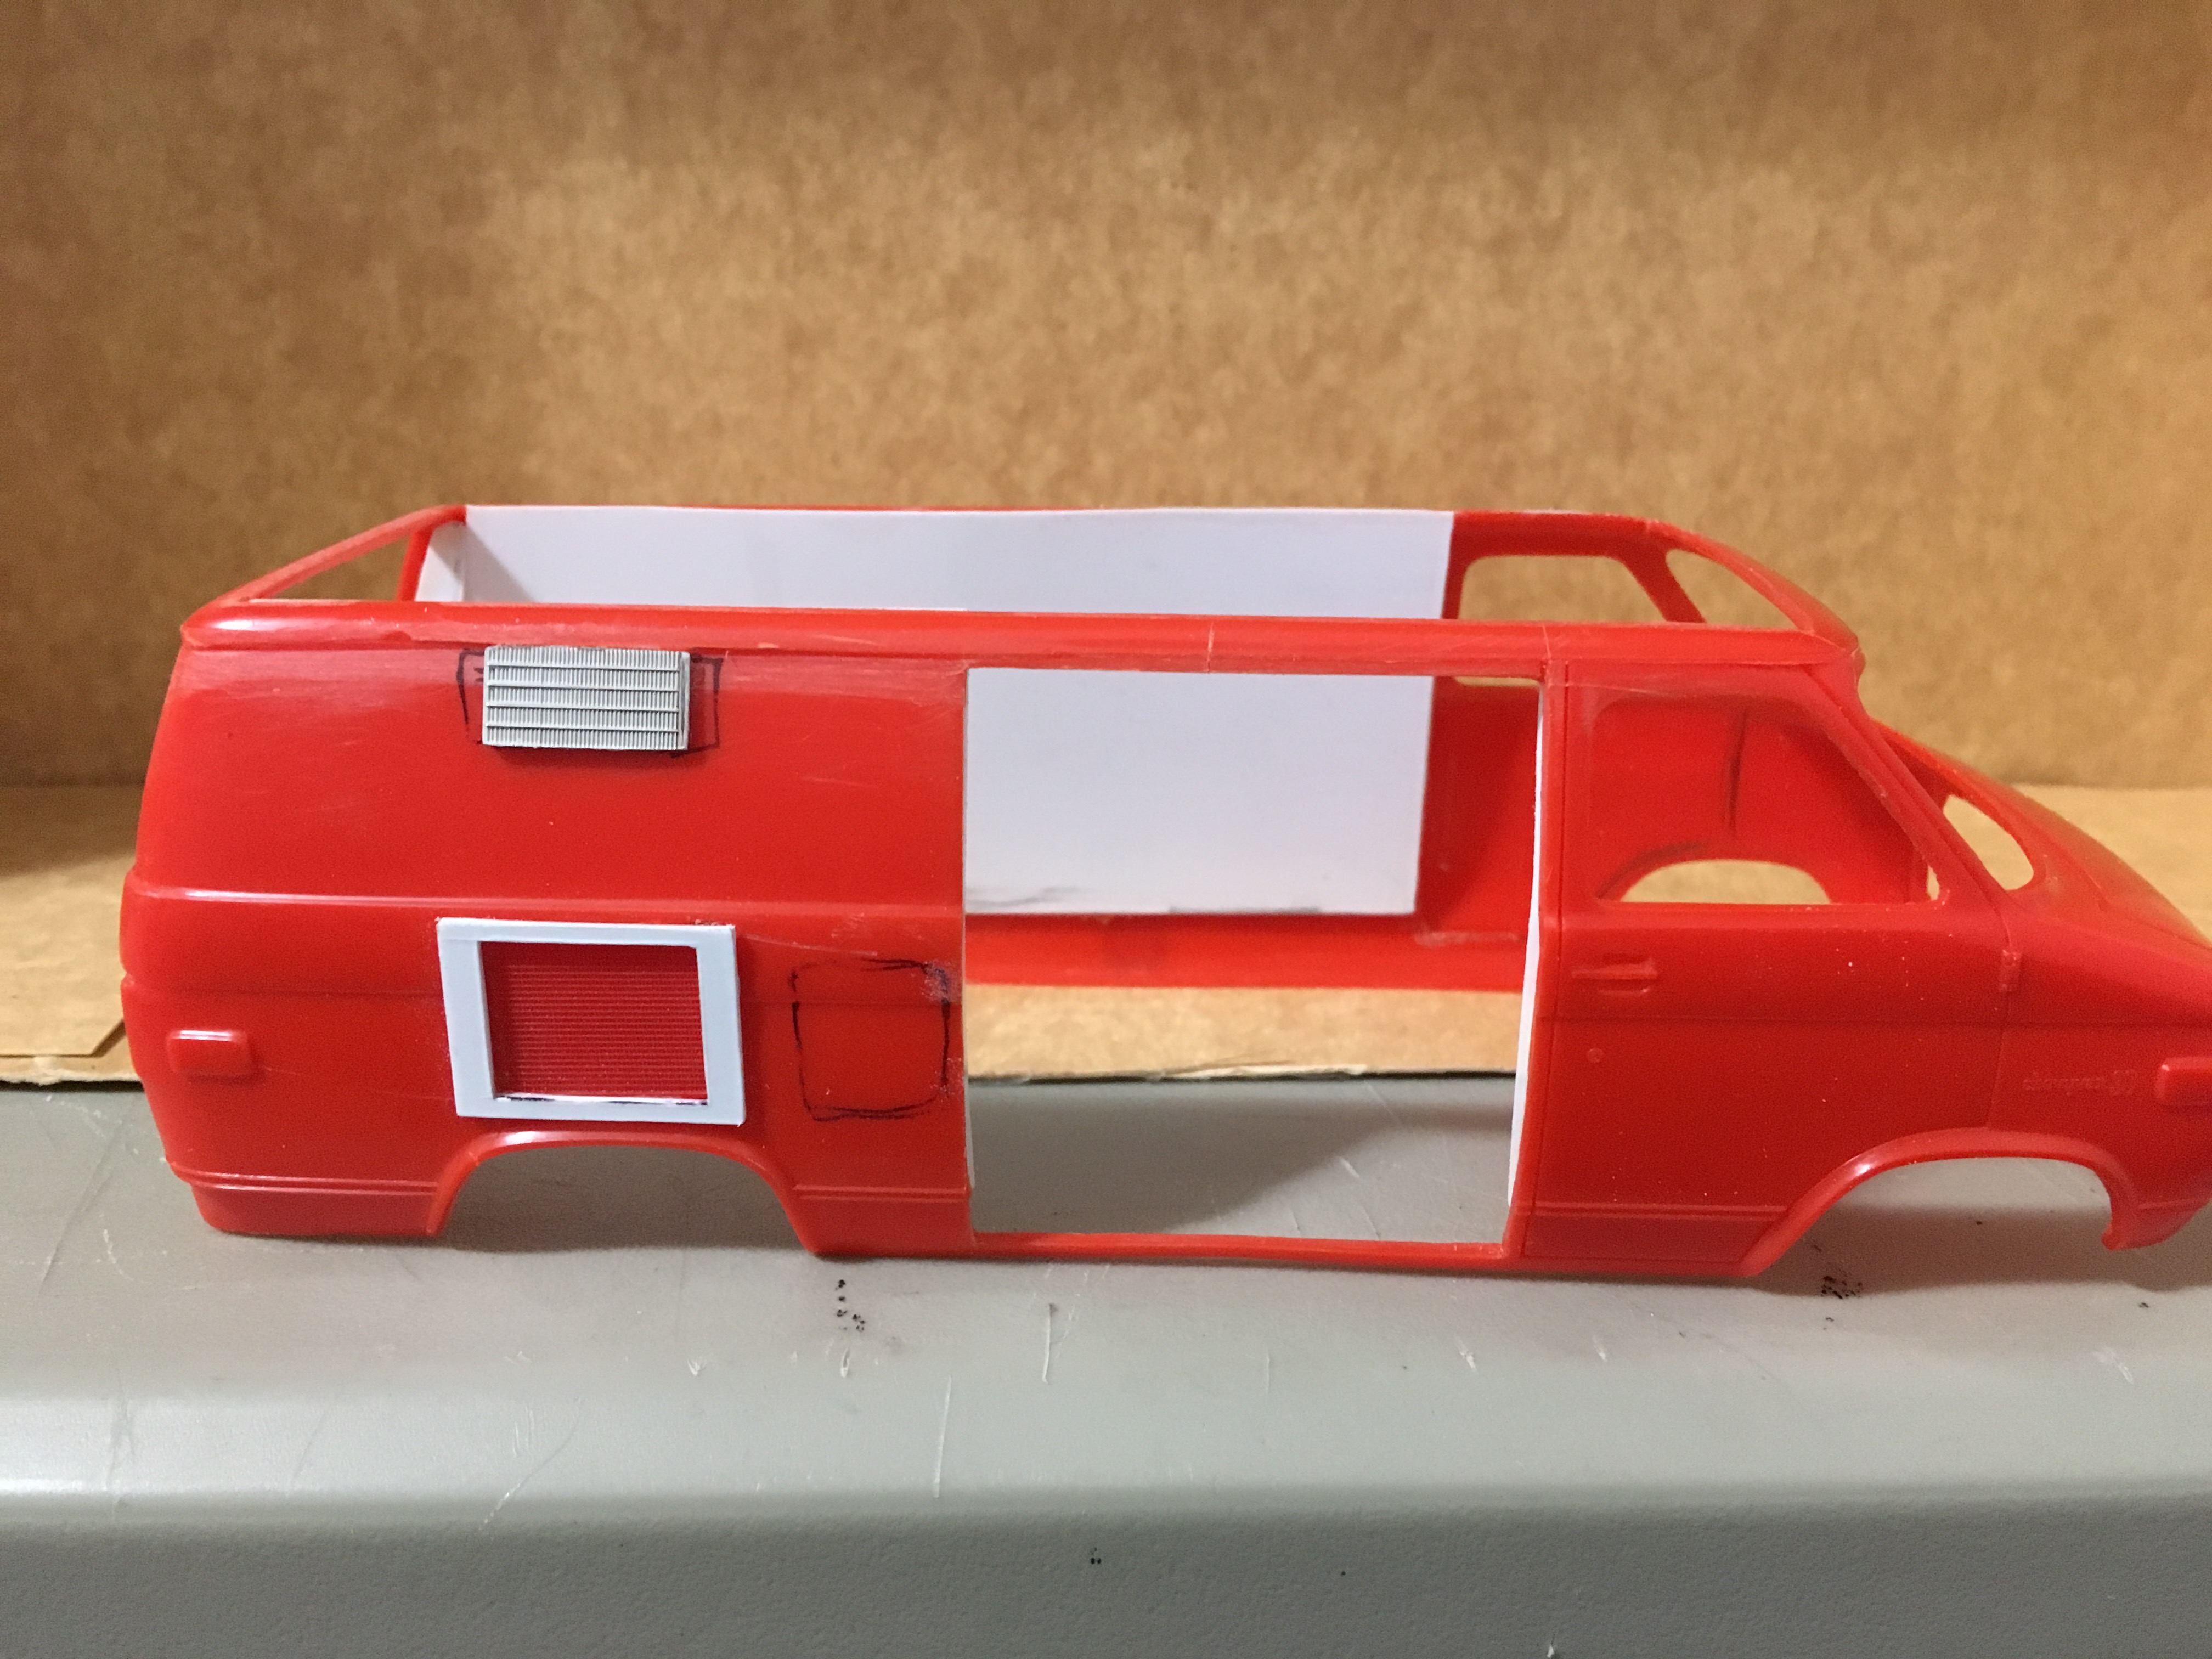
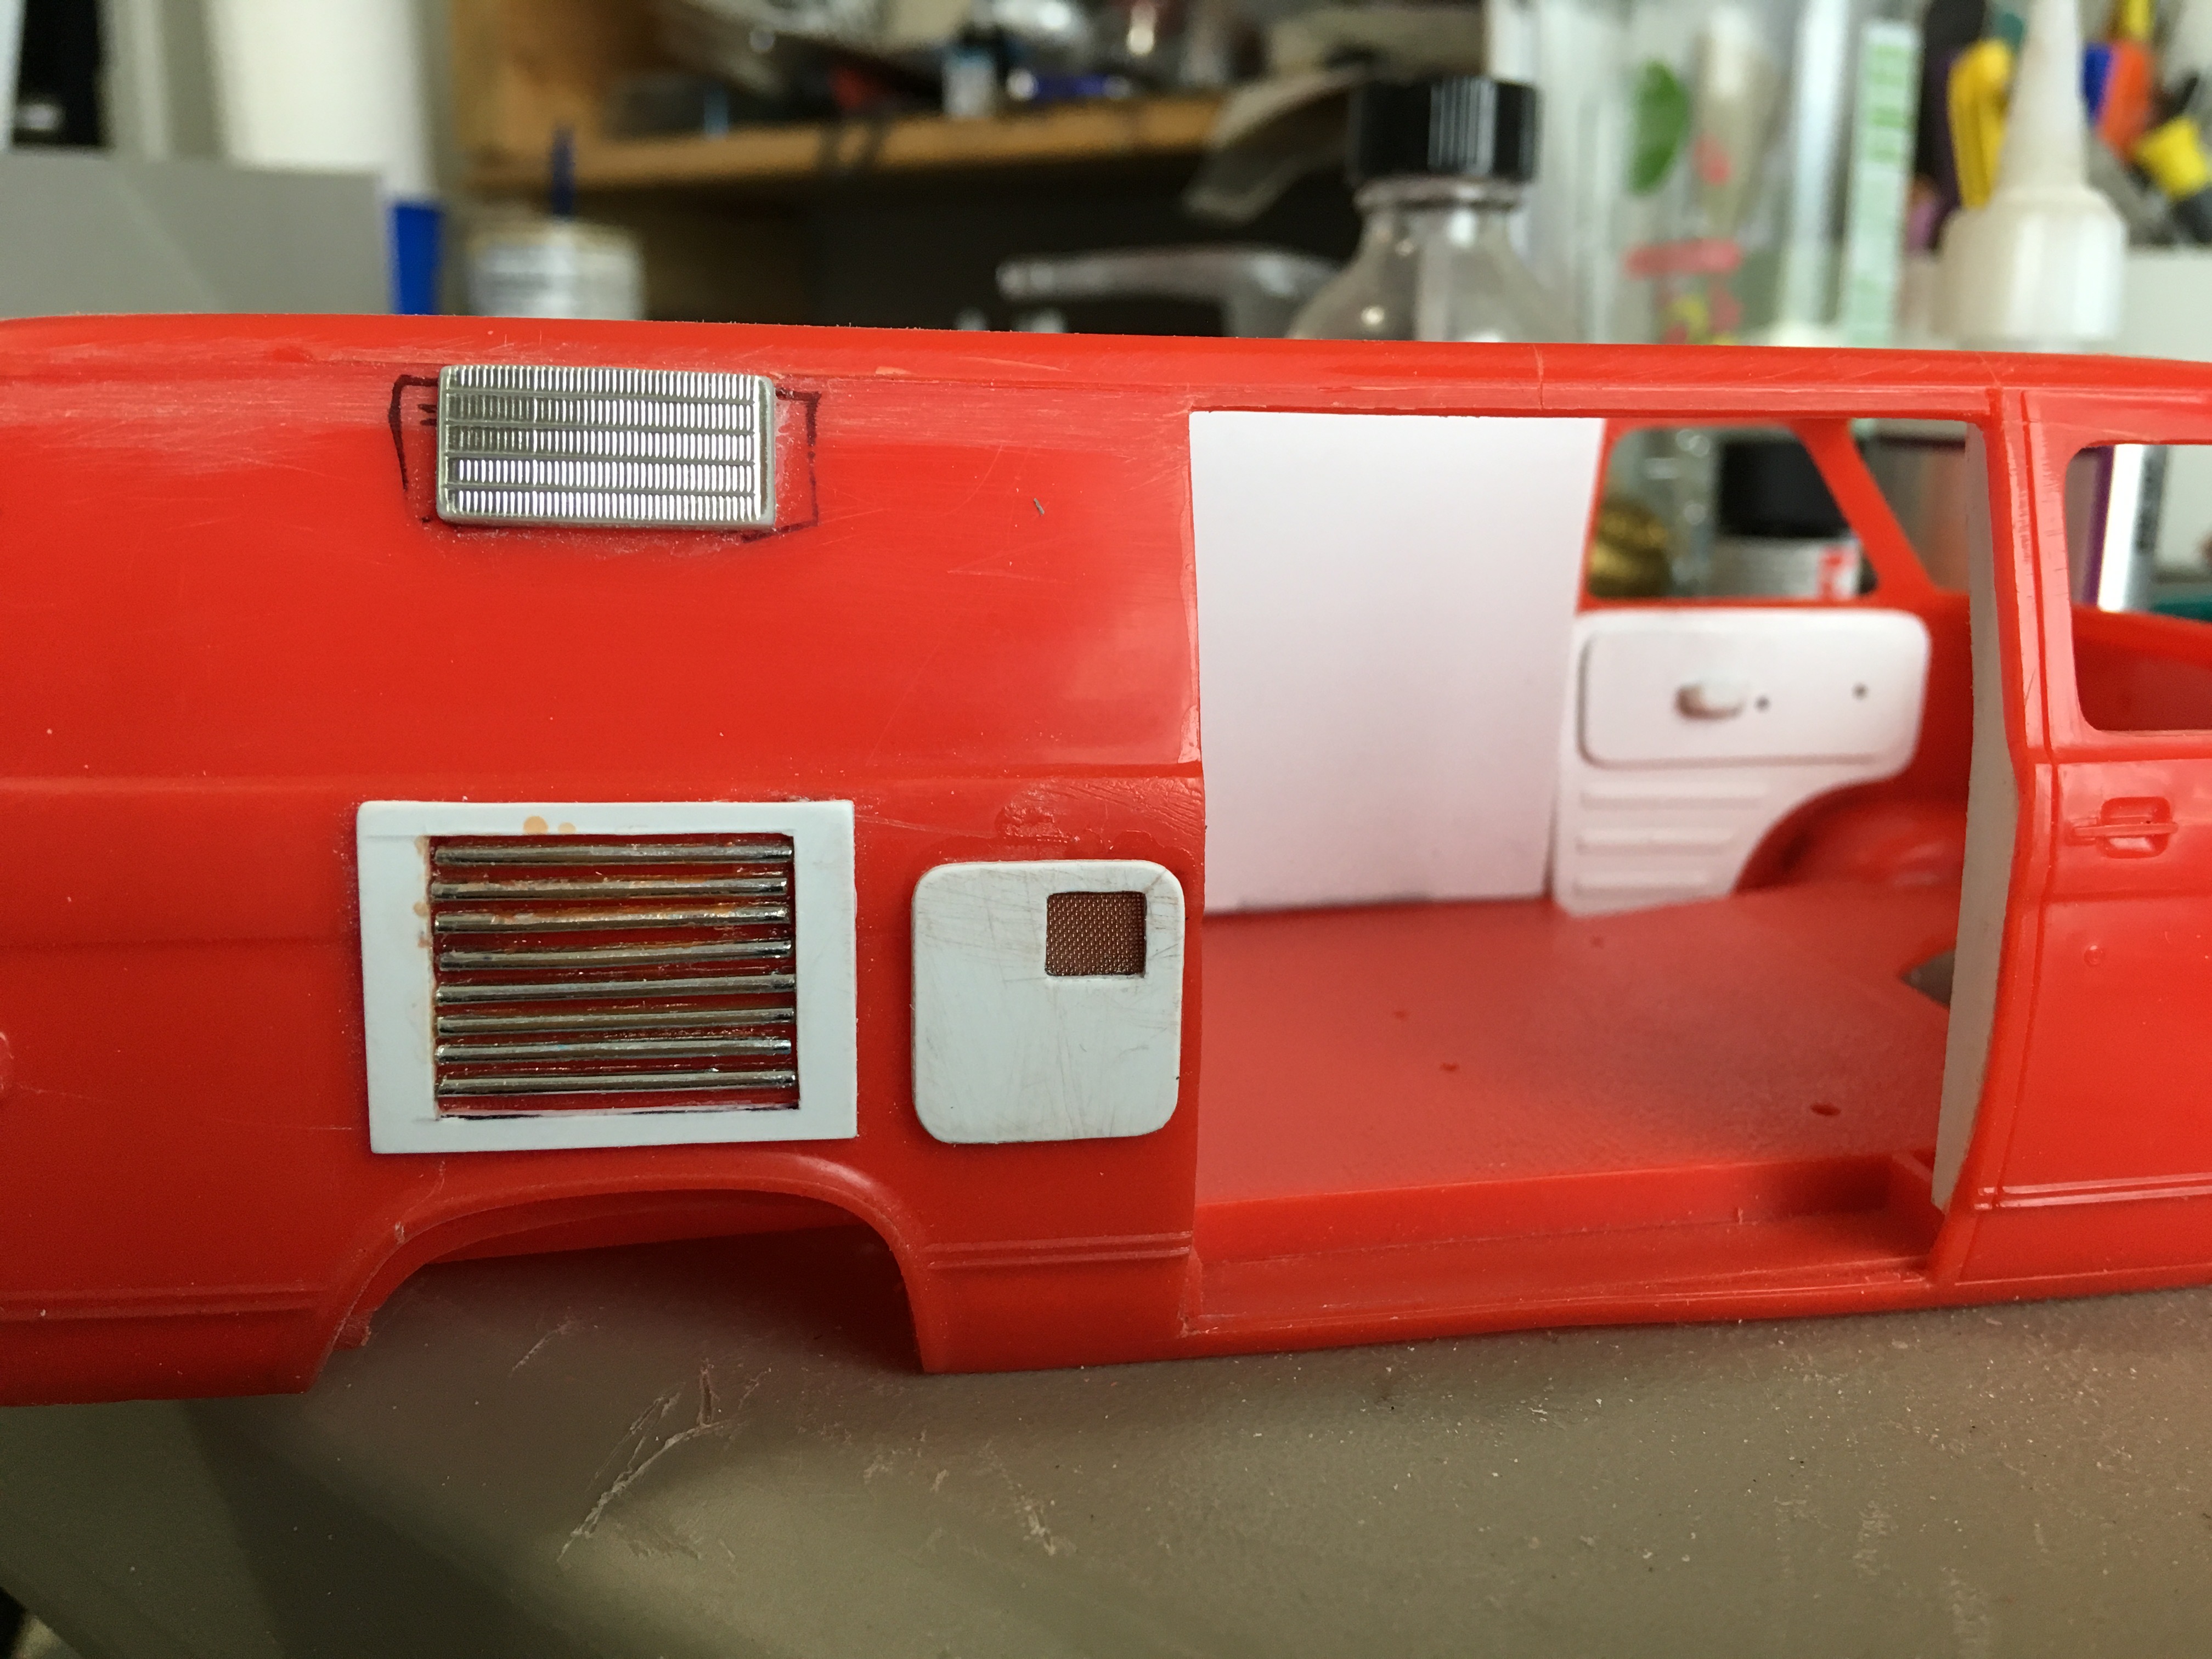
Up next are the body mods. I want the rear and side doors to be open, so I cut them out. I also added back in the body line that is missing right below the drip rail and added the drip rail. I cut out for the side window and added "Doors" and panels to simulate the stuff on a regular camper van like the water heater, heater, city water inlet, etc.
-
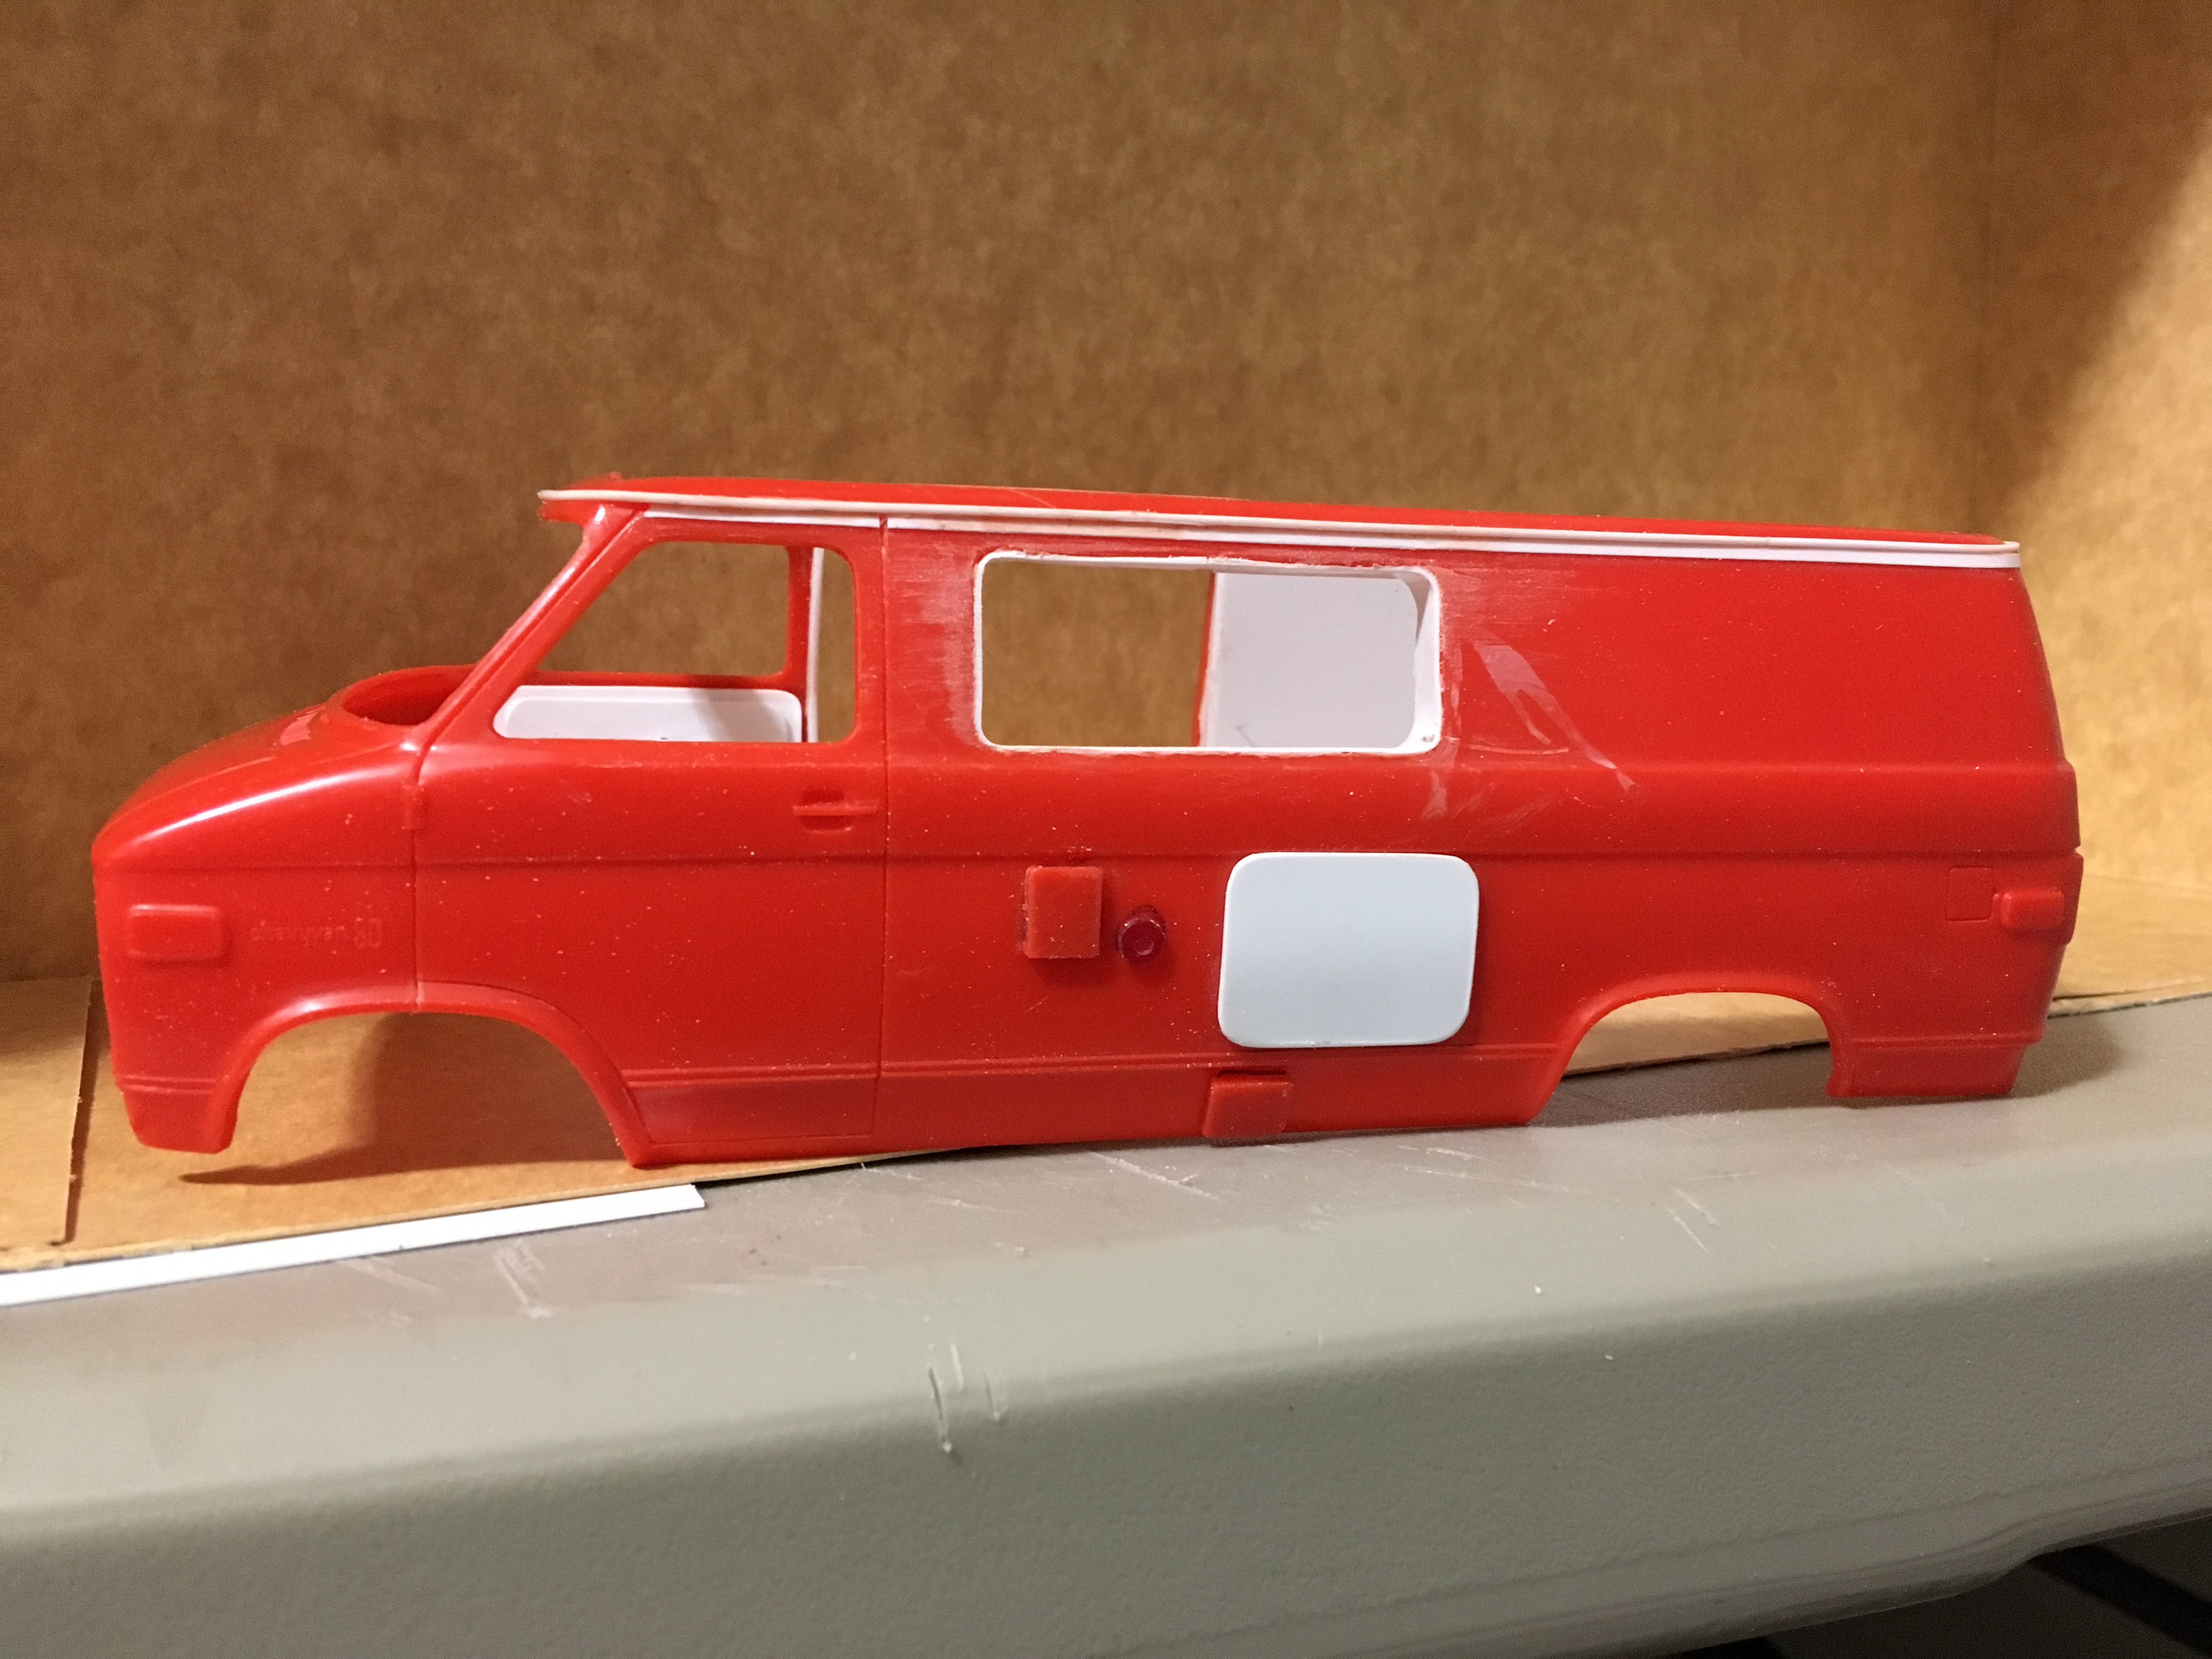
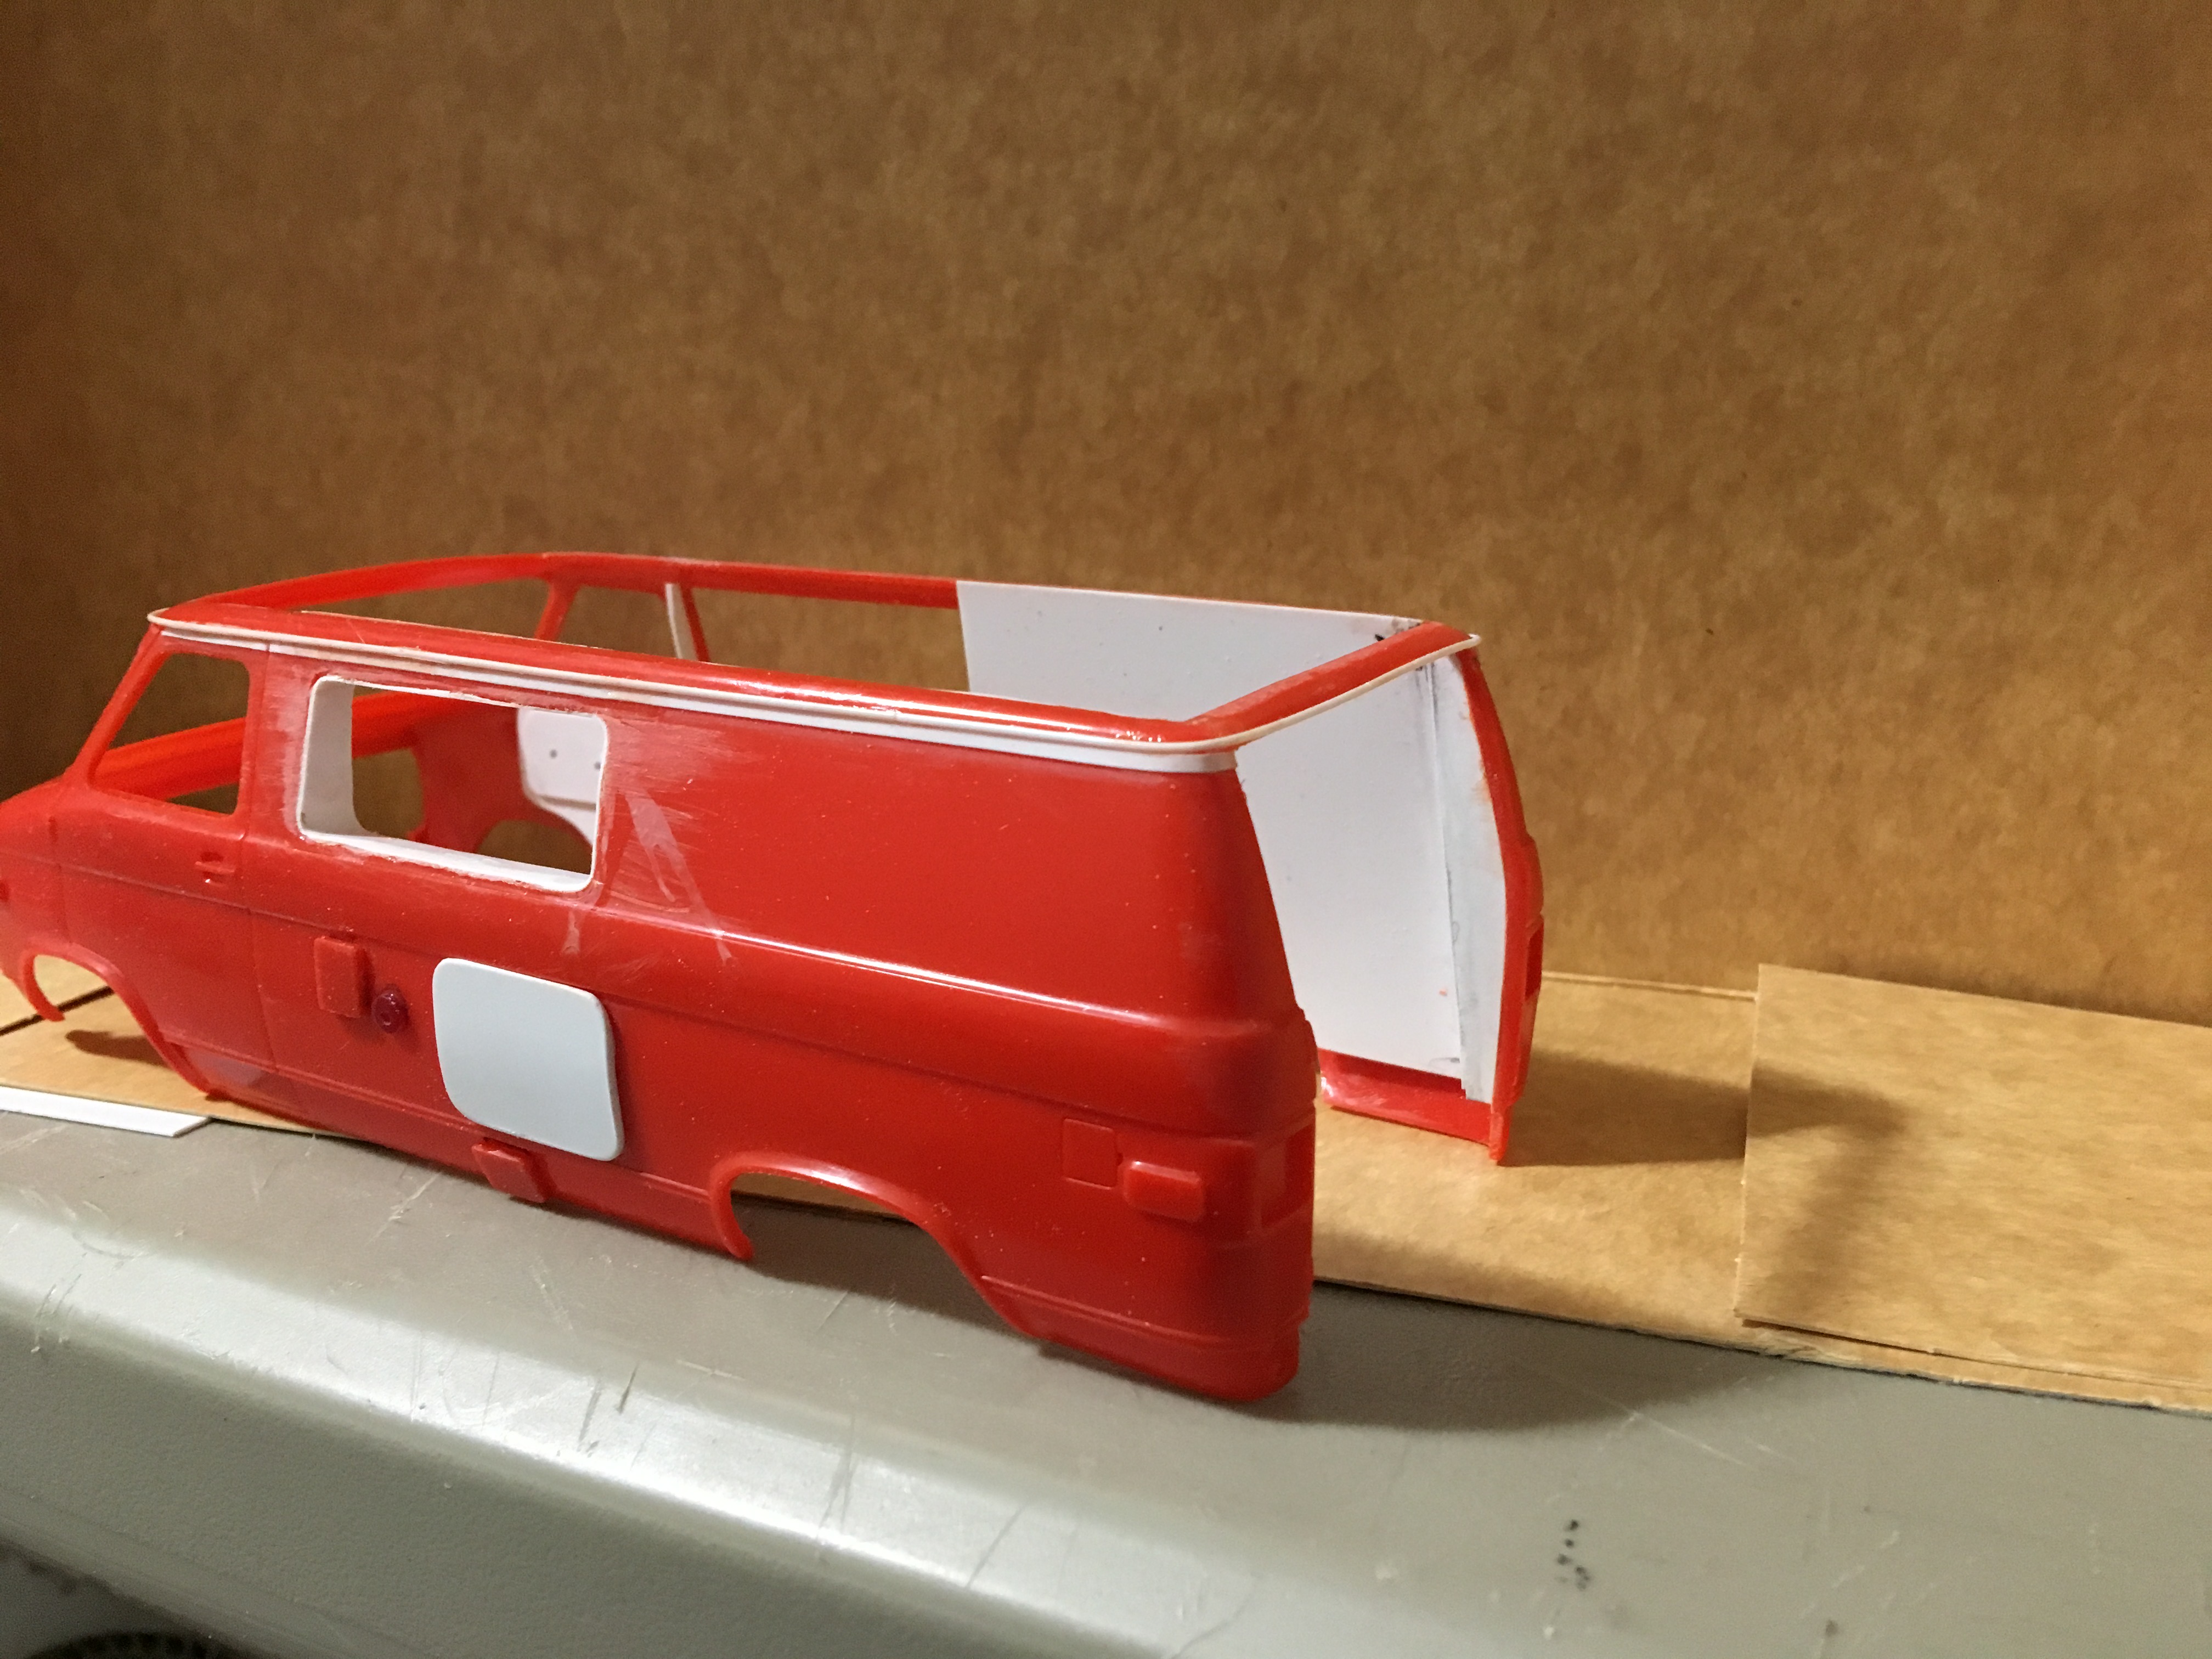
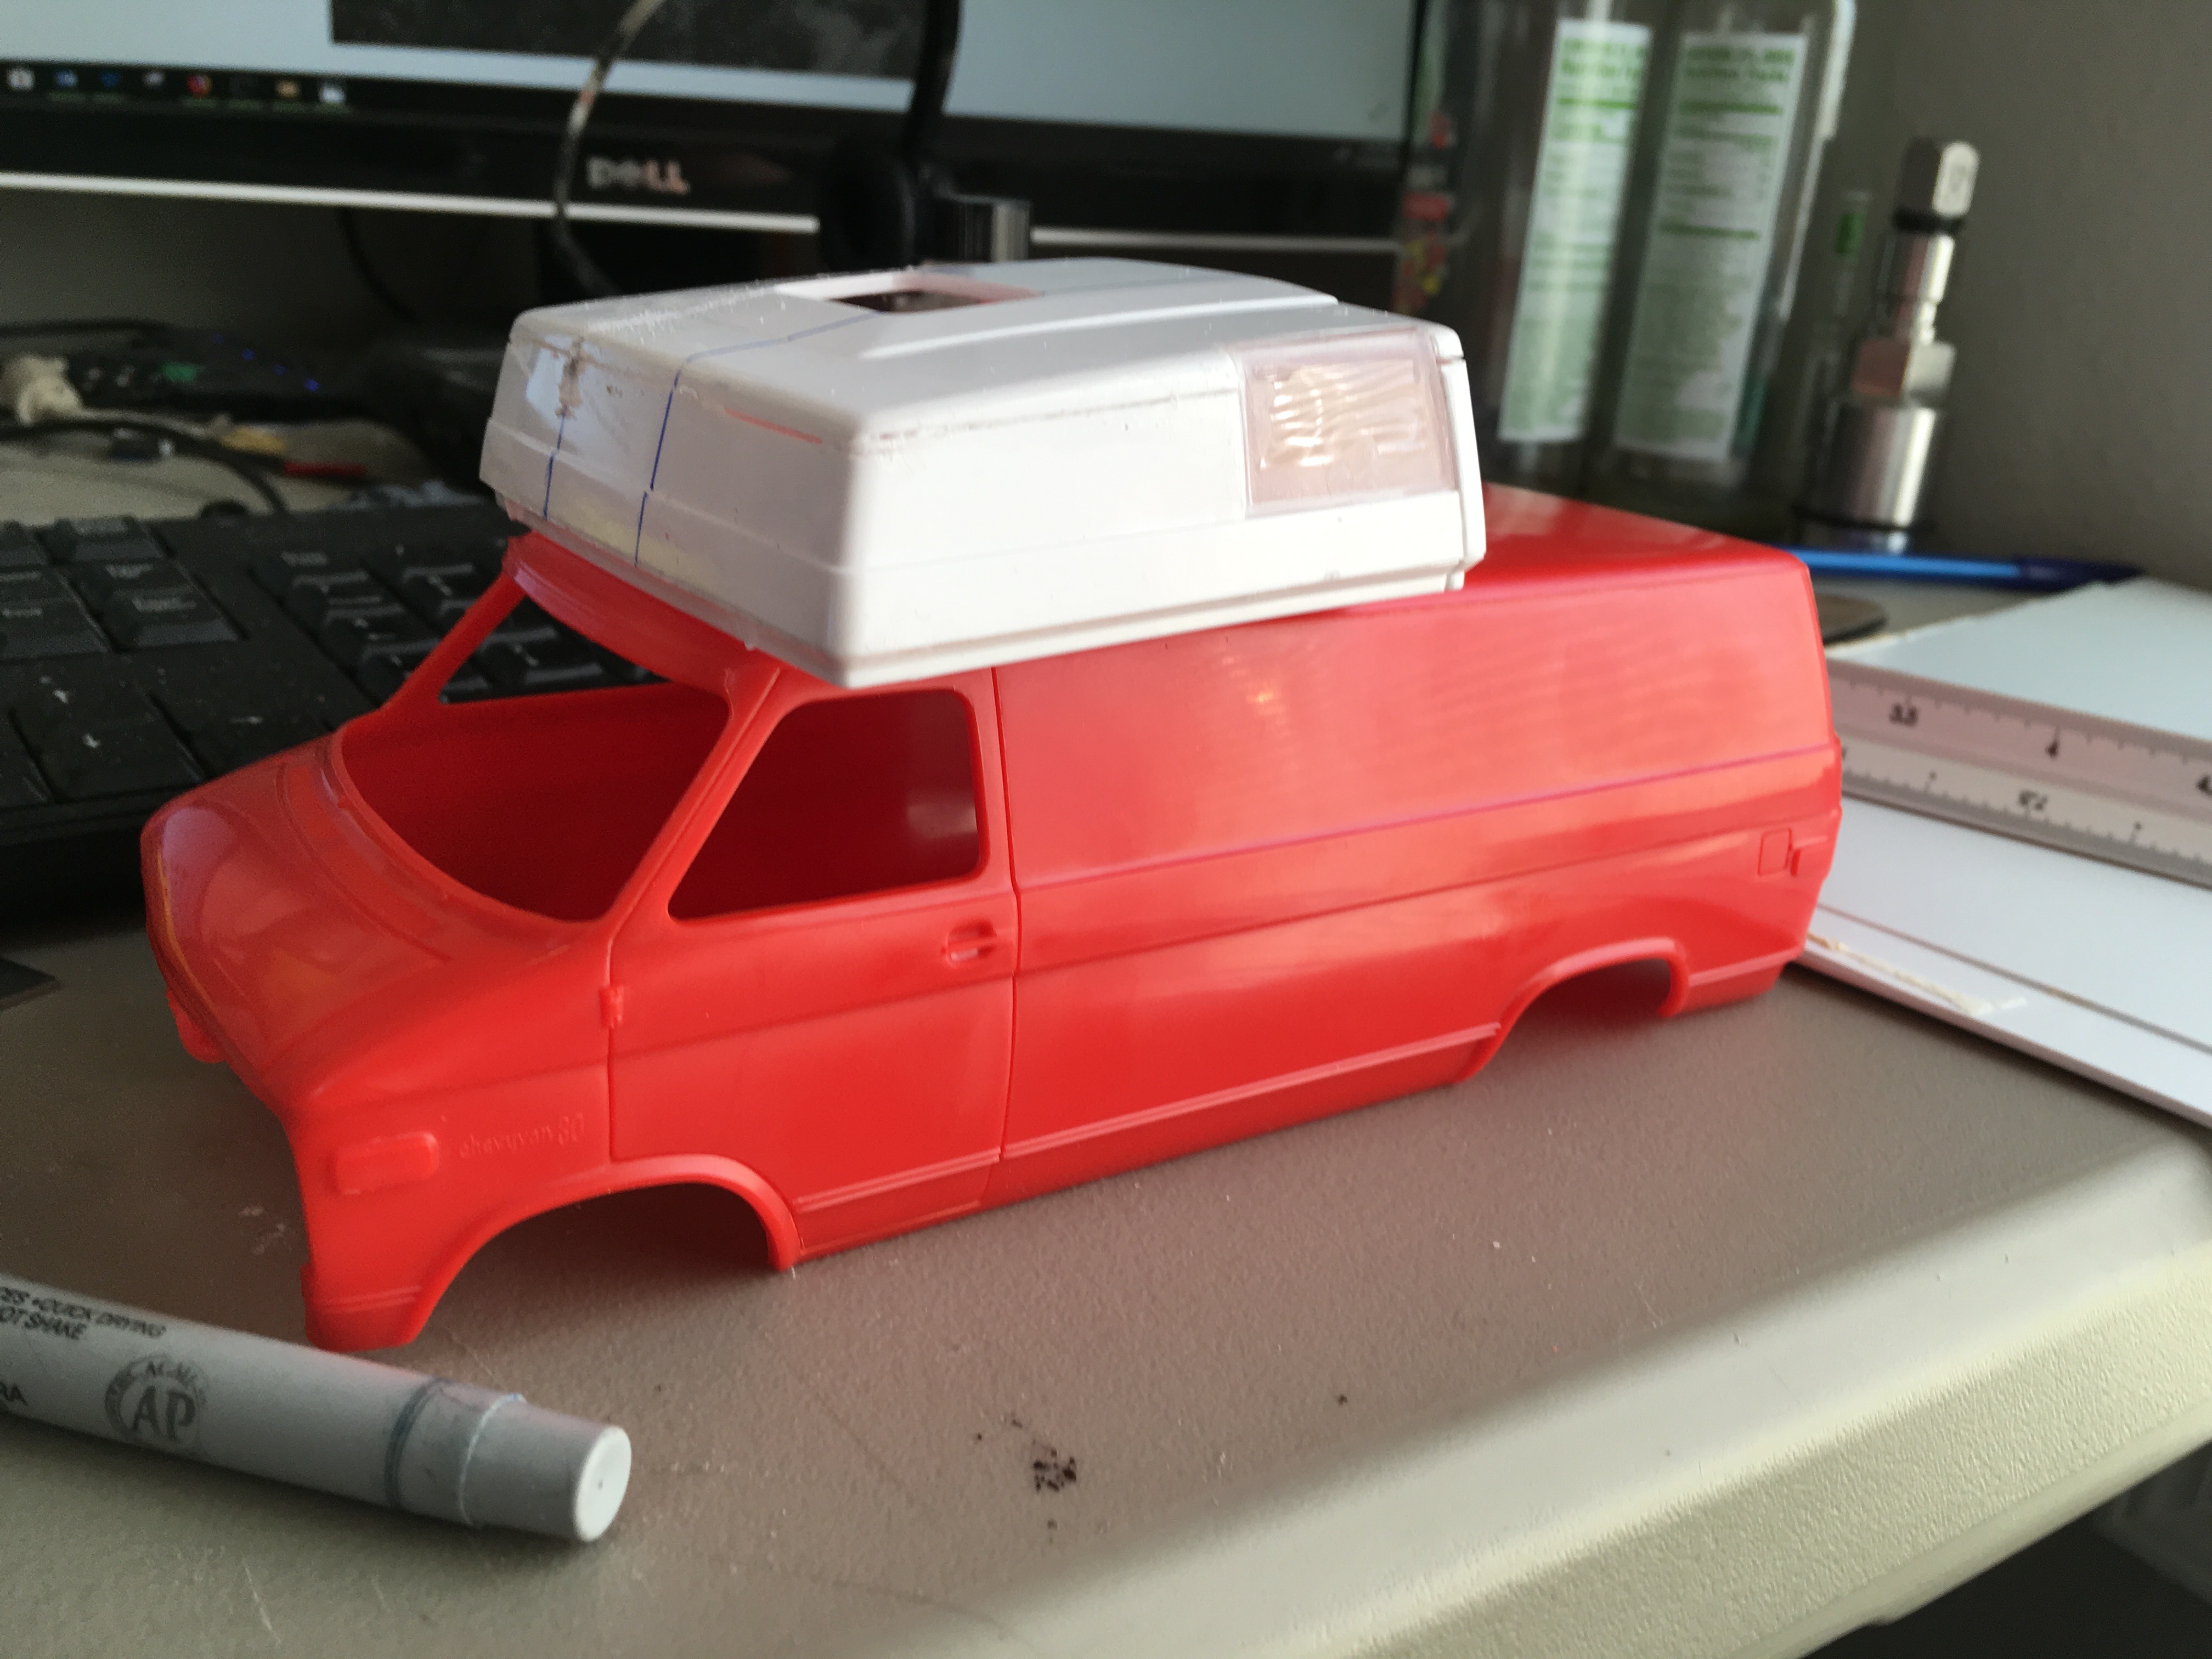
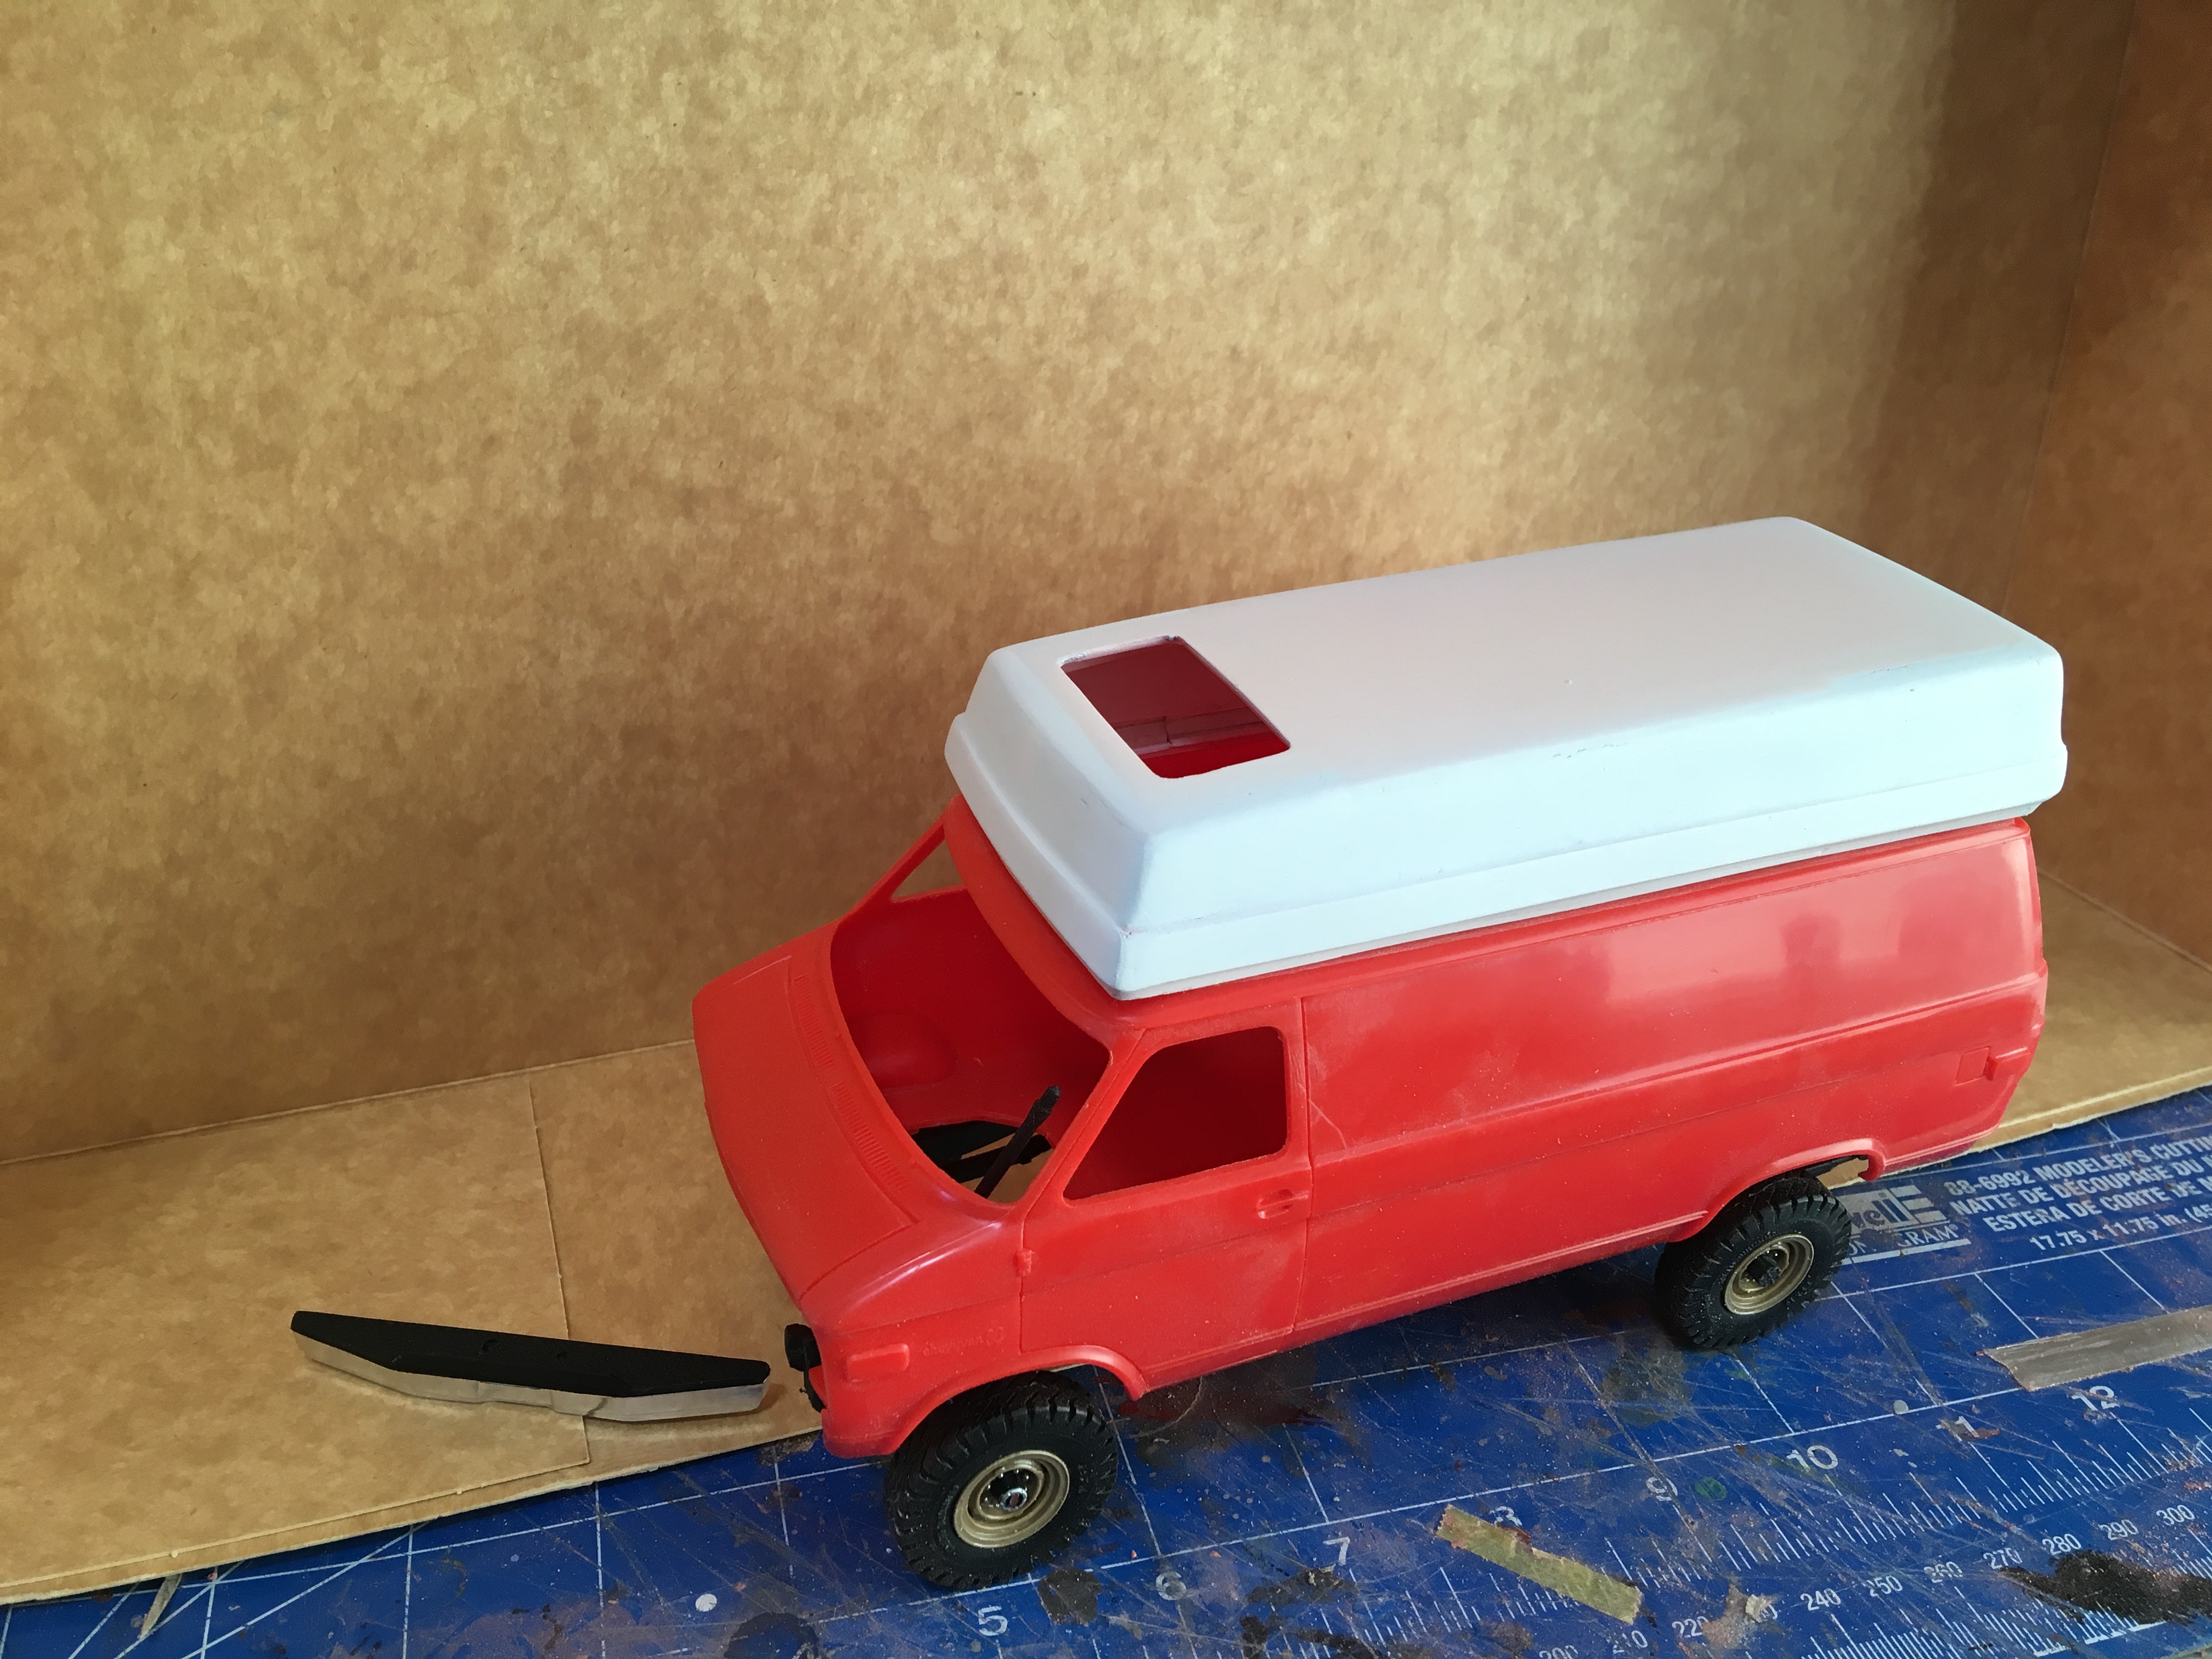
Next came the body mods. I want this to have a high roof. I am also building a Italeri MAN with a "Space Roof" top. I did not like it and removed it and made a new roof, but it seemed like it had good bones to make a high roof for this. So, I cut it, narrowed it, the lengthened it and put it all back together with lots of sheet styrene and the original roof section cut out of the van.
-
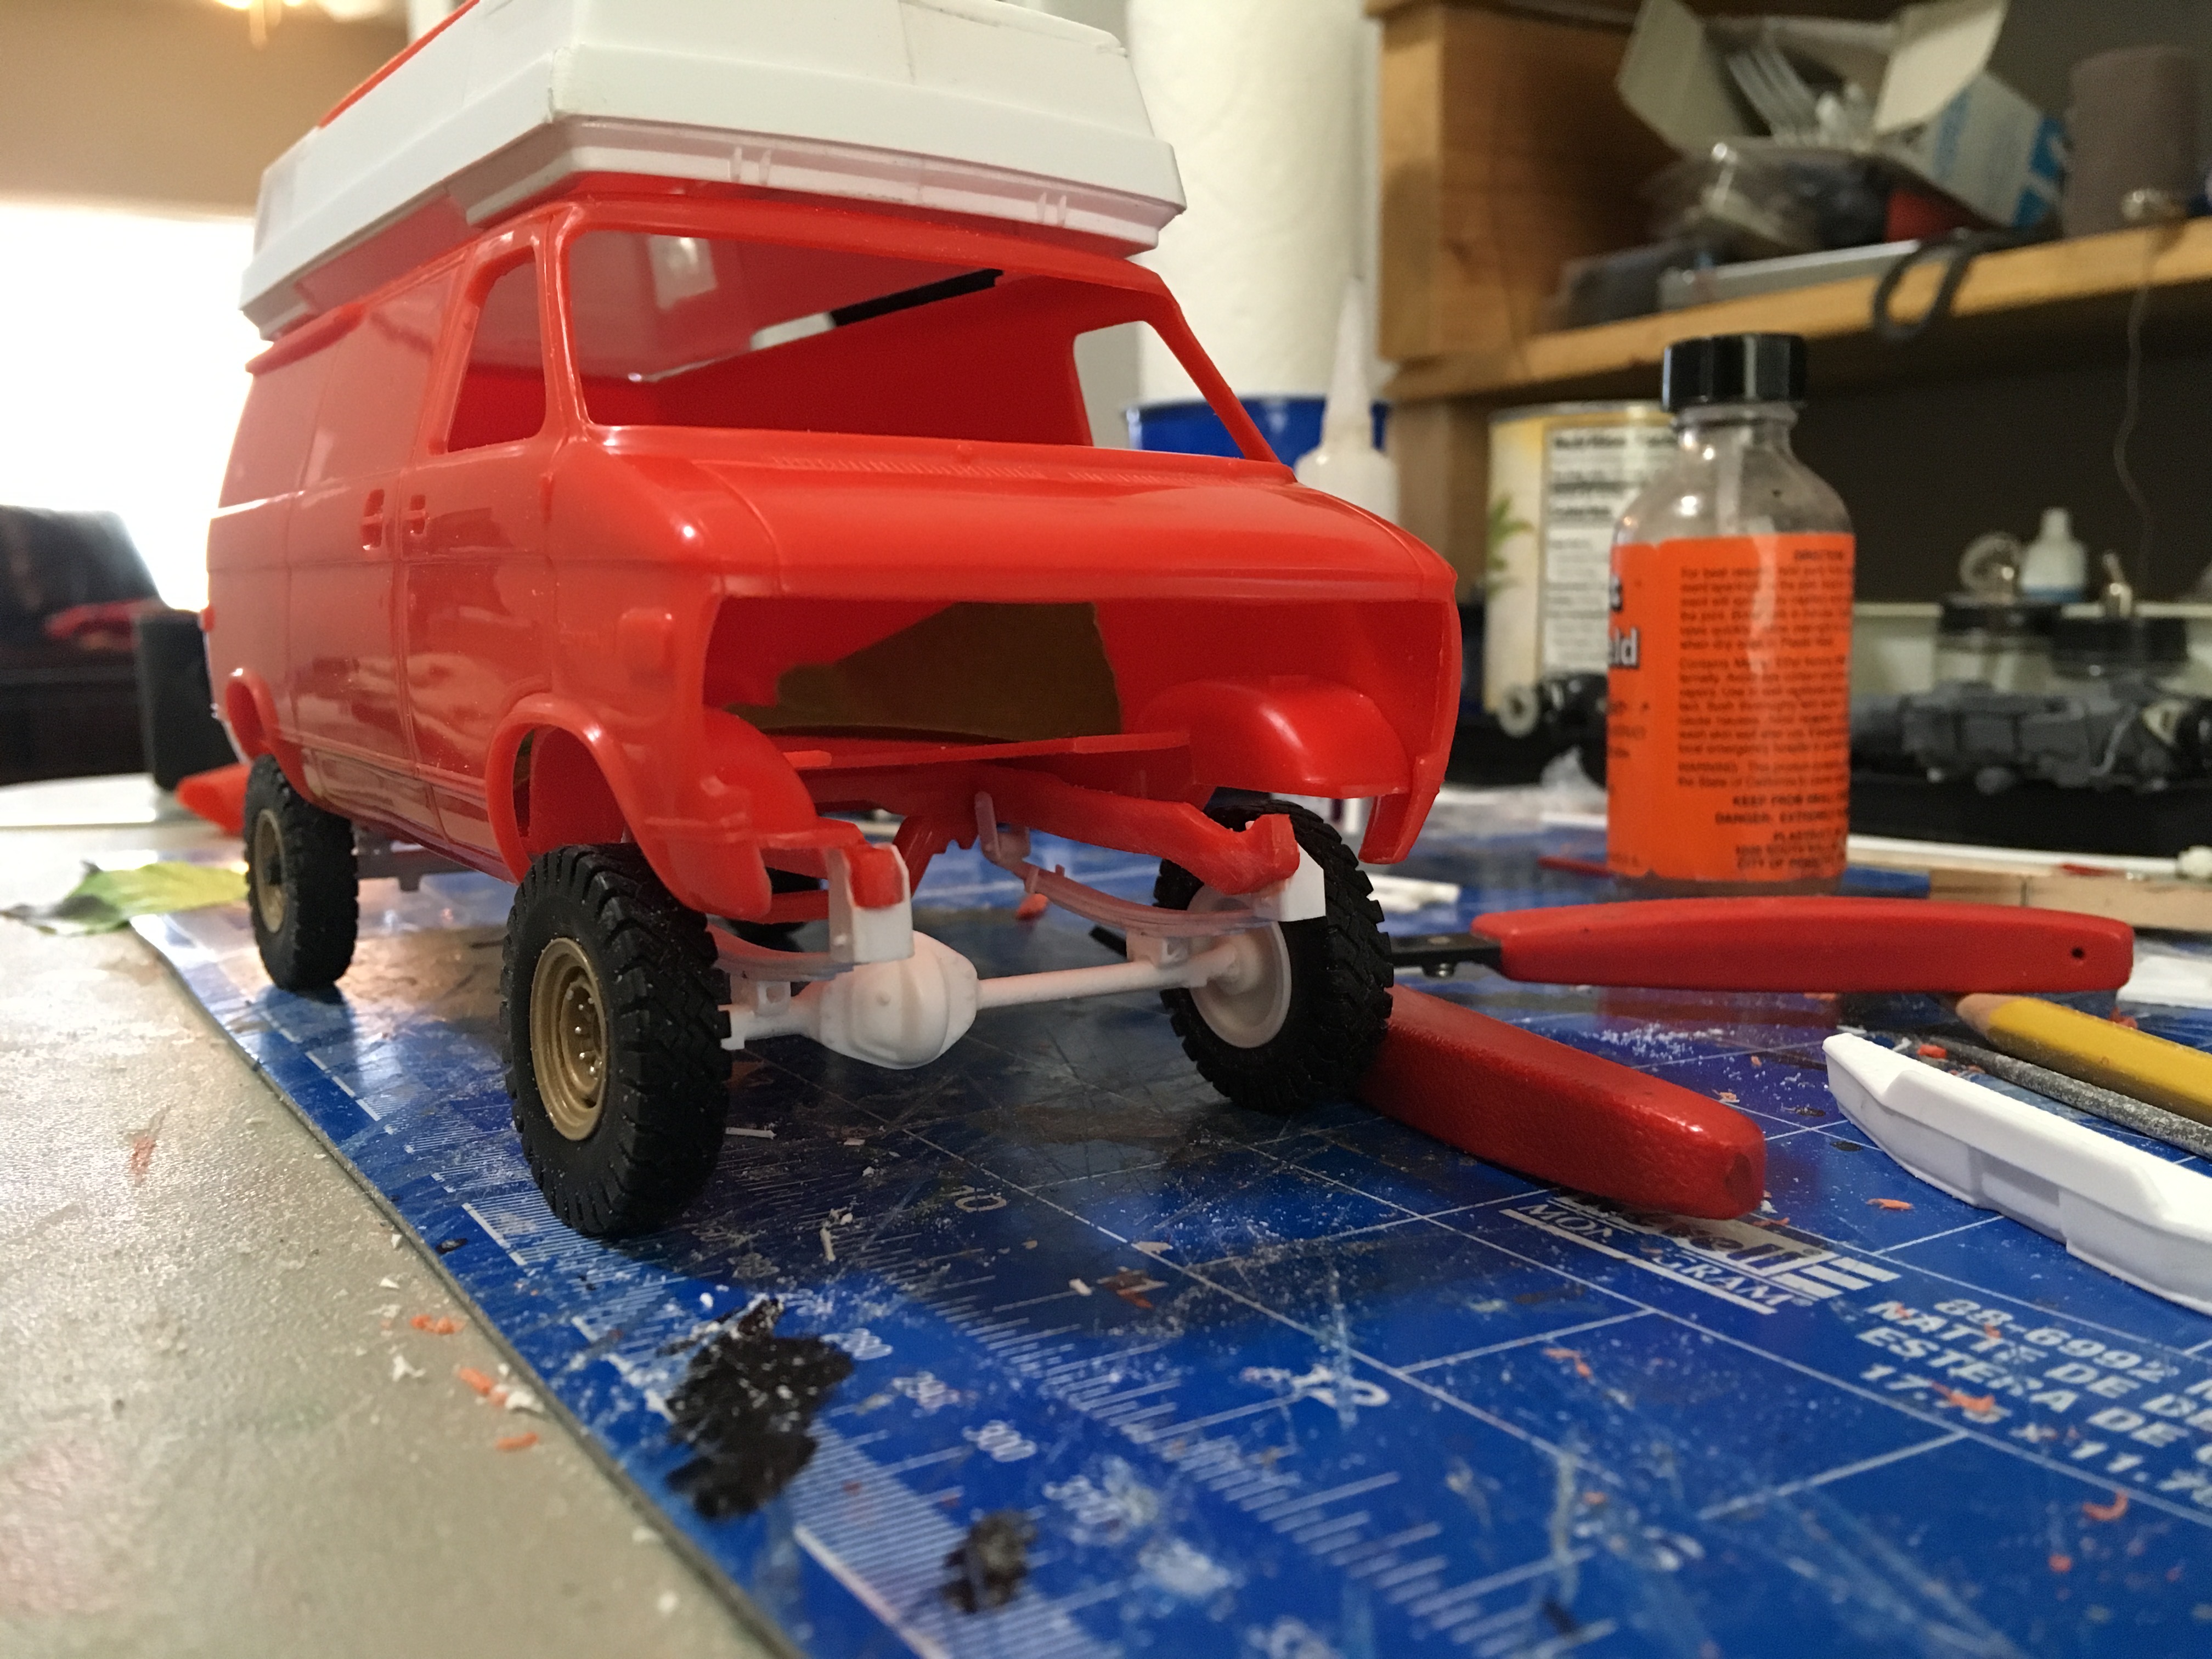
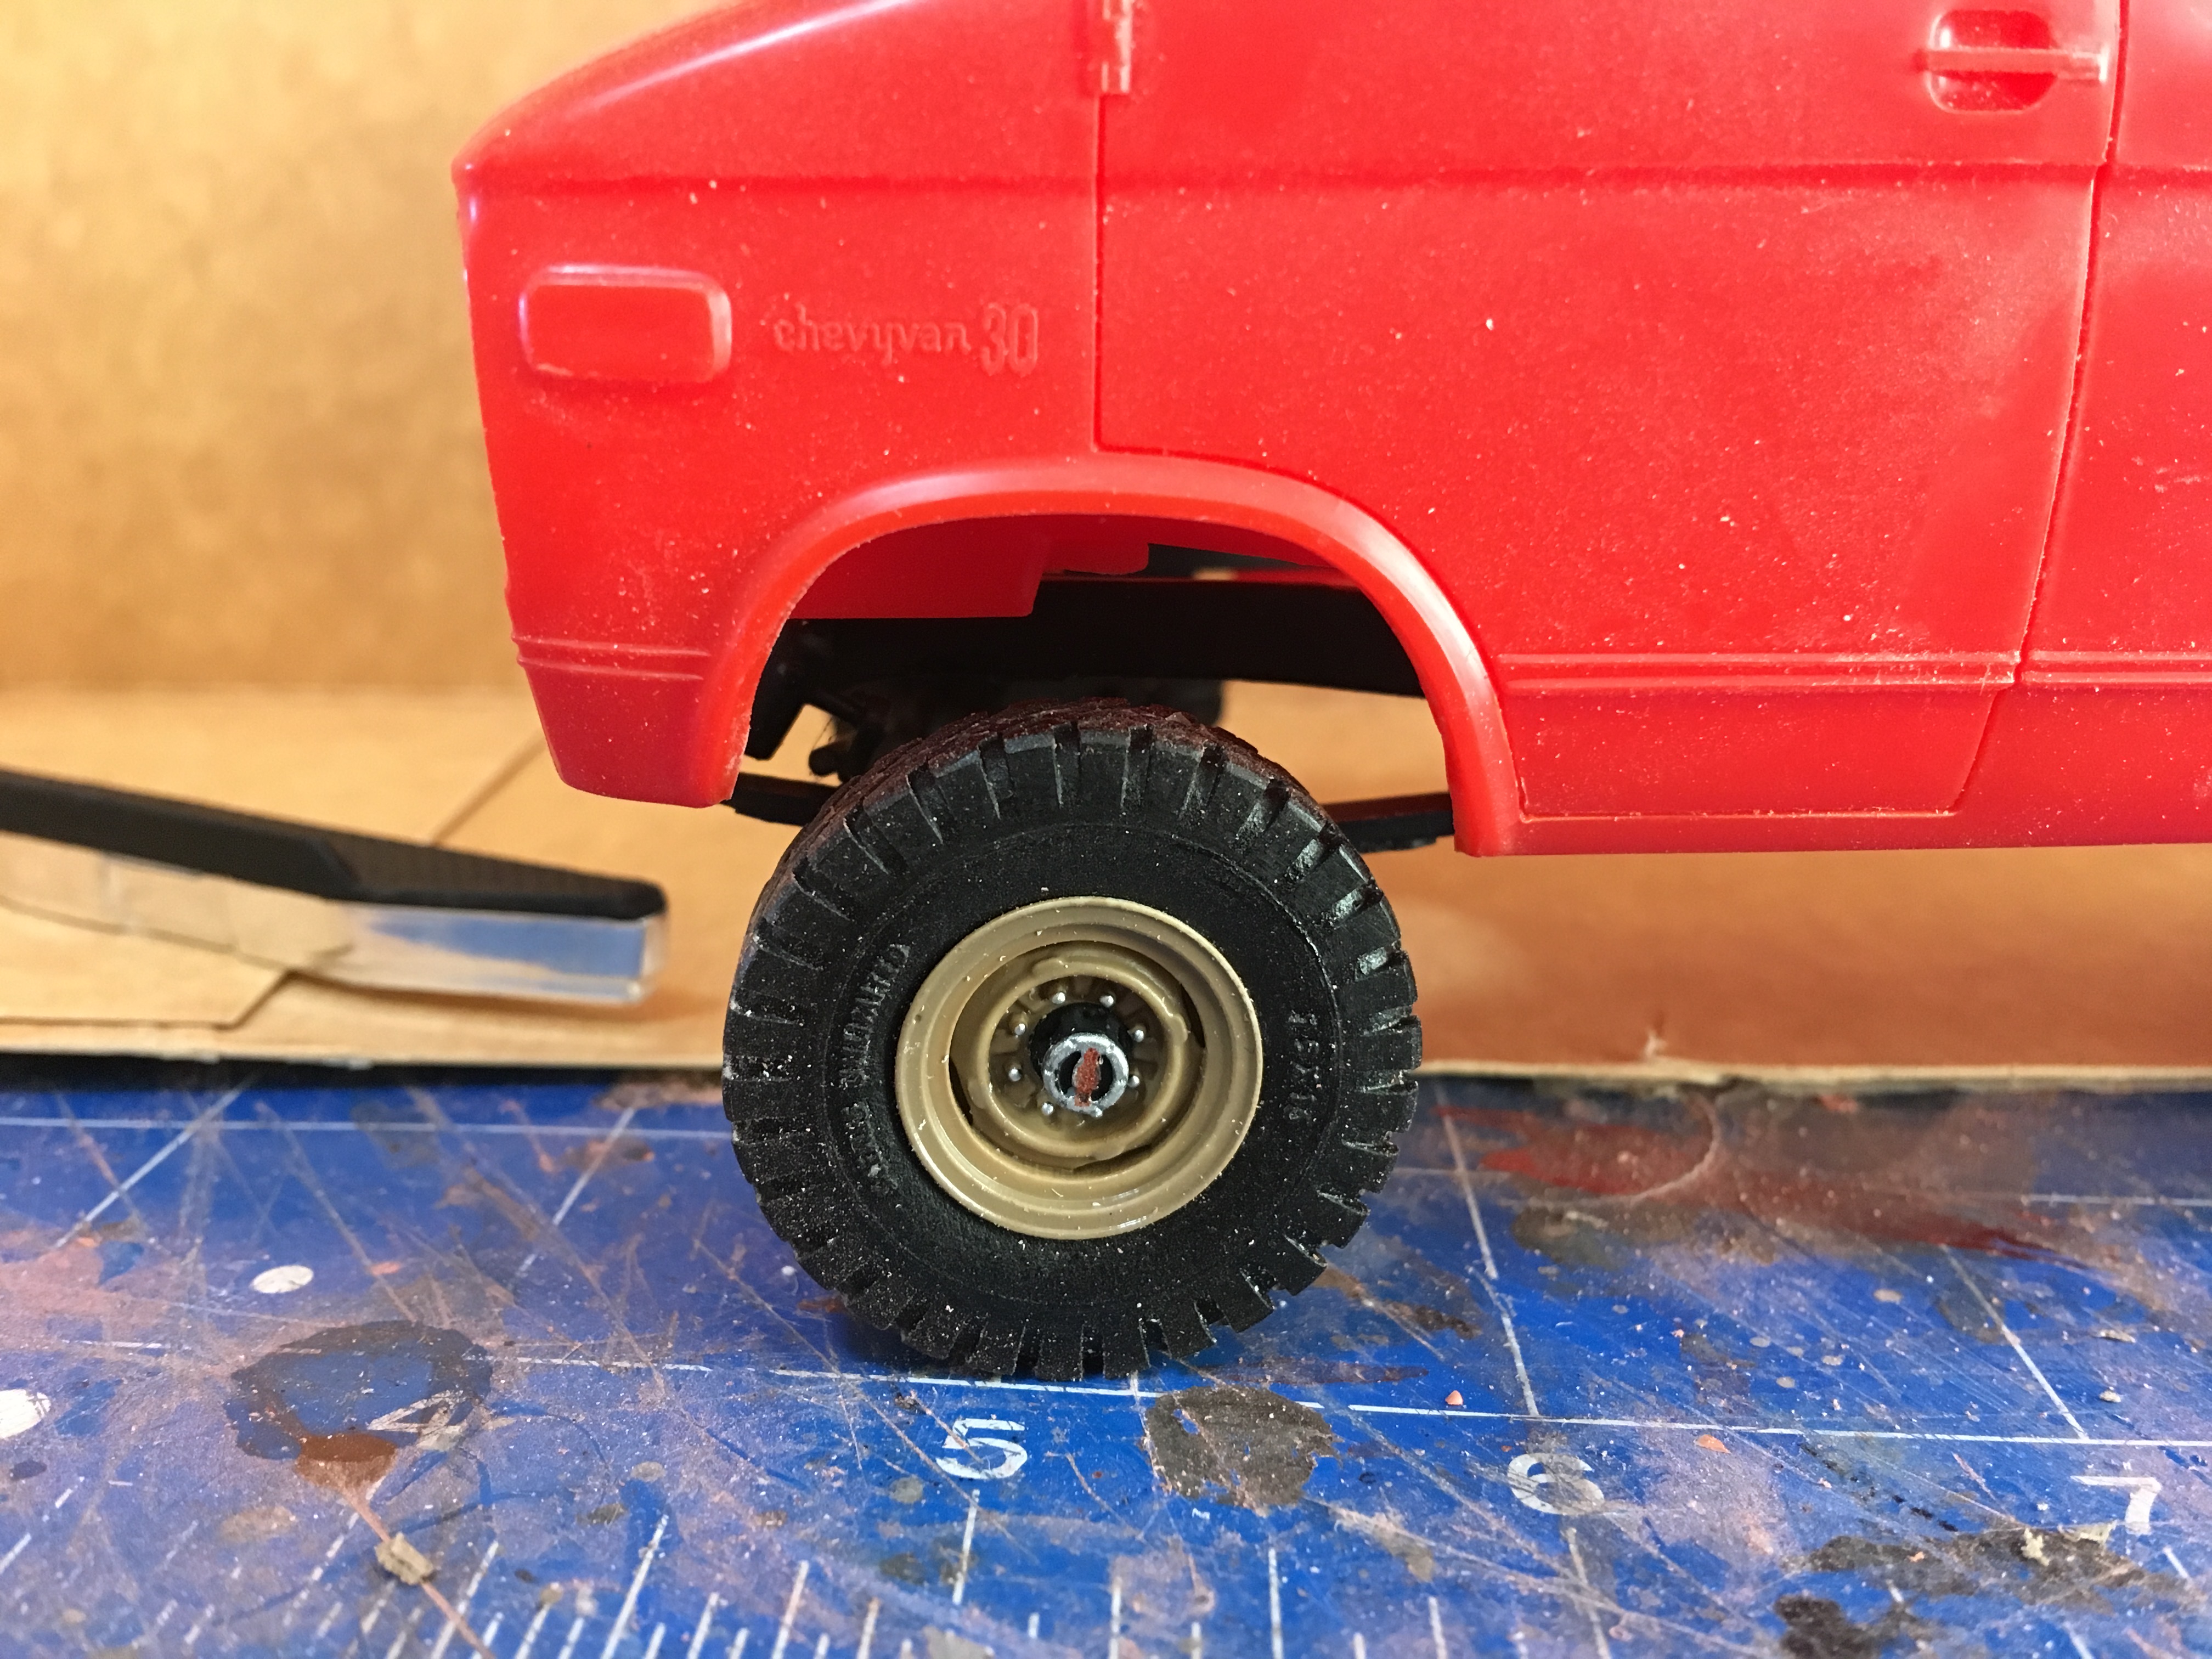
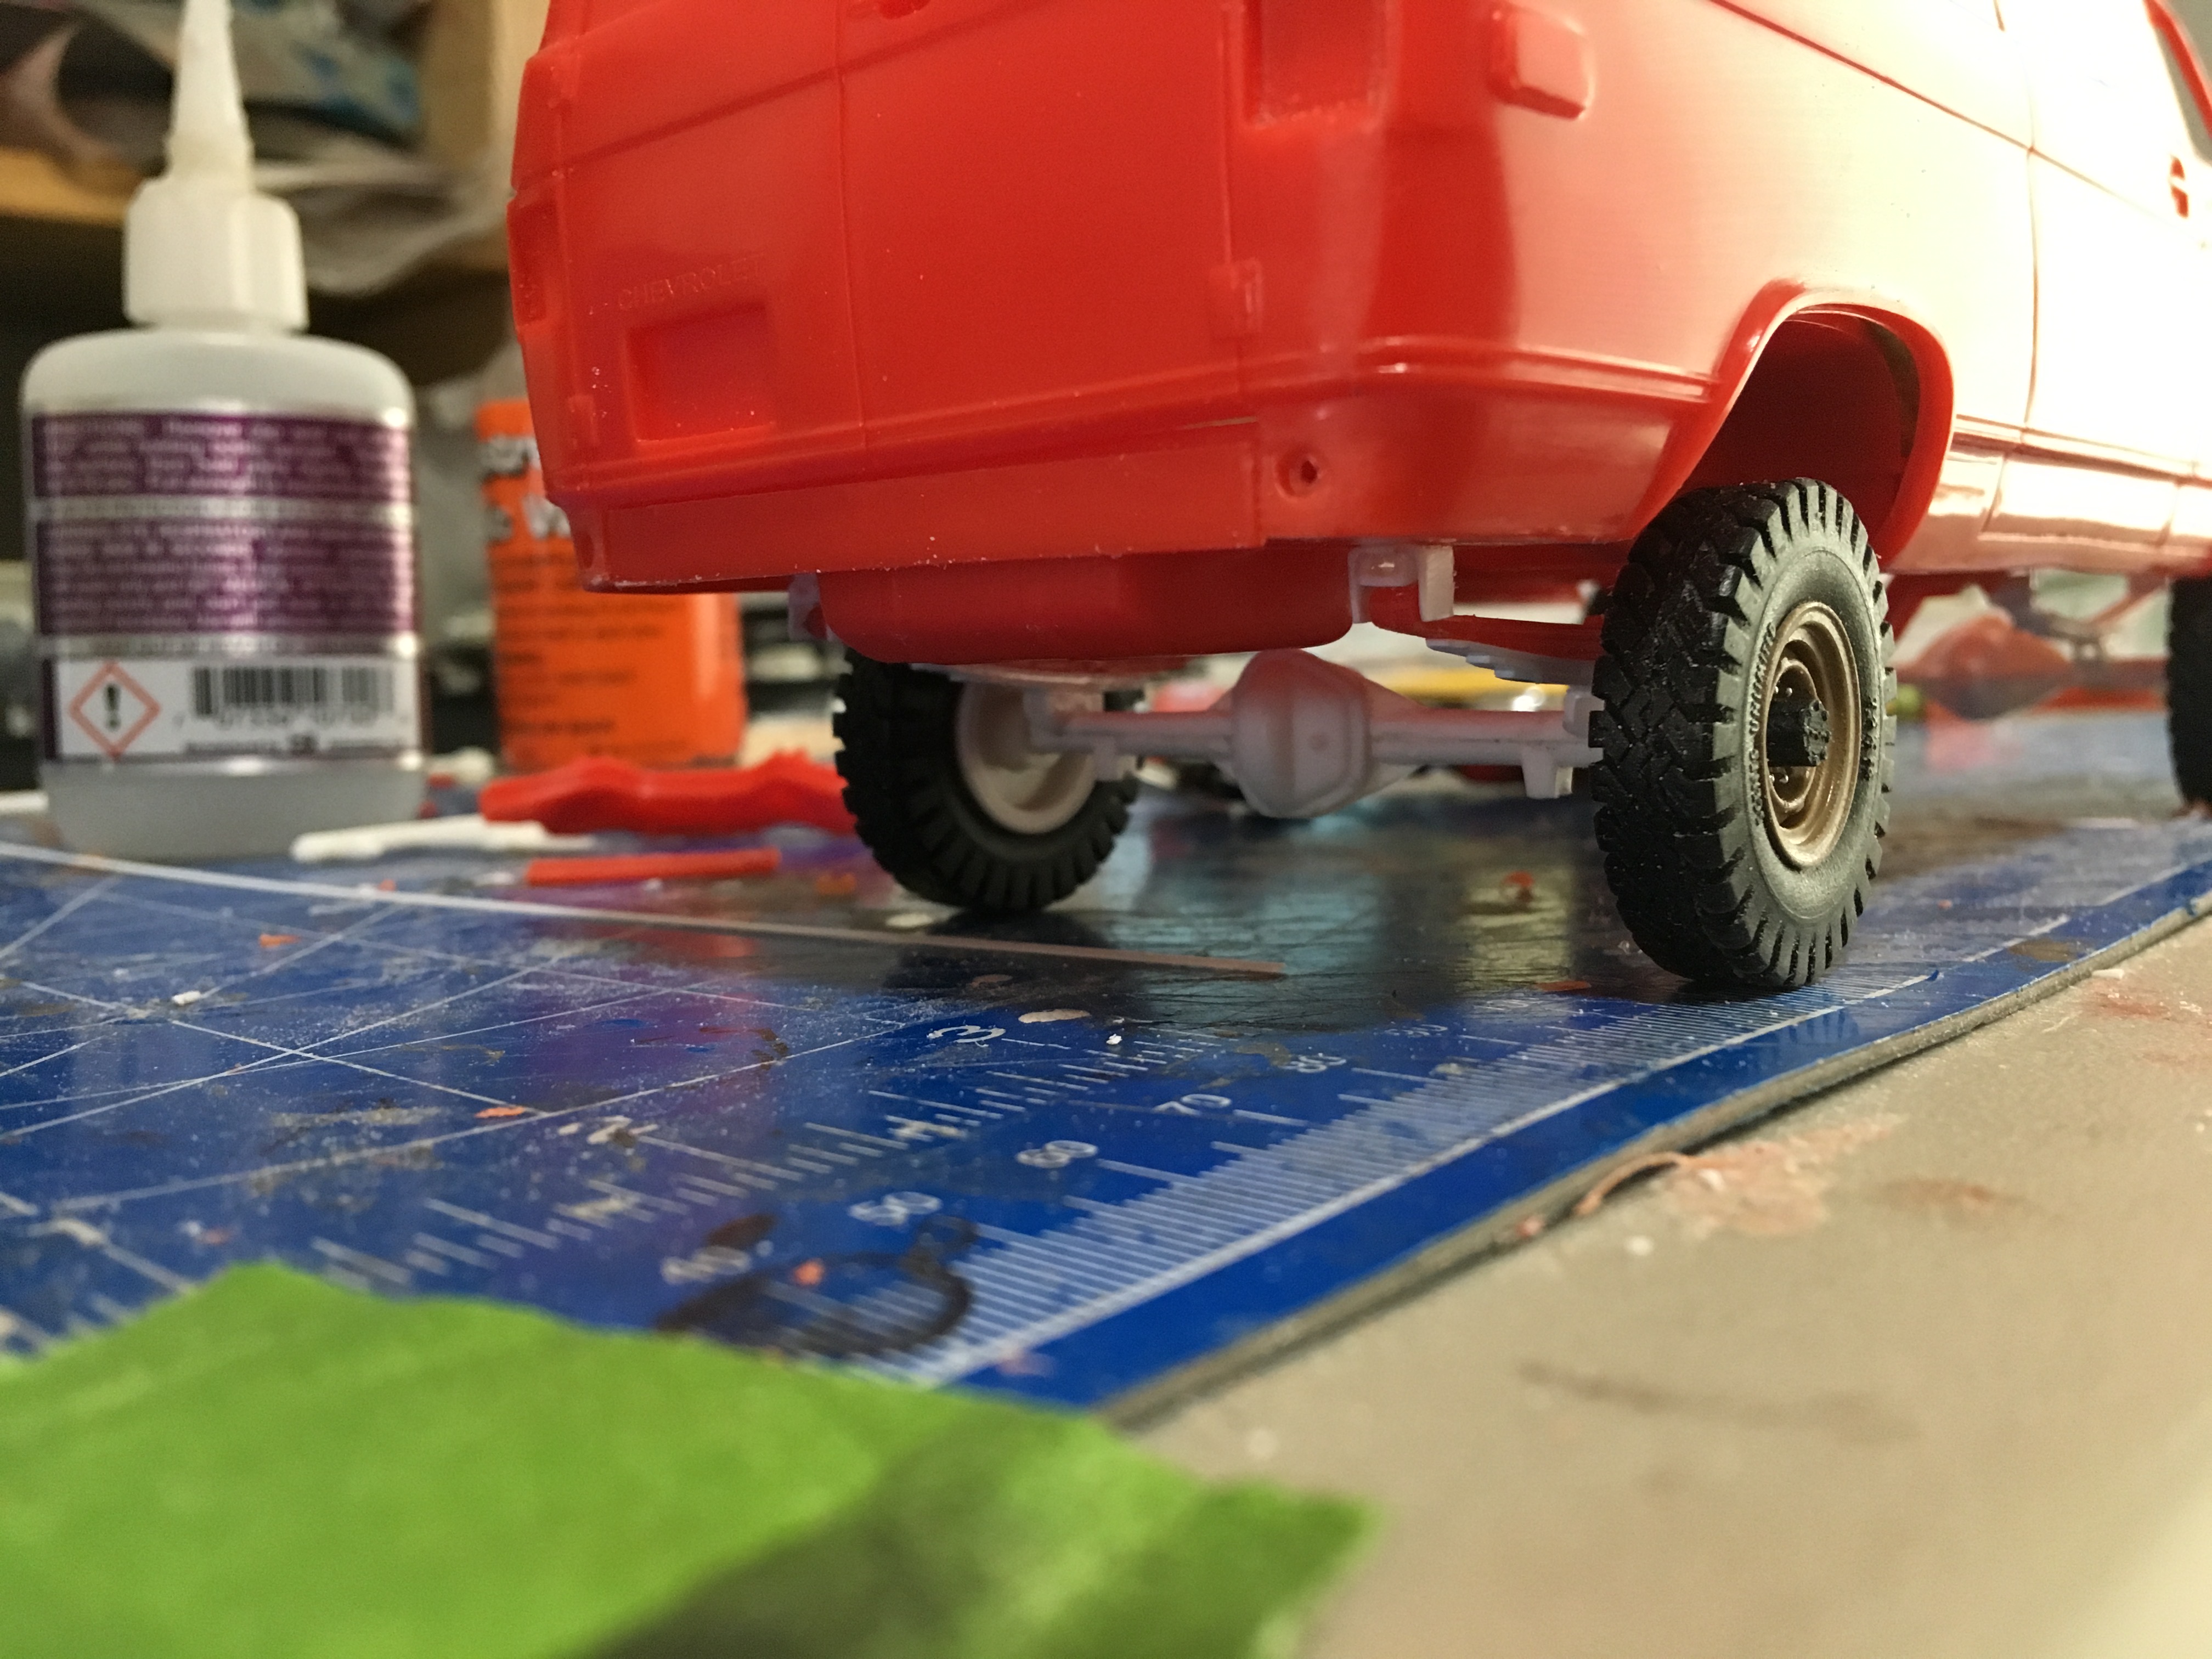
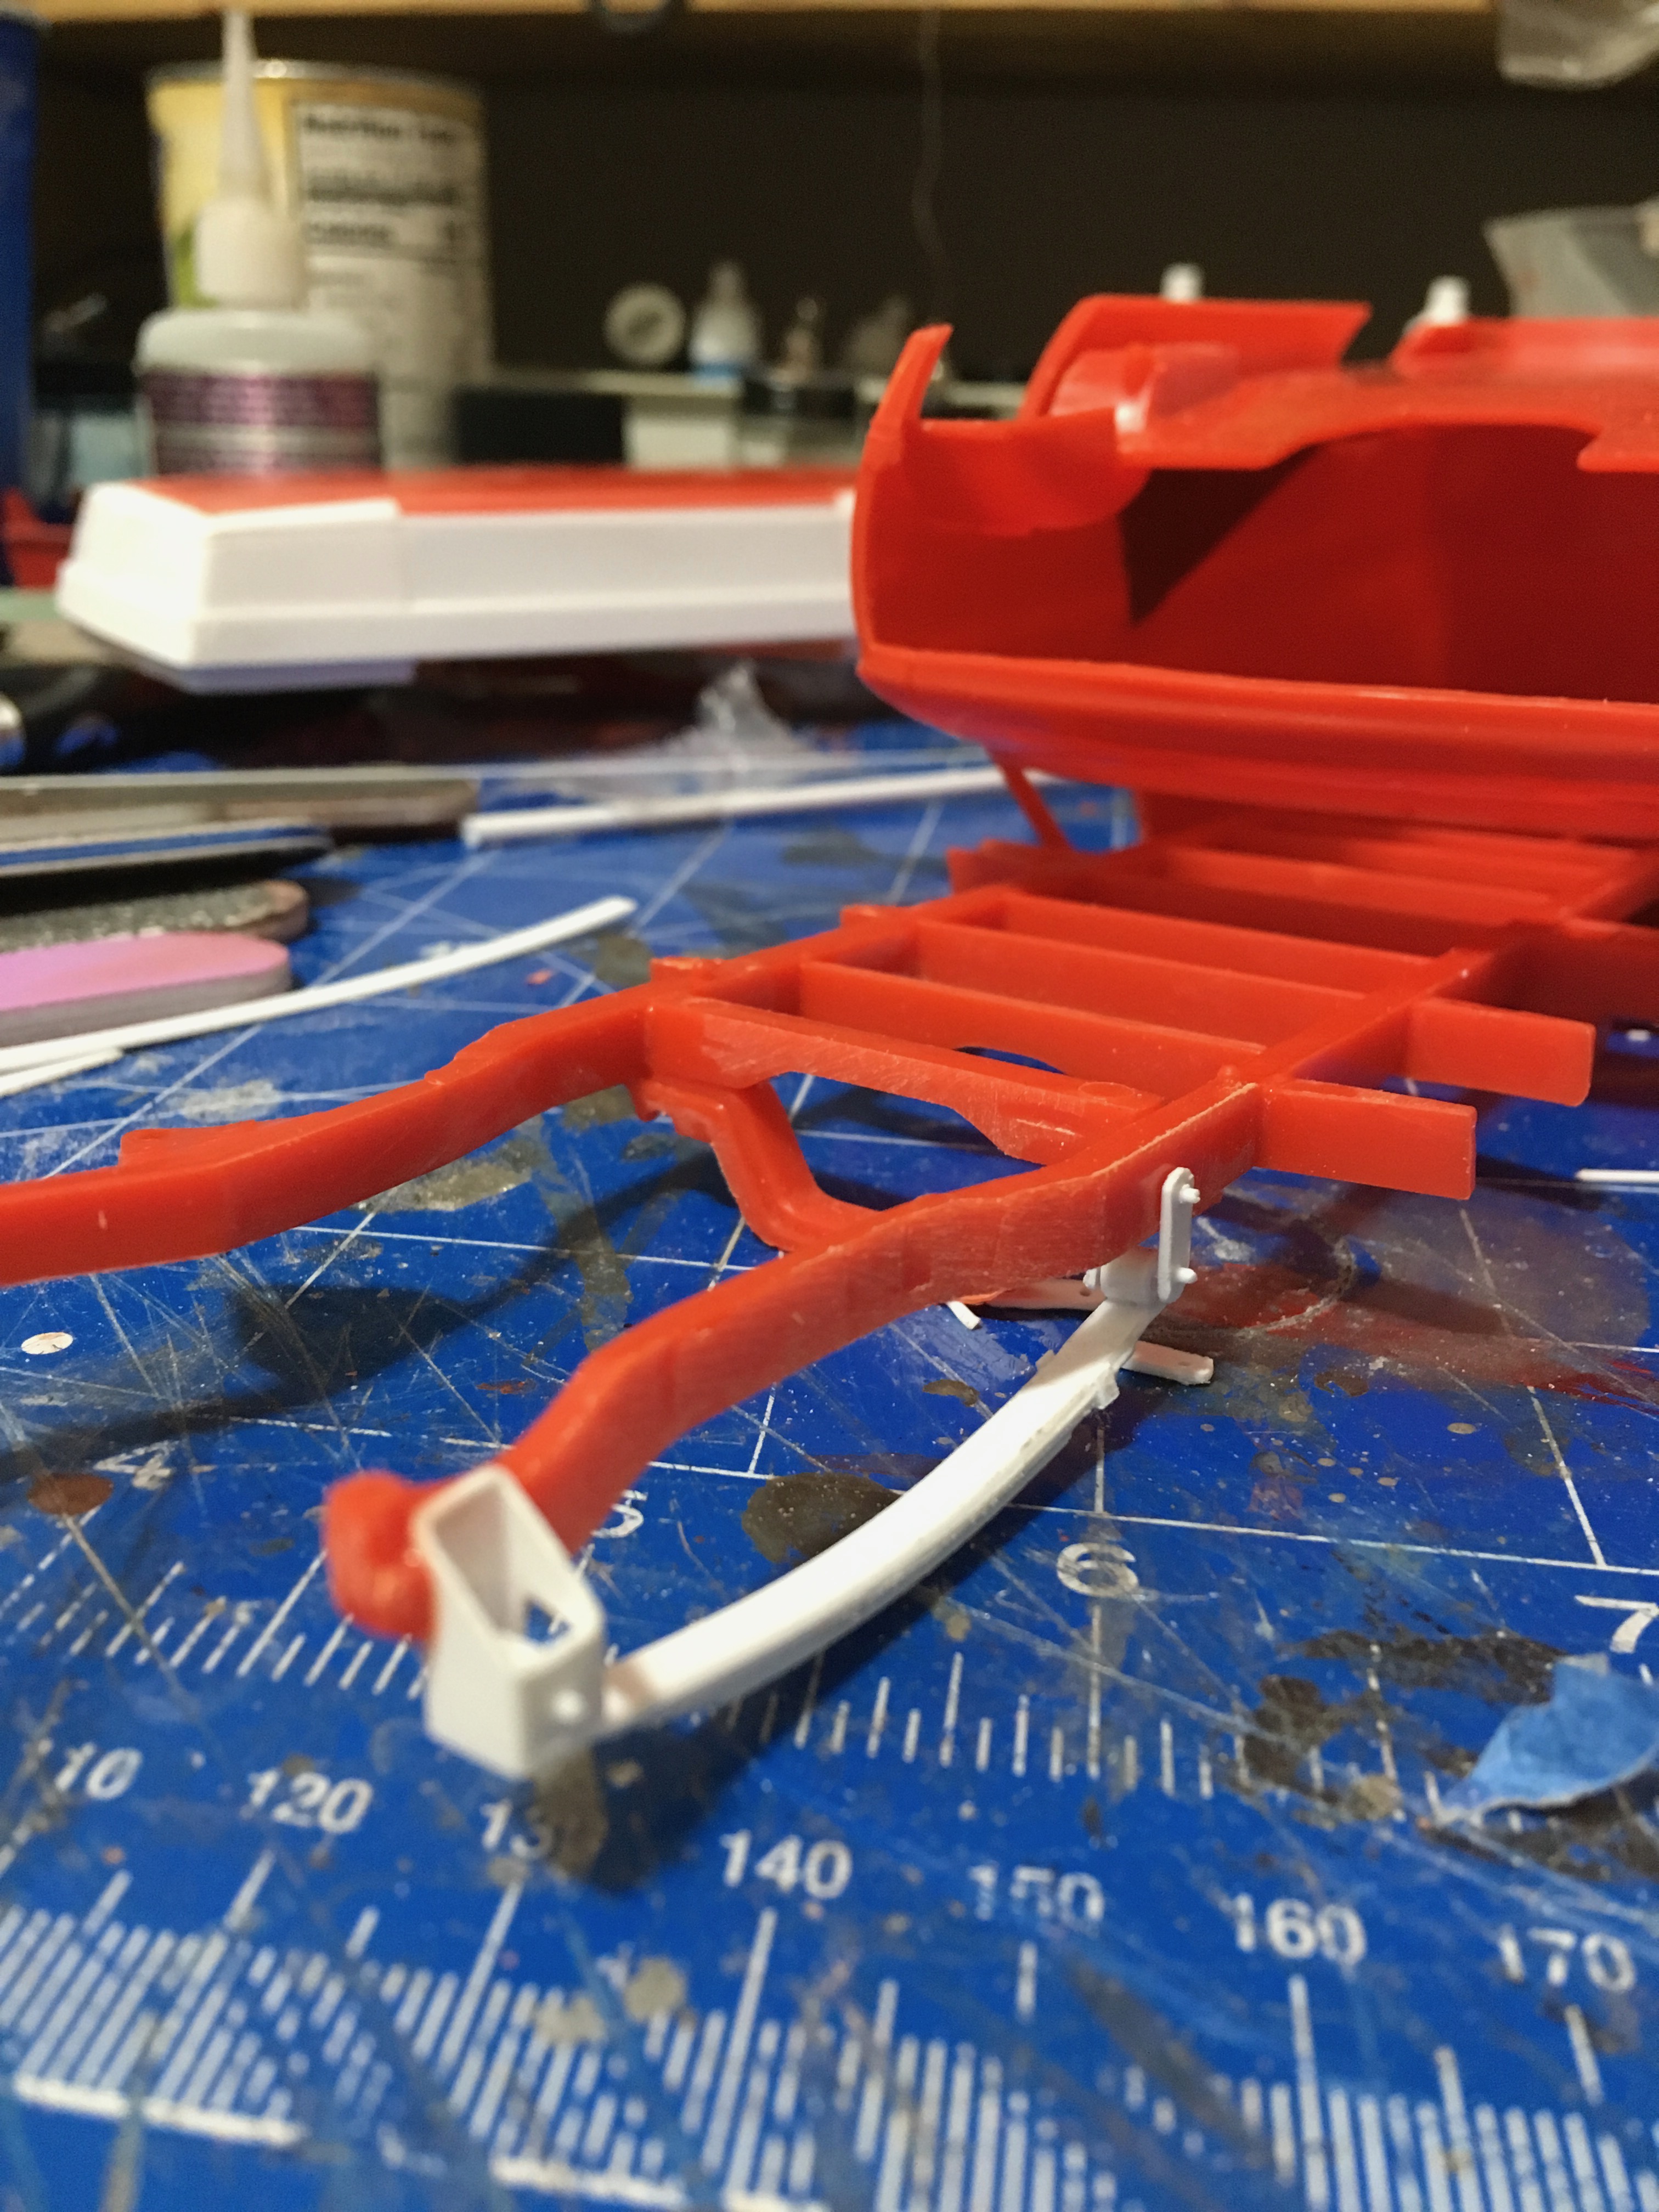
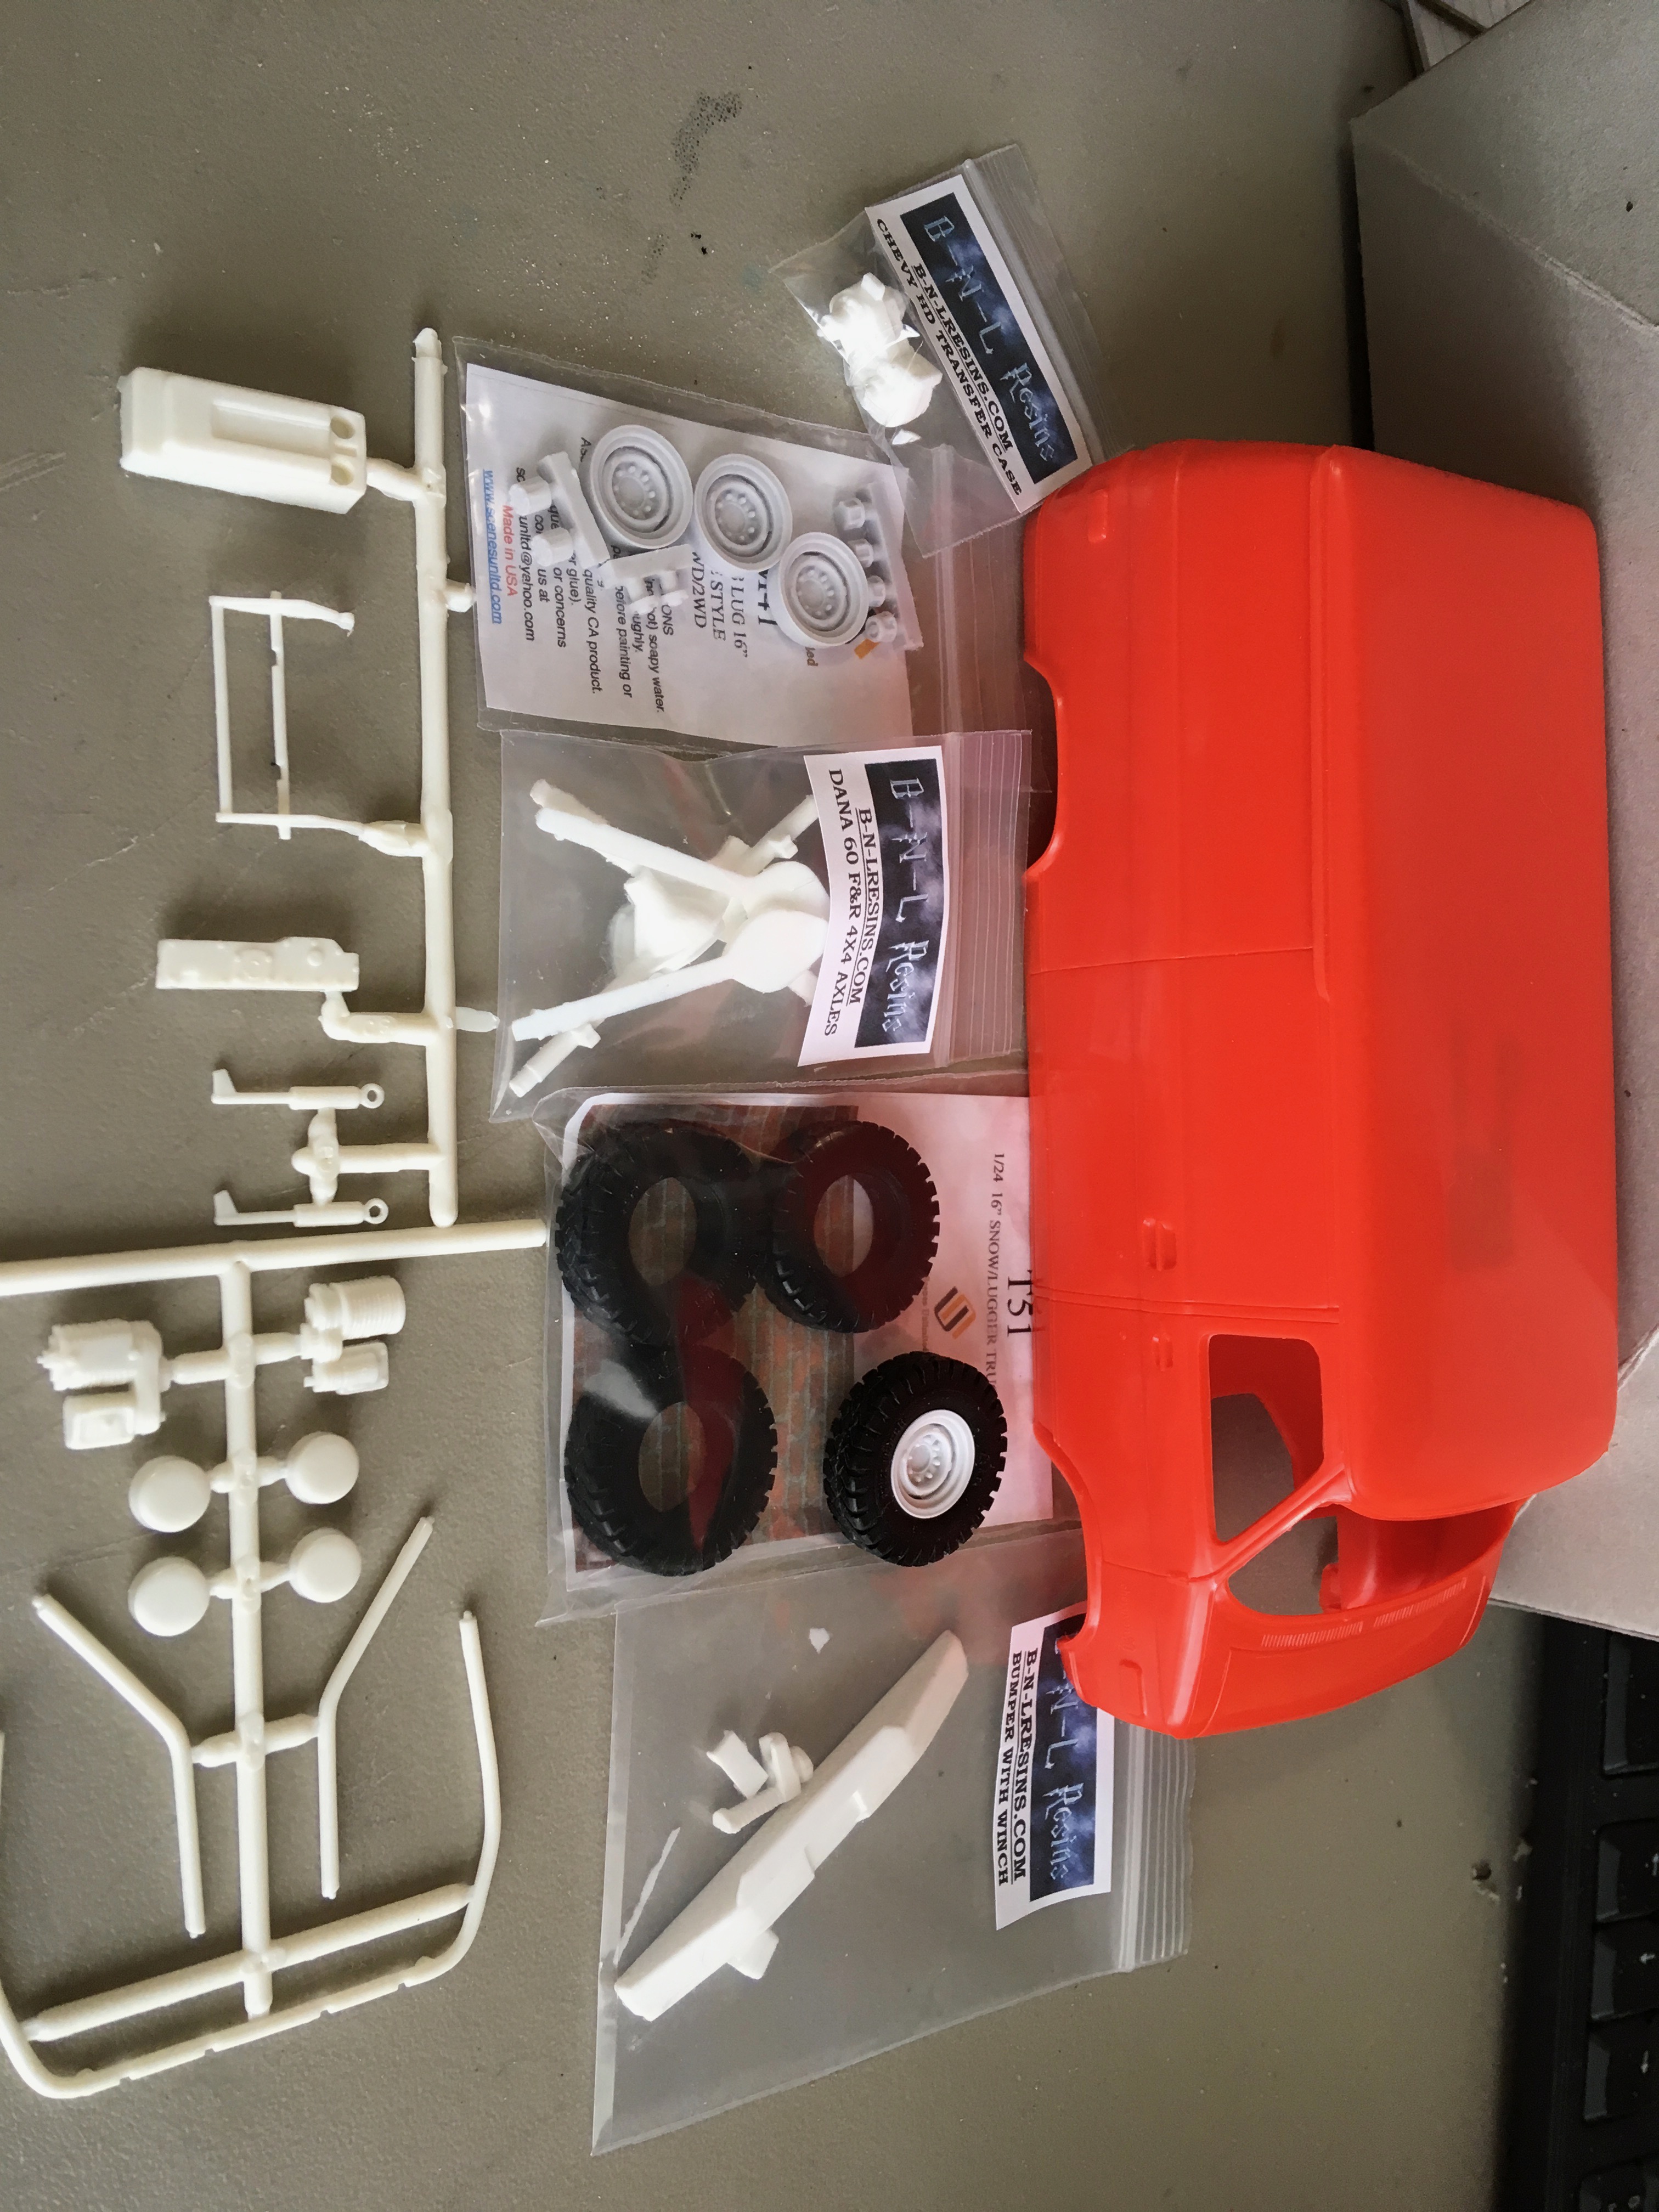
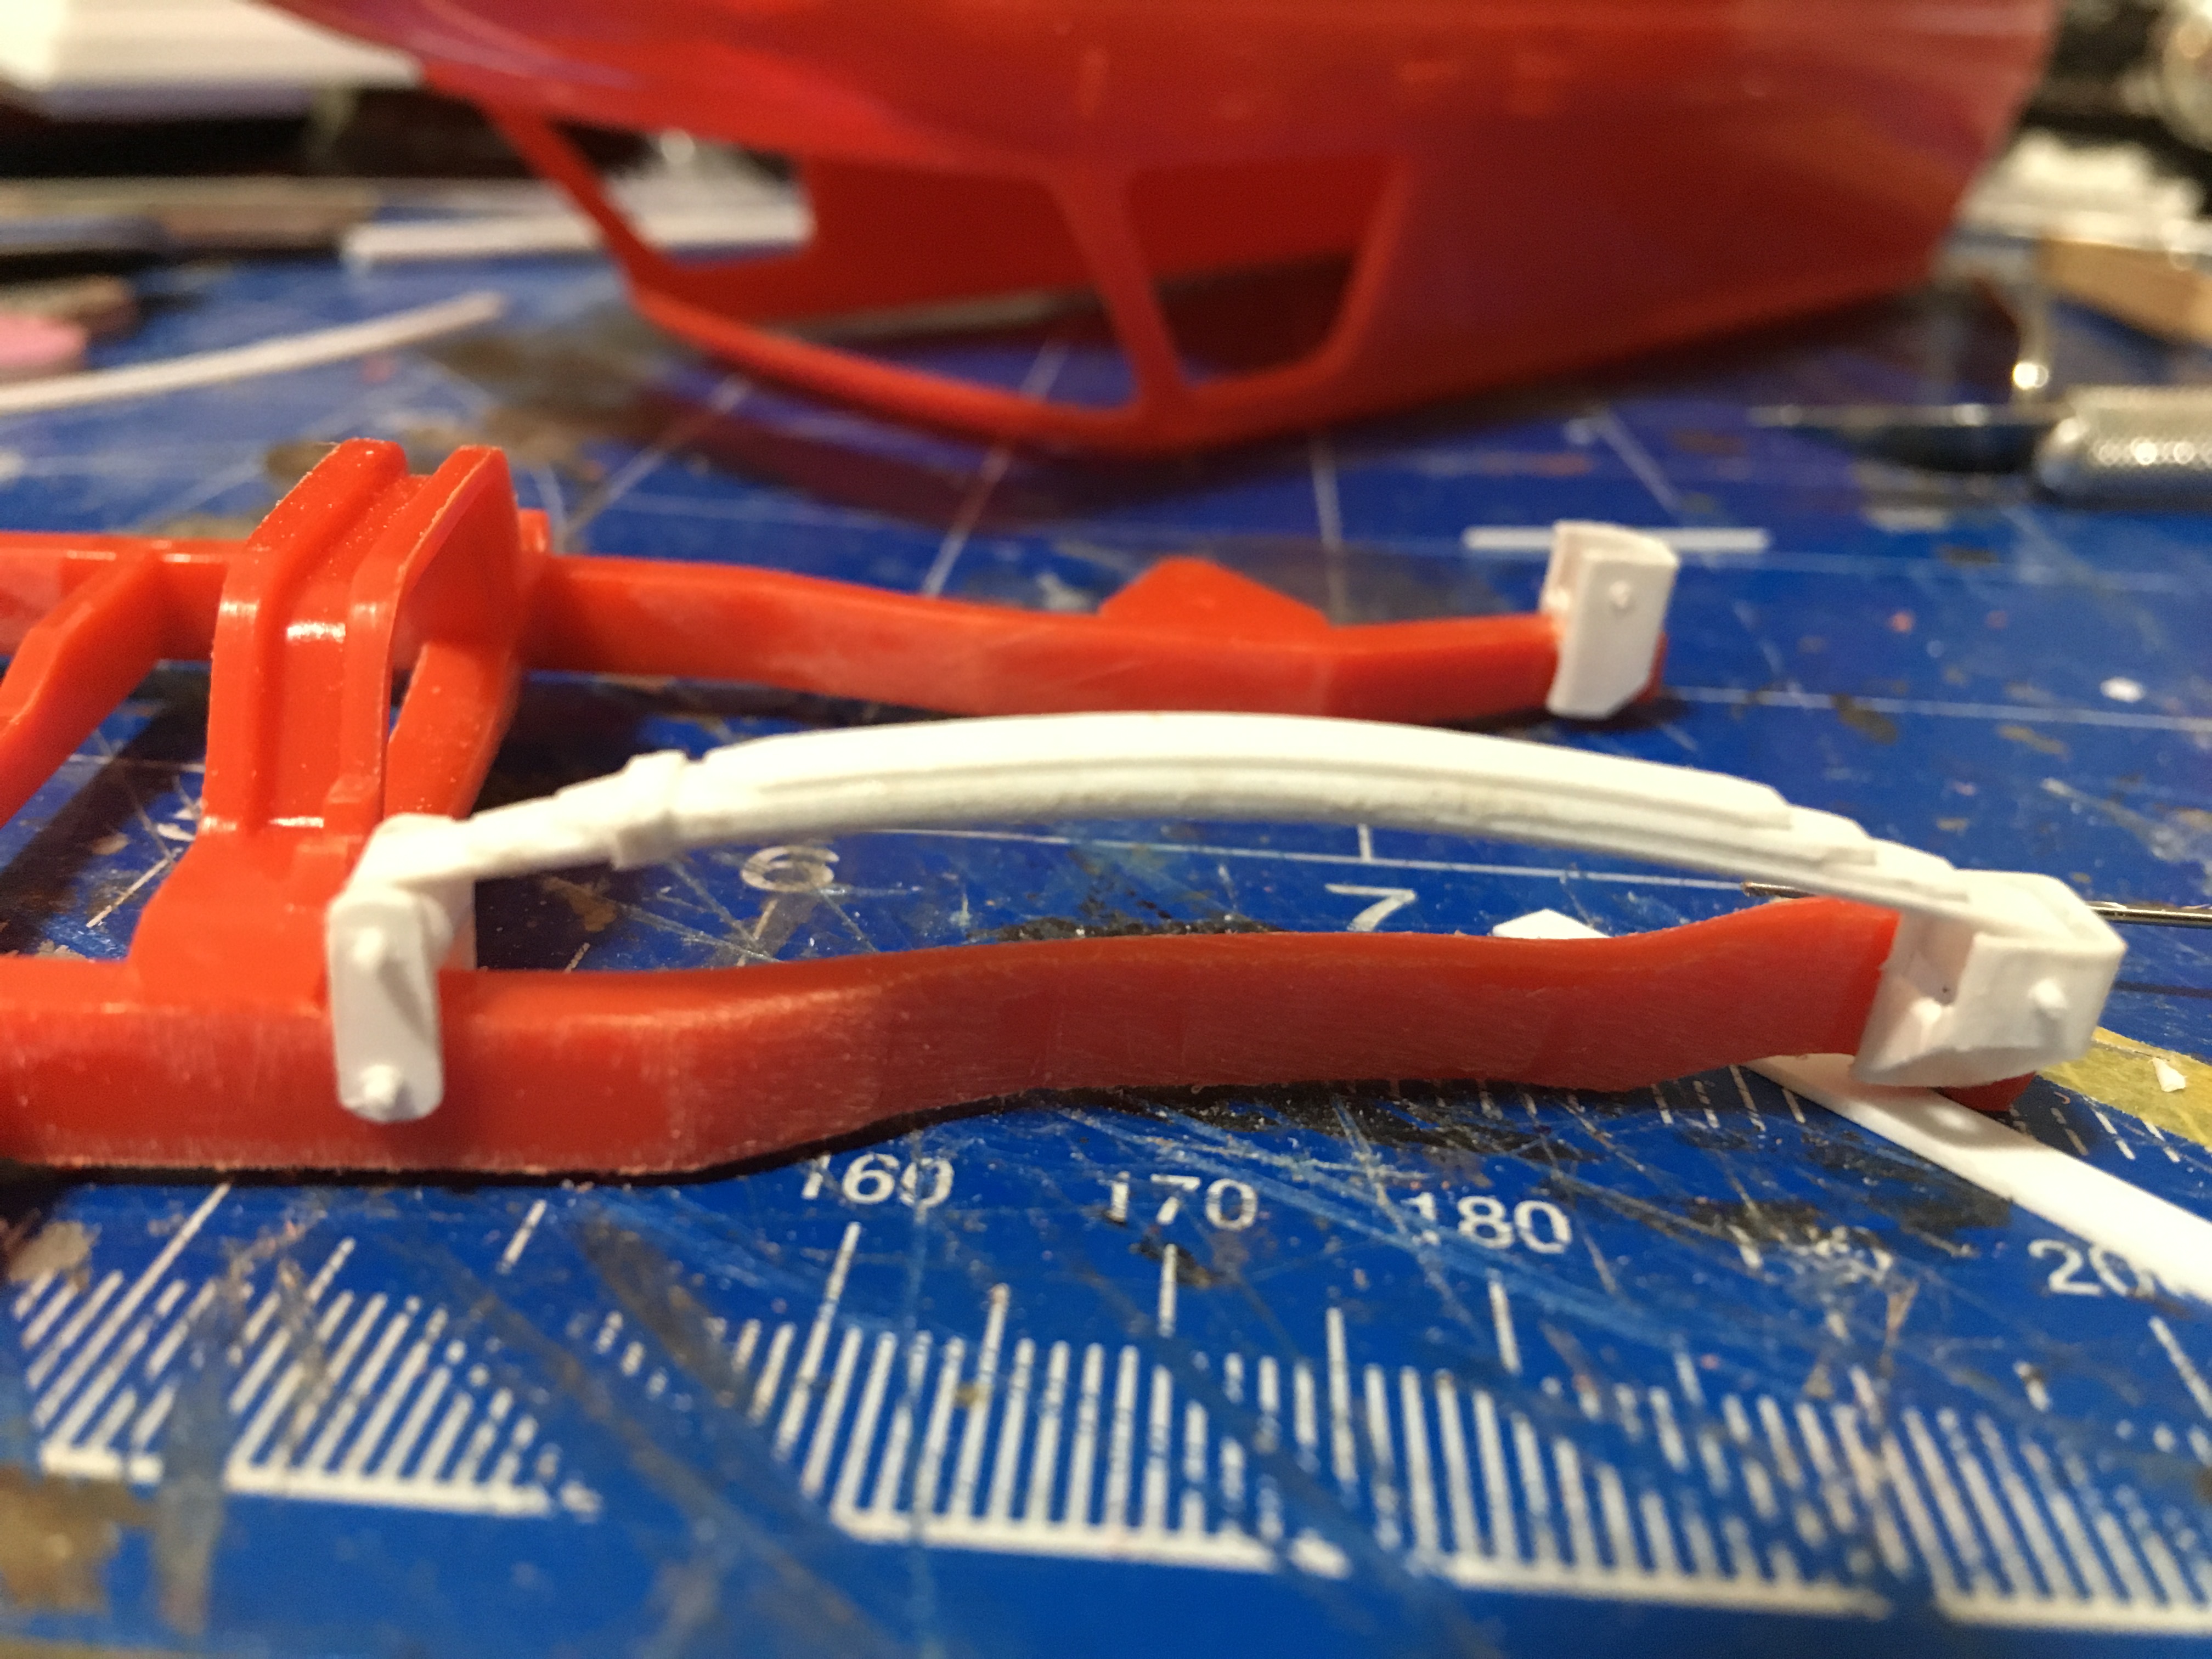
Ok, yes I know that is a long title, but there is a lot going into this build. I am starting with the AMT Rescue Van. I want to build the off road adventure van that I have in my head. So, that is the inspiration for this. The transfer case and axles are resin from B-n-L resins and the wheels and tires are from Scenes Unlimited. The front springs are custom made and the rears are from the kit, but I added some leaves to add lift. This required a bunch of cutting and custom scratch building to get it all on and sitting right.
-
MAN, that's some truck!
Oldmopars replied to Oldmopars's topic in WIP: Model Trucks: Big Rigs and Heavy Equipment
Cool truck, might have to do something like that someday. -
I am not sure what department the S if from, just a picture I got from Google. But it let me know that a S could have been used for this purpose.
-
1967 also had one year only door handle and engine lid. The engine lid had a unique shape and no vents on non-convertibles. 67 also had wide trim, first year for 12v system, last of the 5 lug wheels and more.
-
If you follow the history of the VW bug from the first one to the last one that came out of Germany you will find that they were never the same 2 years in a row, every year they changed something. Excluding the cars made in Brazil and Mexico, the only part that stayed the same from day one to the last German Beetle was the metal strip that holds the rubber gasket on the trunk/hood. Every other part on the car changed over time. So, armed with this info if you are a sick and demented VW fan/Addict you can walk up to any Beetle of any year and figure out what year it is.