Steamboat
-
Posts
826 -
Joined
-
Last visited
Content Type
Profiles
Forums
Events
Gallery
Everything posted by Steamboat
-
I did a similar crew cab on a mid-70's Dodge a few years ago. I had a lot of difficulty getting the roof to look right. I ended up adding a sheet of styrene on top of the roof and sanding it to shape. Good luck with it!
-
Beautiful! I never thought of building a police car but now I want to. You nailed it!
-
Wow! Does the kit come with the hardware for the gull wing doors? That's a really nice touch.
-
Nicely done. The interior is especially well done.
-
One of my favorites as a kid......Big Al Allison powered drag car
Steamboat replied to V8tiger's topic in Drag Racing
That's cool. I bet it was fun to drive, but not to change spark plugs! -
Wow! You don't ever see that one. Nicely done!
-
Nicely done. The color looks right.
-
Nicely done. It looks beautiful.
-
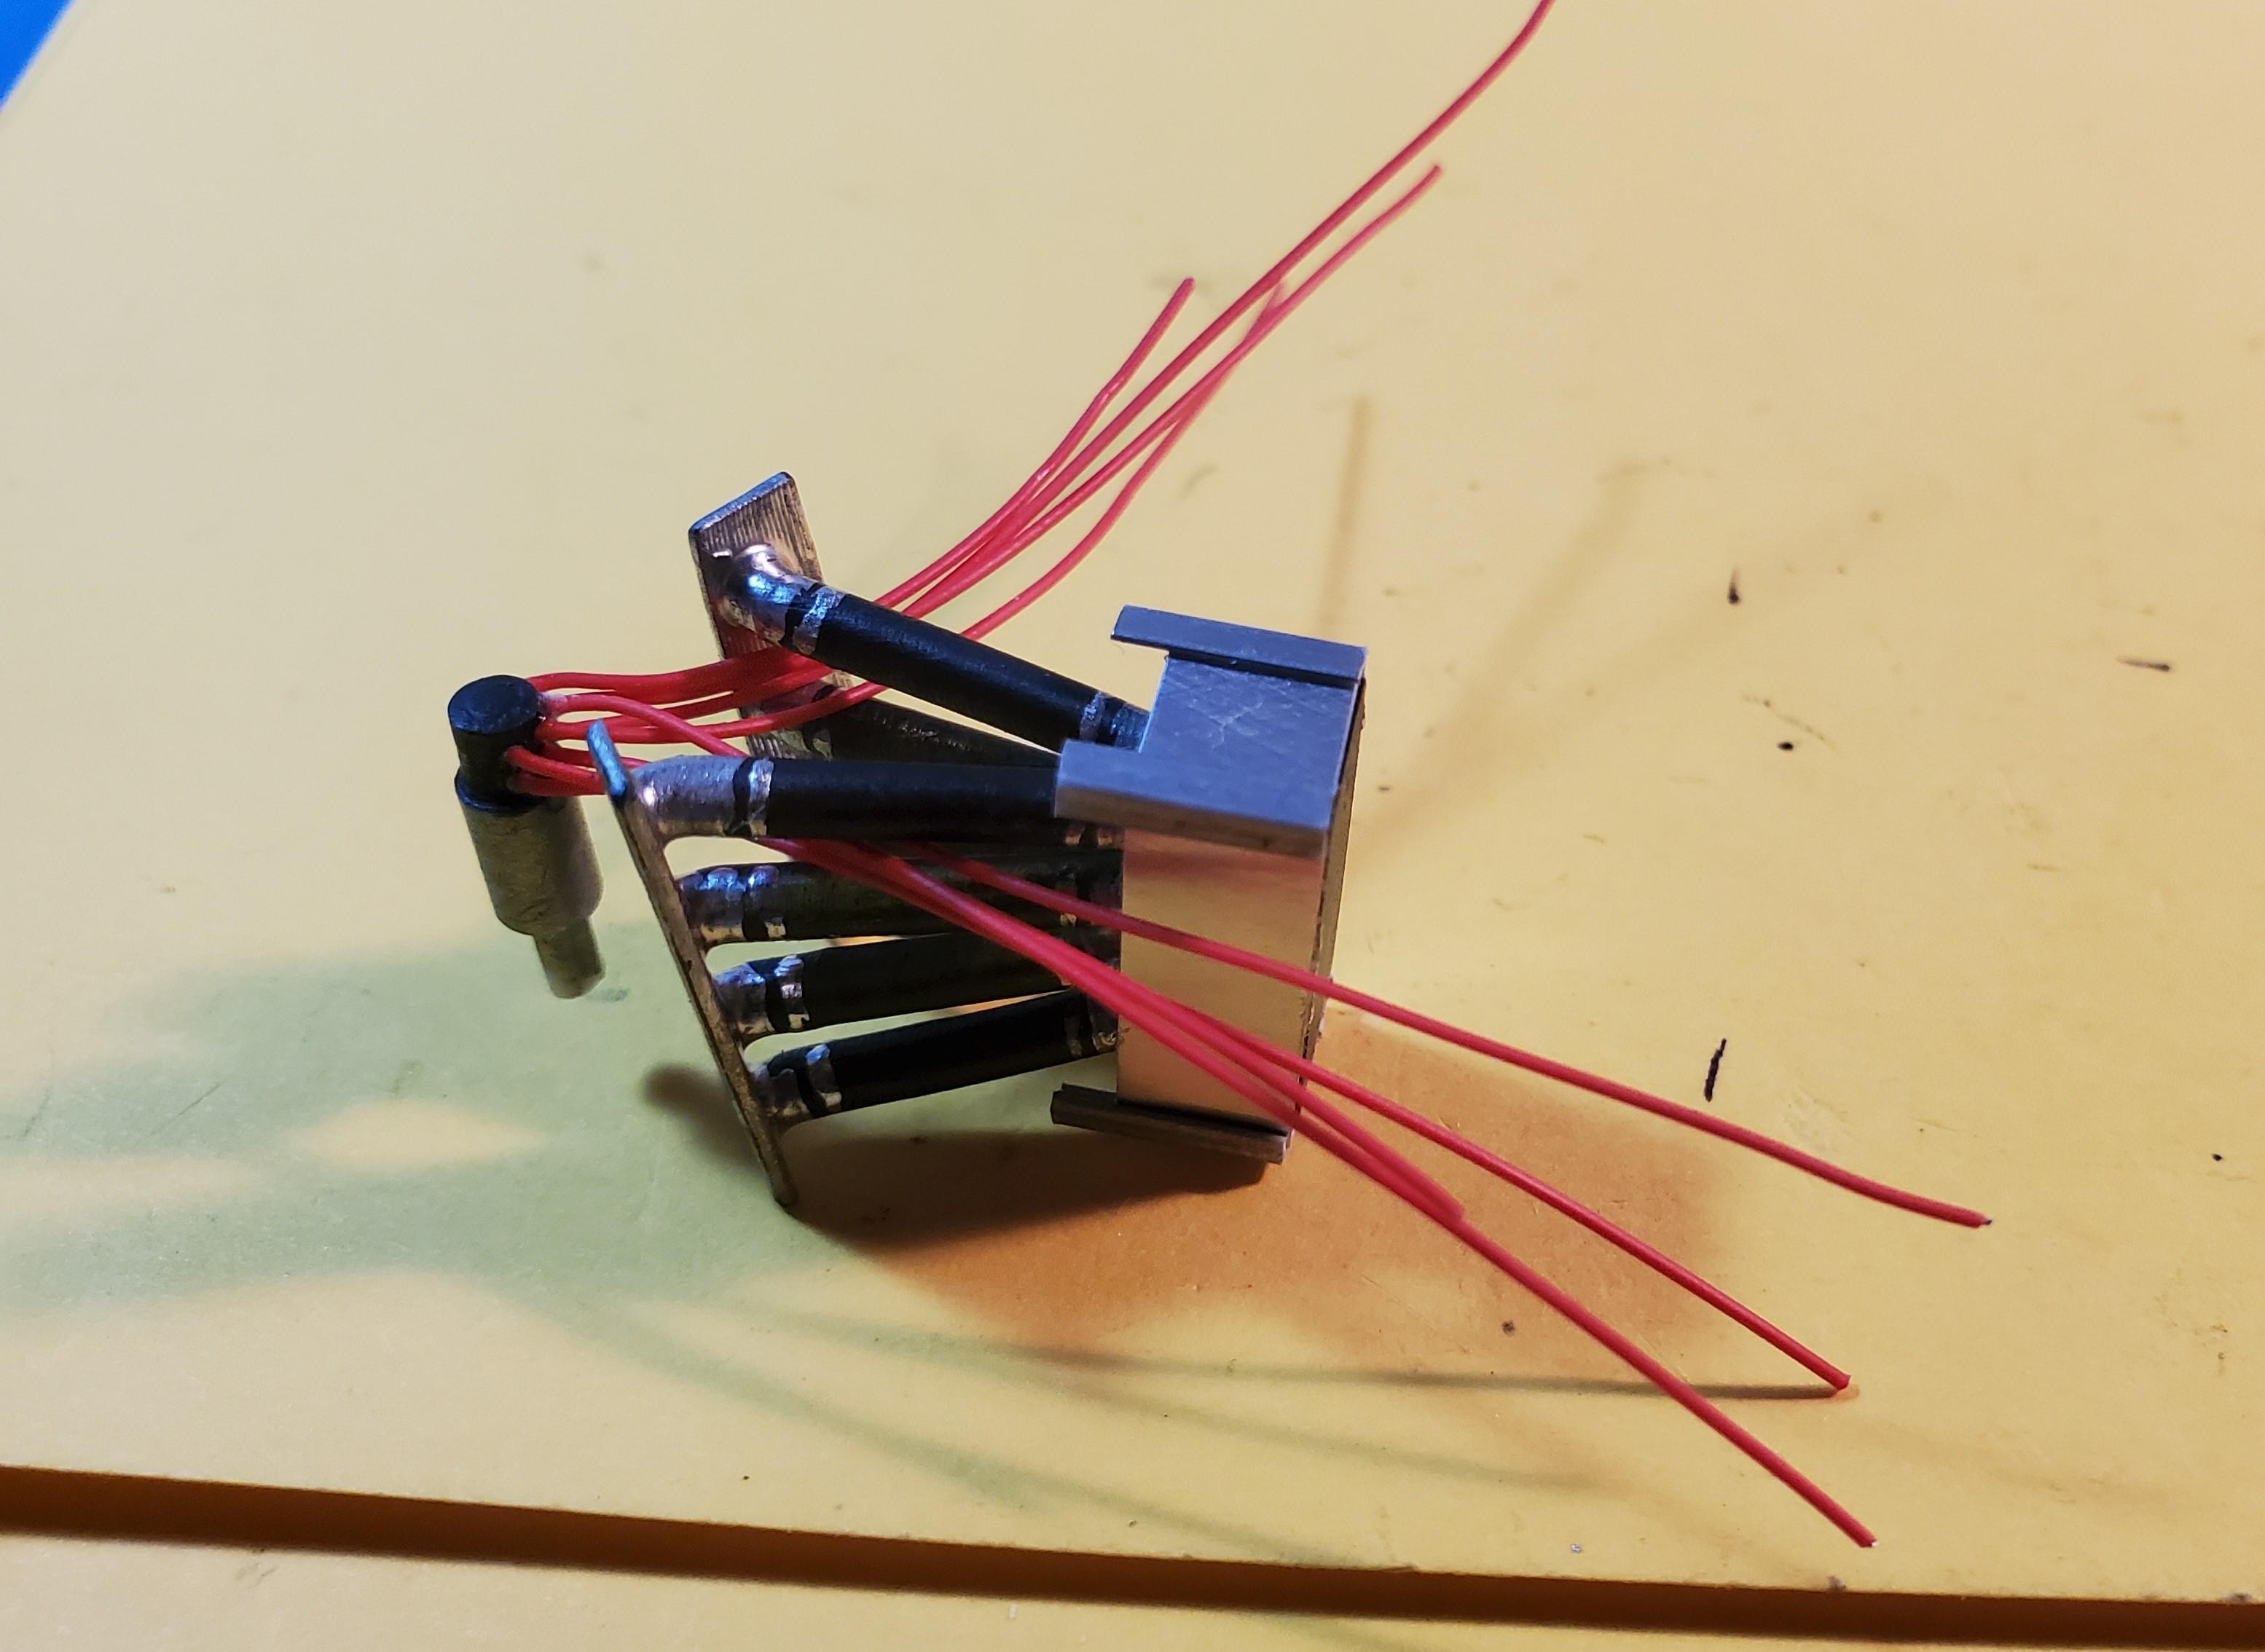
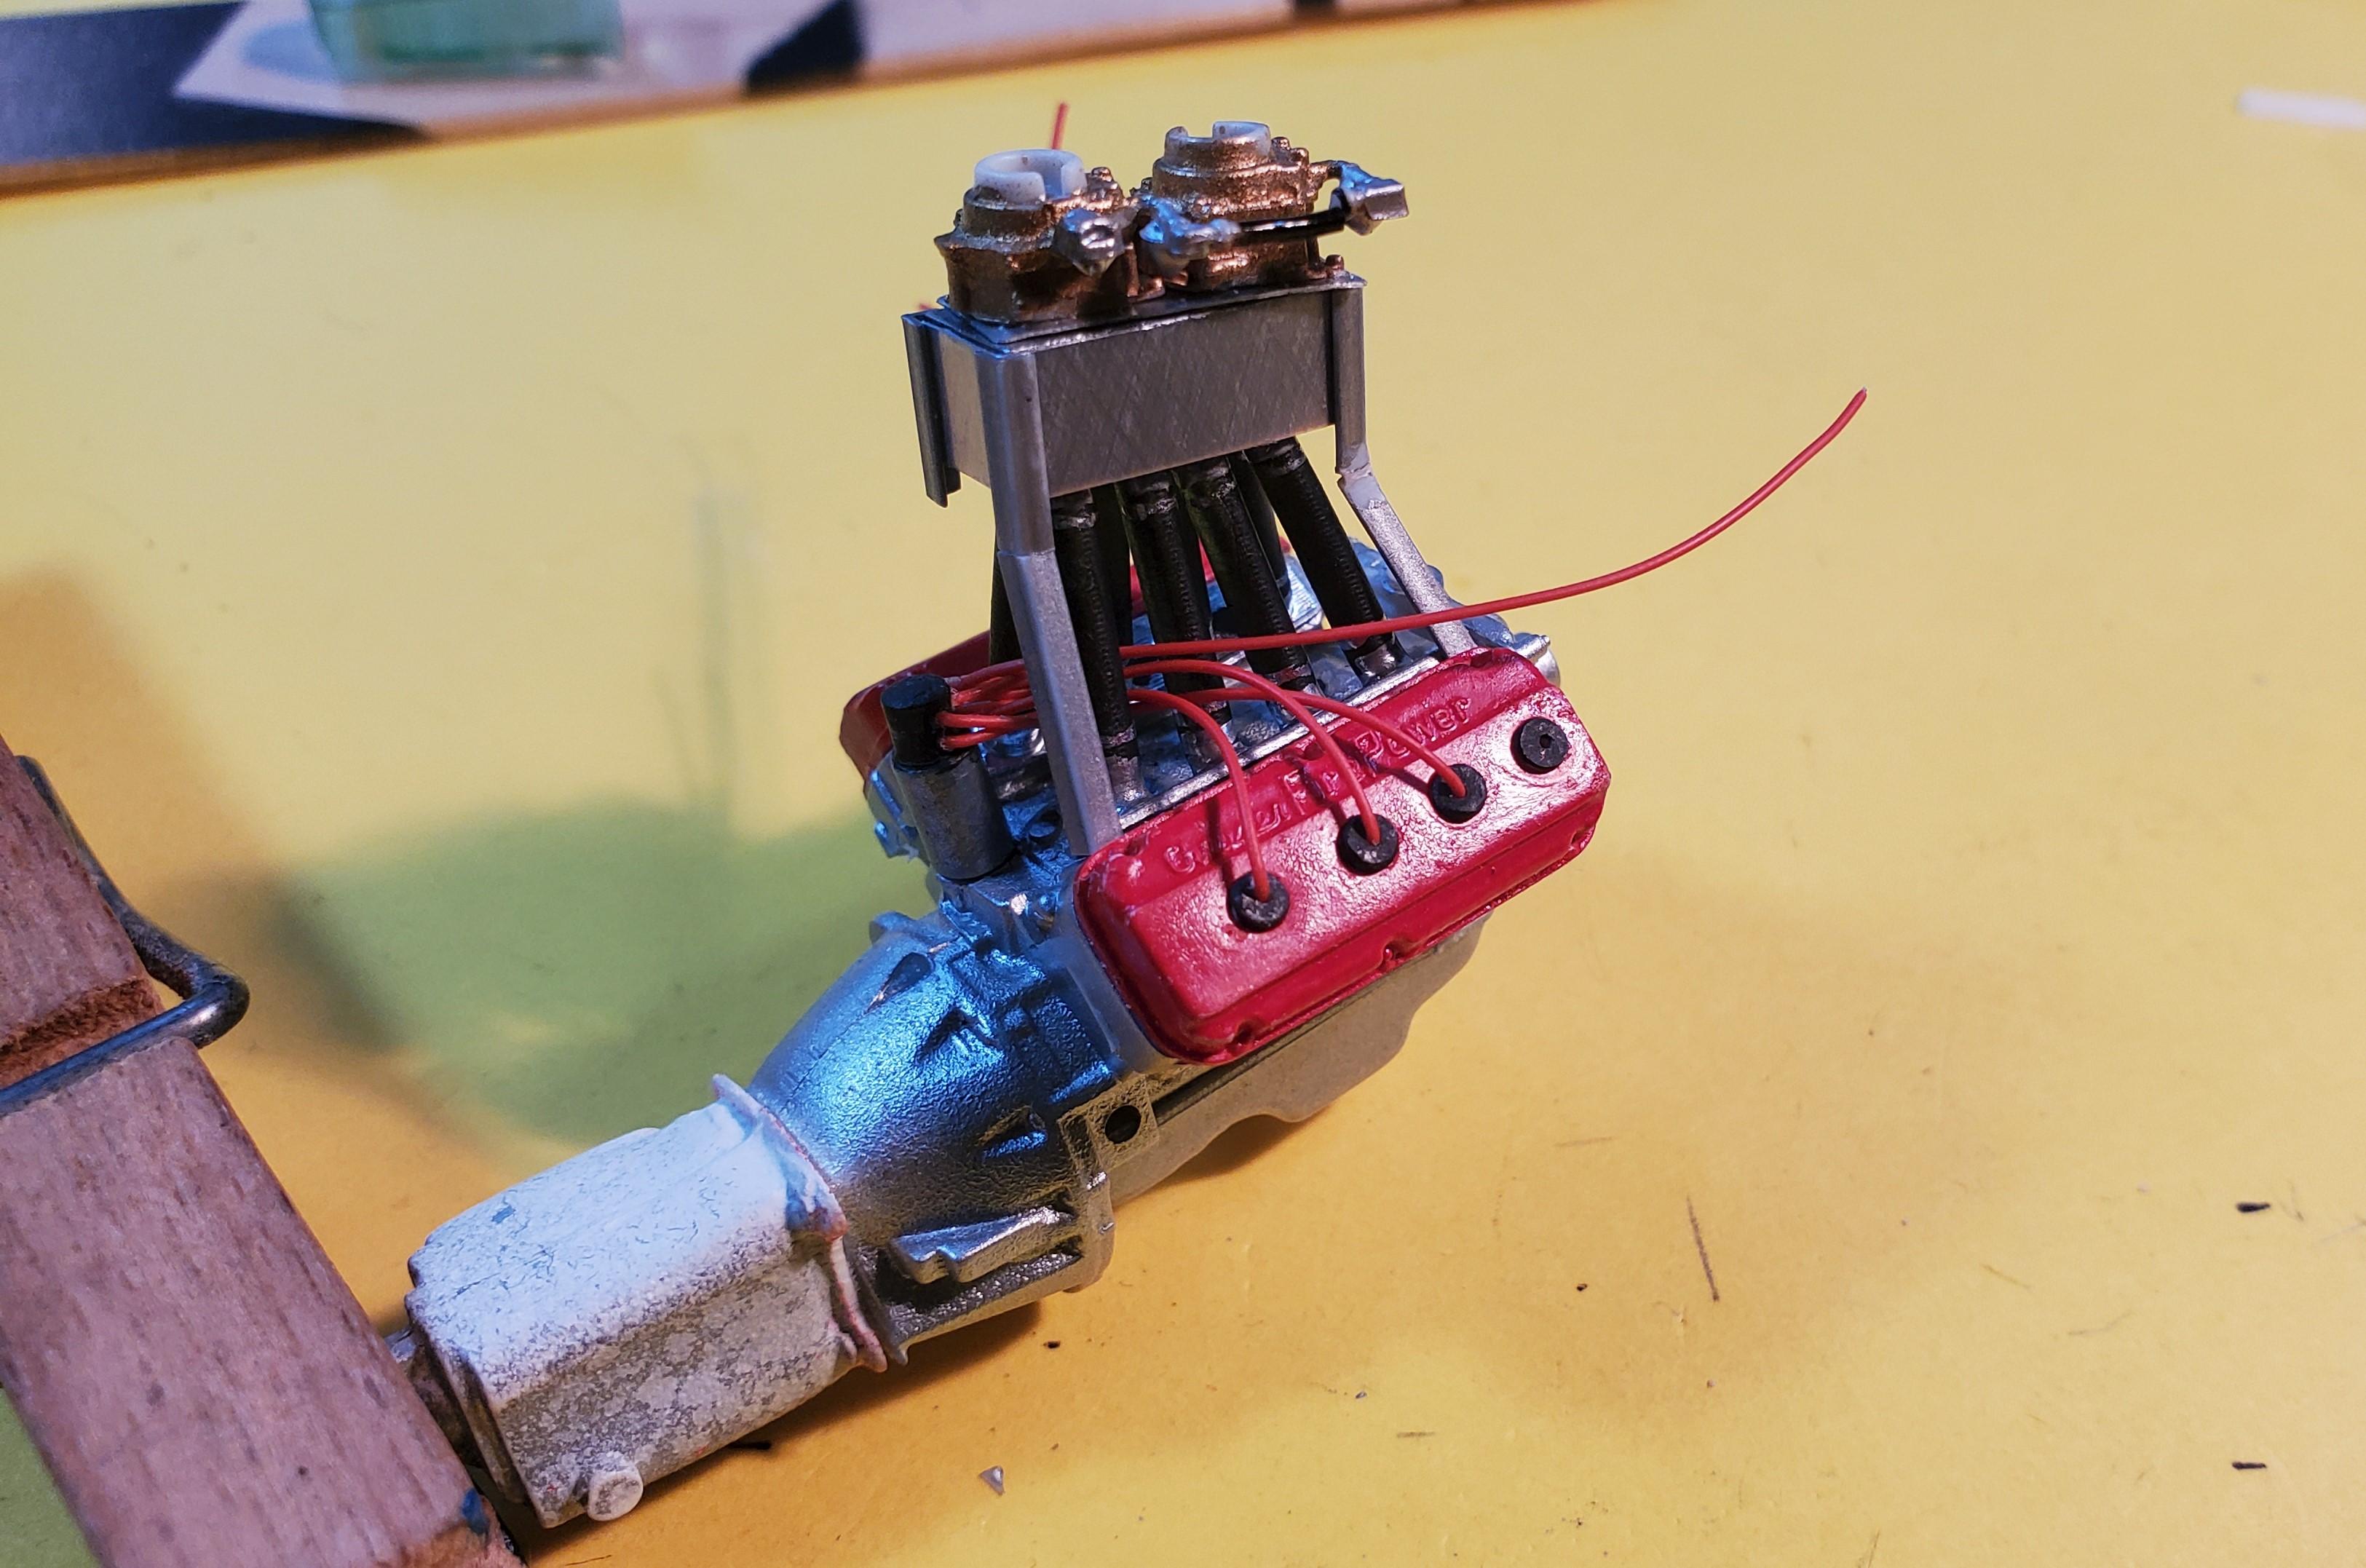
The Mighty 354 hemi nearing completion: The magneto is made from bits of sprue and styrene tubing. The spark plug wires needed to be run between the intake tubes before the manifold was installed on the engine. I did not research the firing order for the mag - purists please forgive me! The intake was first painted flat black, then silver for the flanges and metal parts. The hose clamps are Molotow pen. I could have made the hose clamps better by wrapping bits of tinsel around the tubes as I would normally do for a radiator clamp, but I decided that 16 of them would just be too much work. The plenum is wrapped with aluminum sheet. It's not really necessary, but hides some imperfections in the 3d print and gives a nice finish. The supports for the plenum are Evergreen .060" styrene angle, painted with metallizer. You can see that they still need to be added on the Captain side and paint touched up. I'm still fine tuning the 3d print for the carbuerator scoop. I'll post a photo of the finished engine when I can.

-
Ditto on the paint scheme. I like it!
-
Nice build. Did the original have a Chevrolet engine? It's heresy to a Mopar guy!
-
Looks great to me. I wish I could build one that clean!
-
Nice job! The early 2nd generation cars are my favorite too.
-
We didn't go to the Freedom 500 on Friday, we went to the Cleetus and Cars burnout contest on Saturday. We got to see some burnout cars up close and see what makes them go. The formula is pretty obvious: gobs of blown, methanol injected horsepower in a light car with about a 80:20 front to rear weight ratio! Pickup trucks rule. The scoring rules were that to score maximum, they needed to pop both tires within 2 minutes. Only a handful of cars did it. There was a beautiful metallic blue '71 or '72 Chevelle in the contest that nearly made me cry, he rear ended the wall and turned a $40,000 car into a $500 junker in the blink of an eye! Here's Independence as it looks now.
-
Beautiful. It looks like you could jump in and drive it!
-
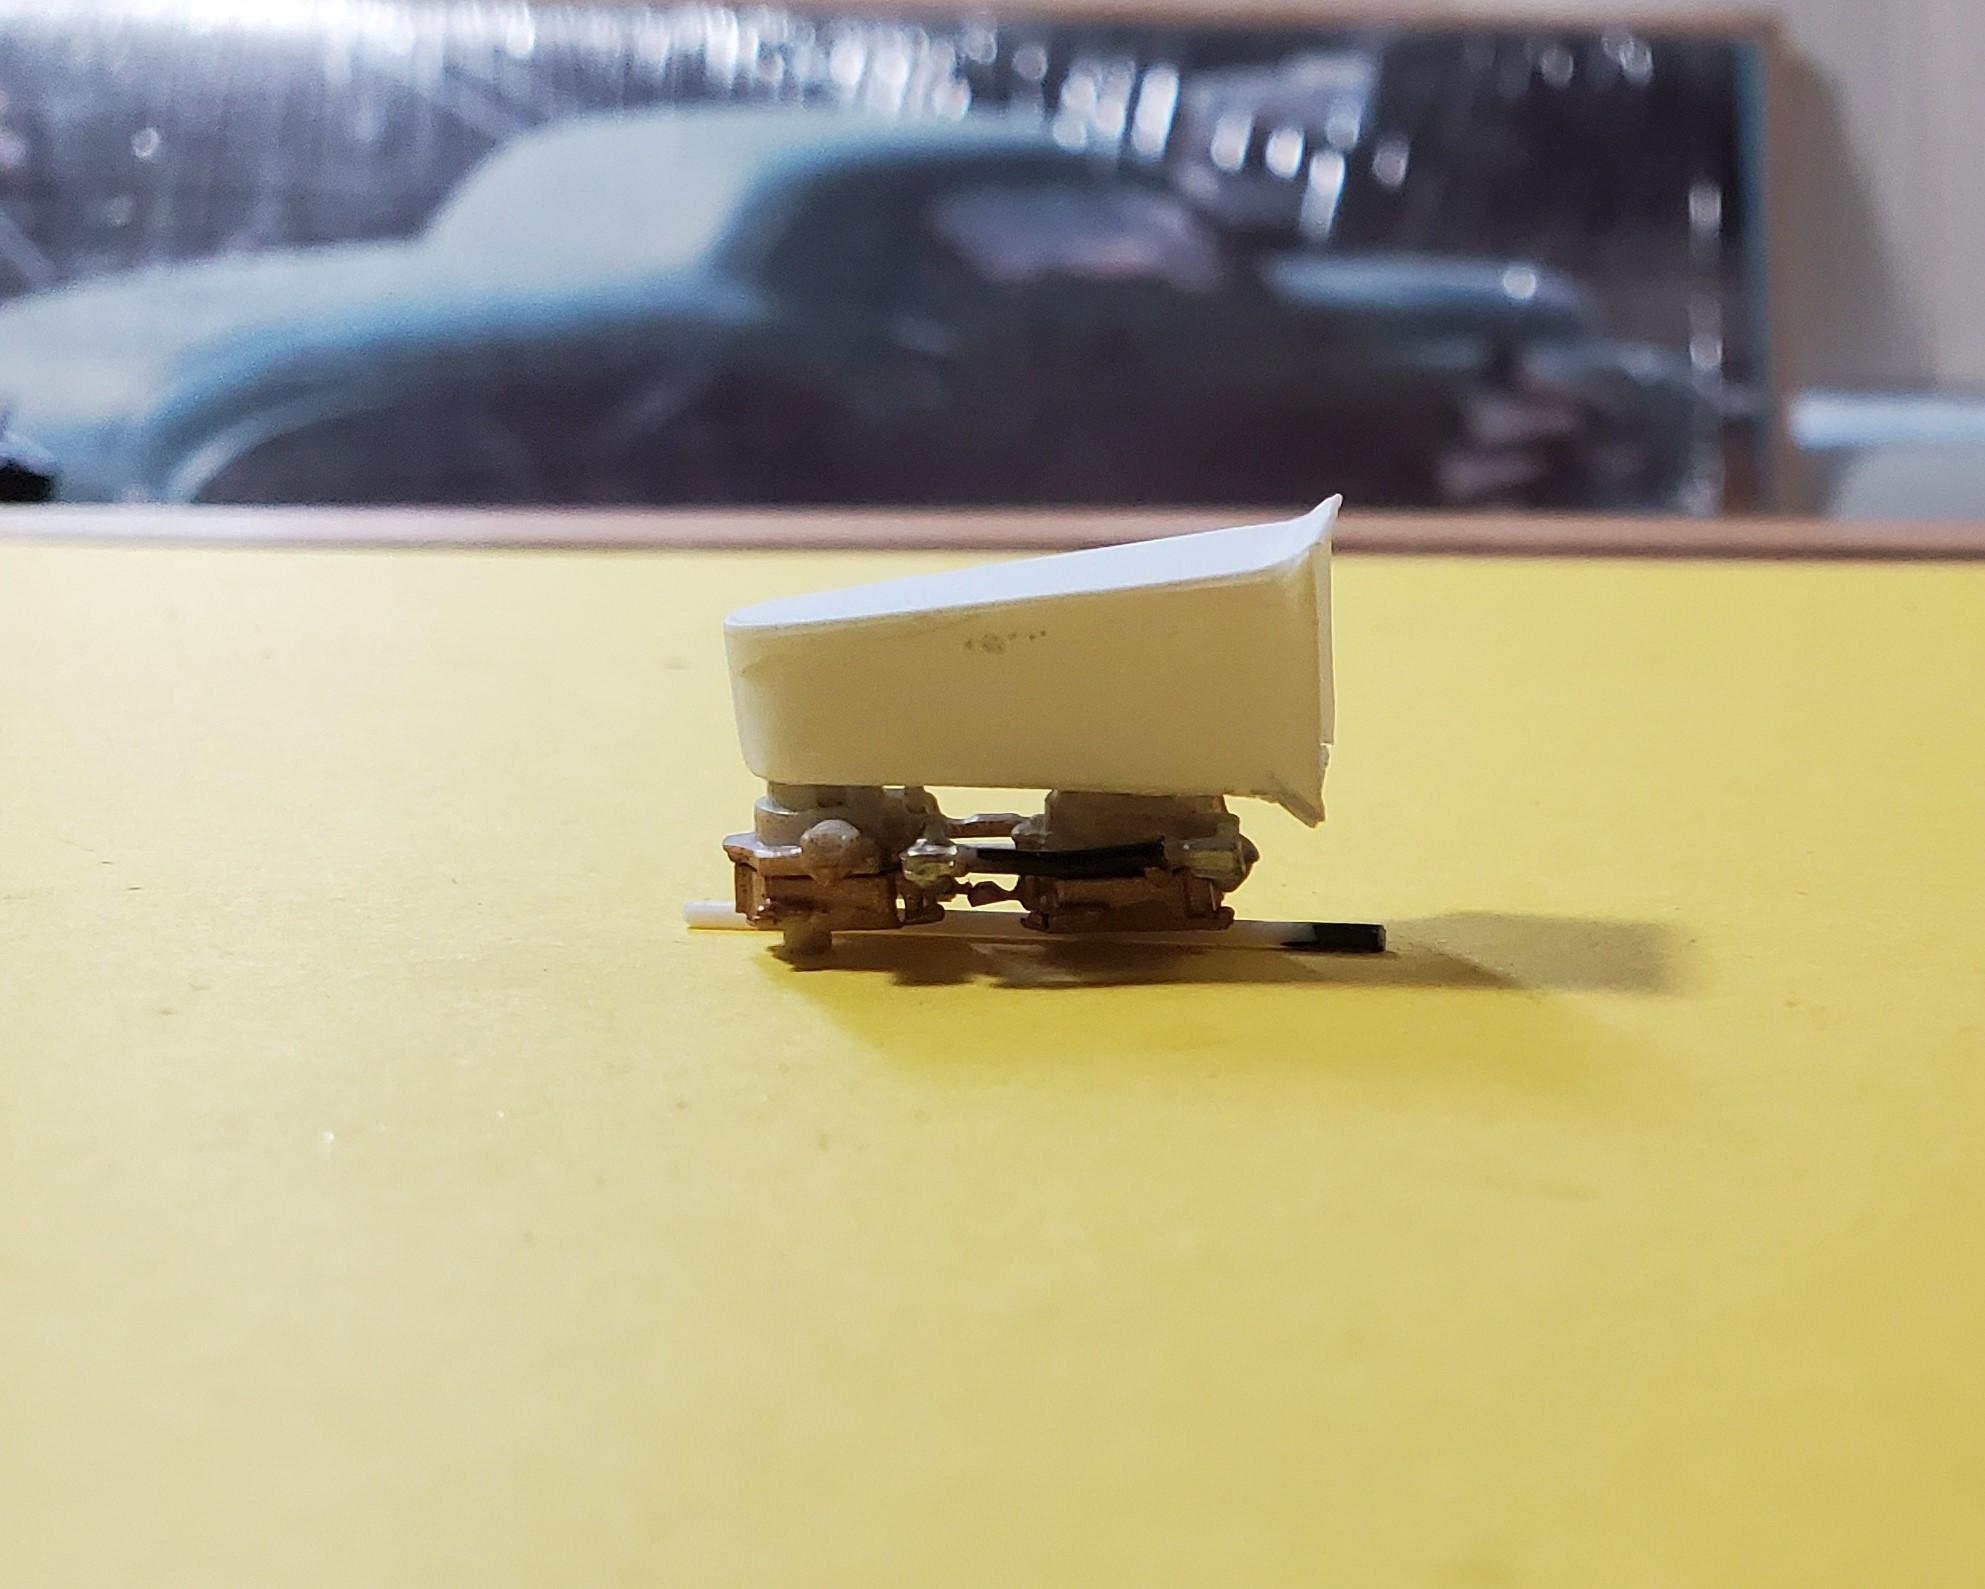
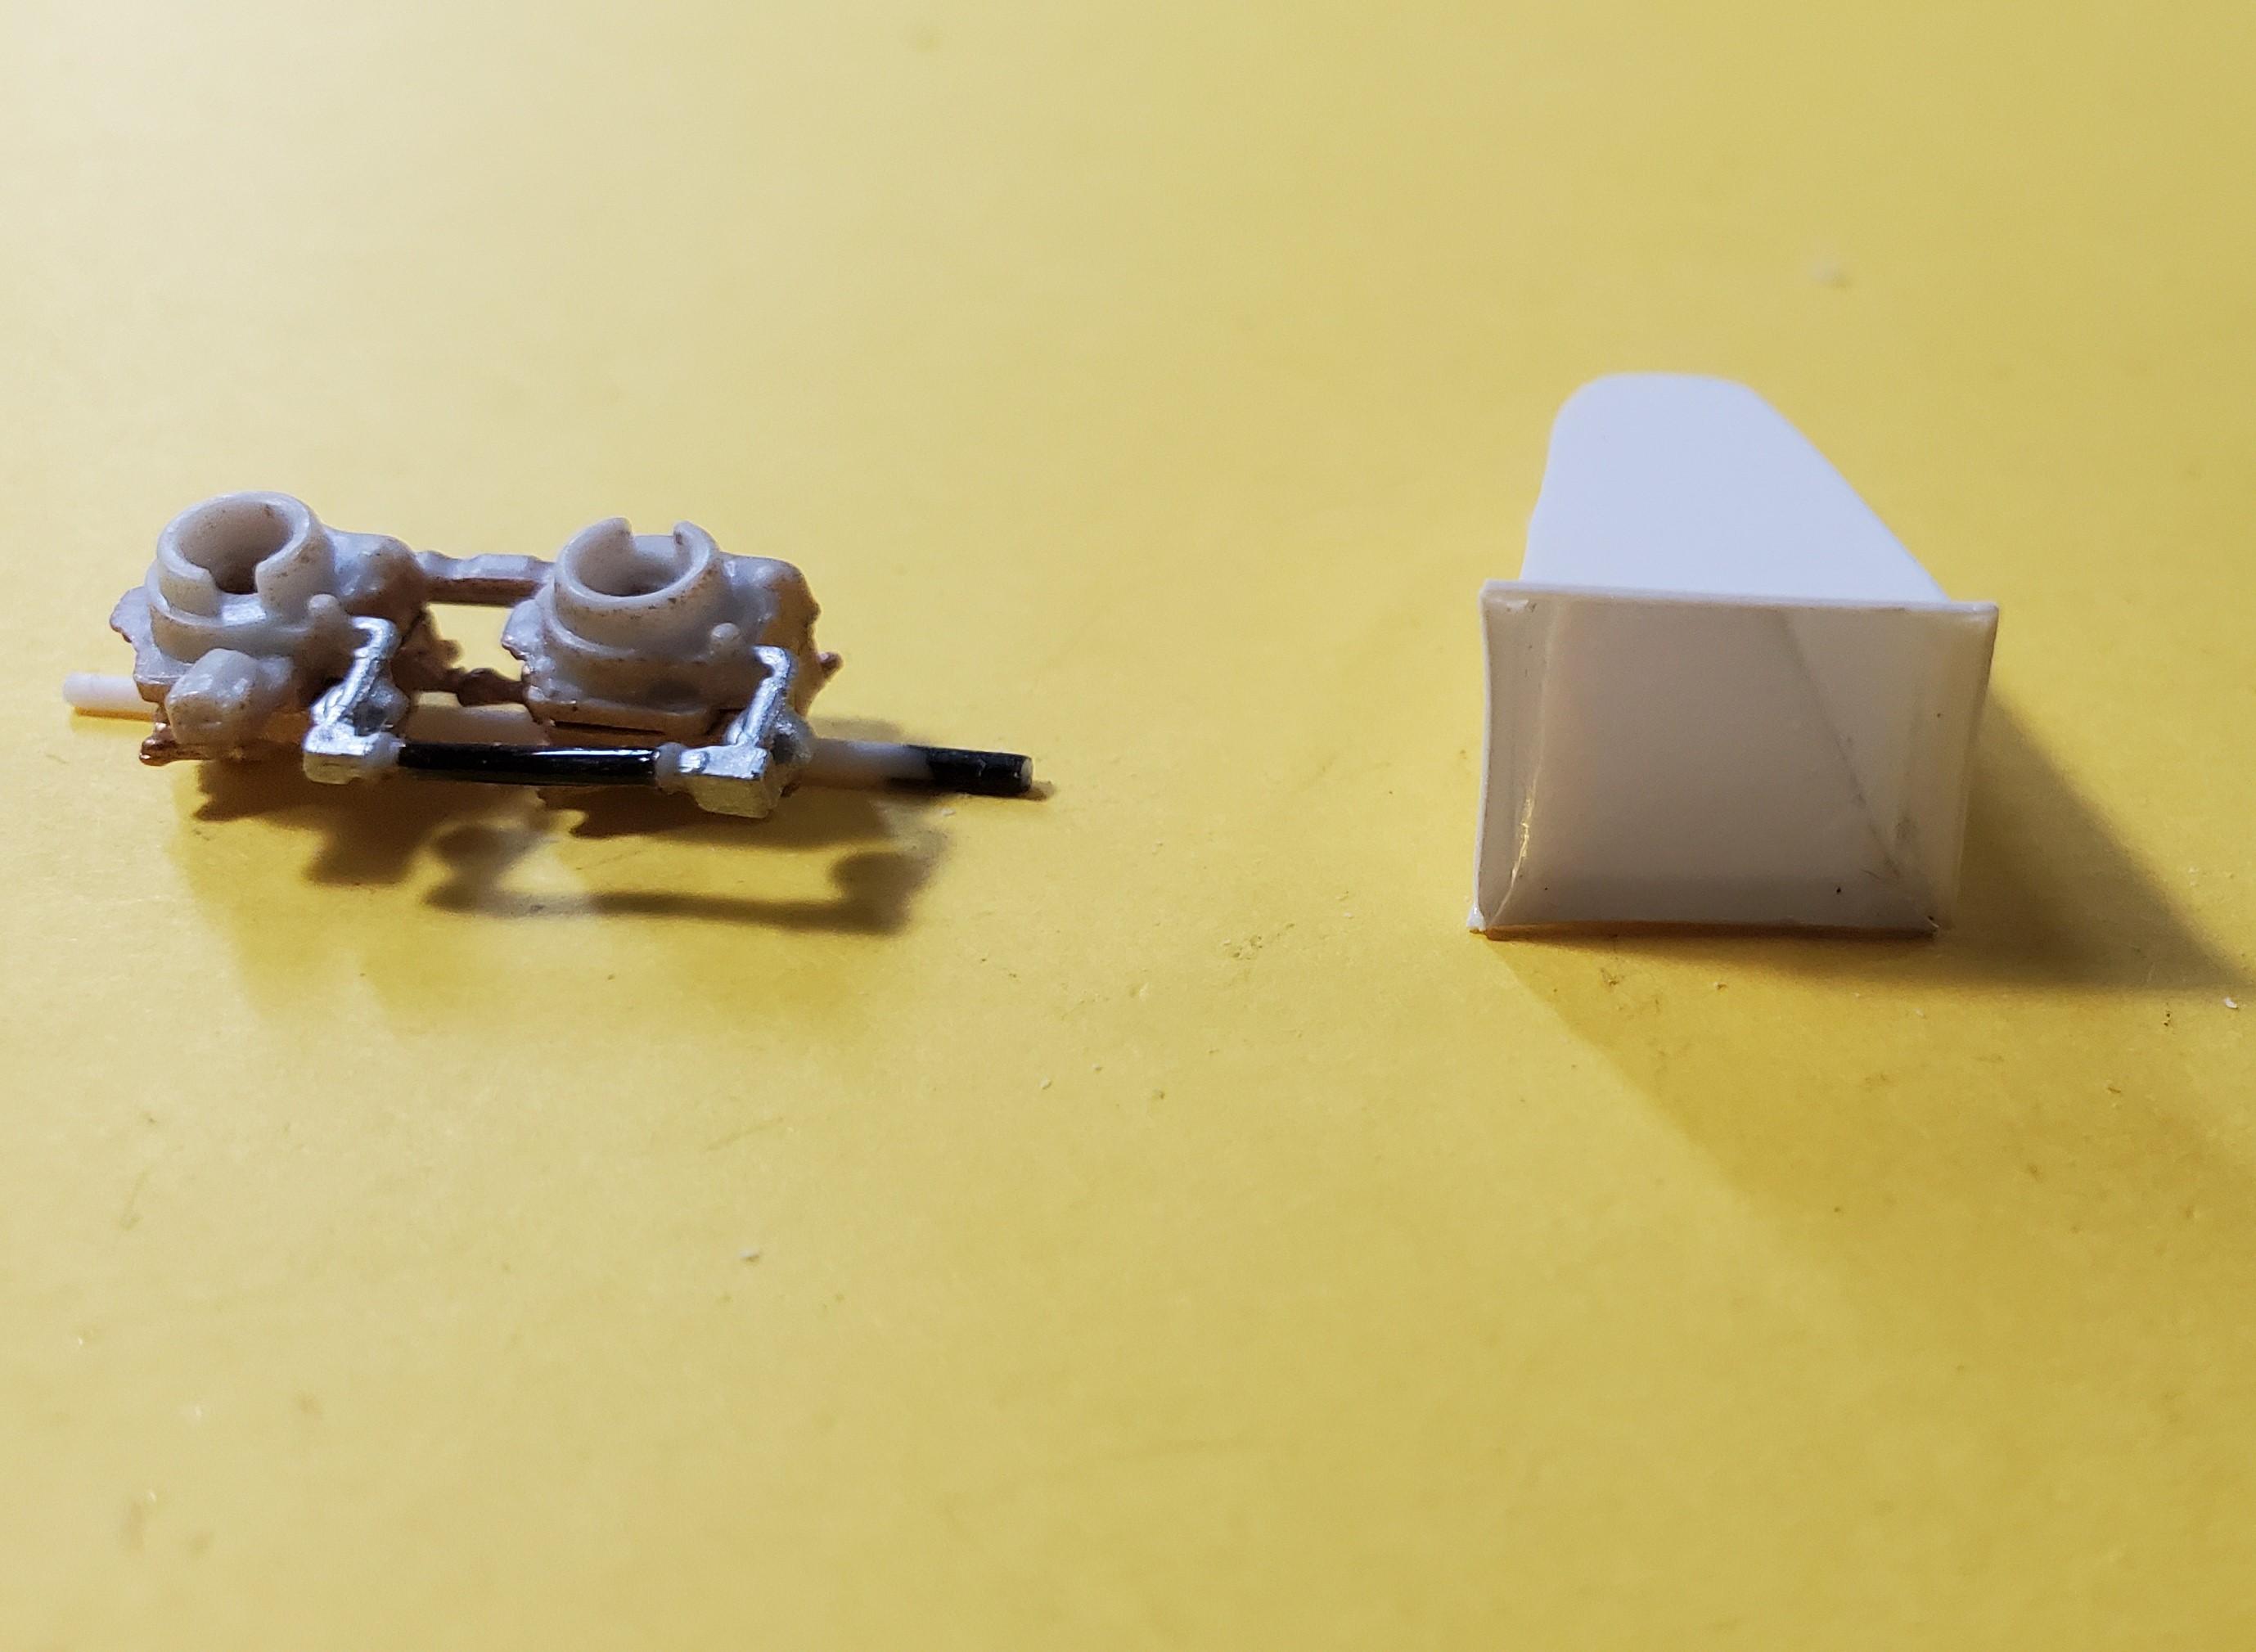
I made a scoop out of sheet styrene (10 years ago), but I think it's a bit too large for the carbs I'm using. The carbs will be closer together when installed on the manifold. I'll try my hand at 3d printing a scoop. If it doesn't work out, I can make another from sheet stock.
-
Love it! I need to get one too. My wife had a white one just like it when we met. I remember we had to make a fan belt out of nylons to get it home once!
-
Yes, thanks for letting me know. I wasn't aware that he would use the videos but I'm thrilled! Derek even autographed the model for me.
-
OK, a hint. A lot of aluminum gets trucked into St. Louis.
-
Wow! Nice work.
-
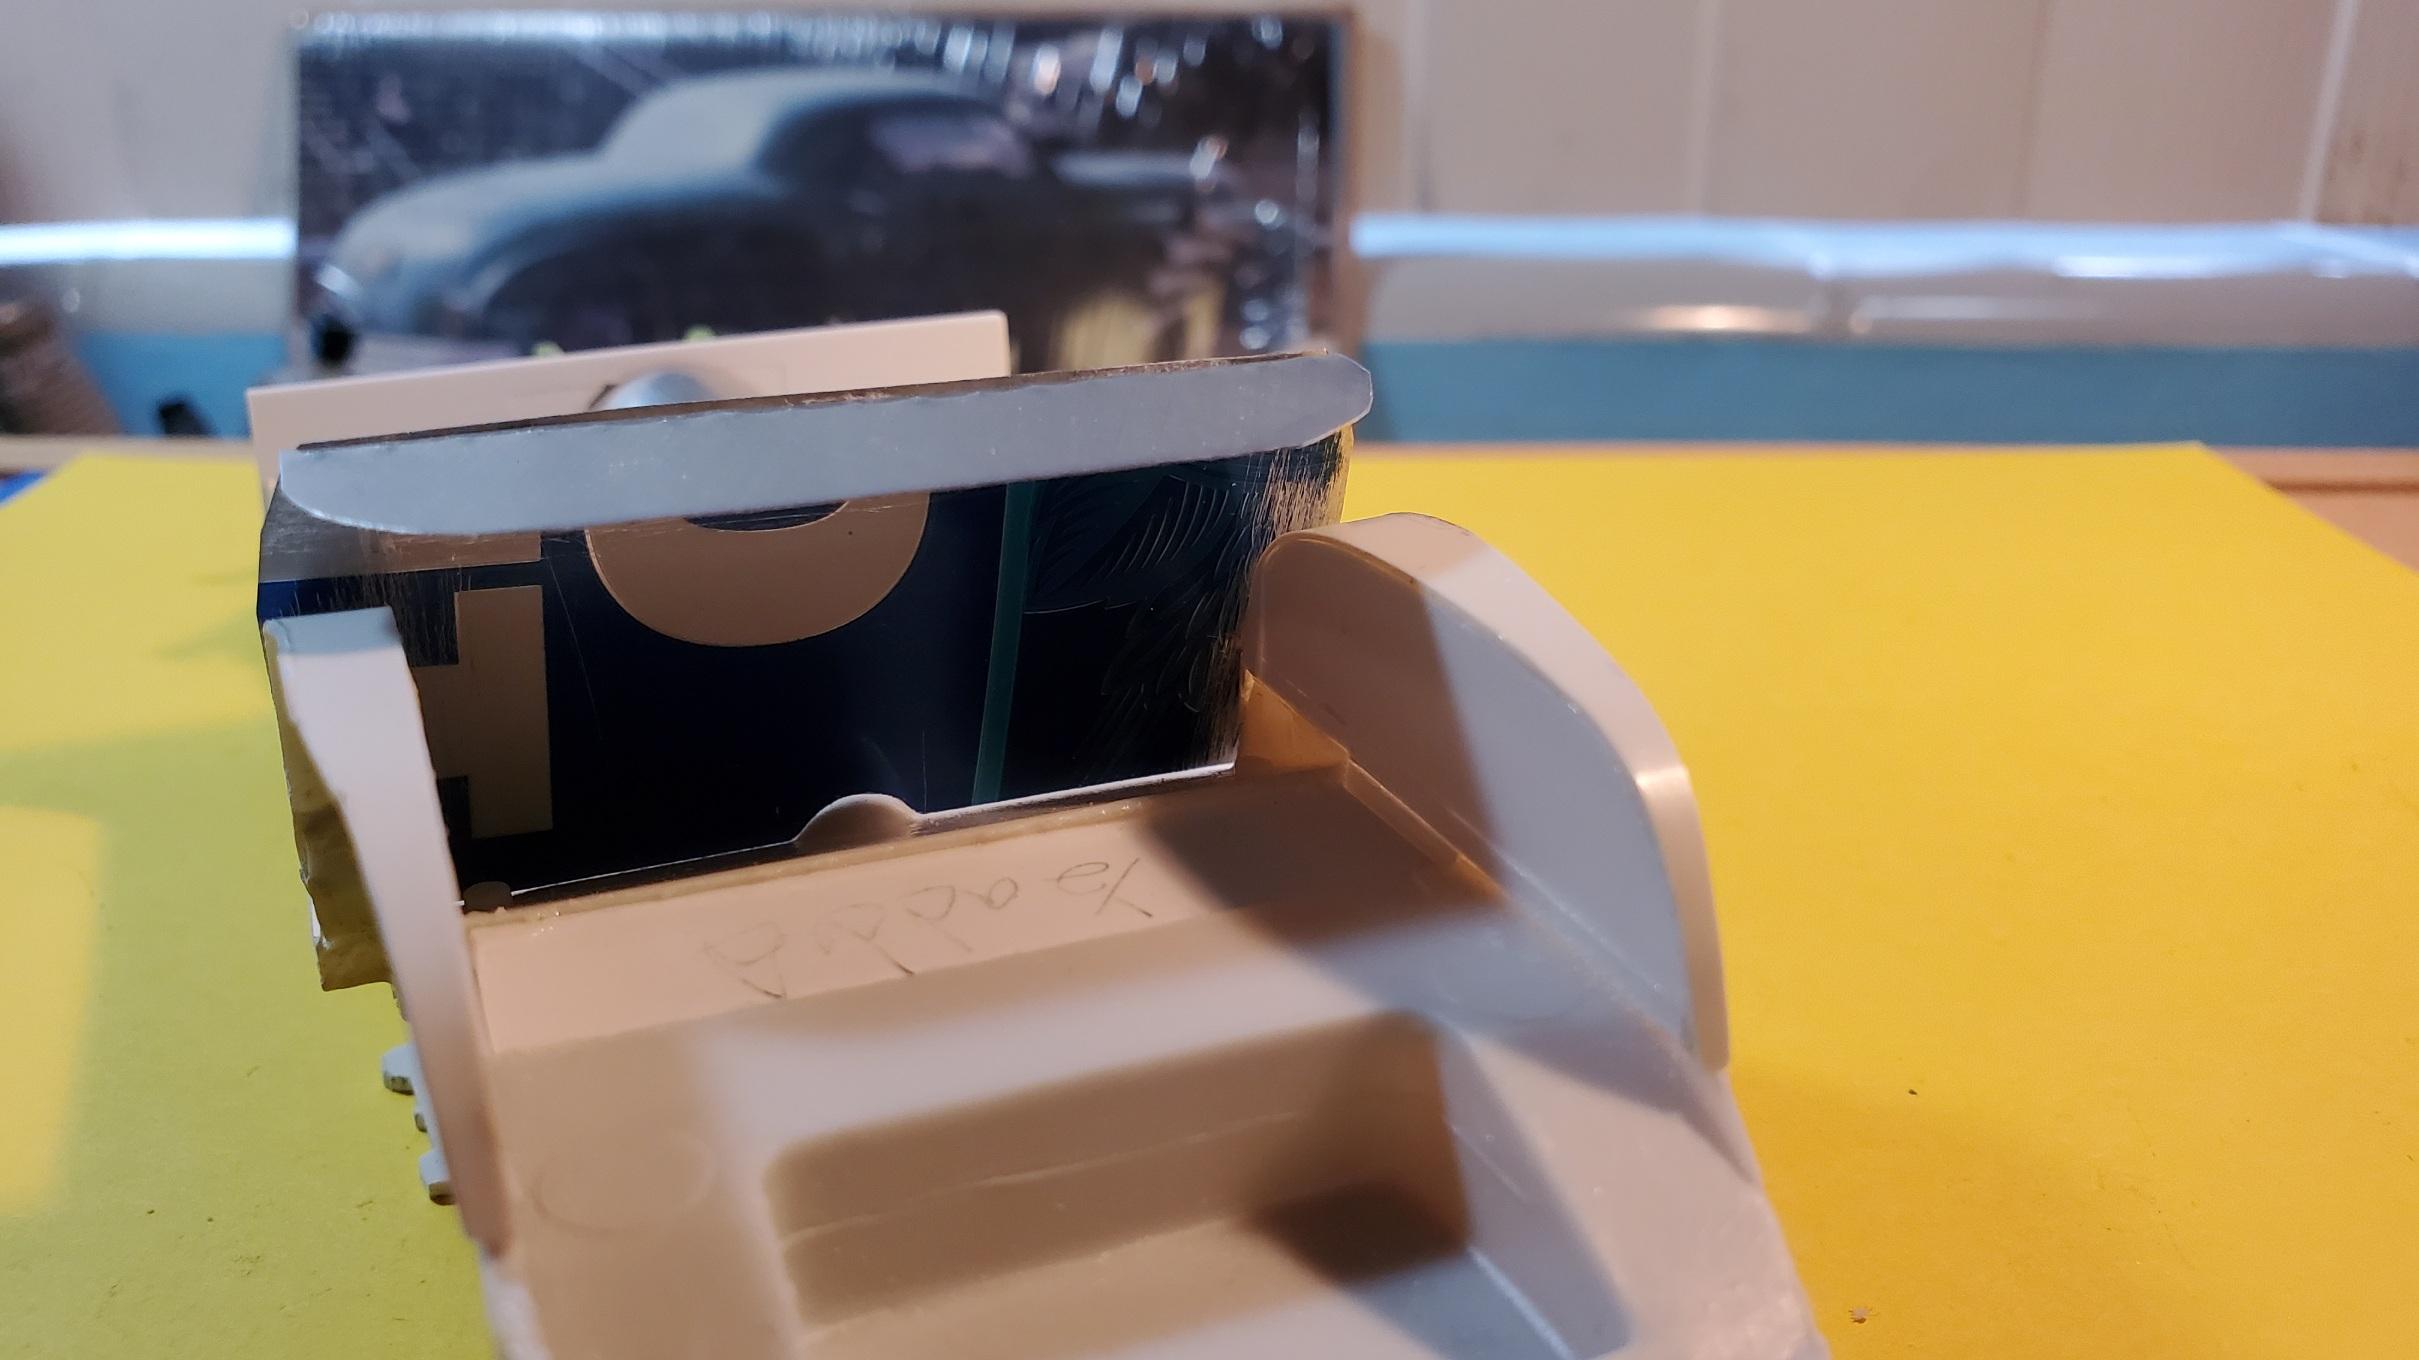
I'm doing some work on the interior sheet metal, using real aluminum when I can: 1) for ease of shaping and 2) my supply of Testor's aluminum metallizer is running out. I recently saw that one bottle was priced at $30 on everyone's favorite auction site! Can anyone tell what the source of the aluminum was? Soda cans will also work just as well but they are not as much fun!
-
I finally finished this one a few months ago. There's a thread in the WIP section showing some of the major mods. Trying to make a presentable model from a Revell kit originally issued in the '60's is like putting lipstick on a pig. Fit and finish were pretty lacking, but I'm happy to call it done. Major mods included reworking front and rear wheel openings, narrowing the kit tires, scratch building the drinker side interior door panel. 3d printed hub caps, front turn signal lenses and head light lenses. The windshield was one of the most challenging things I have attempted to date. The windshield frame is made from styrene sheet, cut and bent and then finished with Alclad. Paint is Alclad black base coat with Tamiya rattle can clear. Little known fact: the Porsche factory used giant cats for security in the '50's and 60's, hence the giant cat hairs in the interior photo!
-
Finally finished this one. Unfortunately I don't have photos of the struggles to get it done. I'll post some more pictures in the Under Glass section.
-
Nirvana Chevy van
Steamboat replied to Limeyglue's topic in WIP: Model Trucks: Pickups, Vans, SUVs, Light Commercial
Very cool. I'll be watching this one. -
Looks great from what I see. I think the photos didn't do it justice.