Dragonhawk1066
-
Posts
3,931 -
Joined
-
Last visited
Content Type
Profiles
Forums
Events
Gallery
Everything posted by Dragonhawk1066
-
Nice work Greg!
-

OK, I'll Join In here-My 5 Builds for '22
Dragonhawk1066 replied to TransAmMike's topic in Model Cars
Nice work Mike! -
Revell '67 Chevelle - mild Pro Touring style
Dragonhawk1066 replied to Justin Porter's topic in Model Cars
Fantastic looking Chevelle! Nice paint job and choice of colors! -
WOW! I was very fortunate and lucky to have been able to complete 19 builds for 2022. In order from the AMT 1955 Chevy Bel Air in January to the Revell 1969 Chevelle SS396 in December.

- 31 replies
-
- 11
-

-
Nice work!
-
Great looking collection!
-
Turned out quite nicely! Super job on the engine/engine bay!
-
Mattilackens 2 for 2022, LSX454SS and Cutlass
Dragonhawk1066 replied to Mattilacken's topic in Model Cars
Both are very nicely done! -
That's a nice looking Chevelle! Unfortunately that AMT kit has it's issues, but like you've shown, a little patience and ingenuity can get a very nice result.
-
From Merc to Mustang... Tommy124's Thirteen in '22
Dragonhawk1066 replied to Tommy124's topic in Model Cars
Excellent builds! -
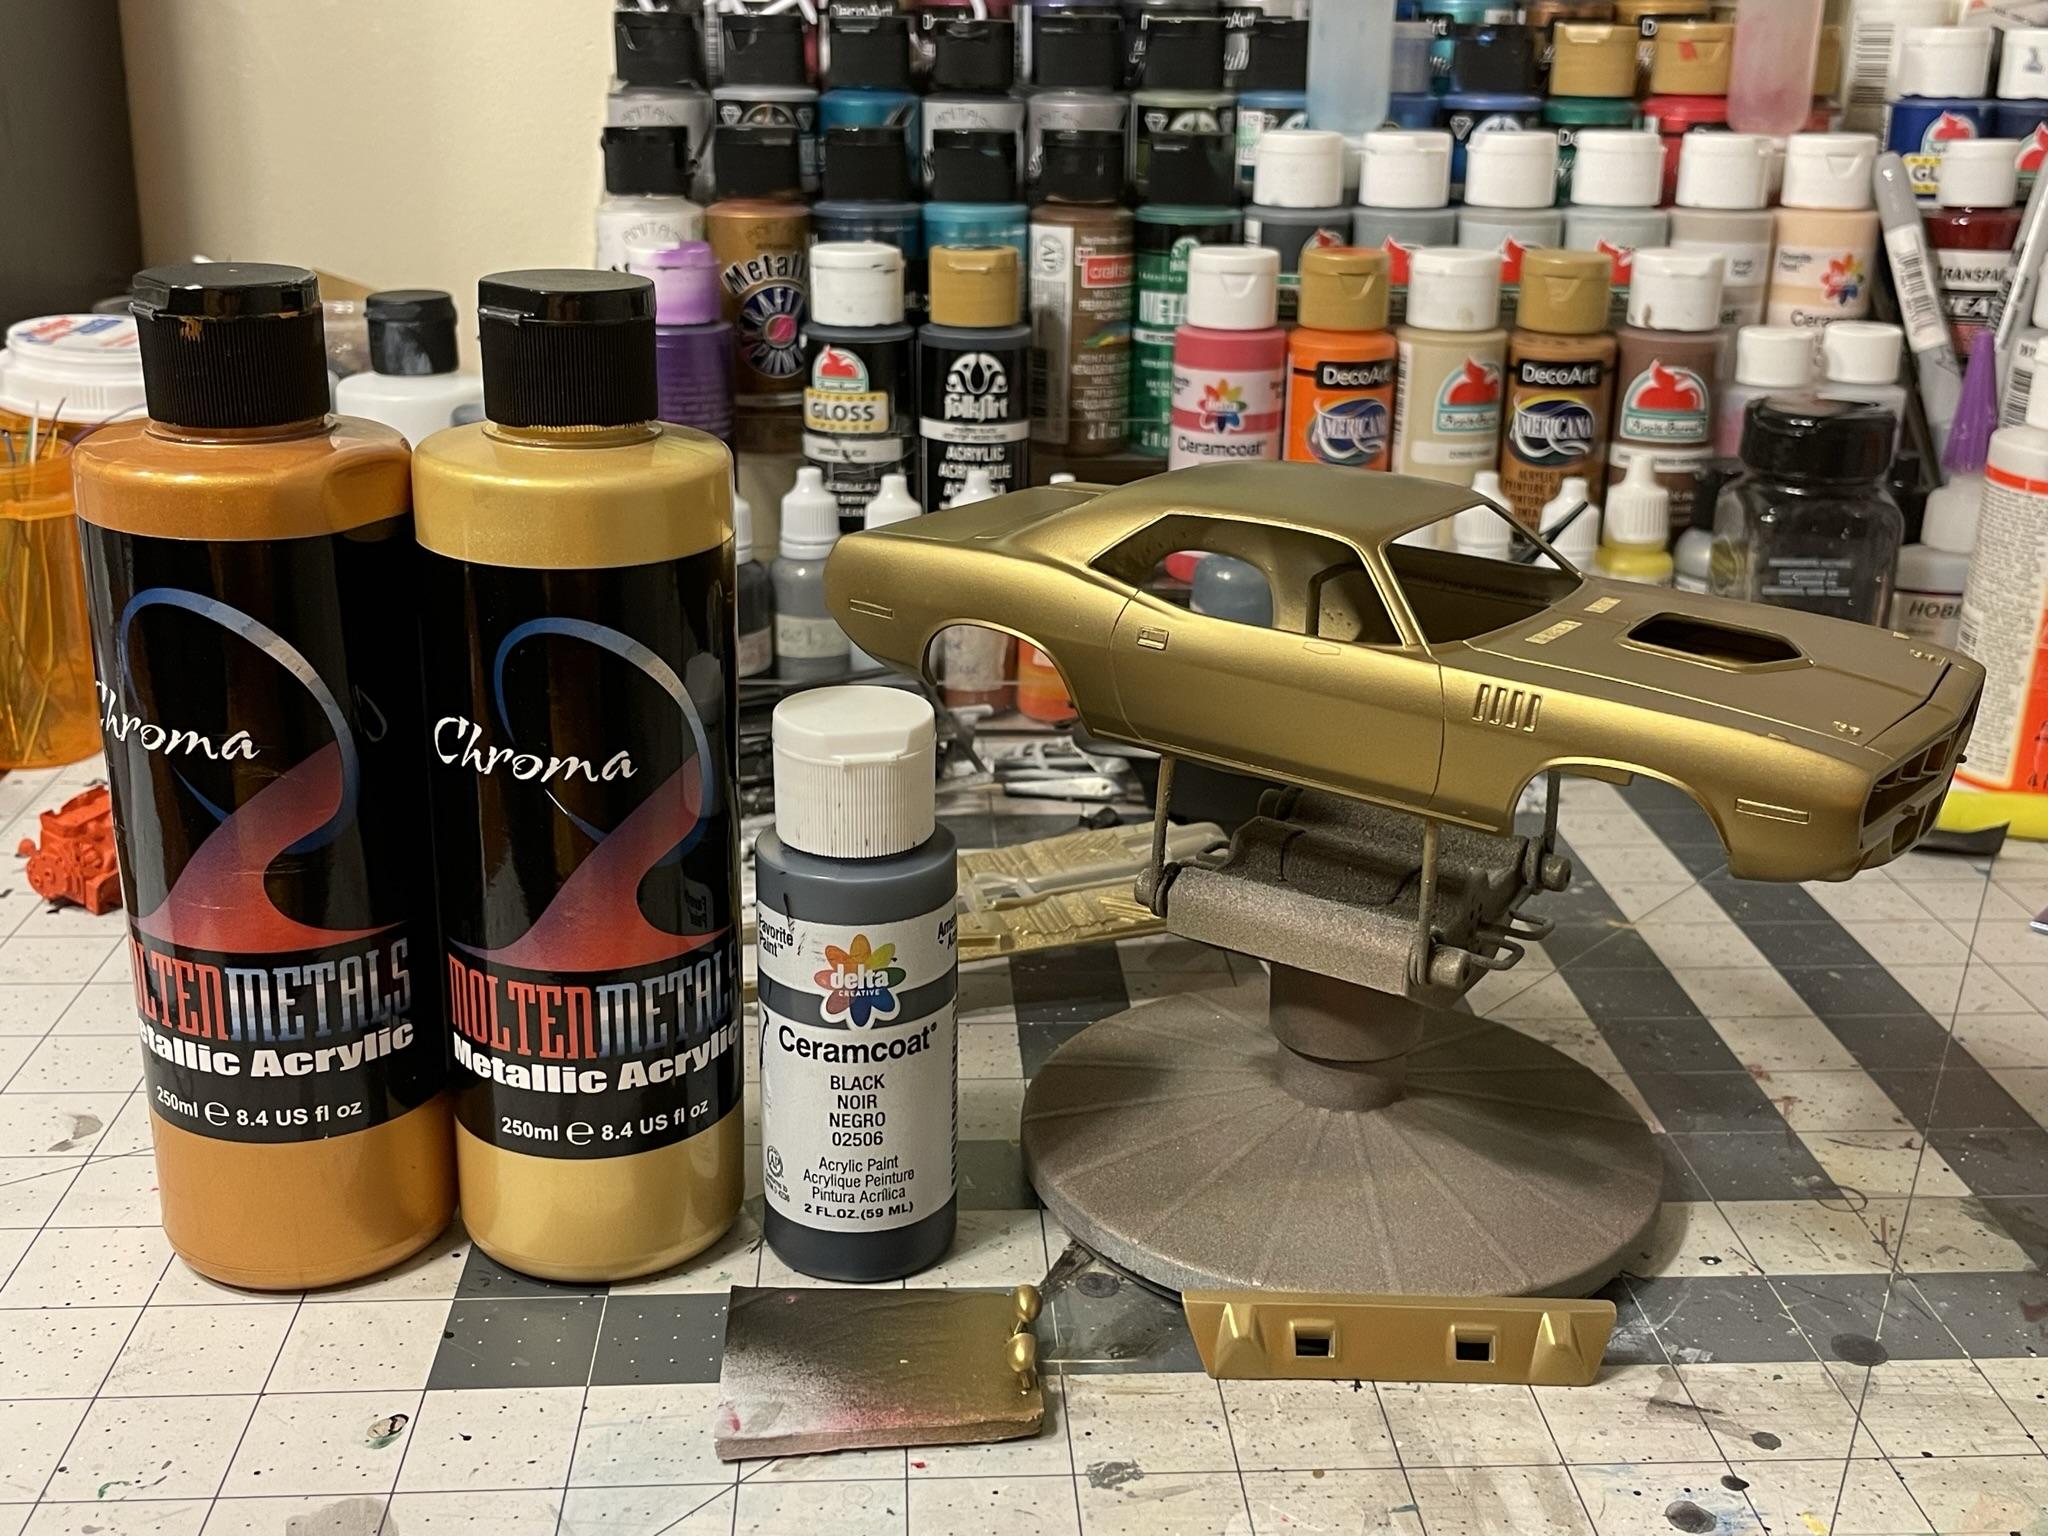
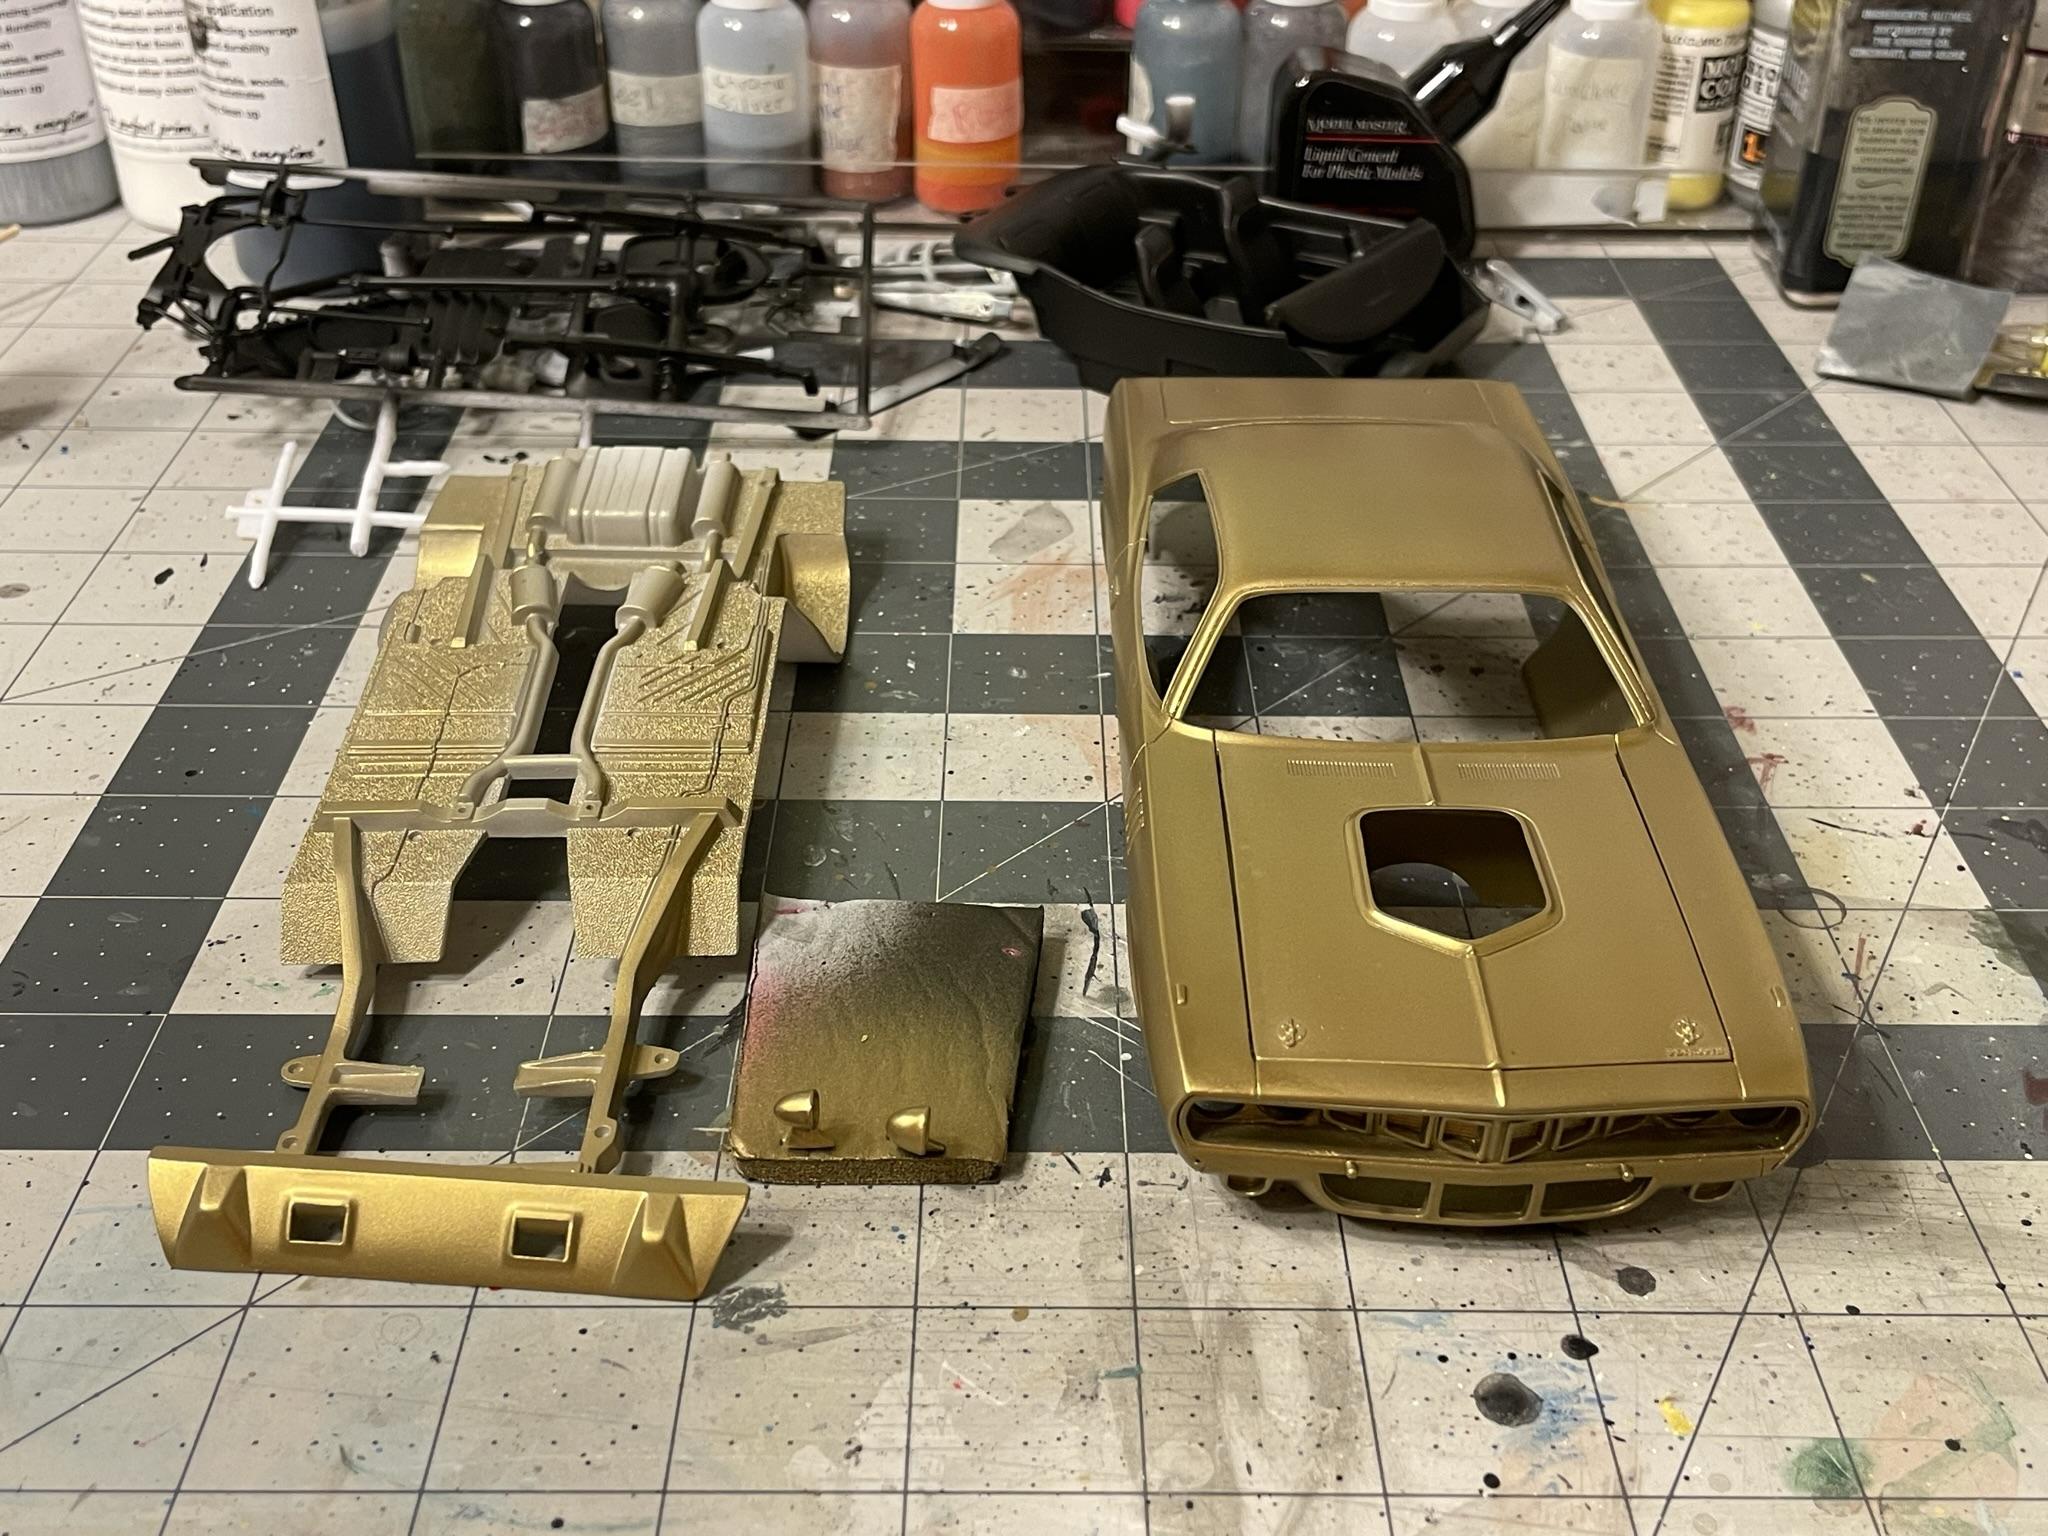
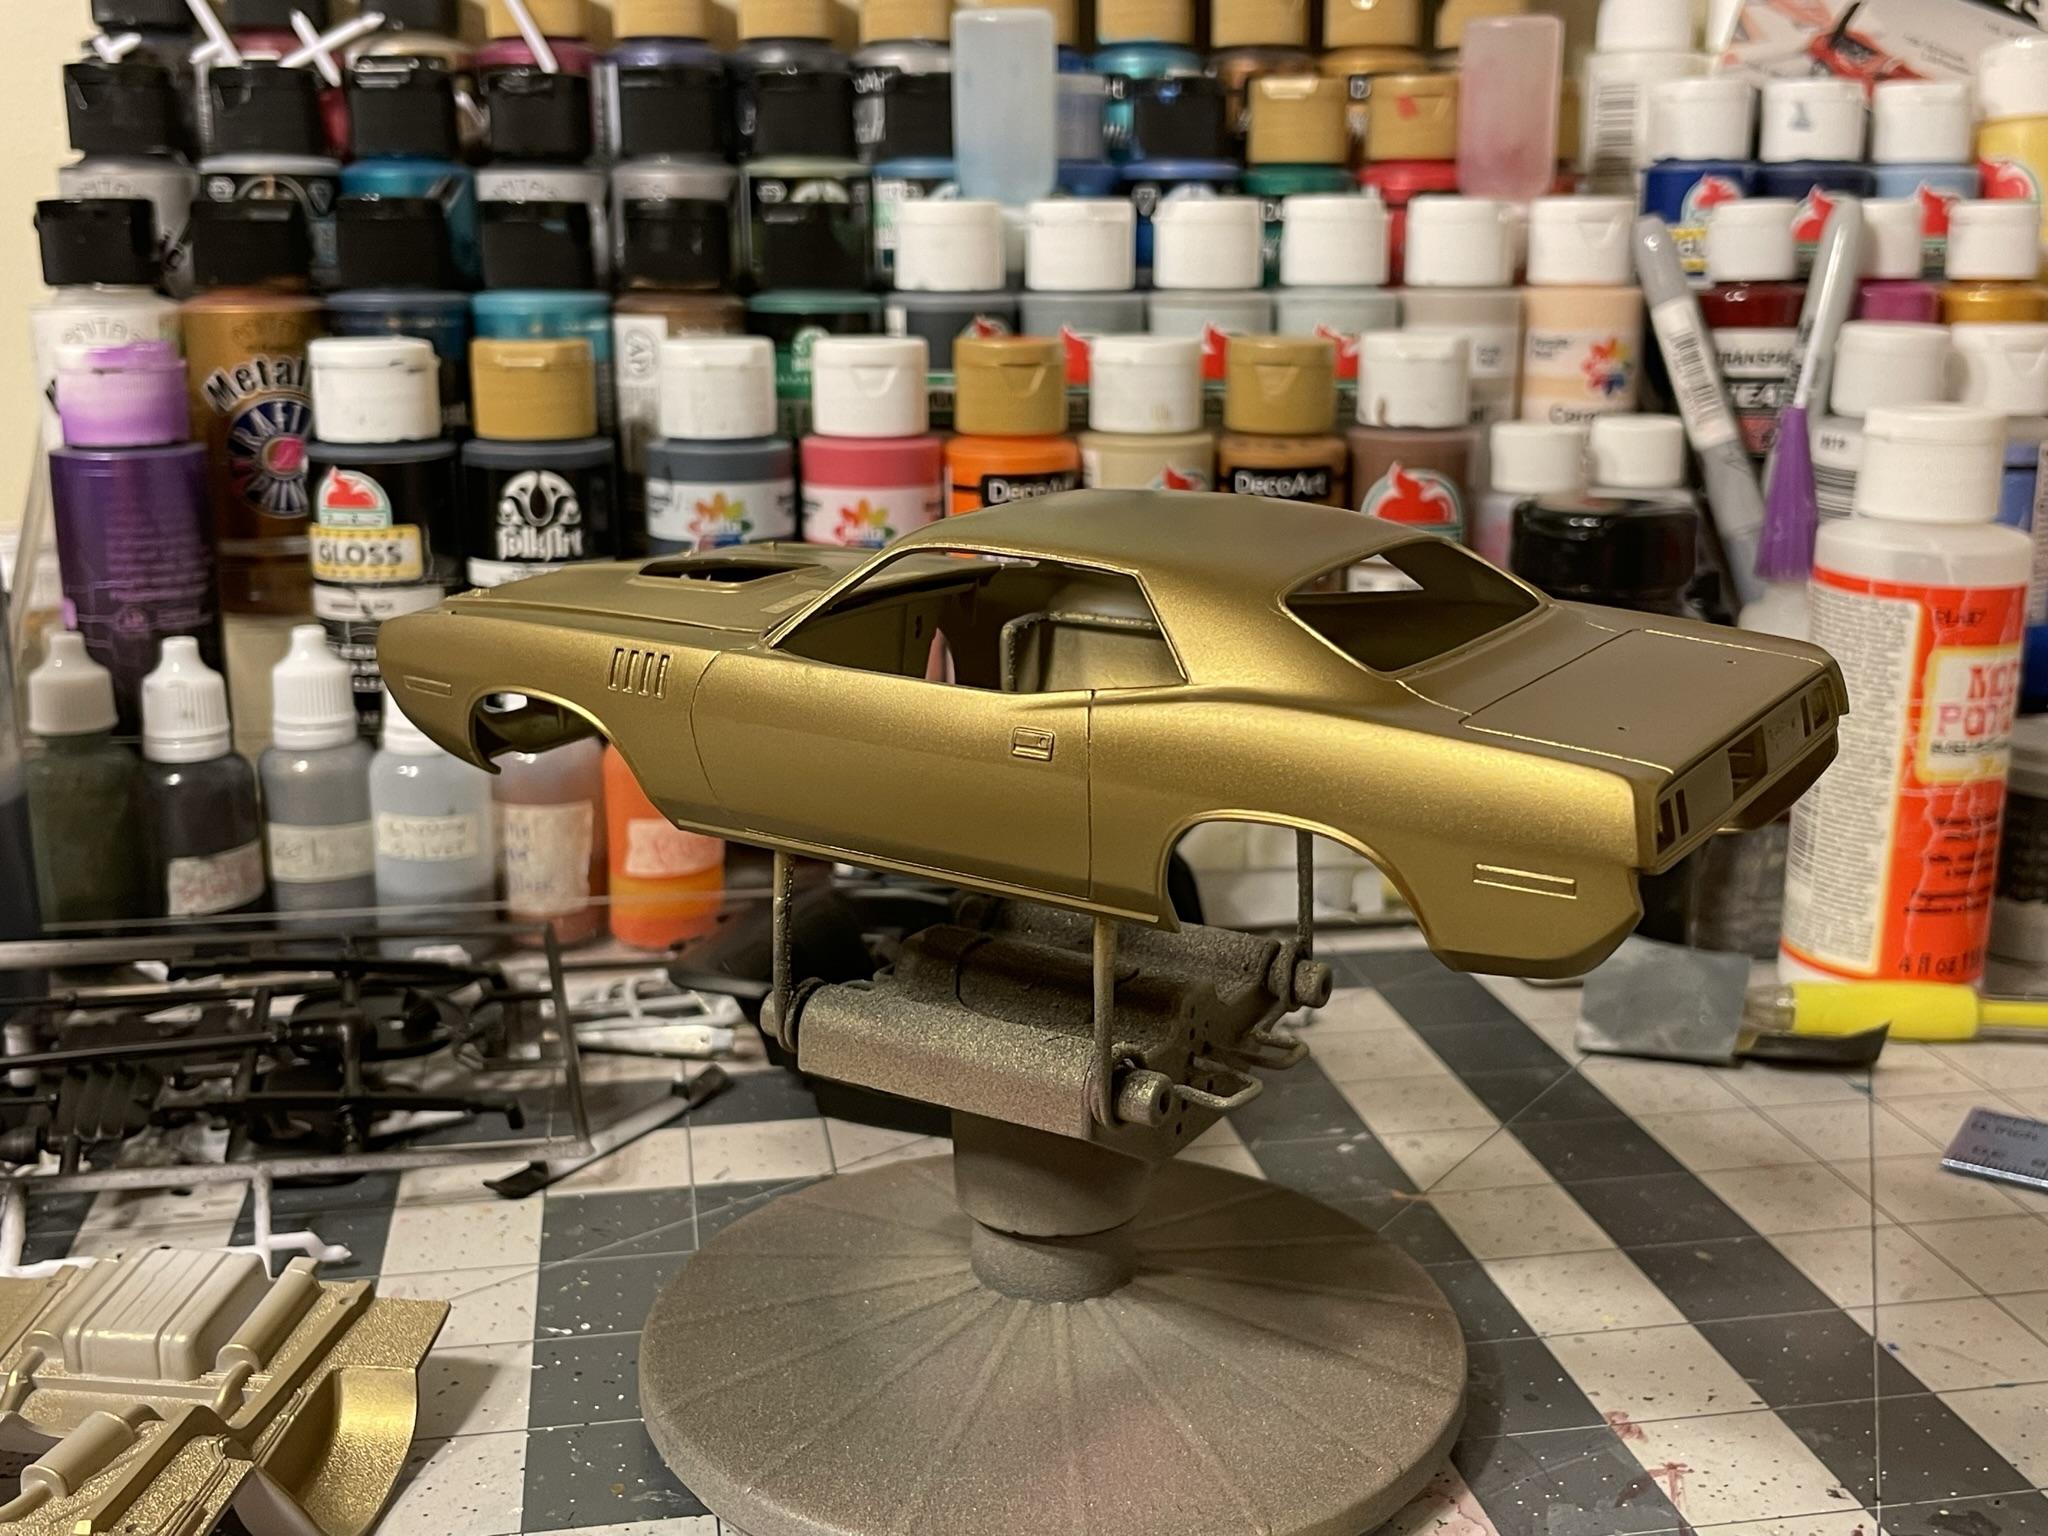
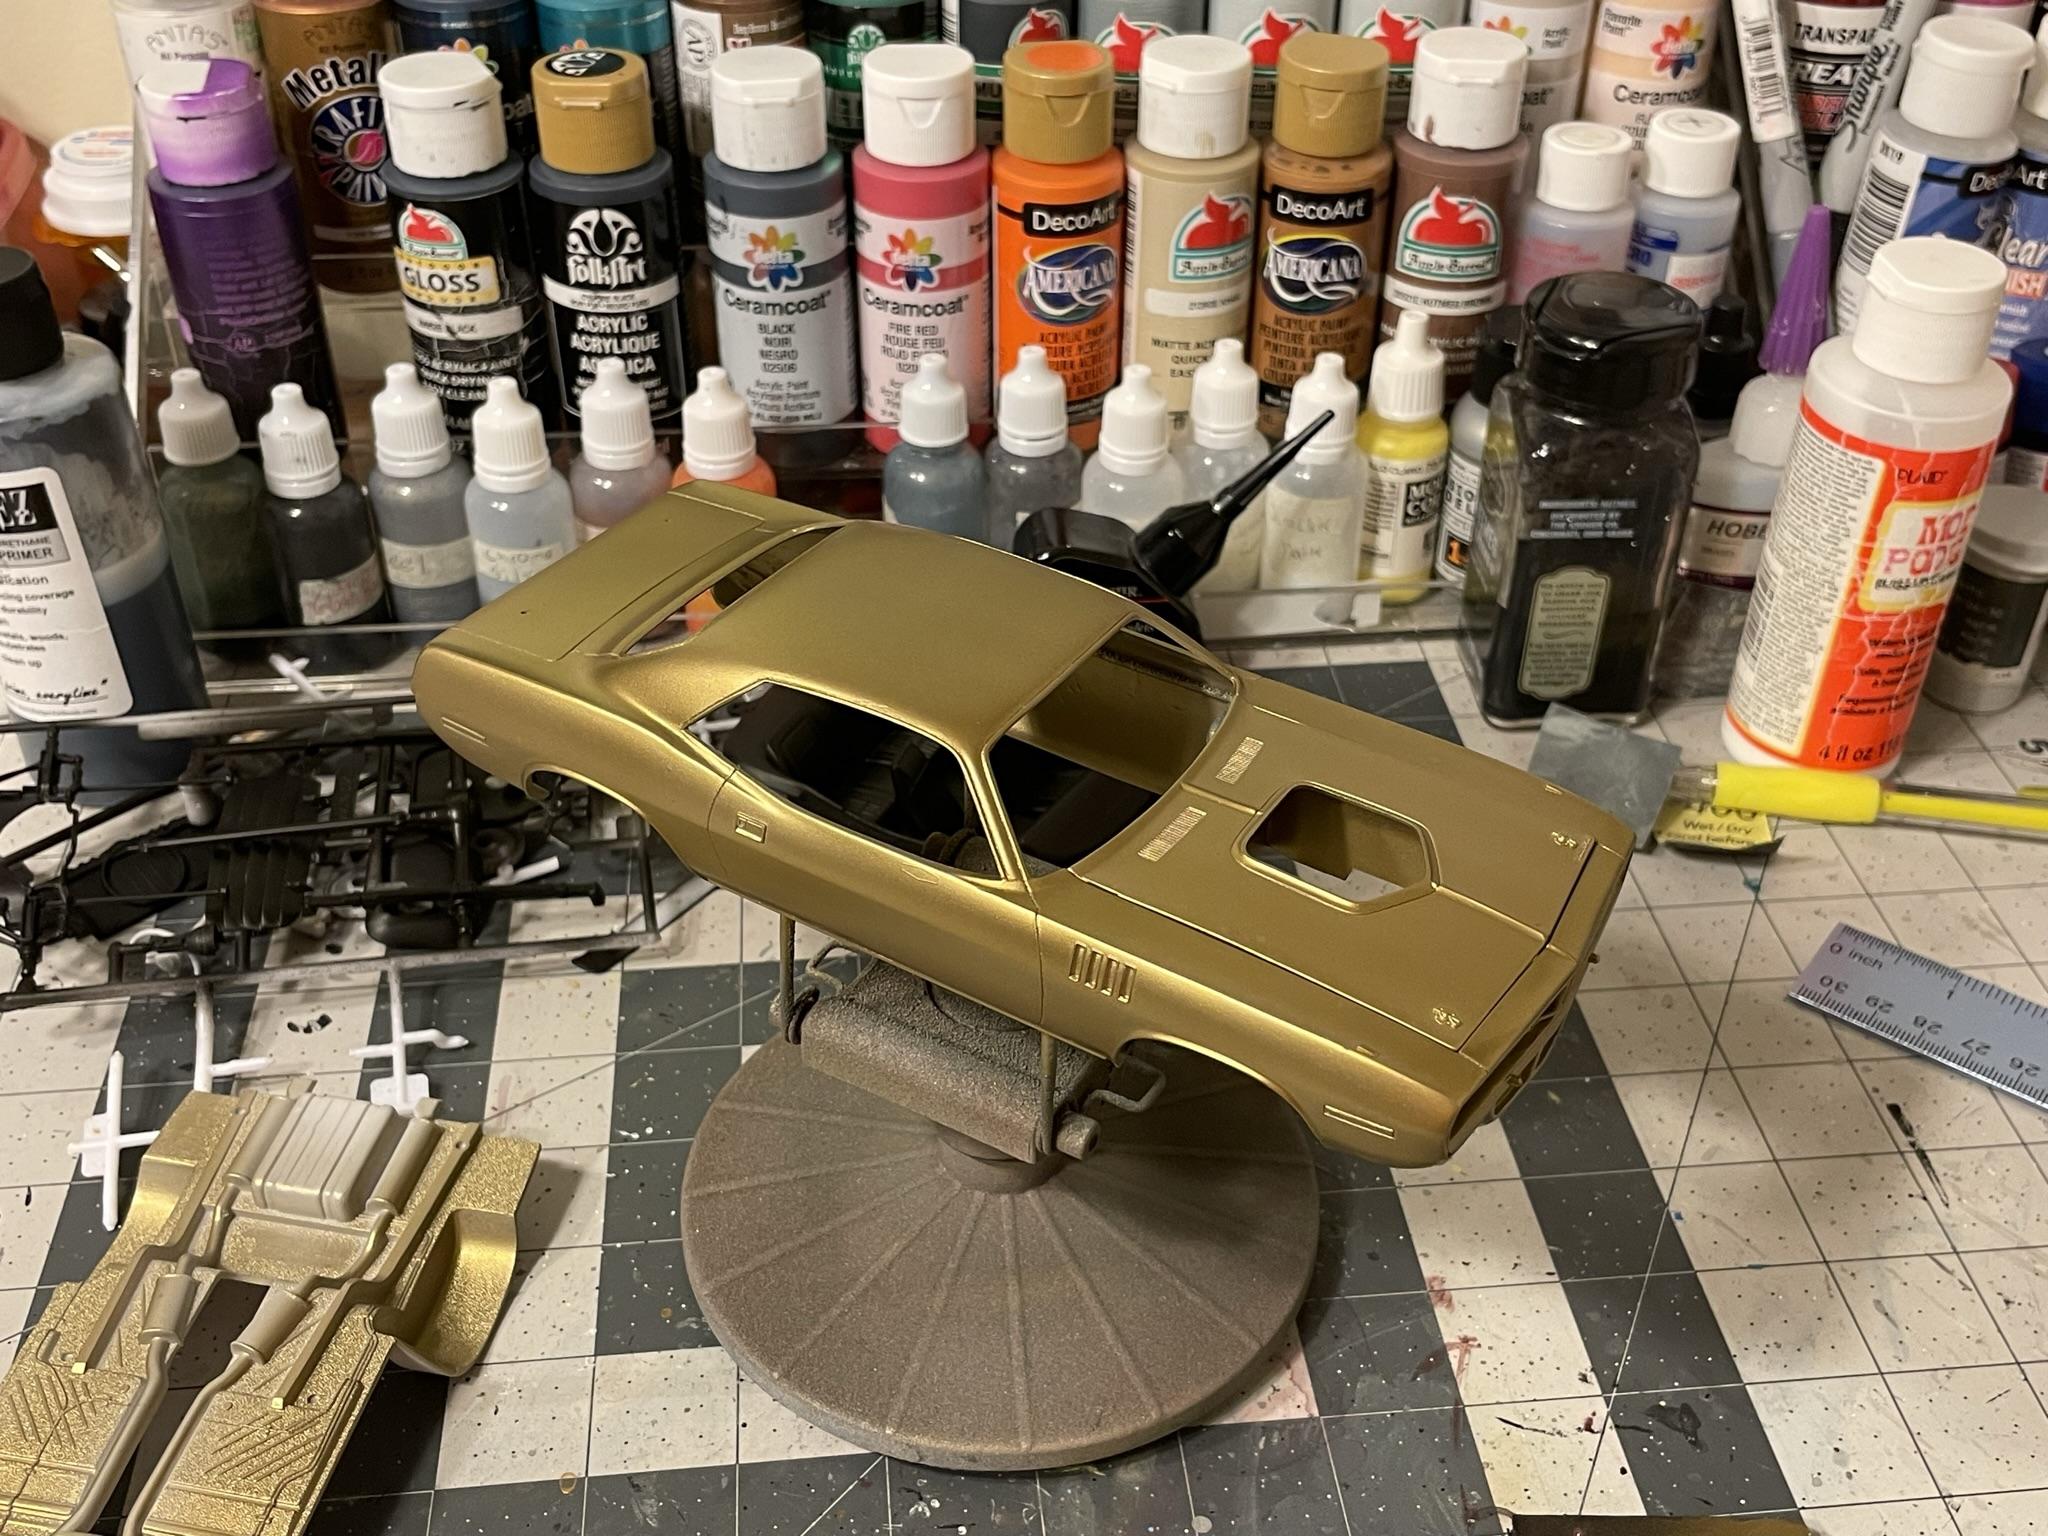
Revell 1971 Hemi Cuda in Gold Metallic, 1/24 Scale.
Dragonhawk1066 replied to Dragonhawk1066's topic in WIP: Model Cars
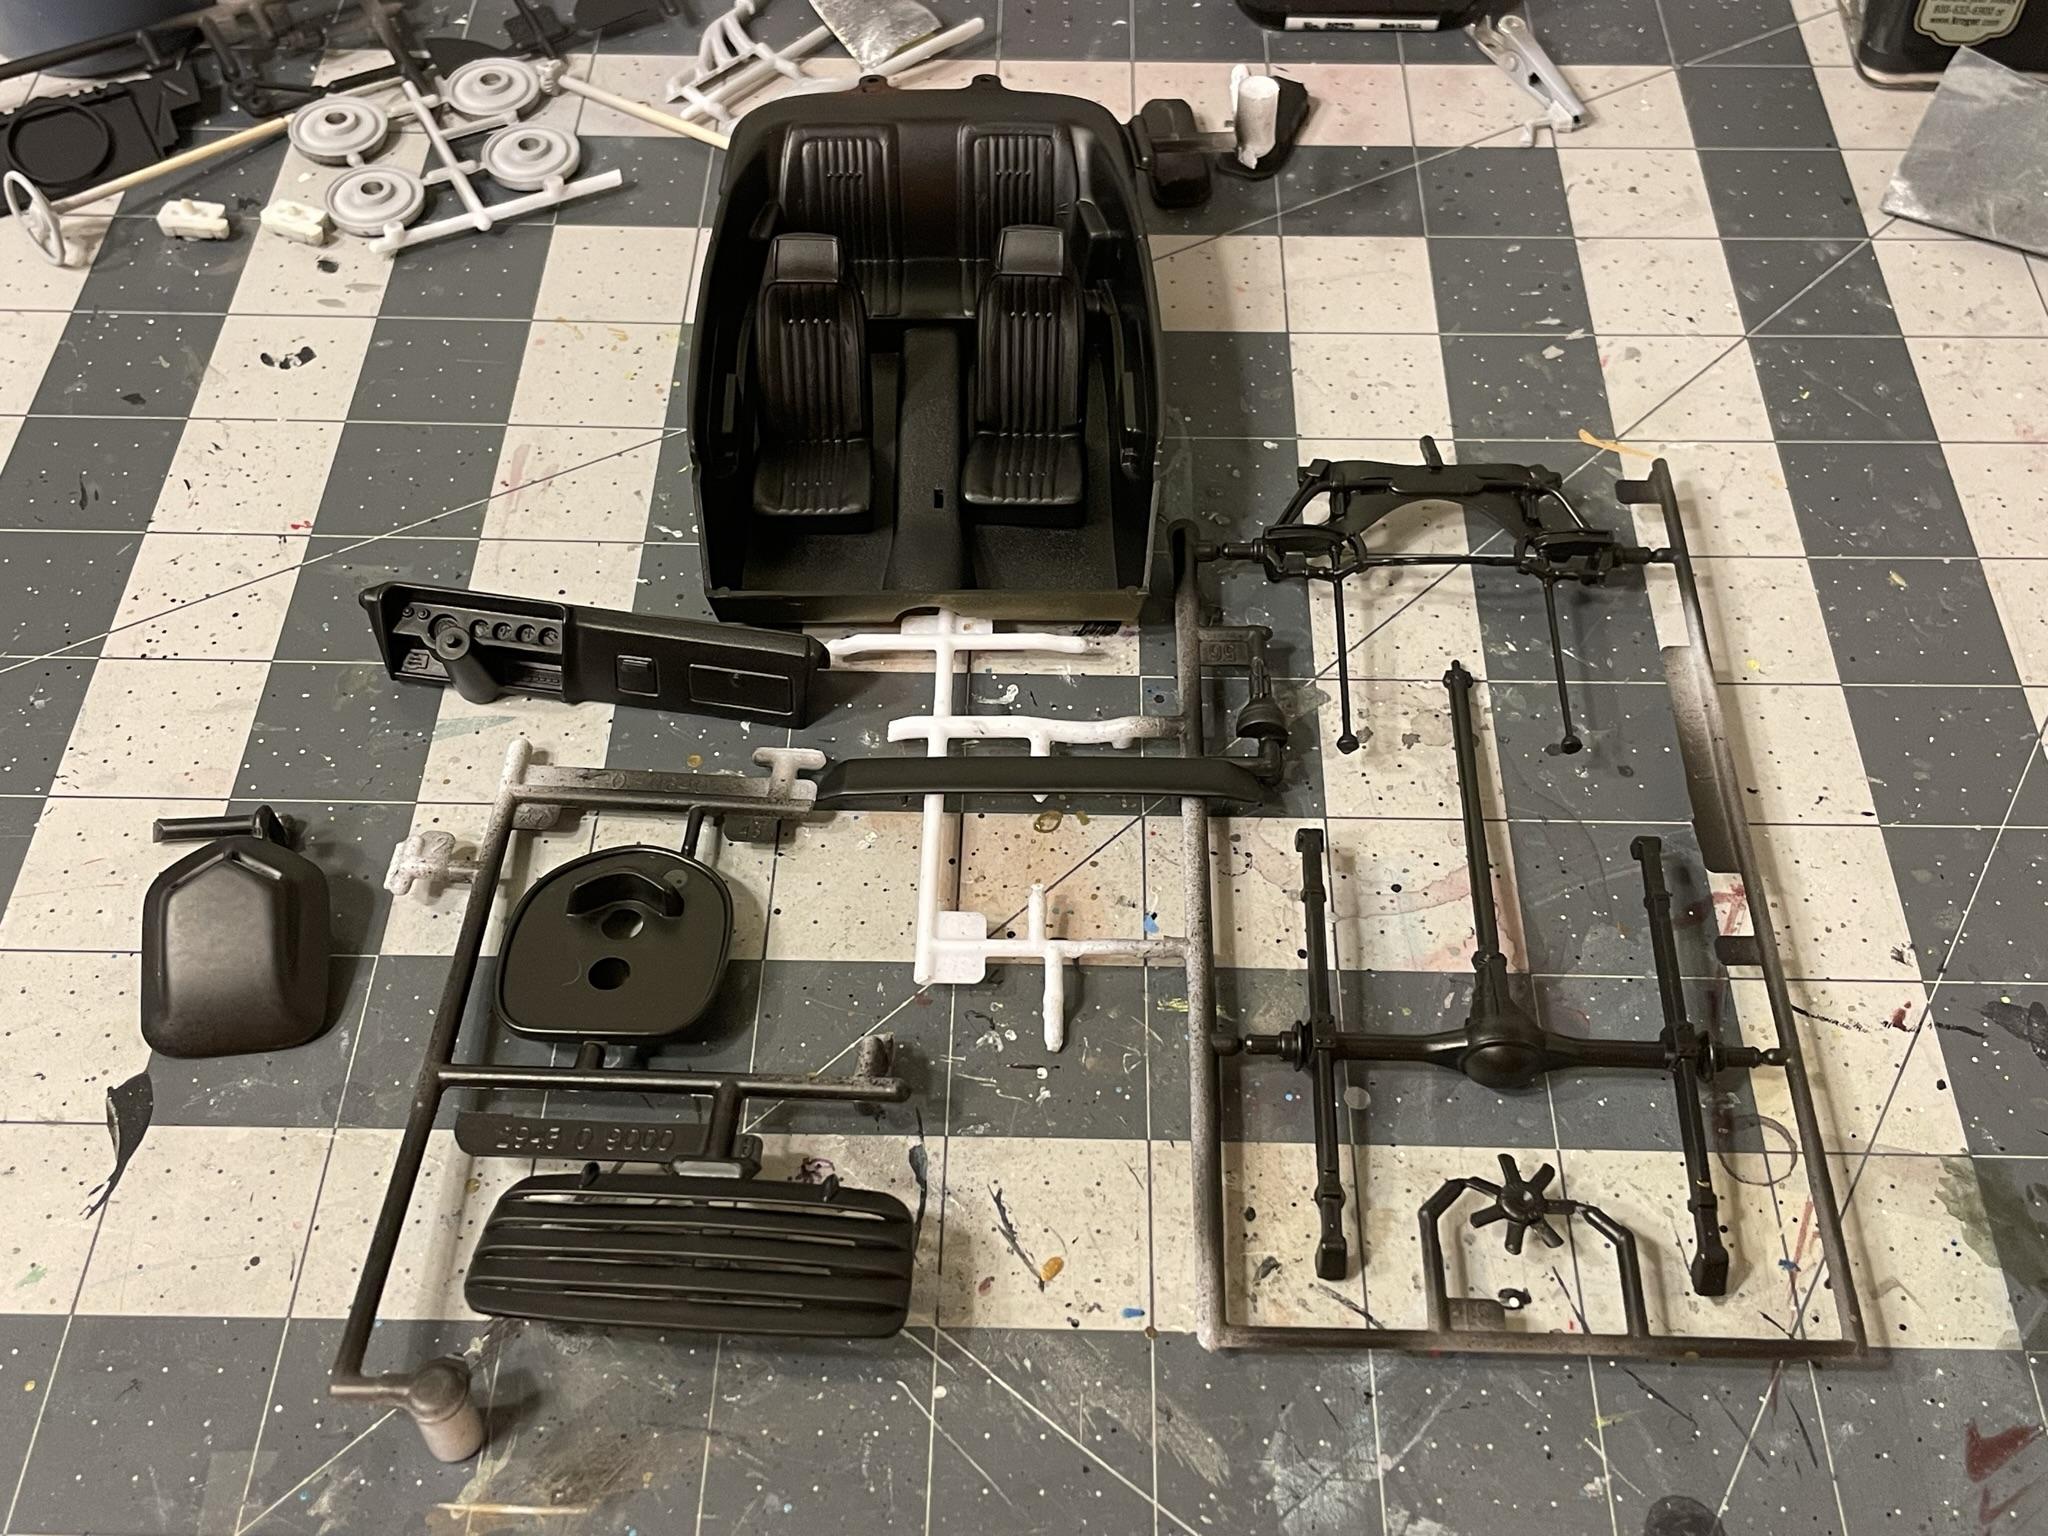
I got the interior parts and chassis parts sprayed in a semi-gloss black this morning. I also decided on a last-minute color change to Gold instead of Blue. Then this afternoon I mixed up a batch using Chroma Molten Metals Xanadu Gold, Dorado Gold, and Delta Black. I ended up with about 7 coats to build up the shade to where I wanted it. It looks like another coat or two is needed on the hood to blend with the fenders. I'll probably spray on a coat of clear before the Black Hemi Billboard decals go on.
-
Fantastic work! Love the blue Cobra and Vette!
-
Nice builds! I love the Cobra Transporter with the Cobra's.!
-
Great looking builds!
-
1989 Ferrari 348TB in Blu Medio (1/24 Hasegawa)
Dragonhawk1066 replied to e30lover's topic in Model Cars
Beautifully done and in a great color!! -
Nice looking Chevelle! Looks good that color with the Cragar's!
-
Nice work!
-
Great looking builds!
-
Very cool and very nice work!
-
Excellent work!
-
Excellent work! The 1/8 Ford GT and Cobra are amazing!
-
Nice builds!
-
Cool builds!
-
Nice work!