NOBLNG
-
Posts
9,963 -
Joined
-
Last visited
Content Type
Profiles
Forums
Events
Gallery
Everything posted by NOBLNG
-

Unusual stretch limo
NOBLNG replied to Earl Marischal's topic in General Automotive Talk (Trucks and Cars)
Jeez…all that work and they couldn’t extend the side trim.? -
I agree, it looks great!? Makes me want to start mine.?
-
That was a beautiful paint job…too bad about the clear coat.?
-
That is one fine looking Corvette Louis!?
-
The hardest part when scratch building exhausts is getting left and right pipes that look like mirror images.?
-
I prefer to use the foil under paint technique if it hasn’t been painted already. I have also filed badges down slightly to level them and then applied the decal. Then it sits a little proud and doesn’t look as much like a decal.
-
LABLE??

-
Unusual stretch limo
NOBLNG replied to Earl Marischal's topic in General Automotive Talk (Trucks and Cars)
From a link on that site…some more neat rail cars.? http://justacarguy.blogspot.com/2009/11/inspection-cars-for-railroad-inspectors.html -
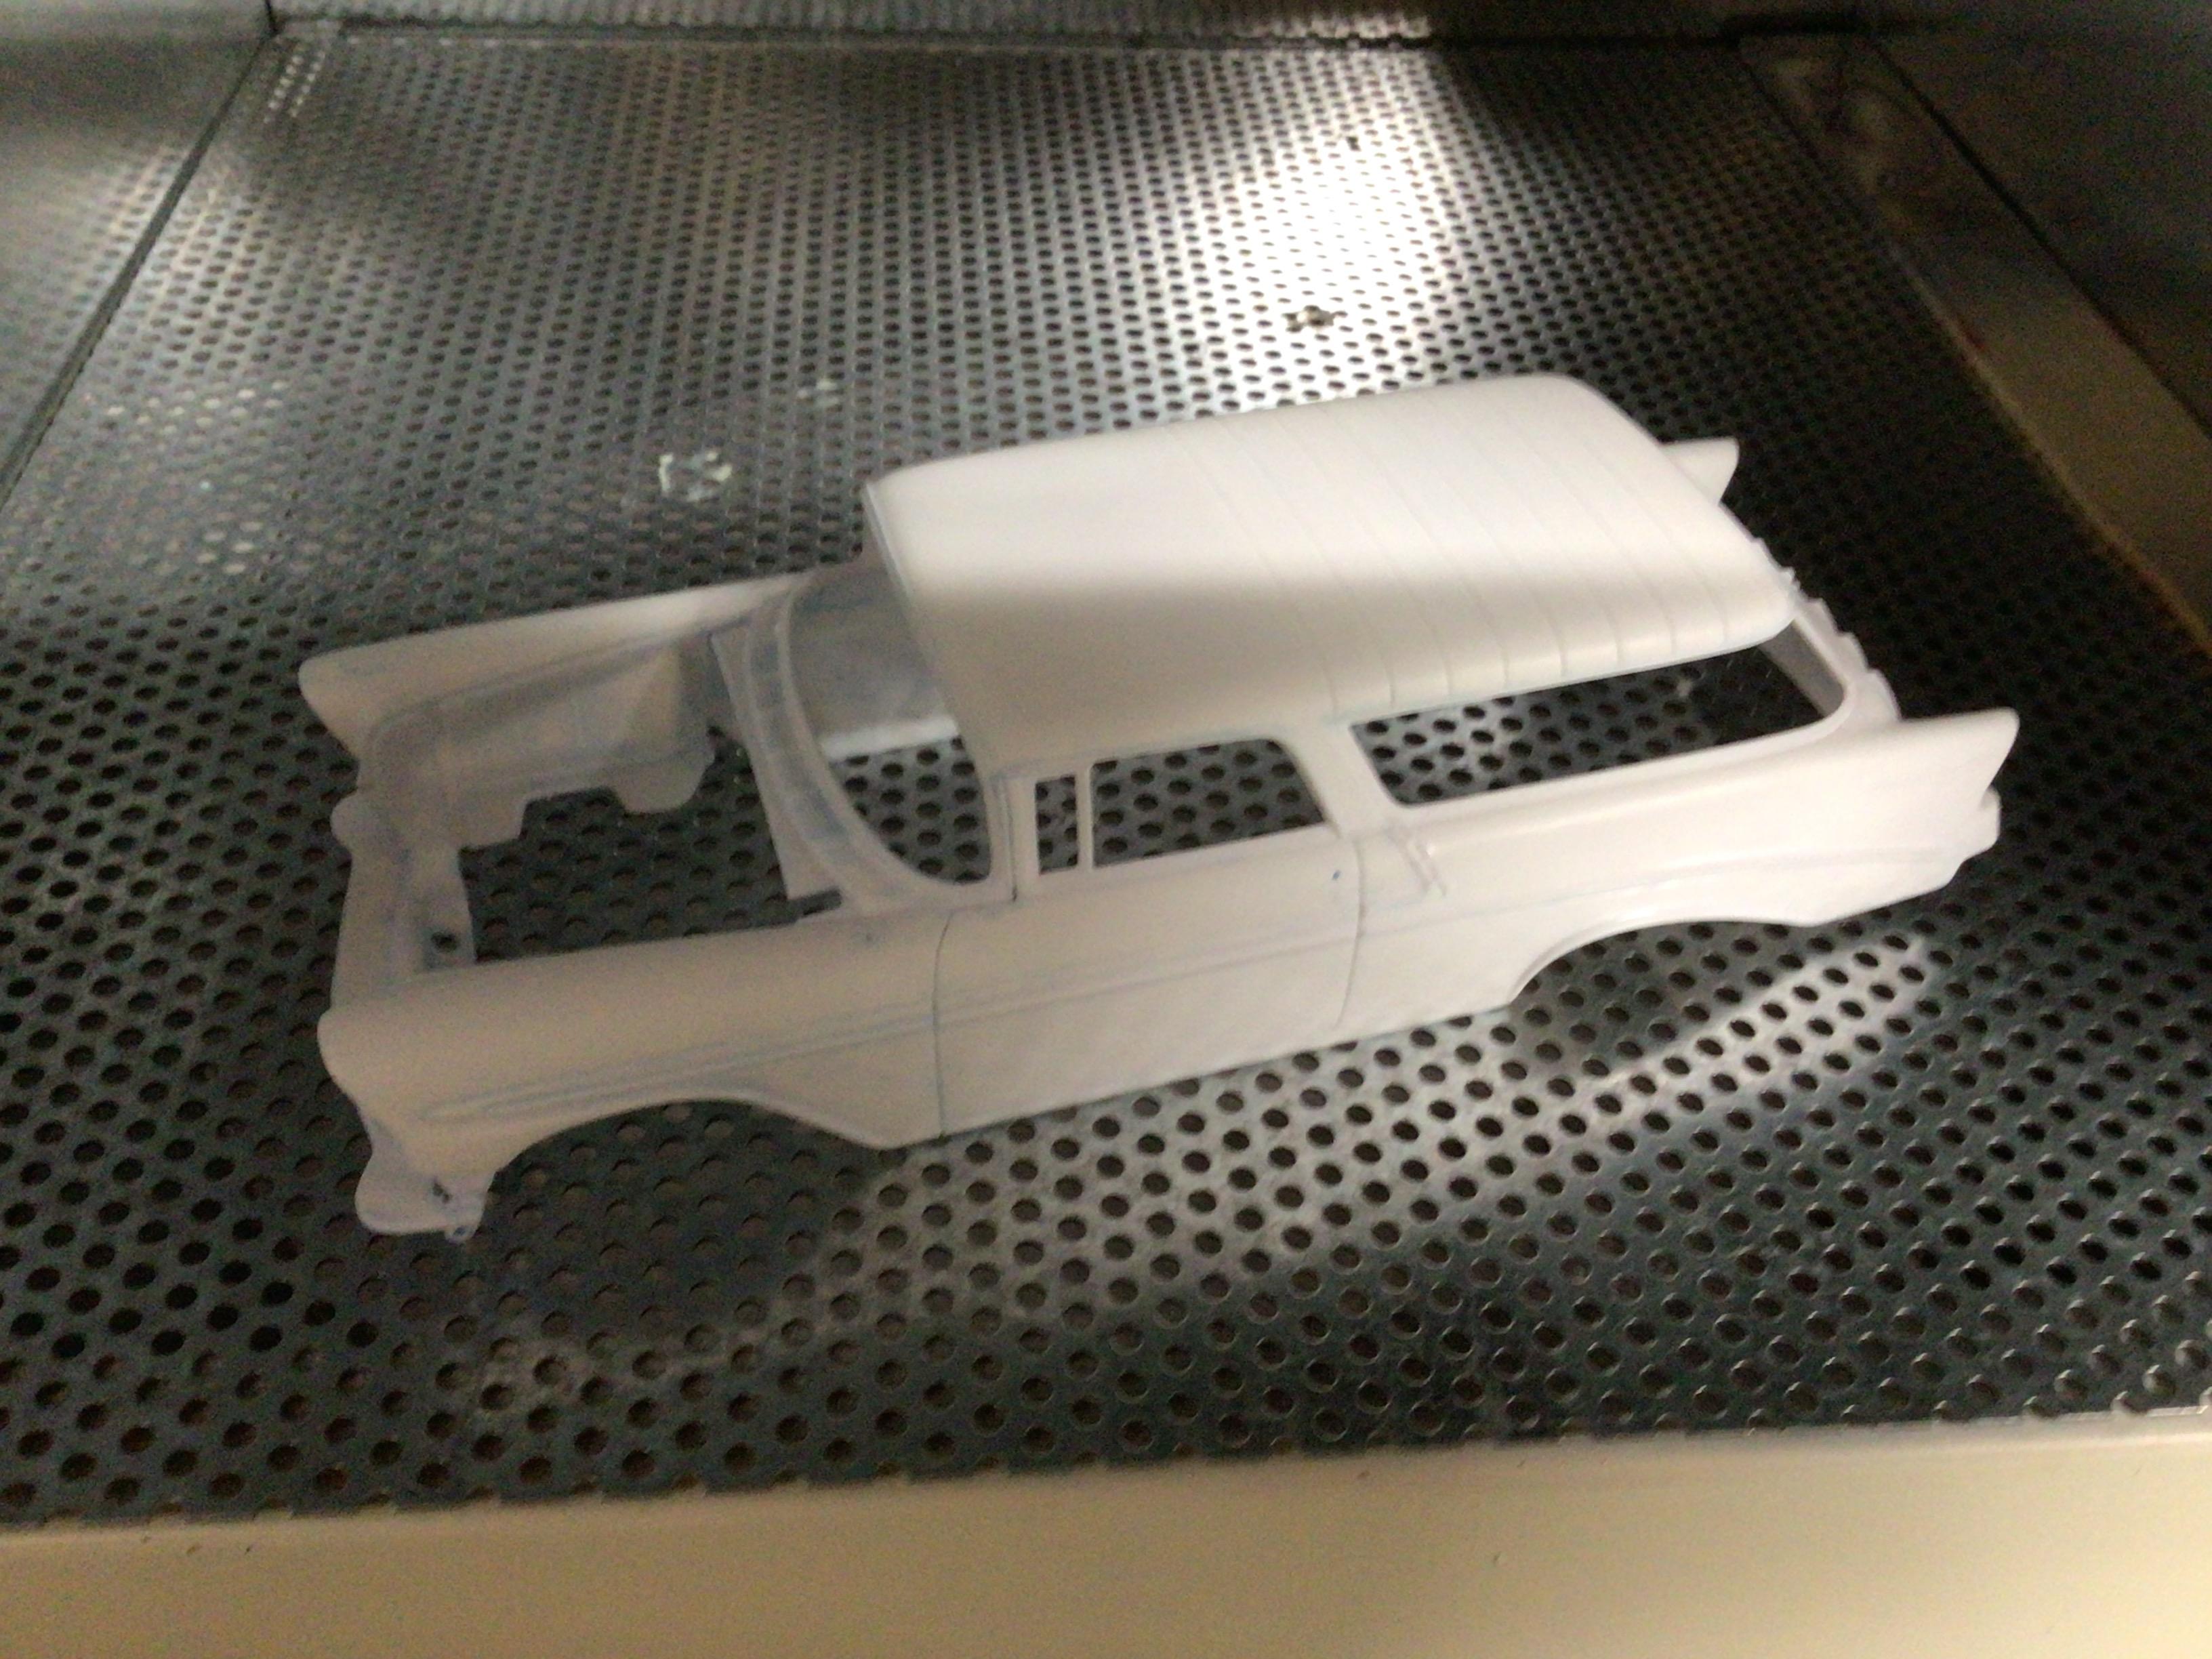
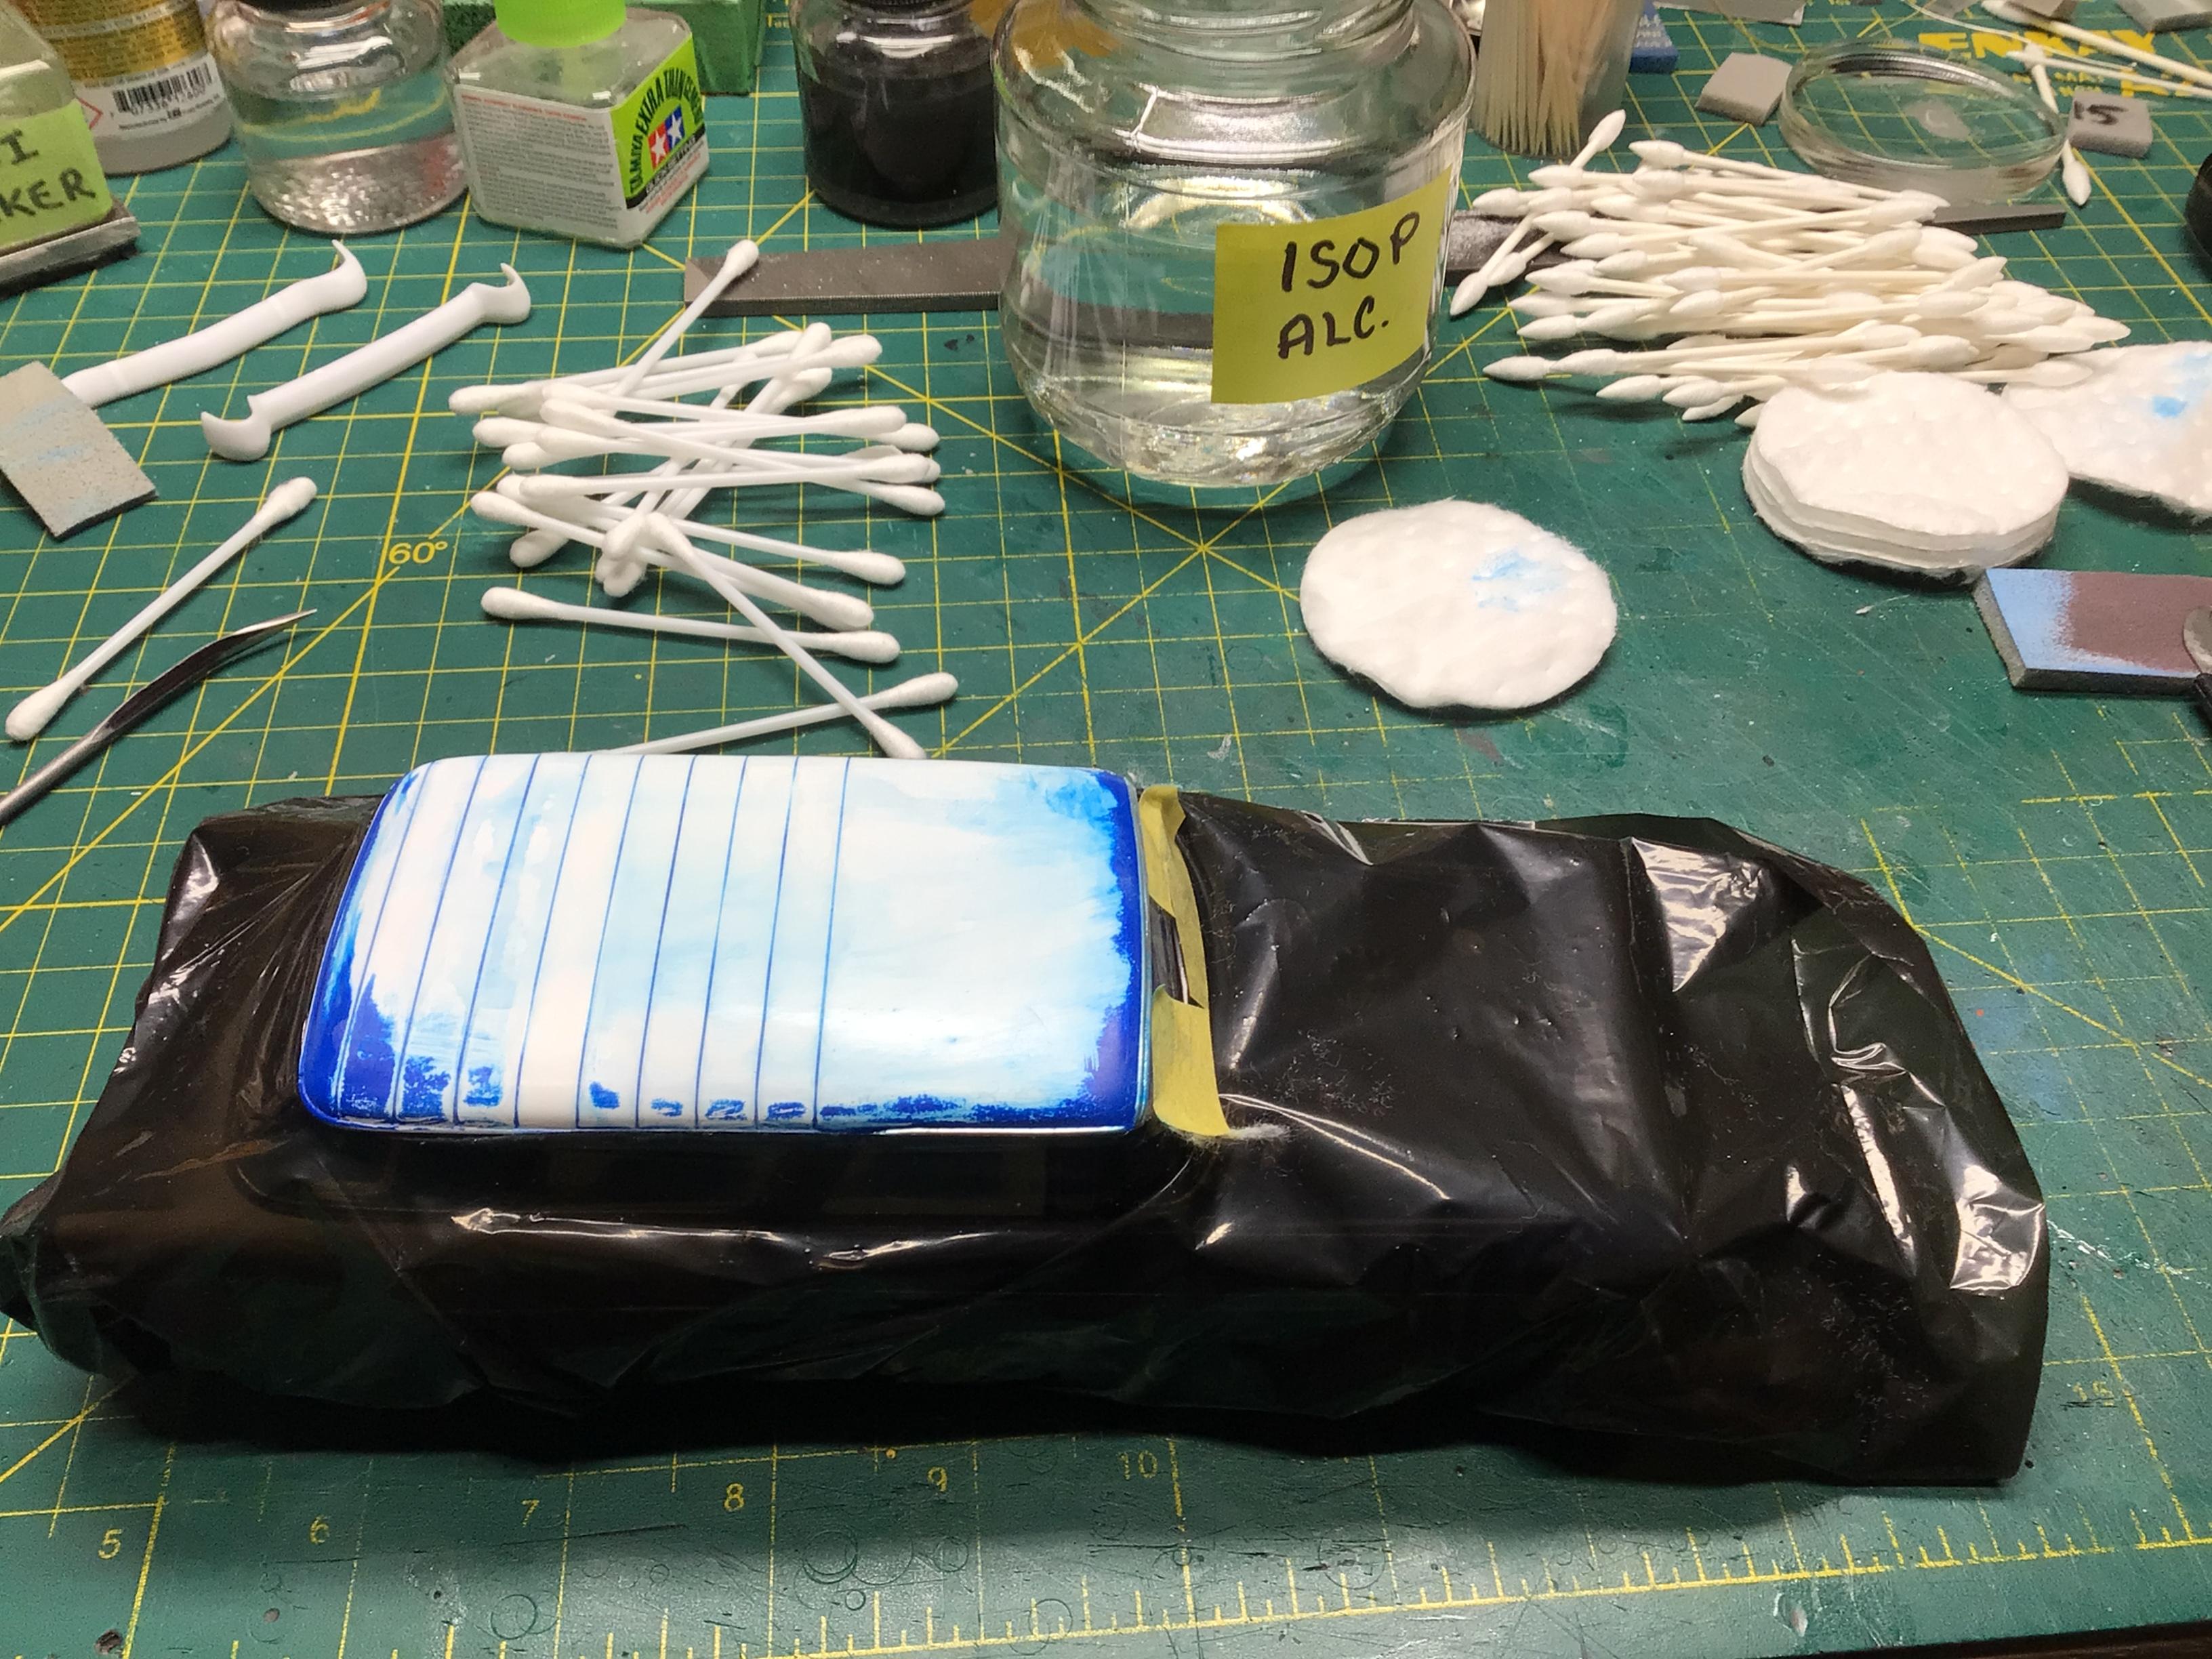
Don’t I know it.? I’ve had some practice with second tries…so I hope so.? Thanks Steve. The interior is Vallejo Air Russian Blue 71.333. I could have maybe salvaged it, but I would always notice the transition and it would bother me greatly.? On the upside, I managed to save the hood.? Back to square one…dang that Tamiya primer is tough to remove.?
-
Johan ‘70 Cadillac ElDorado pro touring (low and aggressive)
NOBLNG replied to Steve H's topic in WIP: Model Cars
Looking mighty fine Steve!? I love the whole thing, including all the little details like the water bottle.? -
I’m watching. I’ve already picked up a couple of tricks I can use on my ‘32.?
-
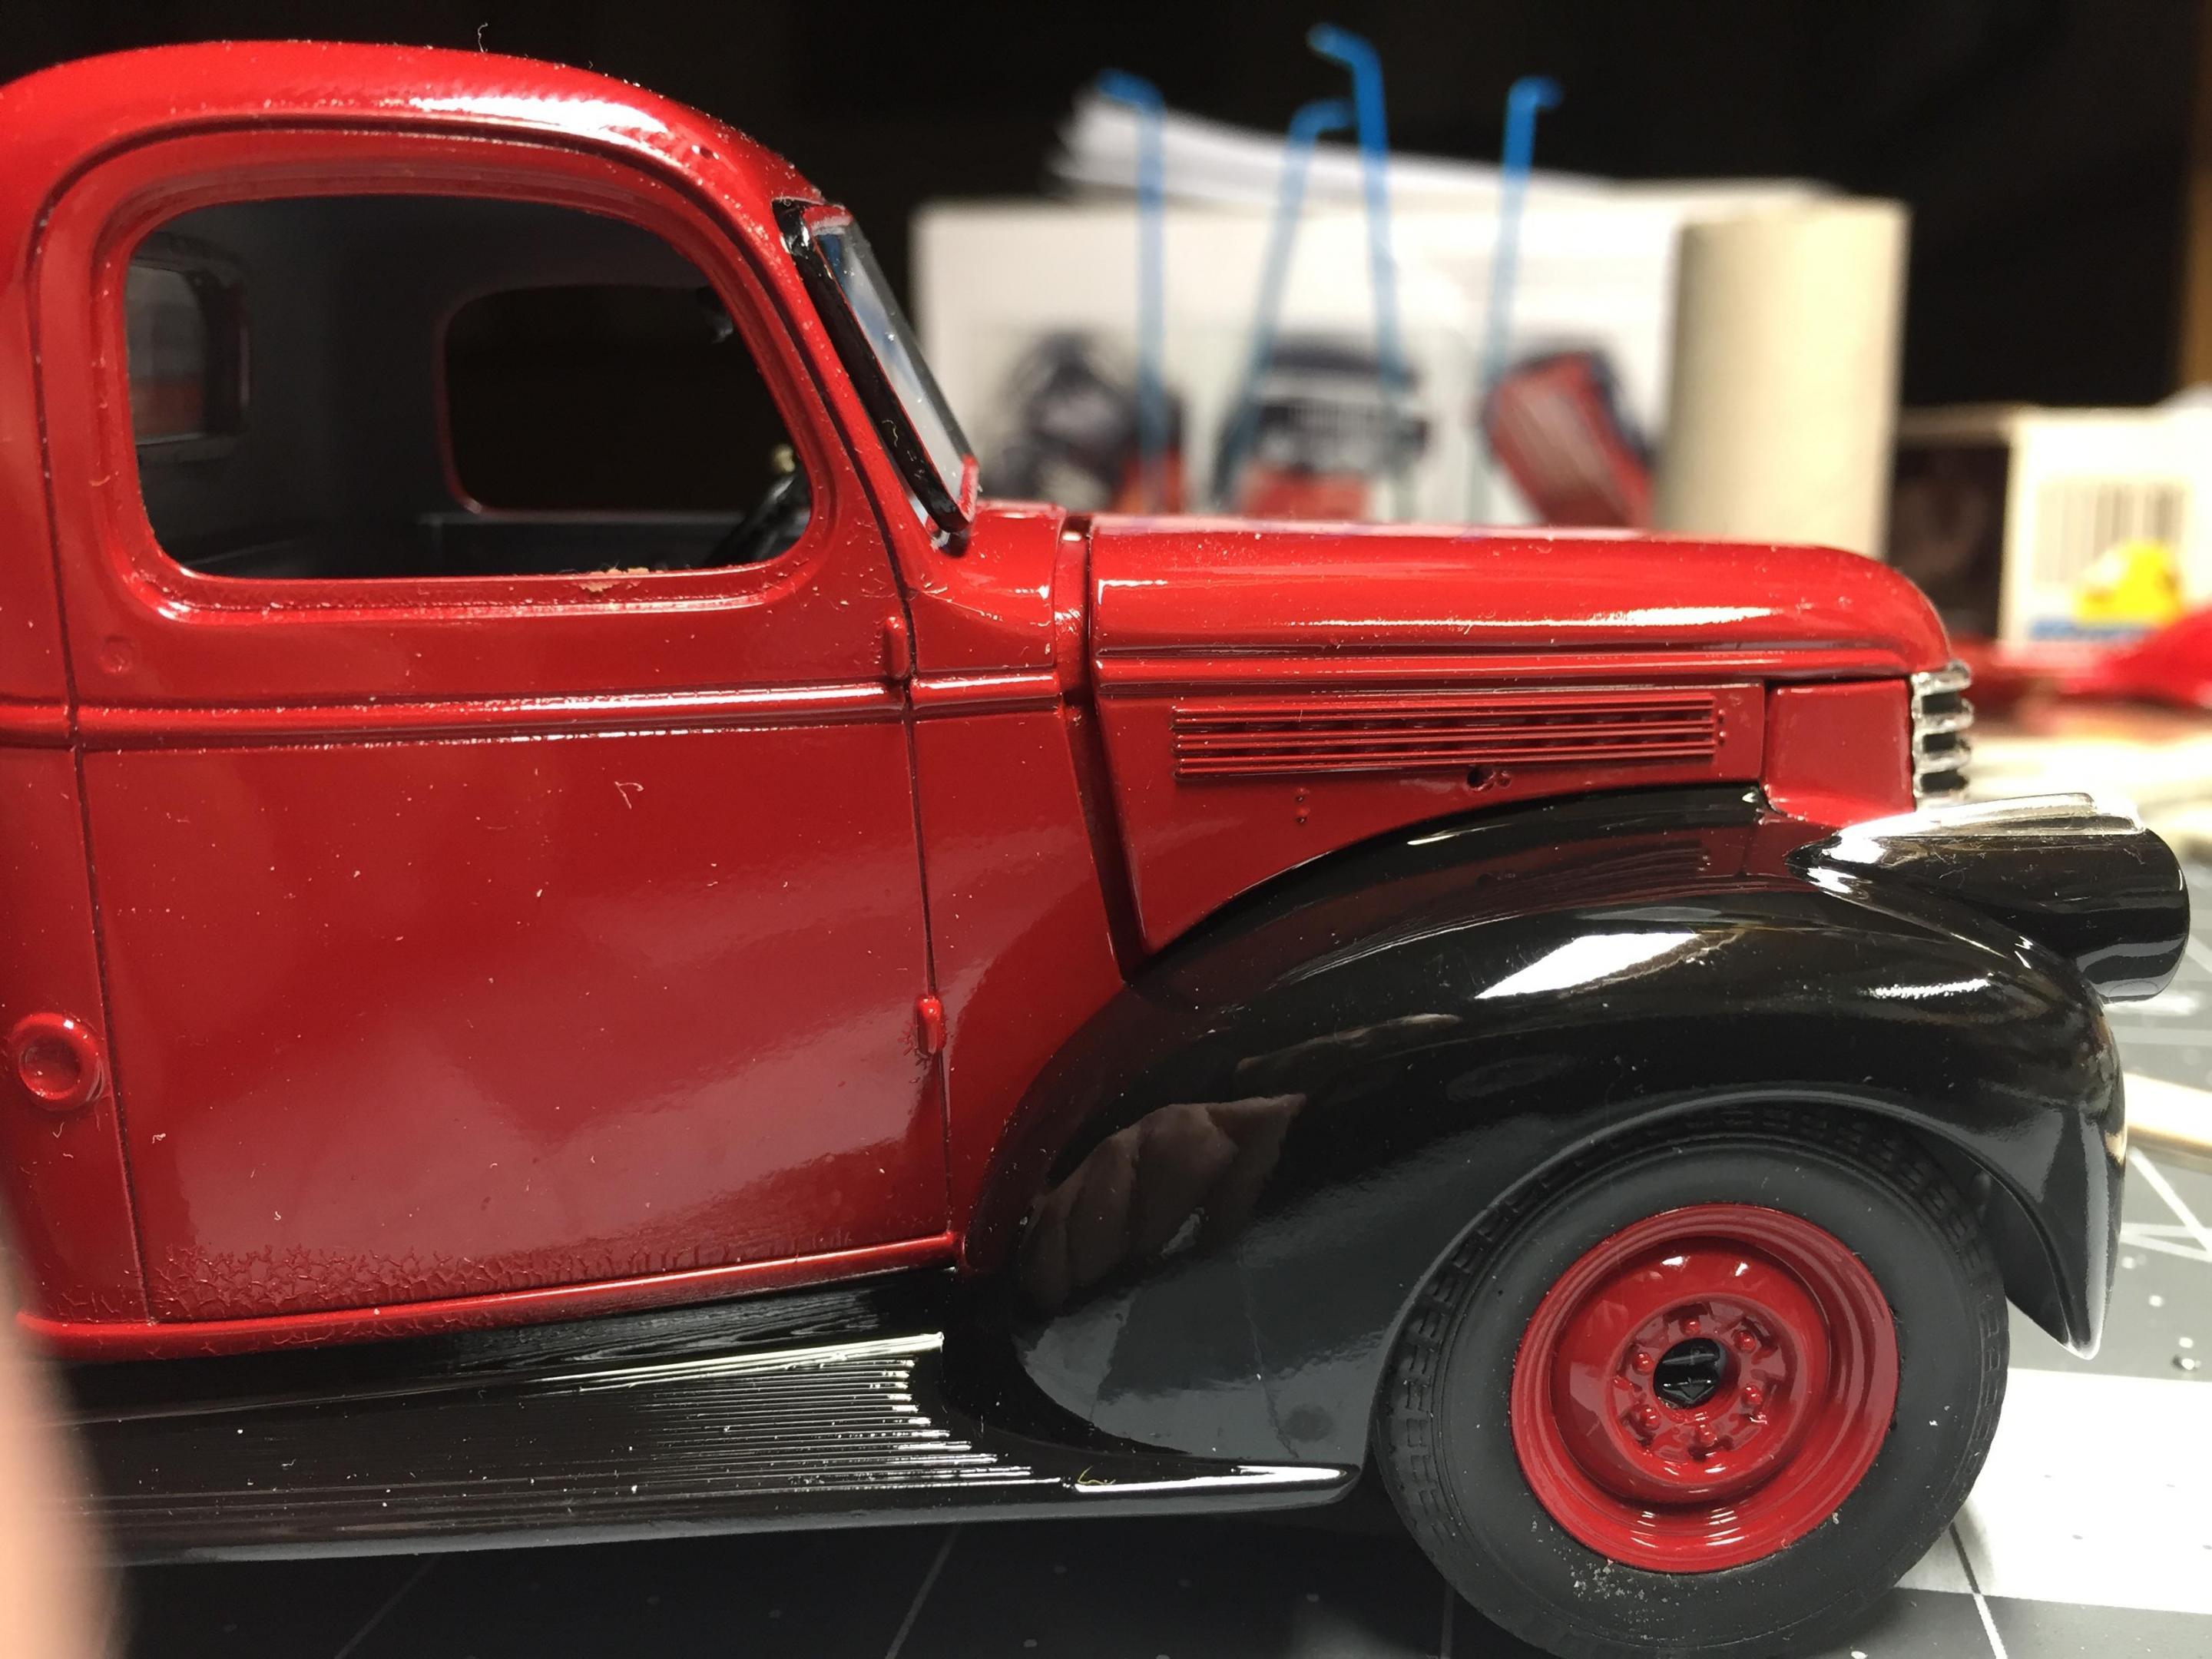
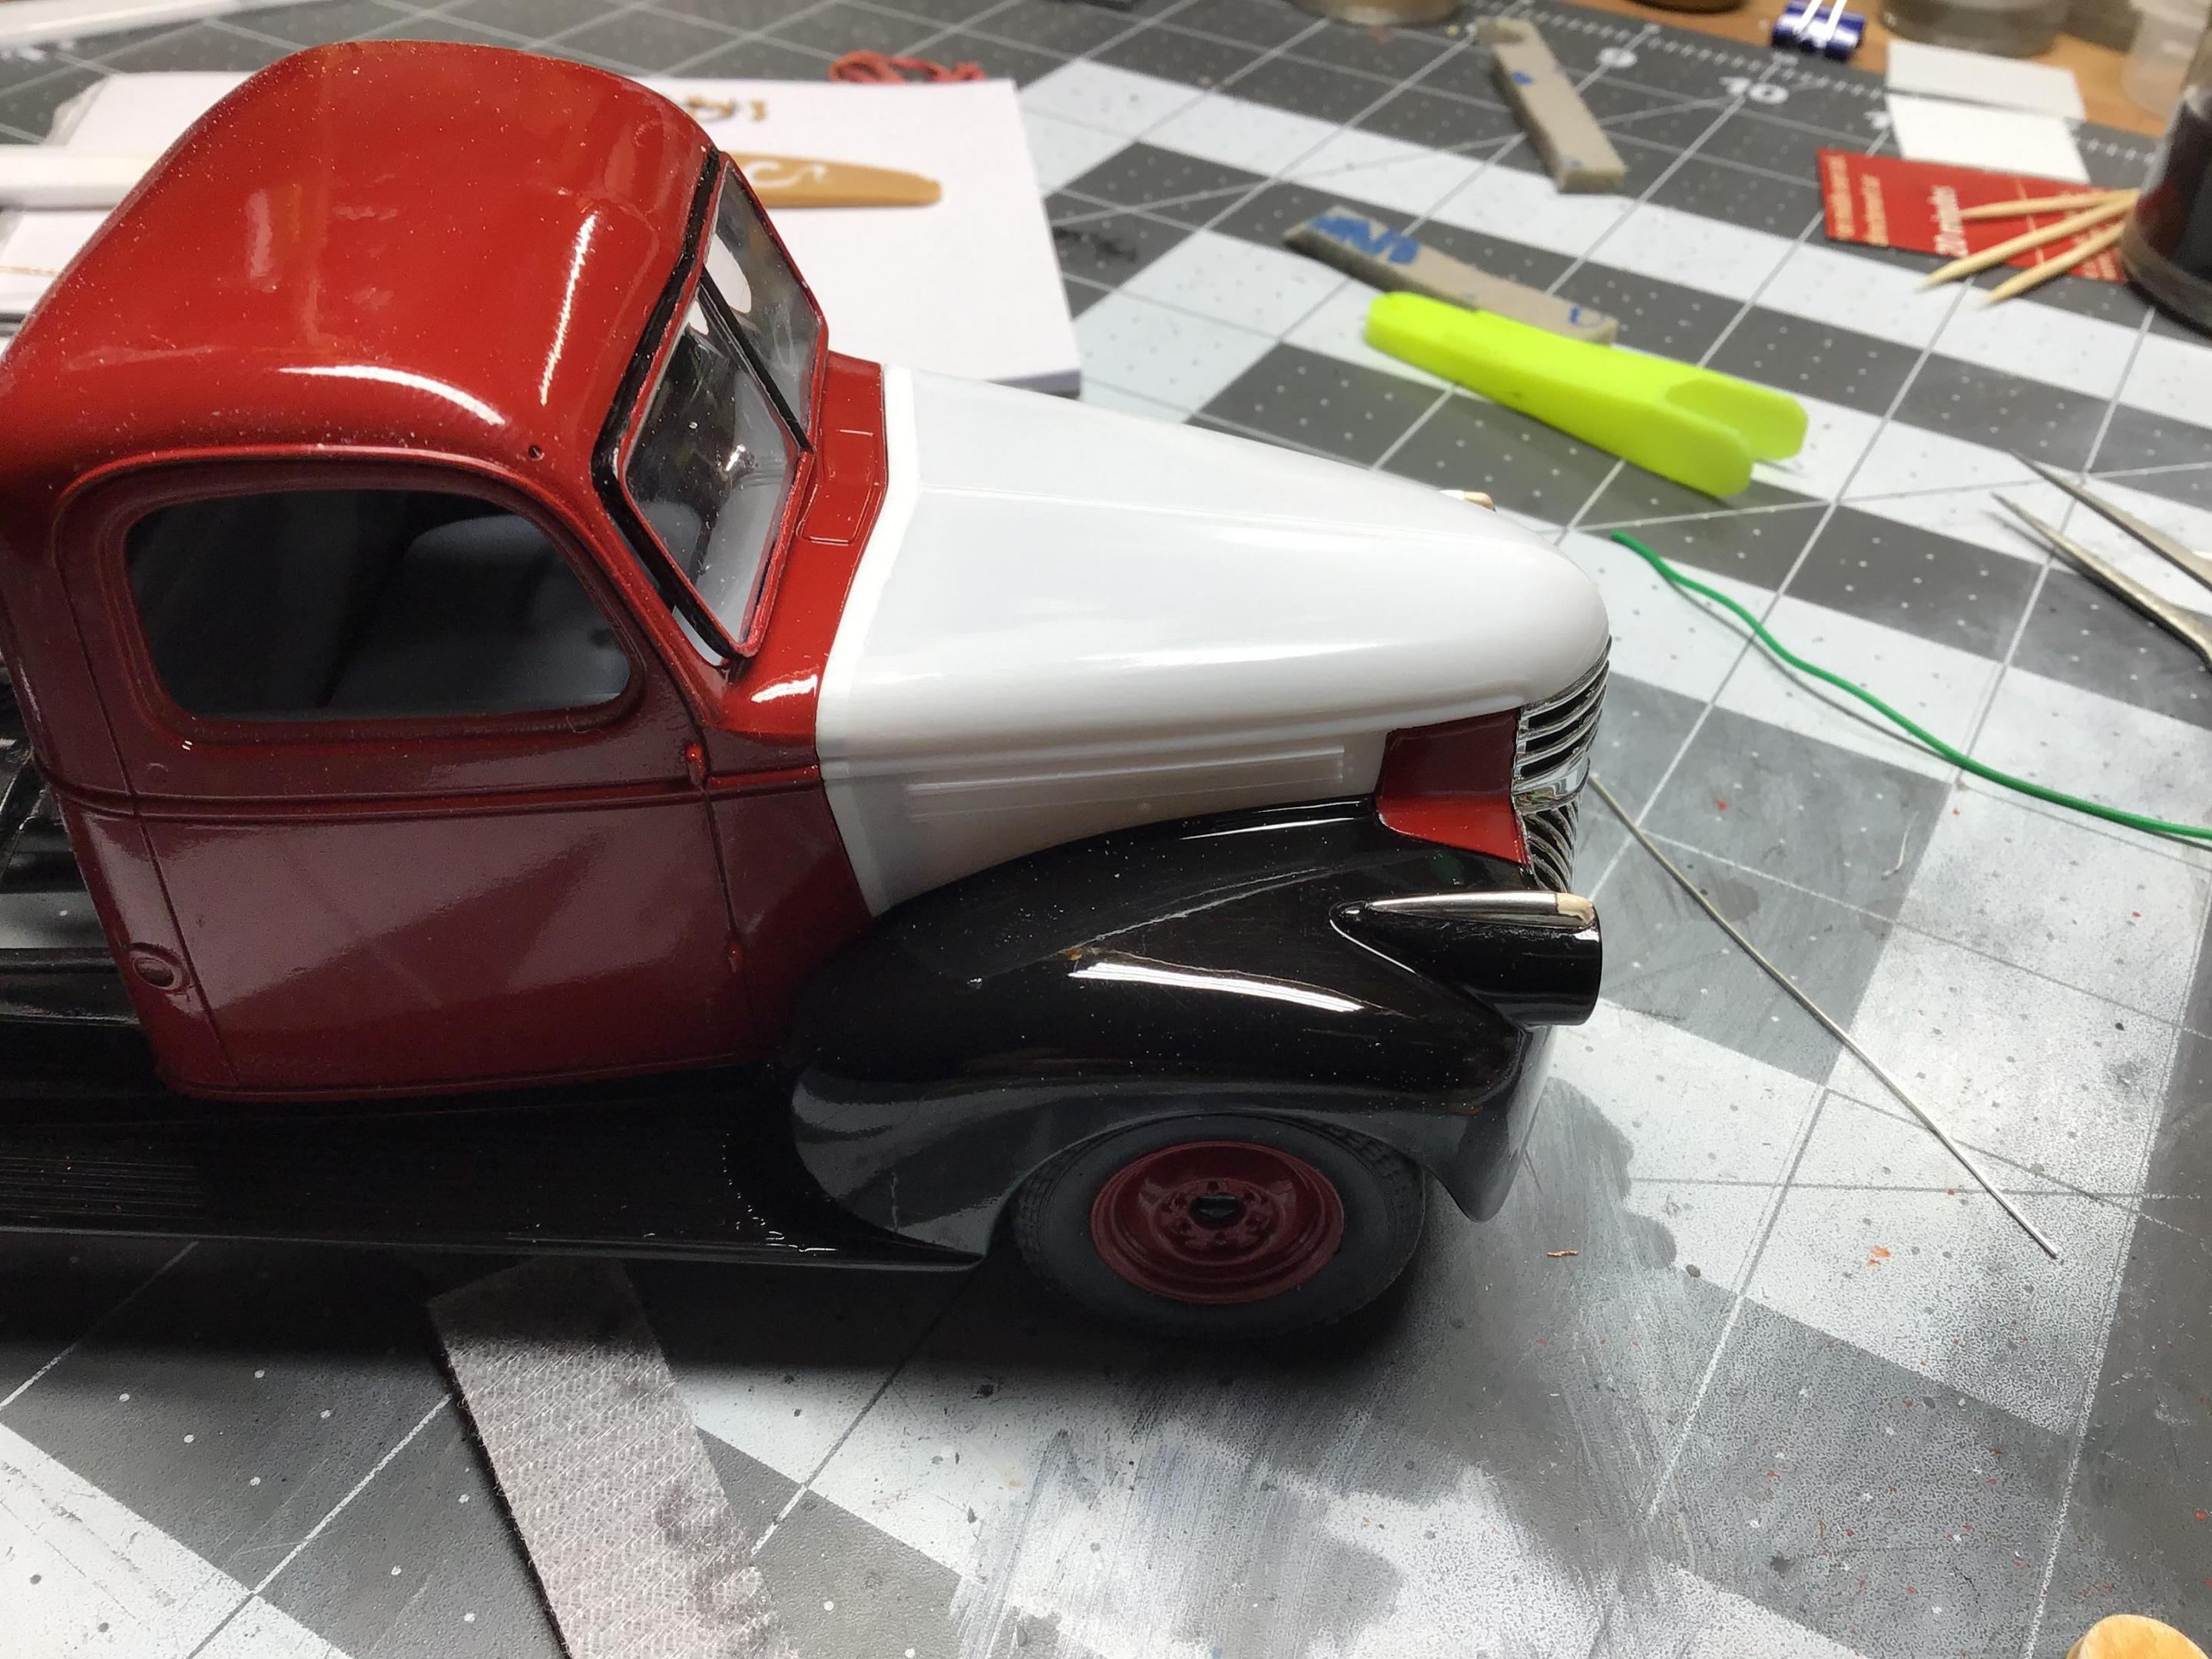
1941 Chevy Pickup
NOBLNG replied to Zippi's topic in WIP: Model Trucks: Pickups, Vans, SUVs, Light Commercial
Nice start Bob. The wheels look good.? Check the fit of your hood with the grill in place. I don’t know if I did something wrong, but I had to add to the back of the hood to get it to line up at the front.?♂️
-
TS-7 Racing White, is it glossy or flat?
NOBLNG replied to Milo's topic in Model Building Questions and Answers
I can’t recall for sure, but I think it would be Tamiya gunmetal or light gunmetal. -
Revell 32 Ford roadster new release done the hard way!
NOBLNG replied to Bullybeef's topic in WIP: Model Cars
Very nice…looks like Tamiya pearl green? -
I don’t think I’ll ever use it.
-
TS-7 Racing White, is it glossy or flat?
NOBLNG replied to Milo's topic in Model Building Questions and Answers
I believe I used Tamiya racing white for this interior. I should have given it a coat of flat clear??
-
Very Nice!?
-
Beautiful John…just Beautiful!?
-
'51 Fleetline windshield issue
NOBLNG replied to customline's topic in Model Building Questions and Answers
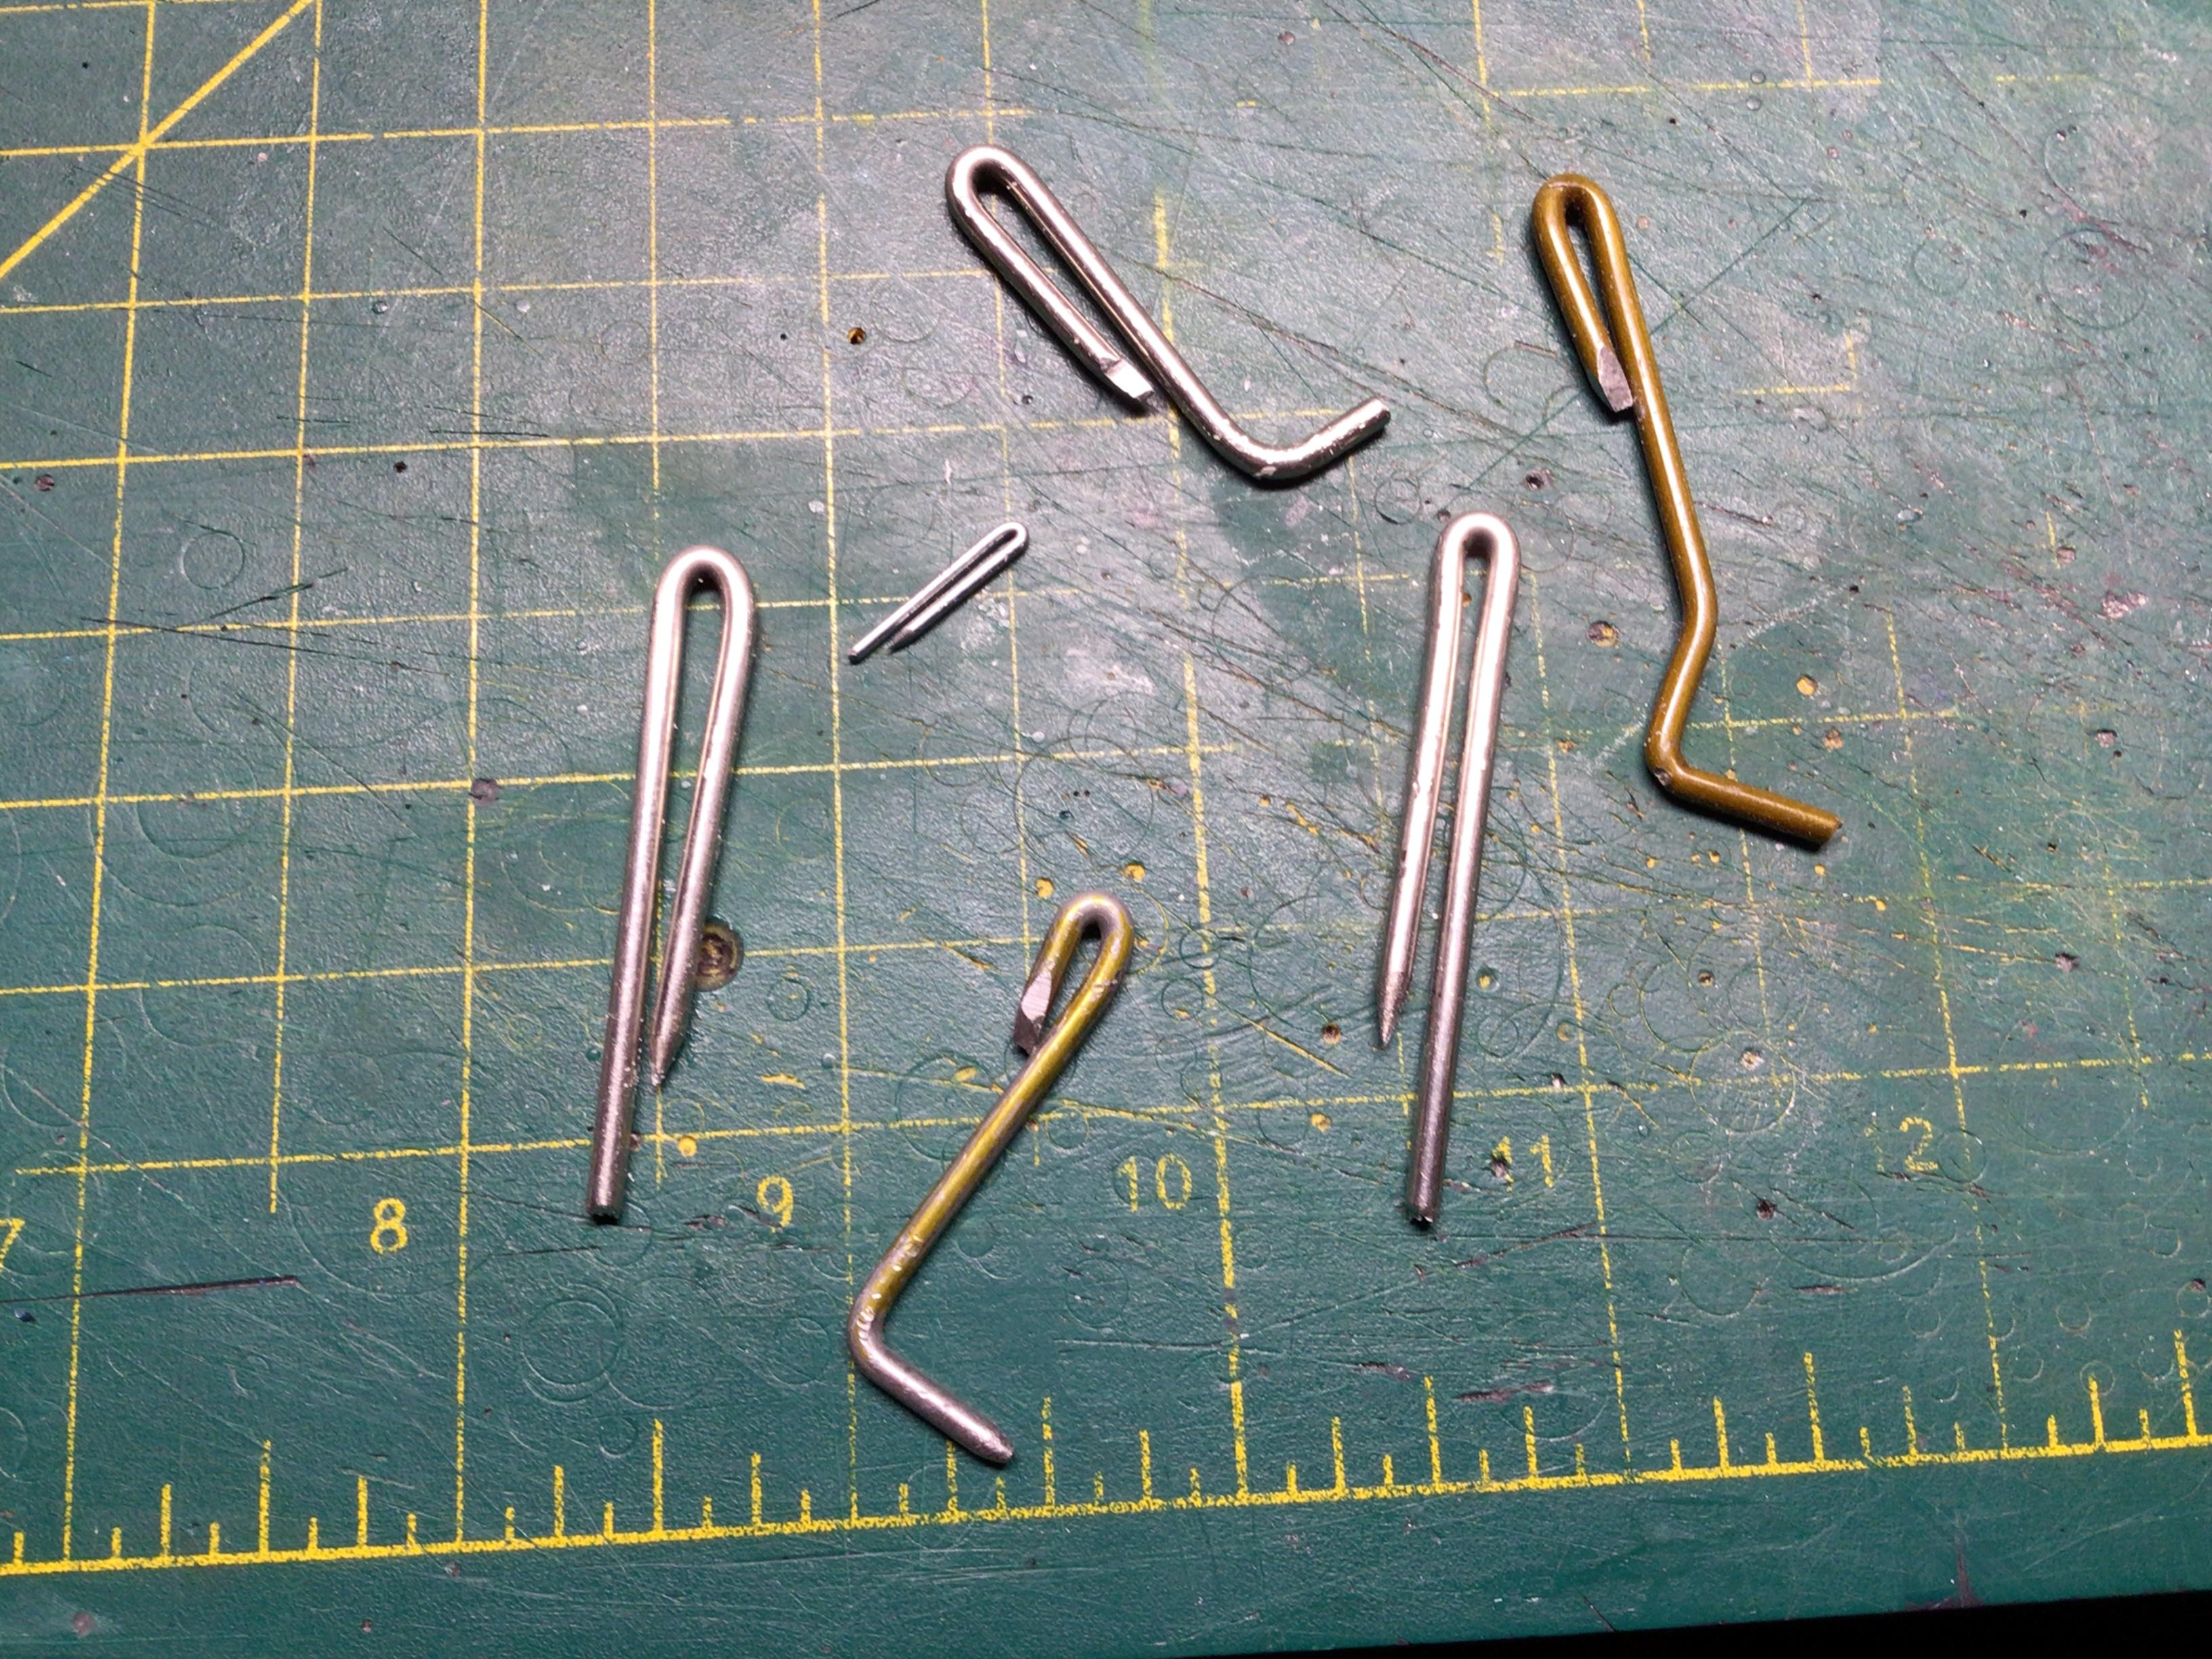
These easily made tools may be of help if you want to re-scribe the trim and mount a windshield on the inside. I made up these pointy scribers for deepening the trim lines evenly. The scrapers I’ve used to put a recess on the inside for a glass mounting channel. Made from s/s welding rod and just a coat hanger.
-
Bought this today at Michaels with a 40% off coupon….just for parts.?
- 38,885 replies
-
- 2
-

-
- johan
- glue bombs
- (and 1 more)
-
That’s a good idea.?
-
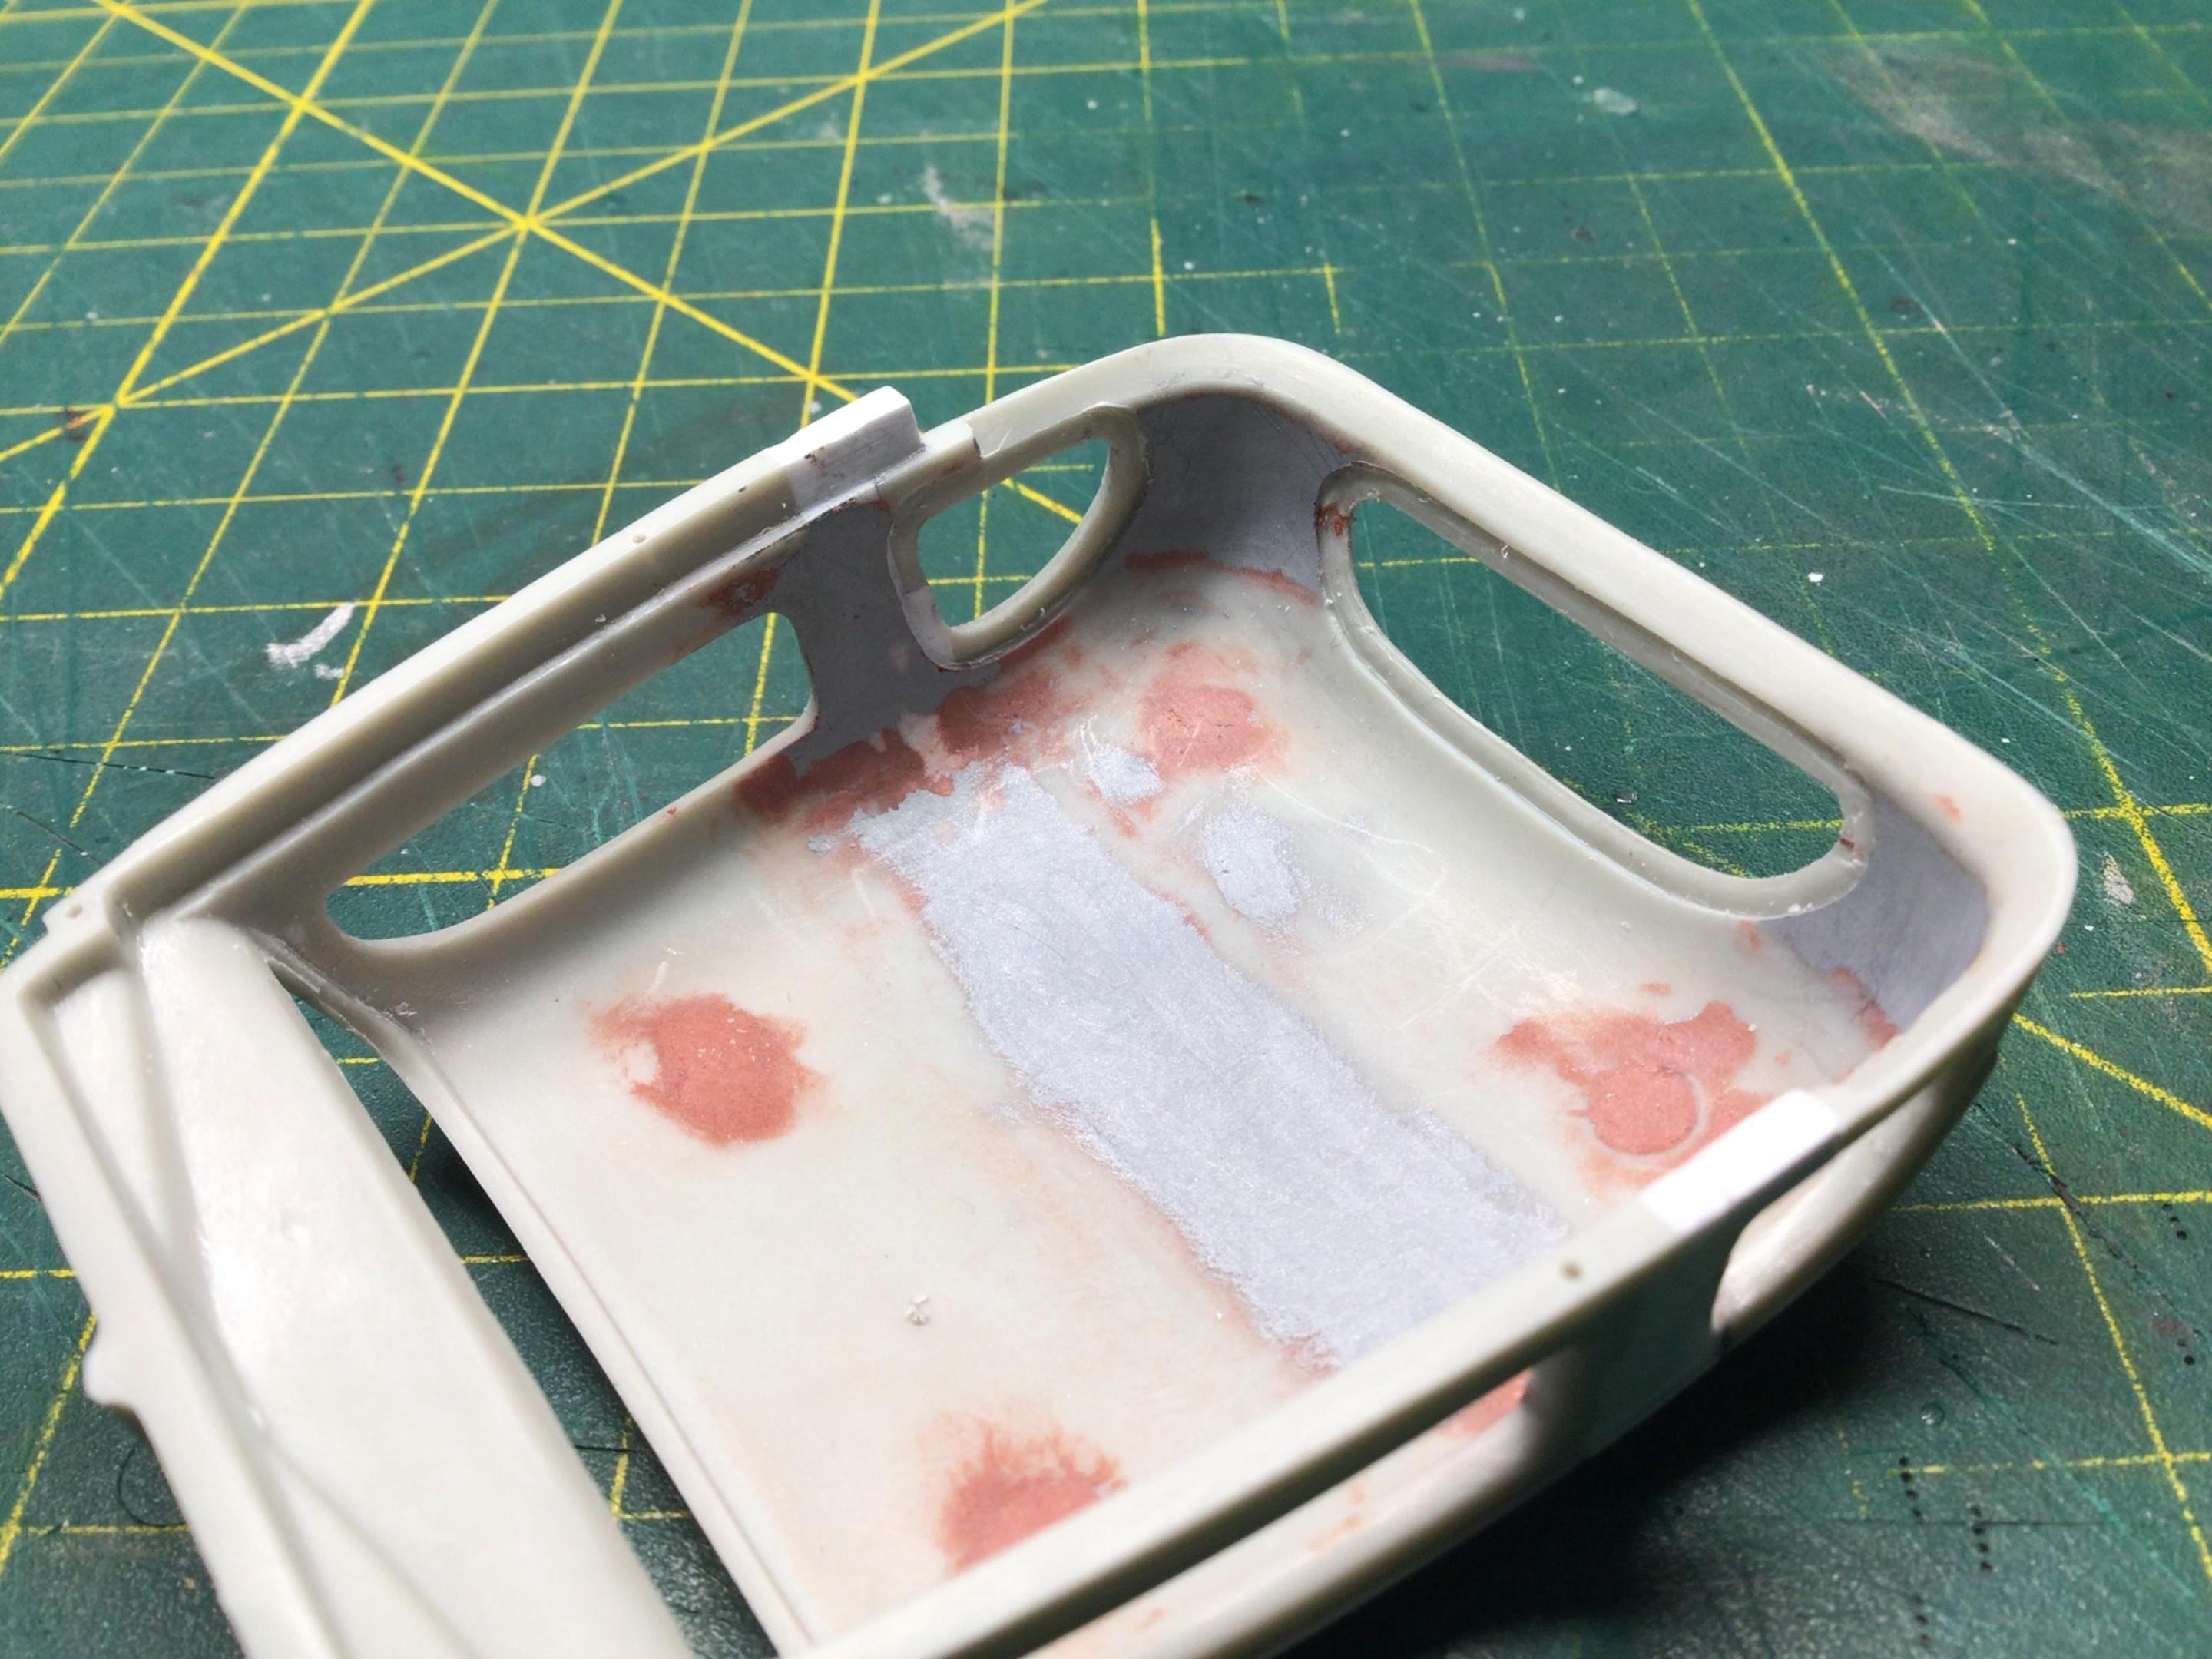
Two steps forward…six steps back.? I only had the antenna left to install when I dripped some CA on the roof. I tried filing and sanding it off and went through the paint.? I had given the entire thing a coat of Revell acrylic gloss, so no chance of just spraying another coat of Tamiya lacquer. So I tried stripping just the roof.? Eventually I decided to strip the whole thing.?
-
I have some of the plastic boxes, but those are mostly for un-used or excess parts. I bought a bunch of different sized small zip lock bags at the buck store to store parts in once they are off the sprue. I will put left and right parts in a separate baggies with their number if they are different. Then everything gets piled back in the original box between sessions.
-
Revell 1966 GTO Engine Bay/Chassis Fit.
NOBLNG replied to StevenGuthmiller's topic in Model Building Questions and Answers
Here is a pic I found on a GTO forum.