NOBLNG
-
Posts
10,236 -
Joined
-
Last visited
Content Type
Profiles
Forums
Events
Gallery
Everything posted by NOBLNG
-

Bending plastic for trim curves
NOBLNG replied to Len Woodruff's topic in Model Building Questions and Answers
I have also heard that coating the strip with solvent and letting it “soak” for a while to soften the styrene before bending may work. I still think it may snap, but you could try a test? -
I agree, the roof change looks great on this car.?
-
Bending plastic for trim curves
NOBLNG replied to Len Woodruff's topic in Model Building Questions and Answers
Solvent glues will only work for styrene to styrene joints I believe. To glue anything to resin you would need CA or epoxy. I’ve never tried a PVA (white glue) or canopy cement, so I don’t know about those? Best to shape the strips to the contour needed beforehand so the glue is not tasked with holding the shape, especially if it’s a sharp curve. -
What New (Modeling) Technique Did You Try Today?
NOBLNG replied to Snake45's topic in Tips, Tricks, and Tutorials
Where’s the orange peel when you want it eh? -
How often do you guys do models
NOBLNG replied to youpey's topic in Model Building Questions and Answers
I am retired also, so I work on them everyday unless the wife comes up with a plan for the day. I usually have 2 or 3 going so I am not tempted to rush the paint and glue drying...but this scratch building is obsessive. -
Bending plastic for trim curves
NOBLNG replied to Len Woodruff's topic in Model Building Questions and Answers
I have had curved styrene strips break the instant that I applied a solvent cement to them. I wouldn’t think CA would do that If the strip is already preformed to the finished shape. I have also used 5 minute epoxy which allows you time to play with the positioning, but it does squish out a bit and requires cleanup. -
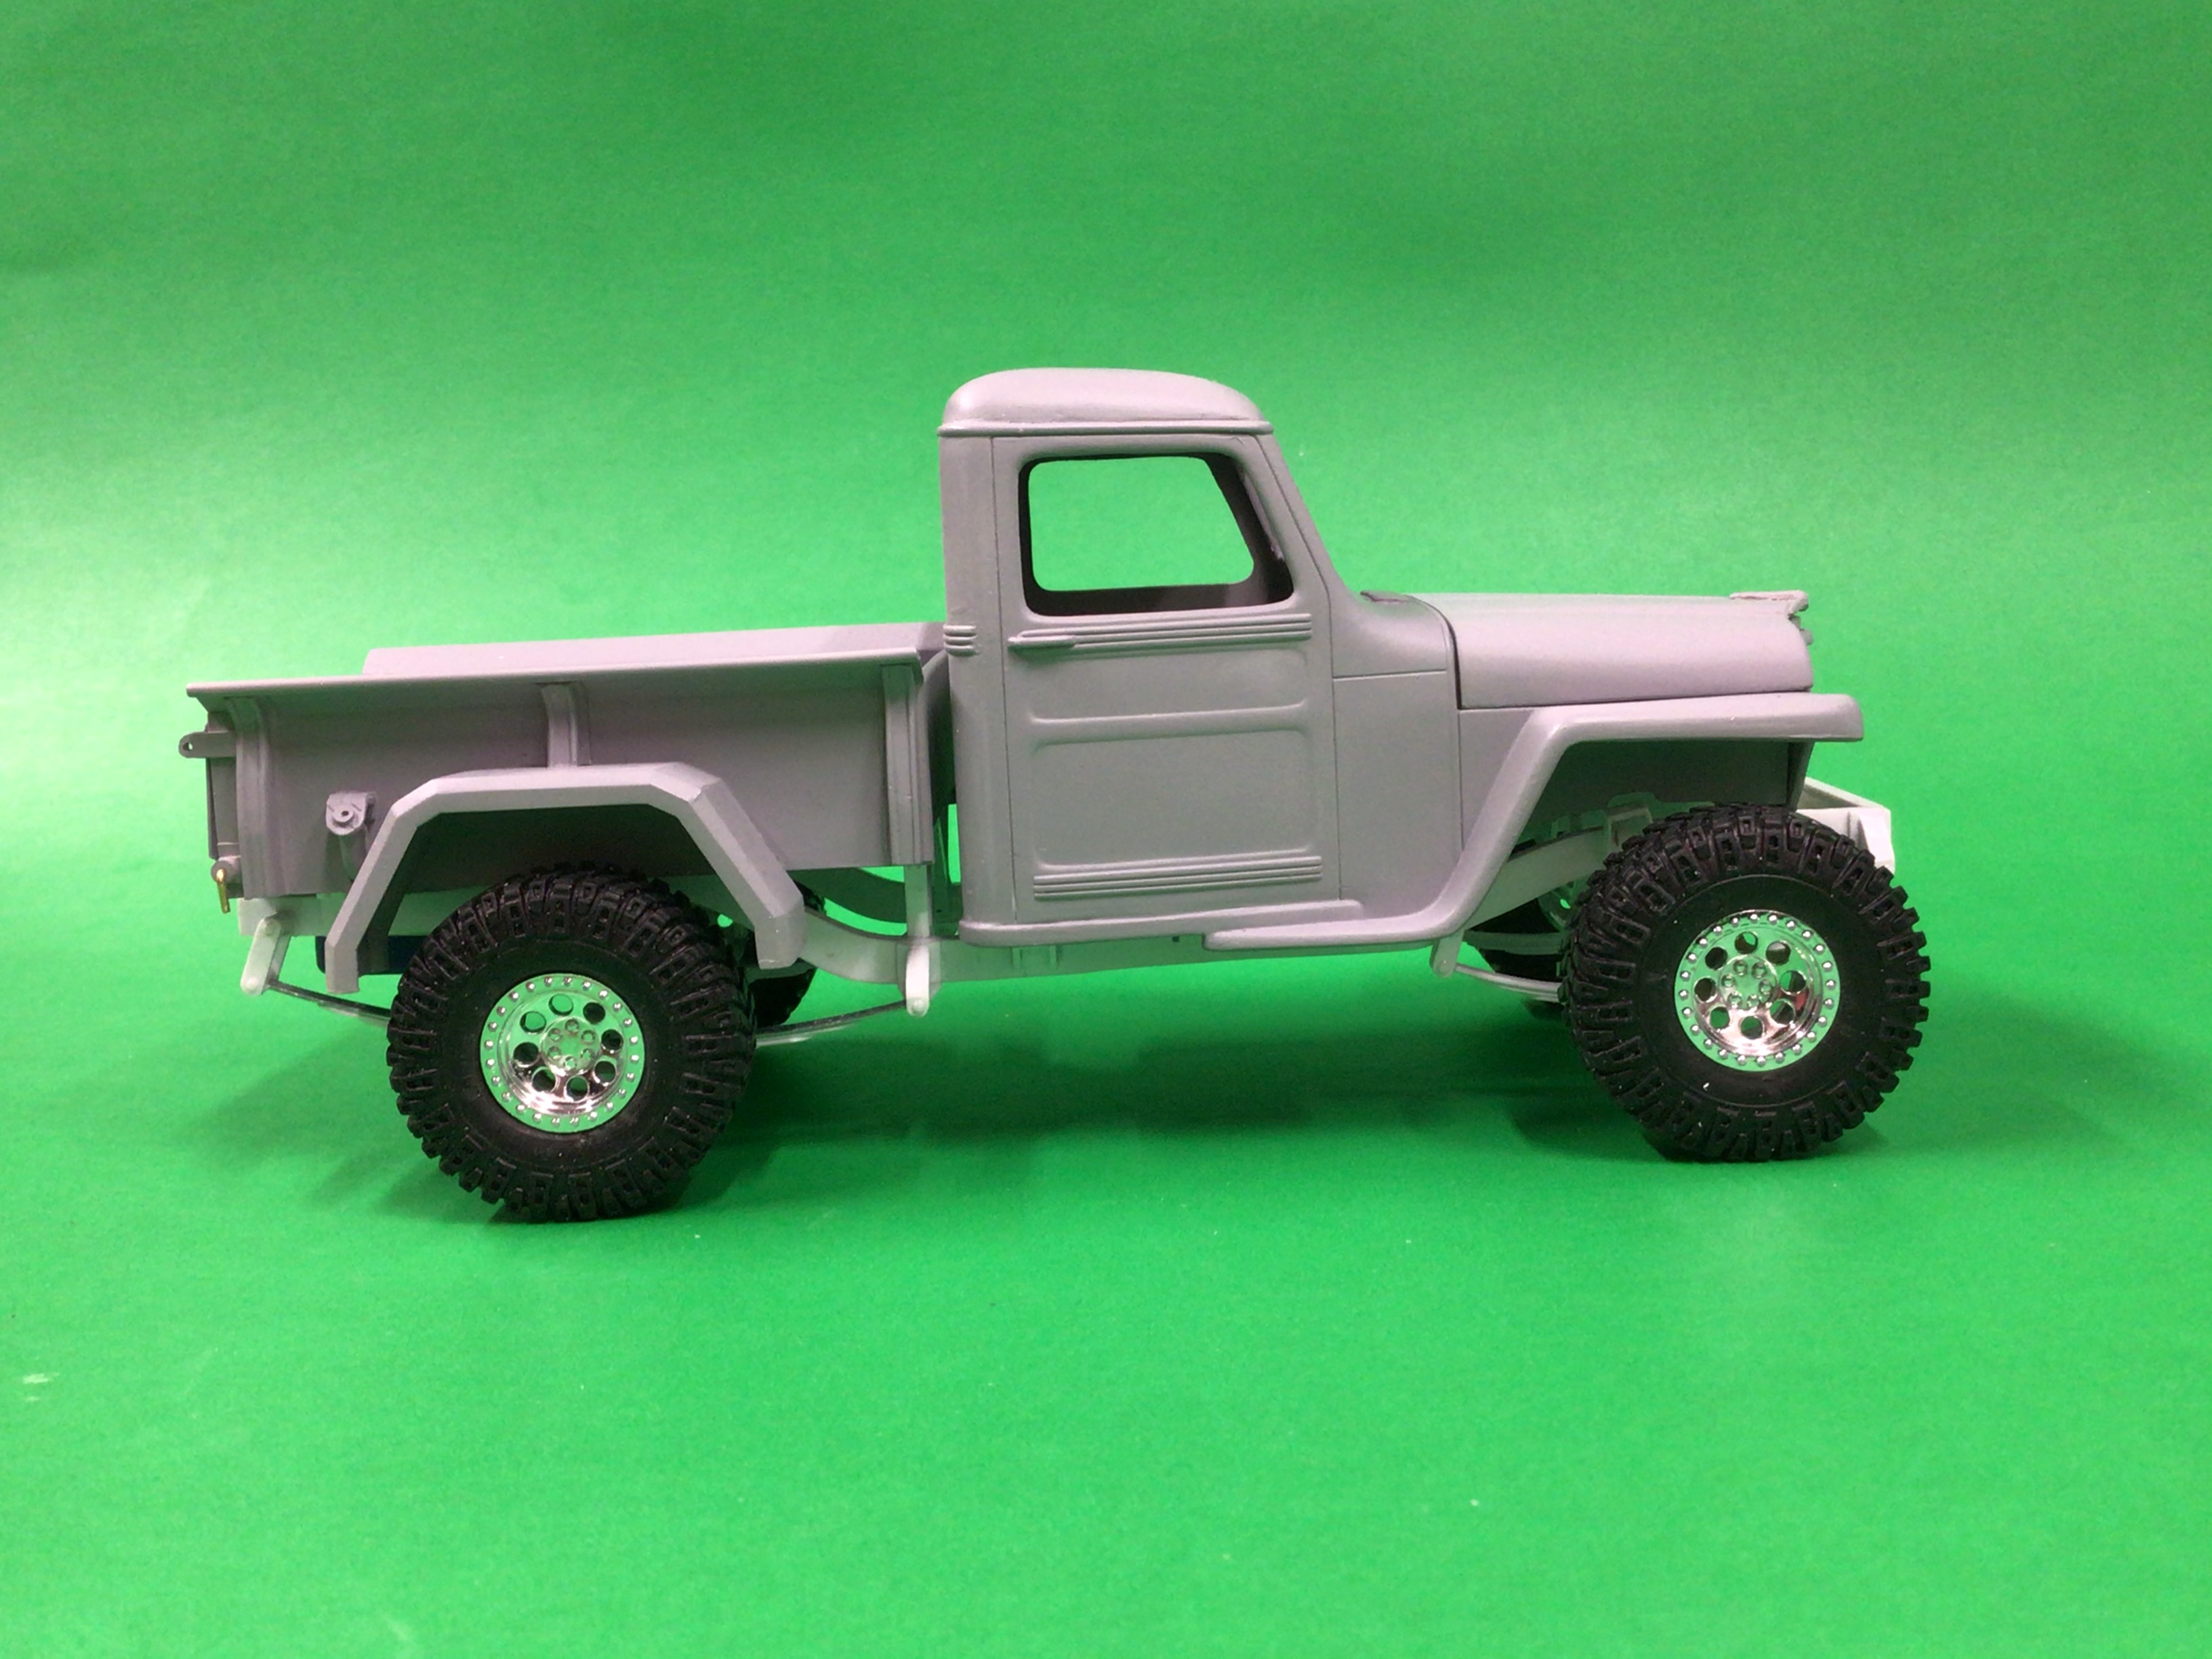
‘54 Willys P/U
NOBLNG replied to NOBLNG's topic in WIP: Model Trucks: Pickups, Vans, SUVs, Light Commercial
Thanks Steve, Anton, Tom! ? I didn’t like the styrene plank and screws holding the hinge onto the toolbox, so I got rid of them. I epoxied the hinge on and camouflaged the holes. The next items I have to fab are some bumpers and an exhaust system.
-
Forum Software Upgraded
NOBLNG replied to Dave Ambrose's topic in Forum News and Questions (formerly: How To Use This Board)
I don’t see any arrow pointing right. There is an ad at the top of the page. When I close it, an arrow appears on the left that brings the ad back when clicked. -
I think I read on here a while back that someone either glued a fabric softener sheet on the floorpan, or dabbed the wet paint with it to mimic the raw fiberglass texture.
-
Forum Software Upgraded
NOBLNG replied to Dave Ambrose's topic in Forum News and Questions (formerly: How To Use This Board)
Since the update, some threads have 1/3 of the screen on the right taken up by “thread statistics” and the actual post section is only 2/3 of the screen on my i-pad. This particular thread is full screen.? Has anyone else’s display gotten smaller and is there any way to get back to a full screen?
-
So...since this thread is about lousy ‘57s, how does this old kit compare accuracy wise? I searched this site via google and could not find pics of a built one. I gathered that the doors don’t fit proper or are finicky, and the plastic is brittle. One member said he built a few and had no issues with it.
-
‘54 Willys P/U
NOBLNG replied to NOBLNG's topic in WIP: Model Trucks: Pickups, Vans, SUVs, Light Commercial
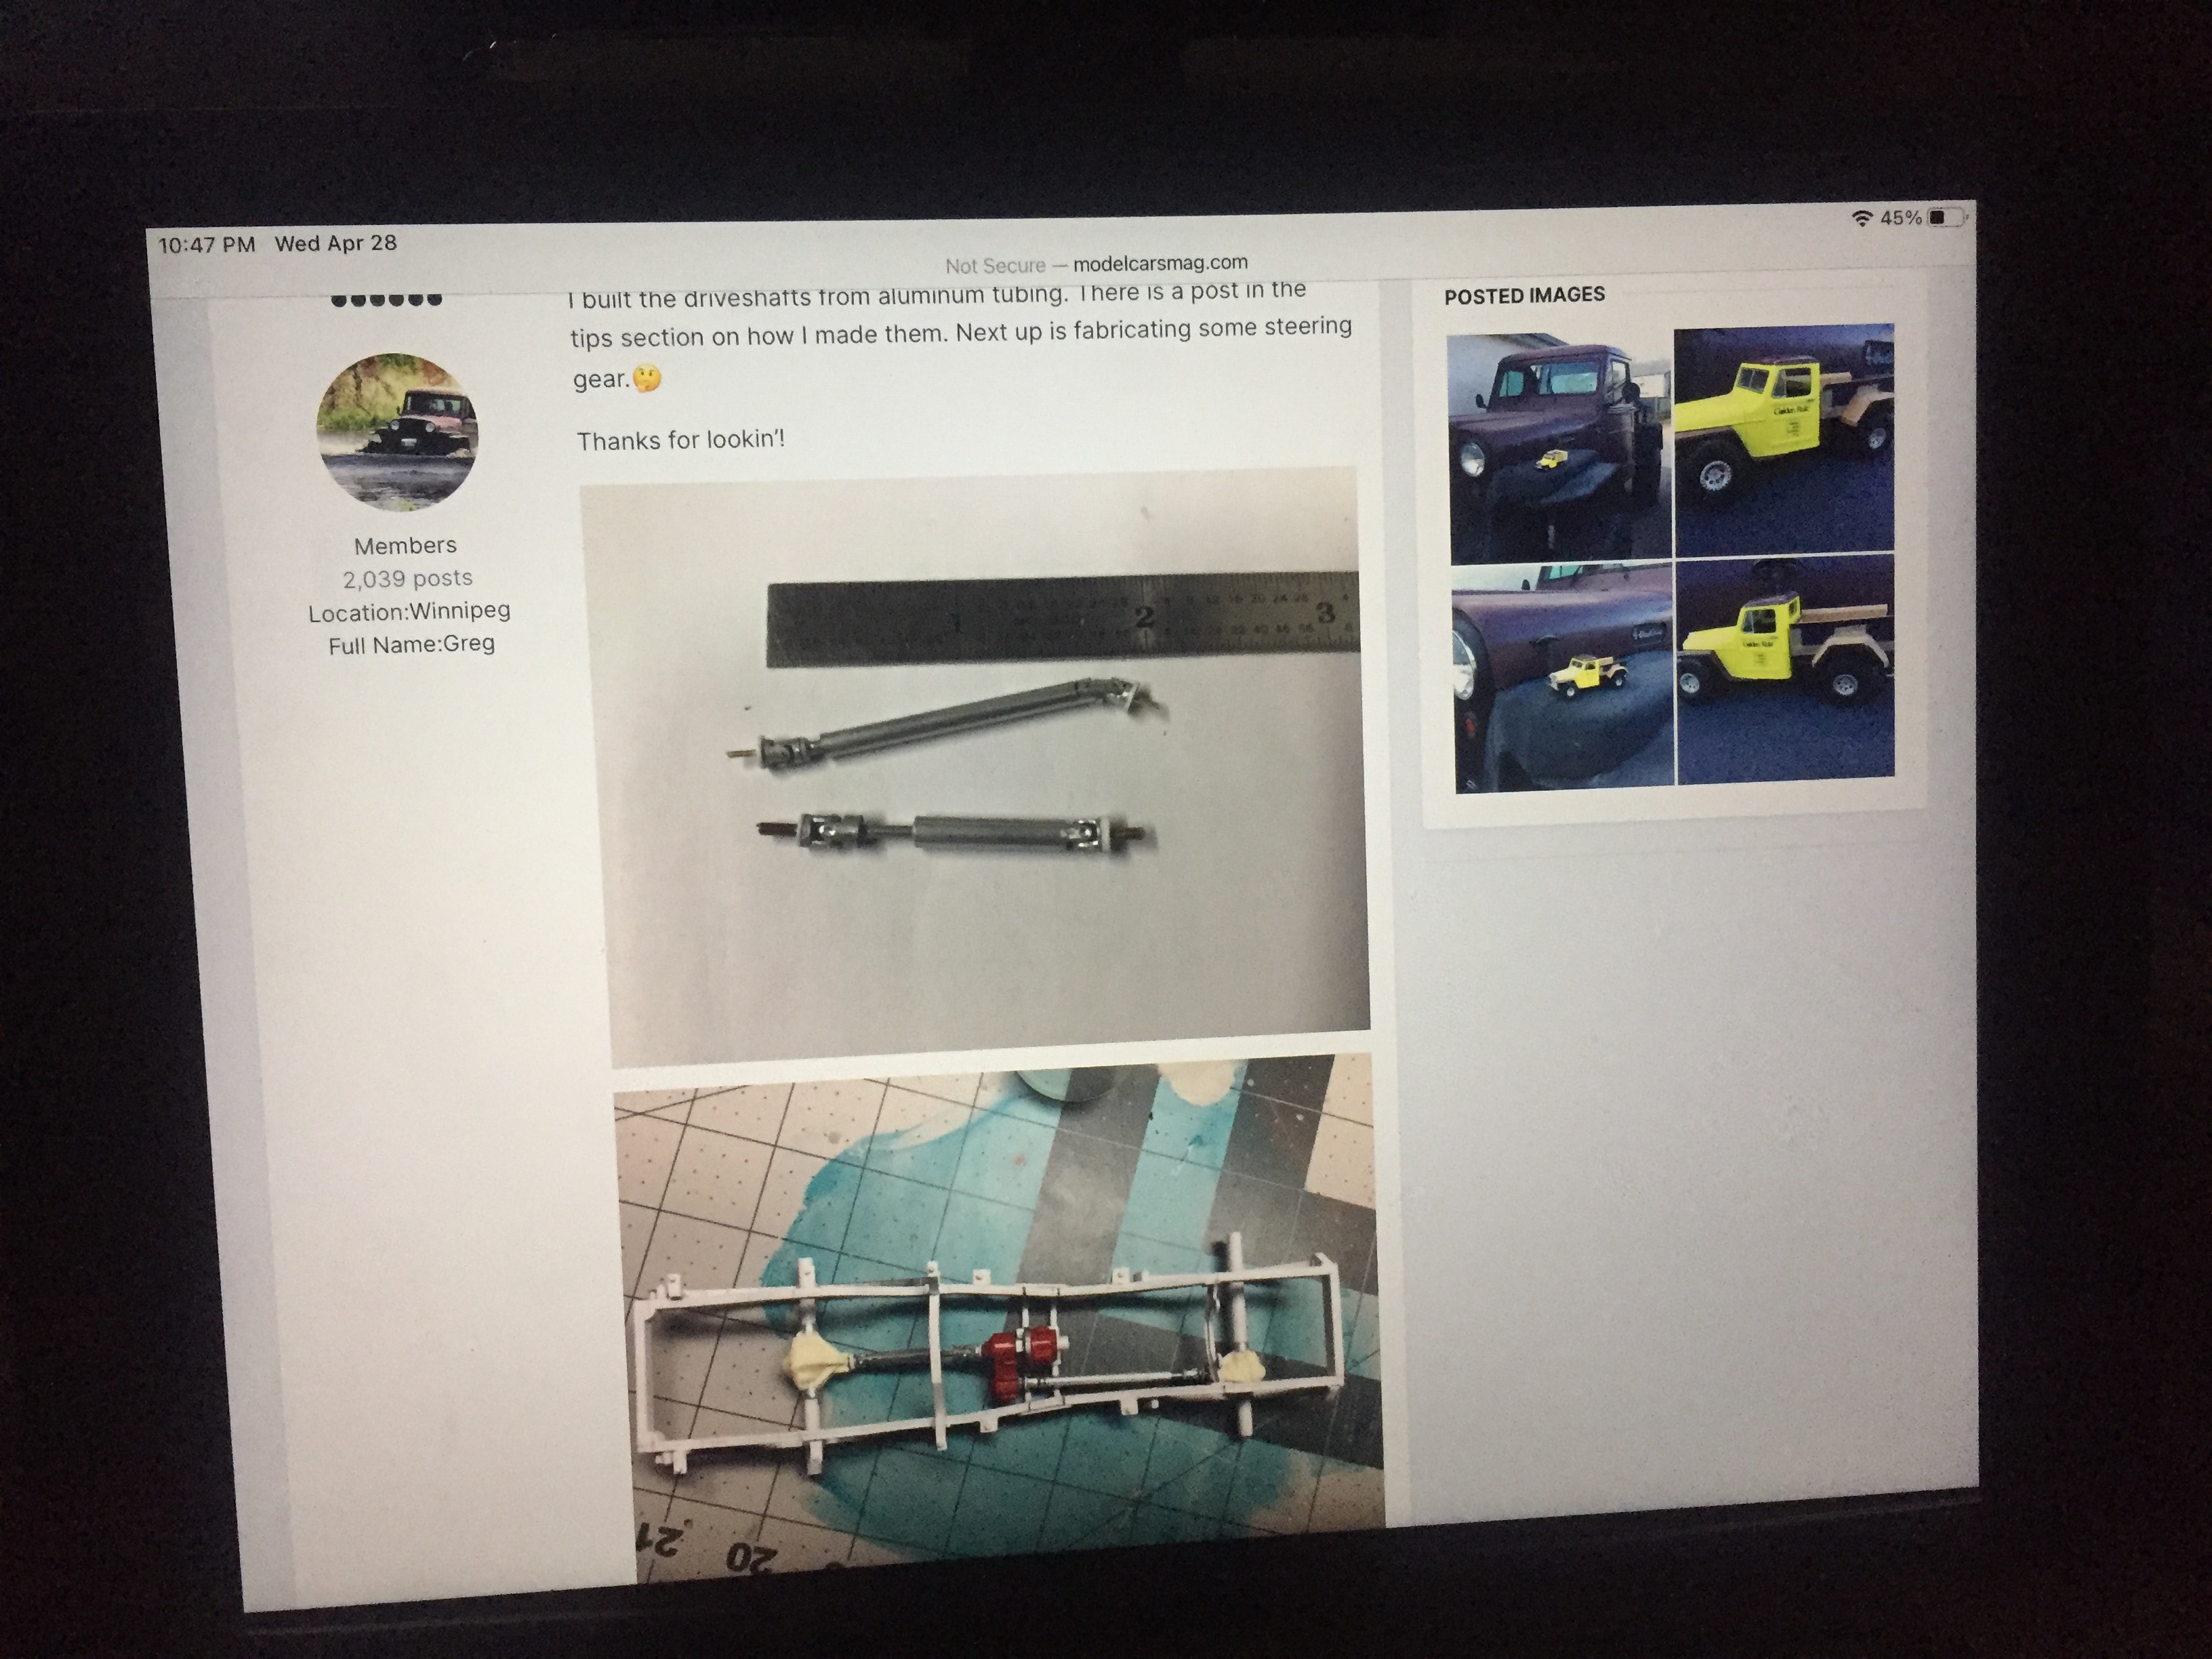
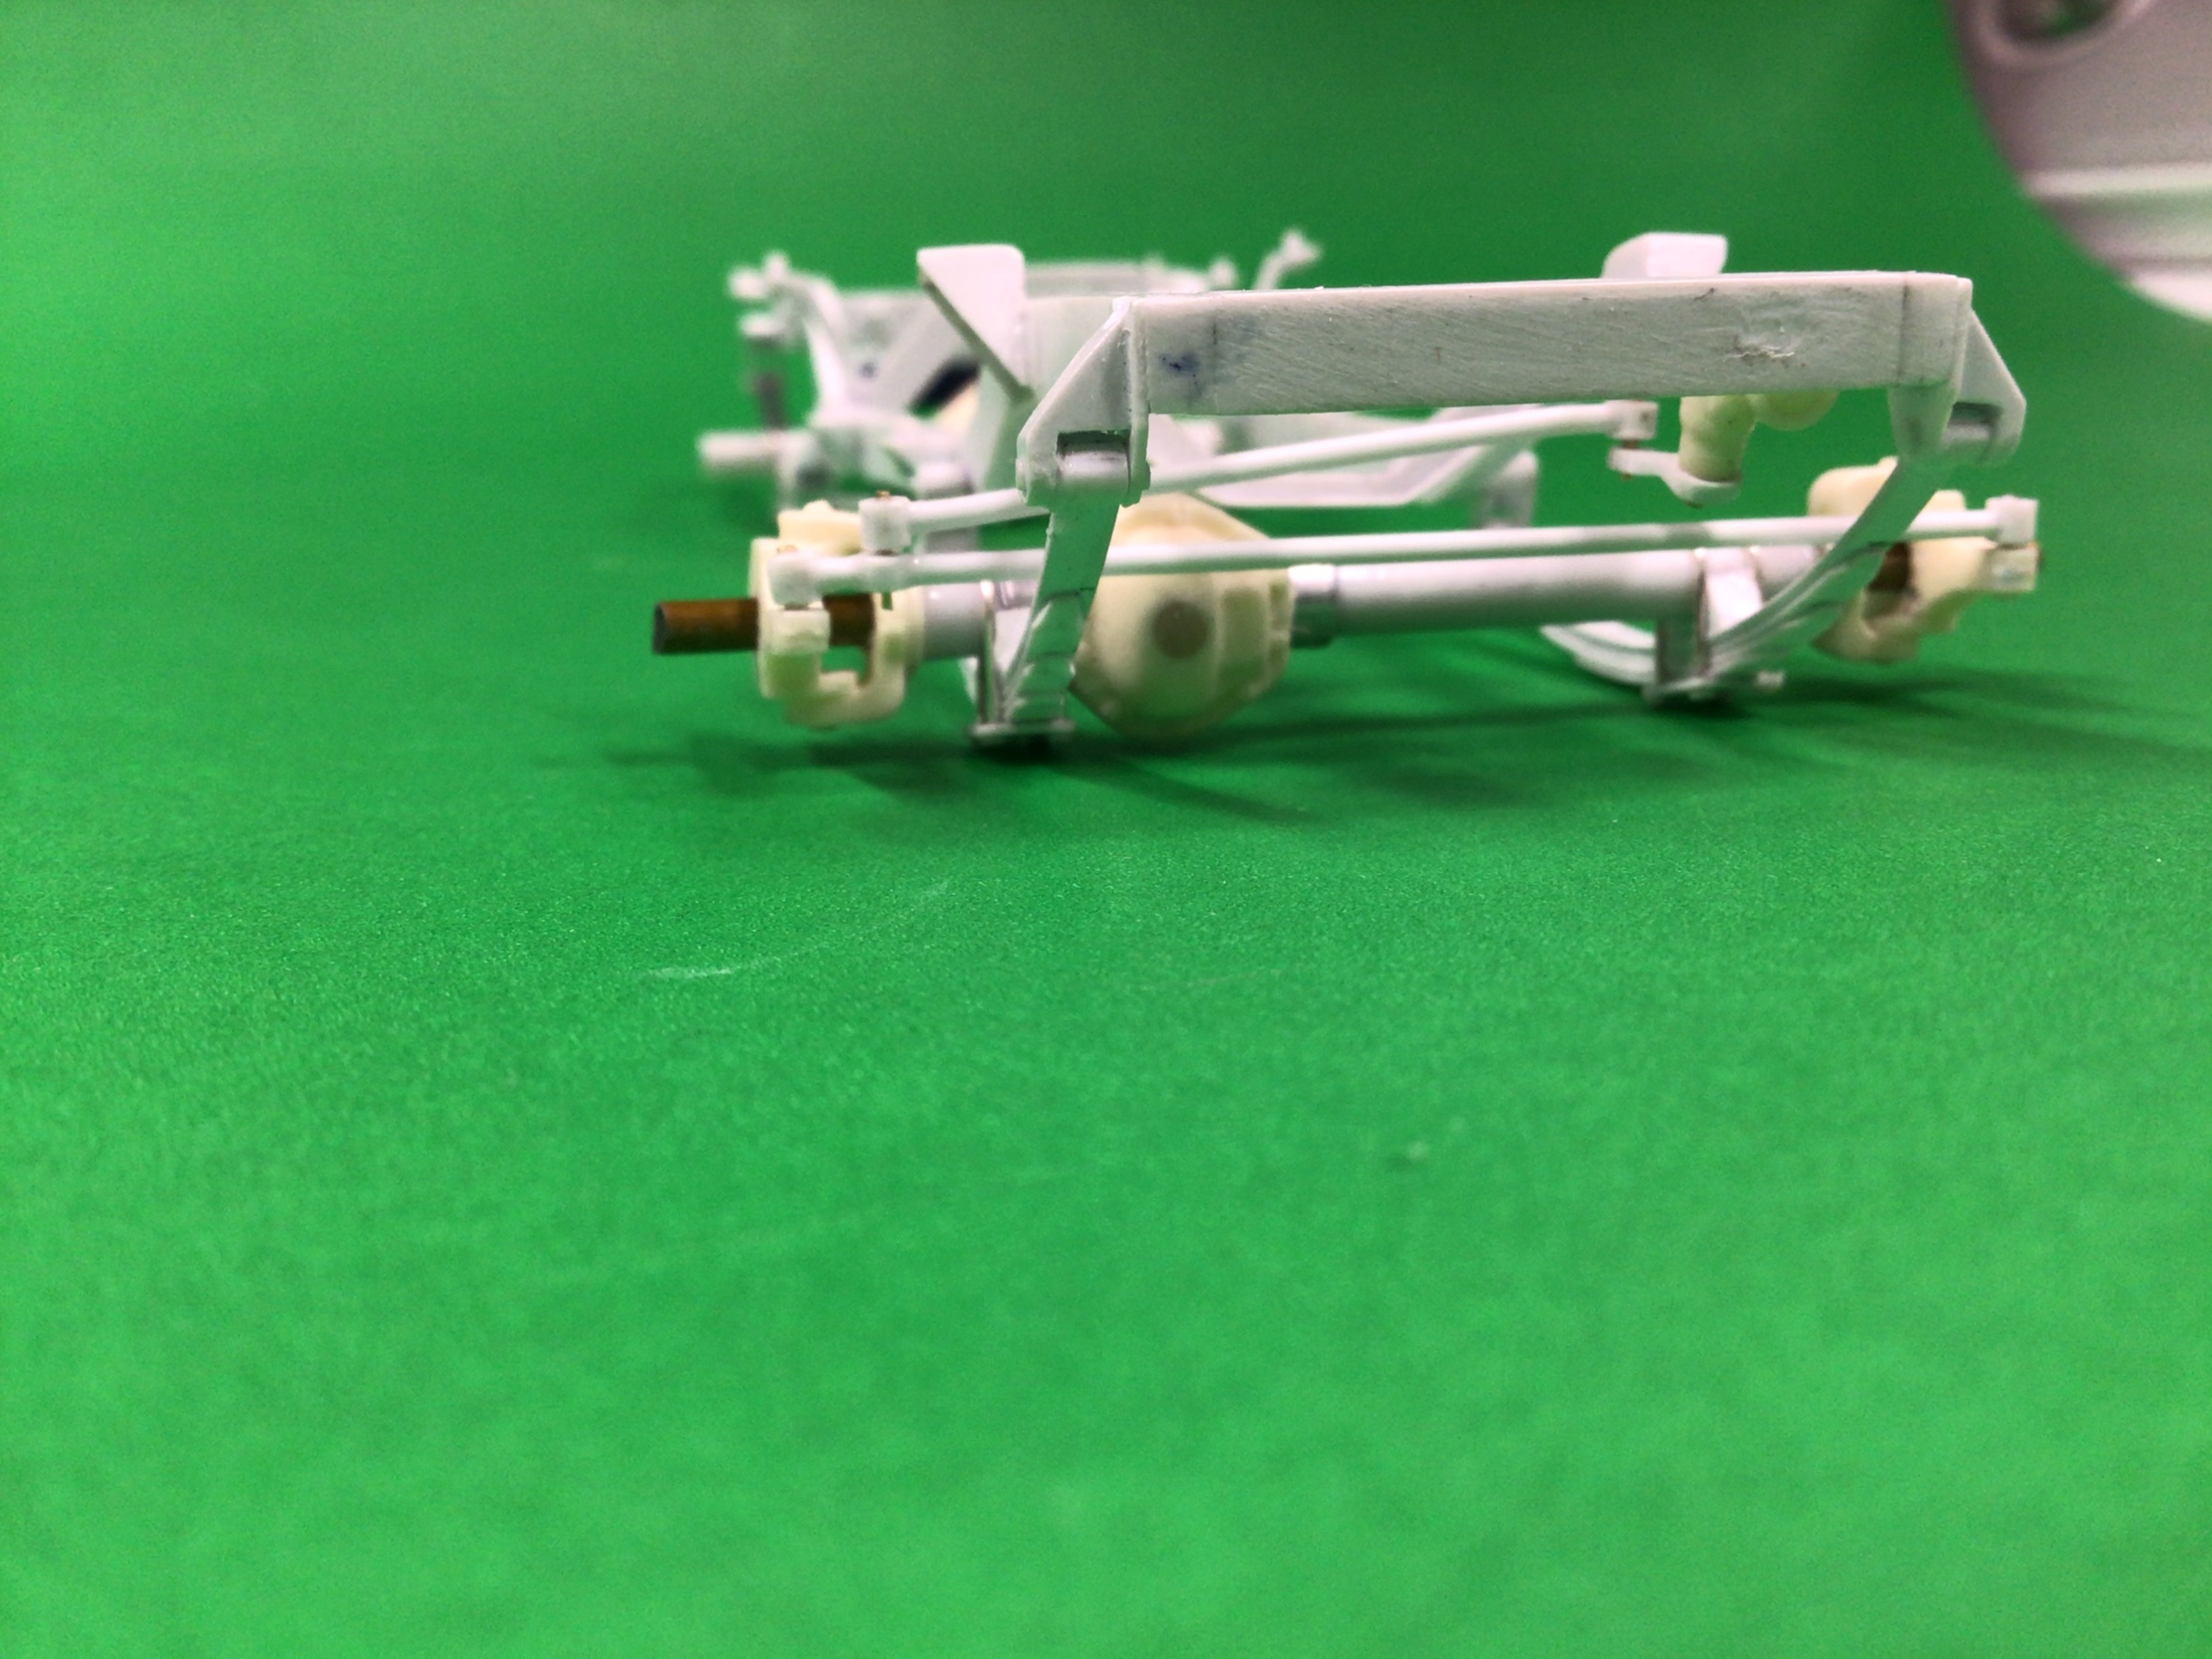
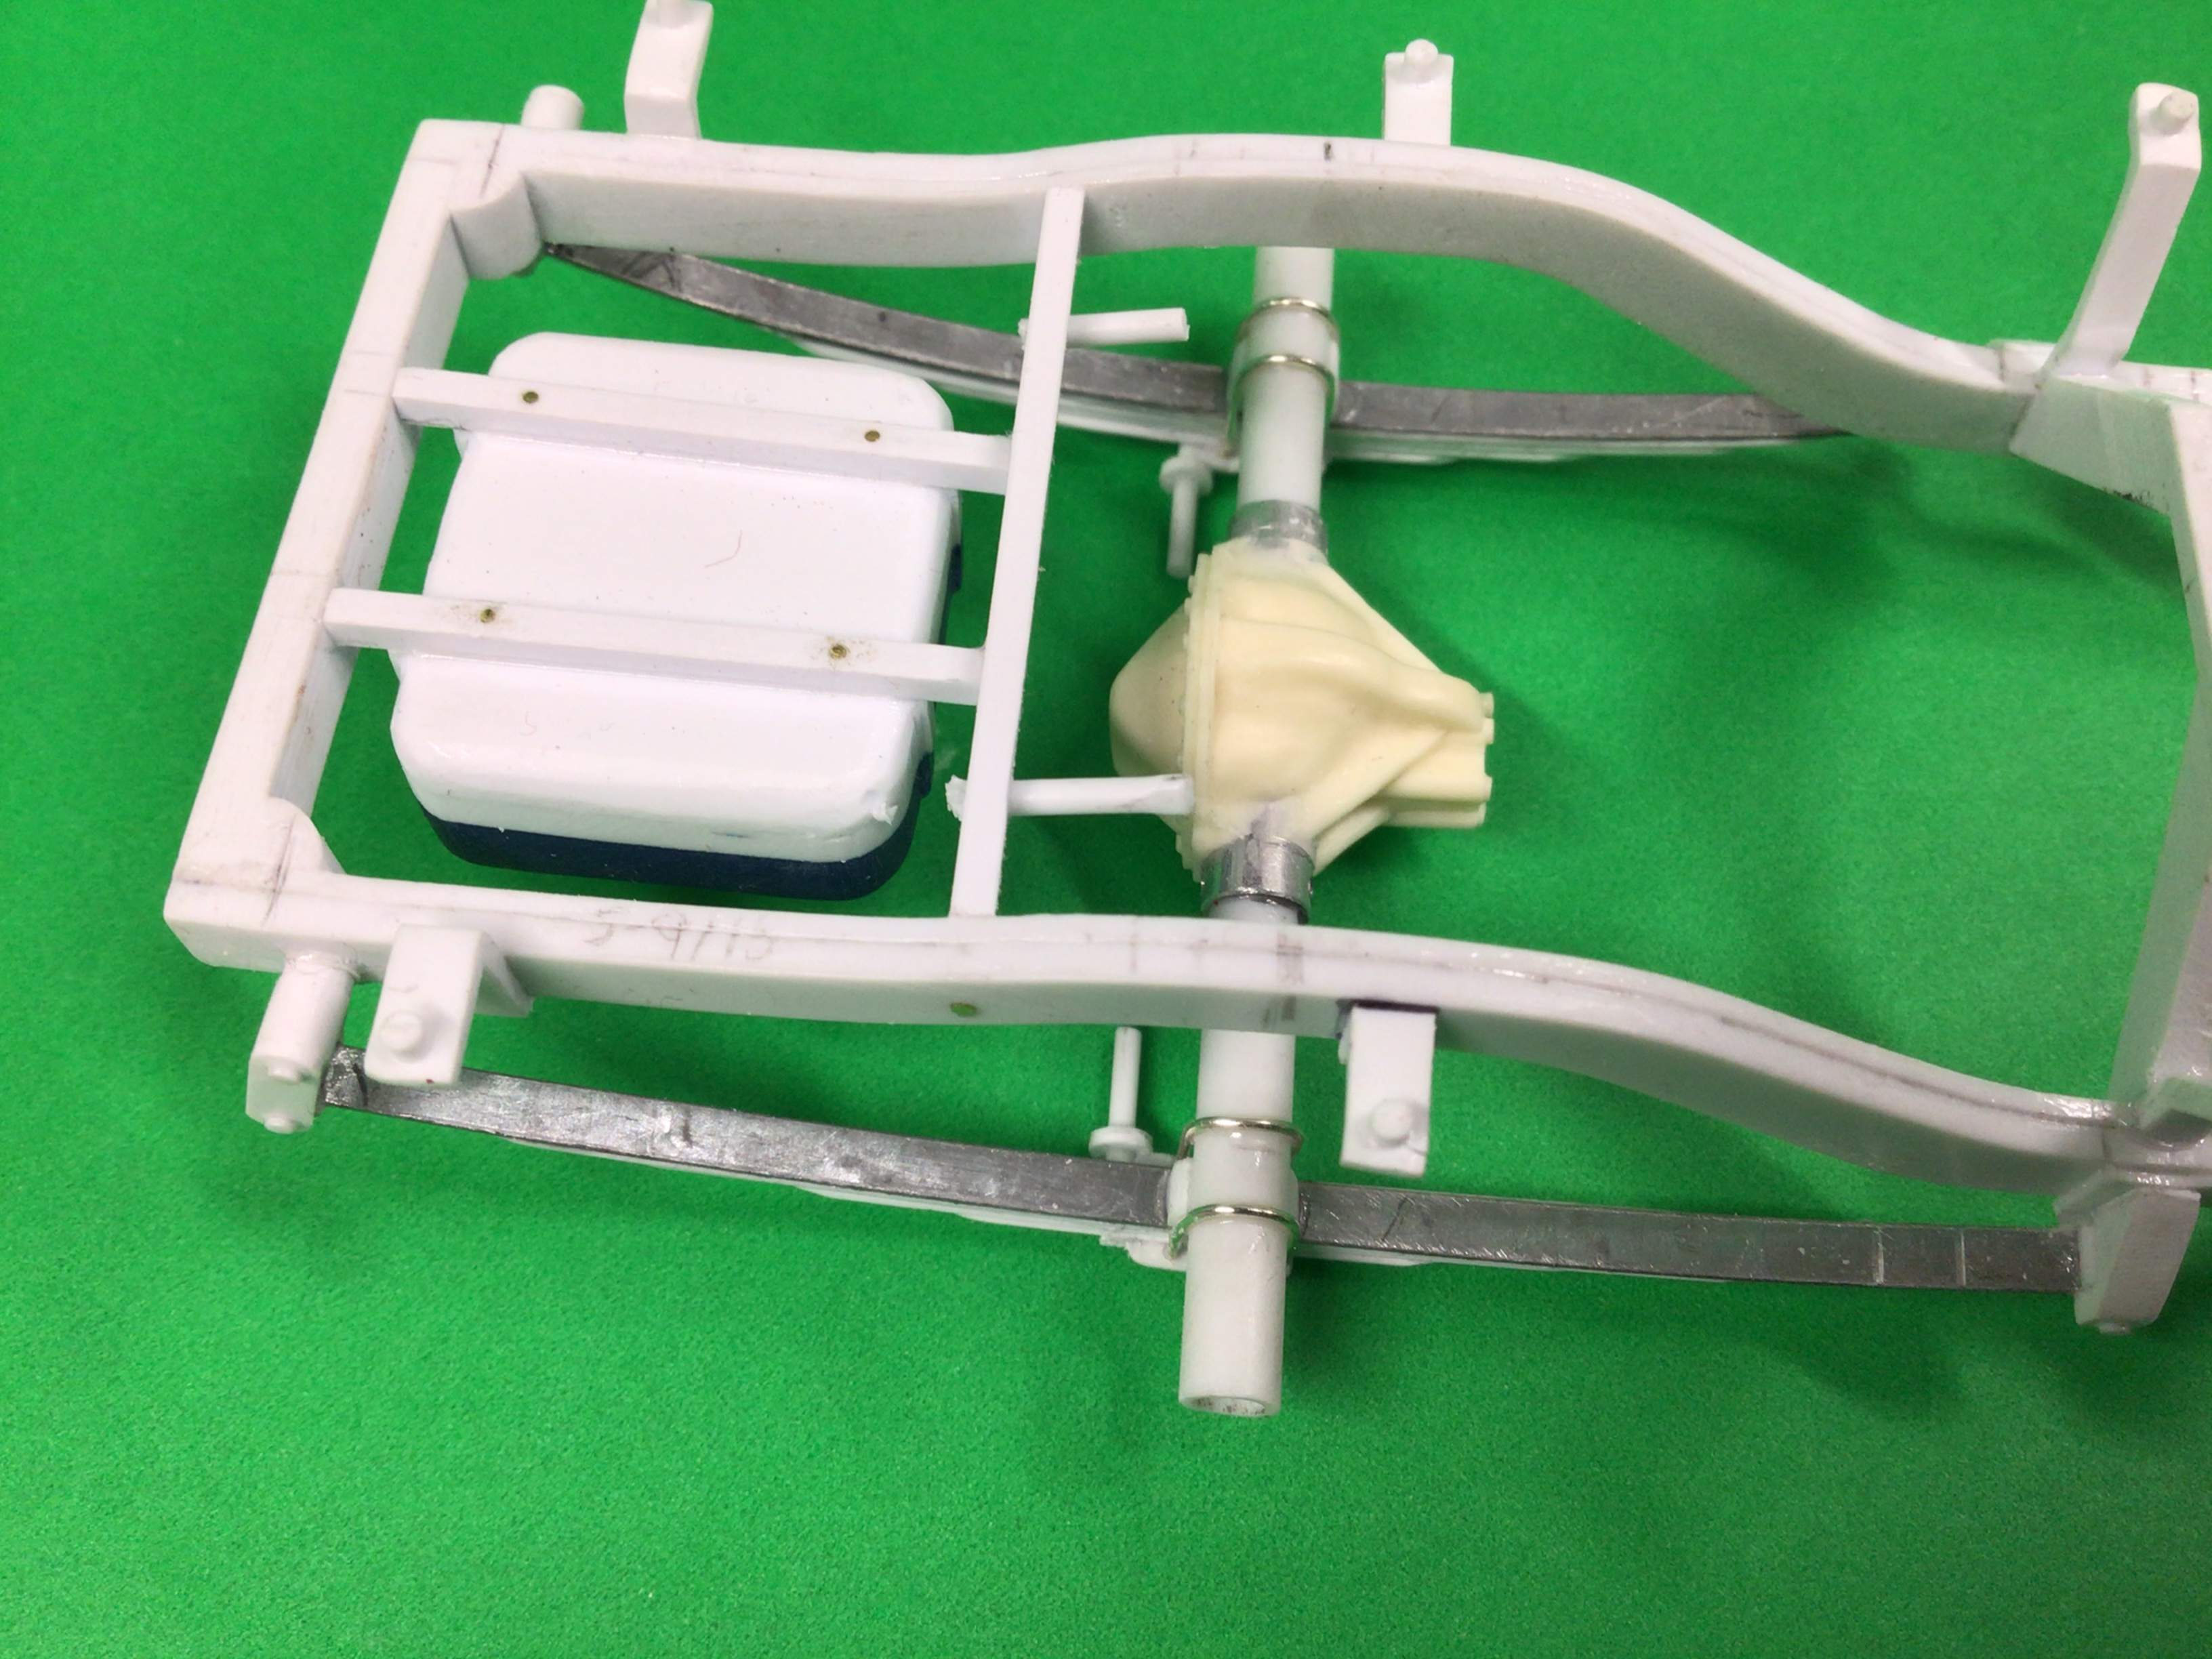
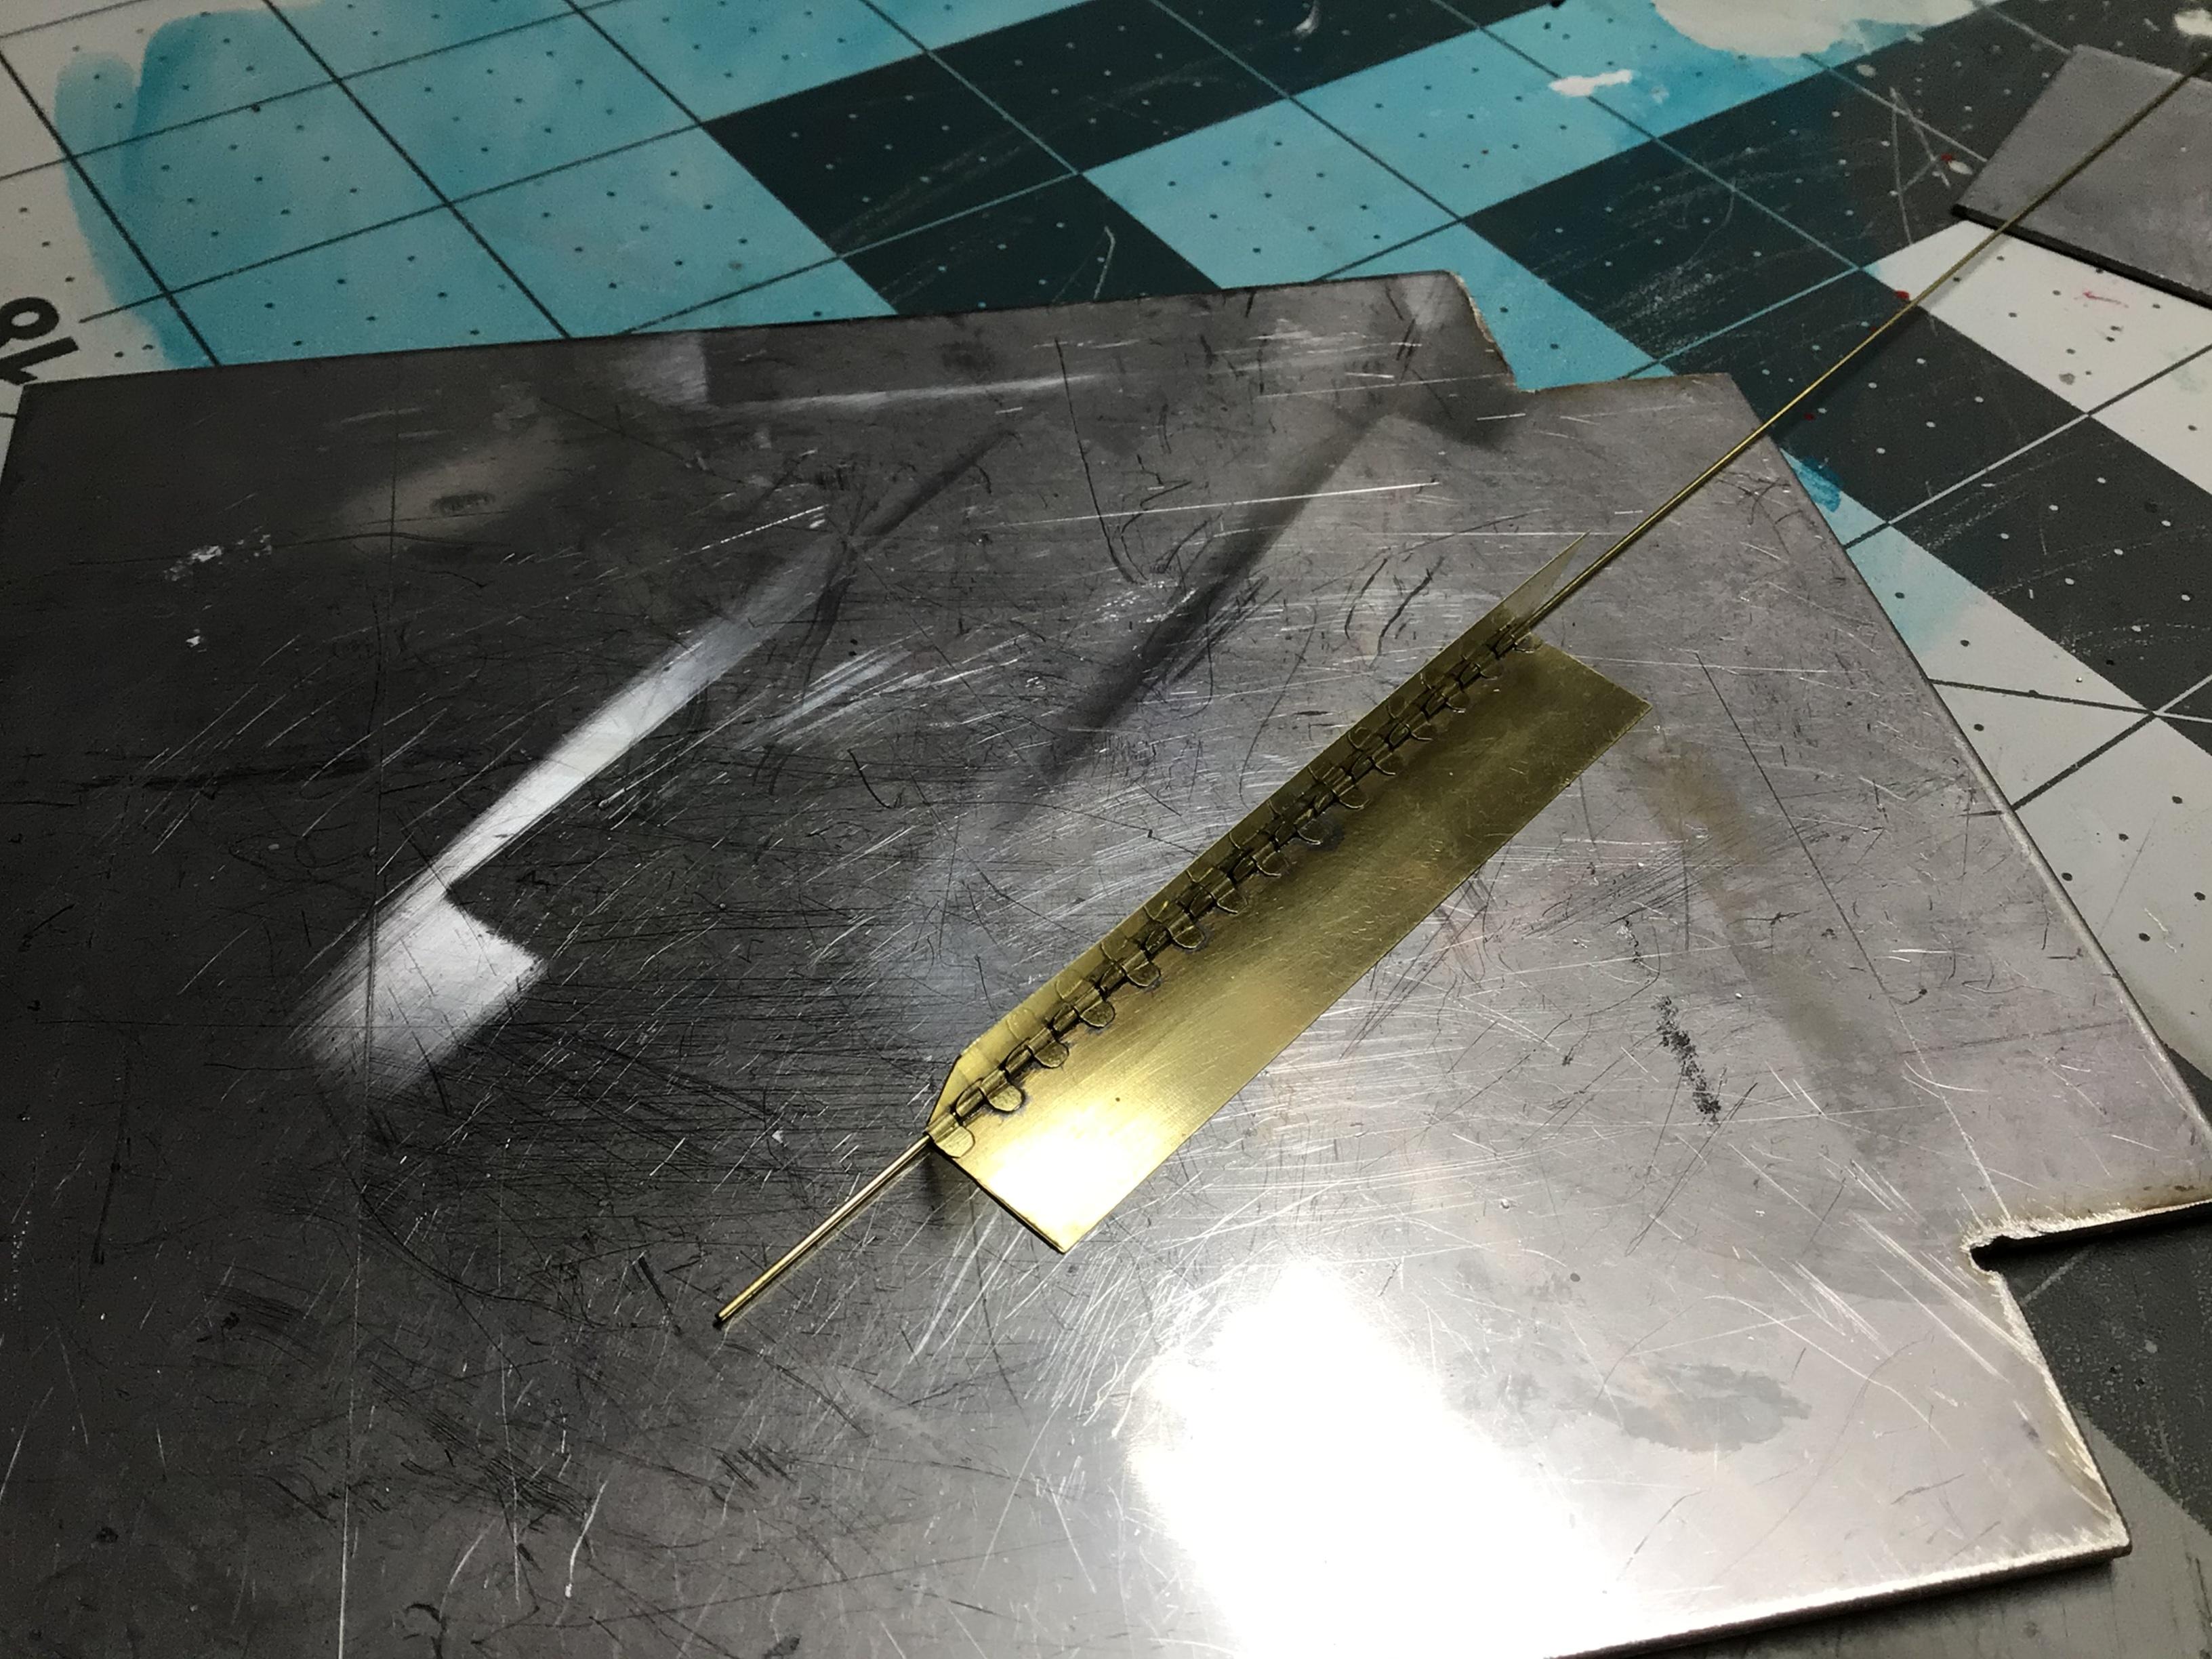
Well it’s been slow going on this project. I’ve gotten lots of fiddly little things done though. Steering linkage is fabbed now and hooked up. I’ve re-made the rear shocks and roughed in the mounts for them and mounted a fuel tank. I mounted the tailgate and fuel filler tube and also managed to get a coat of primer on it so that I can see what needs a little more body work...mostly the grill area I think. My checker plate from Slaters arrived, so I got to work making my toolbox and box cover. I’ve been dabbling a bit with brass lately and made some hood hinges for it and these little gas shocks that hold the box lid up.?
-
This is Tamiya TS-7 “Racing White” in the interior. I’ve never seen a paint called parchment.
-
Nice job on that chop.?
-
Super nice job there Helmut. I never would have thought that was done with rattle cans.?
-
Type this into google and maybe the thread will be there? ”site:modelcarsmag.com tube chassis” You can substitute “tube chassis” for other cues. Good luck
-
In what vehicle did you learn to drive?
NOBLNG replied to BeakDoc's topic in General Automotive Talk (Trucks and Cars)
I took my drivers test in a 1968 Biscayne with a straight six and 3 on the tree. There was no drivers ed available that I recall, but Dad had a quarter section of land so I’d done lots of tearing around before I was of age. I could even speed shift that baby...not that I tried that during my test.? He also had a ‘61, a ‘63 and a ‘56 chevy parked on the property. I can remember riding in the ‘61 and ‘63 as a kid, but I don’t think I ever drove them? I also had a job driving tractor for a neighbour at the age of 13.? -
Your latest refinements sound great...but I’m not seeing any pictures.☹️
-
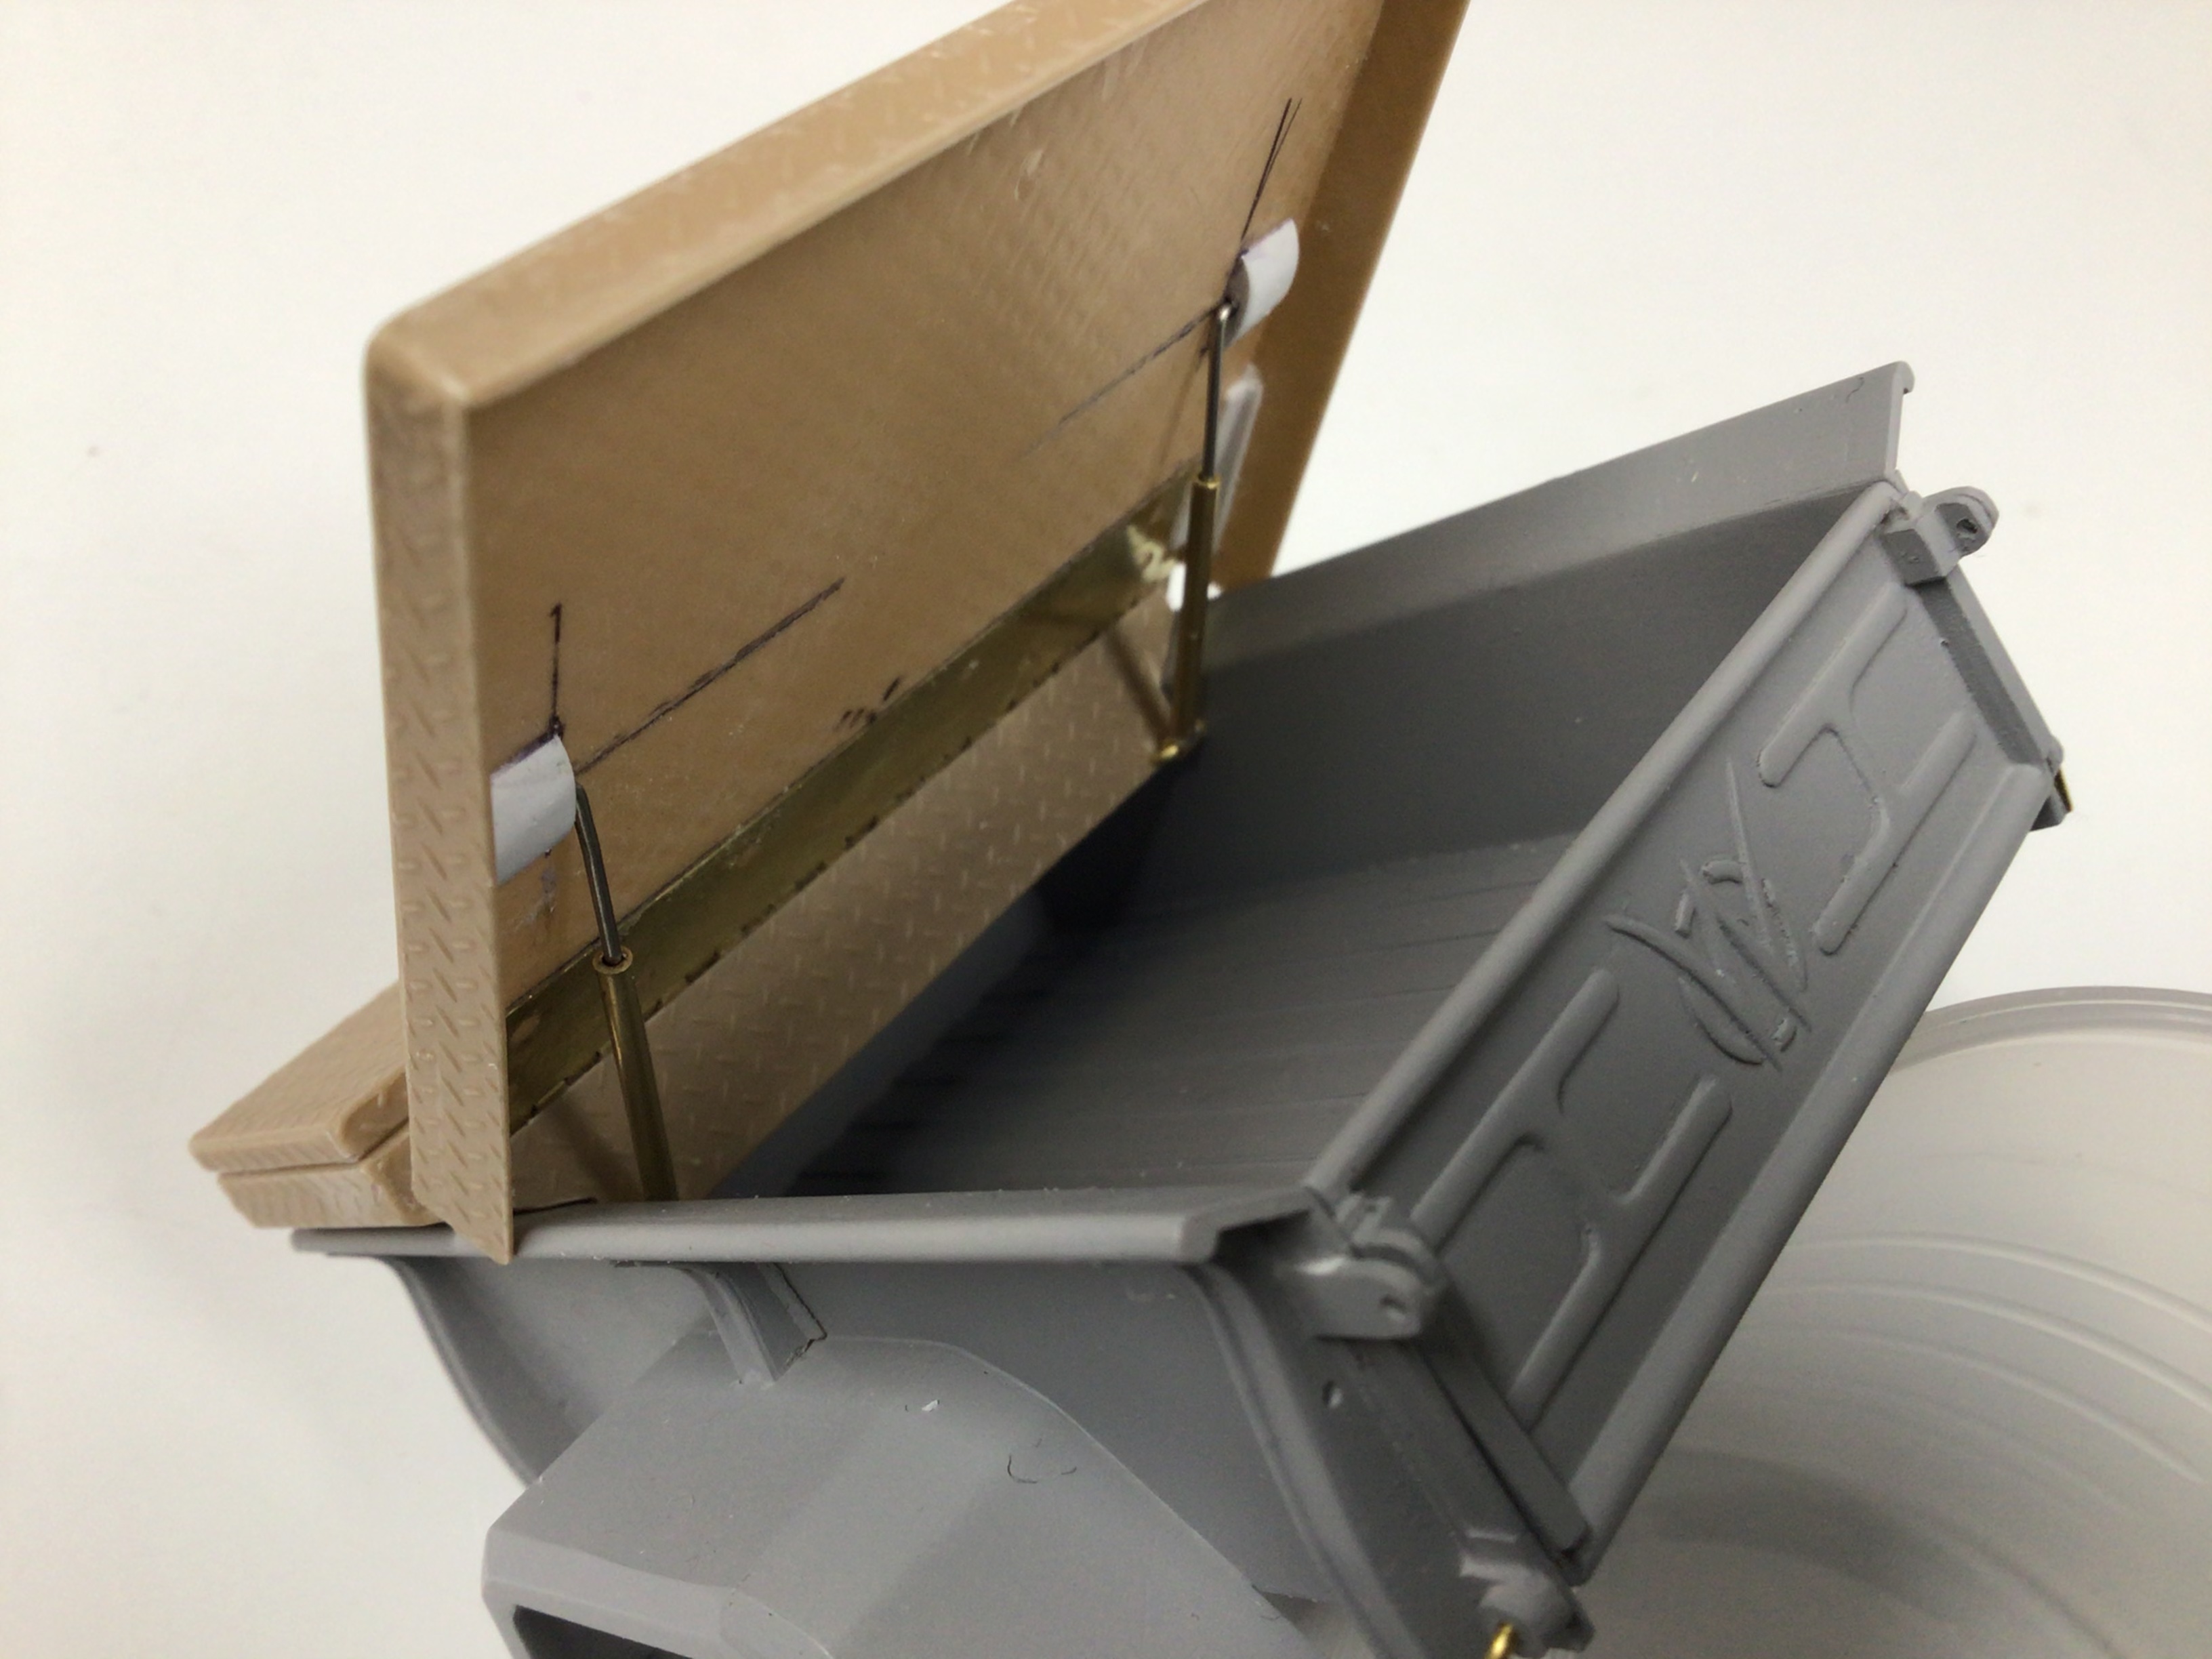
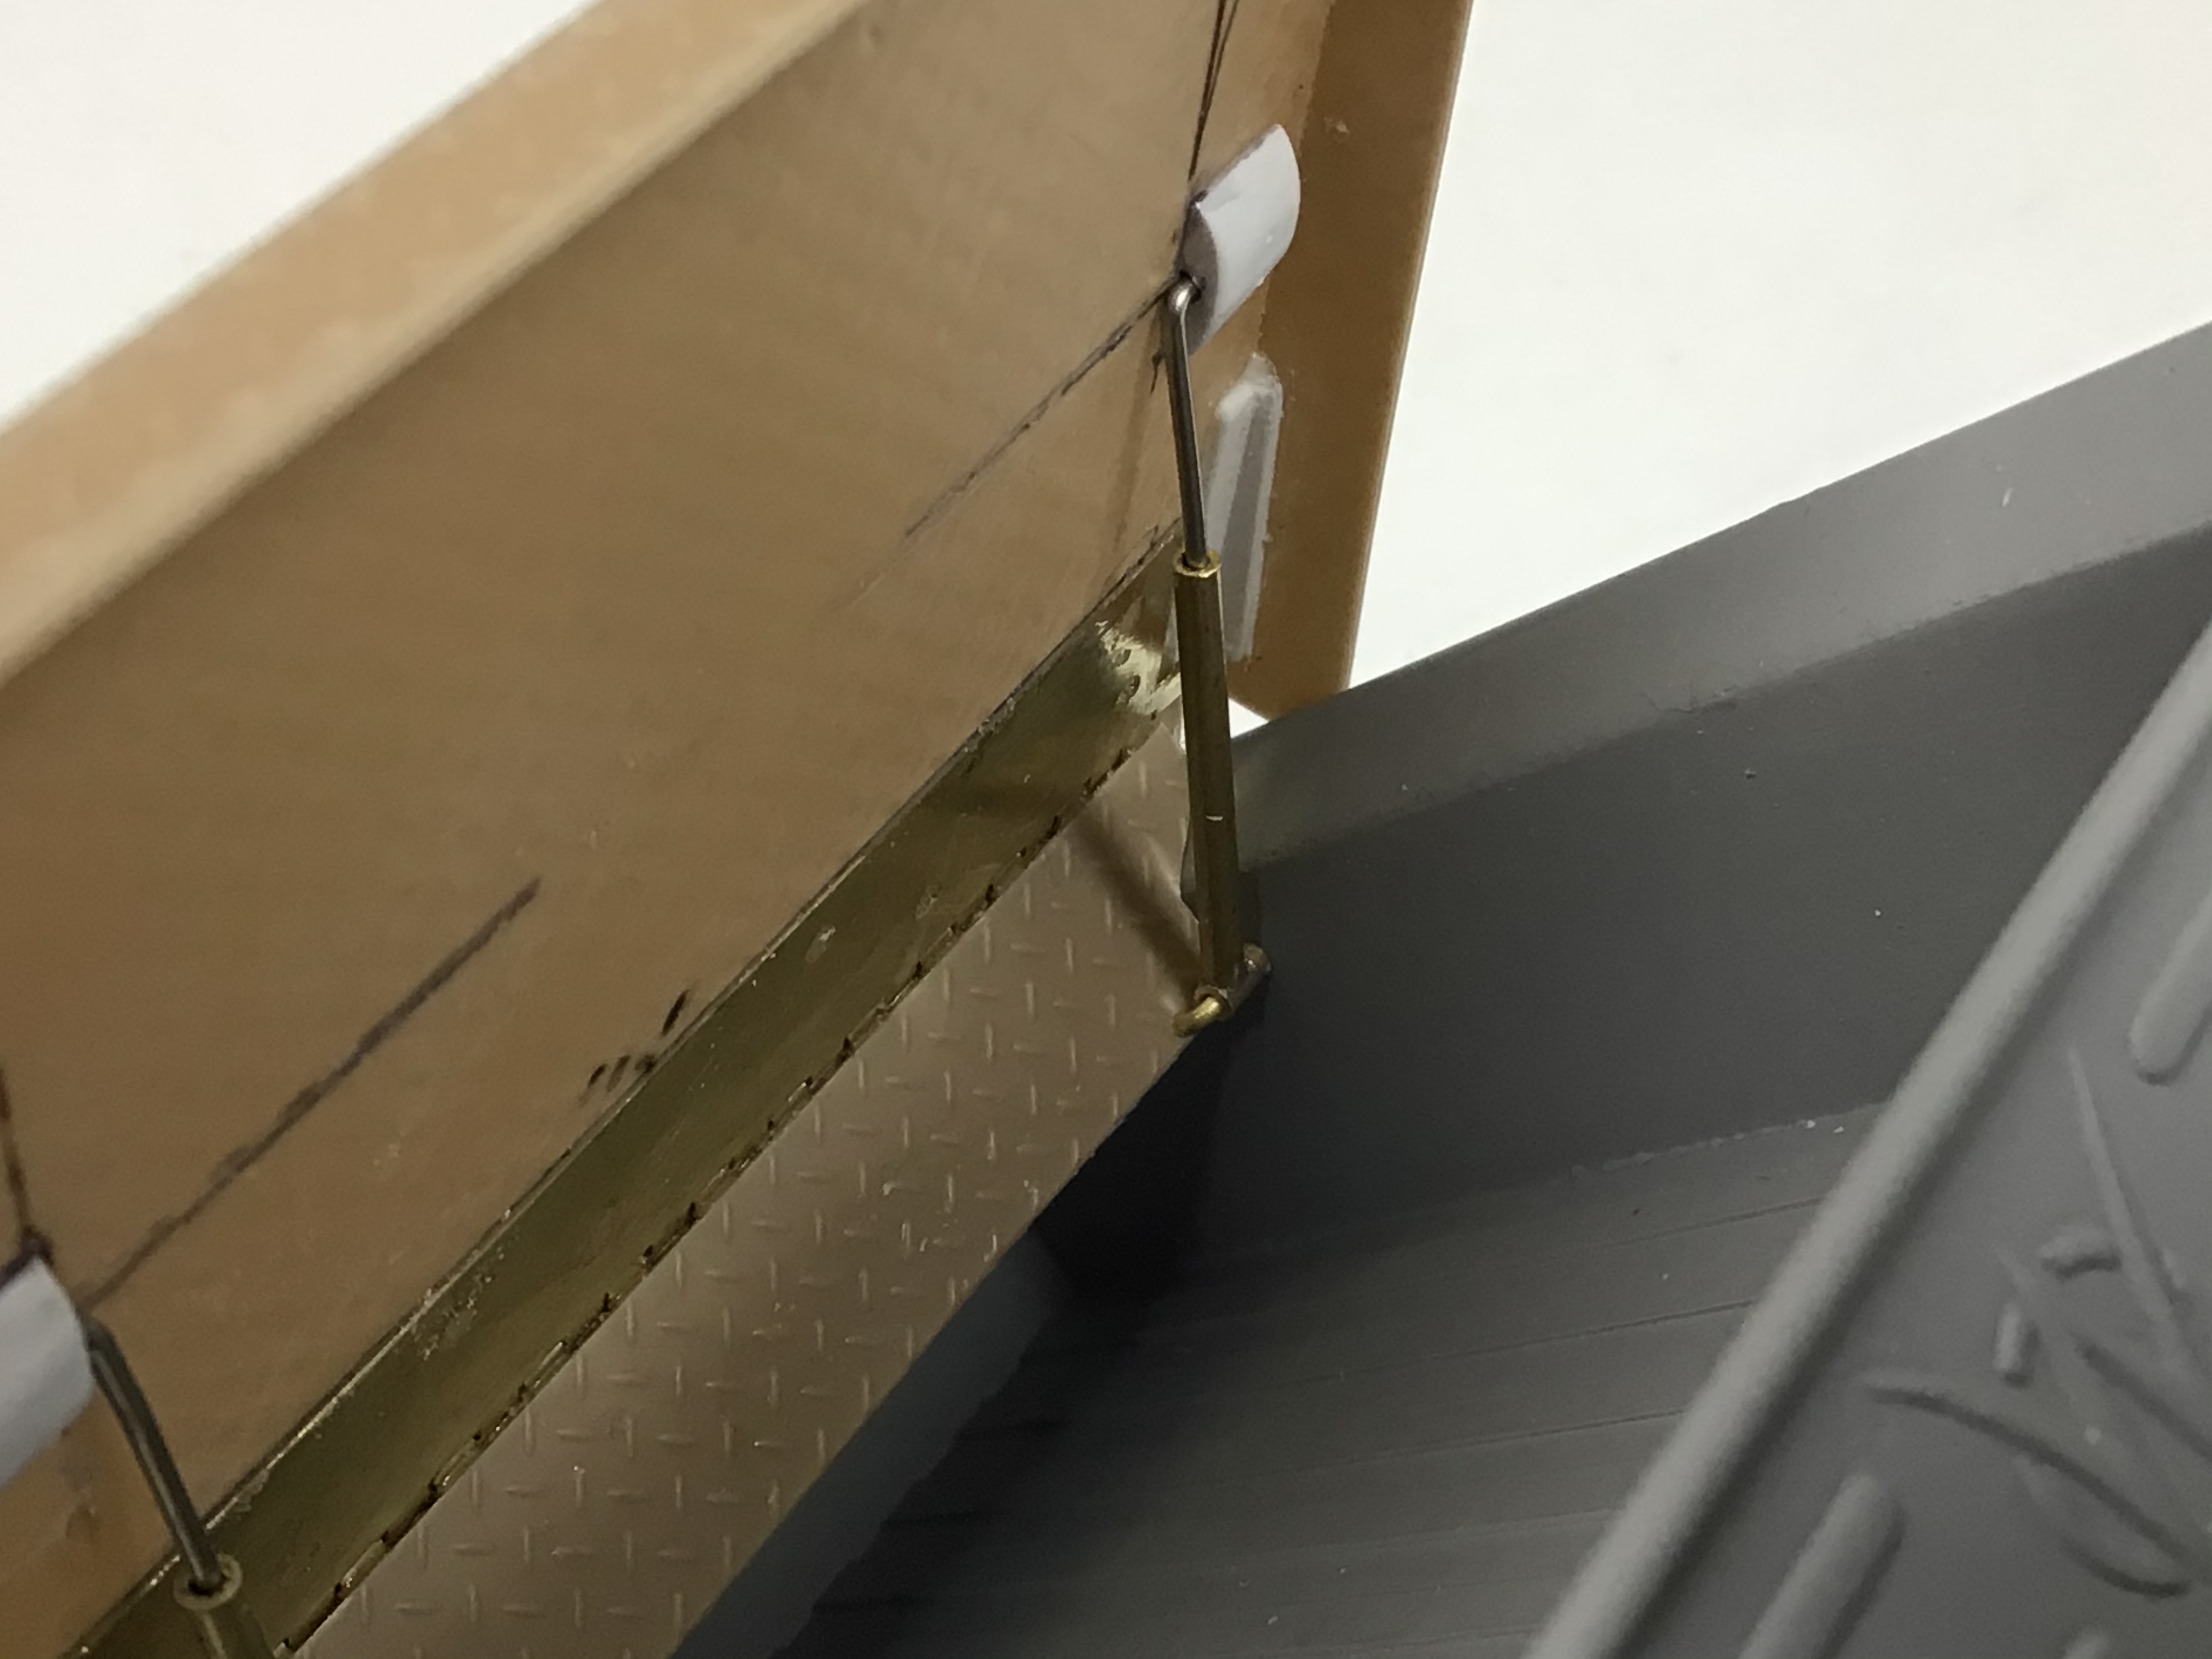
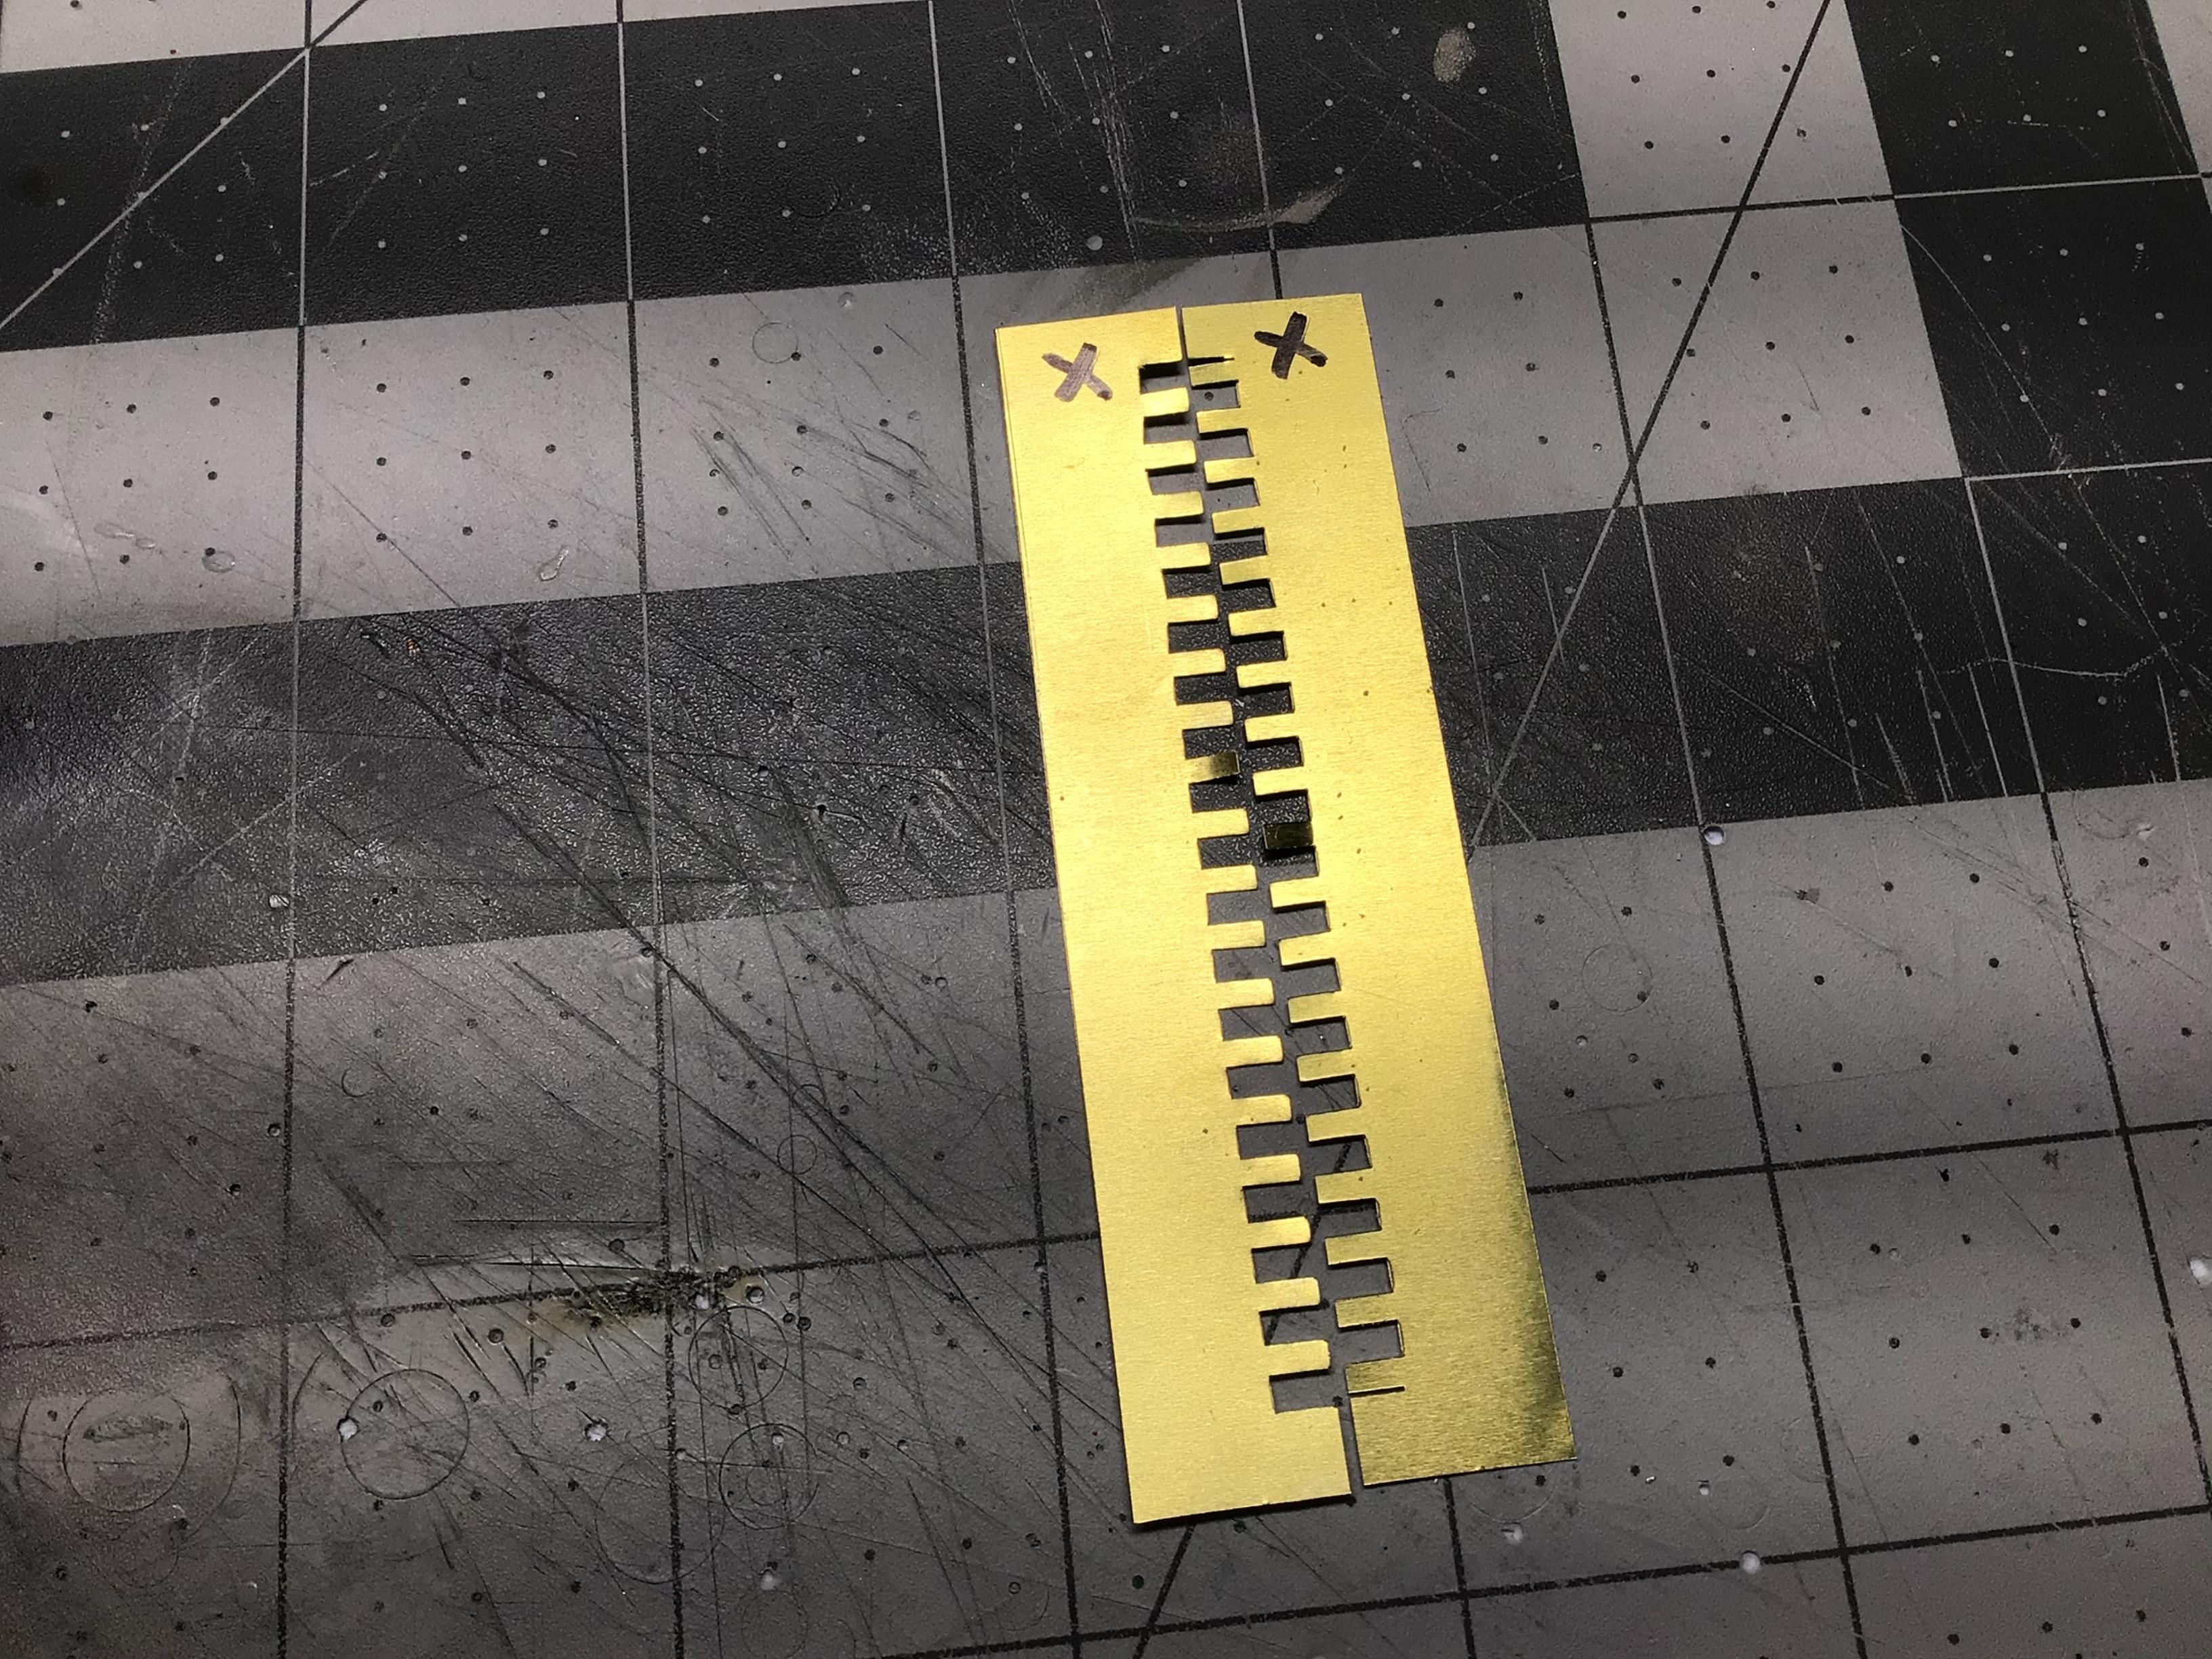
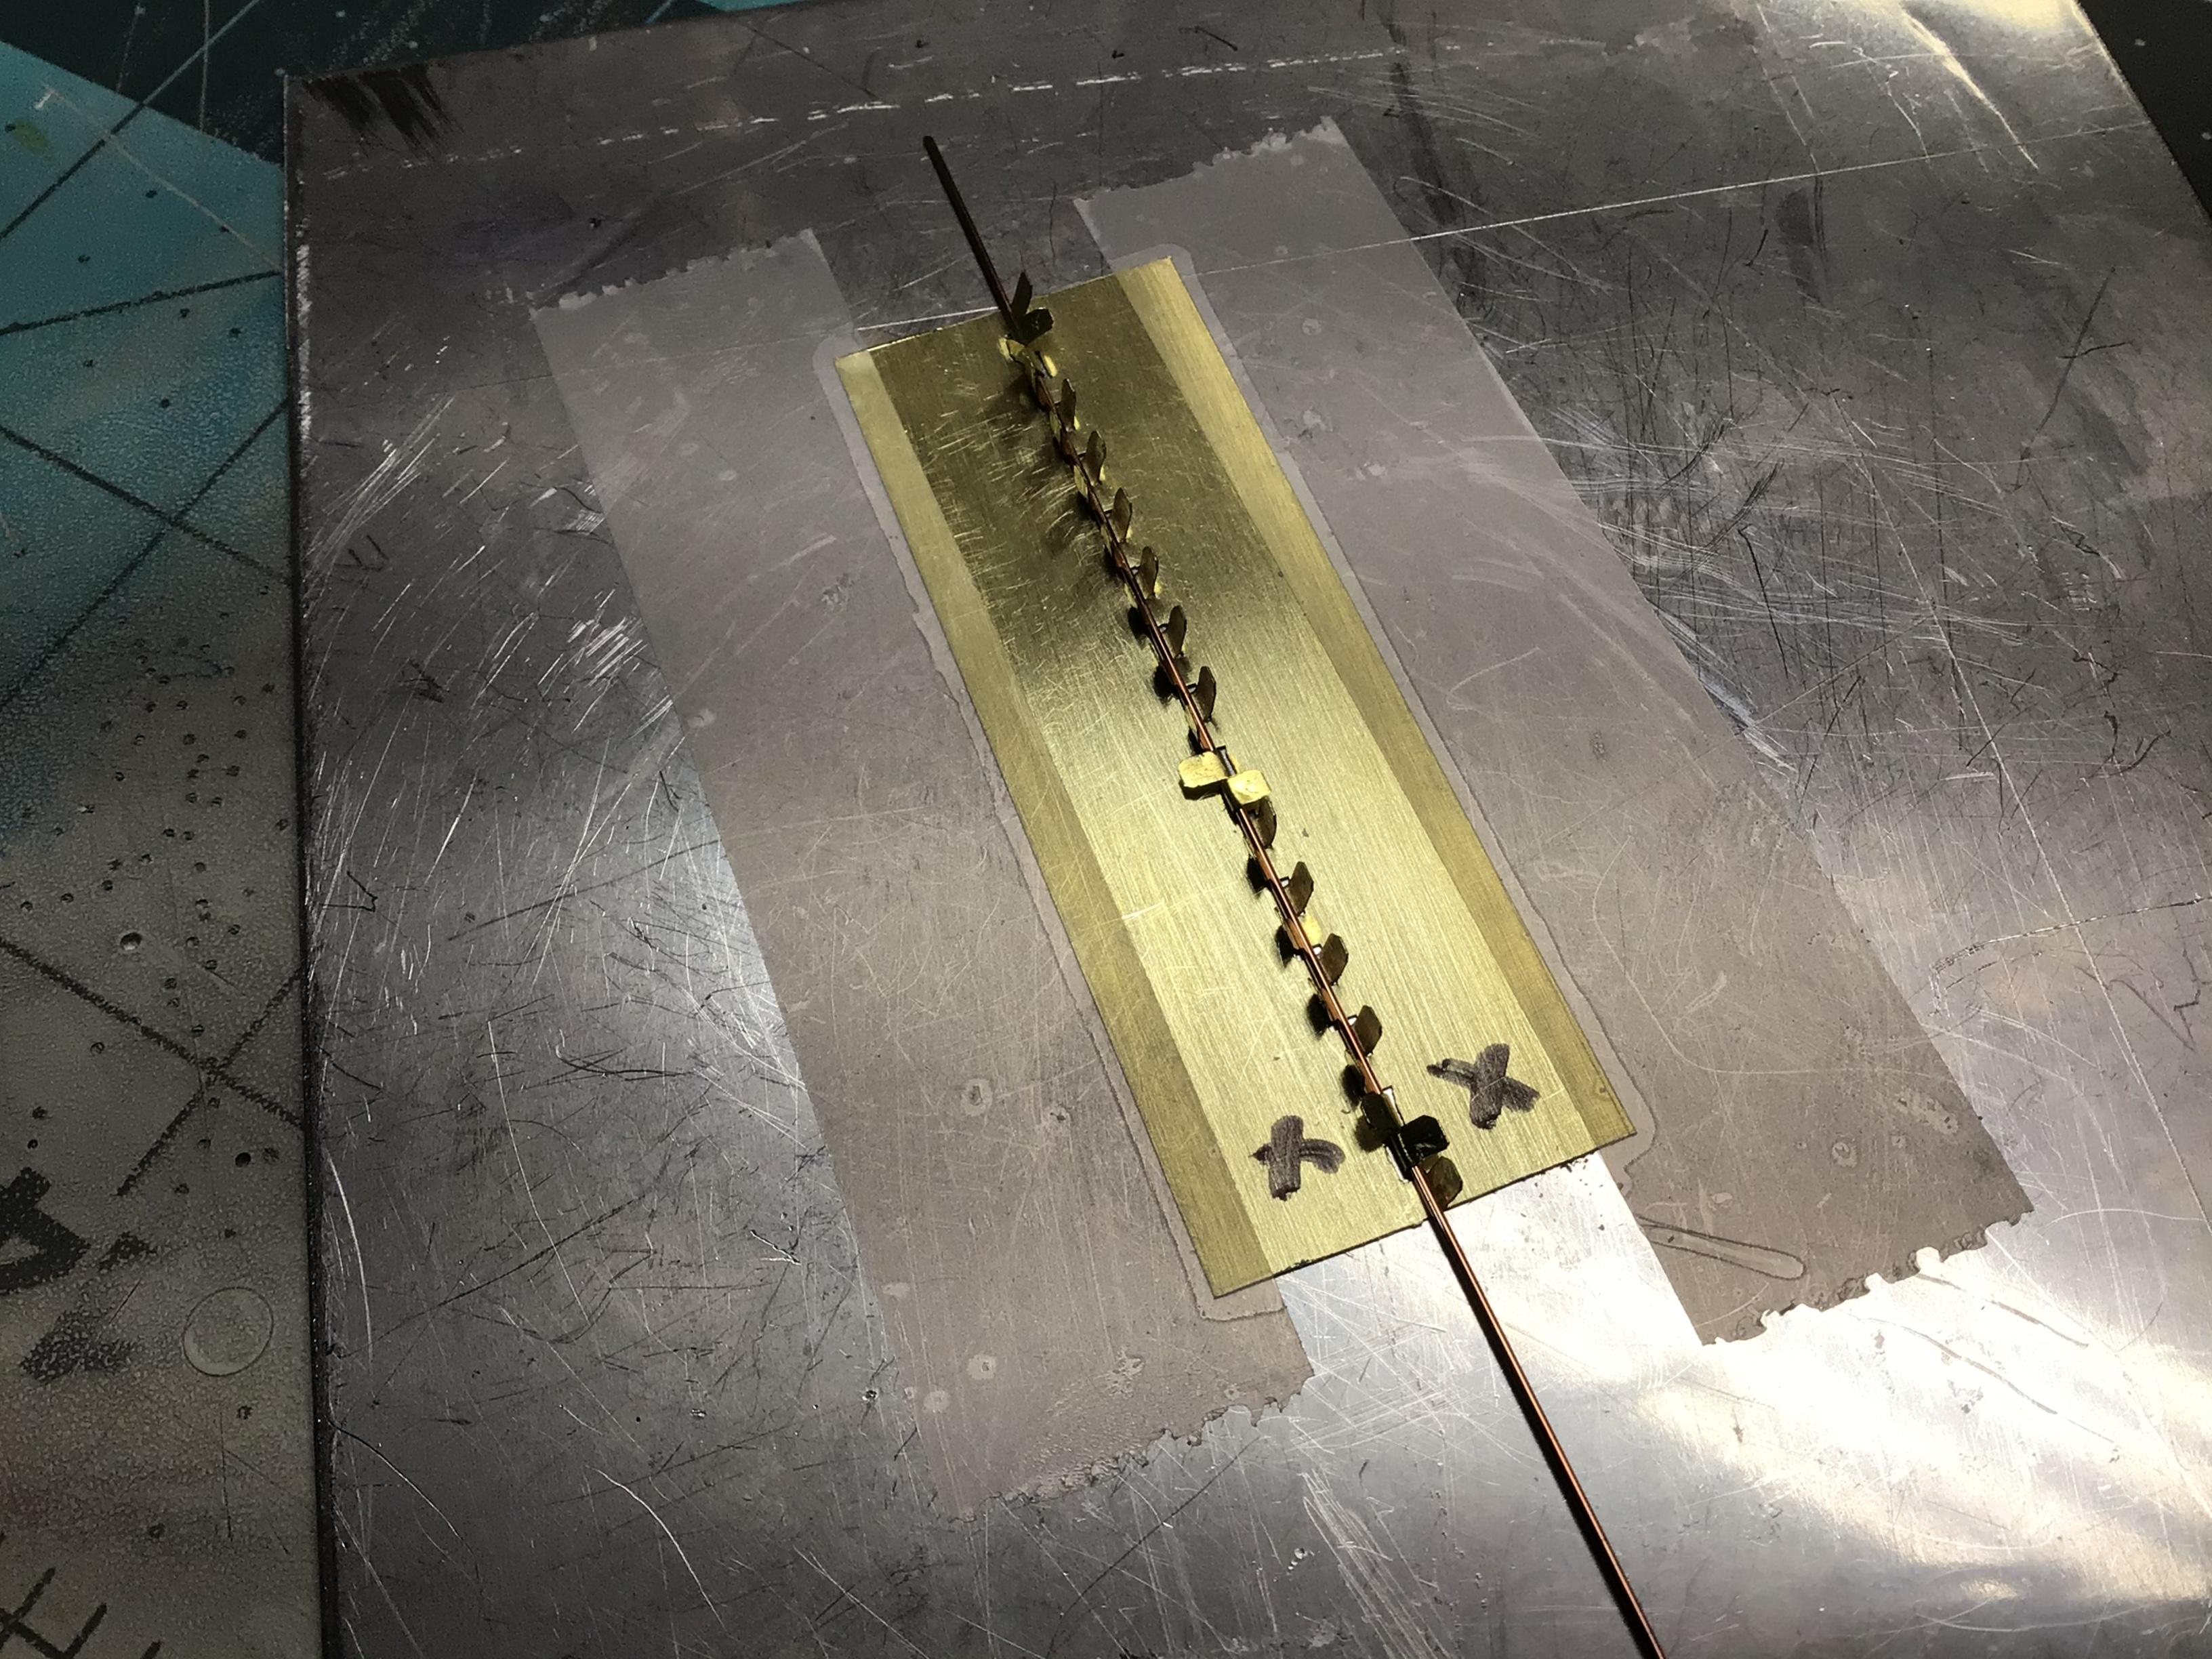
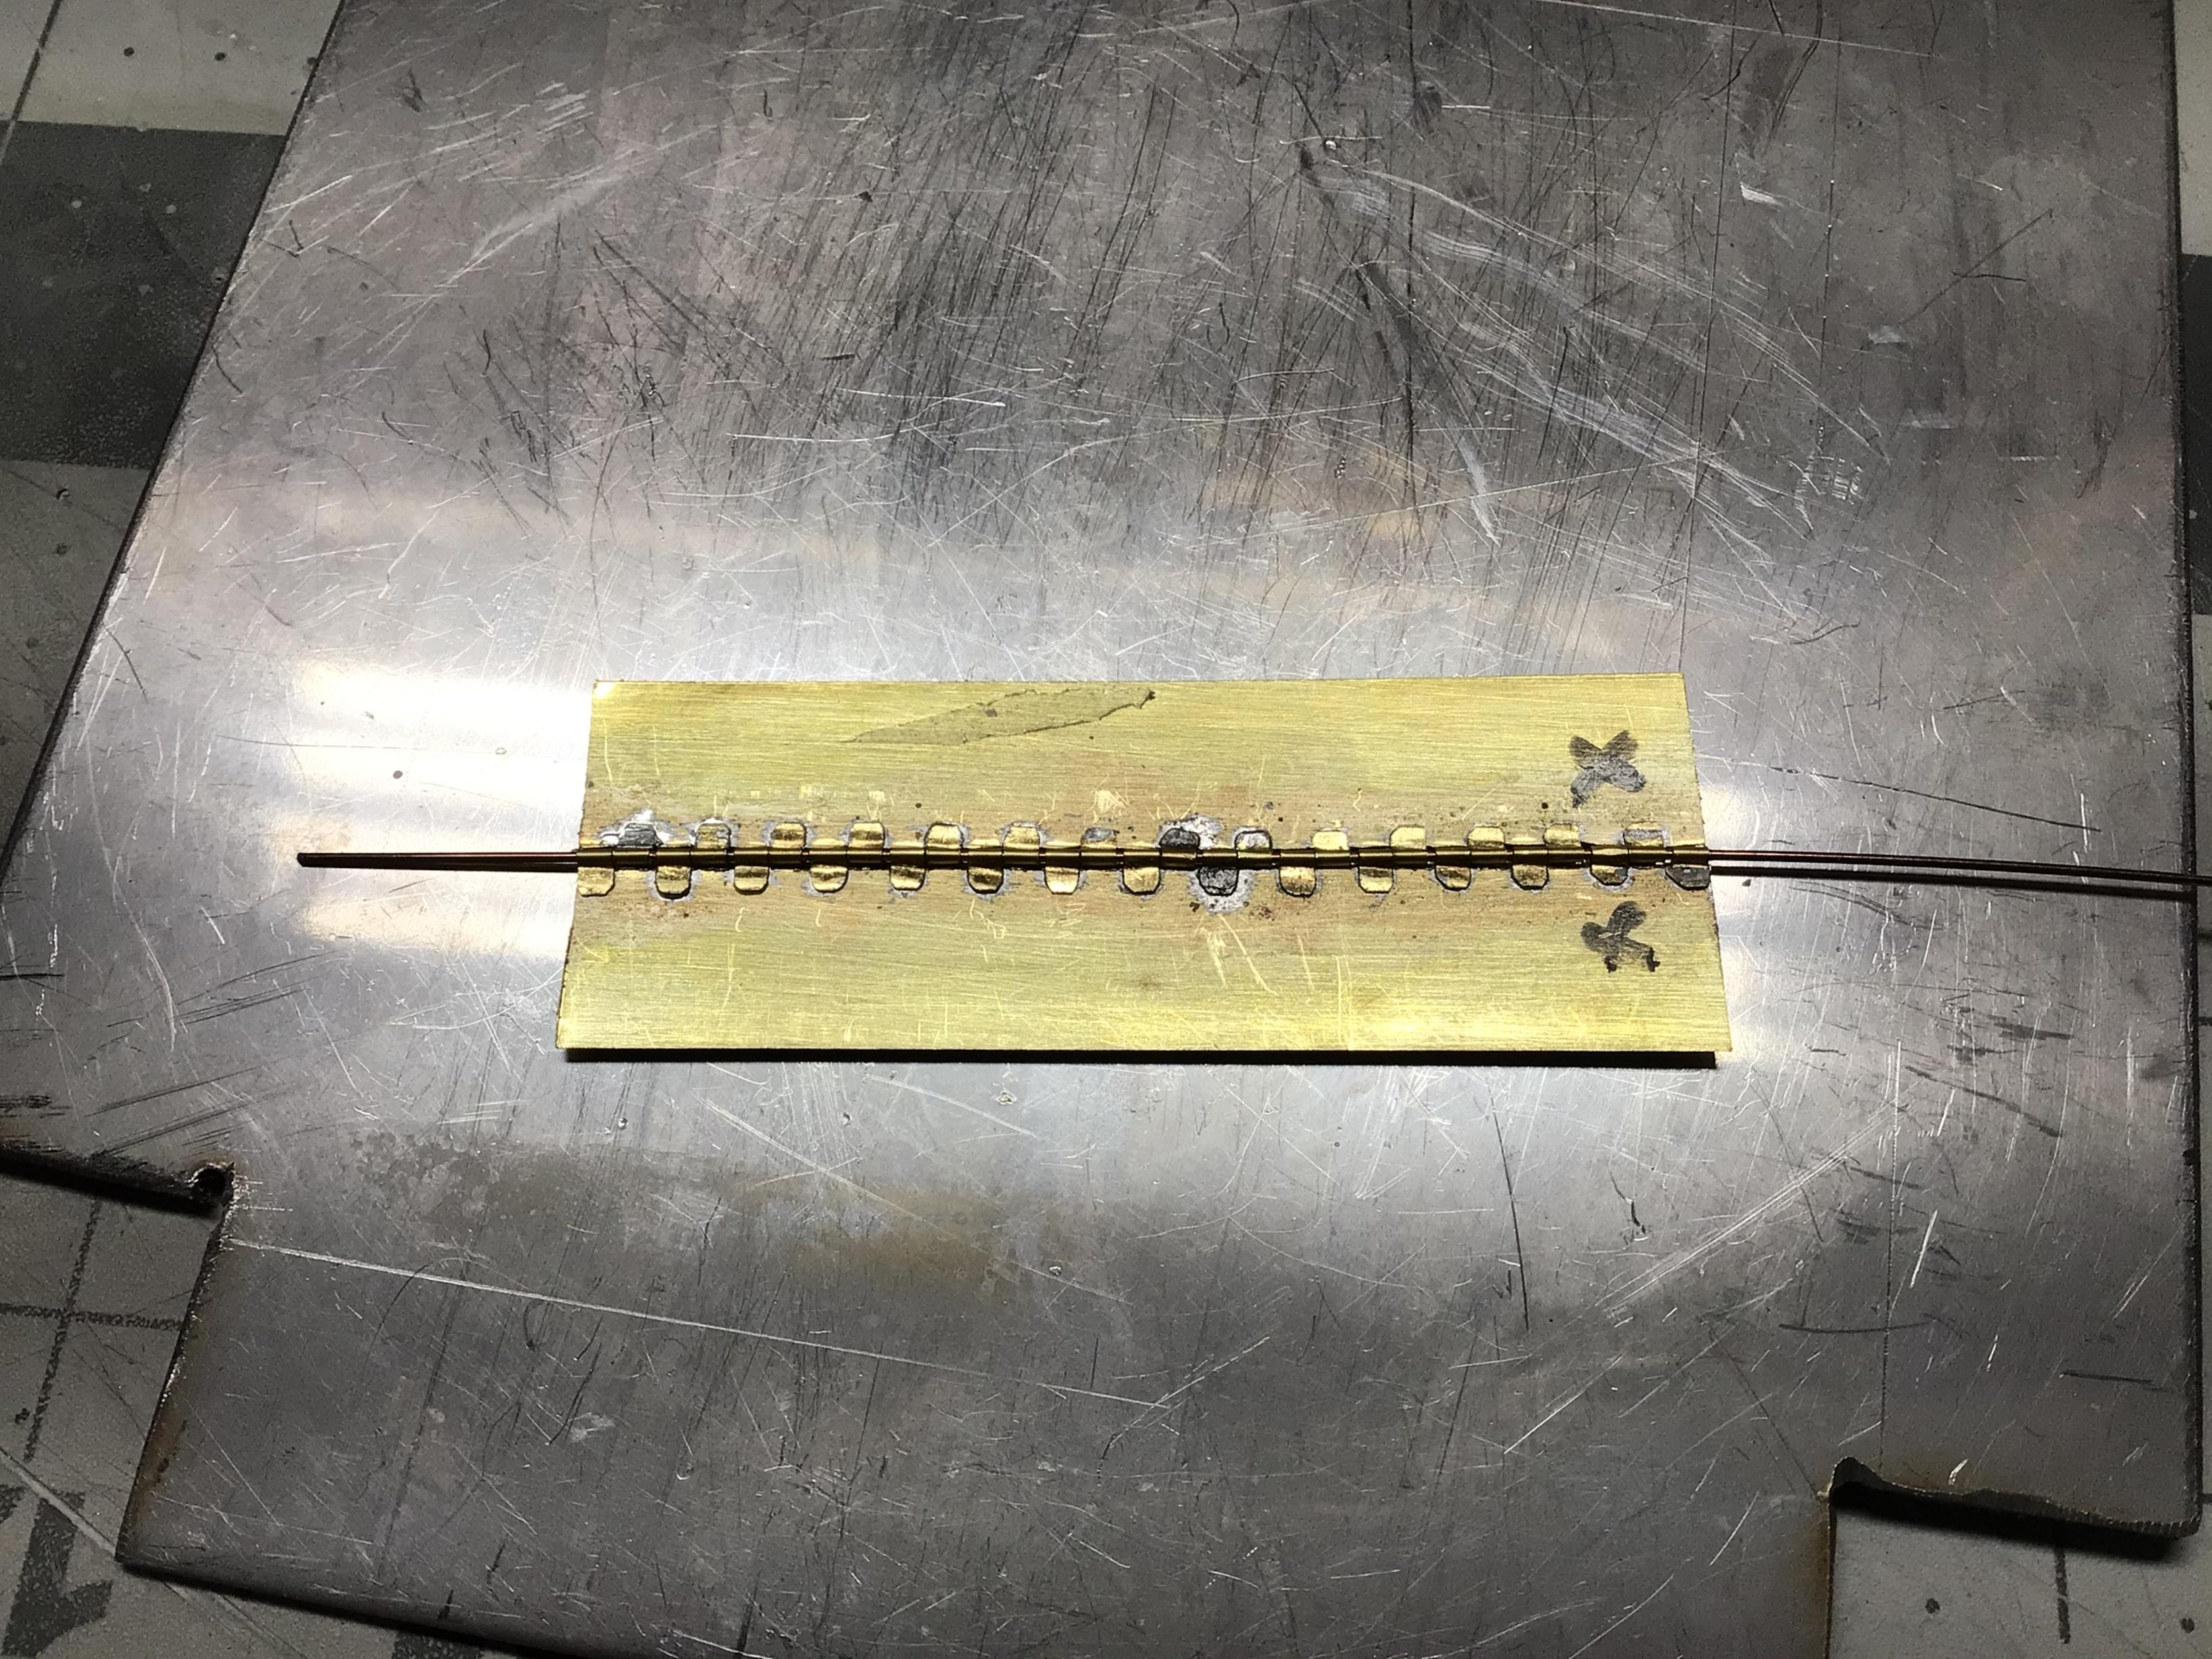
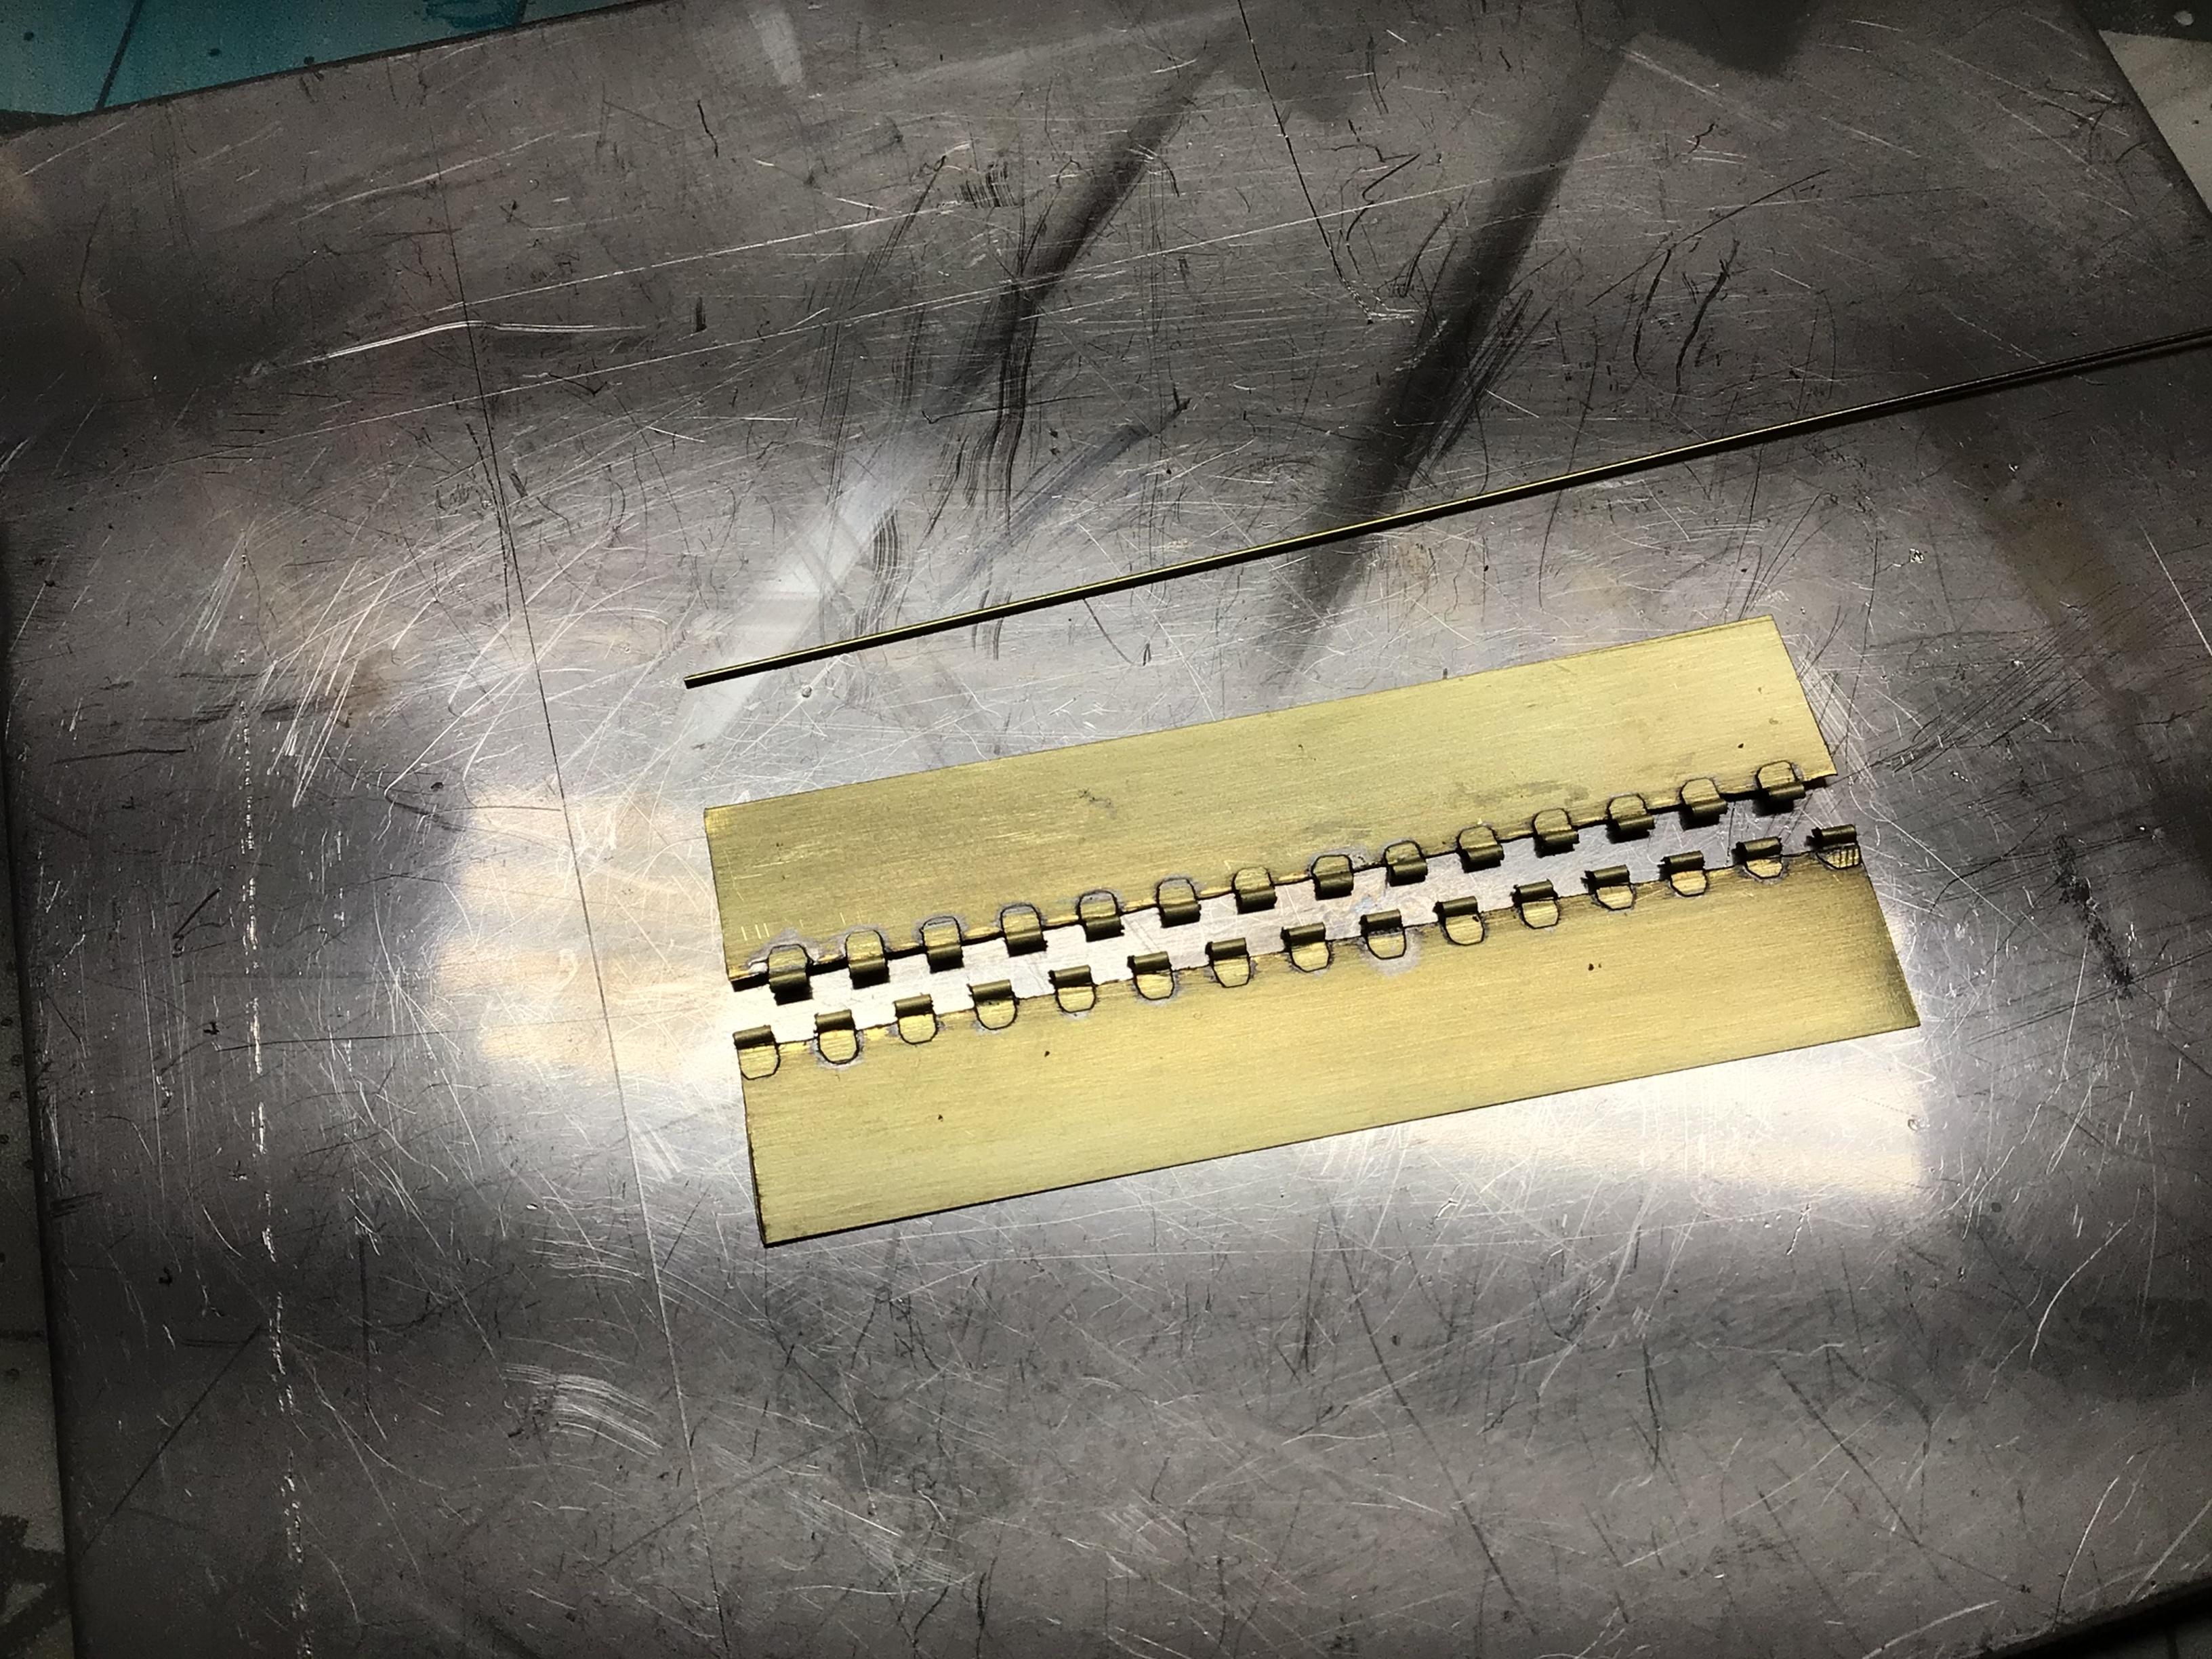
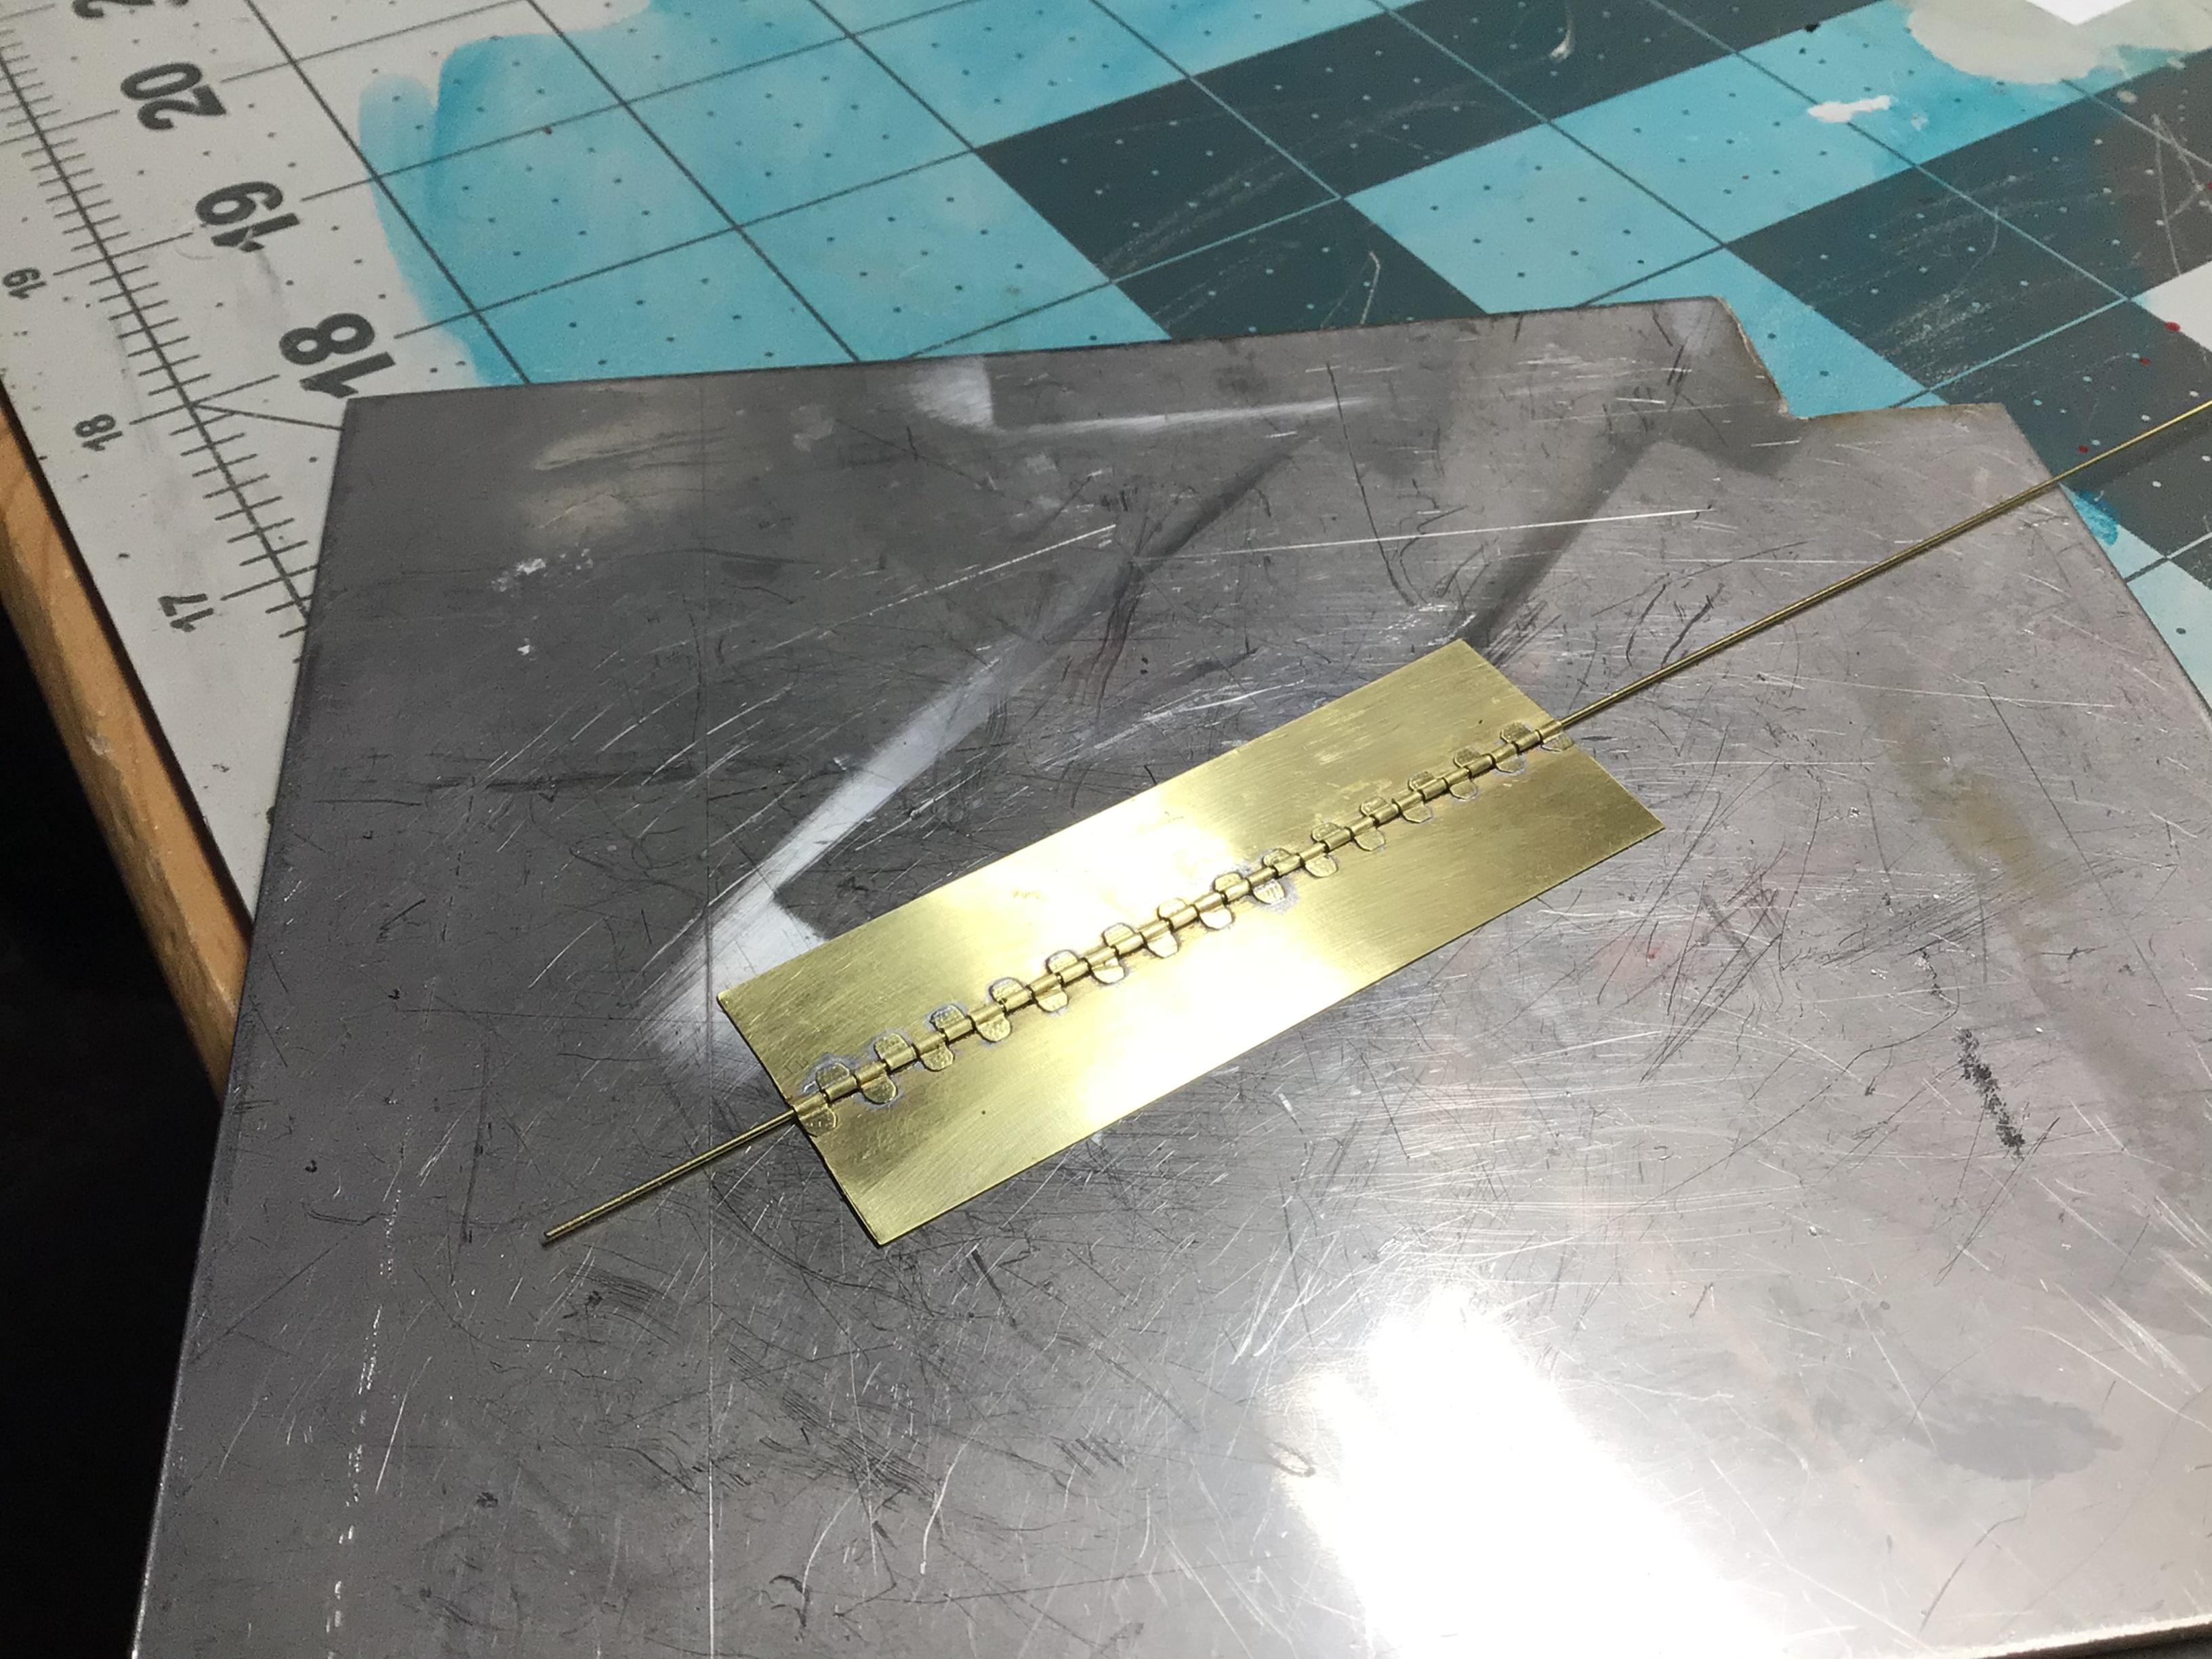
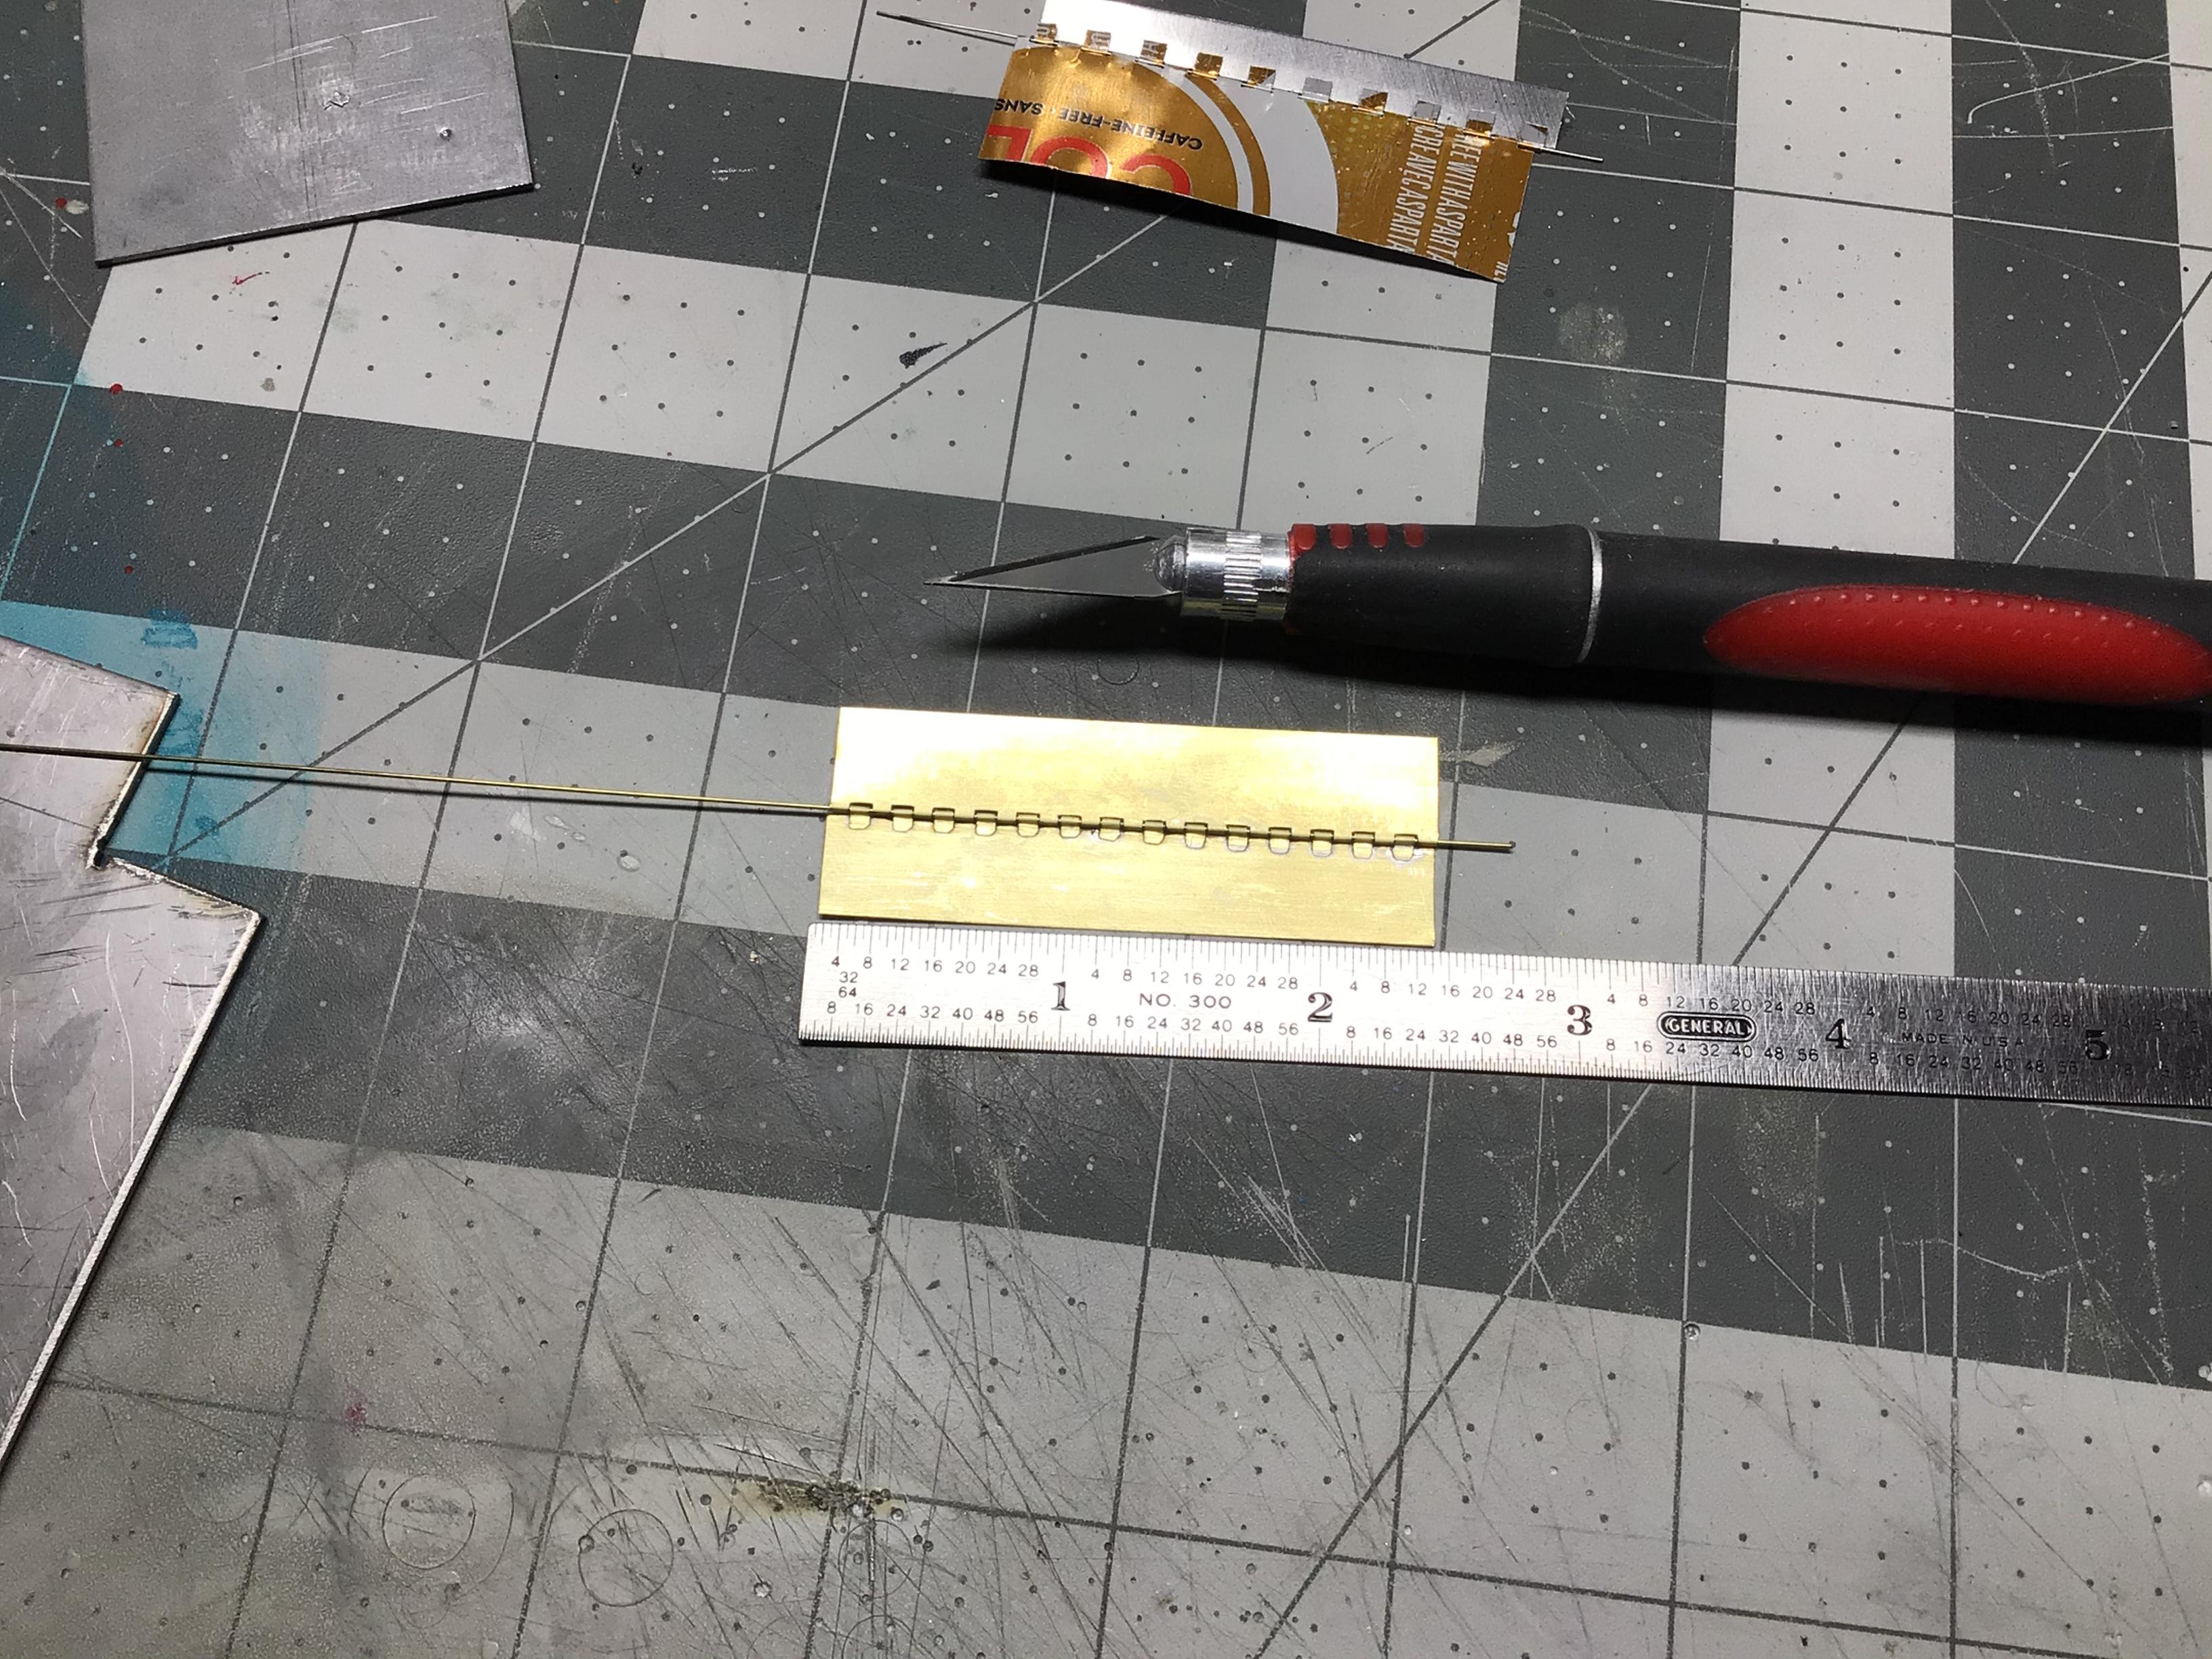
Yes, care has to be taken not to solder the pin in place. That is why I cut the tiny squares of solder and tucked them under the tabs instead of heating the hinge up and touching the solder wire to it. It limits the amount of solder possible per tab. Also, the .023” steel wire used for the initial forming will not attract the solder near as easily as a brass pin would. Aluminum rod rod would work, but may be hard to remove when you need to.
-
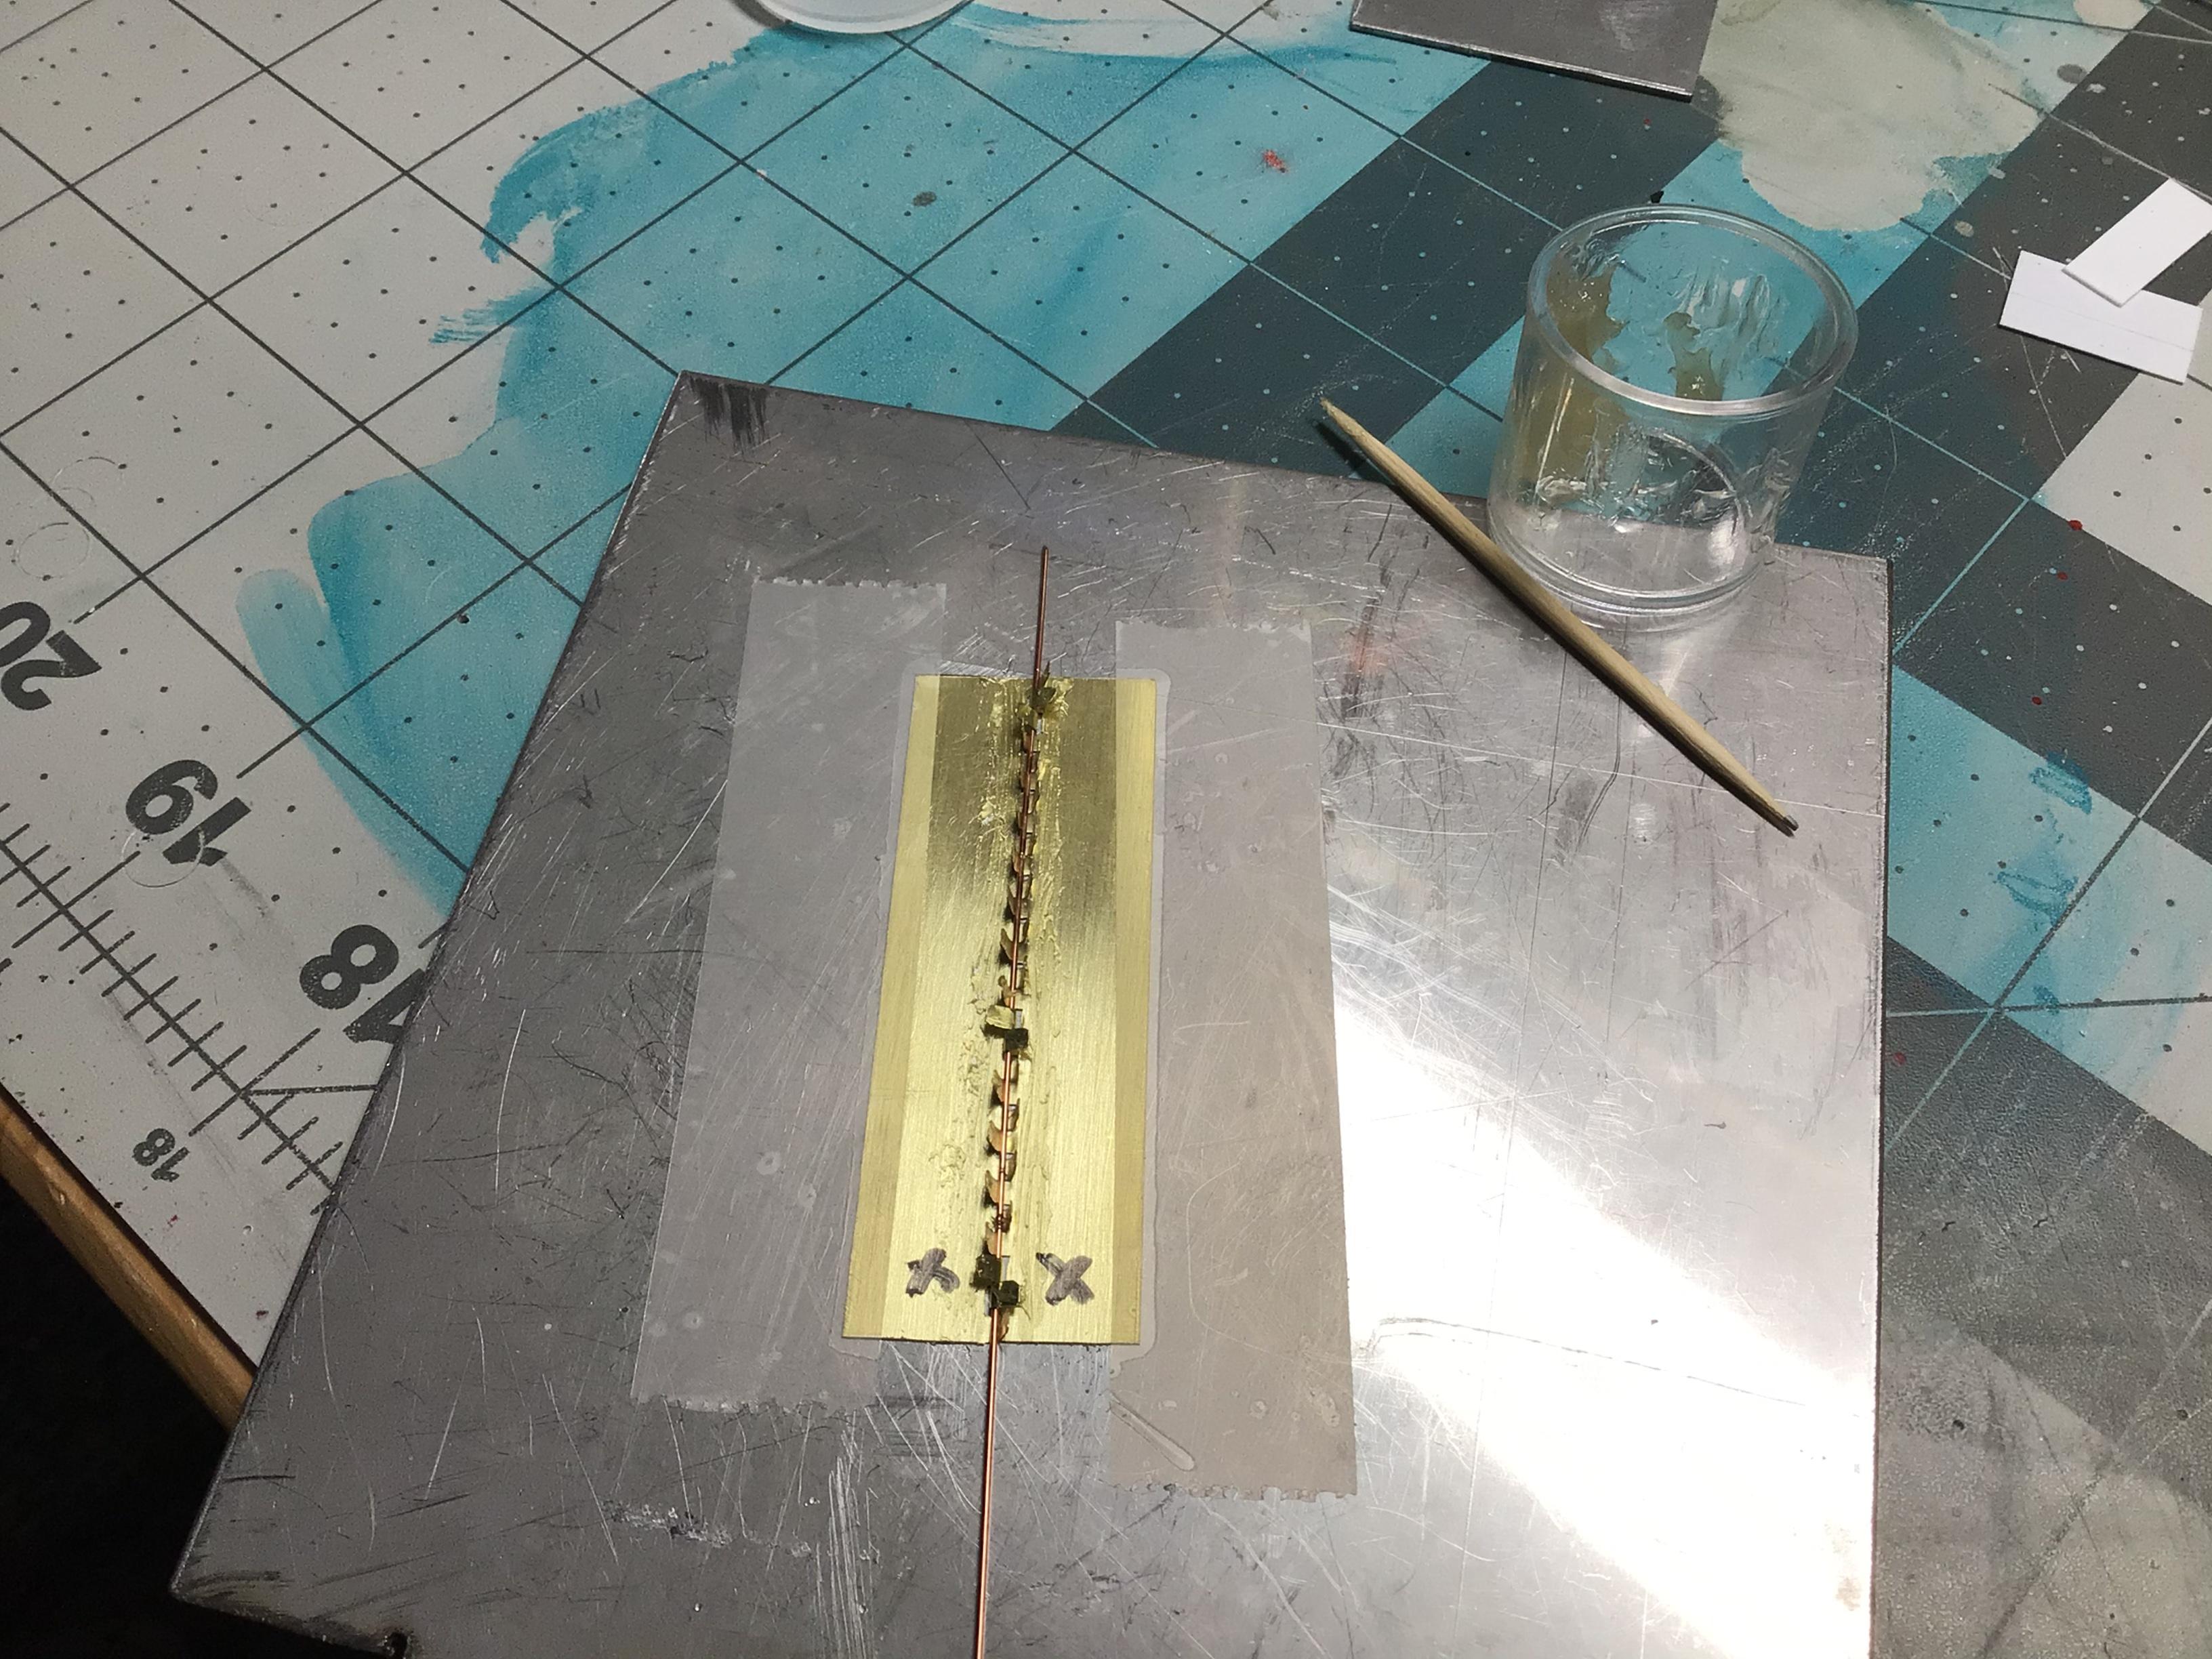
I don’t see why not. Just make sure what ever surface you’re working on can withstand the heat. I warped my cutting matt real good.? Thankfully I have a couple of spares that I got on sale. The tabs could also be cut shorter and not soldered, which is how the photo etch hinge tutorials on here were done.
-
I like a narrow variety. Mostly stuff that I grew up with. Car-wise, I like muscle cars and Classics by all makes, and Hot Rods. I’m not into exotics or what I consider mundane daily drivers. I also Enjoy trucks of any kind and especially 4x4’s.
-
Reservoir Dogs?
-
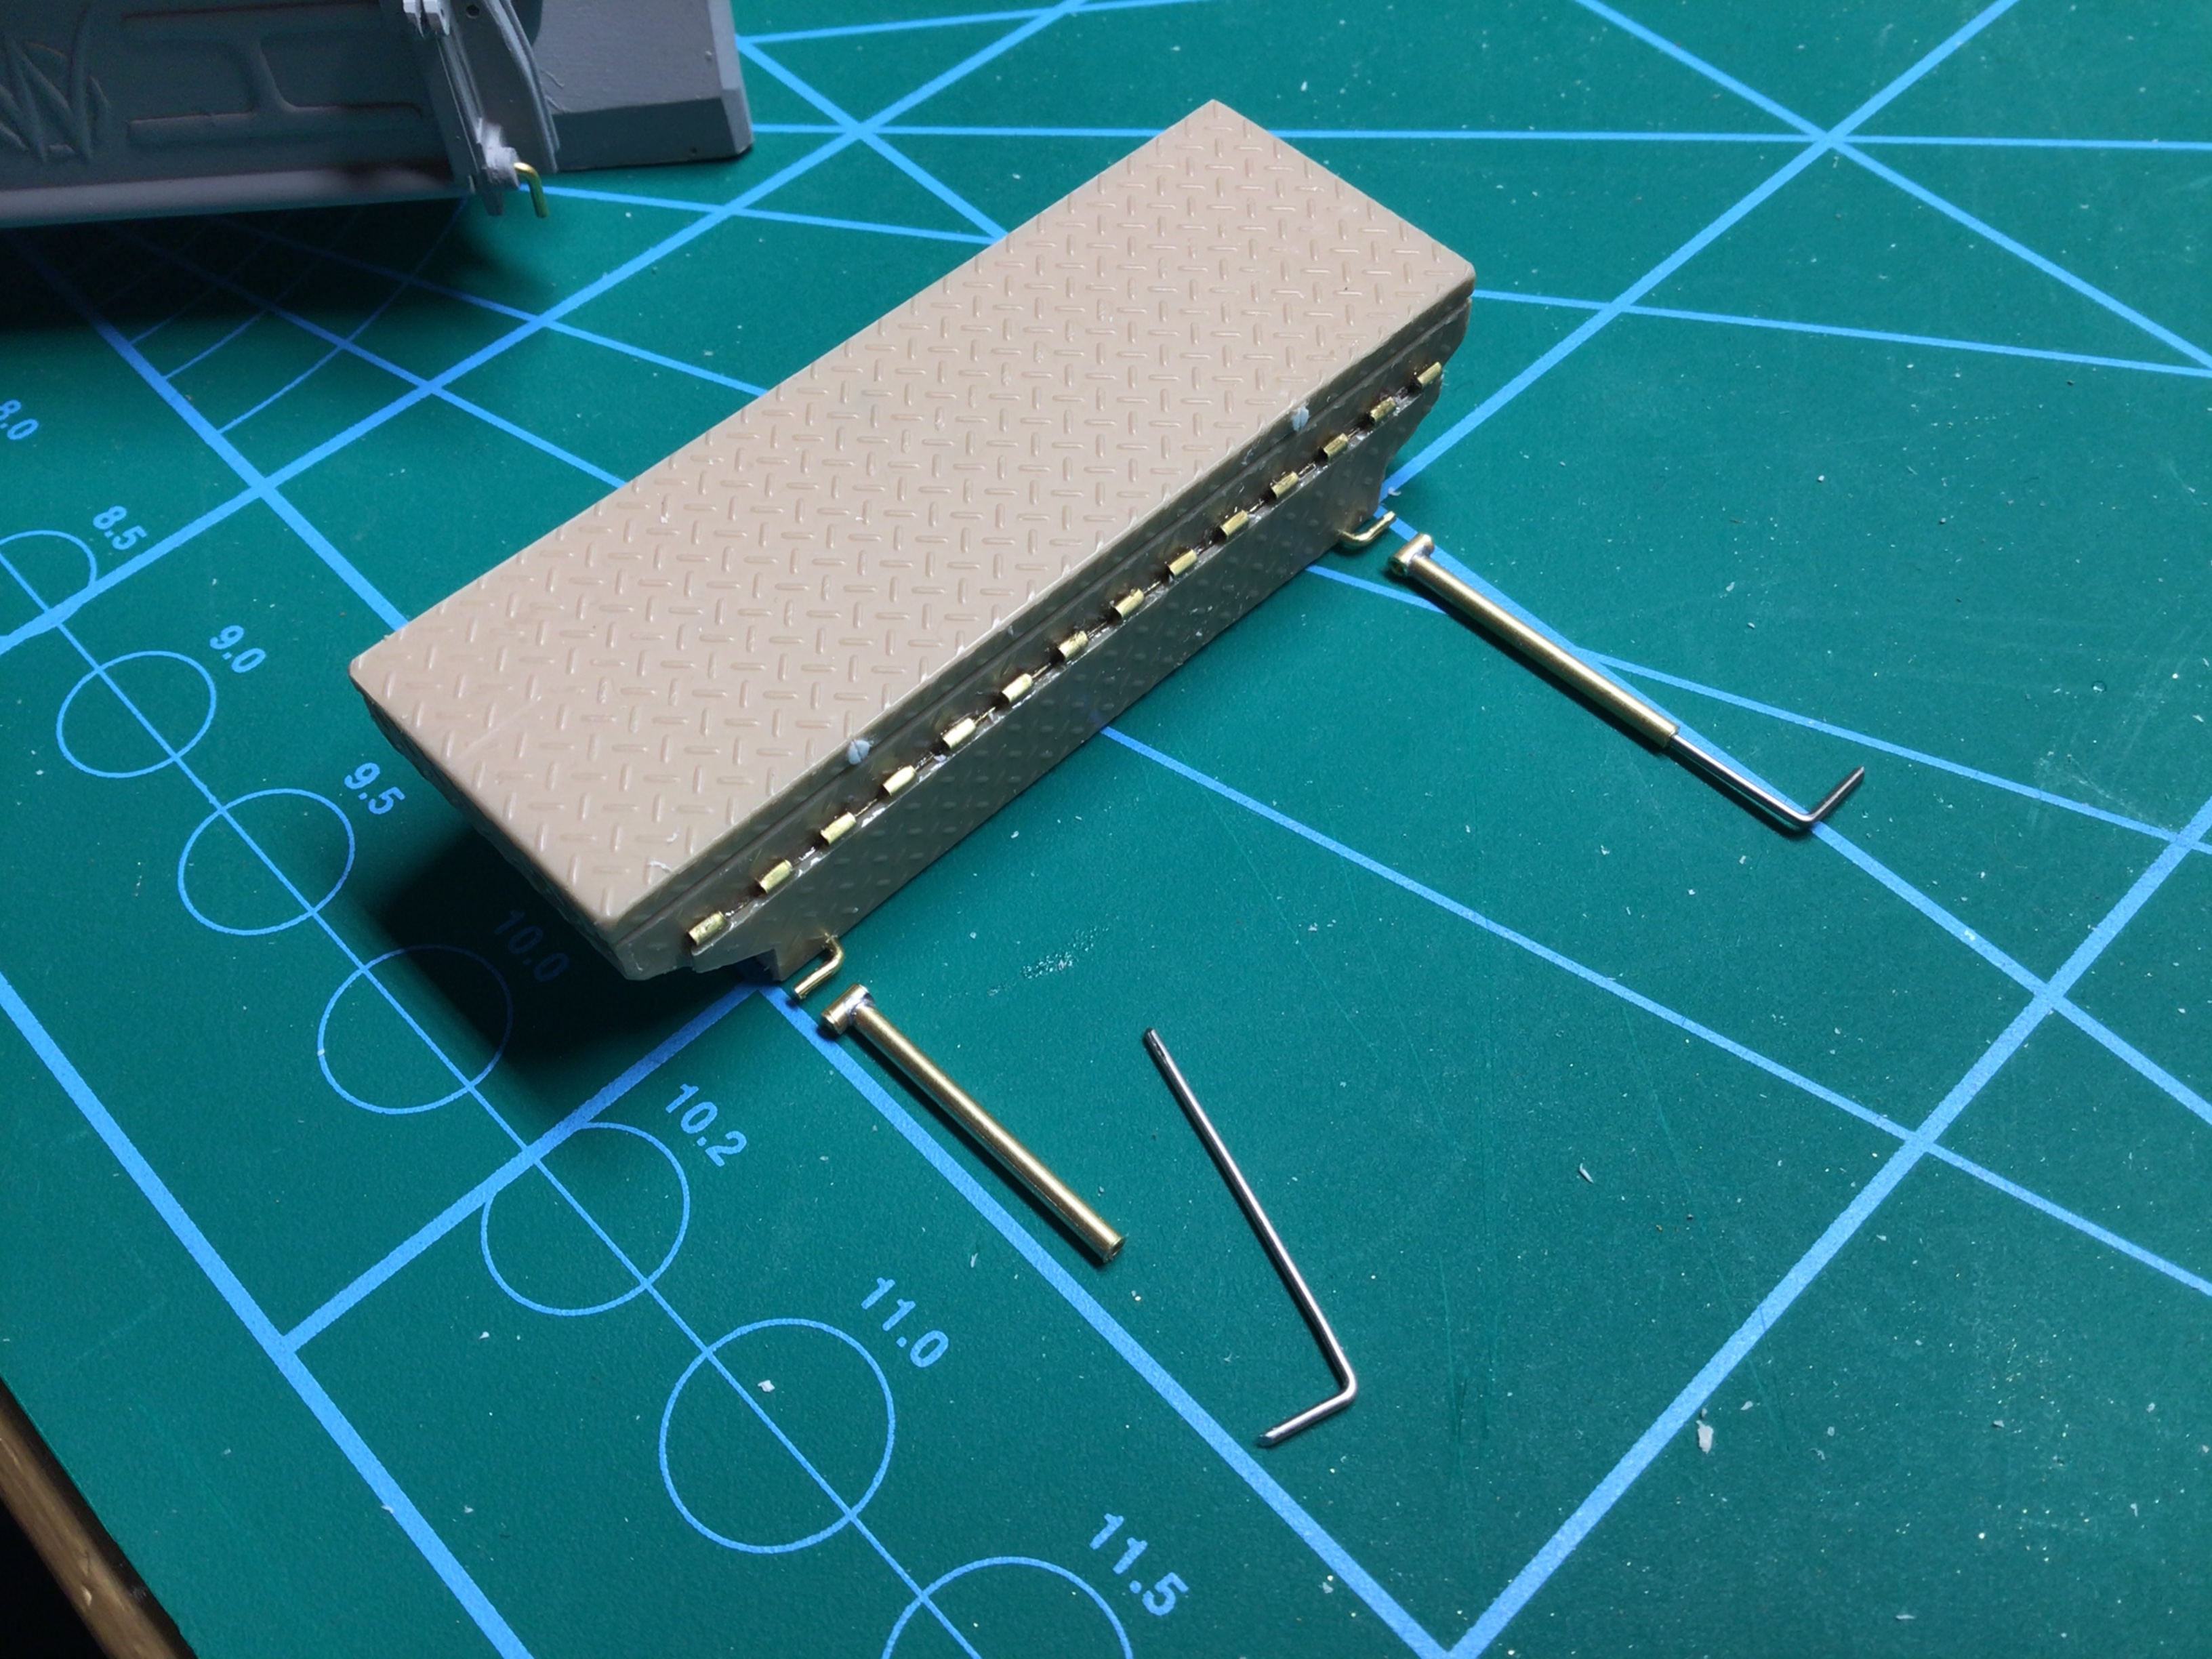
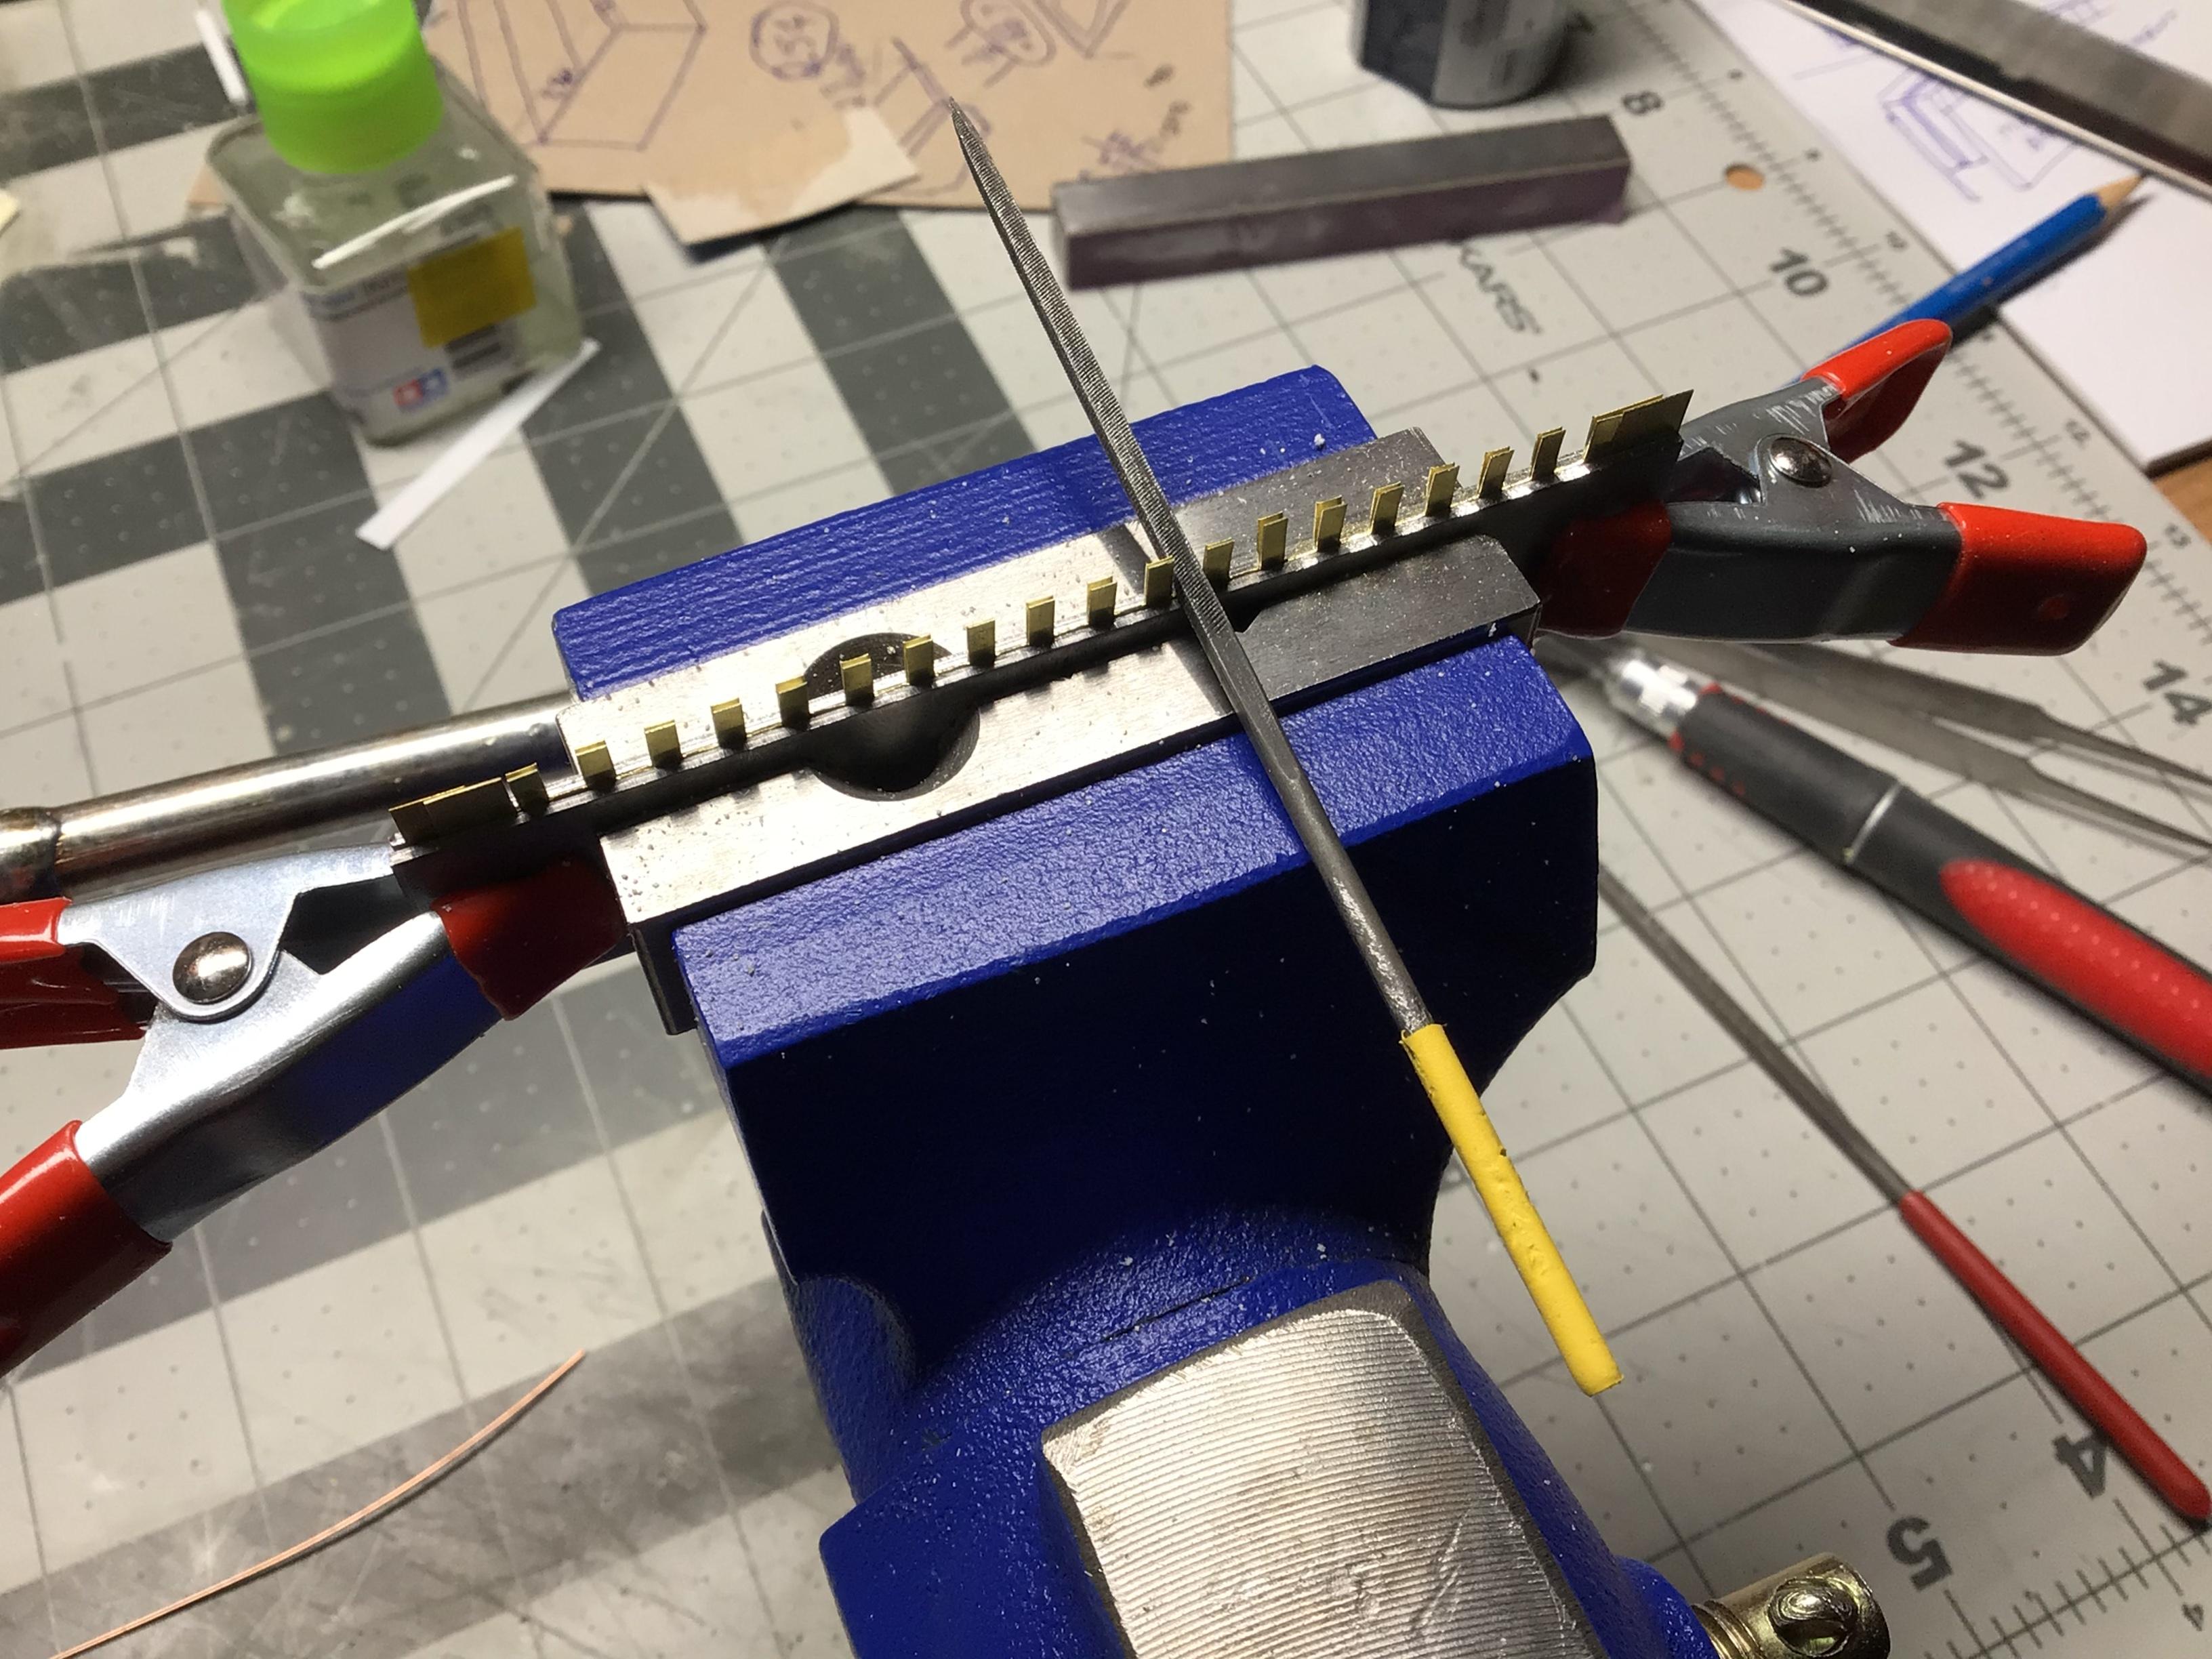
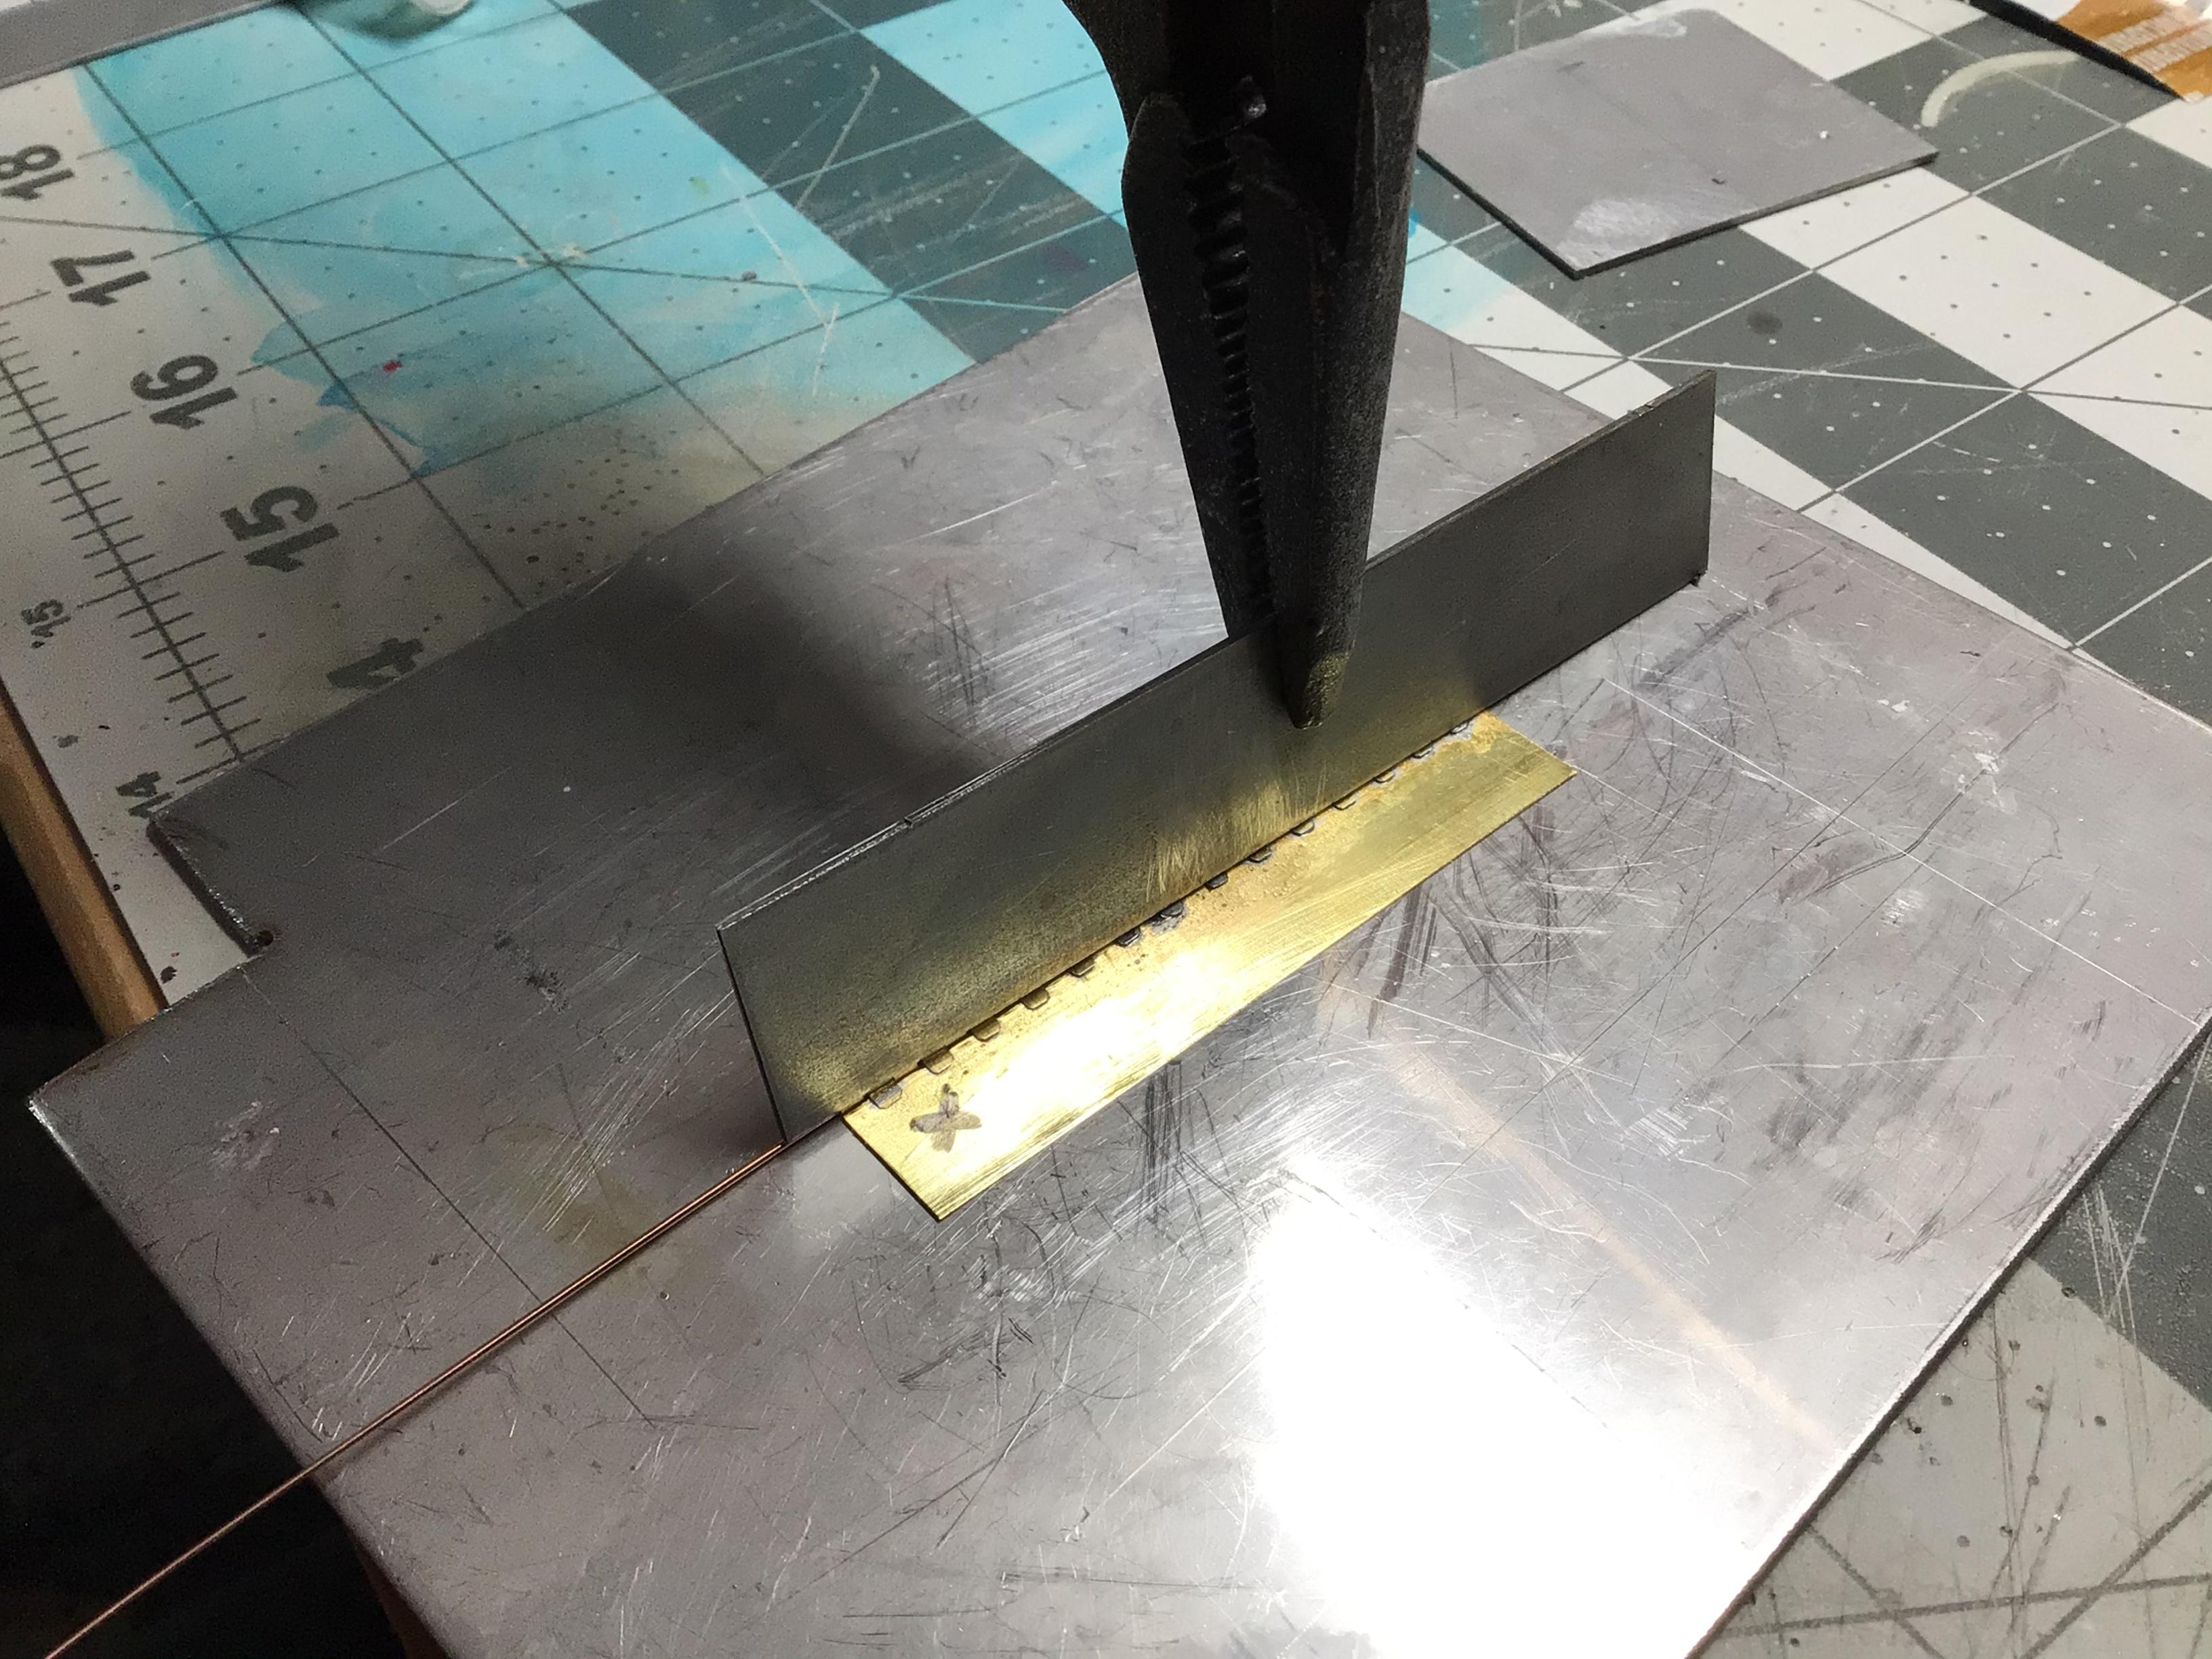
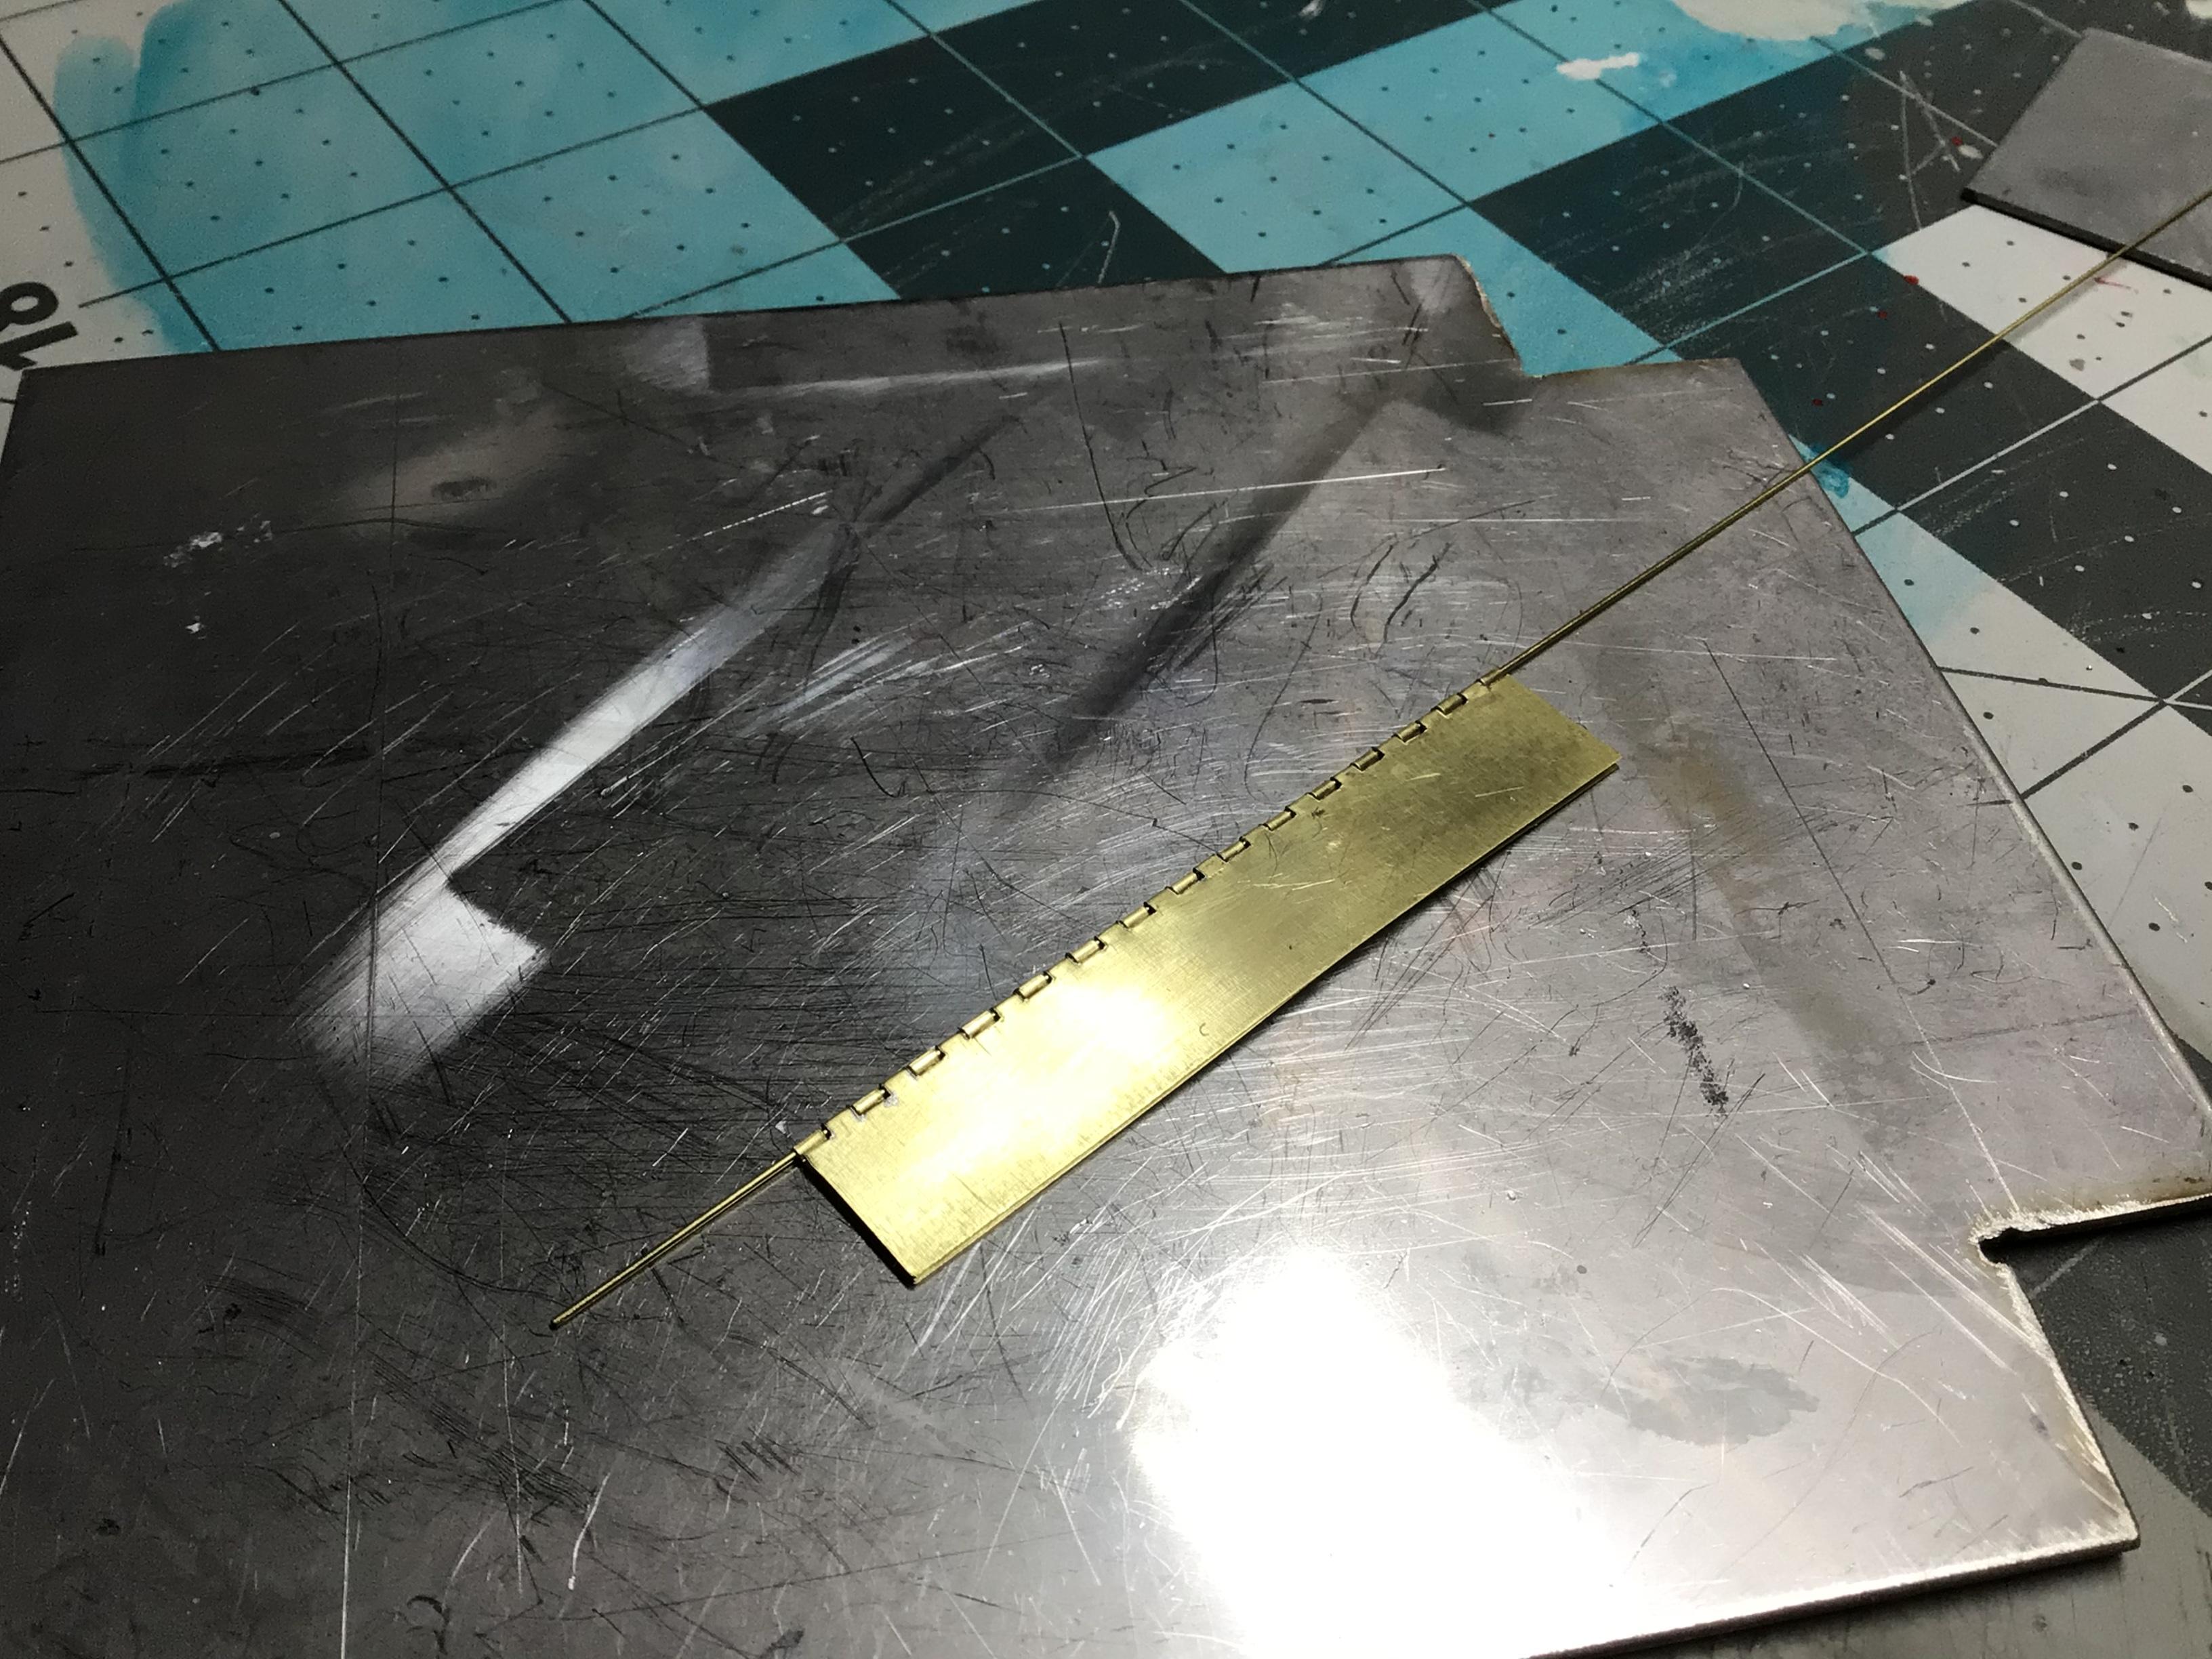
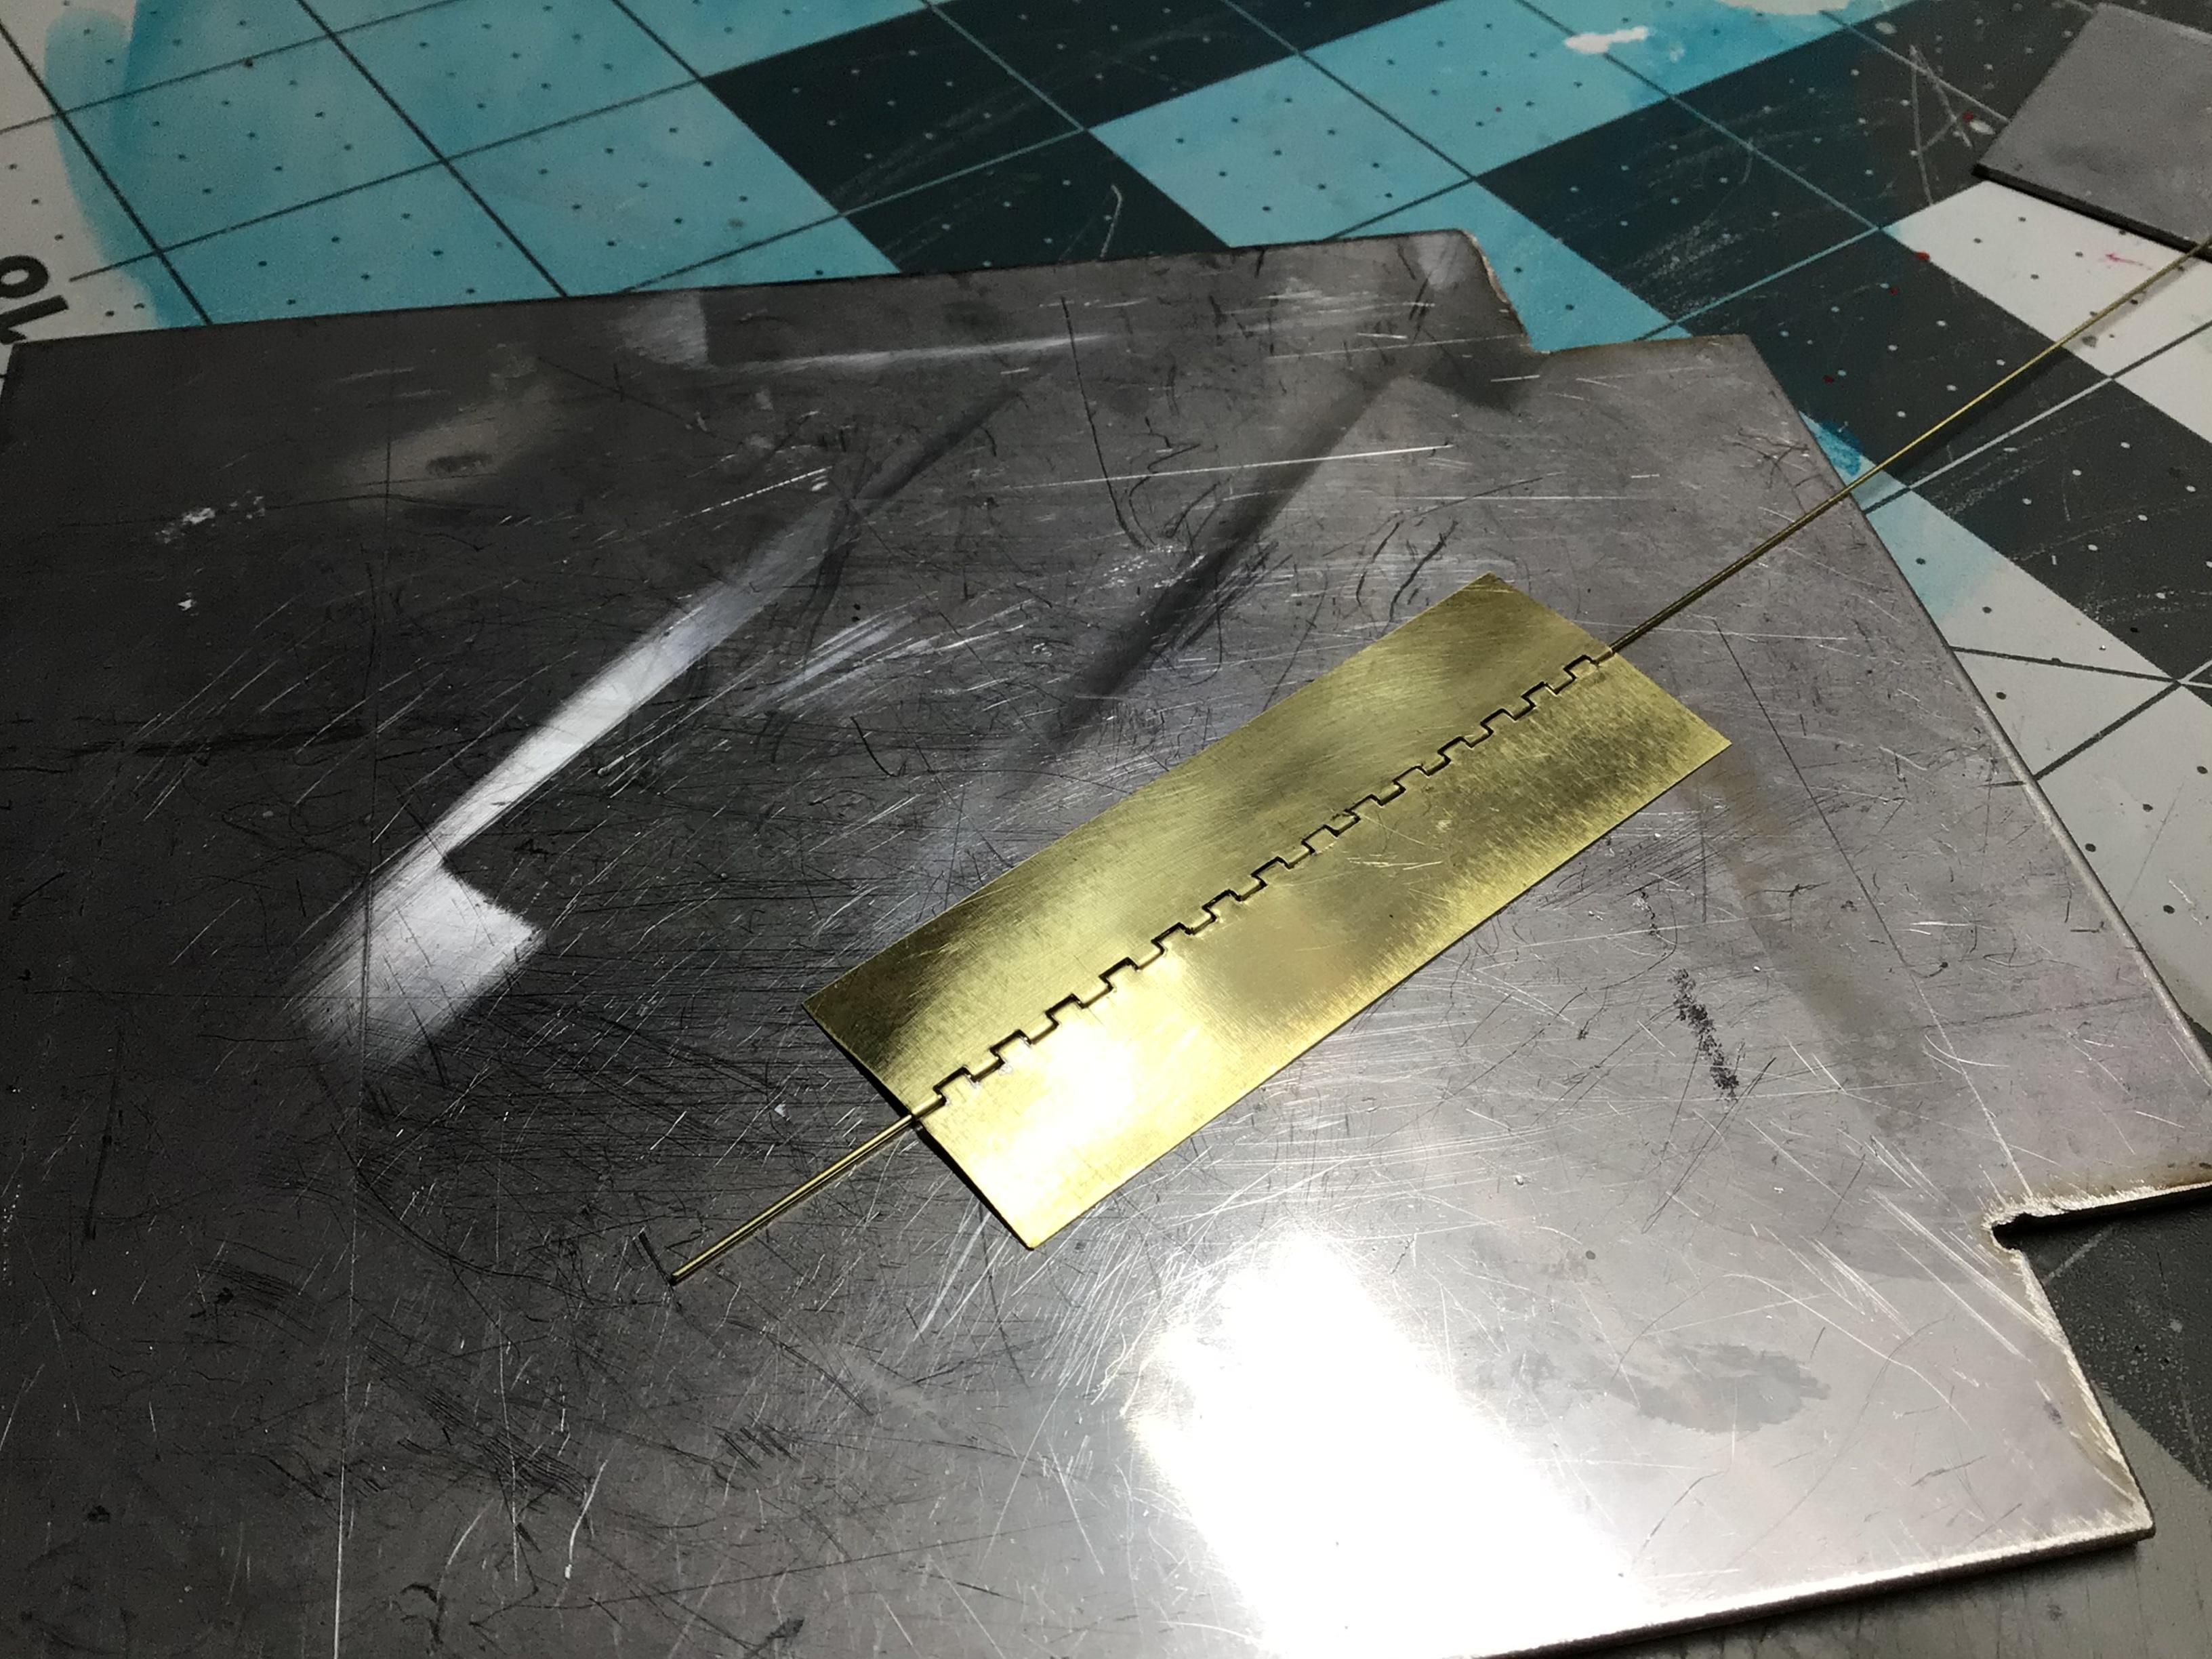
I went and picked up some .005” brass yesterday in order to give this a more serious attempt. First, I remade my “jig” using 3/32” spacing instead of 1/8”. Then I slotted the brass and broke off every second tab on each side. I had to clean up the slots a tad with a square file.? I used a piece of.023” welding wire during the fabrication, only this time I fluxed it up. Since I’m working with brass, I figured I would try soldering it. I tucked a 1/32” square of flattened solder under each tab and melted it in with my butane torch. I tried doing them individually with my electric soldering gun but it didn’t have the guts for it.? A little cleanup and it looks better. I also pulled out the .023” wire and replaced it with a .020” brass rod. It works great!? The loose pin allows one leaf to be reversed for different mounting possibilities.
-
Watched 2067 on Amazon. I wasn’t impressed?. It didn’t make much sense...even for a science fiction movie. Also watched Greenland. It was OK.
-
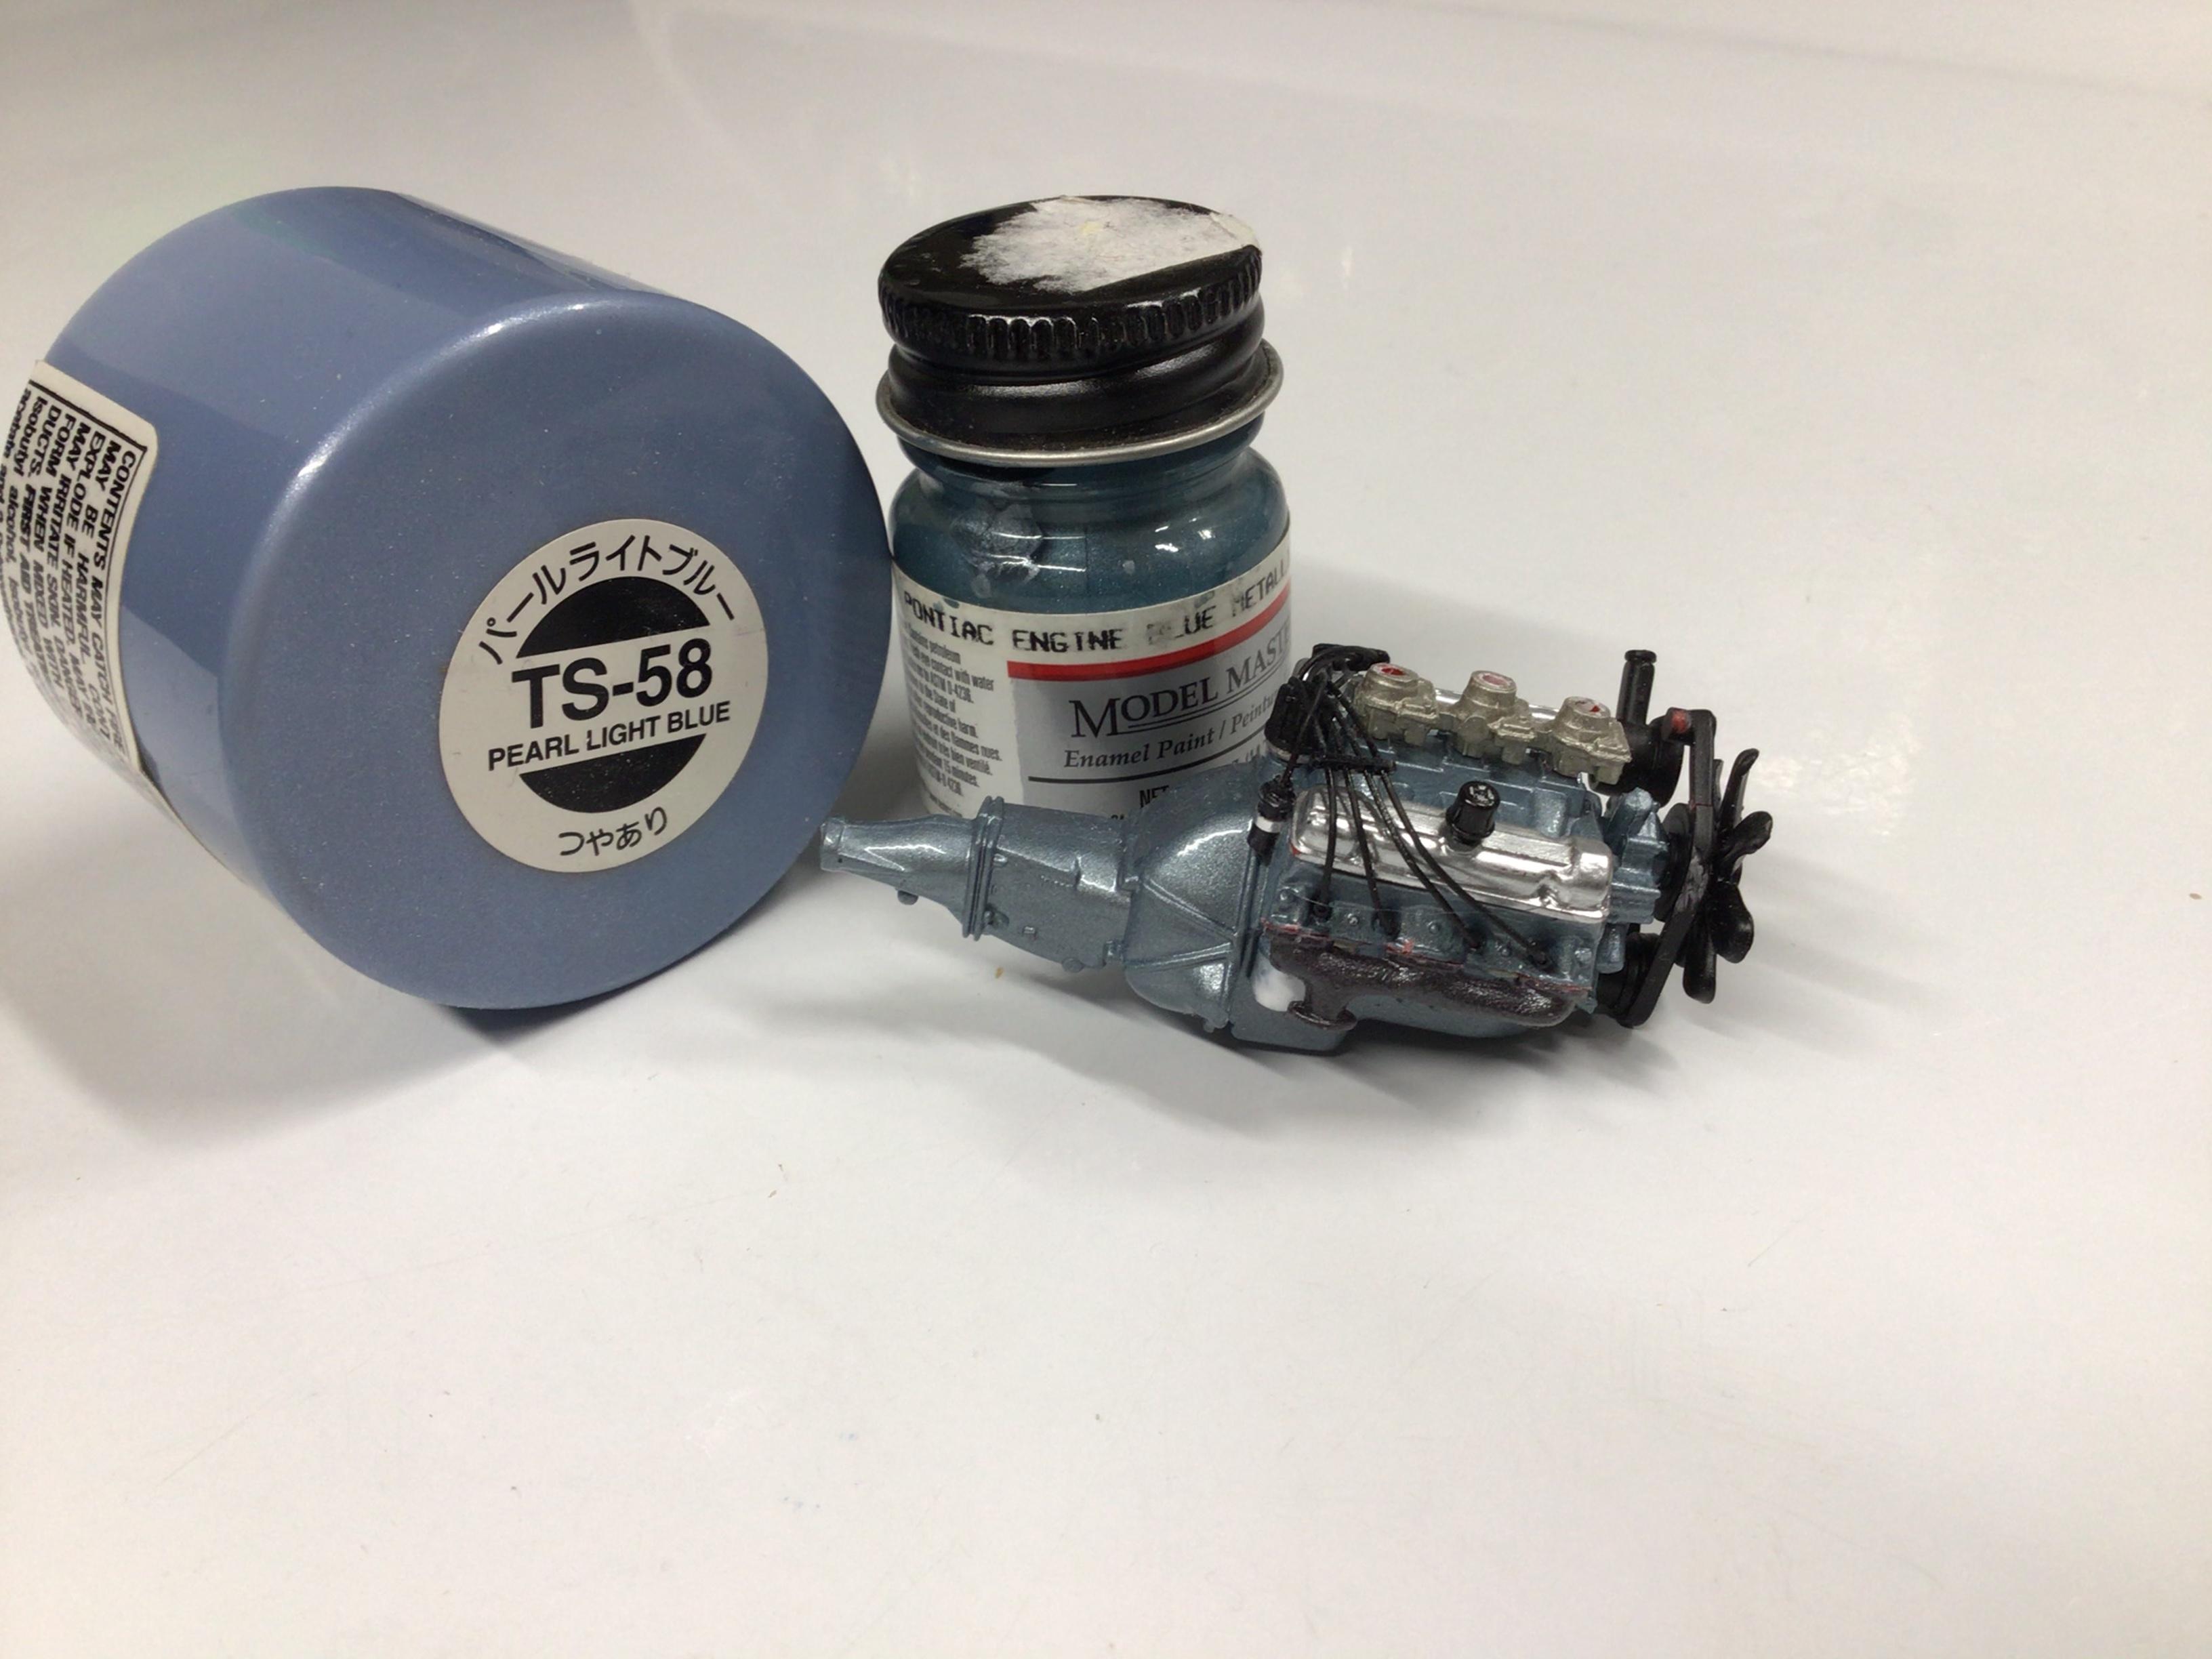
Model Master did make a Pontiac engine blue #2728. Your Jeepster looks like it might be TS-58 pearl light blue? It is pretty close.