NOBLNG
-
Posts
10,236 -
Joined
-
Last visited
Content Type
Profiles
Forums
Events
Gallery
Everything posted by NOBLNG
-
 Exactly! I don’t know why it took Adam Savage 11 minutes to explain that? Those who disagree with the facts are not dumb, just uneducated....or unwilling to be educated.?
 -
That is a great thing you did! Nice to teach him early how to use his mind and his hands for something other than video games.
-
Our Winnipeg Jets came back from being 3 goals down to beat the Edmonton Oilers 5-4 in overtime!????
-
Revell 1968 Chevelle SS396 Day 2 Street/Strip.
NOBLNG replied to Dragonhawk1066's topic in WIP: Model Cars
I really like the colour too, it’s looking great!? -
??♂️
-
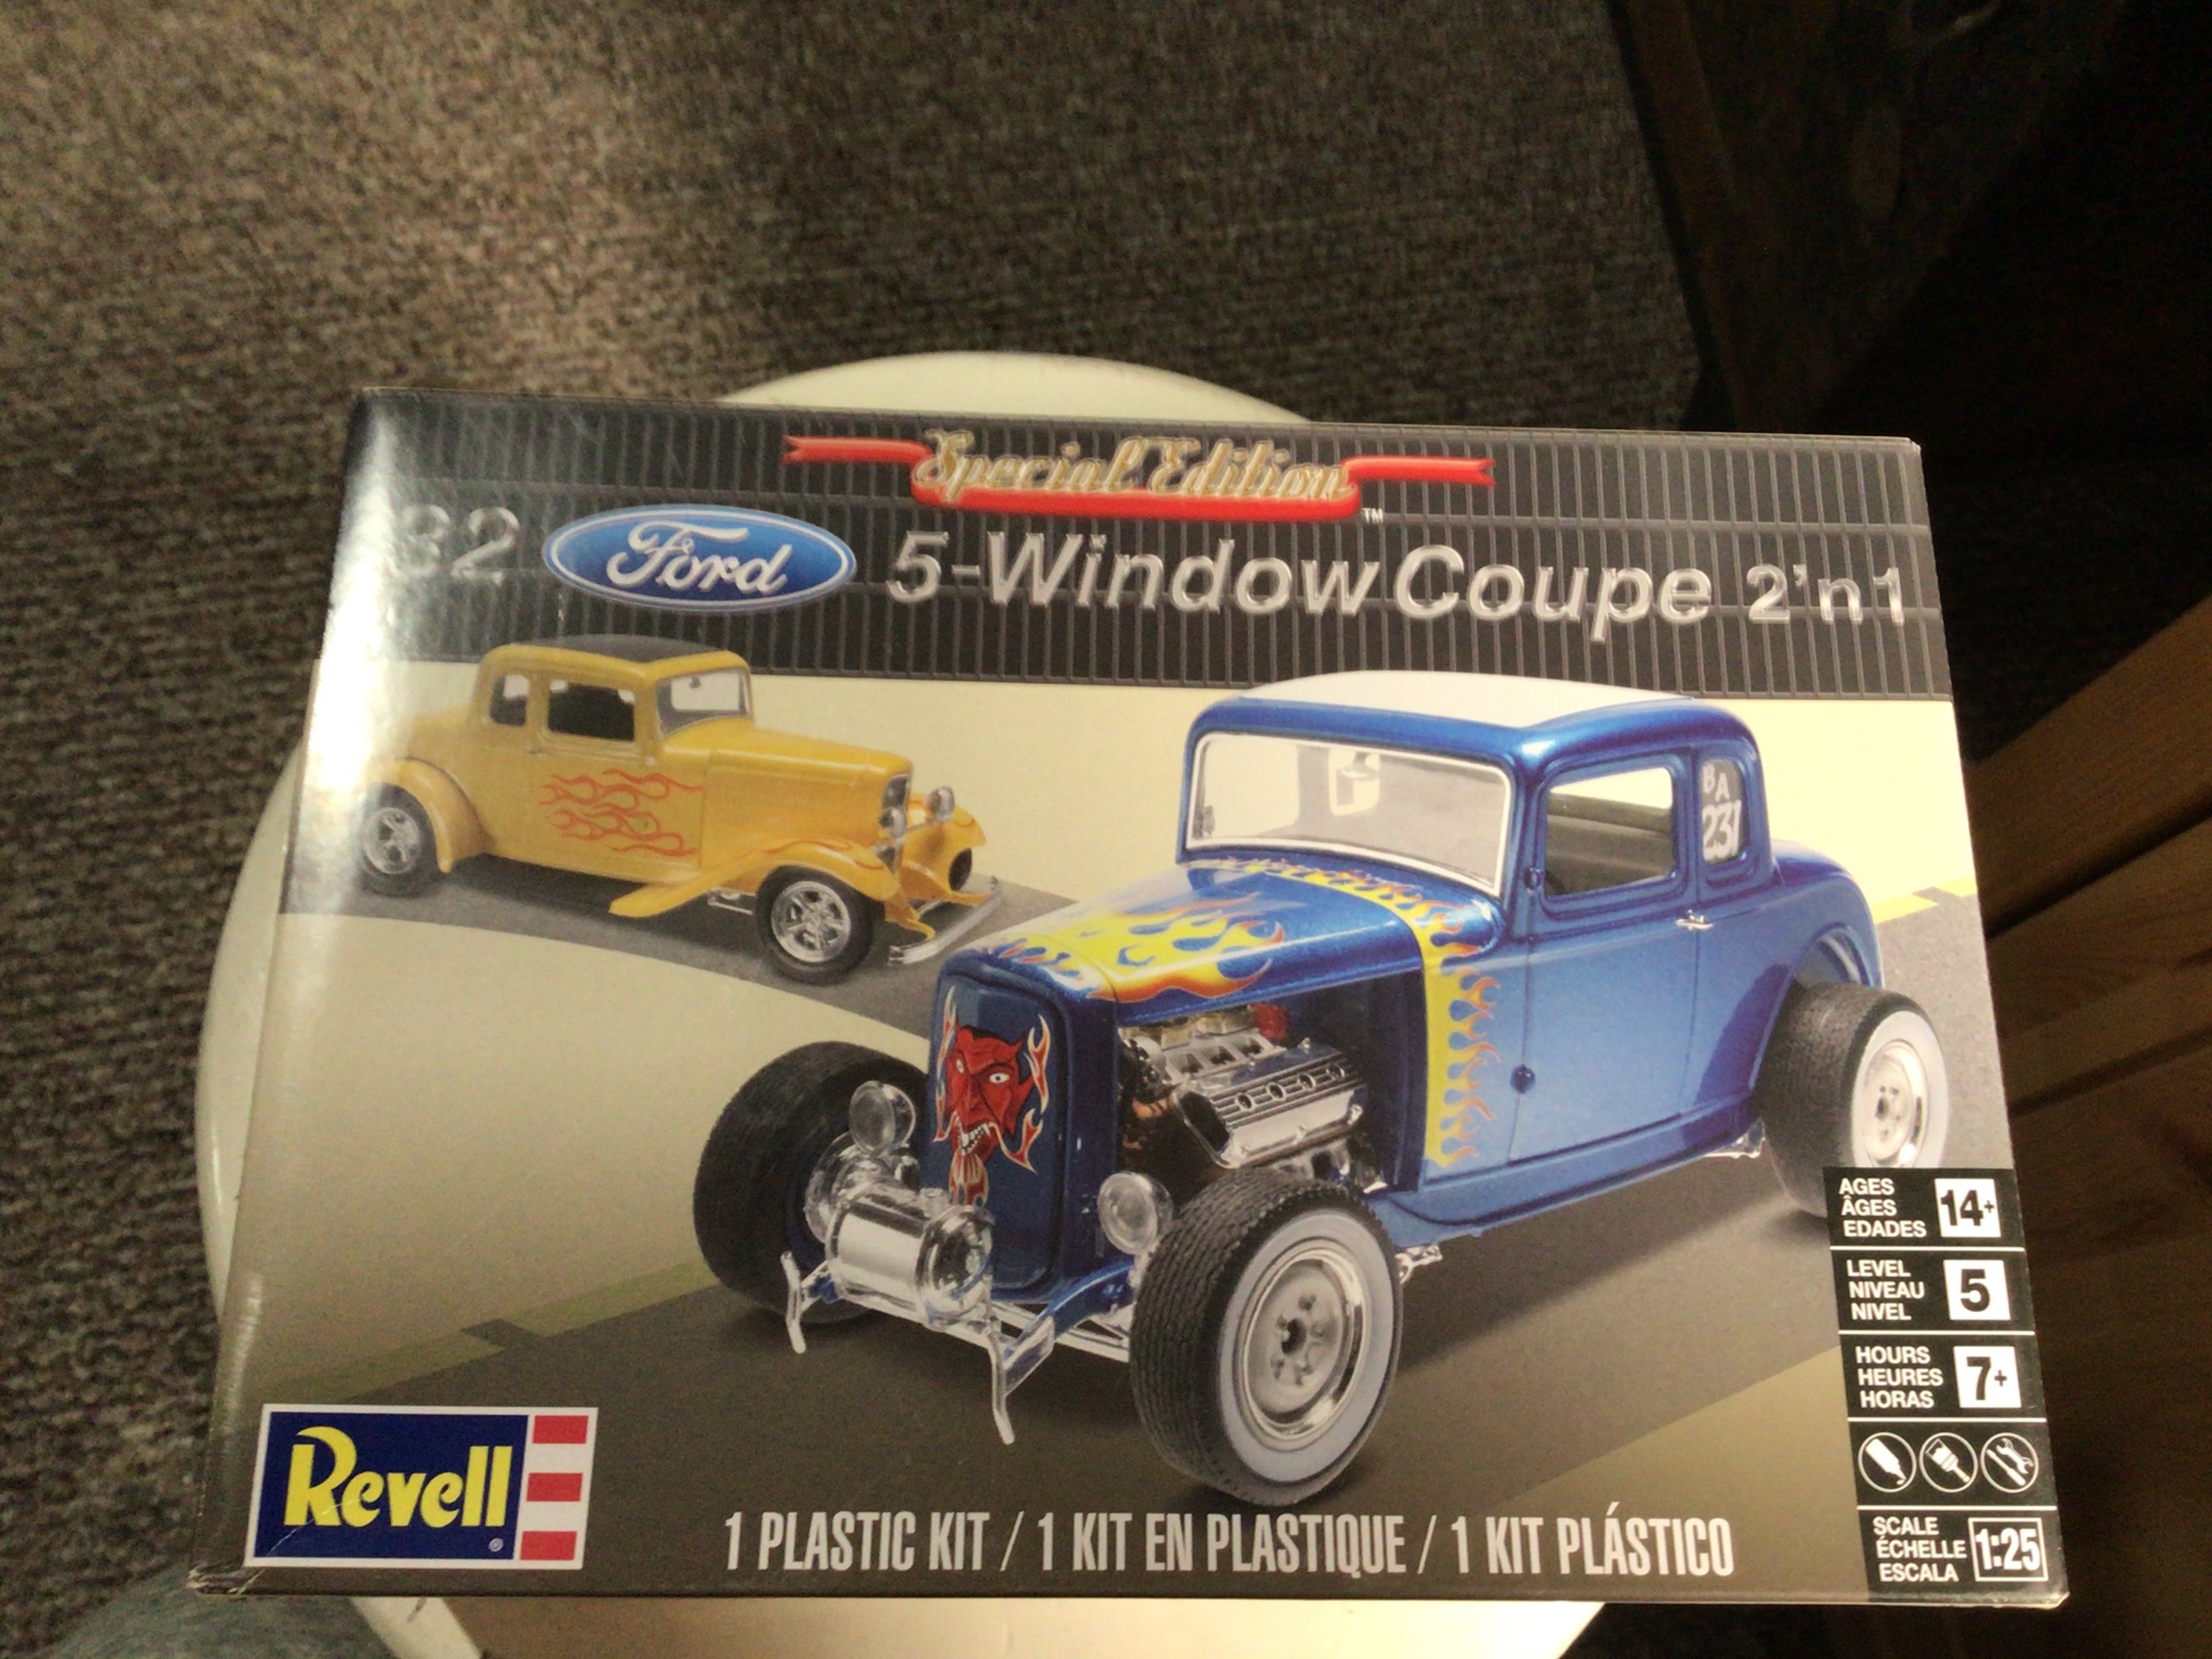
Revell ‘32 Coupe fitment issue?
NOBLNG replied to NOBLNG's topic in Model Building Questions and Answers
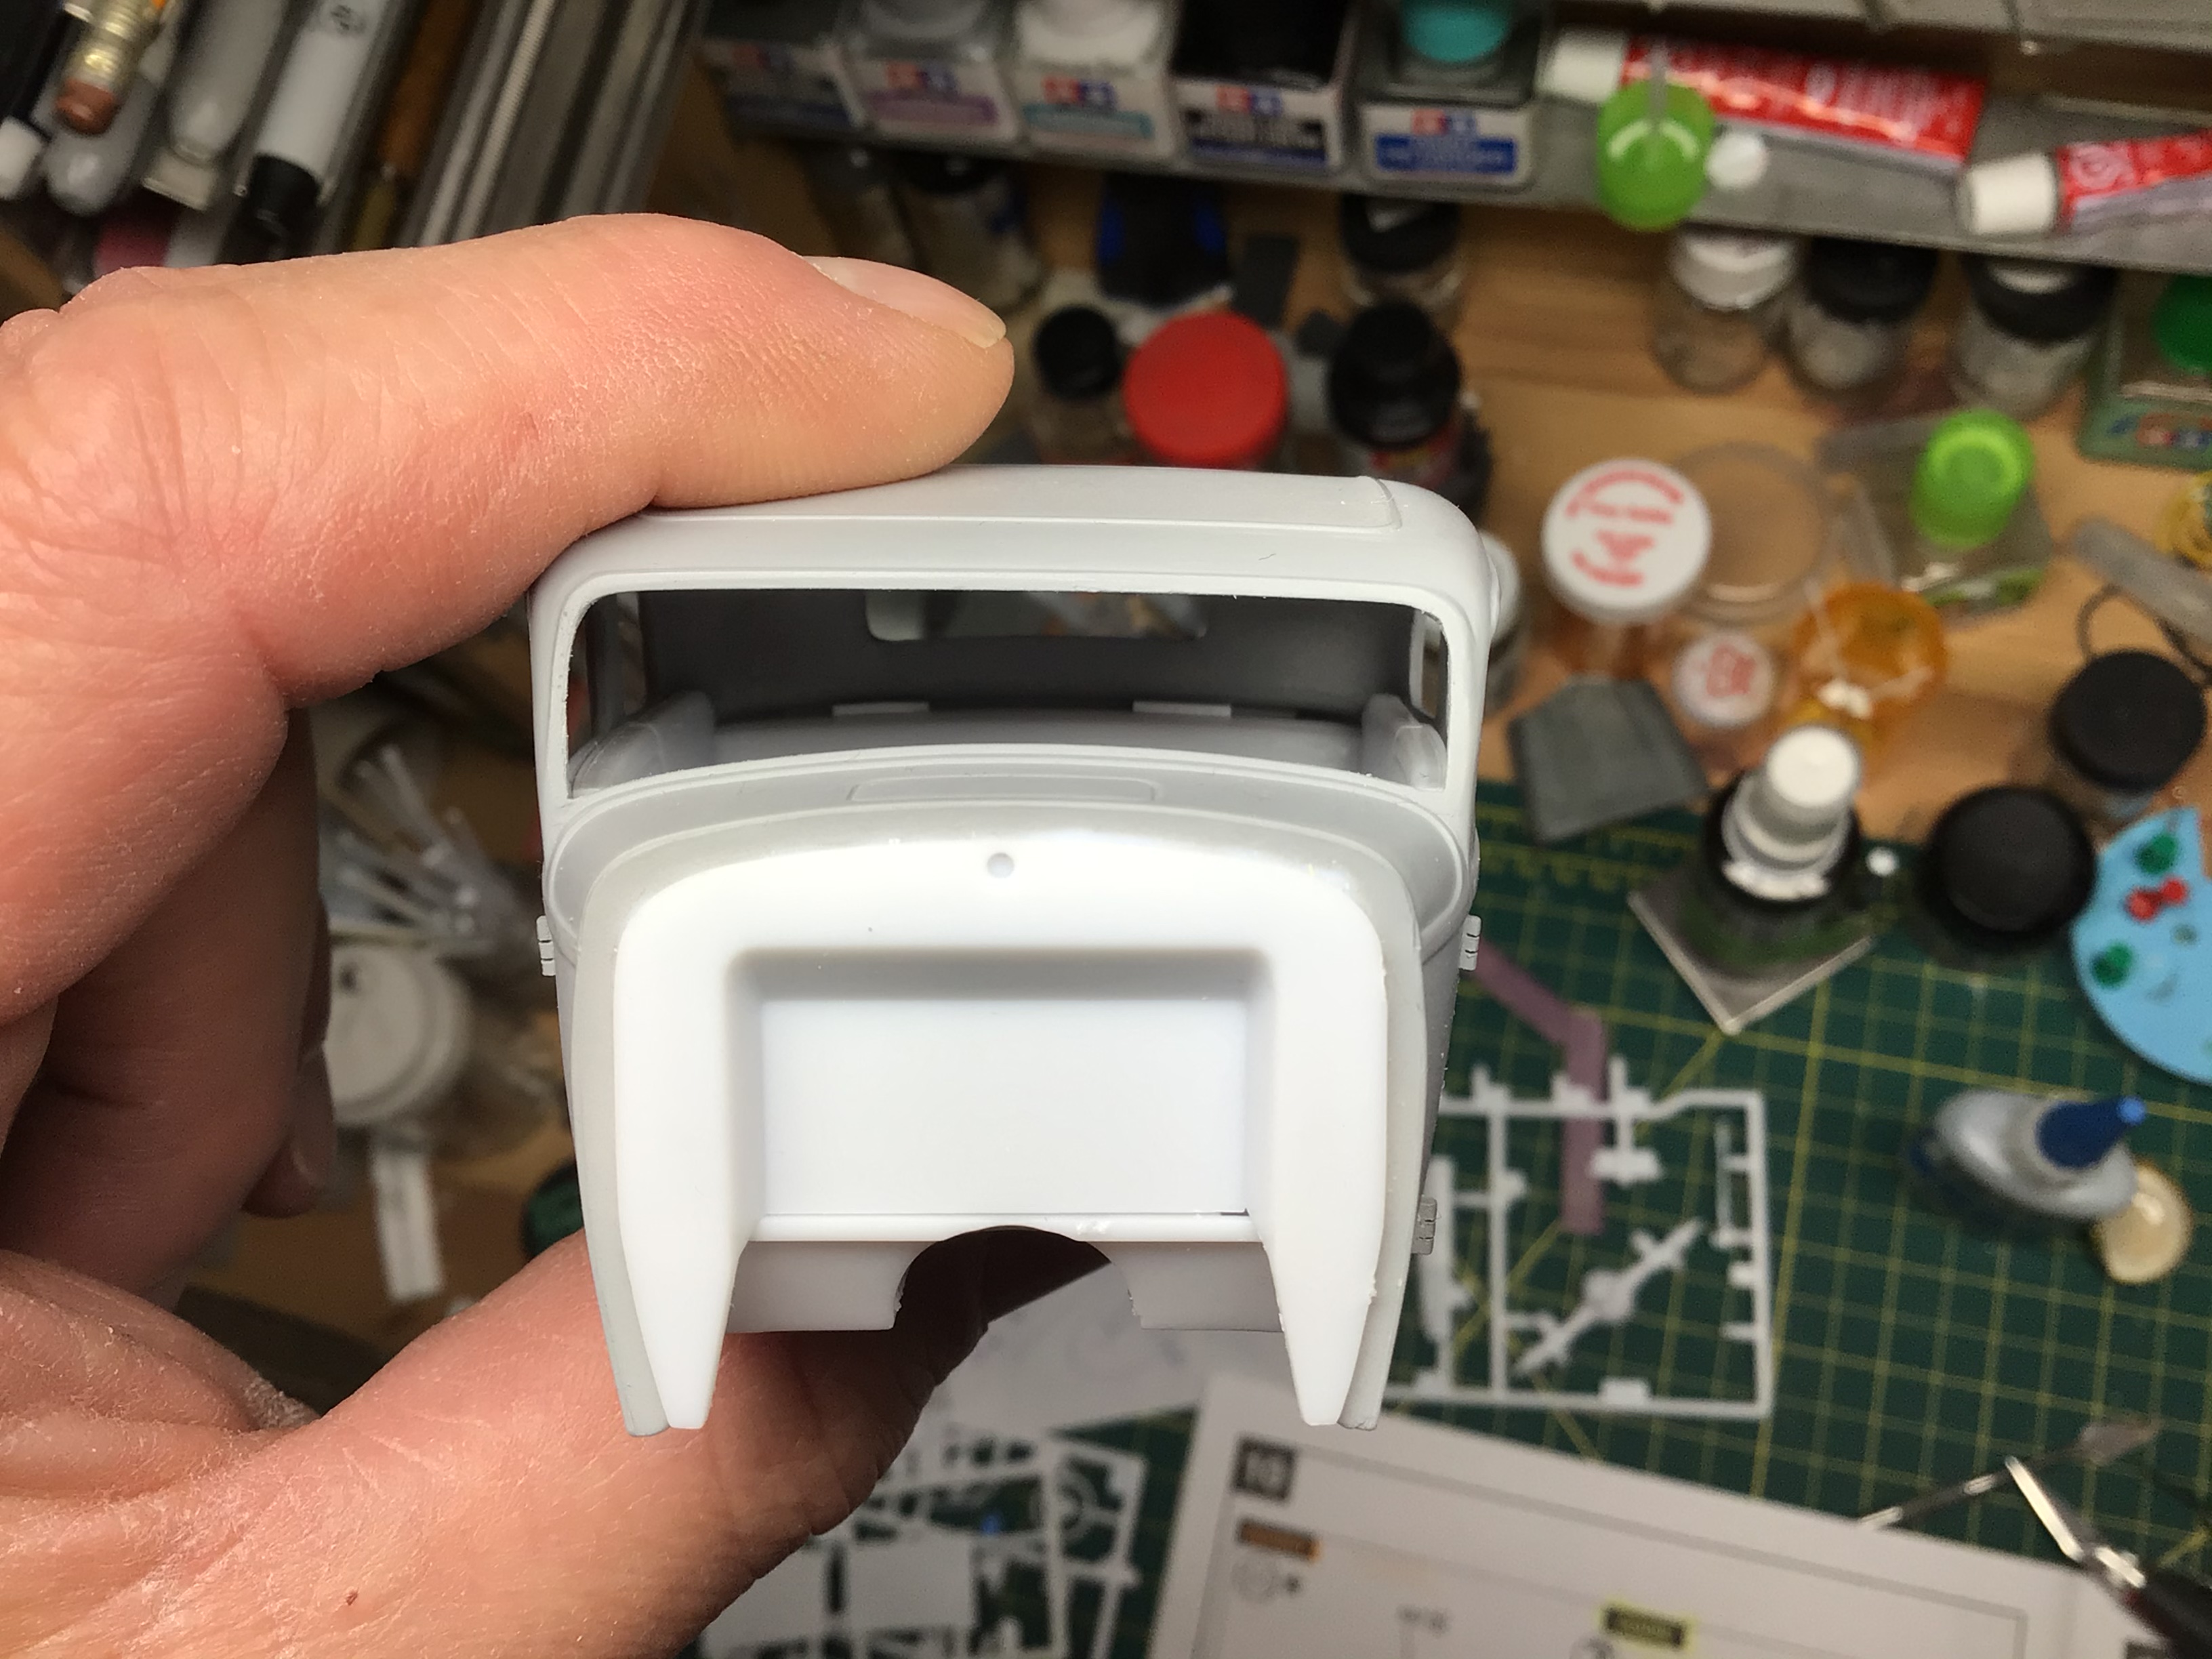
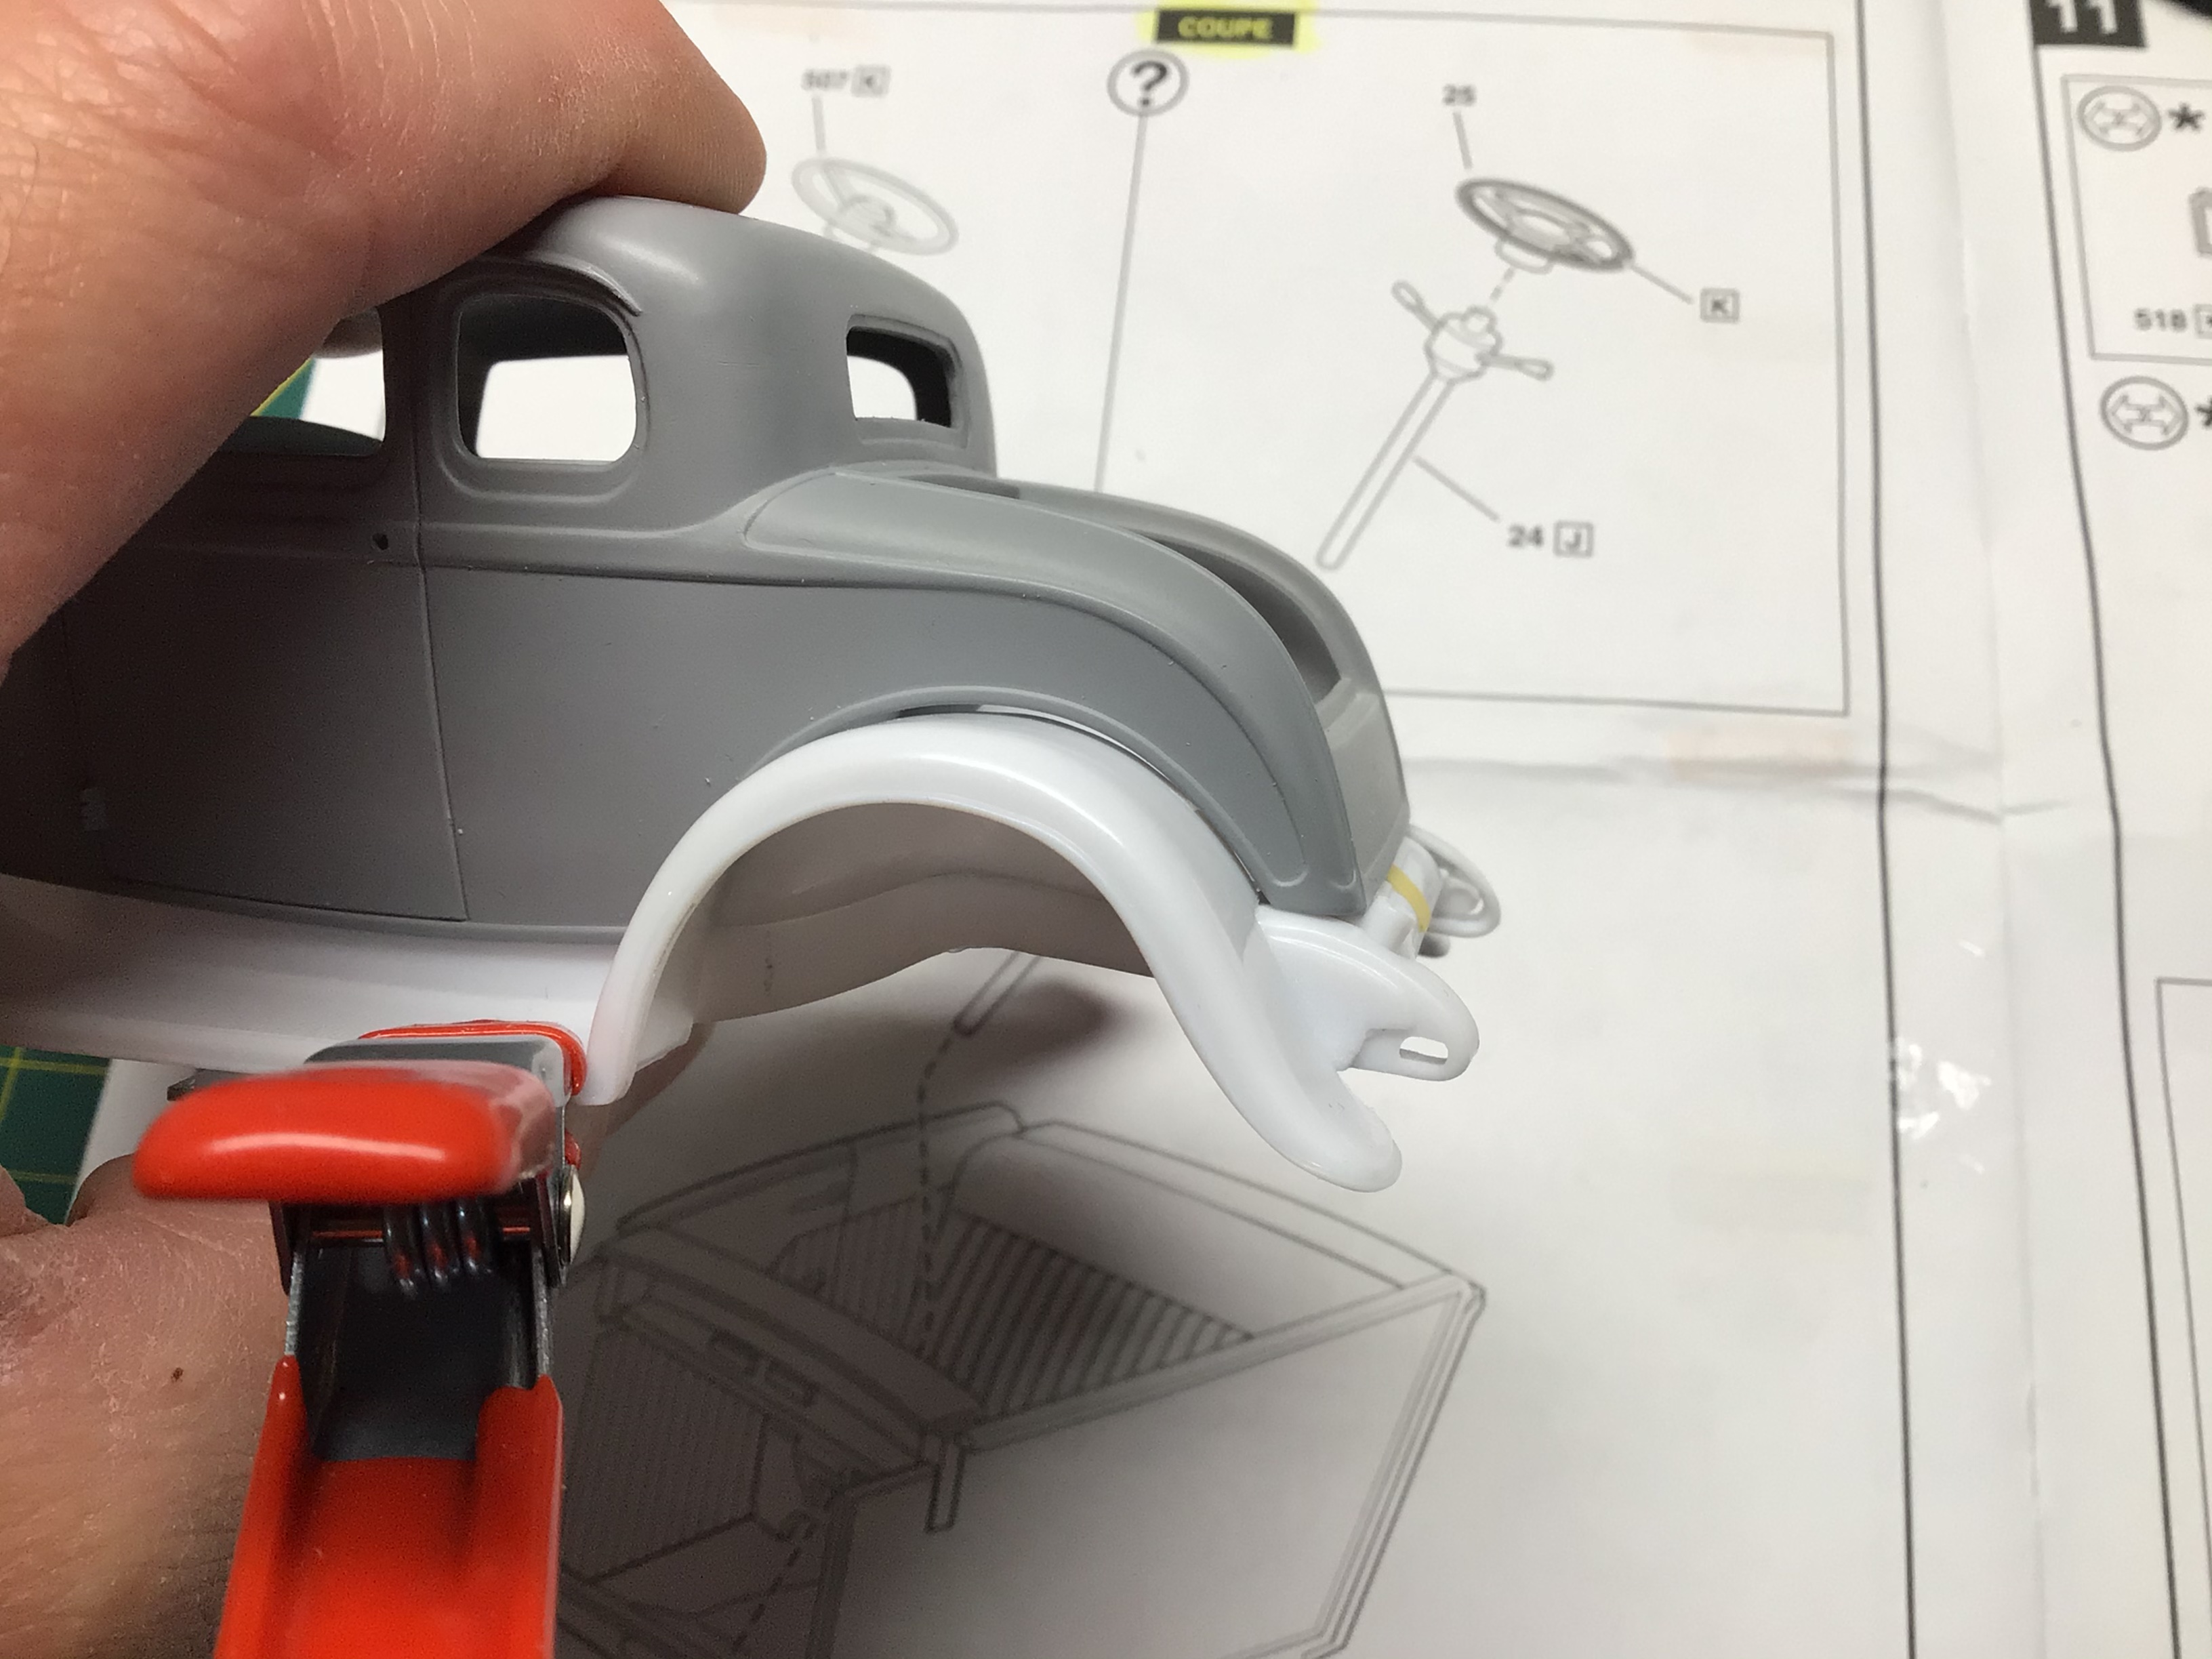
You’re right, that closes up the gap above the fenders.? The interior tub still sits a little high, but that’s an easy fix.
-
Revell ‘32 Coupe fitment issue?
NOBLNG replied to NOBLNG's topic in Model Building Questions and Answers
Thanks Jon. I think I may give it a try. -
Type this into google. site:modelcarsmag.com roll cages
-
Got a pic of that??
-
Are you clumsy like me sometimes??
NOBLNG replied to Deuces ll's topic in Tips, Tricks, and Tutorials
Nice idea! And if you use one of those battery powered mixers, slip an empty TP tube over the jar so it doesn’t spray all over when you pull the mixer out.? -
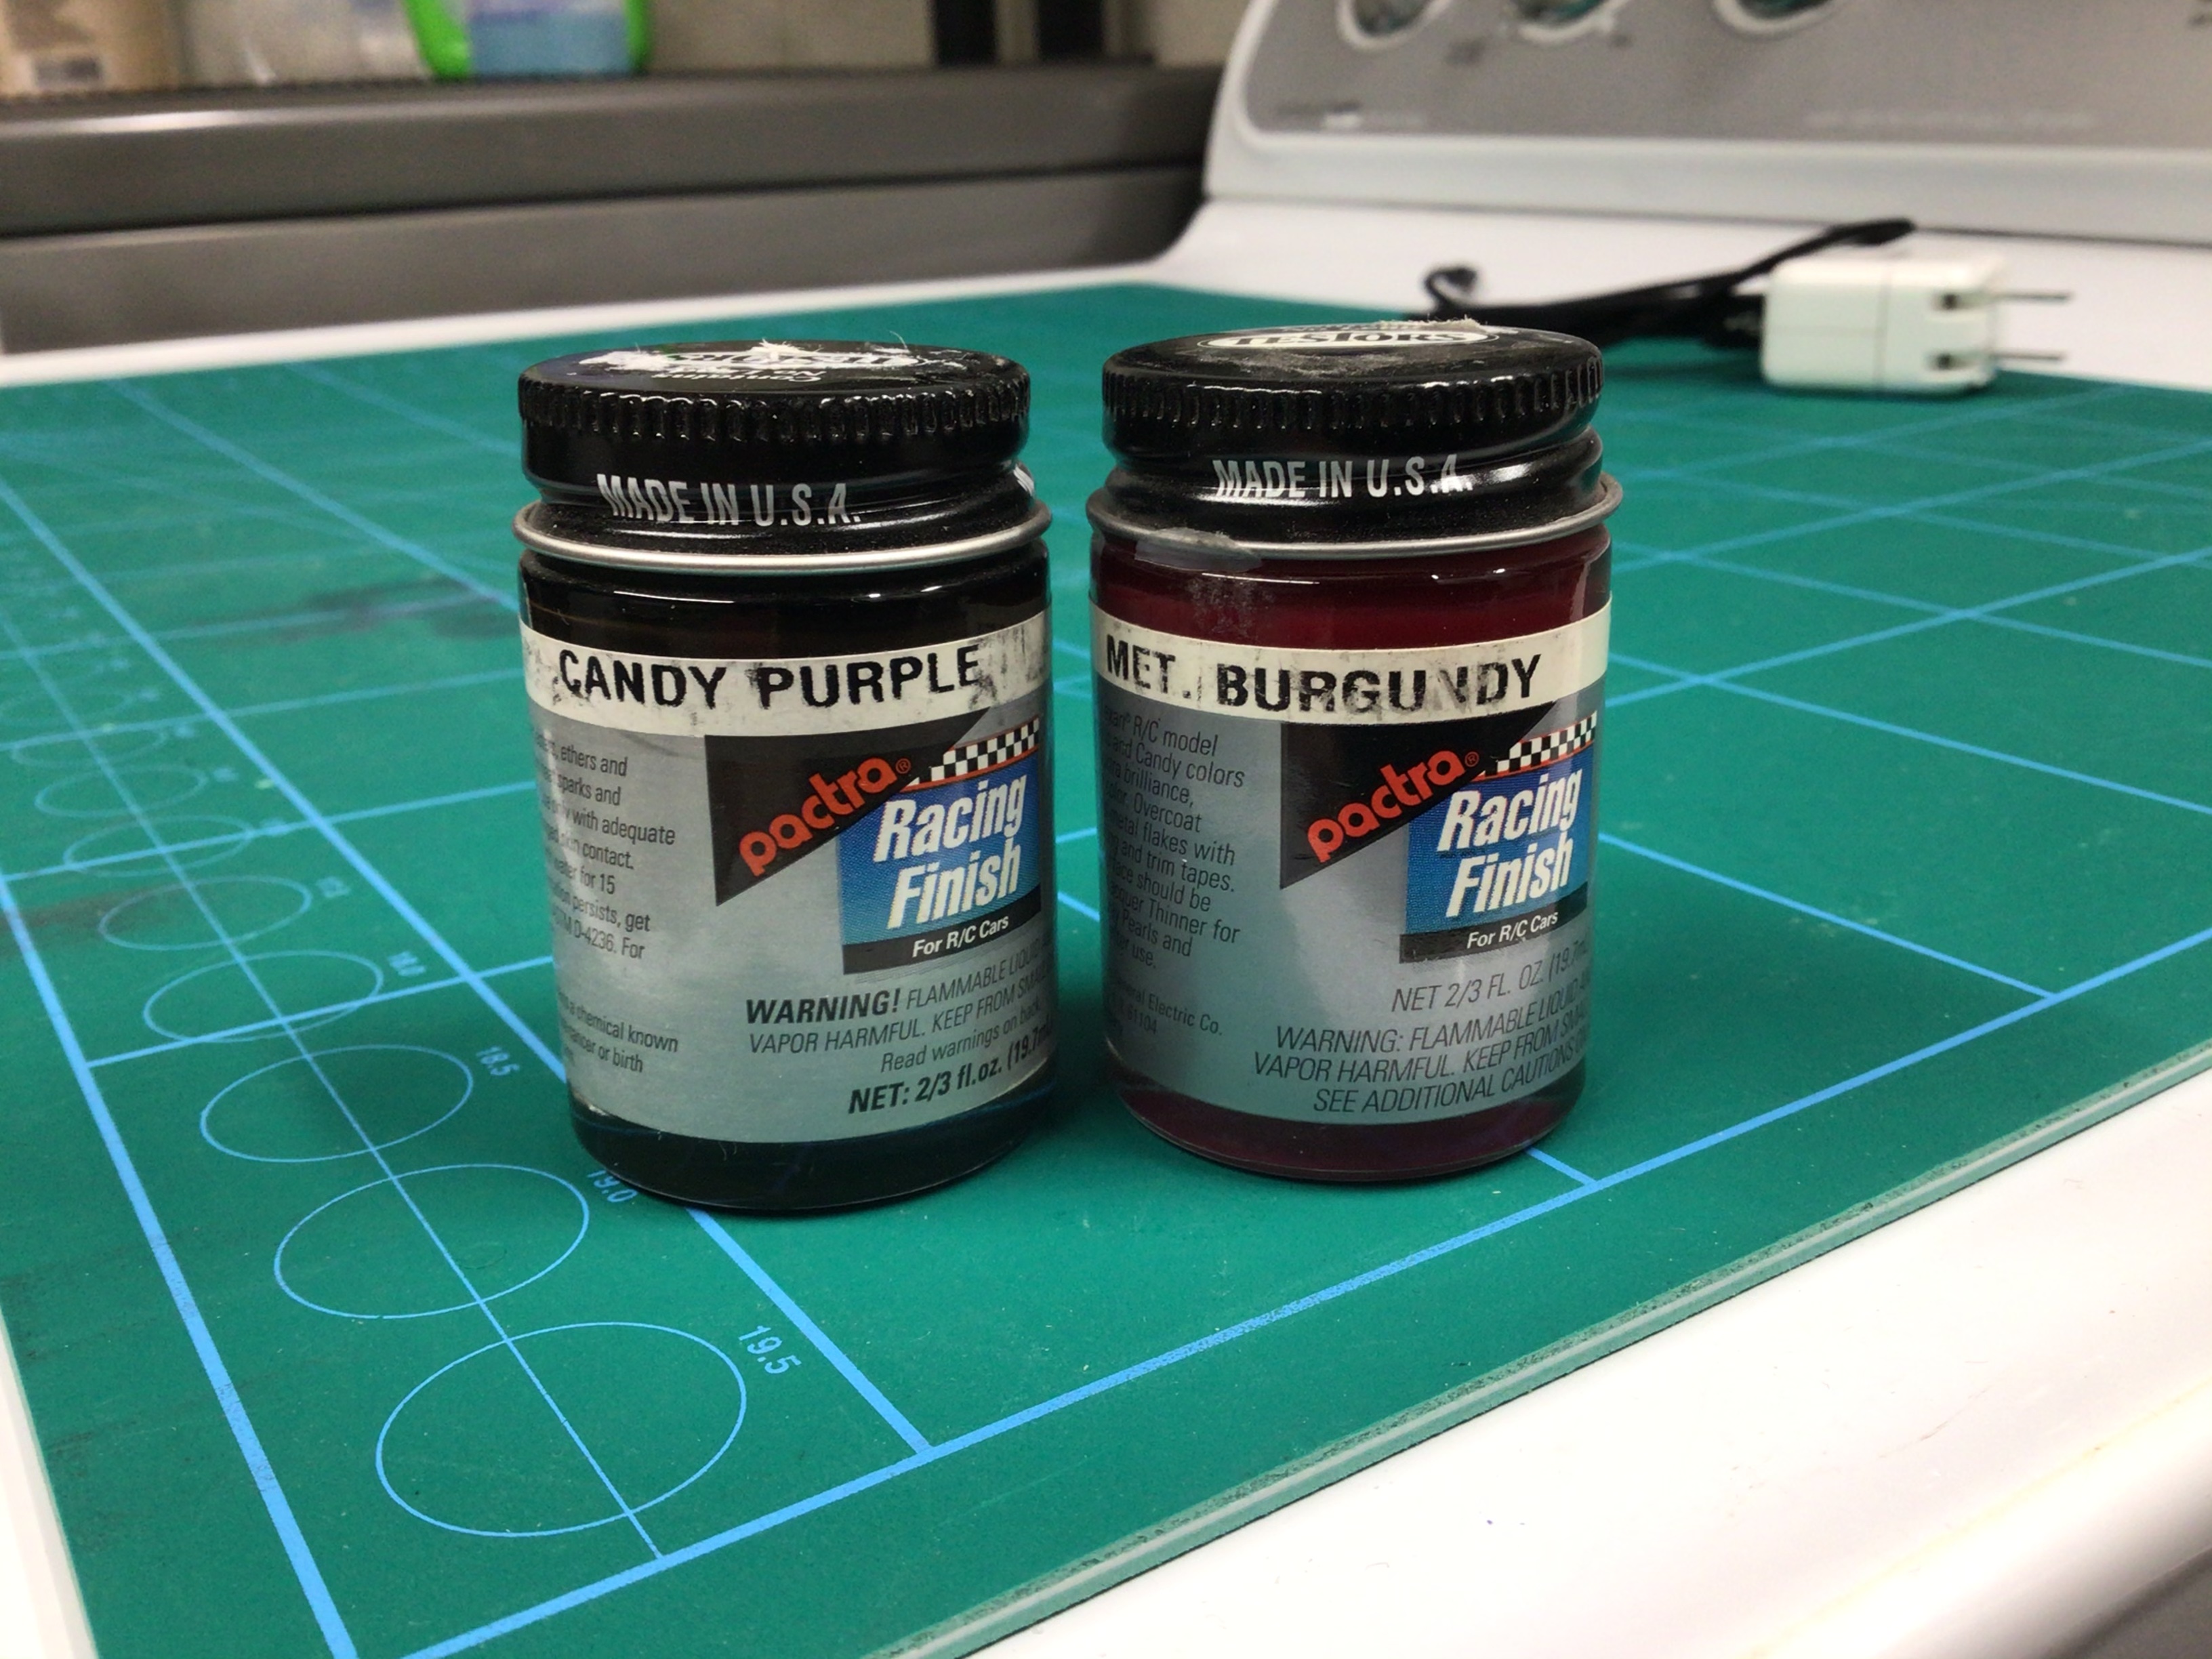
Lexan candy and metallic paint question
NOBLNG replied to NOBLNG's topic in Model Building Questions and Answers
Thanks Steve. That is pretty much the finish I was hoping for...it’s gorgeous! -
Revell ‘32 Coupe fitment issue?
NOBLNG replied to NOBLNG's topic in Model Building Questions and Answers
Has anyone made an operating rumble seat in this? It would be fairly easy since Revell already opened it up. I searched “rumble seat” on here and couldn’t find any ‘32 fords. -
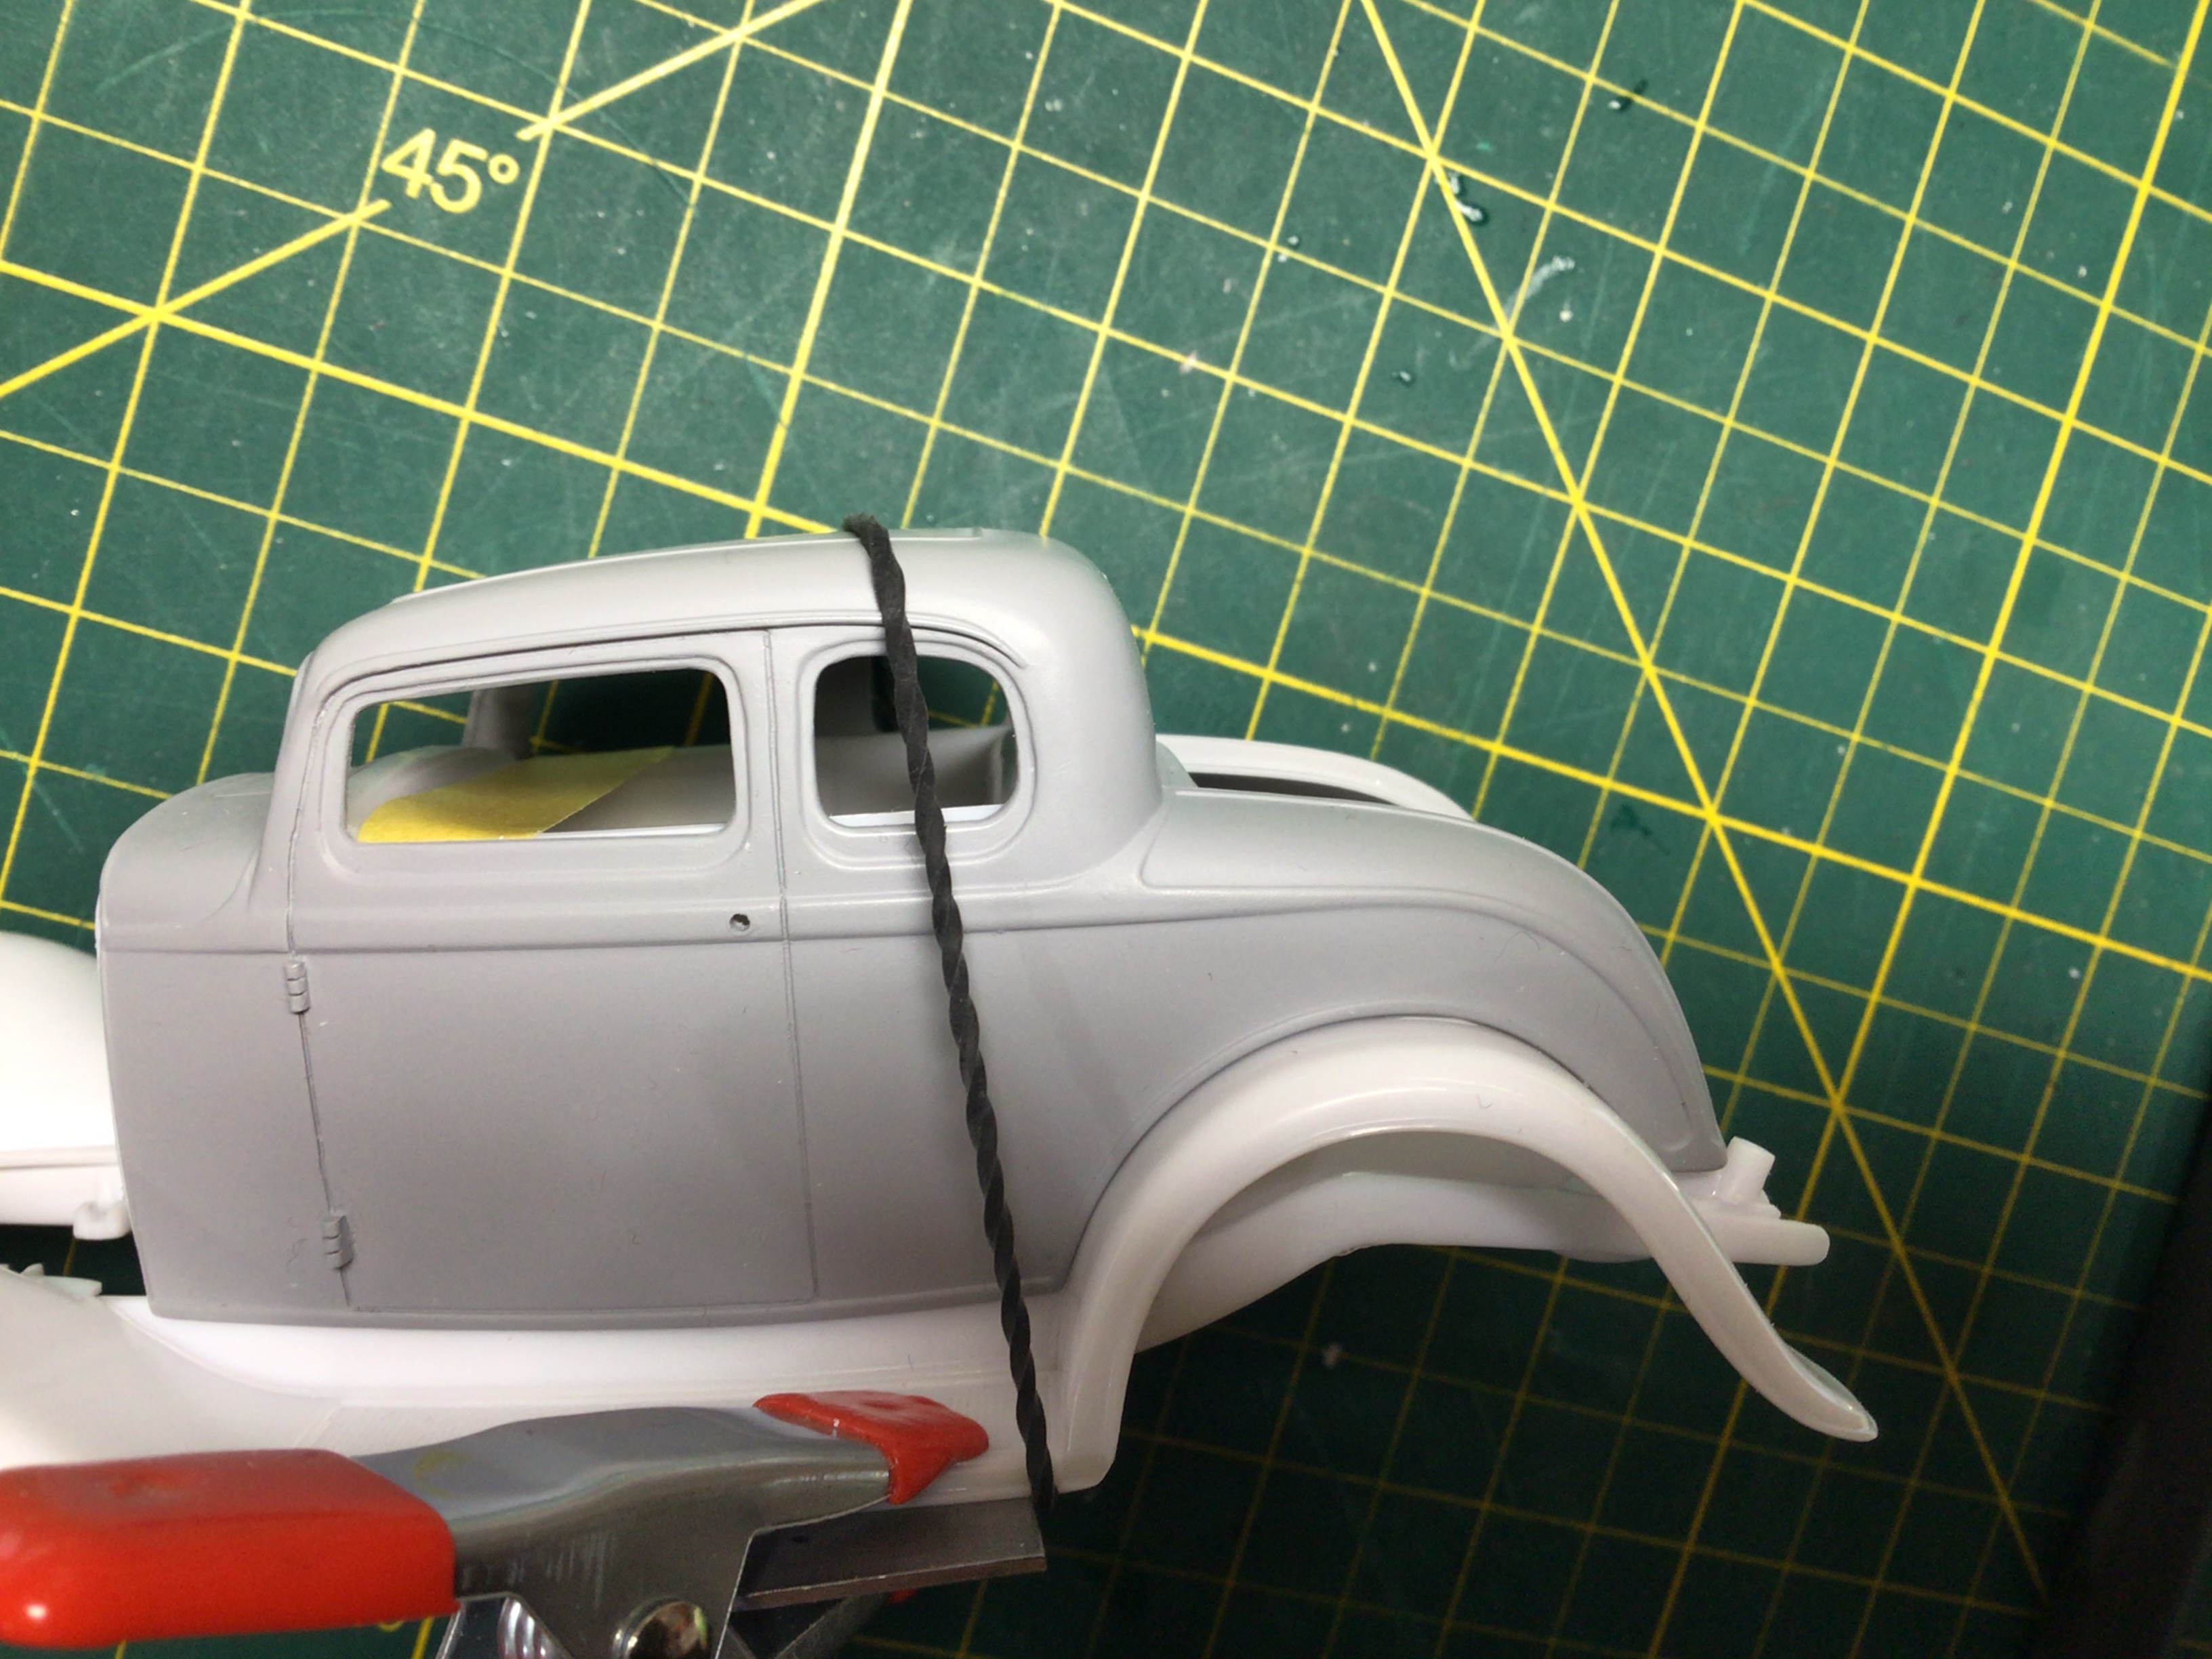
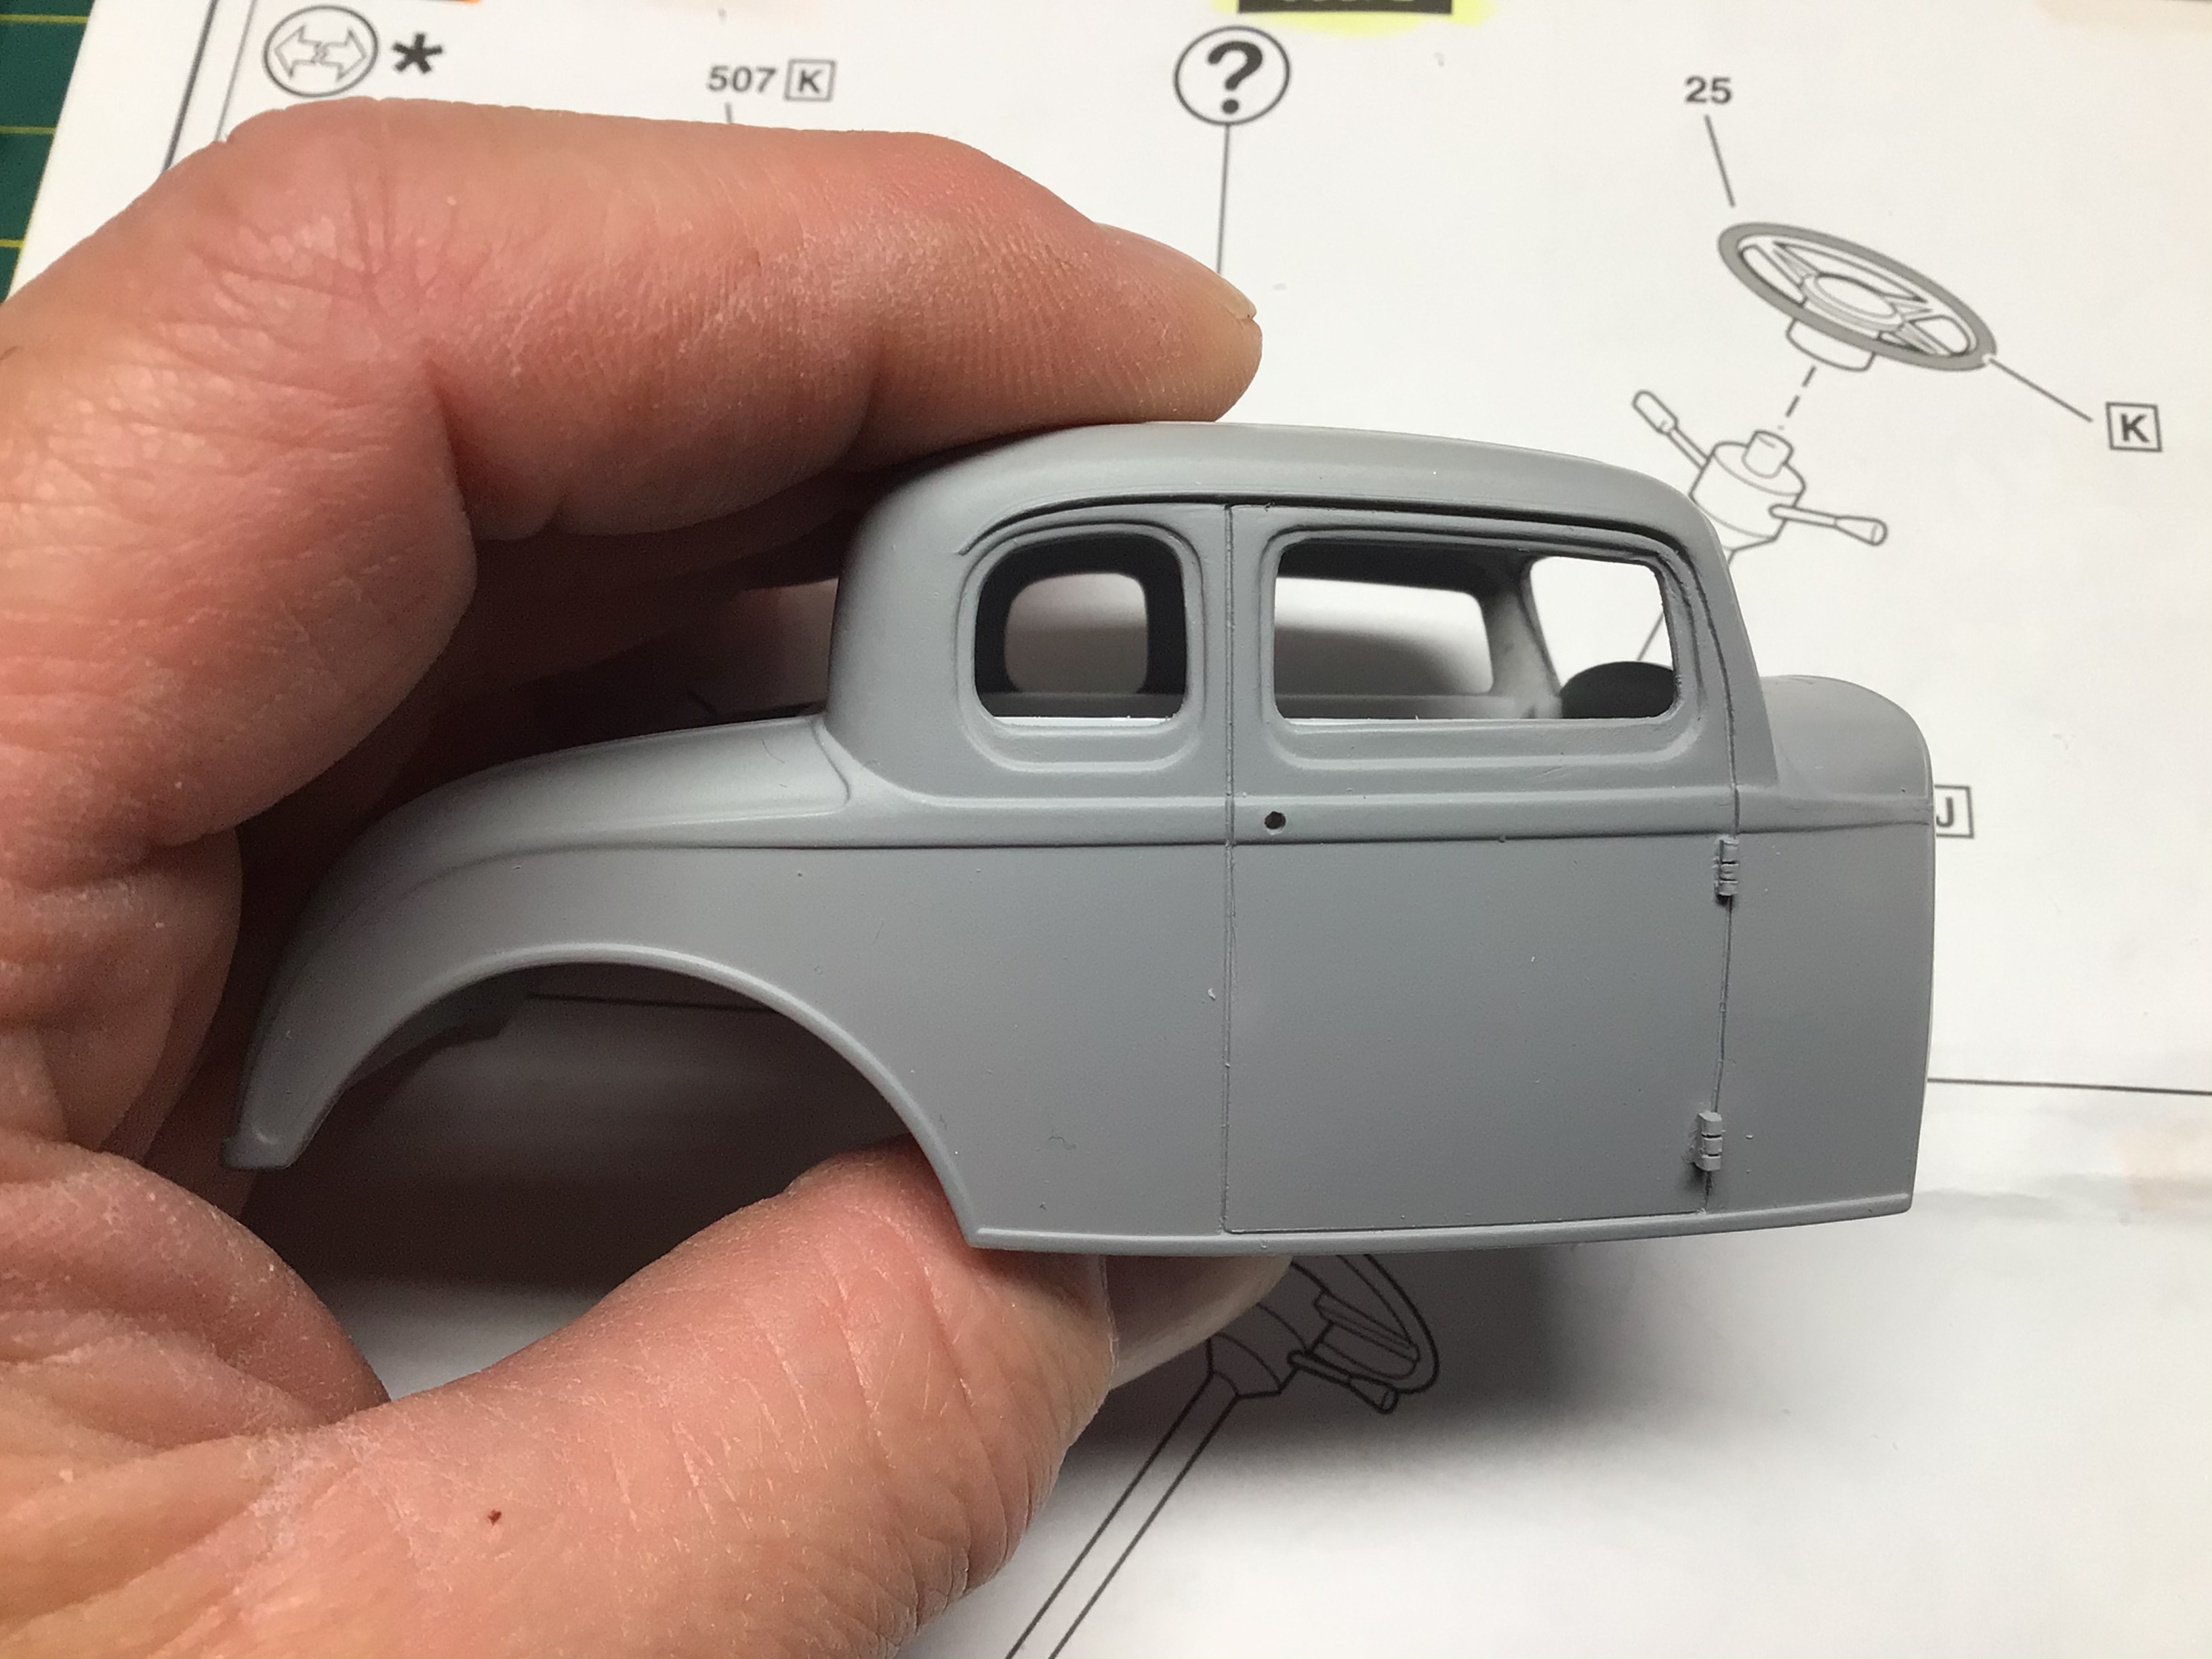
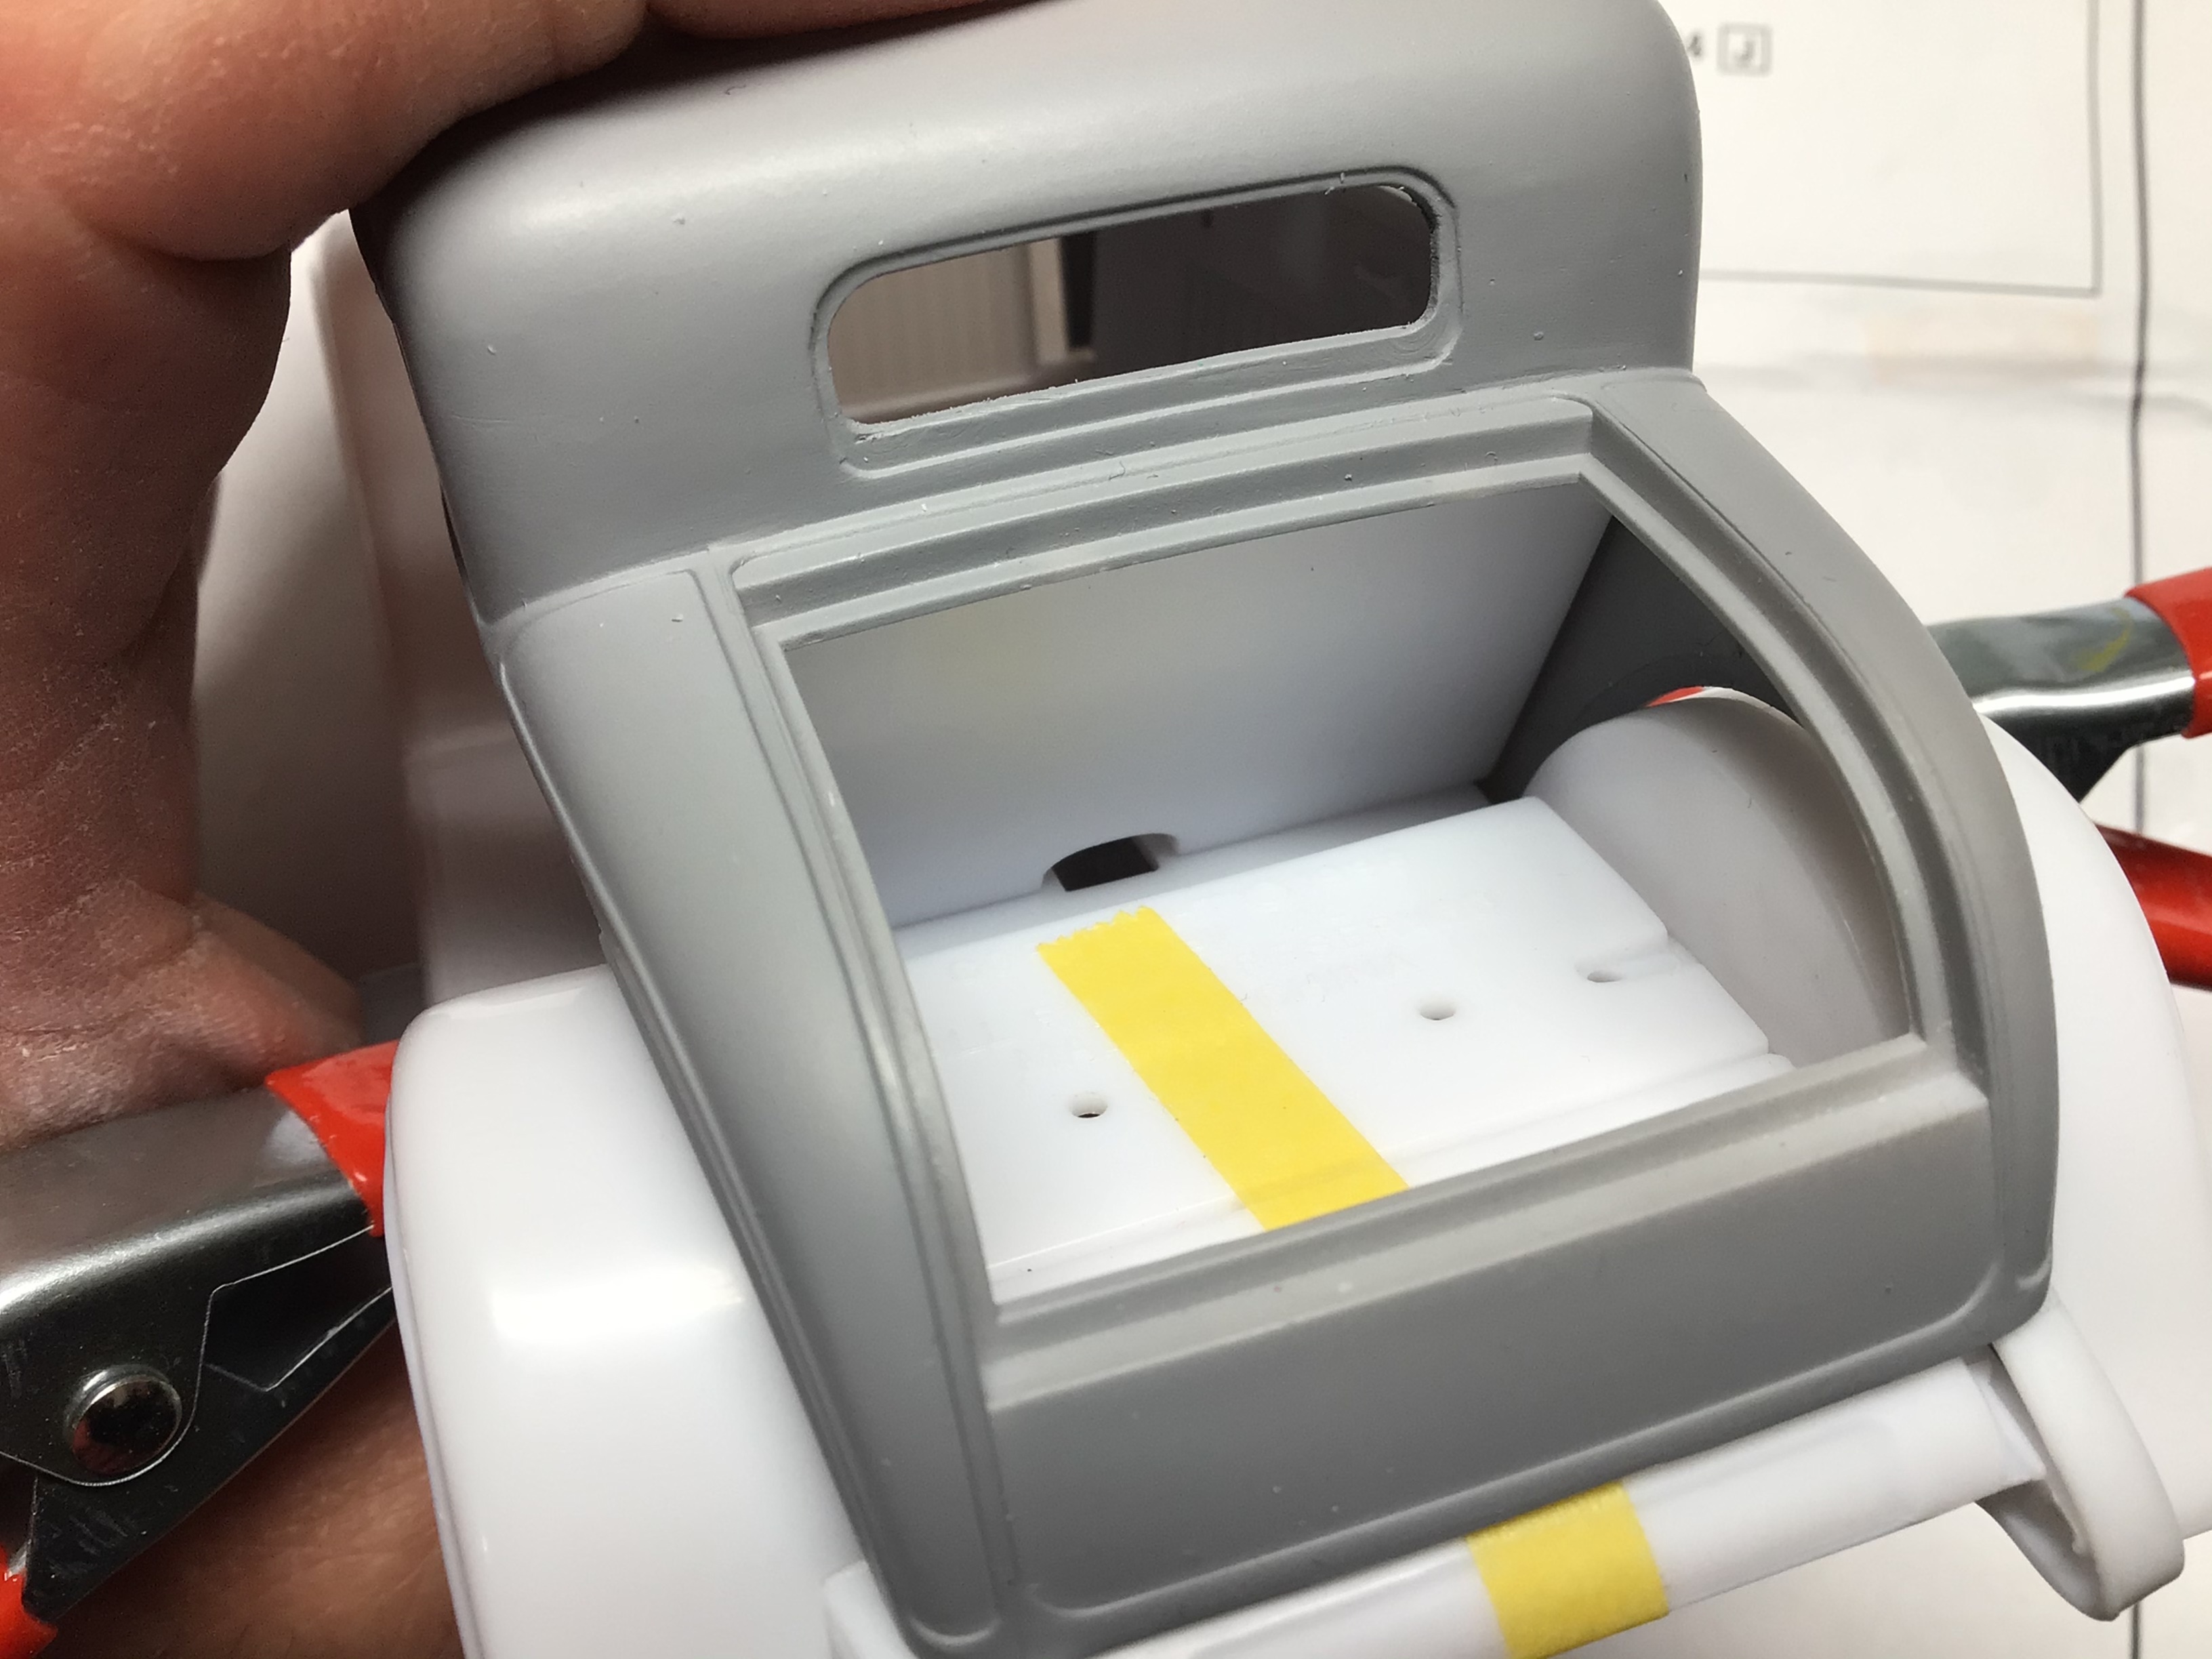
The interior tub on this seems to sit too high. The tub is sitting tight to the floor pan. If I space the tub down so the interior is at the right height, then there is a gap between the body and rear fenders. Am I doing something wrong? I did glue the rear frame horn covers in place, but that should not be the cause. I will fix it somehow but I’m sure someone has already dealt with it?
-
I picked these up recently at a closeout sale. They are made for lexan so I know I will have to clear coat them to get a glossy finish. What would be the best basecoat for them, especially the candy? White, silver, gold? I have two bottles of each which should be sufficient, but I want to keep my tests to a minimum. Thanks in advance.
-
Umm, I may have some bad news for you....?
-
Well it’s nice that some of 348’s friends were able to attend.?
-
Paint not drying on resin parts
NOBLNG replied to NOBLNG's topic in Model Building Questions and Answers
The dash was kind of spongy at that spot so I tossed it. Likely not mixed well enough, or because it was from an old batch of resin.?♂️ -
Yes, I cuss at my models when they decide that they just don’t want to cooperate! I feel no obligation to act mature. FYI...K&S sells a pack of assorted brass rod. Great for making pins etc. and they are a lot easier to cut and file than nails.
-
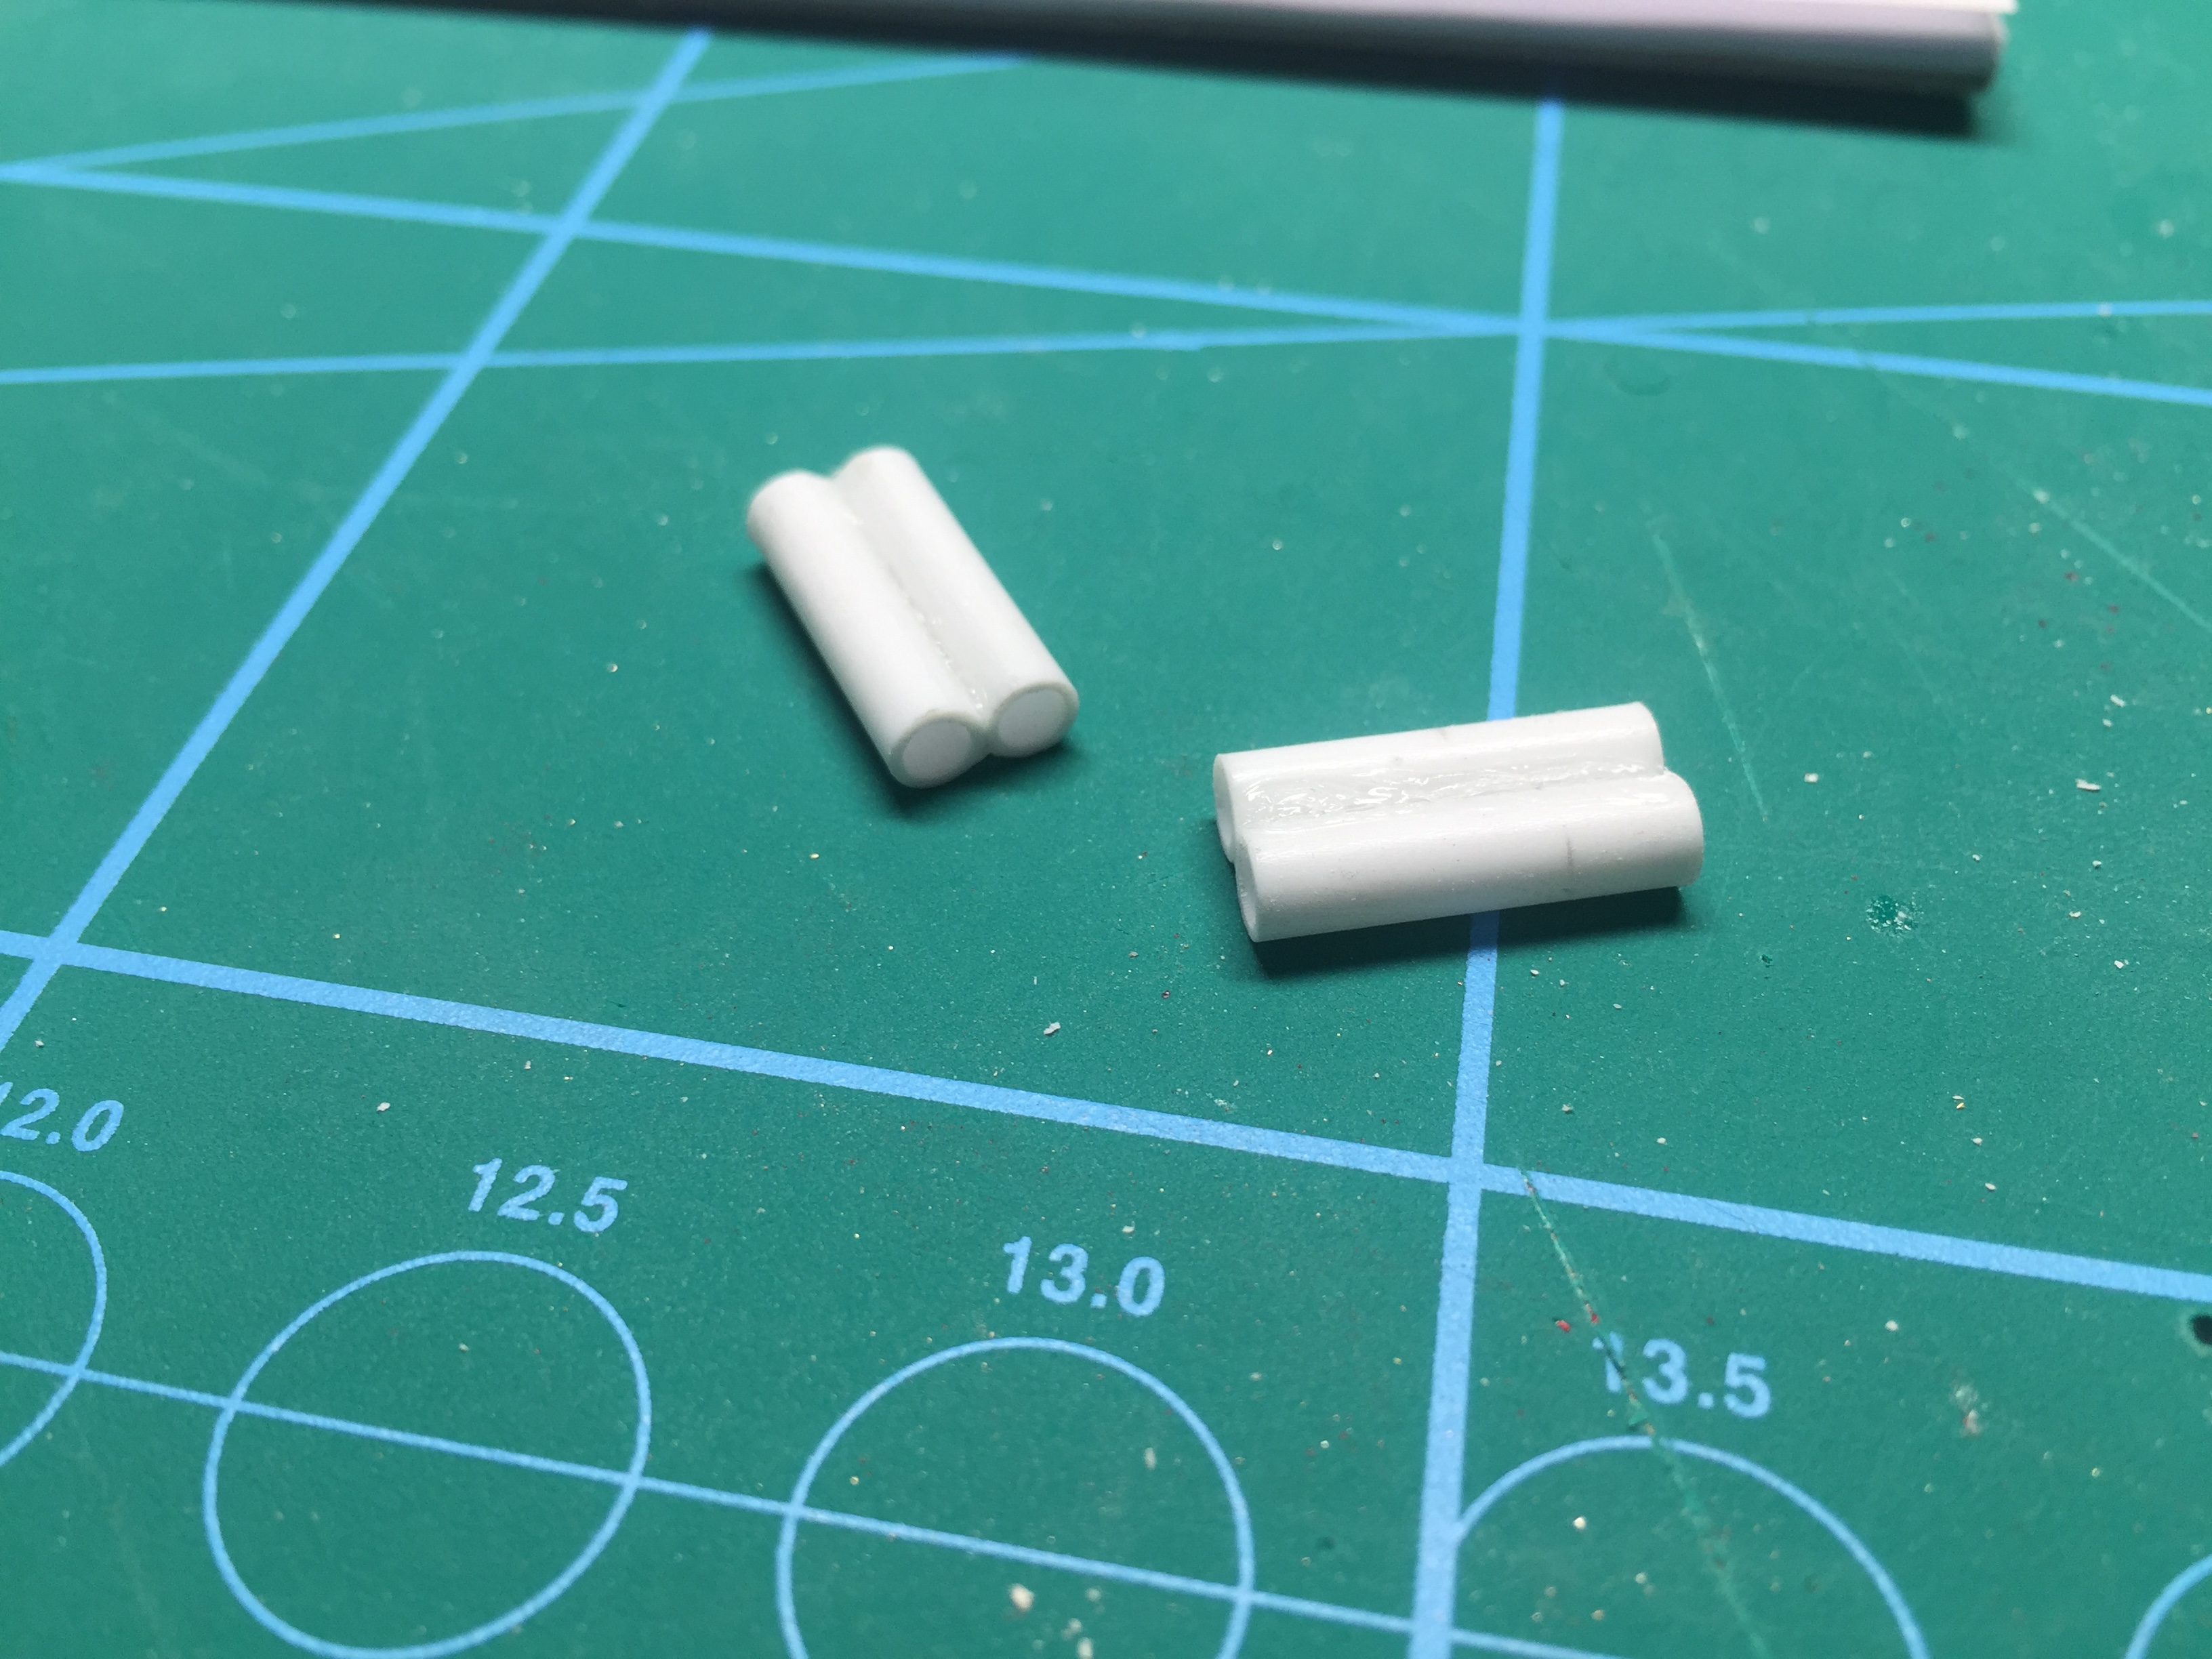
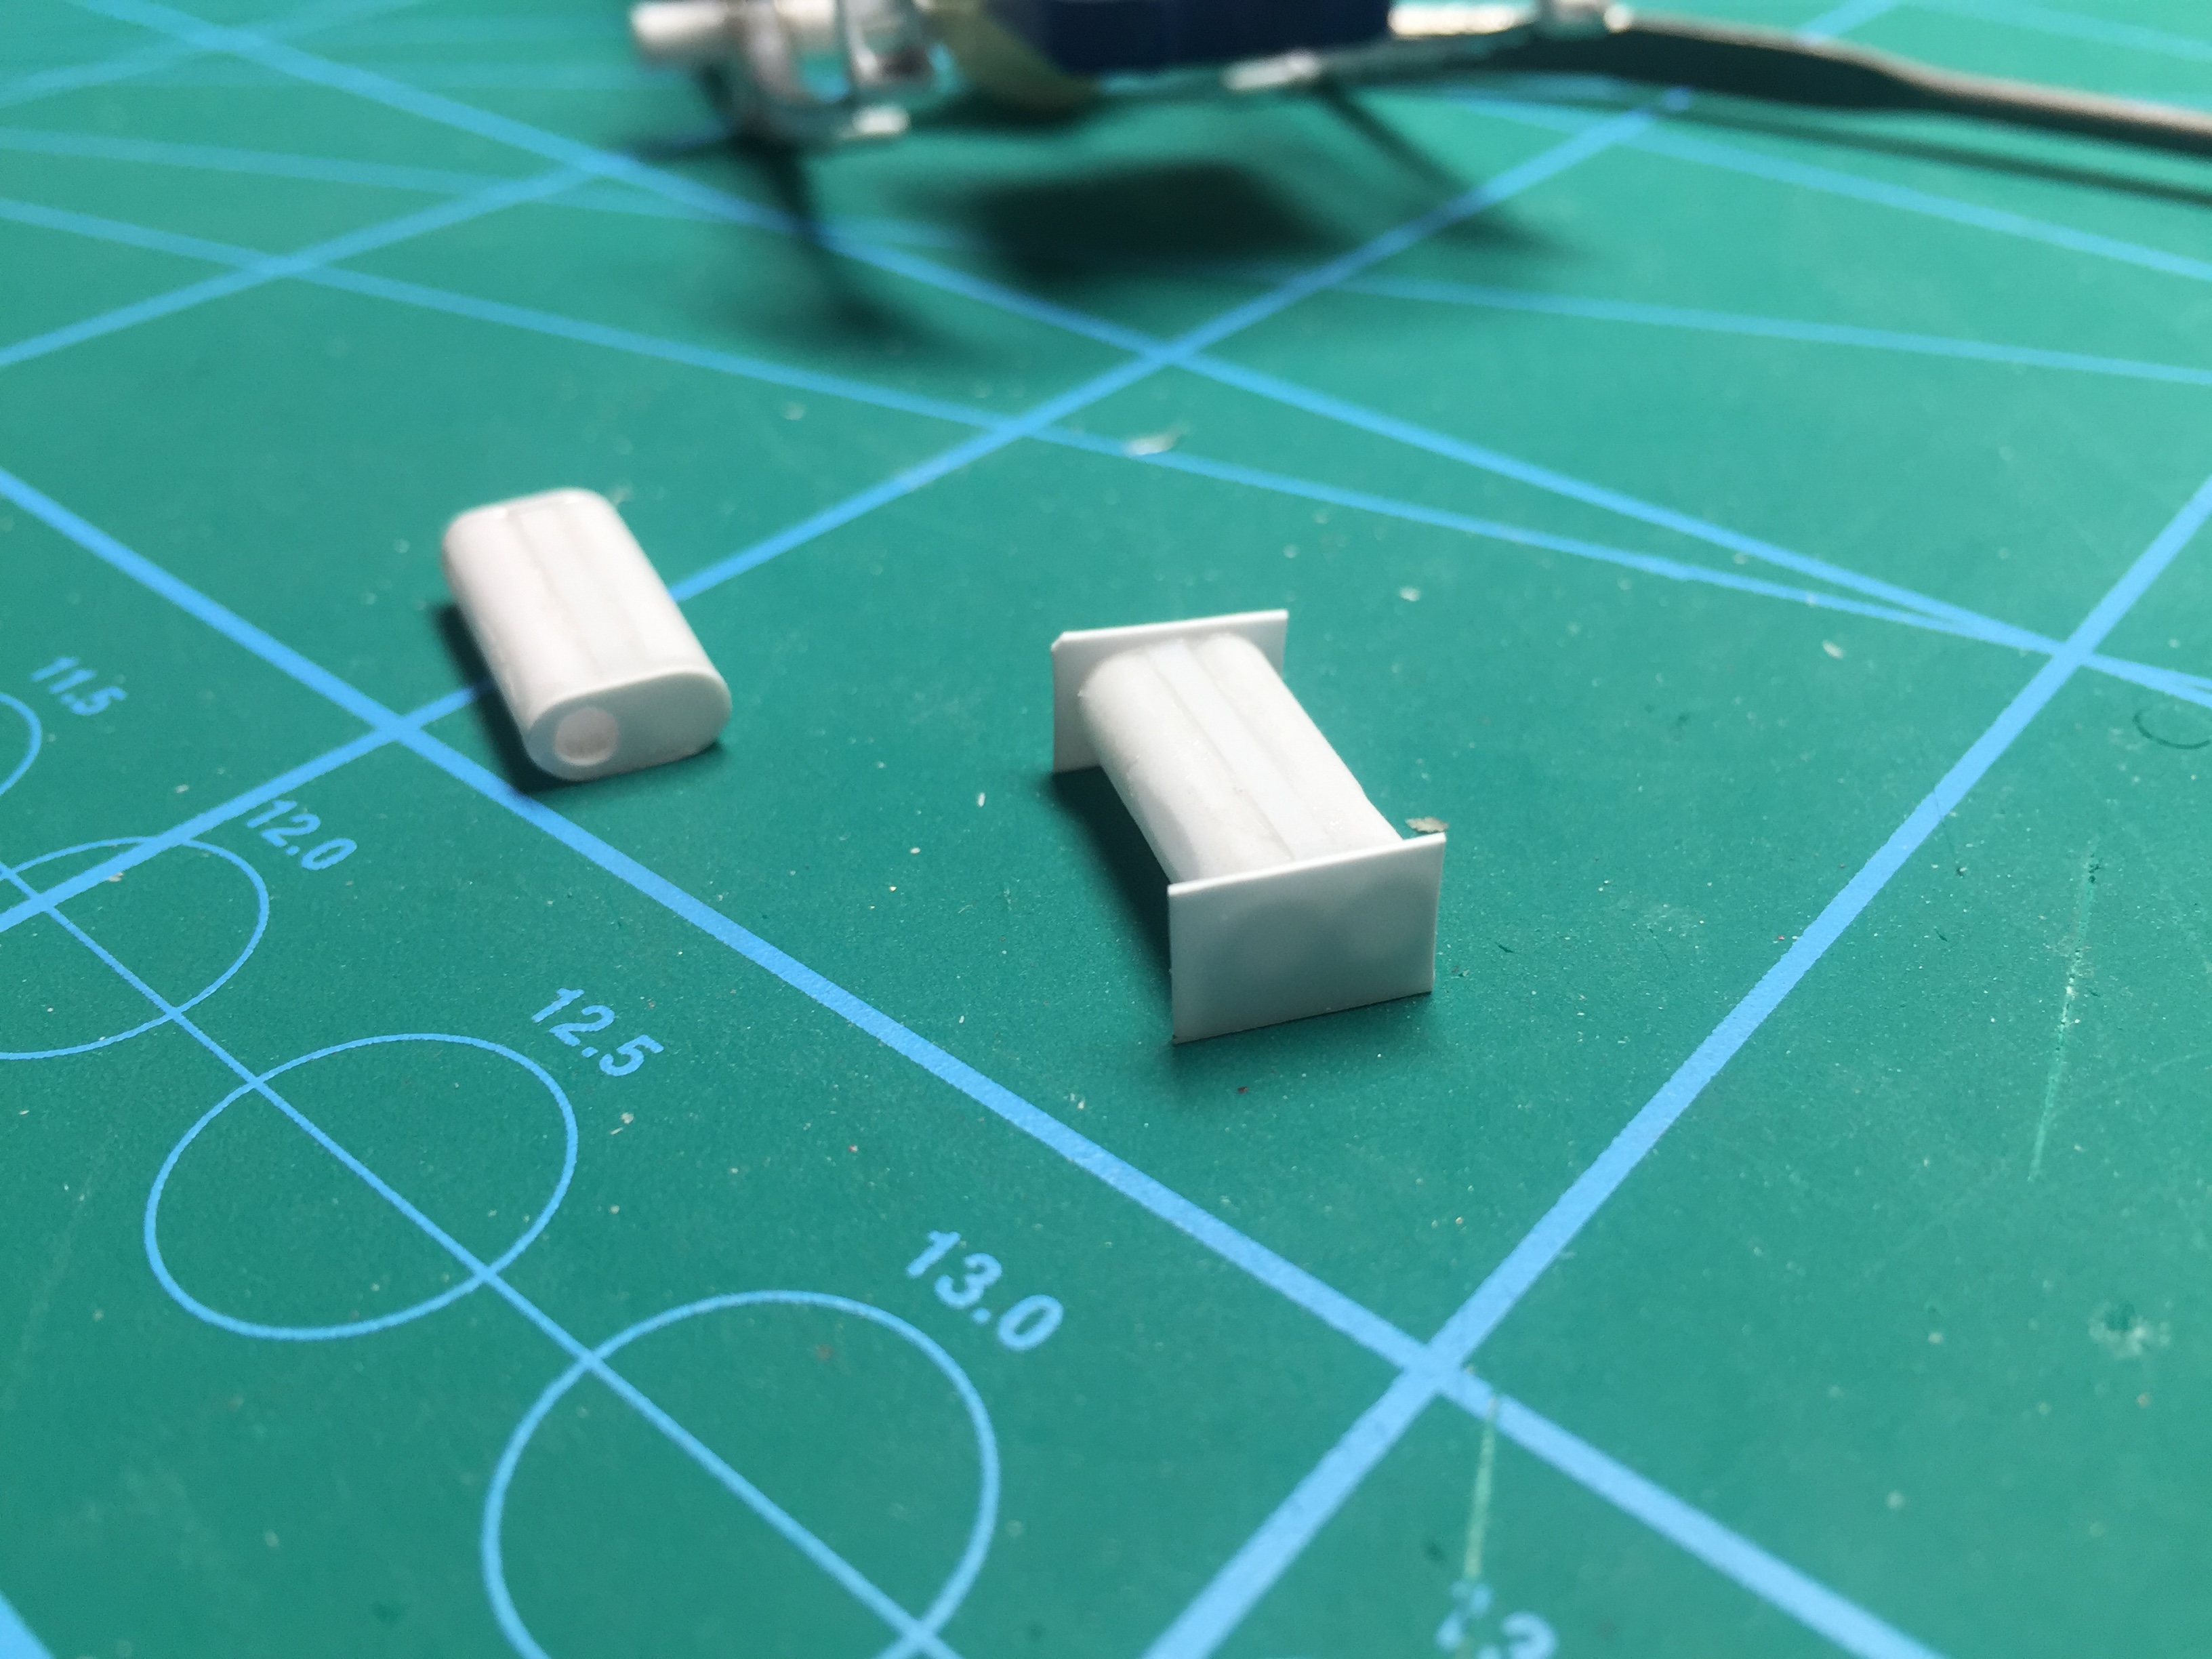
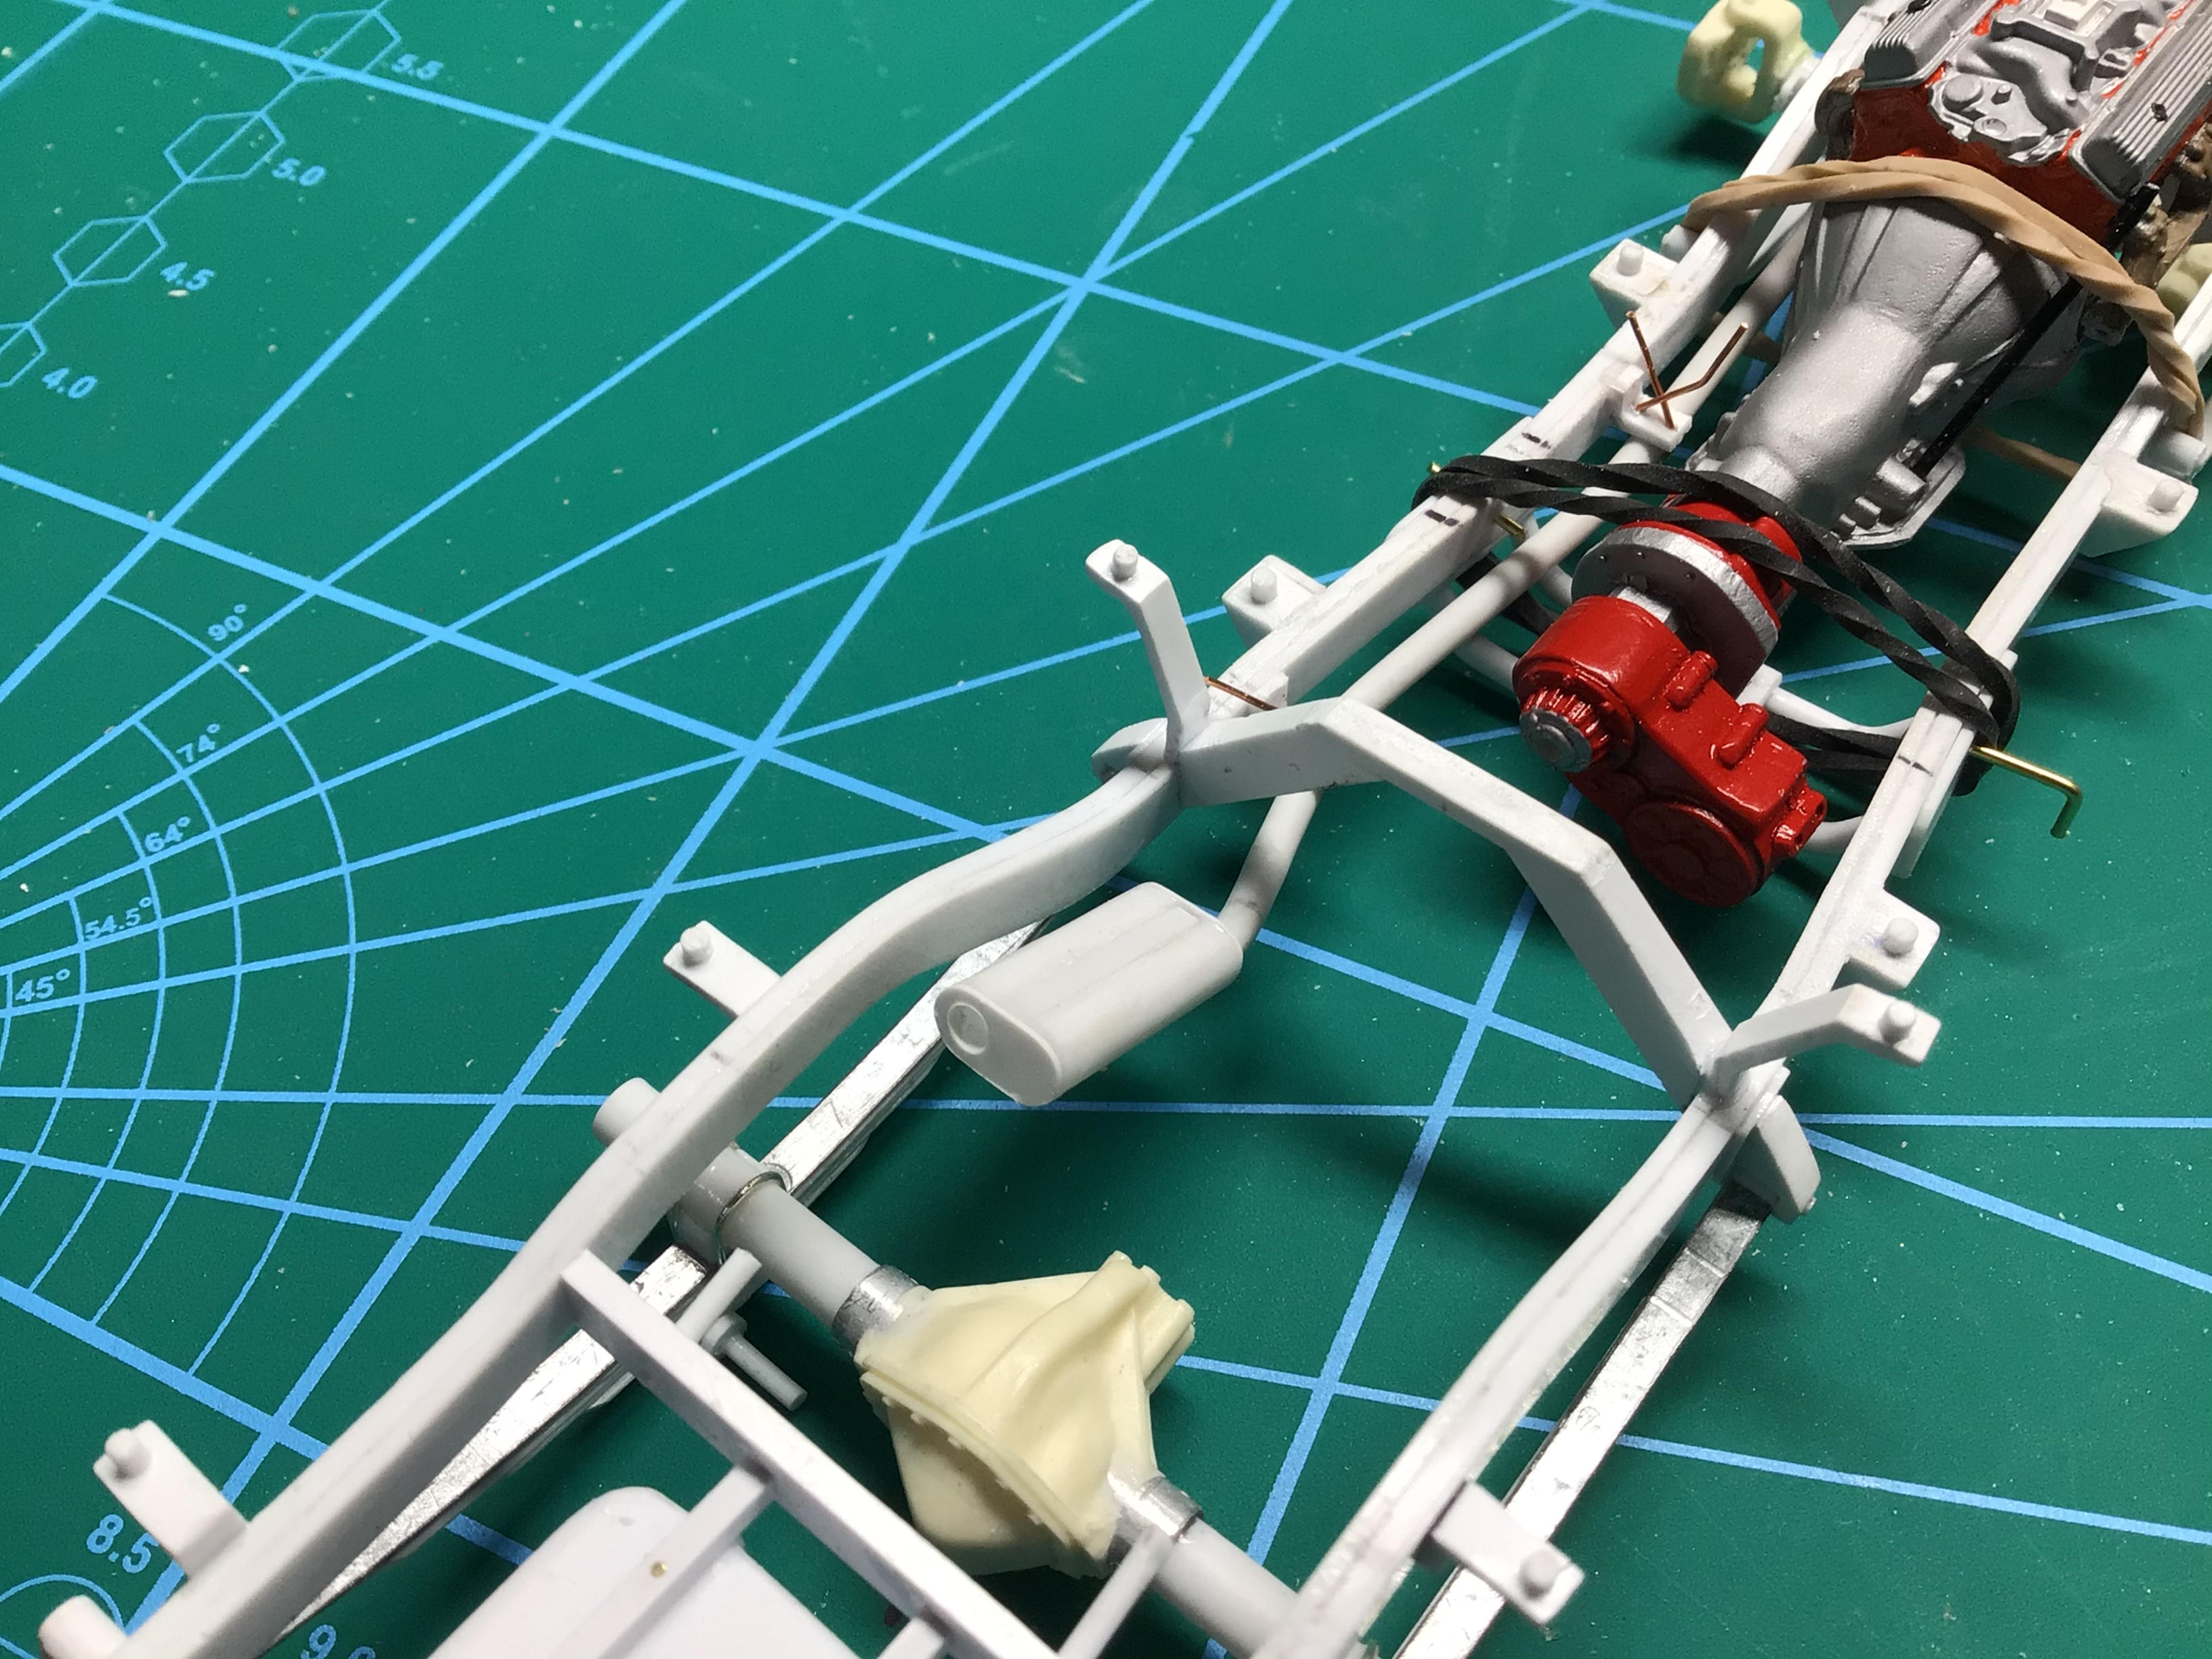
I recently made these mufflers and thought I would share the process. First I glued two pieces of .156” tube together and filled the crotch with some half-round and CA. Then I sanded the ends square and capped them with some thin styrene sheet. Sand the end caps flush and drill the holes for the .100” exhaust pipes....simple!? The tubing allows the exhaust pipes to “float” in and out a bit until everything is in place so it can be glued solid. The exhaust pipe can be solid styrene, solder, or in this case I used .100” tube with some soft wire shoved inside.
-
Good work! Really nice job you did on that roof.?
-
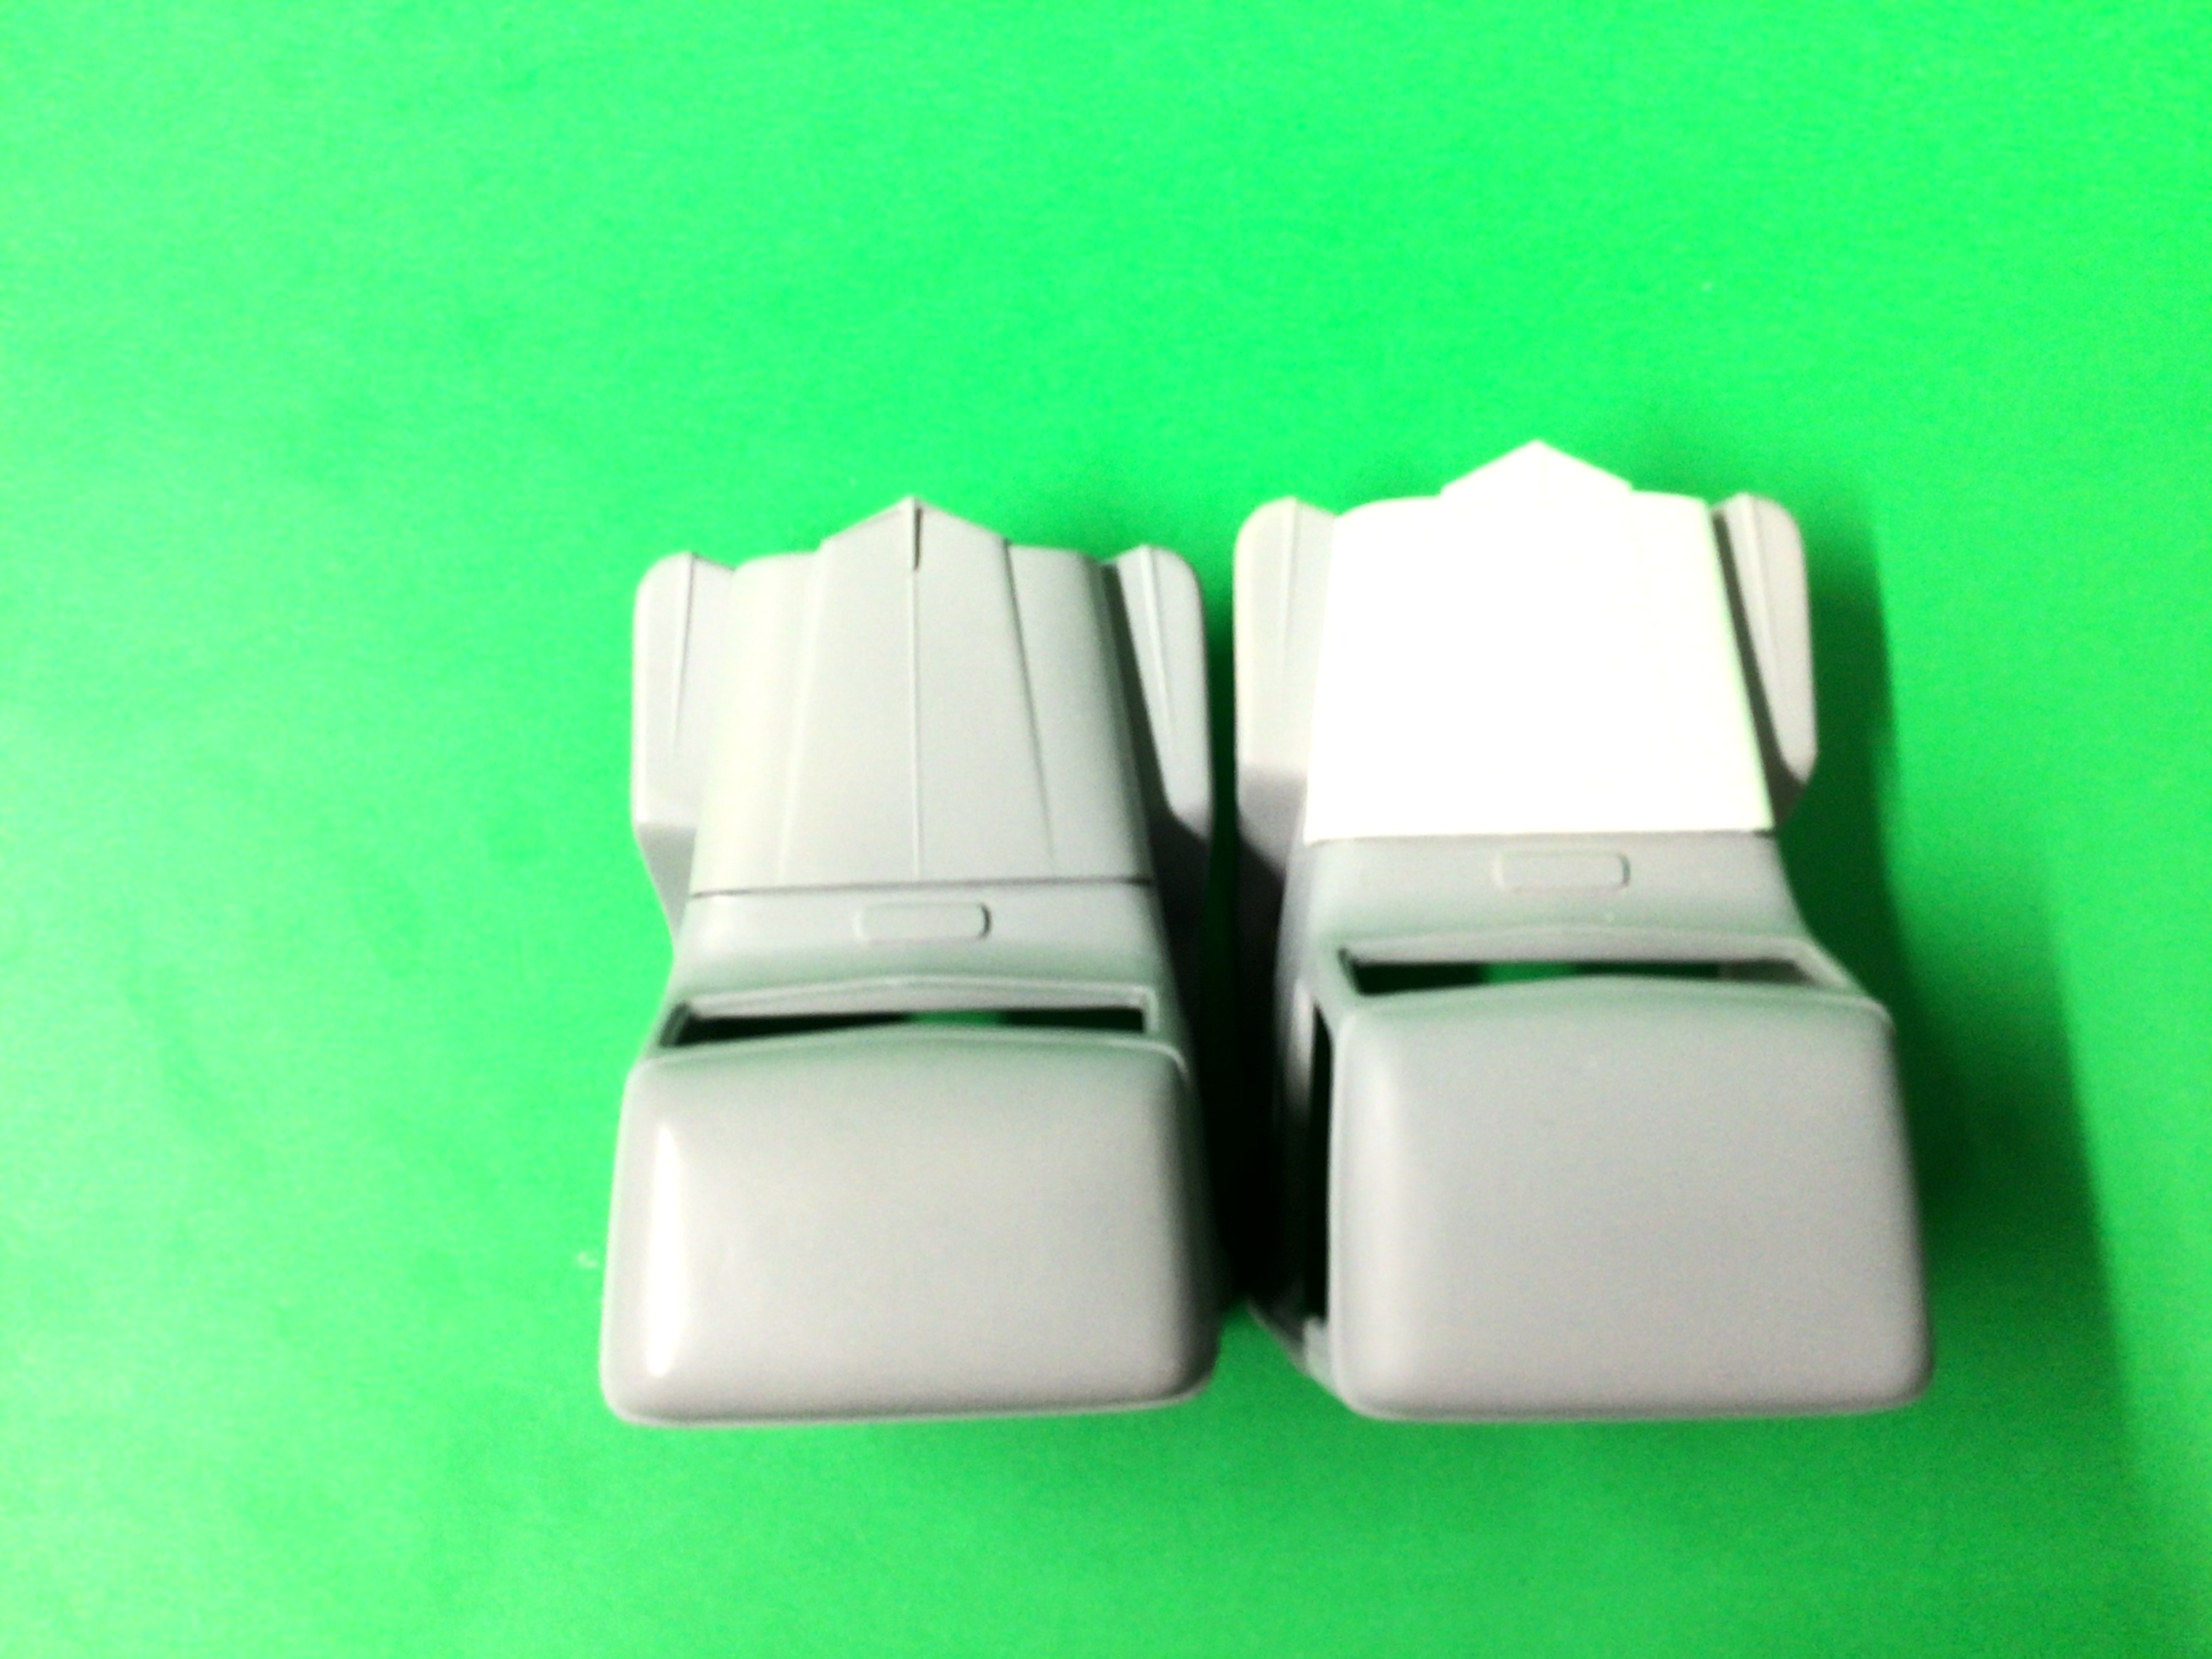
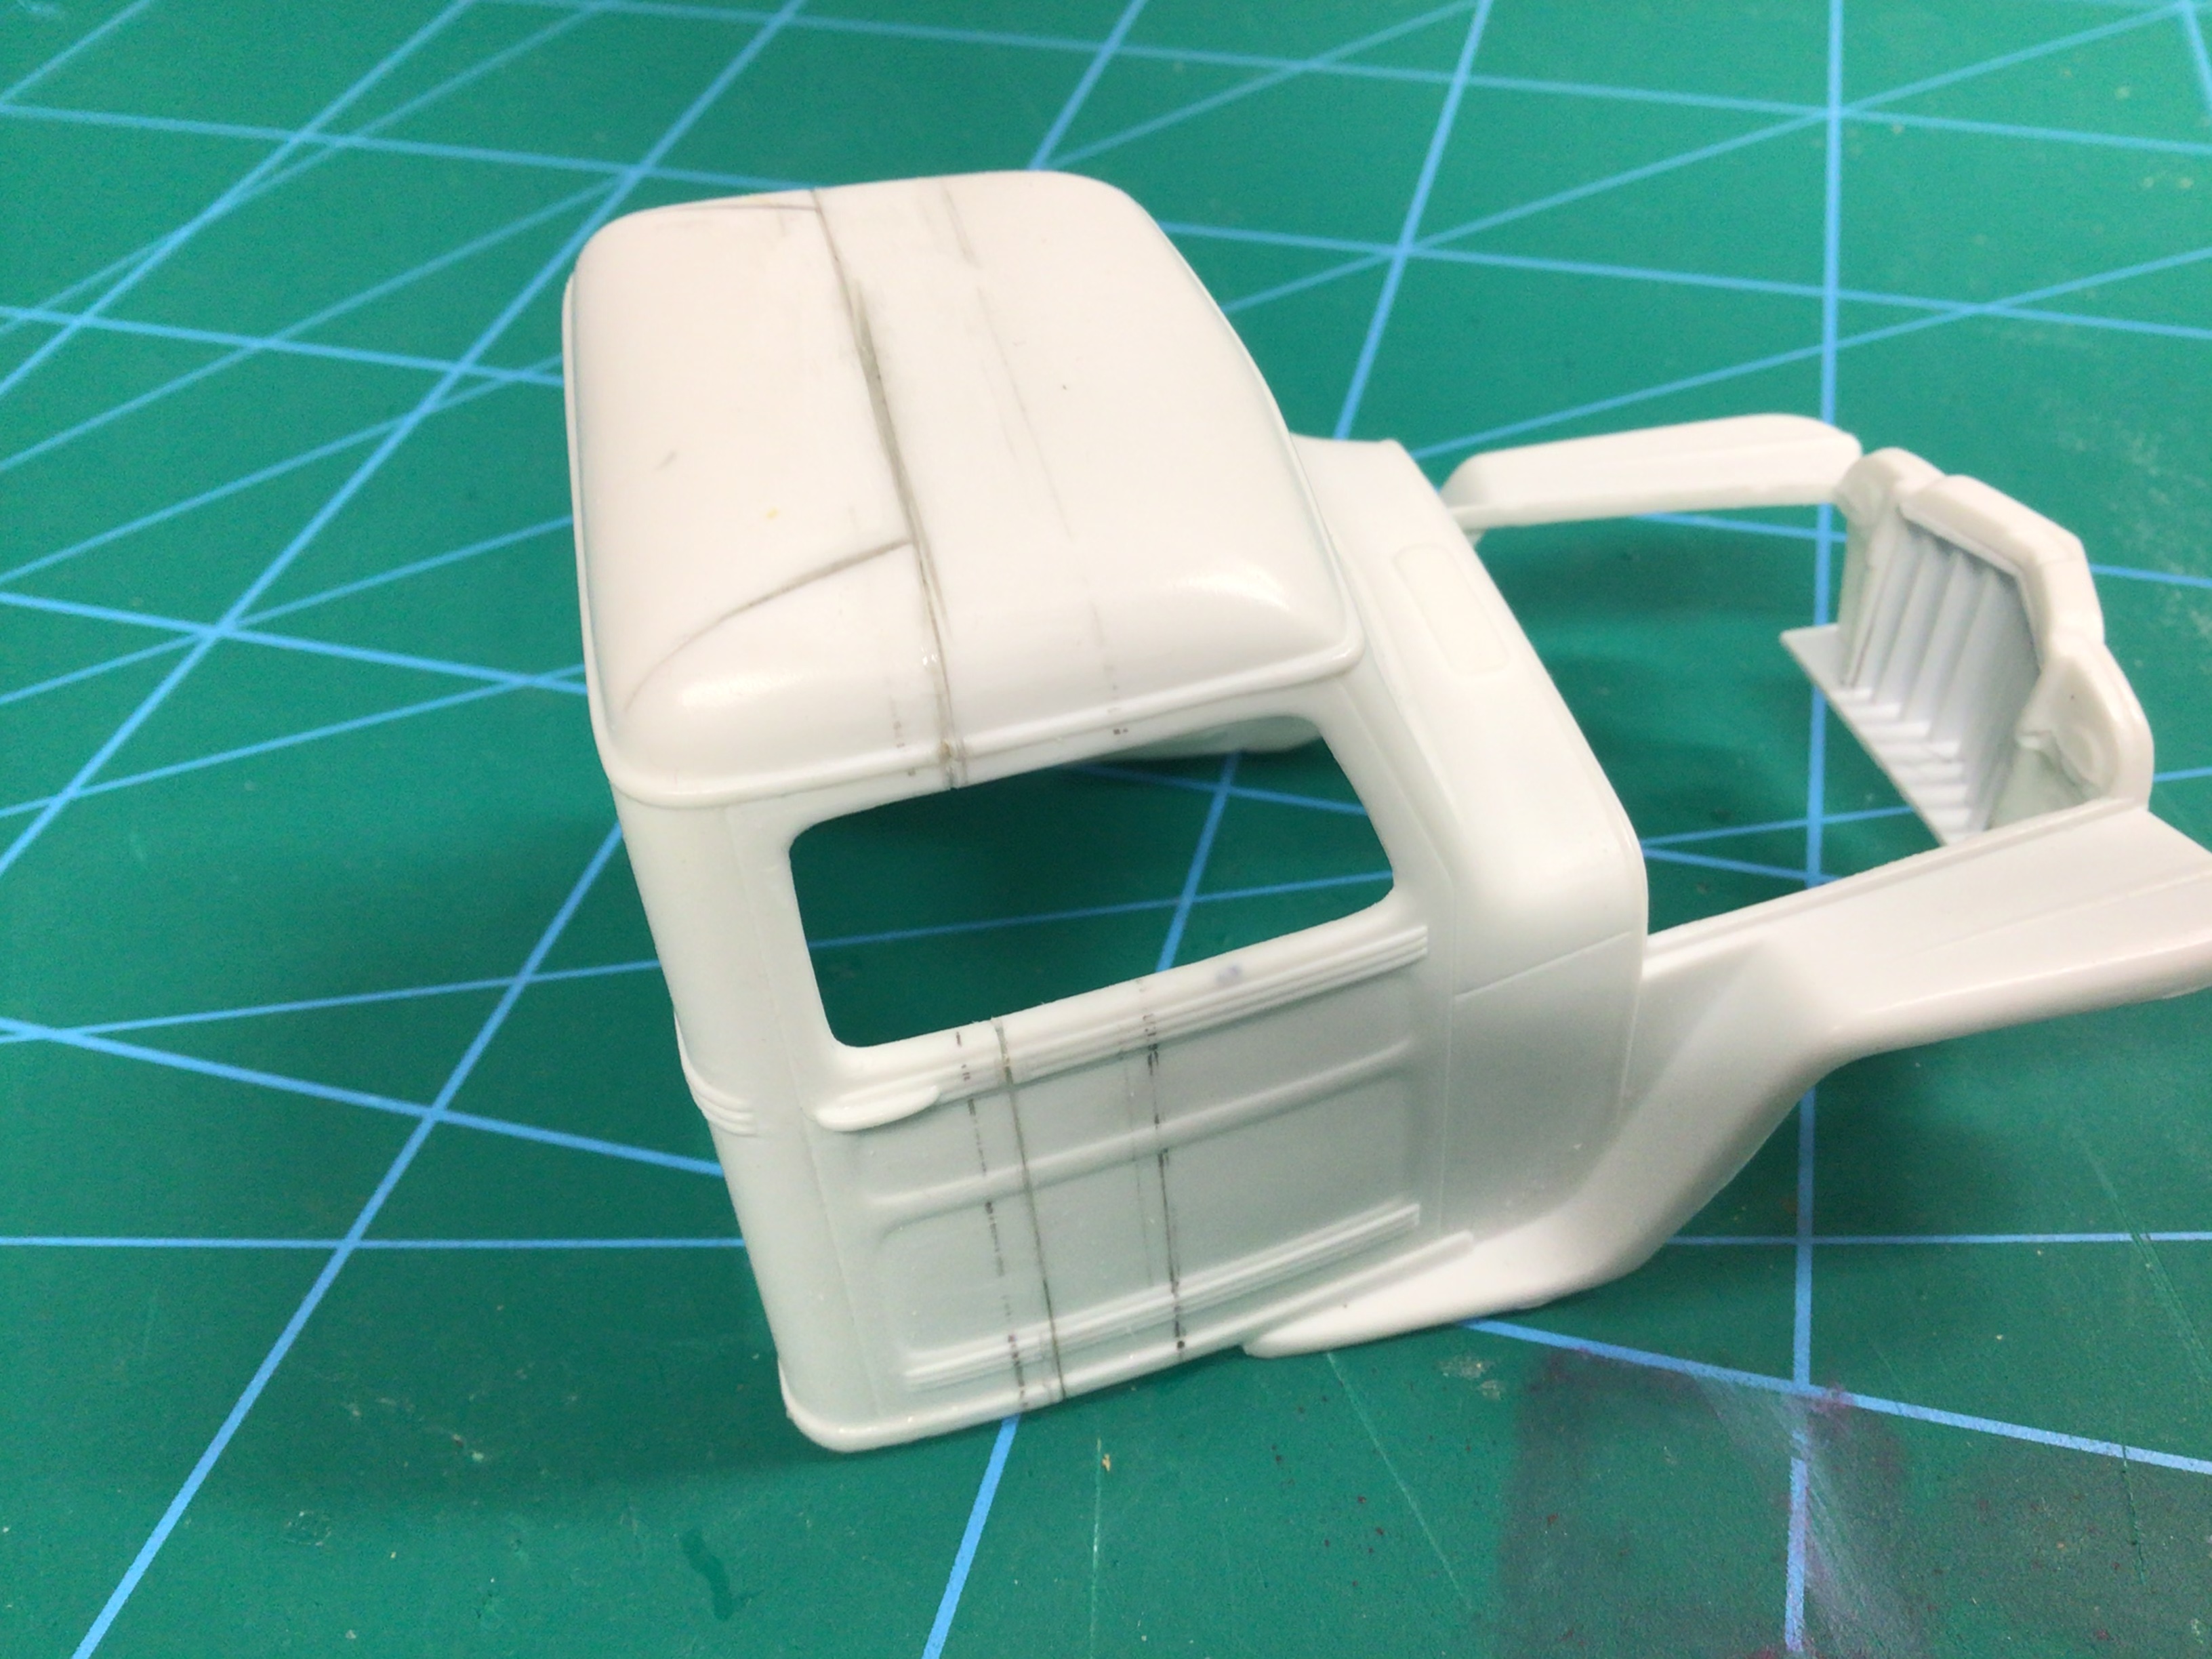
I cut up two resin Willys cabs and made one that is stretched a scale 5”. This will be for a future project.? It’s too bad Willys didn’t do this in the first place! I think it looks a whole lot better....and the extra legroom would sure be appreciated.
-
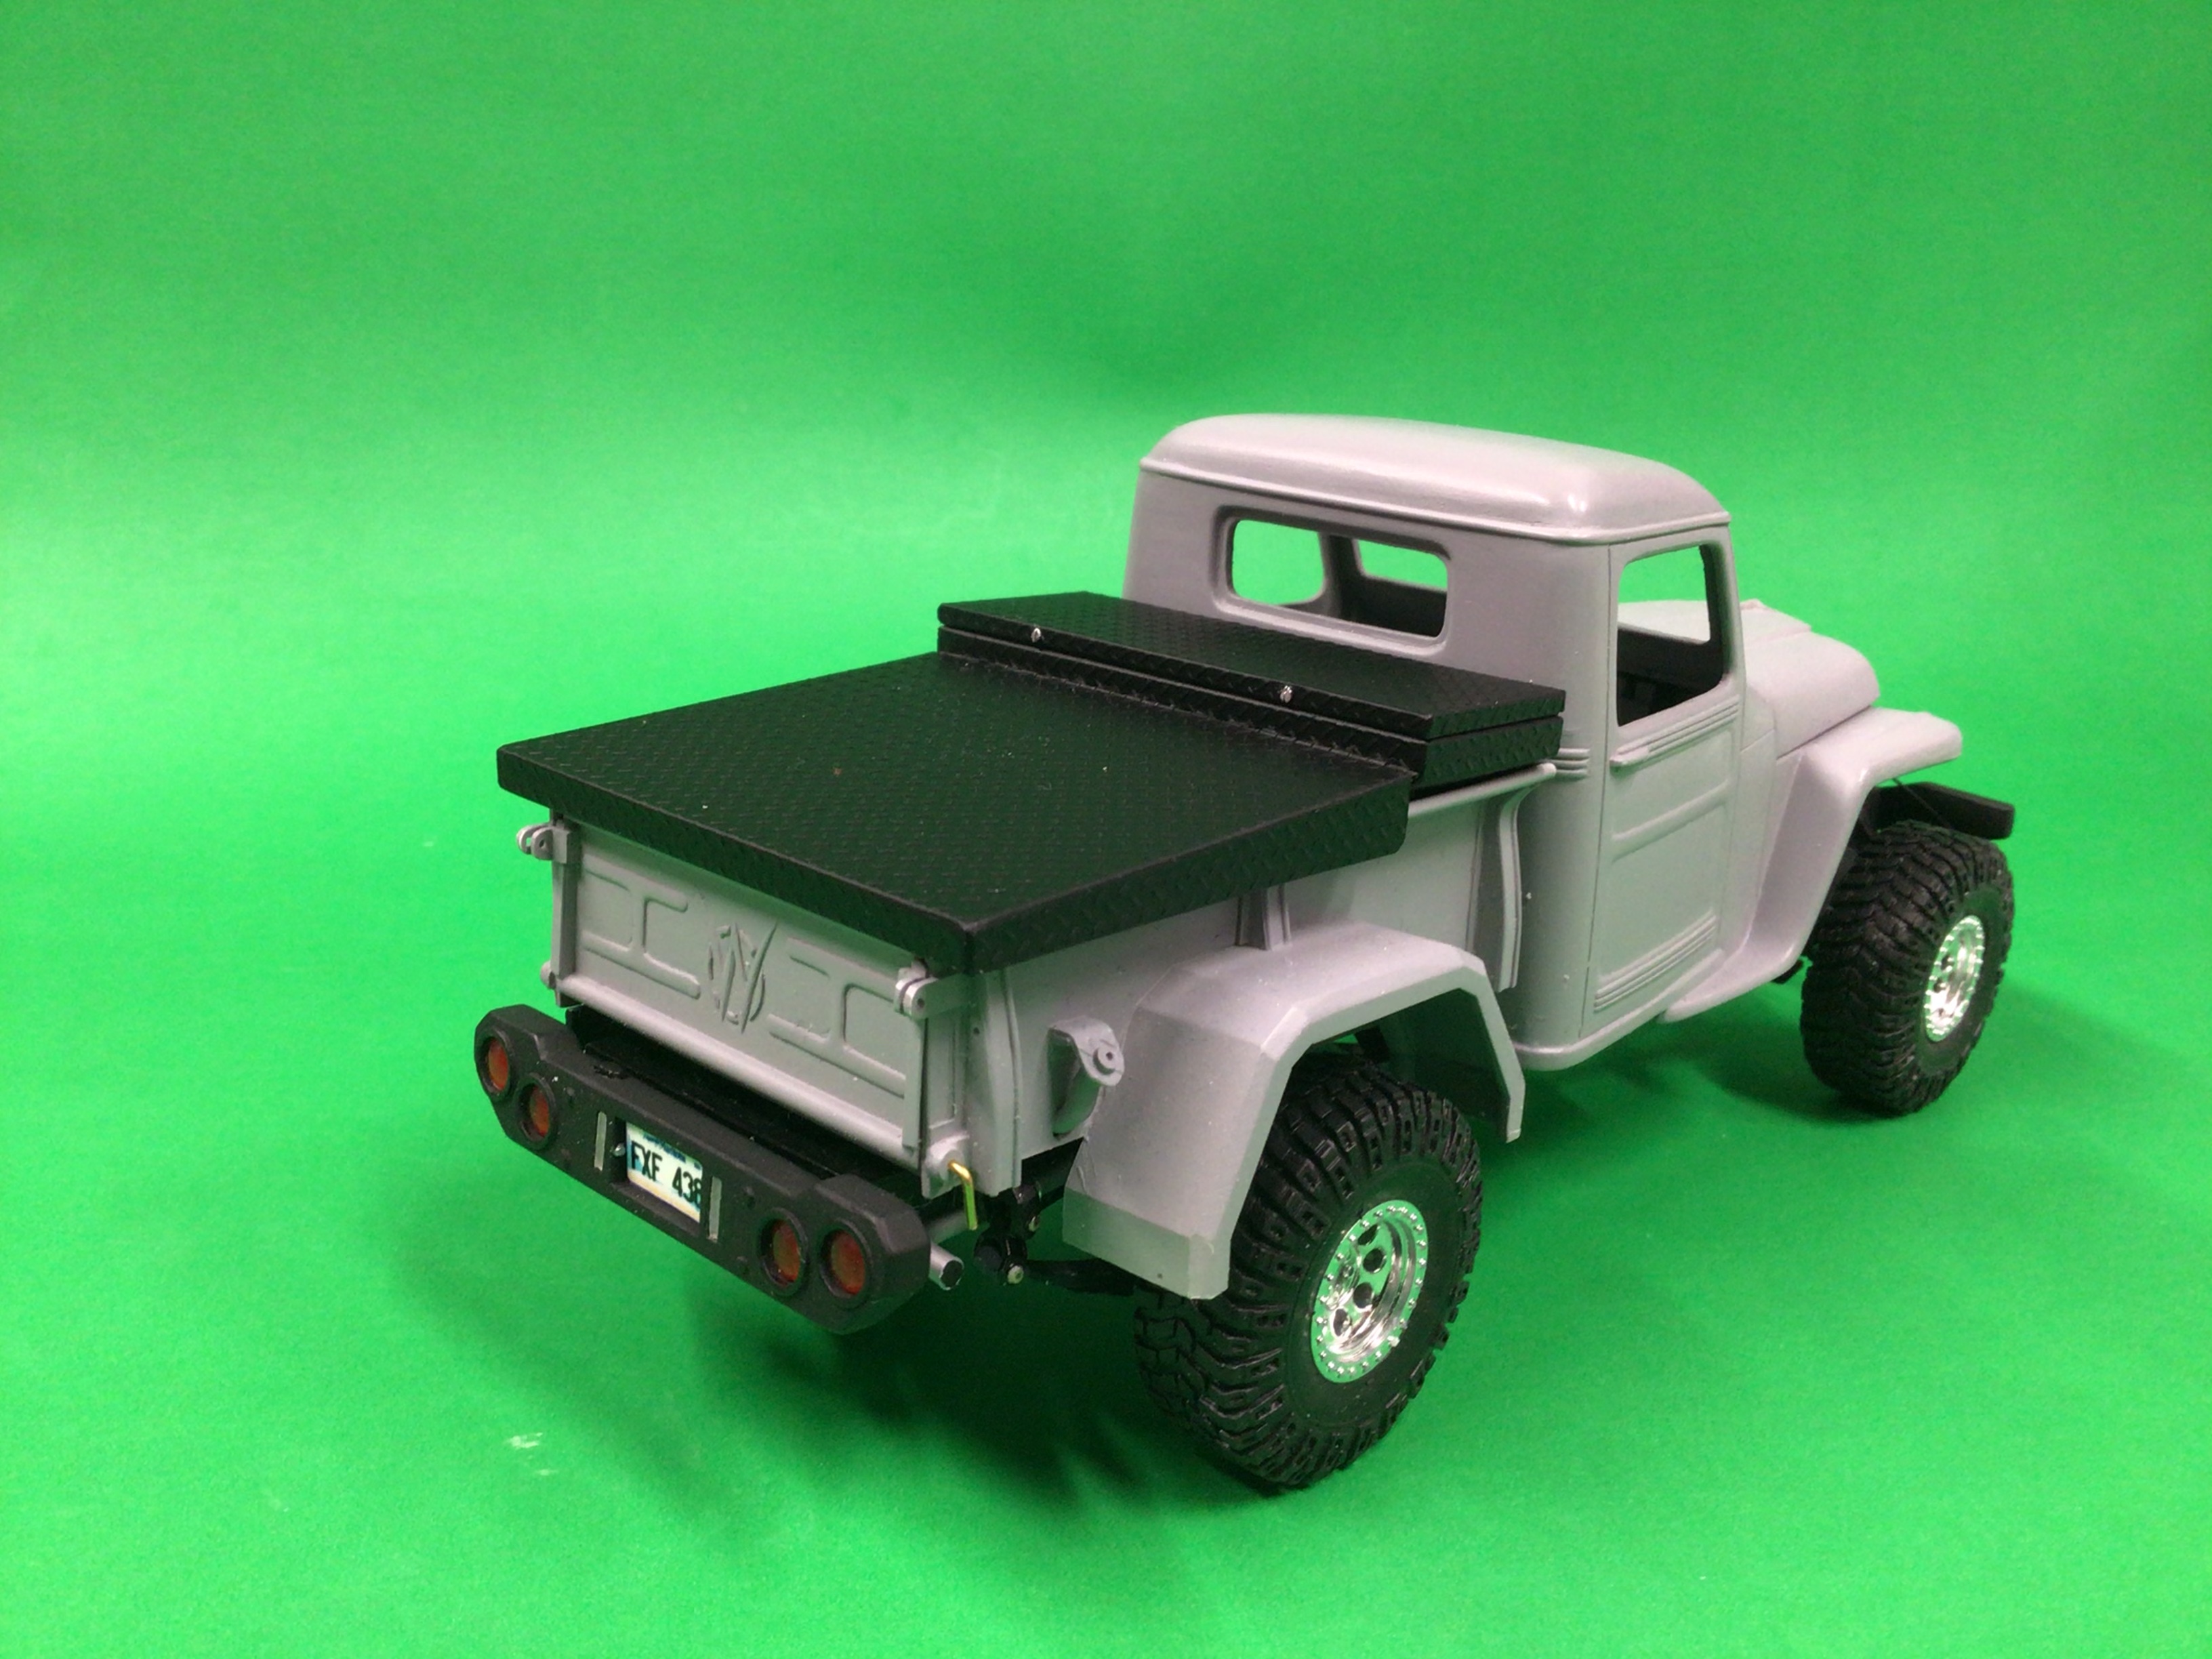
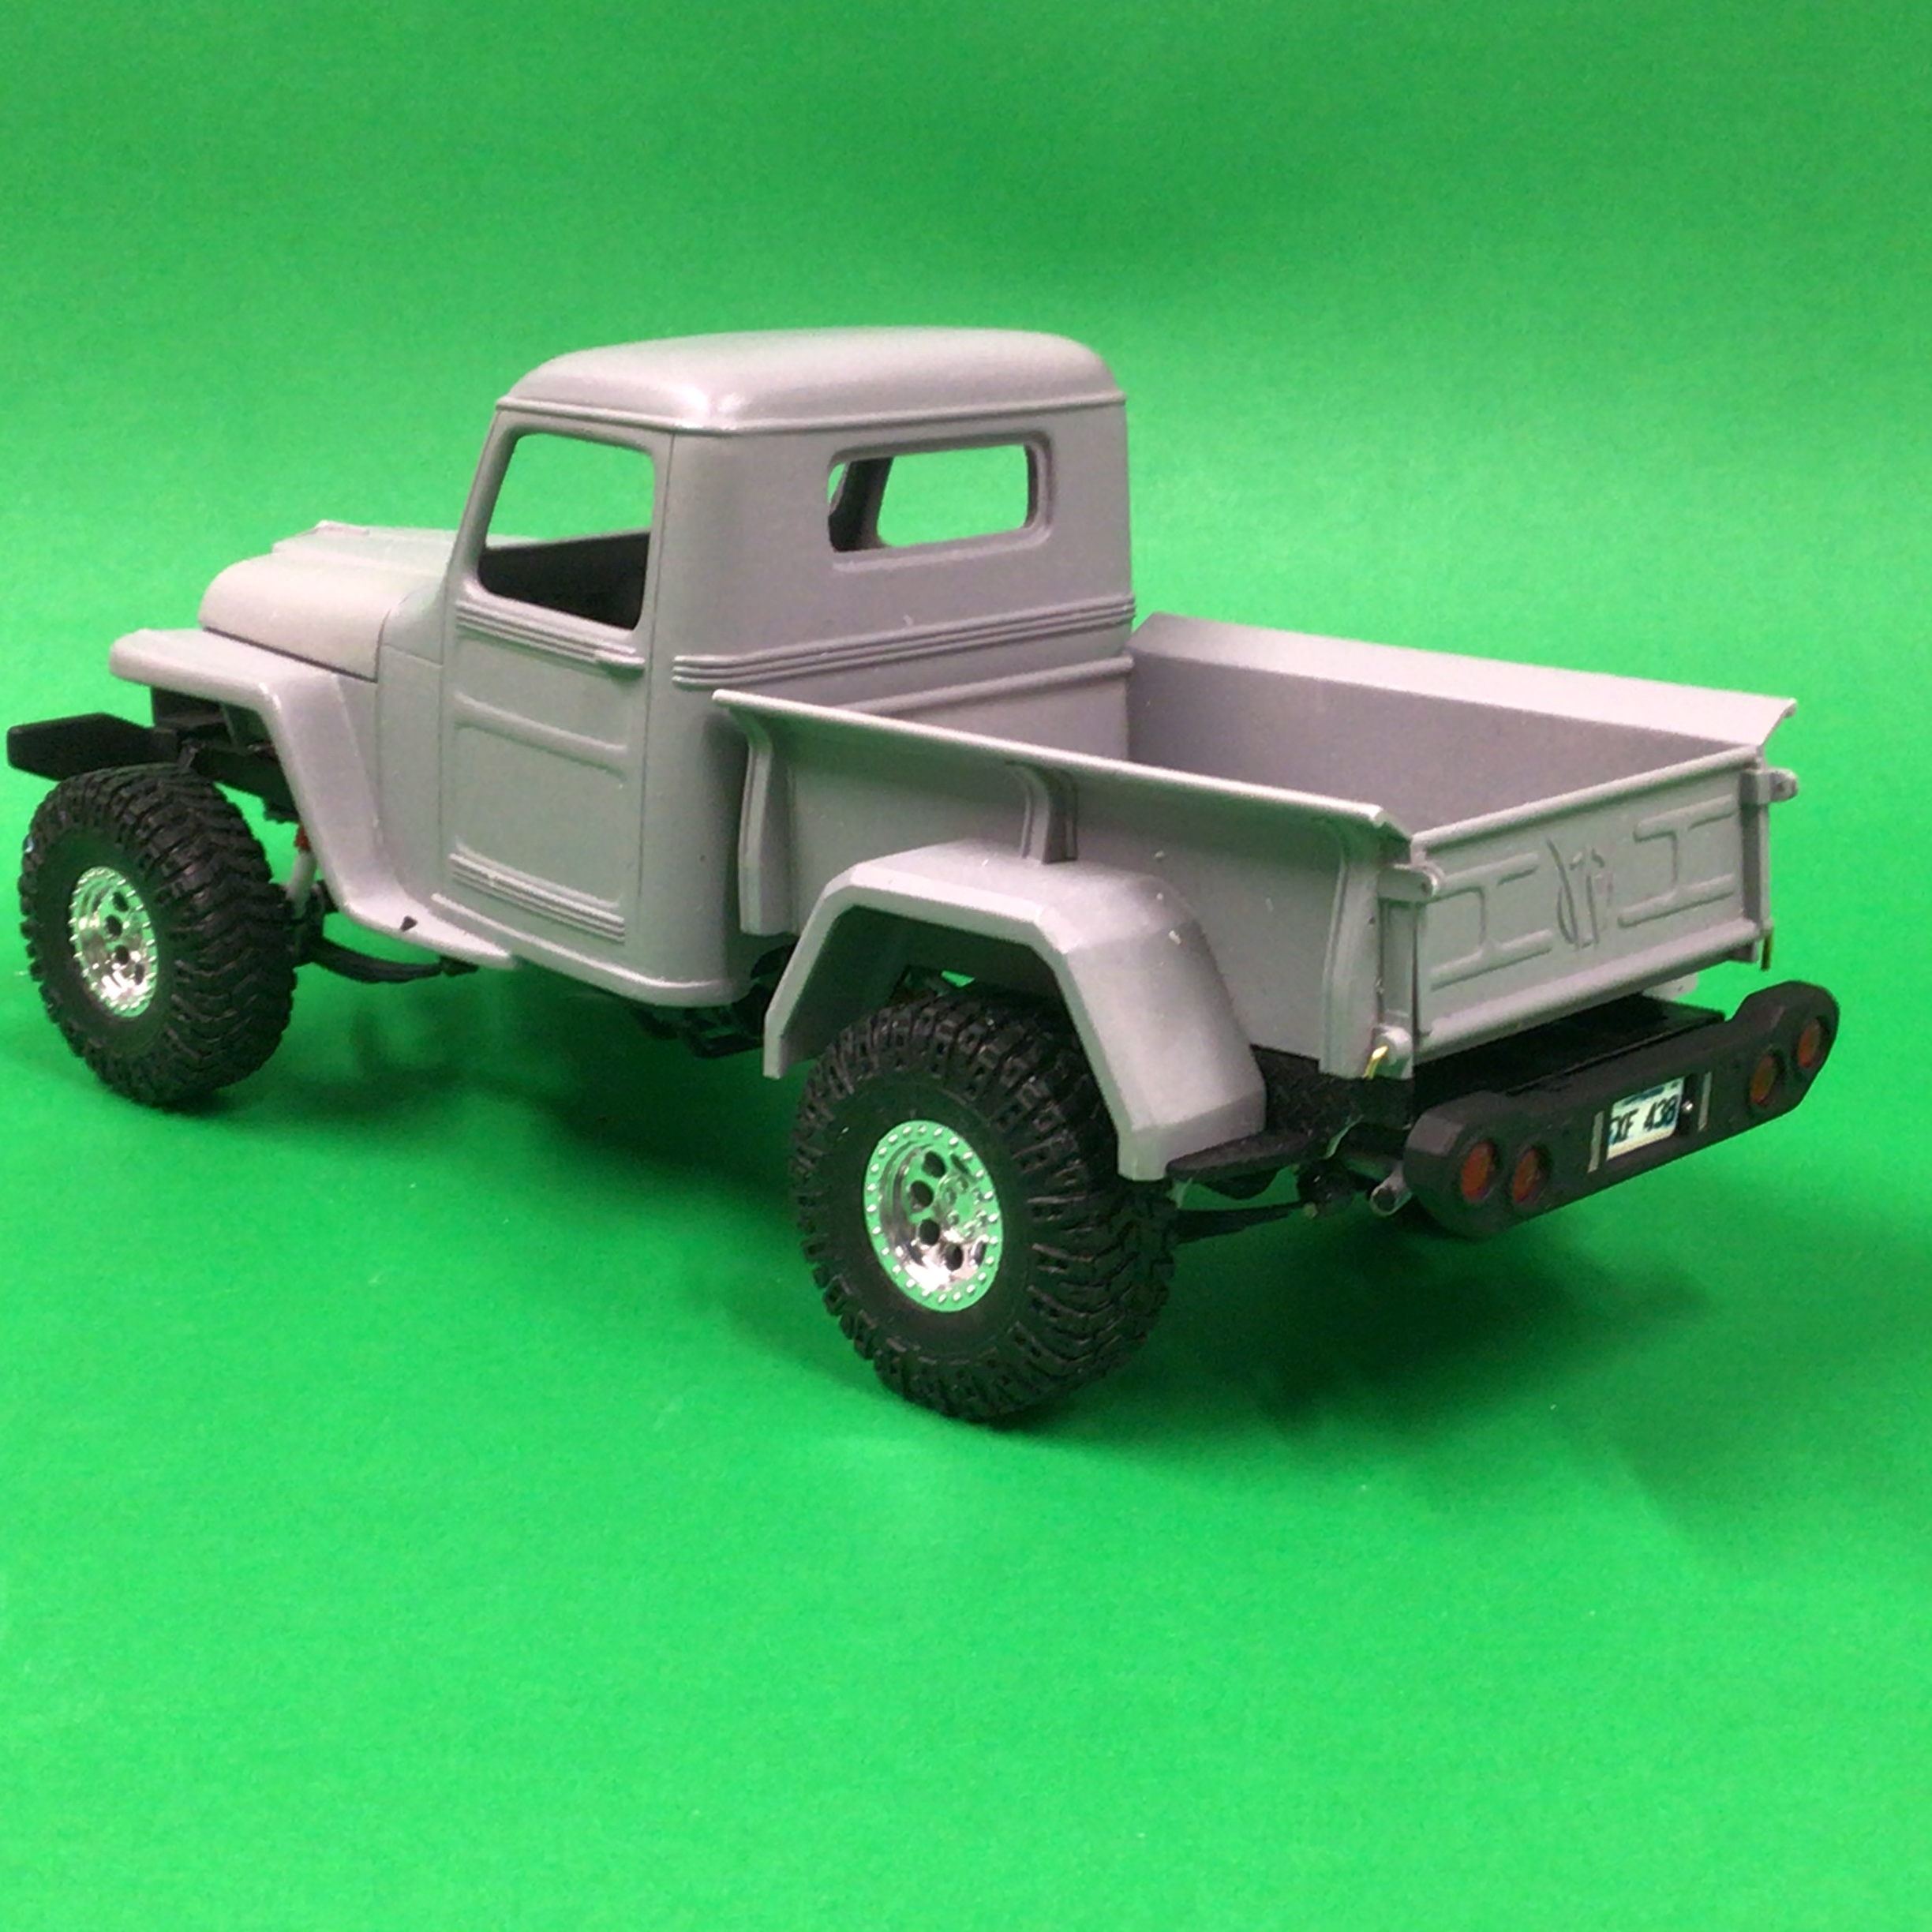
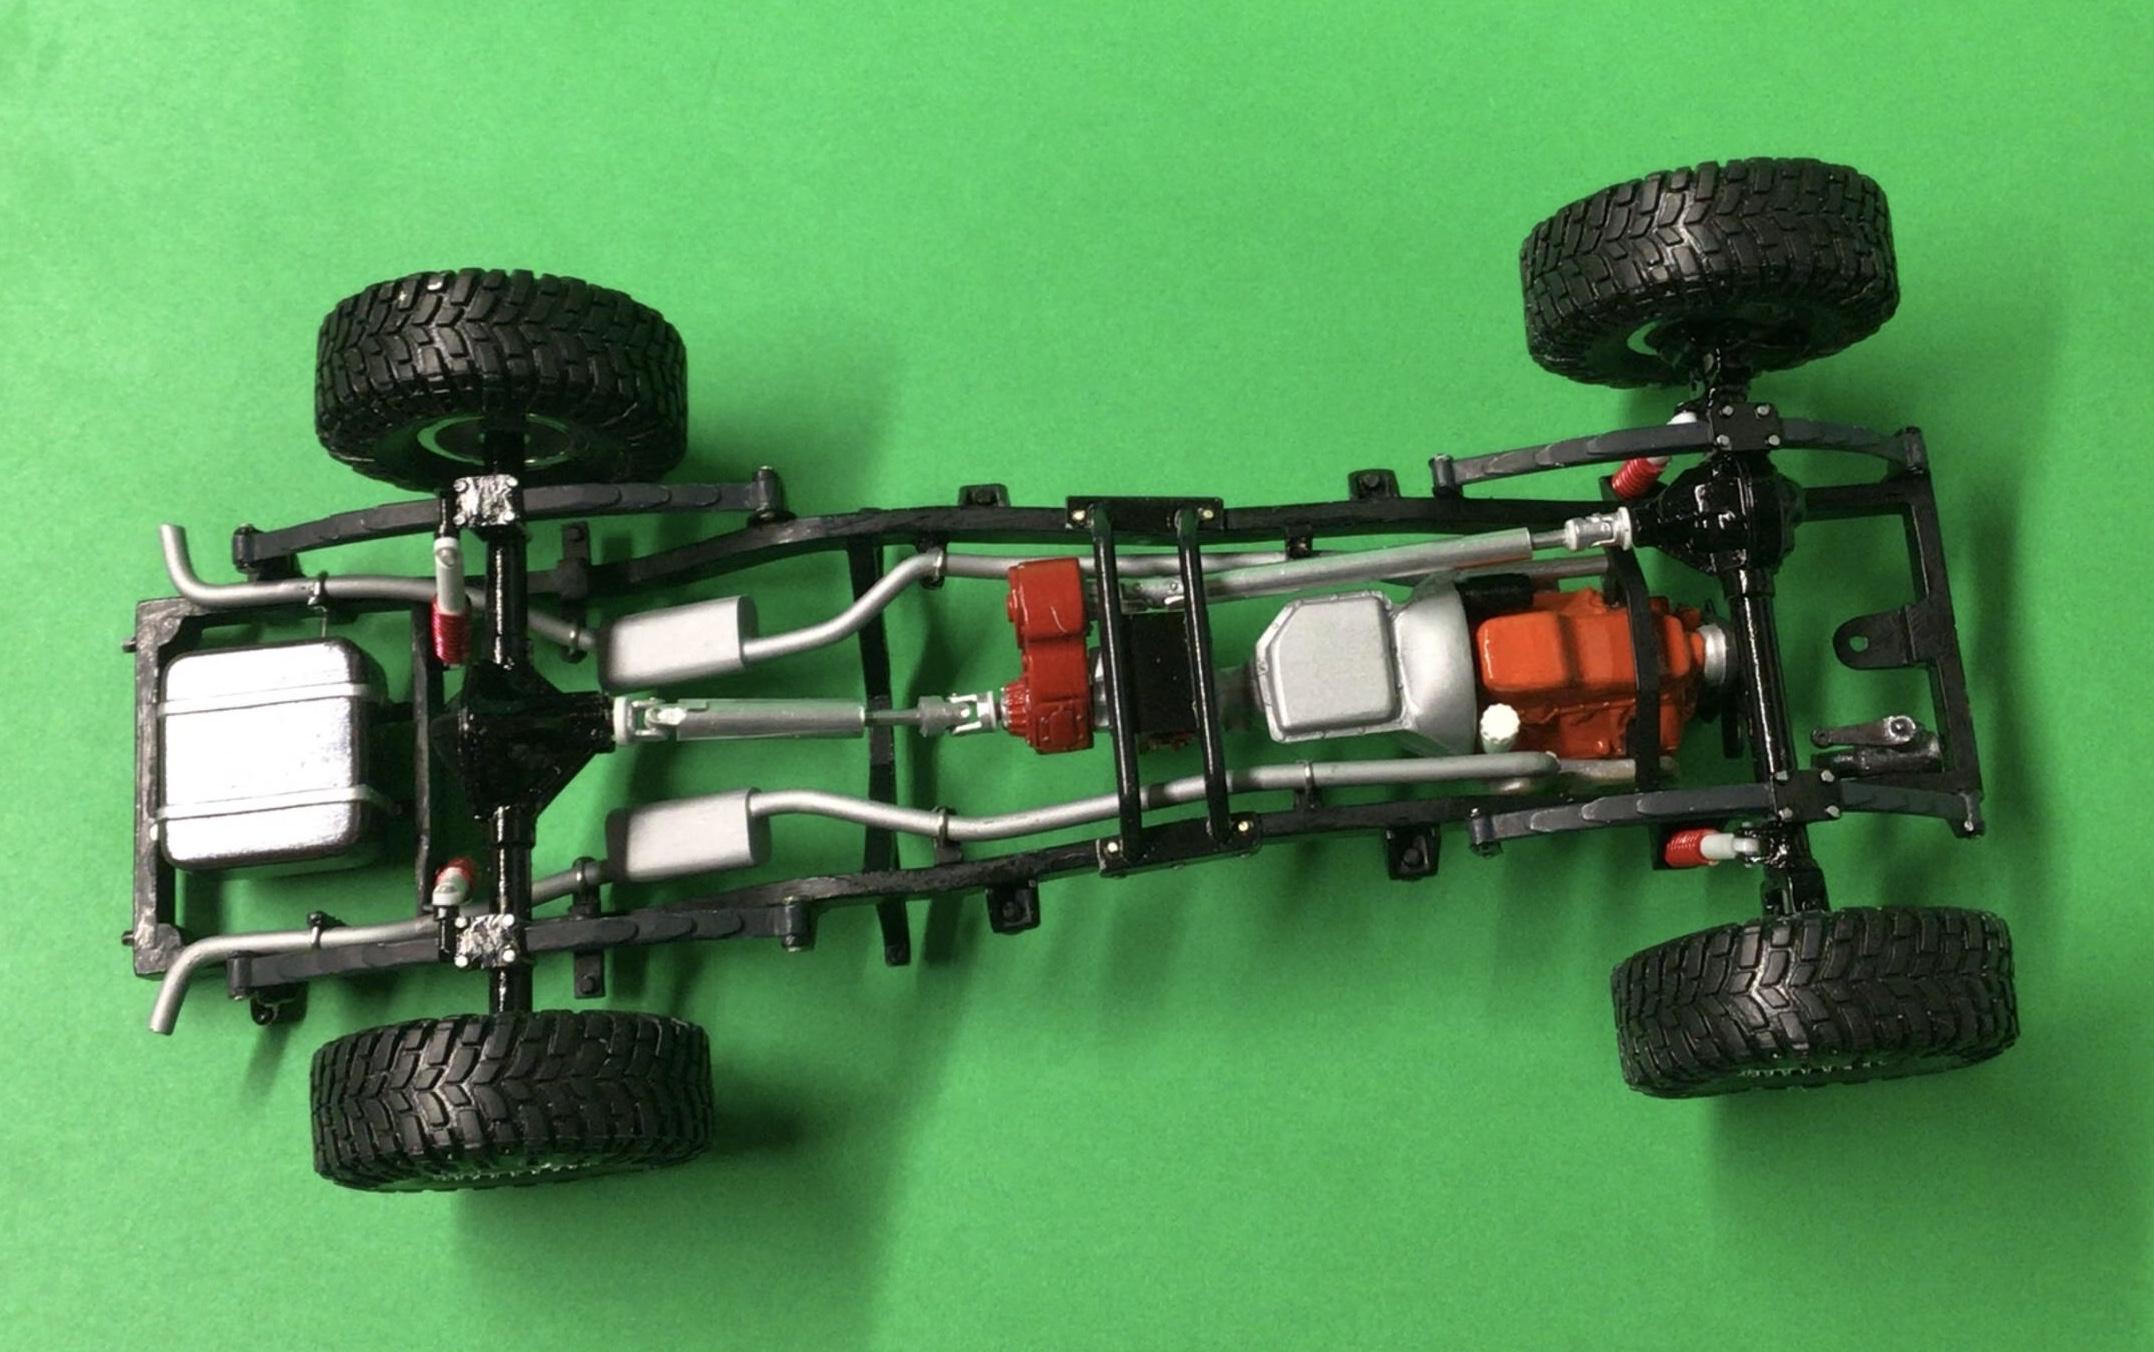
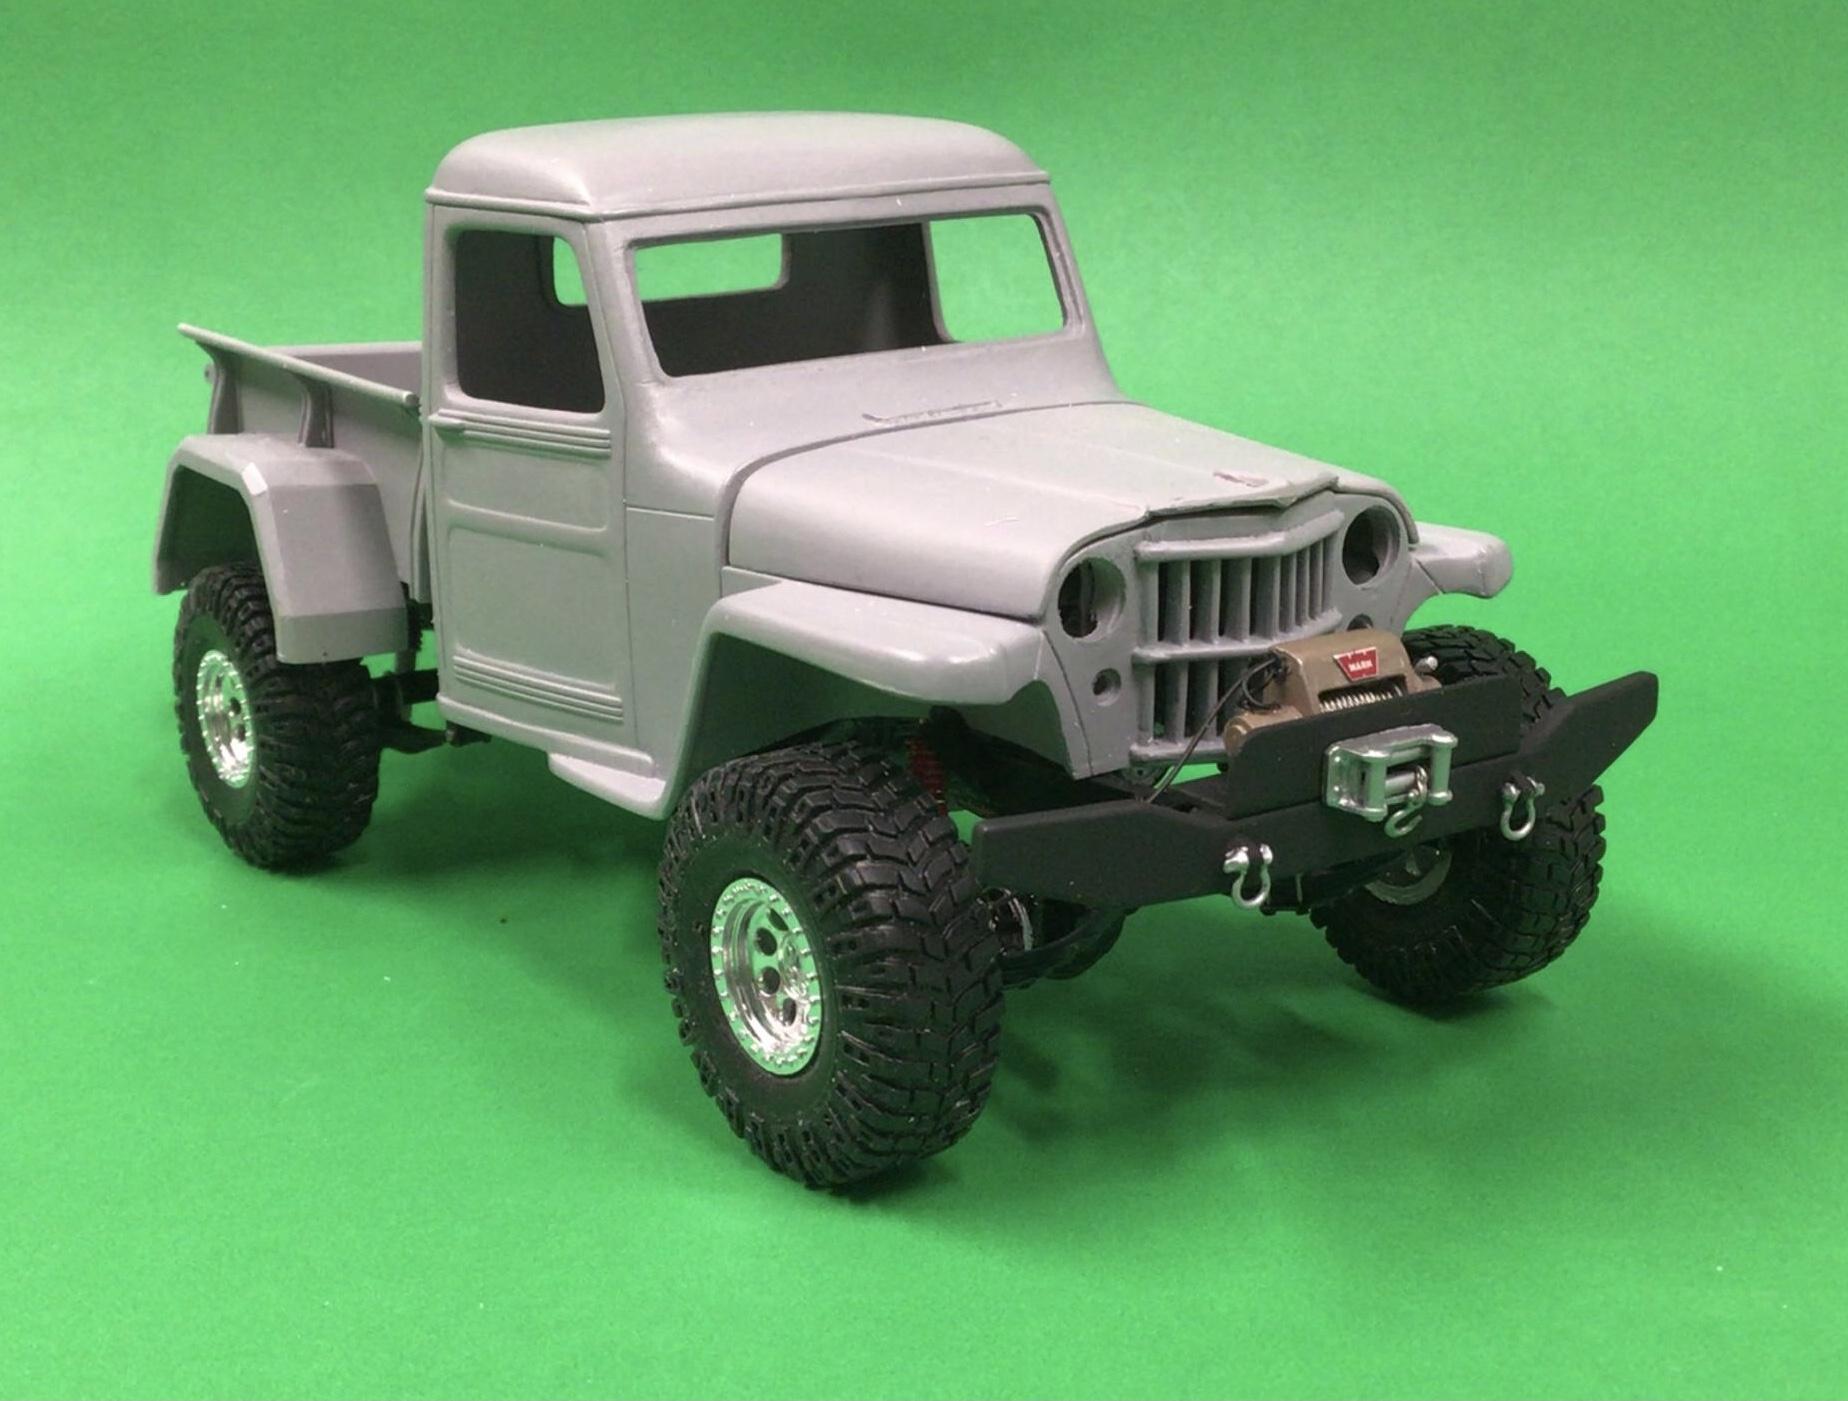
‘54 Willys P/U
NOBLNG replied to NOBLNG's topic in WIP: Model Trucks: Pickups, Vans, SUVs, Light Commercial
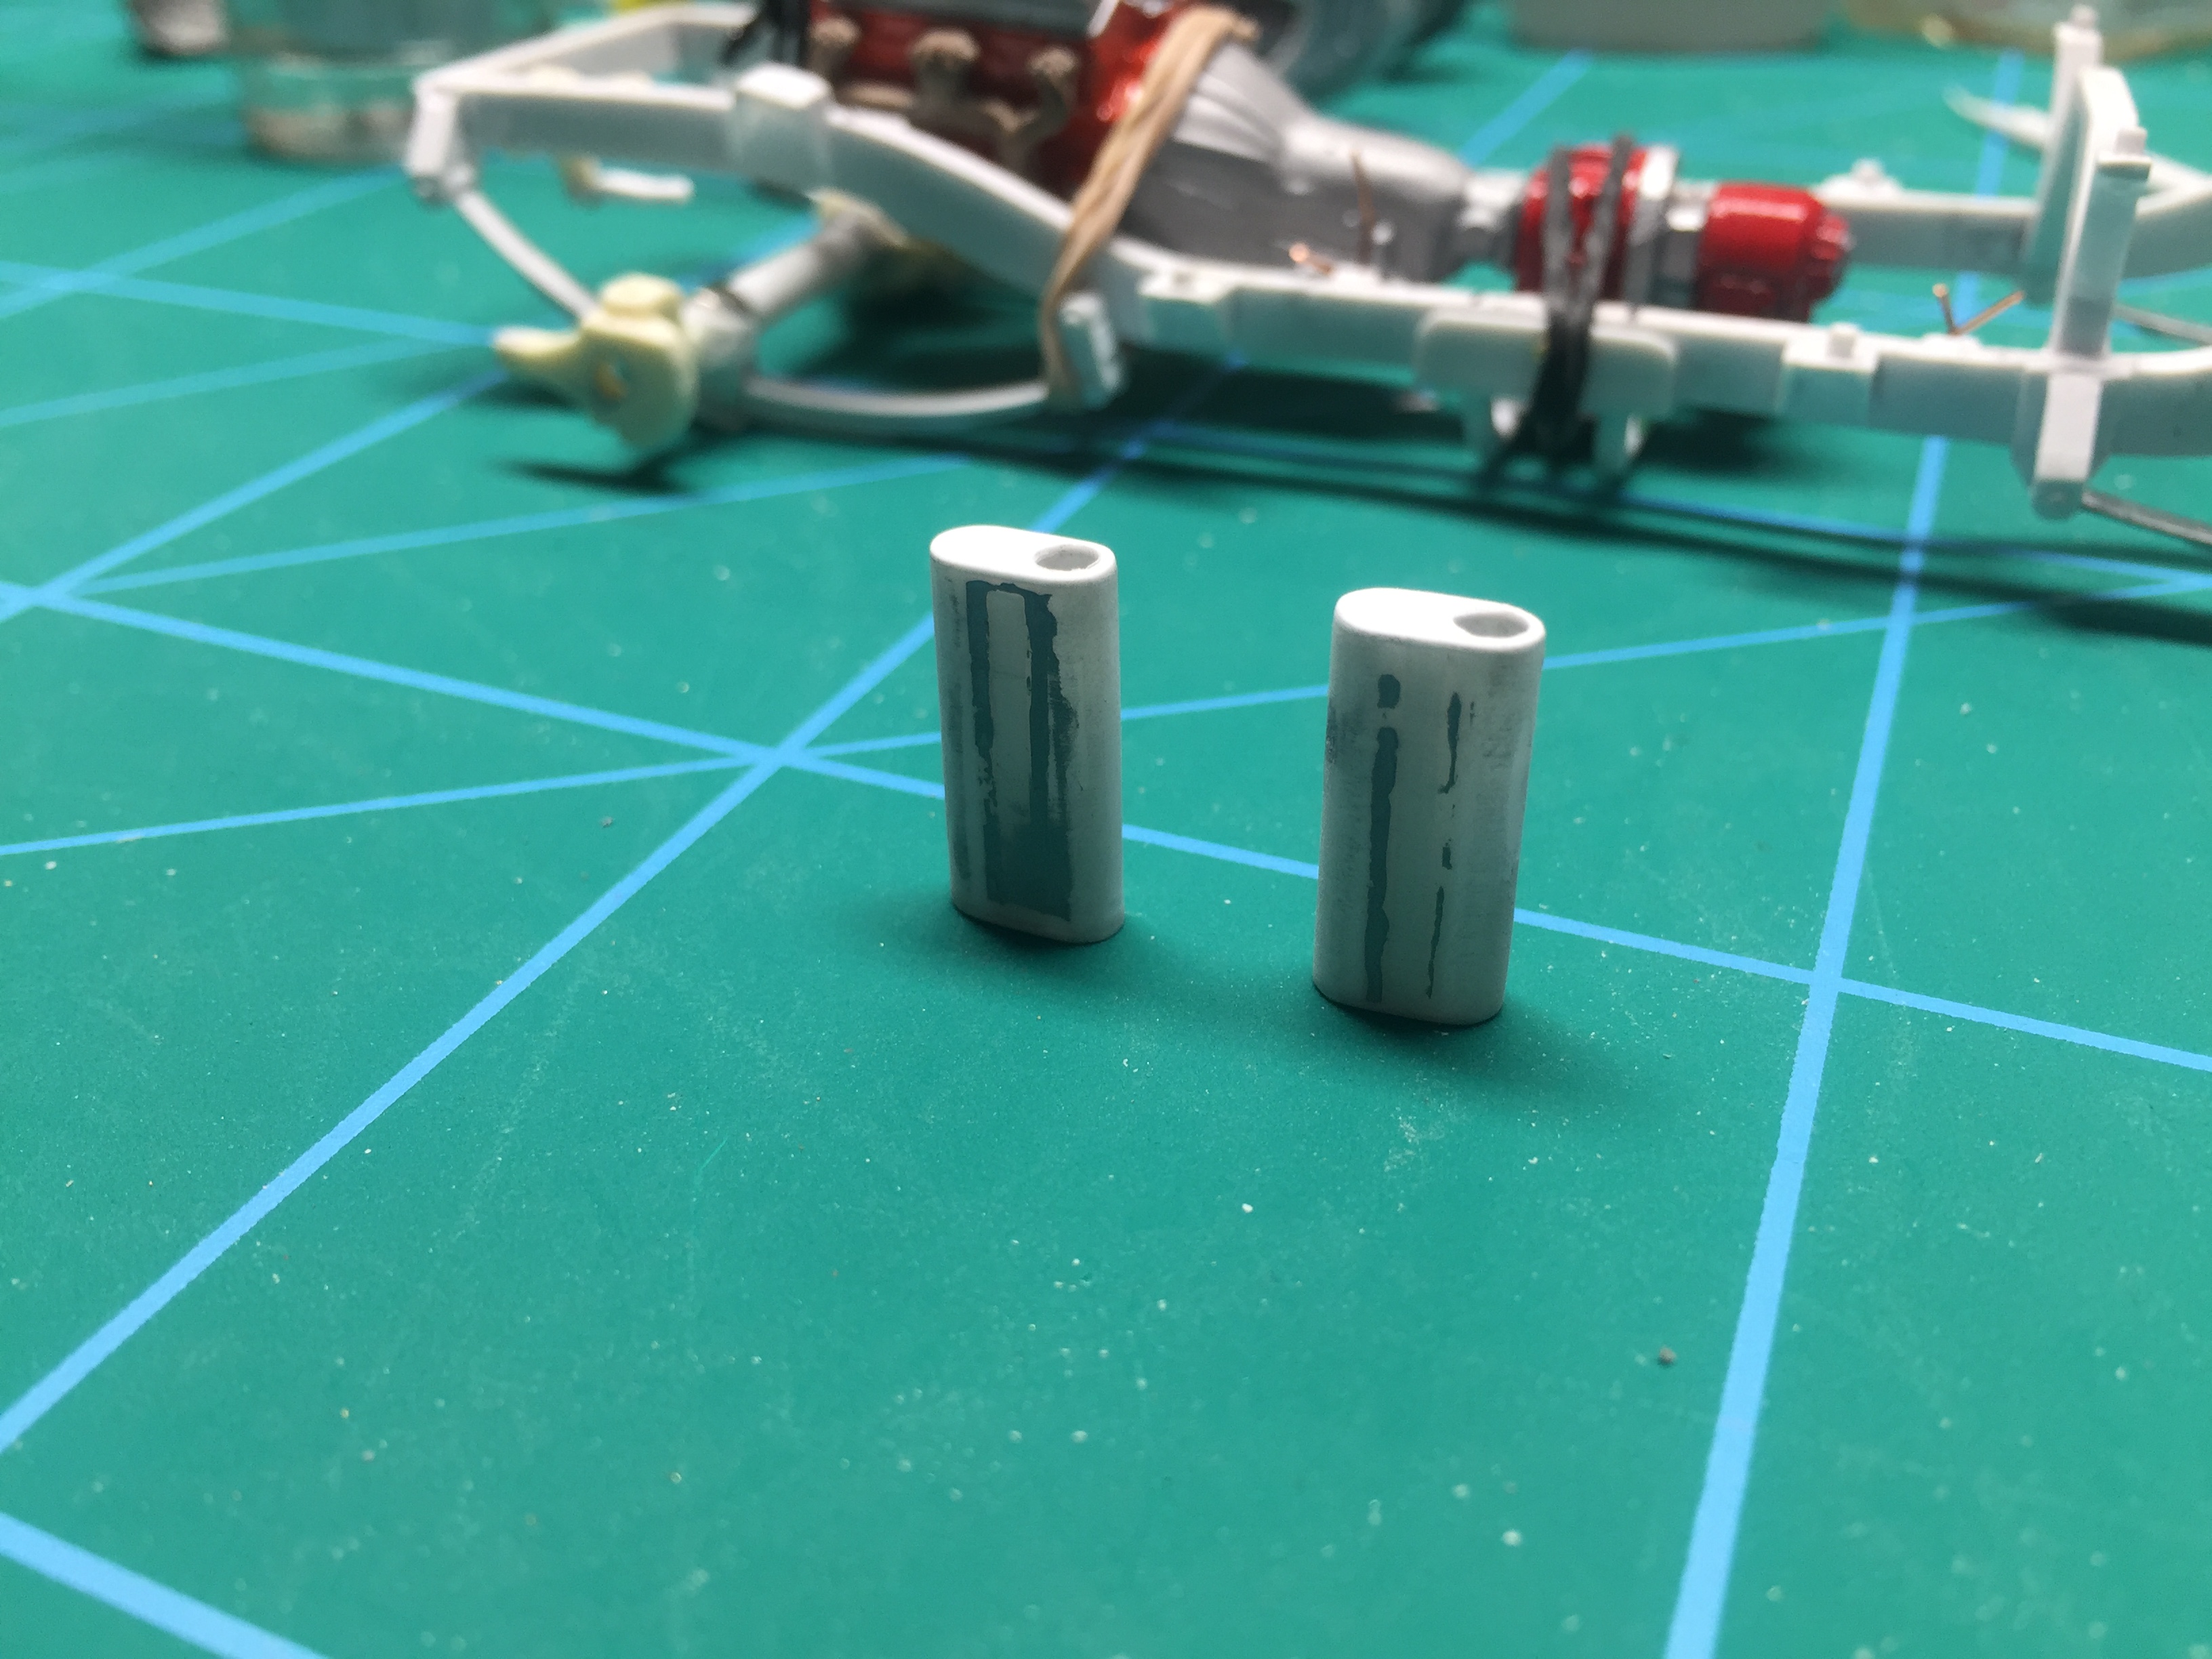
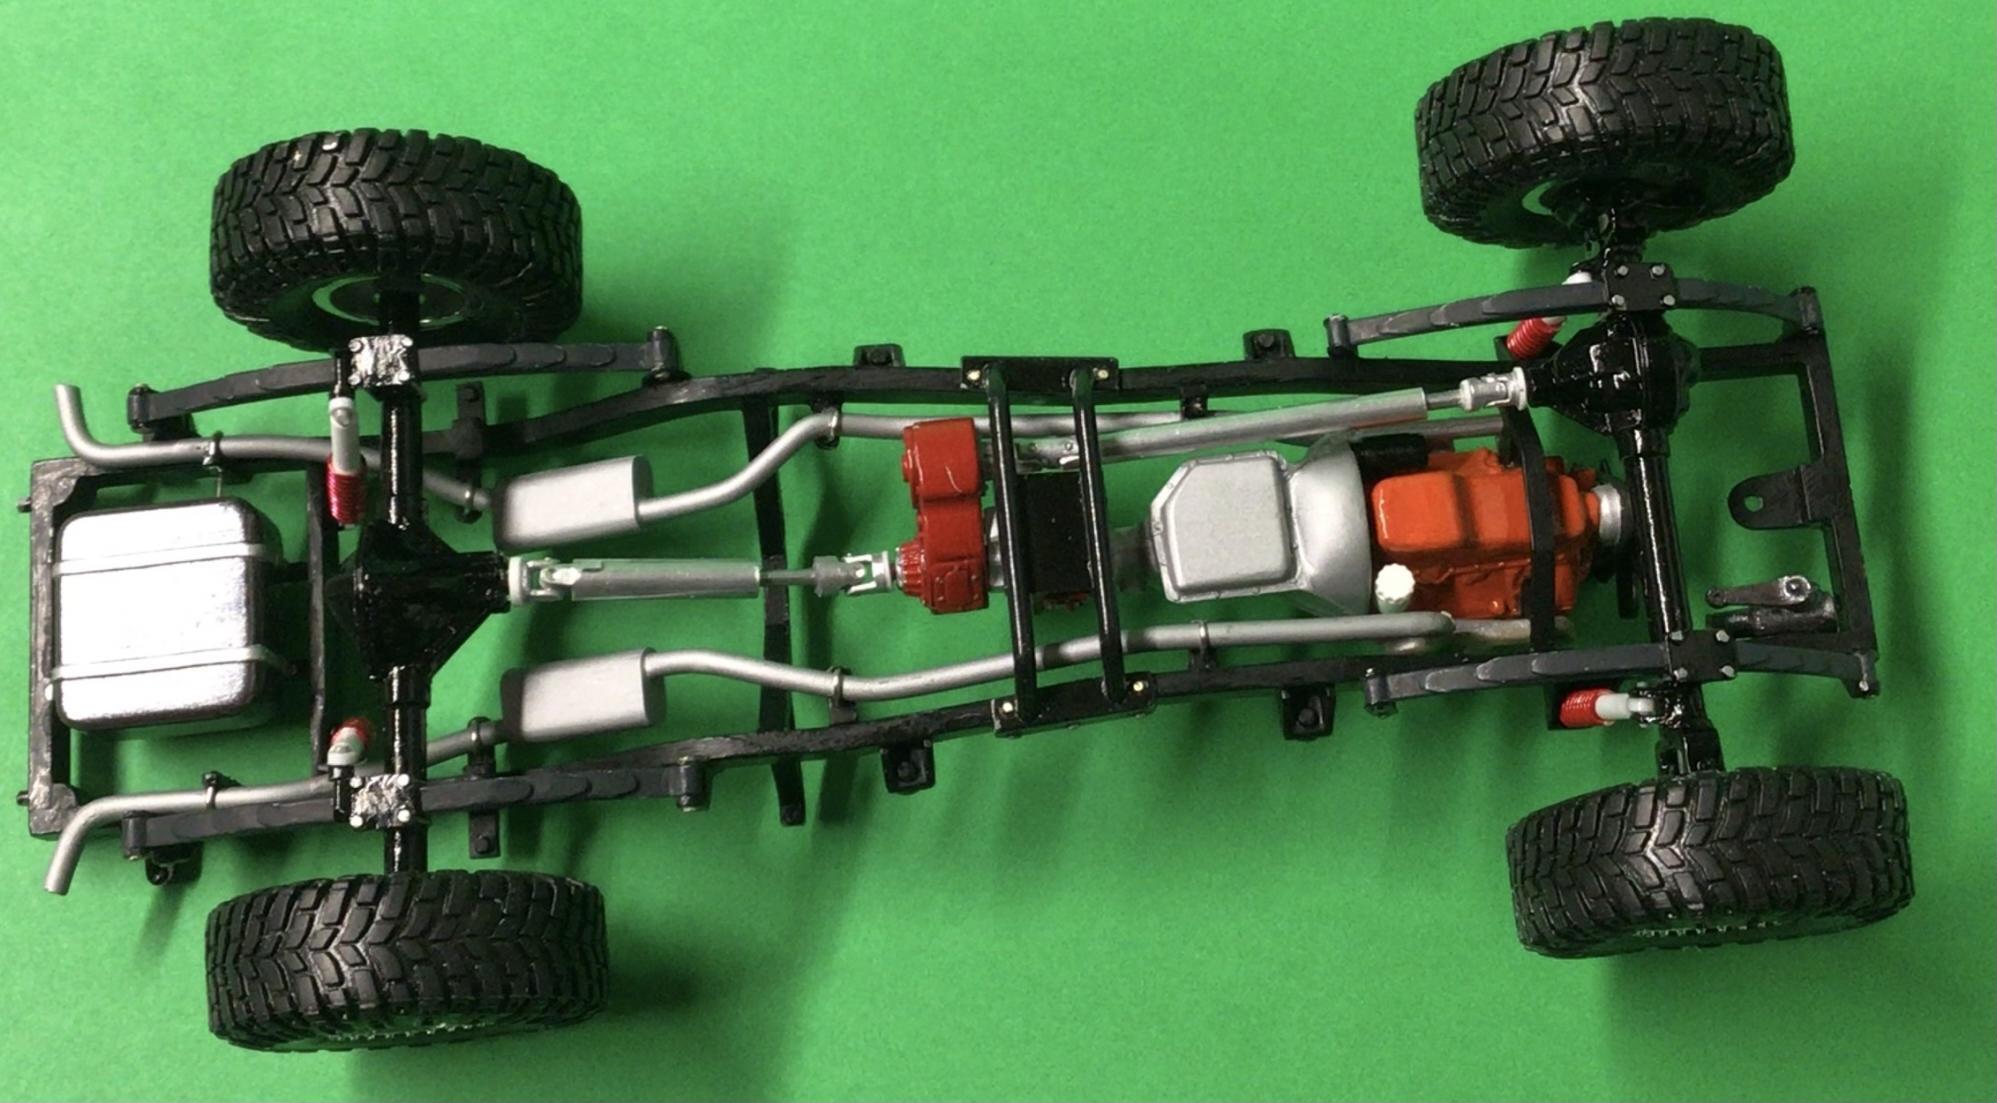
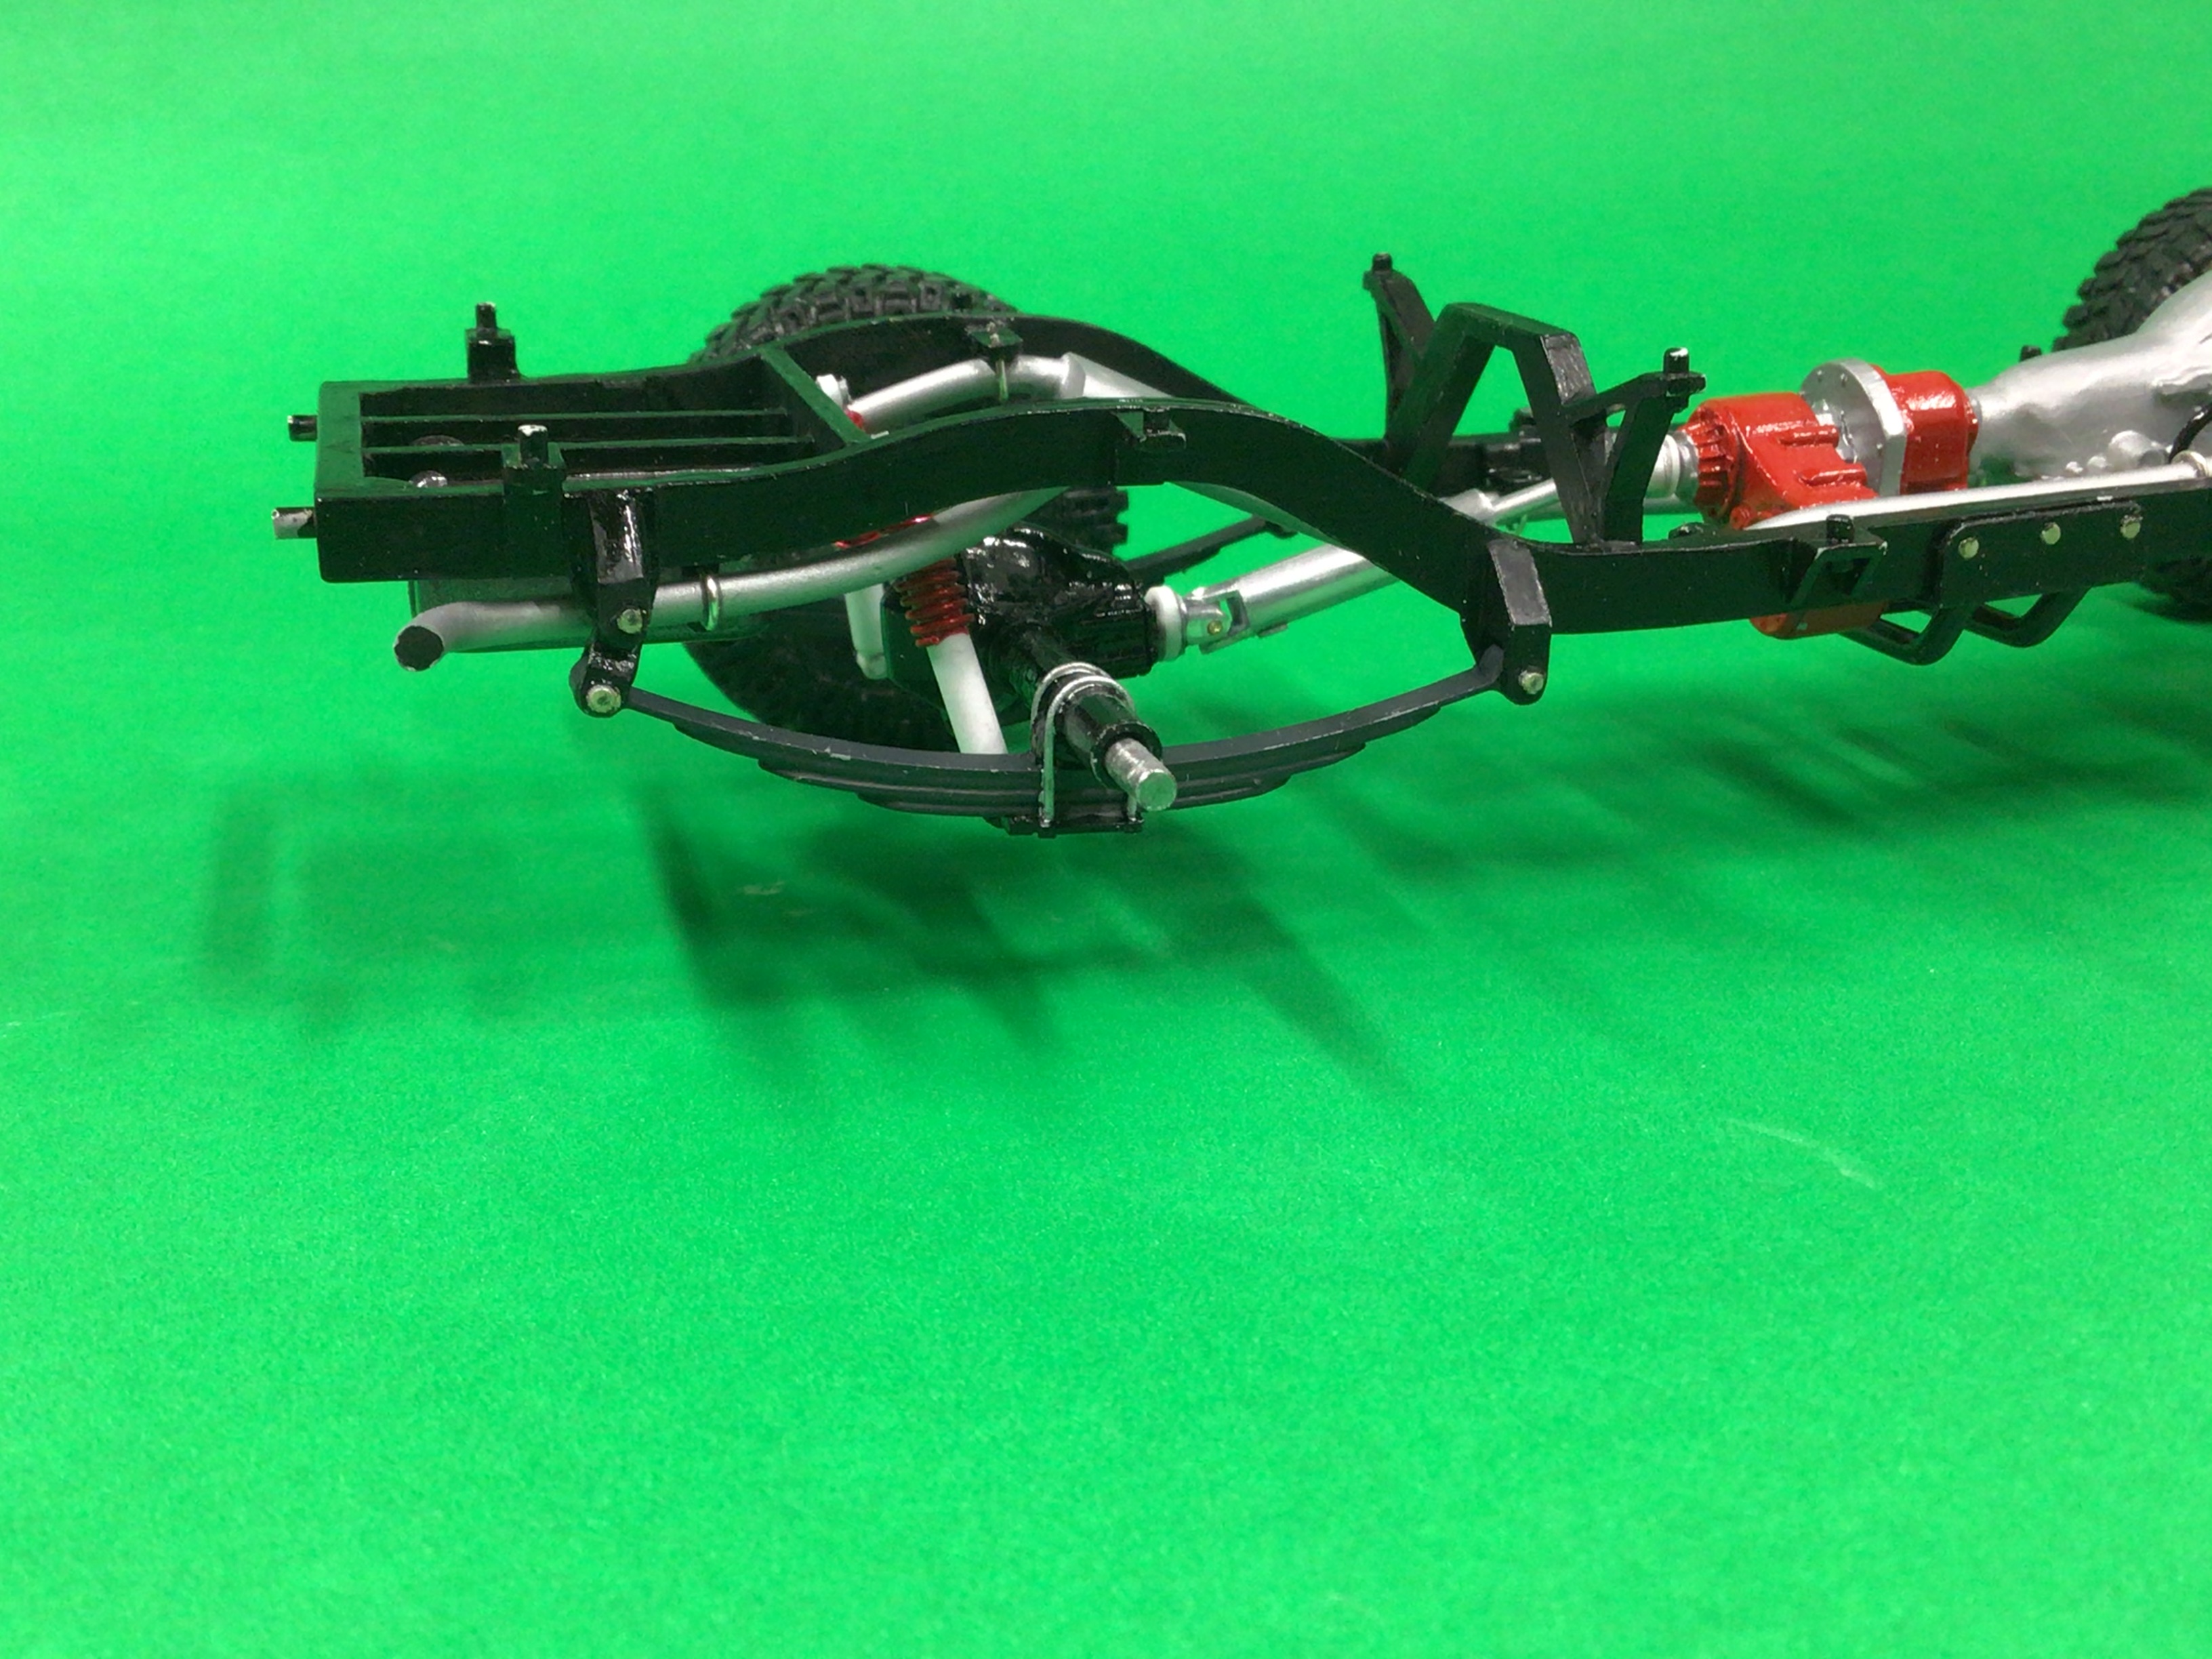
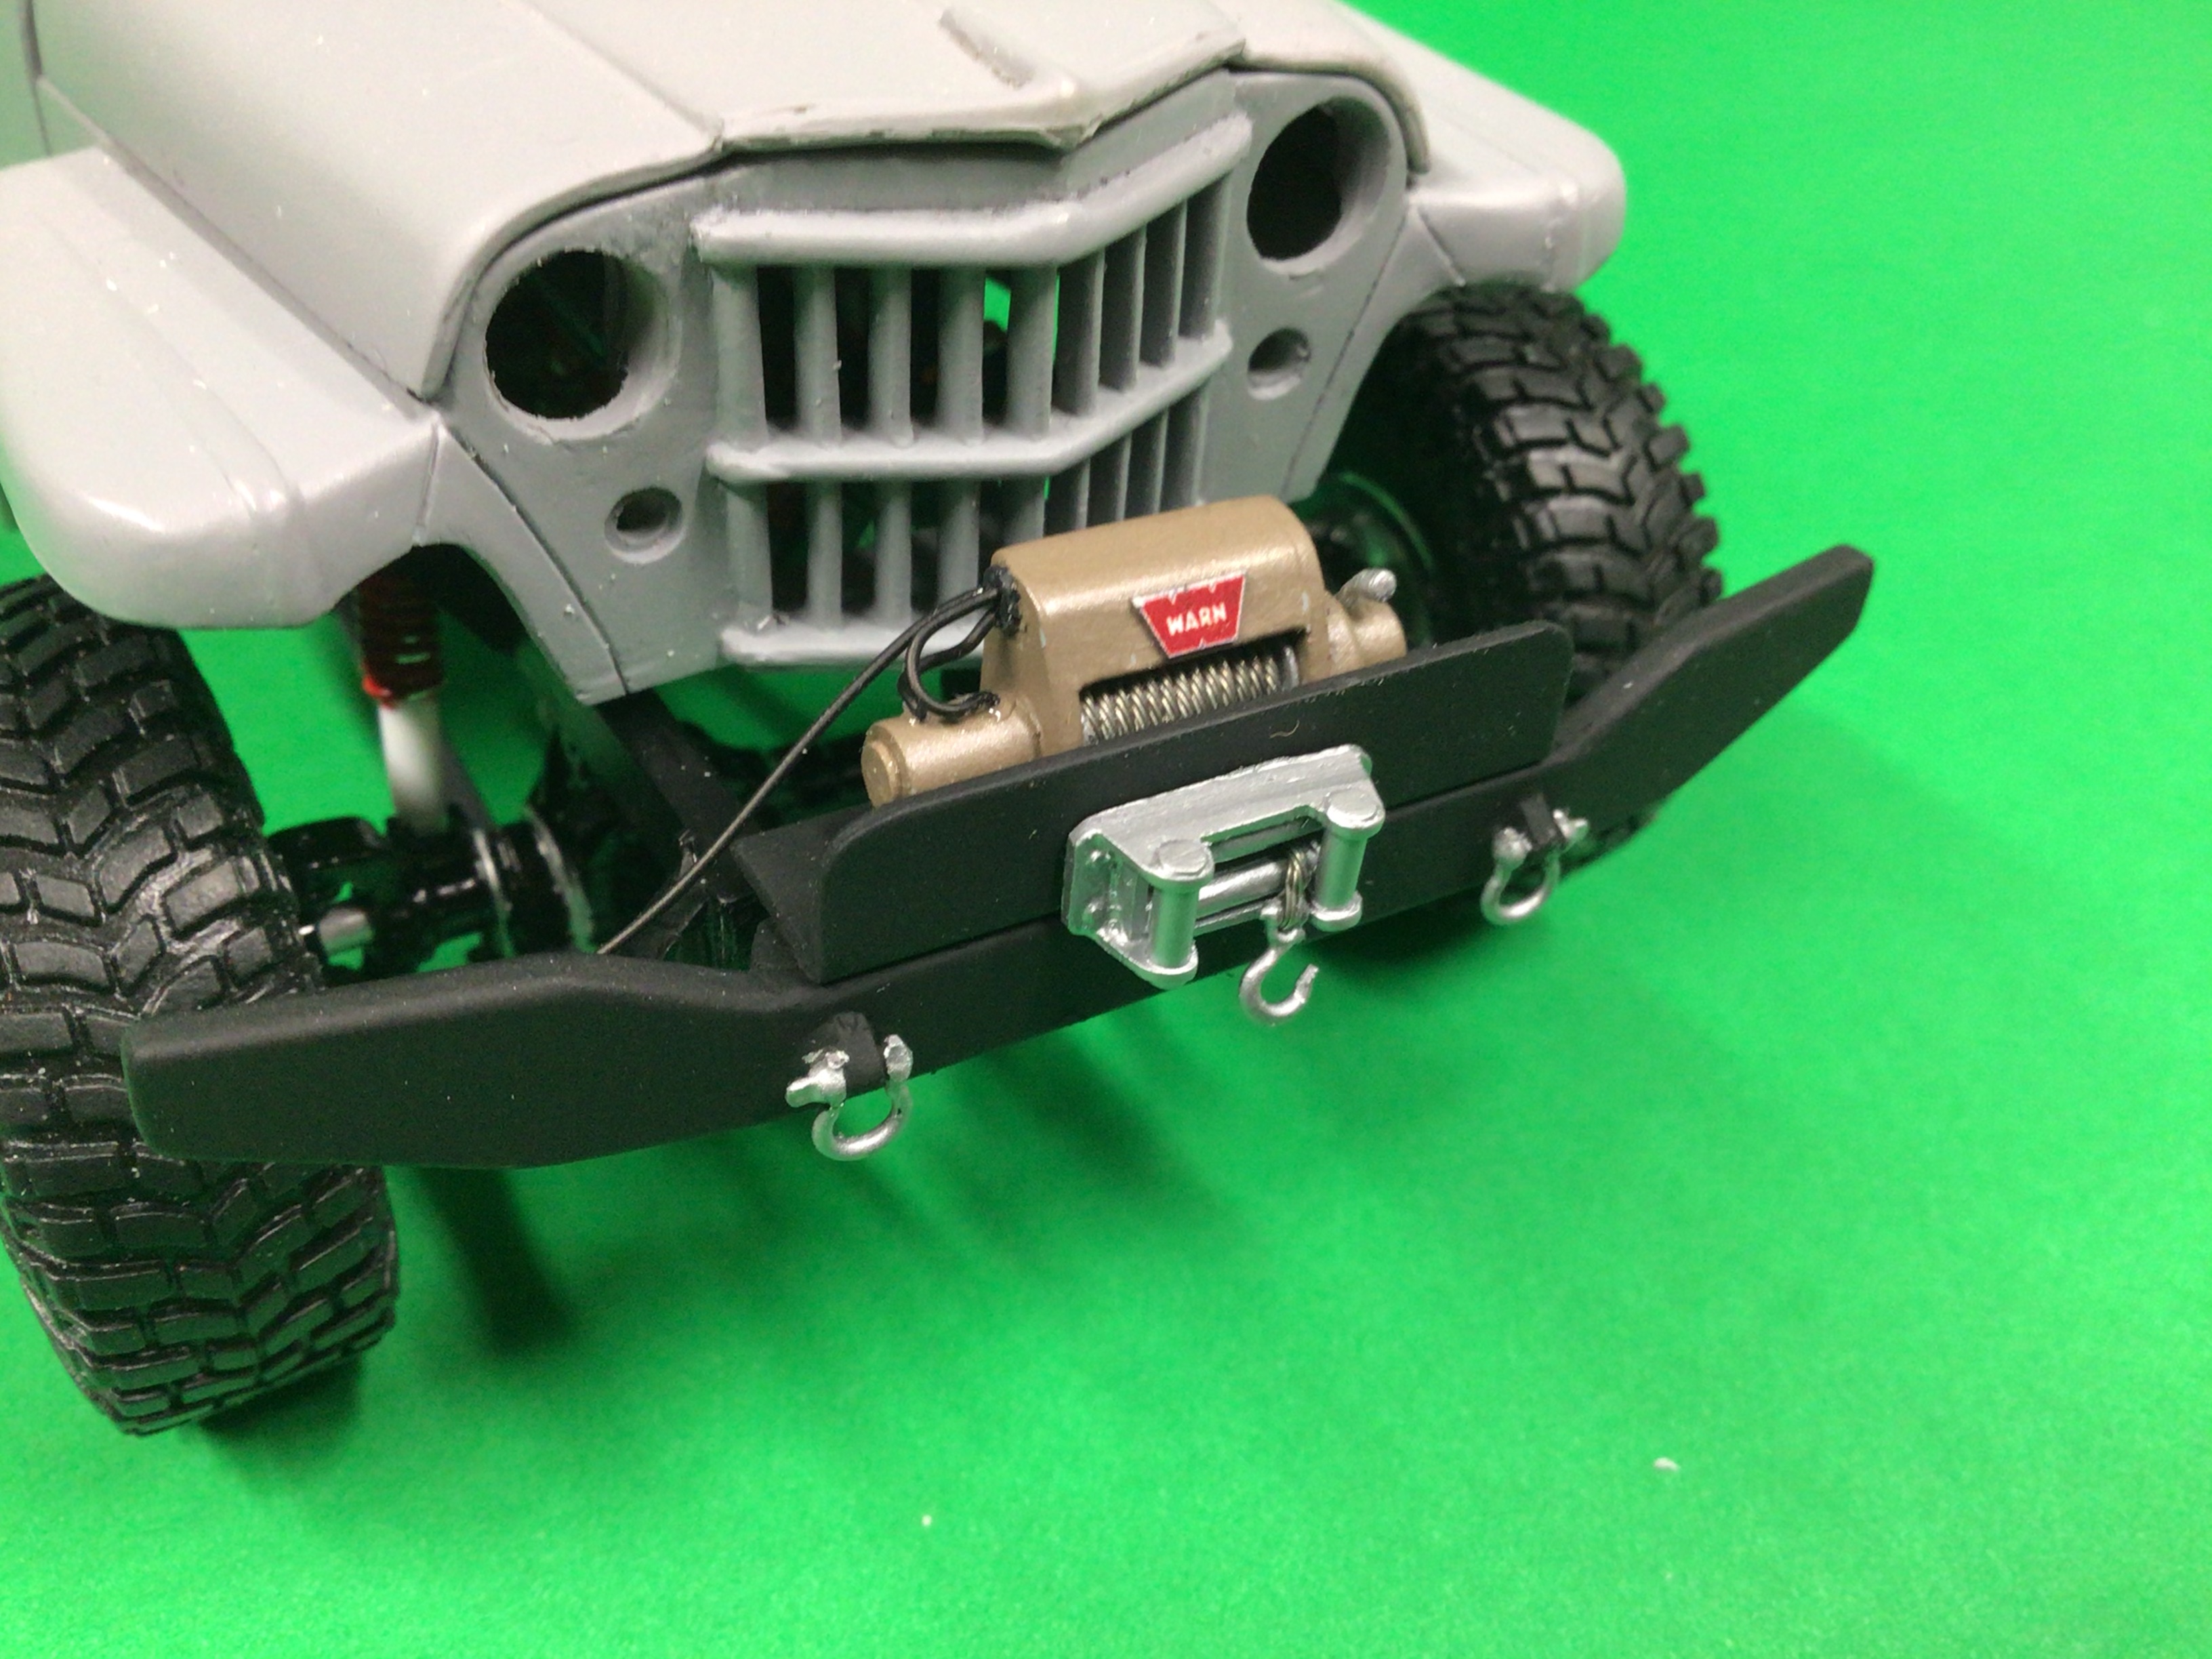
So I redid the rear springs for a third time. When I started making the exhaust, I realized the rear springs were not right. They scaled out to almost six feet long.? The Jeep Honcho springs that I sort of copied are way longer than they should be also. Oh well, it’s all good now! The engine and drivetrain are in place and so is the exhaust system. I scratch built the front and rear bumpers, as well as the winch and roller fairlead.
-
‘54 Willys P/U
NOBLNG replied to NOBLNG's topic in WIP: Model Trucks: Pickups, Vans, SUVs, Light Commercial
Thanks for the compliment Carl. It is a Willys Overland though, not a Dodge.? -
1950 Chevrolet Turdy One Hunnert
NOBLNG replied to Chuck Most's topic in Model Trucks: Pickups, Vans, SUVs, Light Commercial
Wow, that’s gone through quite the evolution! Great job on the weathering. That bed looks so real I would have sworn it was a re-sized photograph. -
Nice job! It looks much better in black I think. What are those wheels from? They look great on it.?