NOBLNG
-
Posts
10,232 -
Joined
-
Last visited
Content Type
Profiles
Forums
Events
Gallery
Everything posted by NOBLNG
-
 That is Cool! Is that a kit? Resin? Build thread?
 -
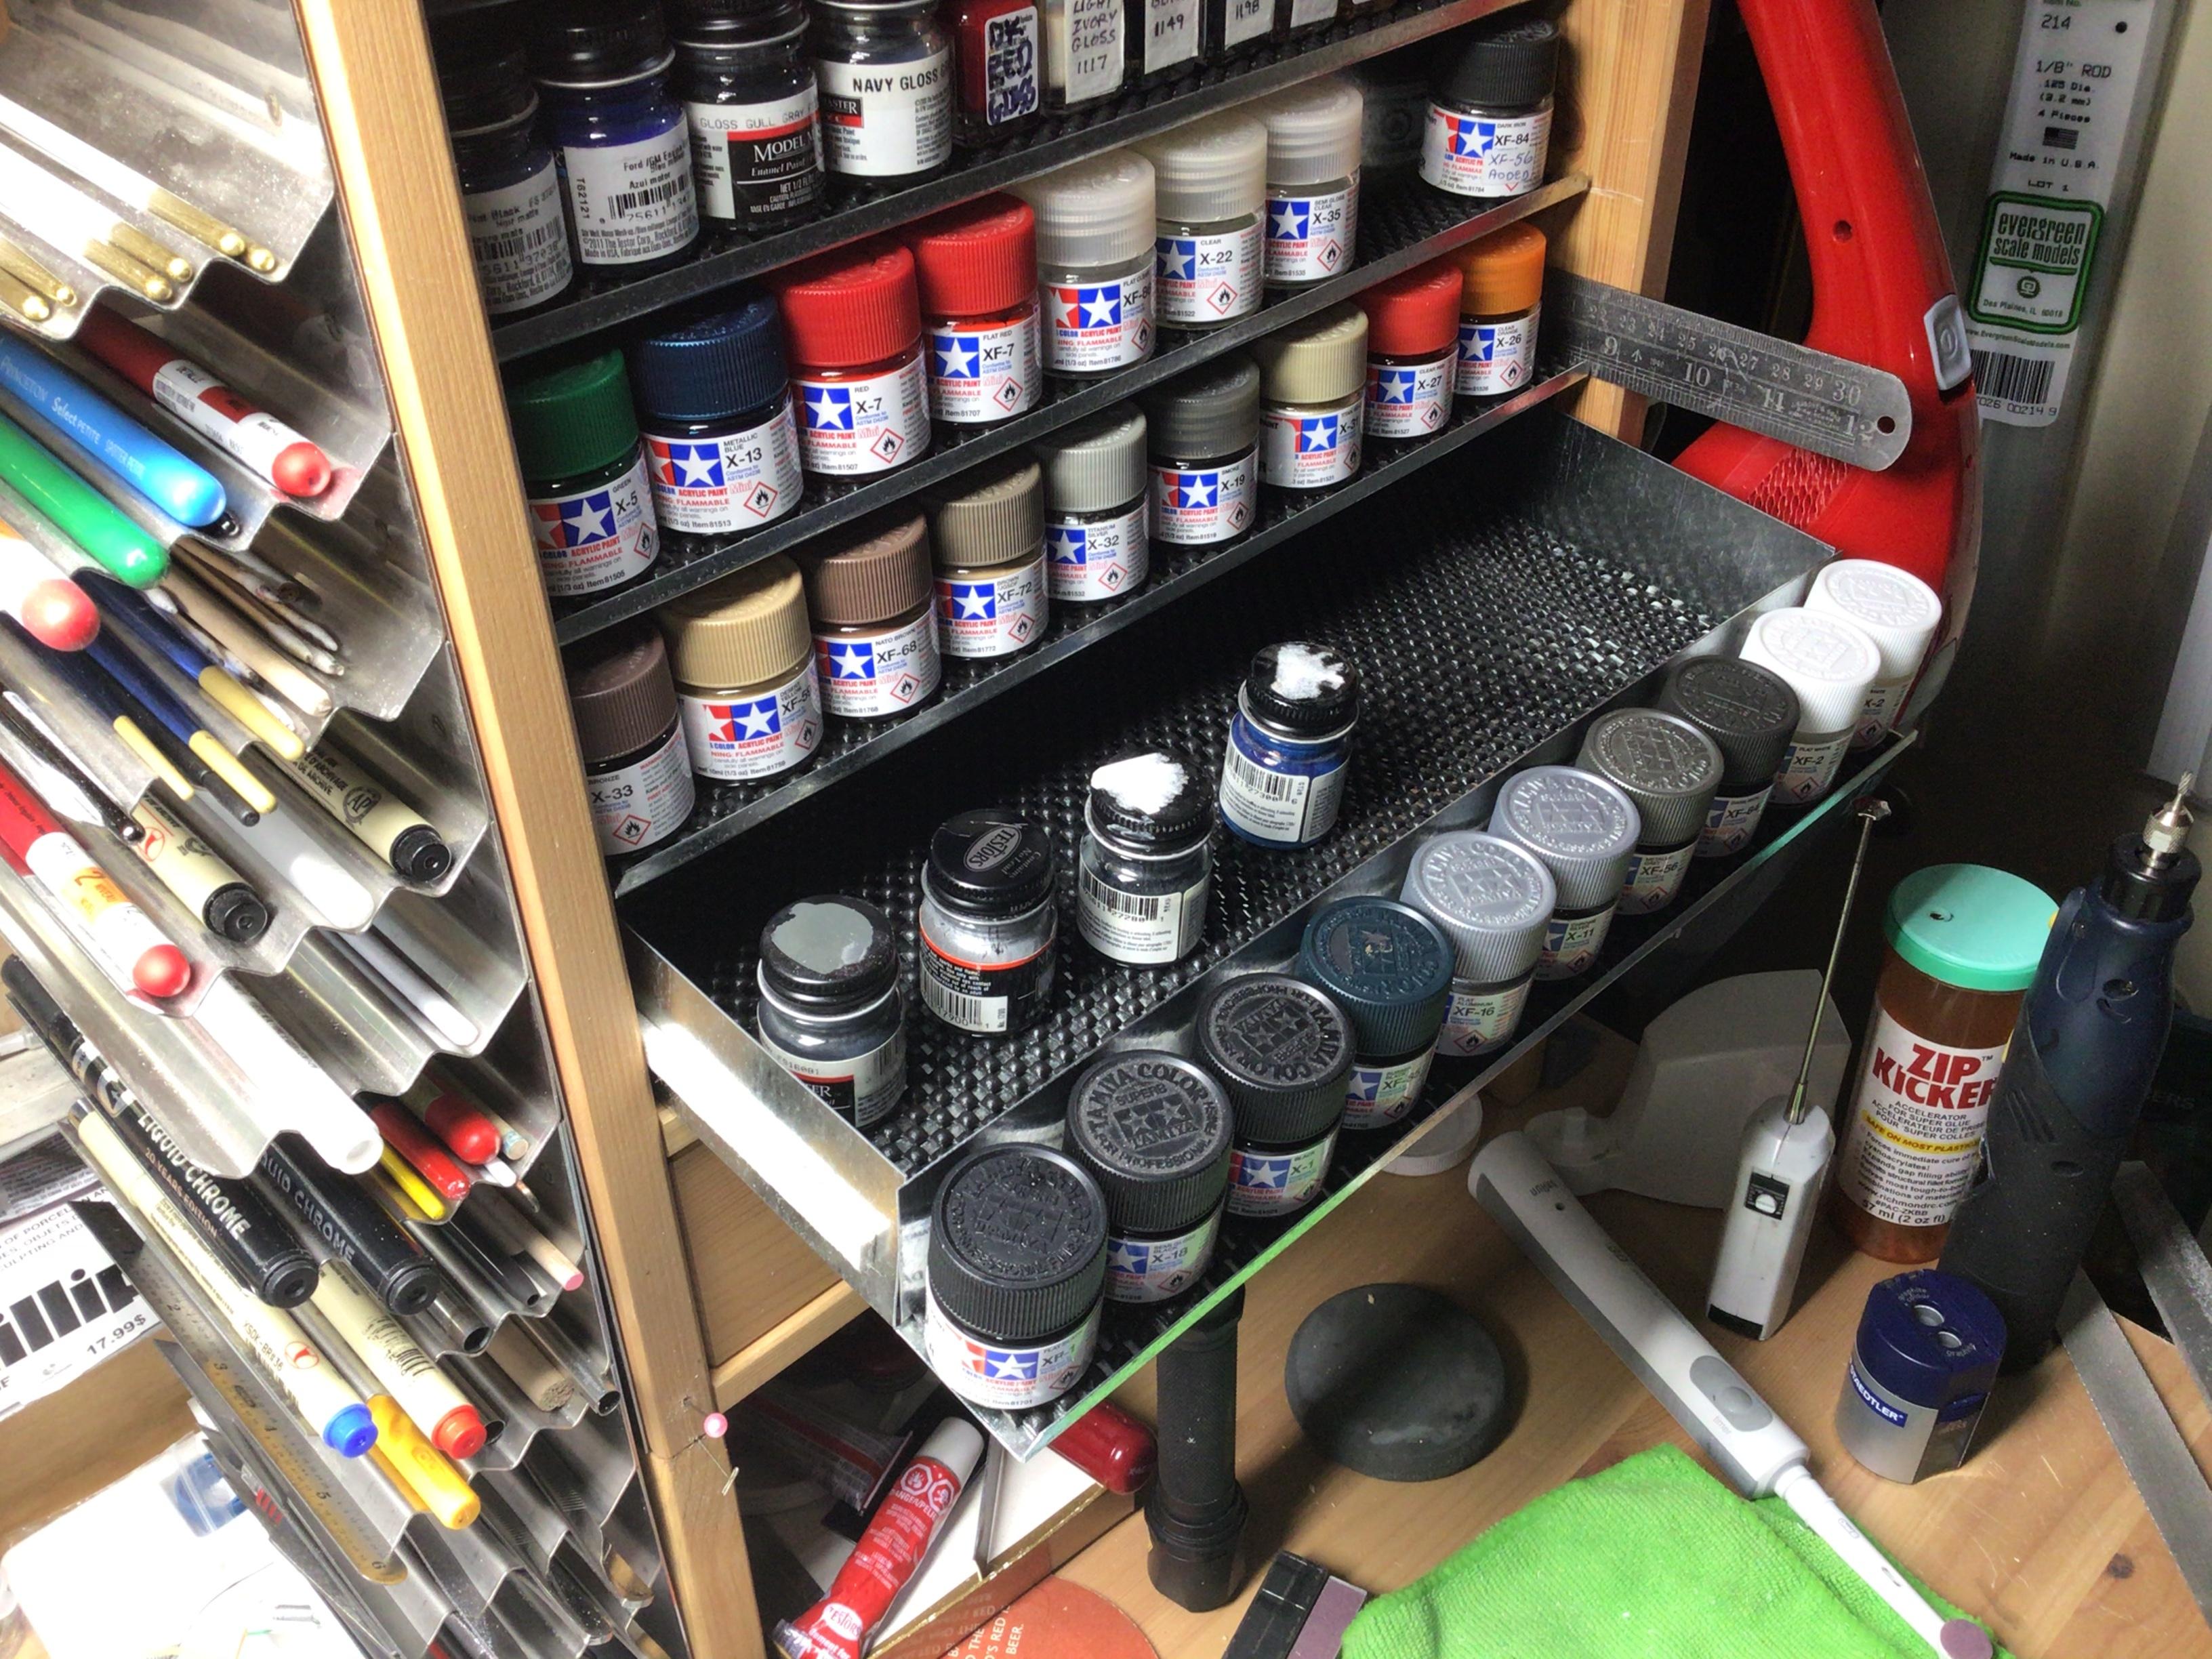
Nice! I was starting to double stack my paints on the stepped shelves I built. So I made some new shelves. Only this time, each shelf is also a drawer. I now can store my duplicates, less used jars, and other supplies as well in the drawers.

-
I just thought of painting it too. I guess I’ve got nothing to lose by trying the Molotow first. Is this a normal state of affairs now with newer kits, or is this a defect? It flaked off of the bottom of the front axle also.?
-
Now THAT is a good trick! The jaws can also be carved to suit tight spots. Thanks! Edit: All clothes pins are not equal either.
-
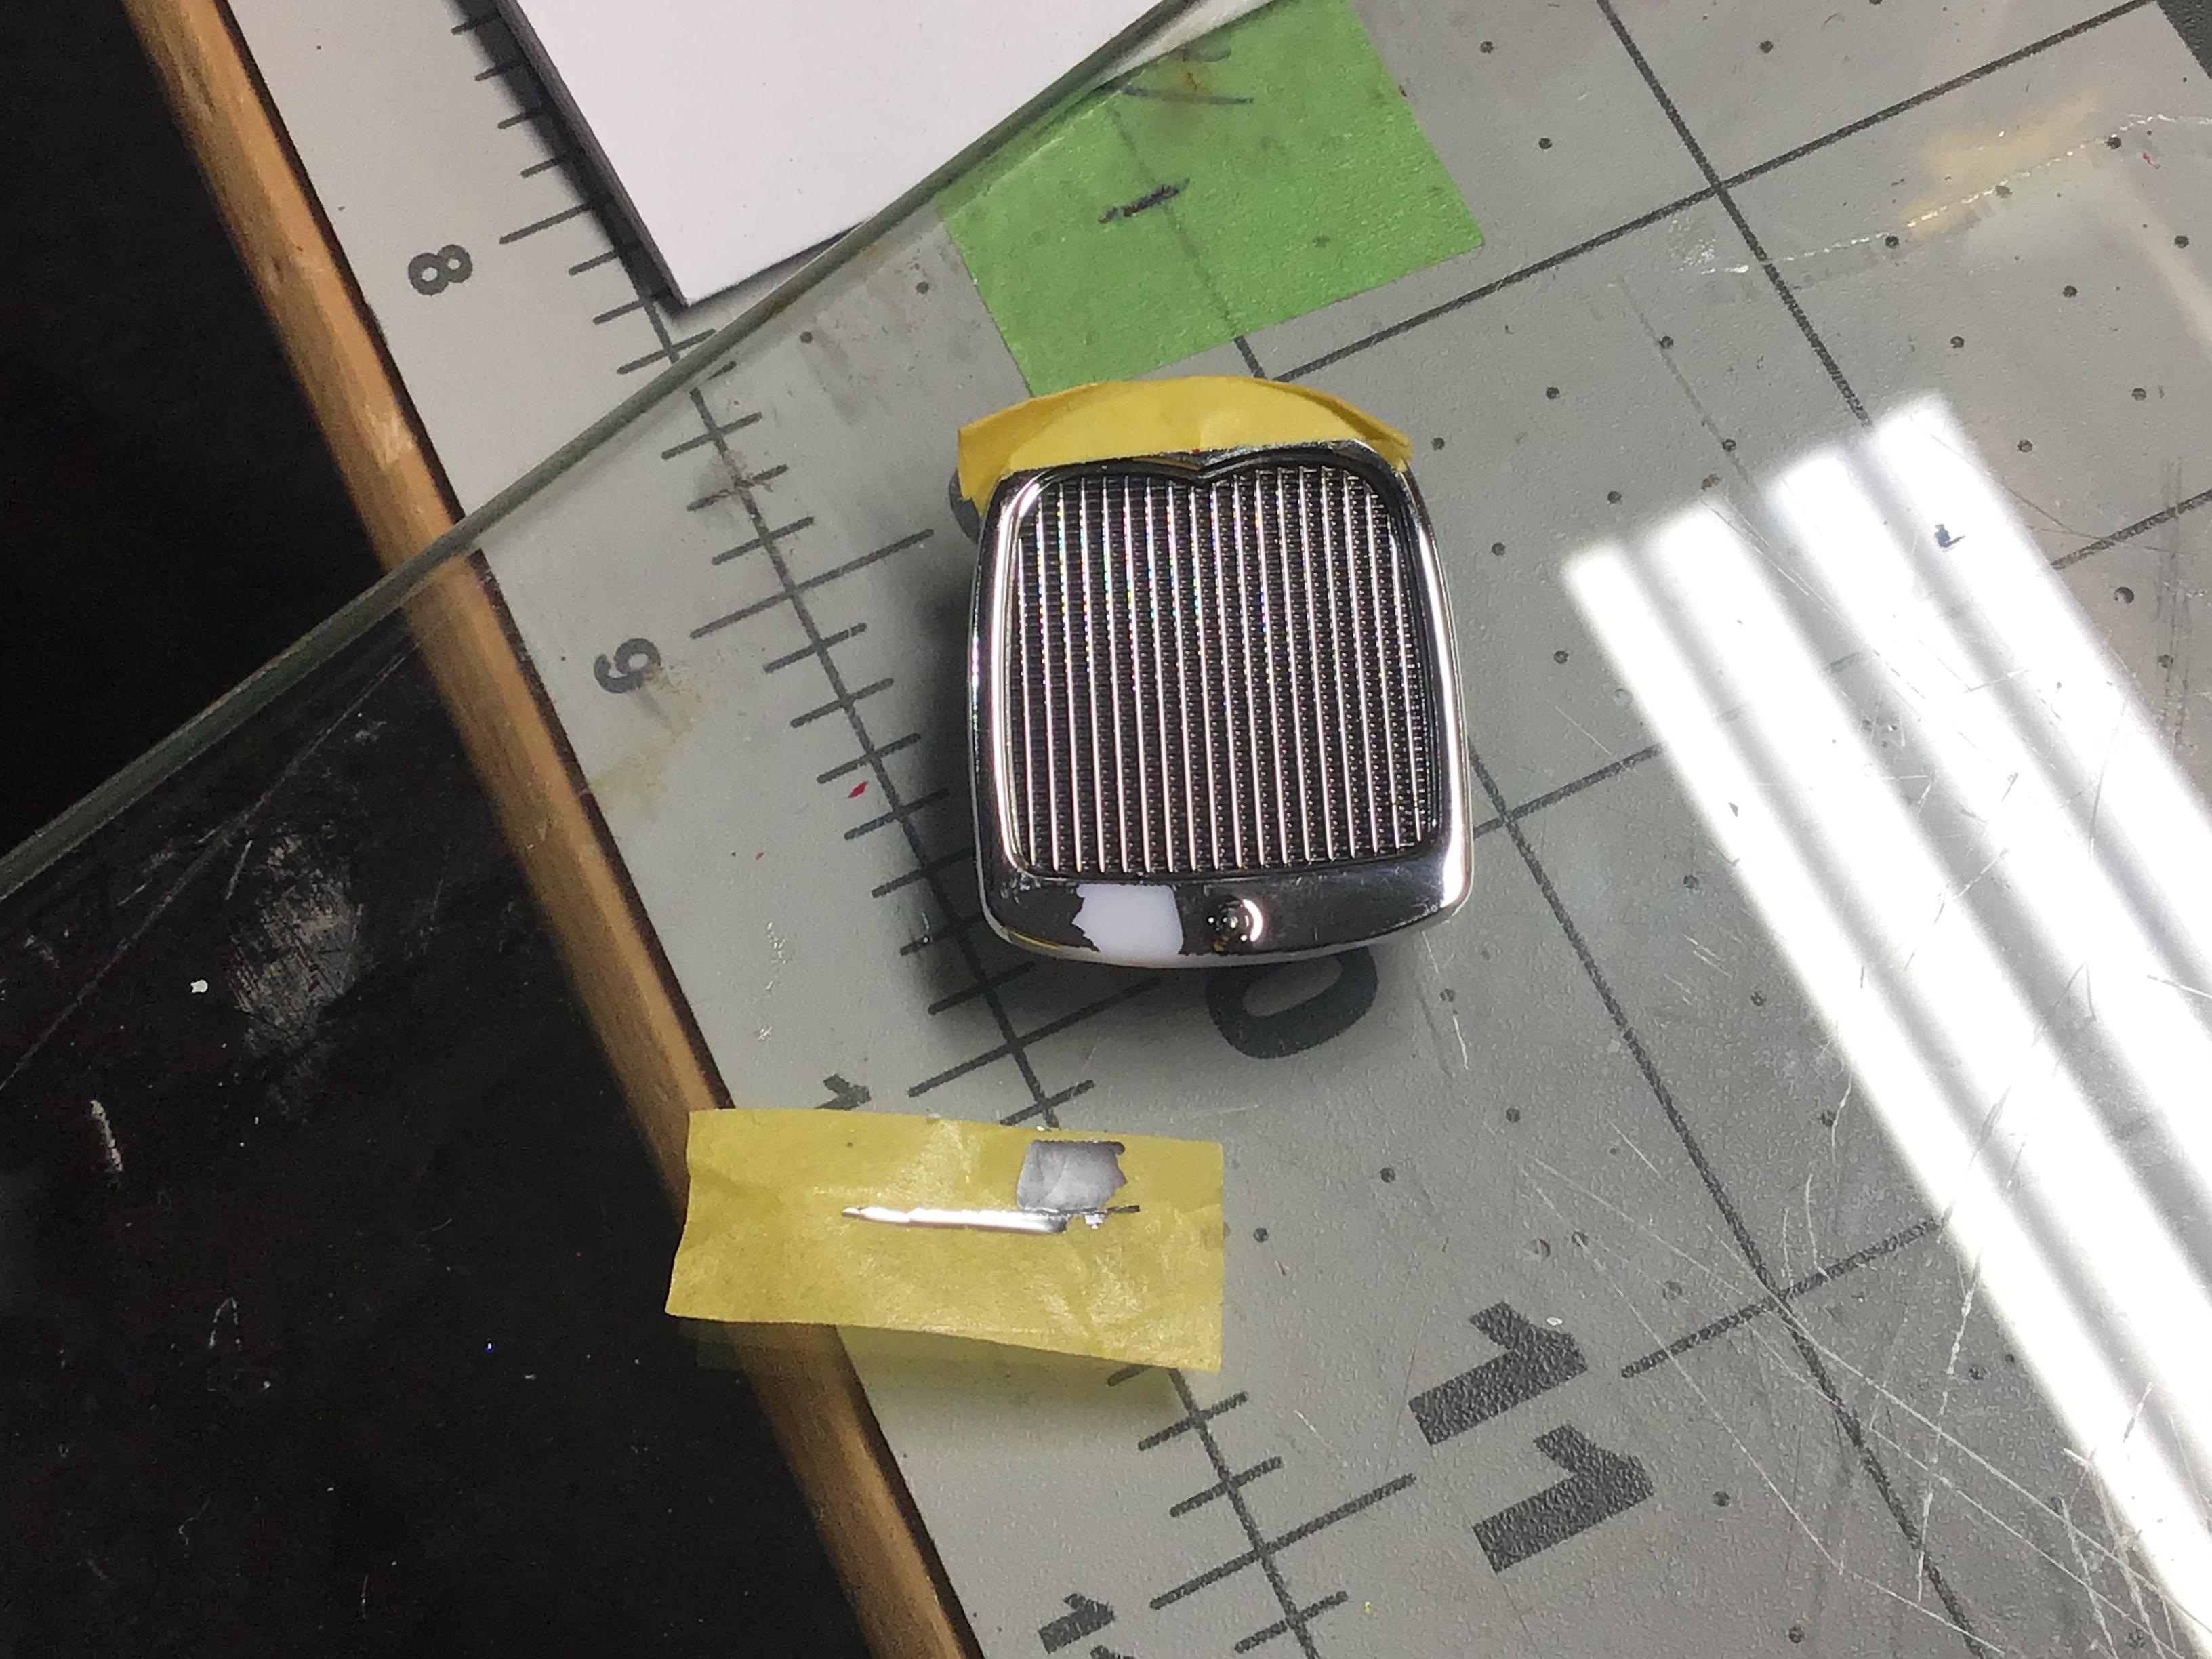
I put some Tamiya tape on this radiator shell to protect the chrome while handling it. As I carefully removed the tape a large chunk of the chrome came with it. I assume there is little to no chance of getting a replacement from Revell?....so I guess I have a good excuse to try the alclad I bought years ago and never used. Anyone know of a better option? Thanks, Greg.
-
Wow! I didn’t really collect them when I was a kid. My younger brother had probably a couple dozen or so of them mixed with Matchboxs. He was a destructive kid and eventually smashed most of them with a hammer.?
-
Thanks Guys. I have some of those same clamps. I probably use these yellow ones and the white plastic ones the most. The long nose ones on the left are handy, as they have very tiny jaws. I made a couple of long reach ones that use elastic bands for clamping, but they are a little sloppy. I may have to re-make them. My hemostats will pretty much crush any plastic part if I clamp tight enough to lock them...maybe good for installing metal pins.?
-
I use these alligator clips a lot for clamping things. They have a nice strong spring and can get in where other clamps can’t. Sometimes though, the teeth can mar the finished paint or chrome. So I trimmed a piece of popsicle stick to fit inside the jaws and then filed the teeth down flush to the wood. If anyone has any other handy tiny clamps, please post them up here.
-
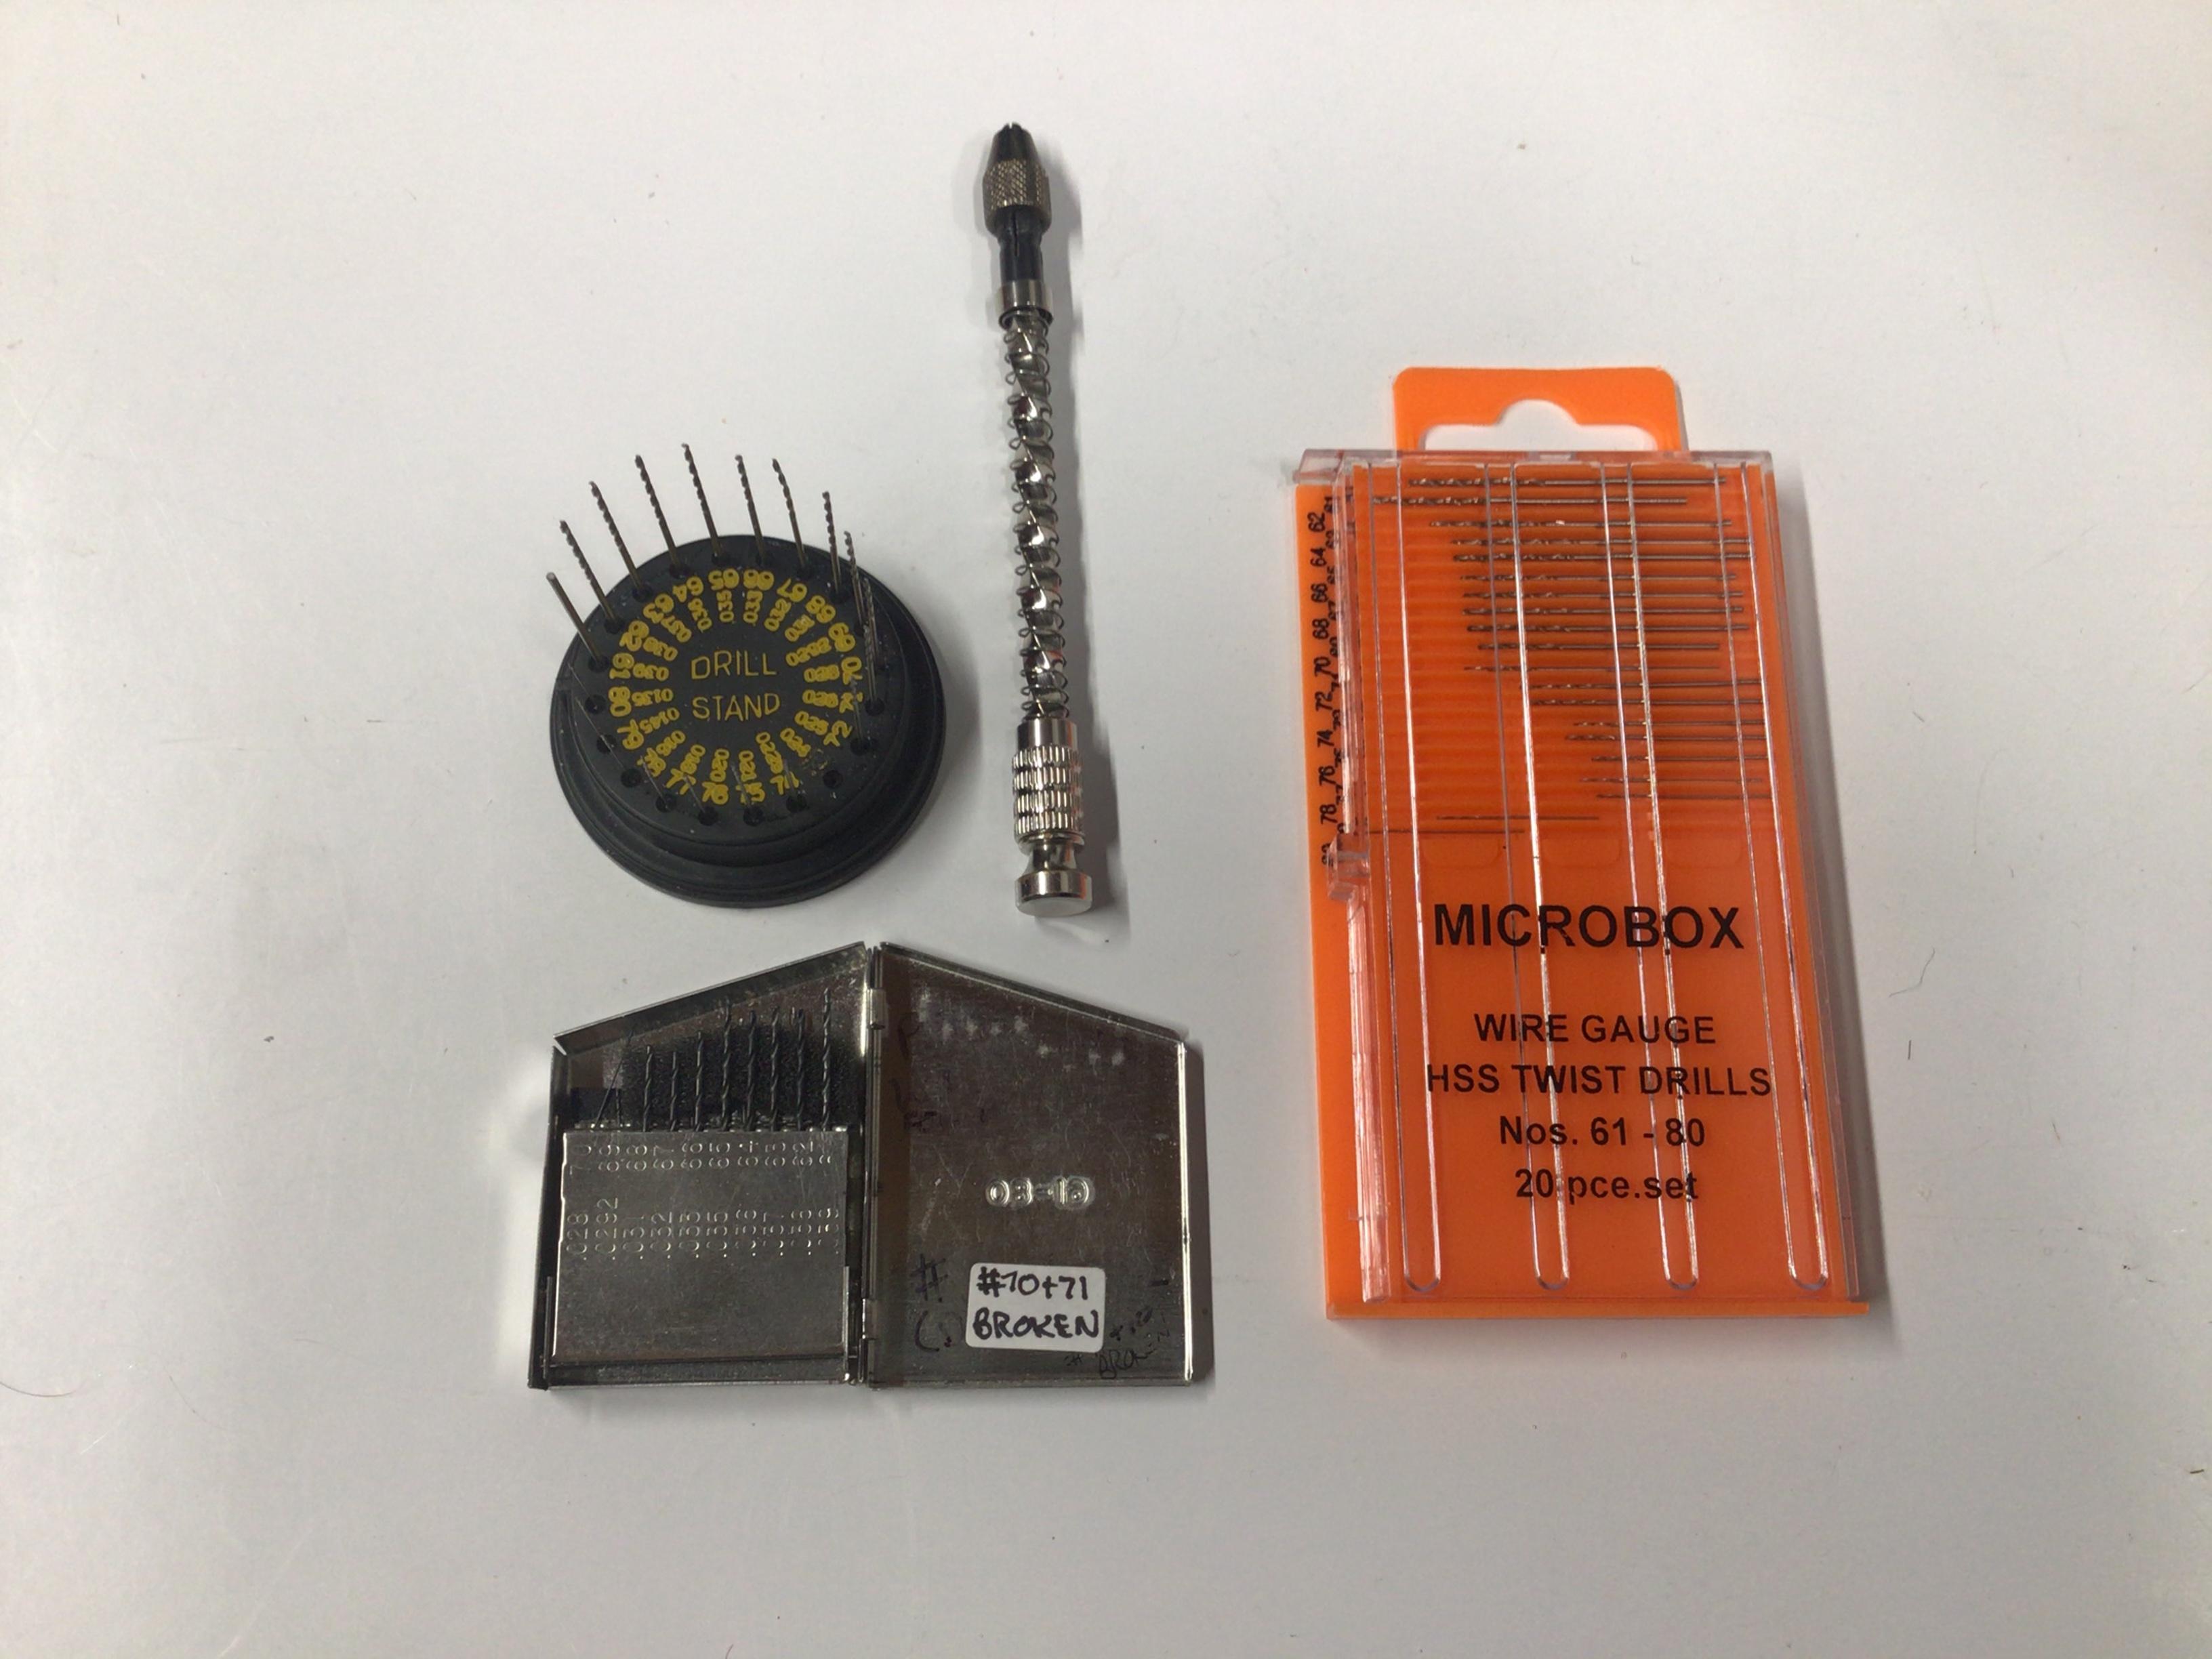
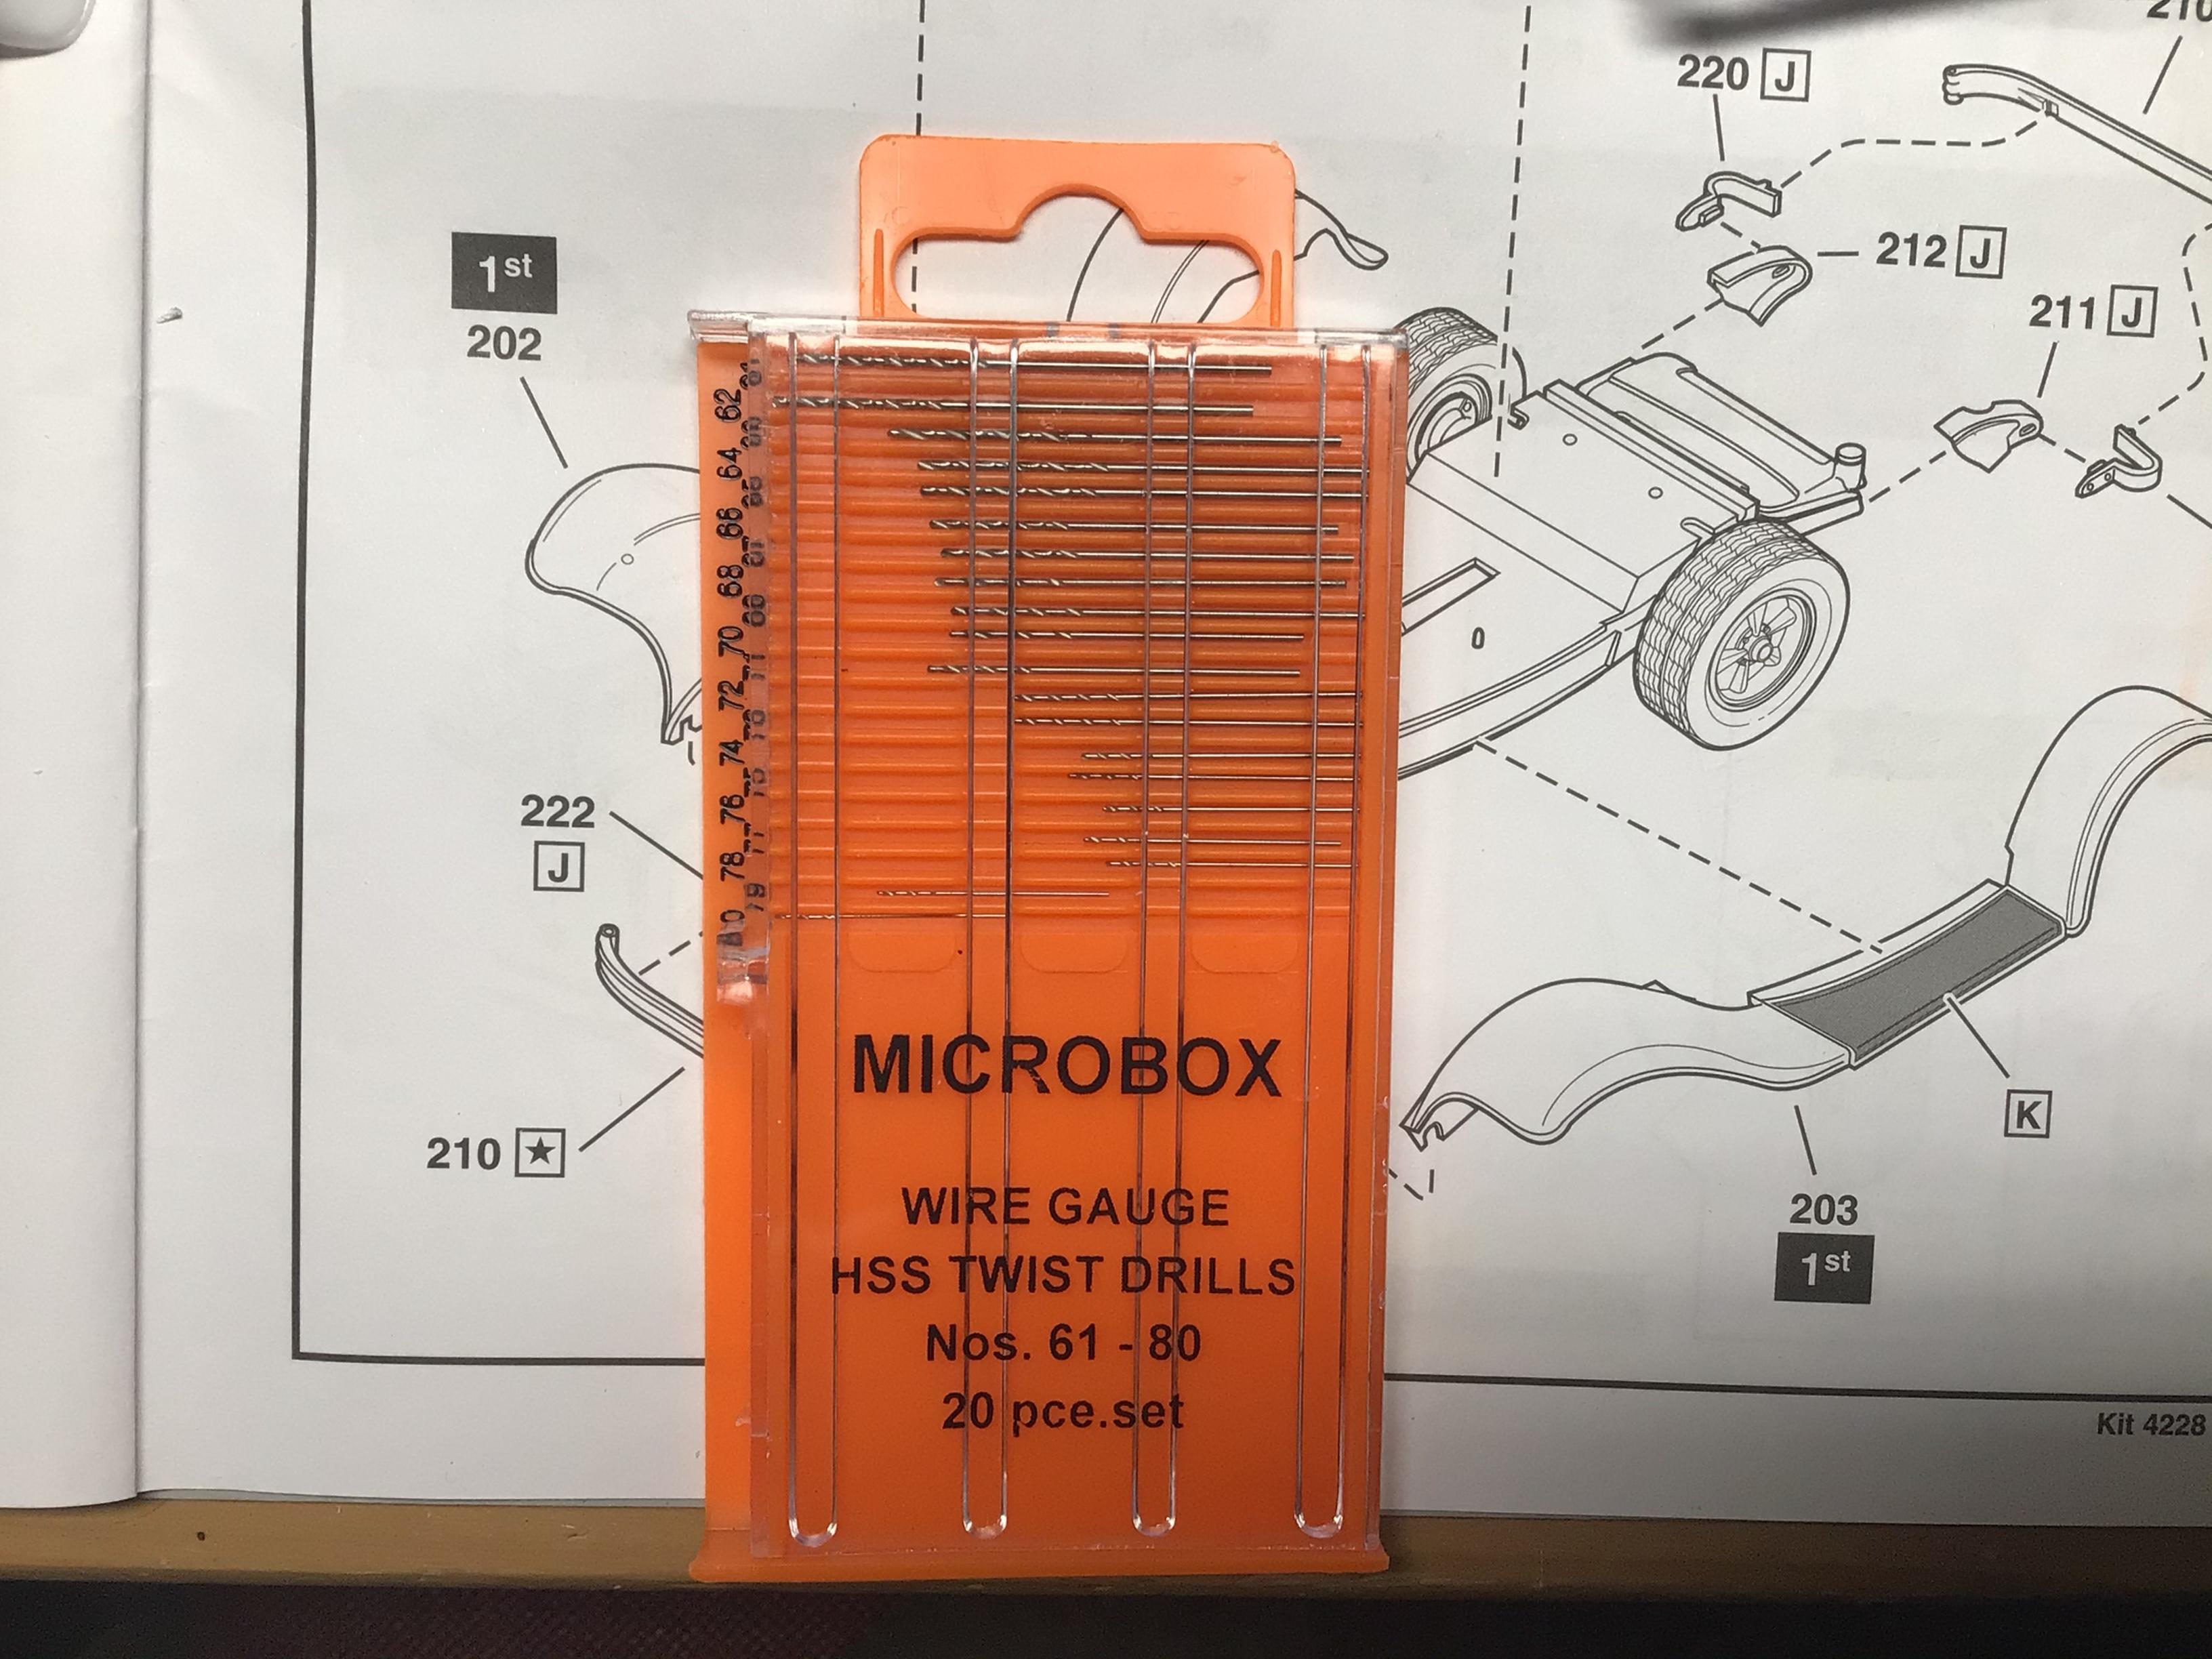
I have a set of “Mascot” drill bits that came in the round plastic index. They have a decent edge on them. I broke the biggest one and bent the #67 (.032”) bit. I also have a nice Morse set in the little metal index...I have broken a couple of those also. The Vallejo set I just got, but they seem to be as good or better than the others. And, yes the index or dispenser is likely supplied to the bit manufacturer.
-
Vallejo makes or imports a really nice set that are made in Spain. The cutting edges on the first set of cheap Chinese ones I bought didn’t resemble a drill bit at all!
-
I like your first and last builds best Dax! The ‘51 Chevy and narrowed VW are great too....heck, they’re all great! It would be really fabulous to see and animated sci-fi movie made with these vehicles...sort of along the lines of Heavy Metal.?
-
Installing Outside Side Mirrors
NOBLNG replied to TransAmMike's topic in Model Building Questions and Answers
And be careful not to drill right through and into your finger! ? It’s sometimes hard to hang onto them slippery little devils with tweezers. -
My first airbrush,compressor,paint
NOBLNG replied to Yamakashi's topic in Model Building Questions and Answers
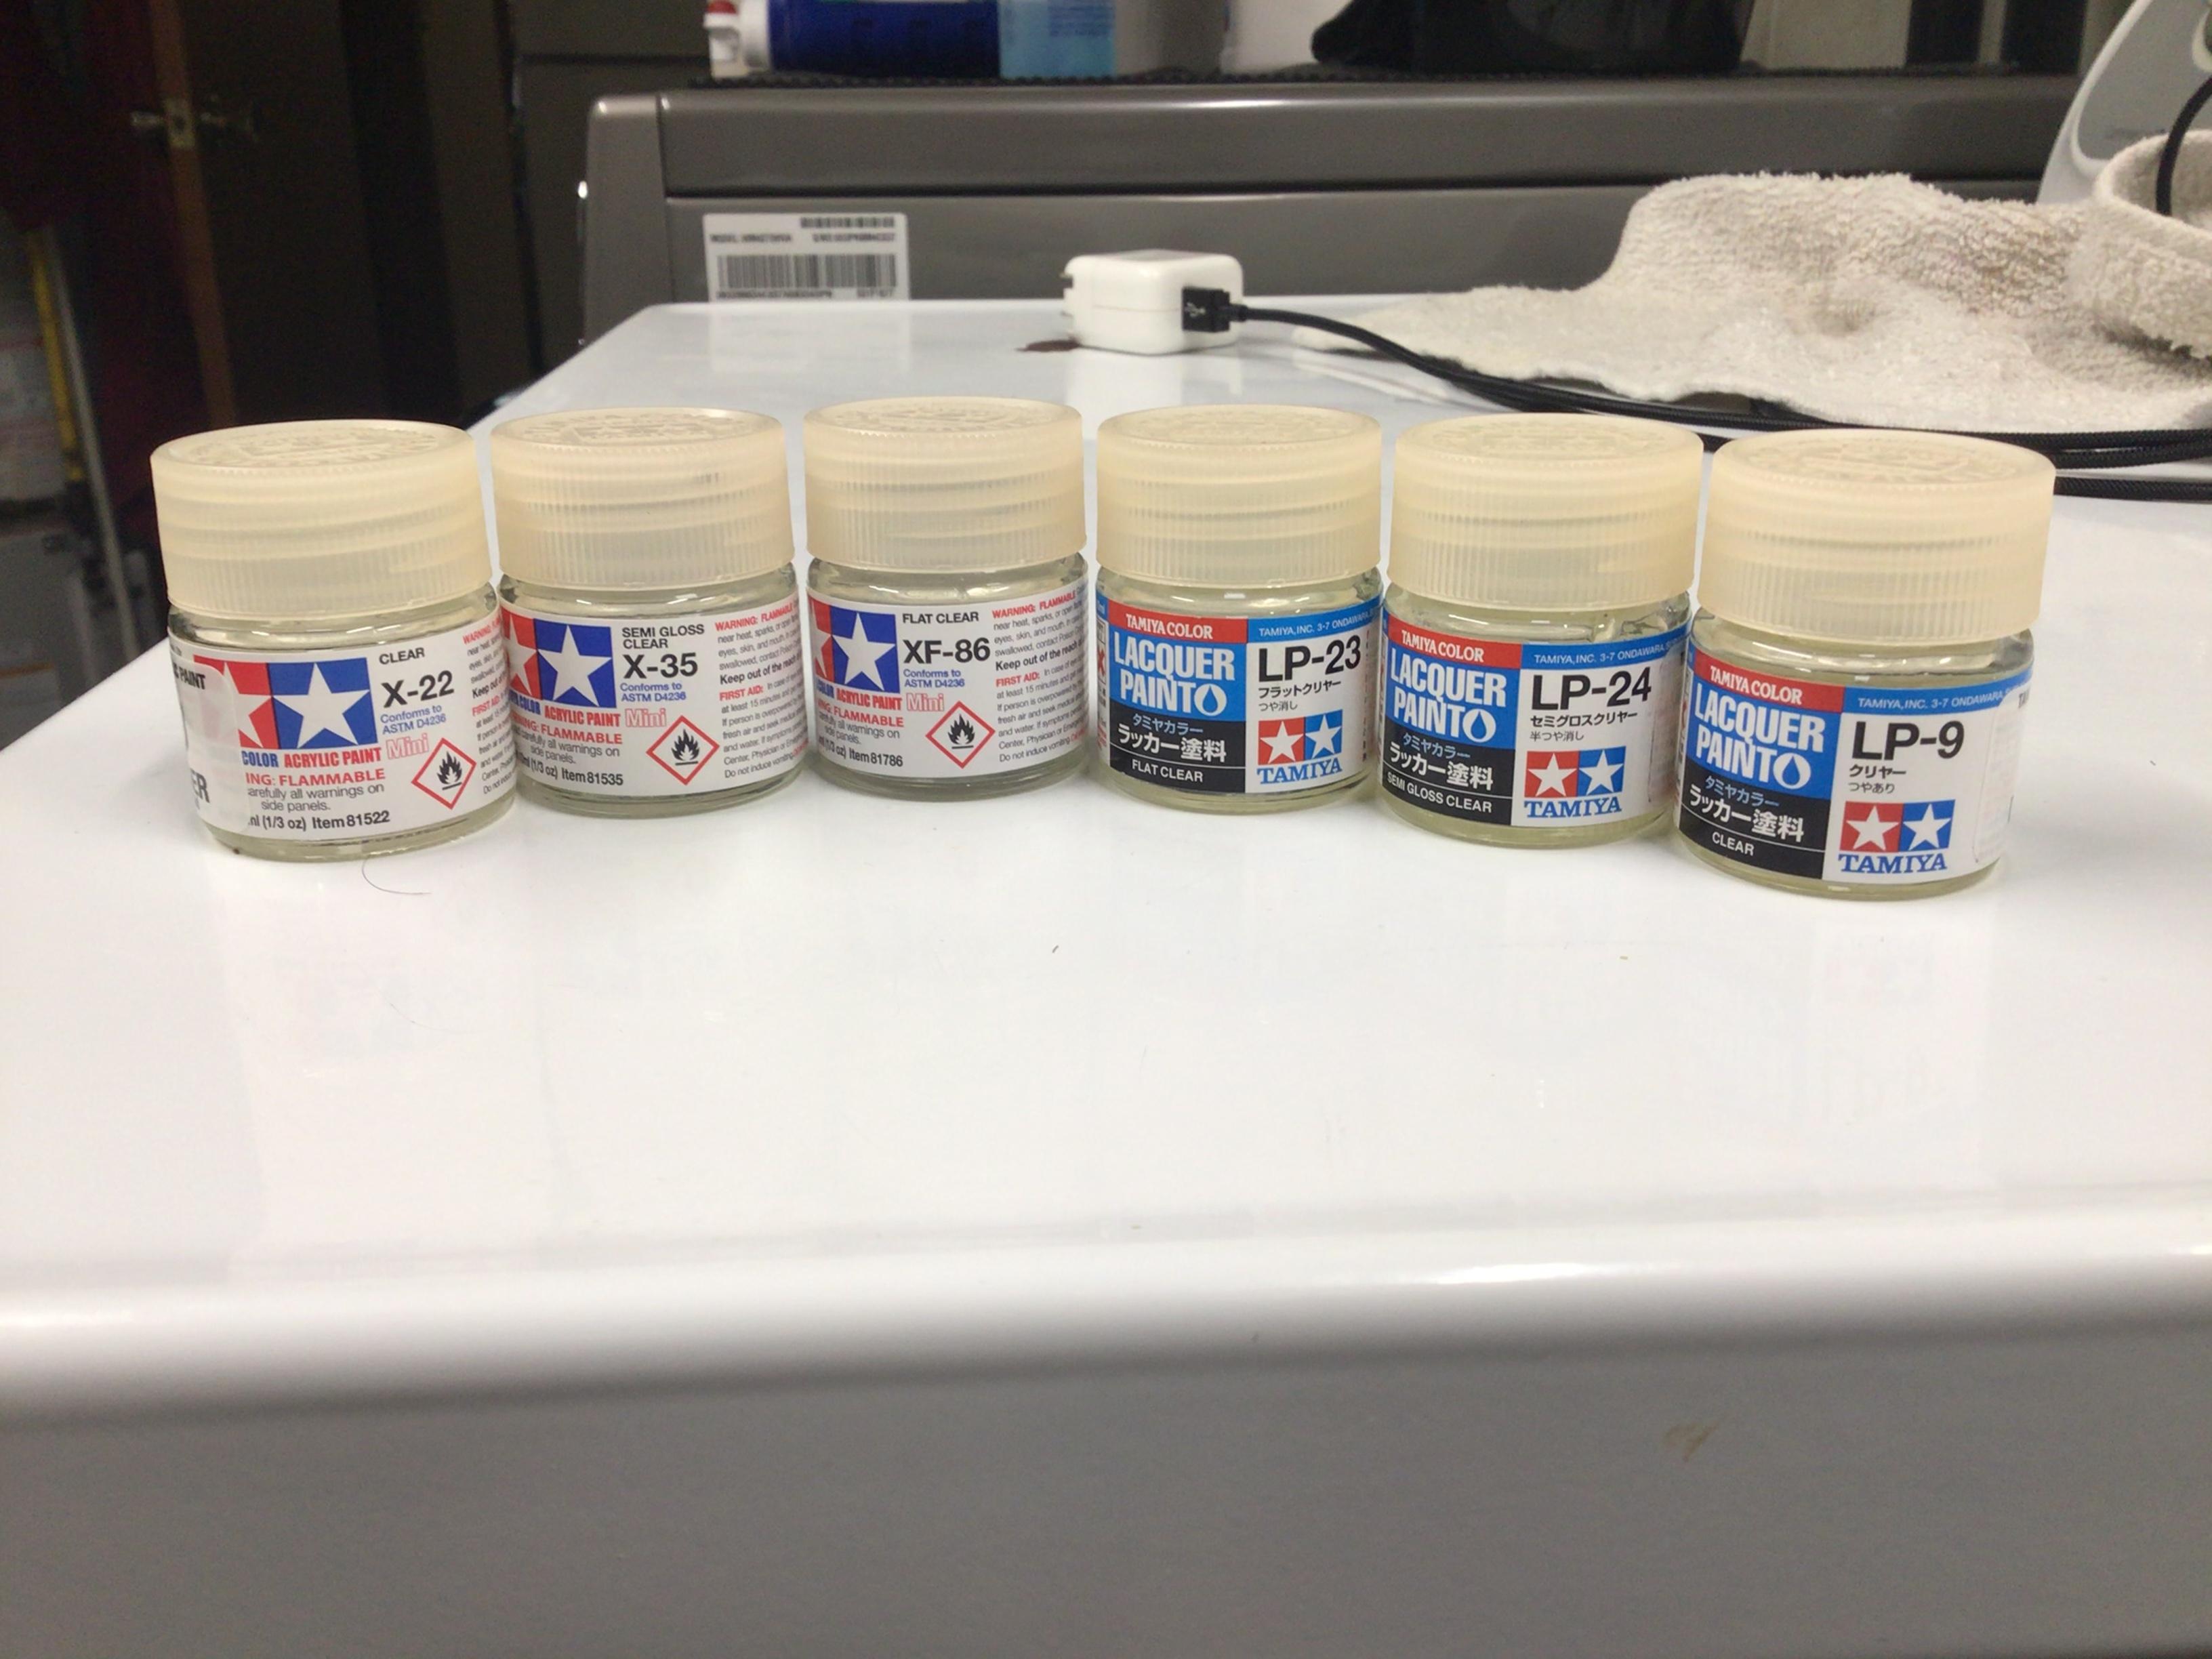
The water-based are all X or XF. The laquers are all labeled LP. And the laquers have a pretty strong odour.
-
You have obviously put a lot of work into these casts and this tutorial. Kudos to you for finding a workable solution for your needs. That said, you may find a more enthusiastic response on an RC forum. Most if not all of the folks on here are into realism in the extreme. Enjoy your hobby Sir, and good luck refining your techniques.
-
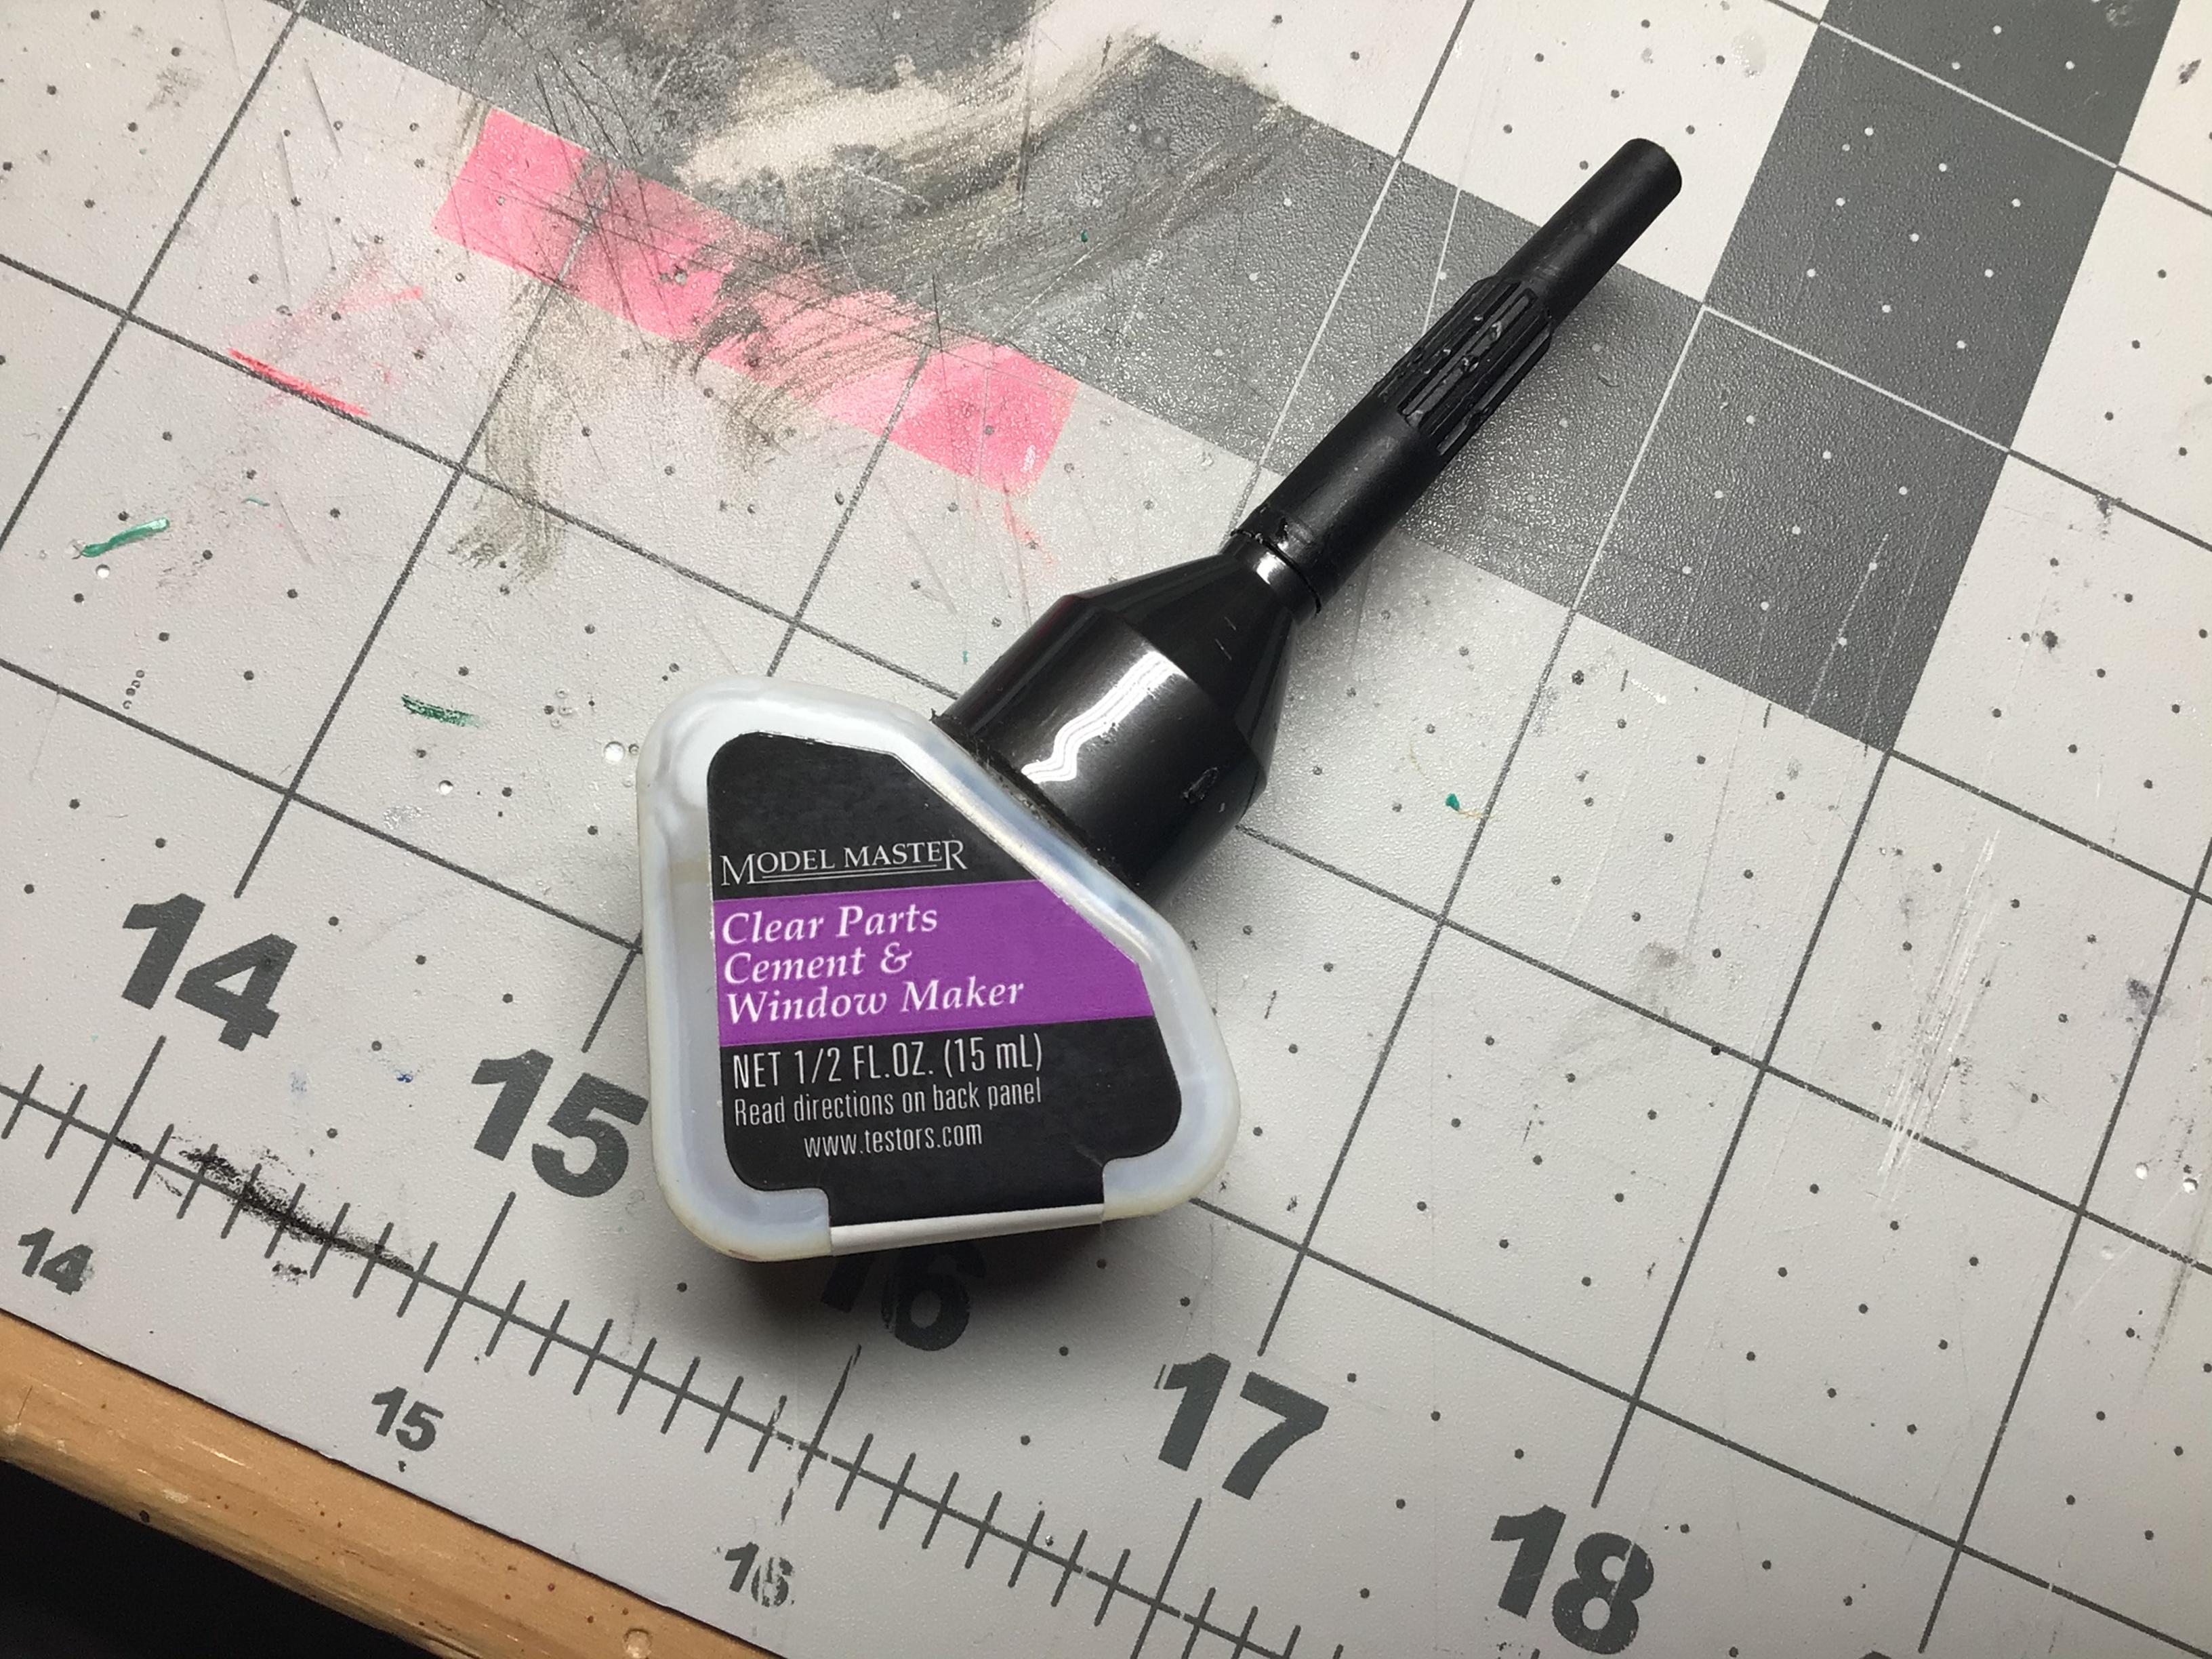
A question of curiosity (gluing windows)
NOBLNG replied to Venom's topic in Model Building Questions and Answers
Good info in that thread! I just bought these Vallejo ones the other day, and they are very good quality (made in Spain) and properly sharpened. I would not try melting the holes either, it will make a mess.? What kind of paint is that? If it’s laquer or enamel the canopy glue shouldn’t harm it.
-
That is looking extremely, radically cool!
-
A question of curiosity (gluing windows)
NOBLNG replied to Venom's topic in Model Building Questions and Answers
This is what I use because I have it. It is most likely a watered down PVA of some type.
-
Very strong, especially if you can compress the joint slightly. You will actually see melted styrene oozing out. They are a solvent, so actually “weld” the styrene together. They dry quicker than the old Testors tube glue. The plastic melts and joins almost instantly, but it has to evaporate before the joint becomes structurally sound. It is very thin and will not fill any gap. It’s best to fit the parts then apply the glue...it will wick along the seam. I use it for probably 90% of my work.
-
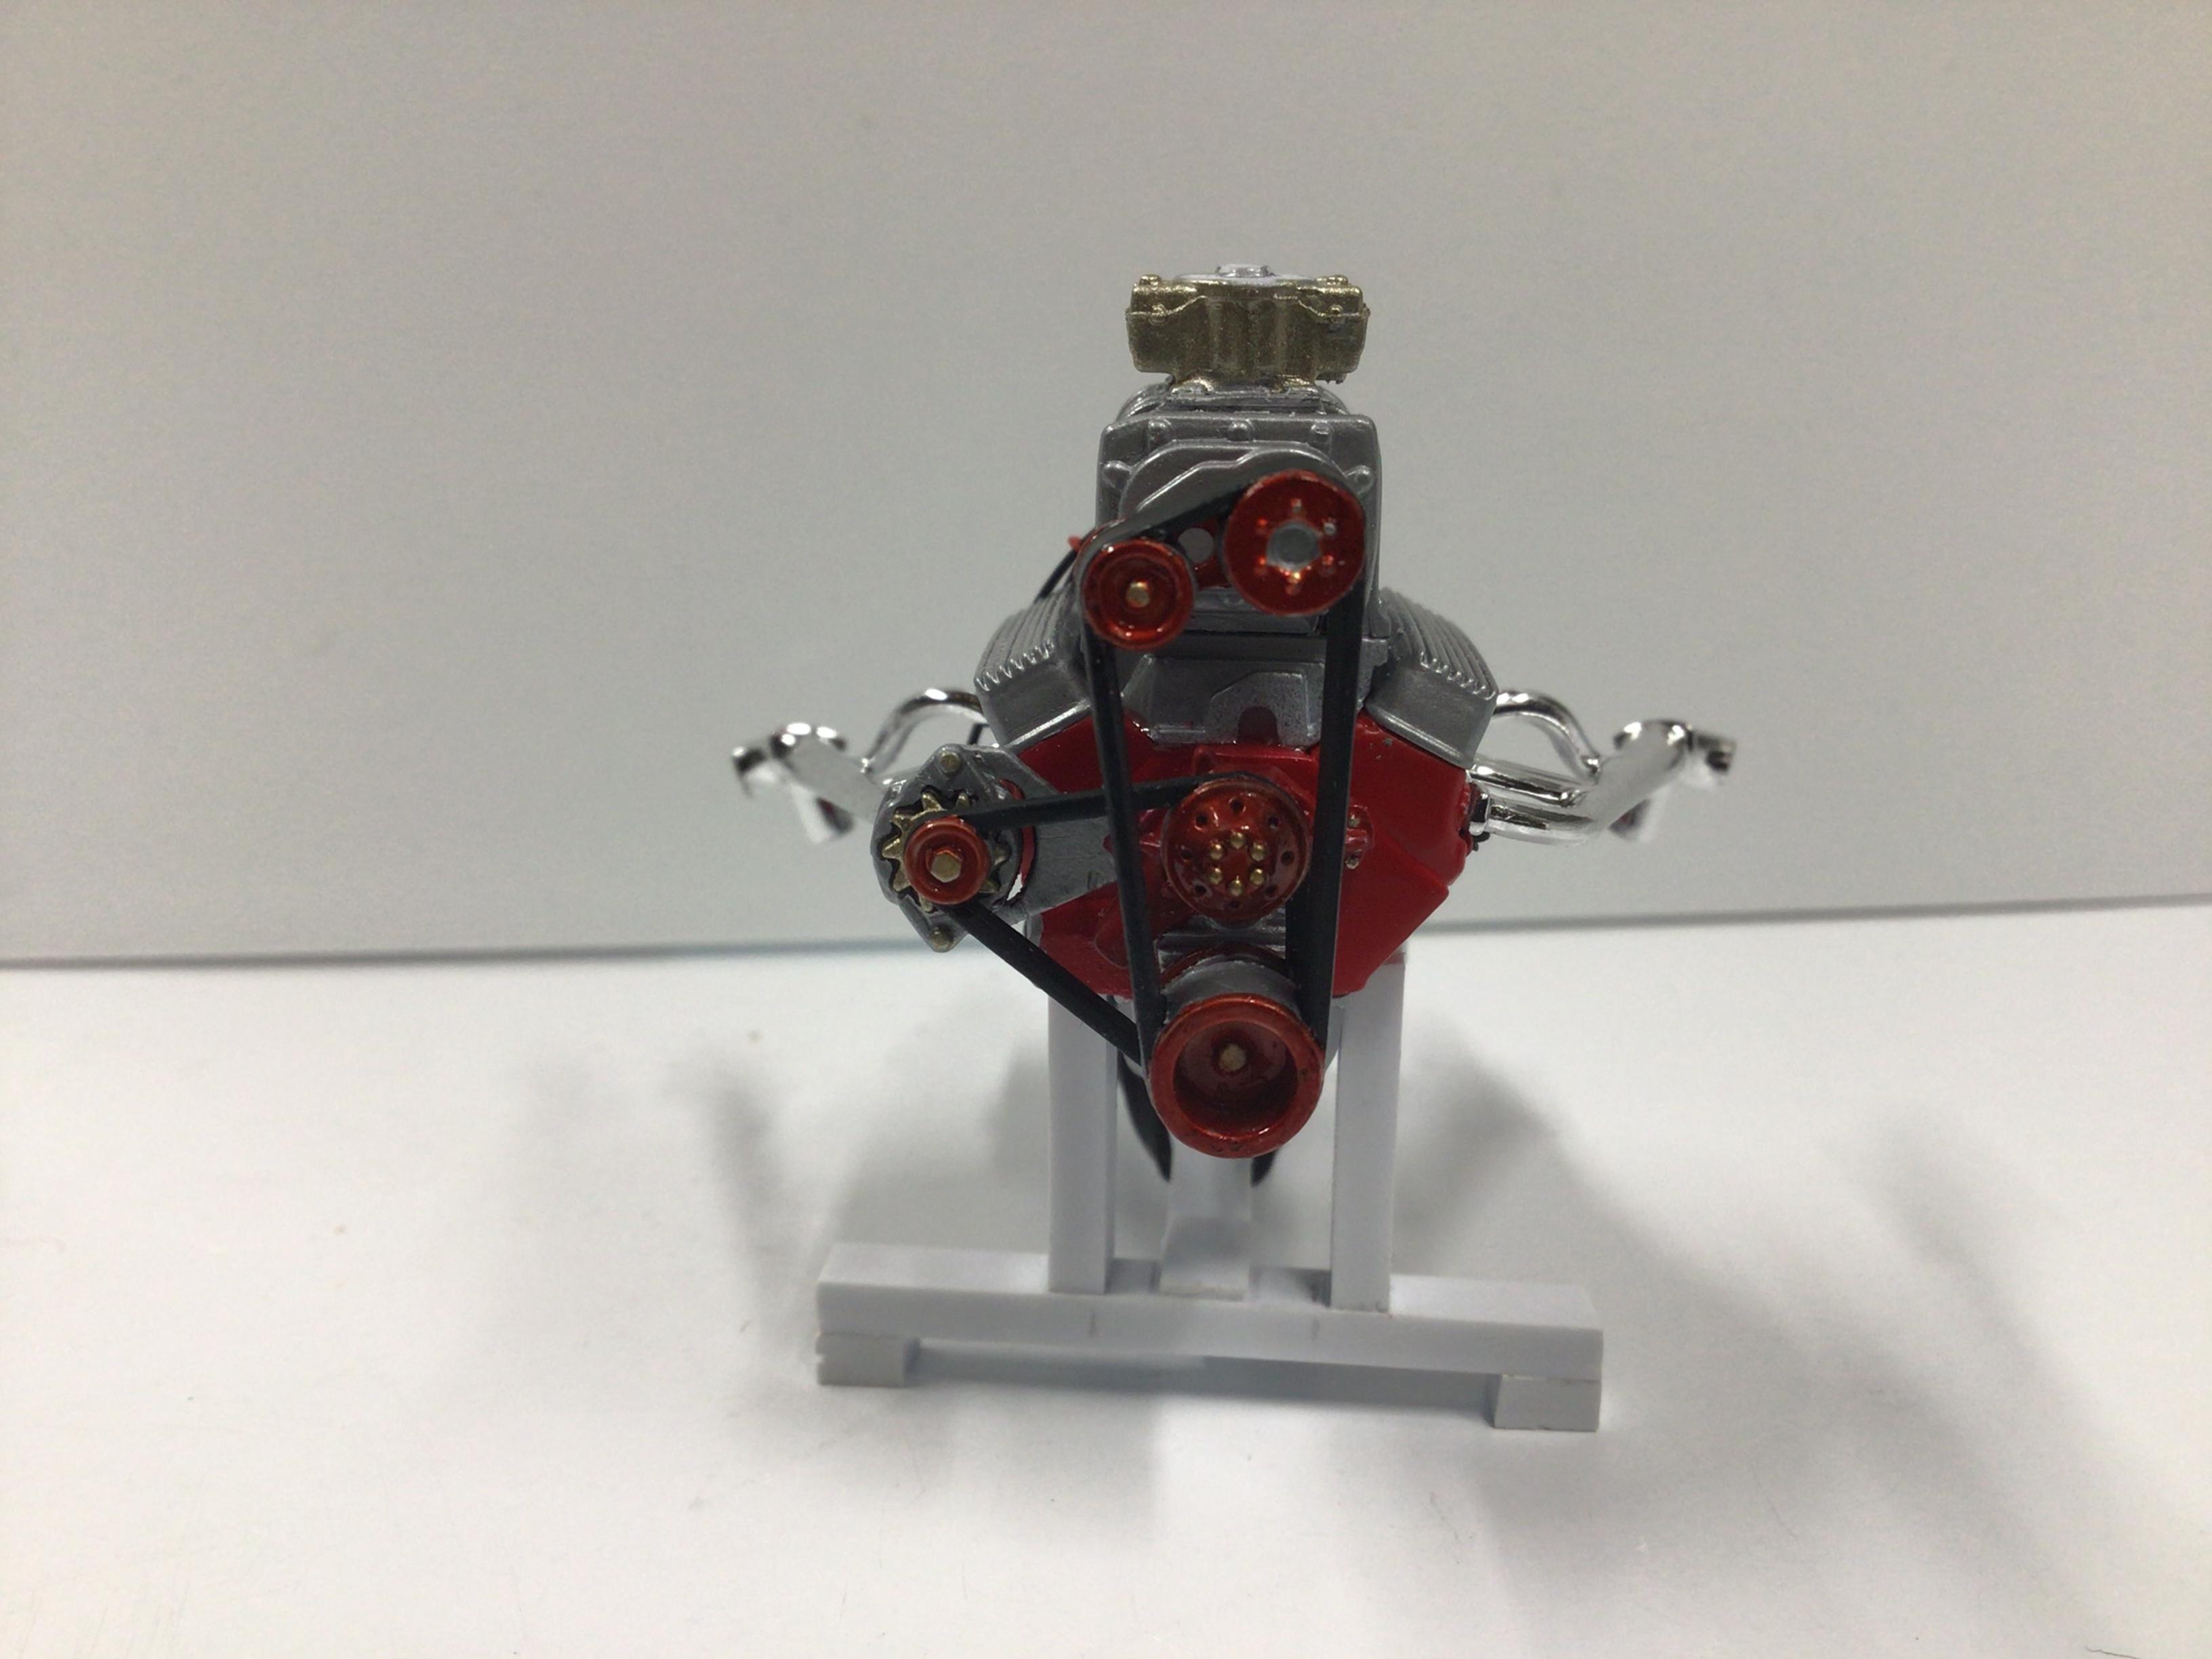
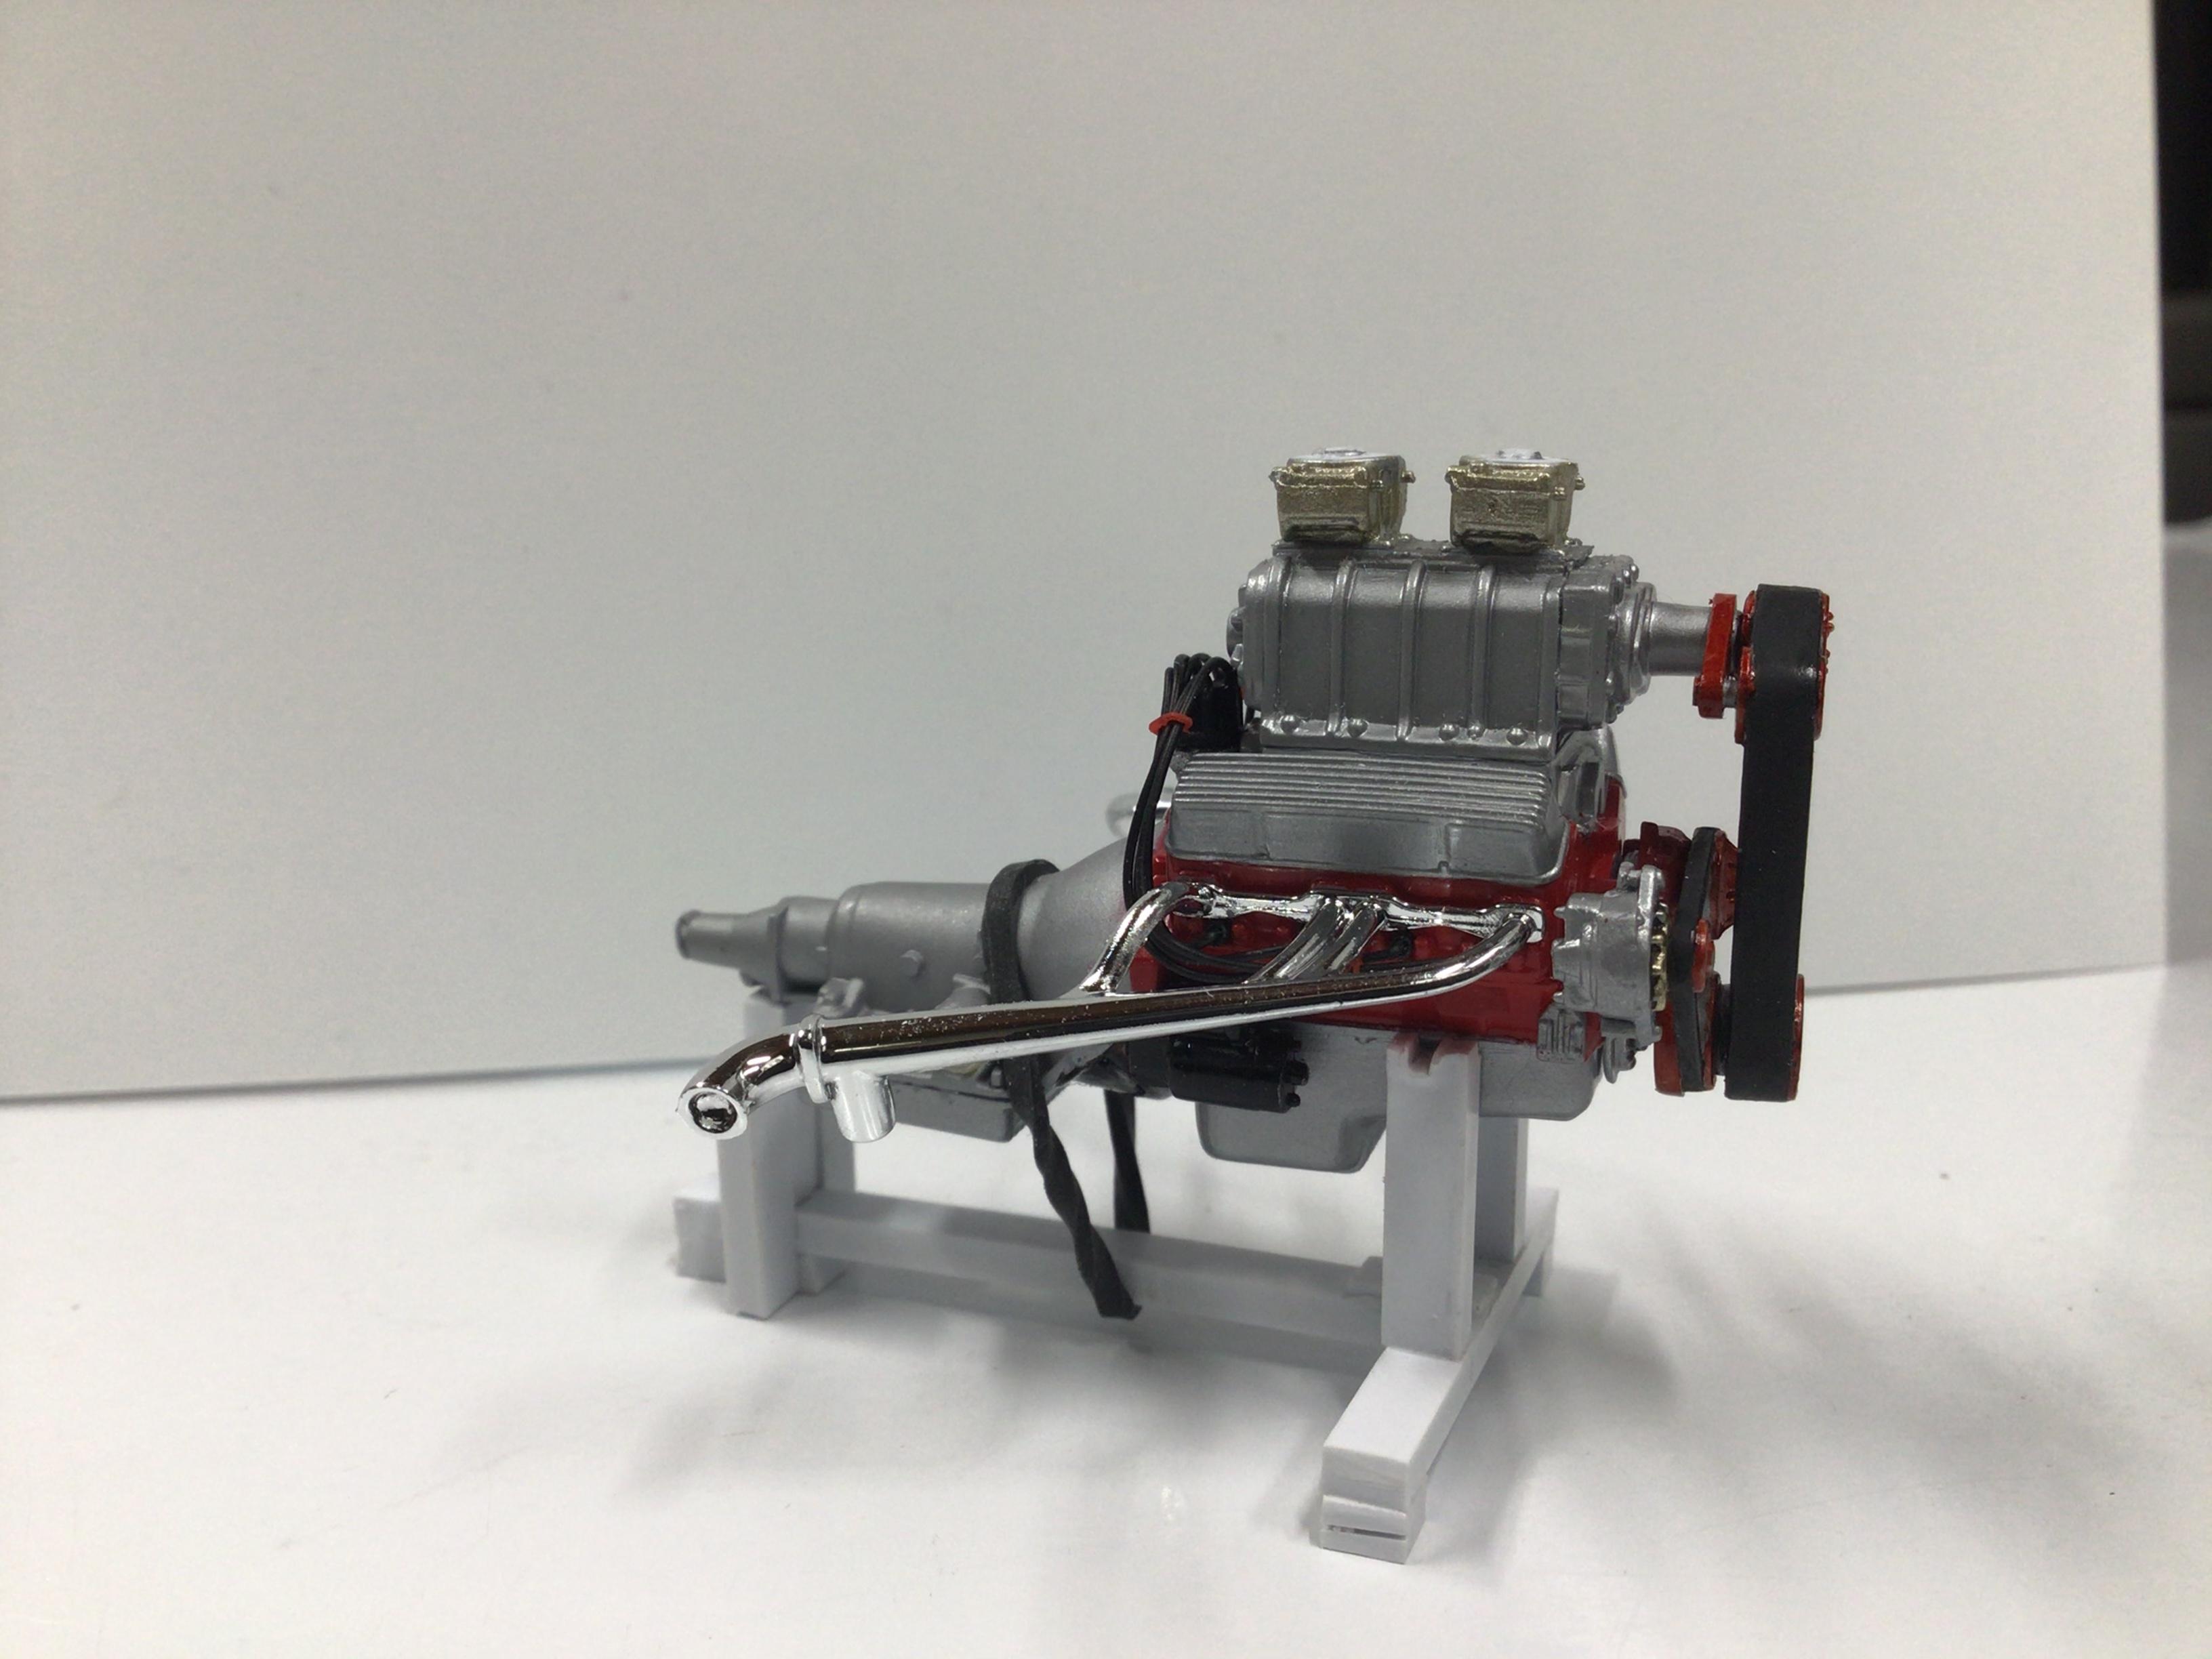
Finished up the engine for the Model A. I wired it, shaved down the carb adapter plate and made a new blower belt tensioner. Also gave the pulleys a sort of anodized look with some clear red over the flat aluminum.
-
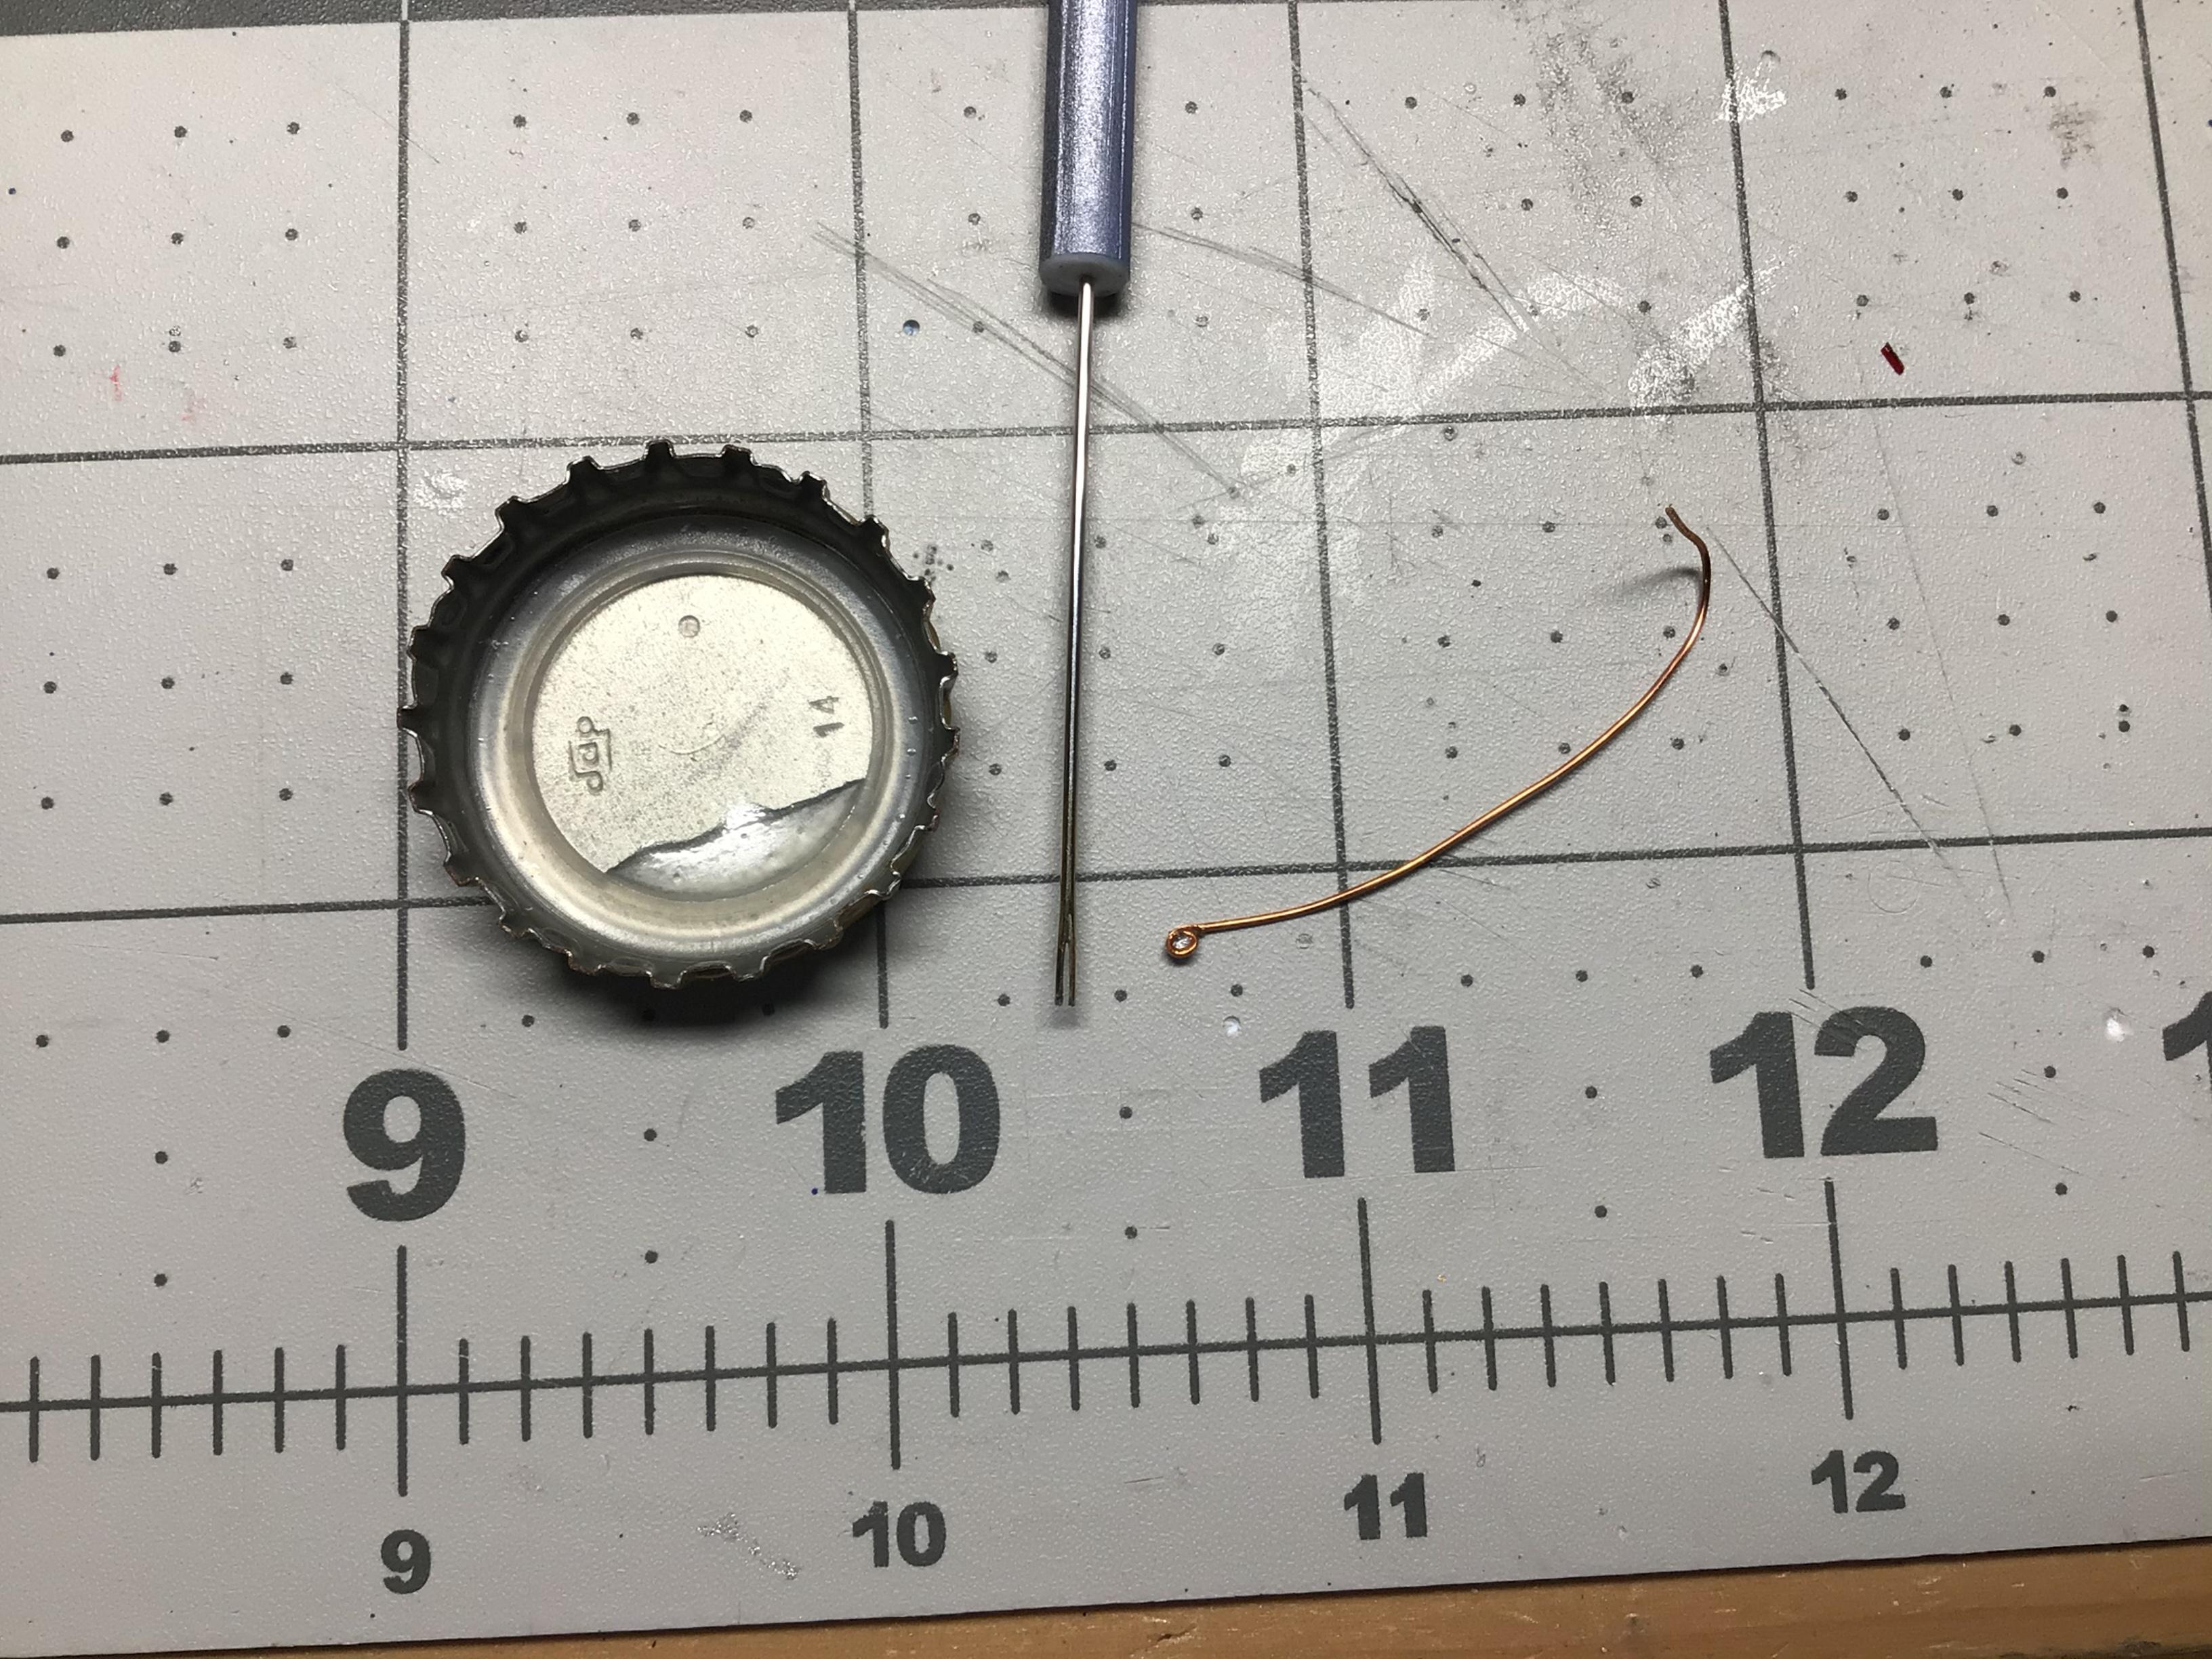
I have the same problem with super thin CA glue. There is NO WAY I can apply it from the bottle. First the nozzle is usually plugged and I have to open it with a pin. Then it will dispense way too much. I usually put a couple of drops in a bottle cap and use an applicator made from a thin piece of wire. I also made an applicator for the kicker from a large sewing needle that I ground the tip off of to make a tiny fork. It would likely work better than the wire for the glue also.? You can most likely buy special applicators at a hobby shop? The Tamiya extra thin quick set will get your parts stuck together quite fast, but takes a fair while to completely evaporate and gain full strength. The medium or extra thick CA glues are easier to manage but also dry slow unless an accelerator is used. What type of joints are you needing it to dry quickly for? Things like door handles, mirrors and wipers, or....?
-
I had though of that, but didn’t think braided fishing was available in an aluminum or metal color? The leaders are far too rigid to wrap around a drum. I imagined it could be sourced out somewhere. Here is a link to everything you might want to know about cable and more. https://www.hanessupply.com/media/pdfs/tmc-by-section/01-Wire-Rope.pdf
-
Yes, if you get a big drop on the end of it, just touch it to the inside of the bottle neck to drain off the excess. It works very well.
-
I figure it would be late 80’s to early 90’s. It looks like 700r4 tranny which I believe were produced between ‘82 and ‘93. GM was also using HEI in this era, so that works for me.?
-
Not a quote, but what movie is this from?
-
American Graffiti.