NOBLNG
-
Posts
10,232 -
Joined
-
Last visited
Content Type
Profiles
Forums
Events
Gallery
Everything posted by NOBLNG
-
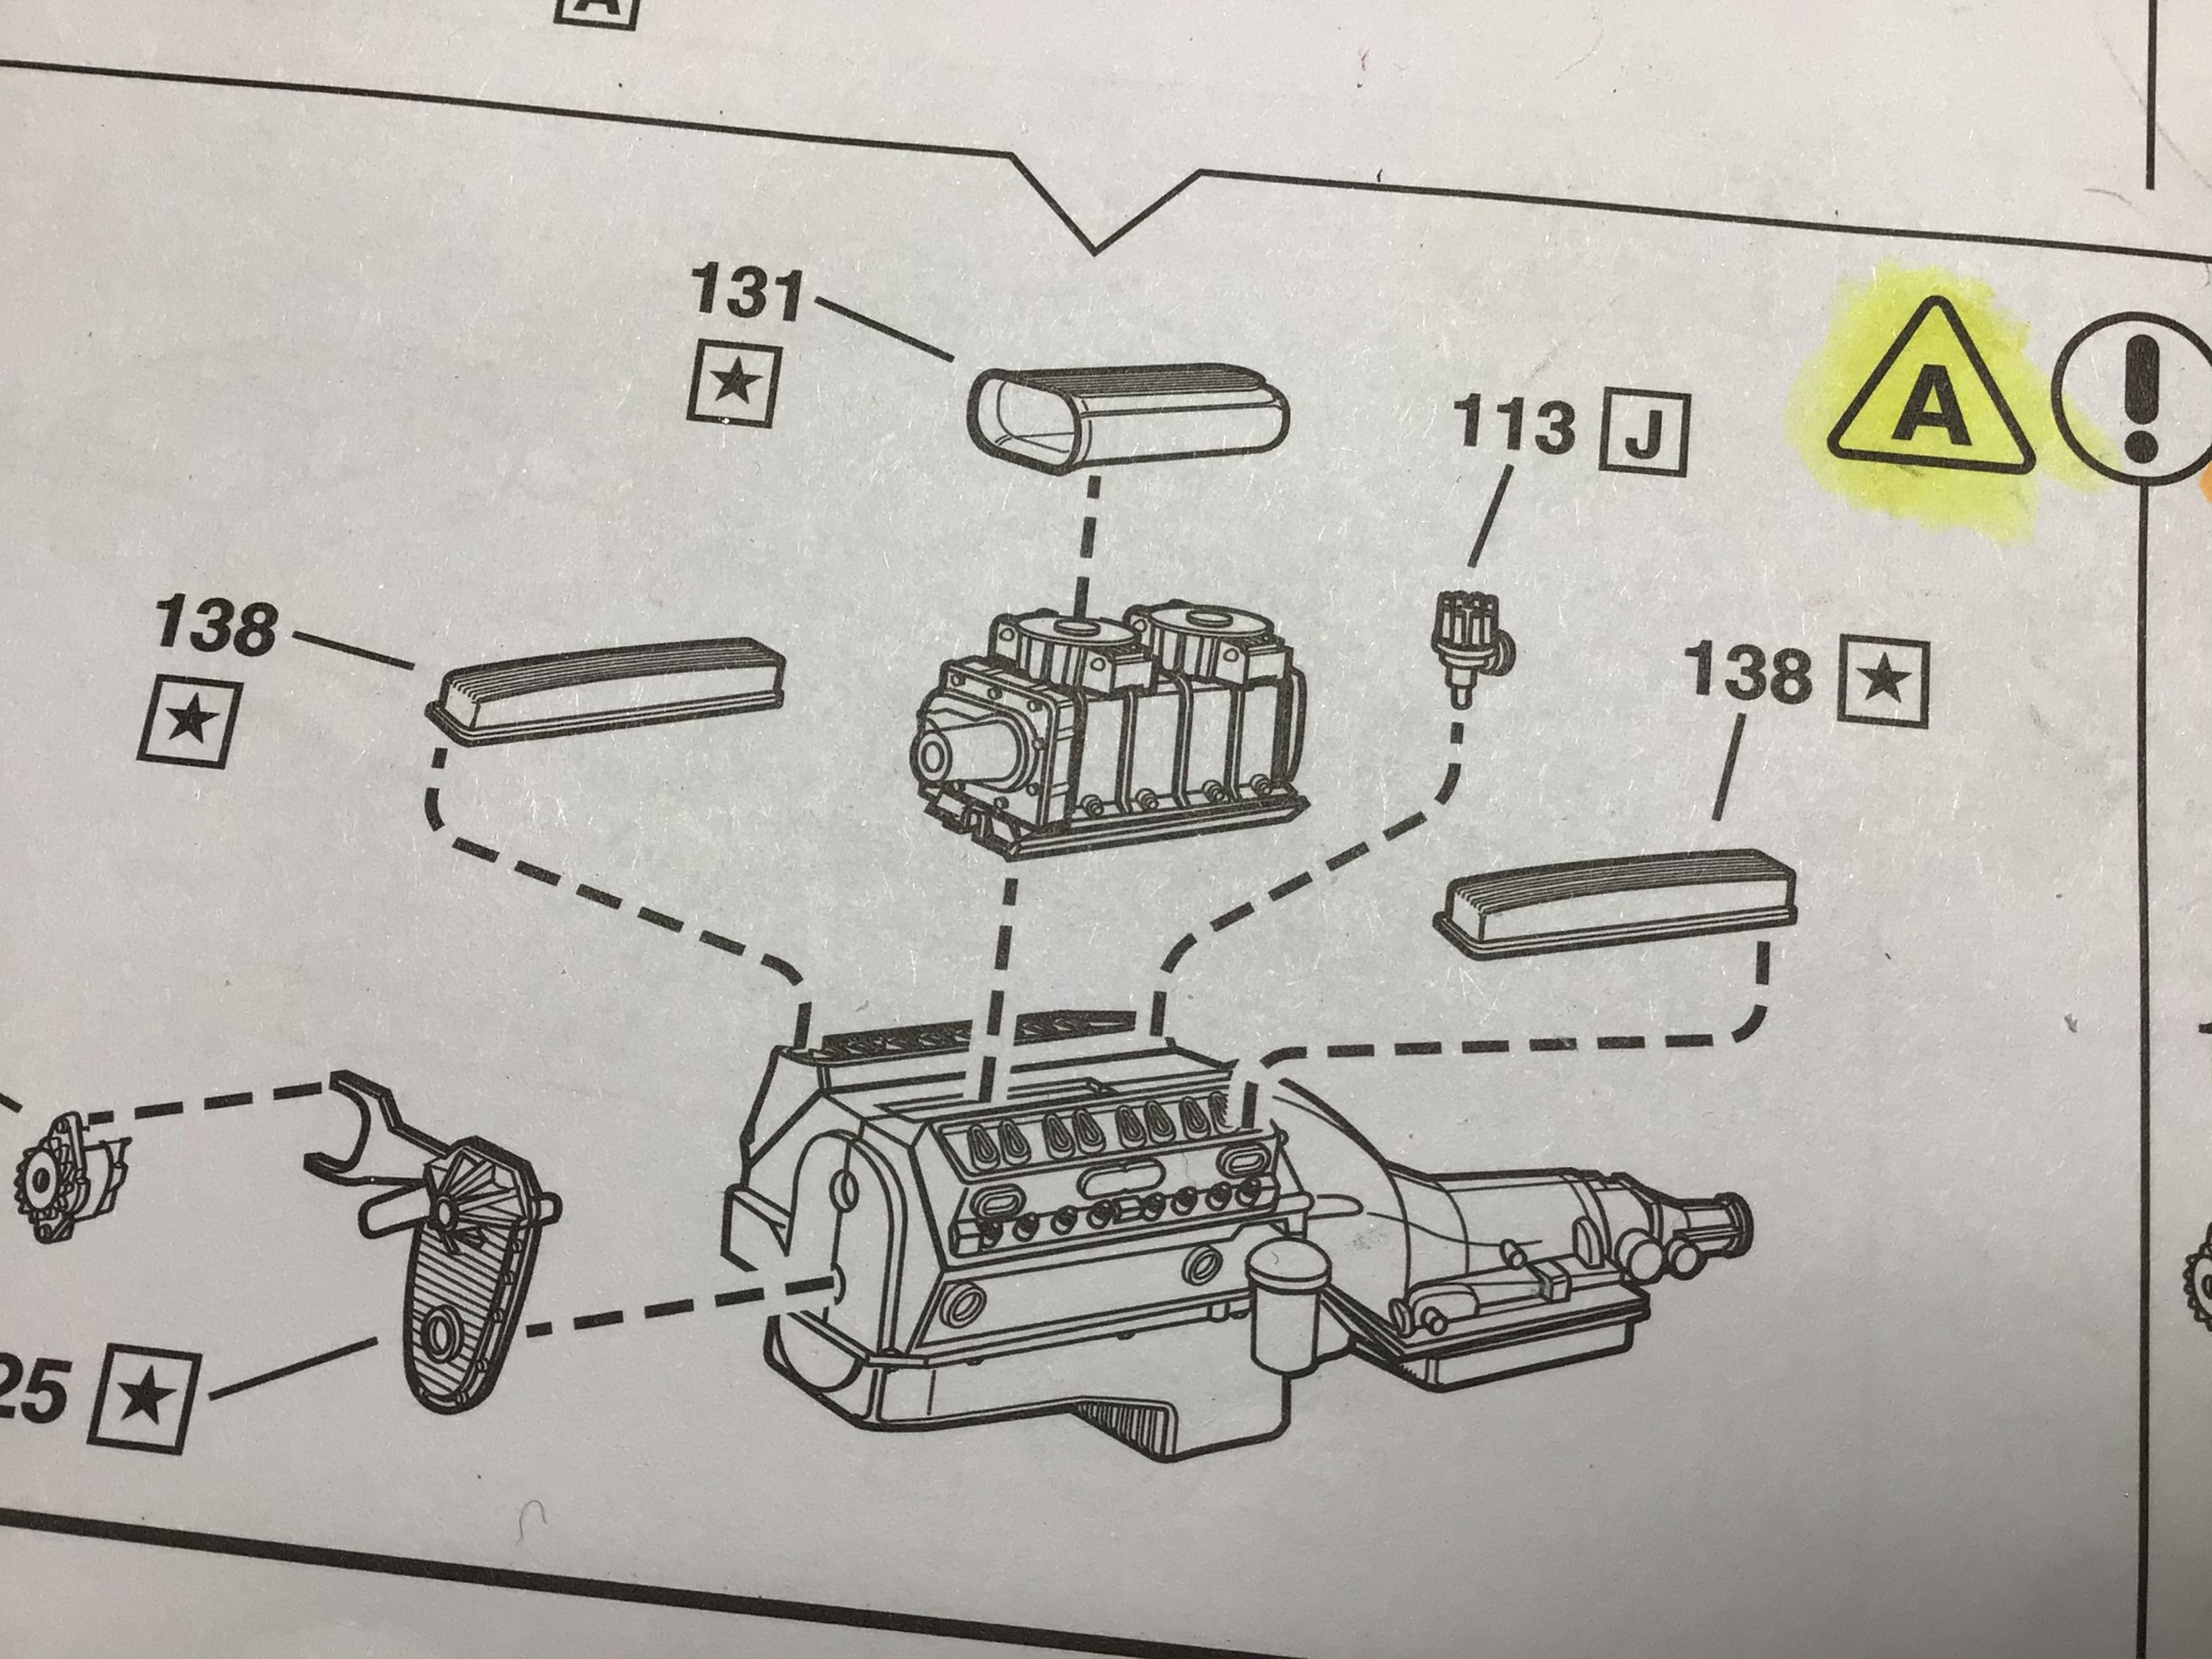
Thanks Guys. For simplicity’s sake, I think I will snip the coil wire and go for the after market coil-in-cap electronic ignition look. So if one was to use the kit distributor on the blown engine version, the vacuum canister should be removed.

-
I have only built one supercharged engine before and never wired it. I am working on the Revell ‘29 model A roadster and have started wiring the engine. I can’t seem to find any pictures anywhere that shows a coil mounted. Can I put it anywhere? Does a blown engine even use a conventional coil and distributor? Forgive my ignorance, but I think a poorly wired engine may look worse than no wiring. Any advice appreciated. Edit: I’ve used a shapeways distributor which is a touch large, so I will have to modify the firewall slightly. Thanks in advance. Greg.
-
Quite the fertile imagination there Dax. It never fails to amaze me. Keep up the good work!
-
 You could likely make one out of a piece of rod...smooth or threaded? Chuck it in a drill and take a file or grinder to it.
 -
Makes me want to start on one of my T-birds. Thanks for posting that.
-
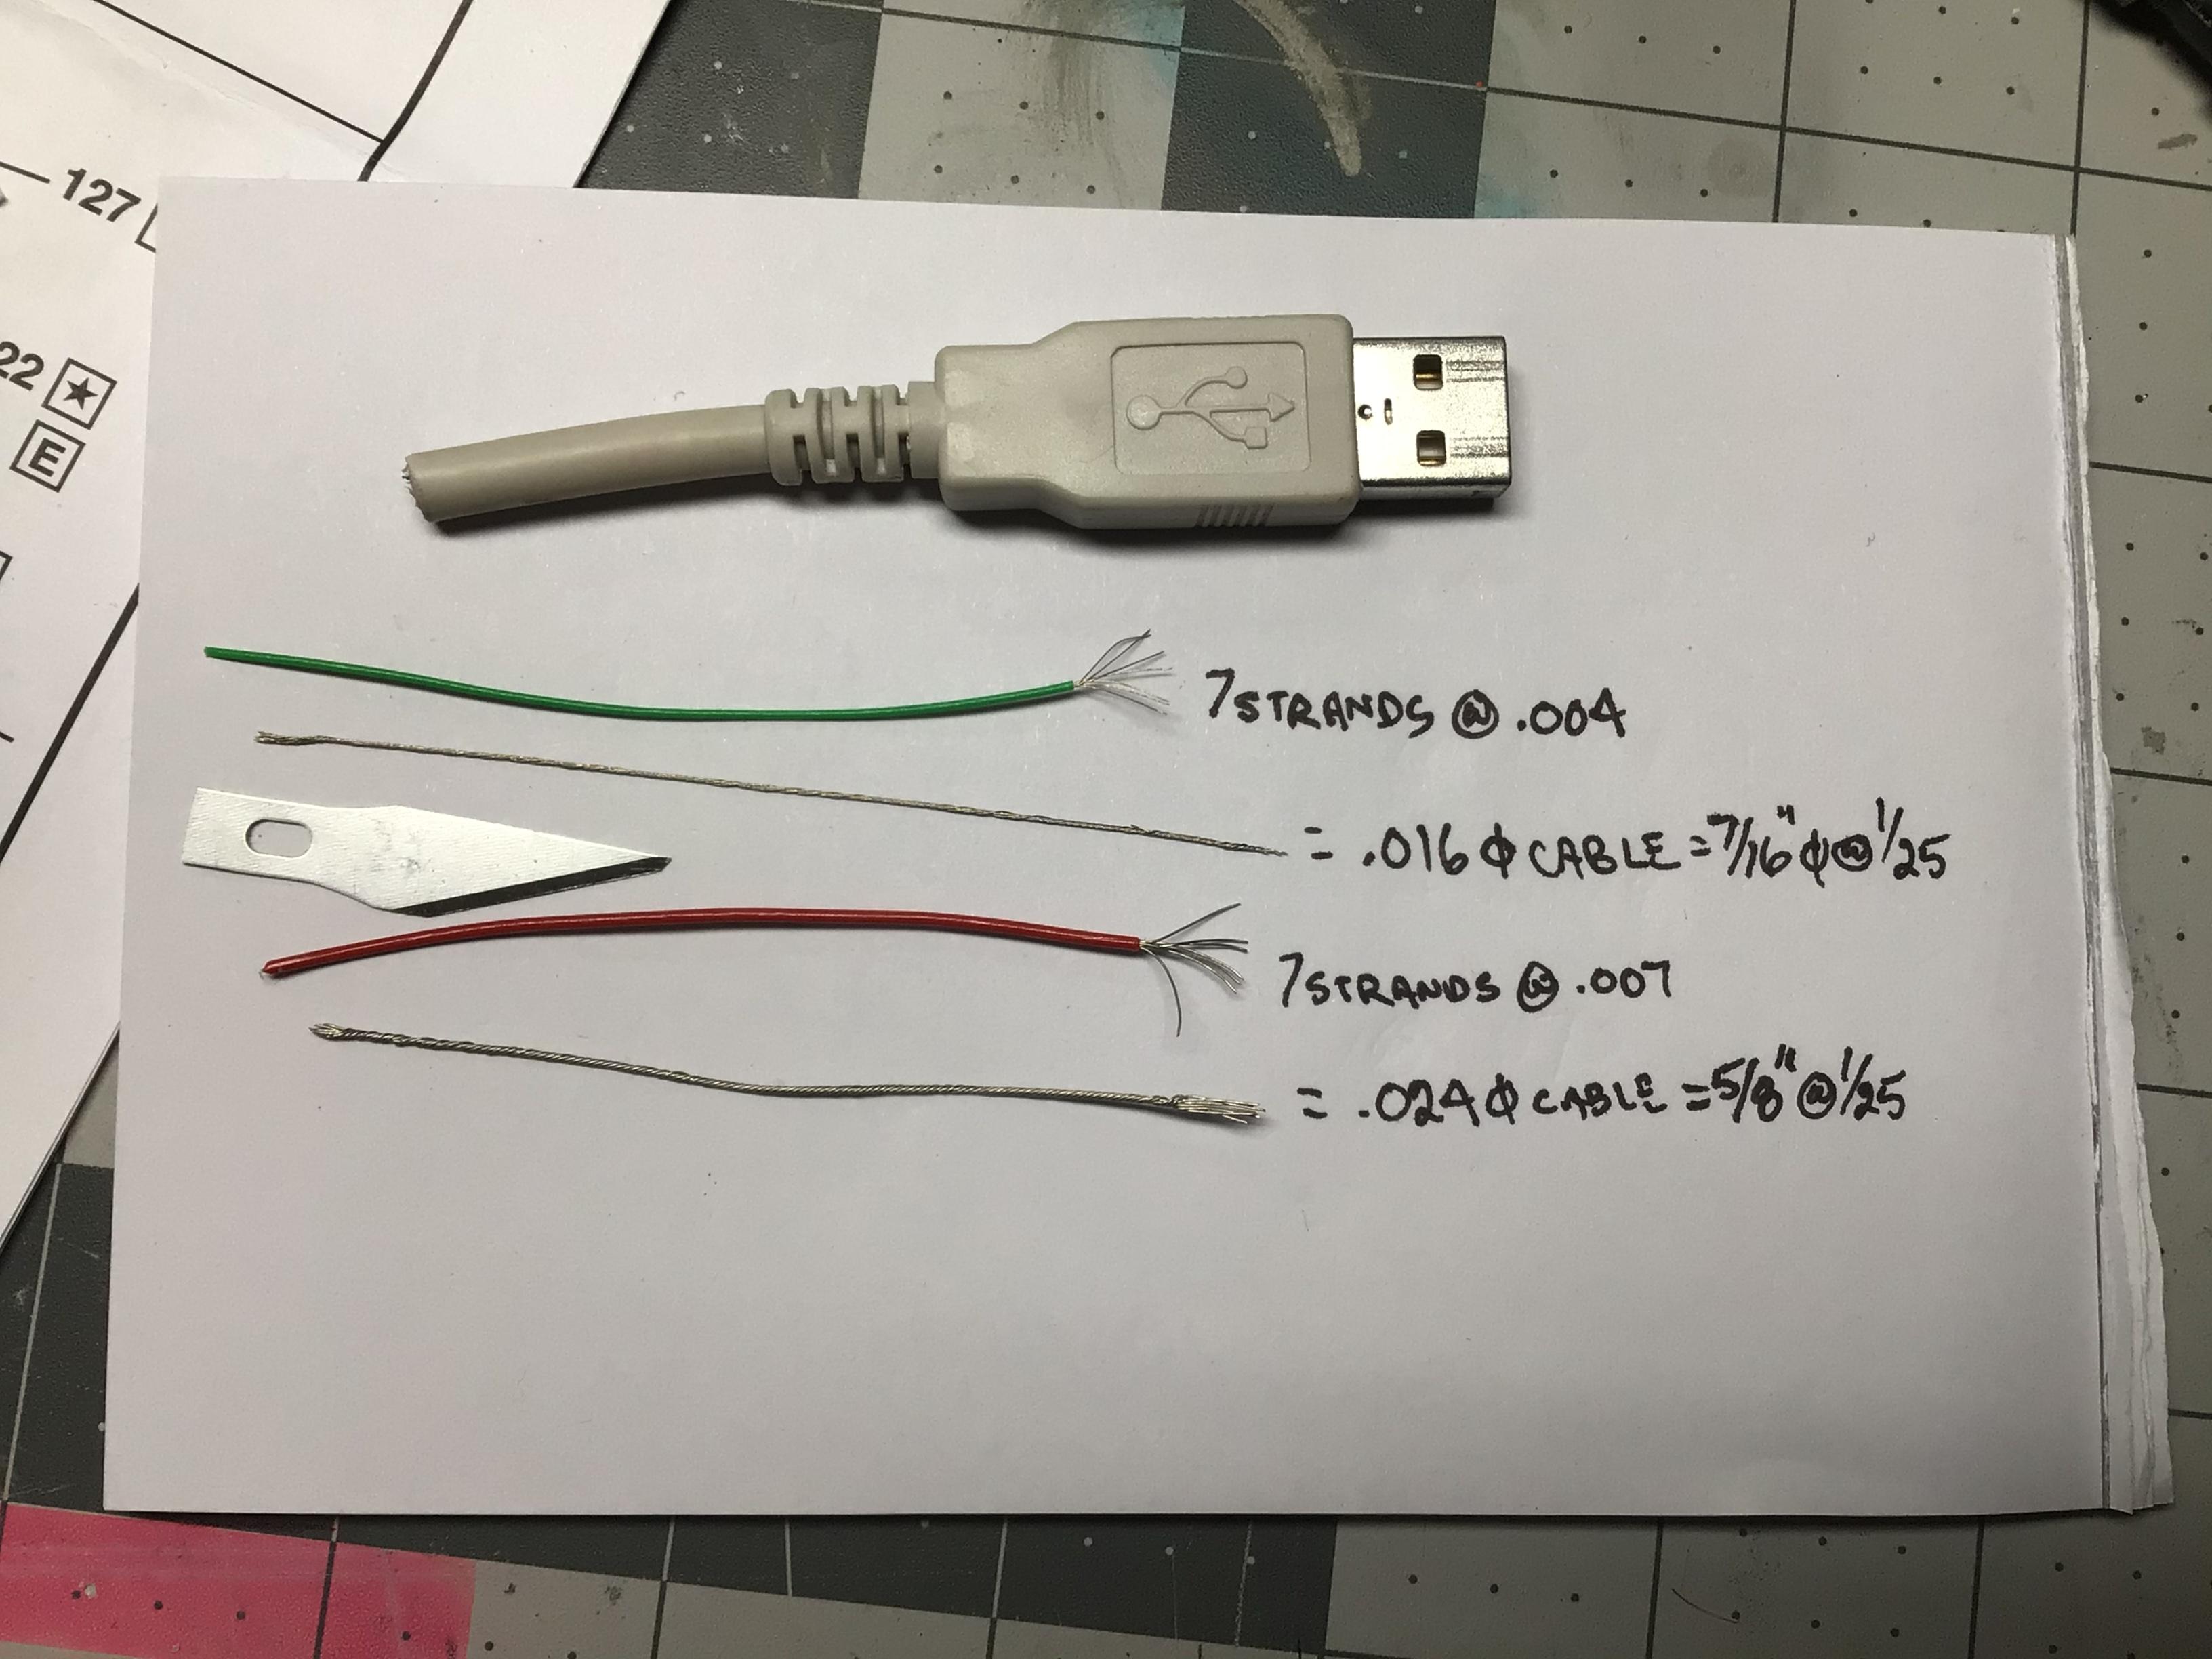
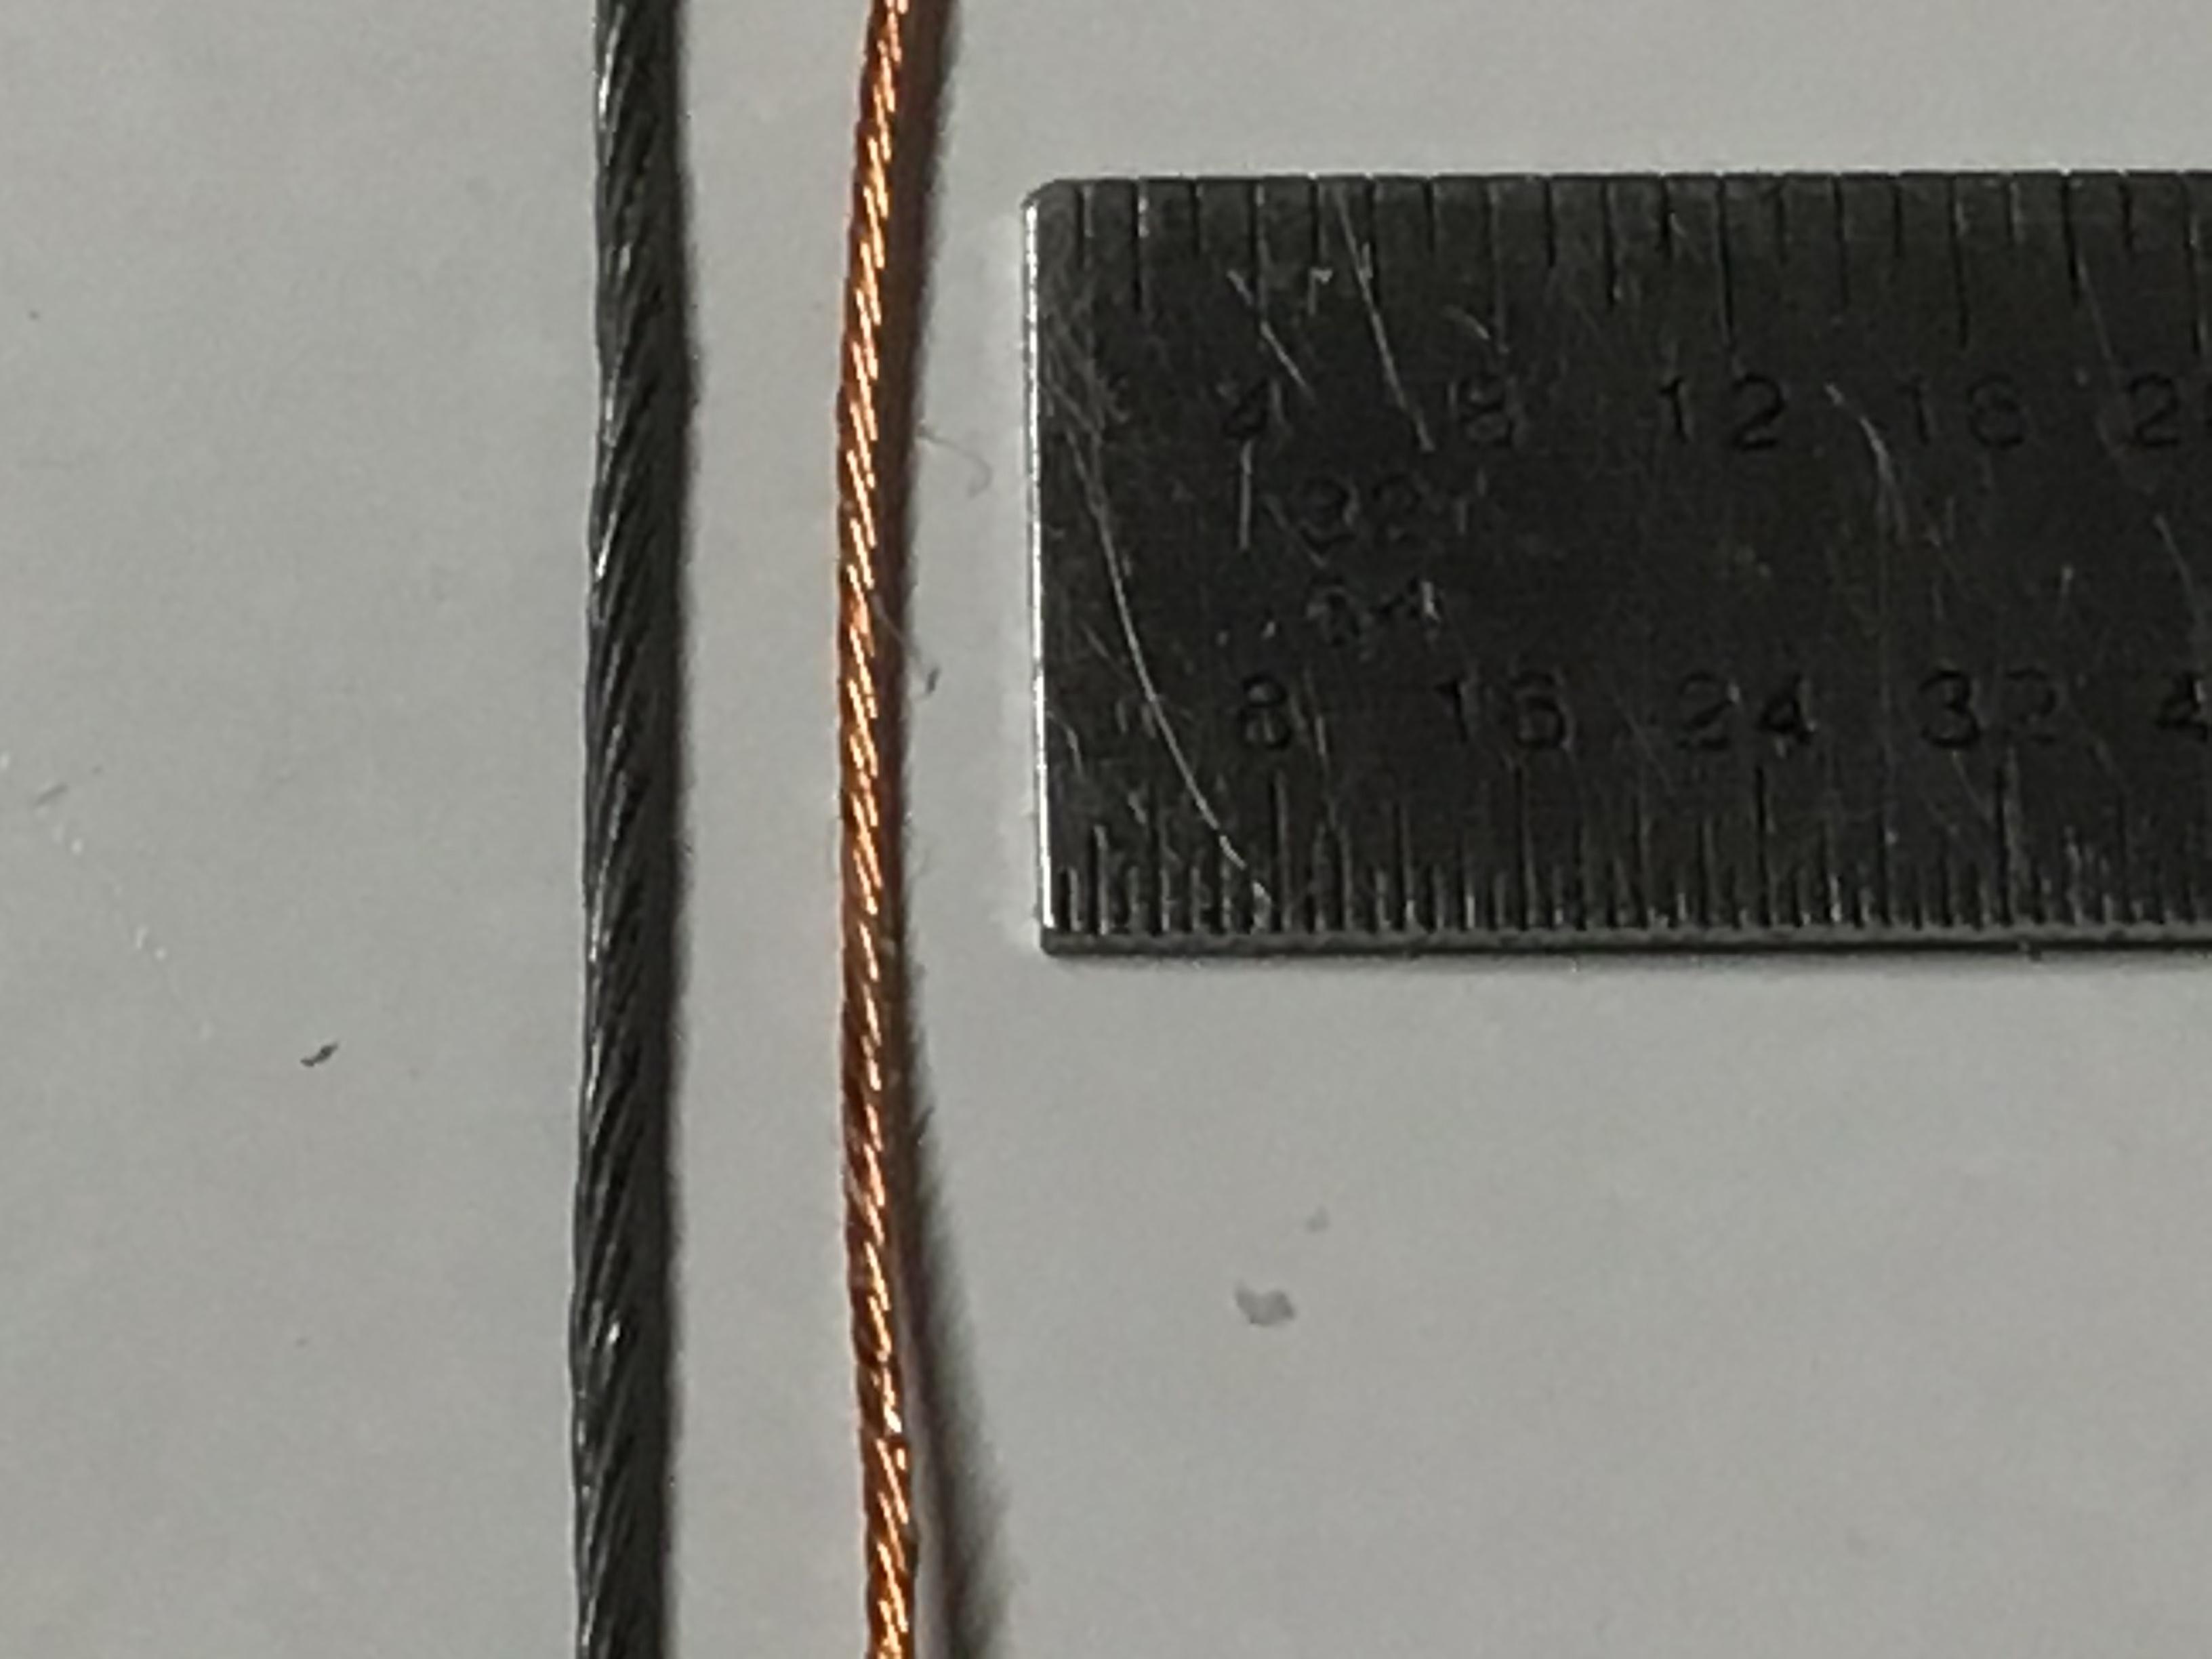
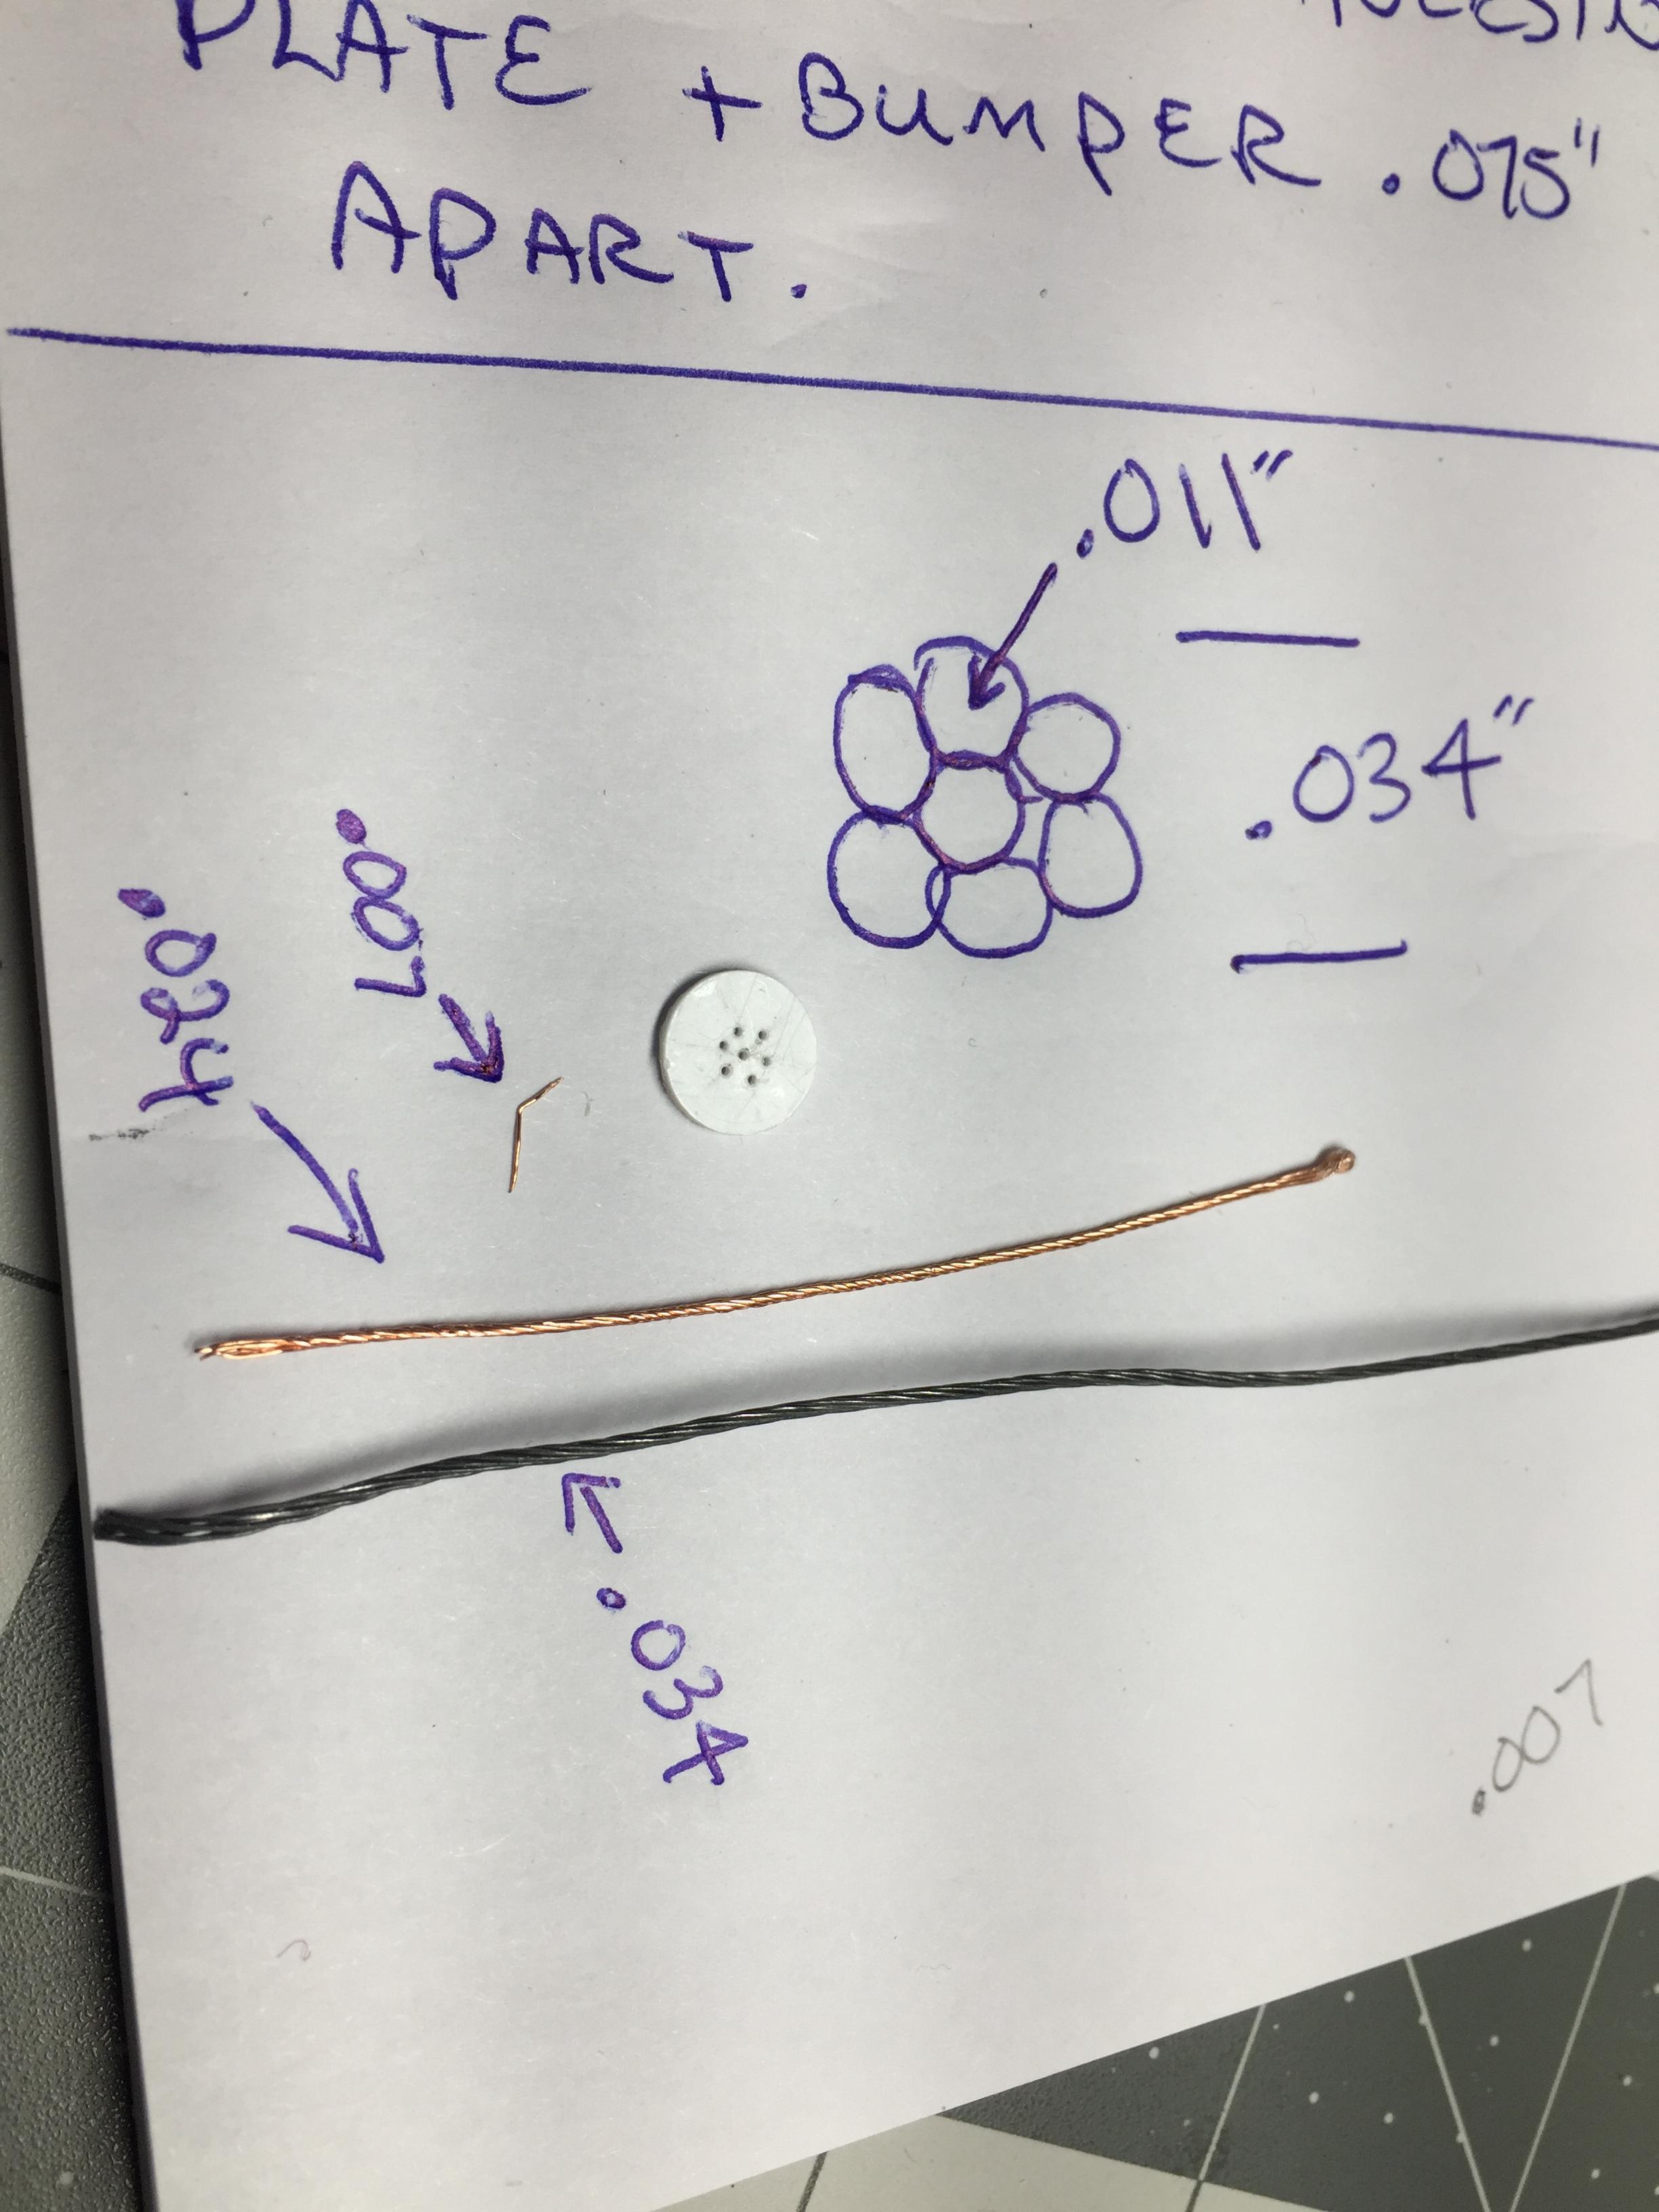
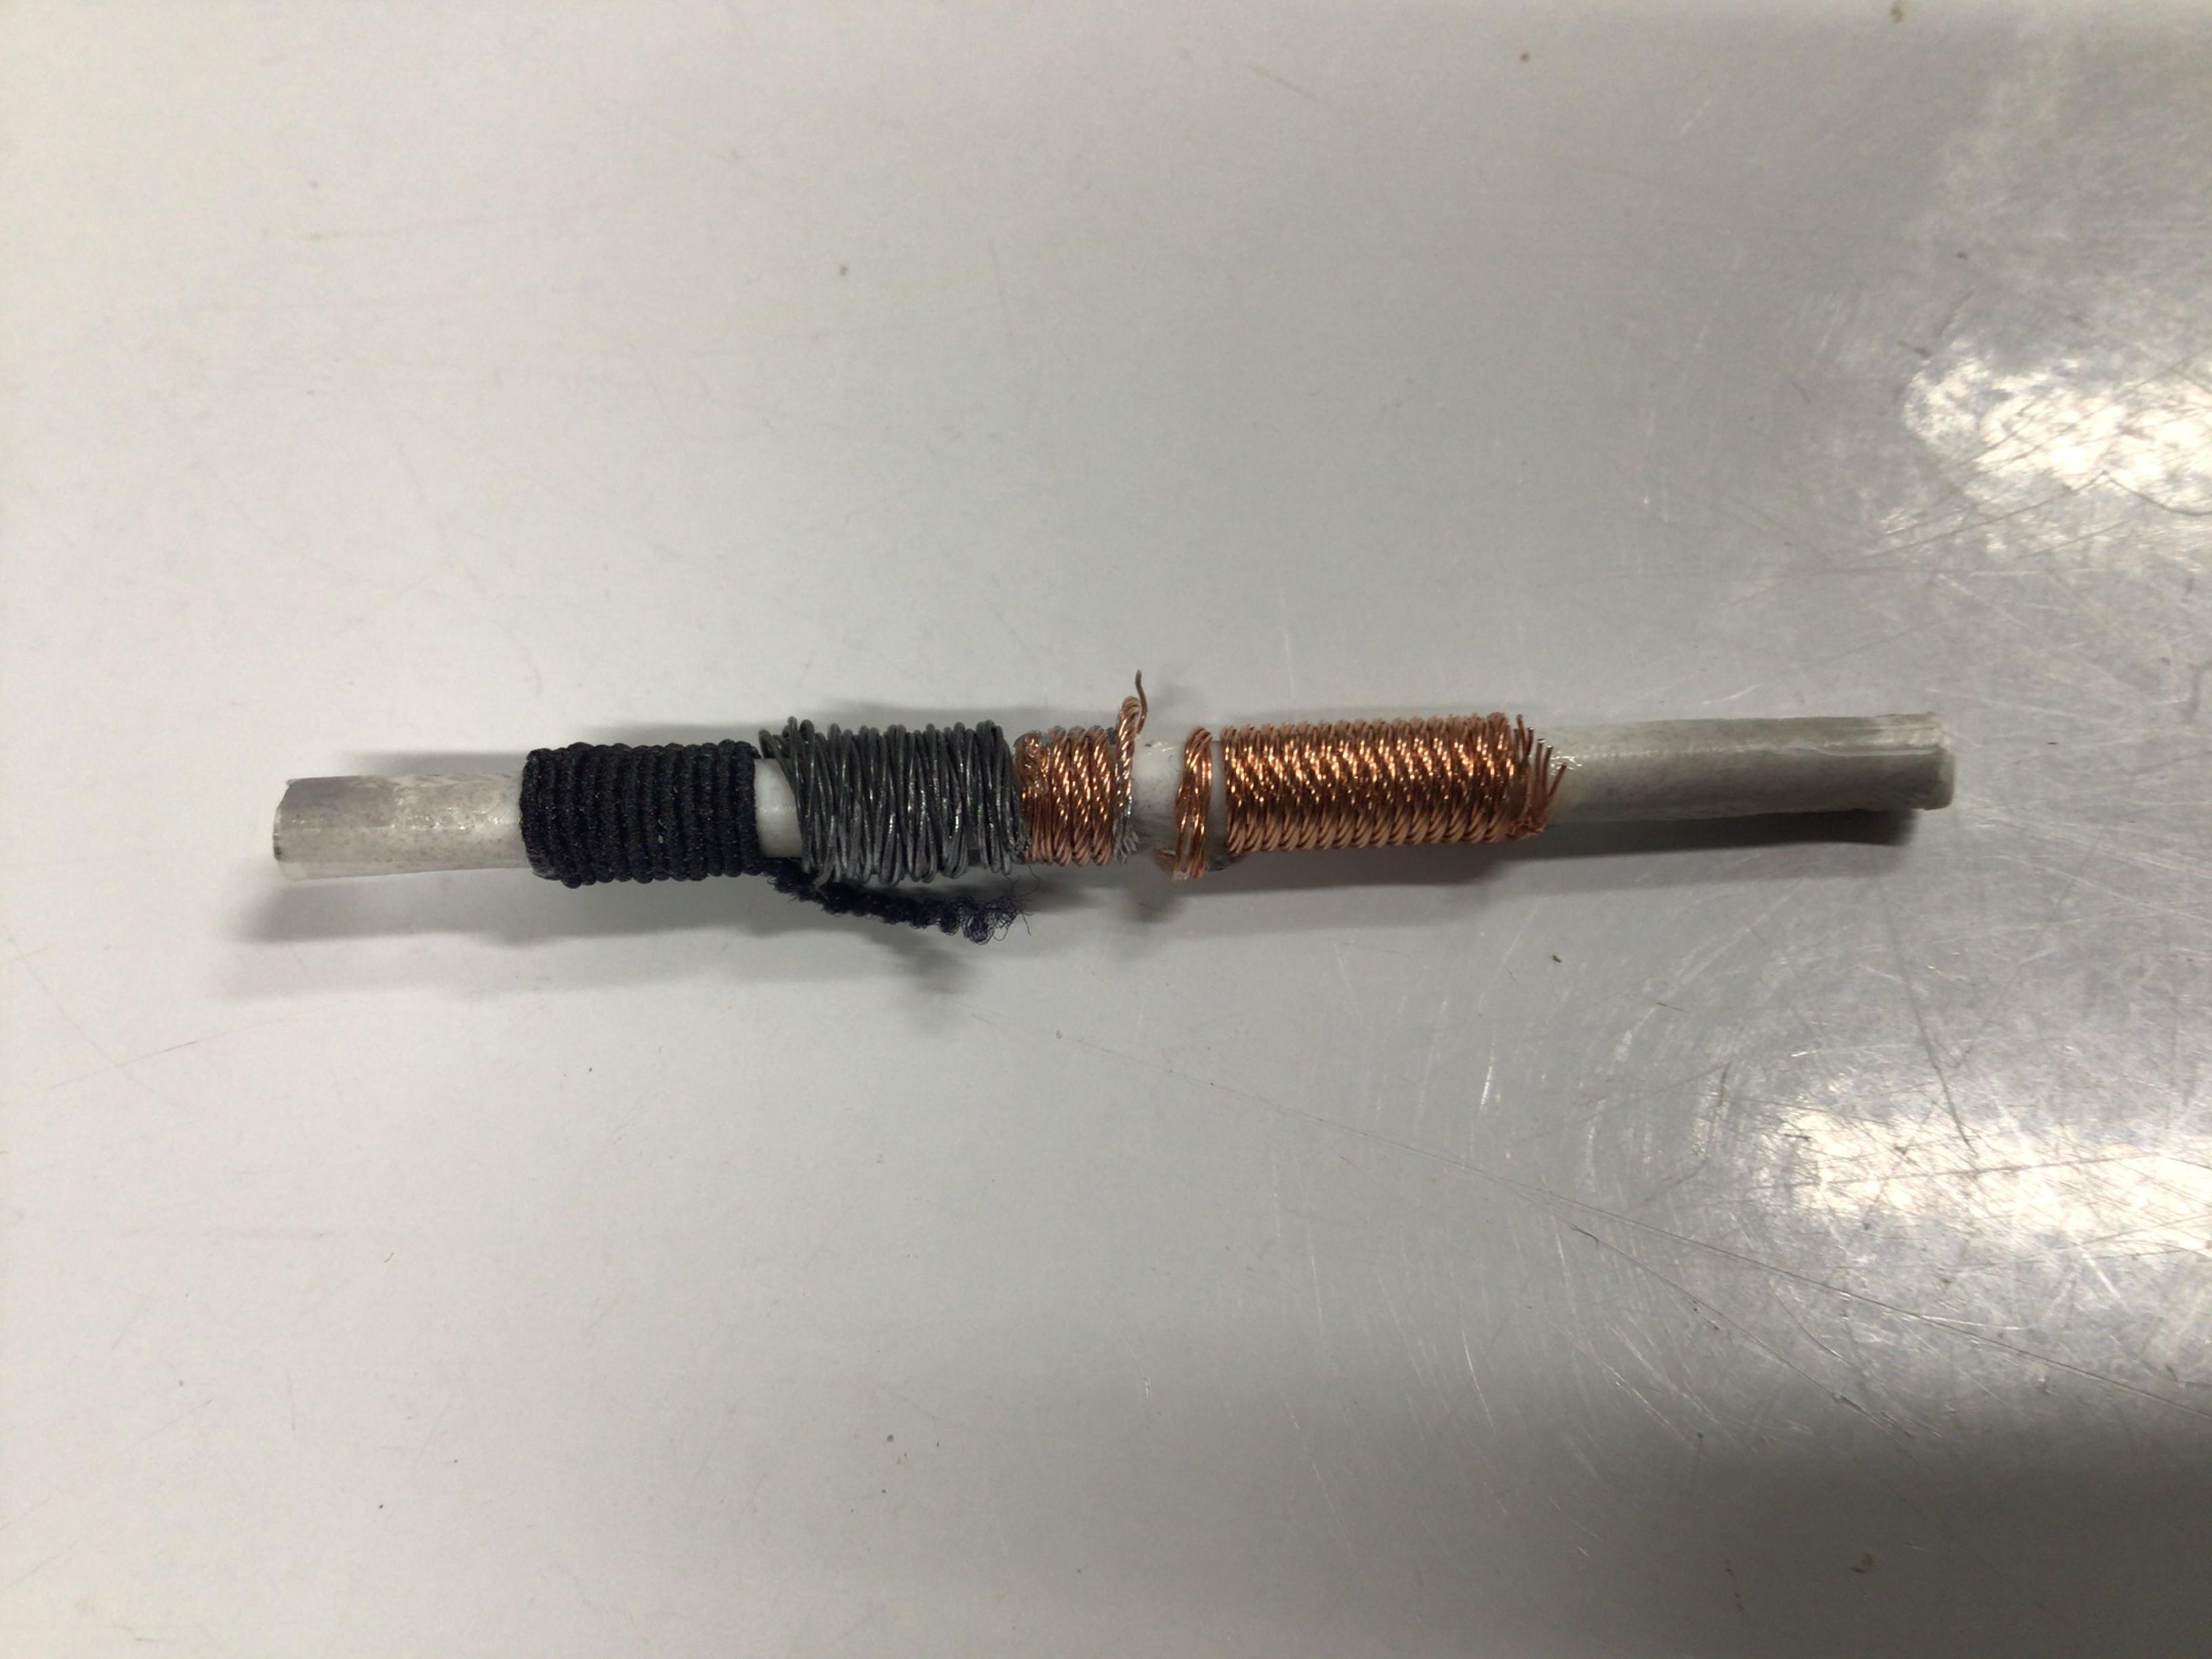
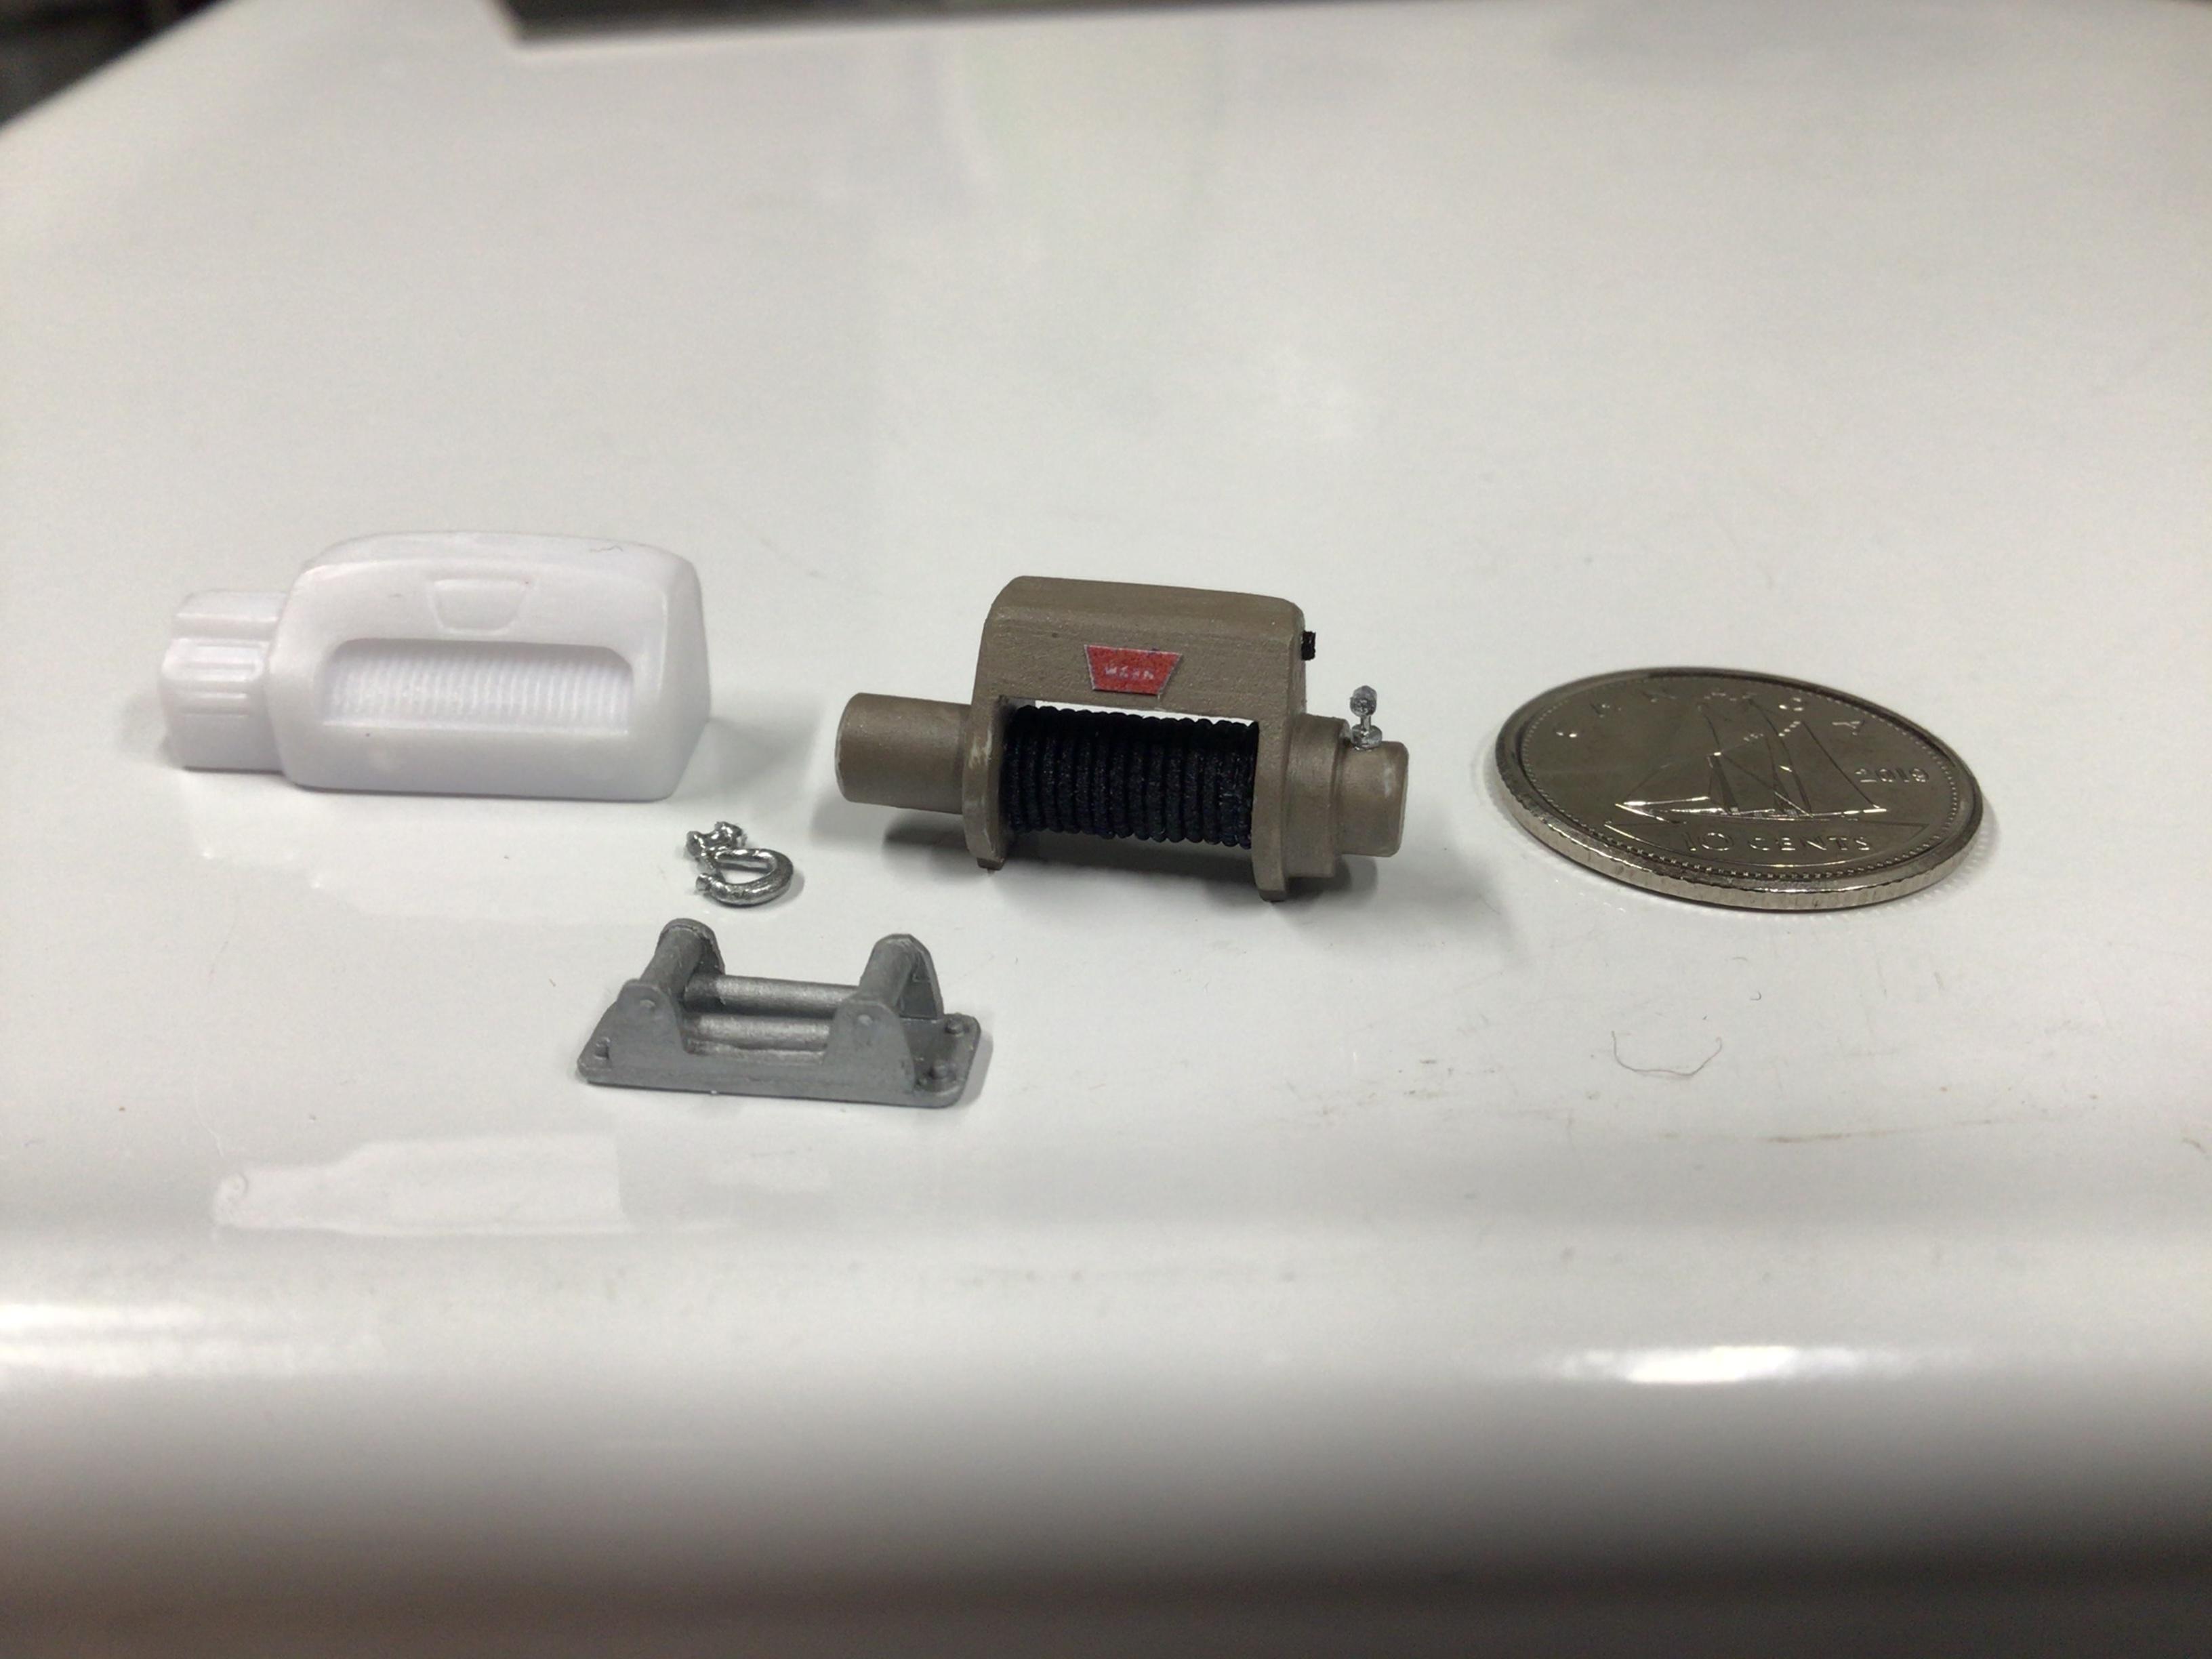
Ok, I cut up a USB cable. It has two small and two large wires. They are tin plated I believe, so shouldn’t need any painting. The larger ones are the same size as my previous copper one. That works out to 0.024” finished diameter, which would be a 5/8” cable in 1:1 (assuming a 1/25 scale model). The smaller one works out to 0.016” finished, which would be a 7/16” cable.
-
Really nice work. That rusty bed looks real!
-
Outstanding restoration you accomplished on that glue bomb.?
-
Super nice job on this. I too love the paint job, and that view from the rear is awesome!
-
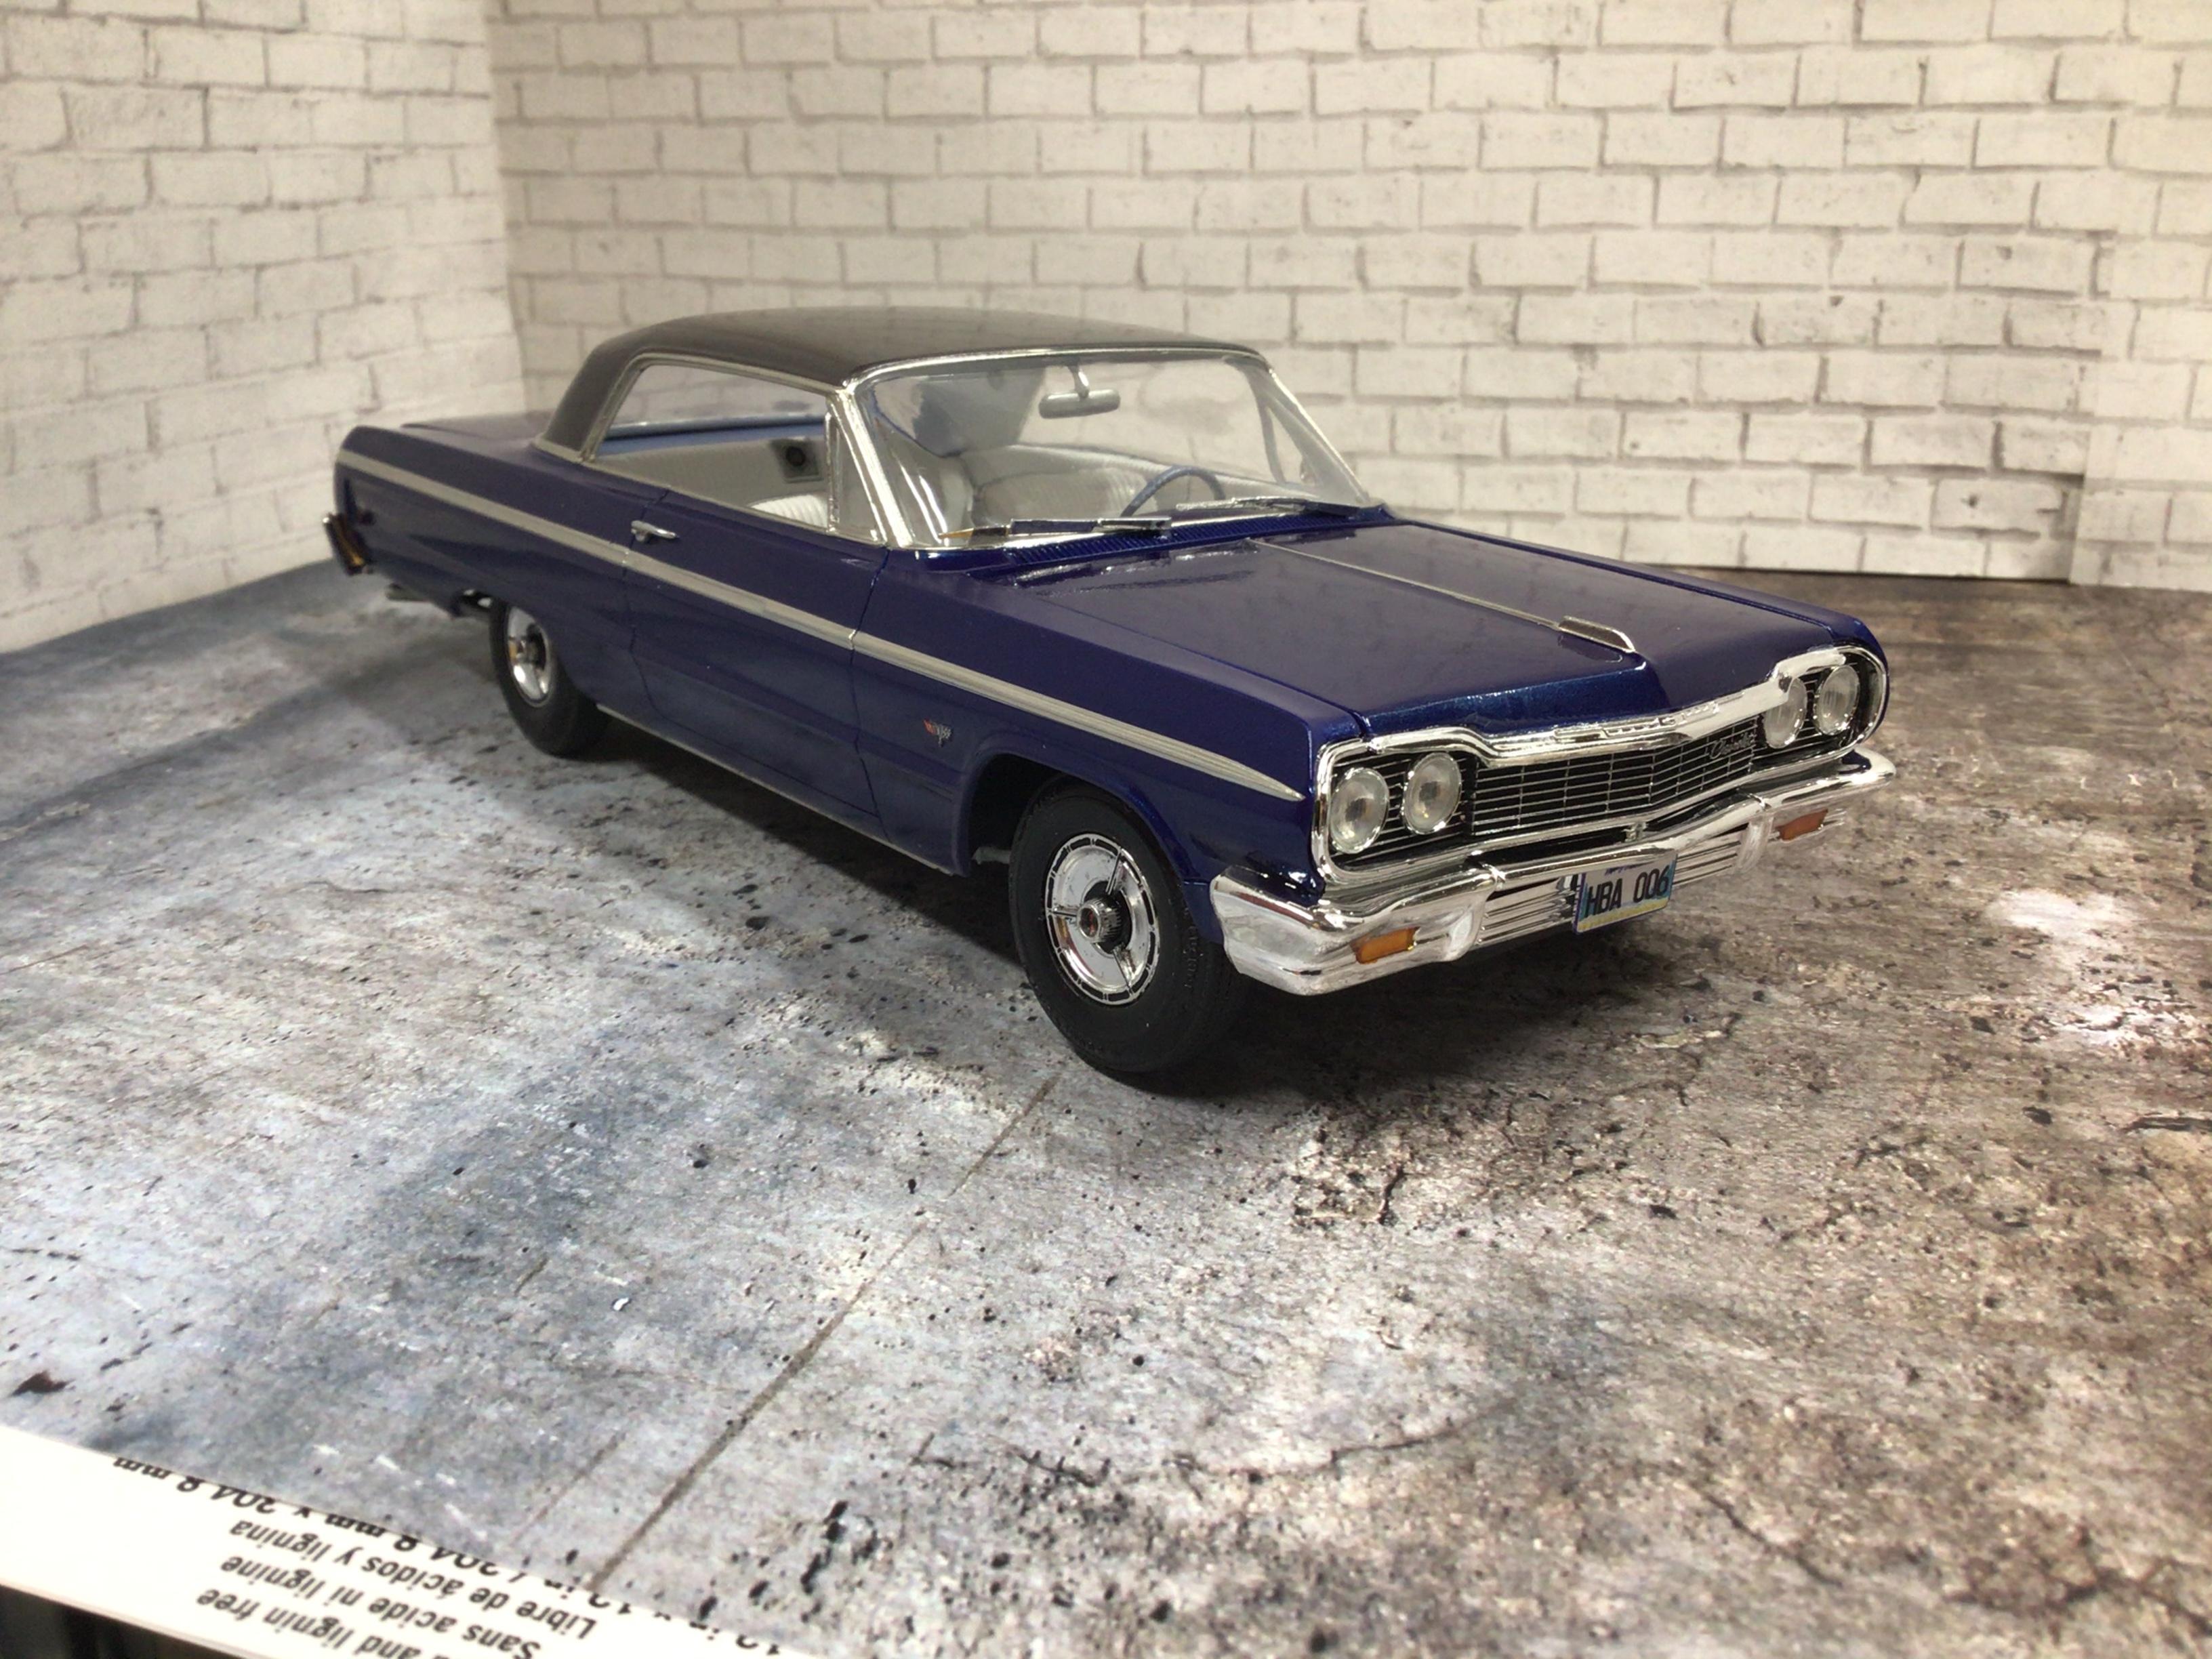
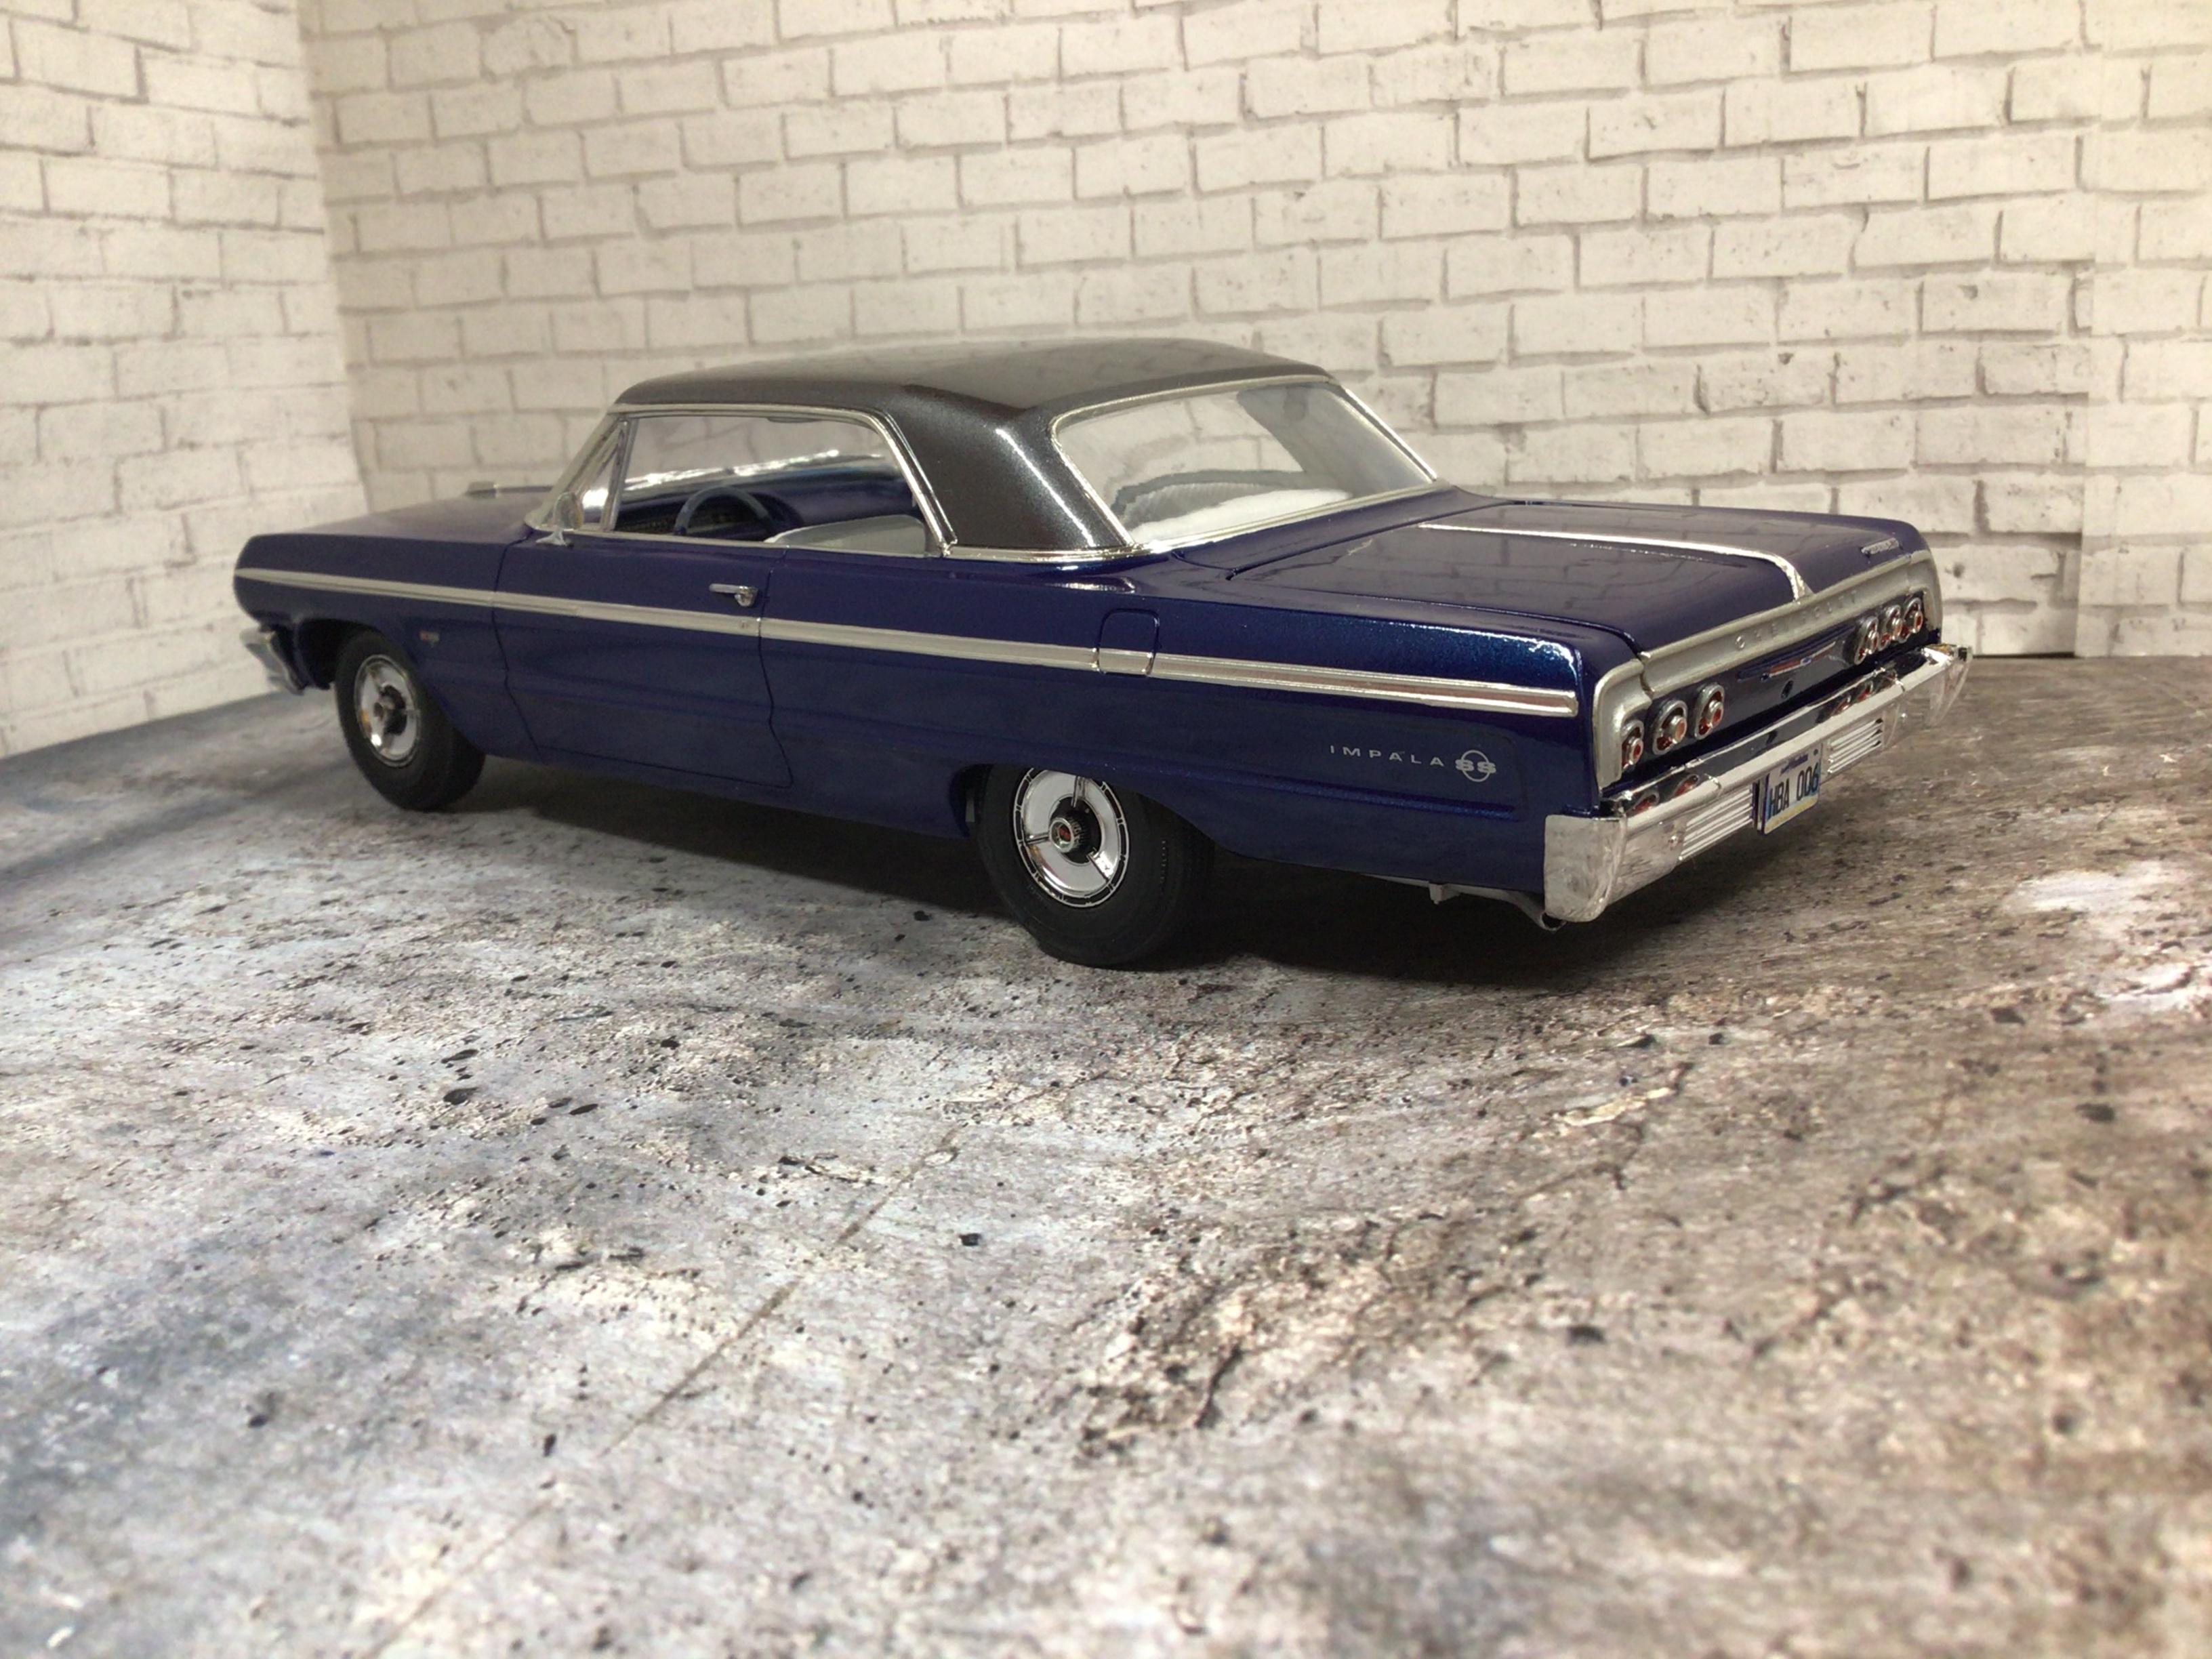
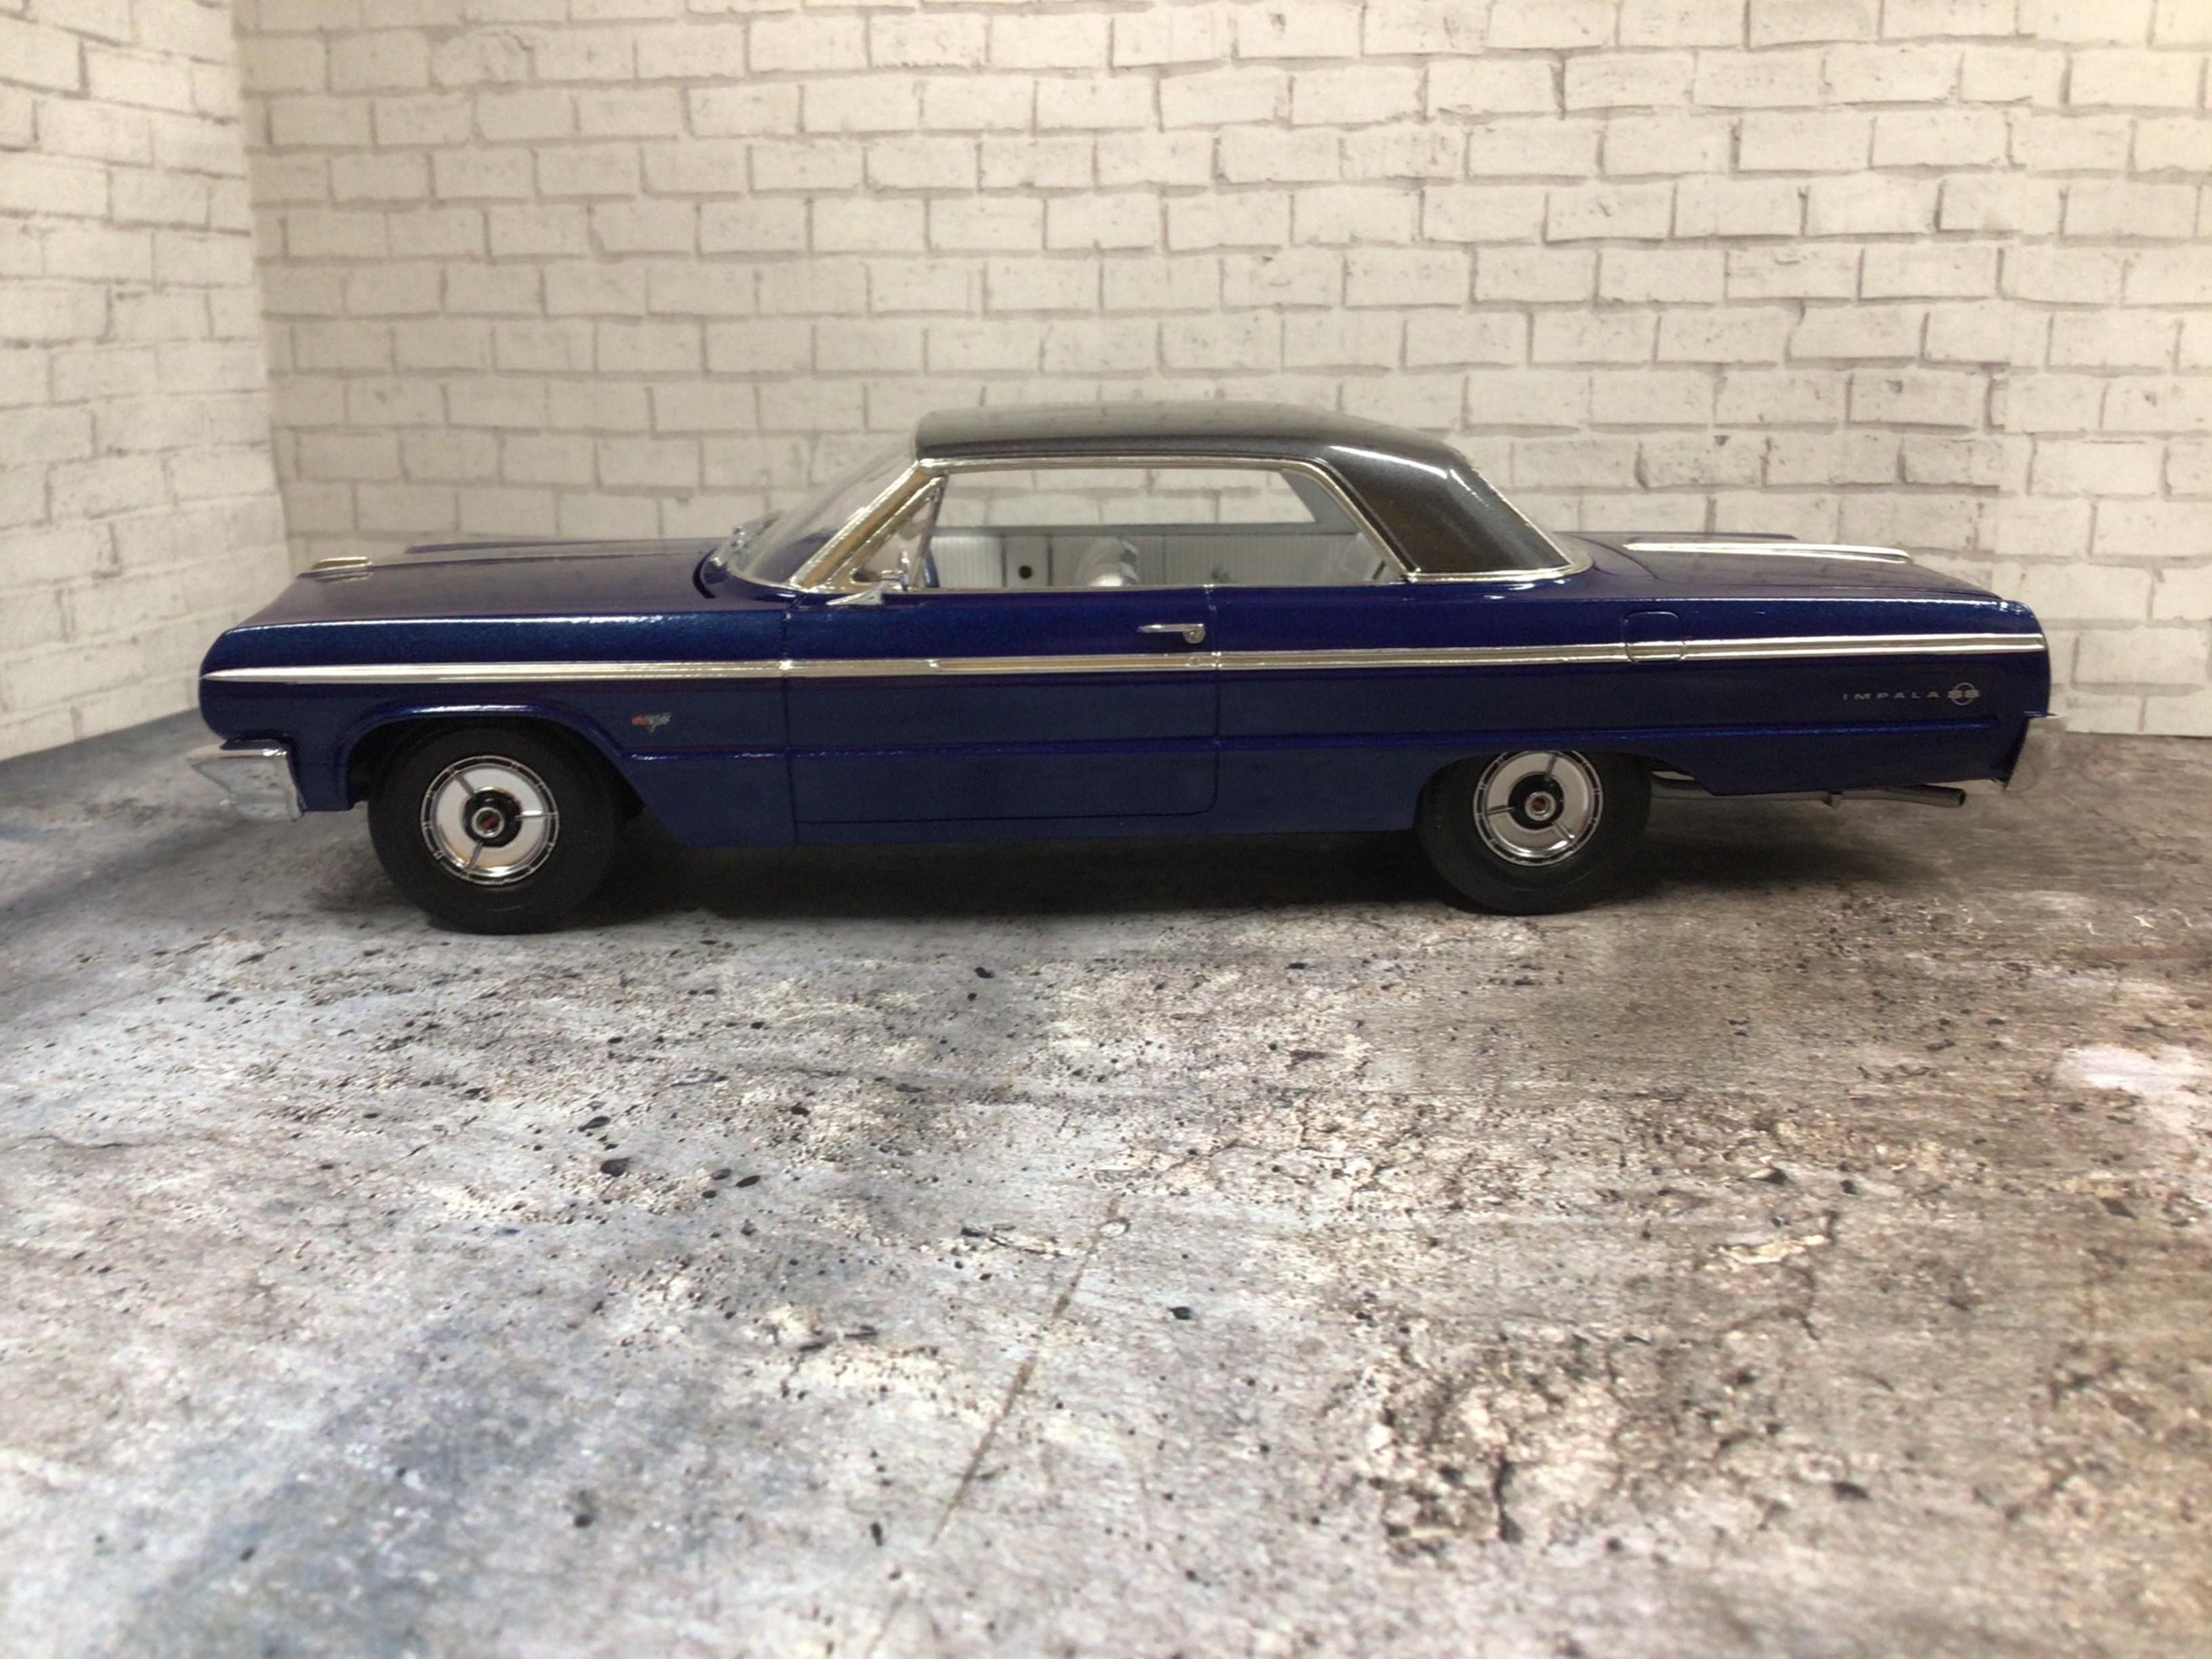
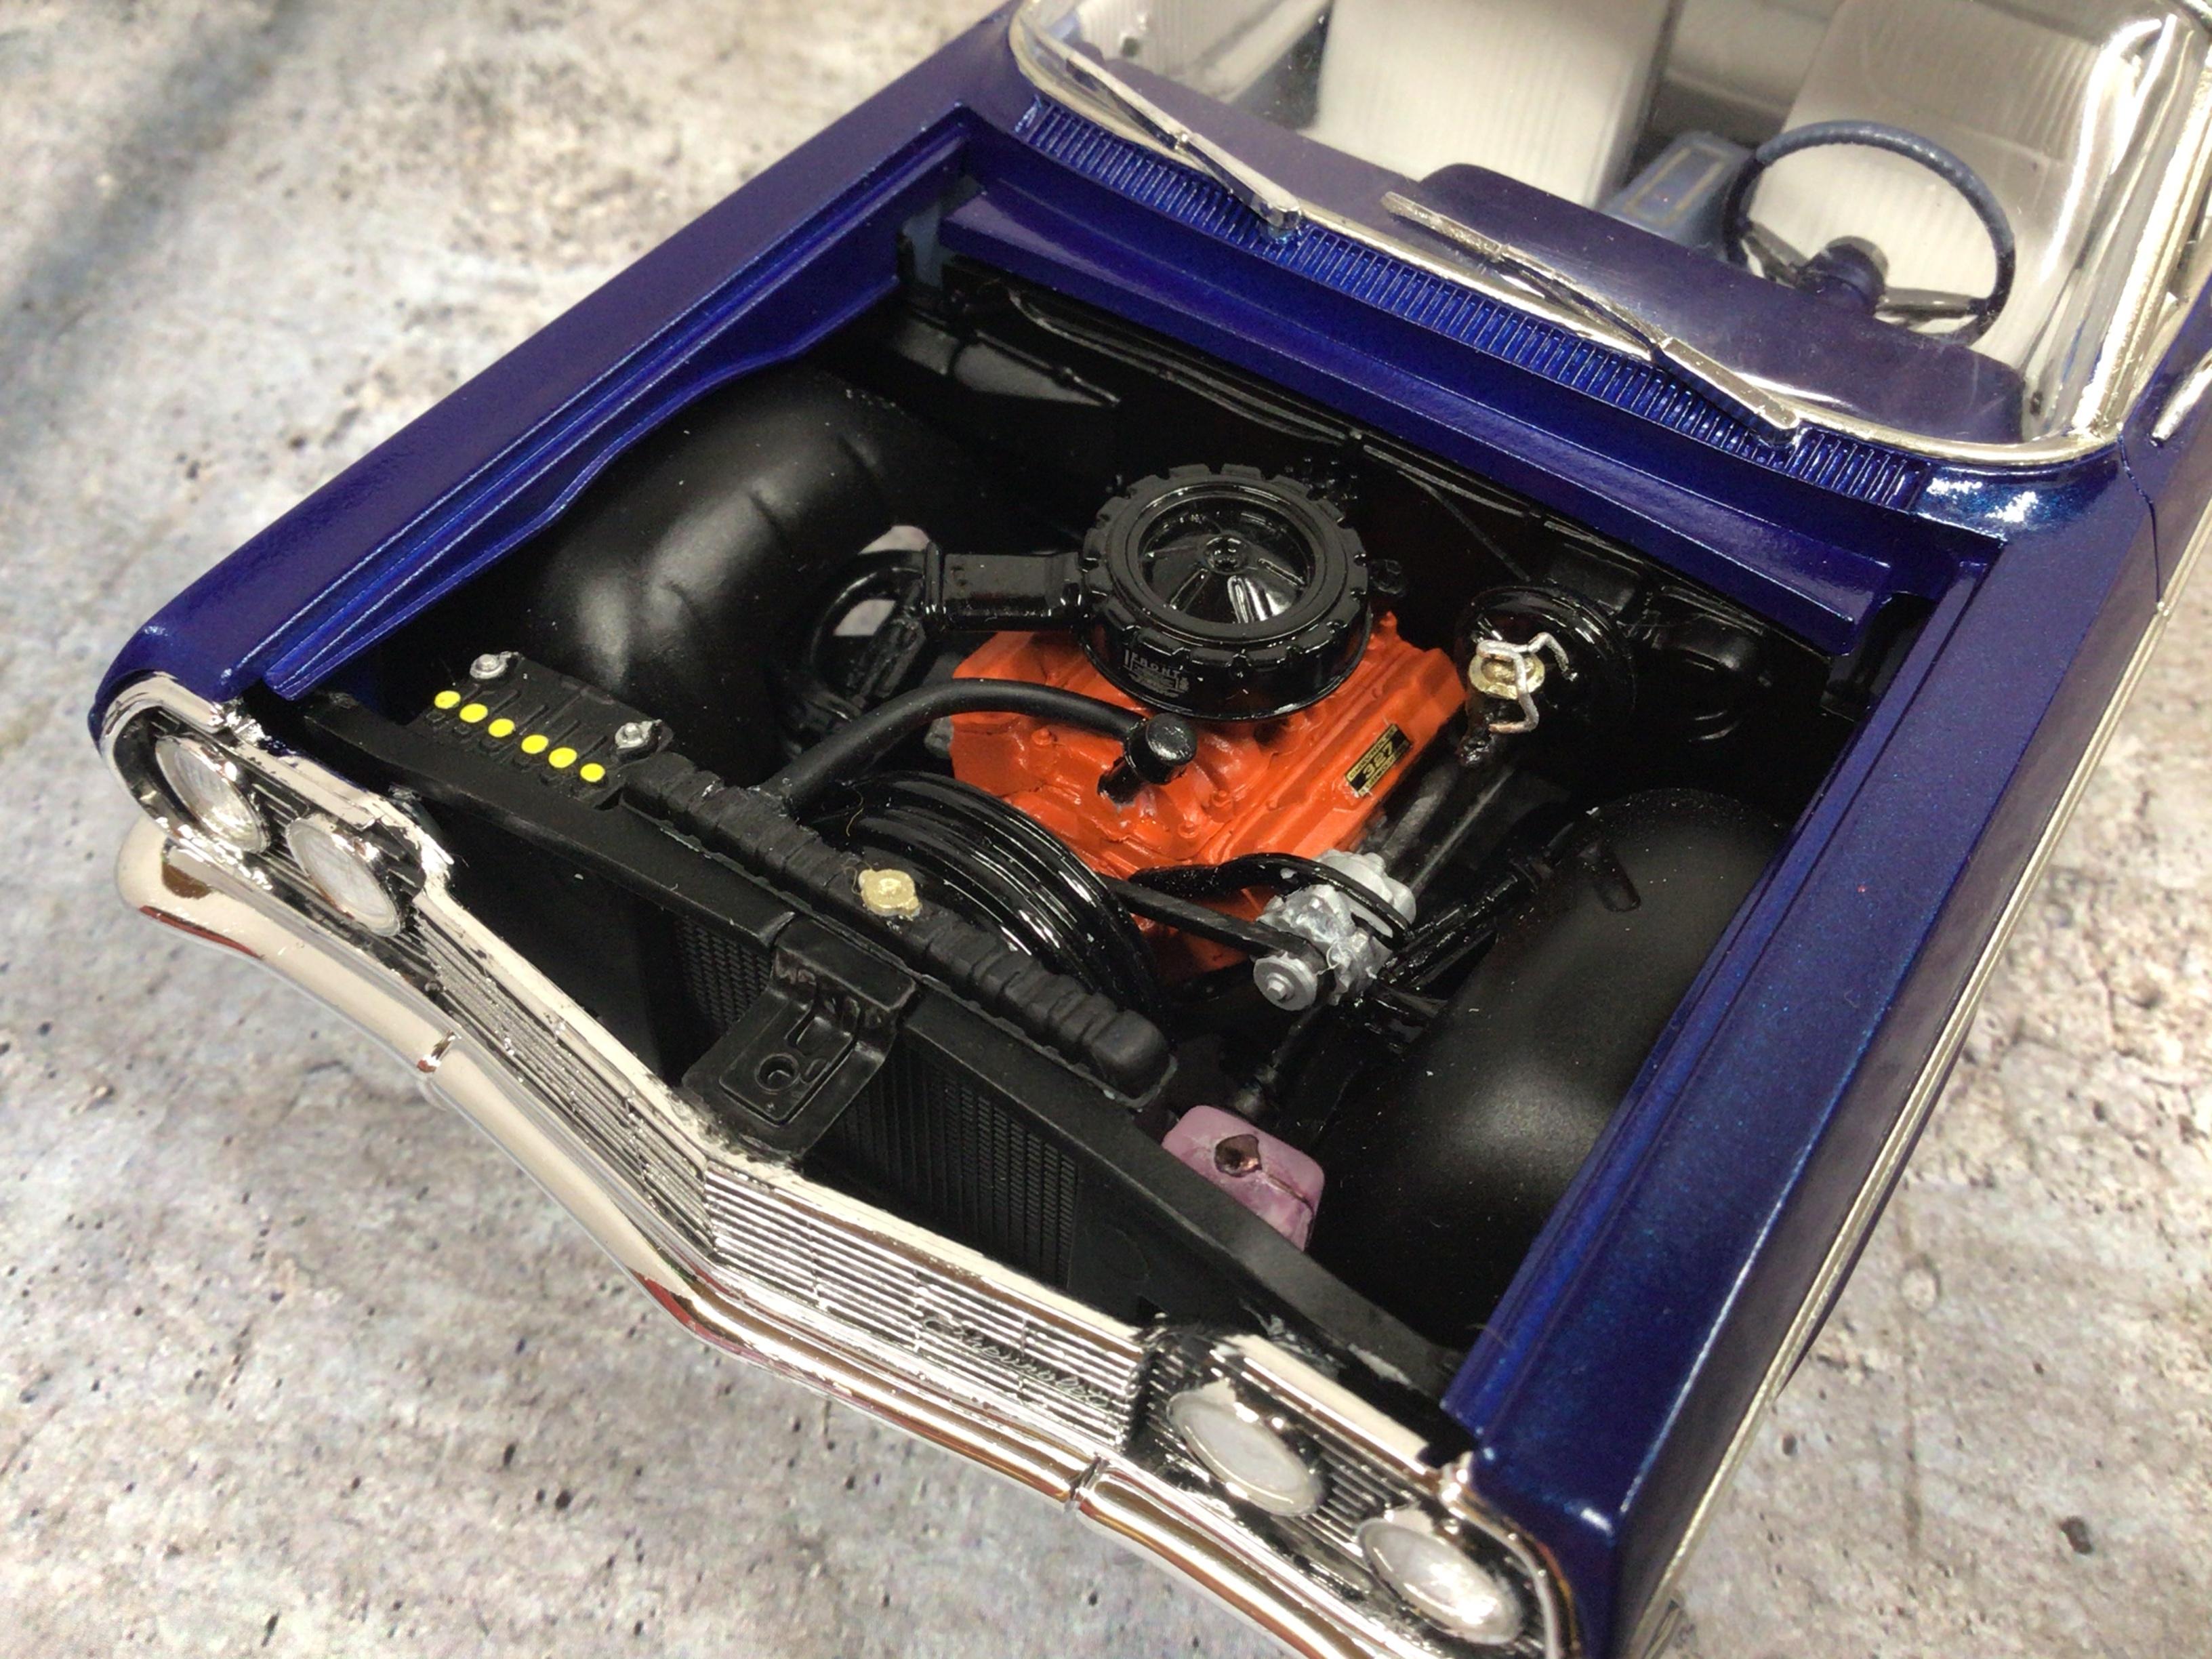
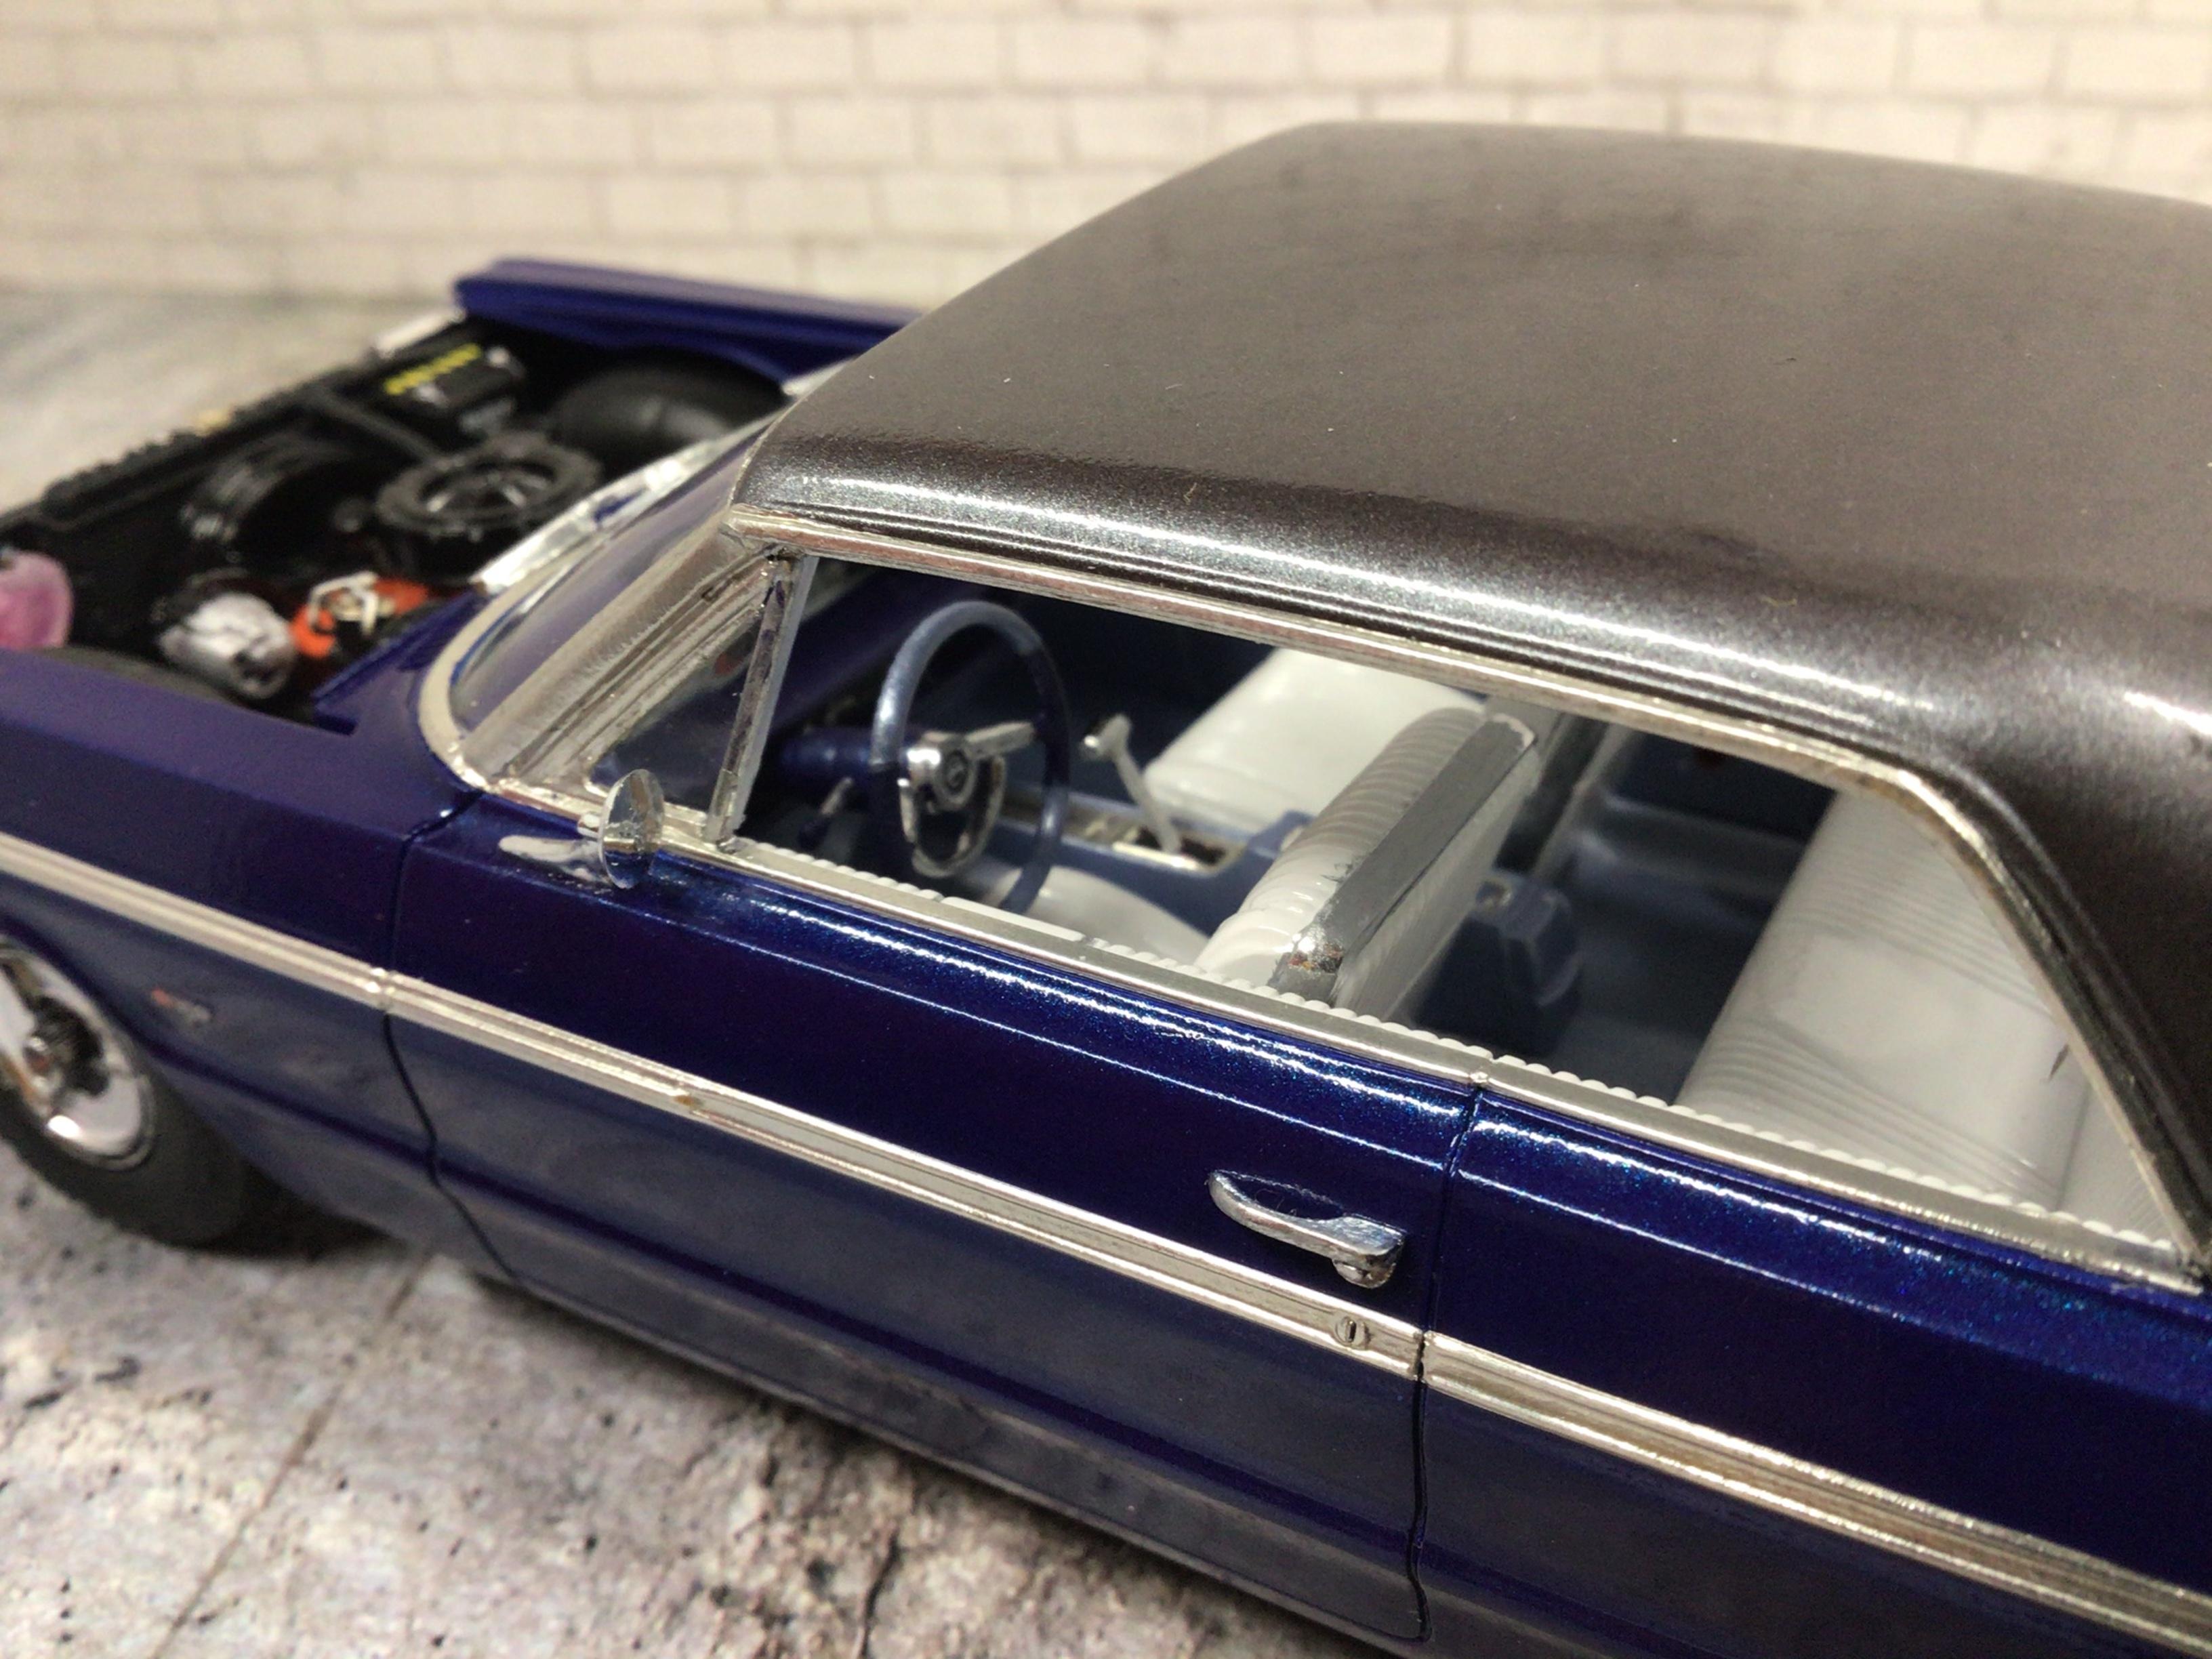
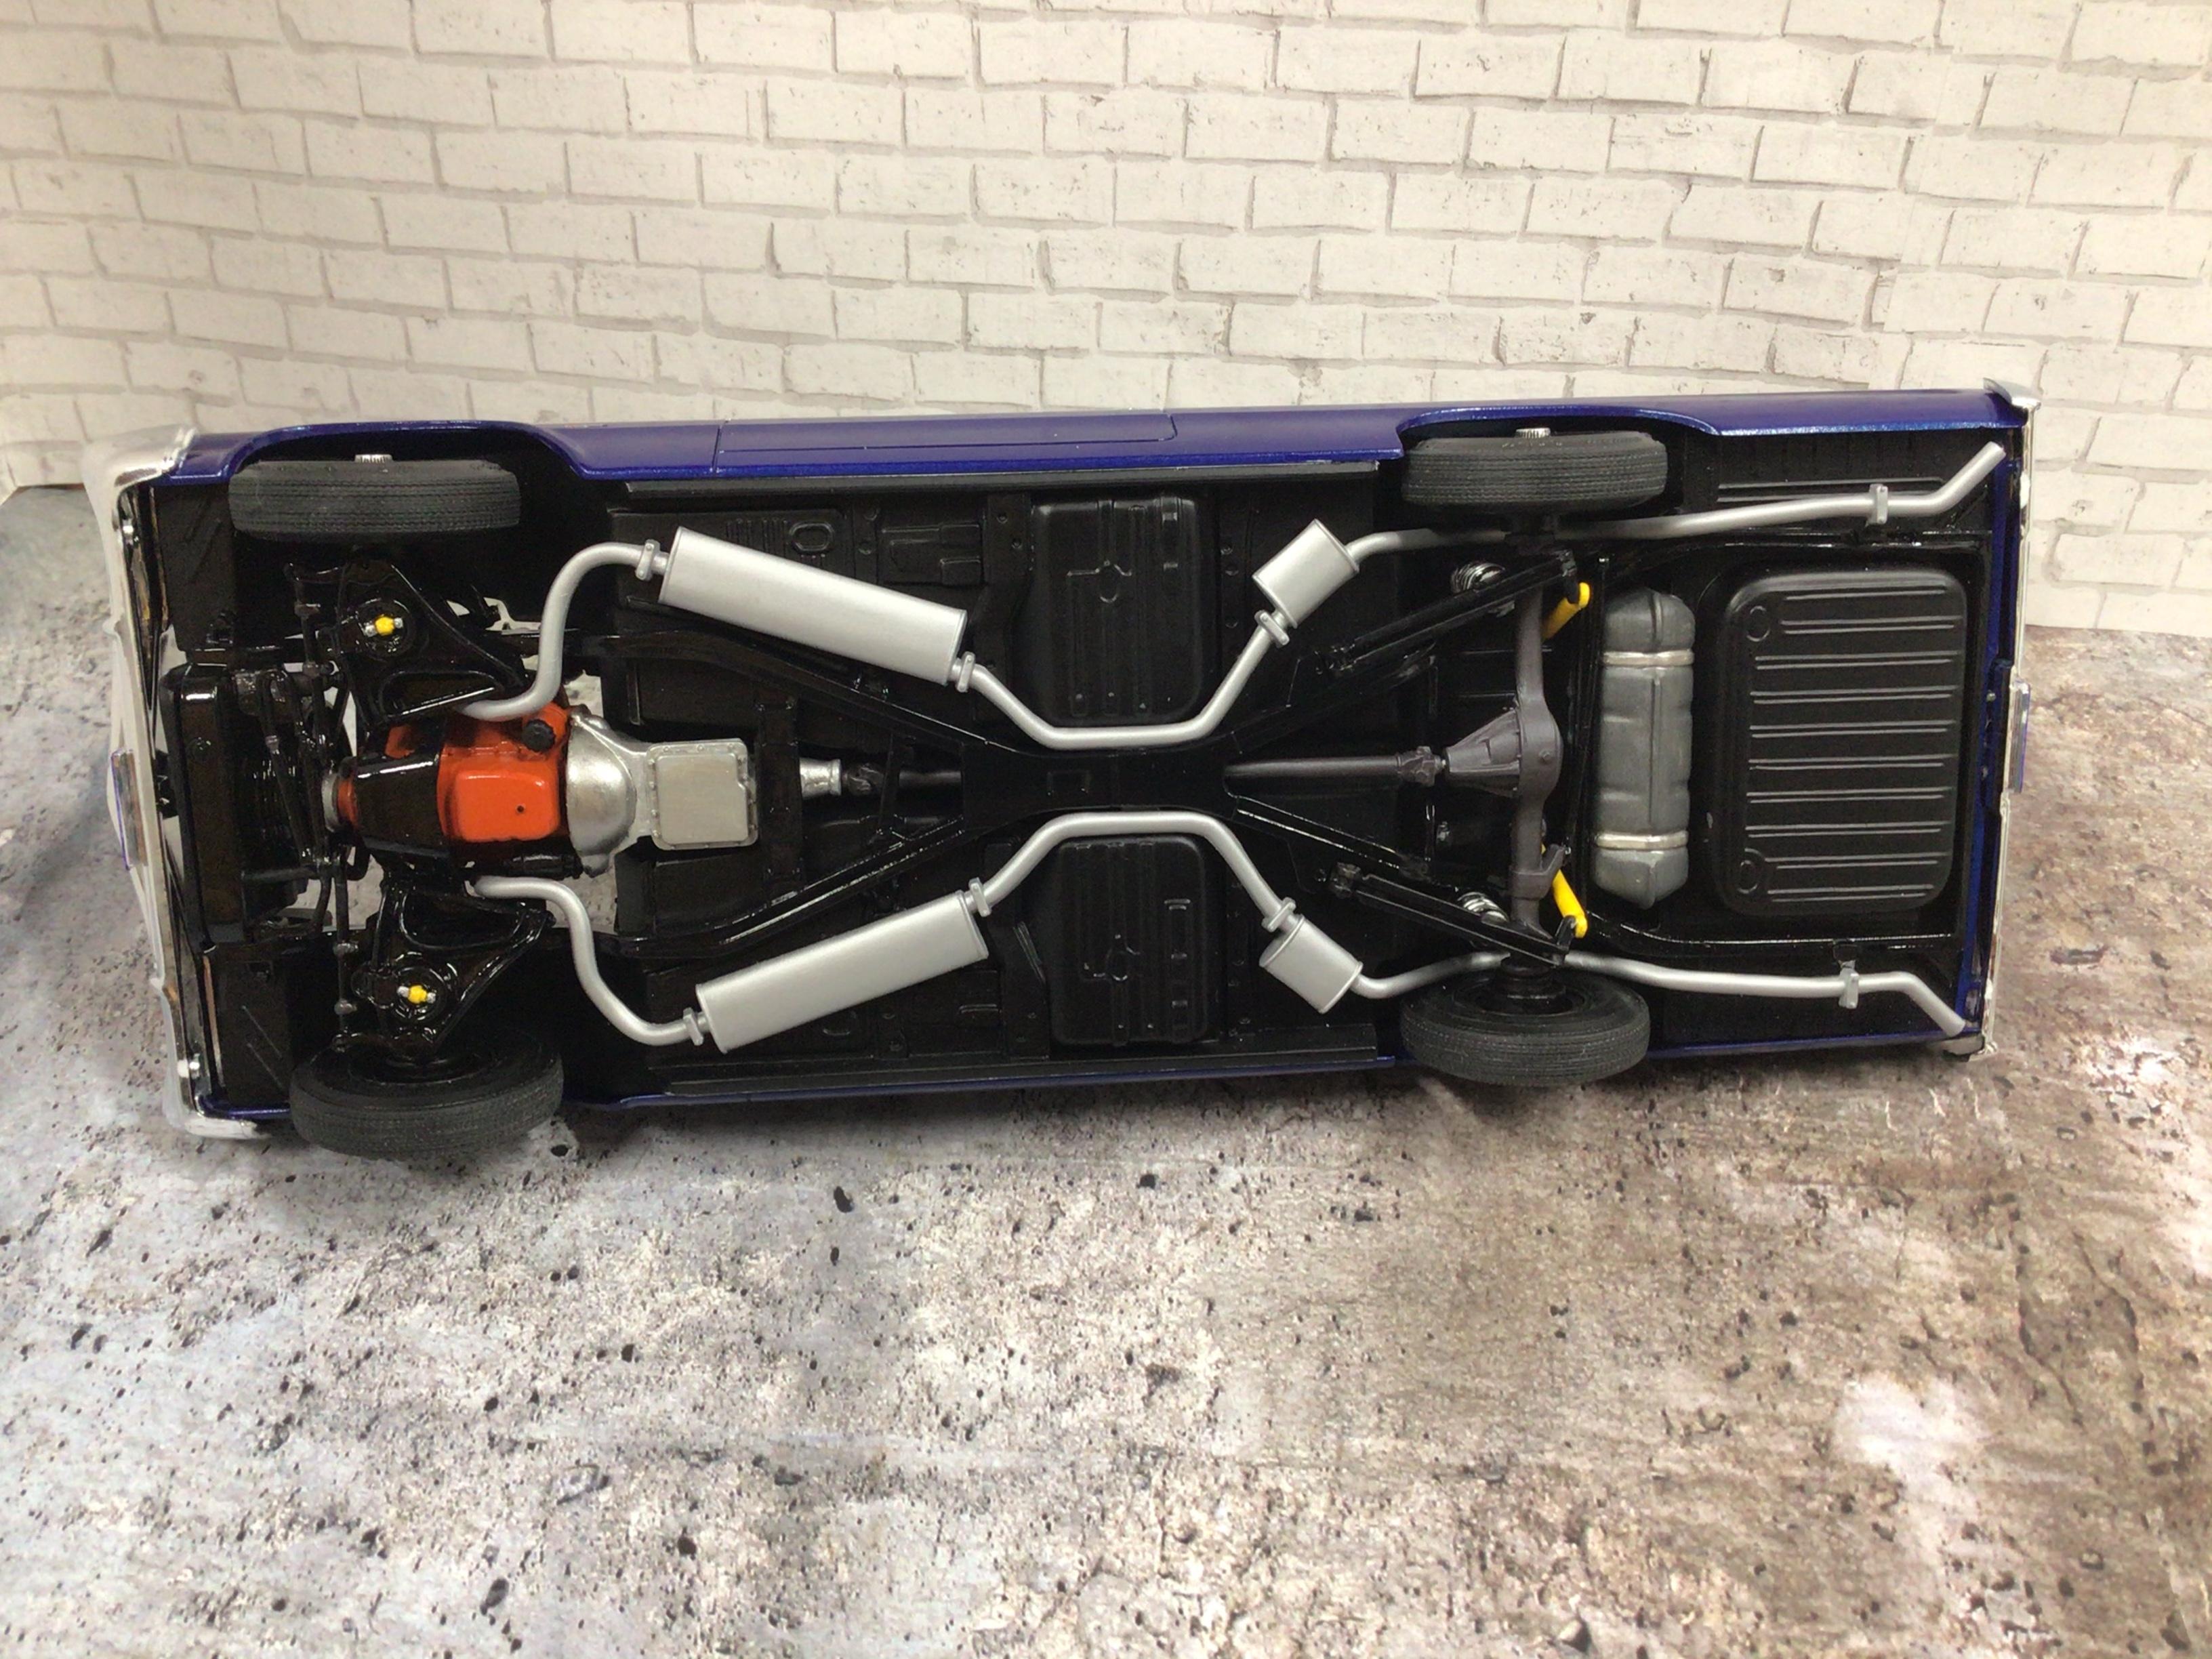
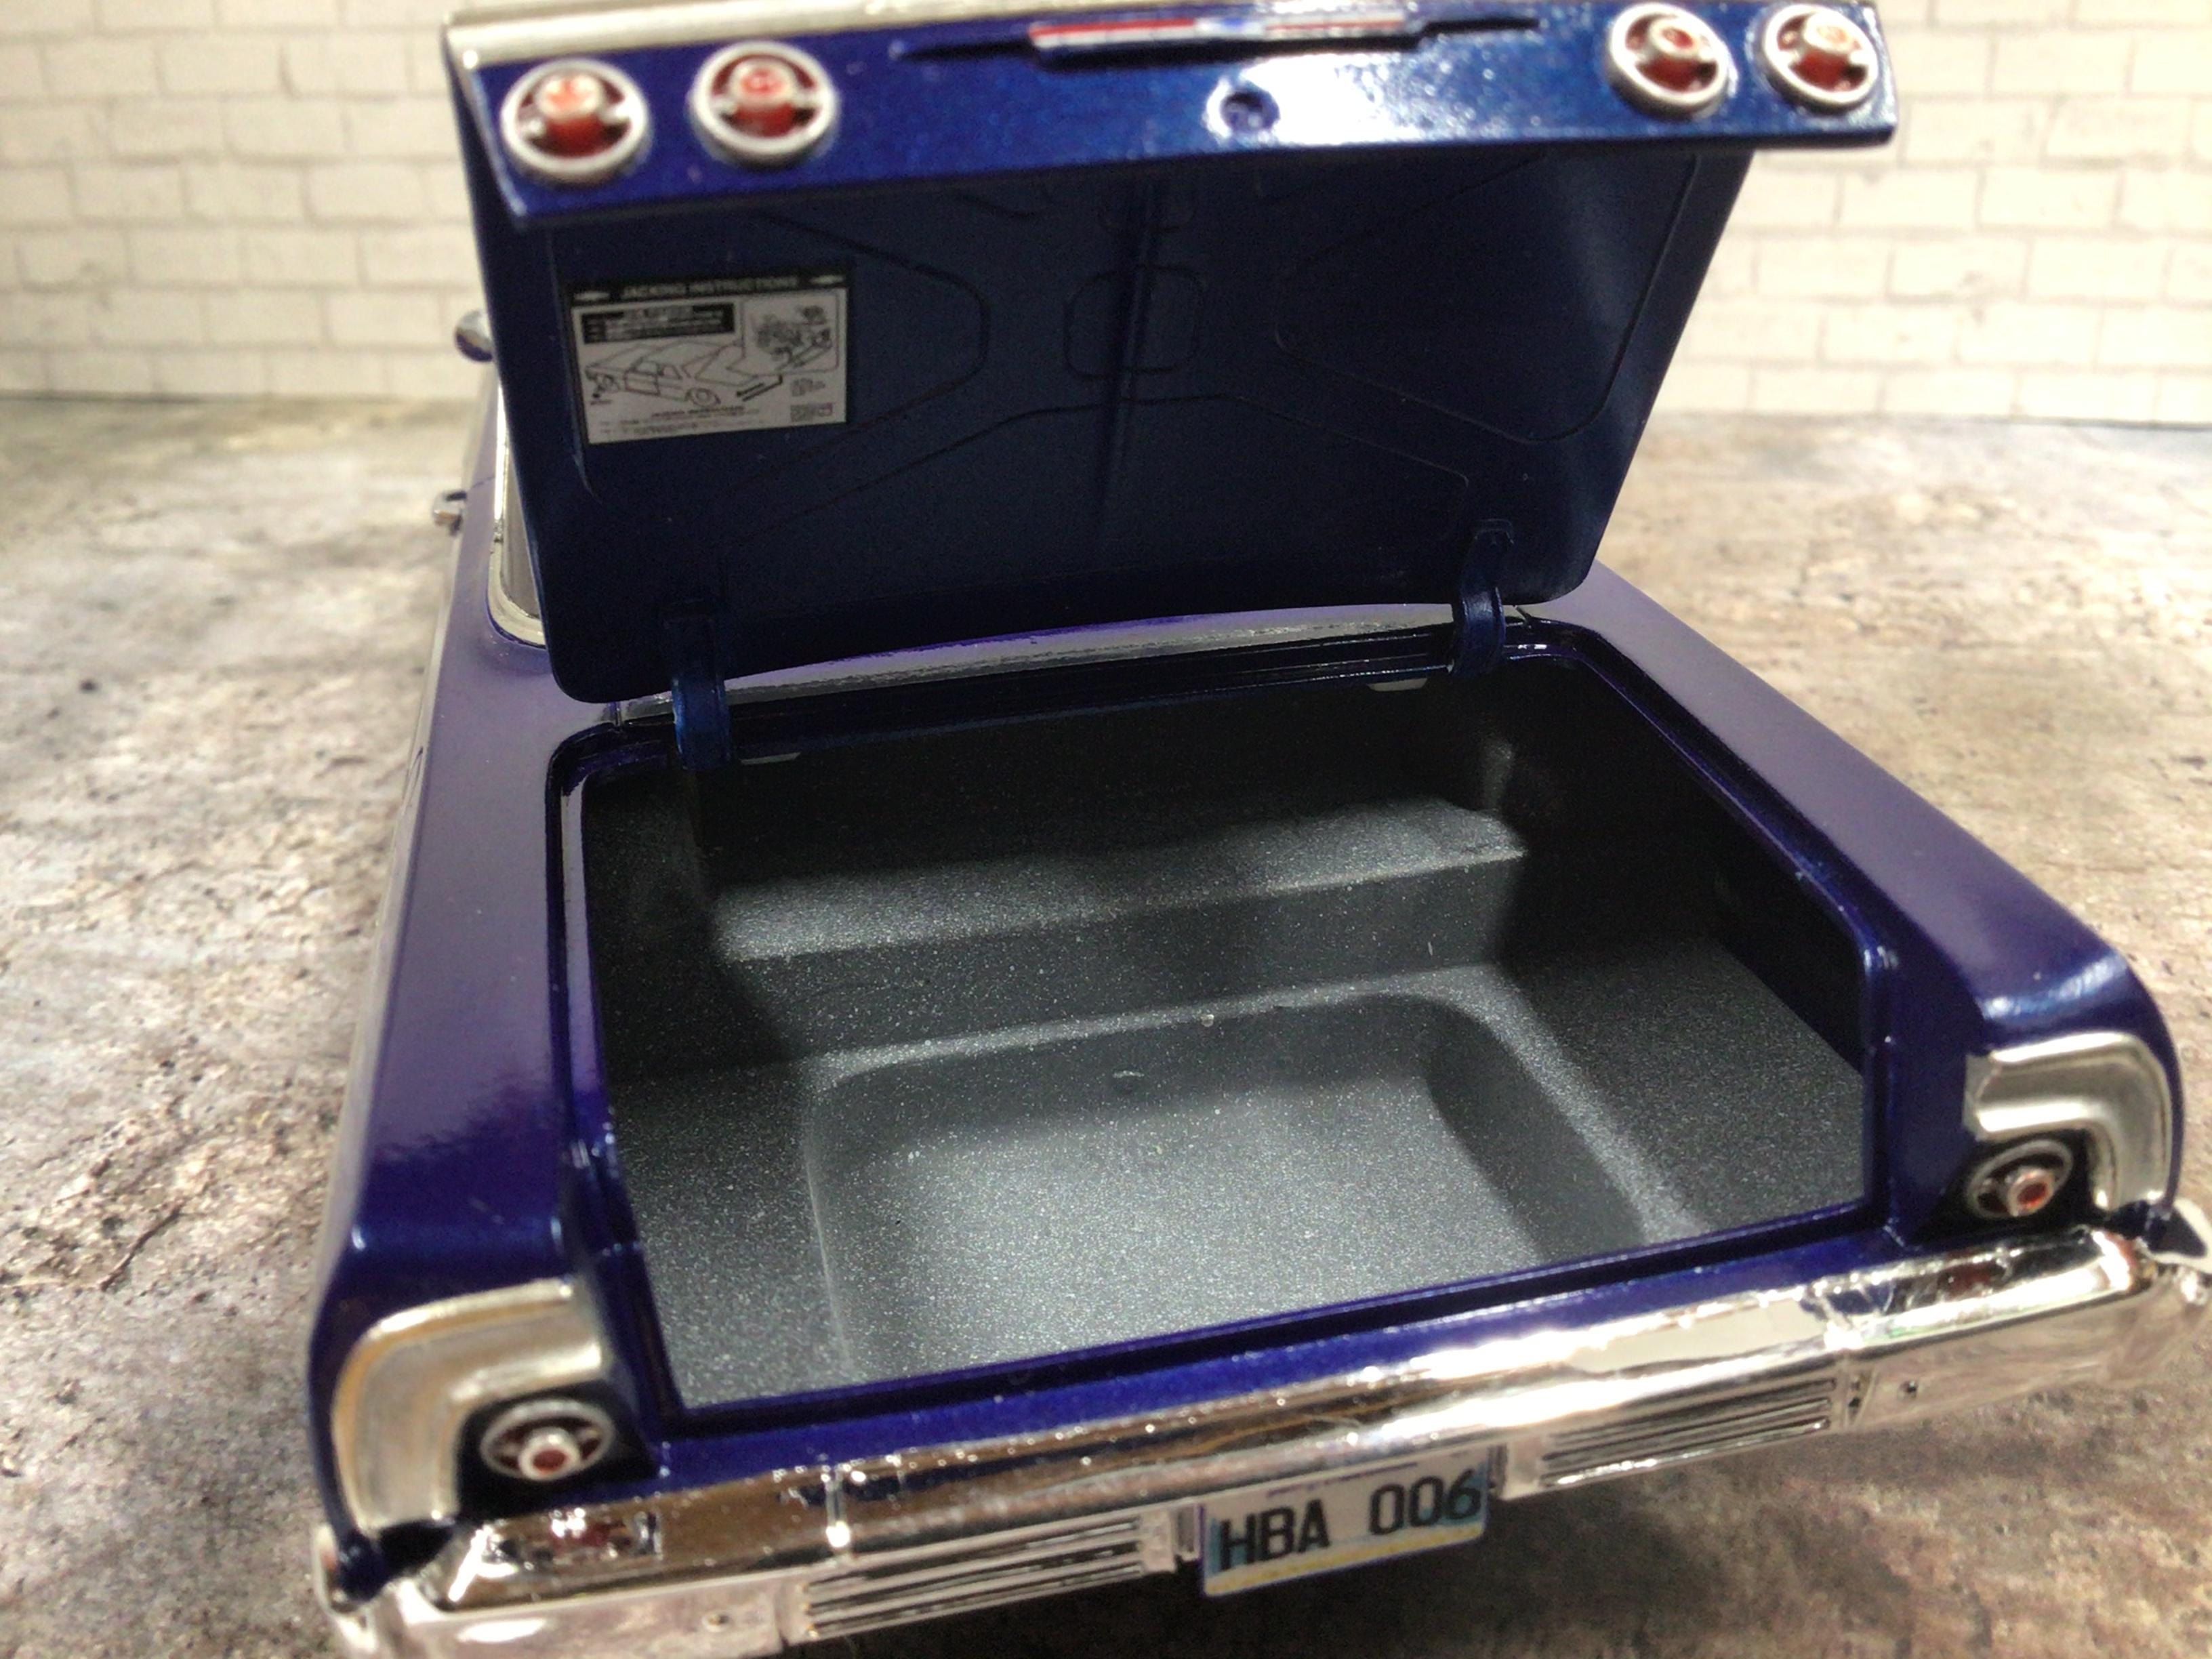
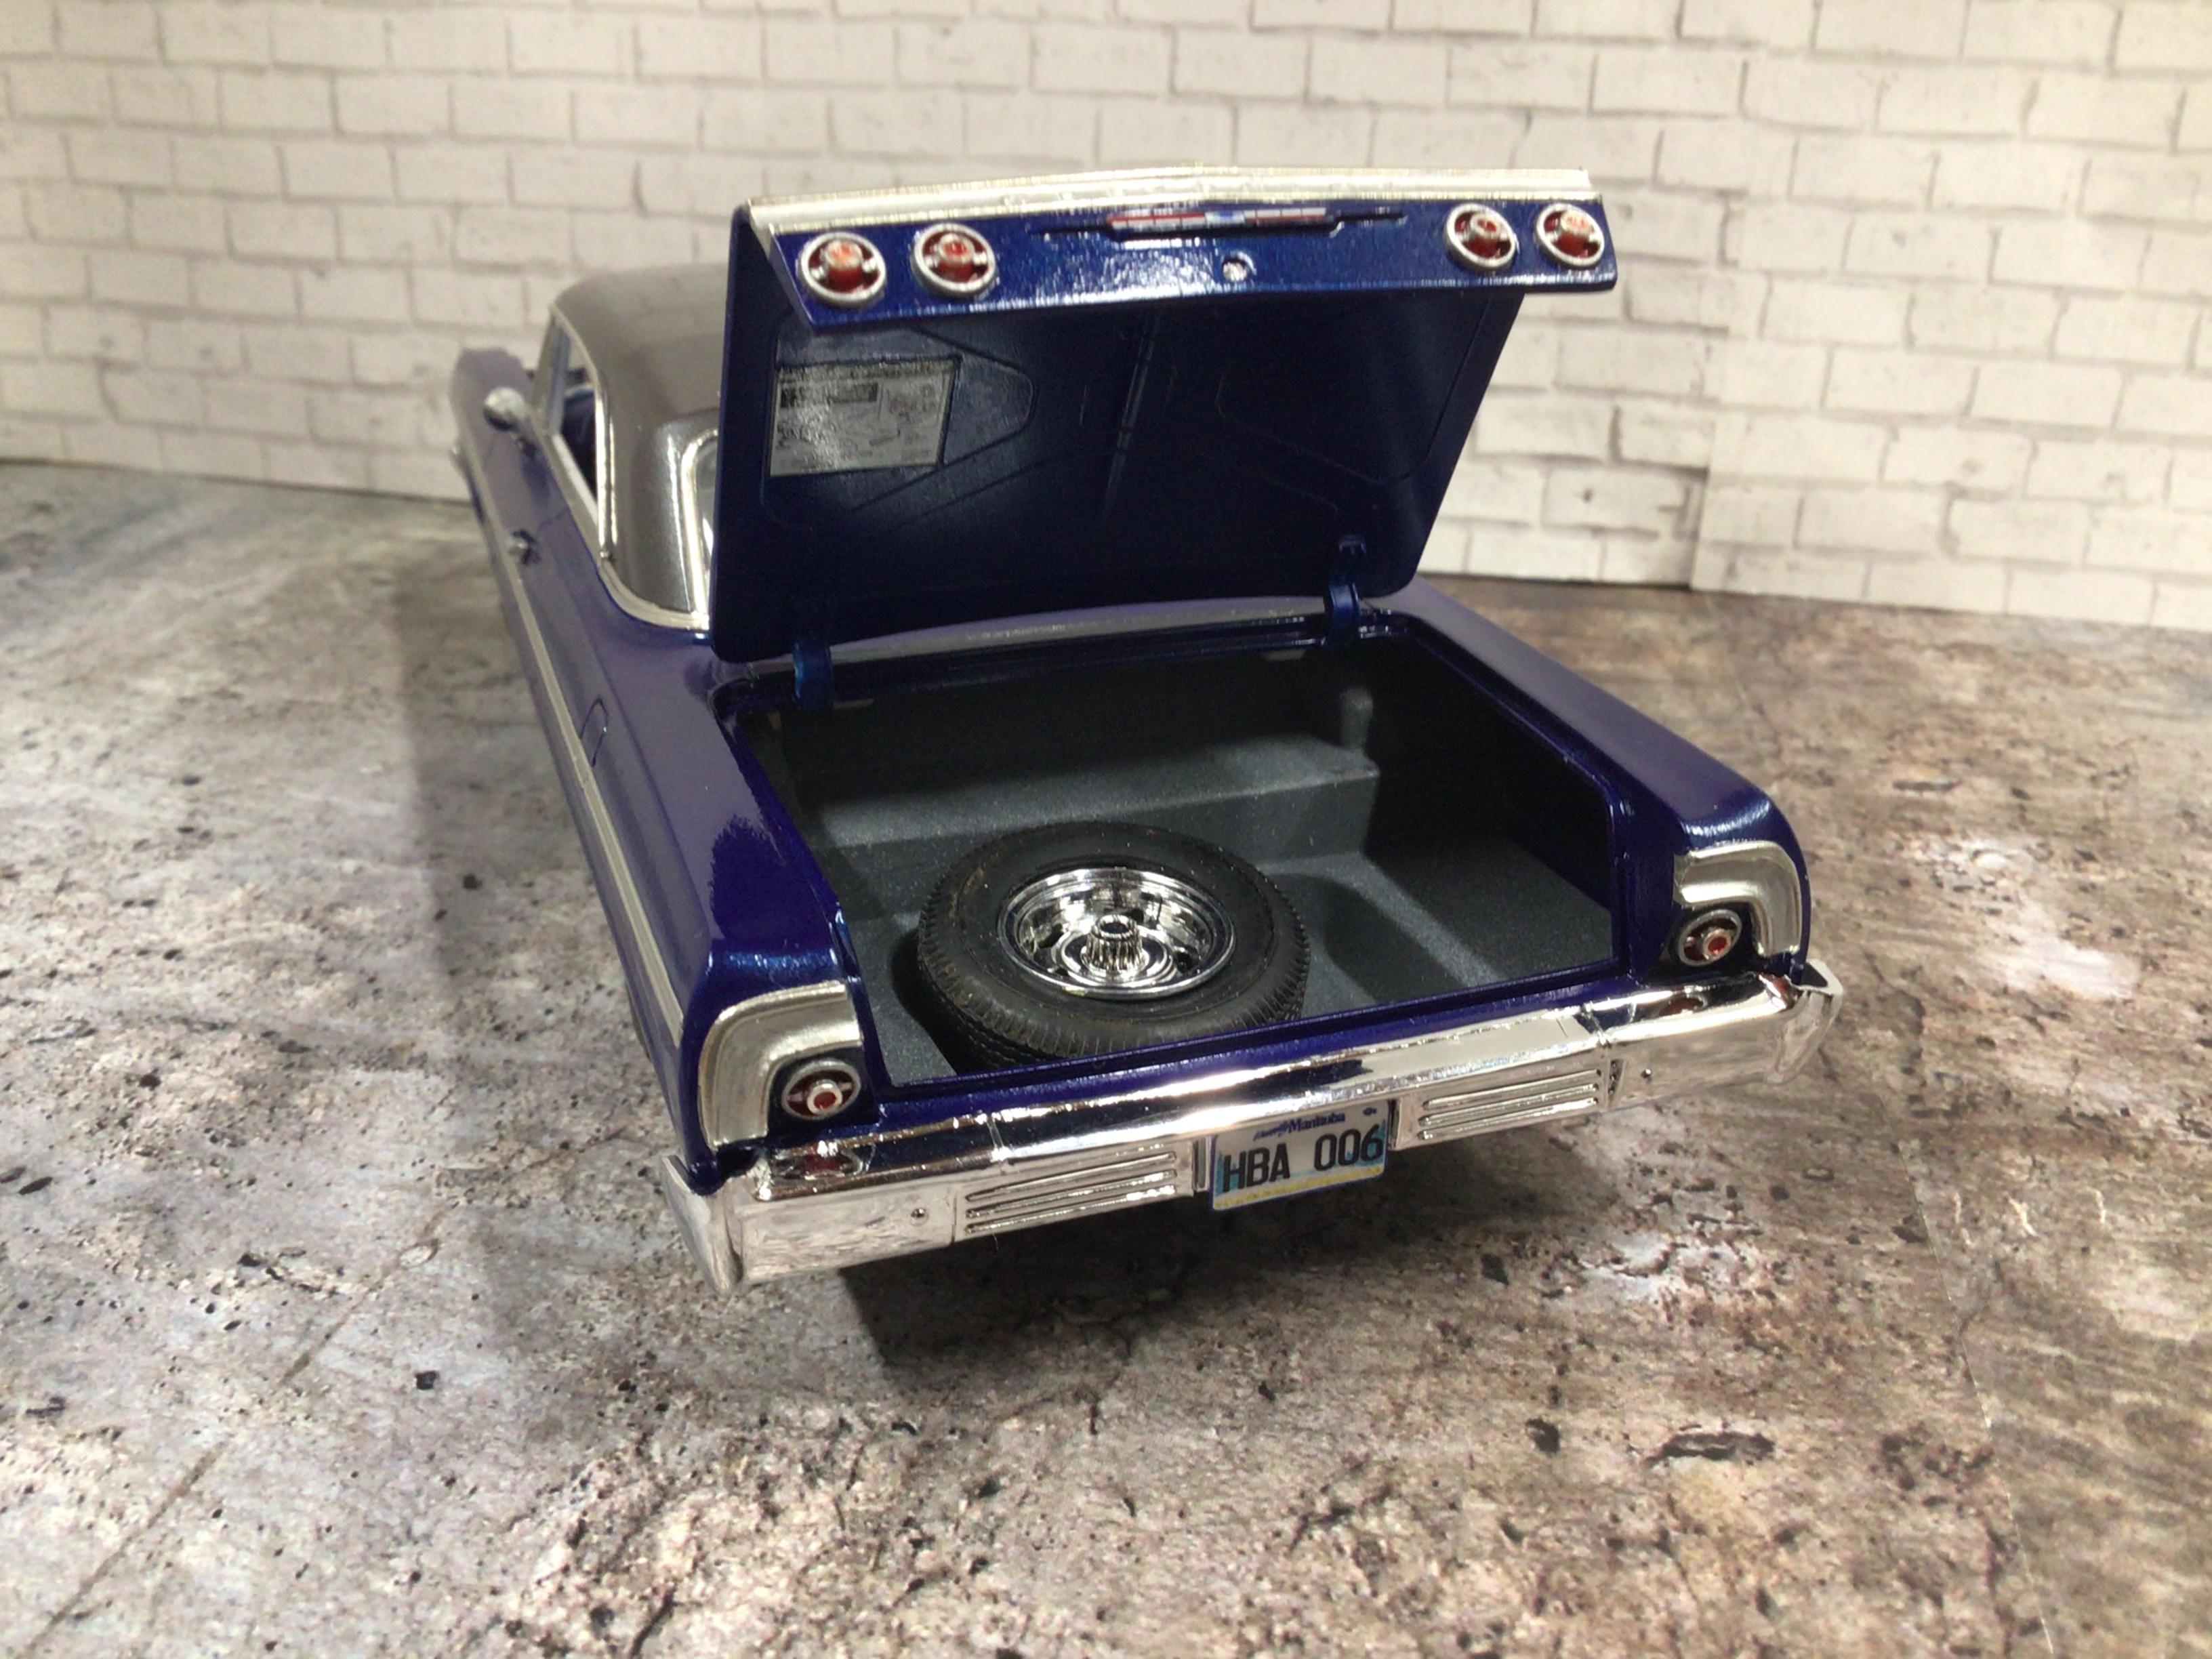
This is the lowrider kit. The paint job could have used some polishing, but I am pretty sure it would have wound up in the purple pond instead.? Other than the horrible tail lights that I replaced, it went together quite well.Paint is Tamiya LP-47 and LP-38. Build thread here: http://www.modelcarsmag.com/forums/topic/132921-64-chevy-not-too-low-rider/
-
I recommend getting a dial caliper. They are super easy to read and calibrate, and can be had for about $20. and up. You also don’t have the expense or reliability issues of the batteries.
-
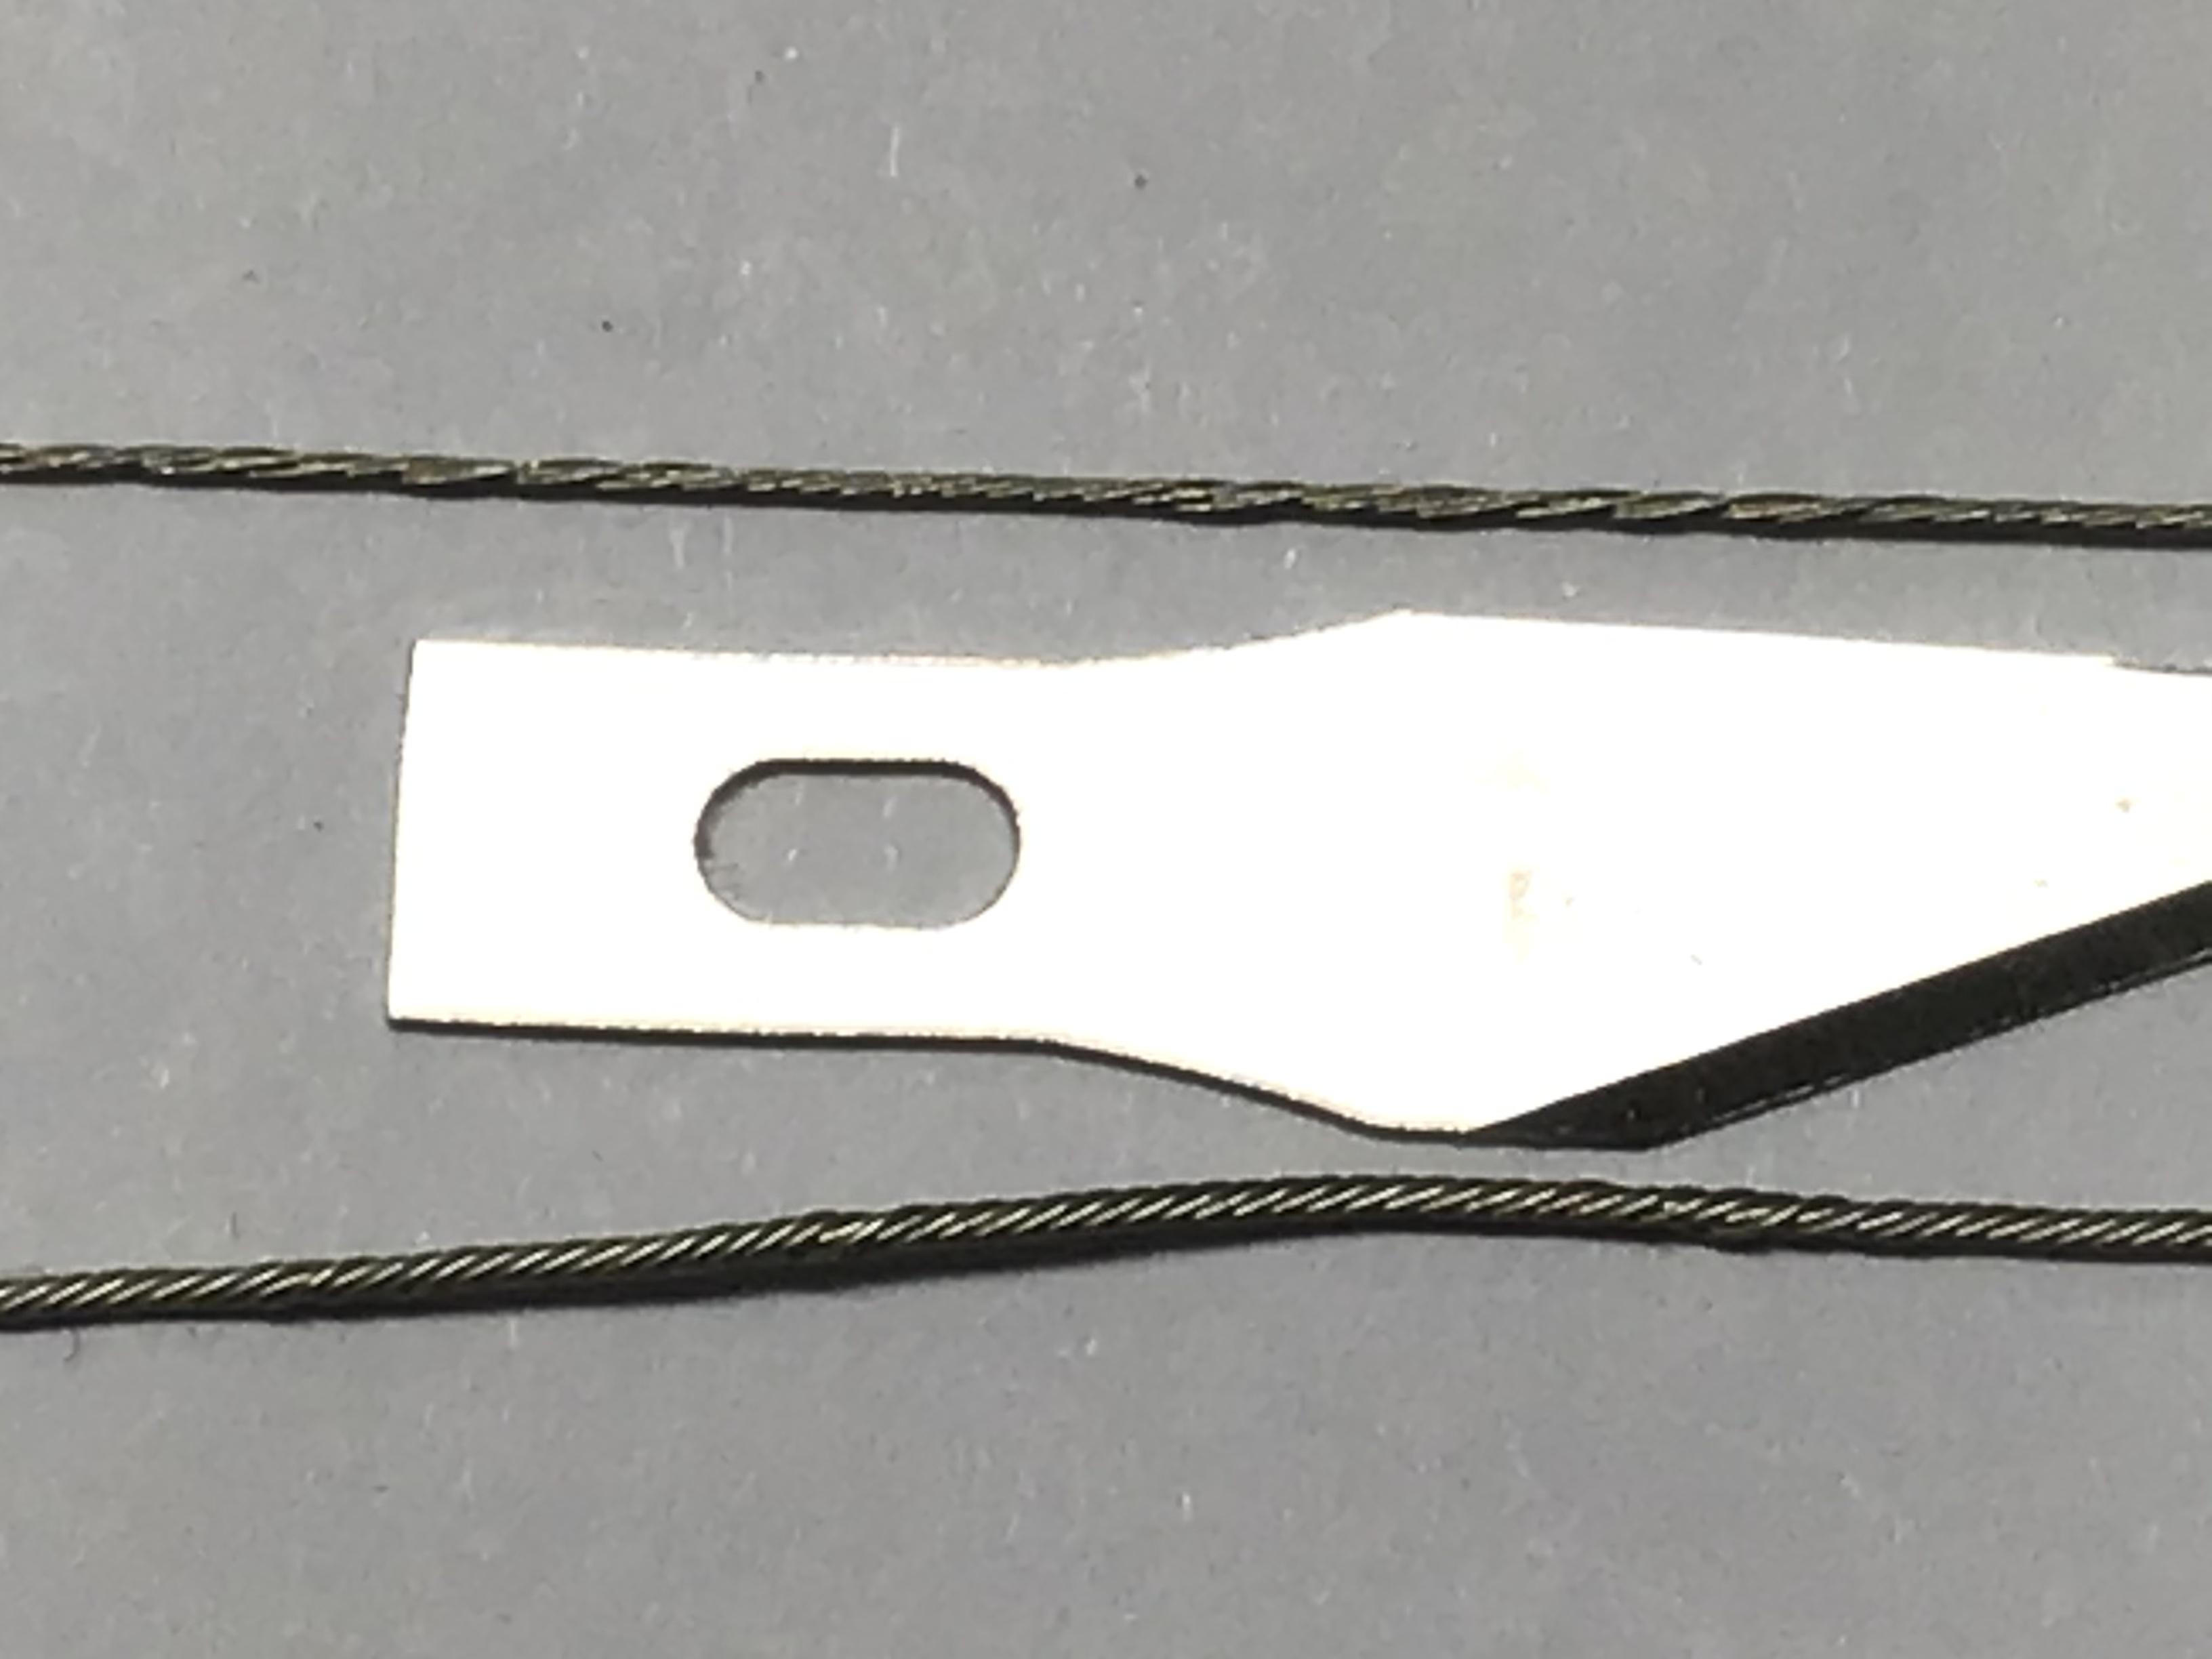
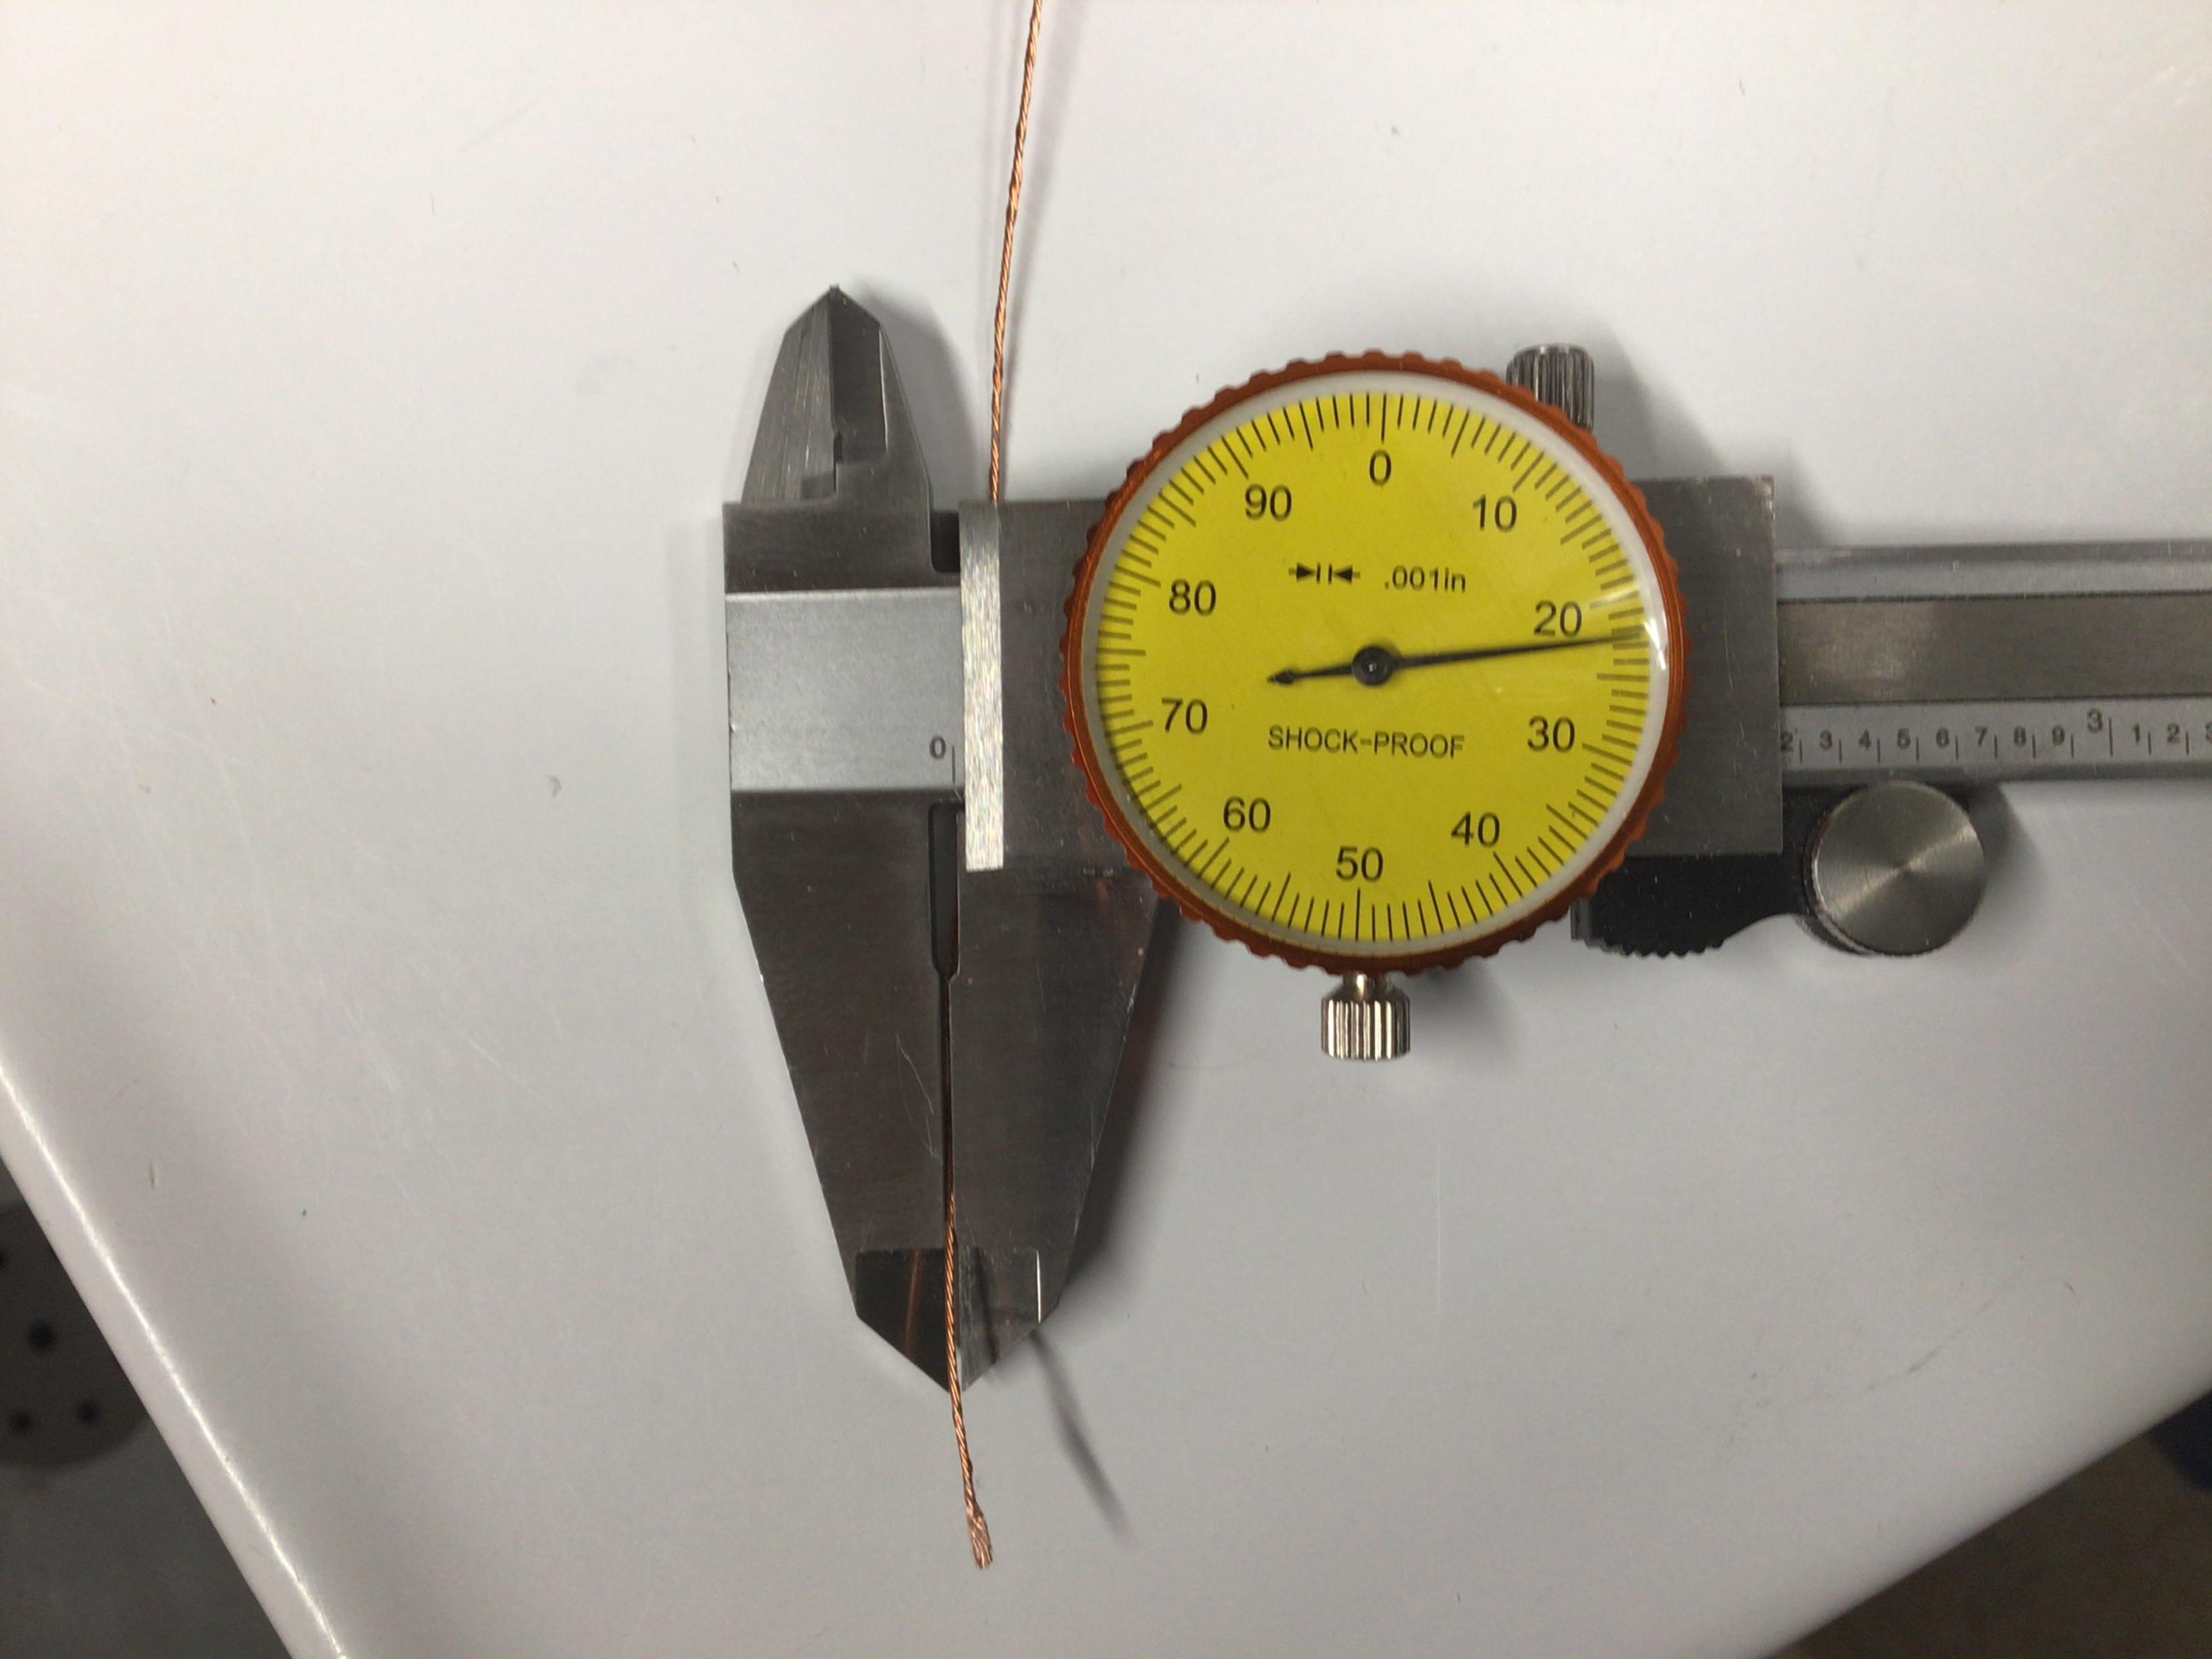
Thanks for spotting the typo. I don’t have the fly tying wire and I’m not 100% sure it comes in a small enough size. That is just what I read on another website and may be worth searching if someone was in need of larger amounts of cable. This copper one is made using six strands of the Cat 5 cable, each of which is .007” diameter. The darker one is the picture hanging wire. Finished diameter of the cable is 0.023”.
-
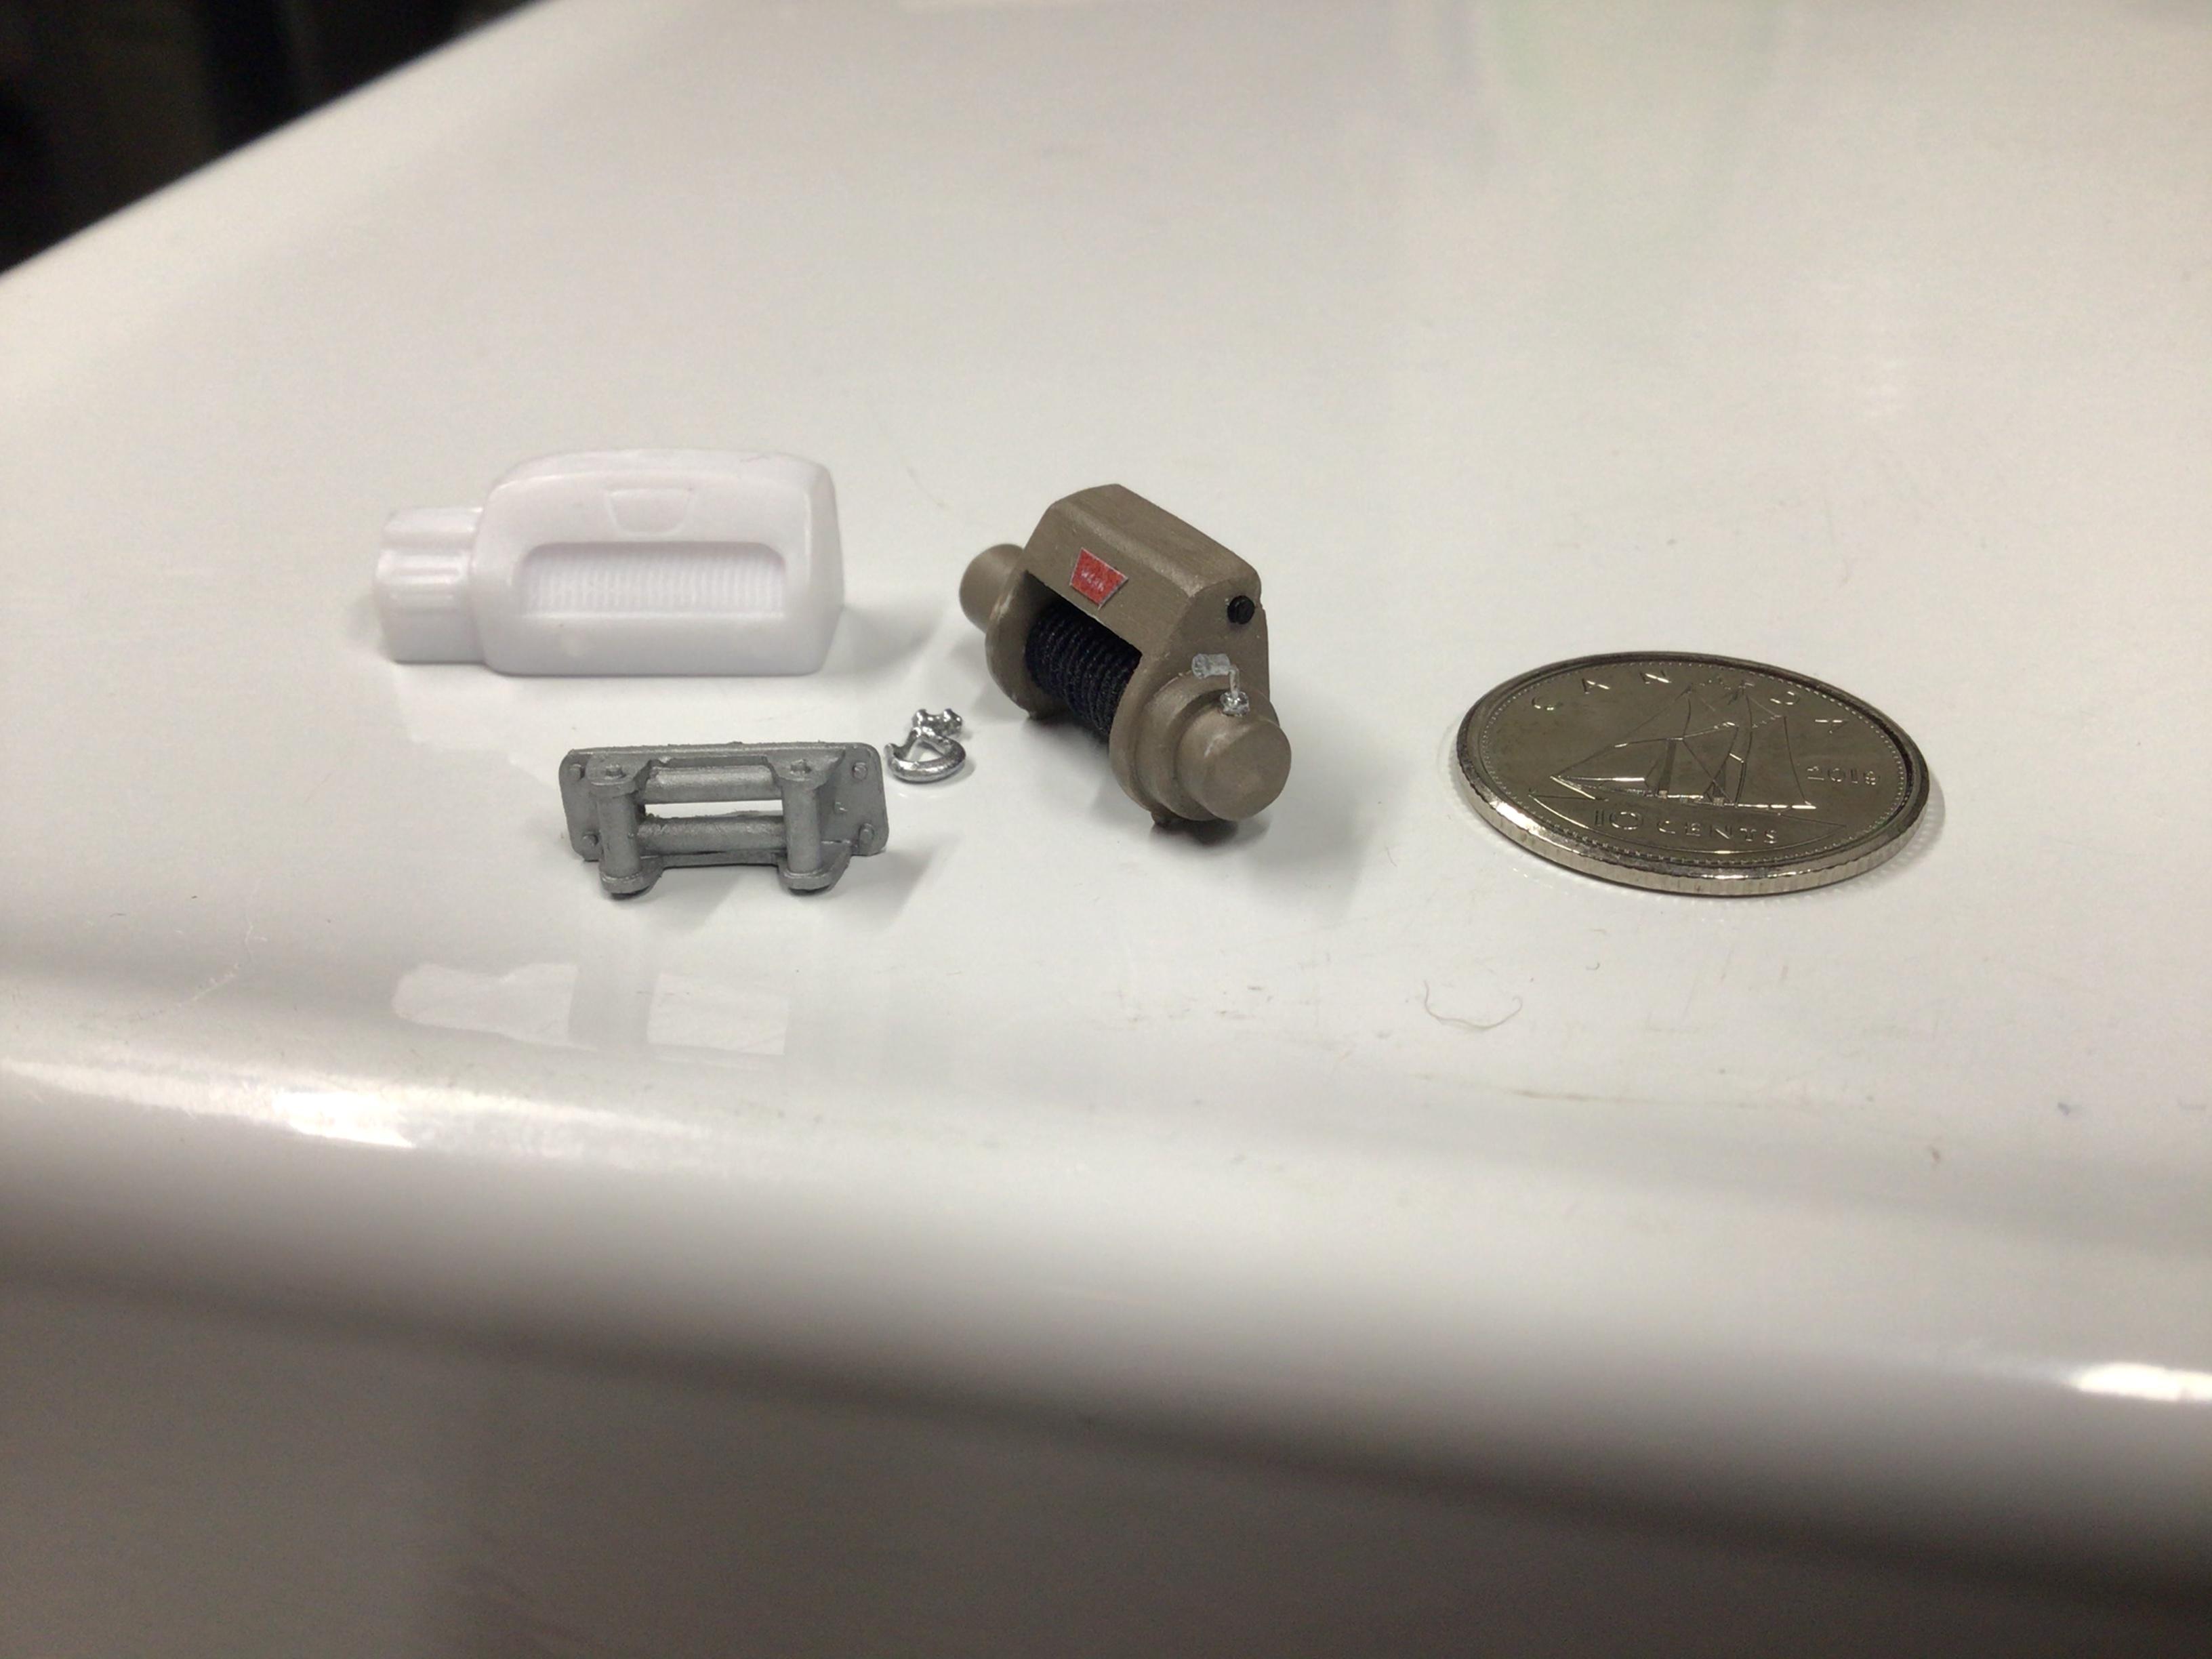
I didn’t know what to use for cable on my winch so I tried some elastic thread that I hoped would look like synthetic rope. I then switched to some picture hanging wire (.034” diameter) that I had. It looks better but it’s a little out of scale. After I had it permanently mounted I figured out how to make a more accurately scaled one by twisting the copper strands out of some CAT 5 cable which came out to .024” diameter. After a bit of paint it looks pretty good. I just discovered on another website that fly tying wire also comes in these super small diameters and comes in a tin plated style which forms easily like the copper, but would not require painting.
-
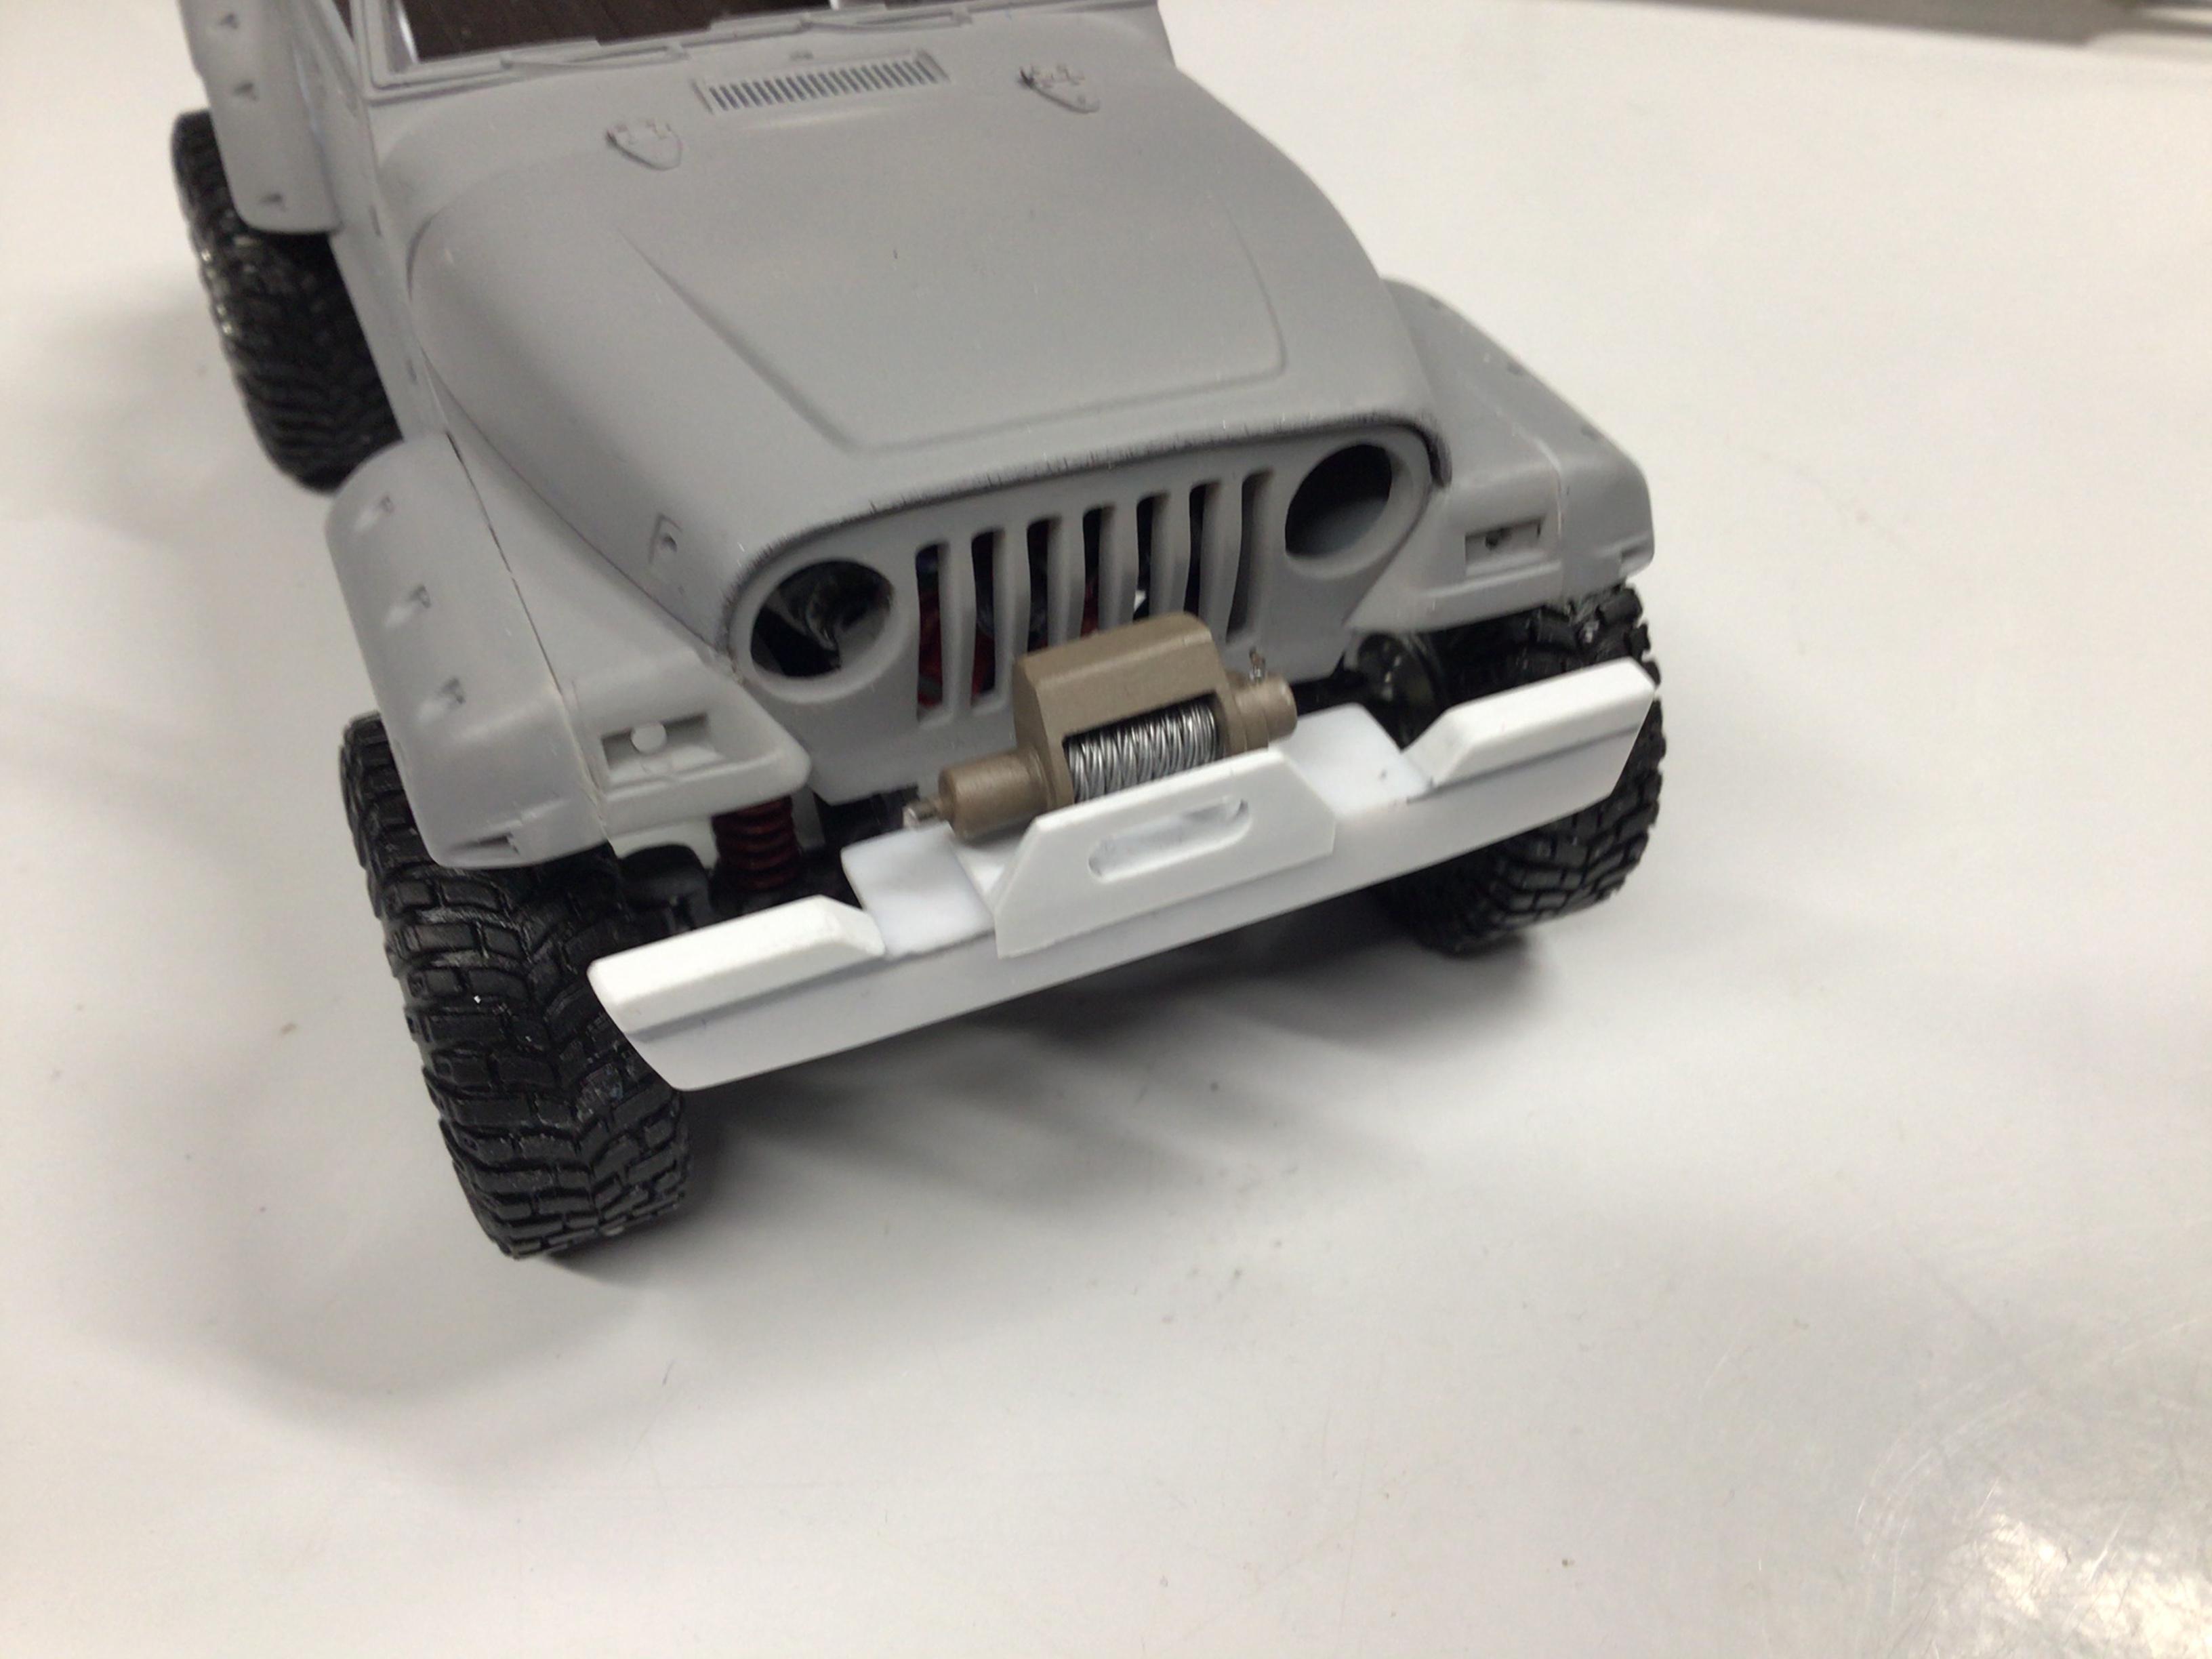
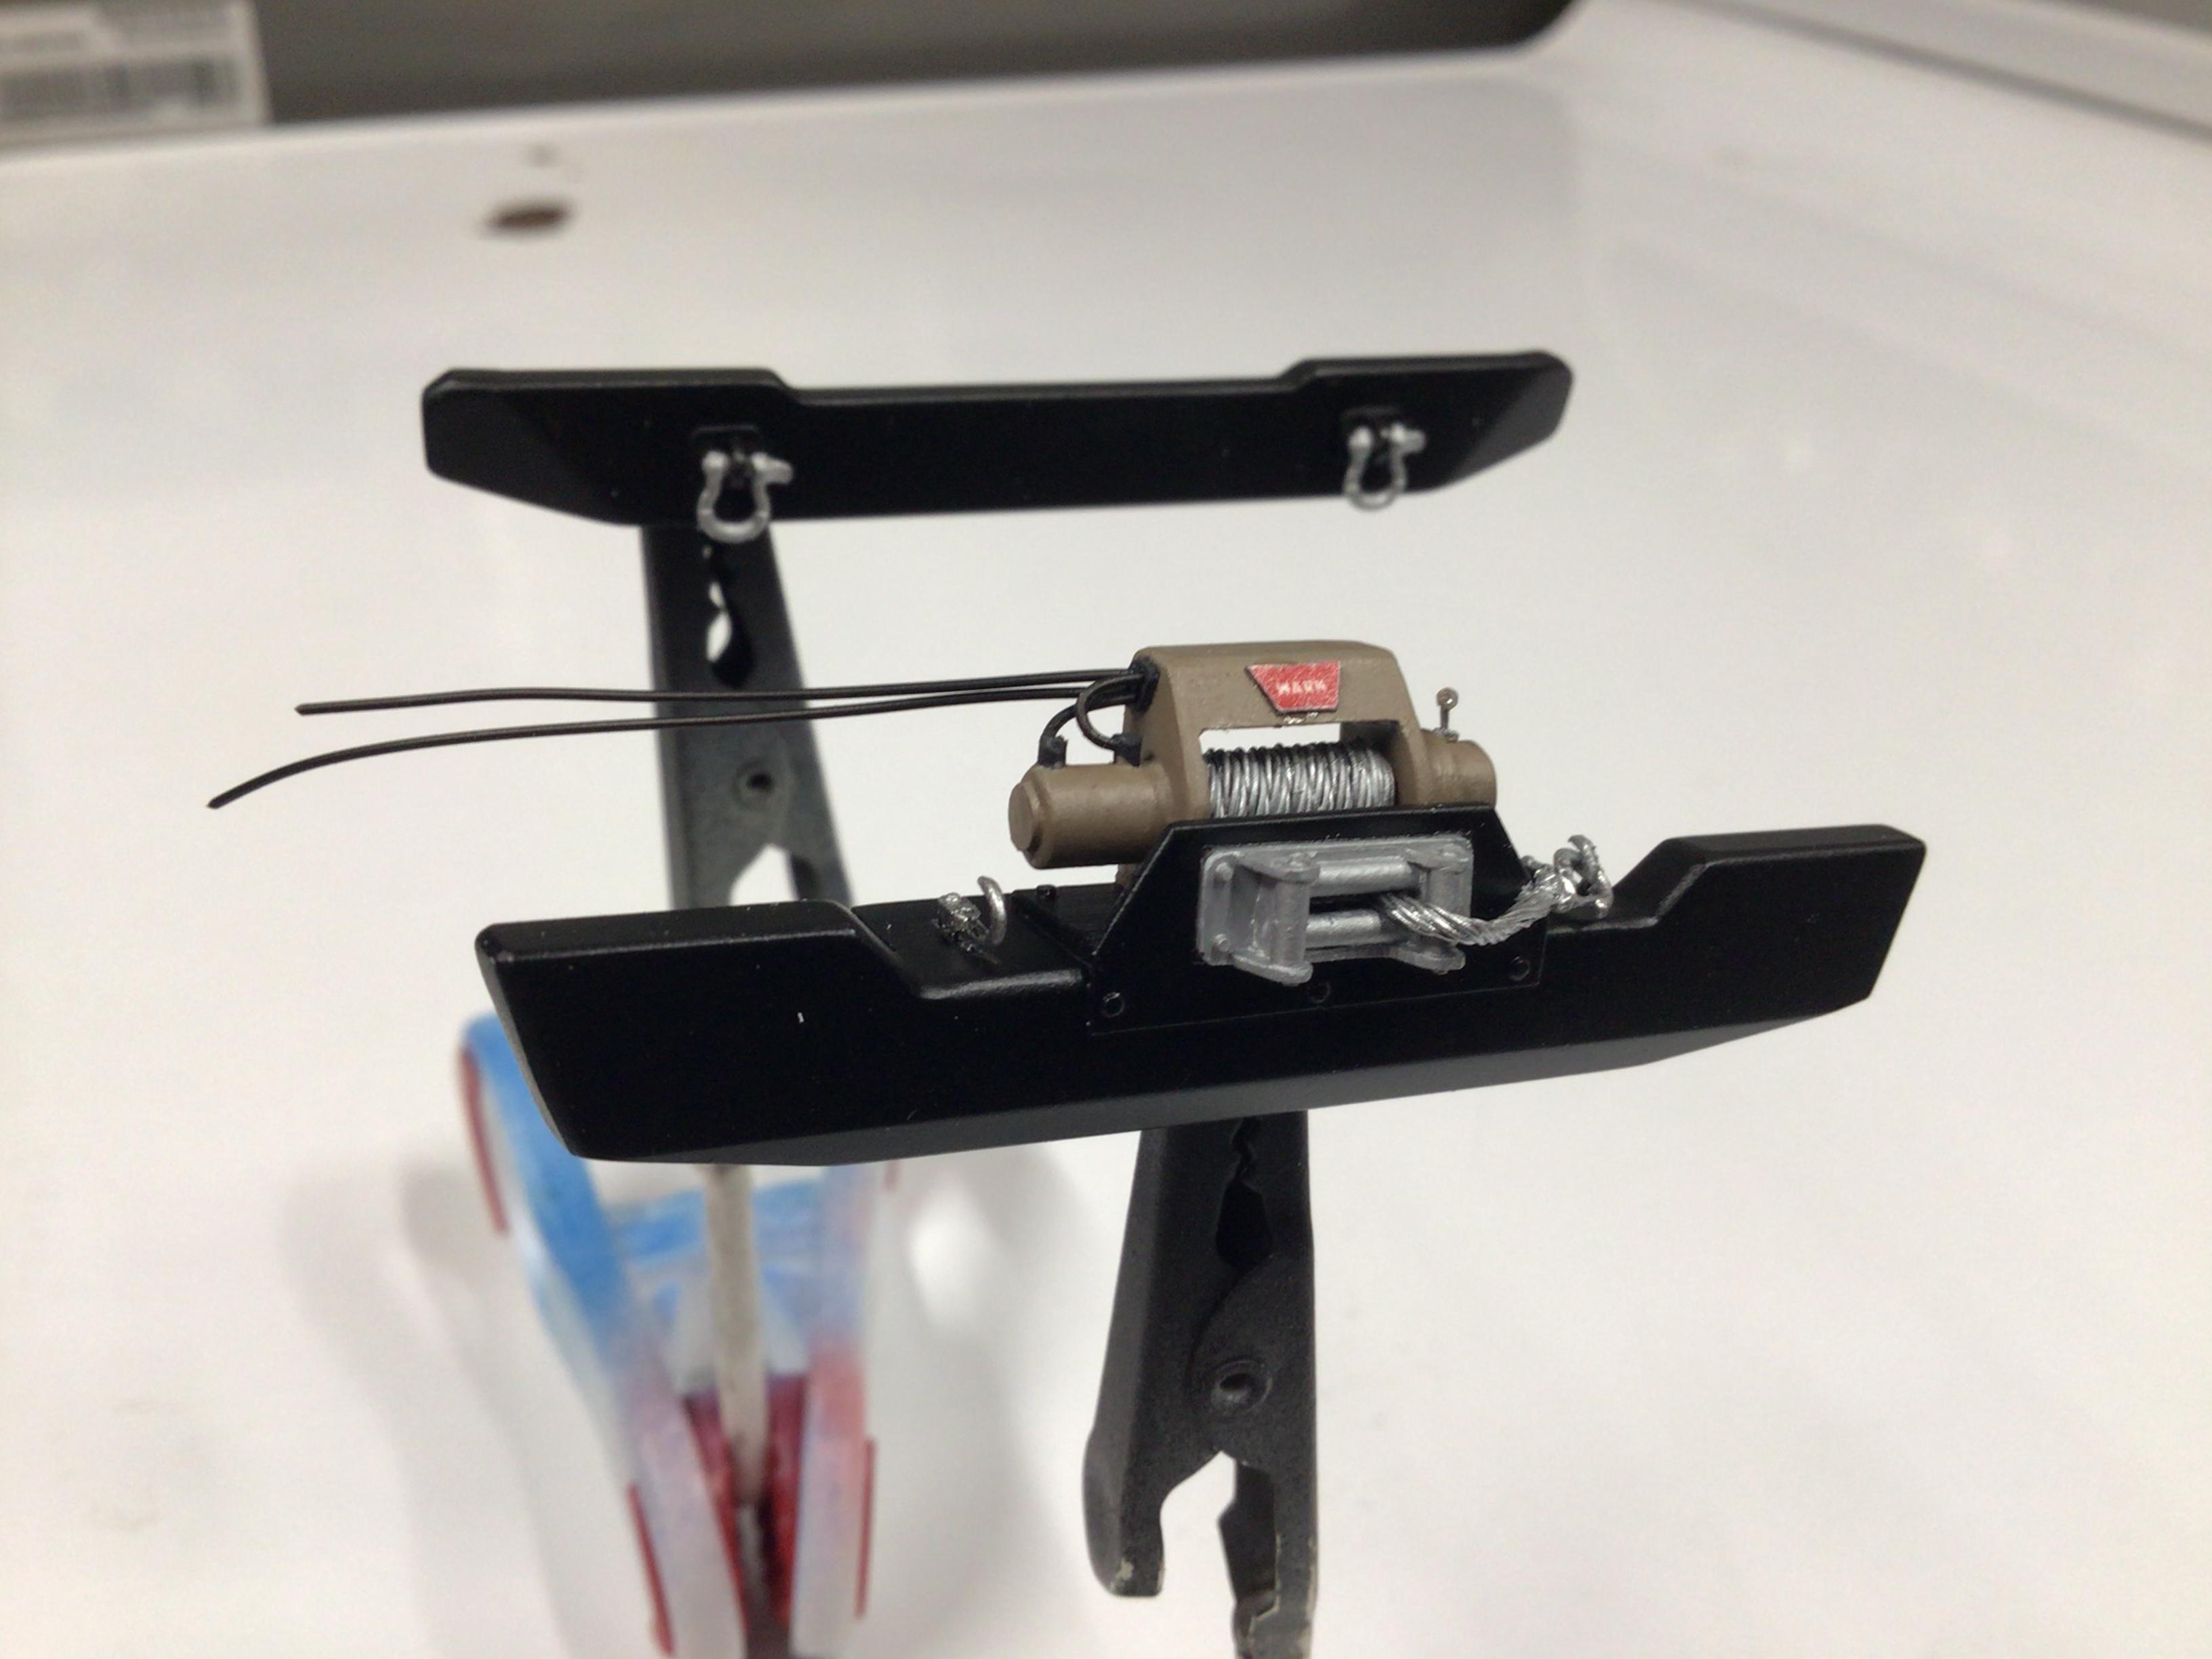
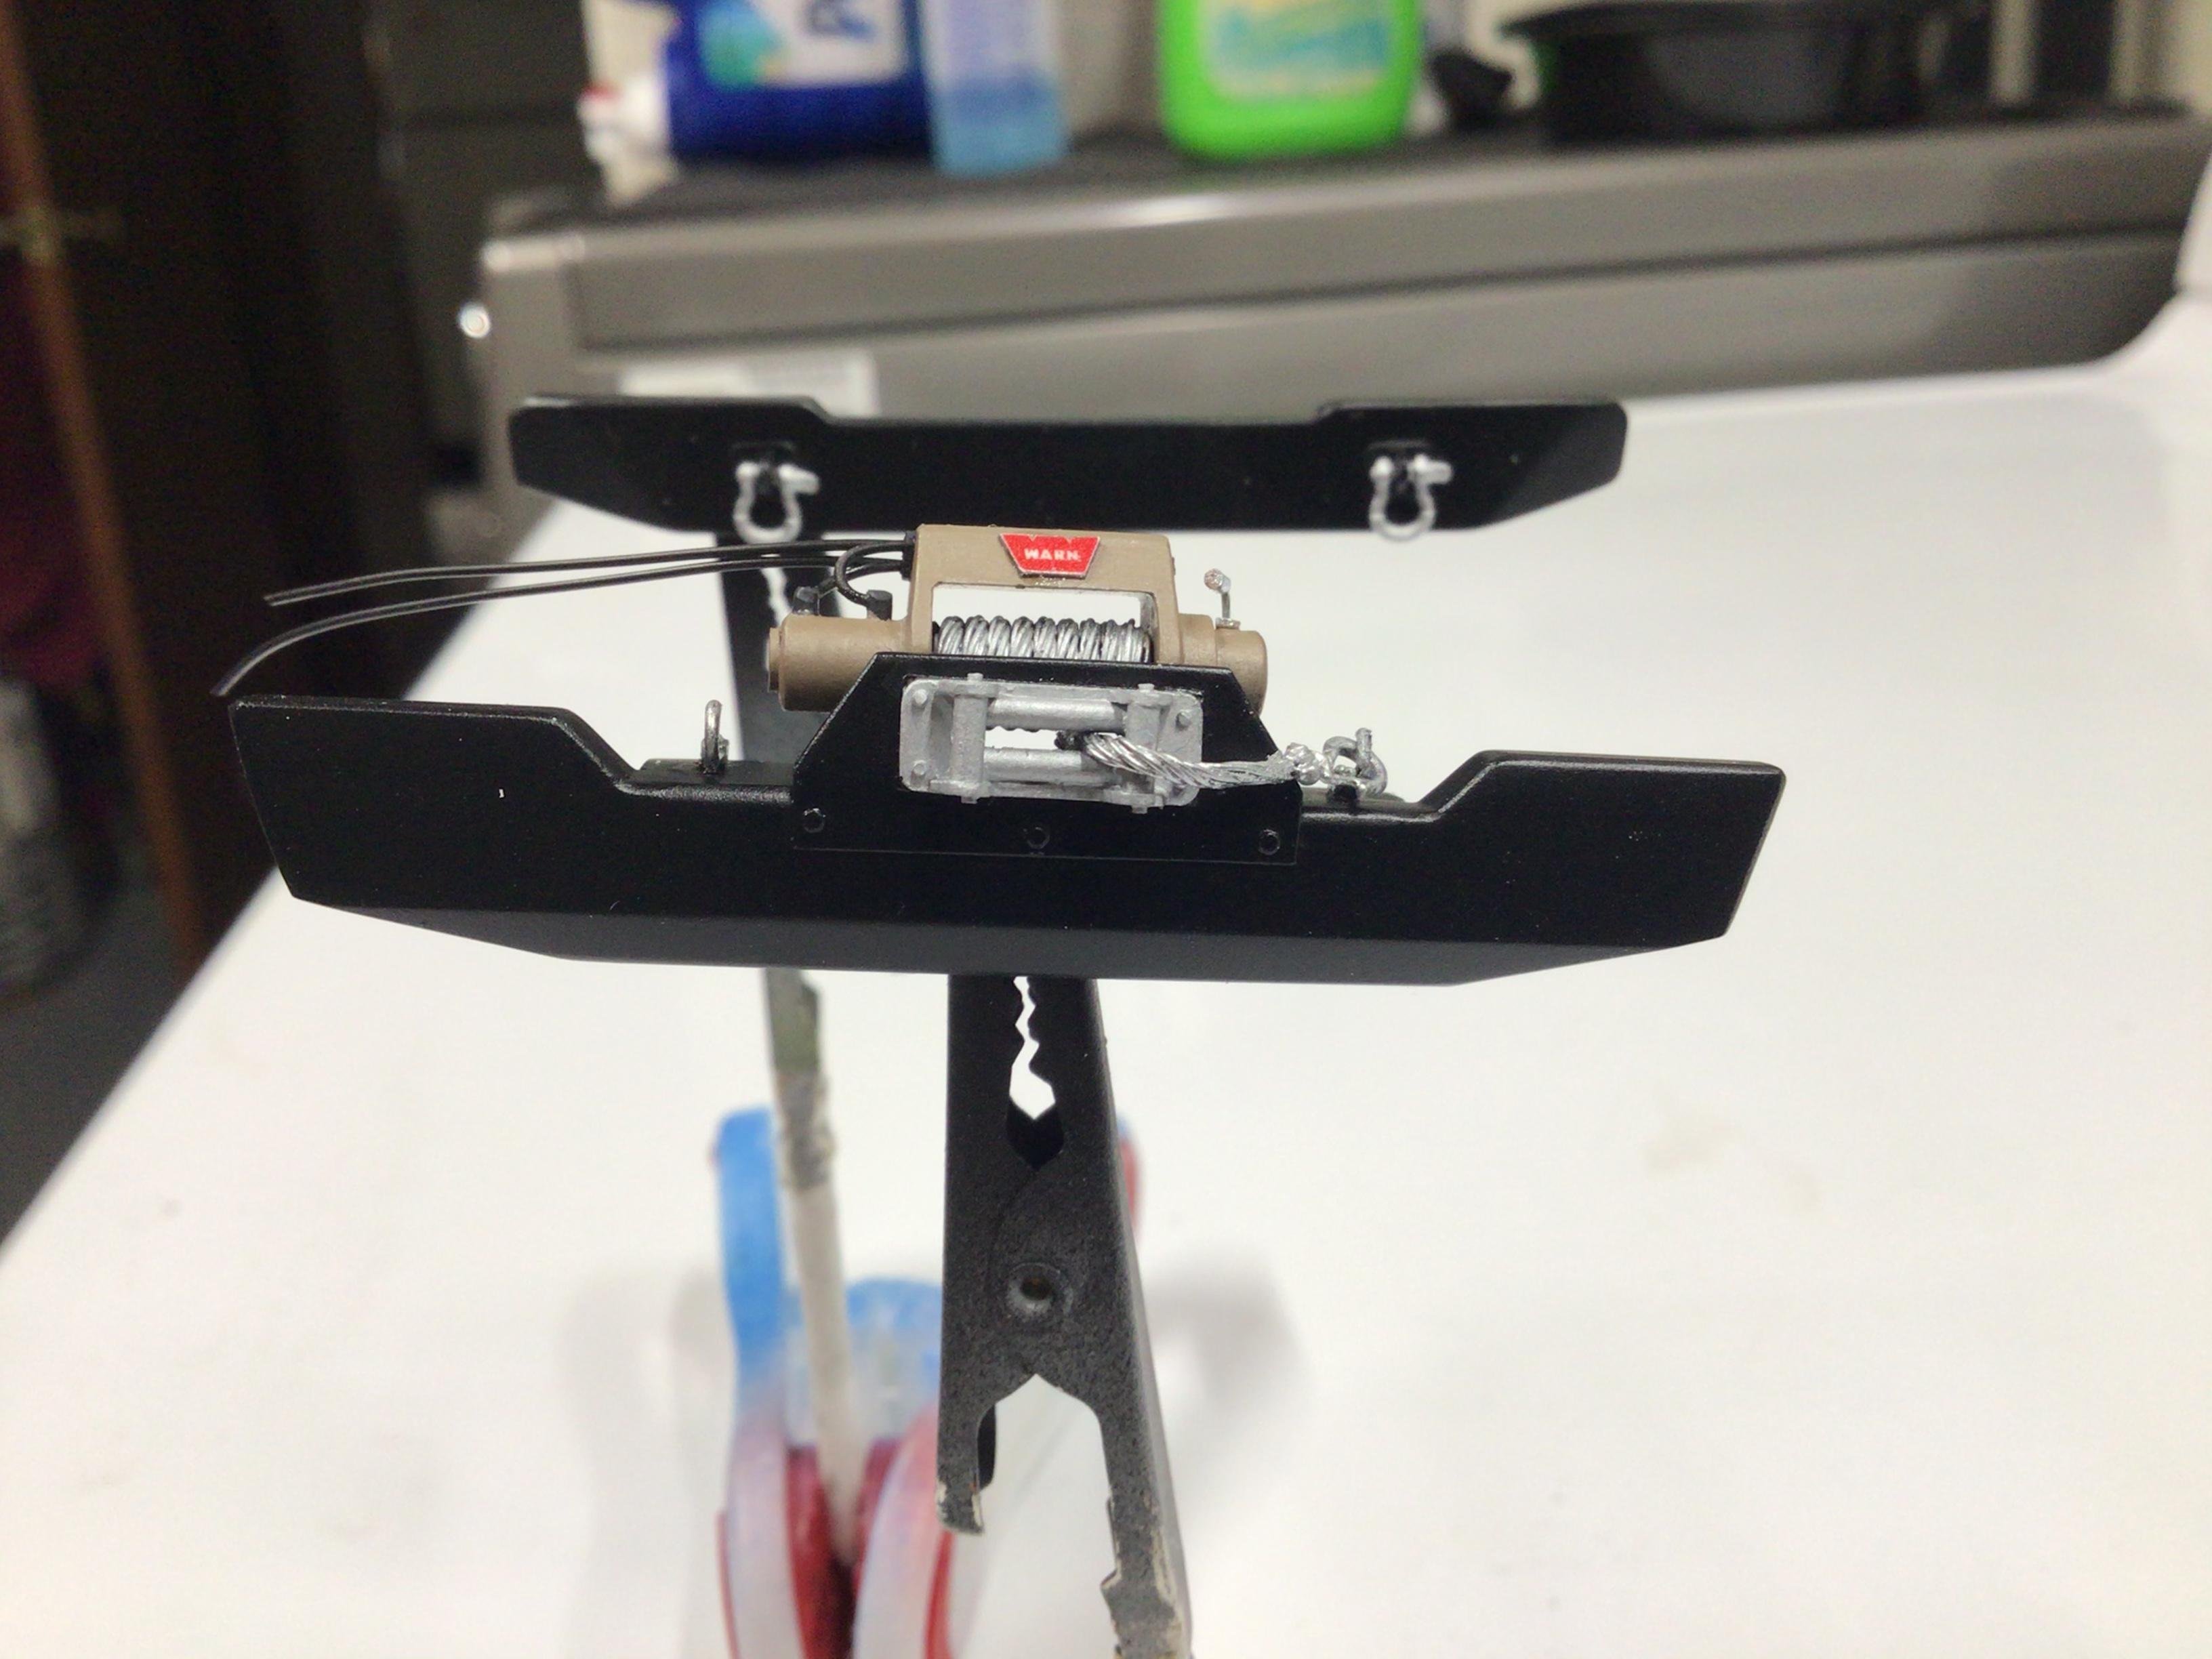
Finished the bumpers for the Jeepster.
-
TJeepster
NOBLNG replied to NOBLNG's topic in WIP: Model Trucks: Pickups, Vans, SUVs, Light Commercial
I finished up the bumpers for this thing. The front one is a reworked Wrangler kit piece. The clevises and hooks are from Olson Brothers, and the winch is home made. The cable is a little out of scale, but I couldn’t find anything smaller. I also widened the Wrangler flares to better cover the tires.
-
RM Mack w snowblower....
NOBLNG replied to gotnitro?'s topic in WIP: Model Trucks: Big Rigs and Heavy Equipment
Nice work on this. It looks like you’ve got those auger flights figured out. Scratch building, although frustrating at times, is also very rewarding...and a great way to while away the hours. ? Carry on! -
1/25 scratchbuilt spark plug -- anybody make them?
NOBLNG replied to chepp's topic in Model Building Questions and Answers
Wow, those look great! Is that 1/25 scale? -
HOLY Mackerel! ?That’s a lot of holes.
-
I was trying to think of what I could use. The stores here are on lockdown and only allowed to sell necessities or curbside pickups...so no browsing at Michaels.☹️ I decided to use some small elastic thread I have and call it “synthetic rope” that is all the rage for winches now ( it doesn’t have the potential to kill you if it snaps). After reading your response, it clicked on me that picture hanging wire would work. It has very little “memory” and should be able to wrap around the 1/8” drum. Thanks.
-
Welcome to the forums Wylde.
-
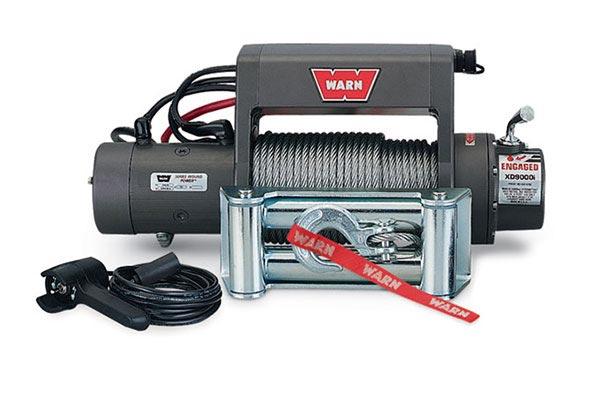
I made a winch for the Jeepster, since the one in the Wrangler kit doesn’t look like any Warn model I could find.
-
That is one beautiful paint job! Too late now, but I have spray painted flocking to give it an even color with pretty good results.
-
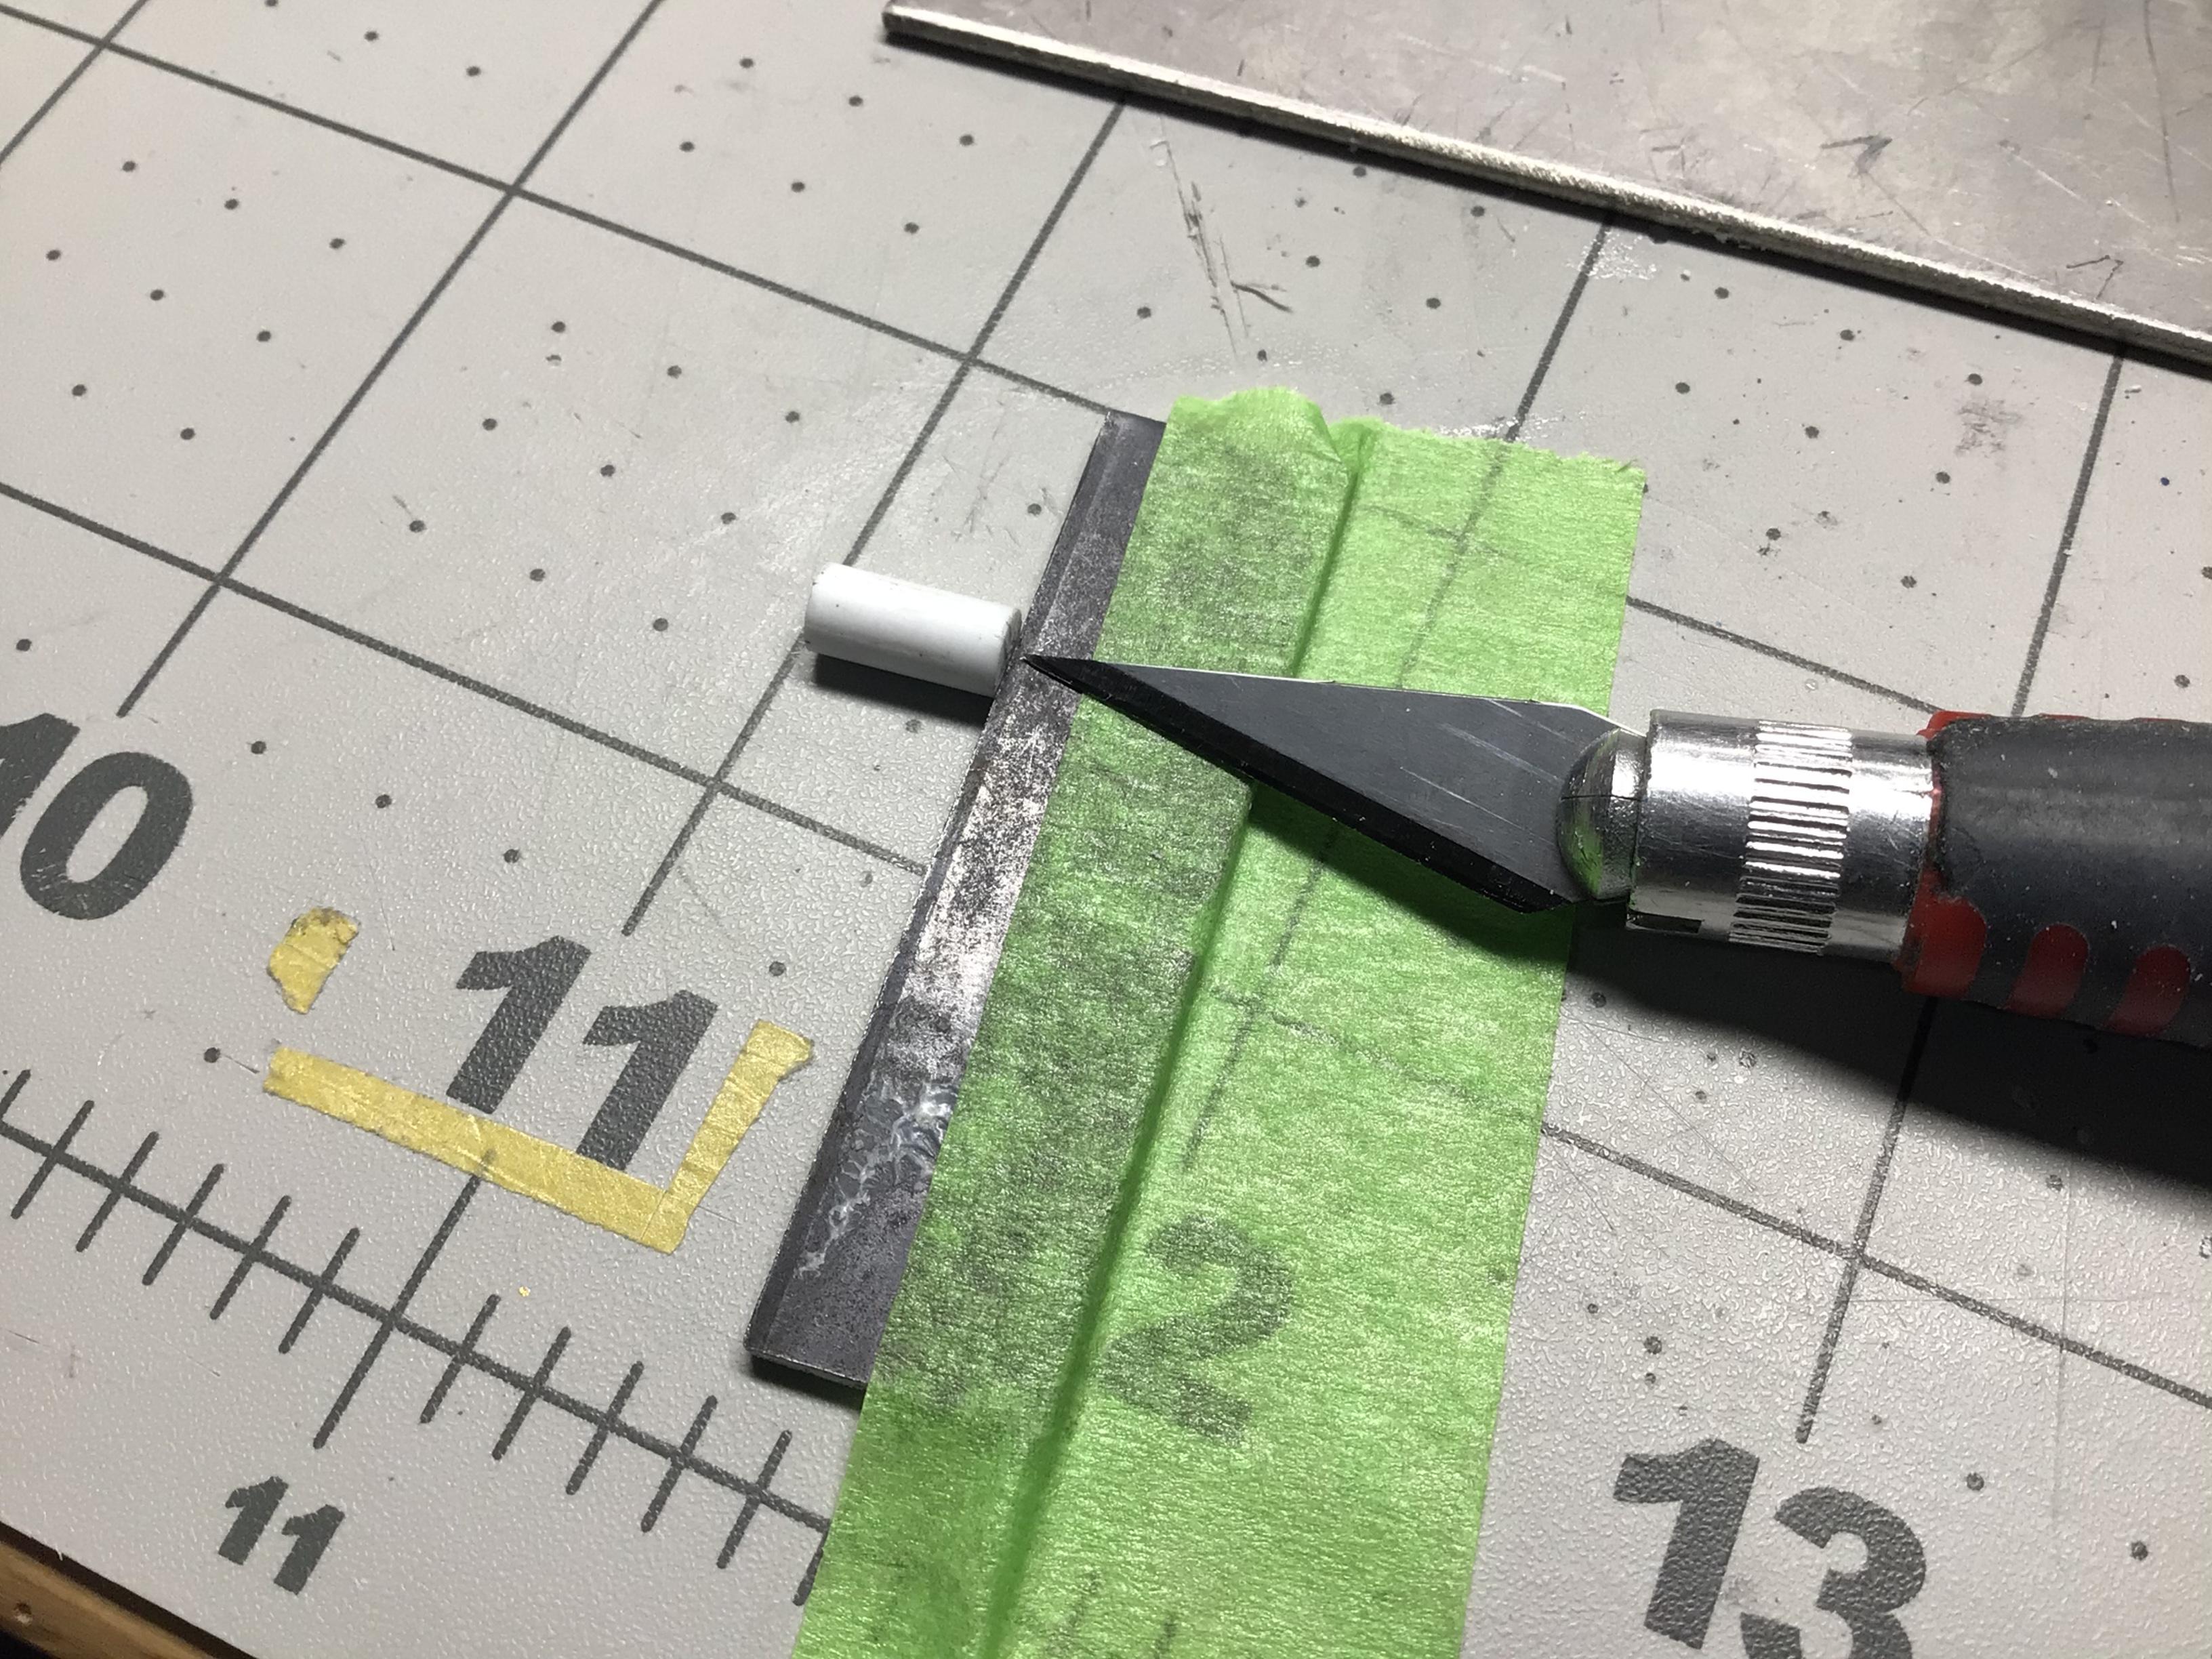
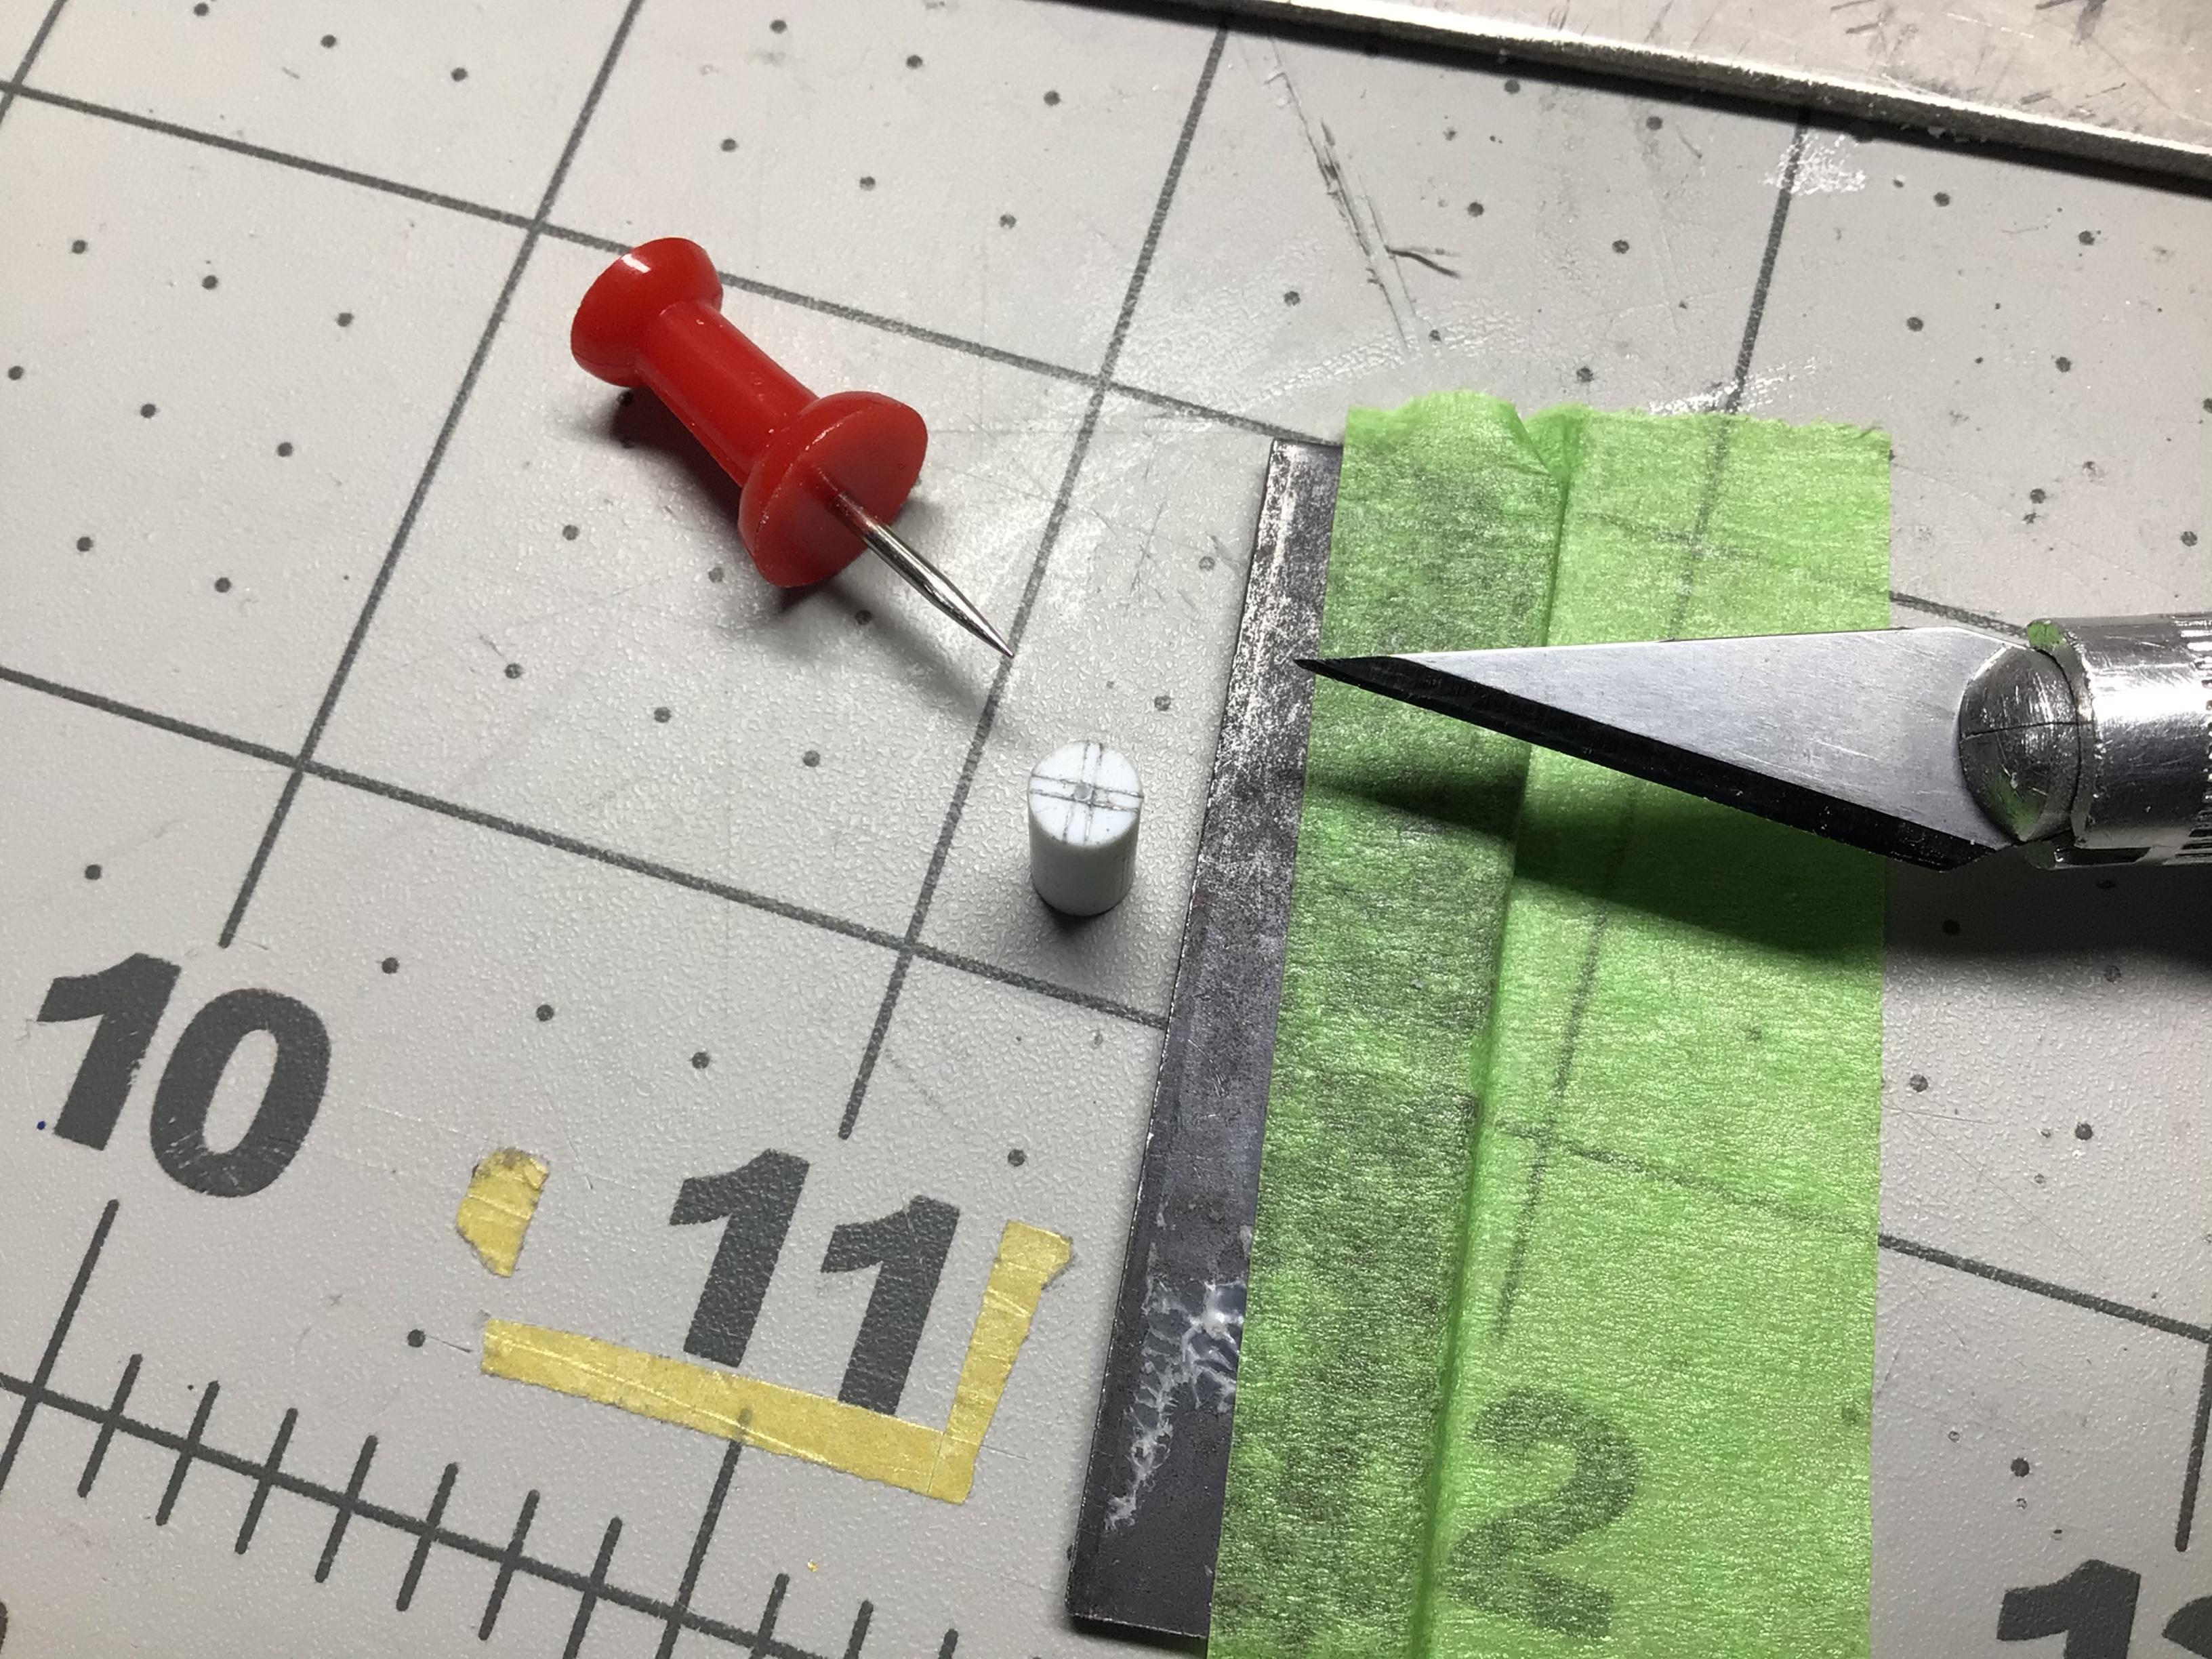
This is an easy was to find the centre of any round rod for when you need to drill a hole in the end of it. Find something that is very close to half the thickness of the rod. Butt the rod up against the spacer and scribe a light line with a hobby knife. Rotate it approximately 90 degrees and scribe another. Do this four times and you will have a double set of crosshairs straddling the exact centre. A light rubbing with a pencil will make them more visible. To get a relatively centered hole clear through a short piece, I drill from both ends and let them meet in the middle. This is likely as close as you’ll get without a lathe or drill press. YMMV.
-
It looks super nice in the video! I like that silly putty masking trick too.