NOBLNG
-
Posts
10,231 -
Joined
-
Last visited
Content Type
Profiles
Forums
Events
Gallery
Everything posted by NOBLNG
-
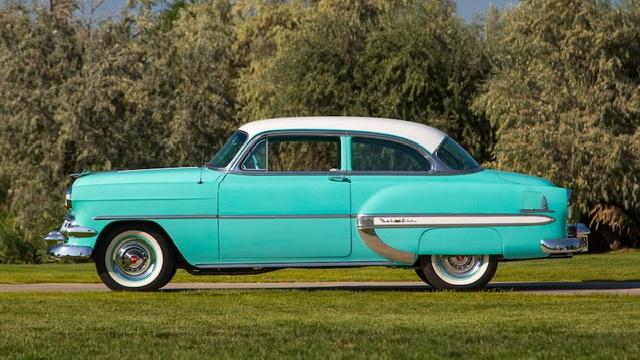
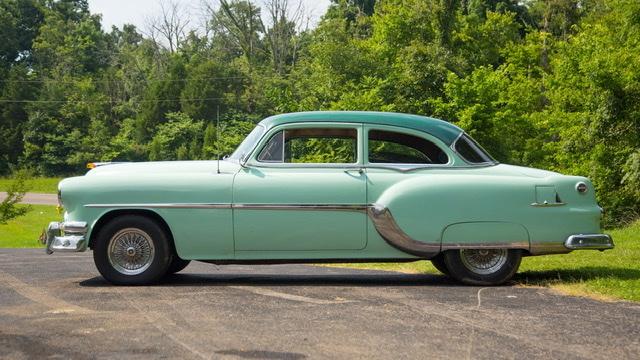
It looks like a lot of extra length, but the wheel opening shape gives the illusion of a lot more. These are ‘54s.

-

Want back in the hobby. Need a new airbrush
NOBLNG replied to Munyundo's topic in Model Building Questions and Answers
There have been a few threads on this recently. I have not used a Badger, but they are highly regarded by some members here. I have the Paasche H and love it. It came with both the cup and bottles. I find the bottles easier to clean than the cup. Plus, I leave primer in one bottle (glass bottles that I bought separately) all the time and lacquer thinner in another for cleaning the airbrush. Paint can be left in the bottle for multiple coats, whereas the cup needs to be cleaned after every use. The smaller jars have the same thread as model master paint jars, so empty paint jars can be recycled. -
I was going to take the front cover/oil filter/fuel pump assembly from the V6 and graft it onto a SBC, but the block is quite undersized and the heads don’t look right. The seller I got the ‘69 Riv from was also selling a separate 430 engine...so I bought it too!?
-
You are correct Scott. The 350 design is based on the aluminum 215 and preceded the big block. They may look similar, but they are not. Edit: But for the purpose of my model, I can easily make the 430 look like a 350.?
-
I don’t know if any kits came with that, .but it would be easy to fab?
-
I have just recently started researching Buick’s. I came across a picture of that and just assumed it was something new or custom. I had no idea that it was from 1967! COOL!
-
I just ordered a ‘69 Riviera off e-bay. This would have the 430 I believe. I found a chart online with engine dimensions, and if it is correct, the dimensions only vary by an 1-1/2” at most...undetectable to the eye at 1/25th scale.? I will check my GSX engine to see which components look best. Thanks everyone!?
-
Yes it has become charged. The wash should fix it? I have had panel line accent “jump” off the brush to the model also. I wipe it with a used dryer fabric softener sheet to reduce the static charge before applying accent.
-
Yeah, I want to stay away from the SBC. I was hoping the Buick would be common. Maybe I can modify the Chevy to look like a Buick?
-
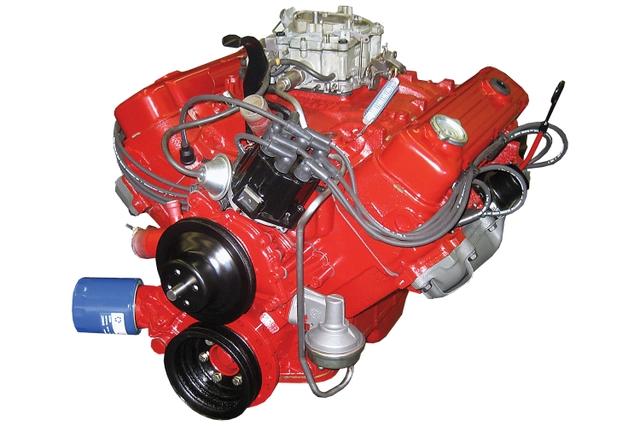
Thanks. I have a ‘66 Riviera that has a nice 425 in it, but it is a nailhead. I also have the Monogram GSX, but it is 1/24th. From 1953 to 1966 the Buick V8’s were nailheads (vertical valves and level valve covers) very popular with hot rodders! The 350 (450 lbs) is a smaller version of the 430/455 (600 lbs). It may look similar, but it has a 1/2” lower deck height and is 150 lbs lighter. I’m considering engine options for my Jeepster. I have a 426 Hemi mounted now (765 lbs) and may keep it. Just searching options. Anything in front of a th400 would make an easy swap in the 1:1 world. The light weight of the Buick would be a real bonus. Some nailhead pics?
-
Anyone know where one would find a nice Buick 350 In 1/25th scale? I believe the 300 and 340 are visually the same. I haven’t found any resin sources...so kits? Thanks, Greg.
-
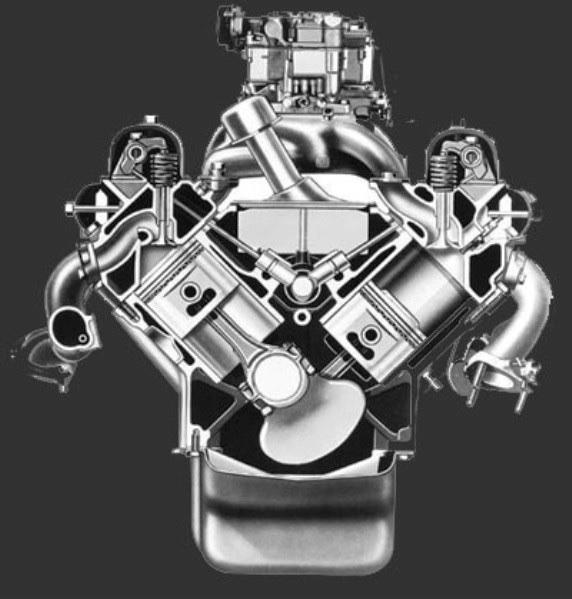
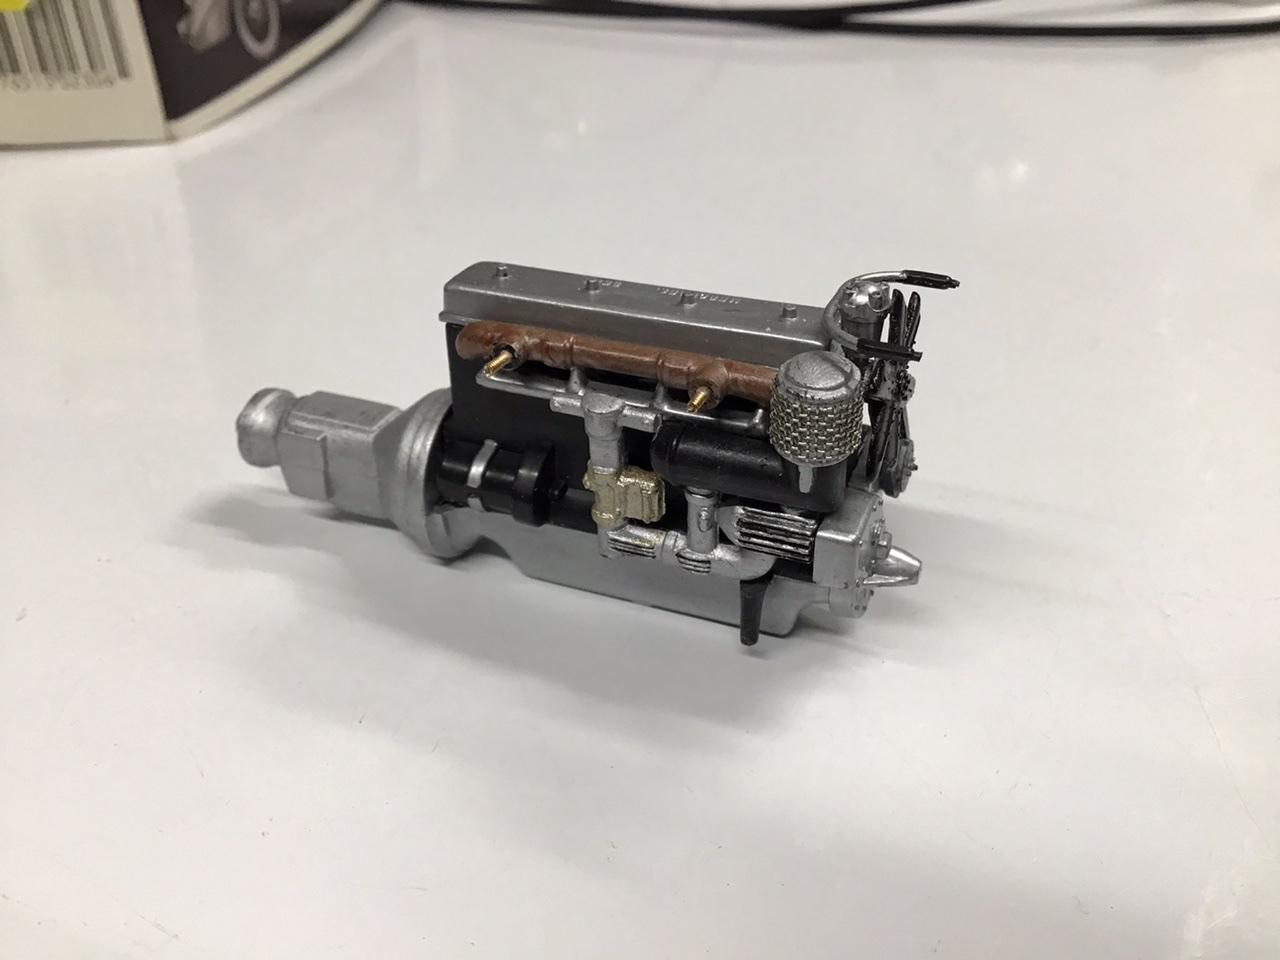
Cool looking cars! Good luck with it. Here’s a couple pics of the engine from a Monogram 540K kit
-
65 El Camino 4x4 camper
NOBLNG replied to Kruzn's topic in WIP: Model Trucks: Pickups, Vans, SUVs, Light Commercial
This is looking real nice.! Bonus that you have the camper and the cap. -
Nicely done.
-
Absolutely! However, my life has turned out pretty well and changing something like that could shift my entire destiny.?
-
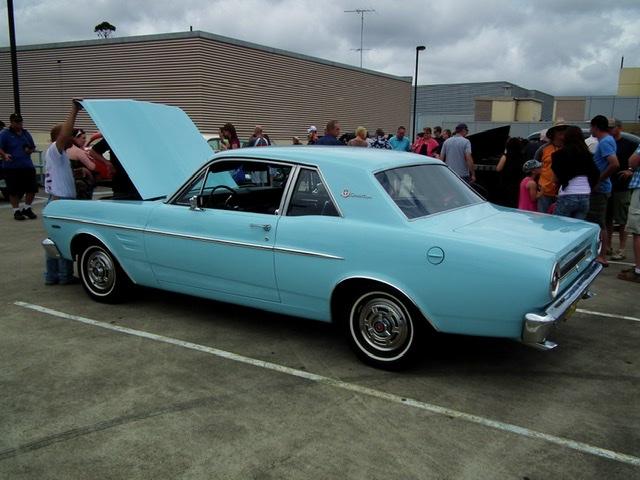
My first car was a 1967 Falcon similar to this. It had a straight six and auto. For the same price ($400.00) I could have had a 1956 Chevy BelAir convertible. It was sitting in a neighbor’s farmyard with 1964 California plates on it and a tow bar on the front. It had only been driven for 8 years and then towed up here! It had no rust on it. The top and interior were shot though. Being 16 years old, I wanted something I could drive so I bought the Falcon.☹️
-
I am liking the looks of this!
-
Really nice! You’ve got some real photography skills as well.
-
I love the paint job. I love how the light blue interior compliments the blue on the body. Absolutely superb work!
-
Excellent job on this. That upholstery looks amazing!
-
It’s coming along nicely! Engine looks great. FYI, those wings attached to the frame are actually part of the cab floor. I made the mistake of painting them black along with the frame at first on my ‘65 Chevy, then re-painted them body colour.
-
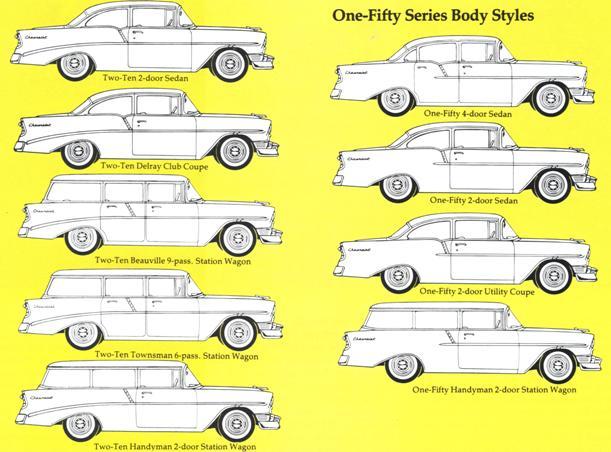
This is one of my all time favourite cars. My Dad had one too. It was parked in the bush with no wheels on as far back as I can remember. My little brother and I (mostly me) destroyed it....and I’ve felt guilty ever since! I don’t want to hijack your thread, but here’s some images of body styles.
-
TJeepster
NOBLNG replied to NOBLNG's topic in WIP: Model Trucks: Pickups, Vans, SUVs, Light Commercial
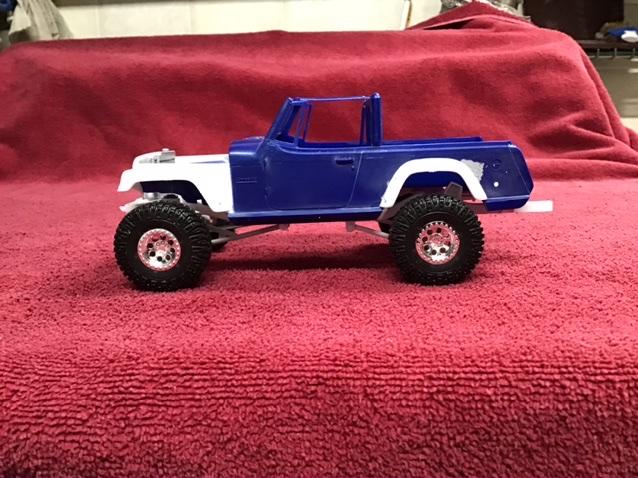
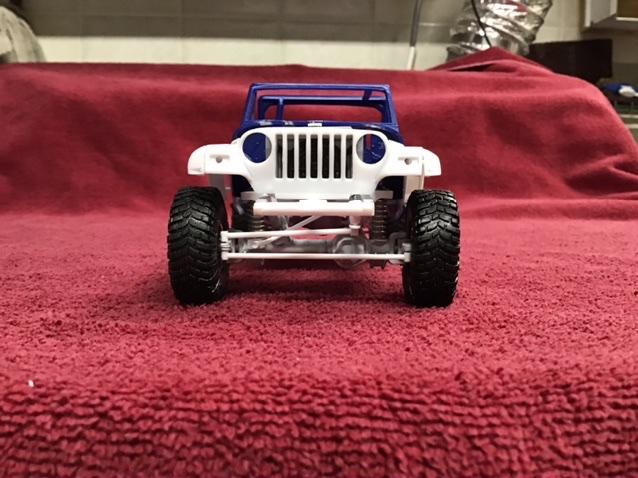
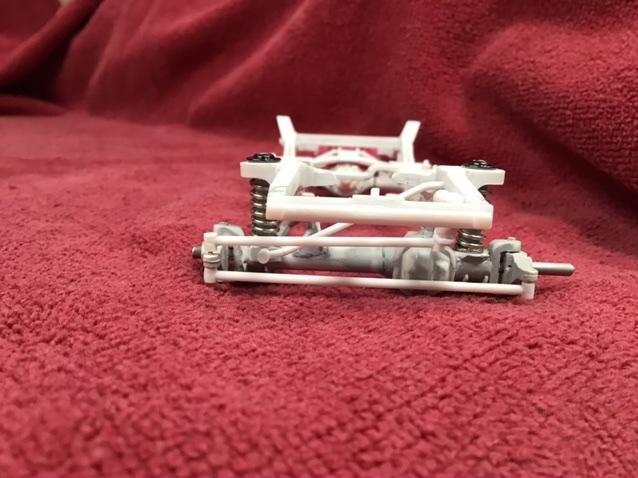
The jig that I made paid off since the rear wheels are still centred in the wheelwells, Yay!? To make room for the knuckles and springs I had to widen the track slightly. I may have to widen the flares a bit to make it Street legal...or I might wait till I get a ticket? ?
-
TJeepster
NOBLNG replied to NOBLNG's topic in WIP: Model Trucks: Pickups, Vans, SUVs, Light Commercial
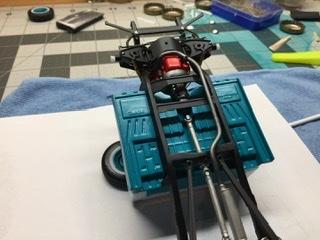
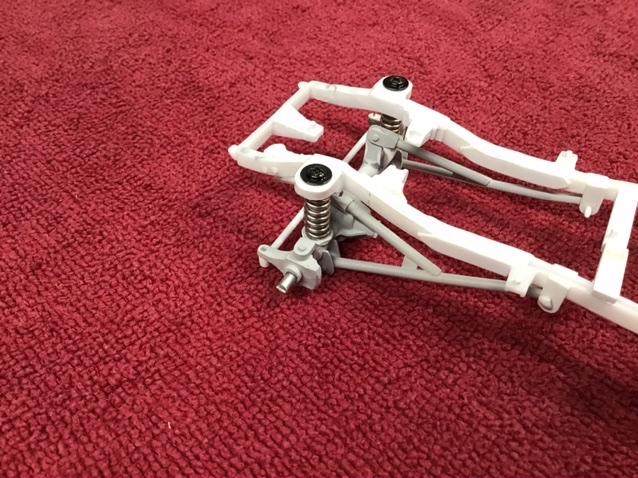
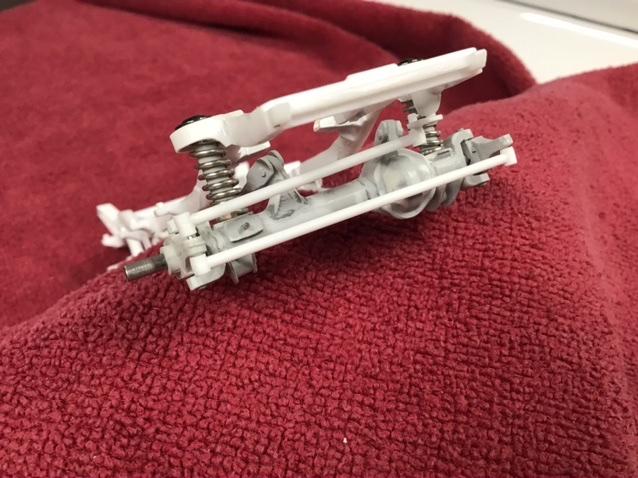
I am pretty much done the suspension and steering mods. I still have to make the front shocks and mounts. The front suspension is a radius arm setup and I went with a crossover steering upgrade because it is easier to fabricate and better than a stock Jeep setup. I also scratch built a steering box, as there was nothing for steering components in the kit. For the rear, I went with a triangulated 4-link setup. I can see I am going to have fun snaking an exhaust system in here!?
-
TJeepster
NOBLNG replied to NOBLNG's topic in WIP: Model Trucks: Pickups, Vans, SUVs, Light Commercial
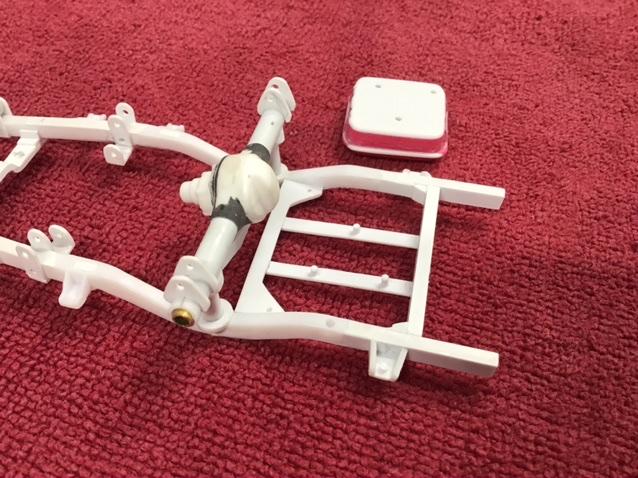
I cut out the second to rear crossmember that I had made and replaced it with one more like a factory one, just behind the differential. I also moved the rear one back slightly so the fuel tank would clear the diff. I made upper shock towers to move the shocks outside the frame and made some shocks. I still have to make the lower shock mounts