Plowboy
-
Posts
3,434 -
Joined
-
Last visited
Content Type
Profiles
Forums
Events
Gallery
Everything posted by Plowboy
-
I use .020 rod. Once the glue is set, I'll sand it flat with 400 sandpaper.
-
Done! It took a lot of scraping and sanding though! I actually made a tool out of an old Xacto blade to scrape with. I usually use a Dremel and get them close. But, I had to keep the underside looking somewhat neat. I was in the home stretch until a hand tremor caused me to knock out a piece. It was tough trying to repair it with the same shaky hand that knocked it out in the first place. But, I'm happy with the effect. I'm going to have to give the grille a look over to see if I can maybe open it also.

-
No need to apologize Mike. I miss lots of stuff and find it later. And thanx! That's actually a '68.
-
You're welcome! I never understood why builders did them that way. It makes the hinge look so bulky. Either way, you're gluing styrene to metal. I could see doing them that way if one wanted to be able to remove the trunk.
-
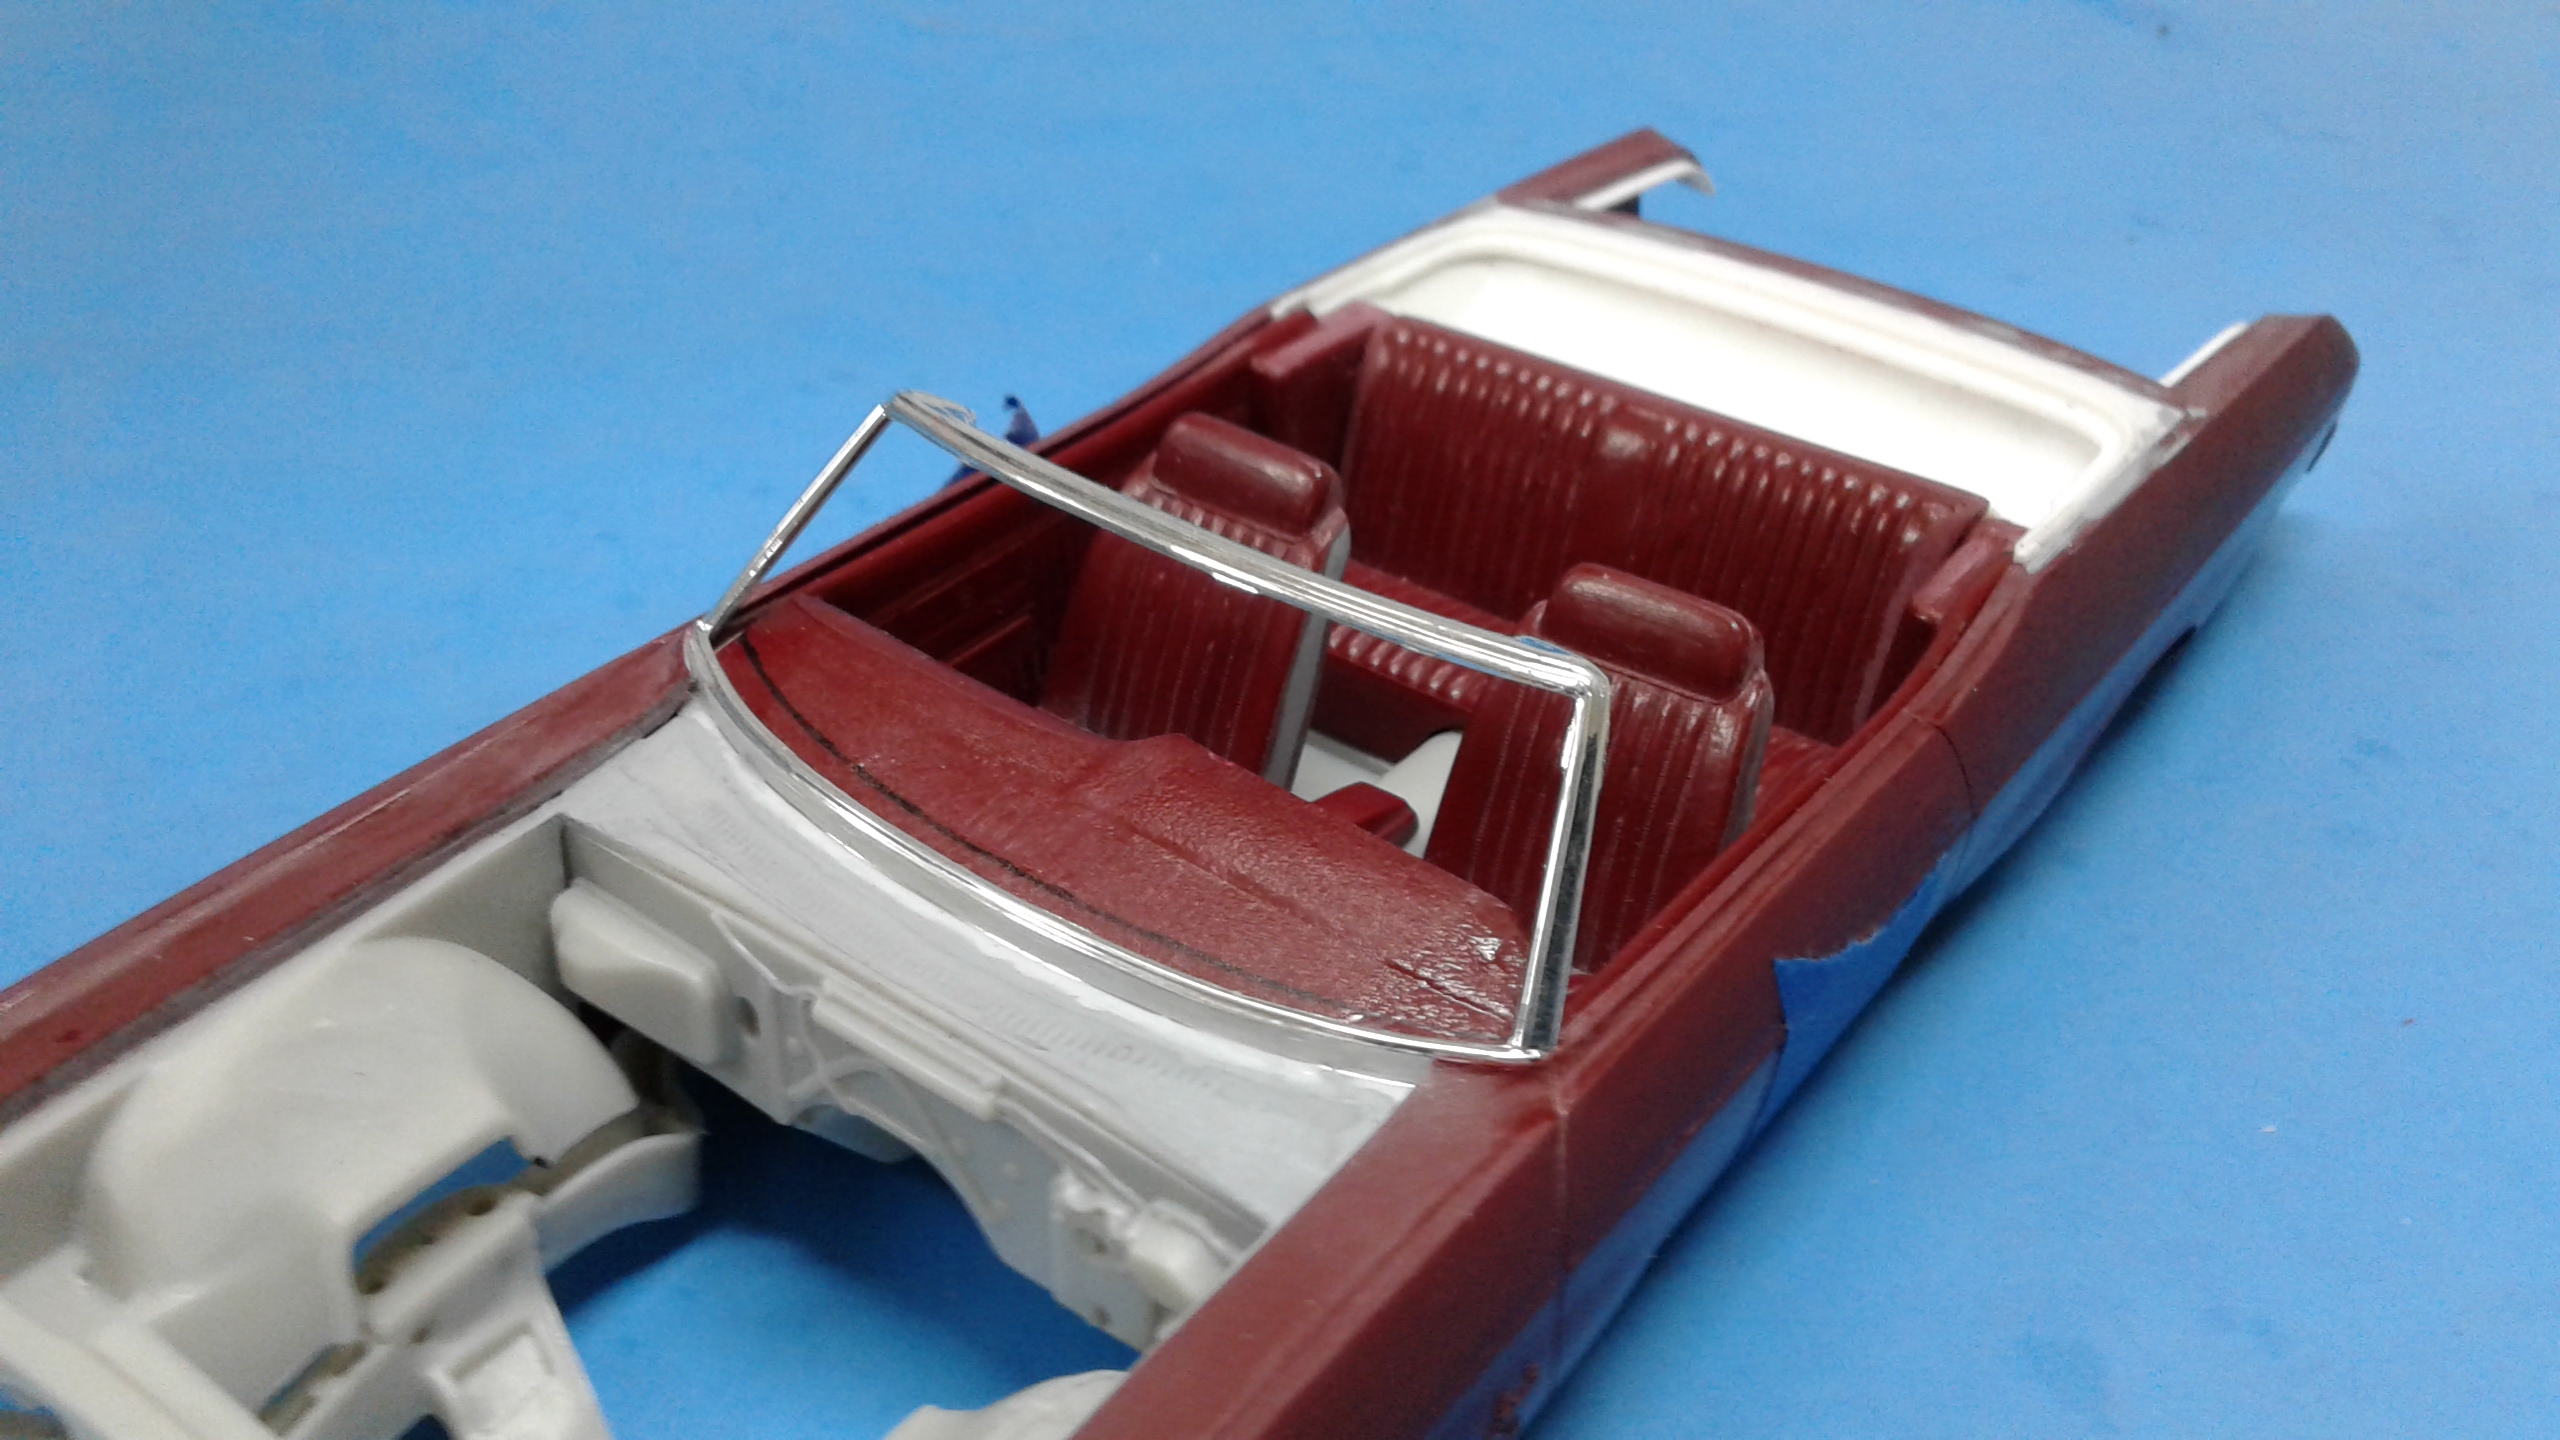
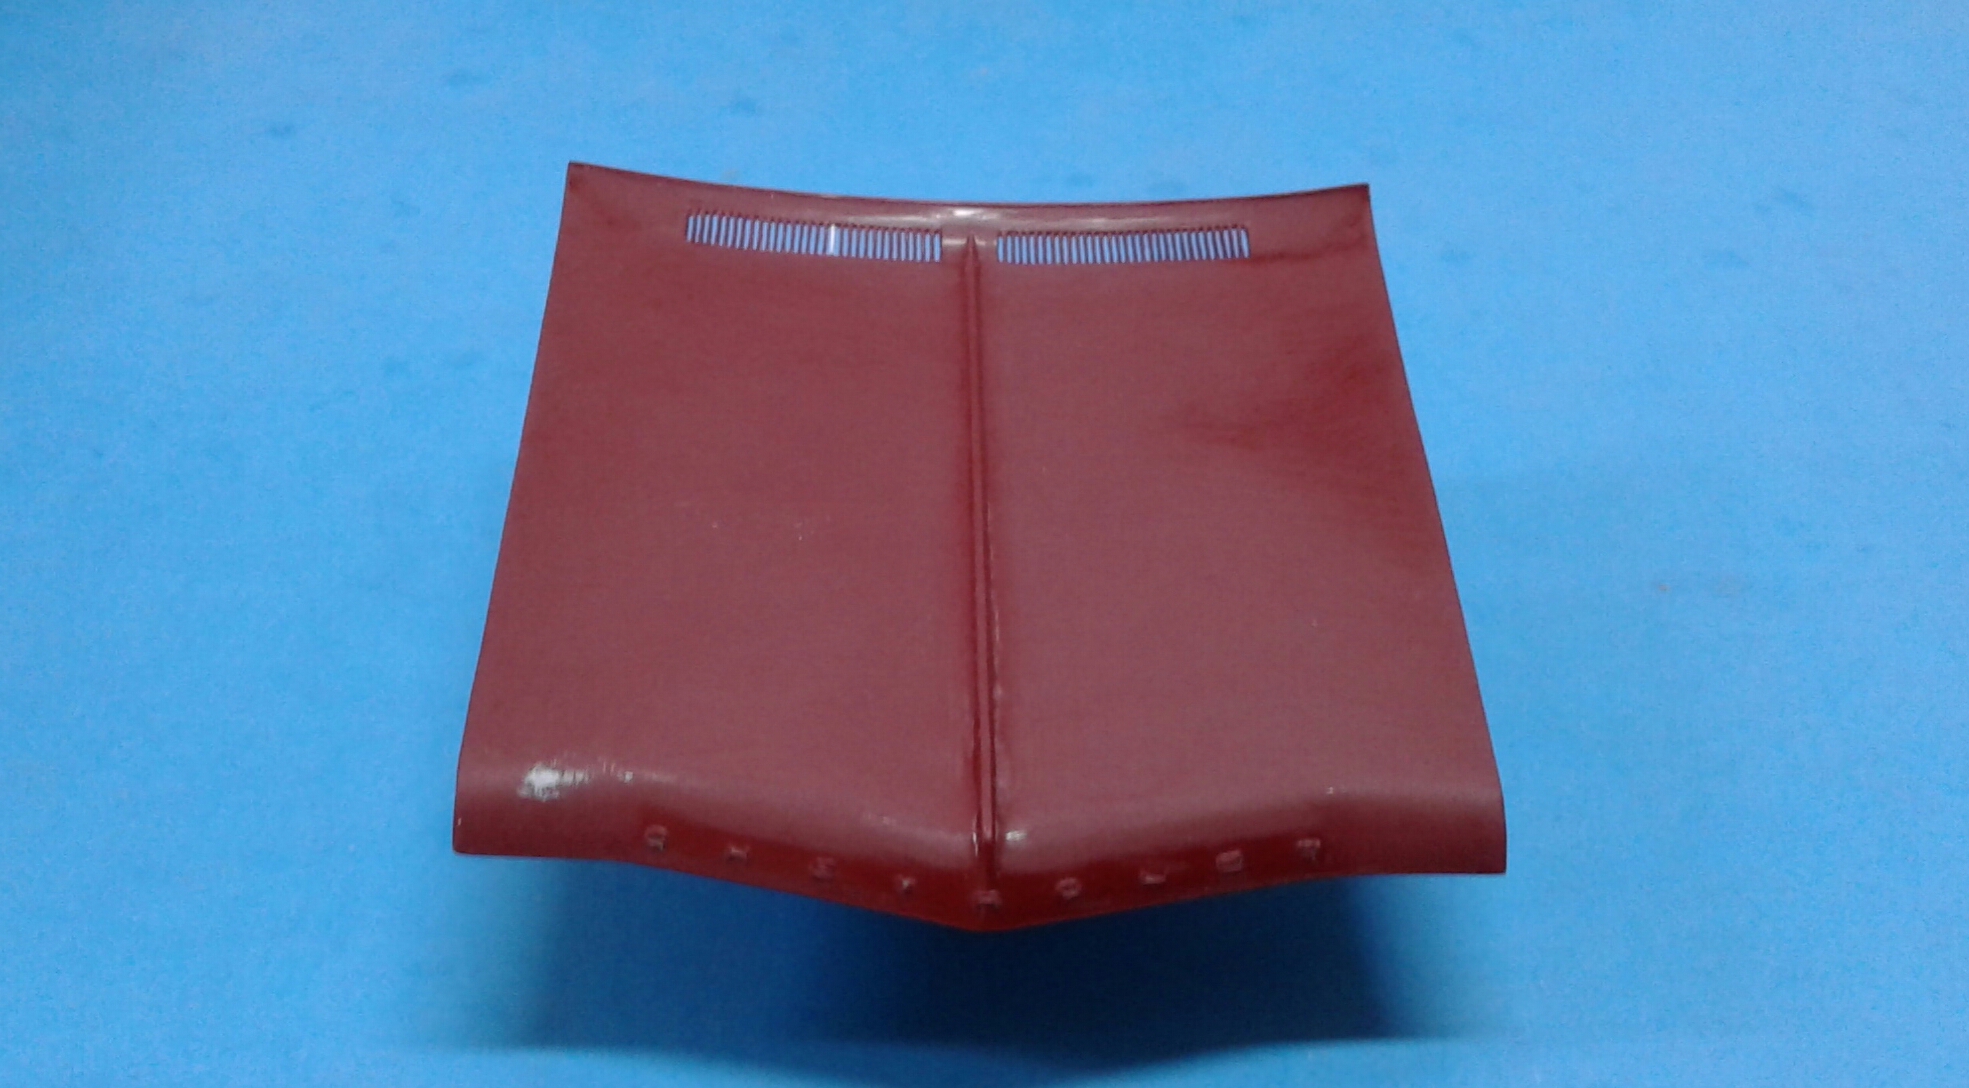
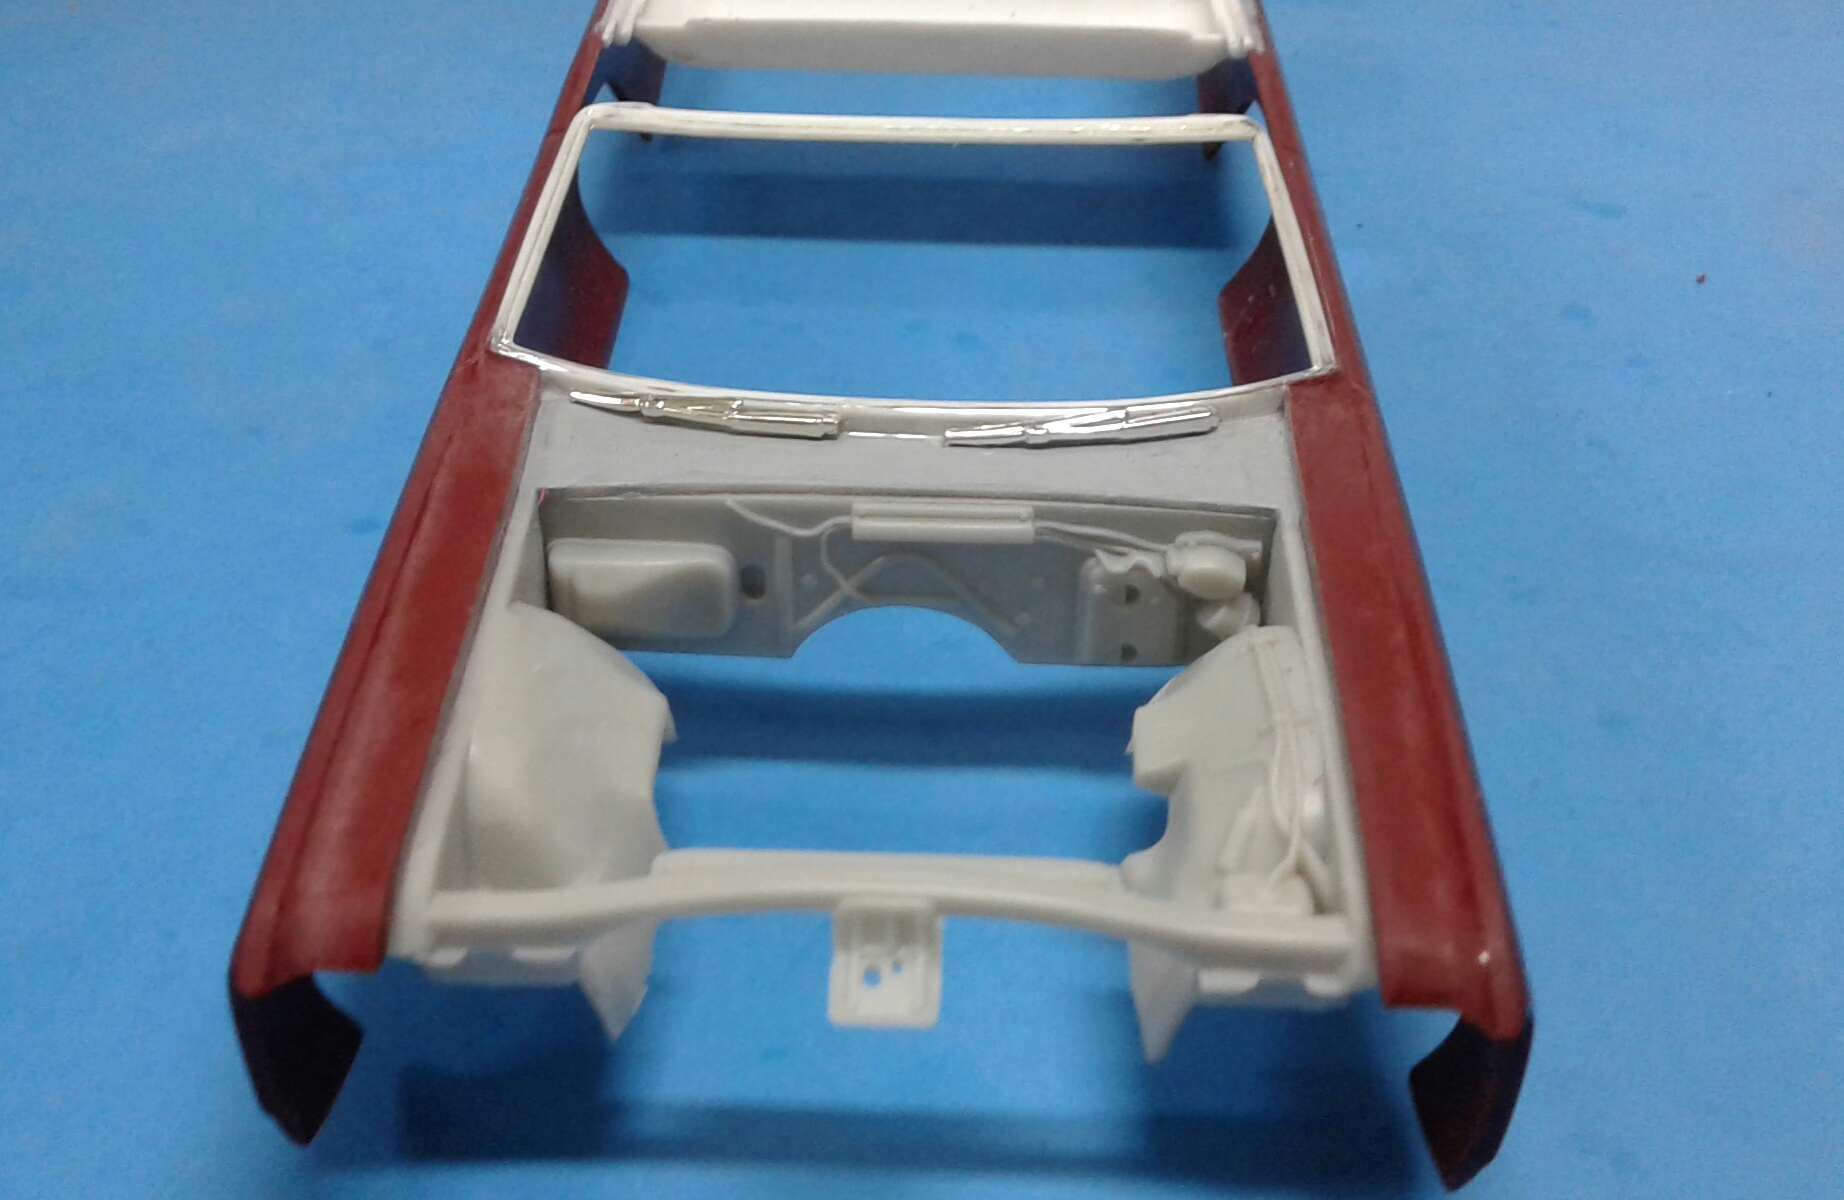
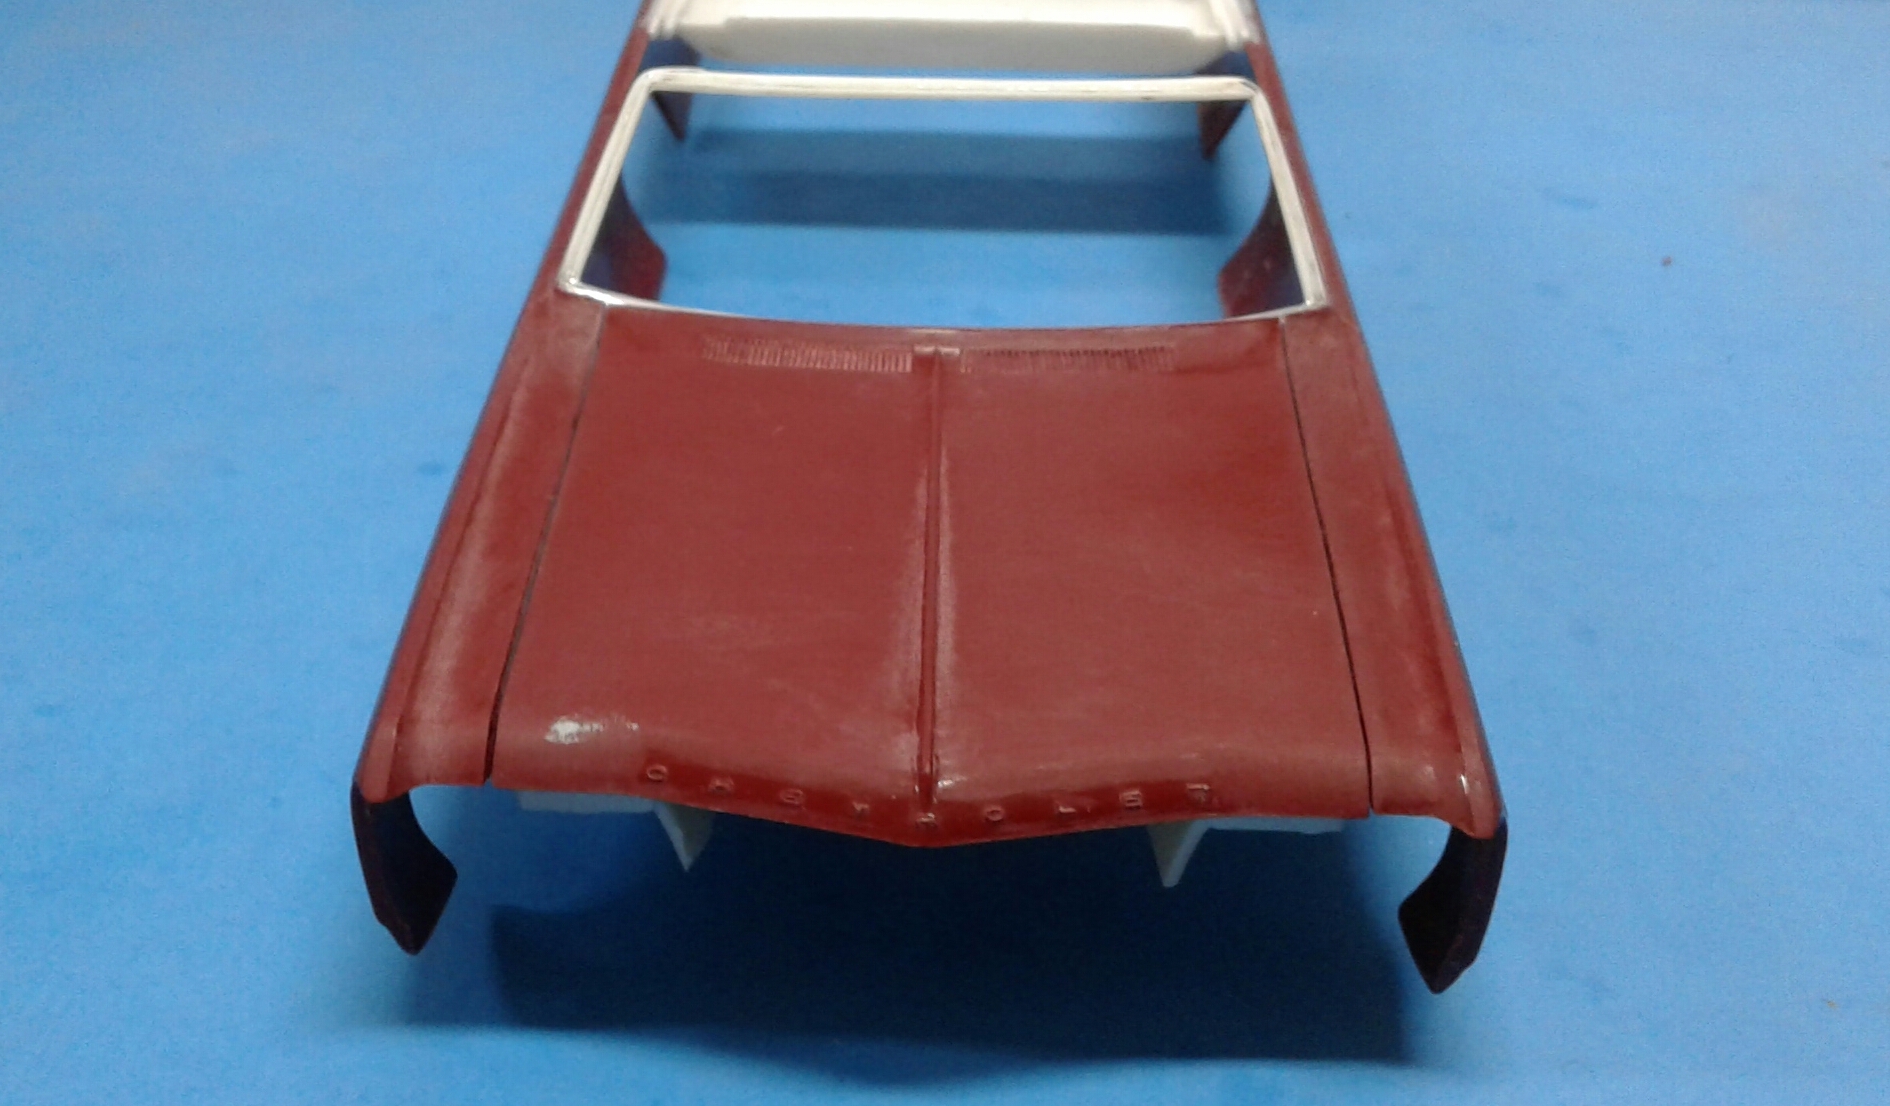
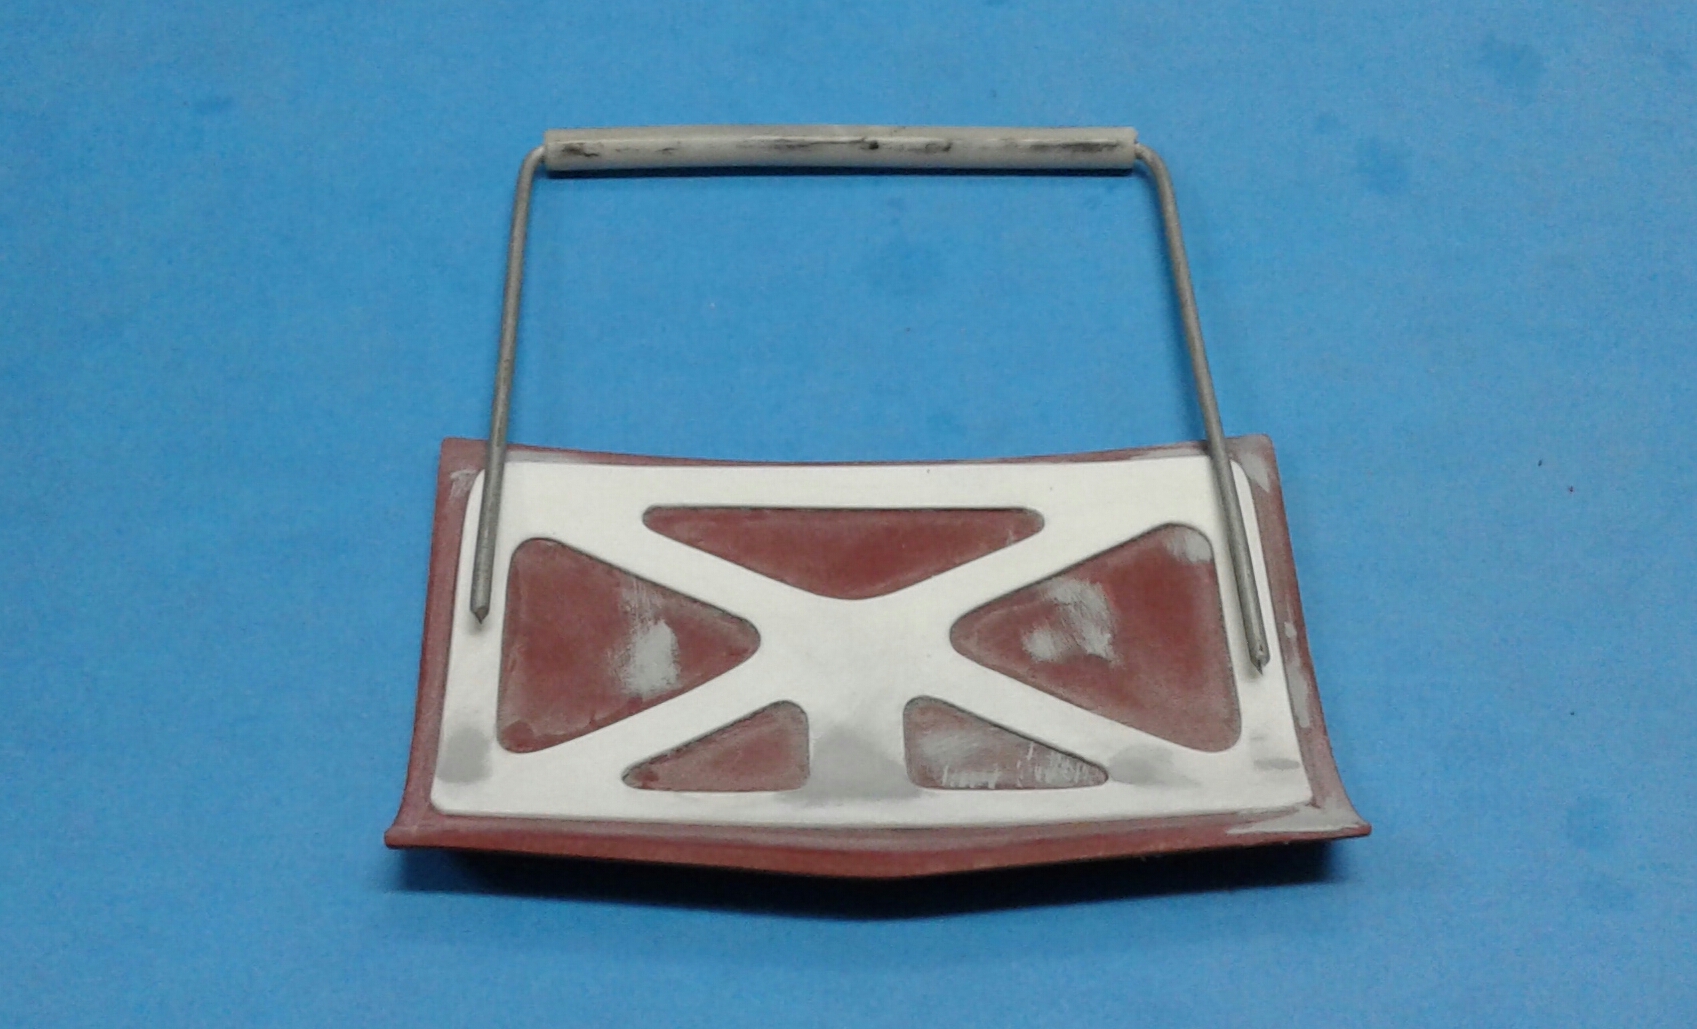
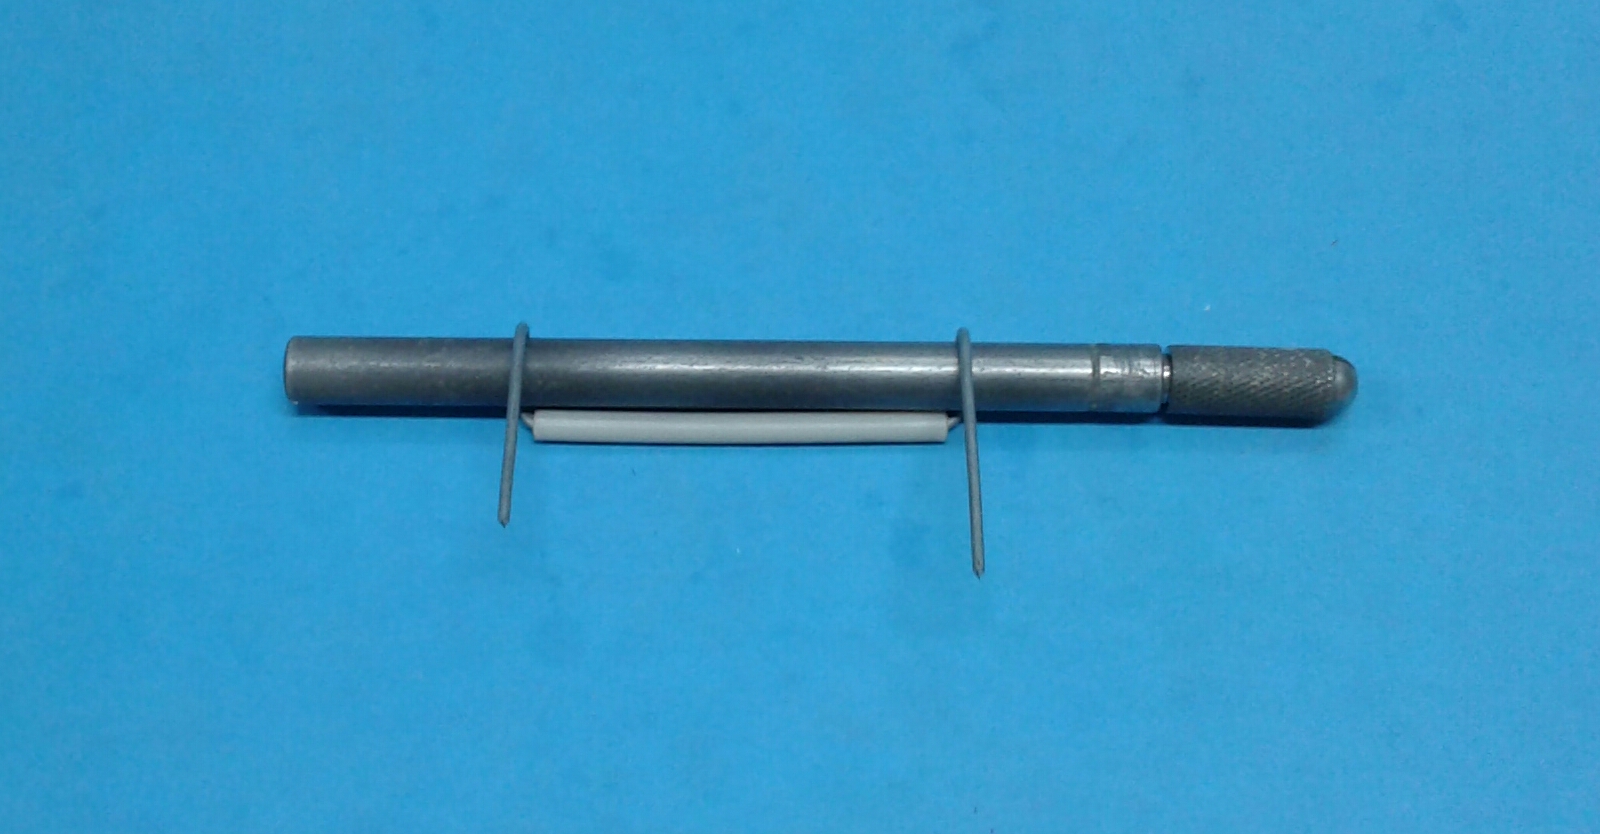
When I first got the windshield frame and underhood detail installed, my first thought was there was going to be no way to install wipers and it was going to look stupid without them. But, with some careful carving on the rear of the hood, I managed to make enough room for the wipers from the '67. I still need to add vent detail to the cowl and give the wipers a bit of fine tuning. But, the hood fits just like it should and the wipers aren't visible! I really want to open up the vents on the hood. But, that may be pushing my luck. I've opened several. But, never any that were on the rear of the hood.
-
Ralley wheels will be a last resort. I like them. But, they're just so overdone! At least around here they are. You'd think every Chevrolet ever made came with them. One local guy even put them on a C-10! I don't know if he converted it to five lug or used adapters. Right now, the plan is body colored steel wheels with COPO hubcaps. I also have a set of large diameter SS wheels that I want to try on it. I'm sticking with Tamiya Maroon for the body color. It's virtually the same color as the styrene. Interior color is still to be determined. I am going to keep the uptop white. So, most likely, the interior will be Dull Red or Maroon also.
-
You're welcome Greg! It is easy. You'll have to try it sometime. The same procedure will work on doors. As is for those that swing. Reversed for those that pivot. One detail I forgot to mention is that the leading edge of the trunk lid where it meets the tulip panel must be reduced in thickness (to around .020) in order to open properly or else it will hang and potentially chip off the paint.
-
A Workaround For Shaky Hands?
Plowboy replied to Miatatom's topic in Model Building Questions and Answers
I've had a hand tremor since my first back surgery in '07. Weird thing is, it only develops when I'm trying to do small things. Especially so when I'm working on a model. Seems the harder I try to control it, the worse it gets. Sometimes, I just have to stop and do something else. Detail painting is my nemesis! I have to mask or scribe around window trim that gets painted. I paint then sand down to the detail on gauges. I've had to develop different techniques for several things. Still, it can be frustrating trying to install a small part and I knock off or knock loose others. I figure when it gets too bad, I'll try a larger scale. -
Just did a mini tutorial in my '69 Impala SS 427 Convertible build thread on page two if you want to check it out.
-
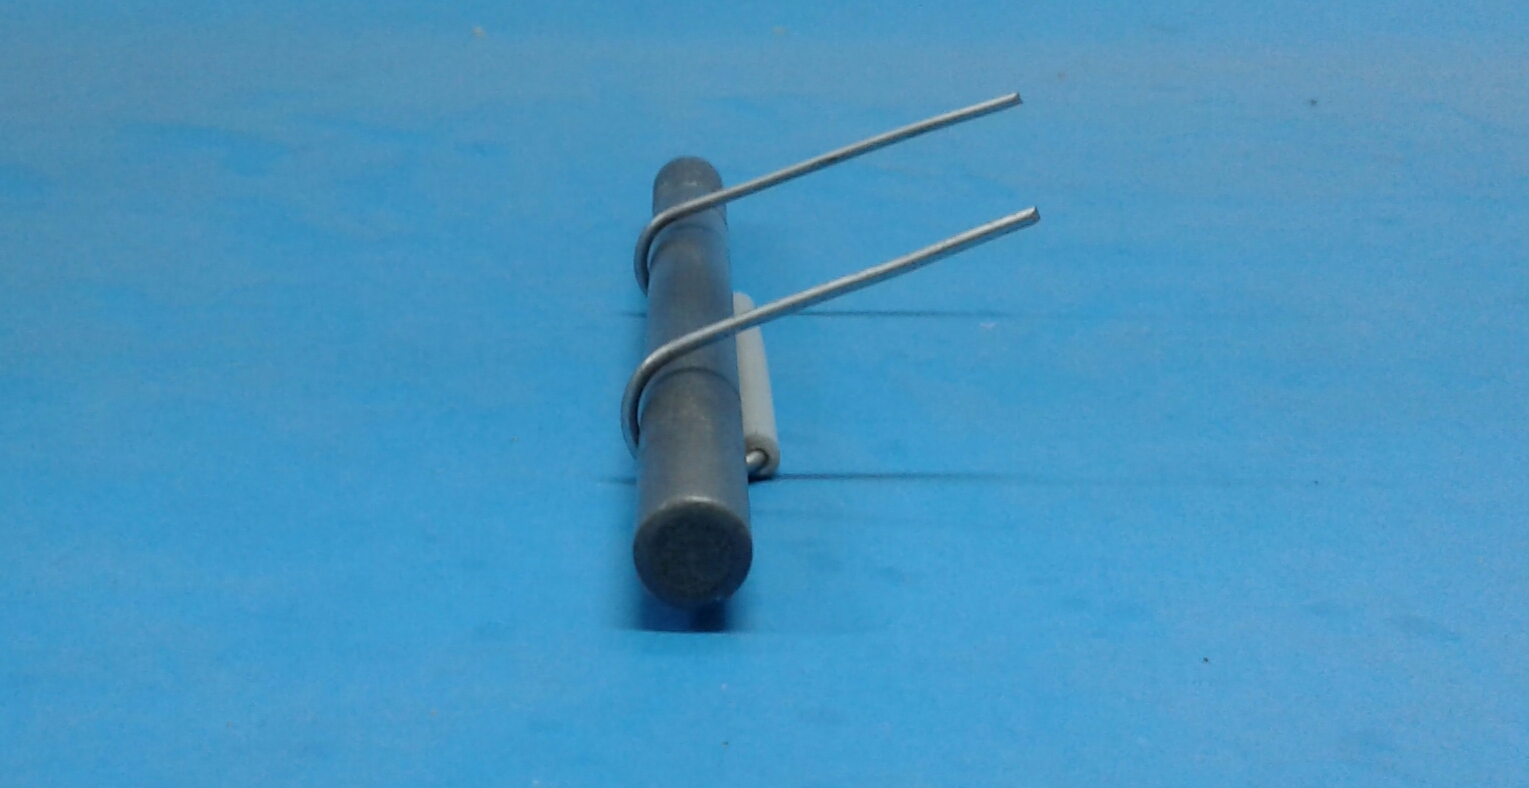
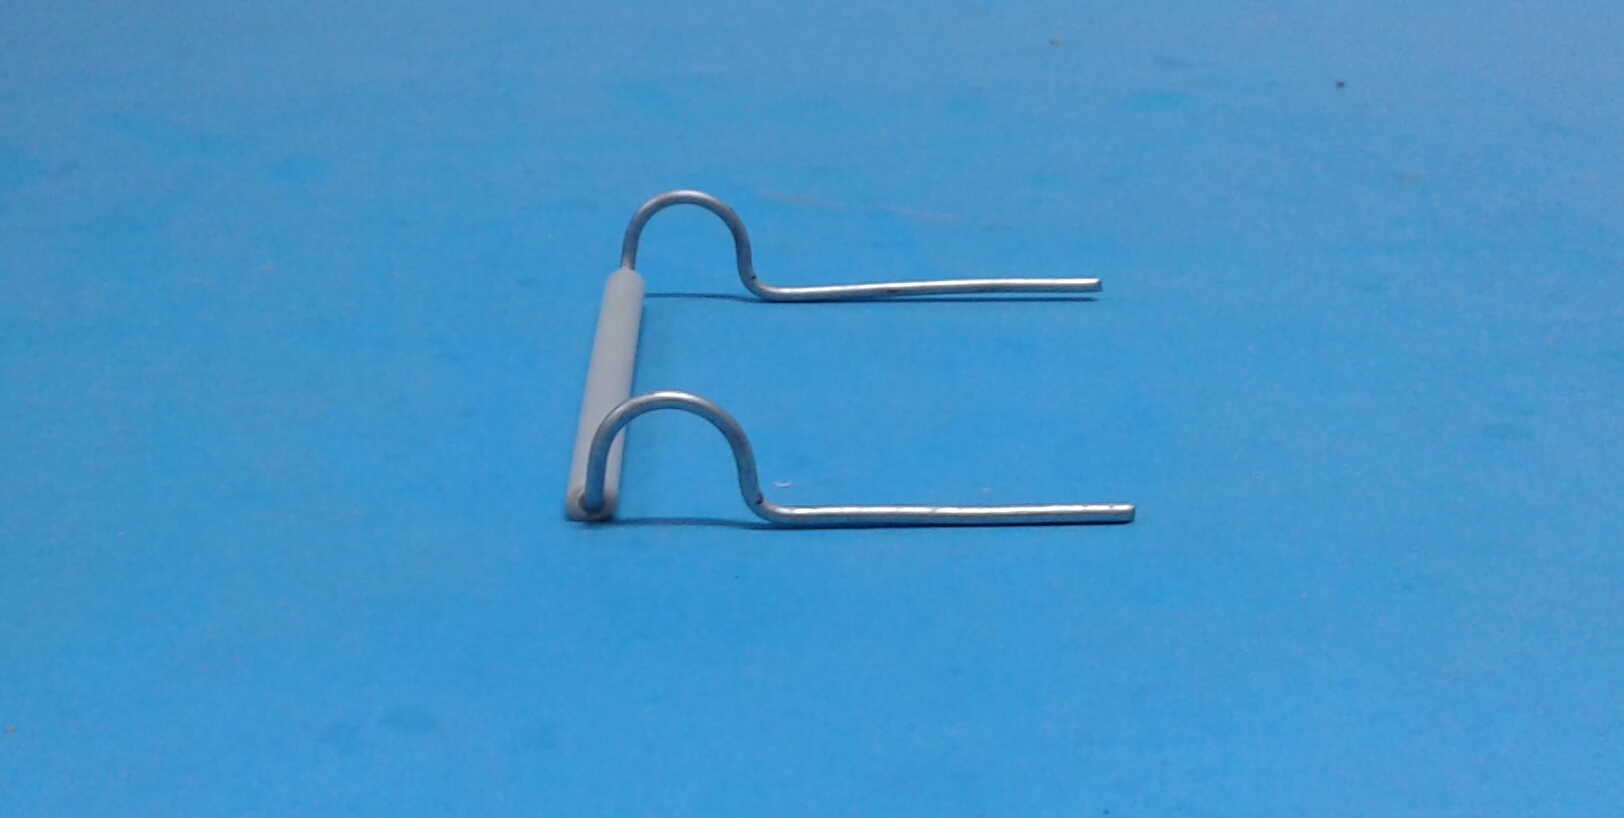
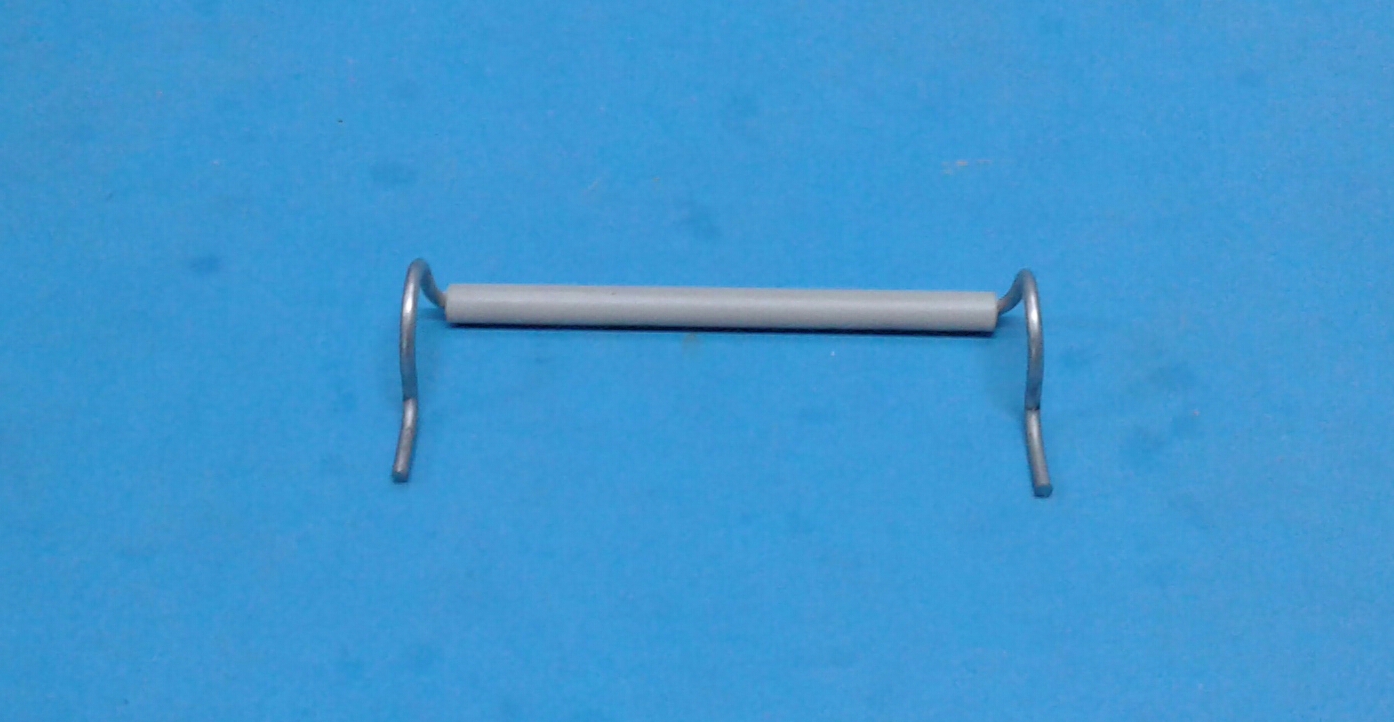
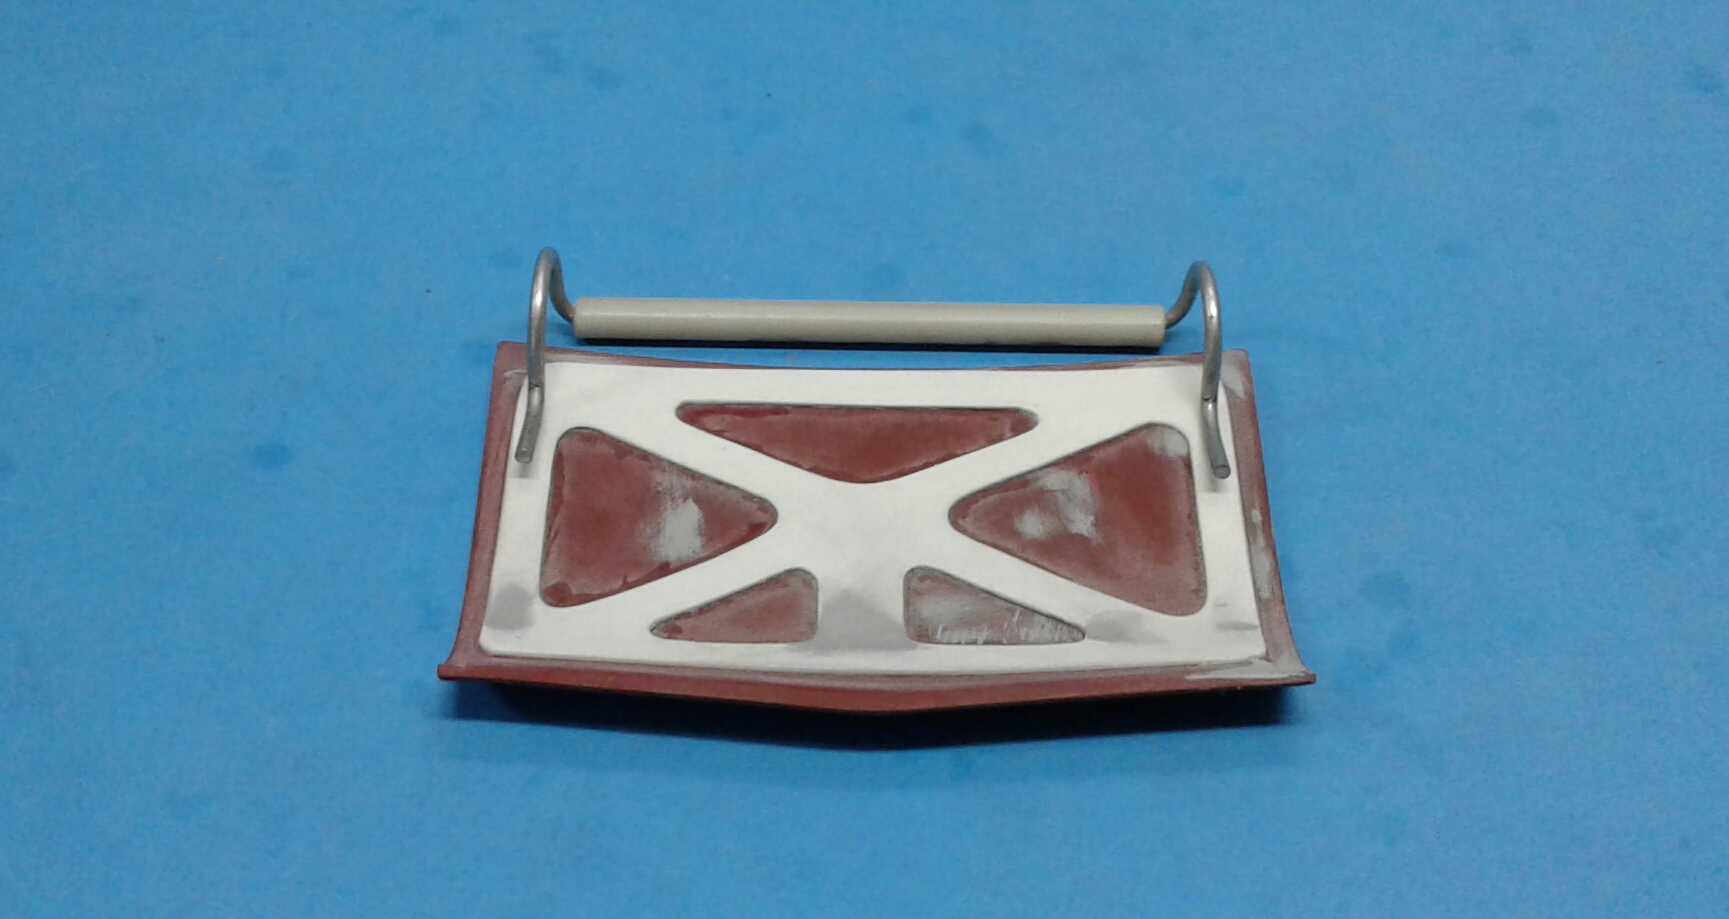
Thanx Carl and Bill! I have a couple of ideas in mind for the wheels. But, haven't had time to try them yet. I have decided on the body color. It'll be Tamiya TS-11 Maroon to pay homage to it's original color. The interior will either be black or red. I'm going to do a test with white. But, I seriously doubt it will work over the red styrene. Most of my time lately has been making tweaks to the fitment of the body, interior, floorpan and frame. You wouldn't believe how much time I had to spend on getting the rear valance to fit! I had to modify the frame and floorpan. Plus, narrow it to get it to fit right. A while back, a member requested that I show how I do my trunk hinges. So, here it is. My method is really simple. I first measure how wide my pivot piece needs to be. In this case, I wanted the hinges to hit the center of the framing on each side. So, I measured inside to inside. I cut a piece of sprue to length and filed a flat area on one side. Next I drilled a hole through the sprue. I drill from each end and meet in the middle. My hinge is simply made from a piece of fencing wire. You can use whatever you like. I use it because I have so much of it around. Next, I put the wire through the pivot piece and bend it 90 degrees on each end. As you can see, the wire is hitting right where I want it on each side. Next, I place the handle of my Xacto knife (remove the blade first to avoid a bloody oops!) on top of the wire and against the pivot piece. I then bend both sides of the wire over the handle. Next, I mark each end of the wire using the handle as a guide to make the next bends to make the flat area that will attach to the trunk lid and make those bends. Cut to length. Test fit to make sure the hinges hit where I want. Next, I tape the trunk to the body. Tape the hinge to the body. If you like, you can now glue the hinge to the trunk lid with super glue. But, I go a step further and mark around the trunk hinge. Next, I remove the trunk and using a Dremel with a cutoff wheel, I cut grooves into the trunk lid where the hinges will hit. This gives me more surface to glue to and gives the hinges a neater appearance when finished. With the grooves cut, make sure the hinges fit them well. You want the hinges to rest into the grooves easily. Once the hinge fits well, tape into place and using a toothpick with a drop of superglue on it, wick the superglue into the grooves and allow it to dry well. And you're done until it comes time to install permanent after paint. Any questions, just ask.
-
Wouldn't doubt that at all. JoHan kits are notorious for being molded in wacky colors! It's like they just used whatever they had on hand at the time. Didn't matter the color or consistency, they just used it.
-
Thanx Mike! It is BMF.
-
That's the pickup. They did also make a Blazer with the big fender flares.
-
I don't know of any aftermarket boots. But, I have made my own. It's actually fairly easy if you have a miter box. Just take a piece of styrene rod the size you need, cut a piece at a 45 degree angle, glue it back onto the rod, cut it off at a 90 degree angle and drill a hole to accept the plug wire. I glue the boot to the engine with Tamiya Extra Thin Cement and allow it to dry well. When I'm ready to wire, I can just insert the wire into the boot.
-
That's a nice clean looking little hot rod Alan! I really like the interior and the right hand drive conversion! Nice work!
-
That's a nice looking Boss Mustang Bill! I really like the widened Magnum wheels! Nice touch!
-
Inspiration for me comes from all different places. It could come from a model in progress, a finished model, a full scale or it could be something I just conjure up in my mind. I never know where it's going to come from. Just recently, I saw a build by a friend and it really struck a cord. So, I had to have one! While they're different styles, it was that build that got the wheels turning.
-
That was the blue my interior was molded in. Looks like JoHan swapped interiors with those two. The black interior looks right with the blue body. But, the blue interior with the black body was weird looking.
-
The only other one I know of is the snap kit by AMT. It's 1/25 and has a little better proportions. But, would take more work to make it a full detail.
-
I've sprayed Tamiya TS 13 over acrylic with no problems. Haven't done it with Testors though. As David said, do a test to check.
-
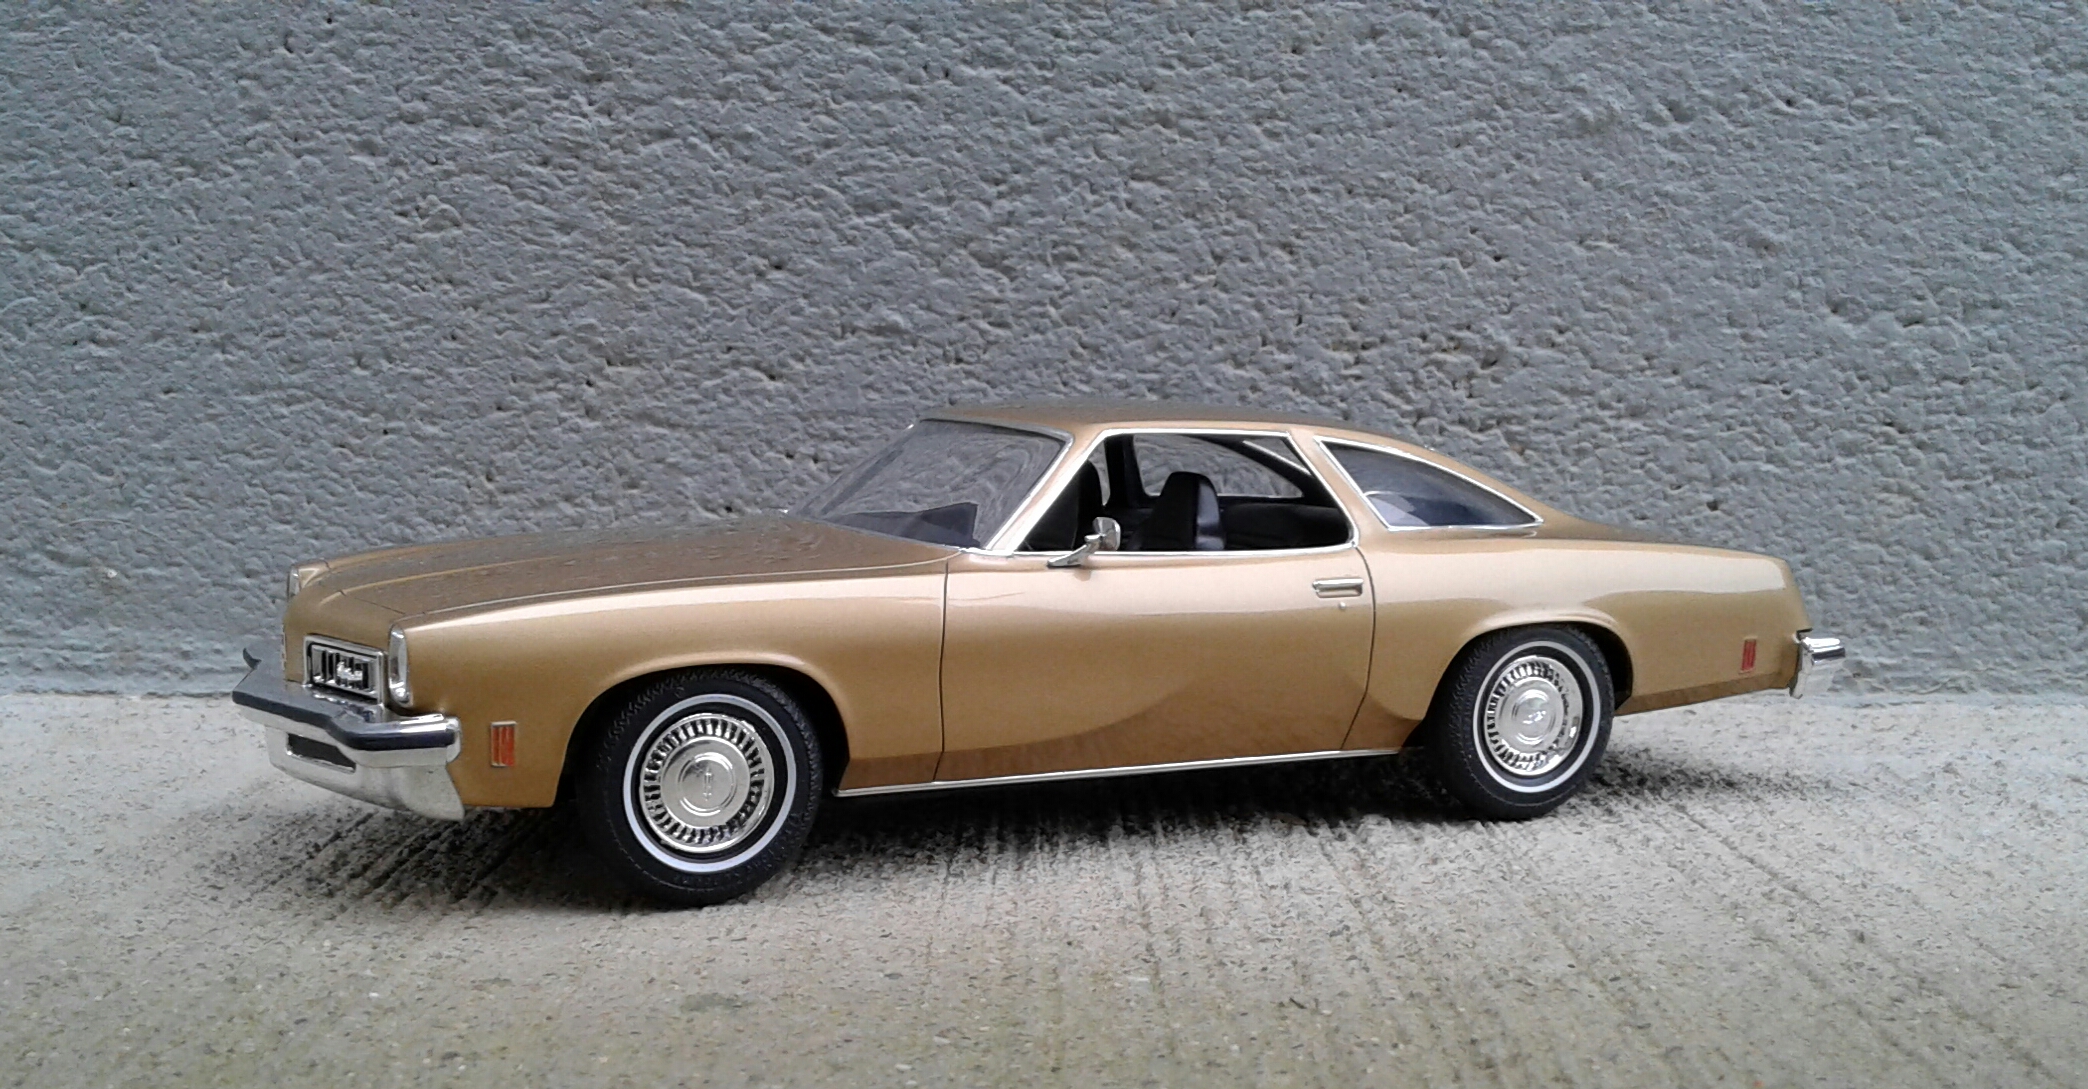
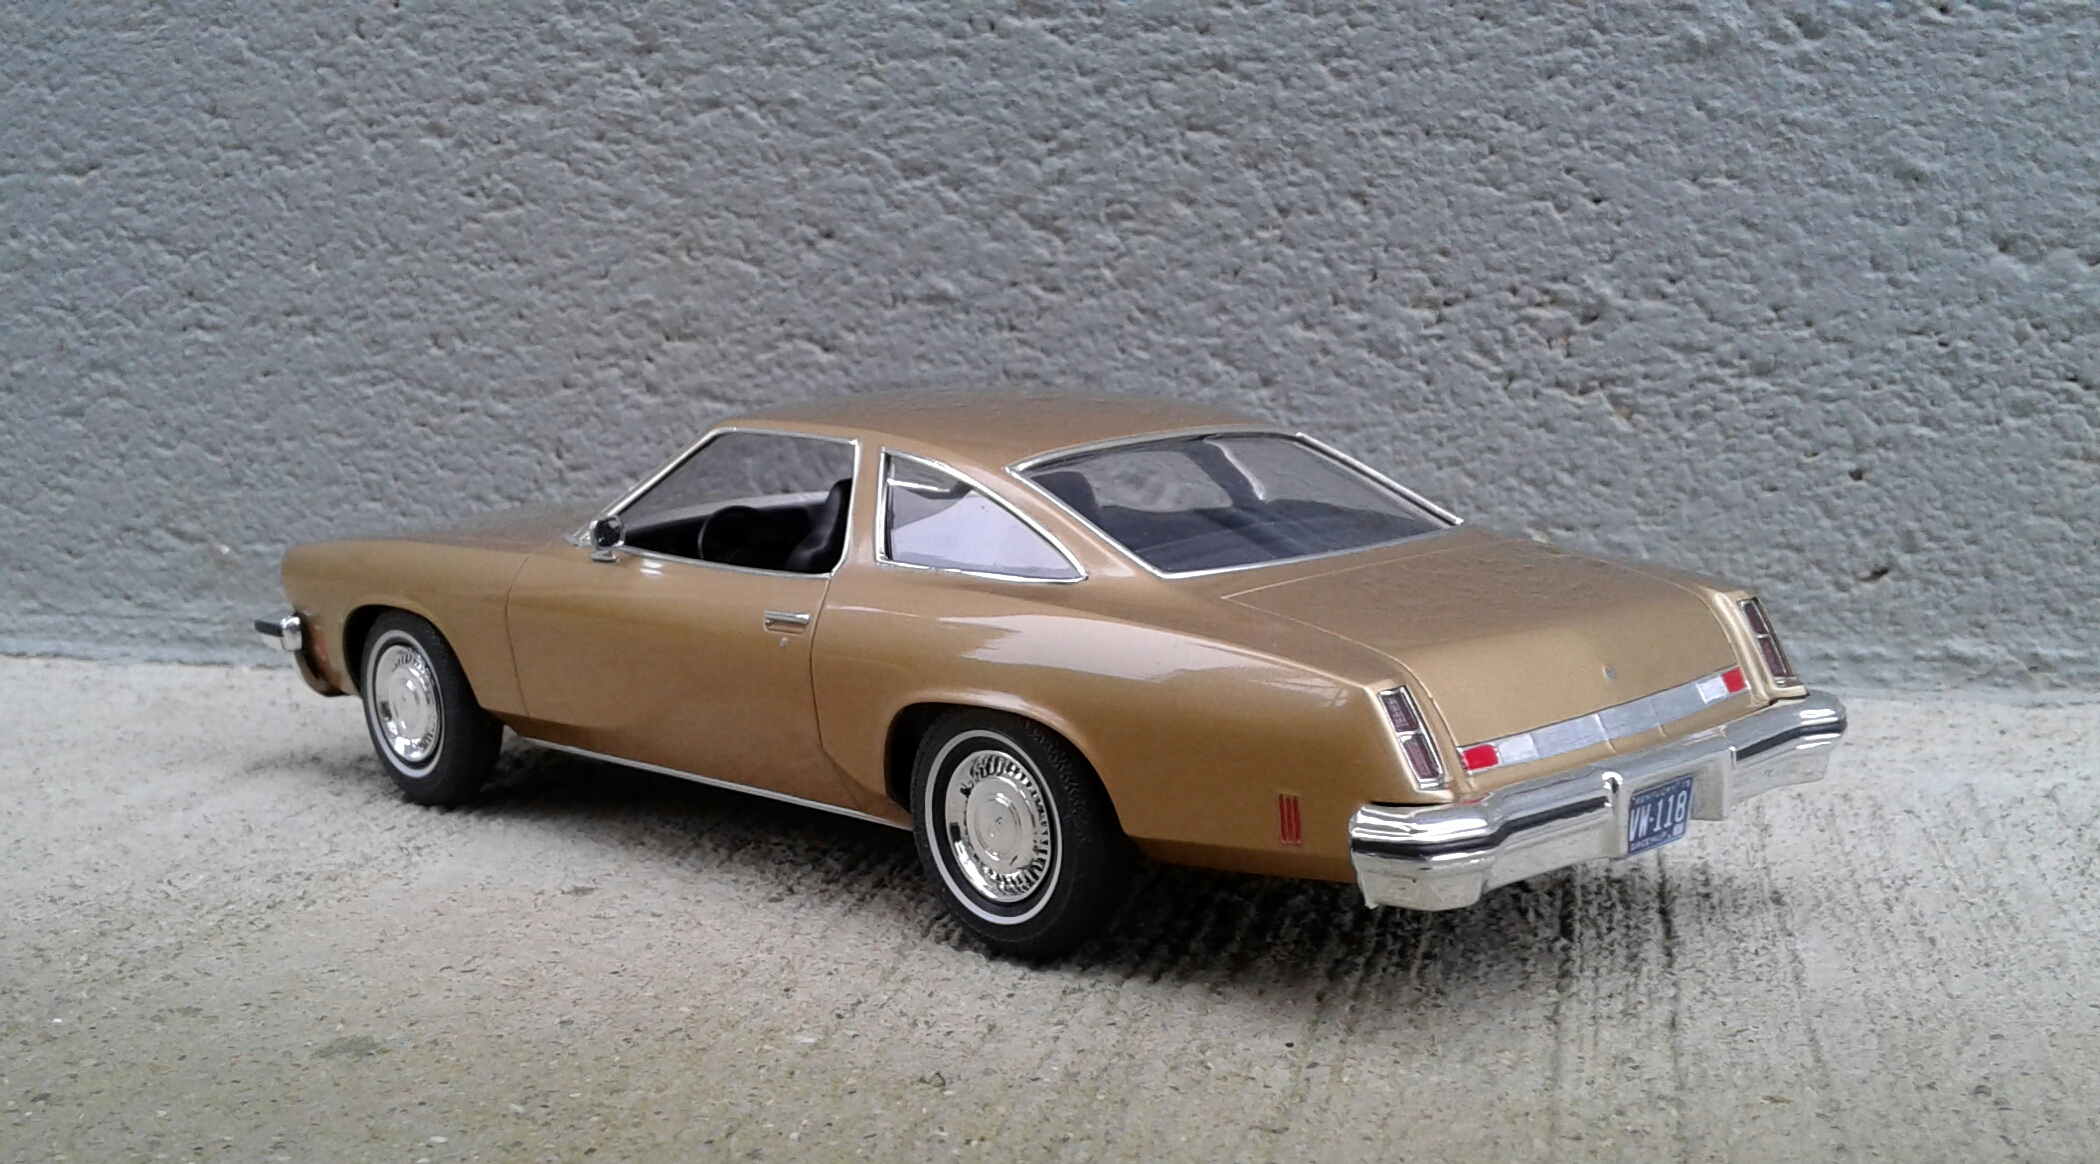
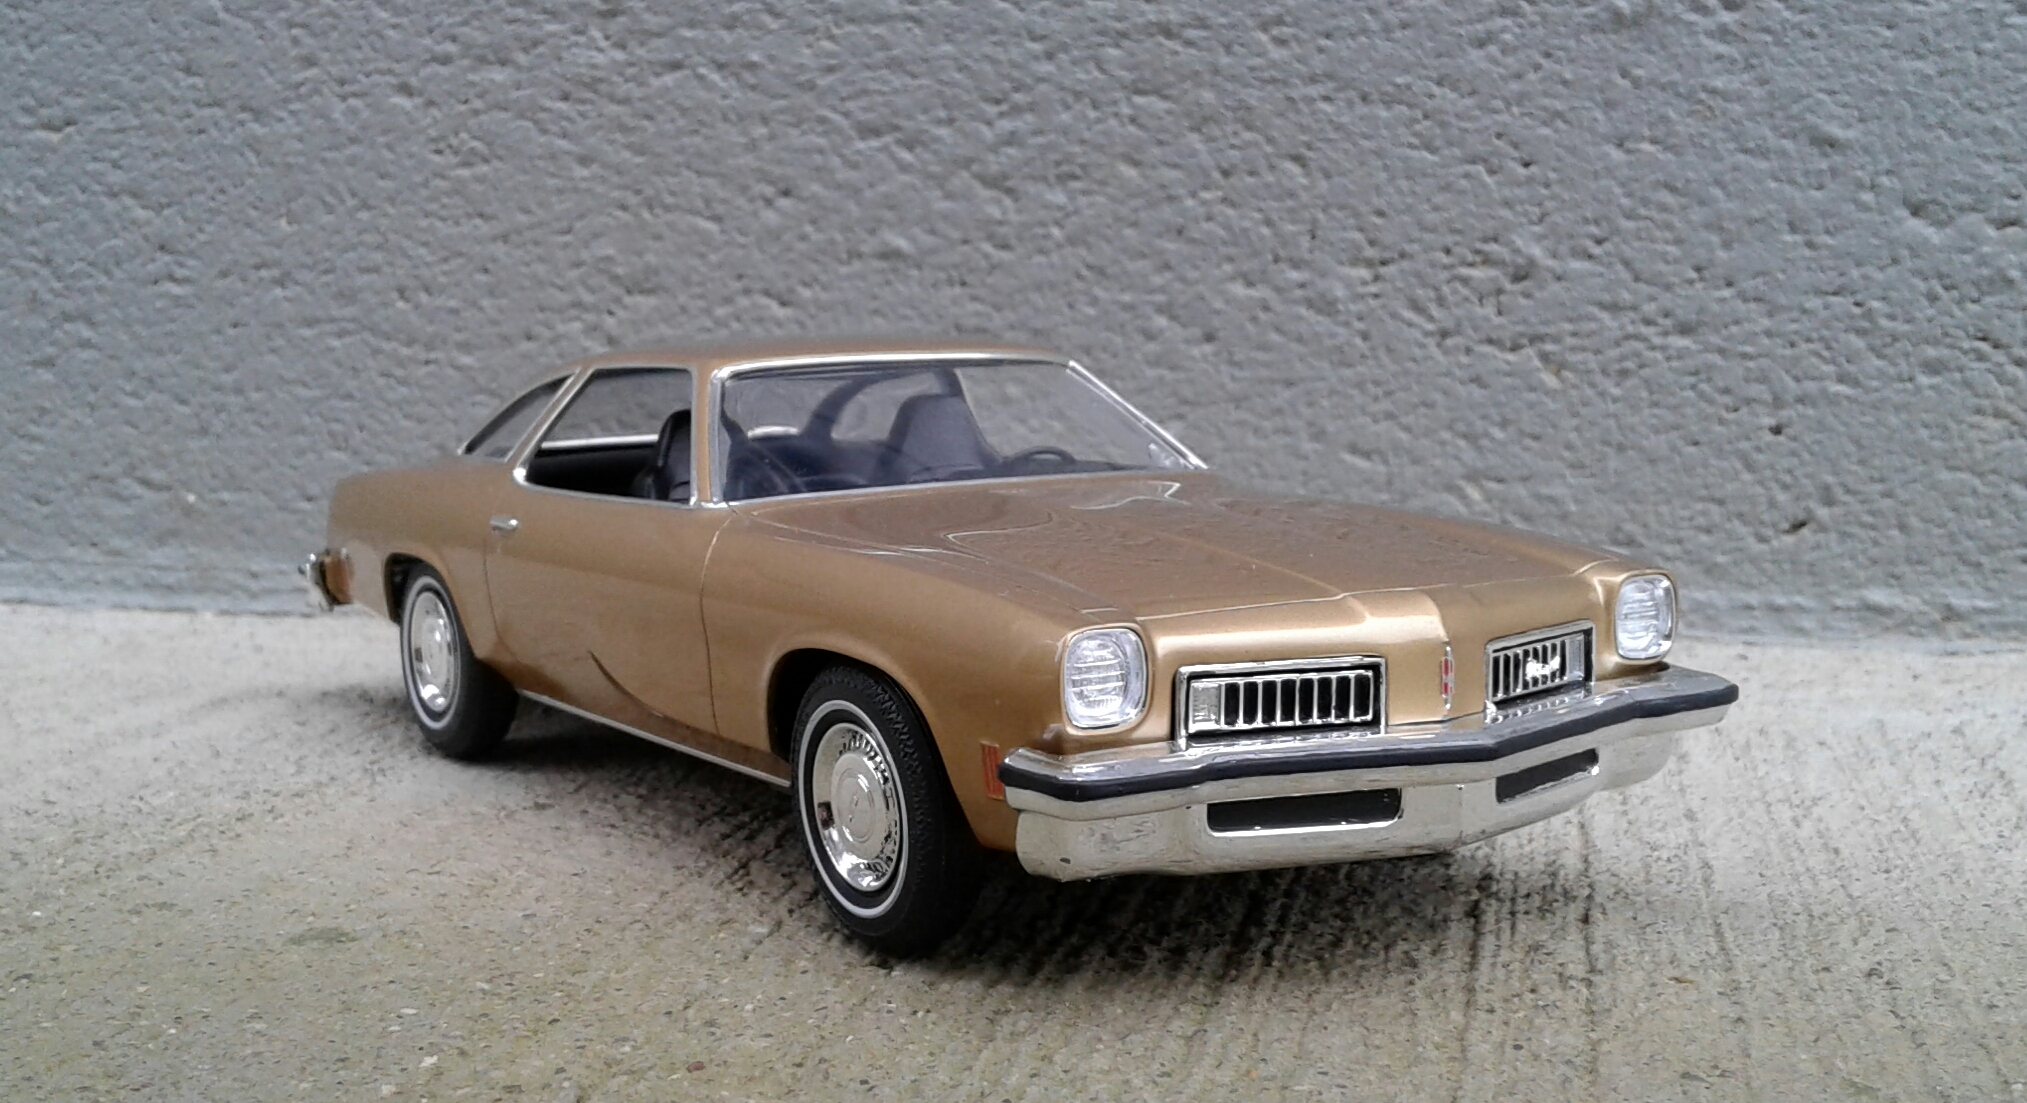
Thanx Bob! I've seen a '74 promo and the grille looked right on it. So, I have no idea what JoHan did. I almost wonder if I got a hodge podged kit since it had the different colored interior. I got it cheap ($20). That may have been the reason.
-
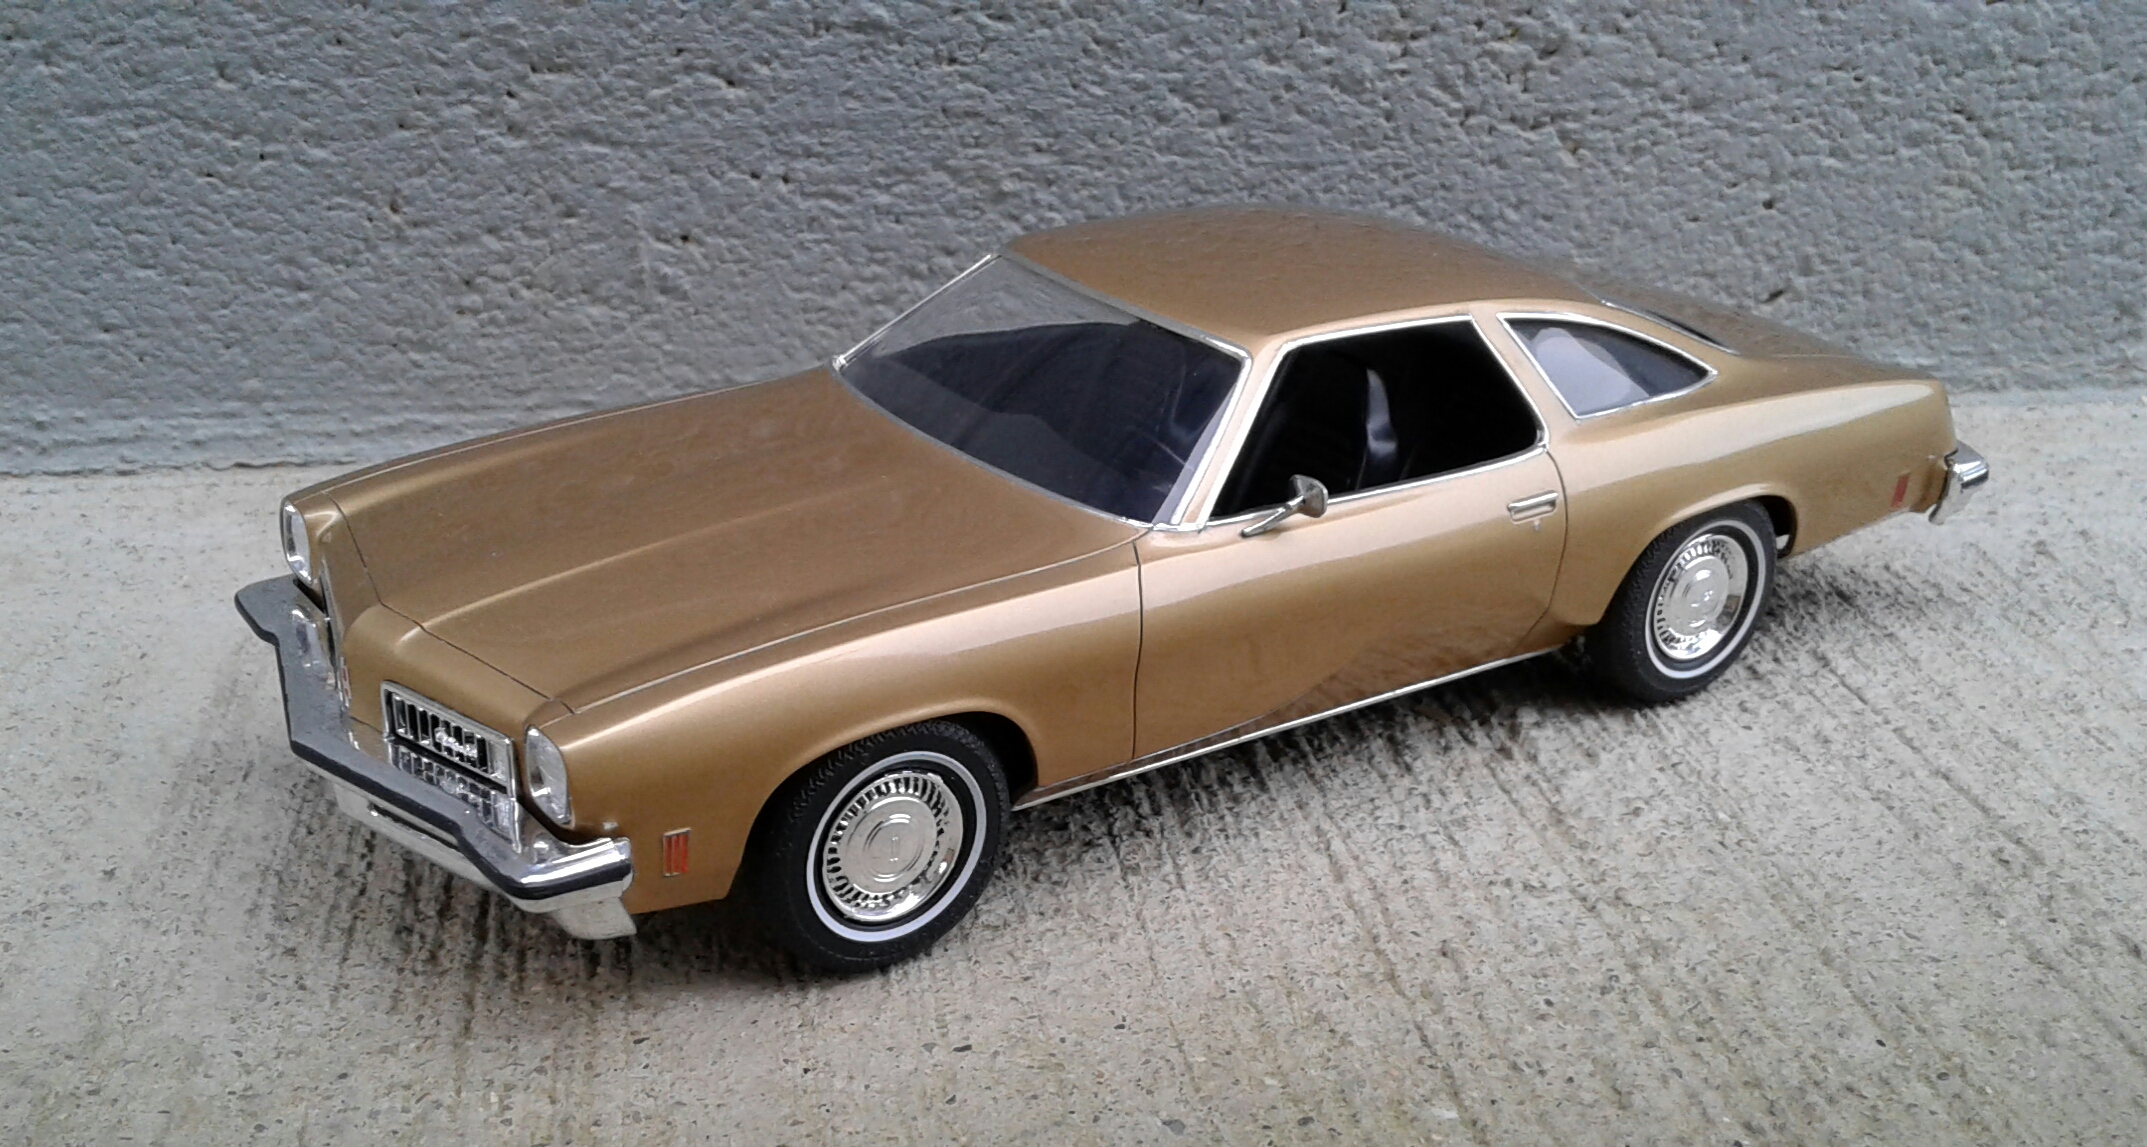
Just finished this one up. Not a lot to it besides paint and assembly. This was a confusing model. It has 1975 on the rear bumper. But, it's not a '75 as far as I can tell. The full scale has quite different grilles and front bumper. There's also a slight difference in the tail lights. In typical JoHan fashion, the body was molded in black (you never know what color you're gonna get) which felt like the old two piece vinyl tires. Very soft. The interior was molded in blue and hard as a rock. The dash has zero detail to it. No radio. No gauge detail. No knobs. Just the basic shape. I did add gauge decals to the center. The only modification I made to the body was below the tail lights. I cut away the piece molded to the top of the rear bumper and added a new piece to the body. I also shaved the scripts from the trunk and front fenders. My original plan was to be a custom. But, none of the wheel and tire combos I stuck on it suited it. So, I detail painted the wheel covers and stuck them in a set of AMT Firestones. The whitewalls on the JoHan tires were way off and unusable. I have to admit that I don't hate the way it looks with the wheel covers and whitewalls. But, I think that'll wear off soon. Paint is Tamiya TS-21 Gold with a coat of pearl and clear. Thanx for checking it out!
-
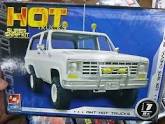
'68-72 Chevy PickUp rummors about reissue?
Plowboy replied to Sergey's topic in Truck Kit News & Reviews
With Round2 offering the wedge bed for the '72, I wonder if they'll offer the camper as well later on? We know they have the tooling already. -
Thanx for the feedback guys! I got the interior cut apart, repaired and fitted to the new floorpan. Everything is now a separate piece. No more seats molded to the console! I also cut the rear seat away from the interior panels. It still needs a tweak here and there. But, it's looking like something now at least. I still don't know what style I'm going to go with on this build! Nothing I've thought of yet has clicked. I think I need to start cramming some wheels and tires under it. Maybe something will come to me then.
-
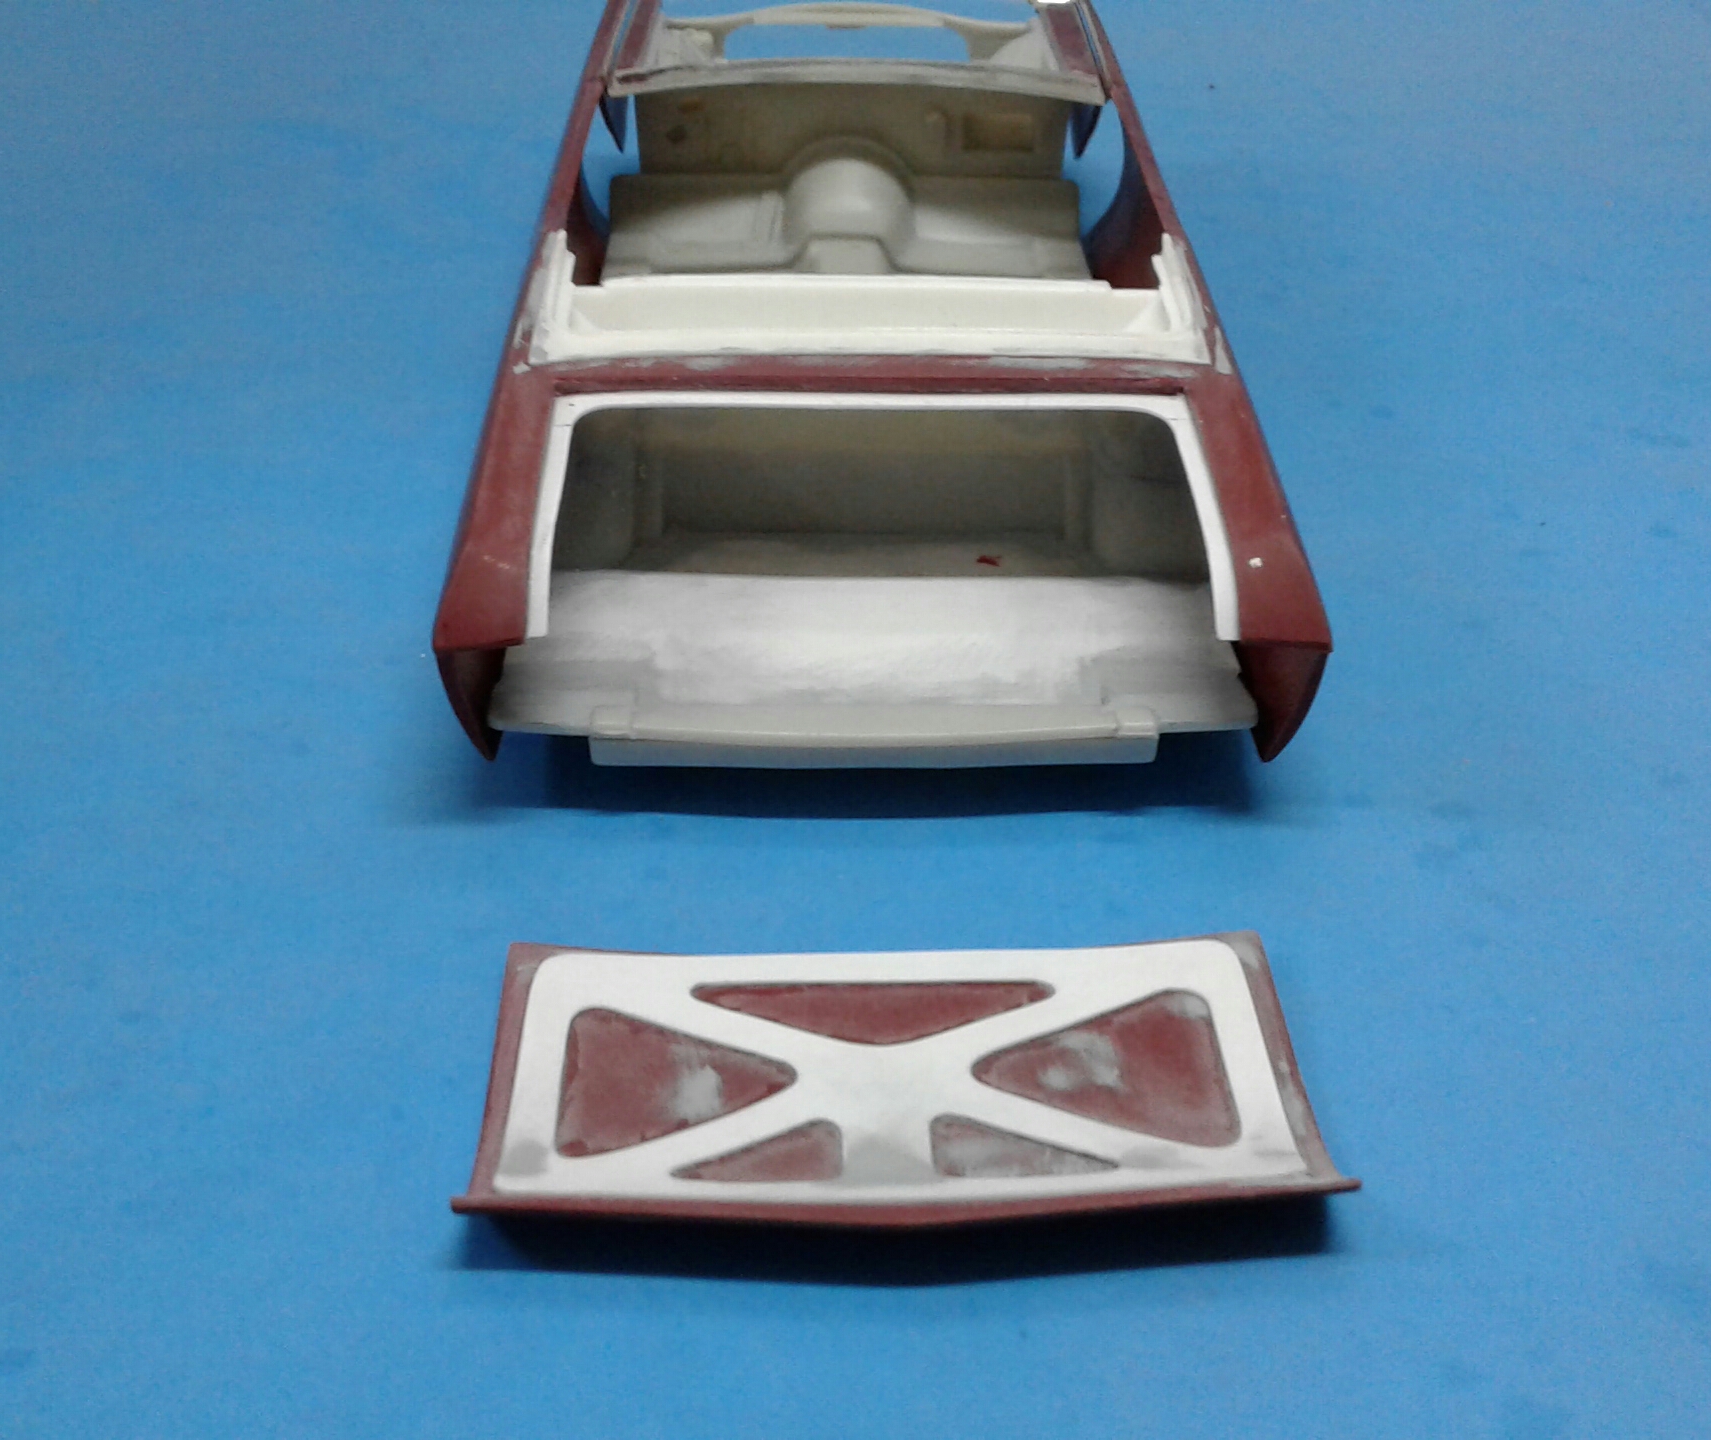
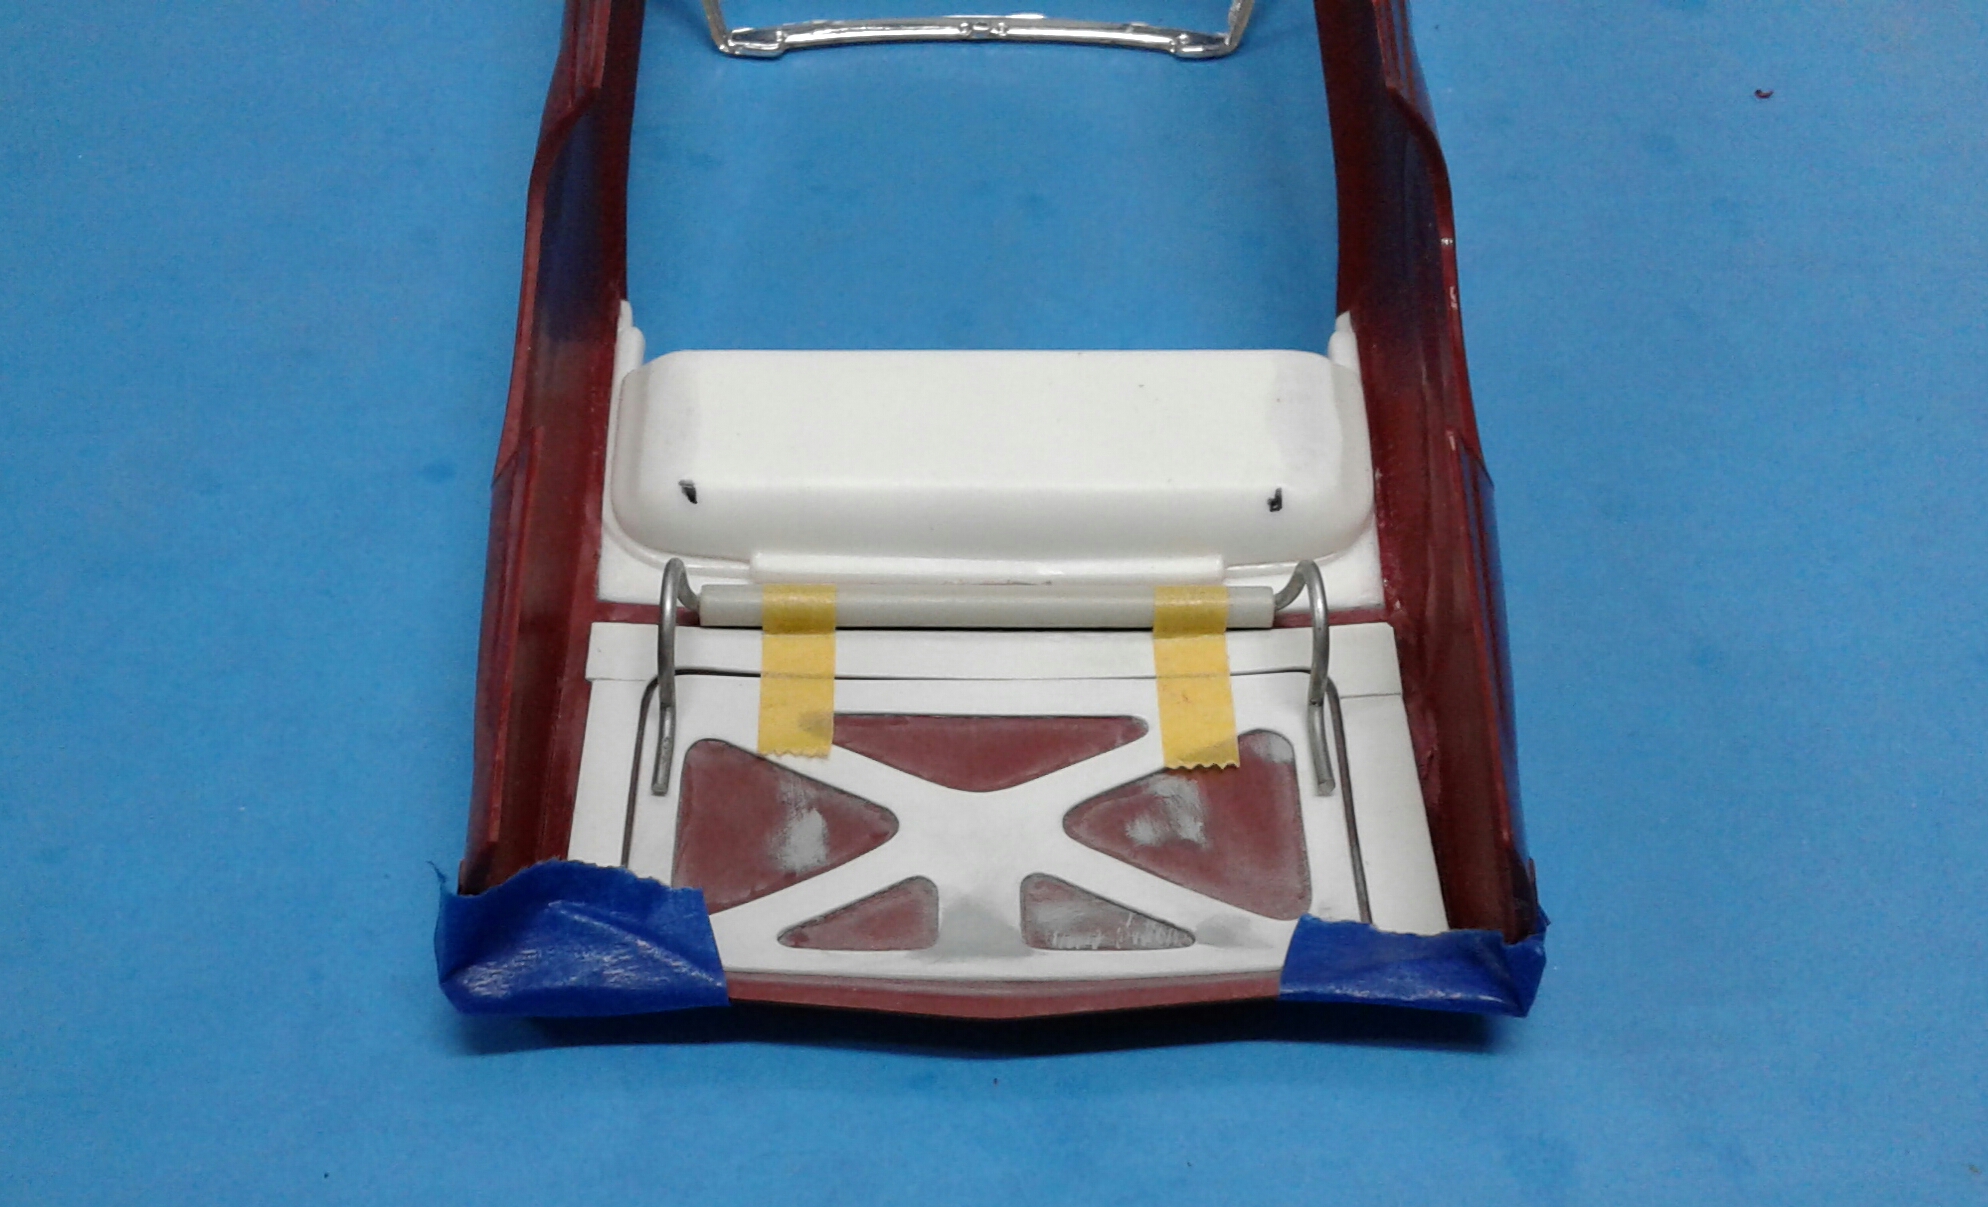
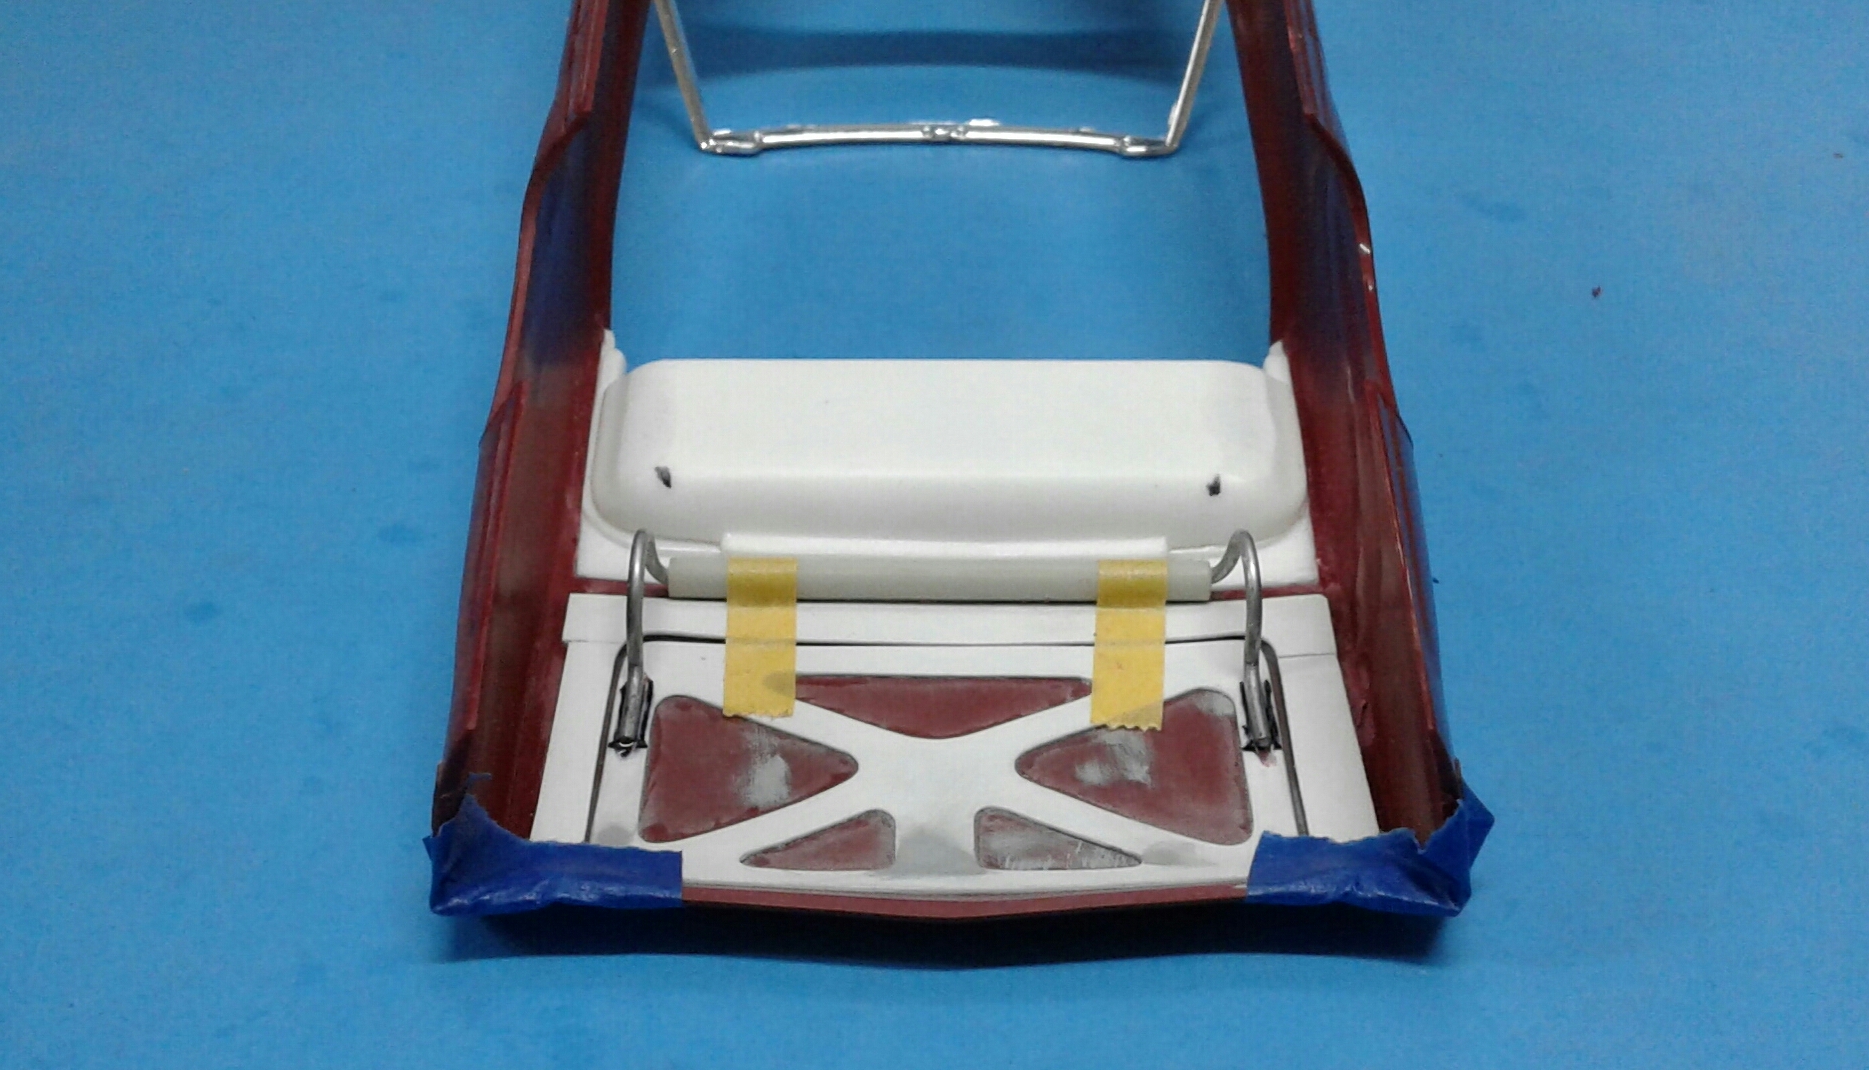
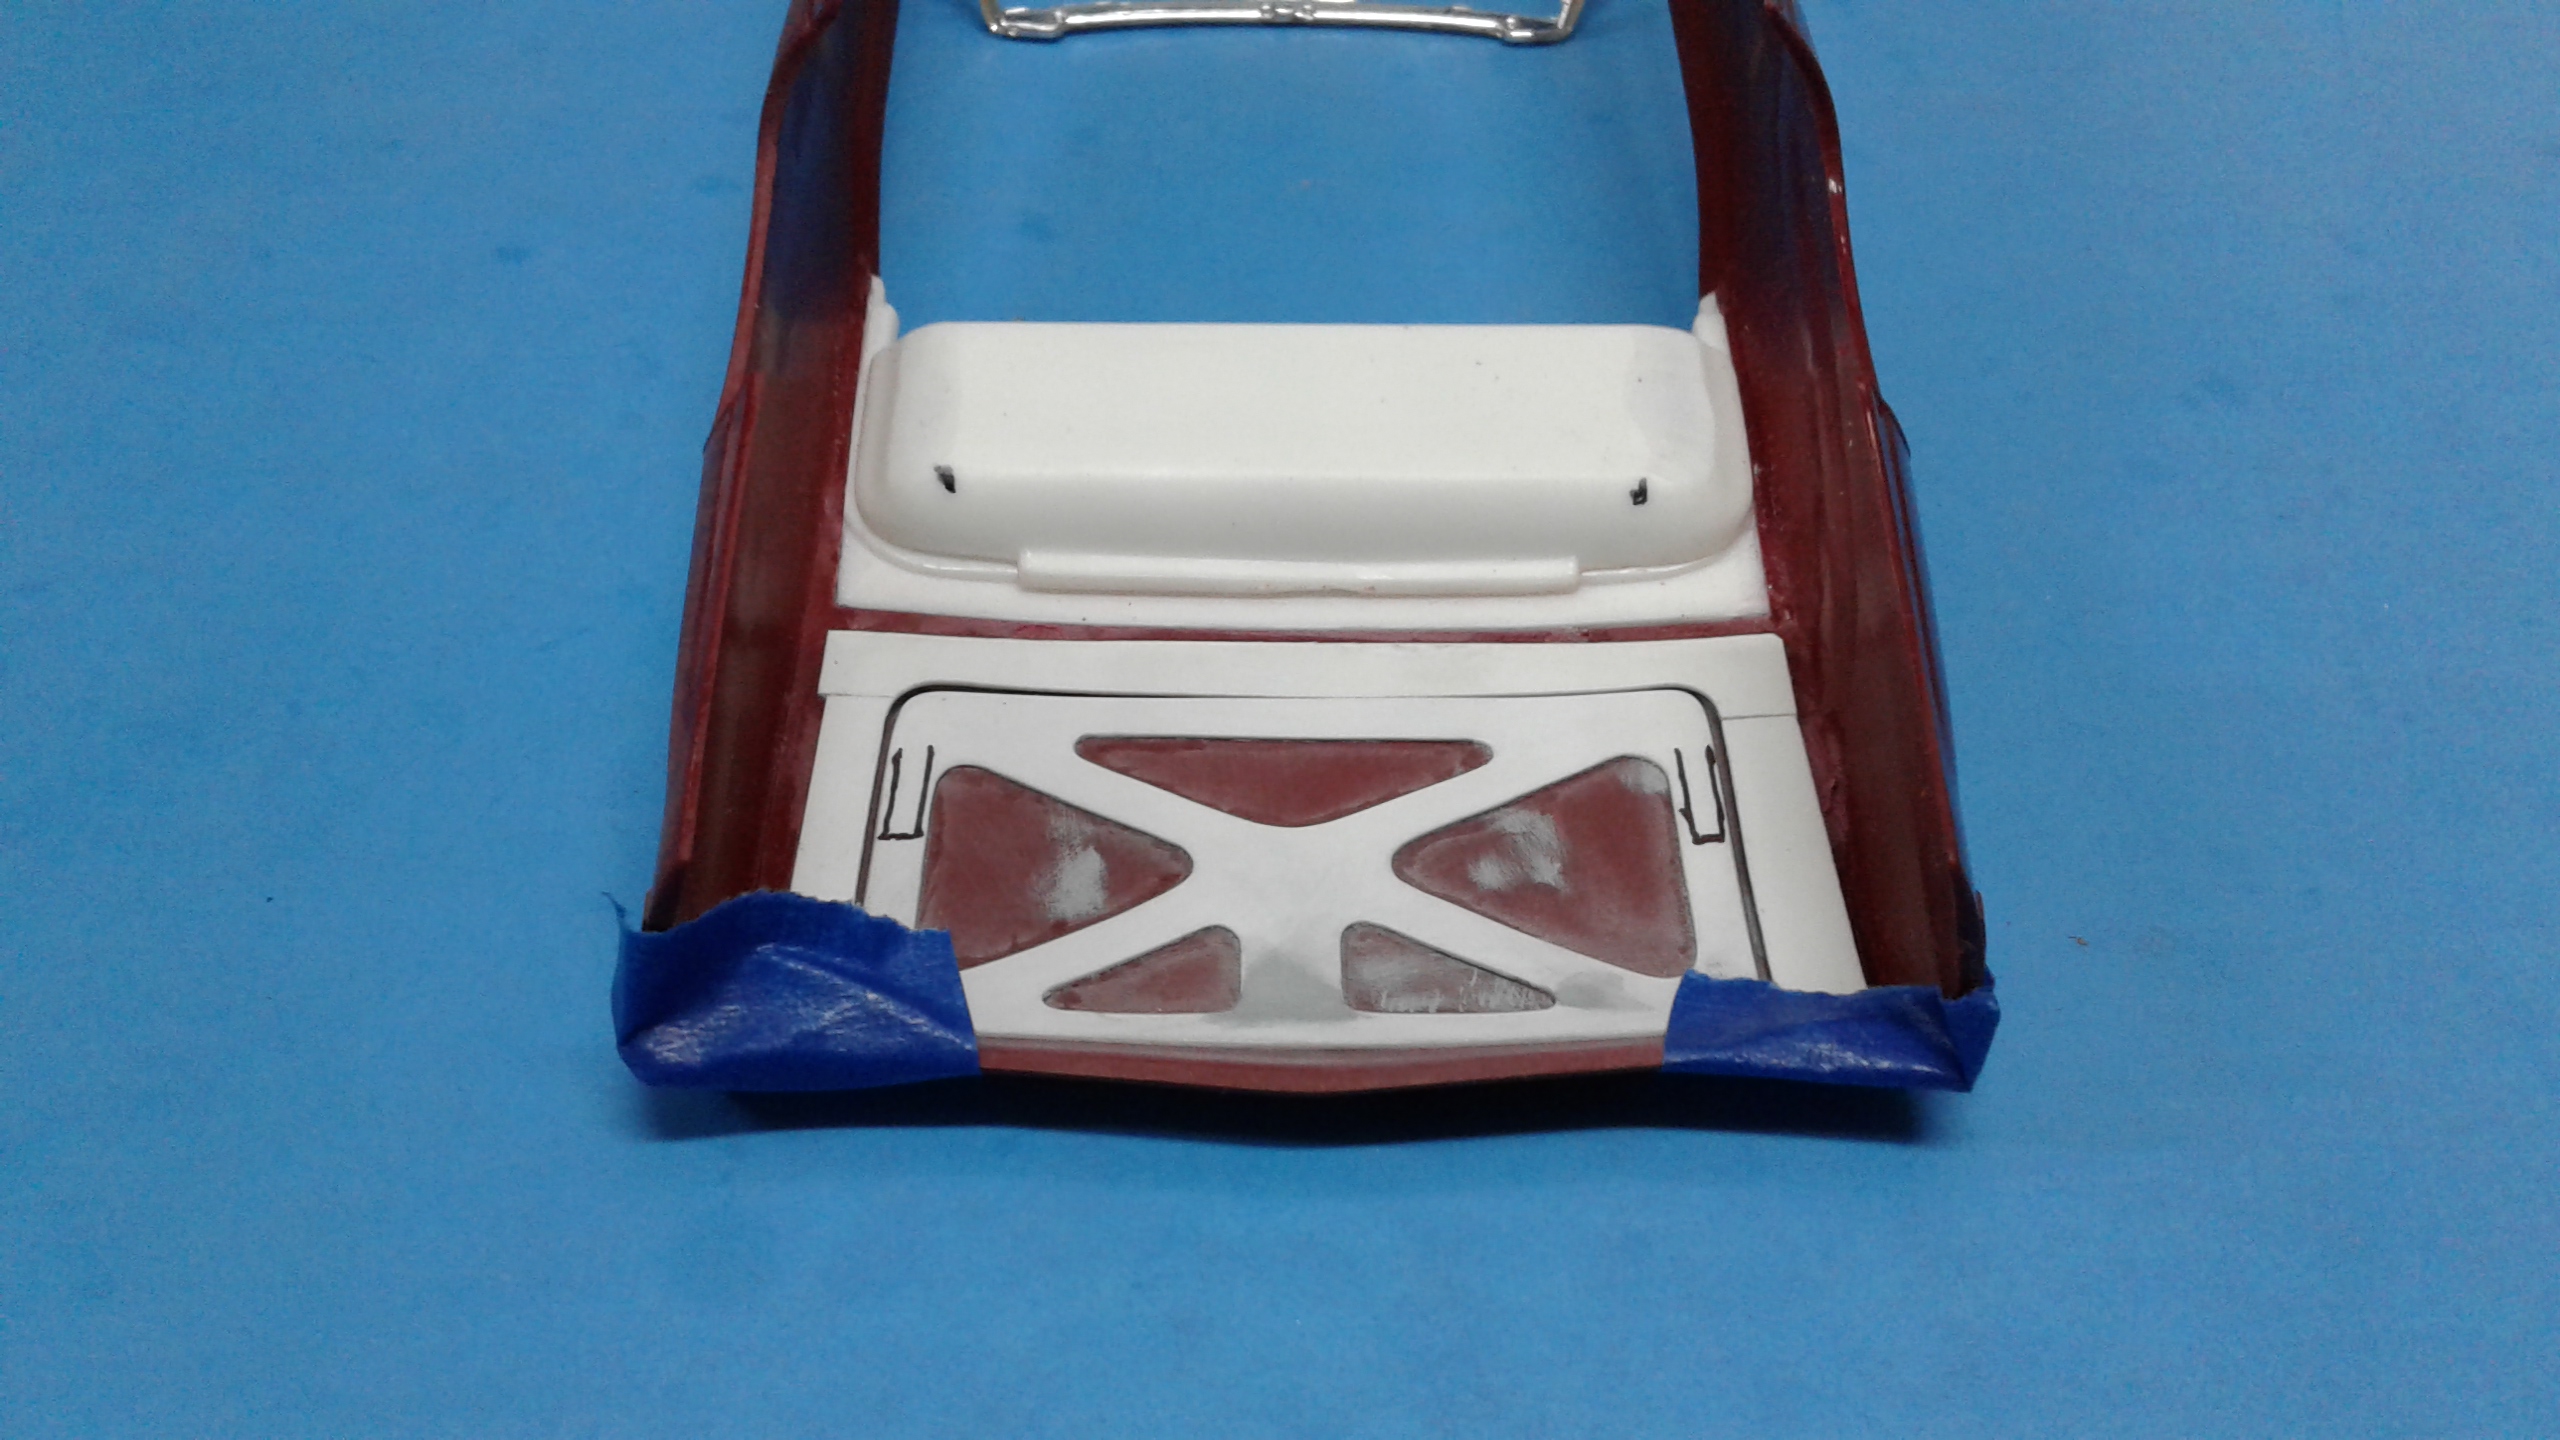
I got the trunk opened, rain gutters and trunk detail installed. I also got the trunk pan filled. It was a good thing I glued the top pocket to the body. There was a fit issue with it and the wheel wells. I had to section the wheel wells a couple of mms to get the floorpan fitting like it needed to. Next will be trunk hinges and getting the interior cut apart/fitted once again.


.jpeg.2f75f93b185ffb1057698924b171054d.jpeg)