Steve H
-
Posts
2,535 -
Joined
-
Last visited
Content Type
Profiles
Forums
Events
Gallery
Everything posted by Steve H
-

Cyber punk ‘88 Dodge Daytona/Mercedes C9 kit bash
Steve H replied to Steve H's topic in WIP: Model Cars
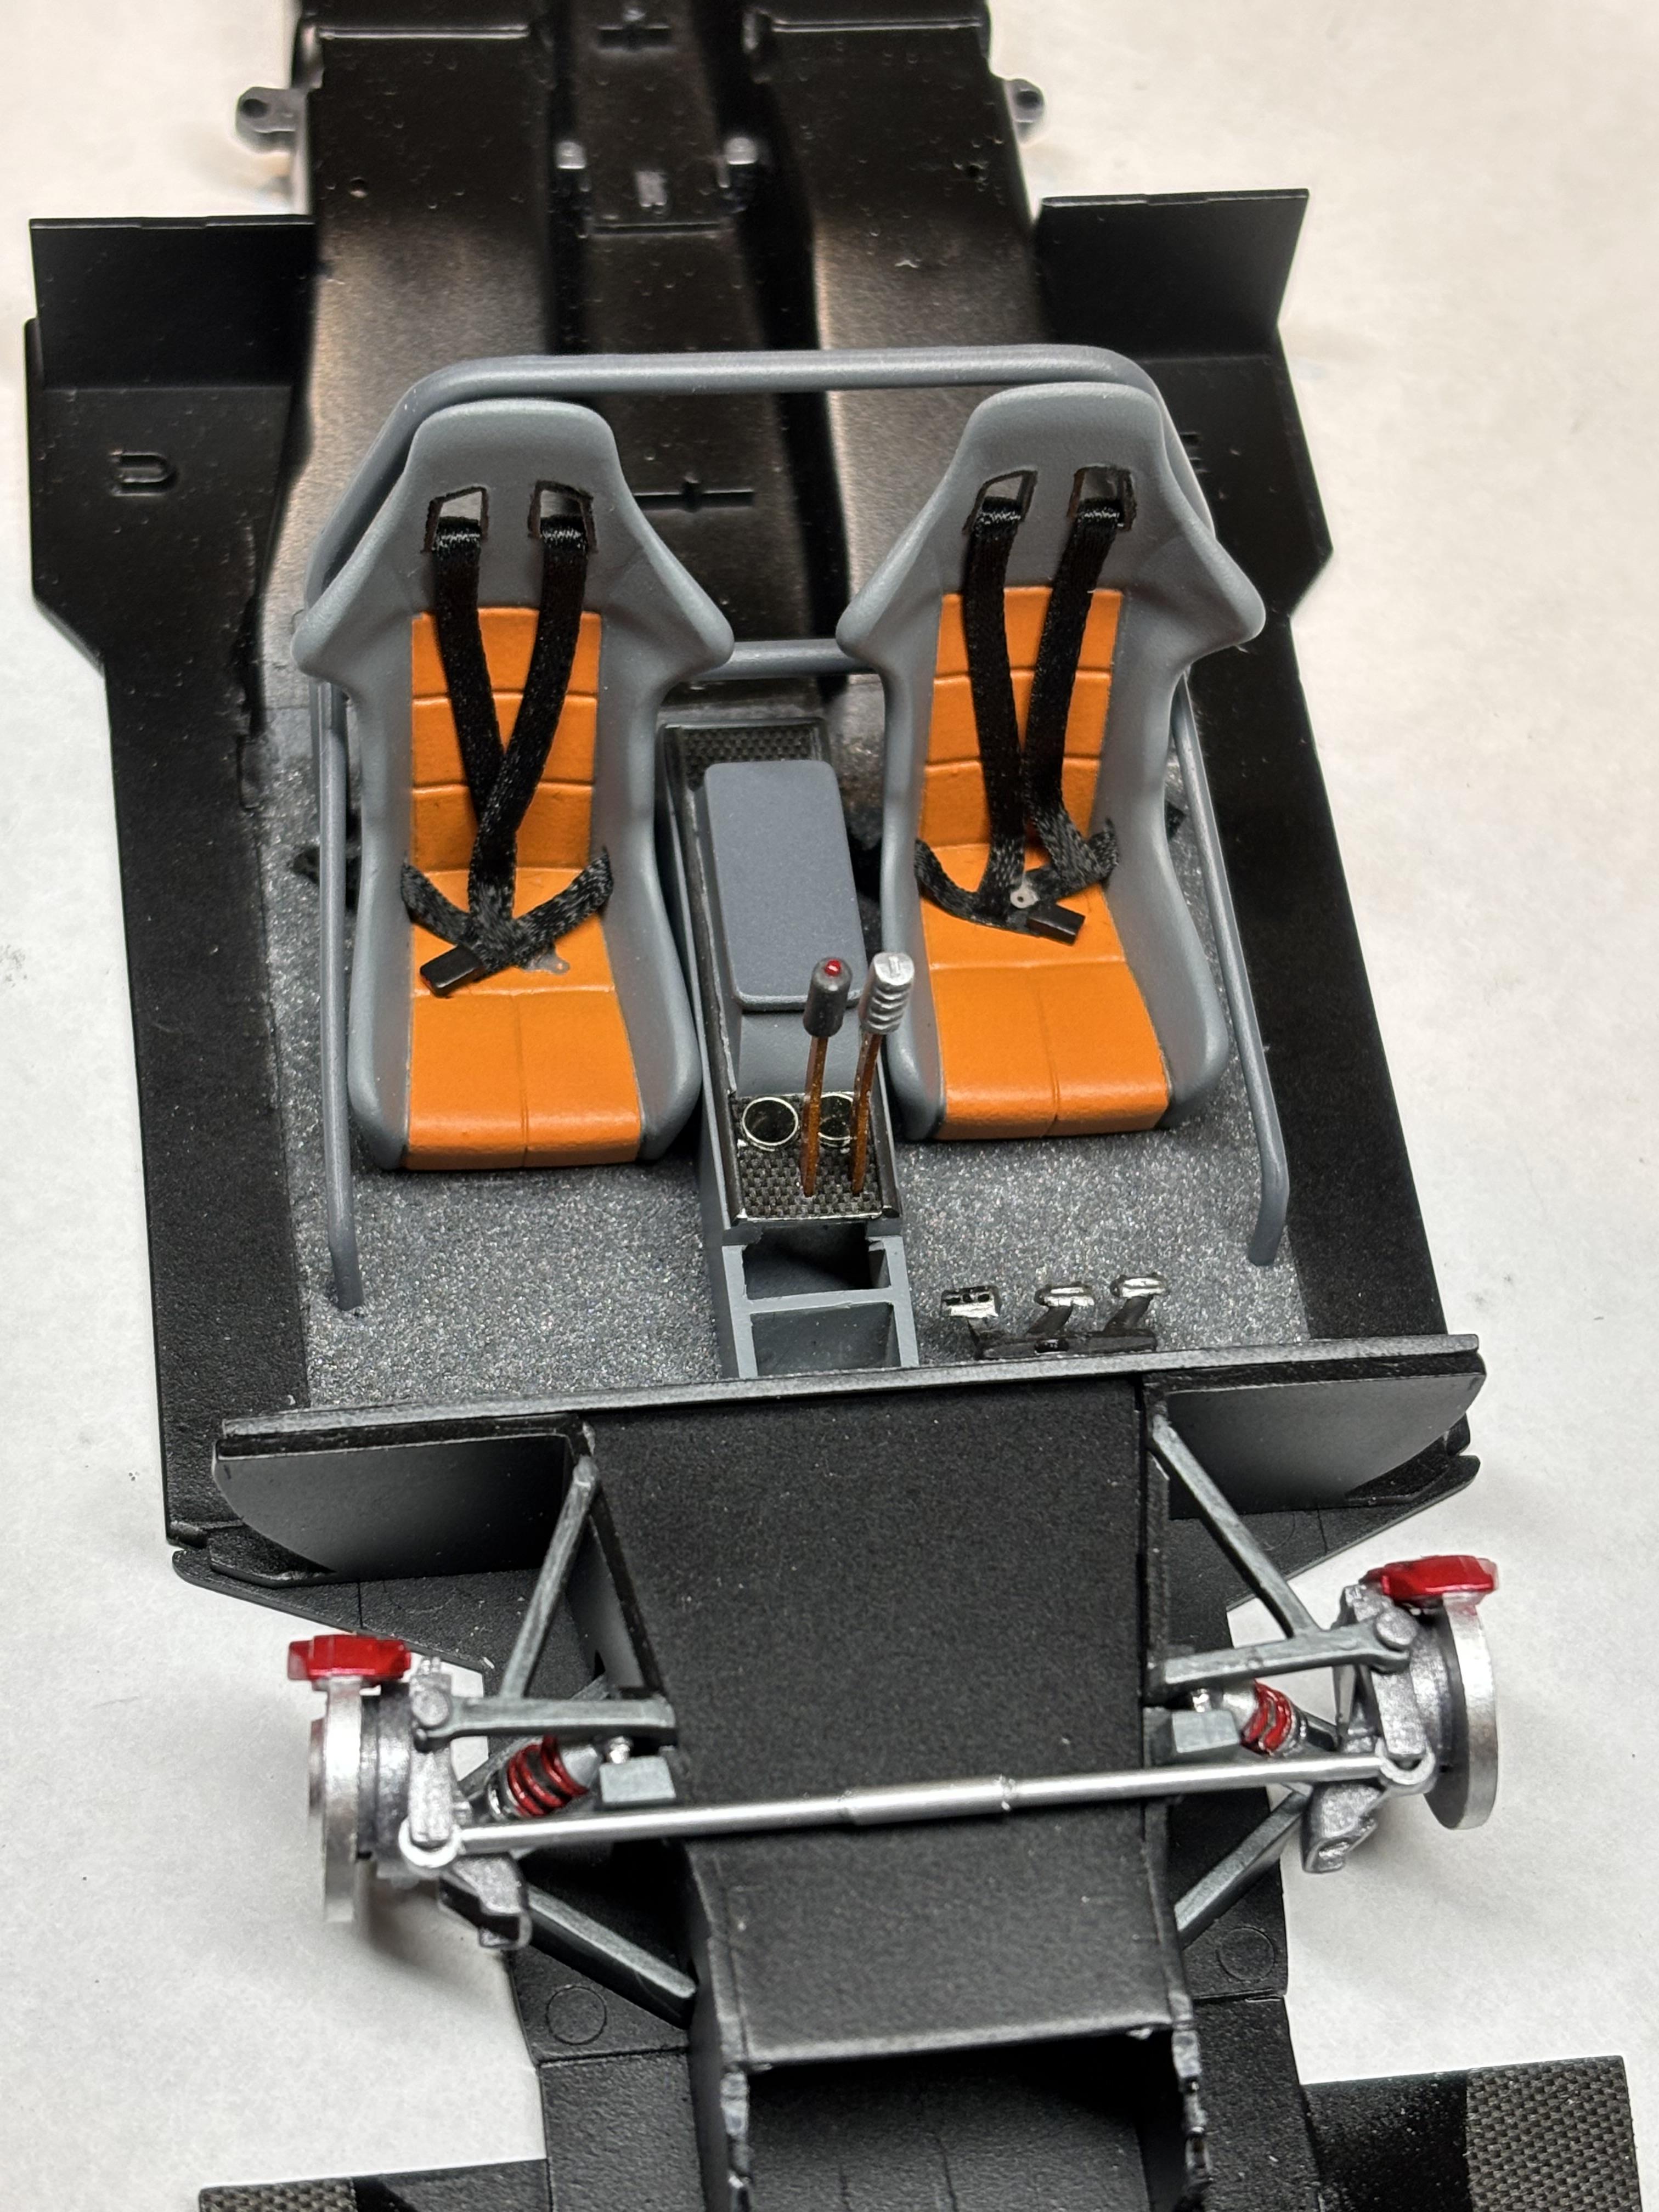
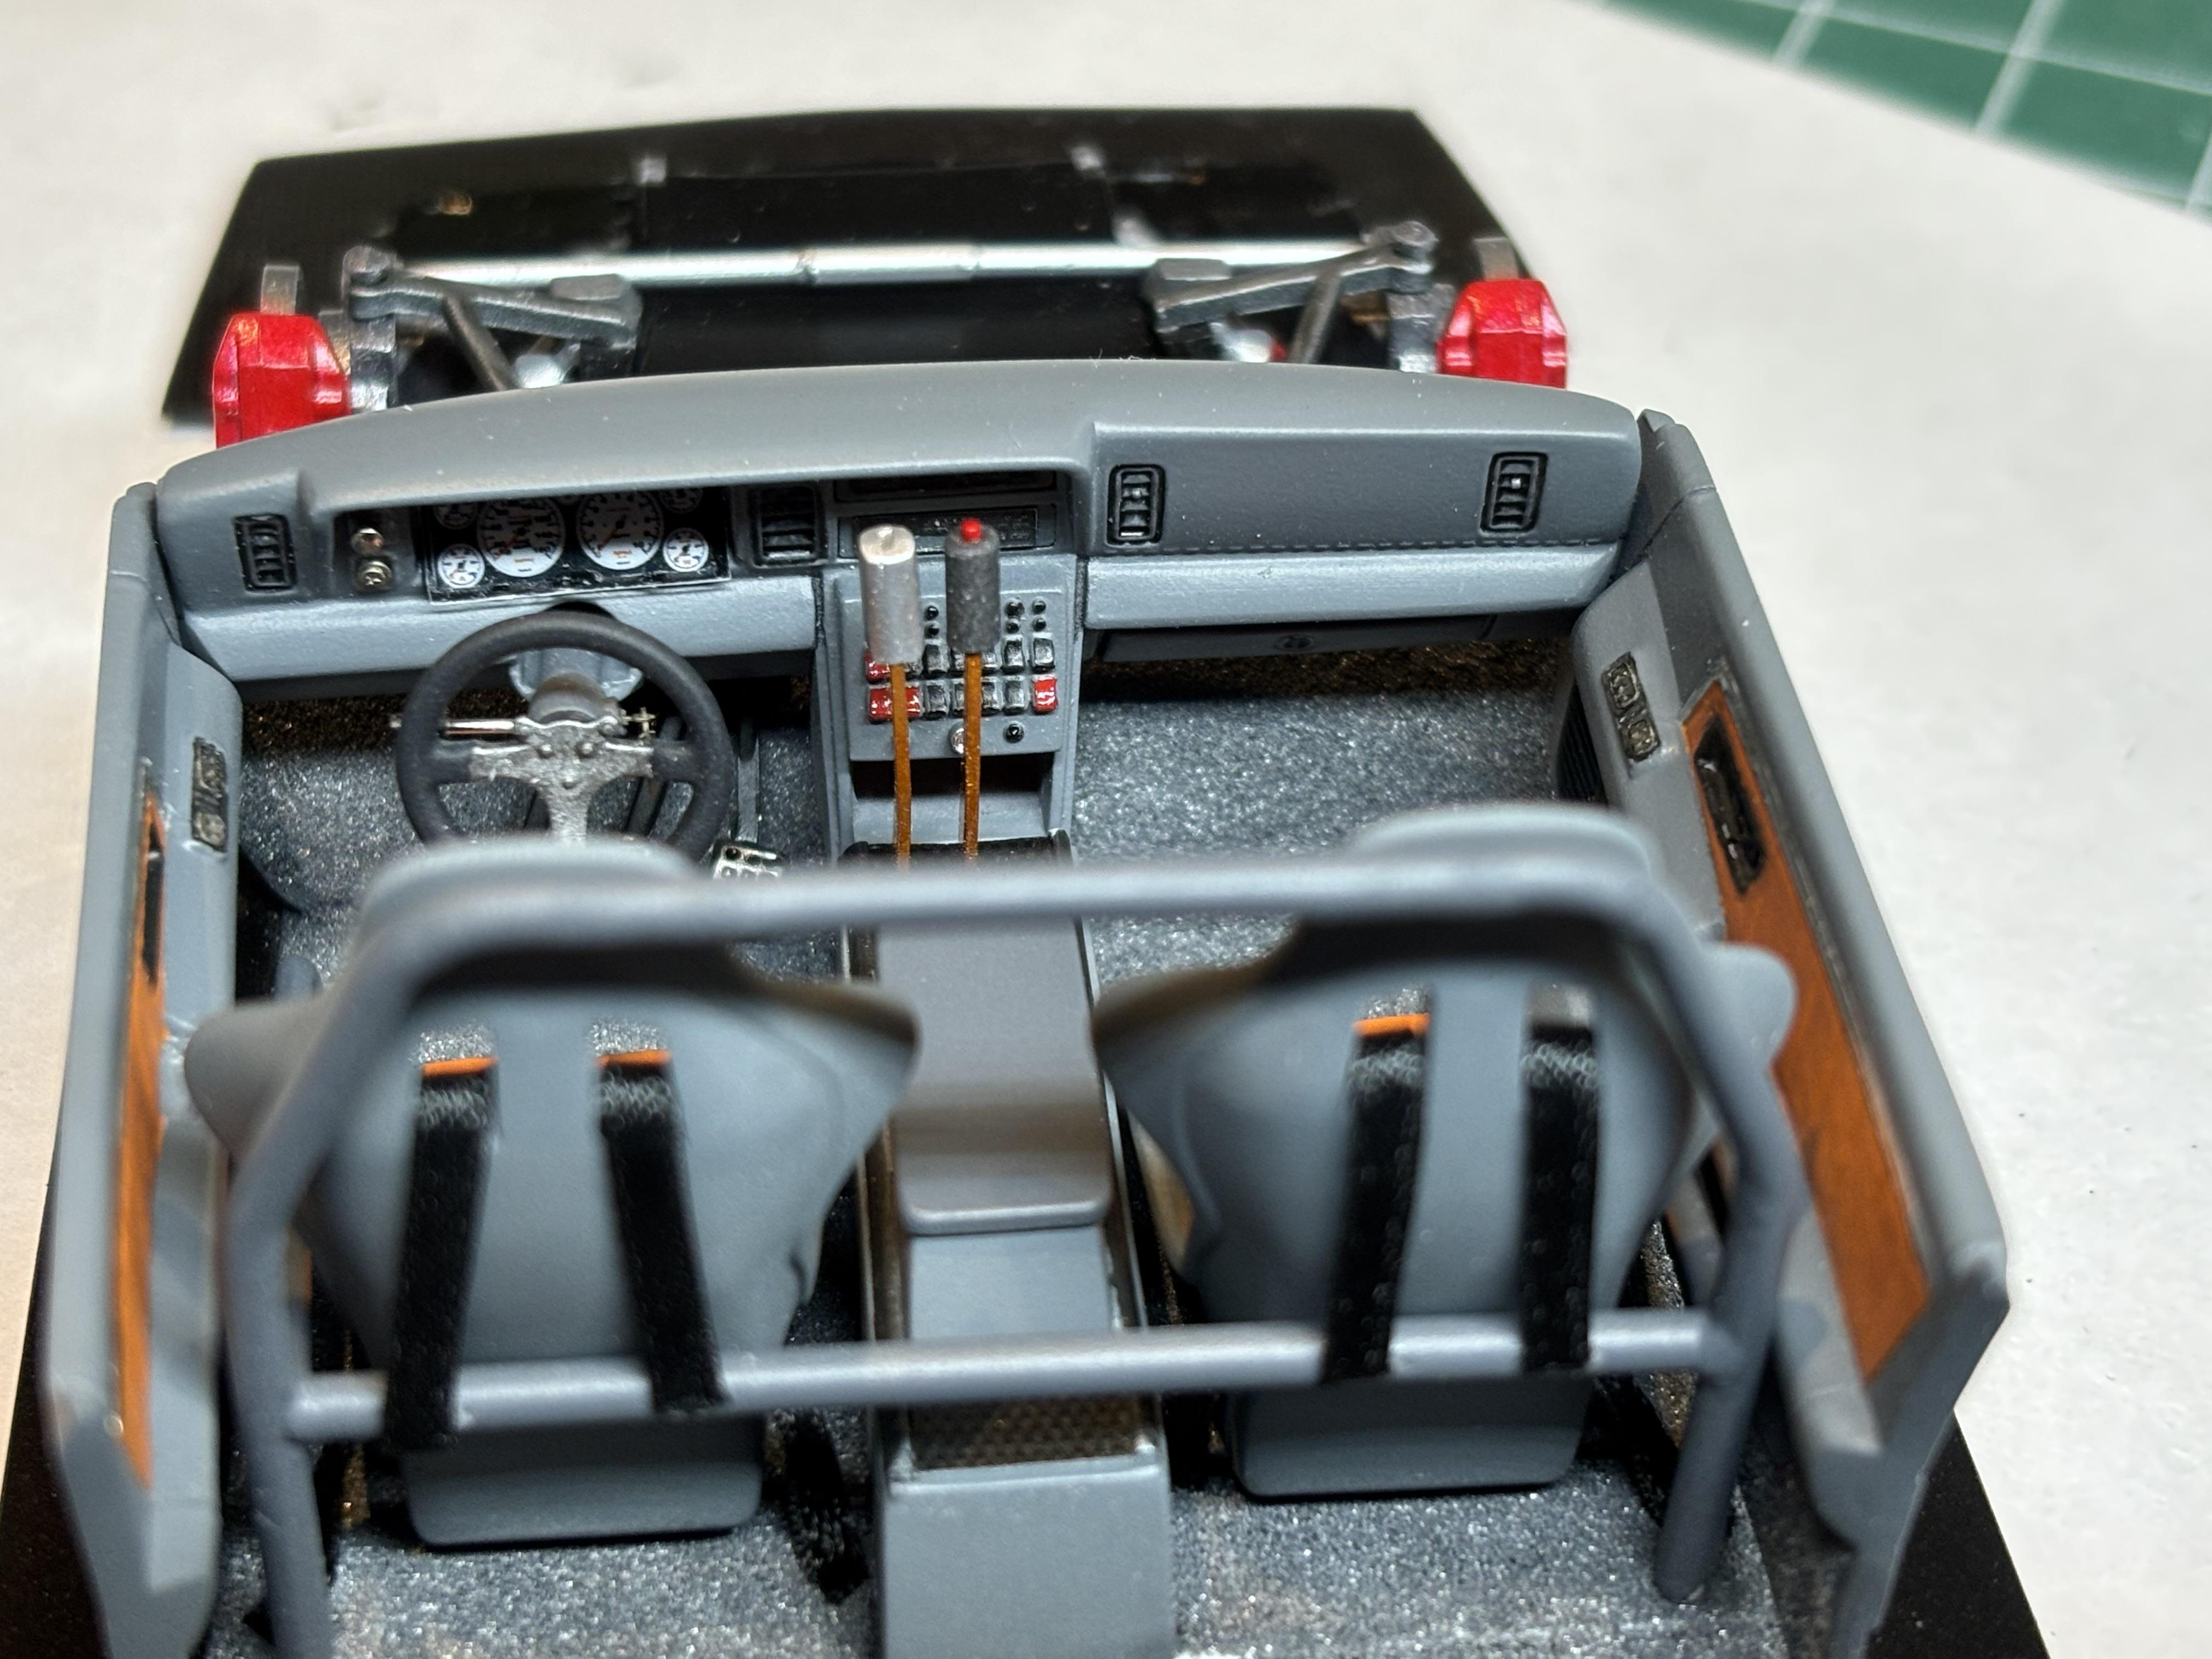
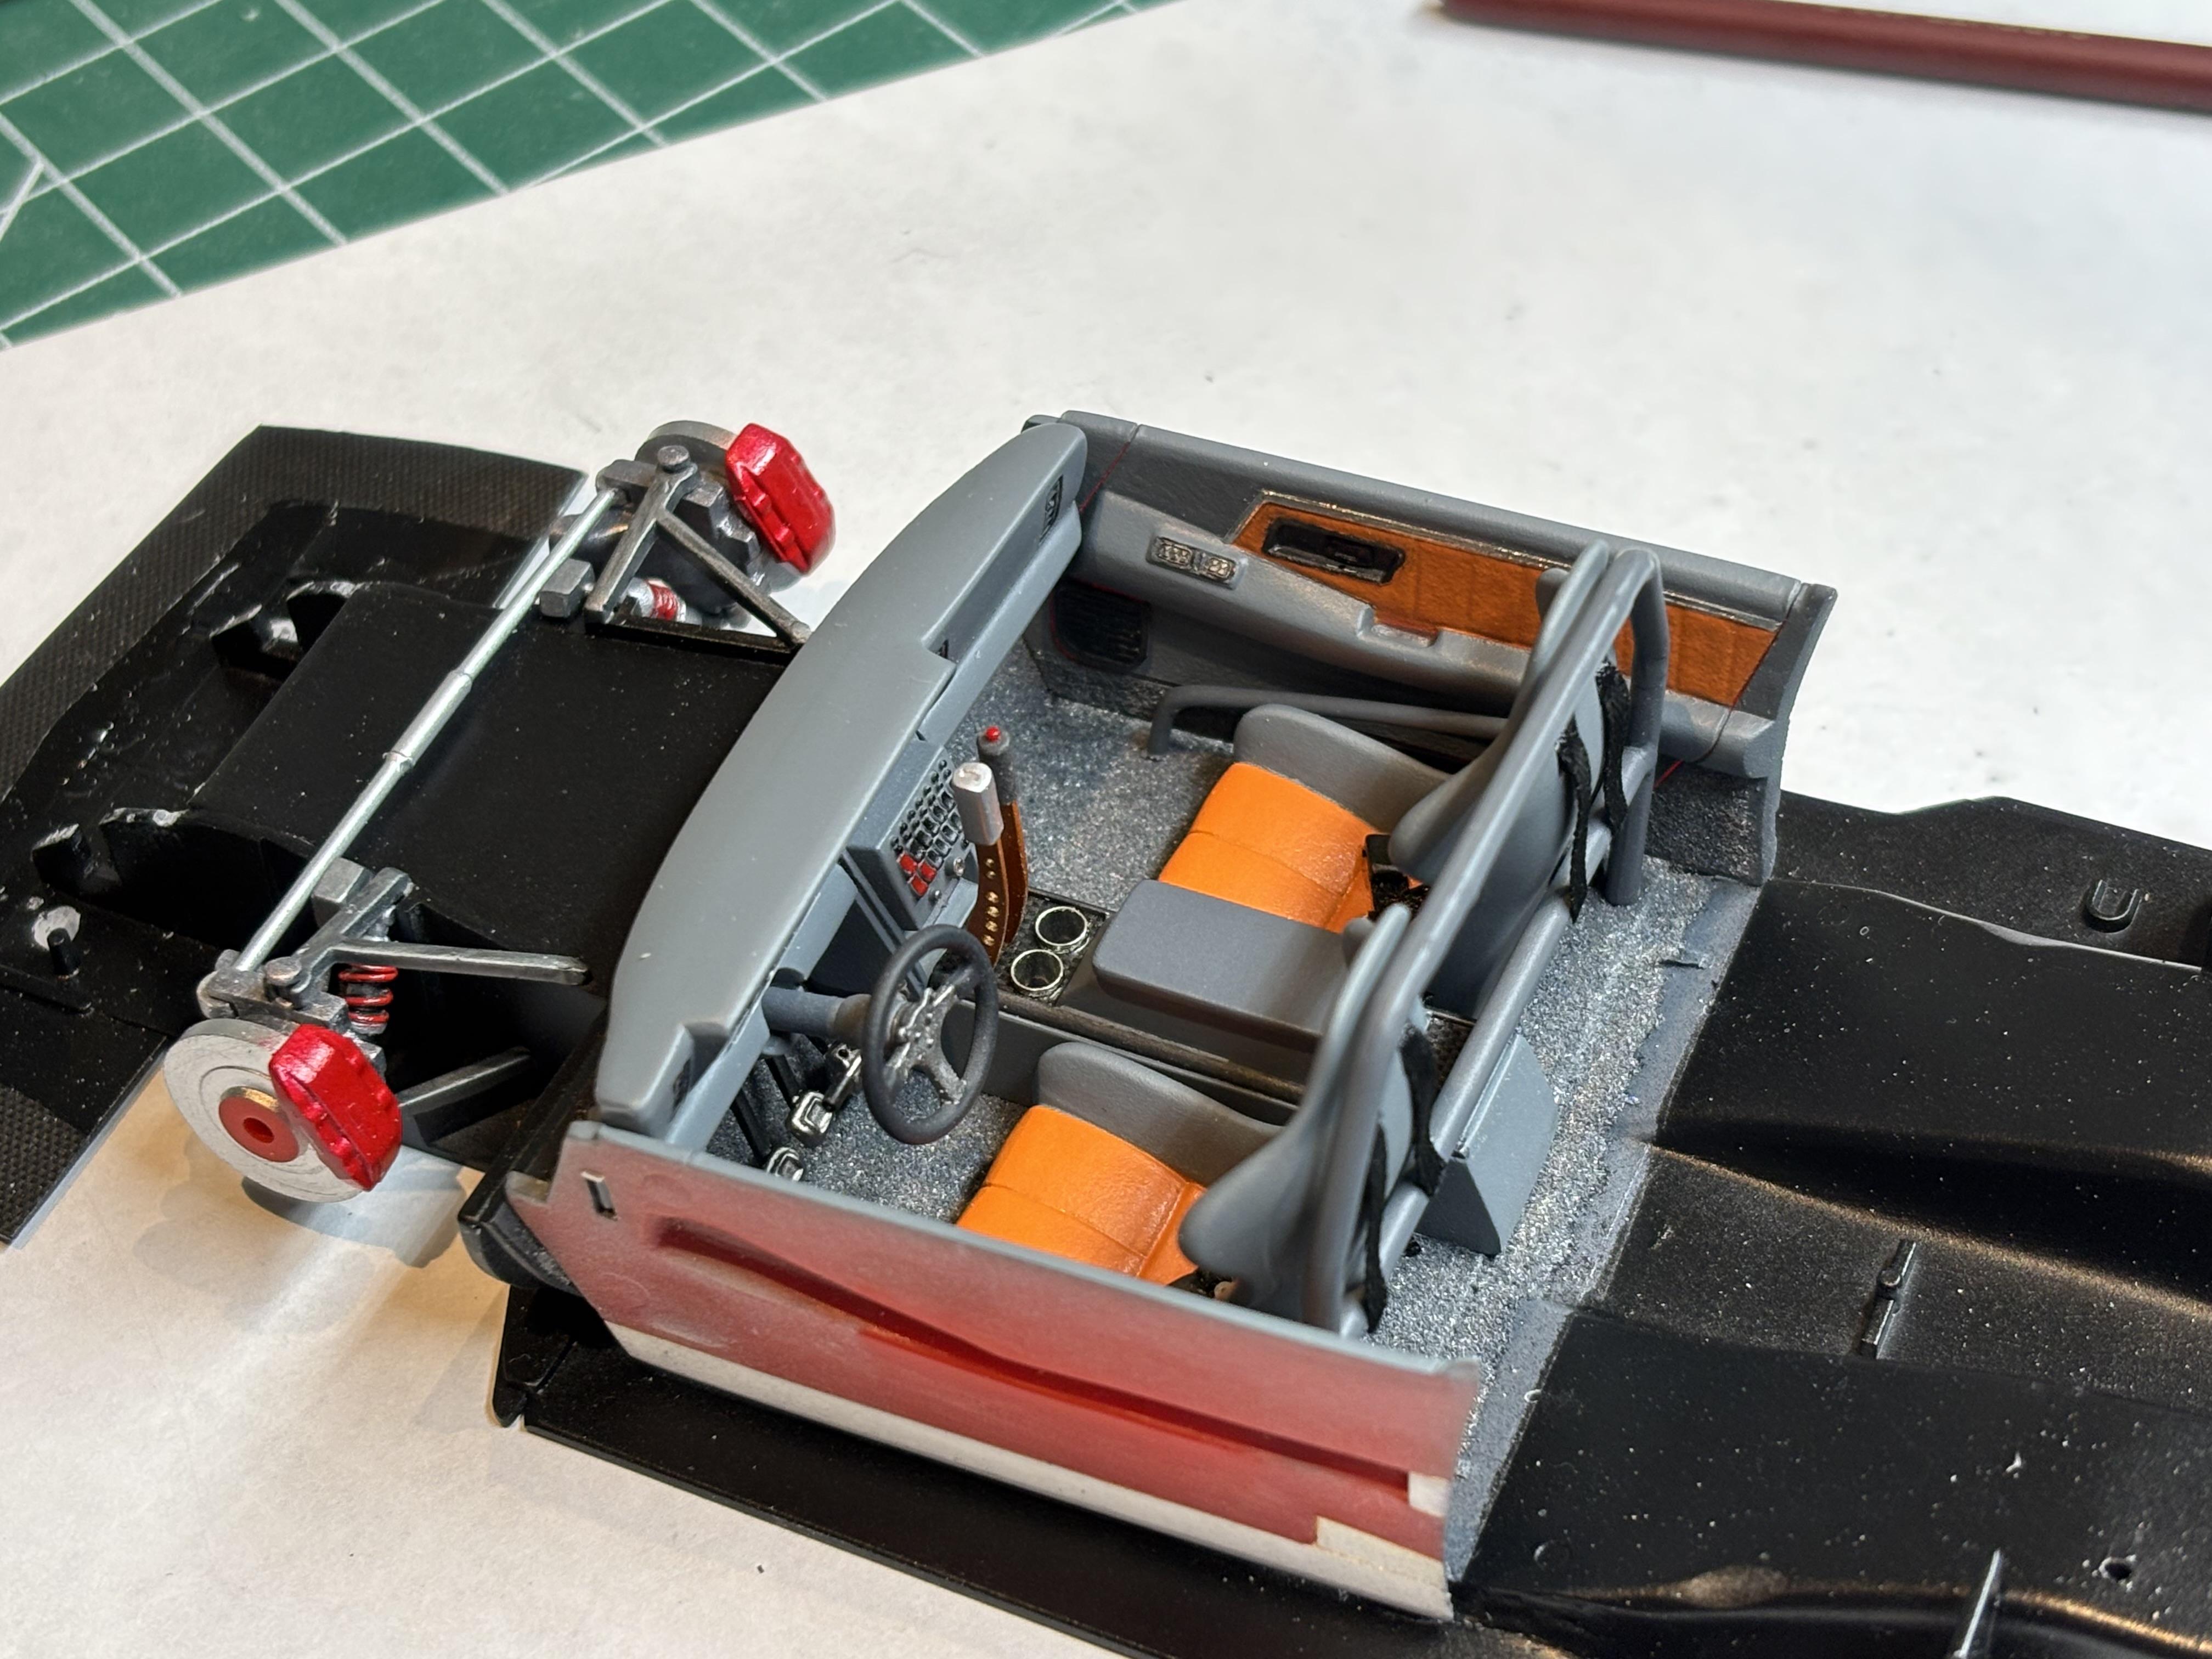
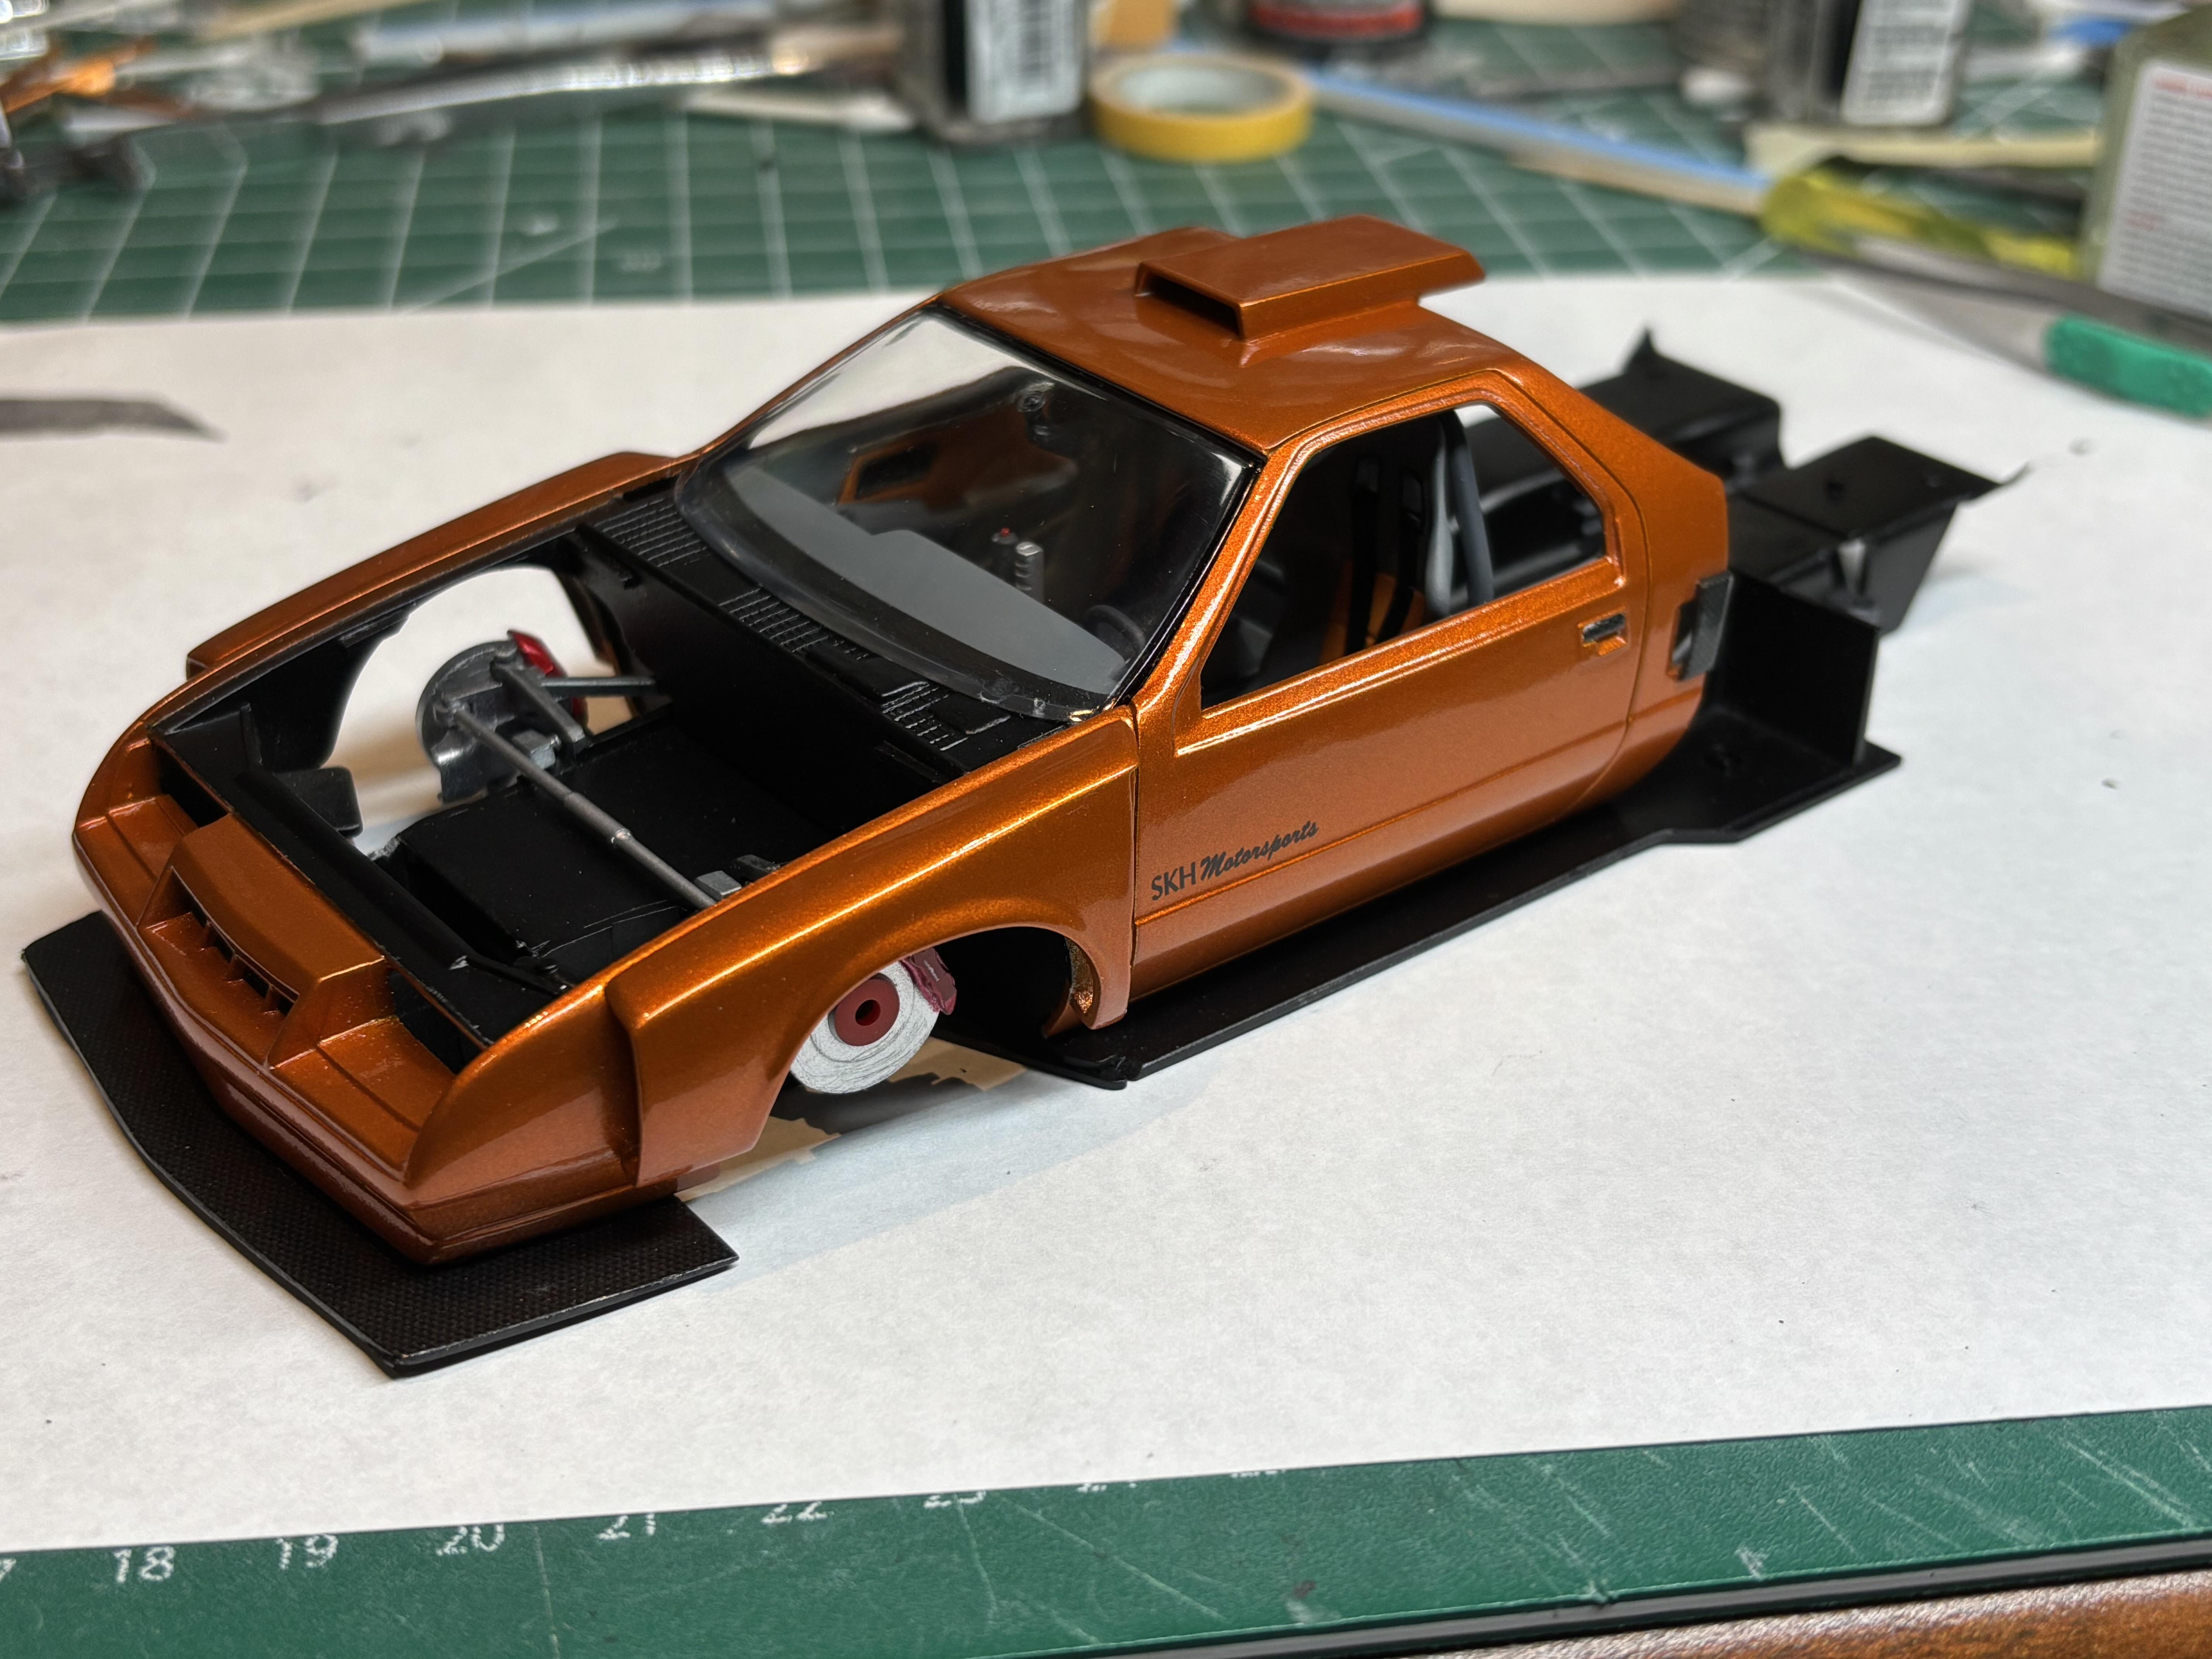
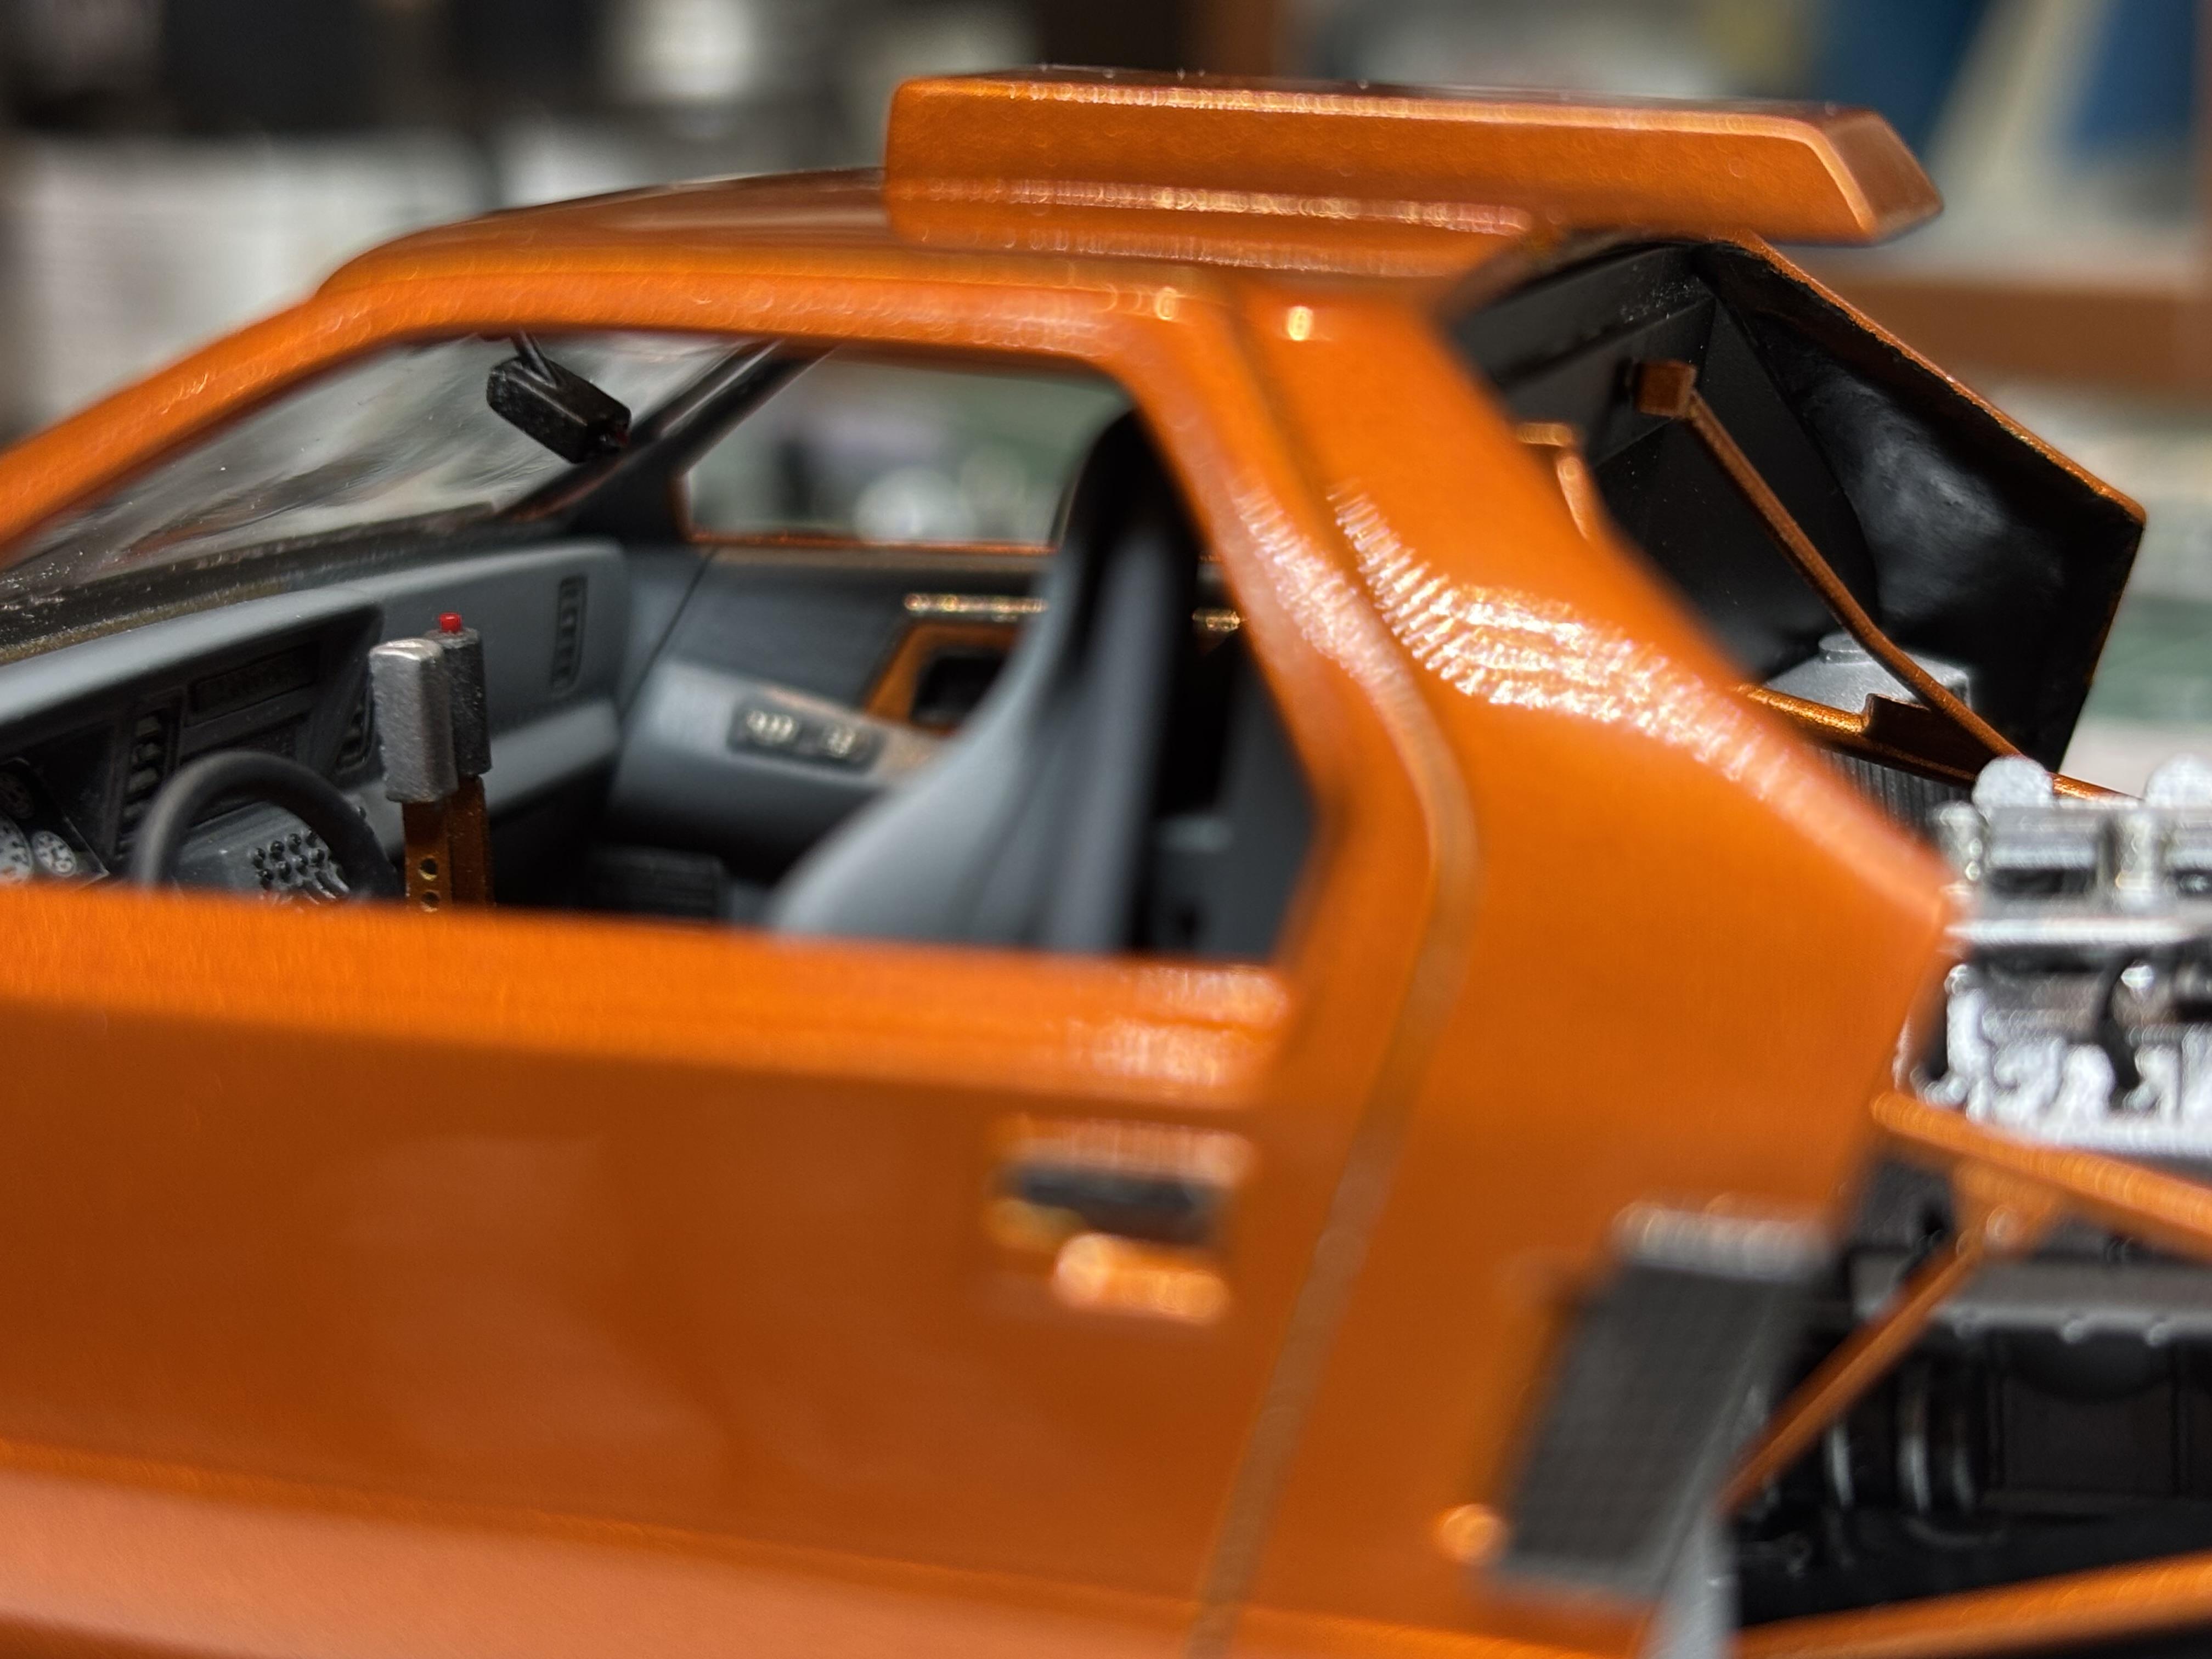
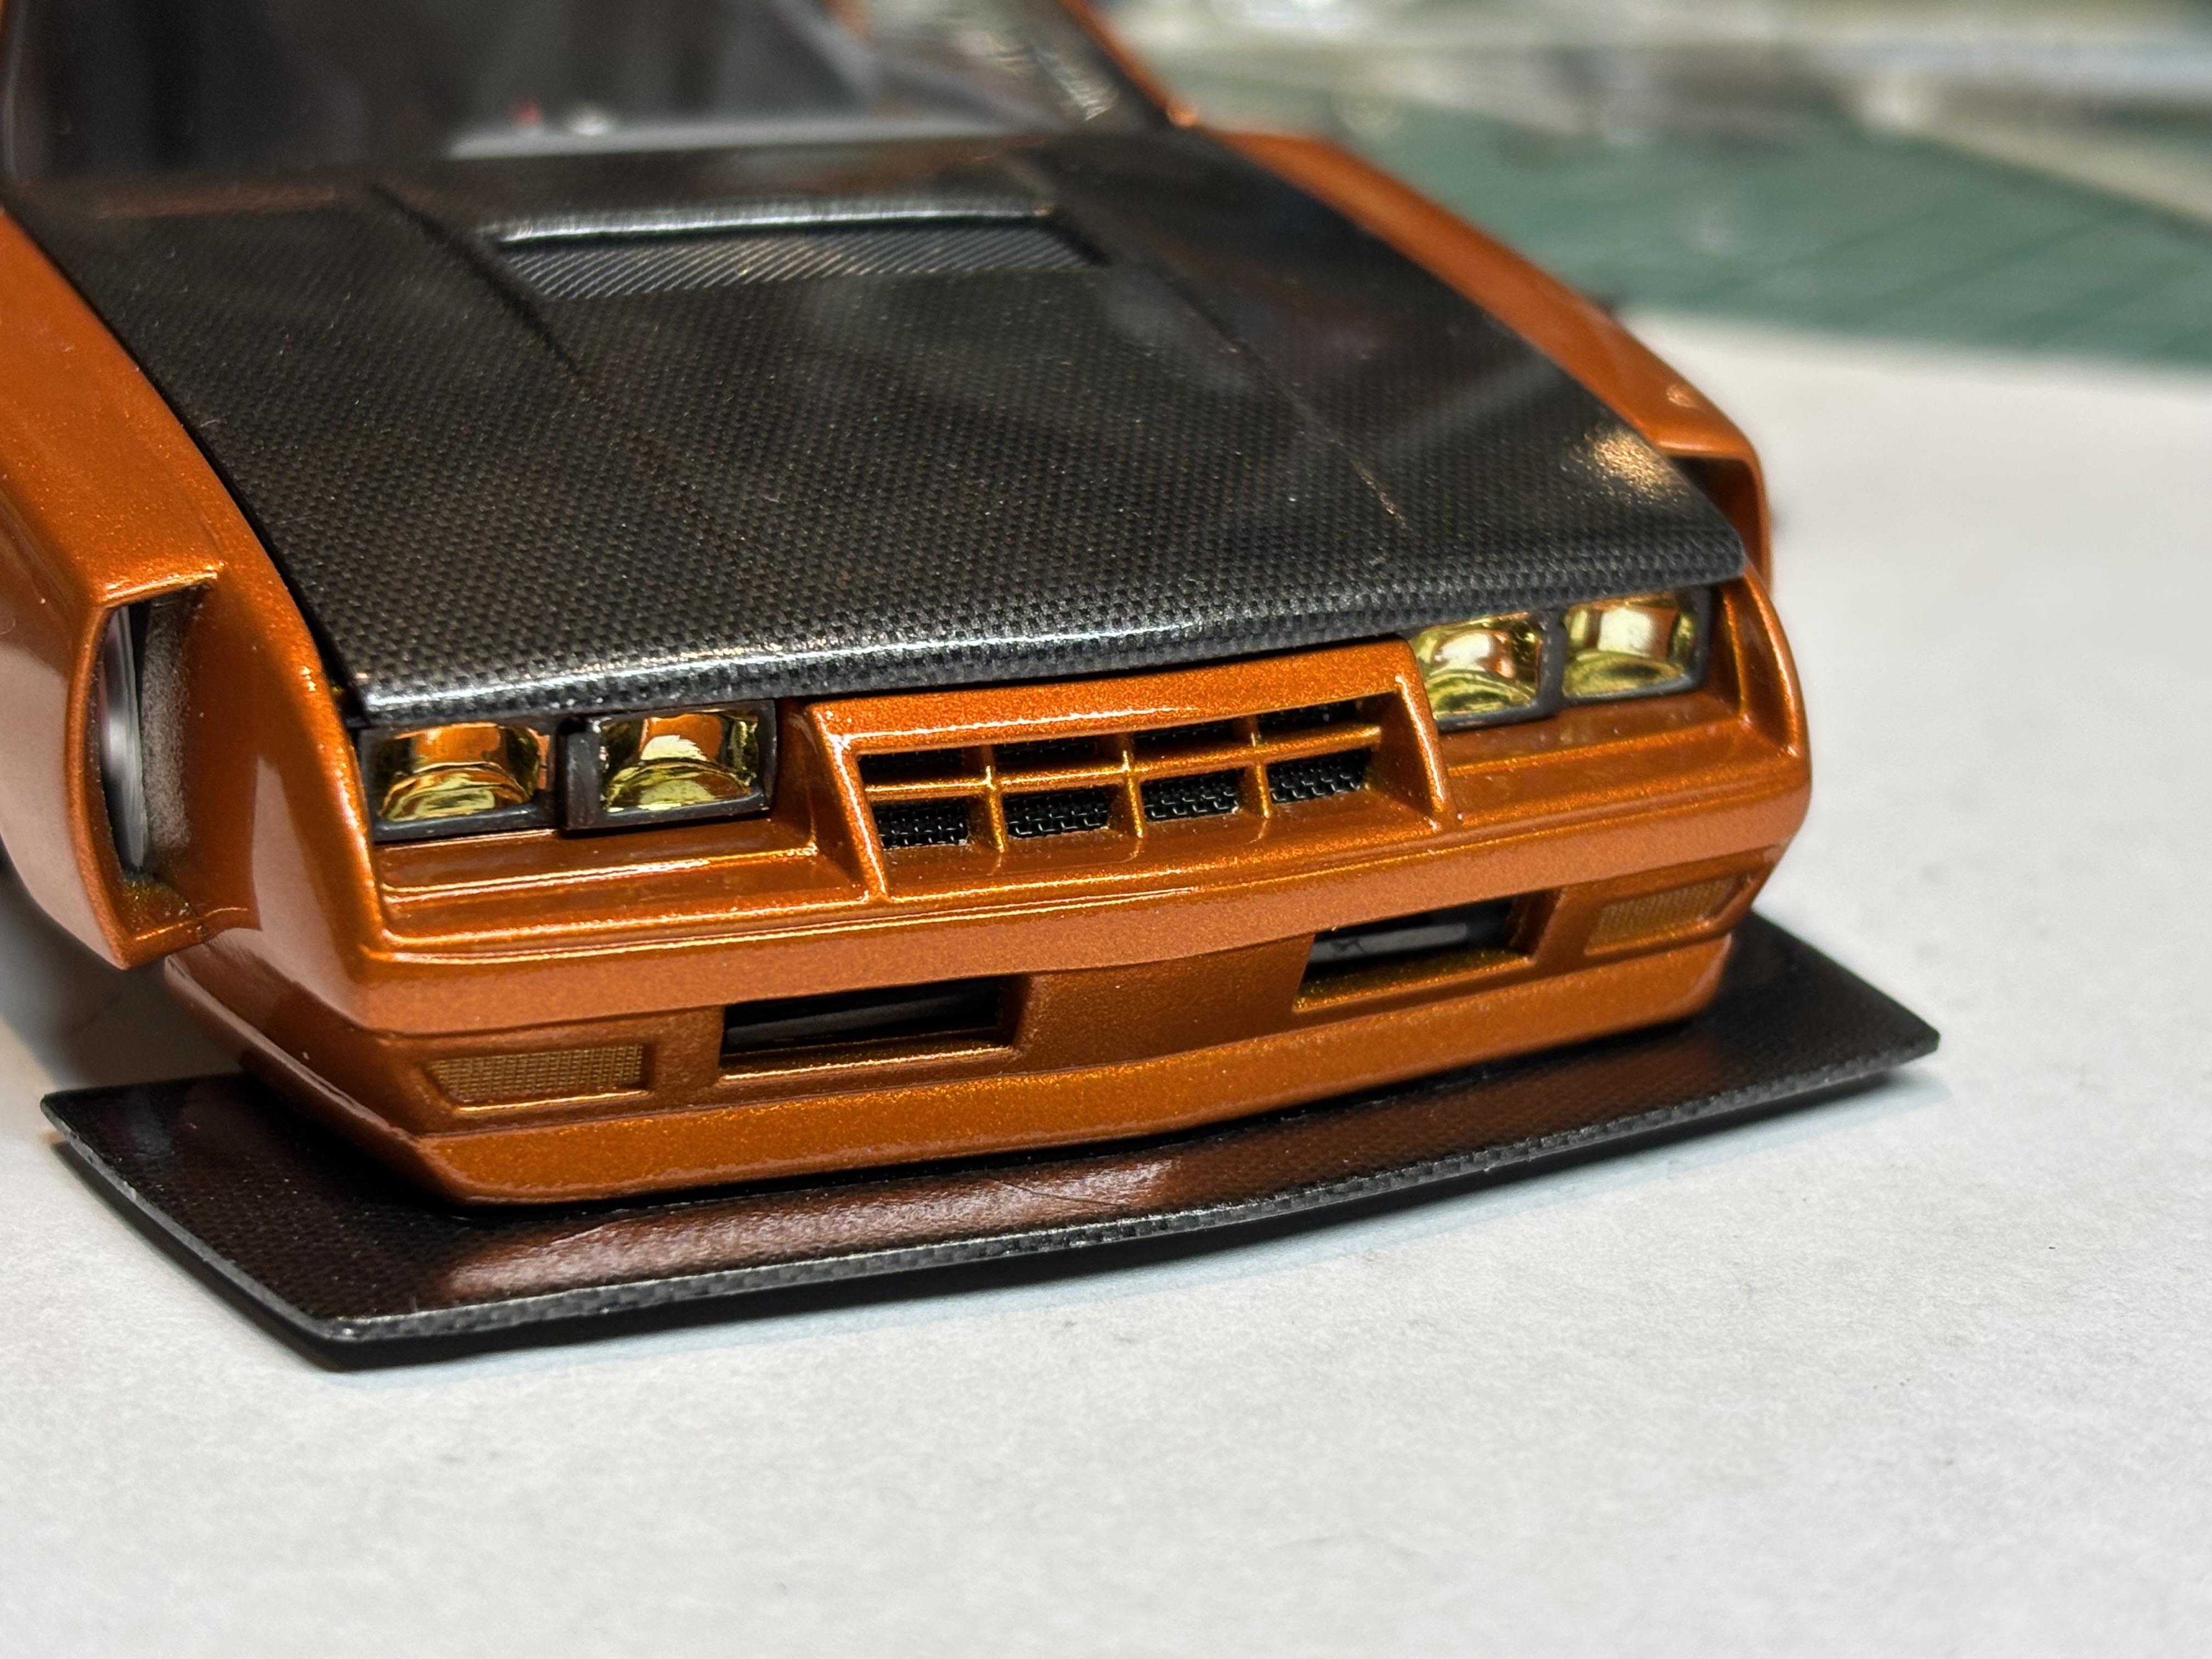
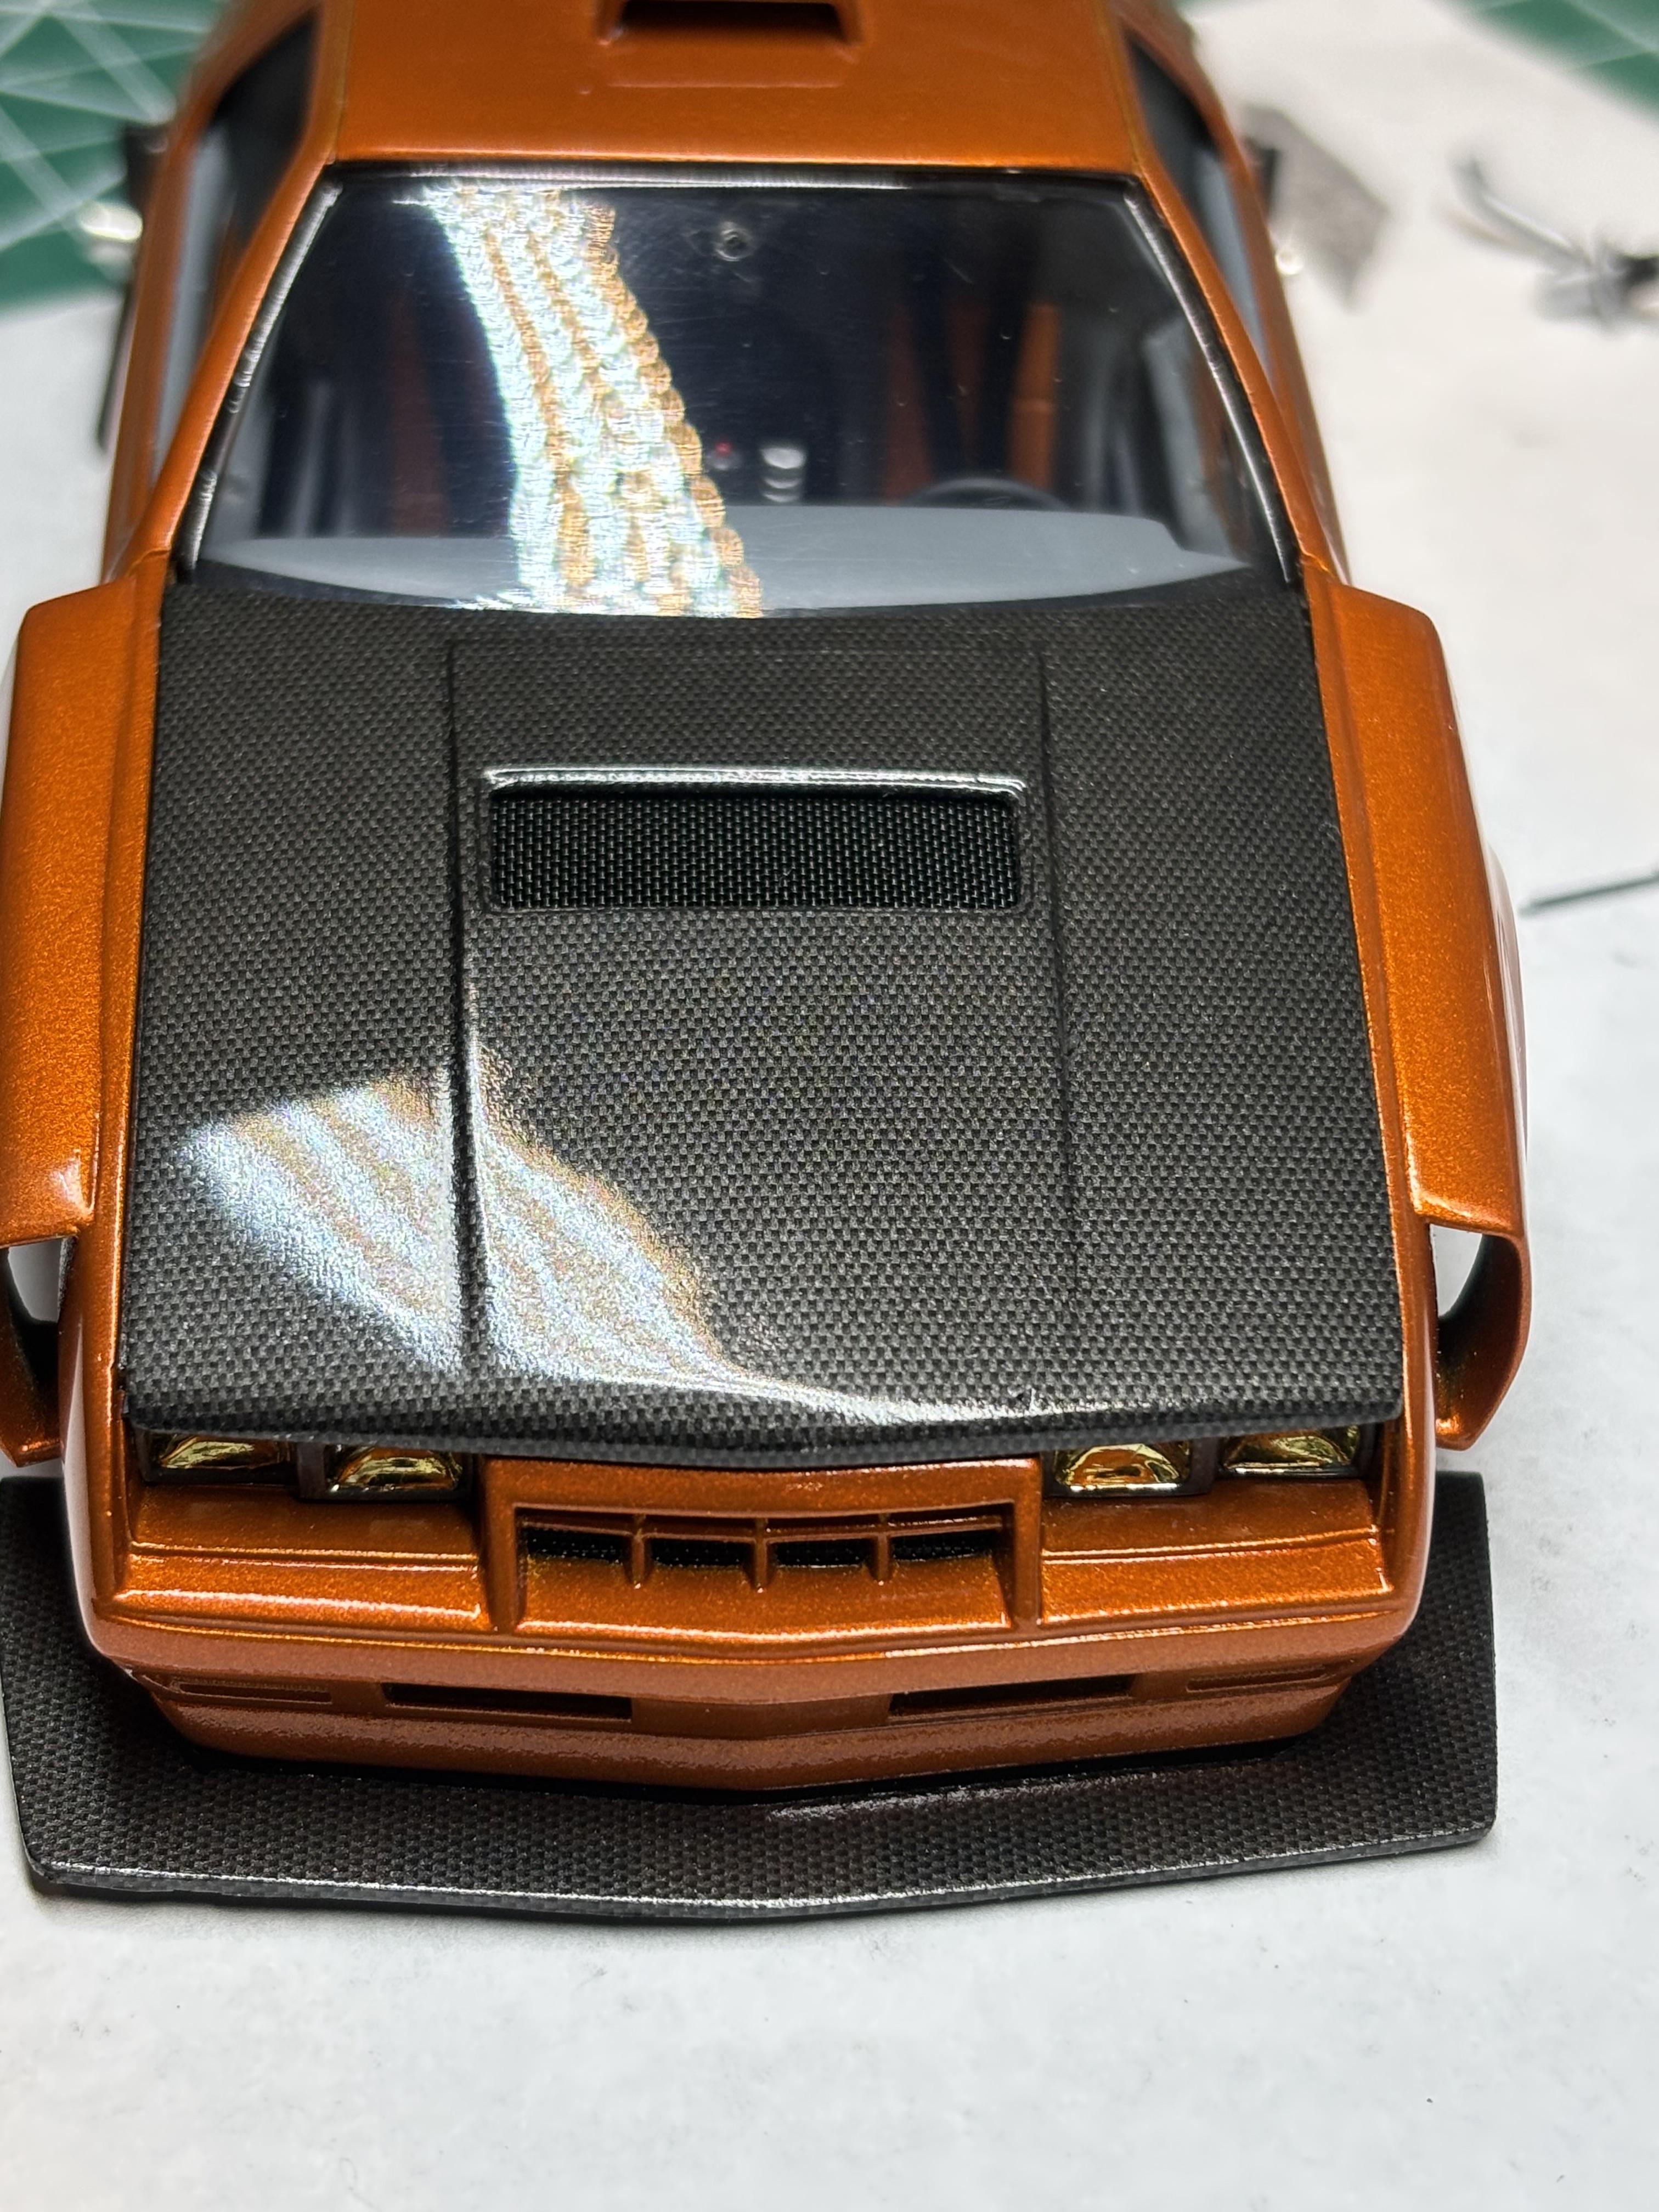
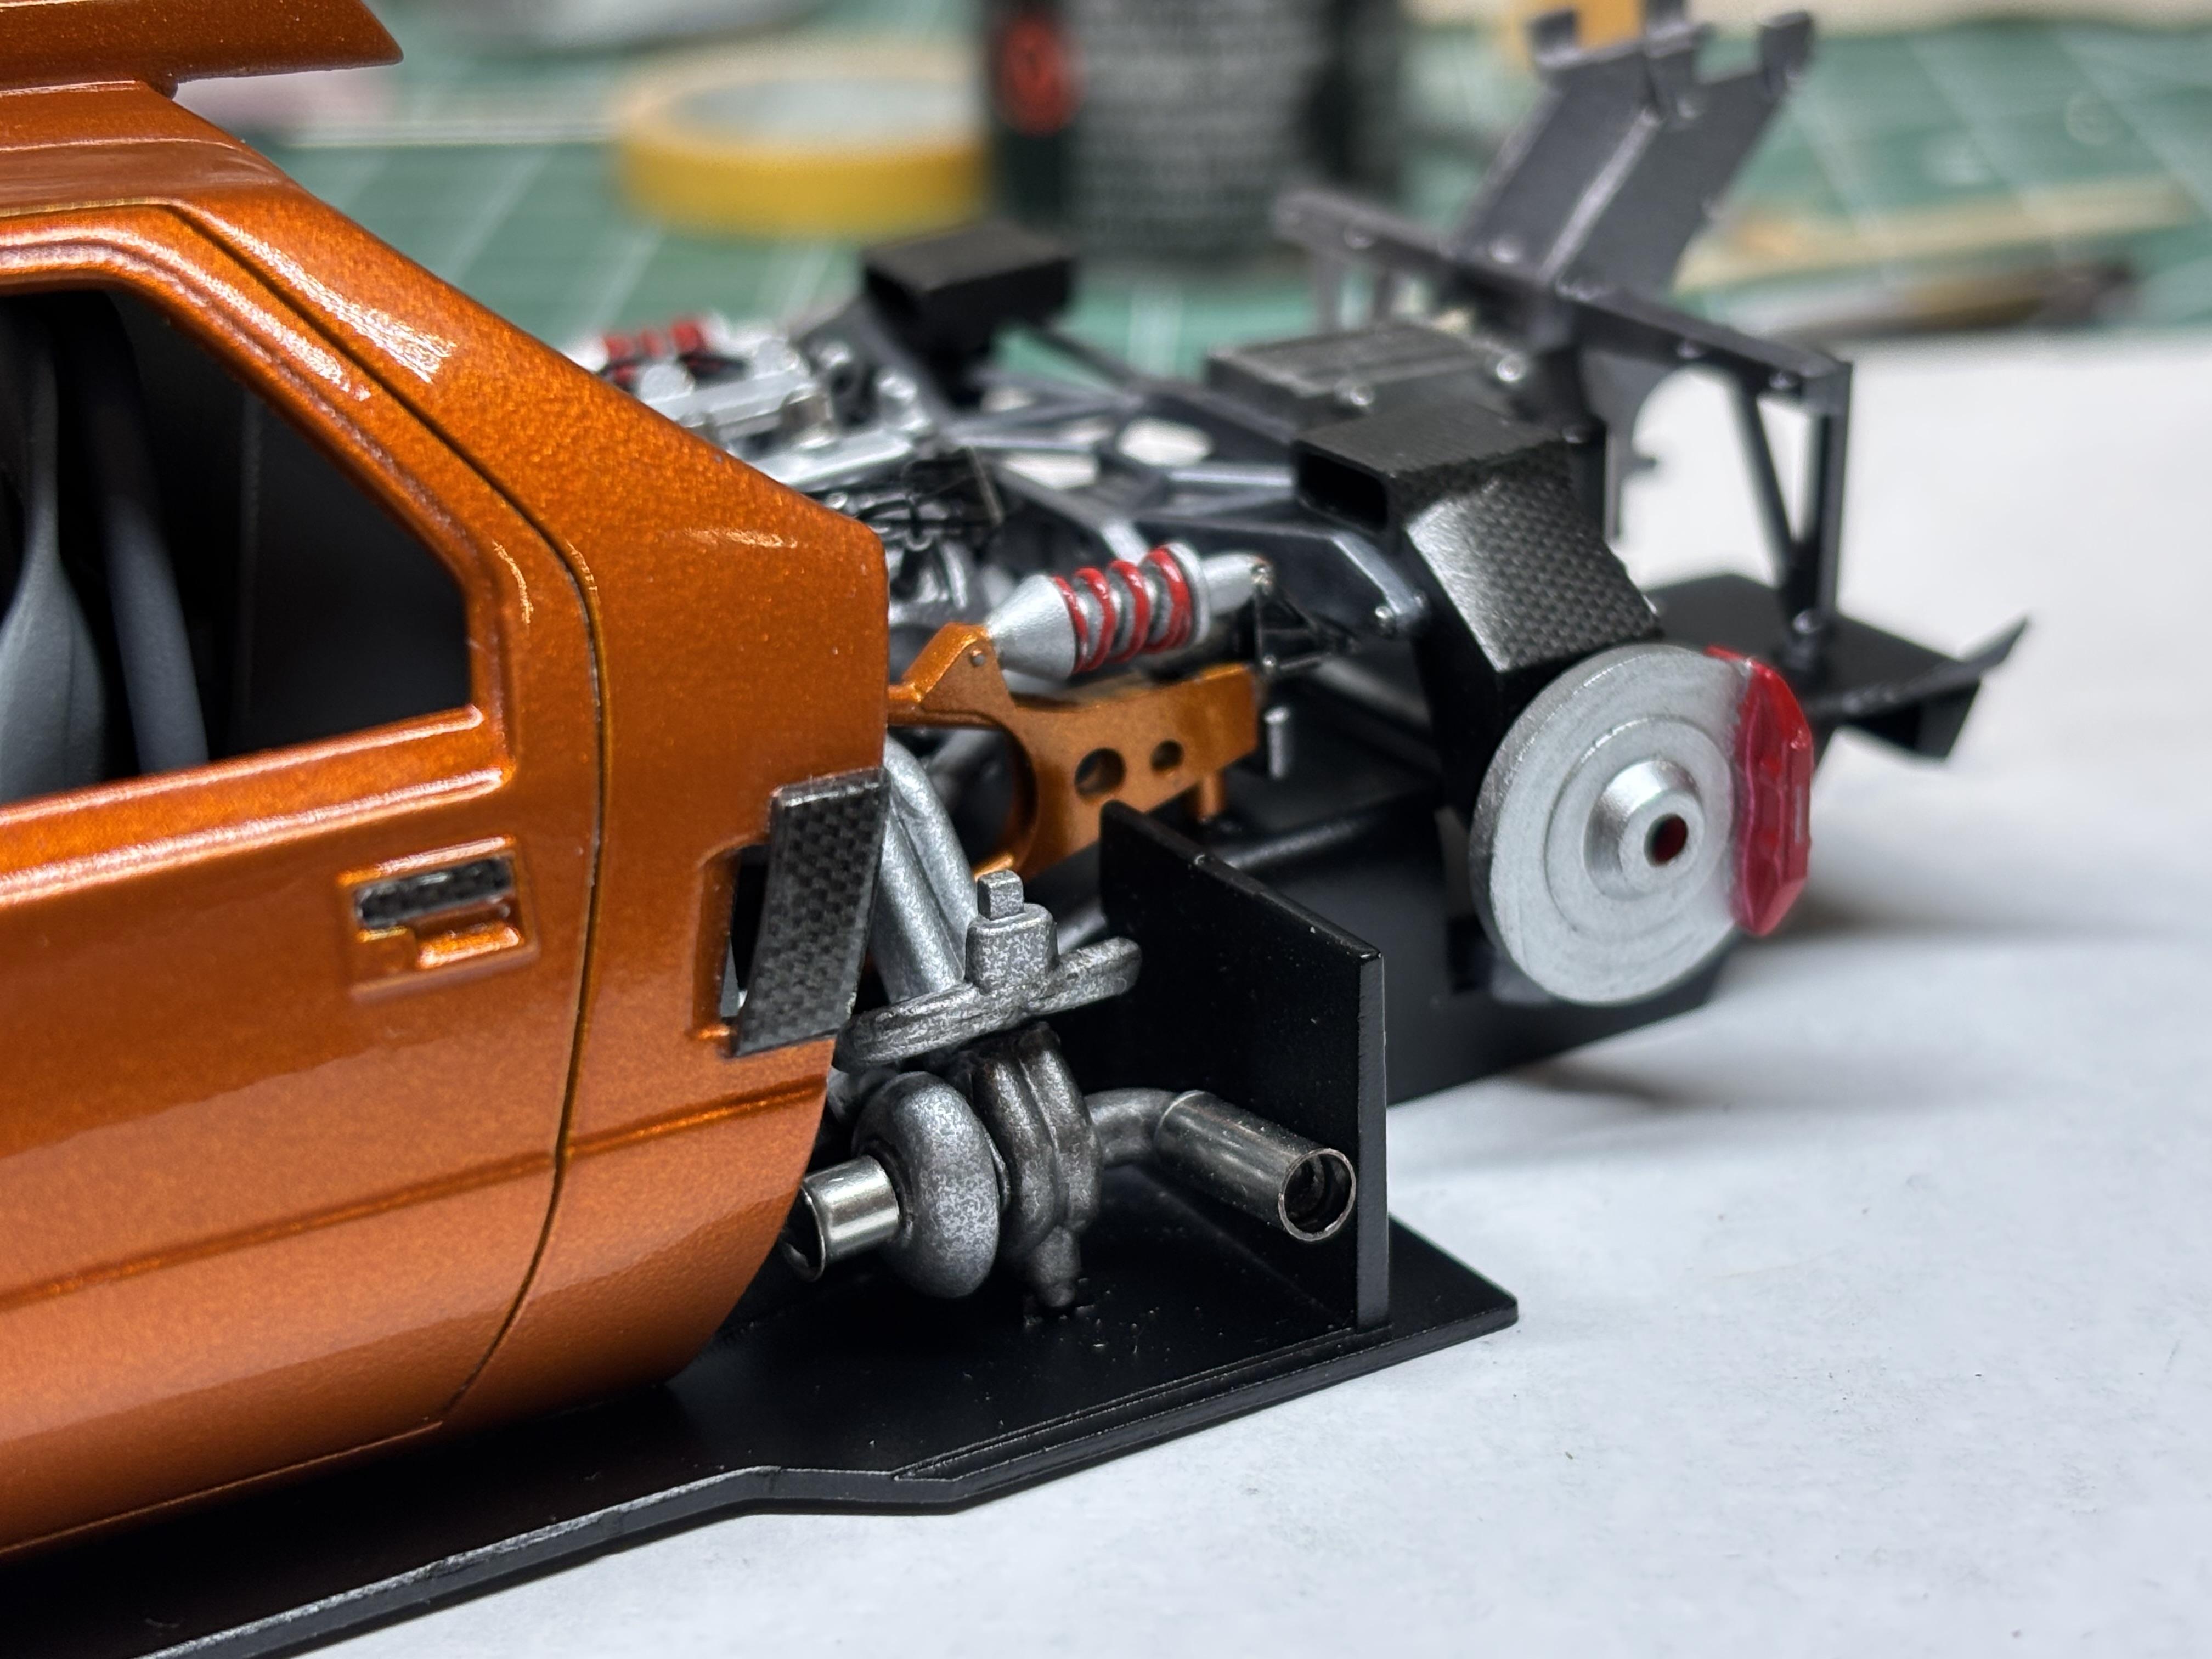
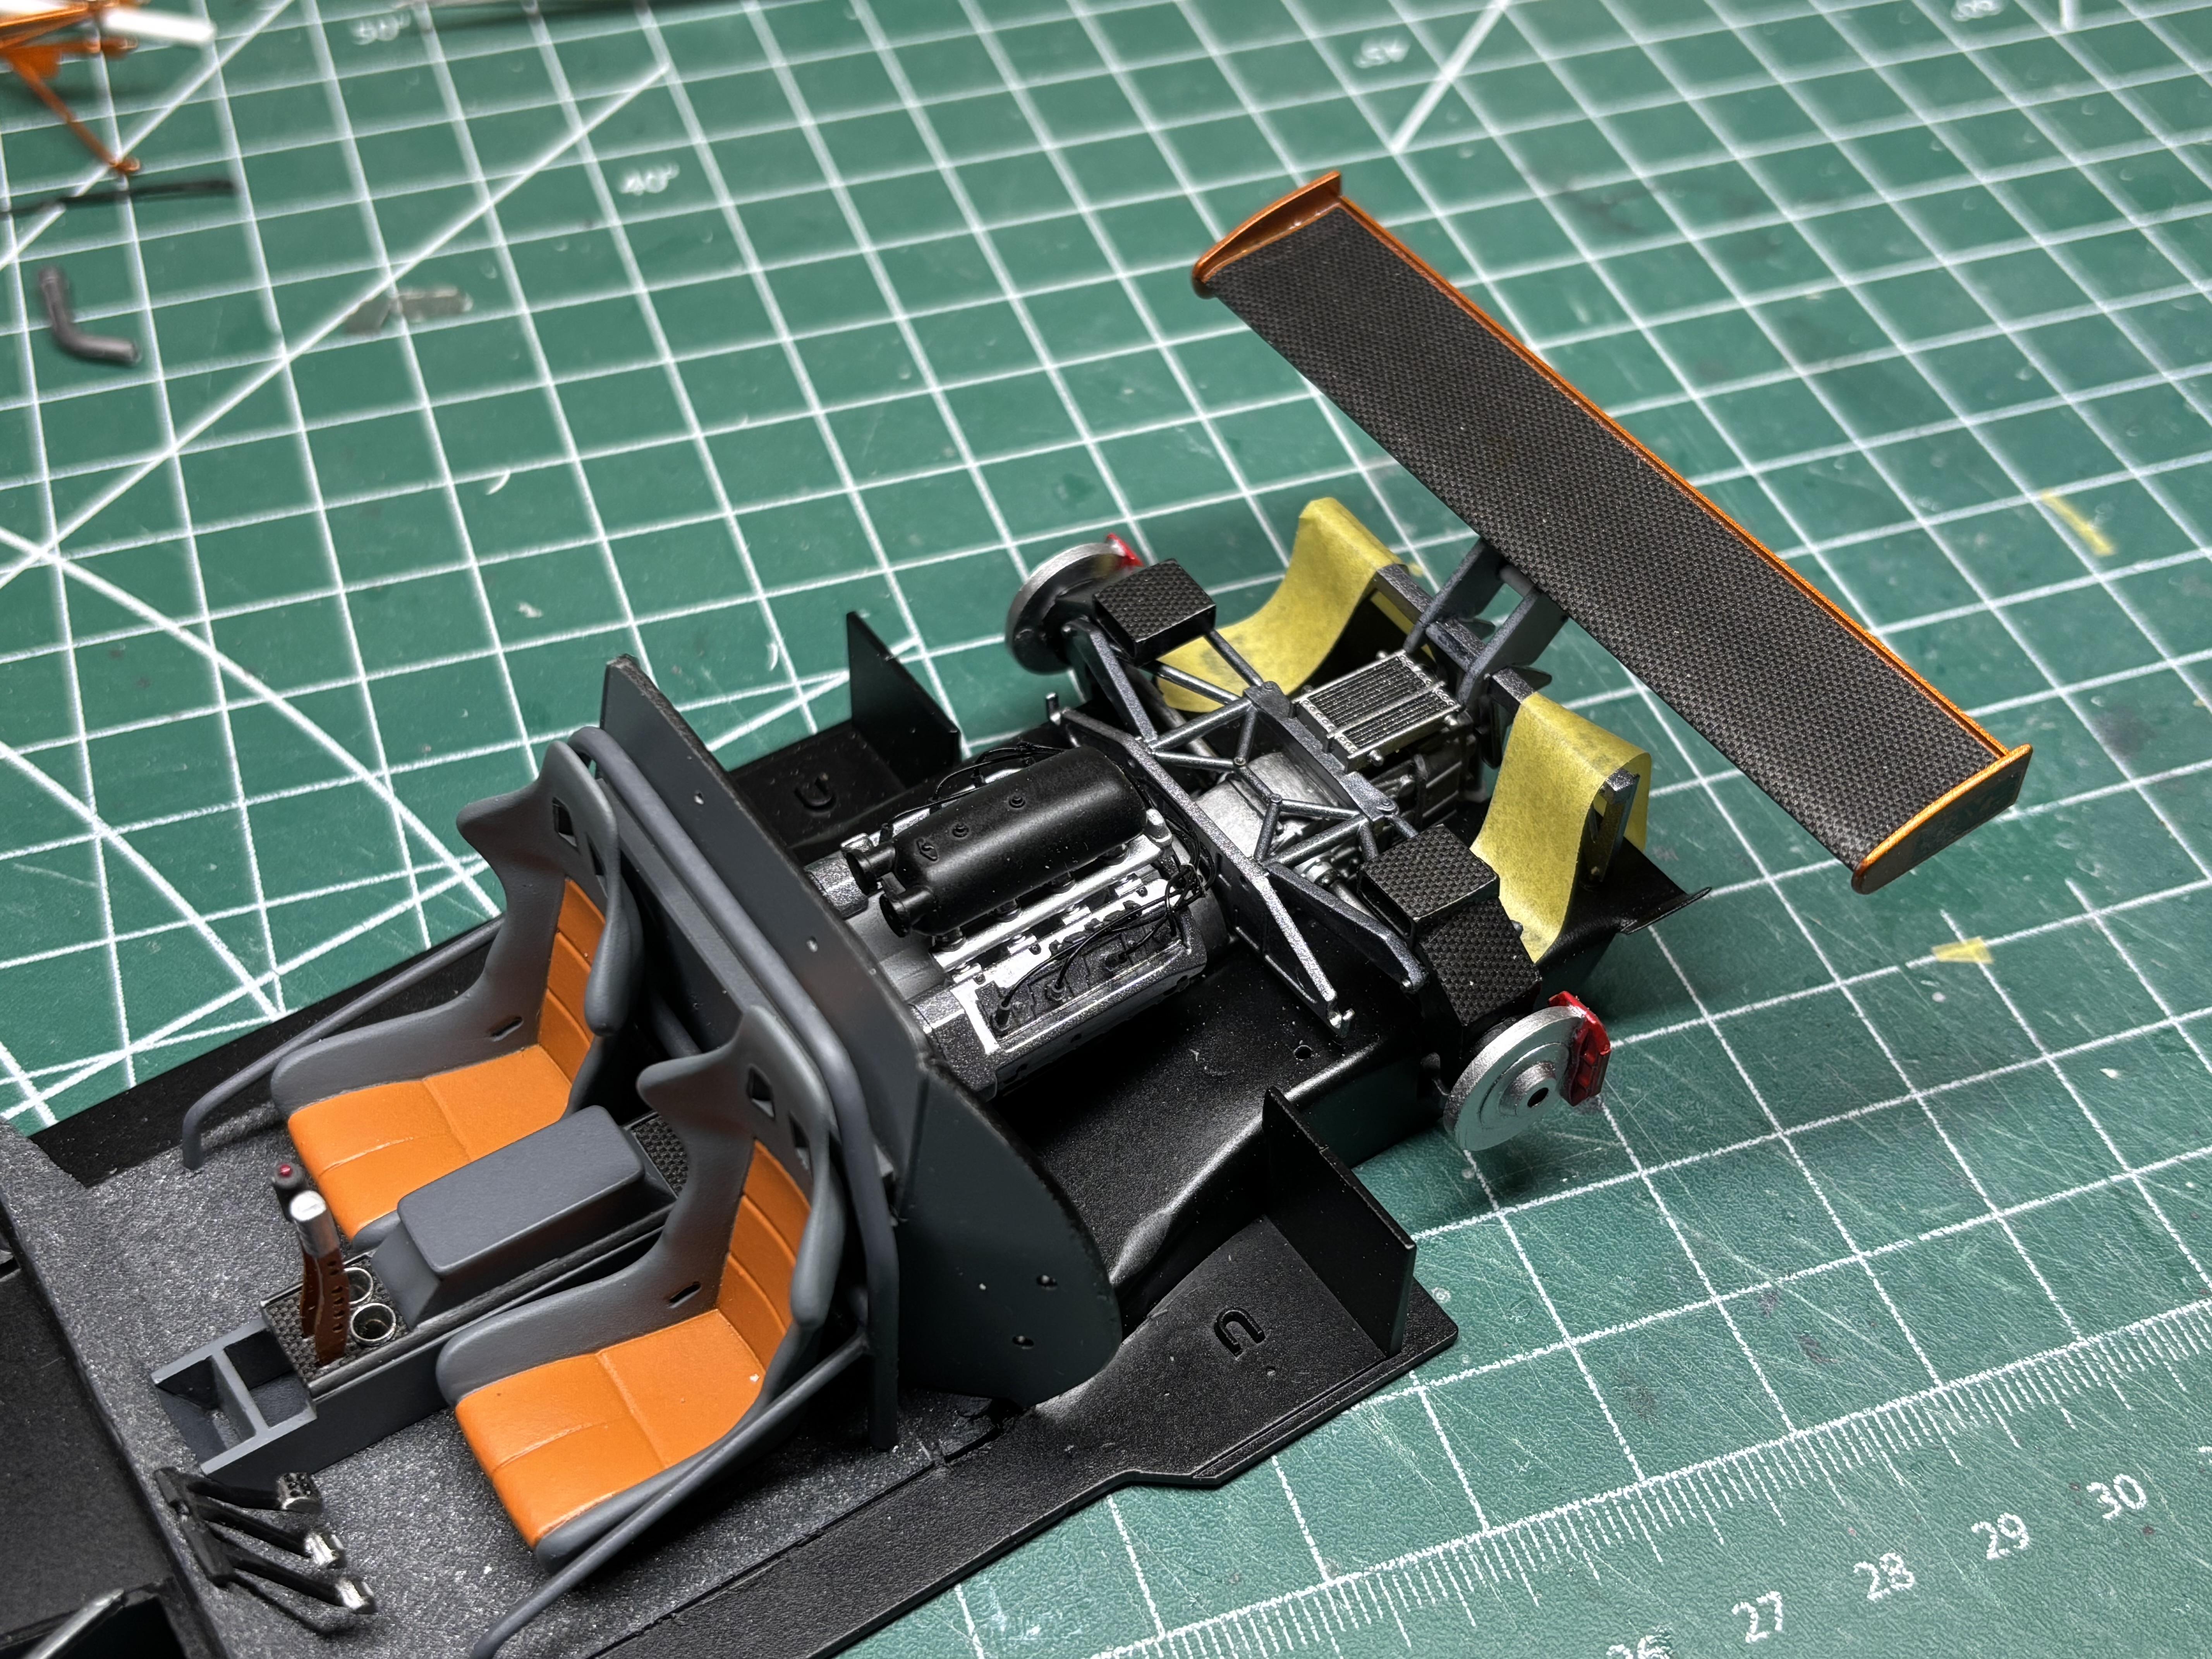
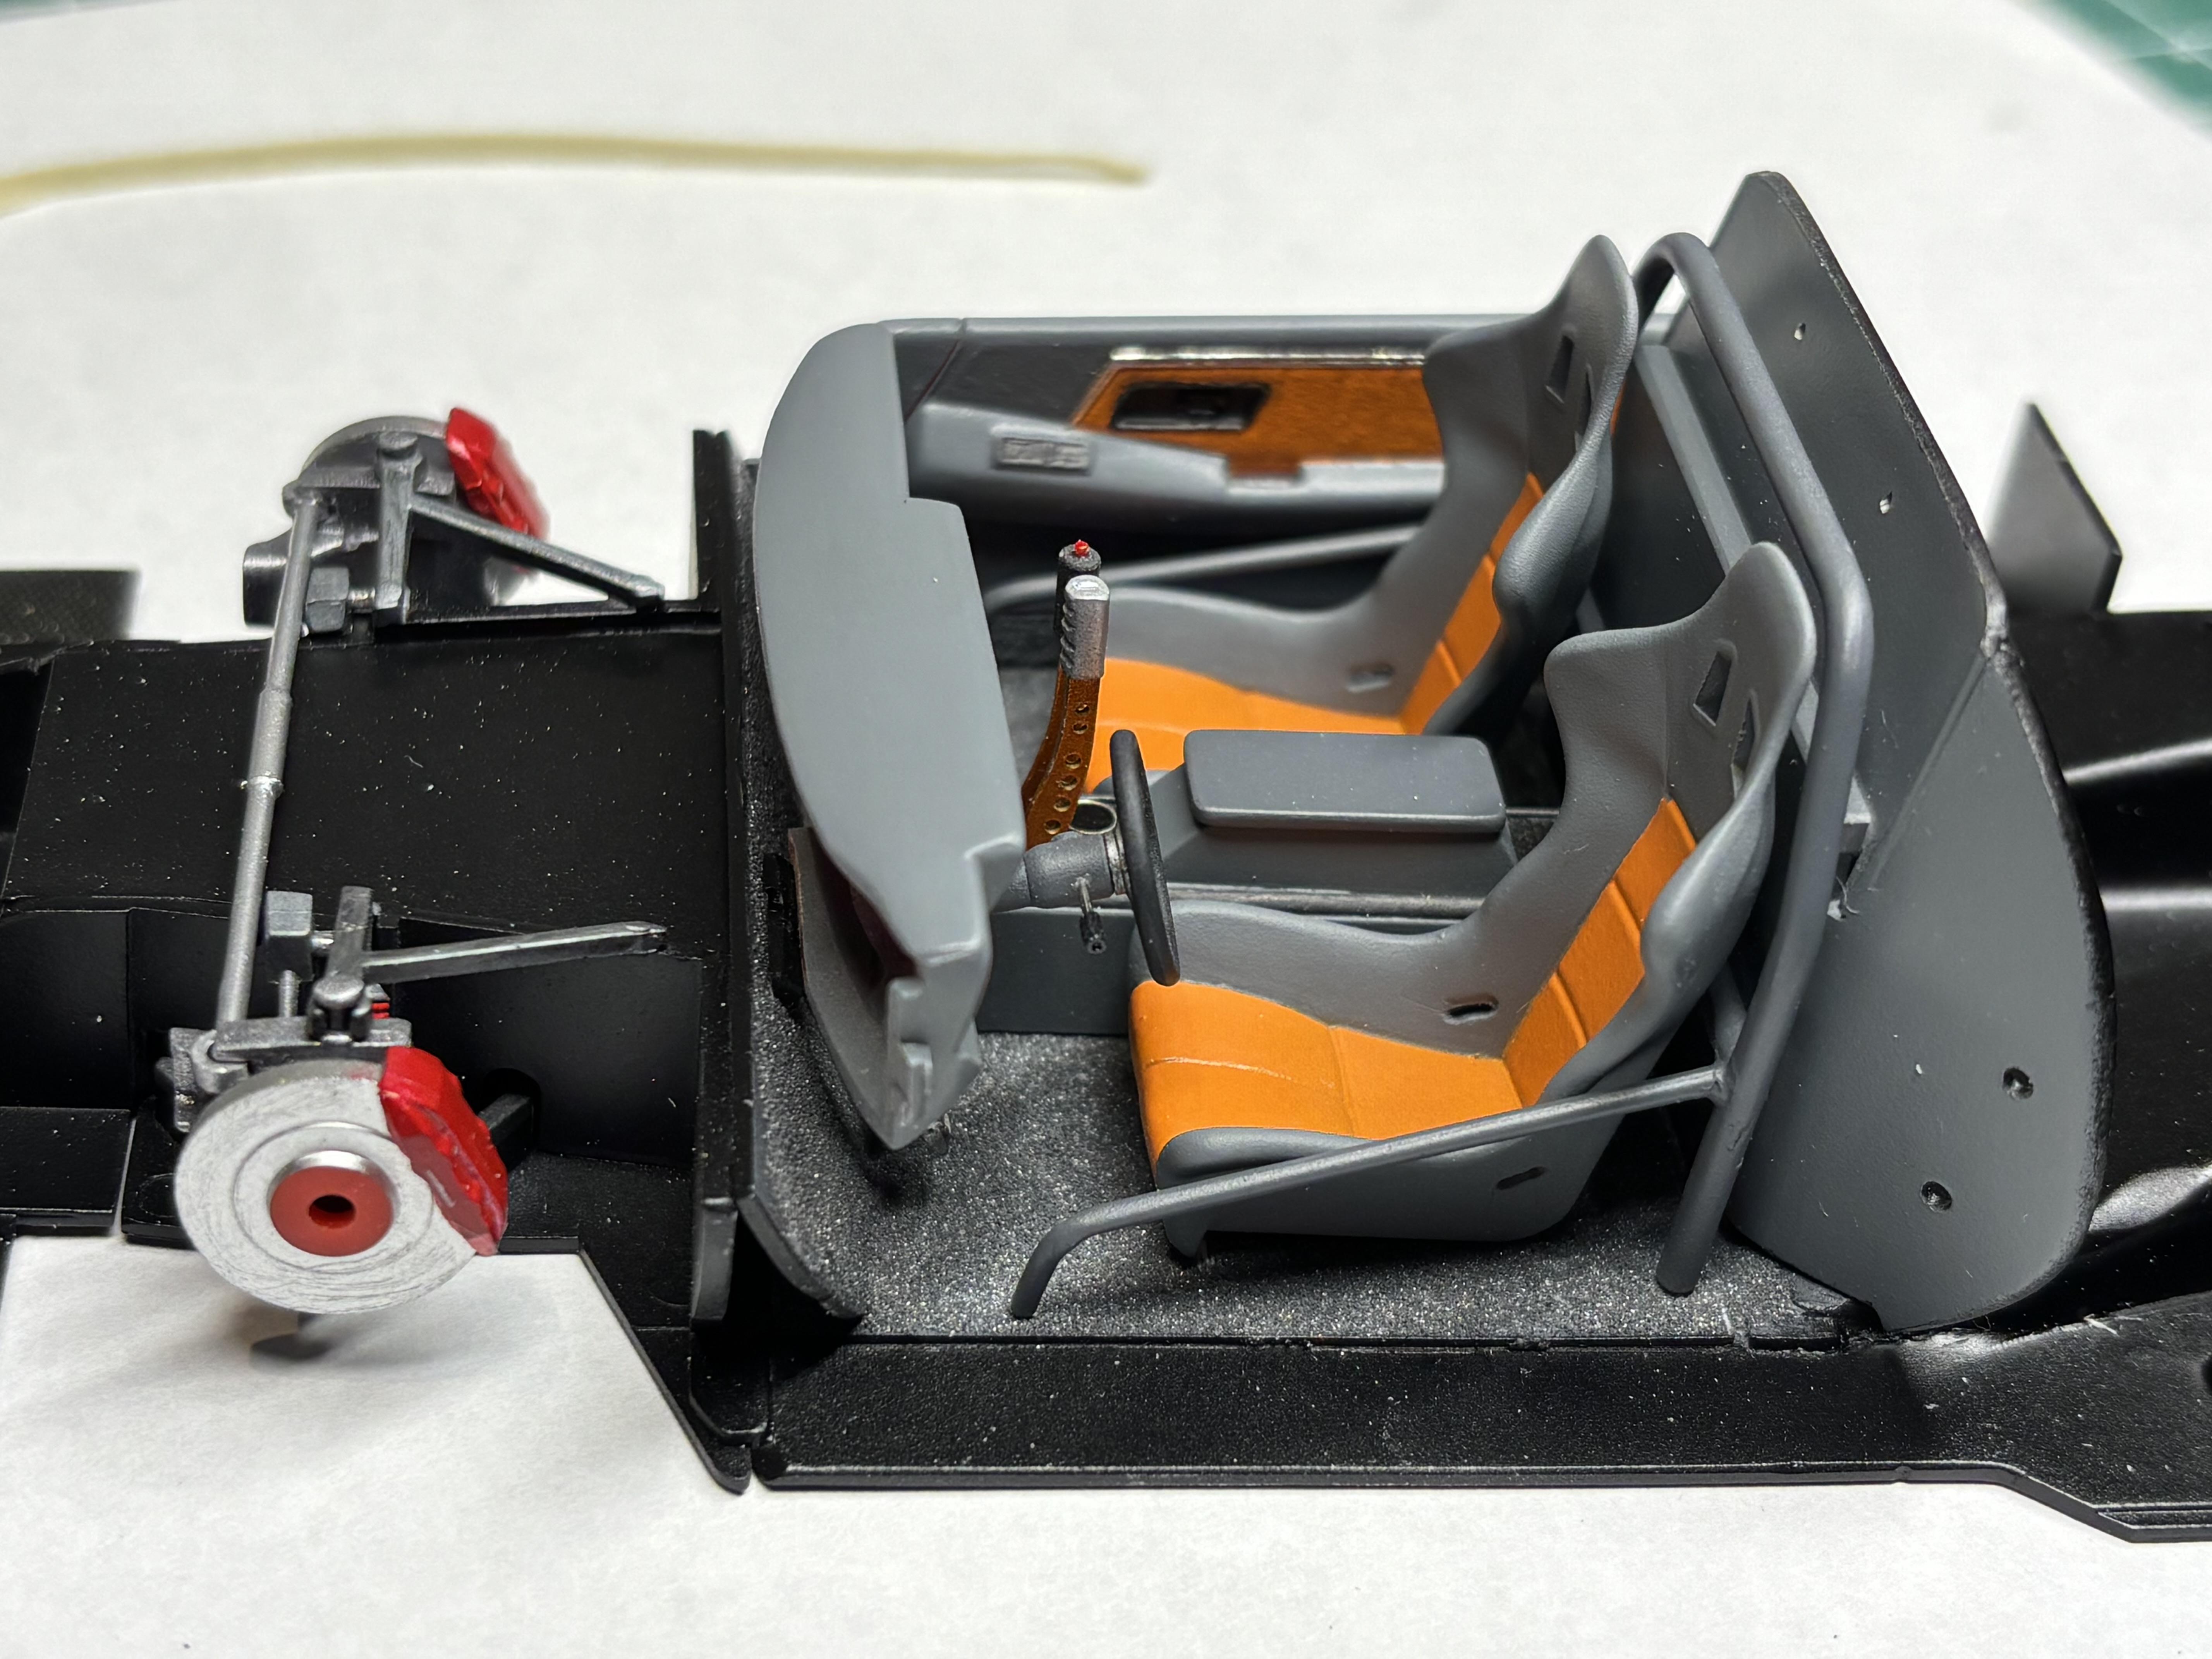
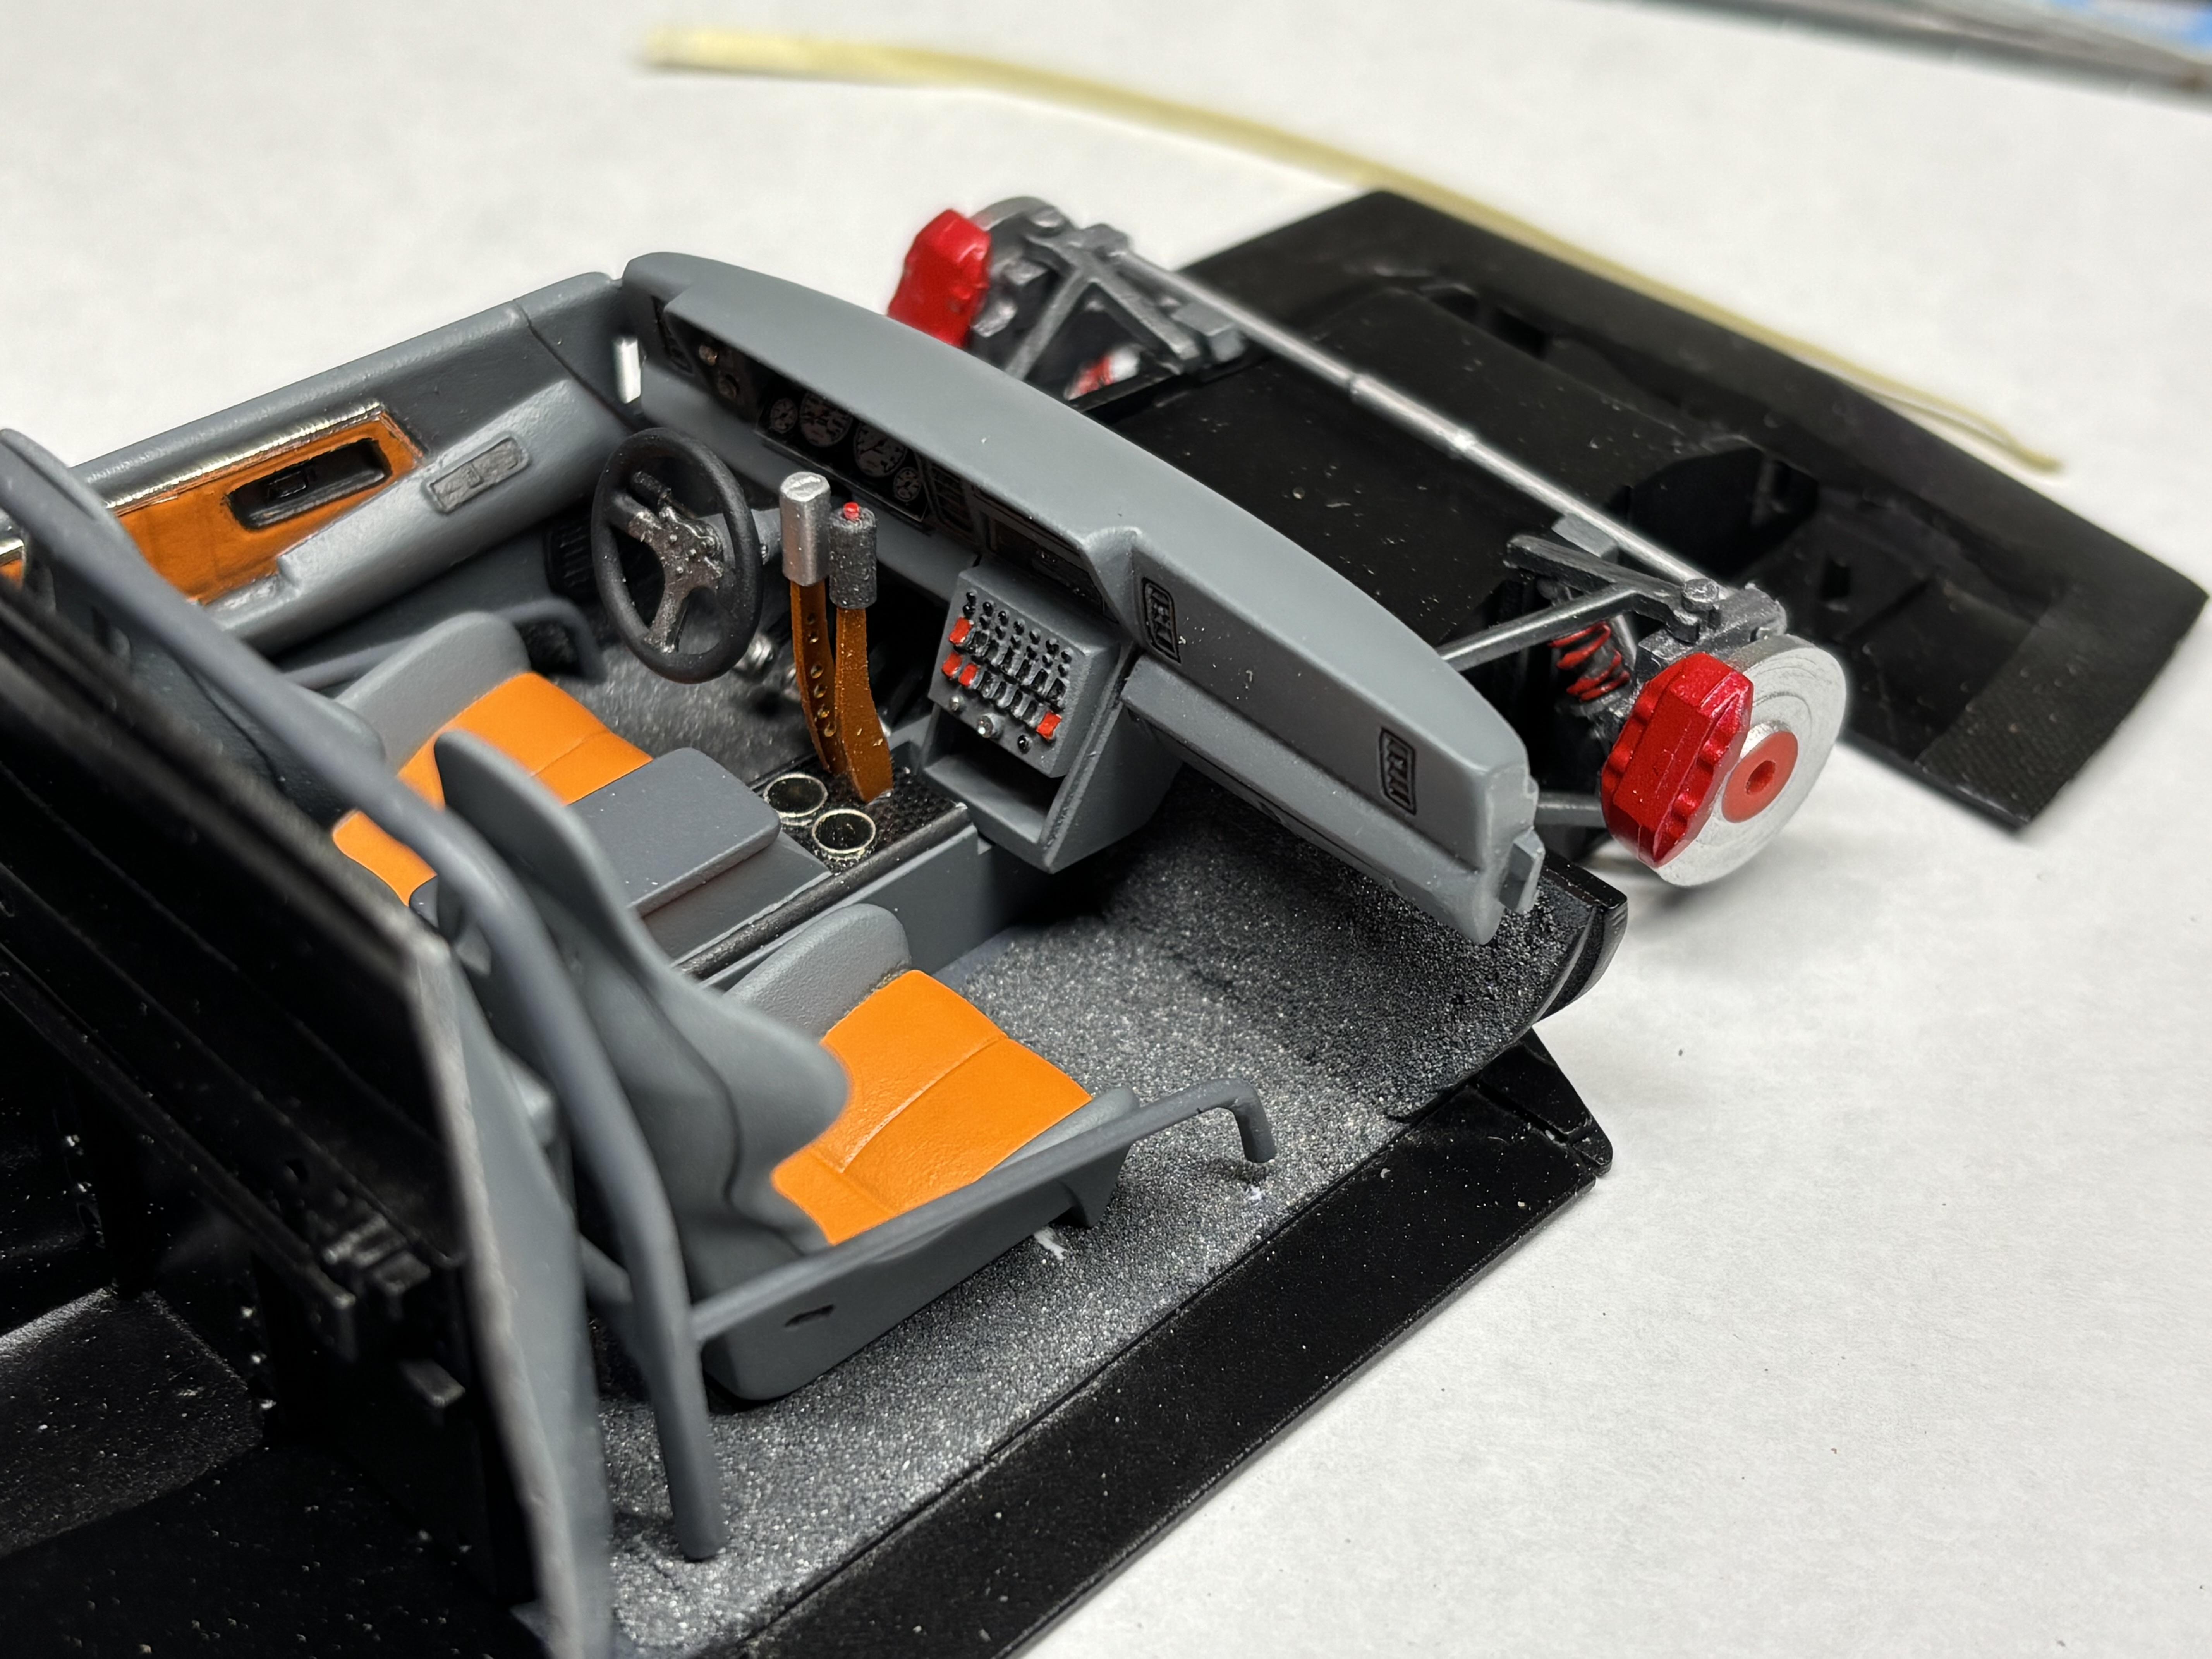
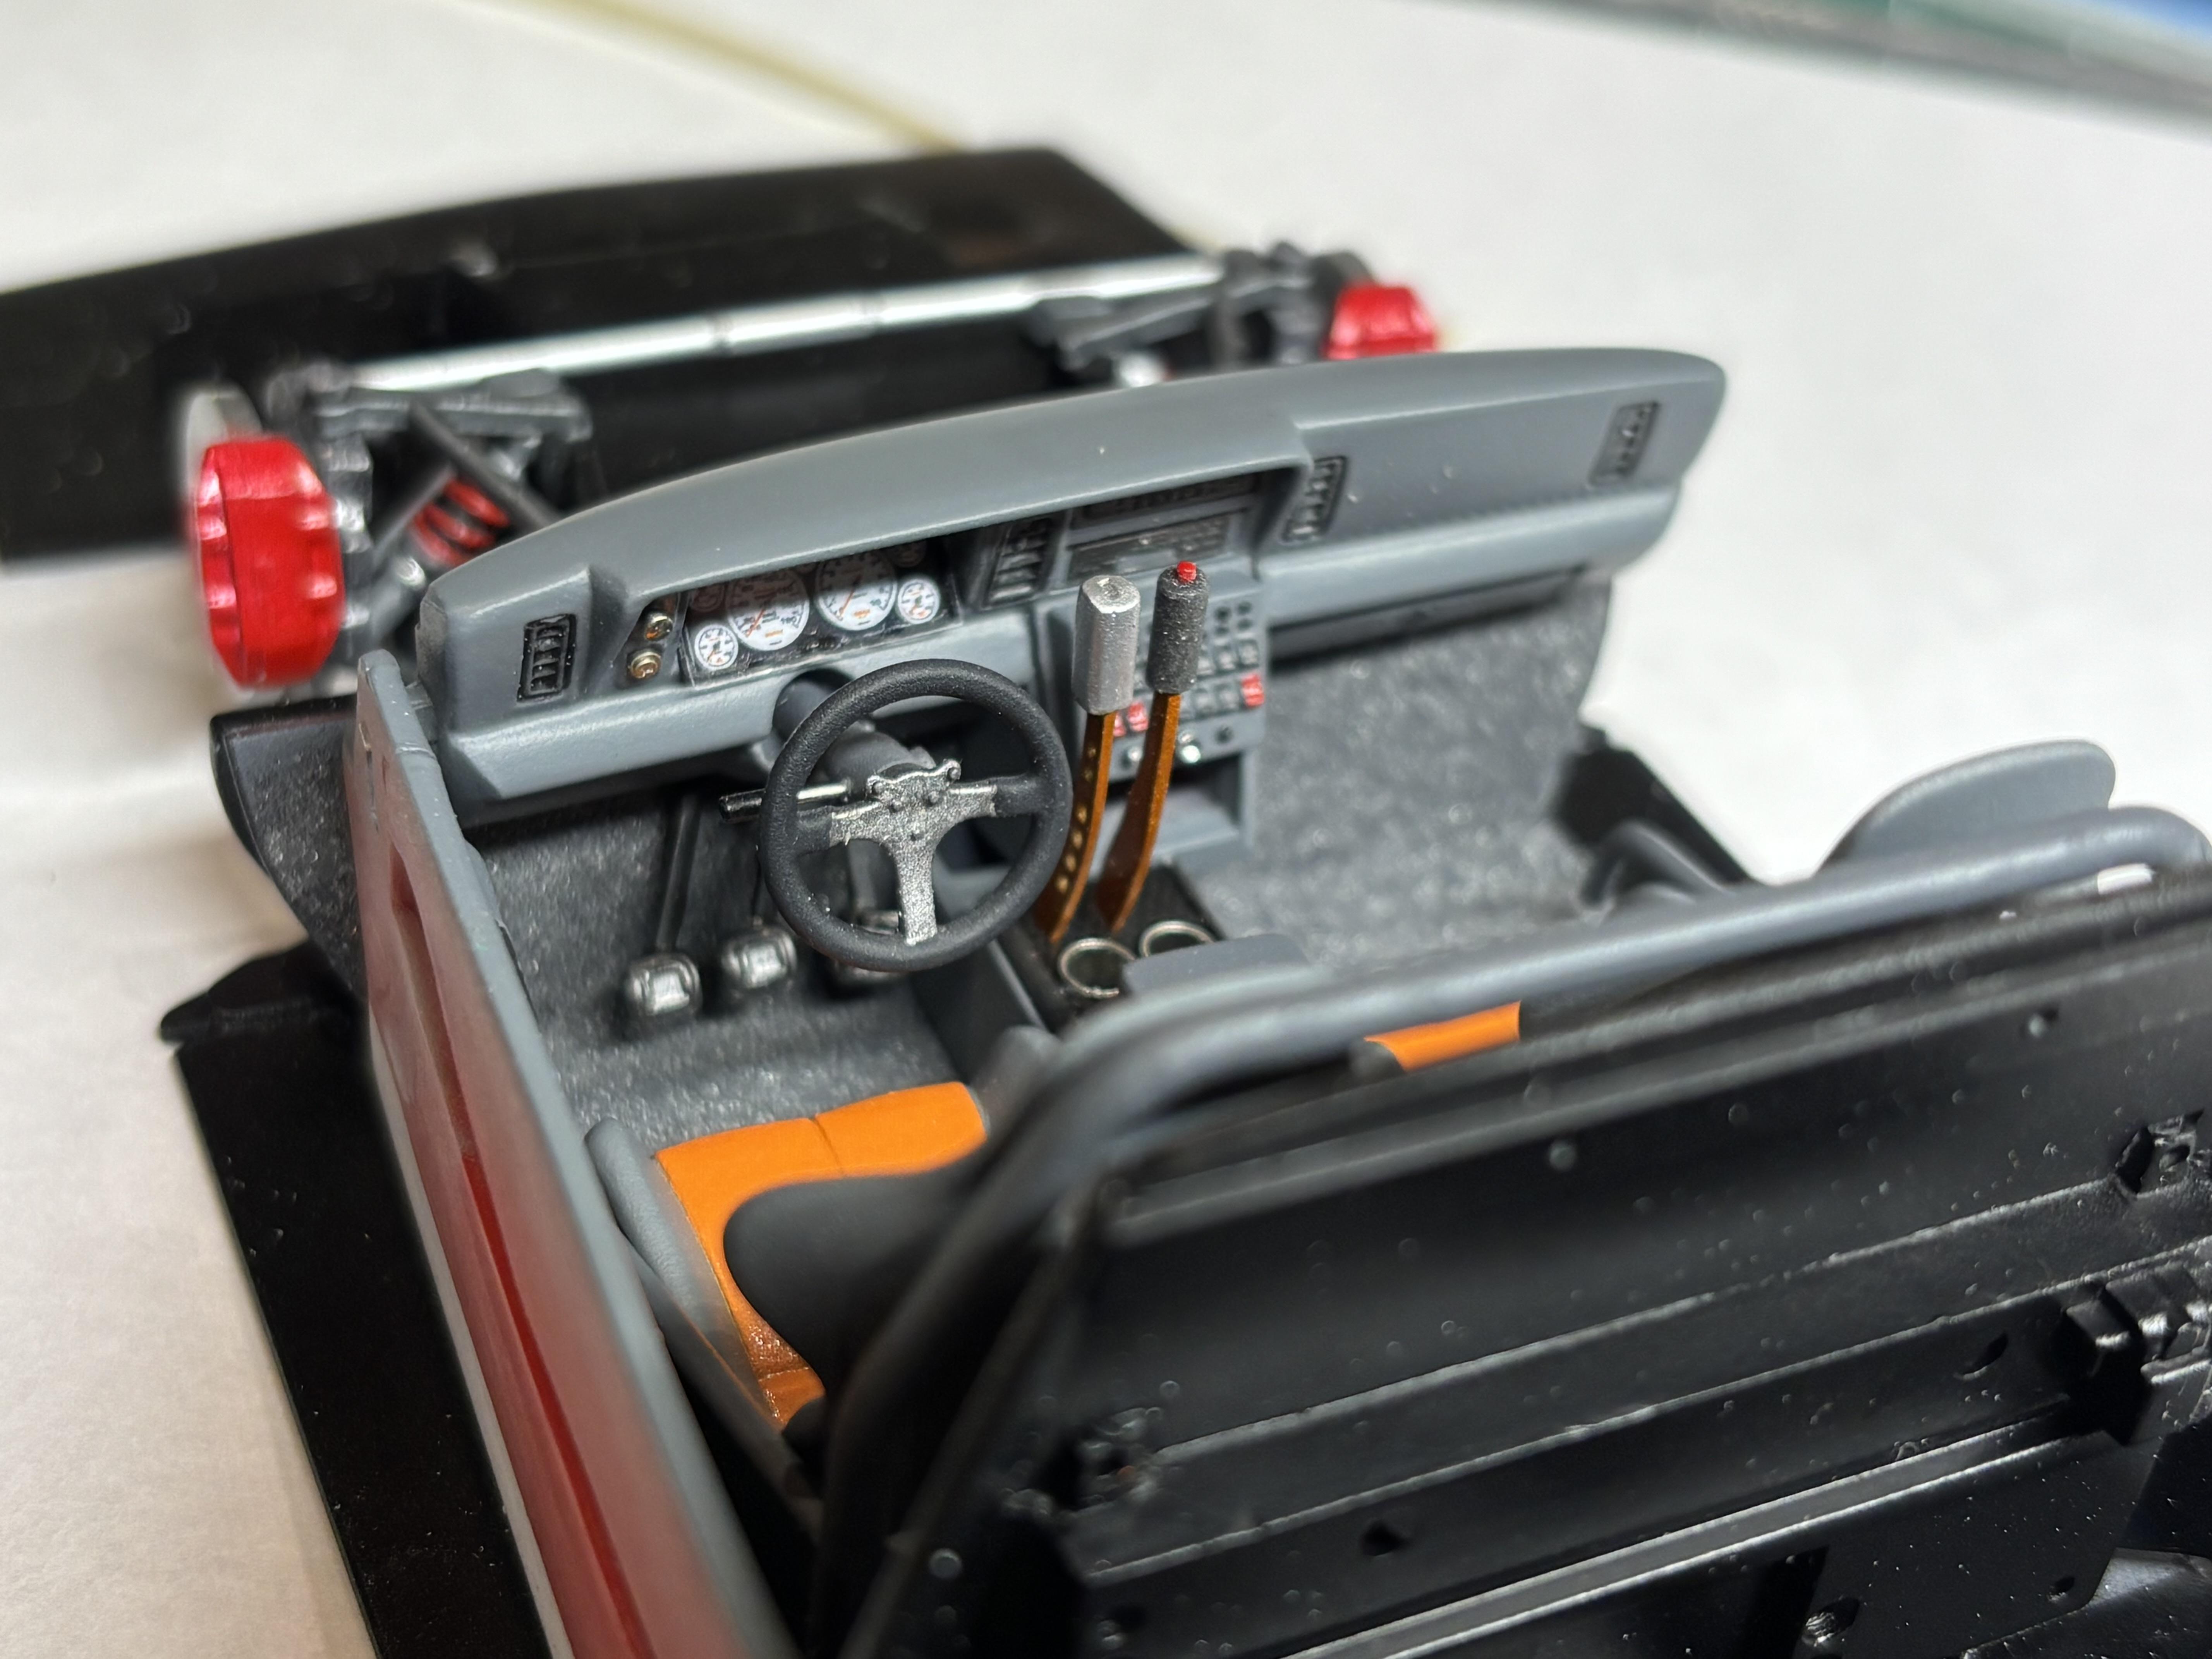
Assembly day!!! 😁 I believe I mentioned previously in this thread, that assembling the body to the interior/chassis was going to be the trickiest part of construction. Well…. there was some colourful language, but actually everything went fairly smoothly. It wasn’t totally straight forward, but not bad. So…. Added seat belts. First time doing a 4 point harness, and I think it’s passable. I don’t like belts being TOO tidy, so I aimed for a ‘worn” look. then a final quick mock of interior before gluing… Then…. Time to bring it all together!! Oh… a shot of the “radar detector” with wheels on, but not glued. Engine is close to complete. I will add fuel lines, the intake will HOPEFULLY be carbon fibre, I’ve put that off as long as possible. 🫣 Then I need to make intake pipe from the inter cooler to intake plenum. Still need to add the blow offs too. I used bootlace ferrules for turbo intakes, and exhaust tips. Headlight bezels are installed, still need lenses. Grill mesh is installed, and the rad is visible behind it! And the hood also has the screen installed. I’m getting close!! Still some under hood stuff to do, some clean up, and details, finish the engine, glue wheels on. Ya… it’s close-ish. As always, thanks for looking and all comments and feedback welcome.
-
Cyber punk ‘88 Dodge Daytona/Mercedes C9 kit bash
Steve H replied to Steve H's topic in WIP: Model Cars
Anton, I would love to see your take on this type of build. Thanks John! Pretty much done with fabrication, assembly time now. See below 👇. -
Great builds Larry! All very “crisp” and cleanly built. The colour on that Caddy is absolutely delicious….
-
Really sharp looking builds Stuart! I particularly like the Chev pickup. 👍👍
-
Great looking wagon Steve. Excellent colour choices, and smooooooth. That is A LOT of beautifully applied BMF 🥵. Sits just right too, especially with those wheels.
-
Tim, I very much agree with Mark here. Your builds are distinct and absolutely beautiful. Your choice of printed wheels and tires is always spot on, and the stance just right. Keep ‘em coming my friend!!
-
Great looking builds Josiah
-
Thank you Mark. Thanks Bill Hi Spike! Thanks for the kind words. Hi Gregory, decals are not my favourite thing. I rarely use large decals on my builds, so it was stressful, but they turned out decent. Funny, such a seemingly easy task… Thanks Mike! It’s always good to get a stamp of approval from a 1:1 owner. Thanks for taking the time to comment. Thank you Craig!! I always enjoy your builds, and your black 442 build was helpful when I got started. I did move the rear axle slightly forward as you pointed out in your build. So thank you for that!! Thanks Larry! Thank you Jim I appreciate that Eric. This was my second “replica” build, and my skills have improved since the last one. I am happy with the final product. Thank you Brian, that means alot coming from someone with your skills. I appreciate the kind words sir. Thank you all for the comments, and thanks to those that were patient enough to follow along on the WIP.
-
You were a beast this year David! All great looking models, the ambulance is my favourite. The extra effort you put into your builds really pays off sir.
-
Nice builds Marty, really like the Chevette, super cool.
-
Hey Anton! Congratulations on a well deserved victory in the CBR. That Porsche is stunning! Hope all is well, Happy New Year my friend.
-
Very nice builds Dan. I like em all, but the Olds 442 stands out for me.
-
Lots of interesting, and well built vehicles Bill. Nicely done 👍👍
-
Nice clean build Harry. I like these old Daytona’s.
-
Cyber punk ‘88 Dodge Daytona/Mercedes C9 kit bash
Steve H replied to Steve H's topic in WIP: Model Cars
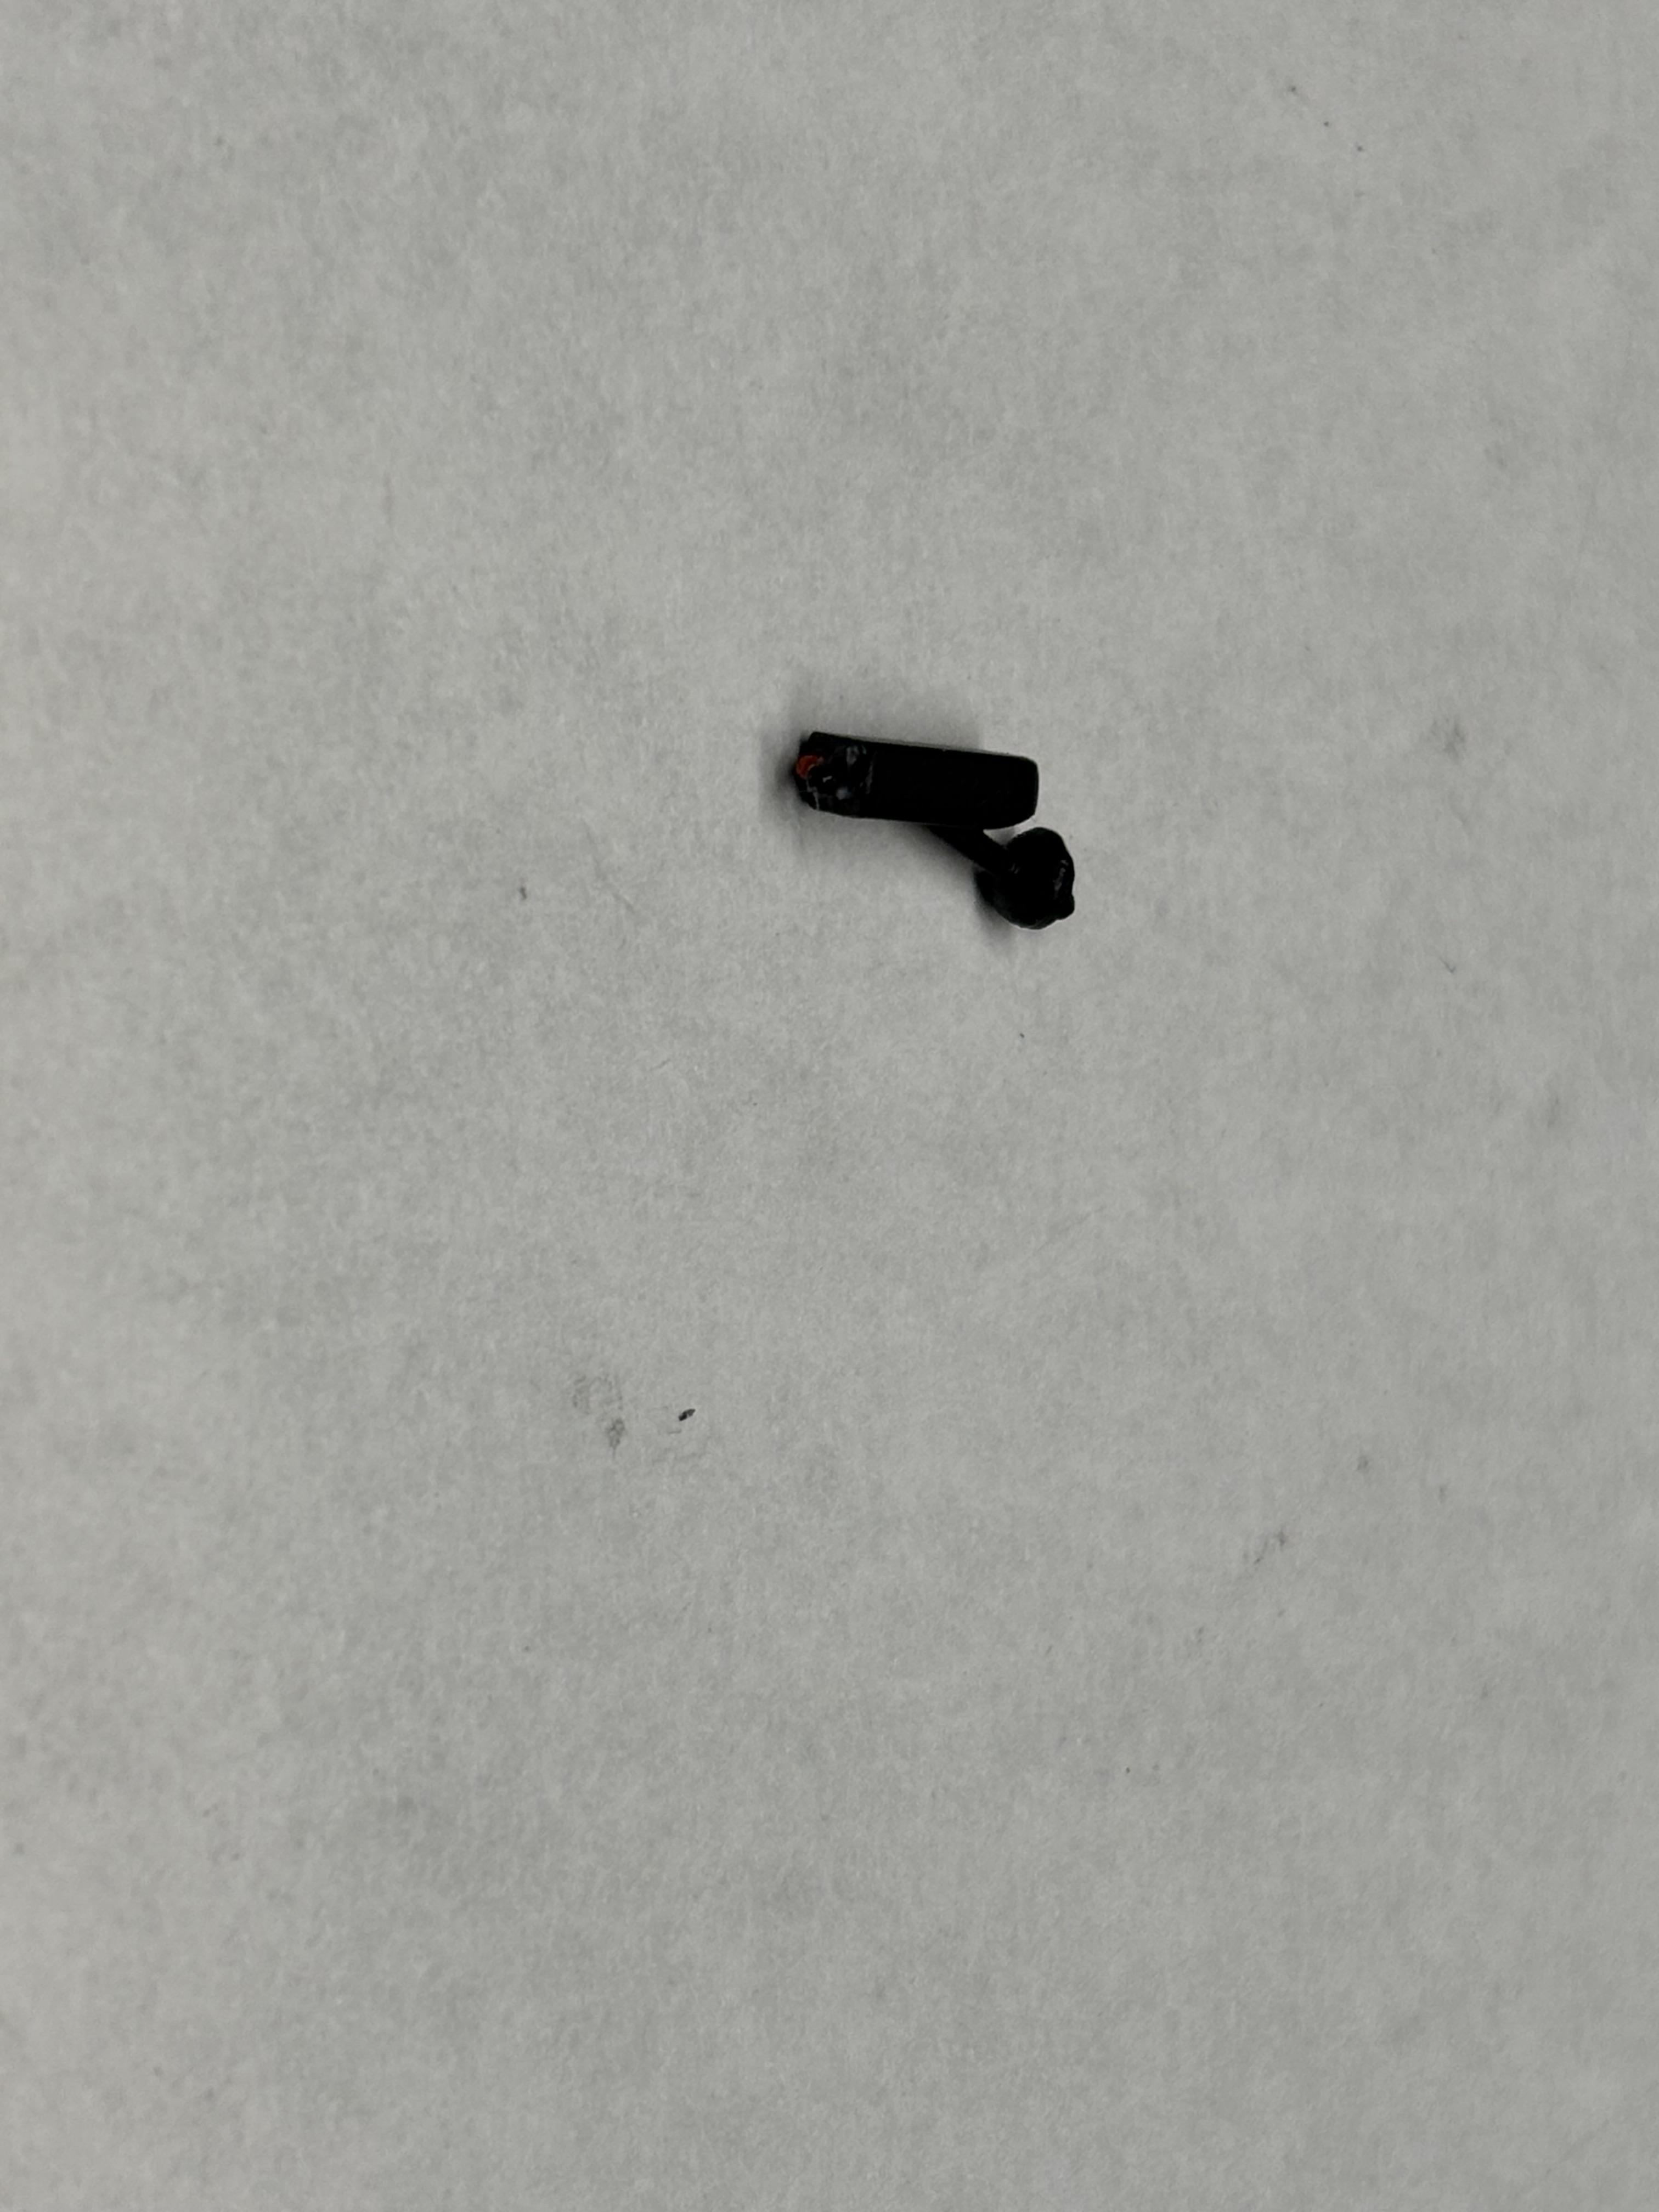
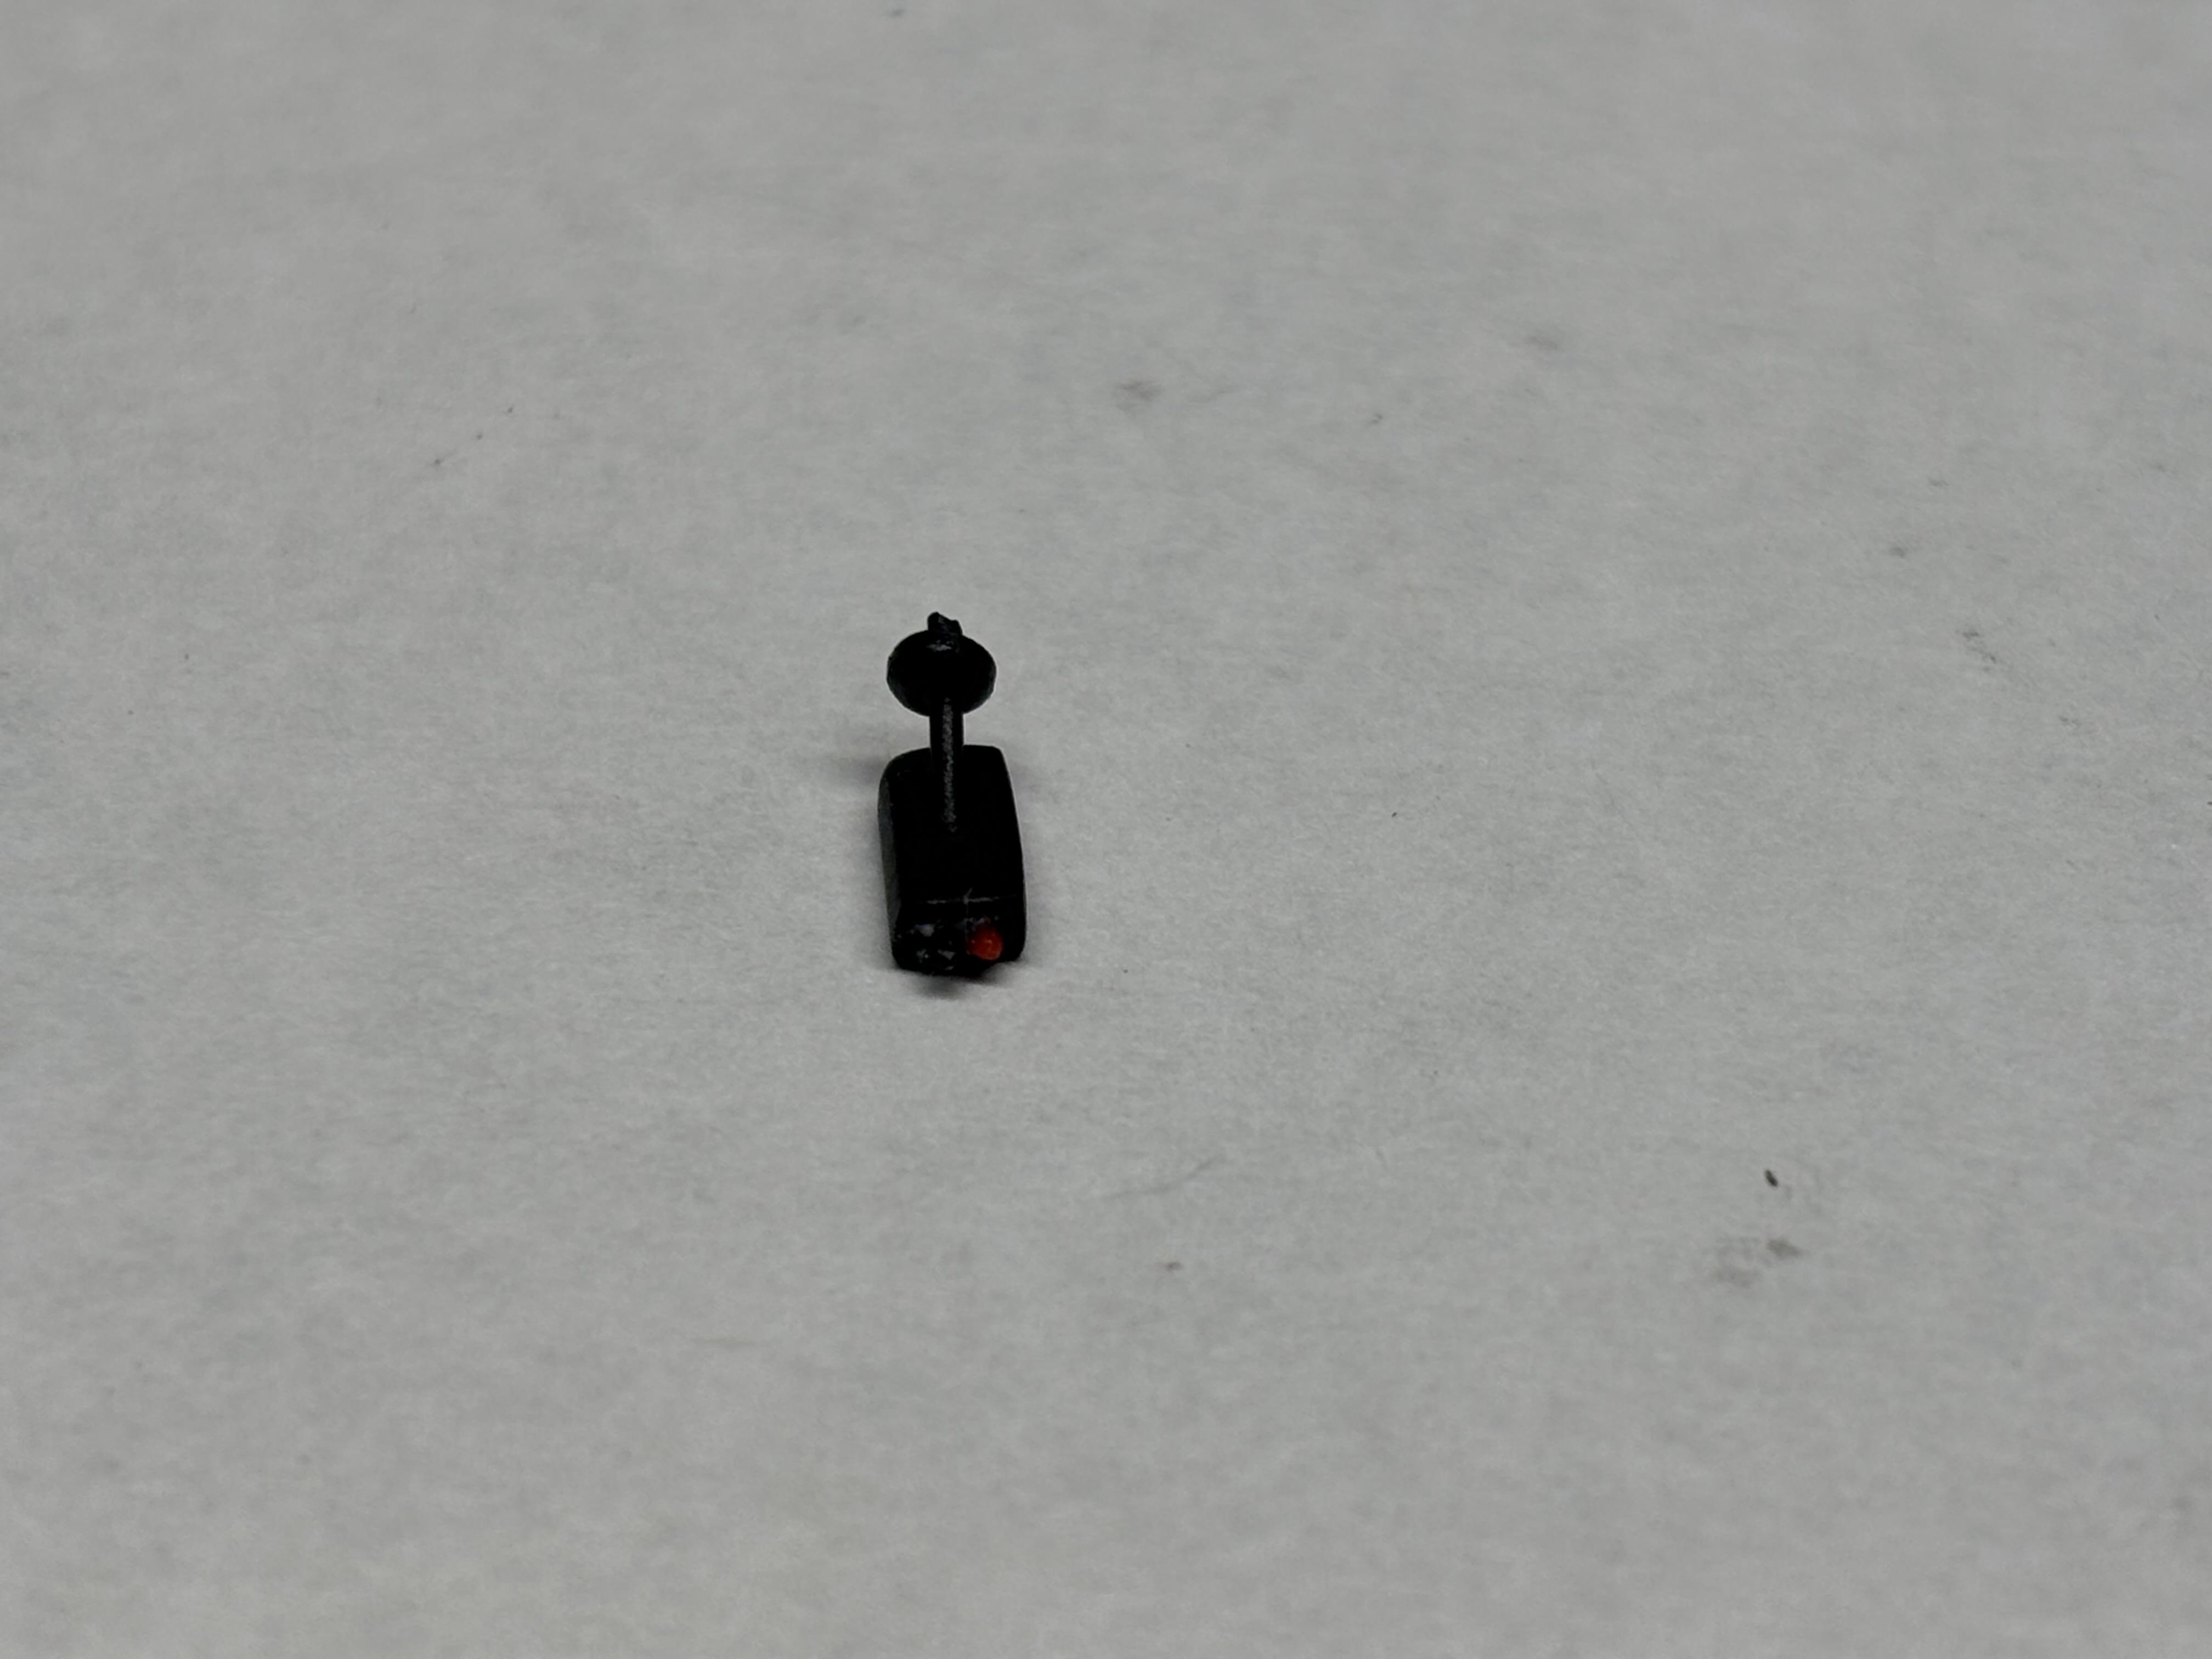
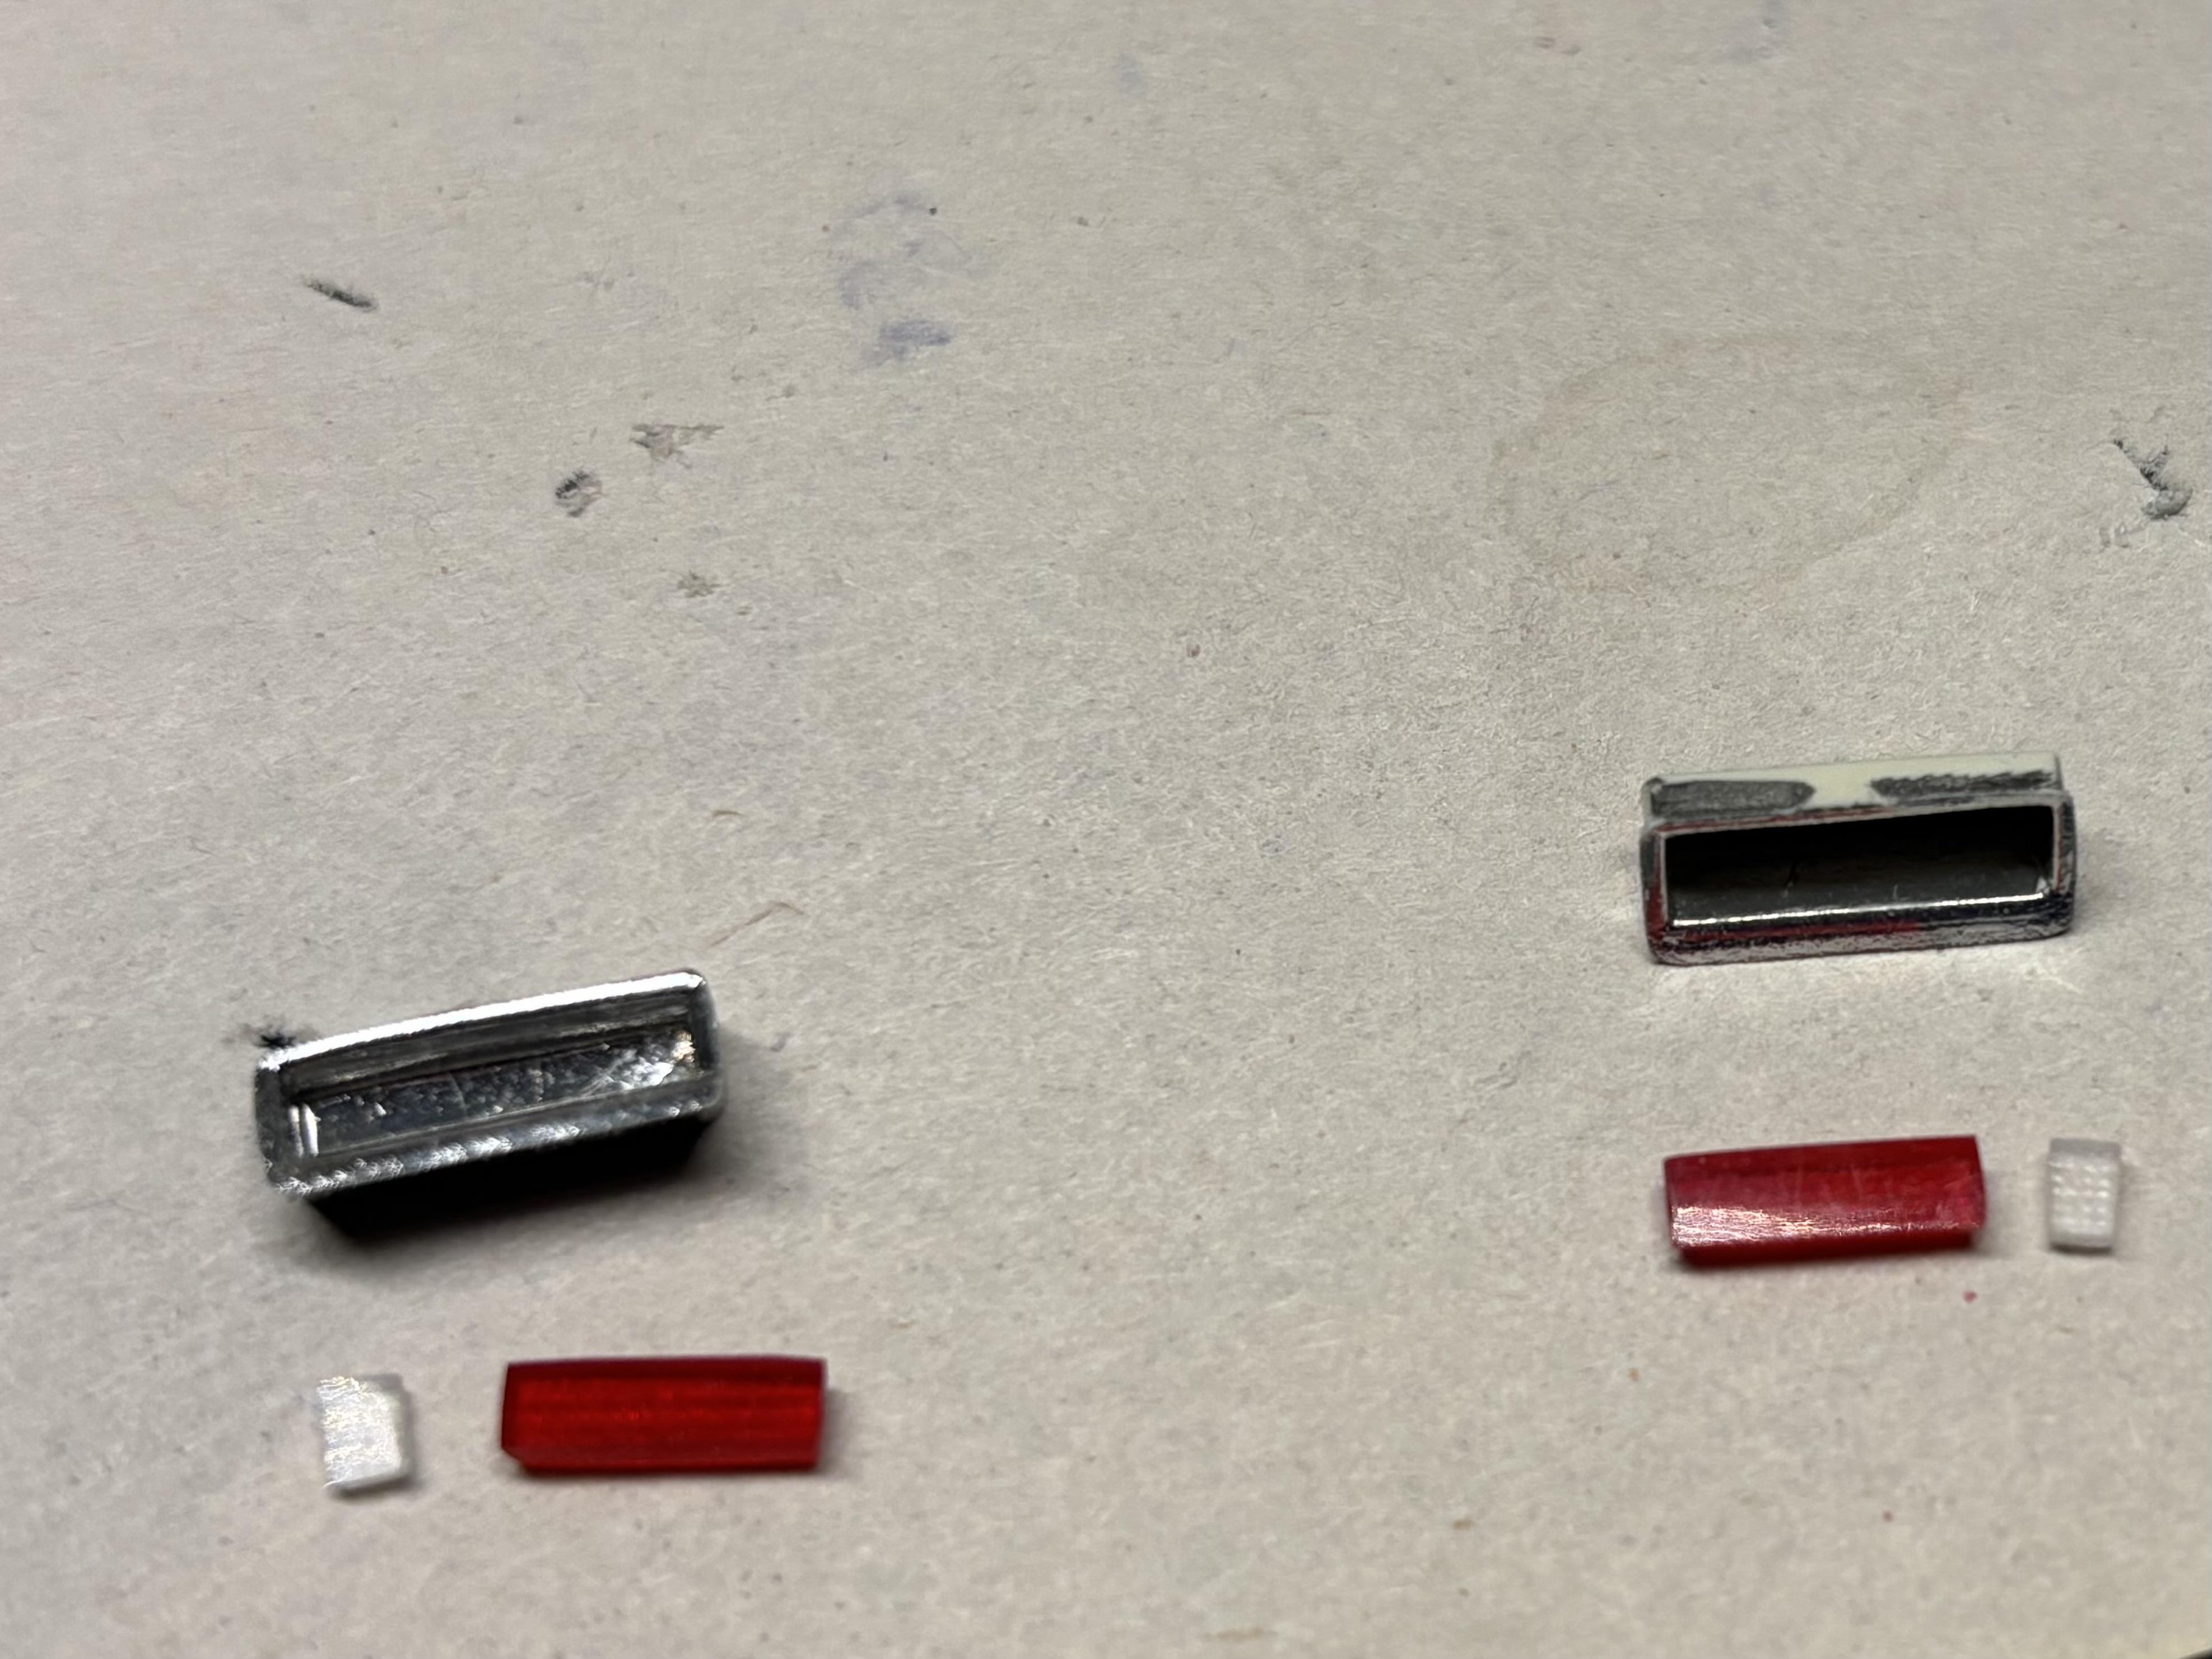
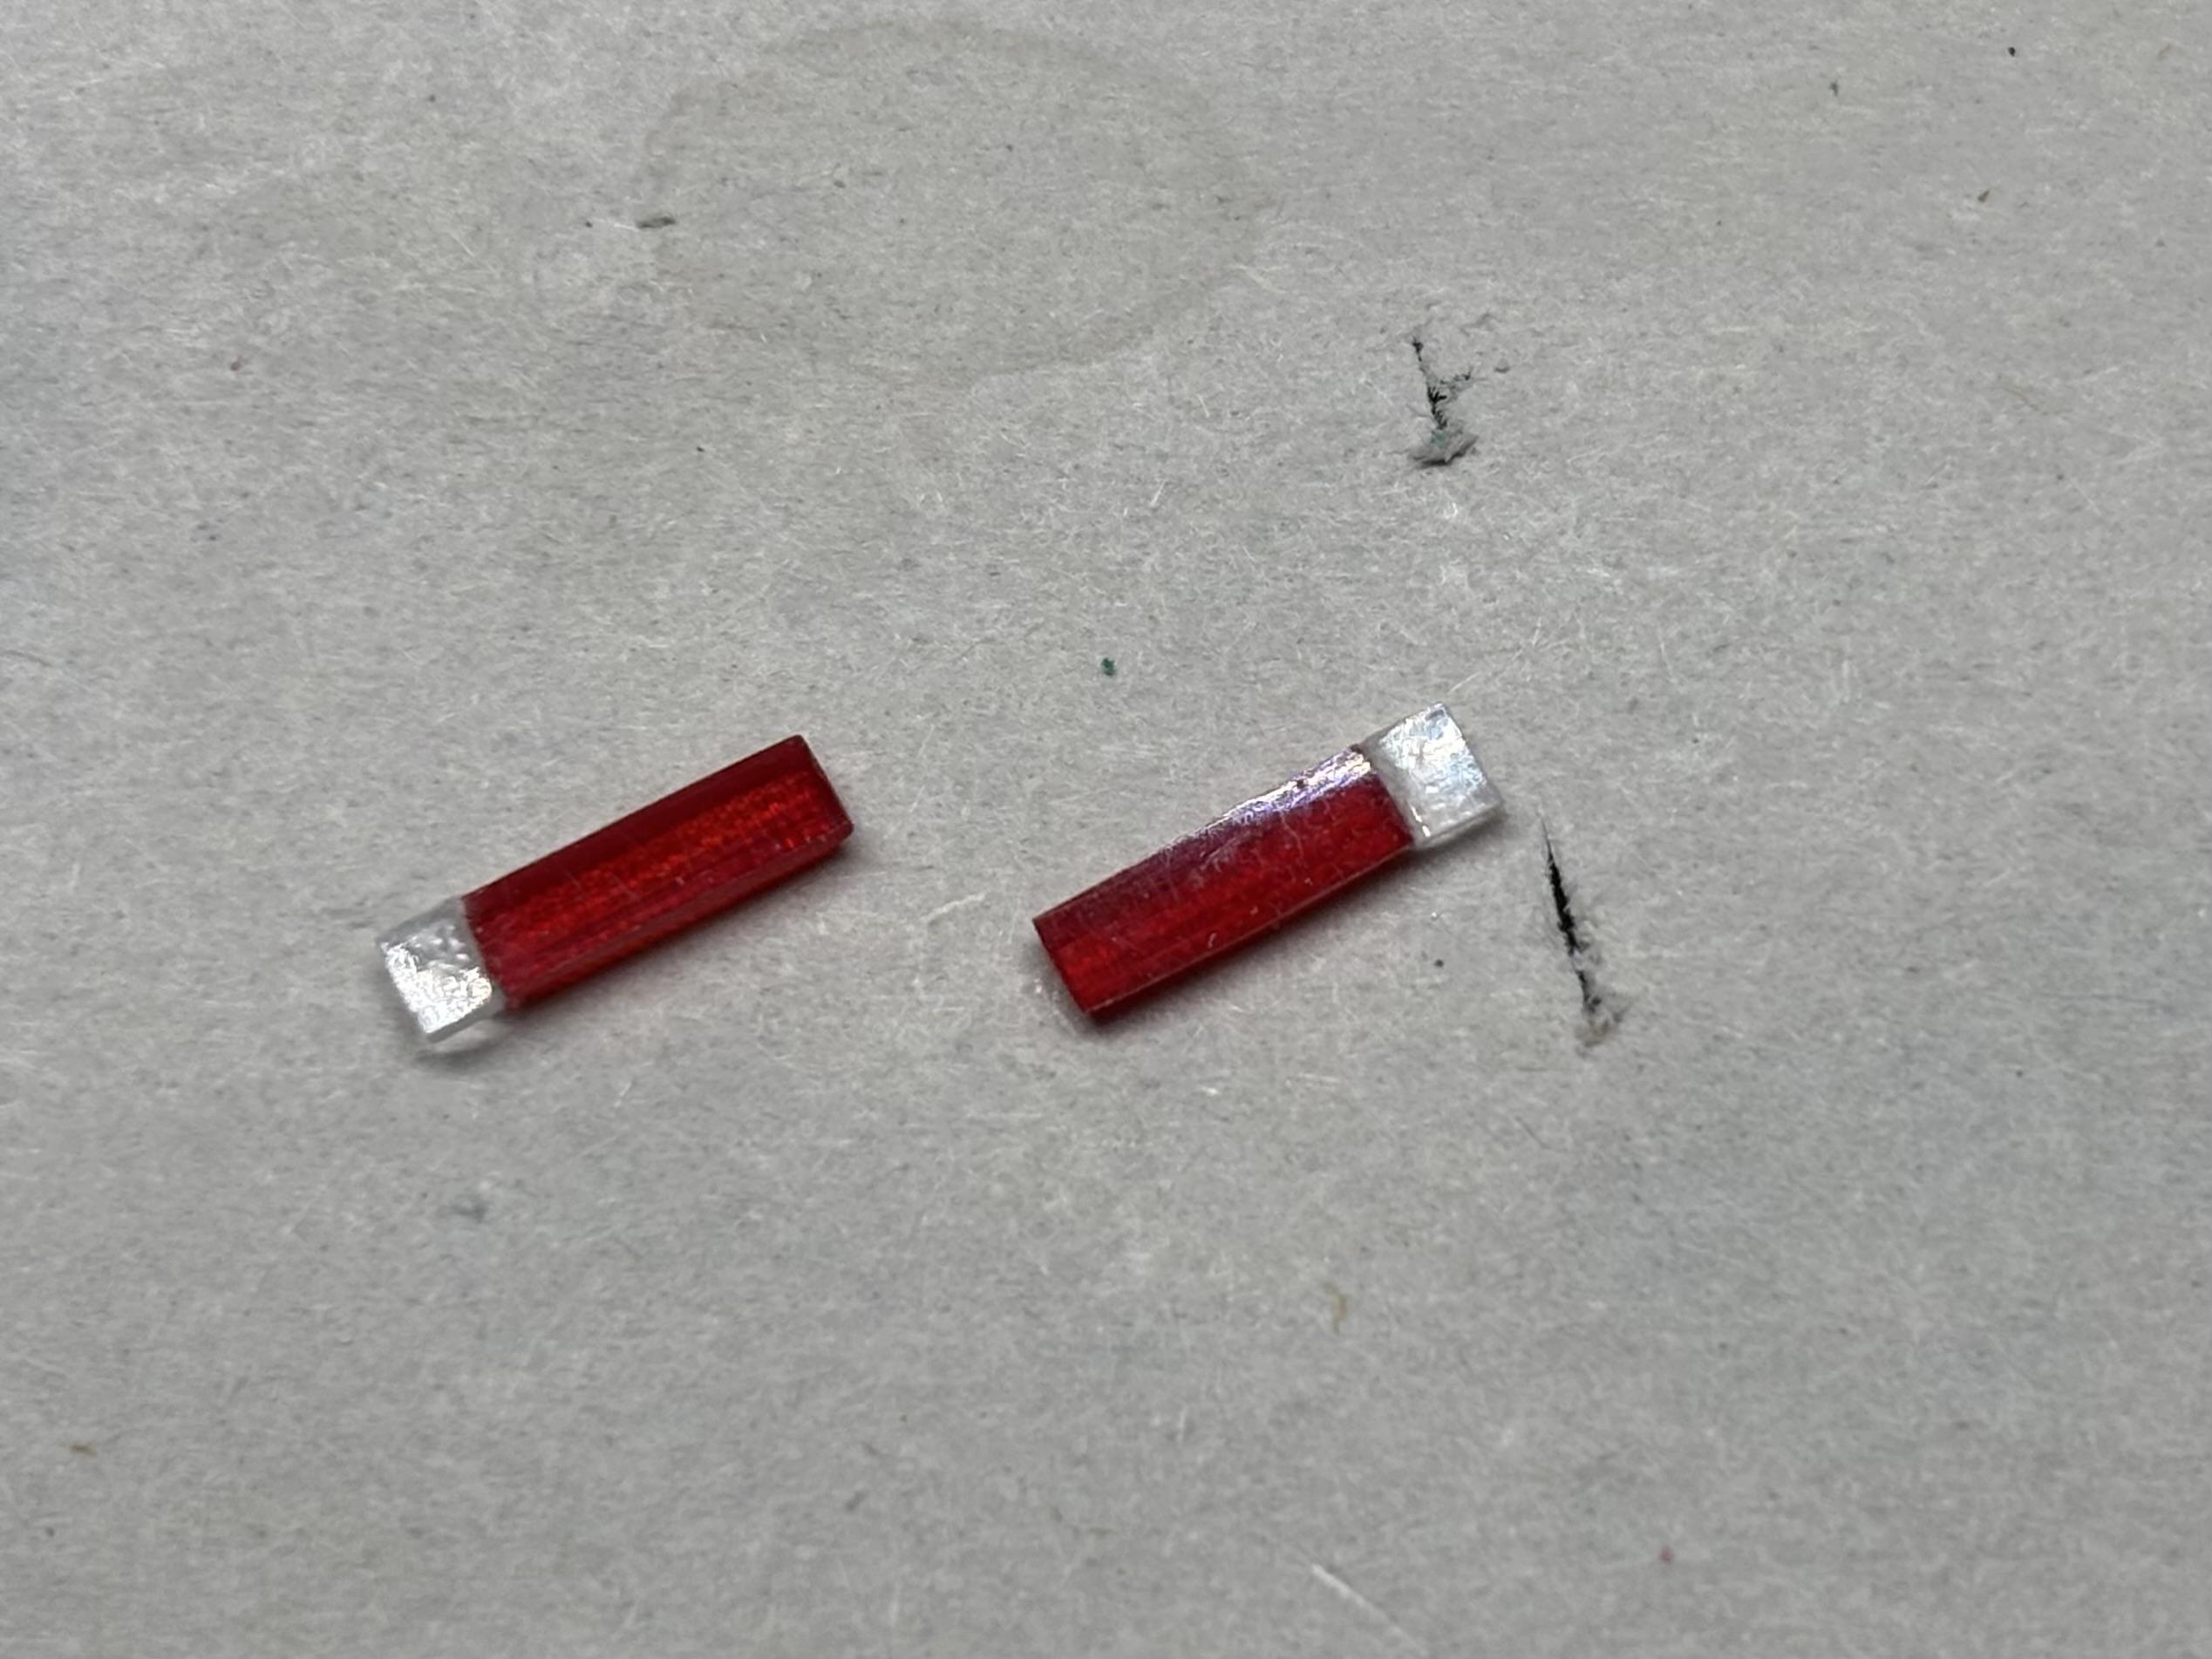
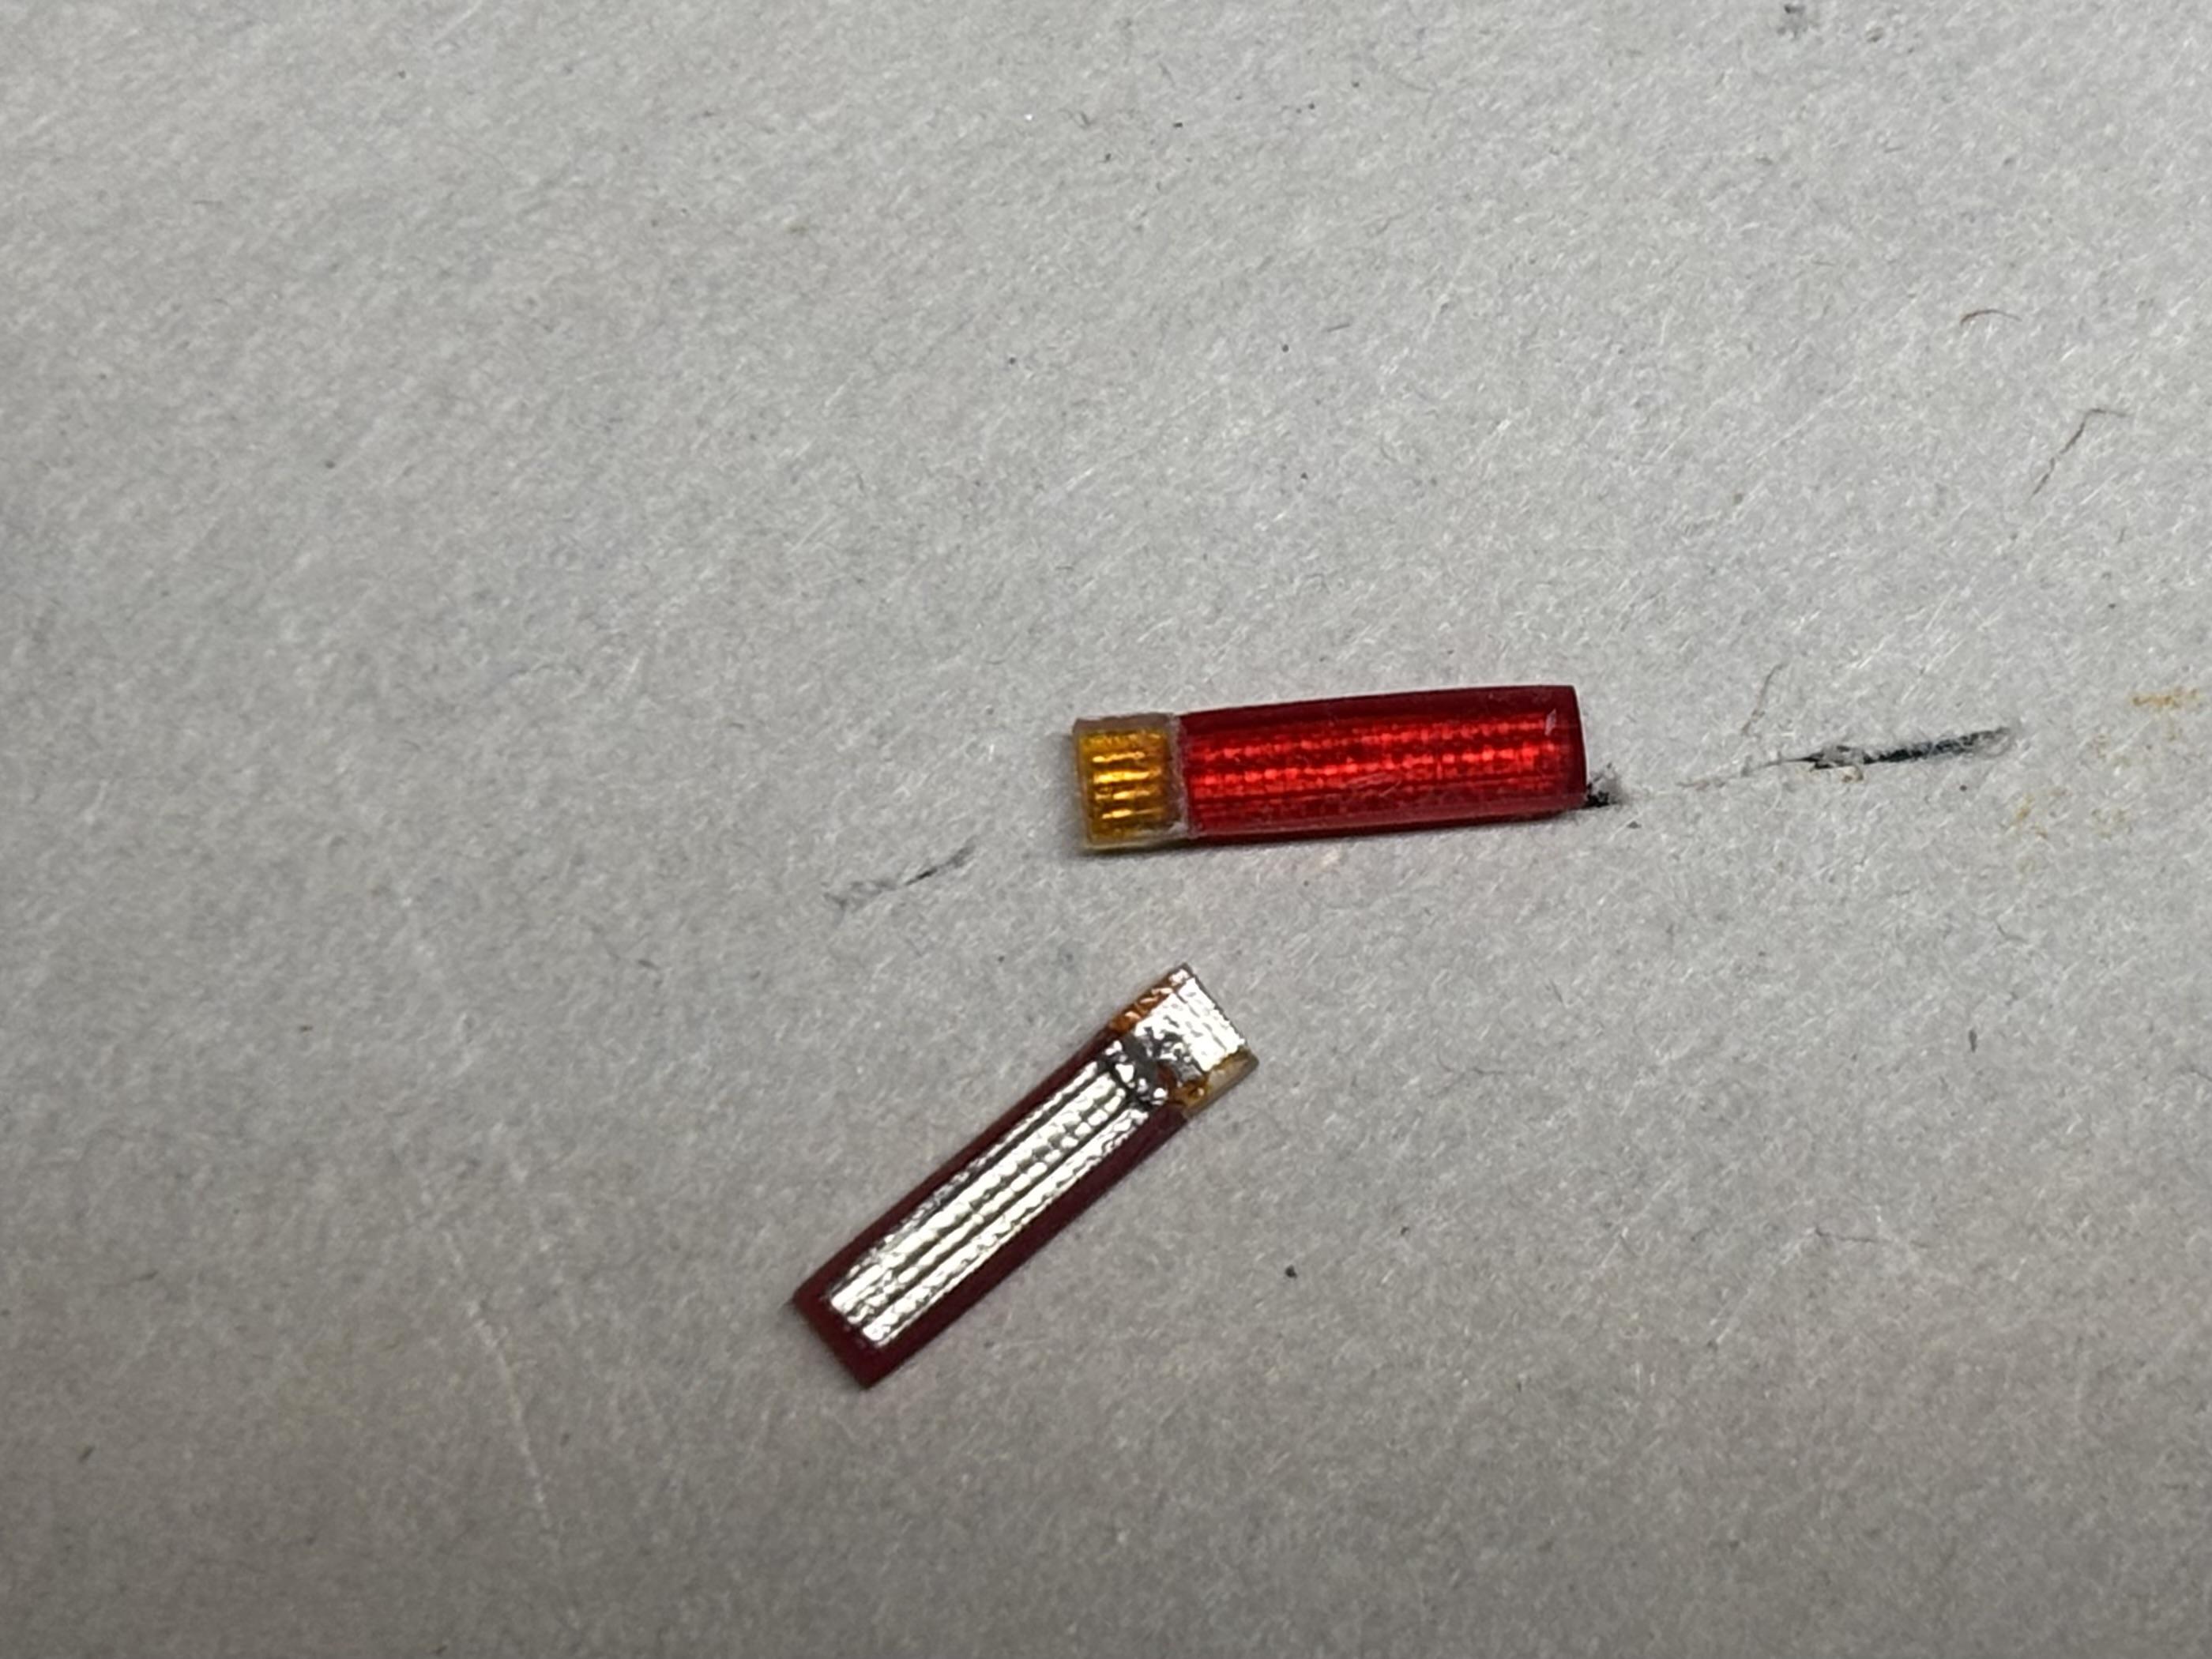
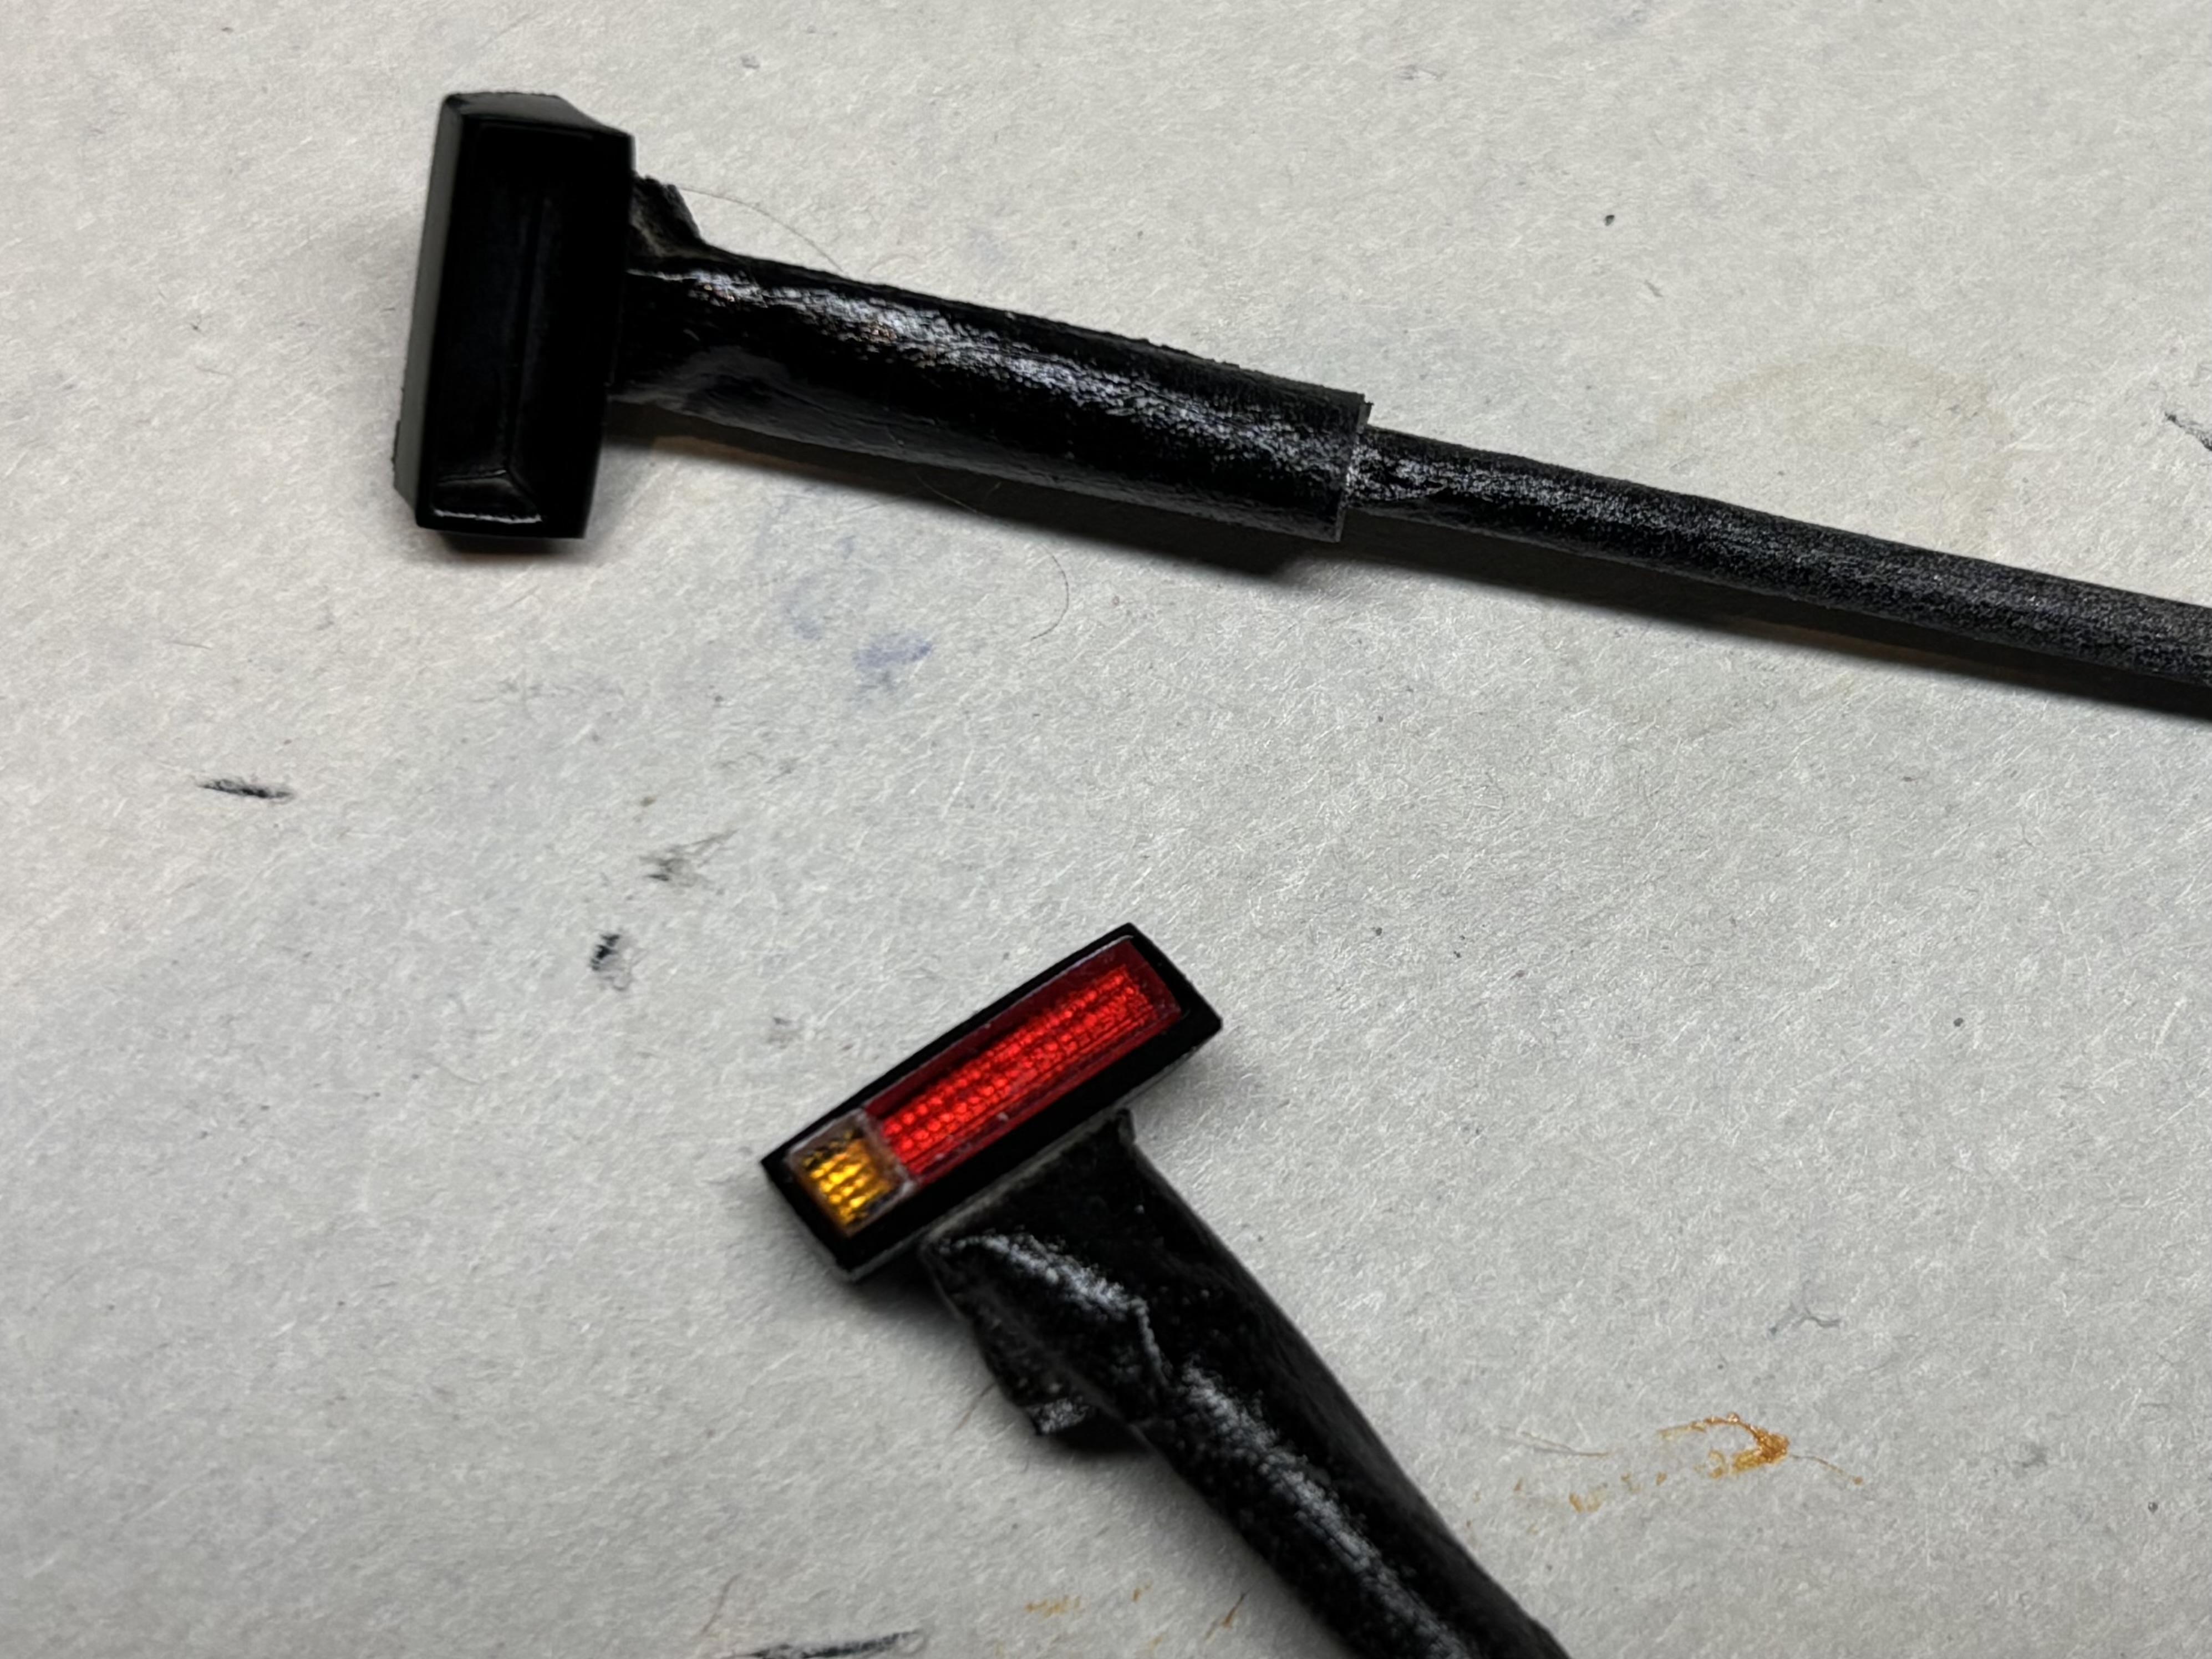
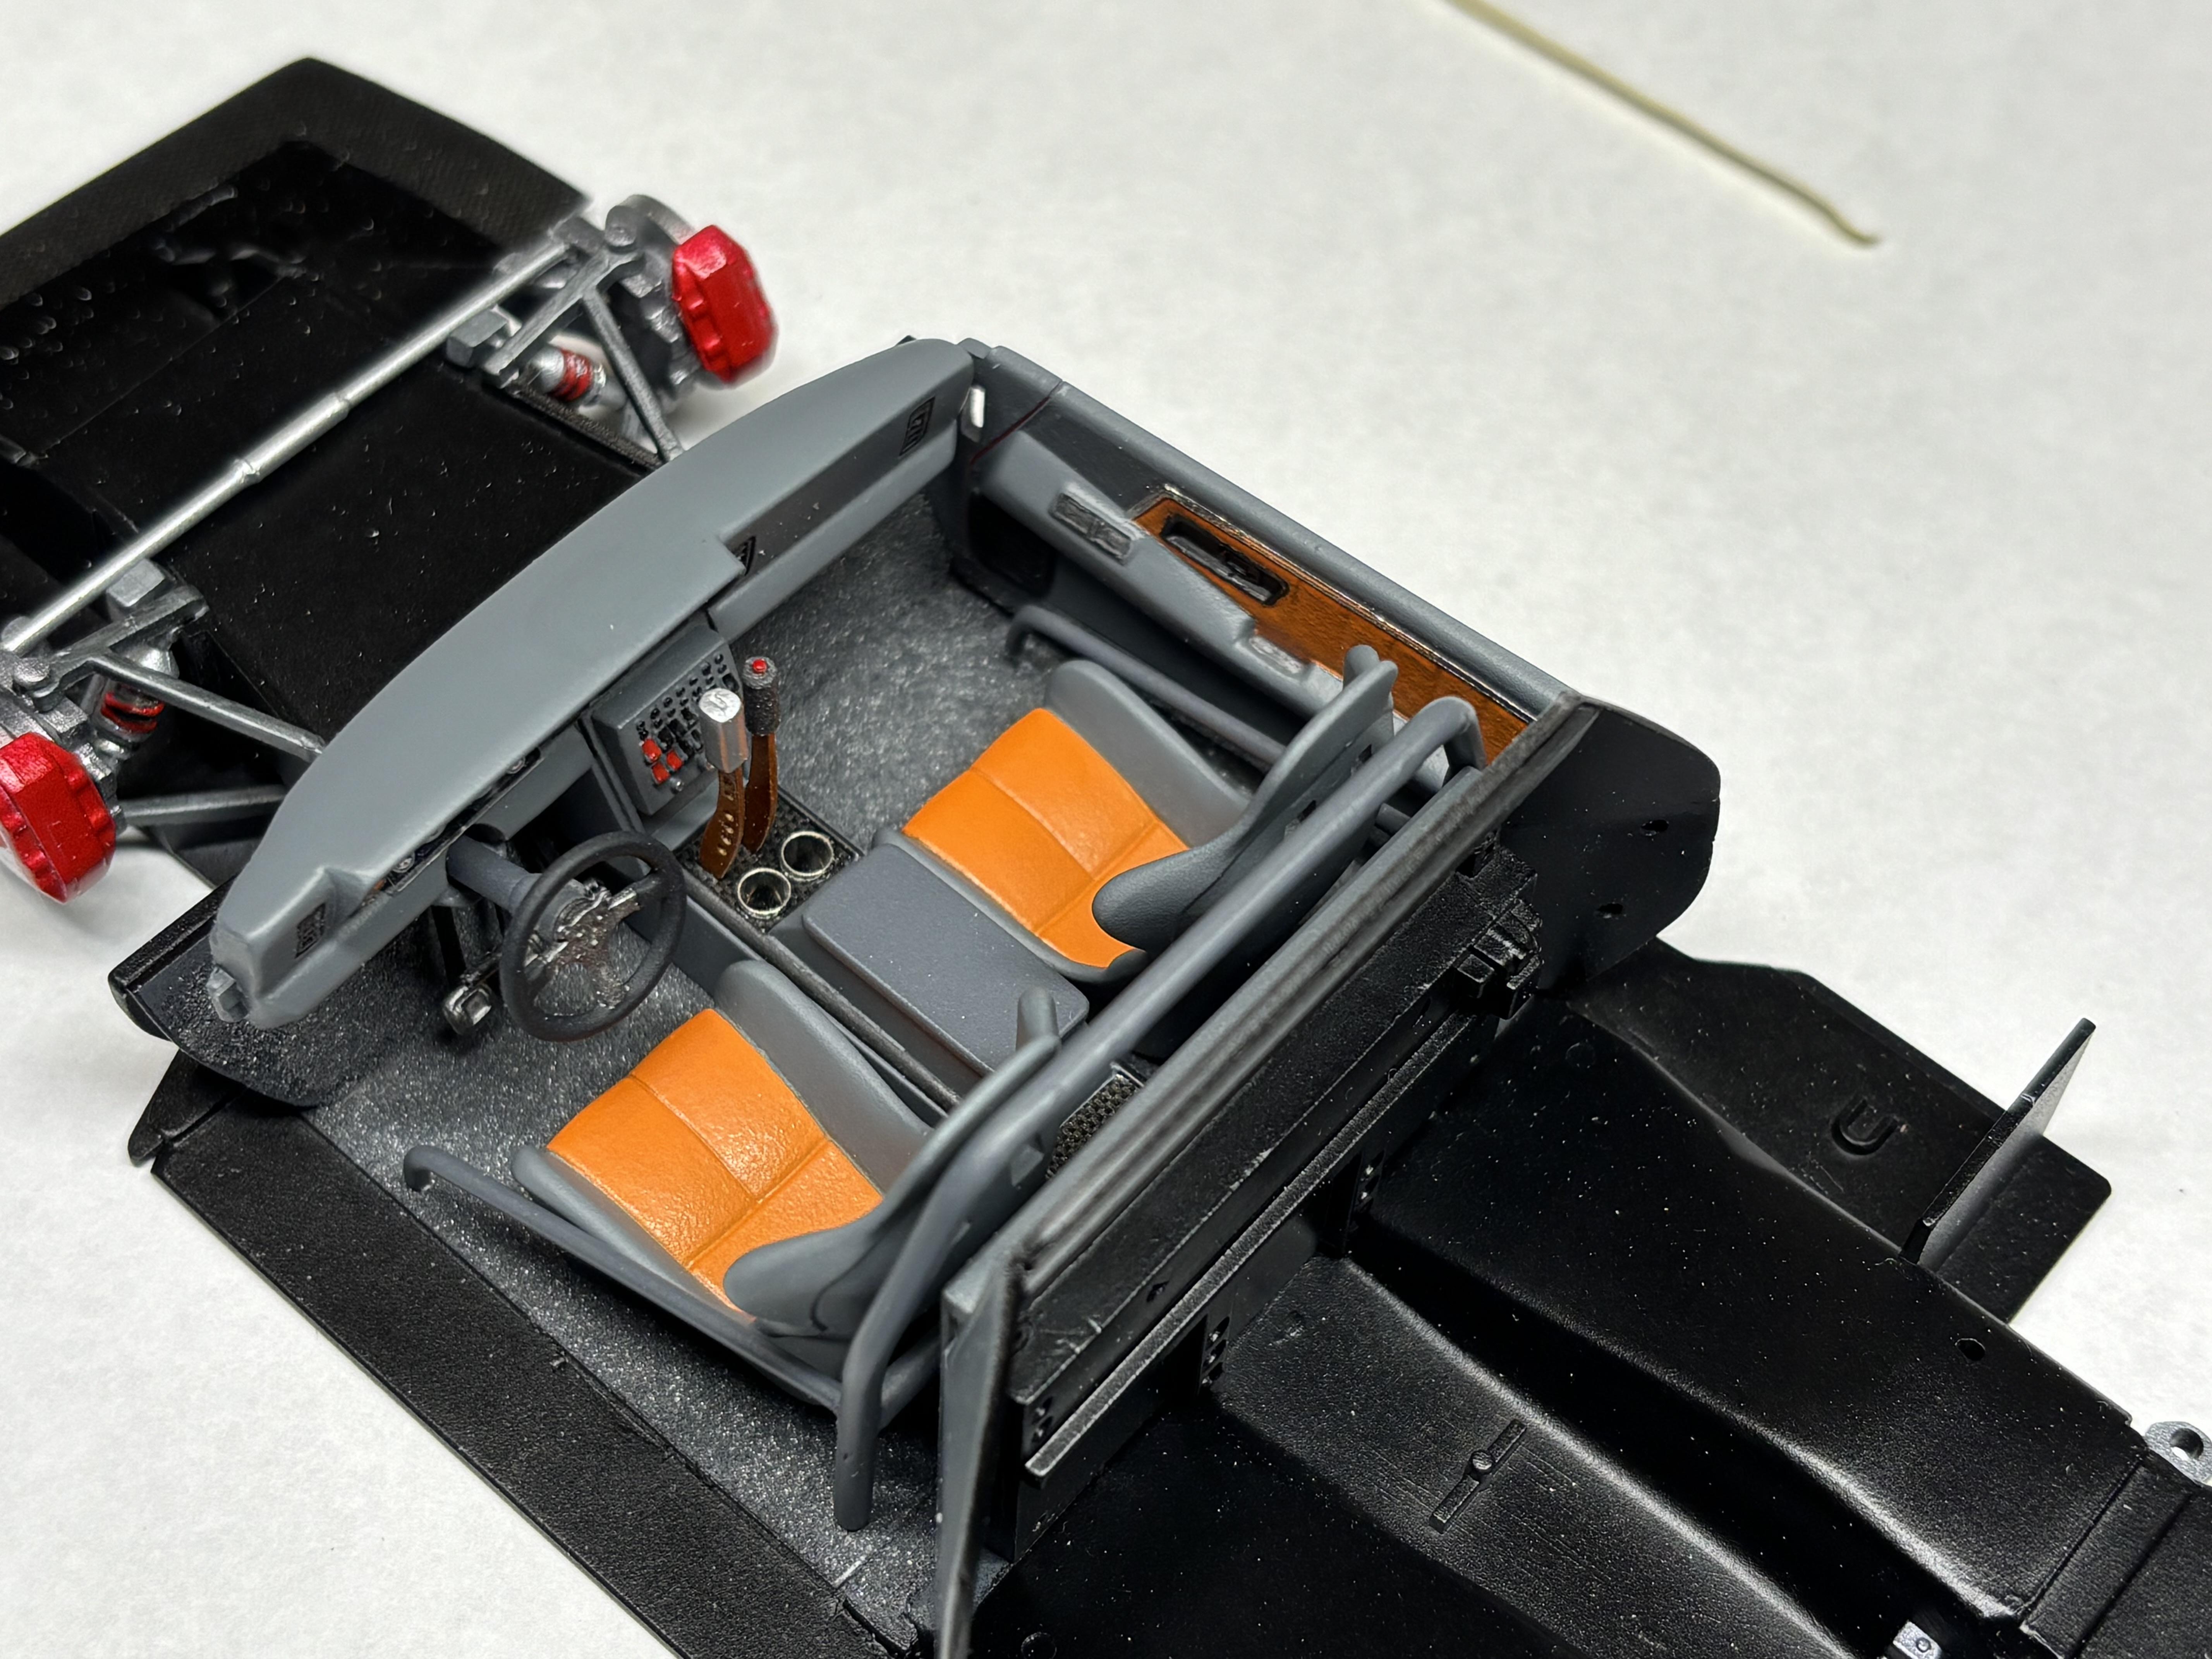
Decided to tackle the taillights today. I had the parts, just needed to do some fiddling. I will let the pictures do the talking, nothing too exciting here… I like to use foil behind taillights and turn signals, gives an extra pop in my opinion. Pieces aren’t glued yet, but these are essentially complete. I found the kit’s windshield in my “glass” bin. It has a dimple for a rear view mirror, which I will not be using. So, I decided to fabricate a radar detector to fill the dimple. Not sure what they actually look like now, but I figure this is close enough. Sorry, not the best photo. I’ll show a pic of it installed later… The rear suspension is now mated to the engine/trans assembly. It is not glued to the chassis yet. The seats, roll bar and console are glued in place now. Lastly, I reworked the wing support and moved it forward about 12”. Better…. Still plugging away, should have more soon. Thanks for looking!
-
Cyber punk ‘88 Dodge Daytona/Mercedes C9 kit bash
Steve H replied to Steve H's topic in WIP: Model Cars
Hi Dan, ya…. I agree with you completely! A bit silly too probably, but a fun build that I’m really enjoying. Thanks for checking in sir. -
Western Star 4900 FA plow truck
Steve H replied to BK9300's topic in WIP: Model Trucks: Big Rigs and Heavy Equipment
Wow Brian, just wow… Tremendous amount of beautiful details throughout this build. Very impressive. -
Hey Keith, nice group of builds! The wagon is my fav. Love old wagons, especially GM variants. Happy new year sir!
-
Cyber punk ‘88 Dodge Daytona/Mercedes C9 kit bash
Steve H replied to Steve H's topic in WIP: Model Cars
Thanks John, I appreciate you following along. Keith!! Happy New Year sir! Hope for another update soon. Thank you Rich. I’m still slightly disappointed the other decals didn’t work out, but these ones still look pretty good. Happy New Year’s to all!! -
Cyber punk ‘88 Dodge Daytona/Mercedes C9 kit bash
Steve H replied to Steve H's topic in WIP: Model Cars
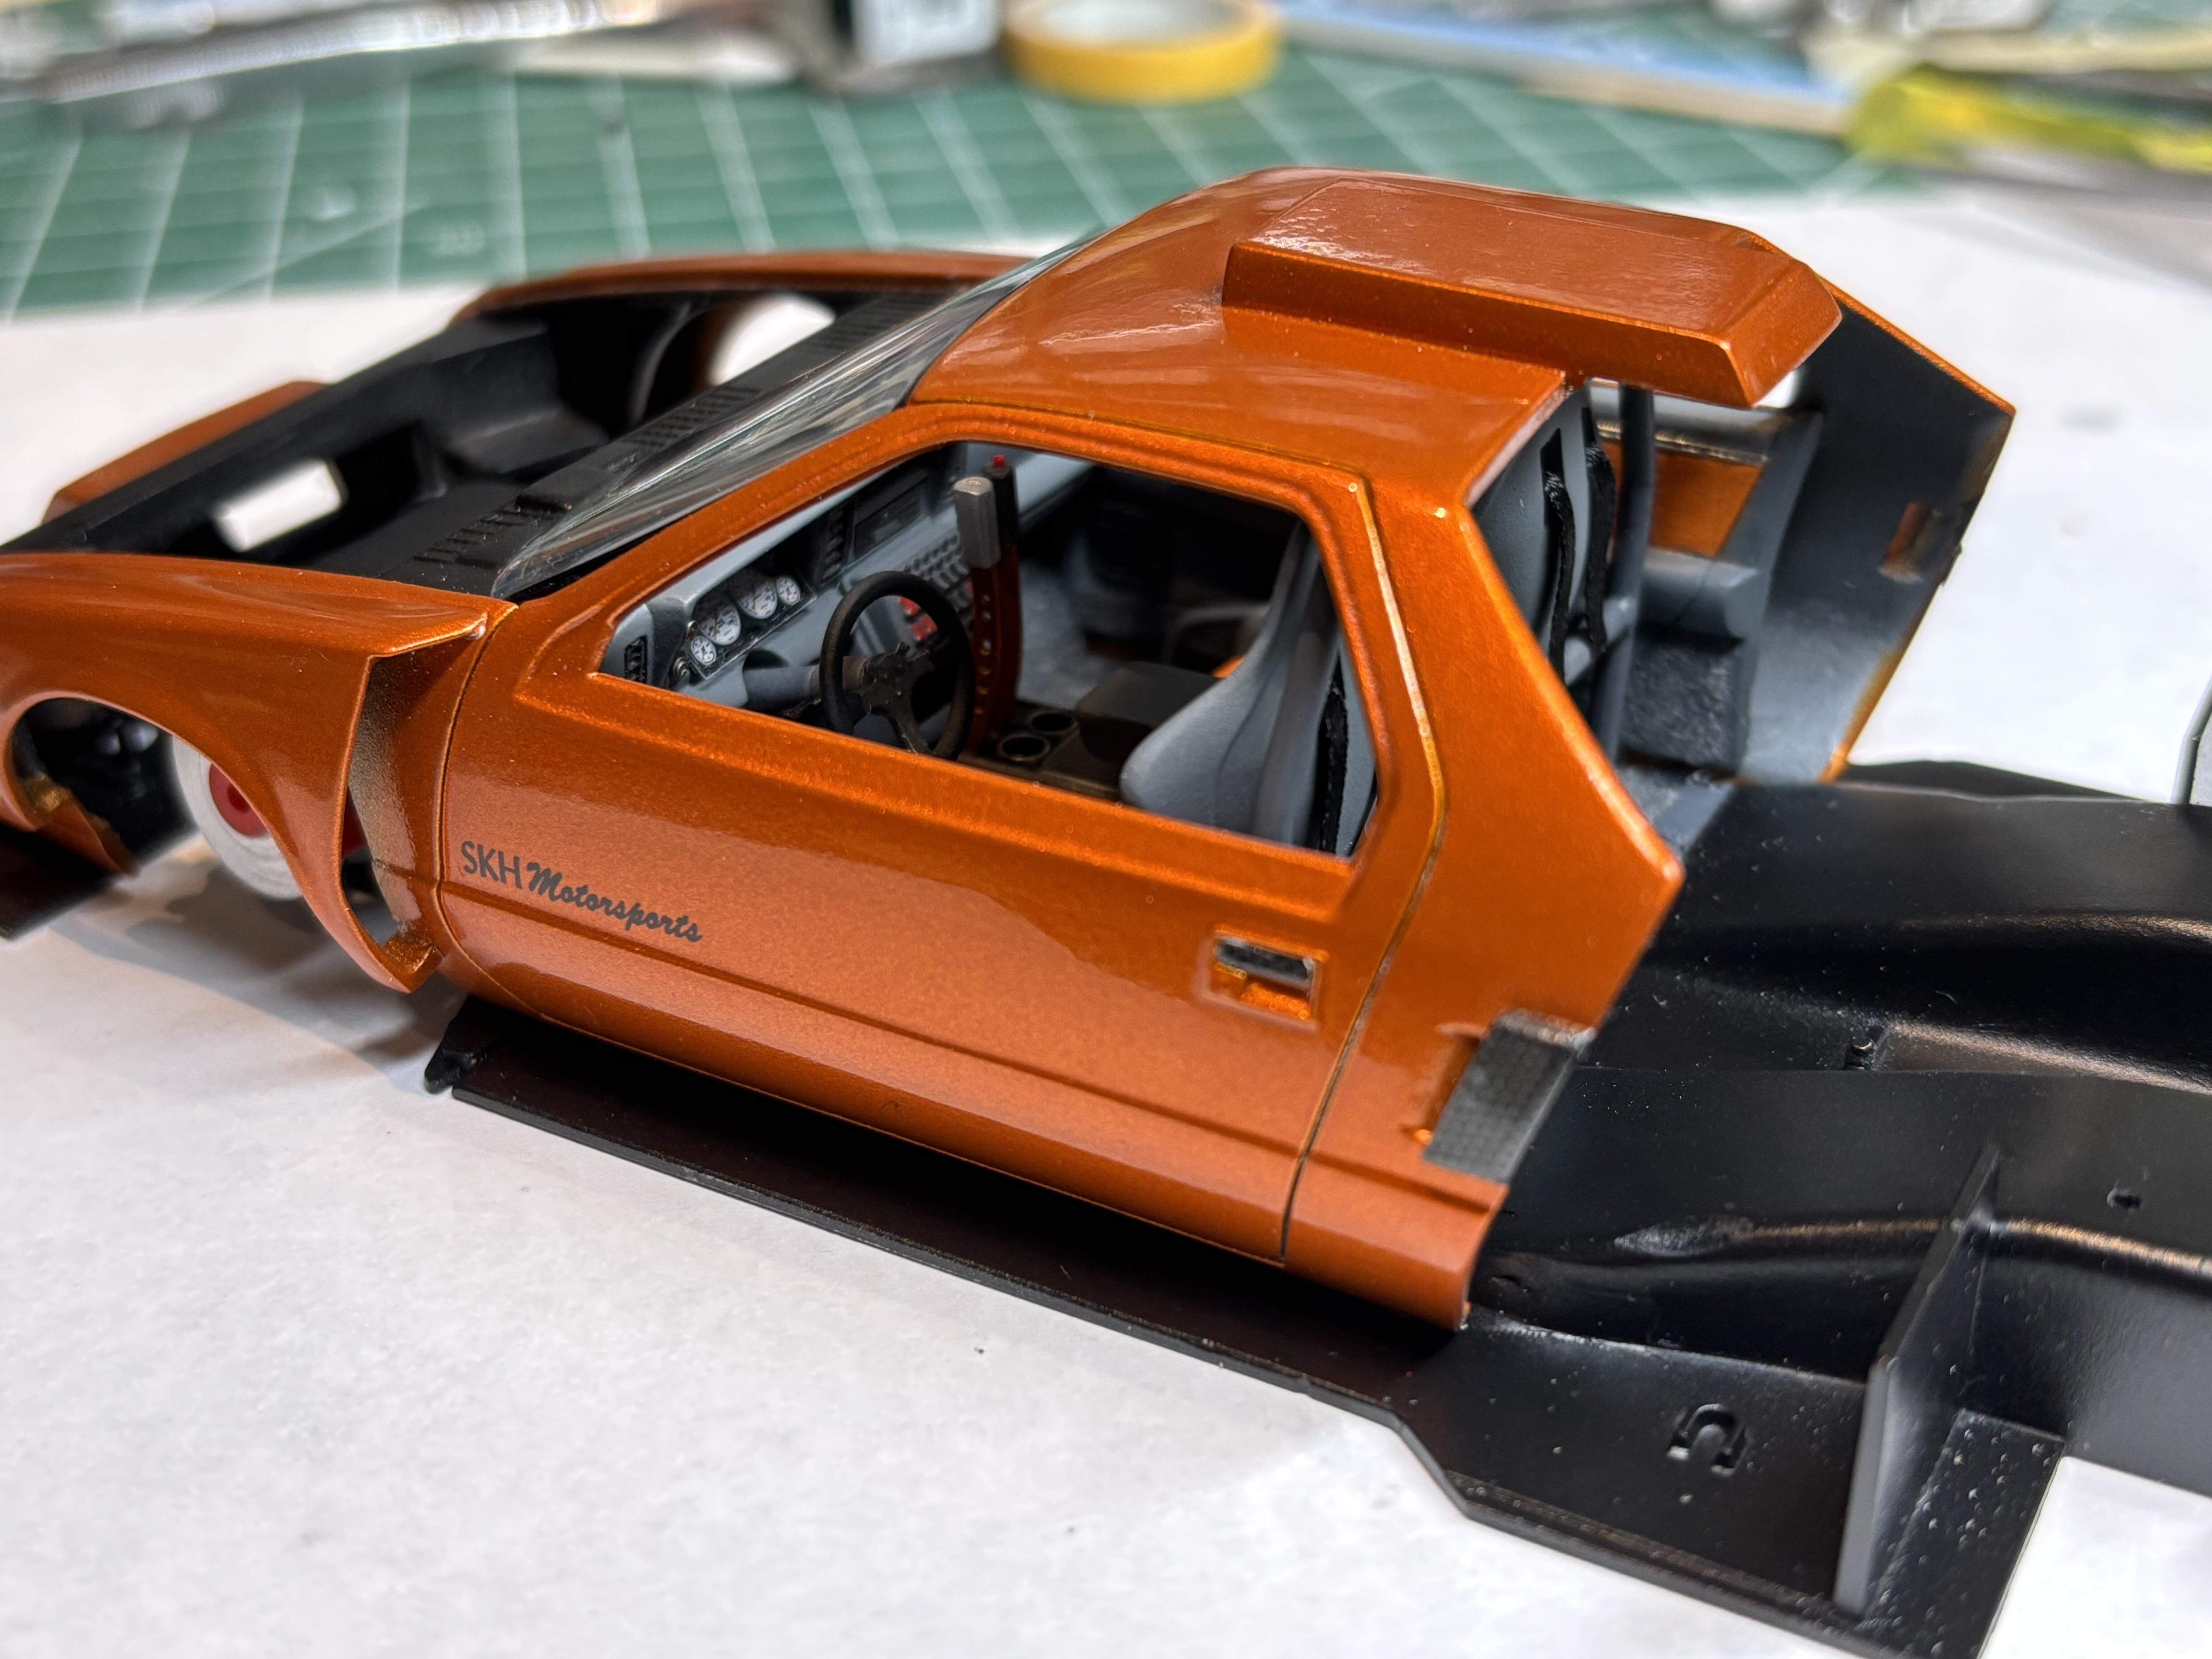
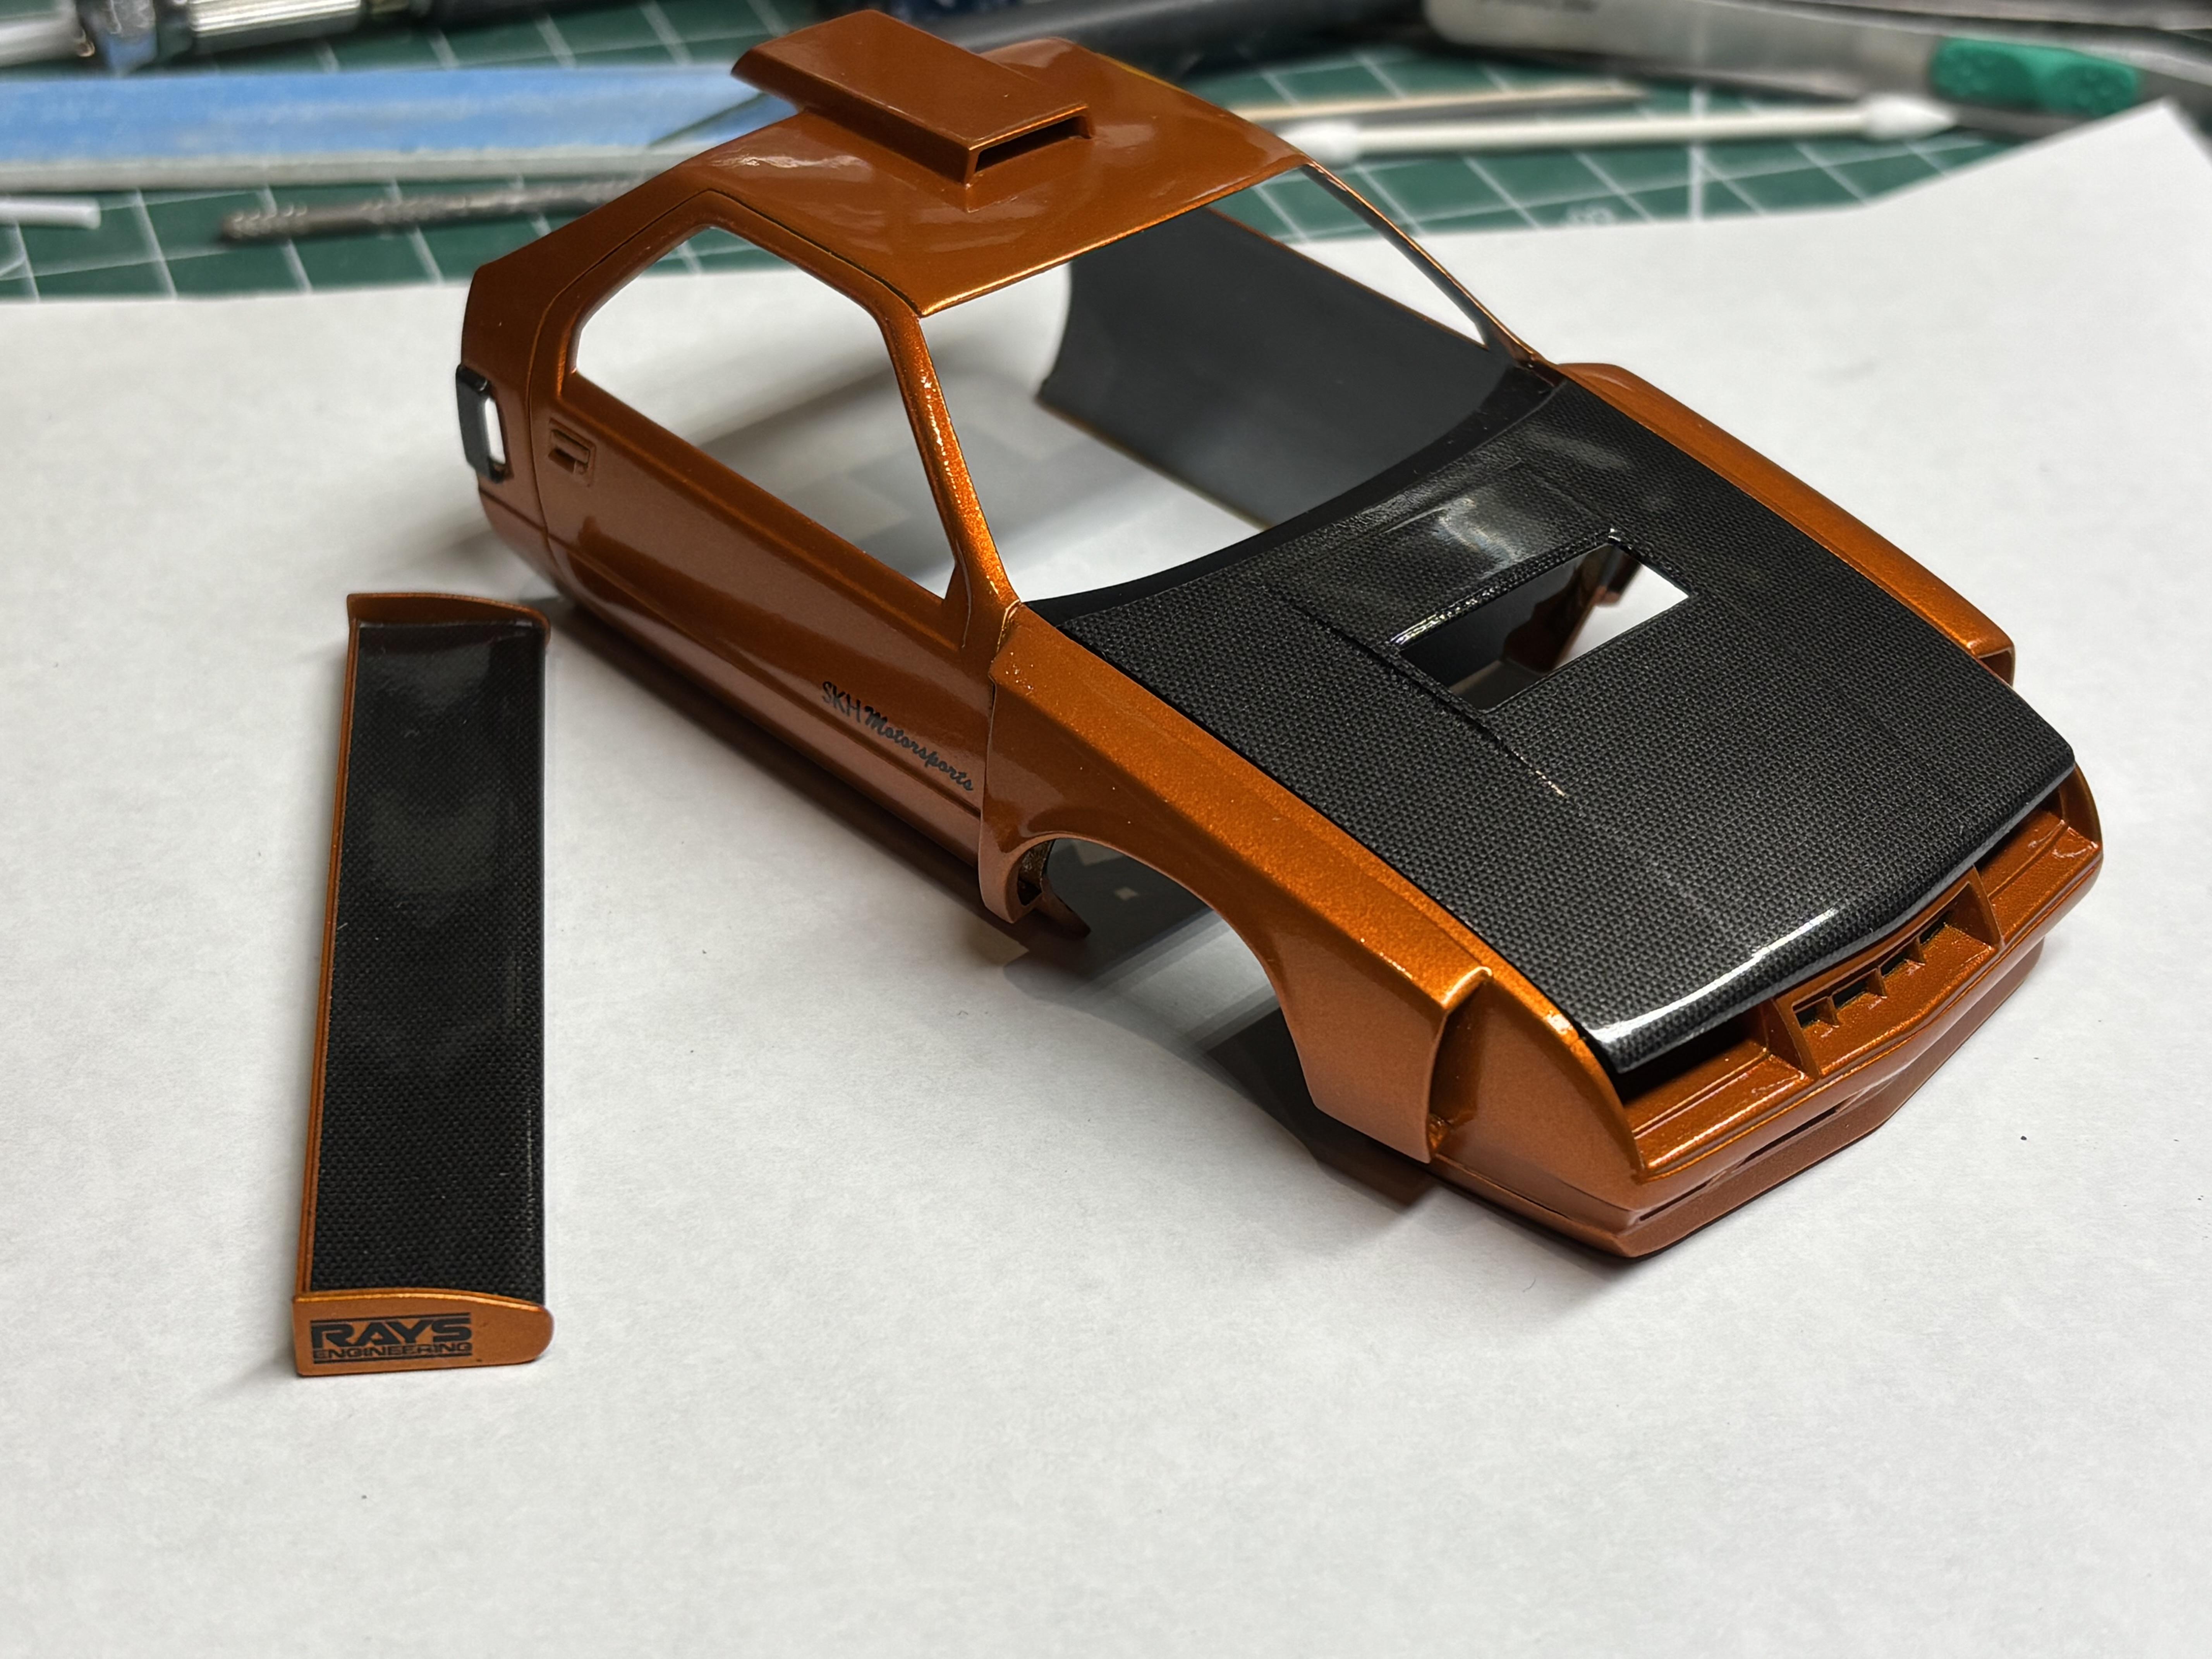
Quick update. Body has been cleared, and polished. I must say that carbon fibre decals and me aren’t the best of friends… I truly admire those of you that get them to conform to odd shapes. I’ve watched several videos and feel like I do things correctly, but meh… I actually wanted to use the Kevlar/carbon decals with the goldish hue as they looked amazing with orange paint. The sheet I had fell apart and cracked before I could even get them out of the water. Anyhoo… the hood, wing and side scoops, are in carbon. I will add mesh at the hood and grille openings. I did a quick (and apparently dusty) mock up of the interior components. Nothing is glued in place yet. Still a few little things to add (seat belts, power window/lock switches, and keys) and tidy up, but it’s coming along. I think that’s it for this round… Thanks for having a look. Oh ya, Merry Christmas to all as well!!
-
Cyber punk ‘88 Dodge Daytona/Mercedes C9 kit bash
Steve H replied to Steve H's topic in WIP: Model Cars
Thank you technics. More soon I hope. -
This is coming along really nicely Dennis. Kind of a shame about the carbs. I was wondering if you could just cut off the intake trumpets and replace them with bootlace ferrules, but I see the carb itself is different.☹️ The rest of the engine looks fantastic, I’m sure whatever you do for a “fix” will turn out great. Is the gold on the valve covers and oil pan Tamiya? Looks spot on.
-
Thank you Chris. Thanks David, I appreciate the kind words. I Chuck, thanks for sharing that story. They are certainly beautiful cars. I always liked them, but I like them even more now. I built the diorama a couple of years back, there’s a build thread for it on site if you’re interested. I like having a decent setting to photograph my models now. I enjoy doing builds for people. Thanks for the comments. Thanks Guido, much appreciated. Thanks Samuel. Thank you Ken!
-
Thank you David. Thank you, adding the details was the fun part. Hi Phil, that means a lot coming from you. I’m still learning from all you guys! I’ve mentioned it before, but thanks for everything you do for us here on the island, and the modeling community as a whole. Unfortunately, I will miss the brunch yet again, say hi to the gang for me please. Happy Holidays!! Hi Doug, he has seen the car, but I still have it. Hi Stu! Thanks for following along on the WIP thread, you must be a patient man…😂 Thanks Steve! Yep, I think he’ll find a spot in his display case for it. Very much appreciated Trevor. Thanks for having a look, and taking the time to comment.
-
Cyber punk ‘88 Dodge Daytona/Mercedes C9 kit bash
Steve H replied to Steve H's topic in WIP: Model Cars
Hi Greg, I appreciate your comments. Thank you Brian! Hoping that it all gels once it’s finished. Thanks Anton! Hi David, with this type of build, there is some “artistic freedom” . The internet has provided a considerable amount of inspiration. Thank you John. One of the challenges with this build is pulling it all together. The interior will be a partially assembled floor pan, mated with door cards and a dash assembled to the body, then a few pieces slid in, before installing the rear firewall. The curvature of the body has created some assembly challenges. I think I have it figured out, but I can’t fully assemble the interior then put the body on. I will however do mock up and get some photos before assembly. Haha!! There you are… I was hoping you’d stop in for look Russell. So first, a sincere thank you for sharing the link back on my Caddy build. That link probably led to about 50-100 screen shots for ideas from various sites. I will check in your links, I’m sure there’s more trouble waiting for me… Stick around, it’s starting to get good! Hey Nigel, it’s been a bit! Thanks for checking in. Thanks Dennis, it’s starting to come together. Spike!! Cool is what I’m aiming for, so the plan must be coming together. Good to hear from you. Thanks for the input guys. Hoping for some more progress over the weekend. Christmas is coming though, so that might slow things down.