Beans
-
Posts
734 -
Joined
-
Last visited
Content Type
Profiles
Forums
Events
Gallery
Everything posted by Beans
-

2025 Cannonball Run - 50 years since the 1975 run.
Beans replied to Mattilacken's topic in Community Builds
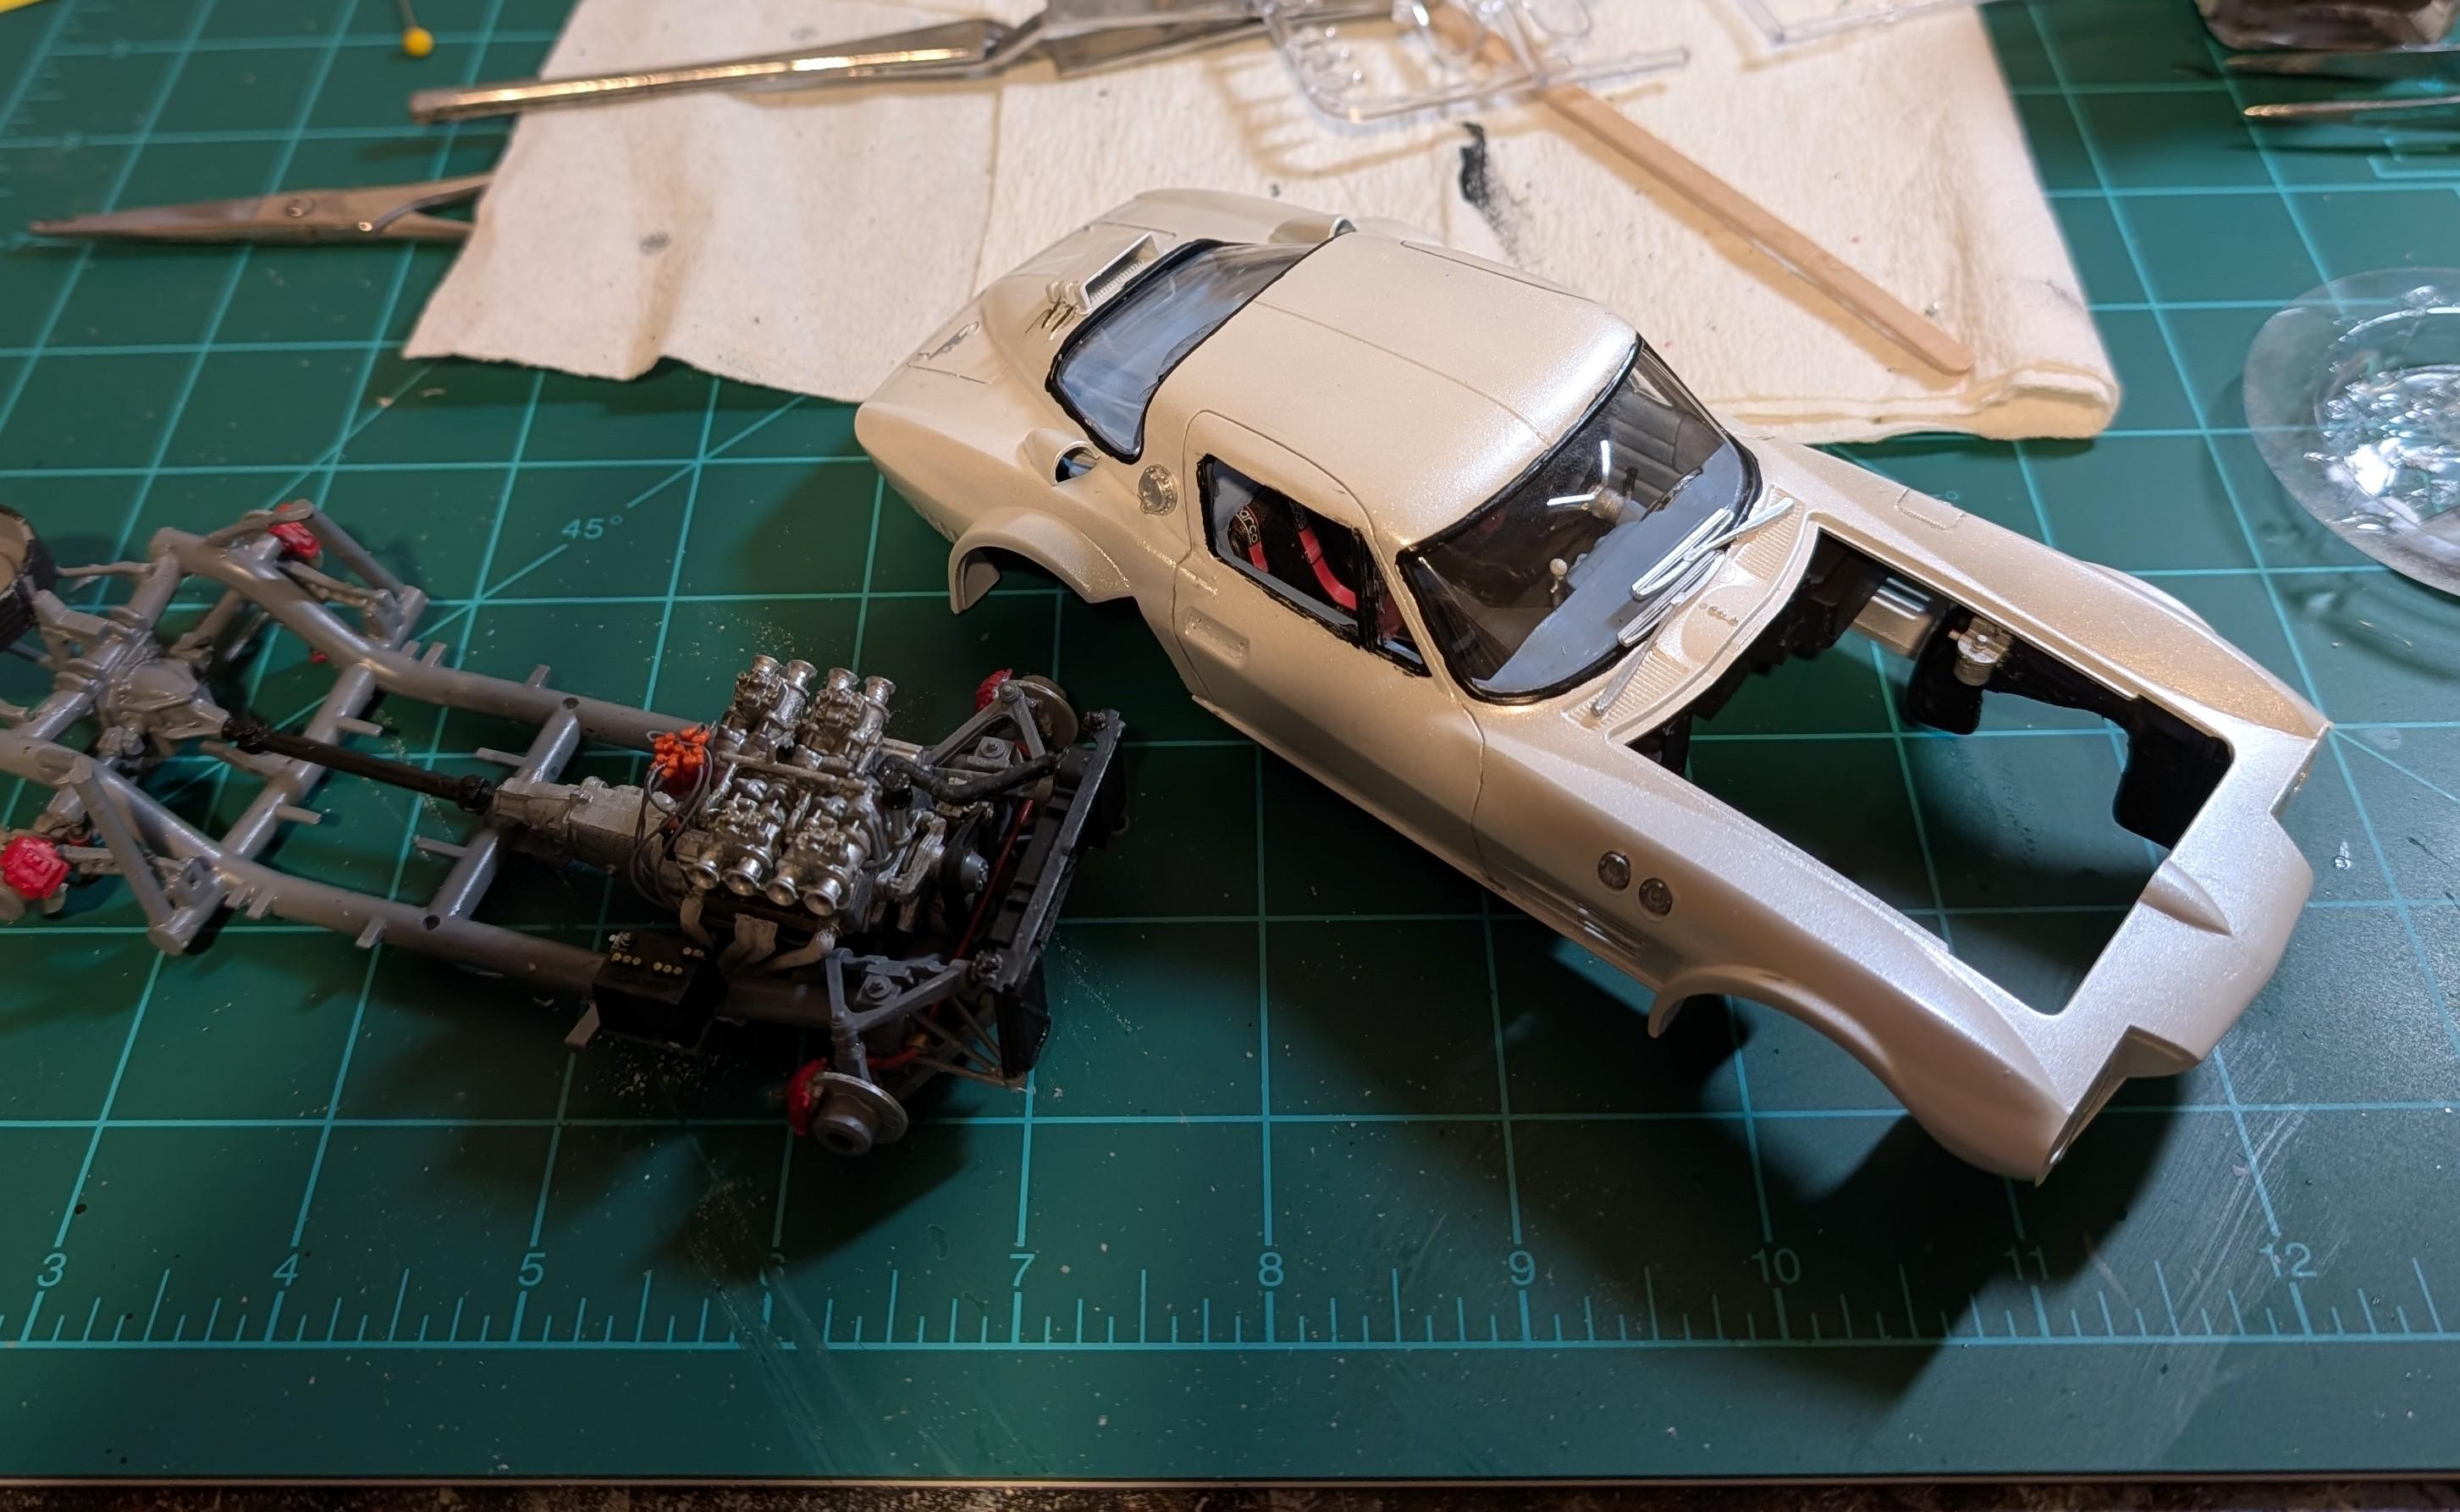
Quick update. Getting close to final assembly.
-
Don't think any kit itself has made me feel that way. Usually it isn't until I get into the build and have my own crazy ideas of what I want to do with it that before I realize I have created all new challenges for myself. To me though, that is the fun in it. I can't seem to ever just build a kit as is.
-
2025 Cannonball Run - 50 years since the 1975 run.
Beans replied to Mattilacken's topic in Community Builds
Seems like no matter how much pre-fitting I do, I always end up with stuff just like this happening on final asssembly. Did you check to make sure that the glass has enough clearance around that radar detector? I made that mistake once. -
Brush painting Tamiya acrylics?
Beans replied to Monty's topic in Model Building Questions and Answers
I tend to experiment as lot so I use a variety of paints. Craft paints, testors little jars, vallejo, green stuff world, Citadel and other wargaming paints. I go through brushes a lot. I use everything from cheapo ones for small but not delicate applications, to artist brushes. I will get a pack of brushes in various sizes from Hobby Lobby or Michaels and go through them rather quickly, but also use finer brushes used by a lot of the small figure painters. Honestly, most of my brushes come from family as gifts for birthday and such. Some people gets socks and underwear as the standard gift, for me it's small paintbrushes. -
Building The Double Zero Mustang
Beans replied to Lionel's topic in Model Building Questions and Answers
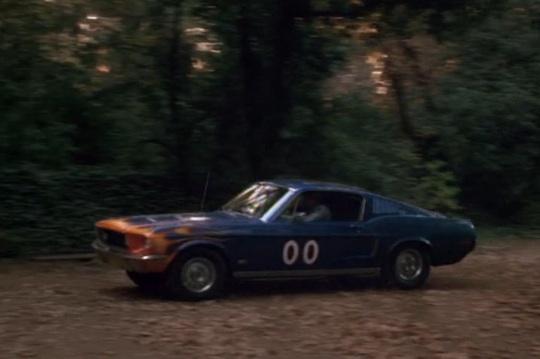
This one? Hadn't seen that before. Looks like a 1968. Not sure about what wheels it has. The Revell 68 GT 2 'n 1 kit should get you the closest.
-
Price is key. Some 3D printers offer full kits from time to time in limited runs. None are anywhere near the injected model price point. It is going to take someone actually offering 3D printed full kits at much much less to create the competition. Right now they can charge full kit price for components and people are buying like crazy. It will take a shift in that for someone to want to produce full kits offered at a lower price than they can sell an engine for. Especially when you can print more than one engine at a time but a full kit will require multiple prints just to complete a single full kit. Definitely a possibility in the future but will the market support it vs cranking out components for the kits somebody else is making.
-
Agree 100%. I struggled for years trying to dial in my airbrush to spray well. Switched and tried createx and watched a few videos, mixed some up and boom, worked like a charm. Only issue I had was on me and not realizing that the pearl white needs to go over a white base coat. Pearl white over grey primer made a cool silver though.
-
one of the best rattle can paint jobs i ever had was done under those exact conditions.
-
I'm pretty much the calibrated eyeball guy as well. I tried the exact measurement stuff once and found that the wires looked too thin. They were in scale but didn't look in scale. Plus, I have yet to find a way to make an out of the box distributor work with any scale of wires. I end up going with aftermarket ones then tend to be a little bigger than scale anyway. I have yet to see a throttle linkage spring that was actually scale correct. Sometimes it boils down to accepting that every little piece isn't in scale because the overall detail looks good and accommodates my skill level.
-
Most people have specific ratio mixes they use. I tend to wing it and just look at the consistency as I add thinner. I find that every different paint has a different ratio and I start on the low end and work my way up until I have the consistency I look for. There are even times when I stop spraying because even though the consistency looked good it is coming out too thin or too thick and will add whatever I need to, to correct it. For me at least, metallics require a different mix than standard colors.
-
Largest kit box ever?
Beans replied to OldNYJim's topic in General Automotive Talk (Trucks and Cars)
Following the instructions in order would be the biggest challenge for me. -
Making my paint booth from galv. sheet metal
Beans replied to 64SS350's topic in Tips, Tricks, and Tutorials
Well nobody will ever be able to call it flimsy. That is going to be the sturdiest paint booth ever. Looks good. -
Not sure how they "print" it but, however they make these seatbelts would be great with a sheet of emblems. That is as long as they could be made chrome enough. I've used the belts a couple of times and they turn out great.
-
chrome-extension://efaidnbmnnnibpcajpcglclefindmkaj/http://www.maximumreach.com/Introduction%20To%20Heavy%20Haul%20Trailers%20Part%201%20Of%202.pdf FWIW I'm pretty sure Les was trying to help you out. I googled heavy haul trailer and came up with the link above. I just searched for "heavy haul trailer schematic diagram". You may get lucky and find someone who has one laying around but that could take a while.
-
This got me thinking way to much this morning.... I started thinking about those compasses that hold the pencil and what would it take to design something that would fit over the tip of my airbrush that would hold a pen. The whole thing is kind of a solution looking for a problem but what the heck.
-
interesting...Just looking around online I see that there are various types at various prices. Some made to work with multiple types of markers. Some with different tips for finer line work.... Could be fun to experiment with. See what kind of inks hold up with clear coats and such.
-
Was going through my old photos and ran across this that I put together at some point. Figured I'd share it.
- 1 reply
-
- 5
-

-

-
Very cool! Some day I hope to attempt a Hornet Sportabout conversion.
-
Hobby Lobby Inventory reduction sale
Beans replied to magicmustang's topic in General Automotive Talk (Trucks and Cars)
The clearance models were still on the regular shelves at mine. The only way you would notice is that there was a clearance price sticker on them. Otherwise they were just on the shelves like regular. -
have you checked Fireball Modelworks? I don't know if they have what you are looking for but tends to be my source for hard to find wheels and covers.
-
What did you see on the road today?
Beans replied to Harry P.'s topic in General Automotive Talk (Trucks and Cars)
Always see the coolest stuff on my way home from work.
-
Down memory lane for fun
Beans replied to John1955's topic in General Automotive Talk (Trucks and Cars)
I was more of a, shoot the army men with a BB gun, kid. The only model kit that got the firecracker treatment was an F14 that I rigged up to slide on a string so I could try and film it with a really old video camera. After realizing the one take didn't work it was too late. -
Hobby Lobby Inventory reduction sale
Beans replied to magicmustang's topic in General Automotive Talk (Trucks and Cars)
Olive Branch MS has them. You wouldn't know unless you look at the price tags. They are all still in the regular aisle. Some just had to clearance prices. They were pretty much gone except for the Bronco and the Nova. I grabbed the last Camaro and Malibu. -
That right there seems to be the most logical next step.
-
https://www.ebay.com/itm/297136599197?itmmeta=01JPX1JQ3BH1MN8JWG6ZQ7F8ED&hash=item452eb8b09d:g:~esAAOSwb0Bn3bFx&itmprp=enc%3AAQAKAAAA4MHg7L1Zz0LA5DYYmRTS30k3eTbChTx34DZrm73ZHMDfQN78E96BzGJifSHMI91QIKGQ6%2FWLzNca71dCfqpadAOV04gFrsJoGZJ5Oh3OJ2mqEDKgDgGB3nO2LchXw7OvFboxQi44r1NxcnY0nyXqj7mGP%2FJ8O6dC%2BfXWnbhSvPSMBiE8envlV%2FqRItRF4Lmu1eoB%2Bk5I9B5rpxpfbgBpE8nTq%2F%2BQ2AiOcr5XKzkVT4%2FQ4hG9Jinn366sYidaGzdpTFU2VSmIuvSzGrCLfrmQGucxeIk3rMDsHDbRwvKVQipV|tkp%3ABk9SR-jxyqG3ZQ Just an FYI. No affiliation.