Pierre Rivard
-
Posts
2,579 -
Joined
-
Last visited
Content Type
Profiles
Forums
Events
Gallery
Everything posted by Pierre Rivard
-
These last pictures show the color much better, and it holds a lot of promise. This project is really taking shape in a beautiful way. Huge cool factor. Thanks for the help on the making of aluminium panels. Might jump in with these on my next project.
-
Mercedes Benz SSK
Pierre Rivard replied to Pierre Rivard's topic in WIP: Other Racing: Road Racing, Land Speed Racers
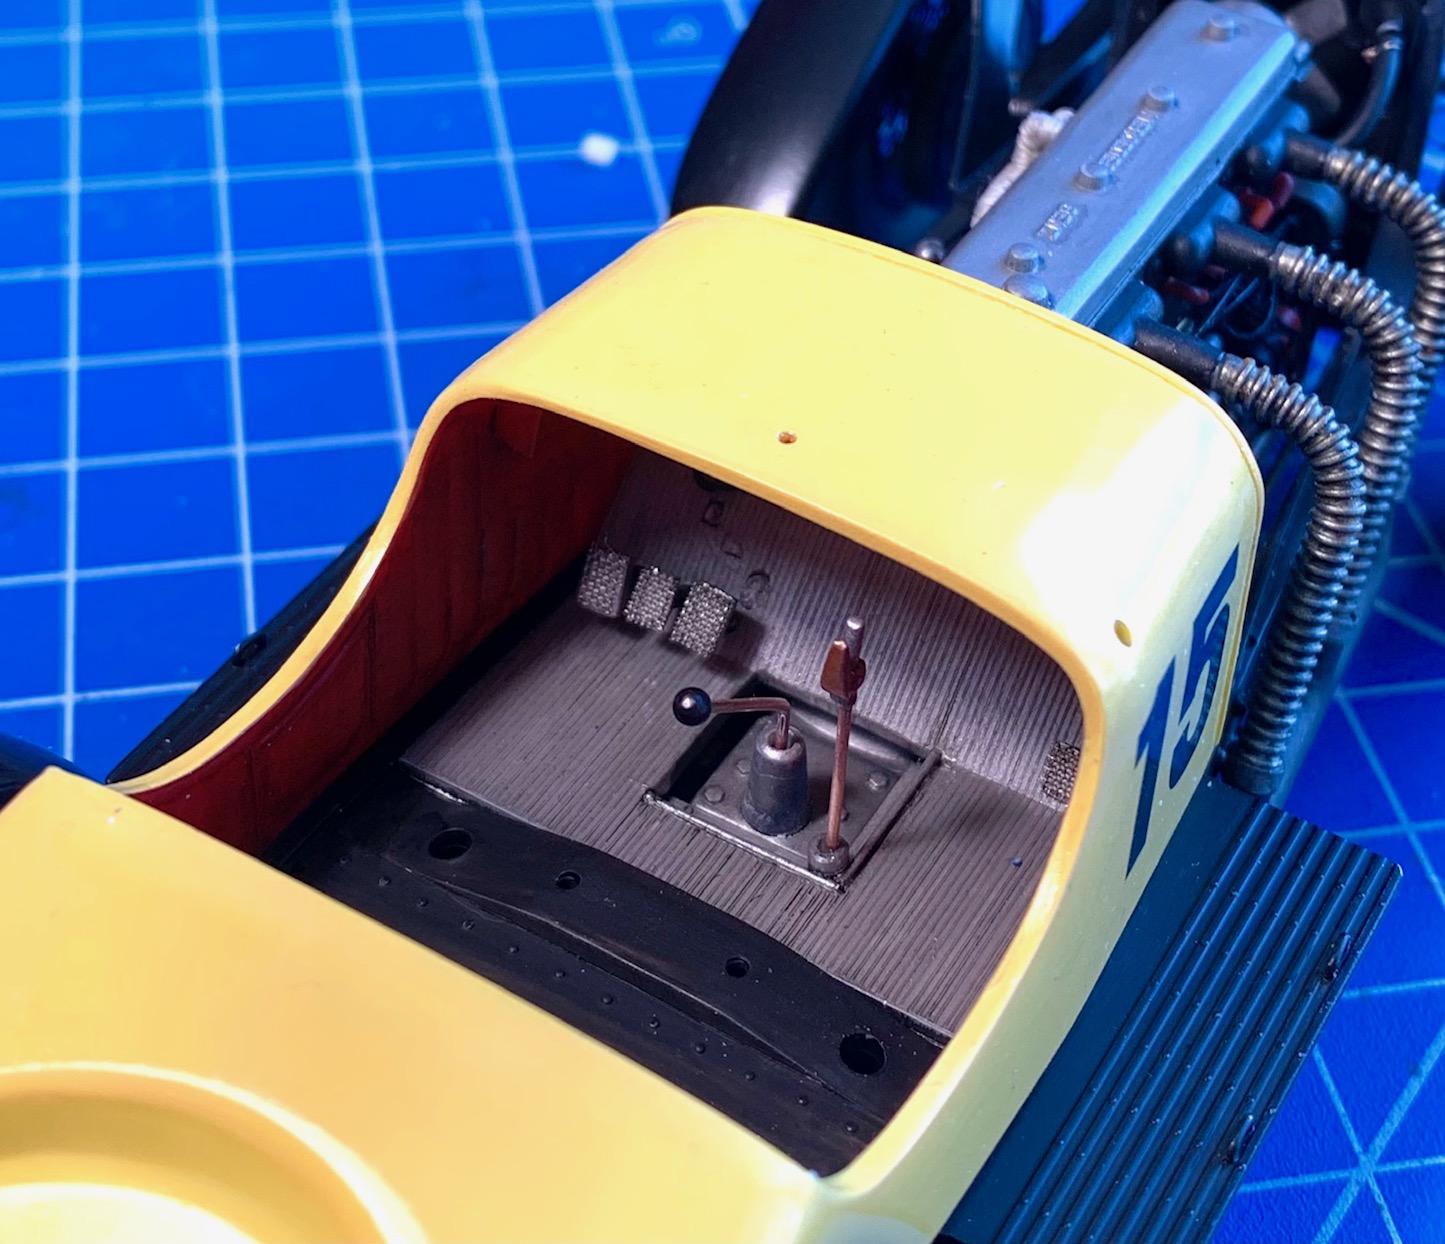
The radiator is very much "in your face" so I'm happy with this mesh screen solution. The pedals were a last minute thought and quickly done. They are a bit crude but I doubt they will be easy to see after the dash and seat are installed. Thank you again for taking the time to follow this thread. Thank you Daniel. Next are the dashboard and steering wheel. High visibility areas so I'm still researching materials and painting methods for these. -
Mercedes Benz SSK
Pierre Rivard replied to Pierre Rivard's topic in WIP: Other Racing: Road Racing, Land Speed Racers
The design of these pre-war cars make it worth the effort with all these components very visible after final assembly. The next step is the instrument panel. -
I love the fender inner skirts. They jus add more to admire. You have convinced me that I need to learn about materials and punches needed to do that as it adds a level of realism that just cannot be done with paint effects. I hope we can see the paint job under better lighting. Deep purple fits this car so well.
-
Mercedes Benz SSK
Pierre Rivard replied to Pierre Rivard's topic in WIP: Other Racing: Road Racing, Land Speed Racers
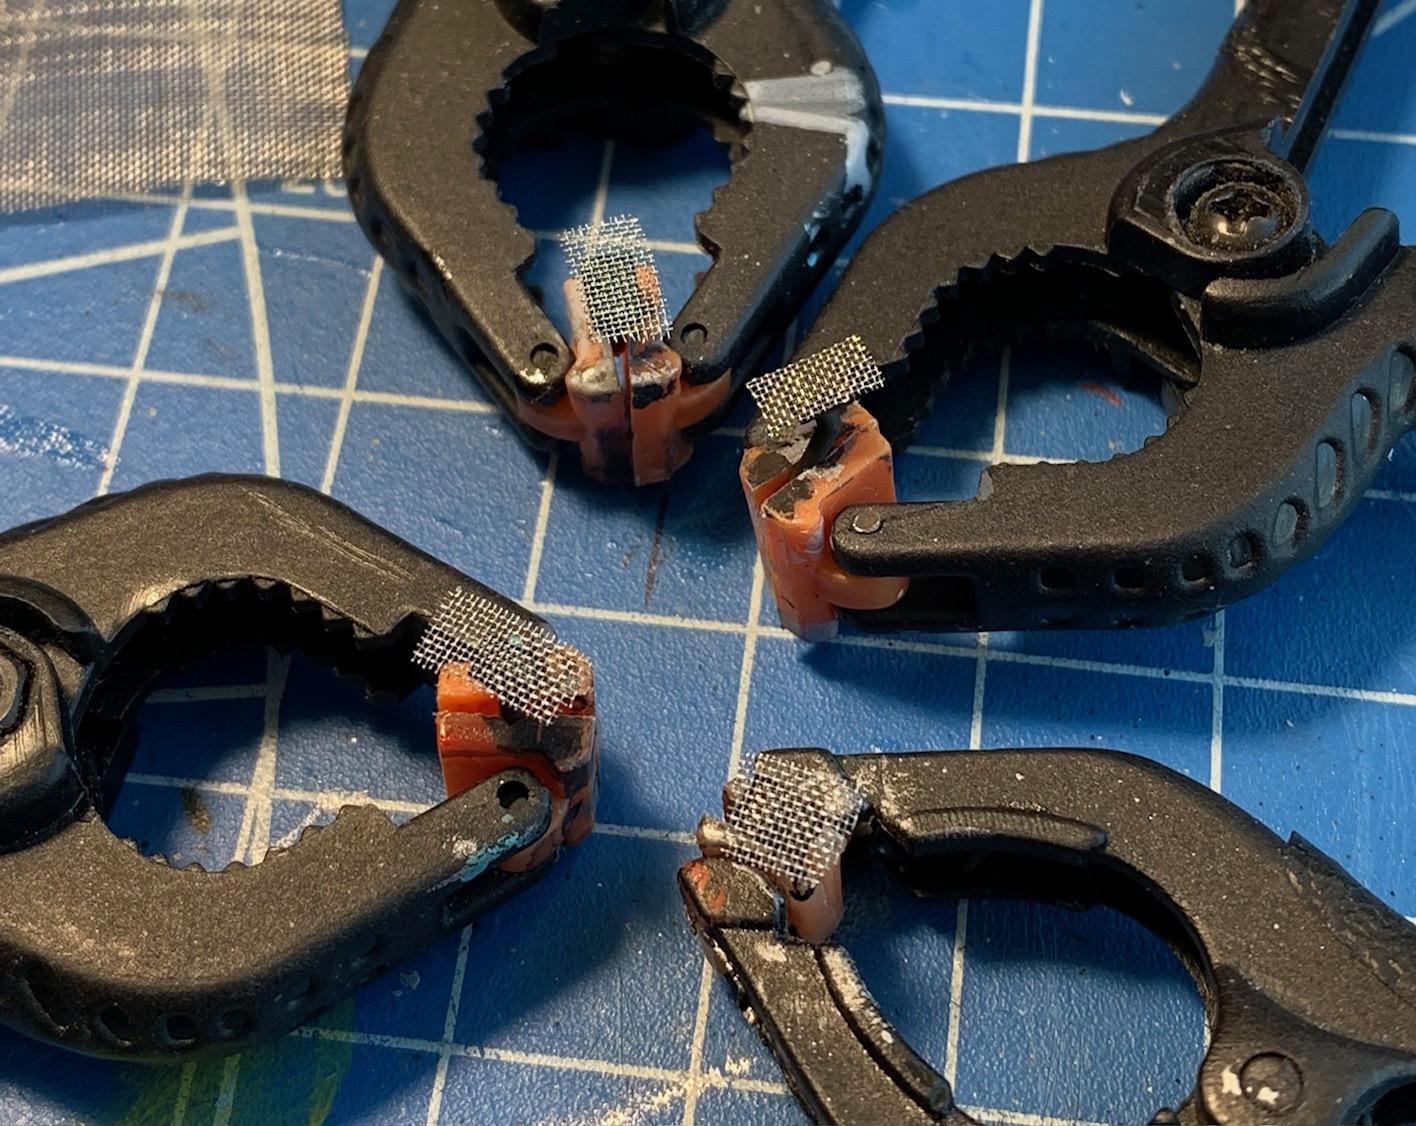
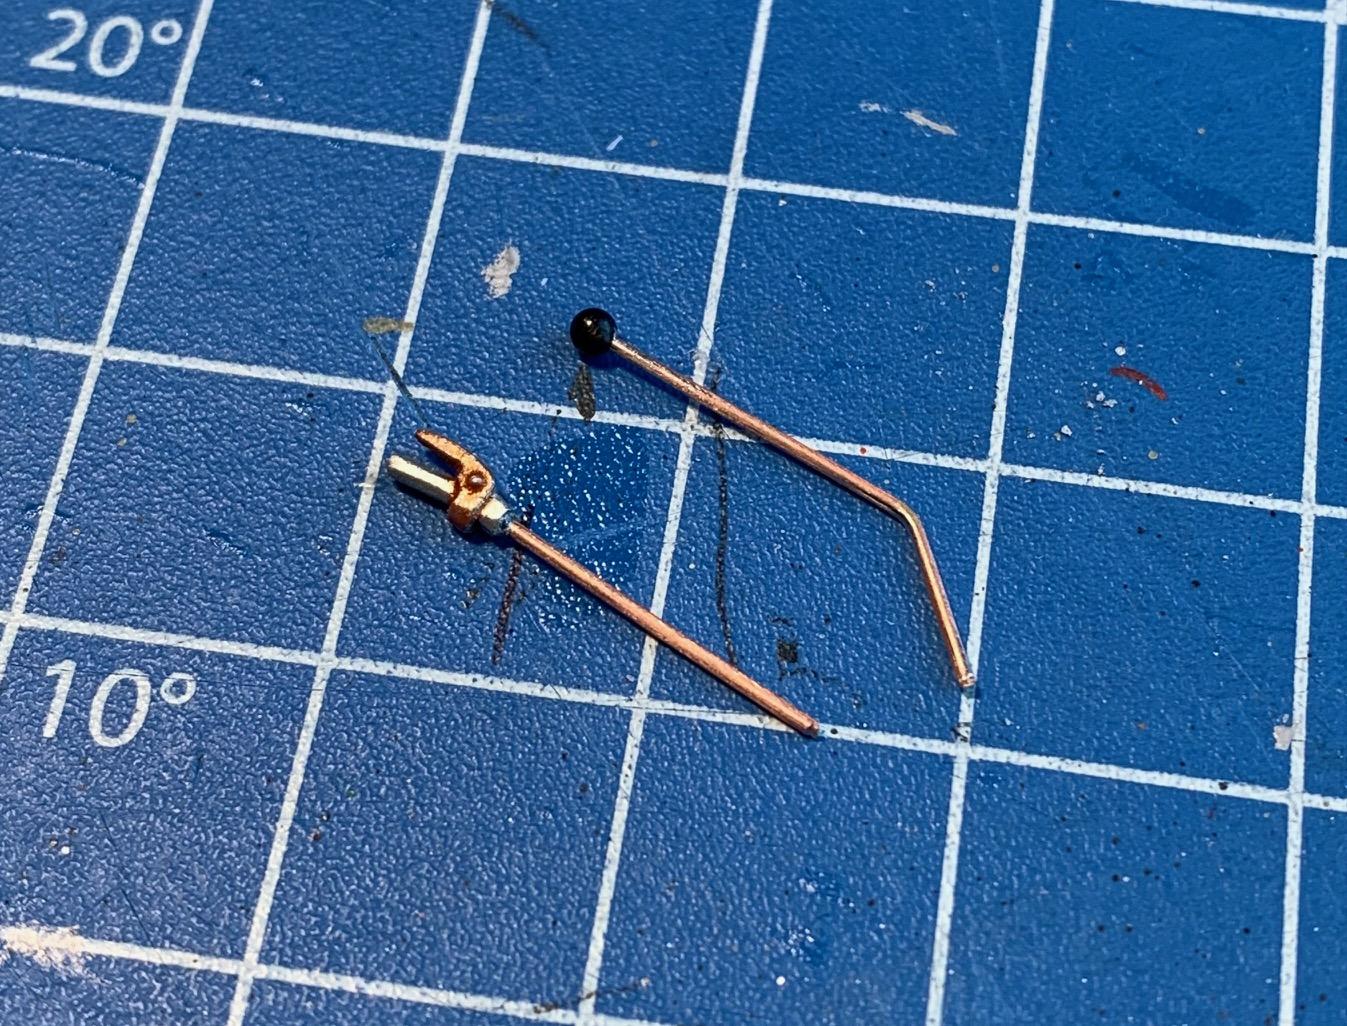
Moving on to the interior. First job is carving up an opening in the floor to expose the top of the transmission, like the real car is. I then did a mock up to get the dash, steering wheel and shifters locations marked up. It's a tight cockpit so better make sure. The steering wheel is not original... and the rest (apart from the seat) will also require some fabrication to look more like the real car. I made the 4 pedals with little blocks of styrene, then glued meshing, which will be trimmed to size. Next were the shifter and hand brake. Going with a pin from Michael's jewelry section for shifter and trimming down the BIG hand brake
-
Mercedes Benz SSK
Pierre Rivard replied to Pierre Rivard's topic in WIP: Other Racing: Road Racing, Land Speed Racers
Thank you friend. It's kinda like this certain Camaro, when finished not much is left un-modified or not replaced with fabricated parts. Not a big change but taking the time to improve all these not so accurate parts will add up to a better replica. Thank you Alan. I can't leave it alone, always something I want to change. Might have caught the Miami virus...😉 Thanks Carl, quite happy with the result. It's that kind of build... -
’72 Dodge Demon Drag Racer 1/25 scale
Pierre Rivard replied to AmericanMuscleFan's topic in WIP: Drag Racing Models
You think this will do the trick? I would say it is nothing short of a masterpiece. All these finely machined tiny components adding up to a functional rack barely bigger than a coin... mind boggling! -
Mercedes Benz SSK
Pierre Rivard replied to Pierre Rivard's topic in WIP: Other Racing: Road Racing, Land Speed Racers
Thank you Helmut. When I started this project my intent was on keeping the touring body, add better wheels and perhaps a bit more... but now 8 weeks later it appears I can't stop. I thought the exhaust was the last bit but now I am looking at the interior and don't like most of the parts. Looks like I'll be a it for a little while longer. Thanks Jay. This is my second pre-war build and I really like the looks of these chassis cars. Not a lot of kits them out there and most of them very old tools. It provides a nice challenge. -
3rd gen Camaro
Pierre Rivard replied to MarkJ's topic in WIP: Other Racing: Road Racing, Land Speed Racers
You've taken on a big one here, basically scratch building most of it. Must feel great to finally see the finish line not too far ahead. -
Looks like the body is good to go for paint. If I remember right the plan is for a Plum Crazy kind of color right? Wild car, wild color, what's not to love!
-
Mercedes Benz SSK
Pierre Rivard replied to Pierre Rivard's topic in WIP: Other Racing: Road Racing, Land Speed Racers
Thank you for the feedback fellows. Finally the last piece of chassis/engine fabrication: the exhaust system. I decide to modify the kit parts with styrene/putty/paint to improve the look. The kit parts have simplified the collector to a straight tube where the headers plug into but it should have leads reaching up to the headers. First picture shows the initial design, then the rest are the modifications and painting process. The header and back end exhaust end pipe are painted 2/1 black/aluminium, muffler painted aluminium and headers are painted chrome with about 20% gold mixed in. I added a Vallejo oiled earth wash (my favorite) and just a touch of Tamiya burnt orange weathering master.
-
Great imagination and execution. Wonderfully different. Please tell us more about the paint process?
-
I'm a huge fan of old Monogram race car kits and working on their very first one must feel very special. Wonderful to see how you use various build techniques and materials to augment & detail this kit. This is a cool project!
-
1/12 Italeri Lancia Stratos!
Pierre Rivard replied to jaymcminn's topic in WIP: Other Racing: Road Racing, Land Speed Racers
The engine with your expertly applied weathering looks incredibly real. You're off to a great start. -
Mercedes Benz SSK
Pierre Rivard replied to Pierre Rivard's topic in WIP: Other Racing: Road Racing, Land Speed Racers
Spent time refining the grille fabrication and then installed the radiator which I should have done before the engine install... or not move the headlamp assembly back. Anyhow, found a way to squeeze it in.
-
Bonjour Yves, I felt very much the same way when I took this one on 3 years ago. Of the few of these I could find build information the common thread I saw was a car riding high and too big tires and stories about how challenging this build could be. On the plus side the kit has high quality components and both the body and engine are simply spectacular. I did not have access to a good WIP from another builder so I made many mistakes along the way but I'm happy I persevered. Stick with it, the kit definitely worth the effort. You have VRM decals too and these are excellent.
-
1950 Cadillac
Pierre Rivard replied to Terry Jessee's topic in Other Racing: Road Racing, Salt Flat Racers
Must have been a sight coming down Mulsanne. The weathering you added adds so much realism to this replica. Thank you for sharing your build of this historic car. -
This build is positively awesome. Top notch fabrication and paint finishes. Going for restored look or race weathered?
-
Downsized to what... 1/22... or better yet 1/24?
-
Mercedes Benz SSK
Pierre Rivard replied to Pierre Rivard's topic in WIP: Other Racing: Road Racing, Land Speed Racers
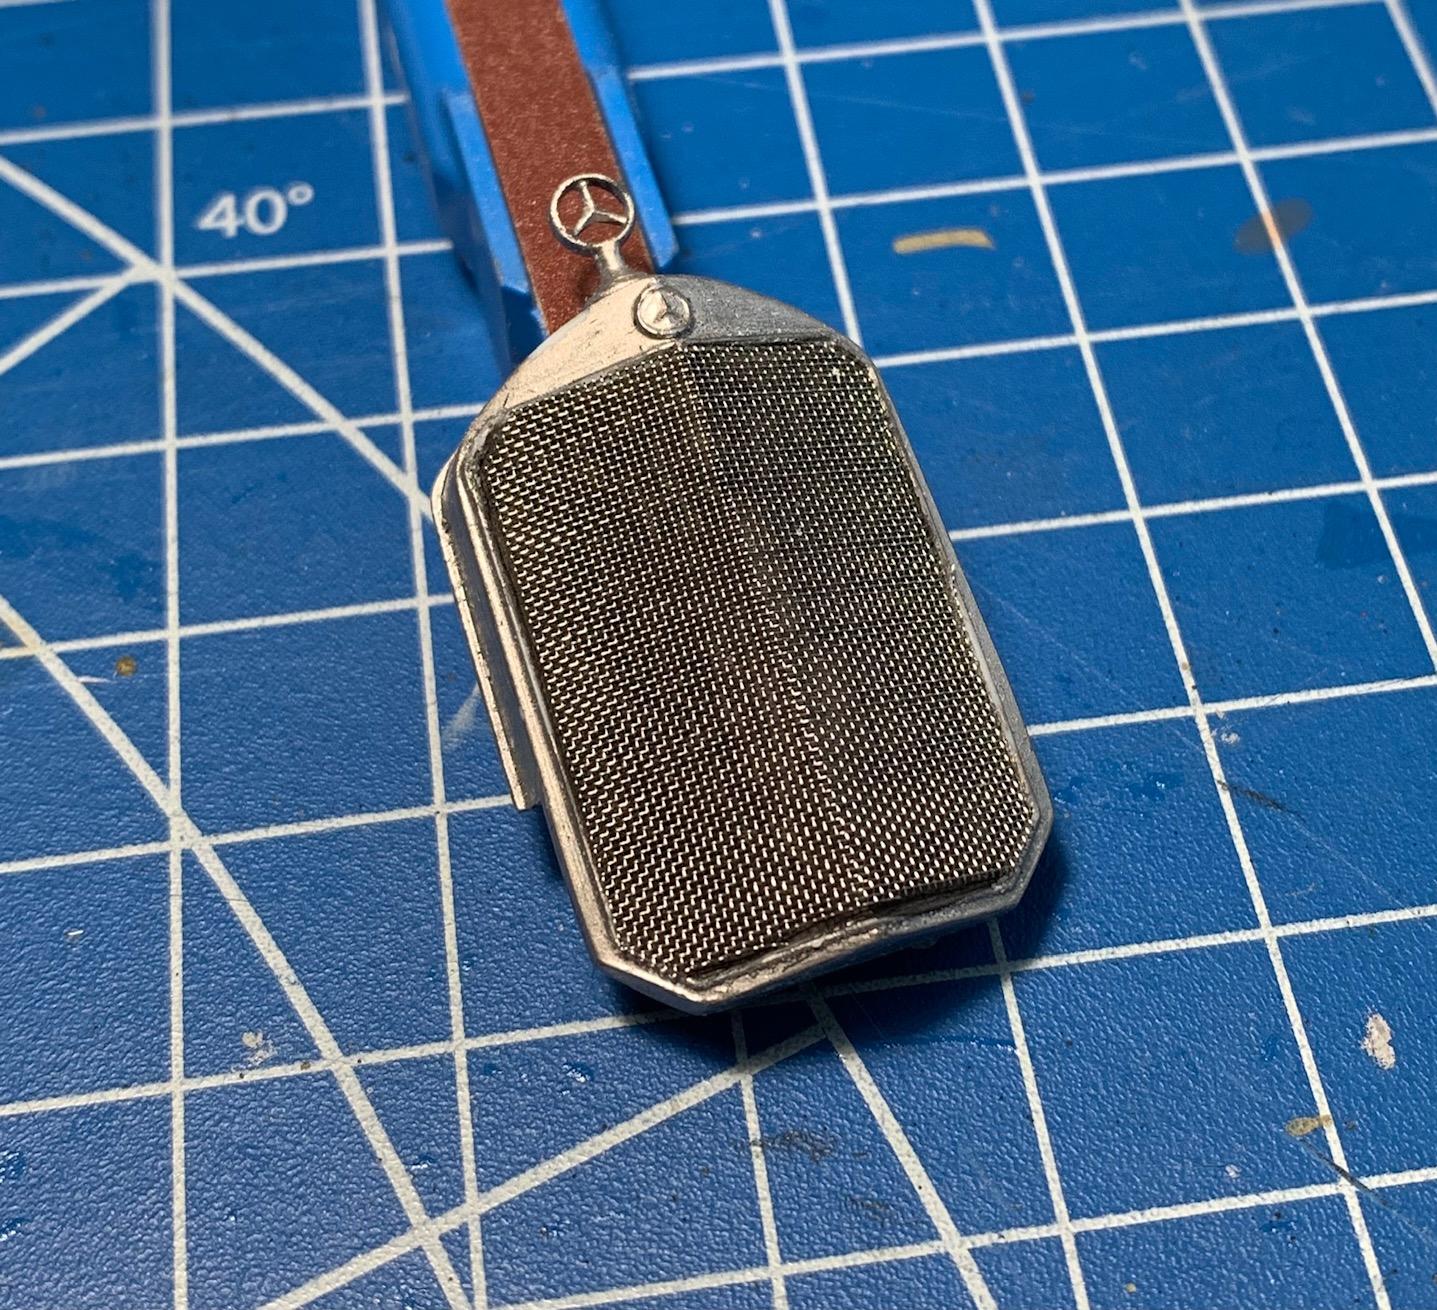
It's a V shape radiator with the cooling cells flush to the front, perhaps what we see is a decorative grille but regardless the kit part did not reproduce that pattern and it is too fine to reproduce at 1/24 scale. Going with a stone guard as was commonly used for racing makes sense and is easy to reproduce. The 80 mesh screen it is! -
Mercedes Benz SSK
Pierre Rivard replied to Pierre Rivard's topic in WIP: Other Racing: Road Racing, Land Speed Racers
Here are period pictures of the car, preferable IMO to what we may see on big bucks restored cars. Top left corner is the actual grille without the stone guard and the other 3 have rather simple stone protection screens. I think the finer screen is a better fit.
-
Mercedes Benz SSK
Pierre Rivard replied to Pierre Rivard's topic in WIP: Other Racing: Road Racing, Land Speed Racers
I need a solution for the radiator grille which is so prominent on this car. The kit rad grille does not have the right mesh pattern plus an extra part for a stone guard with a pattern that appears a bit heavy to my eye. I'll definitely dump that part and and would prefer to apply steel meshing right over the radiator/grille unit. I have 40 mesh and 80 mesh in my tool box so I will test with both before making a more precise unit after choosing which of the two is the better candidate. Again here I aim more for realism than accuracy. Don't hesitate to offer ideas or opinions. This is work in progress.
-
Nice build Bruce. Tamiya always comes to the rescue when we need to refresh after a complicated build. I love the finish you applied (nice gloss but not show car glossy) and the way you scuffed the tires.
-
Wow, your builds are always perfect and this one is as flawless as I have ever seen. Incredible!
-
First go designing and 3D printing? Ok Mr Mouton, you have my full attention!