Pierre Rivard
-
Posts
2,579 -
Joined
-
Last visited
Content Type
Profiles
Forums
Events
Gallery
Everything posted by Pierre Rivard
-
Congrats Matt, you have again turned out a masterpiece from this humble kit. Inspiring work!
-
Well... I'm still scratching my head on why I chose this color. I really enjoy trying to make old kits a bit better but strange that a newly tooled kit needs it. The changes I made were not drastic but I believe they make a difference. Thank you Phil Thank you Trevor
-
So much good detailing here. Would be great to display the car with body panels off, sort of like a build shop environment.
-
Yes... I may have gone off course a bit with the color theme. I promise to go easy on the DB4. That old Aurora/Monogram kit actually looks pretty good. Thank you Jim Thanks Rich. It's just too bad Revell chose to mail it it with this kit... such an important car. This backdrop is a new thing I am trying with this presentation. The brick wallpaper looks surprisingly real. Thank you Brian. Just a shame a newly tooled kit feels so old. I actually enjoy improving/upgrading old kits but new kits should feel... new. Thank you so much Mark. The wheels and tires from USCP are magnificent and combined with lowering ride height have made a huge difference. 99% OOB = quick build Thank you Philip, that was the type of car I wanted to replicate.
-
Heller Renault R8 Gordini
Pierre Rivard replied to Nacho Z's topic in Other Racing: Road Racing, Salt Flat Racers
Well John, we all know you are a very gifted and resourceful builder and you've turned this horrible kit into the best it could be. Heller is sometimes the only source for specific subjects we want to model but a box full of surprises... -
Alfa Romeo 33 Stradale
Pierre Rivard replied to Dave B's topic in WIP: Other Racing: Road Racing, Land Speed Racers
White primer makes it look like you have a good foundation. May only be a first paint layer but it always feels so good to reach that stage of a build. -
No way, not winter yet. My golf ball still sinks when it hits the pond...
-
Aston Martin DB5
Pierre Rivard replied to Pierre Rivard's topic in WIP: Other Racing: Road Racing, Land Speed Racers
Thank you Brian. I am not a fan of the kit but I love the DB5 I did not print them. Check out 50's Indy decals at Indycal for something different from the usual black on white racing numbers. Thanks Mark, it is in the showroom. -
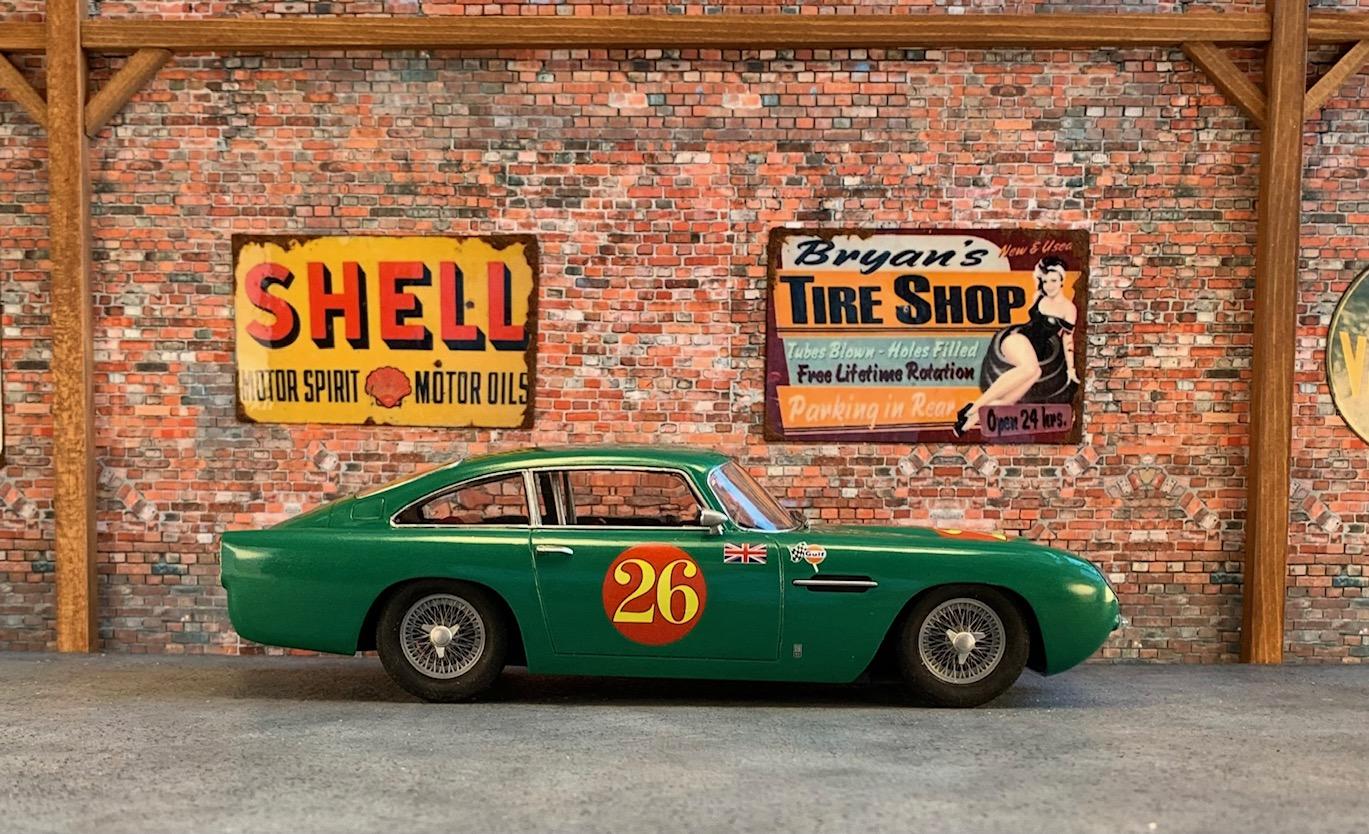
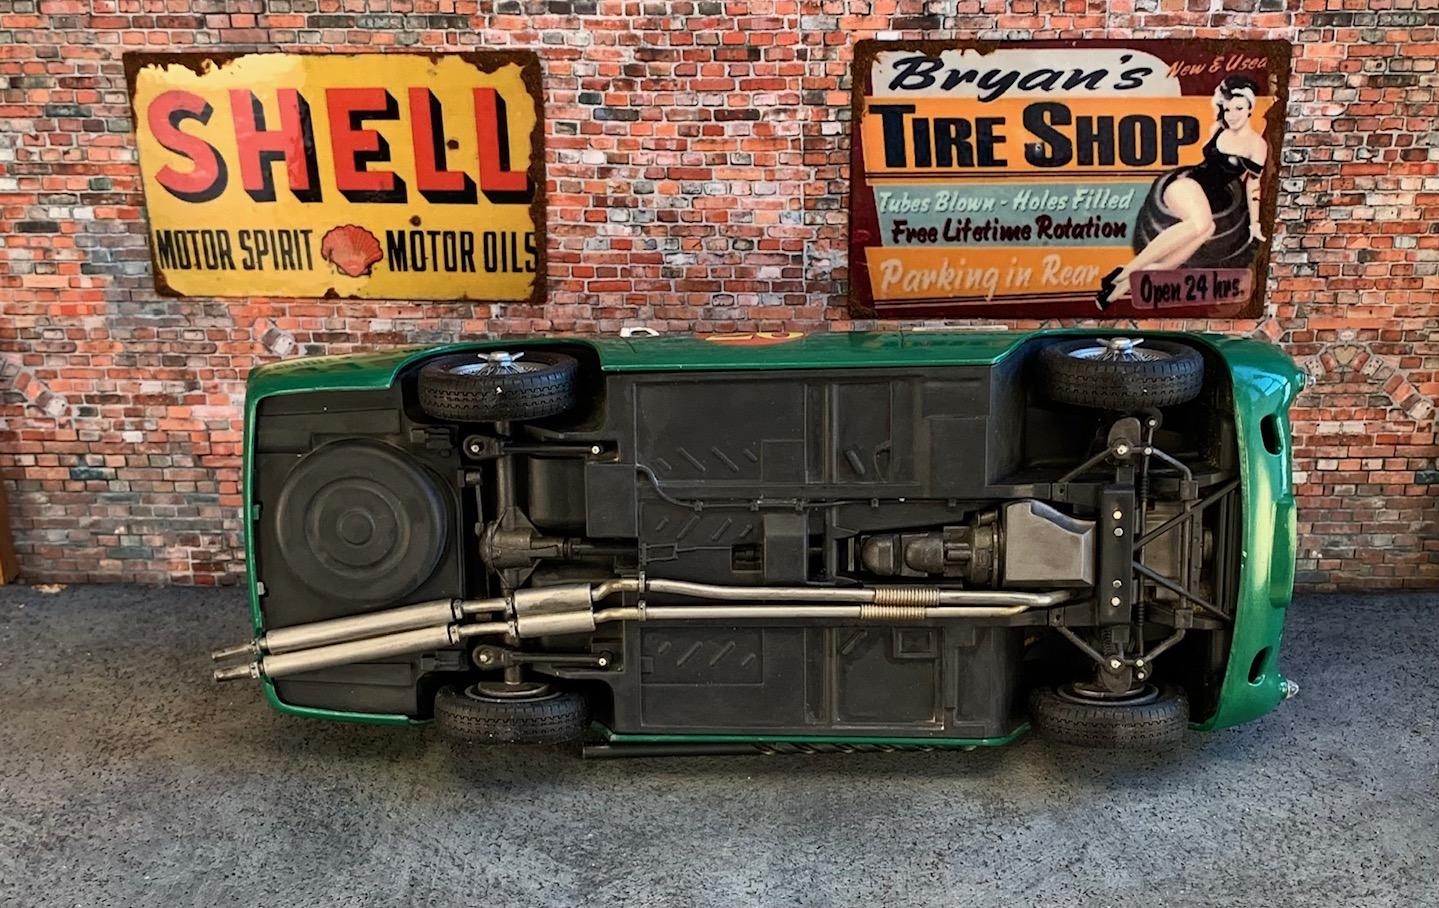
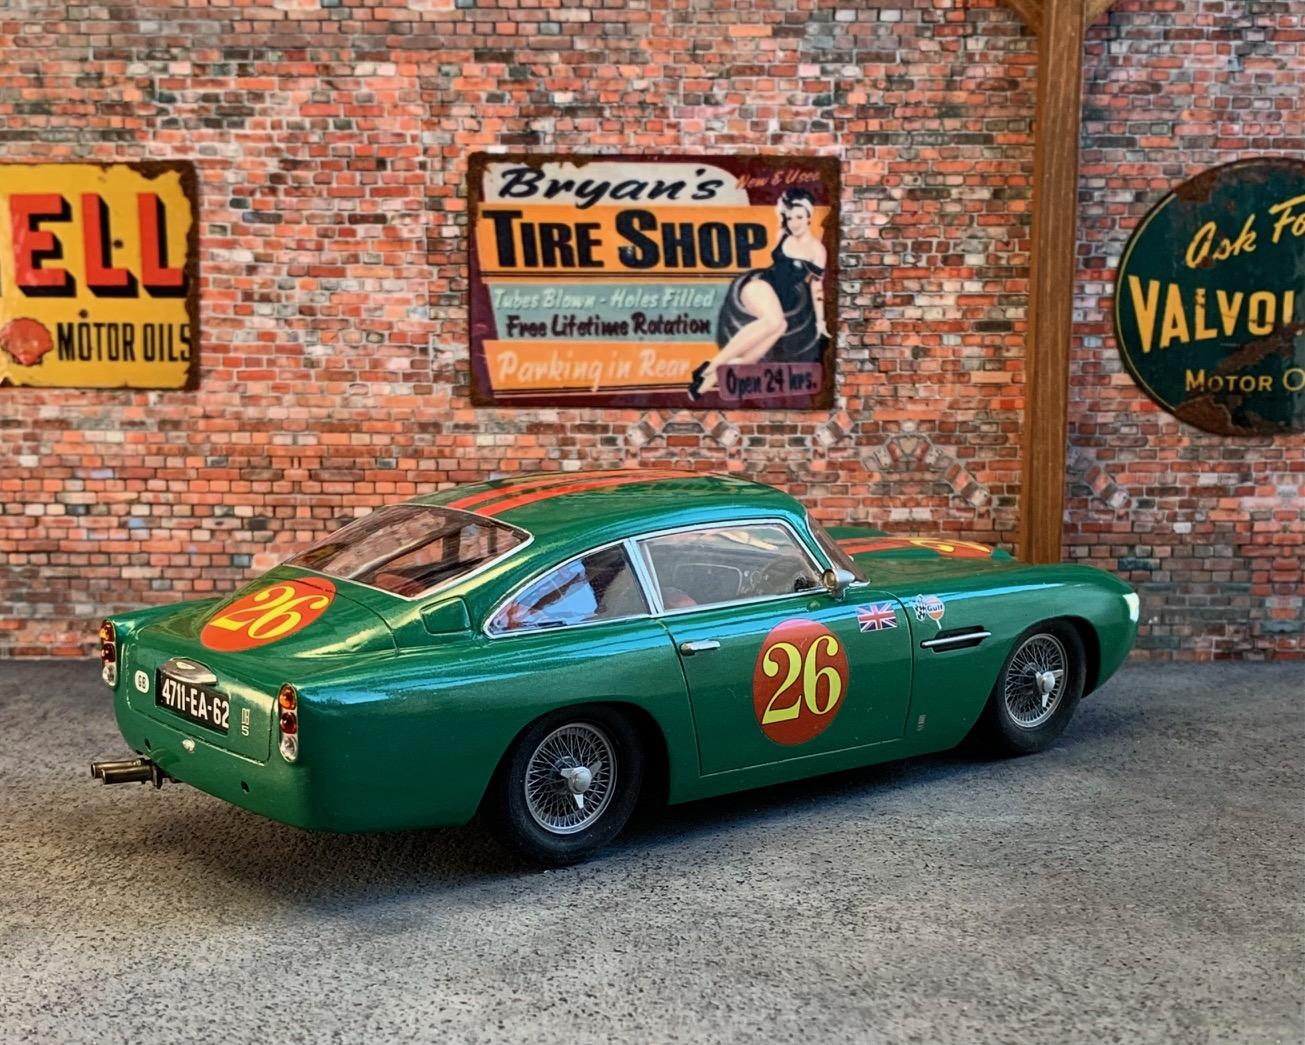
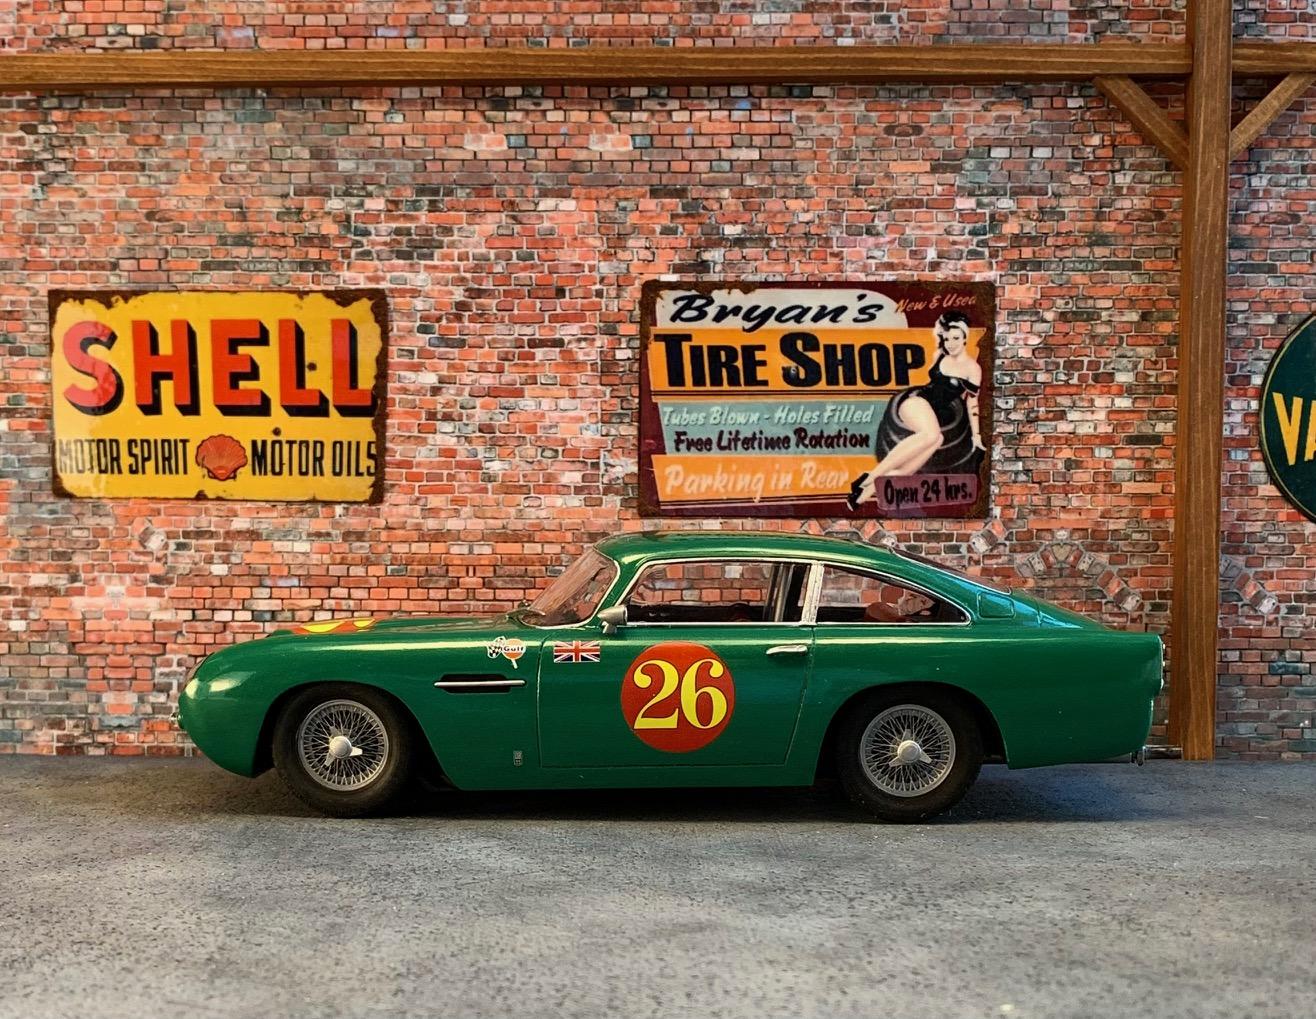
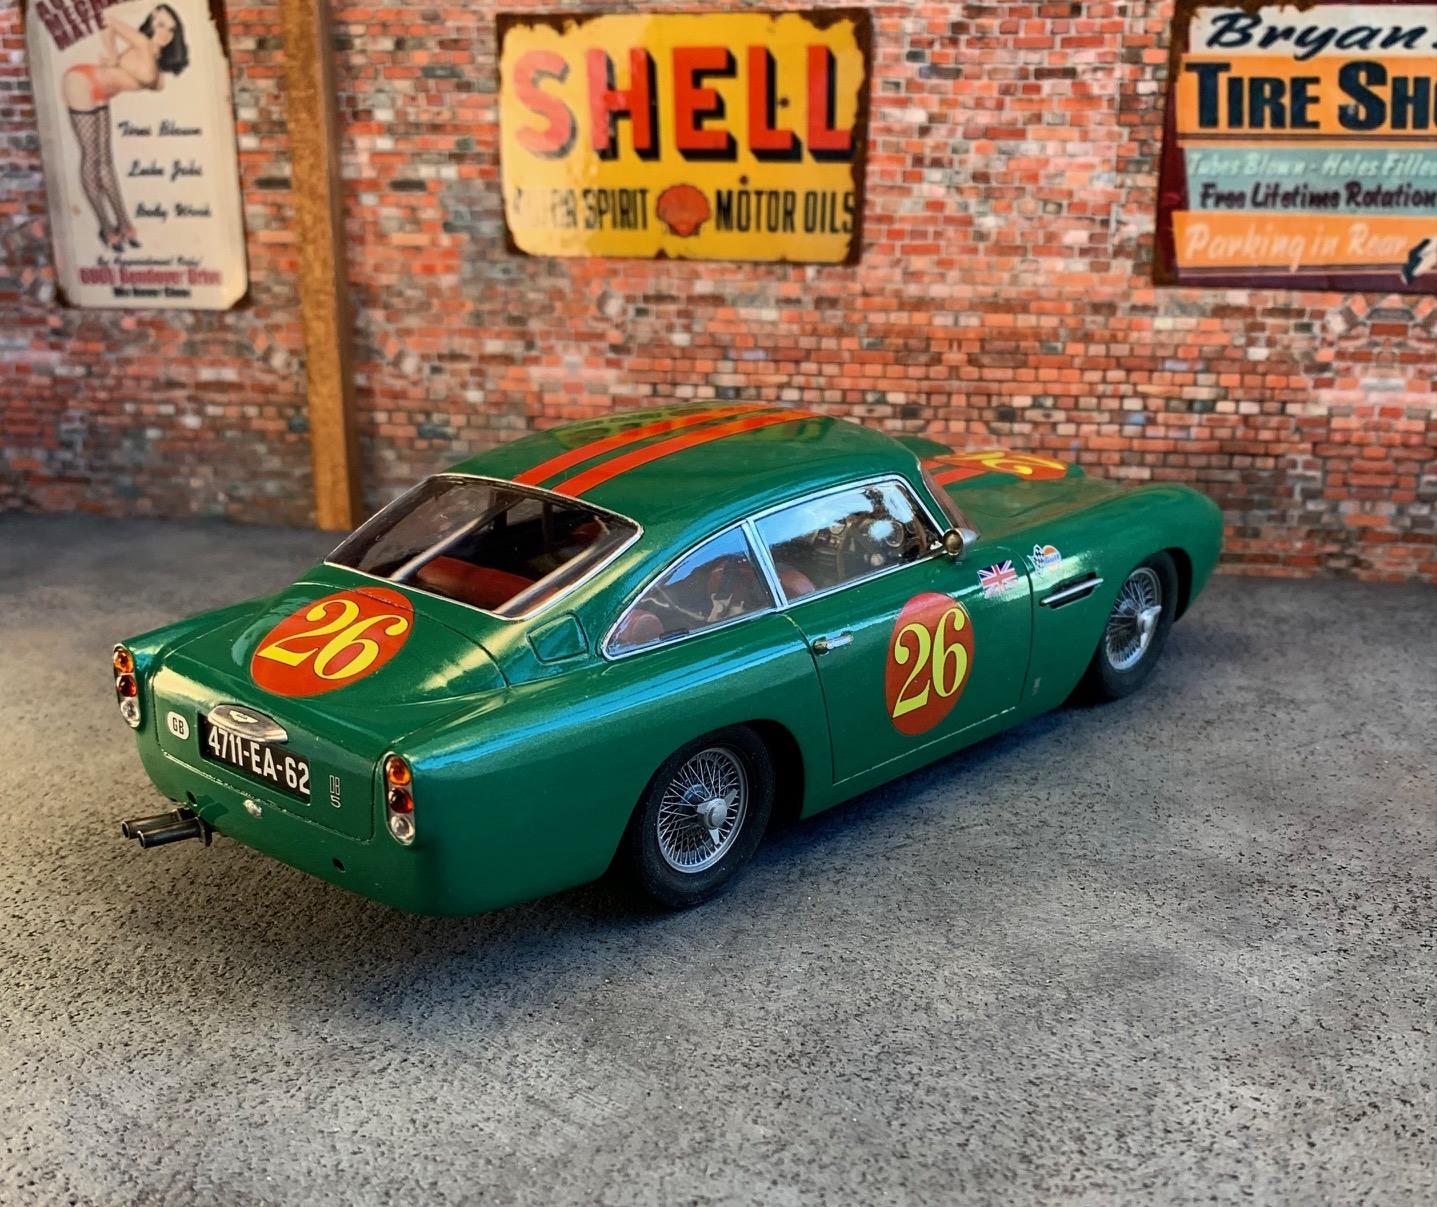
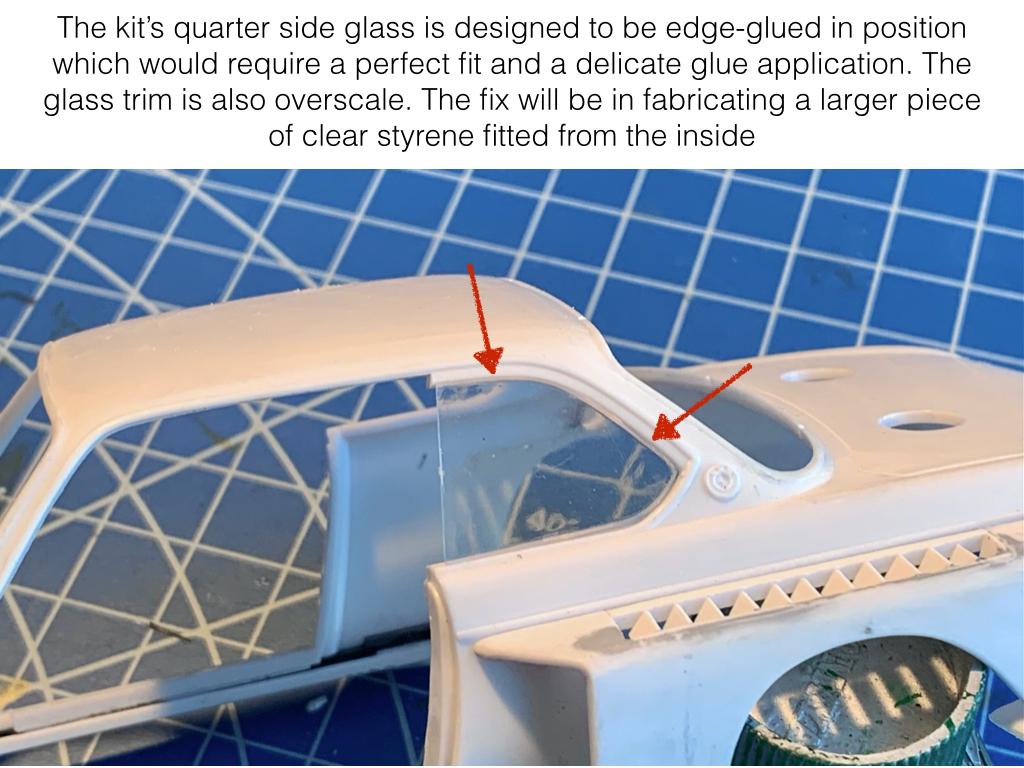
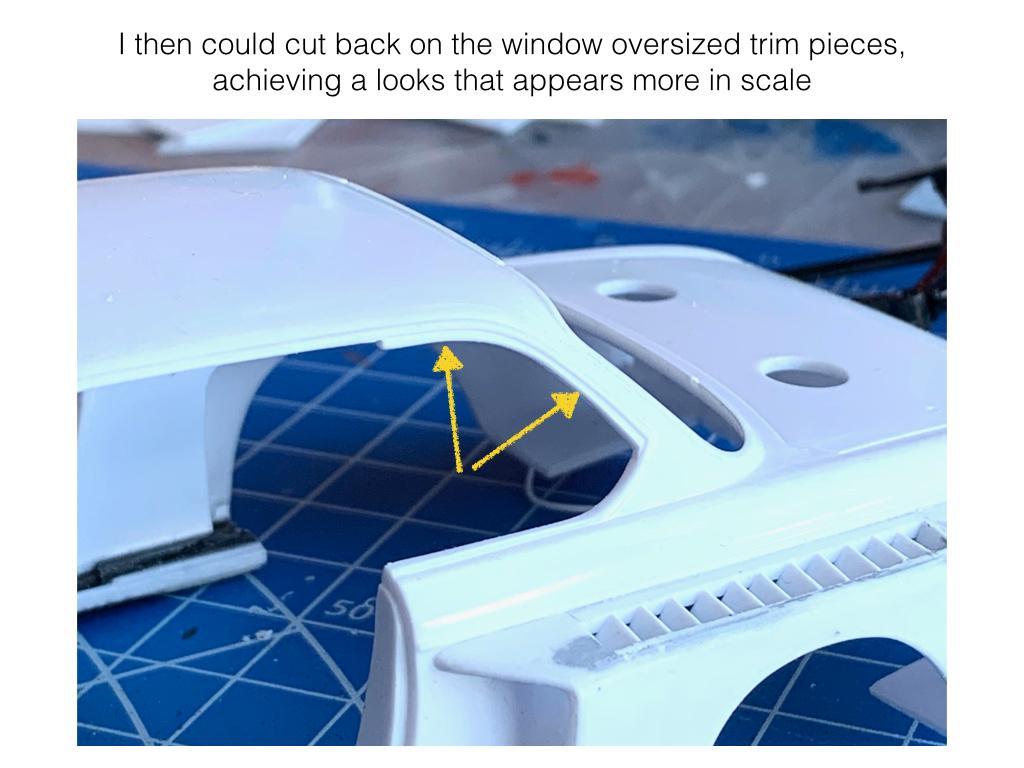
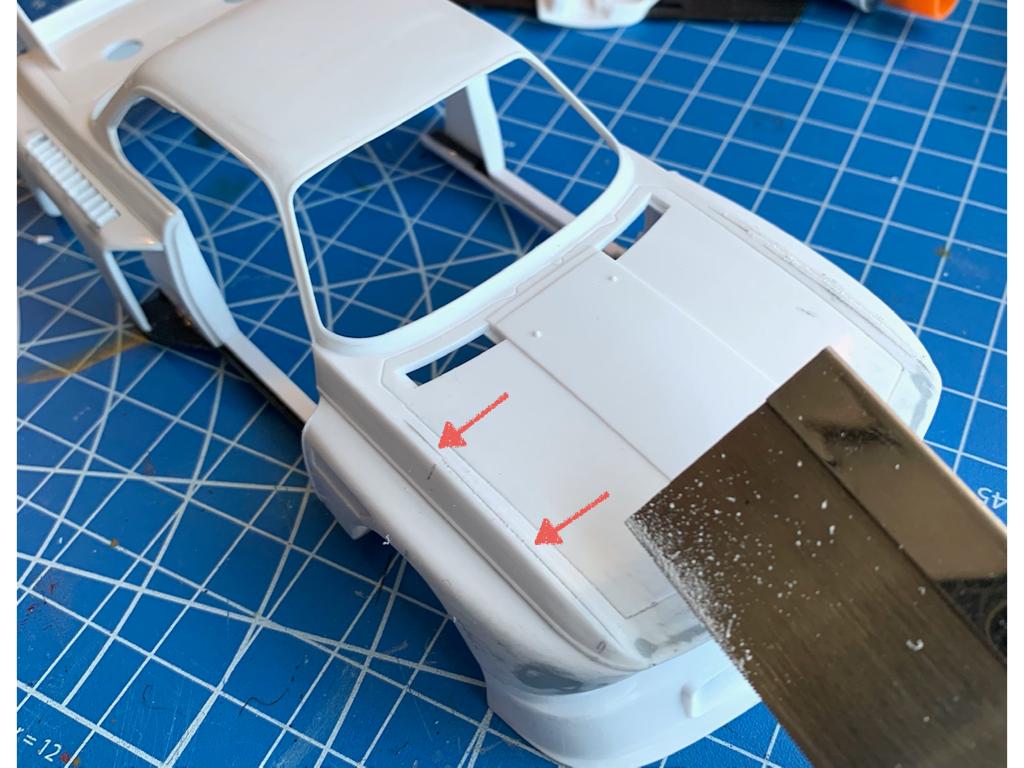
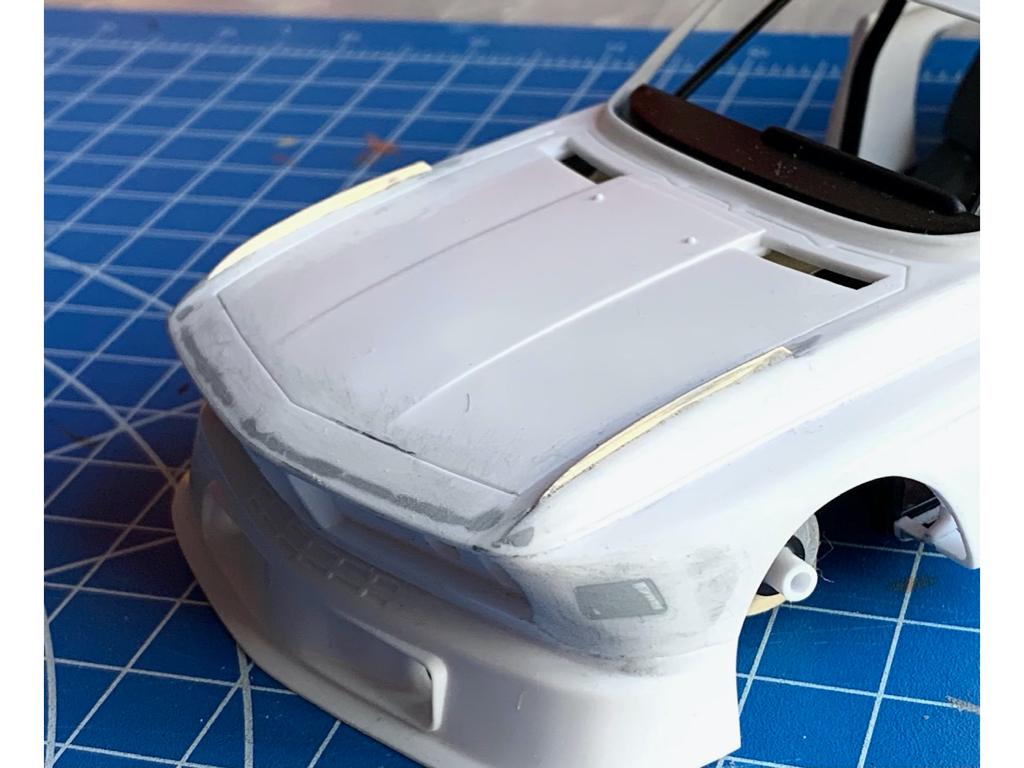
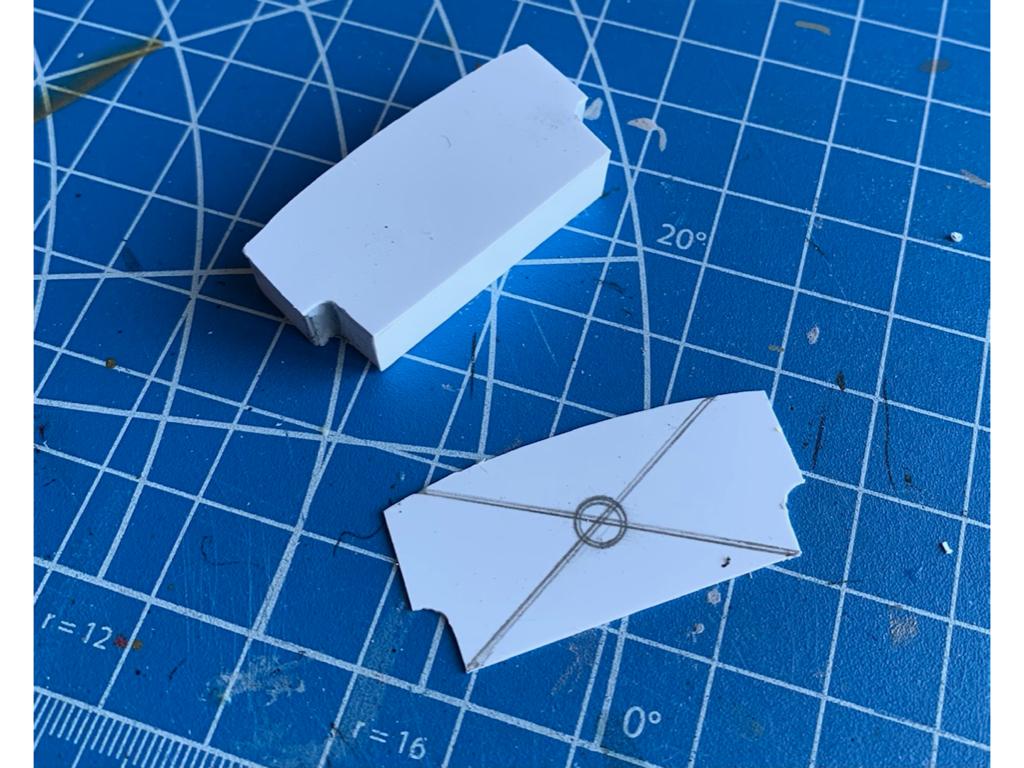
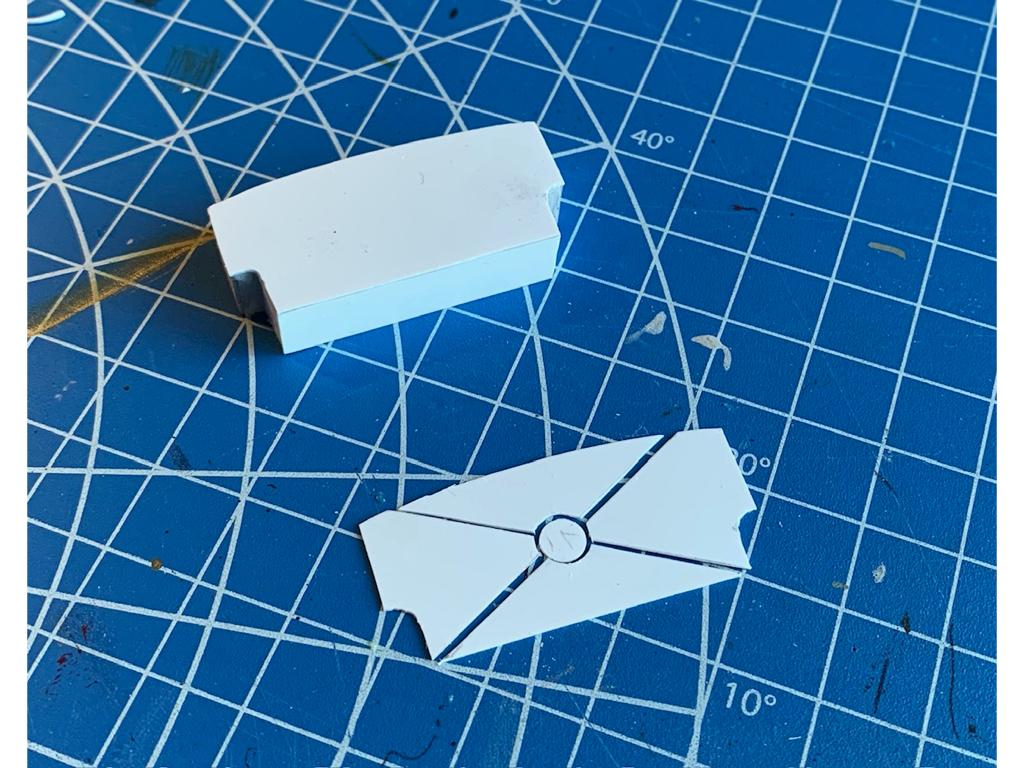
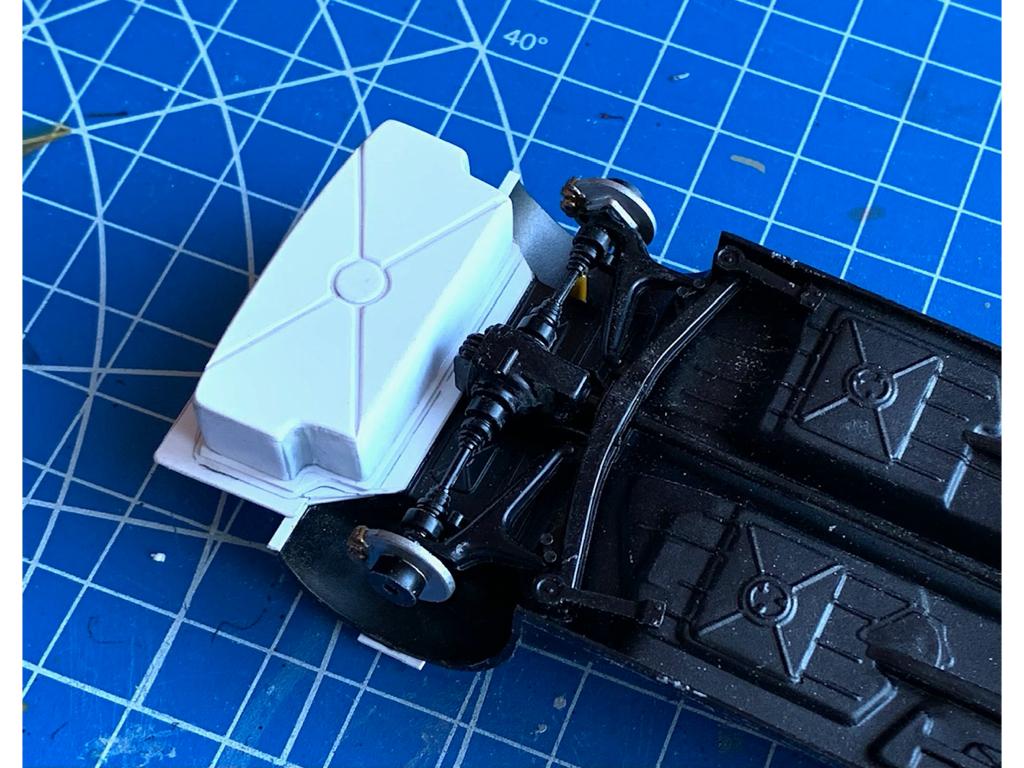
Based on the recent release Goldfinger DB5 by Revell. The kit was designed as a snap fit to attract new customers to the hobby. I am thoughroughly unimpressed with this kit. The shape of the roof is so off you lose the graceful allure of this car. Snap fit glass is wavy with poorly defined trim edges and the snap features are apparent after assembly. Simplistic chassis, no engine, a chrome tree with thick lumpy plating... but I really wanted to do a DB5 so I did what I could with it. I chose to do a bumper less gentleman's weekend racer so all the Bond features were left out or hidden. I spent time on softening the roof lines in an attempt to recapture the car's gentle arch shape. I added a roll cage, lowered the ride height and substituted the pathetic front grille + wheels & tires with the excellent aftermarket units from USCP. I mixed my own colors and decals are from the spares box. Thank you for watching and please chime in if you have ideas on how to improve this kit. With the Airfix kit being impossible to find these days this Revell kit is the only option for DB5 lovers.

- 18 replies
-
- 13
-

-
Aston Martin DB5
Pierre Rivard replied to Pierre Rivard's topic in WIP: Other Racing: Road Racing, Land Speed Racers
Finally, after 10 weeks the wheels and grille have made it to my front door (a world cruise?) So finally this little Aston project is completed.
-
I love the color combo you chose to do. Makes the build very interesting. Well done sir!
-
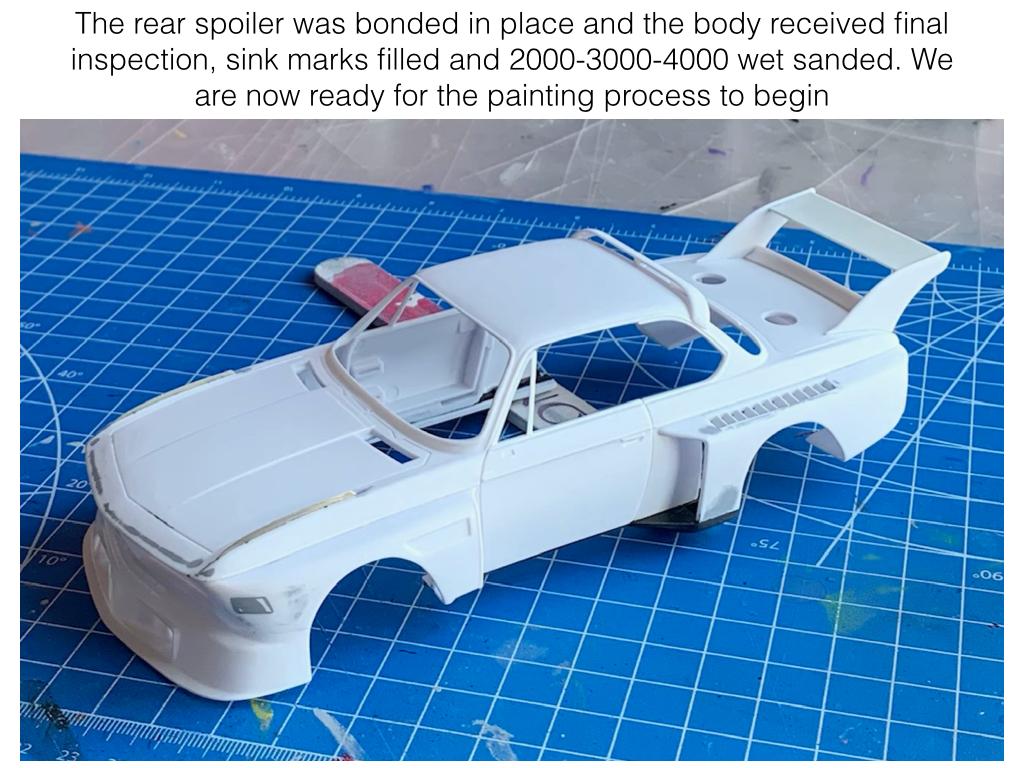
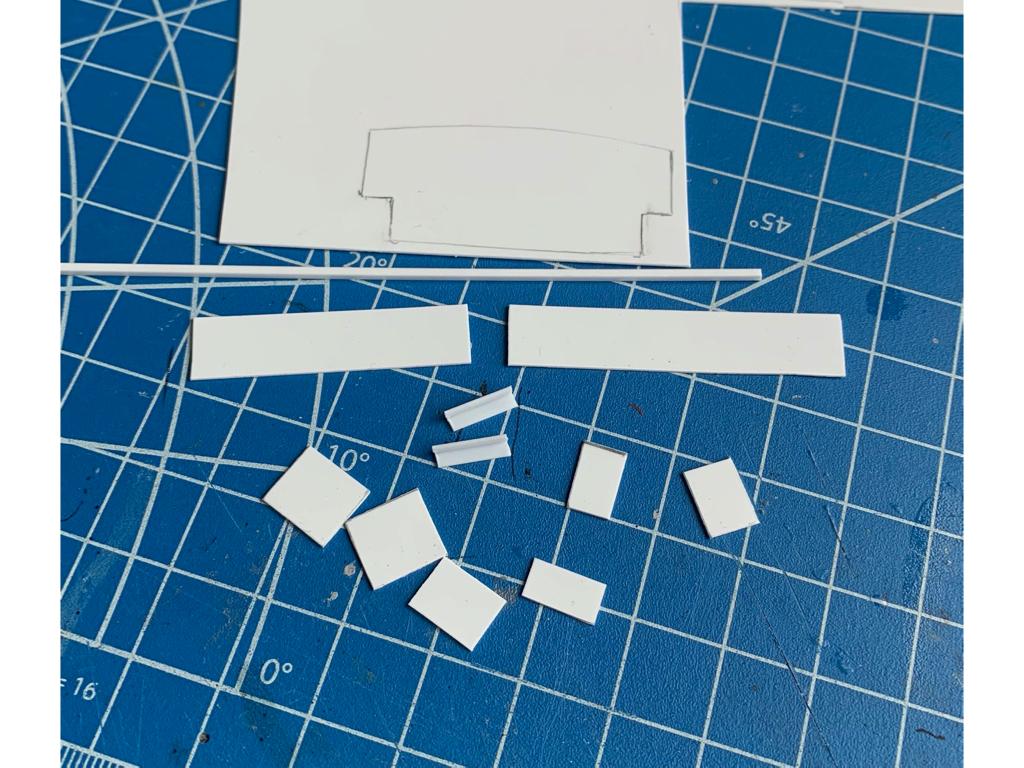
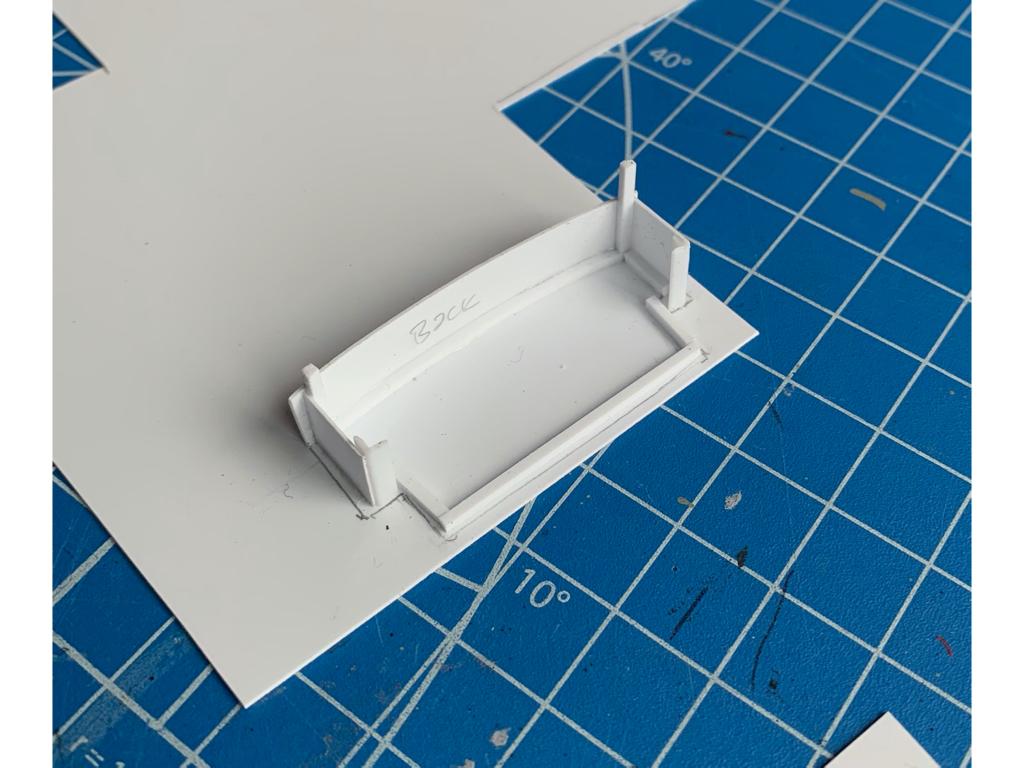
Batmobile
Pierre Rivard replied to Pierre Rivard's topic in WIP: Other Racing: Road Racing, Land Speed Racers
Thanks Mark. It should have color done in about a week Thanks Brian, many fixes needed to make this body right but I think I'm there. Paint is also my favorite part. Of course! I'm not worried about paint but the LeMans decals that will follow are definite knee shakers for me... -
The polishing and wax method provides a really nice finish without the "exaggerated" gloss level we see on restored cars. Looks like it should. Any issues with LeMans decals? I've used them twice and found them to be thin and fragile.
-
Shelby Cobra Daytona
Pierre Rivard replied to 2whl's topic in WIP: Other Racing: Road Racing, Land Speed Racers
Beautiful paint and the decals all seem to have held up well. The clear appears to be at a mid point between gloss and satin, which is spot on for a period race car. -
Just incredible work in so many ways. If this is not perfection I don't know what is.
-
Batmobile
Pierre Rivard replied to Pierre Rivard's topic in WIP: Other Racing: Road Racing, Land Speed Racers
Now turning focus back to body mods & fabrication
-
The entertainment never stops. You produce so much interesting material to follow. Who needs a Netflix account? ?
-
Fantastic stuff Matt. I love the idea of epoxy for the goggle glass, very realistic. These wheels will be perfect for this replica. You are taking this humble kit to the next, next level. No need to re-mortgage the house for a MFH kit...?
-
You did say after the multi-year dragster masterpiece that this one would be a more standard build... right? You are forgiven my son. We should not expect Rembrant to get into finger painting. ?
-
Heller Renault R8 Gordini
Pierre Rivard replied to Nacho Z's topic in WIP: Other Racing: Road Racing, Land Speed Racers
Despite the multiple hurdles the car looks beautiful John, but no thanks to Heller. When a highly skilled builder such as yourself calls a kit a pile of ... then it must be really really bad. We've been warned! -
3rd gen Camaro
Pierre Rivard replied to MarkJ's topic in WIP: Other Racing: Road Racing, Land Speed Racers
You're definitely giving this one the full treatment. Check out Ted's Marketplace for braided lines, they carry multiple suppliers and sizing options. I like the Pro Tech braided lines. -
Superb work Rich. I like the way the suspension arms have accidently chipped off. In today's F! world a scratched part would be discarded but not 35 years ago. Perhaps with tires showing a bit of track use and modest mechanical components weathering (washes).
-
Ford C100 Group C Chassis #4
Pierre Rivard replied to Dave B's topic in Other Racing: Road Racing, Salt Flat Racers
Another masterpiece from your bench Dave. Do you have special methods or materials to take out the surface irregularities from the printing process? -
I love Bertone designs and the Stratos is the ultimate expression of this style. Such a beautiful car in comparison to today's HUGE mid engine supercars. Fantastic choice you are making to go with yellow on this one. Will this be a racing or road car... or something of a mix?
-
Batmobile
Pierre Rivard replied to Pierre Rivard's topic in WIP: Other Racing: Road Racing, Land Speed Racers
On the road car the rear part of the floorpan is occupied by the fuel tank and spare tire tub. The race car has this replaced by a deep tub holding the fuel cells.