70 Sting
-
Posts
1,369 -
Joined
-
Last visited
Content Type
Profiles
Forums
Events
Gallery
Everything posted by 70 Sting
-
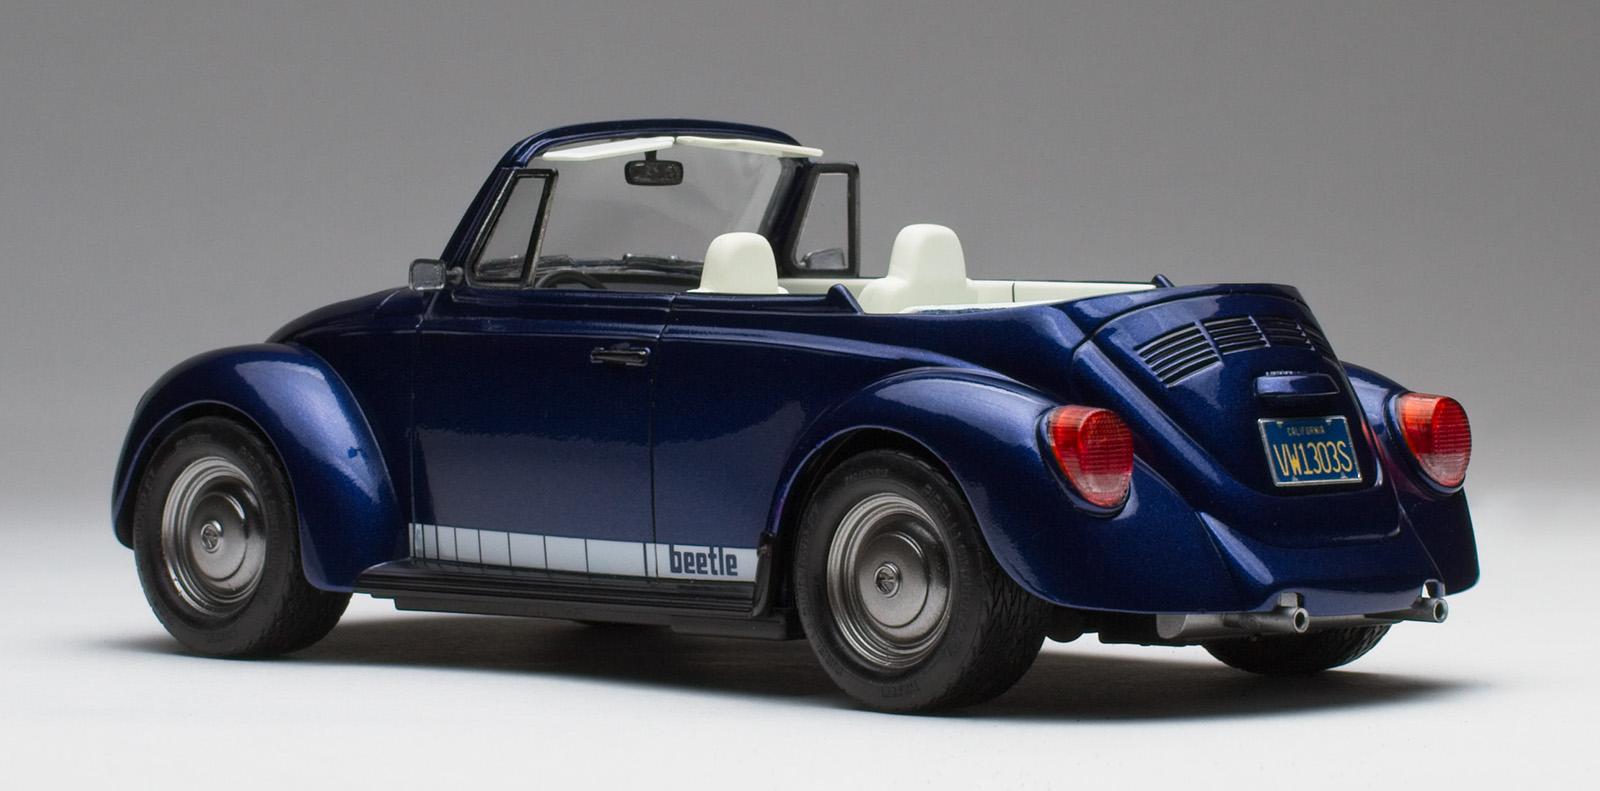
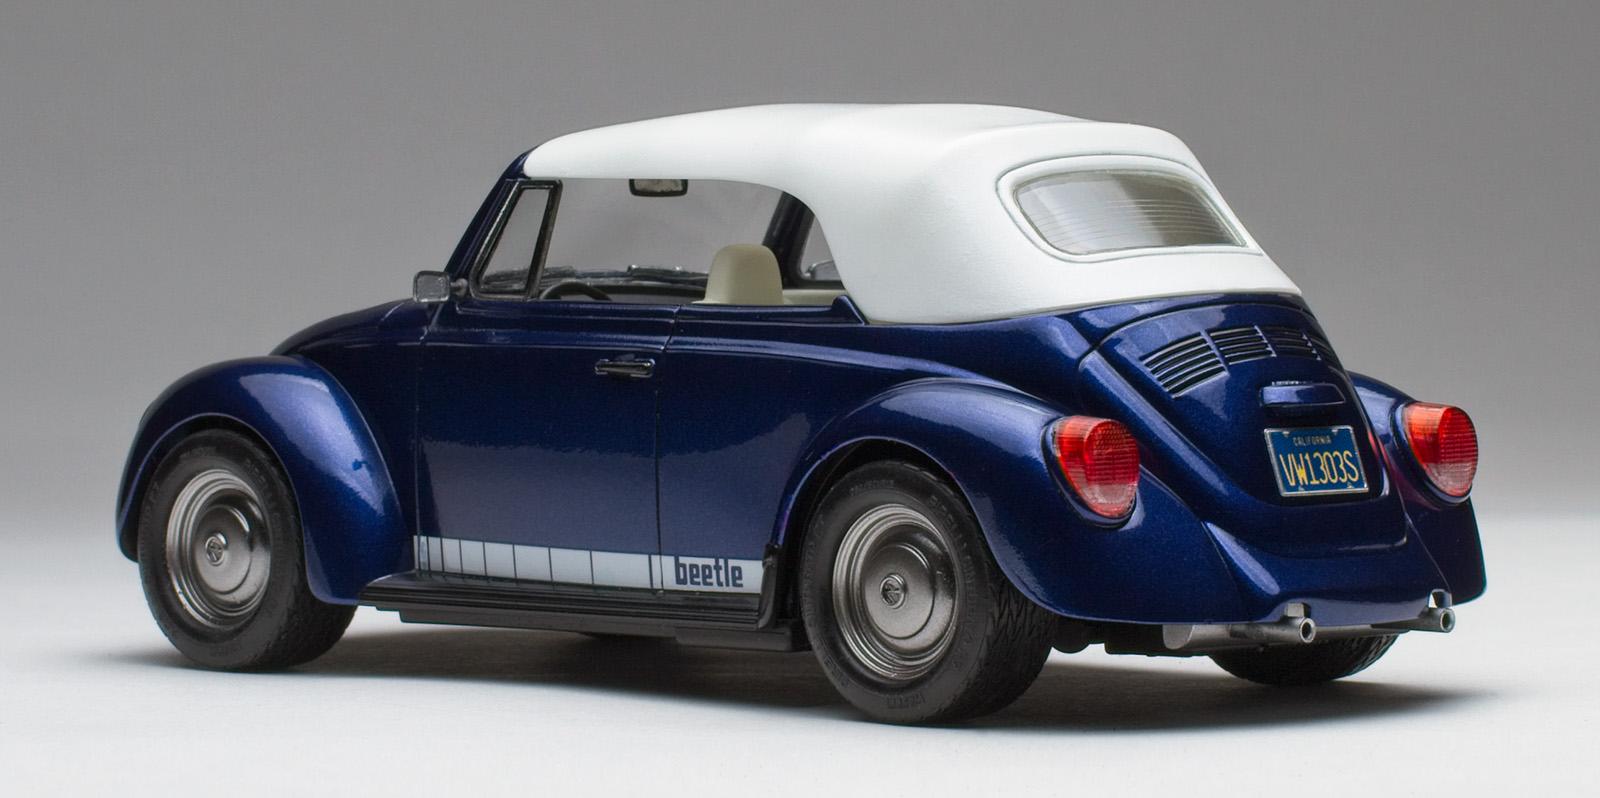
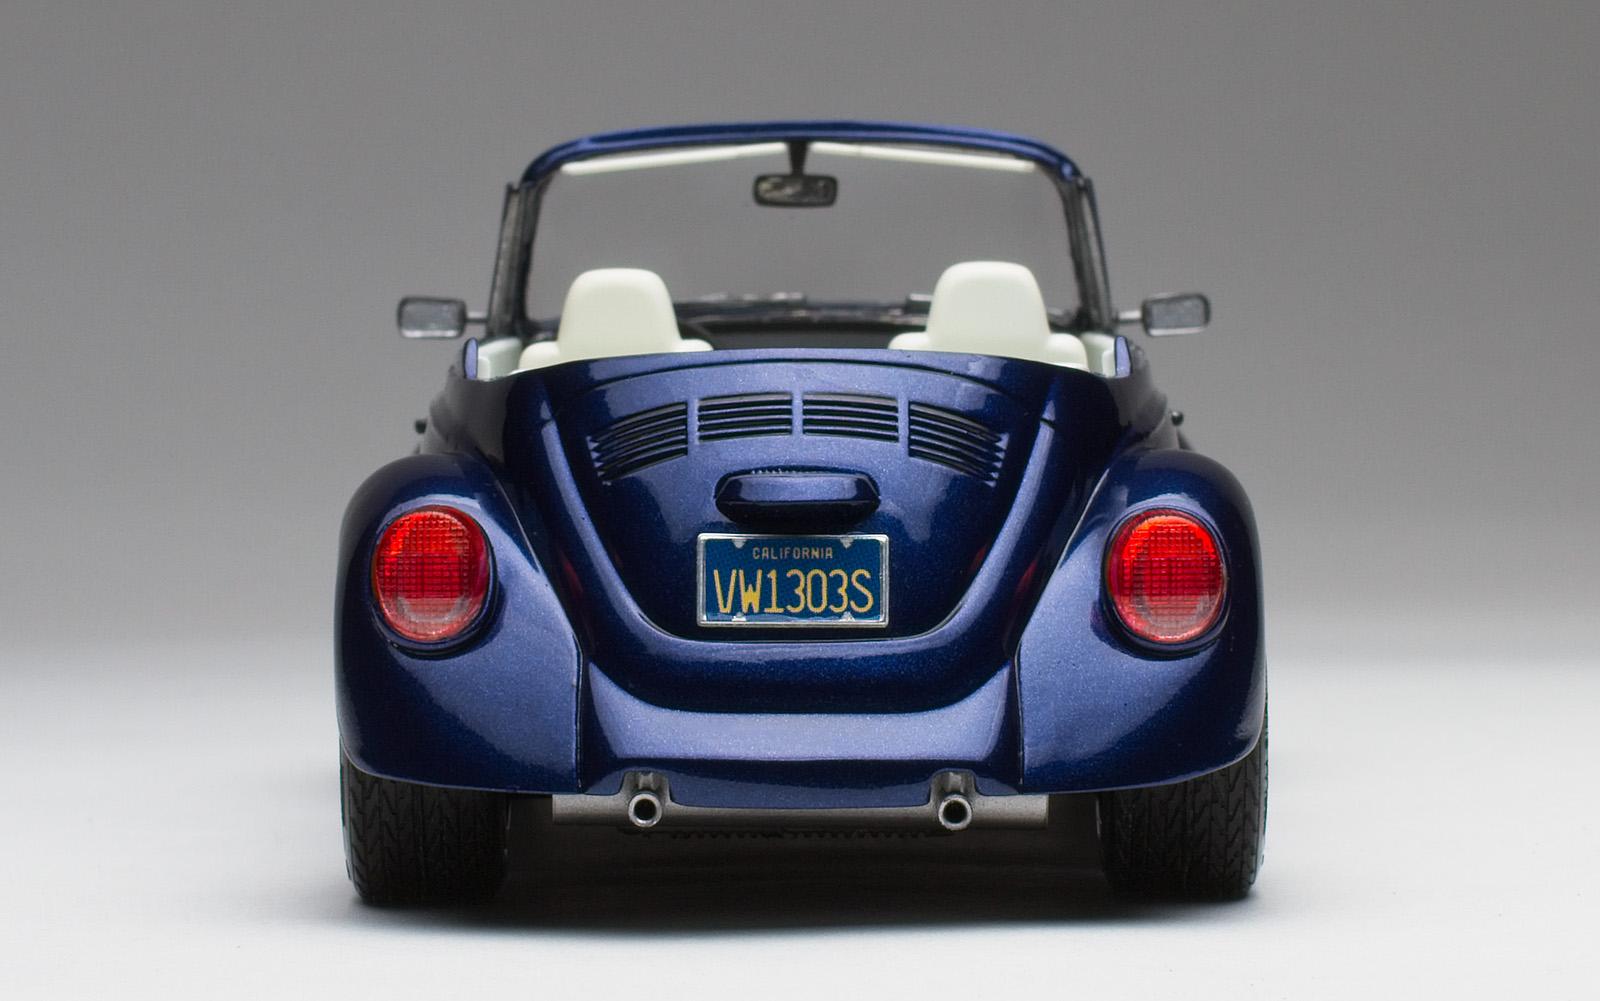
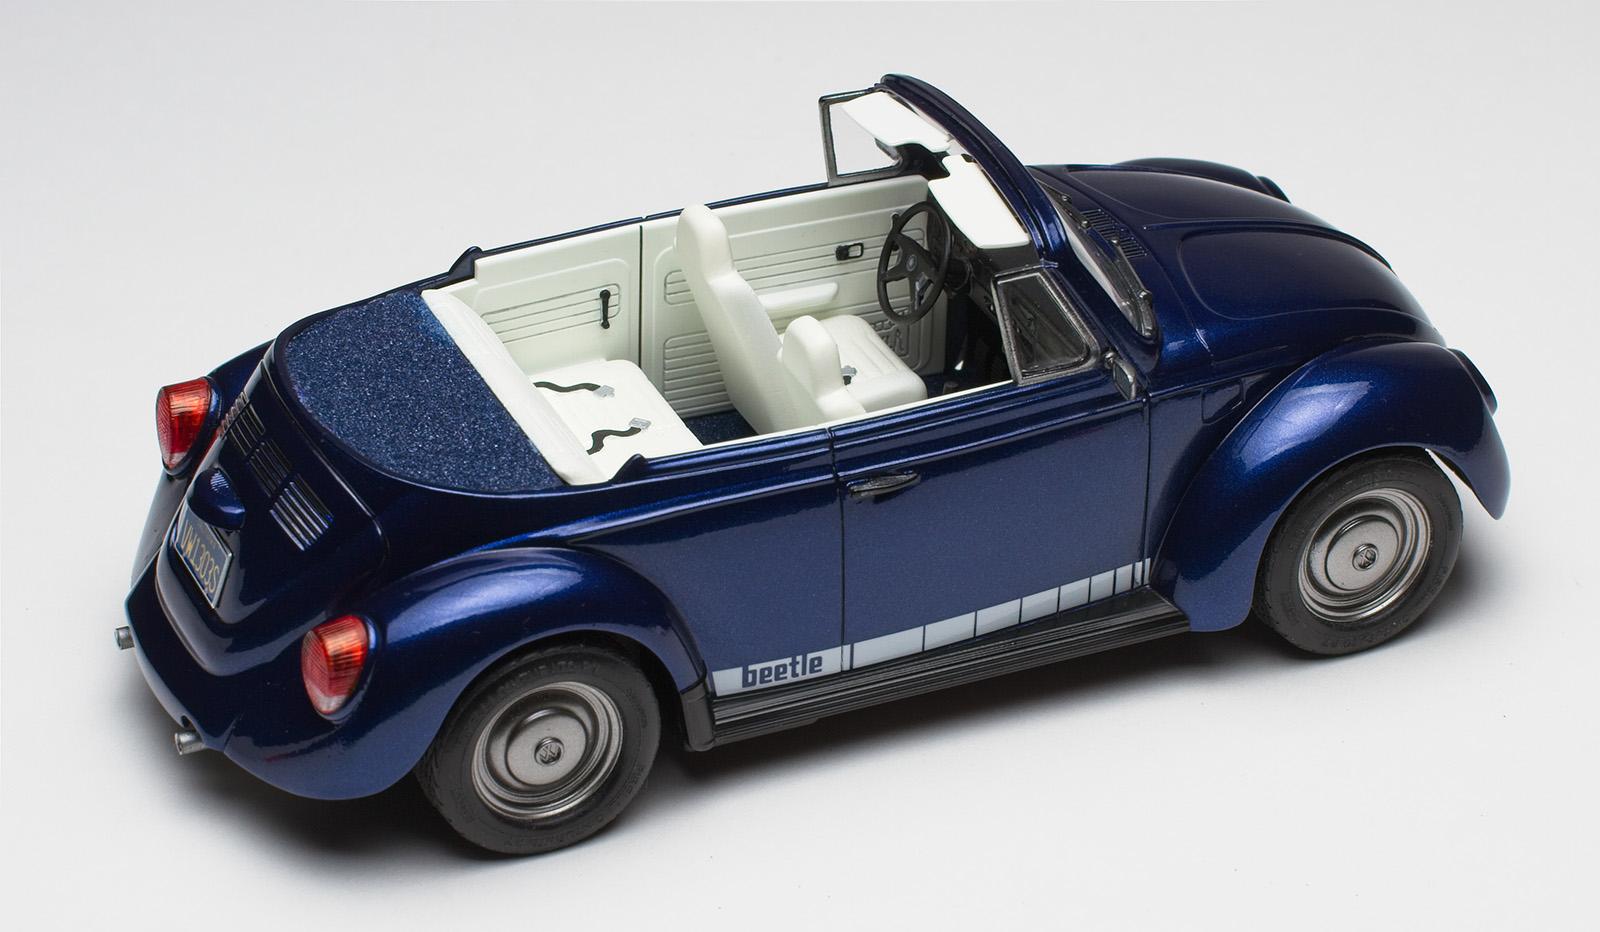
Tackled this kit as a bit of a pallet cleanser. Didn't know going in, but it looks like in a previous release the kit was roughed in for battery powered lights and perhaps a motor. The body was painted with Tamiya TS-51 Racing Blue over Gloss Black and clear coated with Mr. Color GX100. The soft top was painted Tamiya LP-43 Pearl White and the interior LP-39 Racing White. Used Ranger Navy Blue embossing powder for the carpeting. I went with a kind of restomod look by removing the bumpers and eliminating much of the chrome accents. What I Learned 1. Decanted TS paint seems 'brittle' compared to Tamiya's LP. I noticed a number of little chips missing during final assembly. Not the first time this has happened. 2. Should come up with a 'full' build plan before starting a kit. Ended up with a little too much of "wonder how this would look?" For example, I'm not crazy about the side decals and the chrome wheels and mirrors should have been shinier. This lead to #3. 3. Got kinda lazy and sloppy with this build. I didn't paint the windshield trim; chickened-out on painting the outer area of the doors panels which should match the body colour; left a paper towel with paint remover in my workspace which made contact with driver side rear fender (I just painted it in with coloured marker). 4. The headlight bezels were a terrible fit with huge gaps... which leads to #5. 5. Tried Mr. Hobby's Mr. Dissolved Putty for the first time. This stuff is pretty cool as it seems to self level a bit - filling in tiny holes and gaps. I used it over multiple applications of Tamiya's White Putty which likes to shrink. 6. The kit wheels are way out of scale but looked better than other wheels in my stash. On a positive note, the glass fits beautifully on this kit. That's it for now, Cheers.

-
Nicely built with great foil work!
-
?what Rattlecan Dan said. ?
-

Lamborghini Countach double-build: LP400 & LP400S (Tamiya, 1/24 scale)
70 Sting replied to Tommy124's topic in Model Cars
Those are gorgeous ? great paintwork and your doors fit beautifully. ? -
That looks pretty sweet.? Nice work with your mods. I have never built a Morbius kit. How do they compare to other manufacturers?
-
Great build. Awesome engine.
-
Very sharp looking car! Nice colour choices.
-
Gorgeous ?
-
A lot of work went into this build and it shows. ?
-
Very cool. Love the paint. ?
-
Very nicely done. Great touch with the road wear on chassis. ?
-
Incredible paint work. Perfect build.?
-
Cool mods ?
-
Exceptional work.?
-
That is one of the finest examples of this car. Great paint colour and finish. Very nice work on the brake light bezels. ?
-
?? Great build and I love the colour! Excellent photography as usual. I have one of these coming up shortly in the cue. Thanks for the heads up on body/chassis fitment.
-
Superb work! Great paint and interior detail. The engine bay looks 100% real. ?
-
That looks great. Fine detail right down to the valve stems. ?
-
How do you handle complex curves? I would think it would be difficult to keep the acetate flush all around a windshield for example.
-
That’s your first time using an airbrush? I hate you. ?? Awesome build. All the extra work you put in really shows. Great detail everywhere and the fact that you were able to replace the glass with acetate is pure voodoo. I have a Pantera kit sitting unbuilt because it requires a windshield replacement. Well done sir. Well done.
-
Revell 1968 Chevelle SS396. New Pics after wet-sand/polish/wax.
70 Sting replied to Dragonhawk1066's topic in Model Cars
Well worth the effort. Great finish on a very fine build. ? -
Has anyone ever told you you’re pretty good at building cars? ? Always a pleasure seeing your work.
-
Um, this is pretty awesome! Great mods and scratch building on display. The car looks like it spent some time in a lagoon. ?
-
Awesome colour scheme! Nice chrome and trim. Vinyl top looks great too… how did you do it - airbrush/spray can applied from a farther distance to create the texture?