OldNYJim
-
Posts
251 -
Joined
-
Last visited
Content Type
Profiles
Forums
Events
Gallery
Everything posted by OldNYJim
-
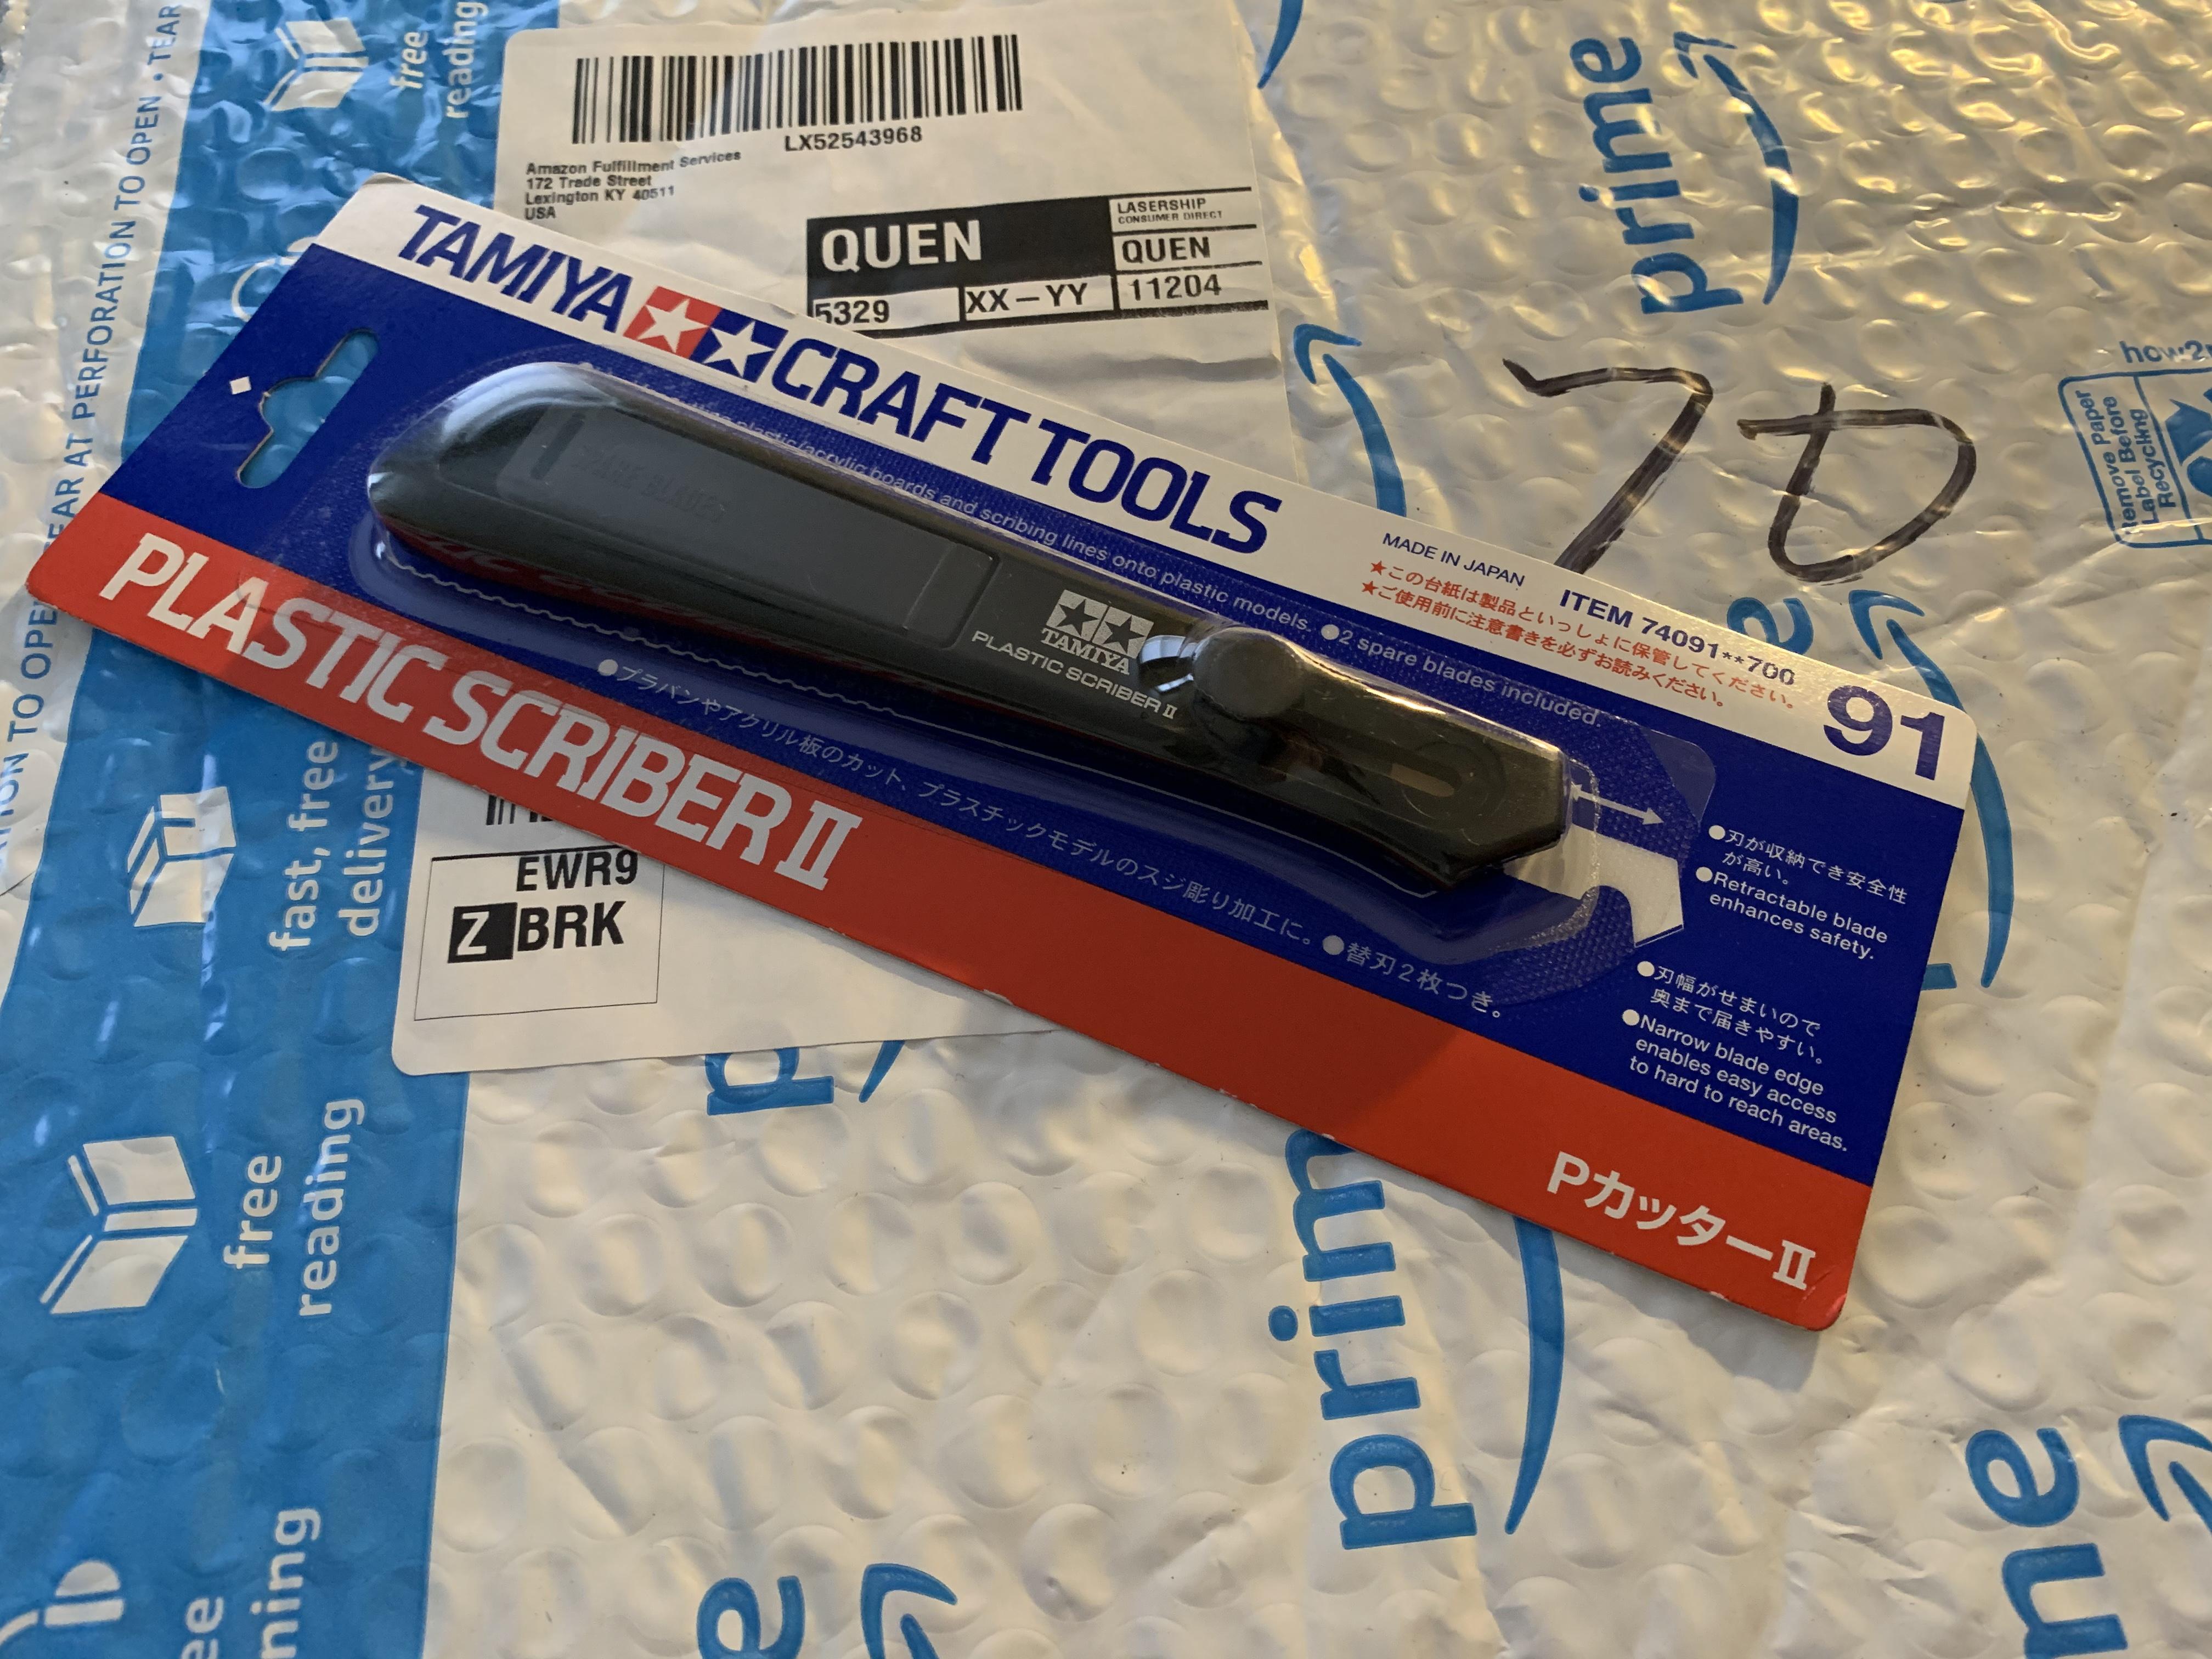
 Haven’t been able to find my good scriber for, ohh, a year so I finally relented and decided to buy another so that the first one will come out of hiding ?? Never used the Tamiya one but apparently it’s decent...ordered at 12pm and here by 3!?! Incredible service - I can’t even get to the local hobby shop and back that fast ?
-
The NYPD has for years! I’ve seen a few of these around - they’re somewhat easy to spot because they usually have two big guys in Mets hoodies sitting in the front ? Slightly off topic I know, my apologies
-
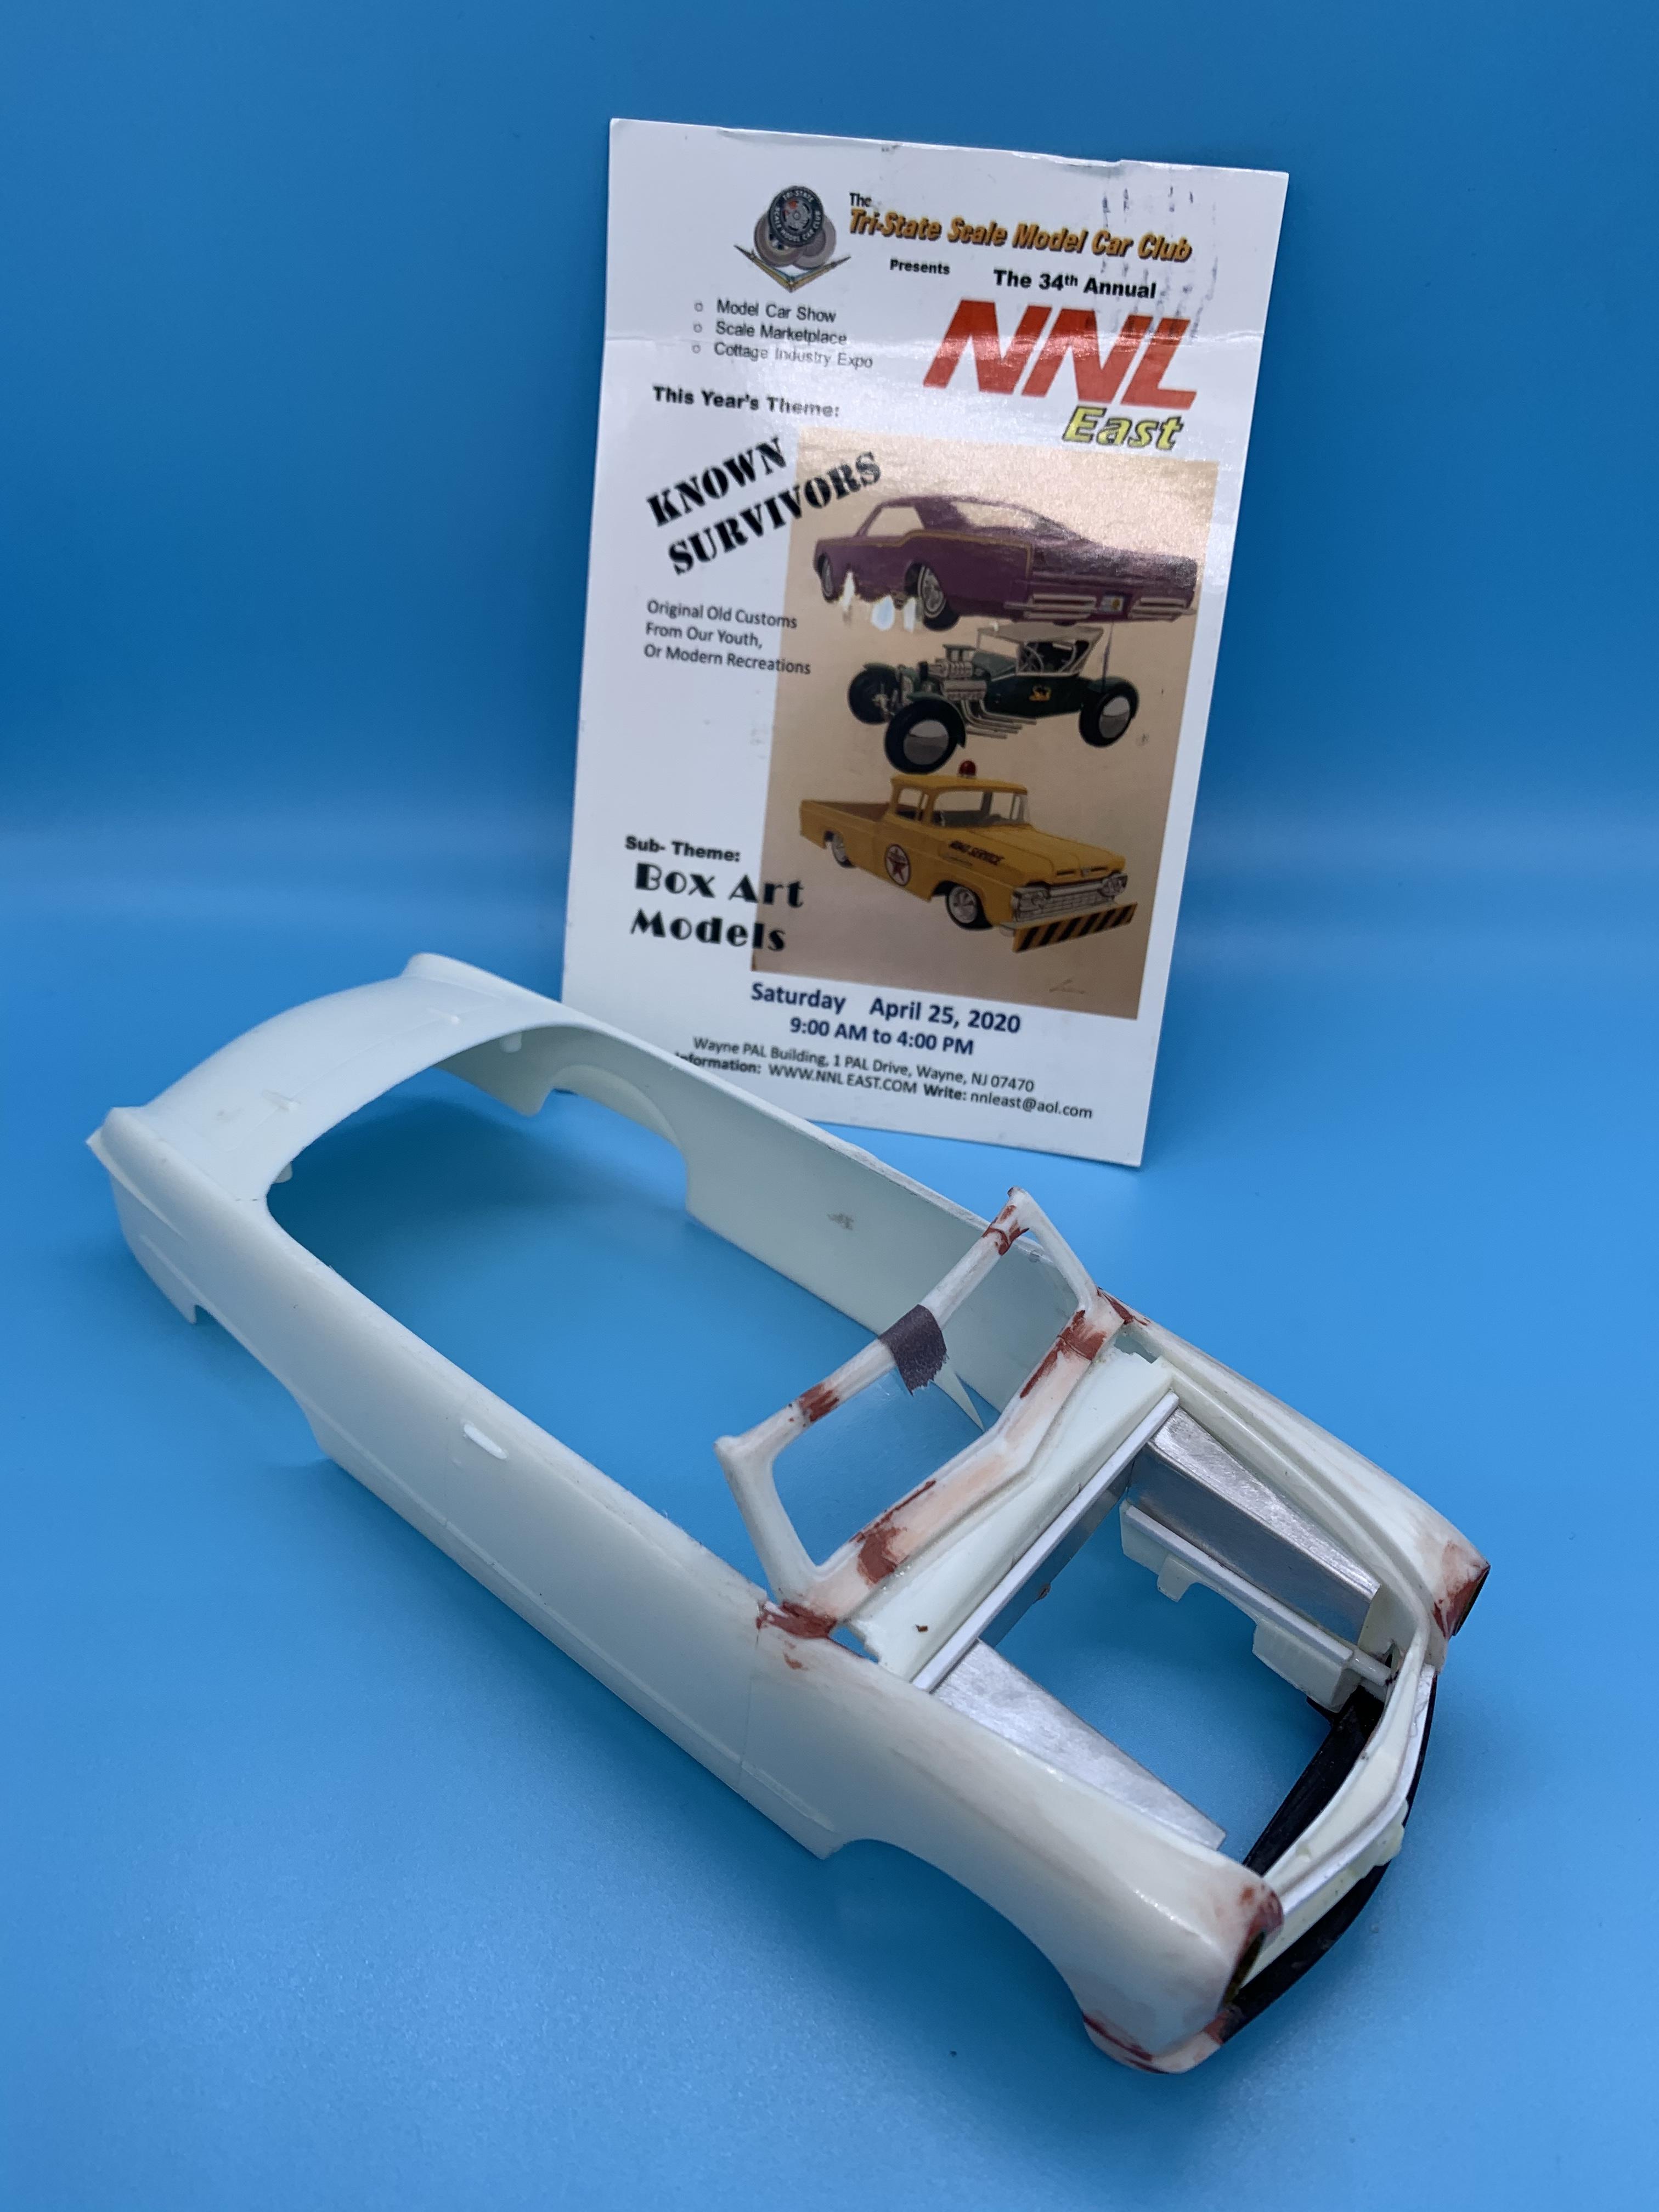
NNL East 34, Wayne New Jersey April 25, 2020
OldNYJim replied to Tom Geiger's topic in Contests and Shows
The postcard idea is really cool - thanks Tom! Just need to Turtle wax my build and I’m all set I think ??
-
Well now I WANNA see it ???
-
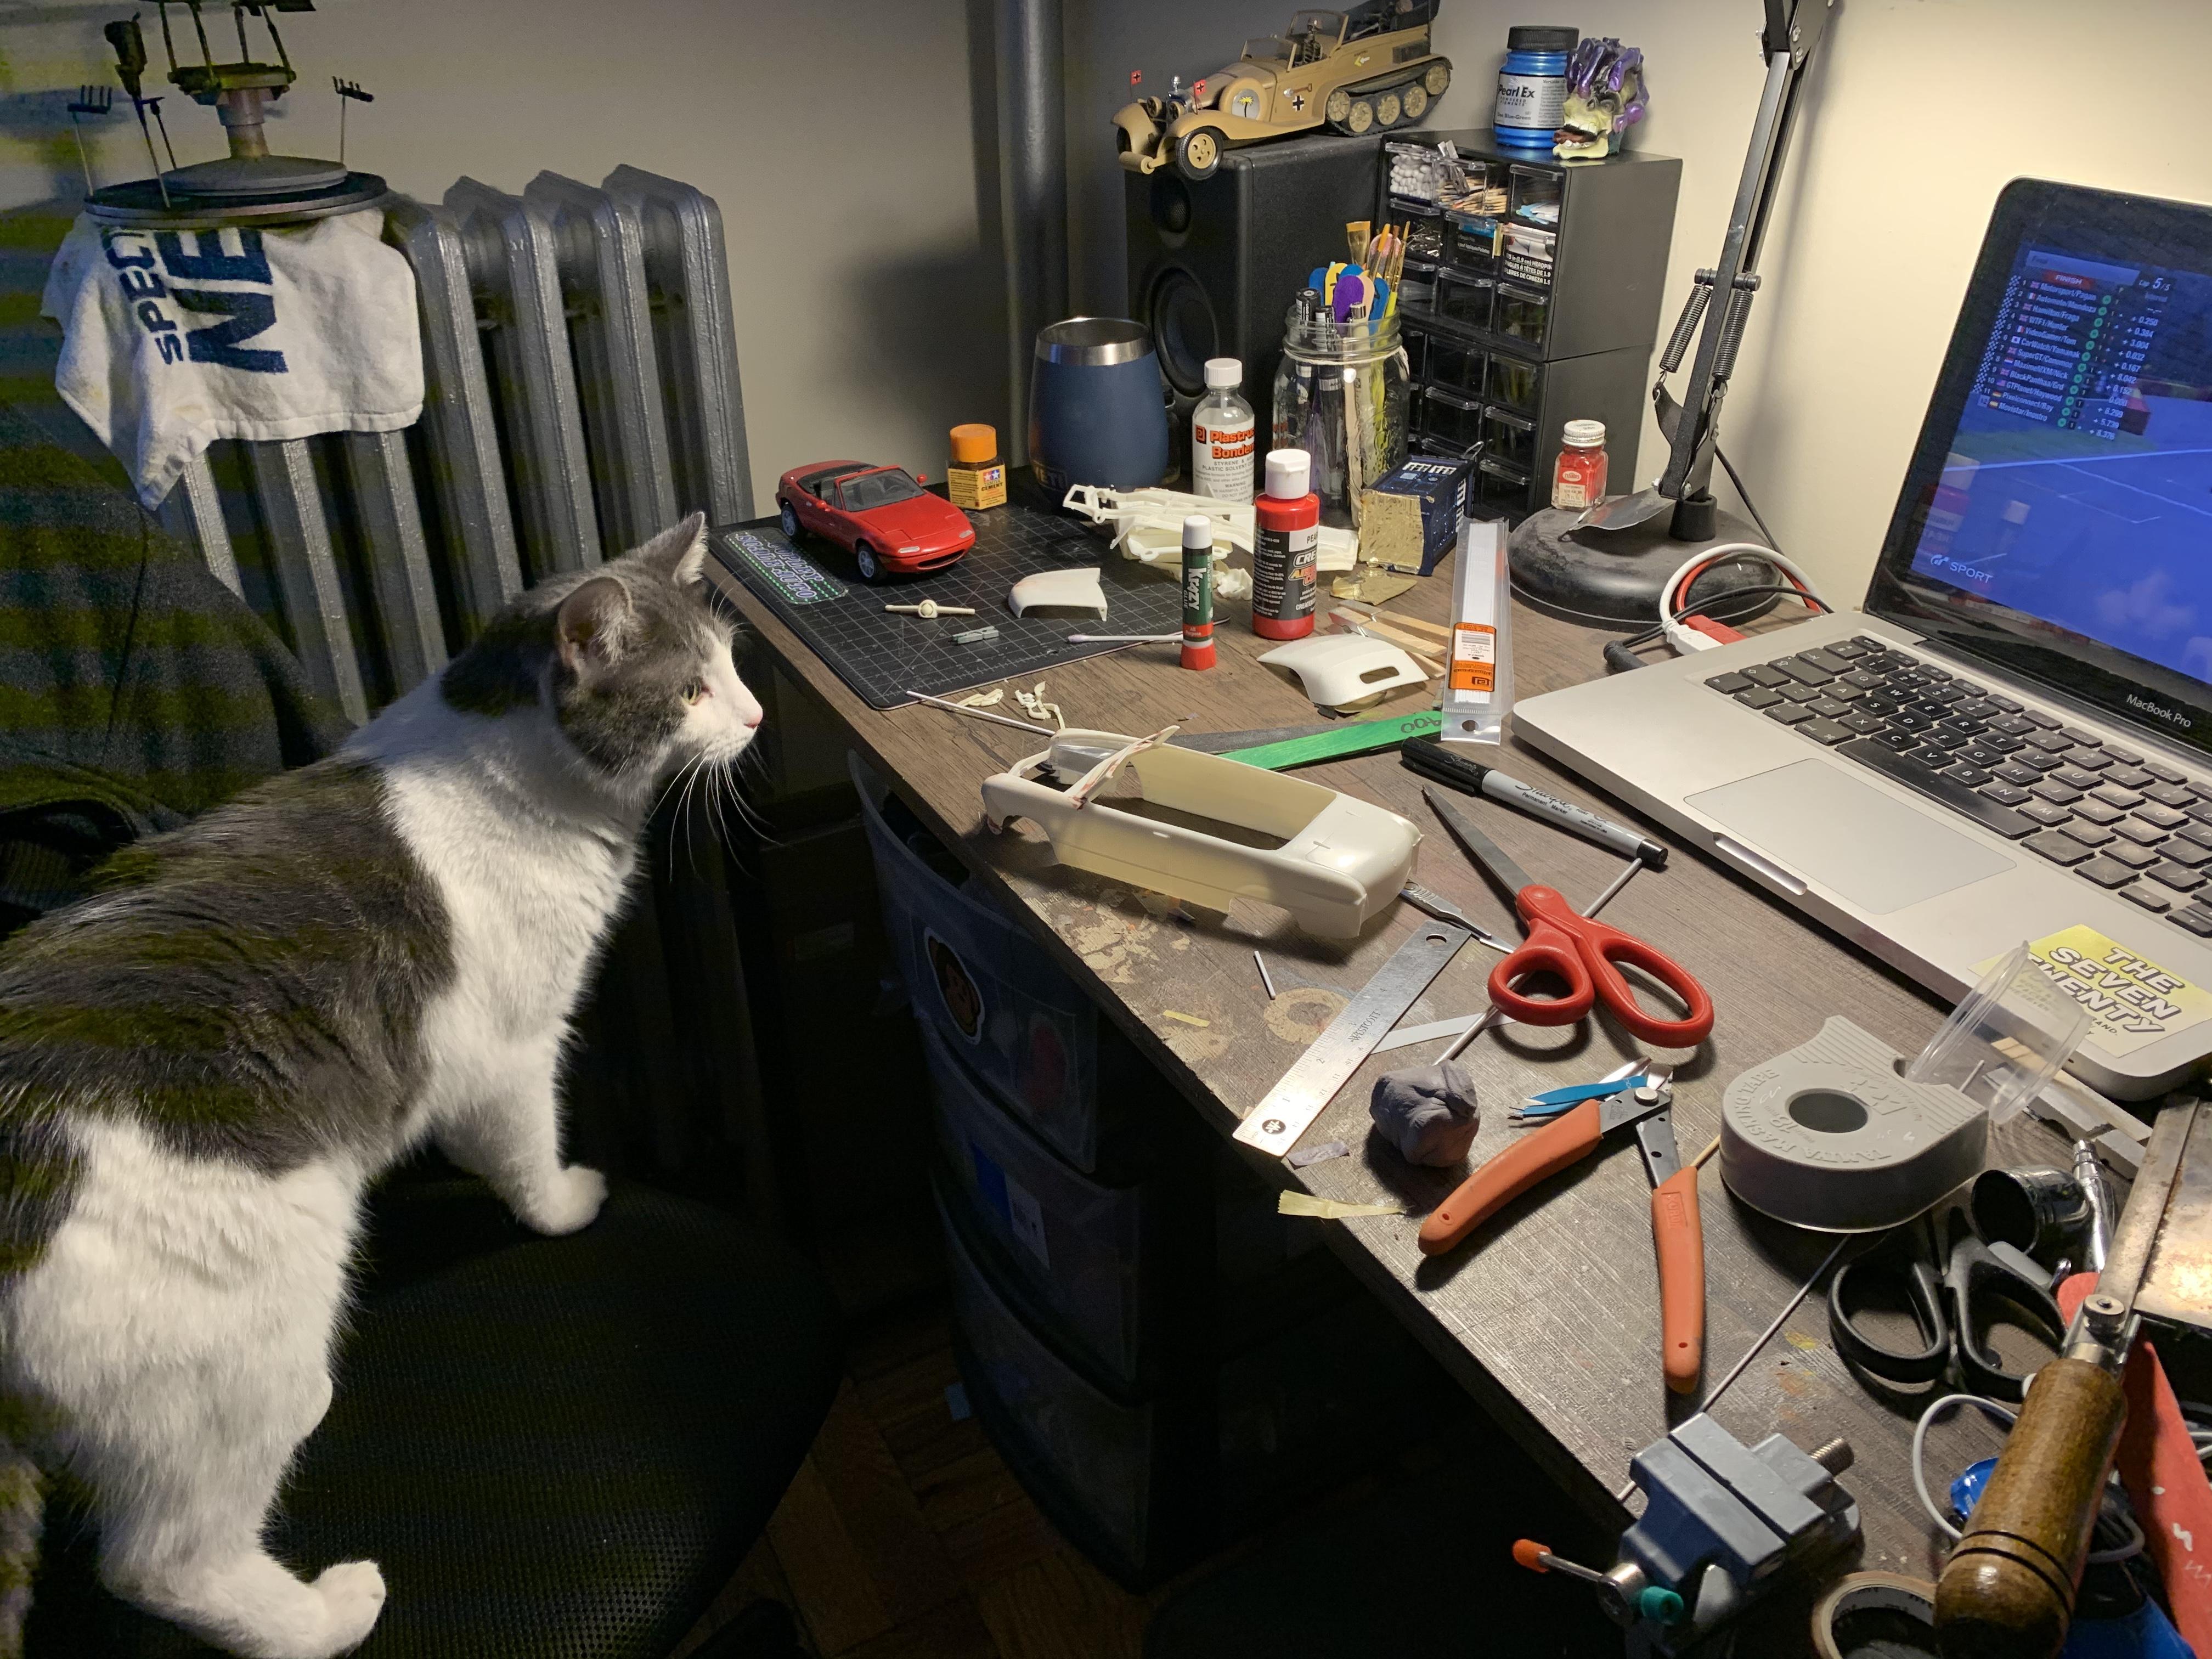
Needed to scribe some panels but can’t find my scriber - was going to run into the city (we’re in South Brooklyn here) to see if any of the model stores carried one, but Amazon had them for SAME DAY delivery (?!). Placed my order at 12pm, let’s see if it gets here today like they said!
-
Good source for windshield wipers
OldNYJim replied to OldNYJim's topic in Model Building Questions and Answers
Some great tips here guys, thank you! -
64 Dodge D100 Pickup Pro Street
OldNYJim replied to AmericanMuscleFan's topic in WIP: Drag Racing Models
Really impressive and inspirational building - enjoying this thread! Keep it coming! -
I like that technique for making the tubs! Clever!
-
I just asked my Magic 8 Ball and it said “geez, someone’s in for some tricky masking to detail paint all that stuff” ?? Looking great so far dude!
-
Ohh yeah, that paint looks GRRRREAT
-
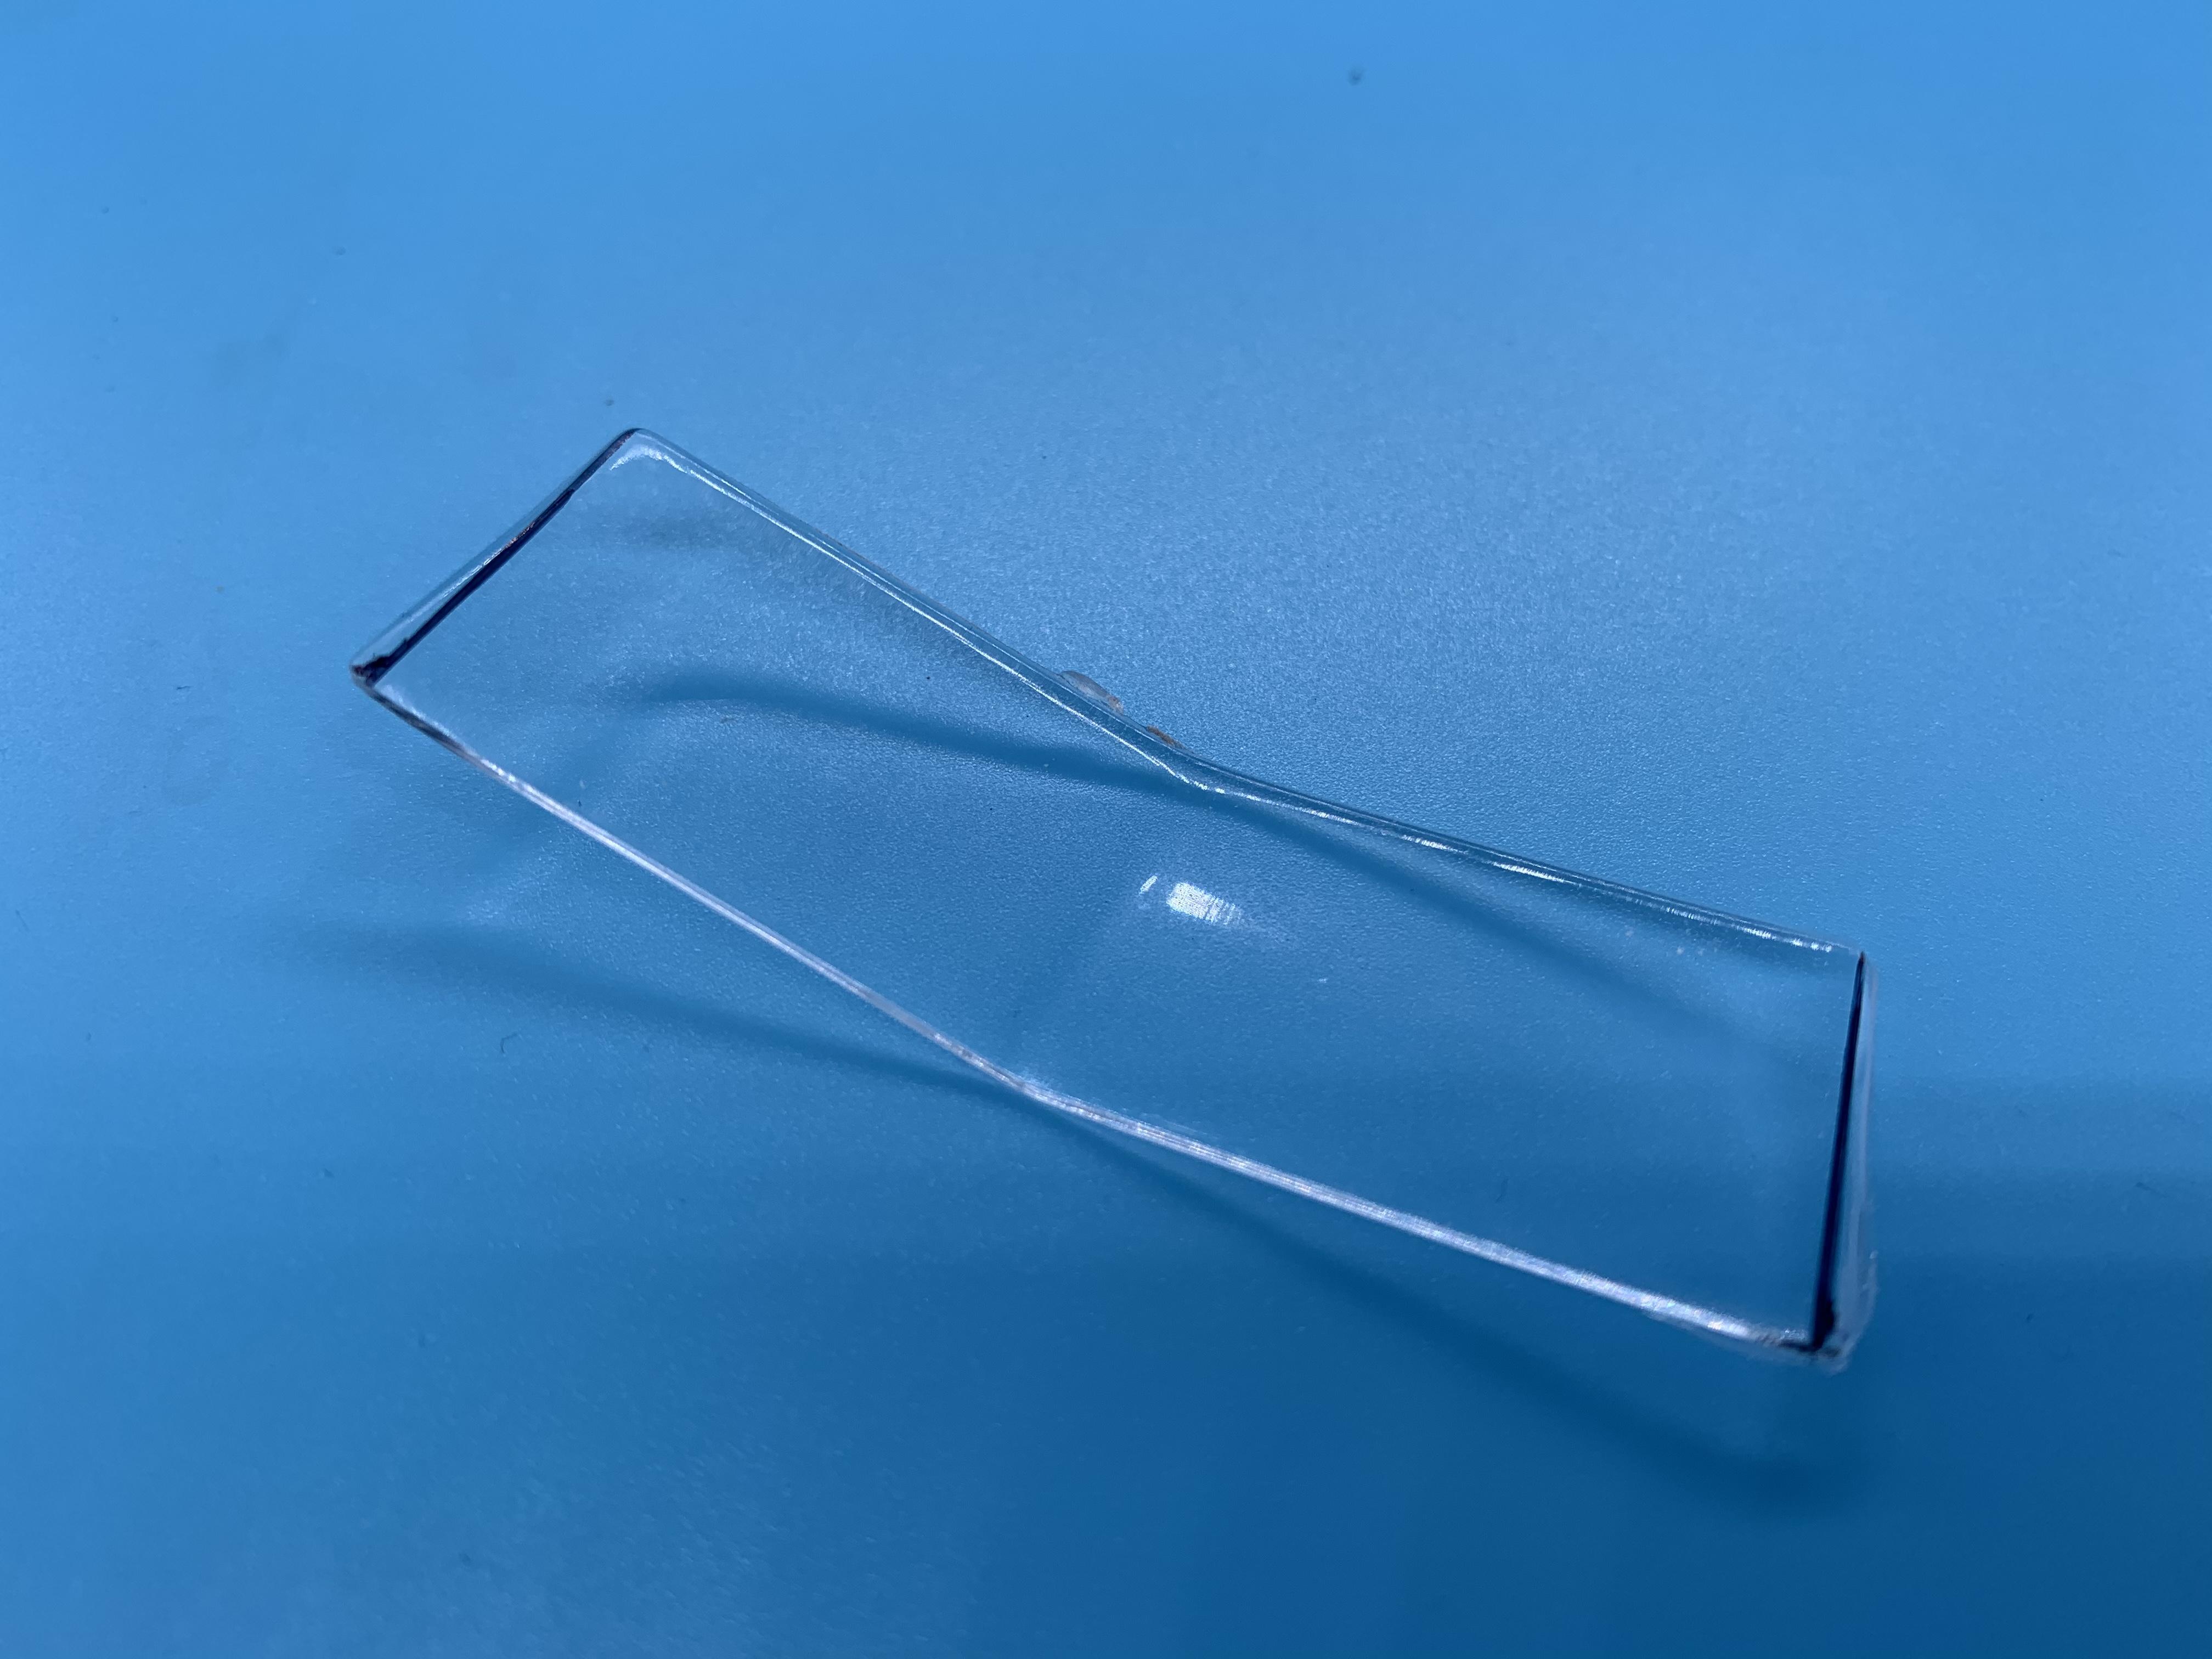
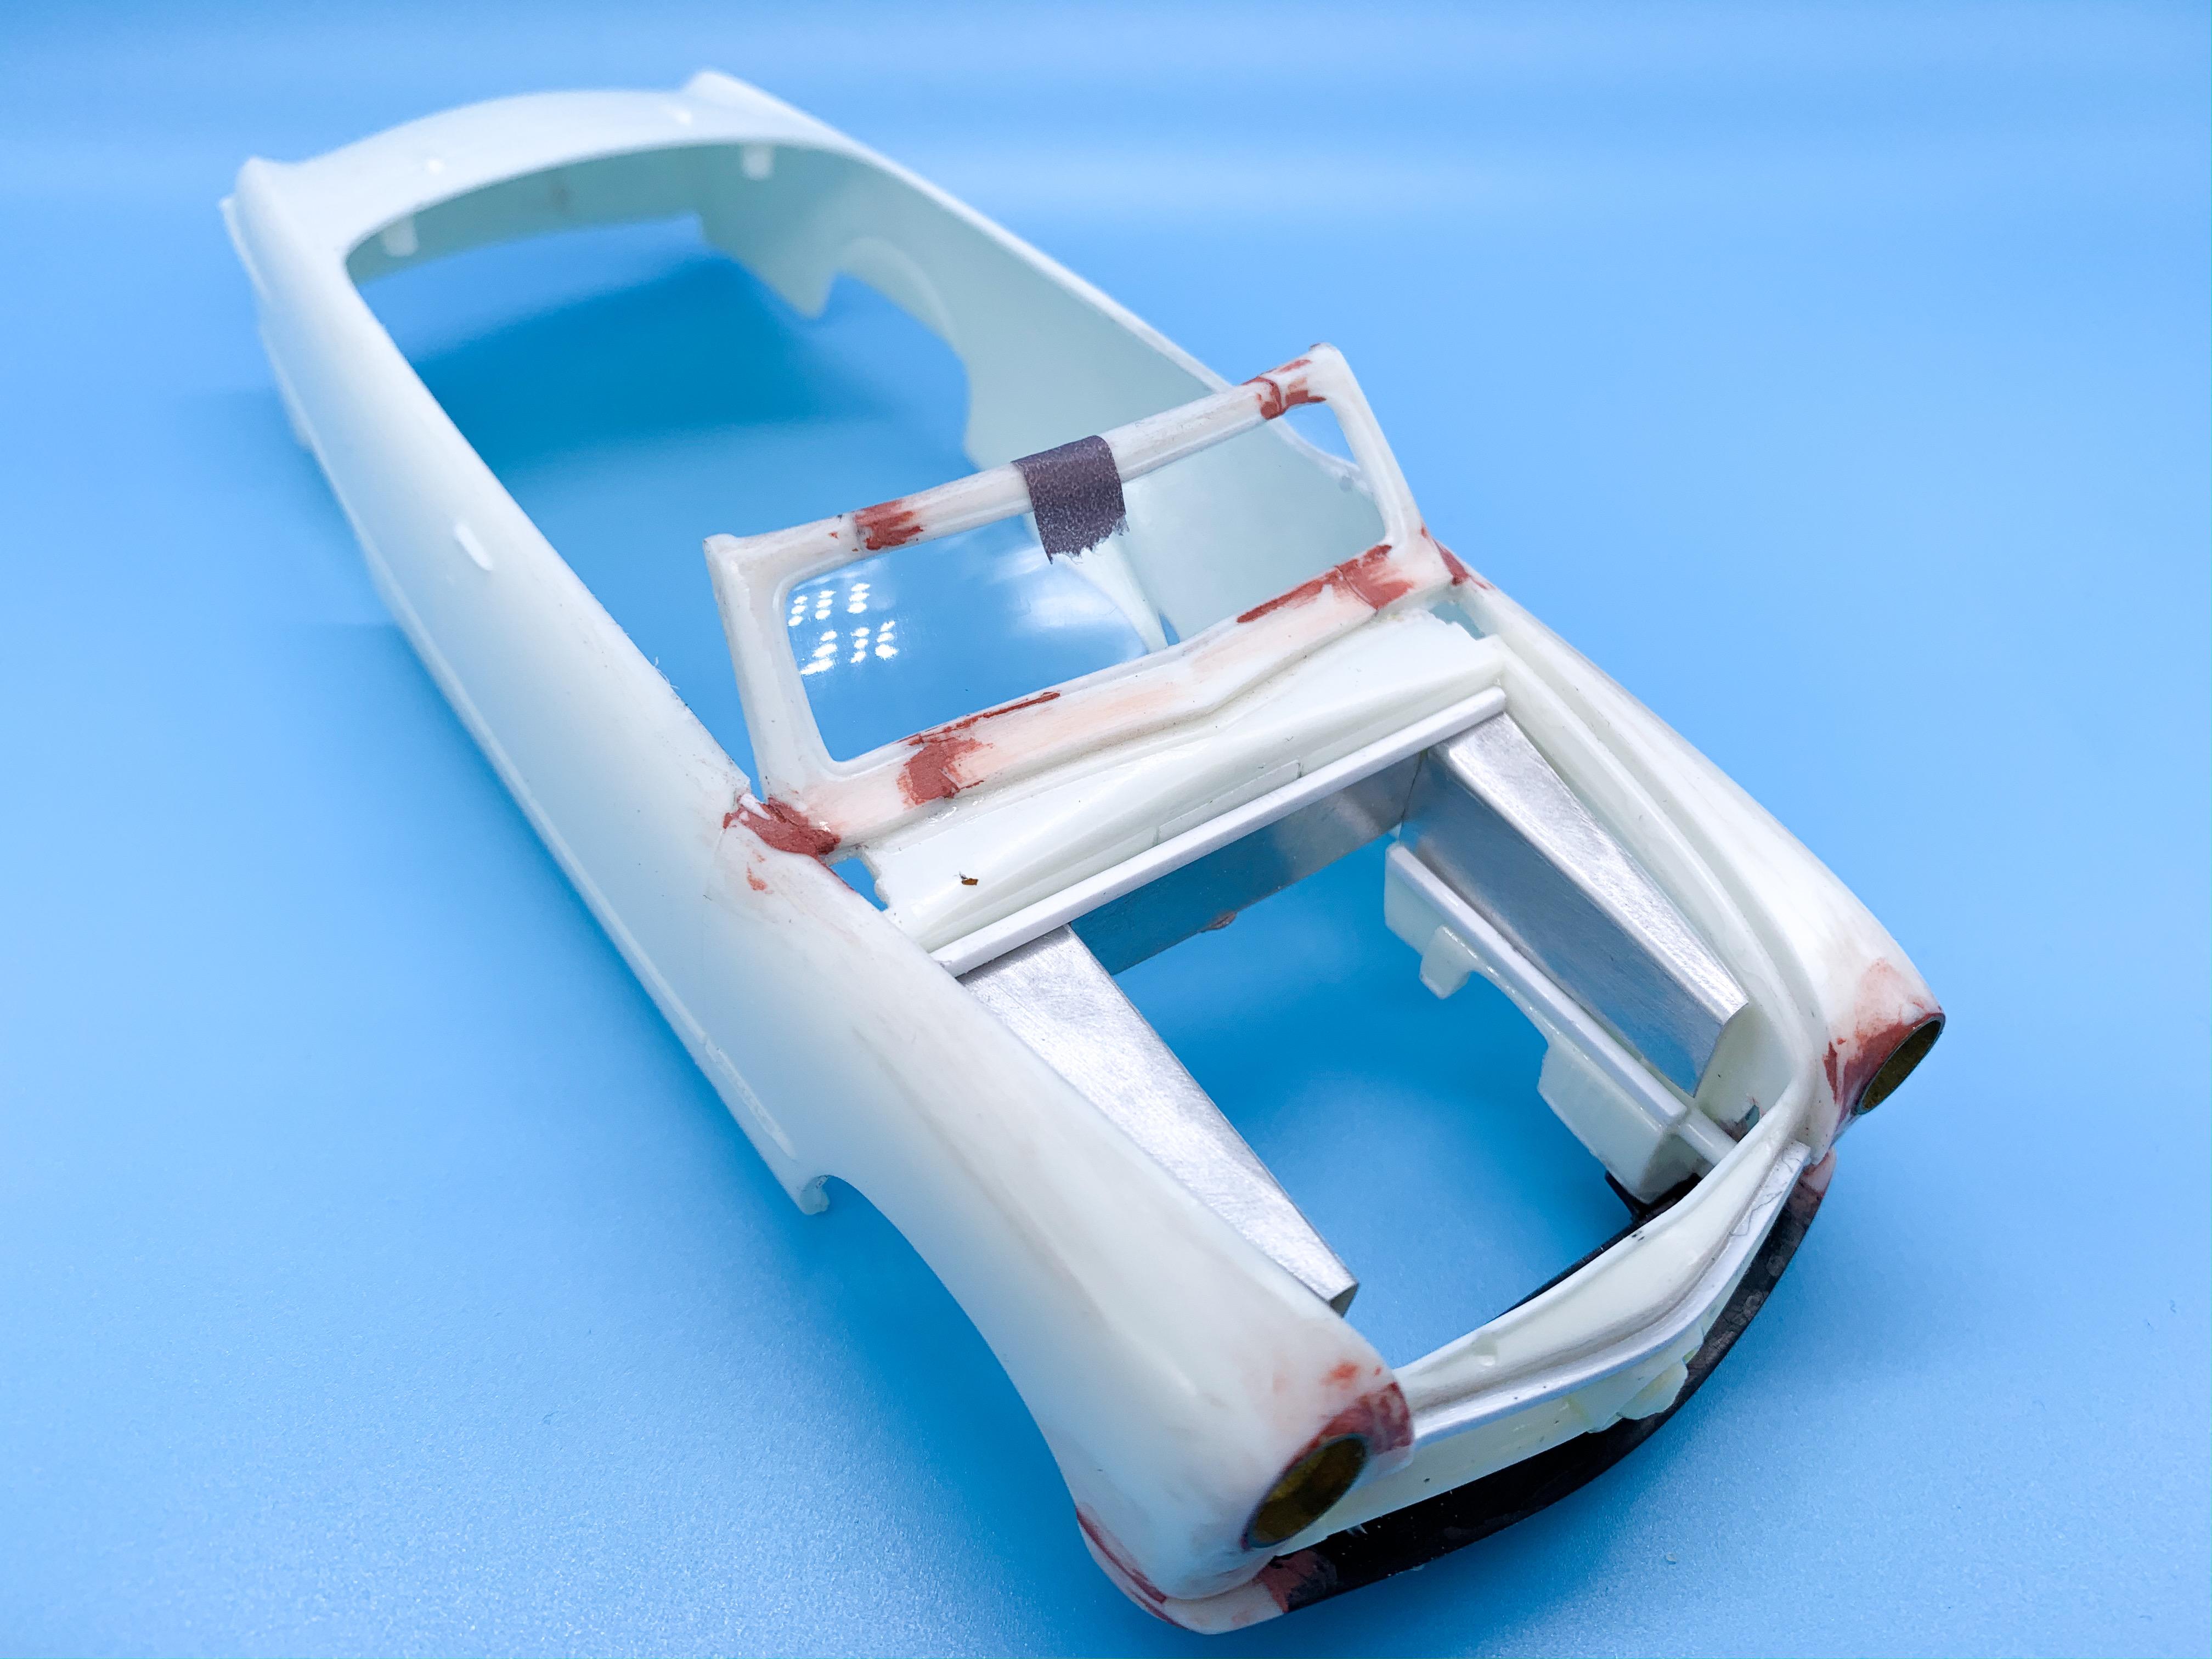
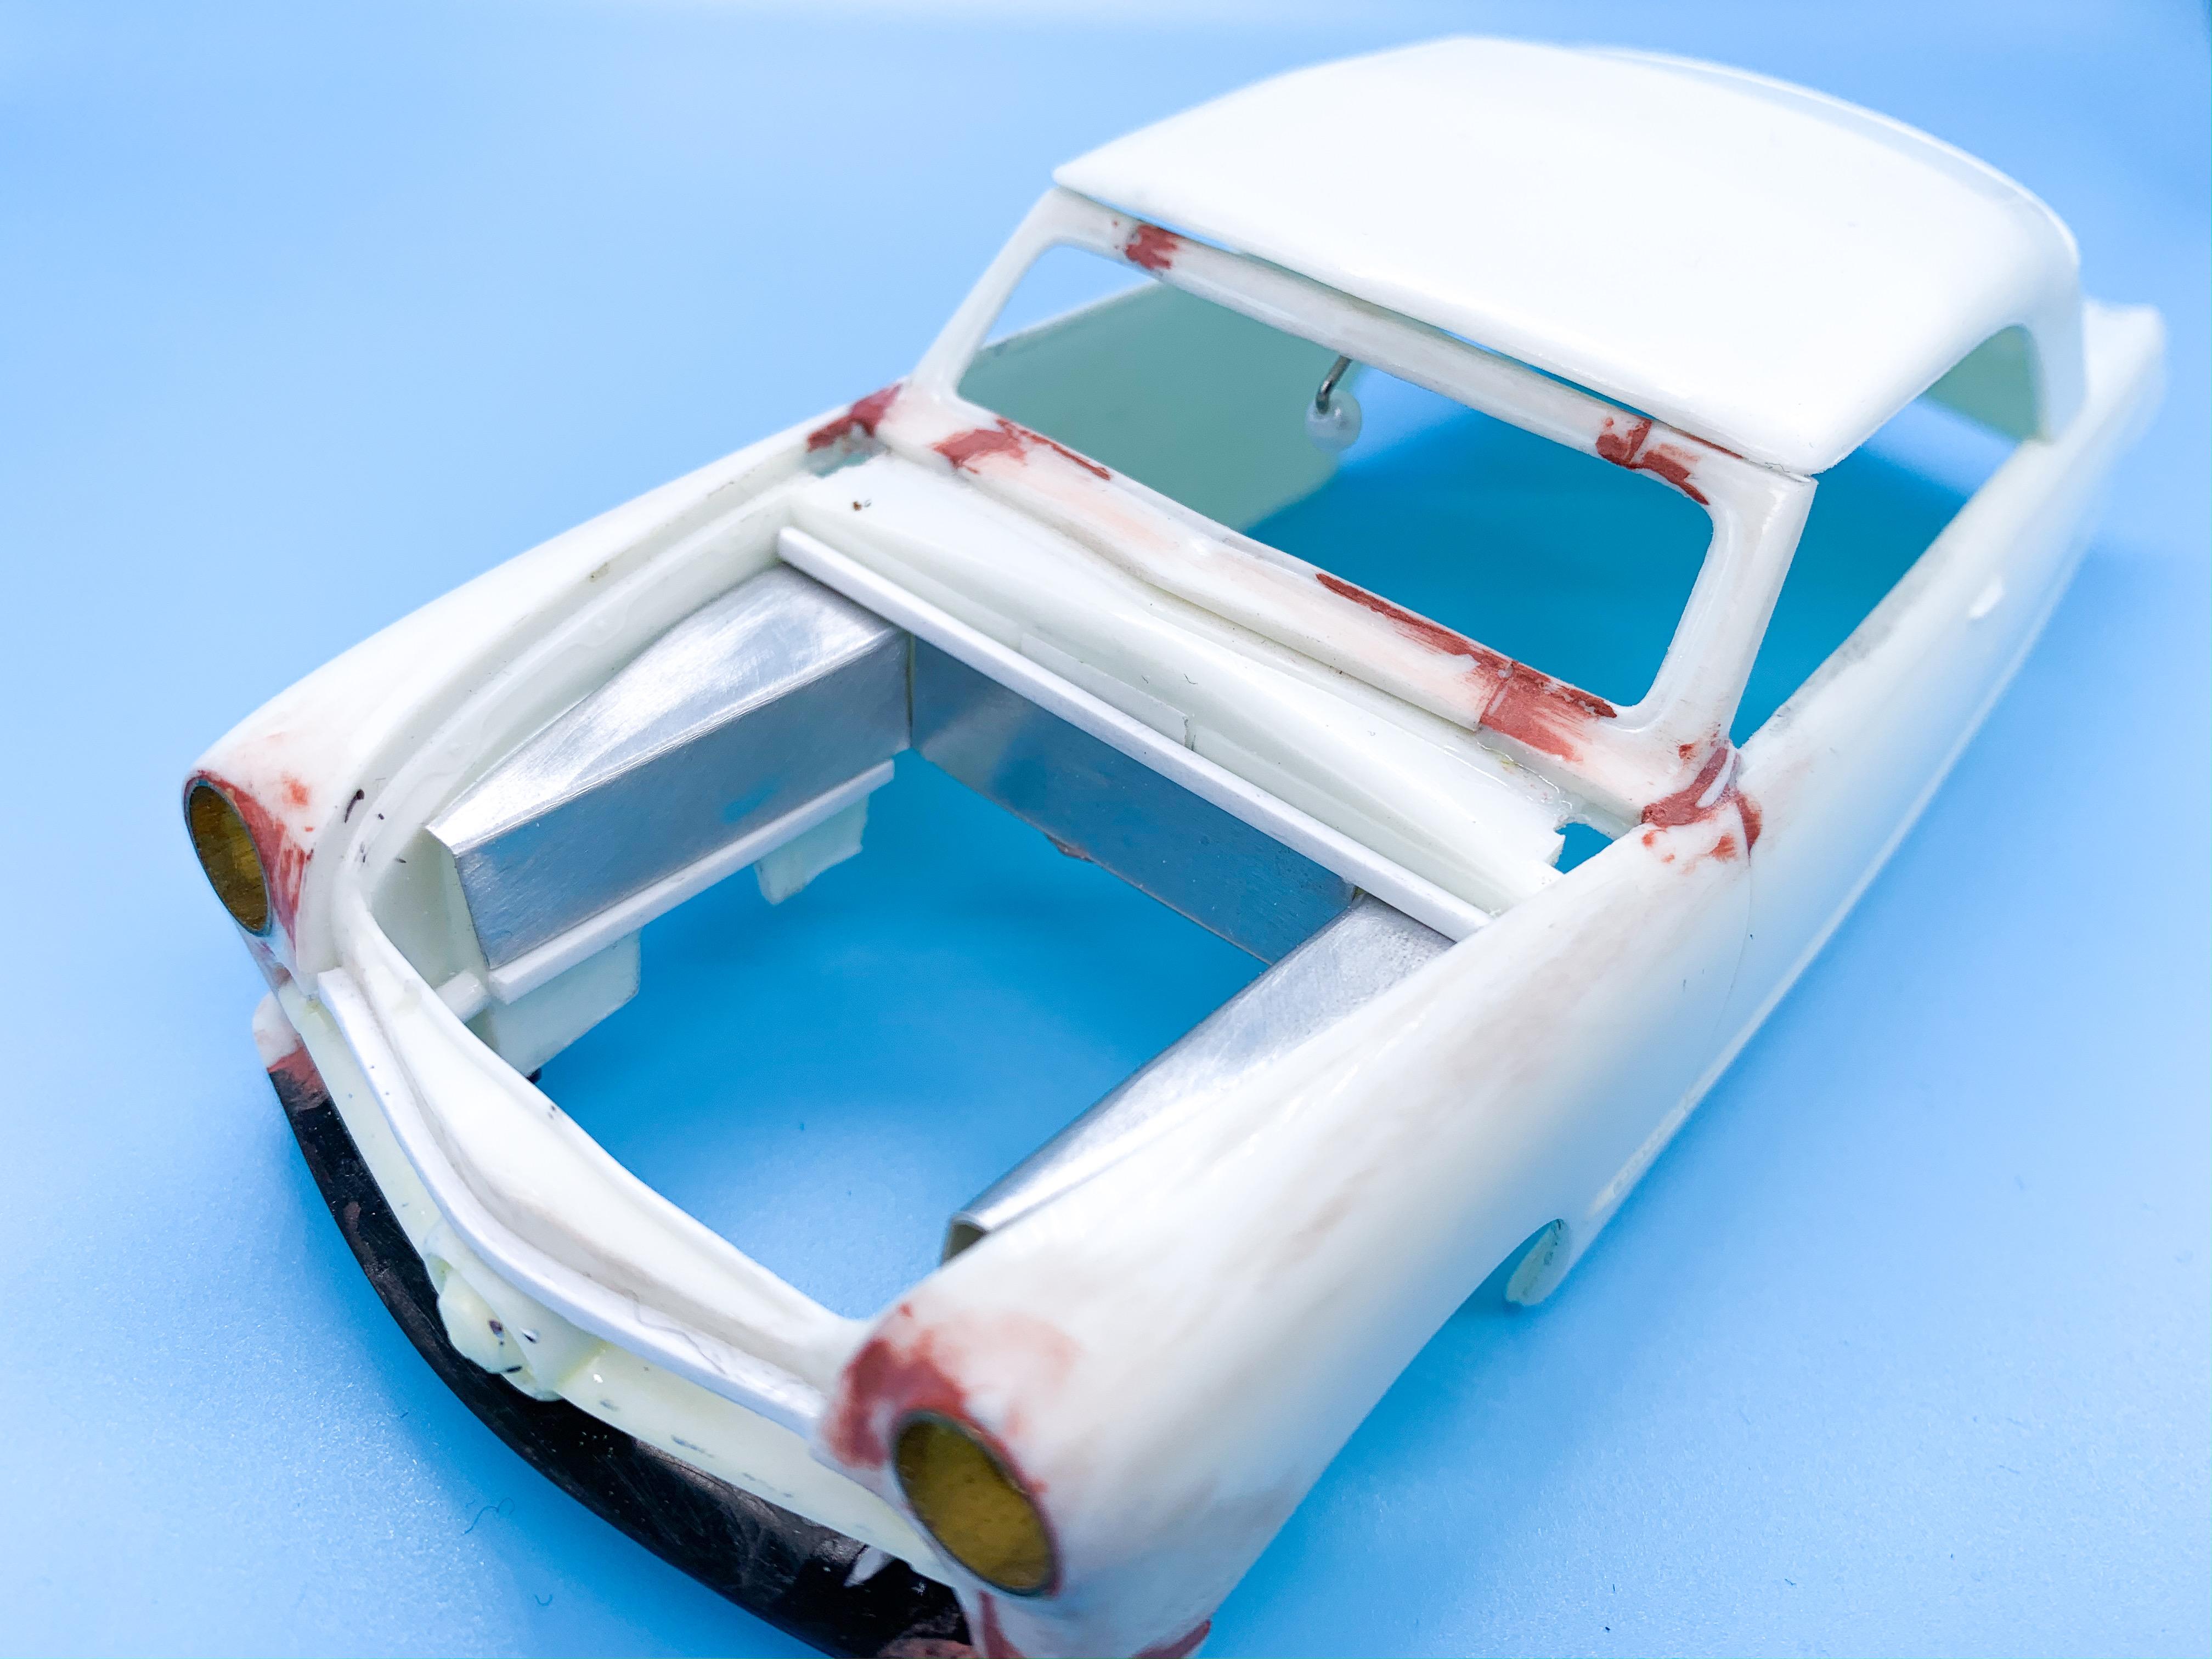
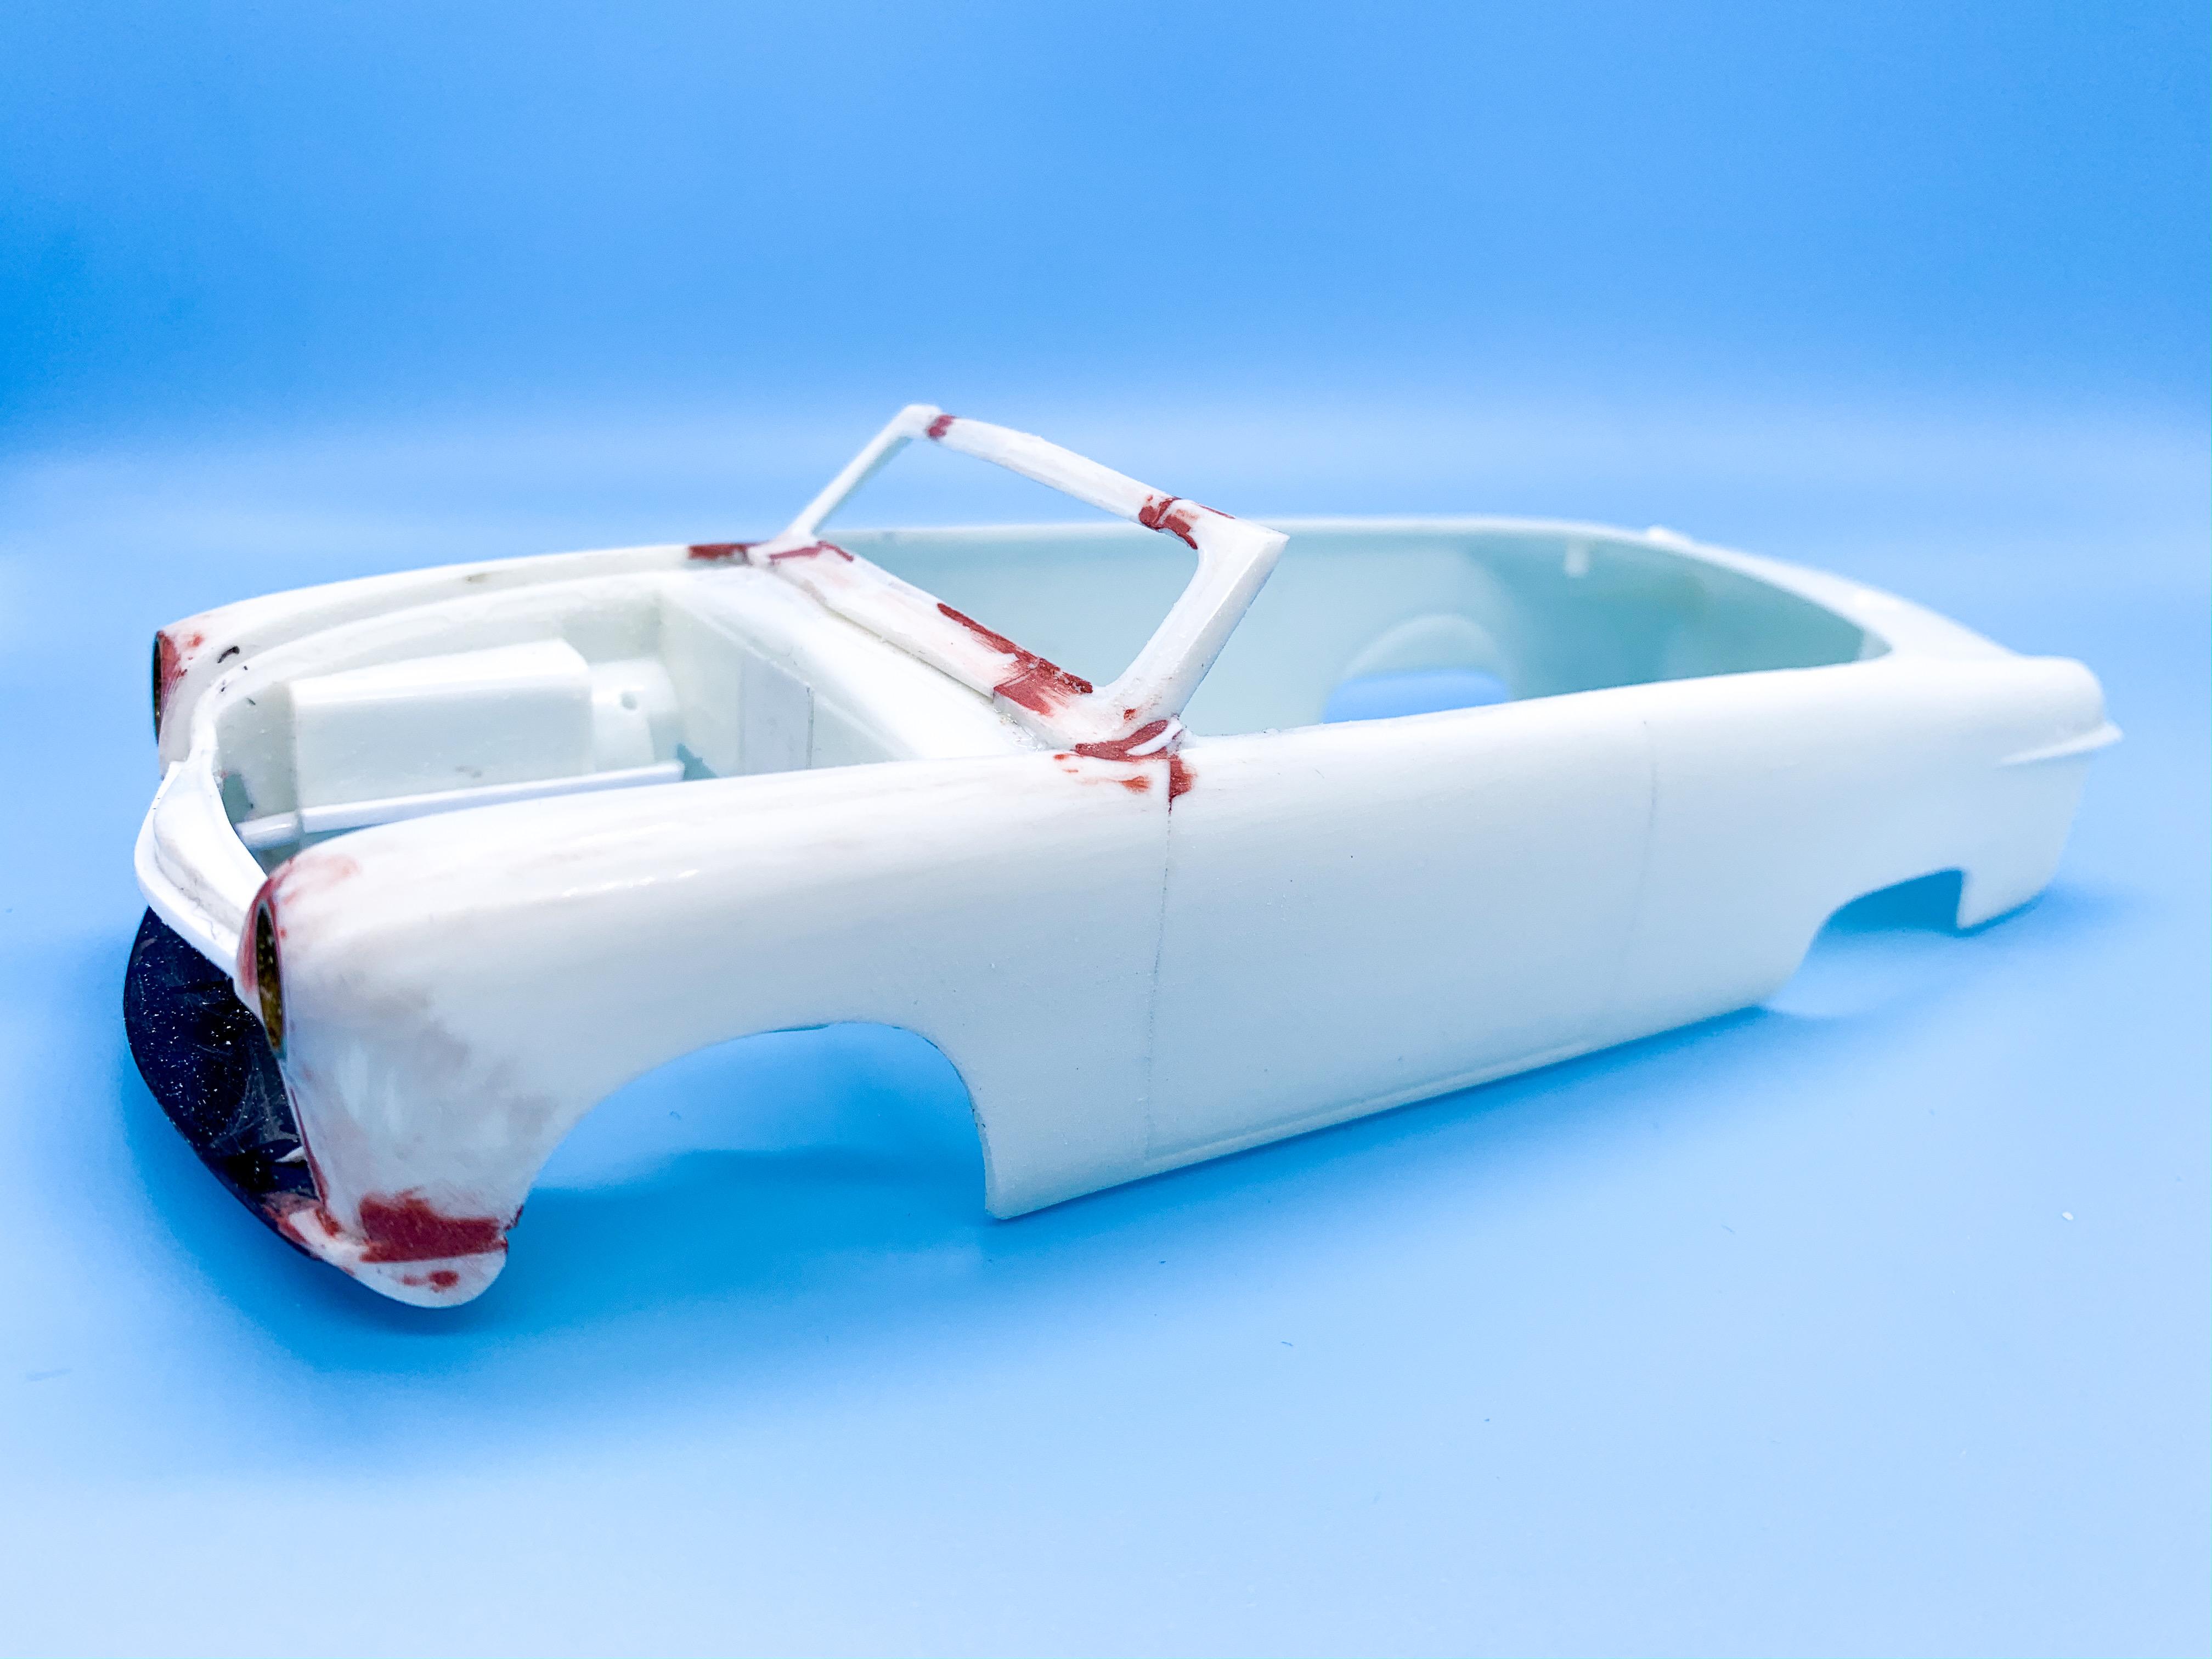
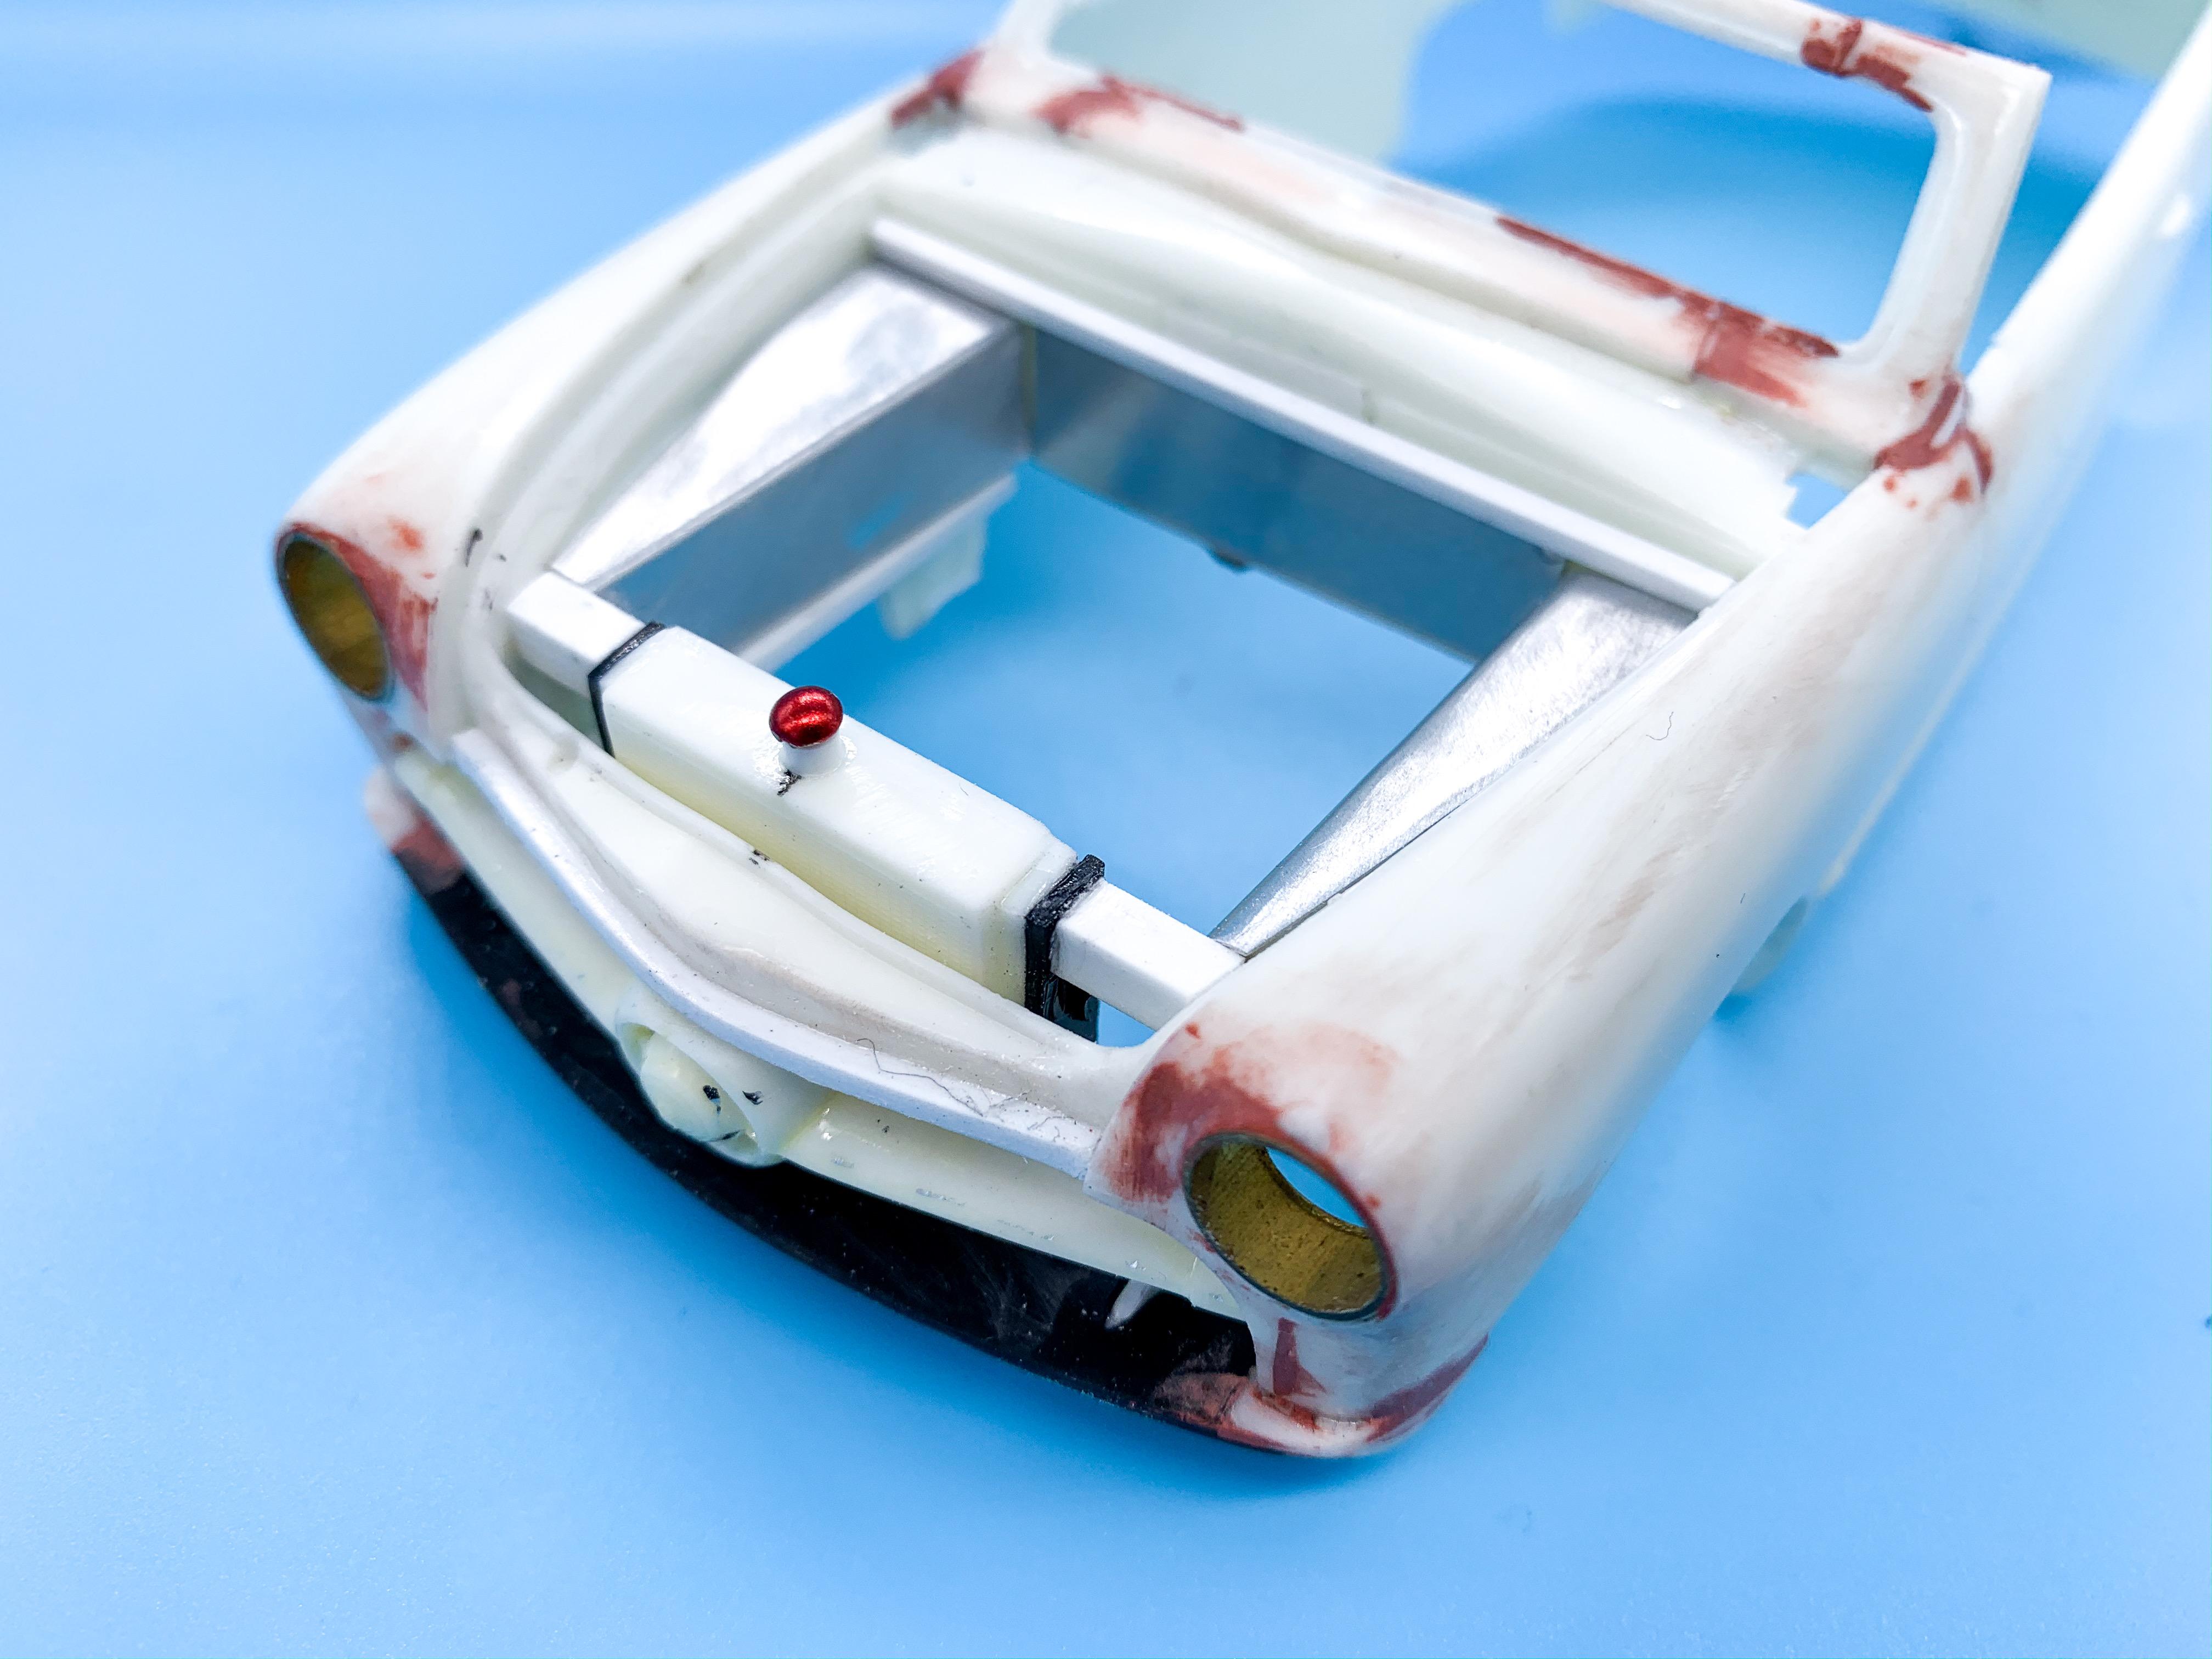
A little progress today, but nothing too substantial either...turned out I didn’t need to do much sanding to make the kit glass fit - just had to run up to the Sharpie lines marked here: Fits in ALMOST as a snap fit - oughta fit real nice with a coat of paint on there! I’m still not totally sold on the idea of using the thick kit glass over just replacing it with acetate sheet..definitely needs some polishing either way. Scratchbuilt an interior mirror from a half-spherical bead from the scrapbooking section in Michael’s... And did the ol’ trim and door handle remove to get us from this: To this: Will need to re-scribe those doors (plus the windshield detail that has Bondo over it still)...couldn’t find my scriber since I moved but luckily Amazon will bring you one the same day ?? More soon, soon as they bring my tool ?
-
Nice kustom Sam! I like the color scheme - pretty close-ish to what I’m thinking!
-
My 1st attempt at plug wire holders
OldNYJim replied to SCRWDRVR's topic in General Automotive Talk (Trucks and Cars)
Looks good to me! Like was said above, some plug boots would really add to the look - just find a larger diameter wire and strip a little length off for each one ?? -
My kit arrives next week! ?. I was trying to think “what would Impalow build?” and come up with something wilder...but you’ve gotta drink some pretty strong coffee in the morning to out-concept this guy ?
-
I really like seeing the AMT / MPC Deuces being built - they have a character all of their own! Good start, I’ll be watching!
-
Quick Reviews: Three Paints PICS ADDED
OldNYJim replied to Snake45's topic in General Automotive Talk (Trucks and Cars)
It sounds really cool! I’m a sucker for a flake-job! Thanks for the tip! I’m interested in seeing your results with the Foil too! -
Quick Reviews: Three Paints PICS ADDED
OldNYJim replied to Snake45's topic in General Automotive Talk (Trucks and Cars)
I really like that metal flake too! I’ll be trying that myself! -
You’ve been busy with the primer lately huh? ?. Can’t wait to see paint on this one ???
-
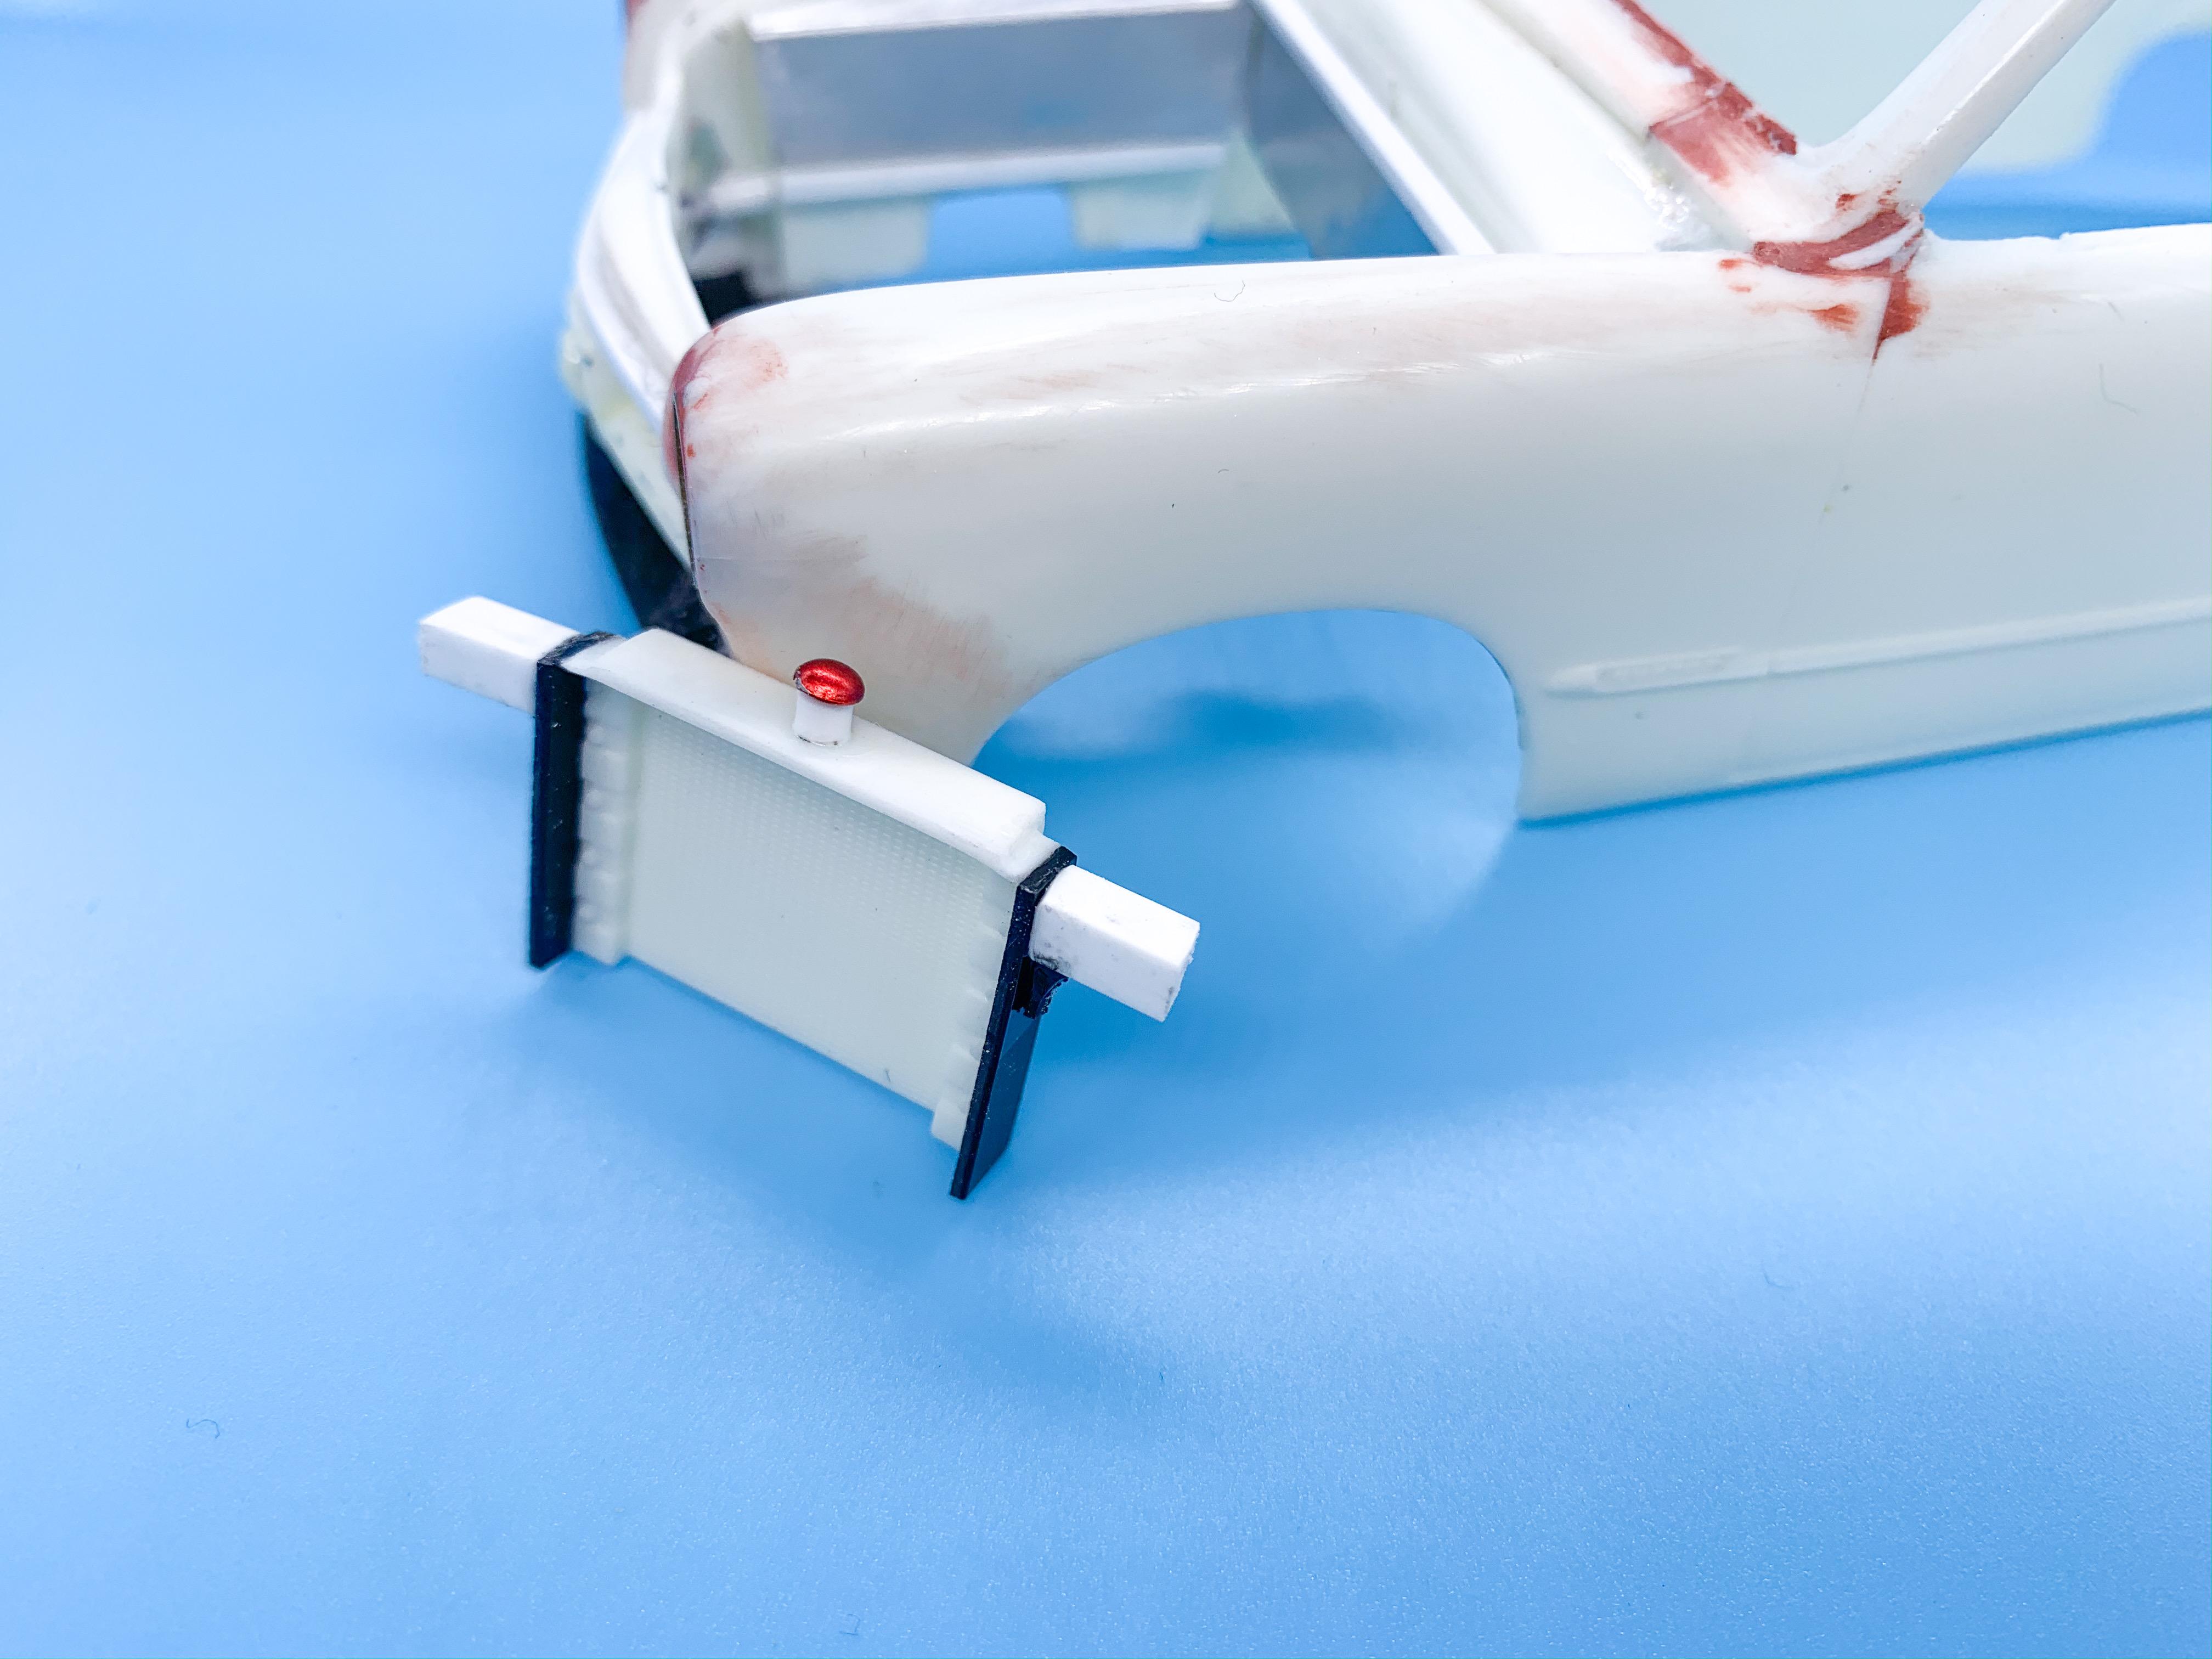
A little more progress this morning - I wanted to use the stock radiator, but the support didn’t line up nicely with the new inner wings that I had made - I wanted it all to be level and even and nice and clean looking. I sliced the edges of the stock support off, leaving just the rad itself, and make a new support assembly from styrene strip and square bar: I spotted these little split-pins (intended for scrapbooking, I think) in the clearance rack in Michael’s last weekend, and for a quarter I figured I’d find a use for them - I think if I strip the anodizing off they’ll make a nice looking metal cap for radiators, oil tanks, gas tanks etc. Not sure what will strip the coating off just yet - tried some industrial bleach which doesn’t seem to be touching them, and the Purple Pond didn’t make an impact either...any ideas anyone? Anyhoo, bright red radiator cap aside I’m pleased with how this looks in the newly cleaned-up engine bay: Next job is to tackle the windshield, seeing as I chopped that frame up and messed with it ??. More soon!
-
Thanks buddy!
-
Biggest pet peeves on builds.
OldNYJim replied to LL3 Model Worx's topic in General Automotive Talk (Trucks and Cars)
According to the various cat age calculators I found online he’s between 13 and 25 in human years - I guess he’s old enough to start building! How about a Jaguar? ? -
Wait - will this be an Impa-loader? ?
-
Biggest pet peeves on builds.
OldNYJim replied to LL3 Model Worx's topic in General Automotive Talk (Trucks and Cars)
The thread was titled PET peeves ?♂️? -
Biggest pet peeves on builds.
OldNYJim replied to LL3 Model Worx's topic in General Automotive Talk (Trucks and Cars)
I hate when Mr Chips questions my styling choices. The box clearly says ages 6 or over and he’s only 2, so I’m not listening to any of his nonsense about I shouldn’t have frenched the headlights and how a Winfield fade would look better than what I had in mind
-
Haha - I was thinking of what to do with one of these today...and all I could think of all day was how cool an ImpaLOW would be! I figured that name was probably taken though... I’ll be watching!