David G.
-
Posts
11,326 -
Joined
-
Last visited
Content Type
Profiles
Forums
Events
Gallery
Everything posted by David G.
-
Great color choice! It really suits the body design. David G.
-

'62 Ford Galaxie 500 Update! 12/23/22 Finally Done! Pic pg. 7
David G. replied to Plowboy's topic in WIP: Model Cars
Good color choice for the interior, the wheels look cool too and that gray paint turned out really nice. David G. -
That looks great! Lucky find. David G.
-
What a grand adventure this build seems to be. It's nice to learn of all the points that will need adjustment or other attention, thanks for posting this. Engine, interior and chassis, everything you've done so far looks fantastic! David G.
-
I finally got caught up on this one! Fabulous work, it was nice seeing your process. Thanks for taking the time to share it. David G.
-
Nice chassis work! David G.
-
Much improved! David G.
-
How tremendously cool! David G.
-
1961 Mercedes Benz 190SL - Revell with a few modifications
David G. replied to 89AKurt's topic in WIP: Model Cars
You weren't kidding about the large amount of work needed on the body! ? Great call on the grille too. I imagine you have a suitable PE mesh to fill it in. David G. -
truck, boat, and trailer
David G. replied to Paul Payne's topic in WIP: Model Trucks: Pickups, Vans, SUVs, Light Commercial
Wow! You have a crazy amount of work going on with this project, it's fascinating to watch it all come together. Keep up the great work. David G. -
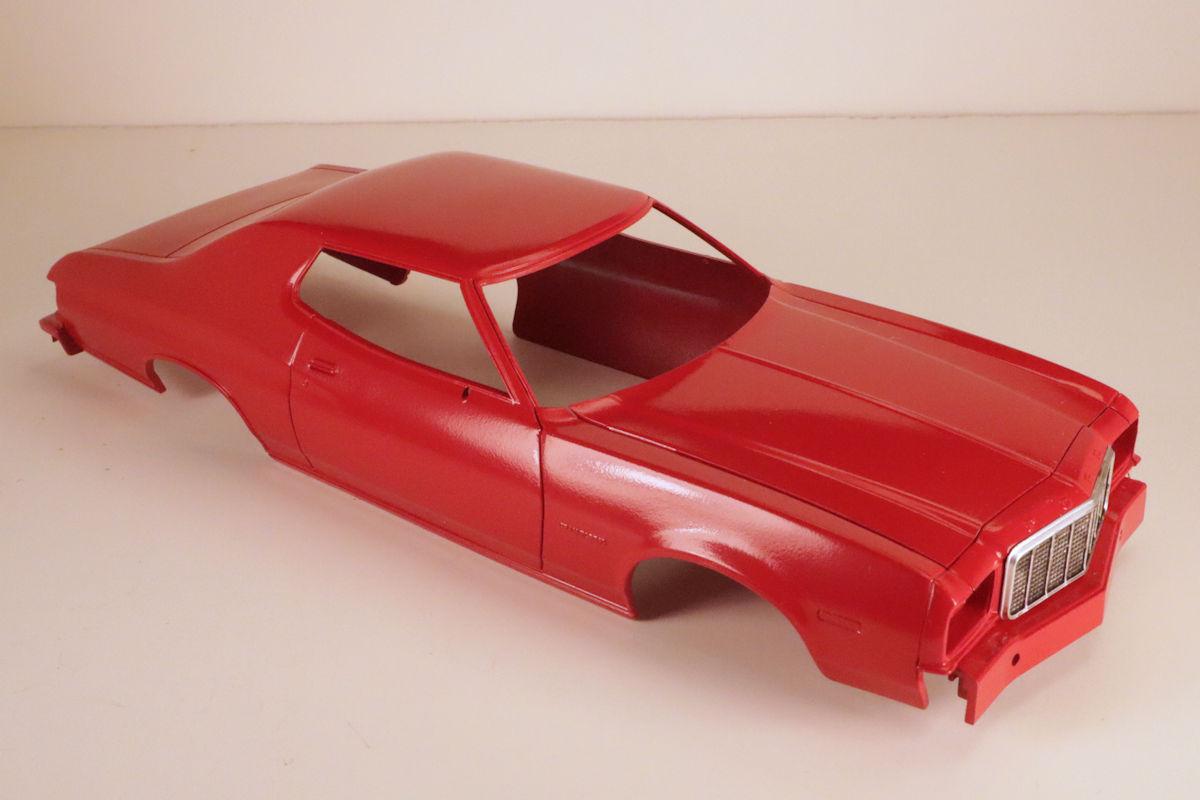
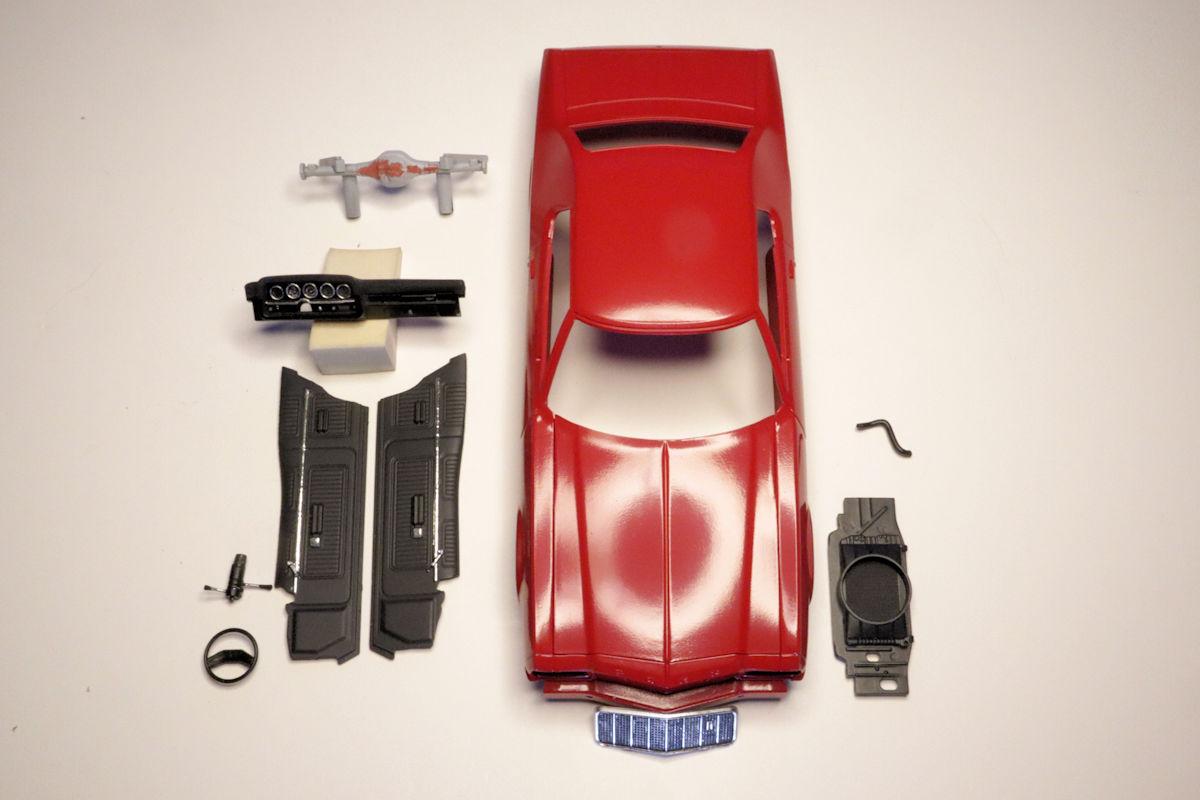
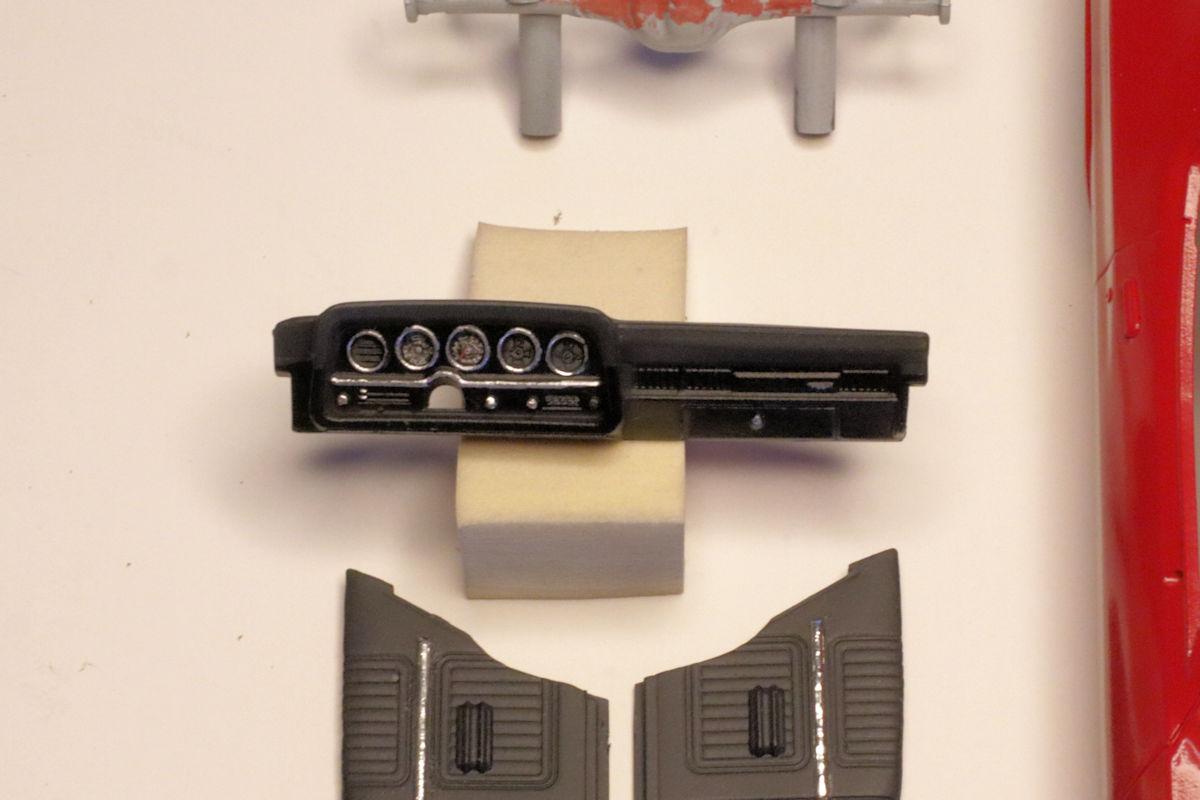
Hello Everybody! Welcome to Day Four of my own personal Seven Day Challenge. I managed to get a decent coat of paint on the body. Though it will likely need a little more work, I'm satisfied with it. The interior detail work has begun. I've applied some BMF and Molotow paint to highlight the door panel trim. I painted most of the chrome trim on the dashboard with Molotow paint. There are a number of decals provided for the wood trim and gauges. Though it's hard to see them, I've applied the first two gauge decals. I finished filling the ejection marks on the radiator support and gave it a coat of paint along with the upper radiator hose. Work continues on filling the gaps in the rear axle casting and the first coat of black wash has been applied to the grille. This represents about 2.5 Hours work. This close-up of the dashboard shows the first two decals on the gauges over the steering wheel bump. In addition to two more gauges, there are a couple of decals that simulate the wood-grain trim on the dash. The paint went on smoothly with just a bit of orange-peel. I should be able to smooth this out with a light color sanding. As always, thanks for taking the time to look and please feel free to comment. David G.

-
Thanks Big. I usually spend most of my cleaning prep on the body and interior, the other parts I wash as needed. David G.
-
Maserati 300S
David G. replied to Dave B's topic in WIP: Other Racing: Road Racing, Land Speed Racers
It looks like you're going to be throwing some crazy detail at this one. It should be a grand adventure. David G. -
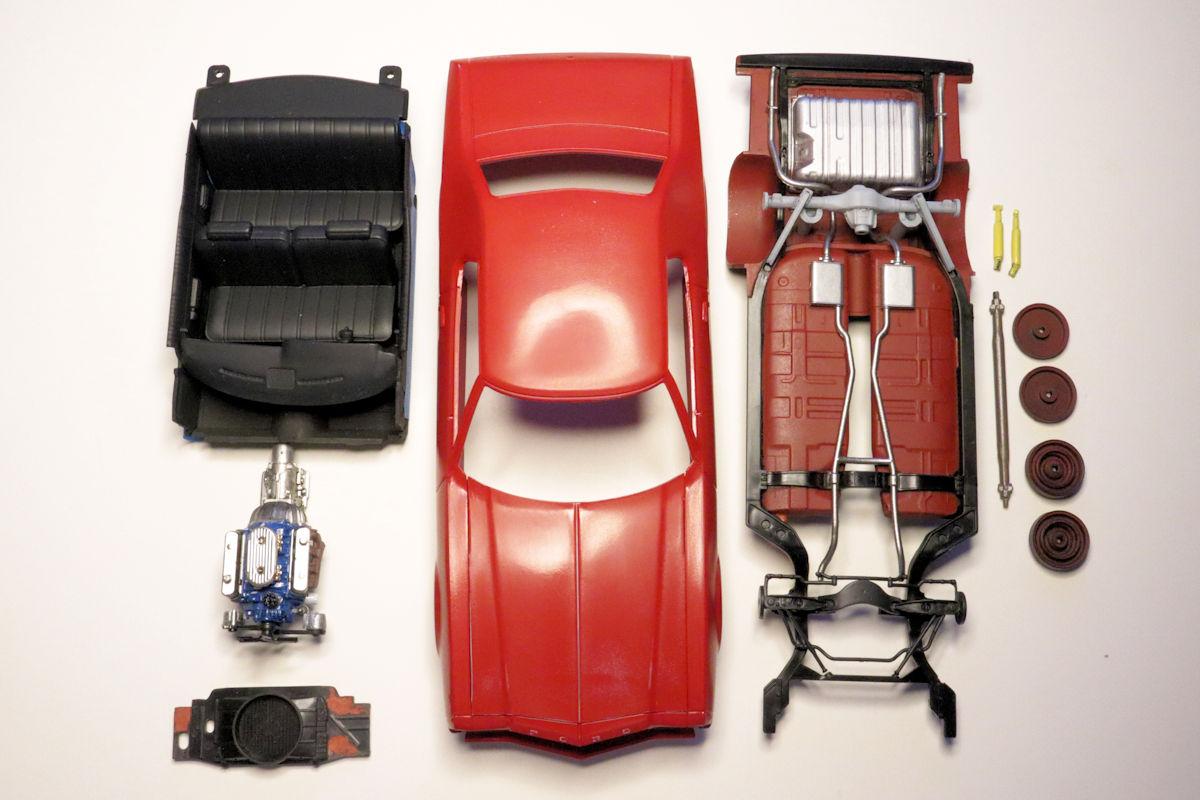
Hello Everybody! Welcome to Day Three of my personal Seven Day Challenge. Much of this build session was spent color sanding the body. It looks much better and I have high hopes for the upcoming second coat of paint. The engine is now complete, decaled, detailed and ready to install. I also started filling the ejector pin marks on the radiator support. I'm not sure why as I don't think they'll be easily visible after assembly but, there ya go. The exhaust system has been painted but I do plan on adding a little more detail to it in the form of weathering. I painted the rear shock absorbers, drive shaft, wheel backs and front suspension piece. I also assembled the rear axle and hit it with some primer, it's going to need some seam filling and clean-up before it gets painted. All of this is the result of about 2 1/2 hours of work. Here is a close-up of the results of my color sanding. The gray speckles are the high spots on the roughness that are hopefully now low enough not to cause any problems with the next coat of paint. I also sanded through the paint on a few of the high spots but I expected that this would happen. That's all for now. As always, thanks for taking the time to stop by and please feel free to comment. David G.
-
Thanks Chaz, I'm hoping that a little color sanding and a second coat will get it smoothed out. David G.
-
Everything looks great so far! Nice detail on the dash. David G.
-
Great looking Chevelle, excellent engine bay detailing. Nicely done. David G.
-
Because new wheels are the first step in any restoration project. At least it was when I was in high school. Convincing rust and paint effects, looks great. David G.
-
Beautiful color, great paintwork! David G.
-
Well worth the effort! Paint, fit & finish, everything looks great. David G.
-
Spectacular work on this! The paint looks fabulous. David G.
-
Excellent work! The tires make it look ready for a weekend on the beach. David G.
-
Great looking T-Bird! The paint came out nicely and the interior looks fantastic. Is there something going on with the headlights or did I miss something? David G.
-
Great mash-up of parts so far. David G.
-
That was Dupli-Color Cardinal Red. Sometimes their paint is too hot, sometimes not. Dupli-Color tends to run hot but as you mentioned, I think it depends as much on the styrene as it does the paint. At least for Dupli-Color. The primer is Tamiya Fine Surface Primer. David G.