David G.
-
Posts
11,326 -
Joined
-
Last visited
Content Type
Profiles
Forums
Events
Gallery
Everything posted by David G.
-

Project Terminator
David G. replied to Saltie Olds's topic in WIP: Model Trucks: Big Rigs and Heavy Equipment
Wow! Excellent progress on this. It'll be fun to see how you work the eye lights into the whole thing. David G. -
Well, time to do another one...
David G. replied to throttlejockey's topic in WIP: Model Trucks: Big Rigs and Heavy Equipment
Looks great, love the colors. David G. -
Absolutely Beautiful! Fabulous color and detail work, looks great from every angle. David G.
-
Kustom Krate
David G. replied to samdiego's topic in WIP: All The Rest: Motorcycles, Aviation, Military, Sci-Fi, Figures
Nice work on that! Brings back a lot of memories. David G. -
1989 Chevrolet K1500 Silverado
David G. replied to Chuck Most's topic in Model Trucks: Pickups, Vans, SUVs, Light Commercial
Nailed it! I always enjoy seeing your trucks, thanks for posting it. David G. -
It's nice to knock together a "box shaker" from time to time. Looks like you're off to a solid start. David G.
-
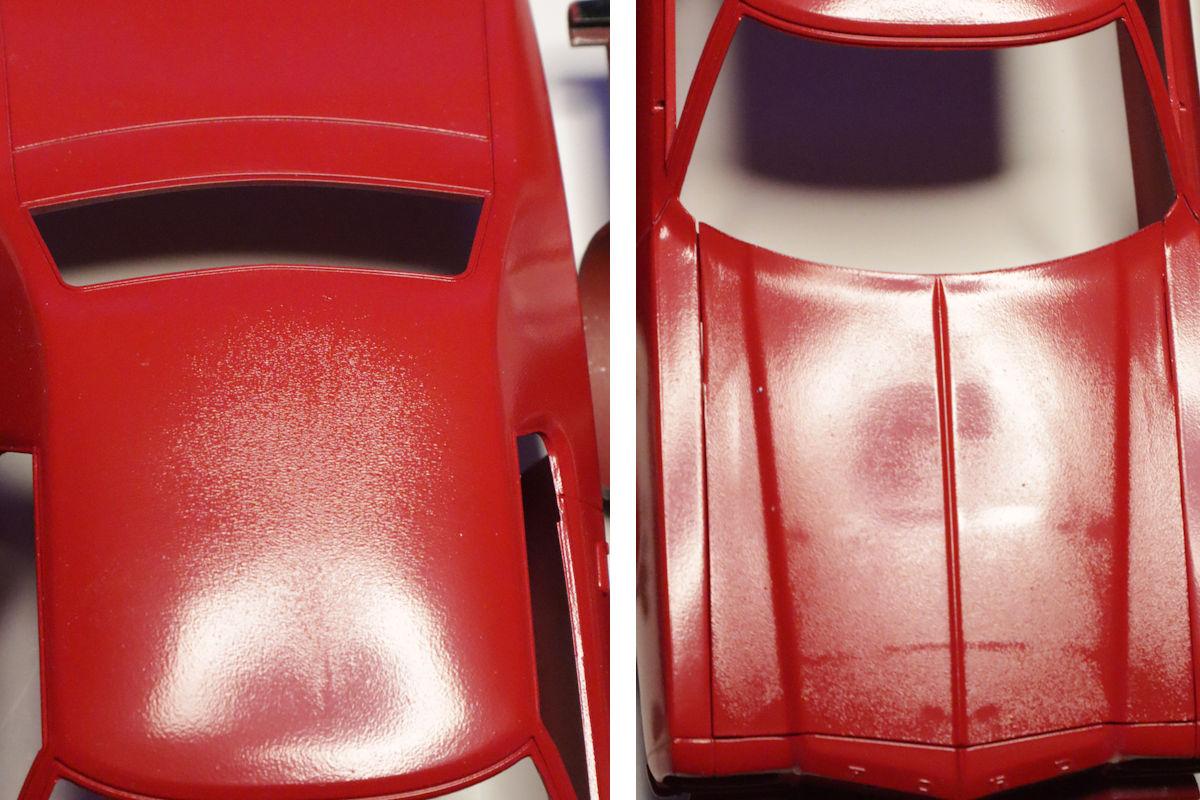
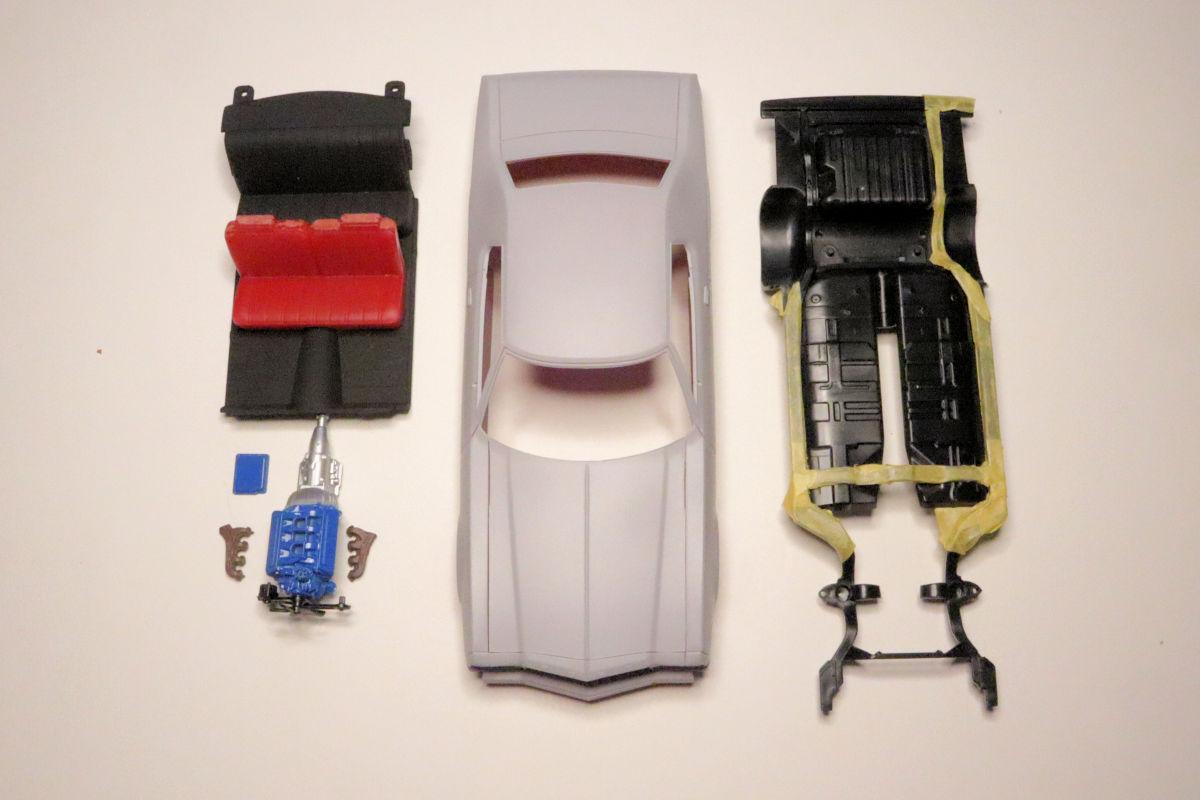
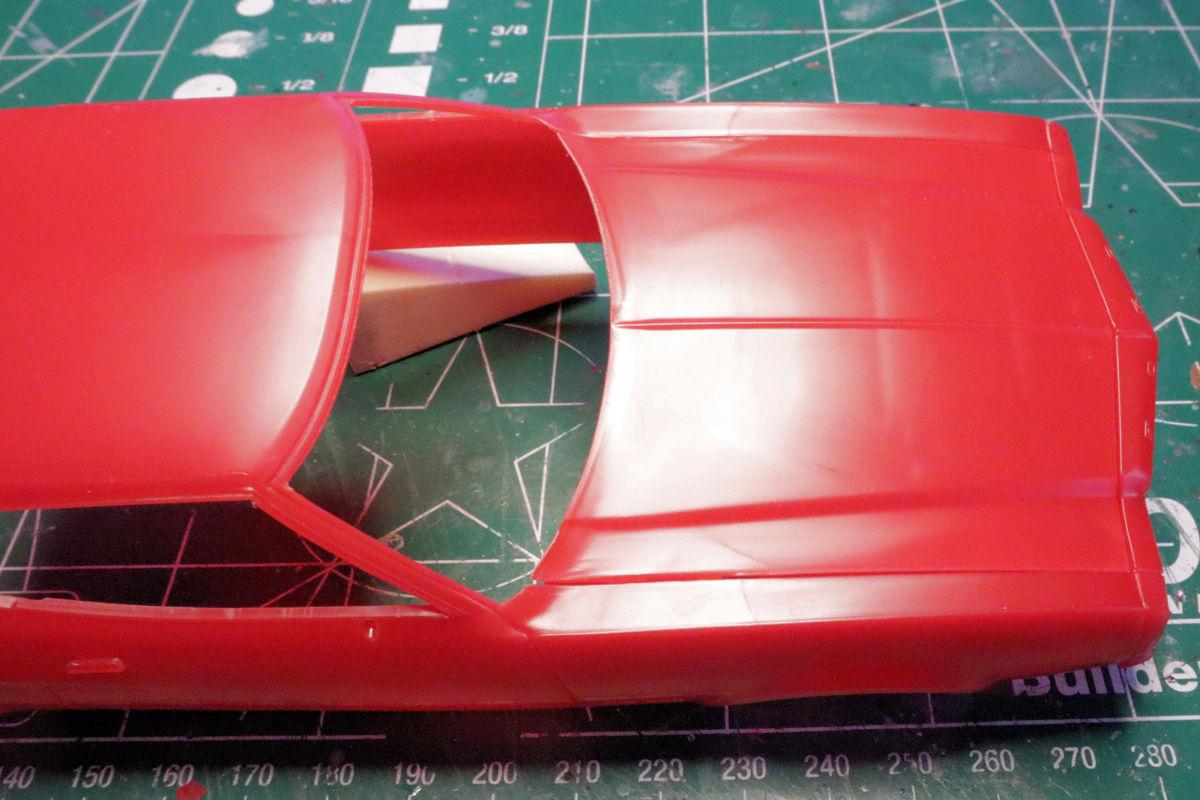
Hello Everybody! Day Two: The engine is about 90% completed, I still have to paint the power steering pump and paint and decal the oil filter (yes, there's a decal for the oil filter) then stick them all together and do some detailing. The interior has its base colors, mat black and flat black, painted. I may spray some gloss and/or semi-gloss on the dashboard before detailing it. The body manifested its problem potential as I thought it would. It looks like there's a combination of ghosting and crazing going on here. I'm hoping that some color sanding and a second coat will correct this. I finished masking and painting the chassis with oxide red on the floor and Tamiya TS-17 Gloss Aluminium on the the fuel tank. Three more hours on the pile for this session. This is a closeup of the paint imperfections. To me this looks like a combination of ghosting and crazing. Ghosting occurs when the paint reacts to different textures in the plastic. The textures are most often caused by temperature variations that occur during the casting process. These variations cause the plastic to cool at different rates causing occlusion lines or texture variations. Crazing happens when the paint attacks the plastic and/or the coat of paint beneath it. This happens when the paint being applied is too "hot". In other words, has a strong chemical base solvent, usually lacquer. But I'm sure that many of you already know all that. My hope is that color sanding the paint will smooth out the current coat enough that the next coat will go on smoothly. The current coat should also act as a barrier between the new coat abd the plastic thus preventing any additional crazing. As always, thanks for taking the time to look and please feel free to comment. David G.

-
Hello Patrick, thanks for taking the time to comment. Most of my car builds take me between 40 and 50 hours spread over sessions that last from one to three hours each. This is one of the more simple kits I've worked on so I figured on 25 to 30 hours start to finish; between seven and ten days at a push. That may be ambitious but there it is. Thank you Luke. So far, so good. David G.
-
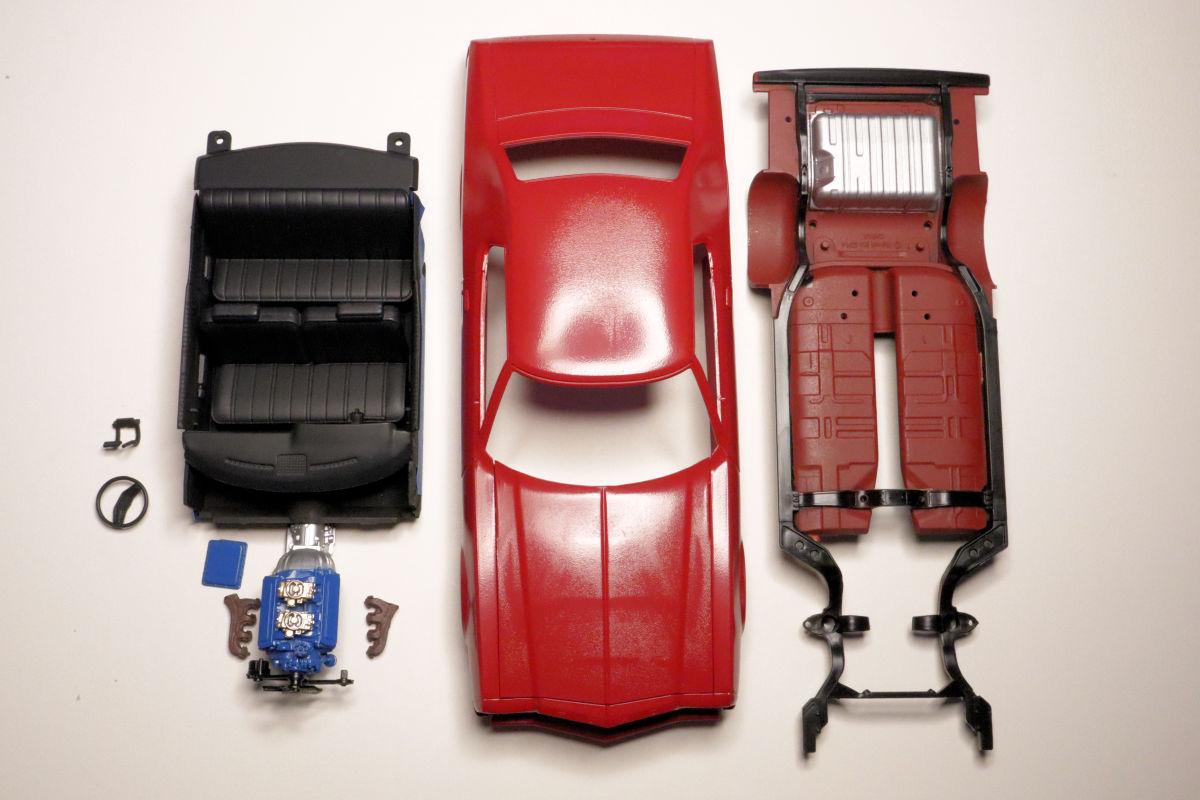
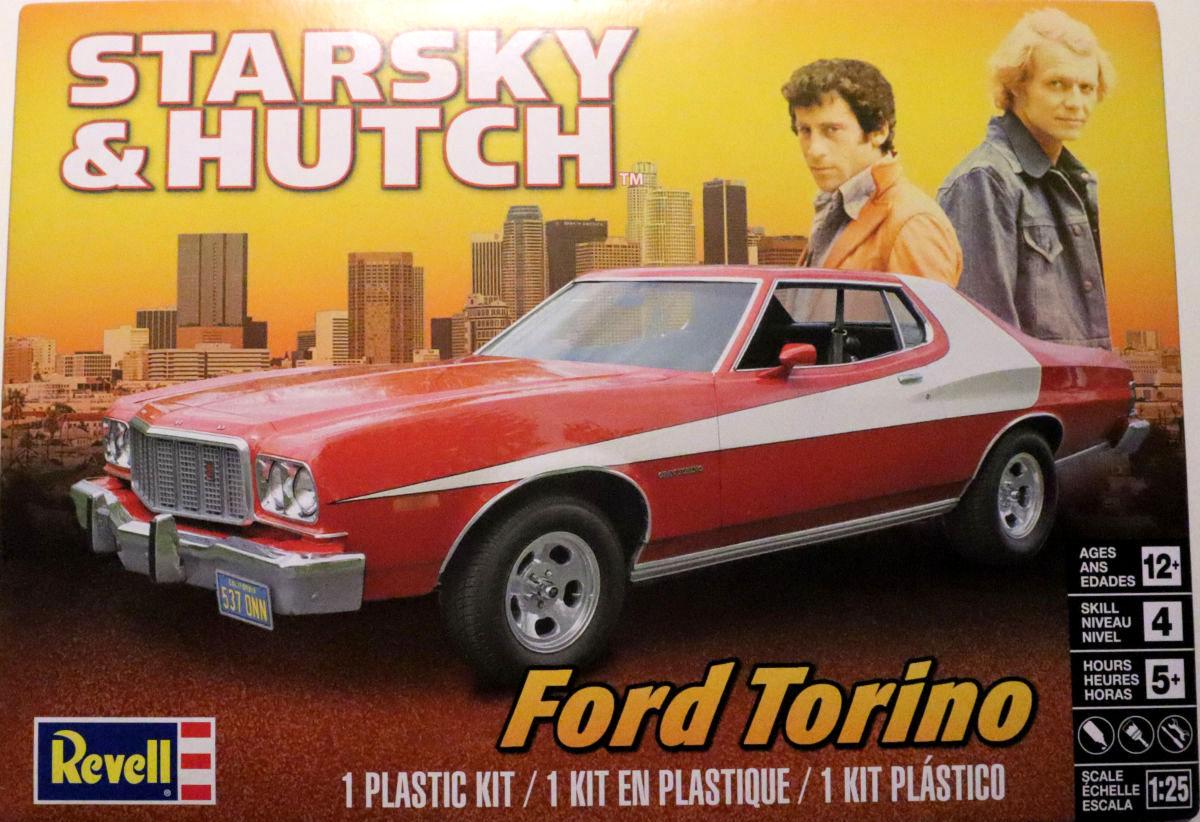
Hello Everybody! The Seven Day Challenge. This is a challenge that I came up with for myself. The idea is to completely build a model from start to finish in seven days. They don't need to be consecutive days but there must be only seven of them. The reason for coming up with the challenge is my desire to finish a build. I have several build projects that have stalled for various reasons and I feel the need to complete something... anything. The idea is to select a fairly simple kit that I could stand a reasonable chance of completing within the prescribed time. How does it work? Each day that I work on the model, I take a photo of what I completed for that day. An over-all view. If there are any special issues concerns or circumstances, I may call them out individually but other than that, this will be a top-down, high-level build project. Focusing, literally, on the big picture. "Model Cars, Mostly" is my Facebook model building page where I've been posting my current and historic builds. If you're interested in following me there, please feel free to do so. The name of the page comes from the answer I give when people ask me what kind of models I build, "Model cars, mostly." The subject is the Starsky and Hutch Ford Torino by Revell. I received this kit a while back as a birthday gift from my wife. She selected it because she thought a cool looking car. Which is as far as I'm concerned, one of the best reasons for buying a model kit. This isn't a kit that I would have ever picked out for myself. I have nothing against Ford Torinos or Starsky and Hutch, it's just that even "back in the day" neither the TV show or the car were really on my radar. It is a cool looking car, it's a piece of television and automotive history and a good model kit that looks like it should be fun to build. That's the cool thing about gifts, sometimes you end up getting something you didn't know you wanted until it's given to you. Since this kit is molded in color, my first thought was to see if I could get away without painting the body thereby saving some time. Unfortunately, my initial inspection found some casting issues with the body. Sometimes casting scars like this cover well, sometimes they don't. Either way, it looks like I'm going to be painting. Day One: The body has been primed and inspected and the few casting artifacts have been smoothed out. The primer looks smooth but I may still end up with paint problems. I sprayed the base flat black on the interior platform and began fixing the joint seams on the front seat. I also got about 75% of the engine complete. I also began masking the chassis plate (molded in black) so I can paint the floor pan with red oxide primer and leave the frame rails in their molded color. This is about 3 1/2 hour's work. That's all for now. As always, thanks for taking the time to look and please feel free to comment. David G.
-
Frosty Salmon Pink, I love it! Excellent shine. Everything else looks great too. David G.
-
Nice progress on this. David G.
-
Cool Project! I can't wait to see more. David G.
-
Just a nice clean traditional Deuce Roadster
David G. replied to OldNYJim's topic in WIP: Model Cars
Great work on this! It's fun seeing all the 3D printed parts come together. David G. -
"The Pennsylvanian" - my take on MPC's "The Californian"
David G. replied to Karl LaFong's topic in Model Cars
A little less "over the top". Nicely Done. David G. -
Too Cool! David G.
-
Link-Belt HC-218 Truck Crane
David G. replied to redneckrigger's topic in WIP: Model Trucks: Big Rigs and Heavy Equipment
Wow, just... Wow! Words fail me. Tremendously amazing work, thanks for taking the time to document and share it with us. David G. -
Impressive detail painting and skin tones, Nicely Done! David G.
-
55 Chevy Sedan from the American Graffiti rollover scene
David G. replied to Alan Barton's topic in Model Cars
Nicely Done! Isn't it a great feeling to find a use for those old parts box bodies? David G. -
Building the 'Icon' - a 57 Chevy in Sierra Gold
David G. replied to beeRS's topic in WIP: Model Cars
Beautiful color choice, it looks like you nailed the mix on it. David G. -
Looks to be a fun build. If this were a $5 swap meet kit, I'd consider using the engine to build a Blastolene knock-off. David G.
-
1961 Mercedes Benz 190SL - Revell with a few modifications
David G. replied to 89AKurt's topic in WIP: Model Cars
That looks to be one seriously fiddly kit but you seem to be doing quite well with it, I love the brake upgrade and the jig box is a tremendously clever idea. David G. -
It still came out nice in spite of the problems. The paint and build-work look great. David G.
-
Nice color combination, excellent detailing and construction. Yet another fabulous build Gareth! David G.
-
Great work on the interior and engine bay. Nicely Done! David G.
-
Packard coach/tour bus
David G. replied to Earl Marischal's topic in General Automotive Talk (Trucks and Cars)
Oh Wow! That just has Steampunk Zombie Apocalypse written all over it! David G.