David G.
-
Posts
11,324 -
Joined
-
Last visited
Content Type
Profiles
Forums
Events
Gallery
Everything posted by David G.
-
Excellent mix of subjects, all very well done. David G.
-
Great set! Love the Merc and the Deuce. David G.
-
Great looking trio! David G.
-
Nicely Done! David G.
-
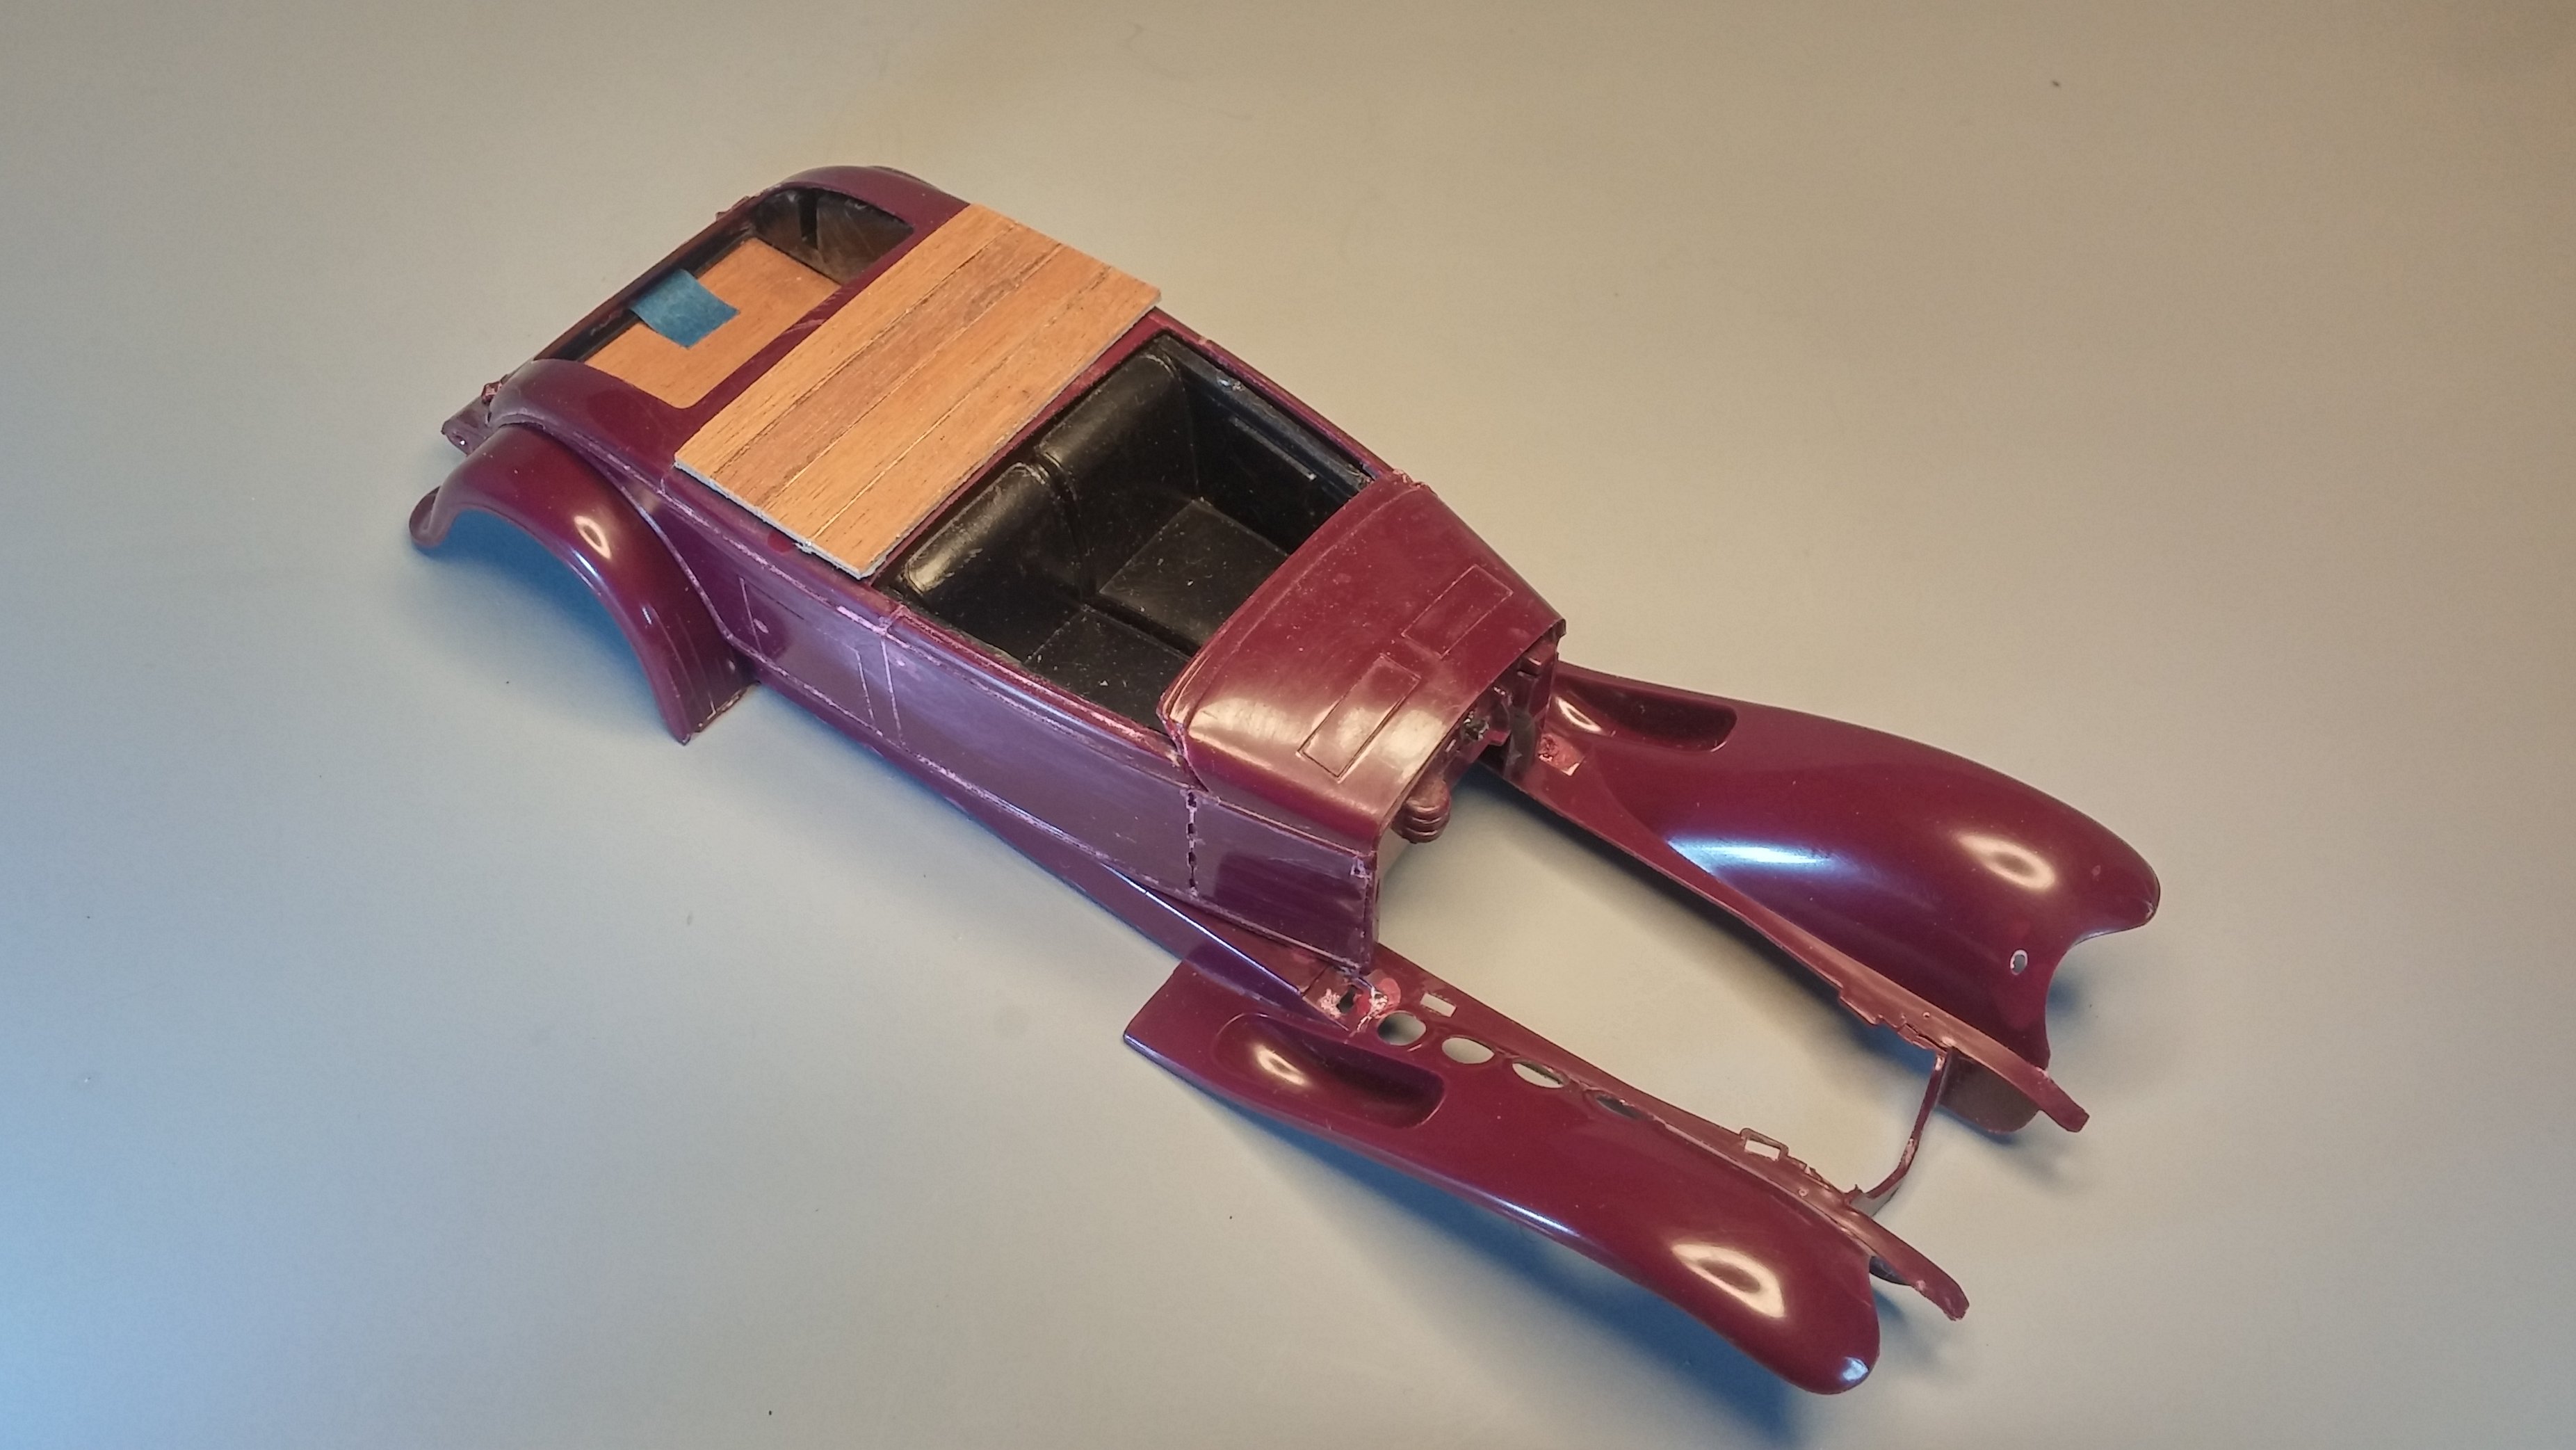
Hello everybody, it's time for another update. I've decided to eliminate the rumble seat and use fill area with some appropriate steampunk machinery. I plan to replace the floor with wood and clad the sides in some kind of metal. The fenders have polished up nicely but I have some concerns about the area of the body behind the seats. There's a lot of glue scarring there. Using wood veneer I'm working to create a deck cover/luggage rack for that area. The image I have in mind is that of a Chris-Craft boat. We'll see how that works out. As always, thanks for taking the time to look and please always feel free to comment. David G.

-

1923 model t snowmobile
David G. replied to blazefox's topic in Model Trucks: Pickups, Vans, SUVs, Light Commercial
Looks great, what's the story? David G. -
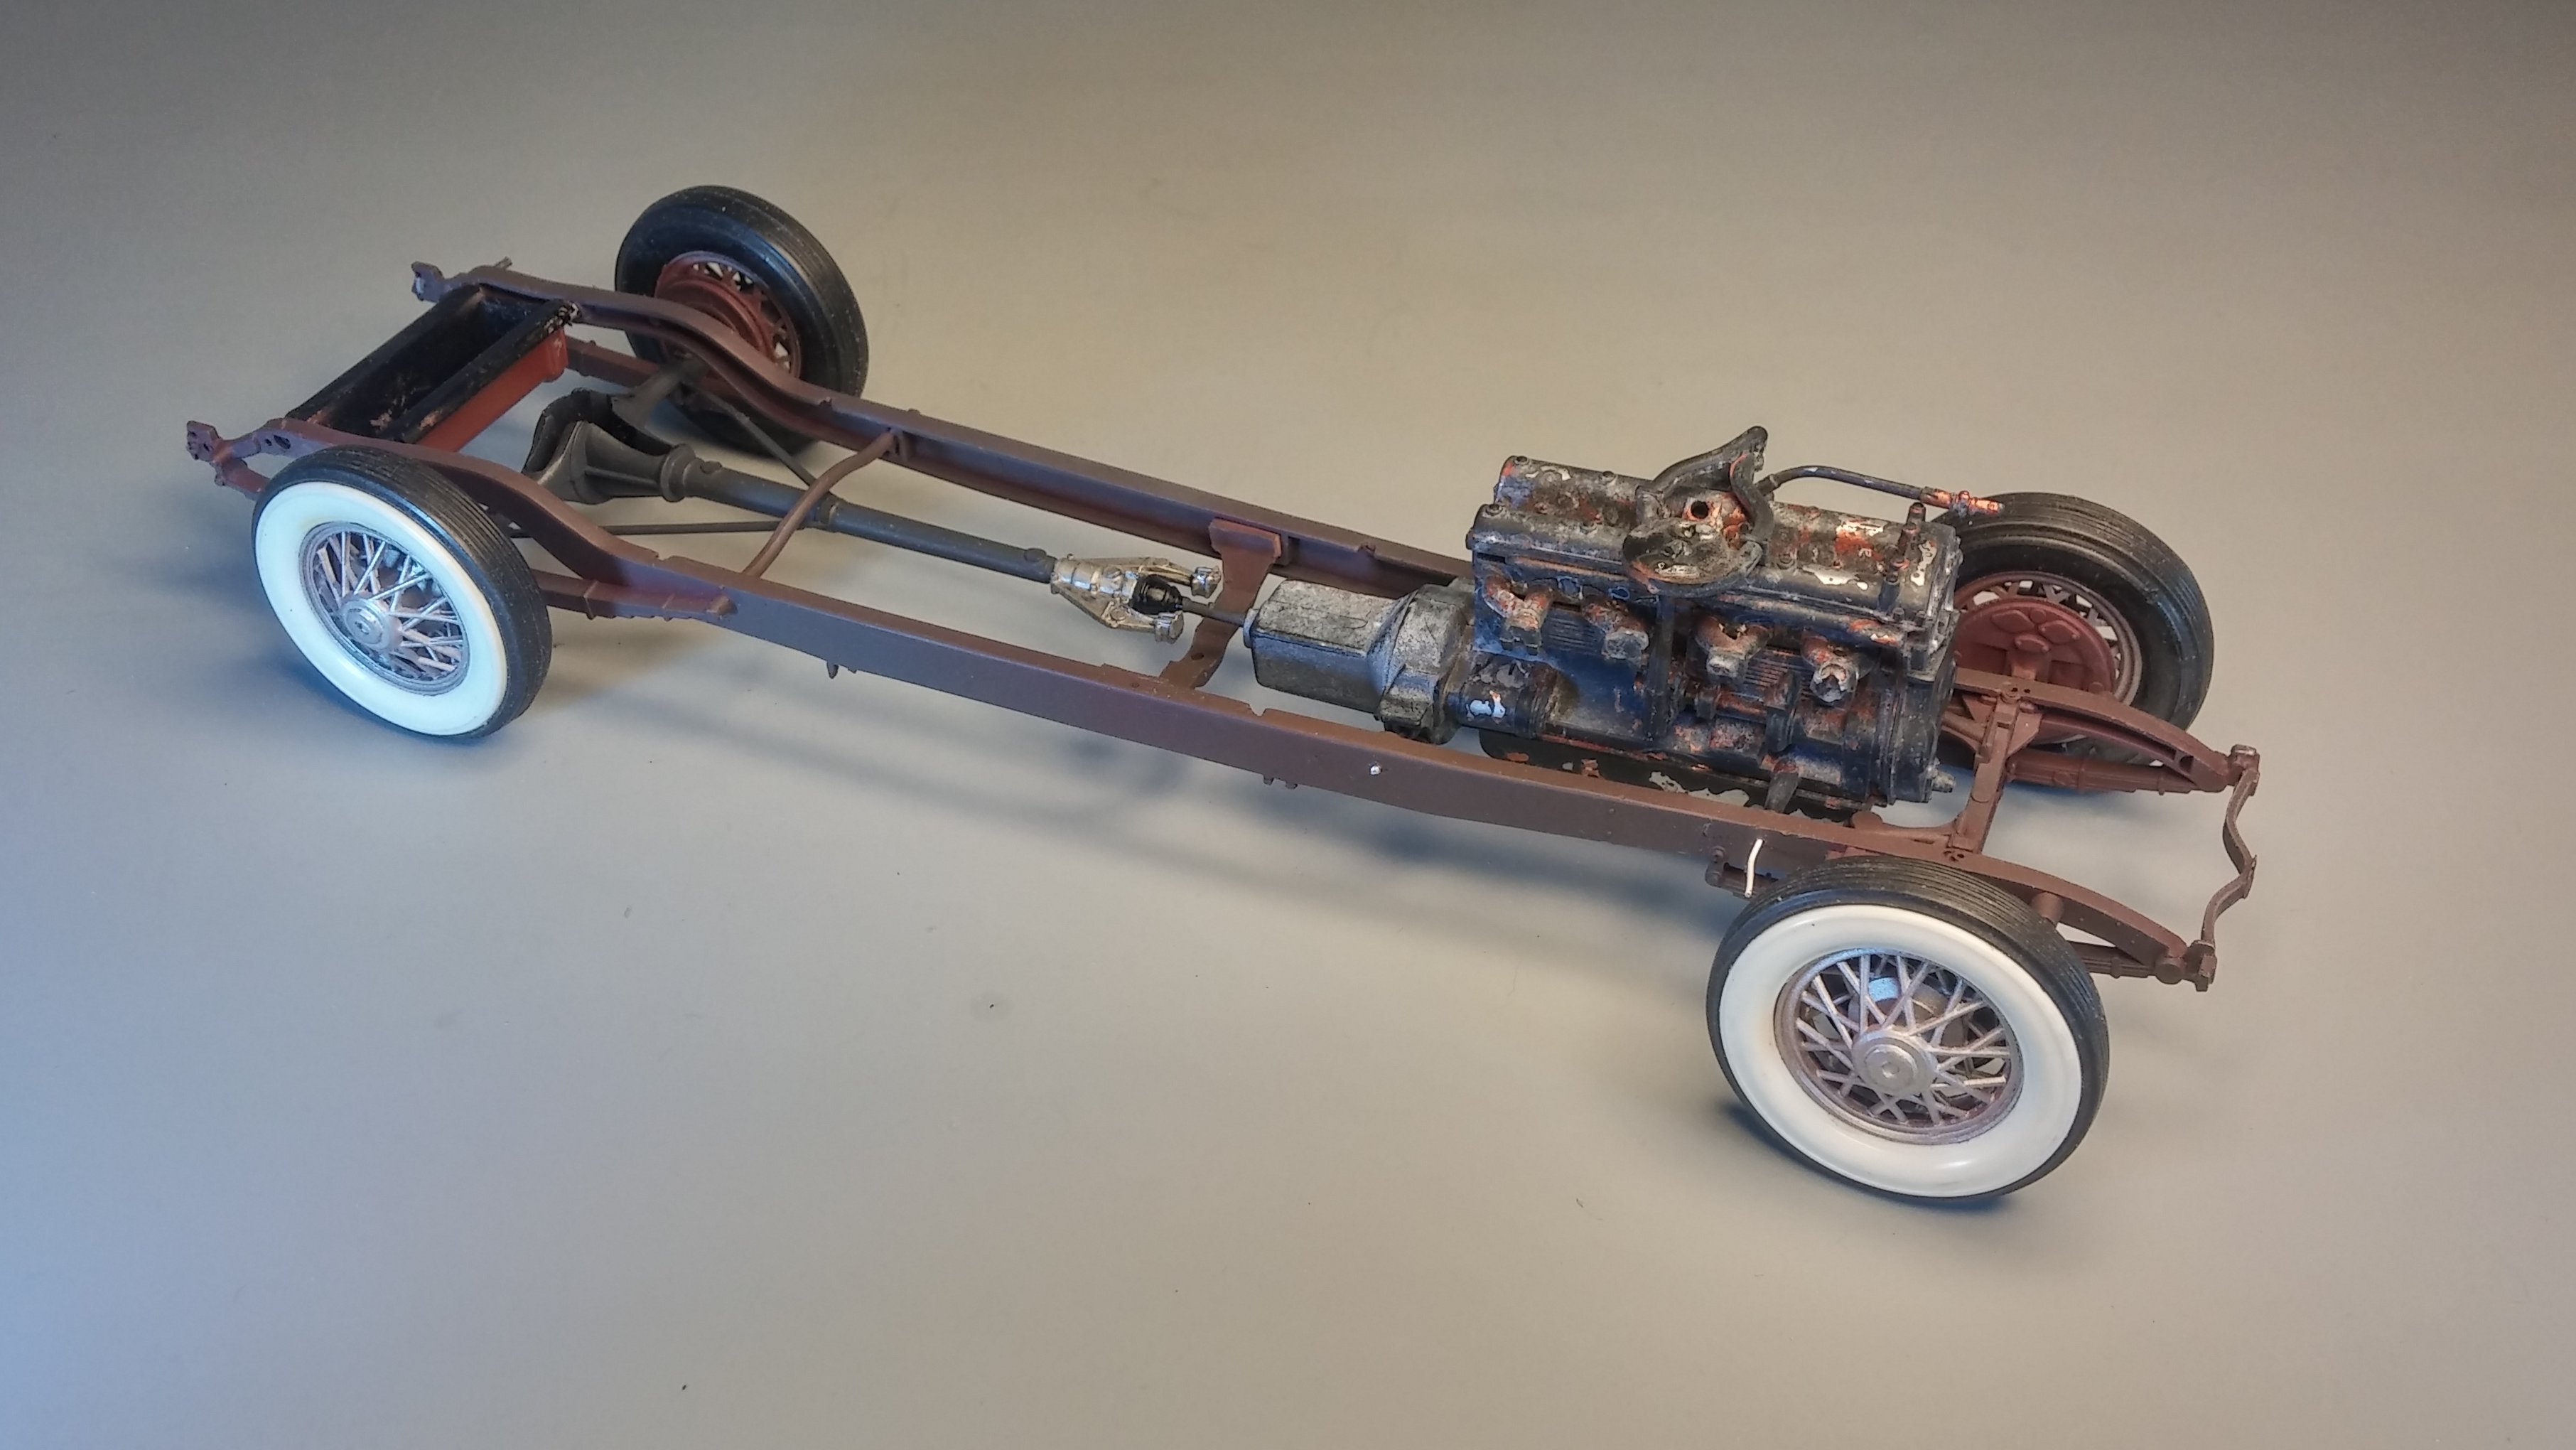
I scrapped the factory exhaust system in order to create something a little more "Steampunk". This meant that I had to realign those characteristic Duesenberg external header pipes in three dimensions with engine block as the only firm attachment point. Simultaneously, I was also creating the attachment point for each of the four header pipes with the collector, as well as keeping the collector in a workable relationship with the chassis, *and* making sure that the header pipes would properly pass through the ports in the fender. Mission accomplished! I also got some proper looking paint on the engine. As always, thanks for taking the time to look and please feel free to share any comments. David G.
-
Cool video, thanks for posting it. David G.
-
Nicely done, great weathering! Love the diorama too. David G.
-
Very Cool! It looks like something that Holden could have made back in the day. David G.
-
Thanks. What's a 9"? David G.
-
Clean, crisp and sharp! Looks great. David G.
-
OK, a little bit of an update: I got the frame stabilized and the suspension bits mostly sorted. The engine suffered a painting mishap so I decided too strip it and start over. Now on to the body work and other details. Thanks for looking! David G.
-
It's terrifying! I love it! David G.
-
Still Mind-blowing! David G.
-
Thanks guys, I'll try not to disappoint you. David G.
-
My tanks shrunk
David G. replied to Agent G's topic in WIP: All The Rest: Motorcycles, Aviation, Military, Sci-Fi, Figures
Cool! David G. -
OK, I've been working on this one in fits and starts, but I've decided on a build direction: Steampunk! I have the front wheels sorted and some of the chassis detail started. Next task is to stabilize the frame and work in the drive line. And, of course start searching for all types of cool Steampunk artifacts to incorporate. As always, thanks for looking and please feel free to comment. David G.
-
Thanks John. I thought about doing that and I love the idea, but it's a bit beyond my current skill set. I'm glad you like it though. David G.
-
Don't be so hard on yourself Ray. It came out pretty good. It's like I say in my signature, "Each kit I build is really only practice for the next one!" David G.
-
Looks good, nice detail work on the tail lights. David G.
-
1958 Ford Thunderbird - Billy F. Gibbons´ Mexican Blackbird
David G. replied to Koellefornia Kid's topic in Model Cars
It's a good likeness, well done. David G. -
Spectacular work! Very well done. David G.
-
Cool! David G.
-
1941 Lincoln Phantom Fastback Wild Custom
David G. replied to Koellefornia Kid's topic in Model Cars
Excellent work. With that profile it could have easily been a Batmobile. David G.