David G.
-
Posts
11,326 -
Joined
-
Last visited
Content Type
Profiles
Forums
Events
Gallery
Everything posted by David G.
-
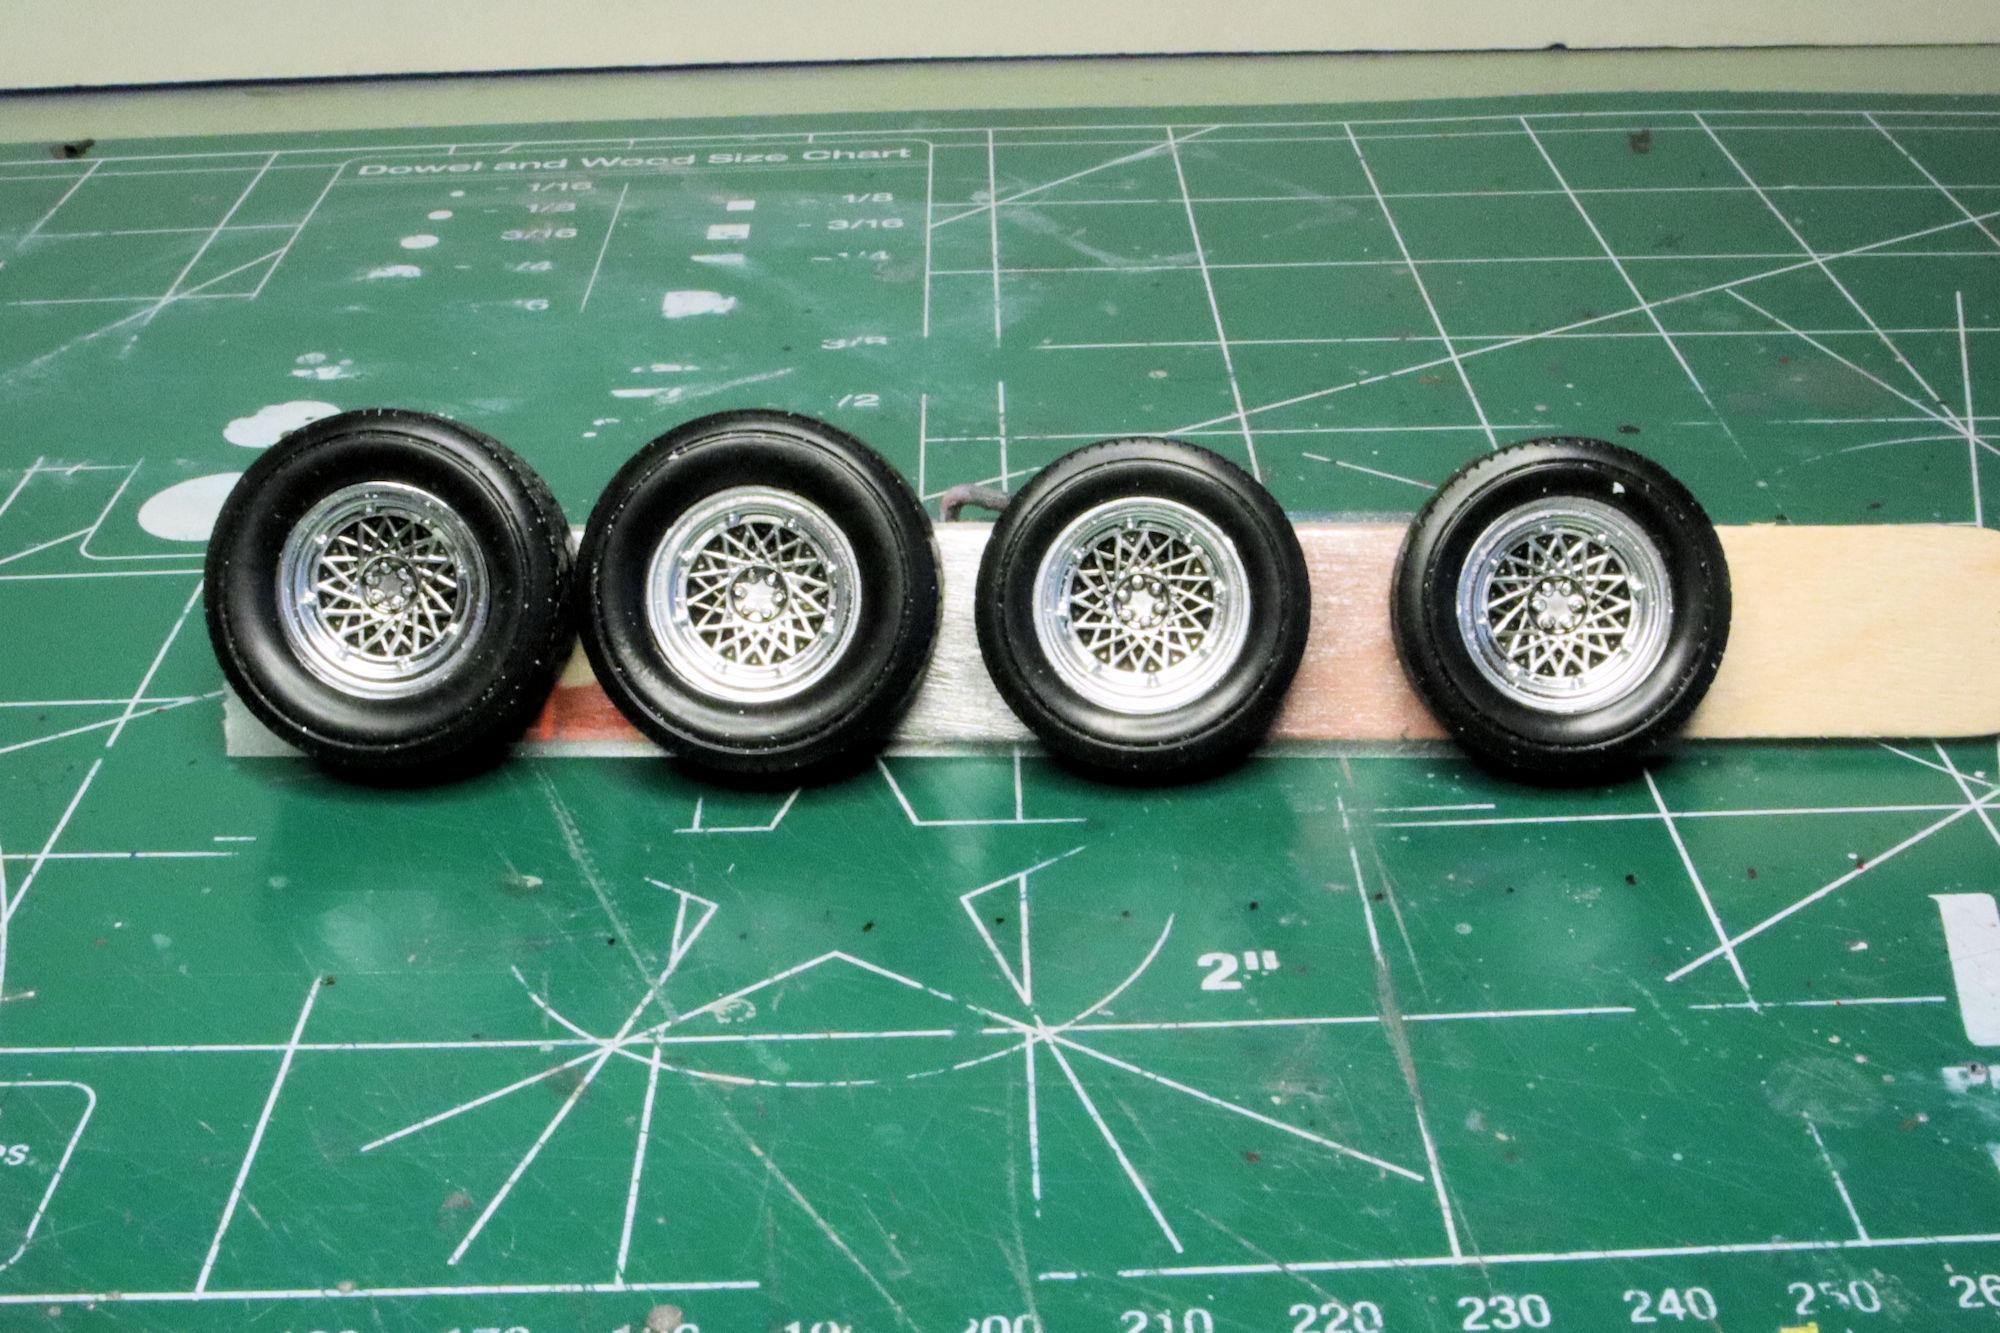
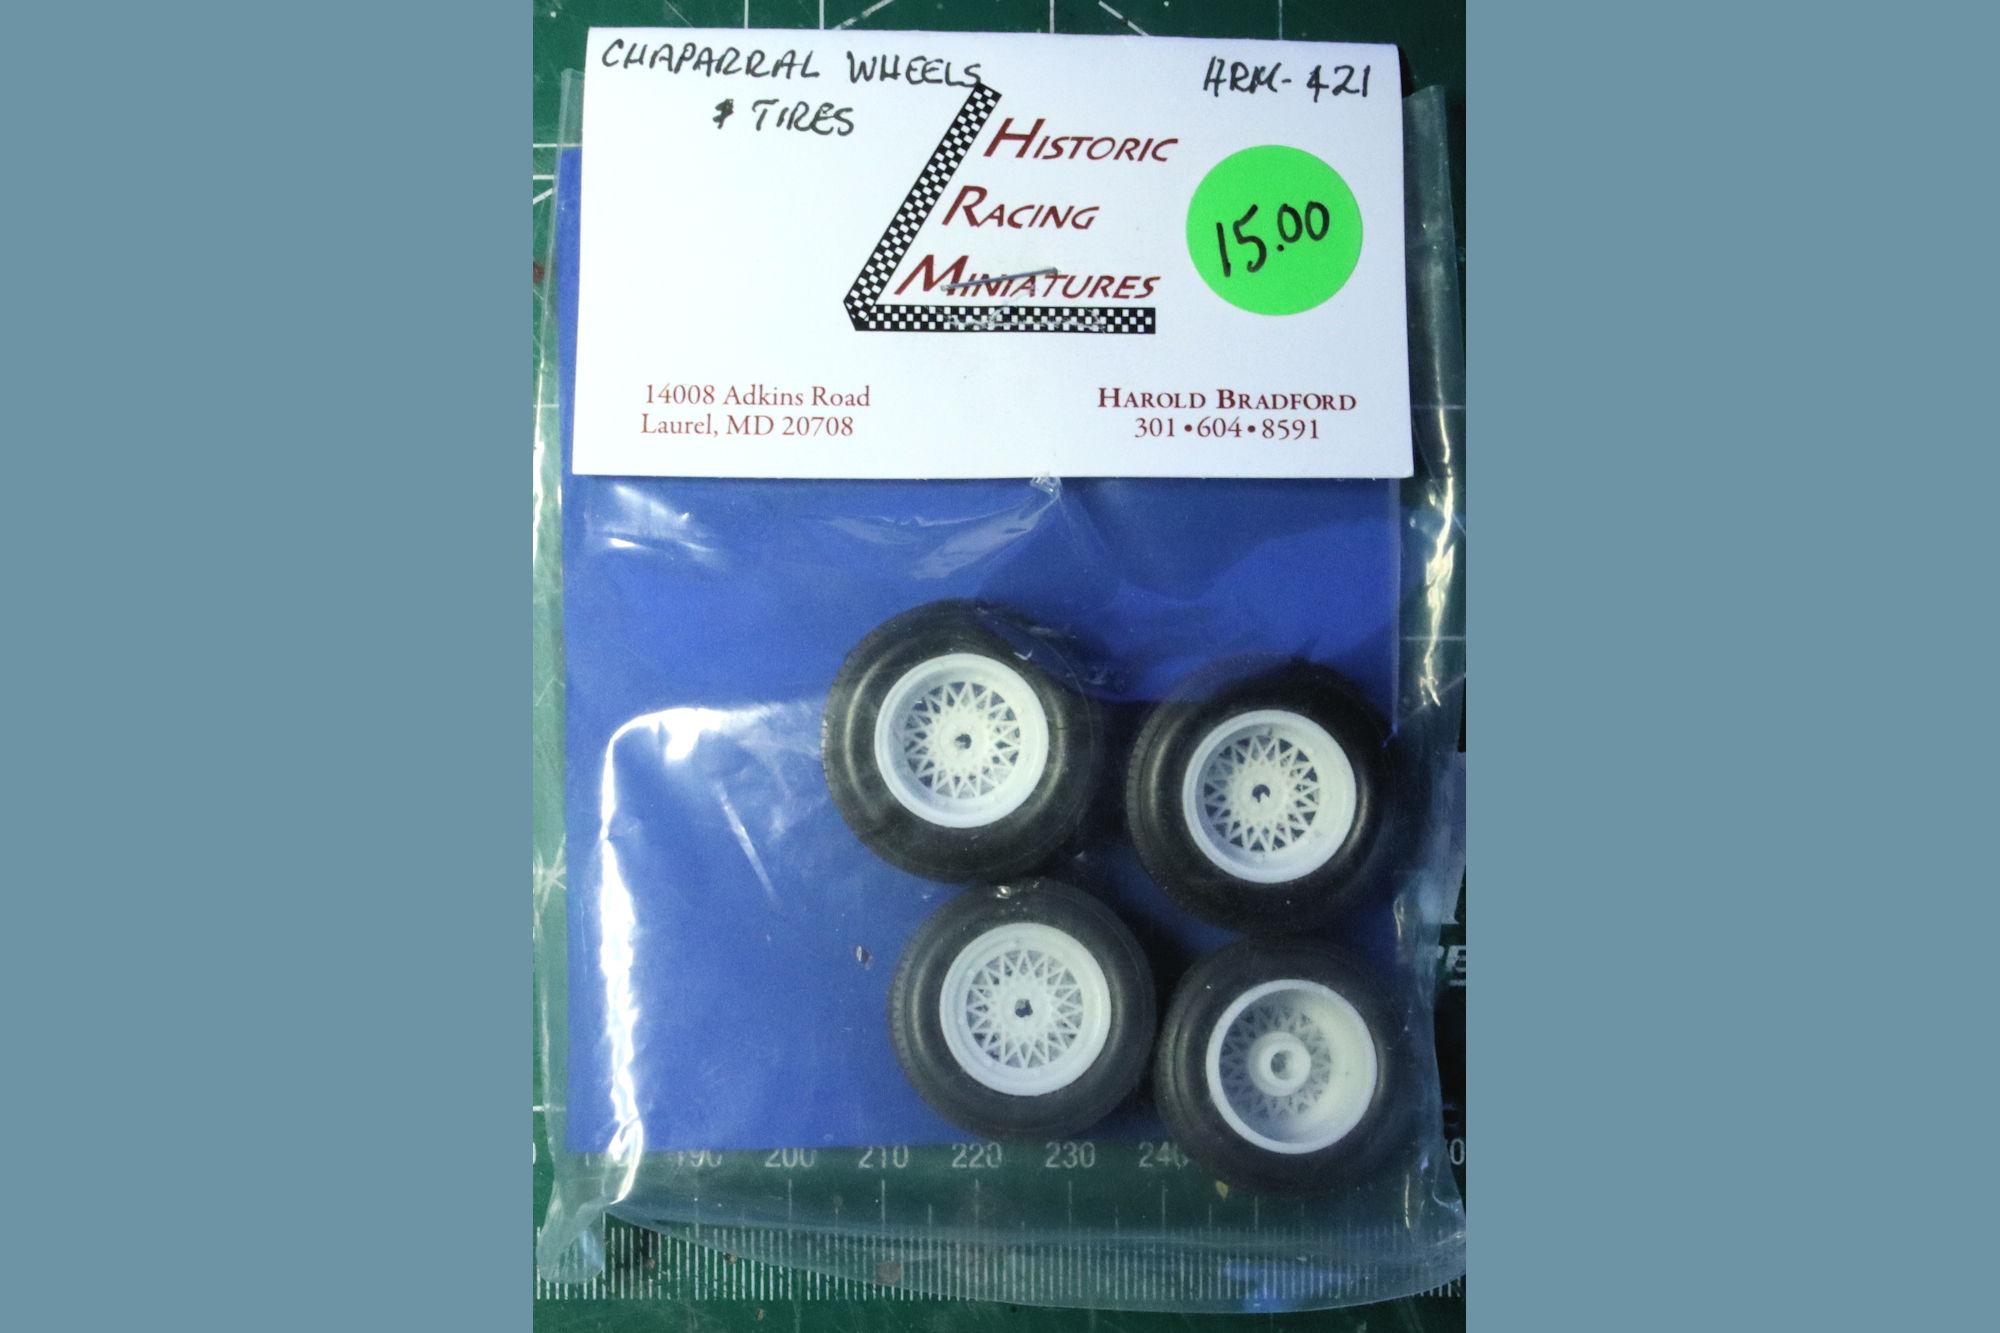
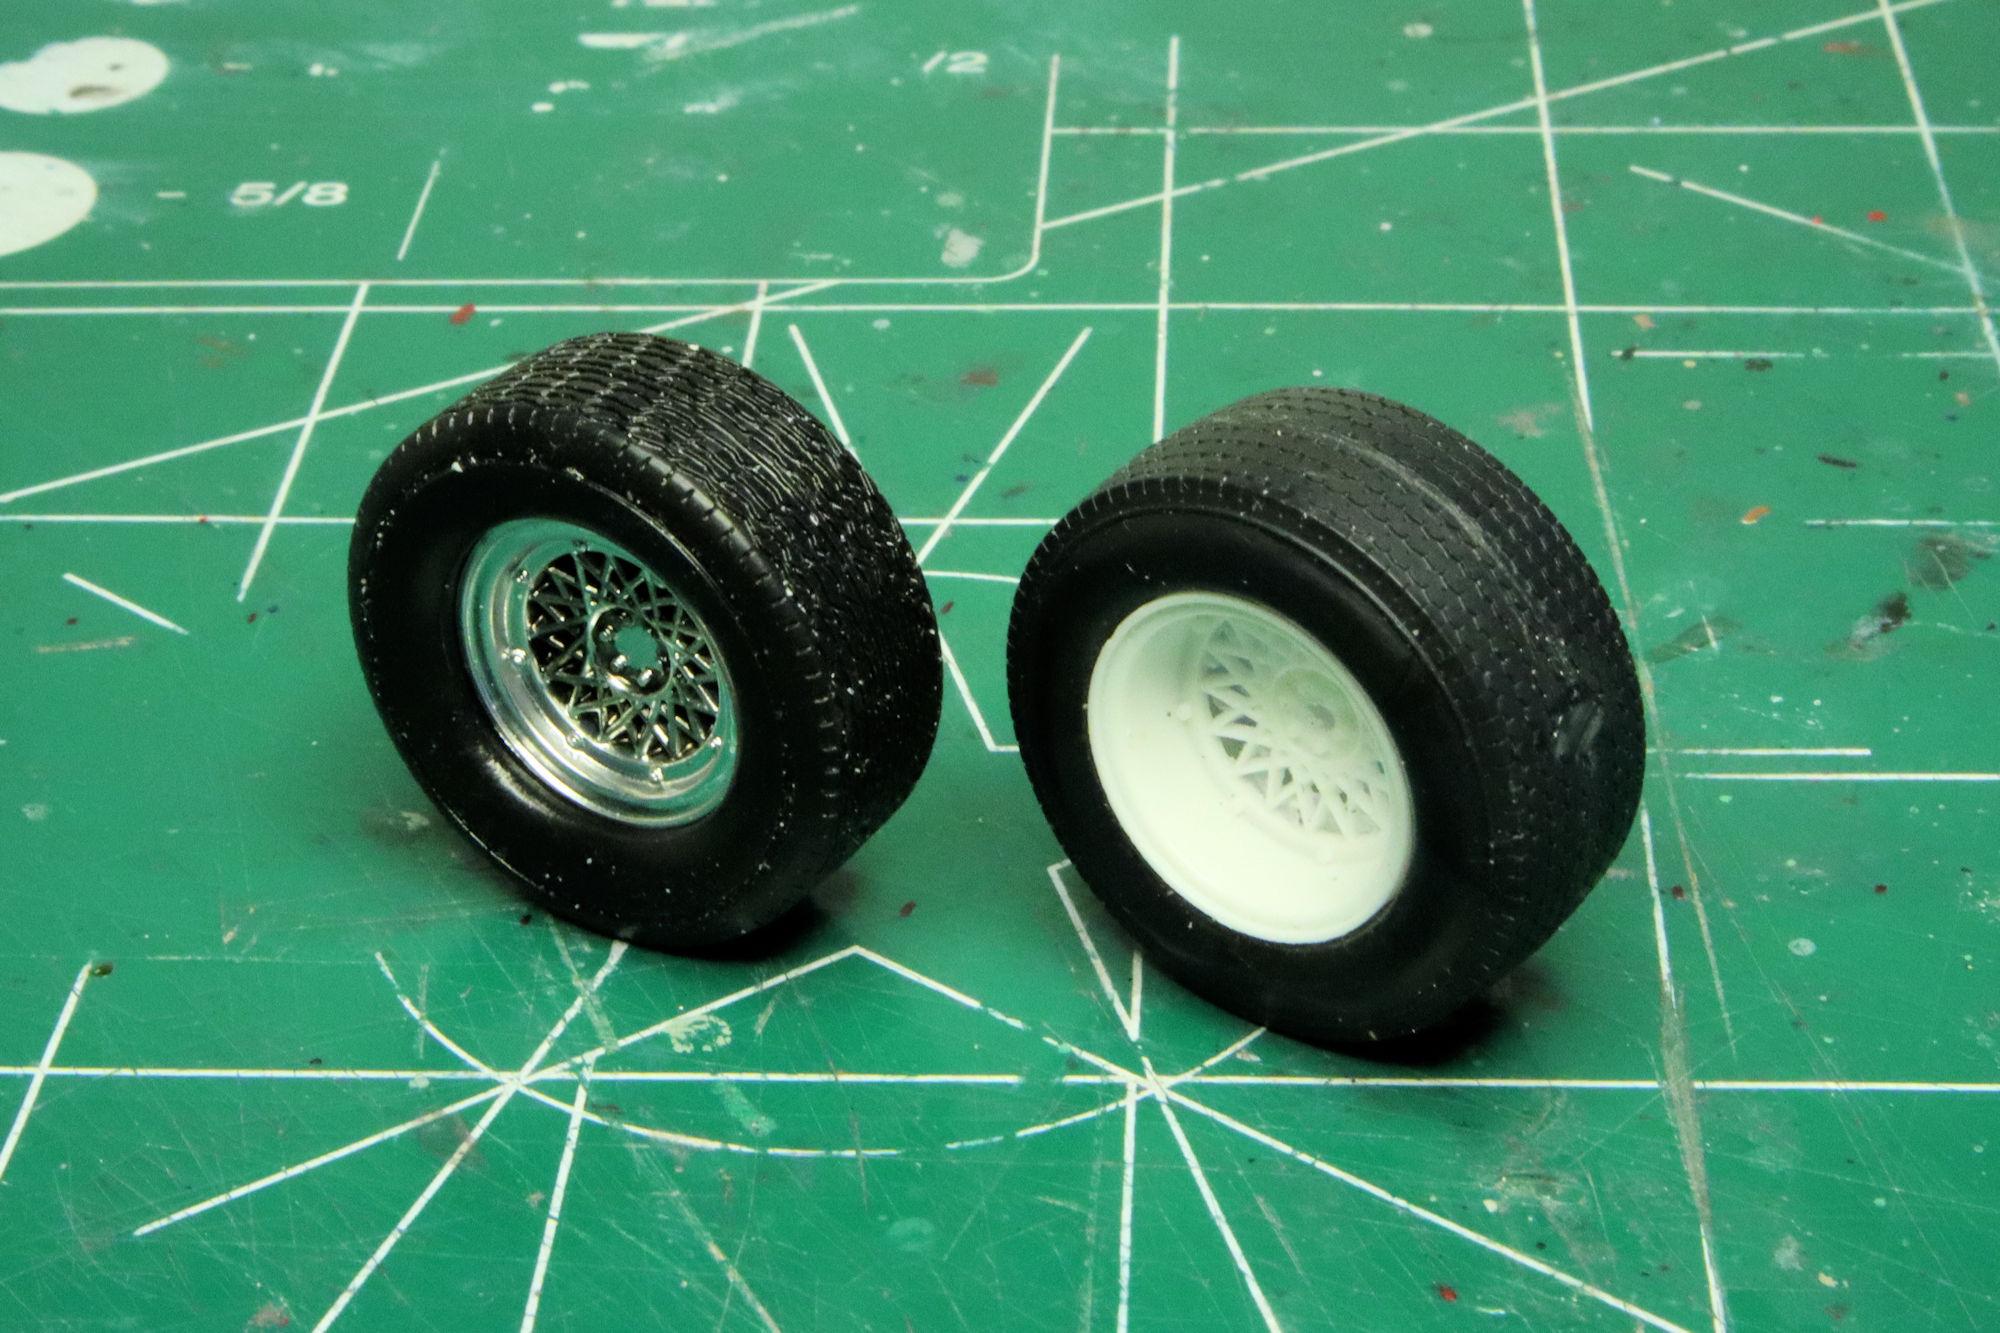
 Hello Everybody! Here is the next update on the Chaparral. These are the wheels provided in the kit. I've cleaned and detailed them and they look pretty good. When I bought this kit at the most recent Desert Scale Classic swap meet, There was a price marking discrepancy on the box. A $20 sticker had been placed on one end of the box and on the other end "$1.00 Missing Parts" was written in Sharpie. The vendor chuckled and said, "Oh yeah, I haven't really gone through any of those yet. I'll tell you what, give me fifteen dollars and it's yours." I responded, "That sounds good, let me see just what's in here." Unbeknownst to the vendor, these aftermarket wheels were included in the box! I discovered them as I was inspecting the contents of the box after having made the deal to buy the kit. When I held them up for him to see he said, "Wow, I didn't even know those were in there. It looks like you got a good deal today." Paying $15 for a complete kit and getting a $15 set of aftermarket wheels to boot? Yeah, I'd say I got a good deal! I wasn't sure if I was going to use the aftermarket wheels so I did a side-by-side which really tipped the decision scale for me. There is a huge difference in depth between the kit wheels and aftermarket wheels! I'm sure I can find some other use for the kit wheels. While I'm considering other wheel sets how about some wide whites to go with those tail fins? No? Fine! I'll stick with the aftermarket bonus wheels! As always, thanks for taking the time to look and please feel free to post any comments you may have. David G.
-
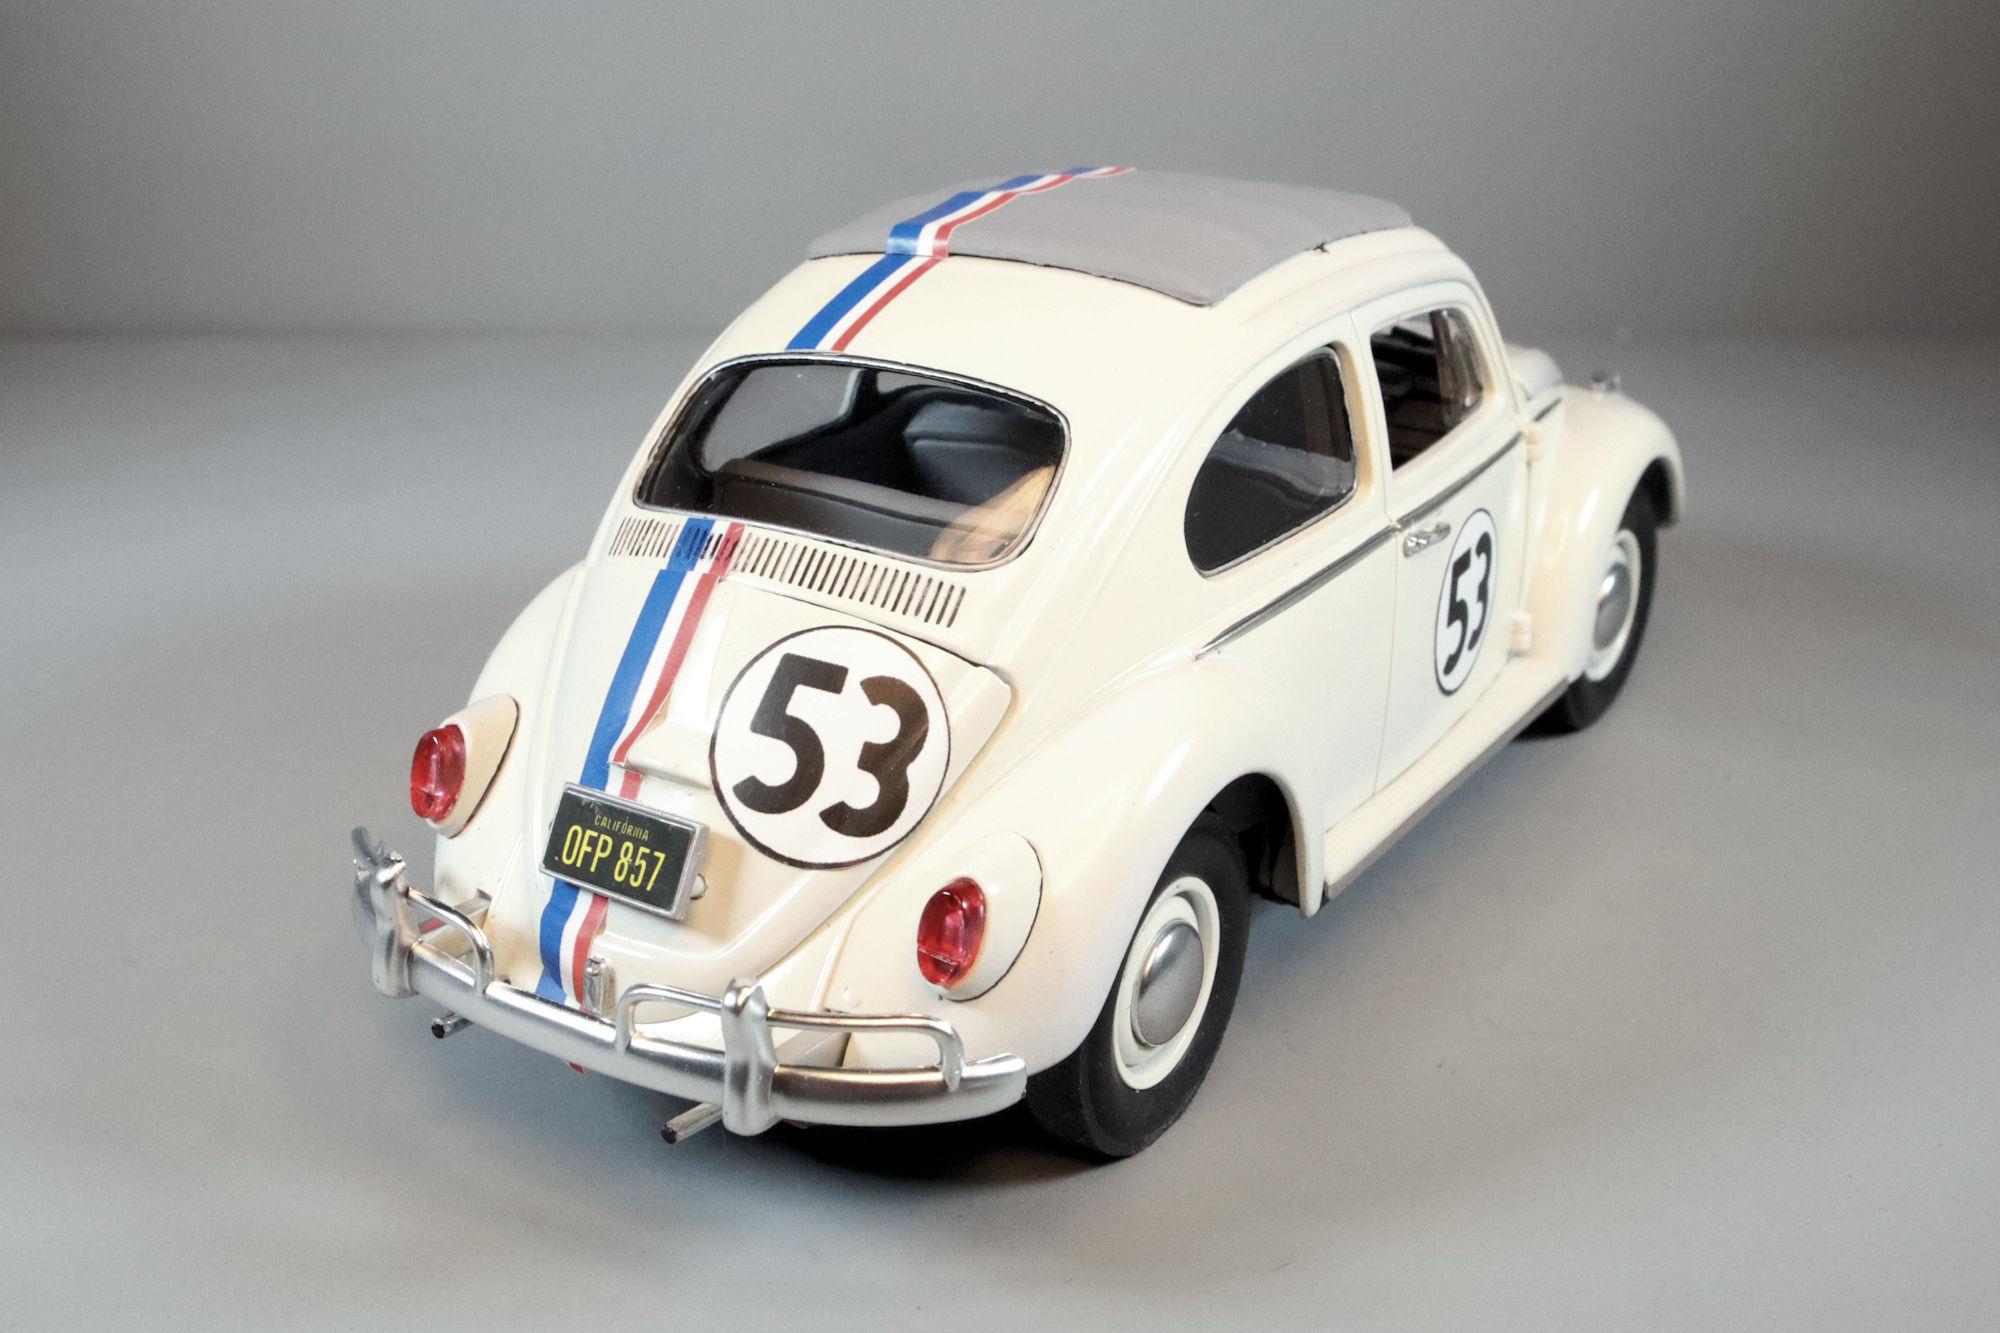
Thank you so much Greg. Thank you most kindly Sir. In an amusing follow up to the copywrite story, upon learning of the movie's popularity and the affection it created for the venerable Beetle, Volkswagen asked Disney to include the corporate badges and emblems on the car for all future films. It seems that sales for the Beetle were flagging around this time and VW was in amenable to any promotion it could garner. Coincidentally, or maybe not, it was in 1968 (the same year the movie released) when VW copywrited the name "Beetle" for their Type-1. Wow David! There are way too many coincidences tying you to the number 53 than happenstance should allow for. thanks again foe following along on the build with me, I'm glad you enjoyed it. Thank you Michelle. Thanks Craig, I'm glad you enjoyed the trip. The stripes weren't that bad. I mean the actual build was so easy that there had to be something to complicate matters. Because there's always something. Thank you David. I didn't know either until I found it at my LHS. But given their other novelty kits, I'm not surprised. Thanks Garry! Indeed he will, everybody loves Herbie! Thank you John. Thanks Larry, I appreciate that. Thanks again to everybody who followed along with the build and thank you all for your kind comments. I have a final few photos to post, I'll probably get to those sometime tomorrow then this one will be officially wrapped-up! David G.
-
1:16 Gunze Sangyo 1937 Rolls-Royce Phantom III Sports Saloon
David G. replied to Anglia105E's topic in WIP: Model Cars
Everything about this build just continues to bring a smile to my face every time I see the photos. This whole build has had a very good feel right from the start, even the challenges seemed to come about for a reason. Having the opportunity to replace the window glass, for instance. I know I keep saying this David, but thanks for taking the time to share this adventure with the rest of us. It's become a real "moment of Zen" for me. David G. -
Thanks for sharing that. David G.
- 47 replies
-
- 1
-

-
- d___
- ill miss him
- (and 1 more)
-
That's one sweet hotrod! David G.
-
Great work fabbing the spindles, the interior is coming along quite nicely too. David G.
-
Ah, that makes sense. It's hard to get the whole picture ...just from pictures. I just thought I'd say something because sometimes we don't see what we're seeing when we see it. If you see what I mean. Cheers, David G.
-
That is a super nice build! The assembly, paint and decals all look great! David G.
-
Wow, I'm so sorry to hear that Carl. Please get checked out by a doctor, falls can lead to more serious problems later on. I have a dear friend who is in the later stages of Type 2 Progressive MS and falls are a major concern for people who endure this disease. Please consider seeing a doctor Carl. Take care and be safe my friend. David G.
-
Hi Tom. The front wheel looks like it's just about where it should be, at least from the photos above. In addition to the rear wheel being too far foreword, the back looks a bit high too. Maybe an adjustment to the rear axle and suspension would be the thing to do? Unless of course the one you're replicating had a rake like the one on the model. David G.
-
Hello Everybody! Just a quick note to let you all know that there is now a posting for this build in the Under Glass section, here is a link. Thanks to everybody who followed along and offered their comments, critiques, suggestions and support. I appreciate you. David G.
-
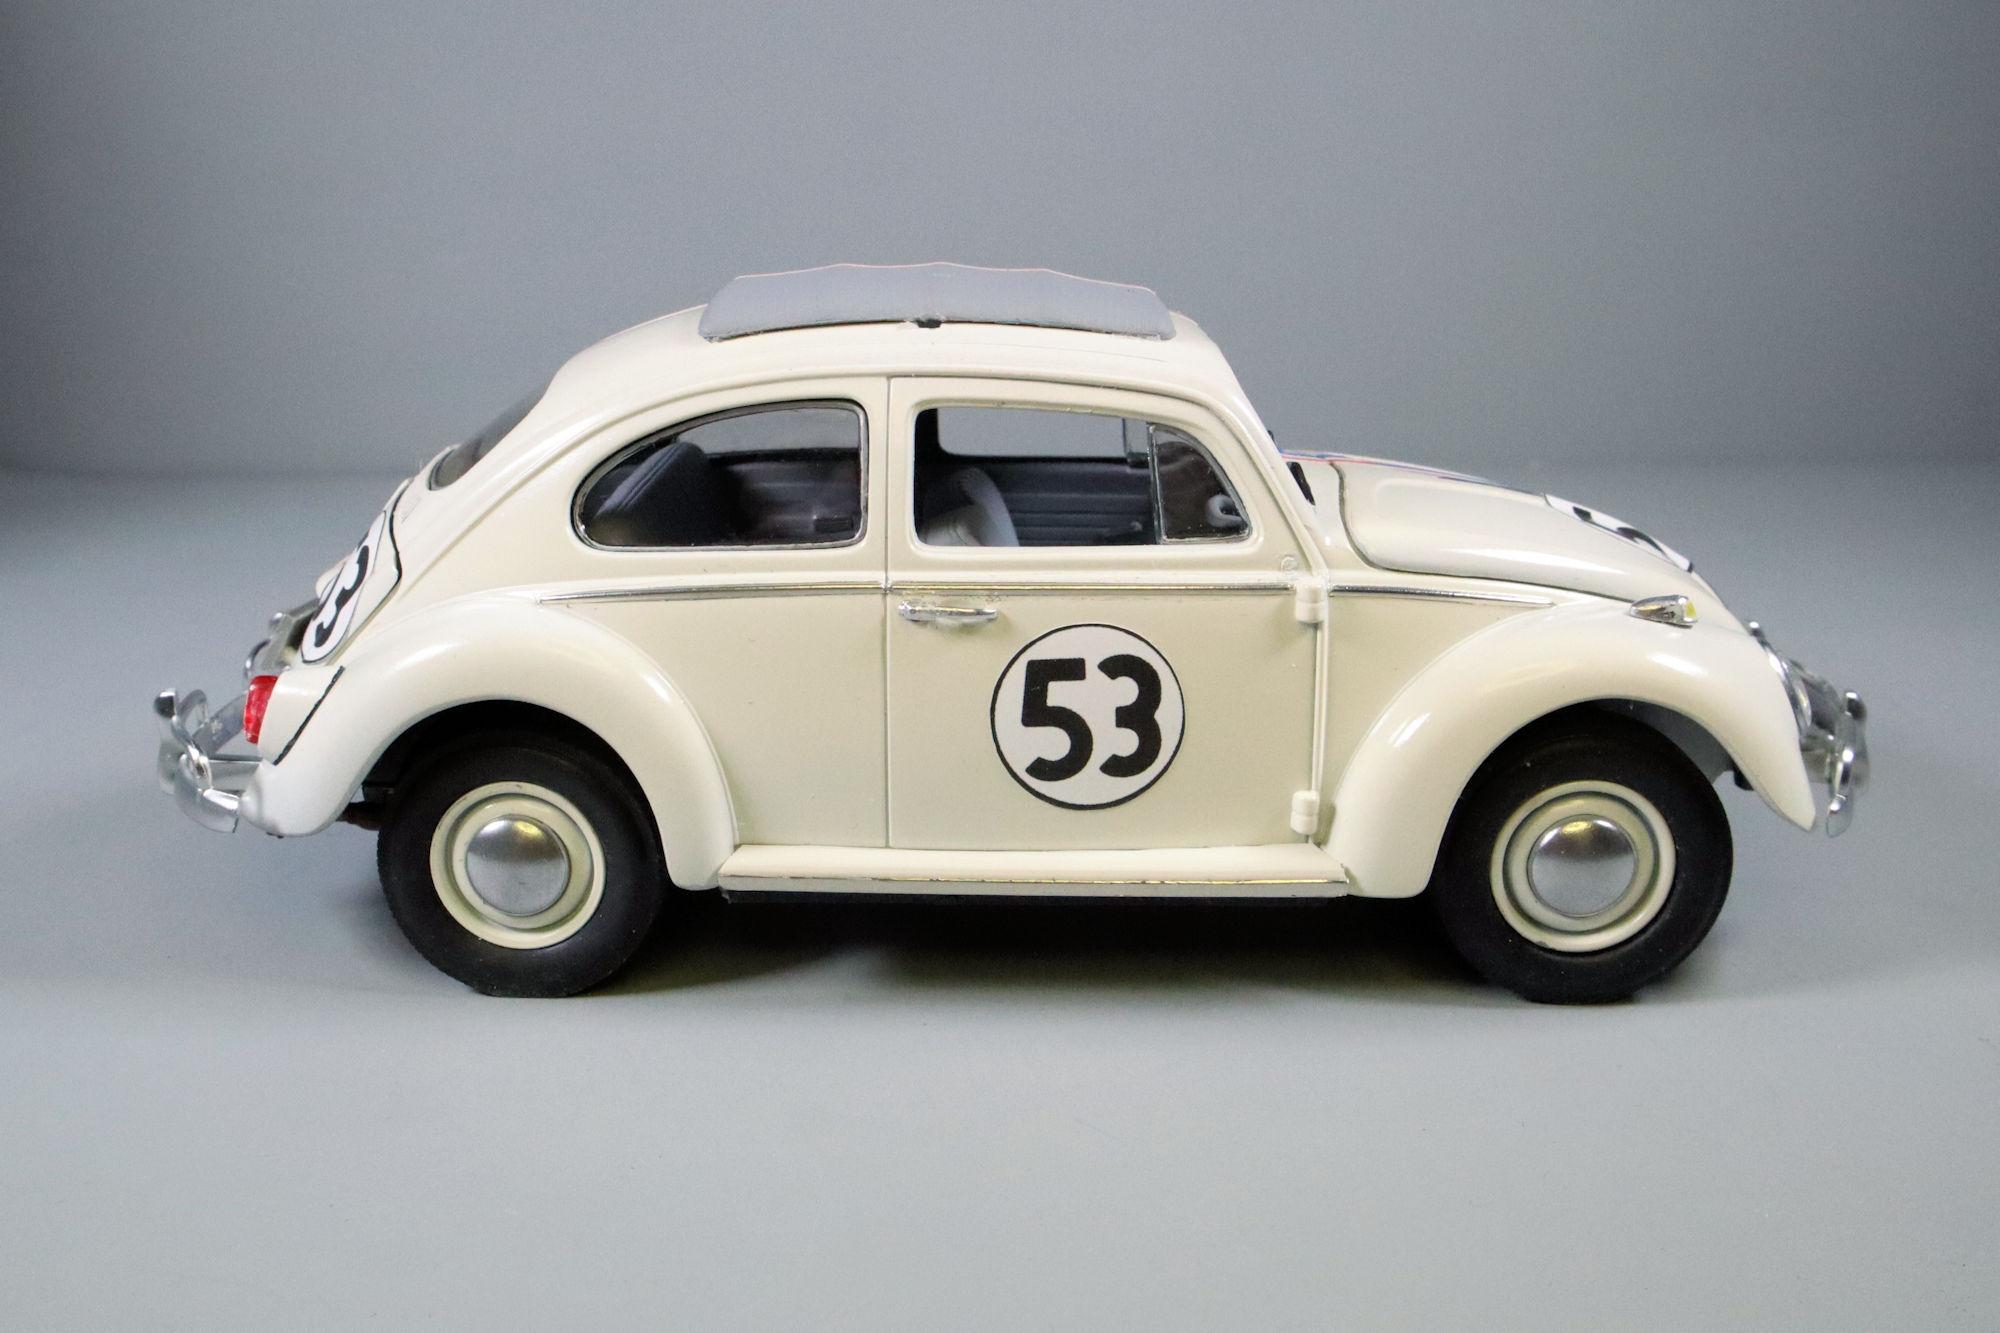
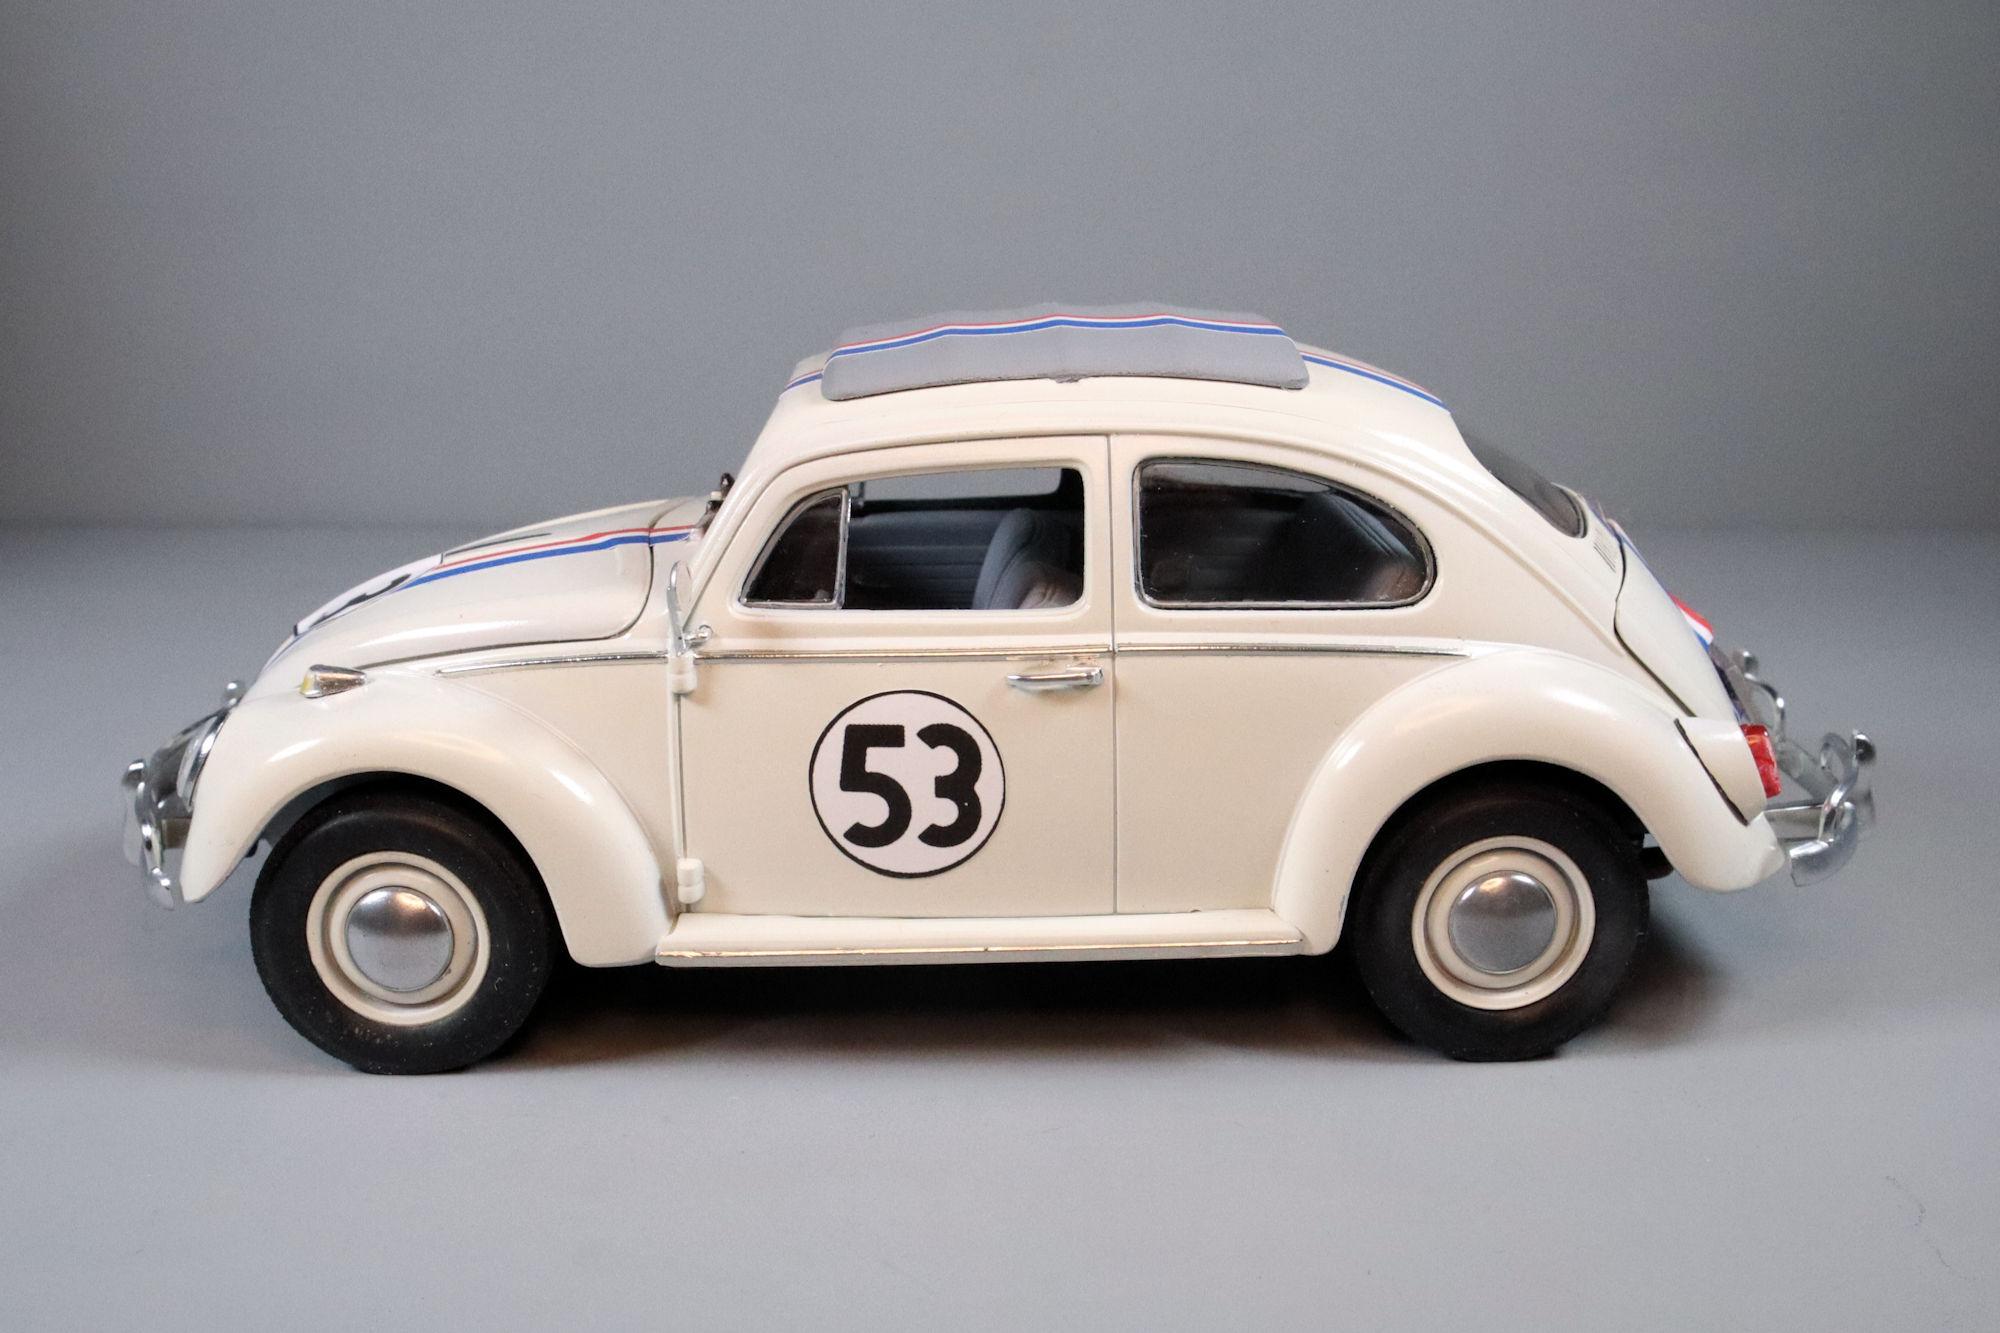
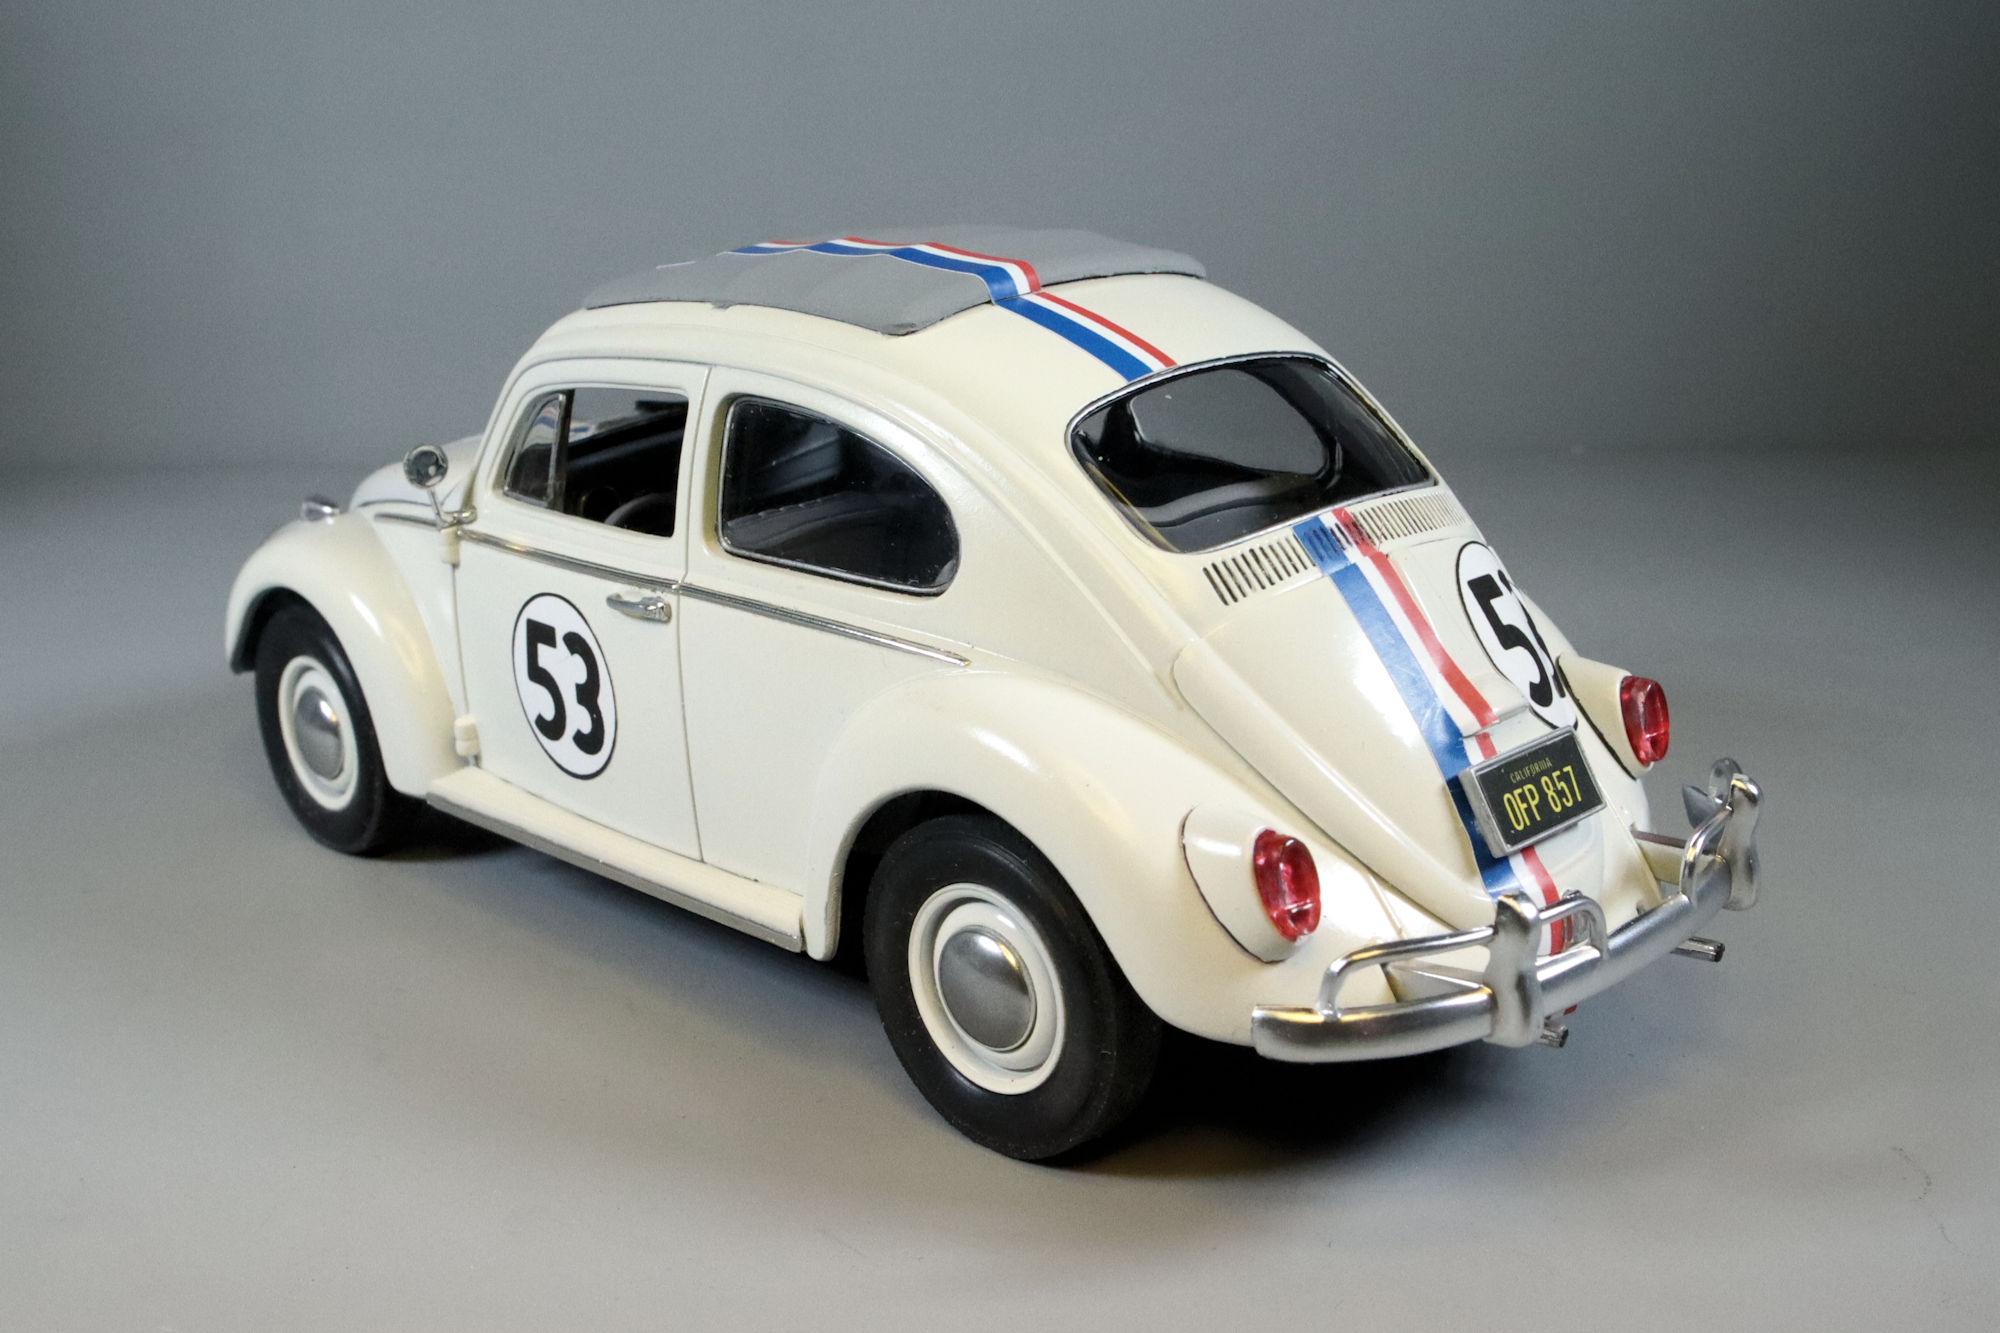
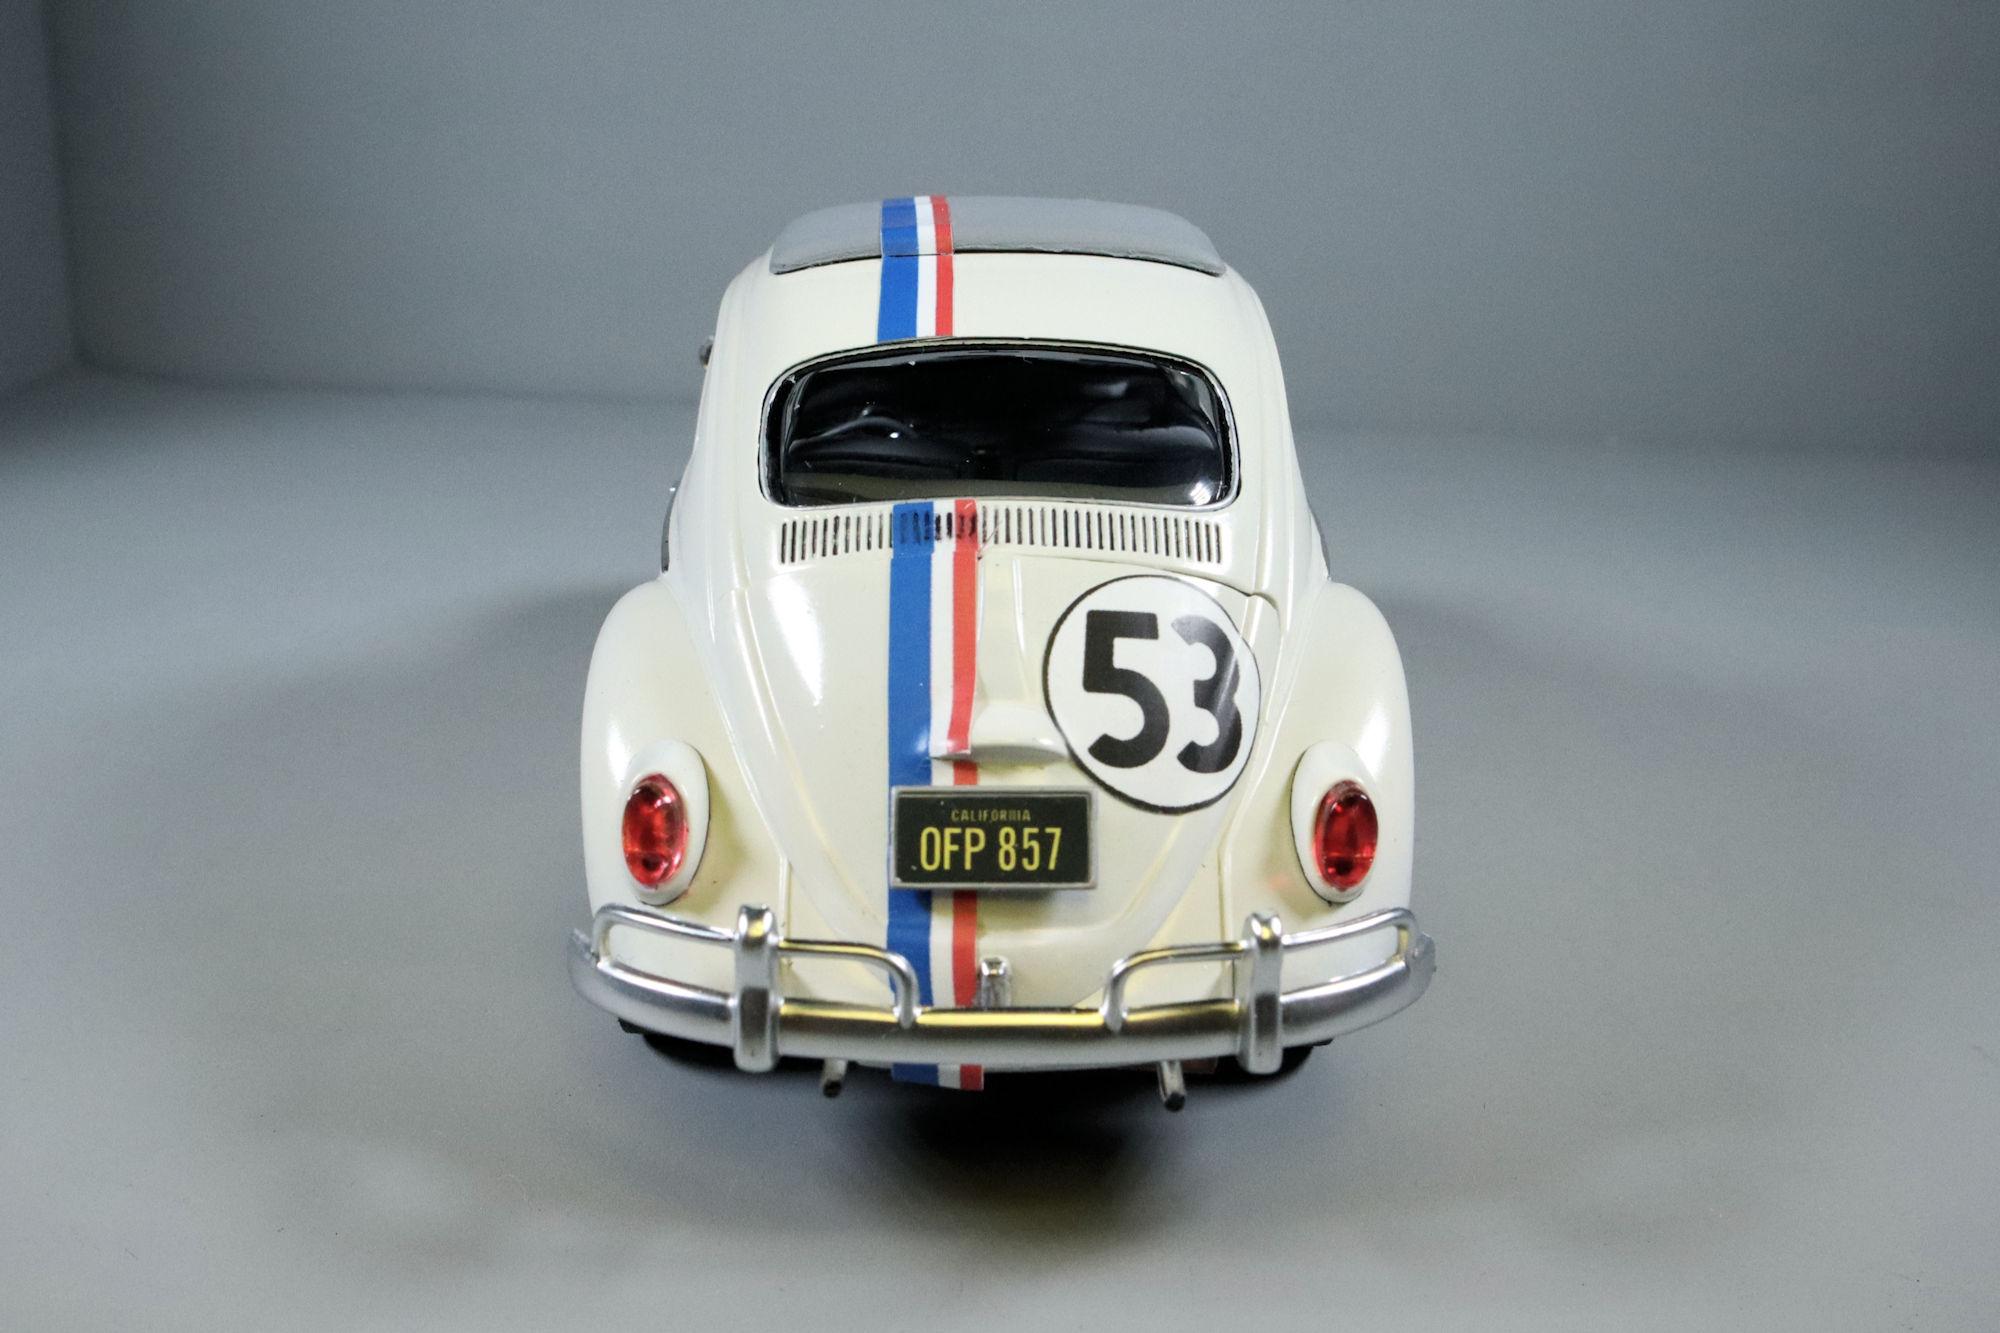
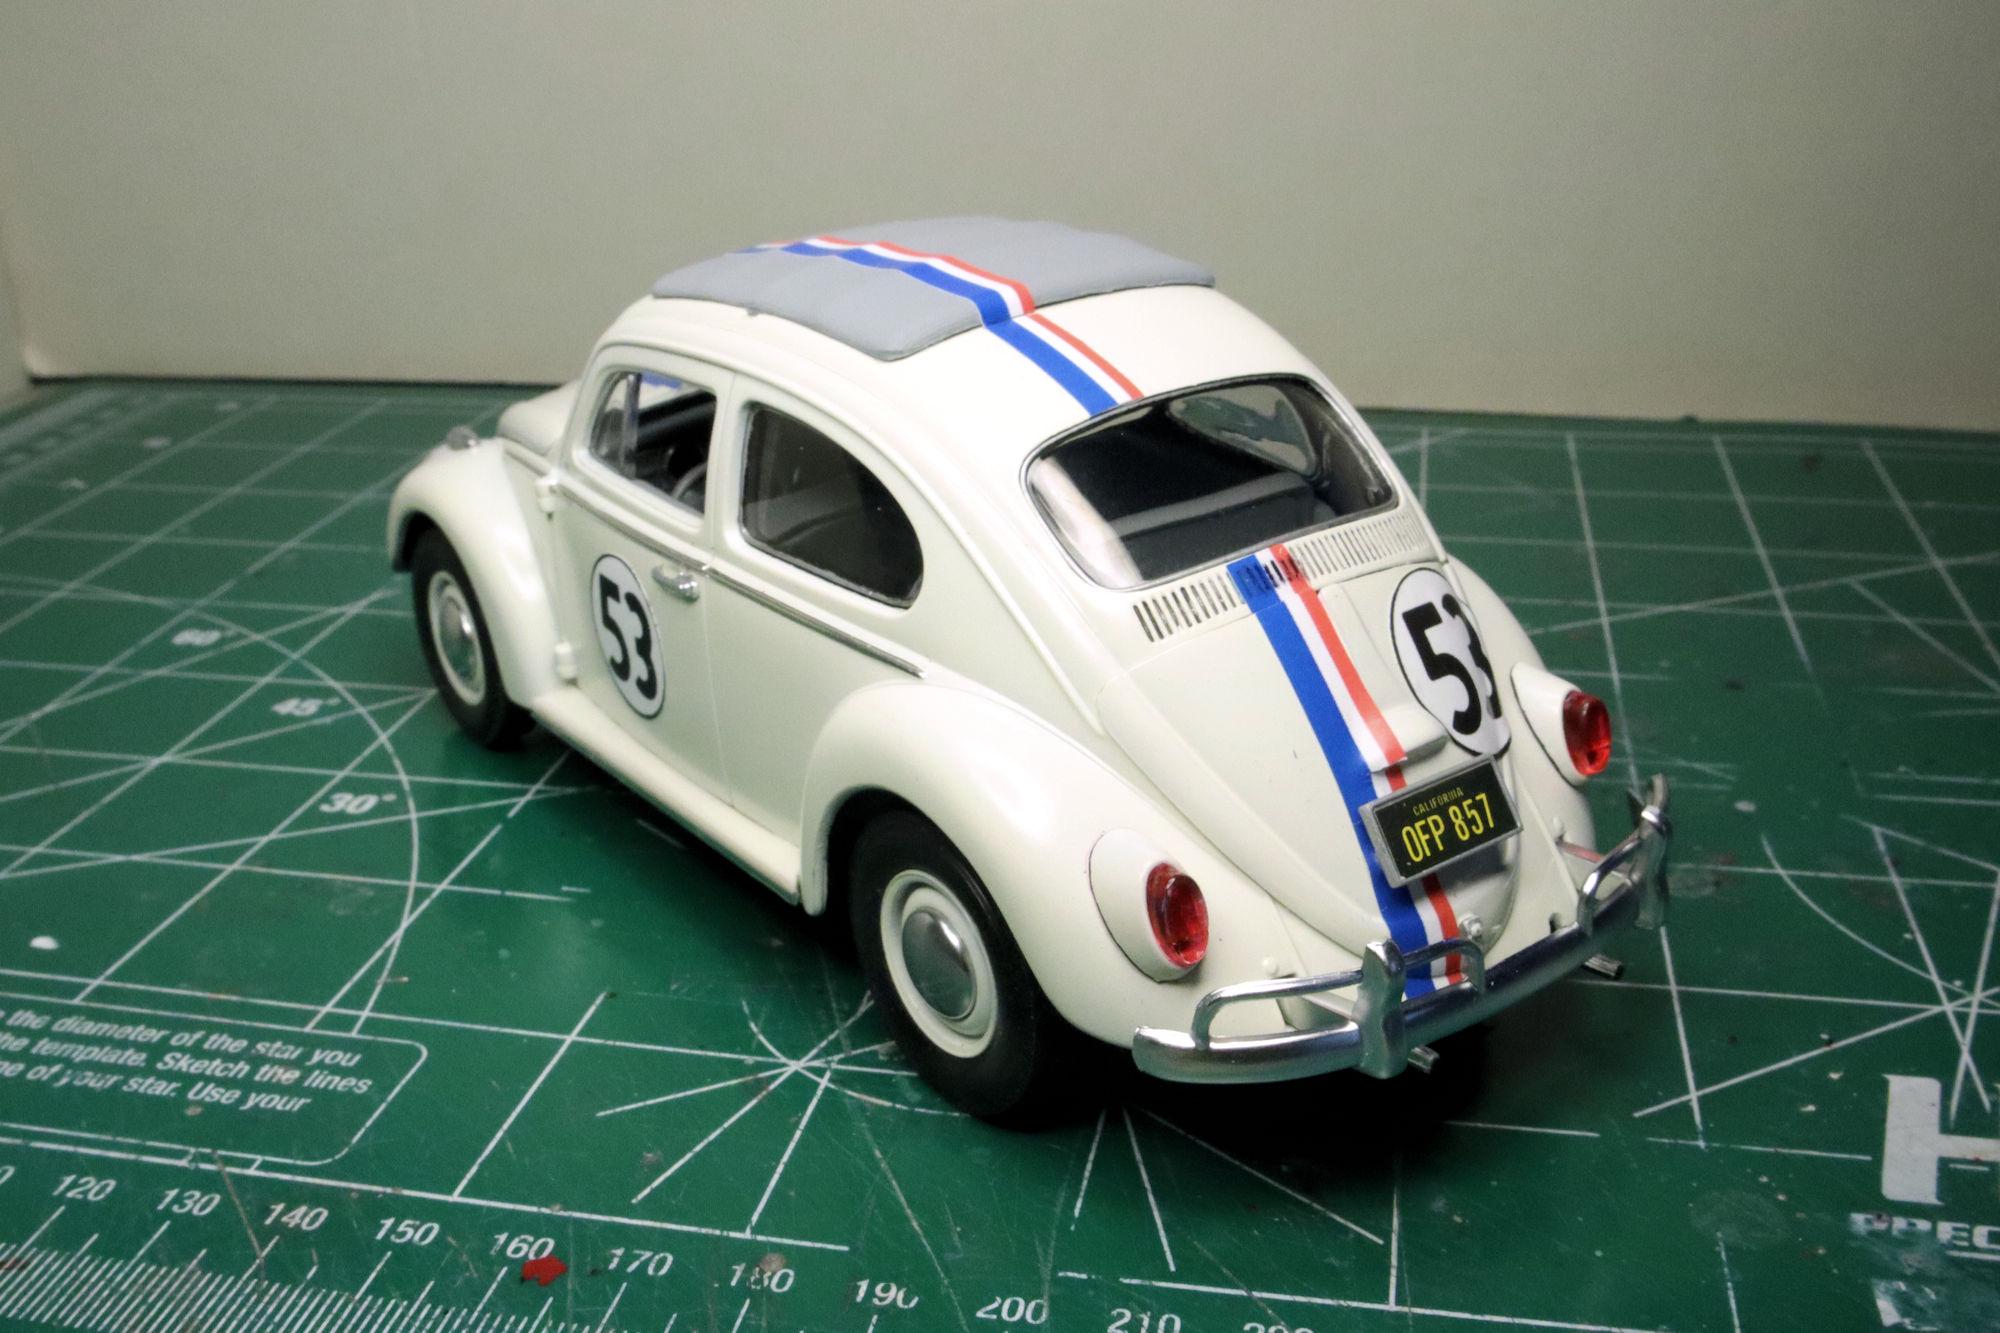
Hello Everybody! Polar Lights VW Love Bug This is the Polar Lights snap together kit of The Love Bug, the main character from Disney's 1968 movie by the same name. The car, more commonly known by the name "Herbie" is based on a Volkswagen 1963 Type 1 Deluxe. All the Volkswagen corporate emblems were removed by the movie studio to prevent copywrite infringement and the model kits follows suit. The kit itself is of good quality and engineering, as are all Polar Lights snap together kits I've built so far. Though simple in nature, Polar Lights kits lean more toward the complex end of the snap together spectrum and sometimes straddle the boundary between snap together kits and more traditional kits that require glue to assemble. This means that Polar Lights snap together kits can be assembled well enough without glue and paint but to achieve the kit's full potential, these kits should be regarded as simplified glue together kits. And I build them as such. For those who may be interested, I have a build thread in the WIP section, here is a link. As always, thanks for taking the time to look and please feel free to post a comment, question or suggestion. Thanks, David G.
- 28 replies
-
- 14
-
-
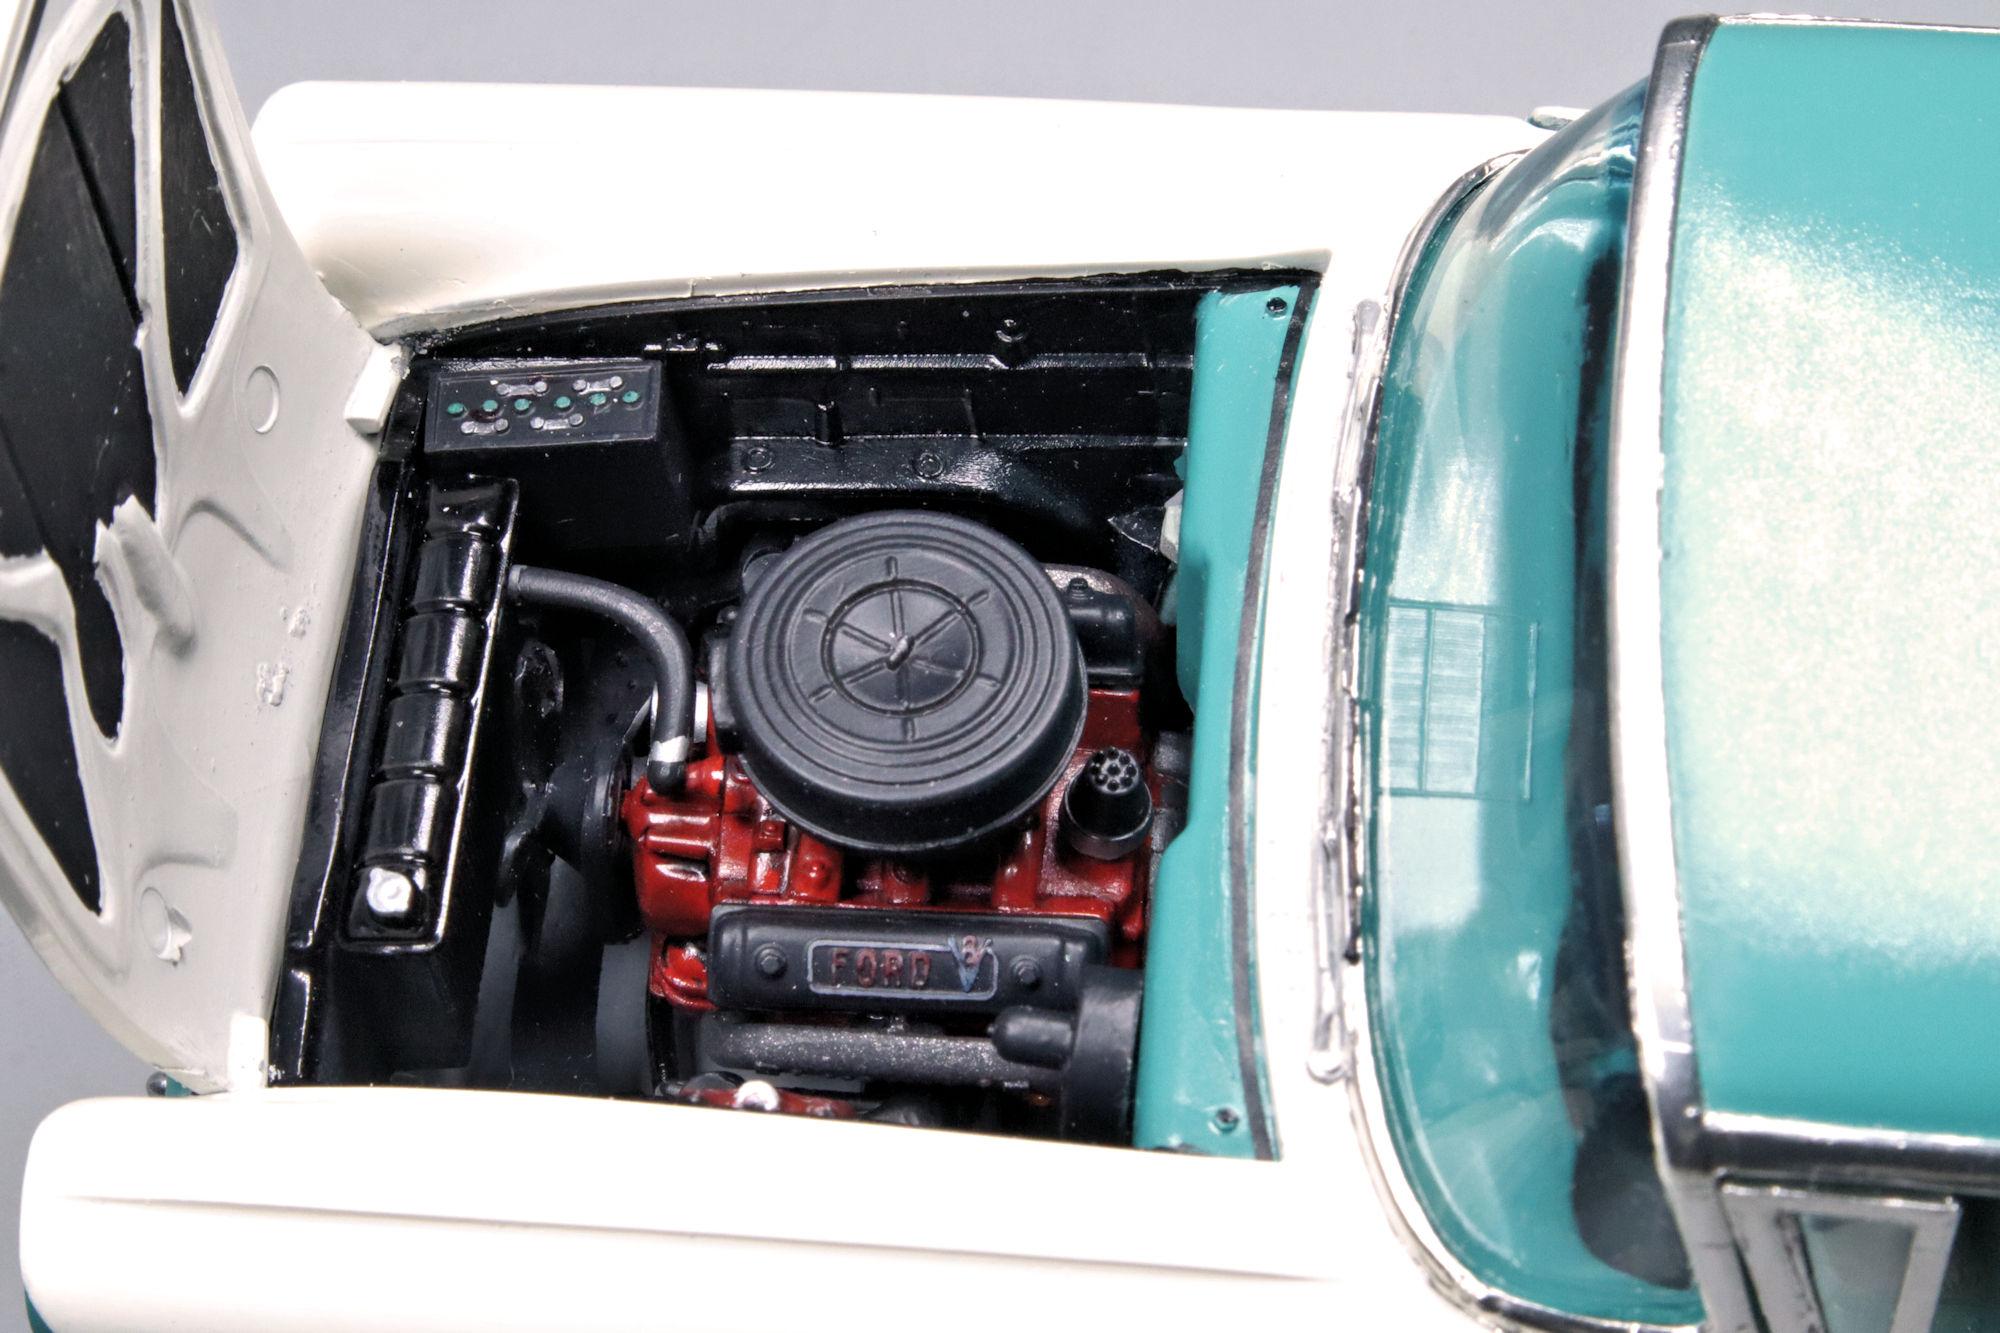
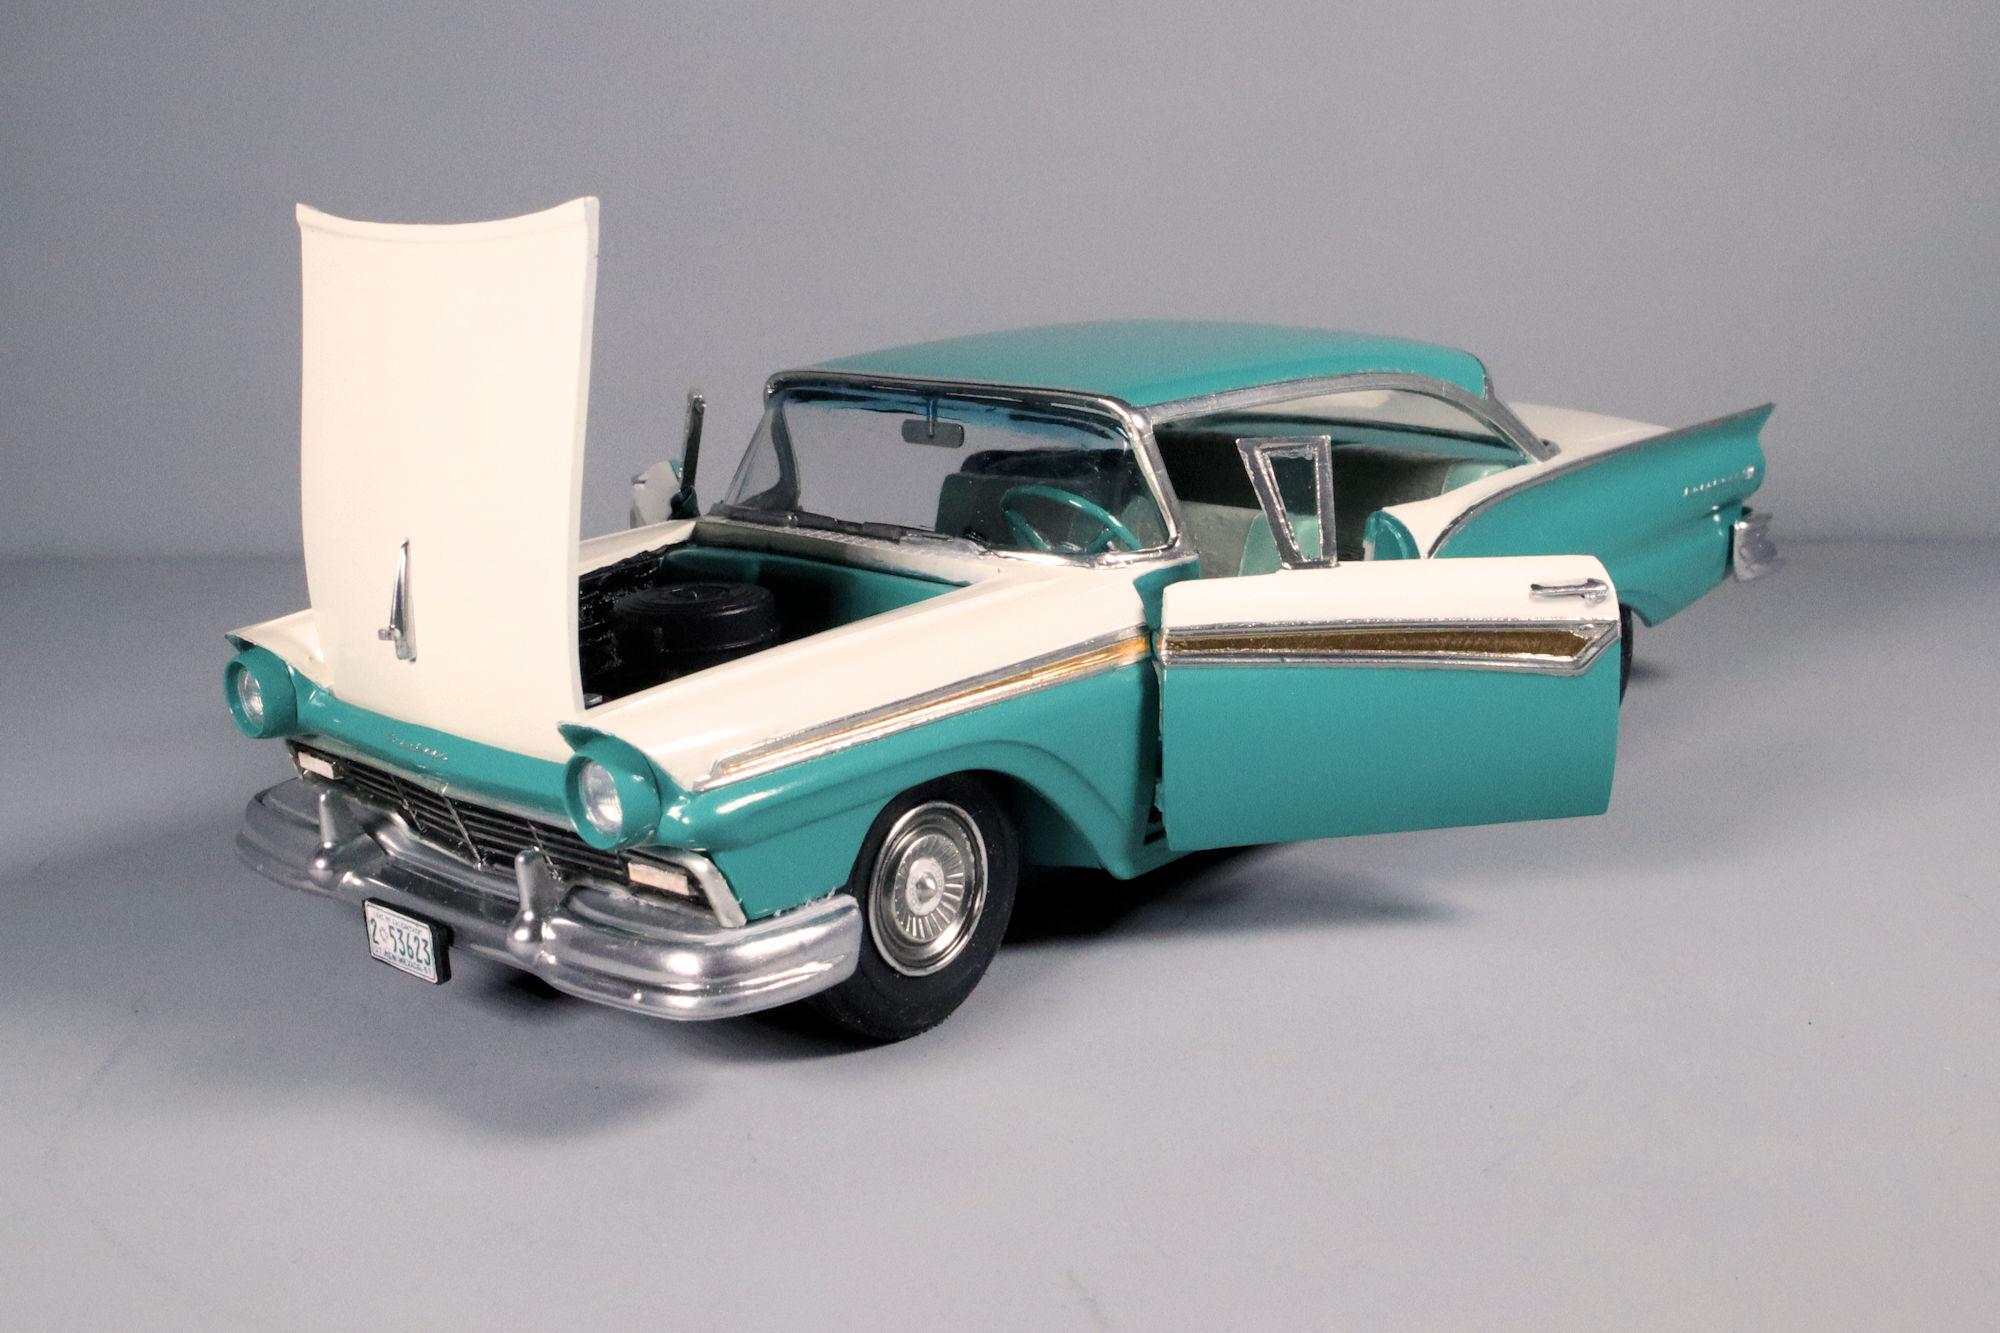
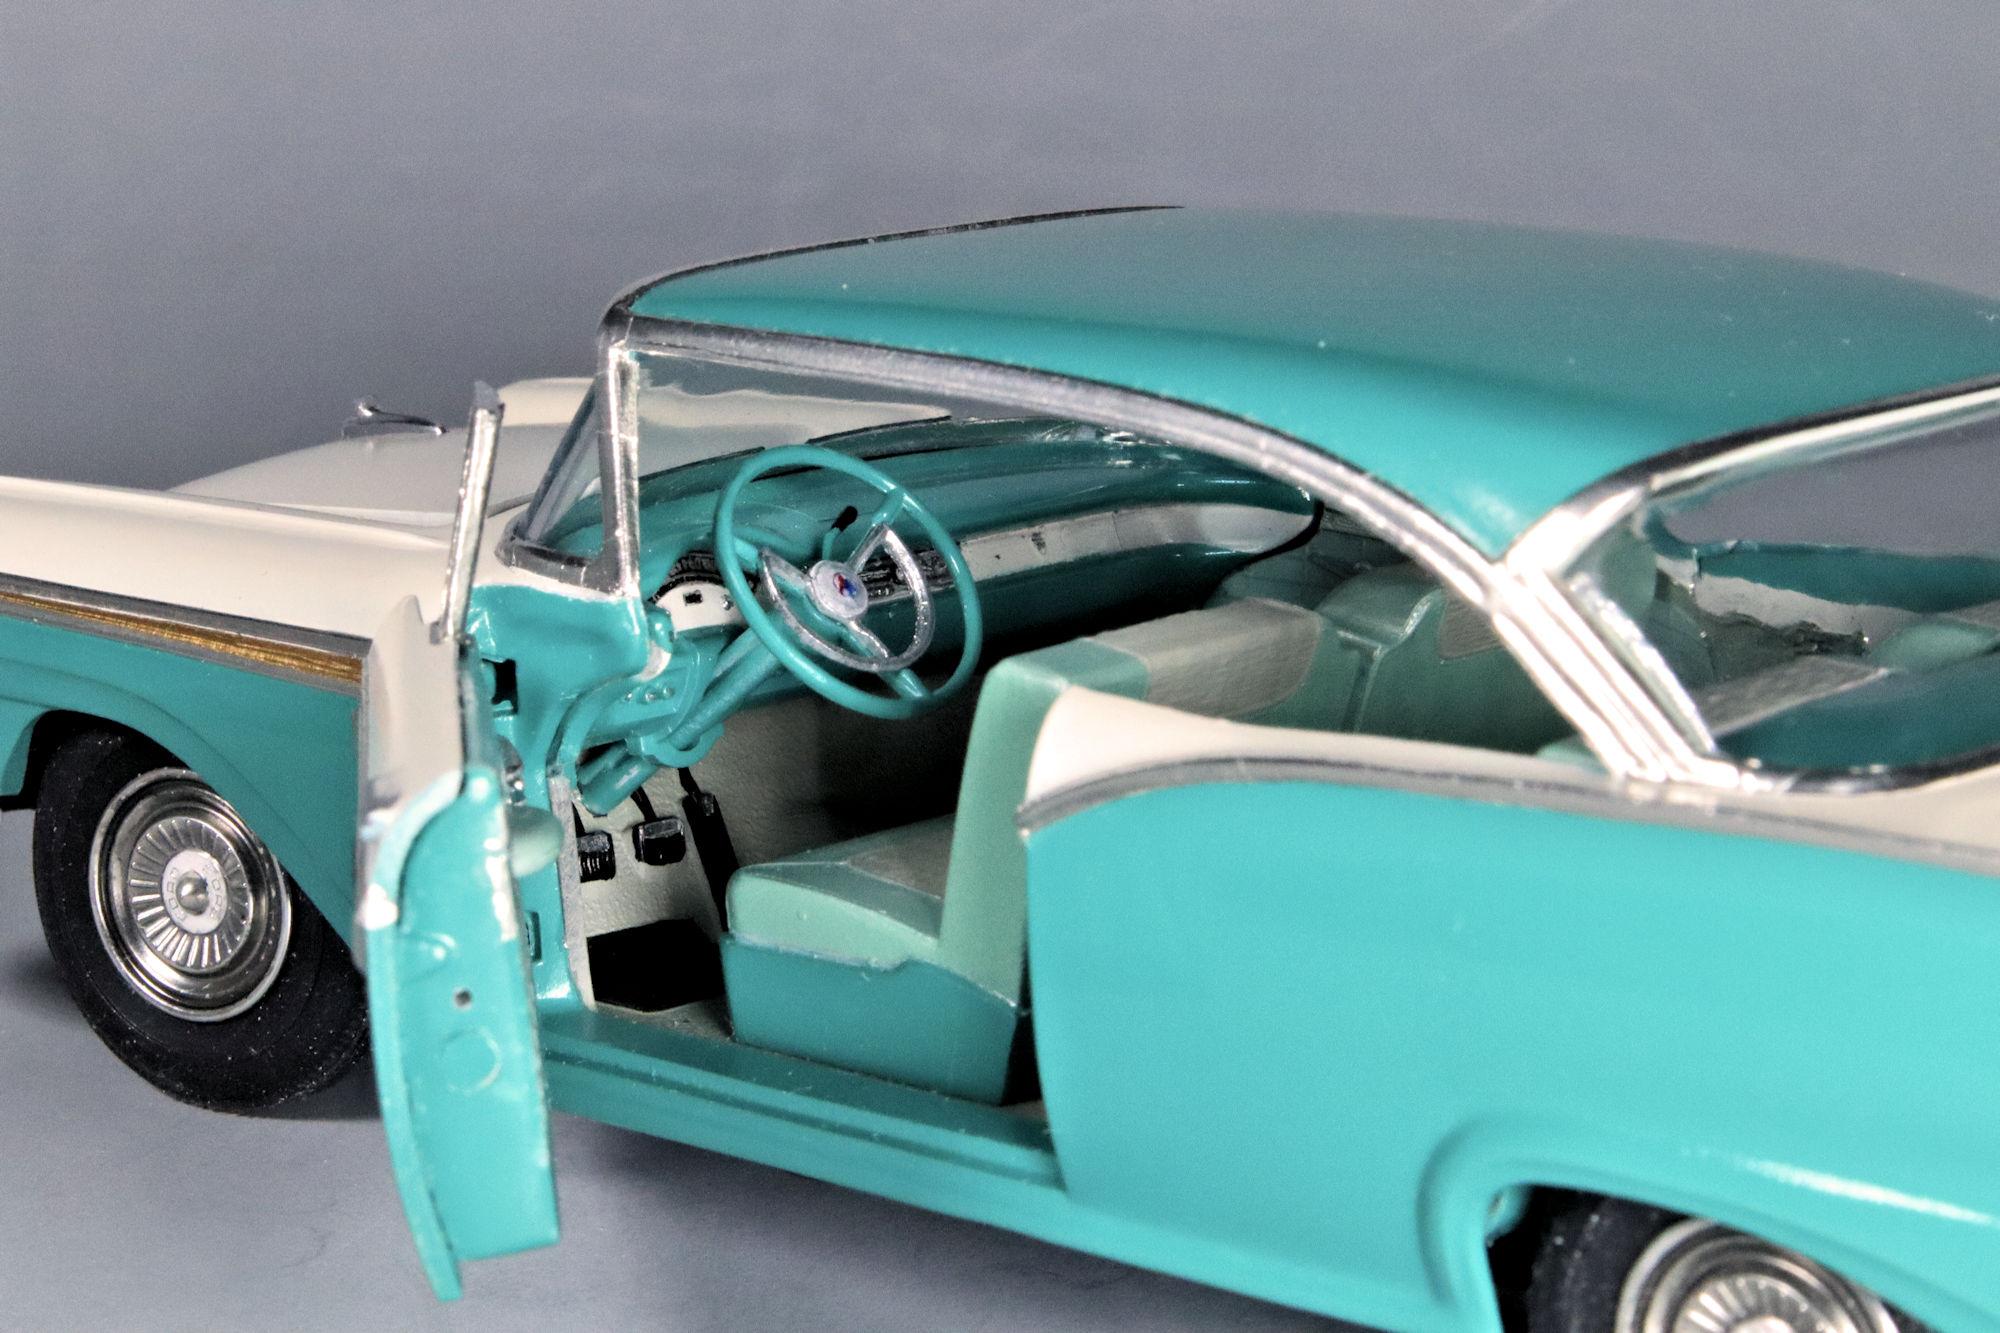
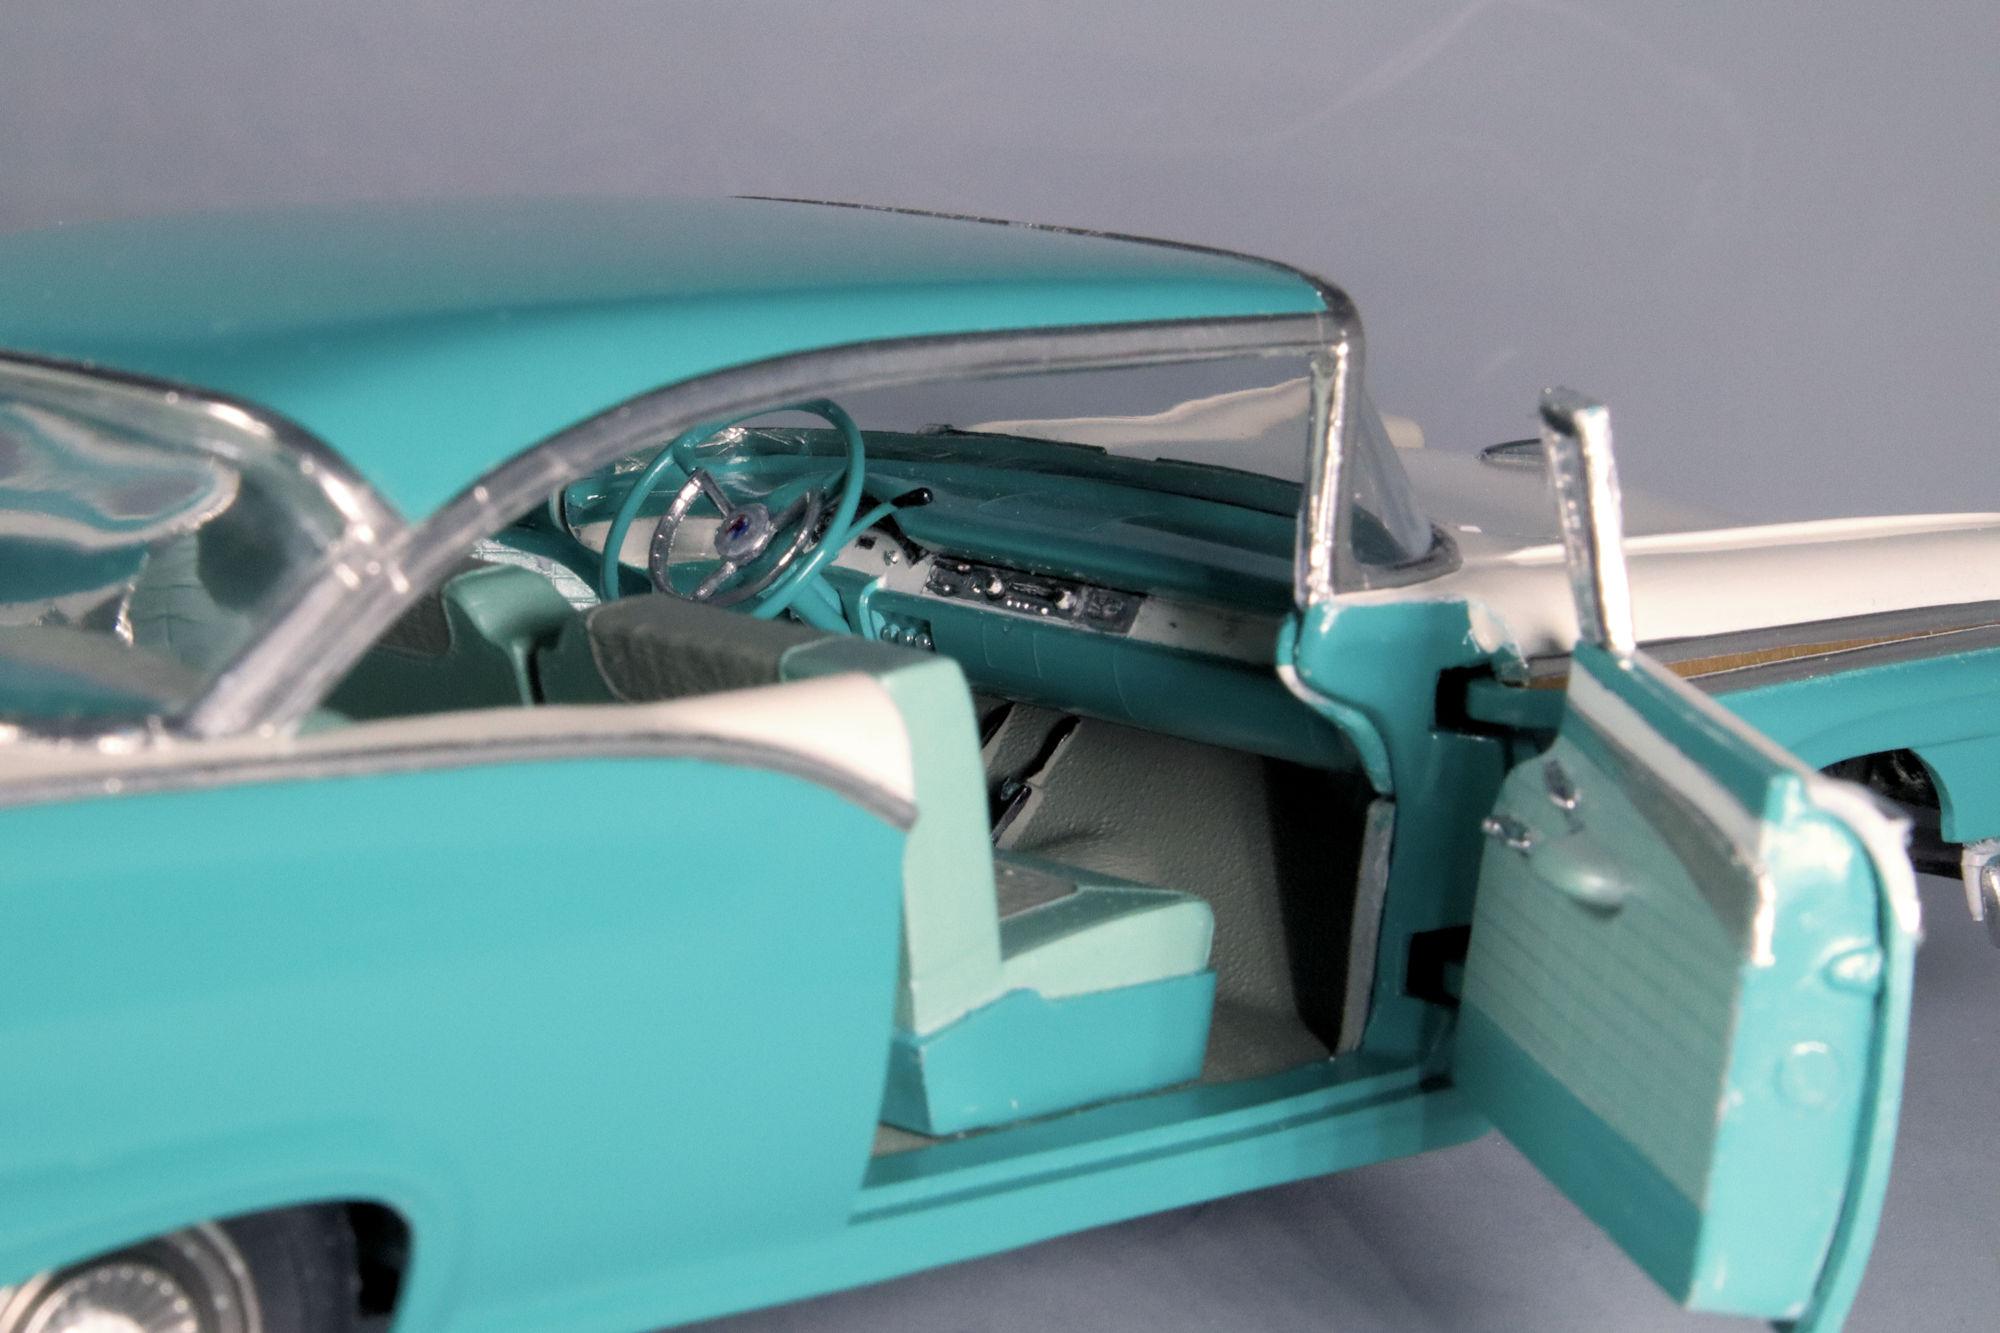
Hello Everybody! Here is the final set of photos for the 1957 Ford Hardtop build. This kit has an opening hood and doors. Opening doors make it easier to get shots of the interior. Another interior detail shot. Engine bay detail. I cut strips of electrical tape to use as inner hood seals. And last but not least, my traditional Display Case shot. Thank you all for your support and encouragement with this challenging and satisfying build. David G.
-
Things to consider for future builds, thanks Len. Thank you Dan. David G
-
Thank you Al. Thanks Ken, I appreciate that. David, thank you! Thank you Bob. I've had my eye on that one, I've even had it in my hands a couple of times at the hobby shop but there was always something I wanted just a little more. Now that I have this one done it would be cool to have a matched set. Thank you all for your kind comments, I enjoy reading and responding to them. David G.
-
The foil looks clean and tight, even the script. Cool! David G.
-
Thanks Donald, I'll have a look for those. Nice hinge work too! David G.
-
Everything about this build just feels right Ken. David G.
-
Hello Everybody! The kit itself was a simple and easy build. The race livery markings, not so much. After three attempts, success! Though not perfect, the vinyl decals do a good enough job of conforming to the complex curves of the boot lid. With a little gentle heat, they might even lay down even better. But I'm not about to mess with that. They even covered up that mess on the rear deck lid. That wraps up this build. I'll post the final photos to the Under Glass section soon. Thanks to all of you who offered your support through your comments, compliments and encouragements David G.
-
Thank you for your comment Pierre. I have a set of aftermarket wheels so that part is taken care of but I'm afraid that the oil will just have to run hot. I've already committed this one to paint and I'm not sure I have the skills to effectively scratch build the actual cooler. The body mods wouldn't be much of a problem but I lack a source for the cooler itself. I am working on a control mechanism for the wing though. Thanks again for your comment. David G.
-
Thank you Carl! David G.
-
Thank you David, they actually worked out pretty well. Not ideal but well enough. I'll be posting the photos soon. There's a bit of a lag between my build cycle and postings. It's probably due to the number of projects I have going and the time it takes me to edit the photos and compose my comments on them. I've been trying to catch up on that but we each work at our own pace, eh? It hadn't occurred to me about that toner is made of plastic. Based on that, wouldn't ink actually be better for decals? Ink would cut down on the chances of reactivity and interactivity with the plastic oriented chemicals and surfaces we work with. Thanks for your kind wishes Len. The vinyls worked out fairly well, I'll be posting the photos soon/ David G.
-
The bronze and blue are a beautiful color combination Ken. Great work on the chassis detail too. David G.
-
Adjustable lift shackles! ? Just like real life! How cool is that! David G.
-
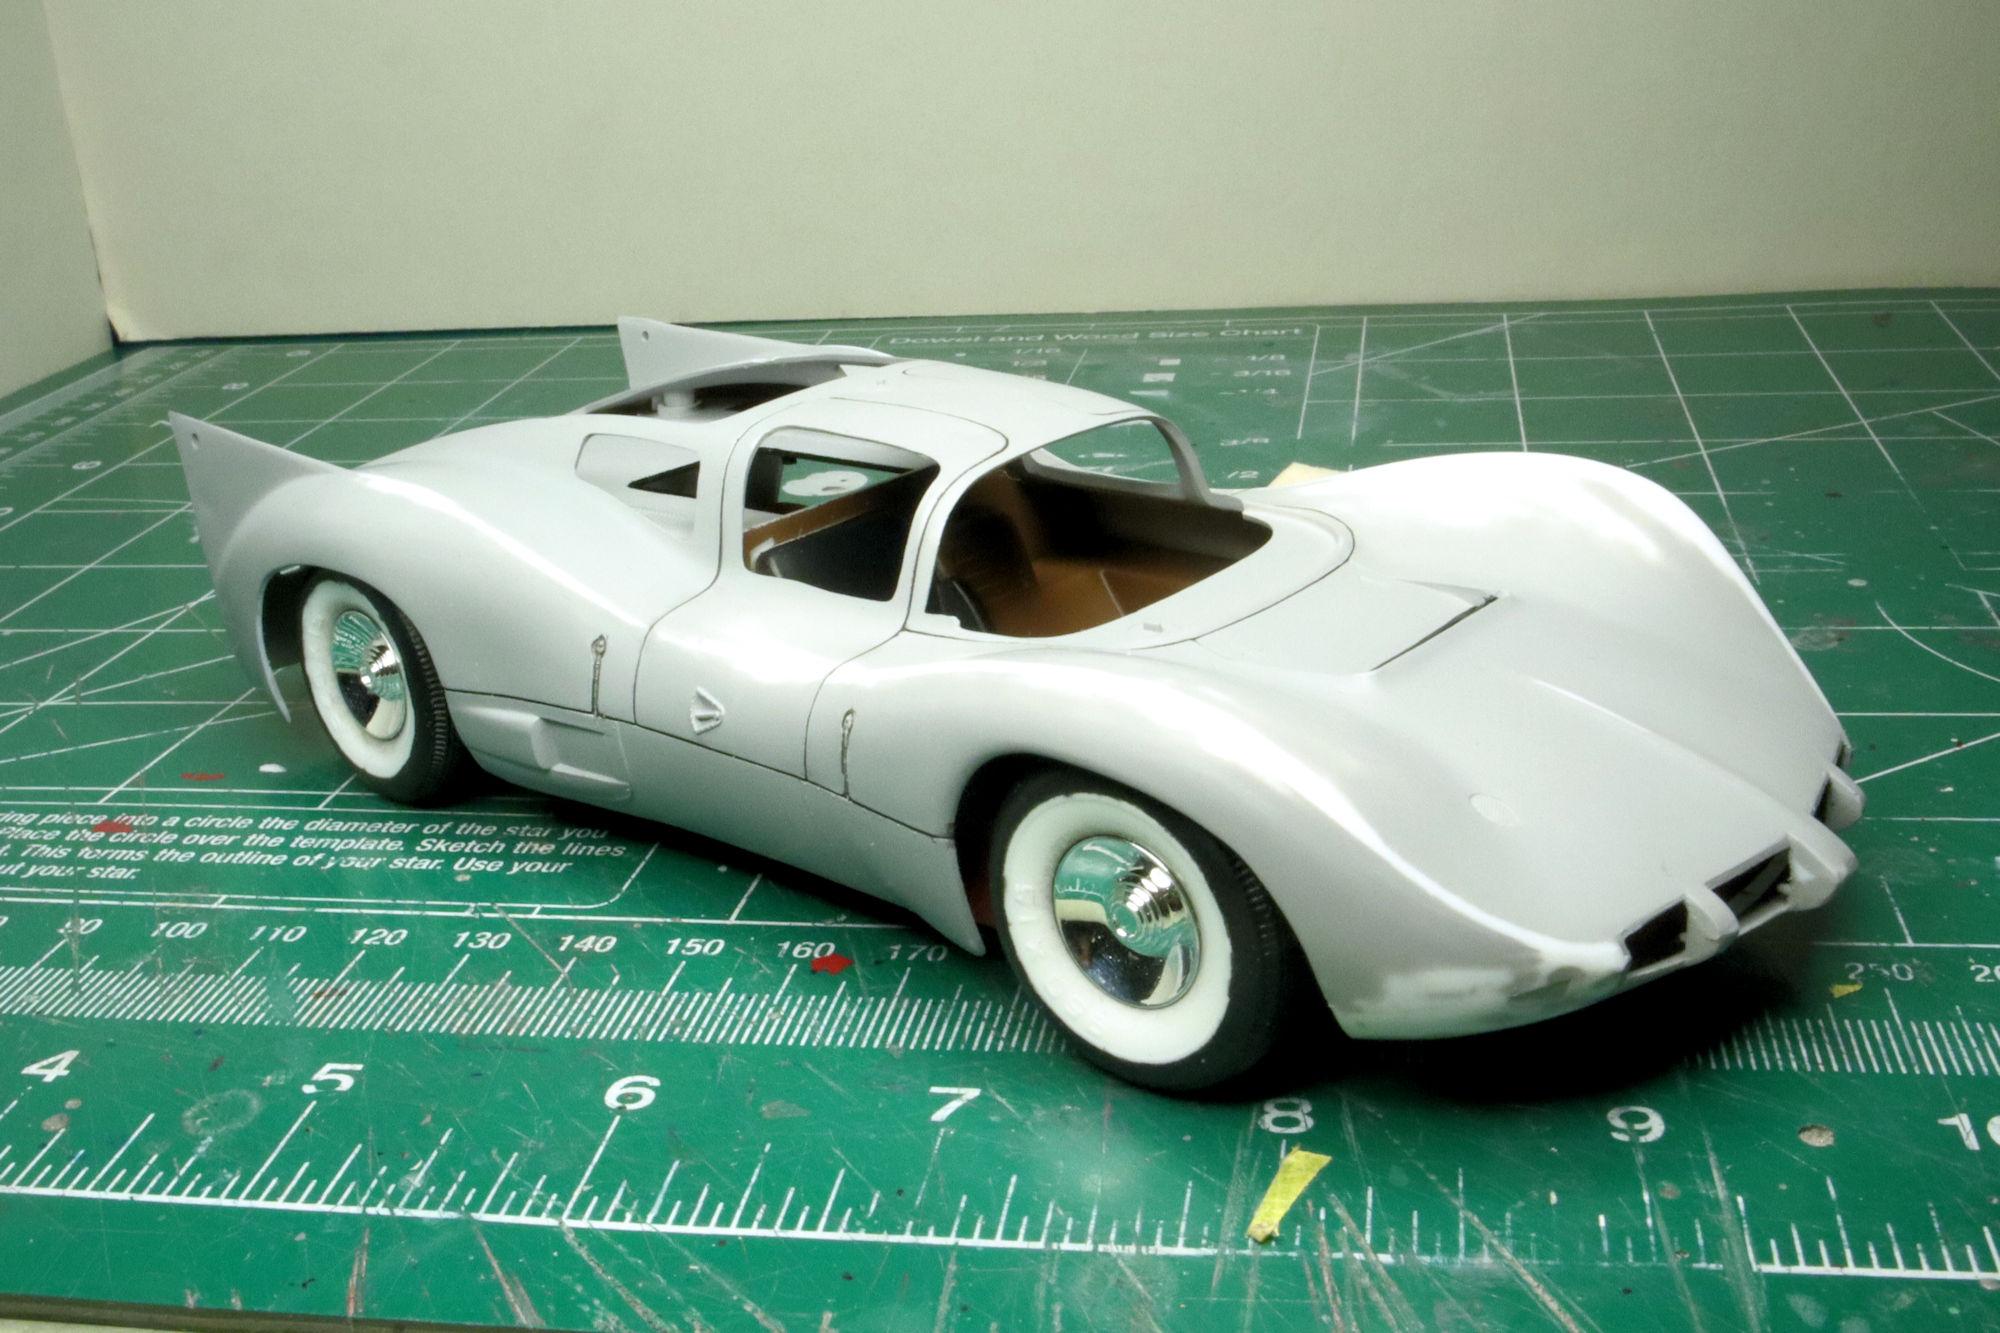
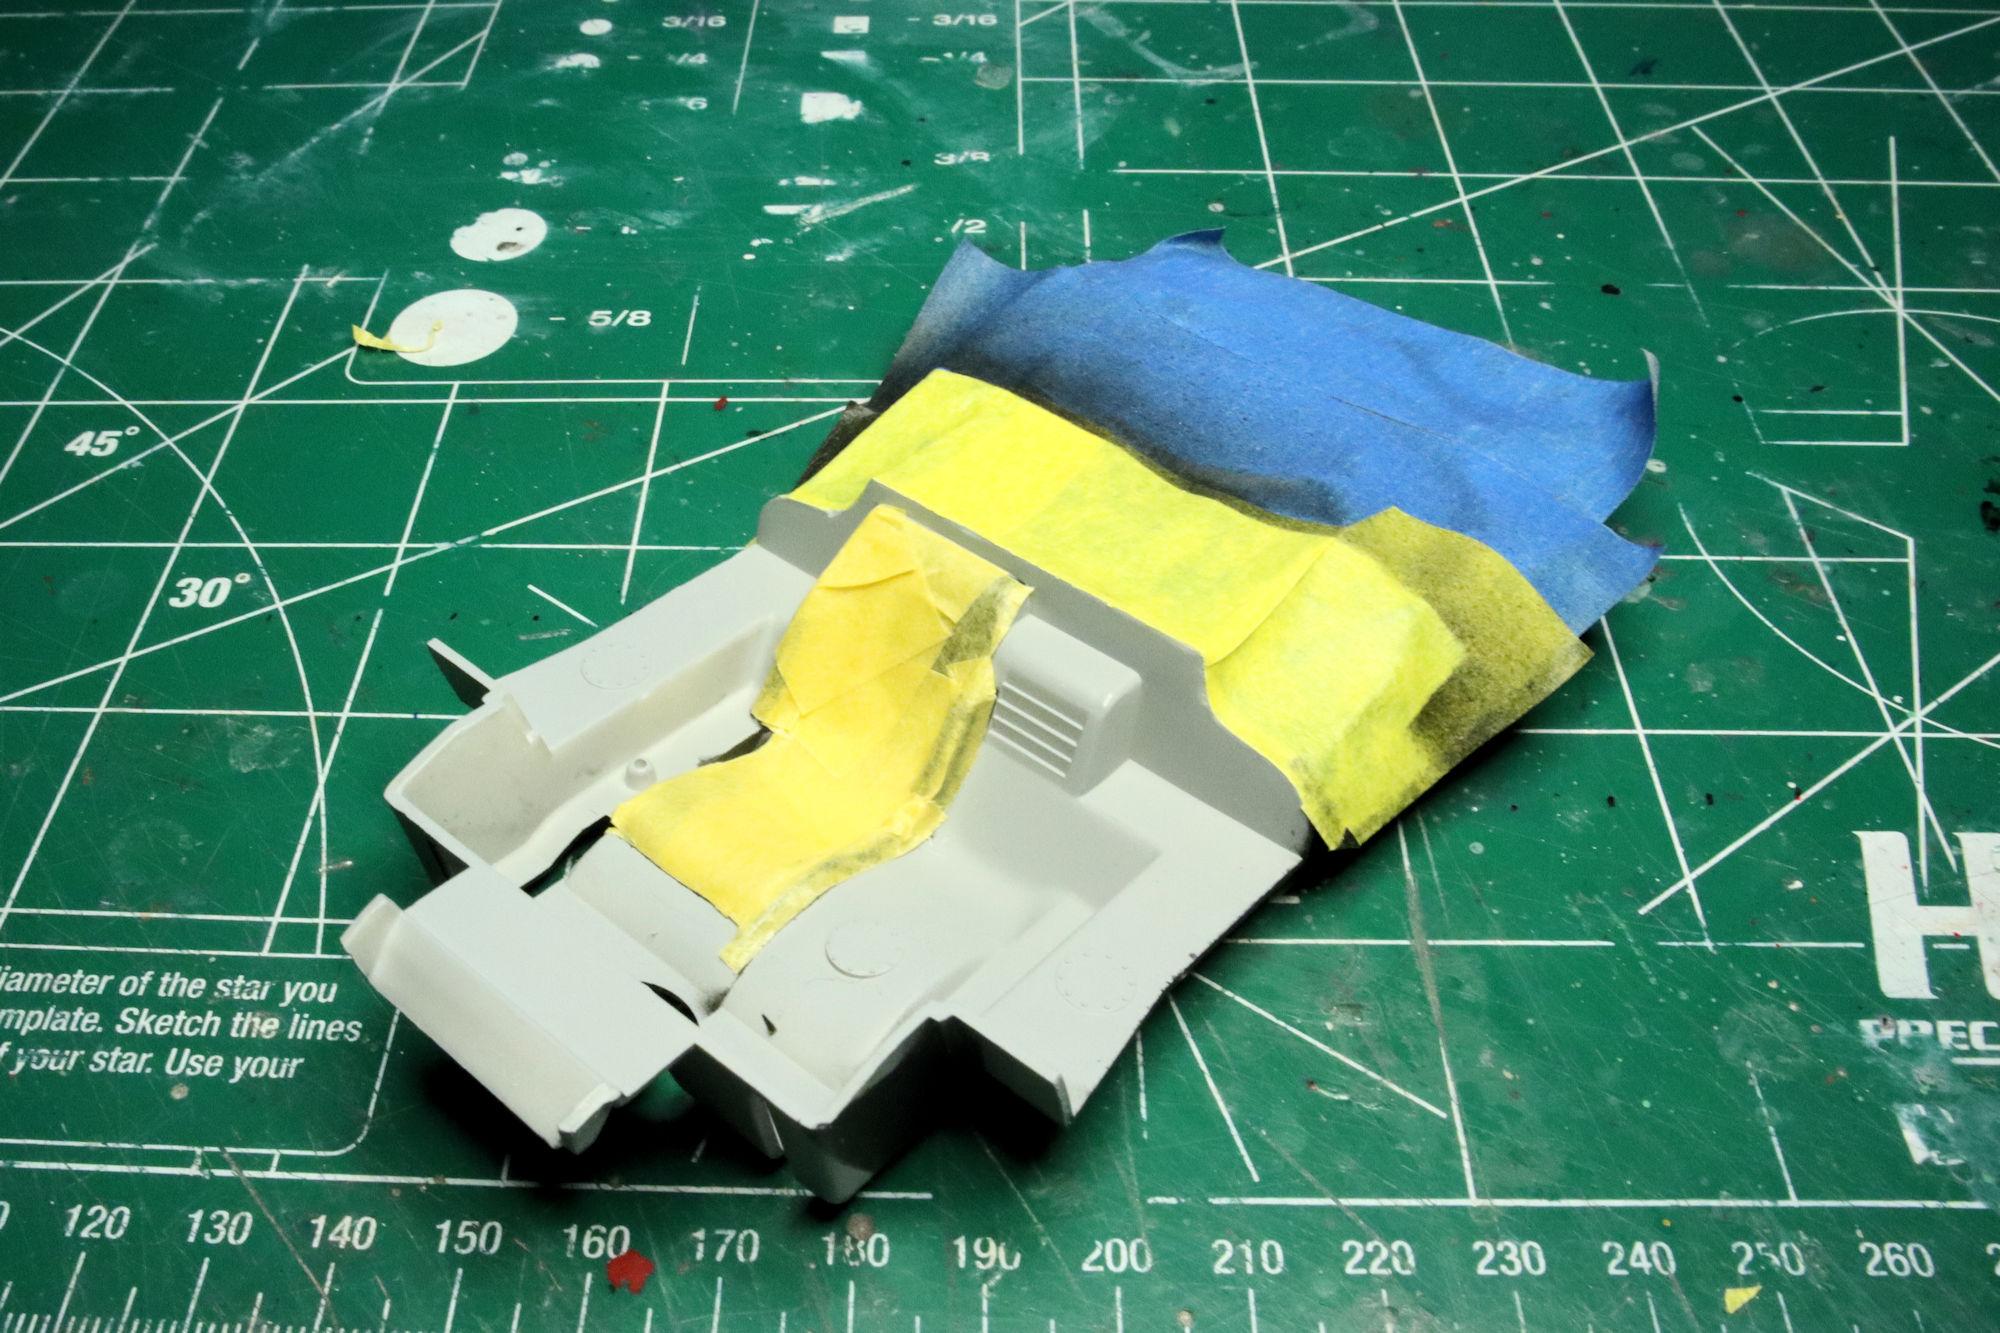
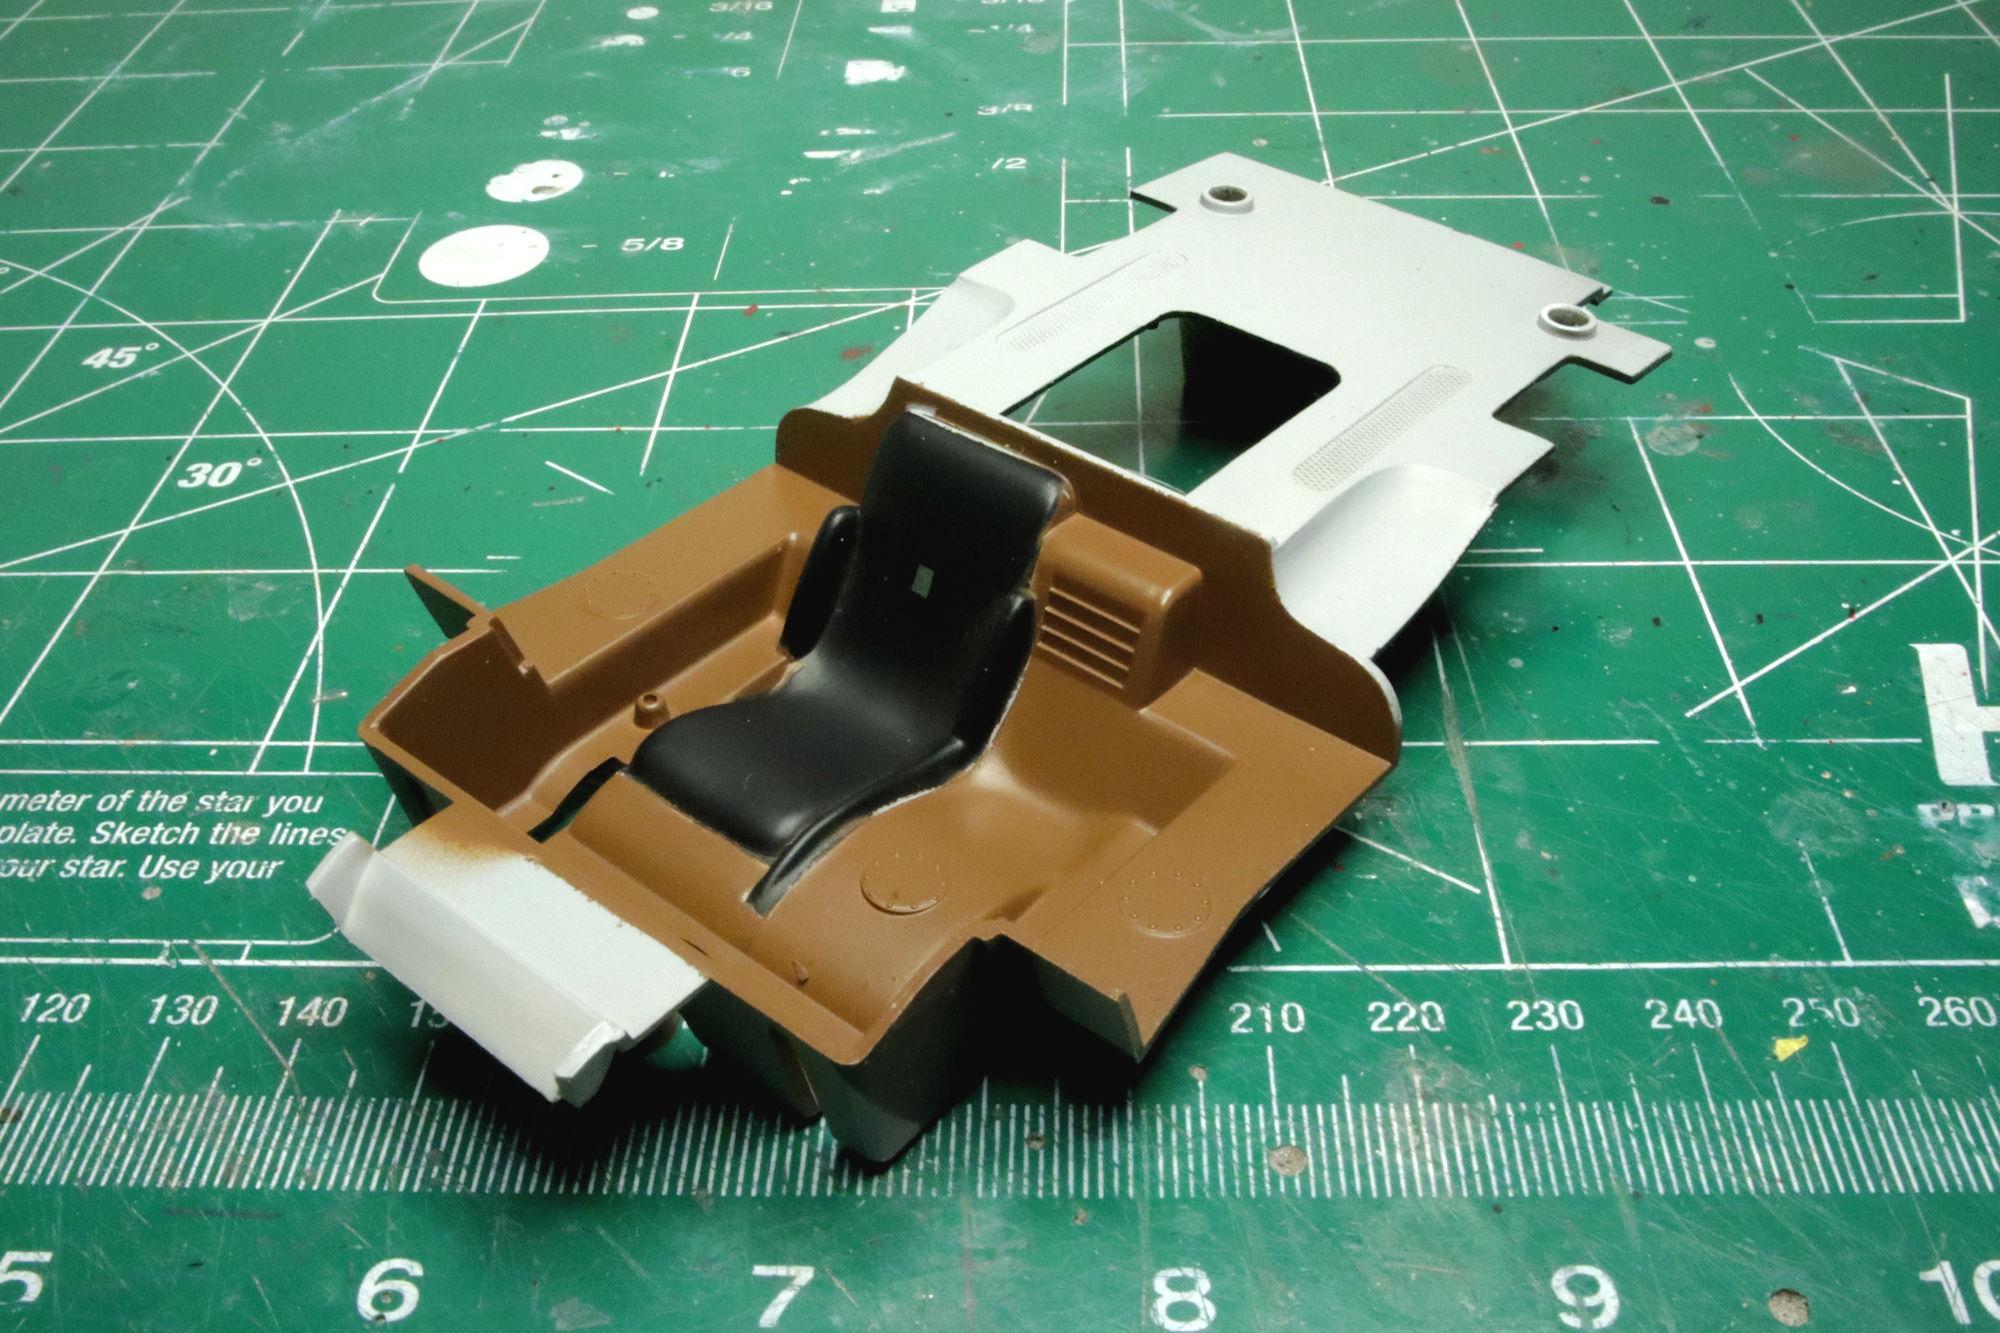
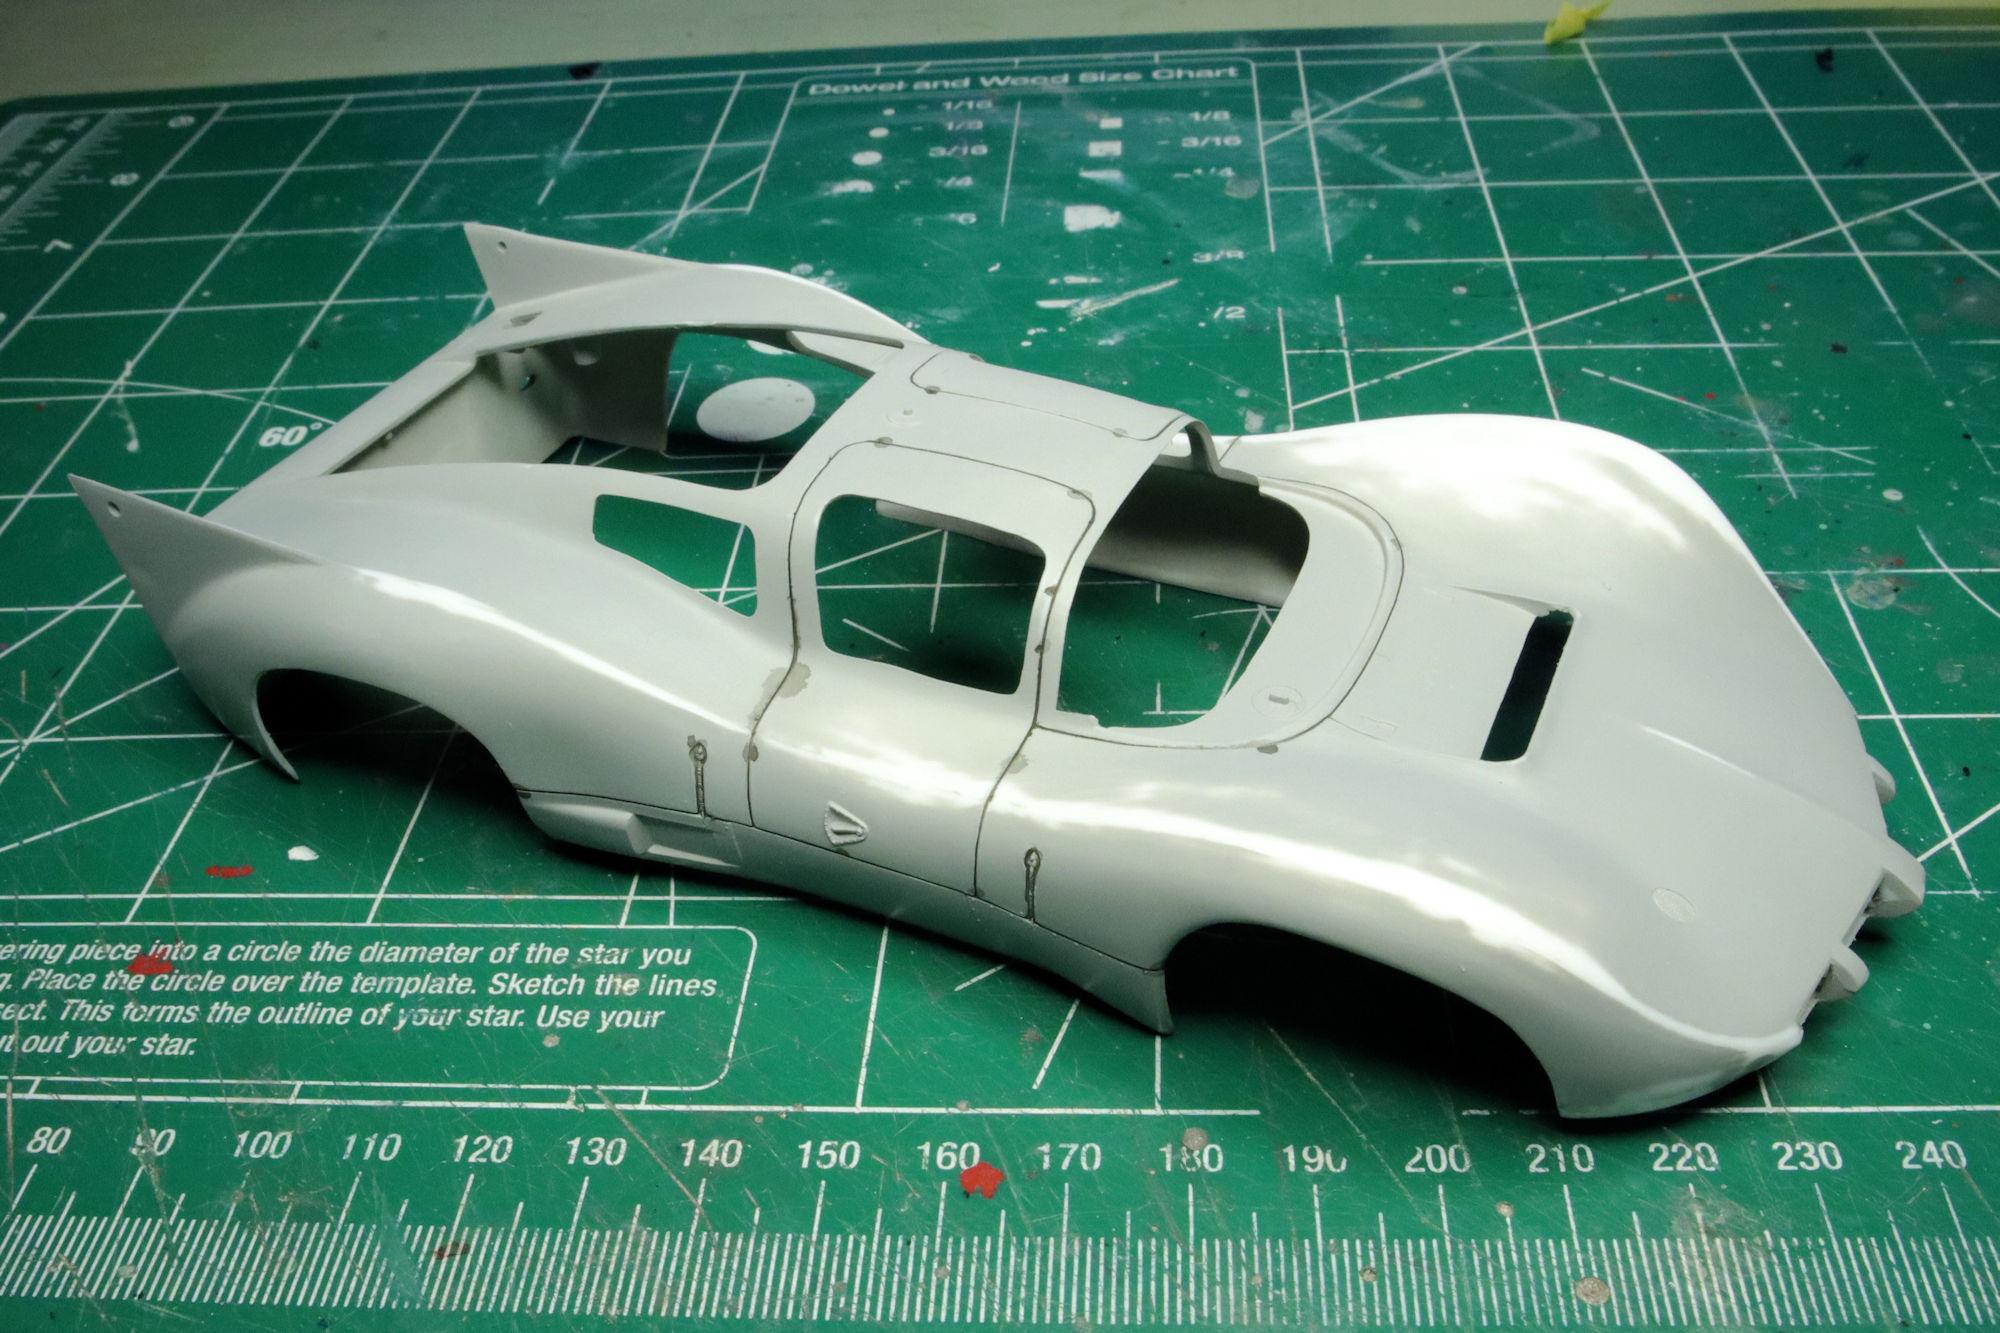
Hello Everybody! With my other two builds wrapping up, I felt it was time to start another. After a good washing, dry off and primer, I started cleaning up the parting lines and flash. There wasn't a whole lot of work to do. The molds seem to be in rather good shape for a sixty year old model kit. Masking the interior. Flat black has been sprayed on seat, and here we see the masking for gloss brown called out for the rest of the interior. The brown is down! I used Tamiya TS-1, Red Brown, it seemed like the right color. Plus, it's the only suitable brown I had at the time. It seems that this will be a pretty quick build. As always, thanks for taking the time to look and please feel free to comment. David G.