Rockford
-
Posts
1,942 -
Joined
-
Last visited
Content Type
Profiles
Forums
Events
Gallery
Everything posted by Rockford
-
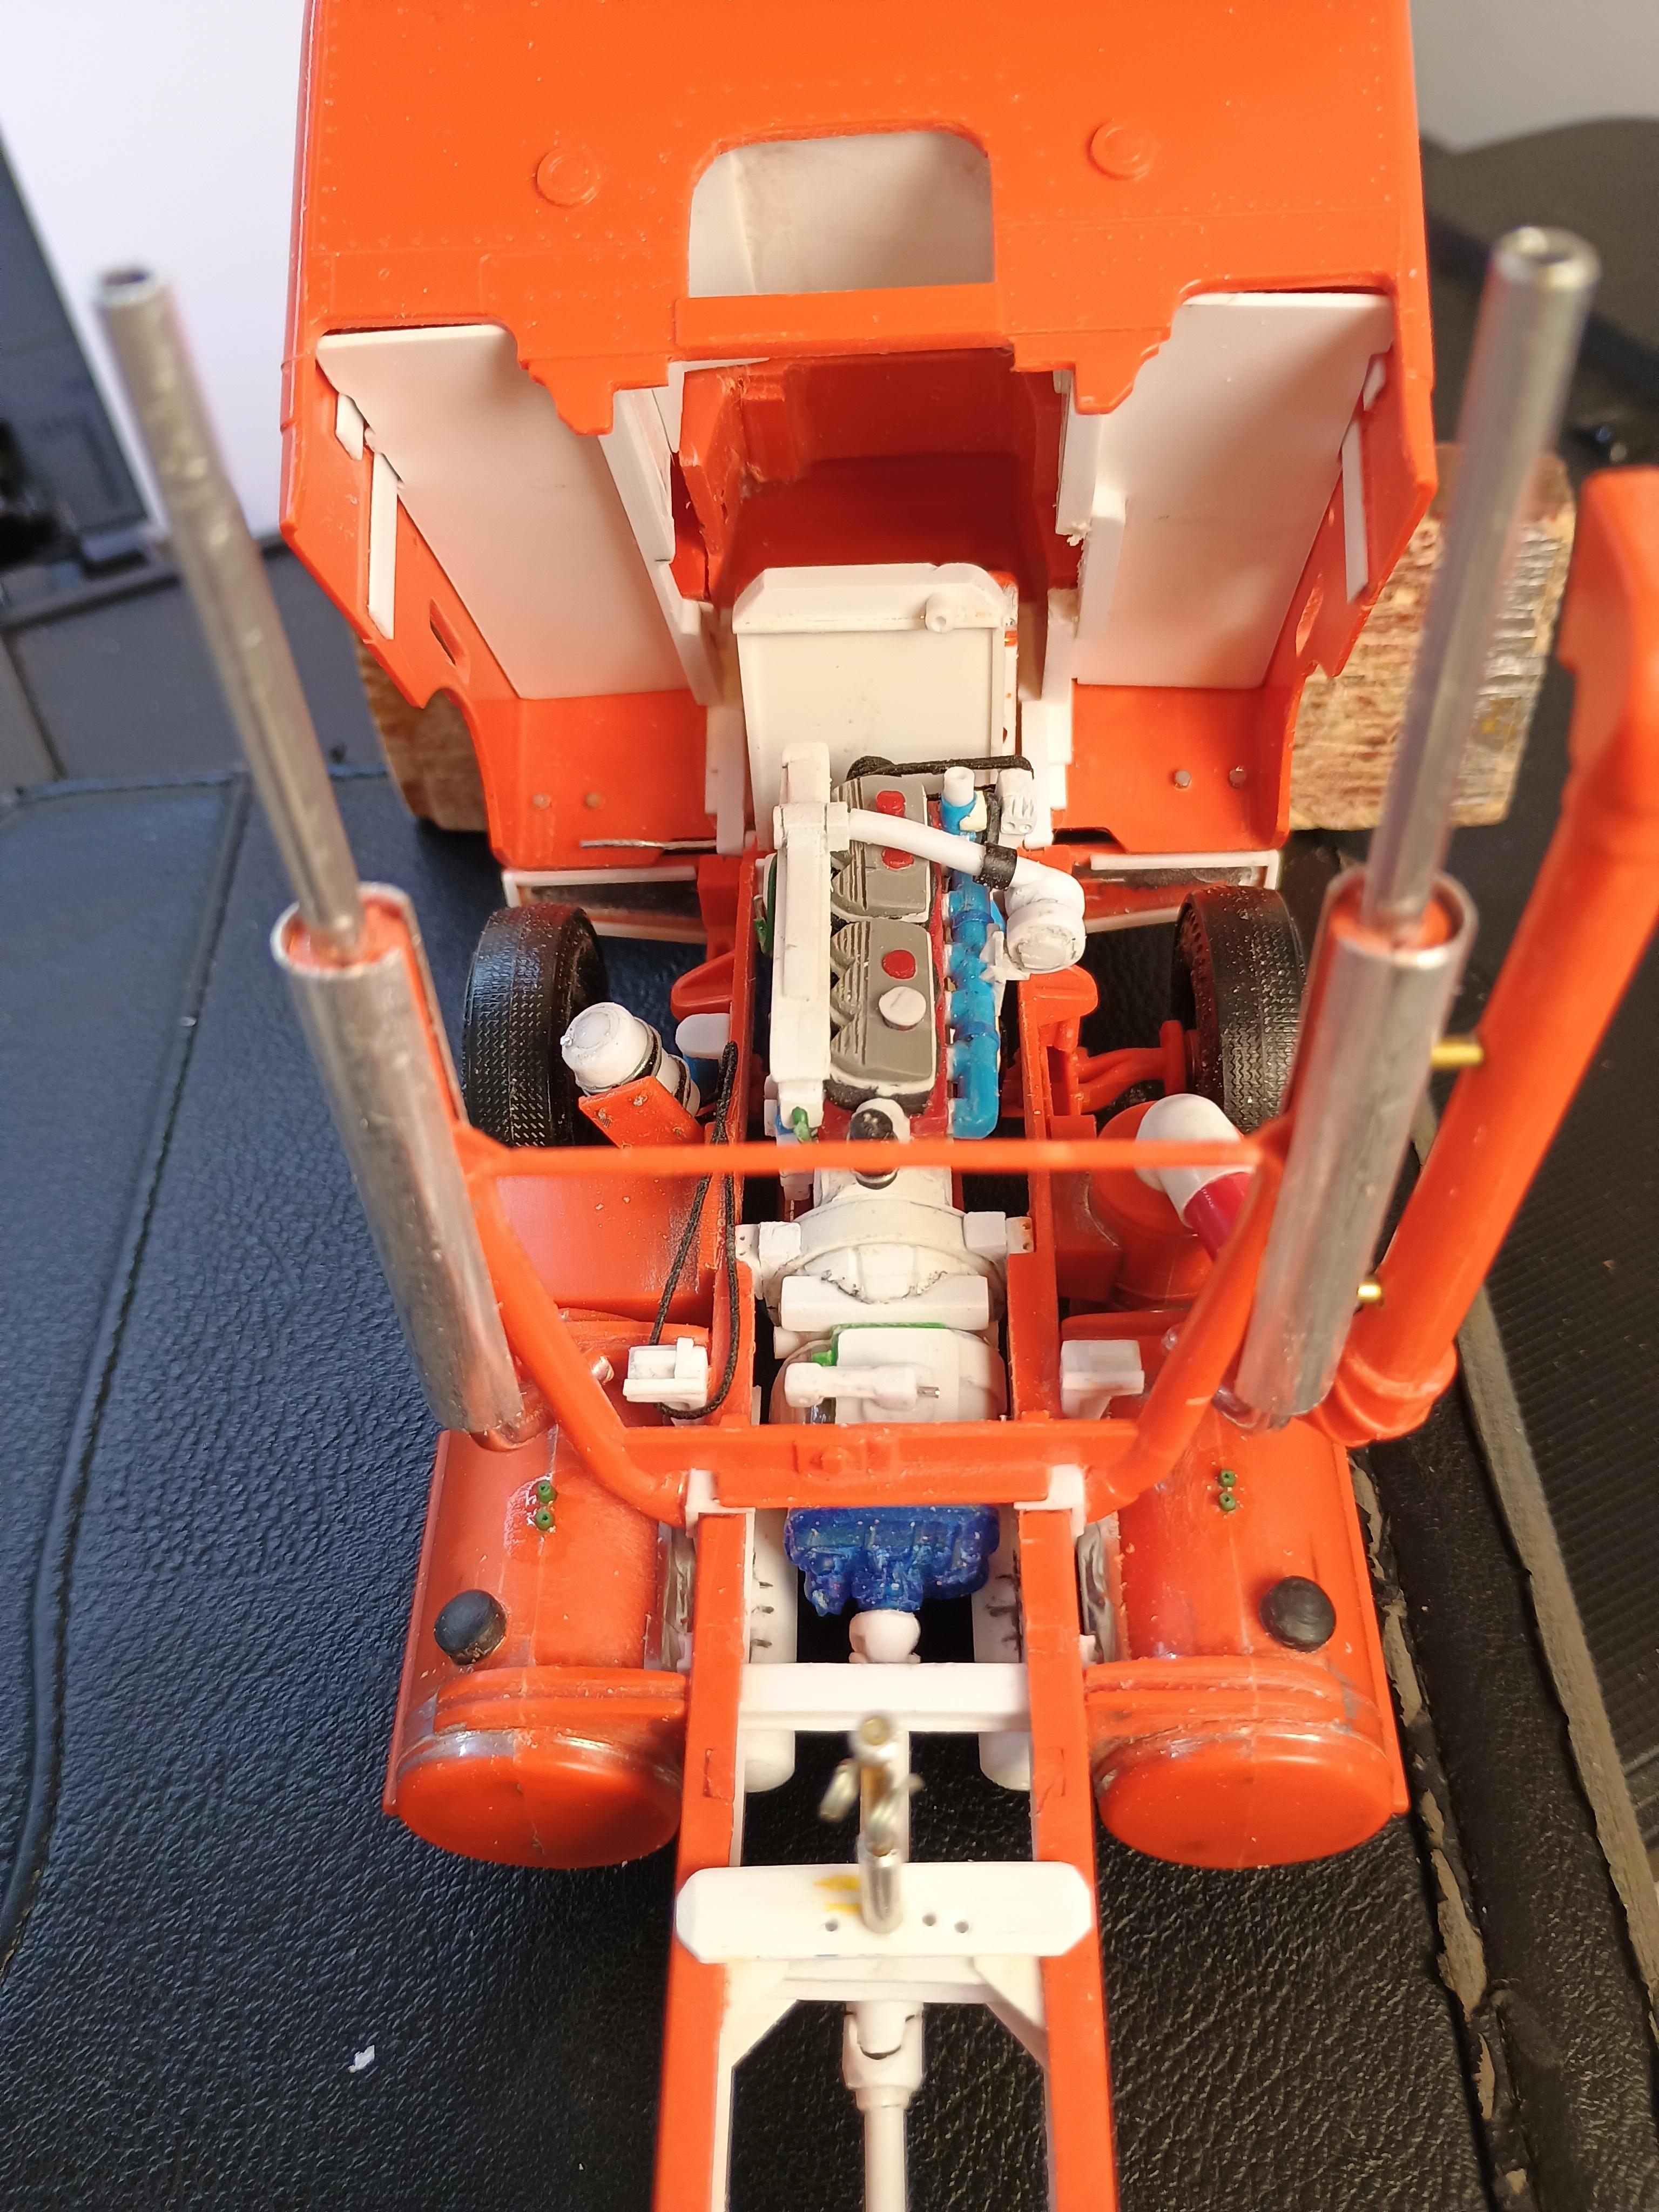
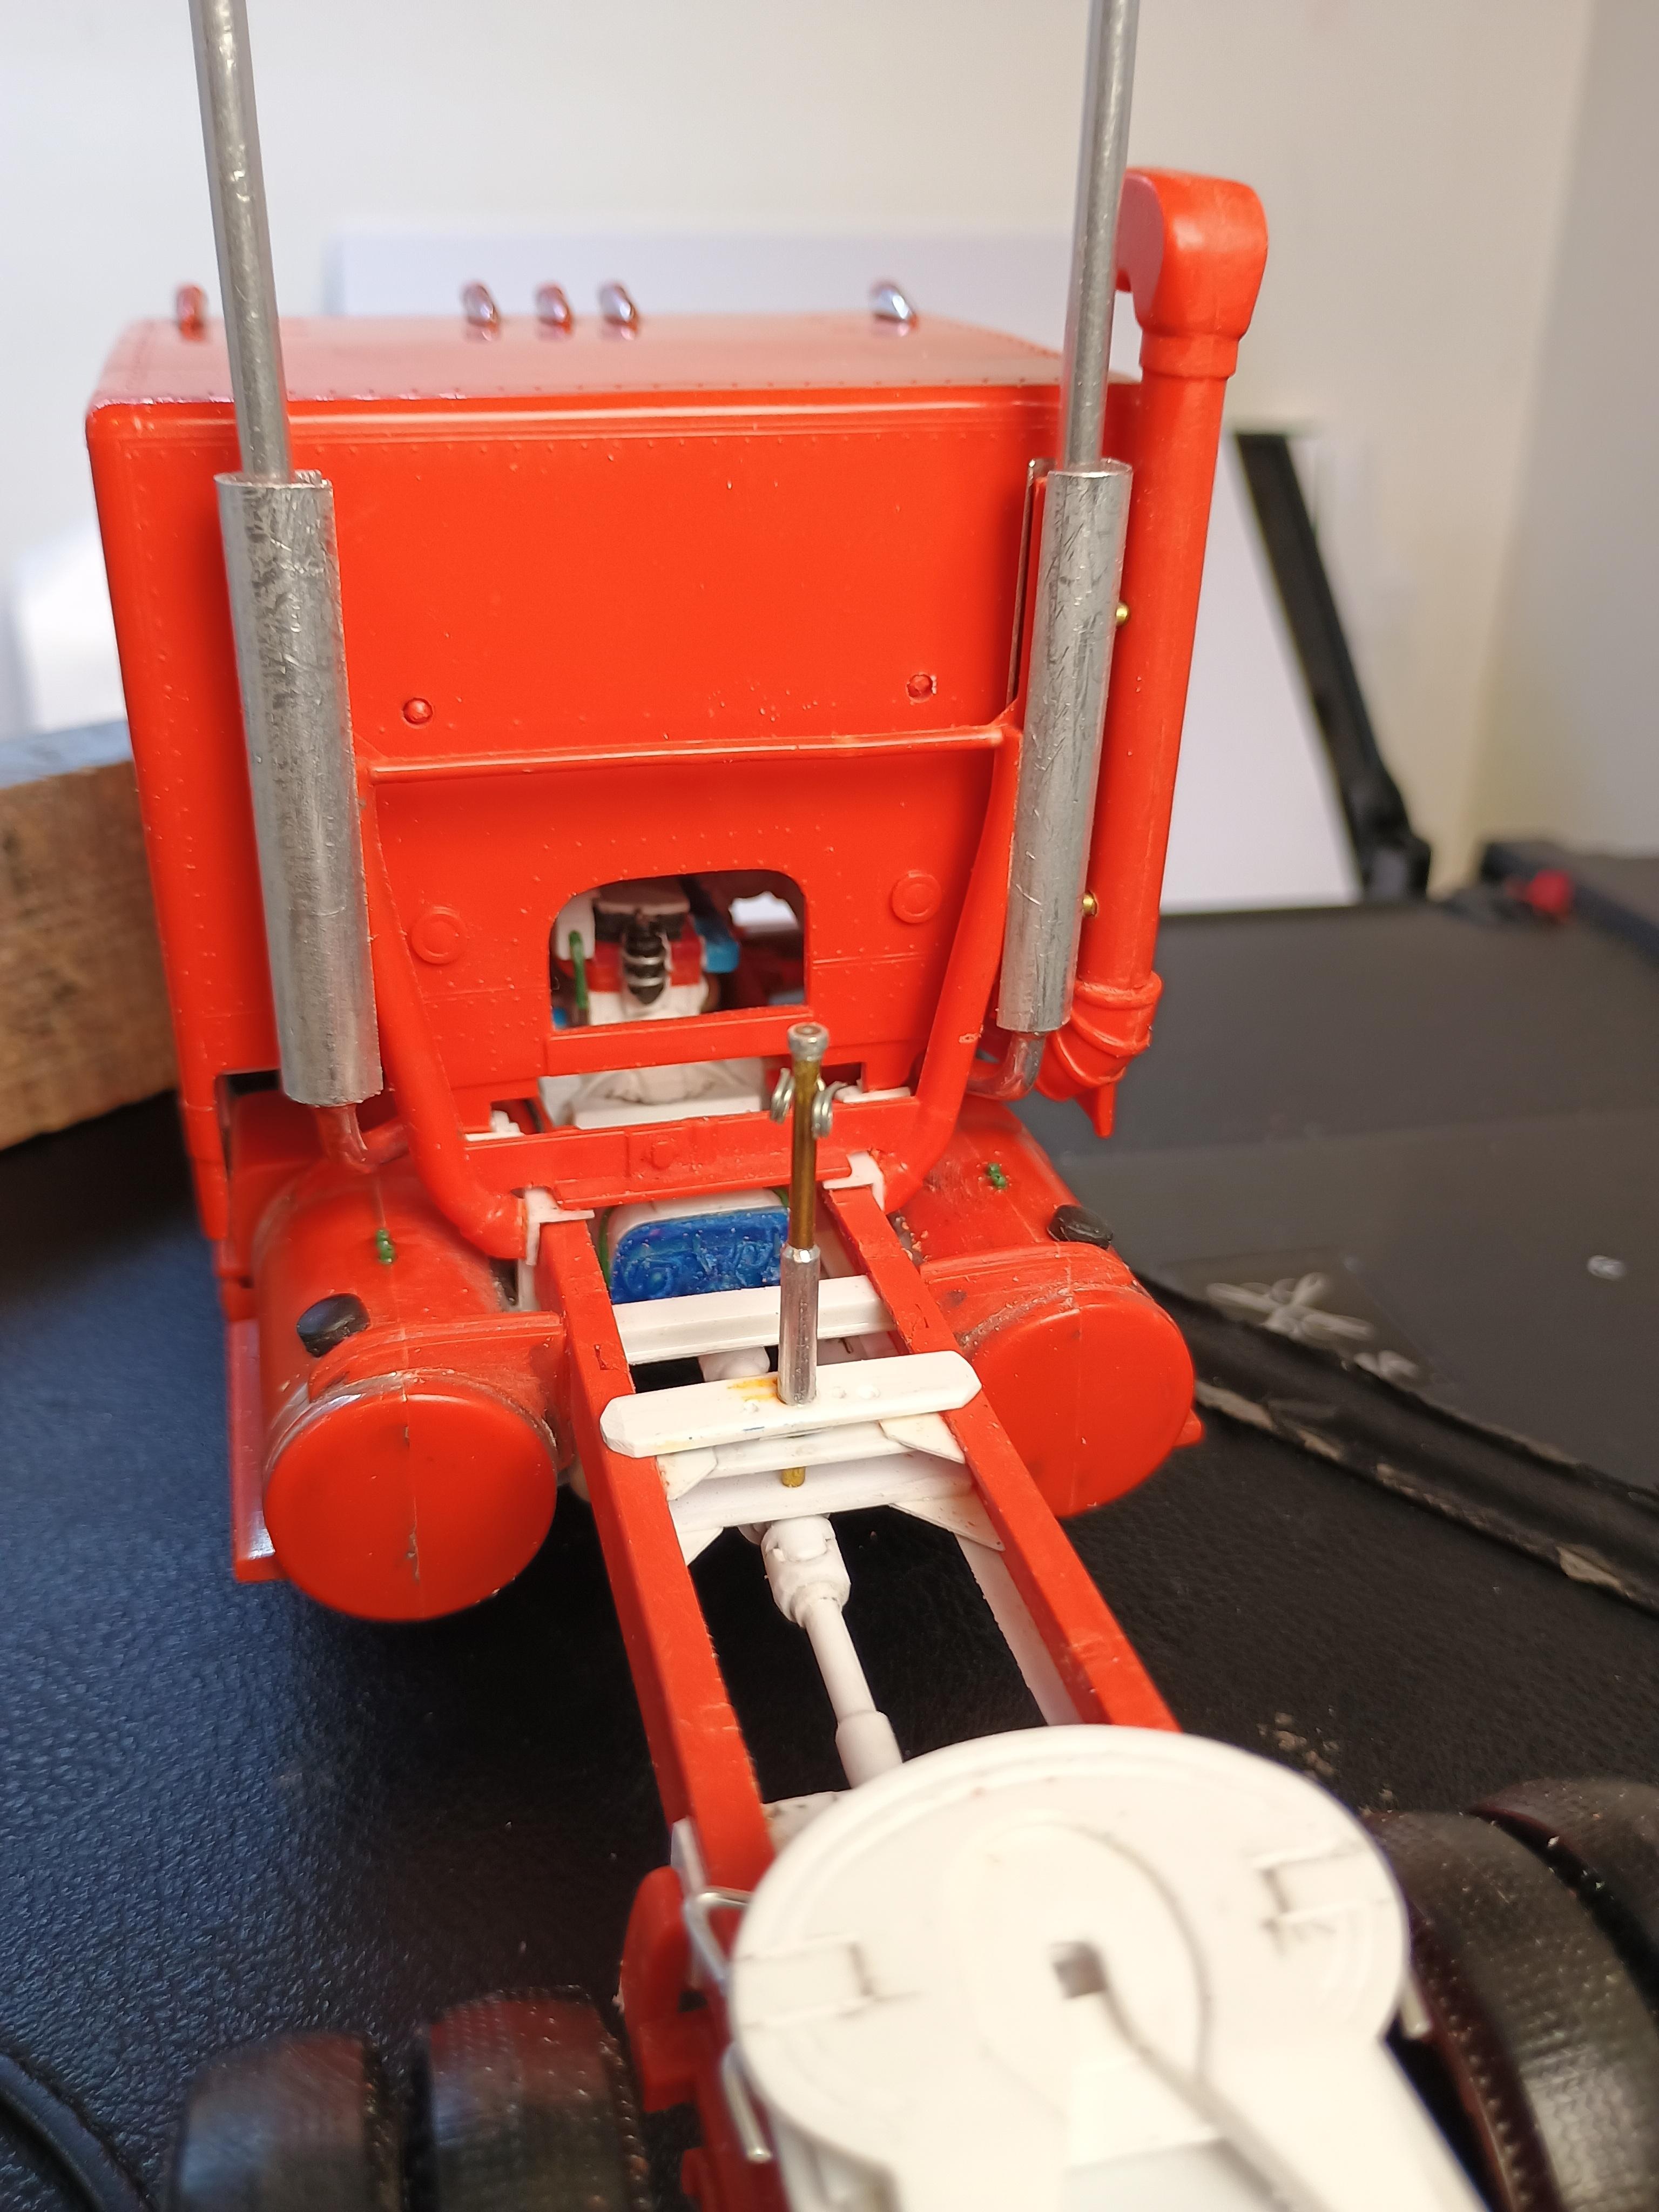
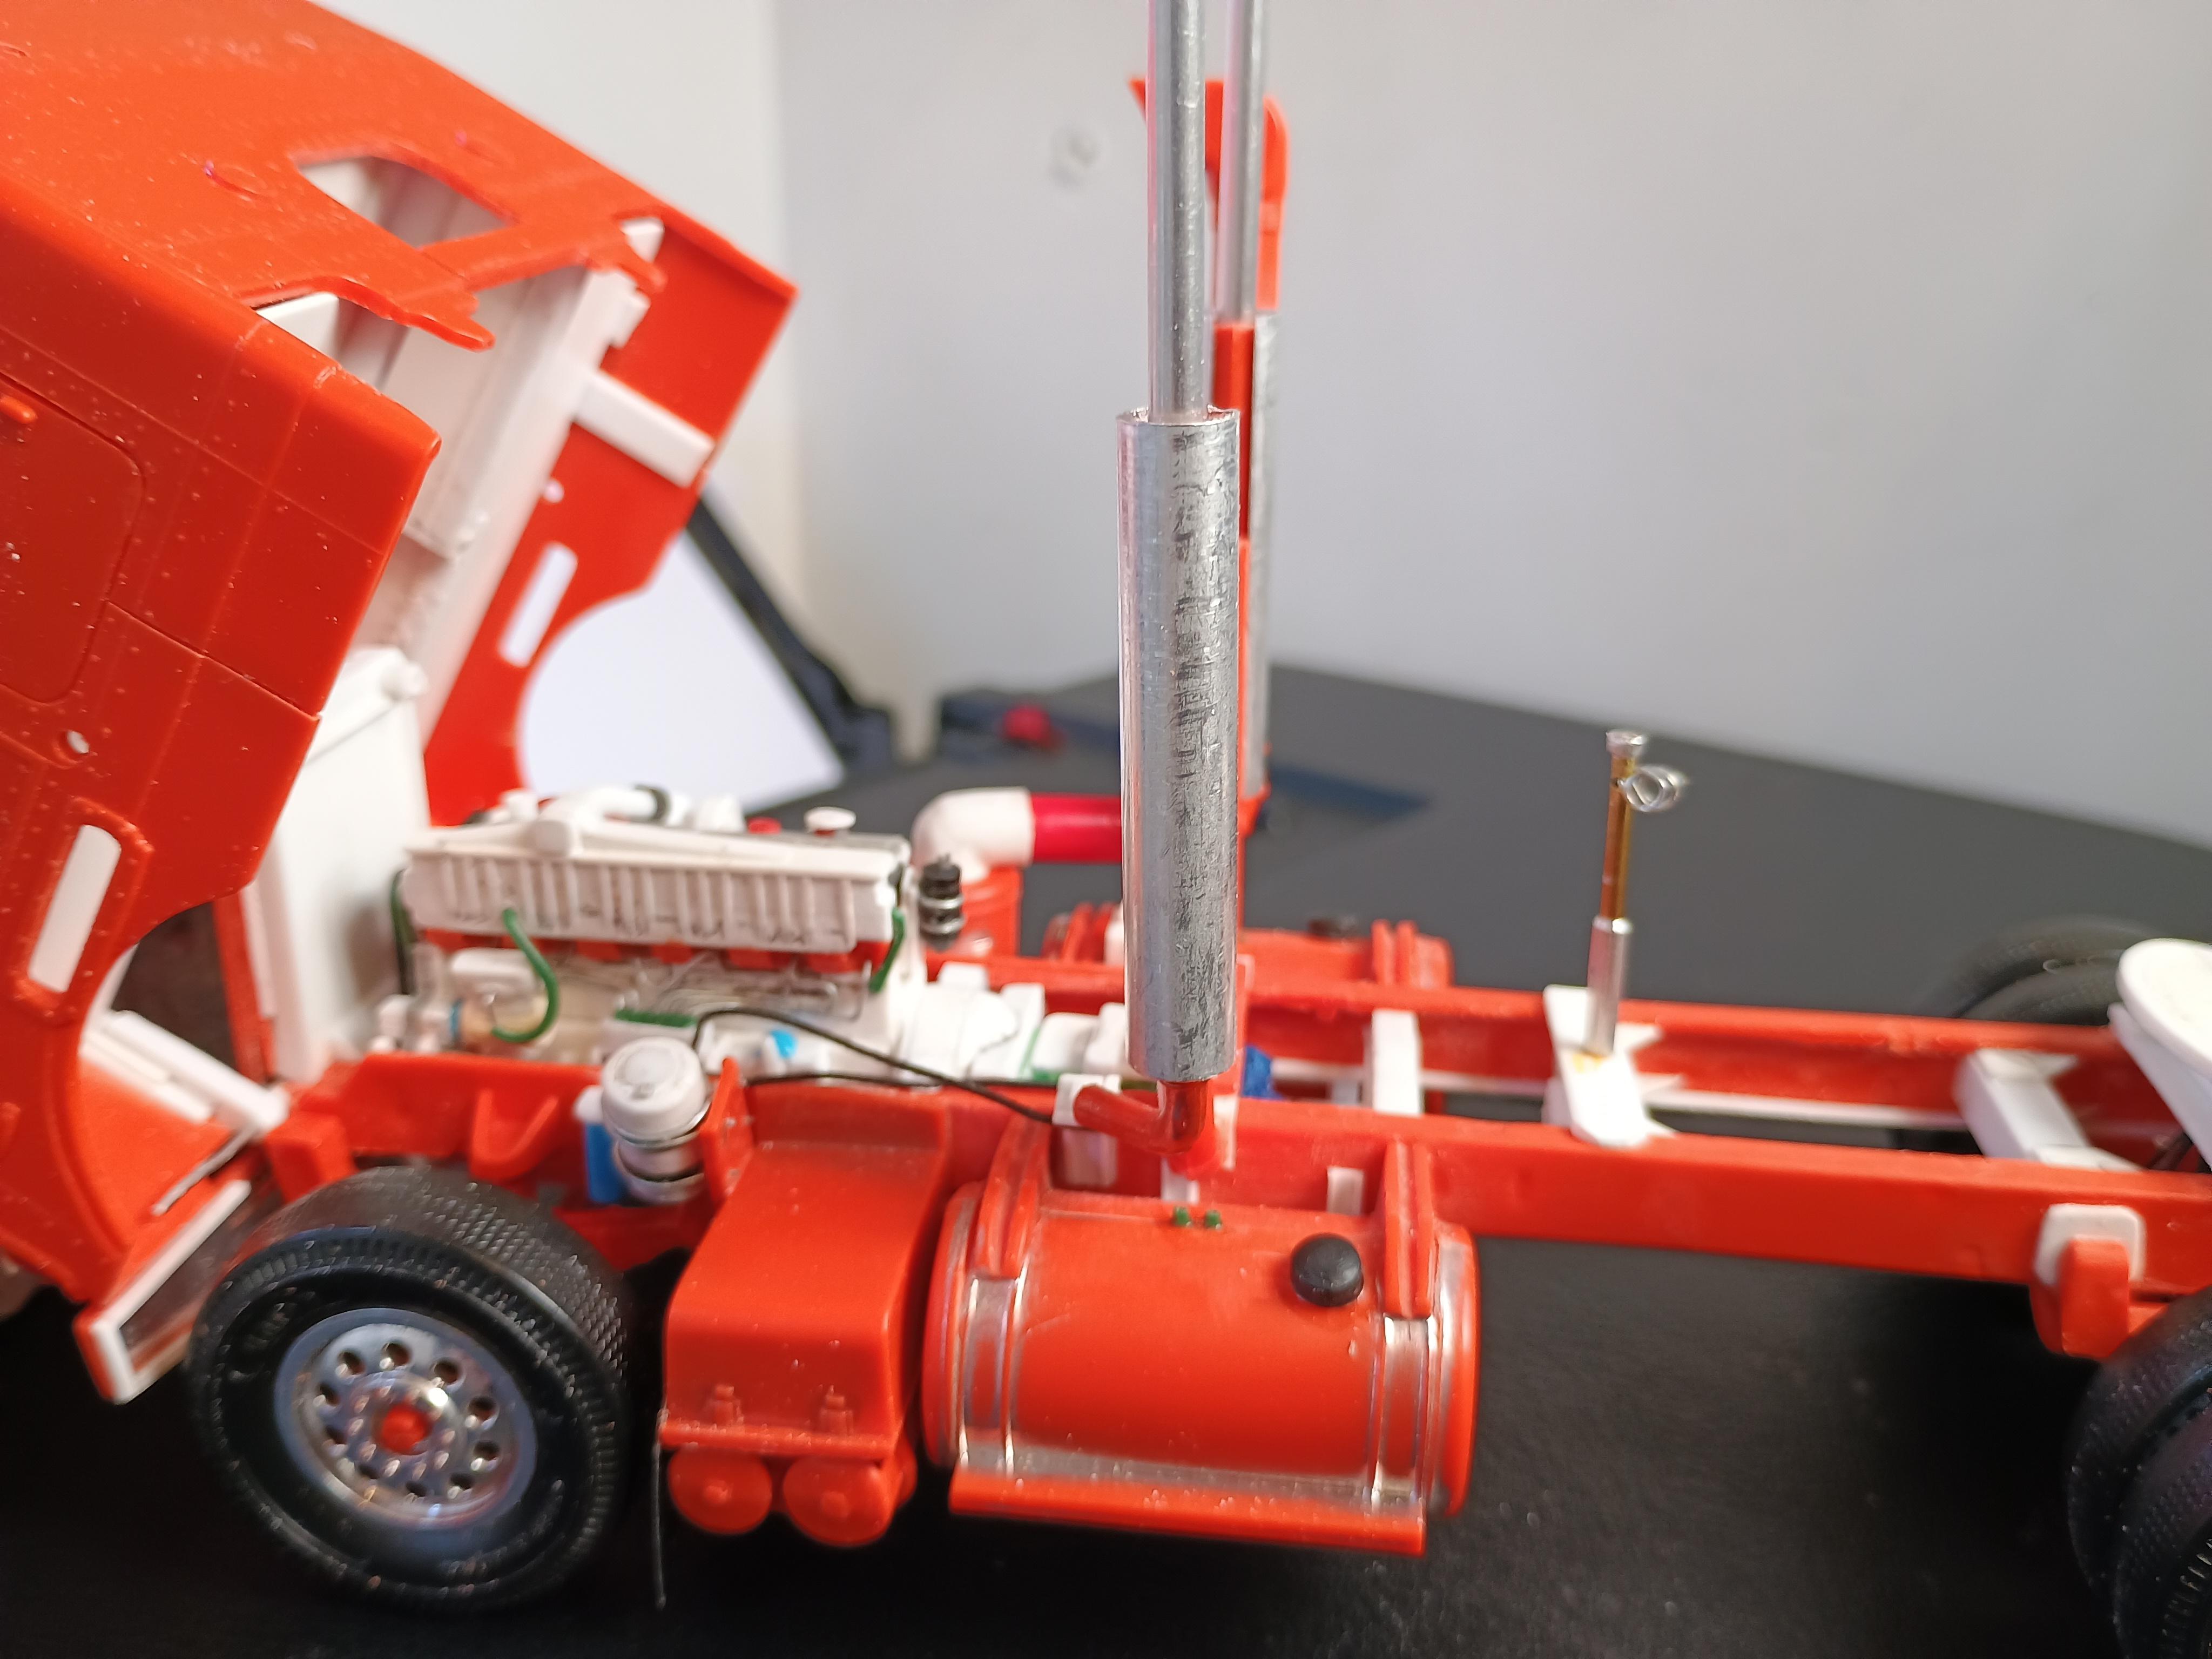
Cleaned up the chassis rails, removing all the remnants of the casting of the inset oil pan etc... Fabbed up a set of engine mounts from plastic card and did a fitting - plopped into place nicely. Had to just do a little bit of an adjustment to the cab floor to clear the turbo. Shortened the driveshaft front section up to the centre bearing. Looking good, just another 30-40 things to do to make it look right: inlet and exhaust pipework, shift lever island, linkage, brake chambers, steering linkage, etc etc etc... All because I wanted something to see through hole at the back of the doghouse!!!!

-

Kenworth aerodyne cabover
Rockford replied to Bronzekeg's topic in WIP: Model Trucks: Big Rigs and Heavy Equipment
Whether it appears black or green it looks spot on! Well done, nearly there. -
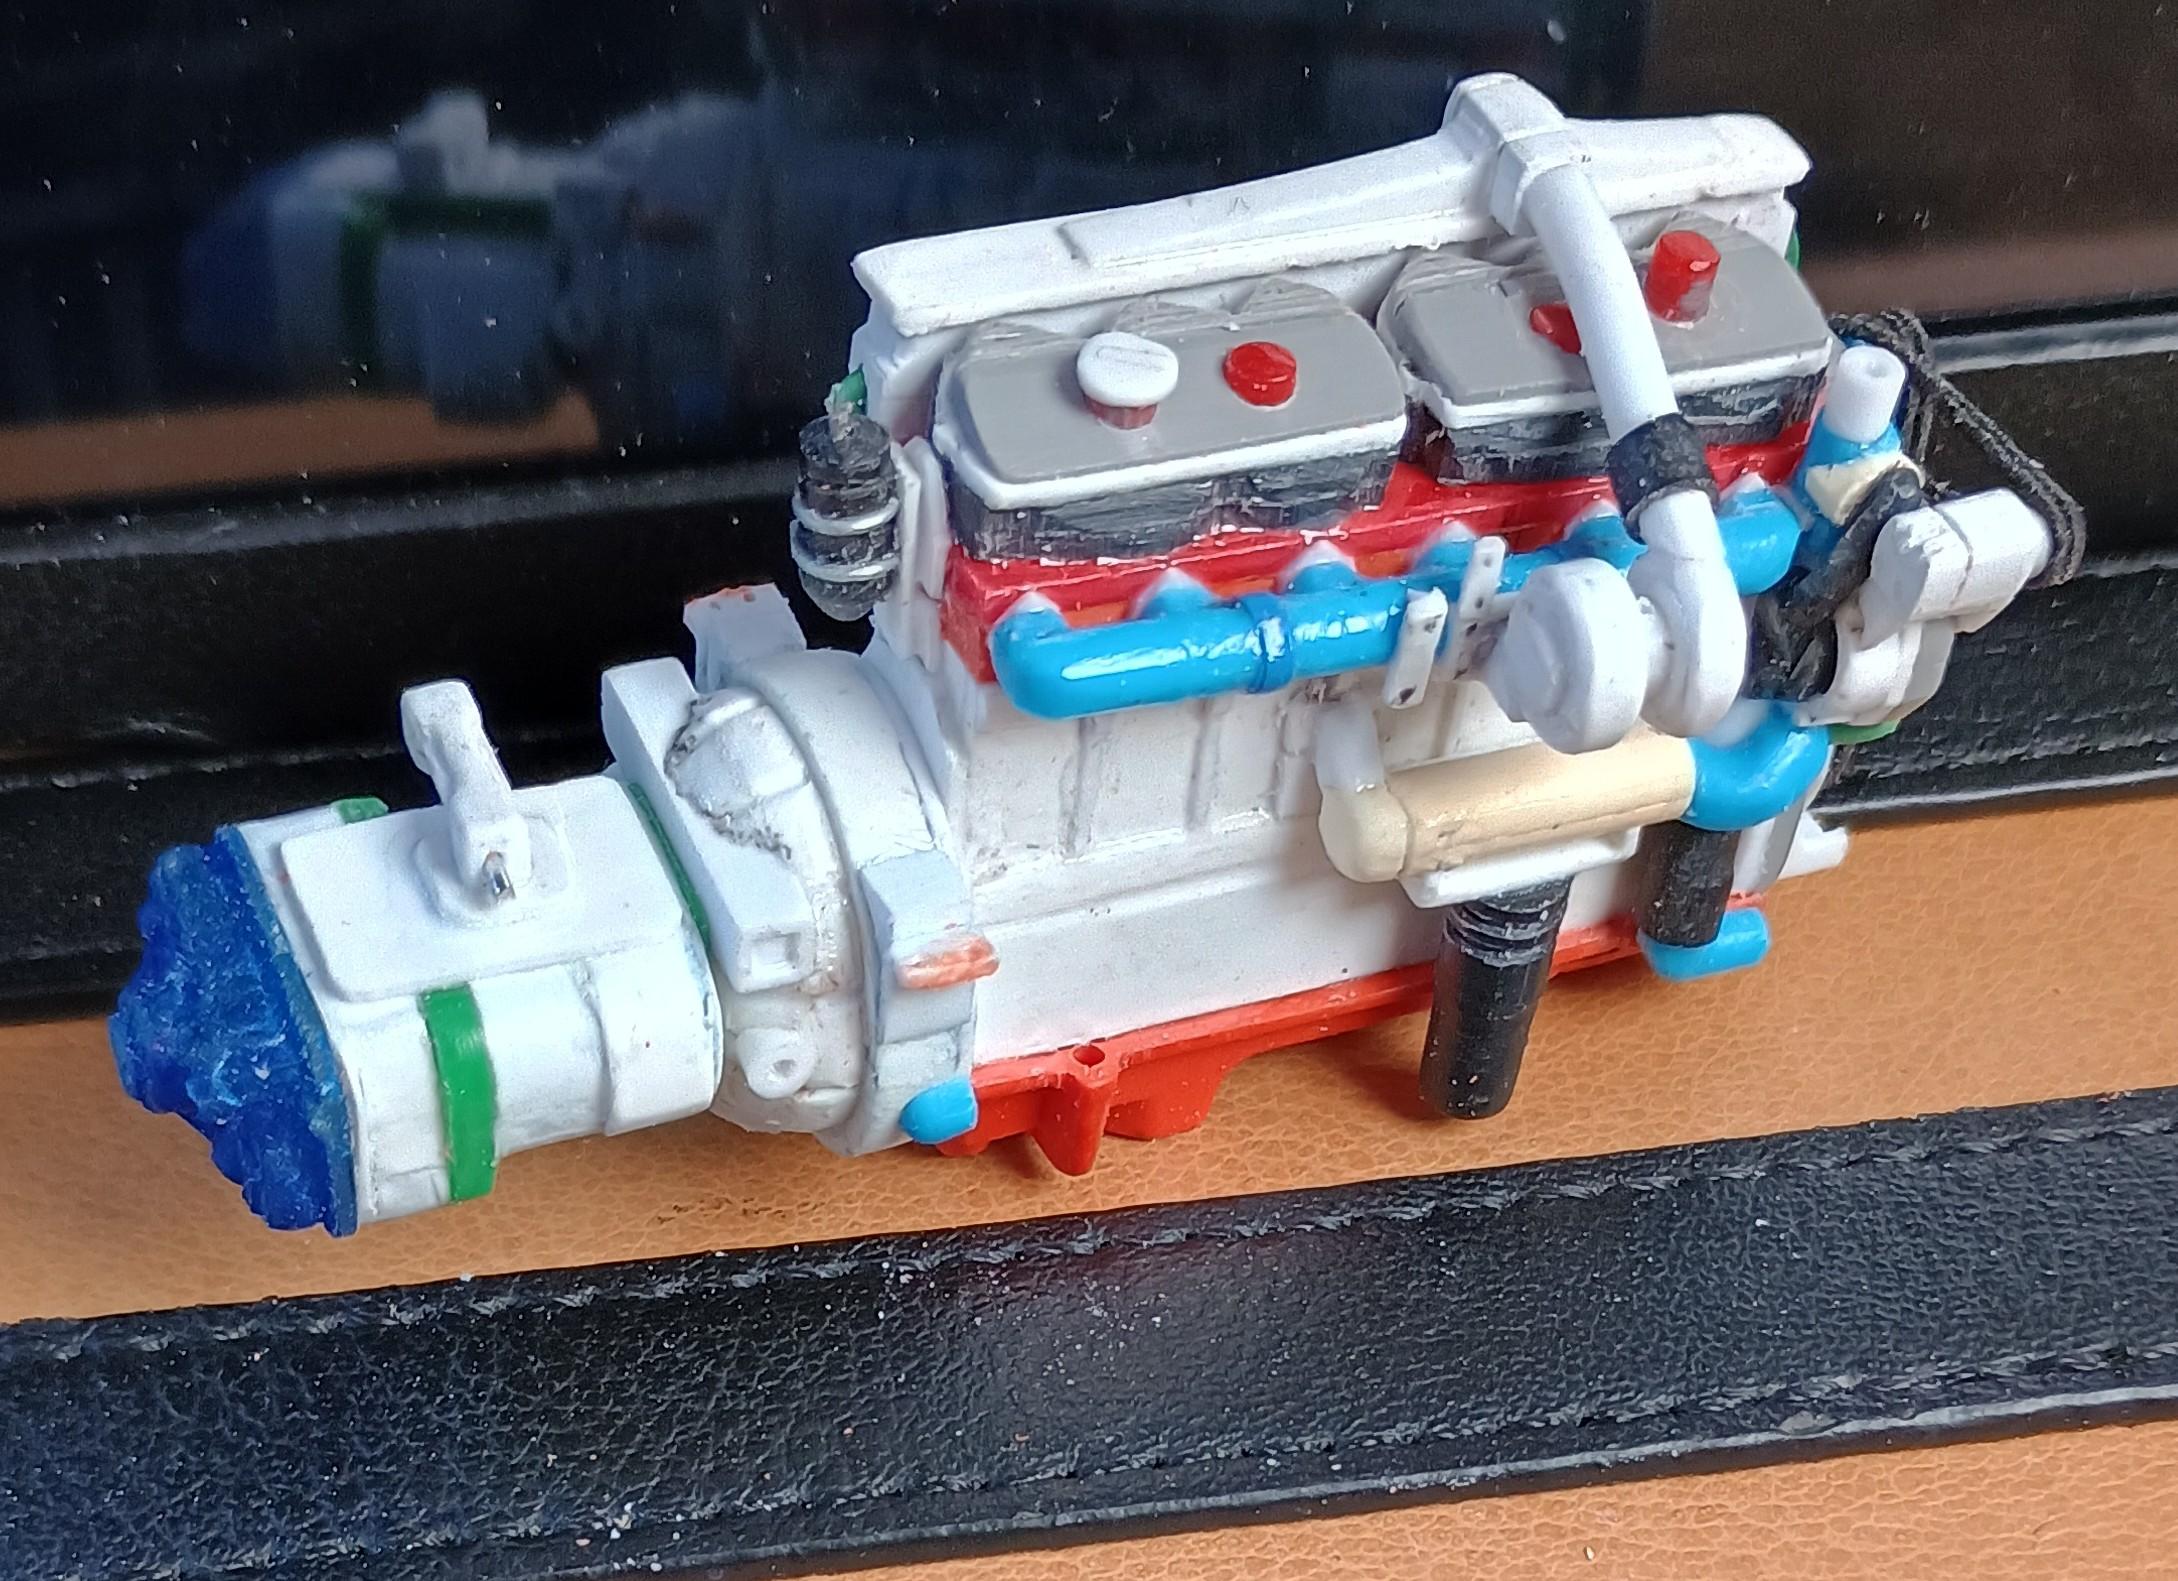
Made a bell housing out of a inner wheel from the Revell Pontiac Firebird. Shaped it in the drill and added the top mounting lugs (not used on this truck), the inspection cover on the bottom and the clutch release fork shaft bosses. Engine and transmission mated together. I have started cleaning the chassis to accept the engine.
-
Service Truck Kitbash
Rockford replied to PHPaul's topic in WIP: Model Trucks: Big Rigs and Heavy Equipment
Brave call on the doors. It looks just as good, and you could have been drawn down a wormhole of what goes in the lockers! -
Kenworth aerodyne cabover
Rockford replied to Bronzekeg's topic in WIP: Model Trucks: Big Rigs and Heavy Equipment
James Pretty on YT has two K100s with that stripe layout. Looks great. -
Fruehauf Flatbed
Rockford replied to DRIPTROIT 71's topic in Model Trucks: Big Rigs and Heavy Equipment
Love it! -
Kenworth aerodyne cabover
Rockford replied to Bronzekeg's topic in WIP: Model Trucks: Big Rigs and Heavy Equipment
Coming together nicely, this would have taken me years to get this far! Going to look very tidy when it's done. -
This truck aint going nowhere without no gearbox. After successfully casting the rear causing that houses the range change and the splitter, I needed to formulate a plan to build the main casing. Looking at the Ford unit I deduced that the main casing could be sliced into three main cross sections each with their own profile. I built the rearmost sort out of shrapnel on an end plate, then made a thin middle slice out of a piece of green offcut from a KW T600. The forward section was the trickiest, I copied the layout of the real thing and placed two pieces of tube where the countershafts would be because they form dictate the shape of the casing, then built the rest of the casing around them, adding the various bulges with dtrips of card where necessary. A good session with my files, finessing the contours and I don't think it looks bad at all for an afternoon's work and a first try. Need to leave it to set properly and then finish it off and add a bell housing.
-
Interior looks great, just the right colour. The wrecker looks excellent, I prefer the old Holmes twin boom jobs even though the modern kit is much more capable.
-
Revell's Peterbilt 359: WIP
Rockford replied to David G.'s topic in WIP: Model Trucks: Big Rigs and Heavy Equipment
Like the job you made of the fuel tanks! -
Alaskan Hauler refurbishing project
Rockford replied to Jürgen M.'s topic in Model Trucks: Big Rigs and Heavy Equipment
Cleverly done, nice work. -
Really nice bread-and-butter truck. Backbone of the industry that type of machine.
-
1974 Peterbilt 352
Rockford replied to DRIPTROIT 71's topic in Model Trucks: Big Rigs and Heavy Equipment
That's a little stunner! Like the old Cat engine. -
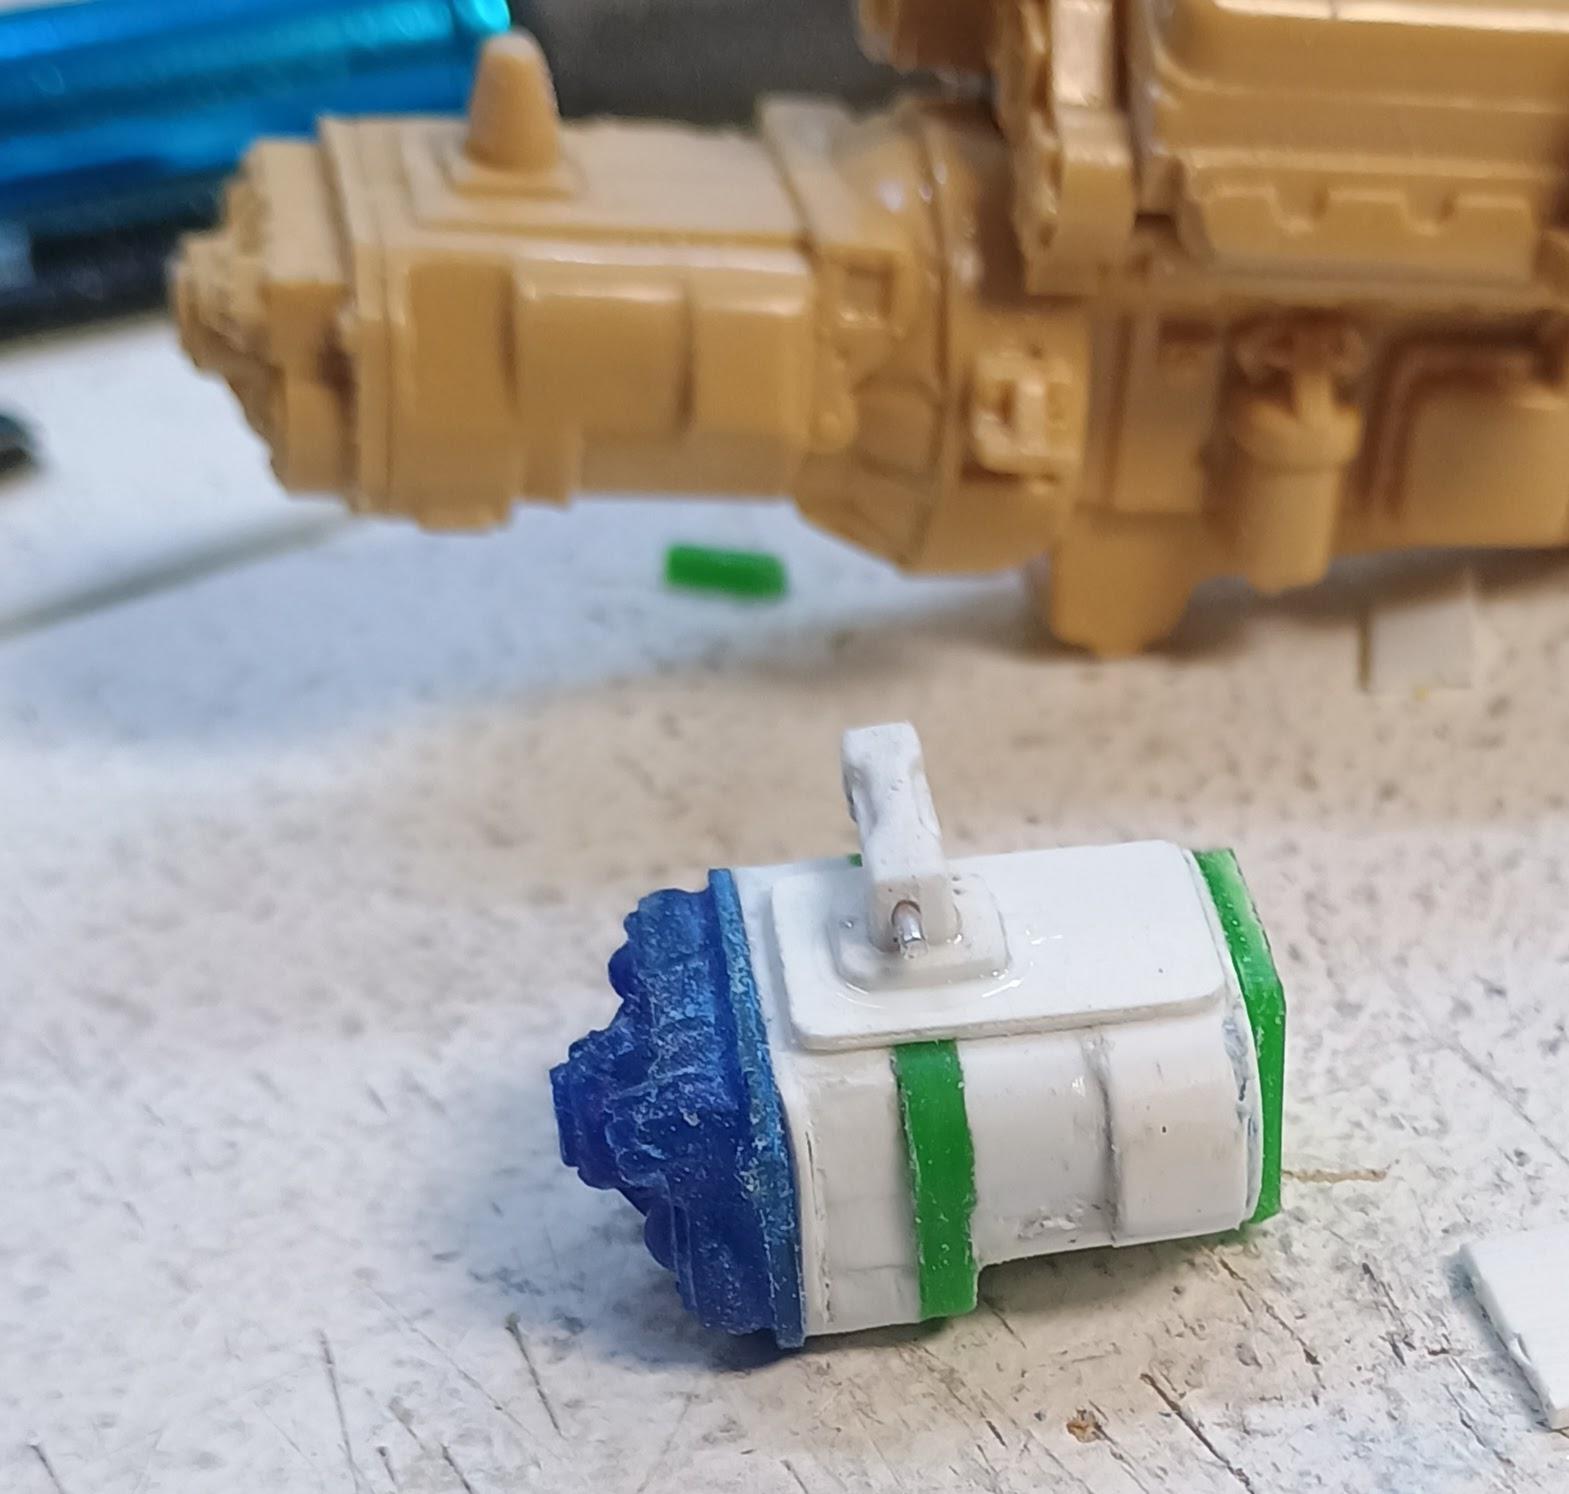
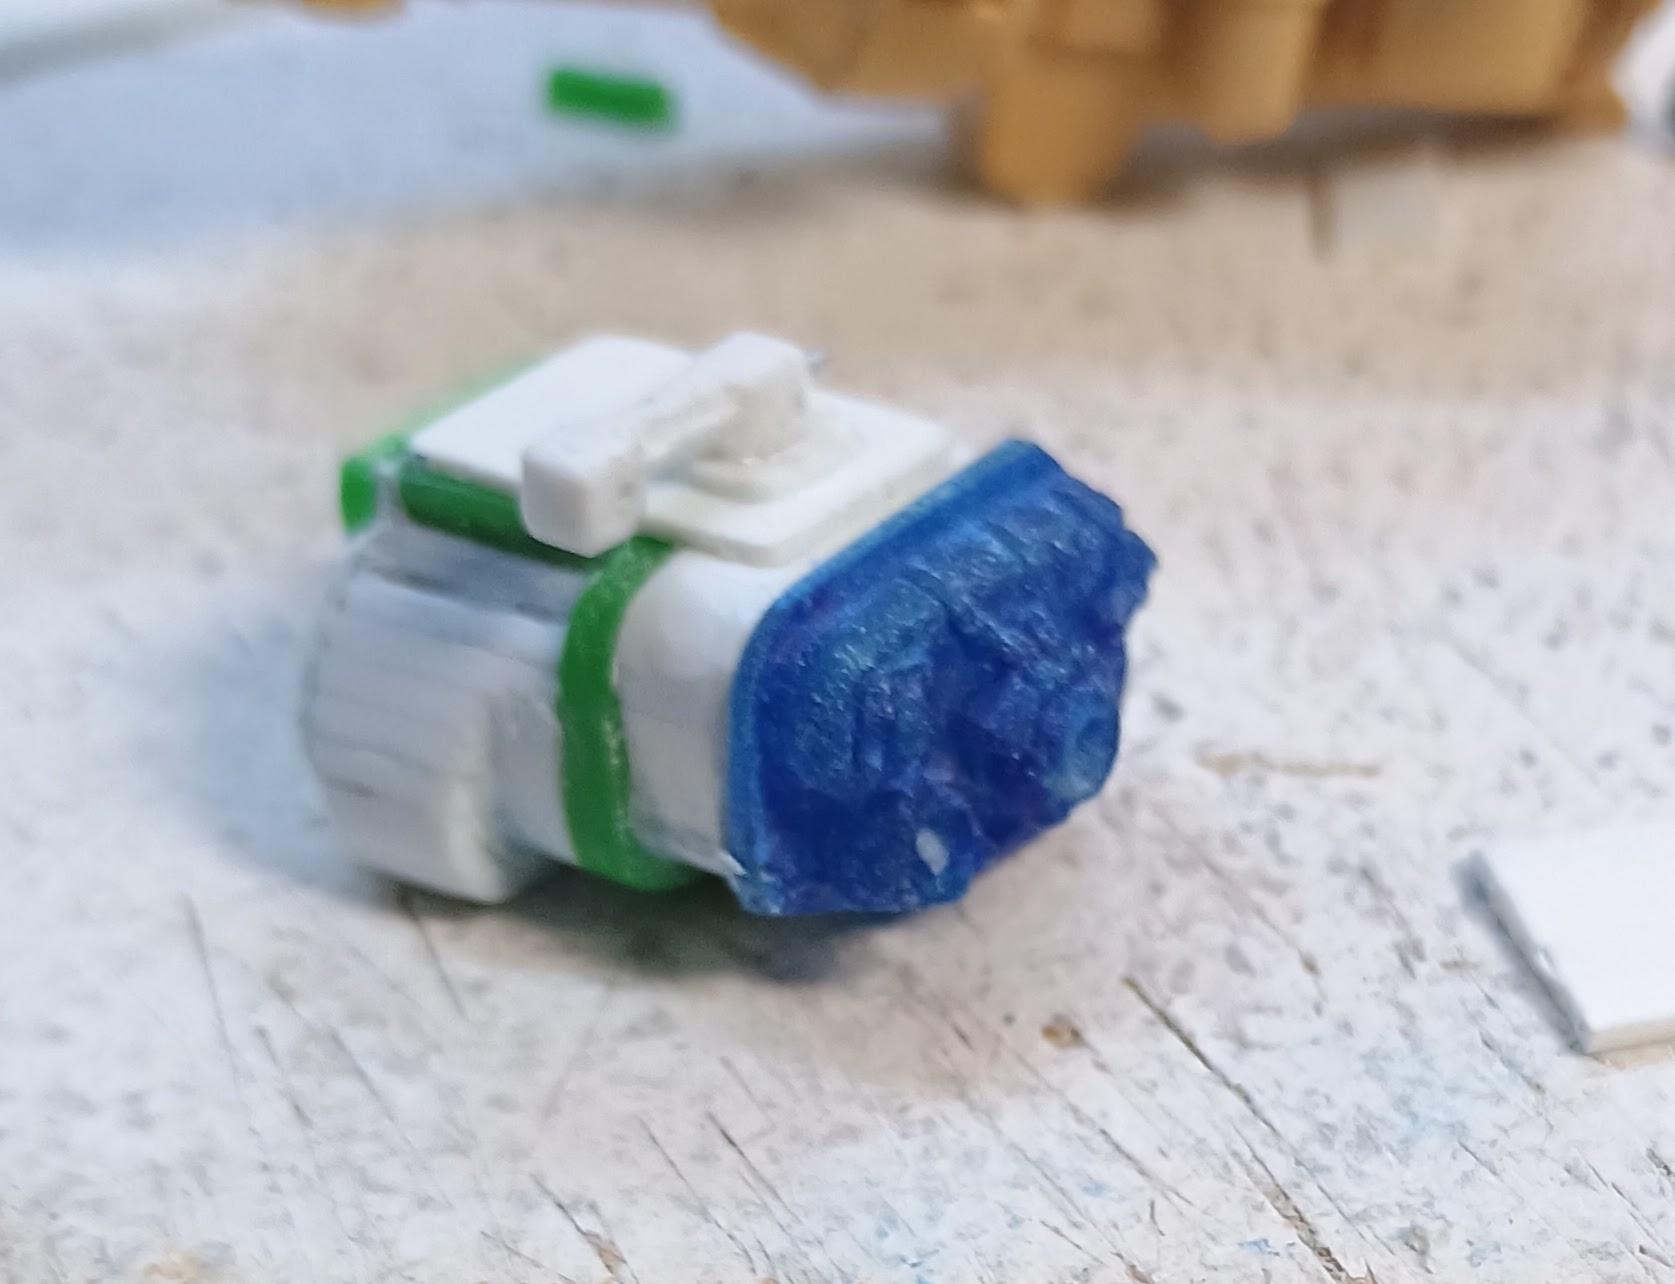
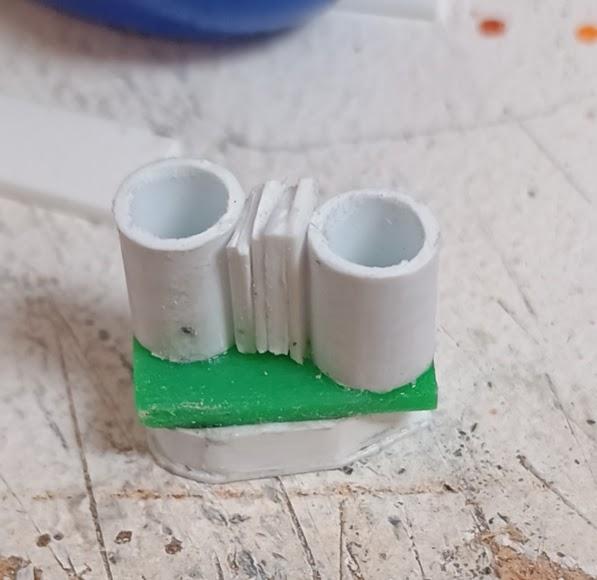
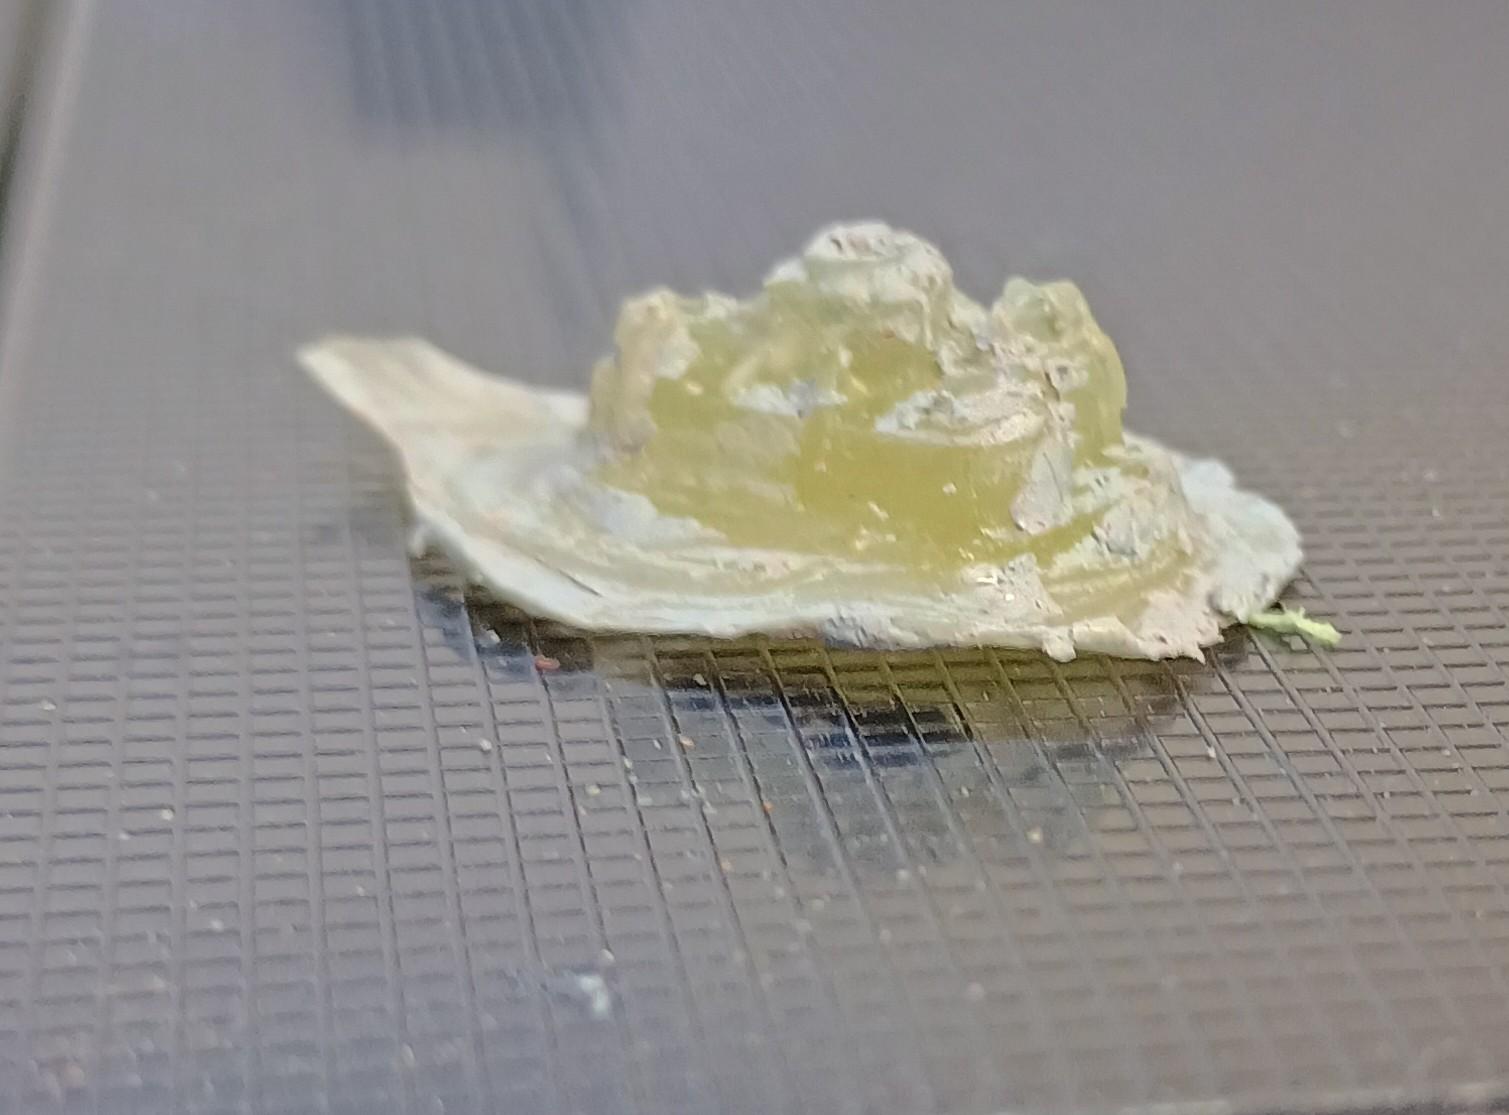
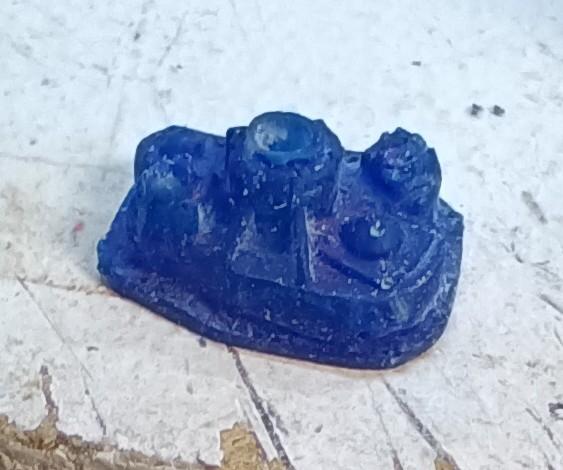
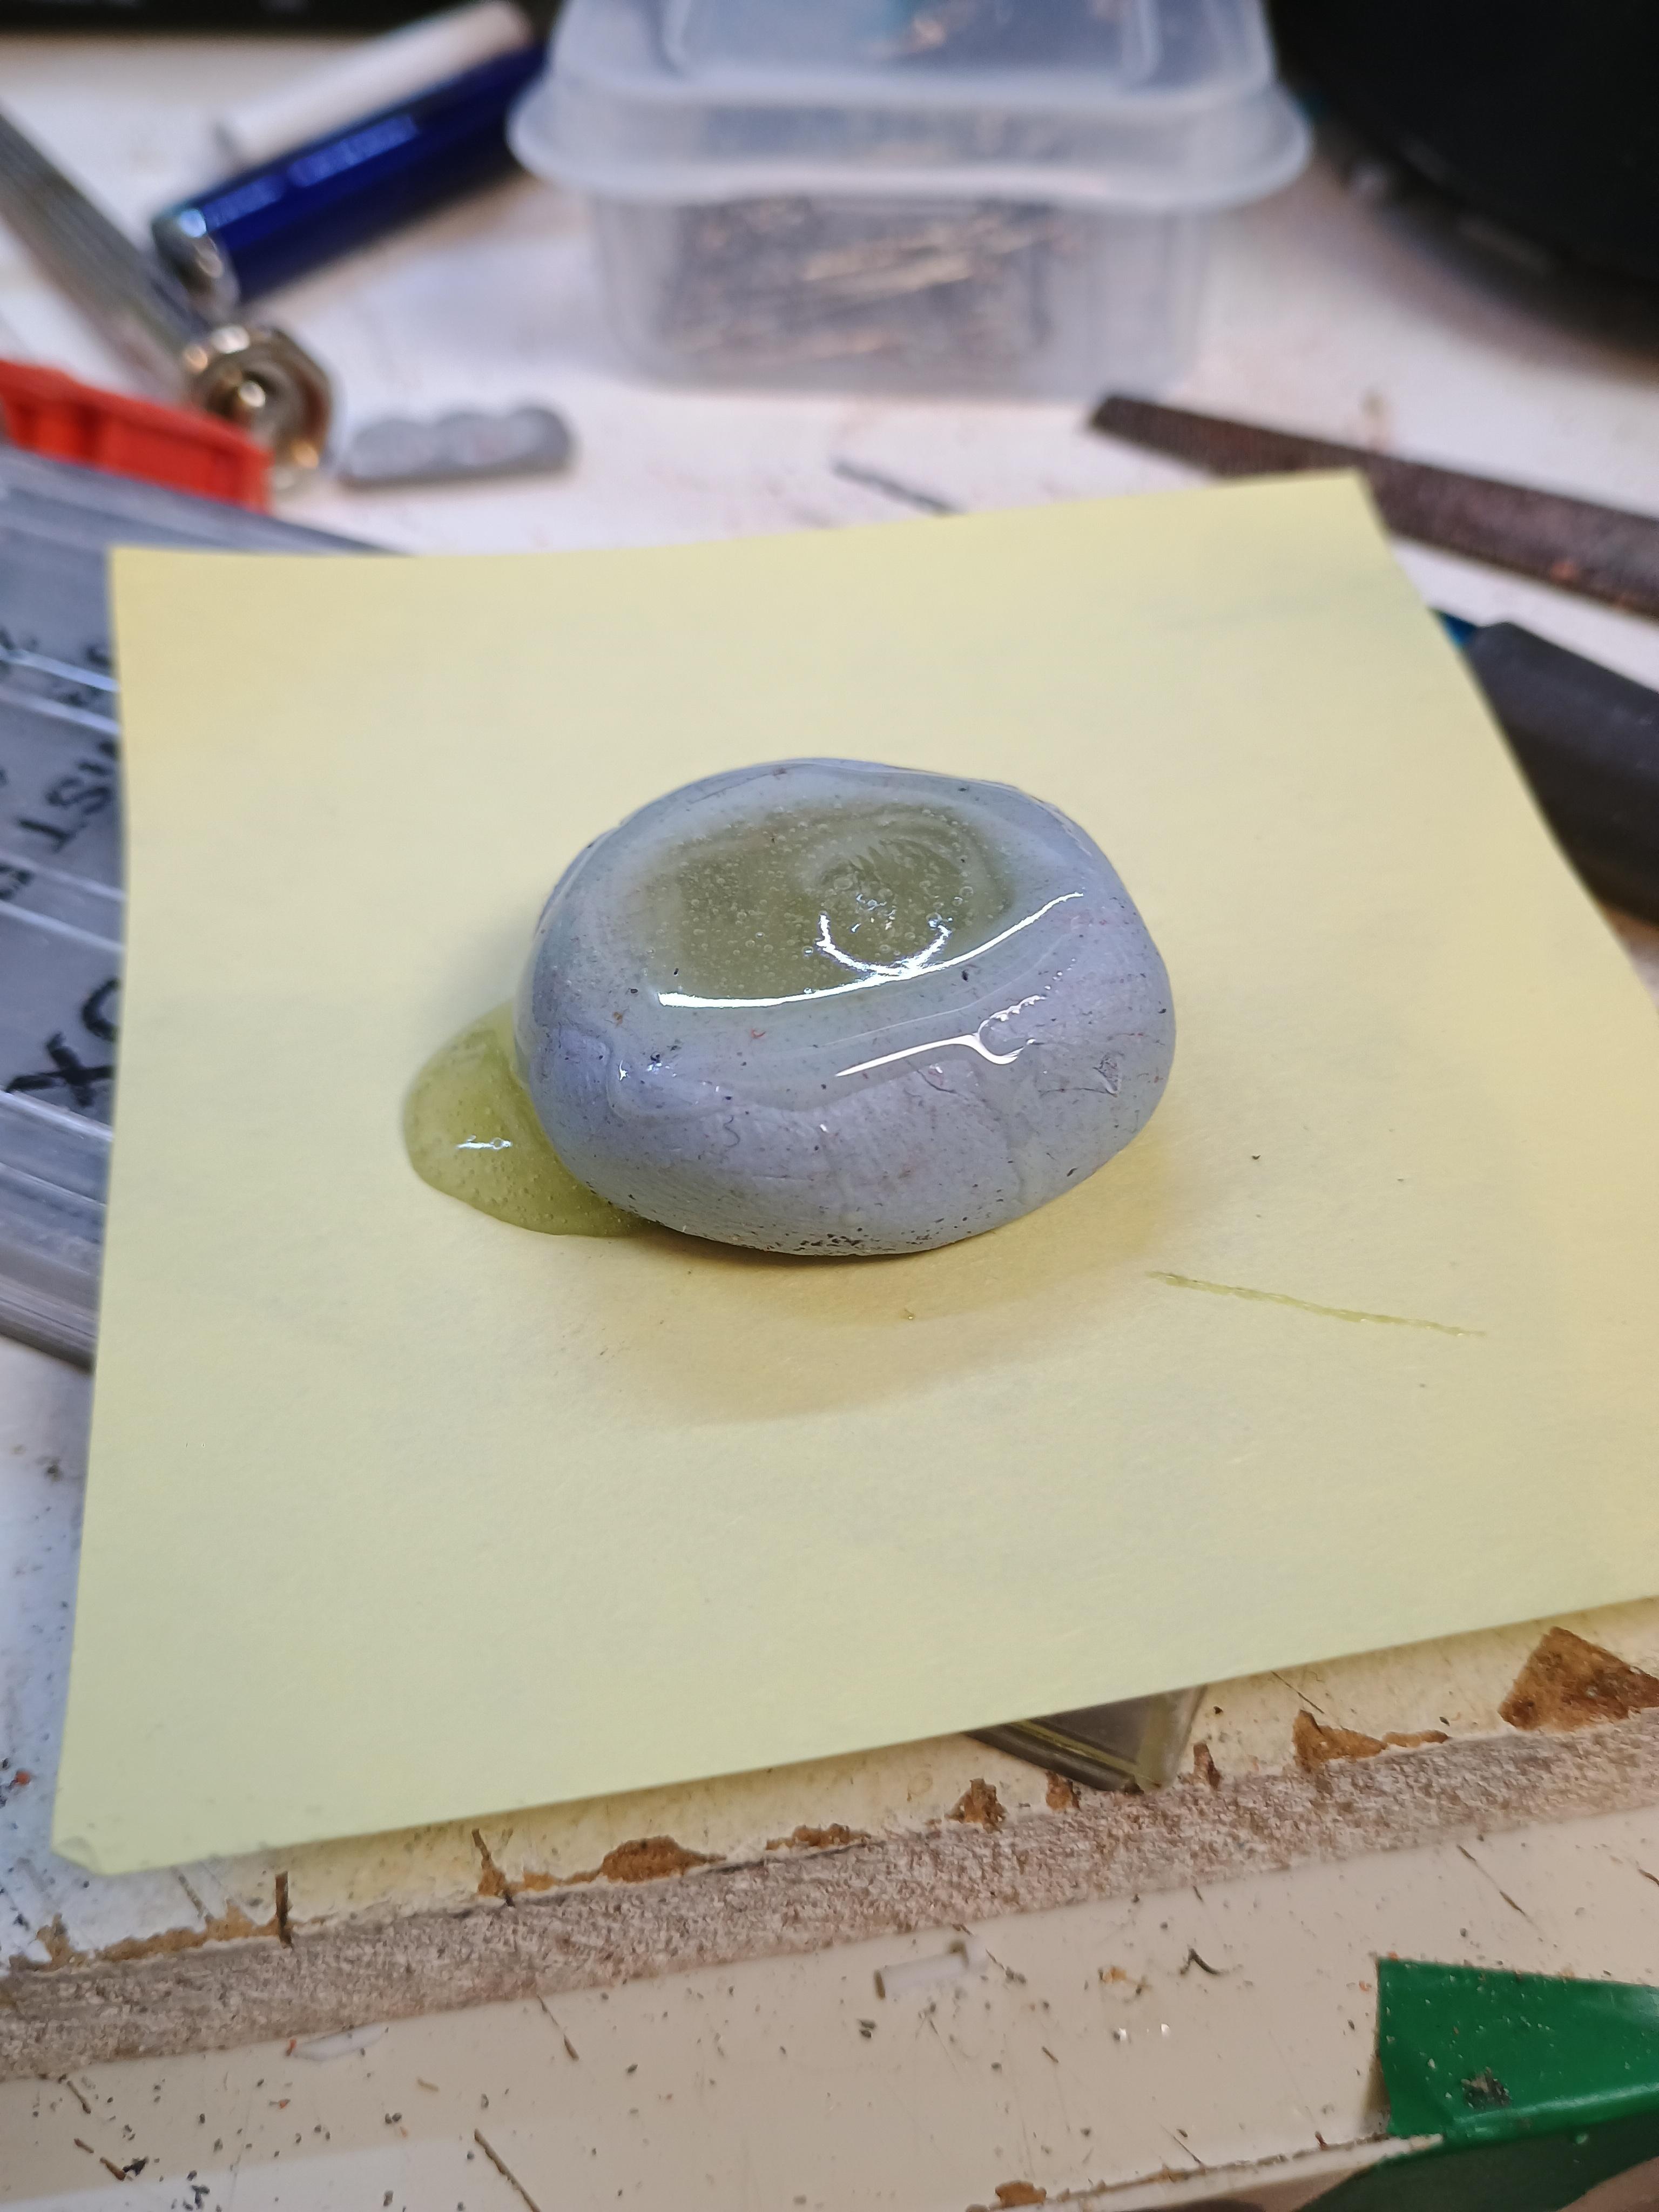
Today was just a case of adding the engine mounts. My mind was on something else today. I want to do a transmission this time, the kit pieces is not even a starting point it's that bad. I took the Ford LTL9000 engine and transmission to use as a pattern, this is a fantastic little piece! I was looking at the rear casing detail thinking about how to model it and I just thought I'd jump into a new world. I balled up some Blu-tack, sprayed the rear transmission casing with olive oil and pressed it in. Then I mixed some epoxy resin and filled the mould. It turned out pretty good. It looked really rough at first but as I cleaned it up it really started to look good. I coloured it with a blue Sharpie so I could see it properly - I'm amazed! The caps on the countershafts are clear as are the fillets on the output flange. First try at casting and it's a real thing! Trimmed it down and it's great. I've just got to make a transmission housing now.
-
Thanks No, I never thoughts about that! I might sit and do that tomorrow. Good thought.
-
Thanks mate, we're ok. Friends out in the sticks had a power outage but we're ok.
-
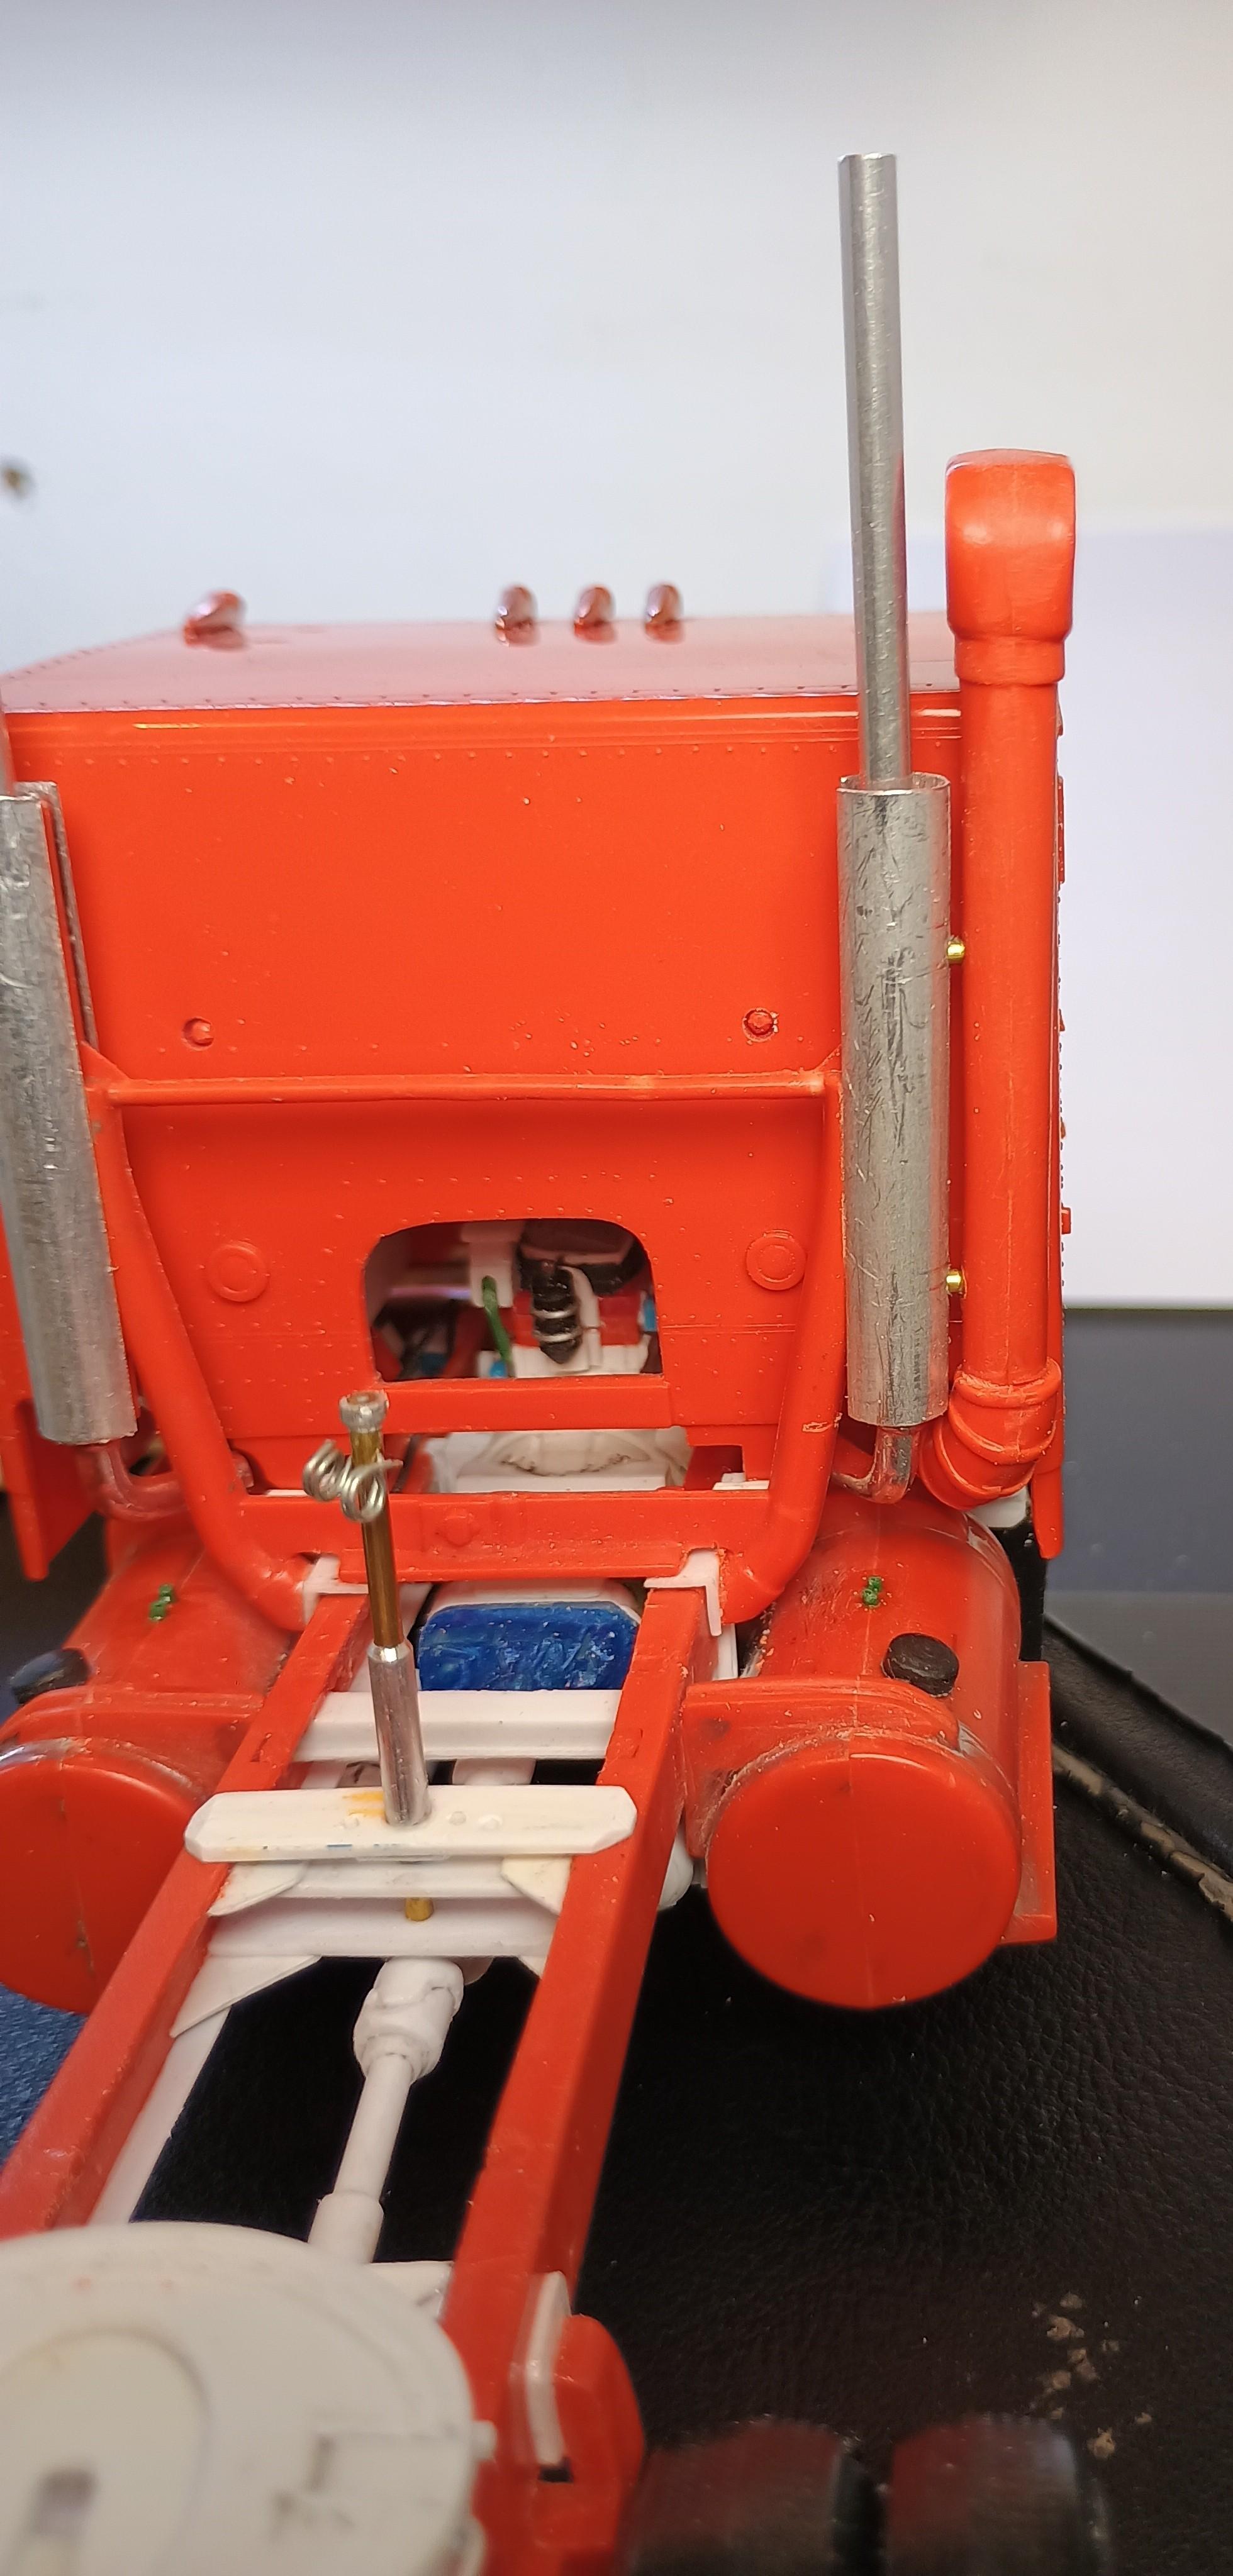
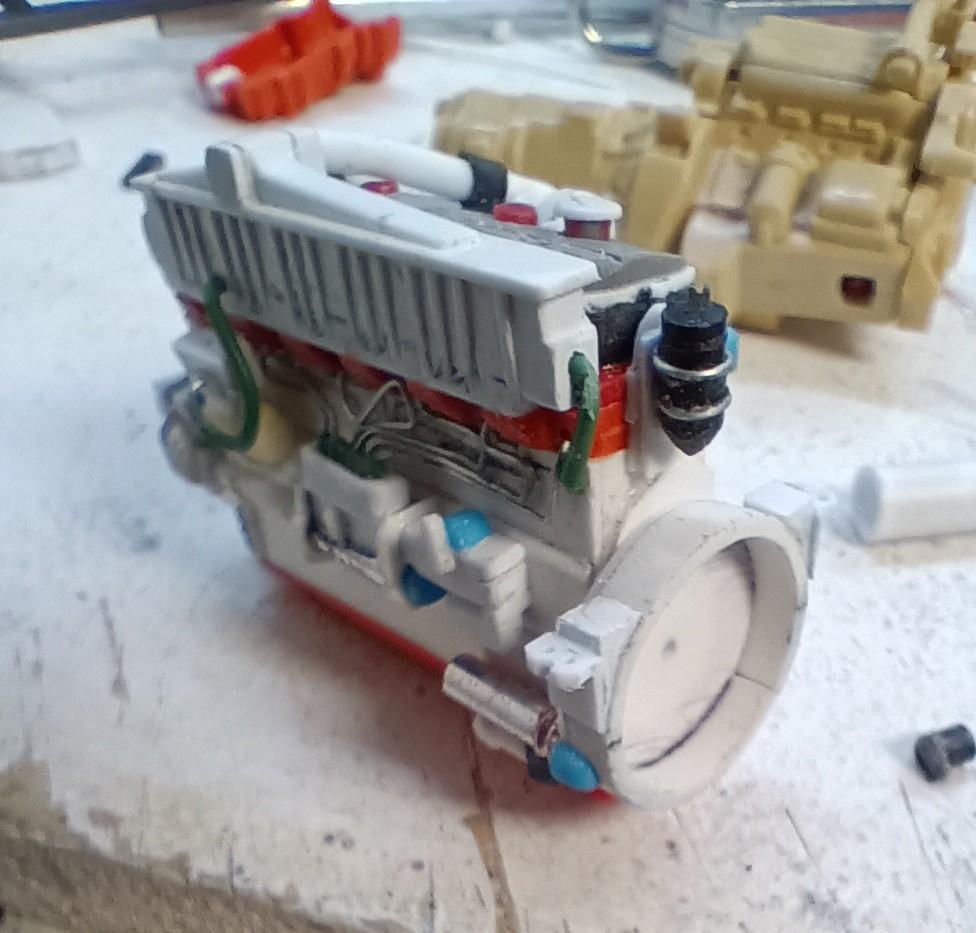
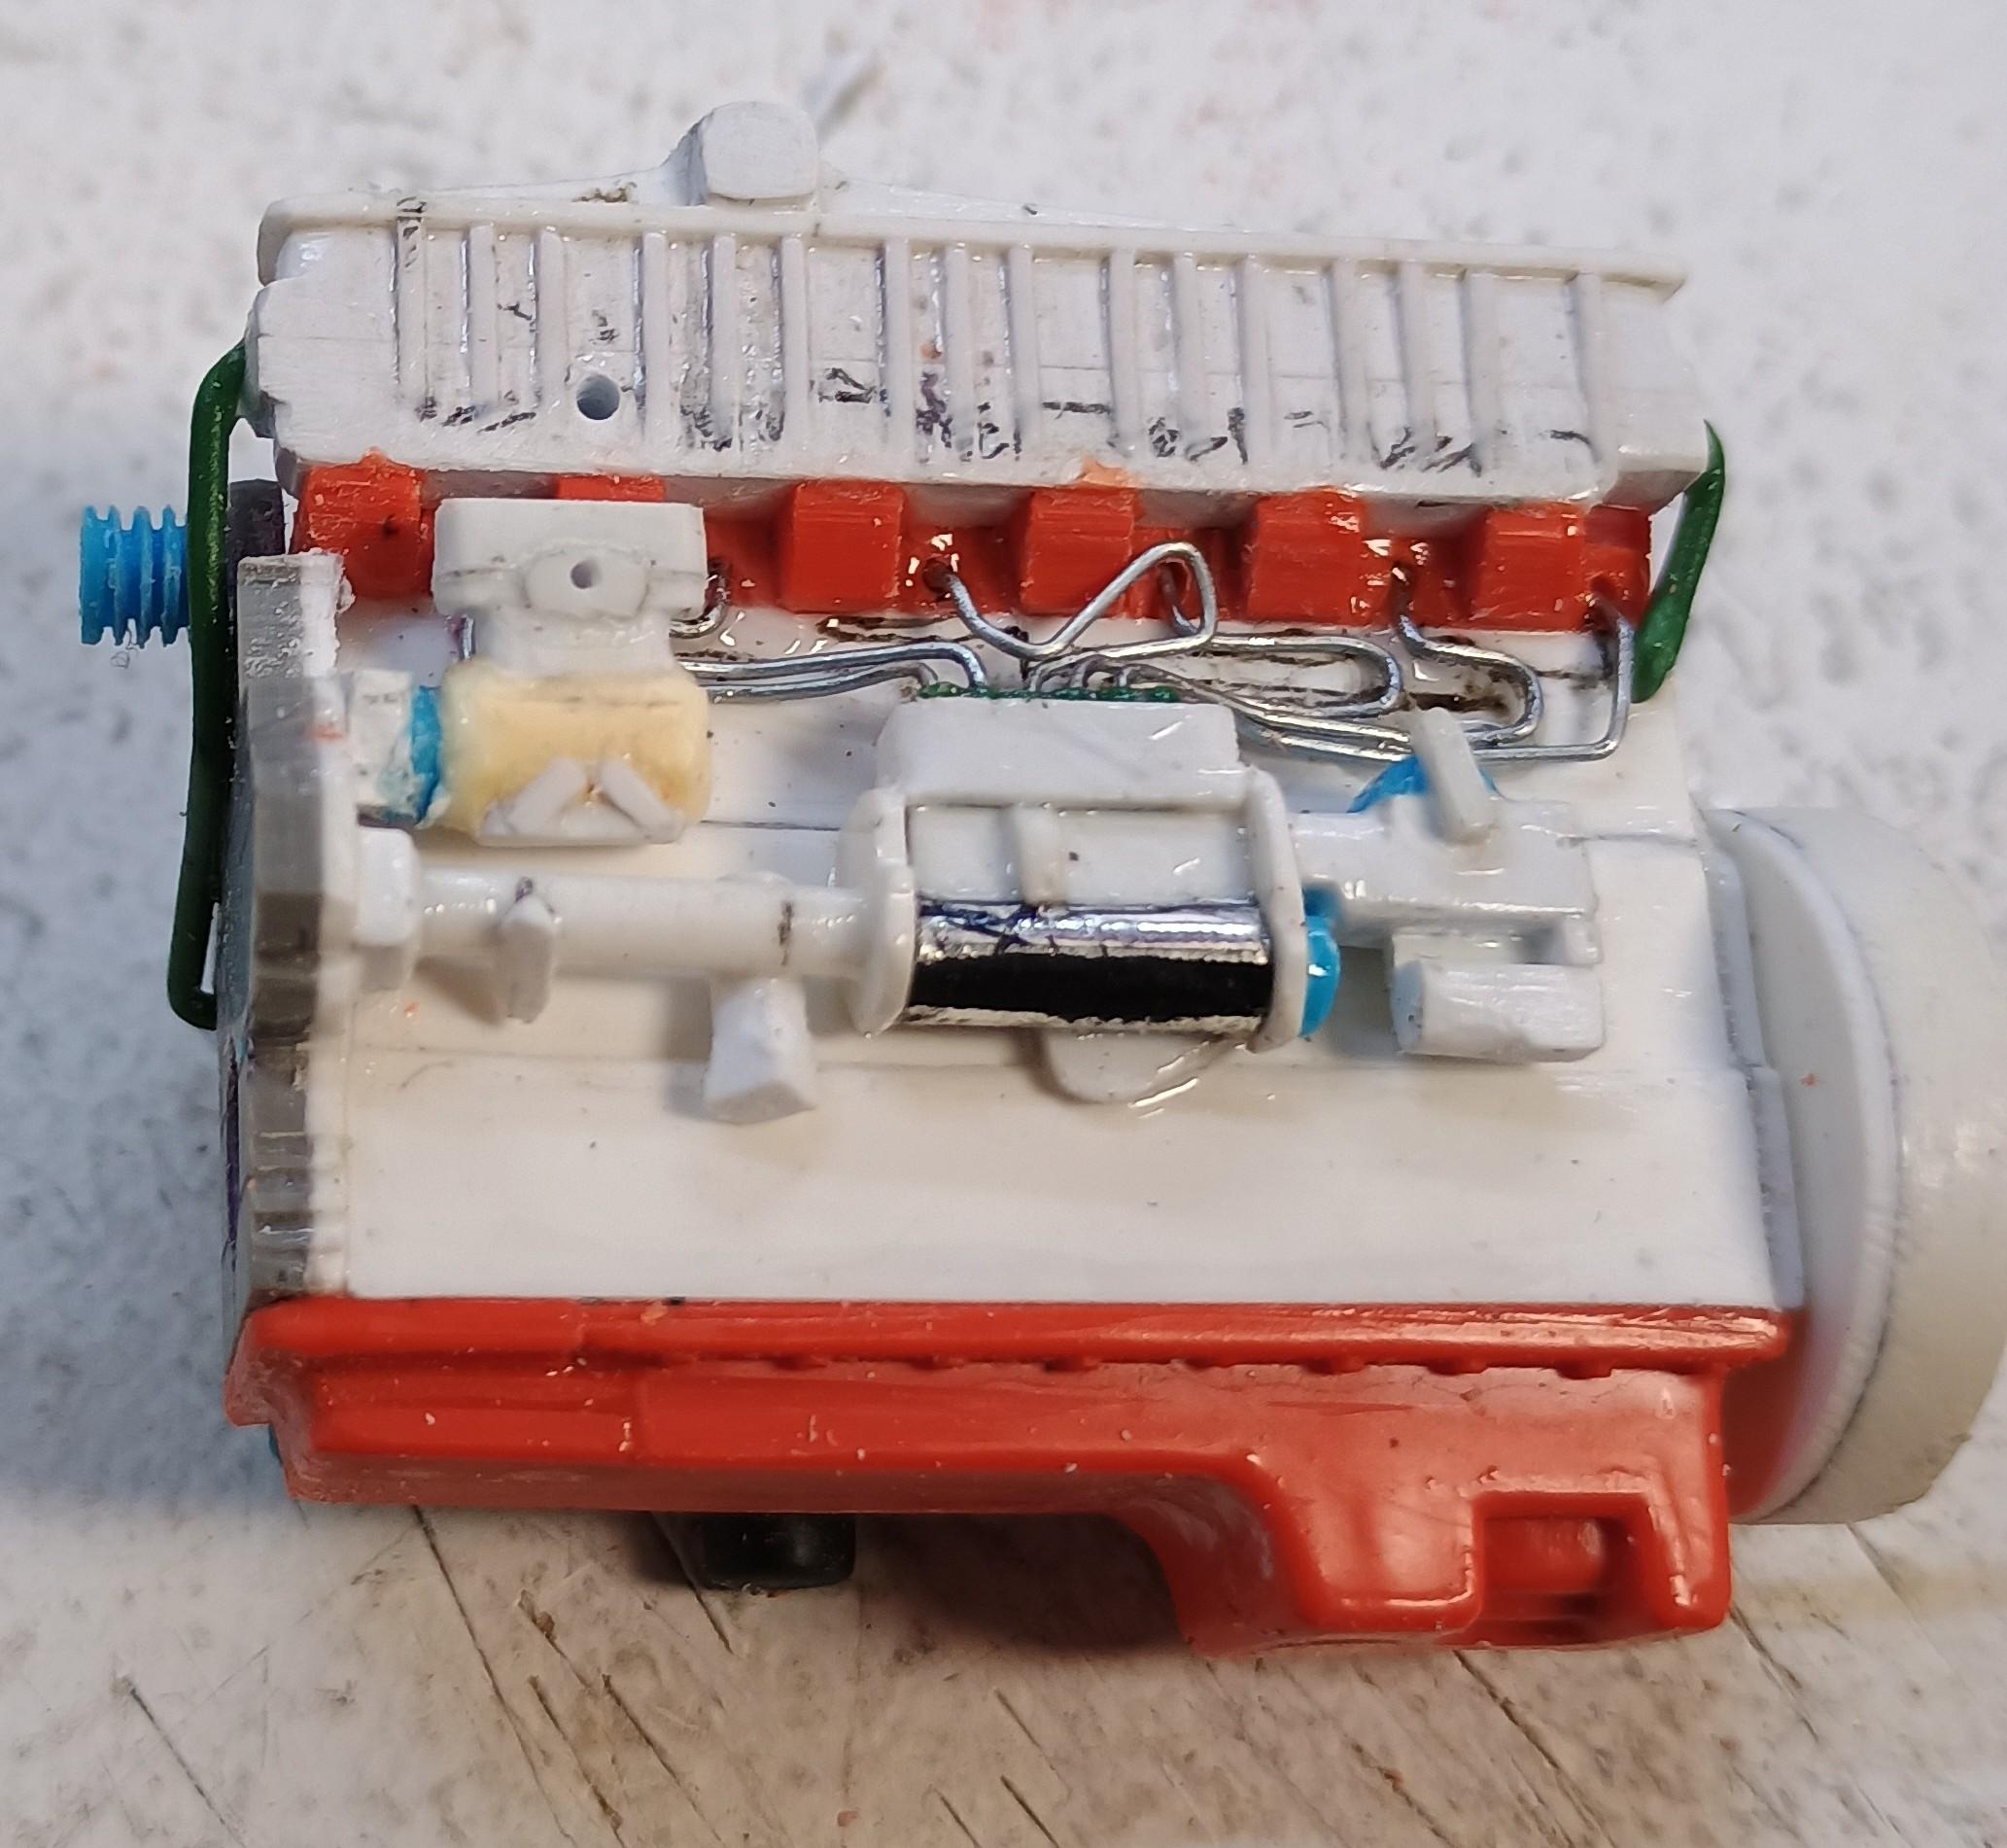
Confined to barracks today by this storm that's battered Scotland and Ireland, +100 mph winds they've suffered. We've just had 60mph so not so bad. Took the opportunity to add more to the Caterpillar, PAS pump in front of the compressor, PAS reservoir on the back of the head, starter motor, alternator, front pulley on the crank, fan belts from elastic cotton and a flywheel housing. Still need to do a fan and engine mounts.
-
1/32 Mack F700
Rockford replied to The Brush's topic in WIP: Model Trucks: Big Rigs and Heavy Equipment
A good demonstration of lateral thinking yielding excellent results, as usual! -
Peterbilt 379 RV
Rockford replied to vincen47's topic in WIP: Model Trucks: Big Rigs and Heavy Equipment
Very tidy work mate, really impressive. -
FDNY Wrecker
Rockford replied to Scott Eriksen's topic in WIP: Model Trucks: Big Rigs and Heavy Equipment
Utterly brilliant work going on here, looks fantastic, the pipework is fantastic! -
Western Star 4900 FA plow truck
Rockford replied to BK9300's topic in WIP: Model Trucks: Big Rigs and Heavy Equipment
The cab mods are really impressive, you're doing a fantastic job. It's amazing how jobs develop, one mod has a knock on effect on so many other things, you wonder if it will ever end. Then you look at a photo you've been studying for months and see something you've missed thousand times! I do have a new found appreciation for the manufacurers, especially in the old days before computers. How they got the kits to go together at all is a wonder to me! -
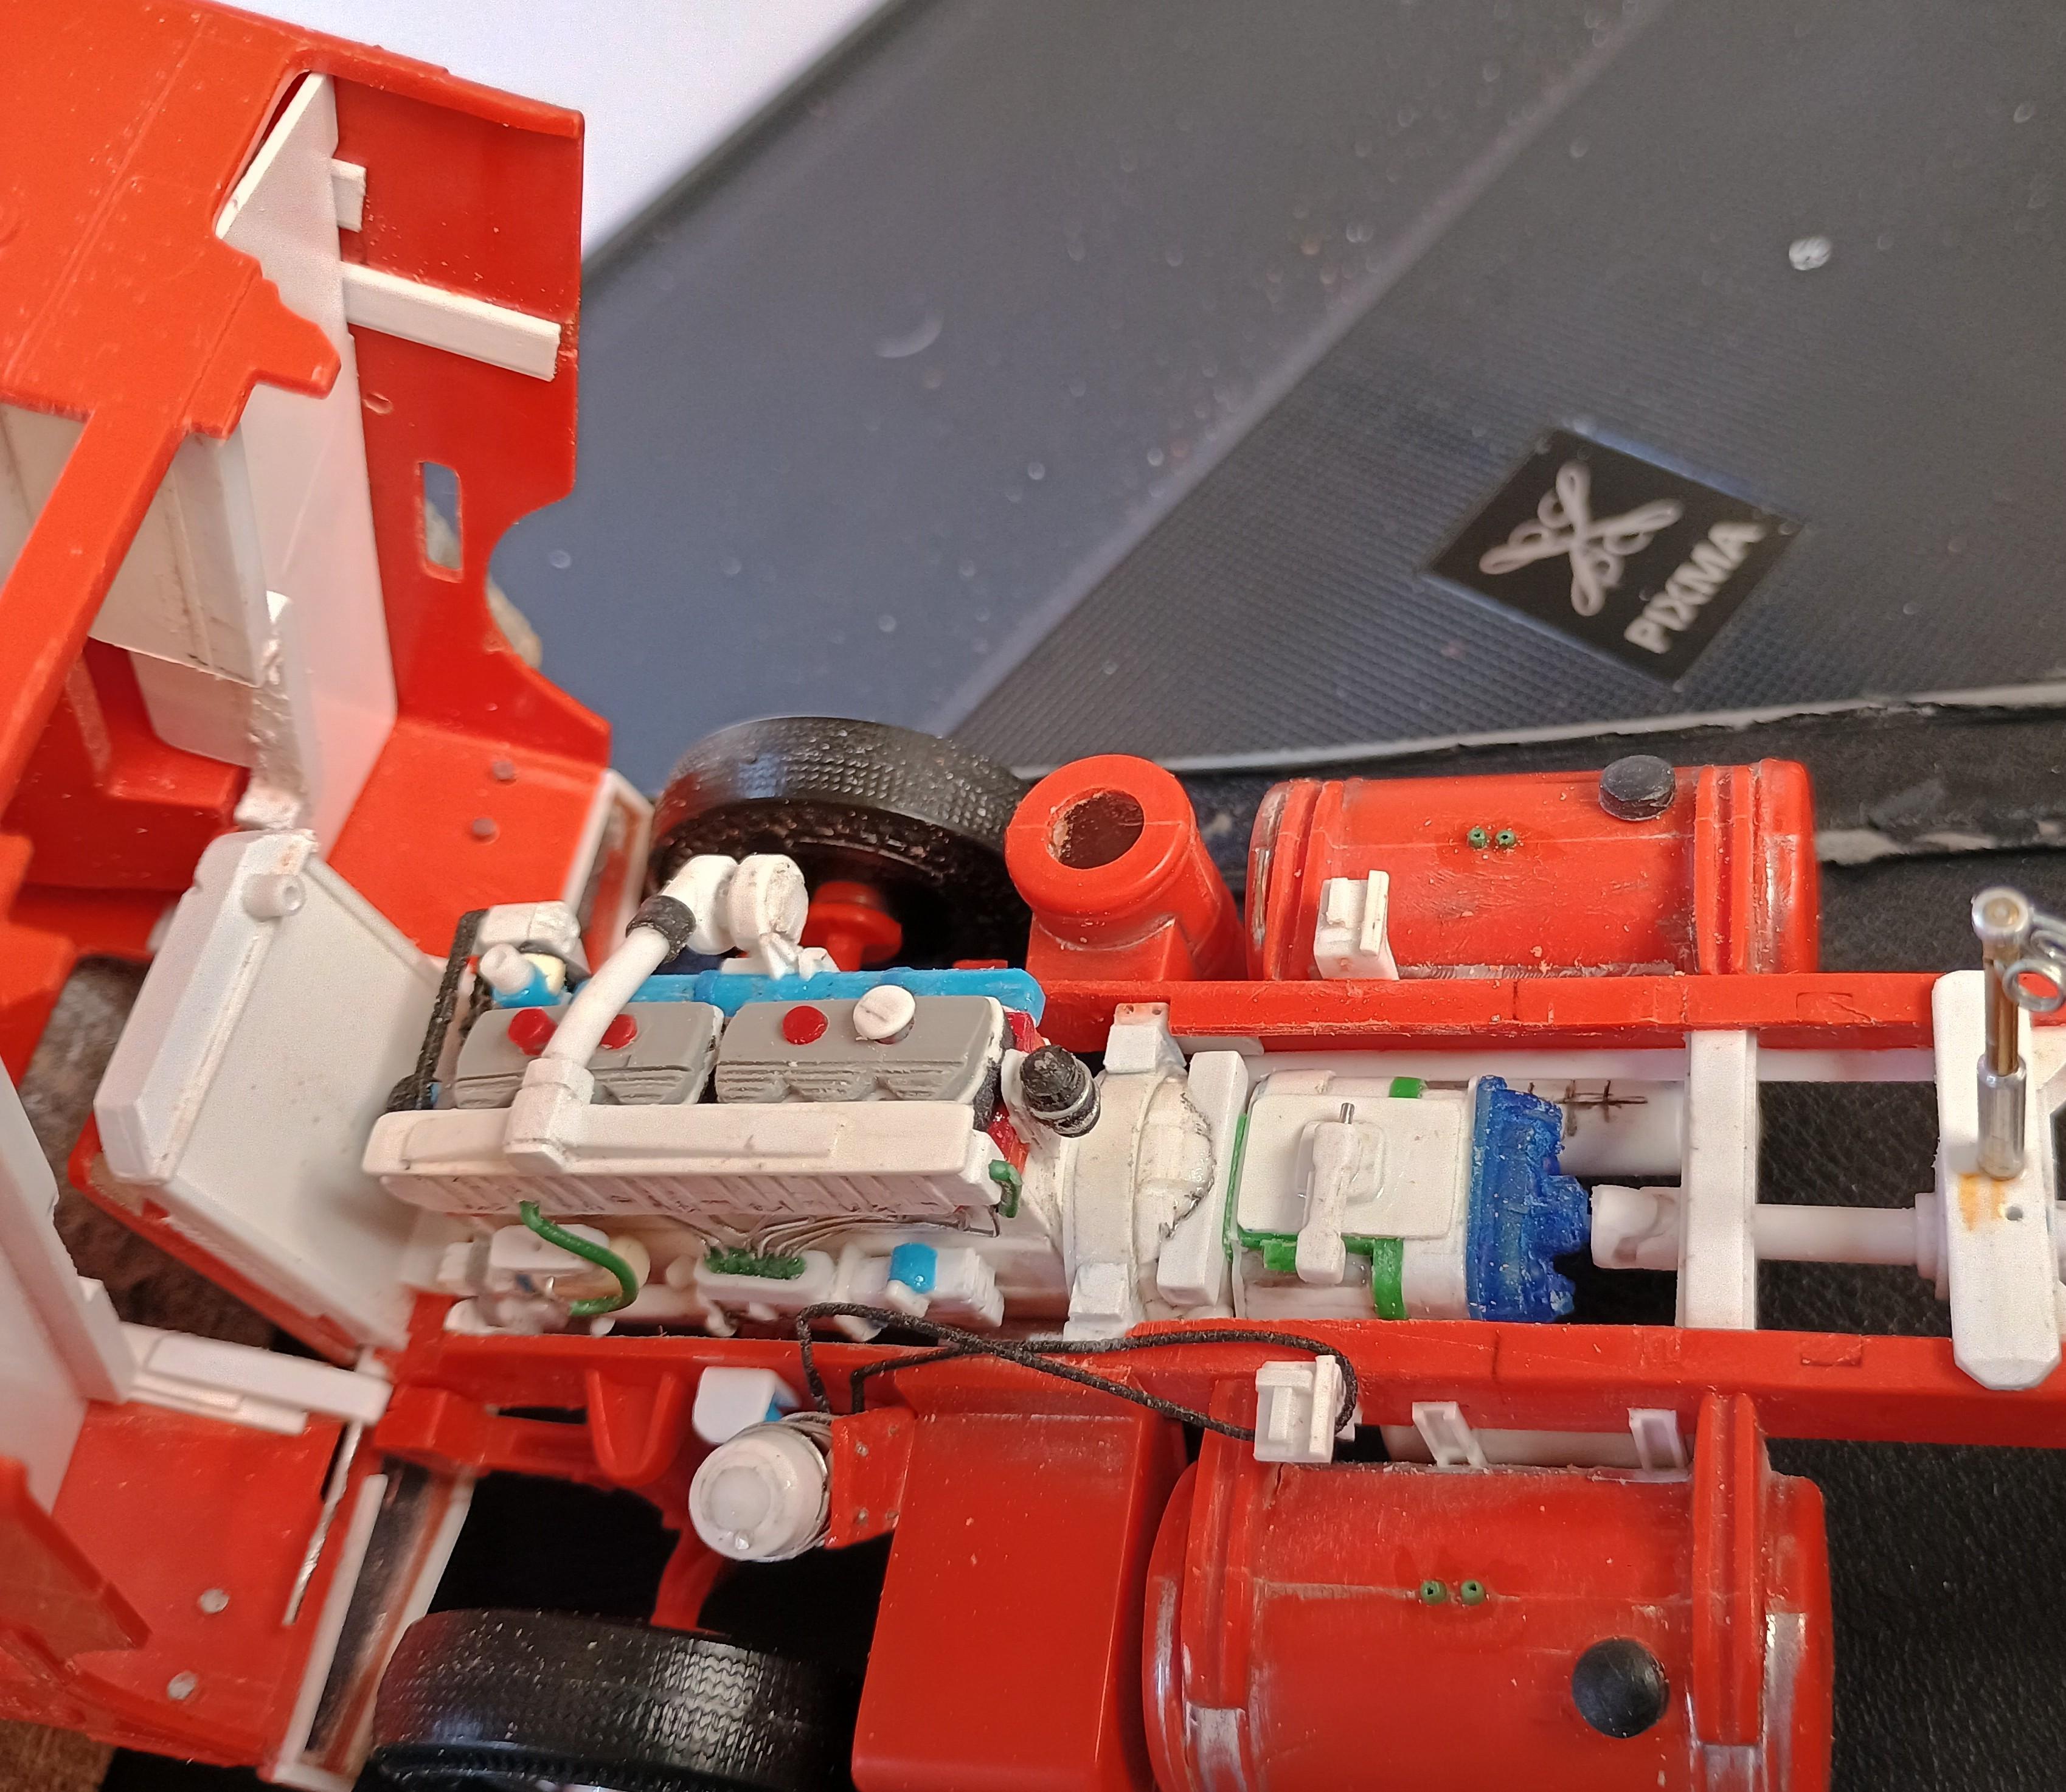
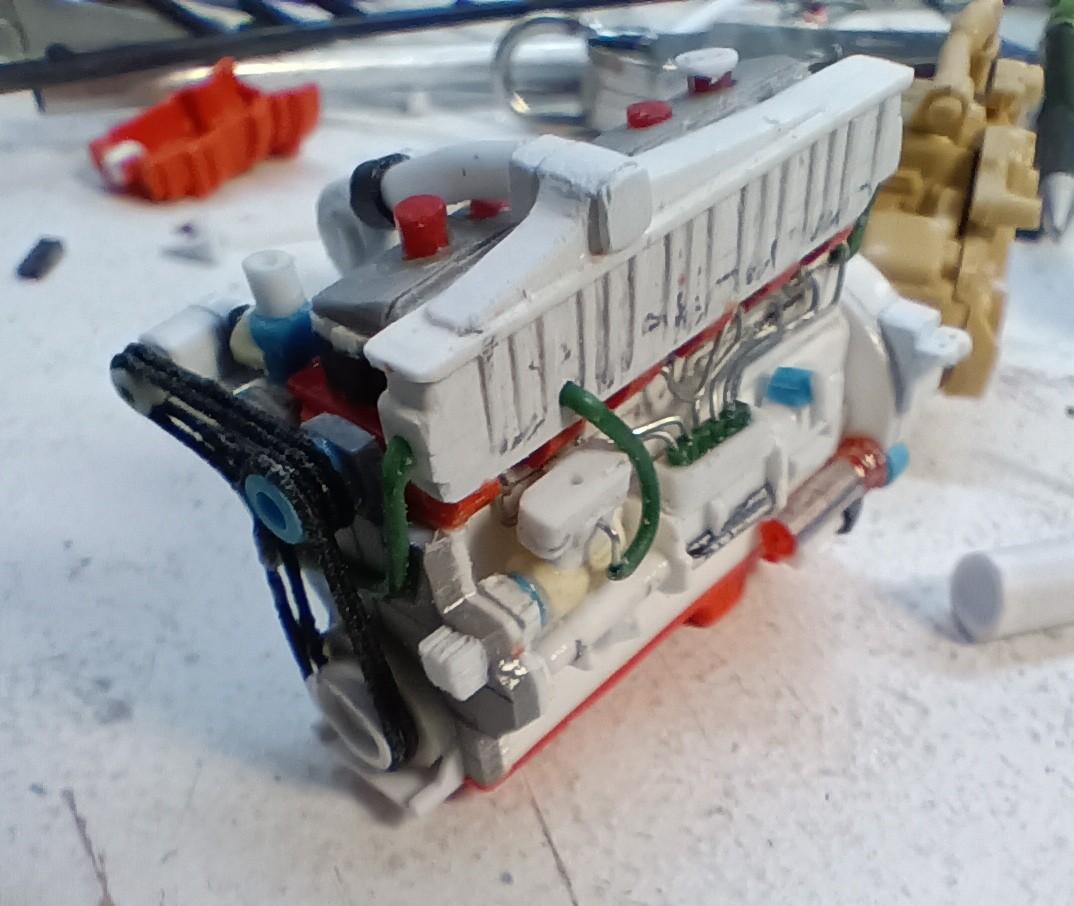
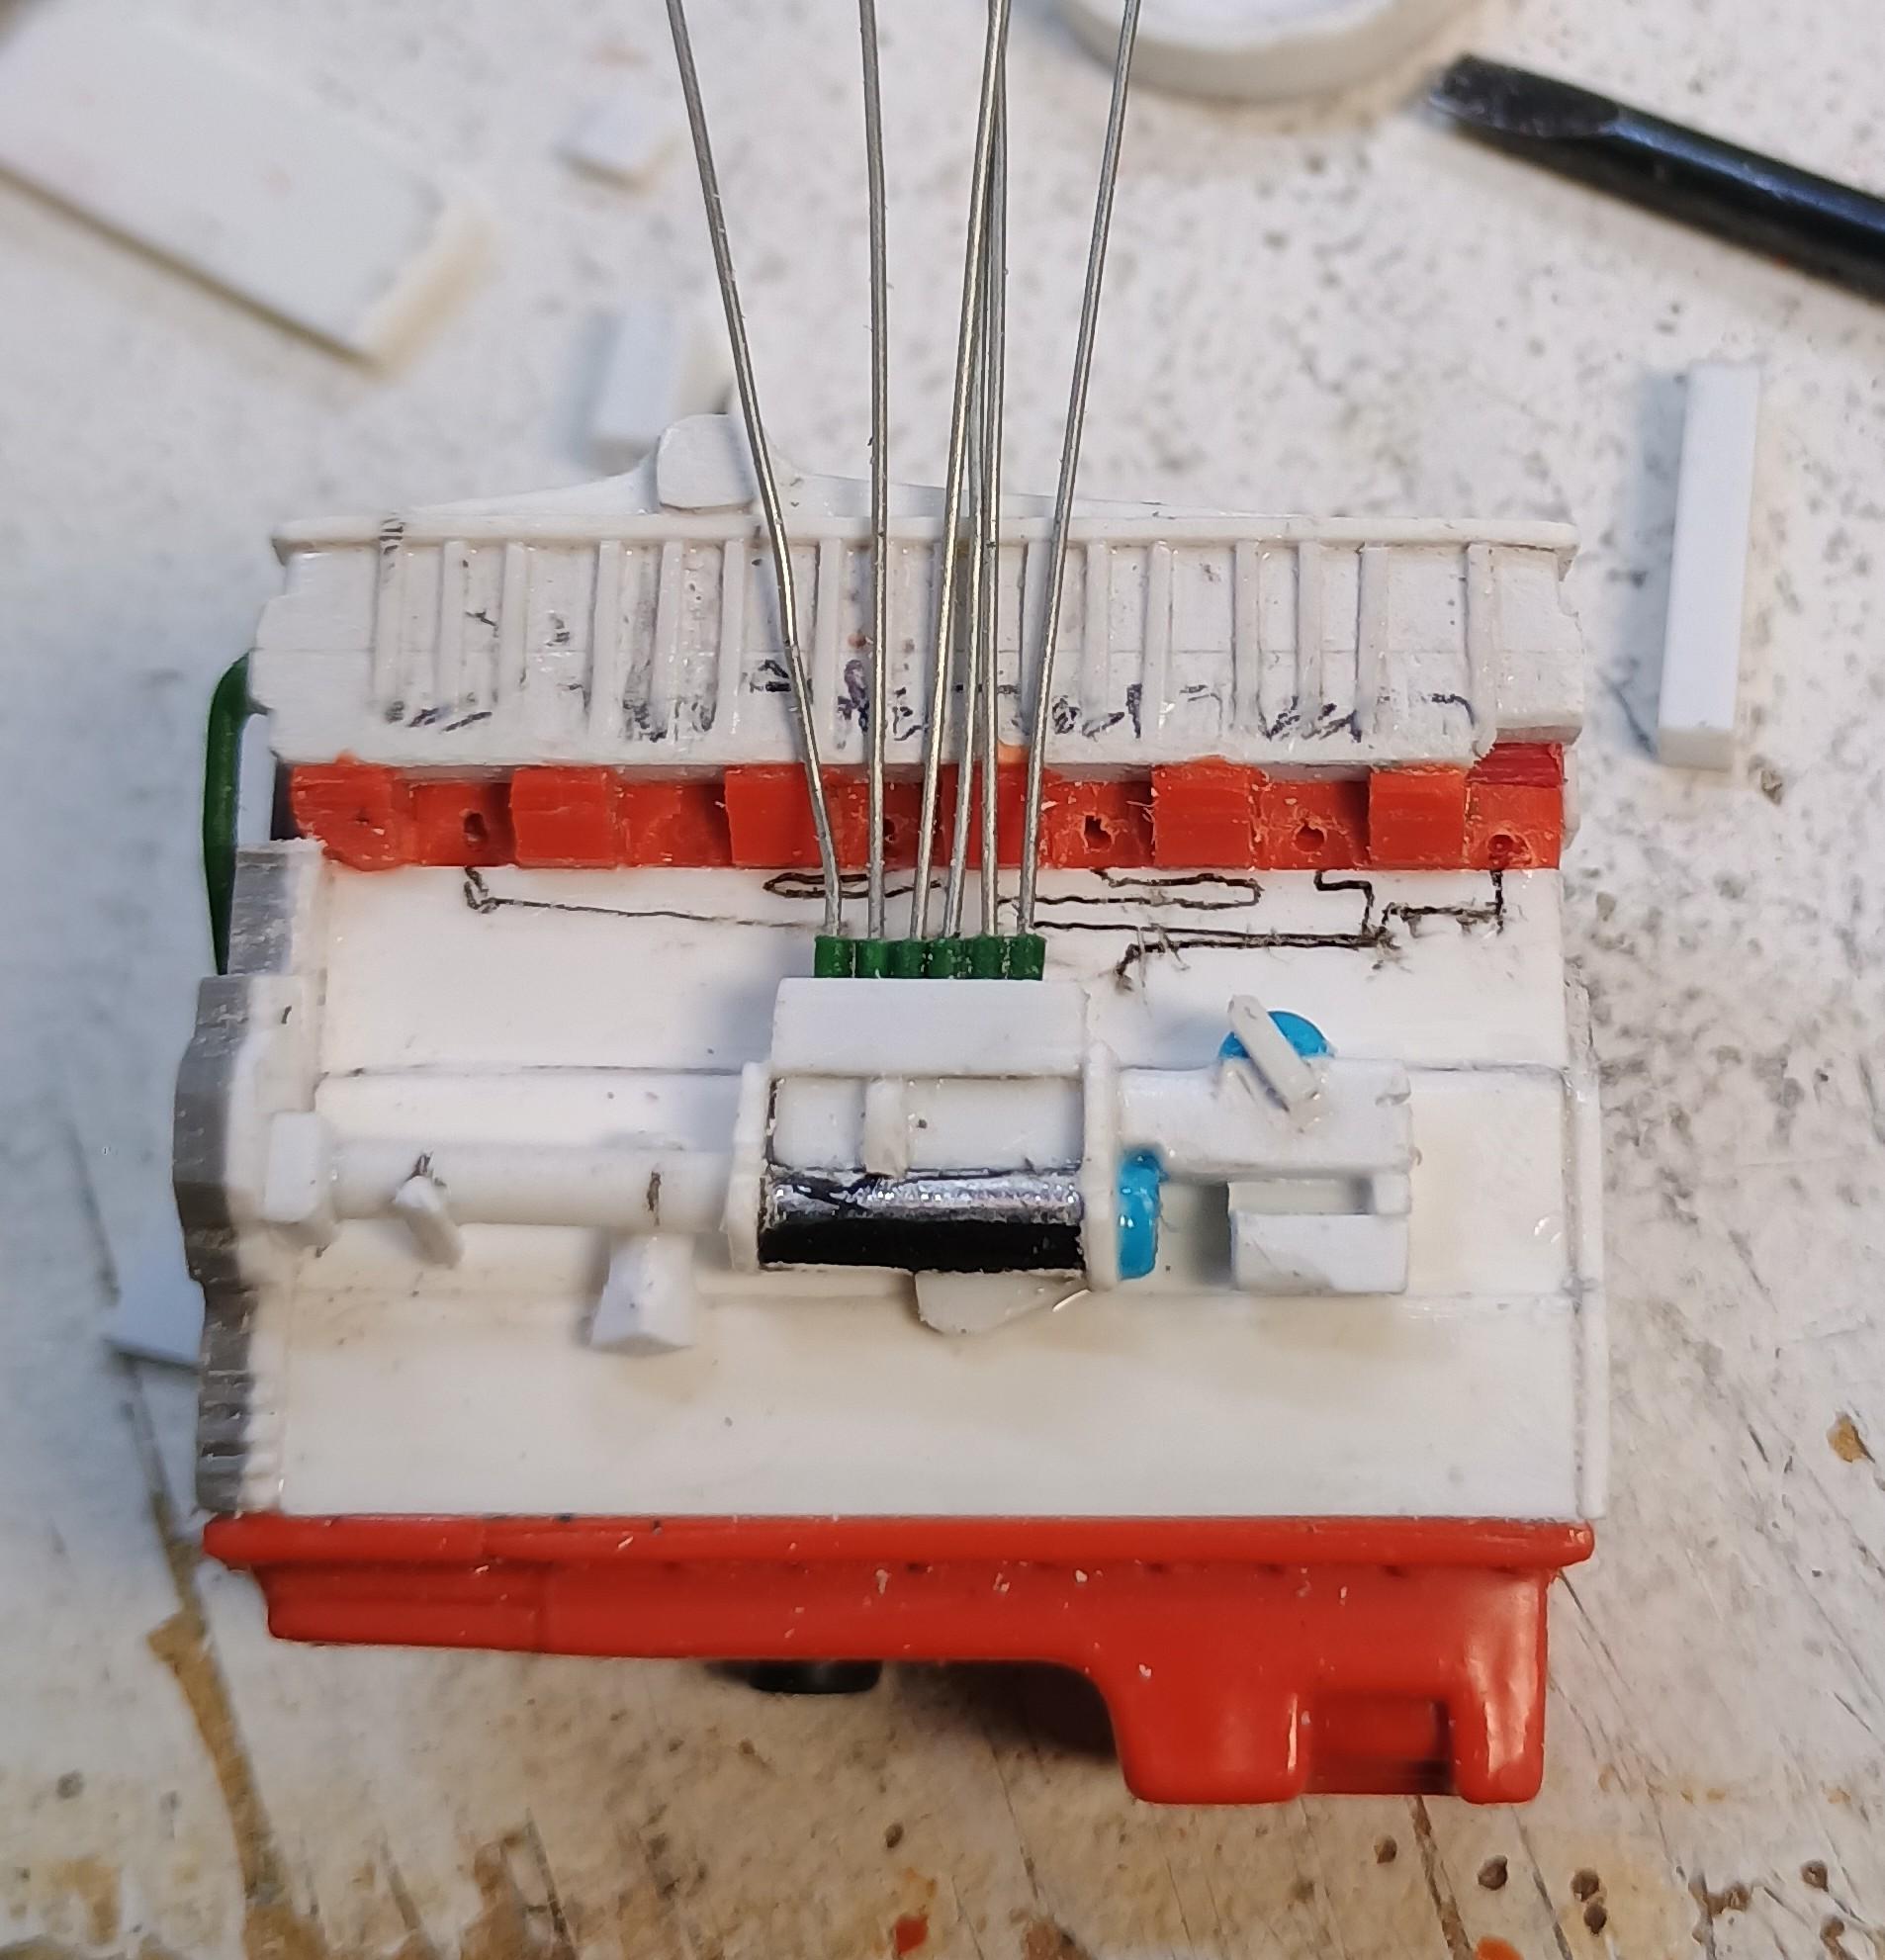
Turned my attention to the driver's side of the block. Built an injector pump, drive, lift pump and governor housing. Bent up a set of injector pipes from 0.5mm wire, they're a bit rough but they're passable. They're so bent around because injector lines for hydraulic injectors (which all except maybe Cummins and Detroit were), should be all the same length to avoid injection timing differences. The longer the pipe, the more deflection in the wall of the pipe when the pump builds pressure and thus you get a later and shorter lift of the injector needle. Just a boring fact wandering around my brain. For the injector pipes I stripped the insulation off the wire and glued six pieces together, then cut a slot in the top of the pump to hold the row of insulation. Once secured, in could use them as sockets to receive the actual wire and keep it spaced neatly. Also built a compressor from plastic shrapnel lying in the bench. Added a fan pulley to the front cover, that's just turned up from sprue in the chuck of my drill. That's the beauty of doing these things, everything is so small I can just use all my offcuts strewn across the bench as raw material.
-
I know, it's madness really.
-
New build...kinda, maybe????
Rockford replied to ShakyCraftsman's topic in WIP: Model Trucks: Big Rigs and Heavy Equipment
Very interesting project, excellent scratch building!- 6 replies
-
- 1
-

-
- 1/24 truck
- trailer
- (and 1 more)
-
Western Star Classic heavy haul
Rockford replied to Biggu's topic in WIP: Model Trucks: Big Rigs and Heavy Equipment
Good colour choice. The Hendrickson suspension does look the part though that would ride hard!