Search the Community
Showing results for tags 'Dodge'.
-
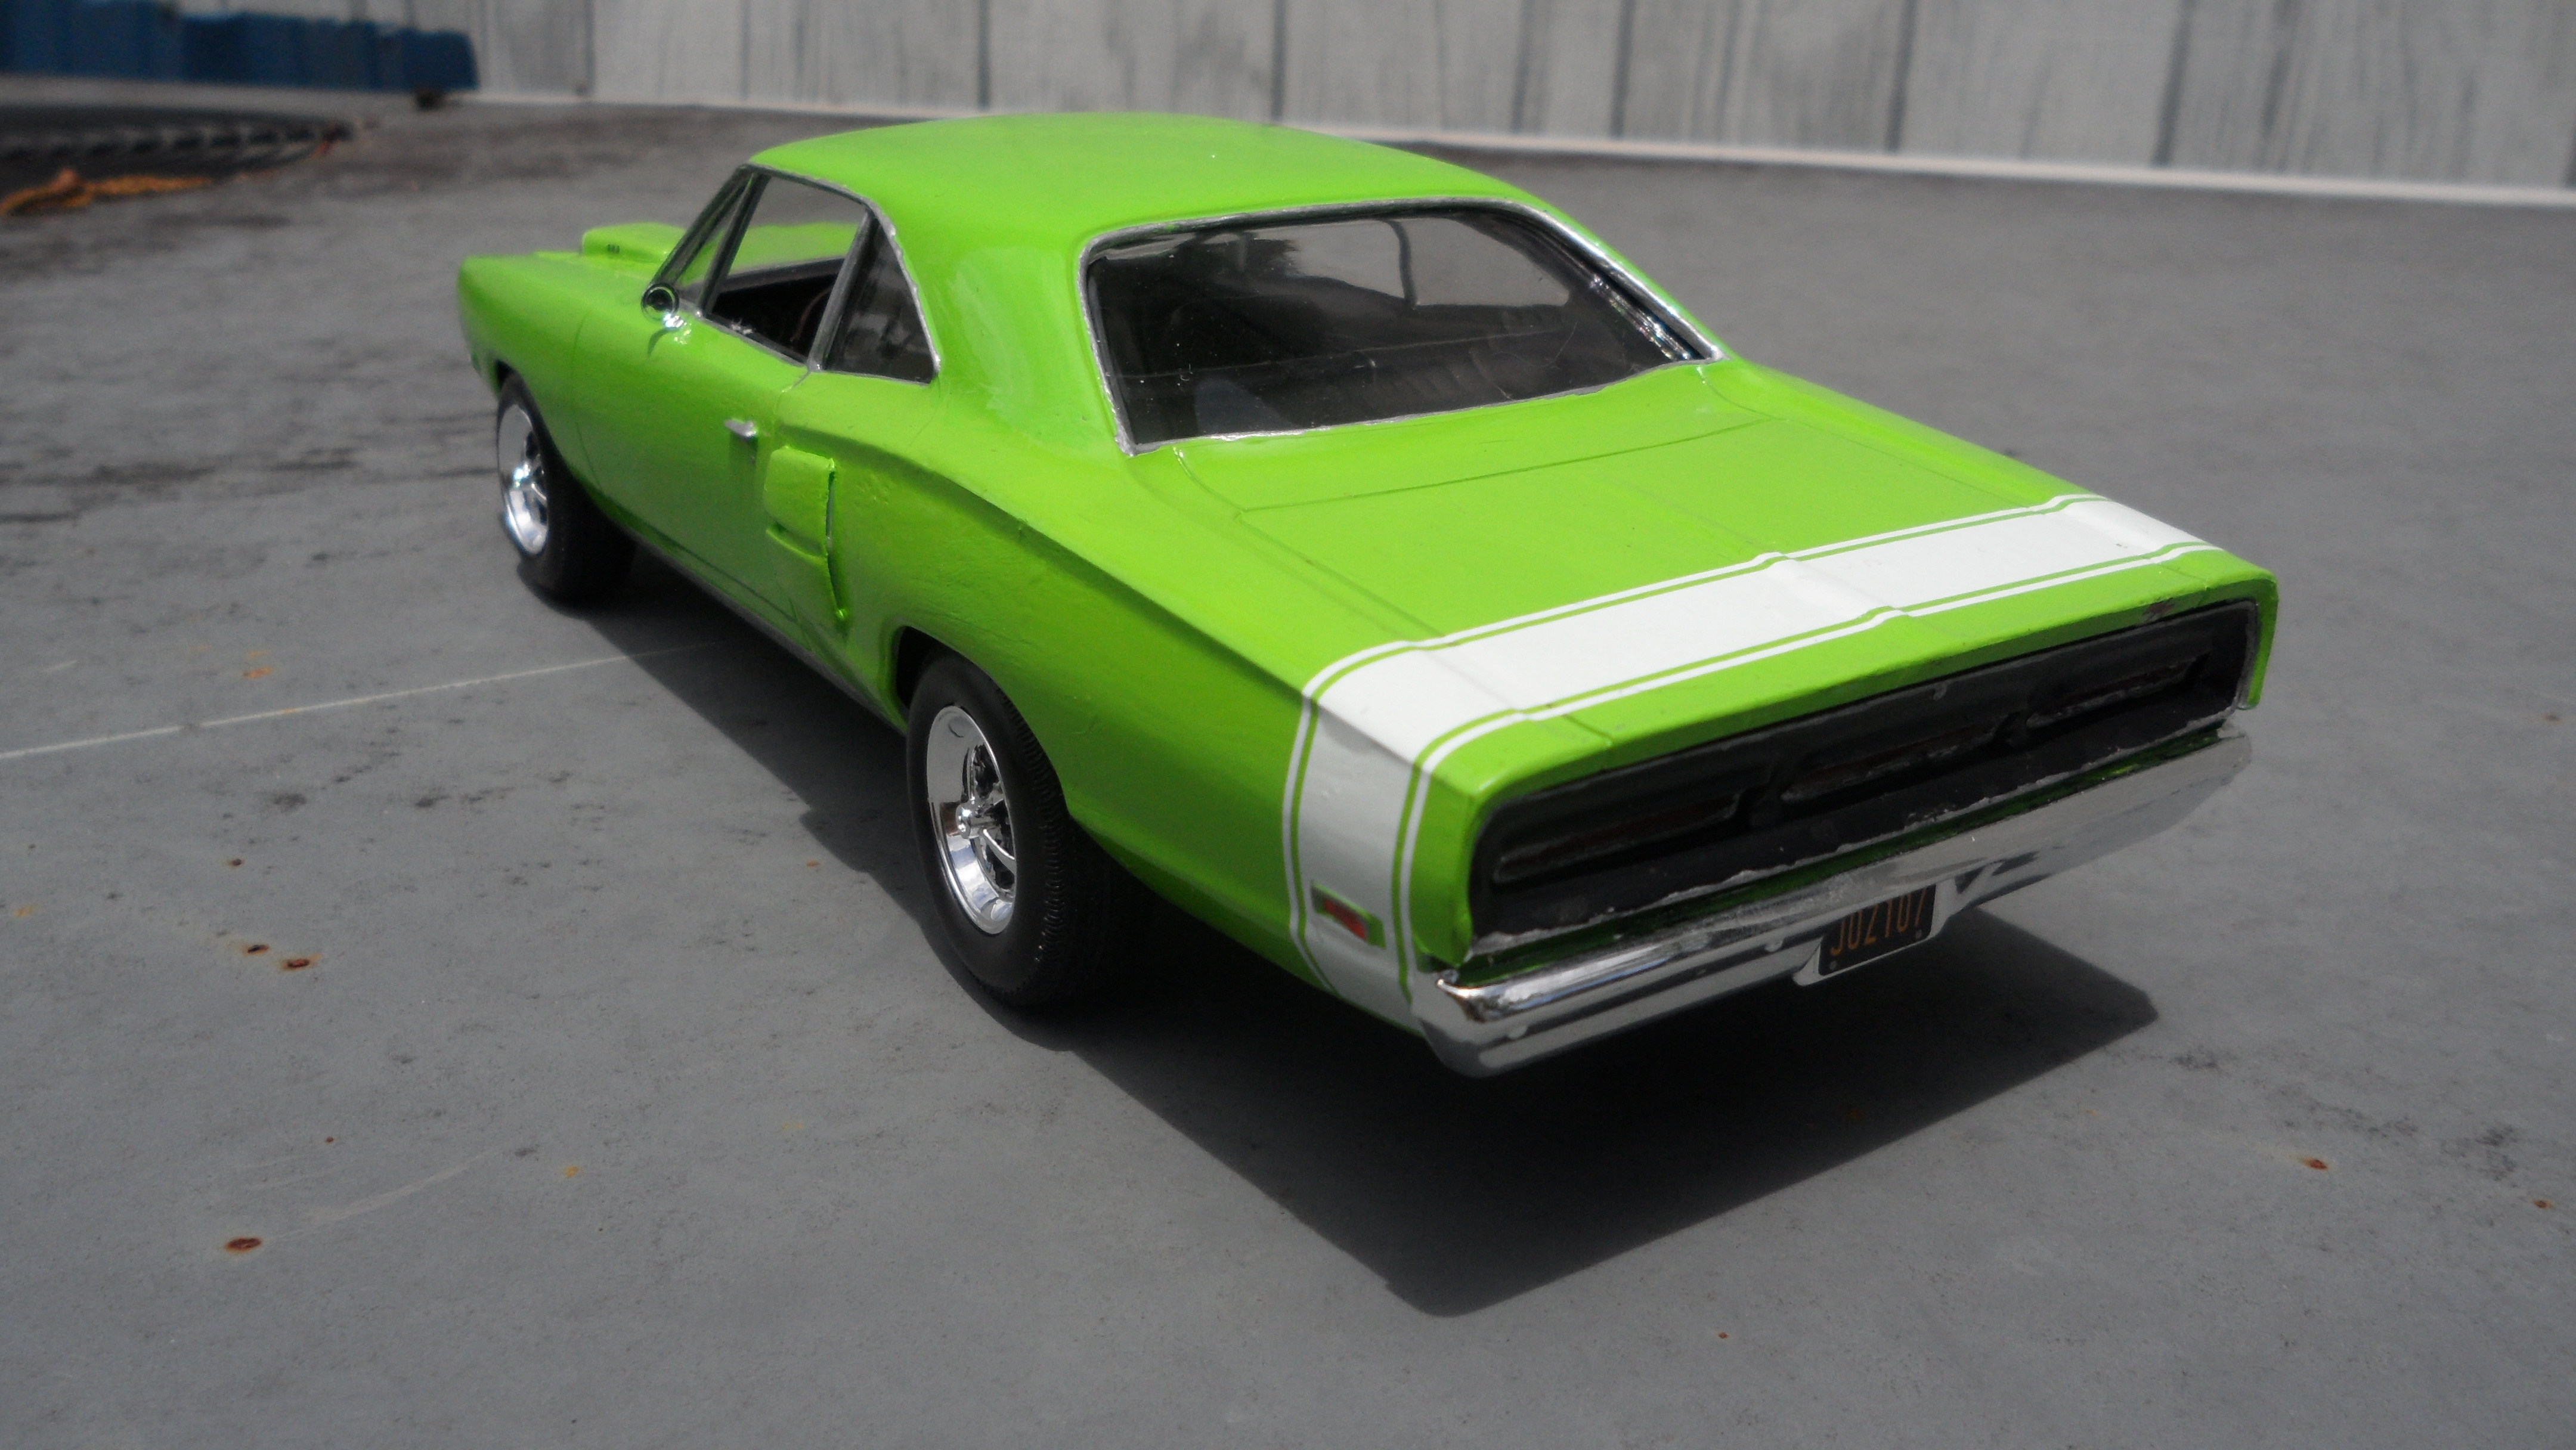
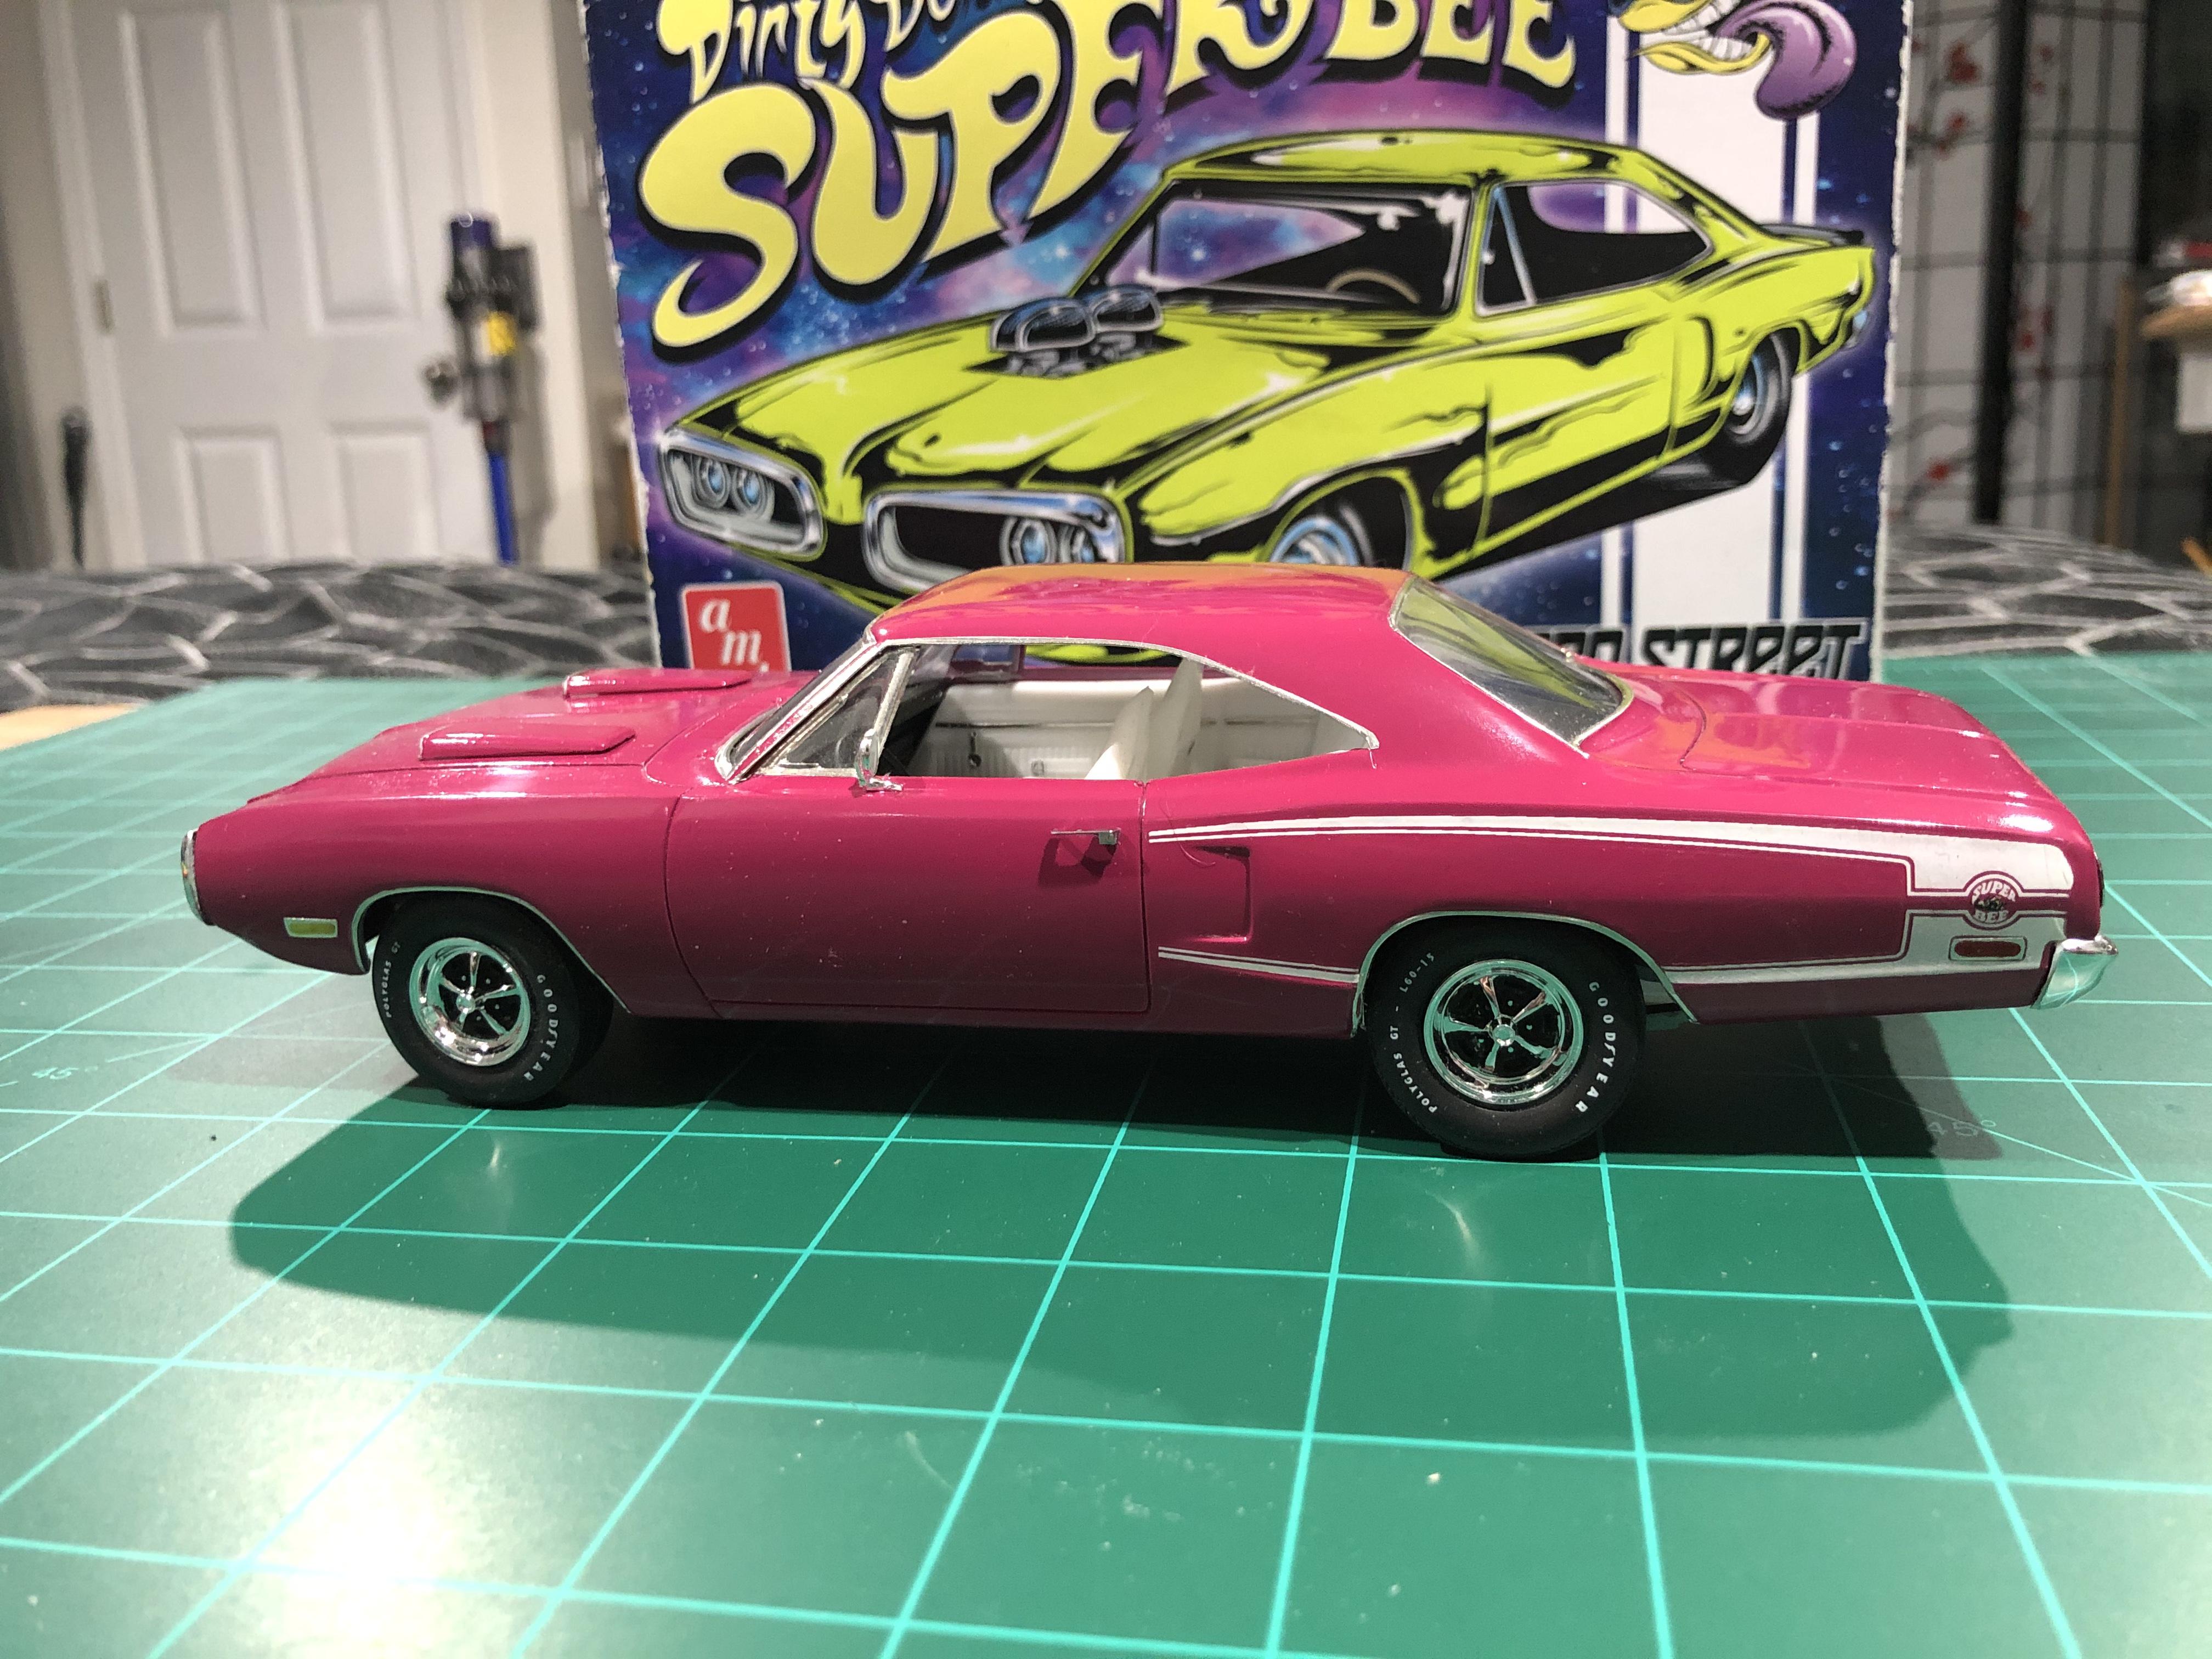
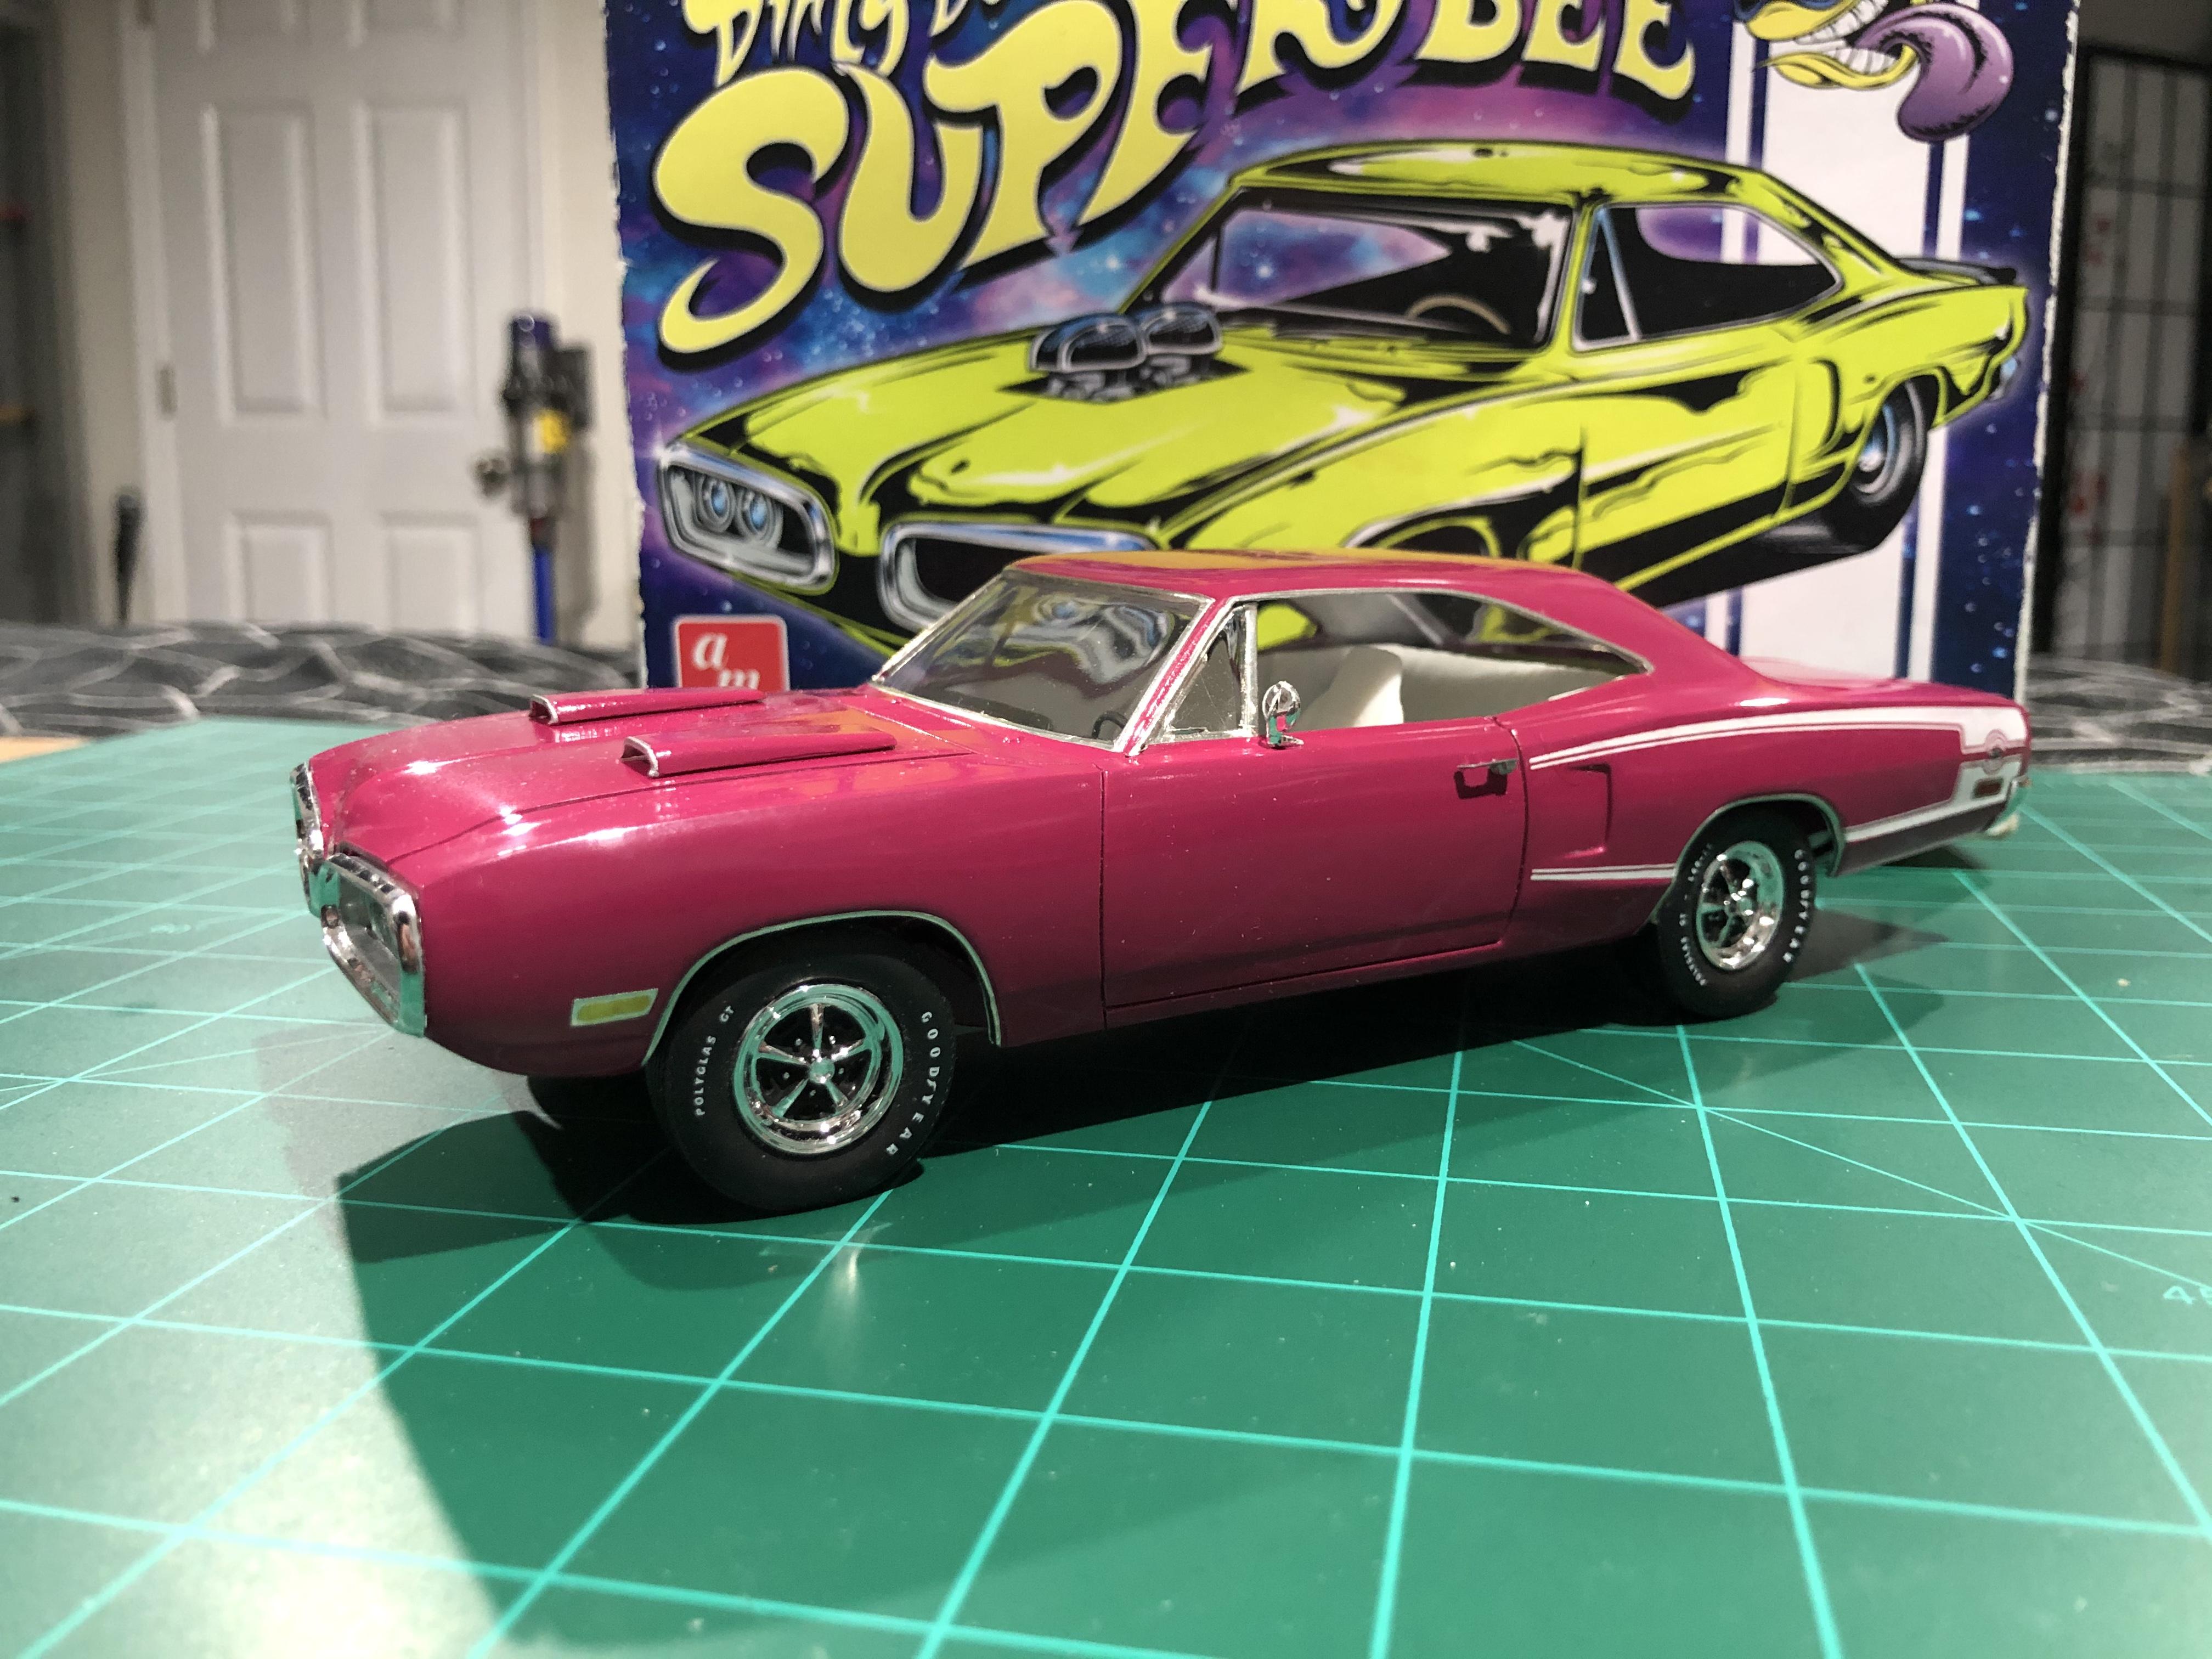
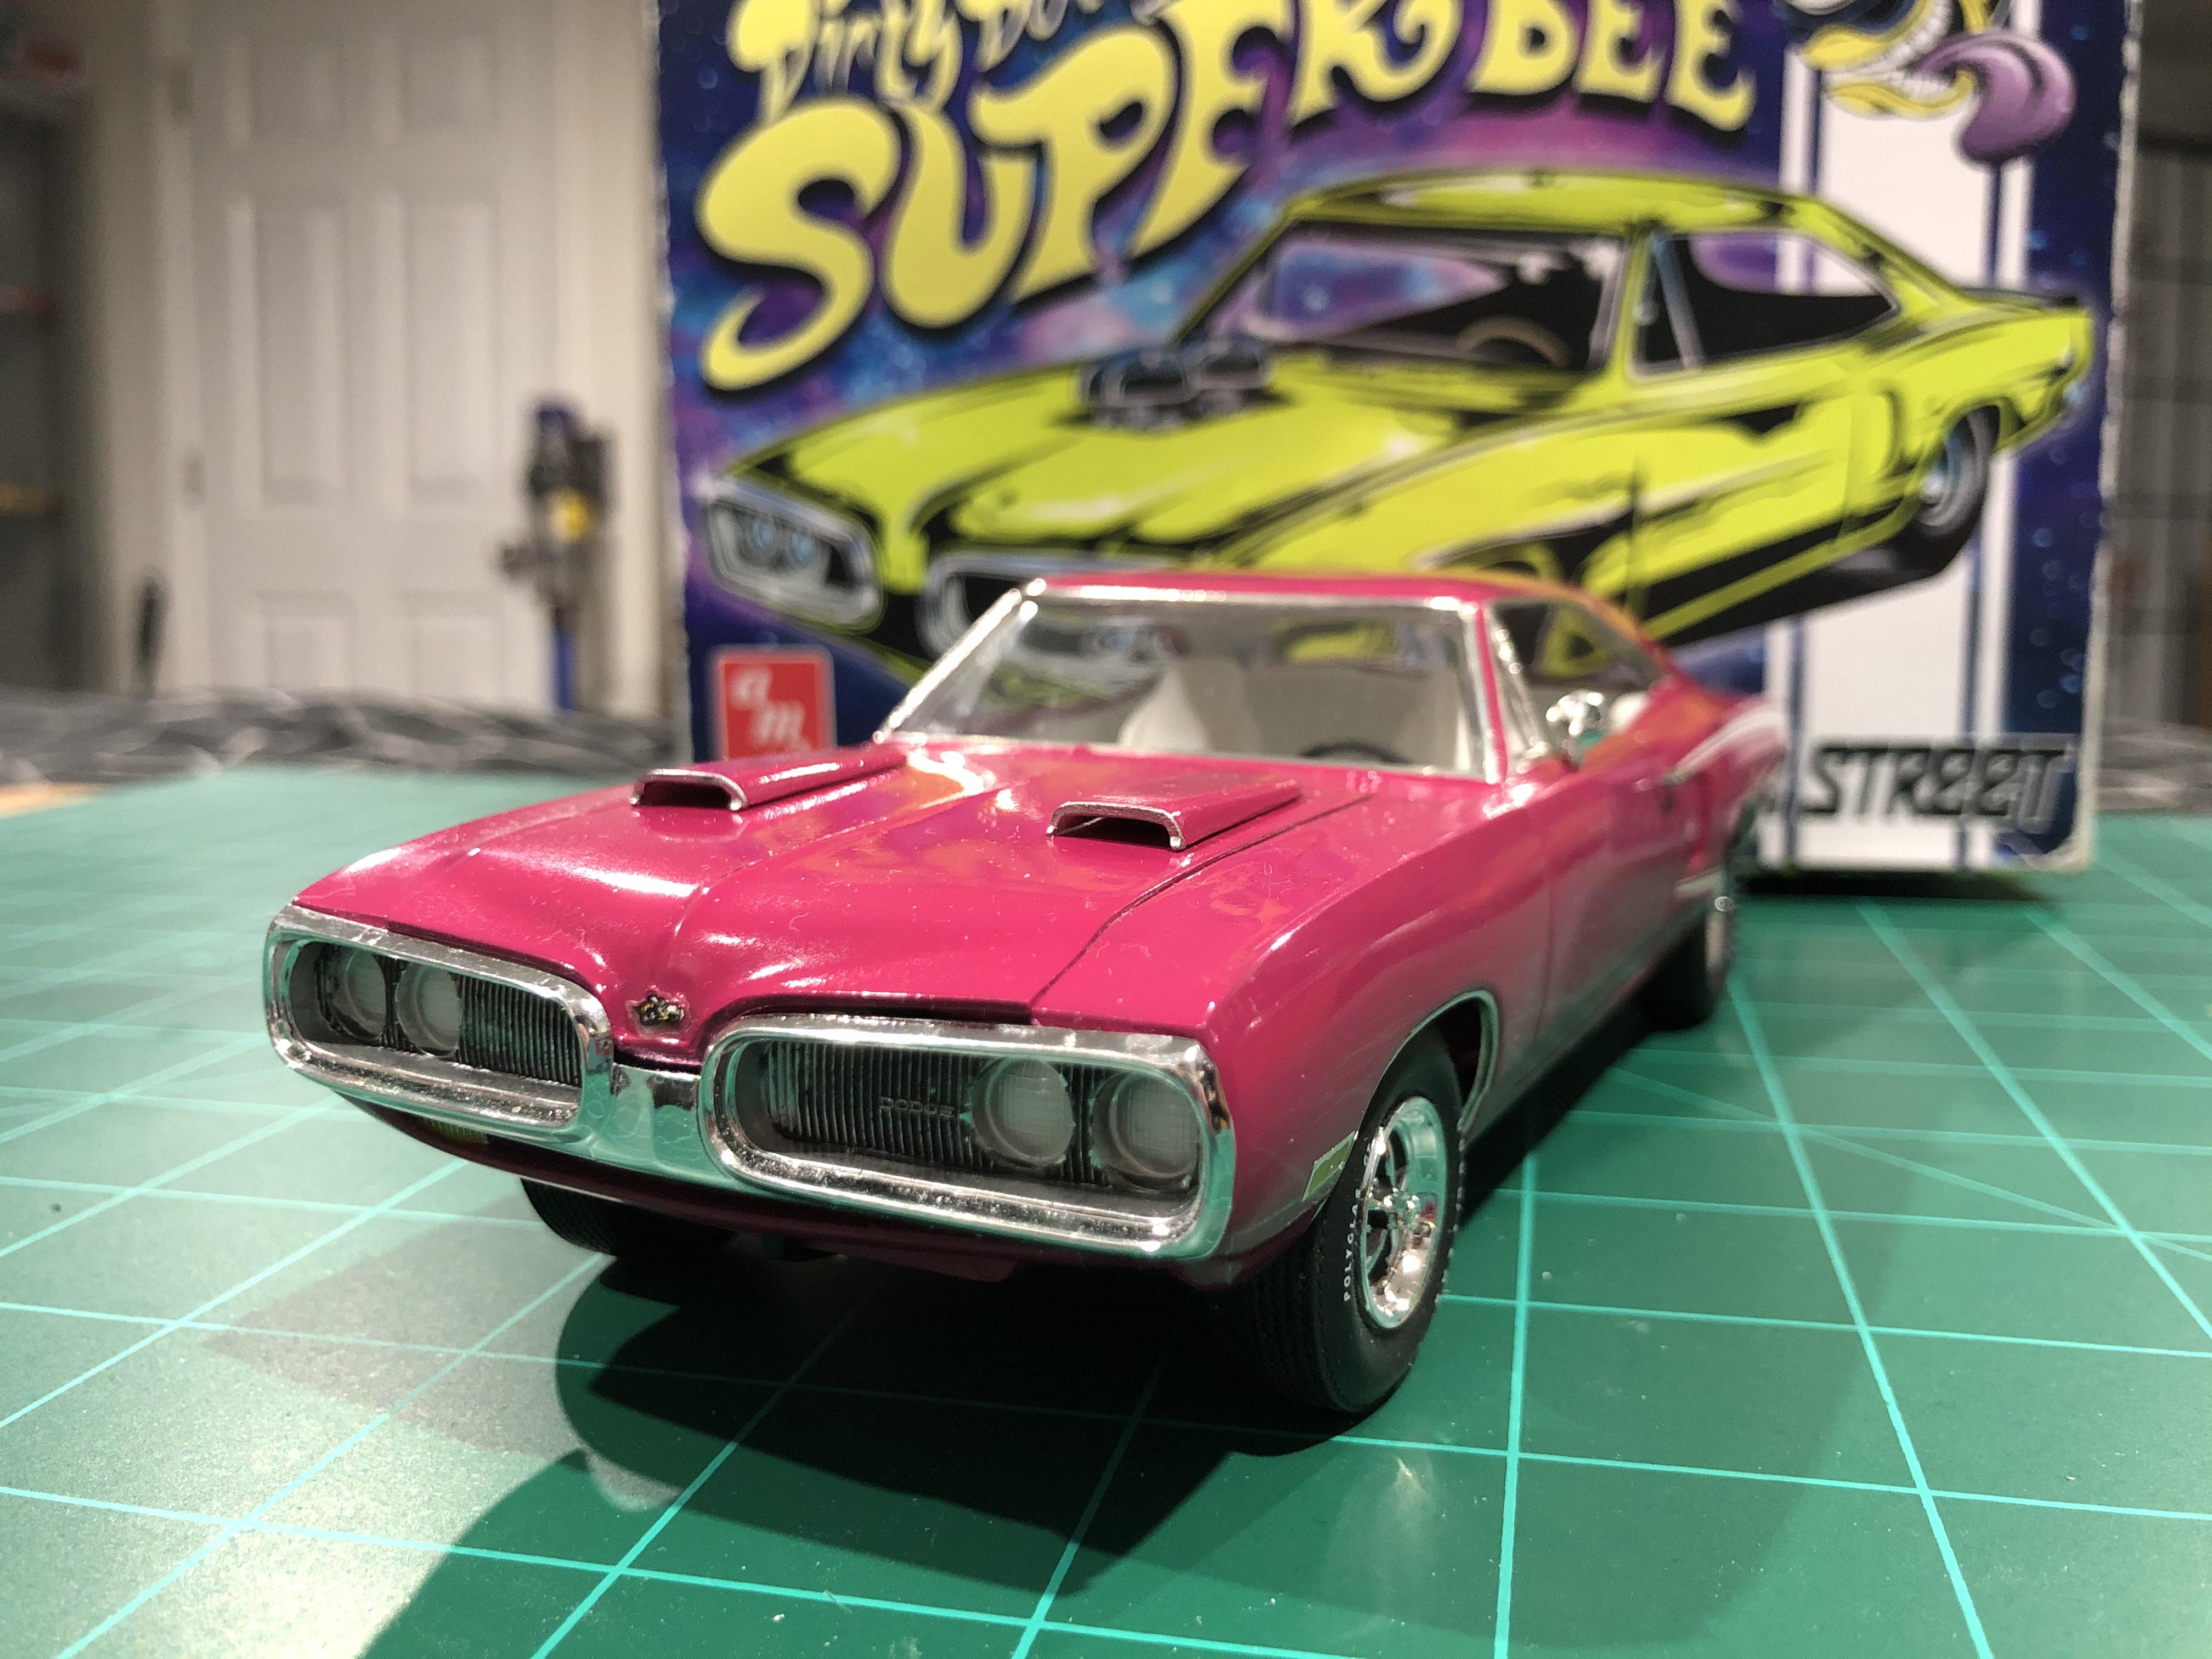
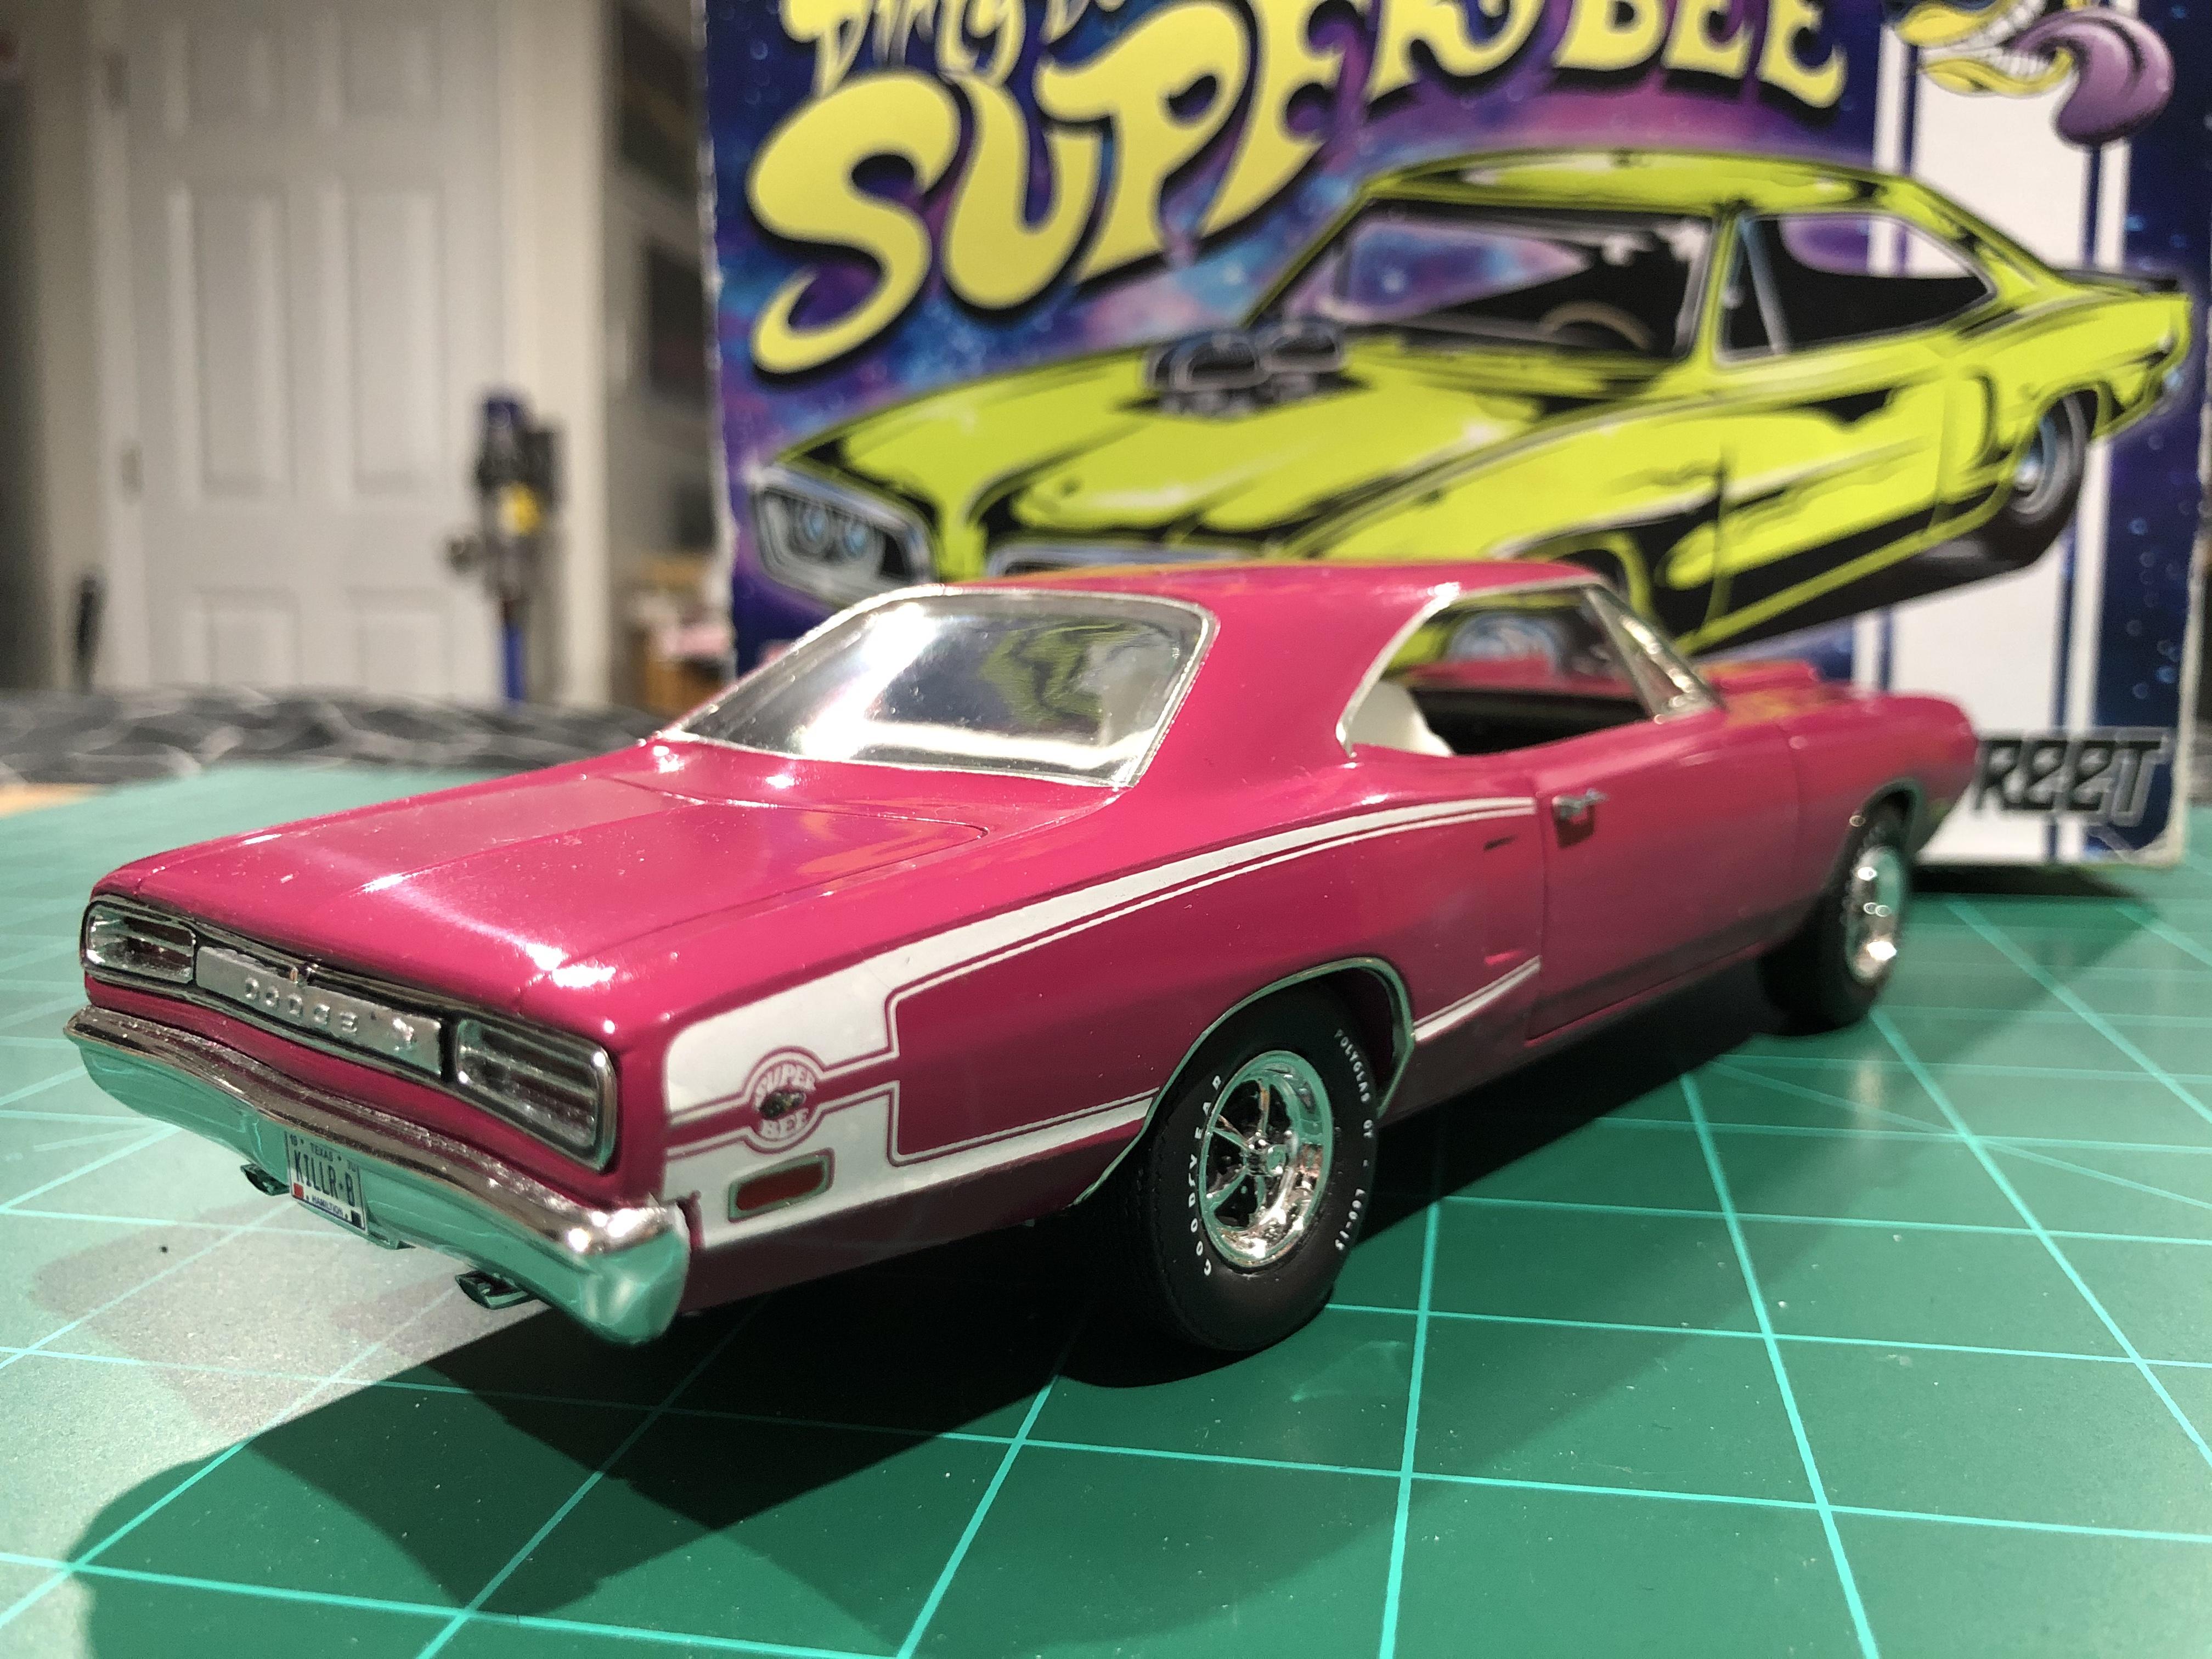
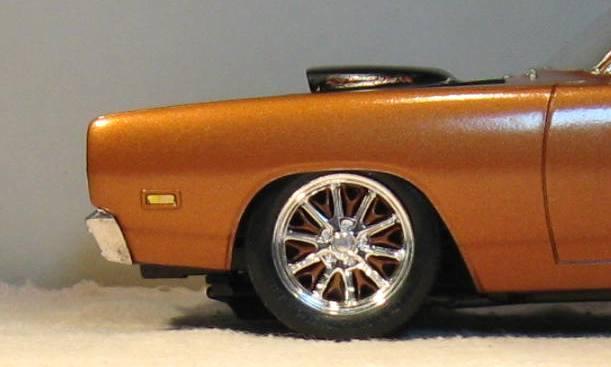
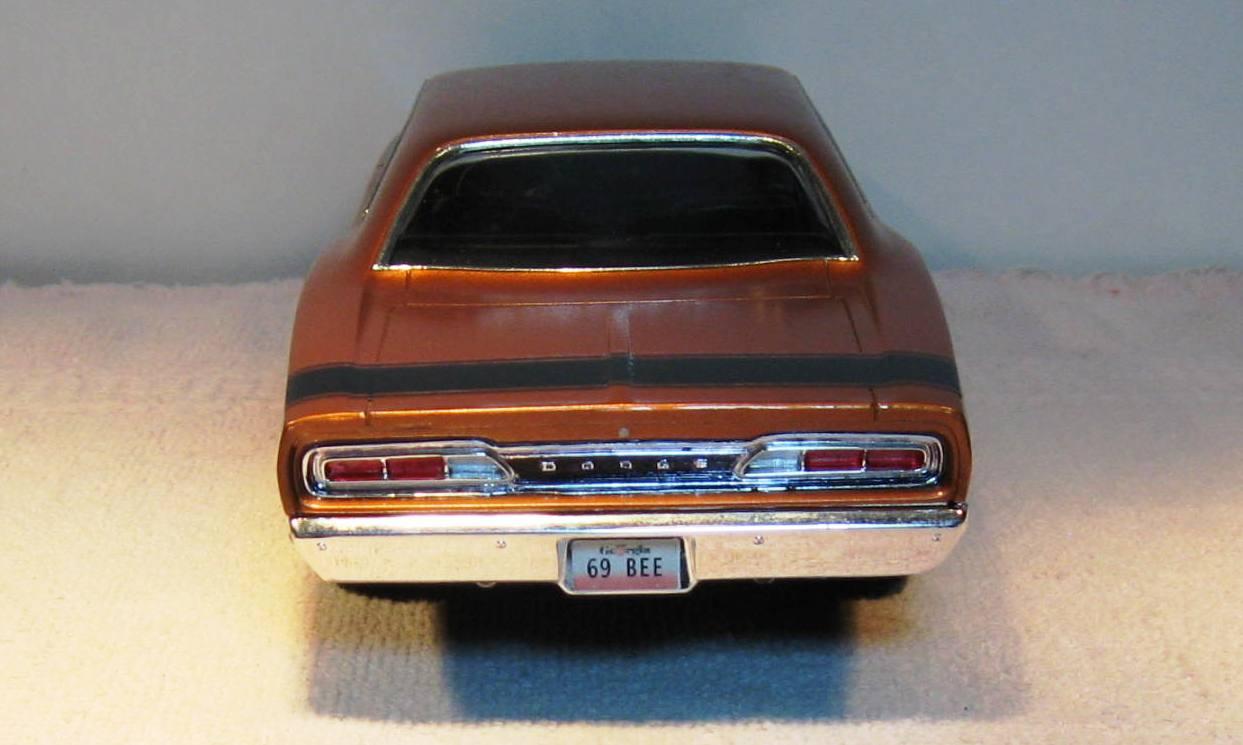
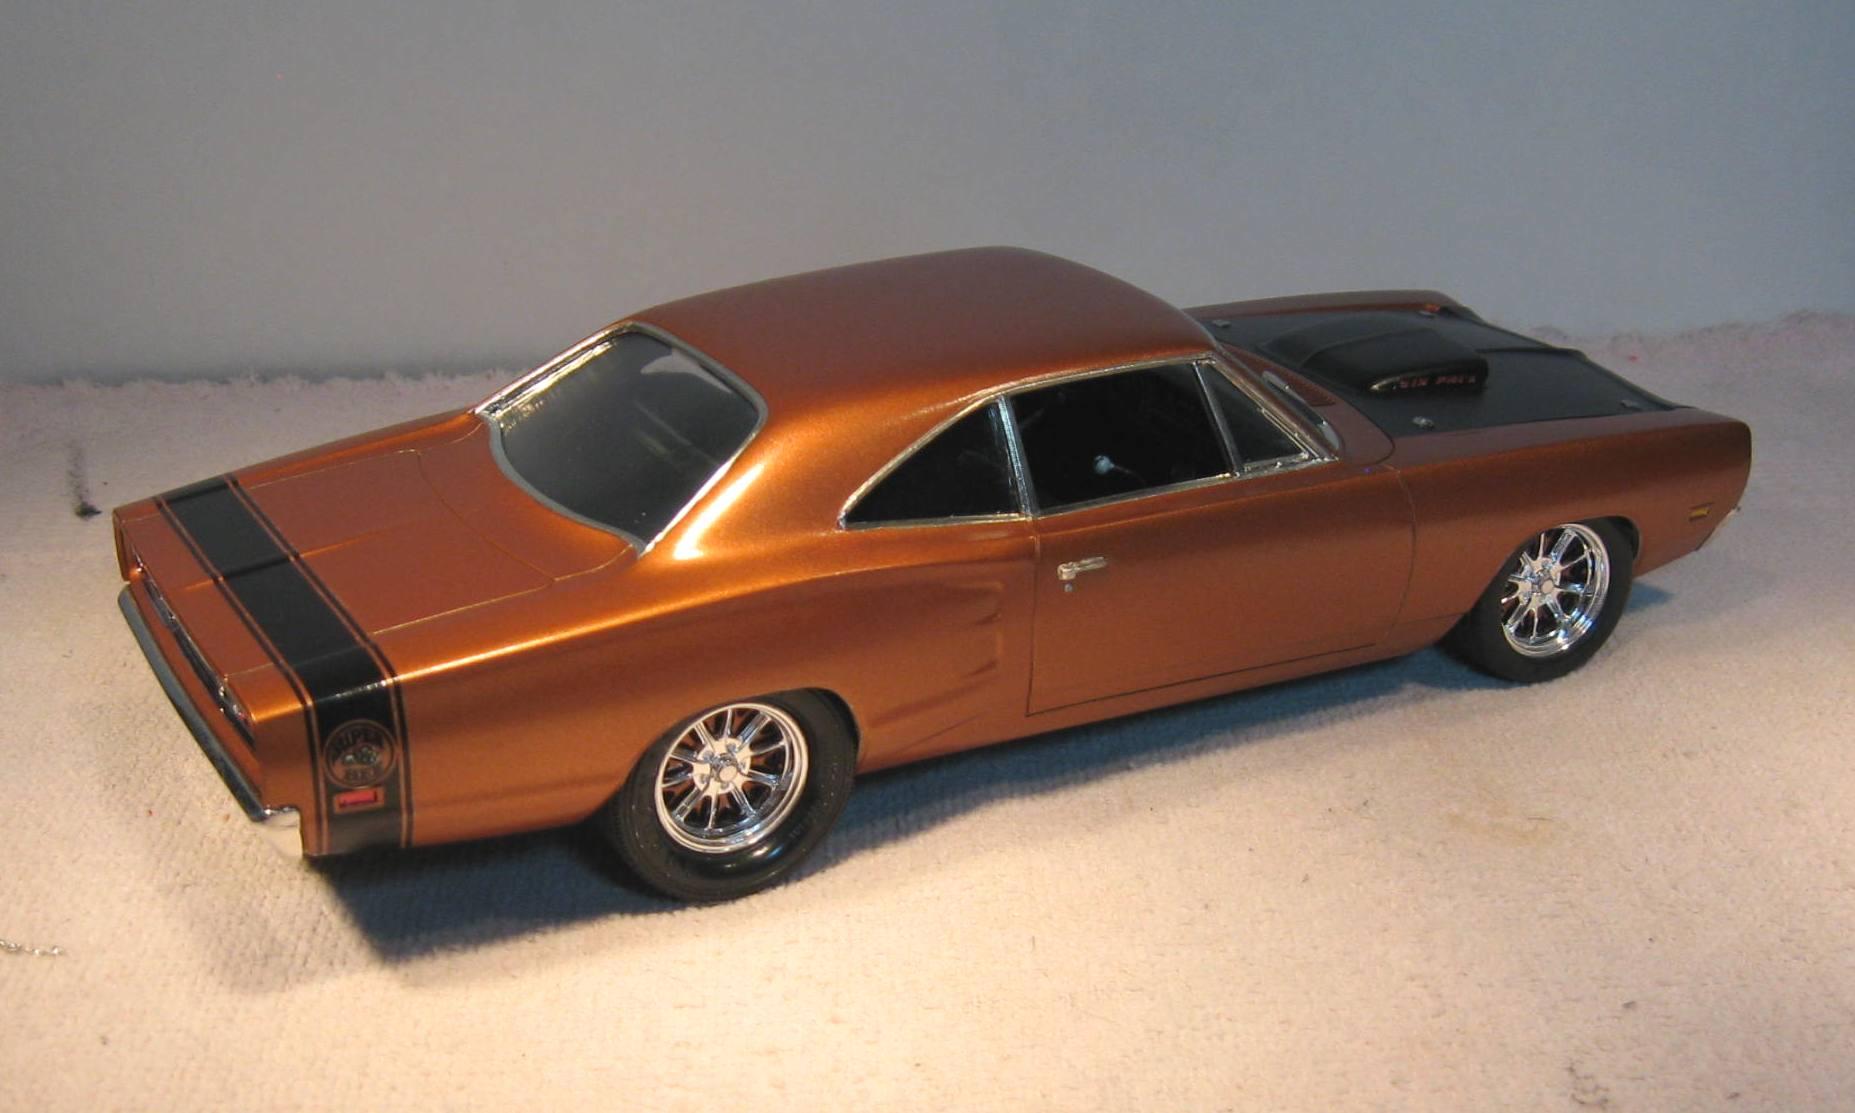
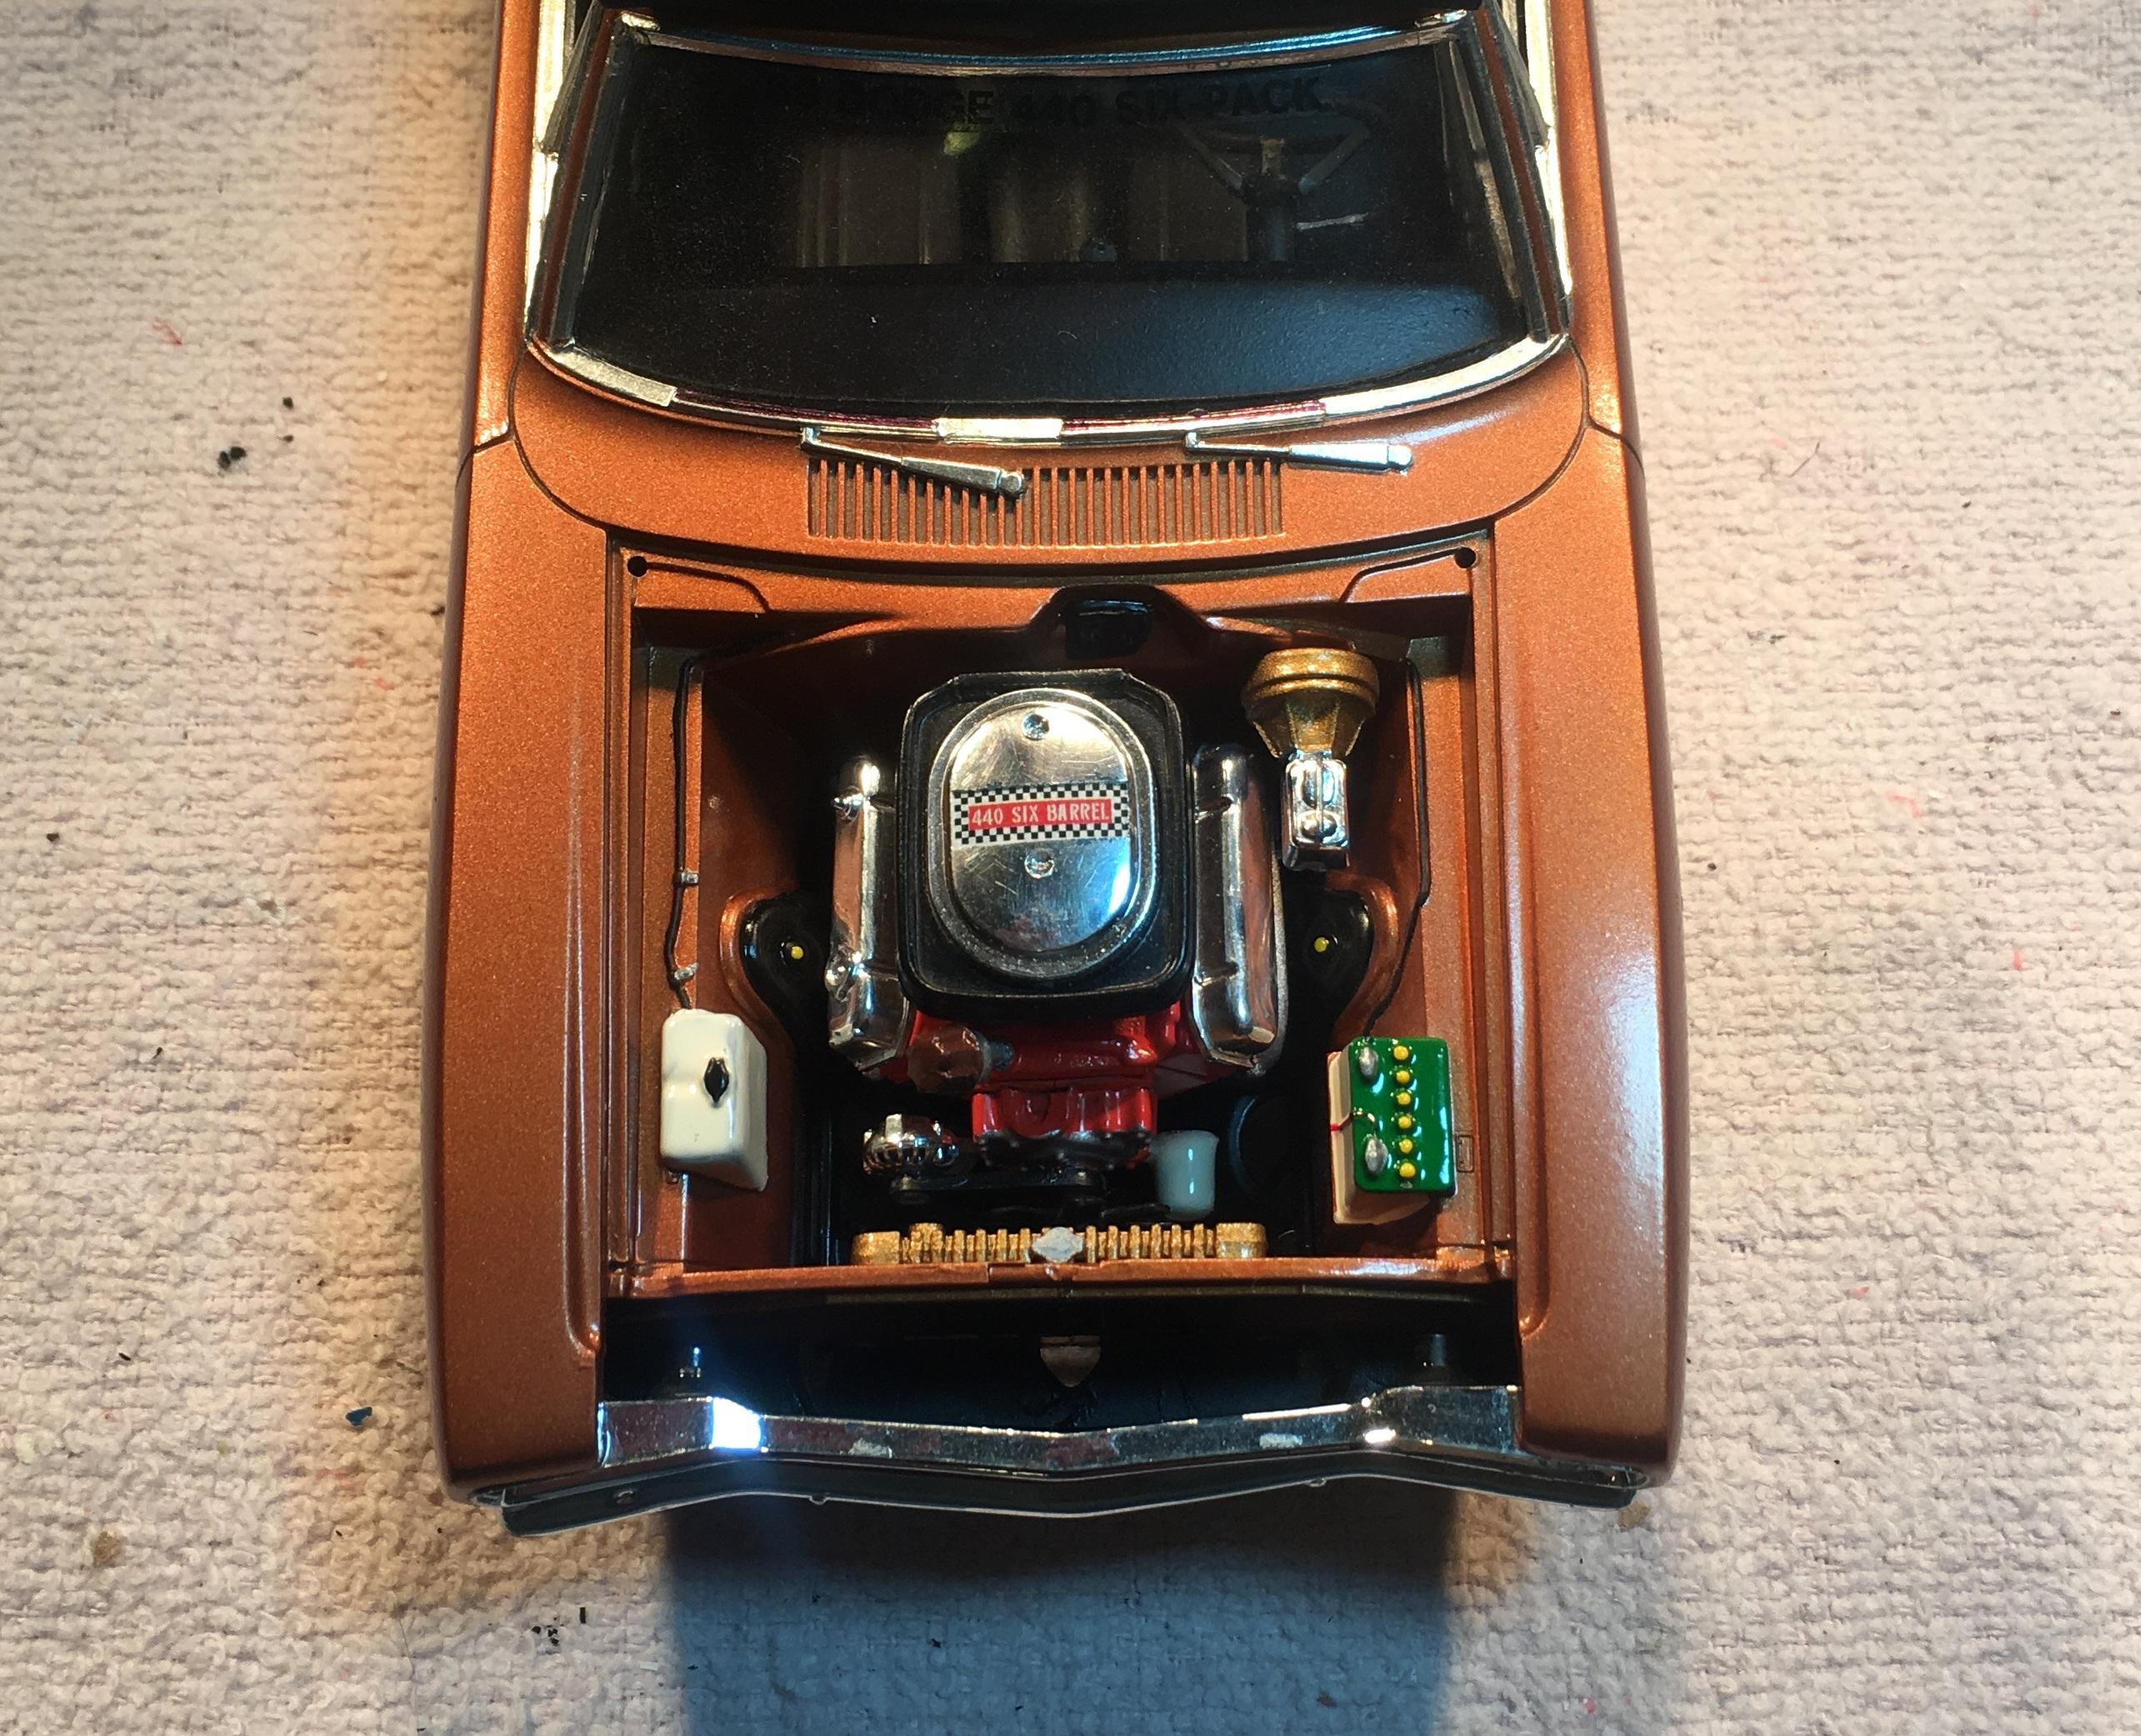
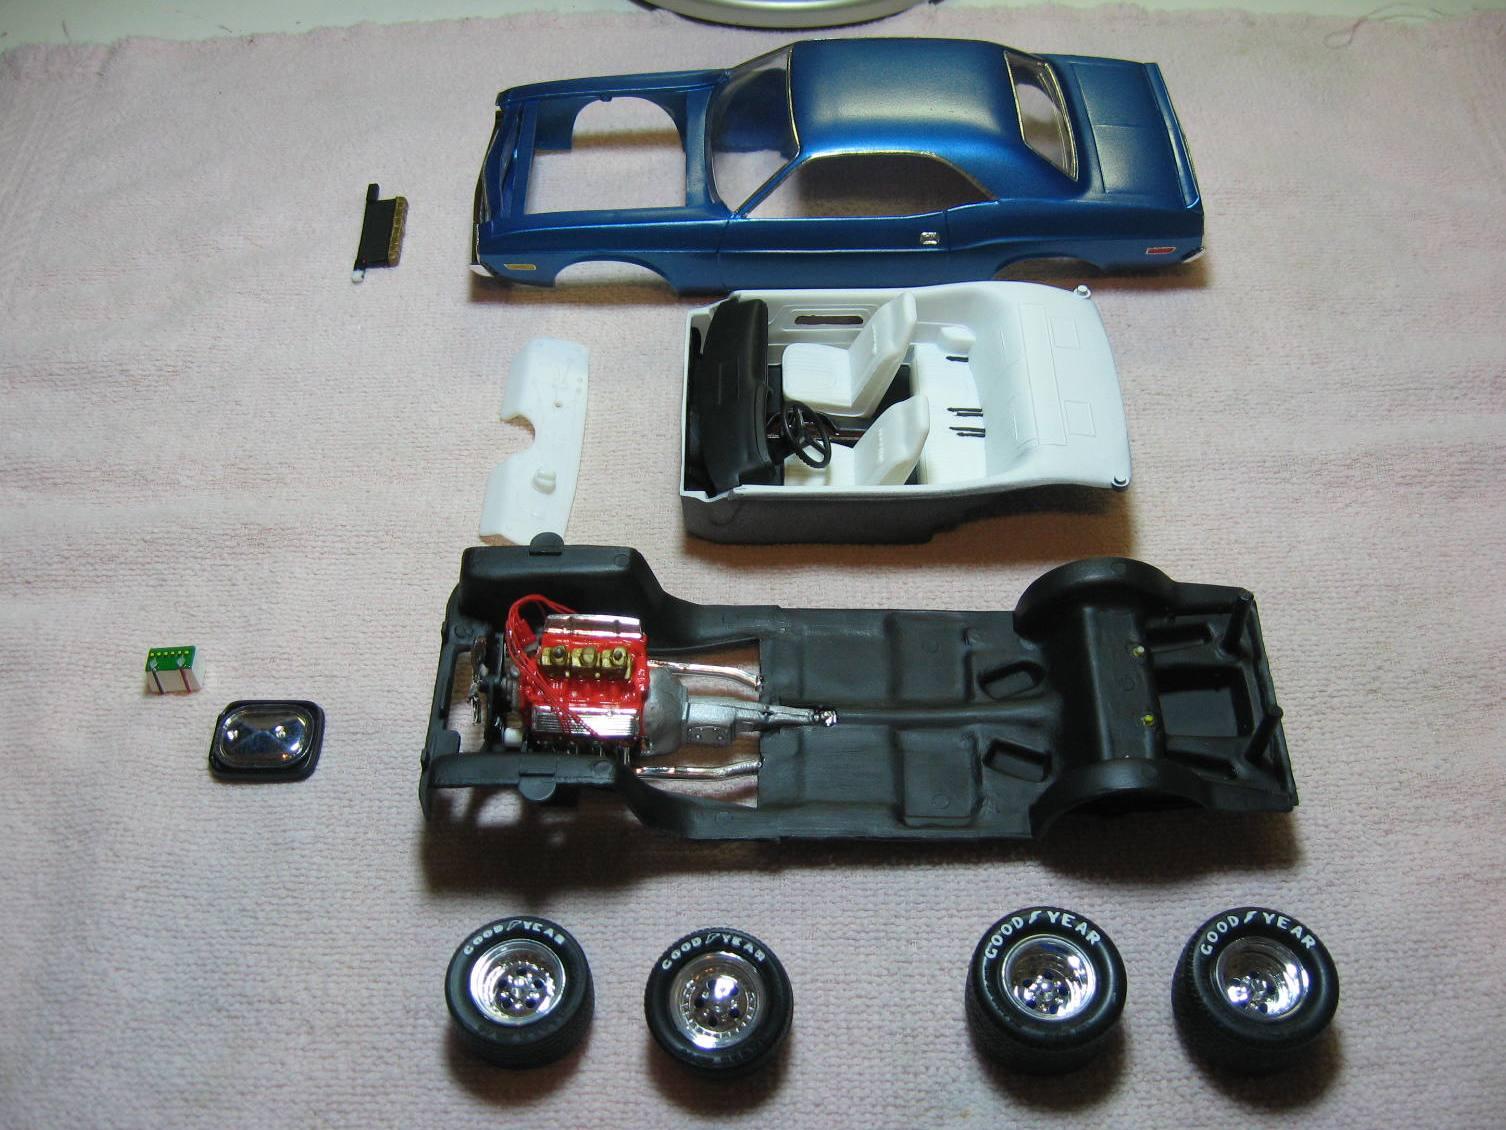
This is my second 69 Dodge Super Bee build. The first one was built (in silver) to be a slot car body. This one is the mixture of a glue bomb and the left overs from the slot car. . The wheels are custom one-offs built by marrying the 10 spokes from a 77 Monte Carlo snap kit with a set of forked, spoked wheels from an undetermined BMW kit. I wish I had more so I could try different colors. The decals were quite a challenge as the were VERY old and may have gotten damp sometime in the past. I did the usual BMF and lighting details in red and amber. I researched the real car details so I could duplicate them on the grille and tail panels. Overall the finished product came out pretty well.

-
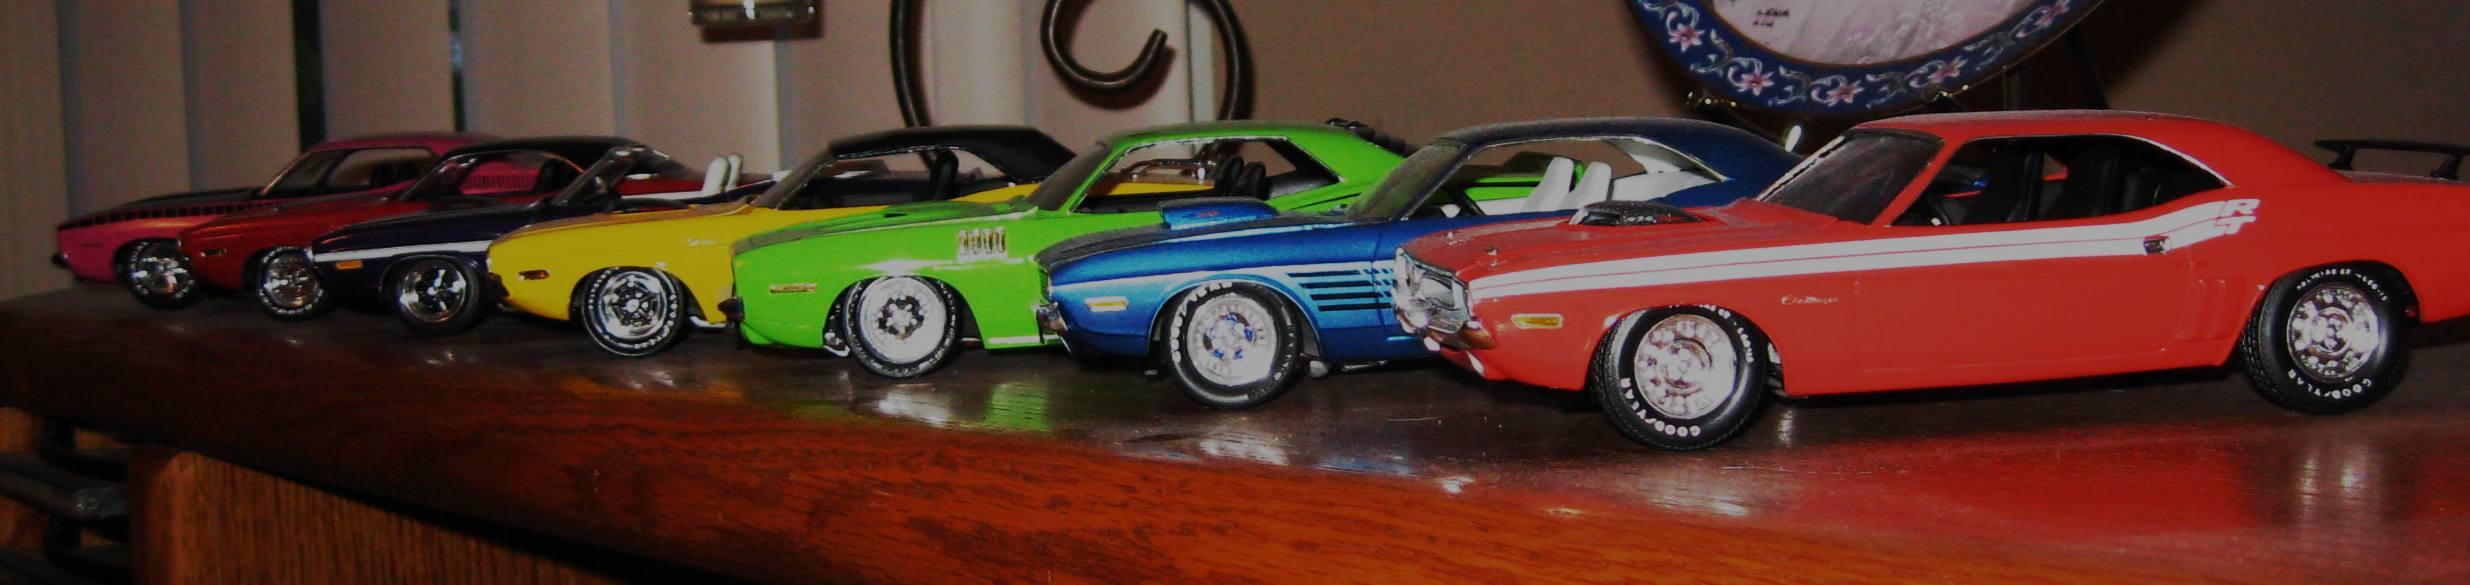
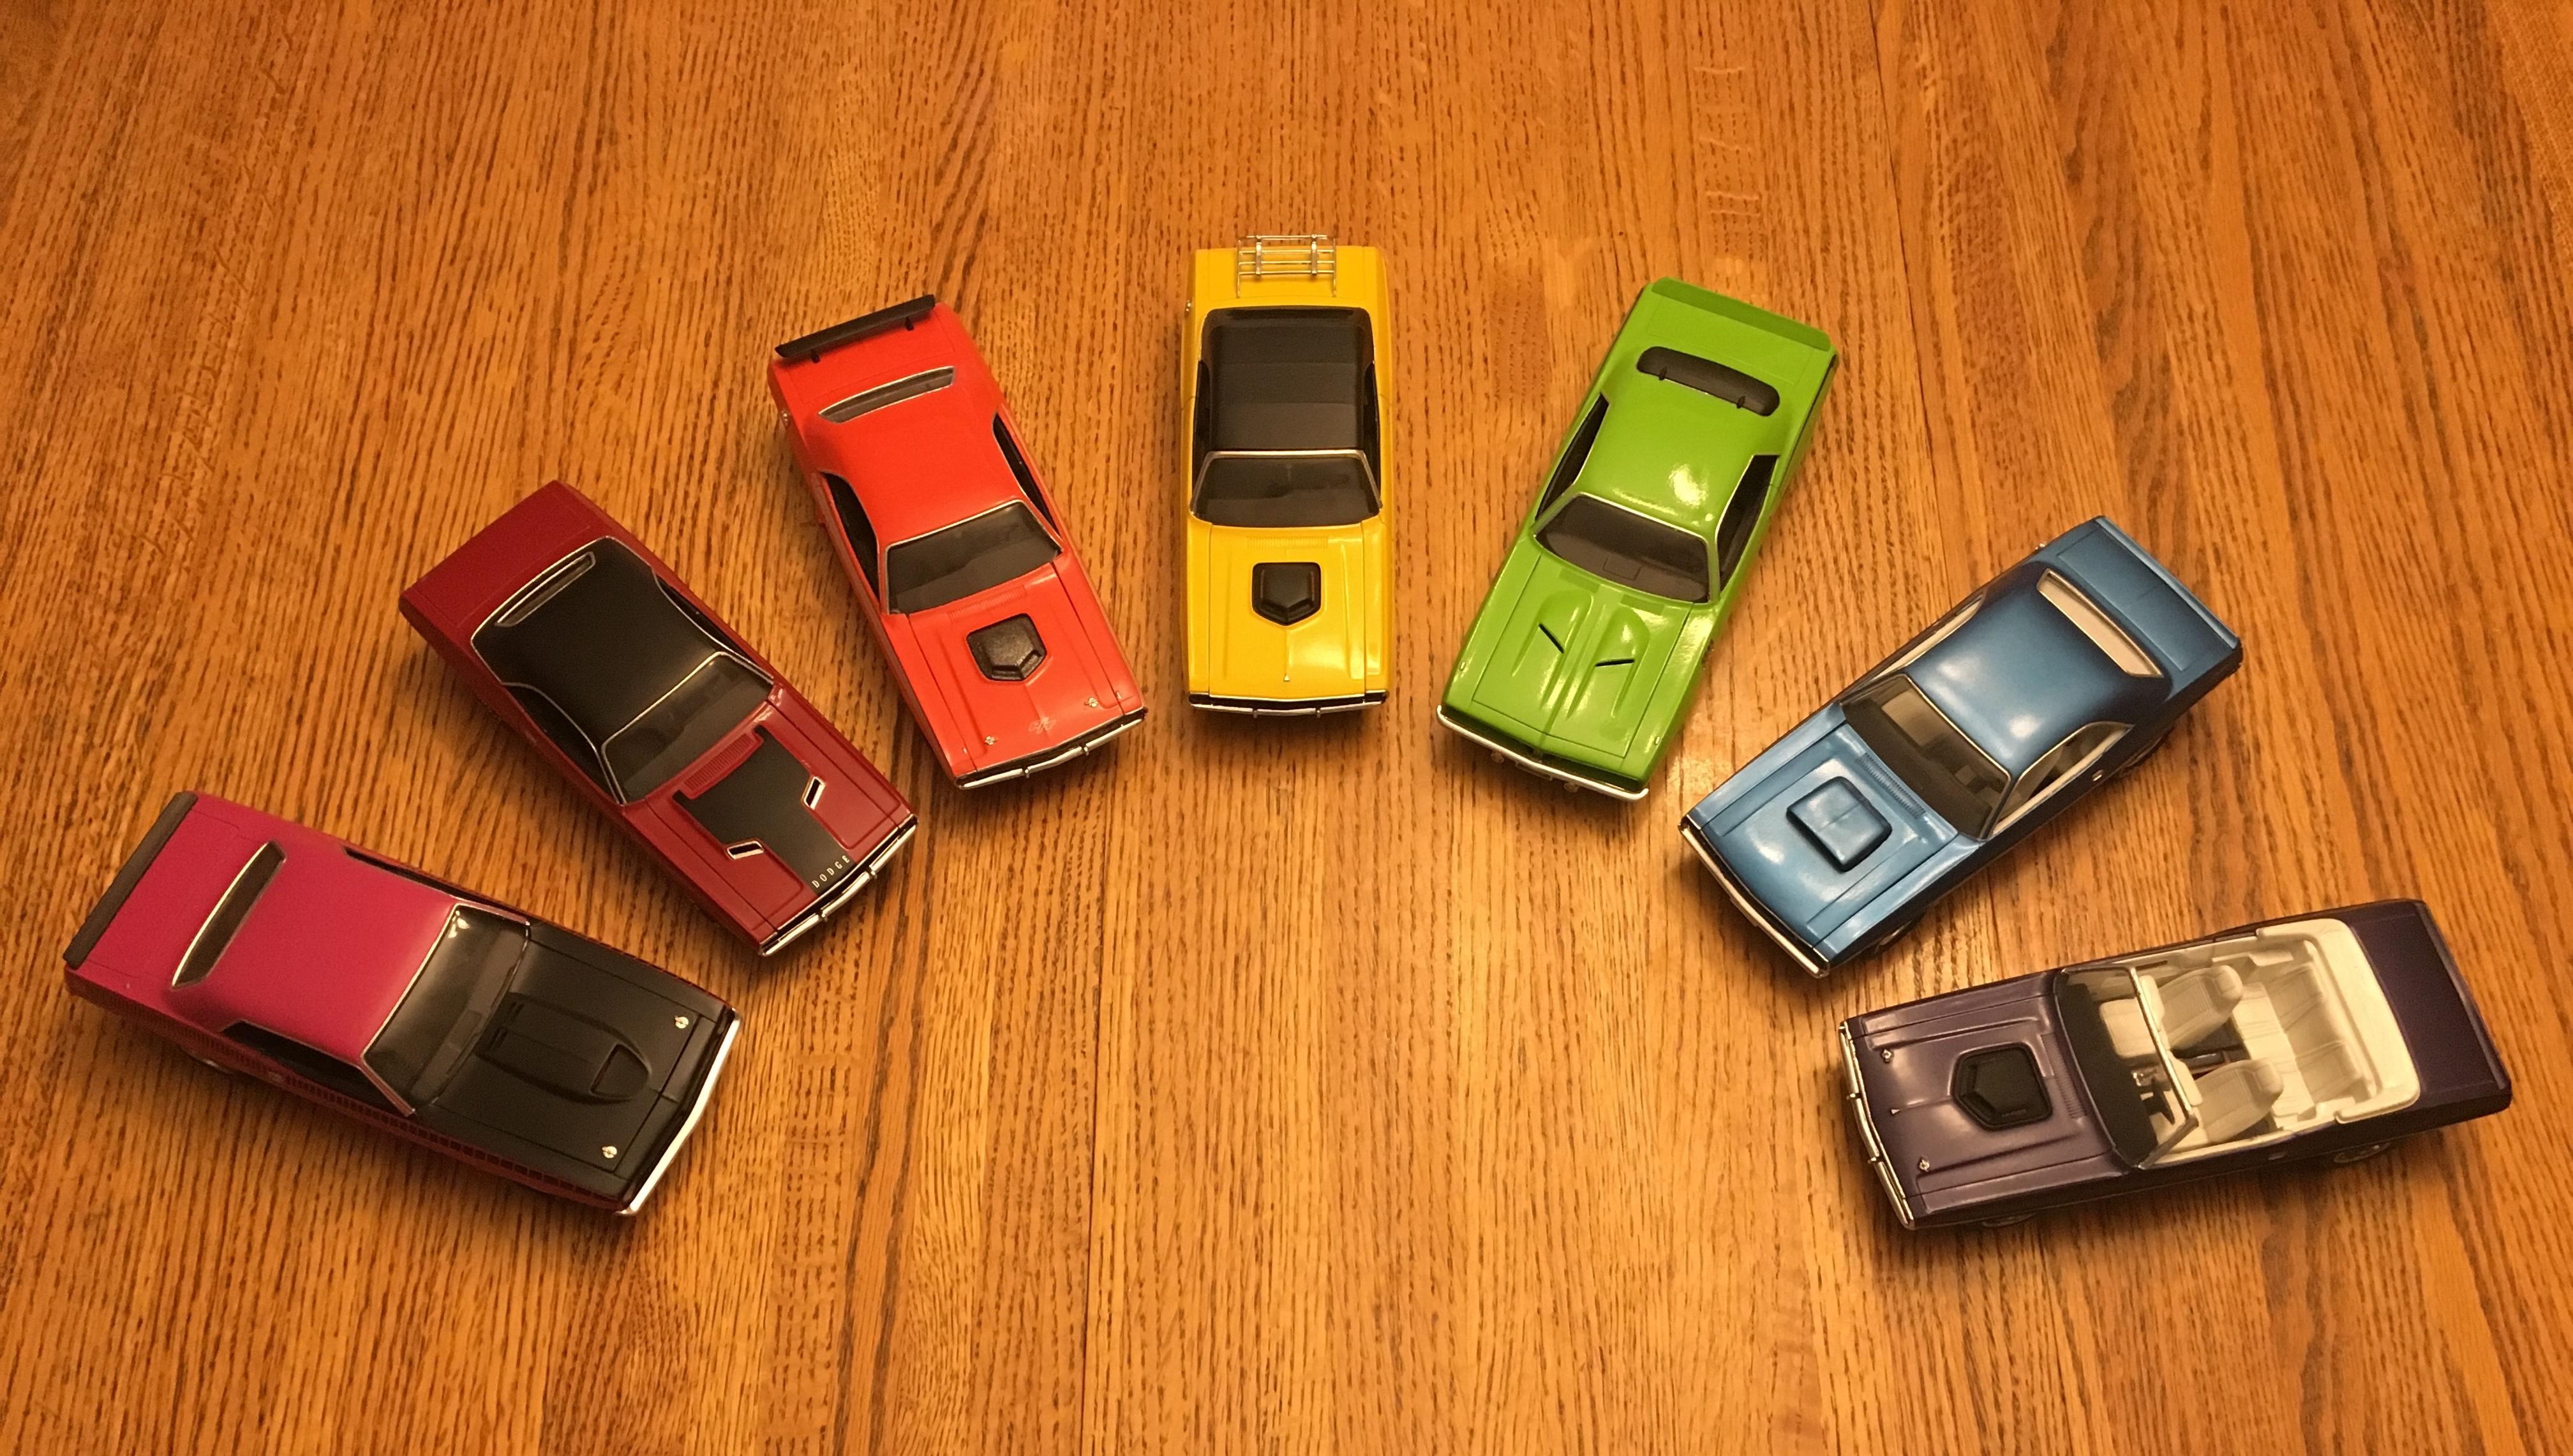
I built all of these Challengers, previously posted, in one batch. It allowed me to mix and match parts for the options desired on each. They were all painted in the same week. Having so many at once allowed me to build efficiently and gave freshly glued or painted parts time to dry before being handled again. Their completion resulted in a rainbow of E-bodies.
-
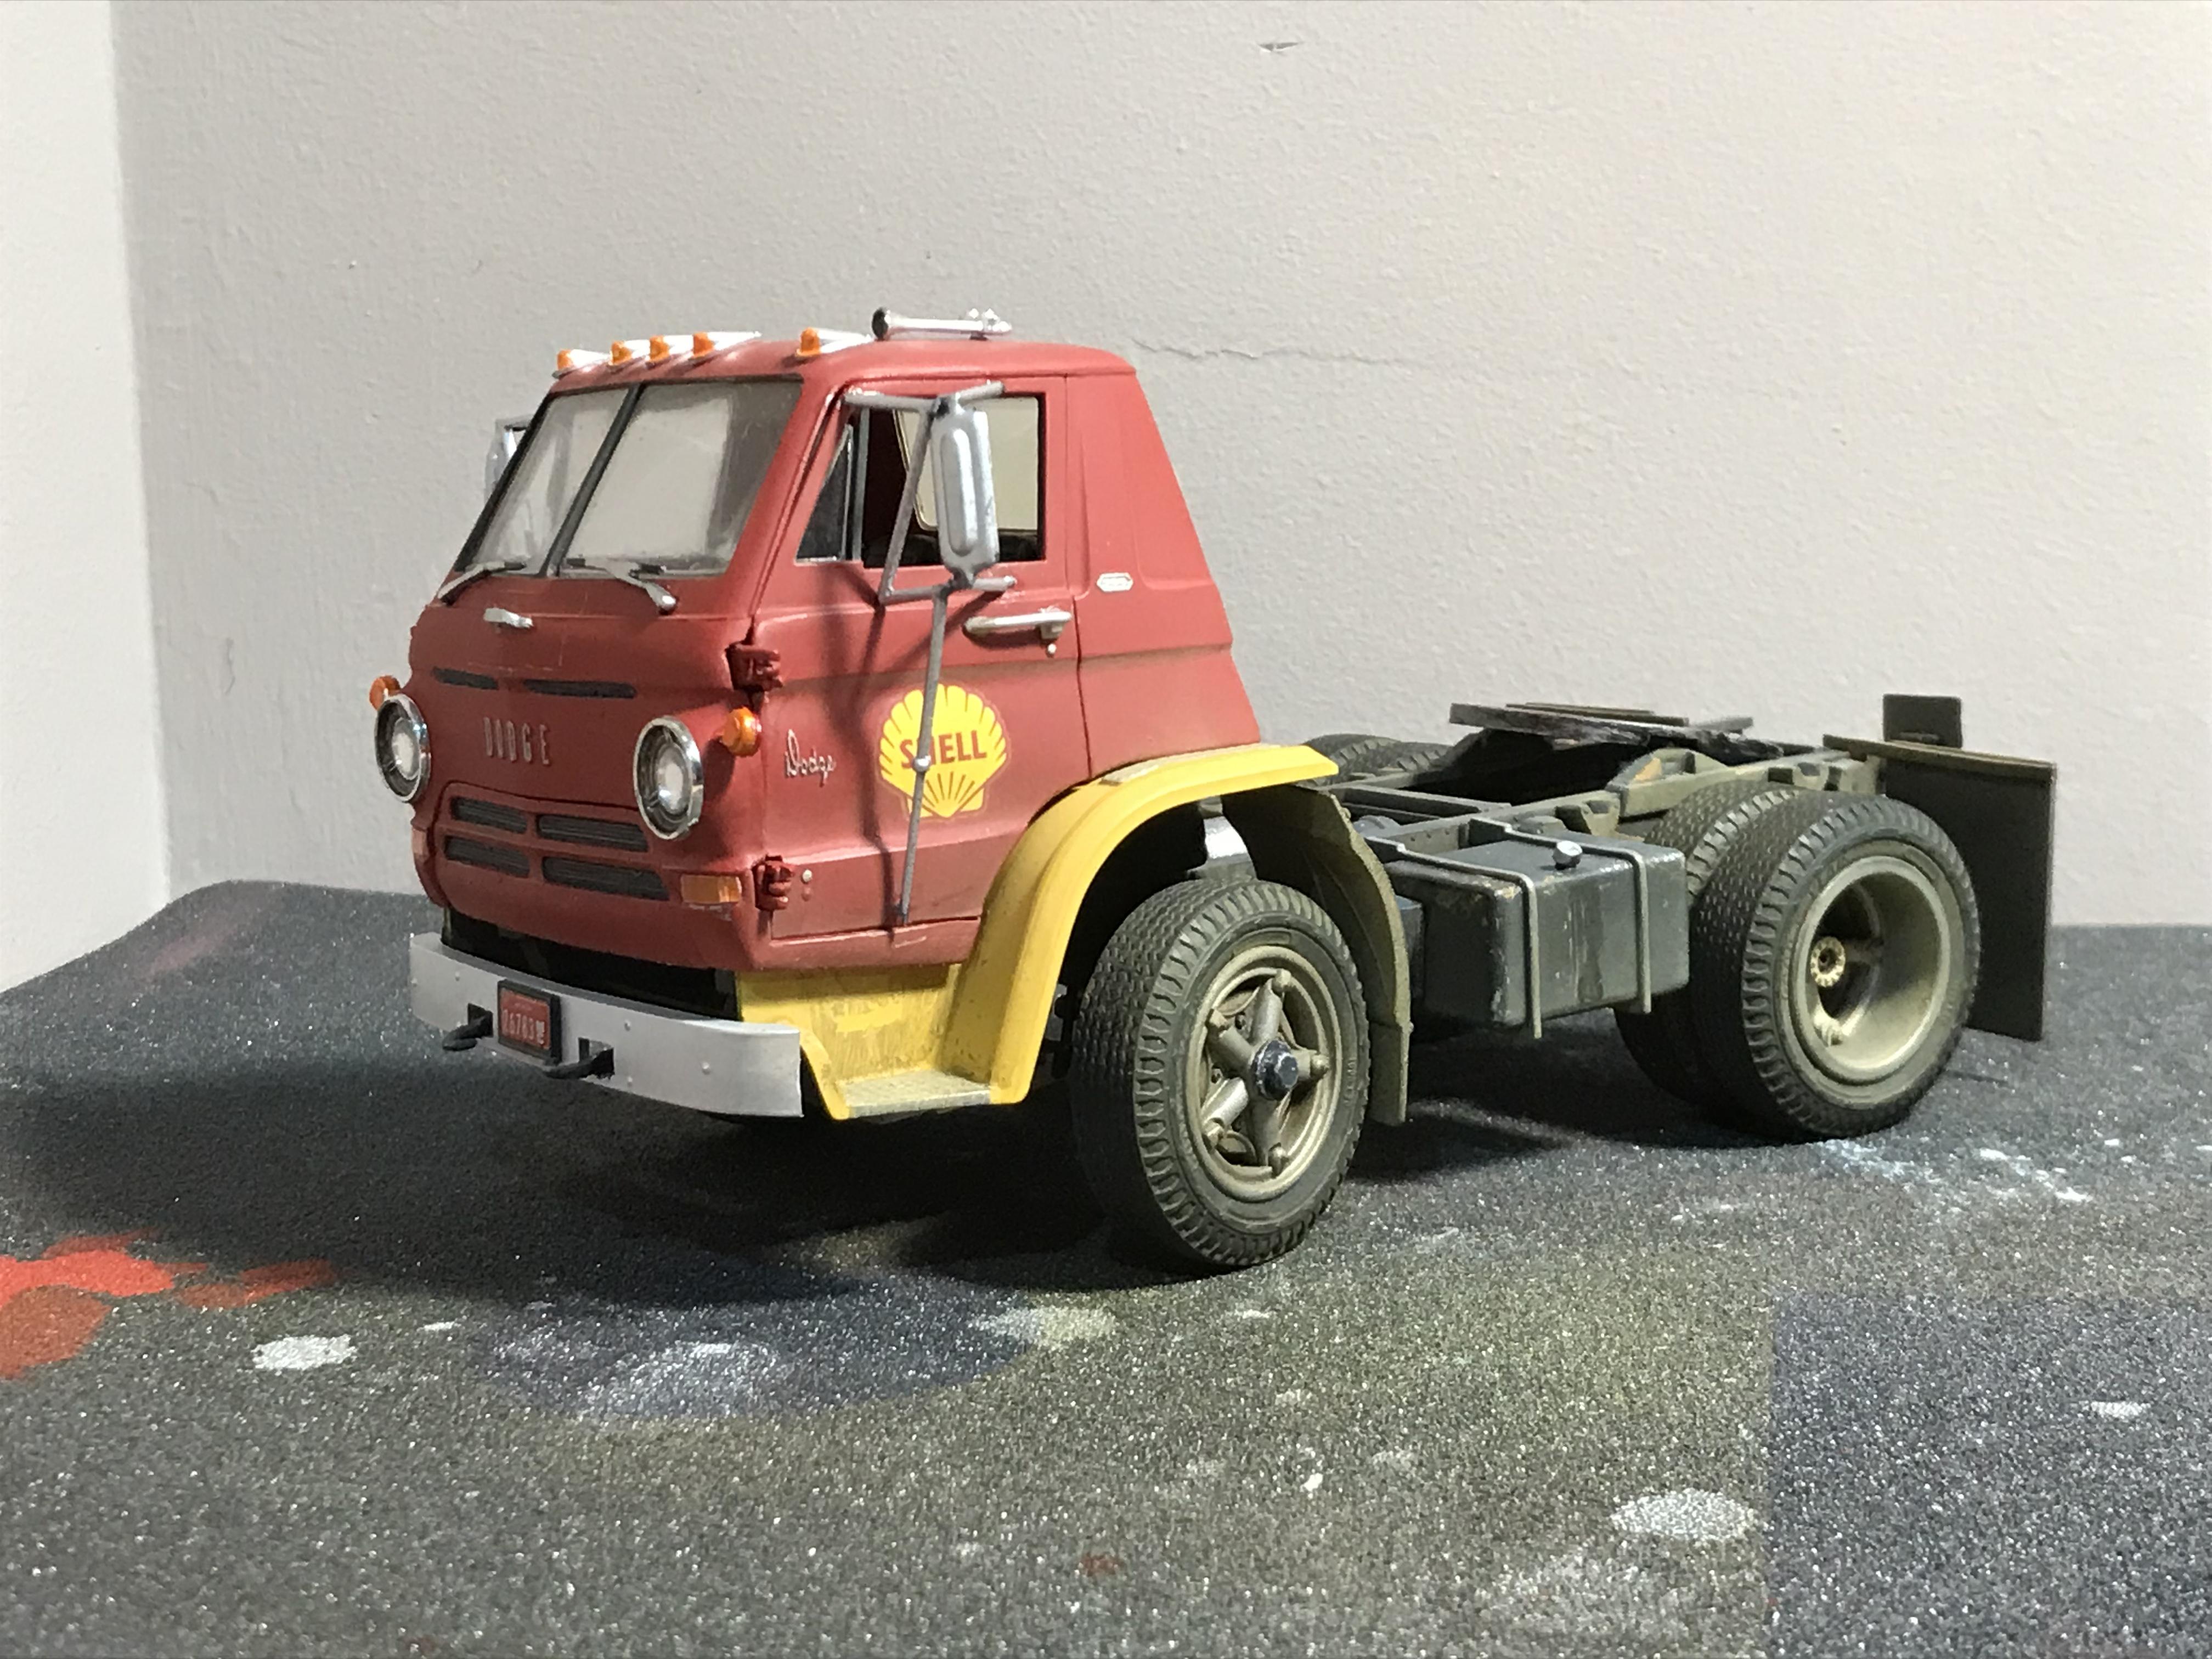
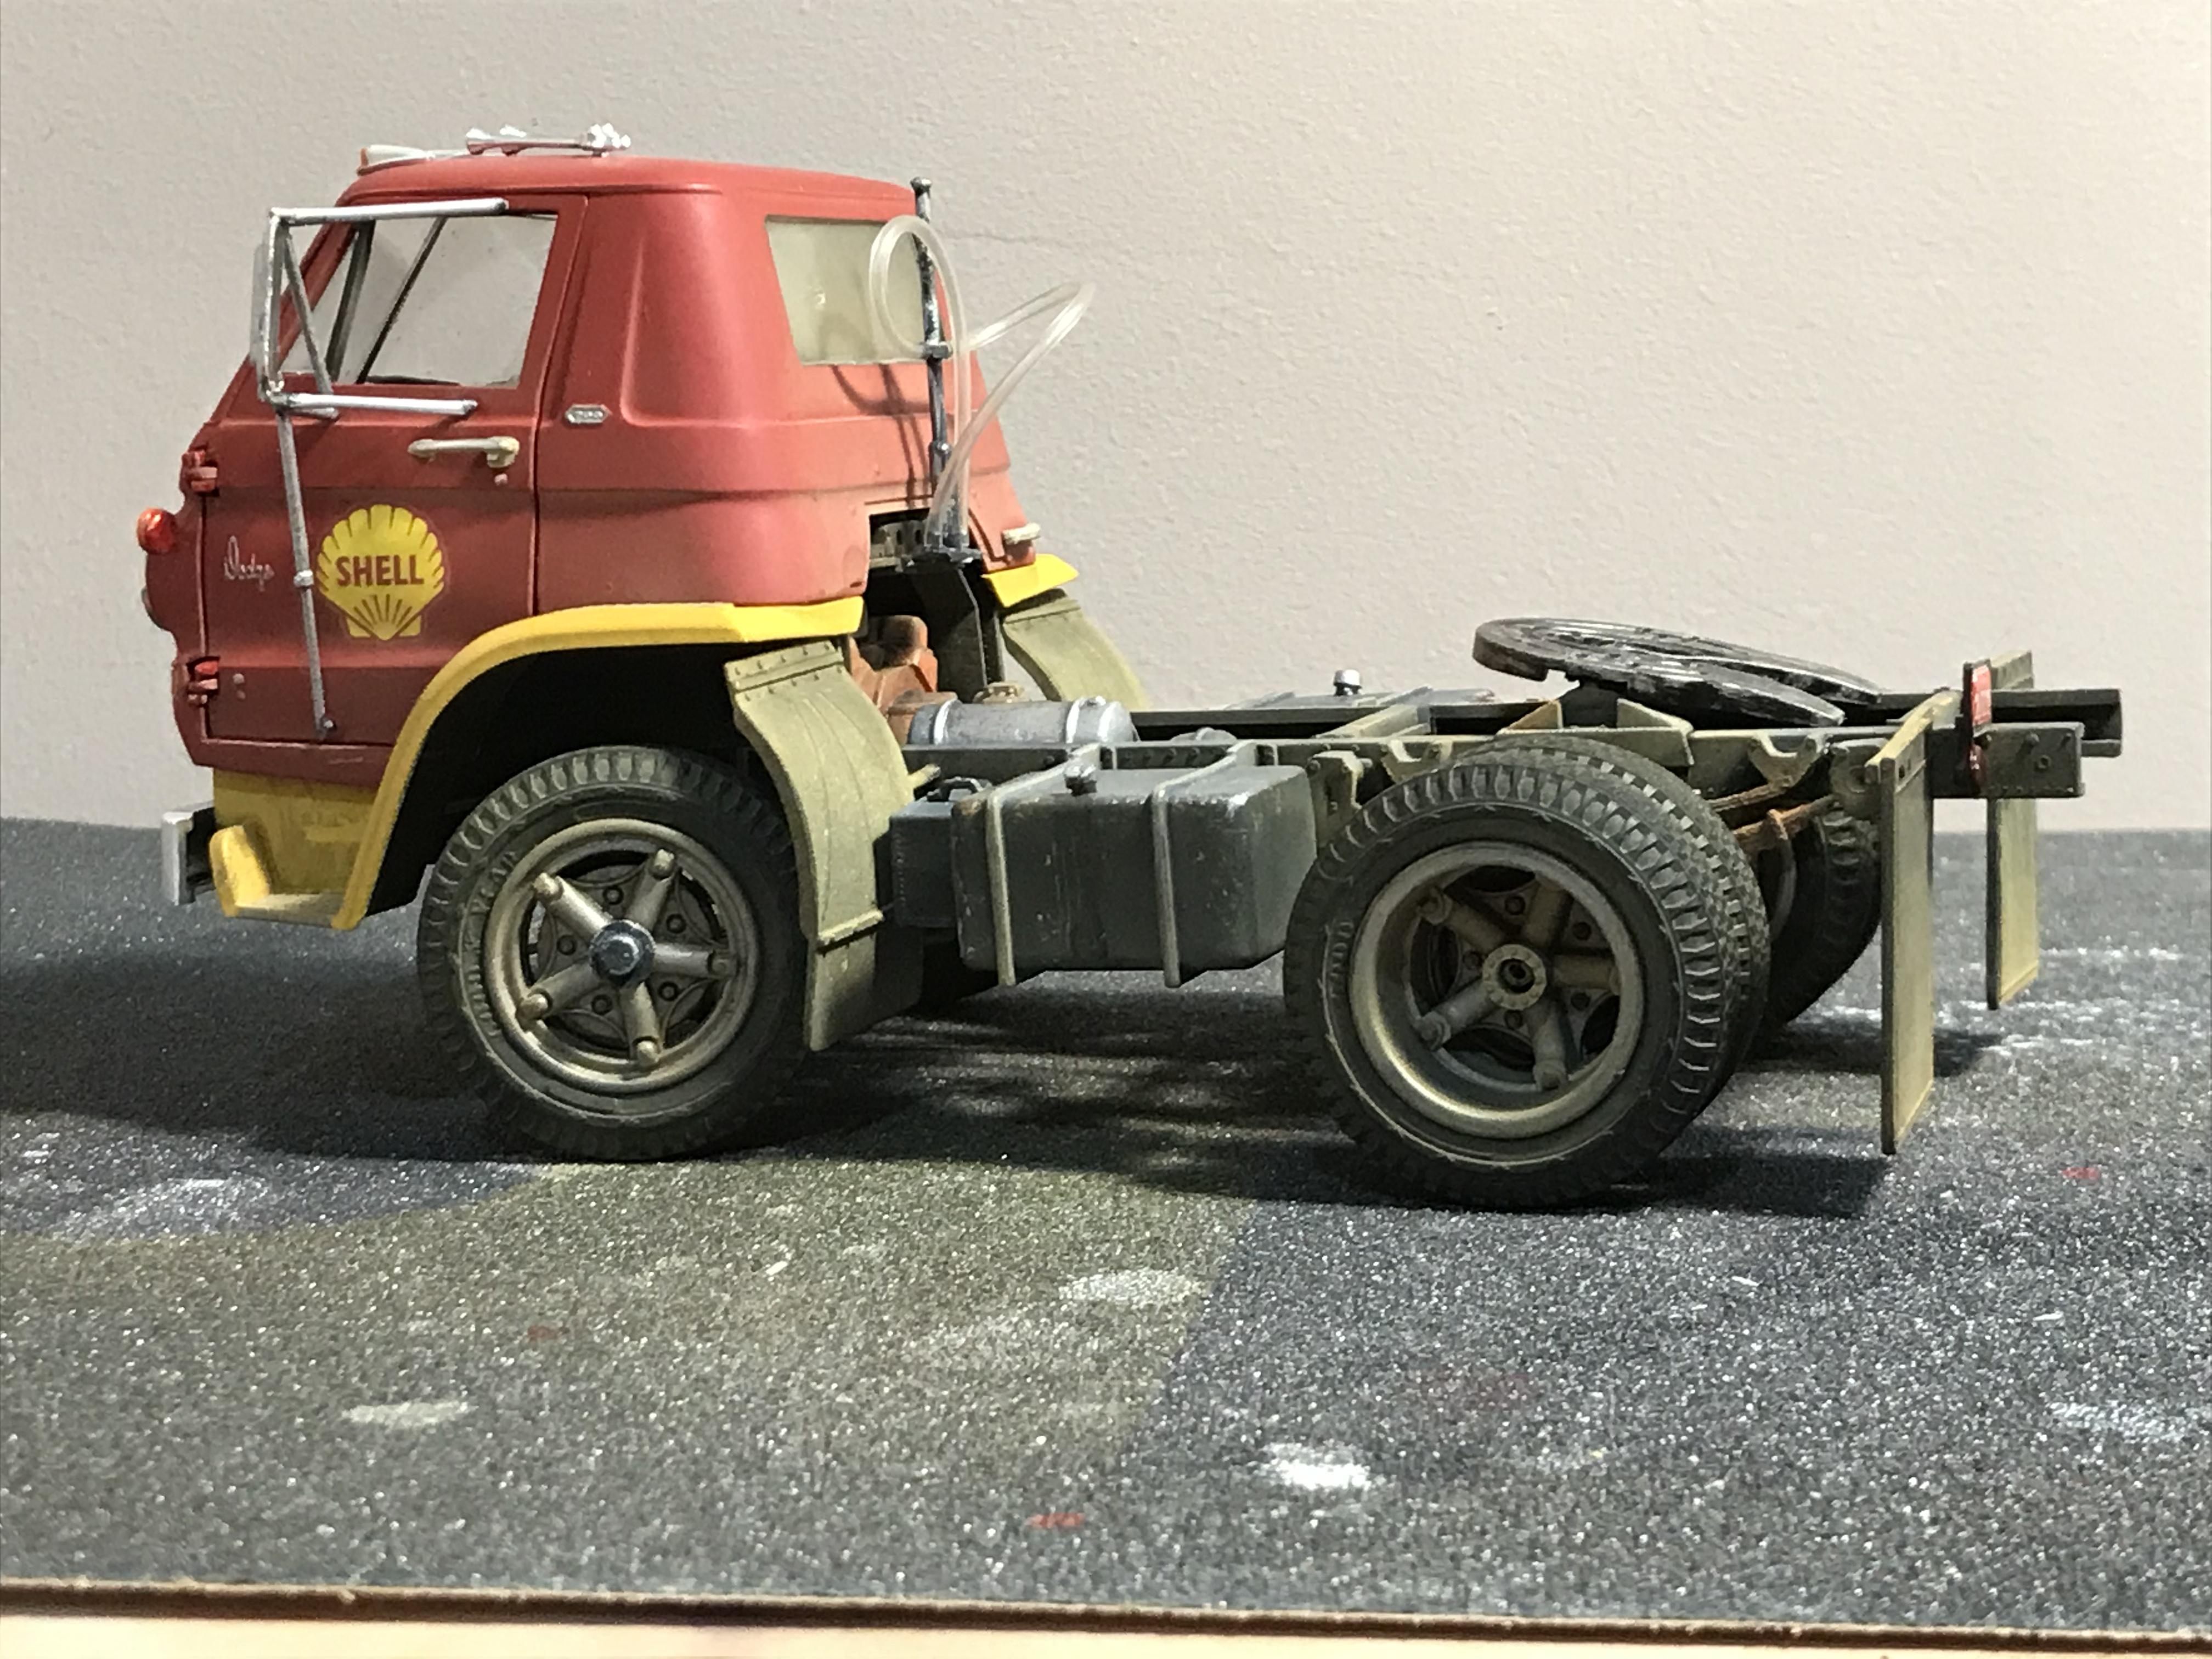
Haven’t built a truck in 30 years. Bought this lit for $17 on a whim last year. And wanted to challenge myself with a first time weathering attempt. Goal was to do a Nevada -Texas truck that had some miles that were all in the dry climates. Here is the cab finished tonight. The tanker will be picked up in Texas when we can find a driver, probably Monday.
- 17 replies
-
- 2
-

-
- dodge
- weathering
- (and 1 more)
-
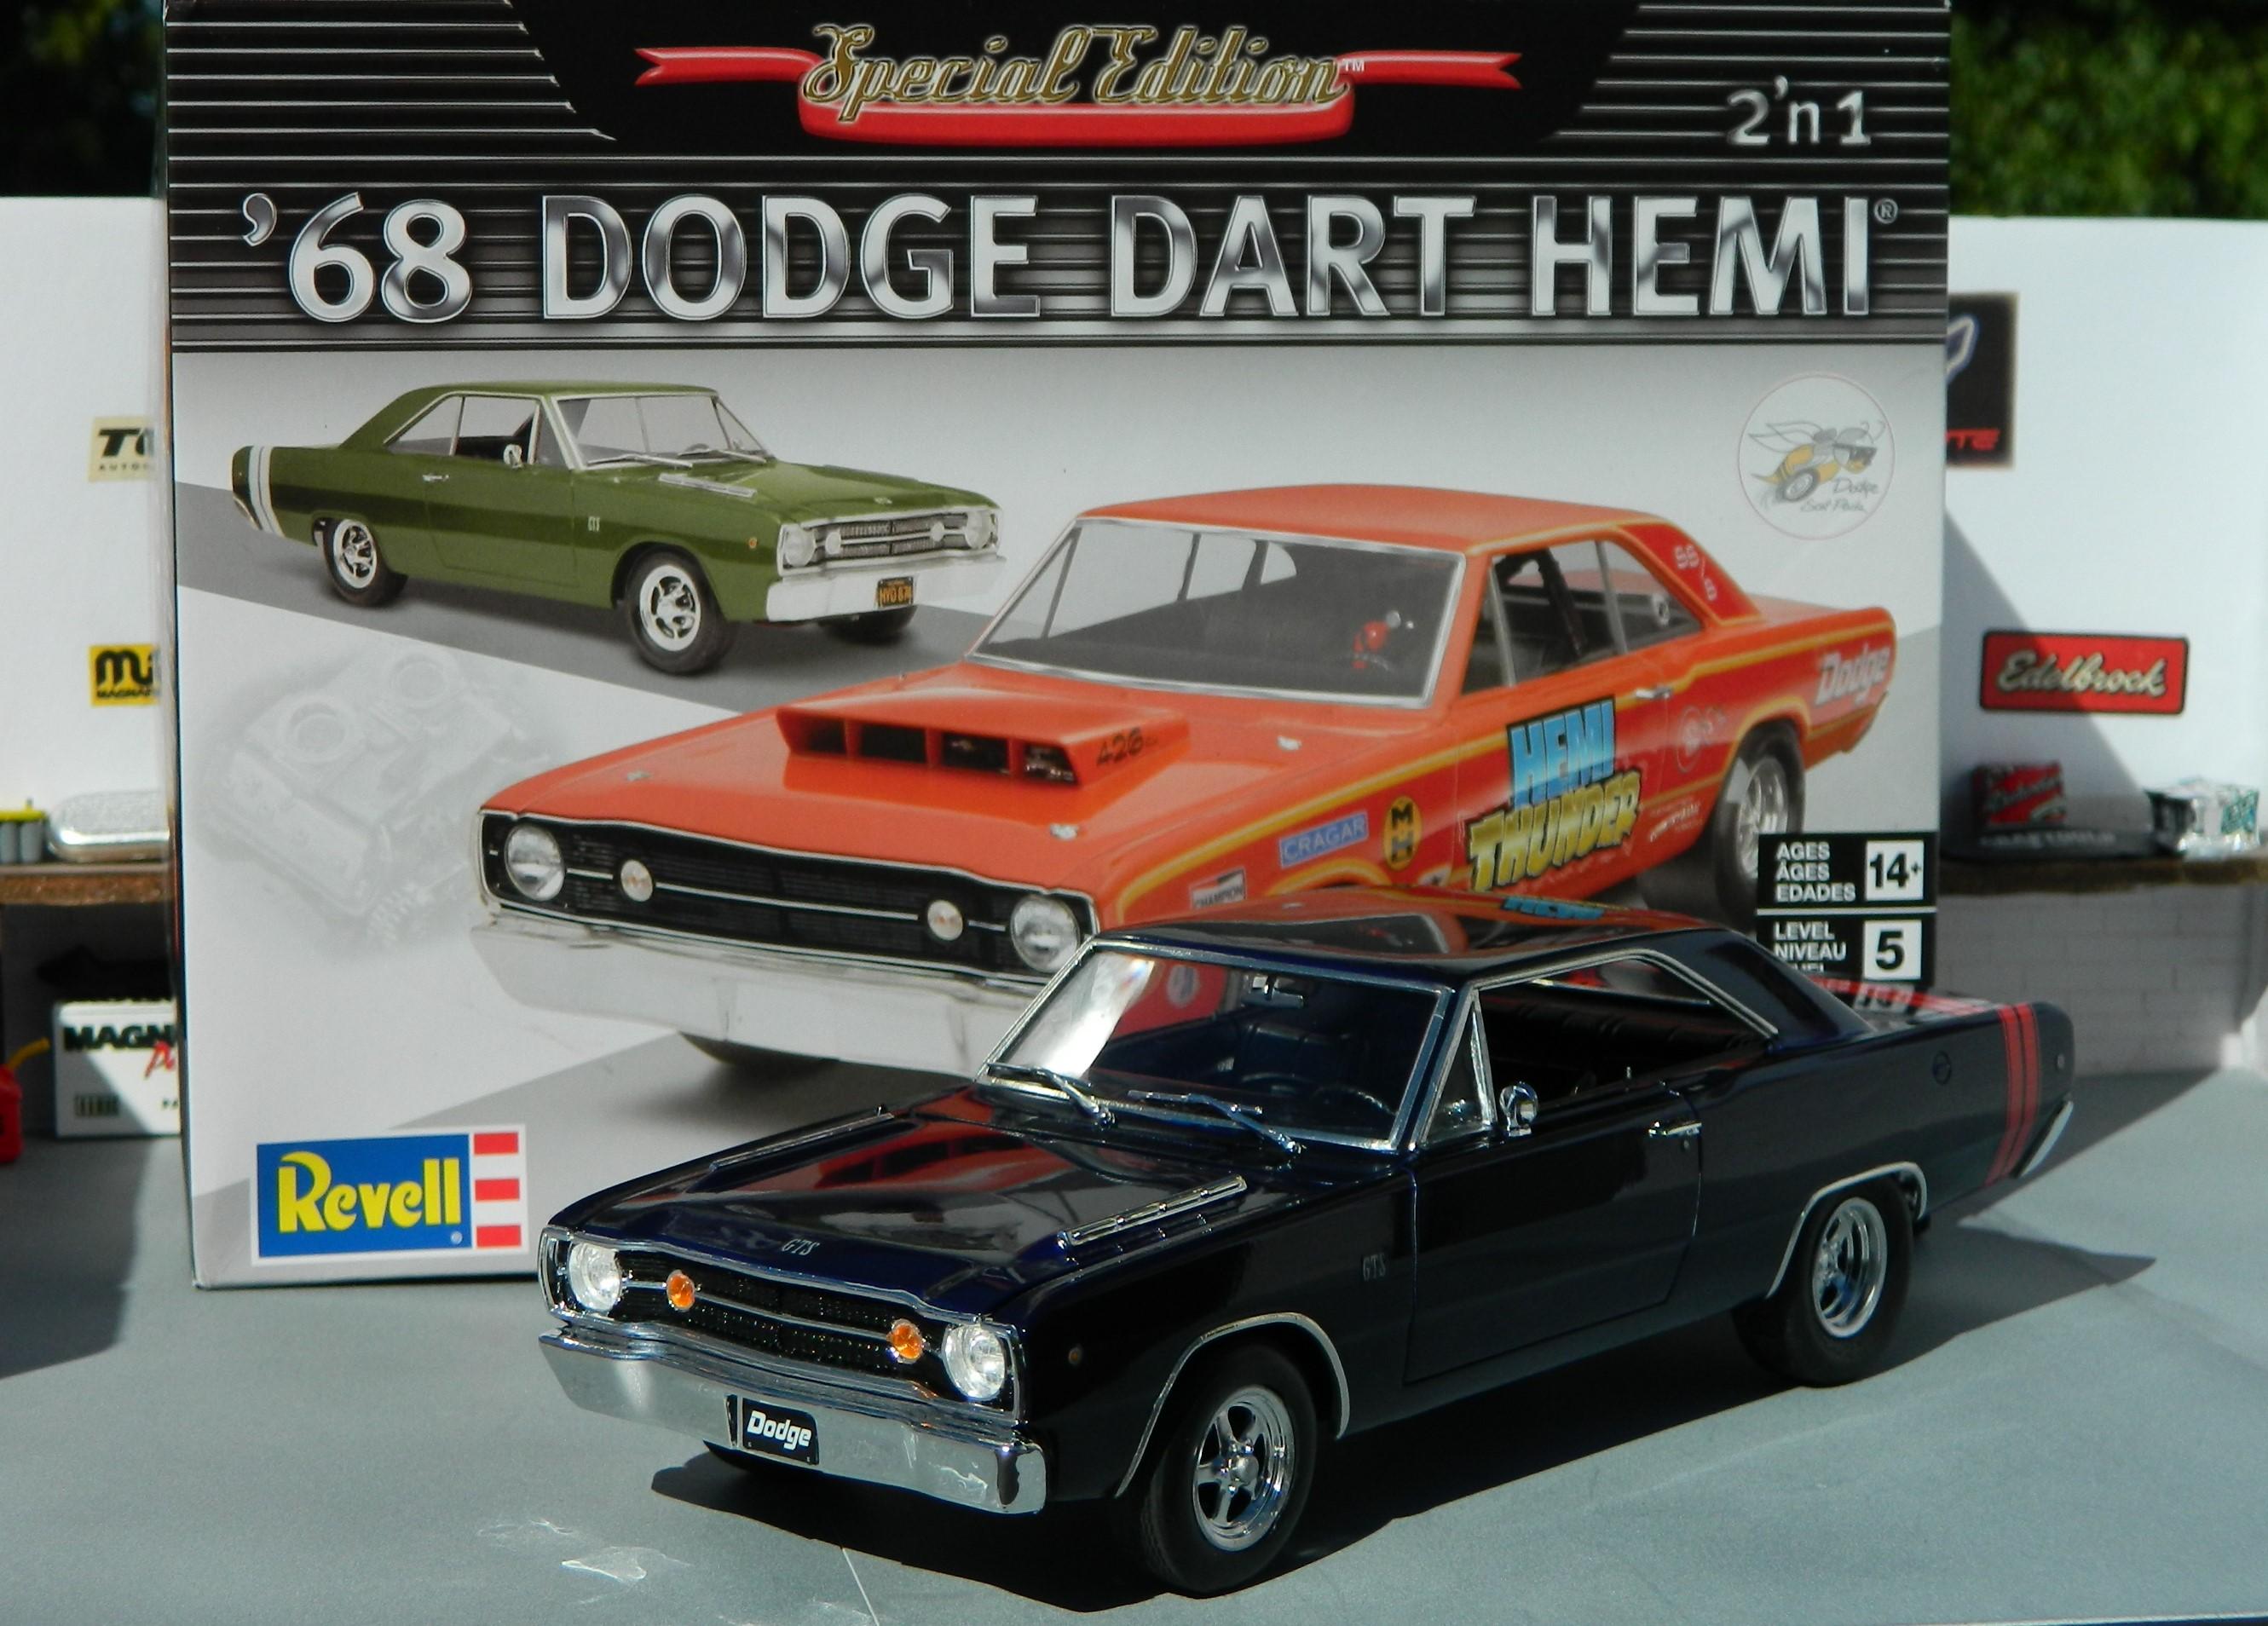
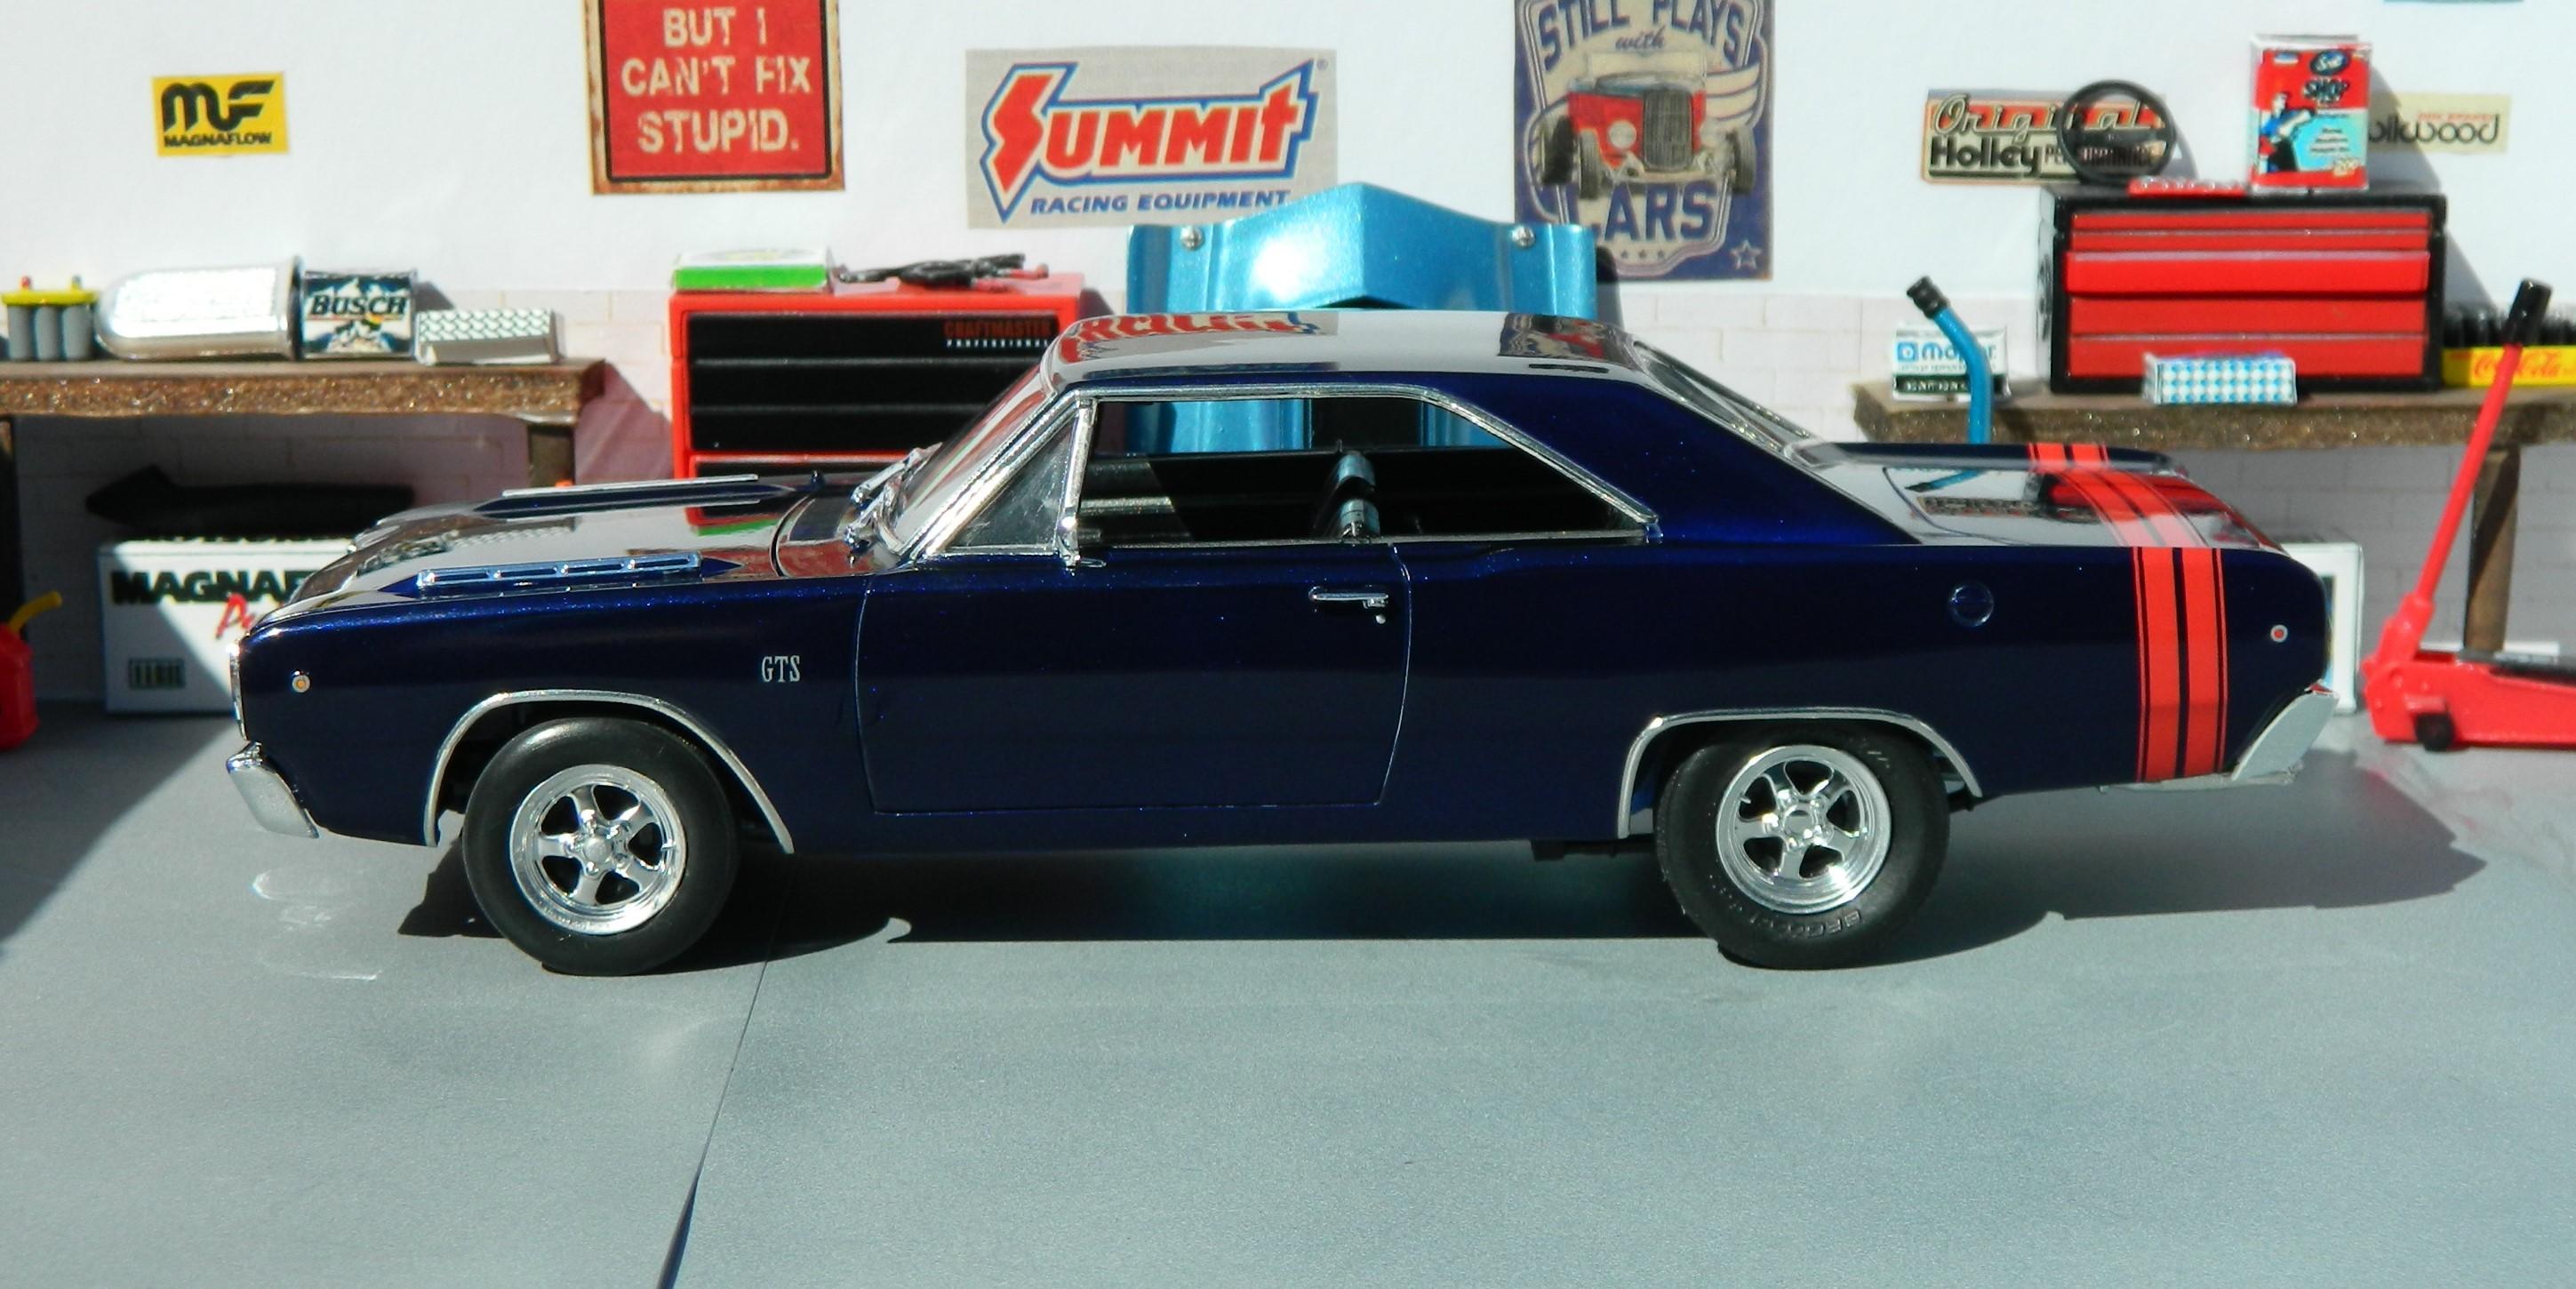
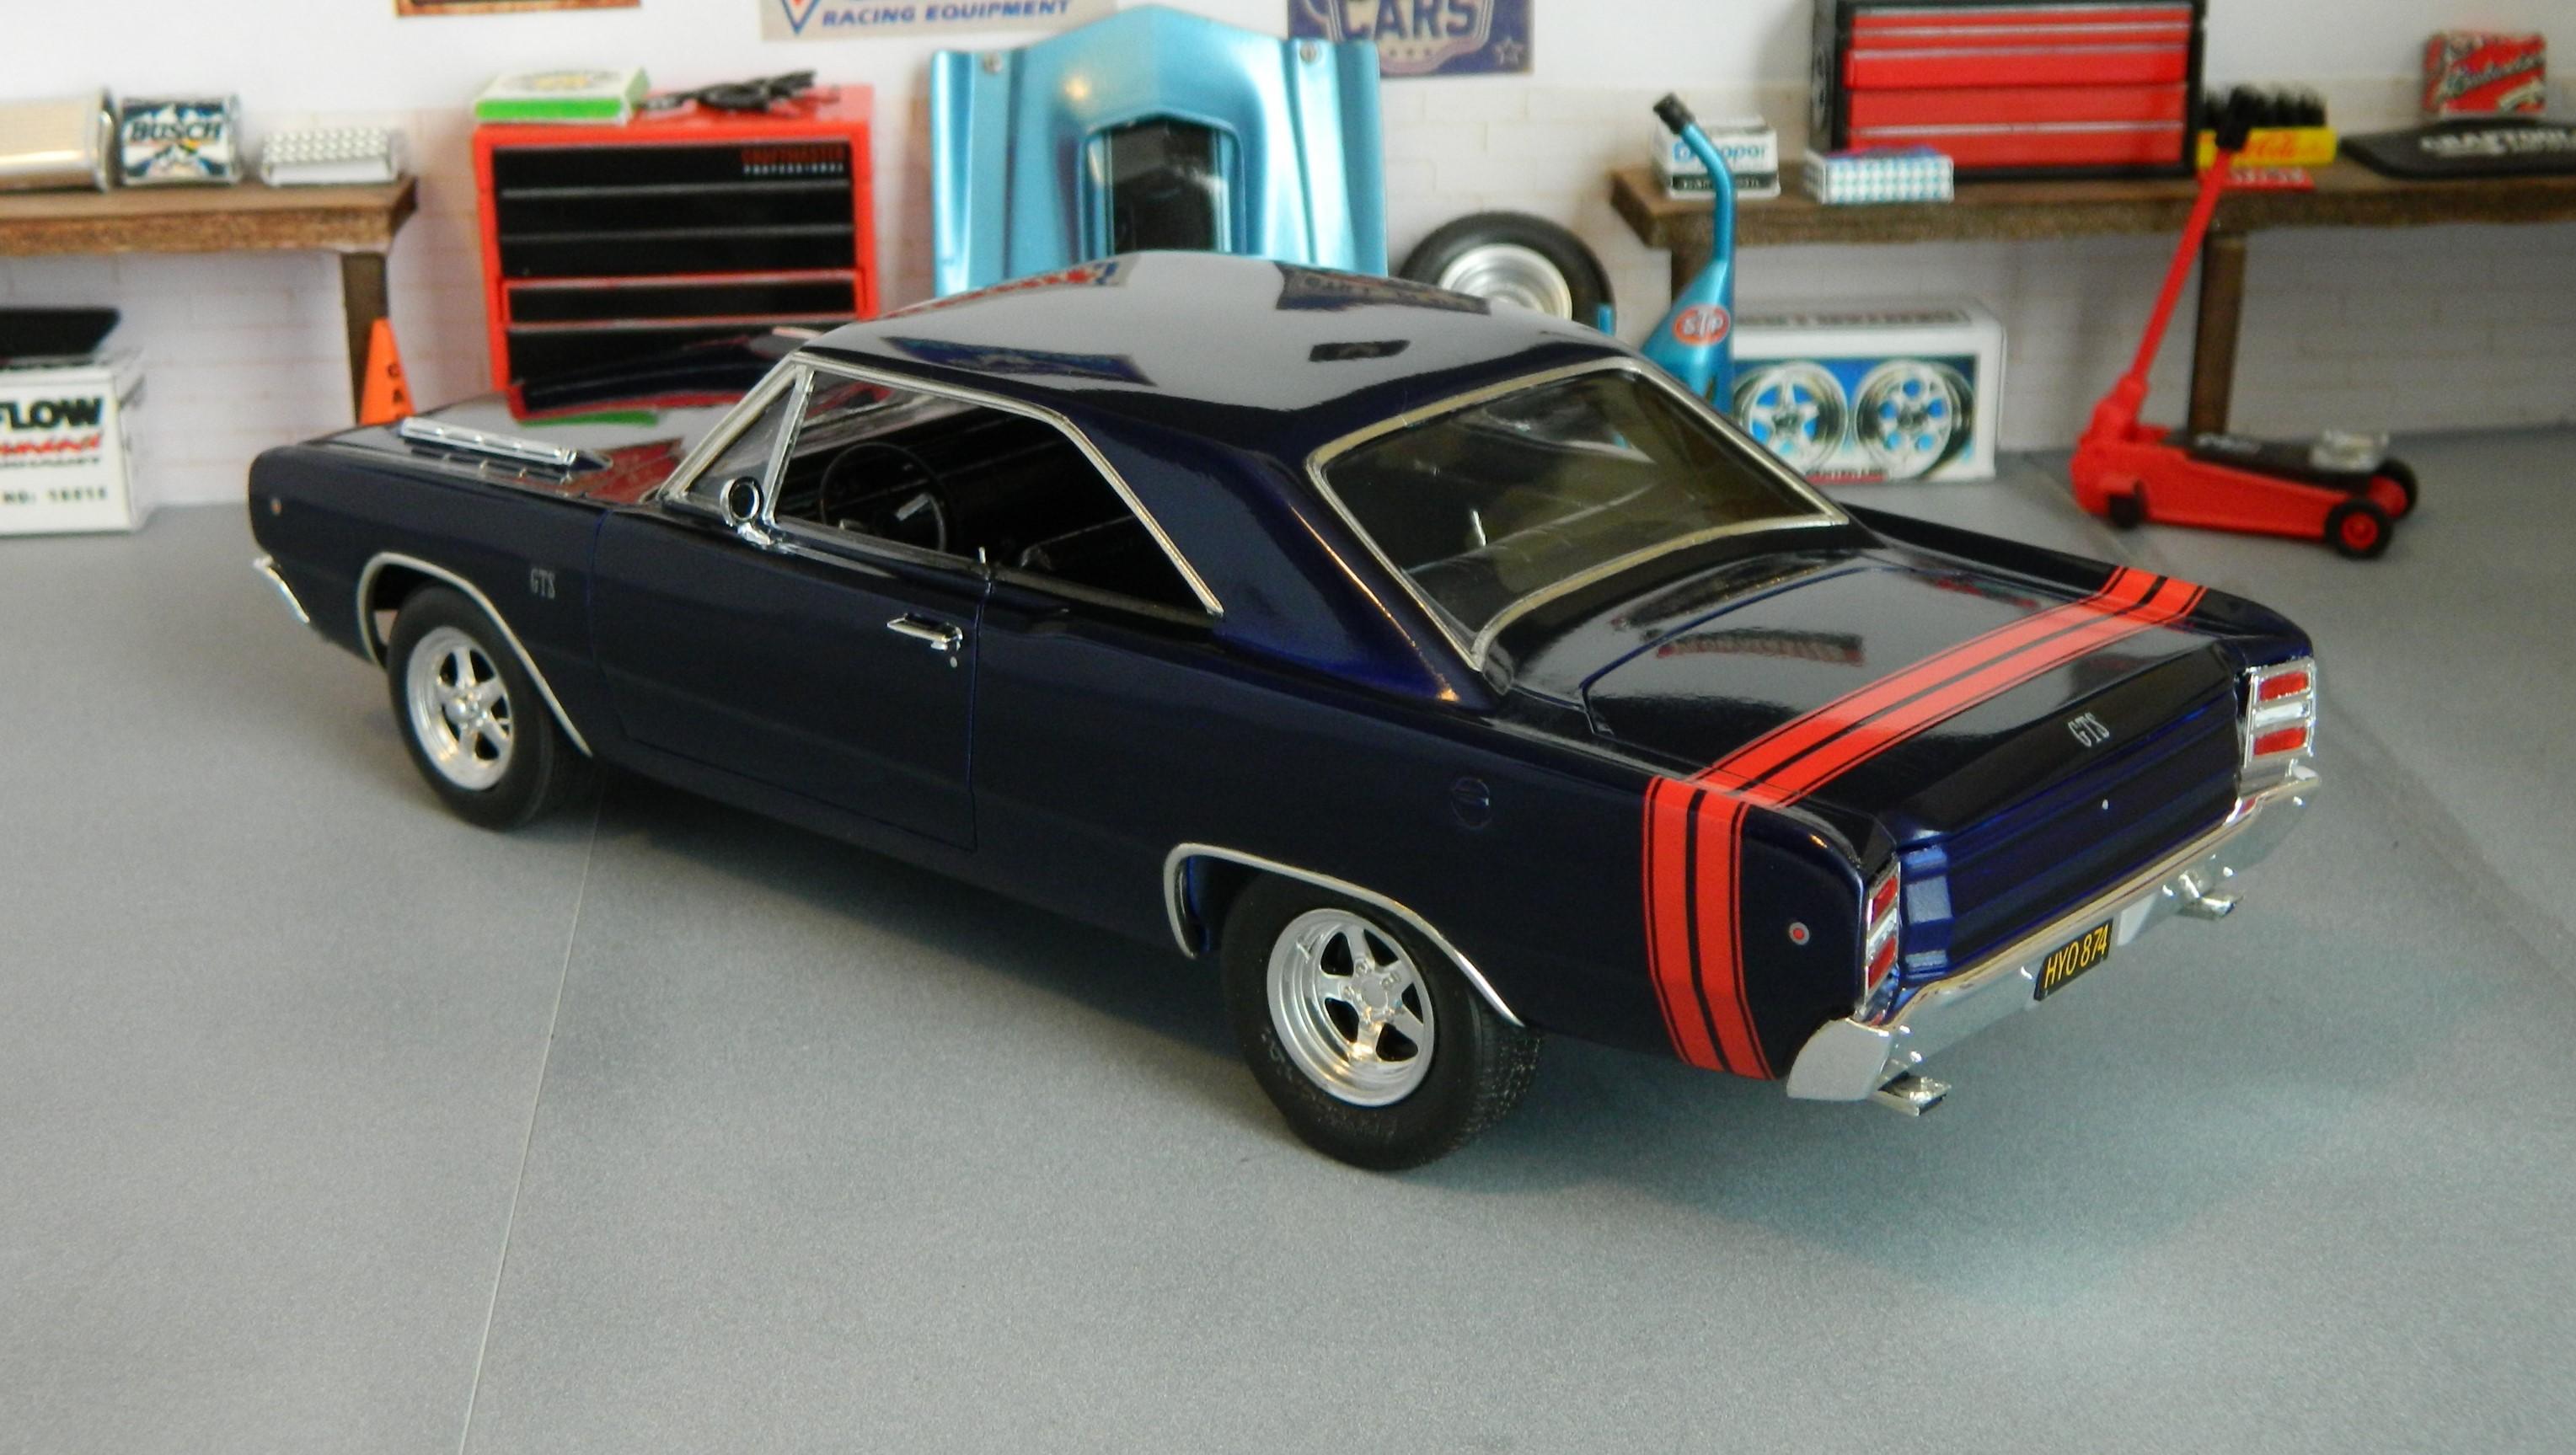
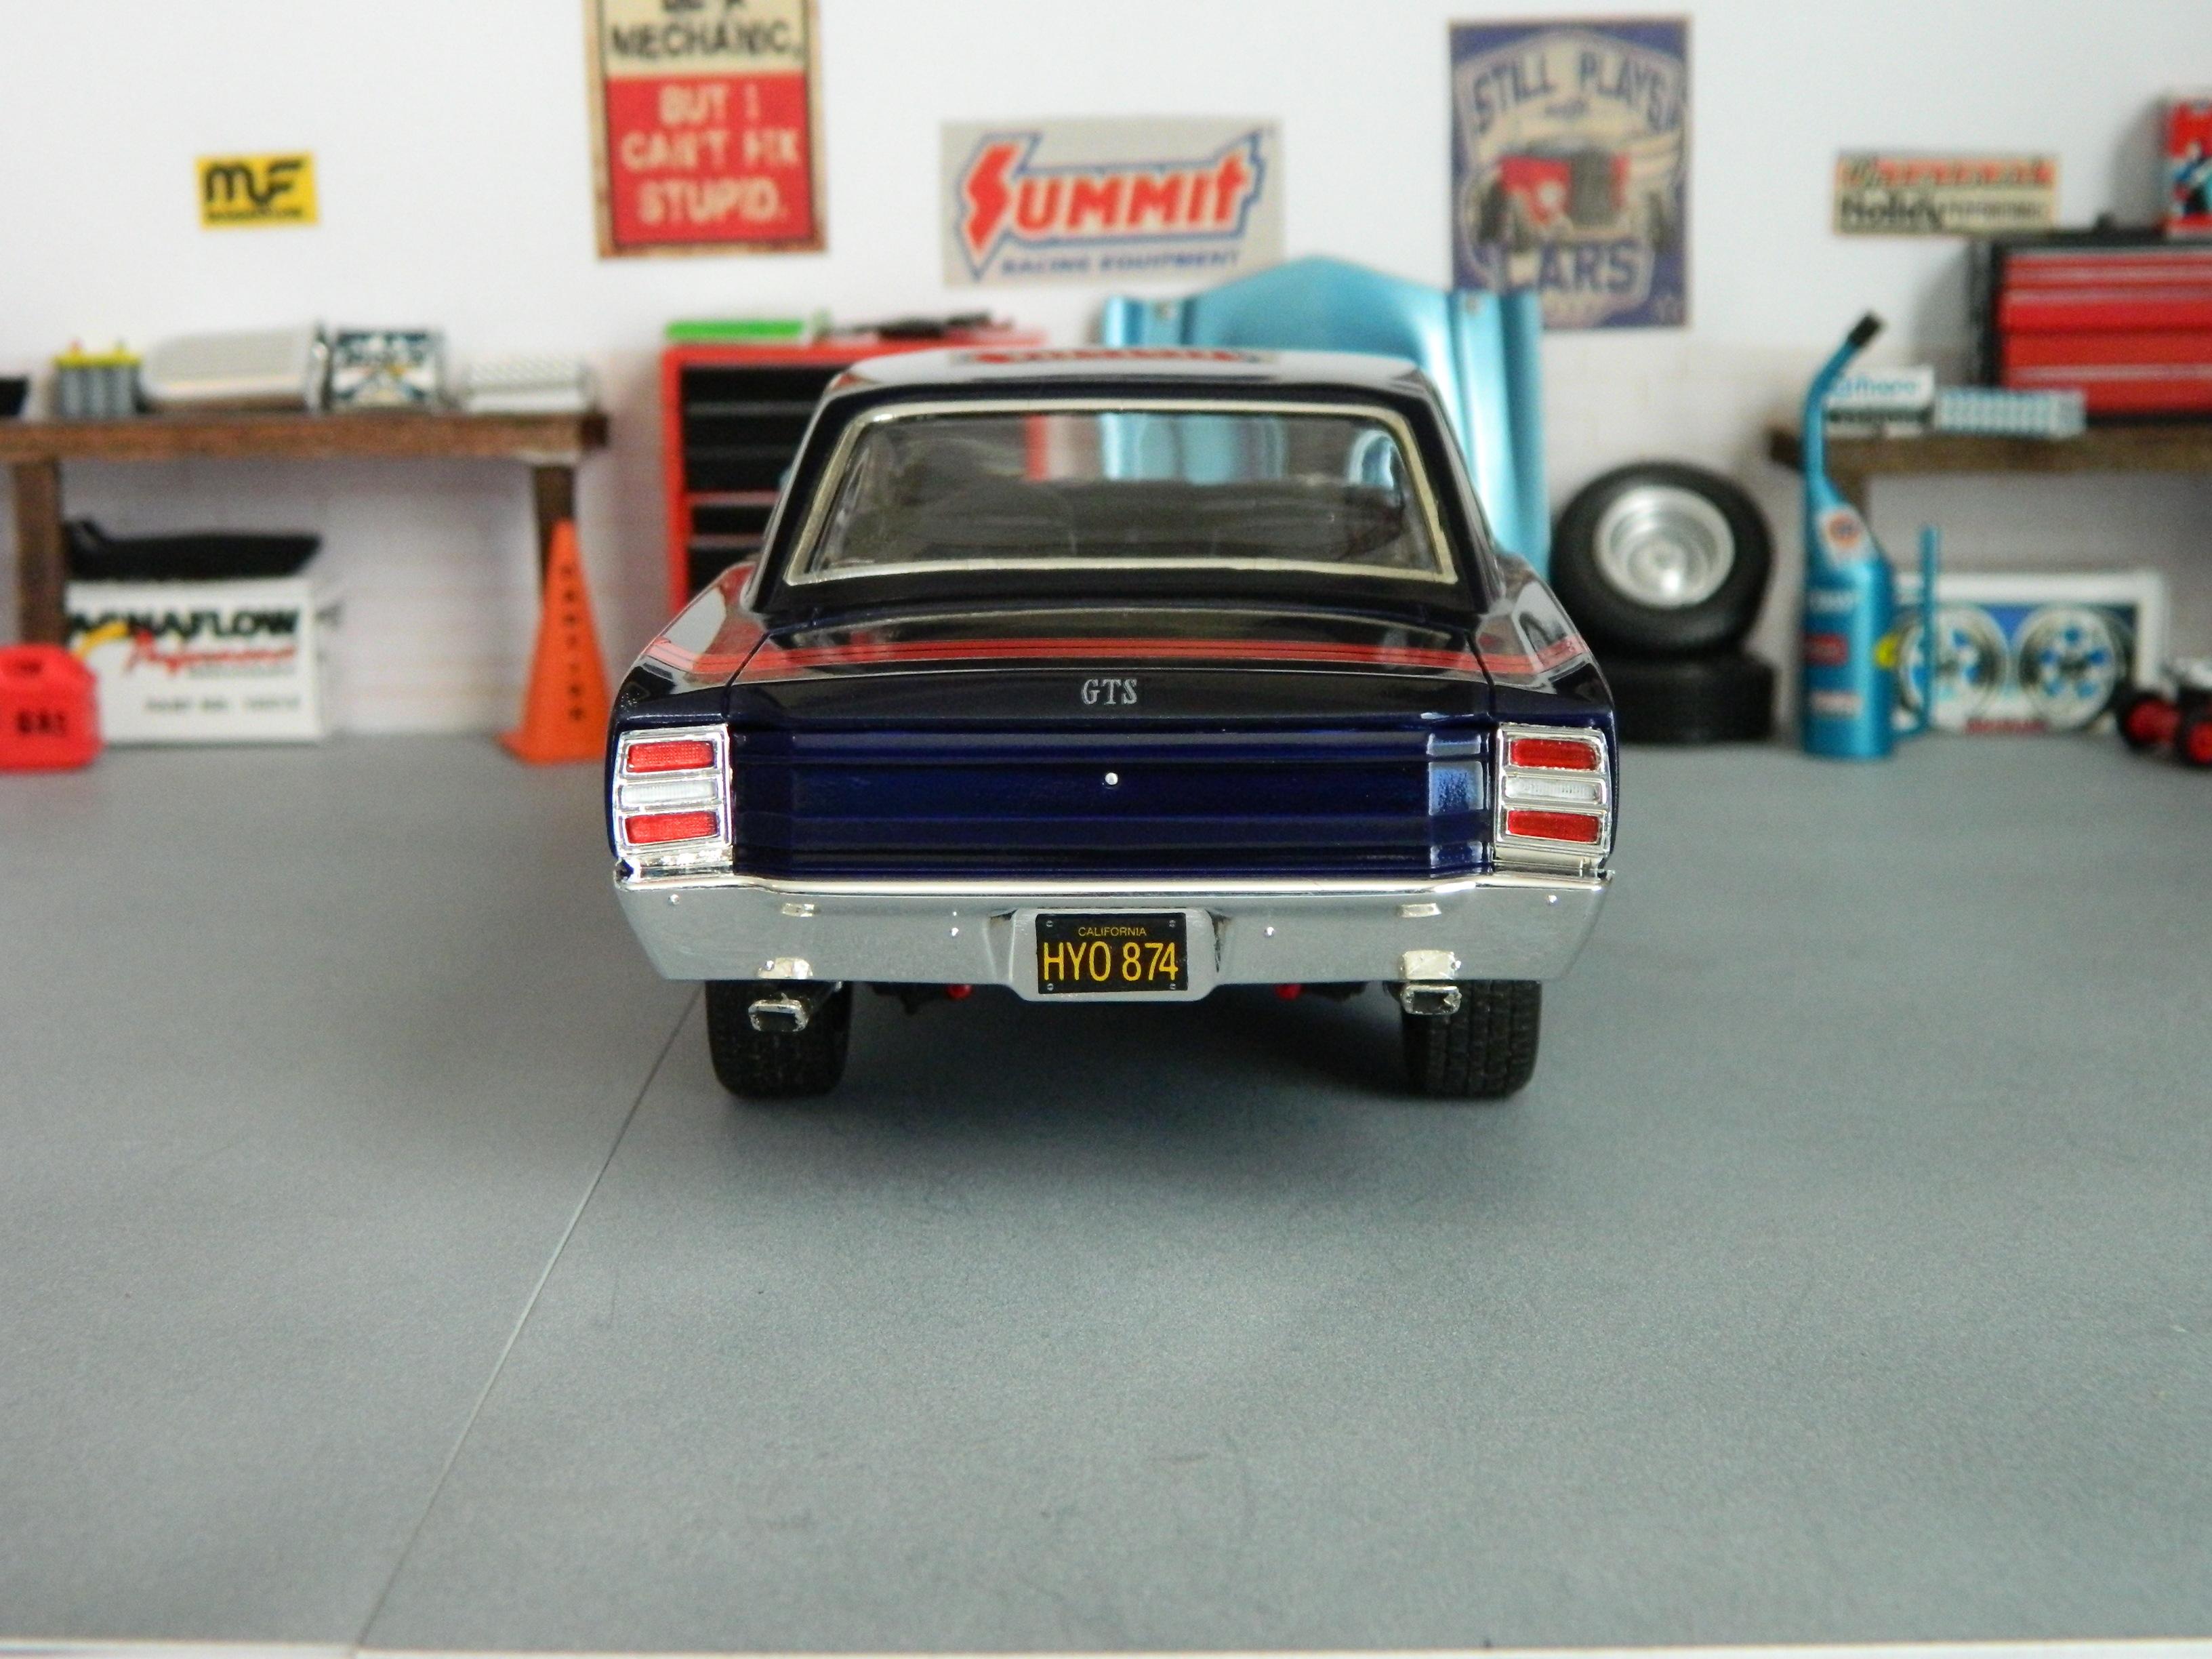
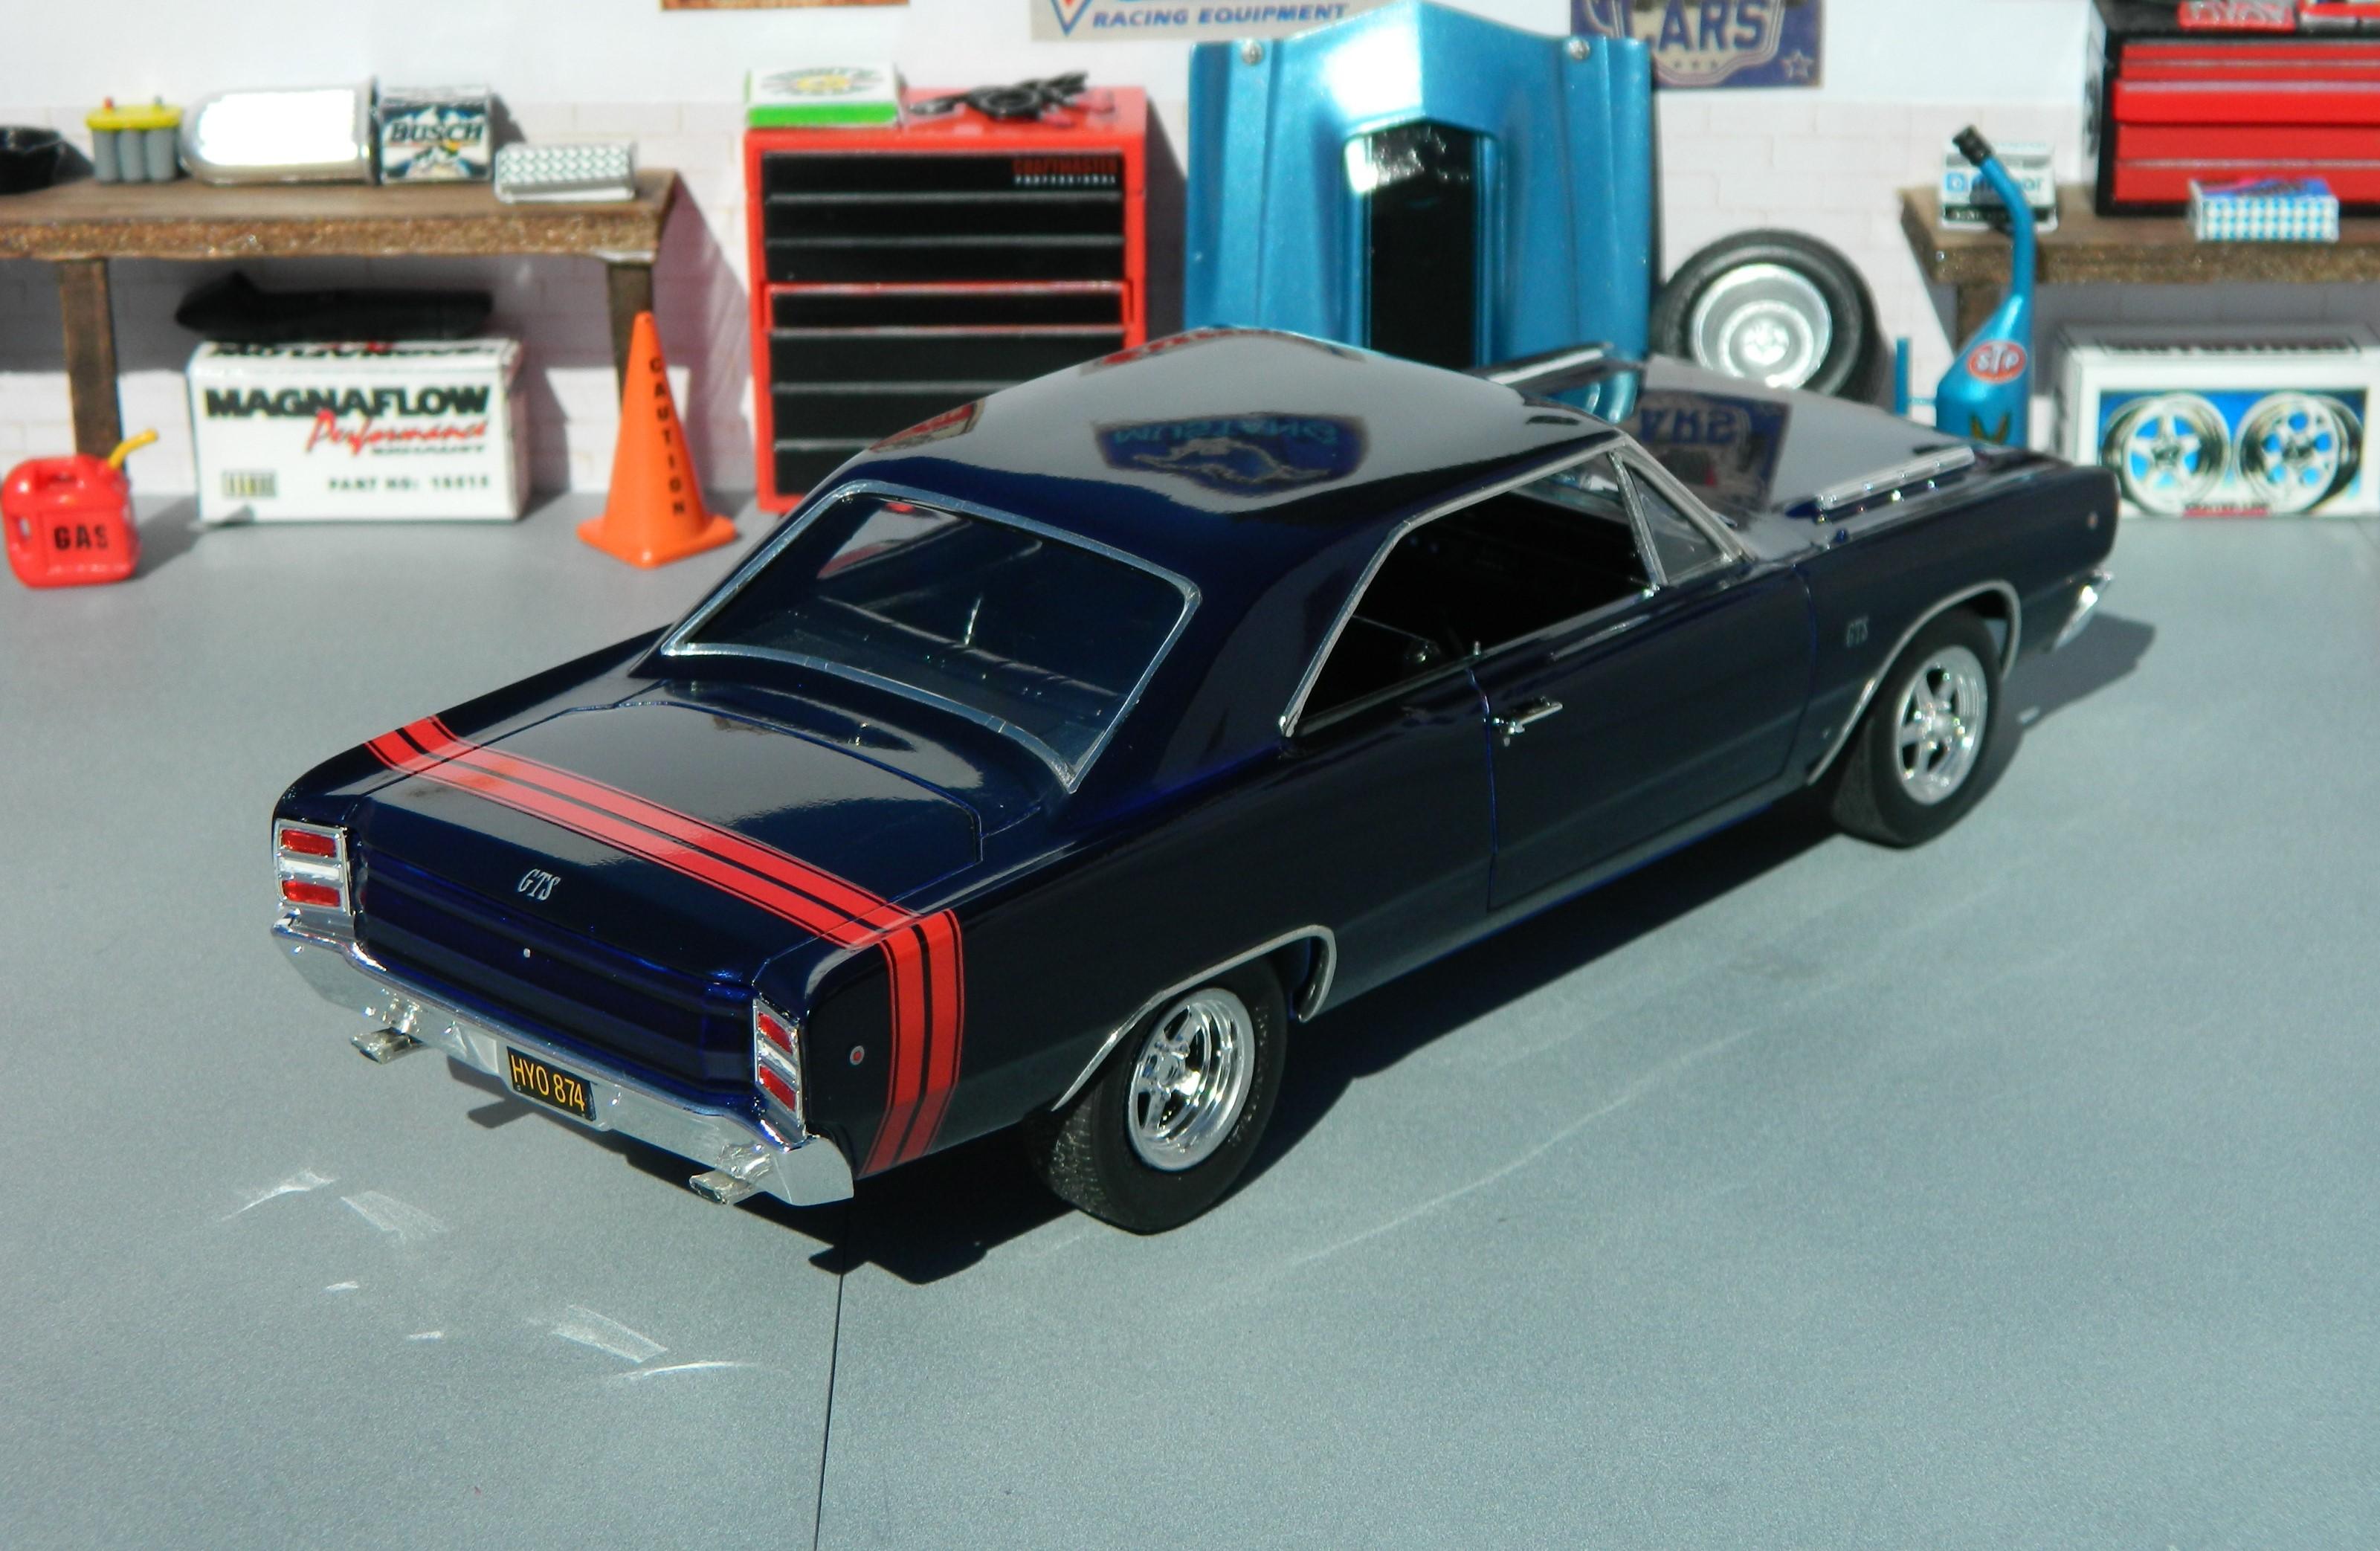
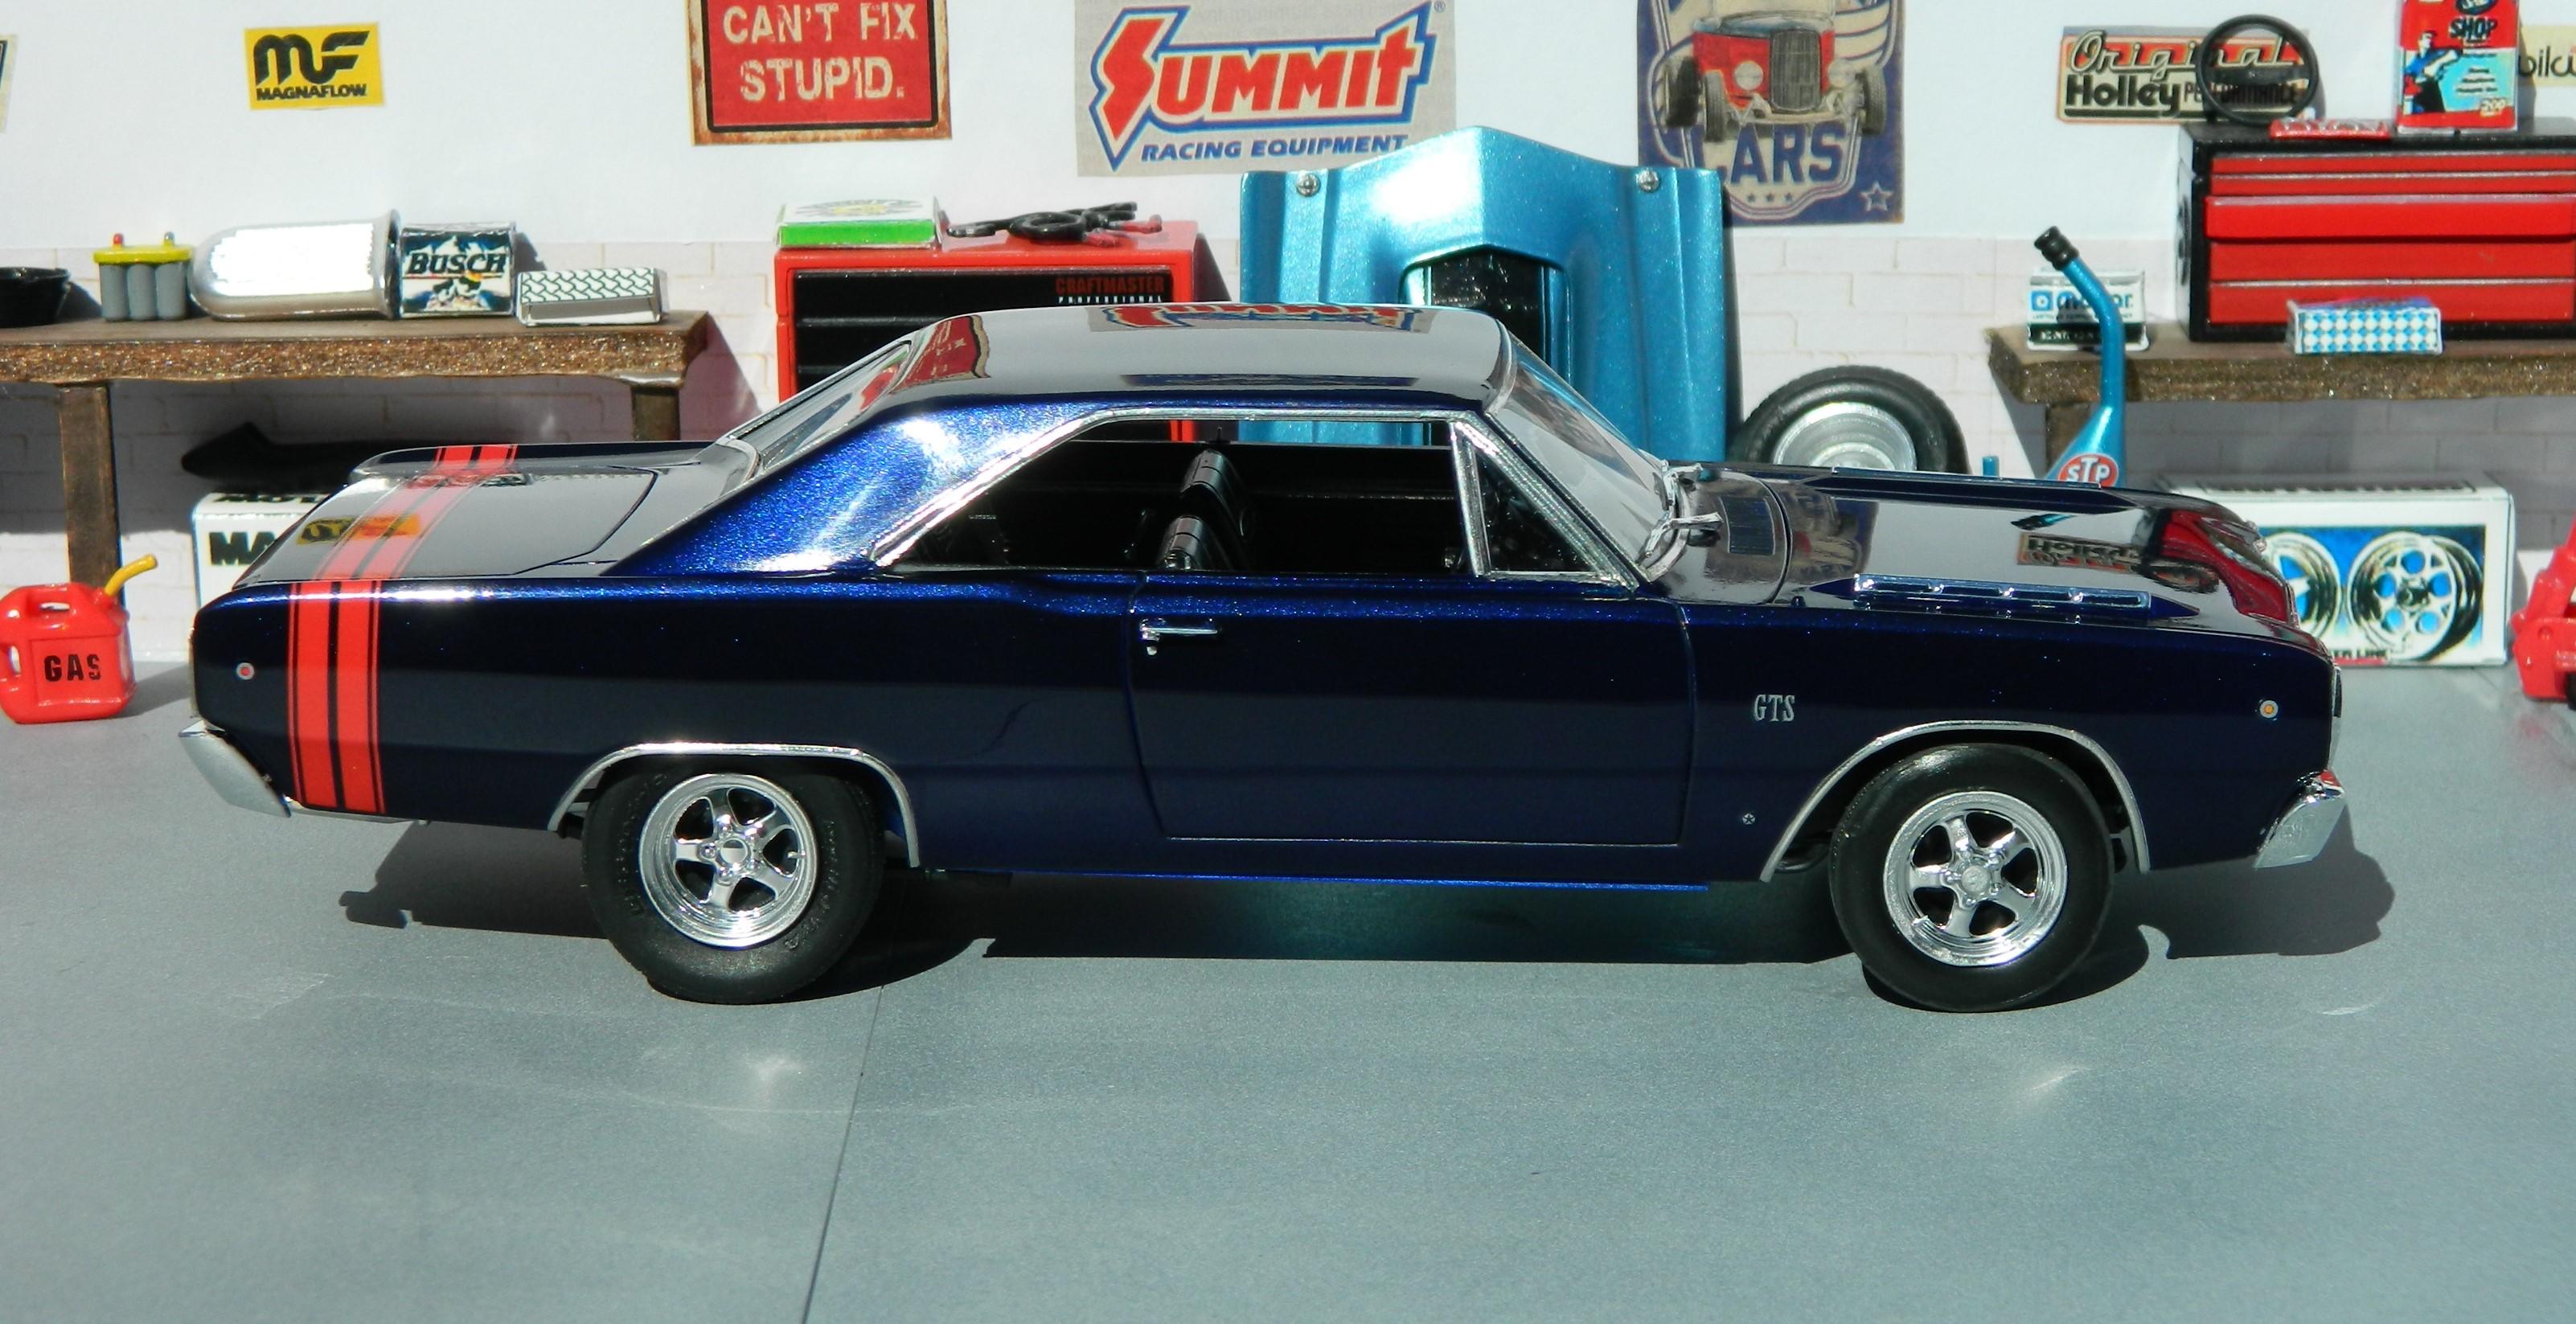
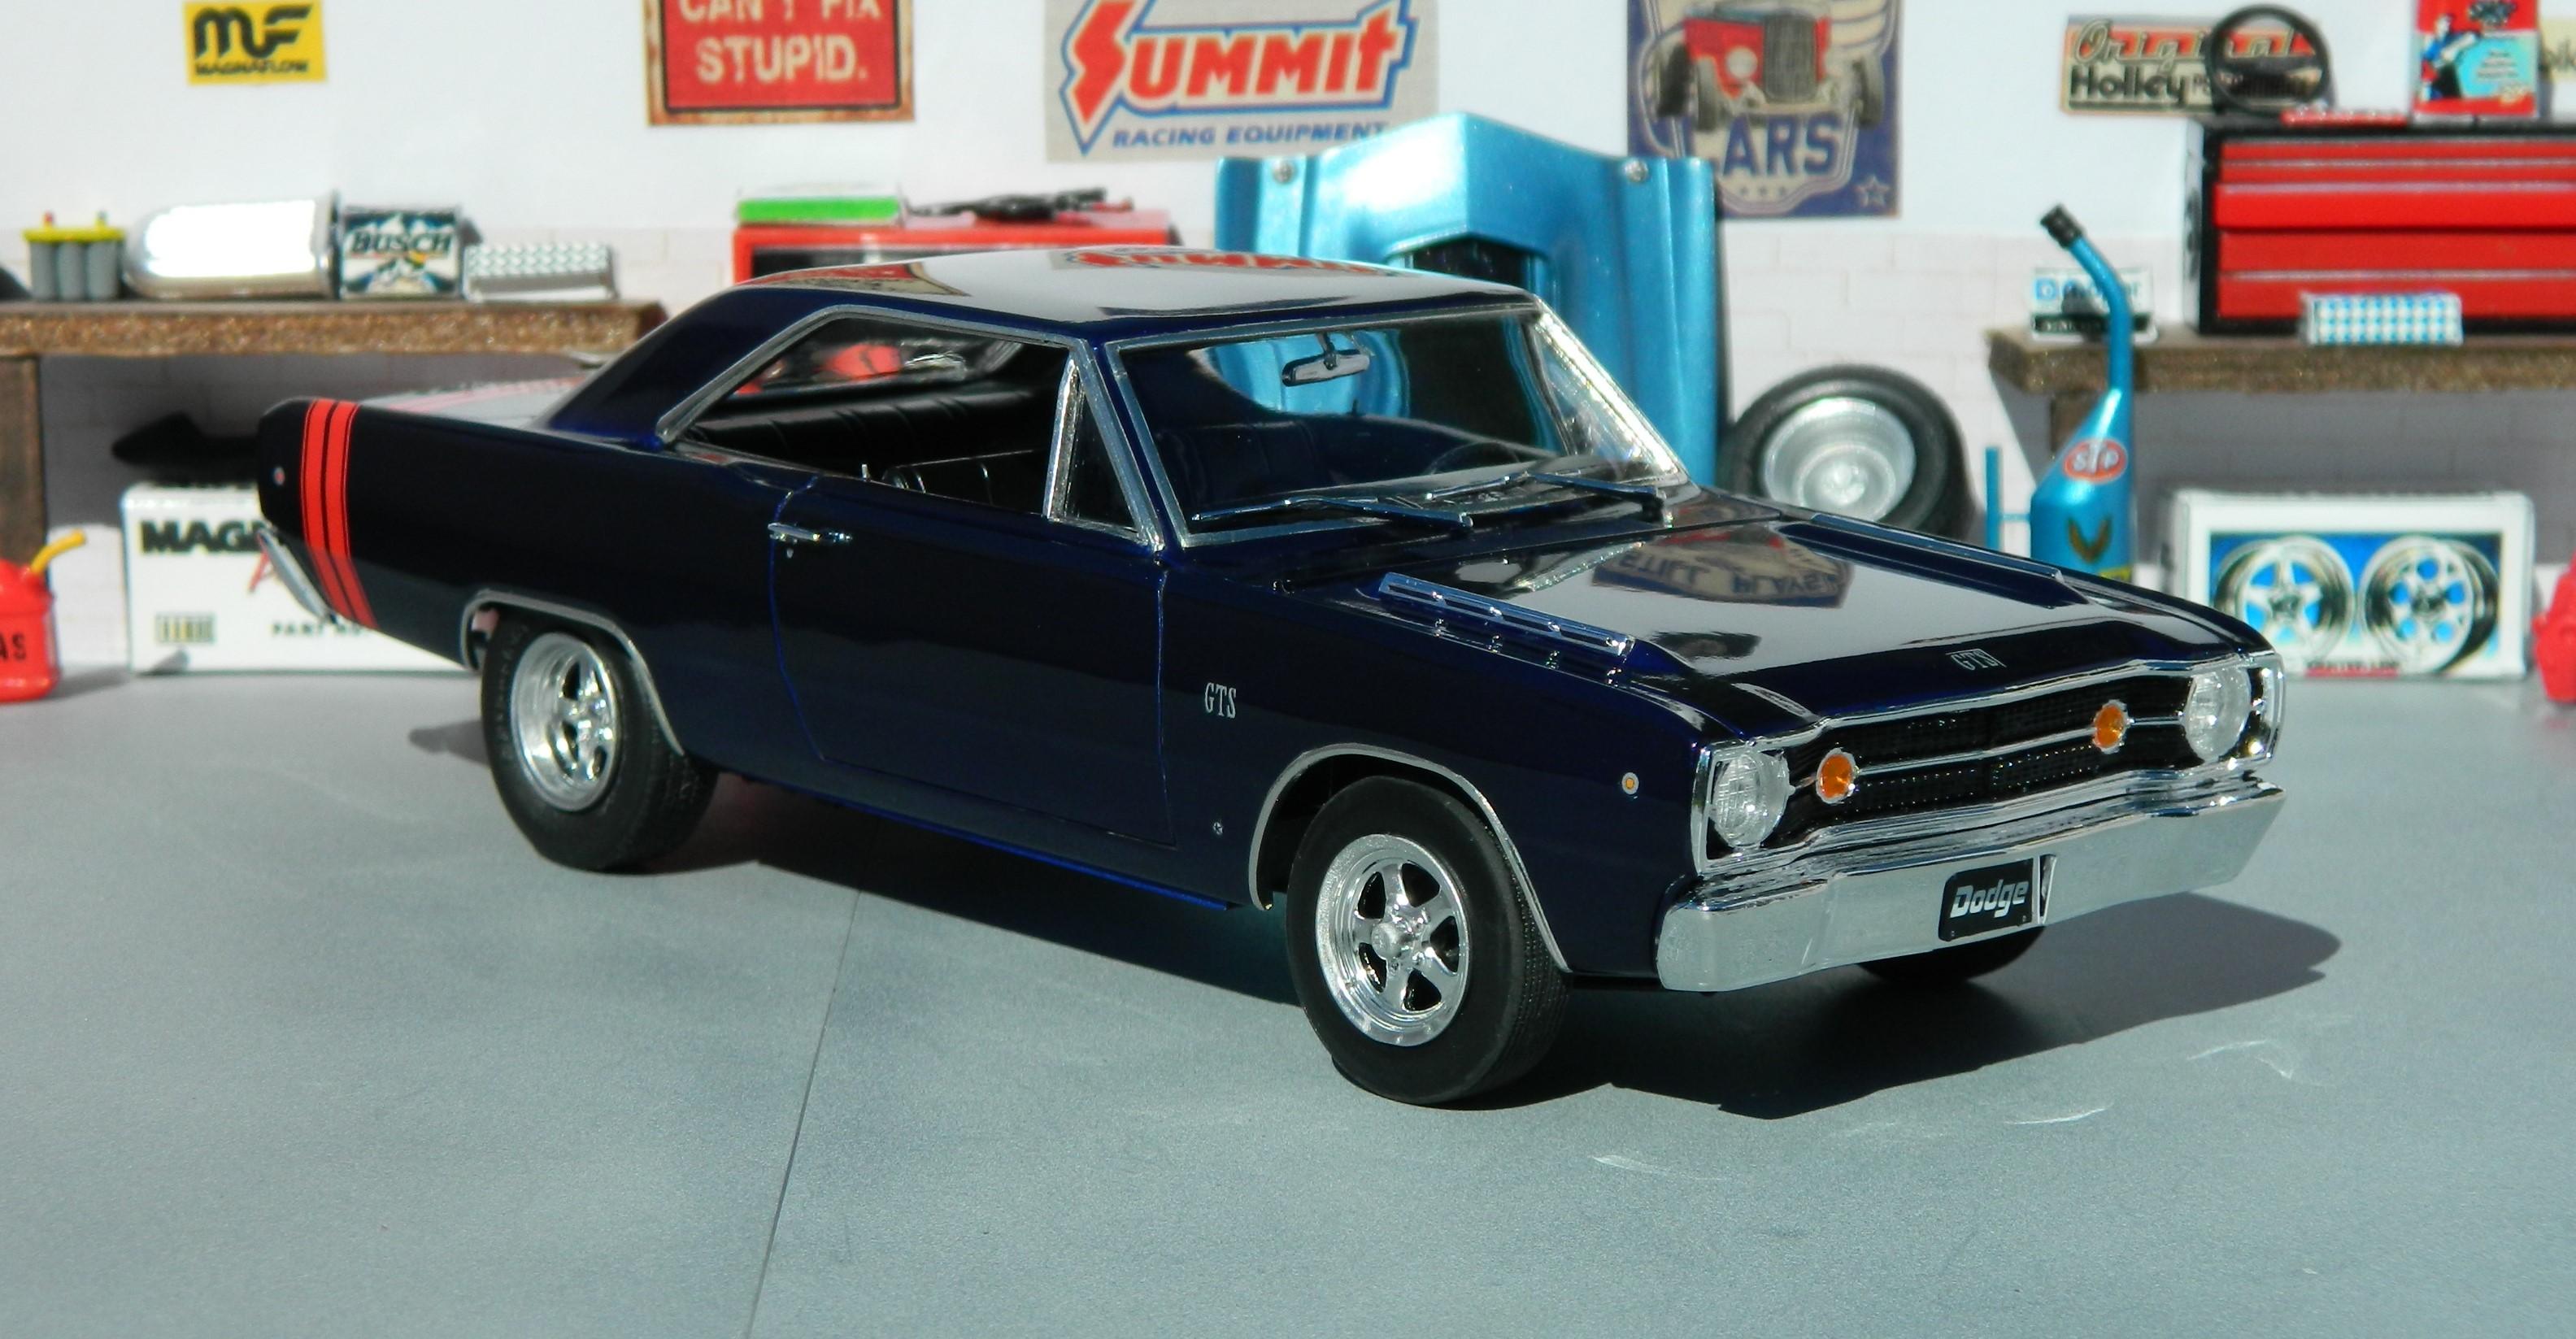
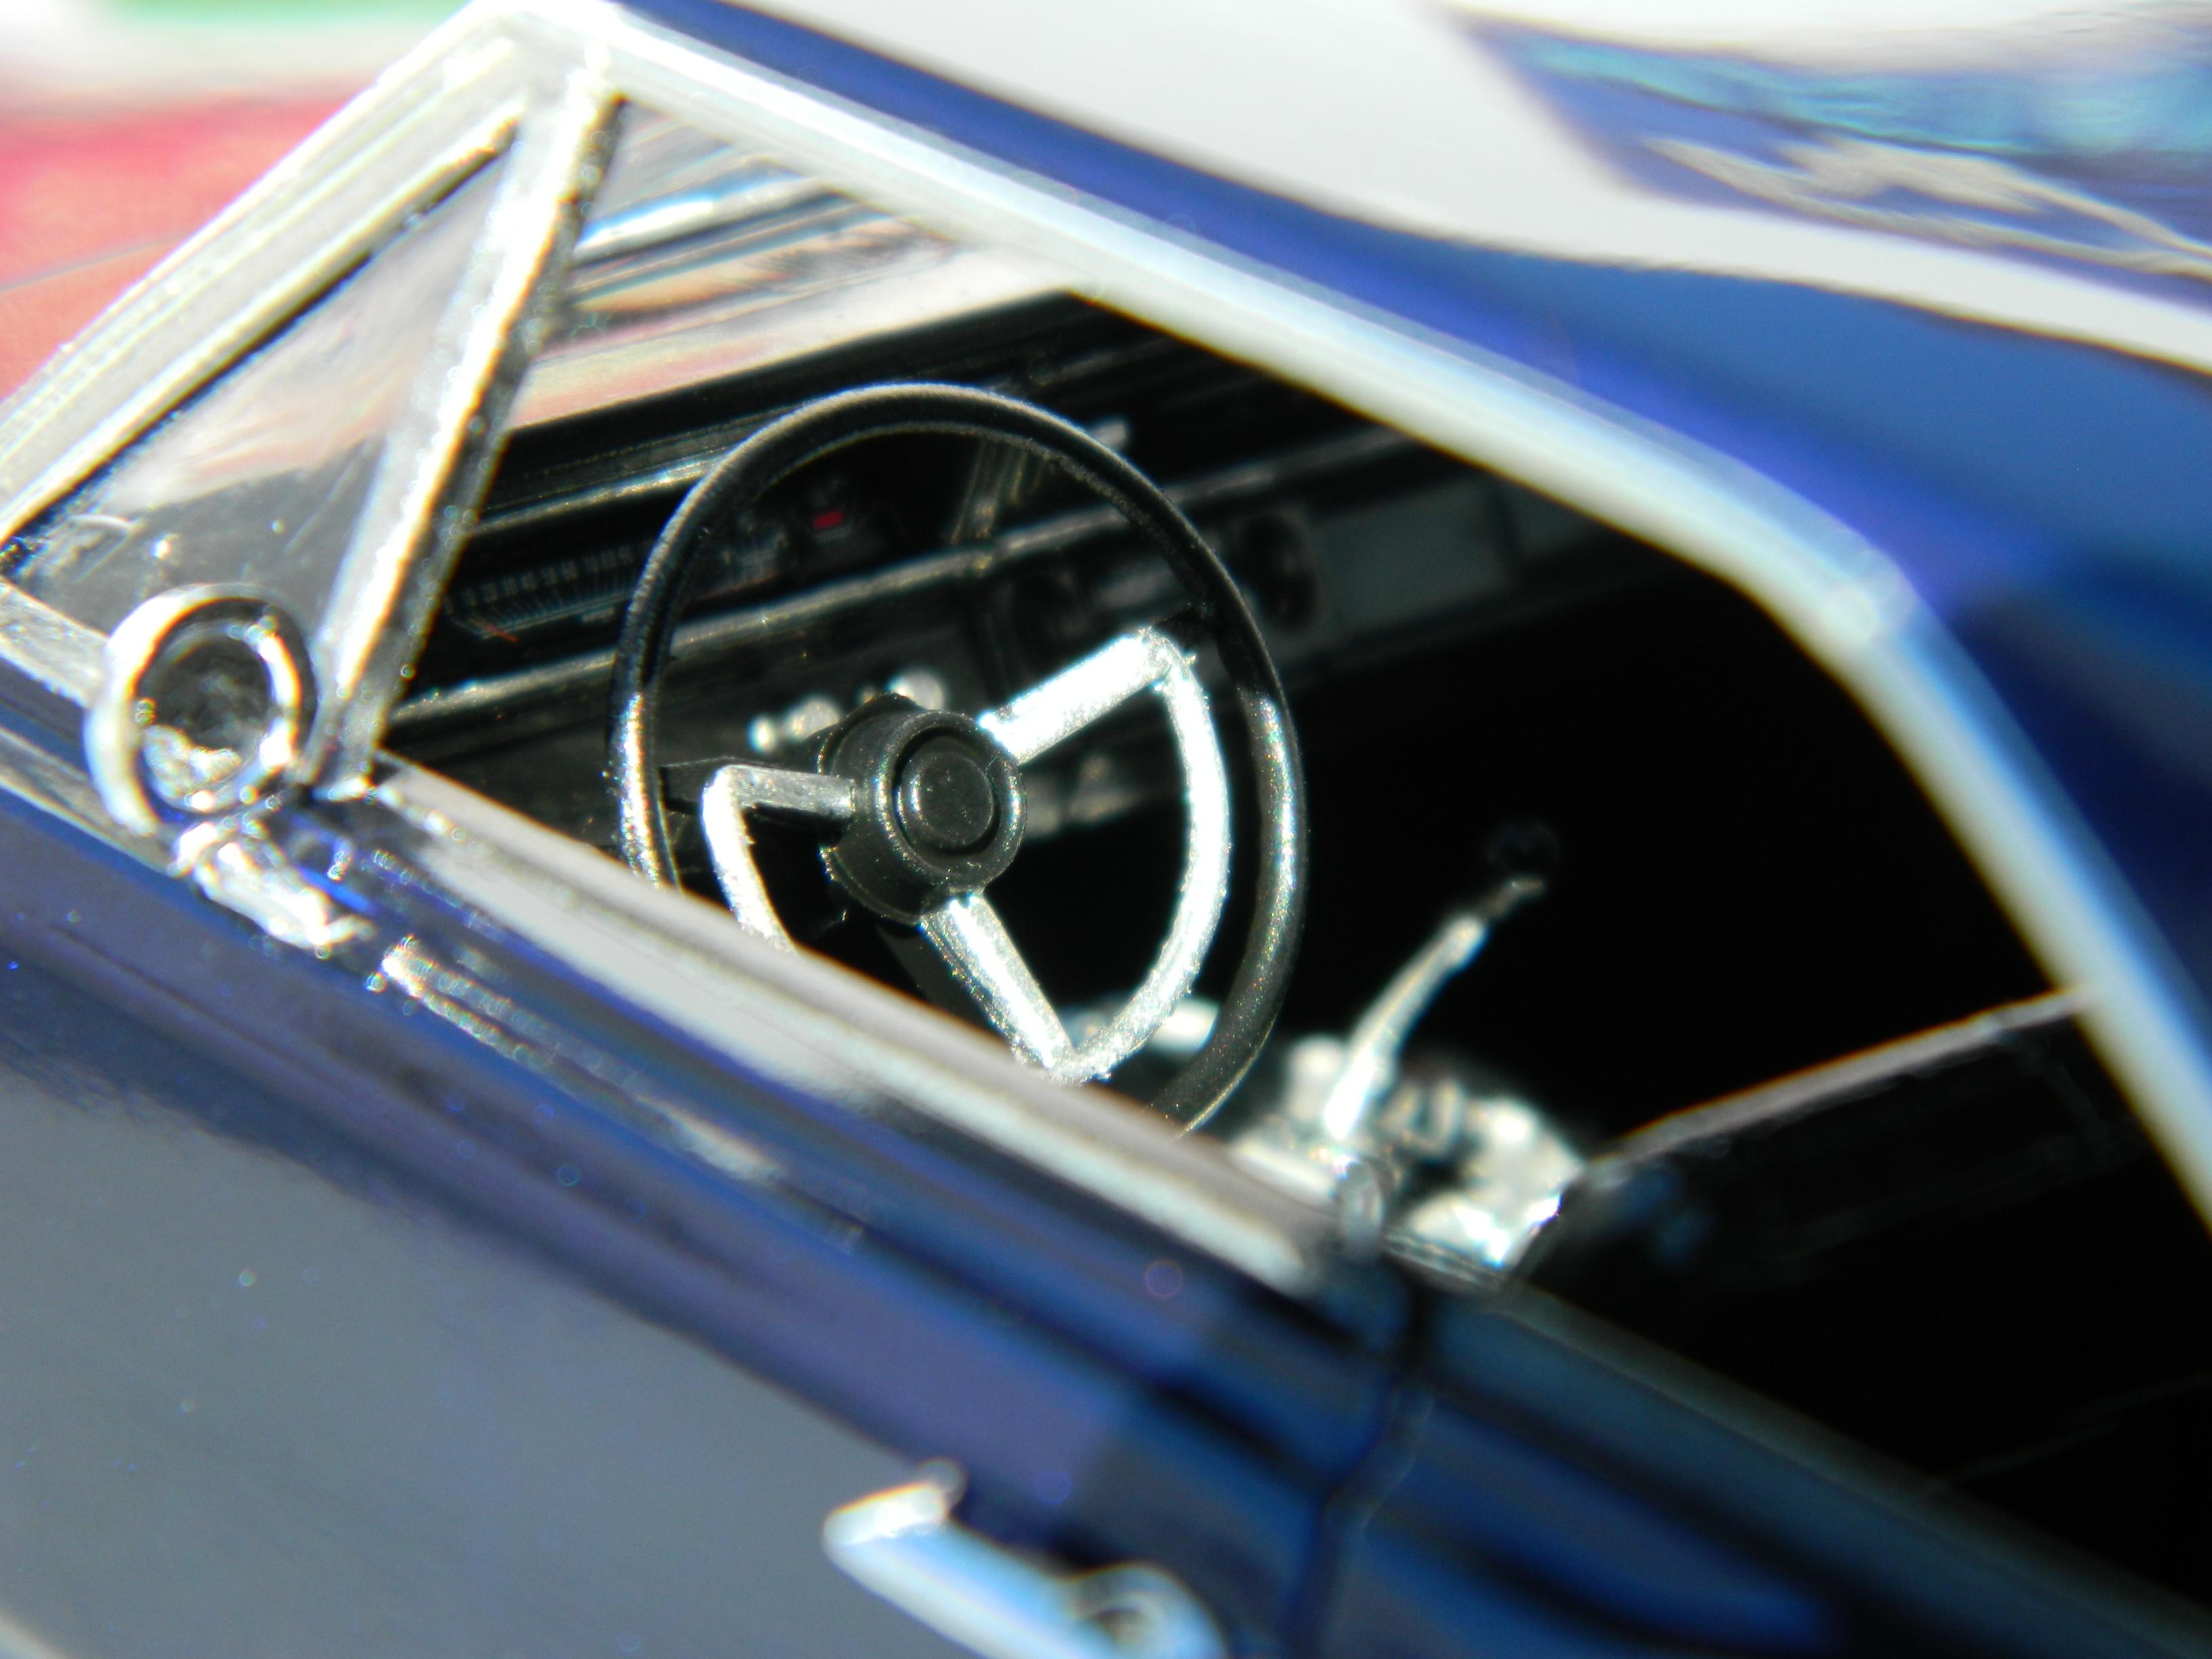
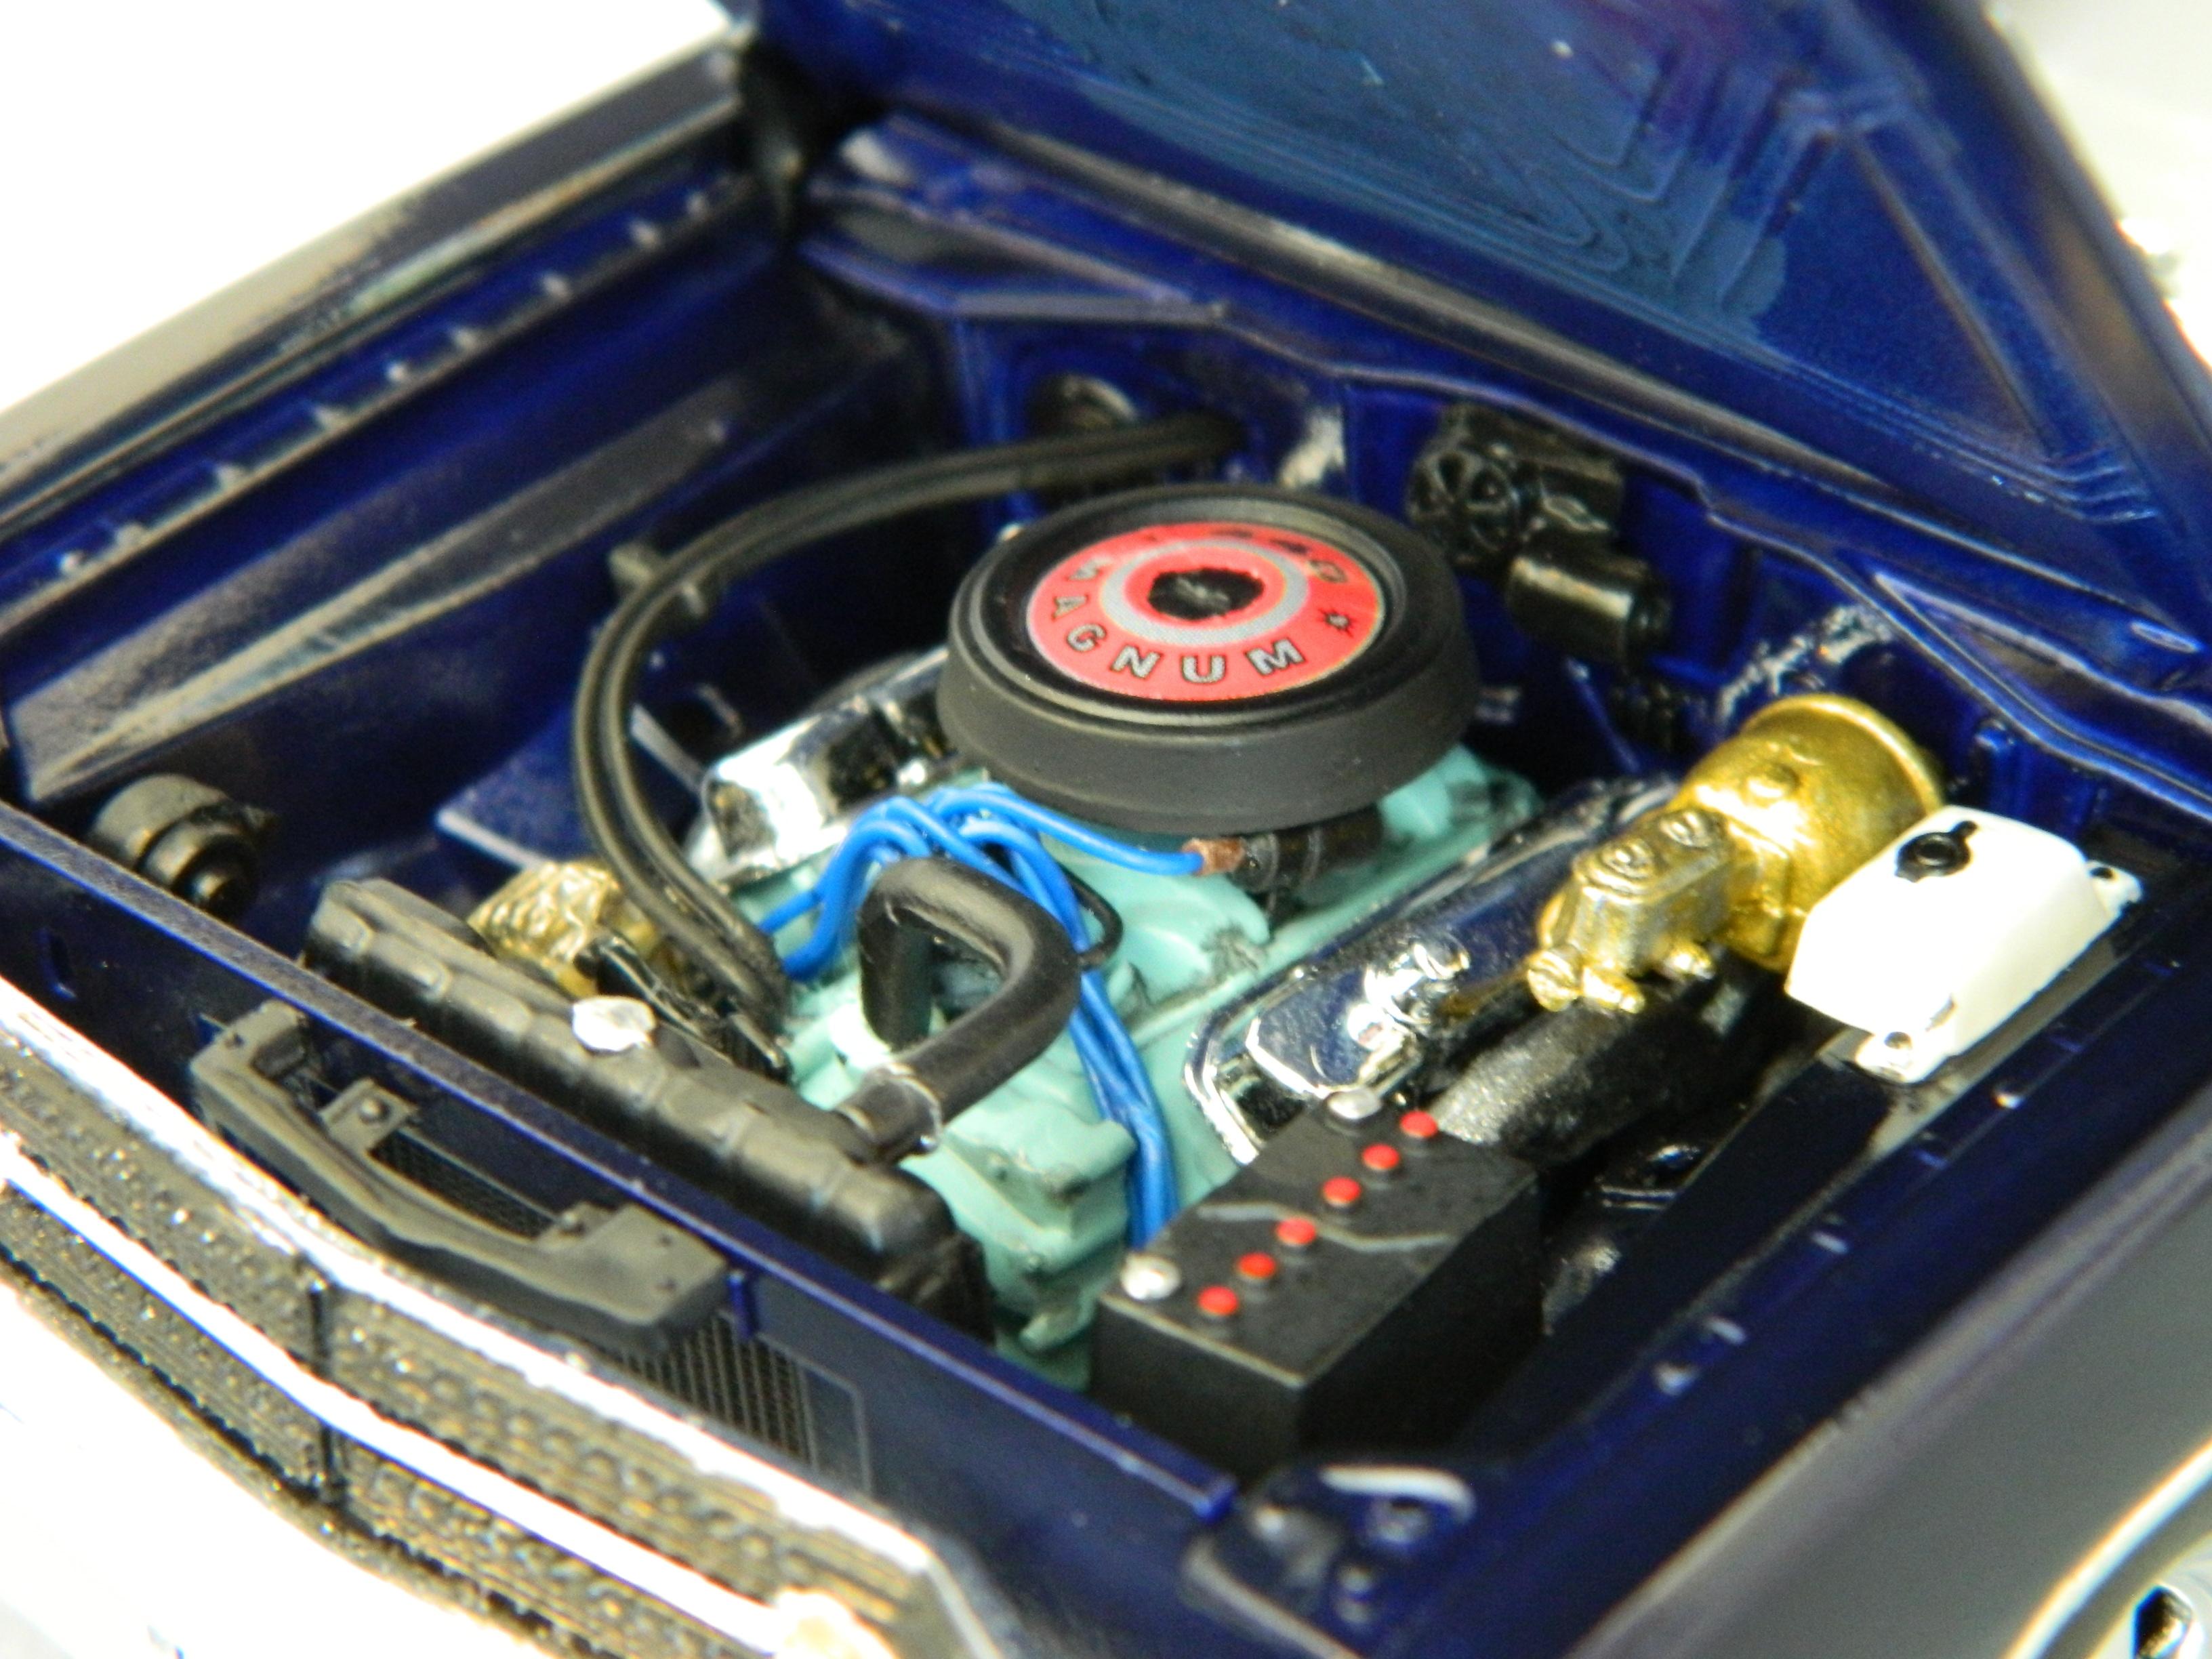
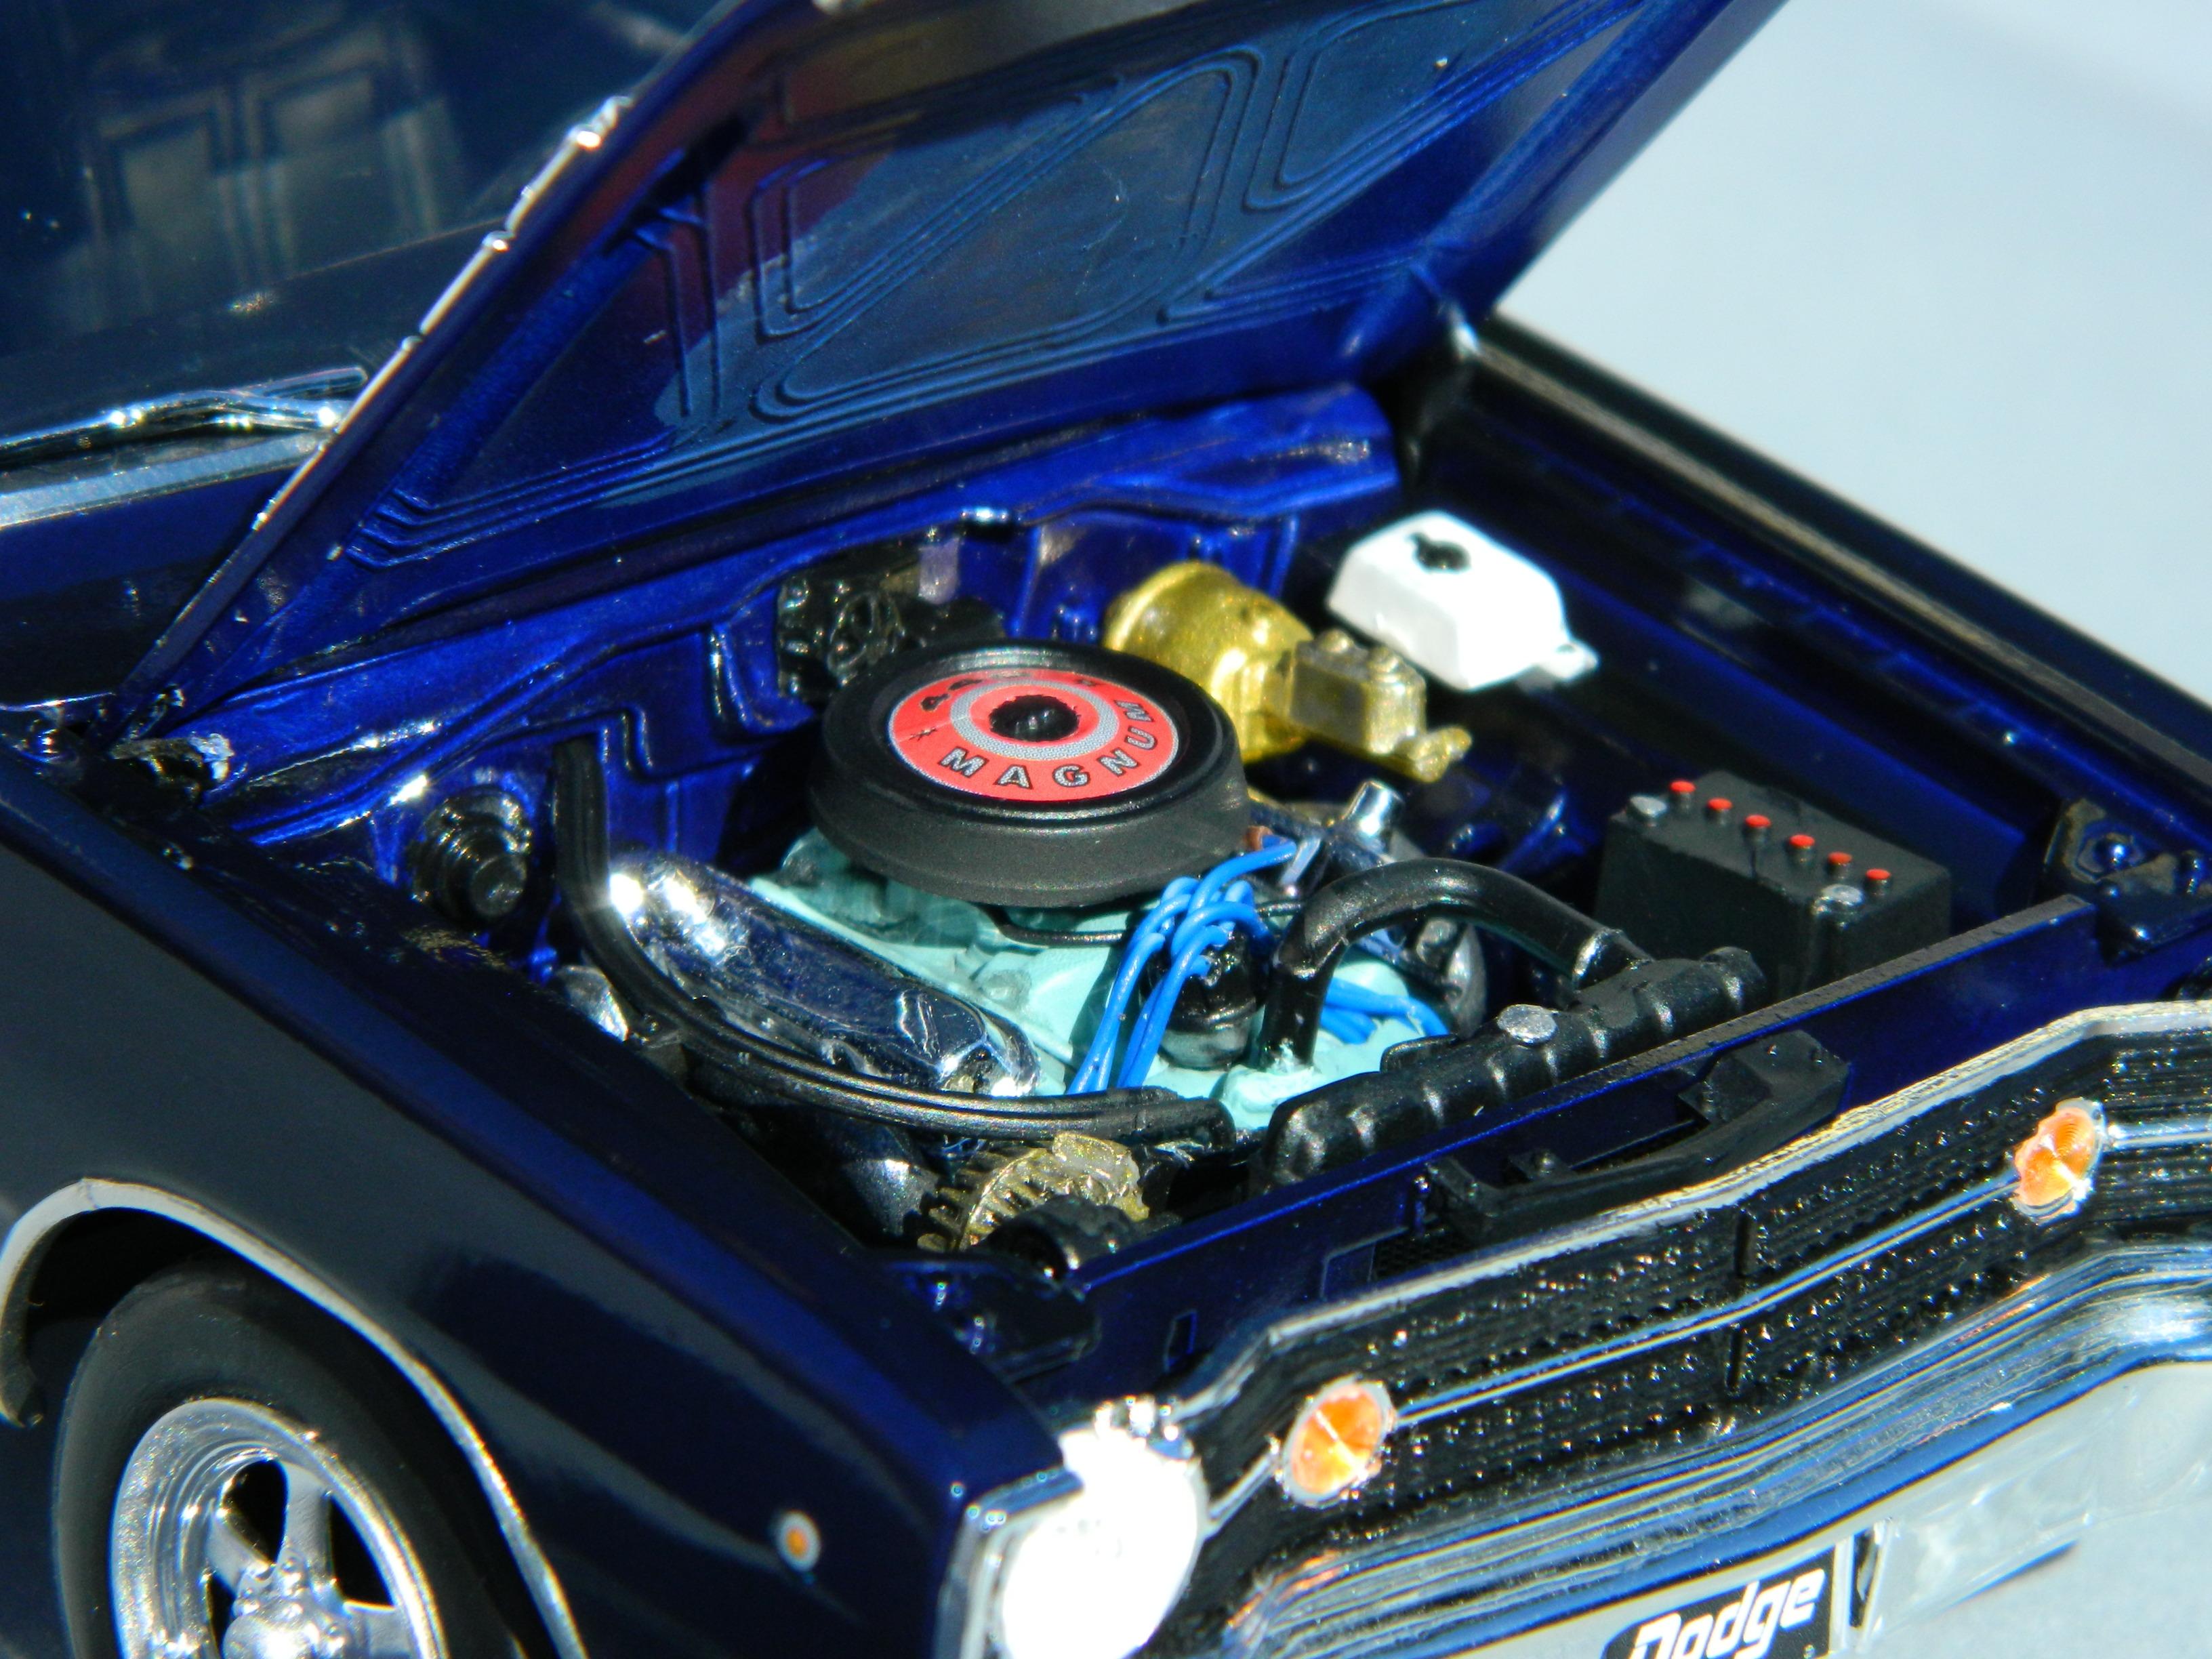
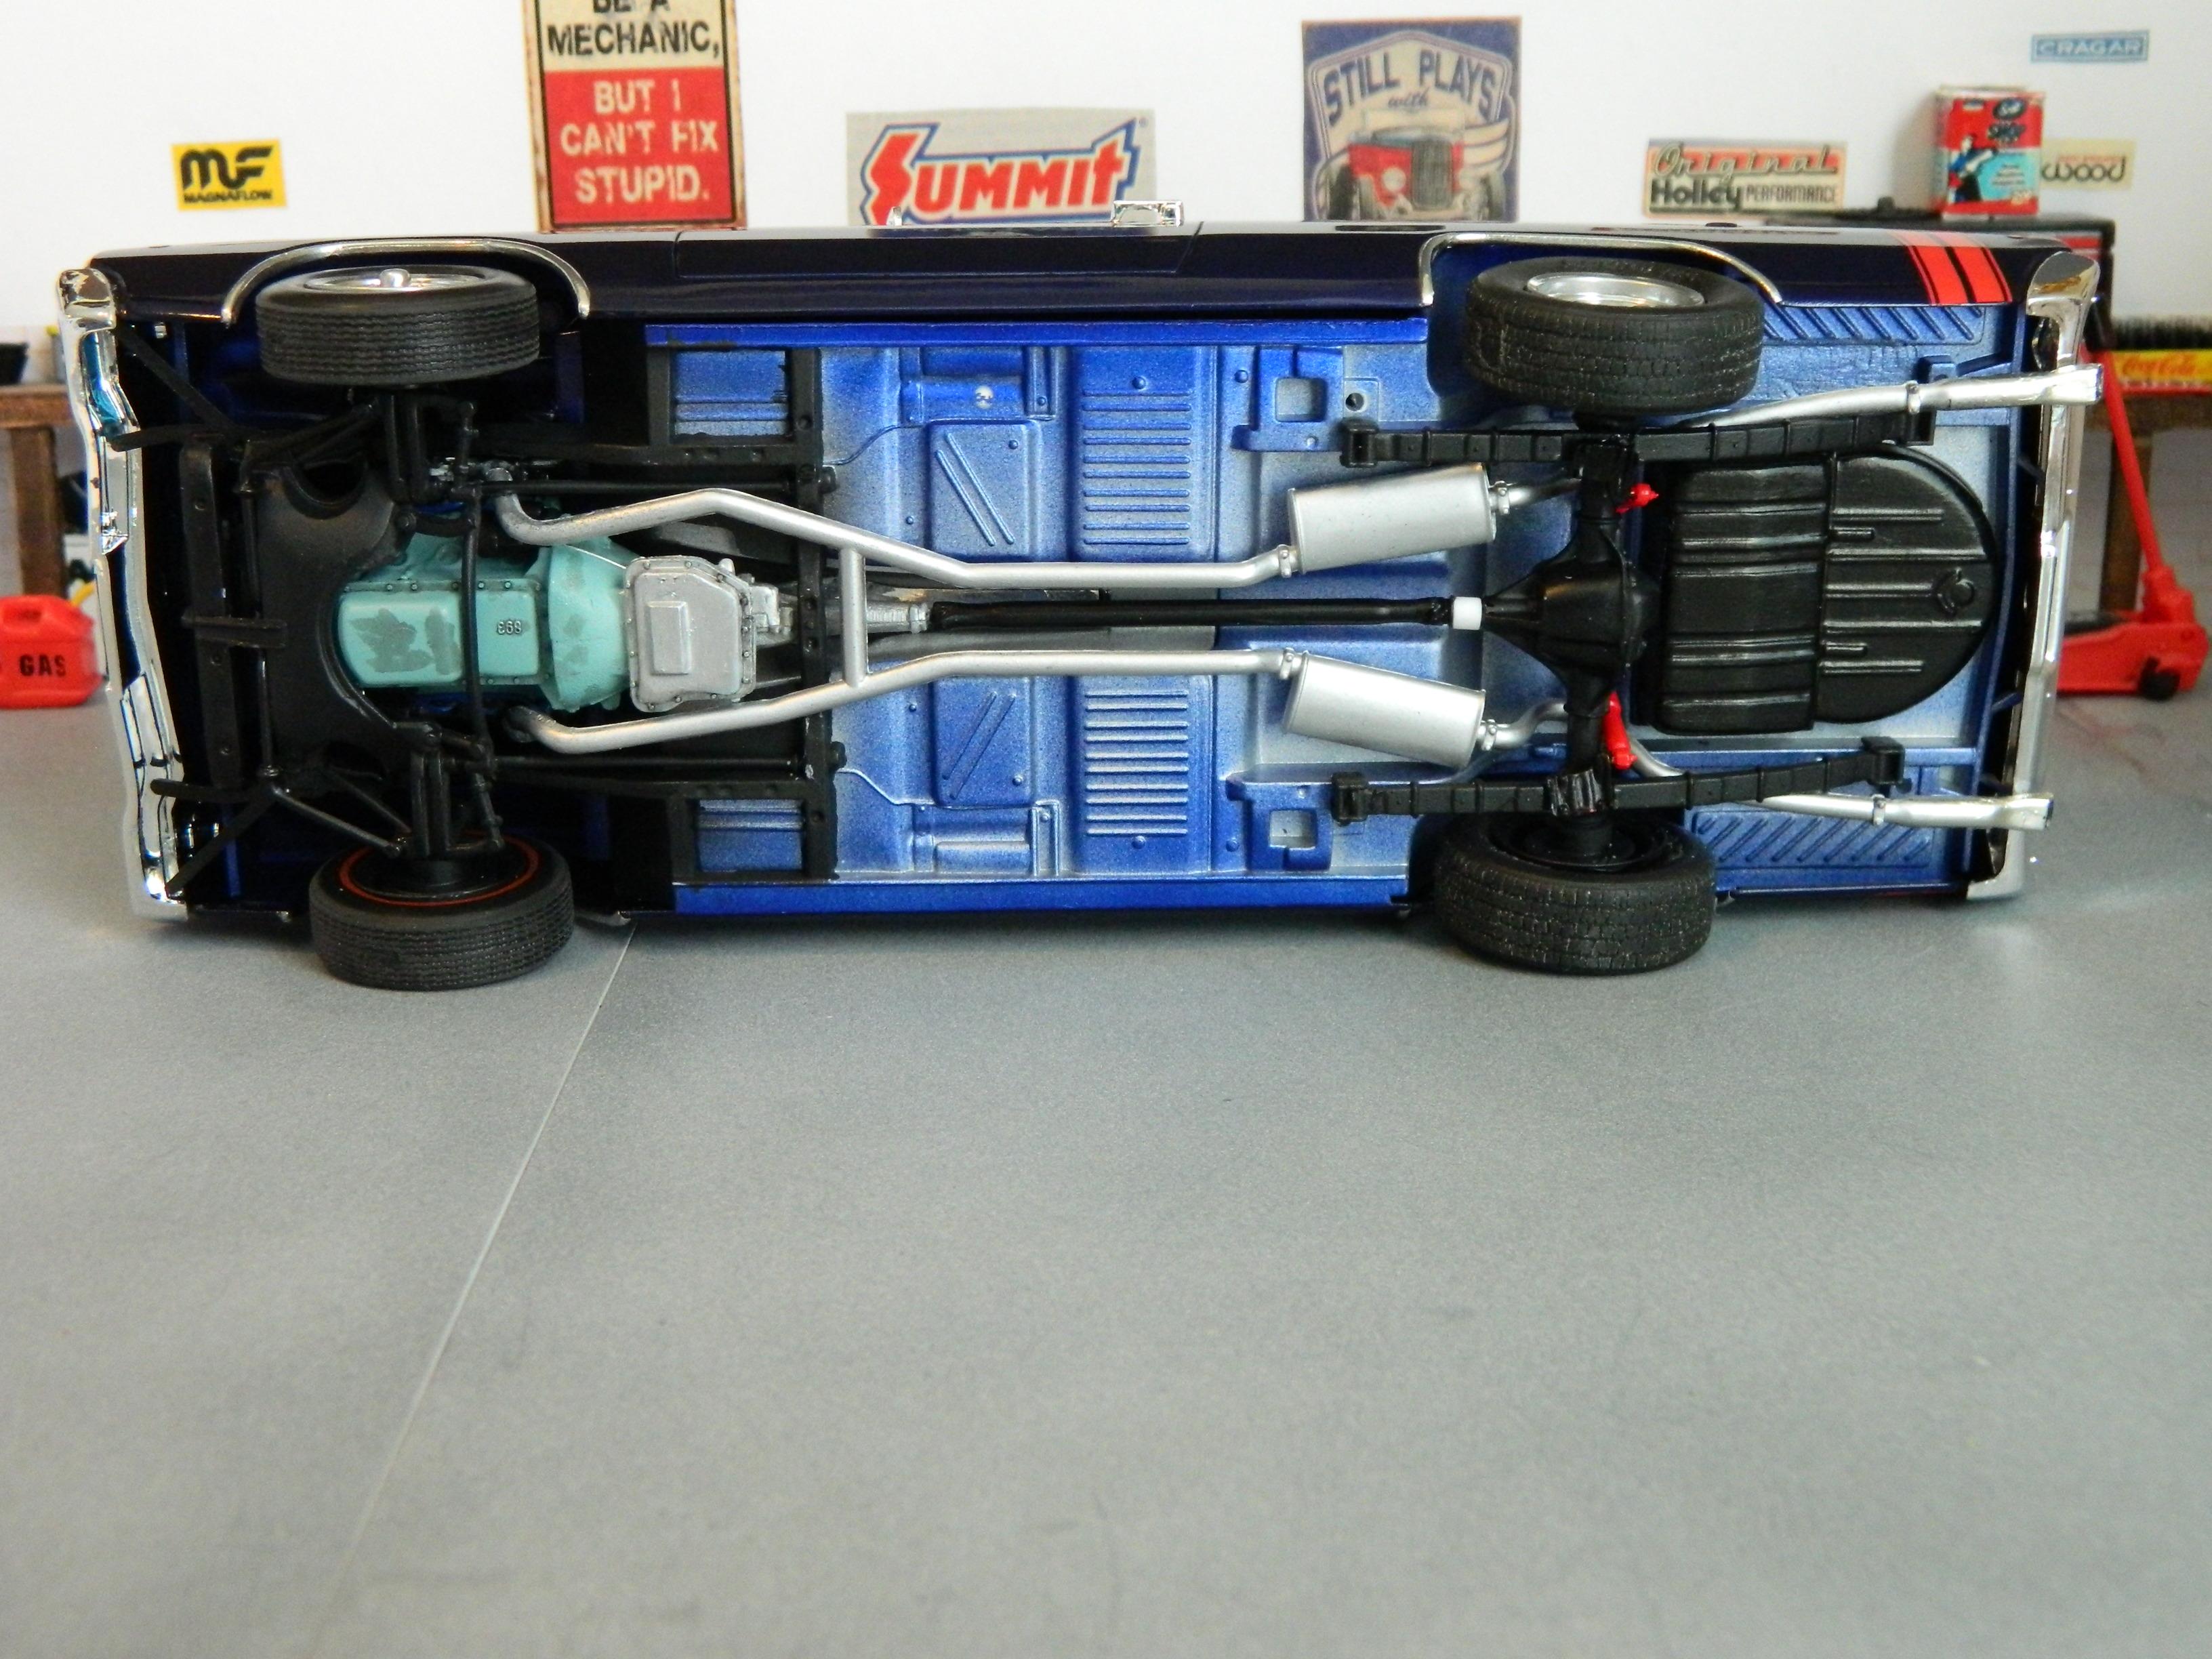
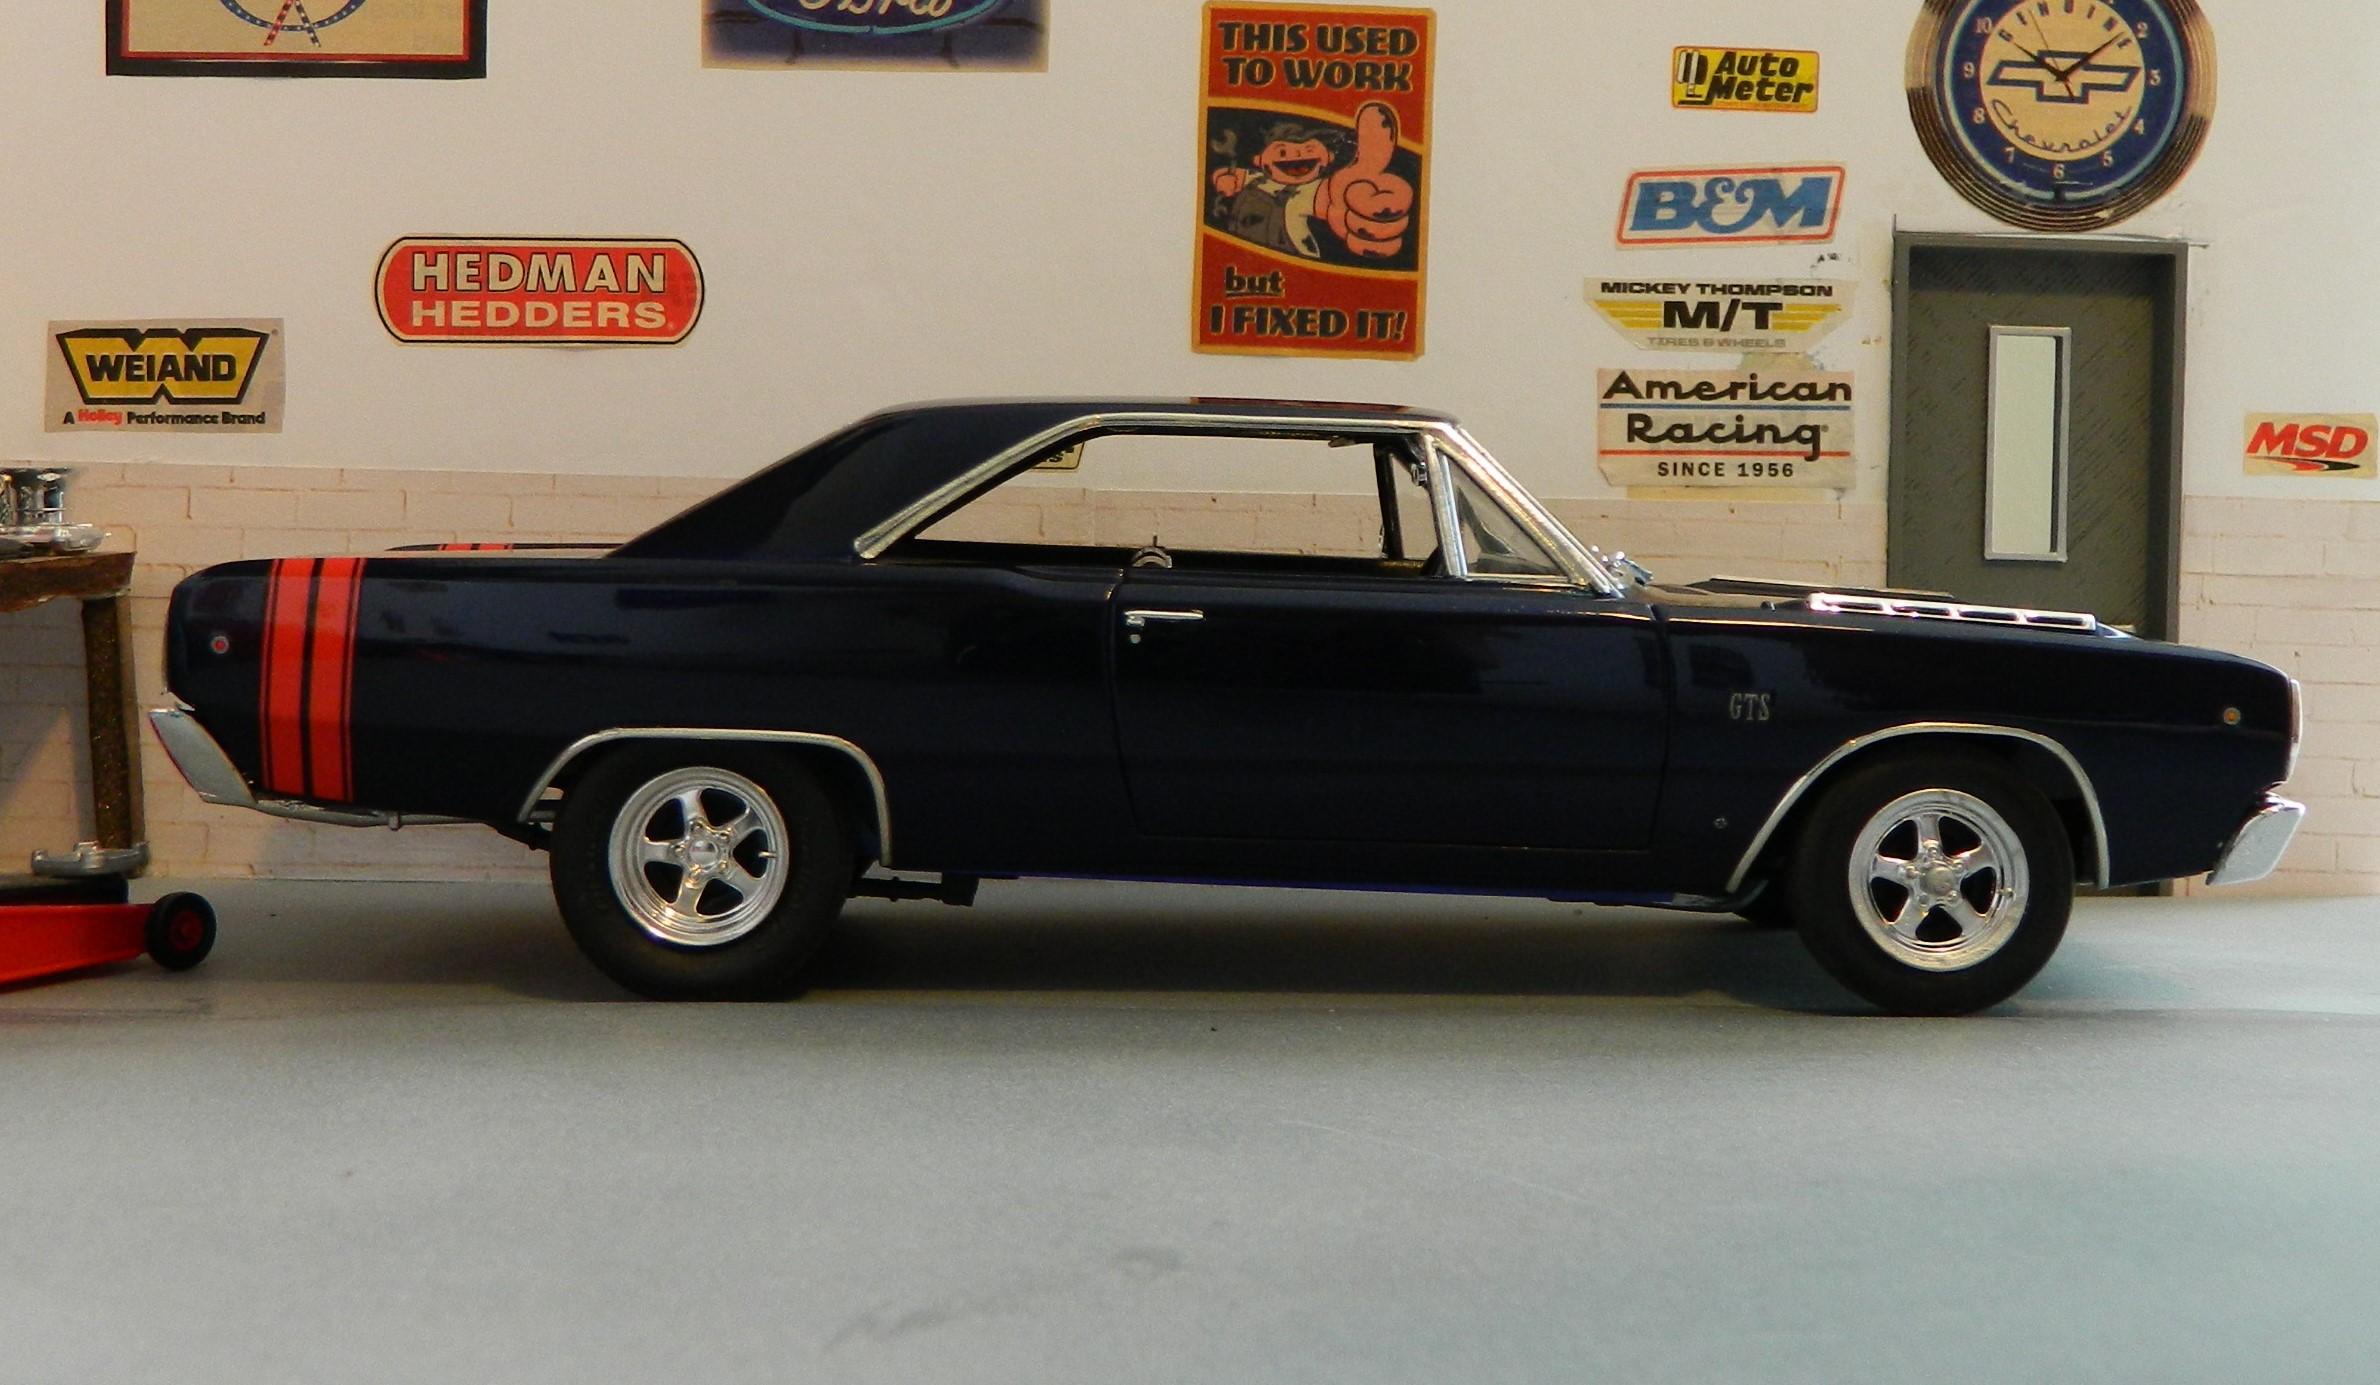
Here's the Revell 1968 Dodge Dart GTS. What a fantastic kit! Everything fit great, and I had pretty much no issues at all with the build, although I did have to shorten the rear axles to fit the wider tires inside the stock fenderwells. The color is Tamiya TS-53 Deep Metallic Blue over gray primer, and was cleared with Tamiya TS-13. The red stripes are decals from the Revell '68 Charger 2'n1 kit. The seats, door panels and dash are Apple Barrel Gloss Black craft paint. The engine is a mixture of Folkart Dutch Aqua with a touch of Apple Barrel Laguna craft paints. The wheels are from Morgan Automotive Detail and were airbrushed with Molotow Chrome. The rear tires are from Fireball Modelworks, and the fronts are from the parts box, although I'm pretty sure they came from the Revell '68 Chevelle kit. I did the trim in Bare Metal Foil and added door locks, valve stems, and ignition wires for added detail. Again, what a great kit, I really enjoyed this build. I included both indoor and outdoor pics to show how the metallic paint pops in the sun. Thanks for looking!
-
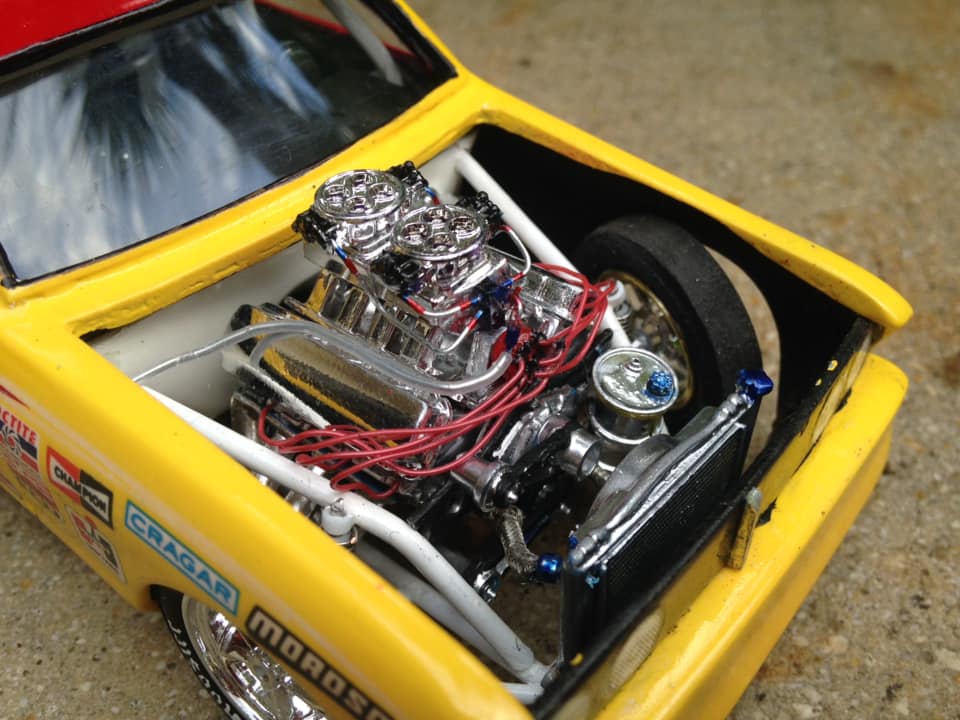
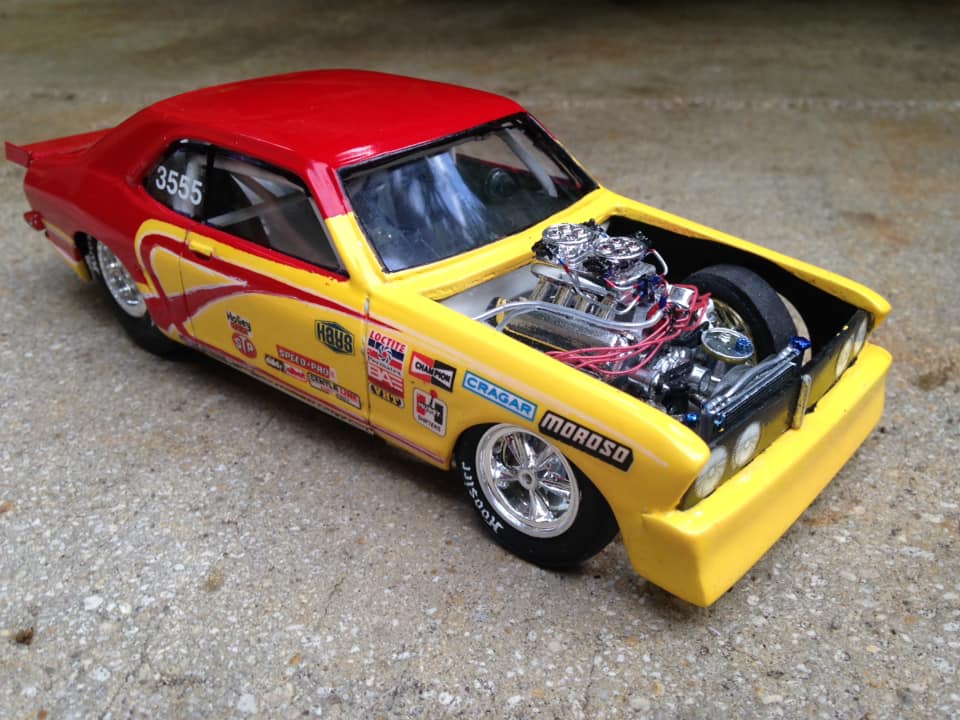
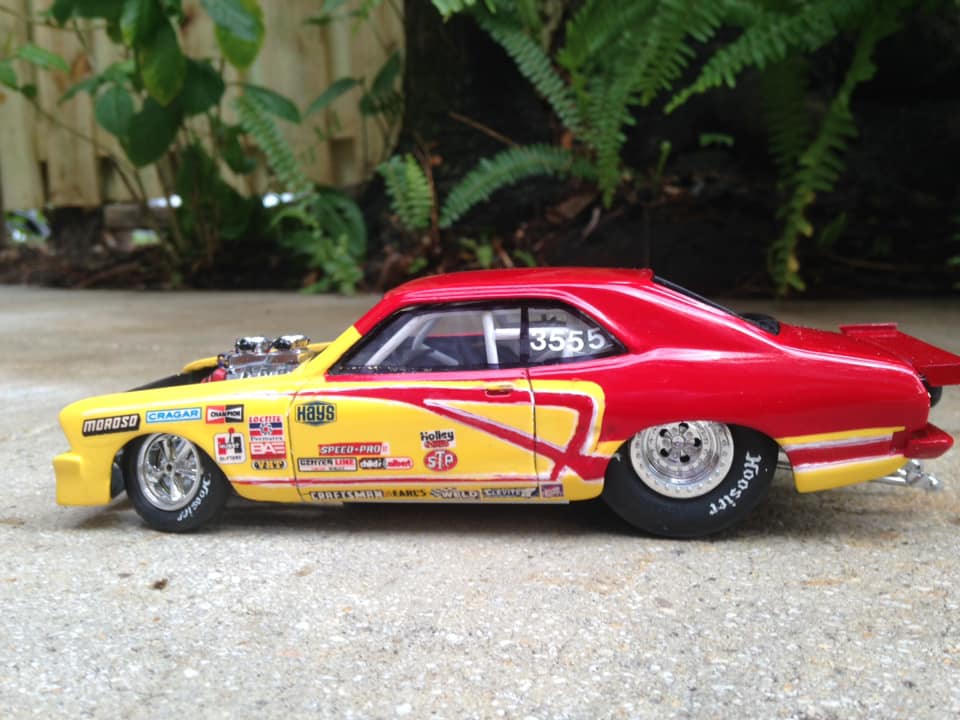
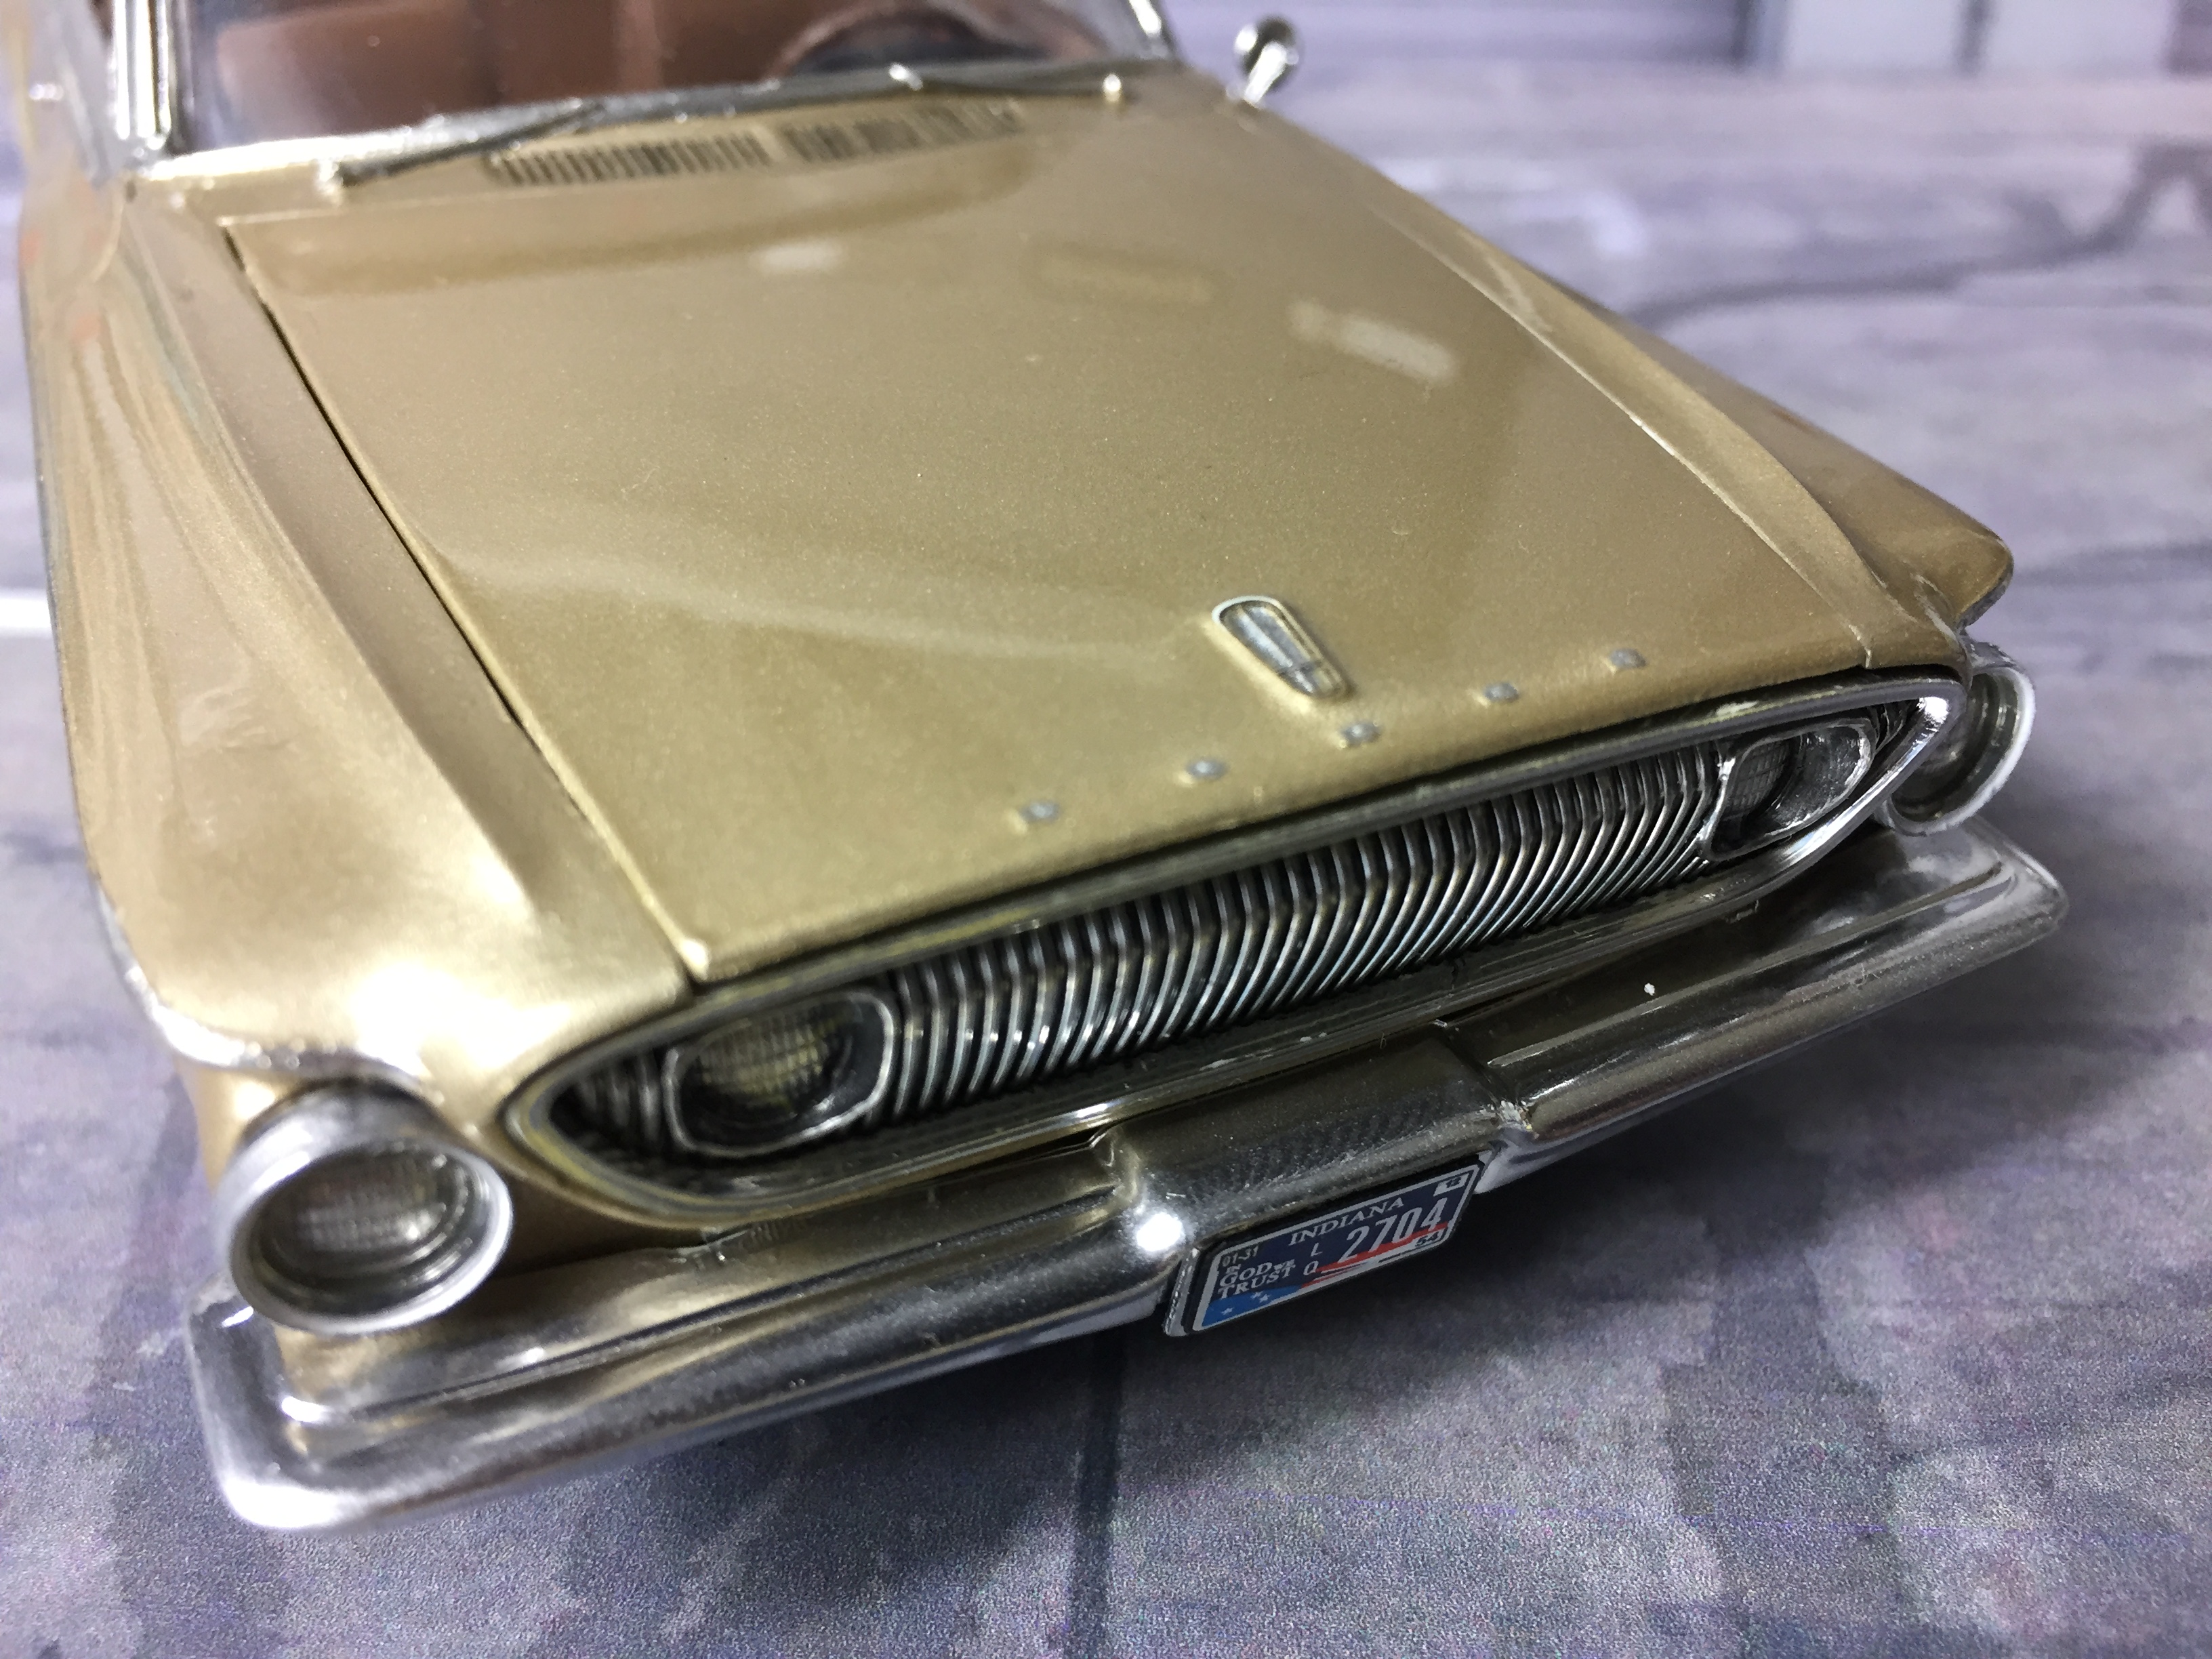
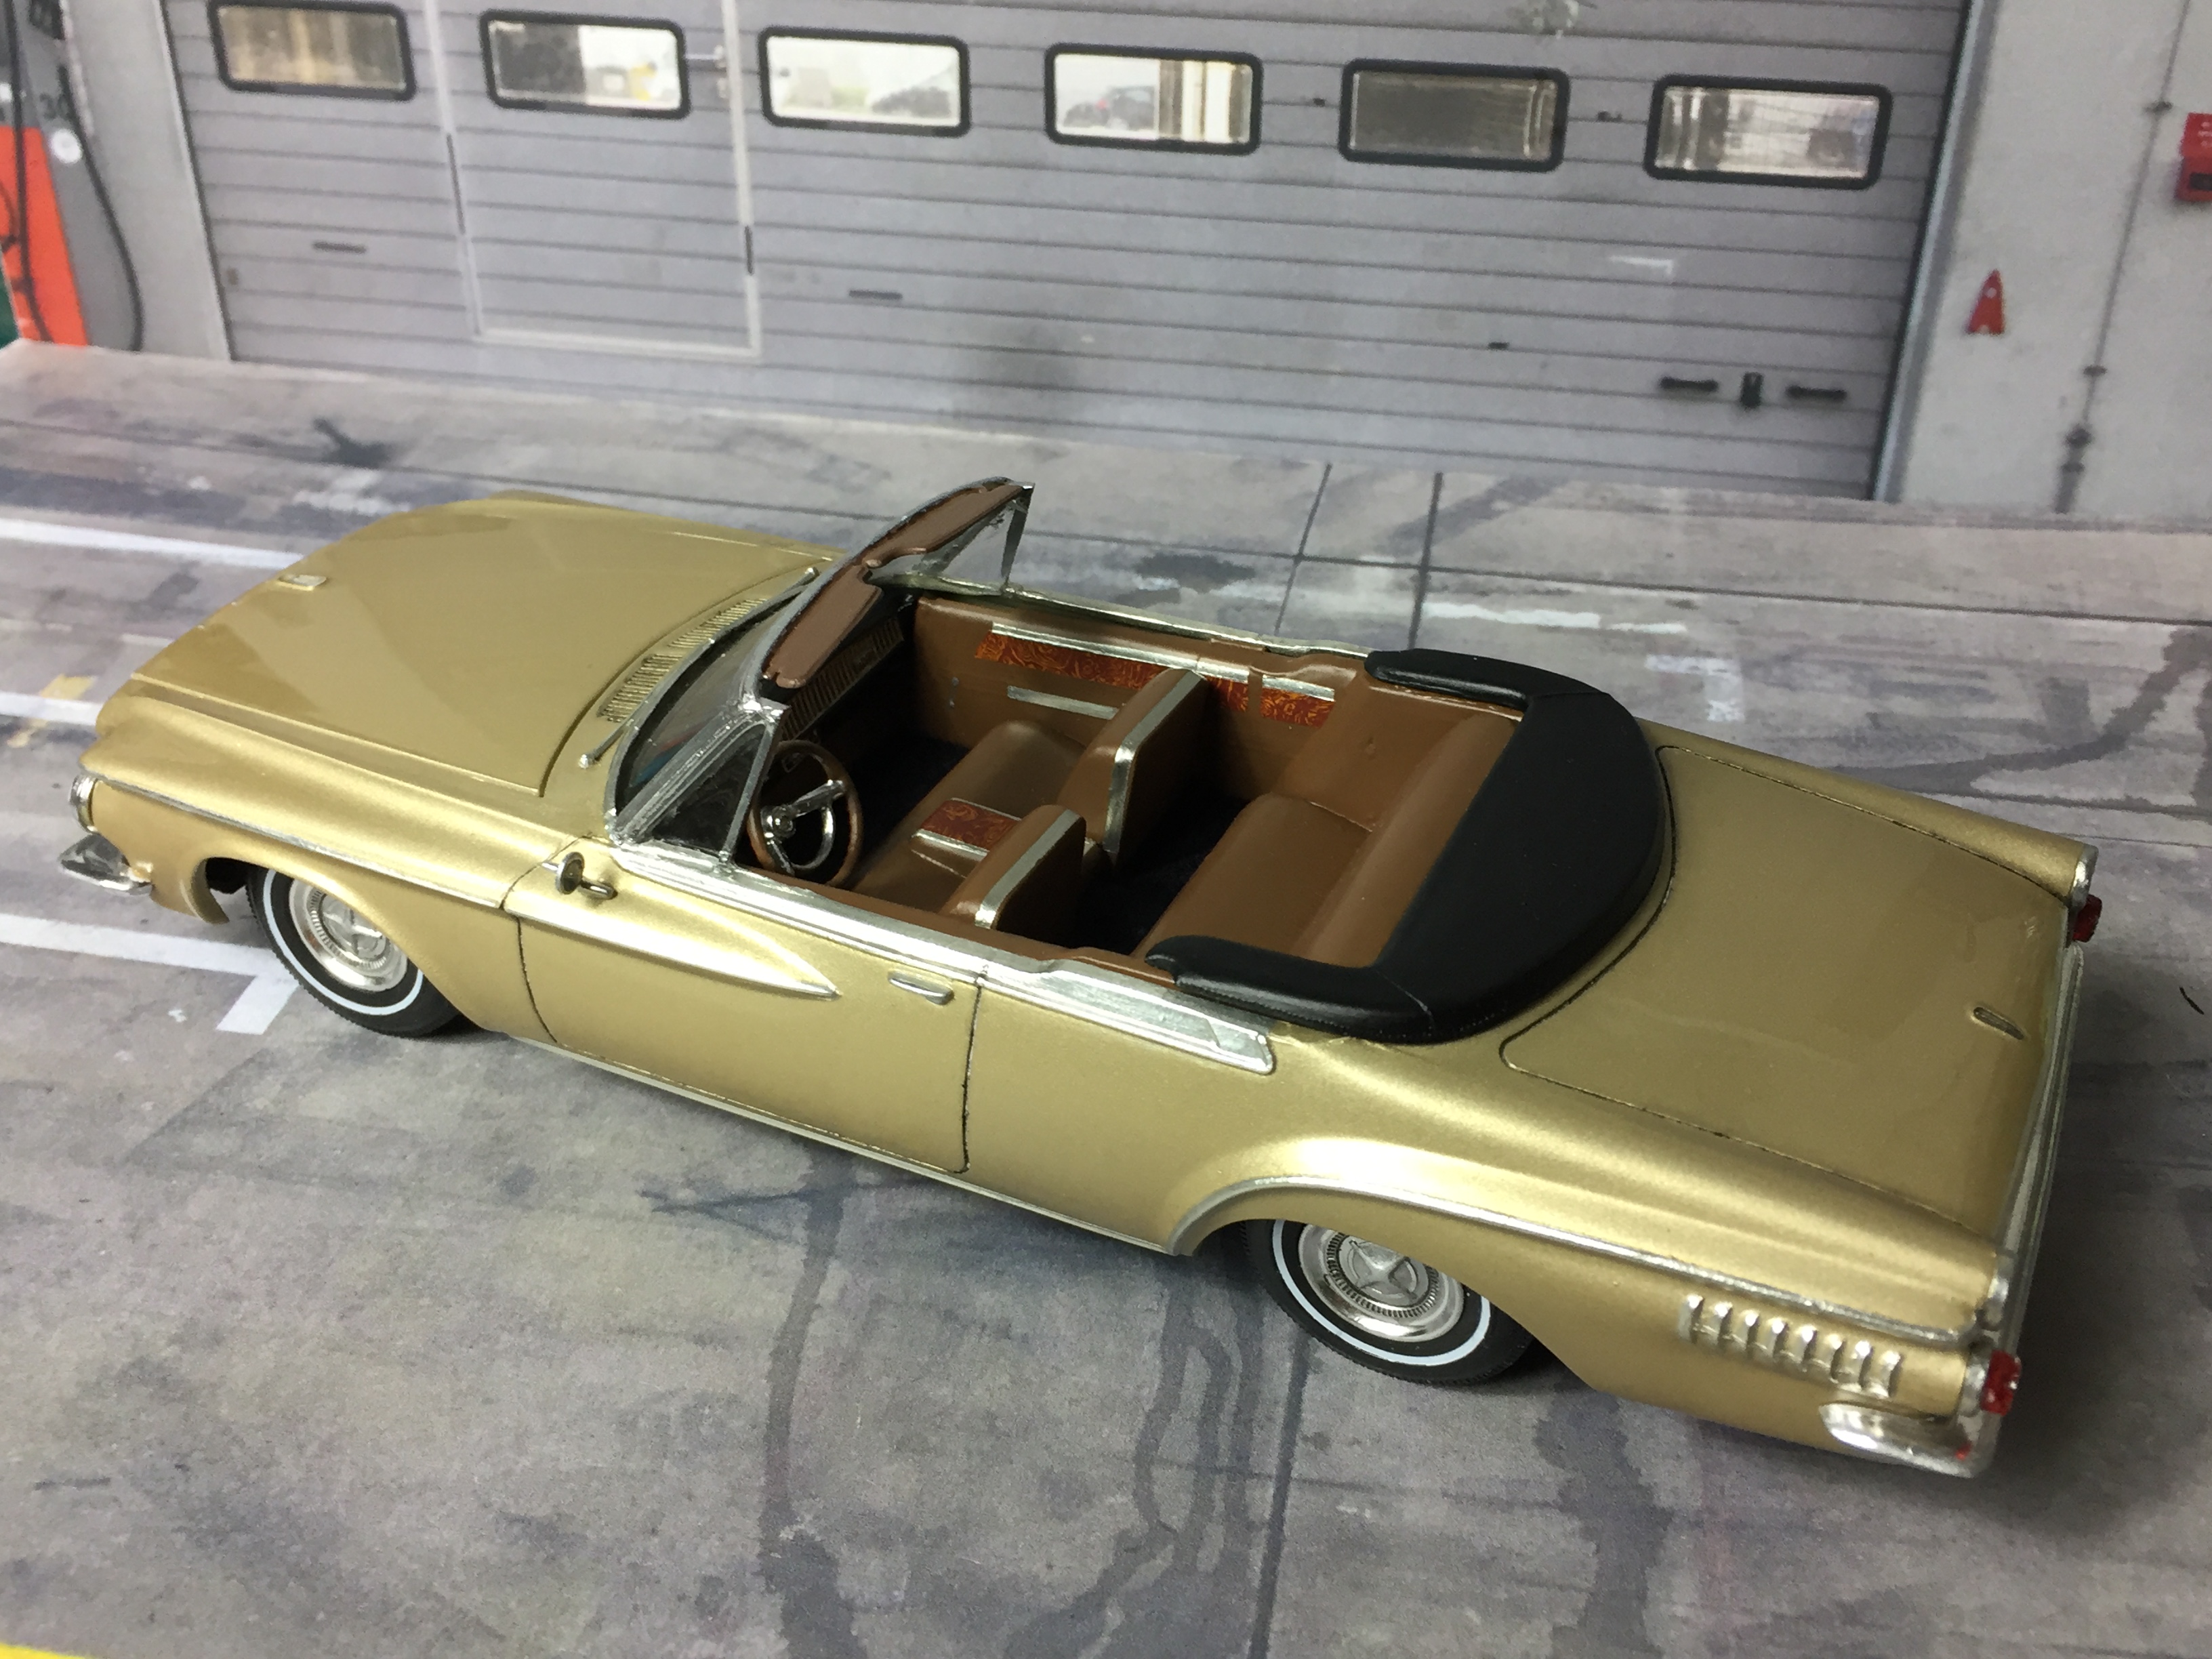
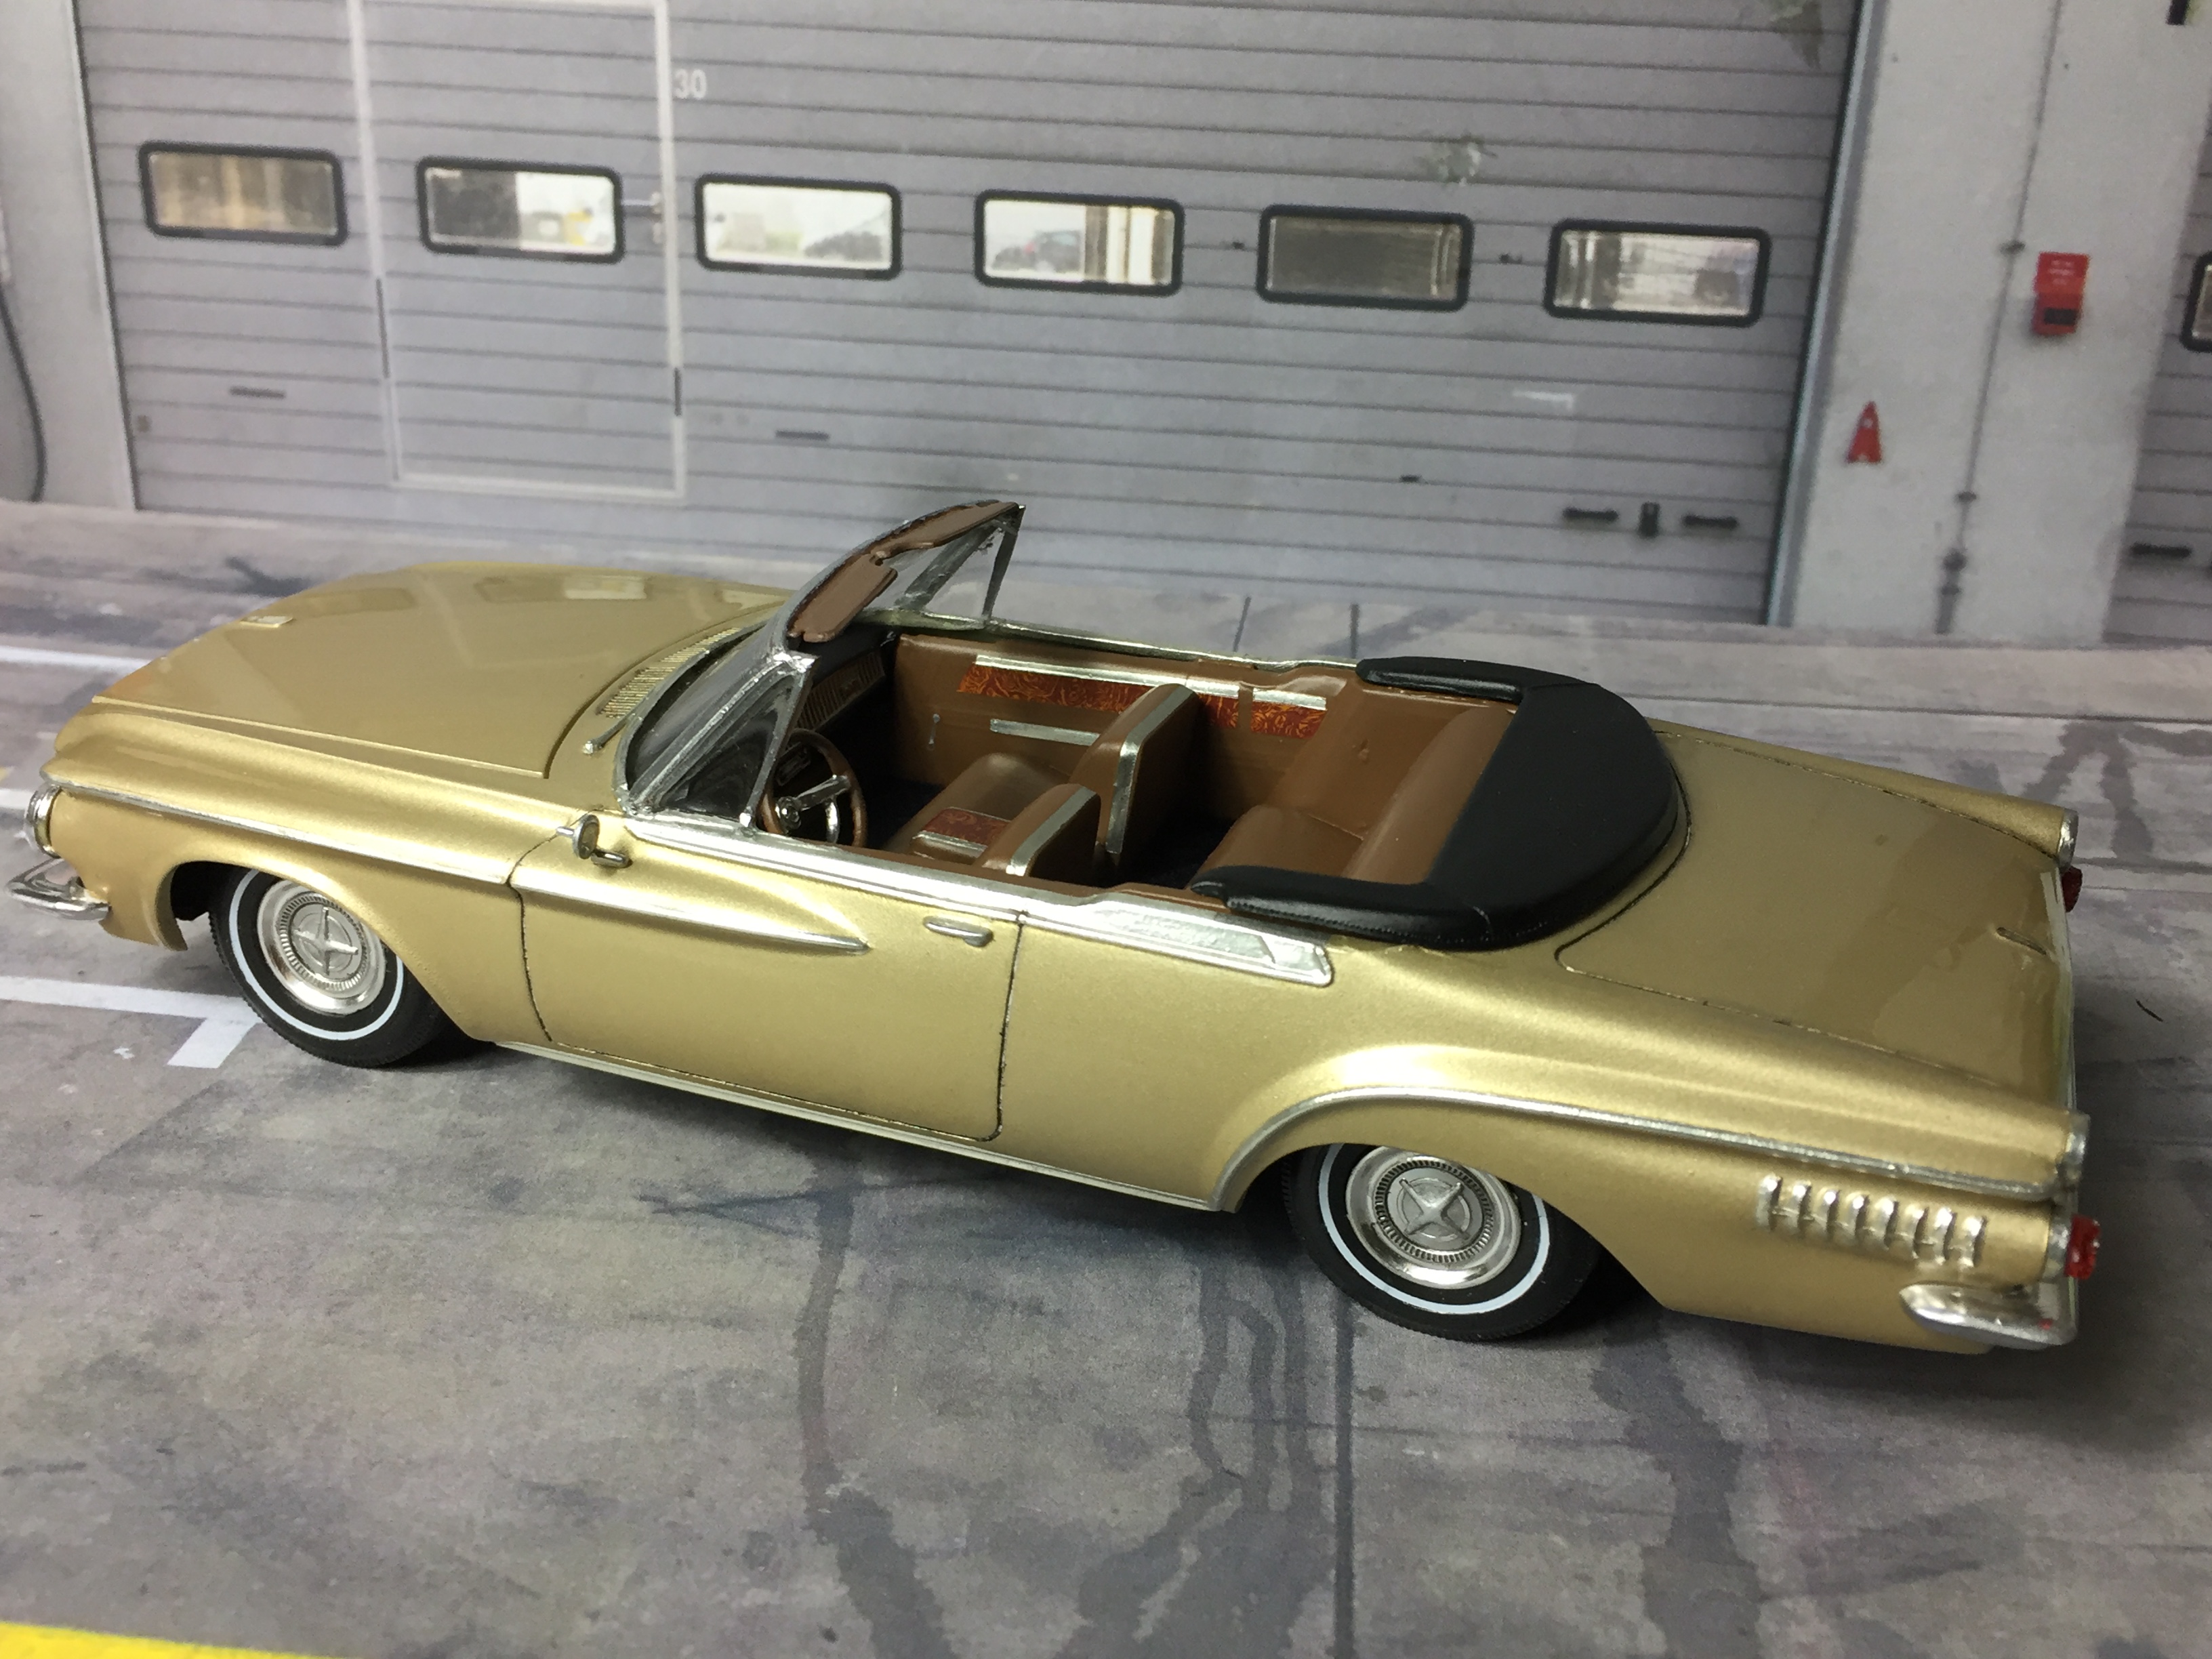
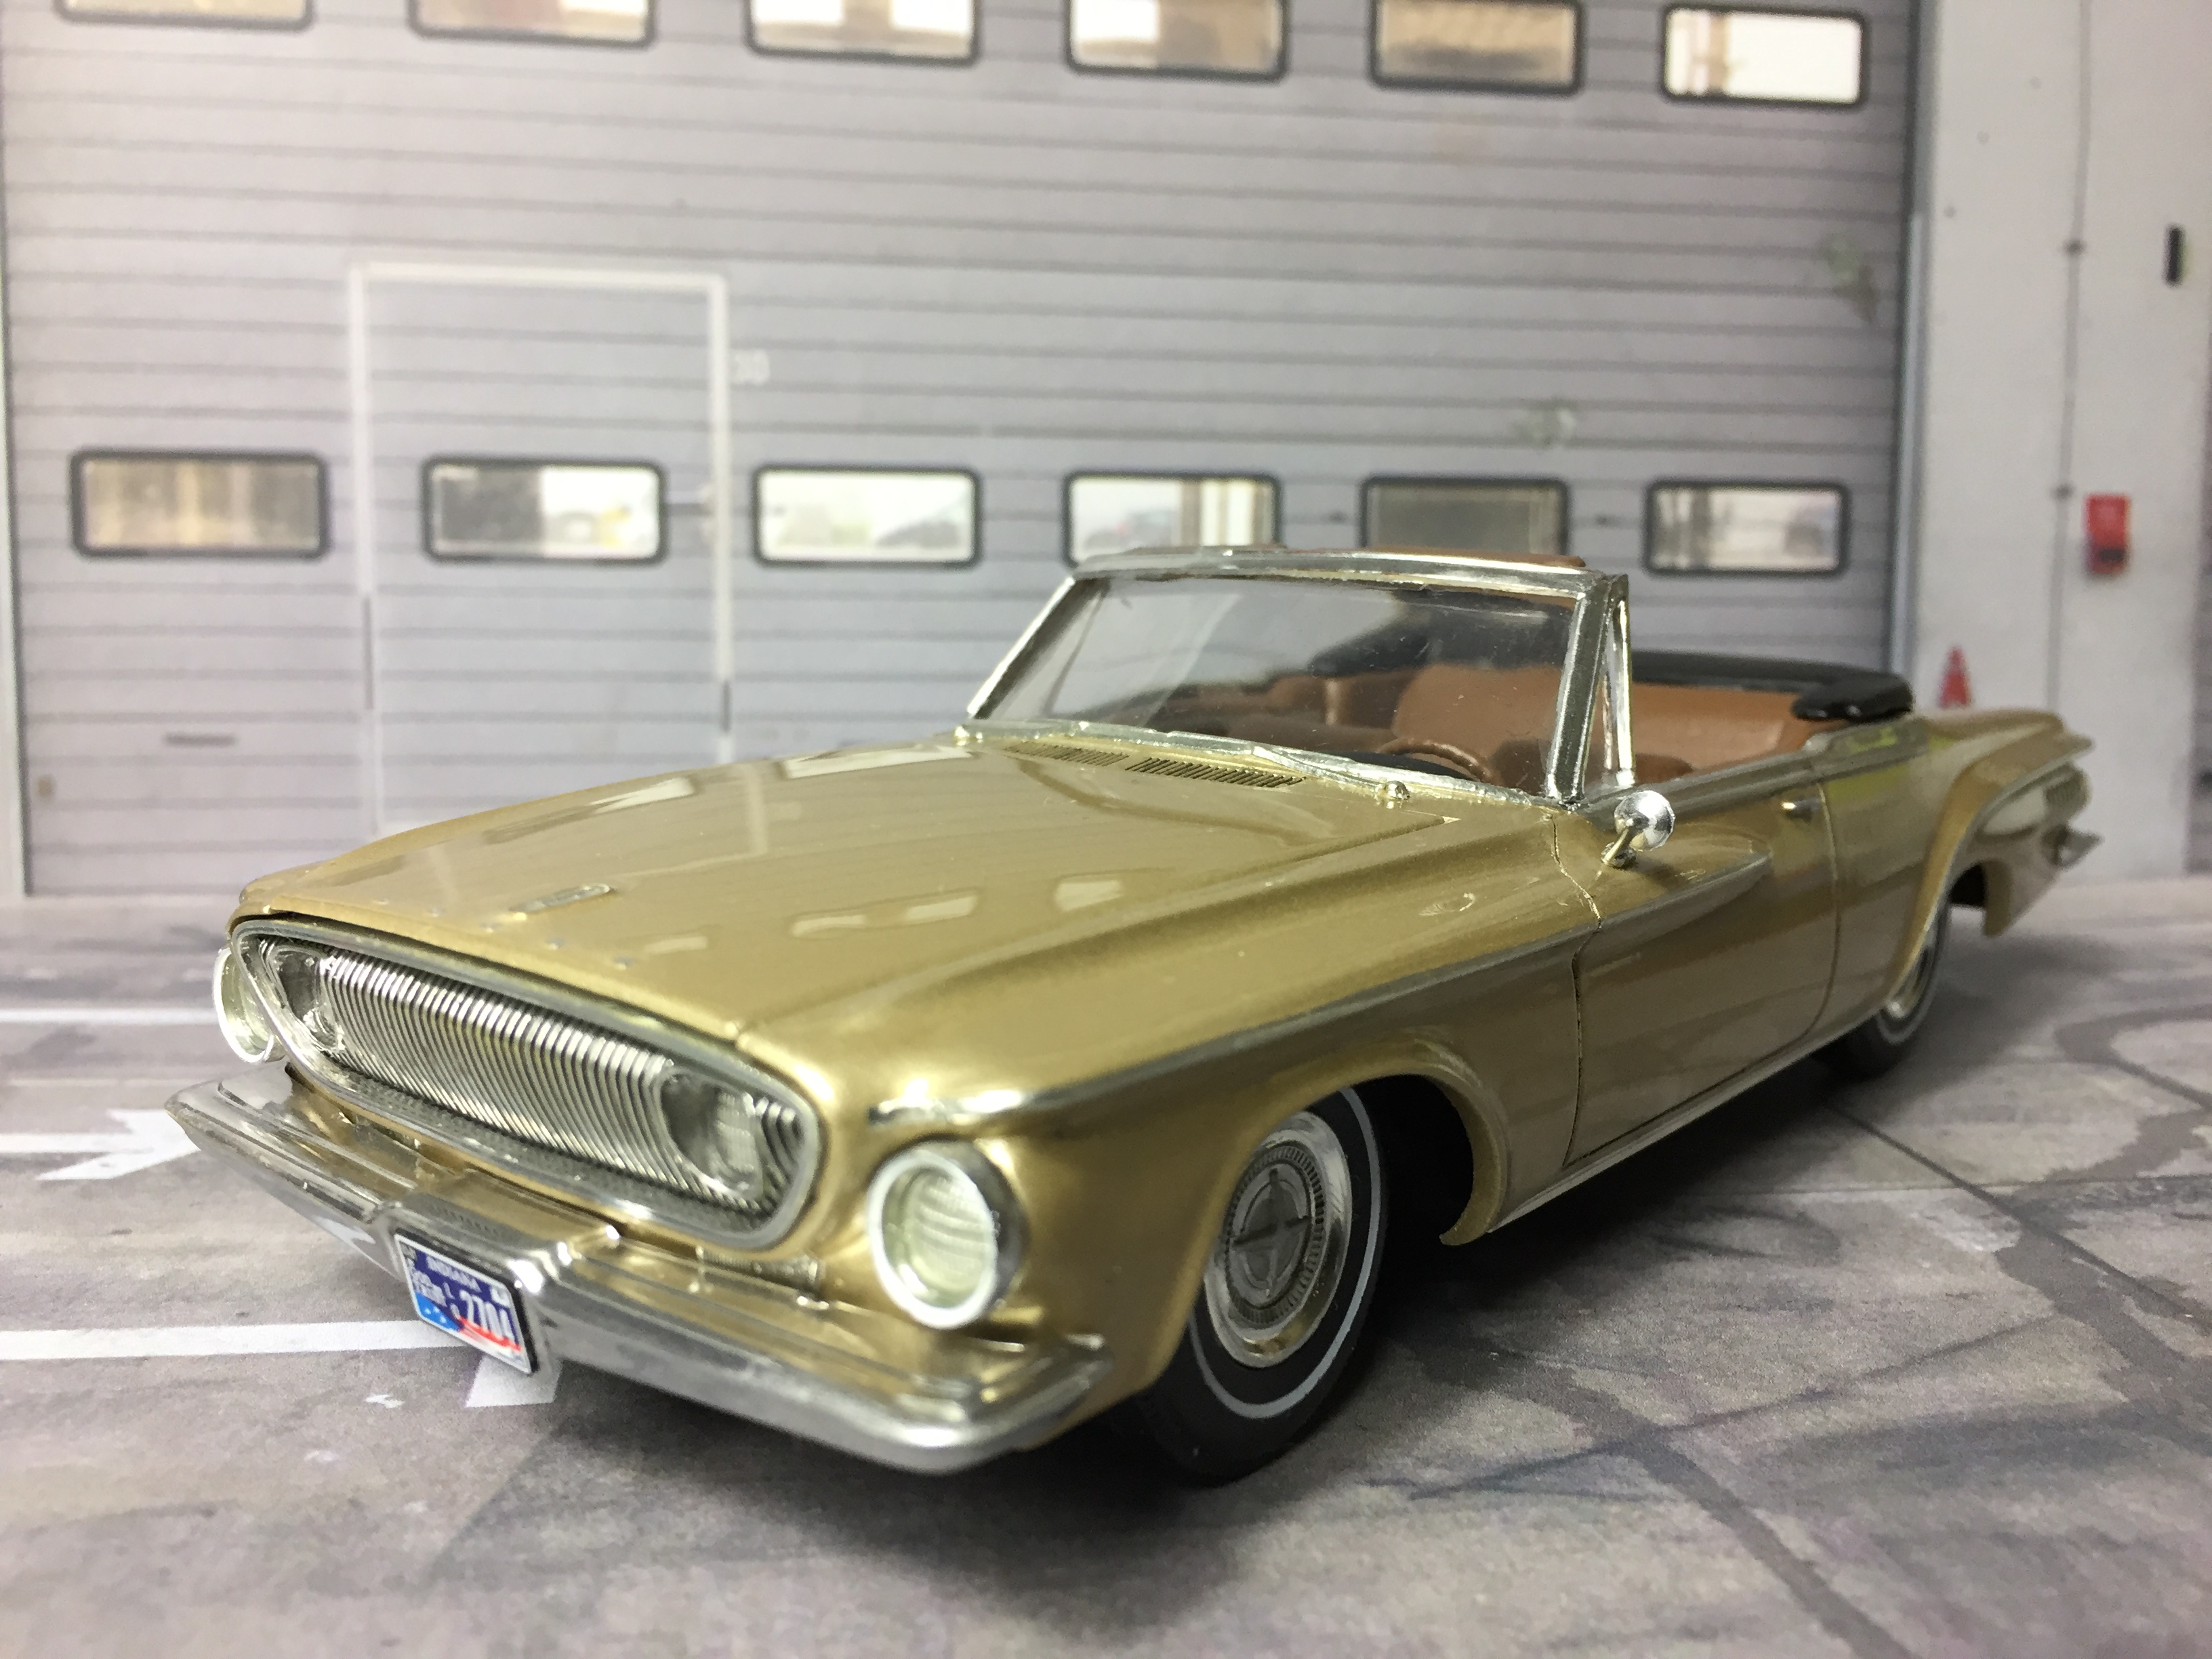
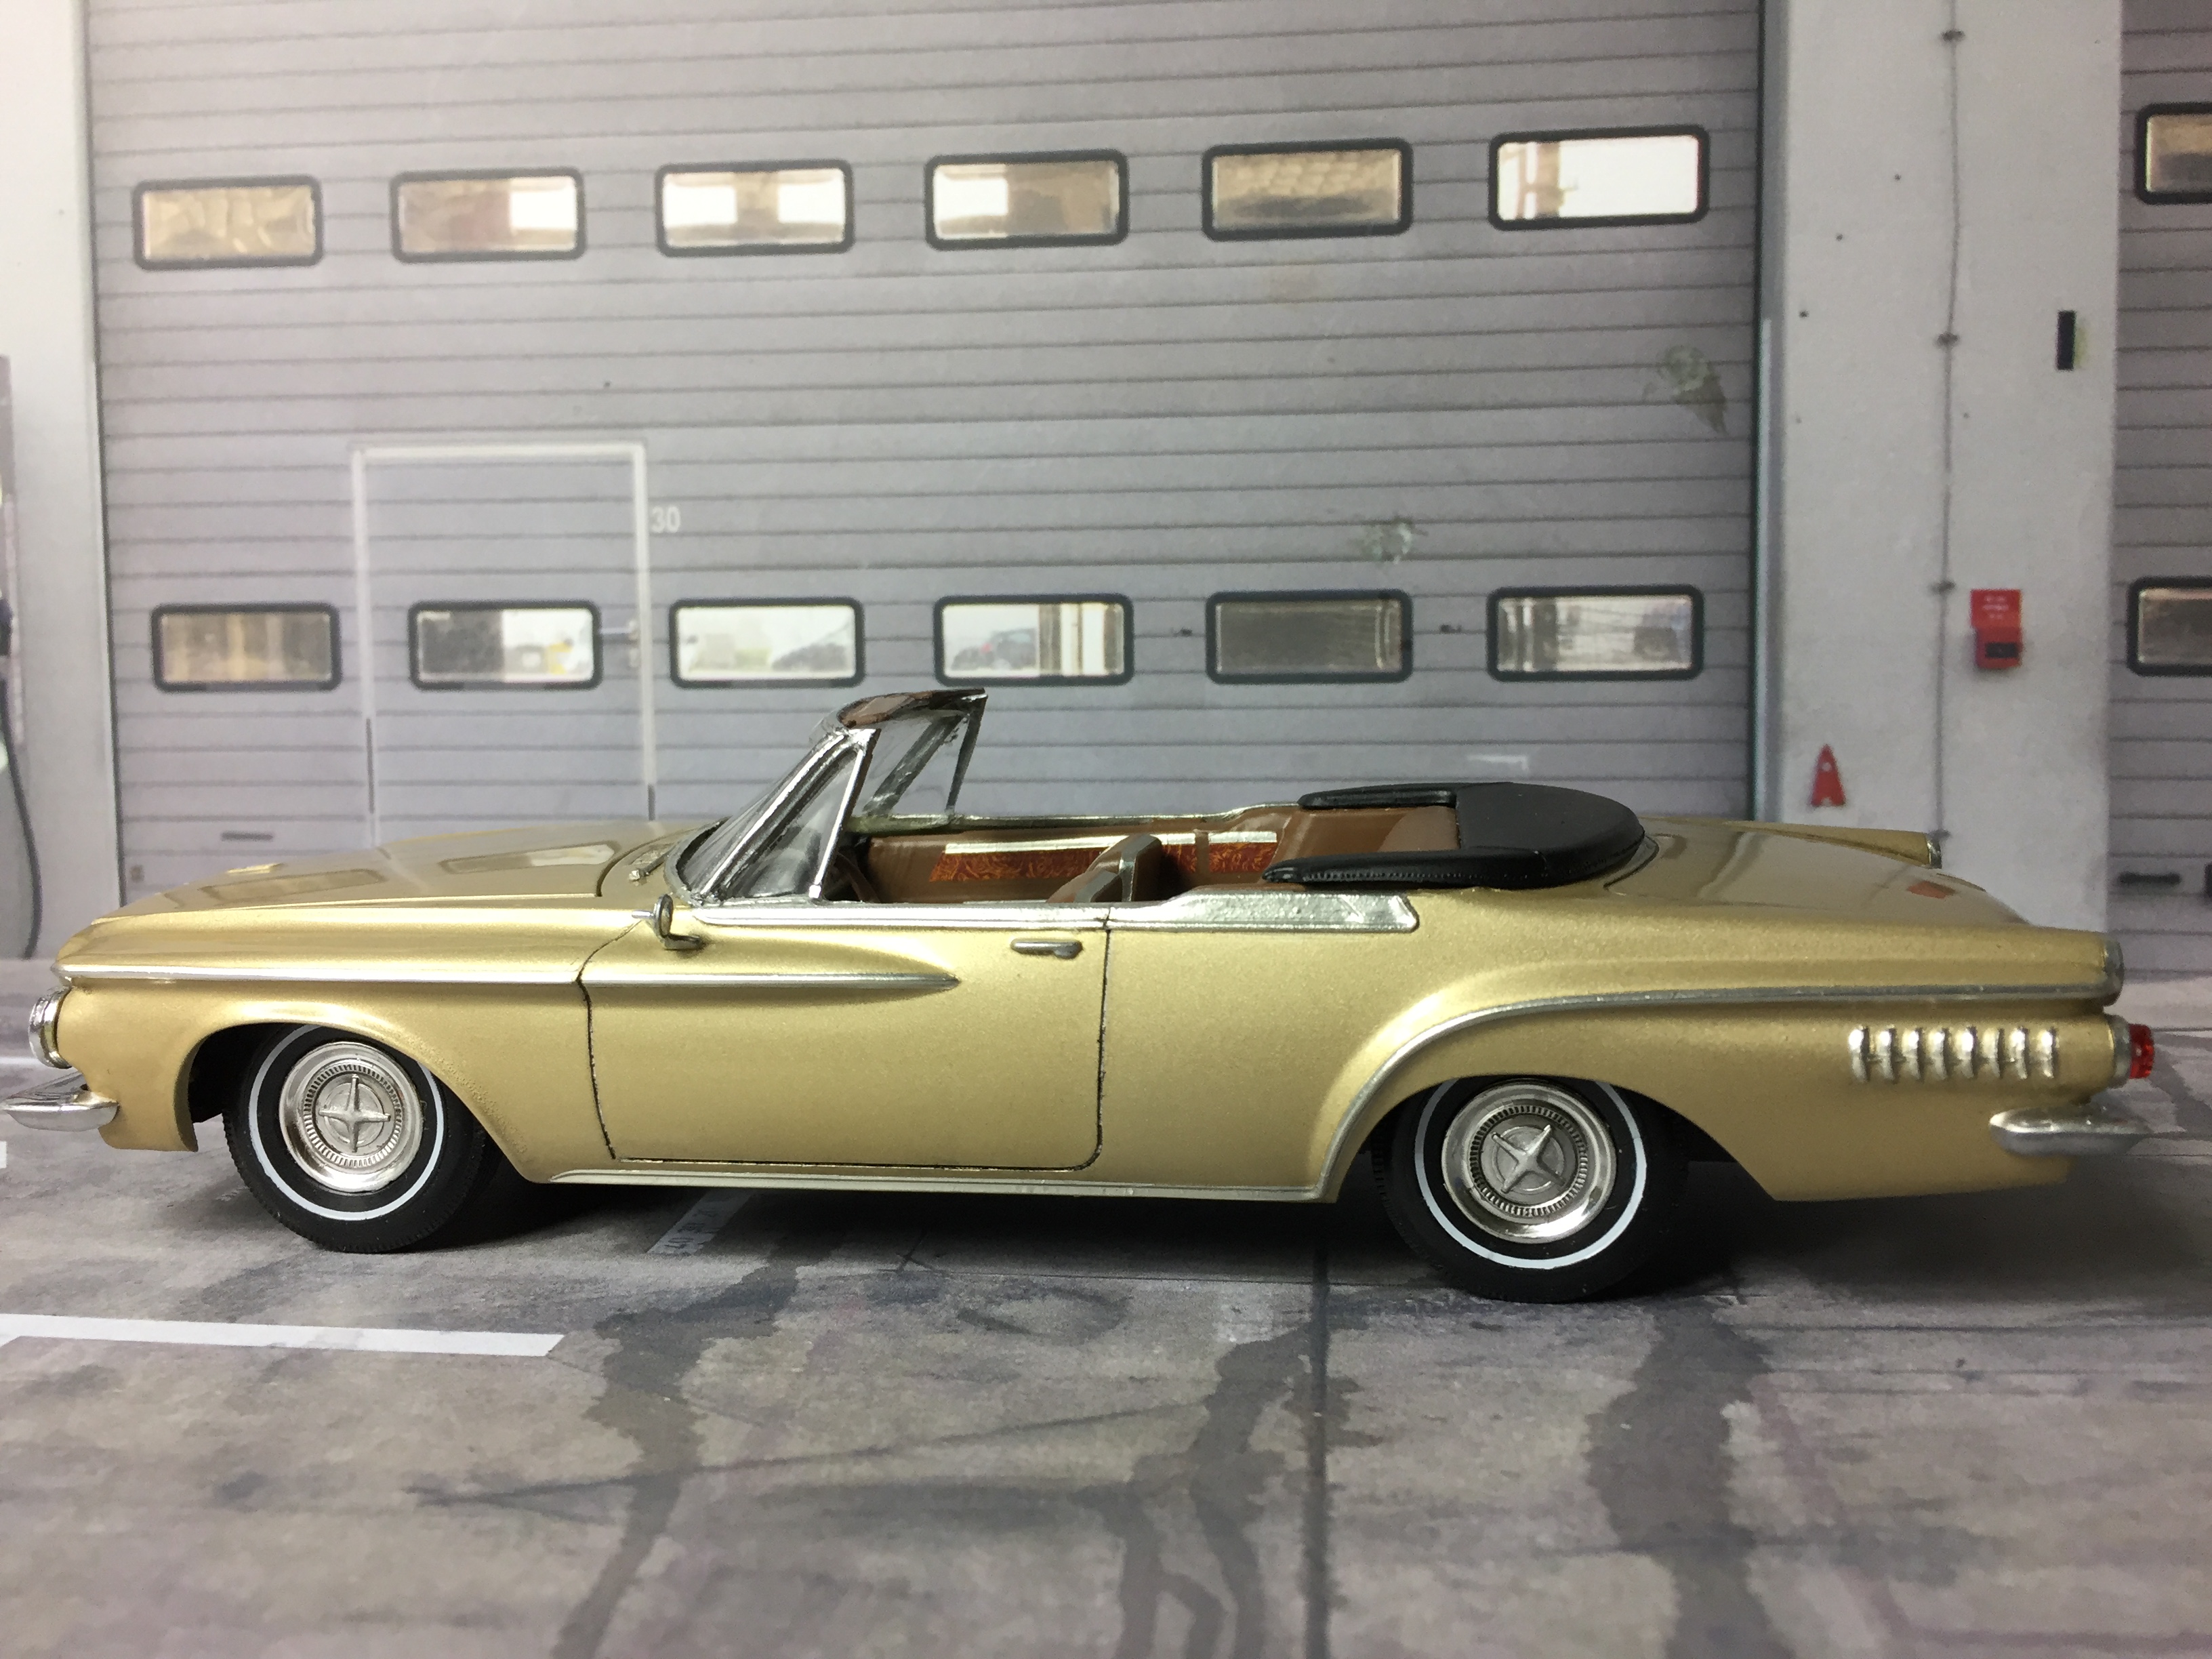
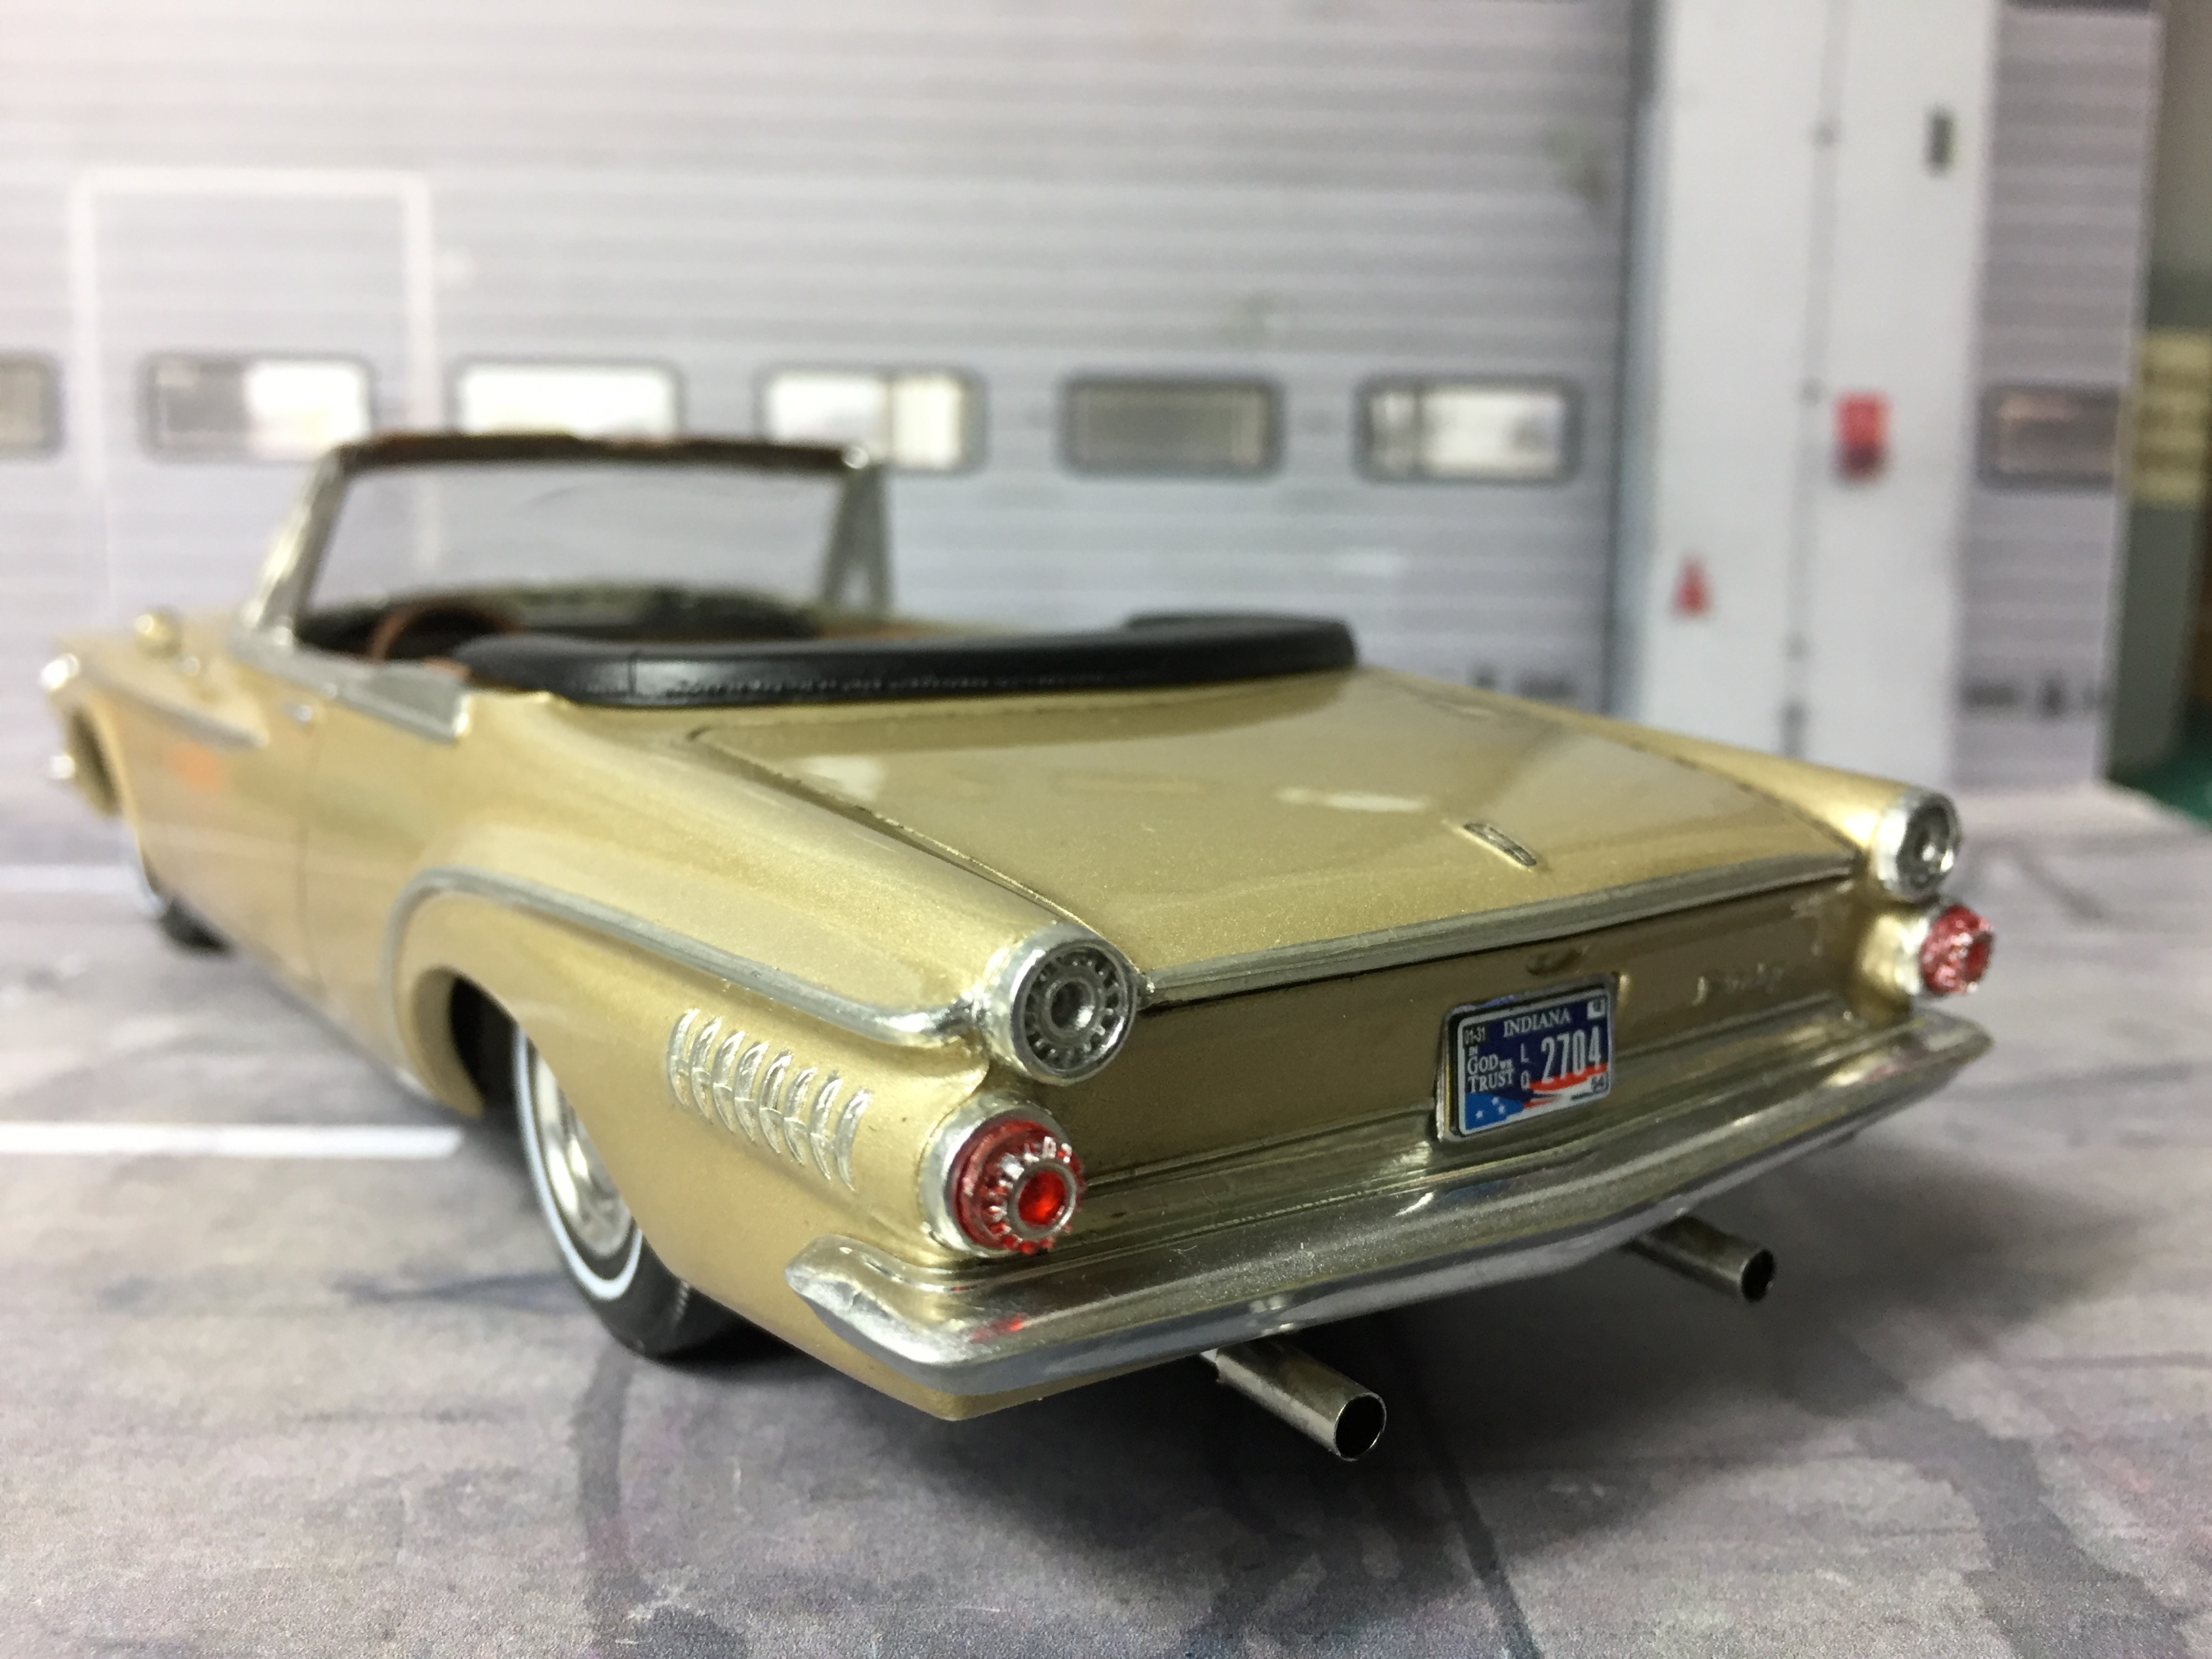
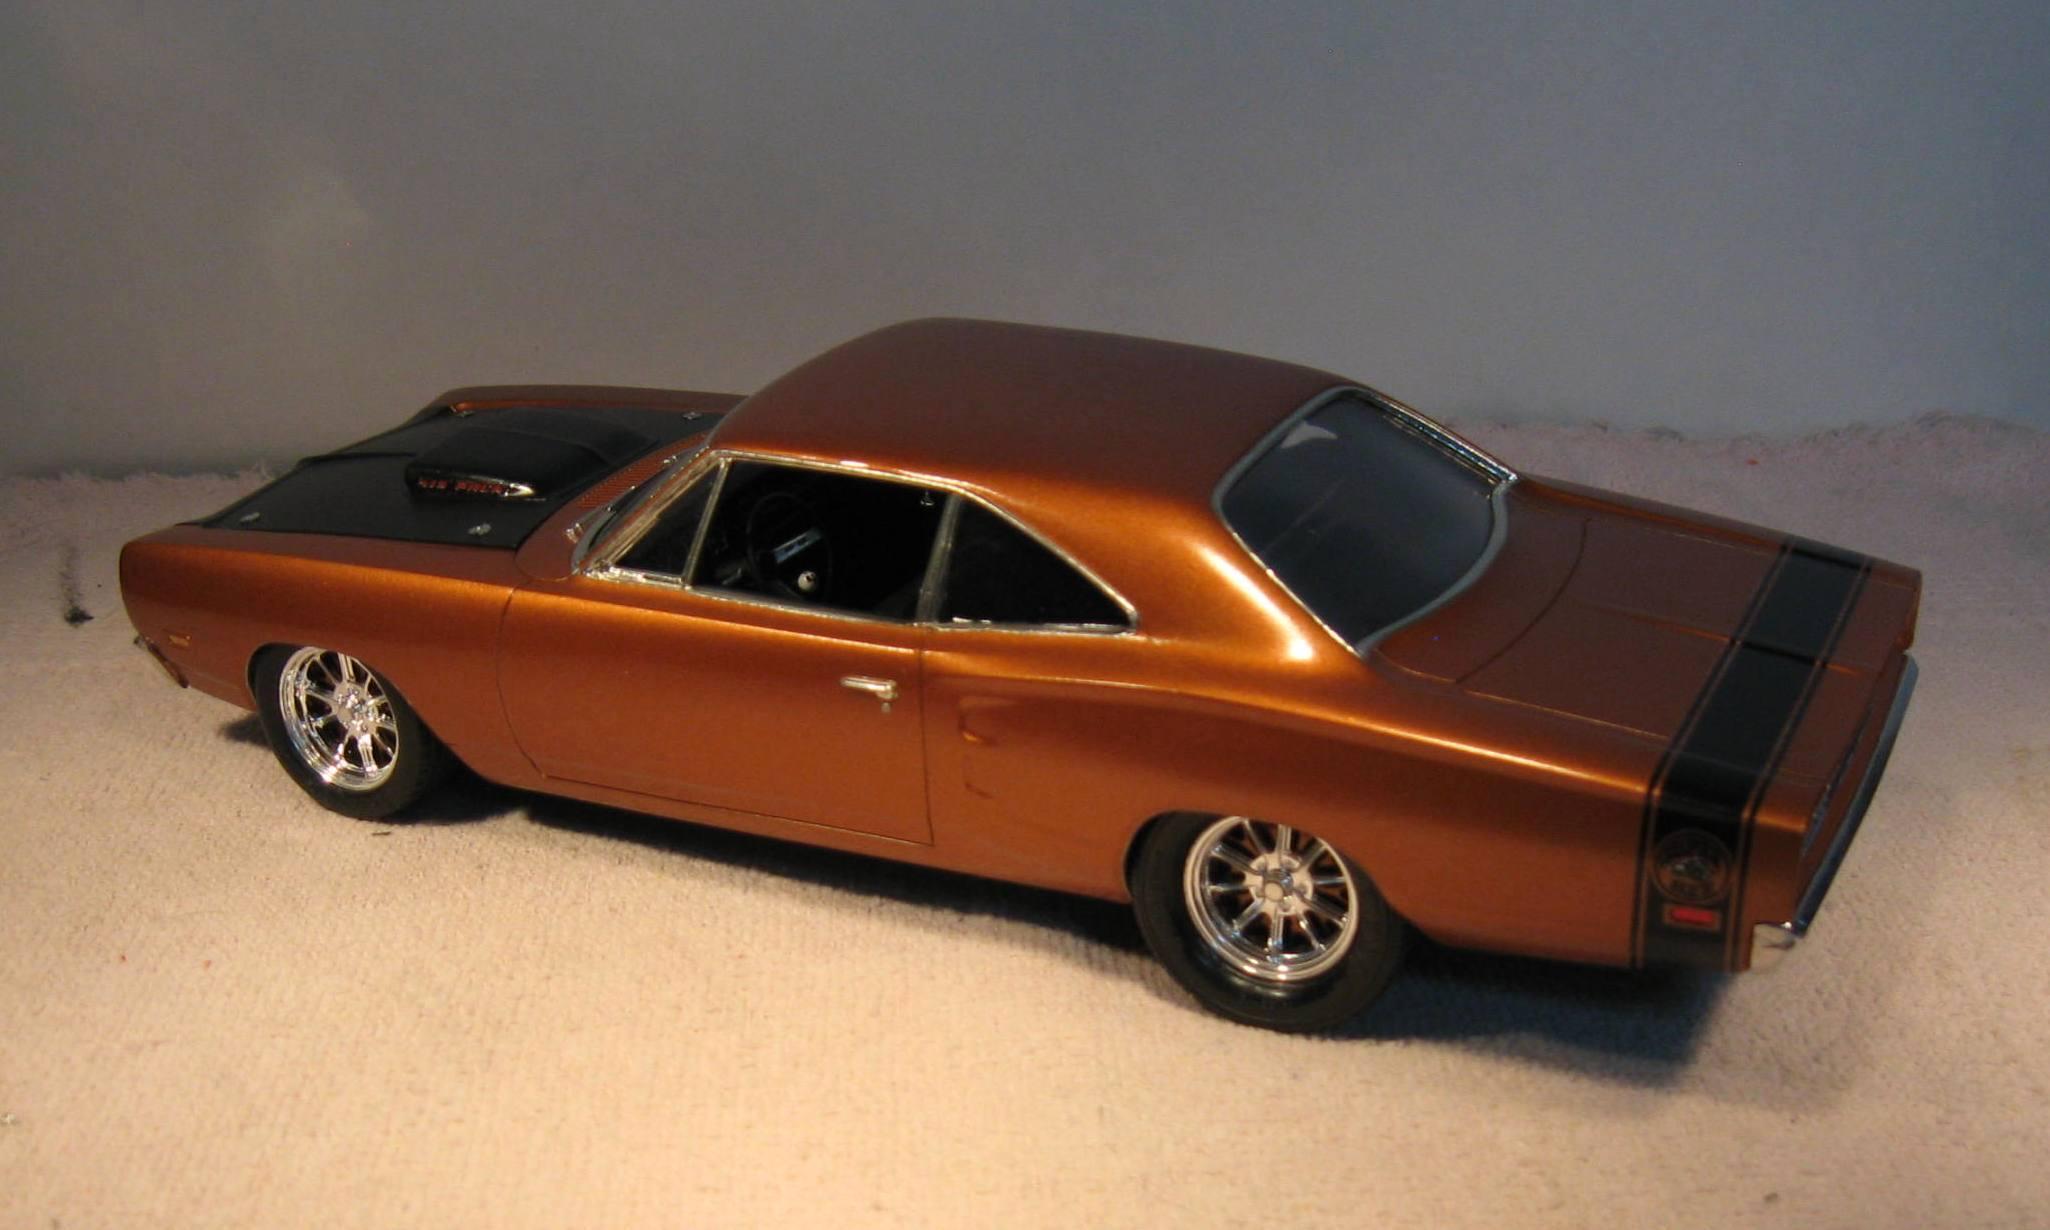
I wanted a late 60s to early 70s period look, so I swapped out the kit tires and wheels for TorqThrust mags on the front with slot mags and Micky Thompson slicks on the rear. I do wish that I'd set the seat and roll bar back a little, but I guess that with each kit we build, we have to find one thing that bothers us and keeps us humble. This one was a two-fer though. Between tweezers that refuse to keep hold of the door handles and uncooperative fat fingers, I managed to set the door handles too high. The front valance on the kit had a factory defect on it that looked like somebody had laid a hot bar or something across it, so that was not used. The paint color was selected scientifically. I didn't want the orange, red, or even the black that is currently very popular, so I selected several colors of paint that I found interesting, laid them out on a table, closed my eyes and moved them around, and with my eyes still closed, picked up a can, and that's the color I used; Testors 1642 Gloss Custom Gold Metal Flake. I did make a couple of minor alterations to the engine and chassis from the kit offering. I'm one of the few modelers that really don't get much into engines, with most of my kits just receiving basic engines from the box, and the hoods glued shut. Once-in-awhile, I let loose and get serious in detailing. This Dodge got full engine and chassis detail. Here, Flo, one of the mechanics at Otto Ray Sing Classic Car Center inspects my work.
-
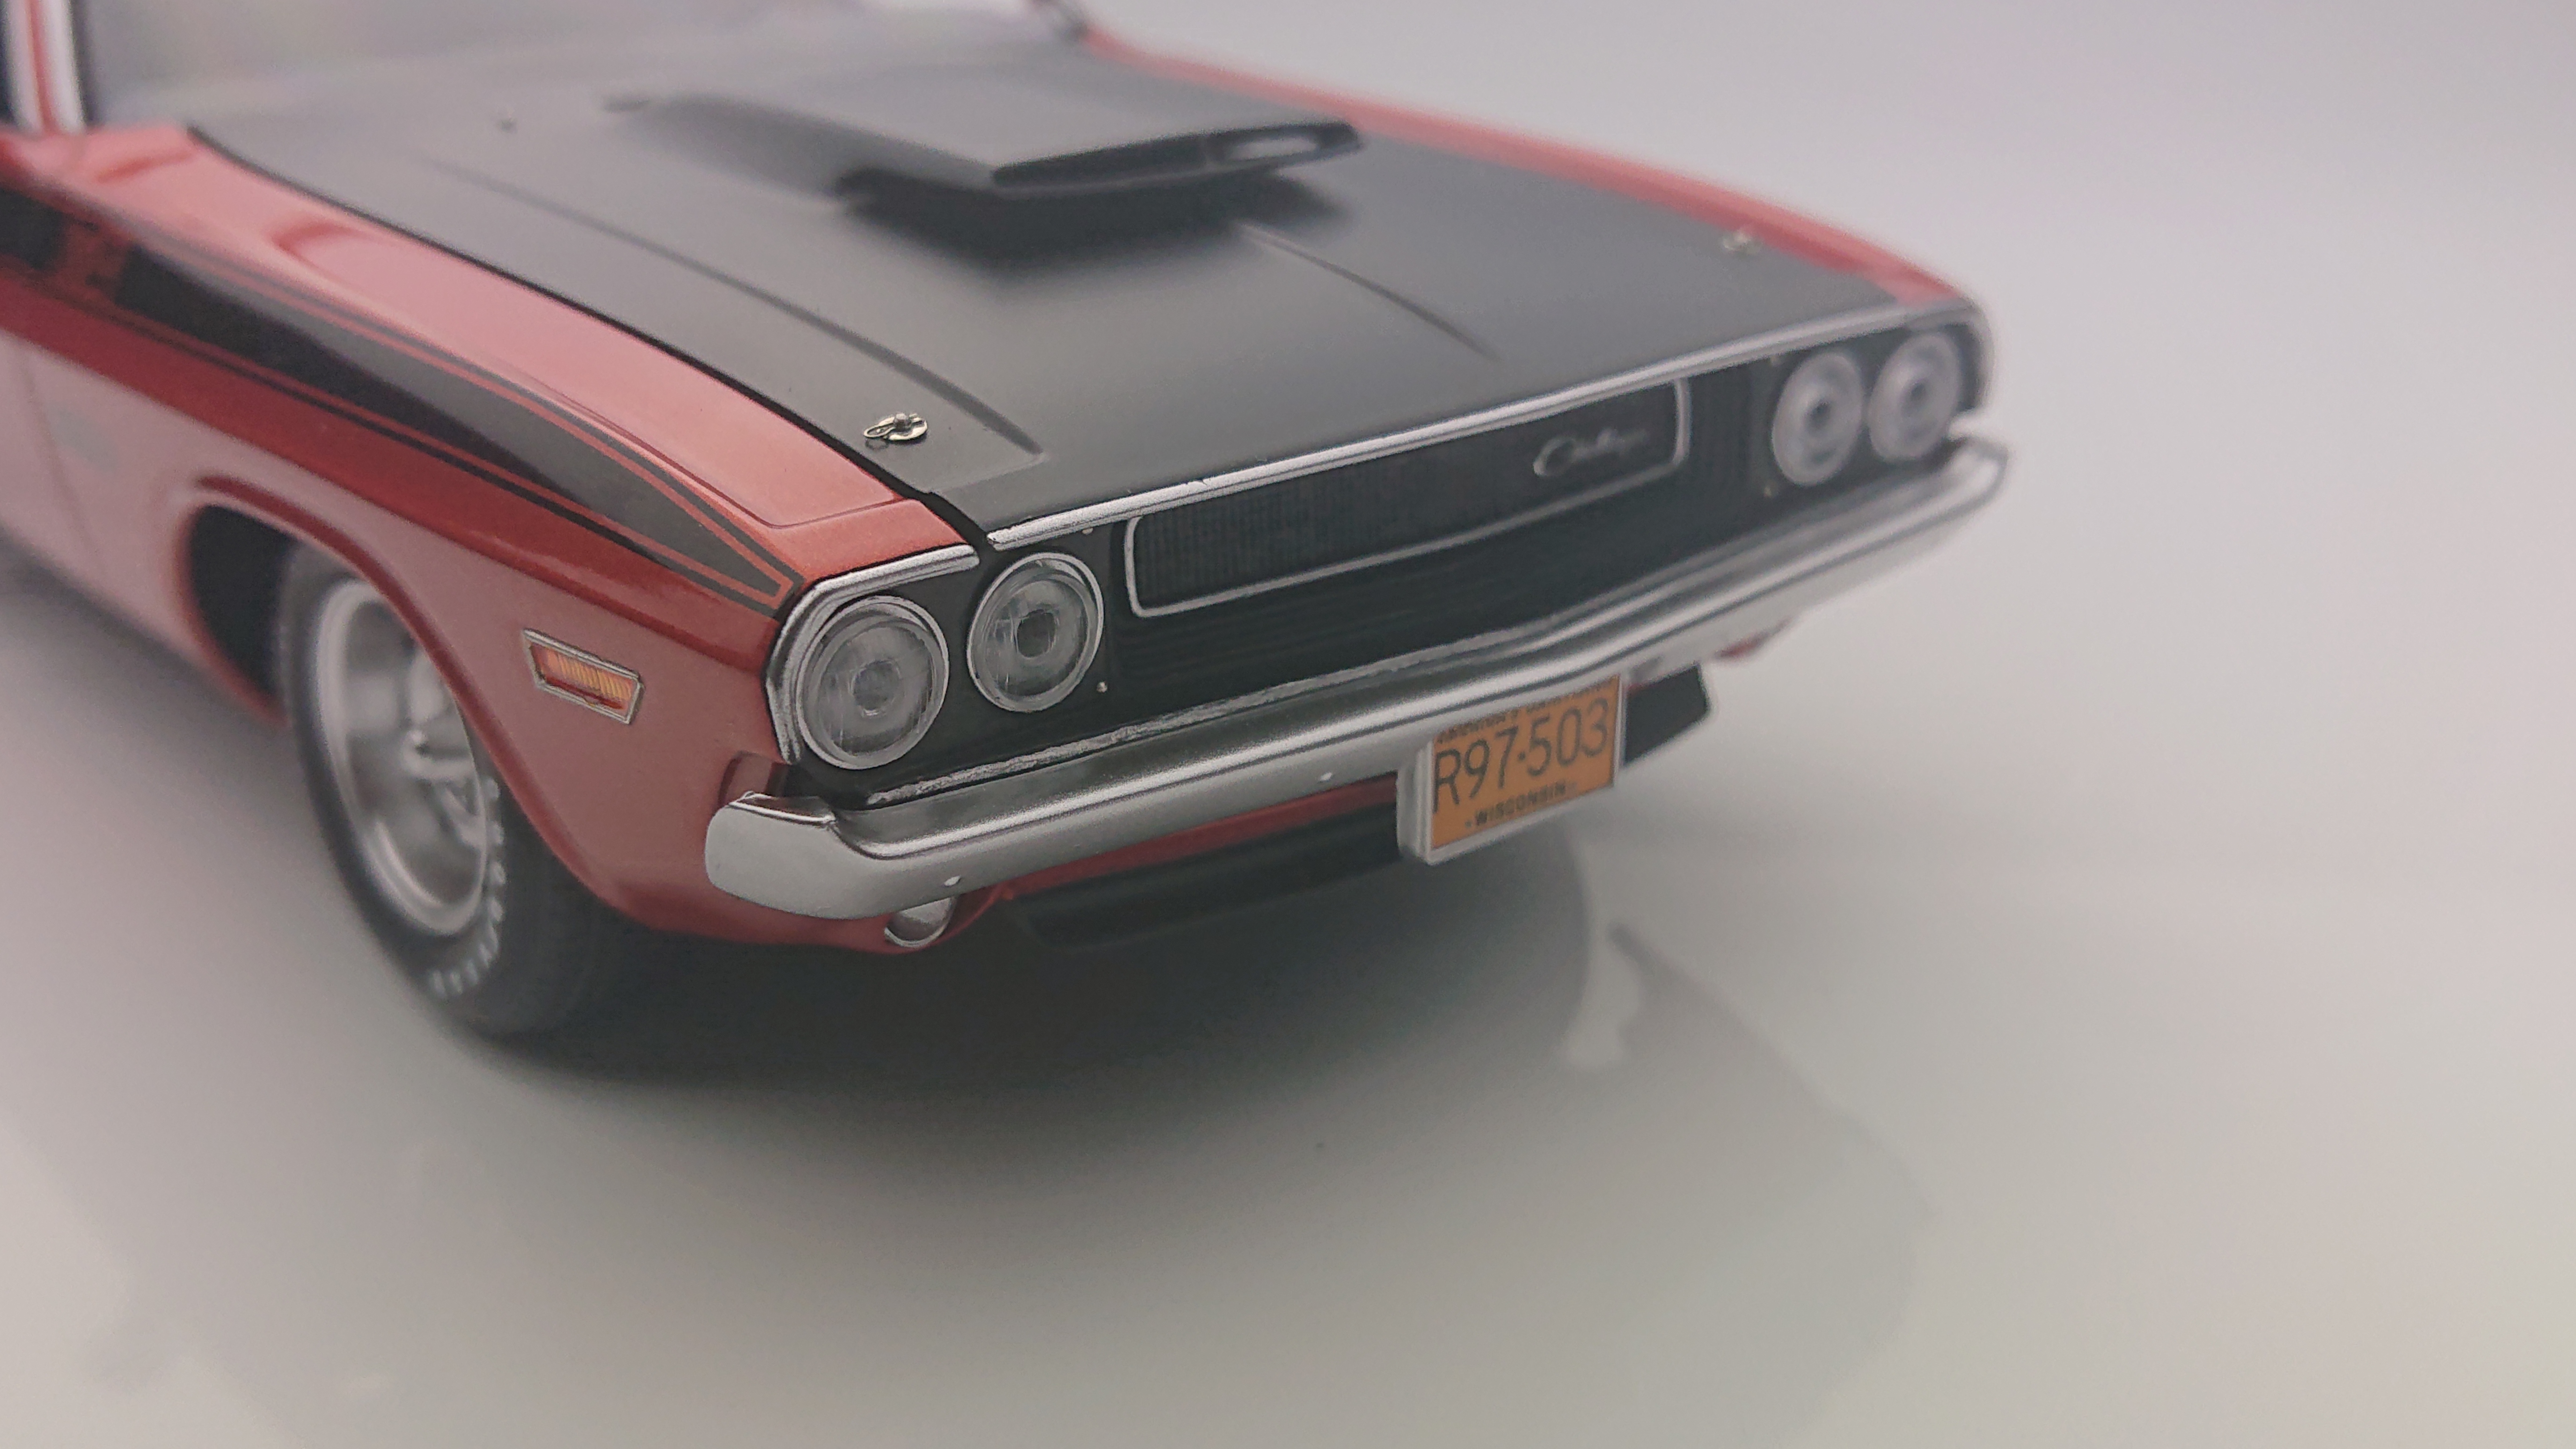
Not a stock color, but the yellow paint didn't want to stick to the hood. Had trouble finding a stripe for the rear as well. Wanted a black stripe, but had to settle for the white. Went with the day two look. Hood. scoops, and tail lights are from Hart's Parts. The pics came out alright, but it's been storming here lately, so there wasn't much sun.
-
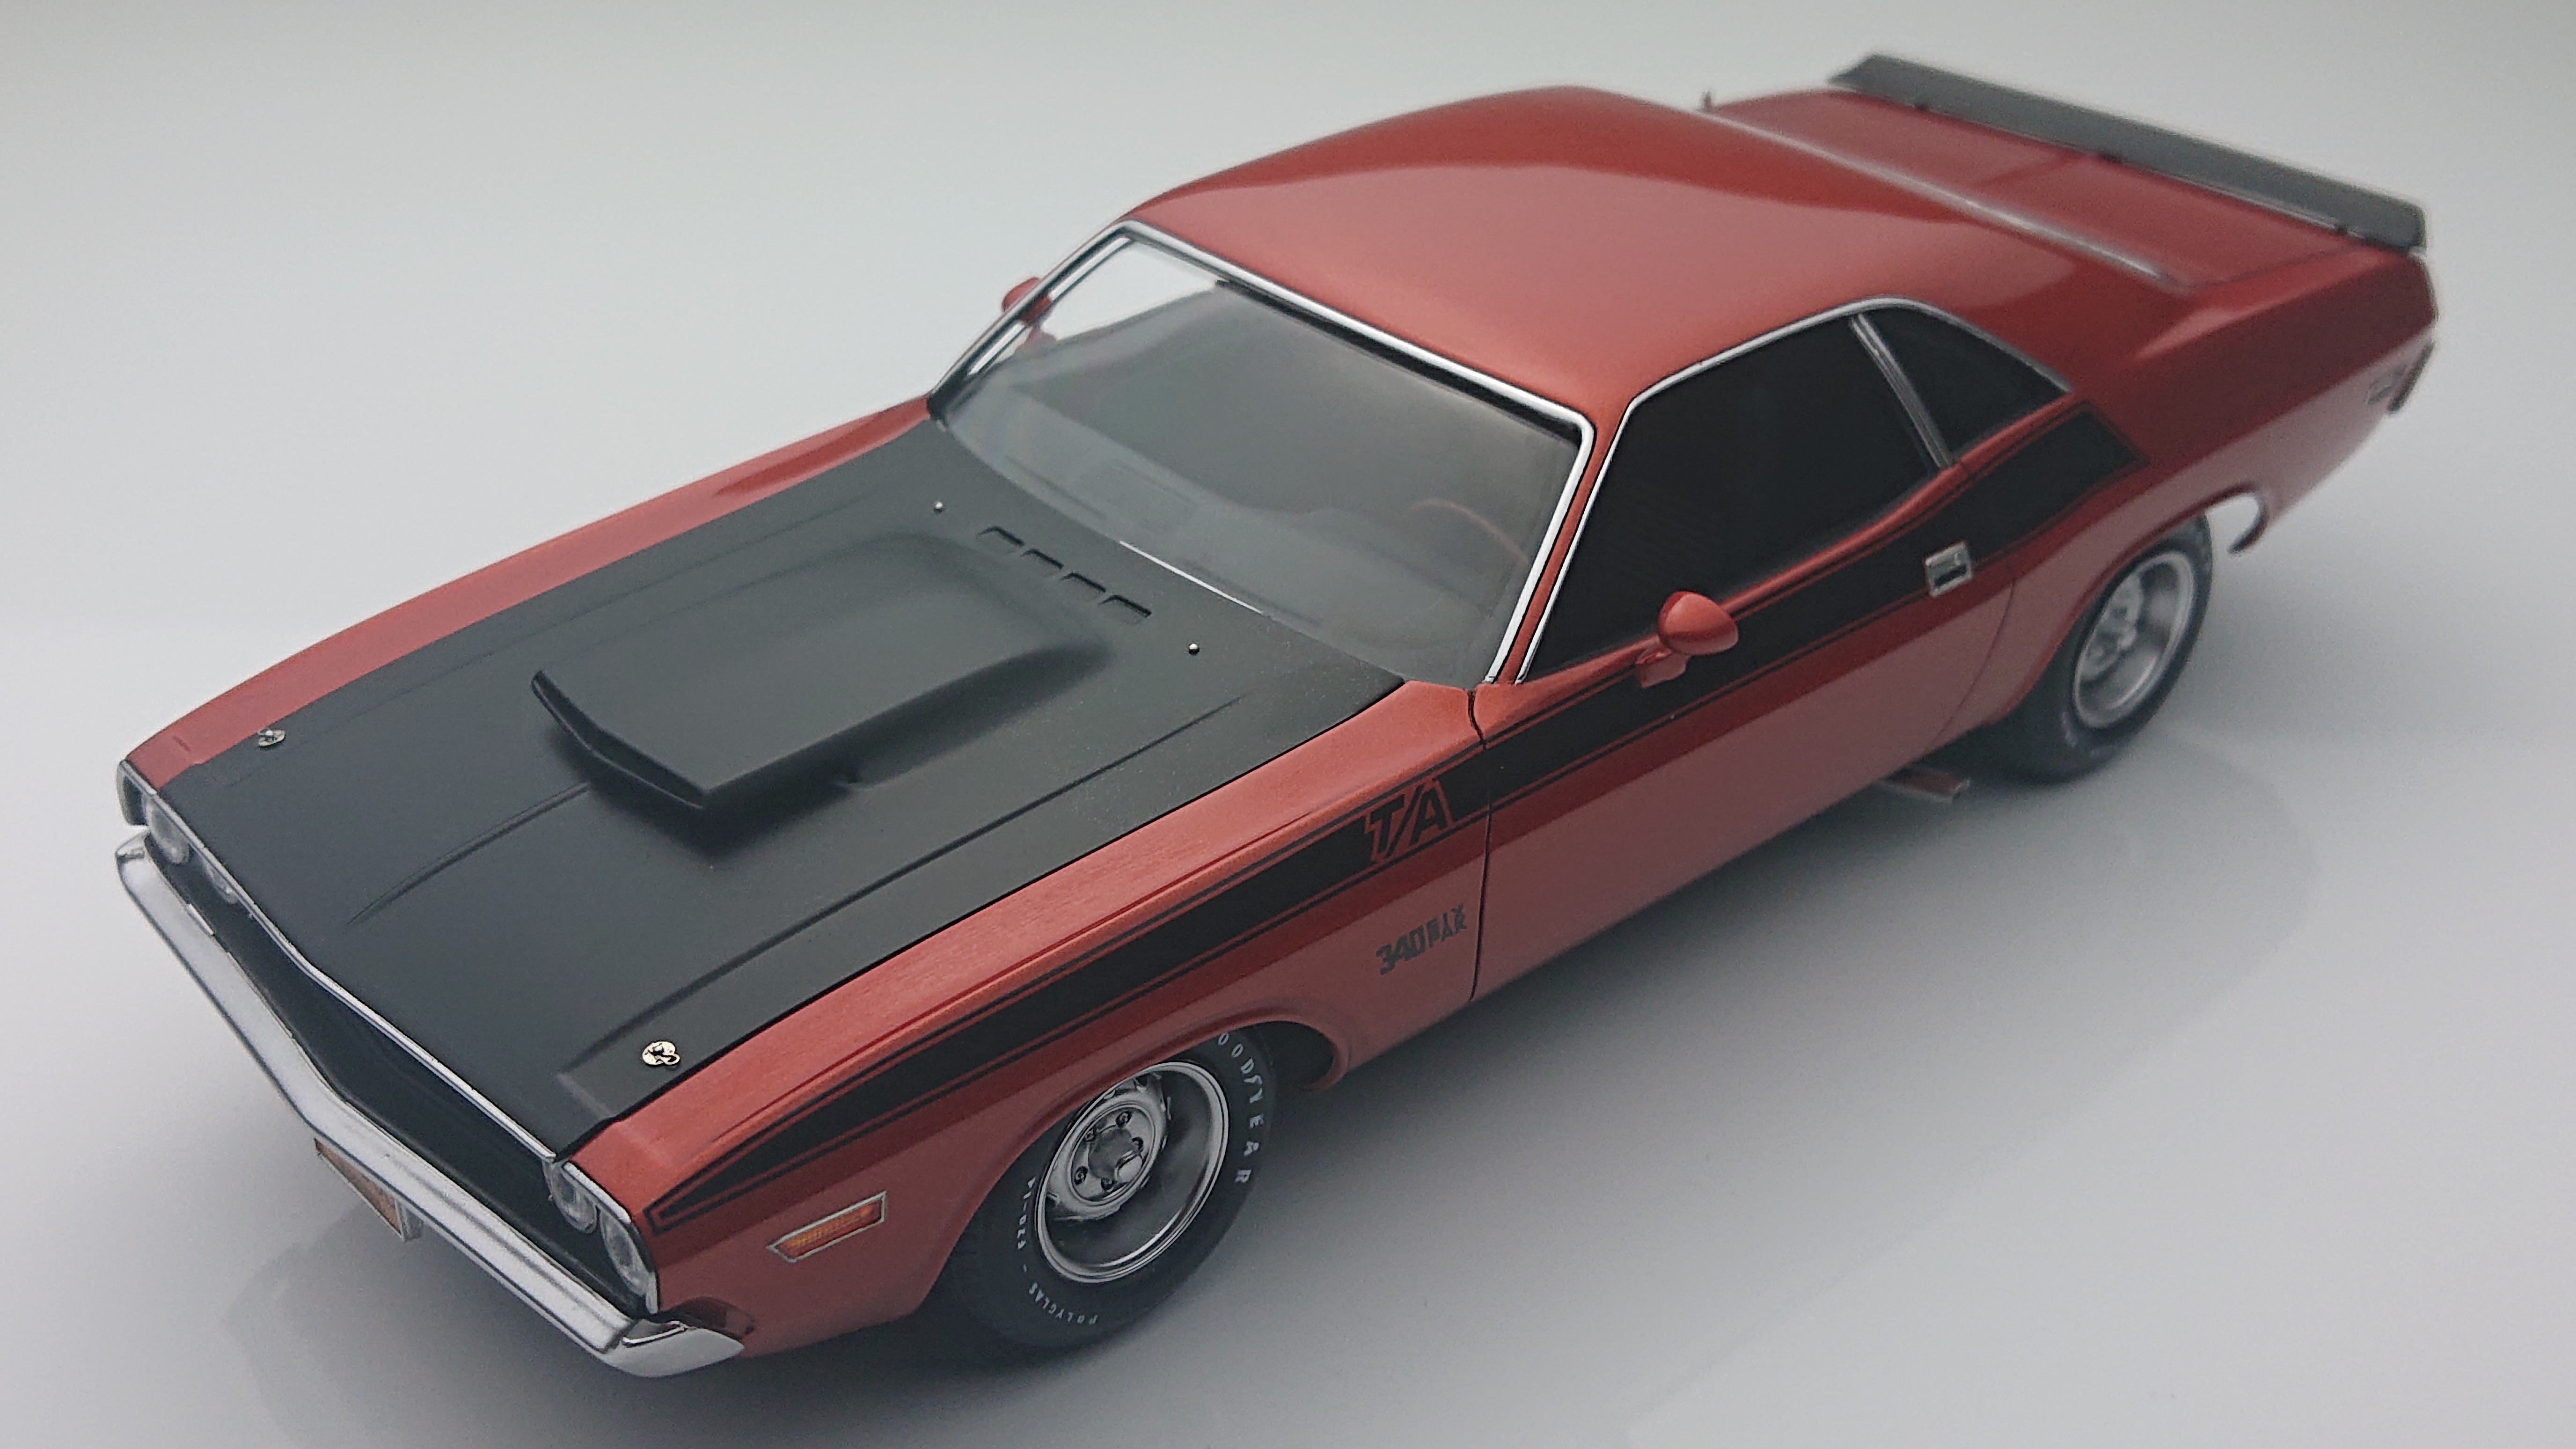
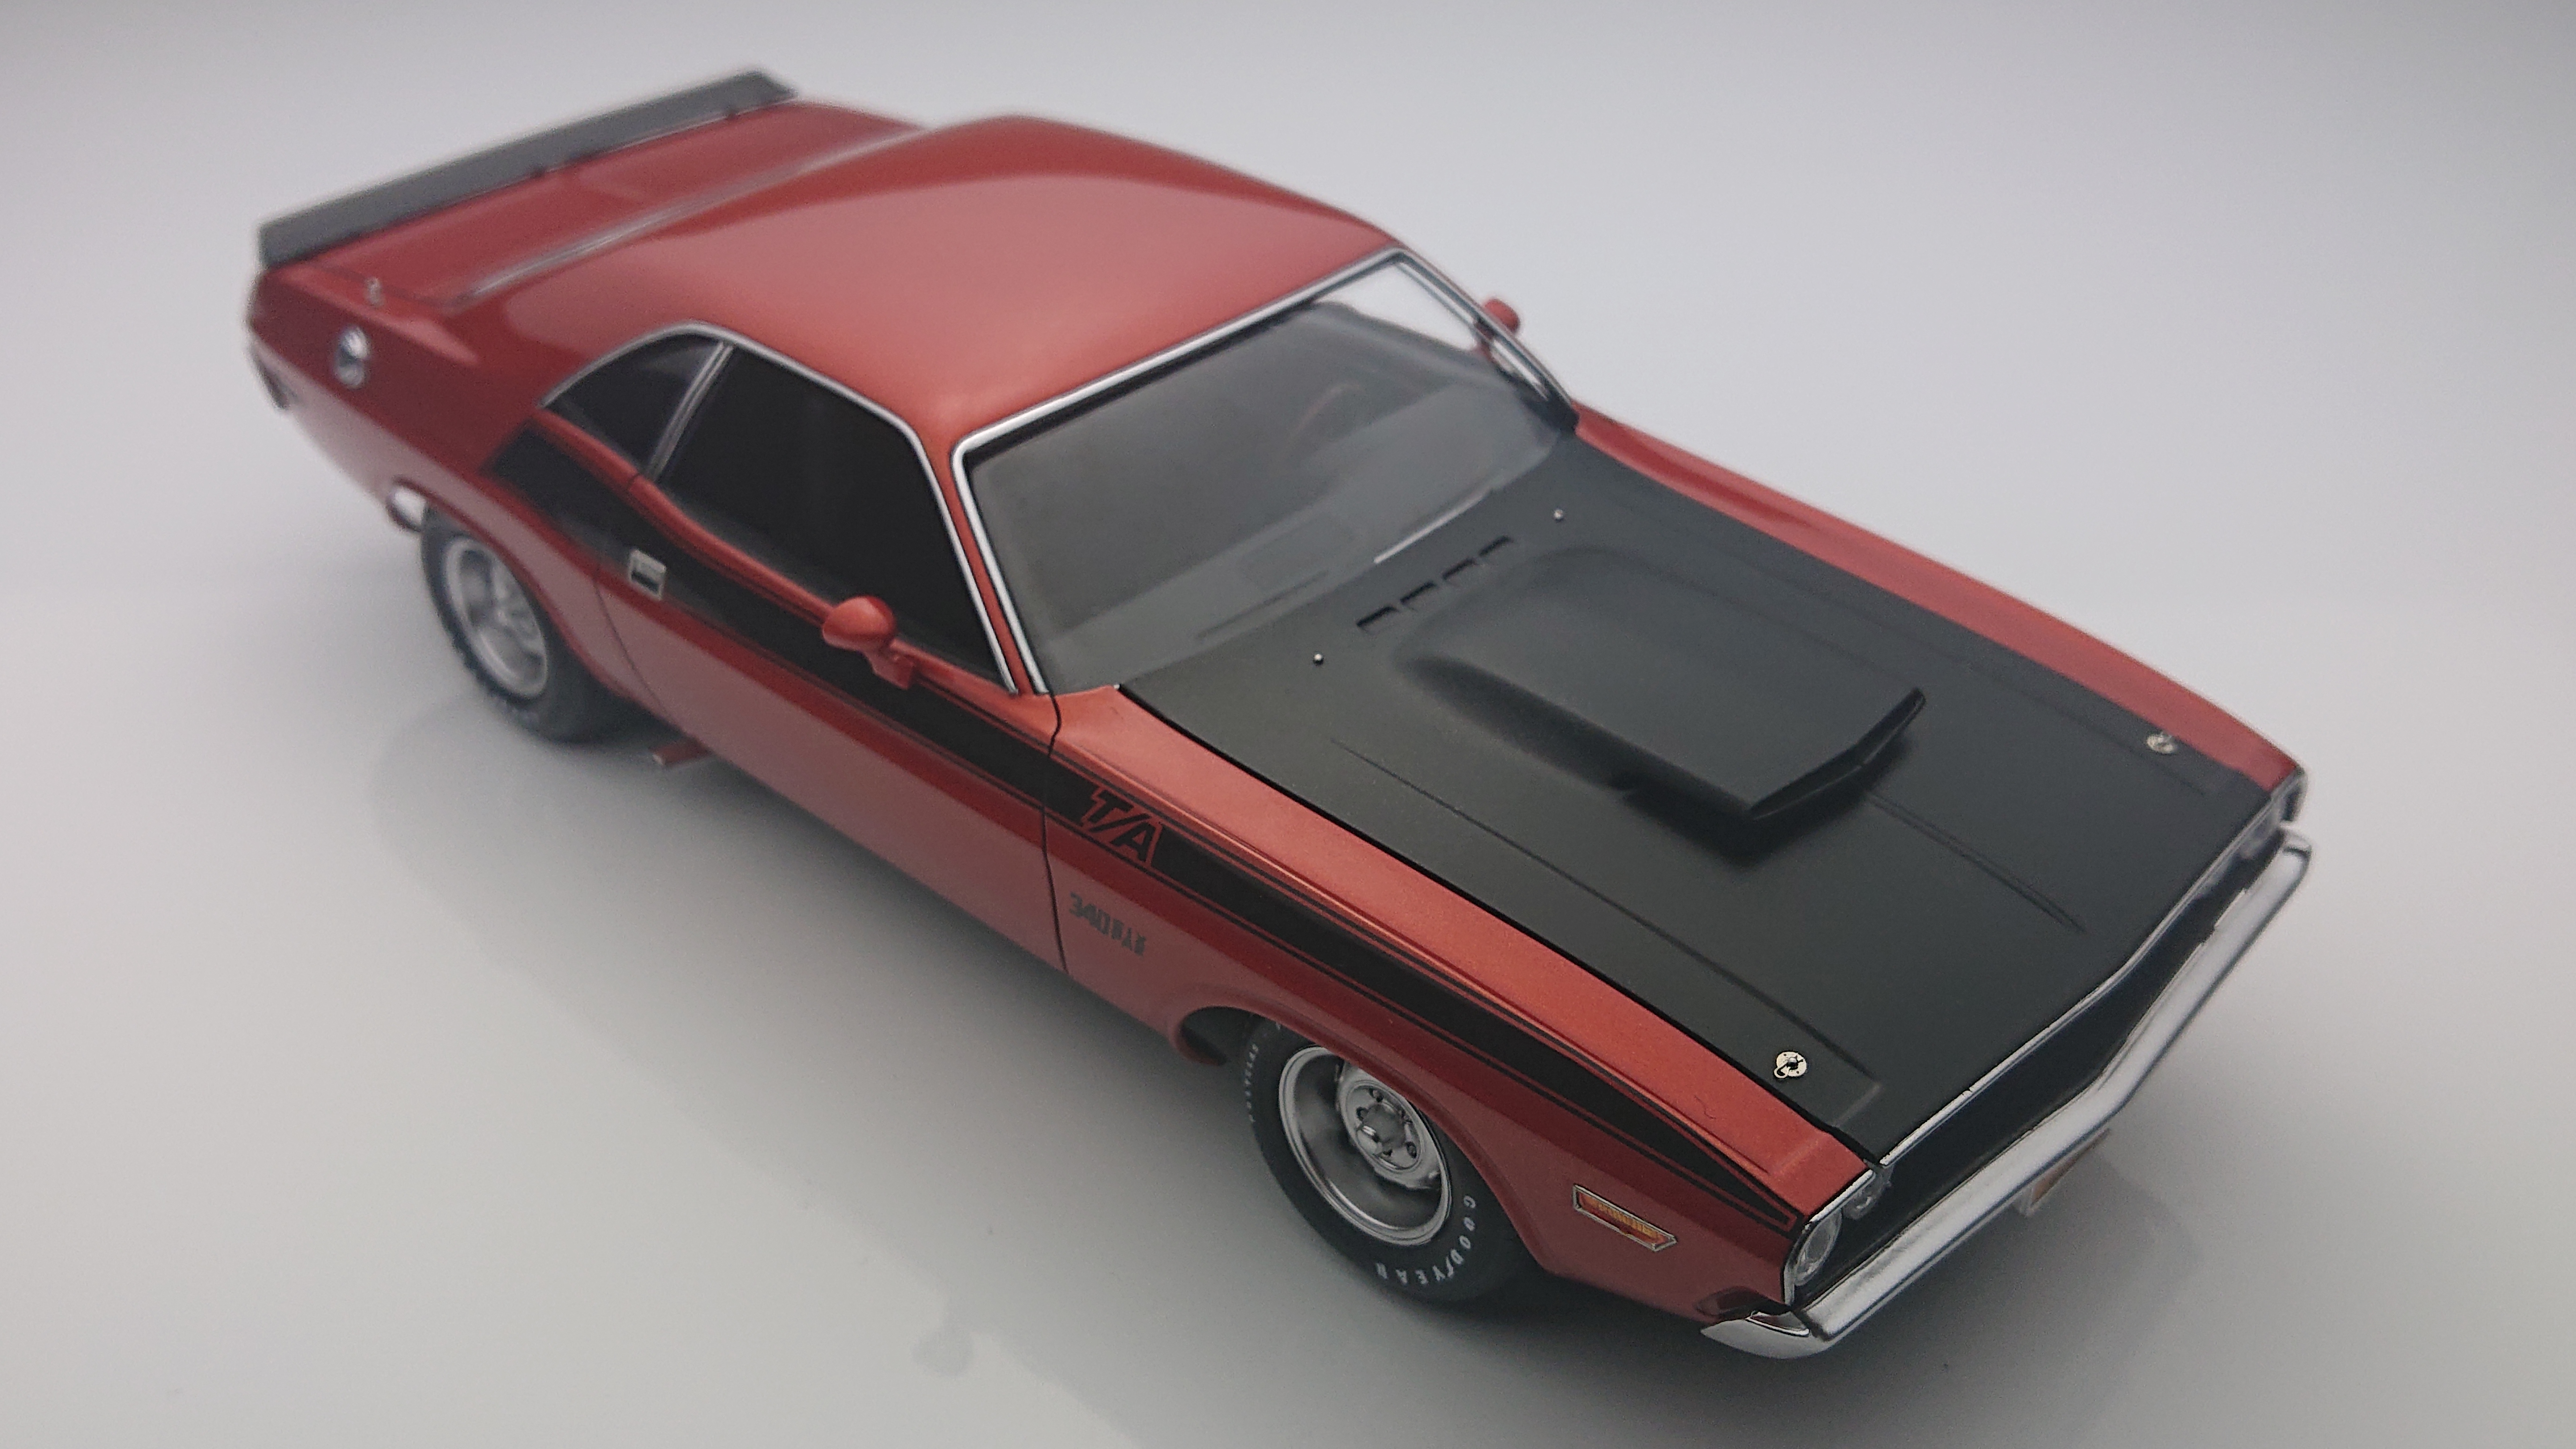
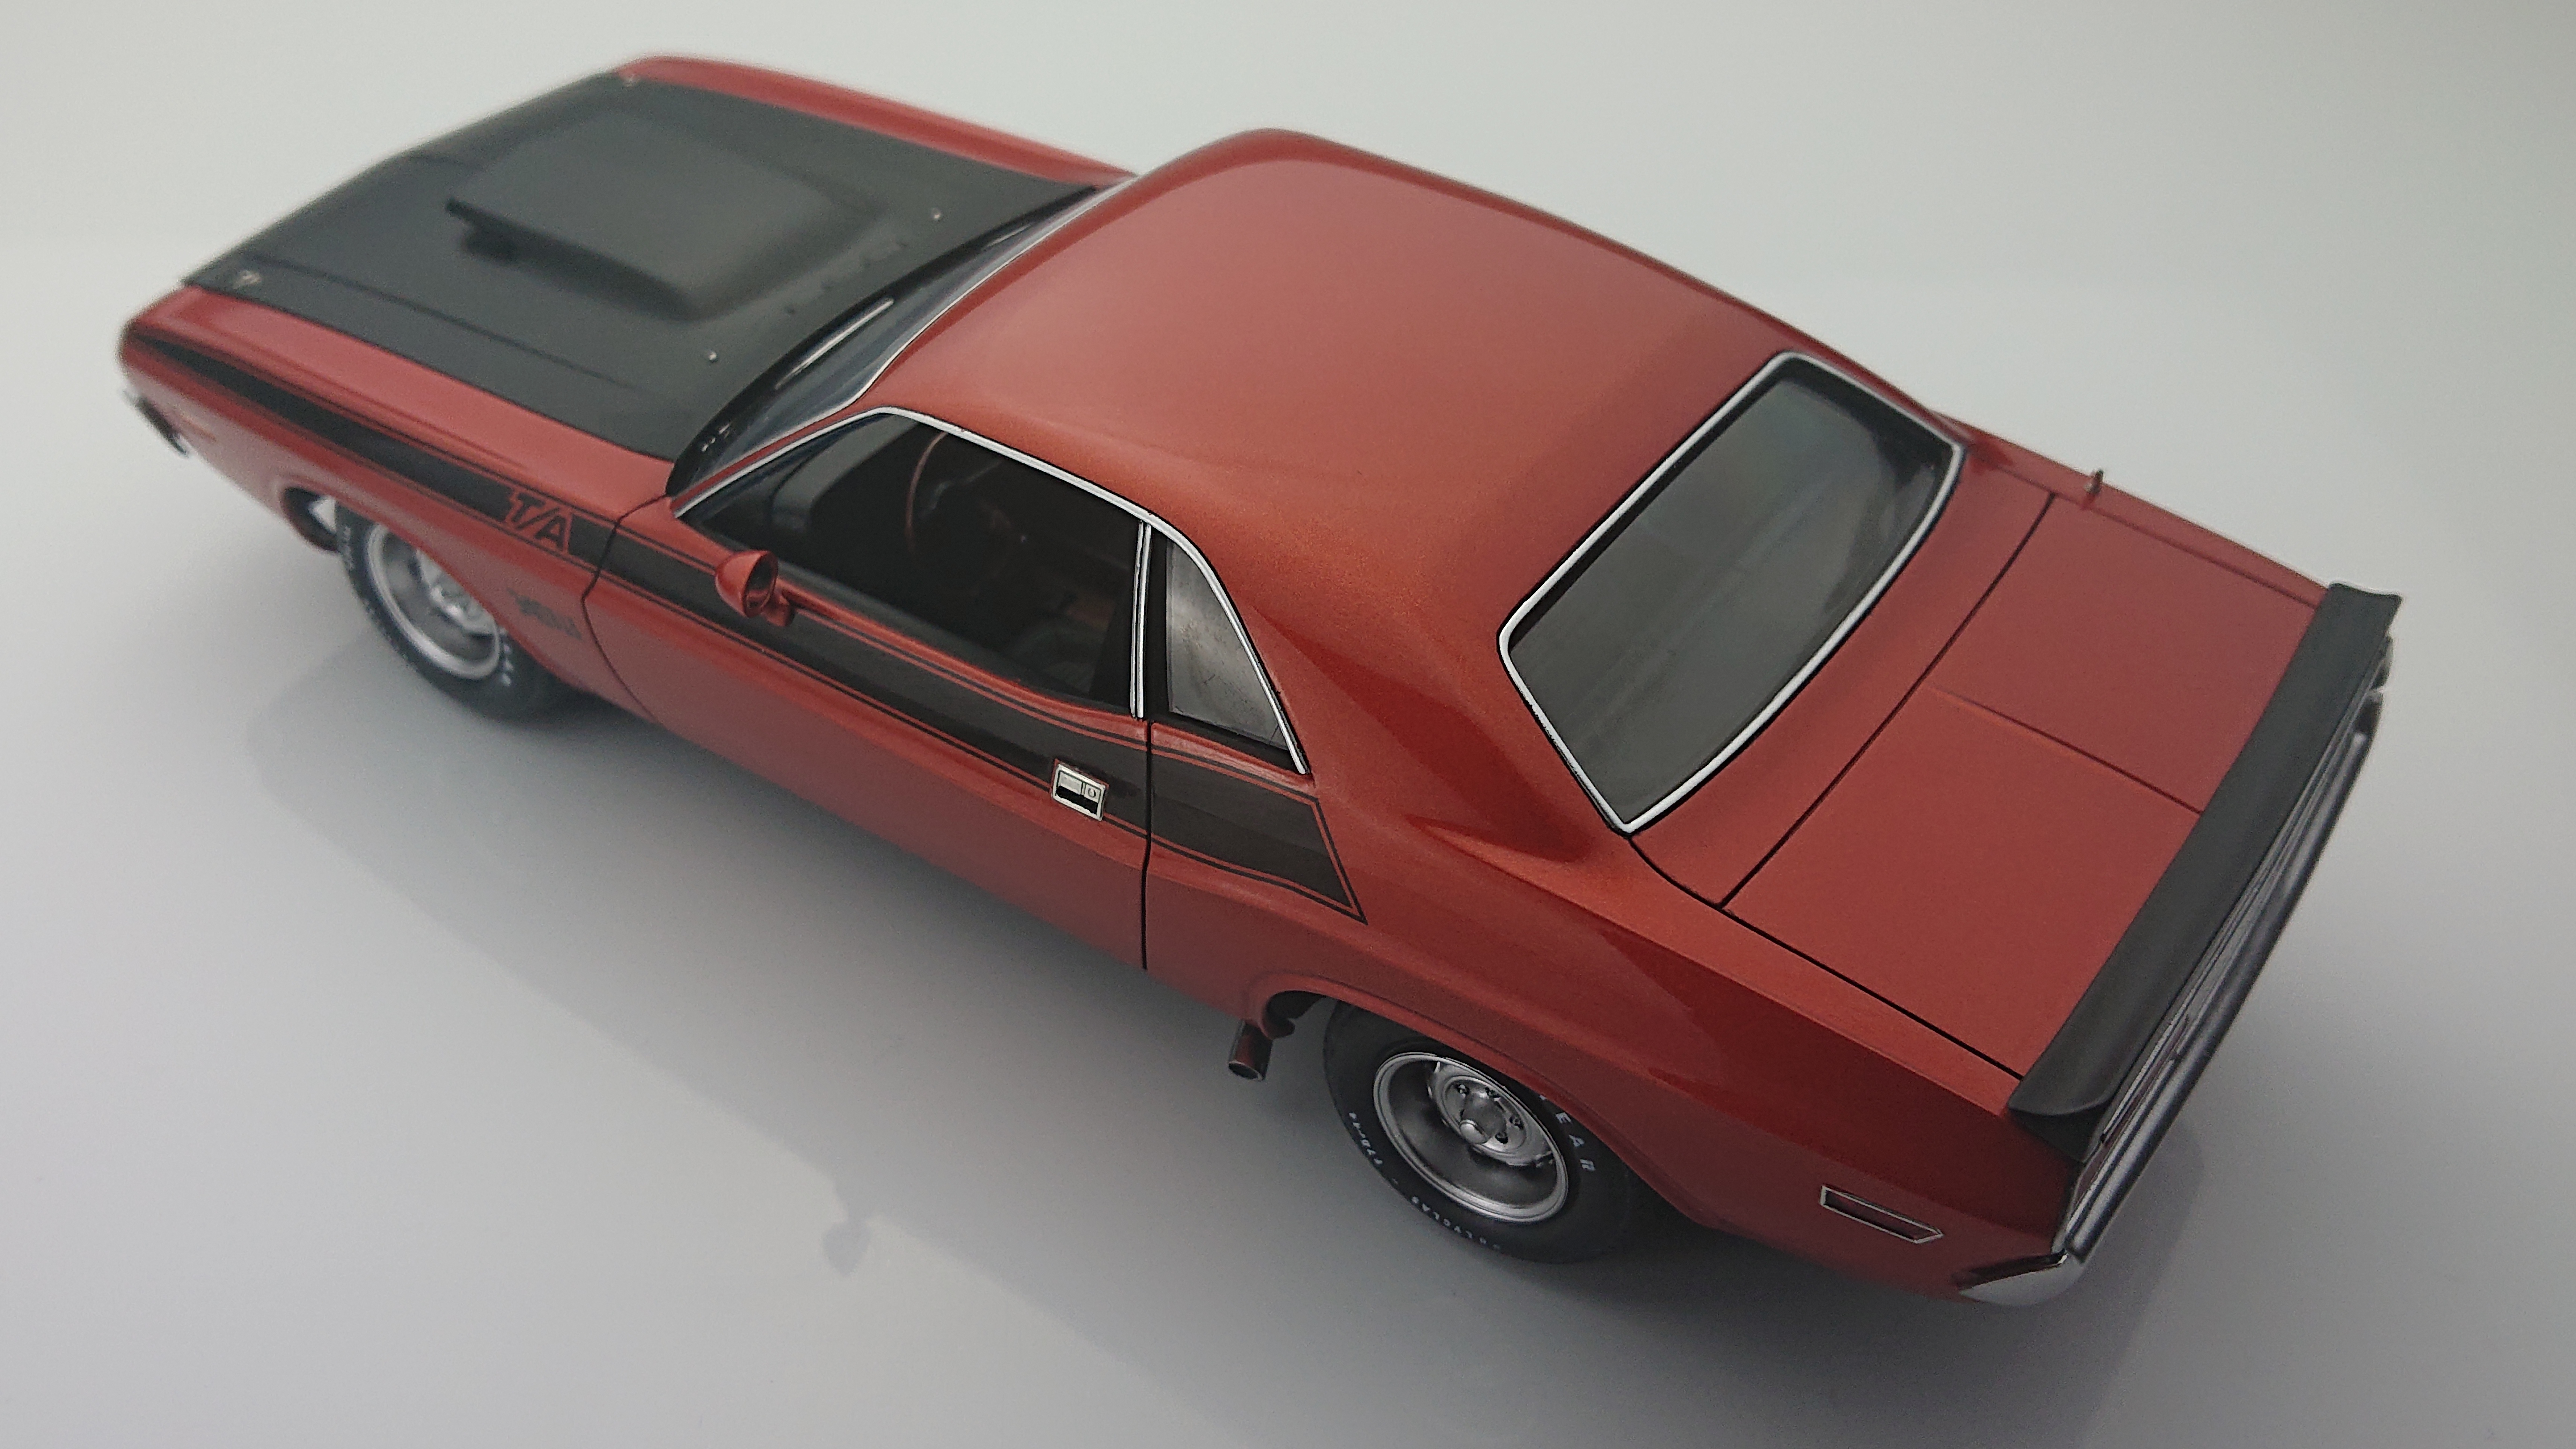
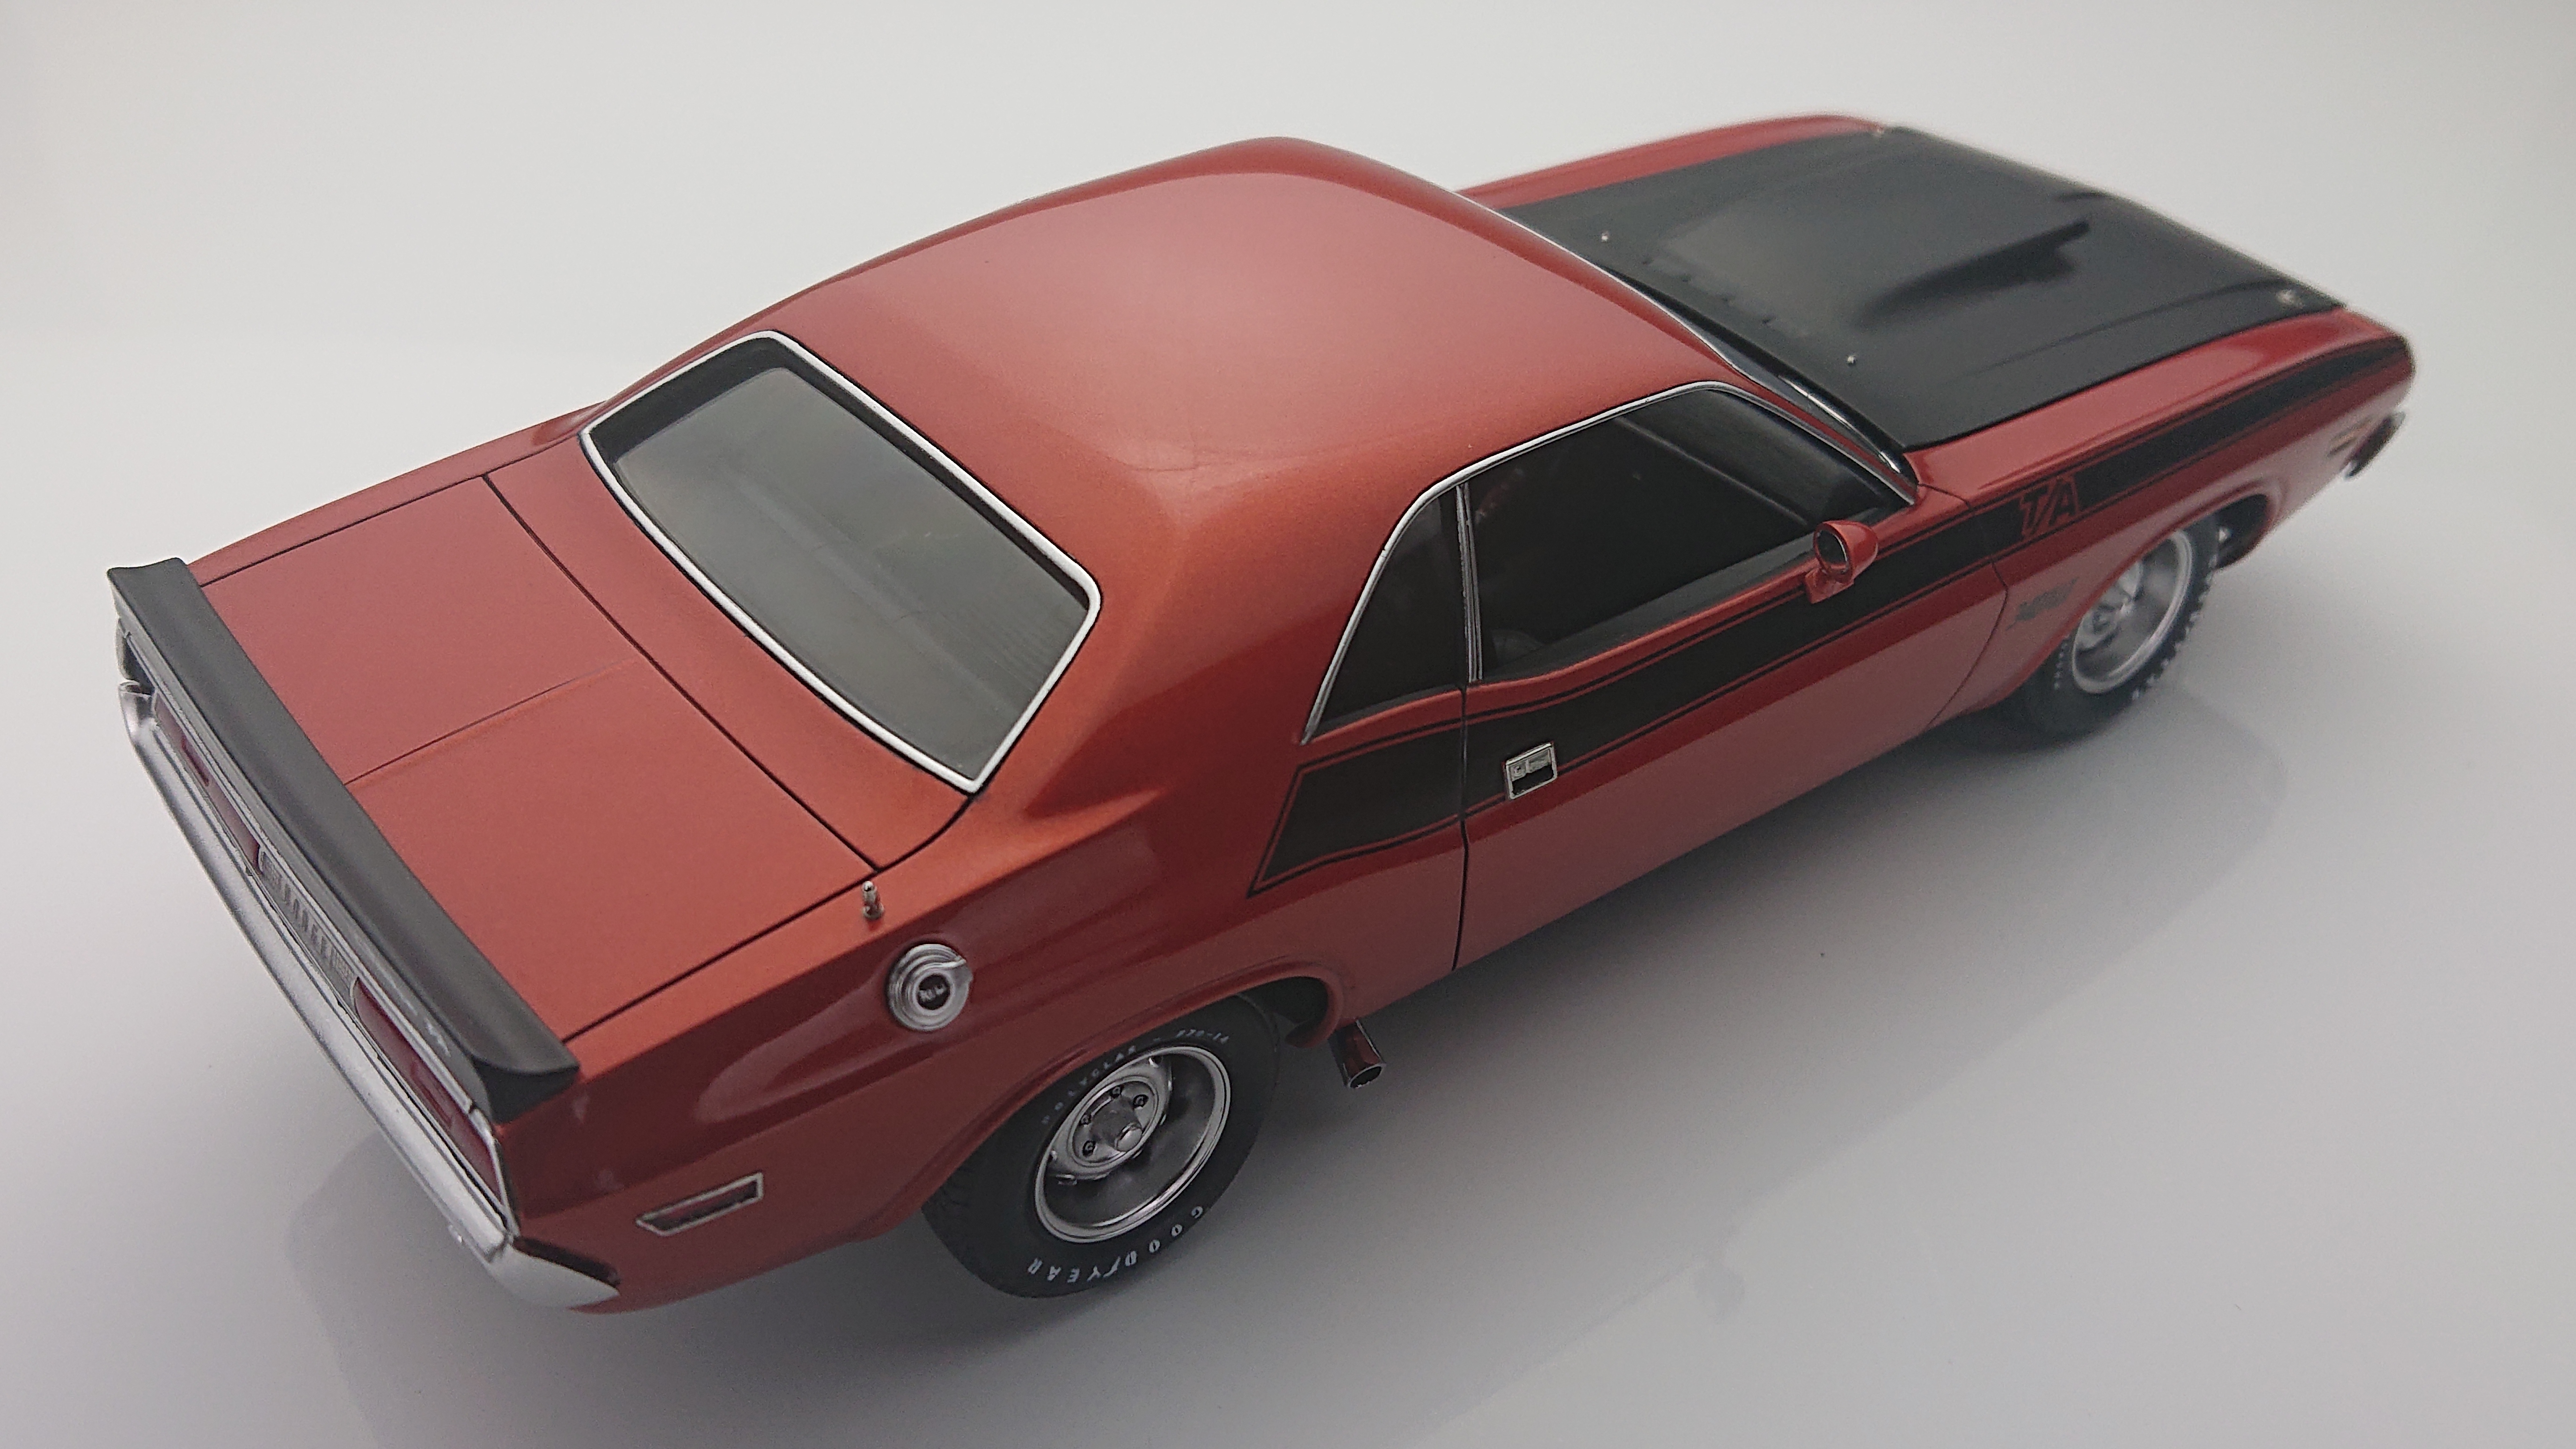
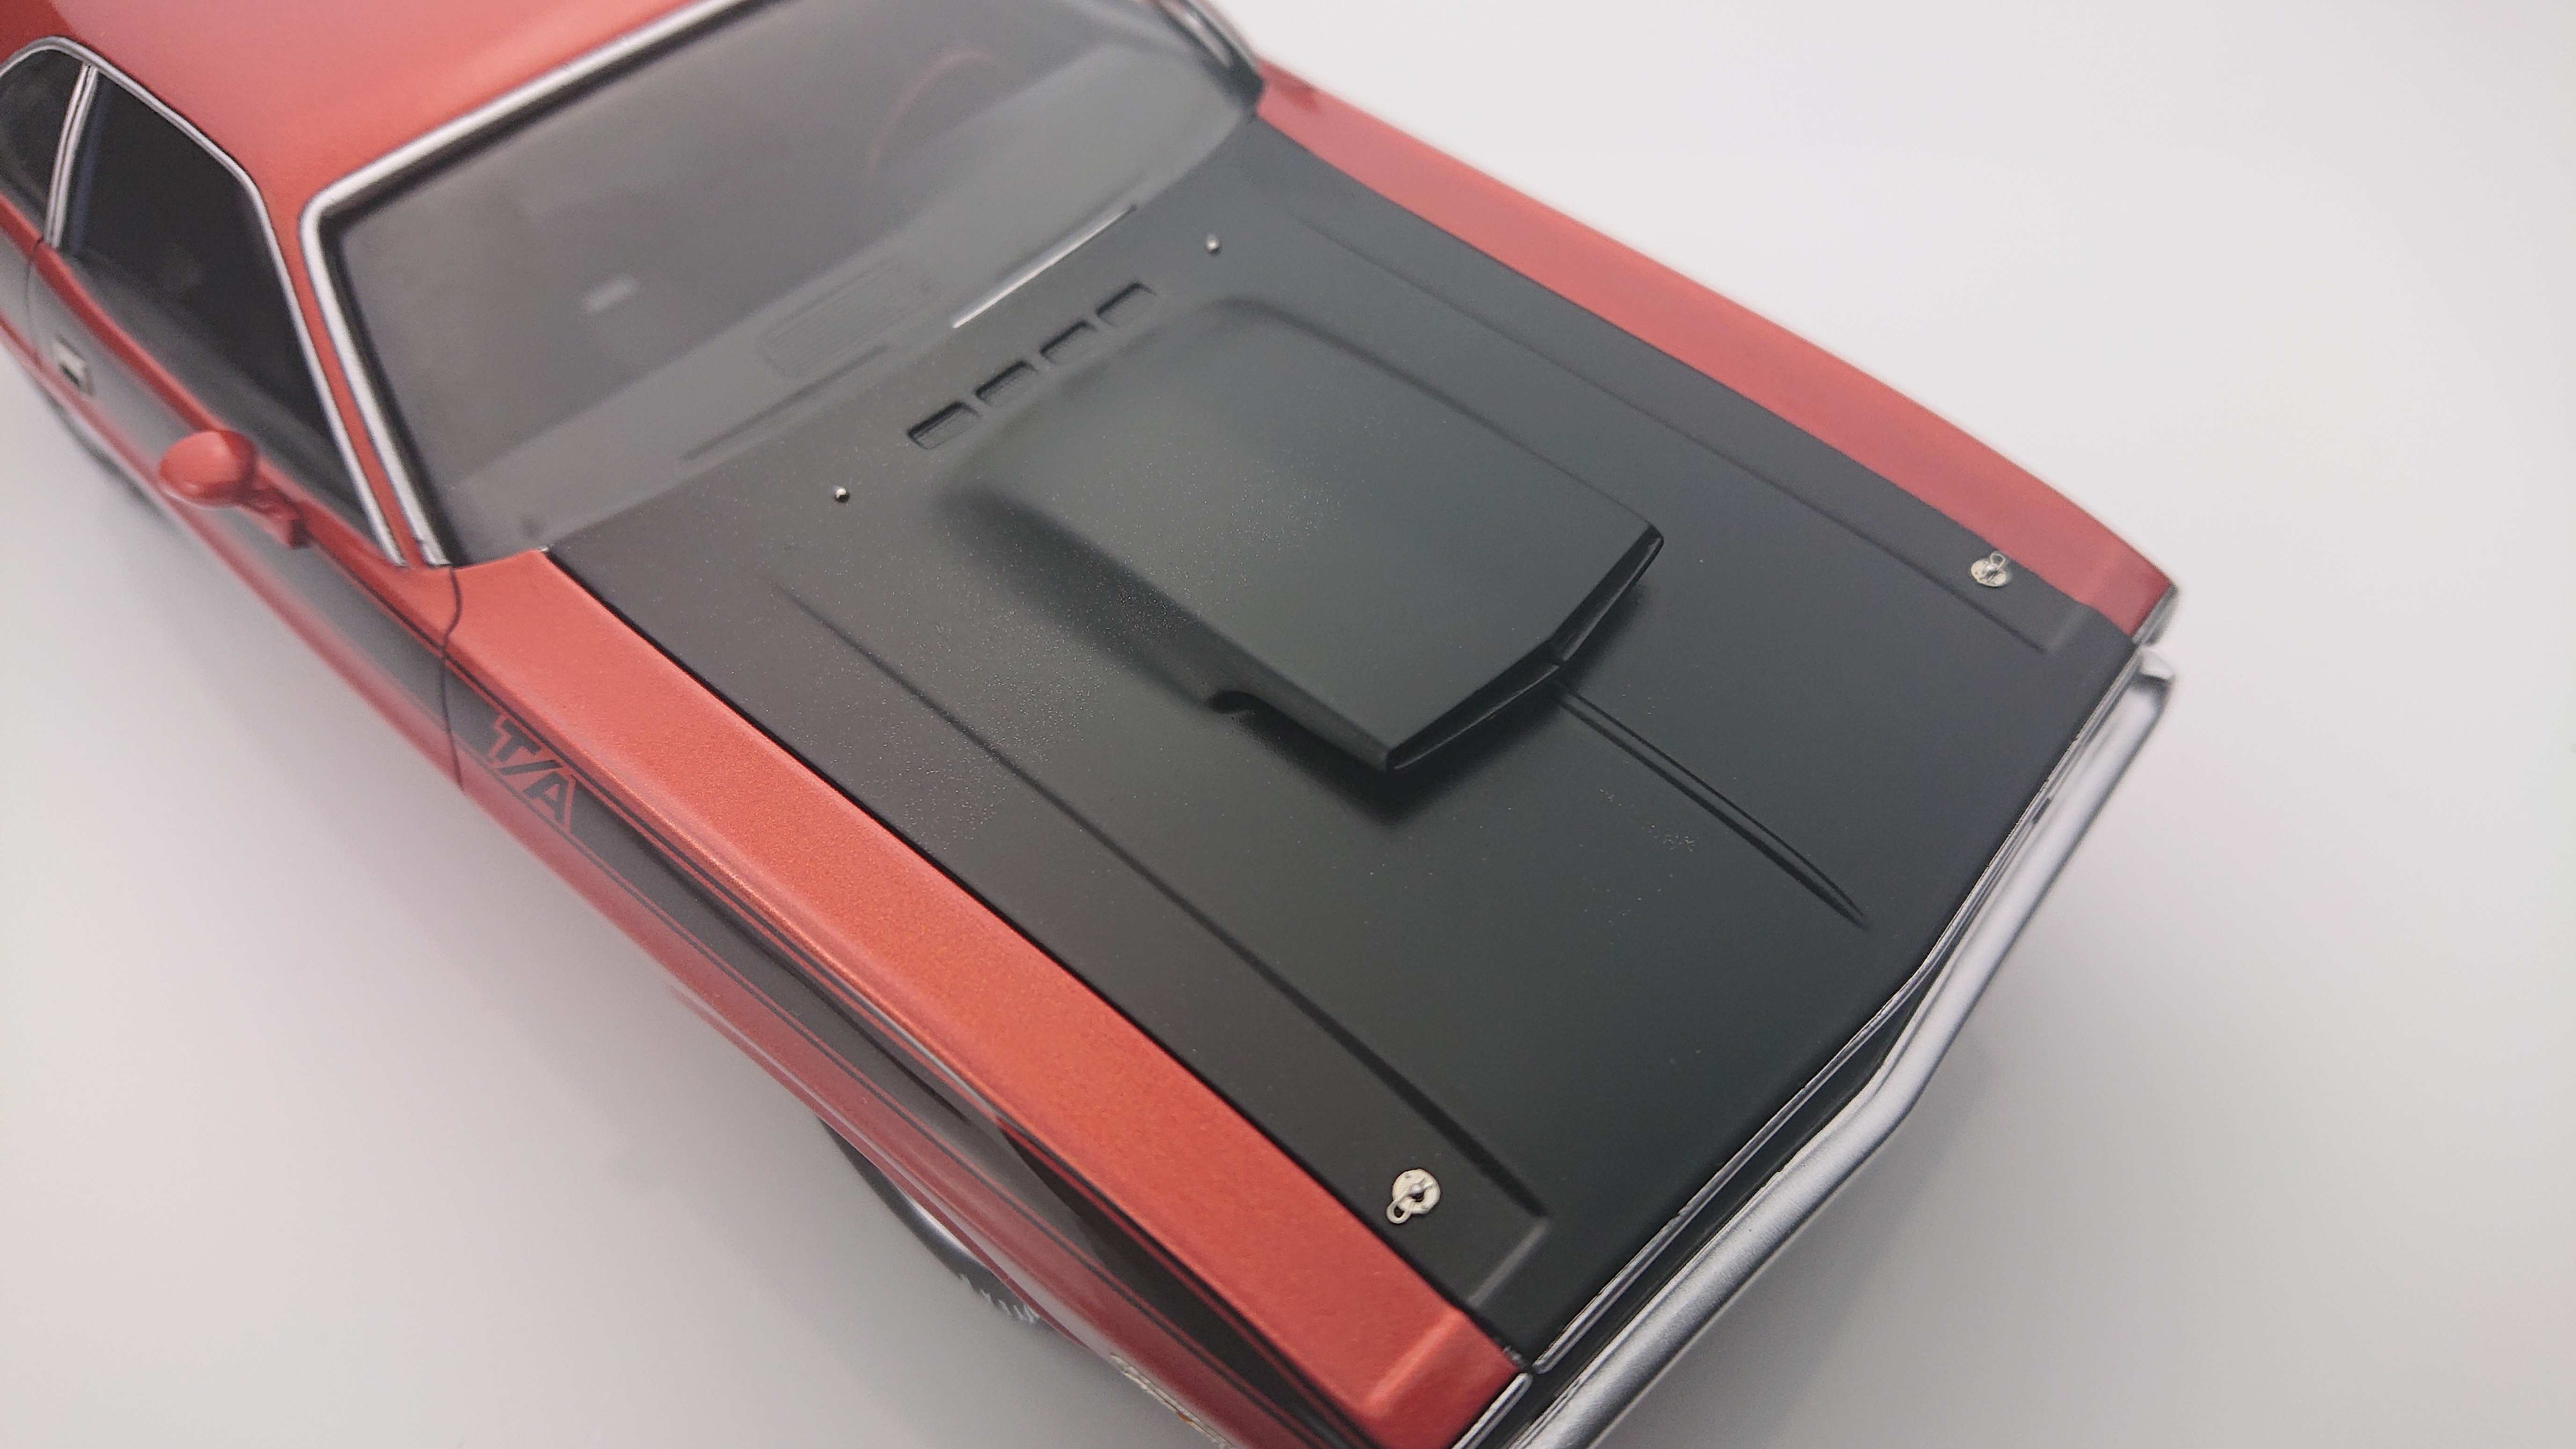
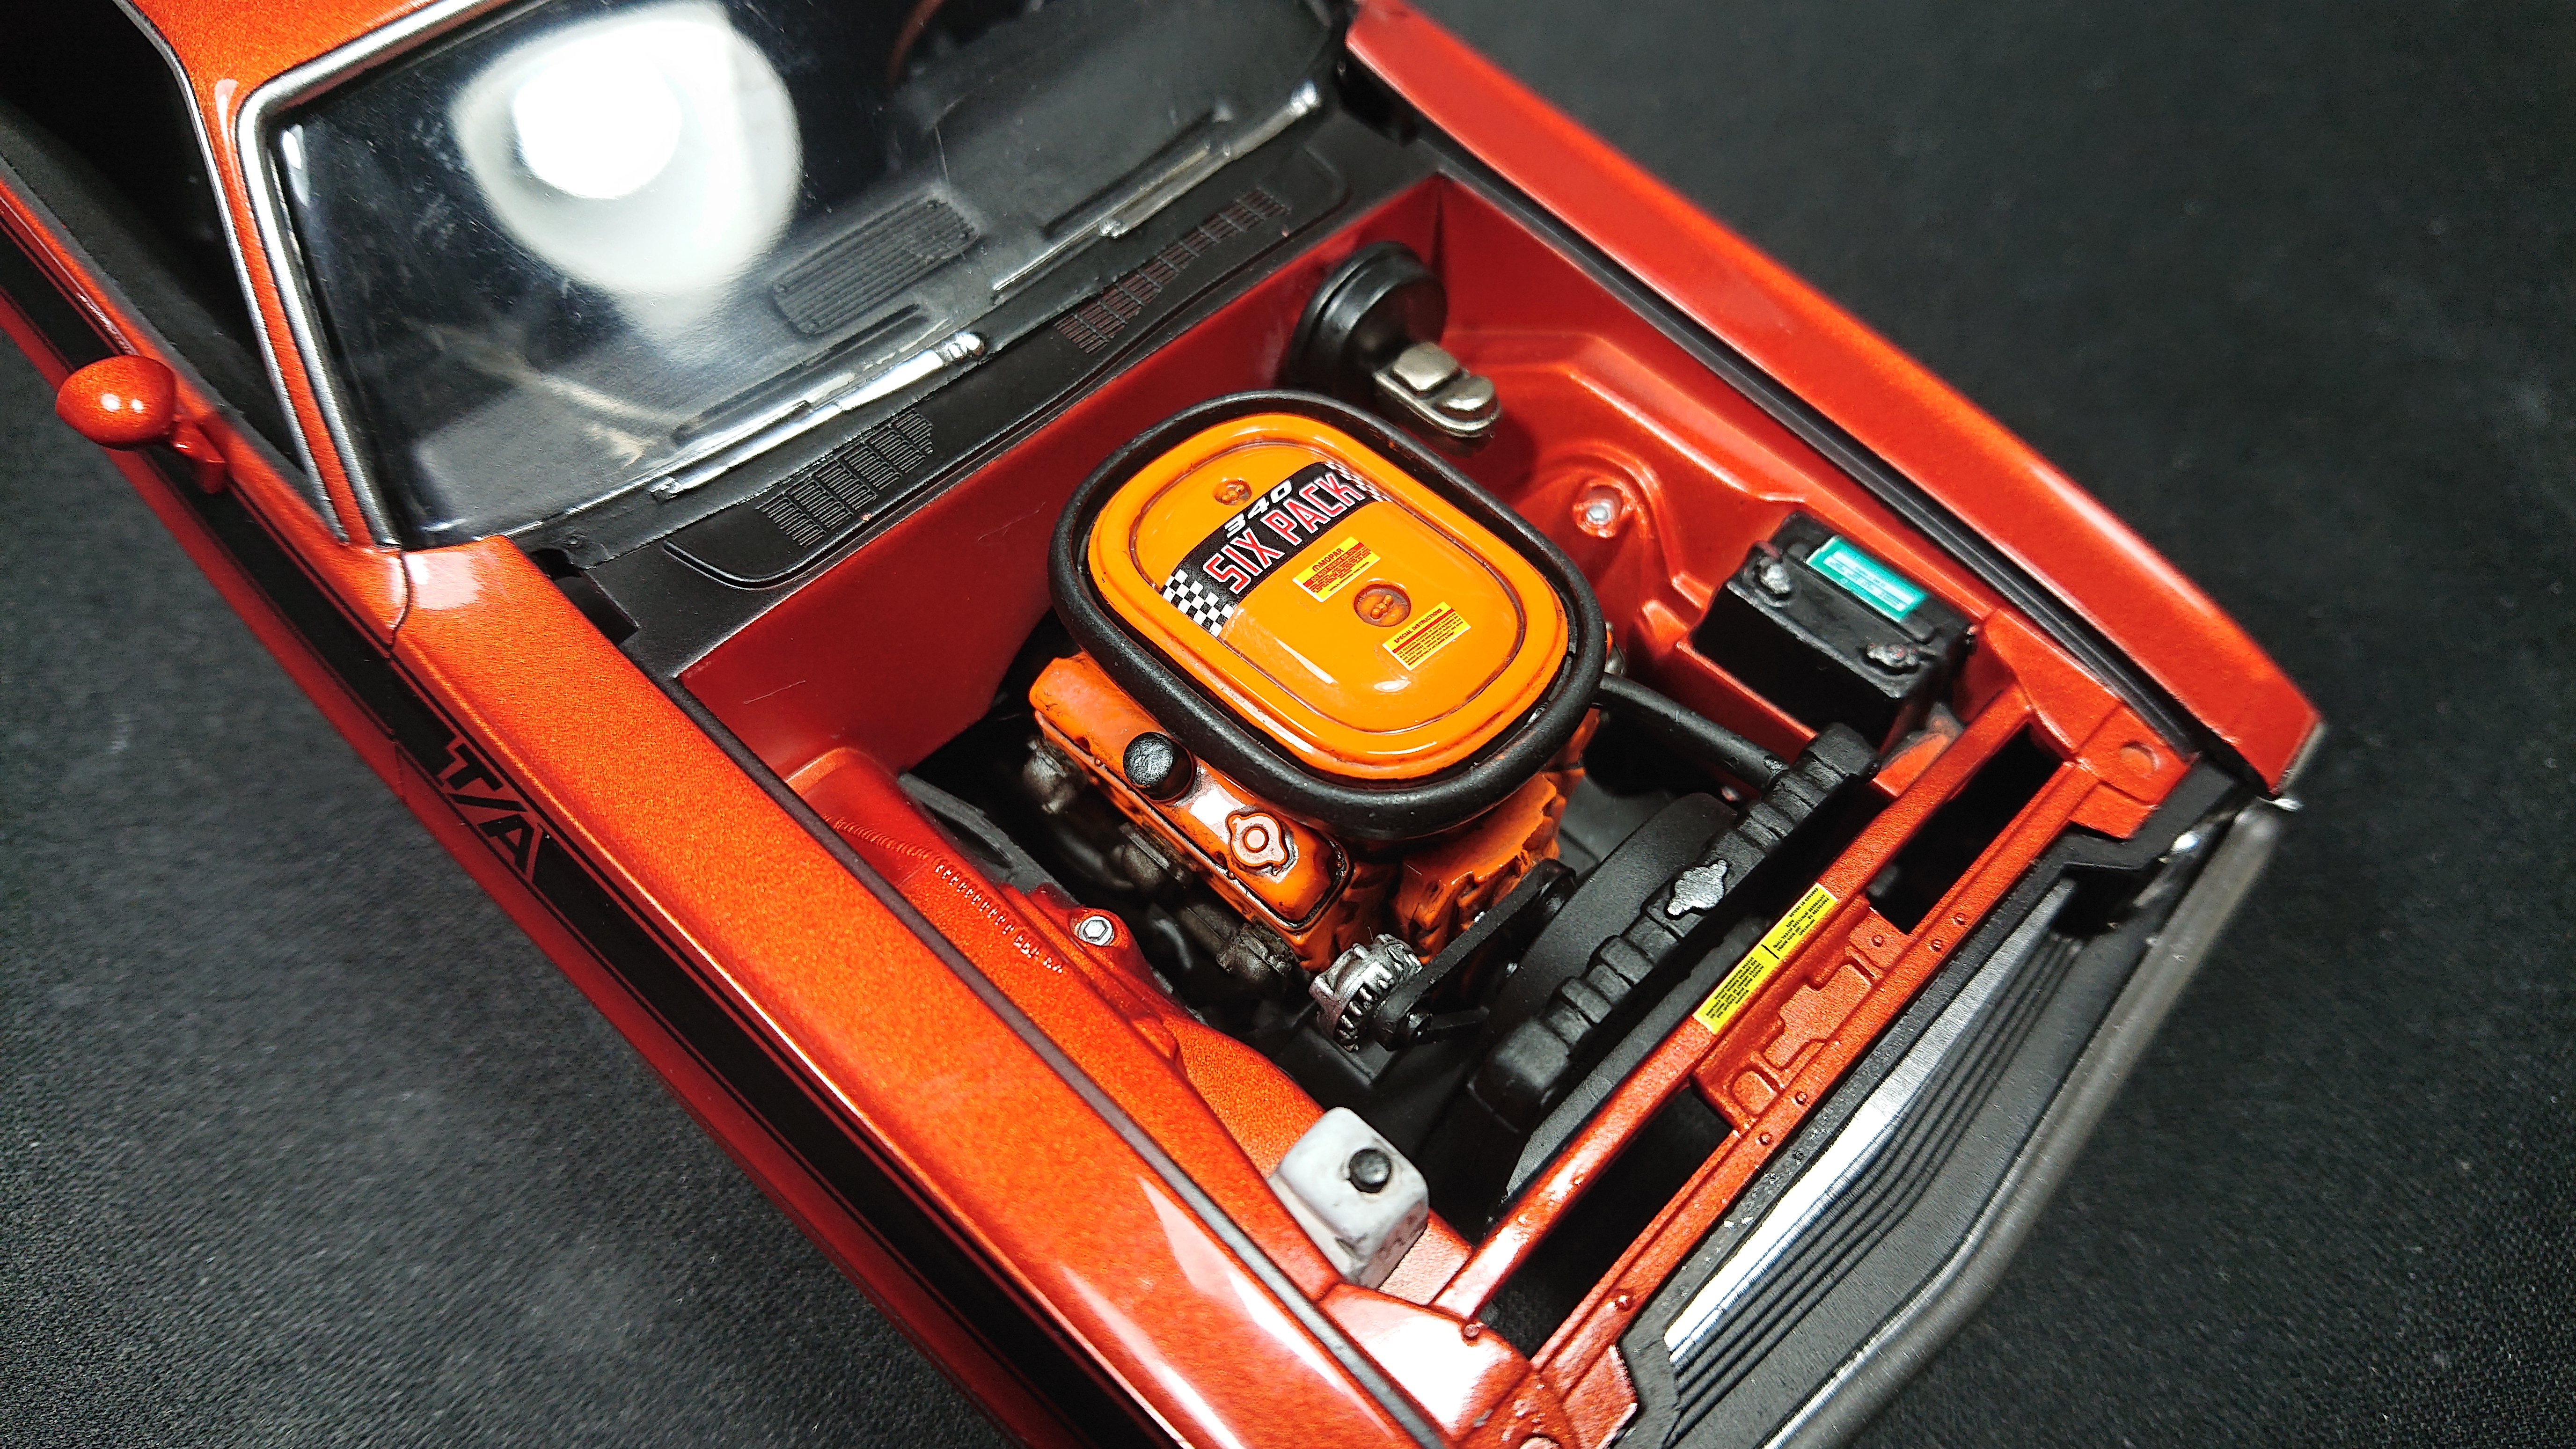
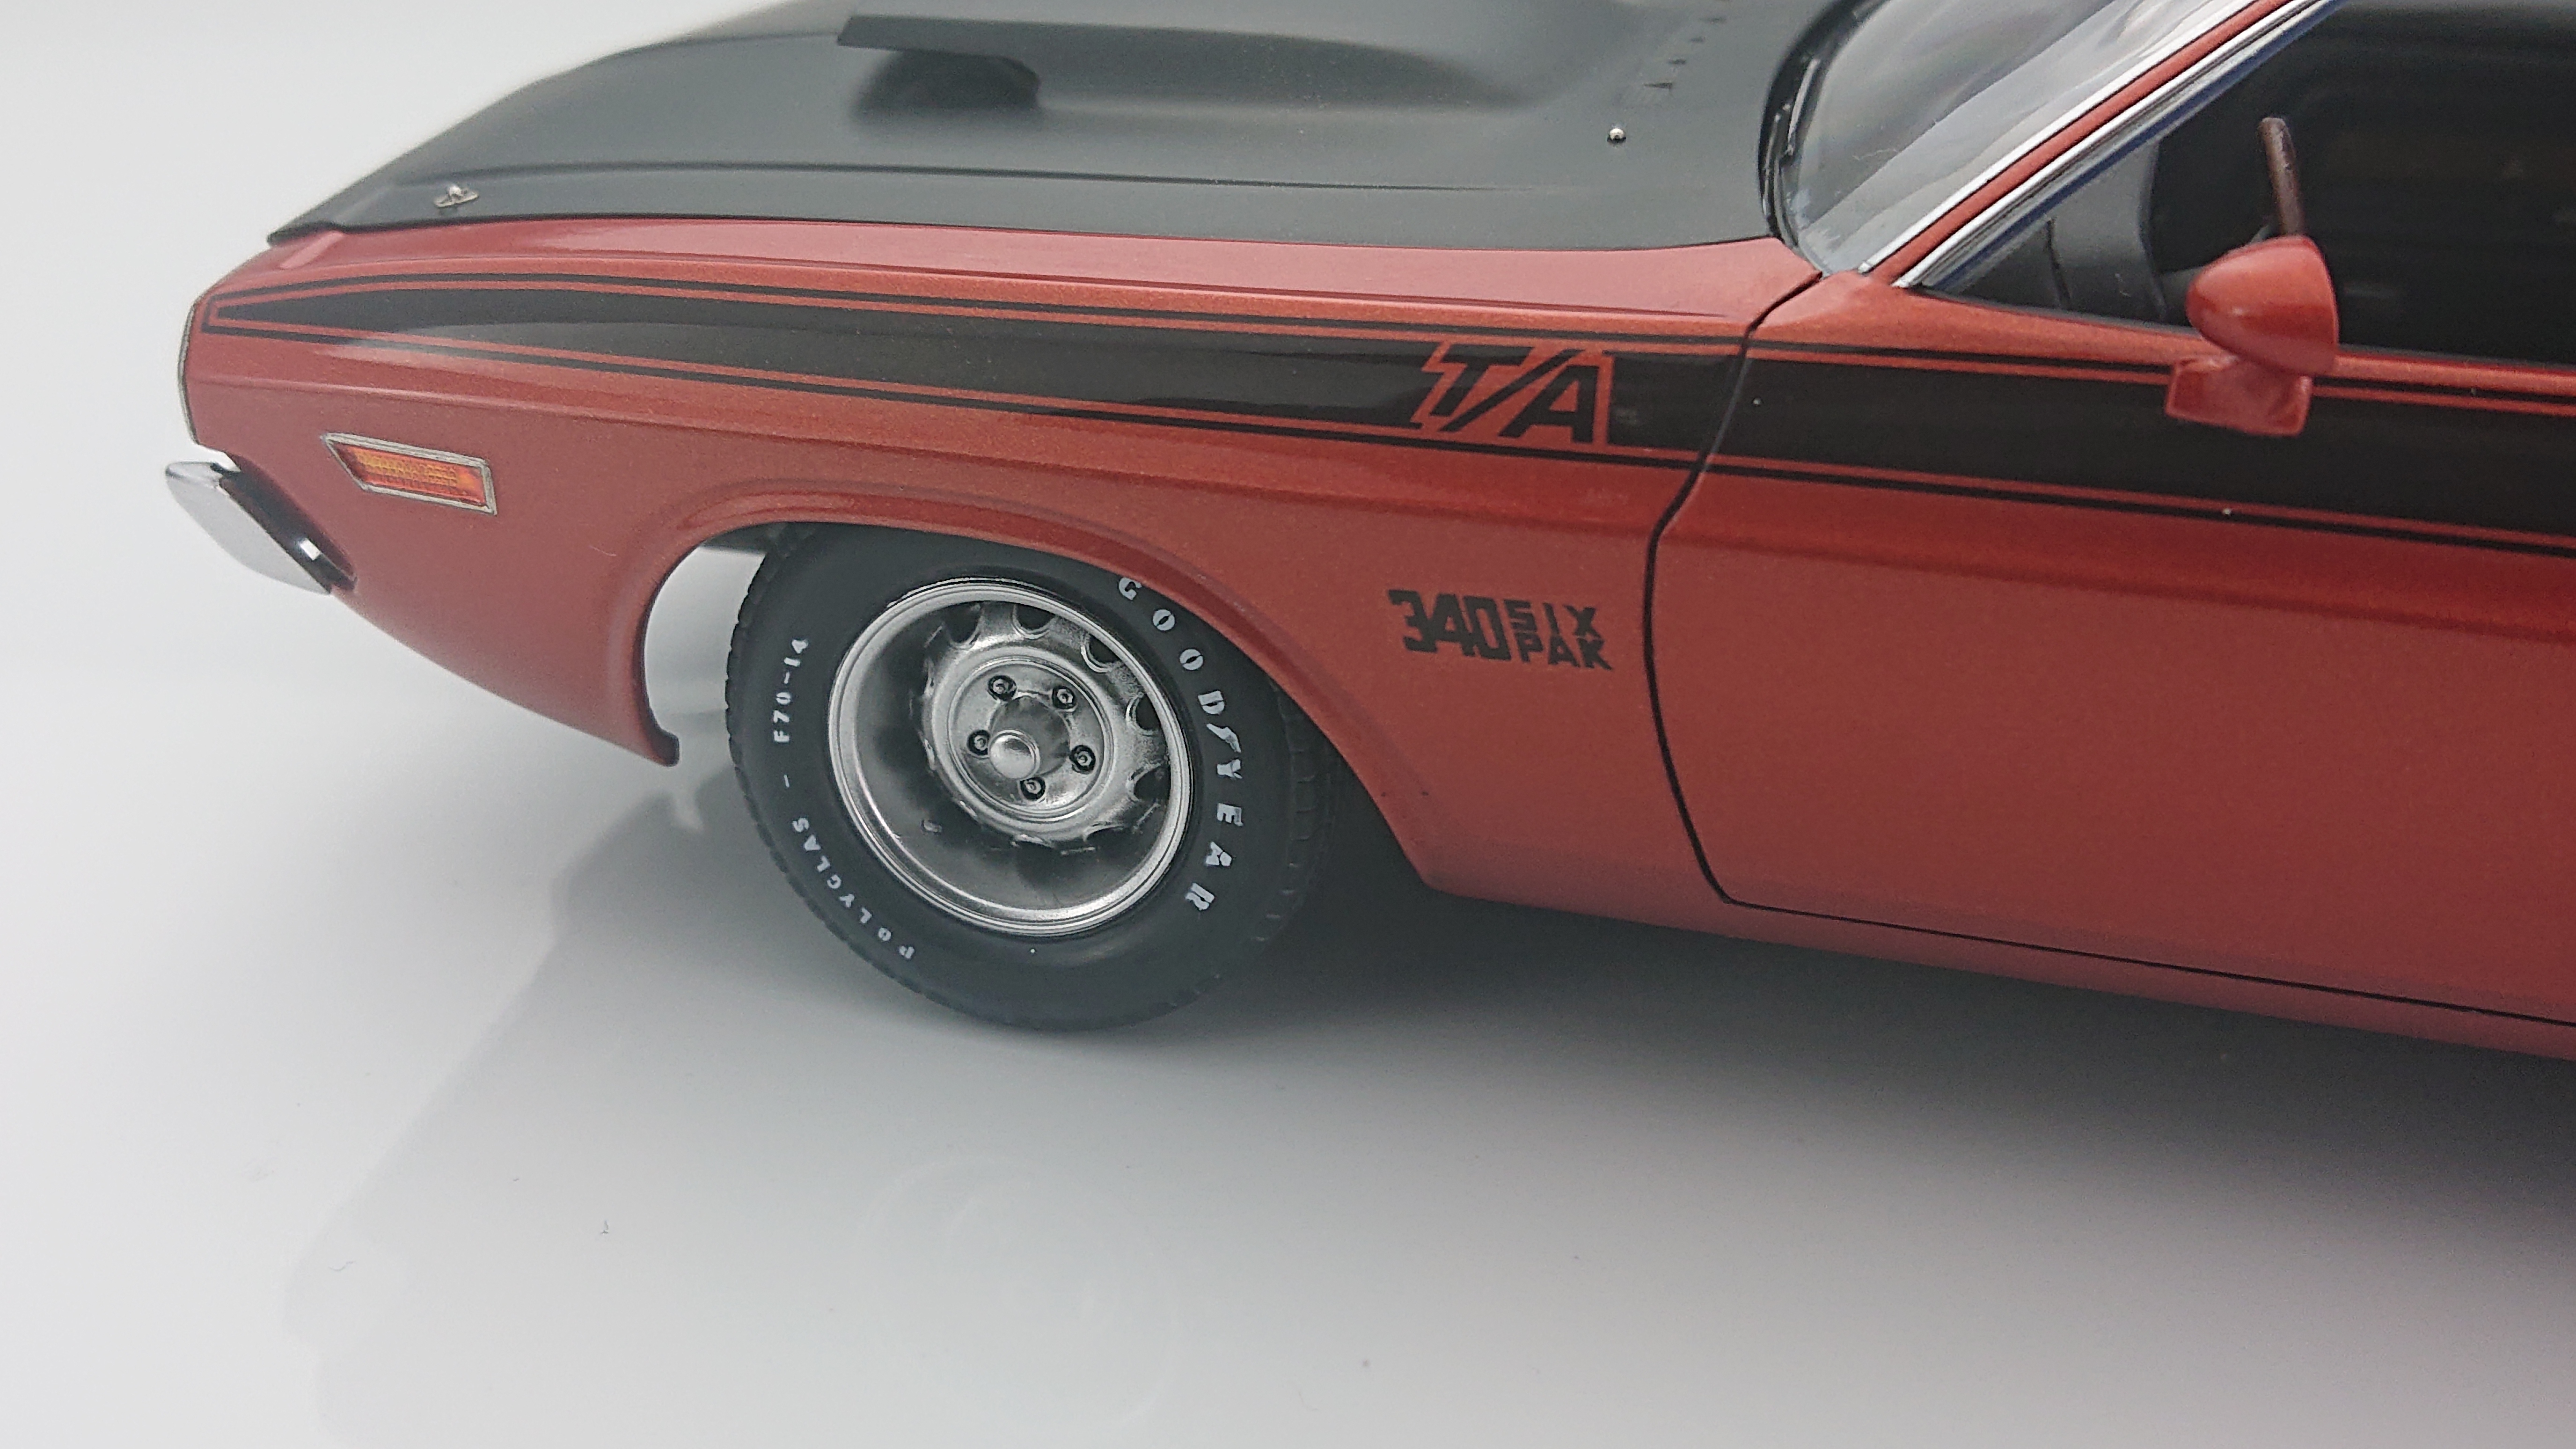
hi everyone !? this is my REVELL 1/24 '70 dodge challenger T/A,an very nice kit and easy to build!! hope you guys like it!!? and here is the video build if you are interested..?
-
My latest project.
- 2 replies
-
- 1
-
-
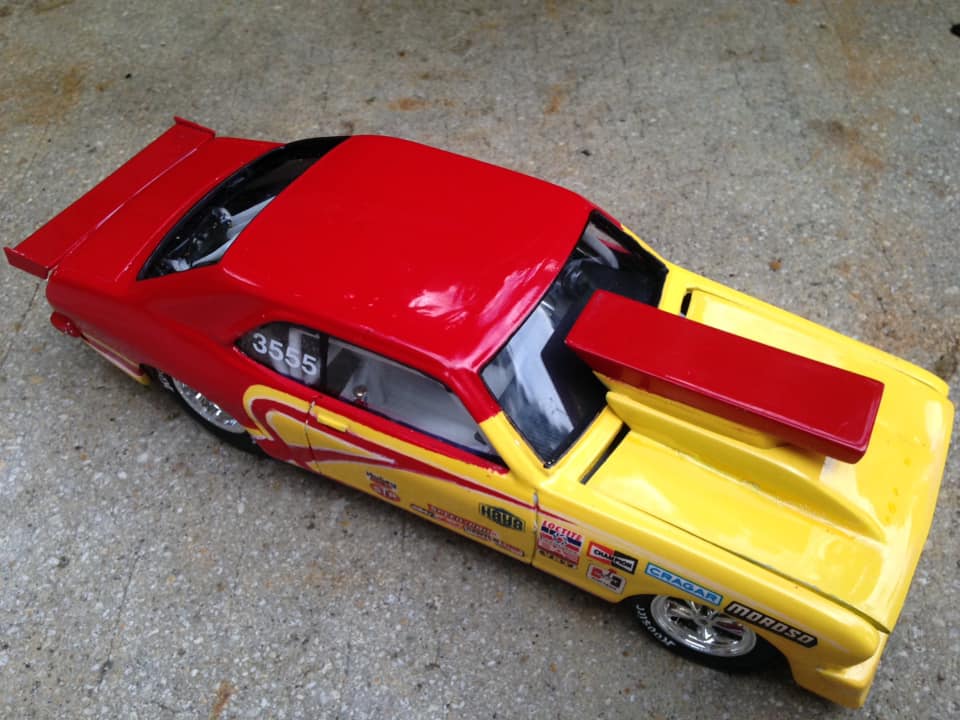
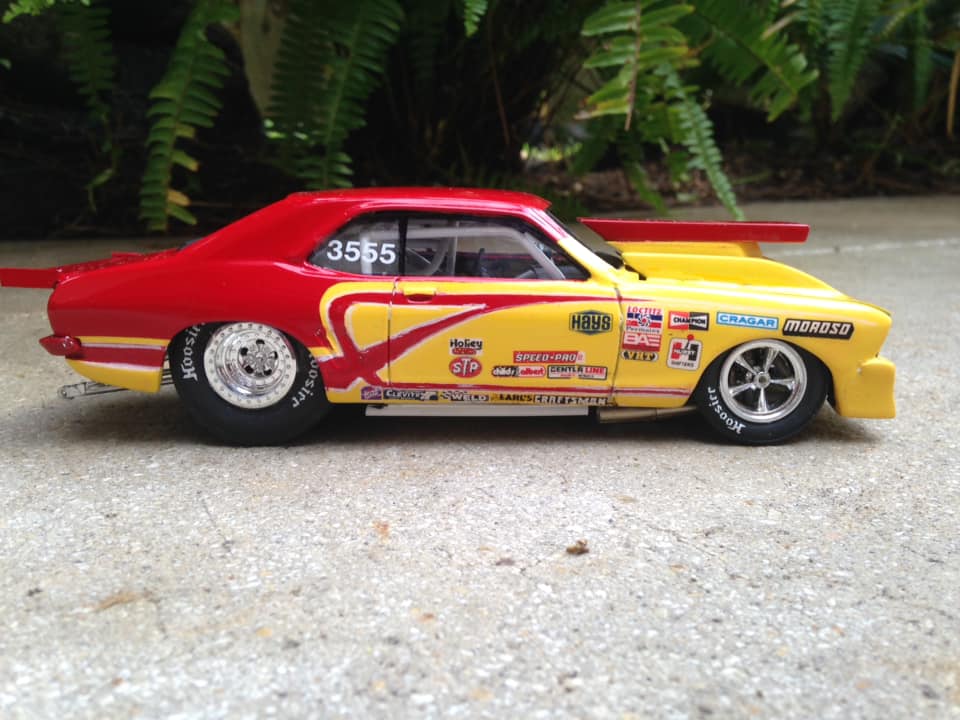
- drag racing
- pro stock
- (and 2 more)
-
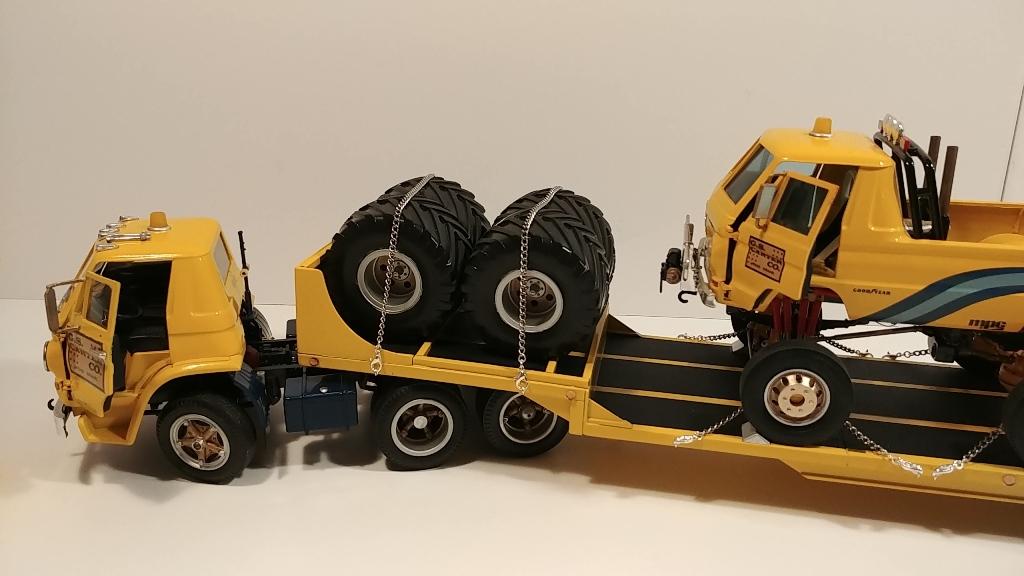
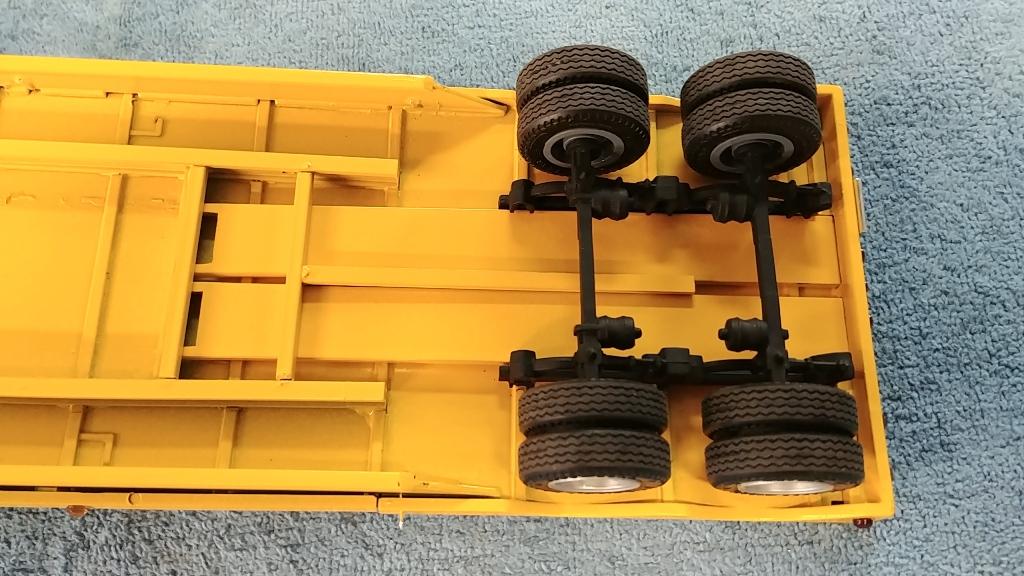
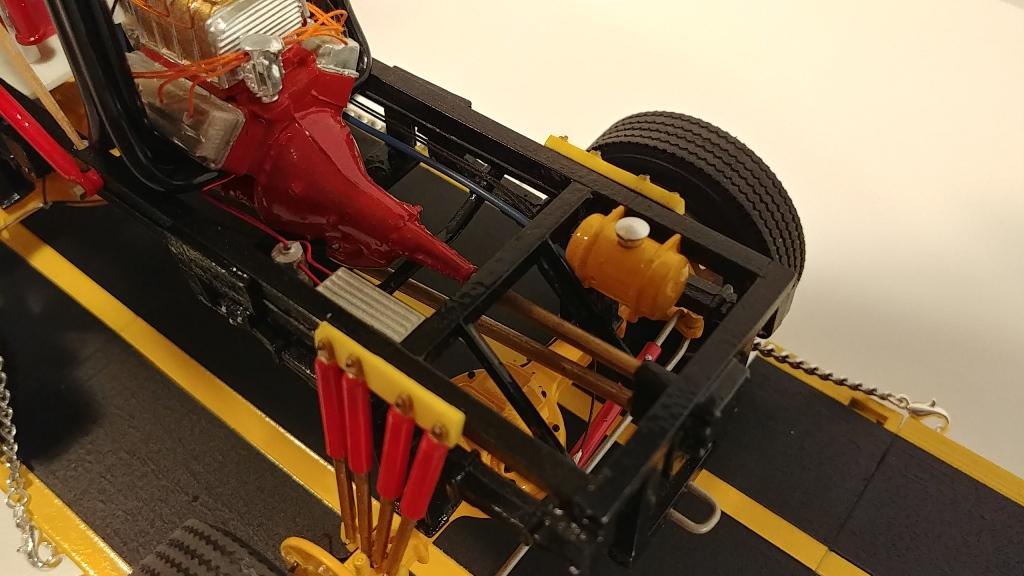
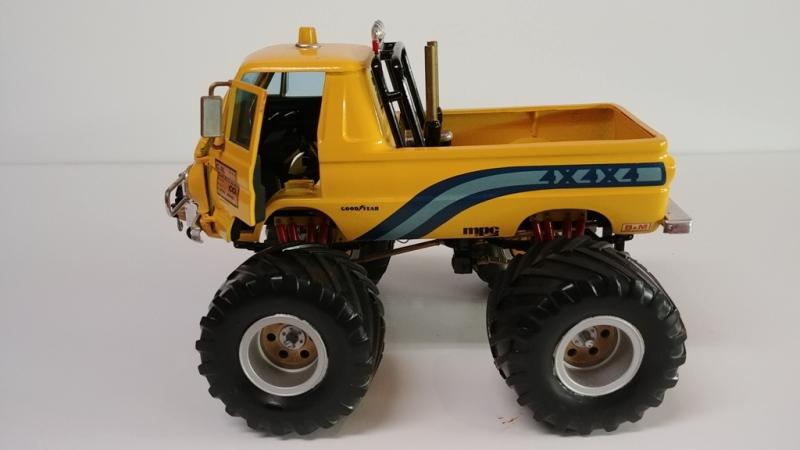
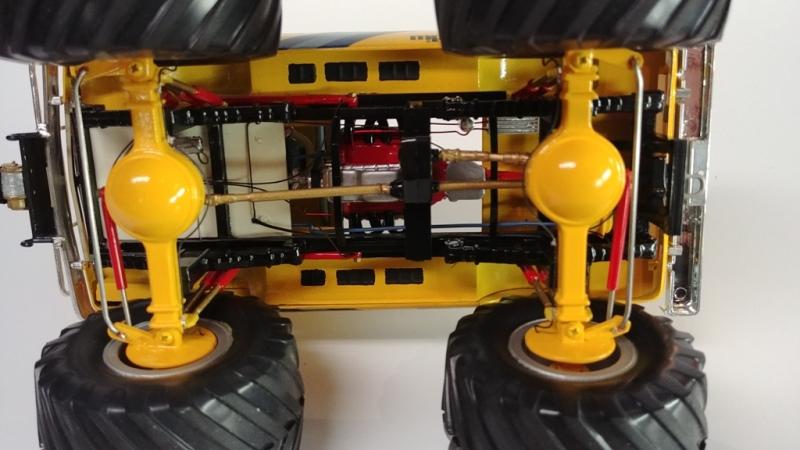
 I built the Dodge A100 monster truck many years ago (approx. 1990). It has a number of scratchbuilt features including forward-tilting body, working simulated hydraulic cylinders for body and steering, working 4-wheel steering, full wiring & plumbing, etc. At the same time I started a rebuild of an old IMC Dodge L700 to match the MT. The frame was stretched and a tag axle added. An IMC Big Rig semi trailer donated it's floor for a custom drop-deck trailer. The project stalled and went into a box. I recently got it out and was determined to get it finished! This is the result. The ramps store under the trailer deck. Trailer wheels, tires and suspension came from AMT 1/32 reefer trailer
-
 Is there really no kit of the Dodge Challenger or Charger SRT Hellcat? I see there are die-cast models. Reason I asked, getting a Lamborghini Chetah kit, which is motorized, thought keeping with the Chrysler V8 theme would be cool.
 -
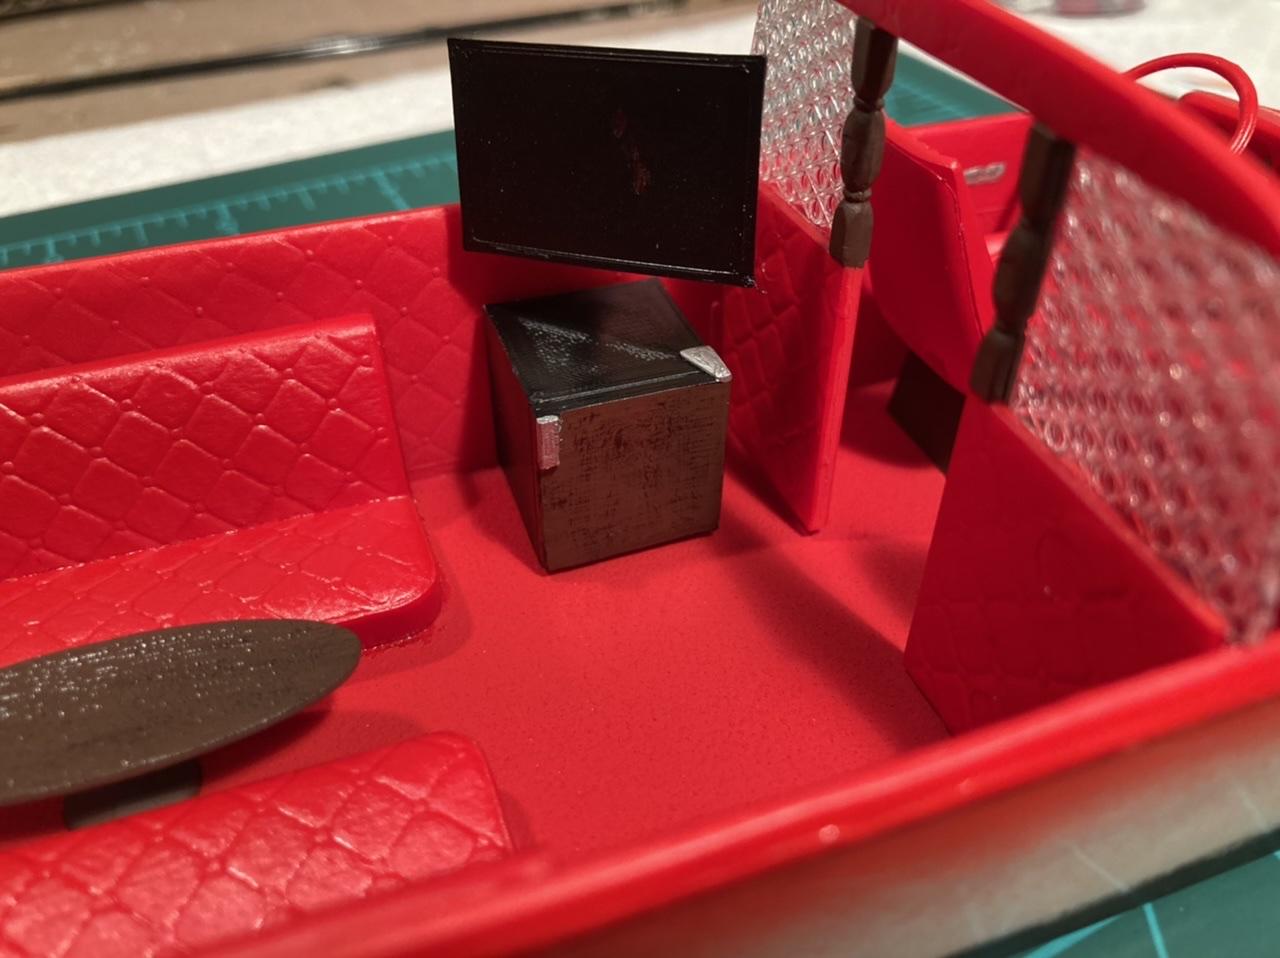
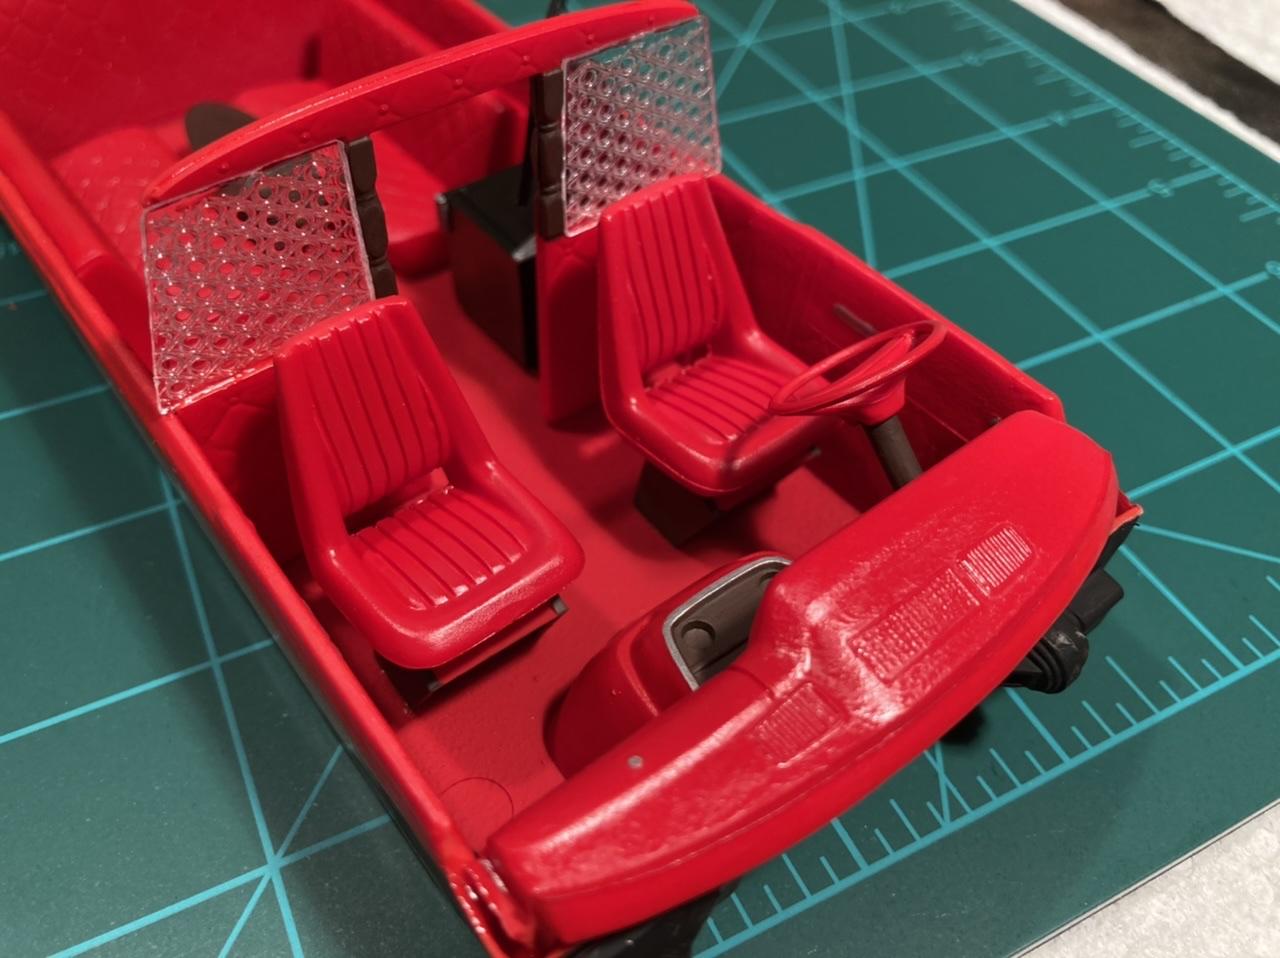
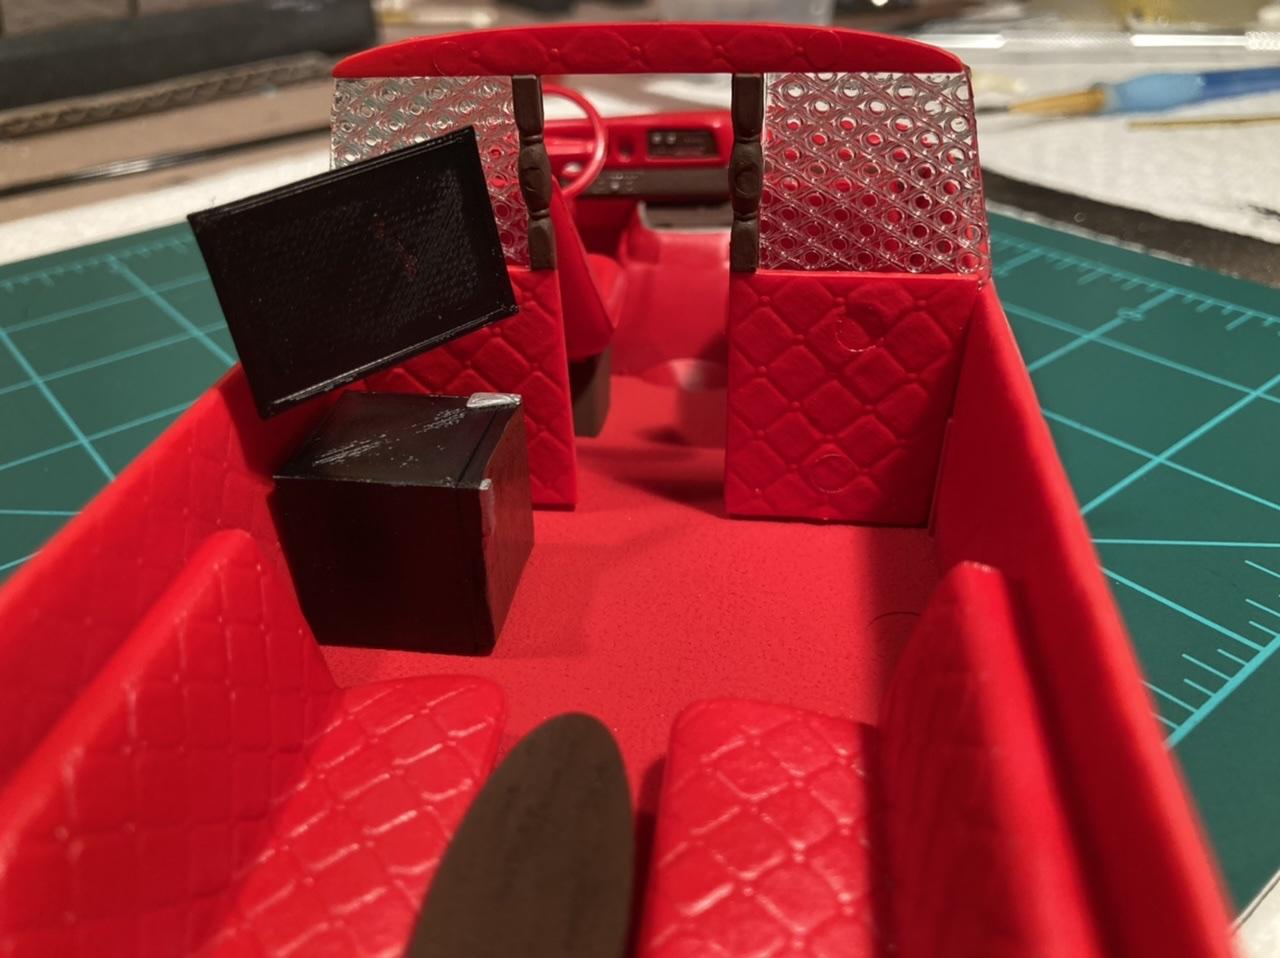
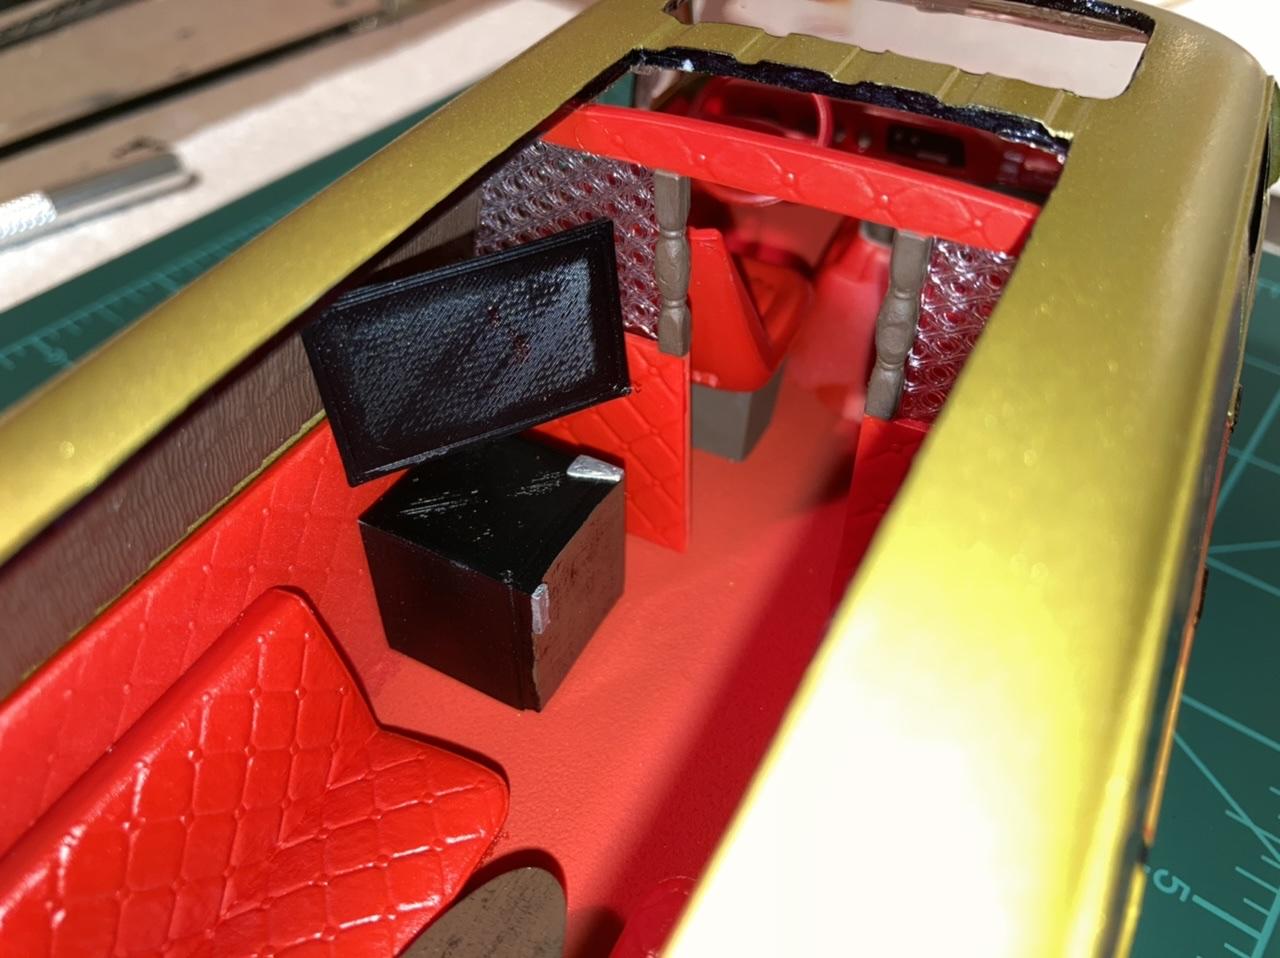
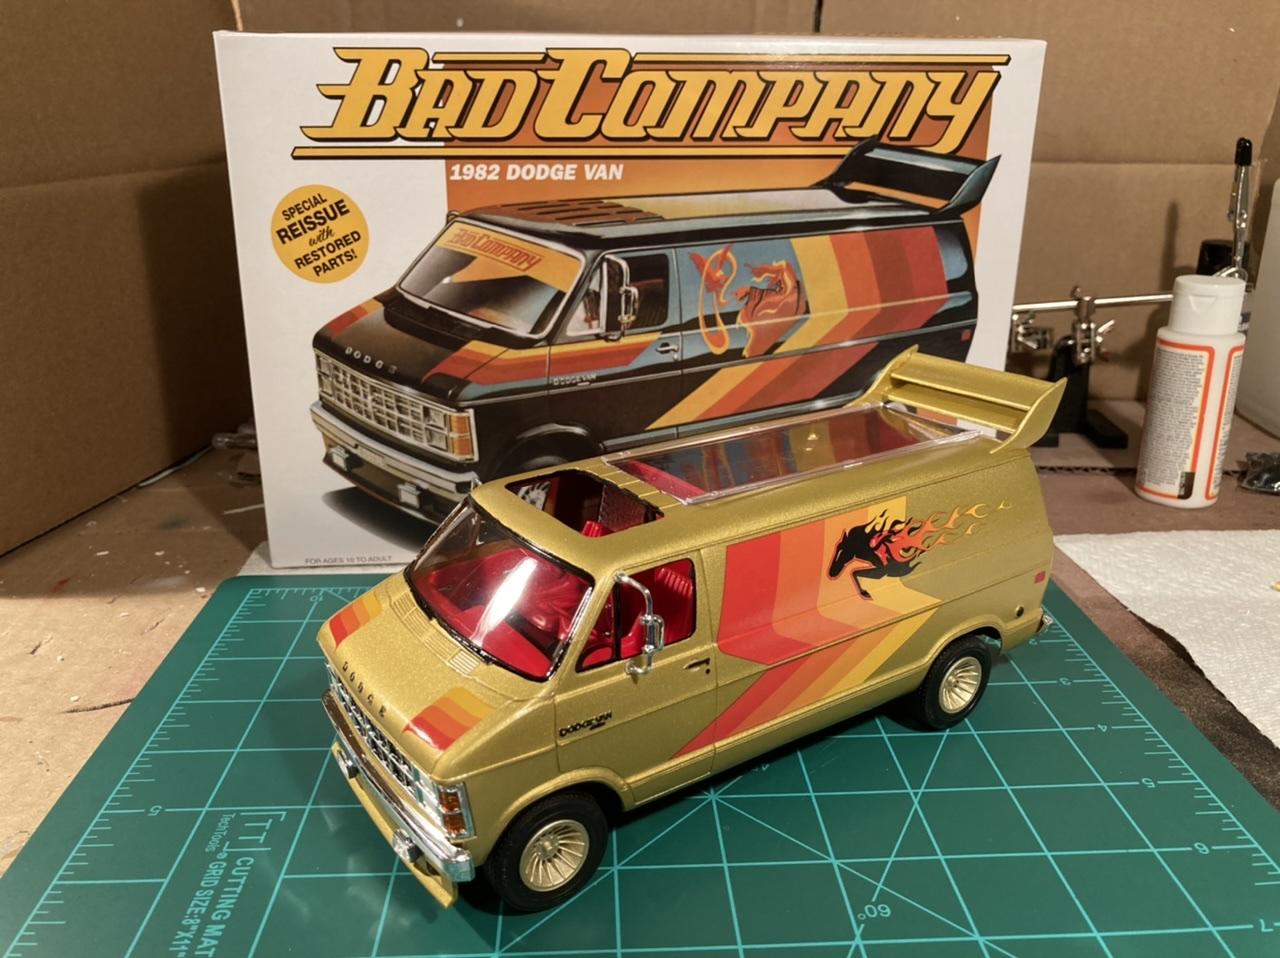
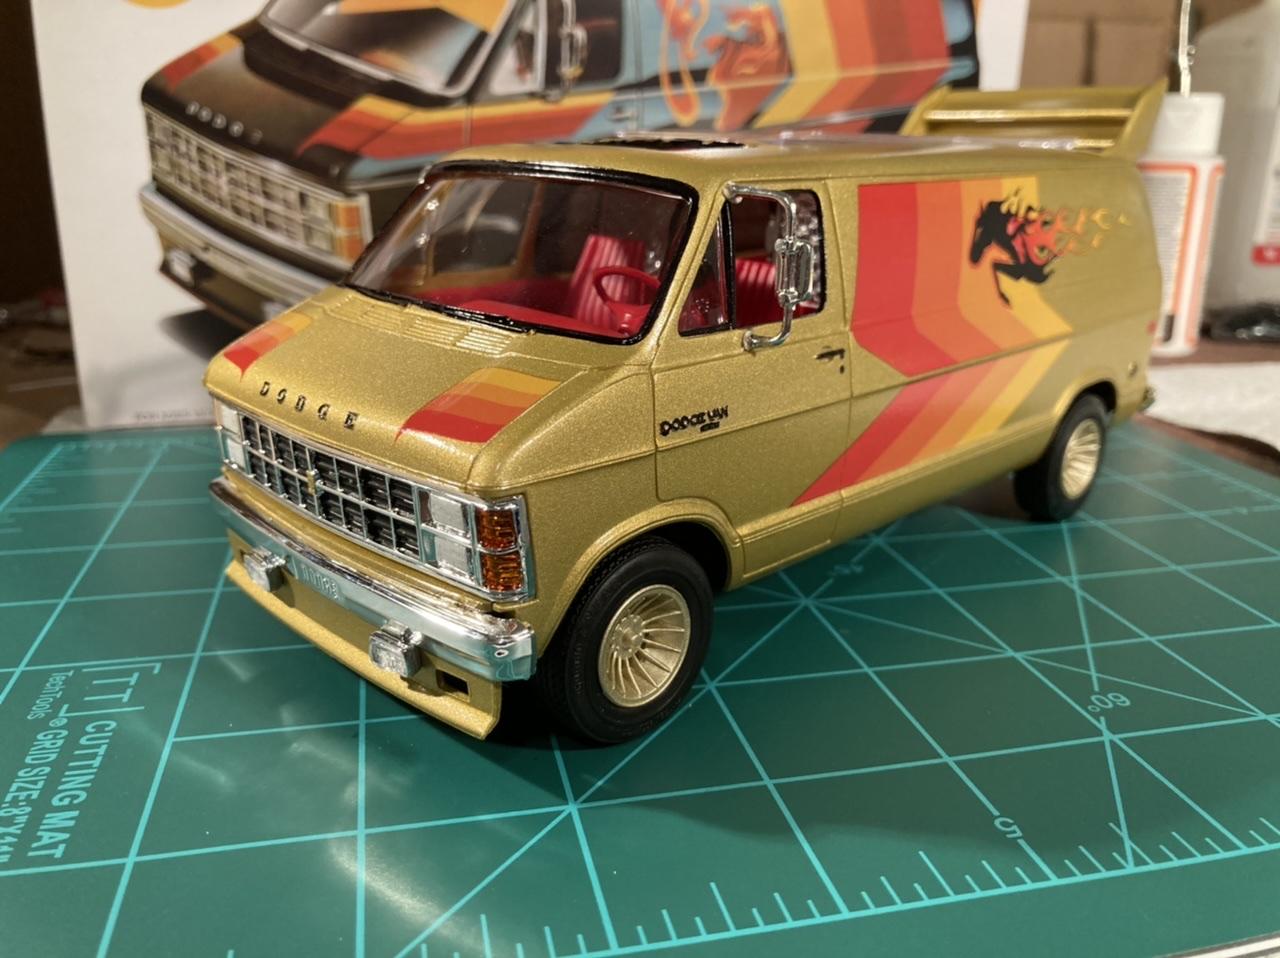
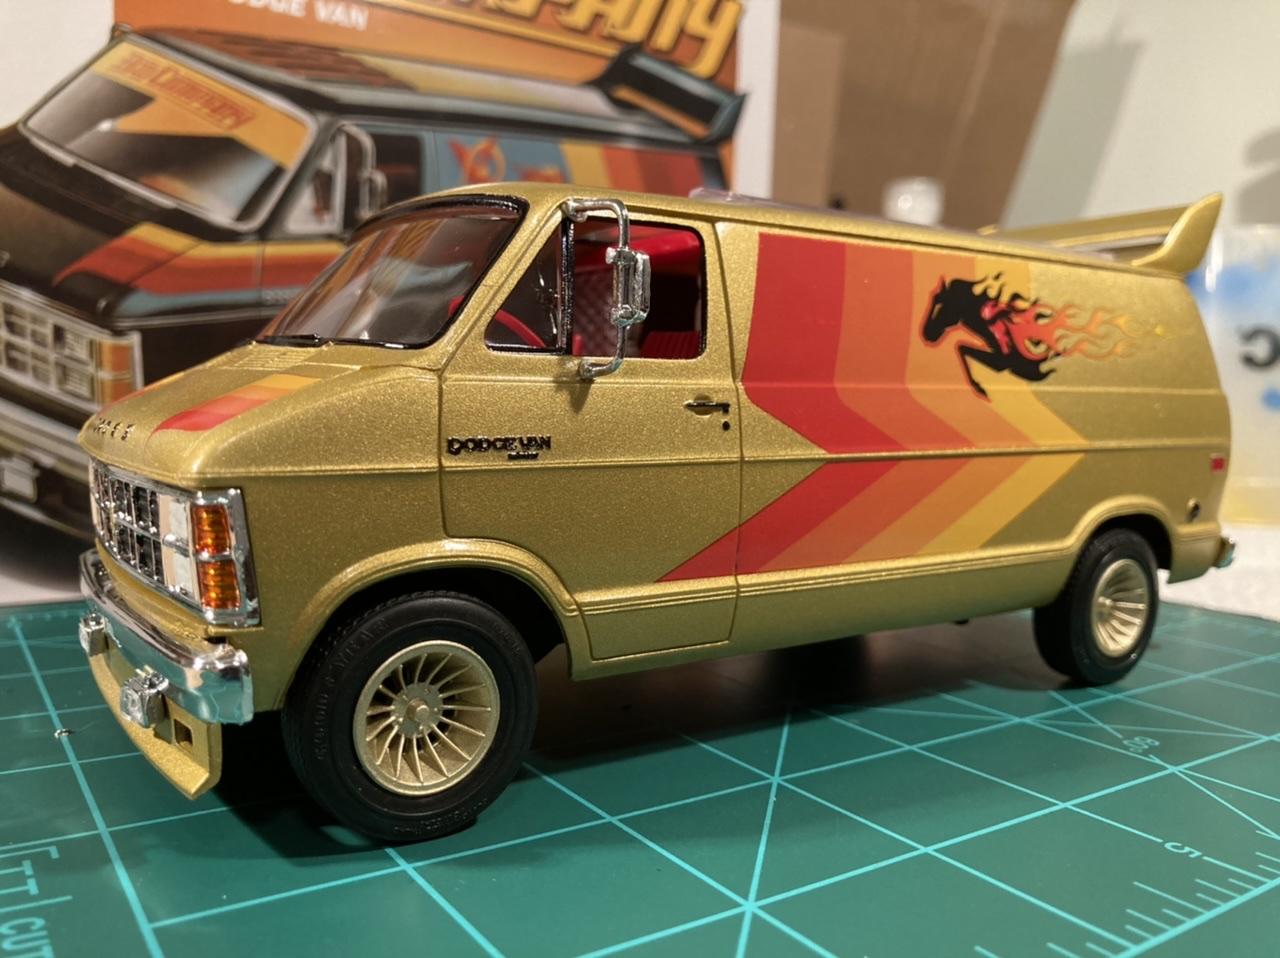
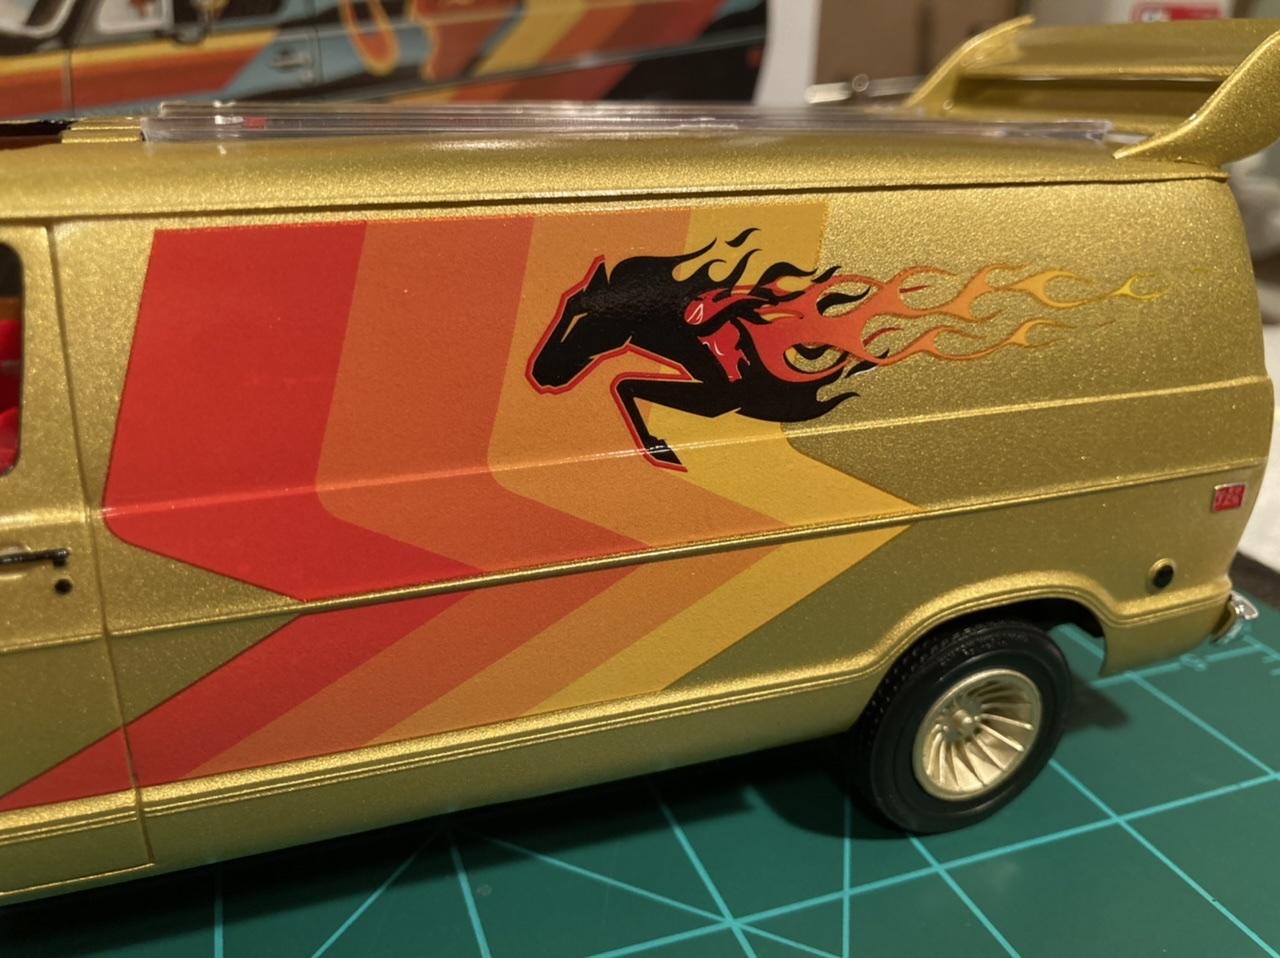
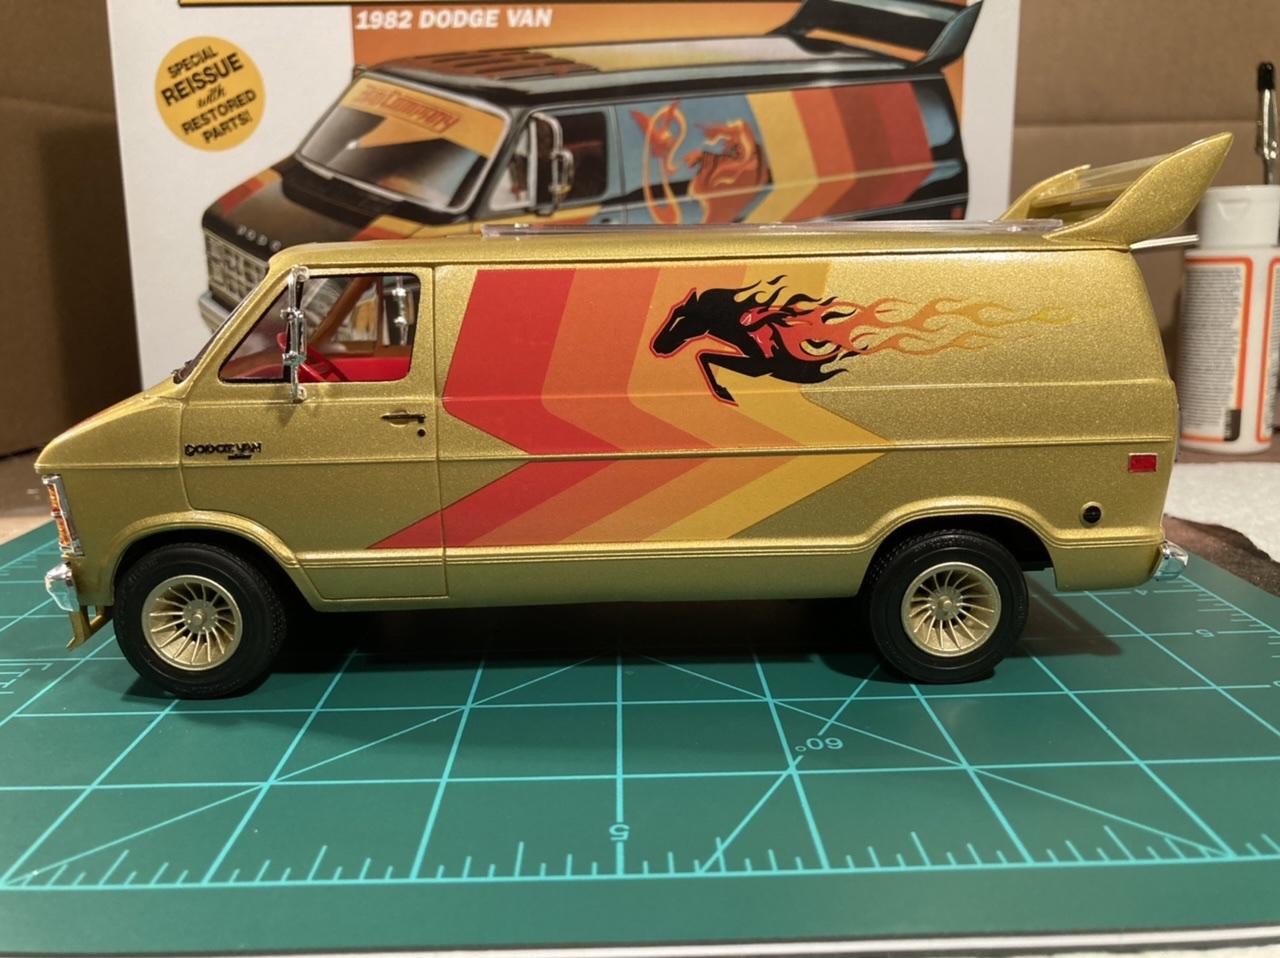
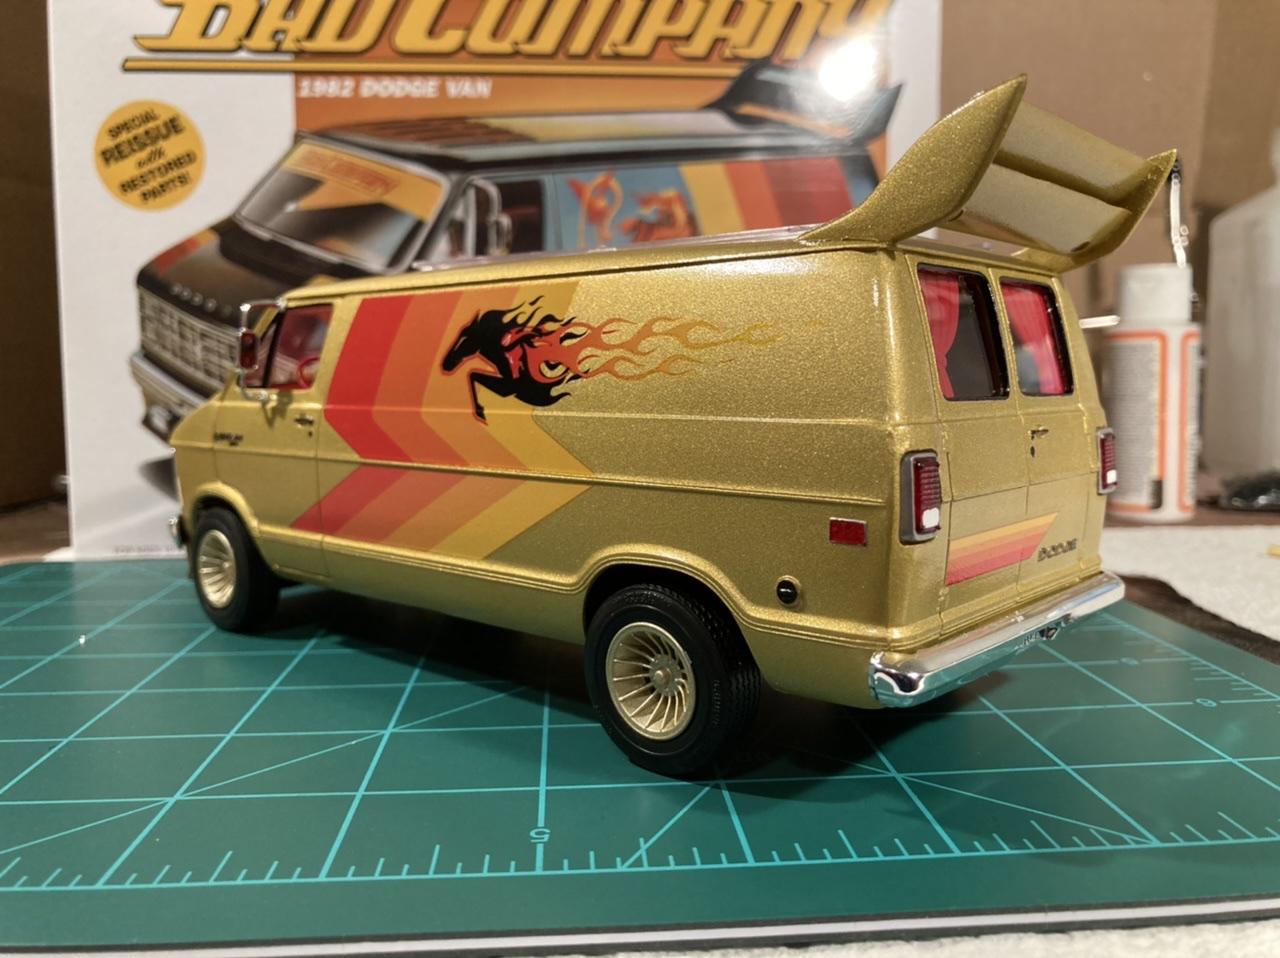
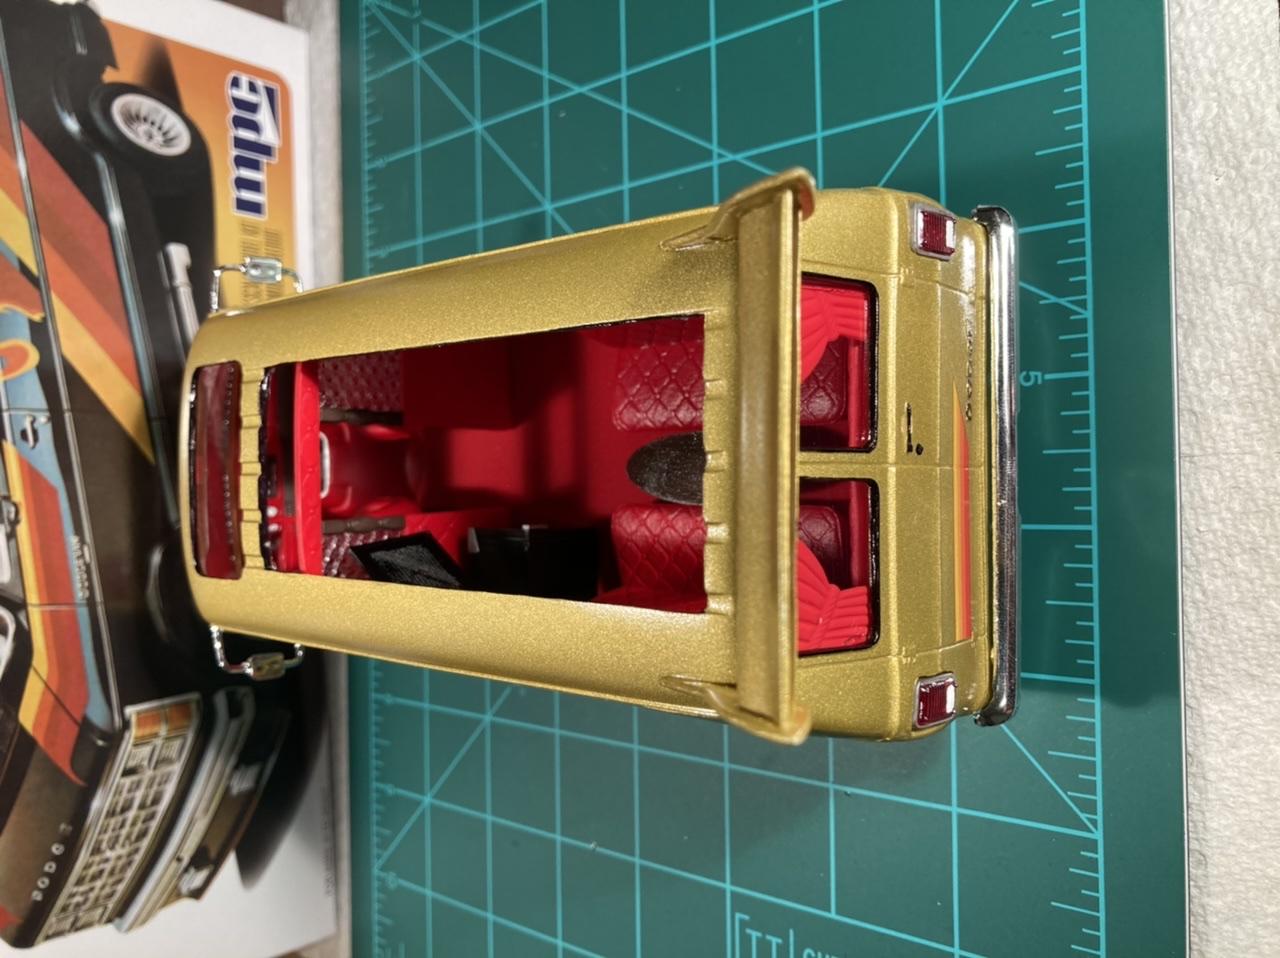
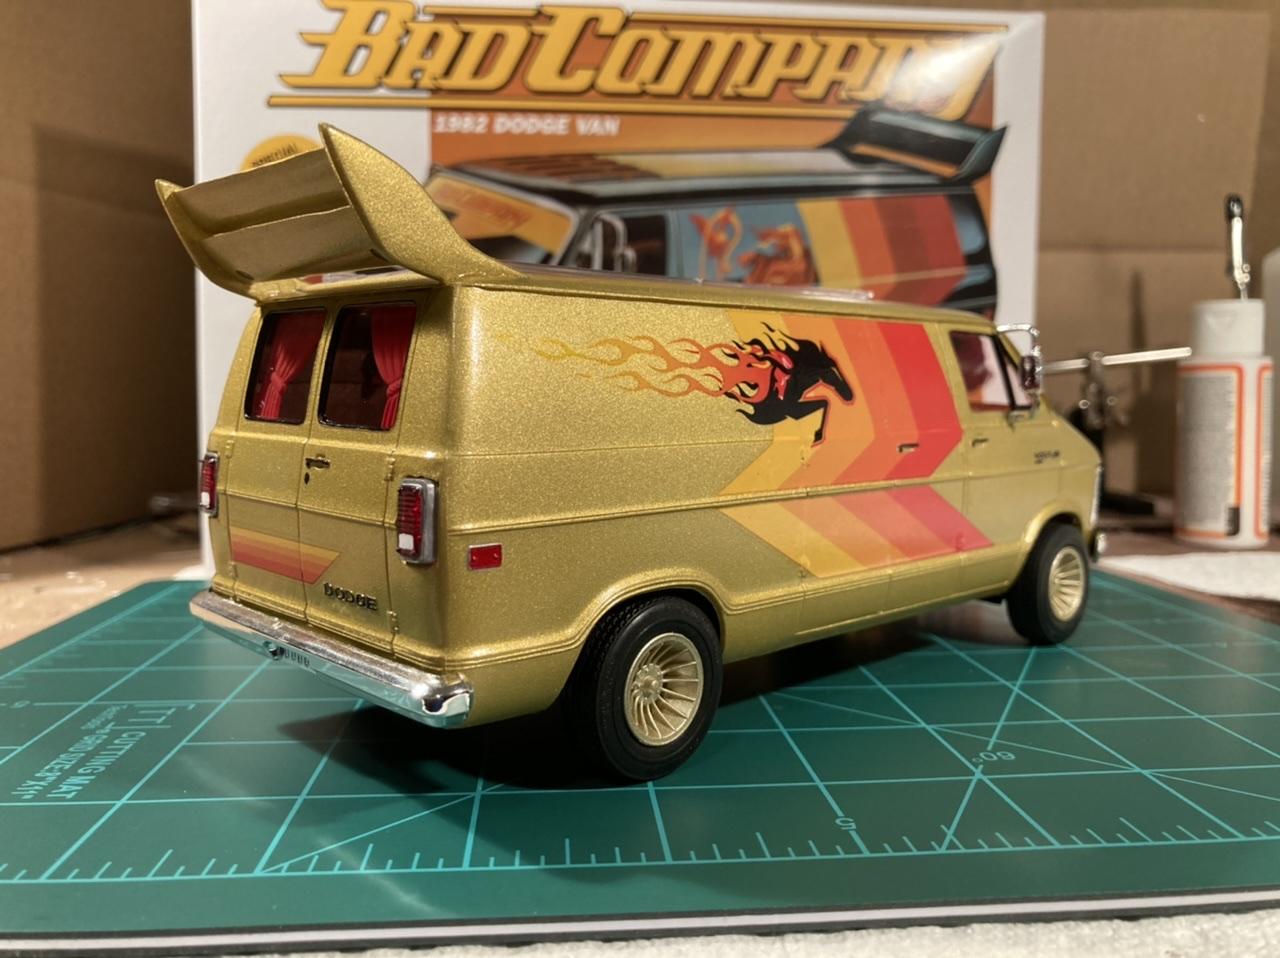
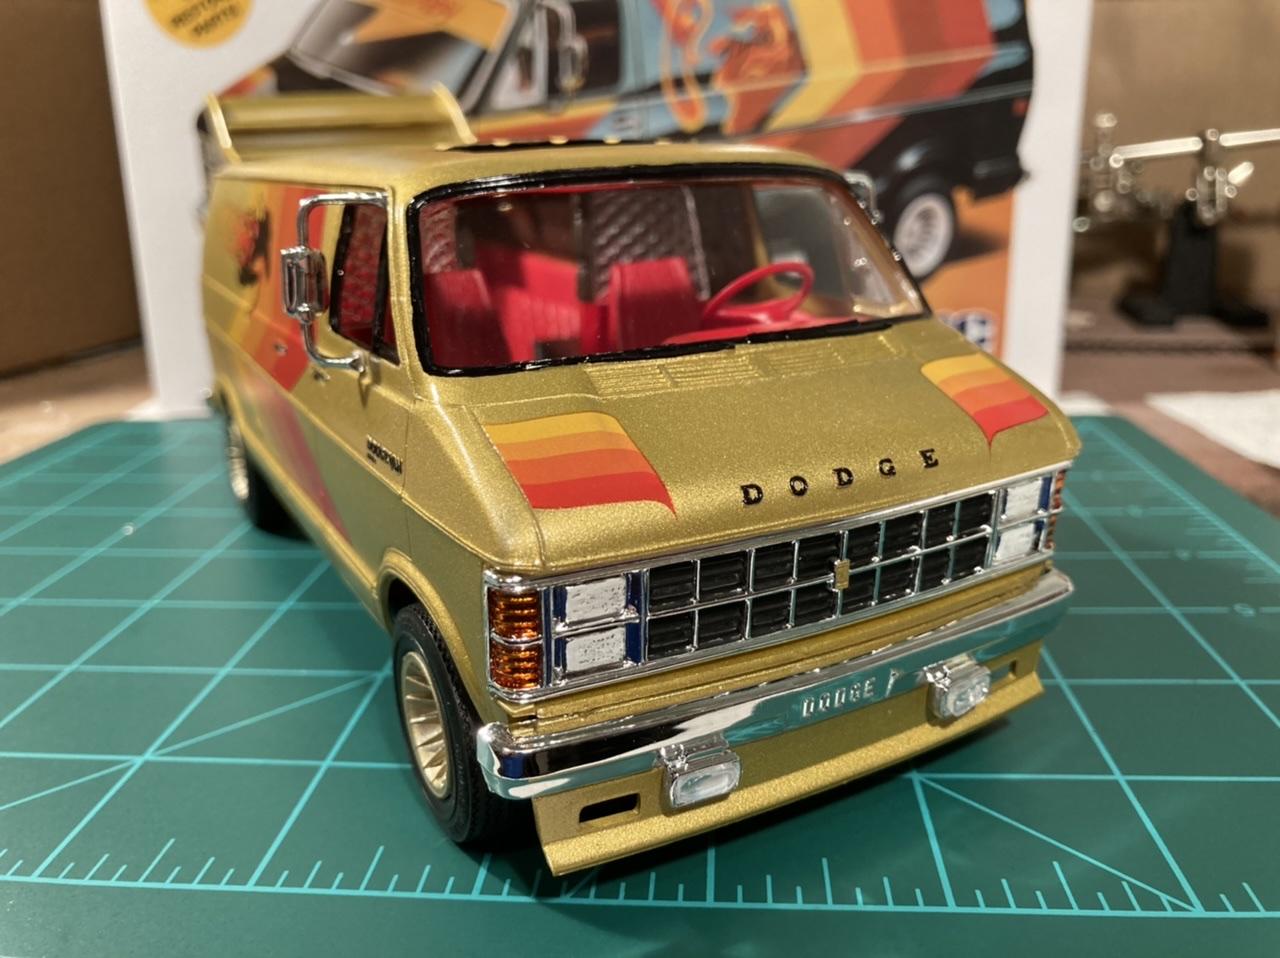
 Here is my ‘82 custom Dodge Van! It’s the re-released “Bad Company” kit from MPC, with my own mix on the decals. The black flaming horse decals came from the MPC Pinto Pony Express re-issue, and the sunset flaming horse came from the recent release AMT ‘66 Mustang coupe kit. I thought the wizard decals in the kit looked goofy so I swapped in those horse flame decals. I think they look like they belong together! I painted the body in Tamiya X-12 Gold Leaf, and the interior in XF-7 flat red, with Future on the seats, dash and walls. This was my first time using Future floor polish and I am definitely a convert! The body paint really pops with three thin coats of future. FYI, it’s now called “Pledge Revive It Floor Gloss Original” - it took me a while to find the current name and I had to order it from Amazon. The interior is mostly box stock, but I added a simple mini fridge and 32” flat screen tv that I modeled up in CAD and had my brother 3D print for me. The TV wall mount is just a cut piece of scrap sprue. Overall this kit went together pretty well, but it took some finessing to get the interior tub and chassis to seat properly in the body. The large glass roof panel is definitely supposed to be glued in from the inside, but it then won’t fit with the cab partition panel in place. I left it removable and just set it in from the outside. I wanted to use the chrome side exit exhaust pipes, but there doesn’t seem to be a way to actually attach them to the body or frame without doing custom fab. I didn’t realize this until final assembly so I won’t bother adding an exhaust. This kit’s eye candy is up top anyway, no one is ever going to look underneath! I probably should have left the engine out too since you can’t really see it. This is definitely the wildest looking kit I’ve ever done, and I had a blast doing it. I grew up well after the custom van scene died out, but it definitely needs to make a comeback!
-
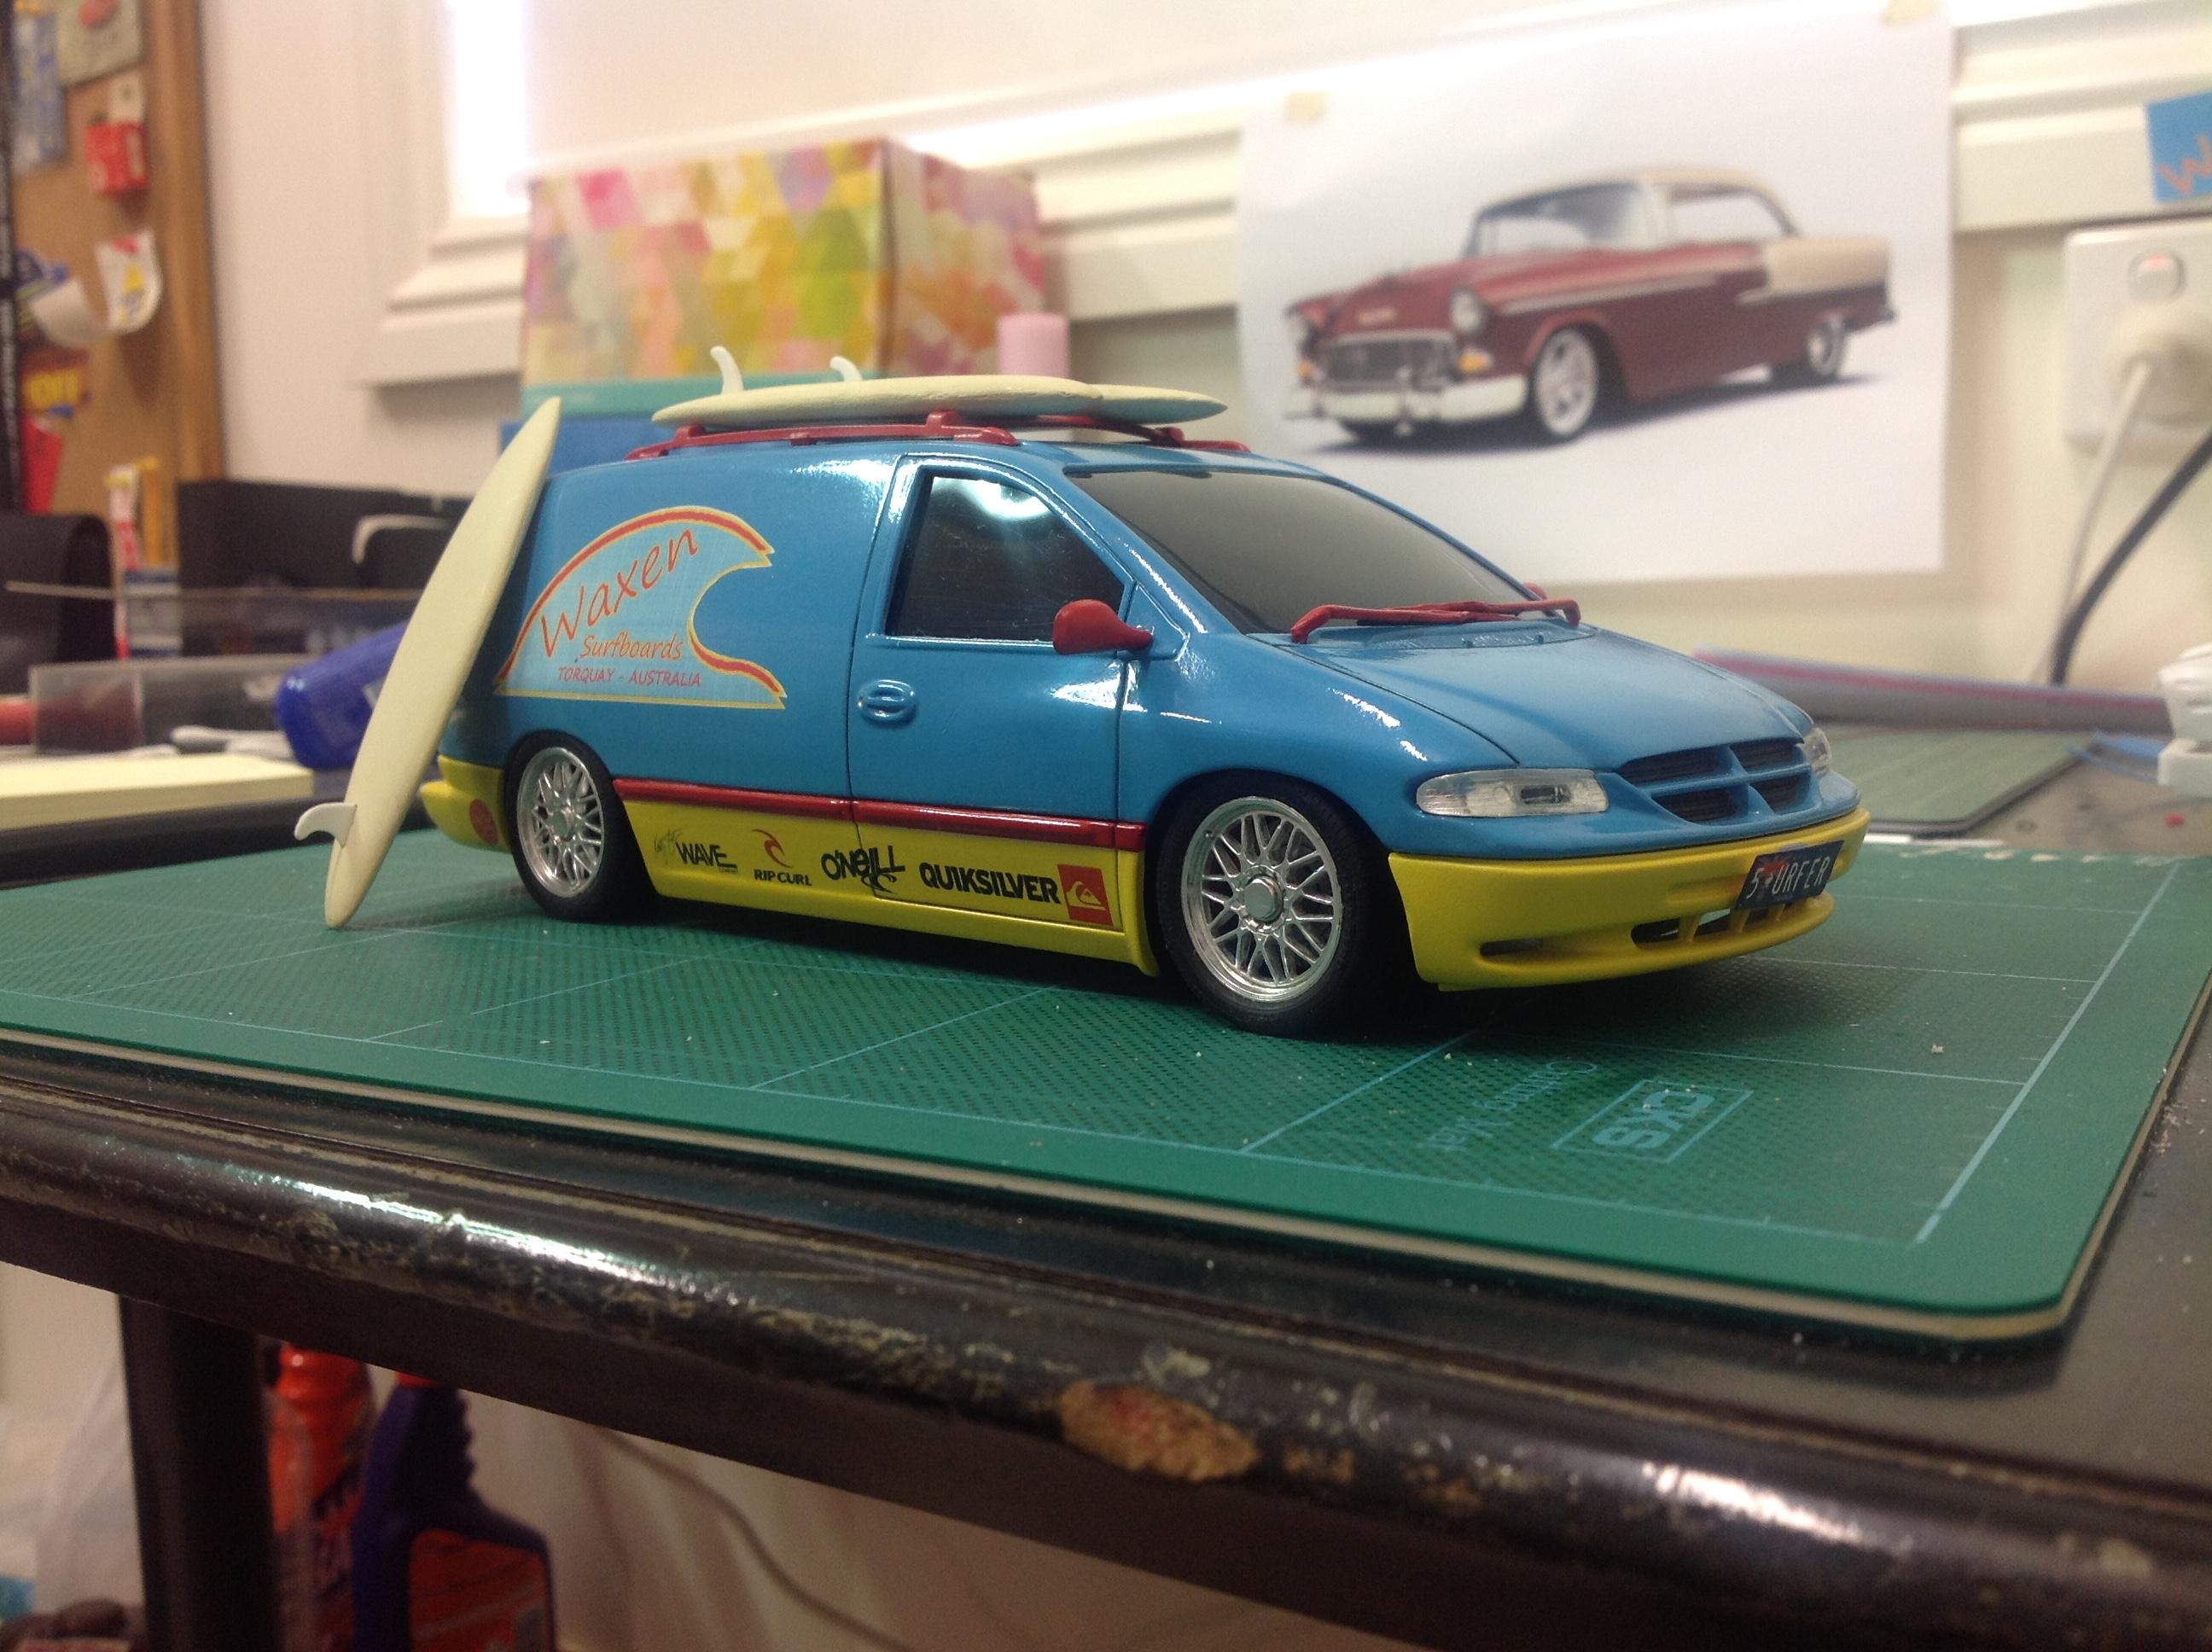
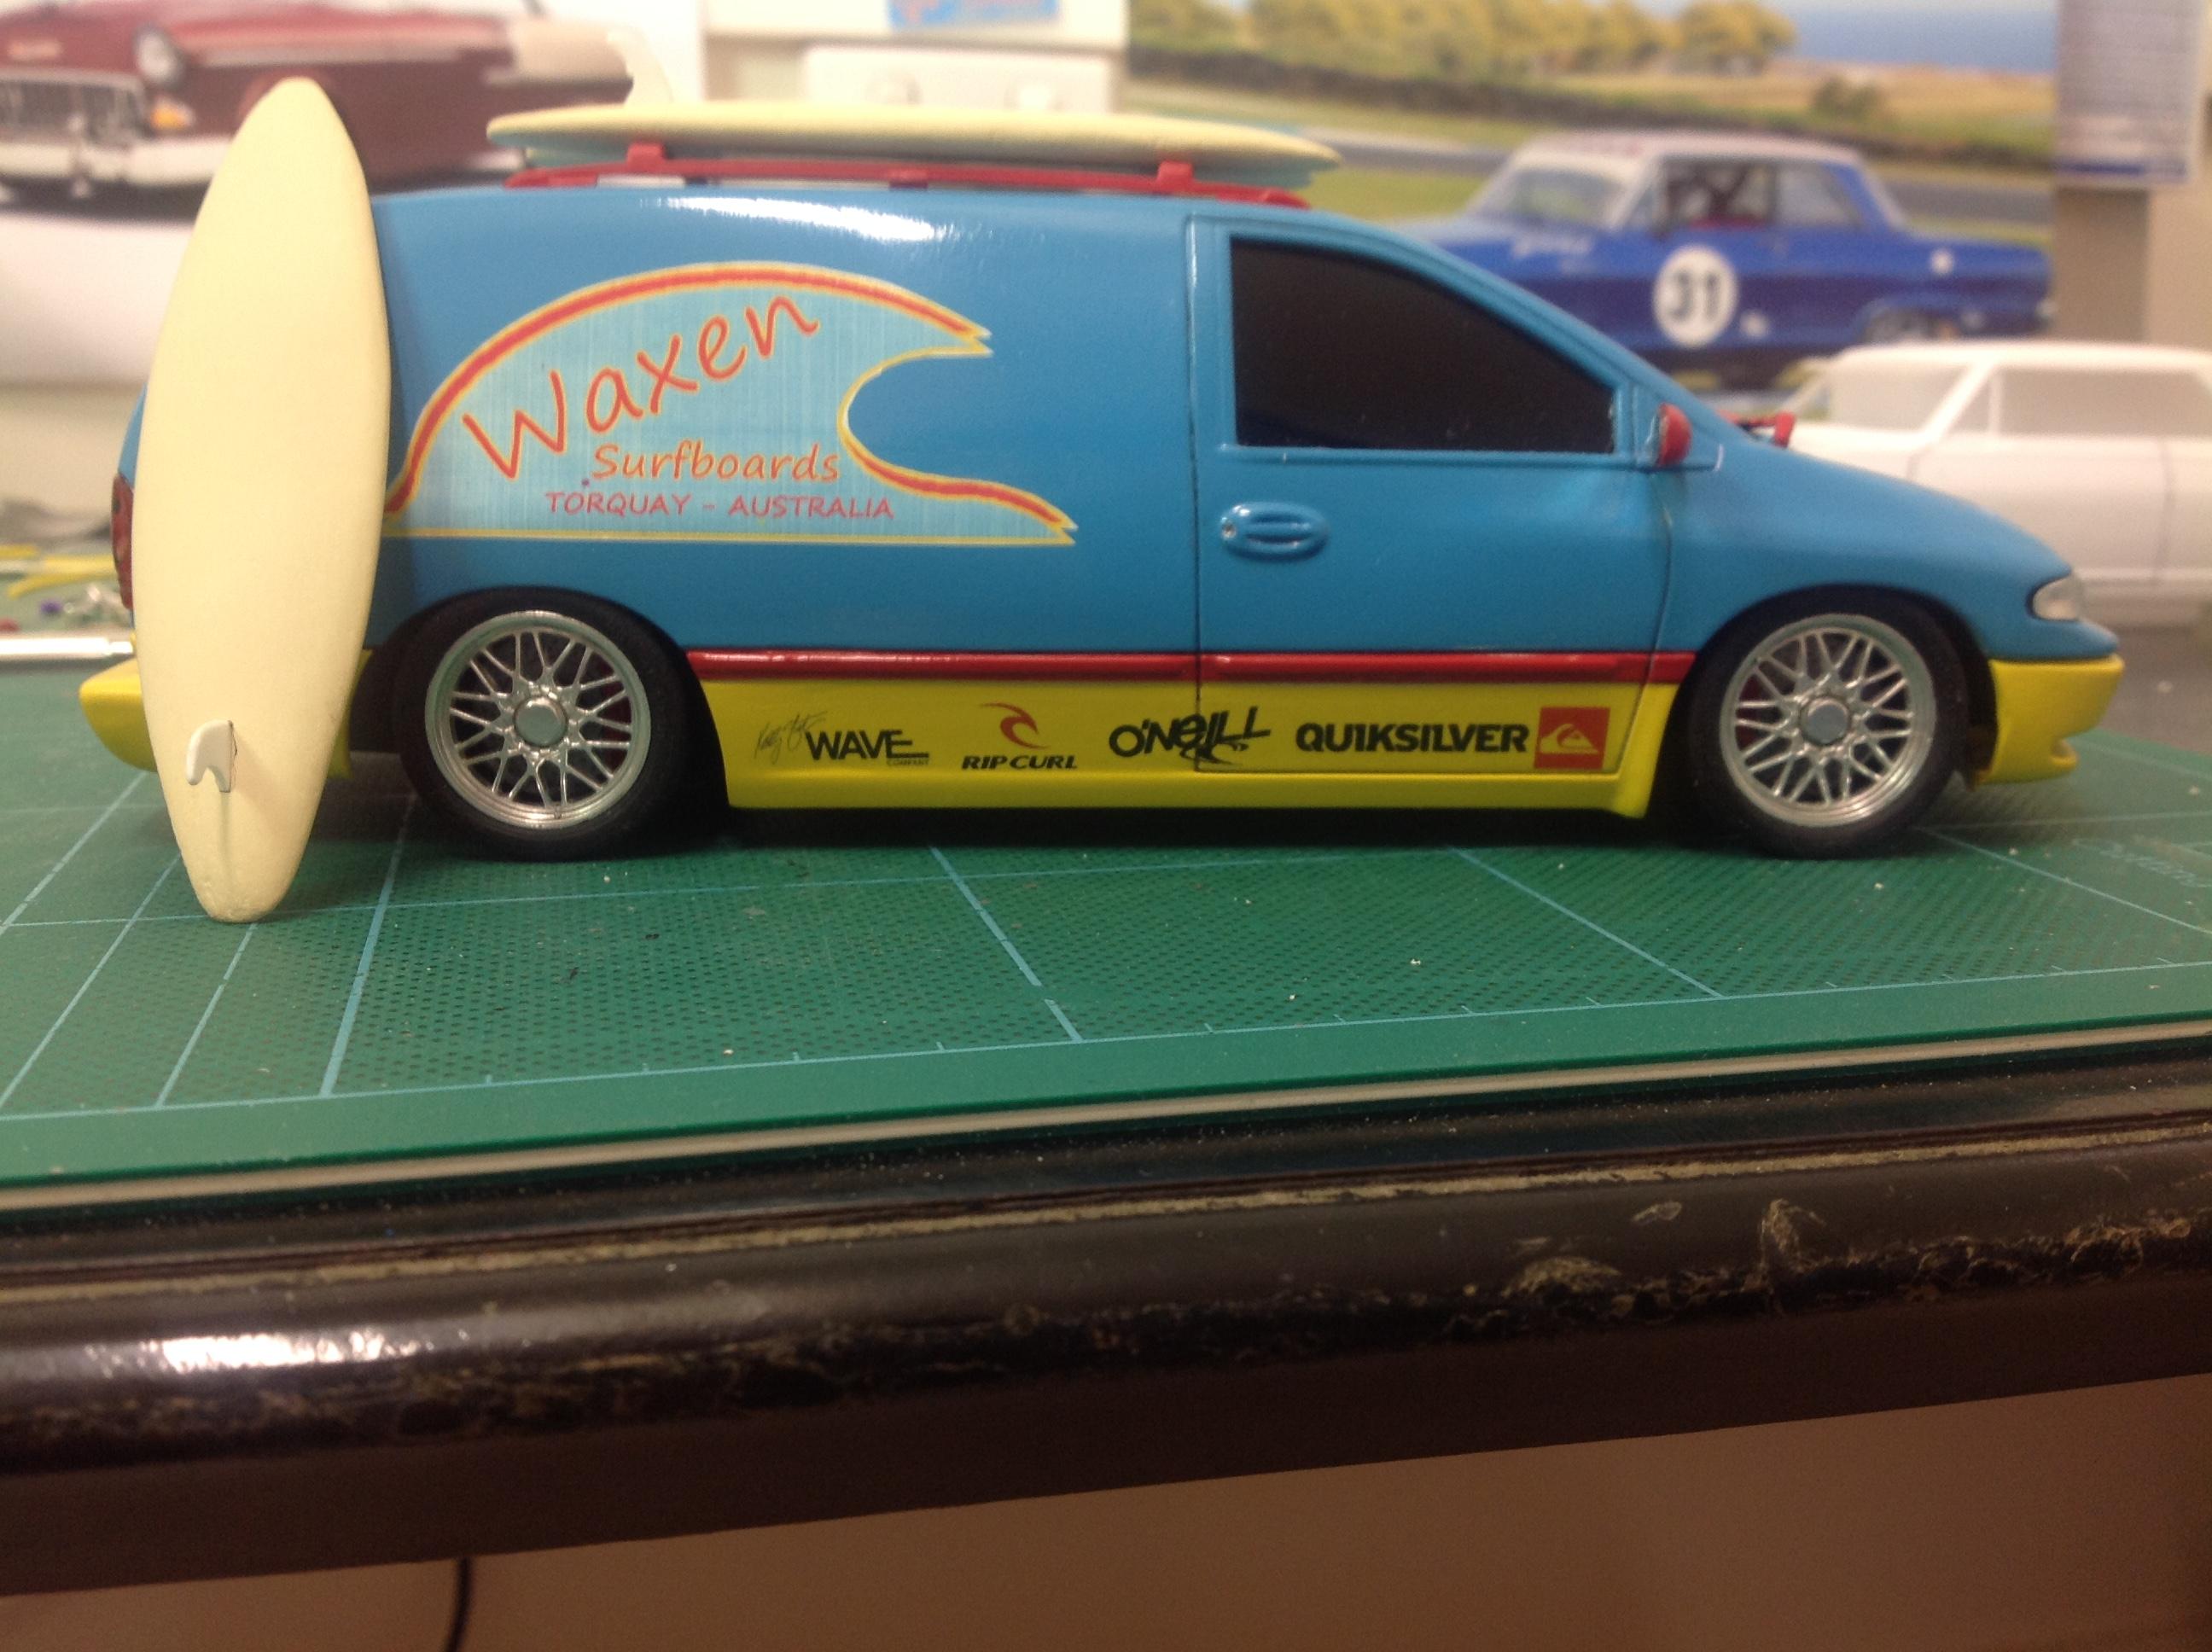
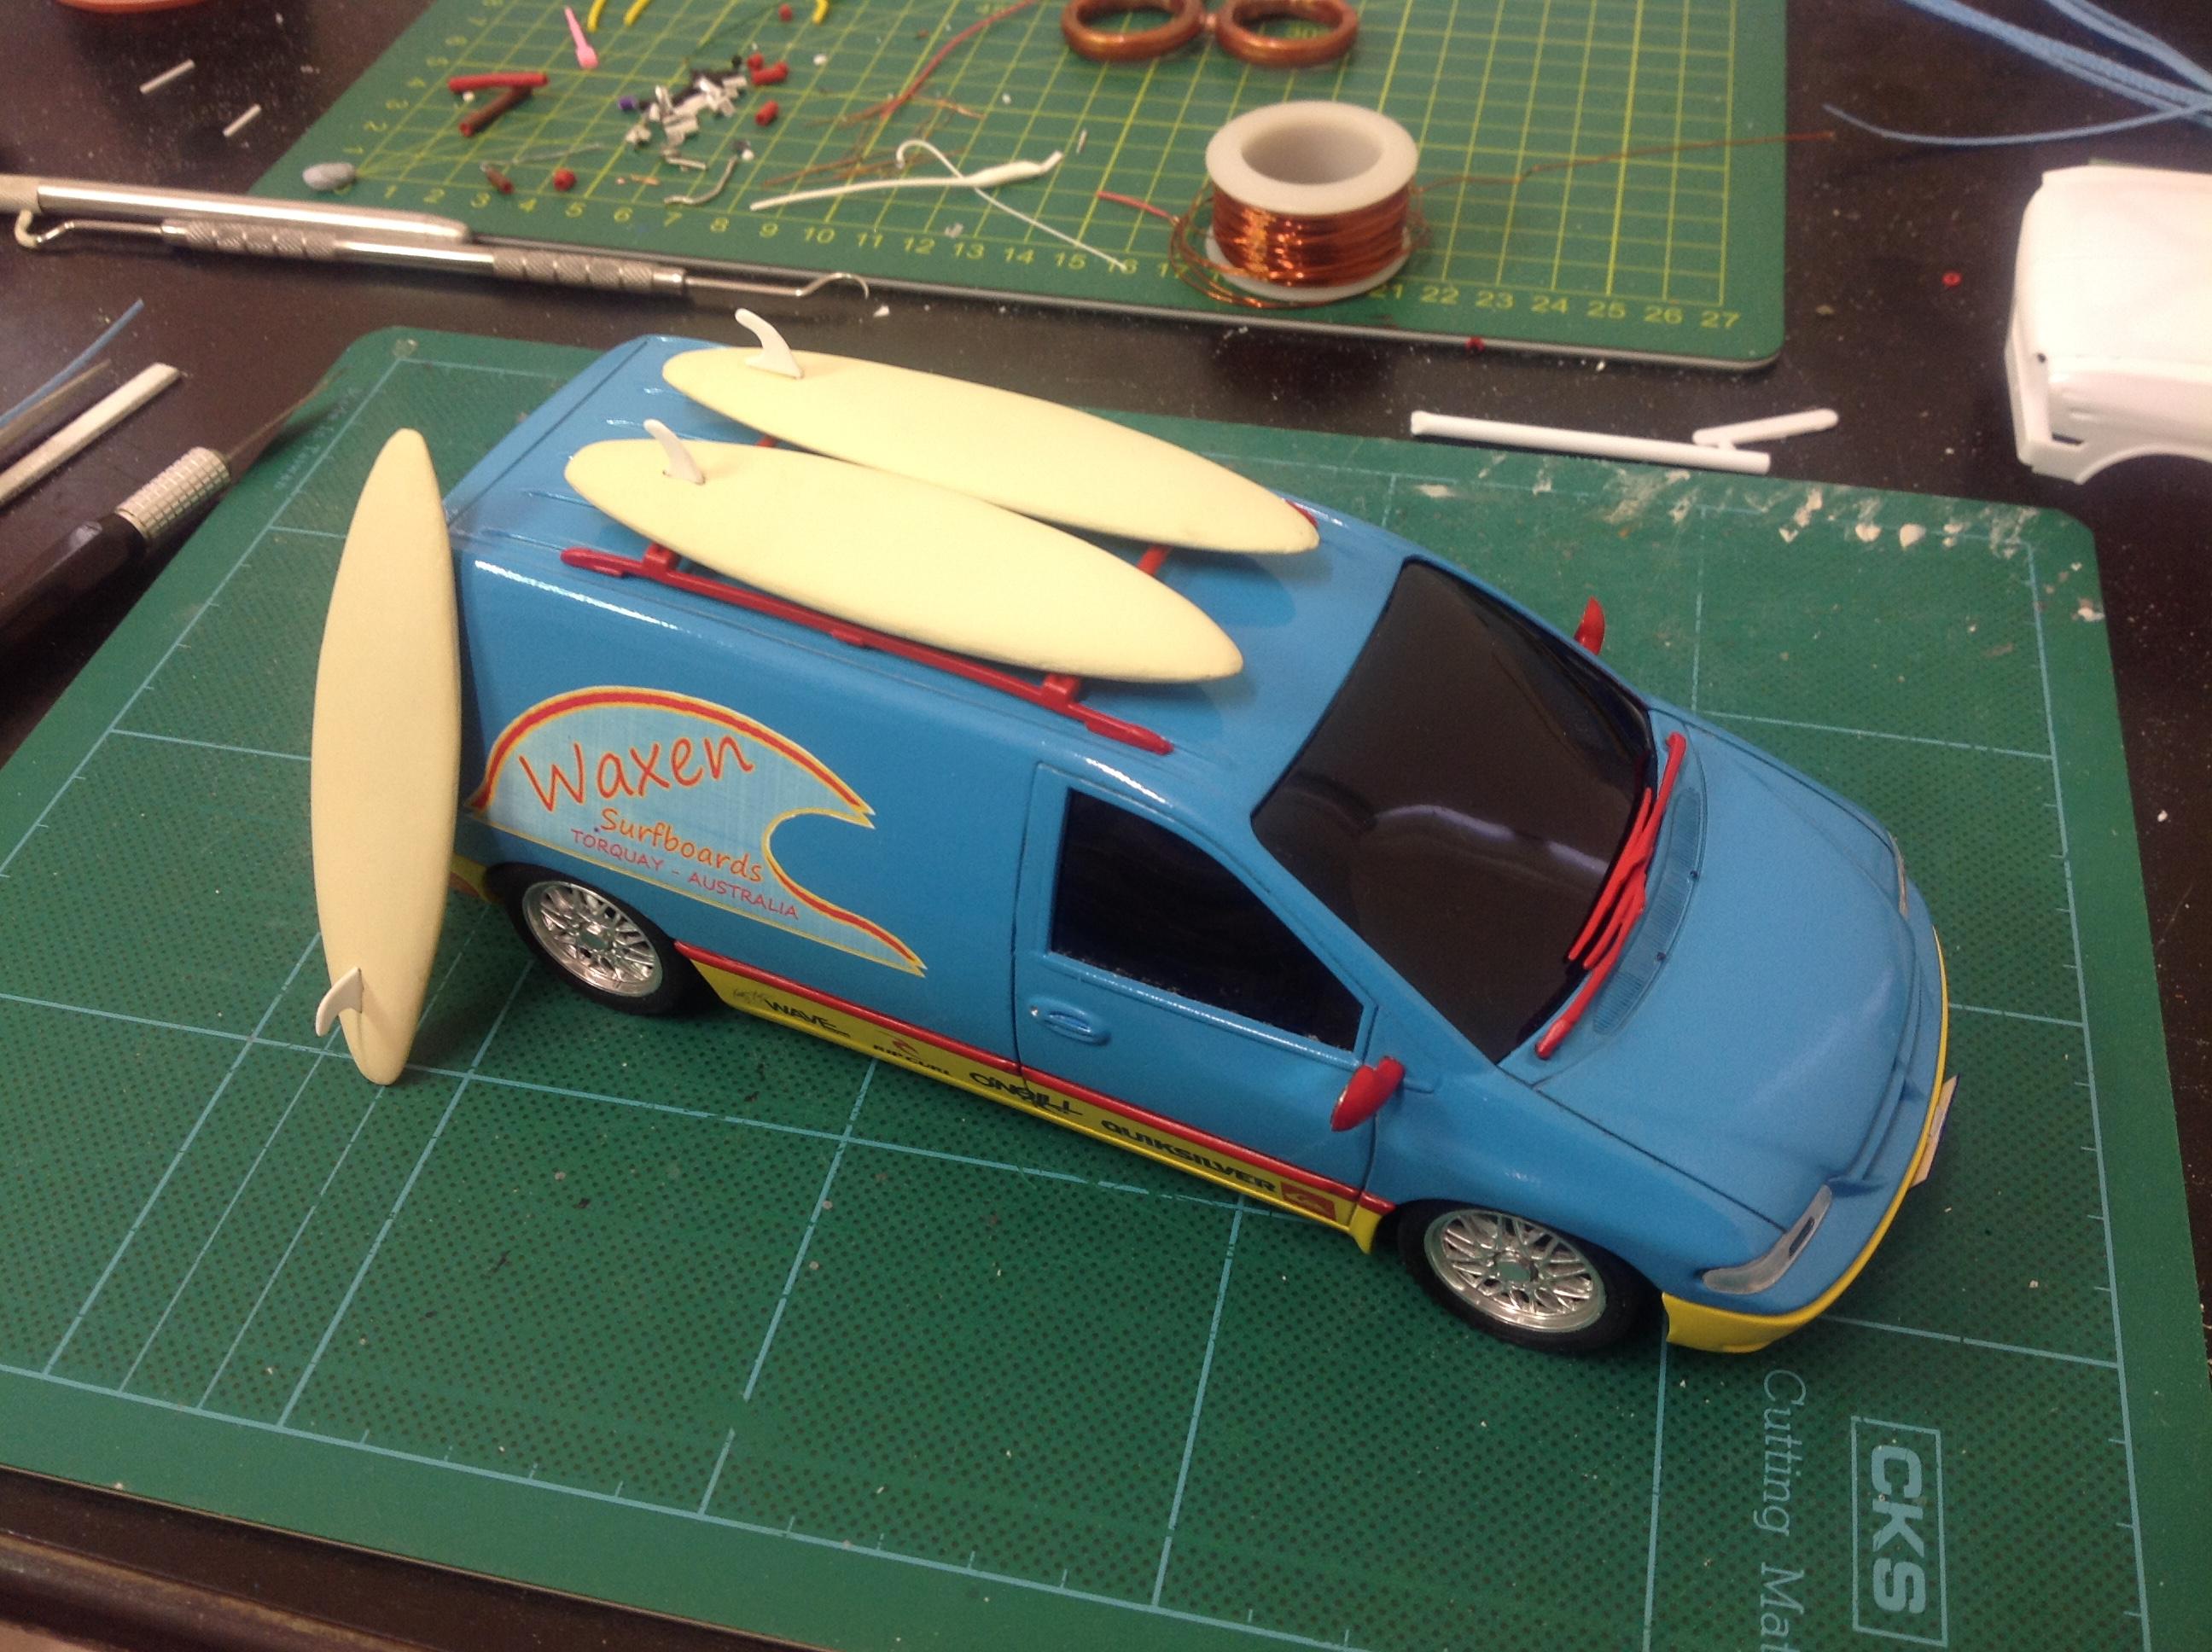
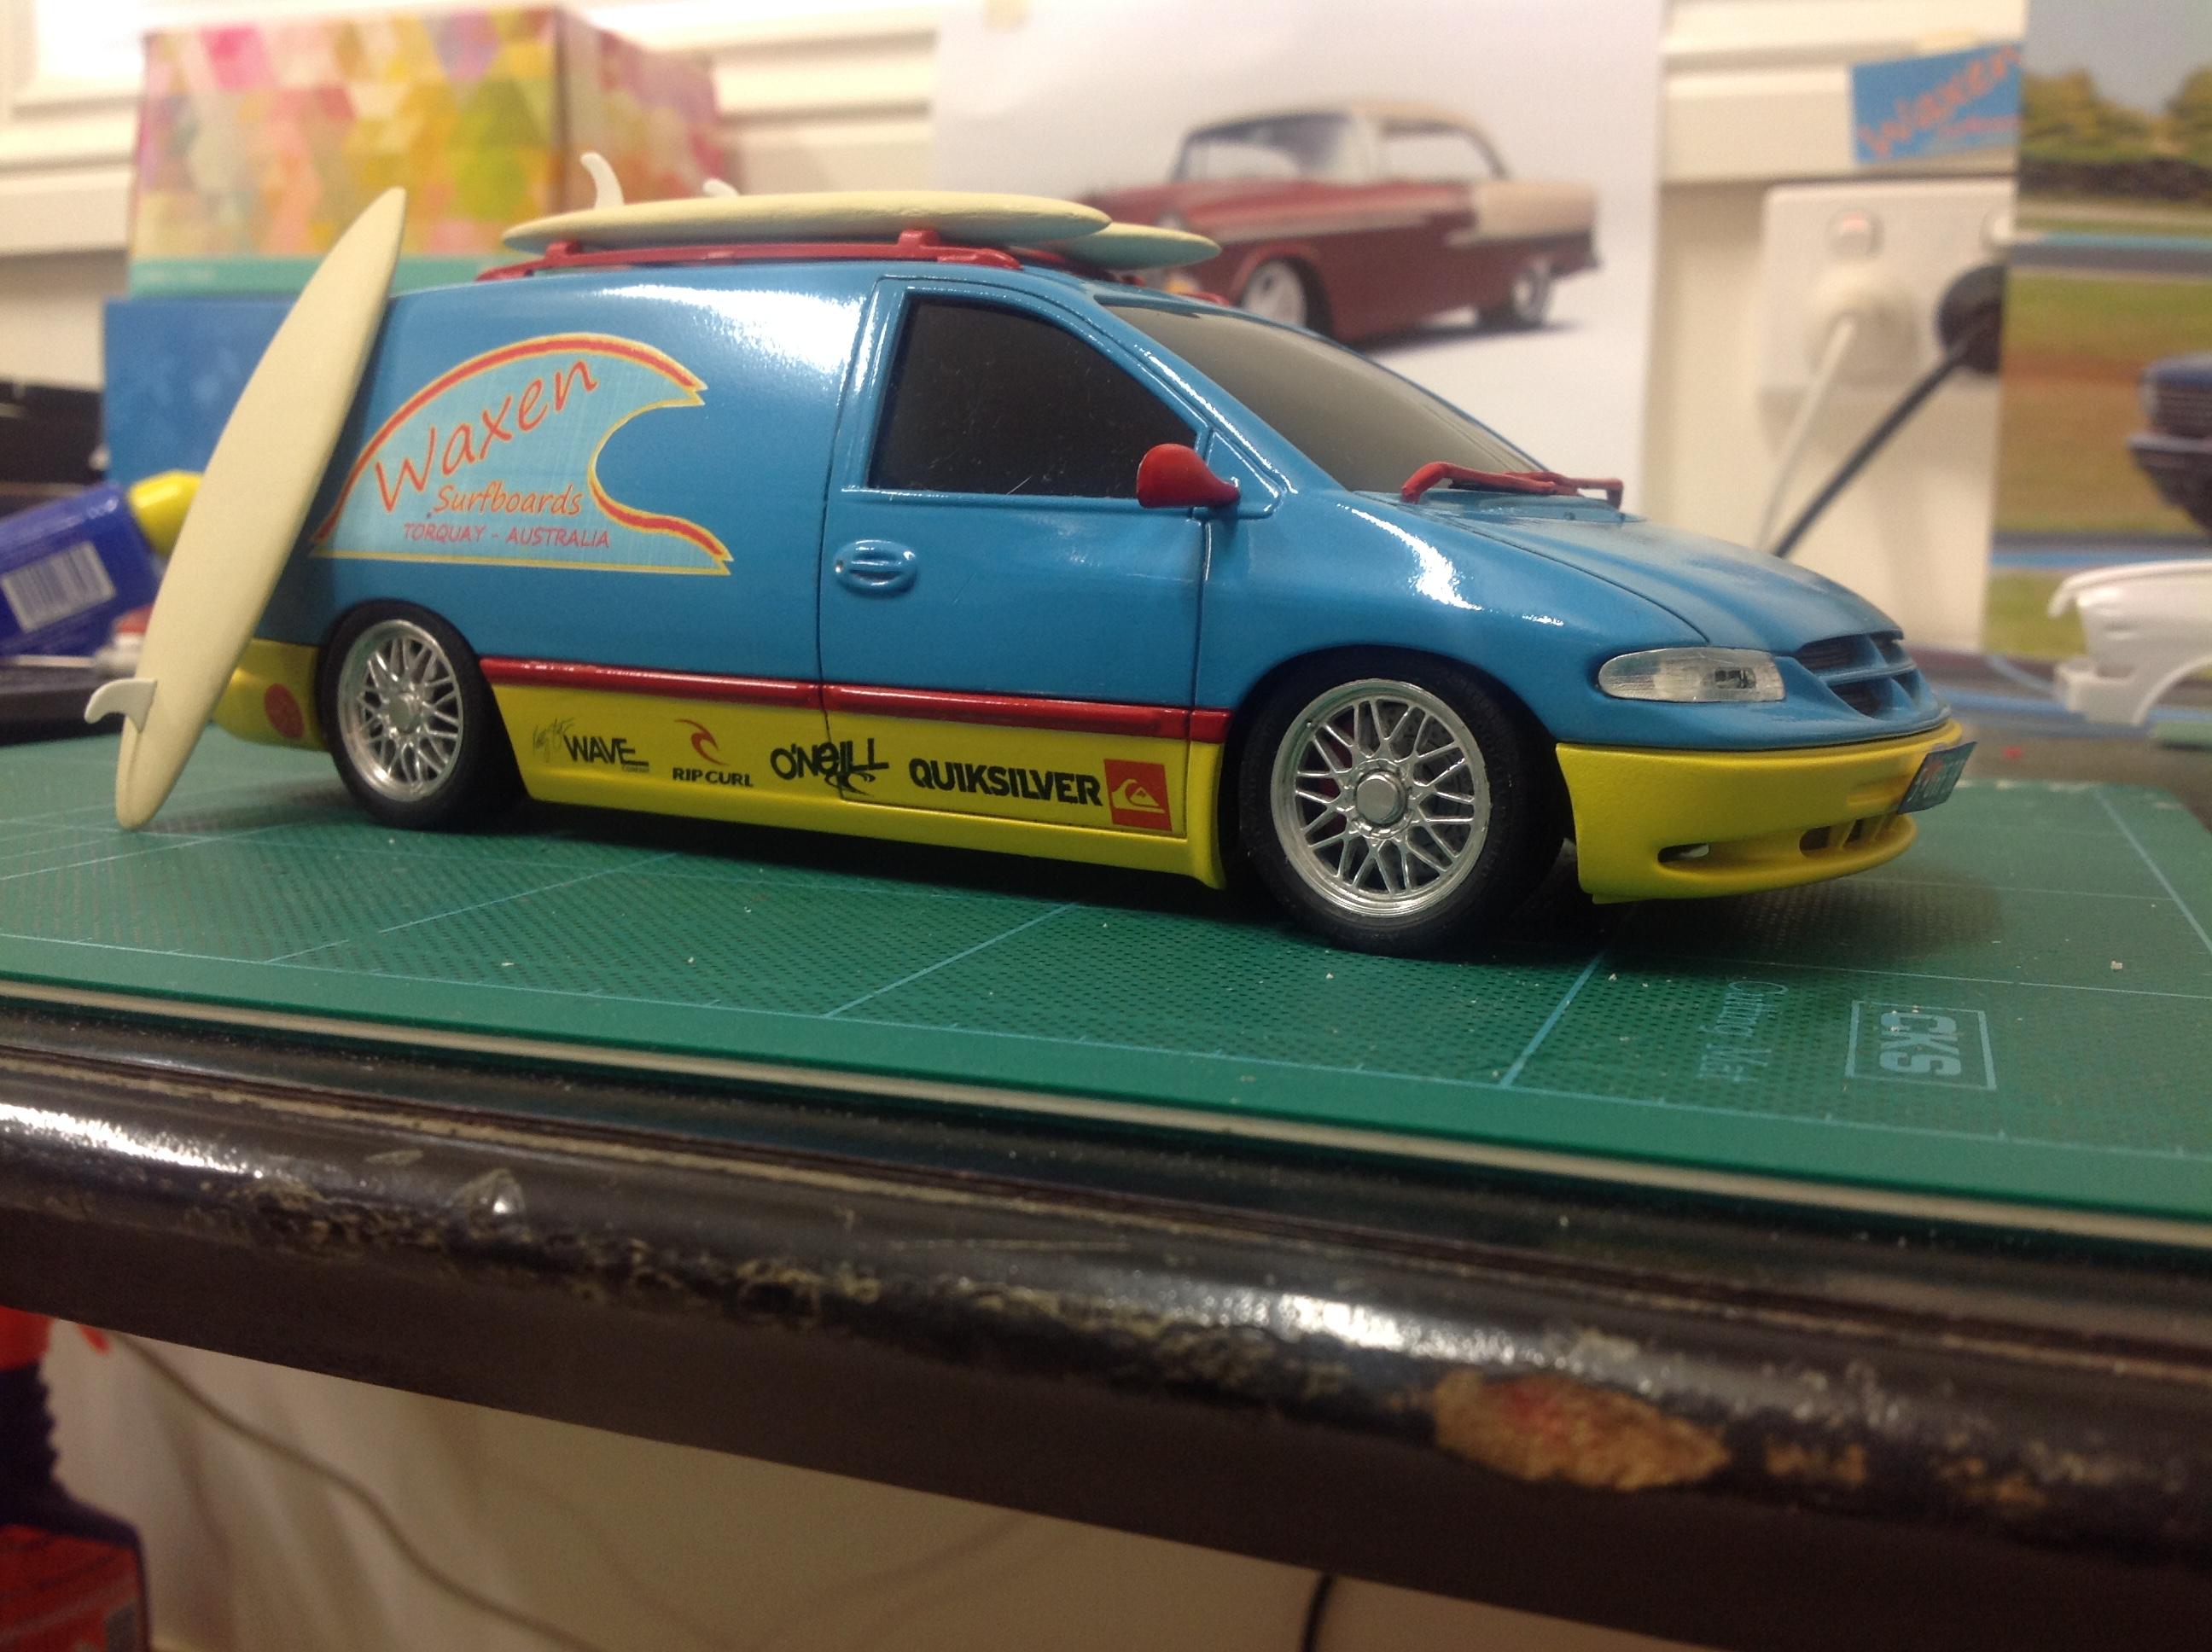
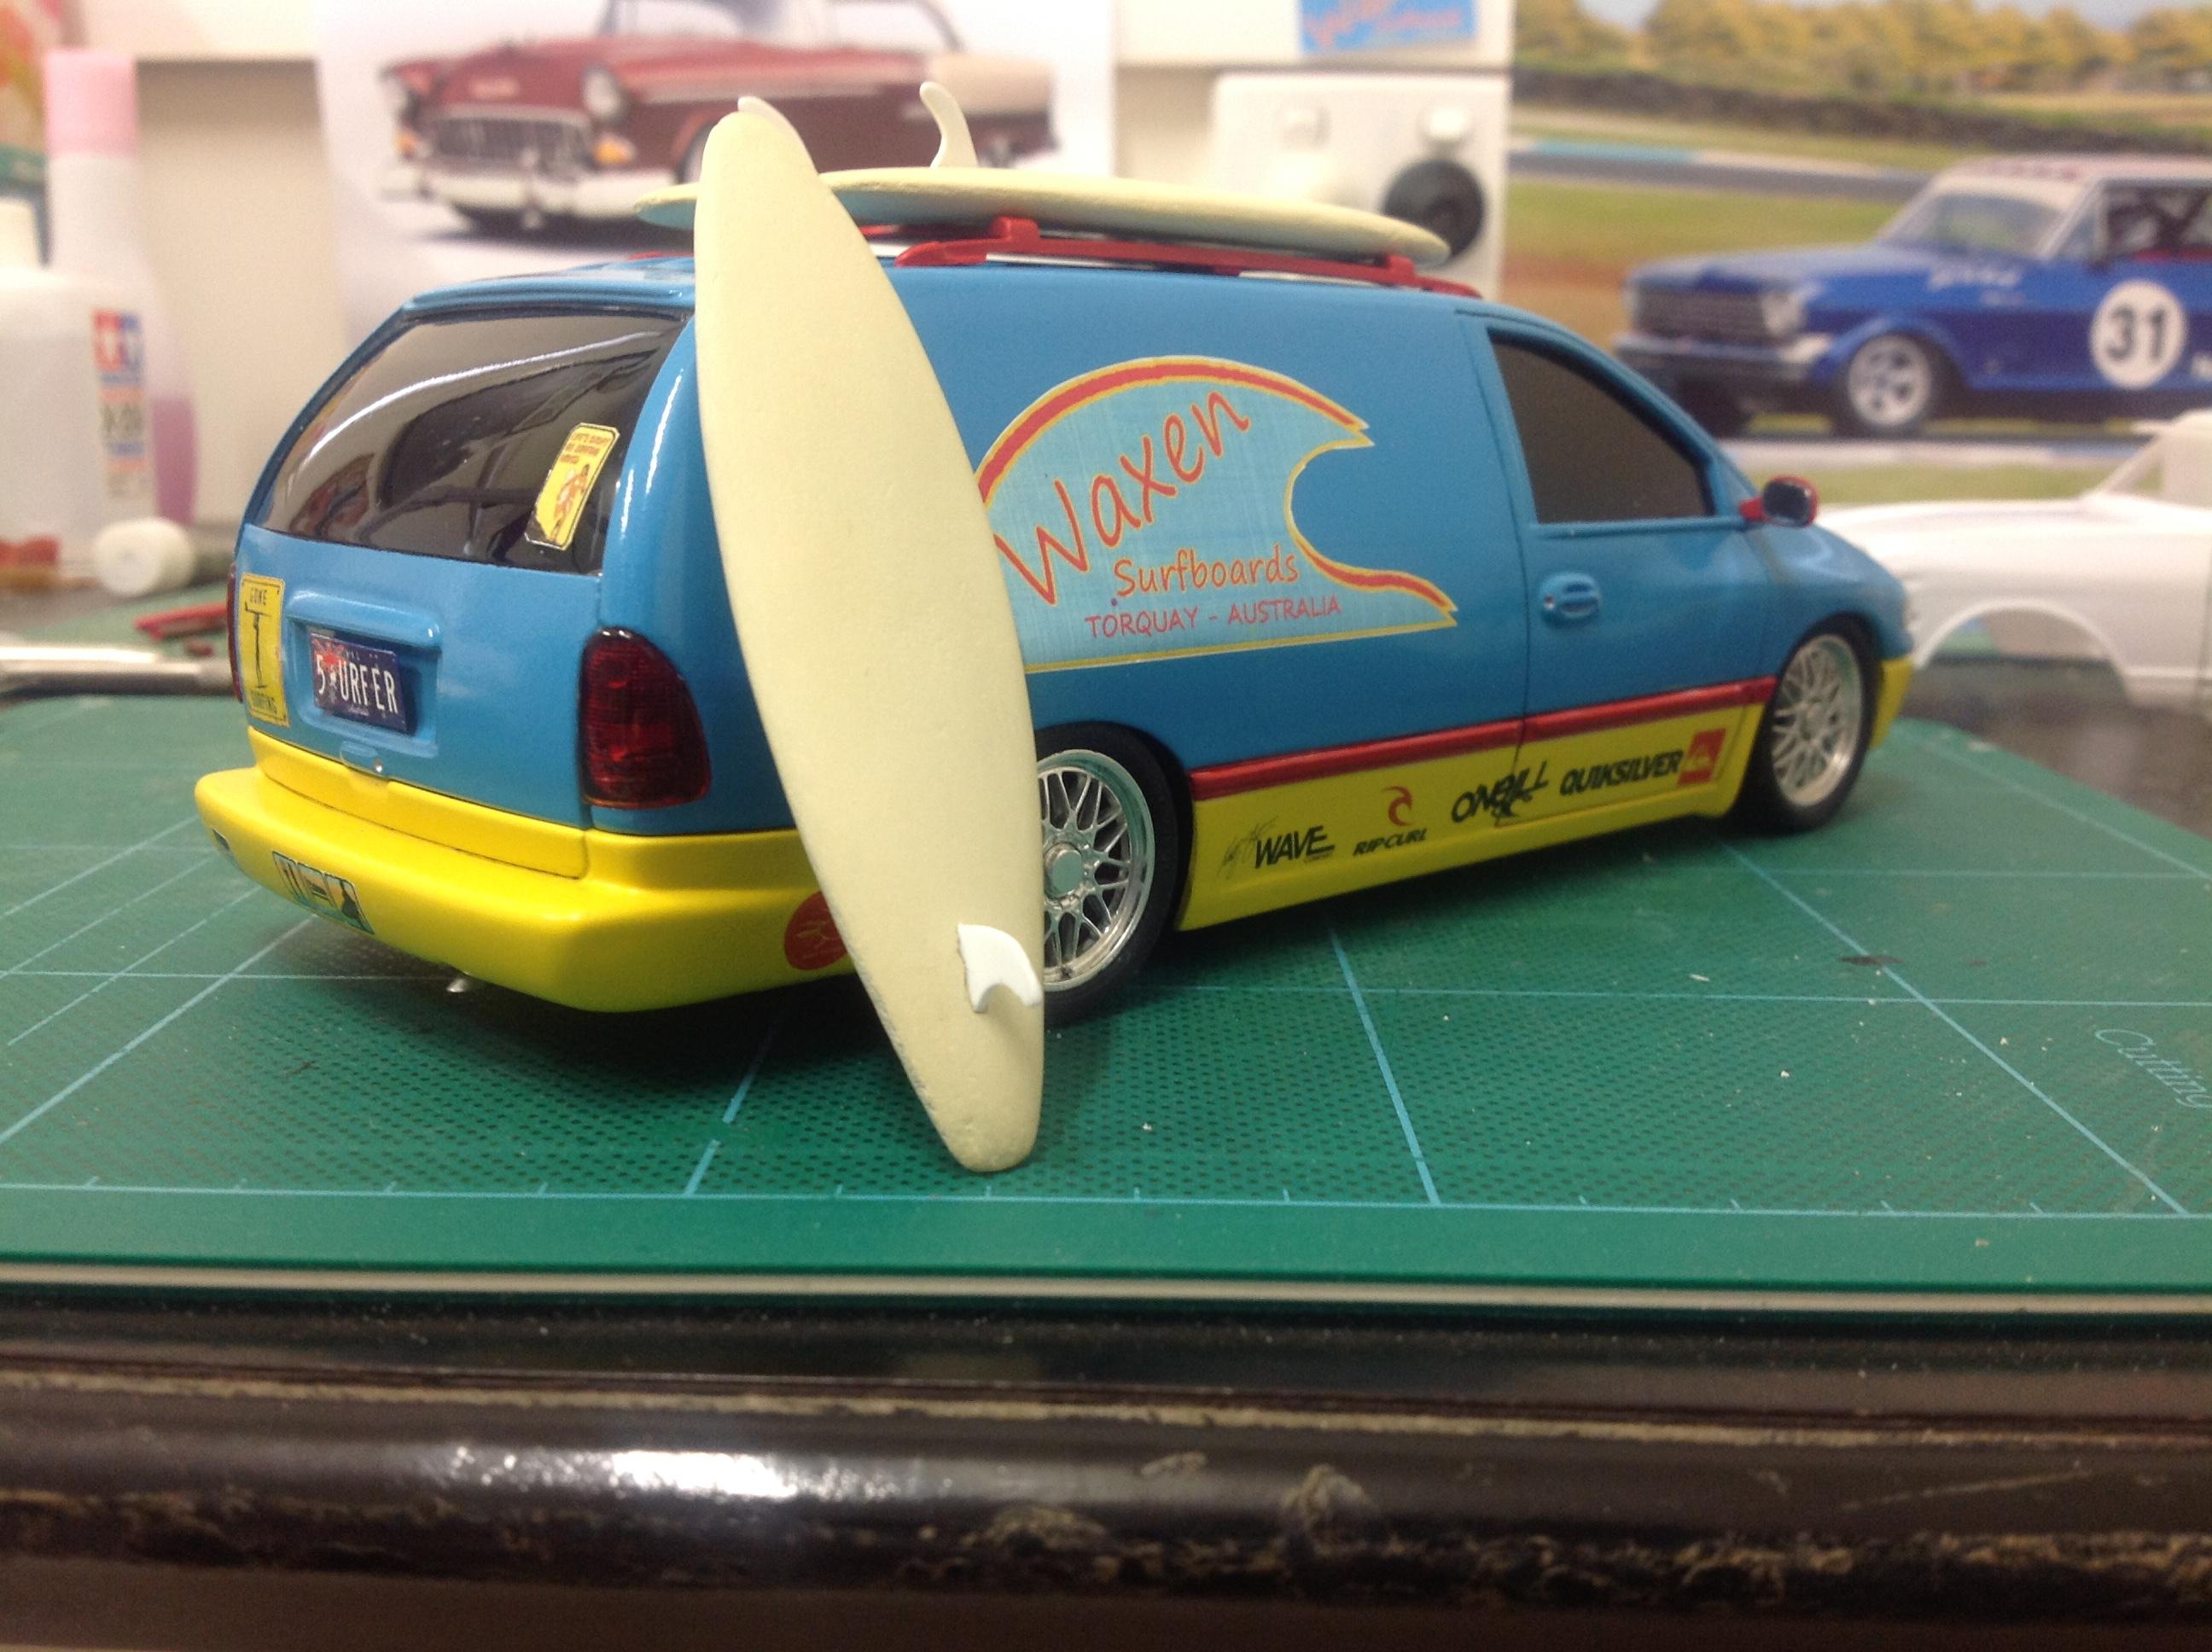
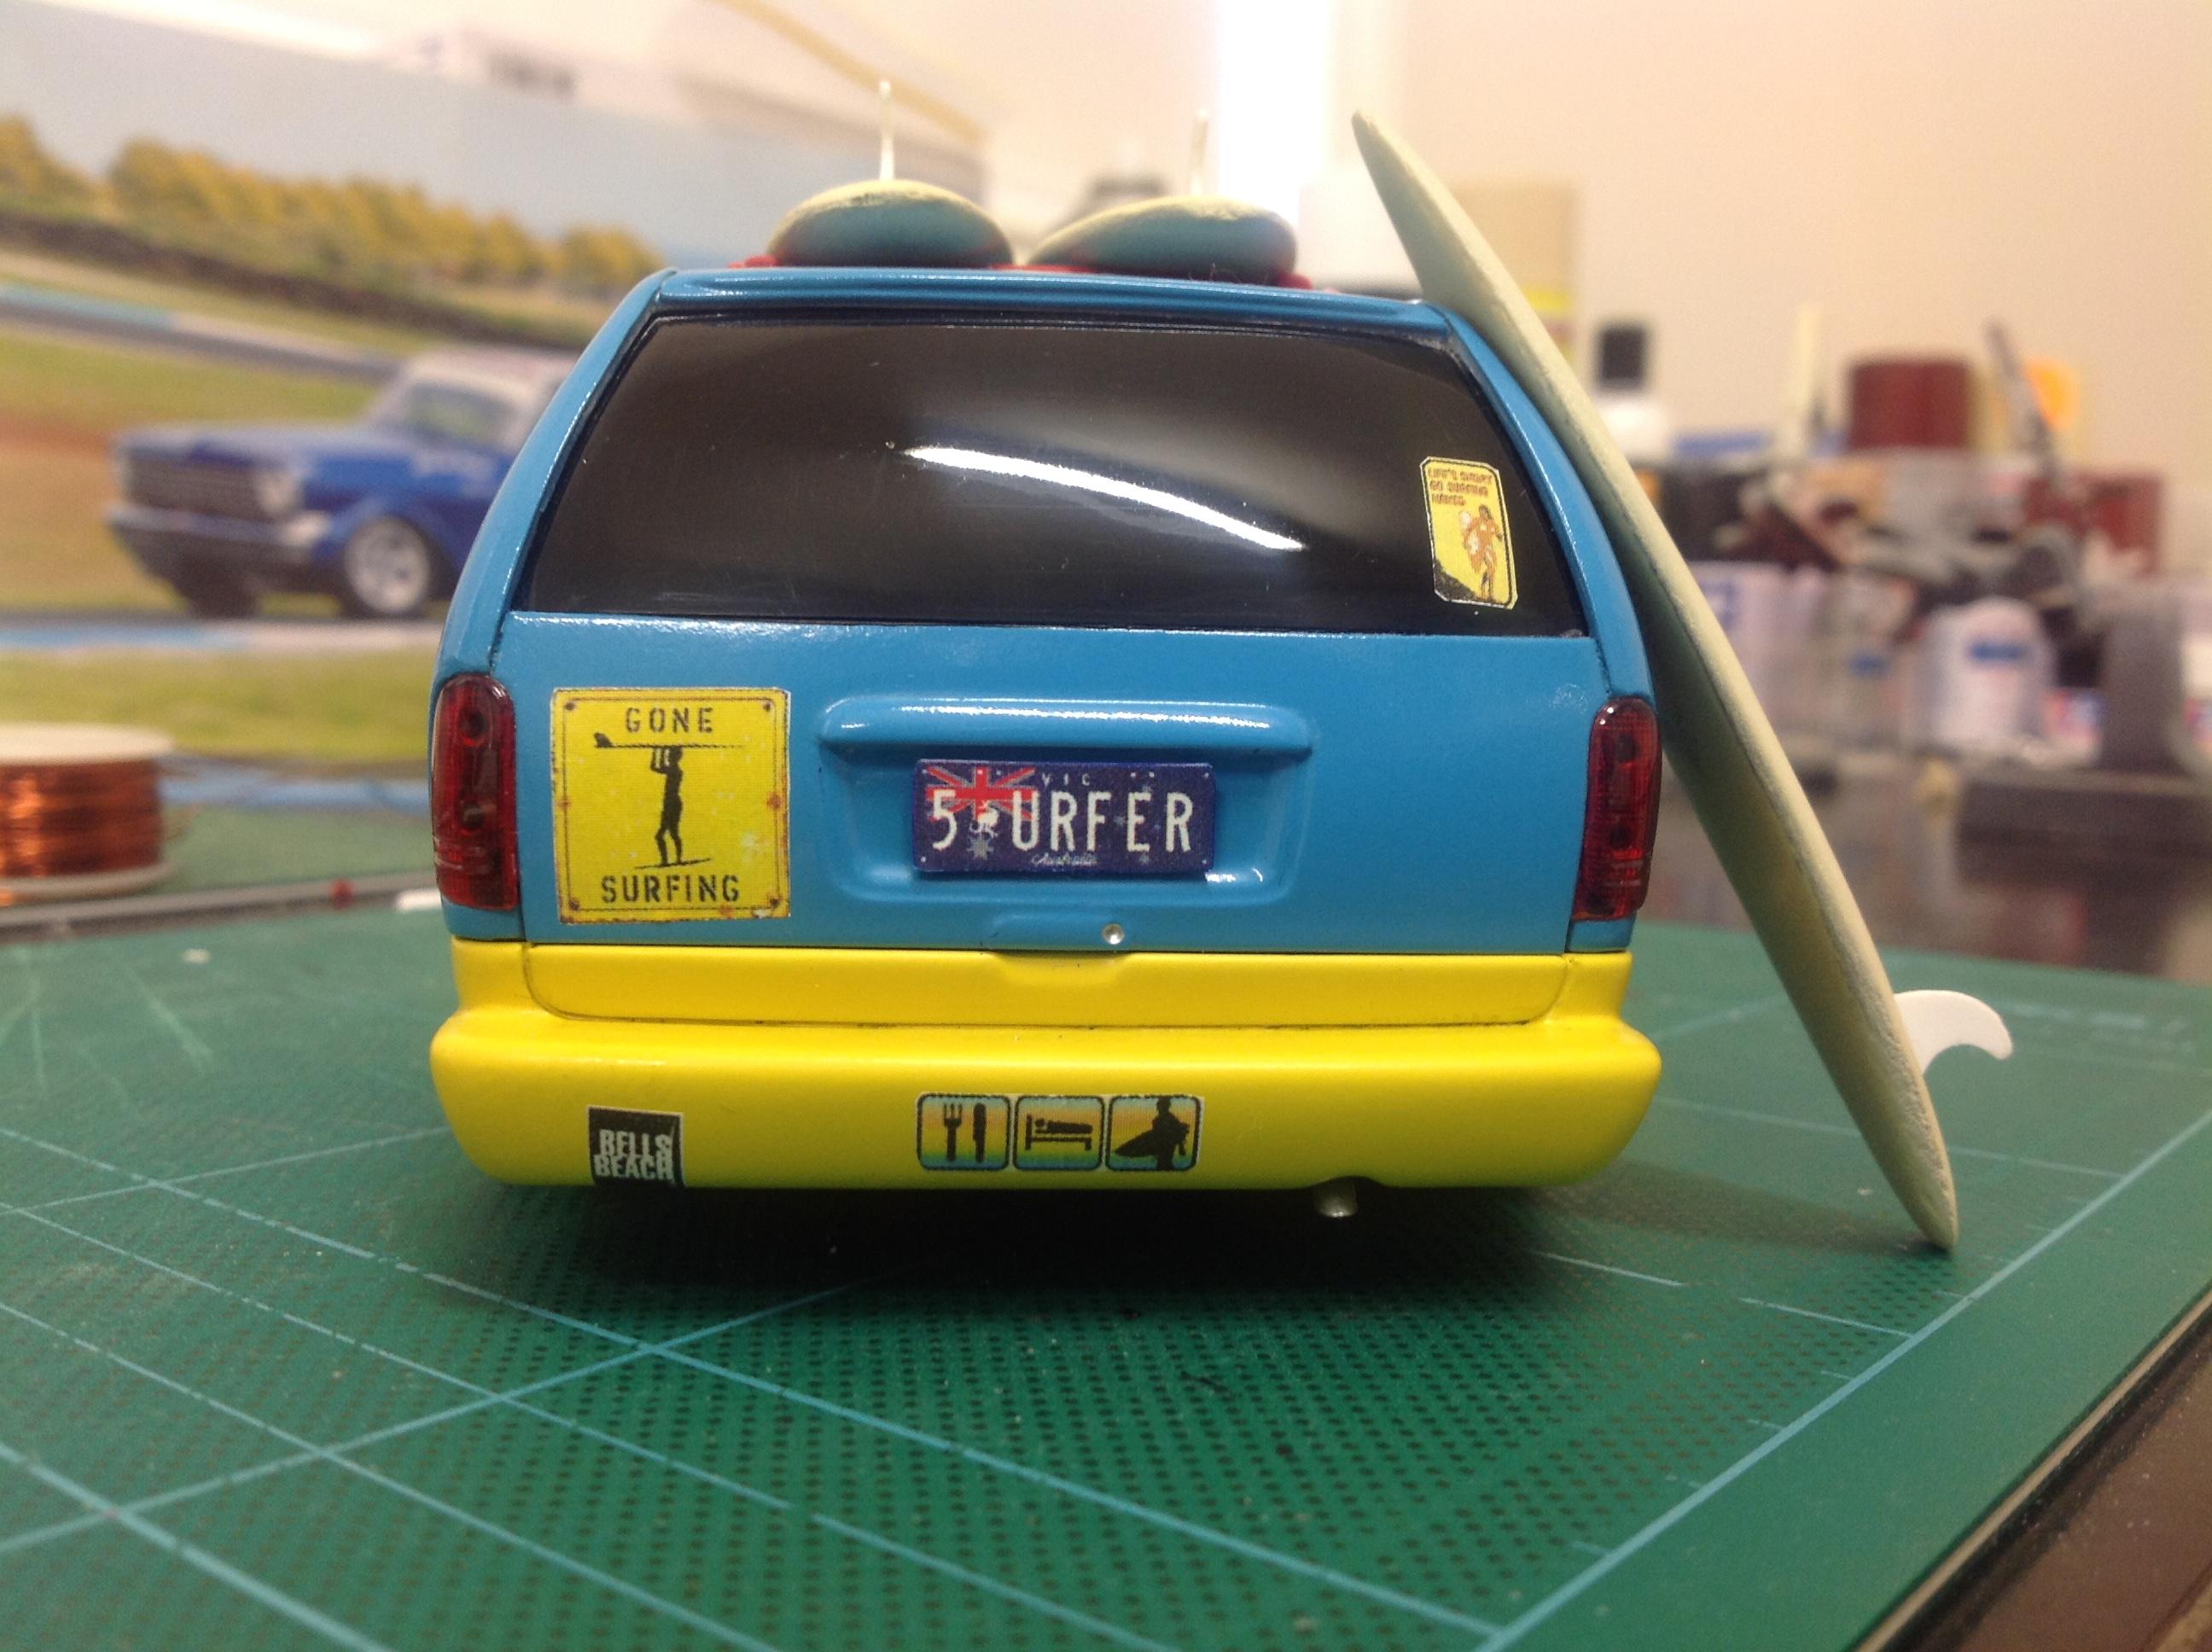
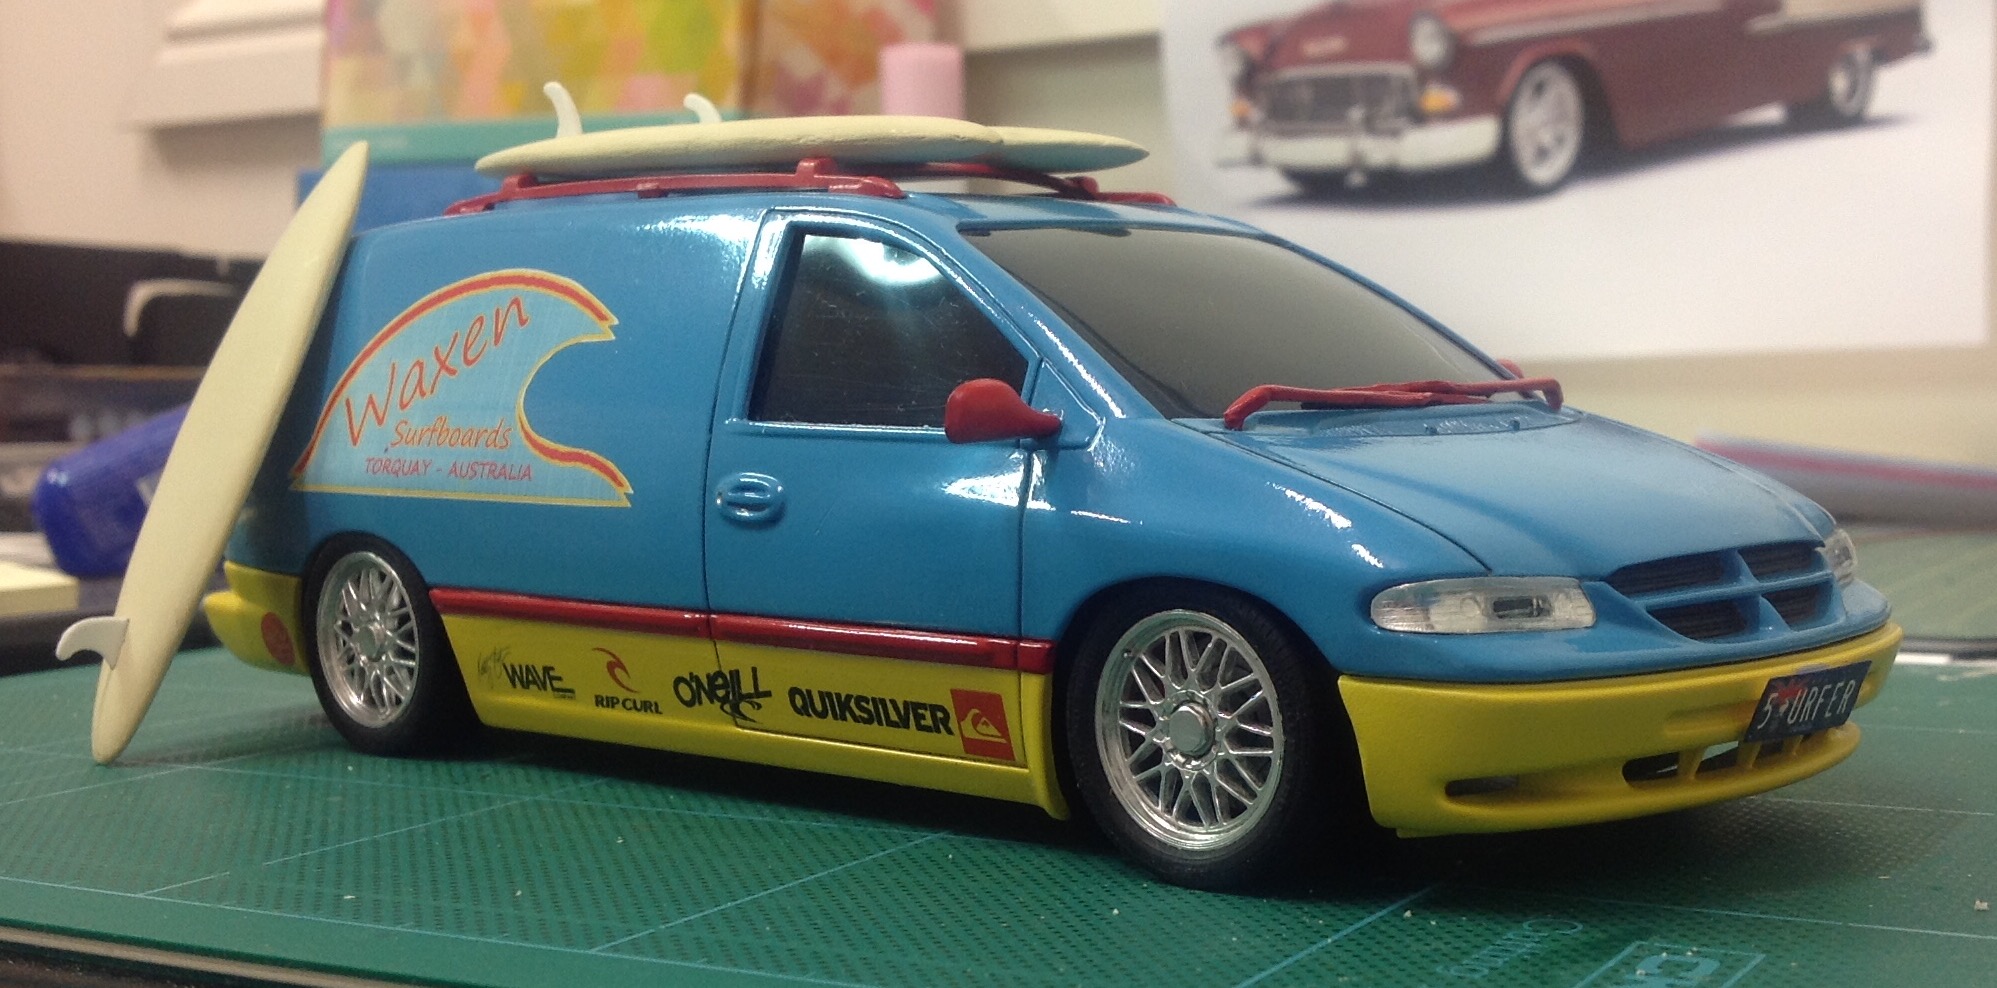
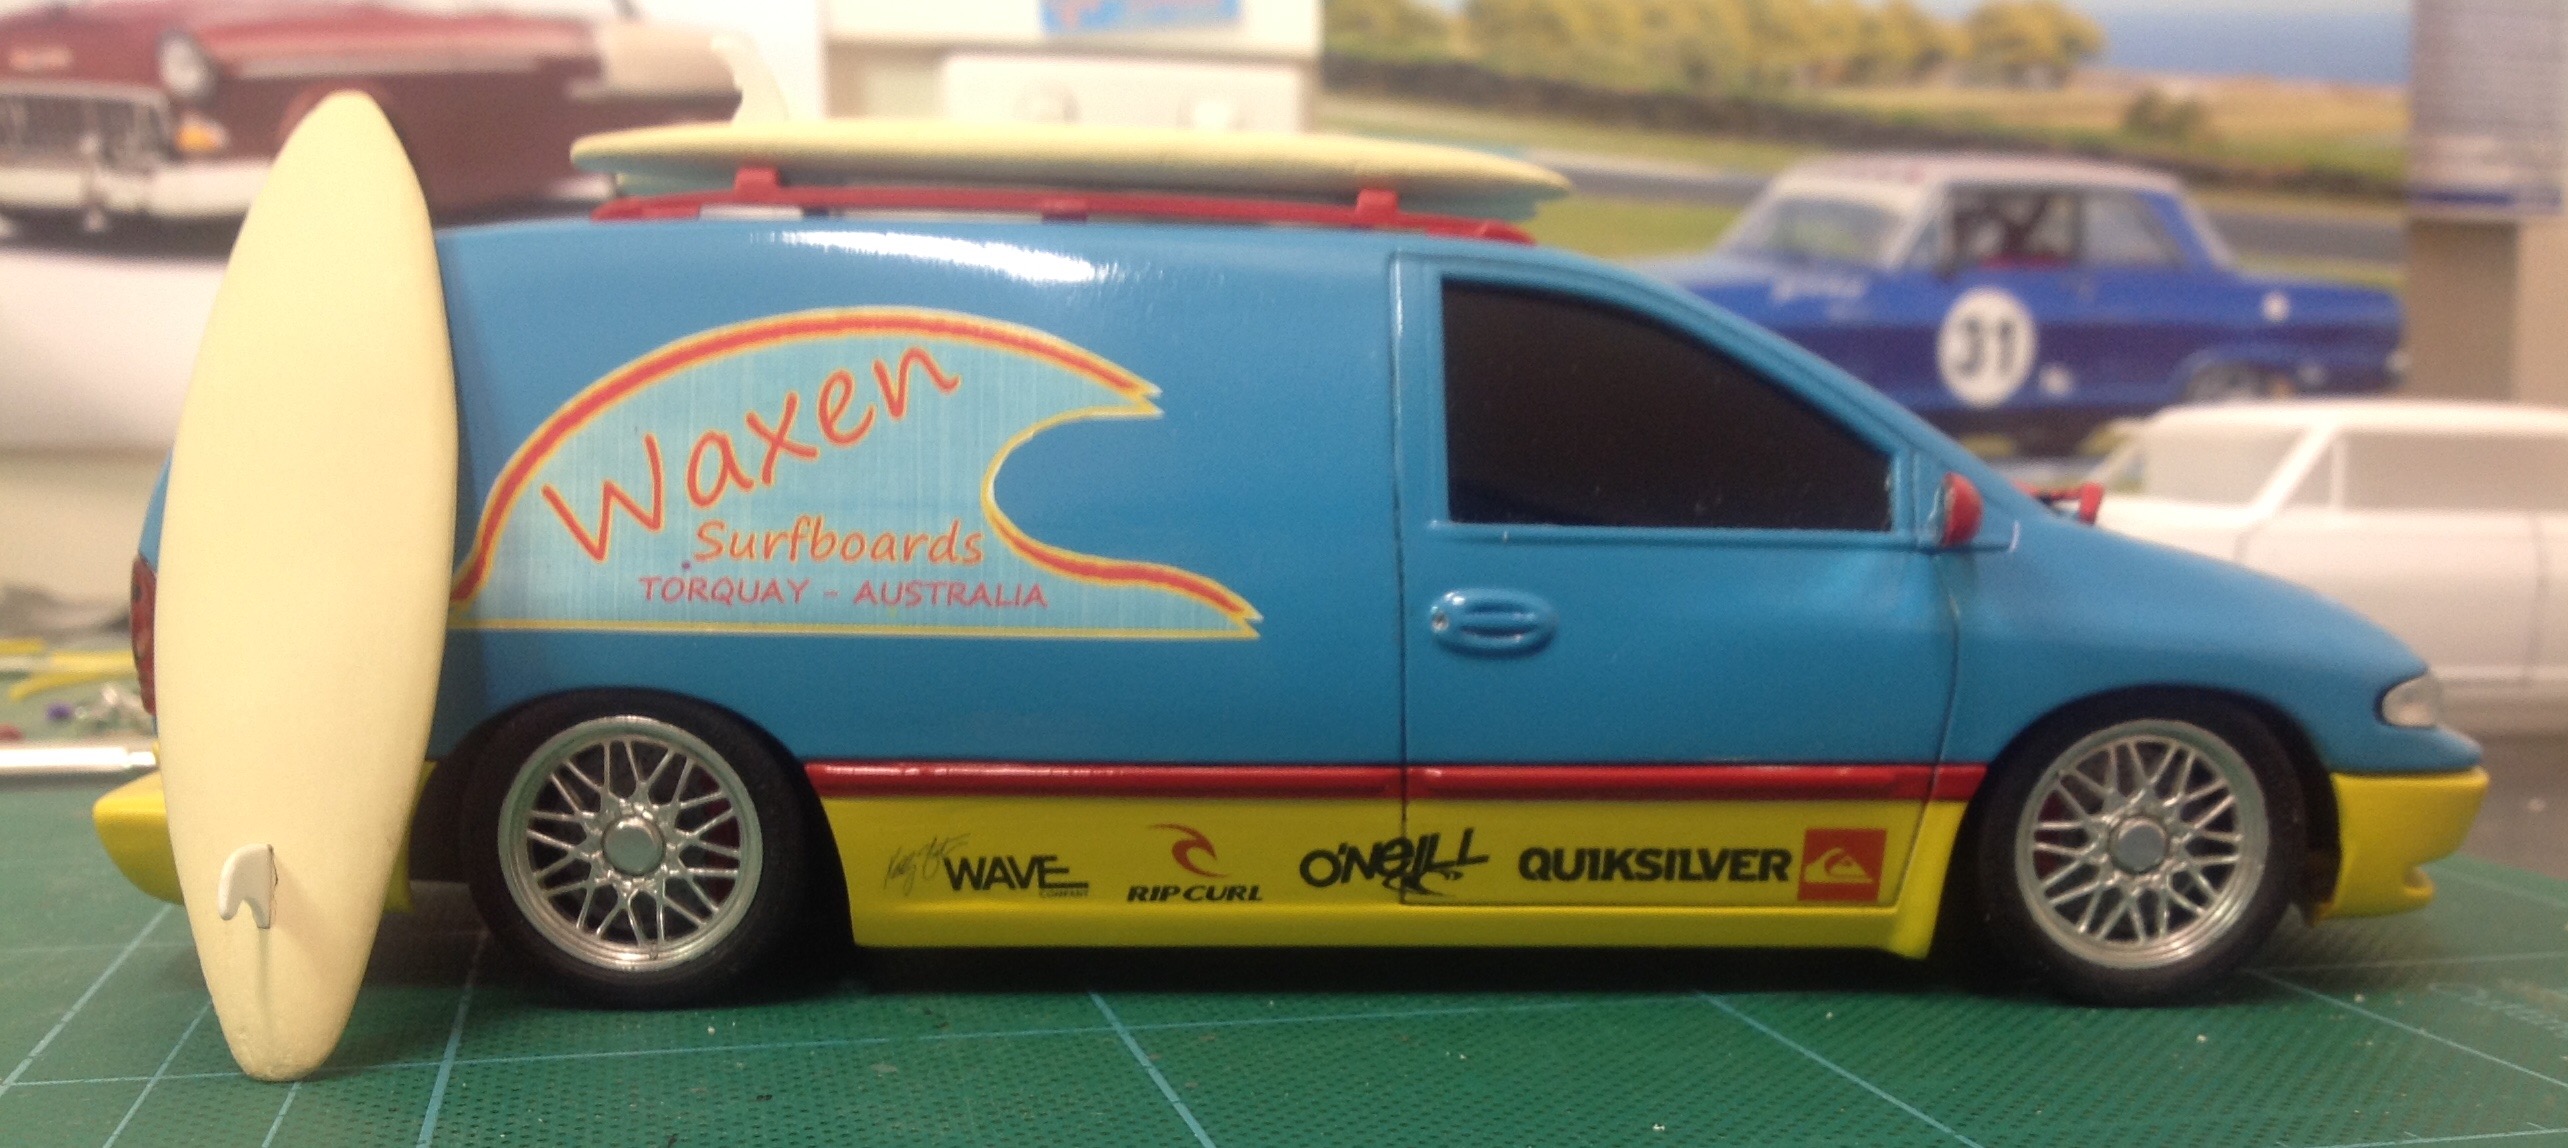
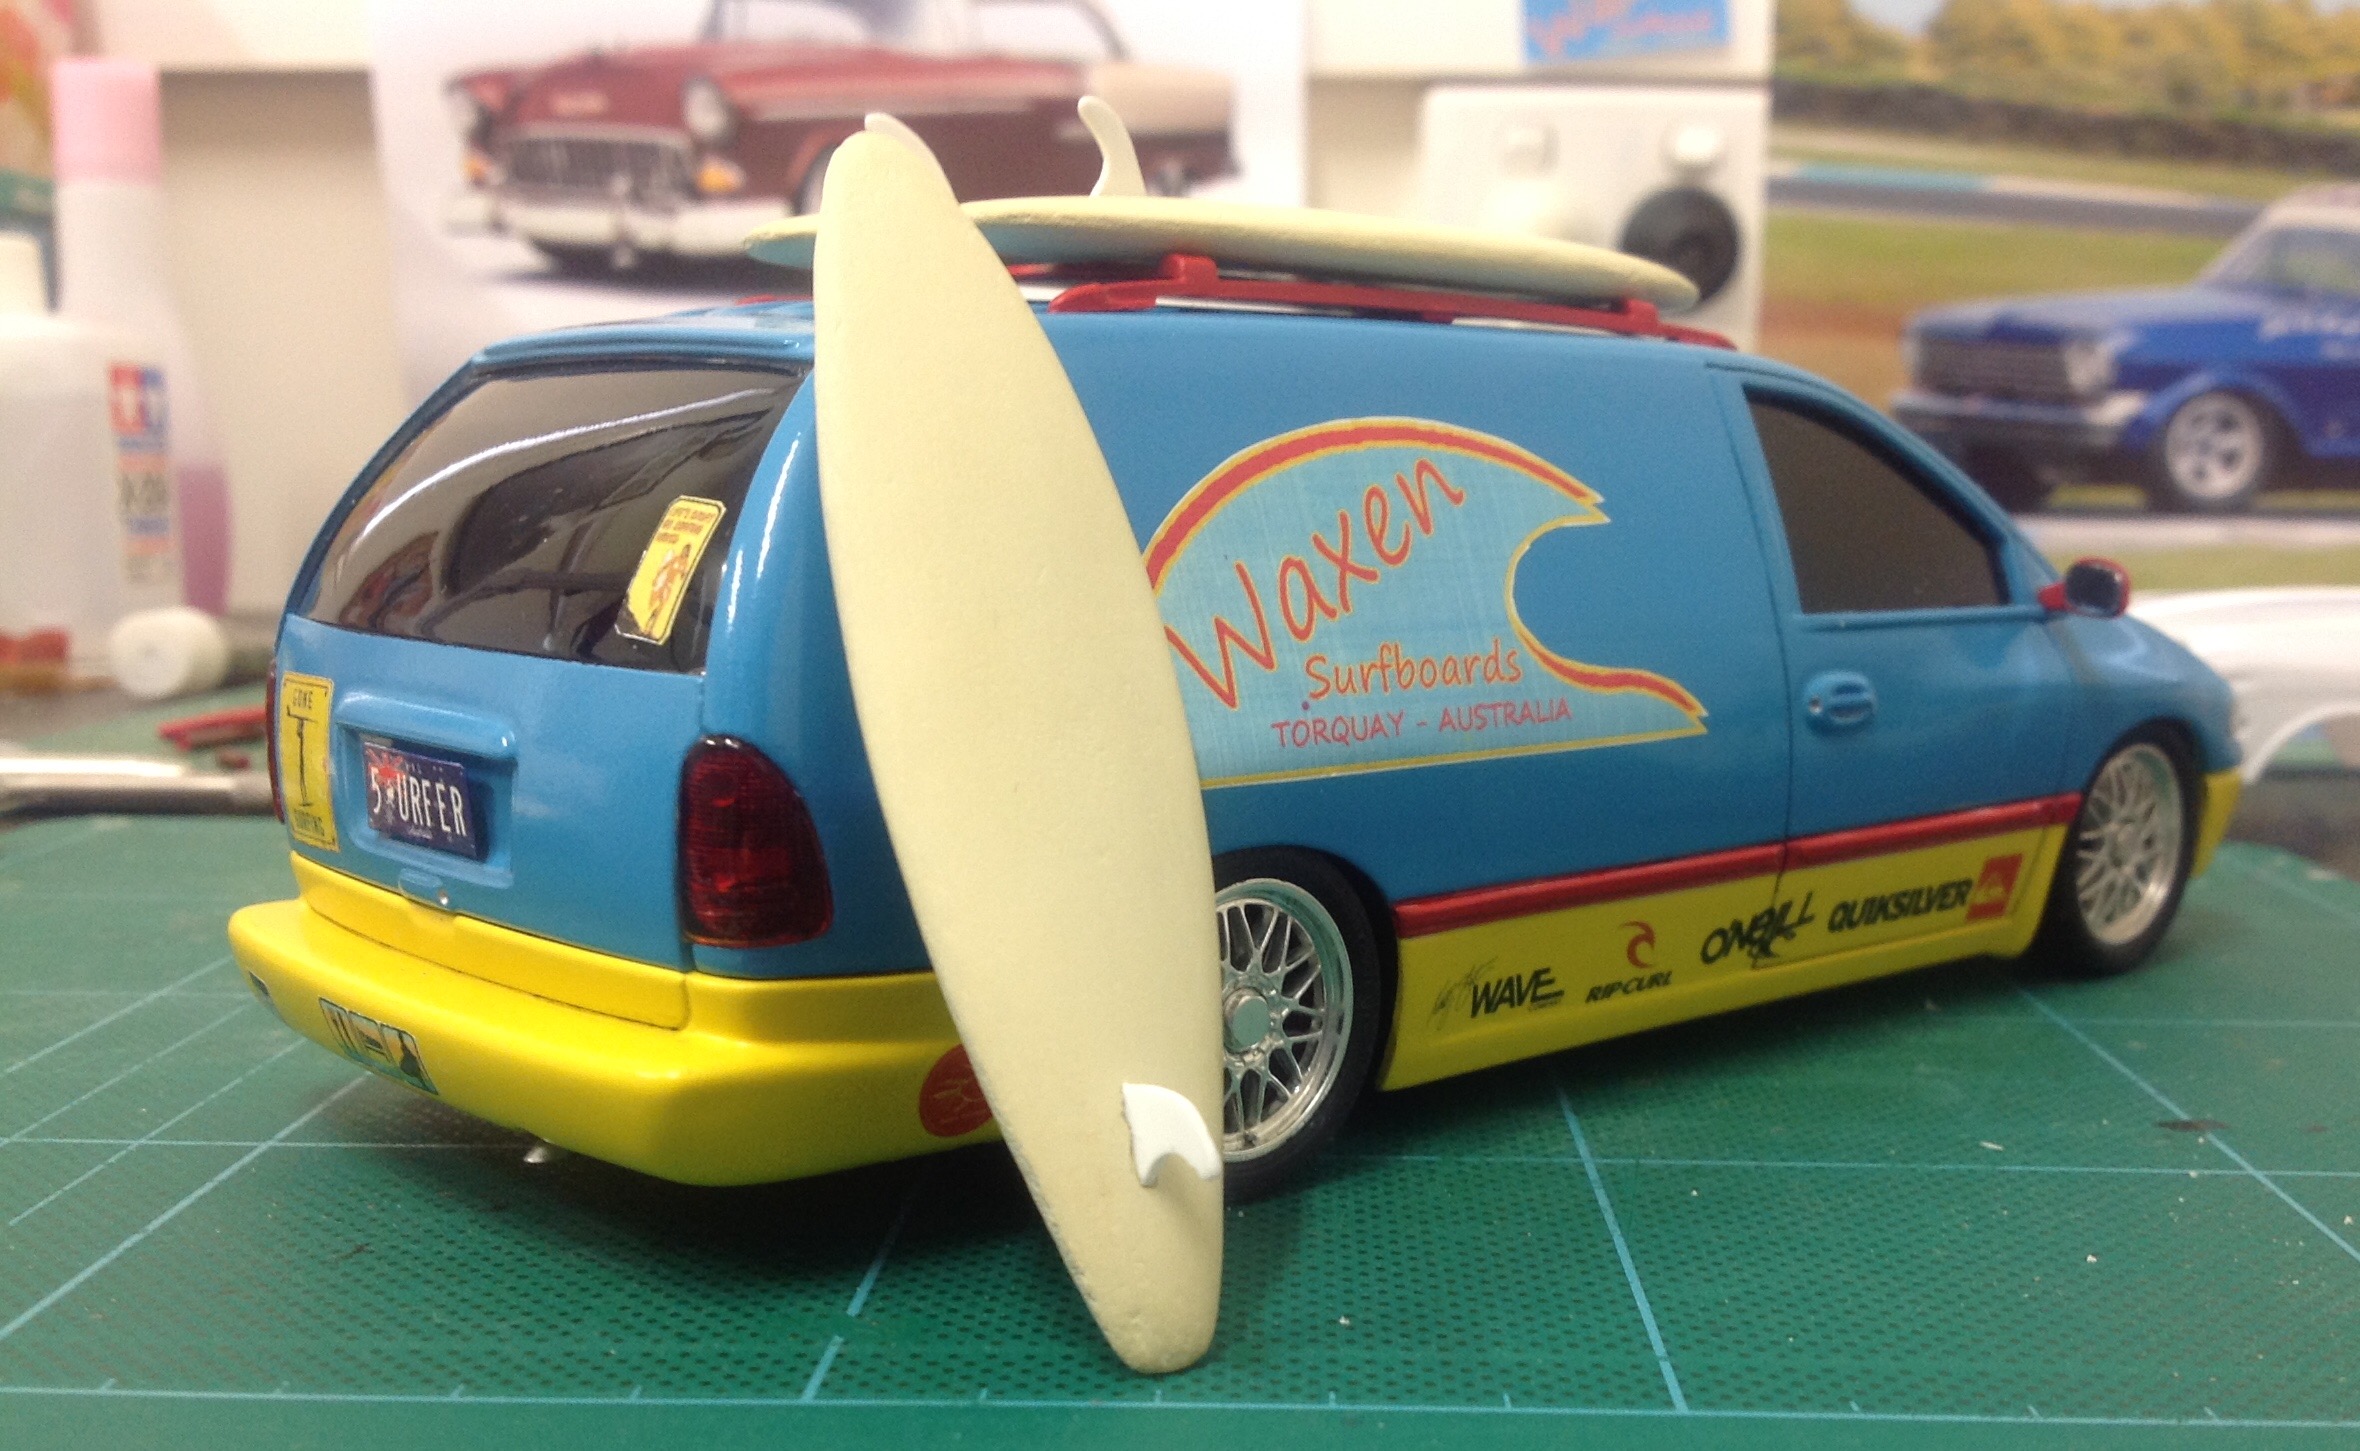
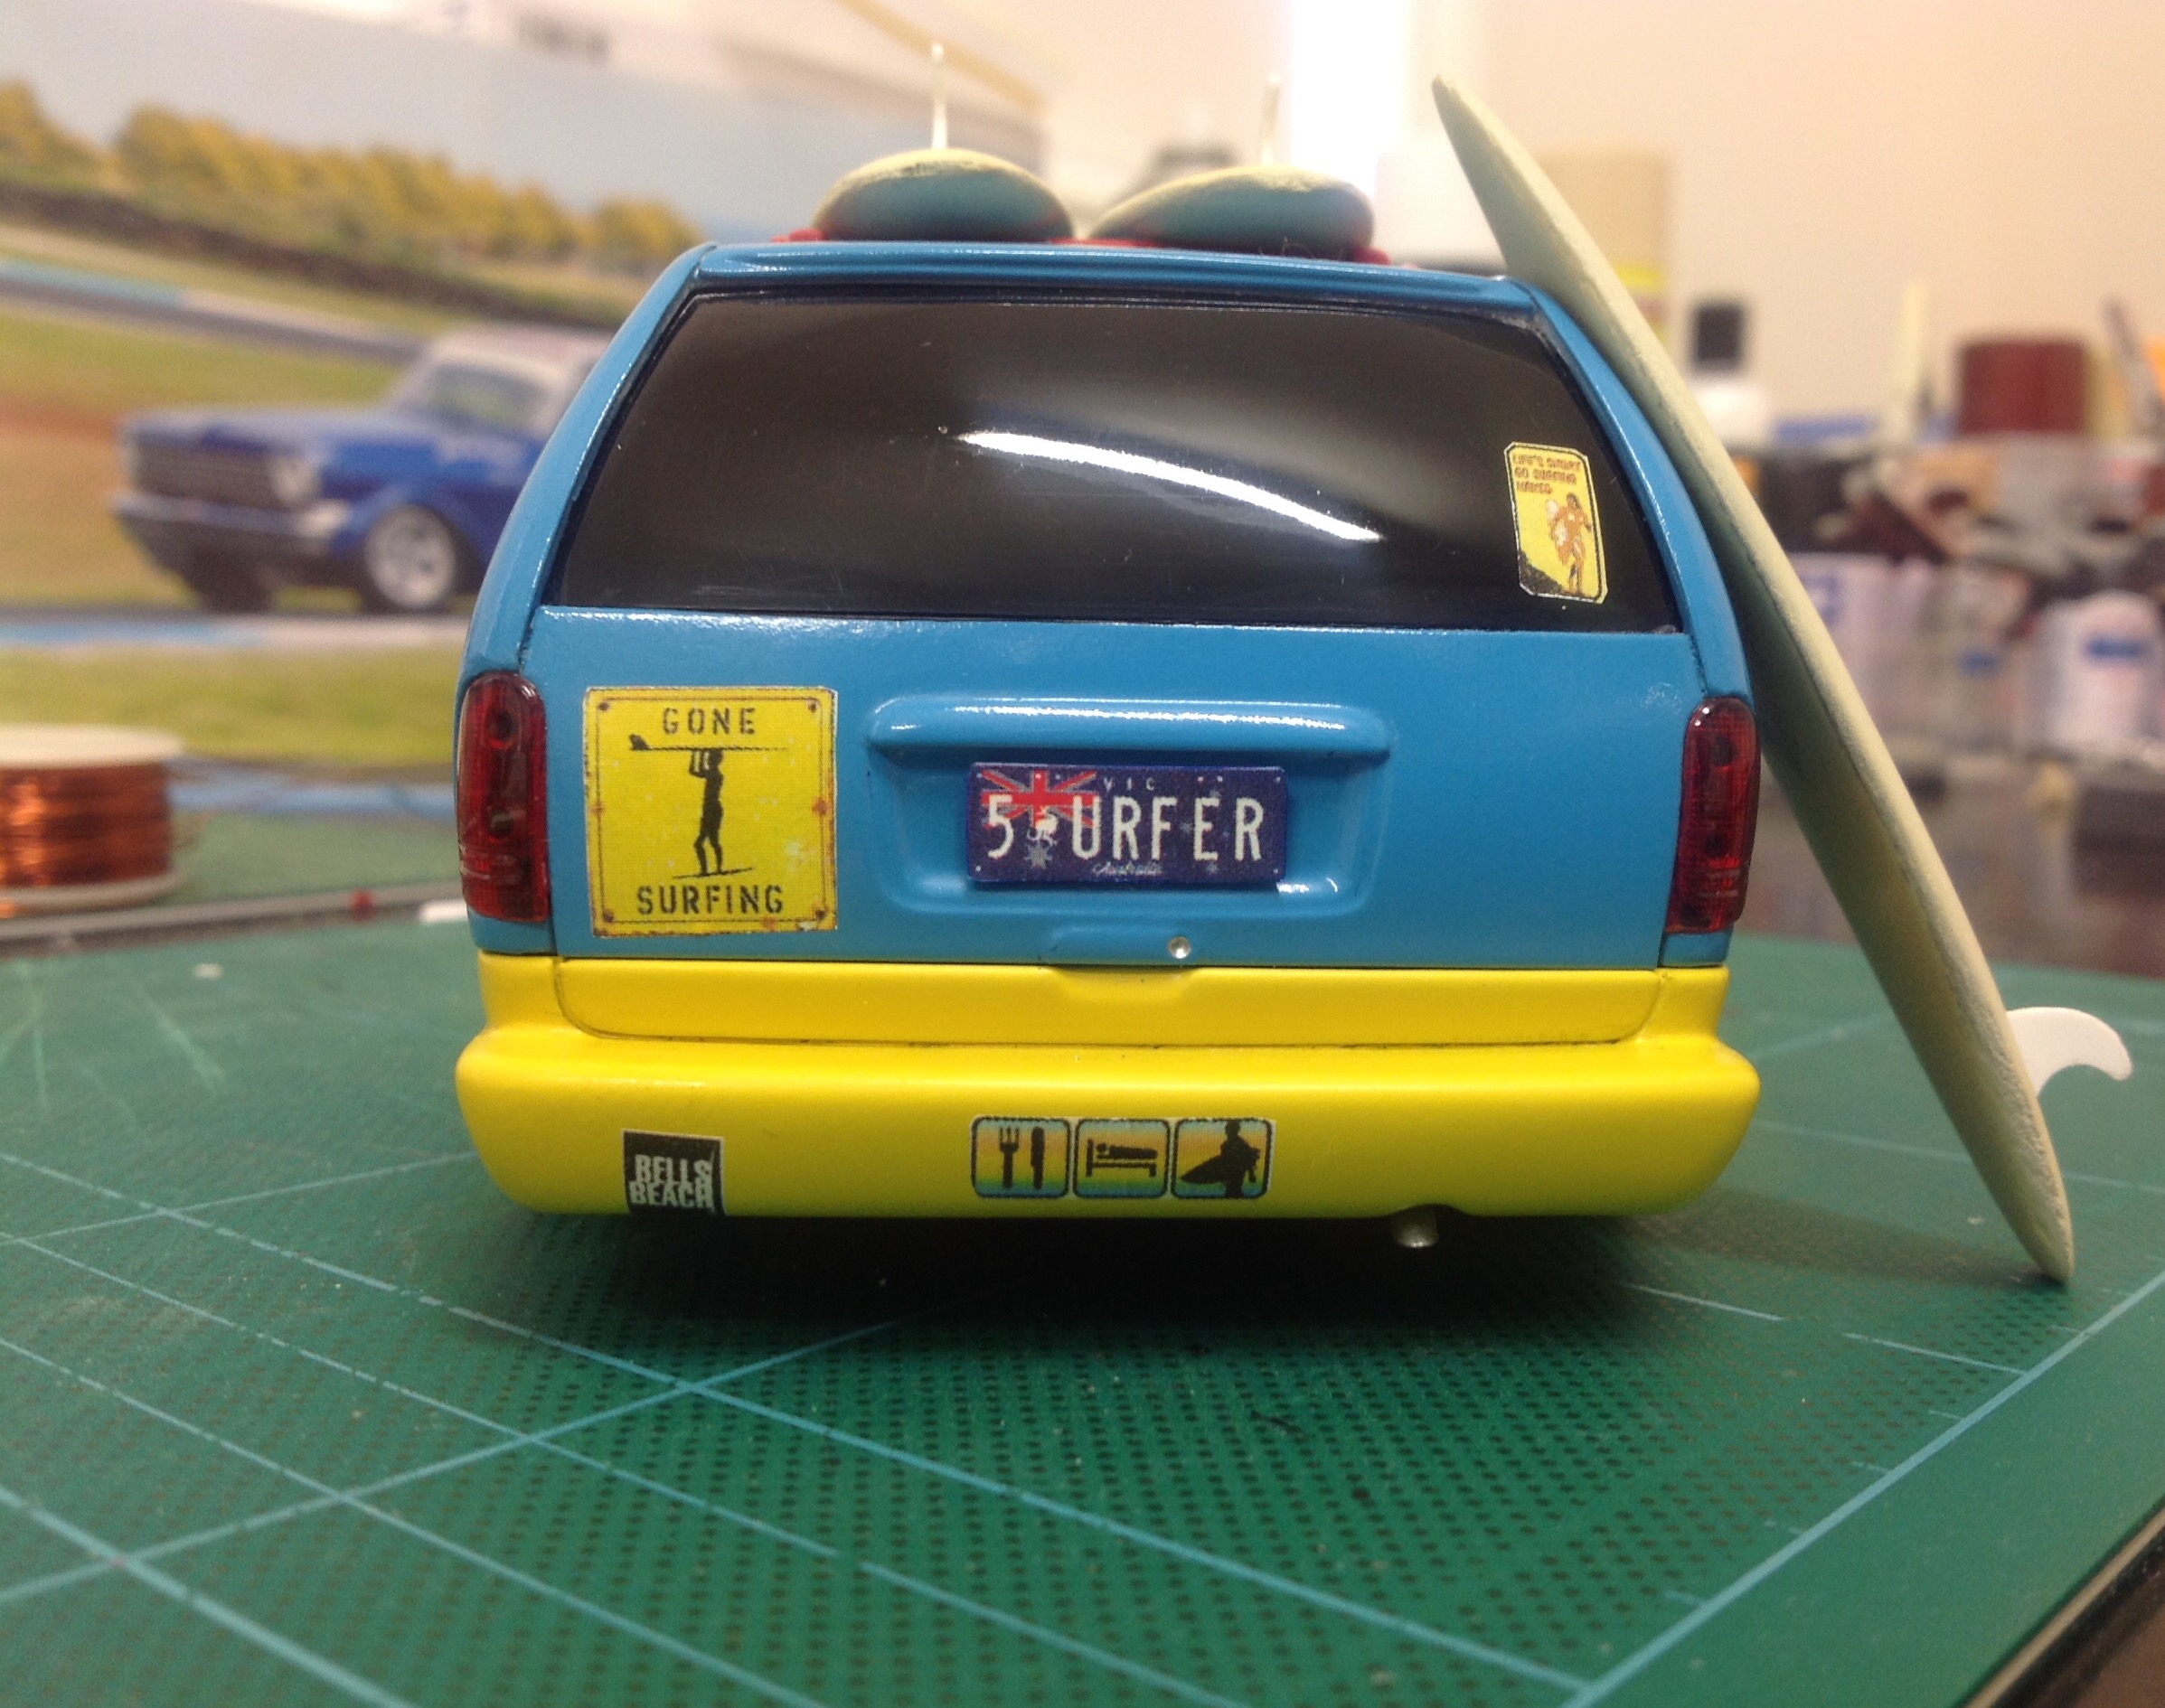
 Built this a while ago and recently added the decals and surfboards. Made the decals and plates on my laser printer and the surfboards are carved from balsa wood with sheet plastic fins. Built as a slammer with Fujimi wheels and tires from the 1/25 scale Lindberg Dodge Caravan snap kit. Paint is Duplicolor. Enjoy!! Cheers....Geoff
-

Dodge Caravan
#1 model citizen posted a topic in Model Trucks: Pickups, Vans, SUVs, Light Commercial
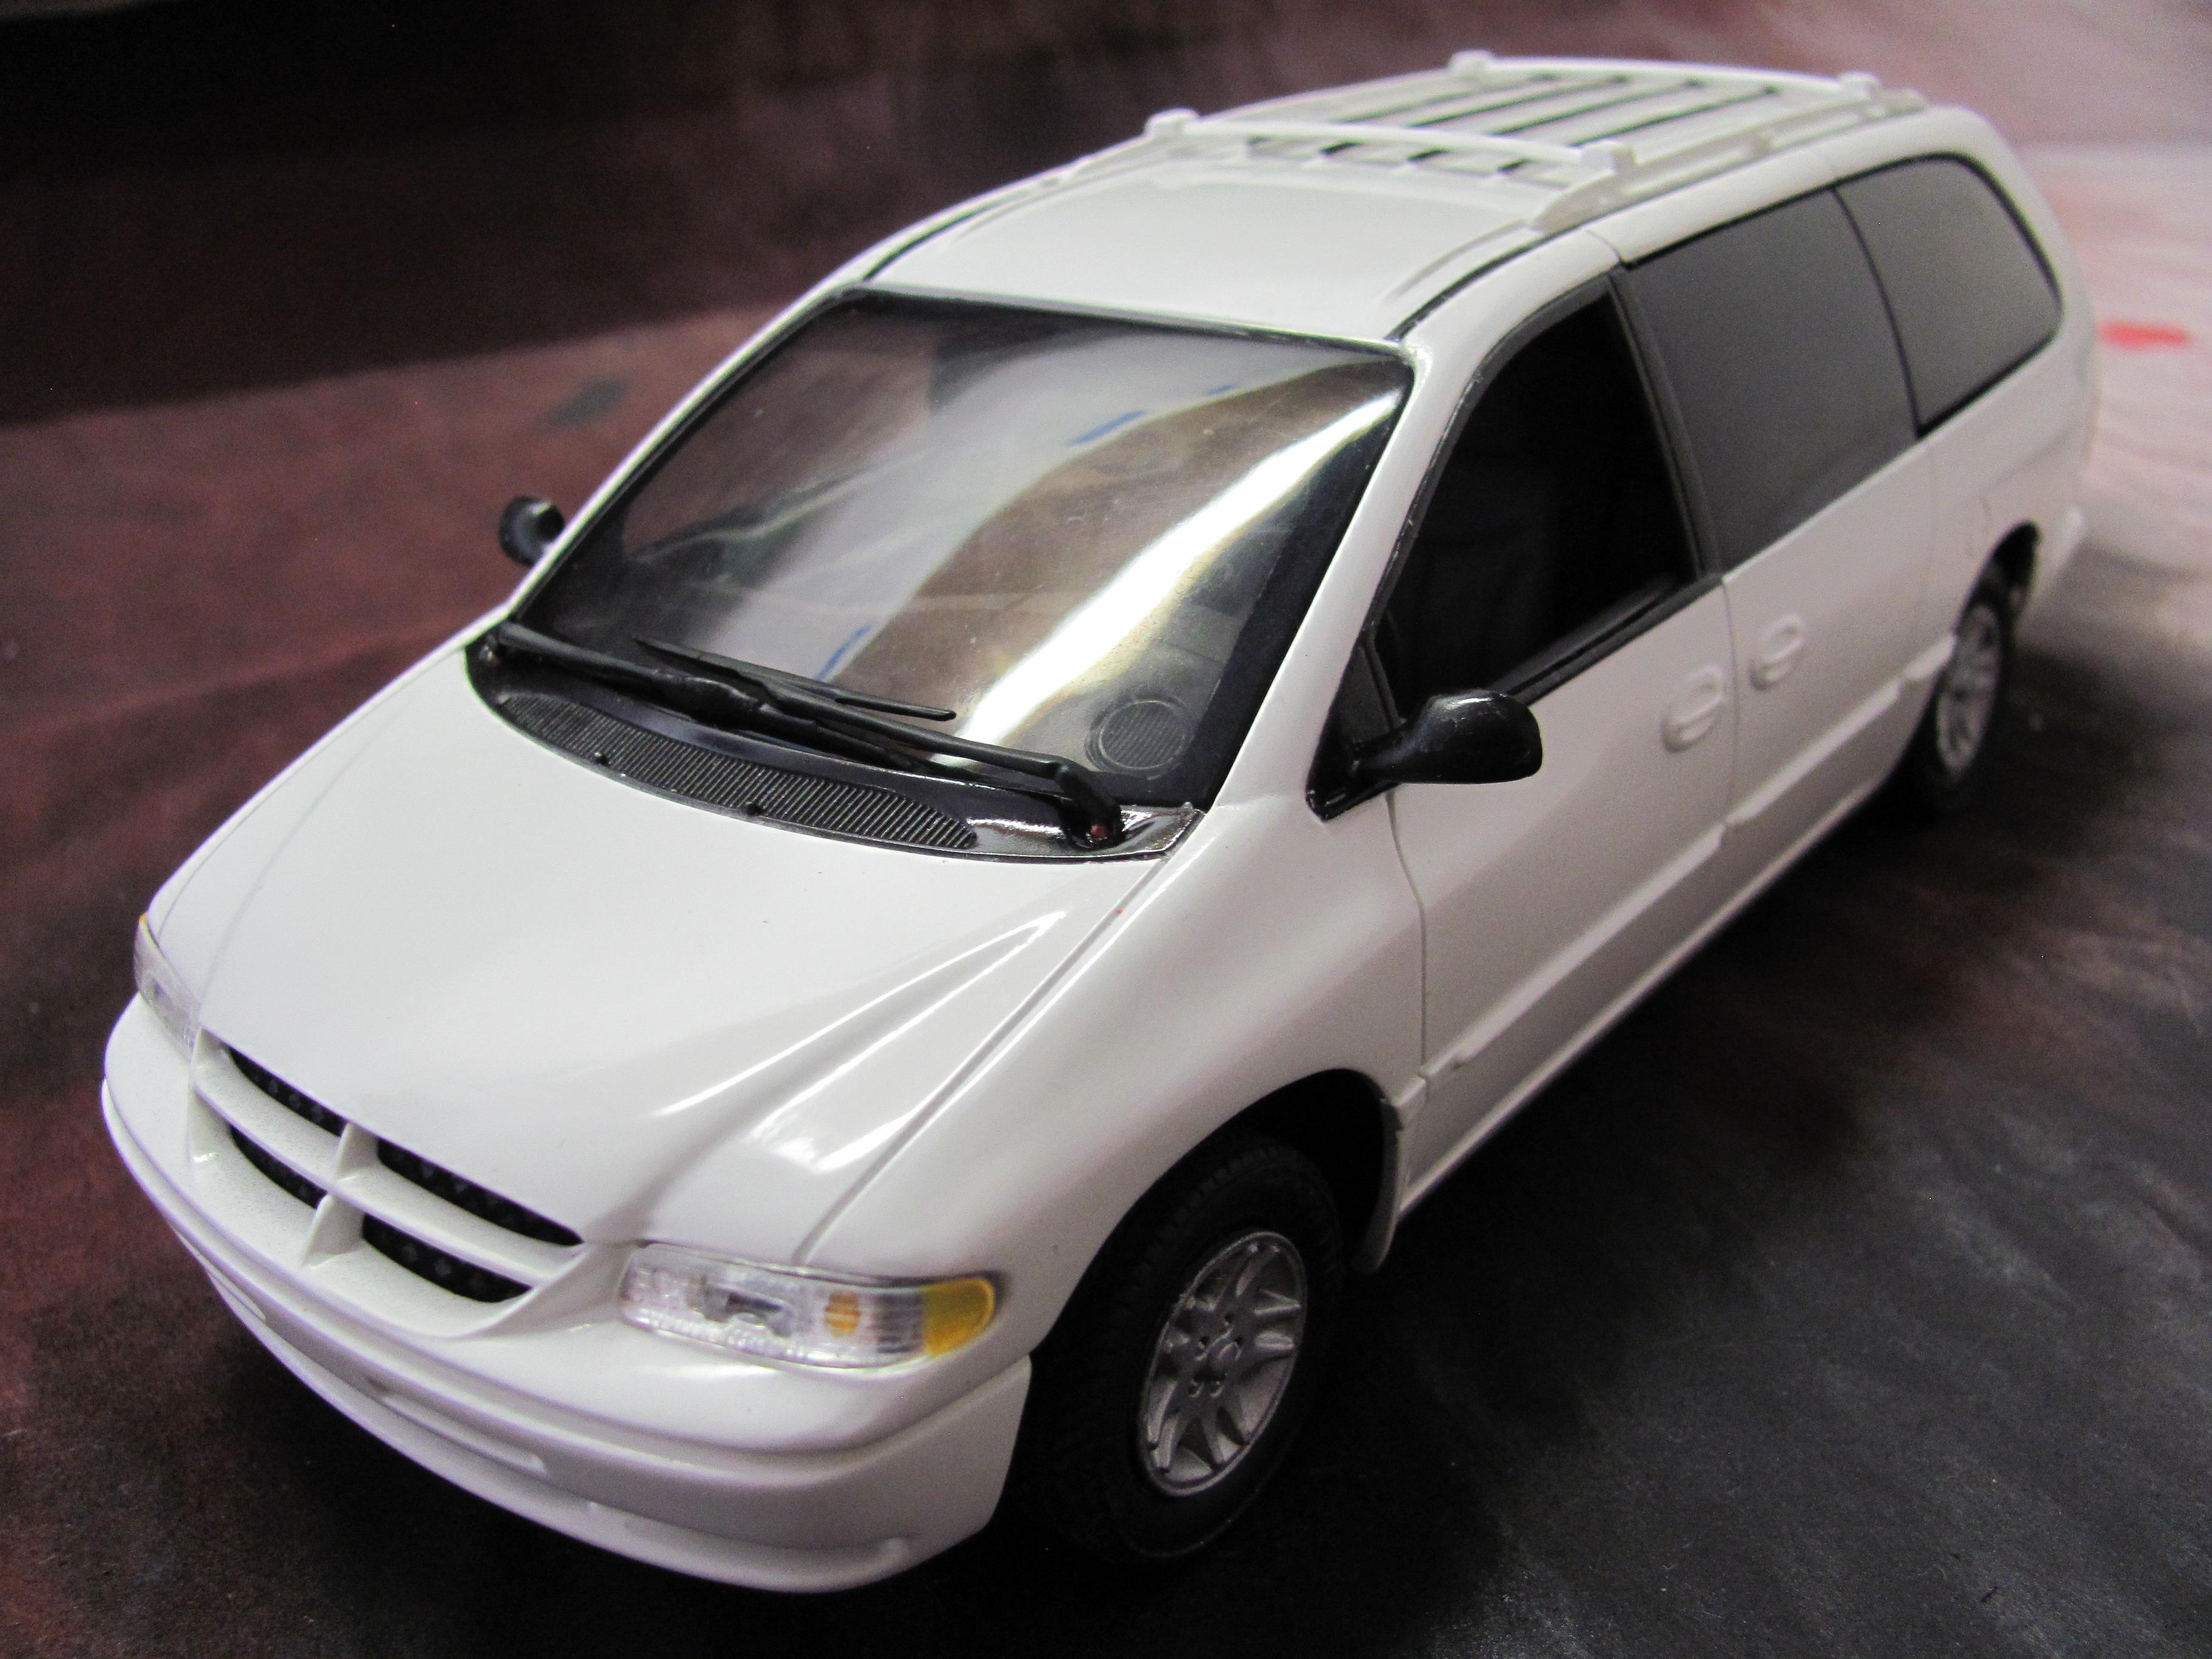
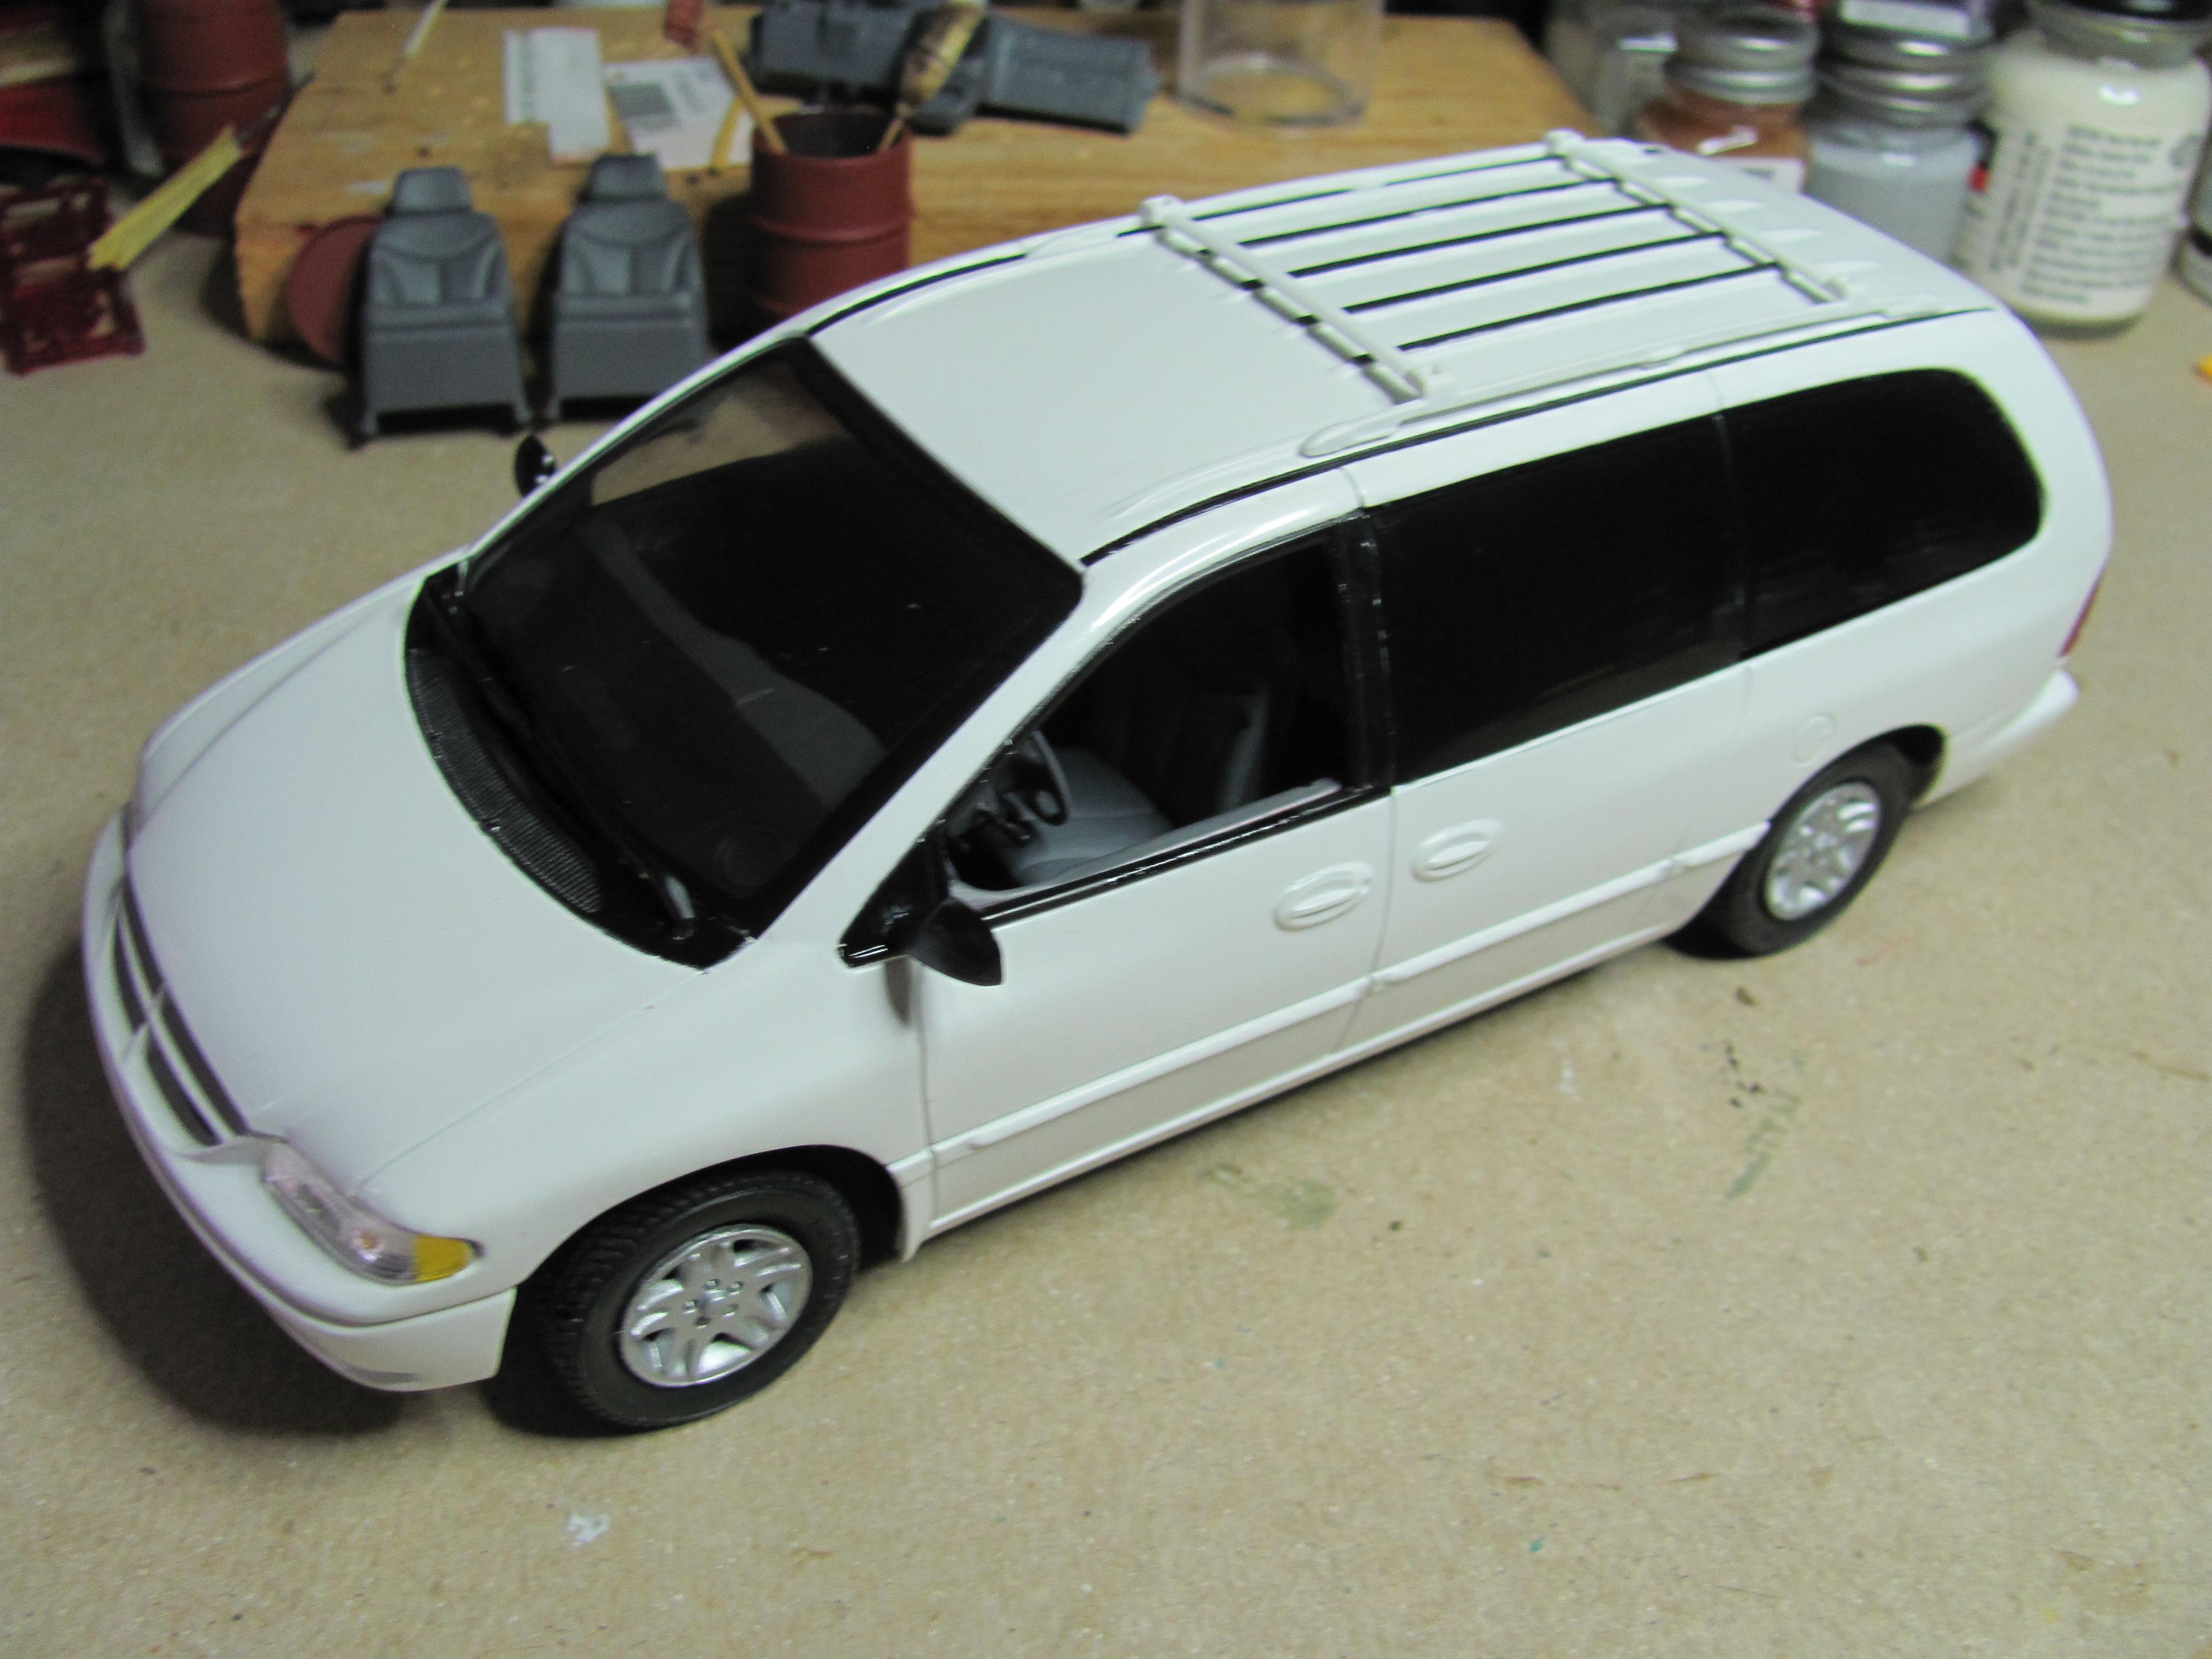
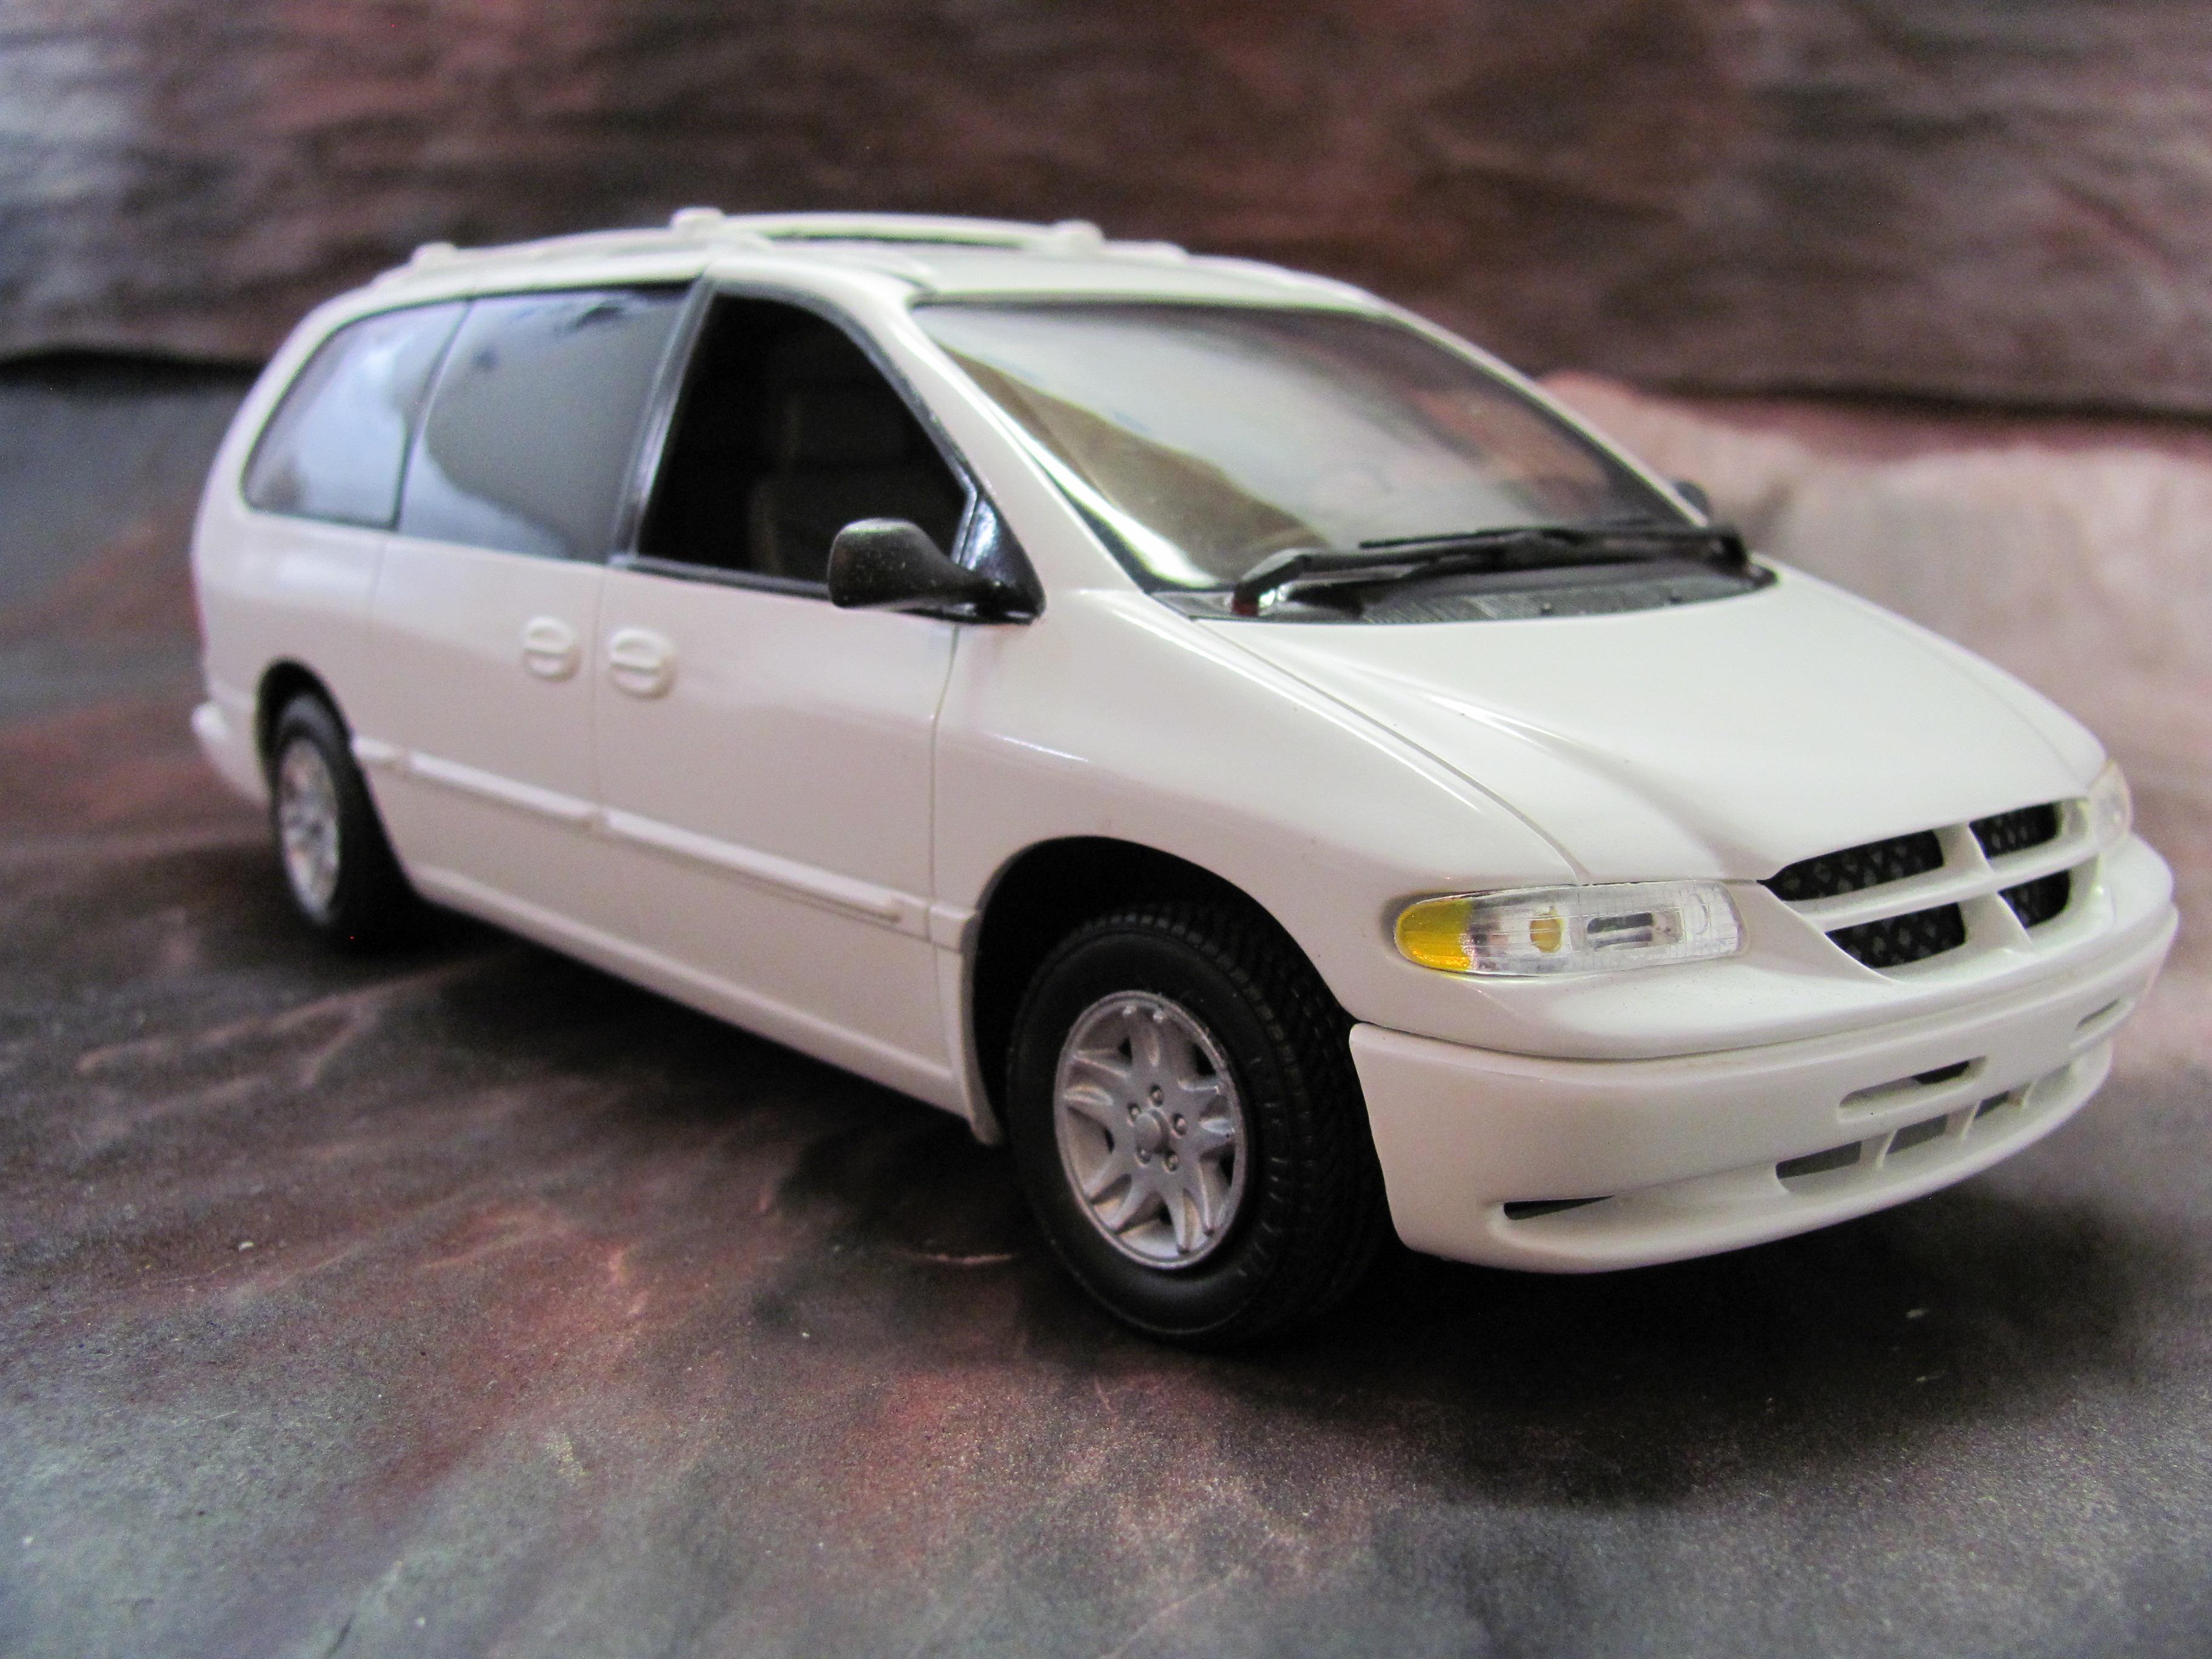
Nothing special. The best car I ever owned is represented here. Paint is Duplicolor Chrysler Bright White. I added rub rails on the roof , repositioned the luggage rack and open the grille and replaced it with some weird netting I found, otherwise box stock. Comments & suggestions welcome.
-
Fun build! I love these cars!
-
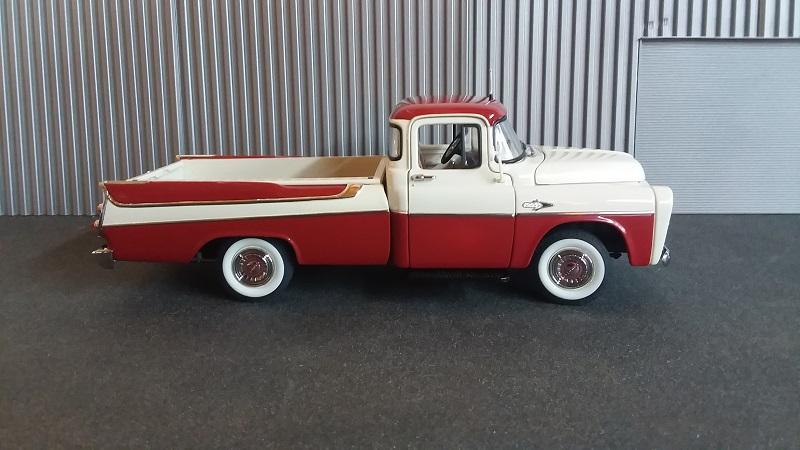
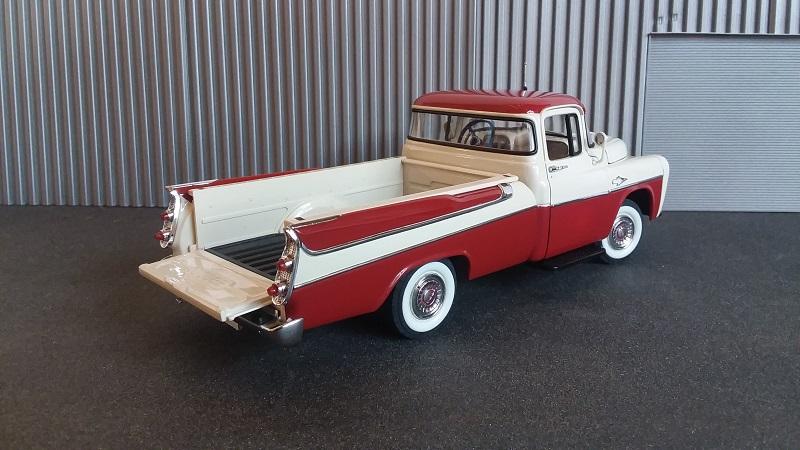
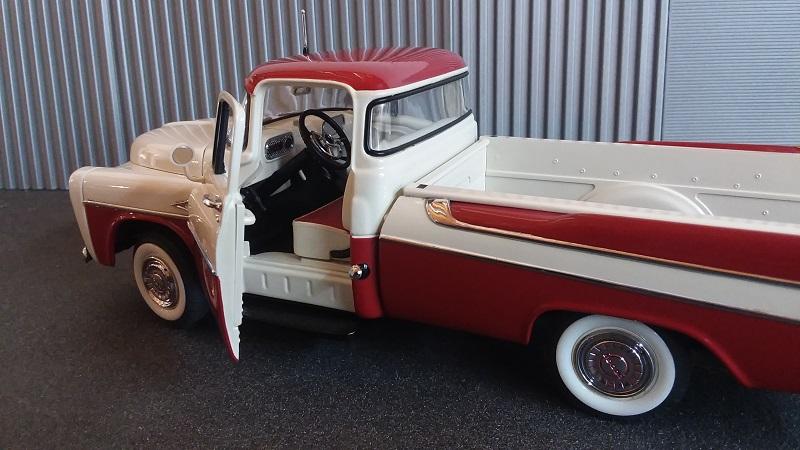
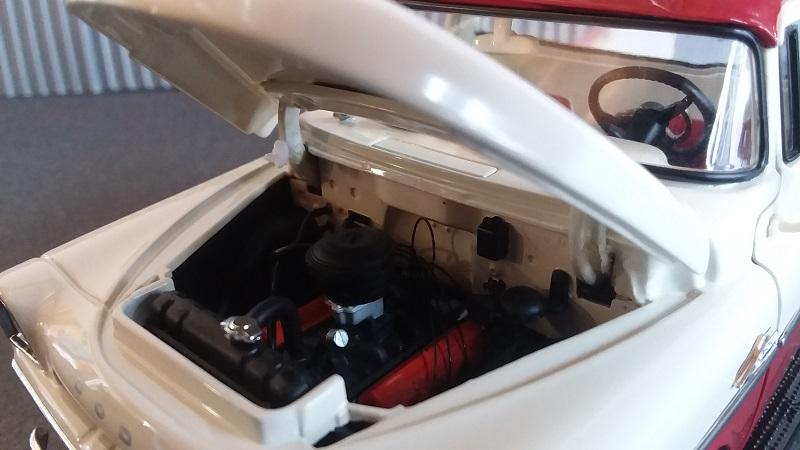
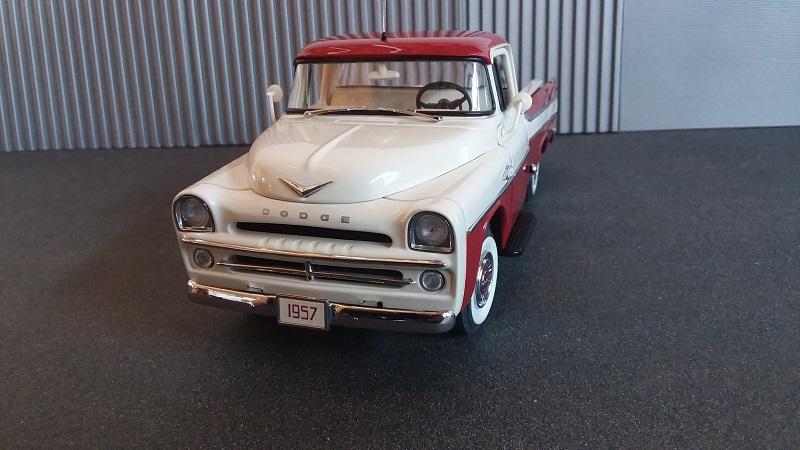
Just arrived is this Danbury Mint Dodge D100 Sweptside pickup truck. I found it for a very reasonable price and could not resist having been turned onto trucks by Tim's Budweiser collection. Overall I am very pleased with it but found the low price may have been influenced by some rash on the top of the cab. Have not decided yet whether to try and buff out the rash.
-
Preliminary box art for the forthcoming 1/25 MPC Dodge D-100 Pickup kit:
-
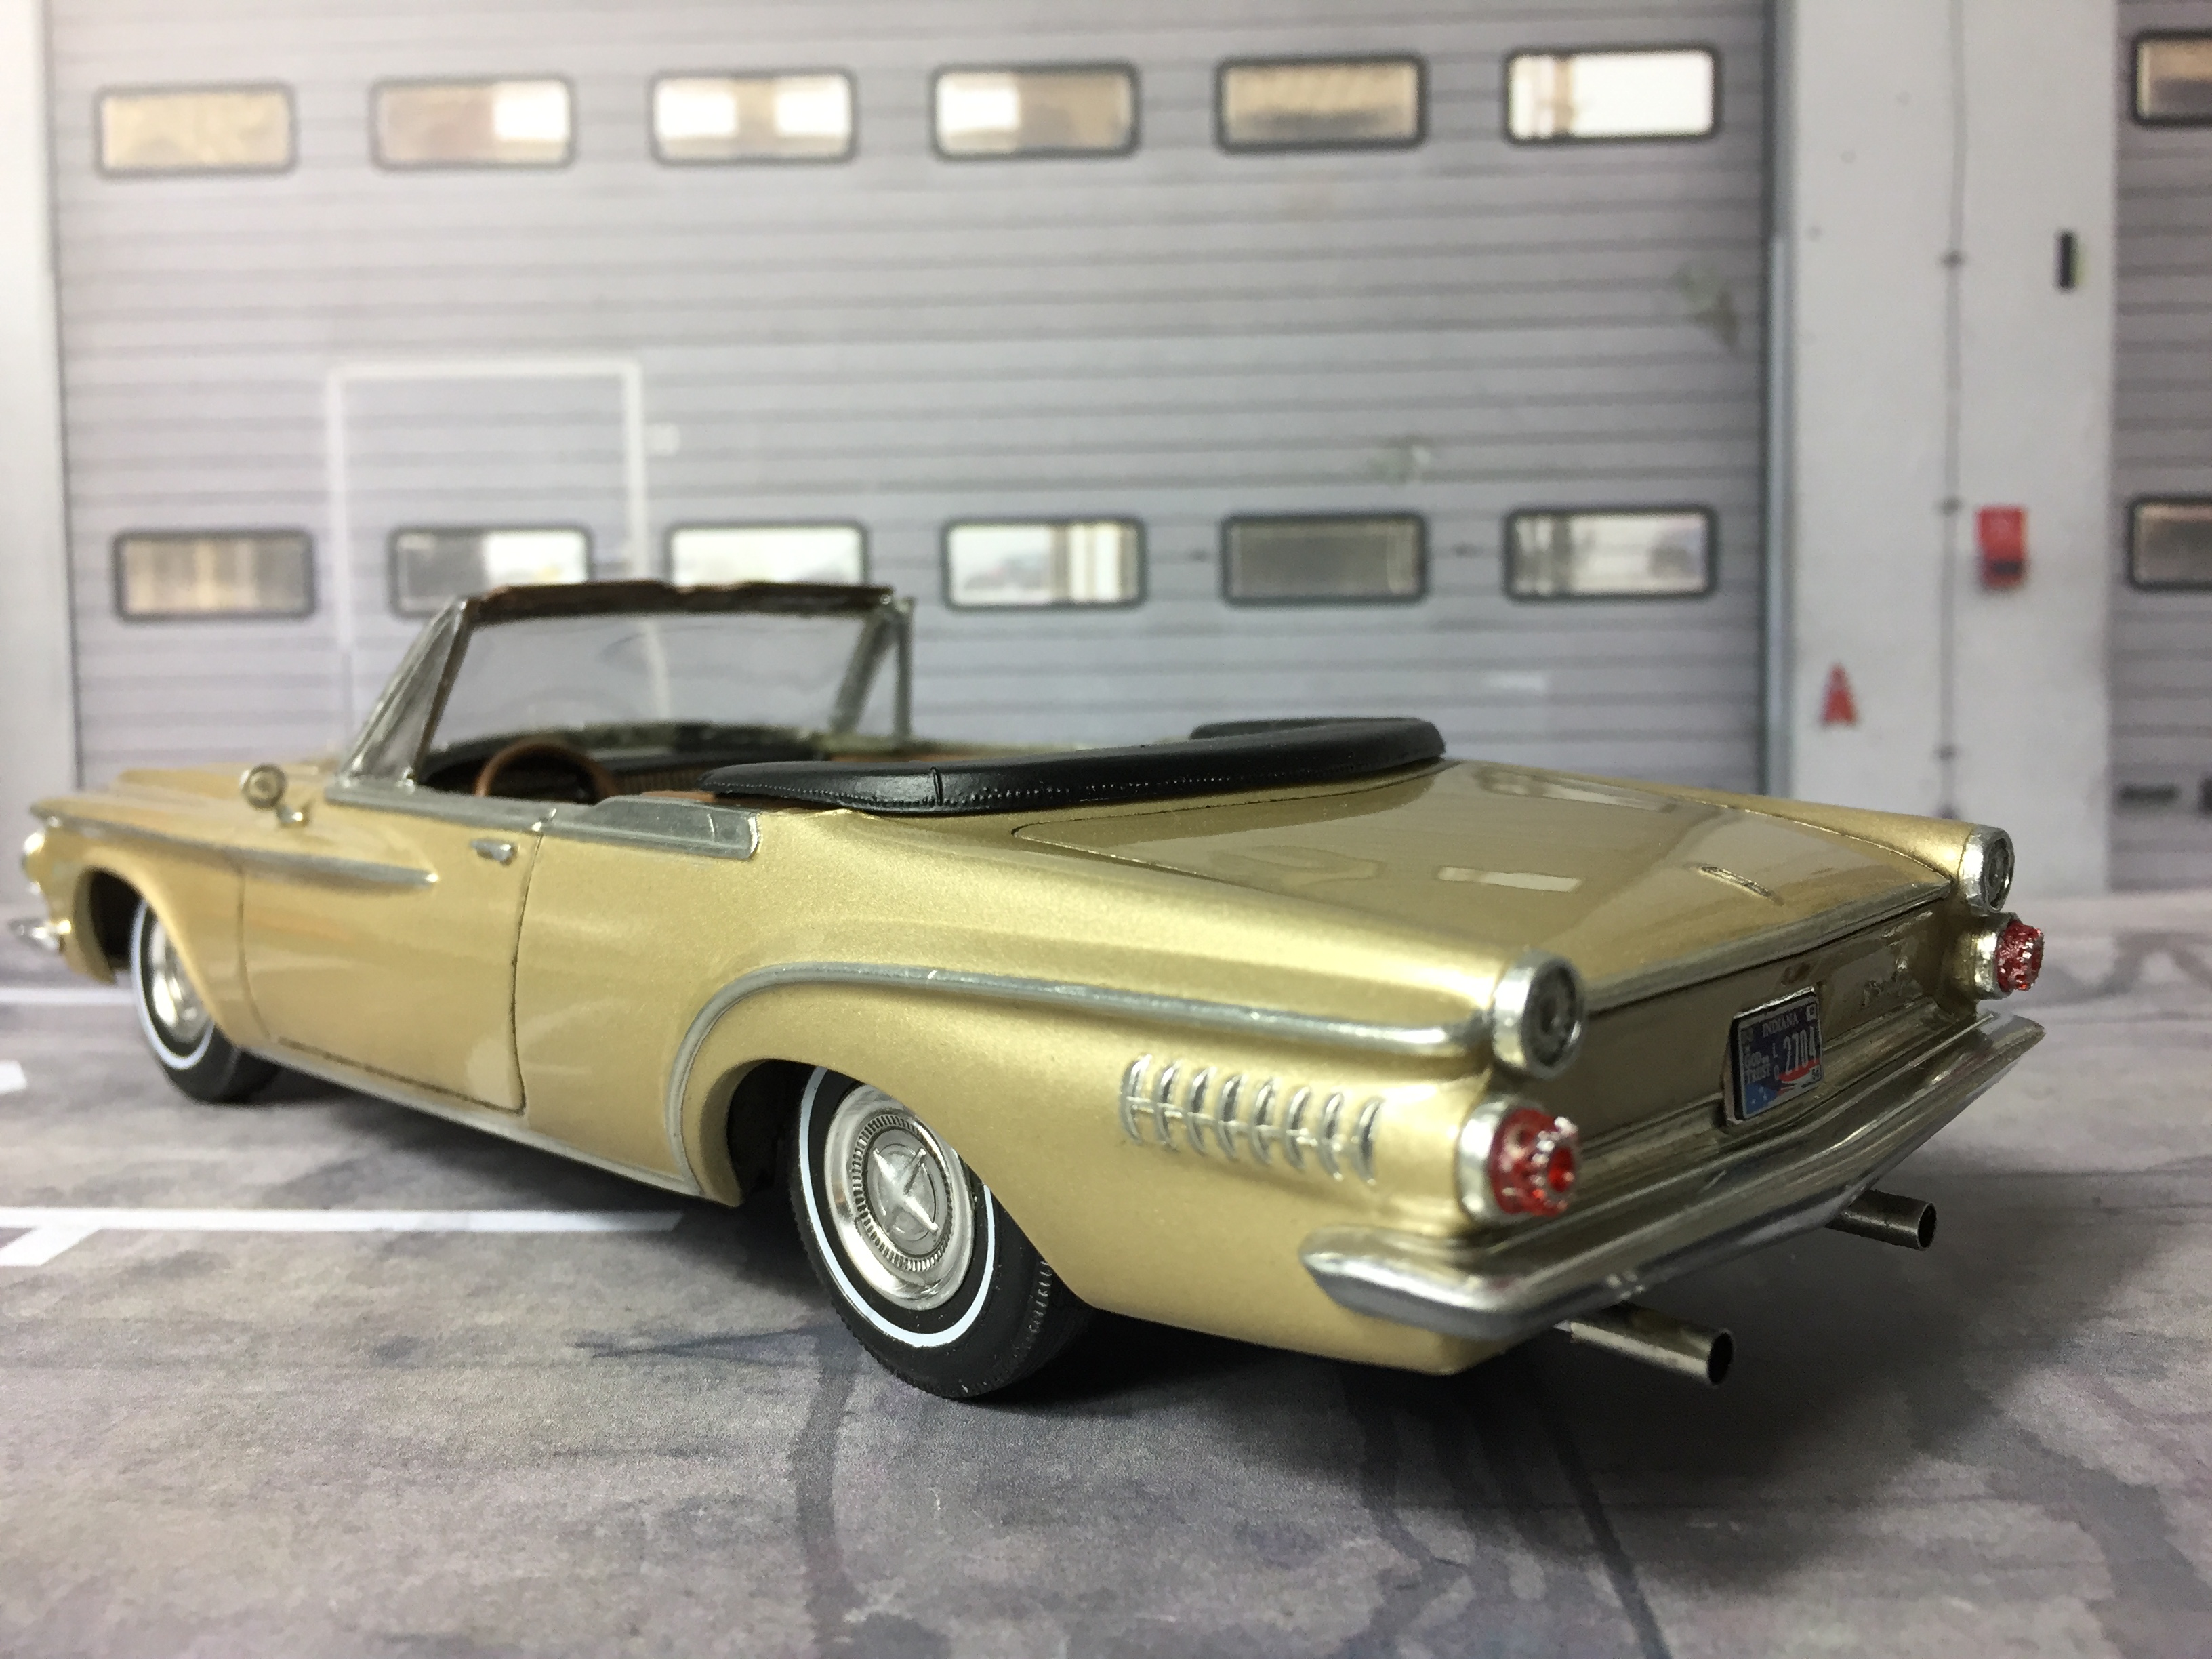
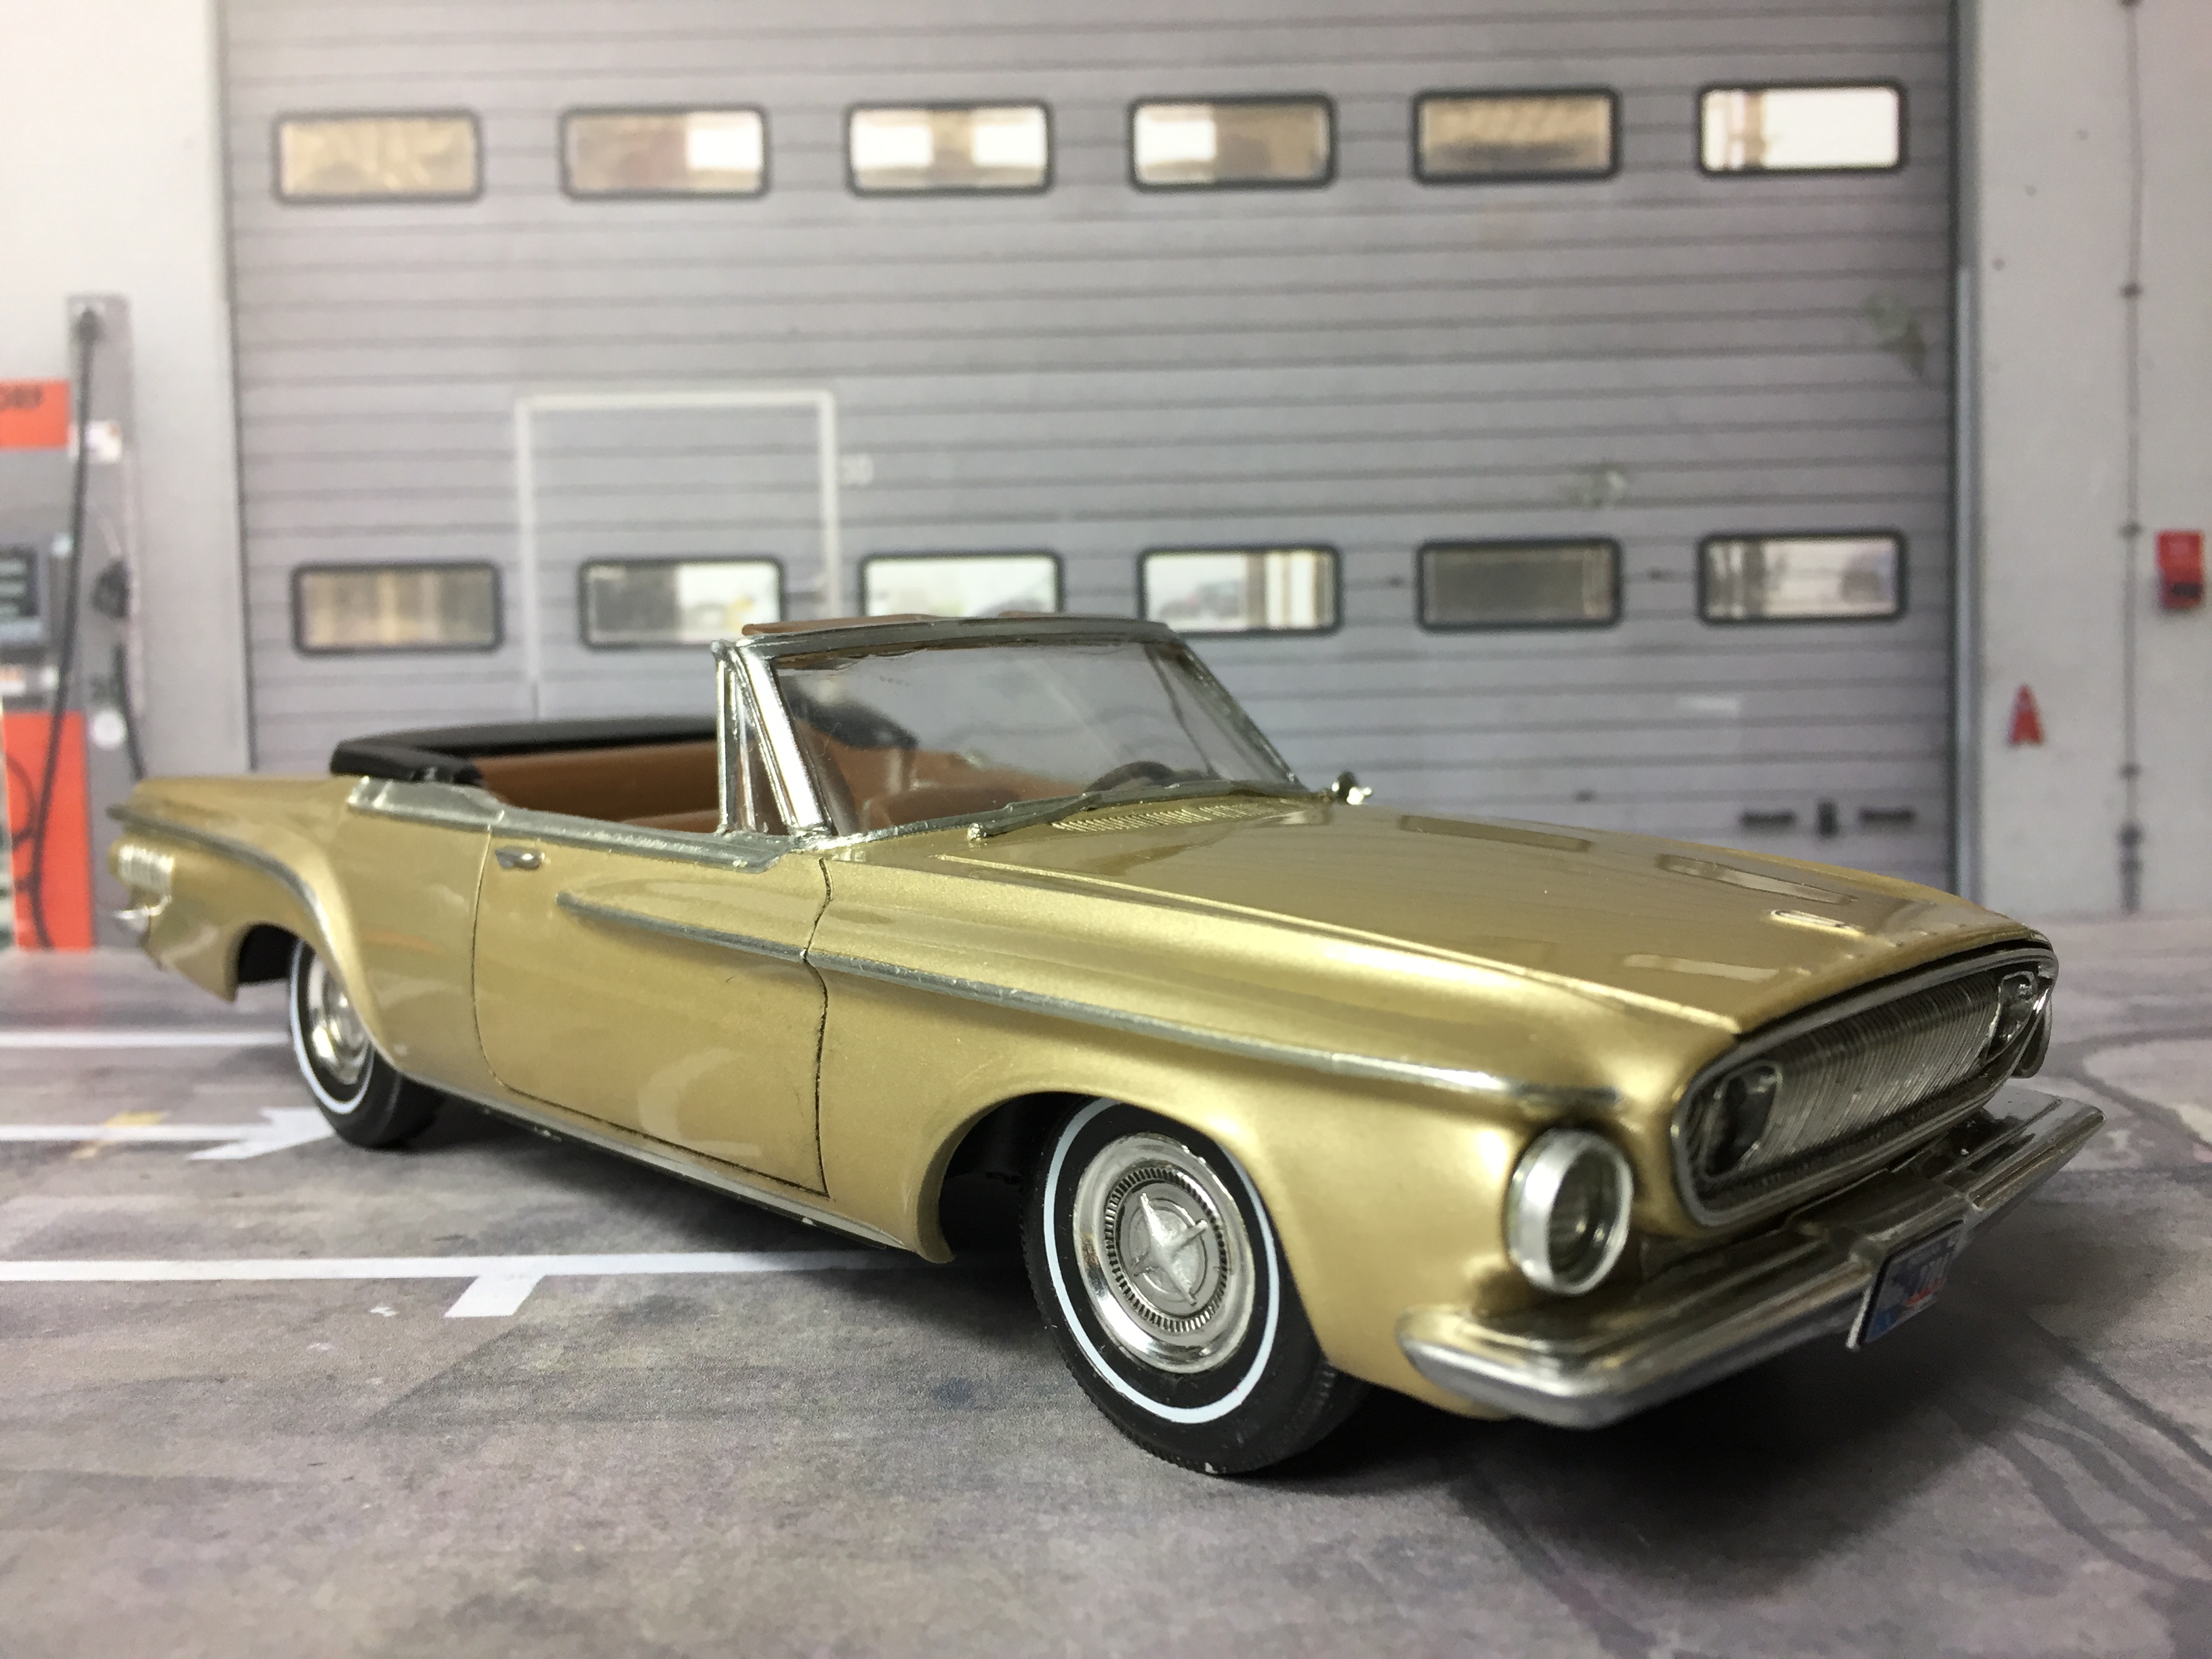
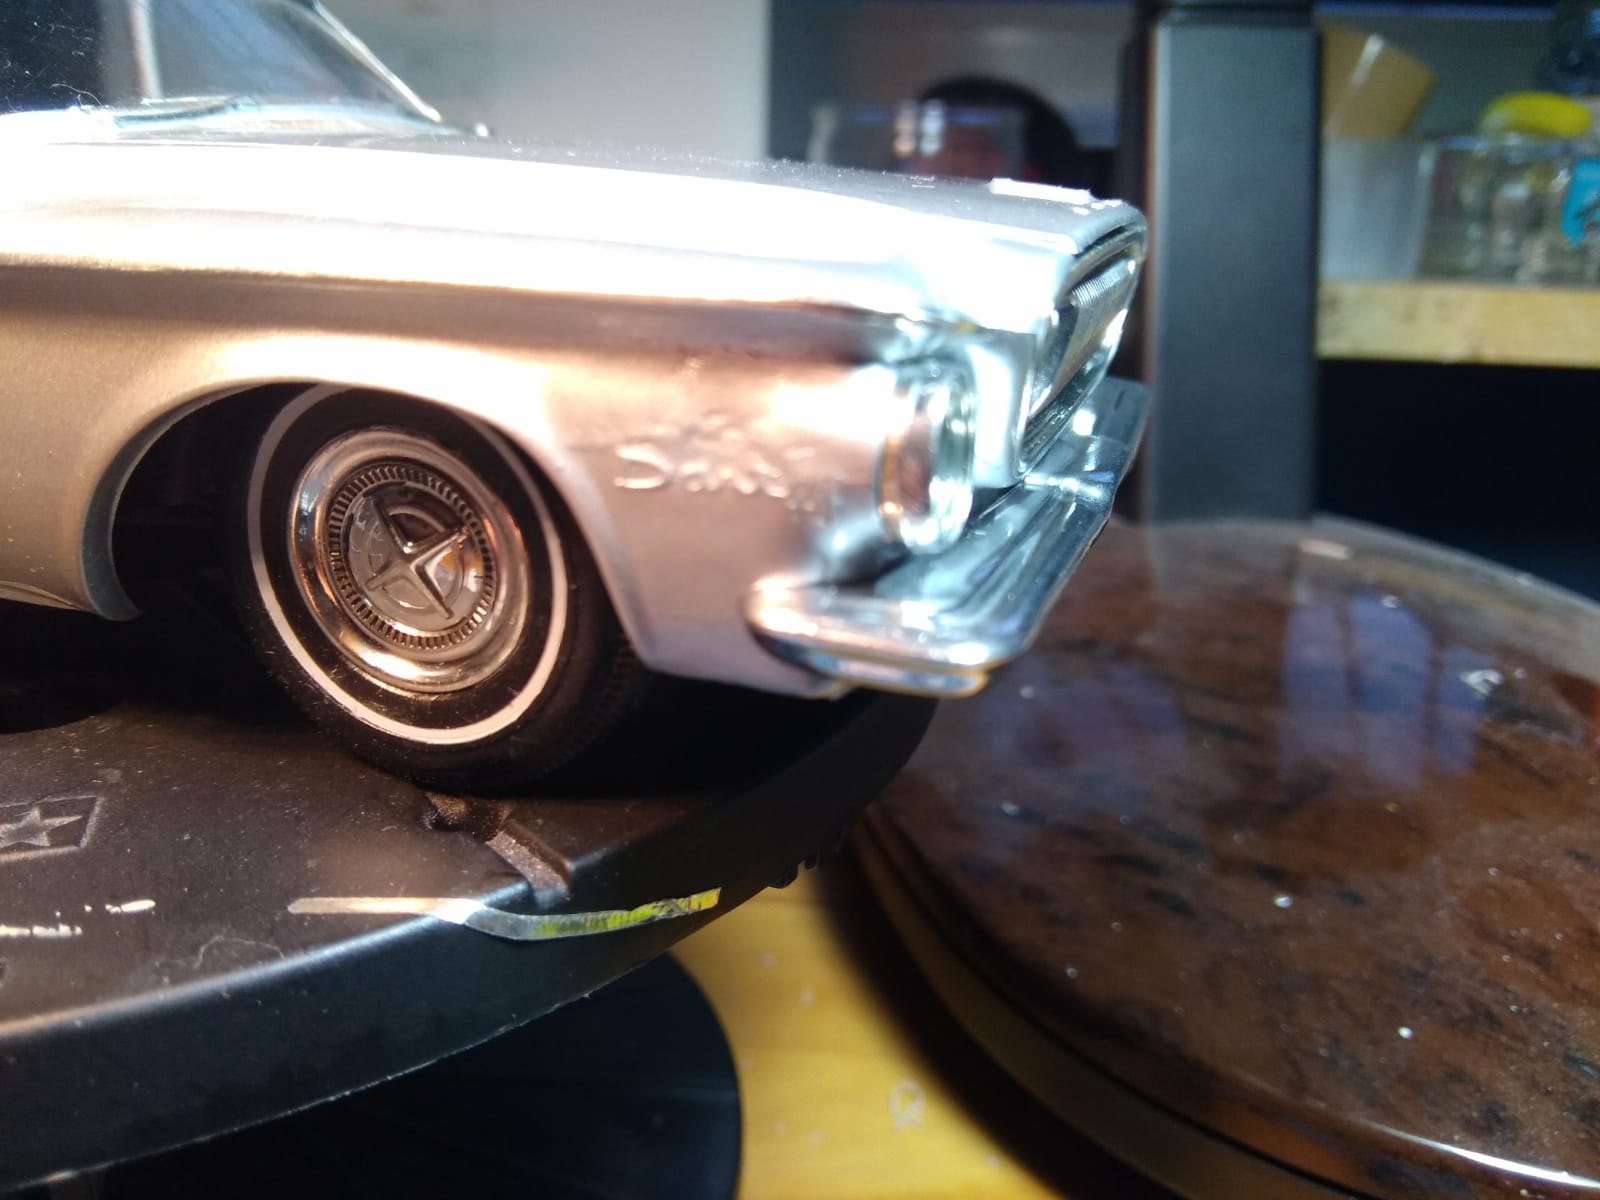
Hi folks, I got this recently from a modelling mate as a built kit amongst other stuff. As we all know, these days these Jo-Han kits come very expensive when bought new, so I took the opportunity to get this one at a very fair price, although it took quite some work because the front quarters had heavy dents on both sides since the kit was new. Of course, repairing those spots meant losing the beautiful "Dart 440" enblems, but that was the price to pay. I sanded down those spots and used Tamiya putty and sandable superglue for filling the dents. Then again sanding to make it fit to the body's contours. The result turned out okay in my eyes. Your feedback, as always, will be appreciated.
-
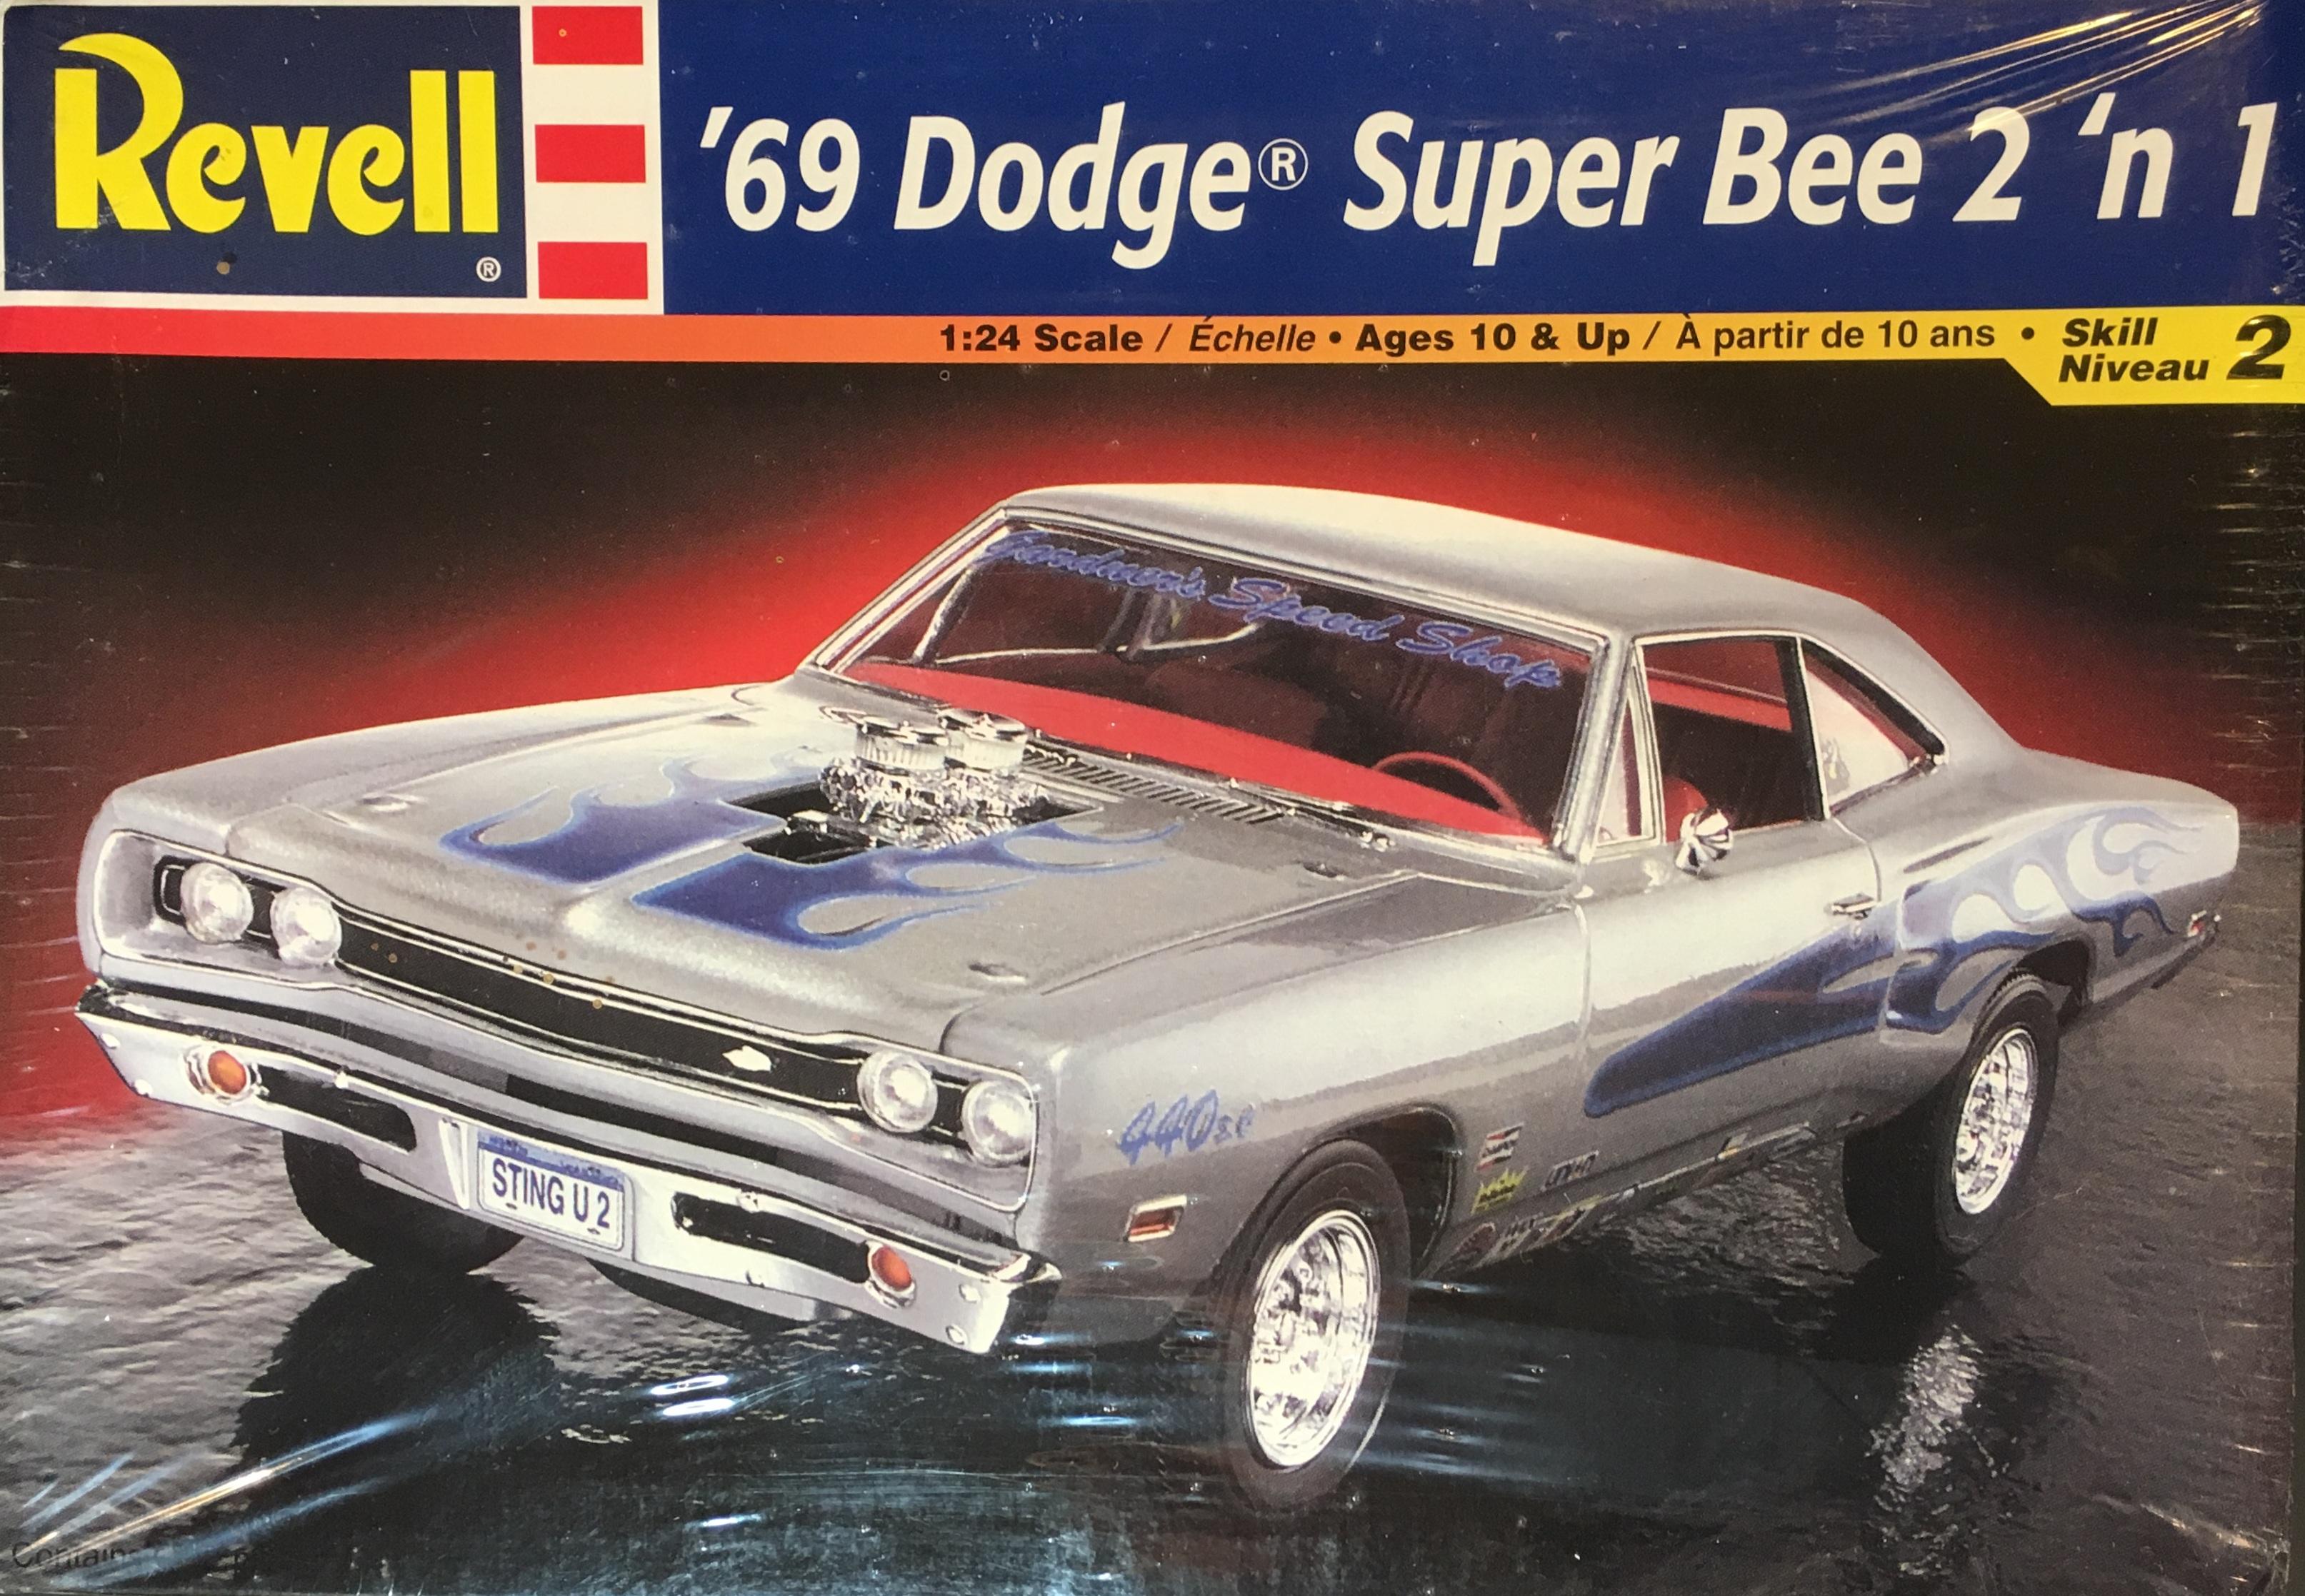
The last today. One of my favorits in my collection, Also a kit from Revell what made a lot of fun to build. I built it in October last year and primary i bought it because of the very cool decals. But the decals were not to old, no, they broke, when i put it into the water. Irreparably. So i built it in Street legal version. Last week i took him again and made it lower to the groung. Looks better for me. Enough of words, here we go - Pictures please: ...
-
My entry is going to be a 1958 Dodge W500 fire engine used by the US Forest Service. The truck on the far left is what I'm going for, although that is a '59 which has a different grill. I will be starting with a resin cab from SELtd and most of the rest will have to be kit bashed or scratchbuilt.
-
Took a Lindberg Dodge Caravan and slab-sided it into a cool Surfie wagon. Built as a slammer, Fujimi wheels and tyres, custom paint job, homemade decals and balsa wood surfboards.
-
Completed this morning. Not perfect but it is done. Painted in Tamiya Park Green with a black interior. The Hemi is from a Revell 67 Dodge Coronet kit. I wanted to use an AMT Hemi from the 68 Road Runner kit but the placement of the exhaust manifolds on the AMT heads did not line up properly with the exhaust pipes so I had to use one from a spare Coronet kit I had. "Hemi" door decals are from a spare Revell 68 Dodge Charger kit. Not much more to say, everything else came from the Daytona kit itself. Thanks for looking.
-
Talk about polishing a turd. My dad got me this for Christmas and, if anyone knows me, I like stock vehicles. The Lindberg kit here is not stock. I ordered a Hart's Parts resin hood and got the stripes from eBay. I came out descent, but this kit is a nightmare of issues. The chassis is smaller than the body! I had to apply the glue and hold the body on the chassis for an hour to get it to stay on! The tail lights look horrible, the hood was glued shut because the engine wasn't stock, and I hate that there were no side mirrors. My stripes were also the wrong scale and I had to trim them. The sides are also wrong which caused an issue with the stripes as well. SAM_0447 by Eric Lucas, on Flickr SAM_0448 by Eric Lucas, on Flickr SAM_0449 by Eric Lucas, on Flickr
-
The very first car model I ever tried to build was a Challenger T/A I got from Hungate's in Independence Mall Wilmington, NC. I always wanted to get another one and do it in Sublime green. I got a few gift cards and decided to use one of them to get this kit. It came out great. The kit is a pleasure to build. SAM_0606 by Eric Lucas, on Flickr SAM_0607 by Eric Lucas, on Flickr SAM_0609 by Eric Lucas, on Flickr SAM_0610 by Eric Lucas, on Flickr SAM_0611 by Eric Lucas, on Flickr SAM_0612 by Eric Lucas, on Flickr SAM_0613 by Eric Lucas, on Flickr SAM_0614 by Eric Lucas, on Flickr SAM_0615 by Eric Lucas, on Flickr SAM_0617 by Eric Lucas, on Flickr
-
Been wanting one for the collection. Found resin parts from Hart's parts and found some stripes on ebay. Came out alright. The grill is a little warped and the rear end isn't exactly correct, but it does look pretty good for what it is. SAM_0599 by Eric Lucas, on Flickr SAM_0600 by Eric Lucas, on Flickr SAM_0601 by Eric Lucas, on Flickr SAM_0602 by Eric Lucas, on Flickr SAM_0603 by Eric Lucas, on Flickr SAM_0604 by Eric Lucas, on Flickr SAM_0605 by Eric Lucas, on Flickr
-
More from my lost pics files 1 (13) by Eric Lucas, on Flickr 1 (14) by Eric Lucas, on Flickr 1 (15) by Eric Lucas, on Flickr 1 (16) by Eric Lucas, on Flickr SAM_1855 by Eric Lucas, on Flickr SAM_1856 by Eric Lucas, on Flickr SAM_1857 by Eric Lucas, on Flickr SAM_1858 by Eric Lucas, on Flickr SAM_1860 by Eric Lucas, on Flickr


.jpg.53780f6366a135384d7fe81c92e0c5a4.jpg)
.jpg.3f7db0f48bd286fa95b4eb89b7f53ebe.jpg)
.jpg.e5352fb22c41b0c38e3582b93f9a7441.jpg)
.jpg.5b10979b75a1a51a2d15562f6b41610d.jpg)