mustang1989
-
Posts
6,687 -
Joined
-
Last visited
Content Type
Profiles
Forums
Events
Gallery
Everything posted by mustang1989
-
 This is frickin' COOL!!! If I had the space I would build a small town with a railroad surrounding it. I've heard from more than one person that model railroading prices have skyrocketed.
 -
Jeez.....it's been a long while since I've looked in on this one Simon. Aaaand the good work continues!!! I'm gonna have to get all caught up here.
-
This looks really good and it's dropped into the perfect setting Bob.
-
WOW!! Sorry I was so late in responding to all of the great and encouraging feedback fellas. I am truly humbled by all of the responses. Thank you all so very much. Joe
-
A different but captivating color you used on this one and the end results speak for themselves. Very good-looking build Jeremy.
-
Good LORD man!! This is a very plush build with beautiful detailing and brilliant color and shine. VERY convincing work.
-
Love the color on this car. Also like that shop!
-
That's a pretty darn clean build you've turned out with this kit Keith.
-
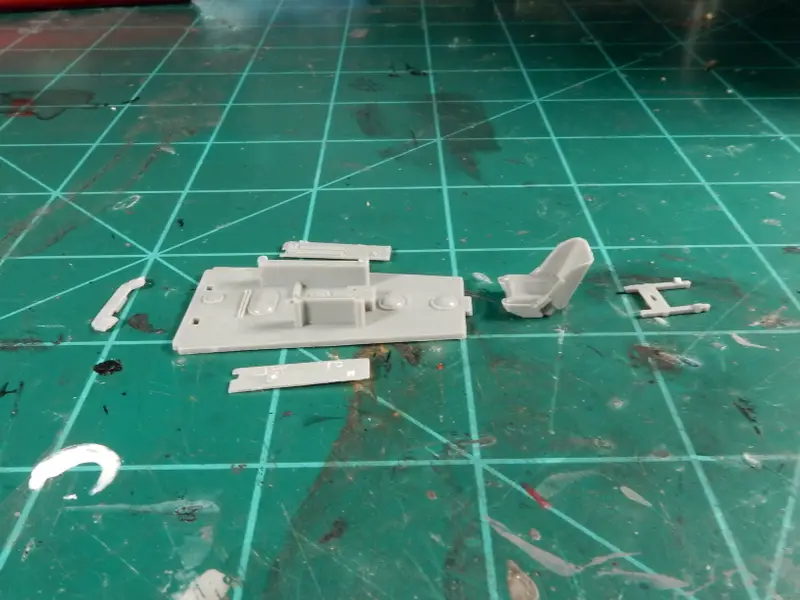
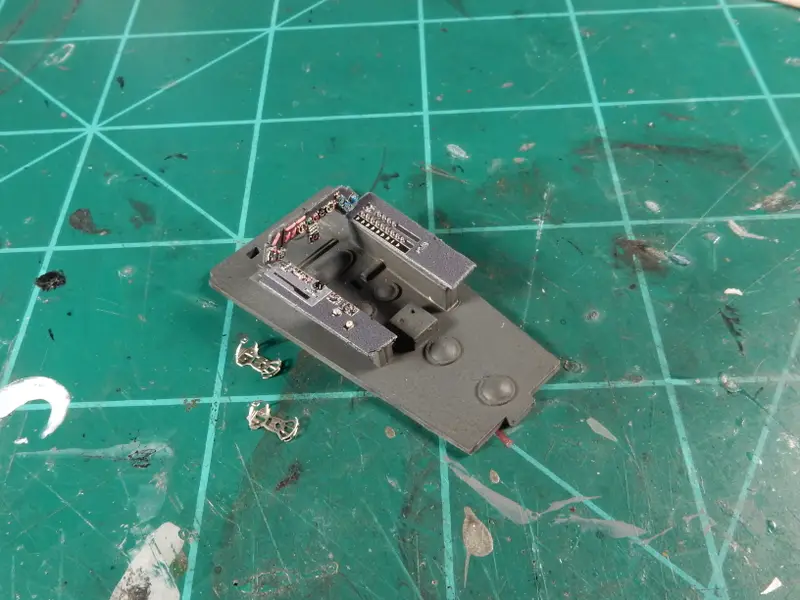
I decided to break the first few bits of this kit out and start doing something with it. I've got the base interior cut out and removed injector pin marks from the flooring. I'll more than likely go with an aluminum plate silver for the floor and seat as a base and then put a super light coat of RLM 66 over that. I'll weather the flooring and seat back some to account for a little bit of wear and tear in the cockpit and then start getting those Quinta decals put on the IP and side consoles. I've got enough Fw190 PE to last me a life time so I'll be using some of that here and there on the build as well. Next is the fun part. rimed the flooring with Model Master Aluminum Plate and then shot a coat of Model Master Acrylic RLM 66 over that. After that step I airbrushed a coat of MIG dark wash over the whole thing and then scuffed the areas on the flooring where the rudder pedals are to replicate the worn areas on the floor. After coating the consoles and IP backing with RLM 66, I busted out with the Quinta 3-D decals. I really like these things!!!

-
Very cleanly built and these look superb Helmut. Top notch work!
-
Gotta love a Maverick. Lookin' good.
-
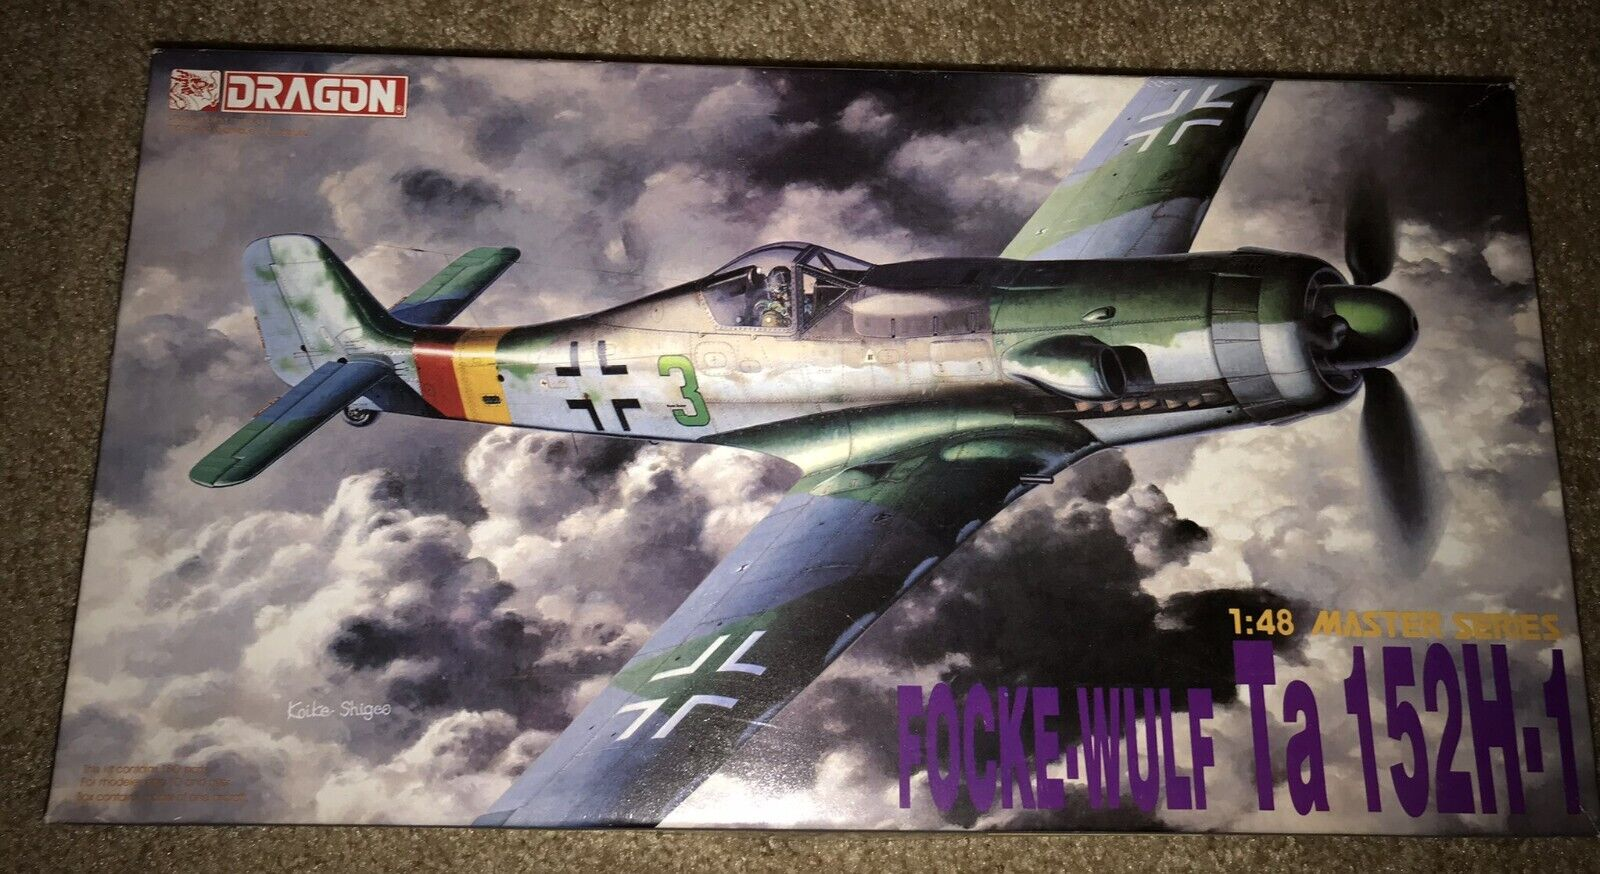
Ok gang, It took me a LOT of thought on my decision to arrive at this build. First, I was going to go with the newly released IBG 1/72 Fw190 D-9 but there's no engine cowlings or engine firewalls available for that one yet (hopefully they are coming because I do want to try my hand at a 1/72nd scale build), then there was the 1/48 Dragon Ta-152 C-0 that I've got in the stash but I'm still on the fence about that one. That lead to me selecting another version in the Ta-152 series....the H version with a wider wingspan. I'll be going with this one from Dragon and will end up opening it all up to display the engine and maybe an open panel .....or two.
-
DEFINITELY a better swap out with the wheels and tires. I had this kit in my stash and took one look at those wheels and tires and the "engine" that was in there and quickly decided that this wasn't the kit for me. I can most certainly appreciate and admire your efforts on this one though Dave.
-
Sharp lookin' Nova Todd and love the old school air cleaner/ filter. Don't let that engine backfire back up through the carburetor!! lol .
-
I've been a classic Dodge/ Plymouth fan pretty much all my life but did NOT know that Plymouth put out a Roadrunner in 1975. This turned out well despite your issues with the stripes Eric. Some good work man.
-
It's not often that I see this combo done this well. GREAT paint work and good work on that 327 in there Garry.
-
This is indeed a very interesting concept Claude. Body work and paint look great as are the details. I gotta hand it to ya bud.......you pulled this whole thing off well.......very well.
-
Pretty cool car Brian. Well painted up and detailed man.
-
Good lookin' little Duece there Ace.?
-
These old square bodied Z's really were good looking cars and those TPI 350's had more than enough power for their day. You've captured the look of this car very well Curtis. Paint looks great and you've got it goin' on with the details in the engine bay and interior. Very well built brutha.
- 25 replies
-
- 1
-

-
- 305
- convertible
- (and 1 more)
-
One may be all you did for the year but your "one" is equal to around 2-3 of mine Steven. You sure put on a good show with this one buddy.
-
Good lookin' Citroen Mario. Love the black paint work.
-
Pretty sharp lookin' car. Great details and paint and really diggin' the hub caps. Very cool.?
-
You pulled that off pretty dang well Jim and good usage of the metalizer bud.
-
Thanks Dave! LOL. Right you are bud. This build is now Under Glass. Thank you to all who looked in on or commented along the way. You guys ROCK!! .