Speedpro
-
Posts
842 -
Joined
-
Last visited
Content Type
Profiles
Forums
Events
Gallery
Everything posted by Speedpro
-
Thanks Marty. Appreciate your comment and taking the time to come back for more looks!
-
Thank's Ken, I really appreciate you taking the time to come back for a second look. Ya, She is alttle sexy. Just the right amounts of this and that. Great comment!
-
 Your forethought and execution is a thing of beauty. Super cool subject matter. Very nice!
 -
Need decals from the bounty hunter connie kalitta funny car MPC788/12 kit. Not looking for the after market ones.
-
beautifully done. Super clean work. Looks like this is a really nice kit!
-
Great looking '32! I really like the color and details to the engine.
-
If you look in the dictionary under Sled, I'm sure this will pop up. Very nice, Very clean. Great attention to details!
-
This is great. Love the color and the stance. Tell you what, Send it to me and I'll stuff a big block under that hood. For a curb side, thats pretty darn cool!
-
Really nice '37. Those wheels look perfect on the car. The engine is very well done. I like the details you did. Well done.
-
Beautiful work! The interior fits so well. The paint and details look perfect. Great engine choice! Really fills up the engine bay.
-
Thanks Steve, The engine was a bit of a challenge. Getting the blower mount figured out was the hardest. Building the engine cover by far was the hardest part to build. The original plan was to stretch the body and frame to give more cabin space (leg room) but I only had 4 wks to get it done. Should have started sooner, my fault. I only have a couple sets of those glidden wheels and and am getting picky about where they are being used. This car just felt right. Still have a couple of the glidden kits in stock, But the shrink wrap is not coming off. Thanks Ken, I too believe it would be on the tough side to change plugs, but doable. Thank you David, The question when building a Model A anymore is "What can I do to separate this build from others?" It's allmost like reinventing the wheel. I think I gave myself some elbow room at least. Thanks Harry, All the chrome parts that were going to be used on the car were stripped and redone with Alclad Chrome, Polished Aluminum and Aluminum. The wheels are the only thing I left "Kit Chrome". Thanks len, This is something that was thought about. The original plan was to stretch the body and frame to give more leg room. Time was not on my side to get the car done to take to GSL. So ya, Its kinda "tight".
-
I'm using a Canon PowerShot SD1300 IS. I'v had this for along time, but it still takes a good photo. I finished this about 10 months ago, Just never posted a wip of it. Thank you for the comment. Thanks Bob, I appreciate you taking the time to look. Thanks David, it was quit the challenge.
-
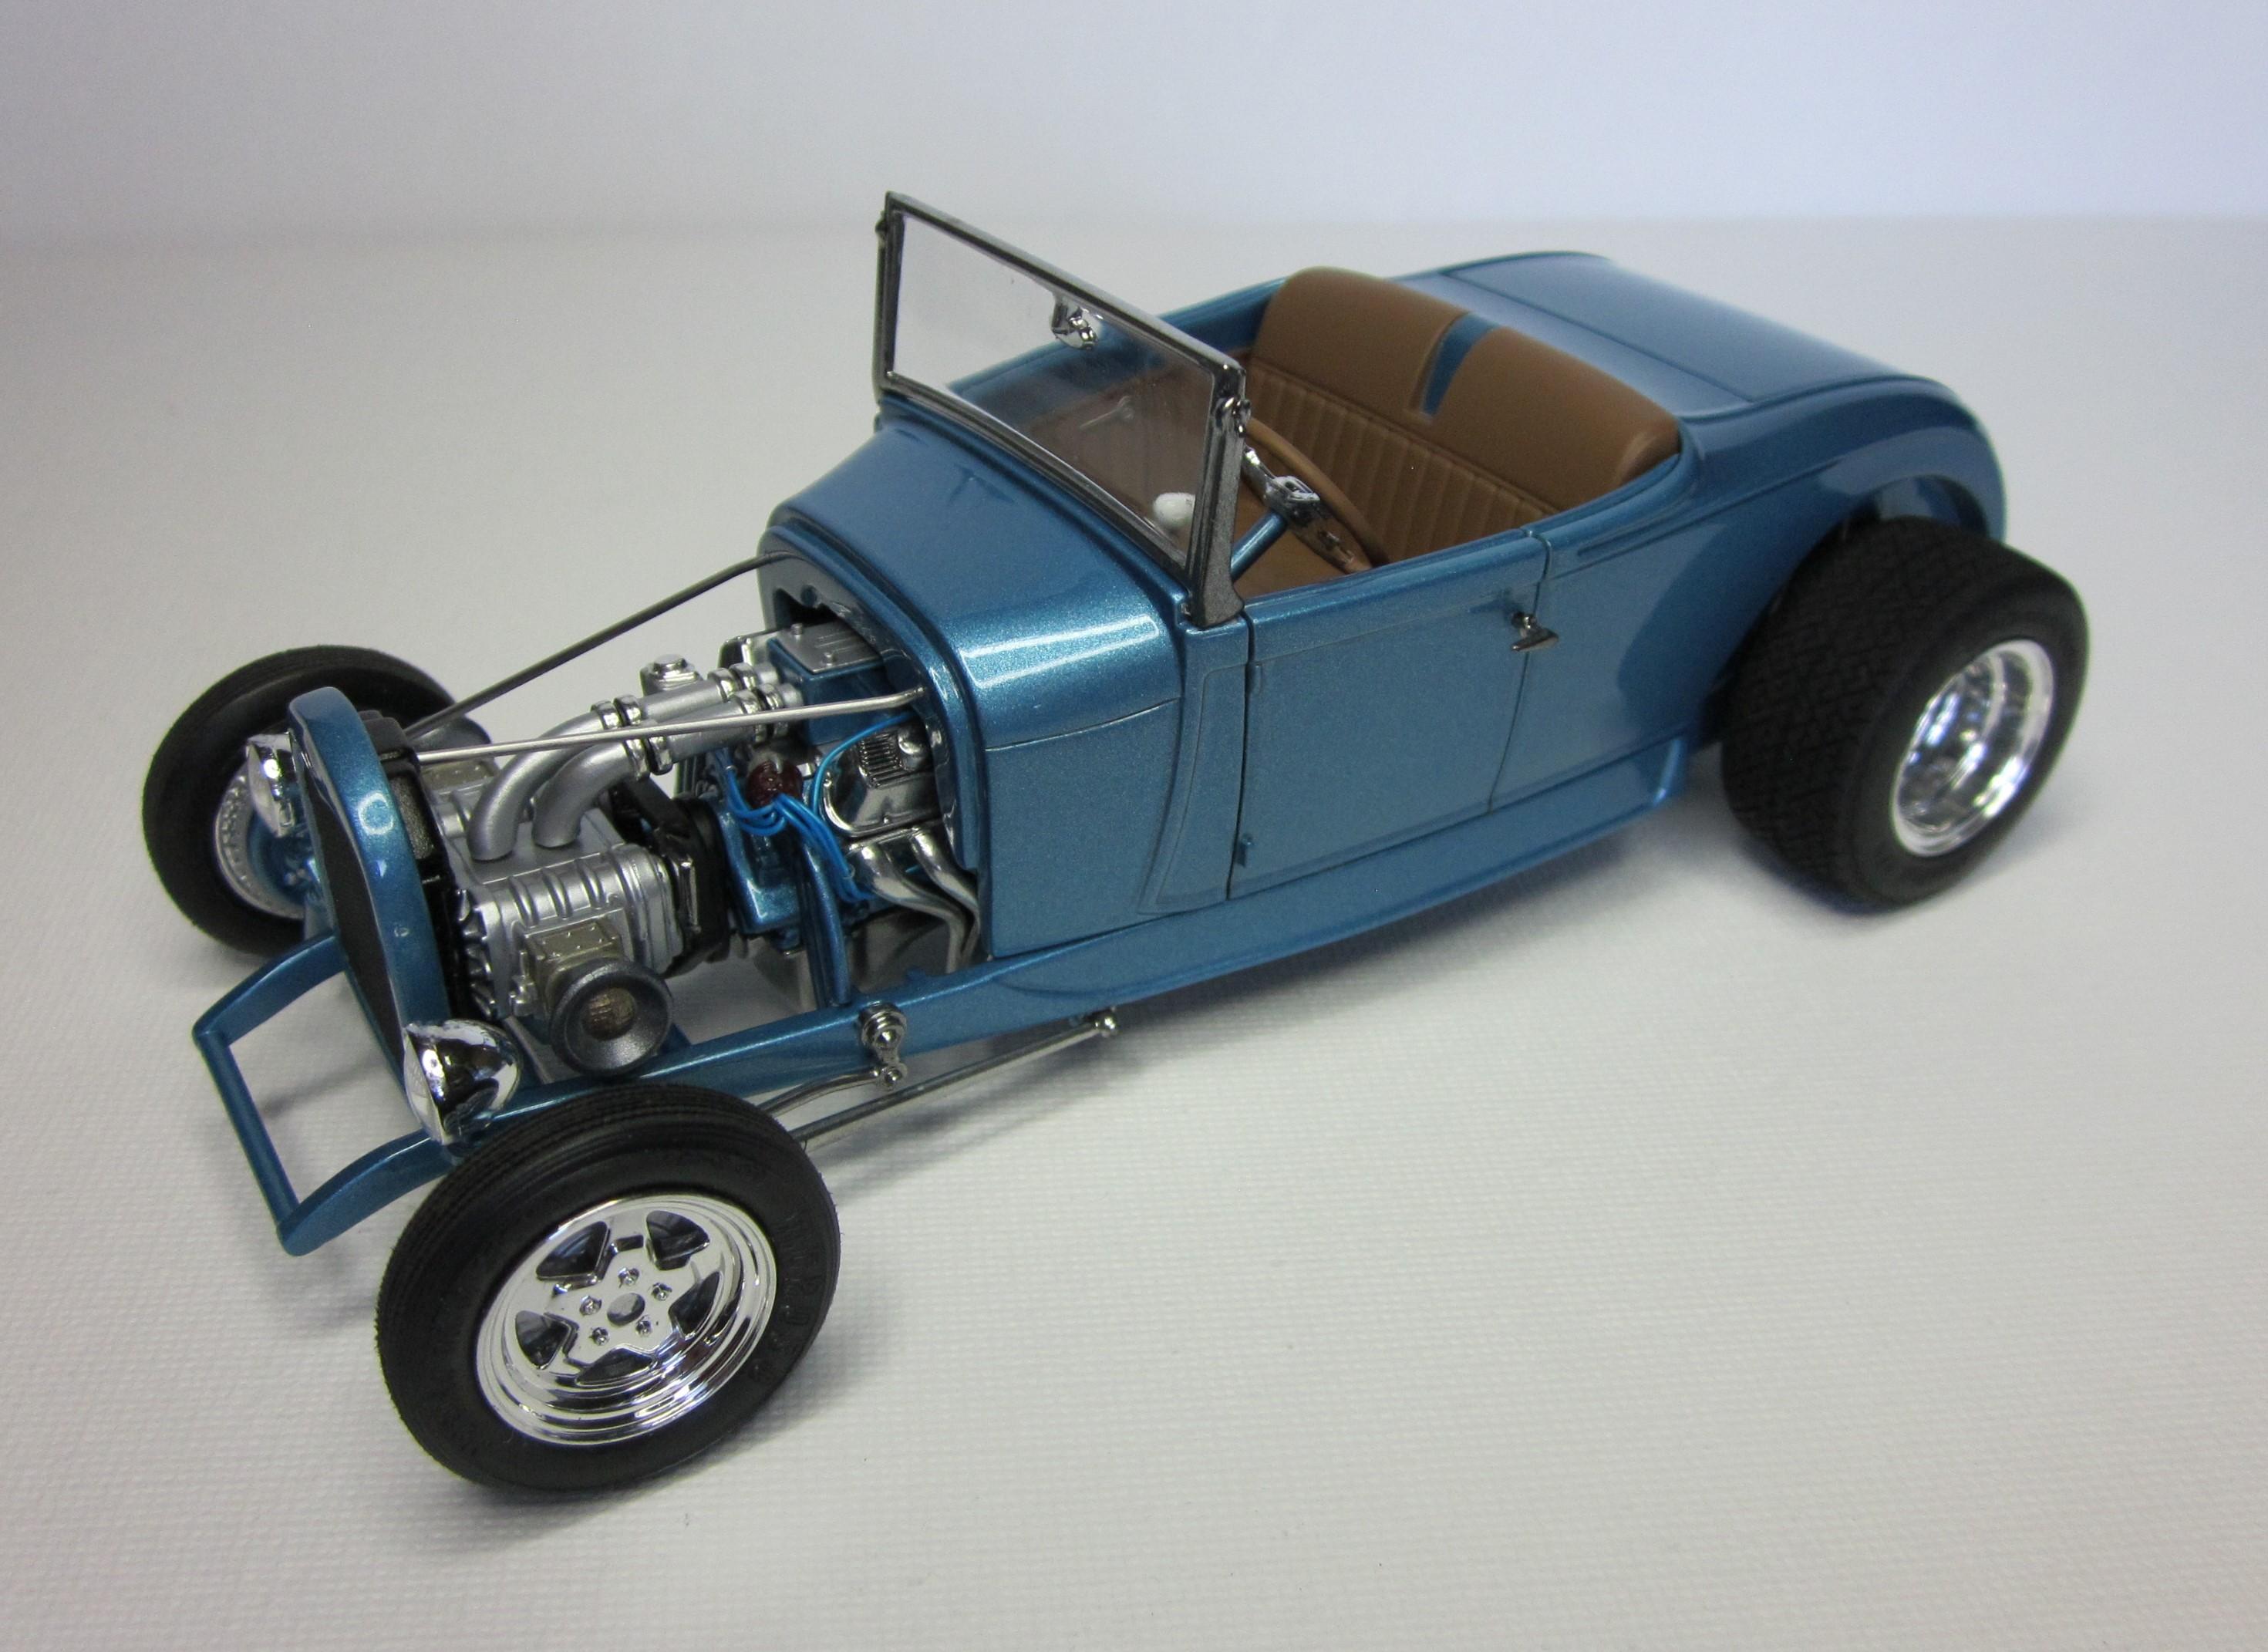
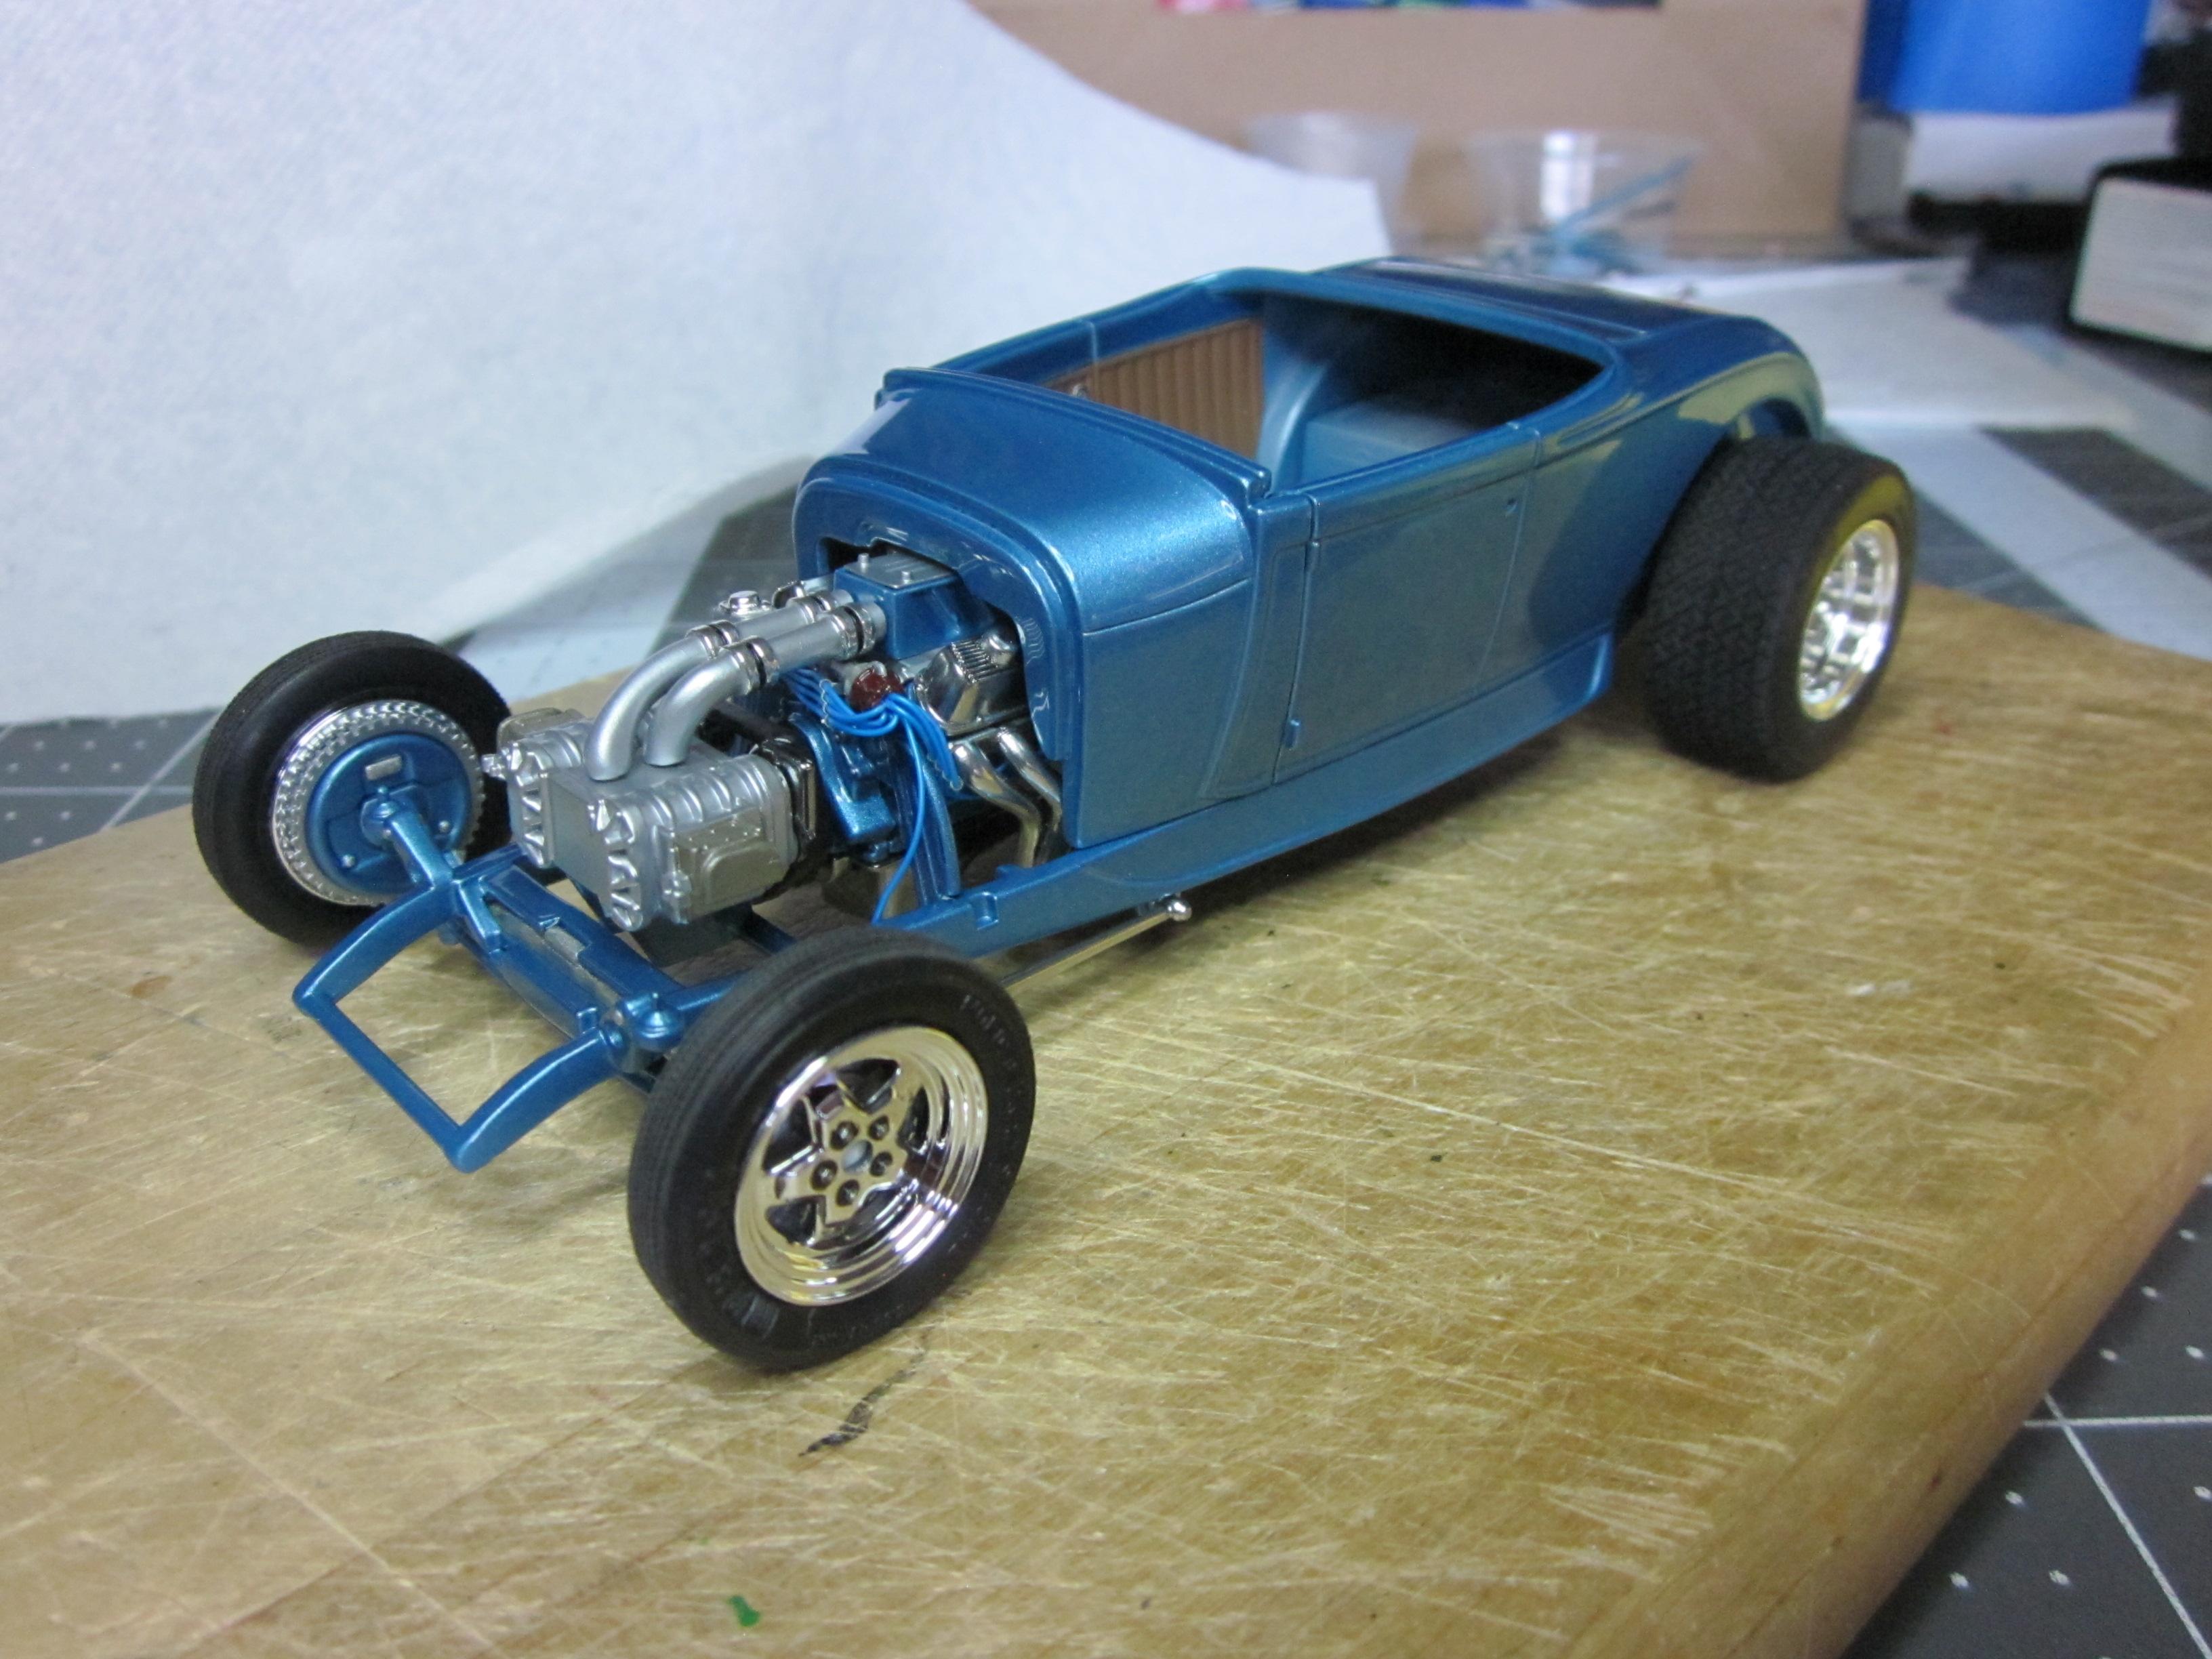
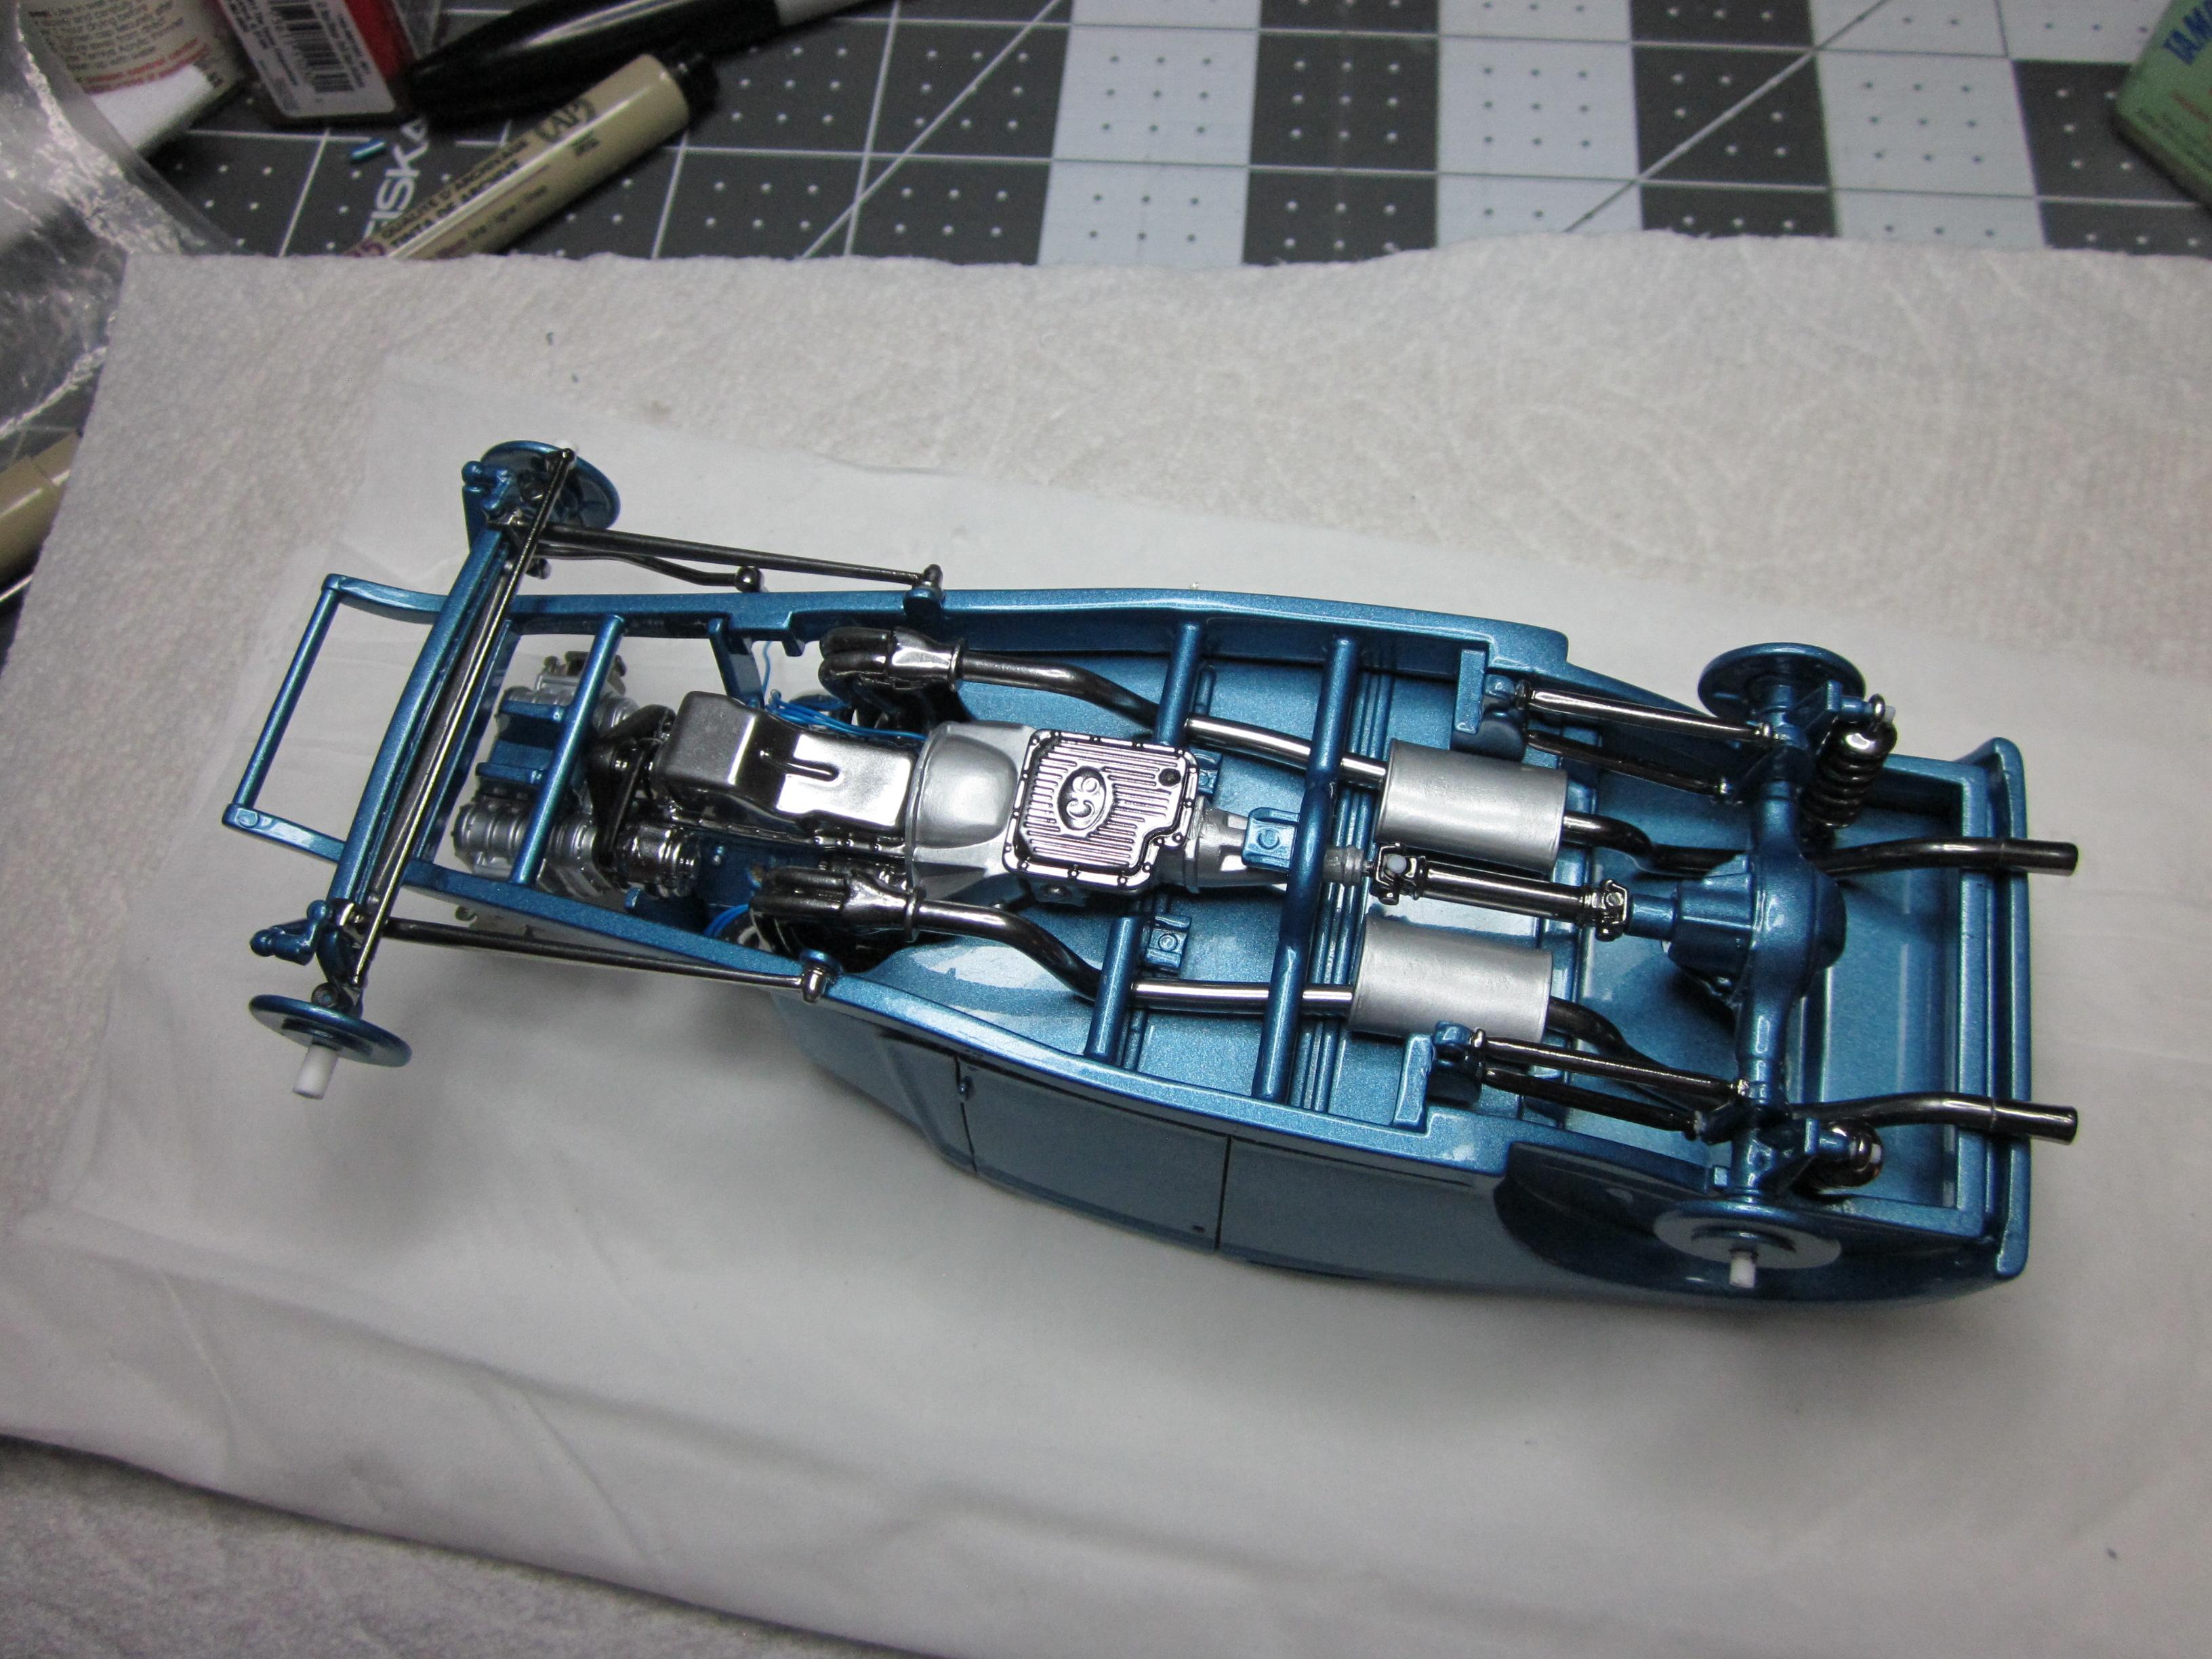
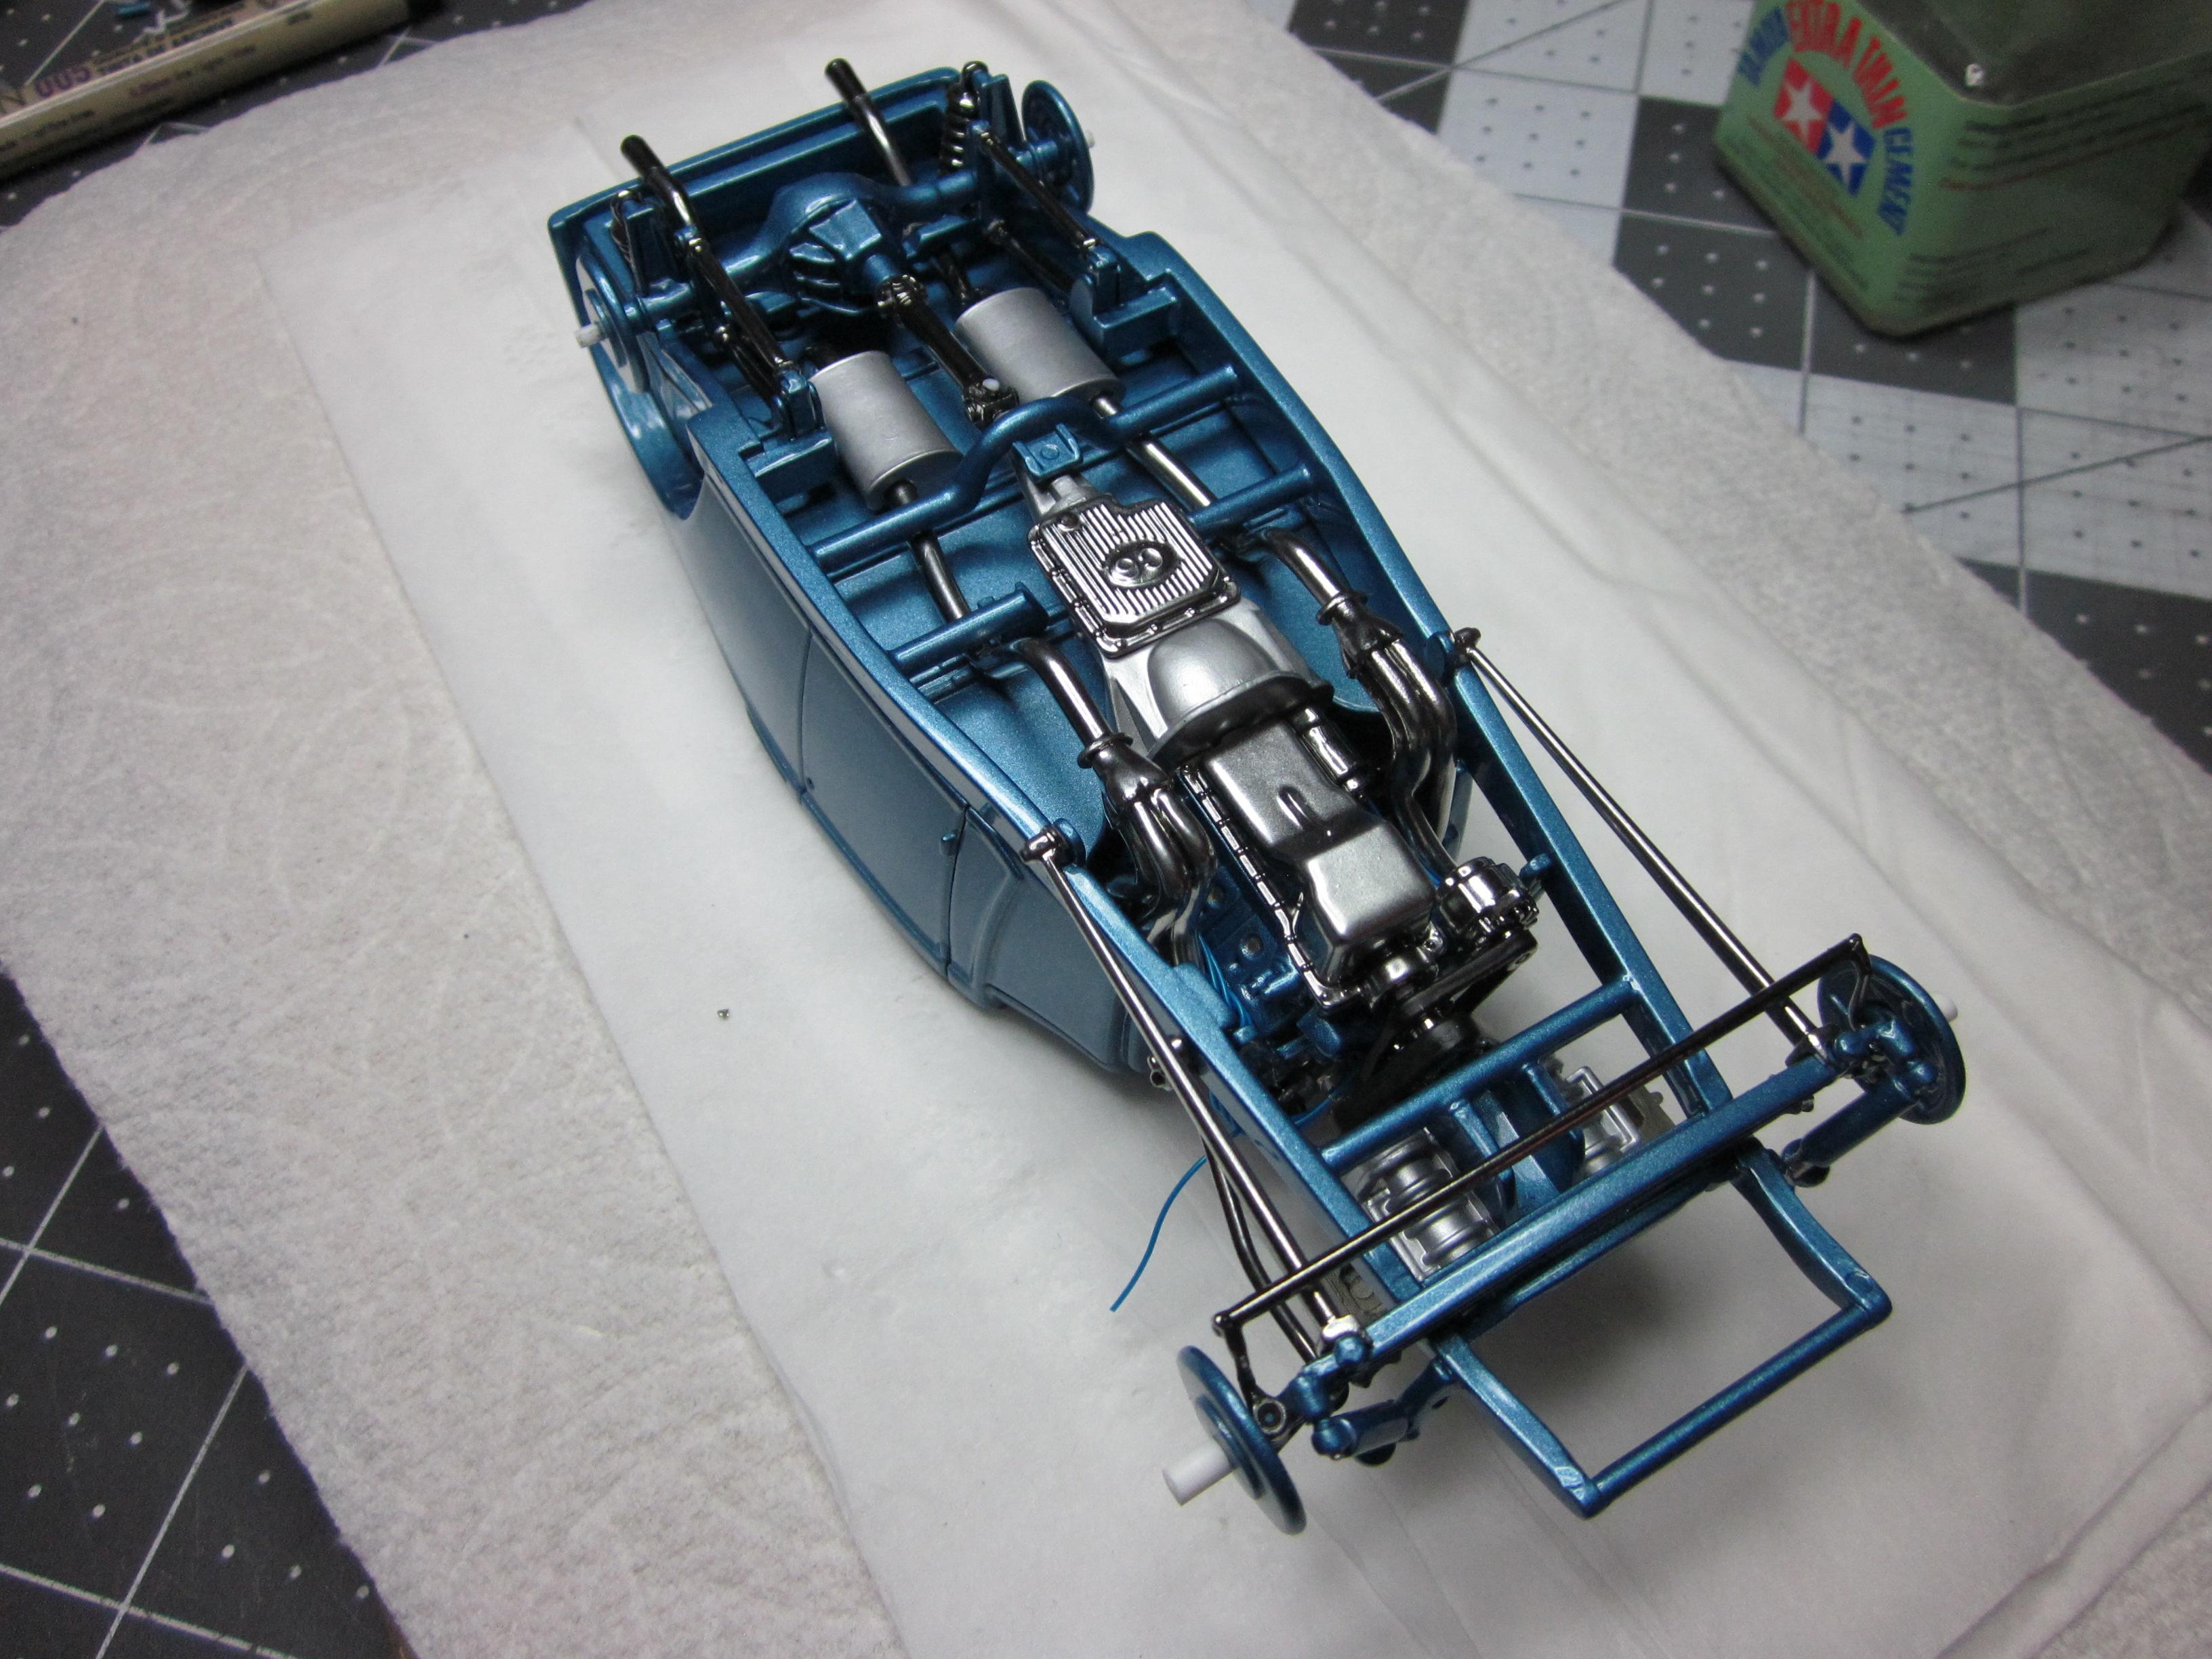
This is a 4 week build I did to have something to put on the table at the final GSL. I had planned on a different powertrain but my idea just happen to be something another builder also had in mind(Mr Mark Weller). So i had to come up with another idea. Ended up building the roadster and kit bashing the Matt Hay pro street T-bird into it. This was rather challenging, being space limited, as the engine from the t-bird is no way just a drop in. But it is a ford. The engine and blower mounts were adapted to the frame and a trans mount was built and relocated. A dog house was built for the interior since more than half the engine was now in the passenger compartment. All the parts for the superchargers were thinned including the drive system trying to get as much room as I could. This really helped getting everything to fit. The front suspension was dropped a scale 5 inches or so by building a new crossmember mount so the radiator would remain in it's stock position. The front axle was also drilled and the drag link was modified to clear. At the rear, The four bar links from the t-bird were used and required new mounting points to the frame. The rear end was narrowed to pull the rear tires inboard to keep the same track width with the front. A drive shaft was also built. Tires came frome the parts box and the wheels were taken from th Bob Glidden Pro Stock kit. Brakes are drums all around. The bottom of the floor was smoothed by removing all the ribs. Then a exhaust system was built using the mufflers from the '66 nova ss kit and round tubing. The system was then alcad chromed. Alclad chrome, polished aluminum, and aluminum were used to finish all the parts for the engine and suspension along with the MCW Nassua Blue Metalic body color. The interior was done with light earth brown and the floor finished with embosing powder. The hurst quarter stick shifter and gauges were used from the t-bird. I added a little something to the front seat to give a little character. Was surprised I even got it done and is missing a few key components. Even so, It was a fun build. Thanks for looking.

- 35 replies
-
- 18
-

-
Nice start on a great kit! Ya, I got kinda carried away with mine. I did build one oob, but did change the intake to a tunnel ram w/duel quads. Keep it up, Looks good.
-
My mom had one of these brand new in '69. It was diamond blue w/black vinyle top. Had the rear suicide doors. This thing looks awsome with the drop top. Ford should have done this. Looks way better than the hard top. Cool build!
-
71 Olds 442 W30 (replica of my brother in law’s car)
Speedpro replied to Steve H's topic in WIP: Model Cars
I don't know what I like more, the dimmer switch or the seat belt retractors? Looking good! -
The rear wheel backs were custom made using part of the original wheel that came with the tires. Just by luck, the '29 brake drum fits it perfectly. The body is mounted. All the suspension is installed. Exhaust finished up. Interior needs the steering column put in place with the wheel. Grill shell and headlamps. Windscreen. And of course some small details. This build went right down to the night before we were leaving for GSL. Only con on this build is I didn't give myself more time. I could have done all the details this car deserves to have. But it is what it is. Thats all I got. I'll work on getting some pics up of the finished car. Thanks for checking in and for the comments. Much appreciated.
-
80's IMSA Mustang
Speedpro replied to Chinacar's topic in Other Racing: Road Racing, Salt Flat Racers
Very nice! I love these cars. I built the black JPS kit. You did a great job on yours! -
Black with dog dish hubcaps looks real good. Nice build!
-
I'v alway's wondered what putting clear on top of tamiya gray primer would look like. Bravo! Great work going on here.
-
Wow that bird turned out nice. So well done! So many cool touches.
-
Nice build you got going John. Sometimes when things don't work out, You end up in a better place. And I think thats what happened to your '65. That Willow Green Metallic looks perfect on it. Ya, It is a bummer about the Evening Orchid color not being correct, But I think your '65 came out ahead. I use MCW paints and have not experienced a problem like you did. I'v had paint that seemed like it was very thin after mixing and was having a problem covering. I was laying alot of paint down and the color was just not there. Had to back off on the ratio of the thinner compared to what I was always normally using with MCW enamal paints. Then the color came around. The last paint I sprayed had some small particals in it and had to be strained. Can you say Alot of sanding! I'v had excellent results with this paint, except for every now and then. It happen's.
-
Cool! That body looks good from here. As a matter of fact, everything looks good. Nice work!
-
Haven't seen one of those in quit awhile! Very nice build!
-
Very nice gasser! Your effort shows. Very tidy work!