Straightliner59
-
Posts
5,814 -
Joined
-
Last visited
Content Type
Profiles
Forums
Events
Gallery
Everything posted by Straightliner59
-
 I just finished my Indy-ish car! Pictures in a bit.
 -
64 Dodge D100 Pickup Pro Street
Straightliner59 replied to AmericanMuscleFan's topic in WIP: Drag Racing Models
Well, thank you, my friend. I just finished that project. I will post some photos, in a while. Merry Christmas to you, as well. -
64 Dodge D100 Pickup Pro Street
Straightliner59 replied to AmericanMuscleFan's topic in WIP: Drag Racing Models
Keep it up, mister! It just keeps getting better and better! -
MPC's Monzas are far superior to AMT's, in the body department. Monza promos can be had, pretty reasonably. Of course, you'll have to cut the hood open...
-
That's a beautiful thing! Thank you, sir!
-
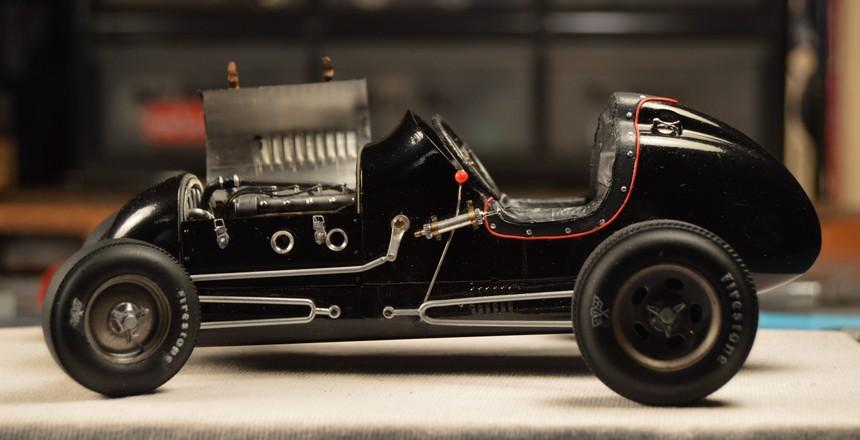
I will be happy to tell you, all day, about the things I know that are wrong with this as any kind of replica of an Indy car. When I started it about twenty years ago, it was meant to be a quickie representation of one--something inspired by the Belanger Special. When I dug it out, earlier this year, it was for the "Bring Out Your Dead" thread, because it was far enough along that I figured it was a manageable completion. The time constraint, there, and the fact that it was already much farther along than I was willing to undo, to make it right (there are a bunch of things I would change!), left me to dress up what I already had, and go with it. Essentially, all I really did was to lengthen the kit's wheelbase and change the wheels and tires. I am aware of its shortcomings. It didn't get here, because I lack information--more so, because I did when I started. Anyway, I'm not sure what good further information is, at this point. Clearly, it's WAY too far along to concern myself with things like the wheelbase, the height of the body, ride height, etc. Therefore, it's kind of hard to see your commentary as anything other than criticism for criticism's sake. Was this still in the beginning stages, I would welcome your advice and your critique, rework my project. At this point...I thought I explained all of this, in response to your earlier comment.
-
What a great idea! Beautiful execution, as well. Nice work, Jim!
-
Thank you, Francis! Much appreciated, kind sir!
-
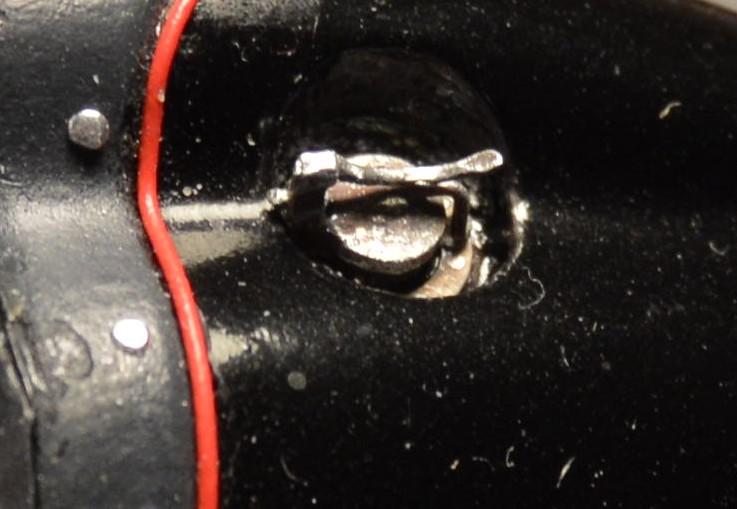
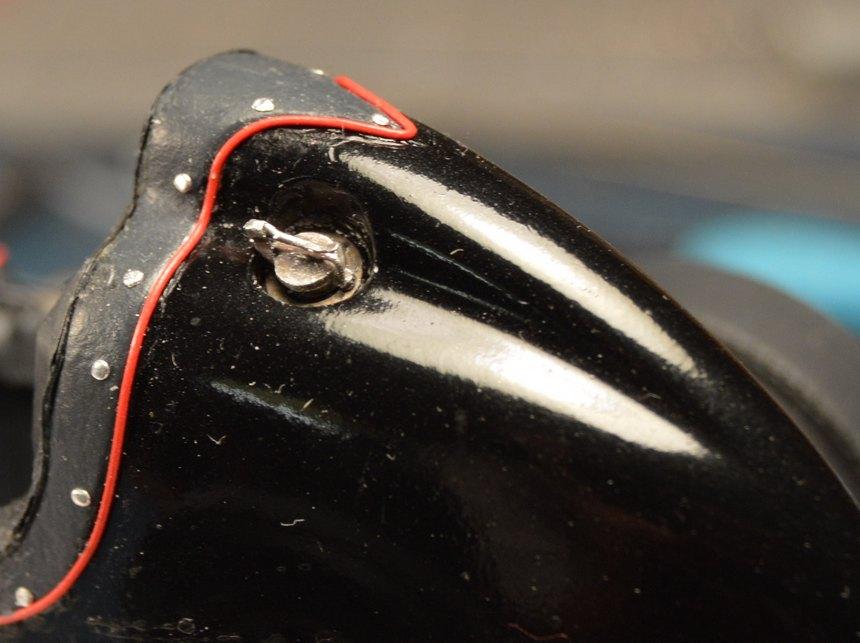
Thank you, Richard. That it's not a true conversion to a "big car" is the reason for the "(Sort Of)" in the thread title. The fuel filler is exactly where Monogram put it, so I went with it.
-
They most certainly would, Steve! If you could grab a shot with a rule alongside, that would be excellent. Thank you, kind sir!
-
With the fuel filler cap, this thing is all but done. I intend to put a windscreen on it, but can't seem to locate the instruction sheet, which I seem to recall has a pattern for it. A search of the usual suspects doesn't seem to turn up a sheet for this kit. So, I am cutting myself a little slack in calling it done, since I don't have those. I'm fine tuning the graphics. I want to have it completely done by Christmas, anyhoo, even if I have to figure out my own pattern for the windscreen. As always, questions, critiques and comments are welcome. Thanks for looking!

-
Jo-Han Maverick-Dyno Don's Ride
Straightliner59 replied to mustang1989's topic in WIP: Drag Racing Models
Very nice work, Joe! I'm sorry if I missed it, but, what did you use for the color on the cam covers? They look extra nice! You've done yerself proud, sir! -
These are very, very well done! I'm not big on sci-fi, but your work on these is remarkable. Jetpunk! You can have that. ?
-
Dupli-color primers
Straightliner59 replied to AMT68's topic in Model Building Questions and Answers
Oh, boy! That's a whole new can of worms! By changing the color of primer, top coats can be altered in warmth and depth of color. Same thing for using gold or silver undercoats. Many builders use plastic spoons to test these different effects on colors. I hope that made sense. If not, someone soon will help you make sense of it! ? -
Ver' nice!
-
Do You Really Need Debonder?
Straightliner59 replied to JordanFordF1's topic in Tips, Tricks, and Tutorials
I don't think I've ever owned a bottle of debonder. If I stuck my fingers together (that usually only happens when first opening a bottle), I used acetone or an X-Acto knife, depending on the thickness of the skin, where the sticking occurred! ? -
Dupli-color primers
Straightliner59 replied to AMT68's topic in Model Building Questions and Answers
If you want to skip the sanding, simply wash the body using Soft Scrub cleanser and an old toothbrush. The Soft Scrub is mildly abrasive and helps give the primer some "bite". I learned it from Don Fahrni, and anything that was good enough for him, is good enough for anyone! -
Thanks, Dave! I hope you found/find some useful stuff you can use on future projects! Thanks for your comments, and for having a look, sir.
-
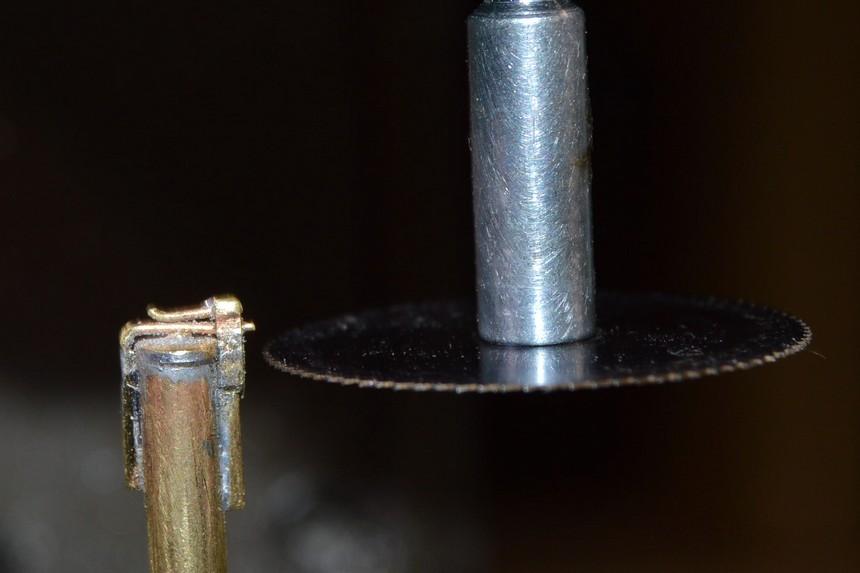
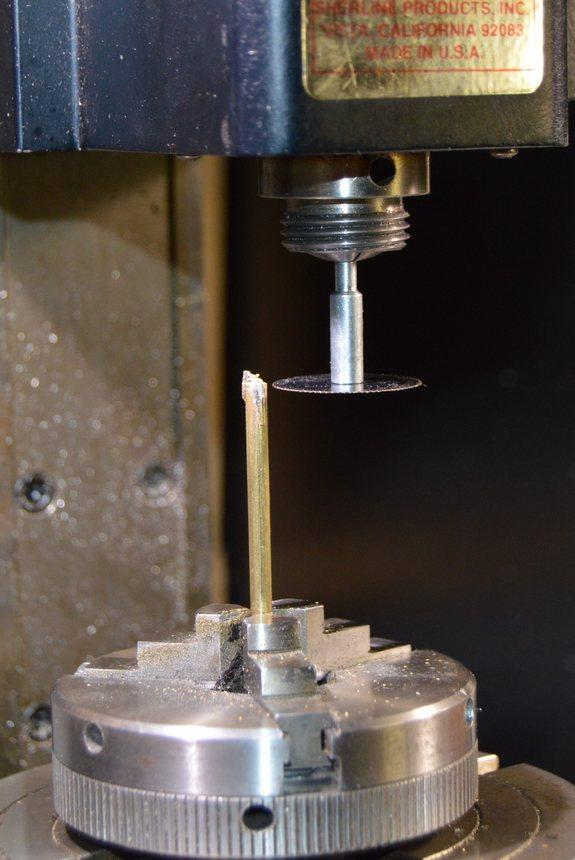
Pretty easy to make one, from a piece of sprue, and some odd bits. I made this one, but, it's aluminum. Still, the material doesn't matter, in this case. The plastic one here is from Johan's Roadrunner.
-
Richard, thank you for your input. I do appreciate it. When I started this thing (about 20 years ago), it wasn't supposed to be a replica, or really anything more than a general representation of an old Indy car--and was never intended to be this involved! When I began working on it, again, it kind of took on a life of its own. As it got out of hand (?), I knew that I was much farther along than I was willing to undo to fix it. It made me just accept it for what it is, and do the best that I could, given where I was with the project. Was I to do it again, there are a couple of pretty big things I would change. All that said, I am happy with the way it looks, as a piece of art. I've learned a lot, in its creation, to be sure, and I consider those louvers and the press something of a triumph! Thanks again for your thoughts, and your kind words. And thanks for looking!
-
Mark just gave you the best way to accomplish this. It's simple, and looks better than any other method I've seen.
-
Jo-Han Maverick-Dyno Don's Ride
Straightliner59 replied to mustang1989's topic in WIP: Drag Racing Models
Coming along nicely, Joe. Looking very good! -
This is how figures should be painted! Beautiful work, Charles!
-
This thing is cool, for sure! always loved their cars. I'm going to guess this photo was taken at Wendover.
-
I needed a pair of seat belts so I set up the remainder of my pack of Model Car Garage PE buckles. I hate the way people just use them flat and they look like wafers in the model. I couldn't agree with you, more! That makes me as nuts as photoetched spokes on dragster wheels! ? Sometimes, those radiator hoses can be a booger. Both of them were a pain, on my current project. It's looking good, Tom!