Chariots of Fire
-
Posts
2,782 -
Joined
-
Last visited
Content Type
Profiles
Forums
Events
Gallery
Everything posted by Chariots of Fire
-
Think I'll stick to a smooth finish!?
-
 Sharpies are best that have the chisel points rather than a sharp point. Much more control over where the ink goes and they give a nice smooth edge.
 -
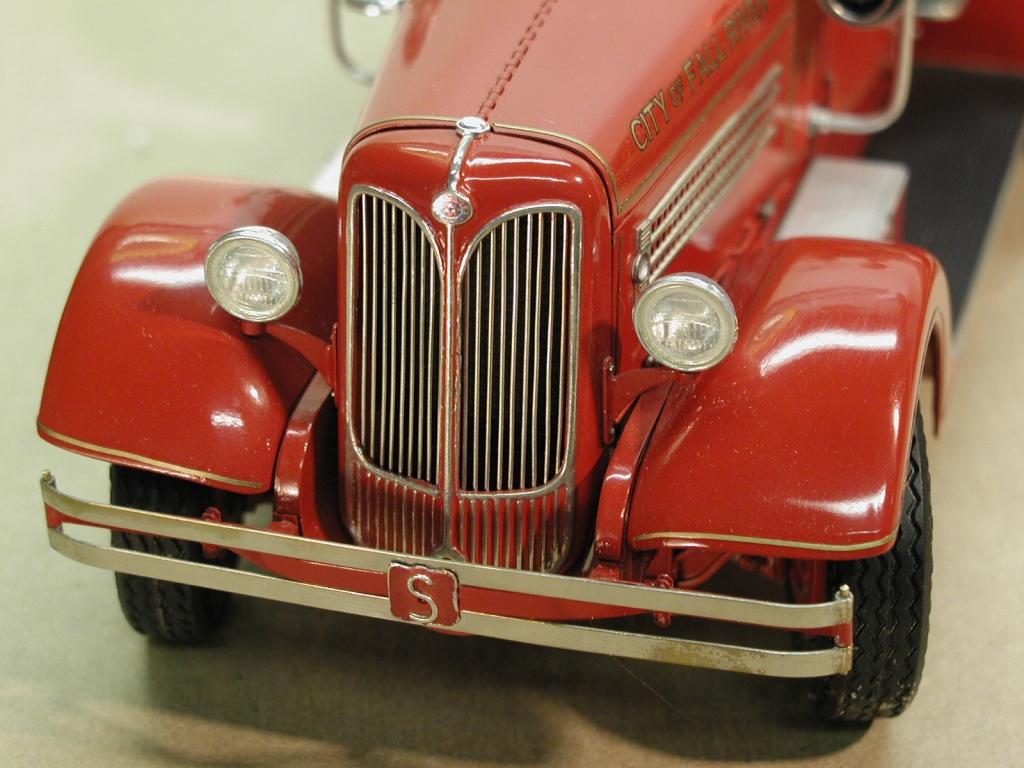
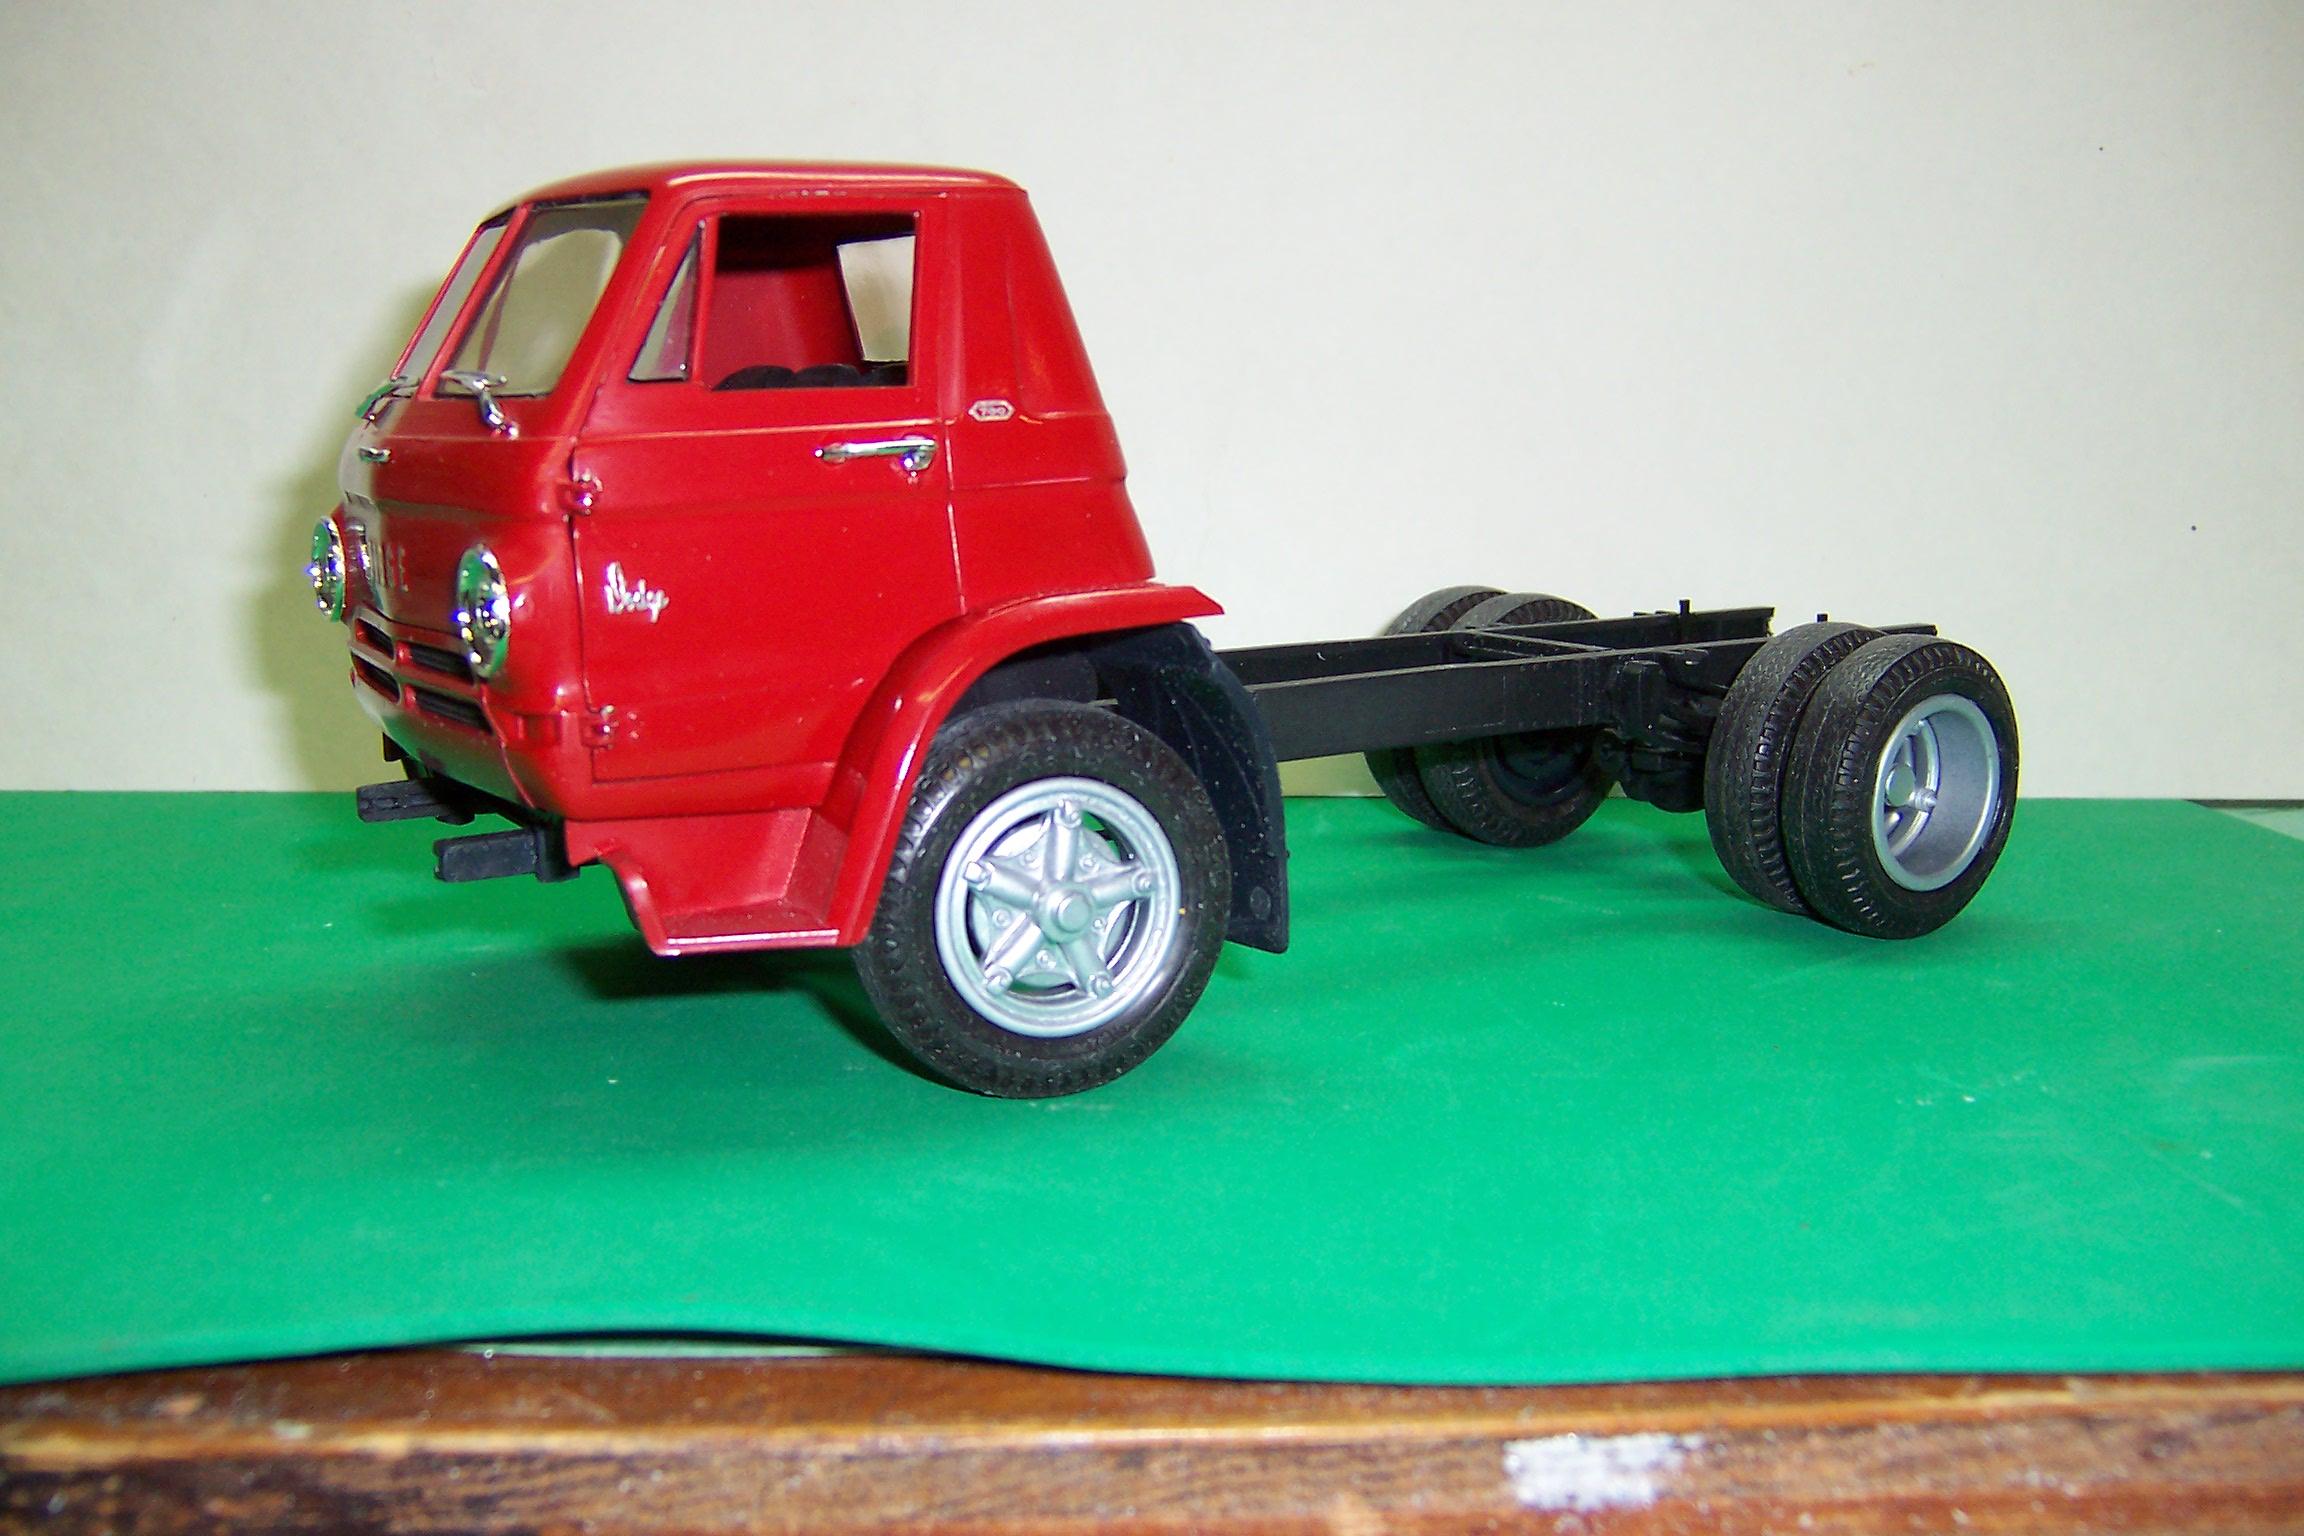
I agree with Petski. Foil it before painting and then gently rub the paint off the foil. You'll get a nice bright image. Here is an example of doing that on a 1937 Seagrave from 20 years ago. The bottom flutes under the grill were covered with foil first and then the surfaces were cleaned of the paint. Here's another image of the script on the front of an L-700. And the "700" to the right of the door was done the same way.

-
Looks like you have done some serious brass work as it is! Nicely done!
-
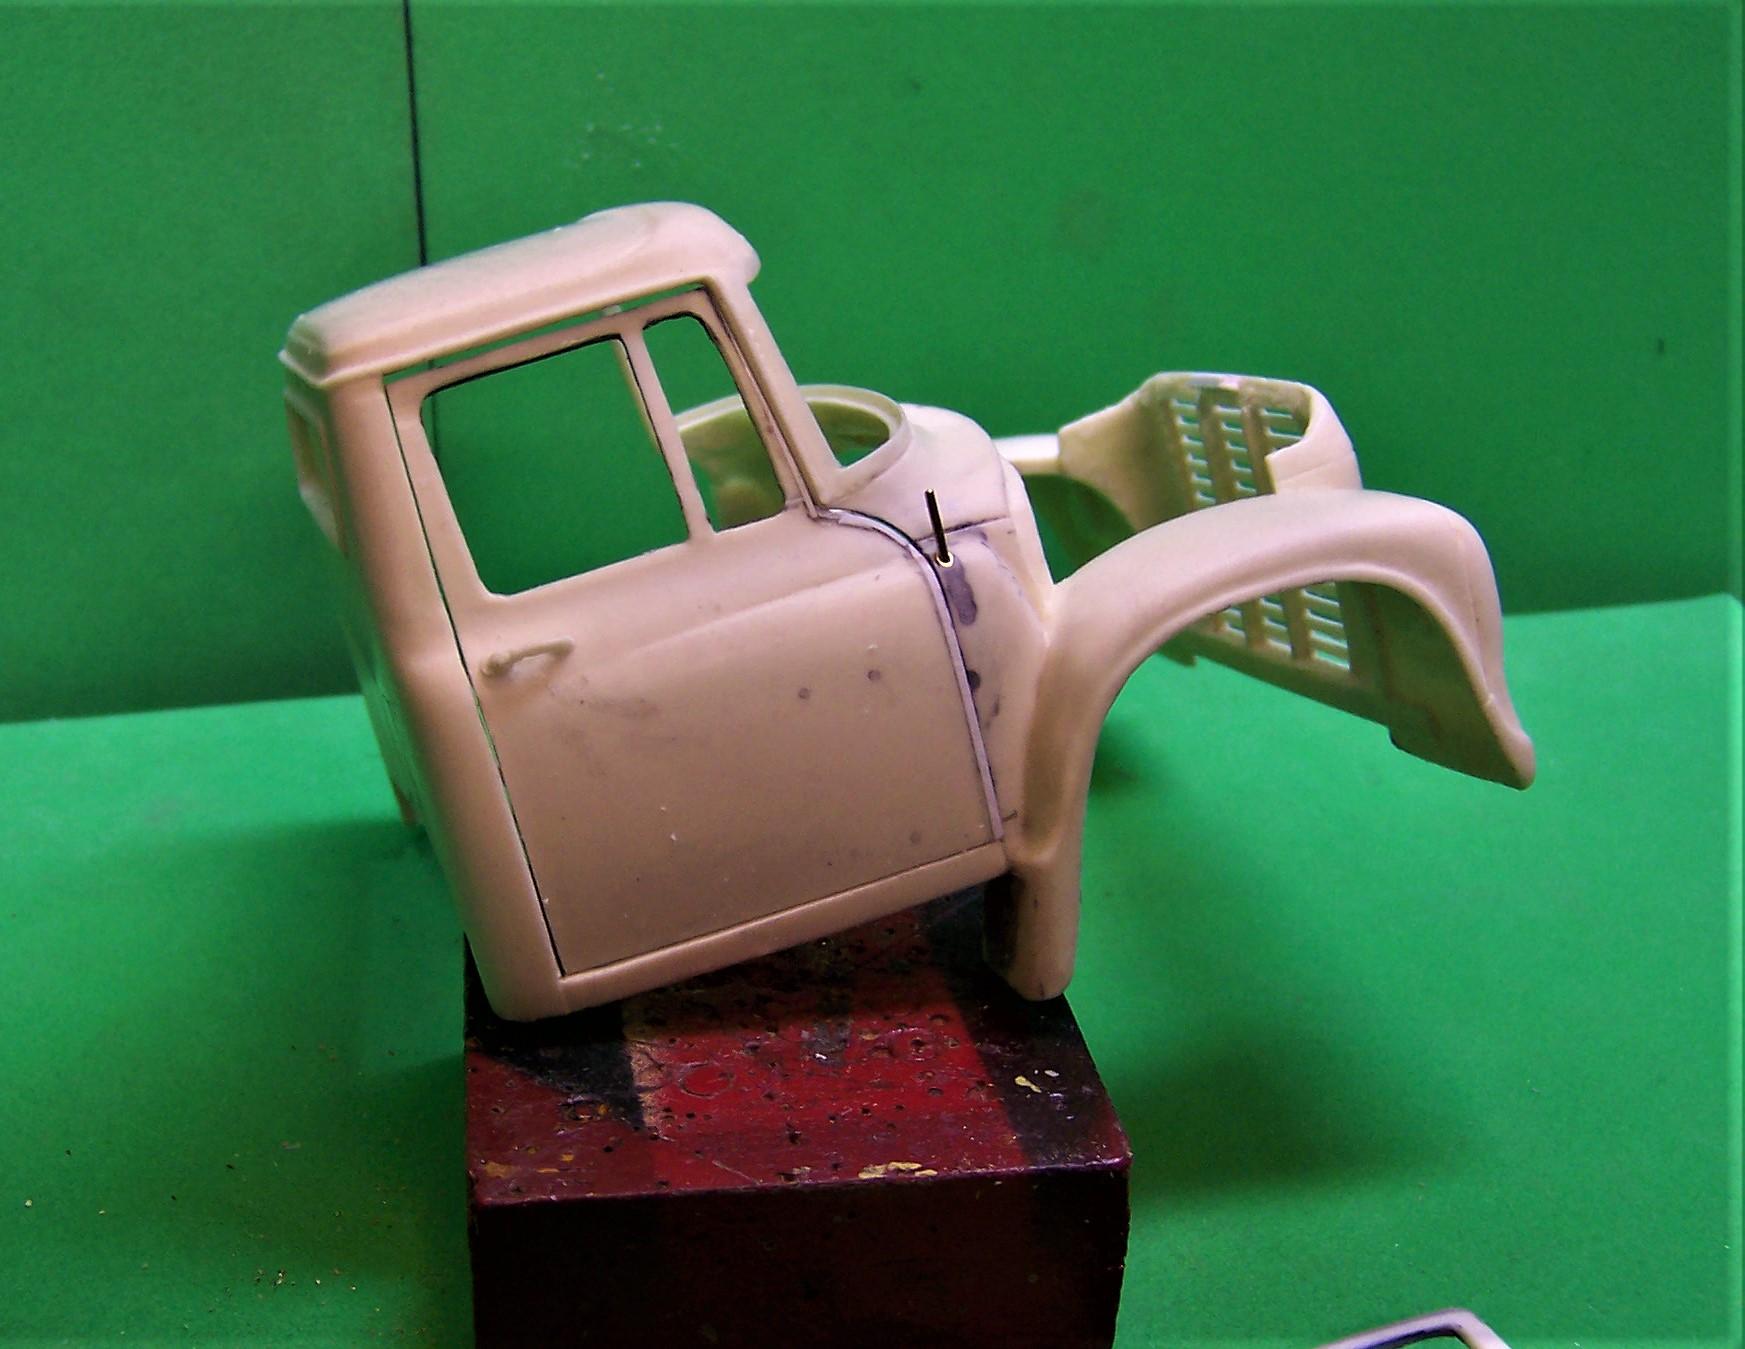
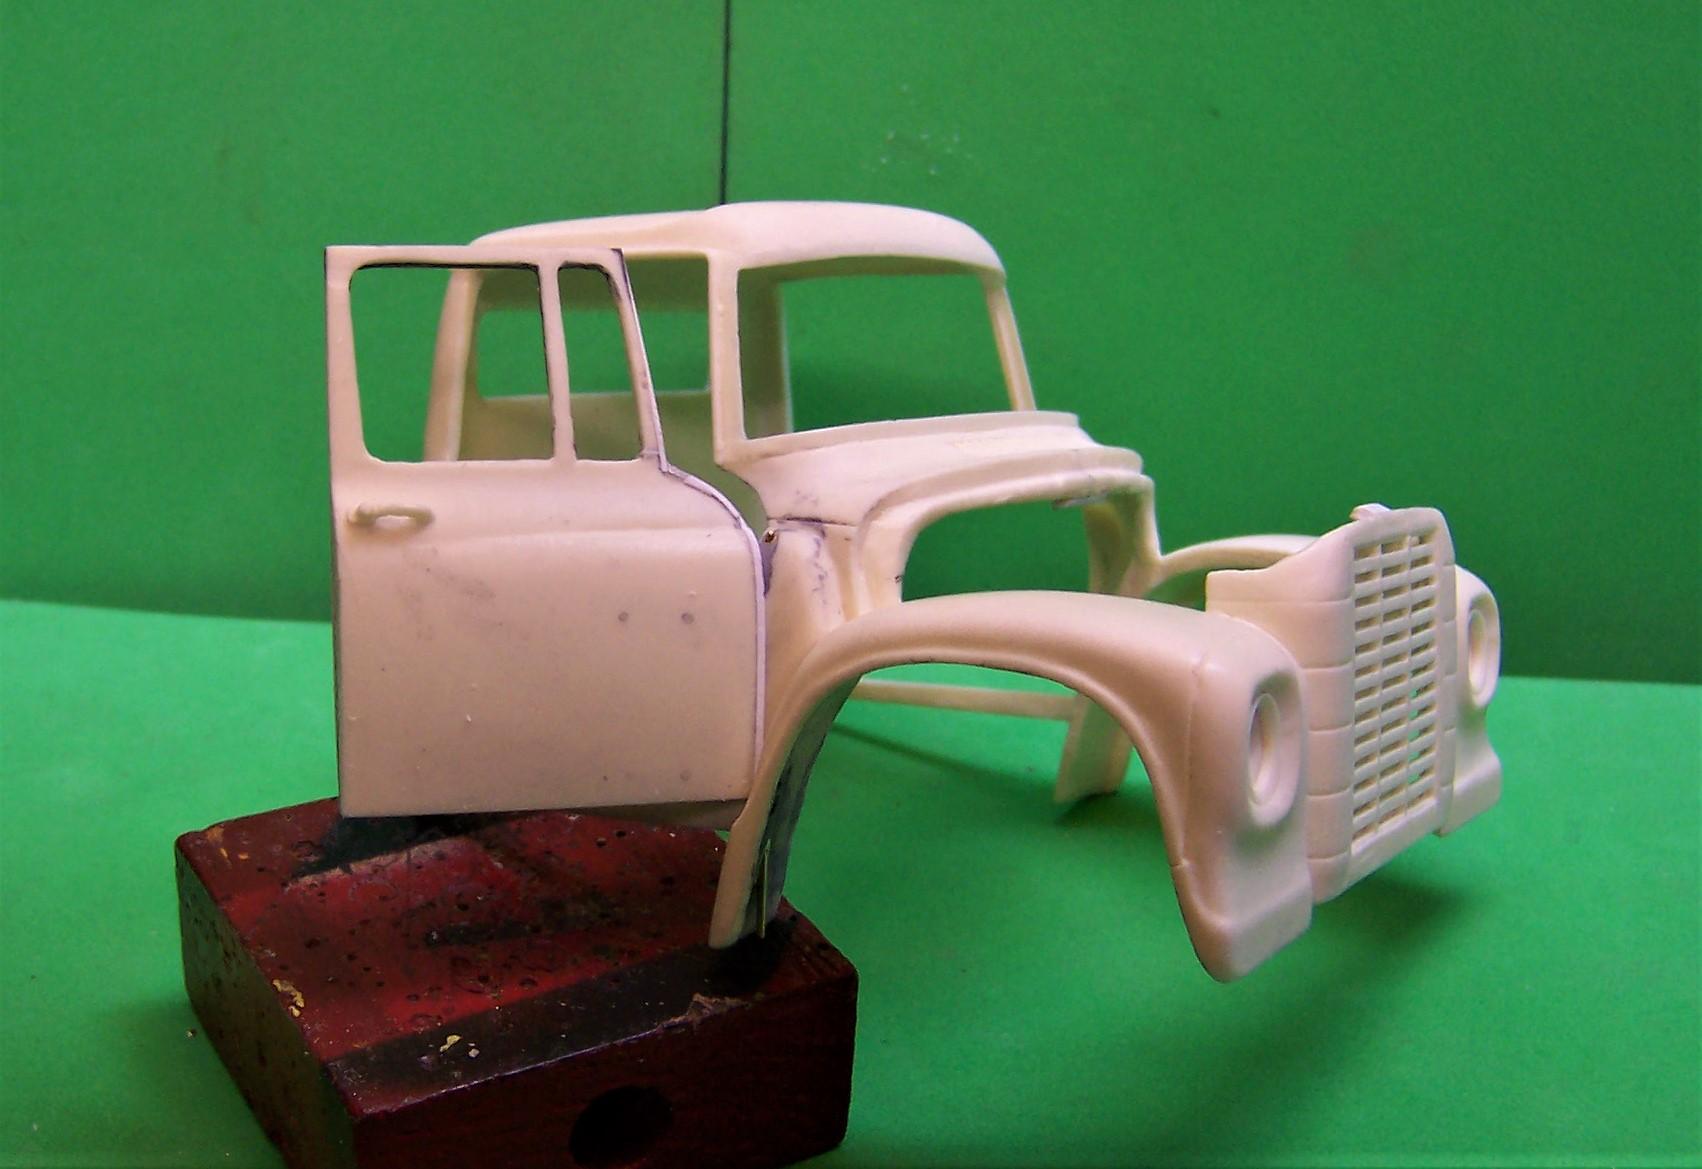
I've done the hidden door hinge thing on several projects. Here is one solution. I used three different sections of brass on these hinges. Flat strip stock, and tubing of two sizes. I cut the large tubing in half making two half circles as shown in the photo. I soldered one end onto the flat stock. On the other end I soldered a piece of small tubing like the piece above the top hinge in the photo. Into the body of the truck (in this case) I inserted two pieces of small tubing like the small ones on the end of the half circles. You can see the end of one just below the windshield of the truck. On the bottom of the fender there is a similar piece of tubing embedded. At right in the photo is the door with the flat strip stock embedded between the outside of the door and inside the door panel. When put in place a piece of stiff wire the size of the interior diameter of the small tubing is inserted. This allows the door to swing with no exterior exposure of the hinge. Just before painting, I plugged the top hole in the body so it would not show later. A look at the bottom section of tubing in the fender. This could be done on a car model as well. It just needs a positive location both top and bottom. The door is closed and the pin has been inserted into the tubing. Still work to do on closing up the door opening and the pin will need to be cut. The door in the open position. No hinges show except on the inside of the door opening, as they would on a real vehicle. The hinges are curve with the half circles because the hinge needs to clear the edge of the door opening without binding. Without it the door would not open. In the photo above, the four gray dots in the door are where the door was drilled open to secure the flat portions of each hinge. And at this stage the pin can be pulled out of the tubing from the bottom for additional work on the door. Here is the door jam showing the two openings in the cowl where the hinges are inserted. The doors are tapered only to serve the purpose of closing up each one. The difference is not noticeable once the doors are in place.
-
1941 Chevrolet tanker
Chariots of Fire replied to landman's topic in WIP: Model Trucks: Big Rigs and Heavy Equipment
Looks like it came from the Italeri Fire Tanker. -
1941 Chevrolet tanker
Chariots of Fire replied to landman's topic in WIP: Model Trucks: Big Rigs and Heavy Equipment
From the thickness of the casting it looks like a re-pop but the outside details are definitely from the Monogram Mack kit. It must have been used as the master. -
1941 Chevrolet tanker
Chariots of Fire replied to landman's topic in WIP: Model Trucks: Big Rigs and Heavy Equipment
Unique use for the 1/32 Monogram Mack lower pumper body! ? -
Ma Bell
Chariots of Fire replied to GLMFAA1's topic in WIP: Model Trucks: Pickups, Vans, SUVs, Light Commercial
Will you keep the two small cab windows in the back or fill them in?? -
Chevy Extended Cab
Chariots of Fire replied to Terry Jessee's topic in Model Trucks: Pickups, Vans, SUVs, Light Commercial
That's cool! Nice everyday truck. Think I have one back in the stash. -
That last adjustment did the trick. Now the cab and bed line up where they should. Good show!
-
Thank! It could be worked on for sure!
-
Mario: What scale, Please!?
-
1941 Chevrolet tanker
Chariots of Fire replied to landman's topic in WIP: Model Trucks: Big Rigs and Heavy Equipment
Nice job on the engine! You might want to consider a heavier frame under the Chevy given the load it will be required to carry. Perhaps make it straight toward the back since you have to extend it anyway. Just a thought.? -
Dodge Mini Pumper
Chariots of Fire replied to Chariots of Fire's topic in Model Trucks: Pickups, Vans, SUVs, Light Commercial
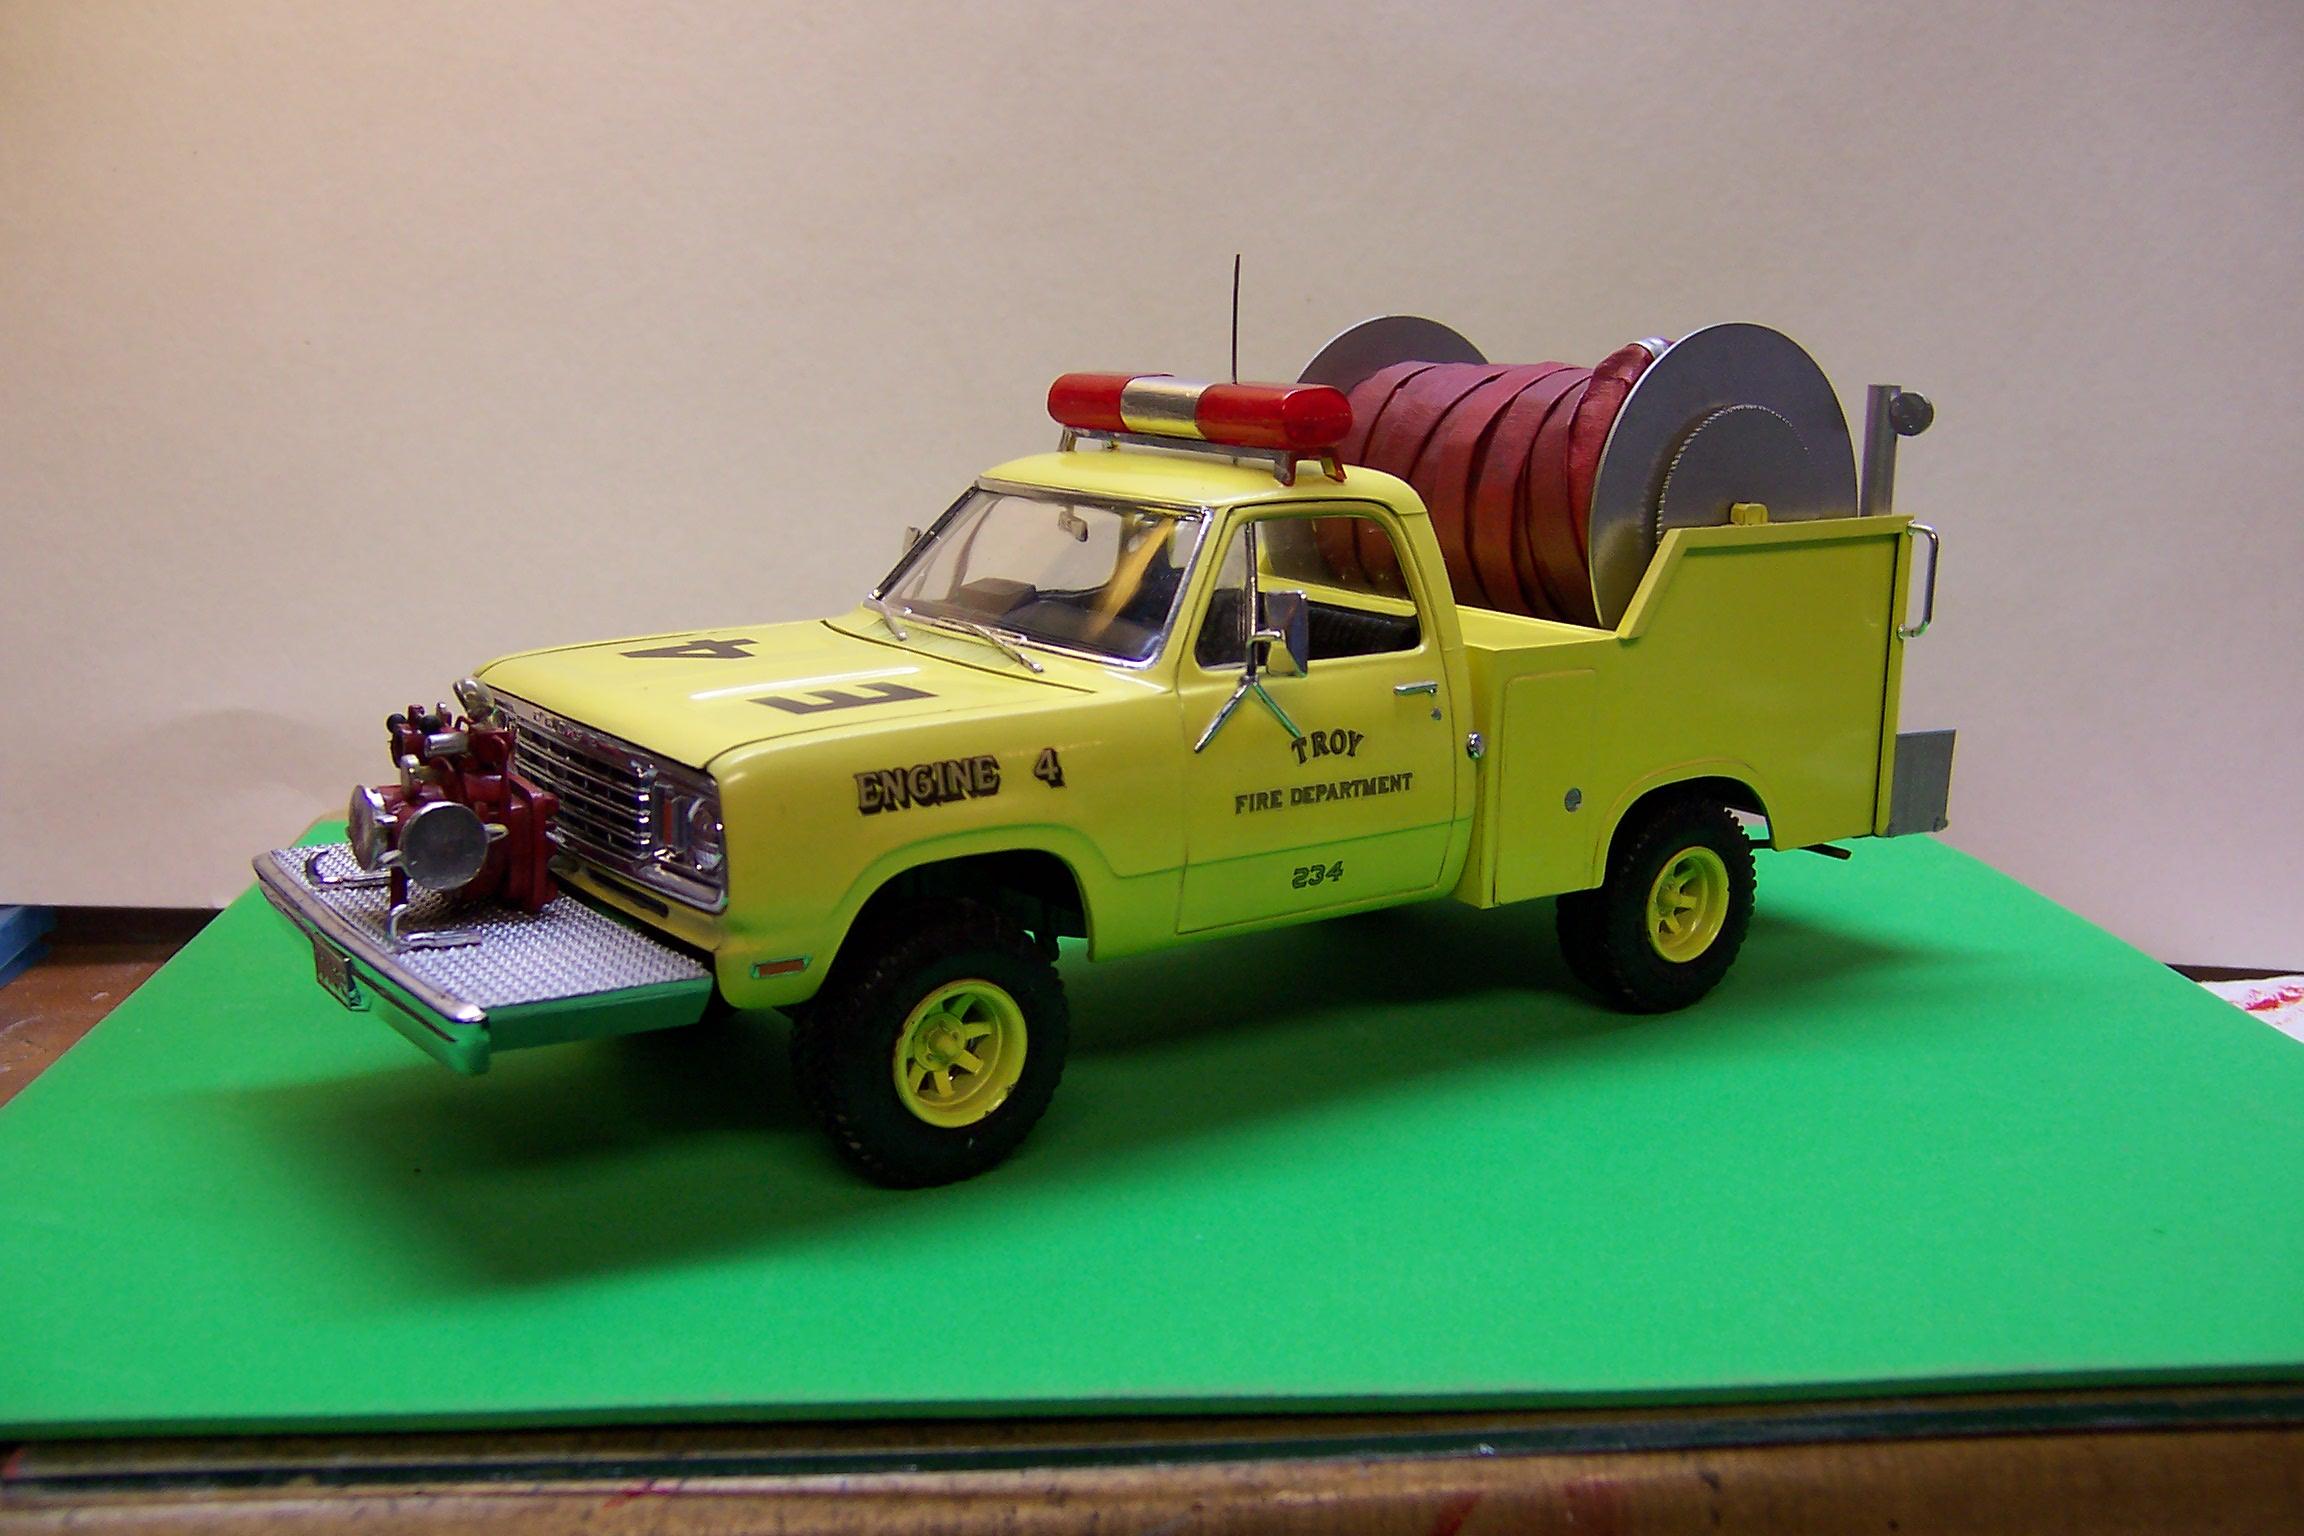
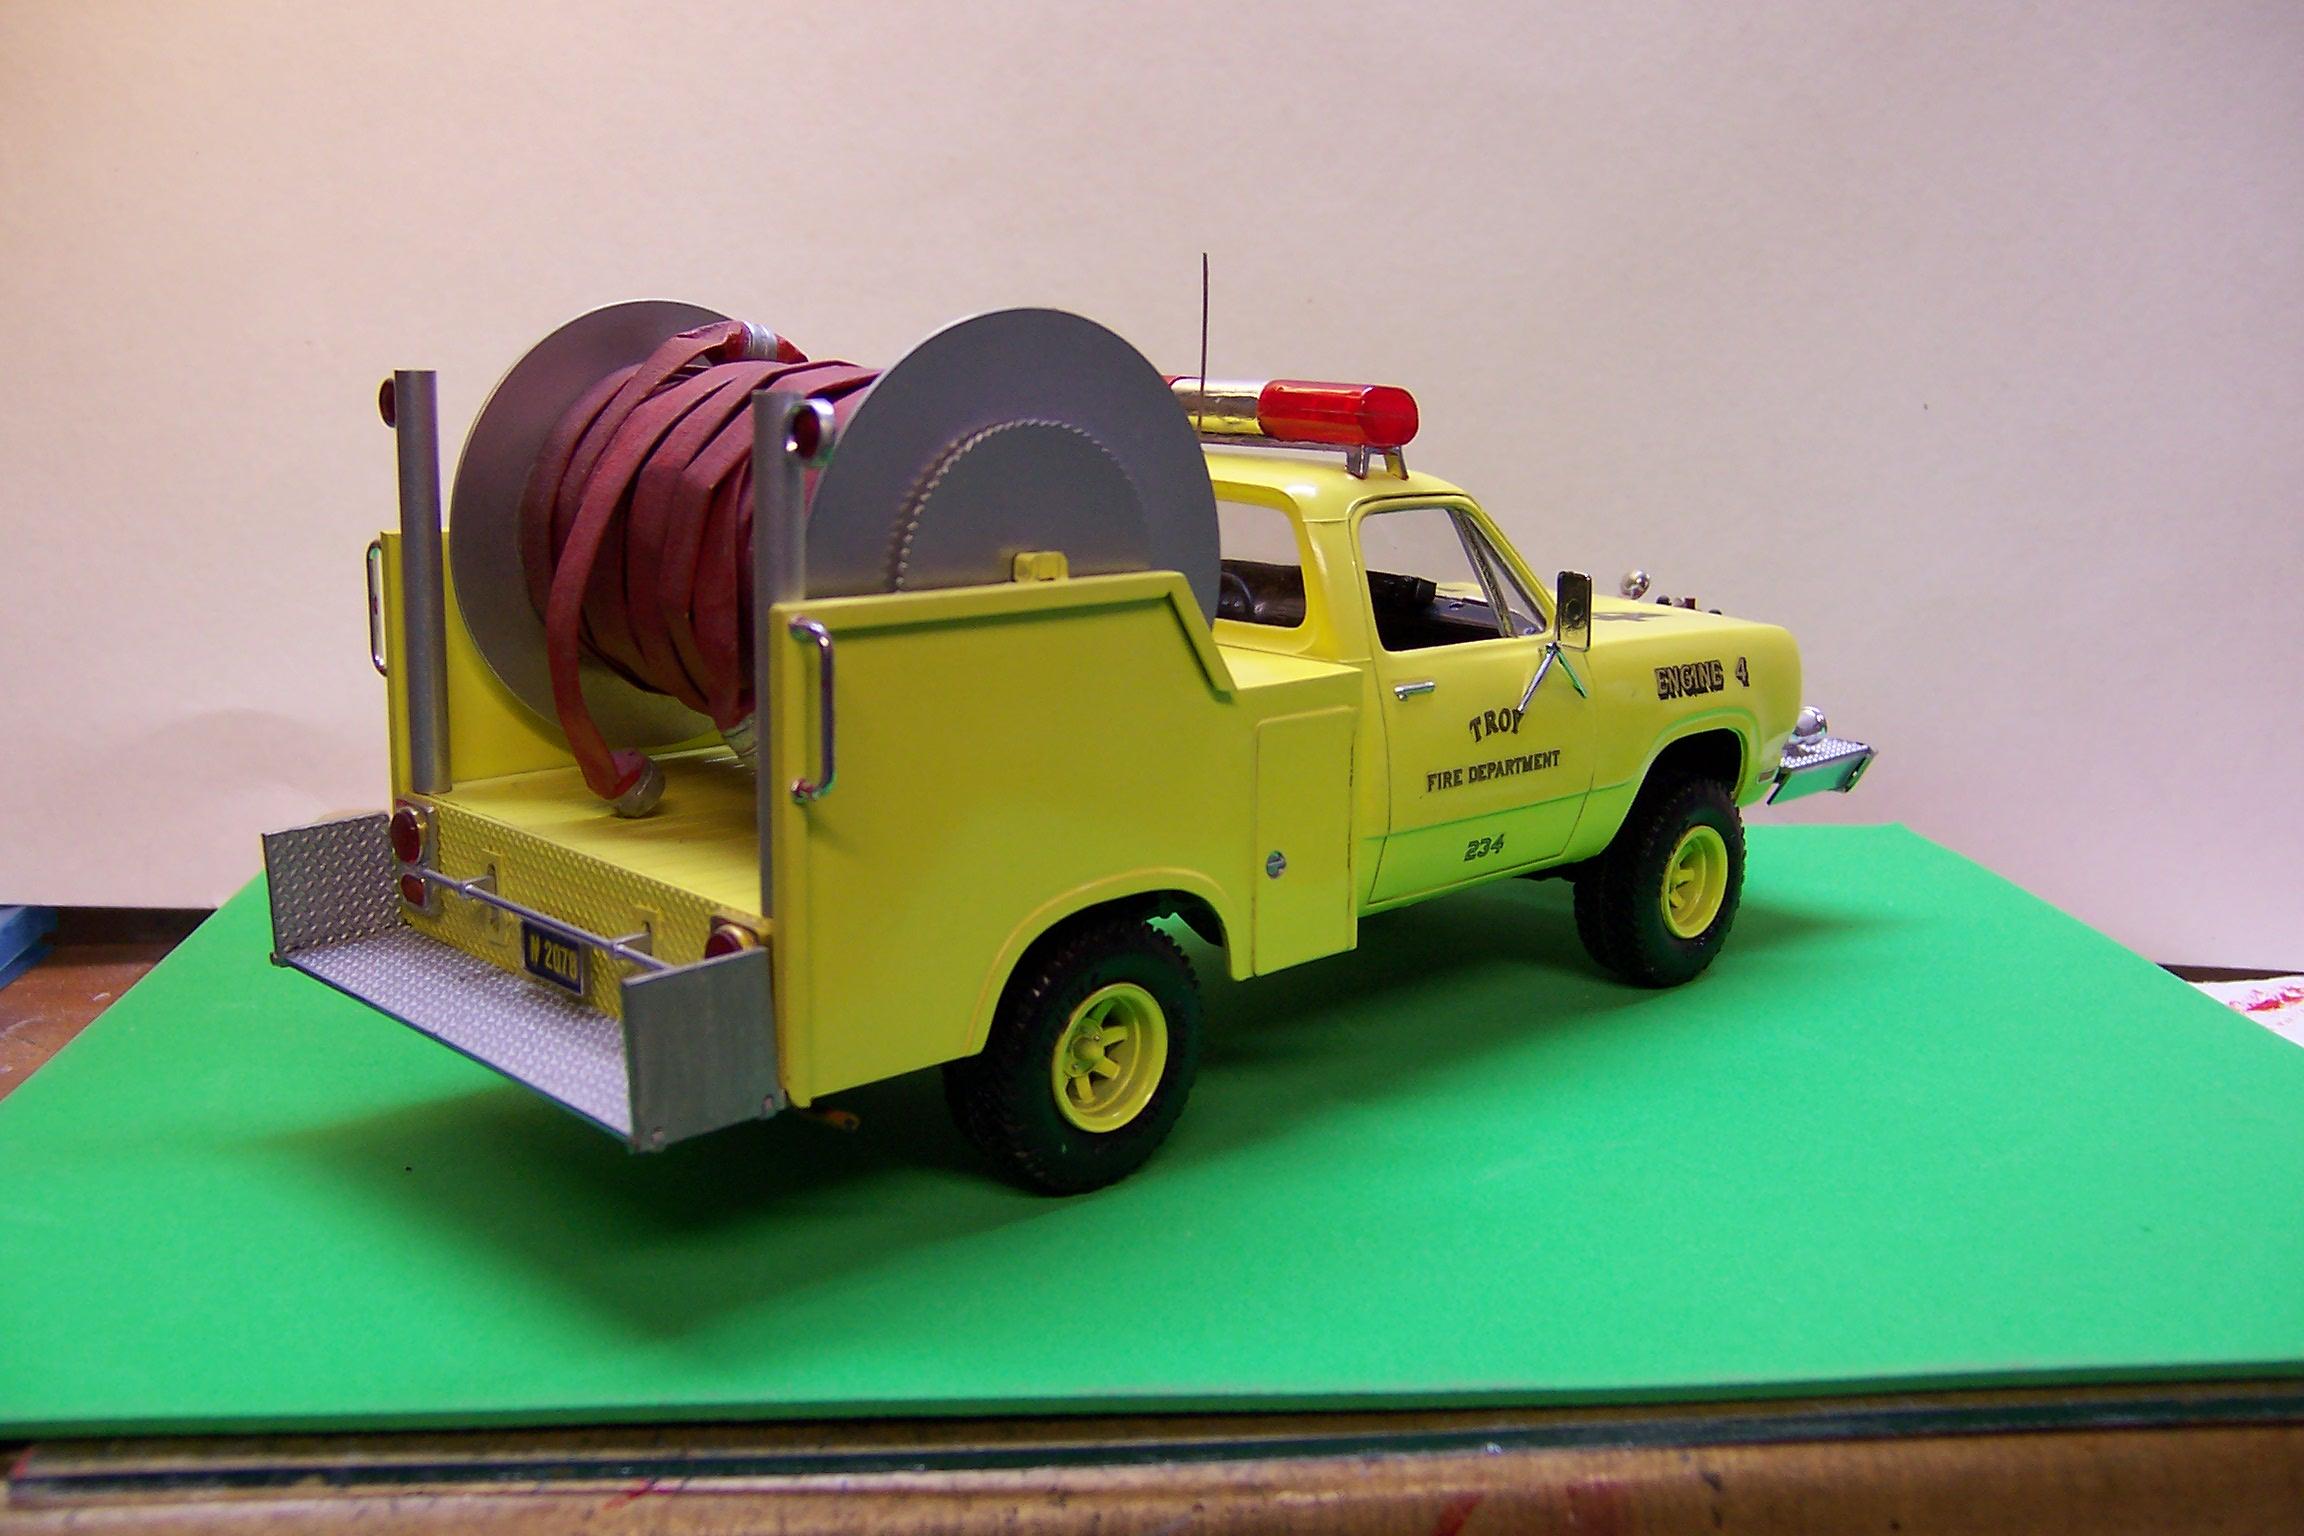
Necessity breeds function sometimes. It all started in the northeast following an international financier's trip to the UK and seeing large diameter hose in use for the first time. He brought the idea to the US and applied it to his own use. He built his own fire department as a mutual aid department and training center to small towns that needed help. So the idea of large diameter hose and a means to lay an above ground water supply took shape. His name was Donald Holbrook and he wrote a book called "The Unlikely Firemaster". This was back in the early 1960's and before the time of what we now know as EMS. -
Two Chevy's
Chariots of Fire replied to Chariots of Fire's topic in Model Trucks: Pickups, Vans, SUVs, Light Commercial
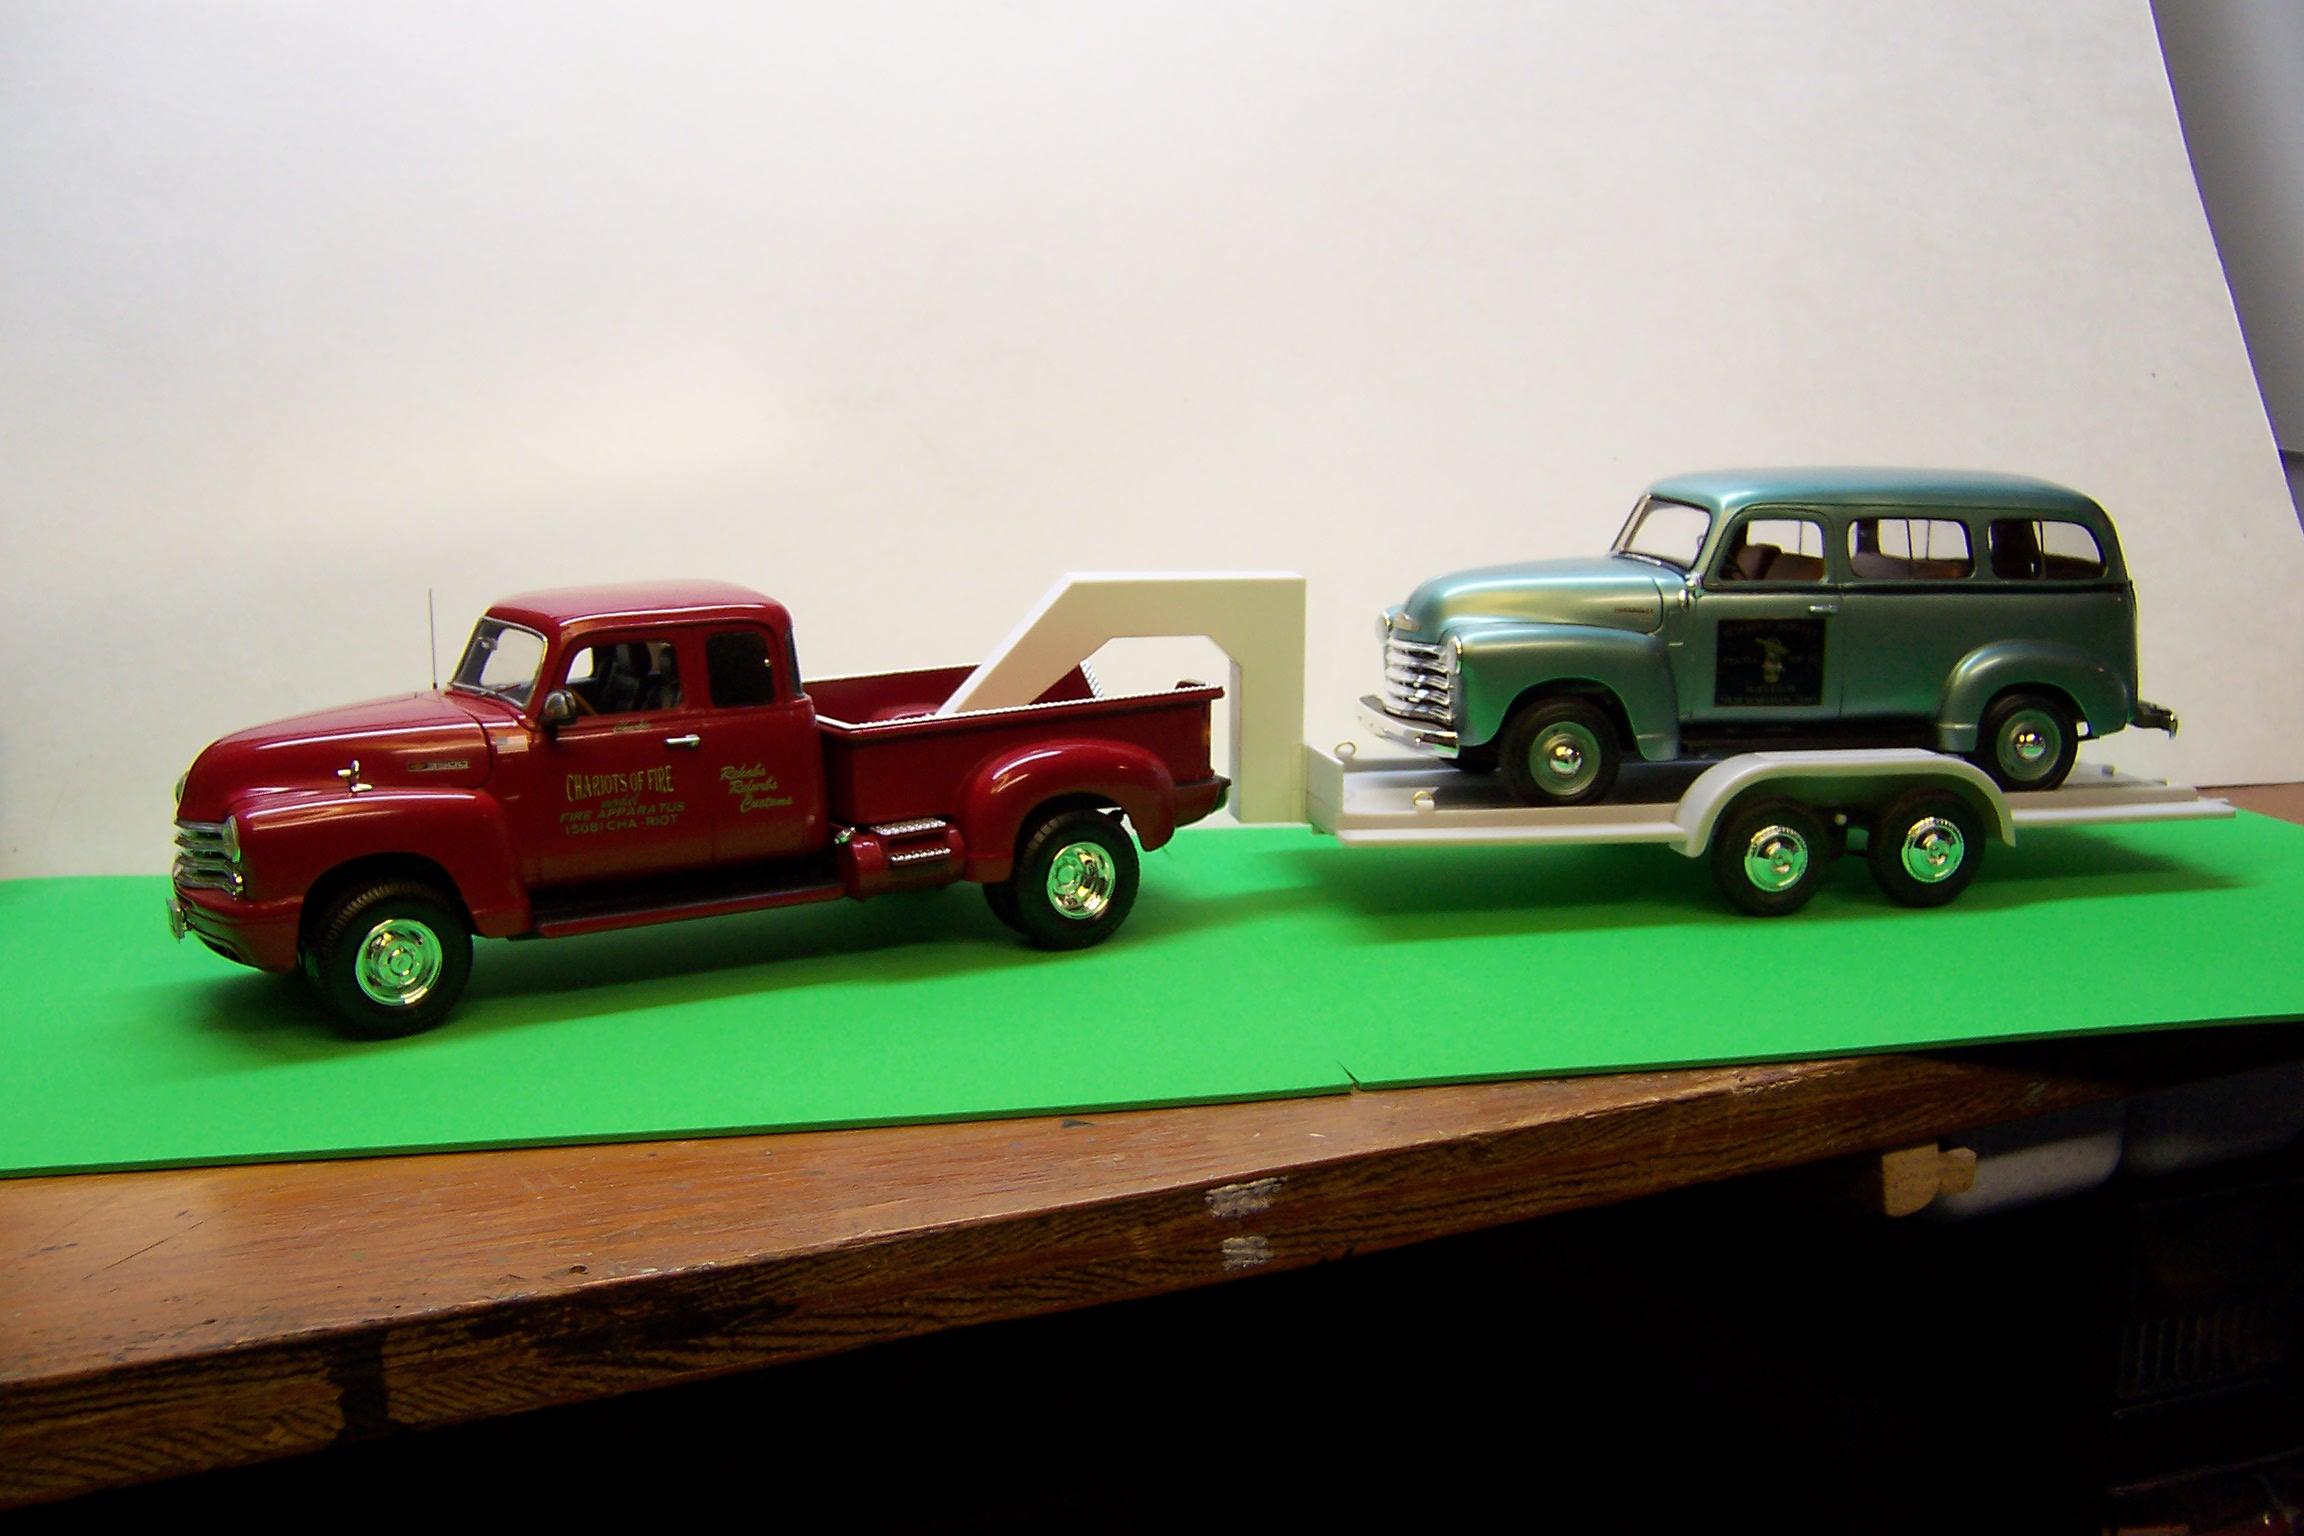
The body is a resin casting. blended into the kit cab. -
I did this one a number of years ago based on photos of the real rig. Not a lot to say about it. Just a fun build before the days of my ALPS printer. Wish I had taken more photos before it was delivered to its new owner.
-
Old School Fire truck smash
Chariots of Fire replied to GLMFAA1's topic in Model Trucks: Big Rigs and Heavy Equipment
?? -
AMT 1/25 Caterpillar D8H
Chariots of Fire replied to KevinCarroll's topic in Model Trucks: Big Rigs and Heavy Equipment
LLLLOOOOOOOOOONNNG ago the D8 was the biggest dozer around. Any construction outfit that has one of those had one of the big boys. Now it is just dwarfed by what is out there in the mining industry. A family friend had a D2 back in the 50's and did a lot of work with it. -
I think I'll stick with the Tamiya basic even if it does take a bit longer to set. It seems to be a real good filler and sets up hard. I've got some Squadron gray but don't like it because it does shrink like crazy and another called Clear Plastic white. The latter is very chalky in consistency even when sanded. Next time at the LHS it will be Tamiya basic gray. Agree, Bill Geary. The gray does seem to have some aluminum in it. Sort of reflects when it's sanded.
-
Trucks like this became popular here in the northeast where water supplies are difficult to come by in rural areas. The thought behind these rigs was to lay out 1000 feet of large diameter hose (4" or 5"), have a big pump at the source of water and relay the water through the hose to the mini. The mini was pass it on if needed to the next mini or to where ever the water was needed. An early attempt at scratch building and long before the introduction of the ALPS printer! The step in the rear folds down at the ends, allowing a firefighter to stand and use his foot to control the bar at the step. This engaged a small electric motor that was connected via gearing to the large gear on the side of the hose reel, allowing the hose to be picked up quickly after use. The vertical tubes kept the heavy couplings from hanging up on the sides of the body. I used folded masking tape to make the hose.
-
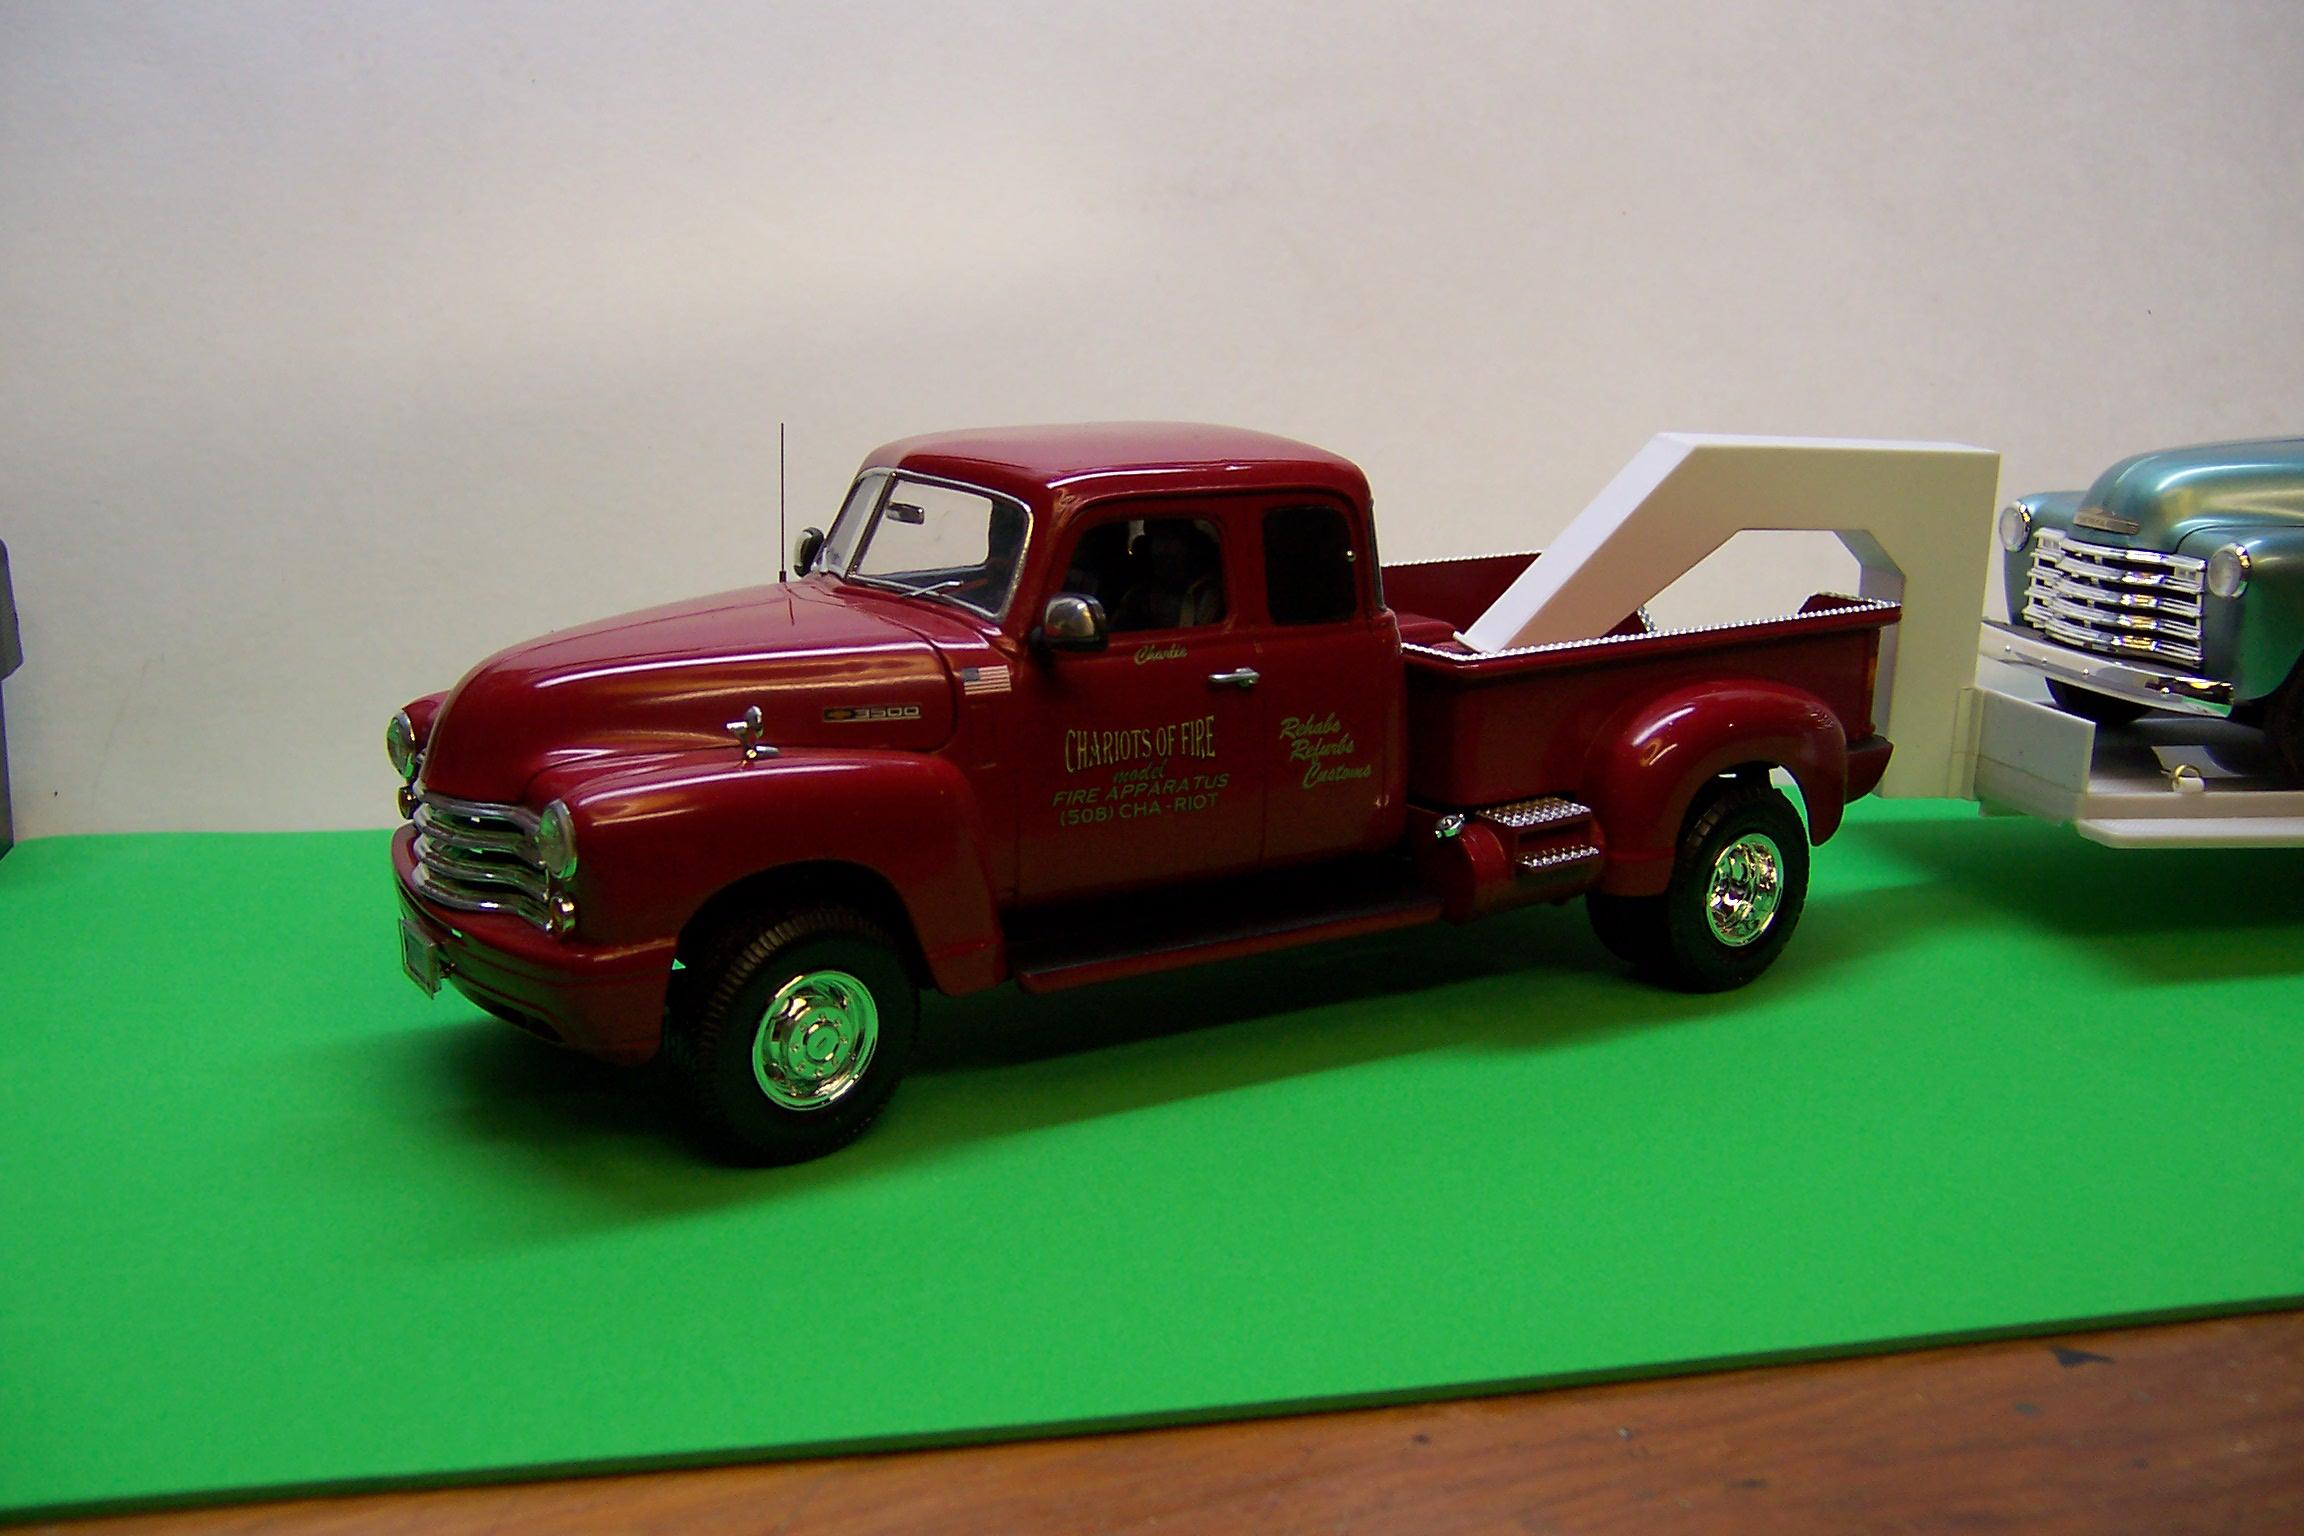
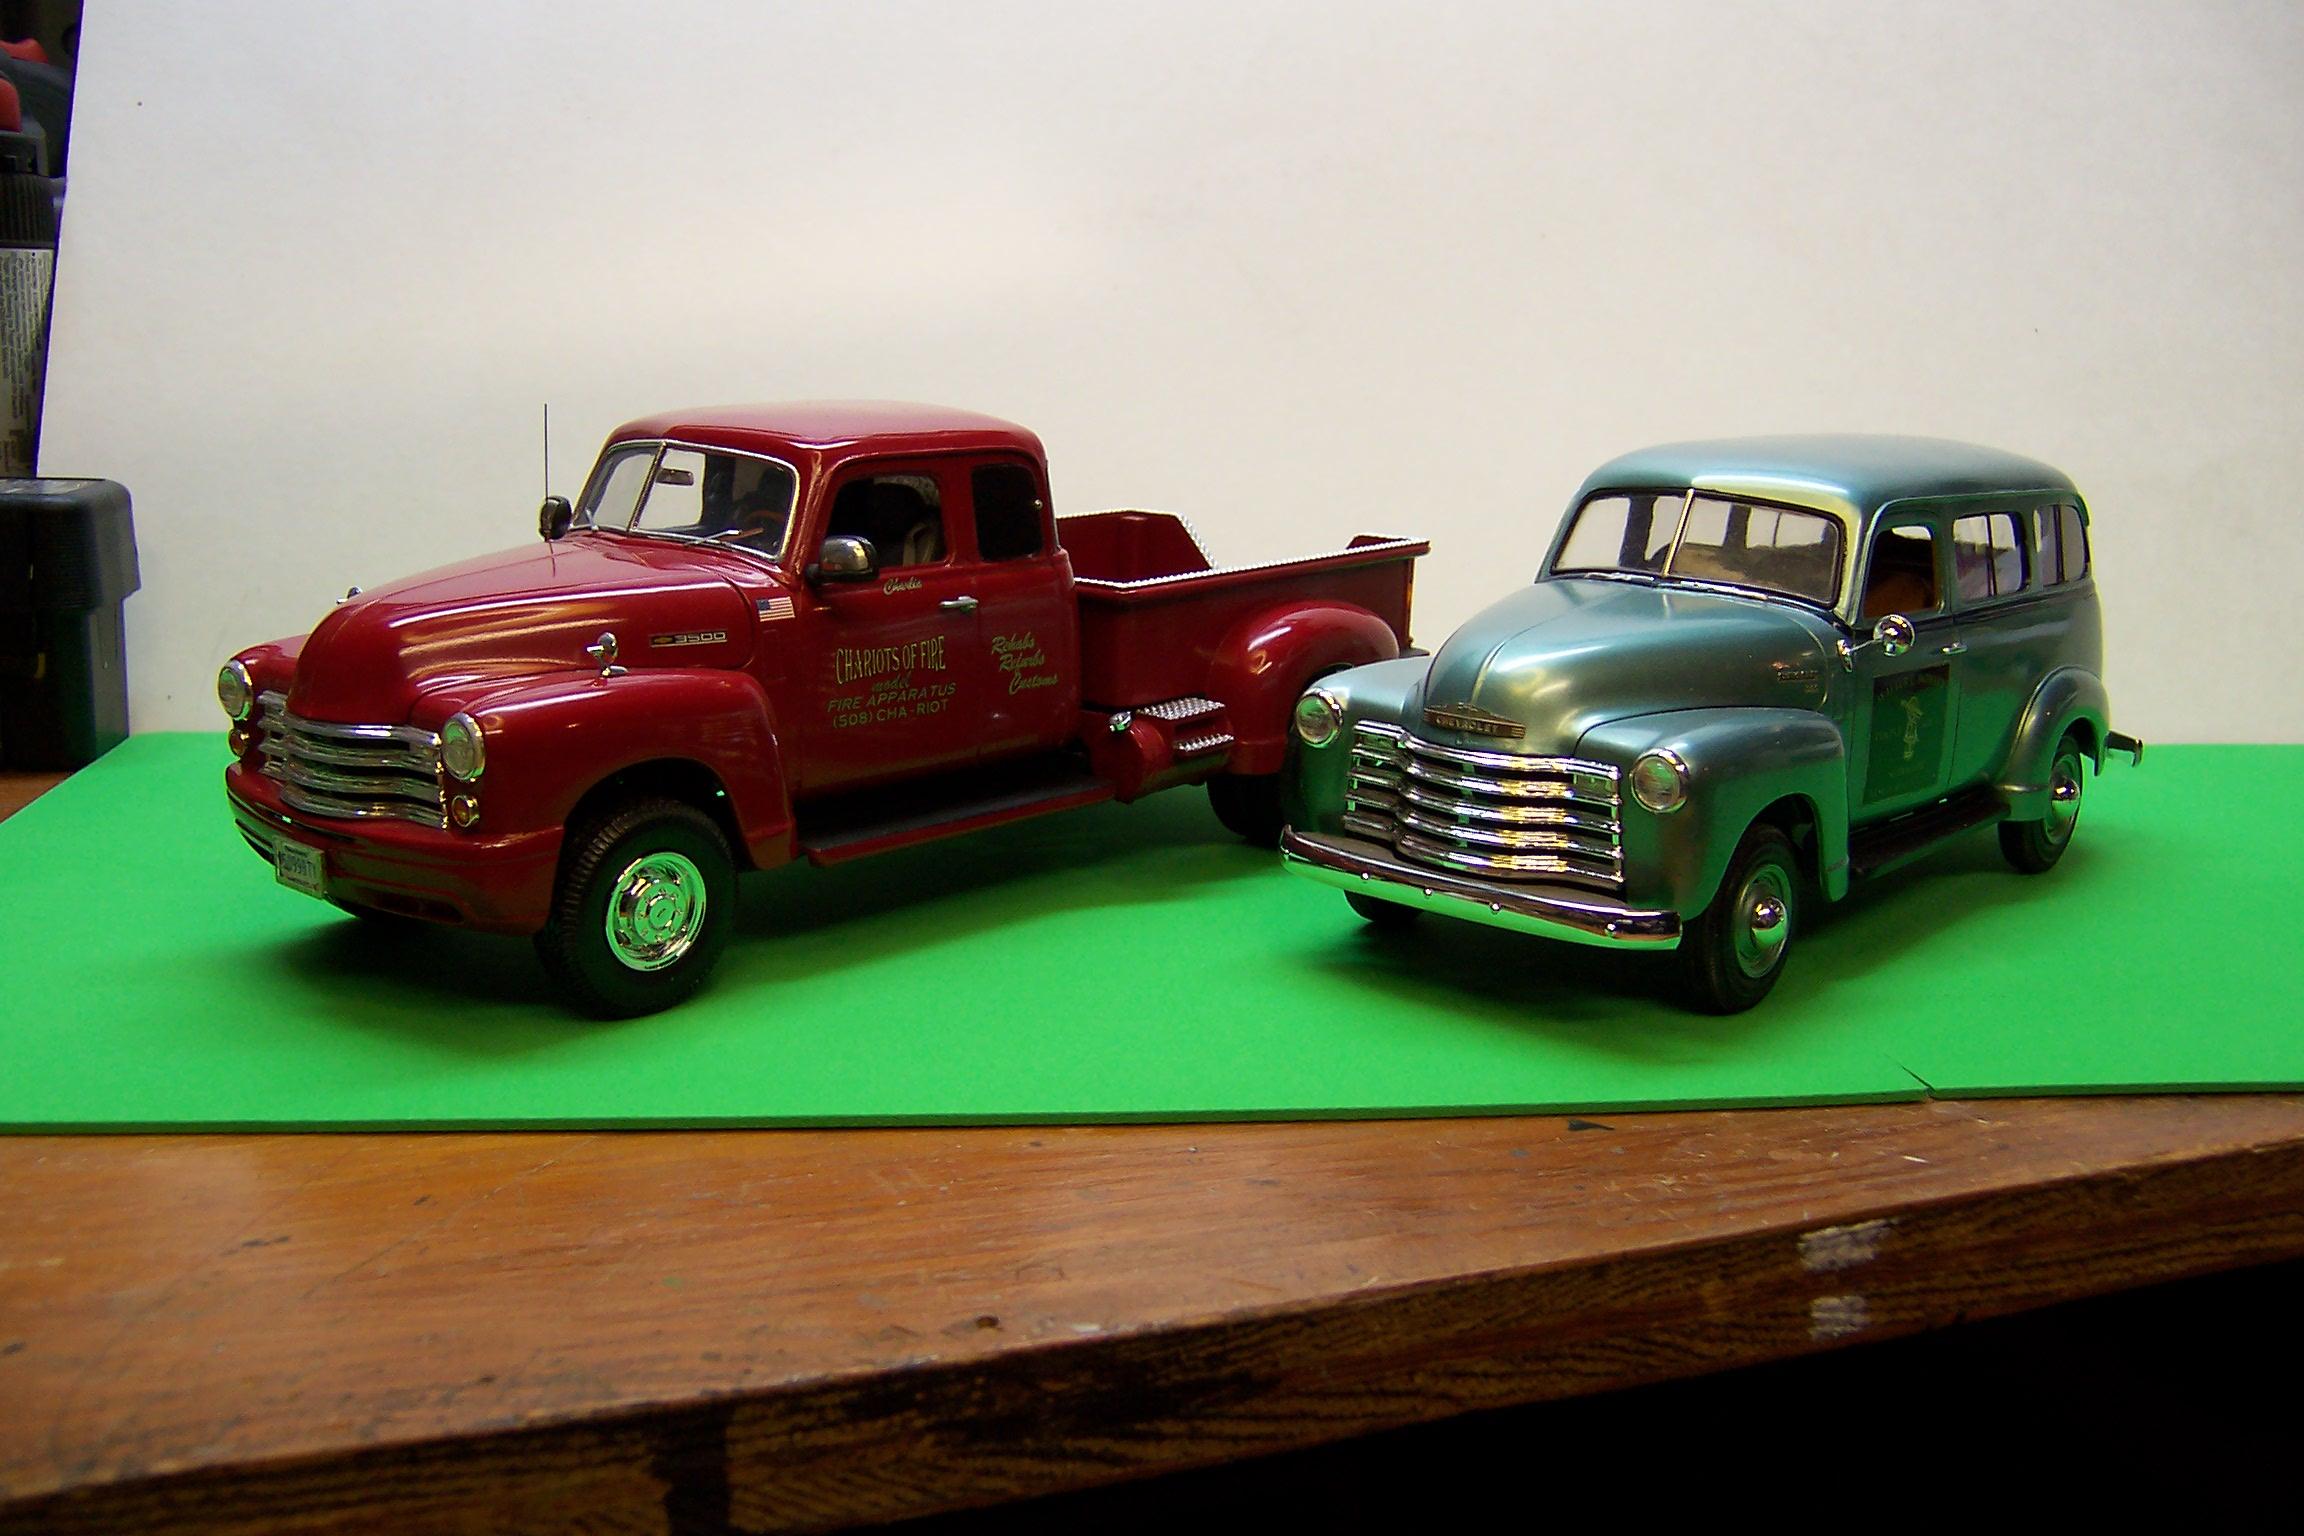
A fun project to update a 1950 Chevy pickup into something a little more modern. I took the front end from a 1999 Chevy and blended it into the front of the '50 taking out some of the horizontal grill bars. Kept the hood clean in front, extended the cab and added a custom box and dualie rear tires. The suburban on the right is based on a 1949 Chevy that my father had and which he used for his land surveying business. He had special graphics painted on the doors. At the time the photo was taken I was still working on the gooseneck trailer. The pickup has a small 5th wheel in the bed.
-
We watched many of those Morse shows. Great stuff! Both of him when he was first beginning and then afterward in his older role. We have a lot of the shows on CD now.
-
Jeep CJ-2A
Chariots of Fire replied to NOBLNG's topic in WIP: Model Trucks: Pickups, Vans, SUVs, Light Commercial
That's some great scratch building to enhance a good looking kit. Thanks for sharing your techniques. -
I've been using Squadron green putty for a long time. Liked it up until they stopped making it. Switched to Tamiya basic and I like it only that it takes longer to set up. What do you use and why do you like it?