Chariots of Fire
-
Posts
2,782 -
Joined
-
Last visited
Content Type
Profiles
Forums
Events
Gallery
Everything posted by Chariots of Fire
-

BRBO 2019 Dodge W500
Chariots of Fire replied to Aaronw's topic in WIP: Model Trucks: Big Rigs and Heavy Equipment
Aaron: Isn't the middle truck in your first photo a '59? Just checking out some images suggest it is. The resin casting you have is the same as what I had and it says it is a '58. A tip on adding the raised "POWER WAGON" lettering on the sides of the fenders. Glue on a small piece of strip plastic the length and height of the photoetch letters that you have. Don't worry about trying to follow the letters but only keep the strip stock real close. After painting use some two part epoxy to secure the photo etch letters in position. -
BRBO 2019 Dodge W500
Chariots of Fire replied to Aaronw's topic in WIP: Model Trucks: Big Rigs and Heavy Equipment
That should be a nice build. I used one of those kits a while back also with this result. Not the 500 and a 1959 version of the smaller rig.
-
Nice work!
-
Thanks, Bob. The stacked pails are really once resin casting that I added some wire to for the top of each one plus the handles. The pump can is also a resin casting. Have to cast one more.
-
1926 Mack AC Dump Truck
Chariots of Fire replied to Jim B's topic in WIP: Model Trucks: Big Rigs and Heavy Equipment
To the best of my knowledge, Jim they used heavy weight oil. I don't remember the AC in particular but the AP's had a small round oil reservoir mounted on the frame just above the small sprocket. The reservoir had a cap on top and a small drip line coming from the end that was curved downward toward the sprocket. The oil dripped one drop at a time onto the chain as it went around and kept it lubricated. Here's a photo of the AP that I did showing what I mean. In the photo the long tanks to the right are air brake tanks. The small tank to the left of them is the oil reservoir.
-
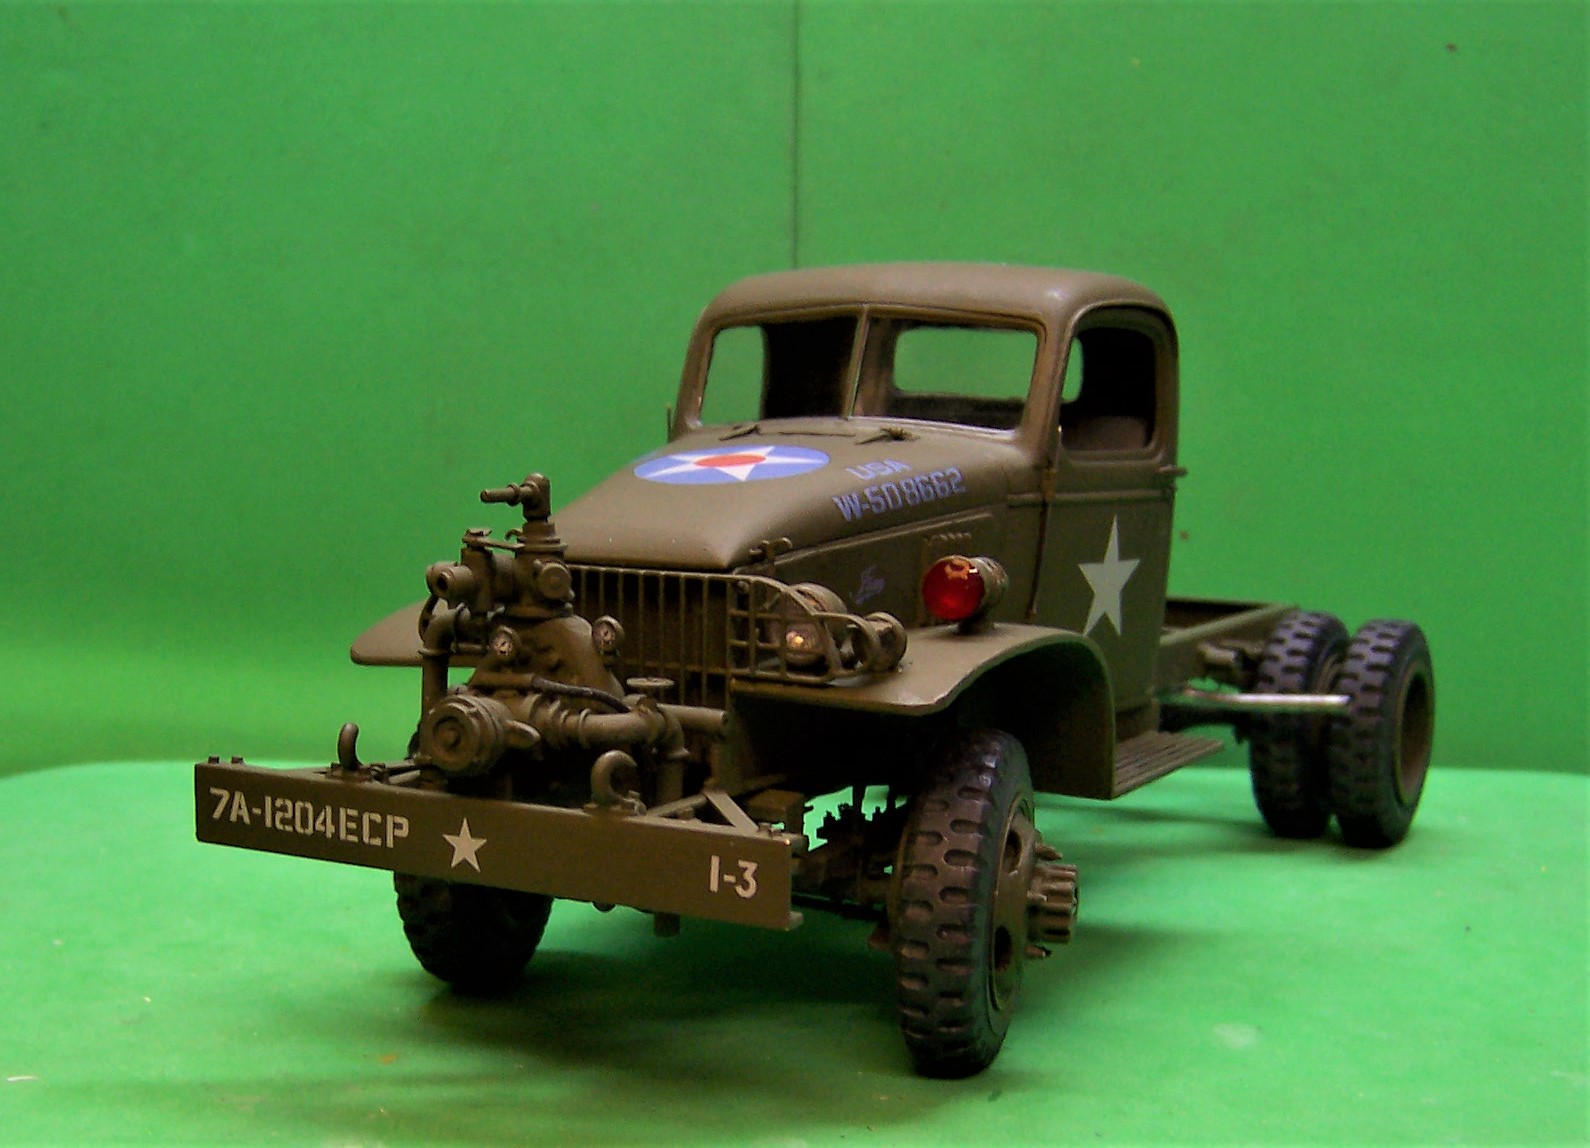
With severe cold weather my work area has been somewhat on the chilly side. But lately I got back into things a bit with some additional details. The cab interior is done, windshield wipers and hinges added and the pump is complete with the priming valve in place in front of the grill guard. Work has also started on the body. One of two hose reels are ready for installation once the body is painted. Still plenty to go before we can call it done.
-
1926 Mack AC Dump Truck
Chariots of Fire replied to Jim B's topic in WIP: Model Trucks: Big Rigs and Heavy Equipment
That's a good color for the chassis, Jim. Here's another thought for the chain drive. Dry brush the chain with a bit of metallic silver, especially on the sides just to highlight it. Then cover that with a dry brush of gloss black to give it an oily look. NO rust! They oiled these chains on a regular basis so it would not be rusty by any means unless it had been sitting for a very long time. JMHO! -
That answers my question! Thanks, Warren.
-
In your photo of the tank and cab on the chassis it looks like the tank could slide forward just a tiny bit. What do you think?
-
Nice work, Tom! Will you be showing this anywhere?
-
I think I’m done with Duplicolor
Chariots of Fire replied to Brutalform's topic in Model Building Questions and Answers
Those swirls that were in your trunk lid look as if they were part of the plastic like maybe the primer was not thick enough and the plastic is showing through. I've used Duplicolor a lot and I only had it act up on me once and that was when I put the gray primer on a Jeep Grand Cherokee model. It had to be the plastic and not the primer. It was so bad there was no way to even sand it out or strip the primer. That is the one thing I found about Duplicolor for both primer and color. It does not like to soften up for stripping like other paints. Duplicolor primer works well for me and I have used it on kits, Evergreen stock and resin. In humid weather the gloss paint will frost over but that can be polished out. Let the primer dry well before trying the color coat. Also the first color coat ought to be just a misting so that it will hug sharp edges and not pull away. Sand that first coat down to take the edge off. Then apply successive coats until the full color comes out. That's been my experience and unless something drastic happens I'll stick with it. -
Now that is scratch building! Tom: That is fantastic. Clean, well executed and the combination of the B Model Mack, the huge tires and that lowbed are just awesome! A fine piece of work!
-
1926 Mack AC Dump Truck
Chariots of Fire replied to Jim B's topic in WIP: Model Trucks: Big Rigs and Heavy Equipment
Somewhere in my file I have a brochure that came from the Mack museum in Allentown, PA. In it are several of the colors that Mack used on their trucks back in the day. Give me some time to dig it out. -
Love these kinds of rebuilds! It is as much fun as building a brand new one; Sometimes more fun when you can resurrect a piece of junk into something great!
-
1926 Mack AC Dump Truck
Chariots of Fire replied to Jim B's topic in WIP: Model Trucks: Big Rigs and Heavy Equipment
Square up the sides and back first. Then fit the top. A little sanding here and there may do the trick. Sometimes it also pays to ignore the tabs and pins and cut them off to get the best fit. -
Oshkosh M 1070
Chariots of Fire replied to Grzegorz's topic in WIP: Model Trucks: Big Rigs and Heavy Equipment
You will have your work cut out for you! I'll be watching progress! -
Work continues. The cab is done except for the interior details including steering wheel, shift lever, hand brake, hi/li range lever and pto lever. Then the seat will go in permanently. There are some instruction plates that go over the windshield also. Body has been started but not much to show yet.
-
'90s GMC TopKick C7500
Chariots of Fire replied to Sergey's topic in WIP: Model Trucks: Big Rigs and Heavy Equipment
You do very nice work! Impressive to say the least! You show that a lot can be done with very simple materials and by applying simple techniques. Great job! -
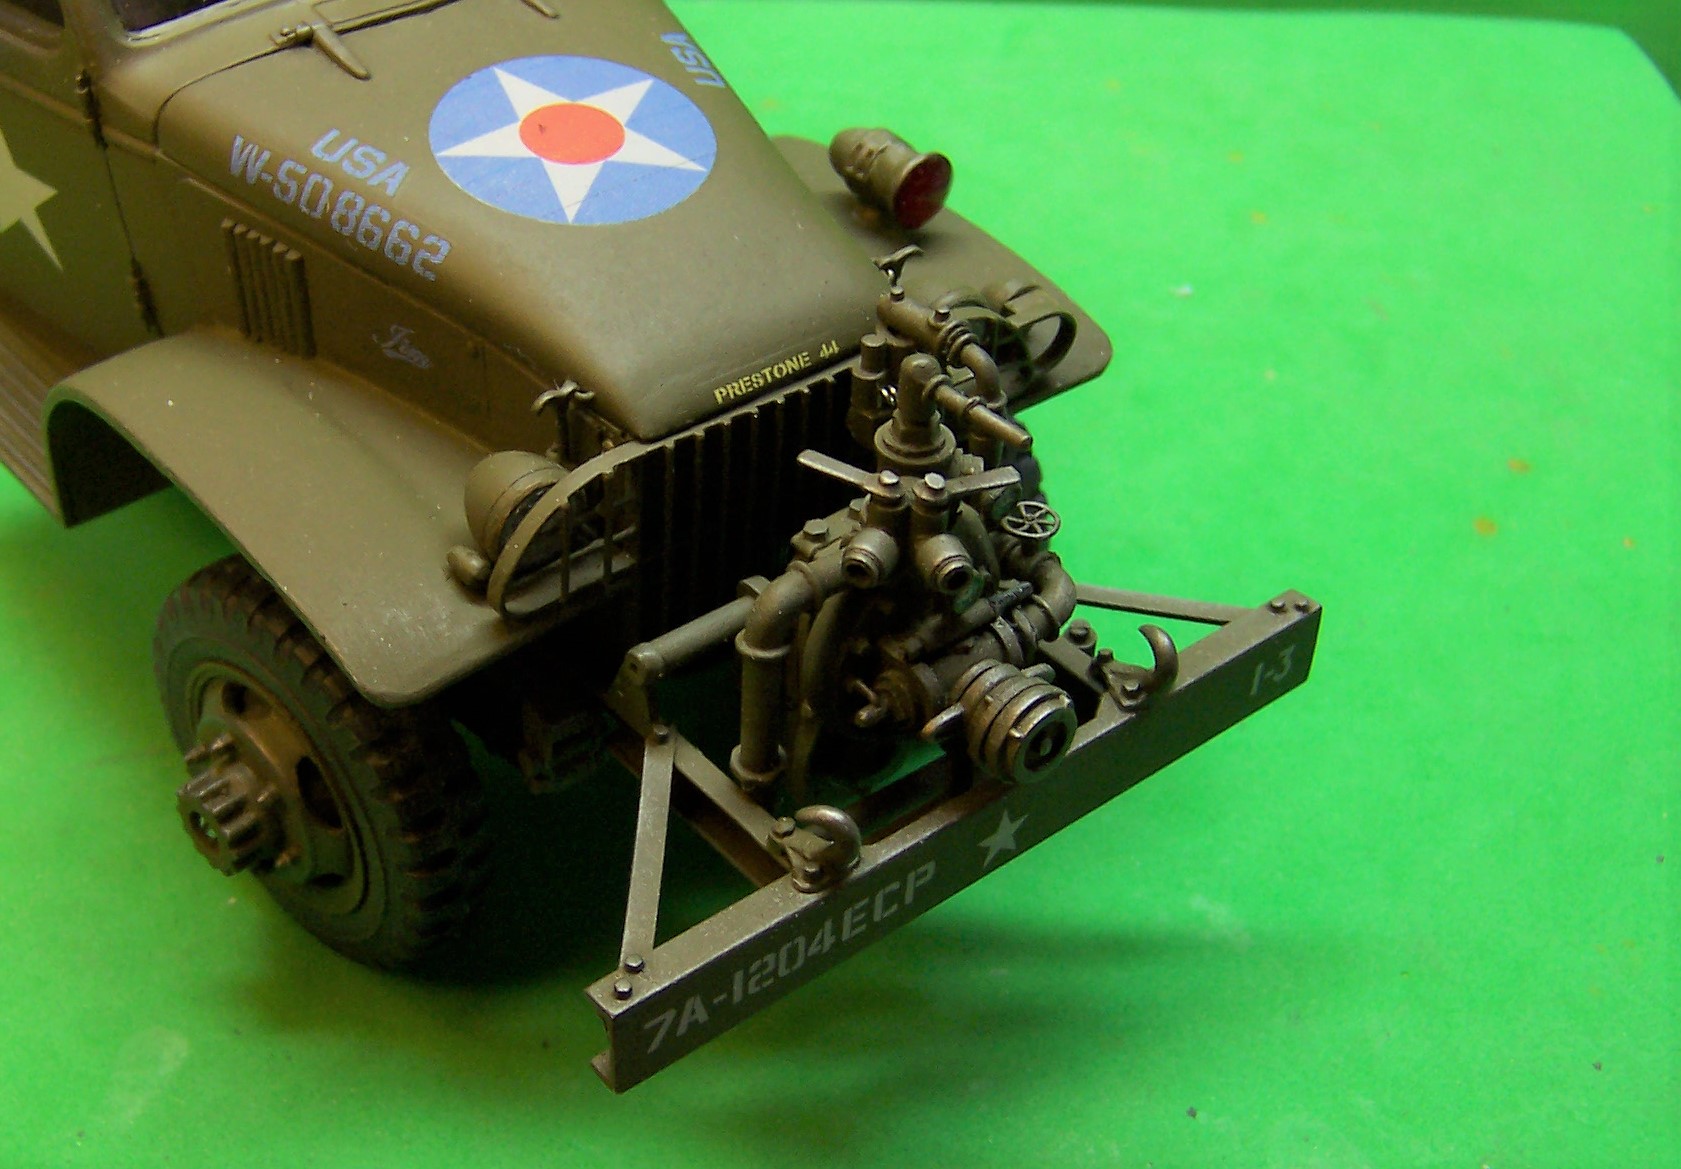
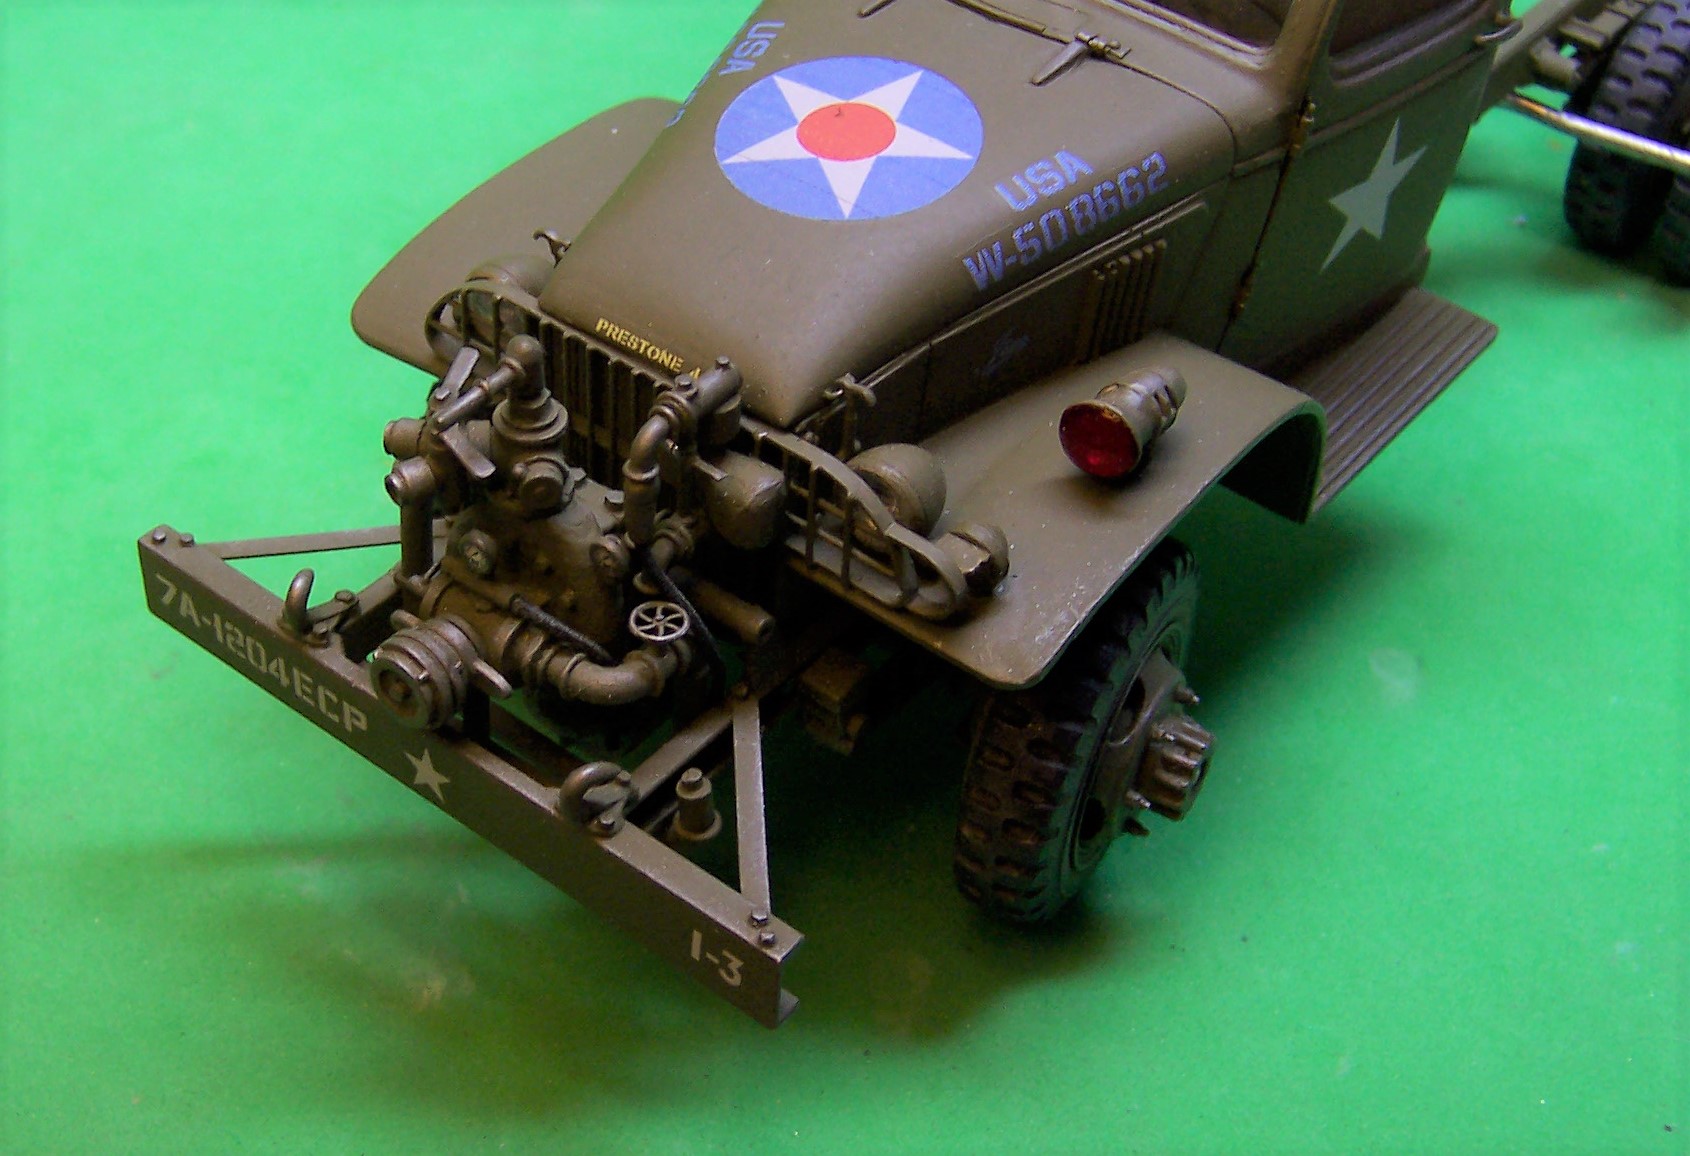
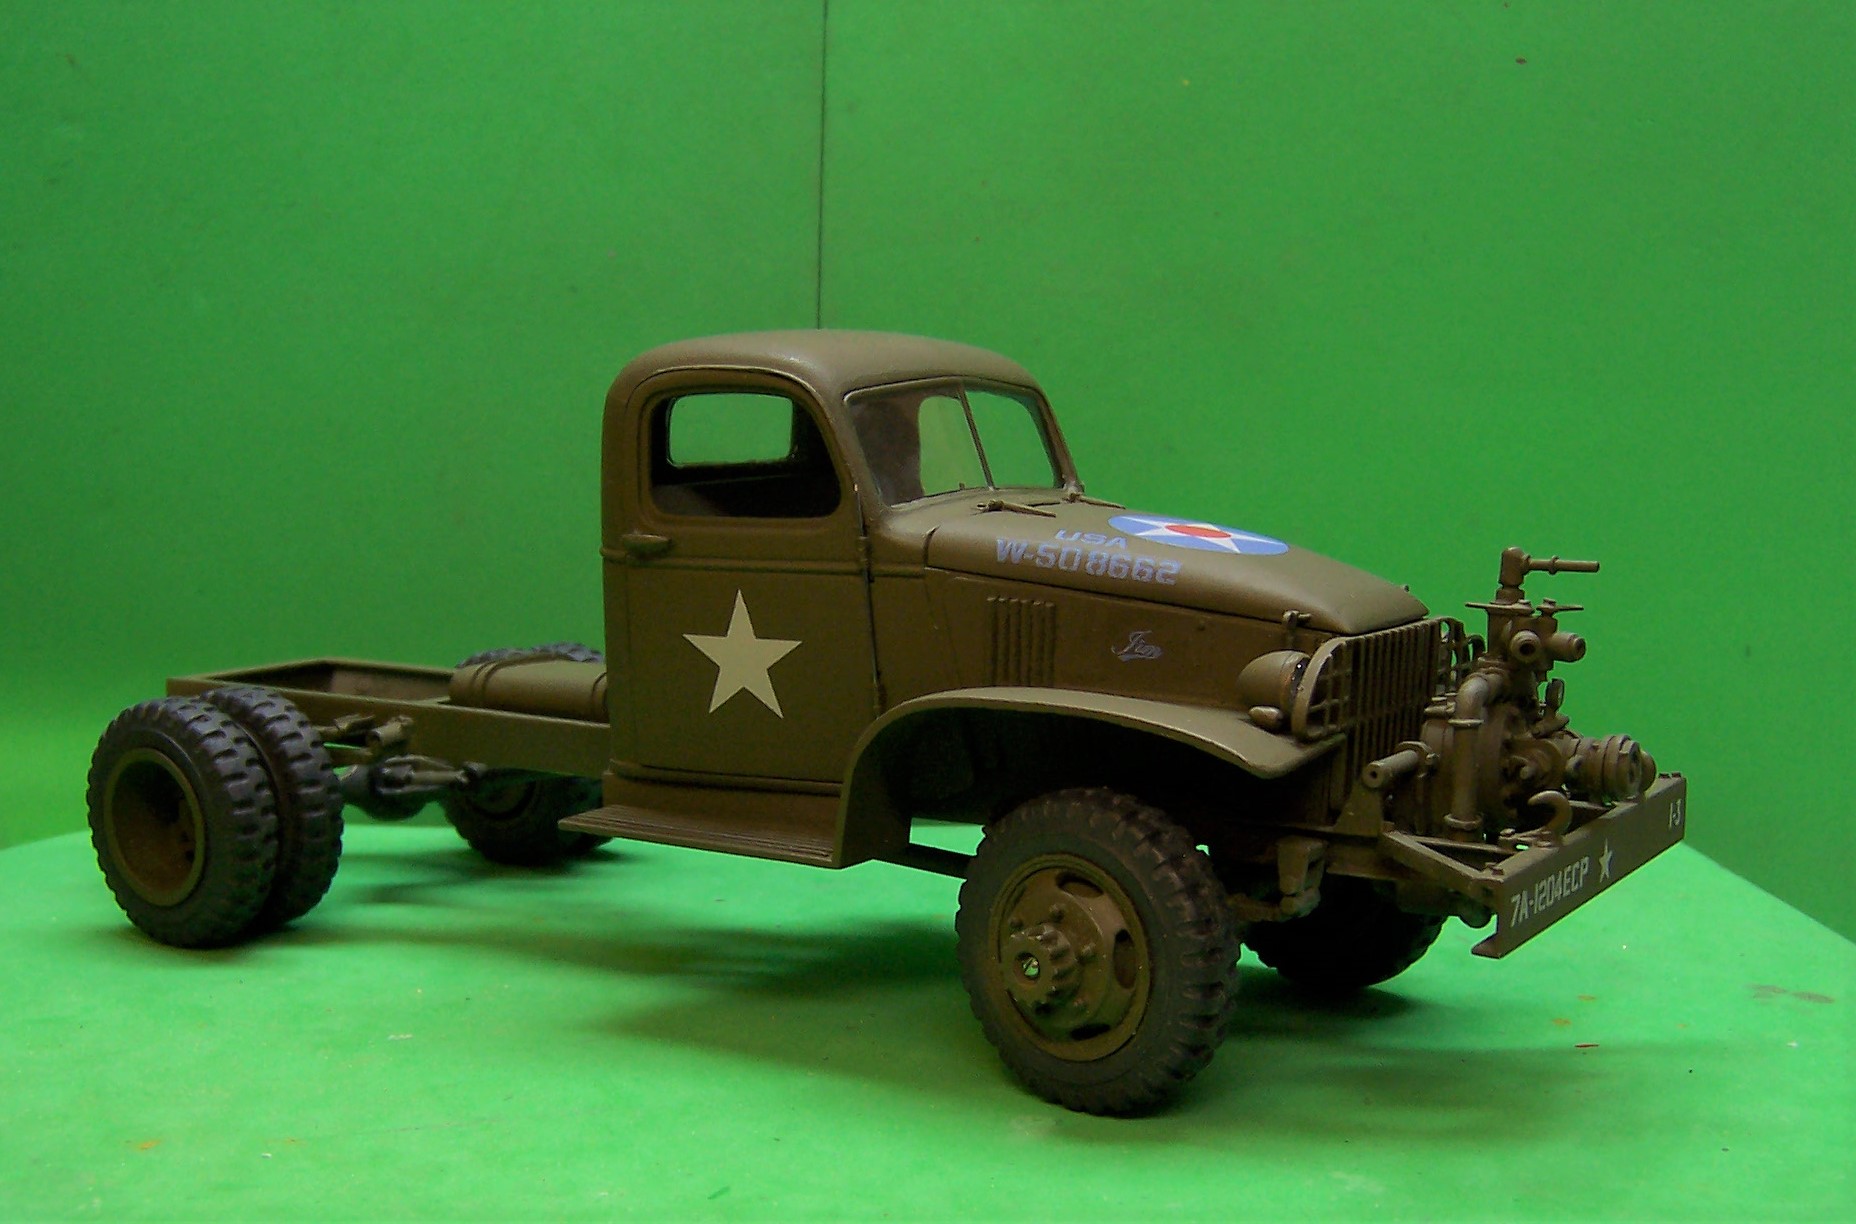
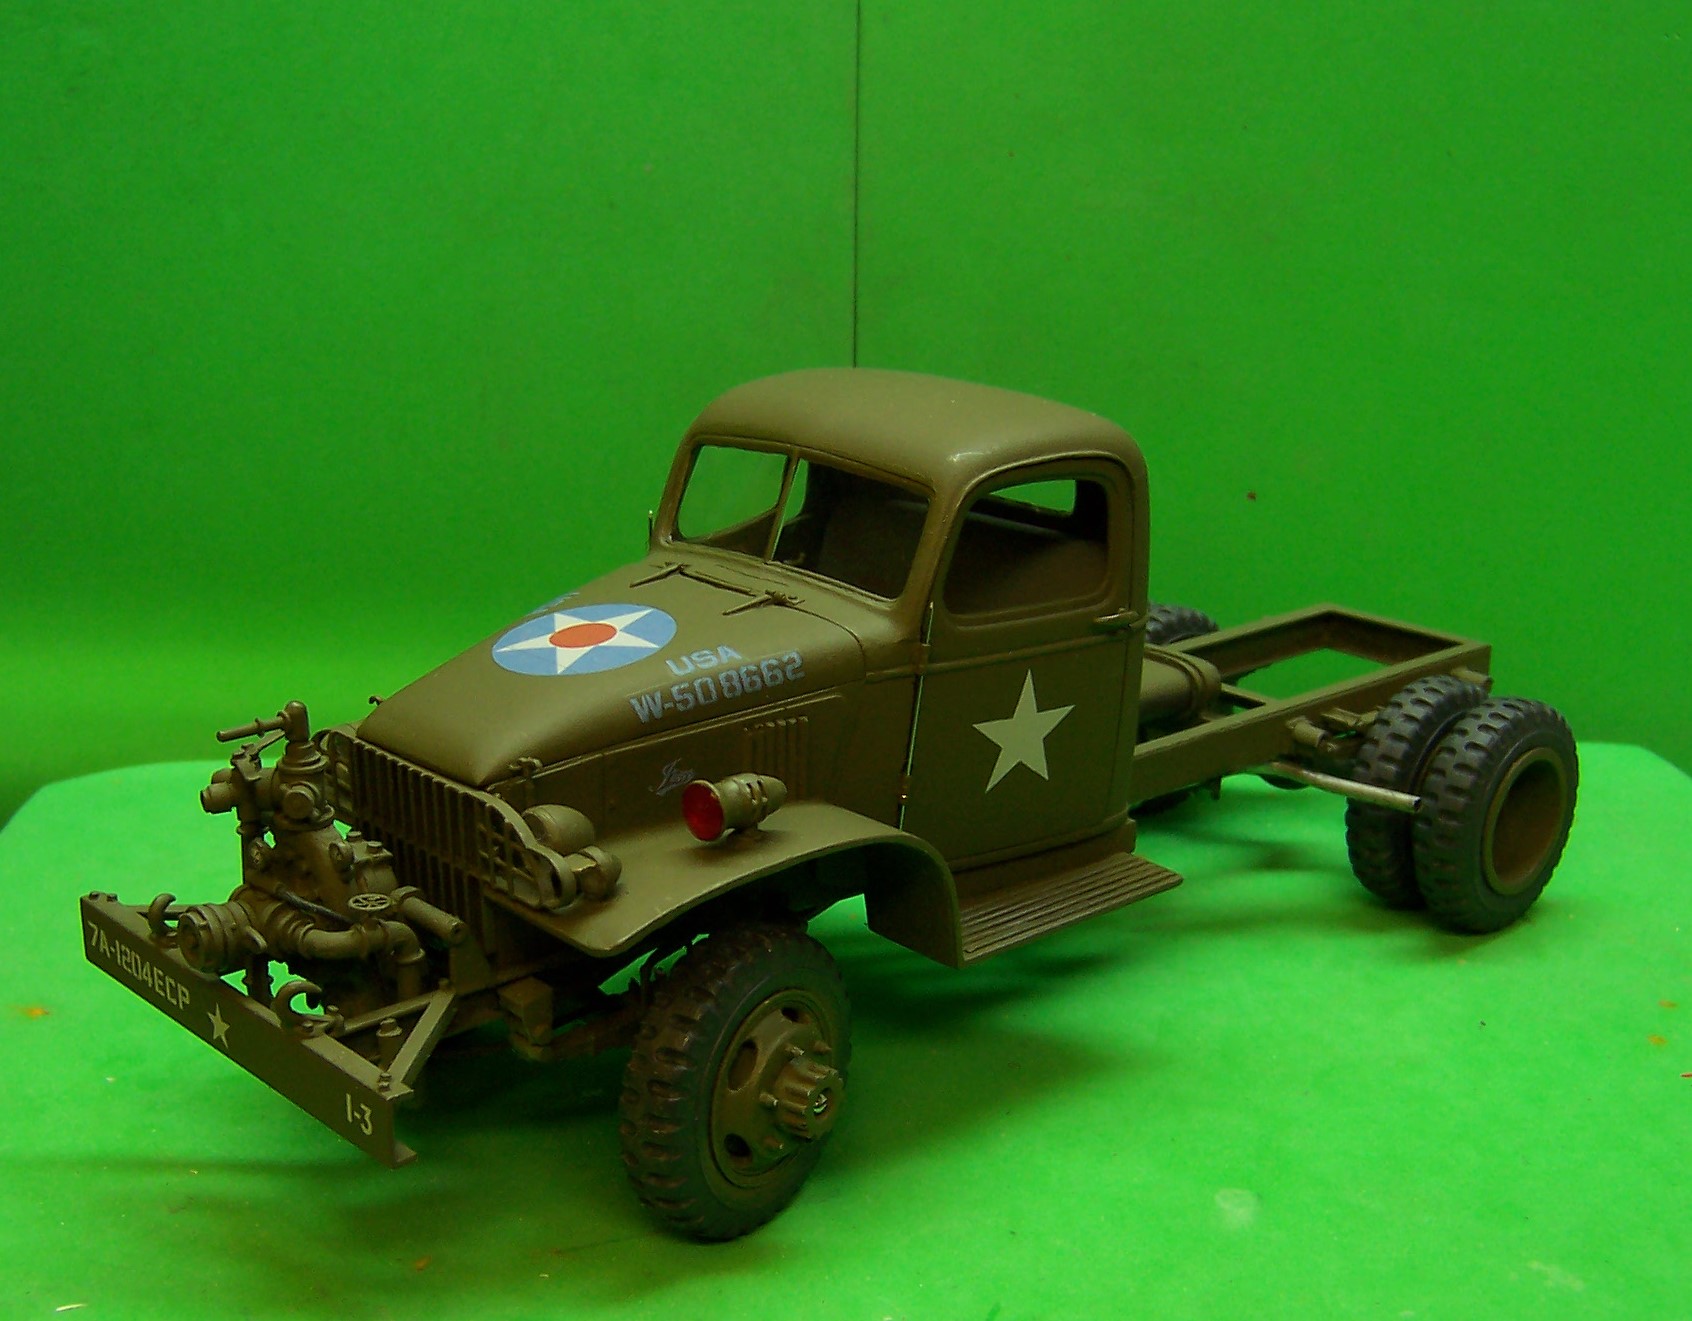
Nope. Chevy BV-1001 engine as shown in one of the tech manuals that I have on these rigs. It had overhead valves. Exact same engine that is in the Revell '41 Chevy pickup kit. The oil pan is slightly different shape but that is the only difference that I see.
-
You're absolutely right. Lots of widgetry to do on this one!
-
I think the Hale pump in the AMT ALF kits might be a bit big for the front of the truck. At least I would chop off a couple of the discharge lines and go with just one or two which could be coupled to a spreader bar under the front bumper and at the back of the truck that would be used for dust control. It would also need a means of powering the pump for pump and roll operations or it would be useless for dust applications. JMHO!
-
Juggernaut War Rig
Chariots of Fire replied to blazefox's topic in Model Trucks: Big Rigs and Heavy Equipment
OH MY! -
Thanks for the compliment, Tom. Glad to share all that I can.
-
Water wagon for construction sites or is this one to be fire related?