Dragonhawk1066
-
Posts
3,932 -
Joined
-
Last visited
Content Type
Profiles
Forums
Events
Gallery
Everything posted by Dragonhawk1066
-
Nice looking Cobra!
-

AMT 1968 Chevy Camaro Z28 in Nassau Blue Metallic.
Dragonhawk1066 replied to Dragonhawk1066's topic in Model Cars
Thanks guys!! -
Looking fantastic! That's gonna be one beautiful Hot Rod when it's done!
-
Nice job!
-
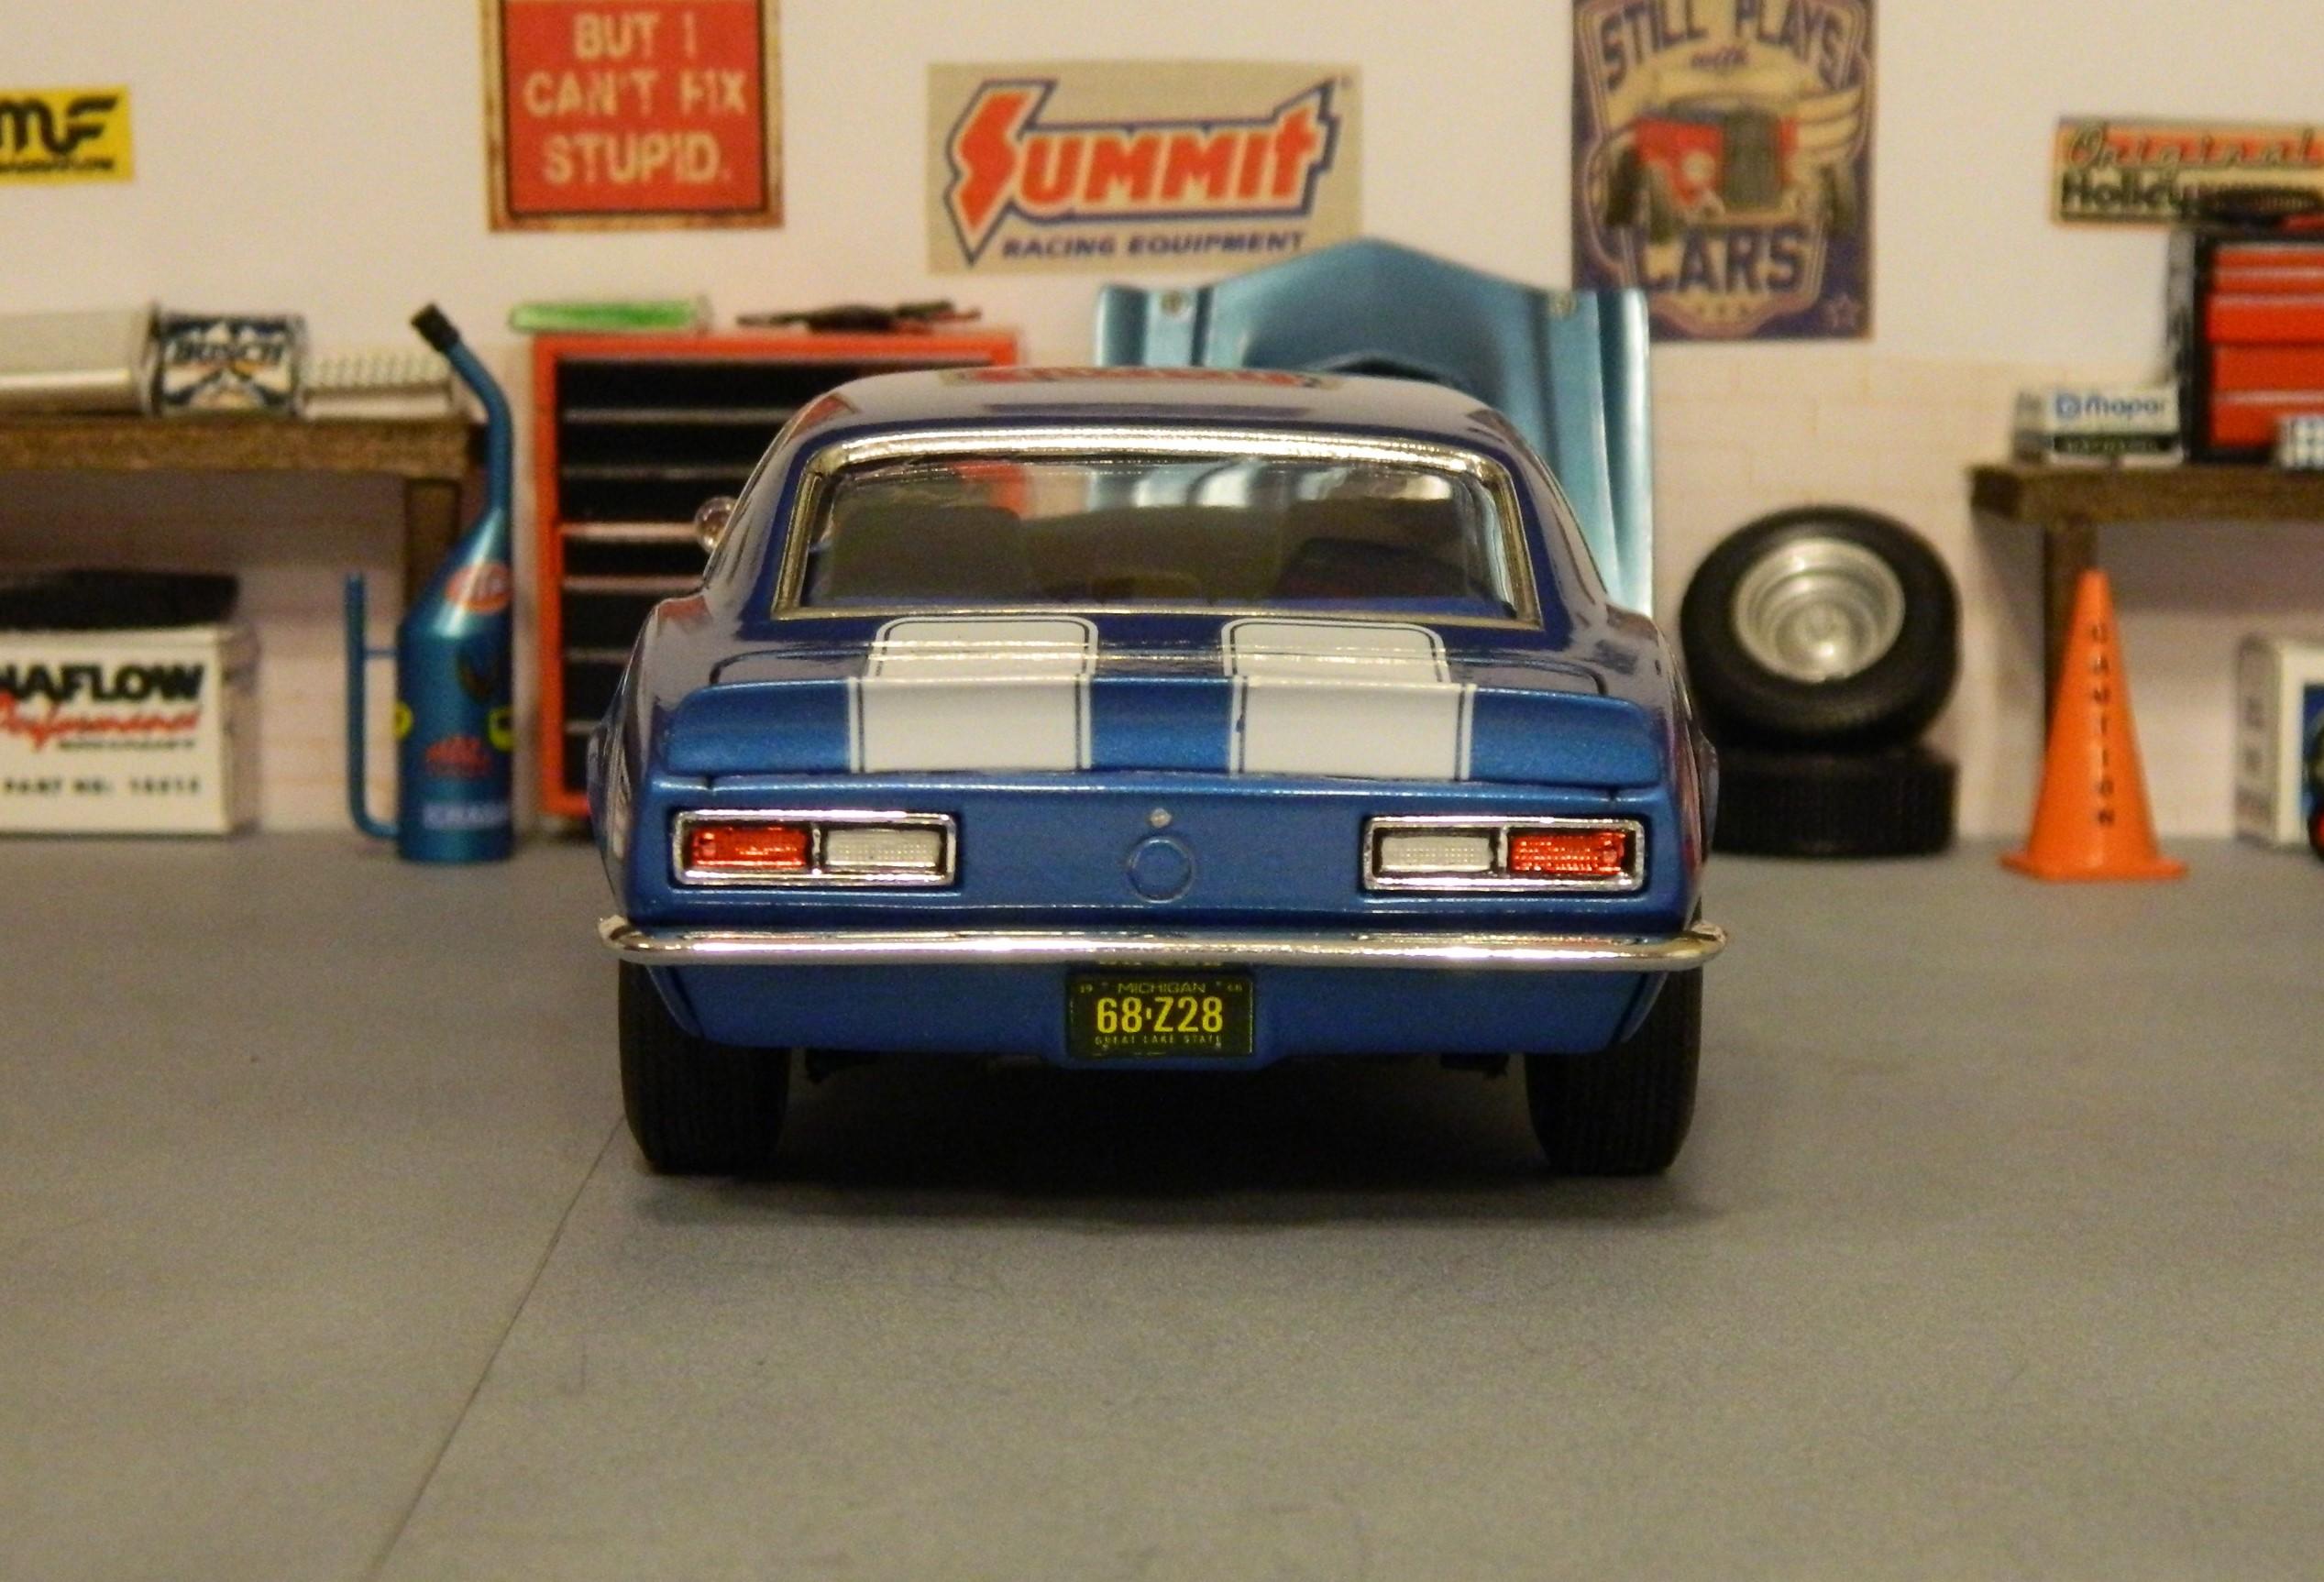
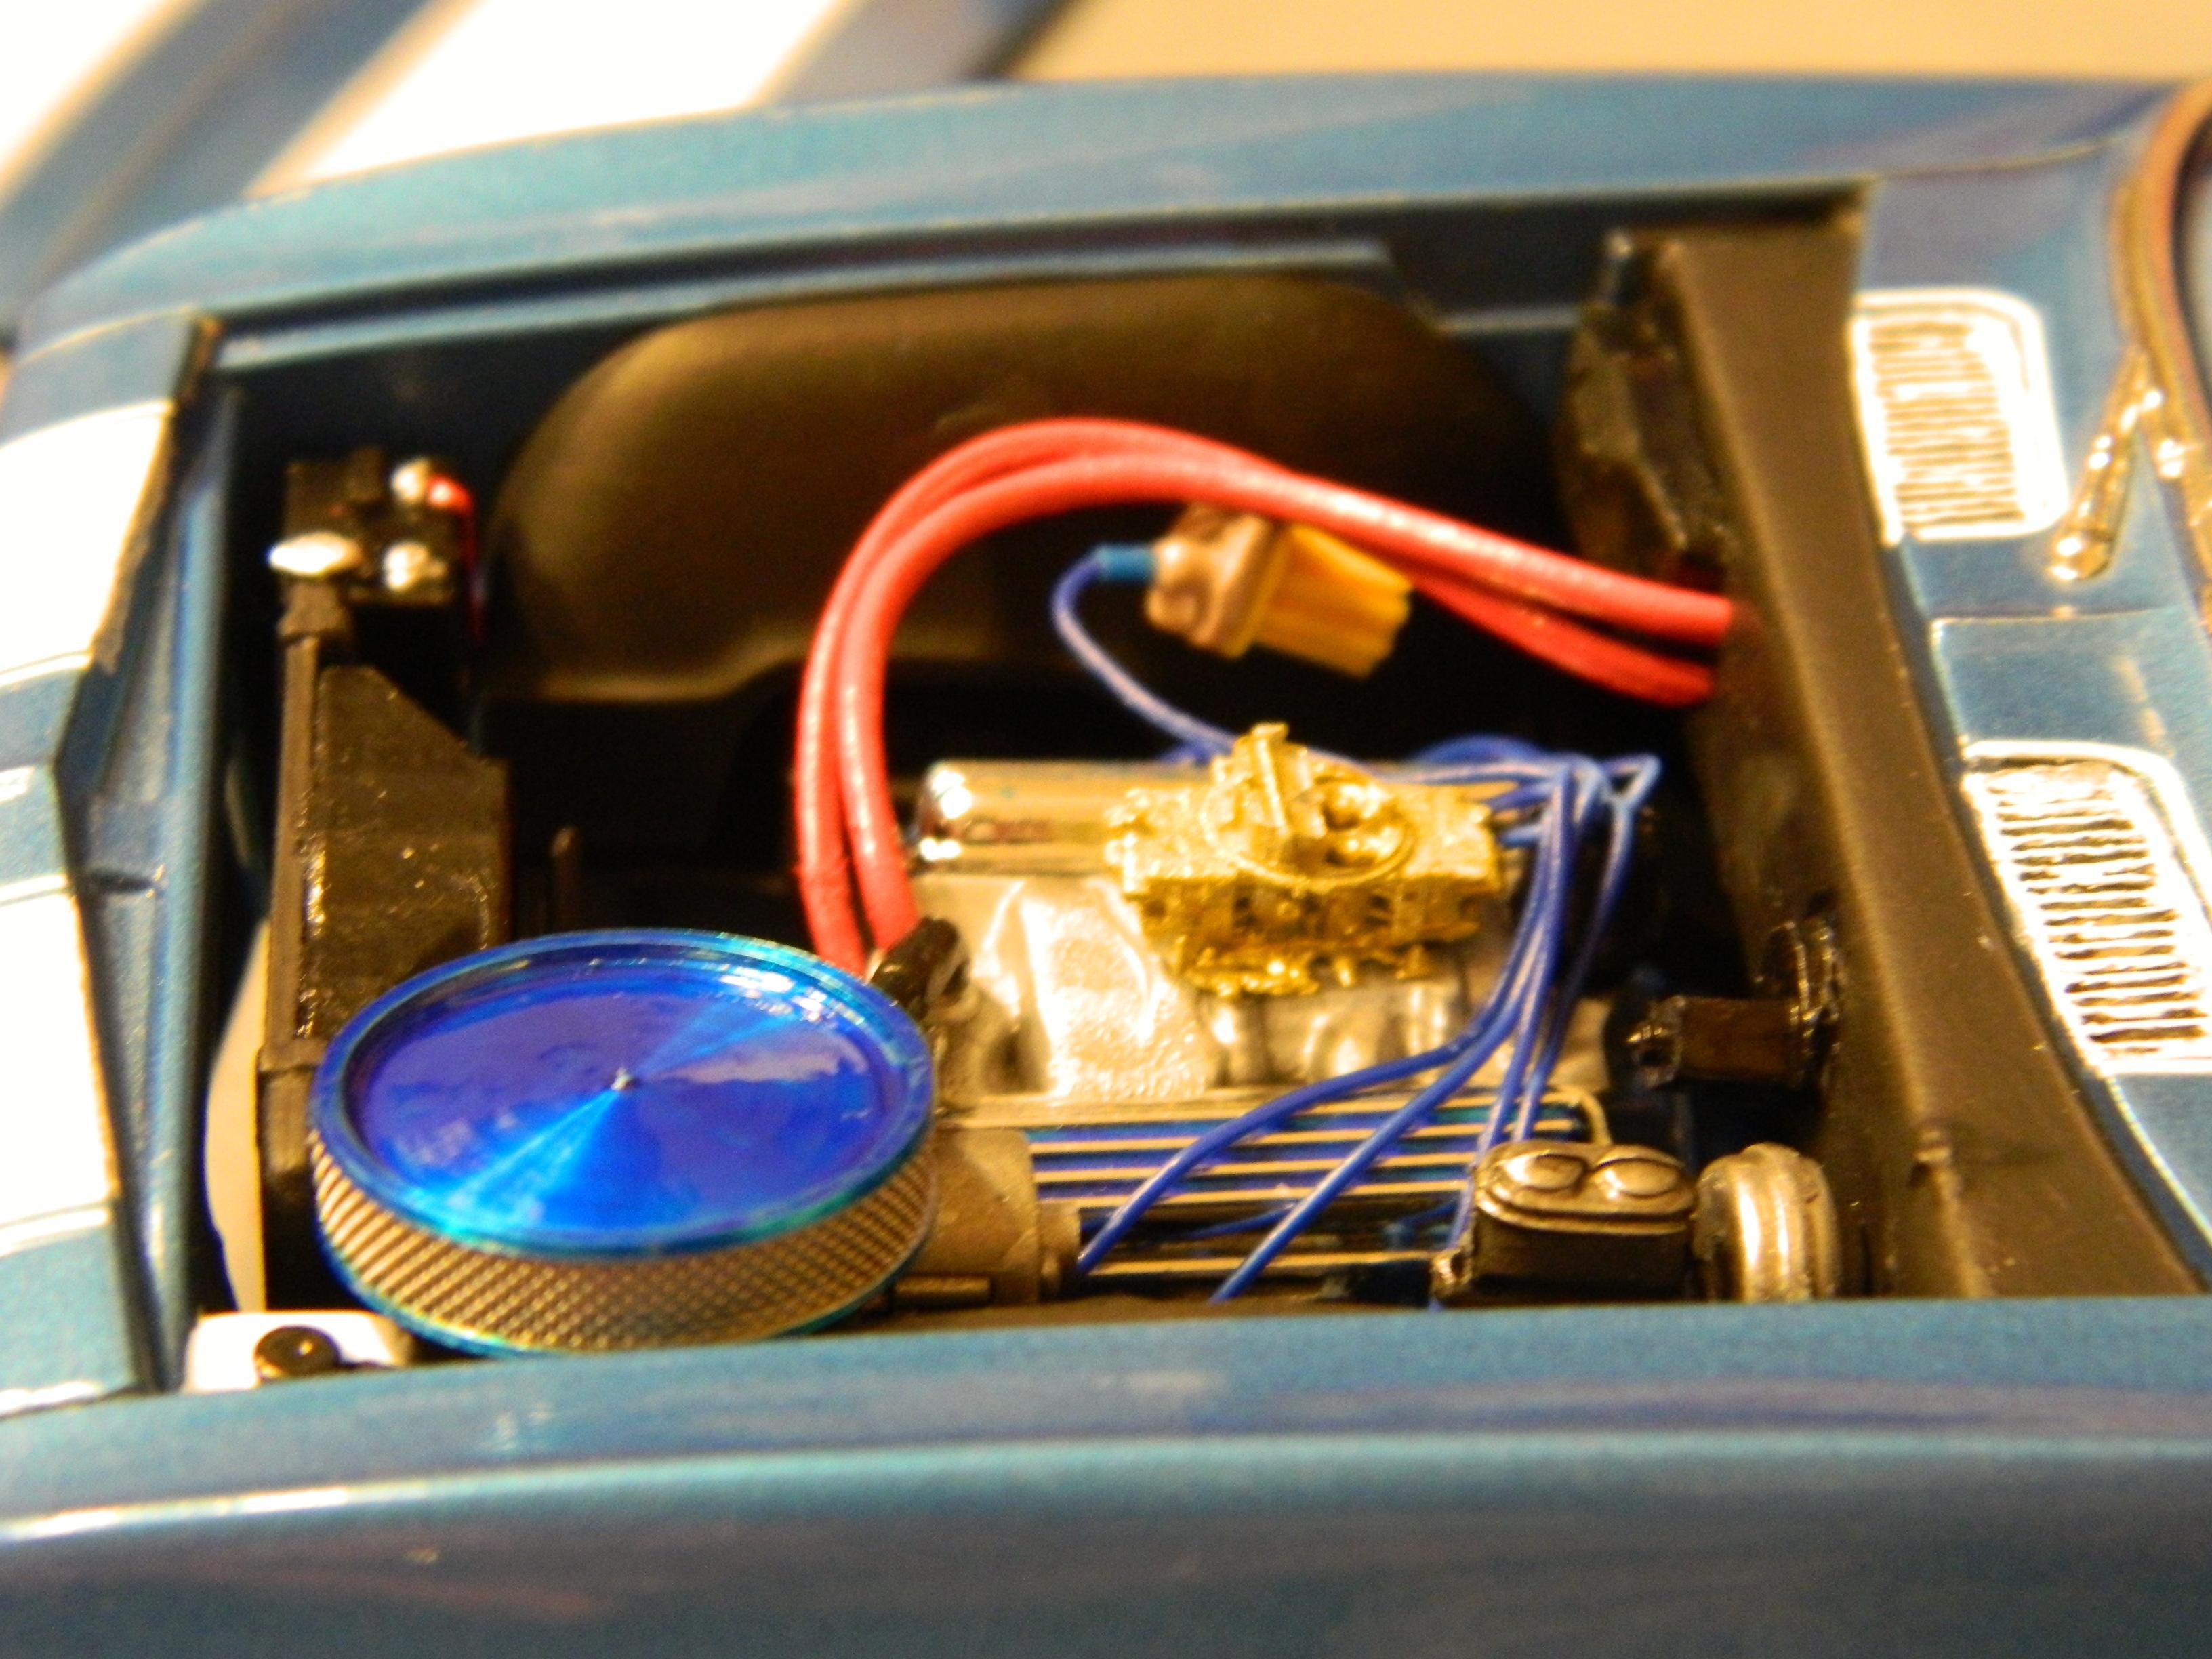
Here's the AMT 1968 Camaro Z28 that I finished over the weekend. It's painted in Model Master Nassau Blue Metallic, and cleared with Model Master Clear Gloss. I gave it the usual wet-sand, polish, and wax treatment. The interior is two different mixtures of craft paints, one for the seats, door panels and dashboard, and the other for the carpet area and rear shelf. The wheels are from MAD Modeling, and were airbrushed with Molotow Chrome from a refill pen, and the spokes were painted with Anita's Galvanized Tin. The air cleaner is a machined unit from Off The Sprue, the carburetor is from Fireball Modelworks. The trim was done with Bare Metal Foil, and I added valve stems, ignition wires, and heater hoses for extra detail. This was a typical older mold from AMT with a not-so detailed one piece interior tub, but it did go together really well and was a really fun build, so a definite thumbs-up from me. Thanks for looking!

-
Looks very good! I did mine in a very similar color.
-
Nice weathering. It looks very realistic, especially in the dio. Your friend would be proud!
-
That color really pops after the clear! I like the black hash stripes as well.
-
1995 Toyota Supra TOM’s JGTC undercover (cannonball ruse)
Dragonhawk1066 replied to Mattilacken's topic in Model Cars
Very cool! I like the color choice! -
Looks great!
-
I've been wanting to go to either of their spring or late fall shows for a few years now. My budget never really lets me, as I prefer to have at least $100 to spend in the vendor area on kits and such. I would have been able to attend last March, but that's pretty much when all of this craziness started. As we got closer to November this year, once again the budget wouldn't allow it, but even if it had my wife feels the same way about being around more than a few people at our current rate. Hopefully both situations relent for me by the time the March 27th show rolls around next year.
-
Nice looking Daytona!
-
Nice looking Ferrari's!
-
A fantastic looking, top notch build!
-
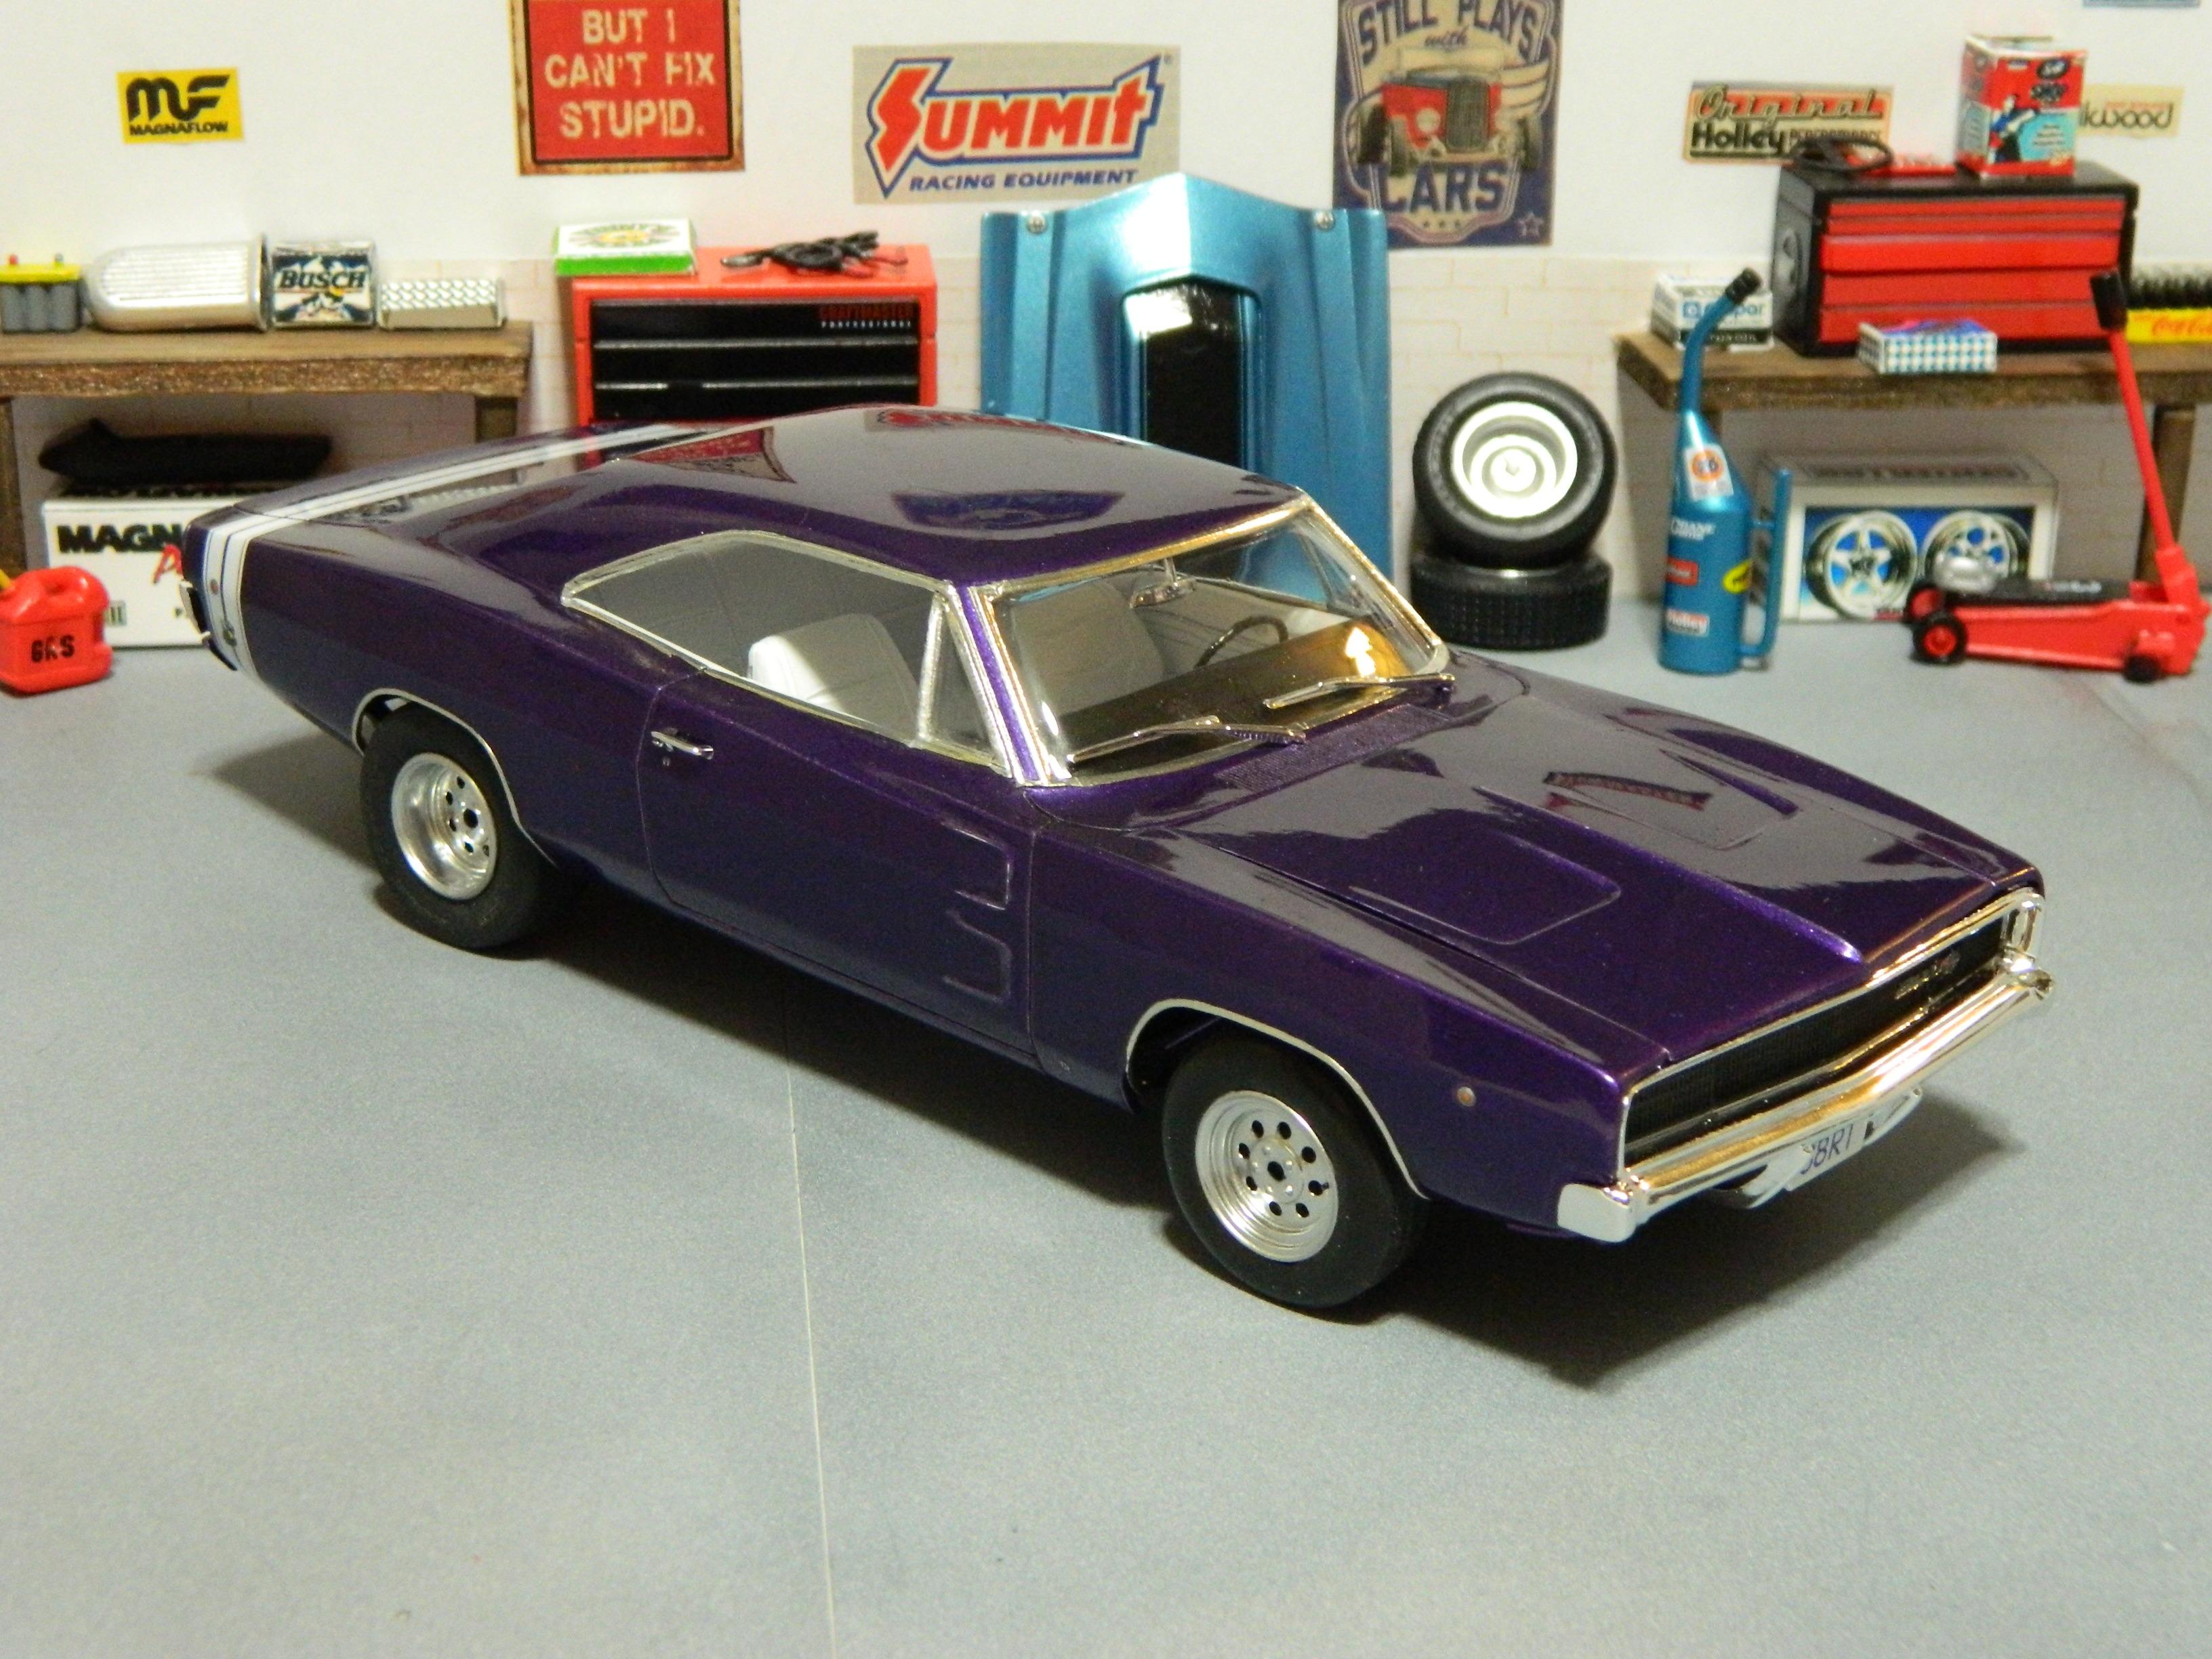
Revell 1968 Dodge Charger R/T 1/25 Scale in Plum Crazy Purple.
Dragonhawk1066 replied to Dragonhawk1066's topic in Model Cars
Thanks everyone!- 28 replies
-
- 1
-

-
- revell
- charger r/t
- (and 1 more)
-
Looks good!
-
They both looked pretty good before, but the Camaro really benefitted from the rebuild. I really like the color on the Firebird!
-
Nice work! Yes, that is an excellent kit.
-
Looks pretty cool! I like the weathering details on the sides of the car!
-
Revell 1968 Dodge Charger R/T 1/25 Scale in Plum Crazy Purple.
Dragonhawk1066 replied to Dragonhawk1066's topic in Model Cars
Thanks guys! -
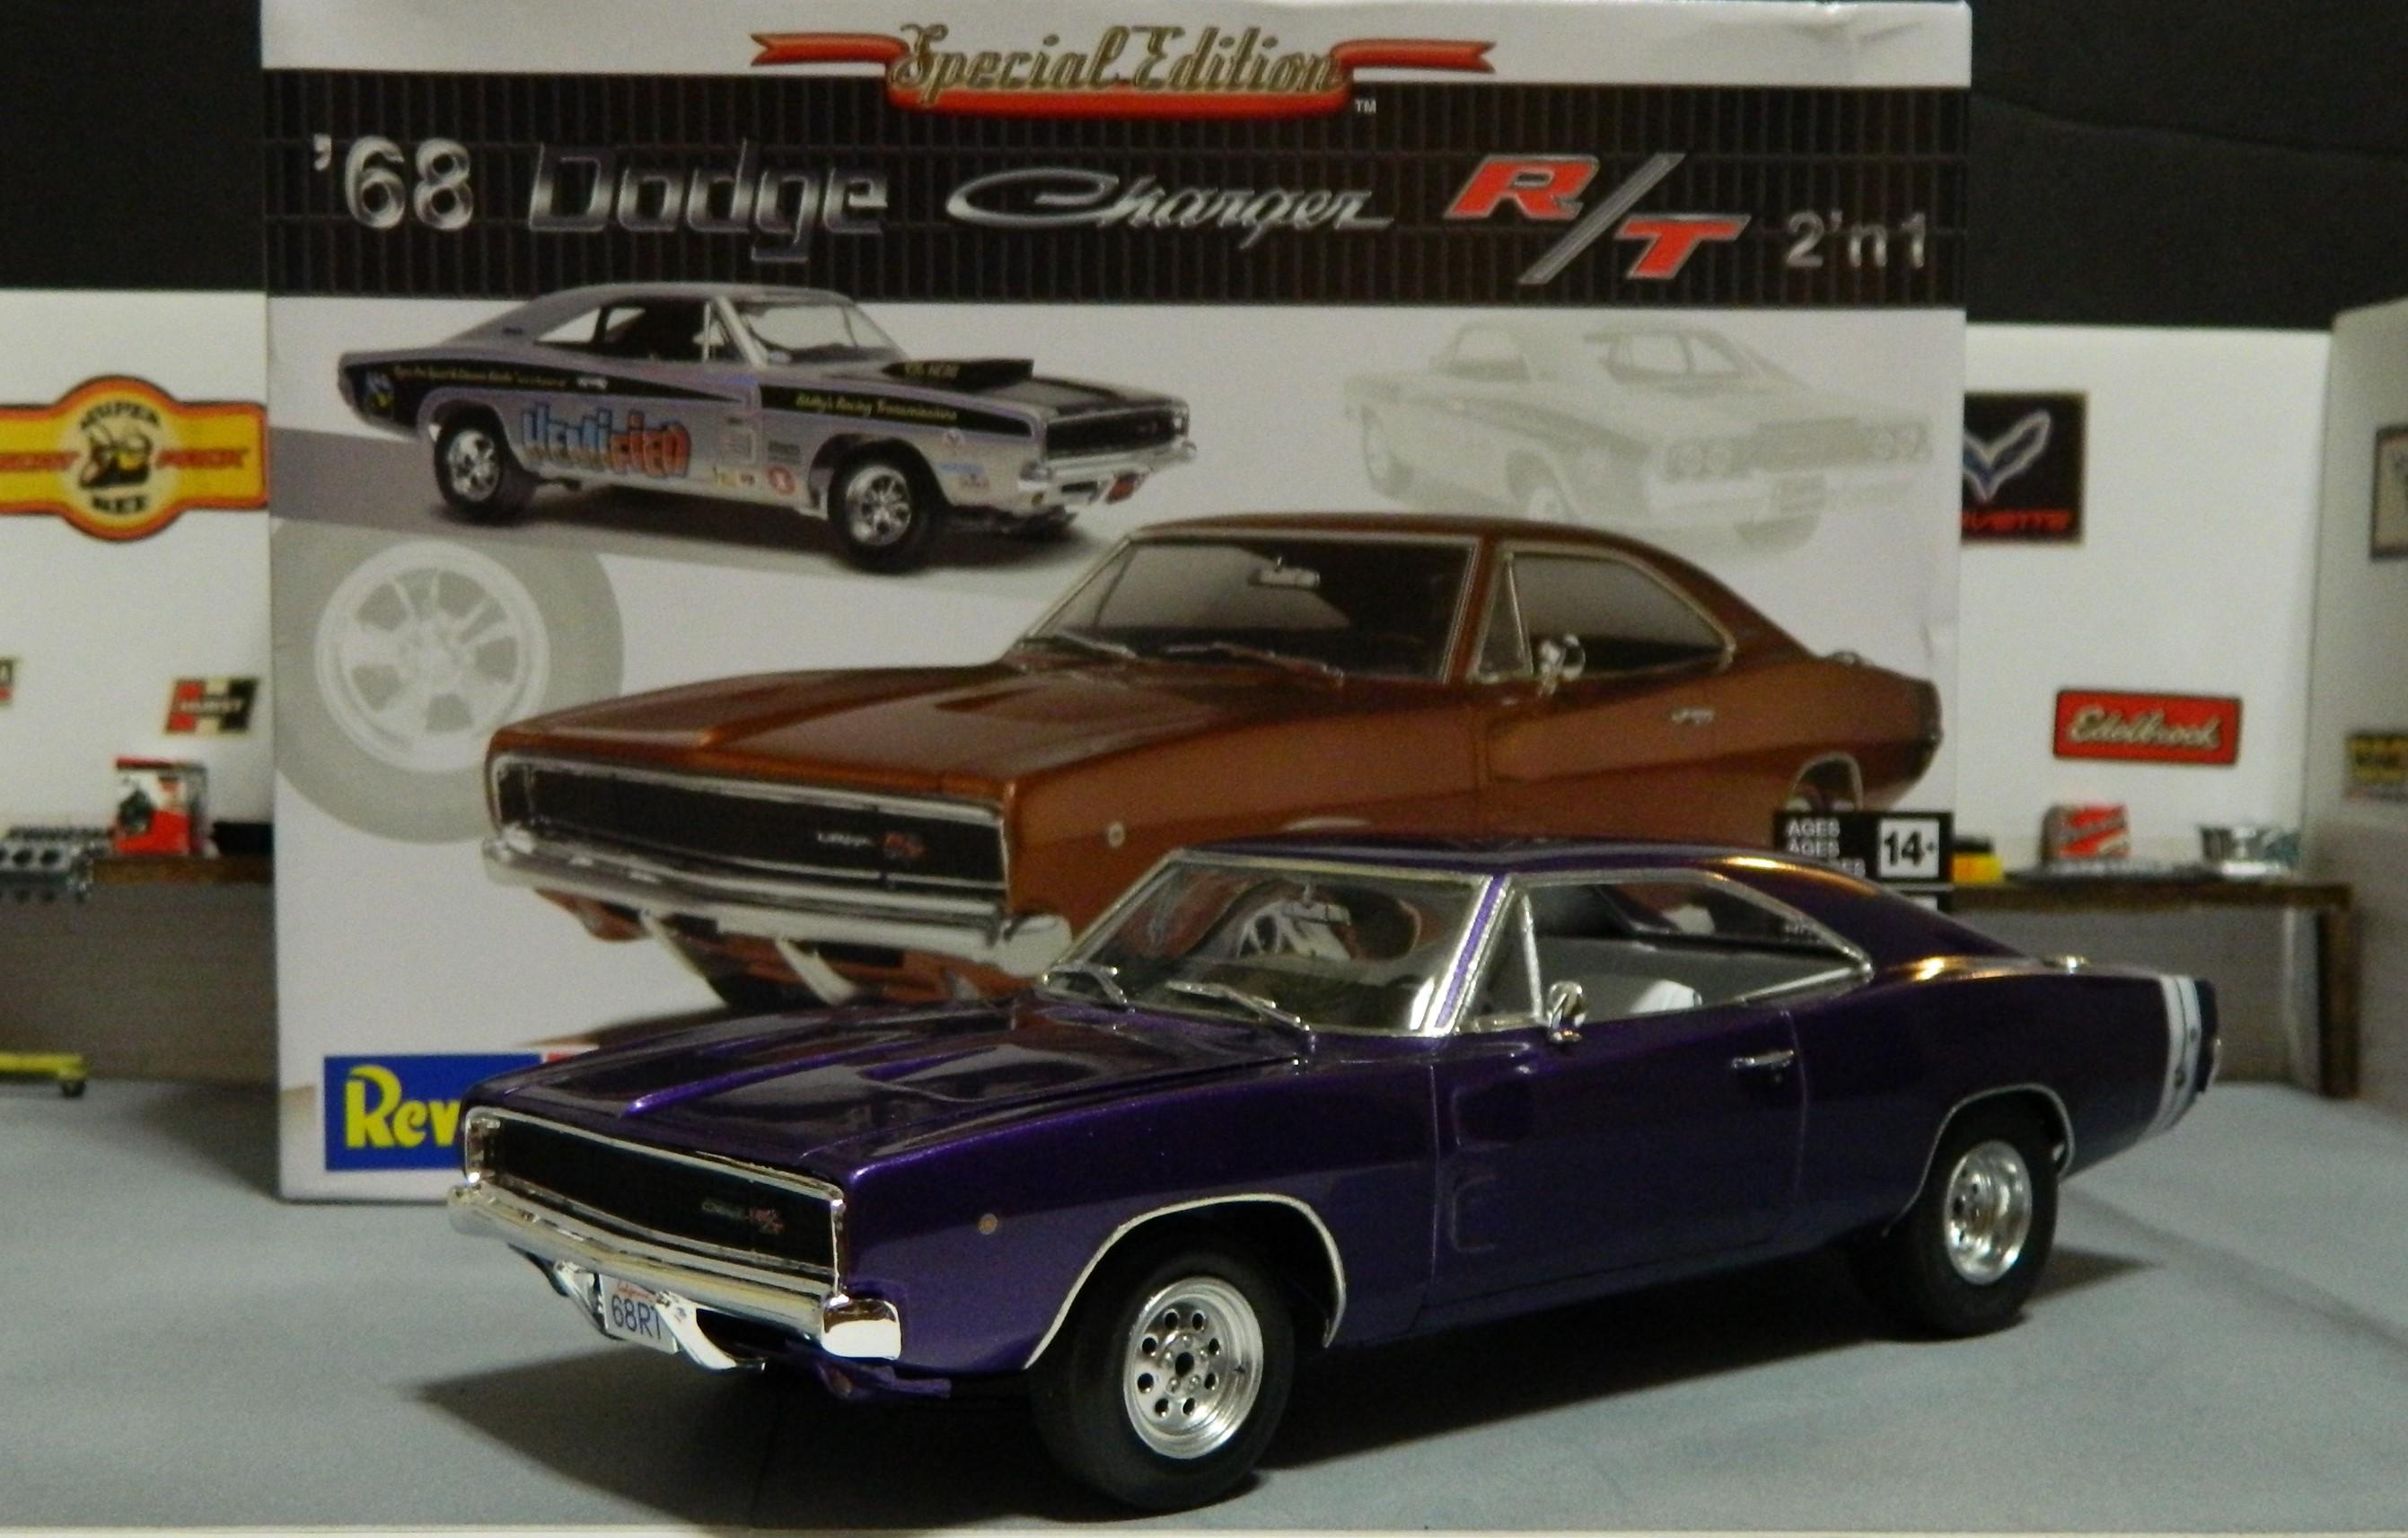
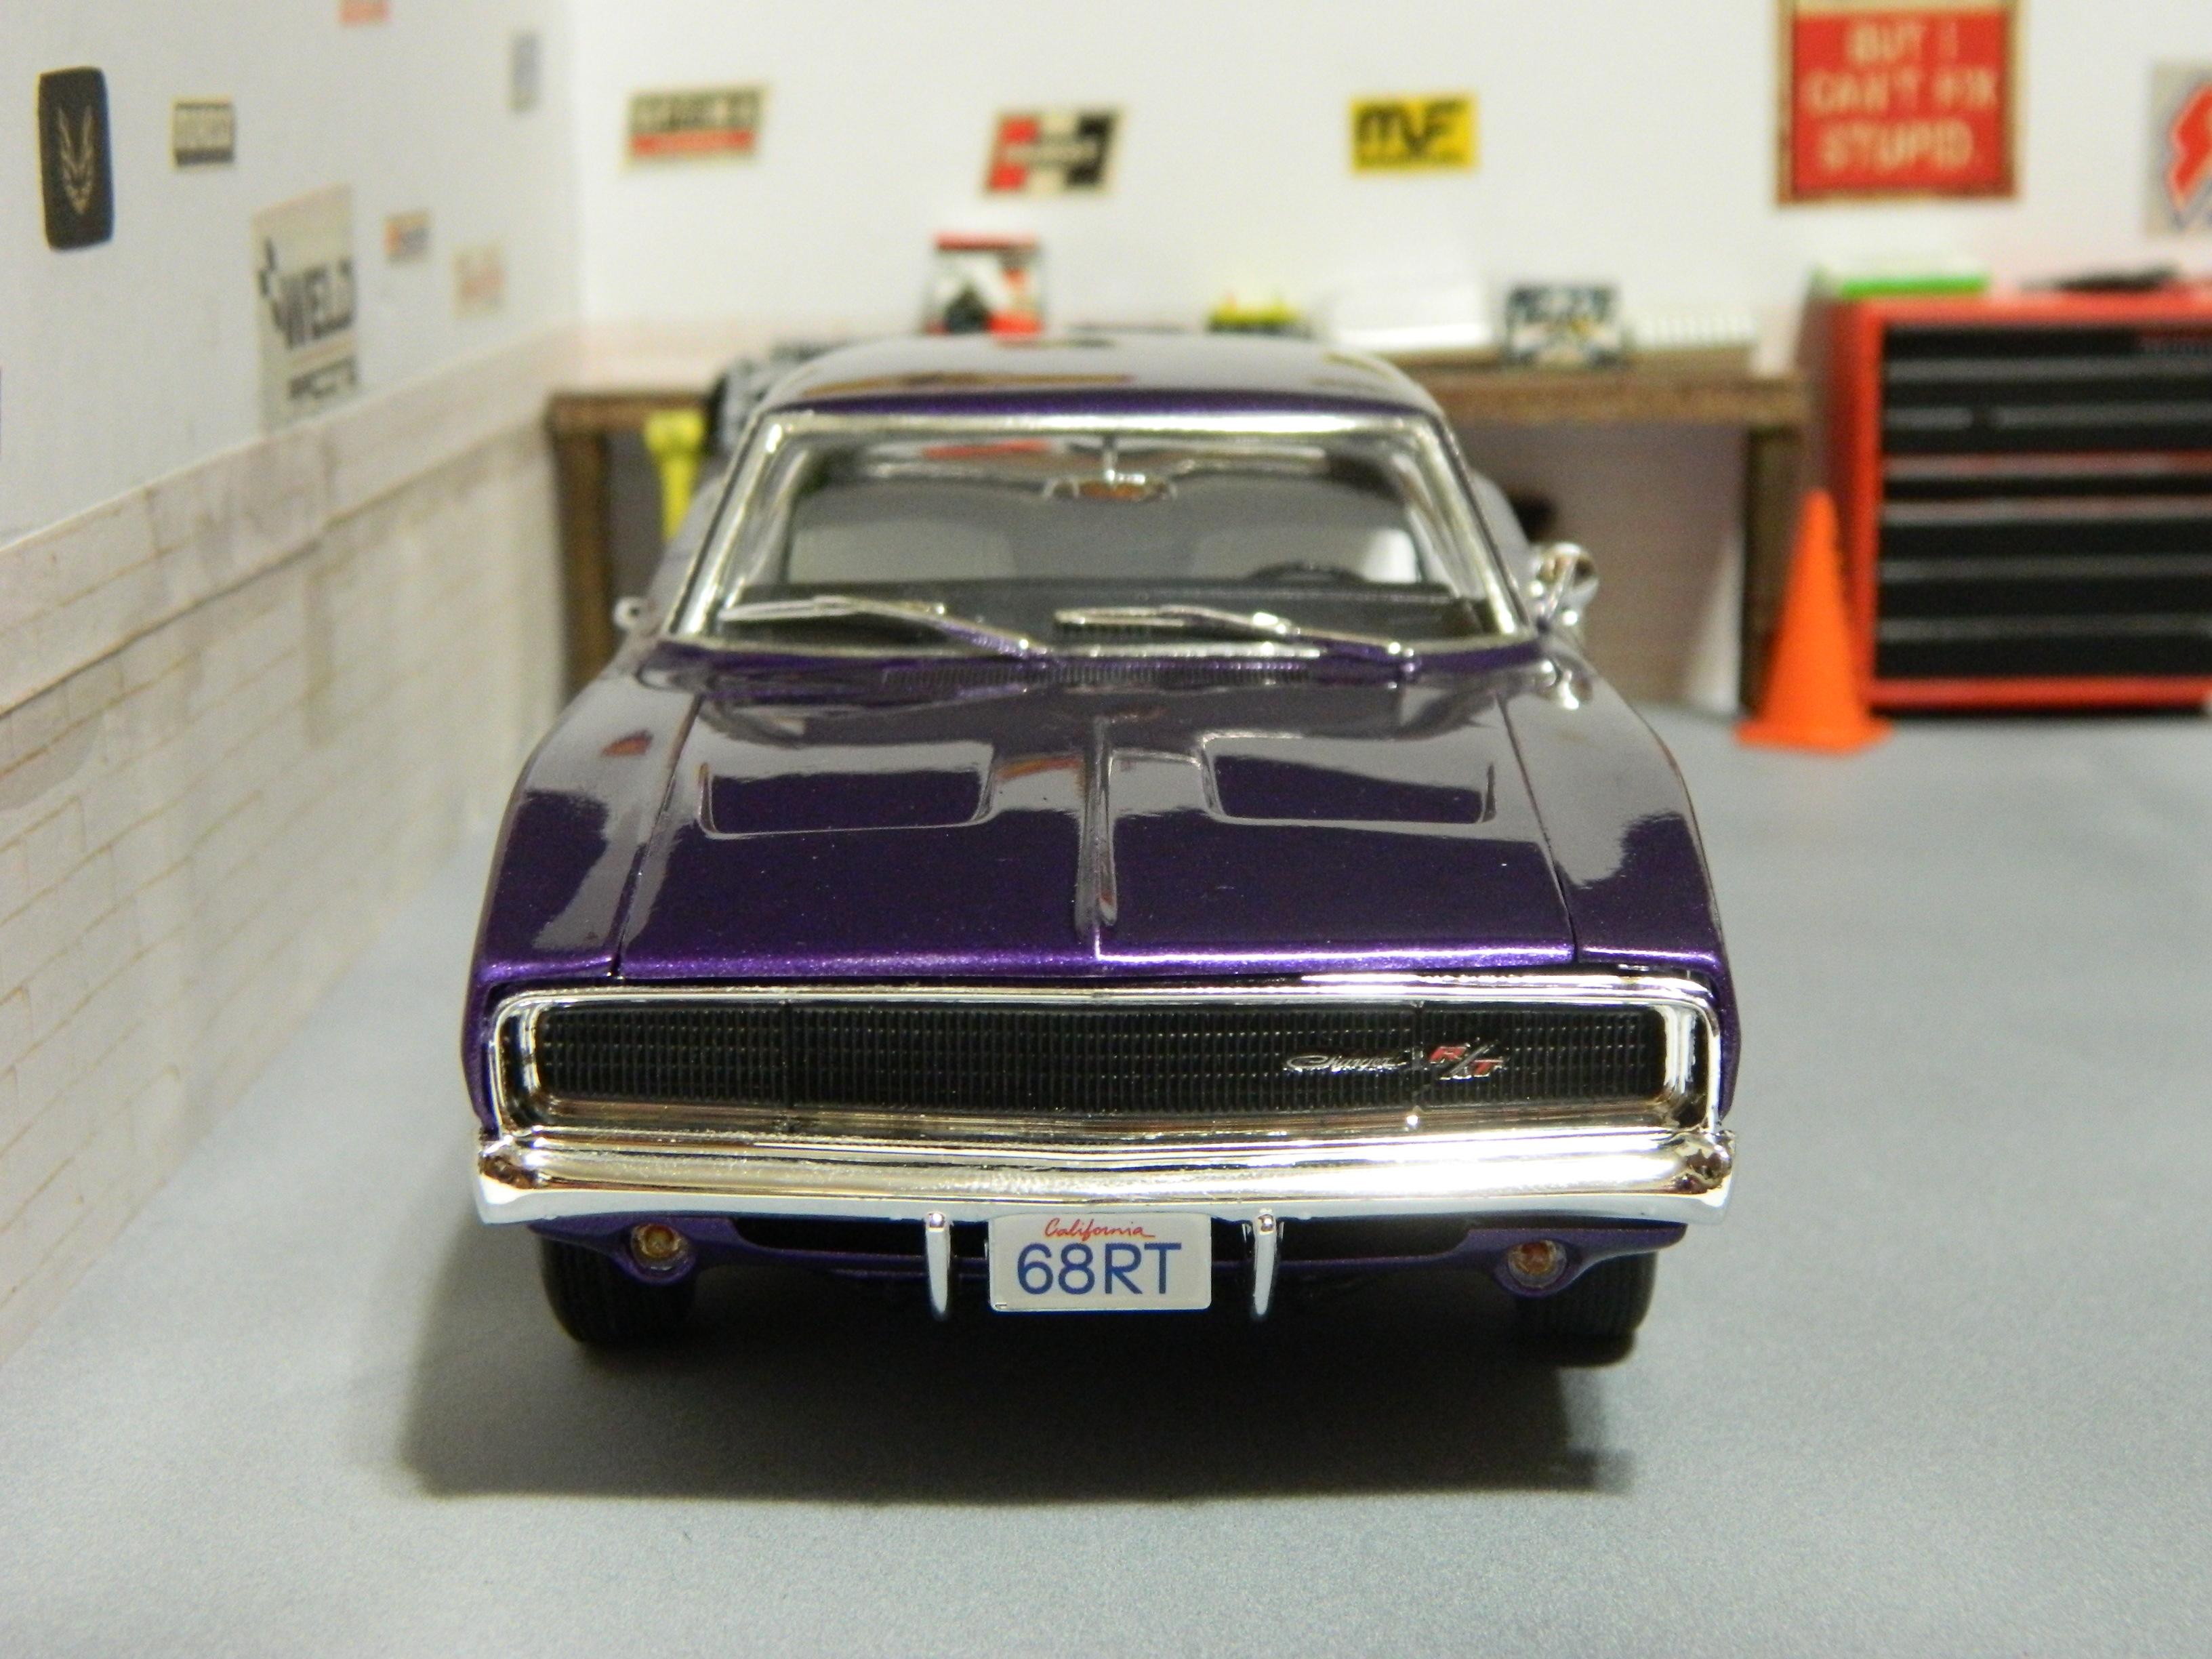
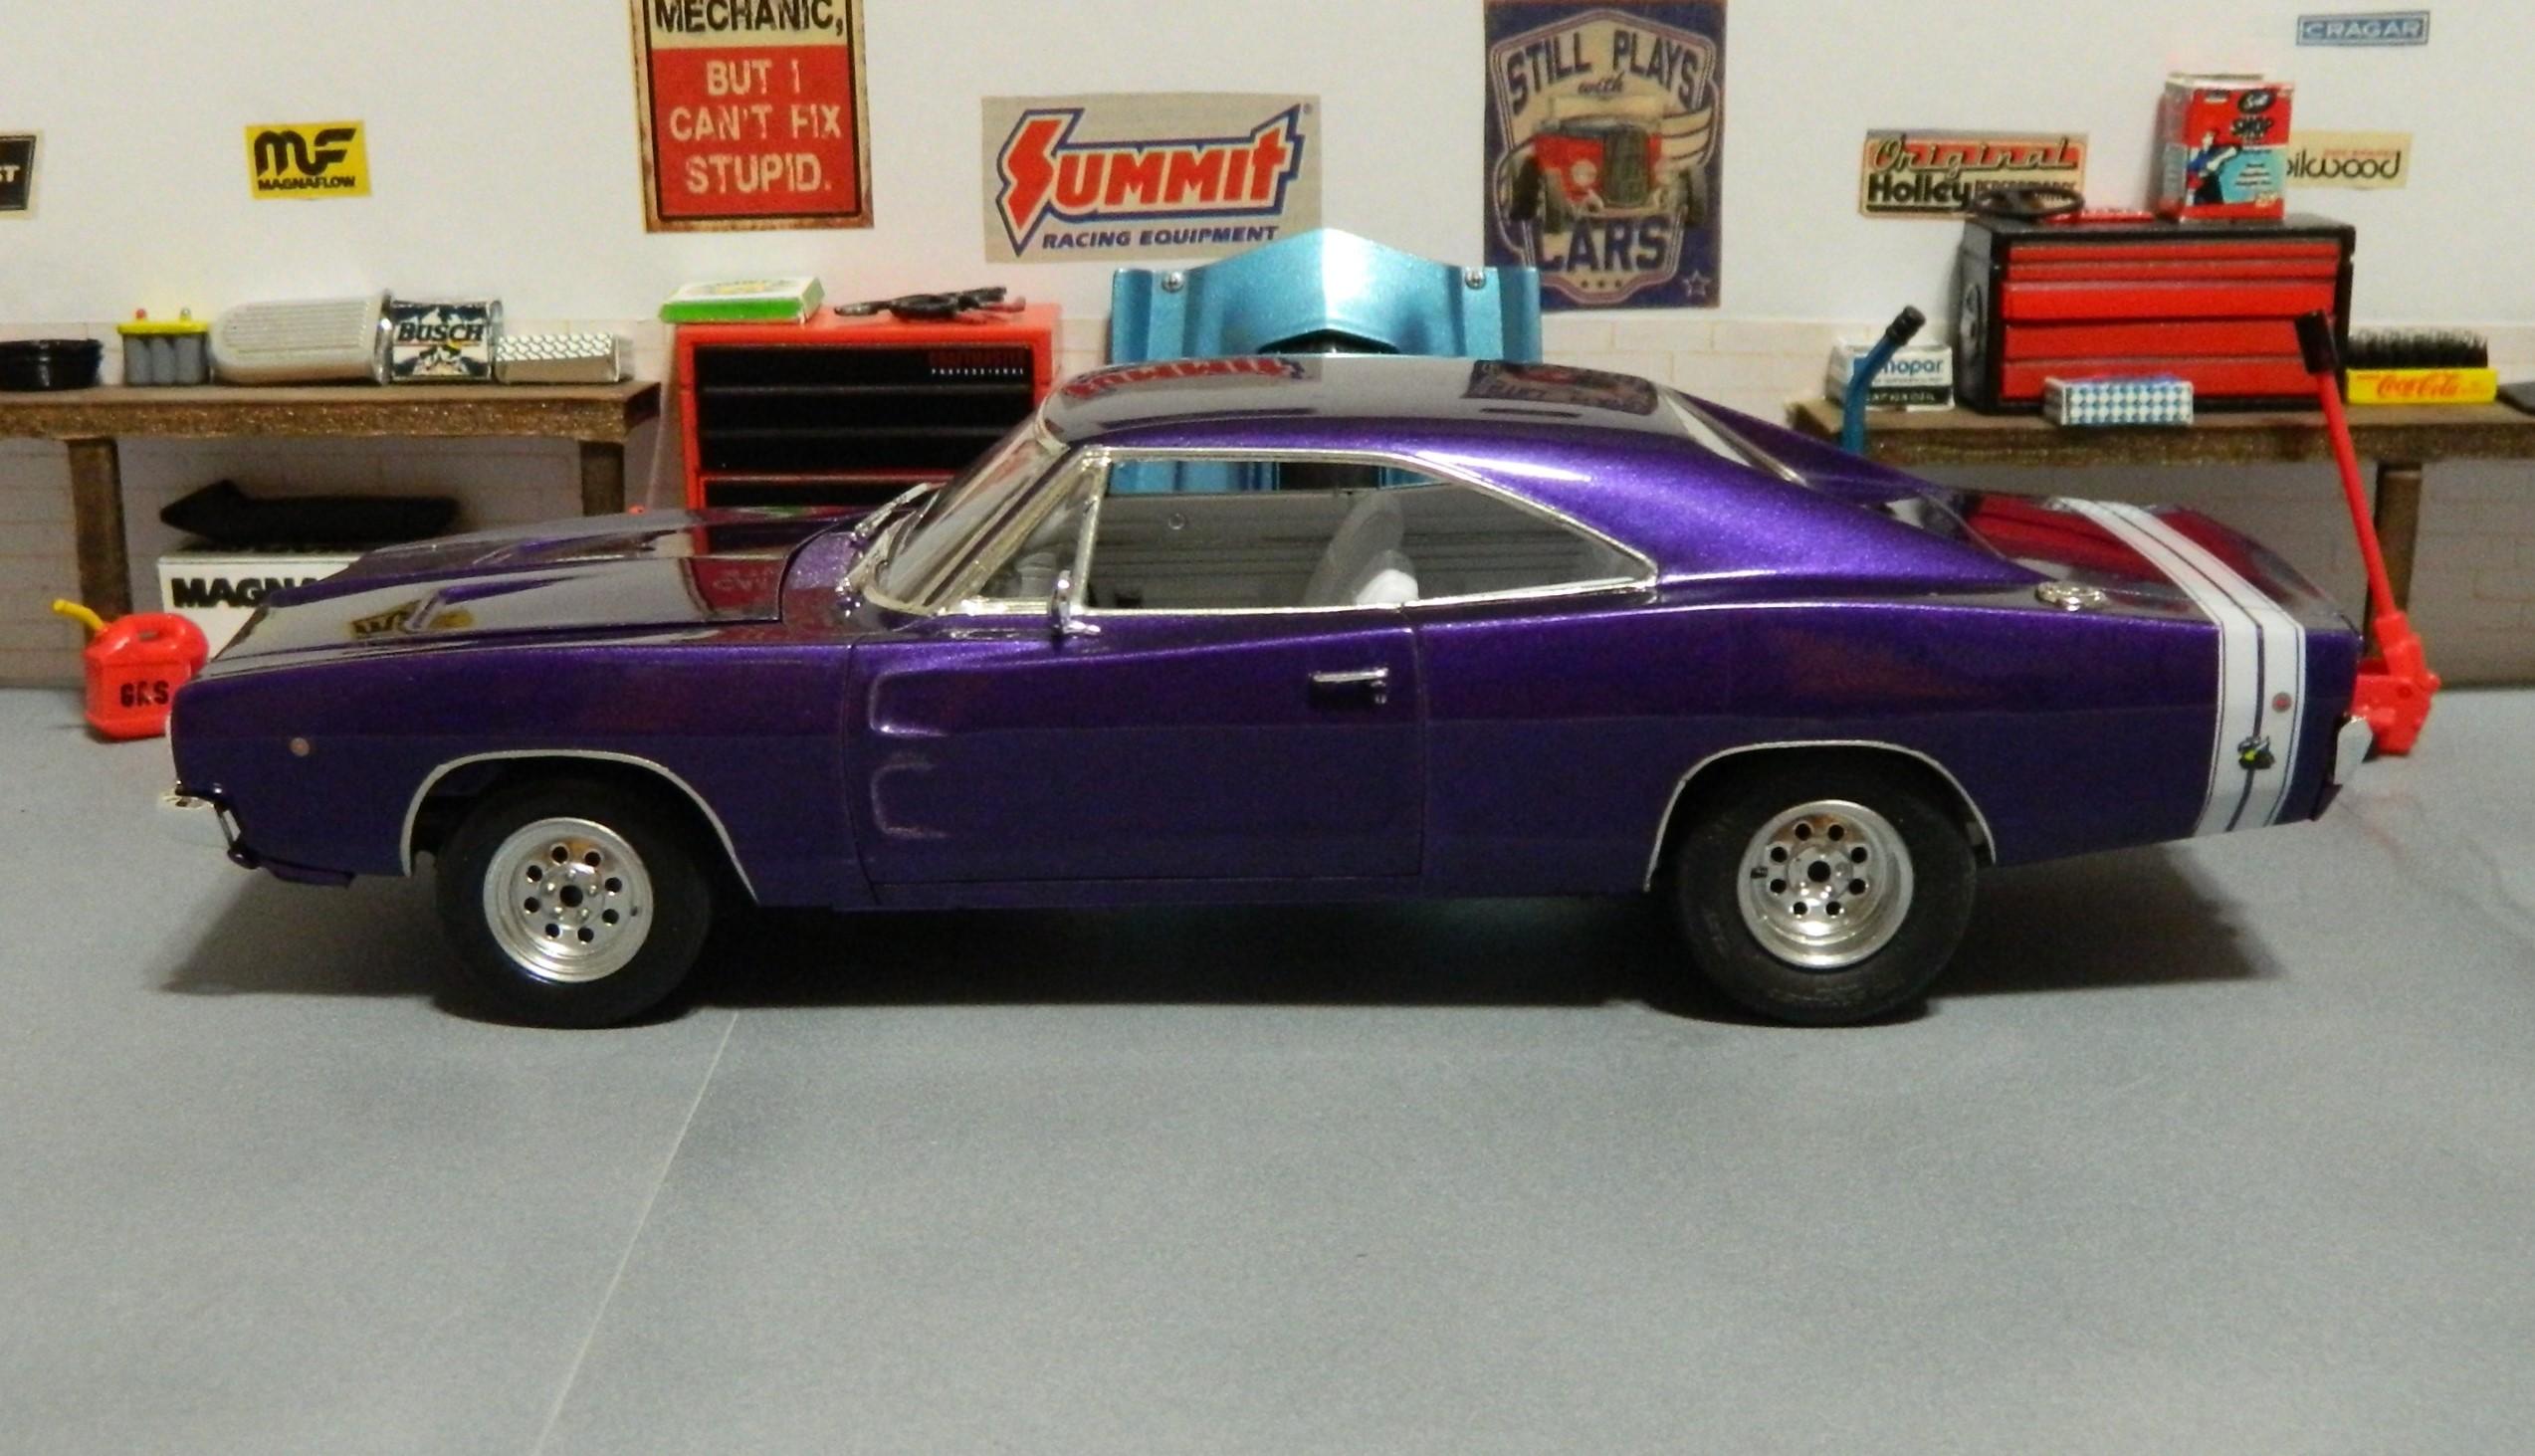
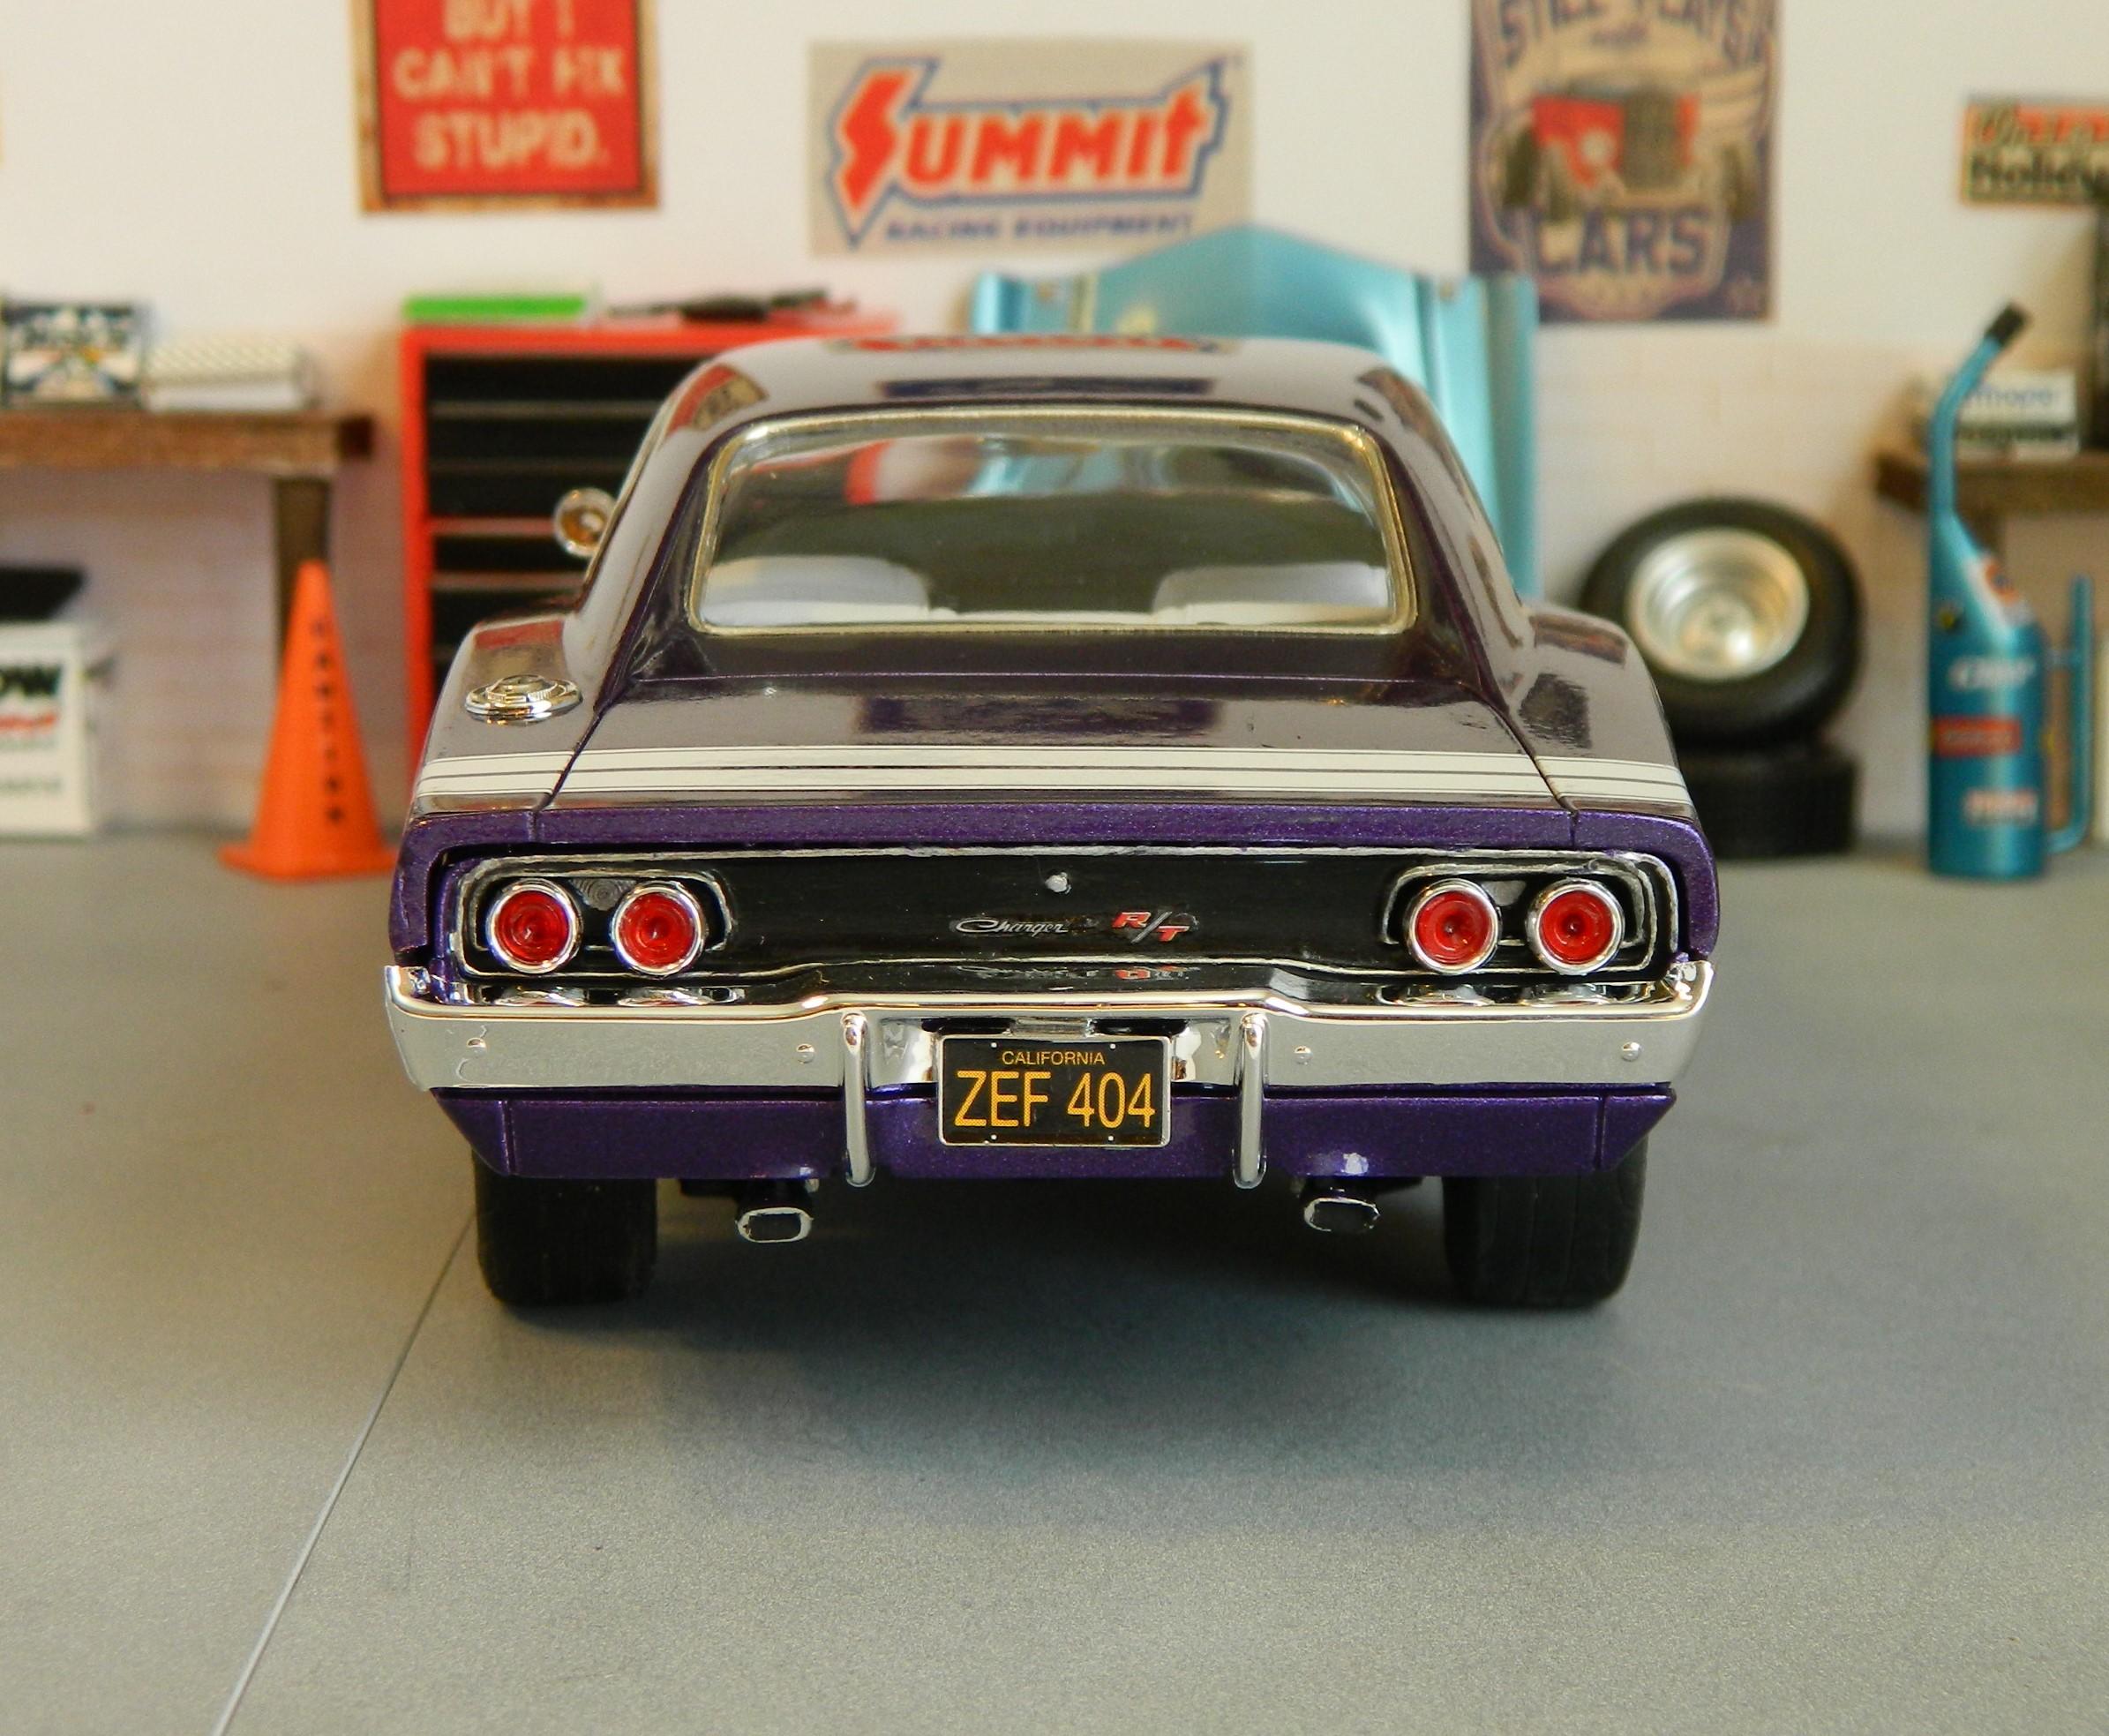
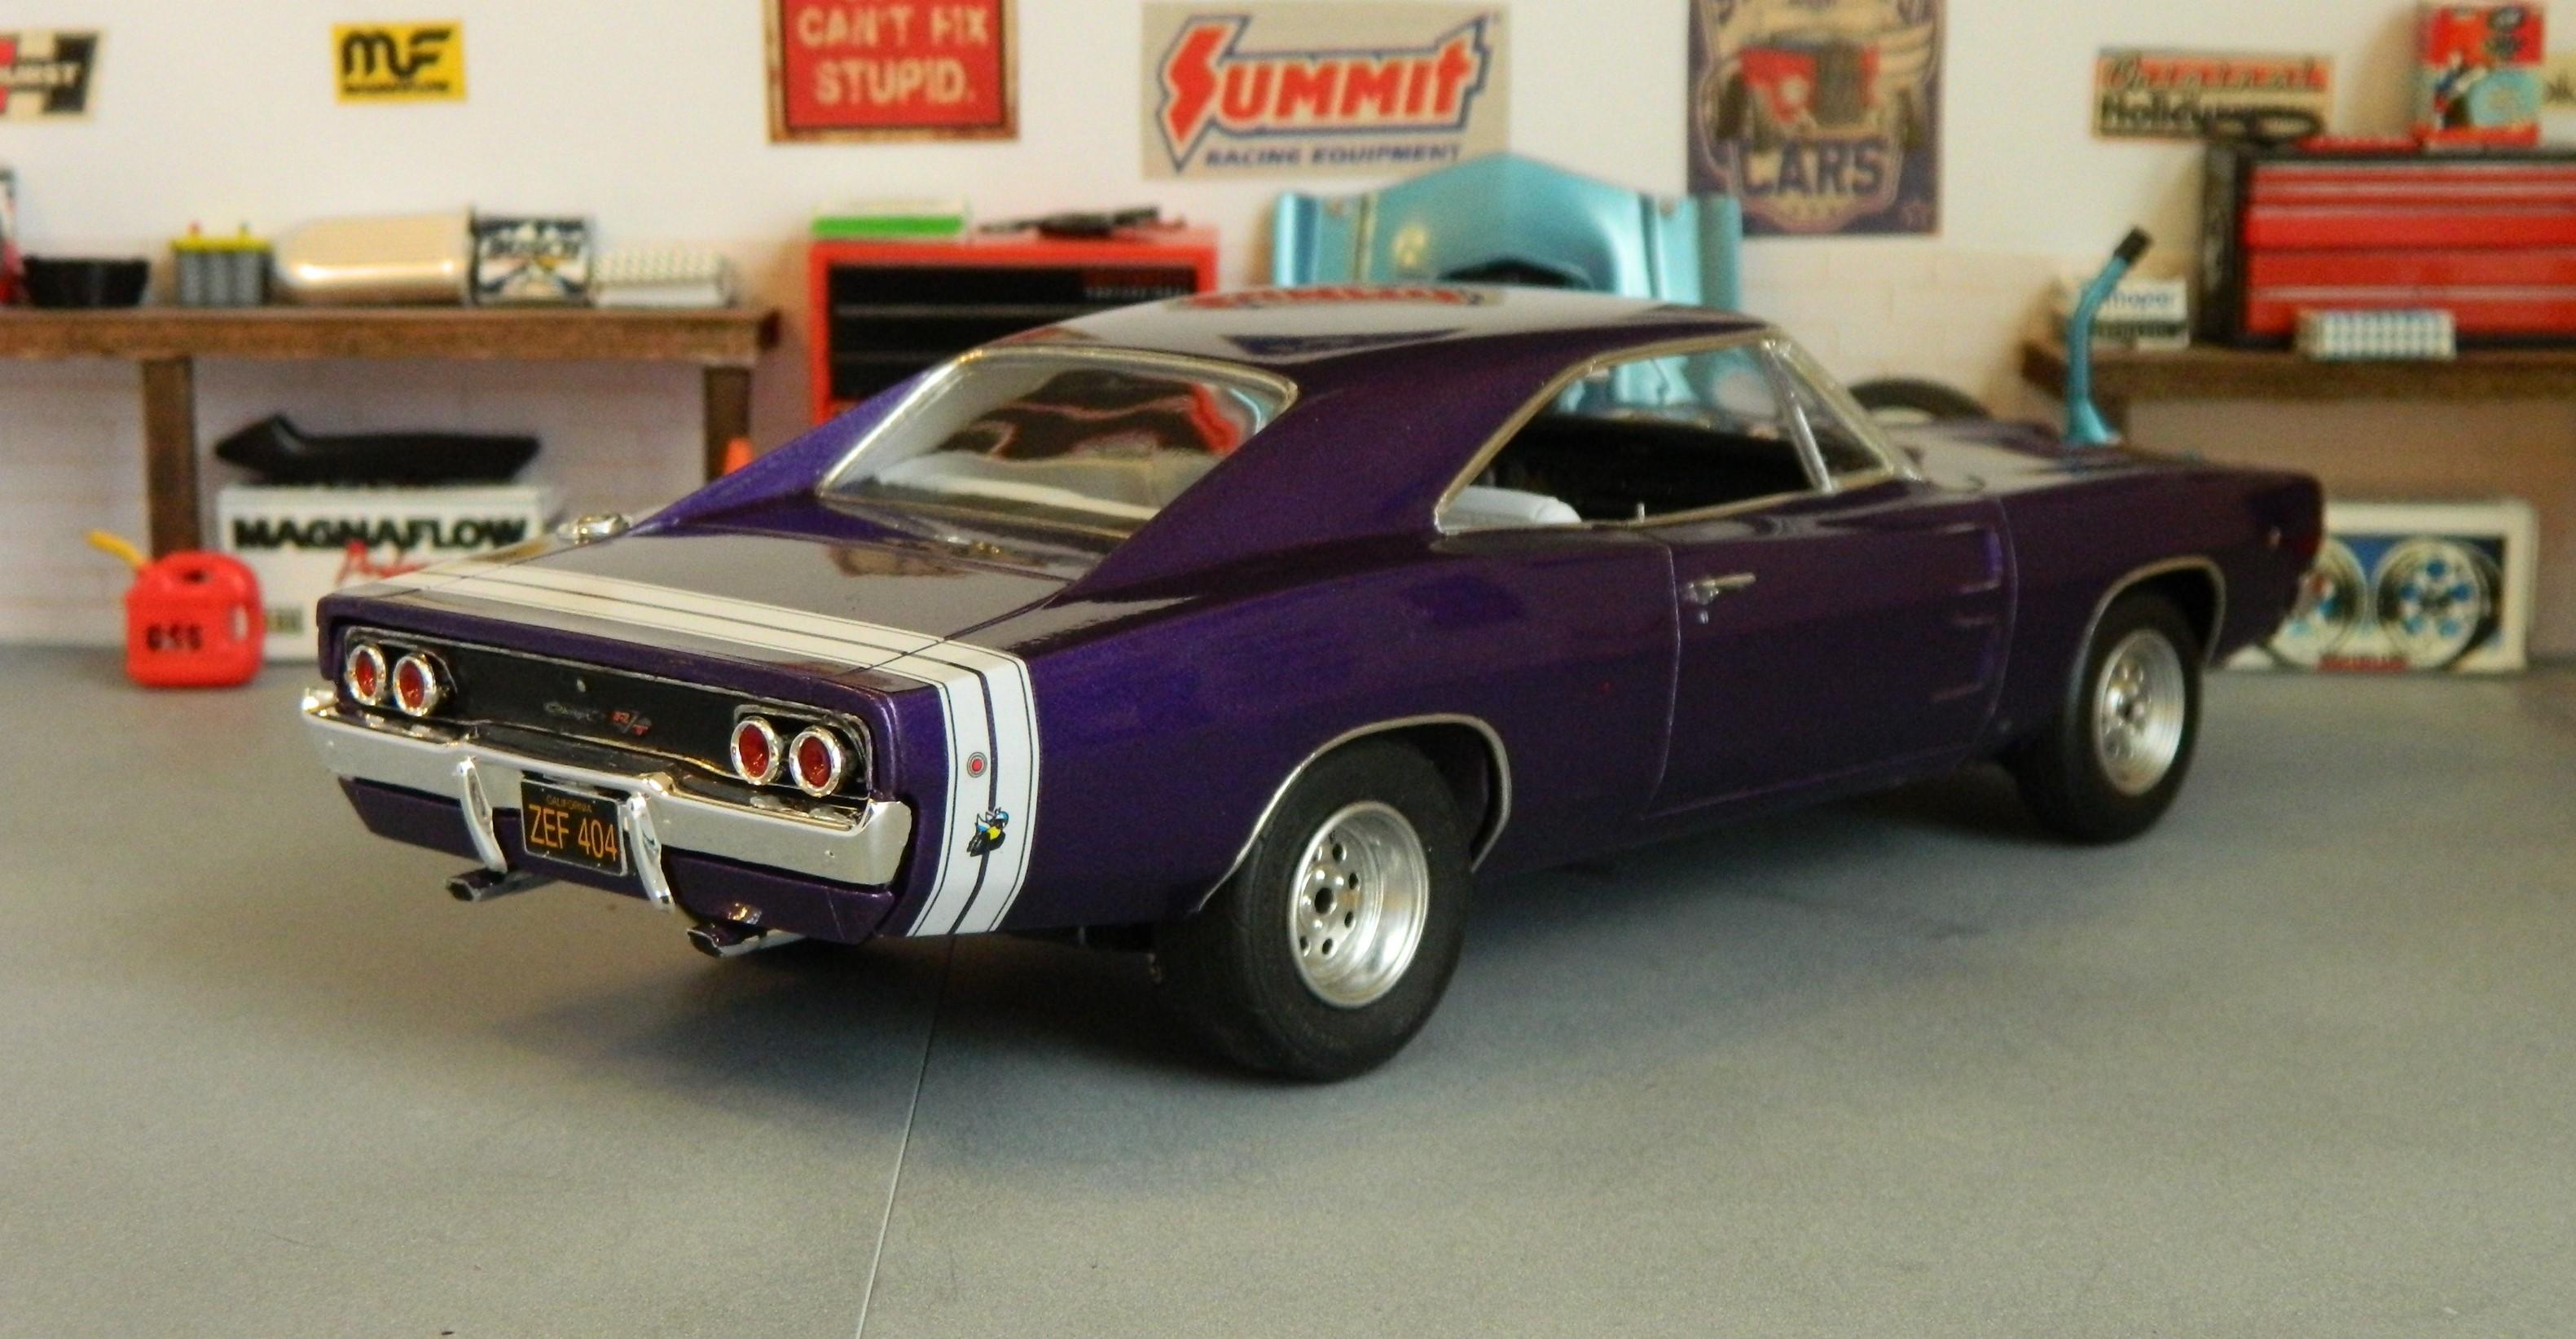
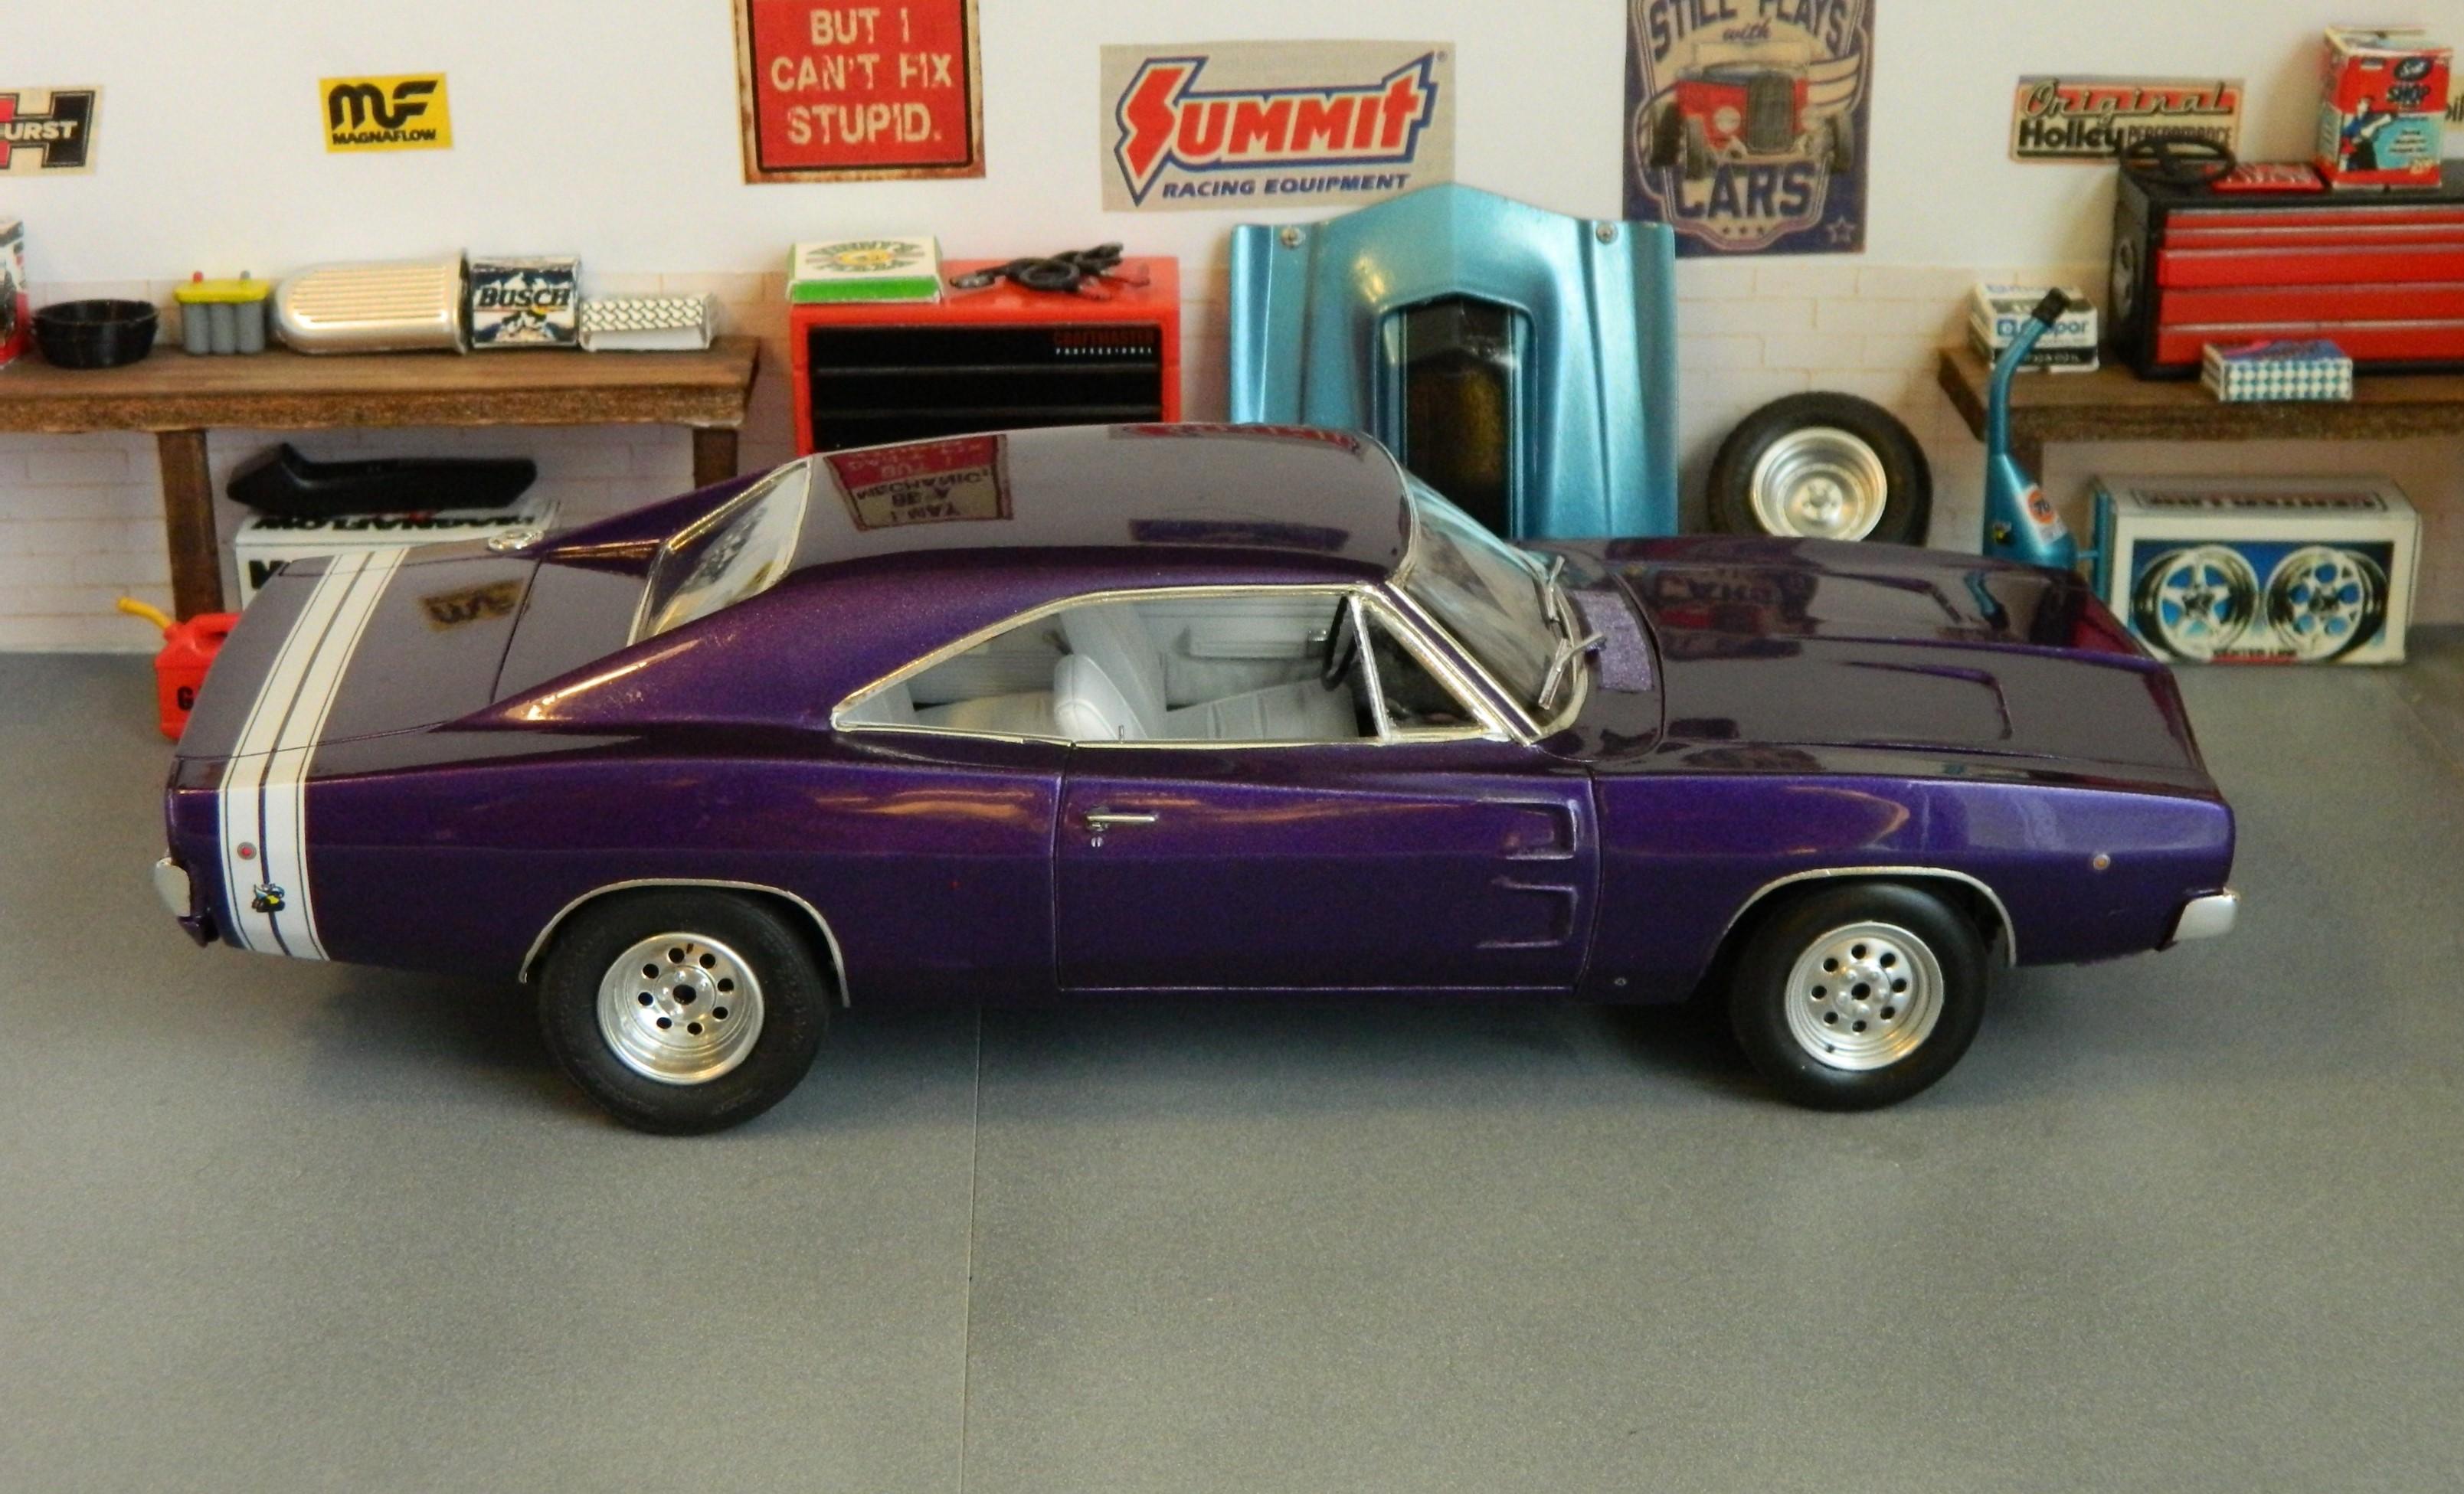
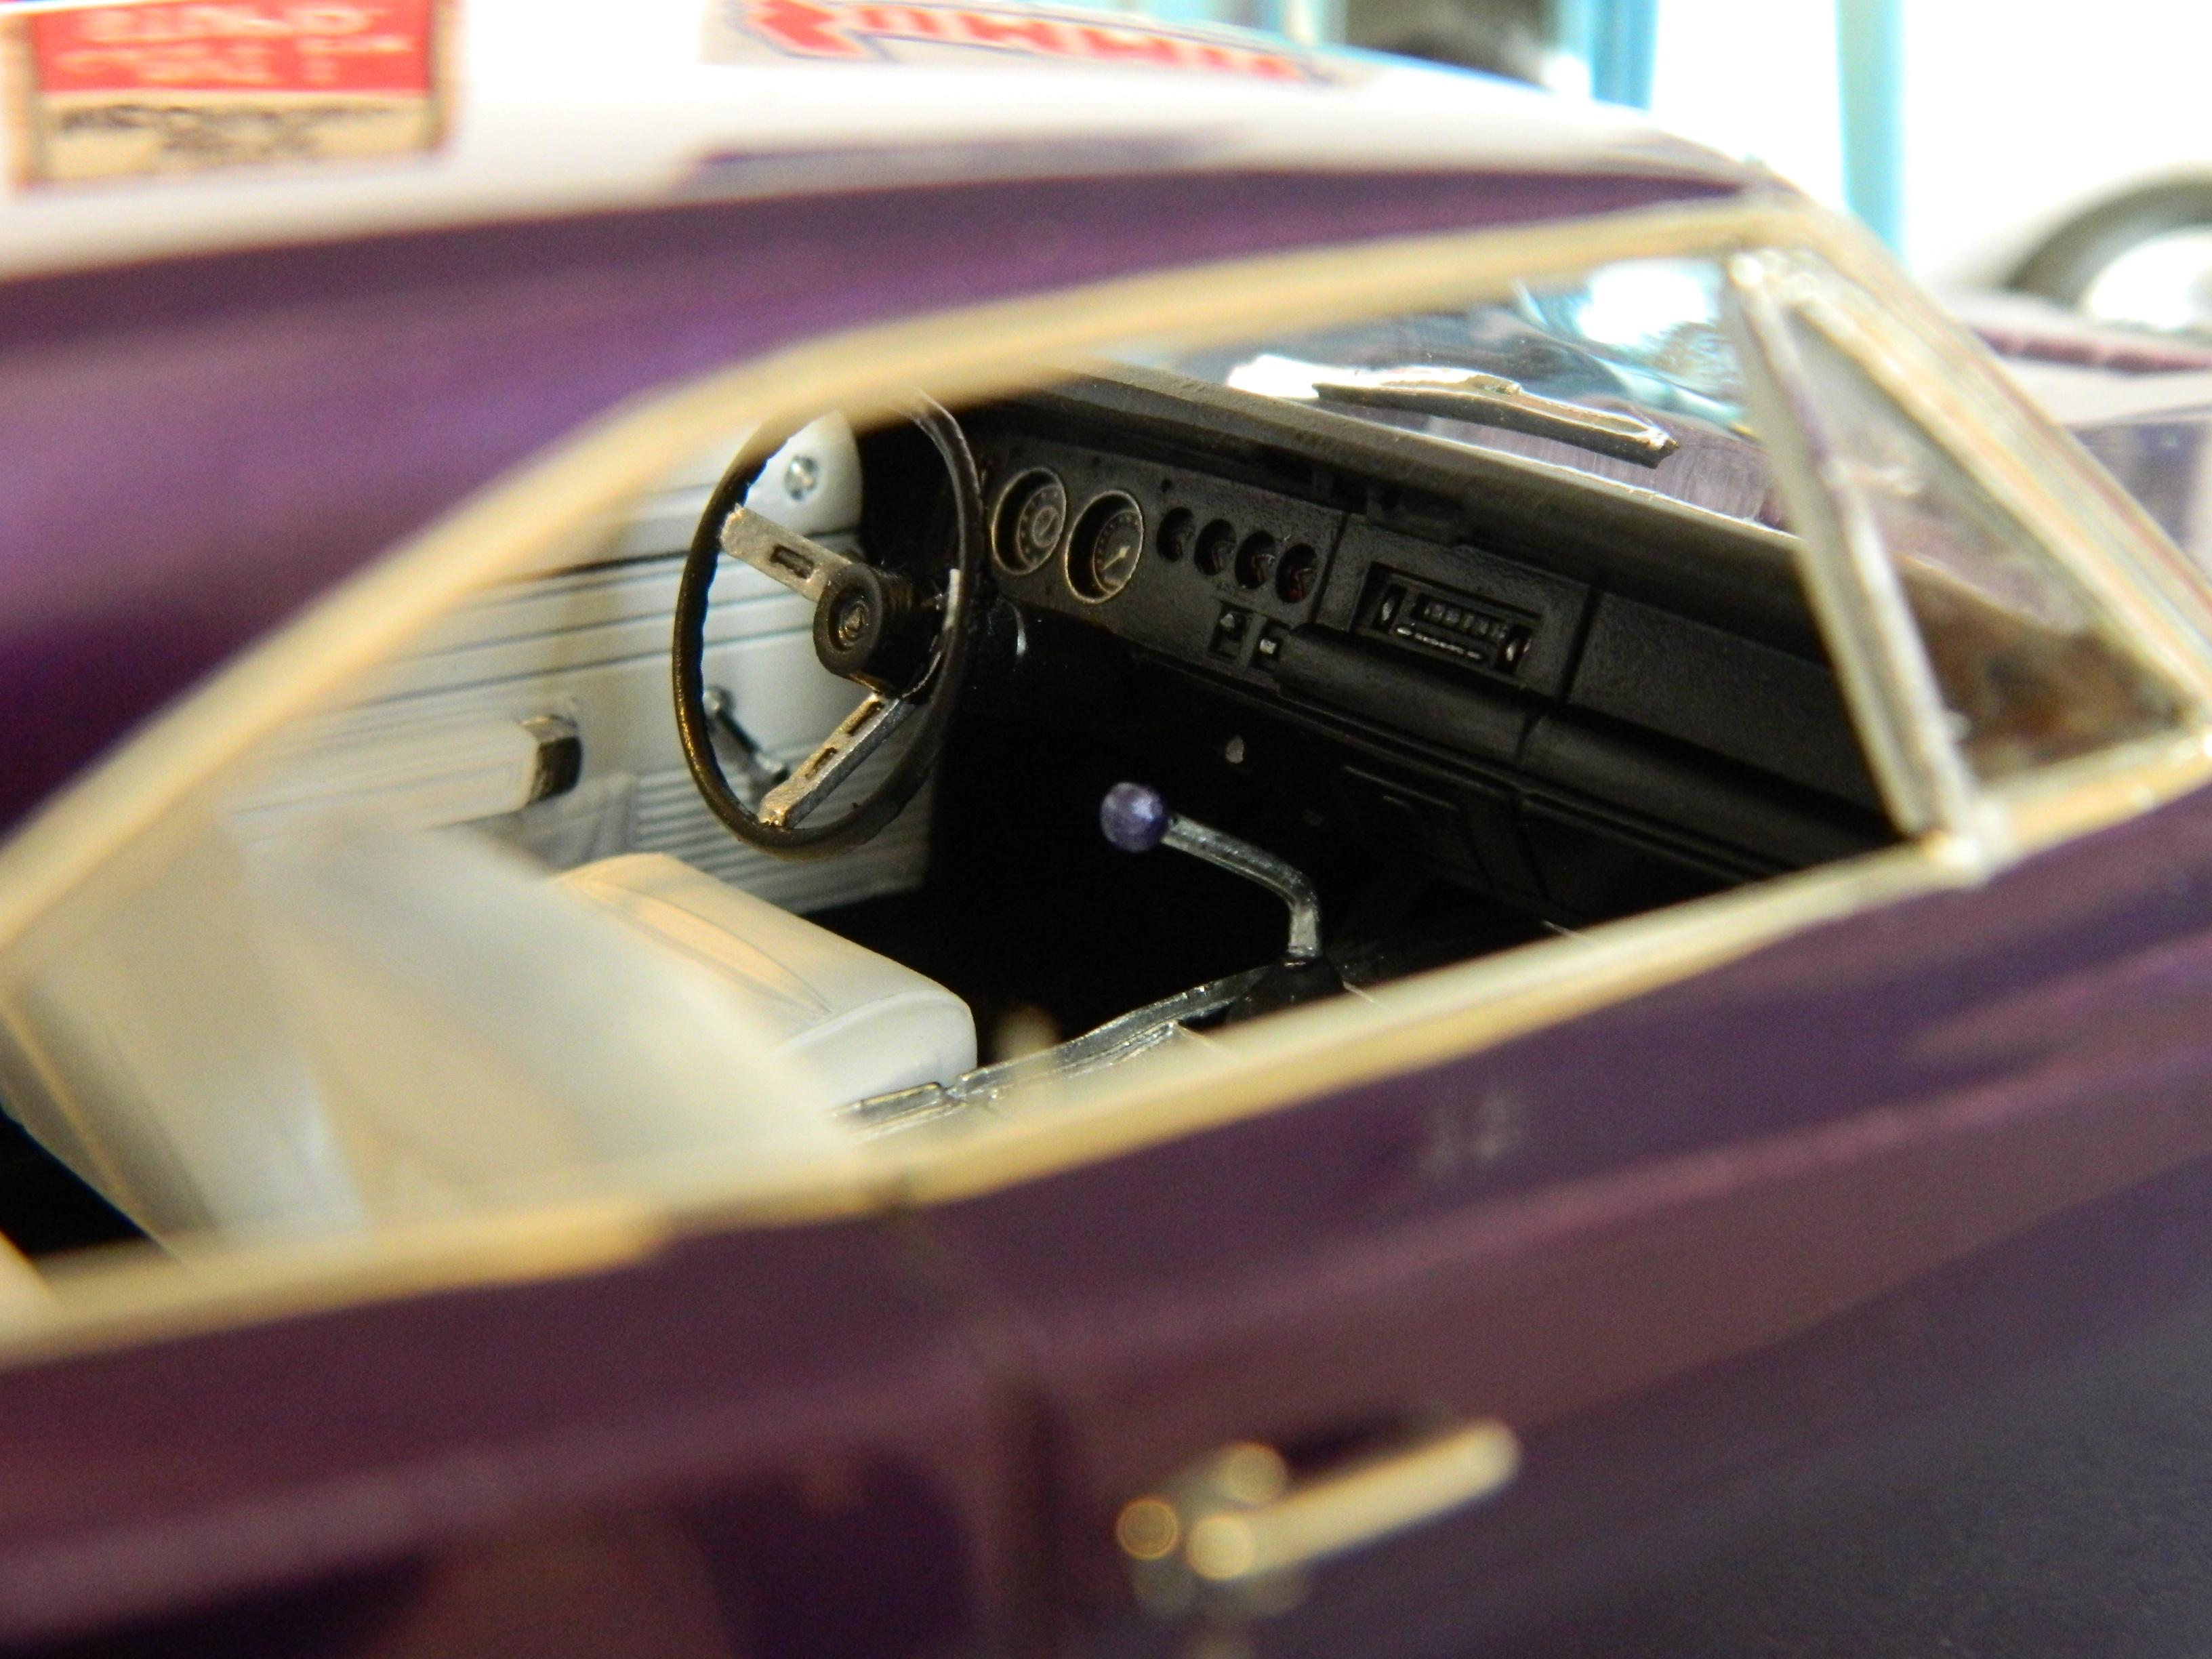
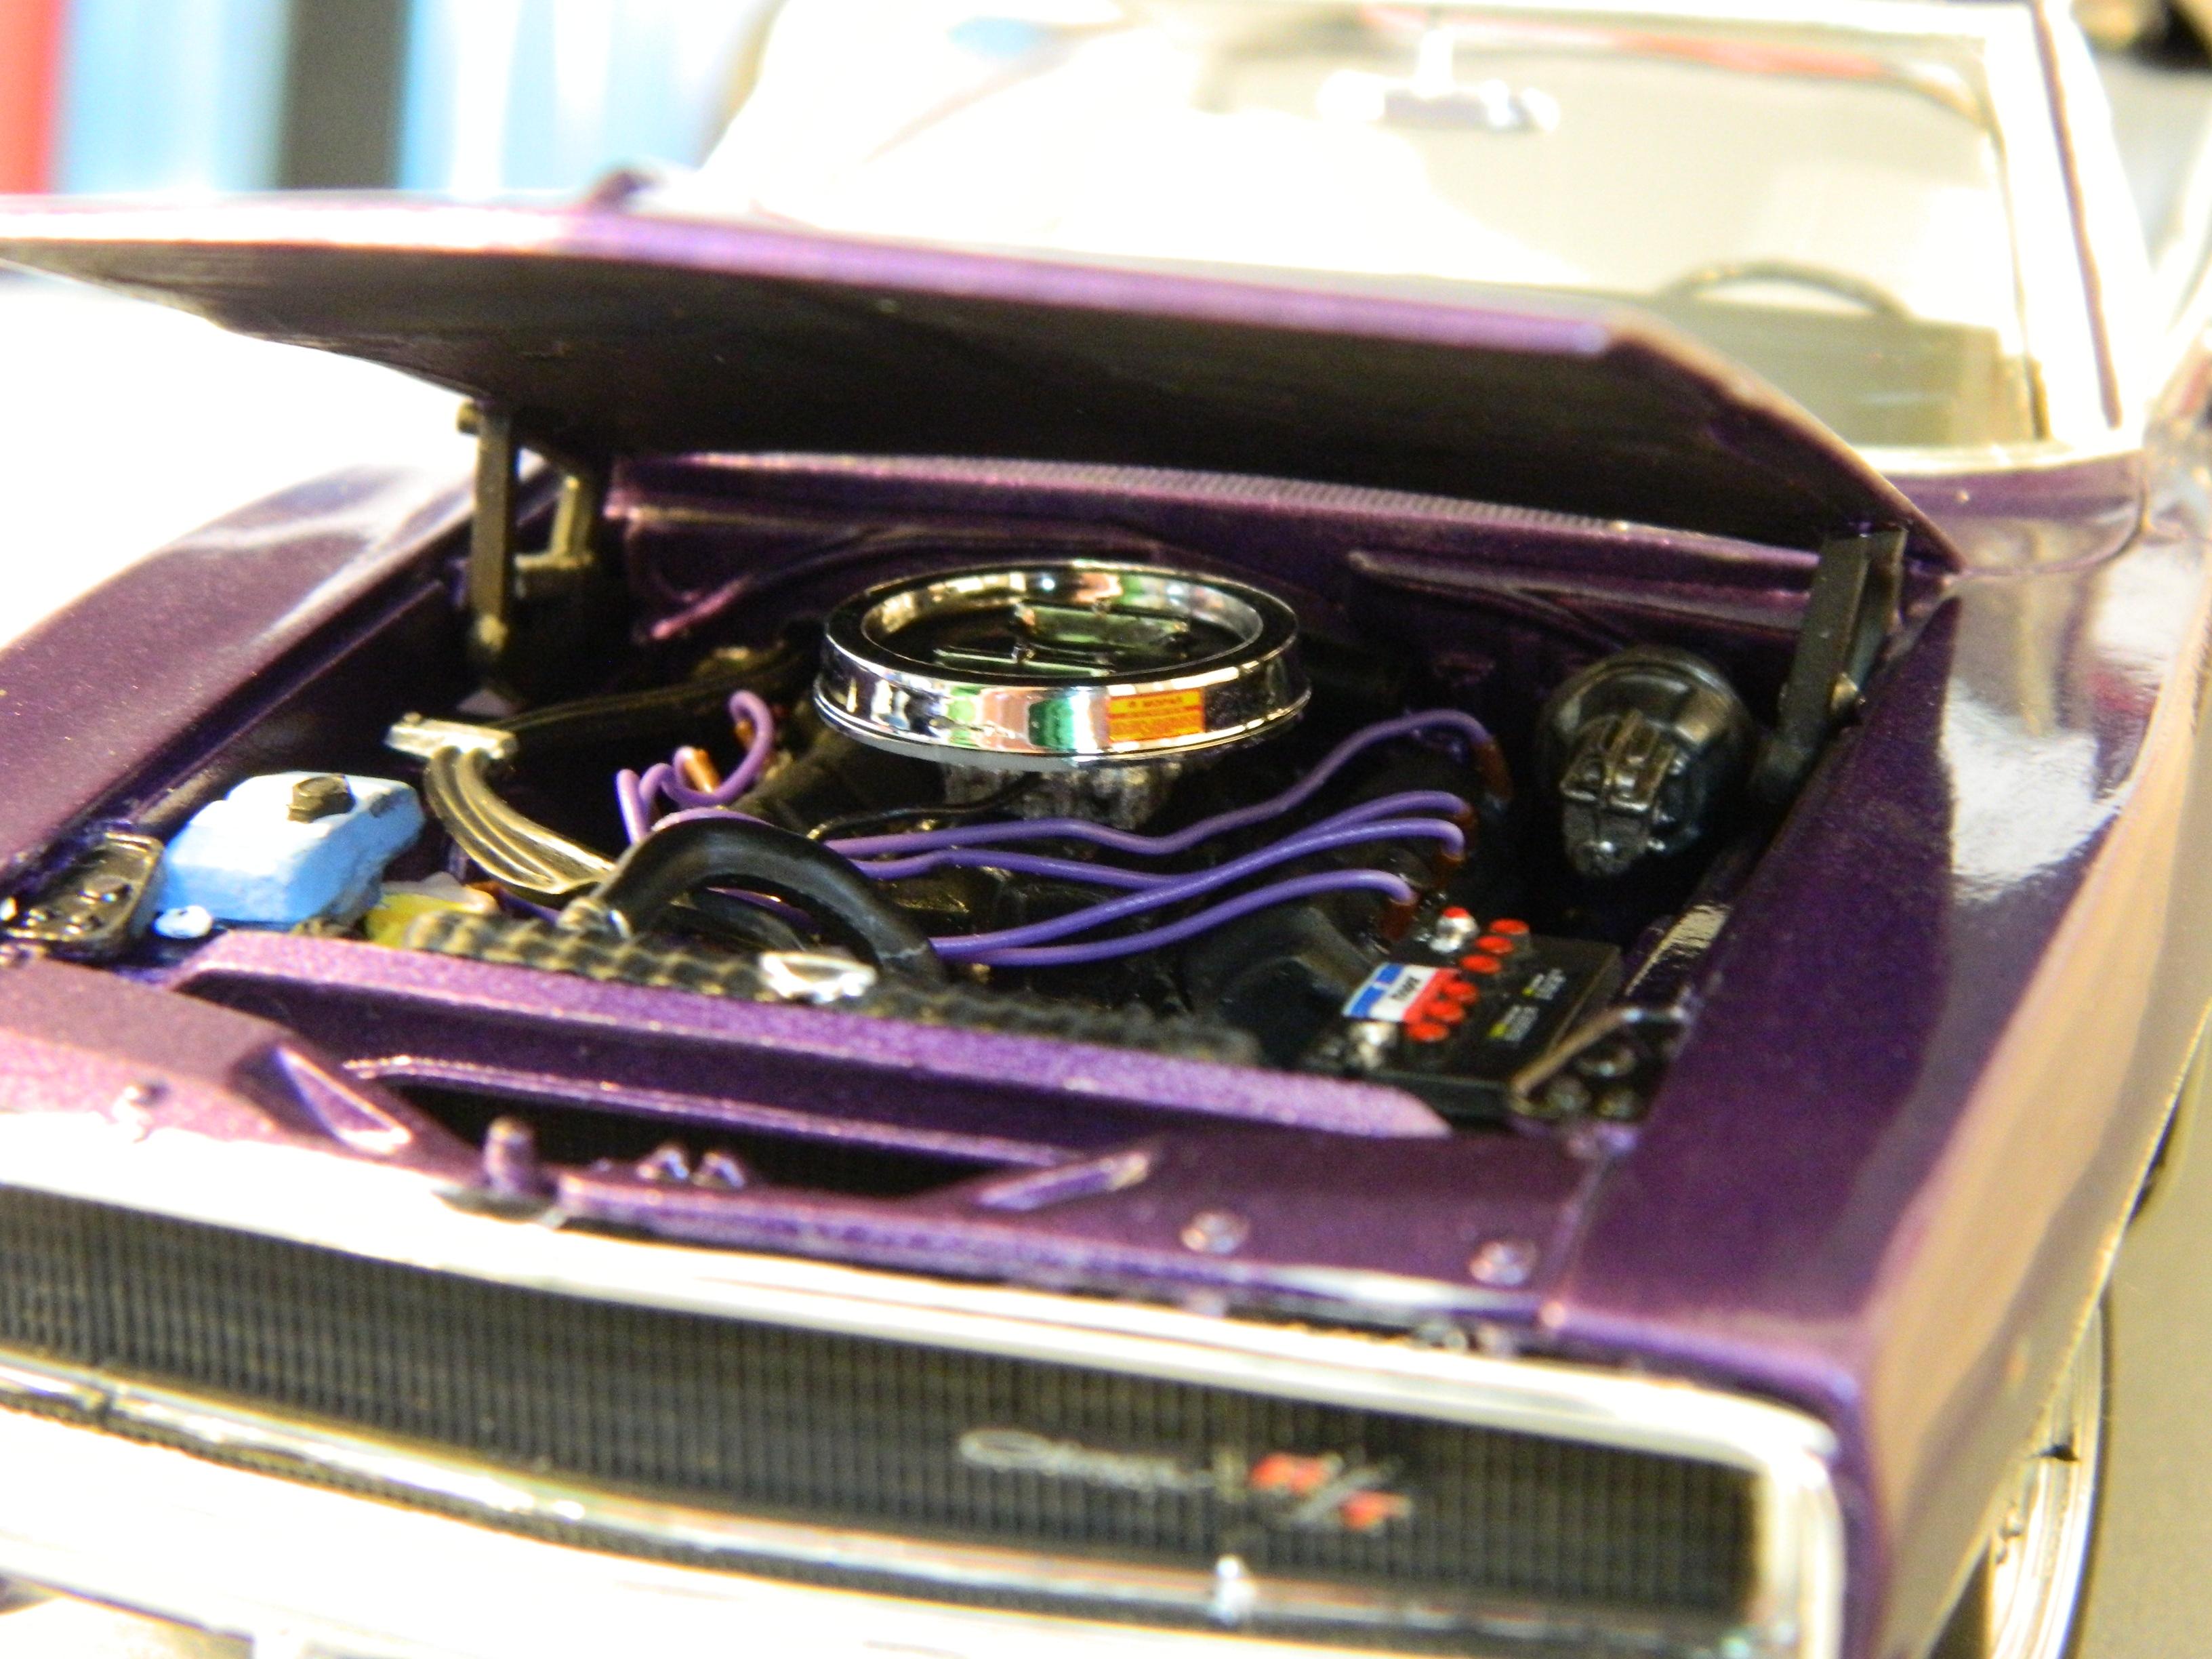
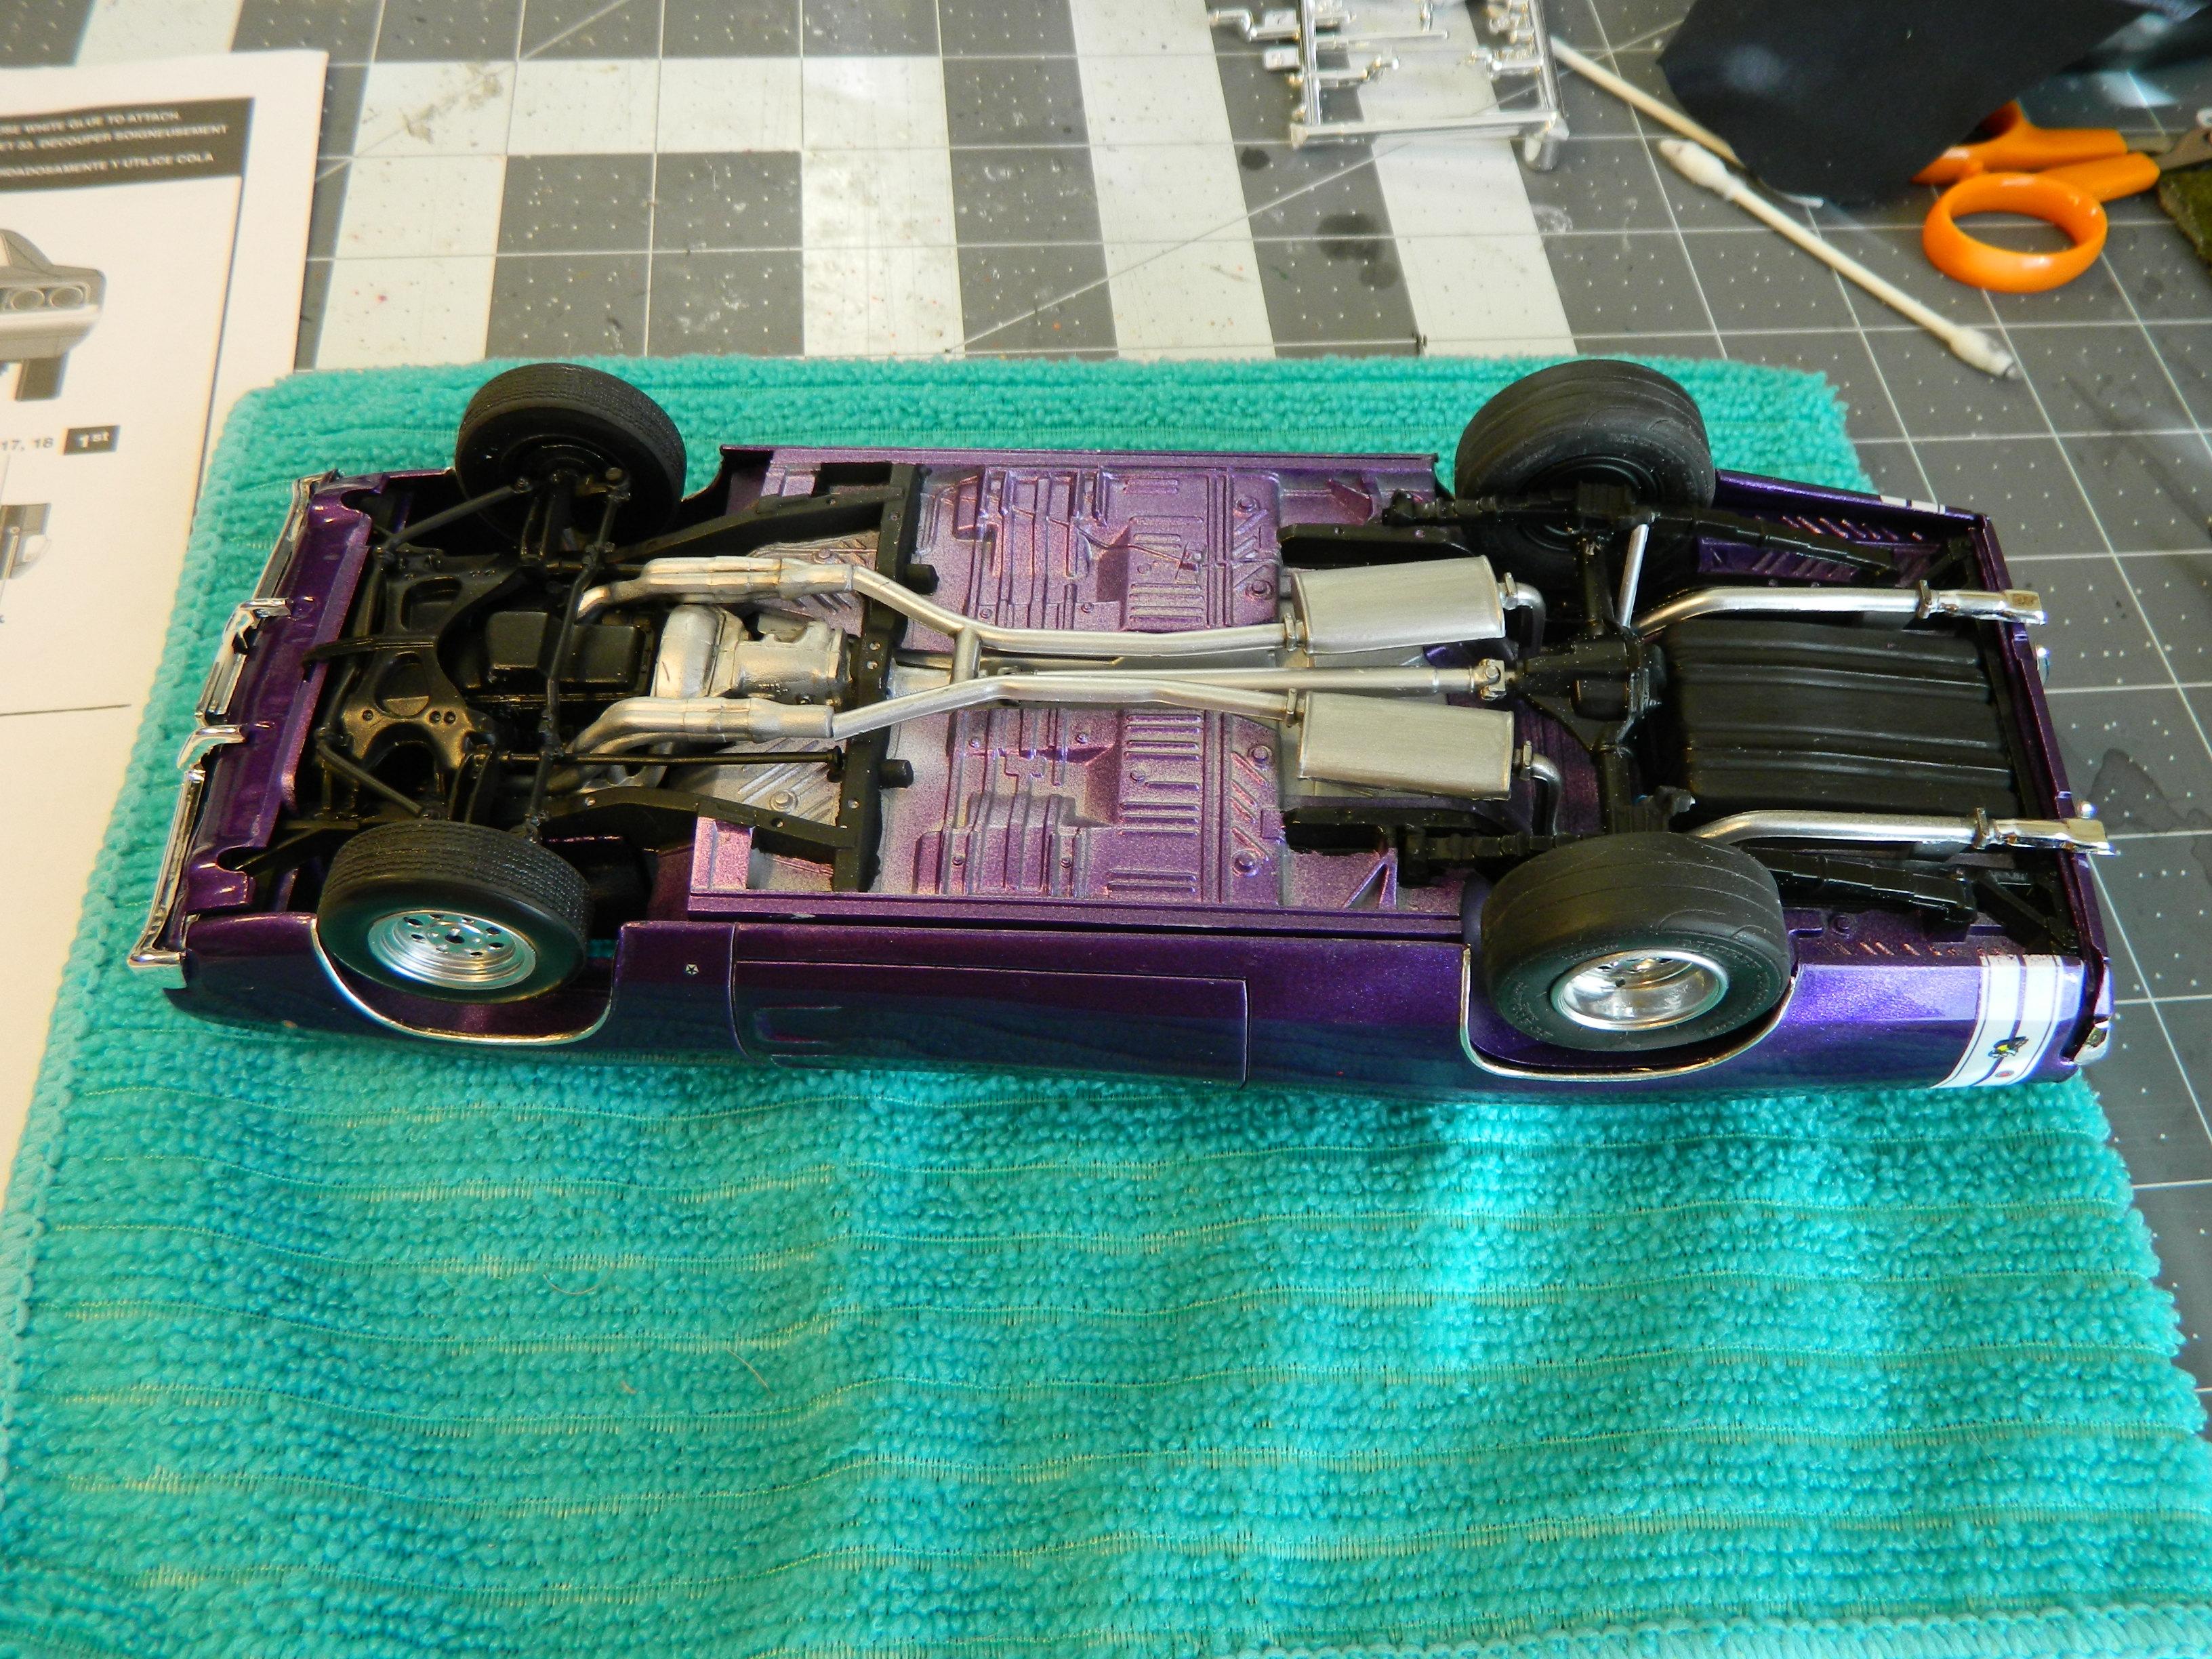
I finished up the Revell 1968 Dodge Charger R/T yesterday. The paint is Model Master Plum Crazy Metallic Lacquer with Model Master Clear Gloss. The wheels were airbrushed with Molotow Chrome and are from Mad Modeling, while the front tires are from the kit, and the rears from Fireball Modelworks. The interior is a combination of Apple Barrel Gloss White for the seats and door panels, Stynylrez White Primer for the headliner, Stynylrez Black Primer for the carpet and rear shelf, and Apple Barrel Gloss Black for the dash. I used the optional 426 Hemi and cut and bent the exhaust to mate with the headers. I used BMF for the window and fender trim, and hand painted Molotow for the taillight panel trim. I added valve stems, door locks, and ignition wires for extra detail. This is an excellent kit with lots of extra parts, including an engine stand, to build the stock, custom, or drag version. I can definitely see myself grabbing another 1 or 2 of these in the future. Thanks for looking!
- 28 replies
-
- 4
-
-
- revell
- charger r/t
- (and 1 more)
-
Nice start! I've got one of those that I'm waiting until I have a place to display it before I build it. I did build one in the late 80's, but like all the other kits from my younger days, it's occupying a landfill.
-
Looks good, I like the color.
-
Nice job! I'm just finishing up the same kit myself.
-
Looks great! Nice color choice!