Tommy124
-
Posts
1,648 -
Joined
-
Last visited
Content Type
Profiles
Forums
Events
Gallery
Everything posted by Tommy124
-
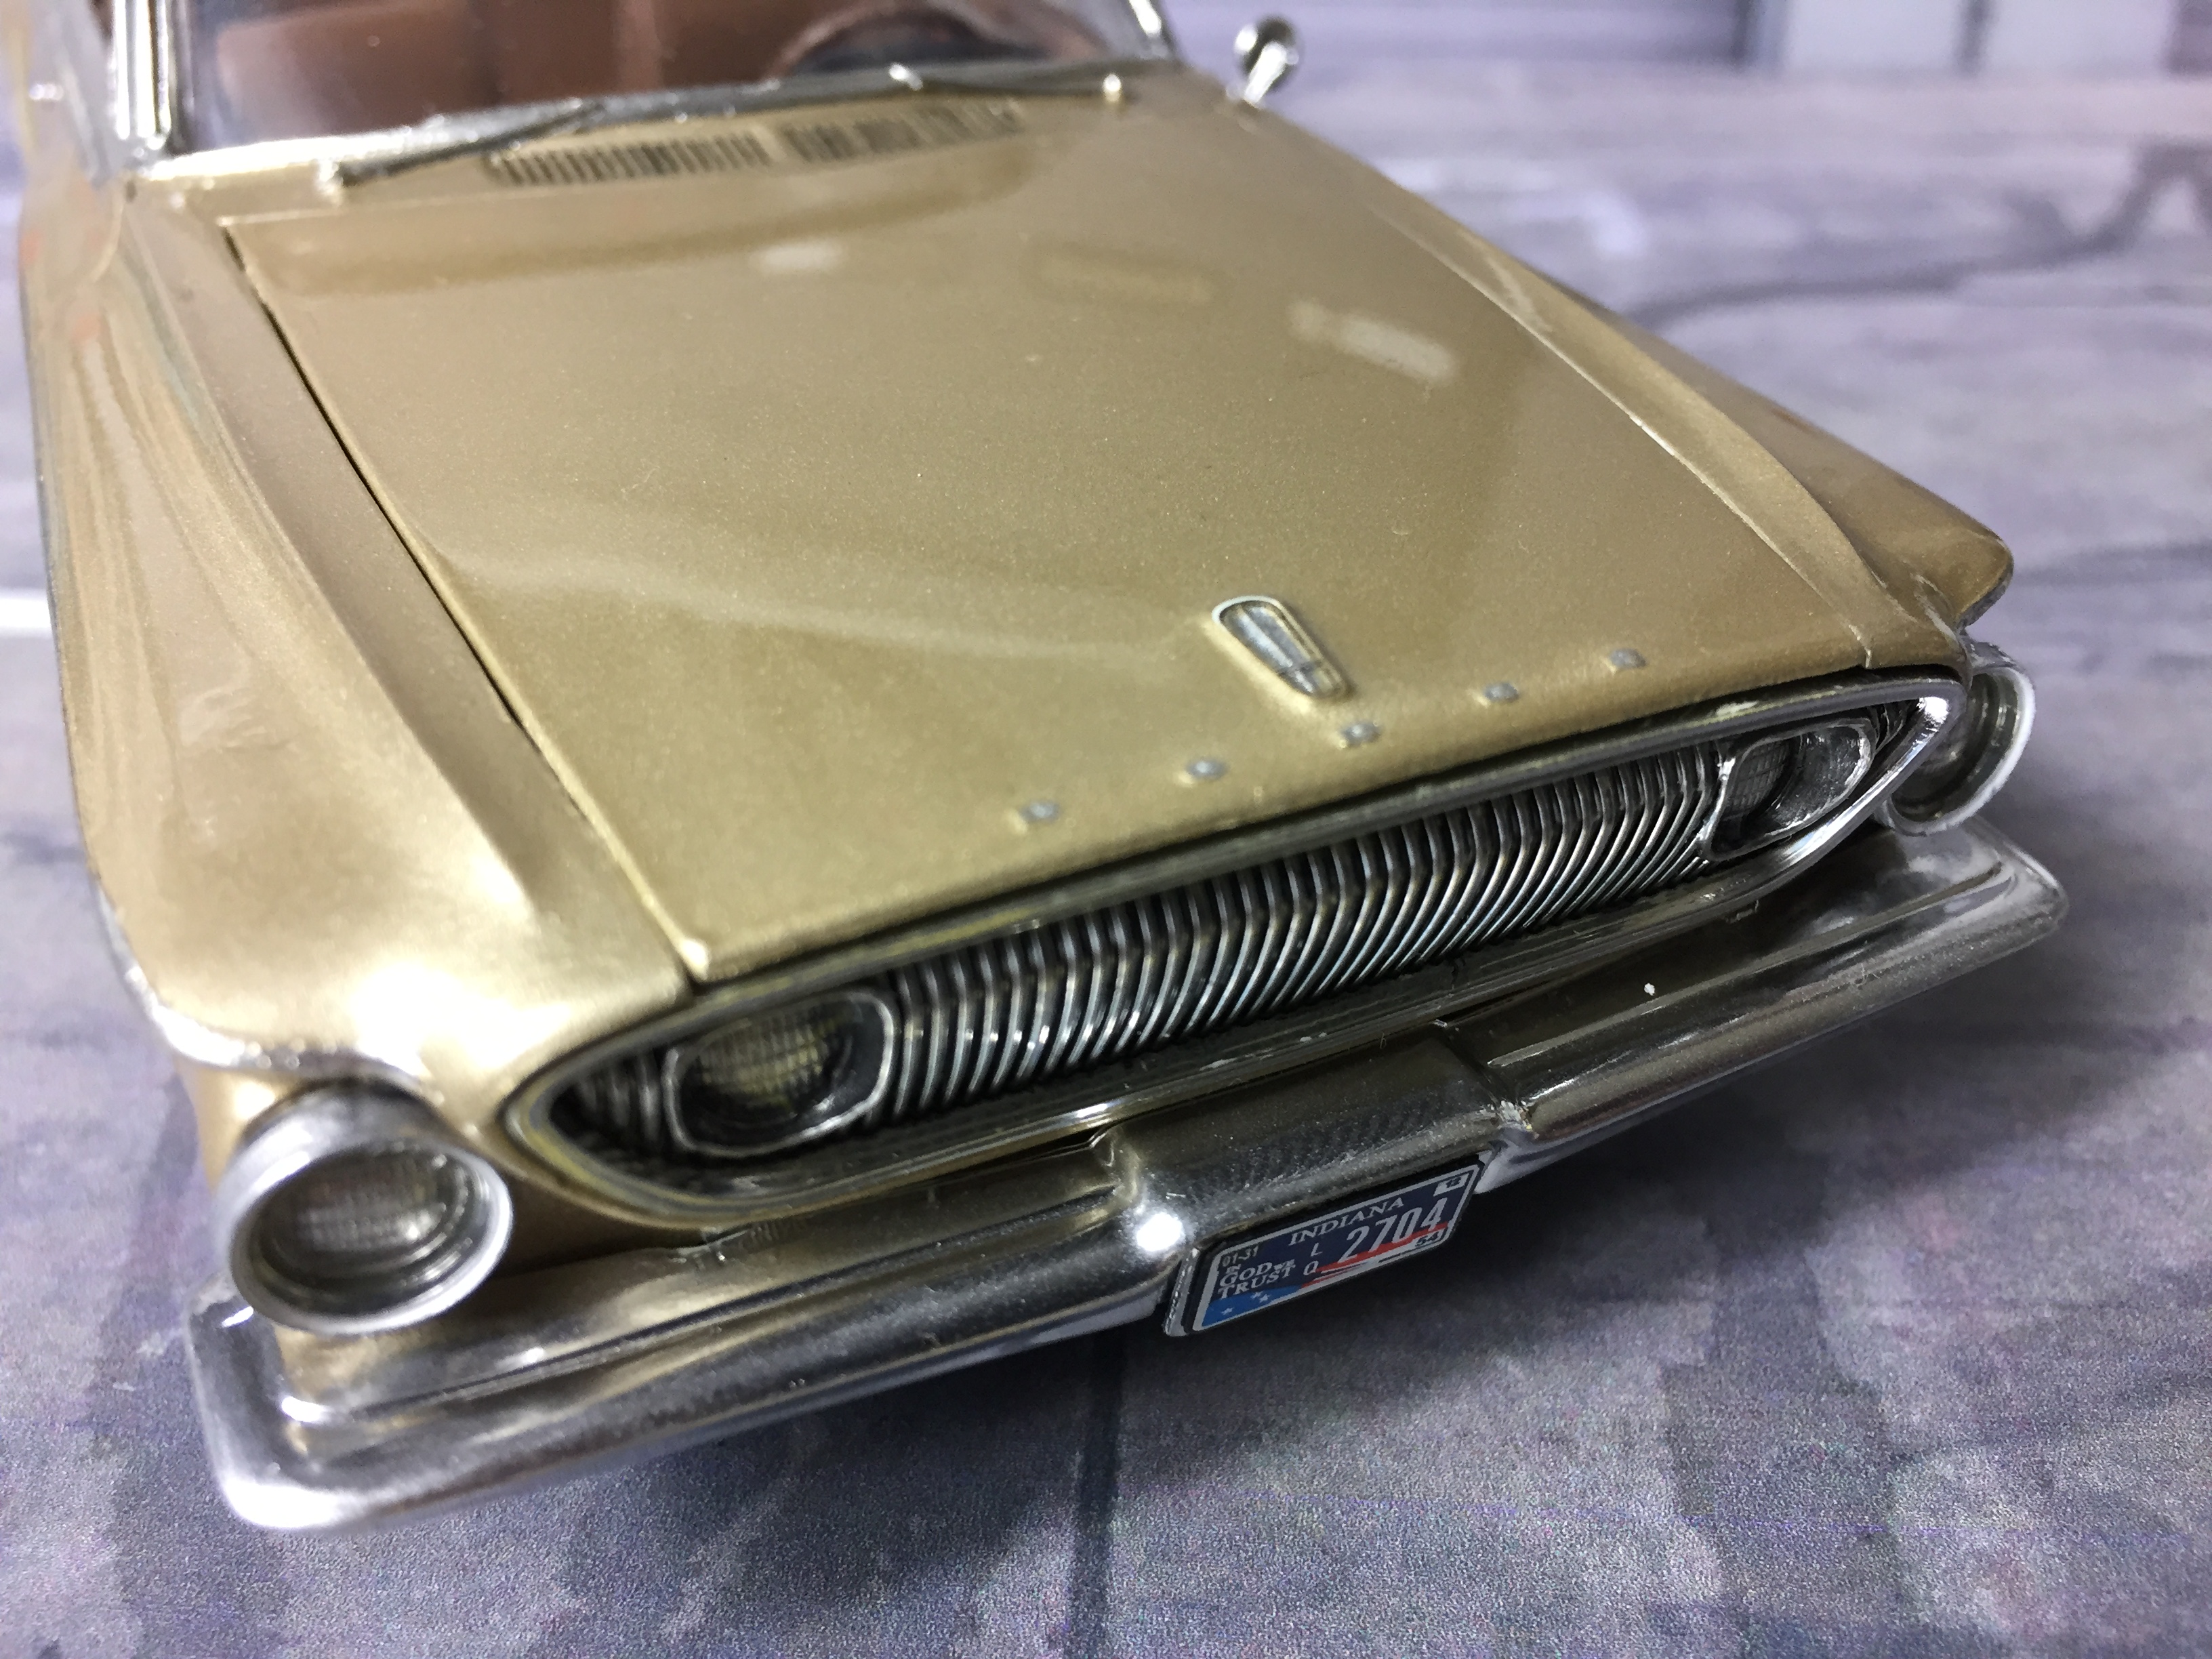
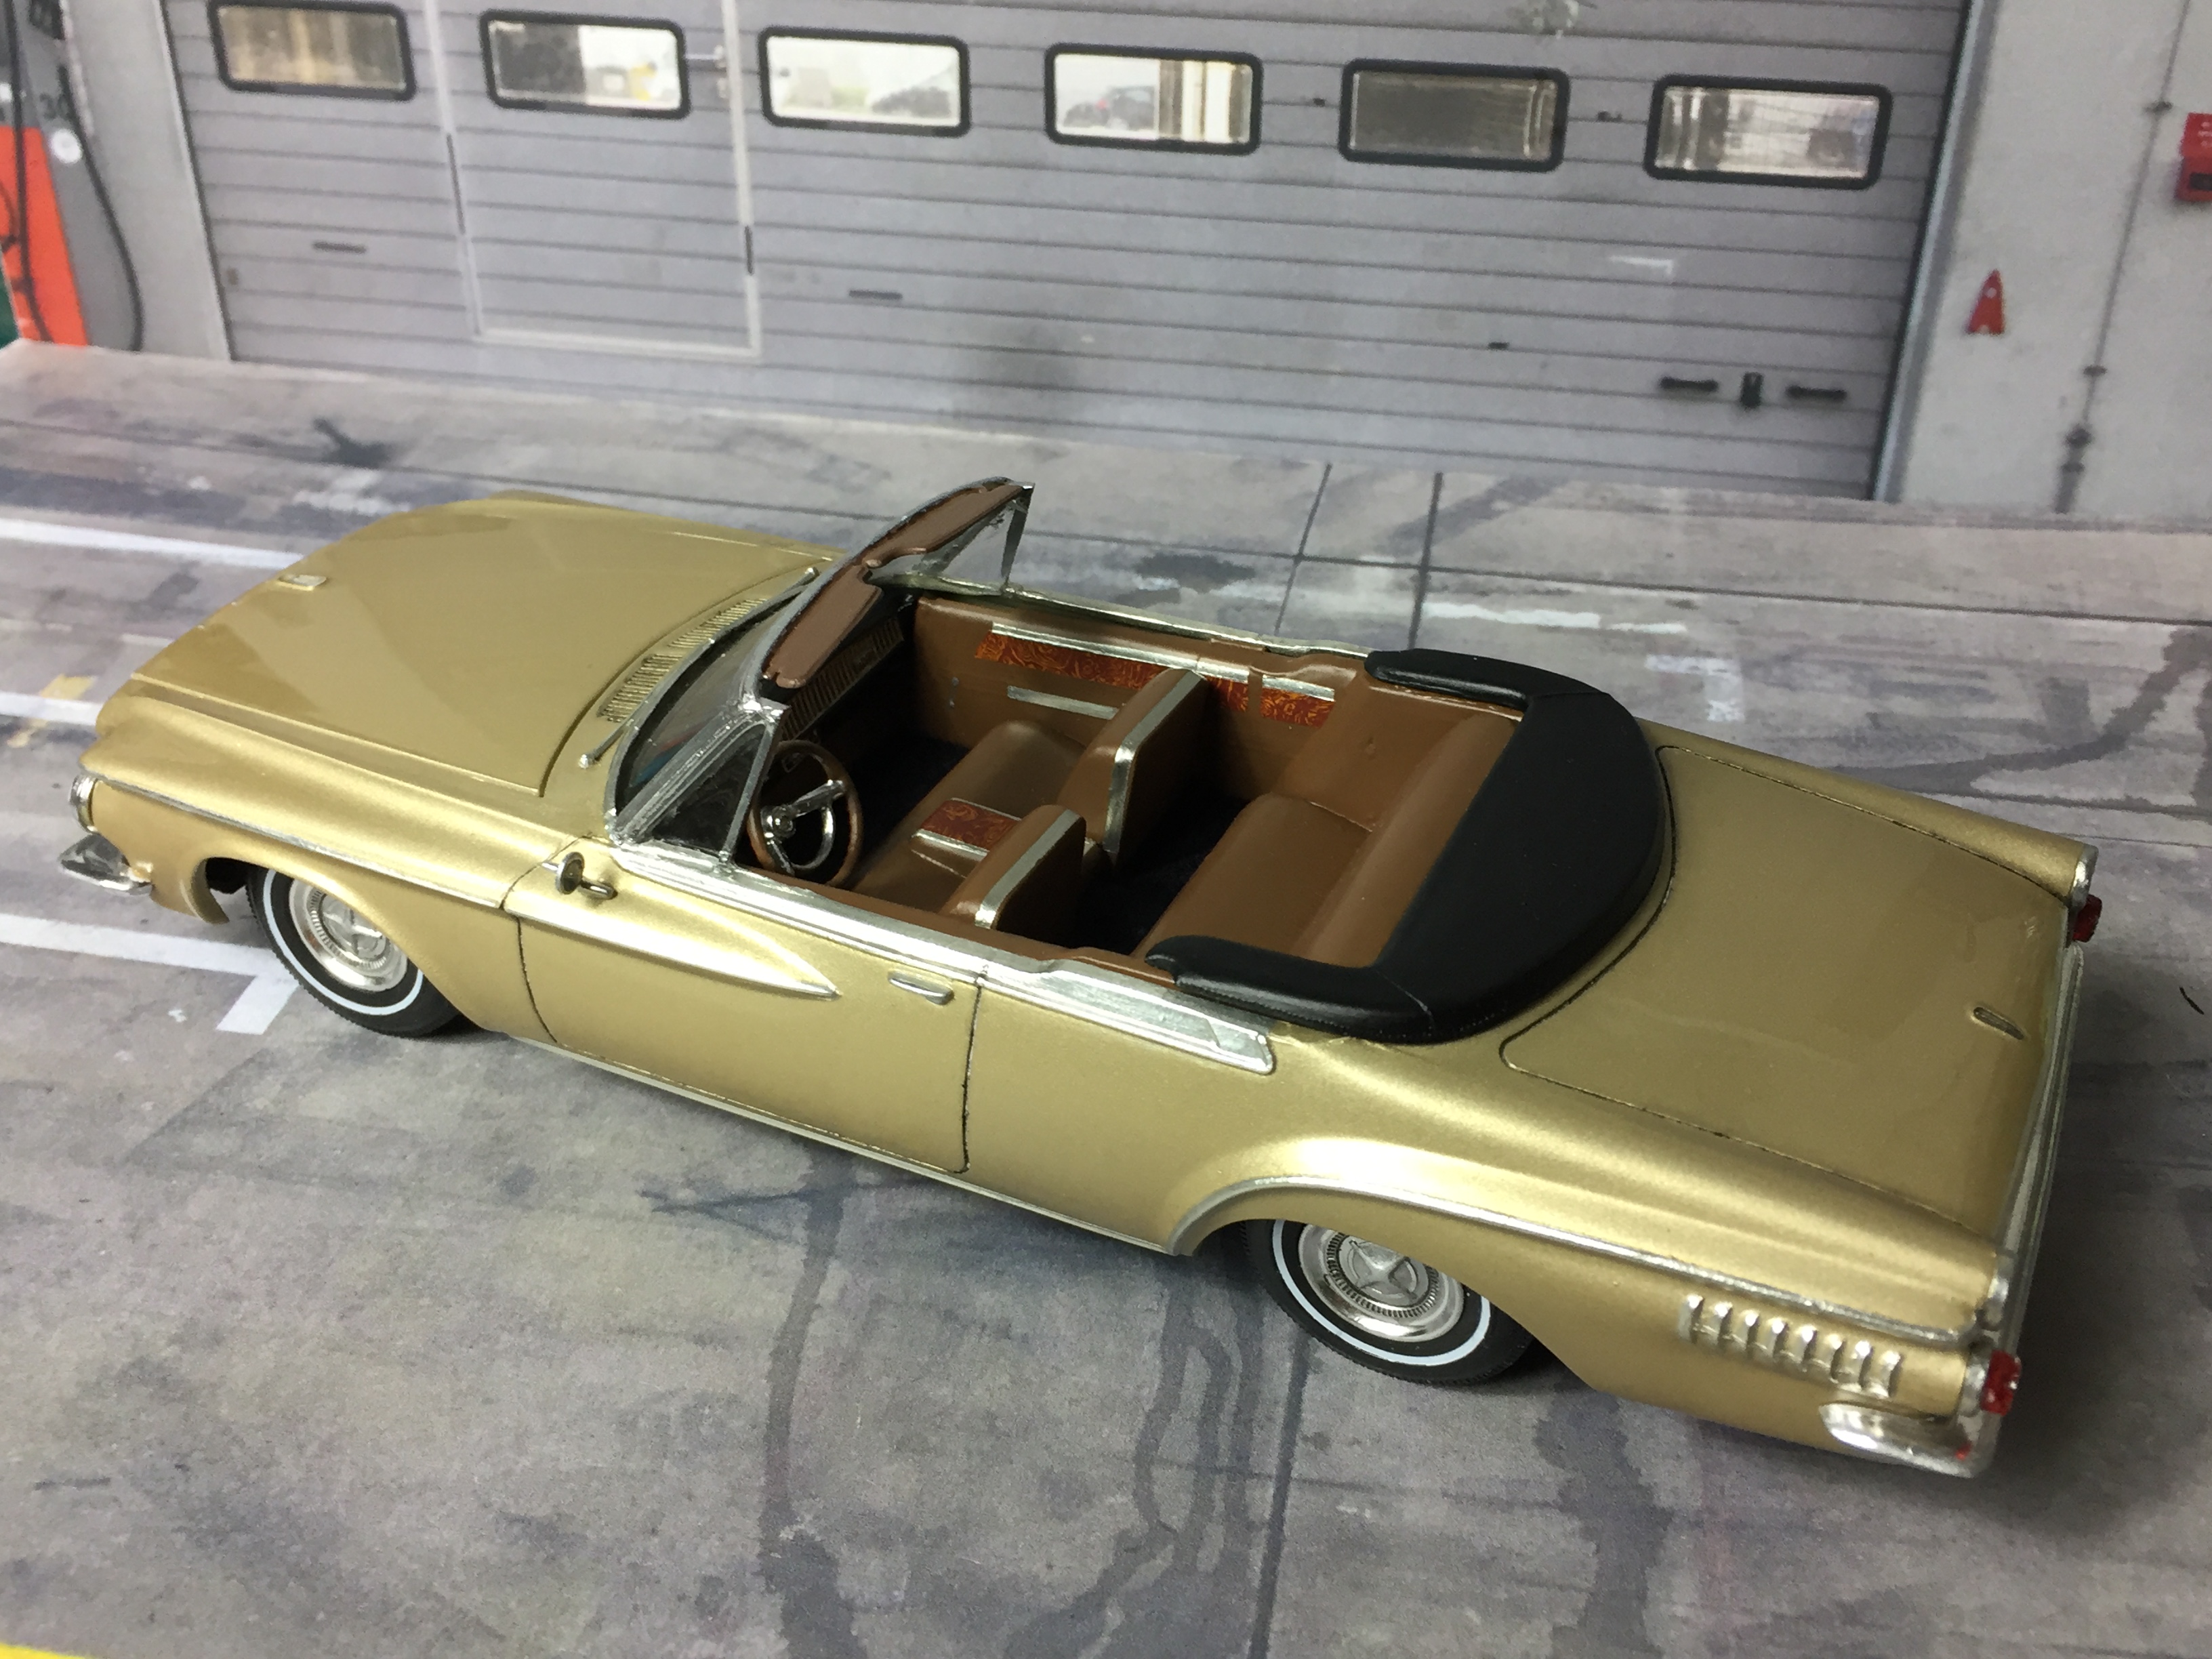
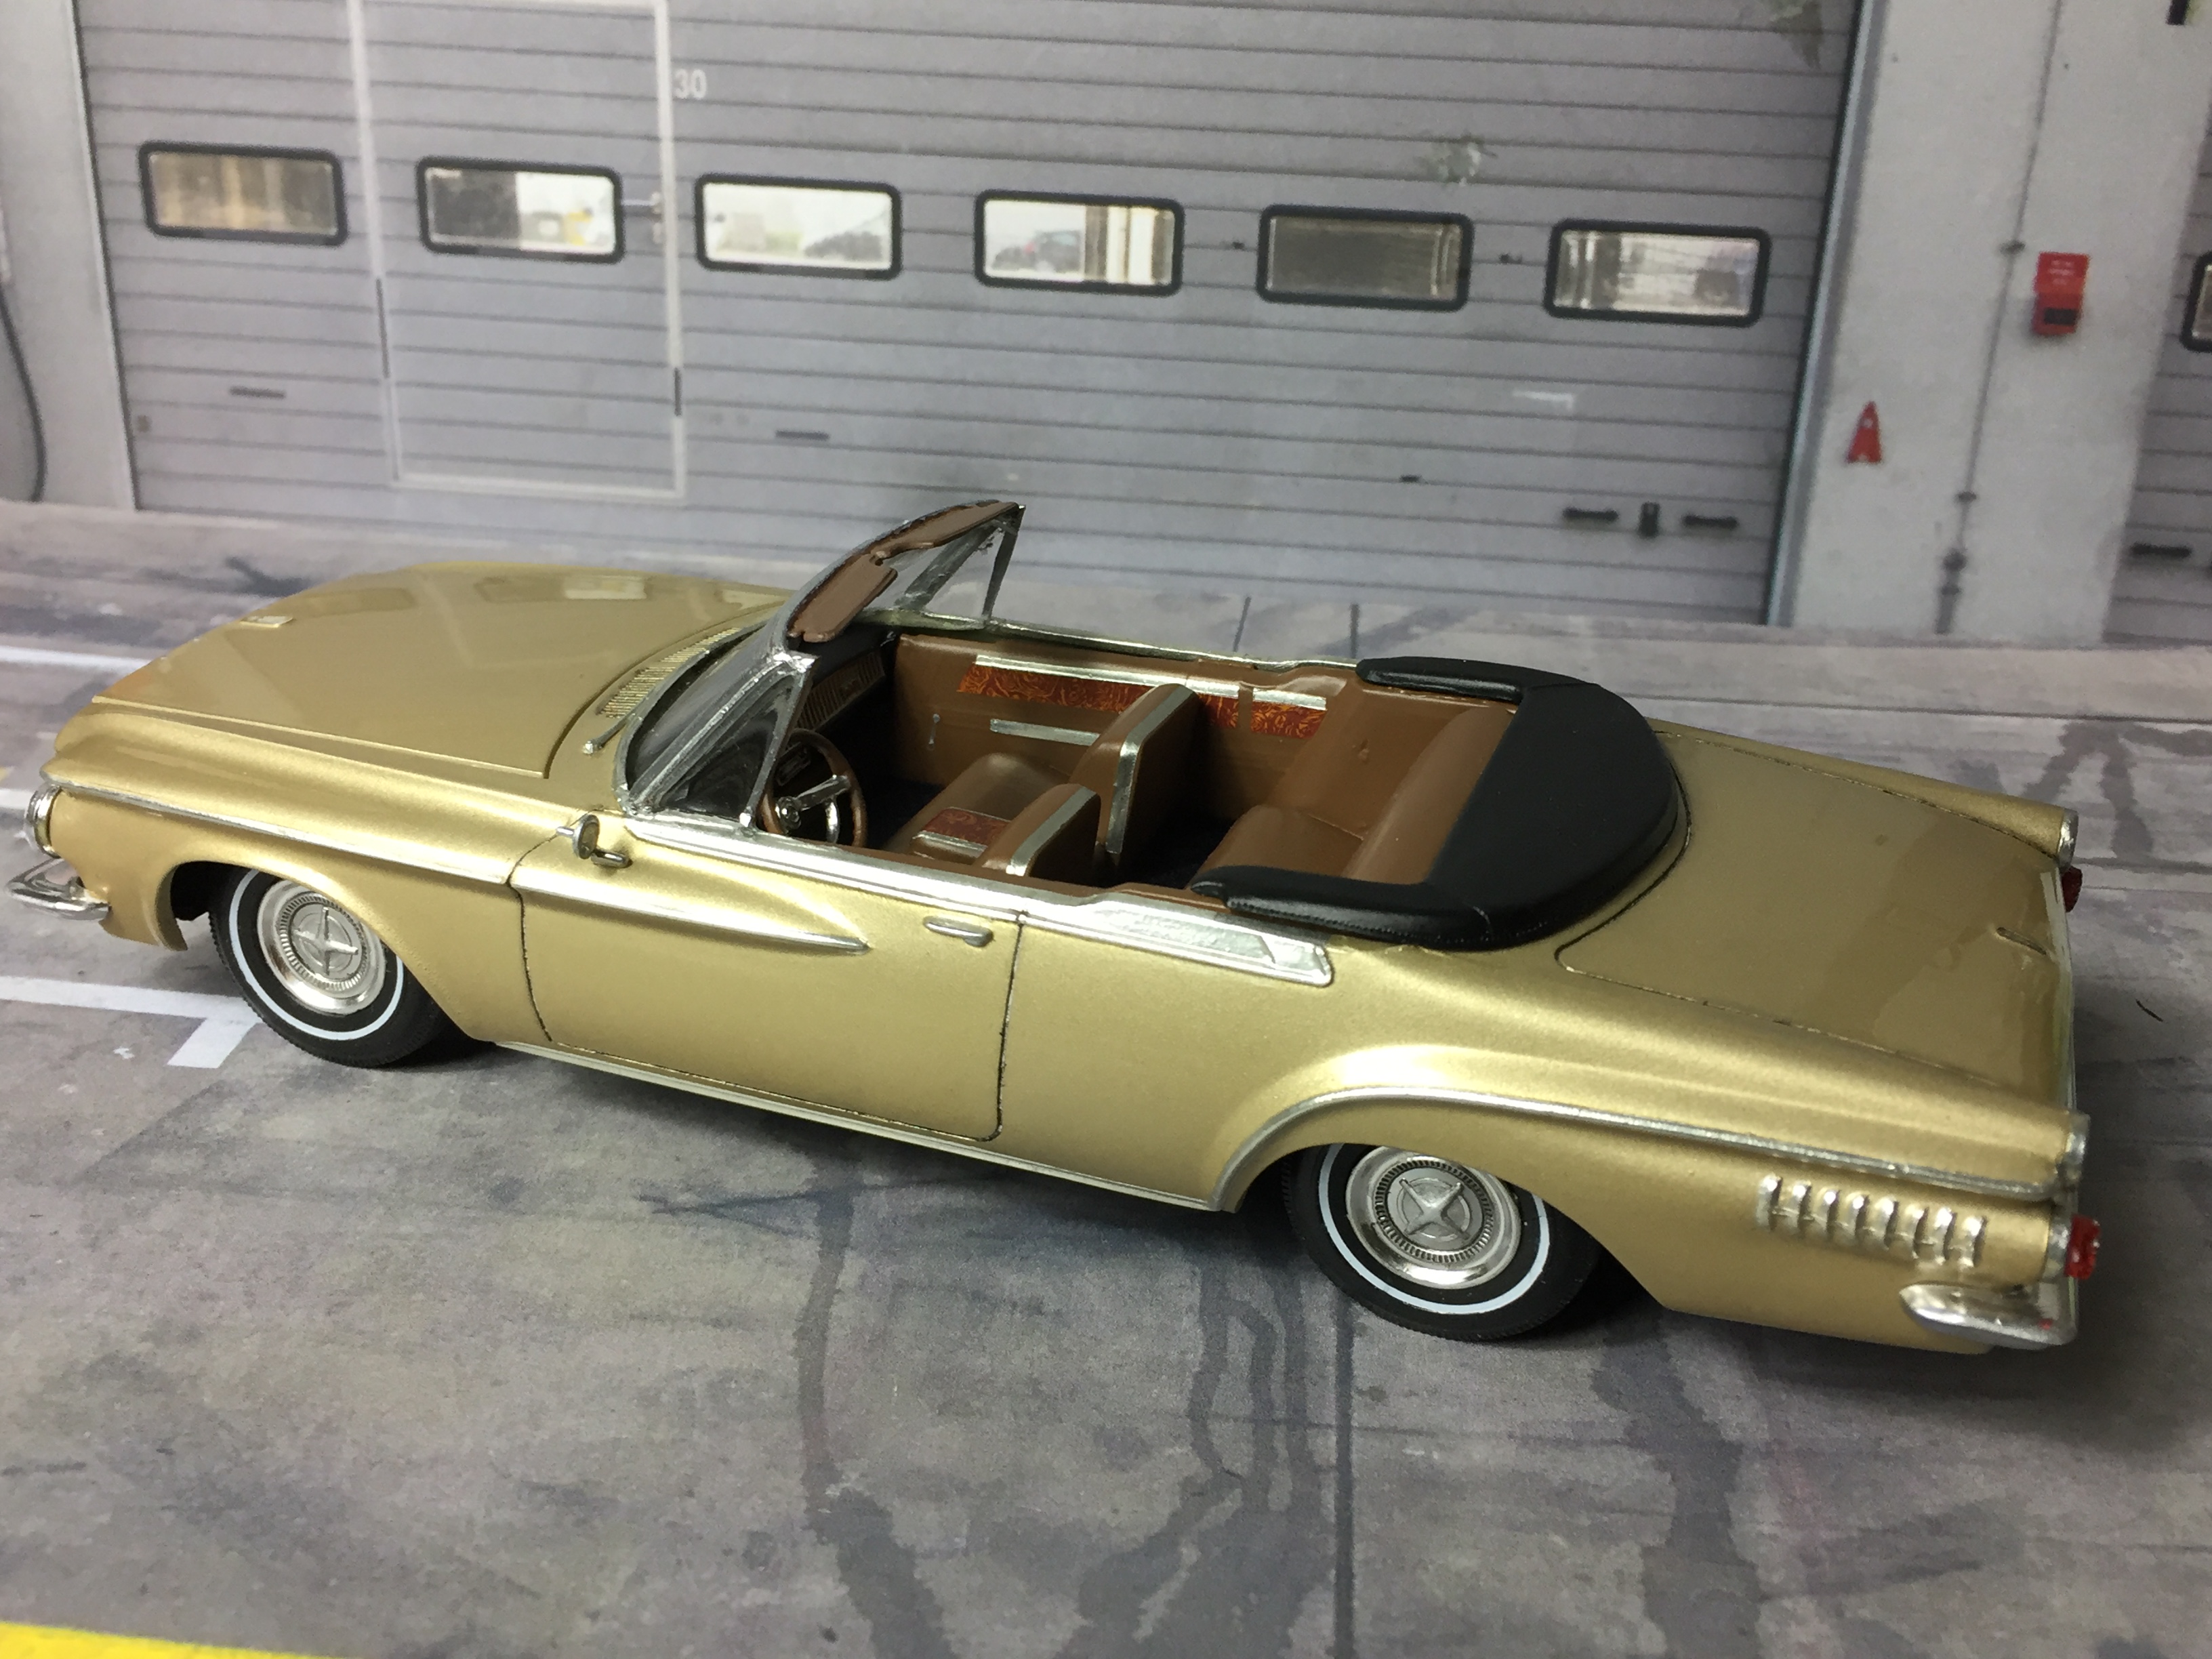
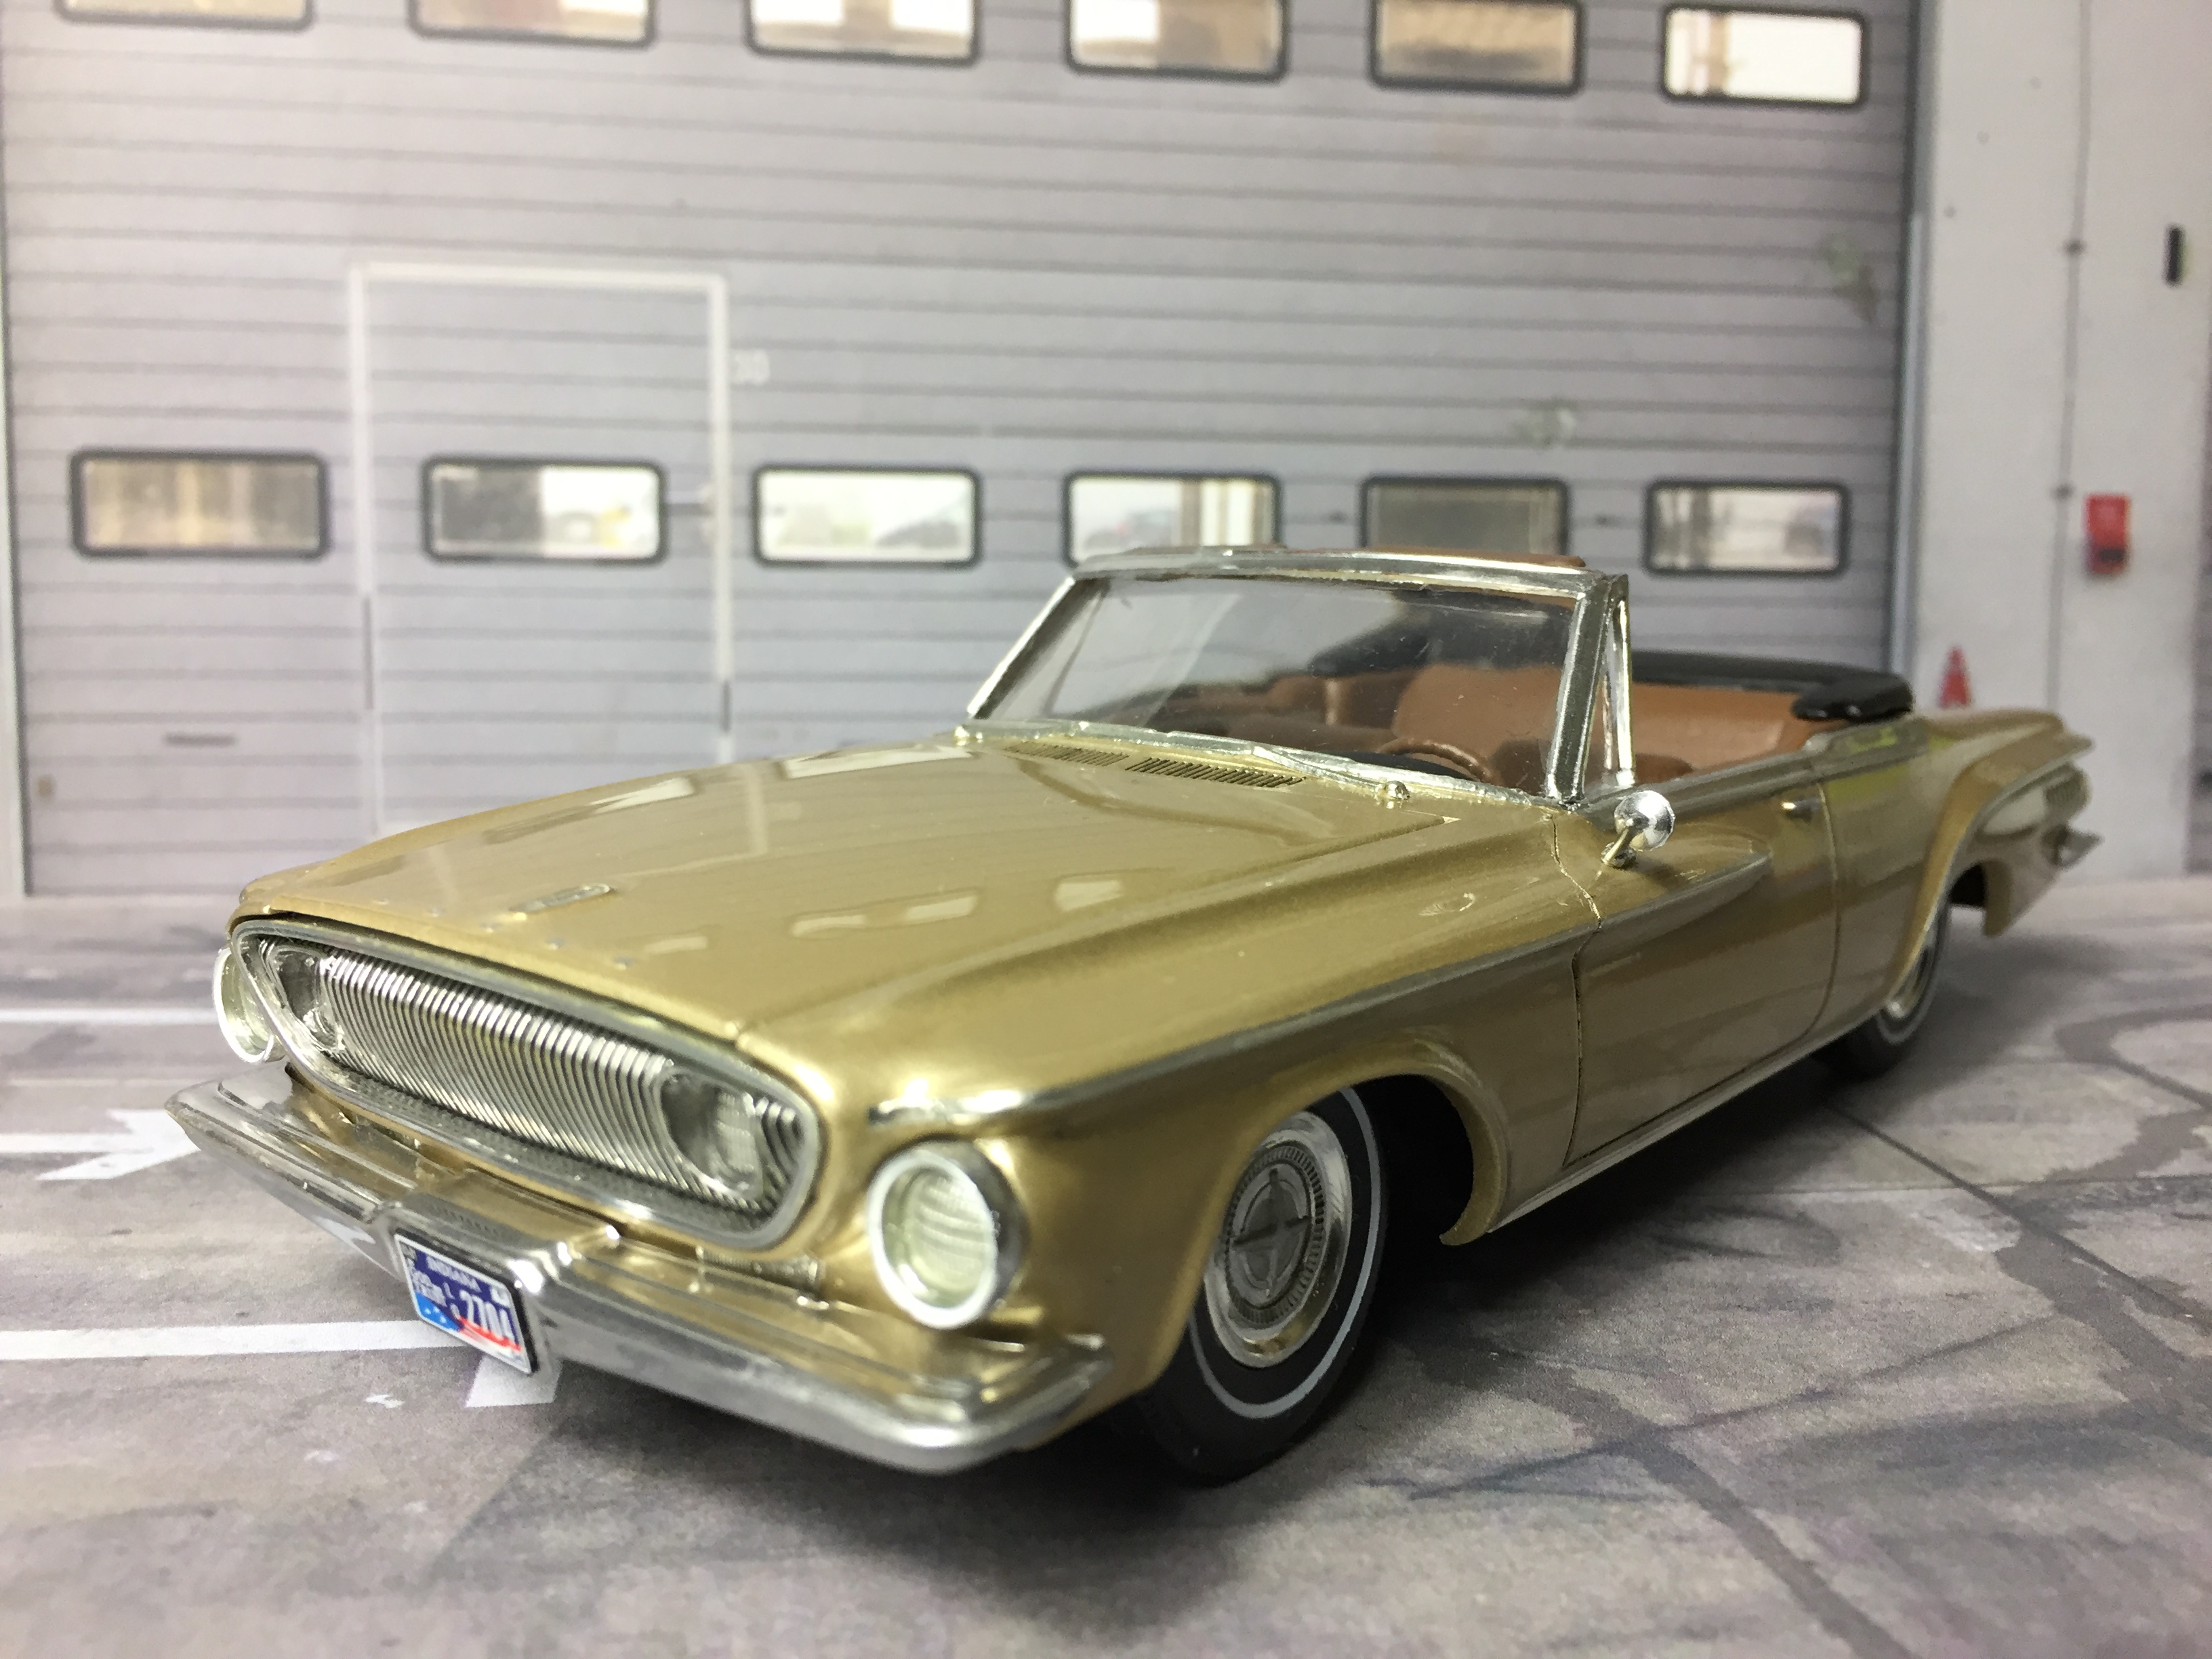
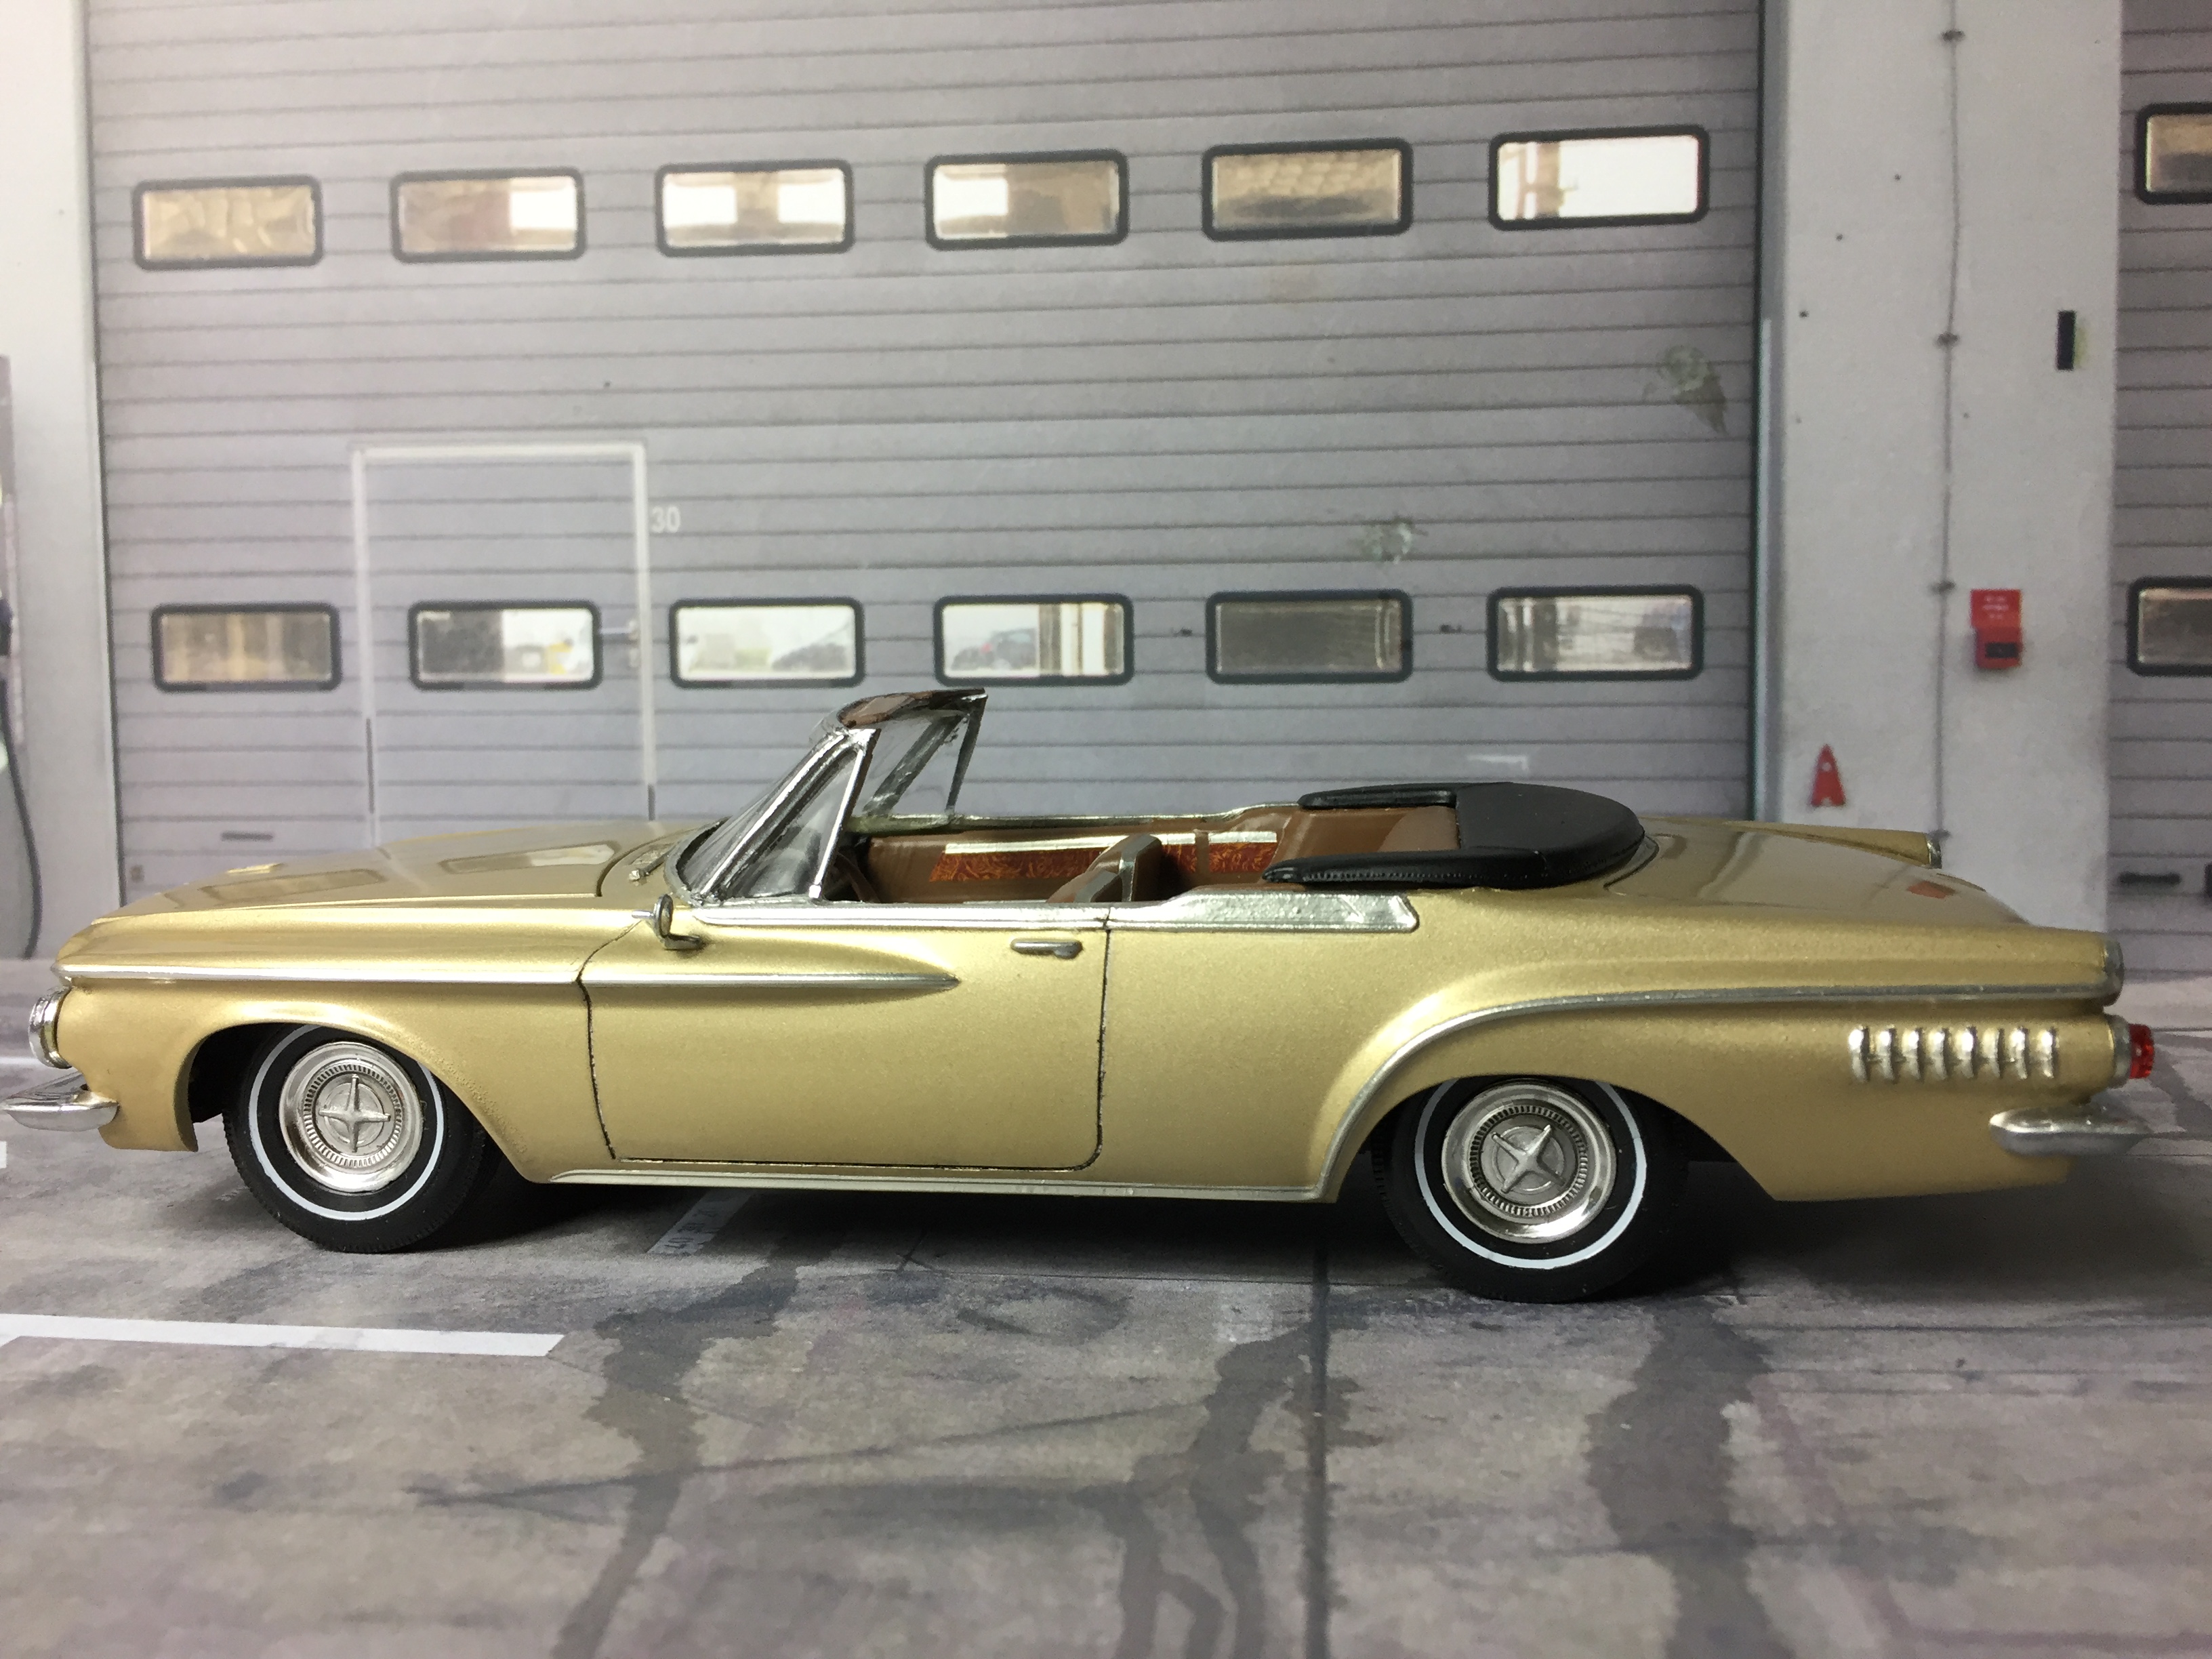
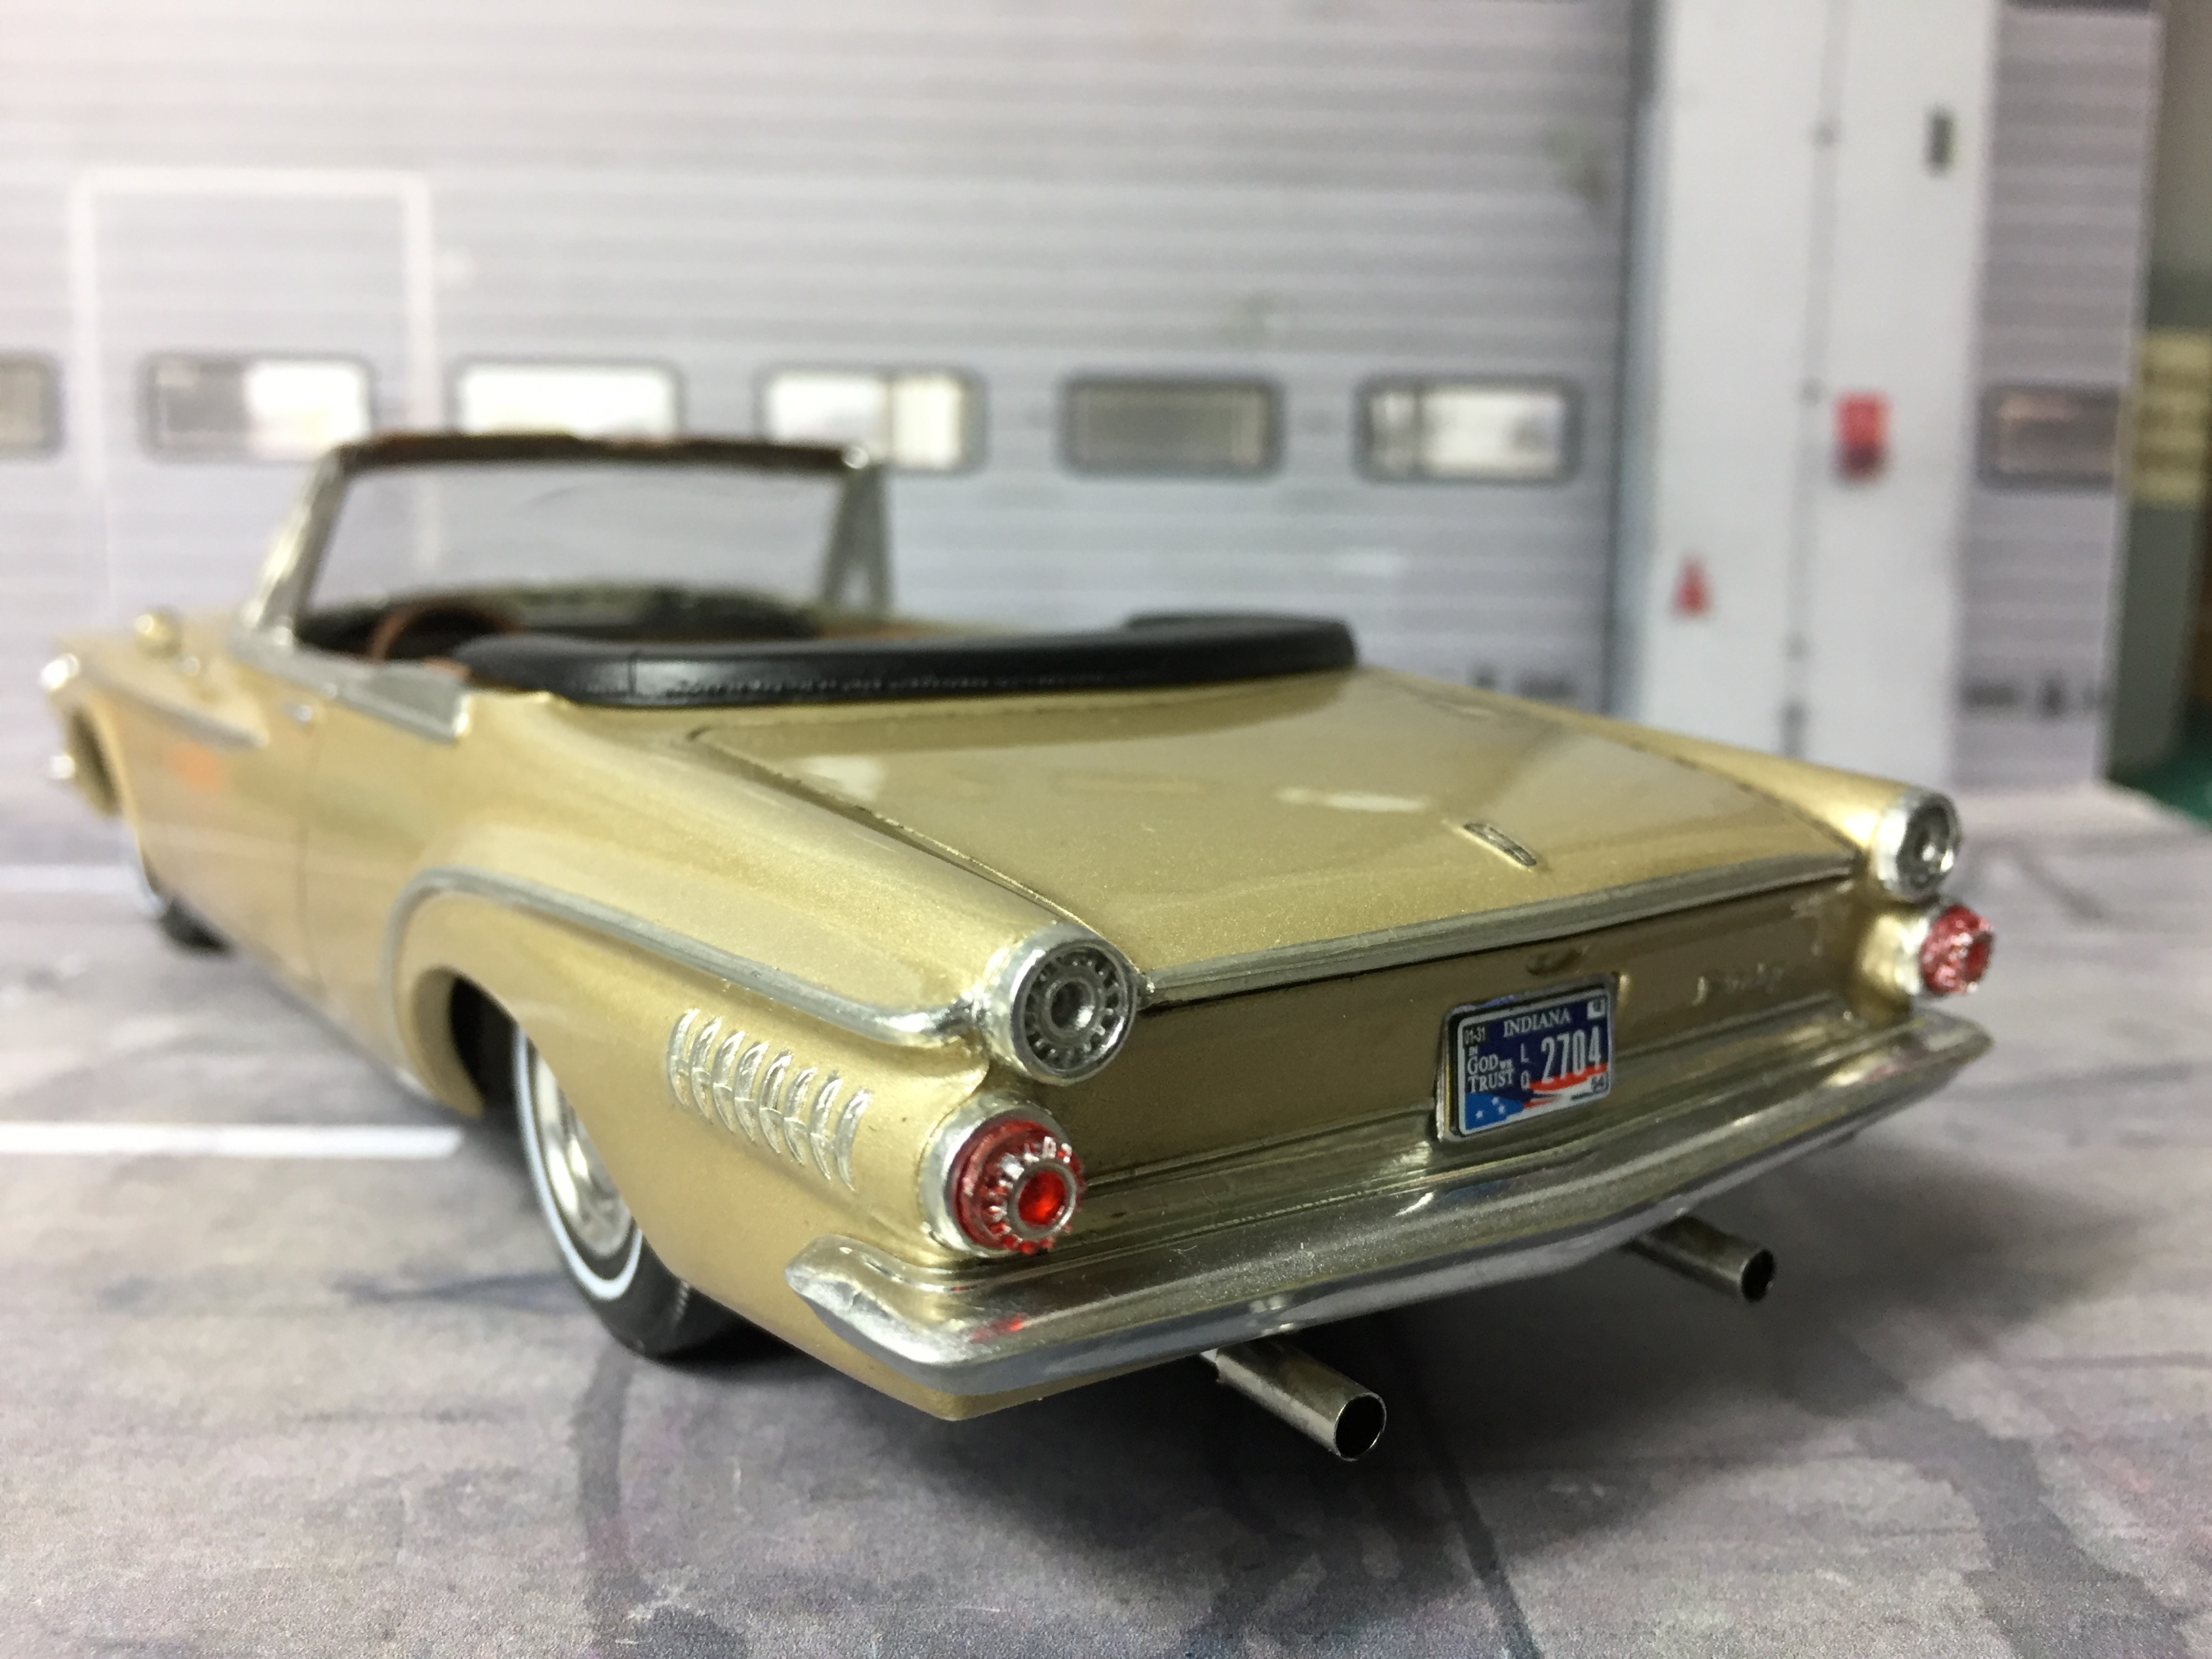
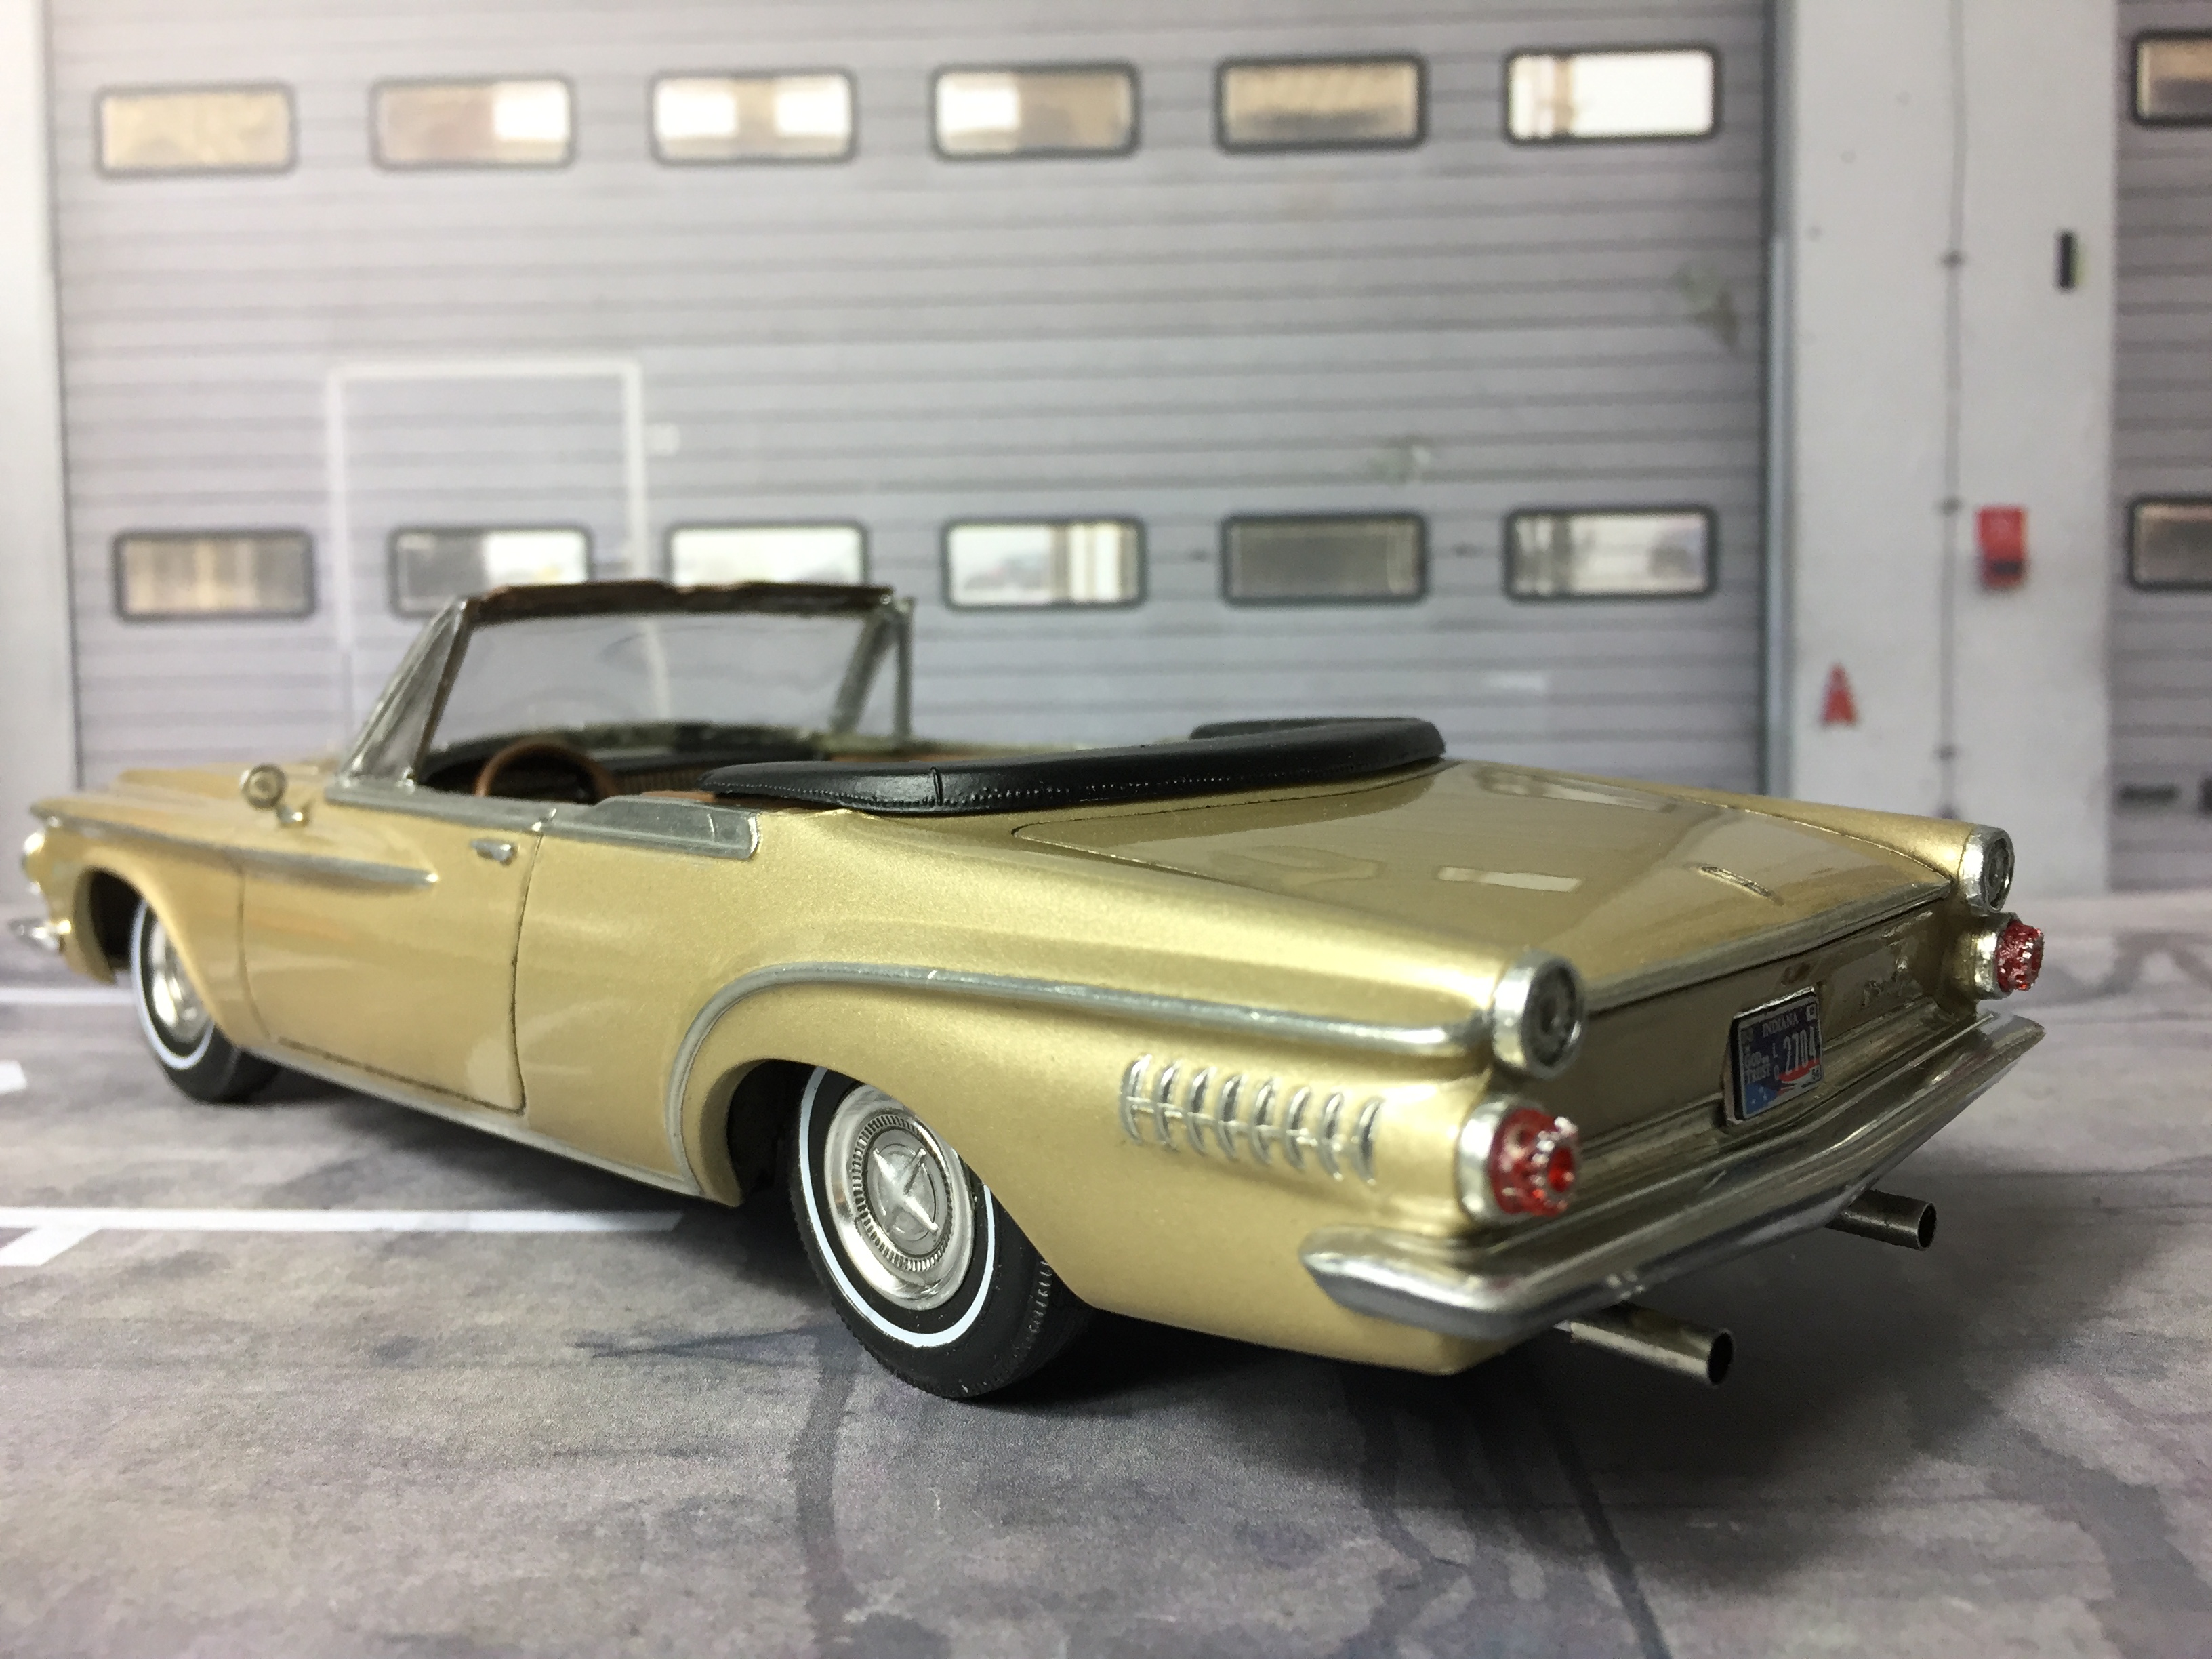
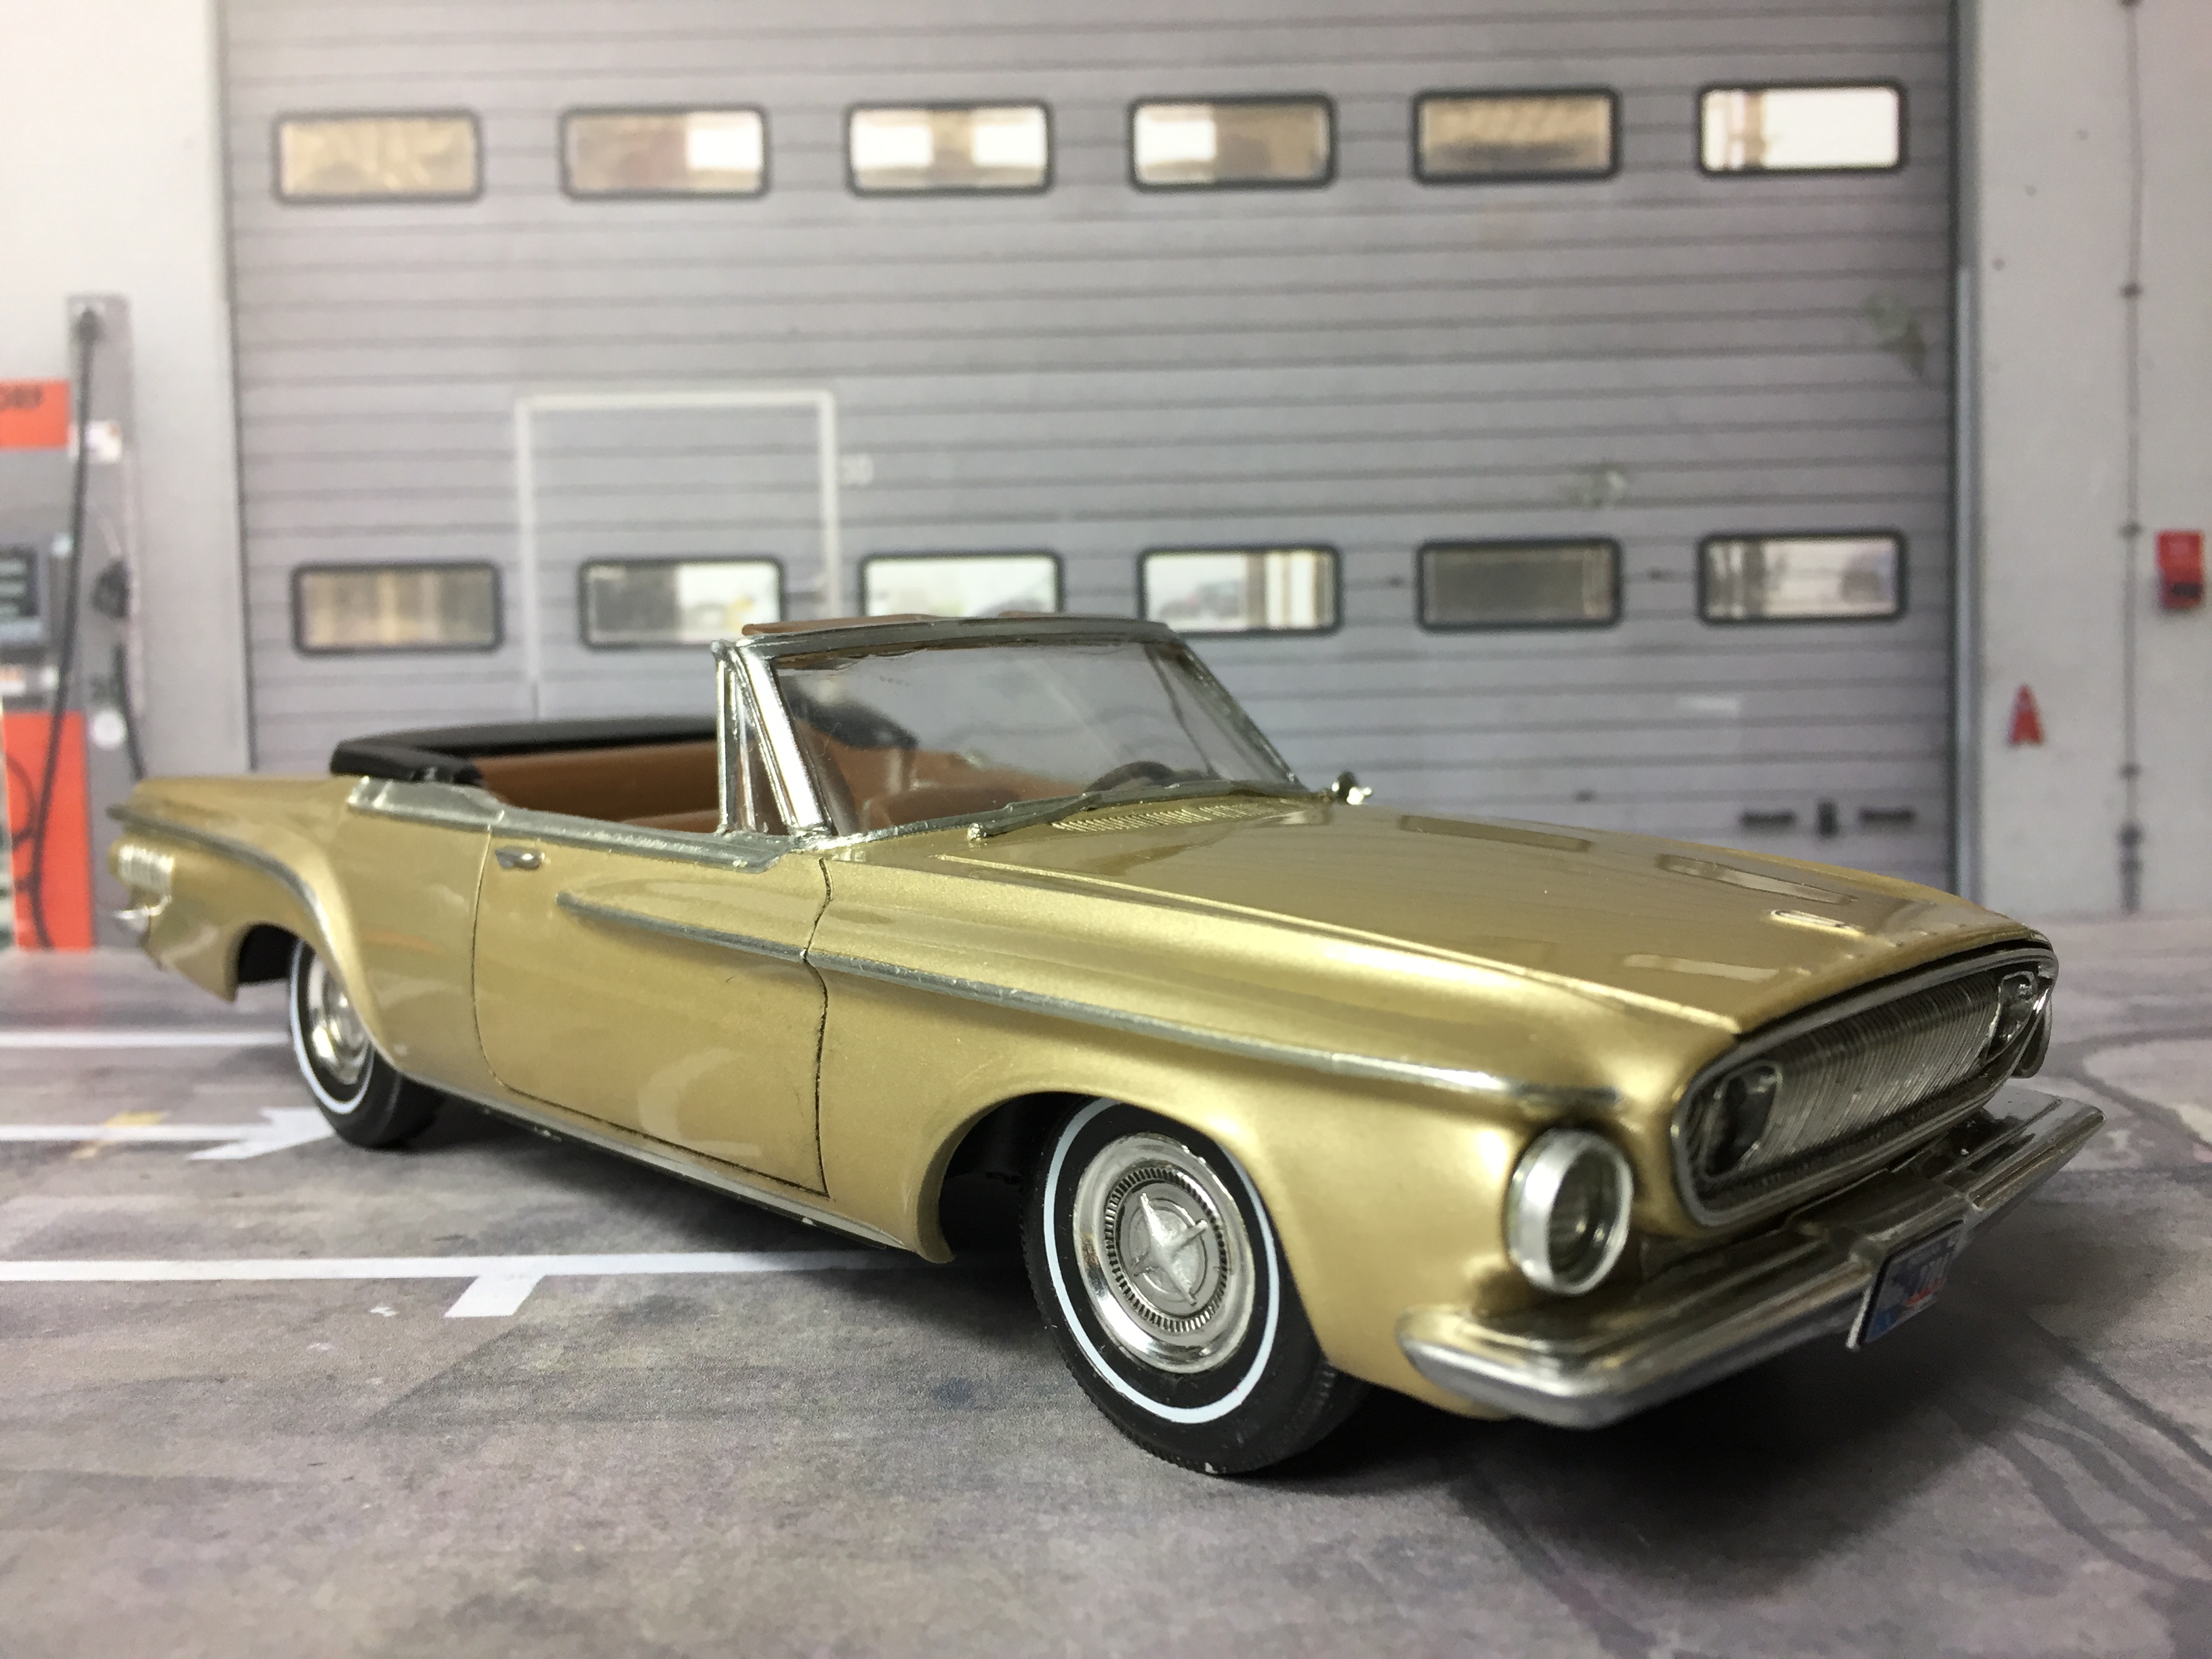
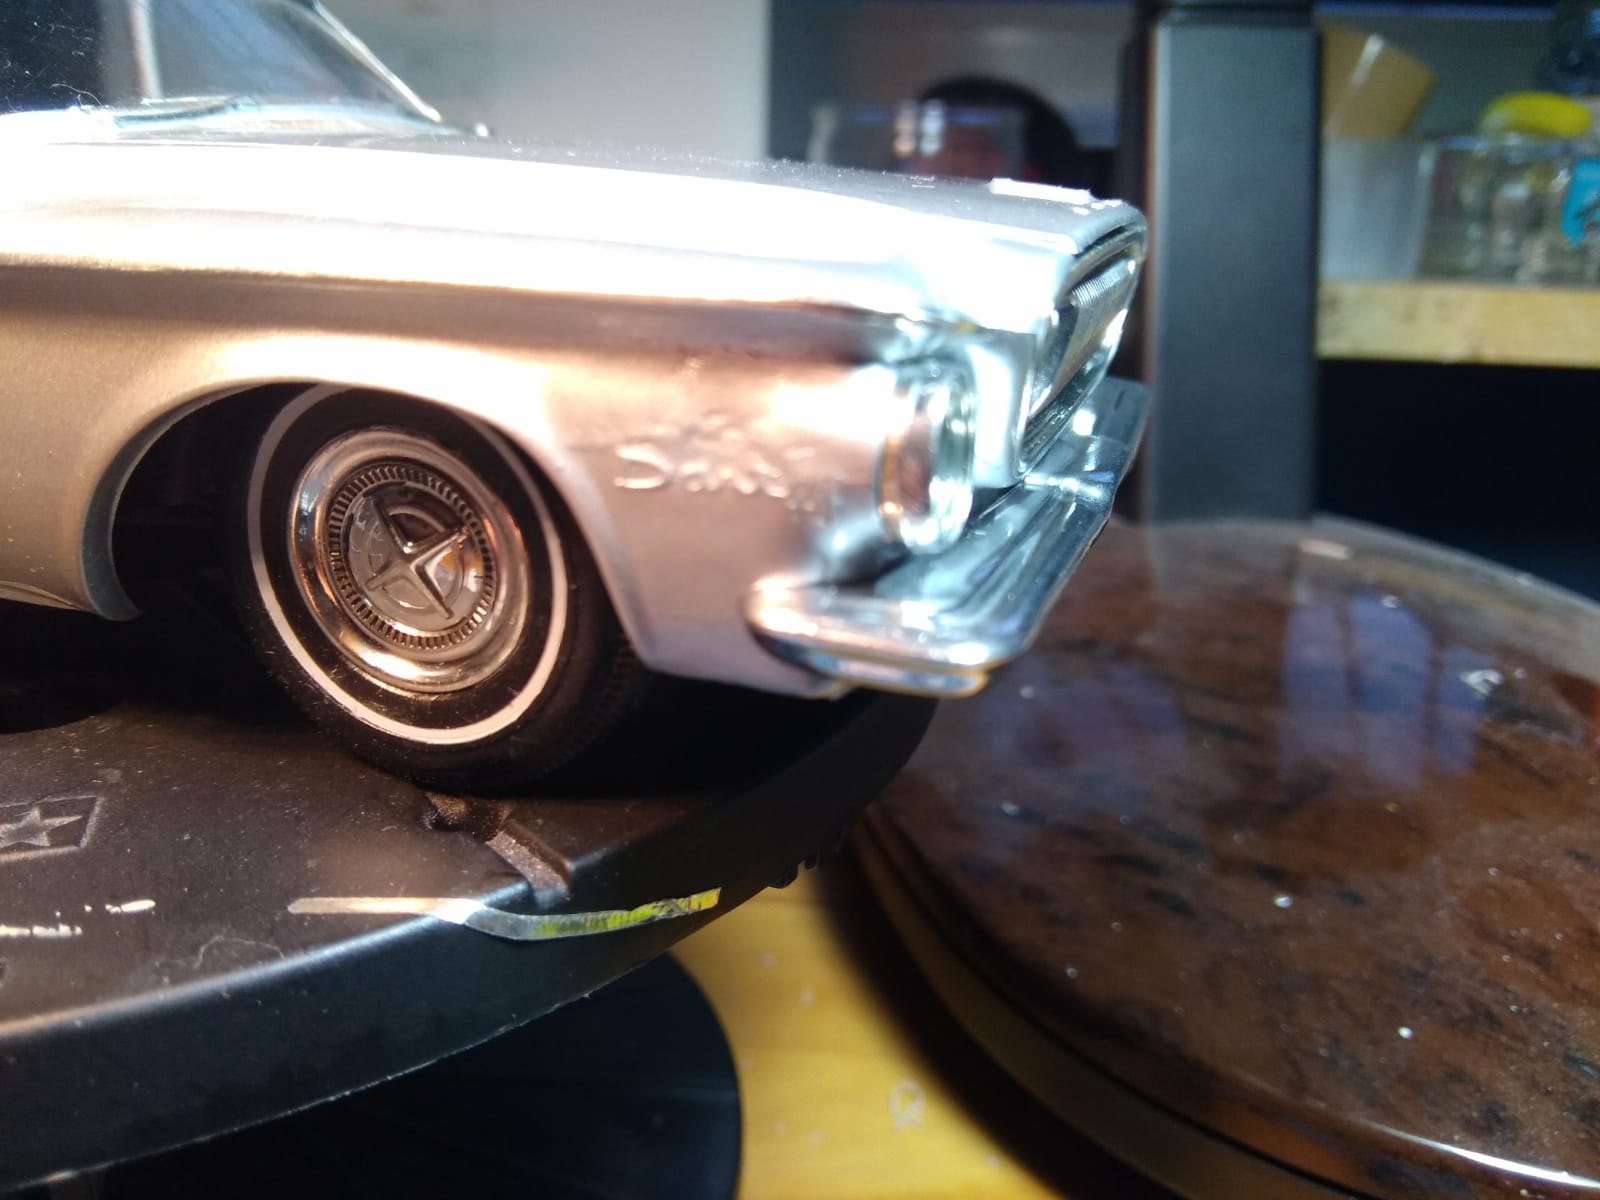
Hi folks, I got this recently from a modelling mate as a built kit amongst other stuff. As we all know, these days these Jo-Han kits come very expensive when bought new, so I took the opportunity to get this one at a very fair price, although it took quite some work because the front quarters had heavy dents on both sides since the kit was new. Of course, repairing those spots meant losing the beautiful "Dart 440" enblems, but that was the price to pay. I sanded down those spots and used Tamiya putty and sandable superglue for filling the dents. Then again sanding to make it fit to the body's contours. The result turned out okay in my eyes. Your feedback, as always, will be appreciated.

-
I have this kit on my to-do-in-the-nearer-future list, so I'll be watching with interest. The work you did, especially on opening the doors and trunk, looks very good so far. Did you choose on a color yet? What I like especially on this car is that it's overall appearance may change dramatically with the choice of certain colors. Use an aqua or turquoise color and it will be a nice bright and elegant sports coupe, use black and it will turn out to look real mean!
-

Tip: dealing with difficult metal transfers
Tommy124 replied to Matt Bacon's topic in Tips, Tricks, and Tutorials
I keep using metal transfer parts of the smallest kind from Hobby Design for detailing door and trunk locks. So far applying them has been a pain in the BLAH every time because these small parts hardly have any adhesive themselves. I will try this method out, I'm positive it will facilitate the process. Thanks for sharing. -
Well done, very nice model! It would be easy though to improve the looks of the "fully-chromed" headlights with just some drops of UV glue to give them some depth.
-
Thanks Guy, appreciate it!
-
Great work all around and in the details especially
-
Thanks guys for your kind words. Appreciate it!
-
Fully agree! As regards the kit, this looks a lot like a re-release/ re-box of their former „Motor-City Muscle“ kit and yes, that contained stock wheels to build a nice 70 Firebird. https://www.scalemates.com/kits/revell-85-2026-70-pontiac-firebird--111902
-
Absolutely lovely result, excellent work
-
1970 Dodge Challenger Deputy 225ci slant six
Tommy124 replied to Michael Kröger's topic in Model Cars
Hi Michael, another nice one from you - good idea about the engine switch and very well executed. One thing though - it‘s a Challenger, not a Charger as mentioned in the title. -
Fully agree. The Tamiya Porsche 962 kits come from the same R/C background and therefore come with those unfortunate glued-in windshield and headlight cover parts. Which is why it is usually wiser to pick one of the Hasegawa kits. @Atmobil: well done on this kit. The headlight decals have always been what kept me from buying this kit. I feel that using parts from a 959 donor kit would be the best way to get an appropriate solution to this optical problem.
-
Thanks for your feedbacks, appreciated! You‘re welcome! I recommend it. There may be similar products available out there, but this is the first one I found that worked this well for me.
-
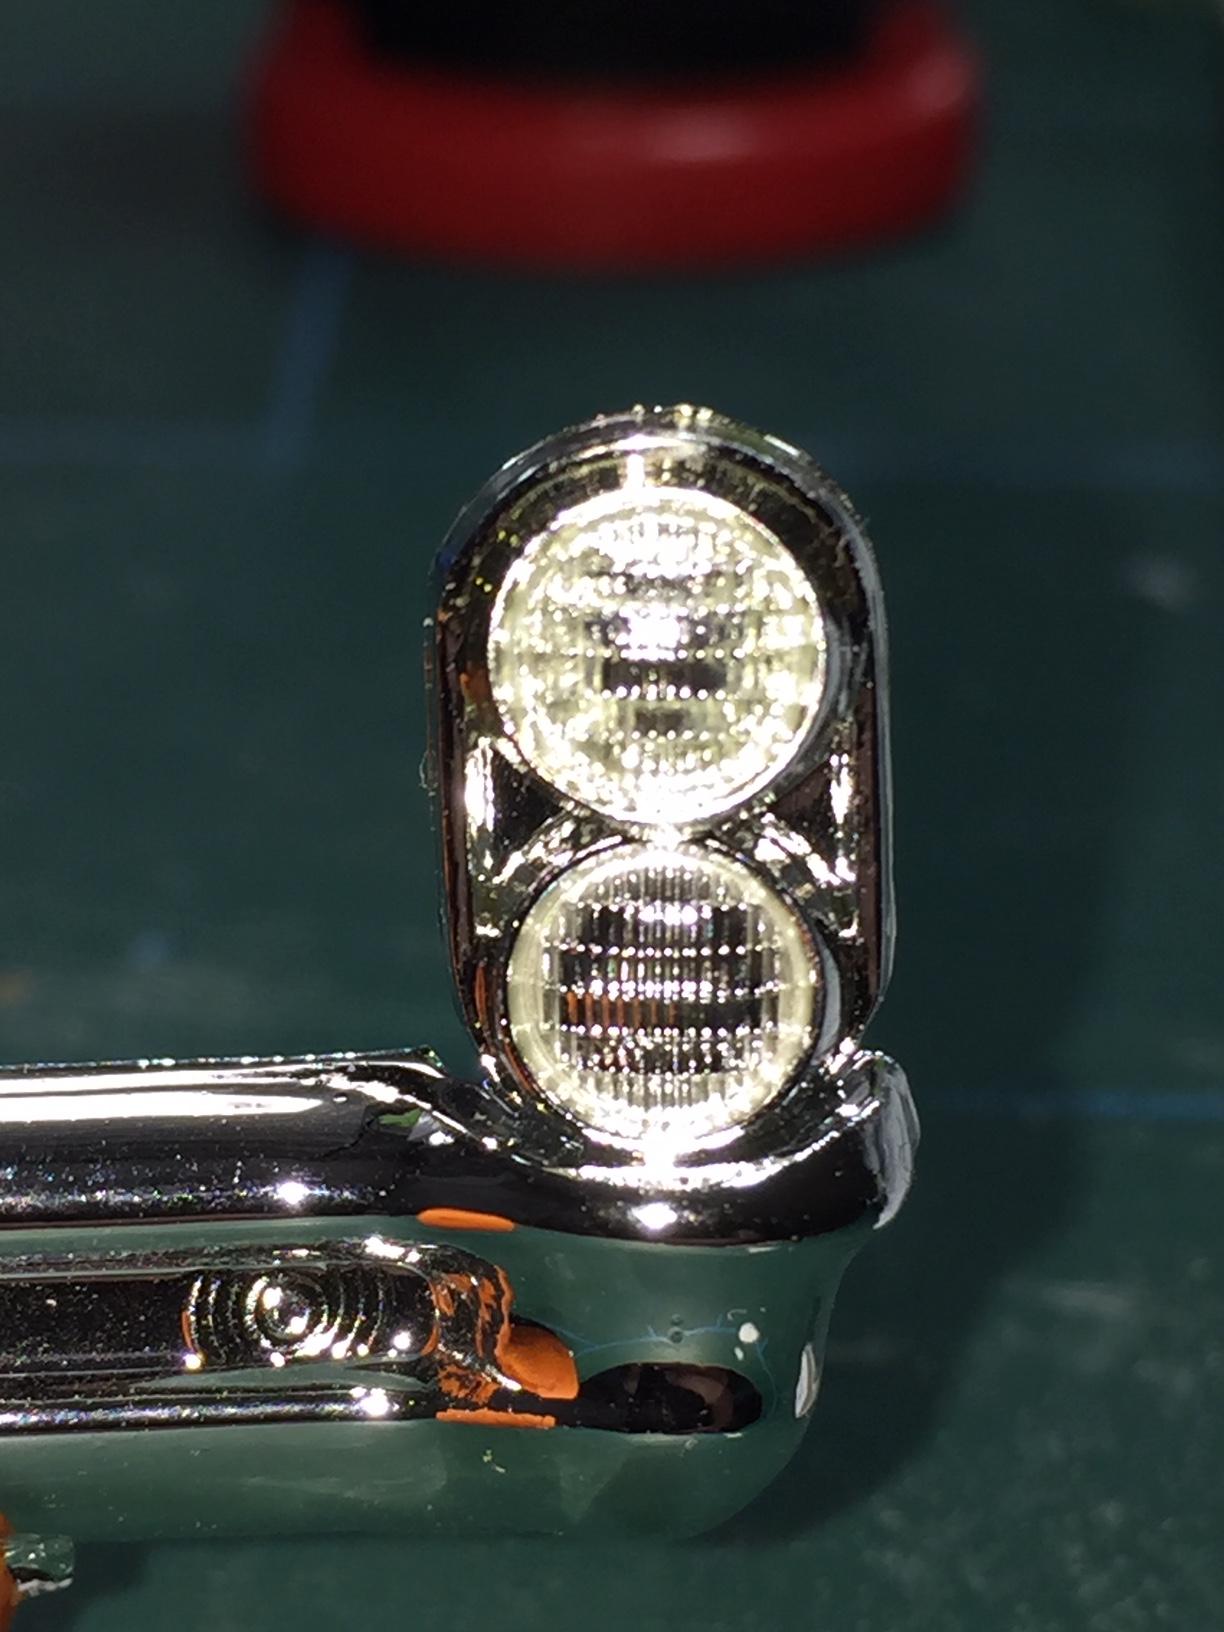
Thanks guys! The UV glue is a product from a German company called Fischer. They are specialized in fastening technology. This type of UV glue is the first one I came across that satisfied me both in terms of transparency and hardness. After painting the kit's "chrome headlights" with the usual mix of tamiya clear and the tiniest amount of white in the first step, I simply applied one small drop of the glue and "dried" it with the small UV lamp that comes with the glue. Below find two images, showing the difference between before (lower bezel) and after (upper bezel) the application of the UV glue. One image was made using flashlight, the other one without. IMHO it's a good result coming from little work. And, what's more, it's eliminating that "dead eyes" look that comes from the "chrome headlights".
-
Cool idea and very well done!
-
Thanks Chris, I'm happy you like it too.
-
Nicely done. I like the subtile weathering!
-
Thanks folks for your kind words, much appreciated!
-
I hear you! I just watched one of my all-time favorite series again, Breaking Bad, and I wonder, how come no-one ever had the guts to do a Pontiac Aztek...
-
I have this kit too but will build it plain "stock" one day. No Foose or custom business of any kind. I'm looking forward though to those modifications you mentioned, it'll be interesting too watch, so count me in!
-
Revell Williams Renault FW19 F1 1997 Champion
Tommy124 replied to Twokidsnosleep's topic in WIP: Model Cars
I agree, this is looking very good. I will follow your WIP. If I may add one small comment, I think the exhaust pipes have to more straight, on those photos they look like they are pointed to the lower part of the rear wing in a somewhat diagonal angle. On the real car, hot exhaust air may never reach the CF parts, that would not be good... -
Thanks Tom! Thanks! I will check on the taillights, they appeared to be strangely small/ thin to properly fit in there. Thanks Ludwig, also for your "support" in this matter.
-
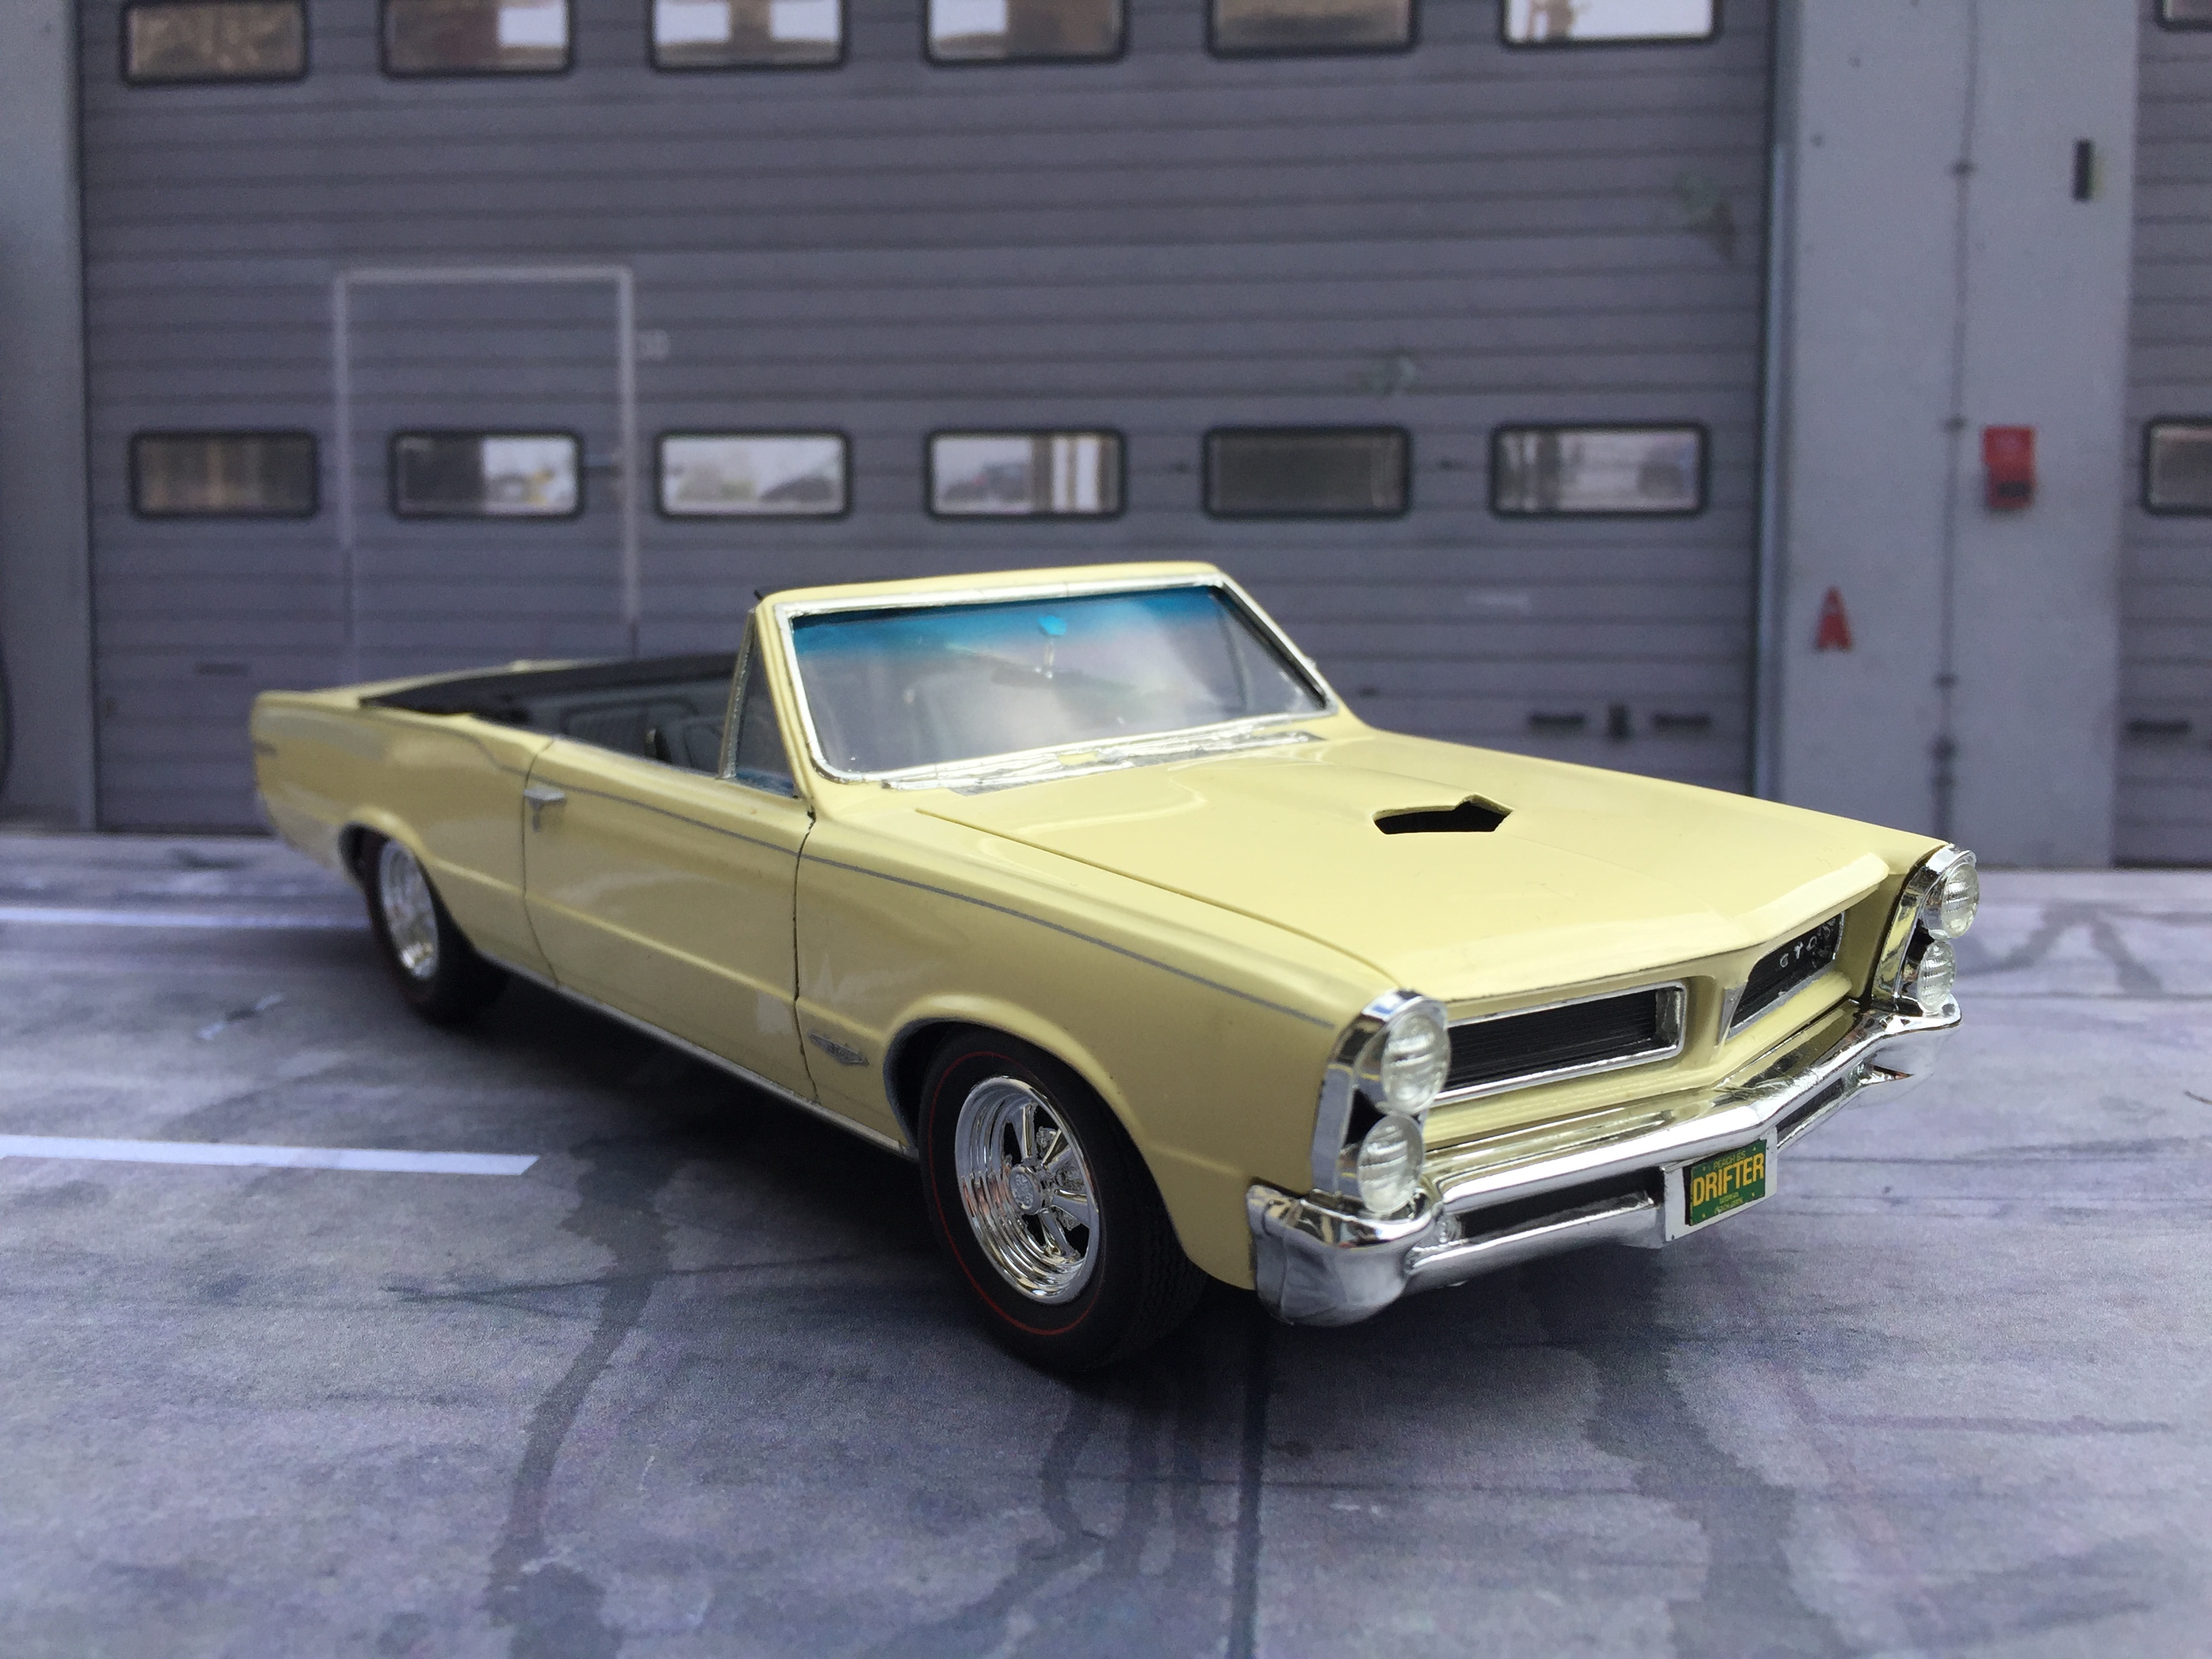
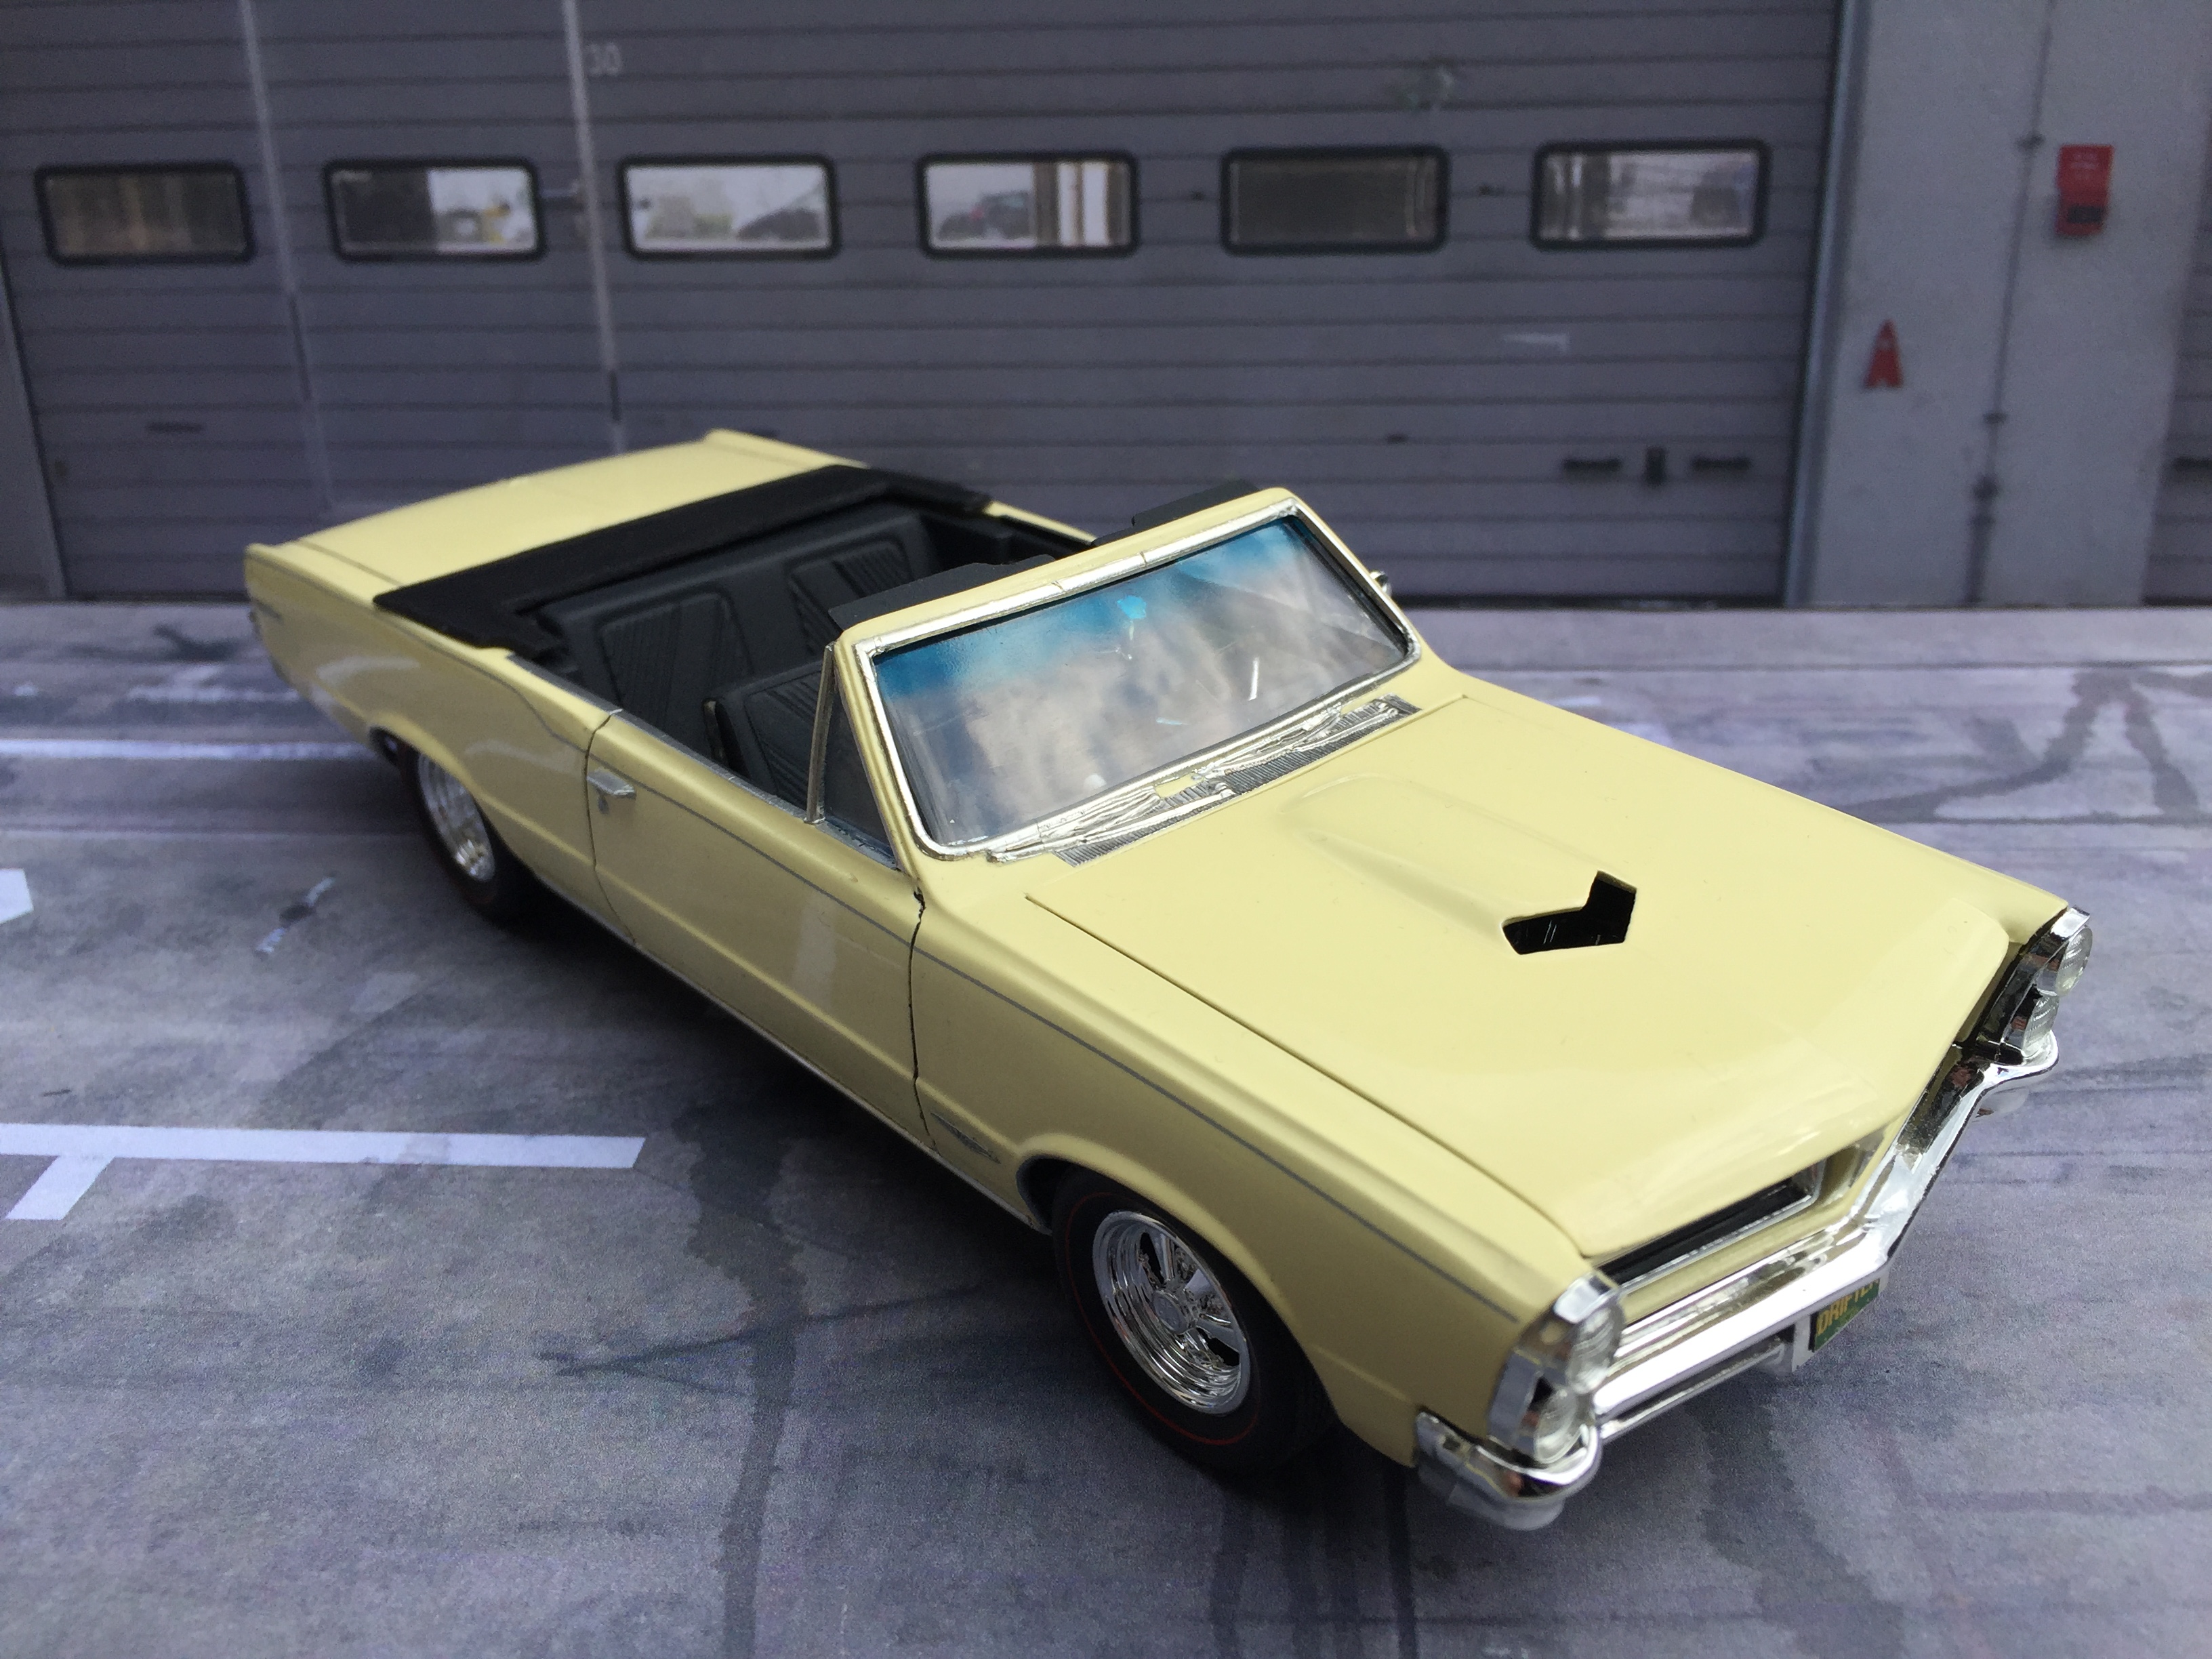
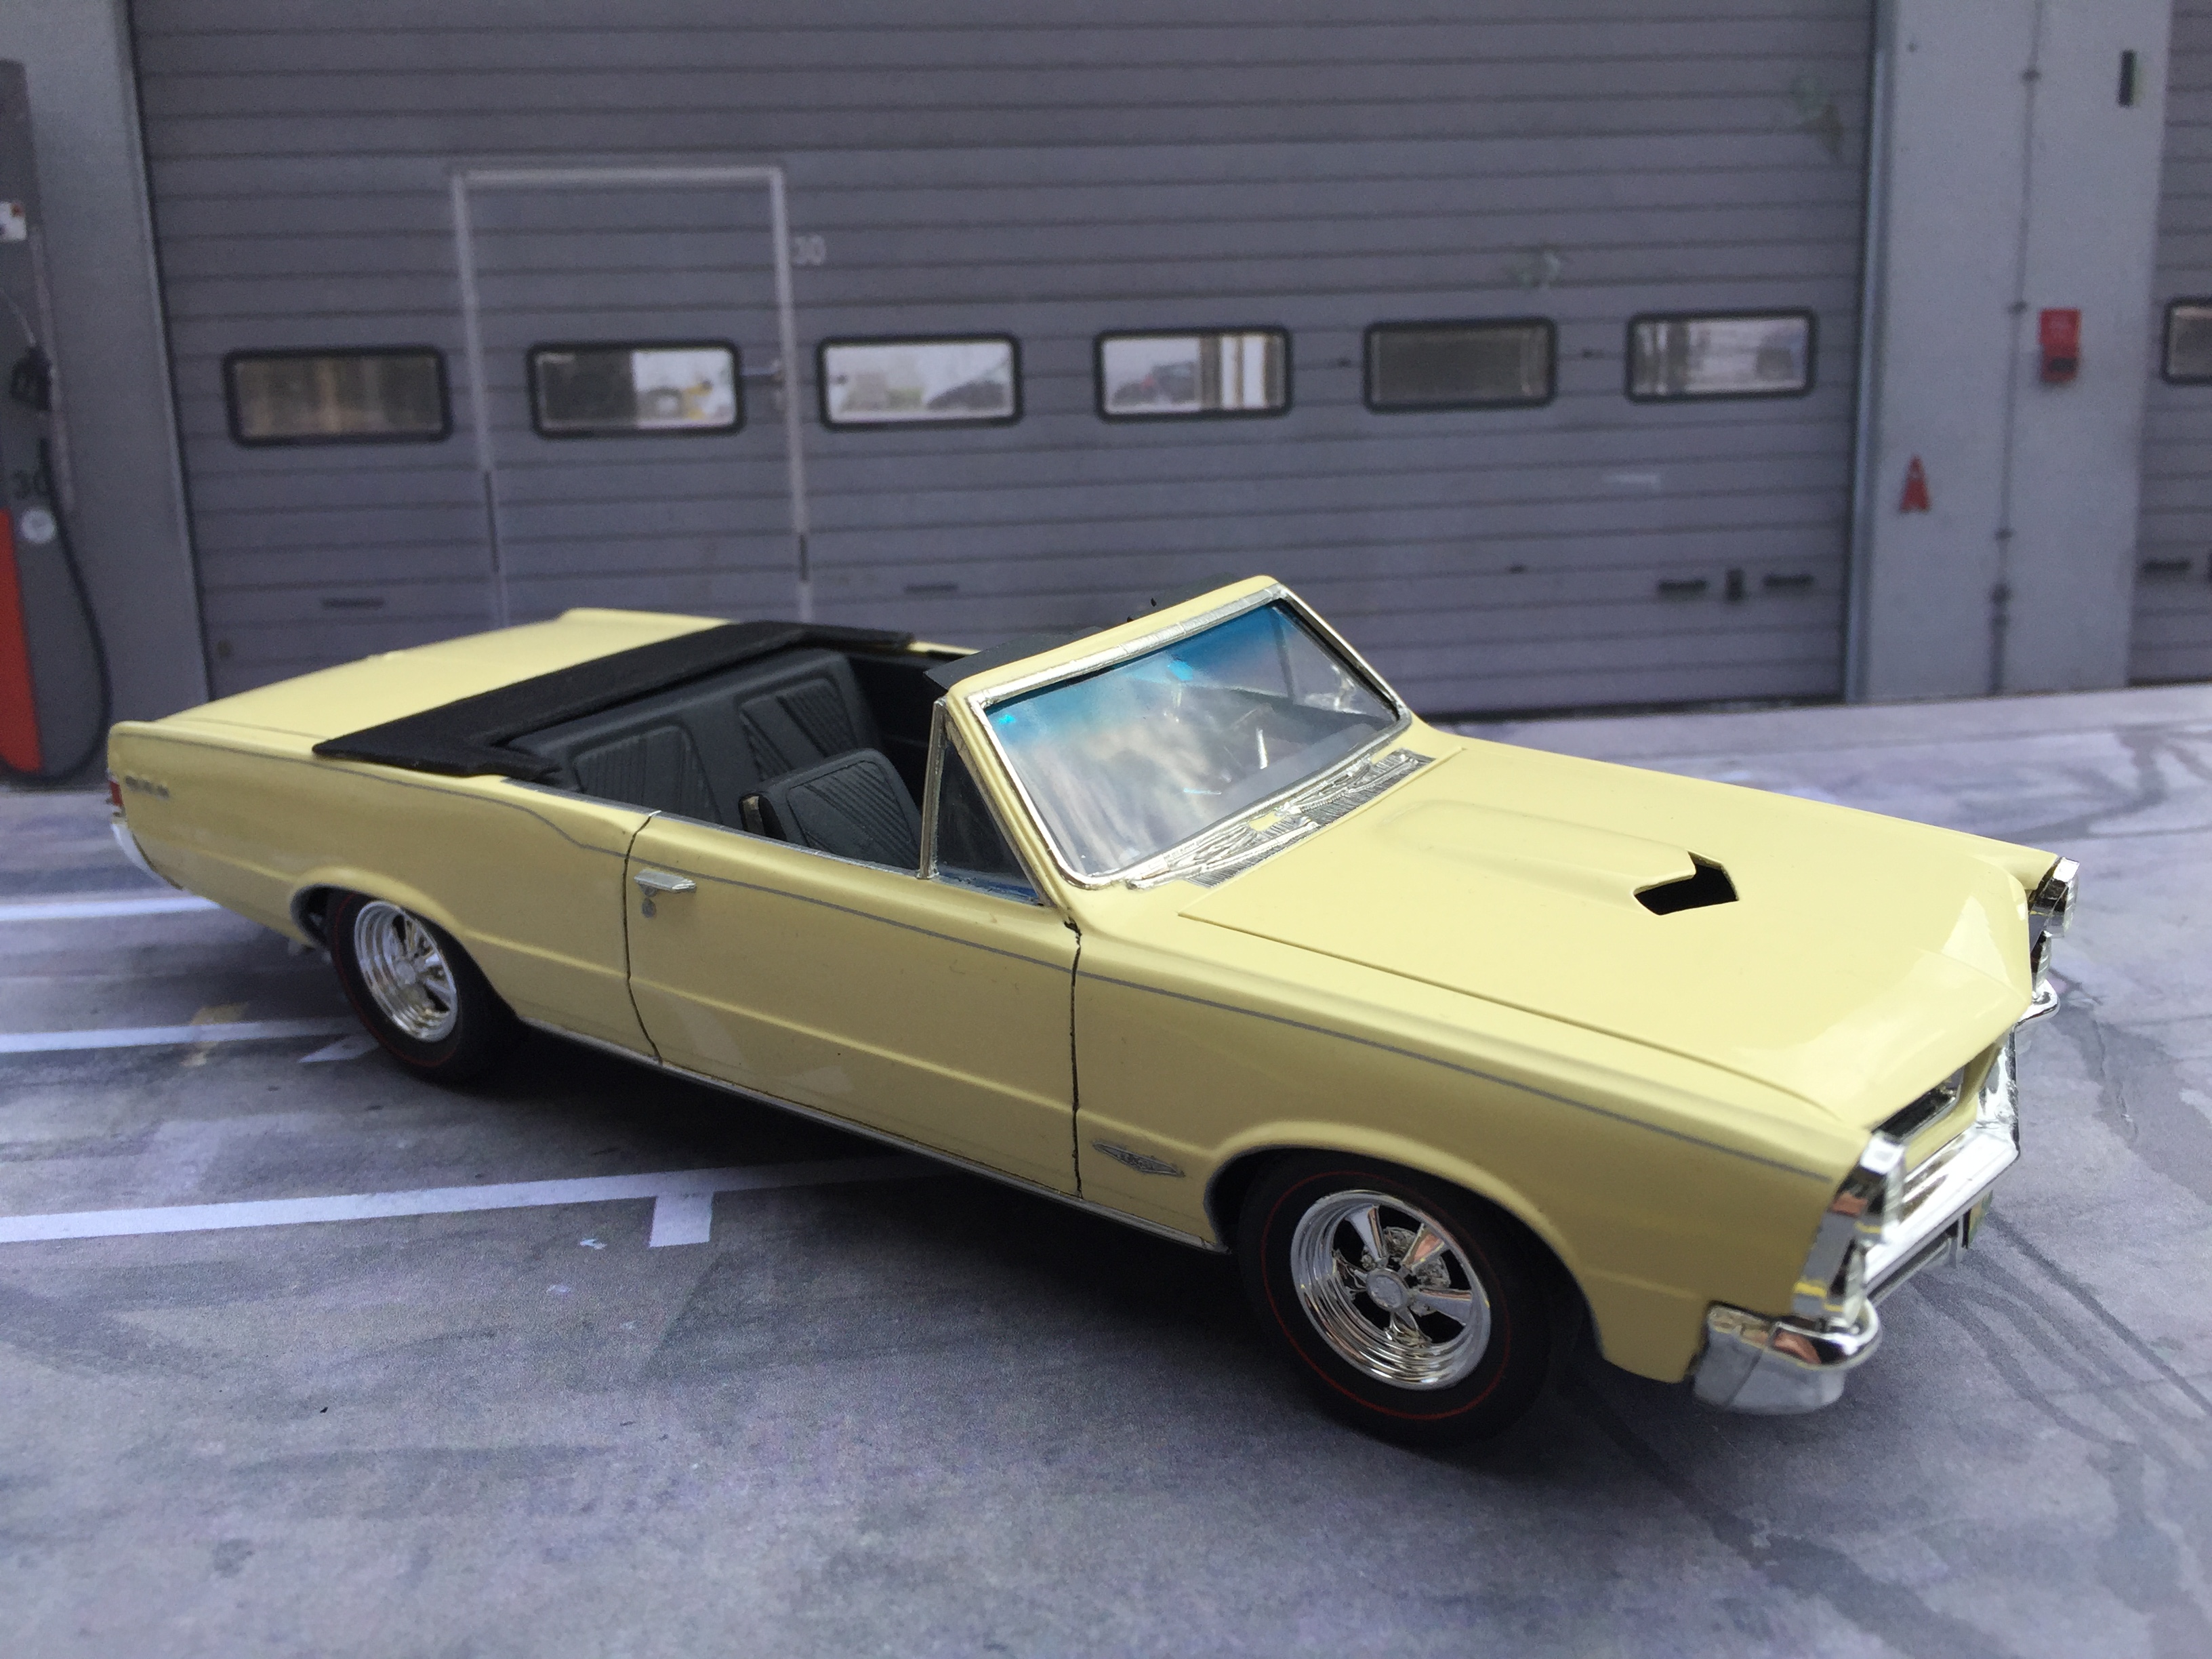
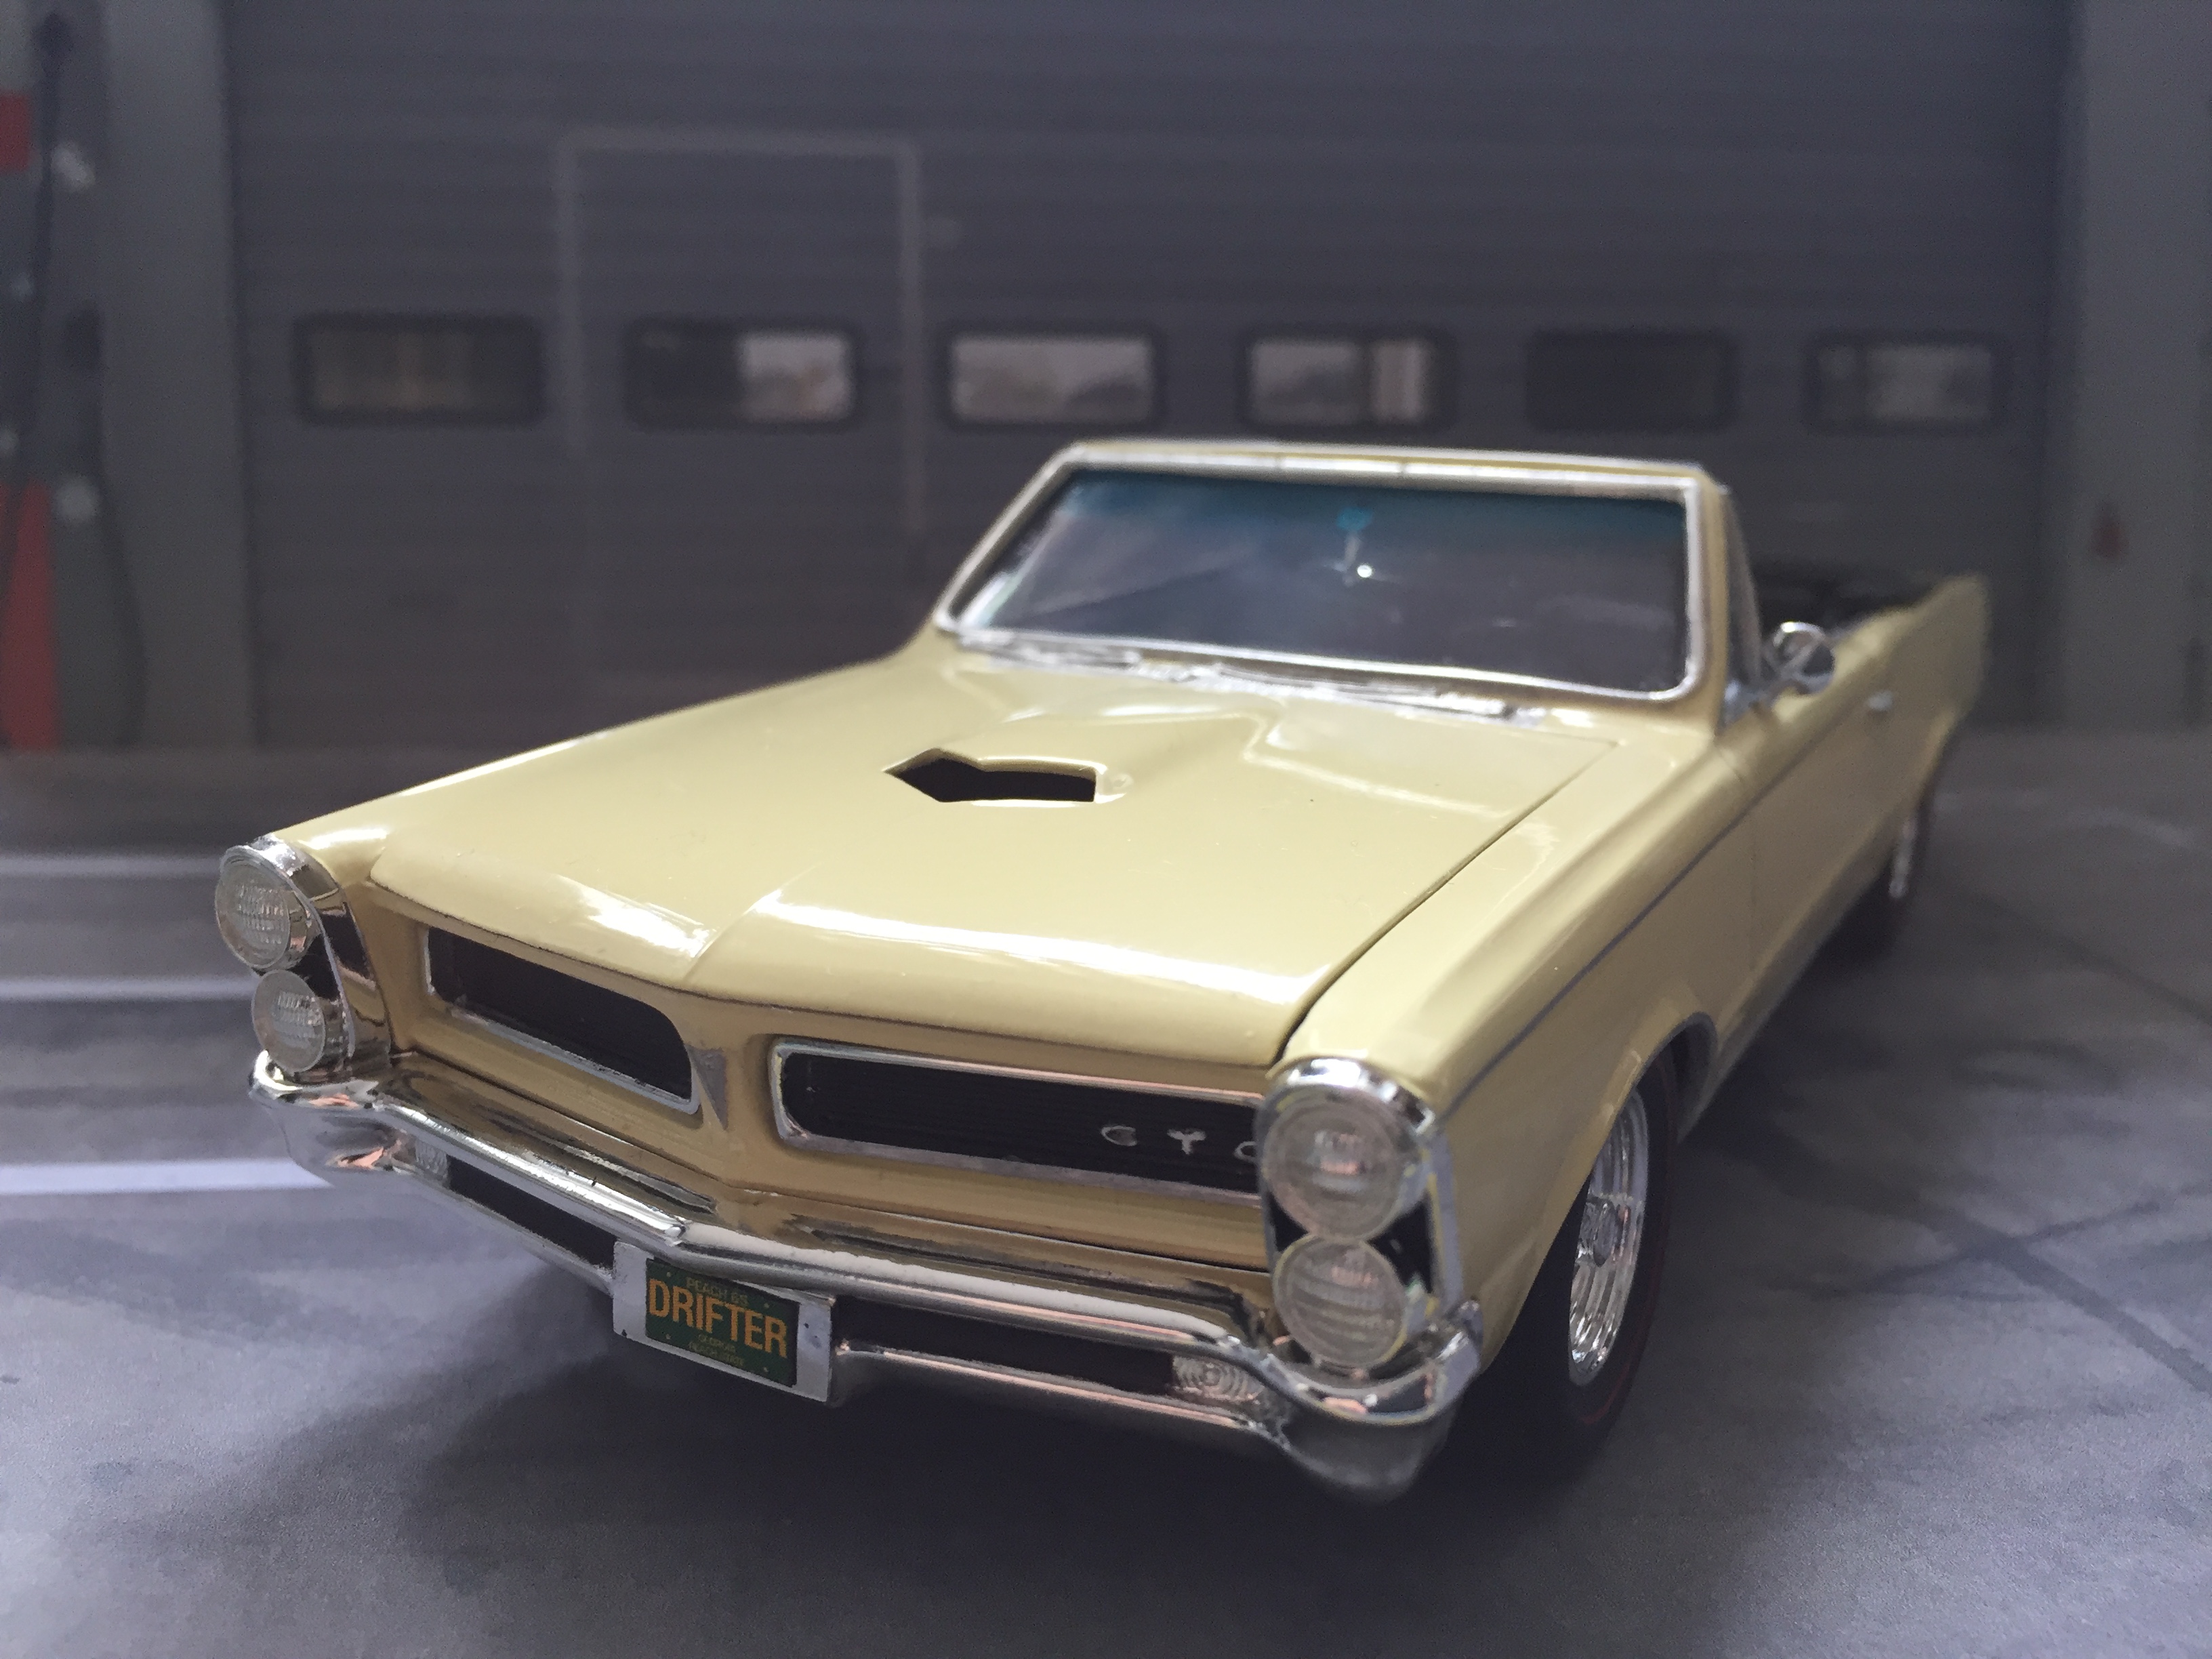
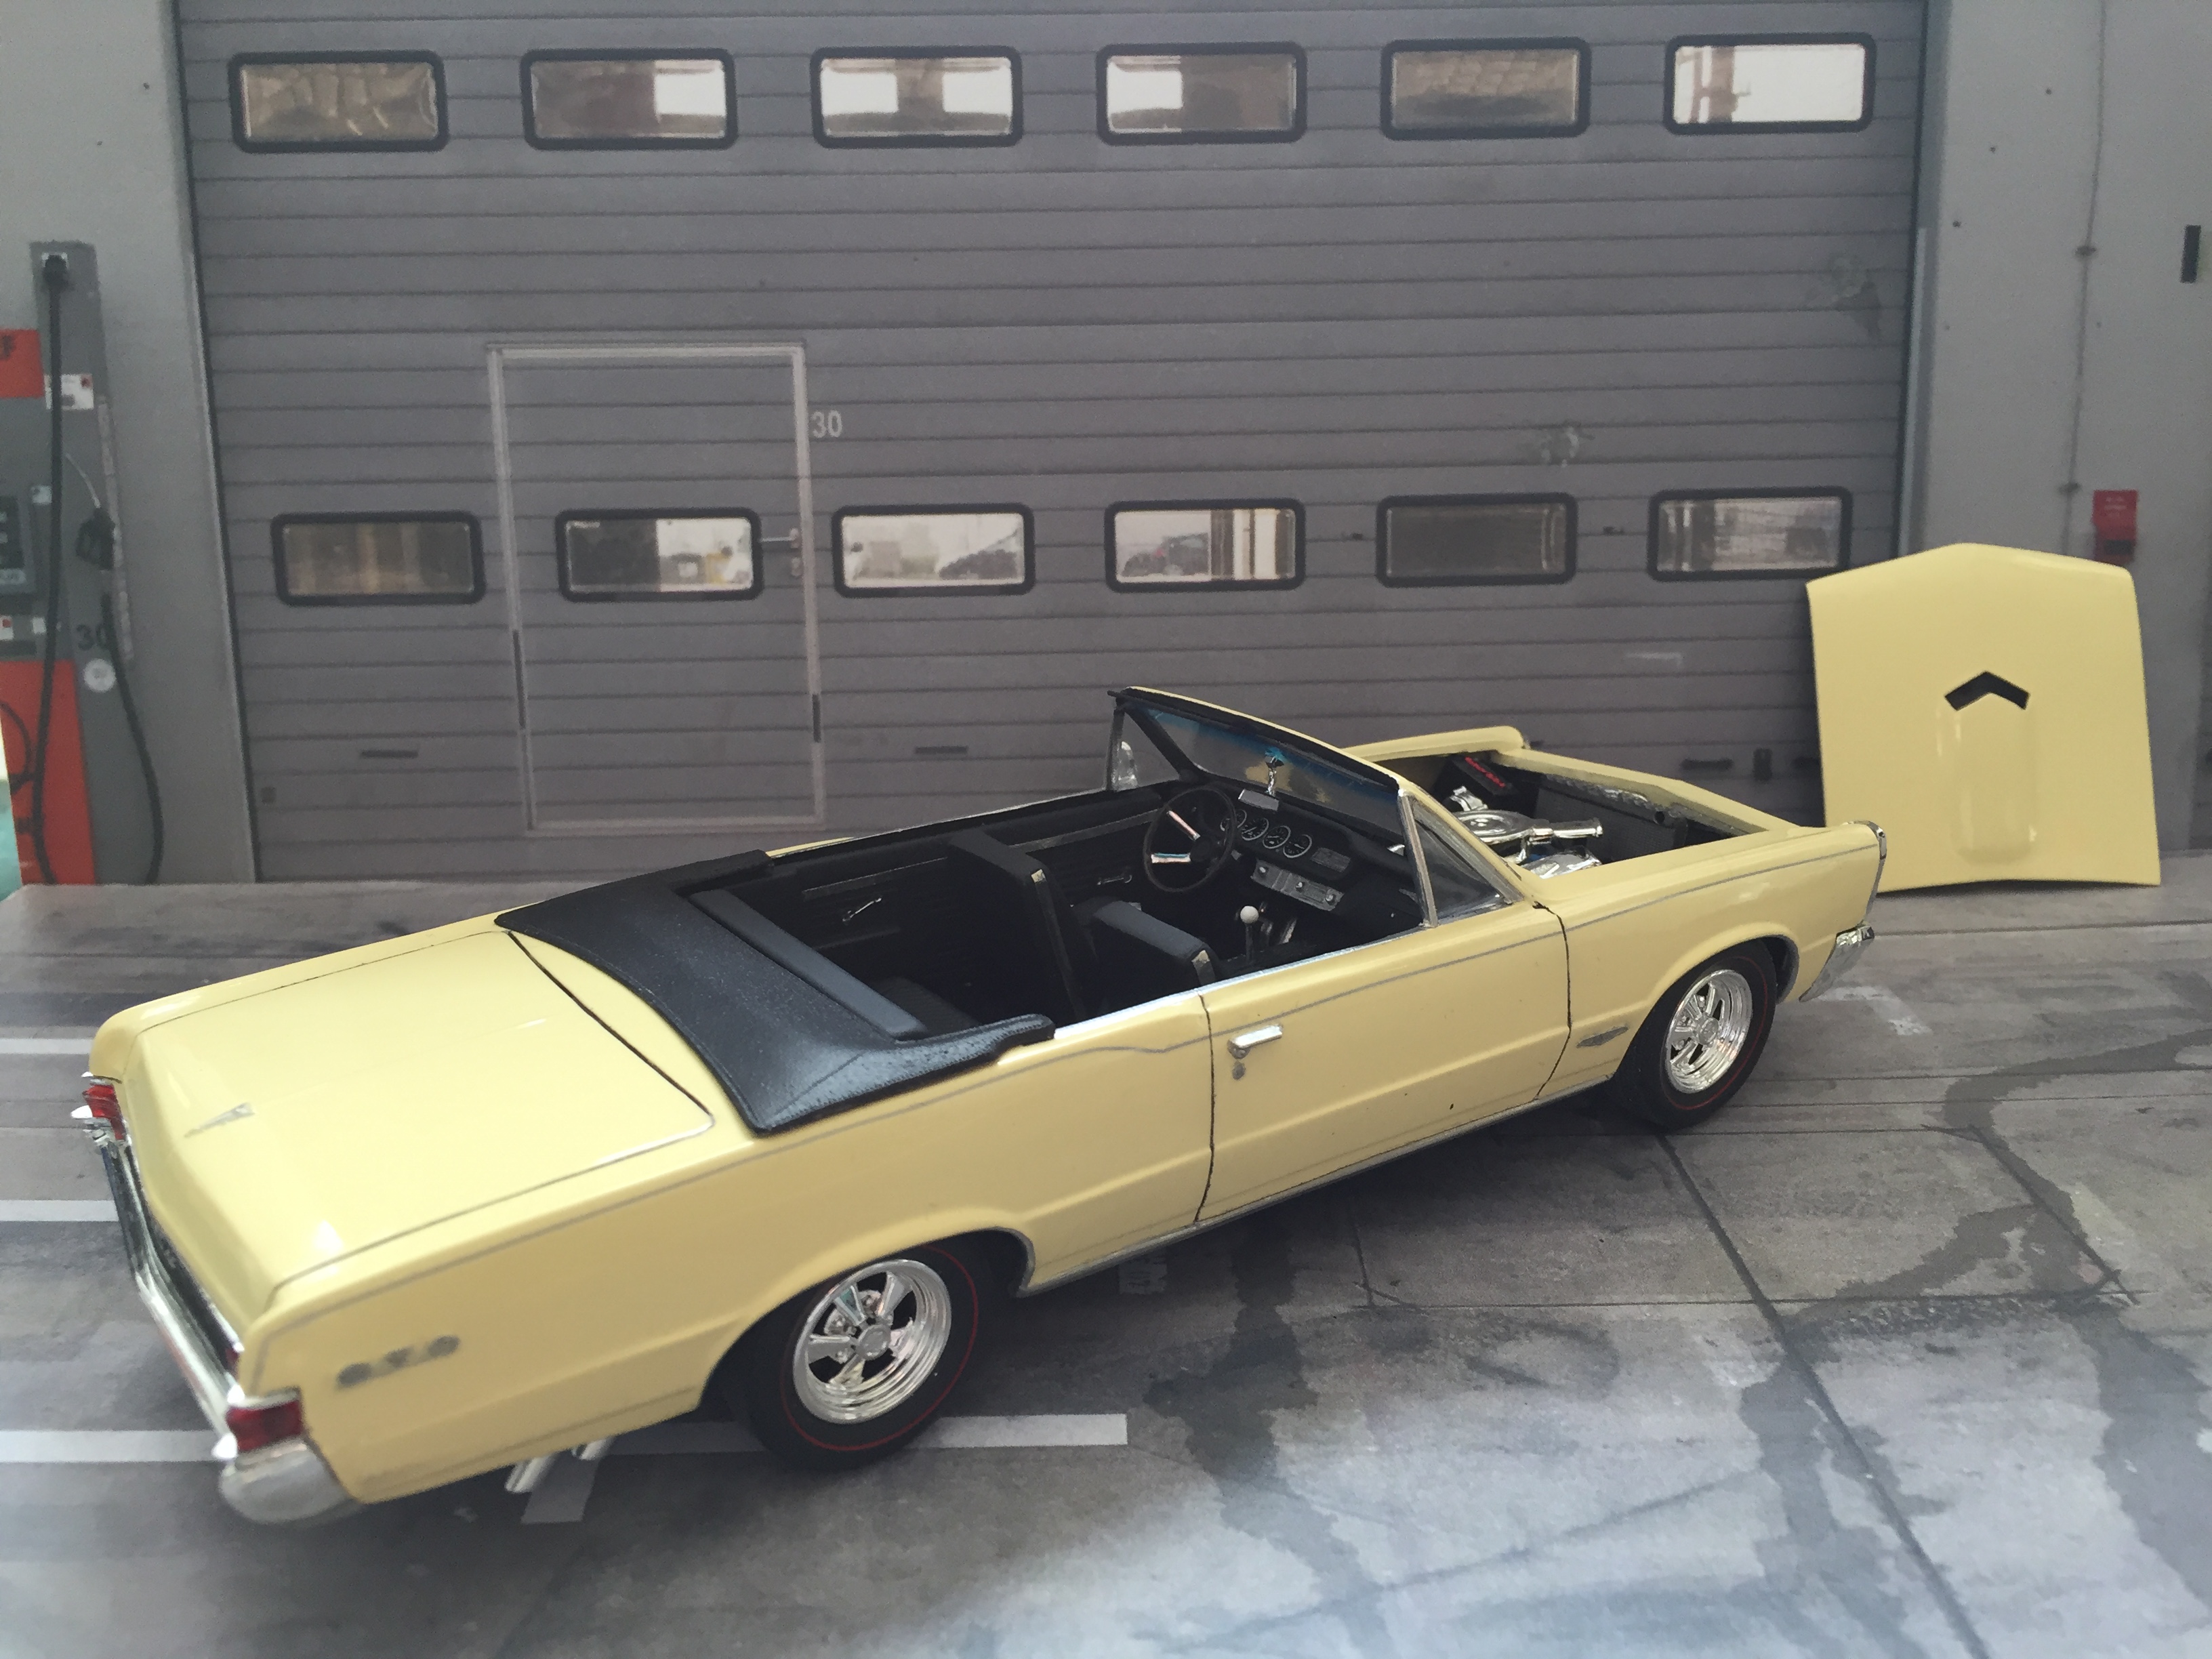
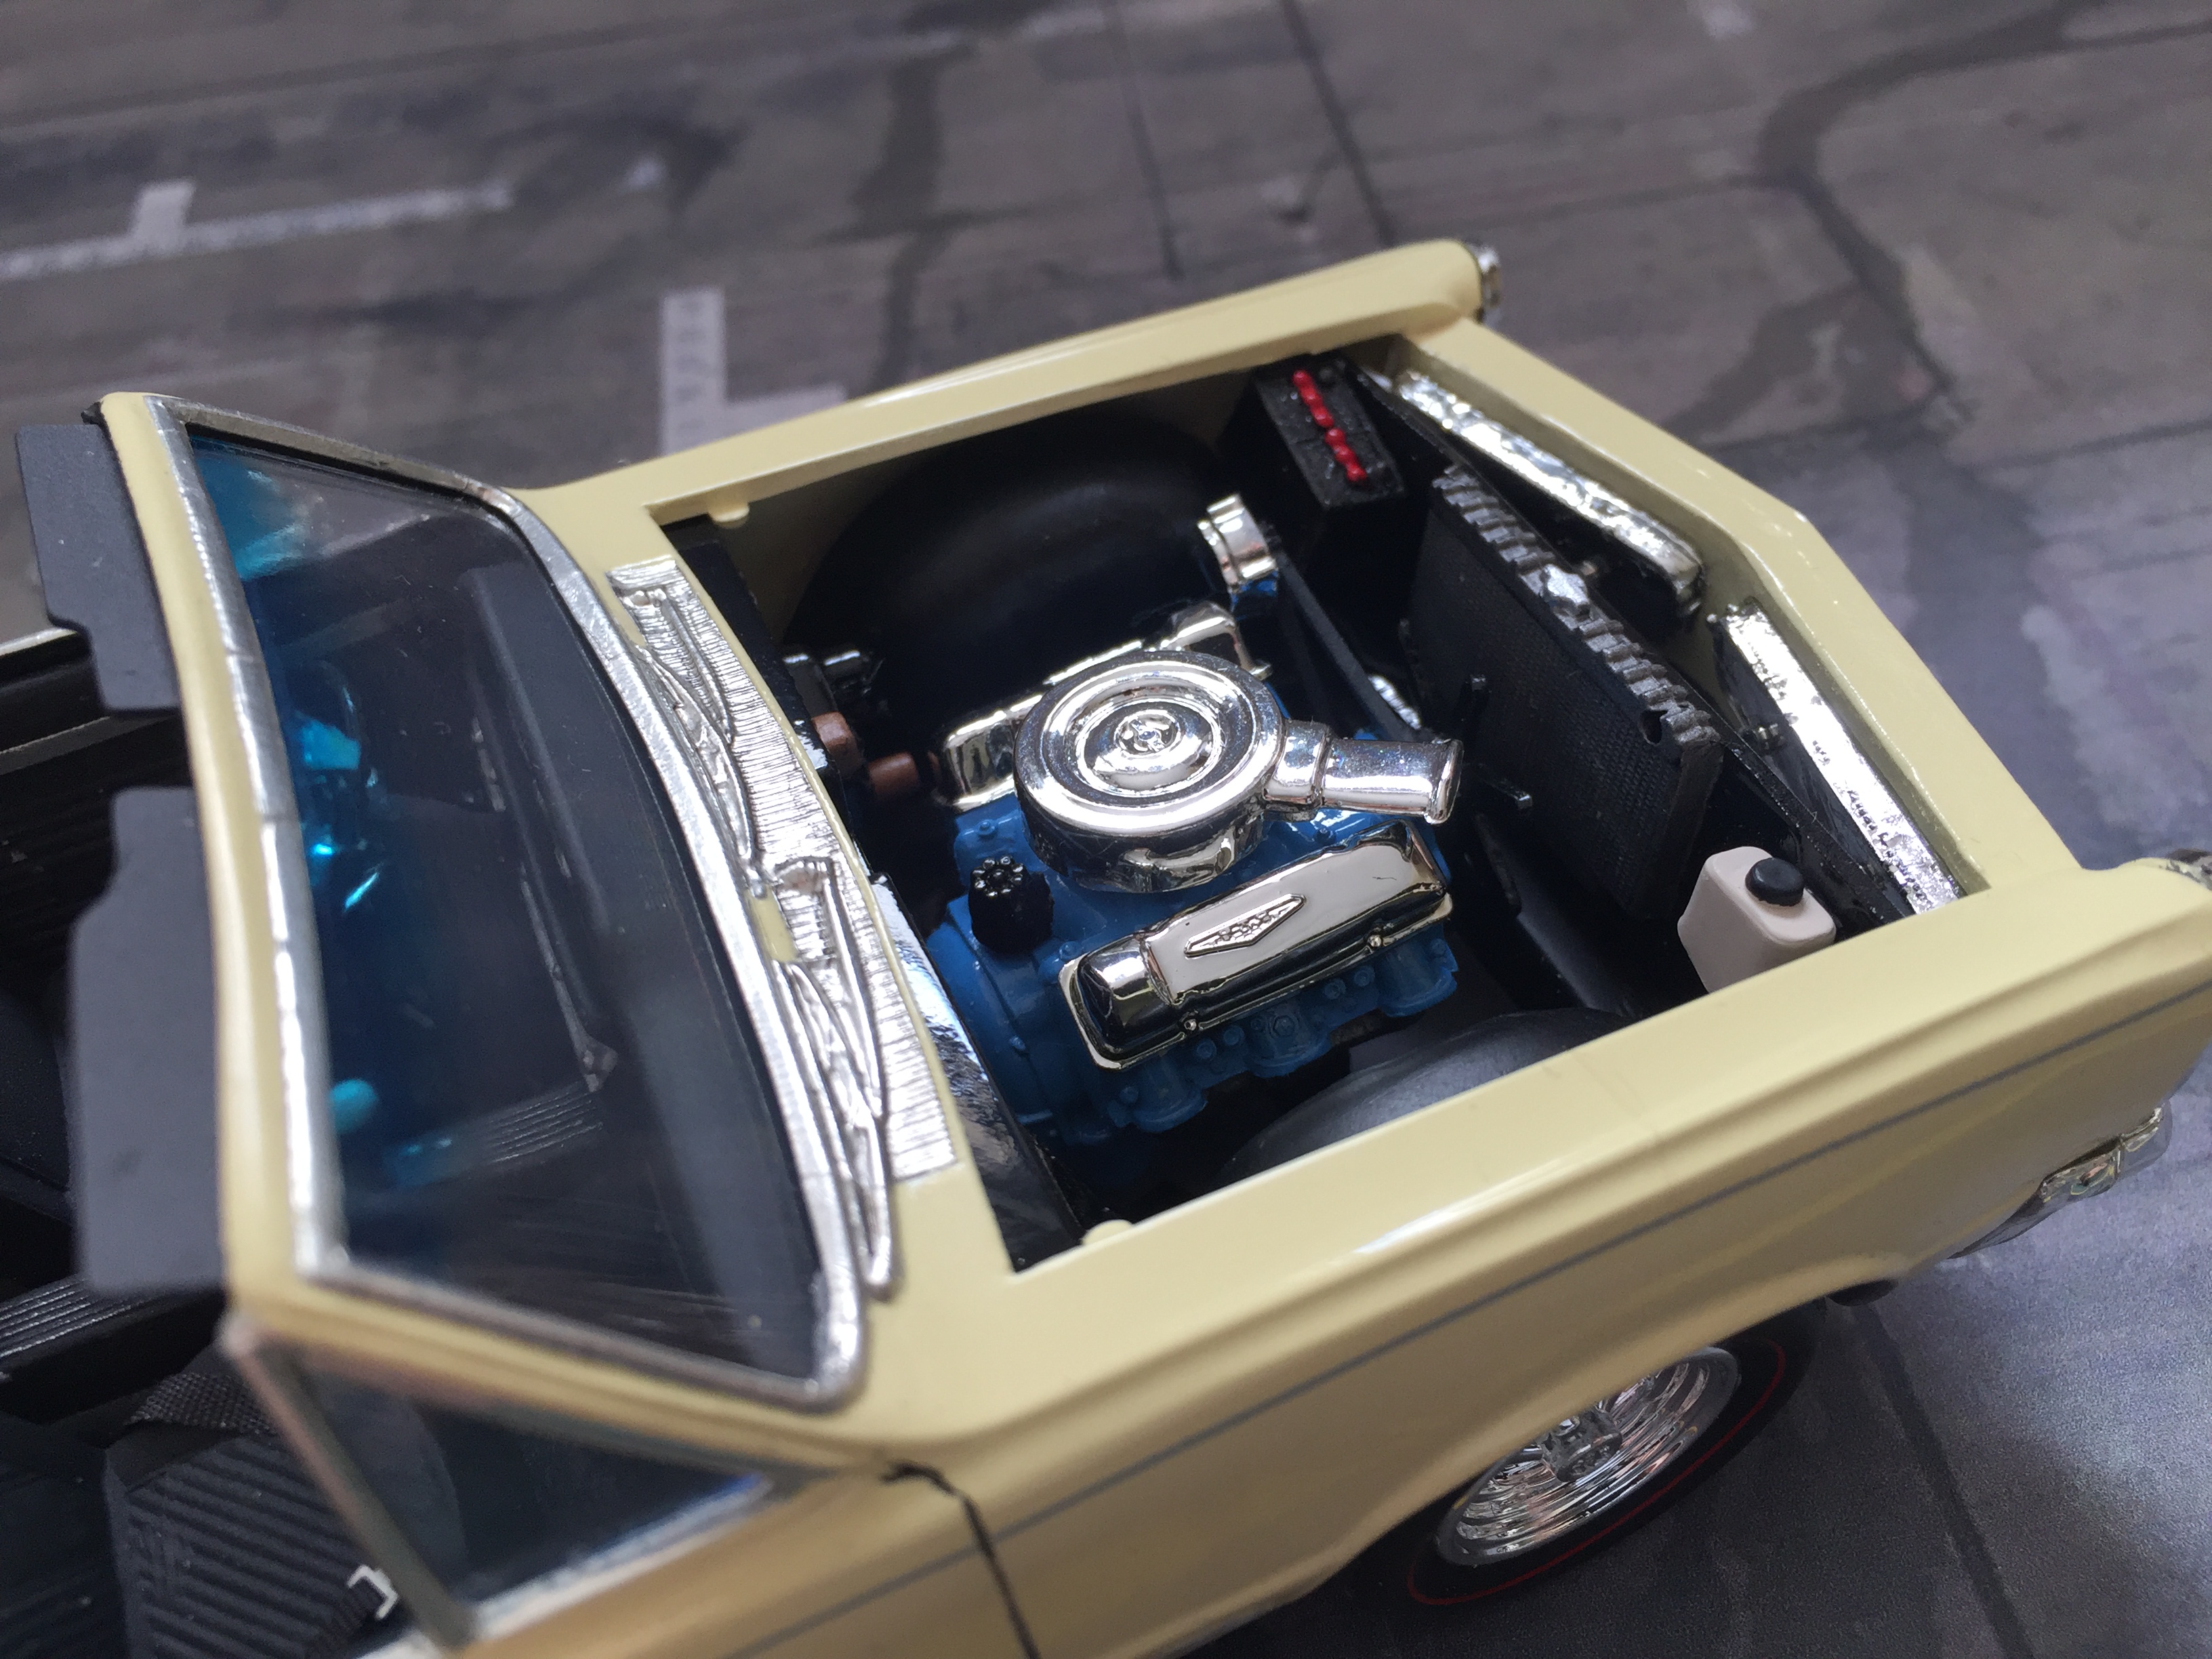
Hi folks, I just finished this goat... It's that old AMT kit, built rather out of the box, except for some small additions: I scratch-built the twin exhausts for both sides, using Evergreen tubes. Seat belts have been made from adhesive medical tape, which has been painted black with a pen. Belt buckles are PE aftermarket parts. Sun visors have been scratch-built from Evergreen card. Some flocking has been used to create a black "carpet" look on the floor. Gauges decals are from the parts bin, as are the mirrors. The glass effect on the headlights has been archieved with the aid of a very nice UV glue. The wheels are from the '66 Chevy Nova kit, the redlines were taken from an AMT aftermarket set. The thin silver pin stripe has been taken from a decal sheet. It's application was rather nerve-wracking and, at times, made me breath harder than Hector Salamanca... Anyways, I hope you like it:
-
This is what I bought some time ago. Pick the silver color, it doesn't look too bad: https://www.ebay.com/itm/Wholesale-10M-Rubber-Chinese-Knot-Satin-Macrame-Beading-Jewelry-Rattail-Cords/322528417816?hash=item4b18311818:m:mj3-5ibtqB4K_mqd3M9DtcA
-
tamiya candy lime green over black
Tommy124 replied to youpey's topic in Model Building Questions and Answers
I think Ford Lime Gold would be quite a good match. And it's available from model color specialists such as Gravity Colors, which means that the metallic flakes should be in scale - unlike automotive sprays which are made for 1:1. And I would use something darker than white as a primer, grey probably, to tone it down a bit. -
Very nice. I also like the interior. Surprised you didn't find the mags in the box, they should be in there (at least for the Round2 release)...?