Tommy124
-
Posts
1,648 -
Joined
-
Last visited
Content Type
Profiles
Forums
Events
Gallery
Everything posted by Tommy124
-
 CobraBird??
 -
That's right. At least in Germany these very same booths come with 2 types of filters. One that is blue on the front and white on the reverse side and behind that there is a greyish one. The blue/ white one is for absorbing the spray mist and the grey one for the fumes. According to the German manual, you can leave the blue/ white one completely if you use an exhaust air hose. That will also increase the performance in suction because the airflow has less resistance.
-
I used the same stuff first but find that it takes "ages" to dry. That's why I switched to using water-soluble, transparent craft glue. I simply apply that with a brush on the BMF parts which are inside the body and it will dry shortly and hold the BMF in place just fine. After that, I clean the brush with plain water.
-
Great product for replicating Vinyl tops!!!
Tommy124 replied to cruz's topic in Tips, Tricks, and Tutorials
I would say that this is the most traditional or conventional way of self-making the vinyl structure. It sure works fine for a lot of people. But you spray the paint at a very late stage when the body is already (more or less) finished. So you'll either have to live with the result or possibly correct it on the almost-finished body. IMHO the upside of the "glue method" is that at an early stage you can see and define the way the structure will actually be. If you find the structure to be too "coarse", you stand still sand it down before any body color has yet been applied. And in the end all you'll have to do is properly mask the body and paint the top matt black. -
Sorry, I meant the line on the headlight housing...
-
Hi Nathan, let me the the first one to gratulate you on this great build. You have really reached a great level of detailing, as you set out to do. Handling those old decals sure wasn't easy but you managed to do that aswell. The engine compartment is looking great and "busy" - something that most Tamiya Group C car kits are lacking when built OOB. Also you have considered the silver trim lines on the outer tail light glass housing. Did you you paint this or do it by BMF?
-
Well... that was 13 years ago...
-
Real nice work!
-
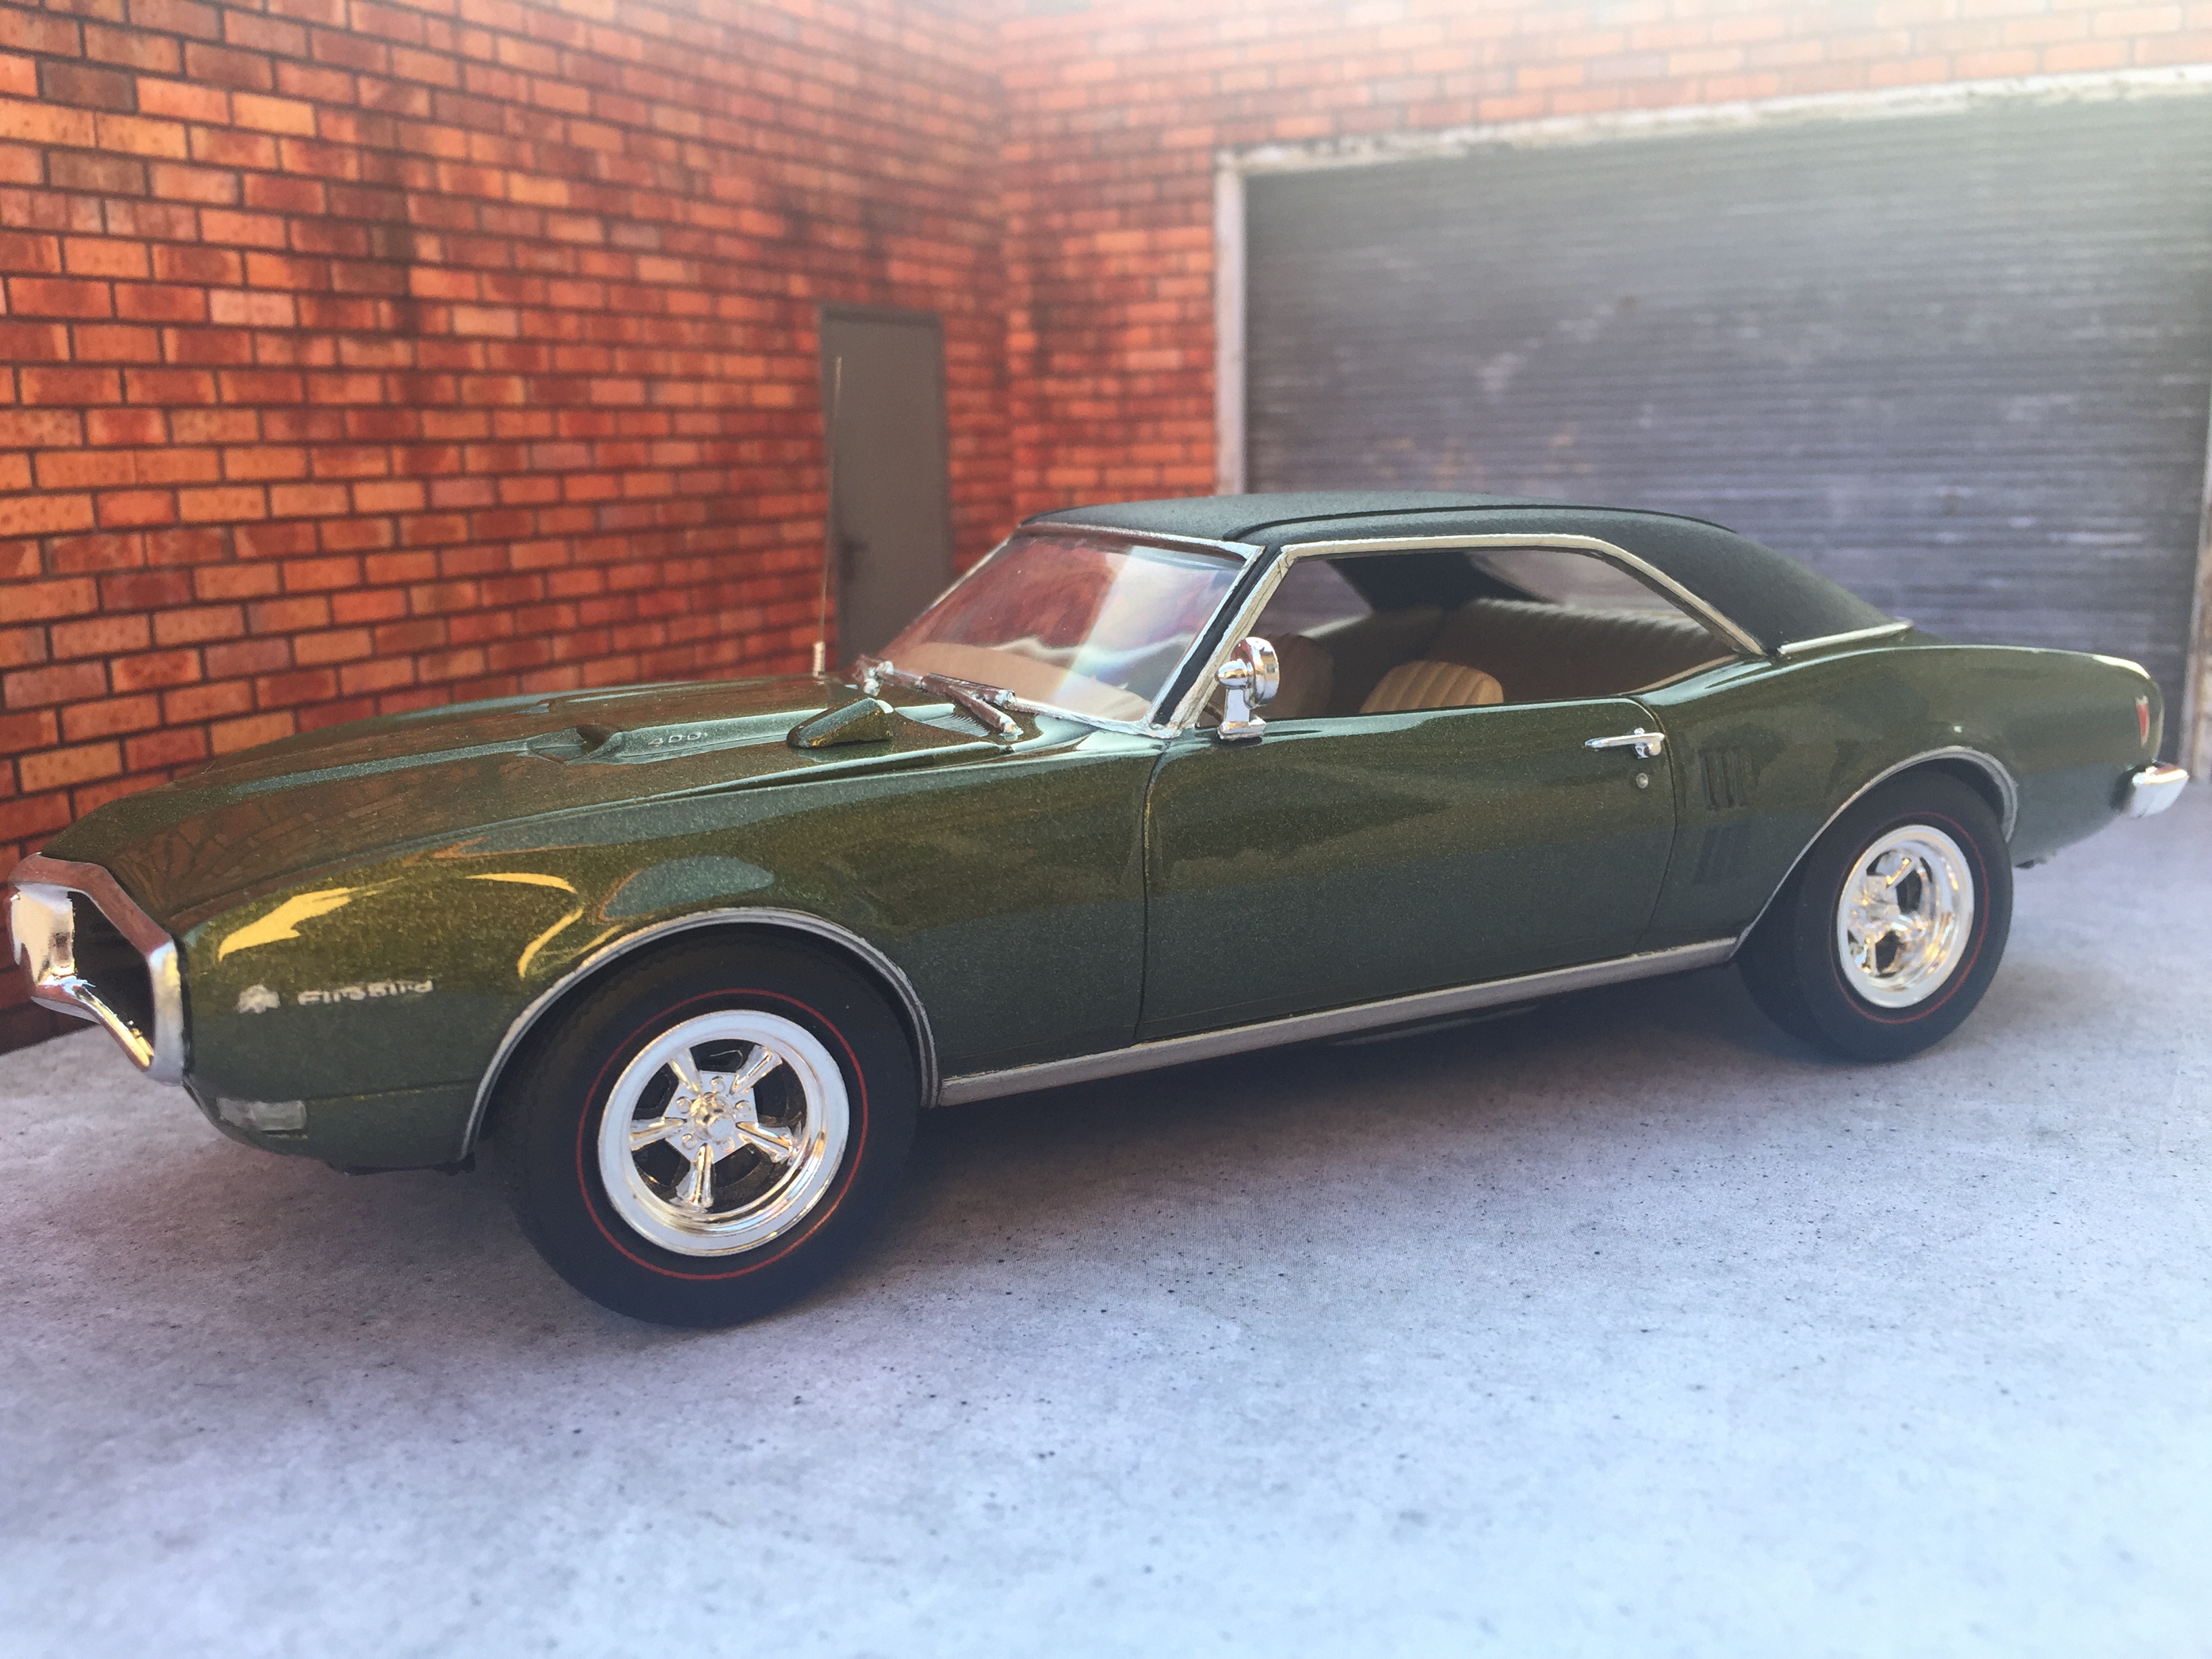
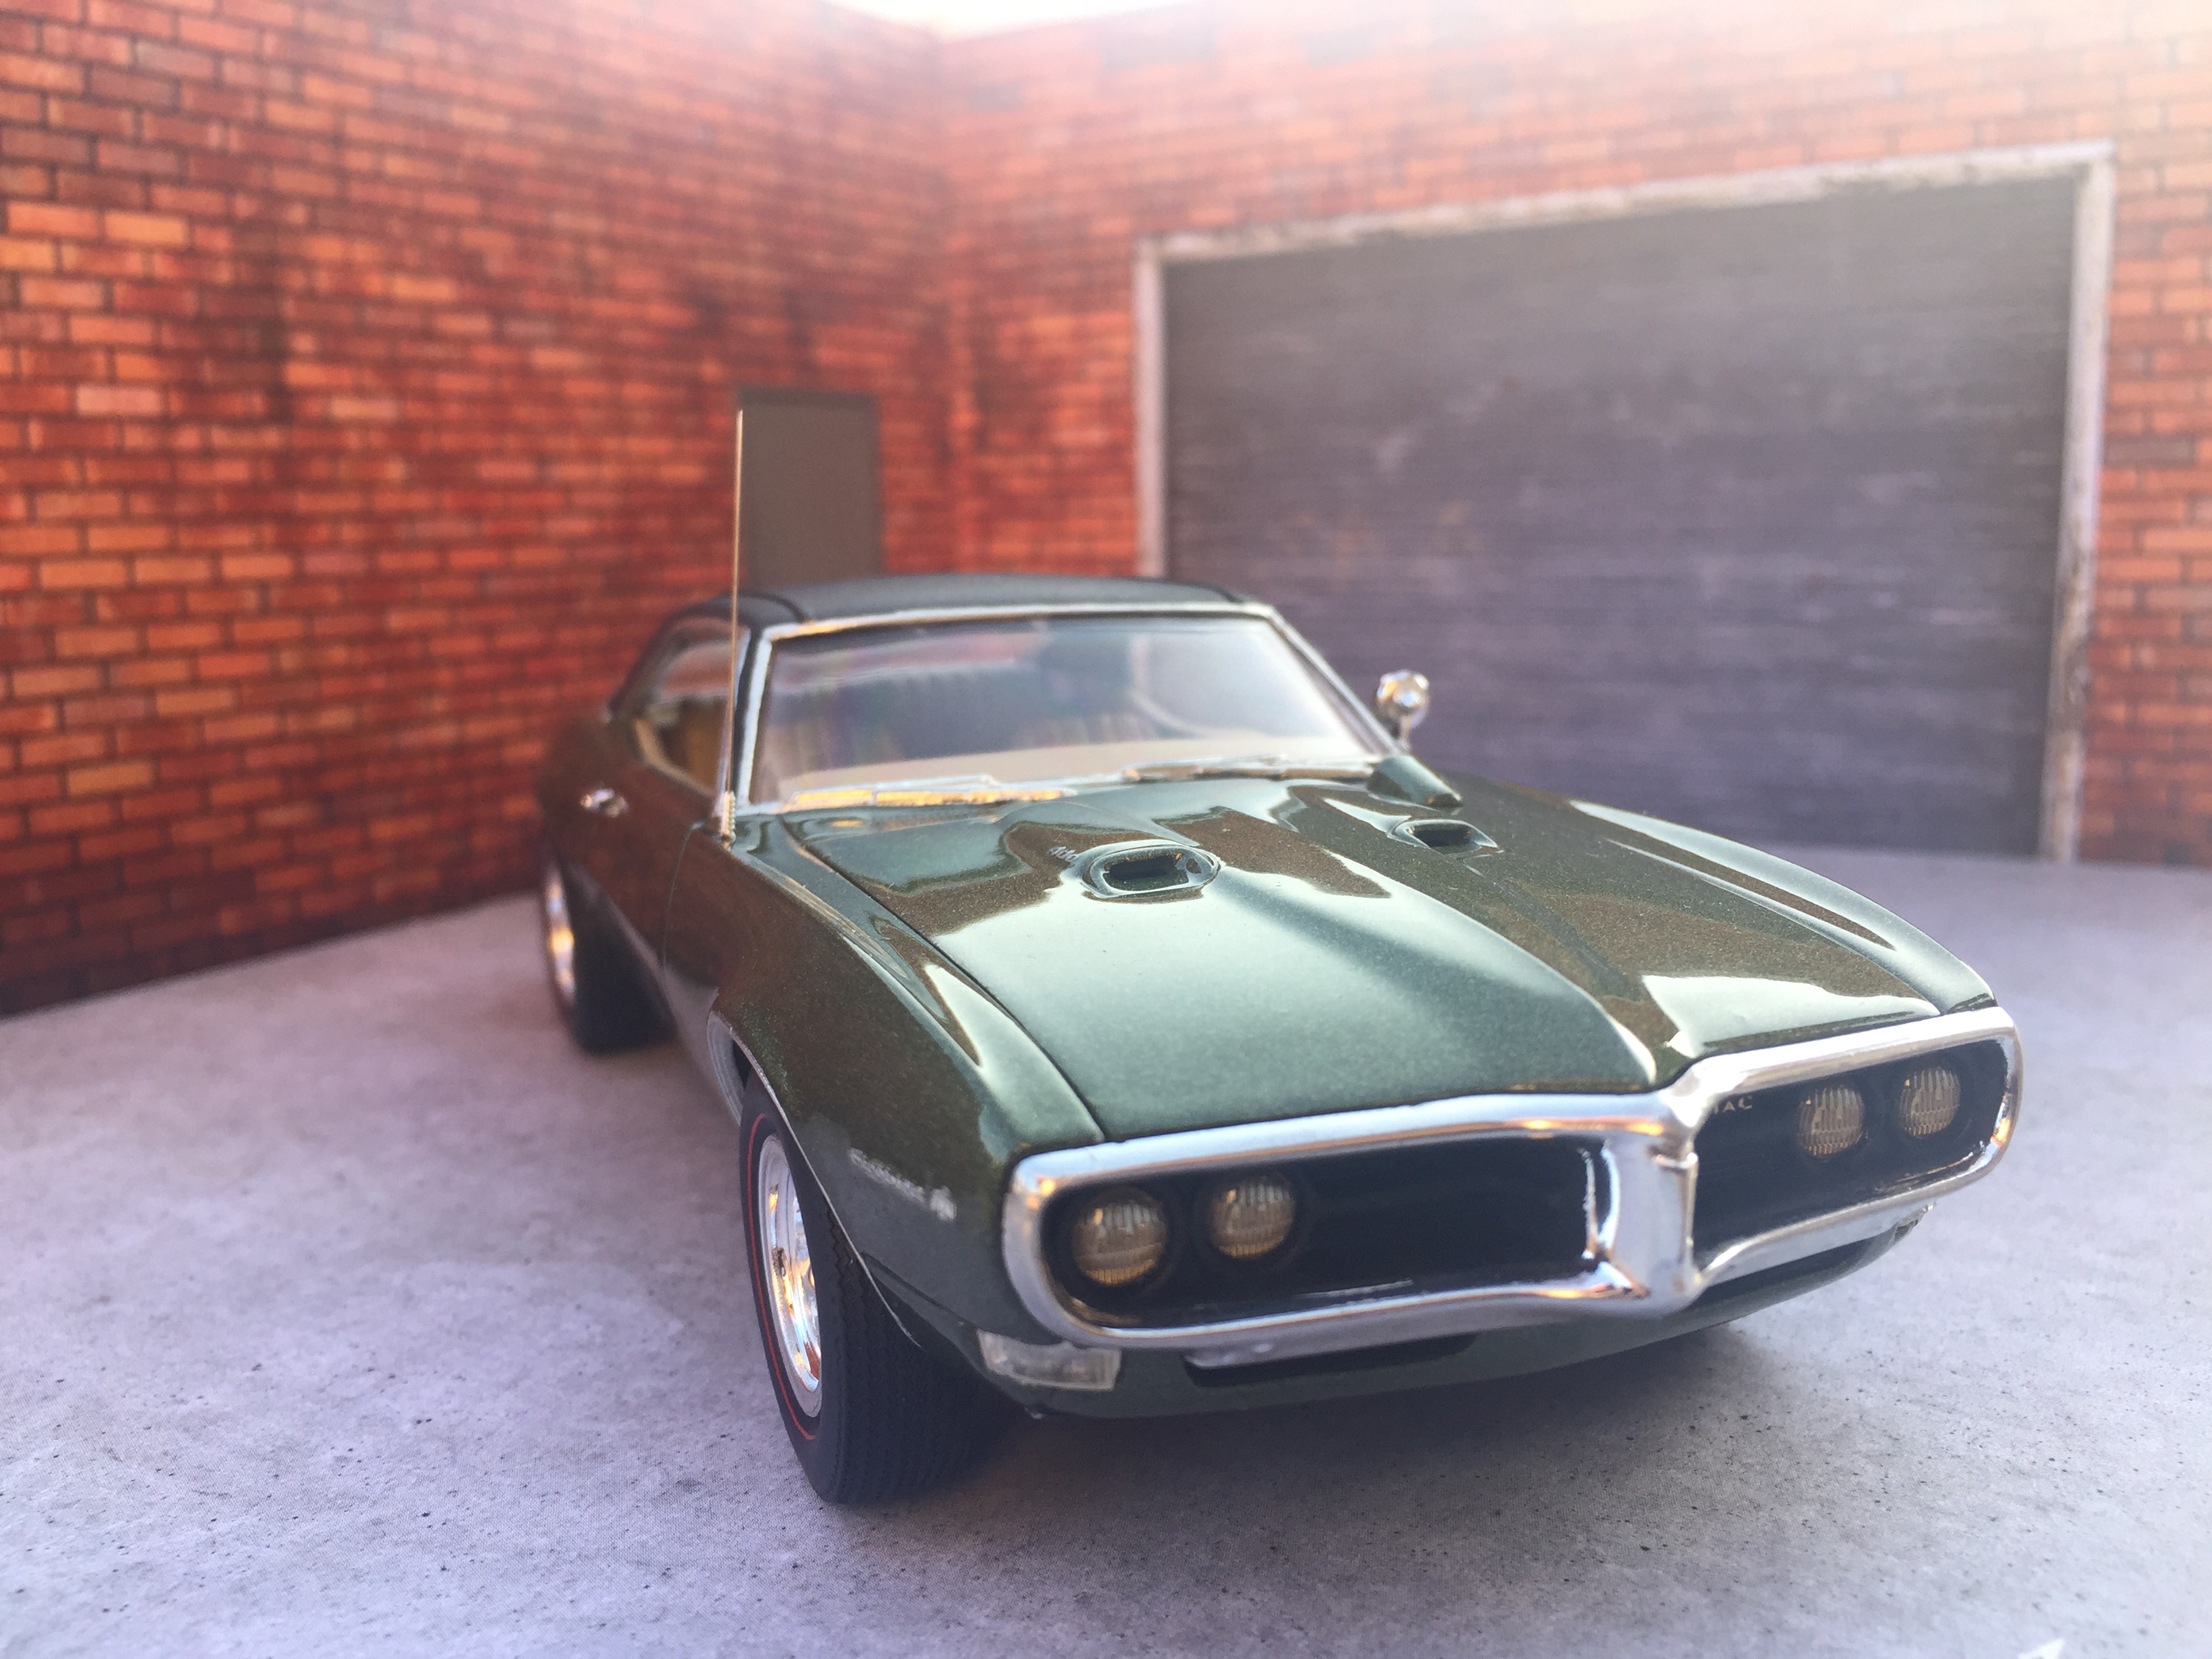
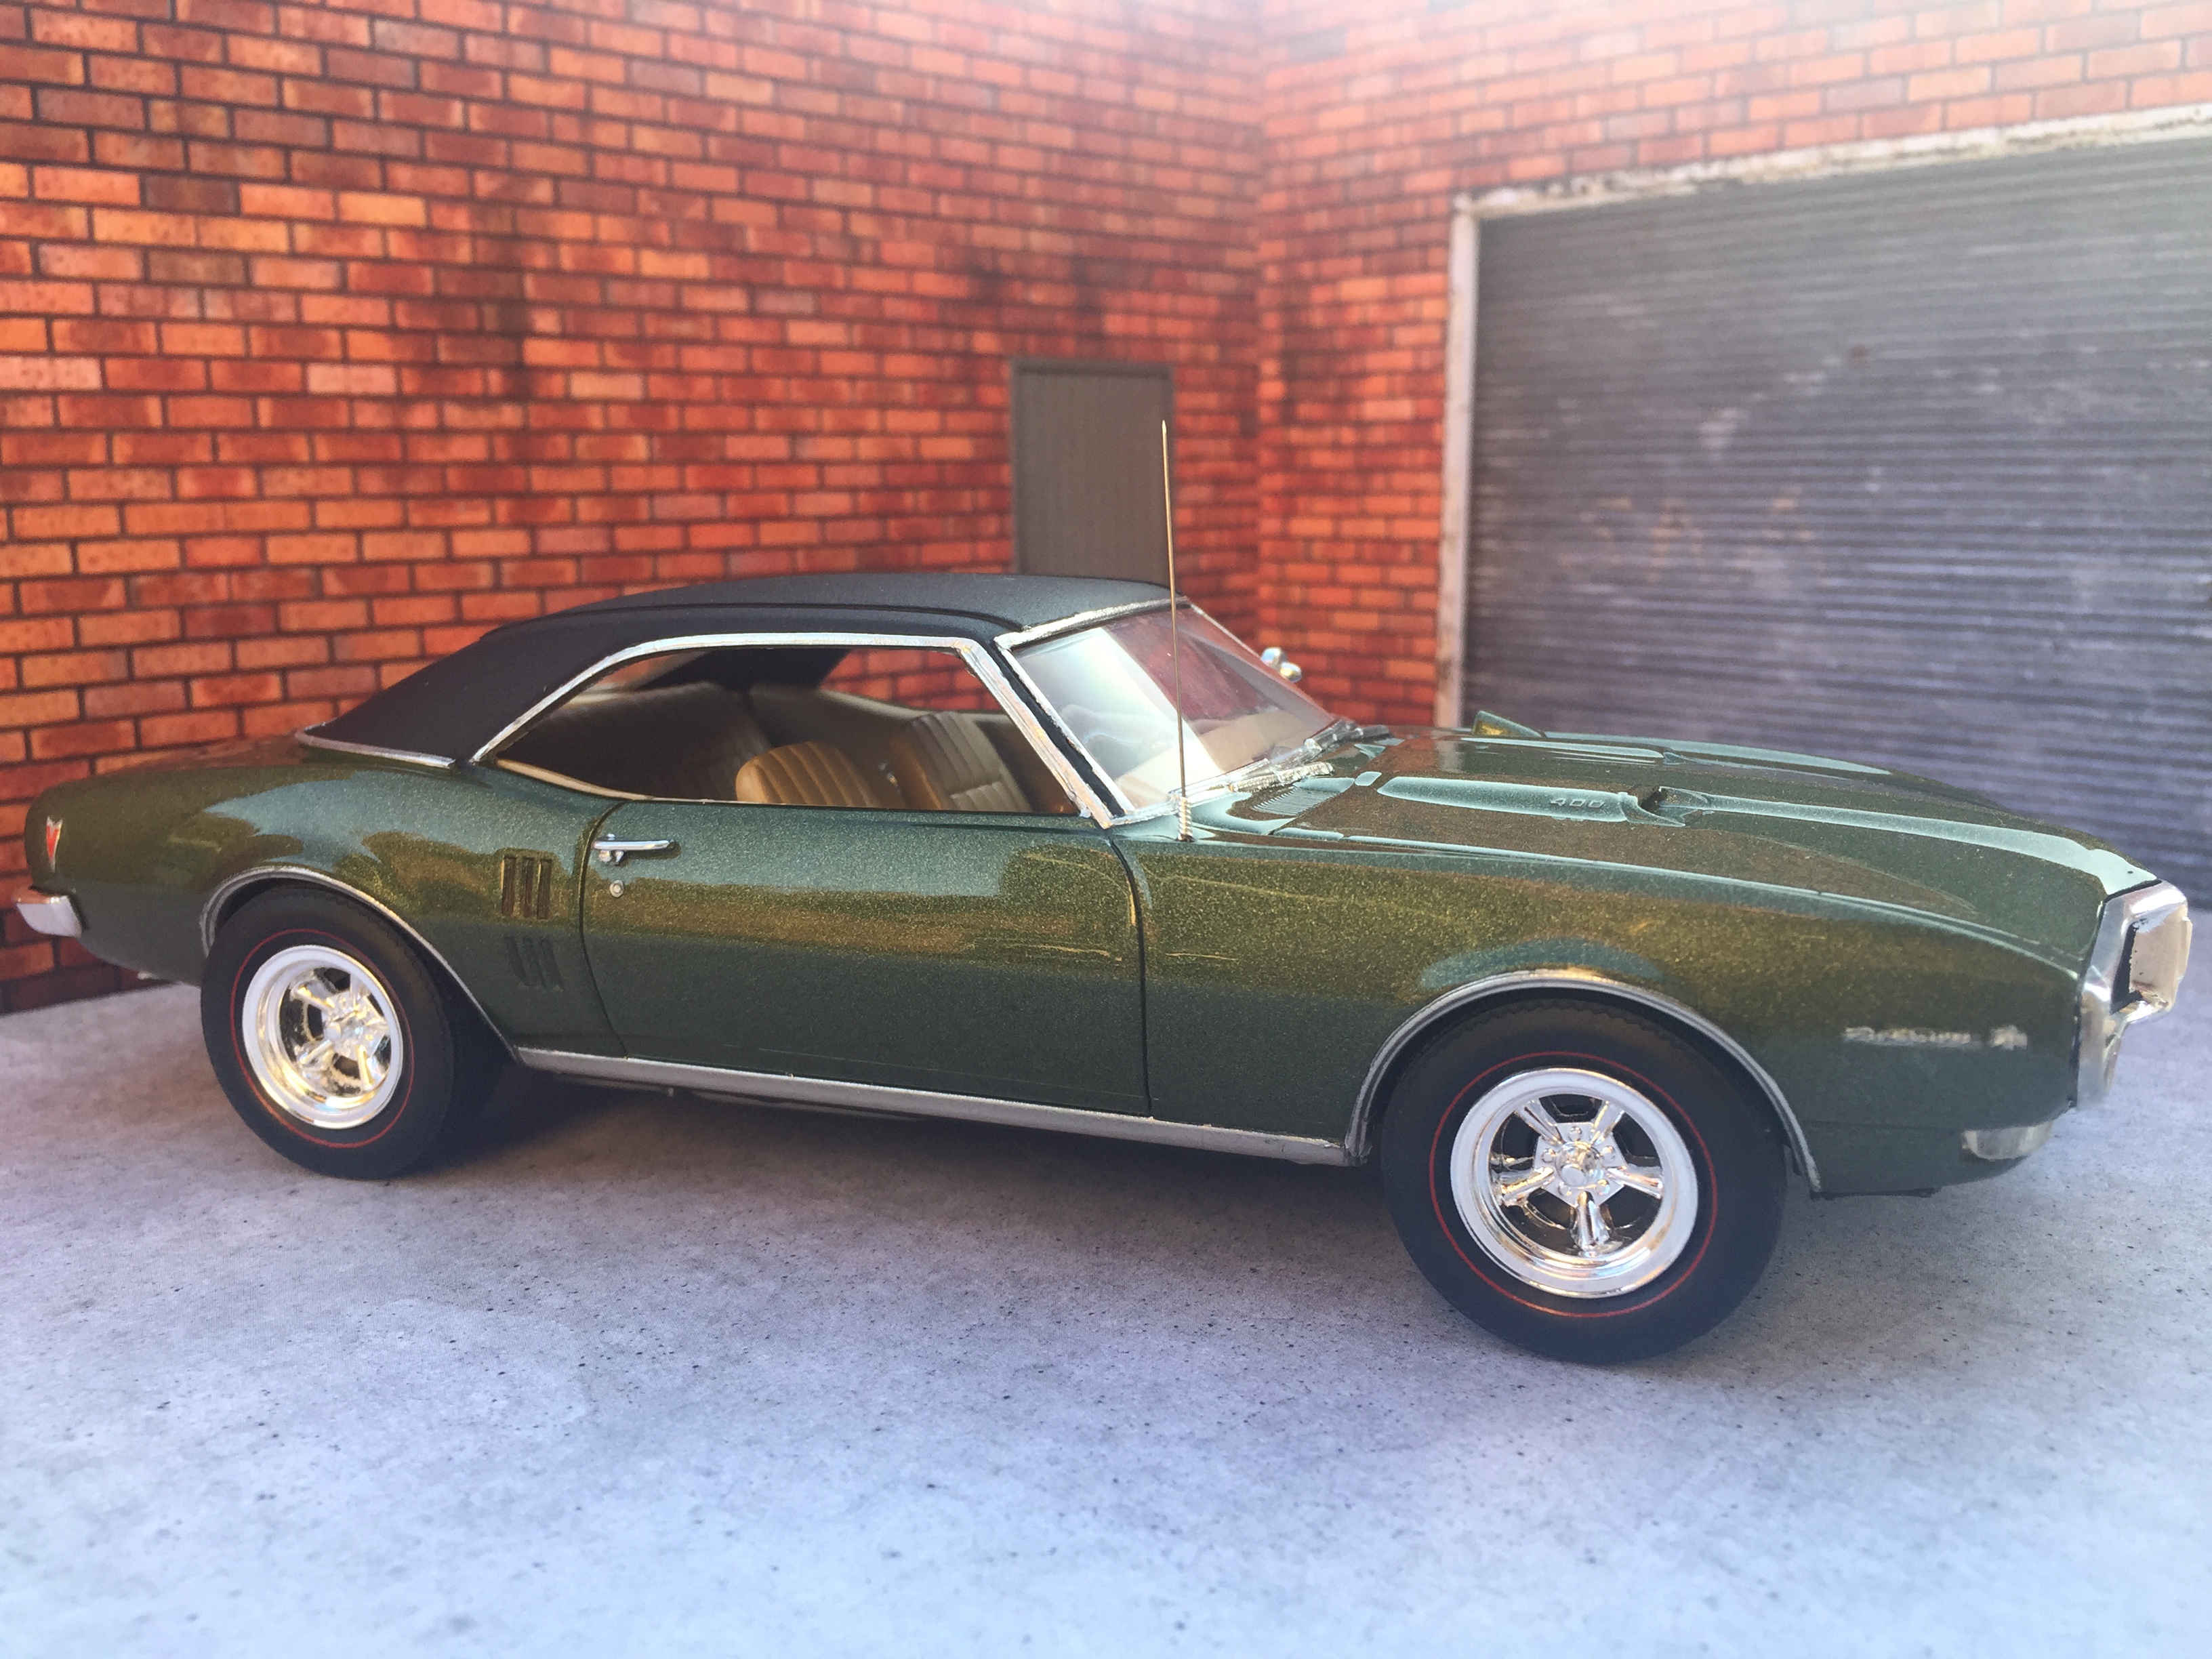
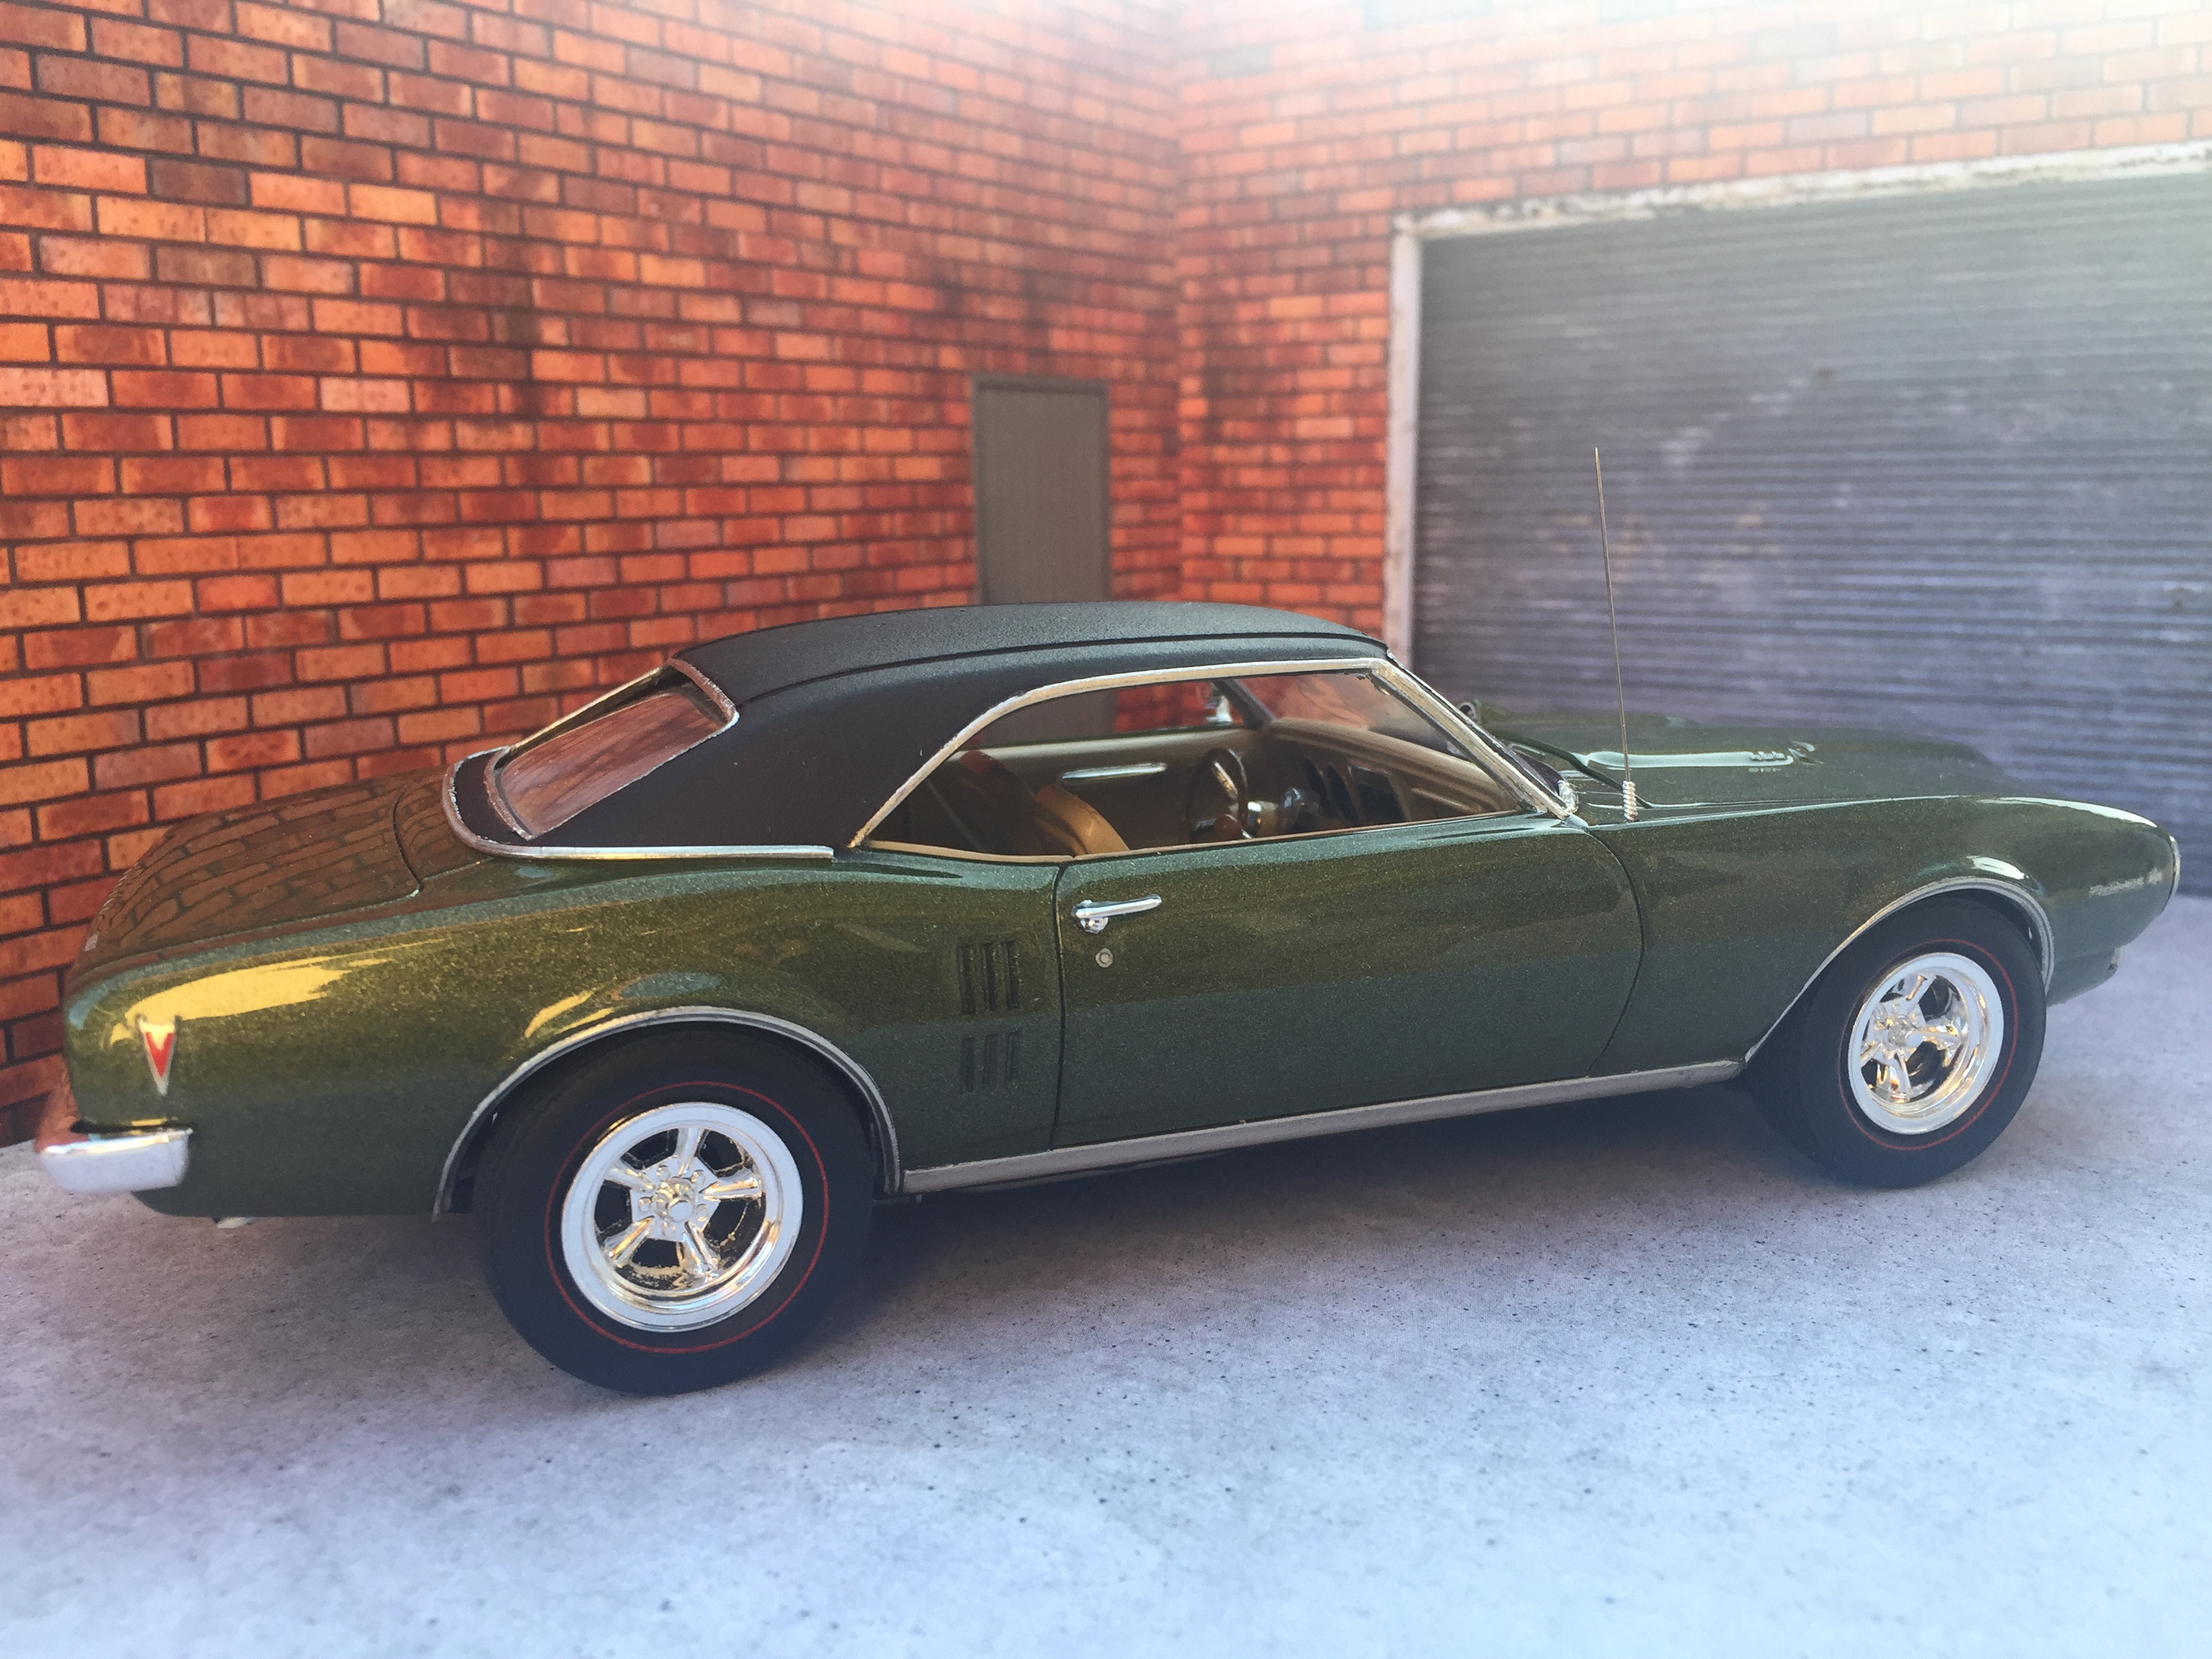
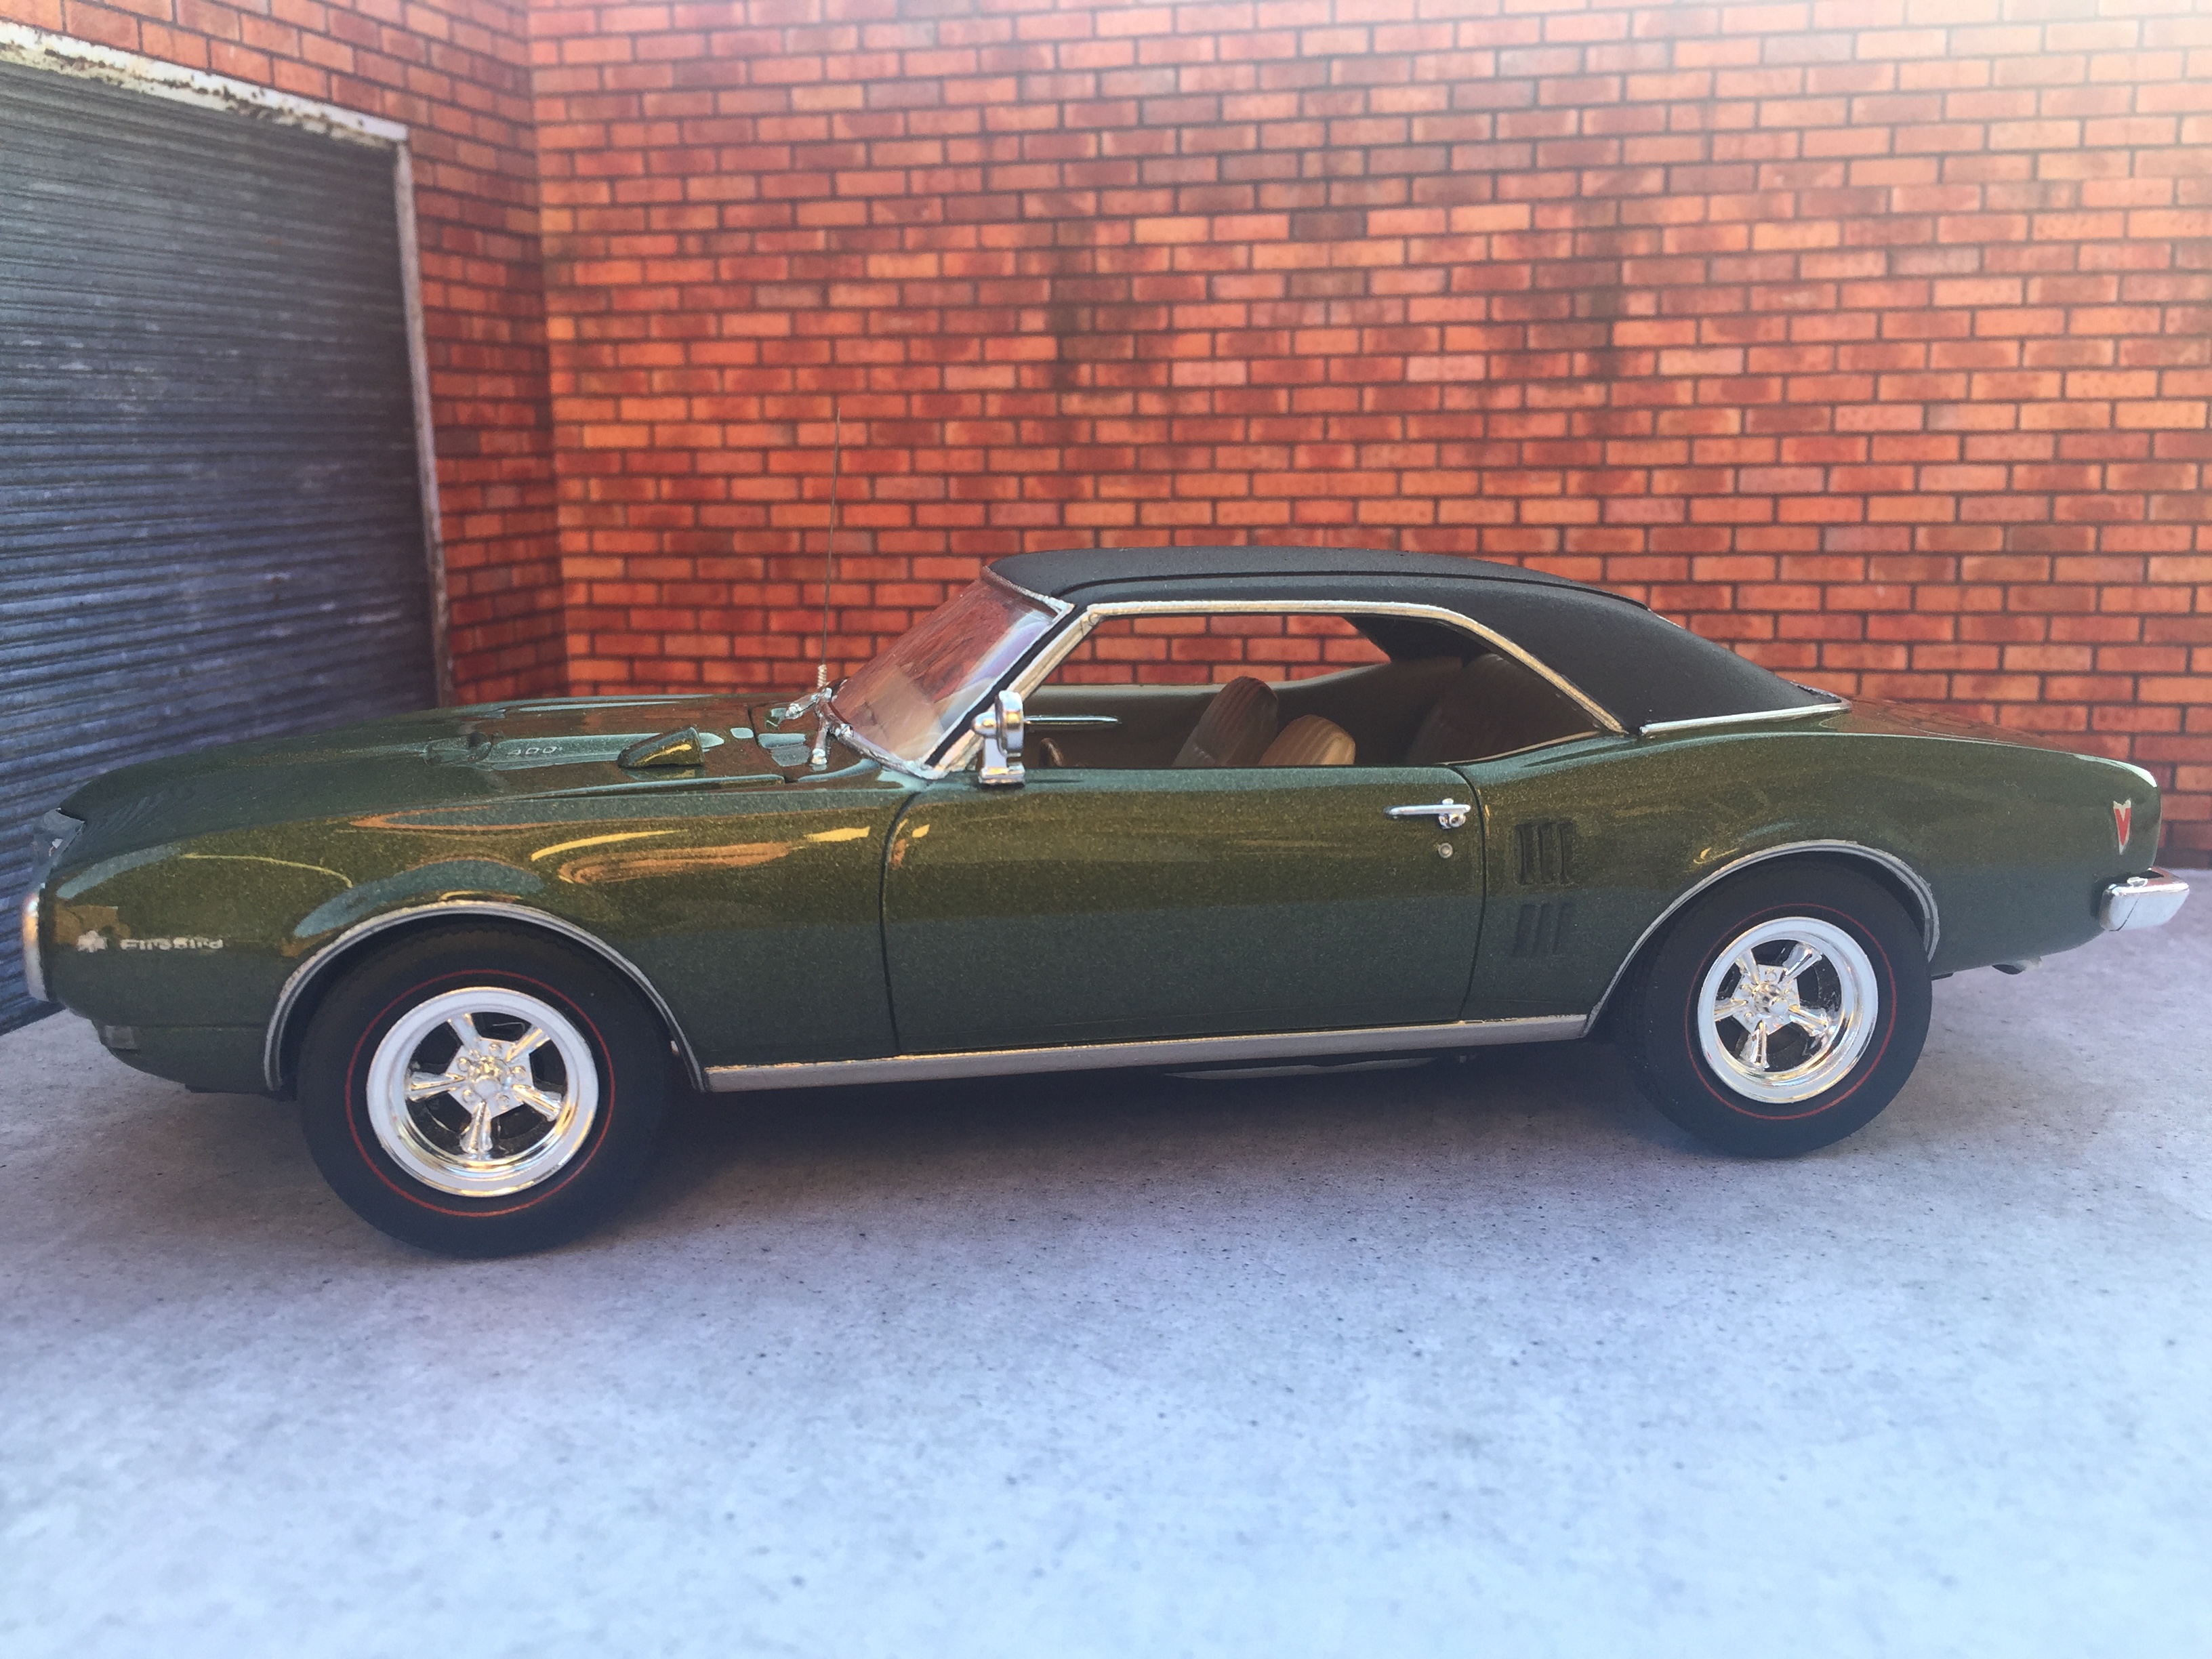
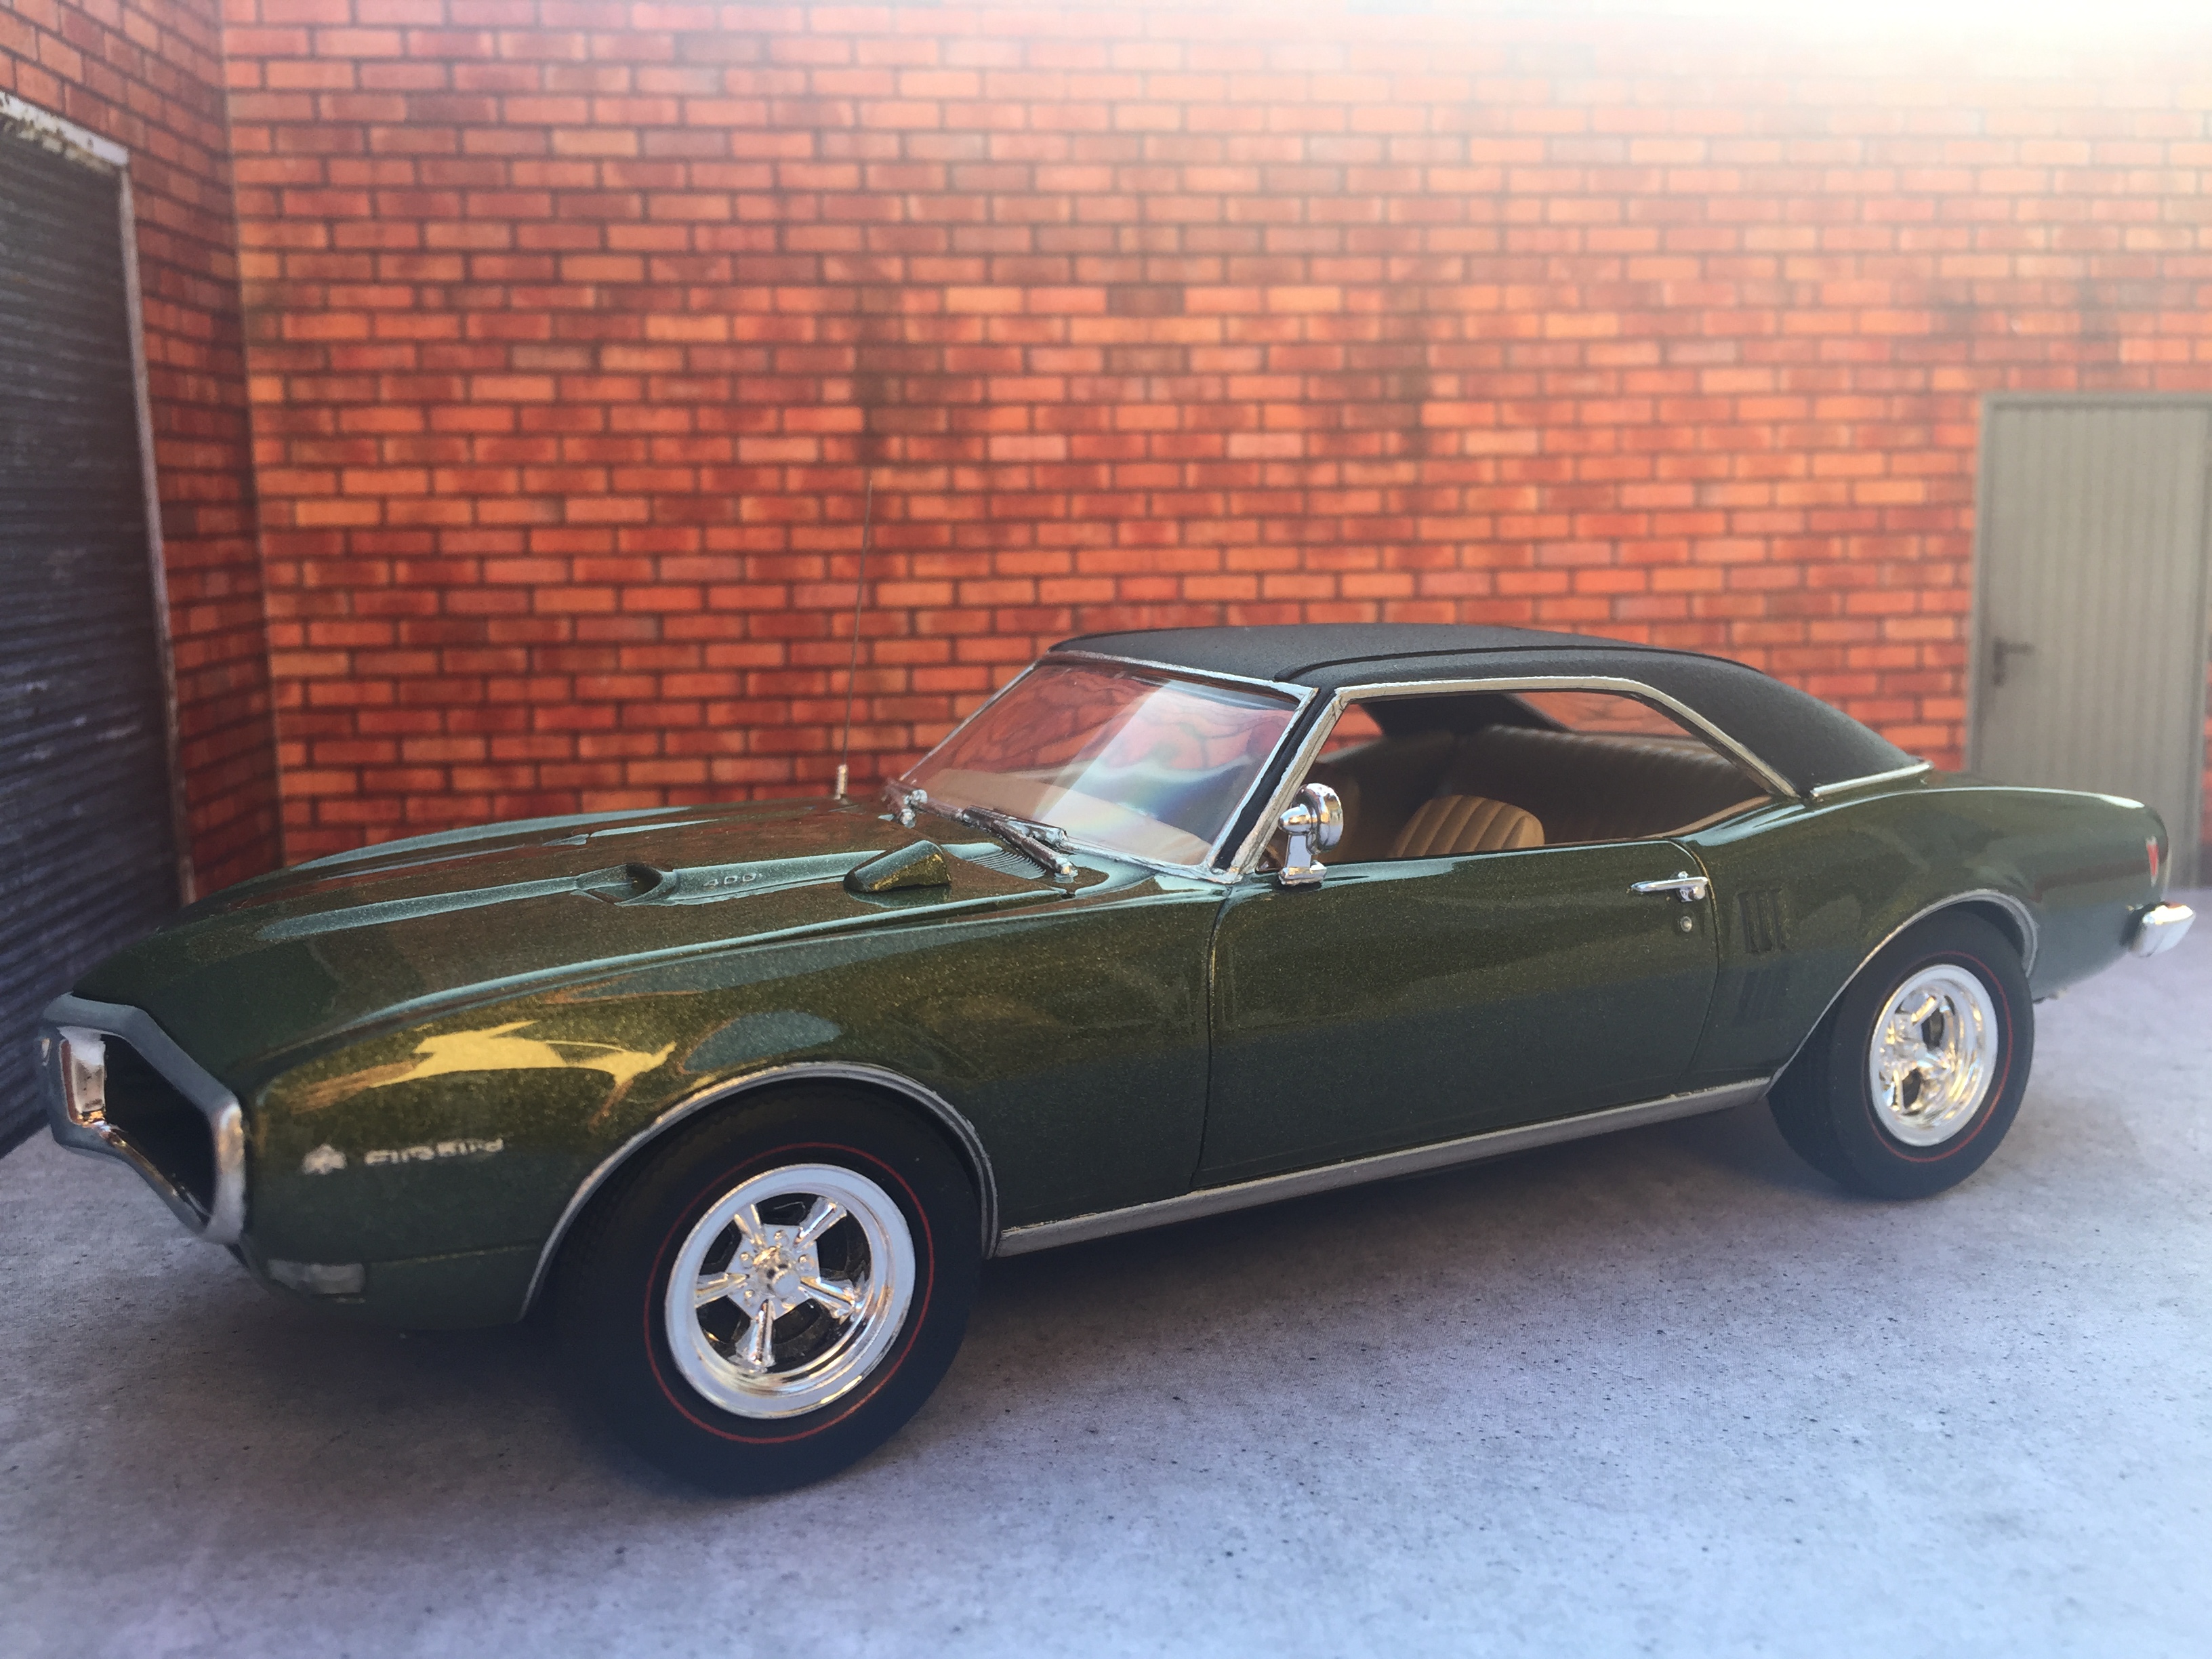
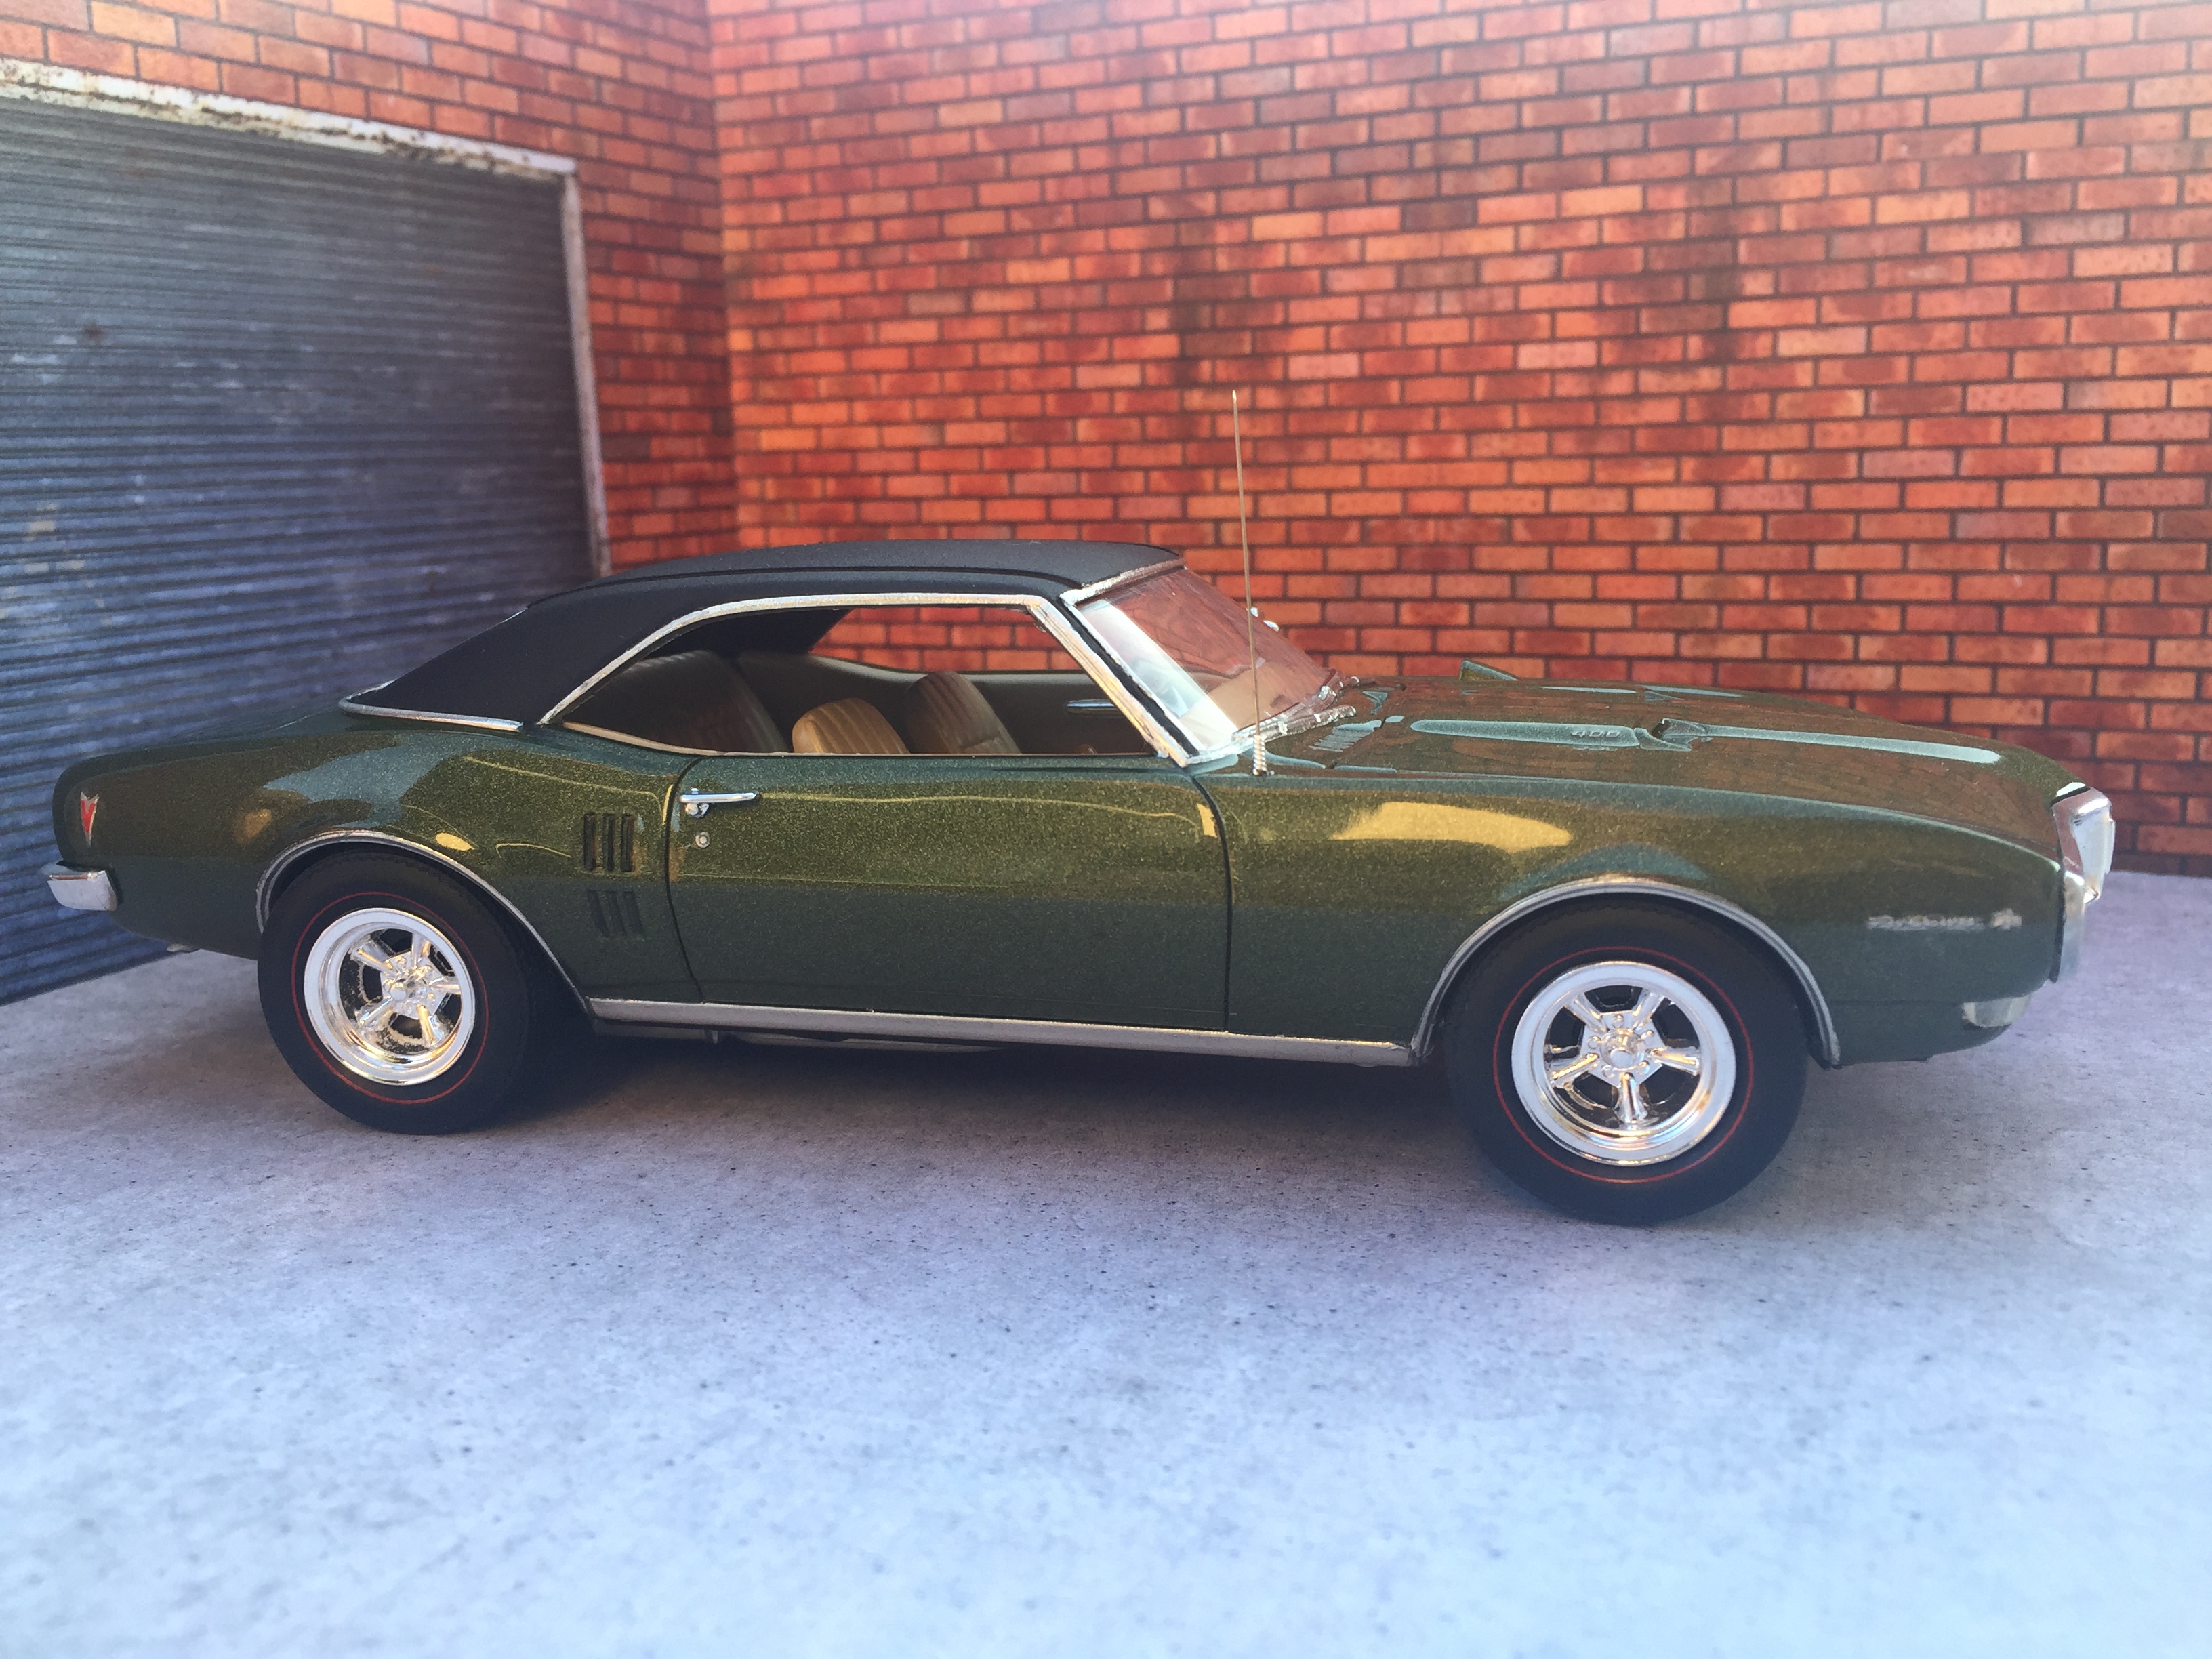
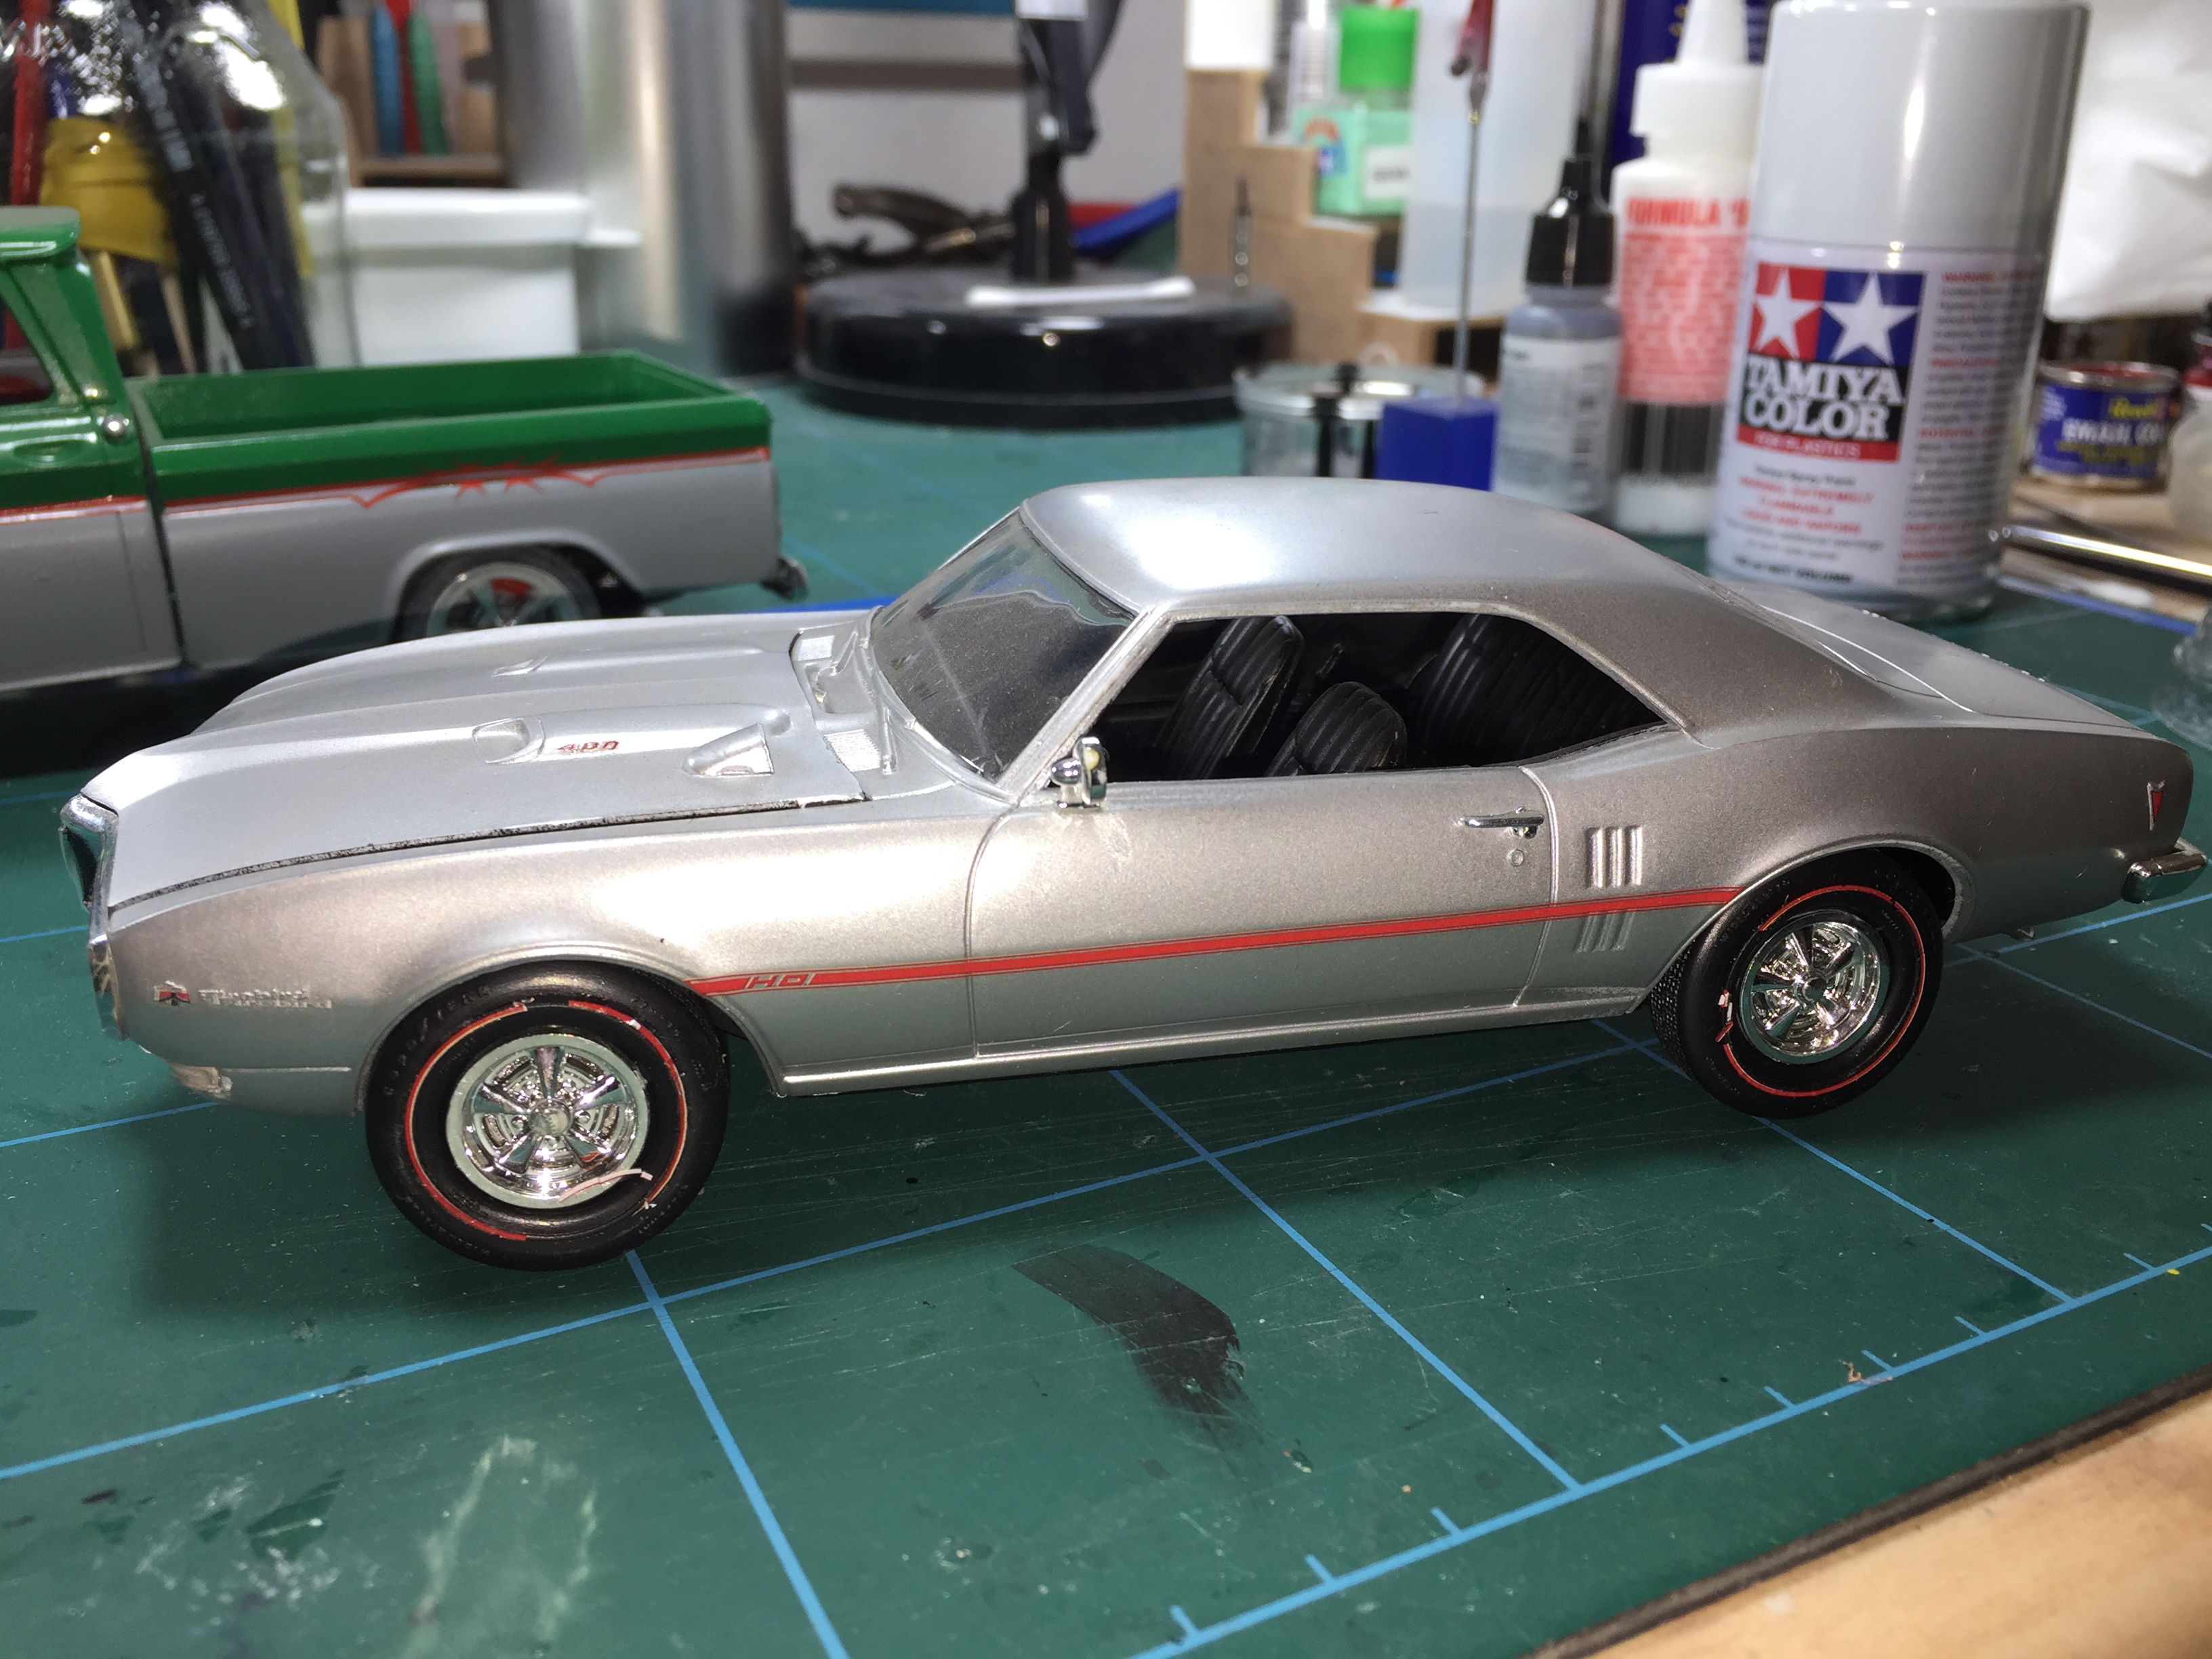
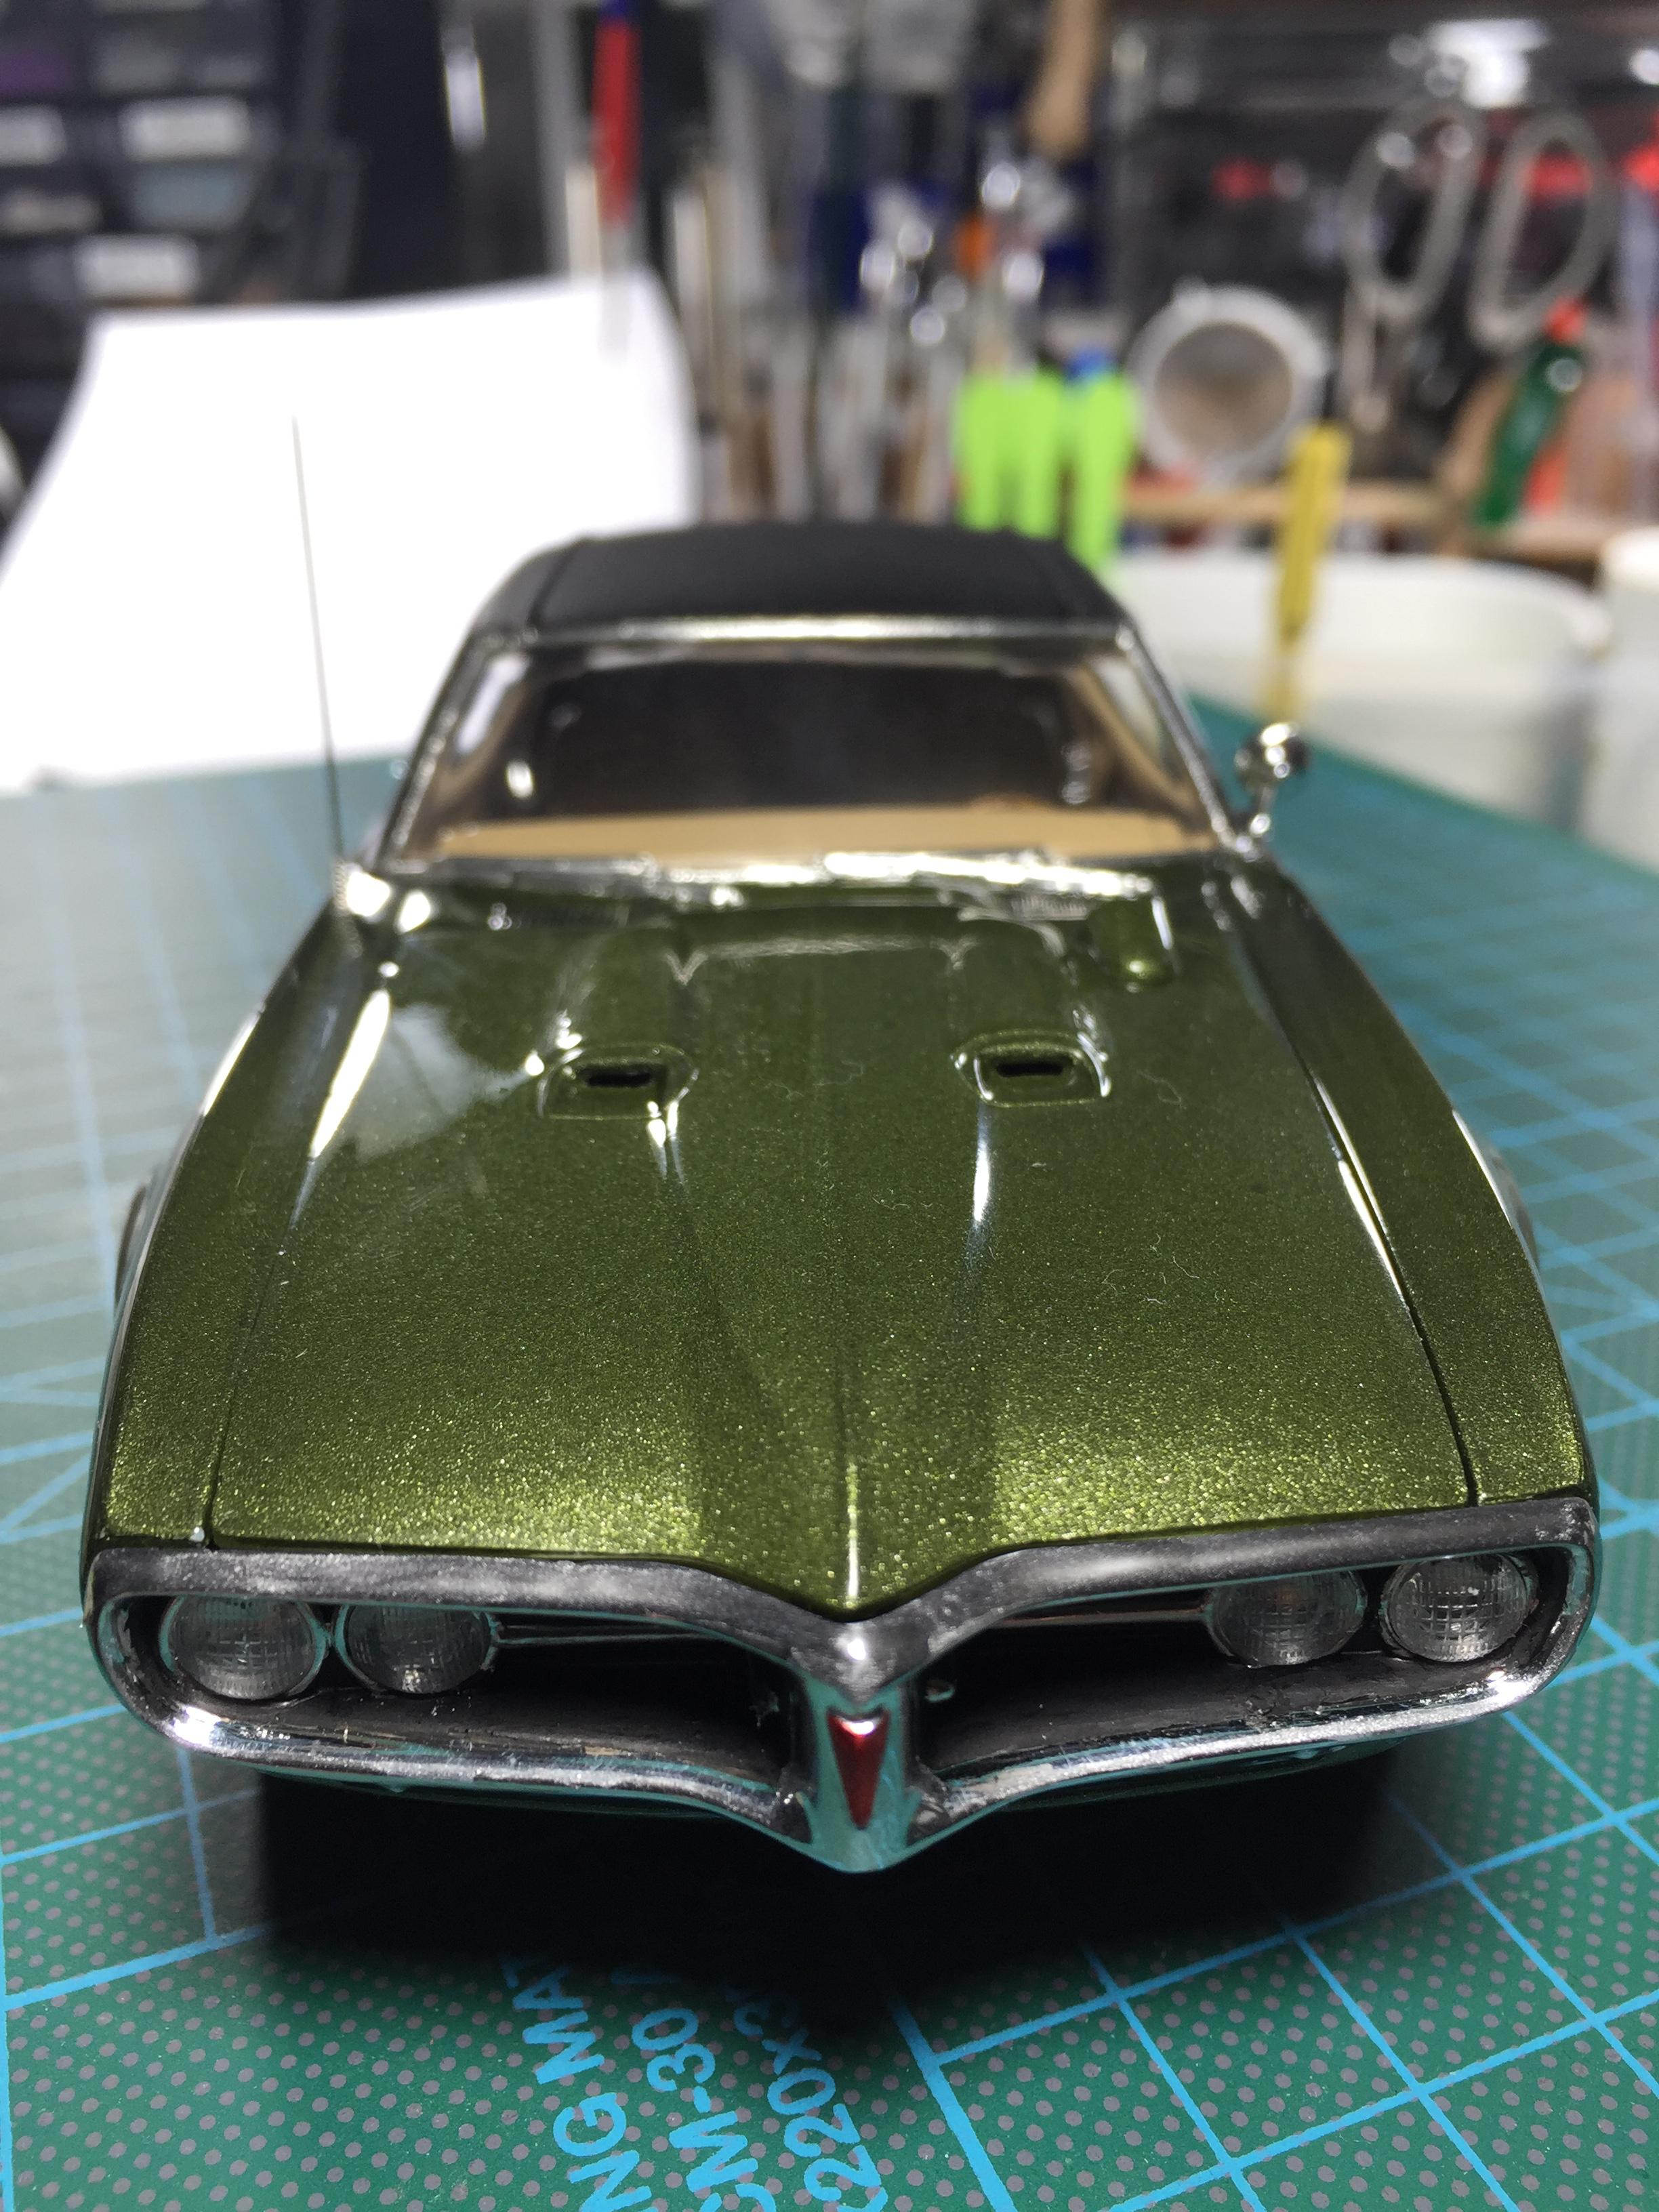
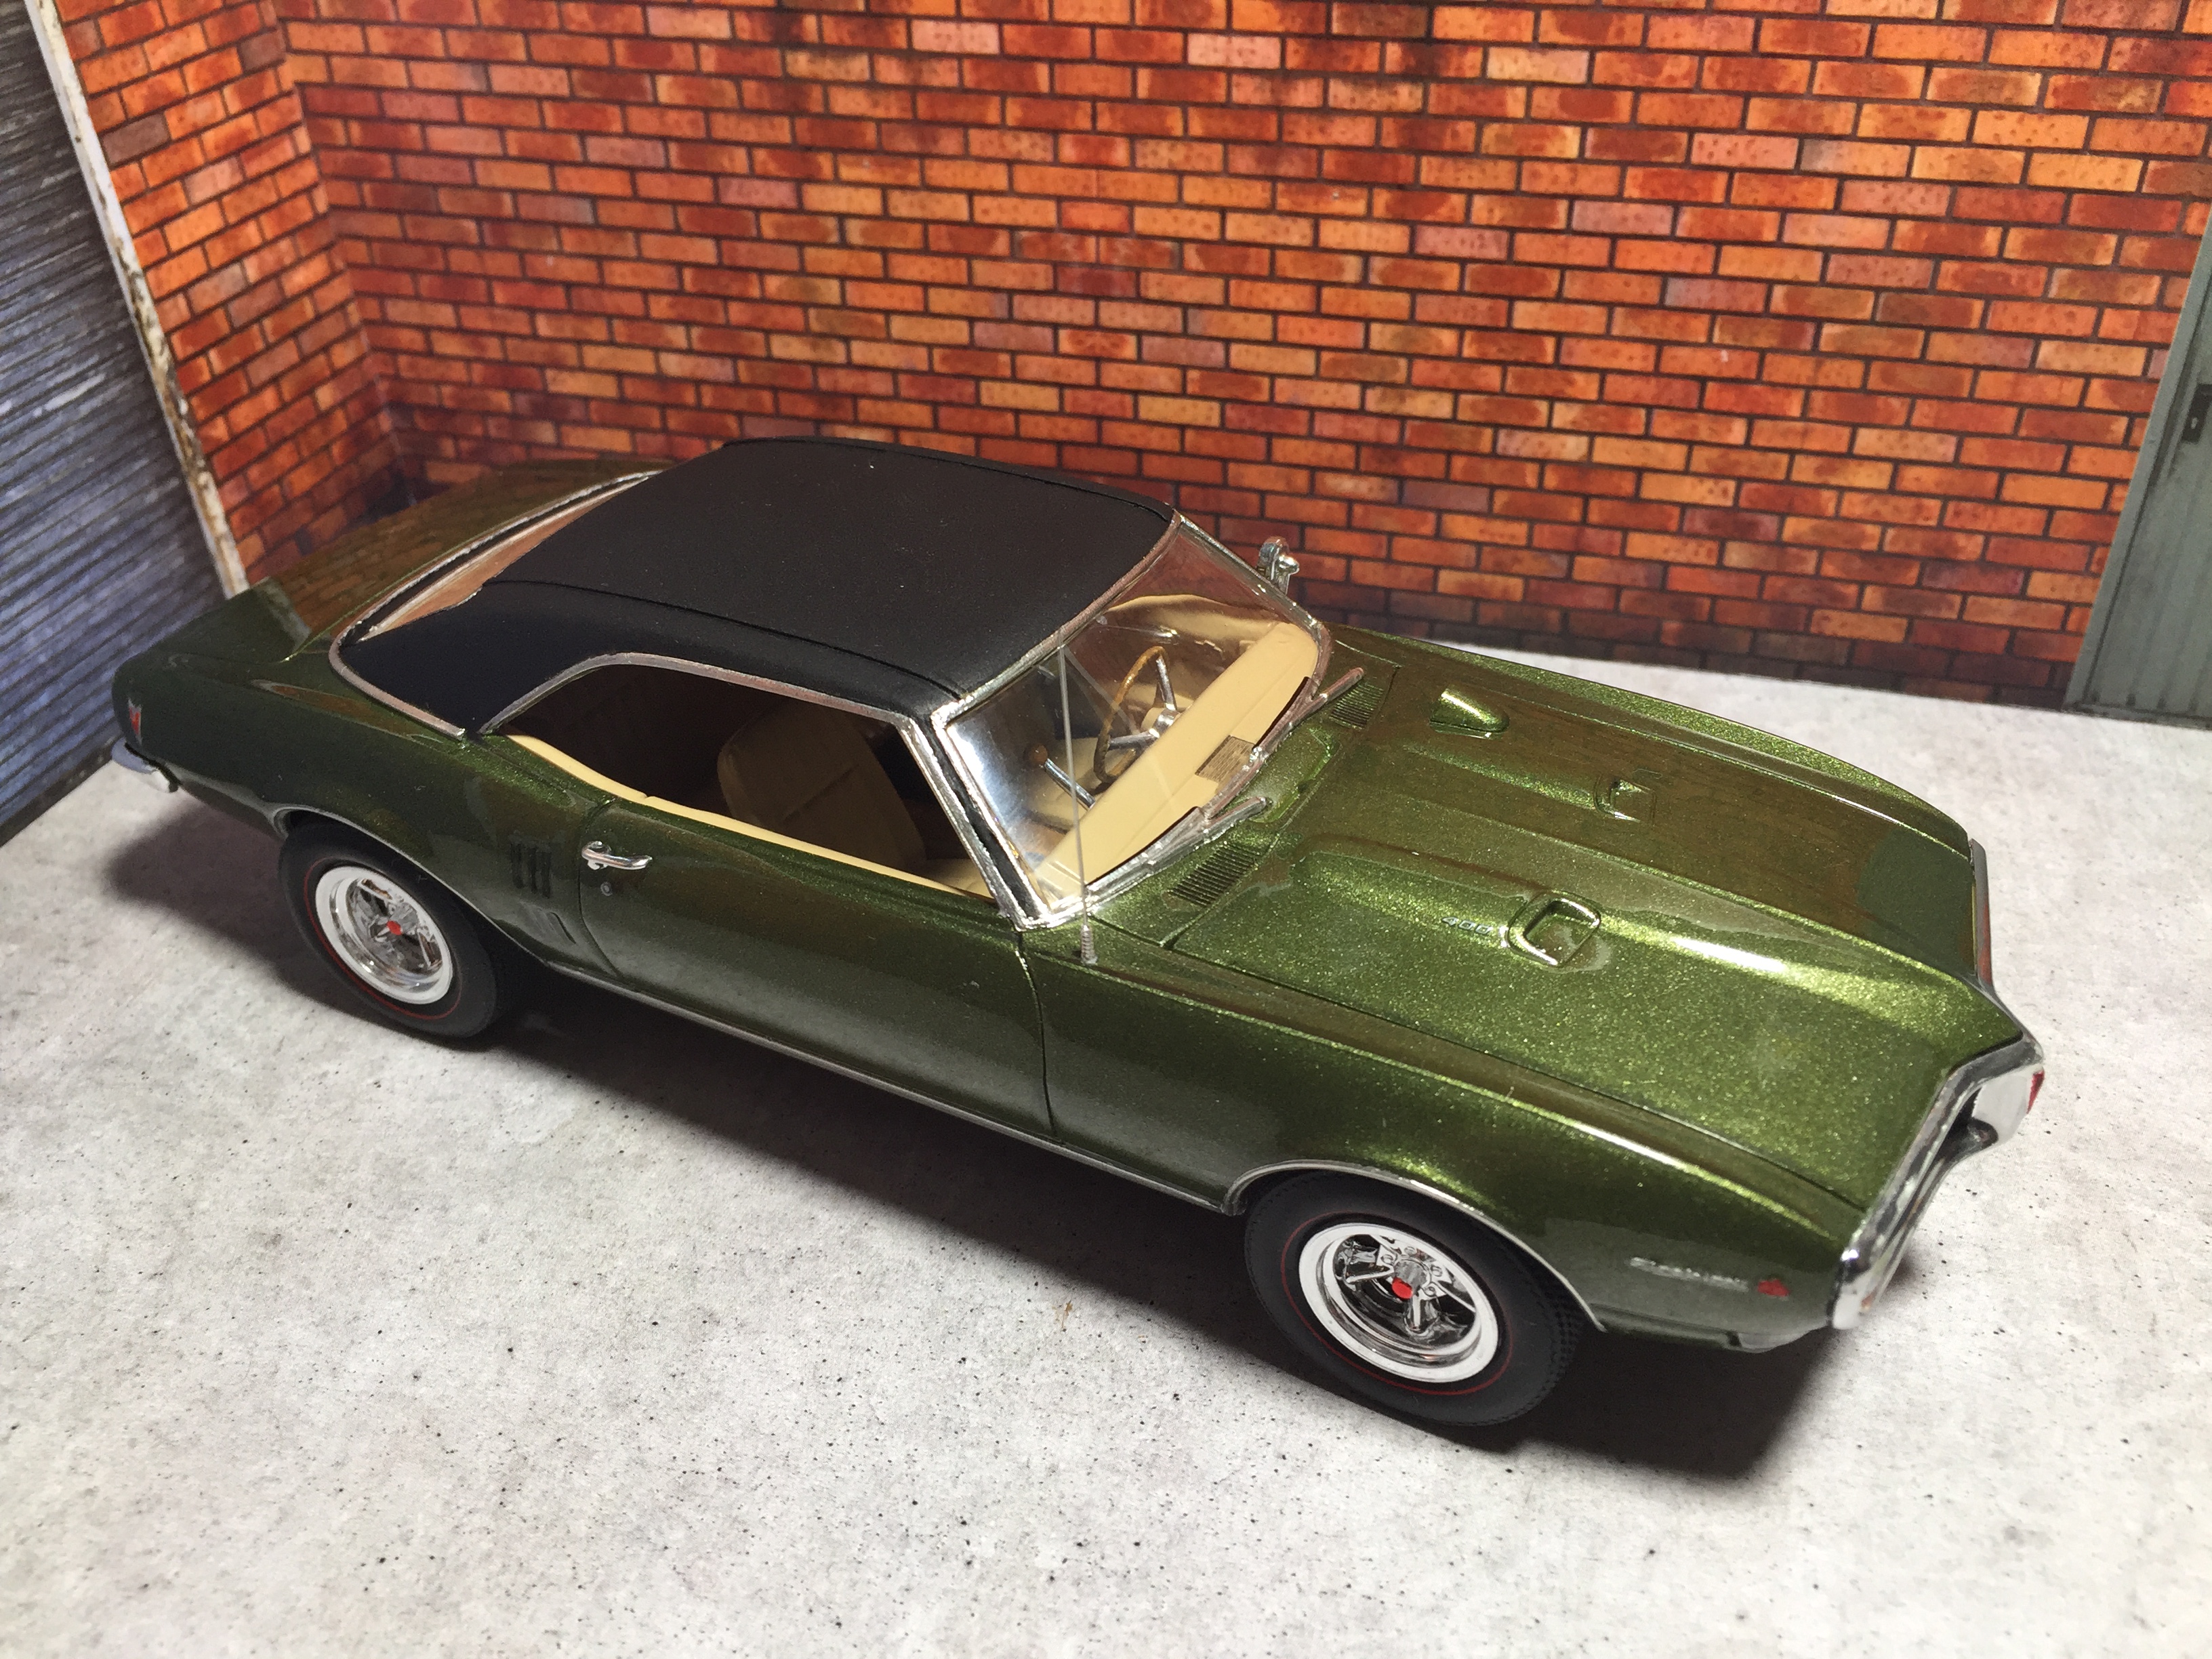
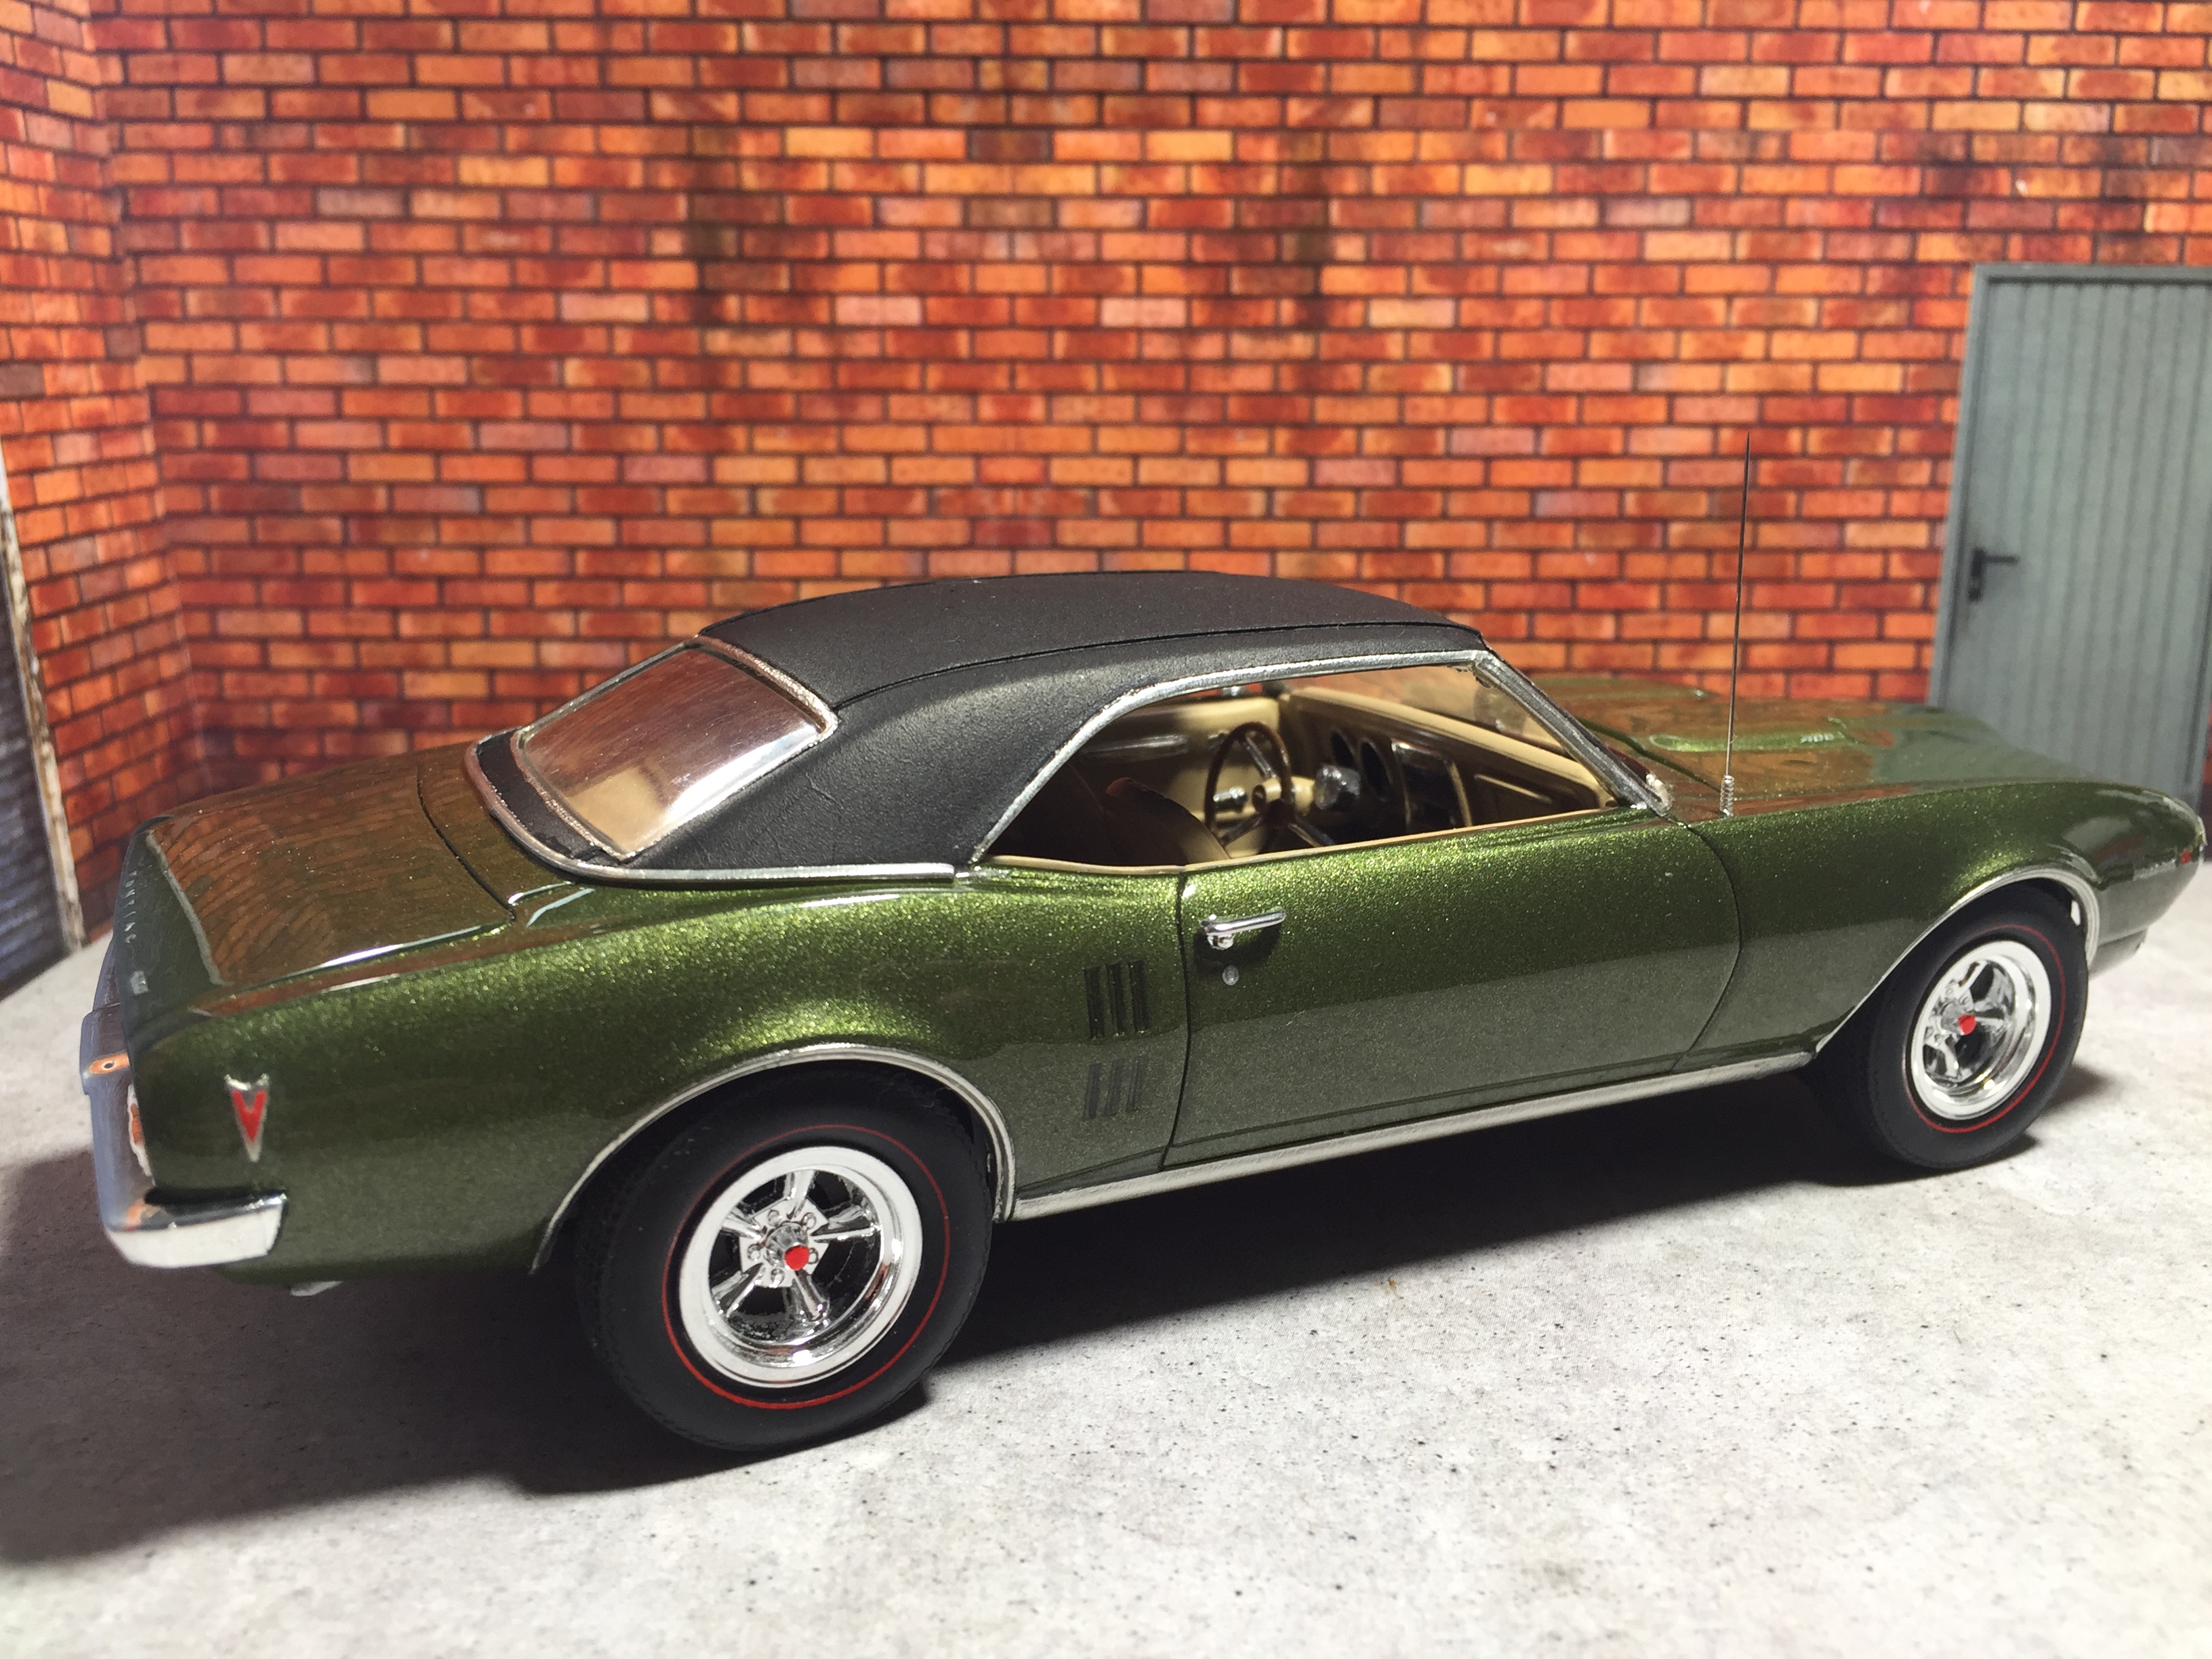
'68 Pontiac Firebird 400 (resto) - NEW IMAGES showing modifications!
Tommy124 replied to Tommy124's topic in Model Cars
Hi Gene, I understand your regrets... That is one beautiful Grand Prix and the color looks perfect on that one, too! I hear you, Terry! Mag wheels are the classic ones to go for on this car. I tried these ones on and instantly liked what I saw. By the way, I have modified some things on the front of the car which I wasn't happy with in the first place (mainly the headlights) and took new photos of that. I edited the initial post and added the new photos there! -
Looks great in that color - I like it!
-
Very nicely done and FWIW, the engine is a modern Ferrari V12 (575 Superamerica, 612 Scaglietti or the like...).
-
Lovely Vette, well done!
-
Hi Dann, great to see you taking on this classic. You are absolutely right in leaving that odd front spoiler. It just does not seem right for any of the many varieties of Pantera cars. Looking forward to see more - count me in!
-
Great product for replicating Vinyl tops!!!
Tommy124 replied to cruz's topic in Tips, Tricks, and Tutorials
I used the spray glue method as shown in the initial post and it worked a charm on my '68 Firebird resto. Thanks @Marcos Cruz for showing! -
'68 Pontiac Firebird 400 (resto) - NEW IMAGES showing modifications!
Tommy124 replied to Tommy124's topic in Model Cars
Thanks to you all for your kind feedback - appreciated! Thanks to you too, David. The inspiration came from the follwoing tutorial by Marcos Cruz and it worked great on the first time: -
One Charger build so far...

-
To be honest, I think it has to specified which kind of ZP primer has been used. There are at least two (that I would know of): Light (Grey) Primer and Primer/ Micro Filler. I have used the latter on two or three occasions without any problems. But what’s annoying me was having all the stink inside the house using the ZP stuff when the job could be done in a few minutes outside in the carport with the Tamiya canned primer. And that one definitely nevers fails.
-
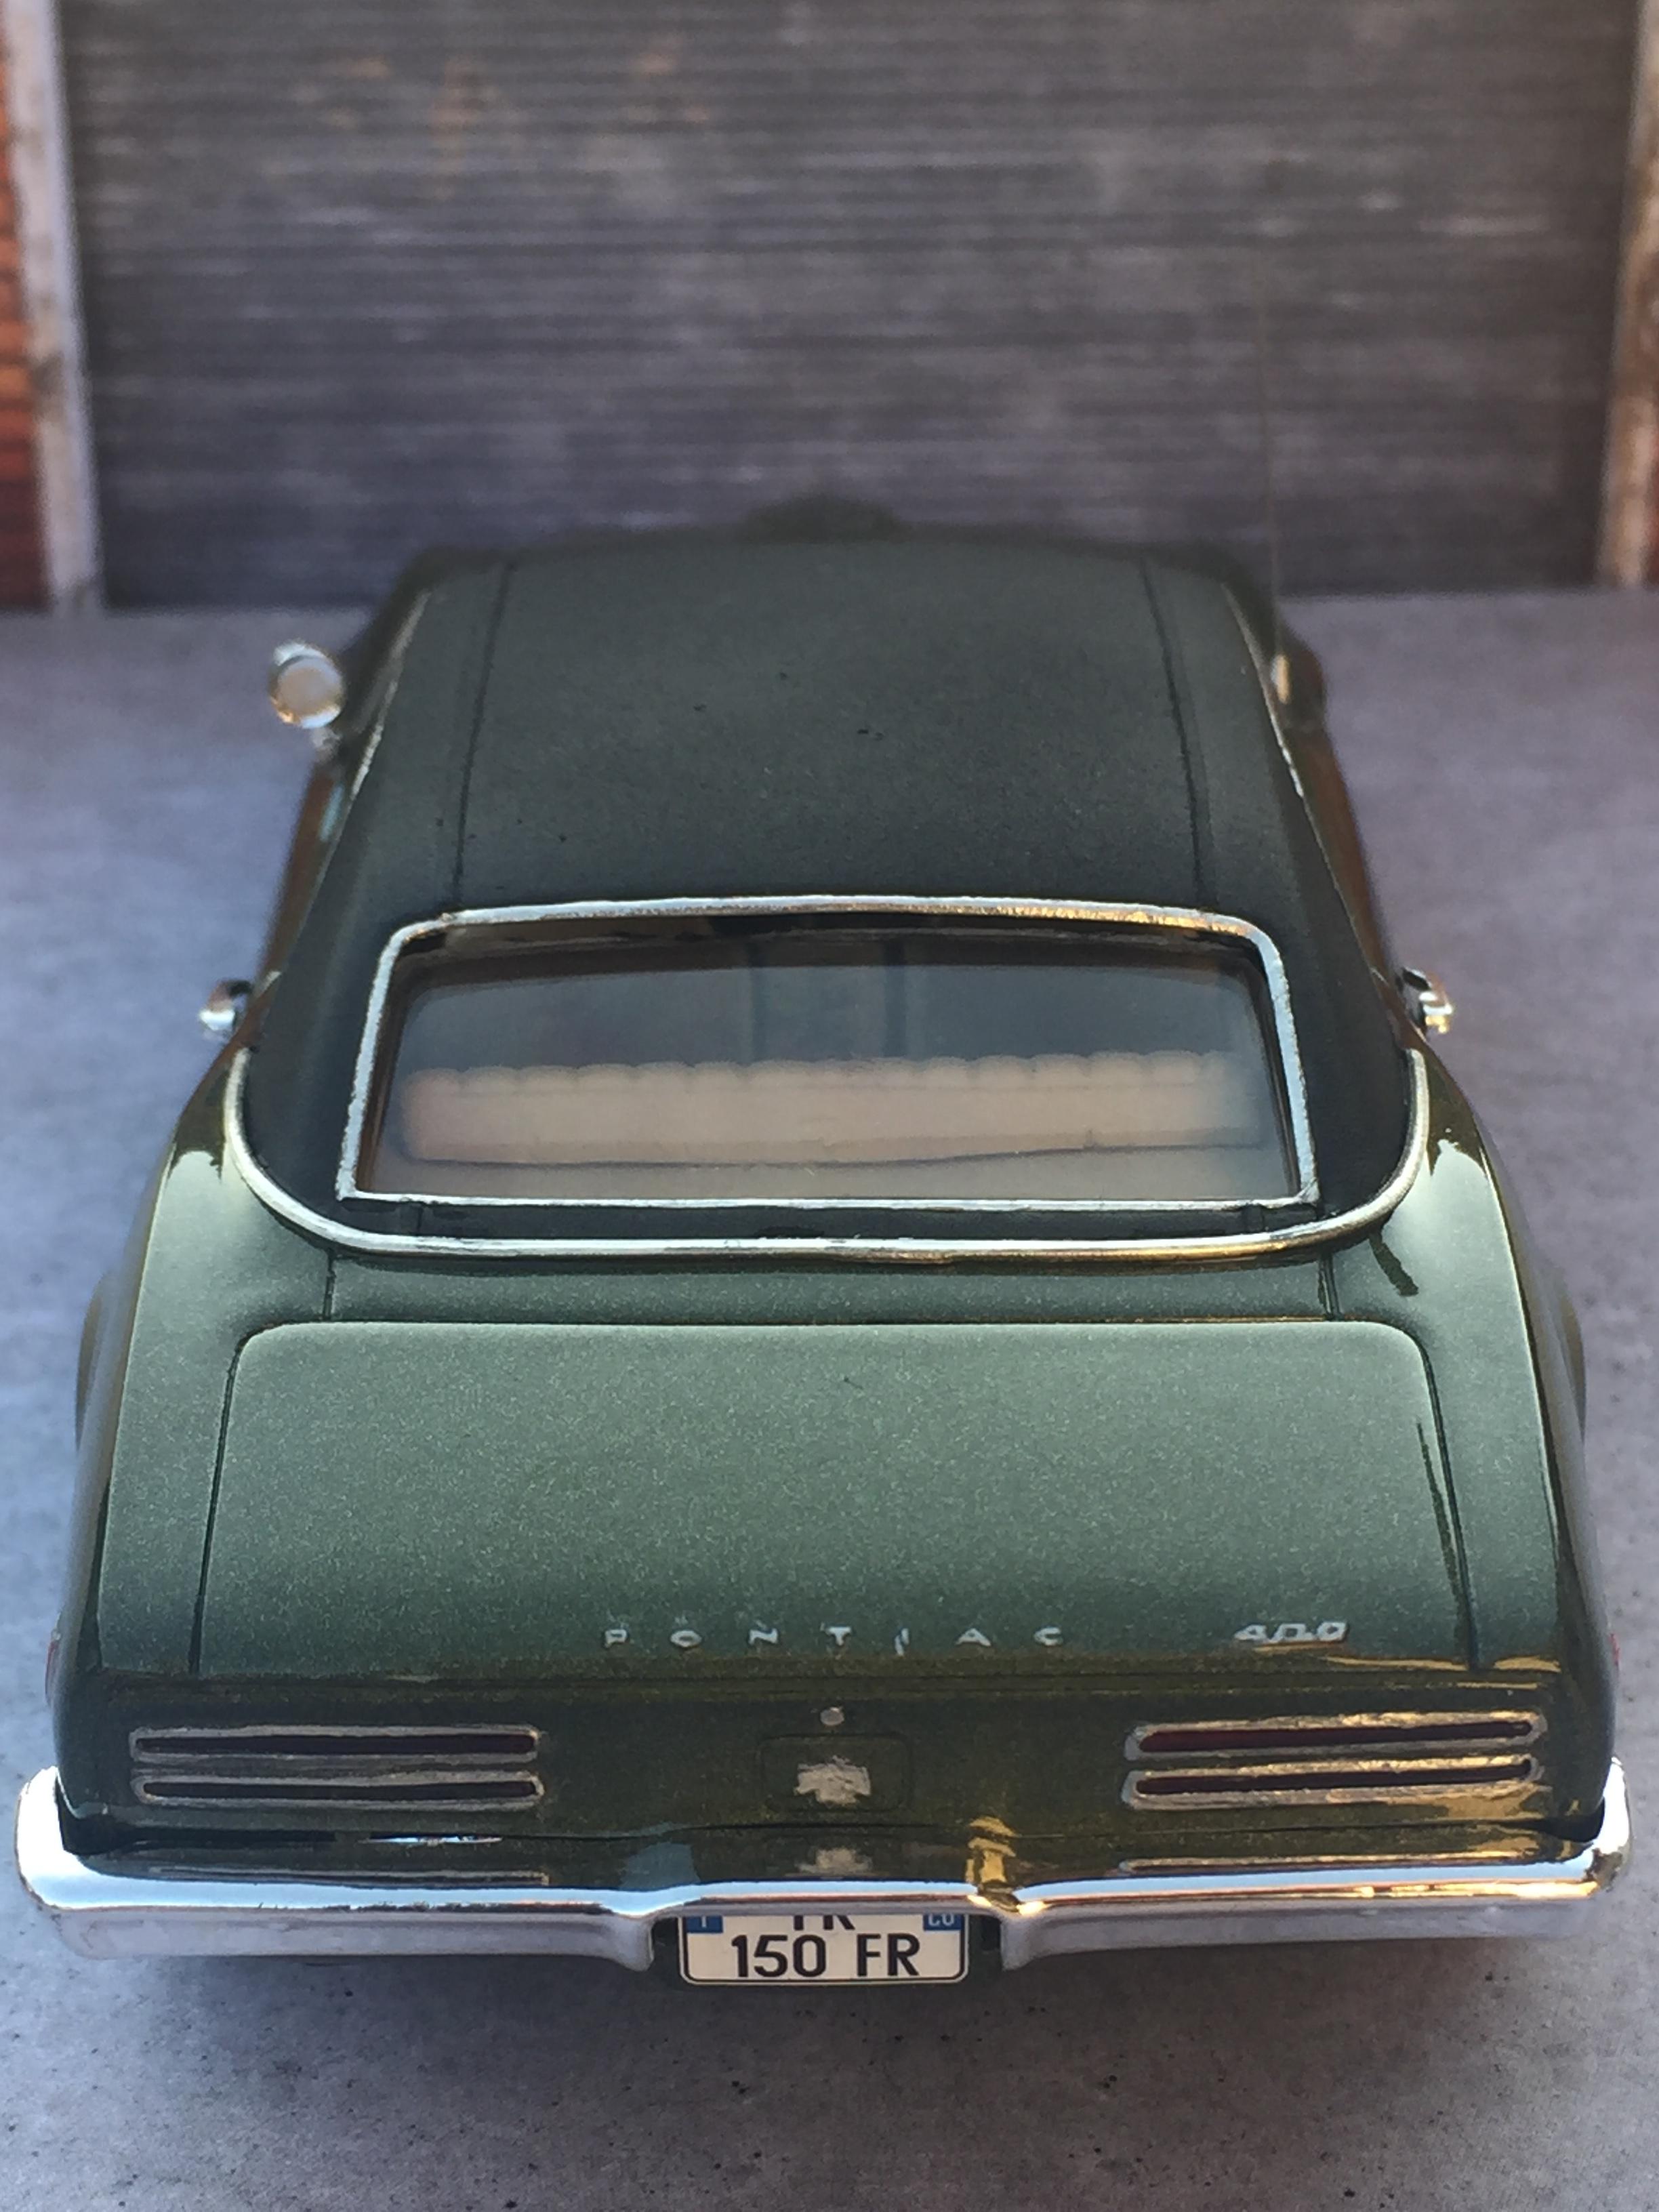
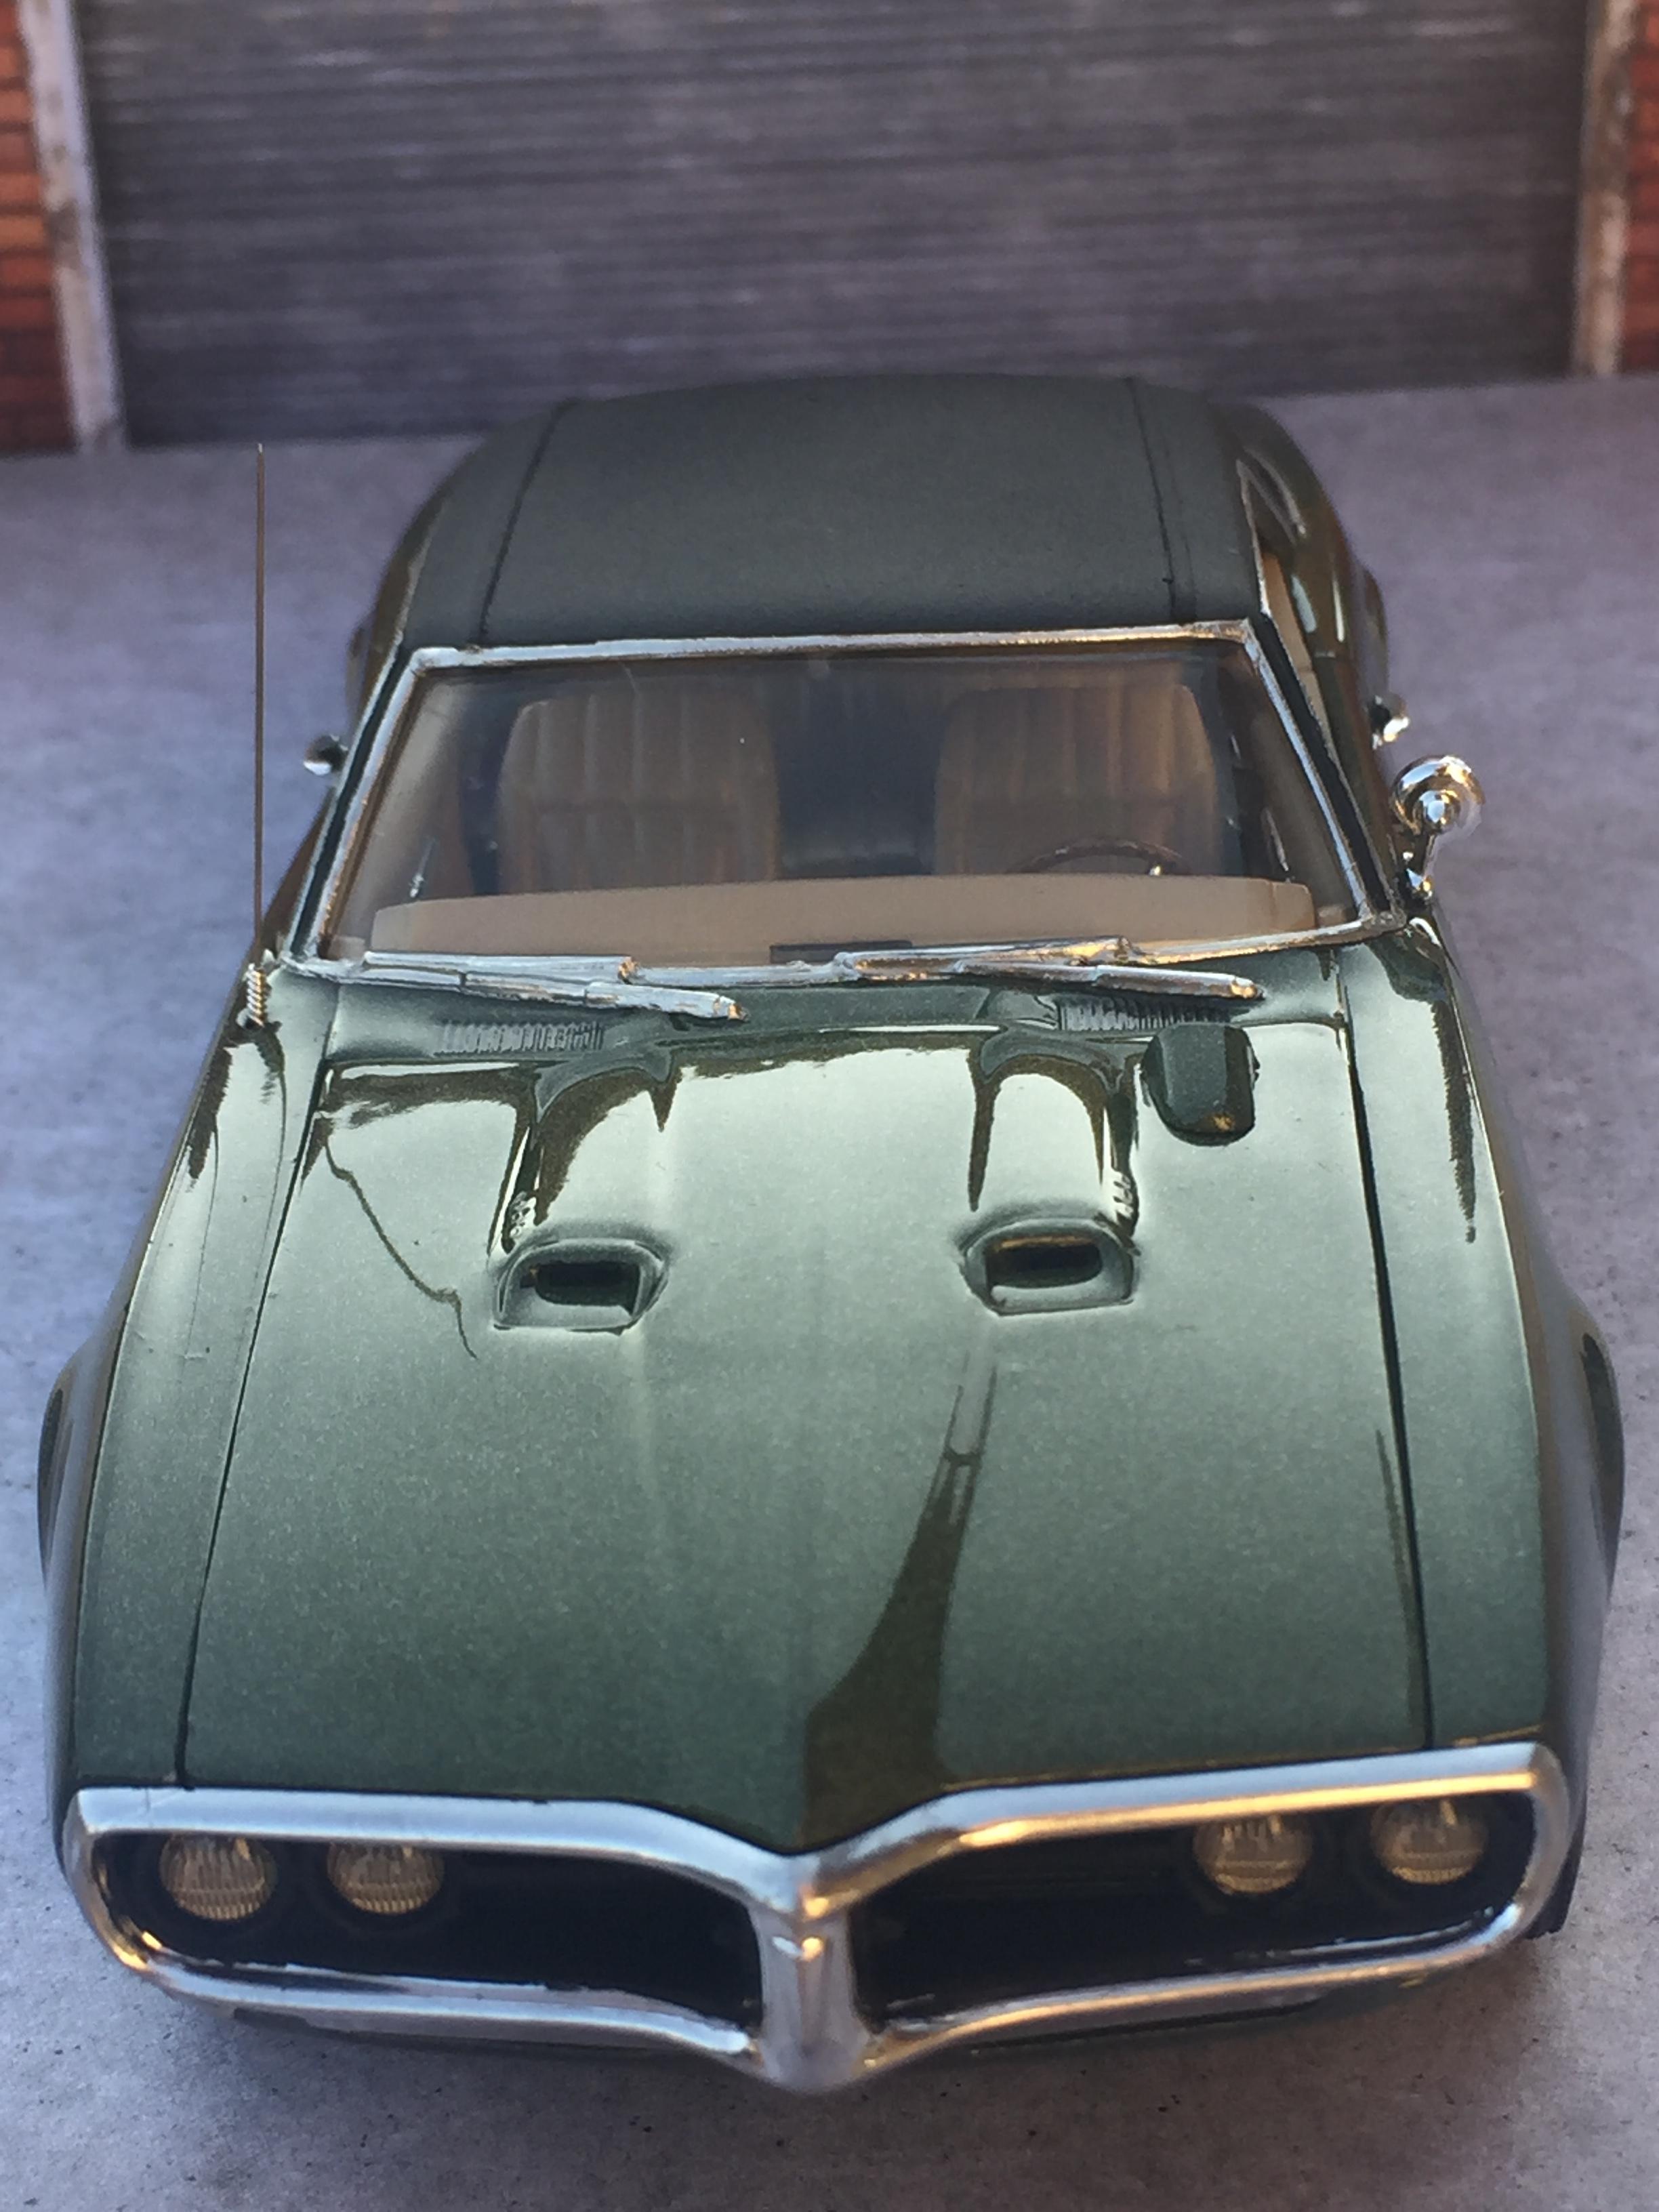
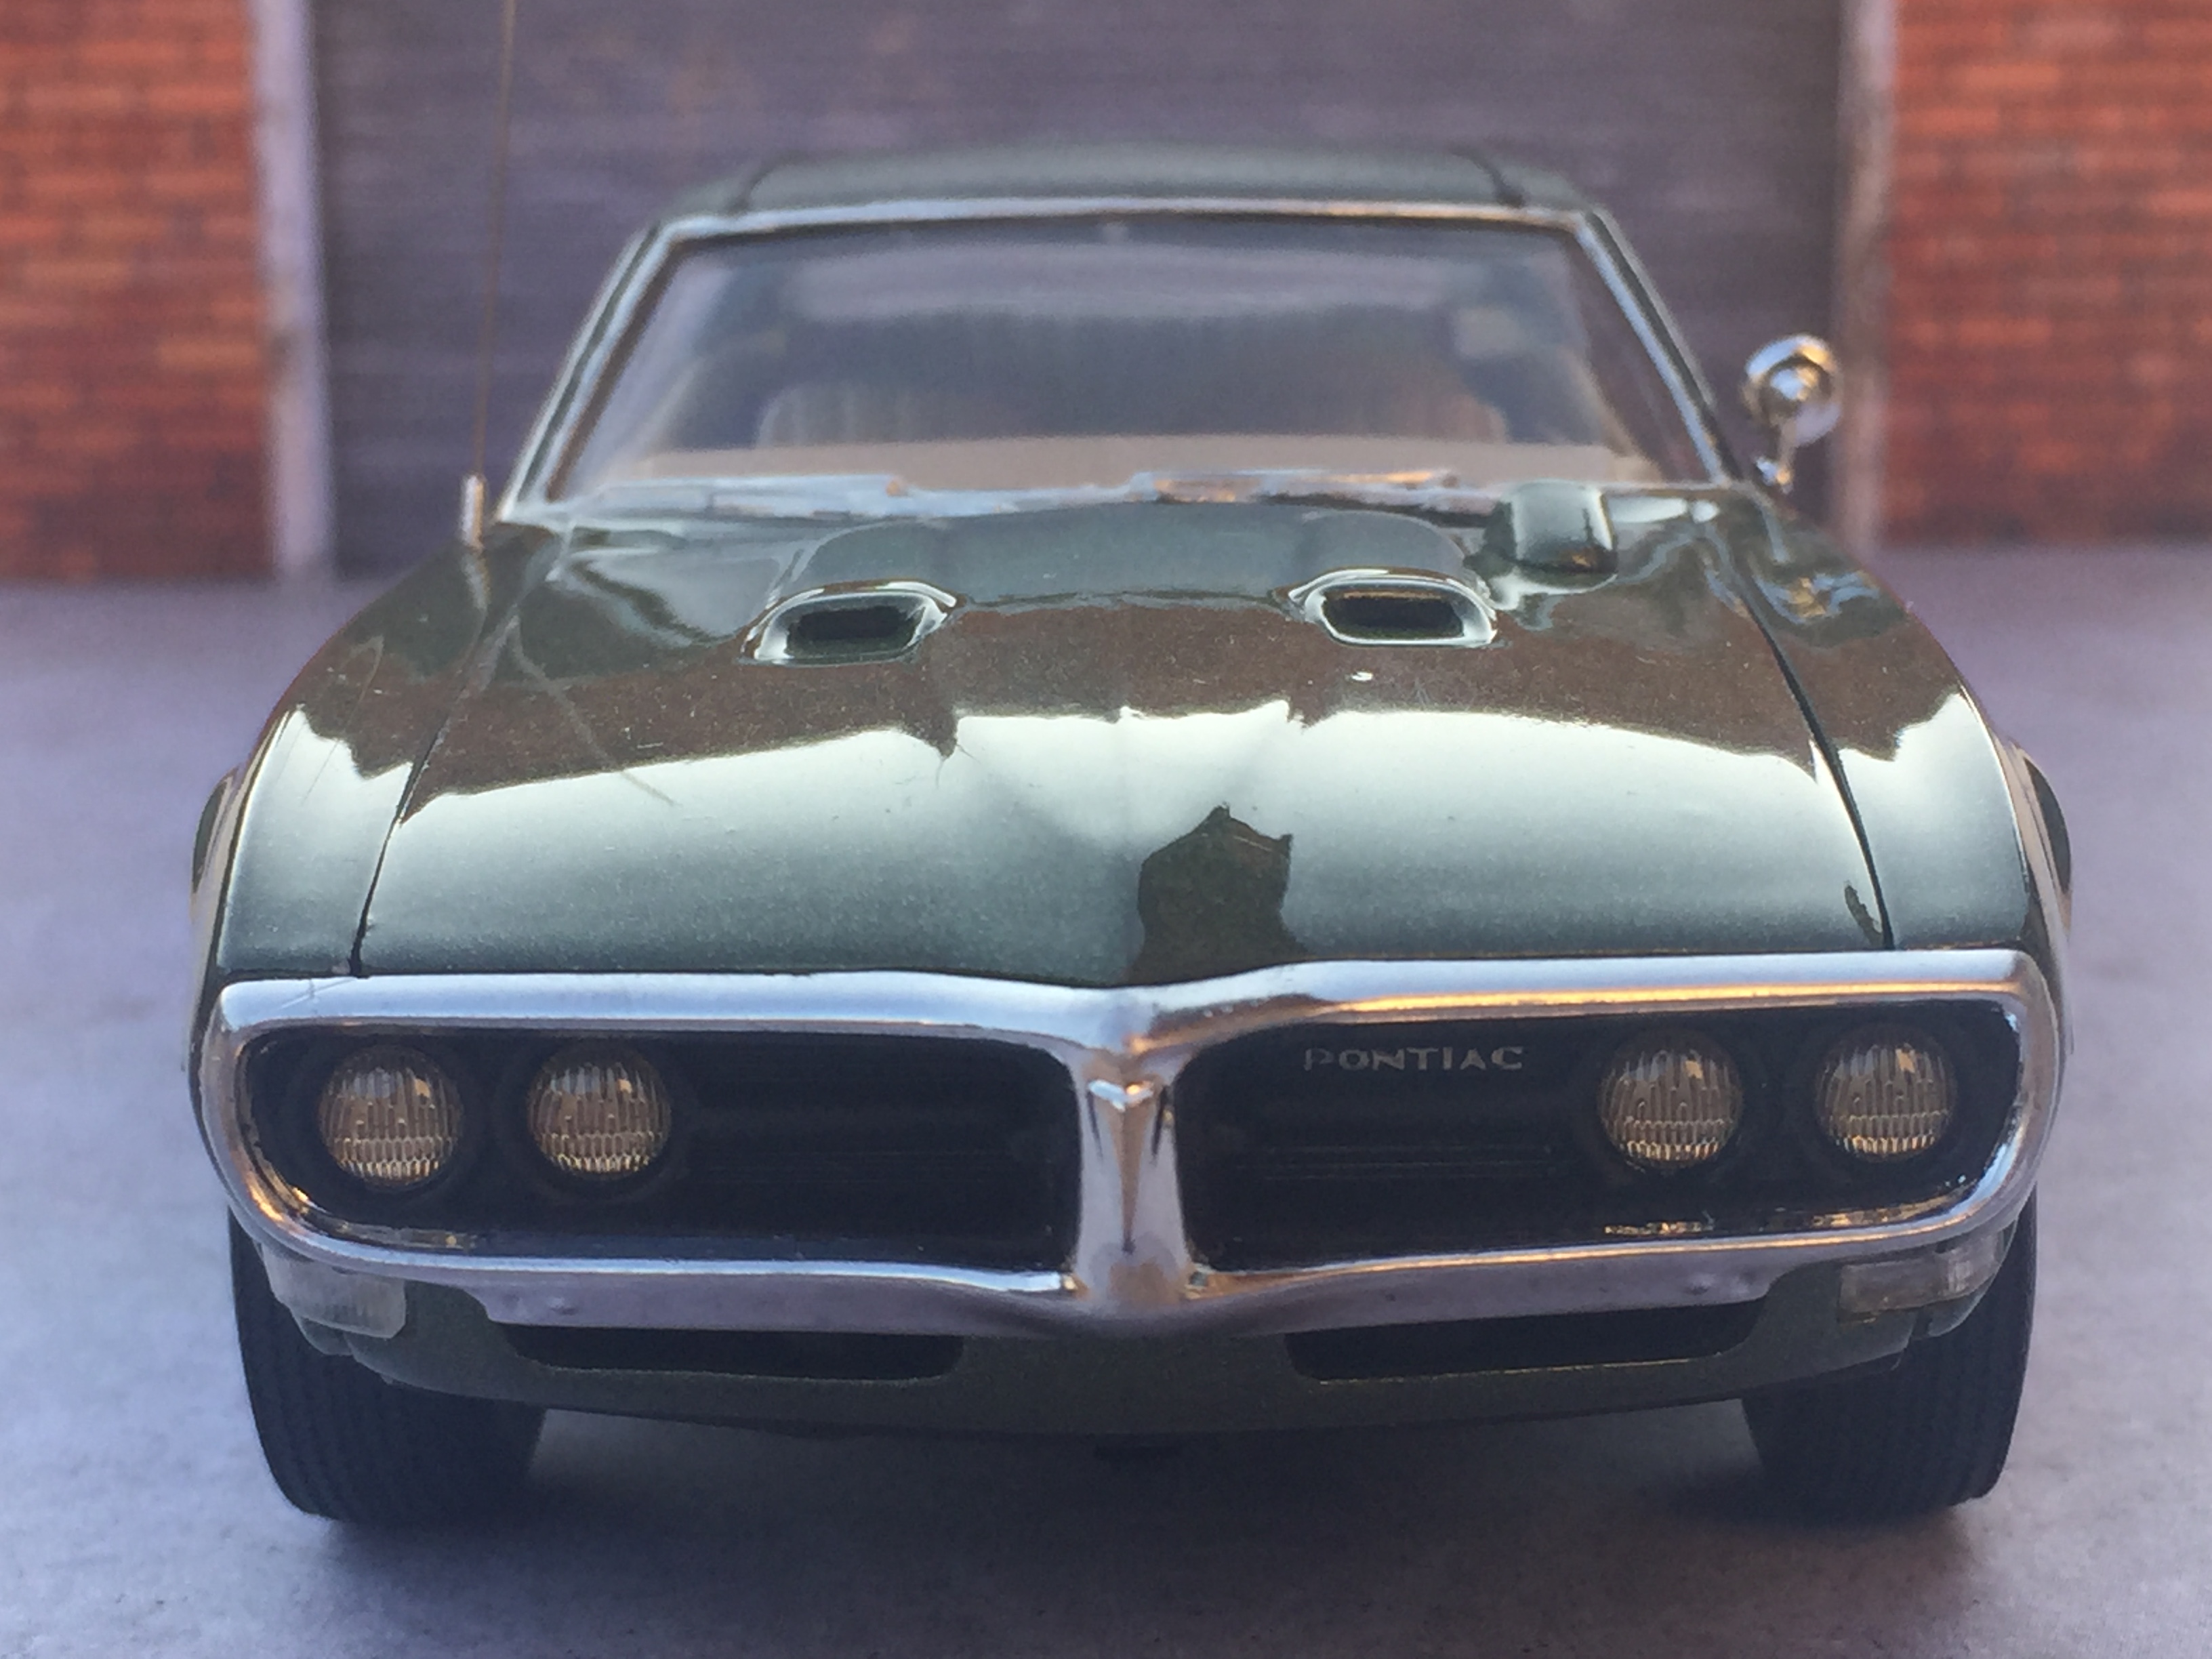
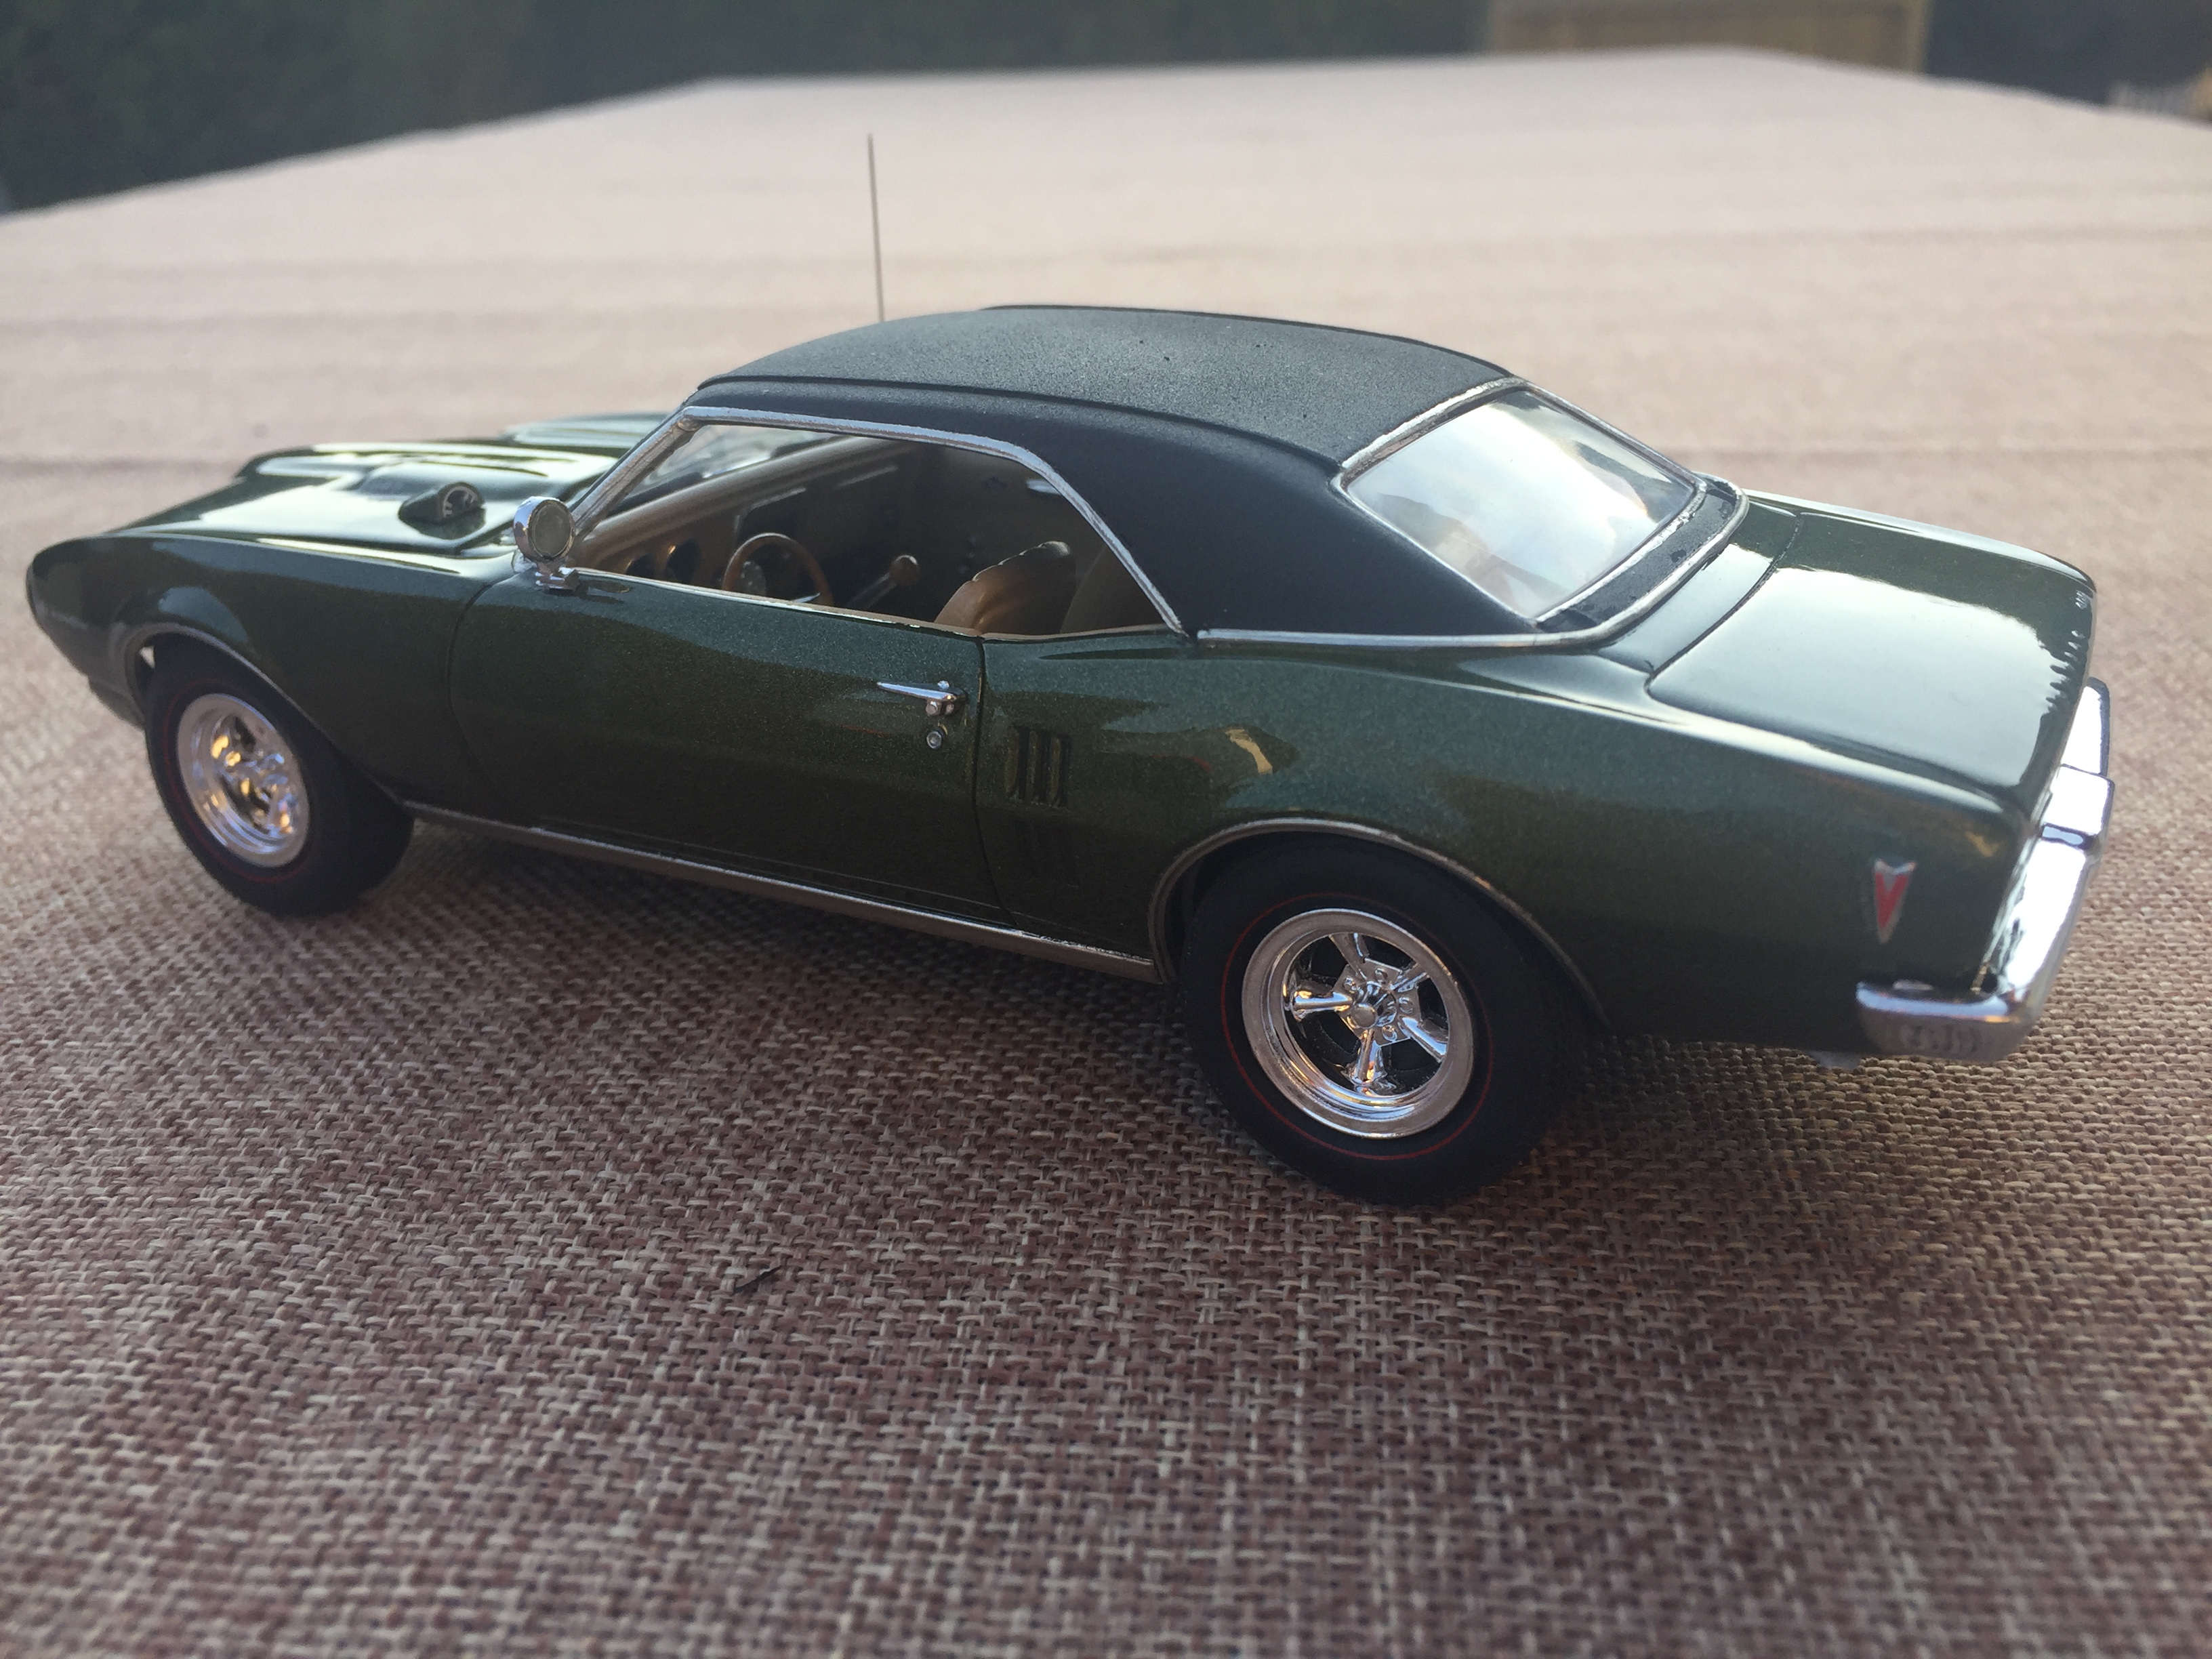
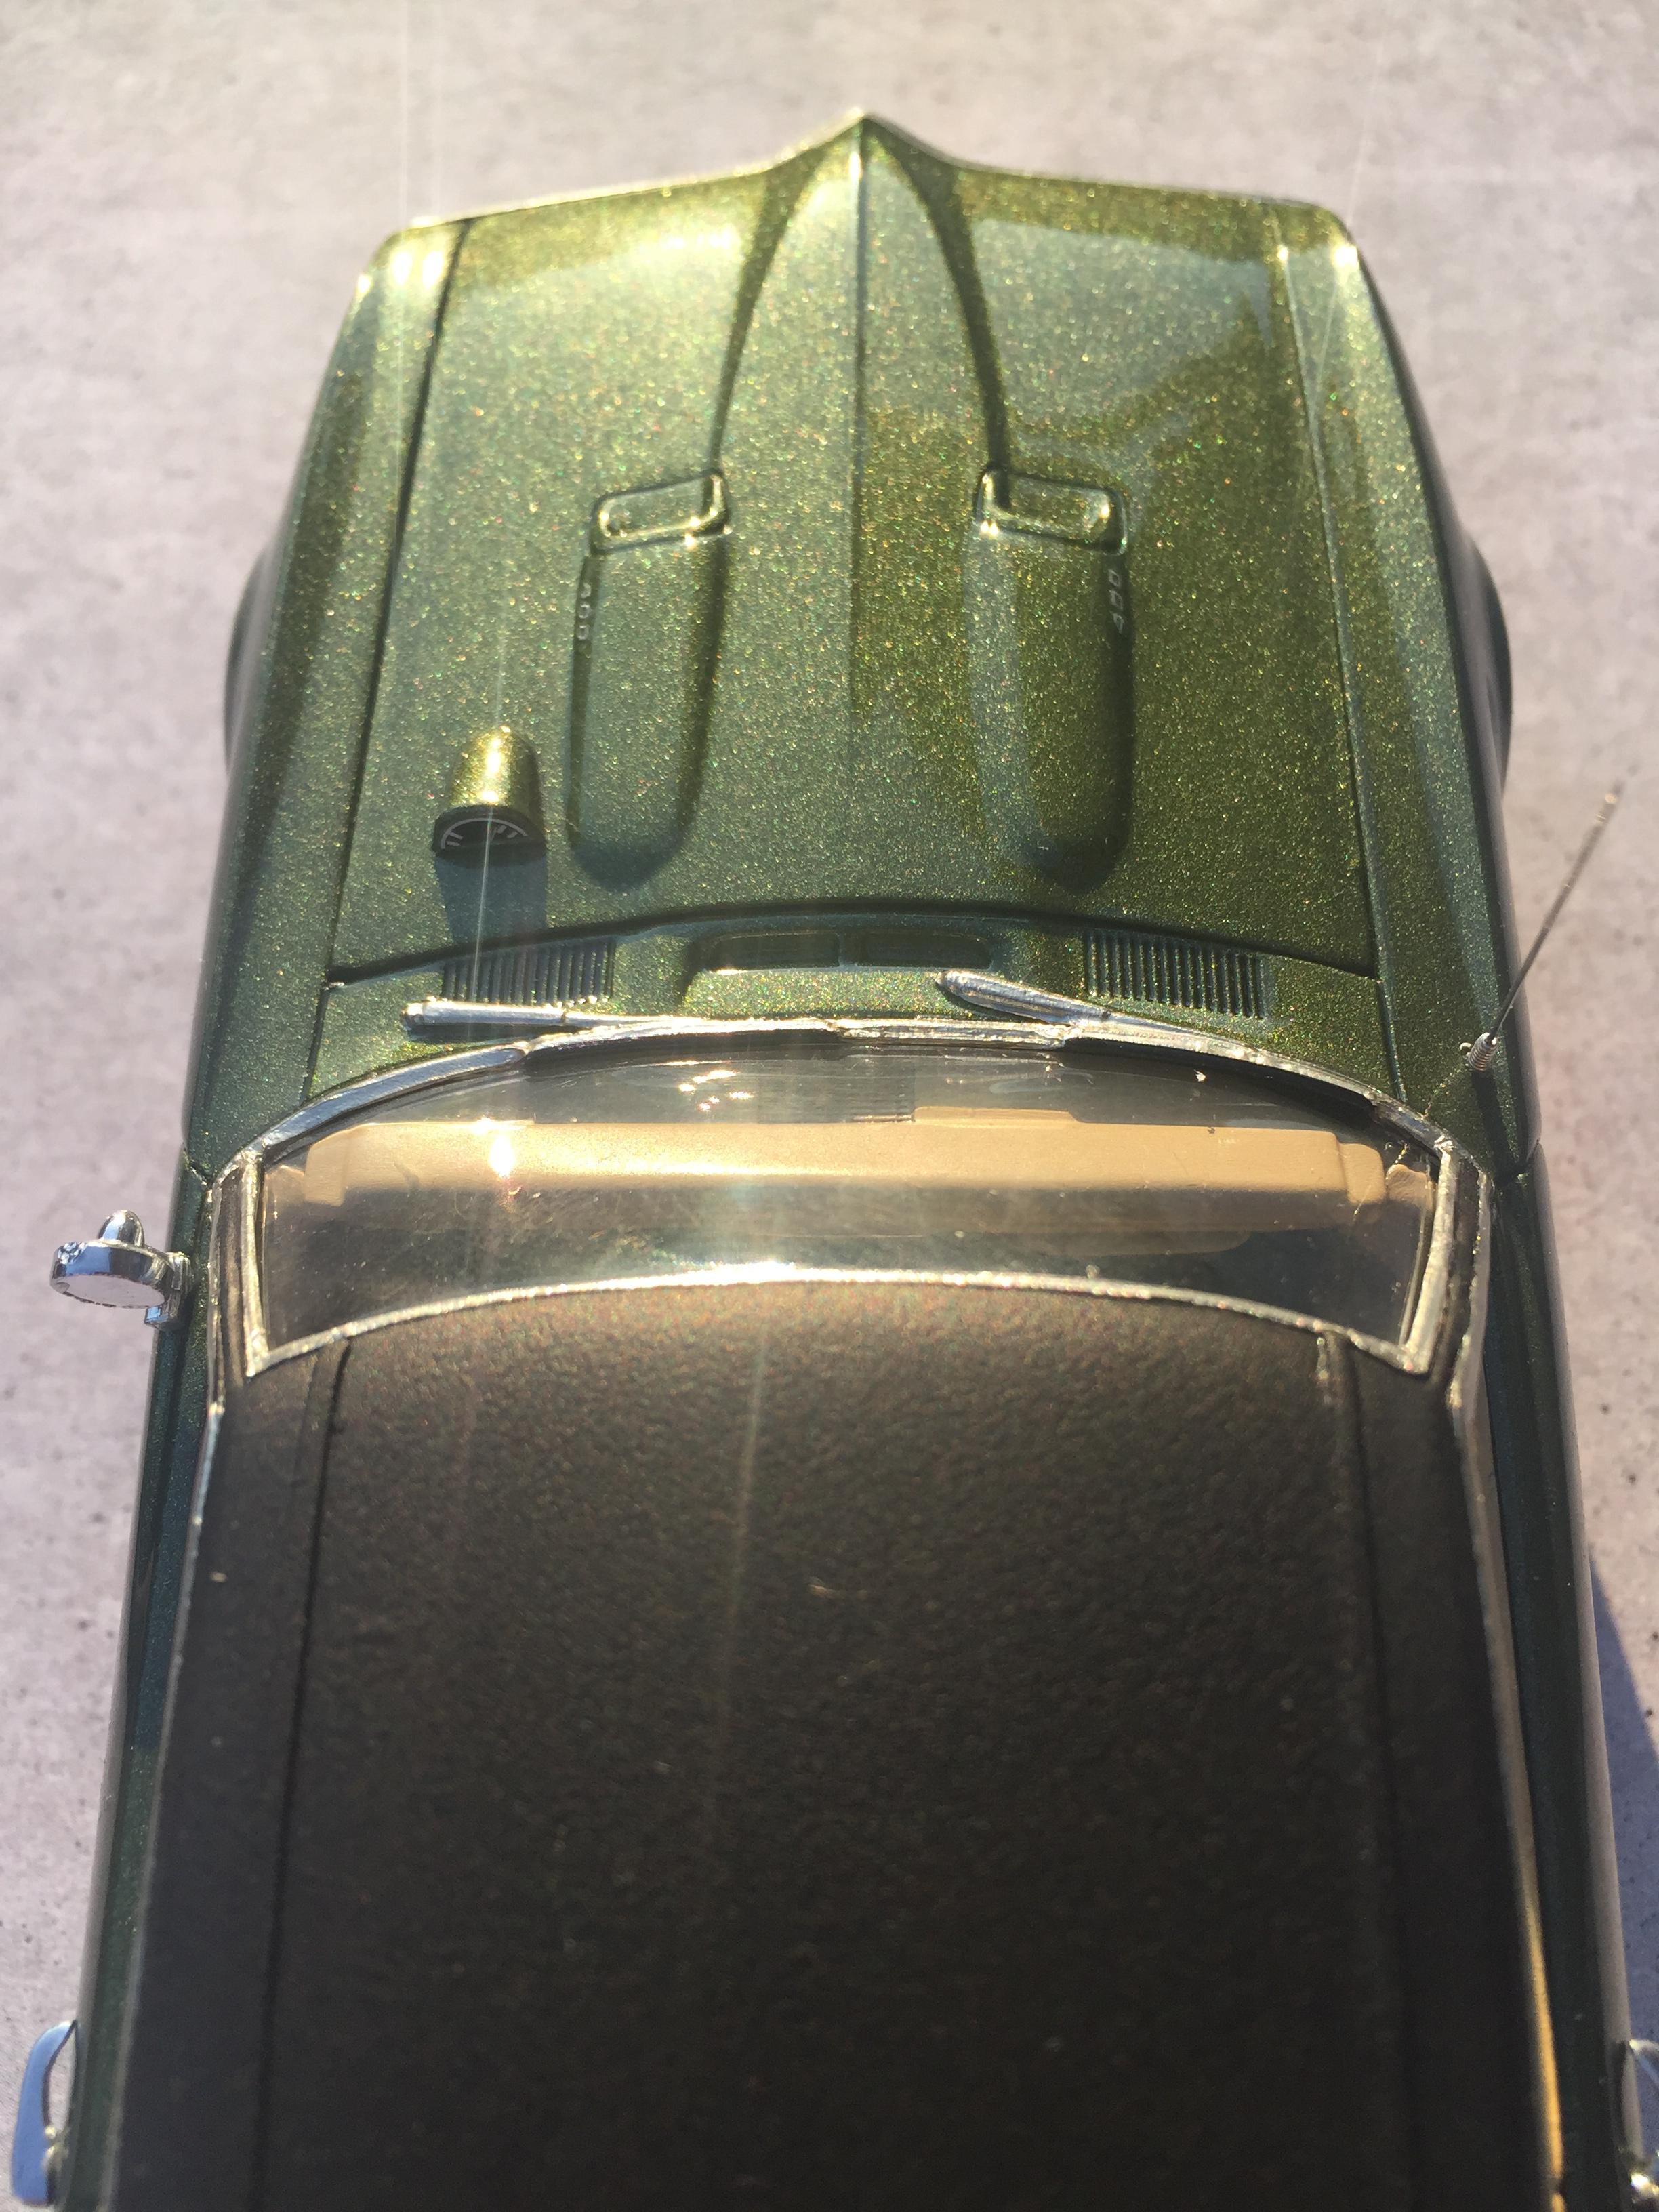
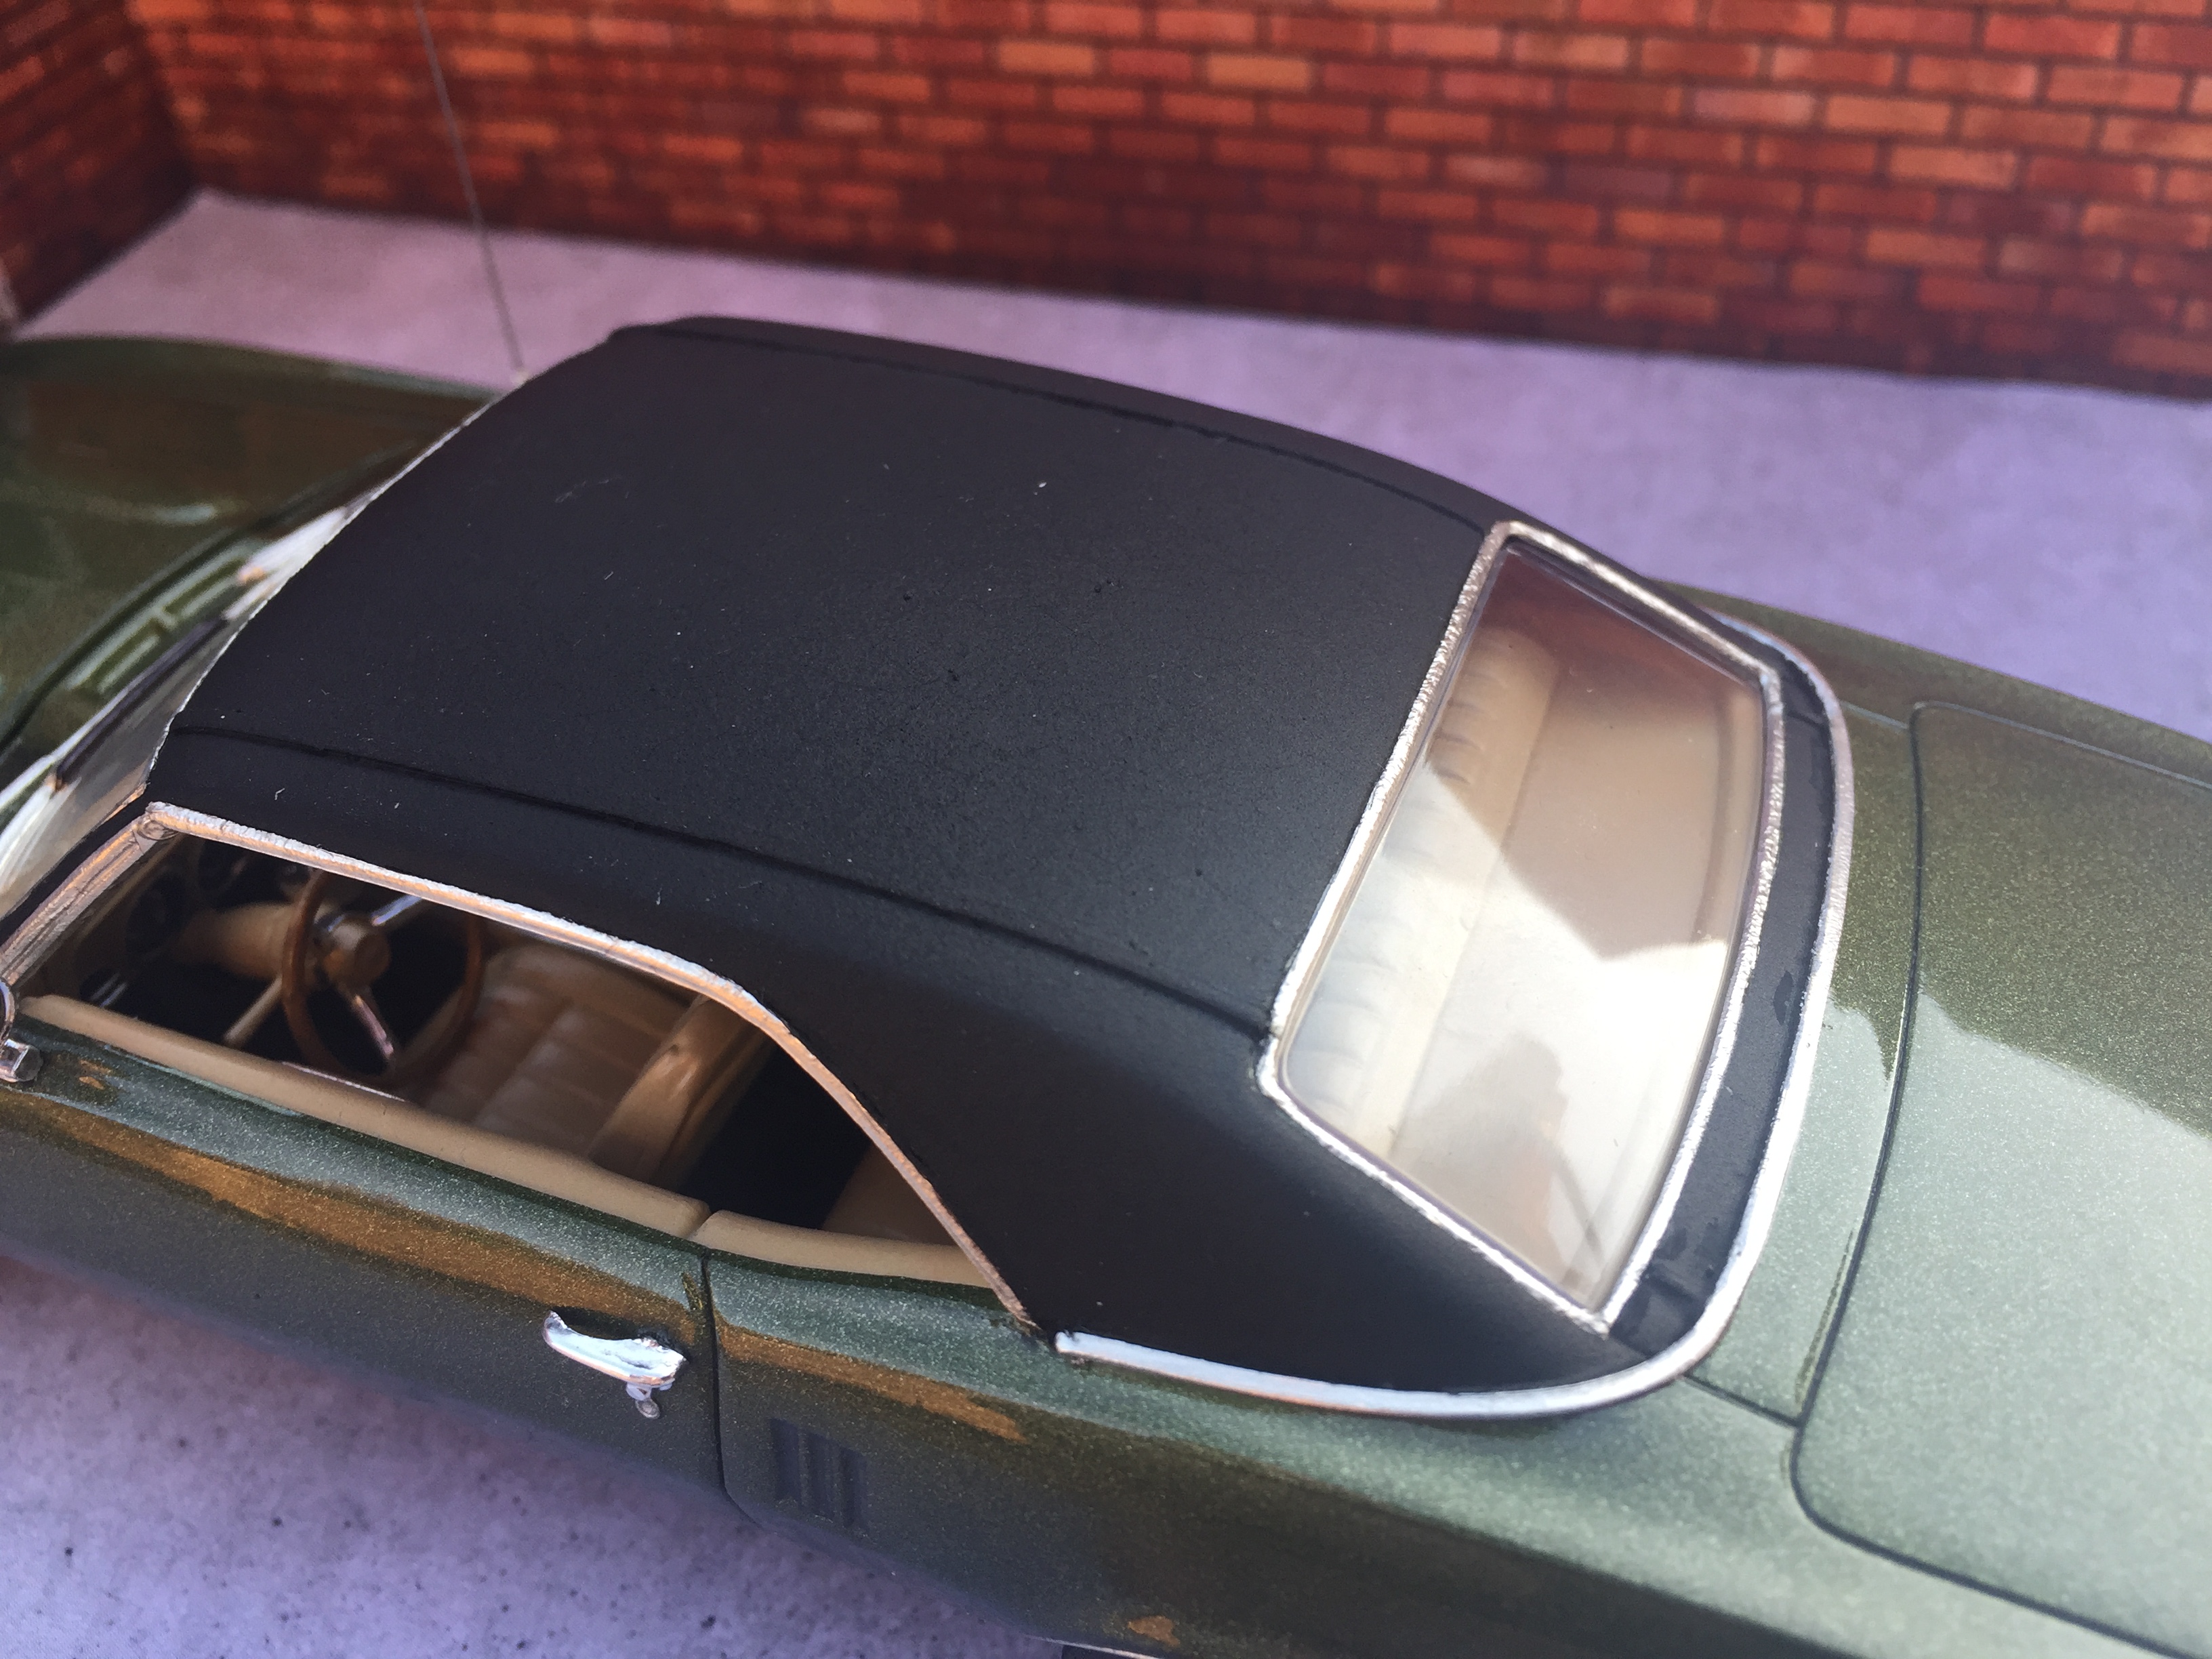
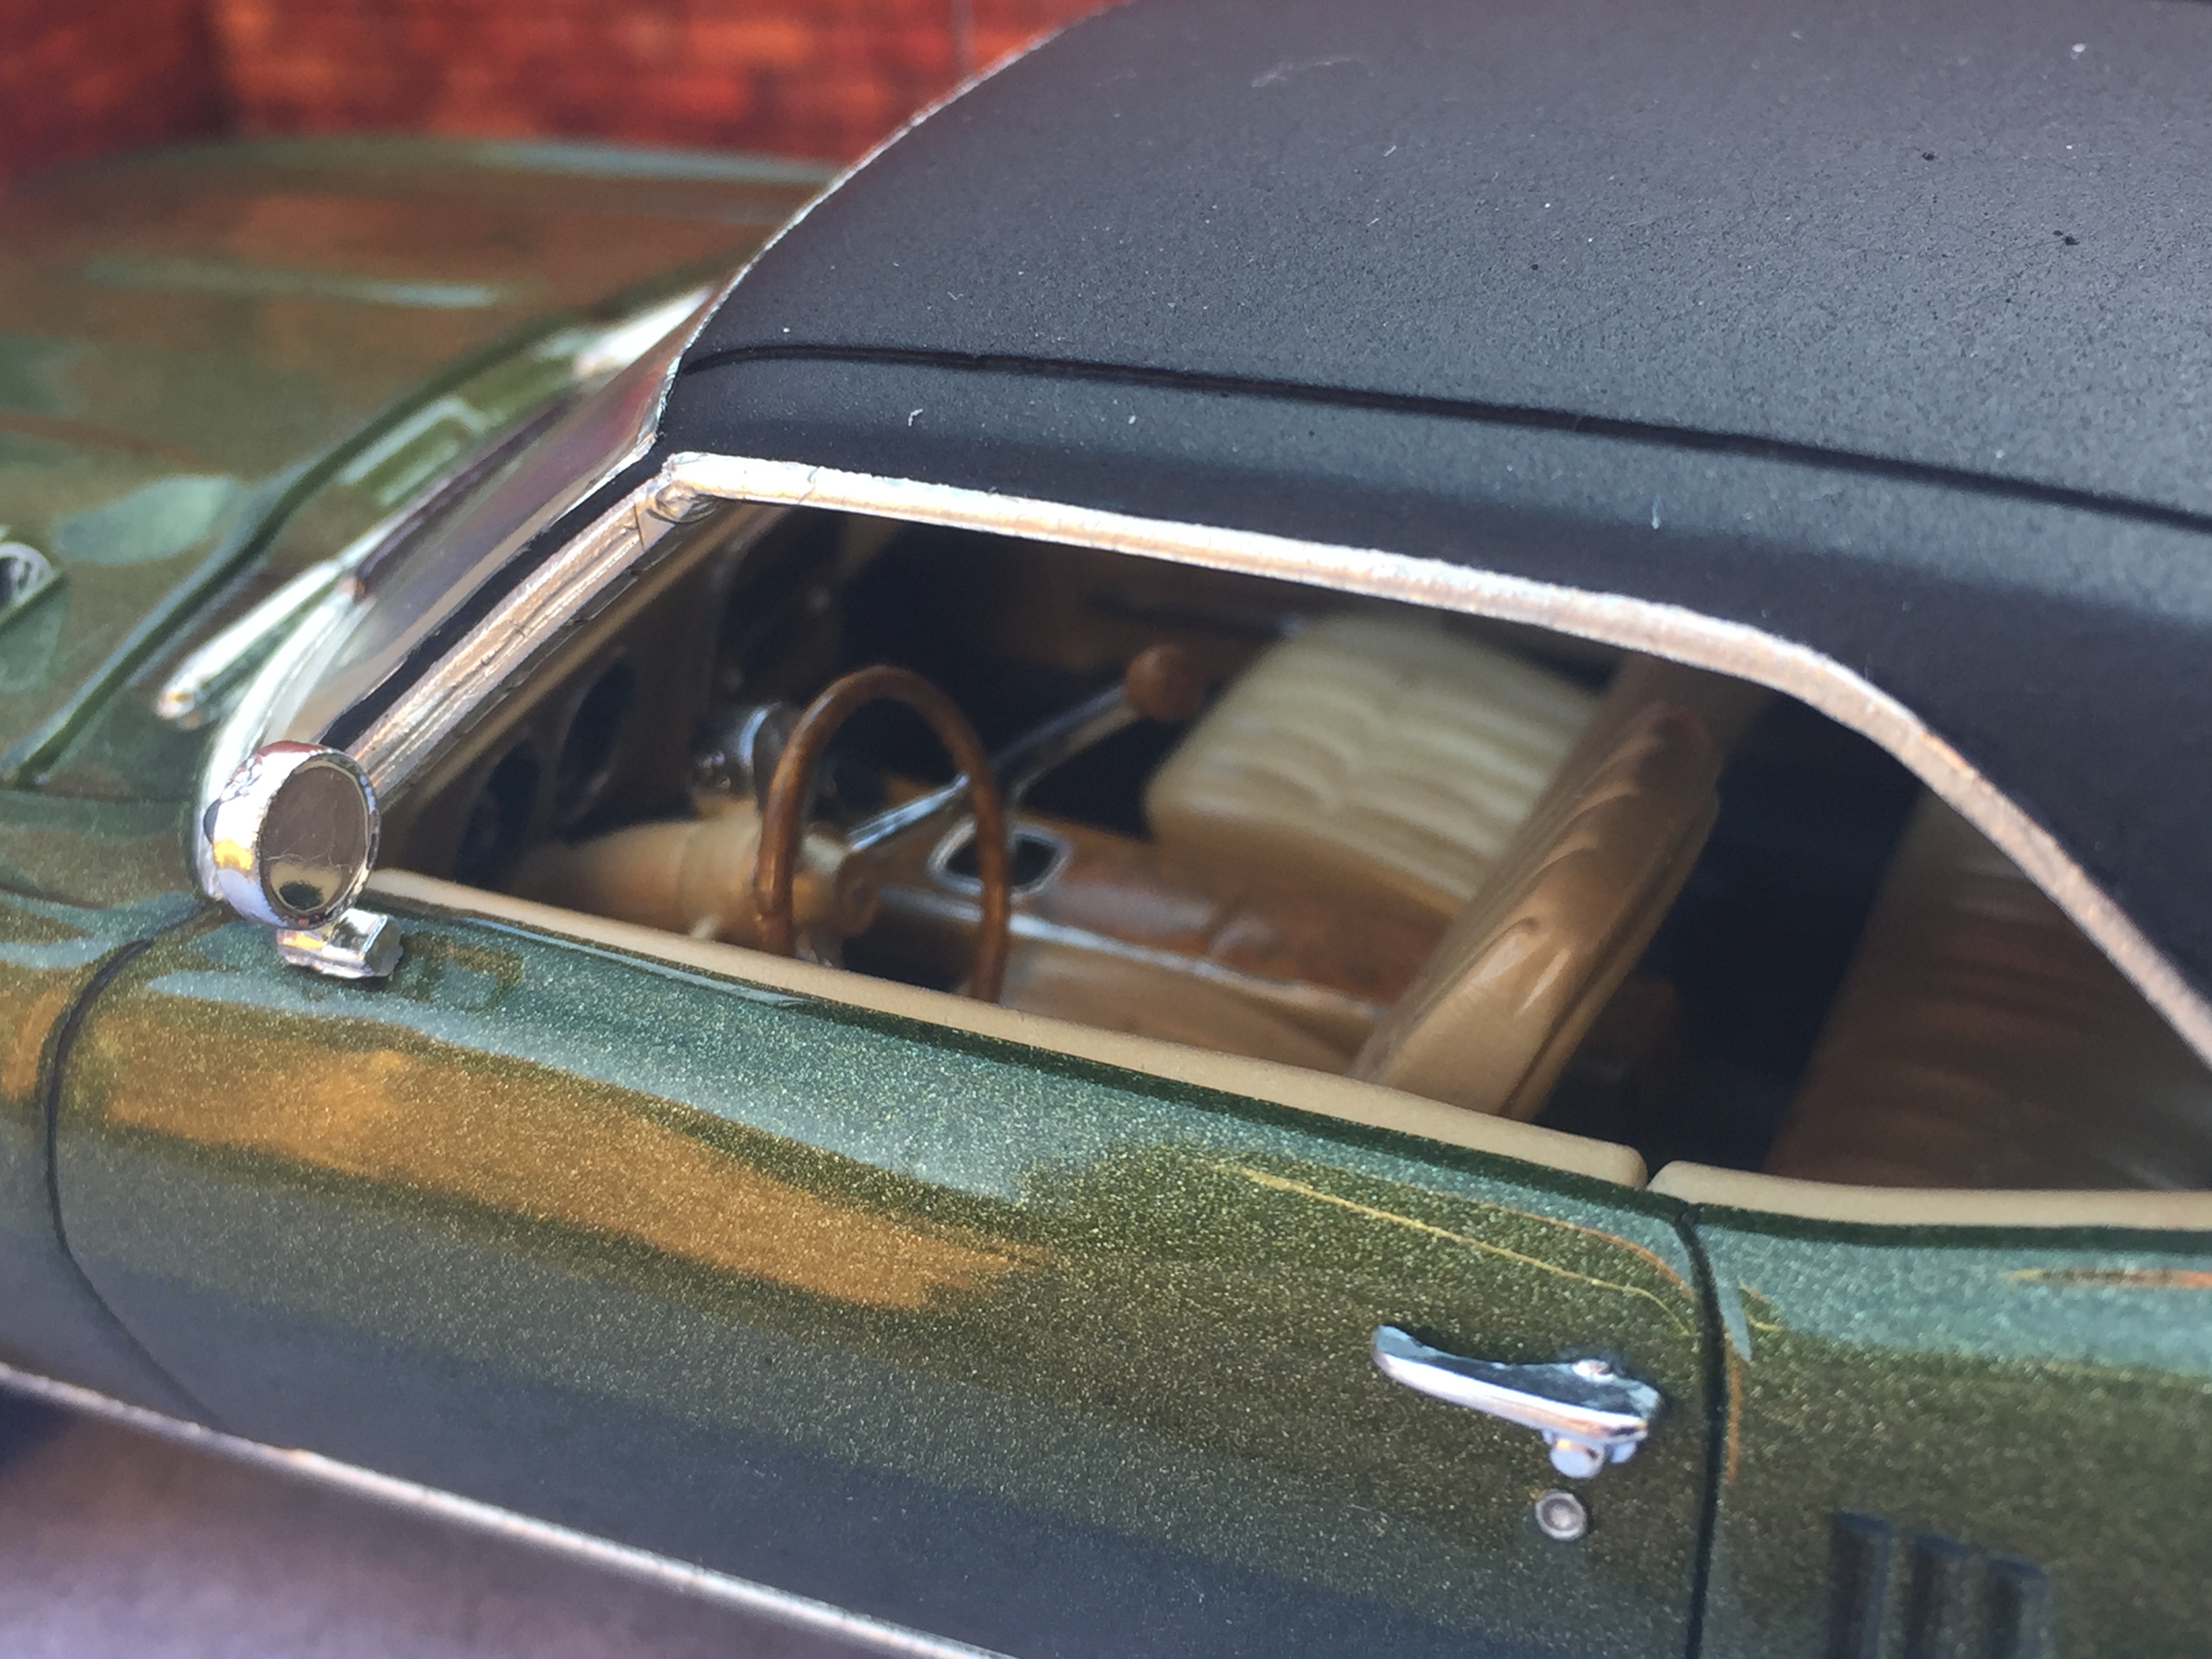
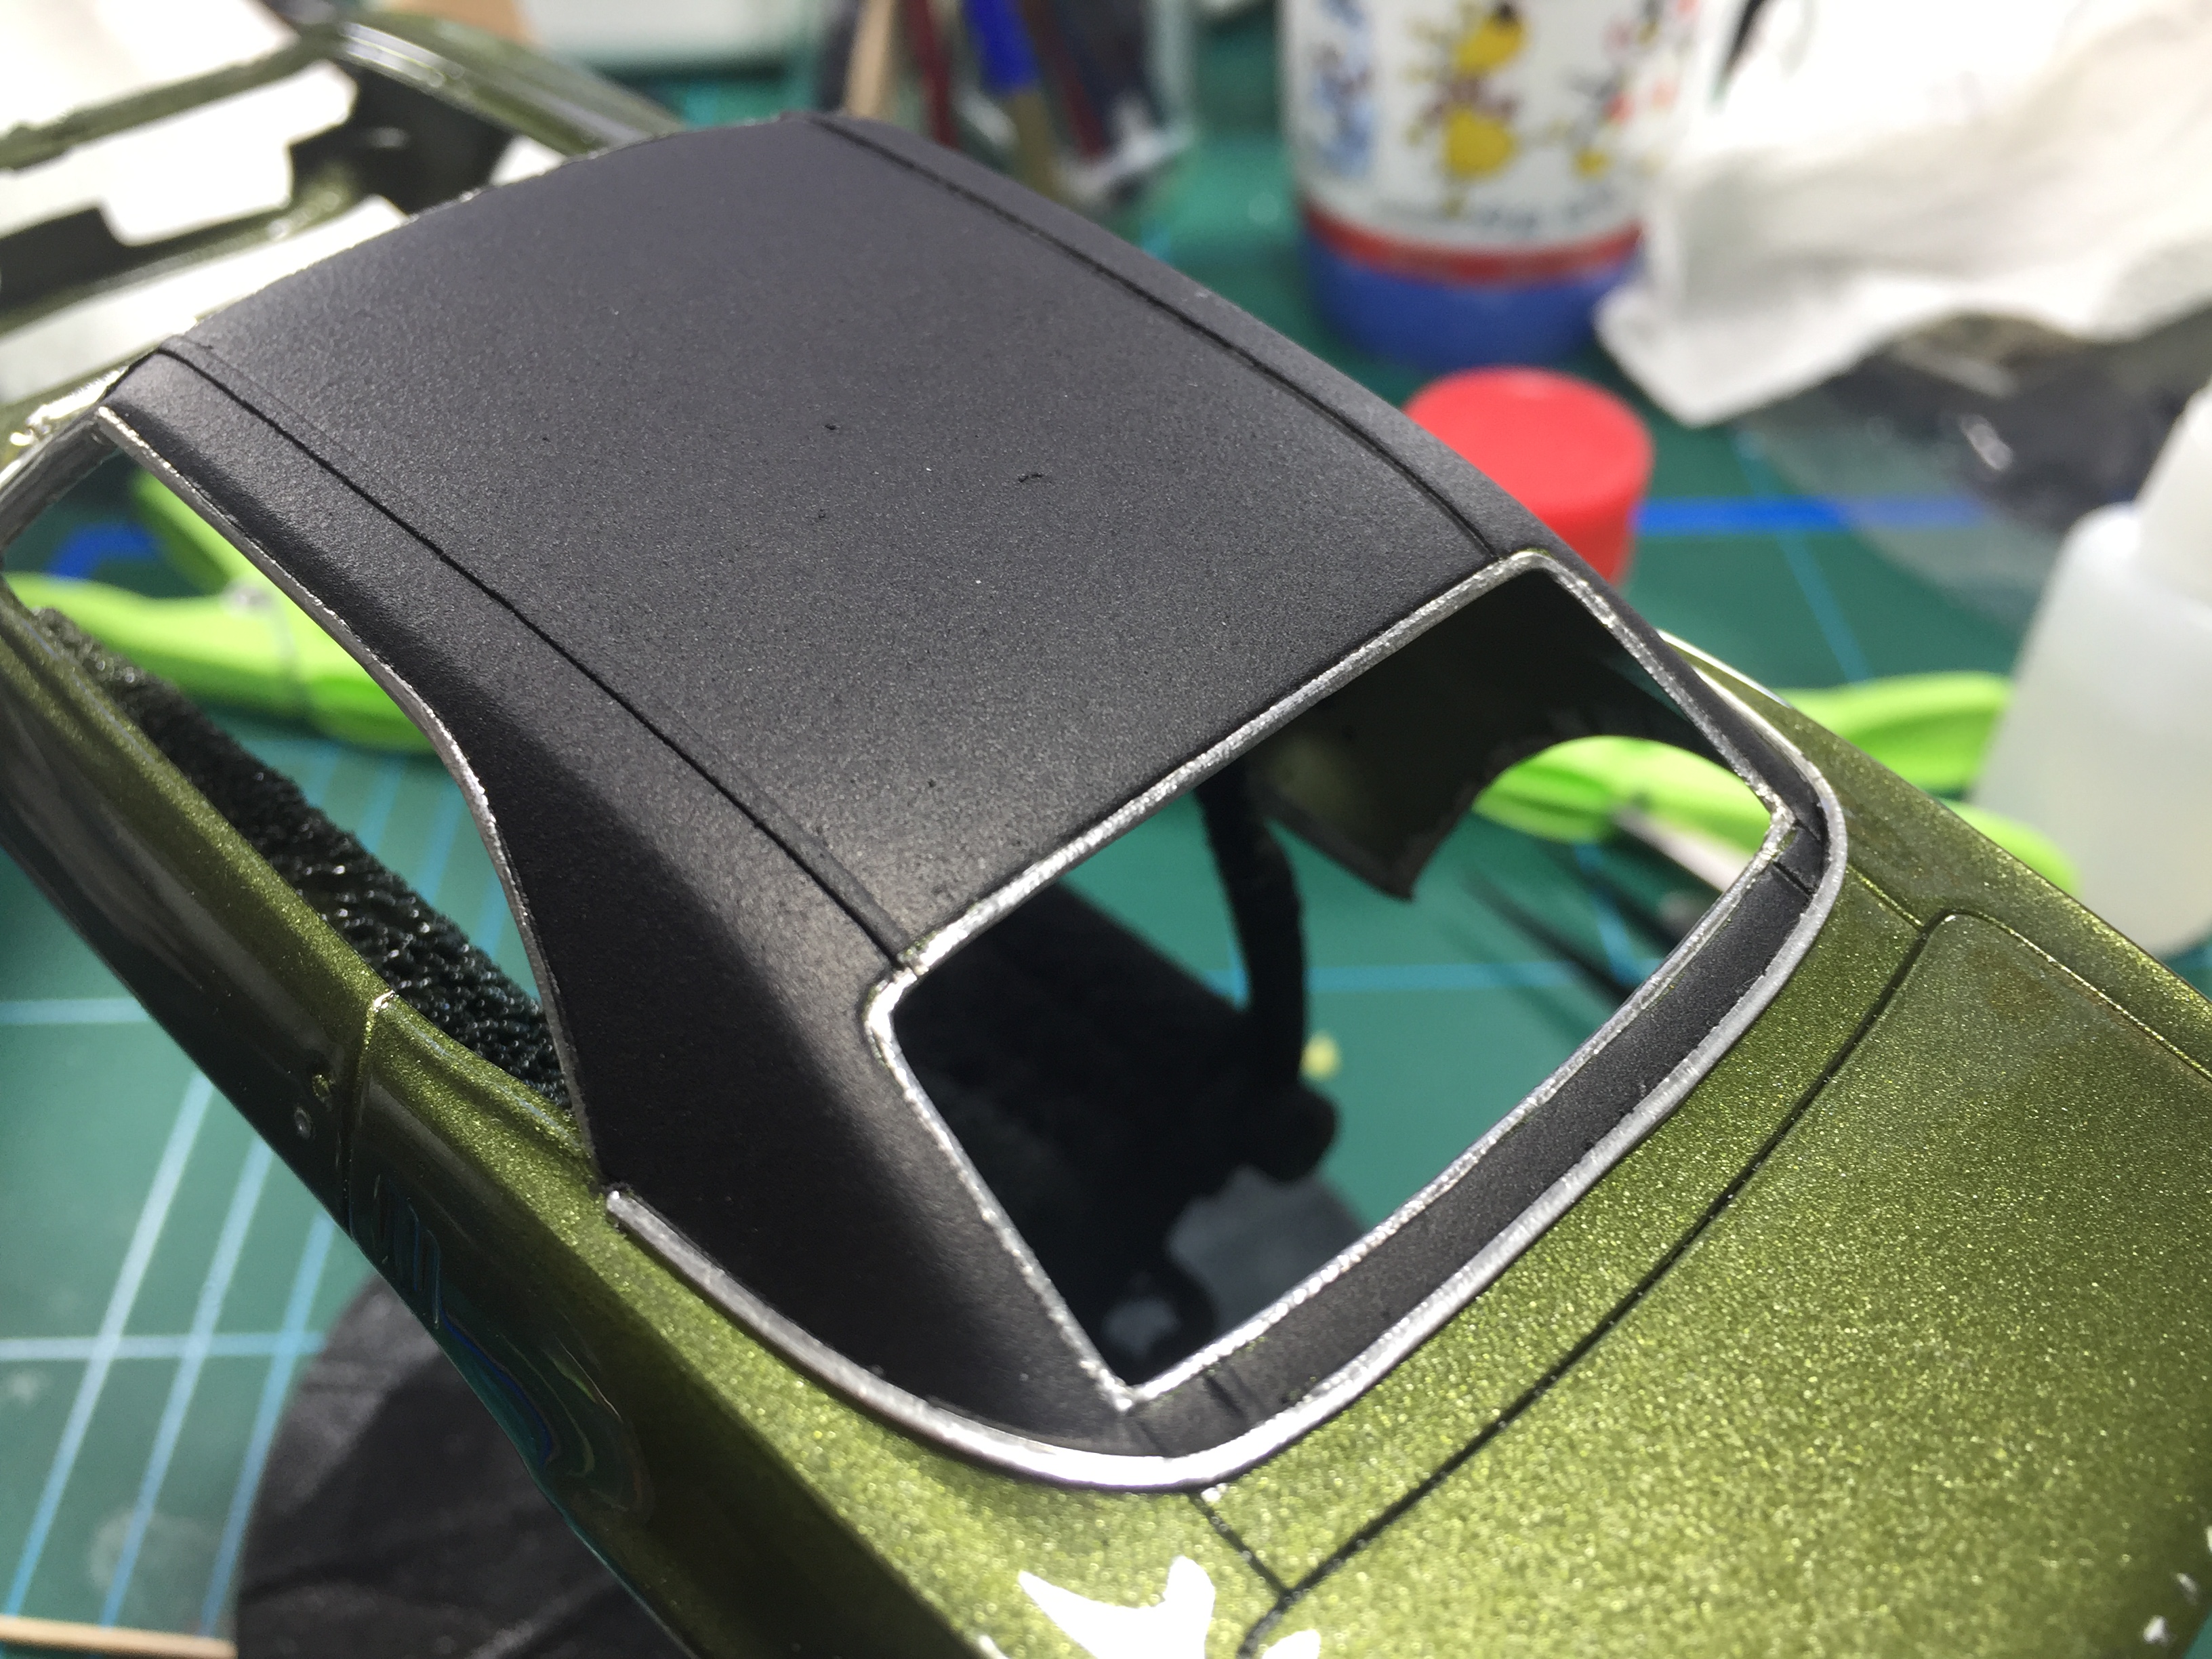
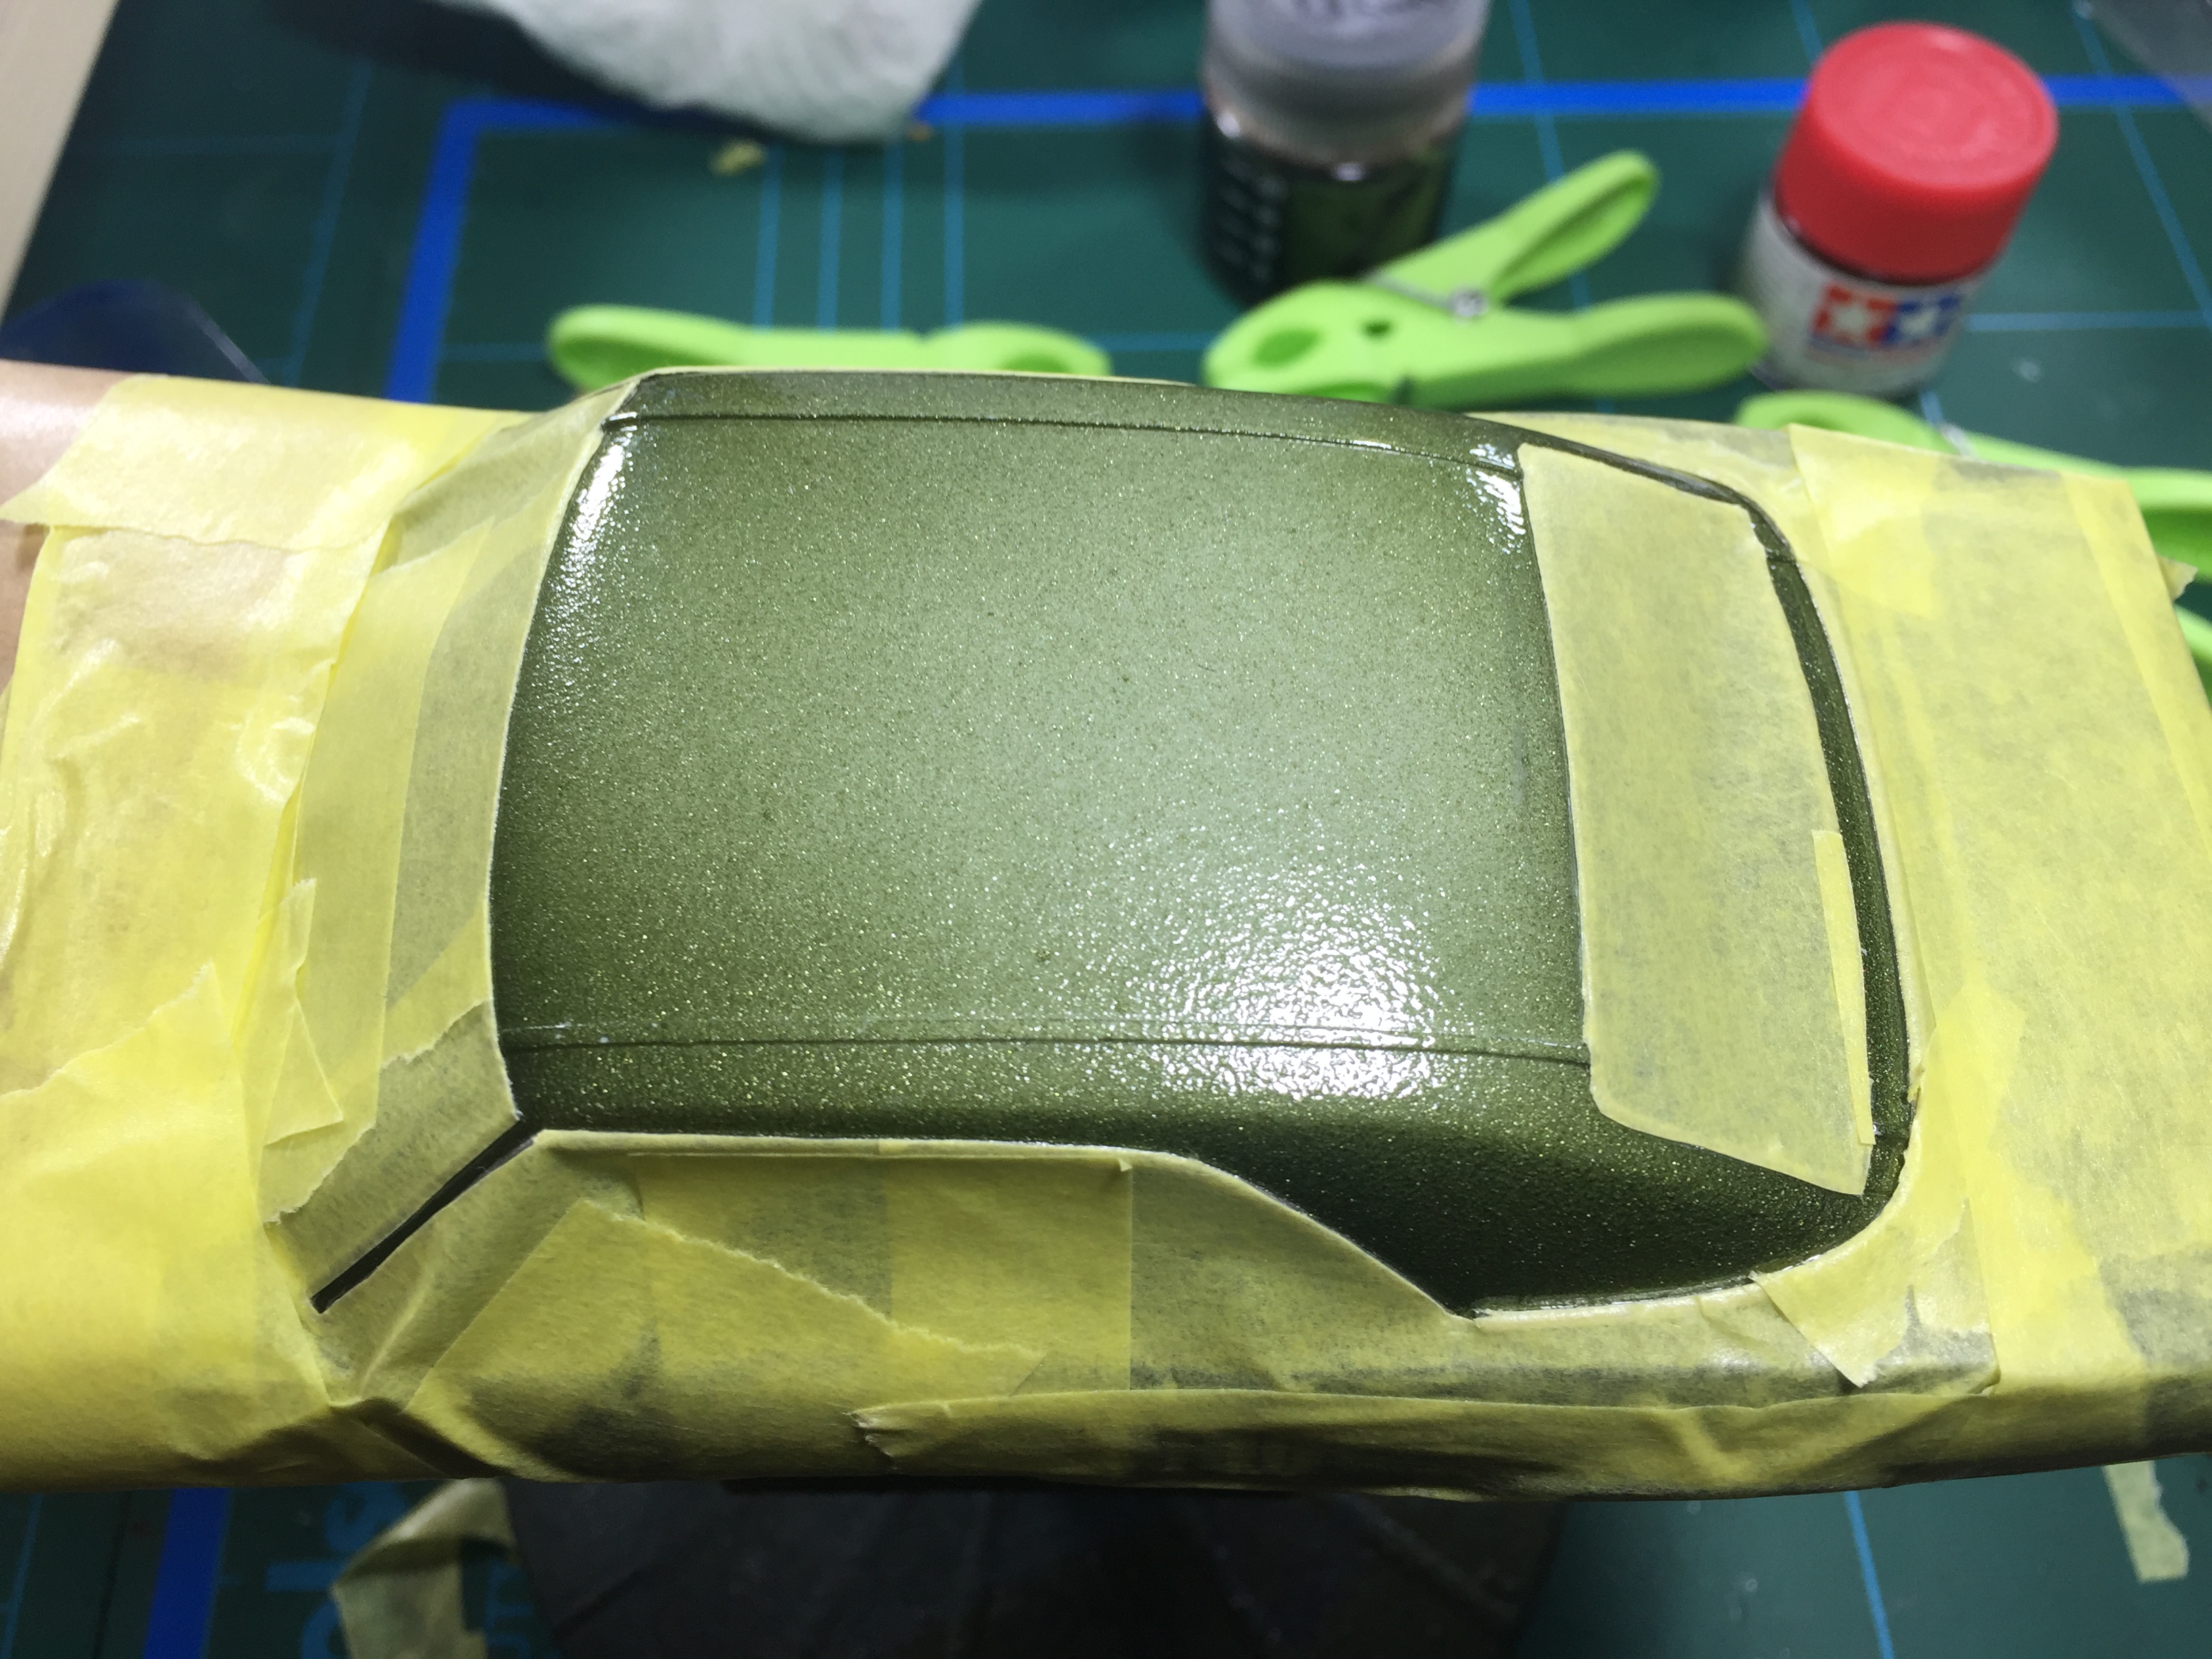
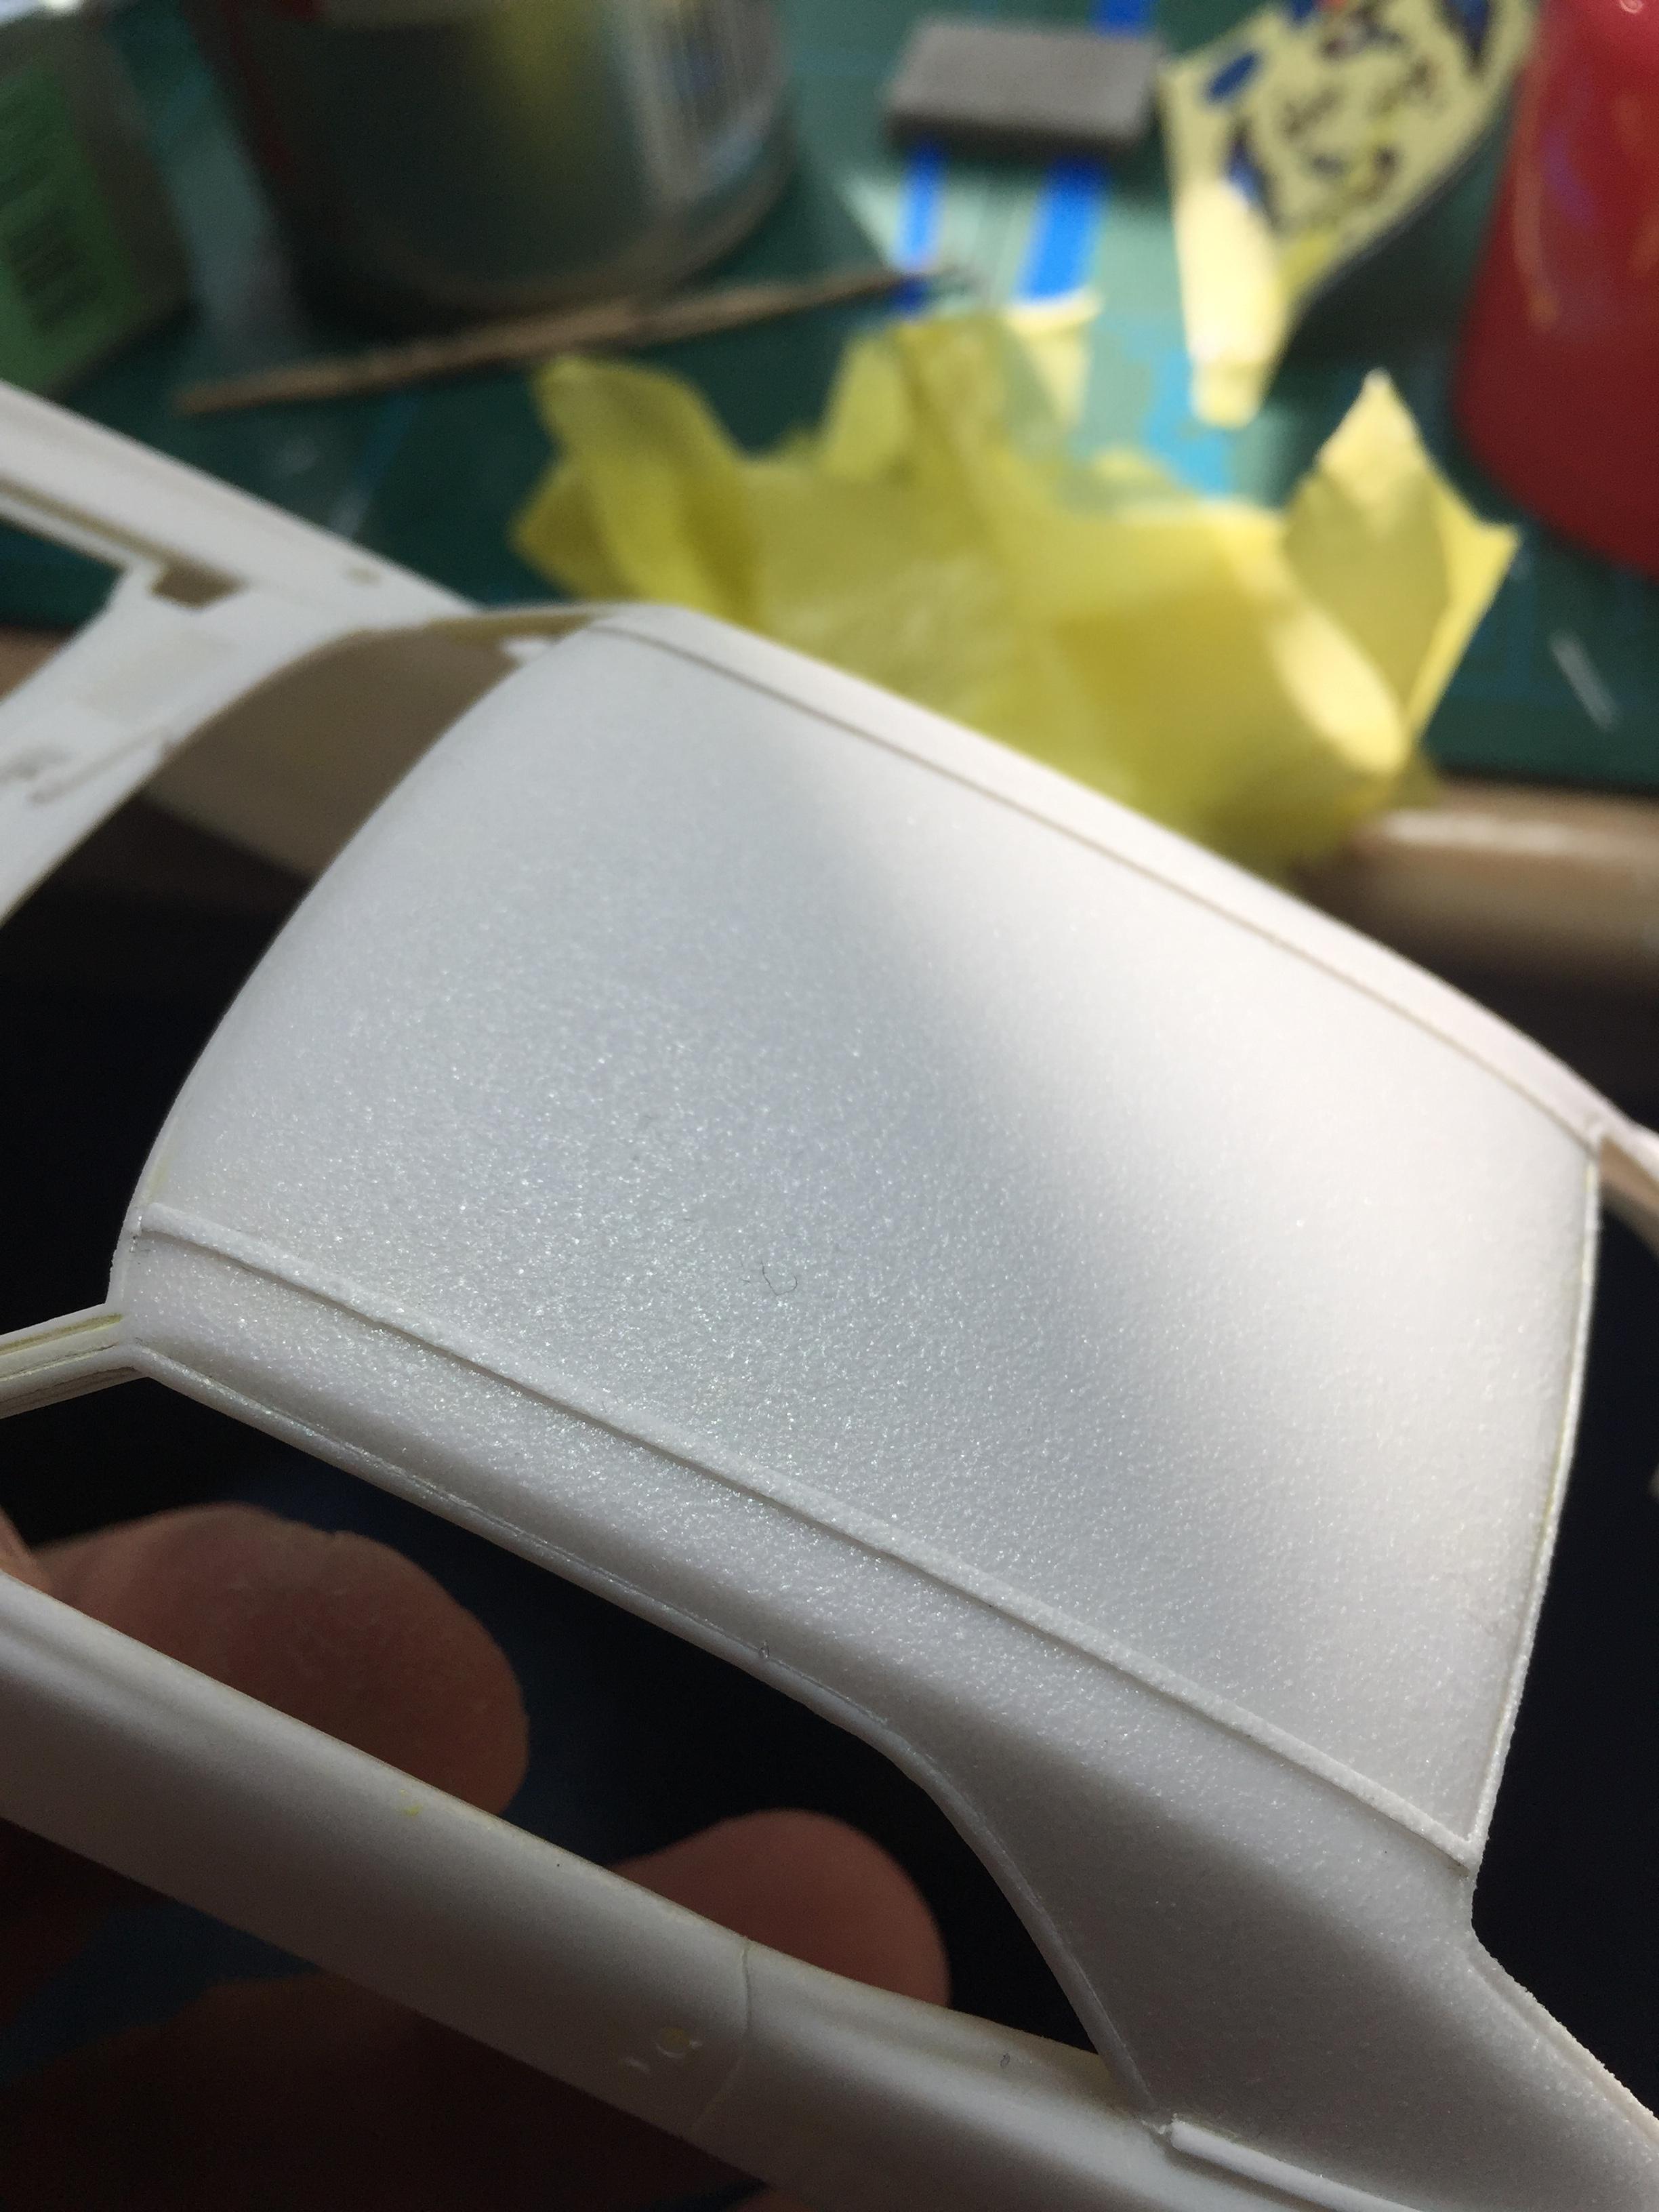
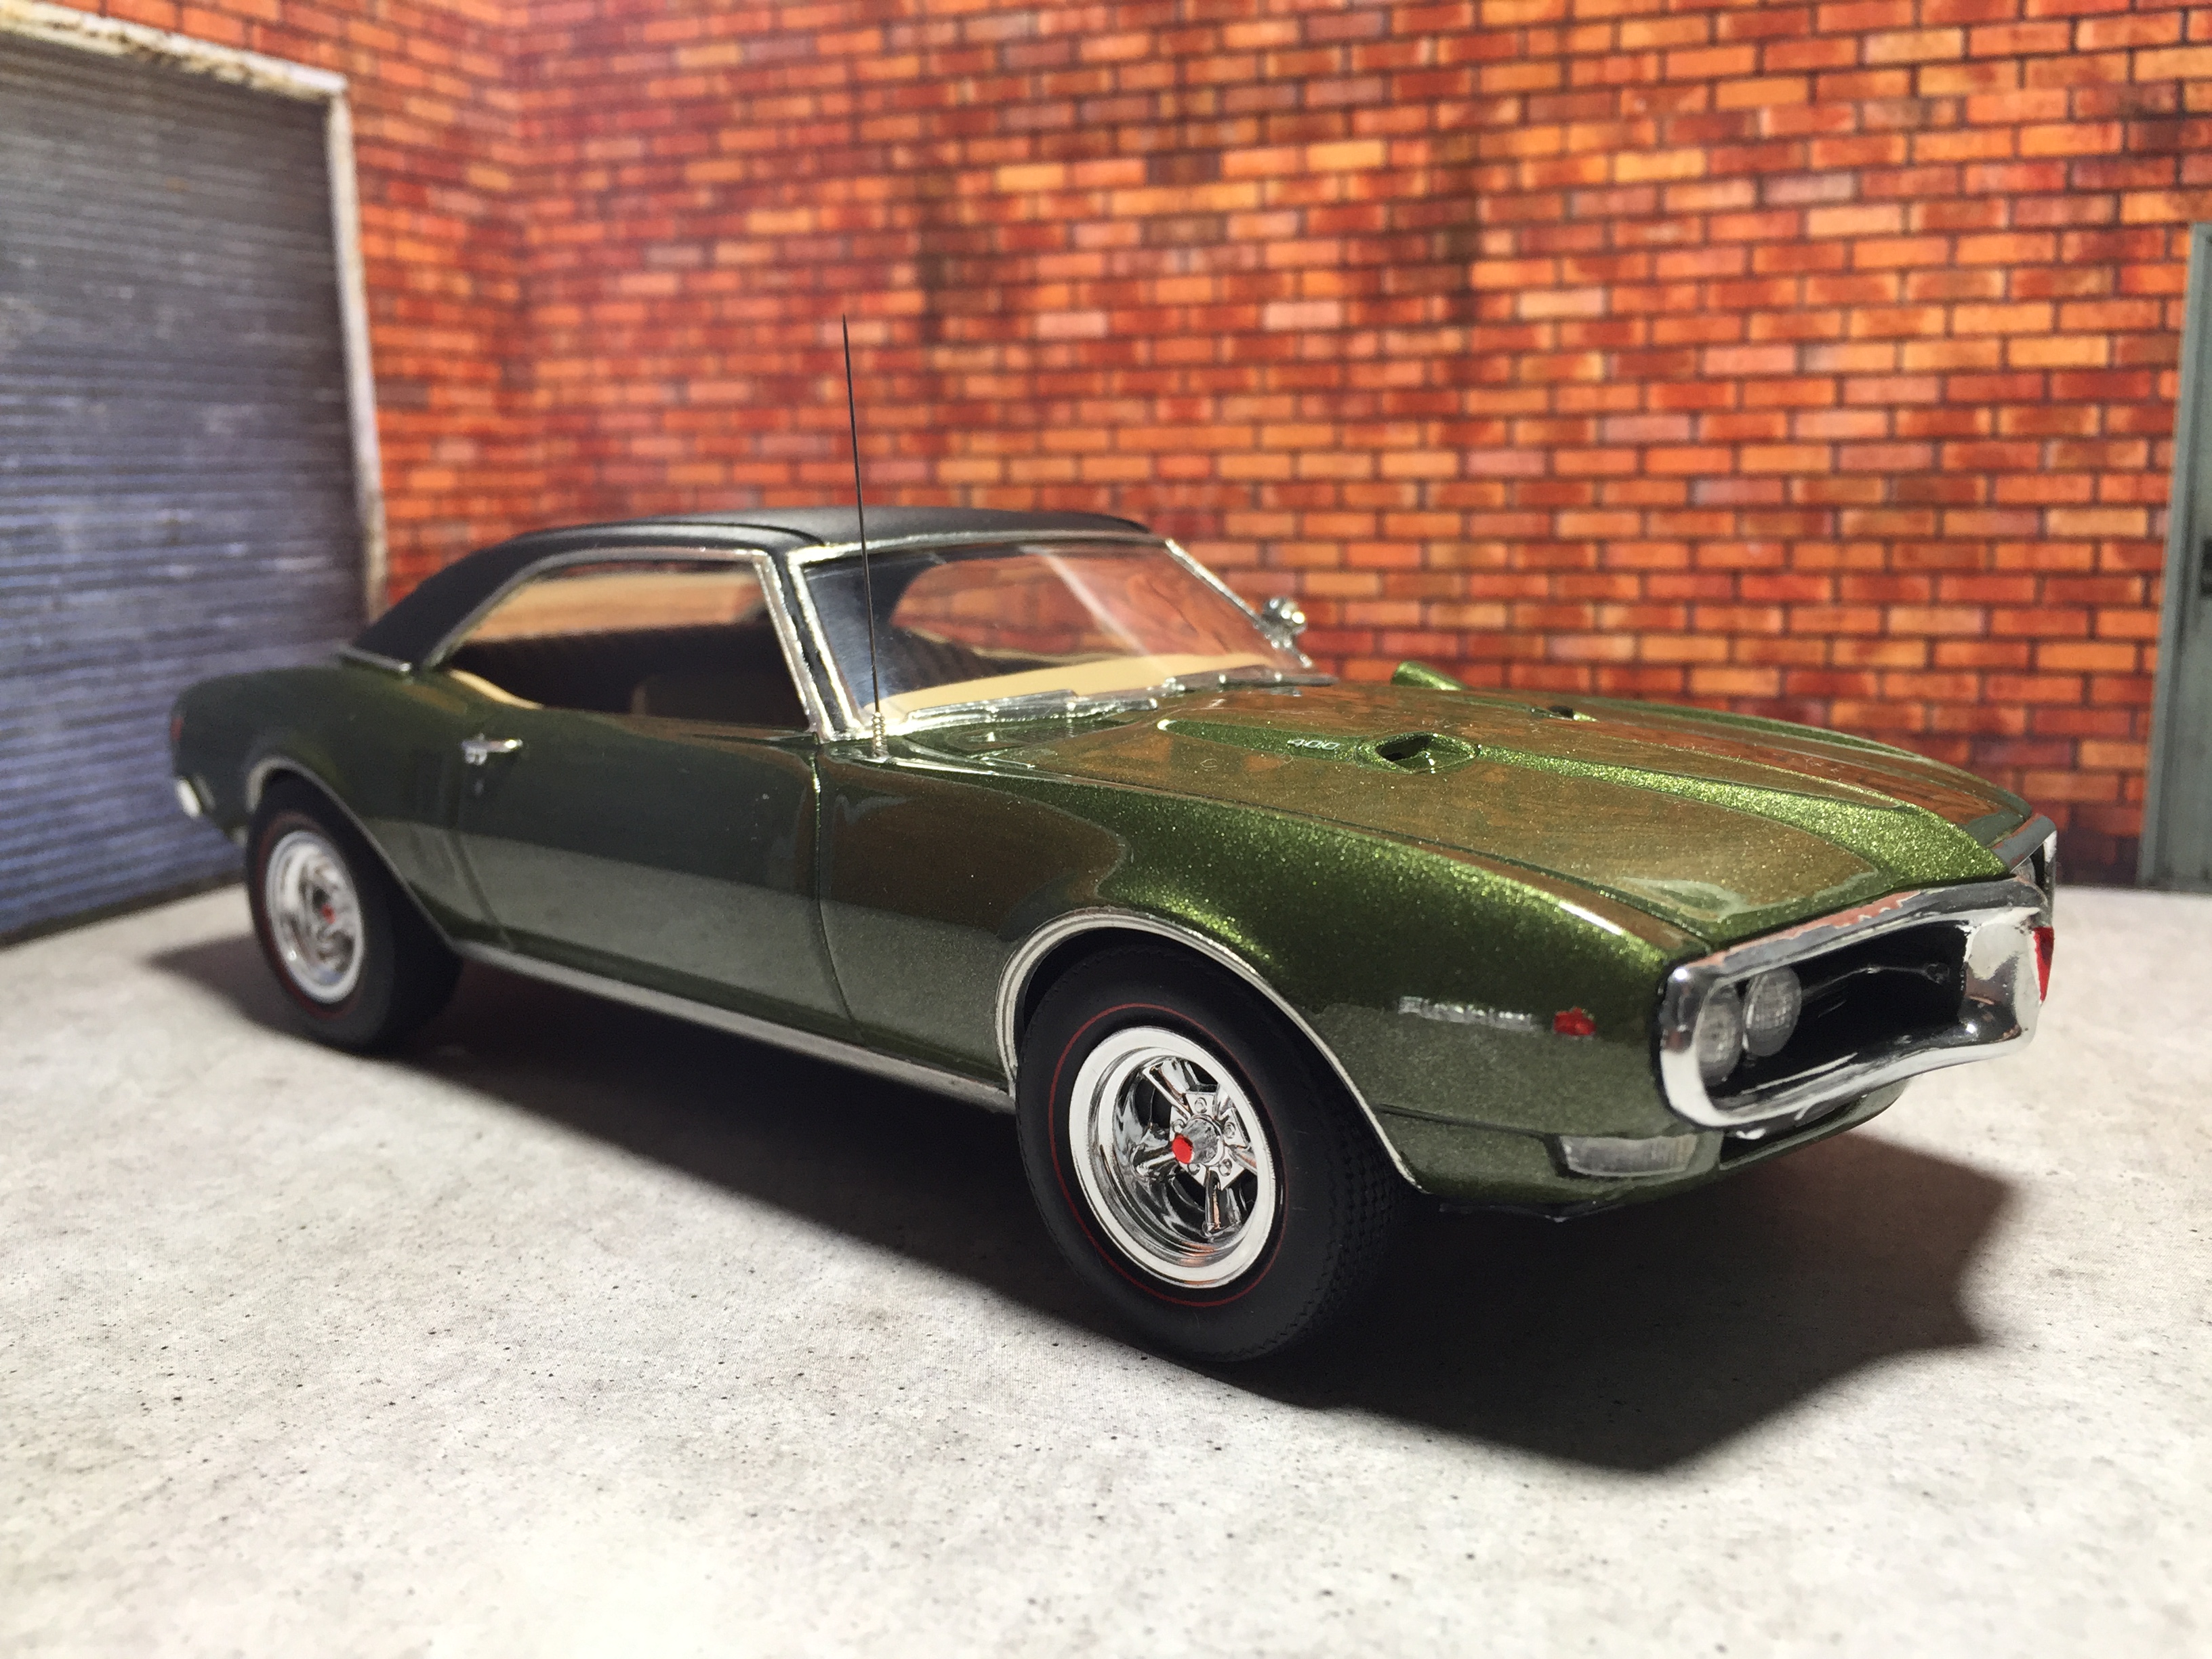
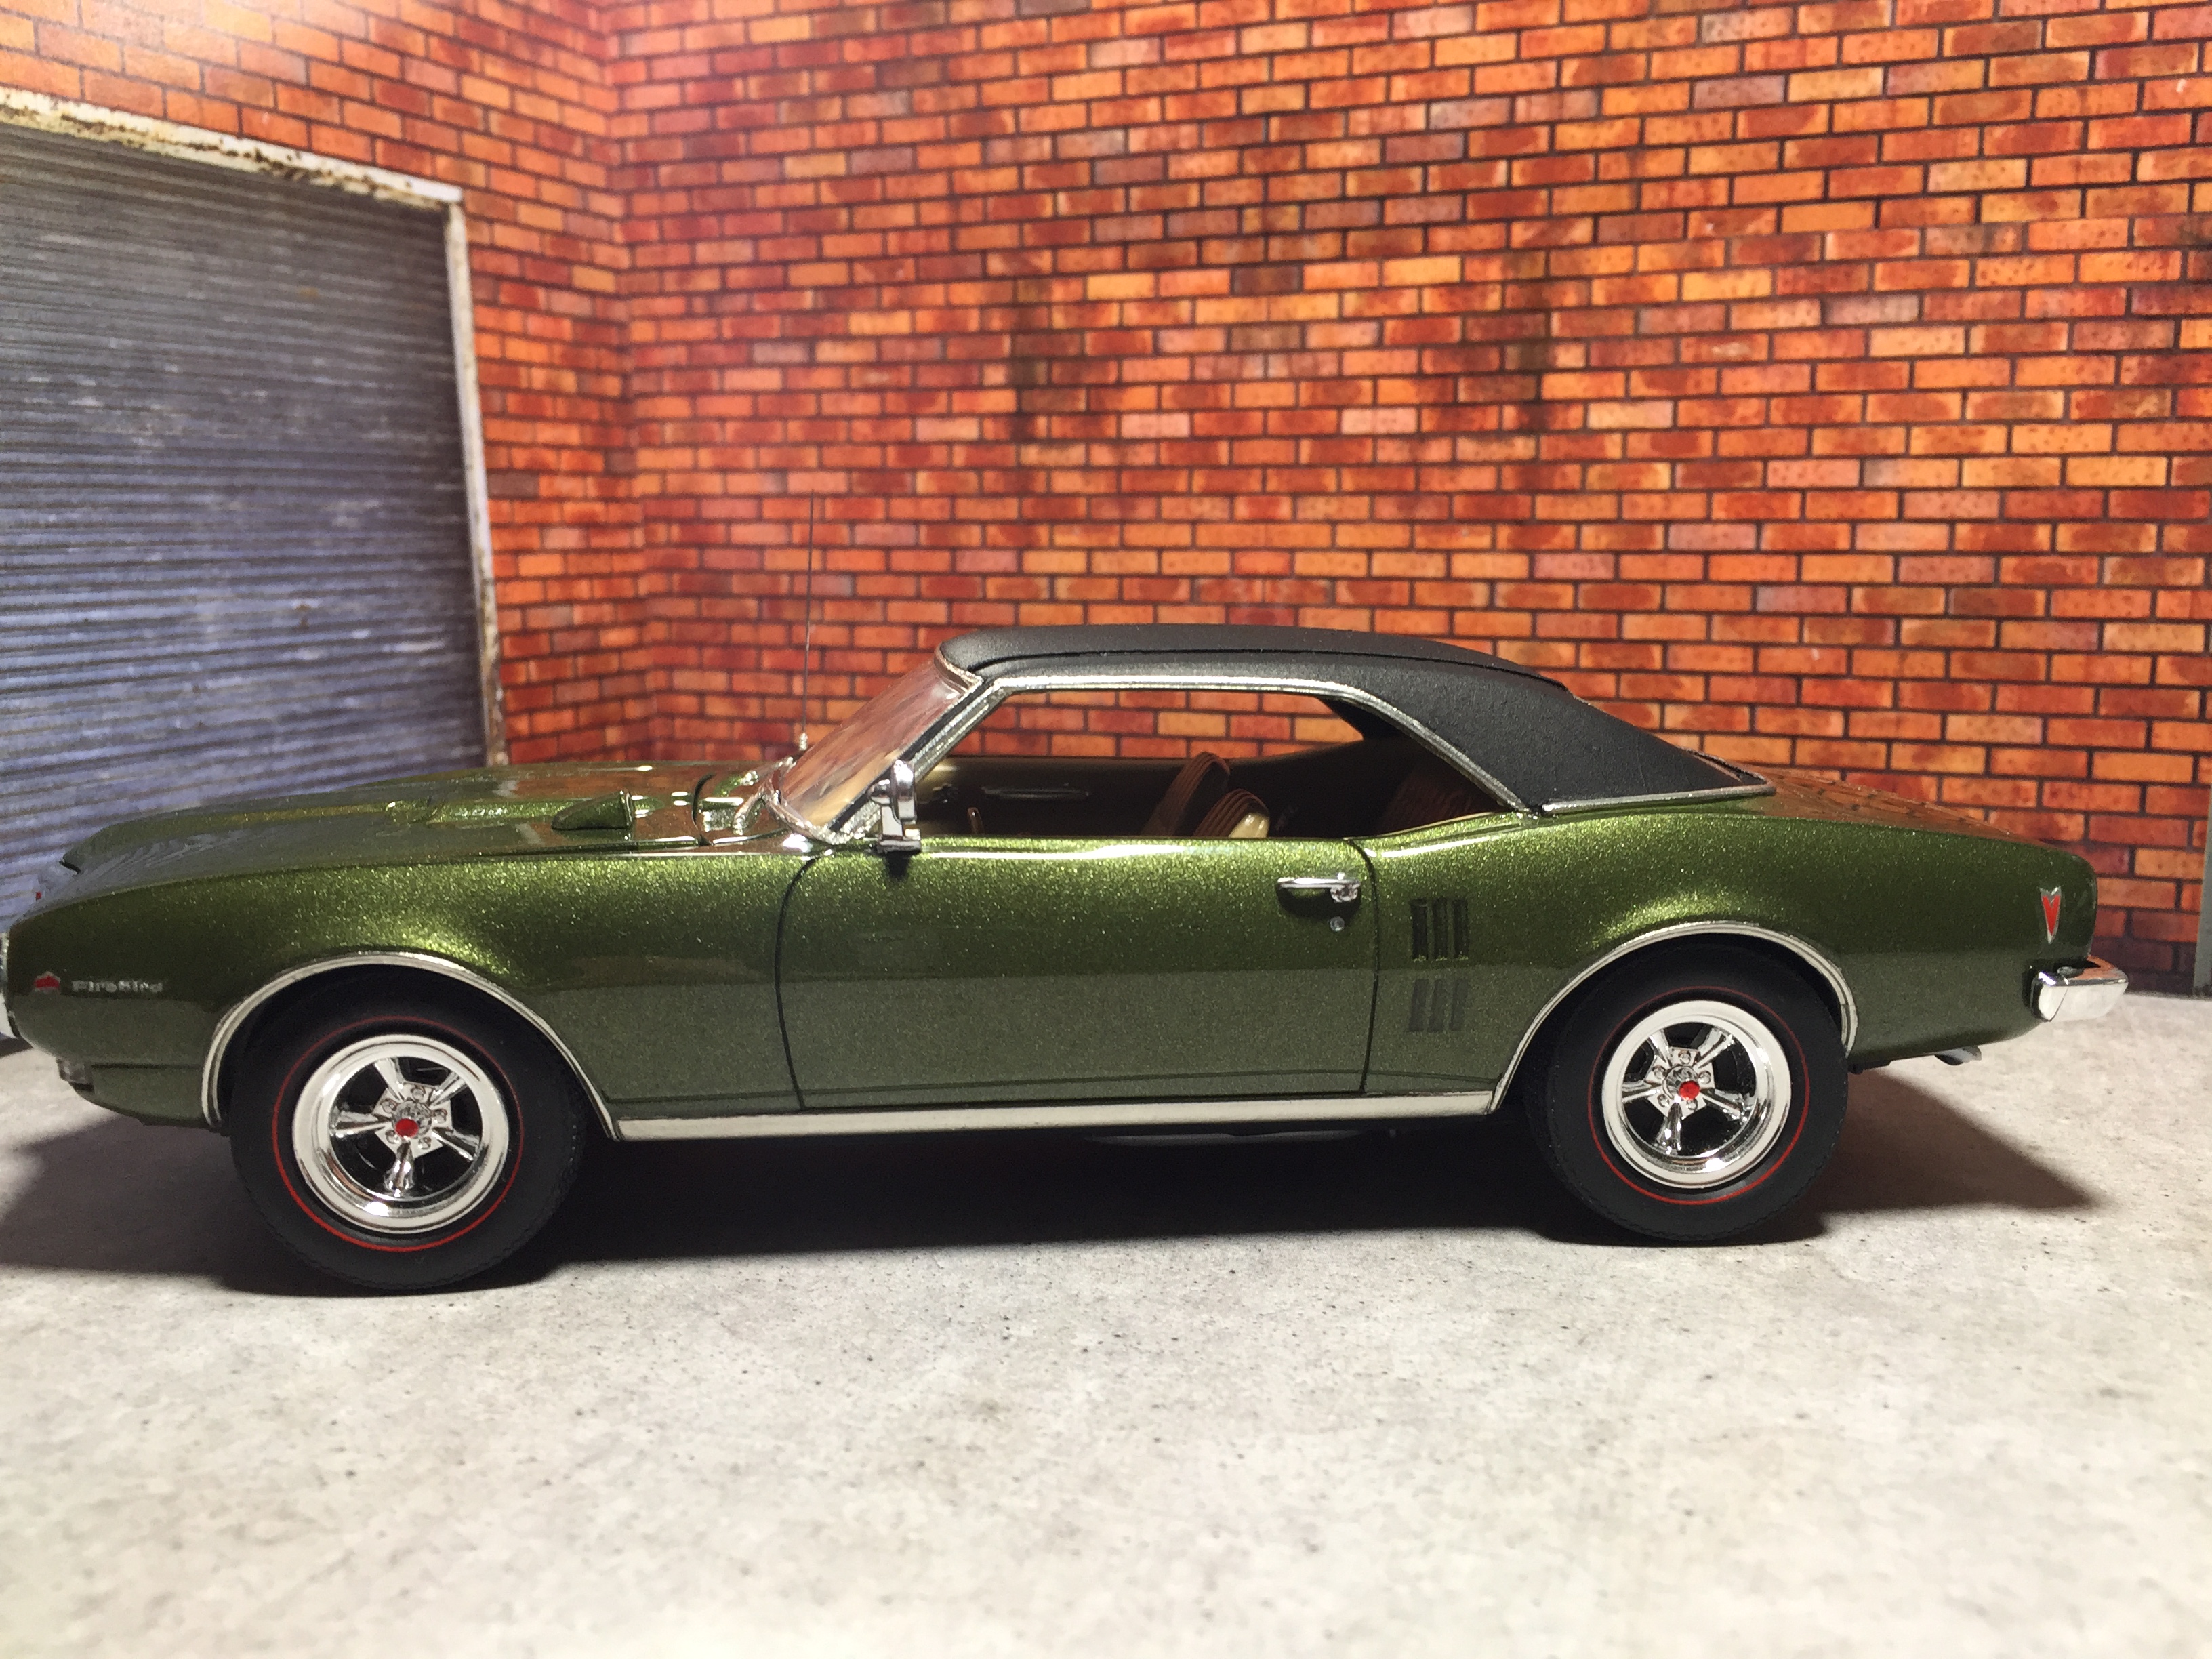
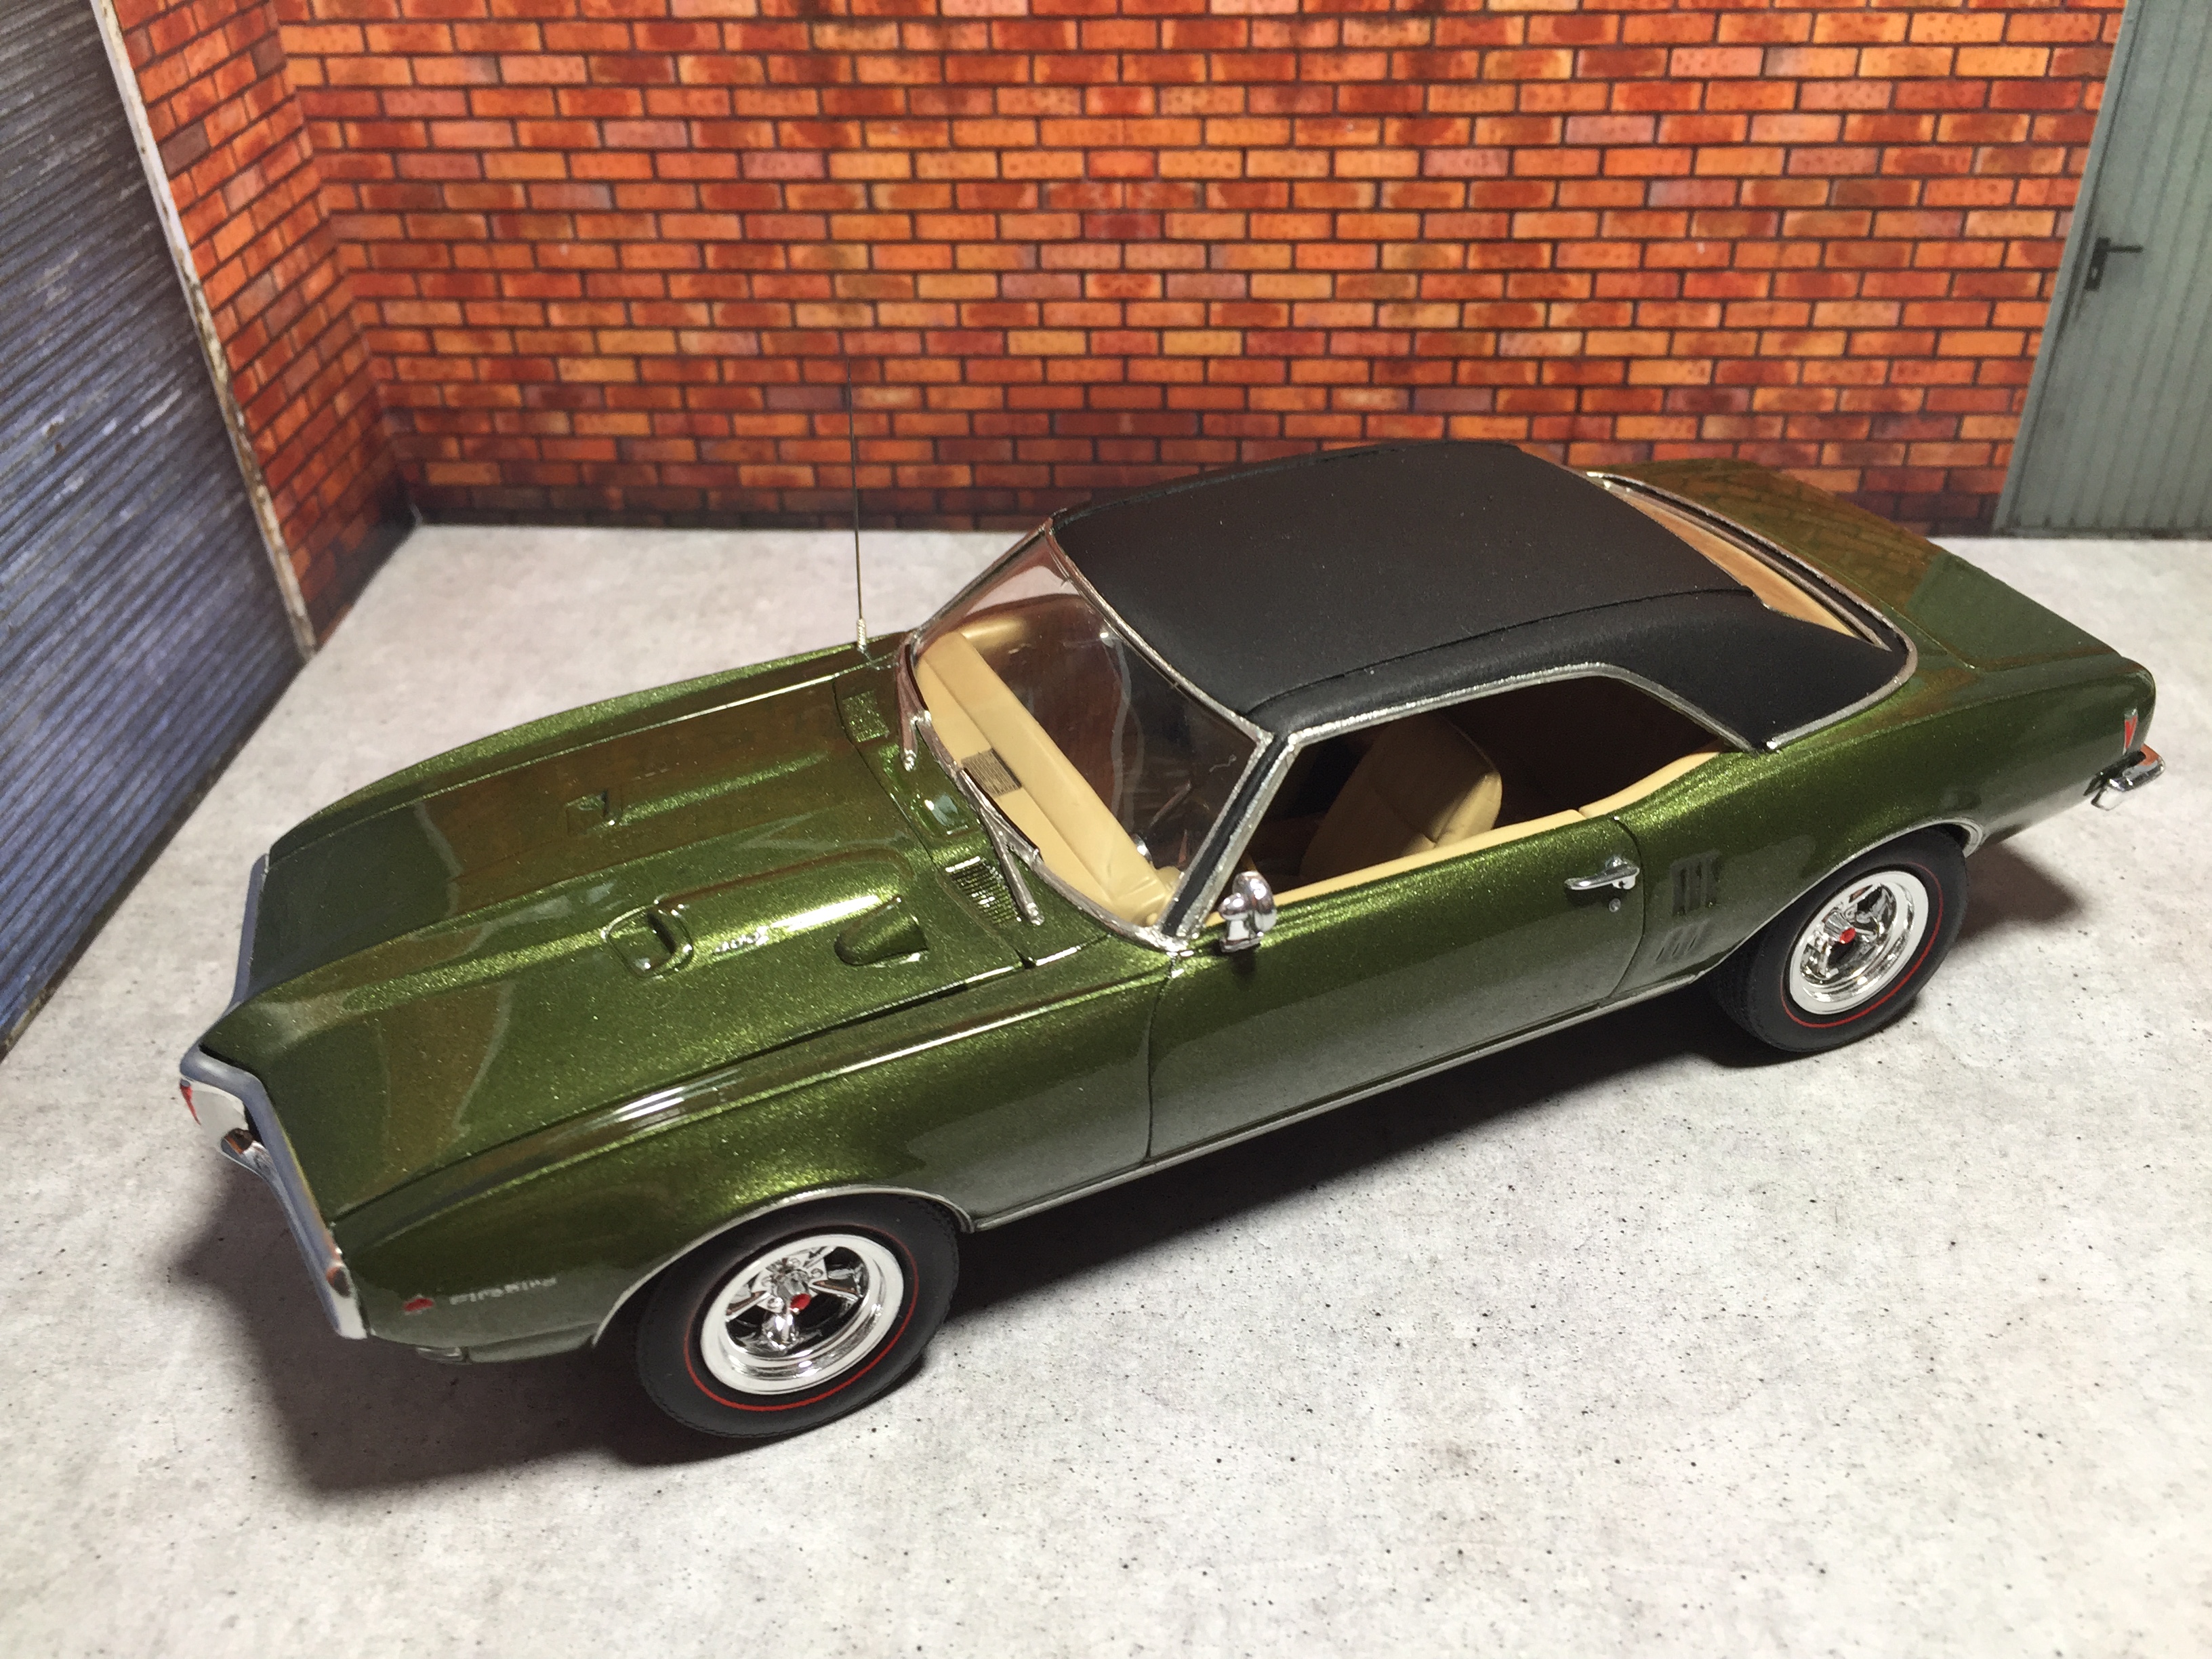
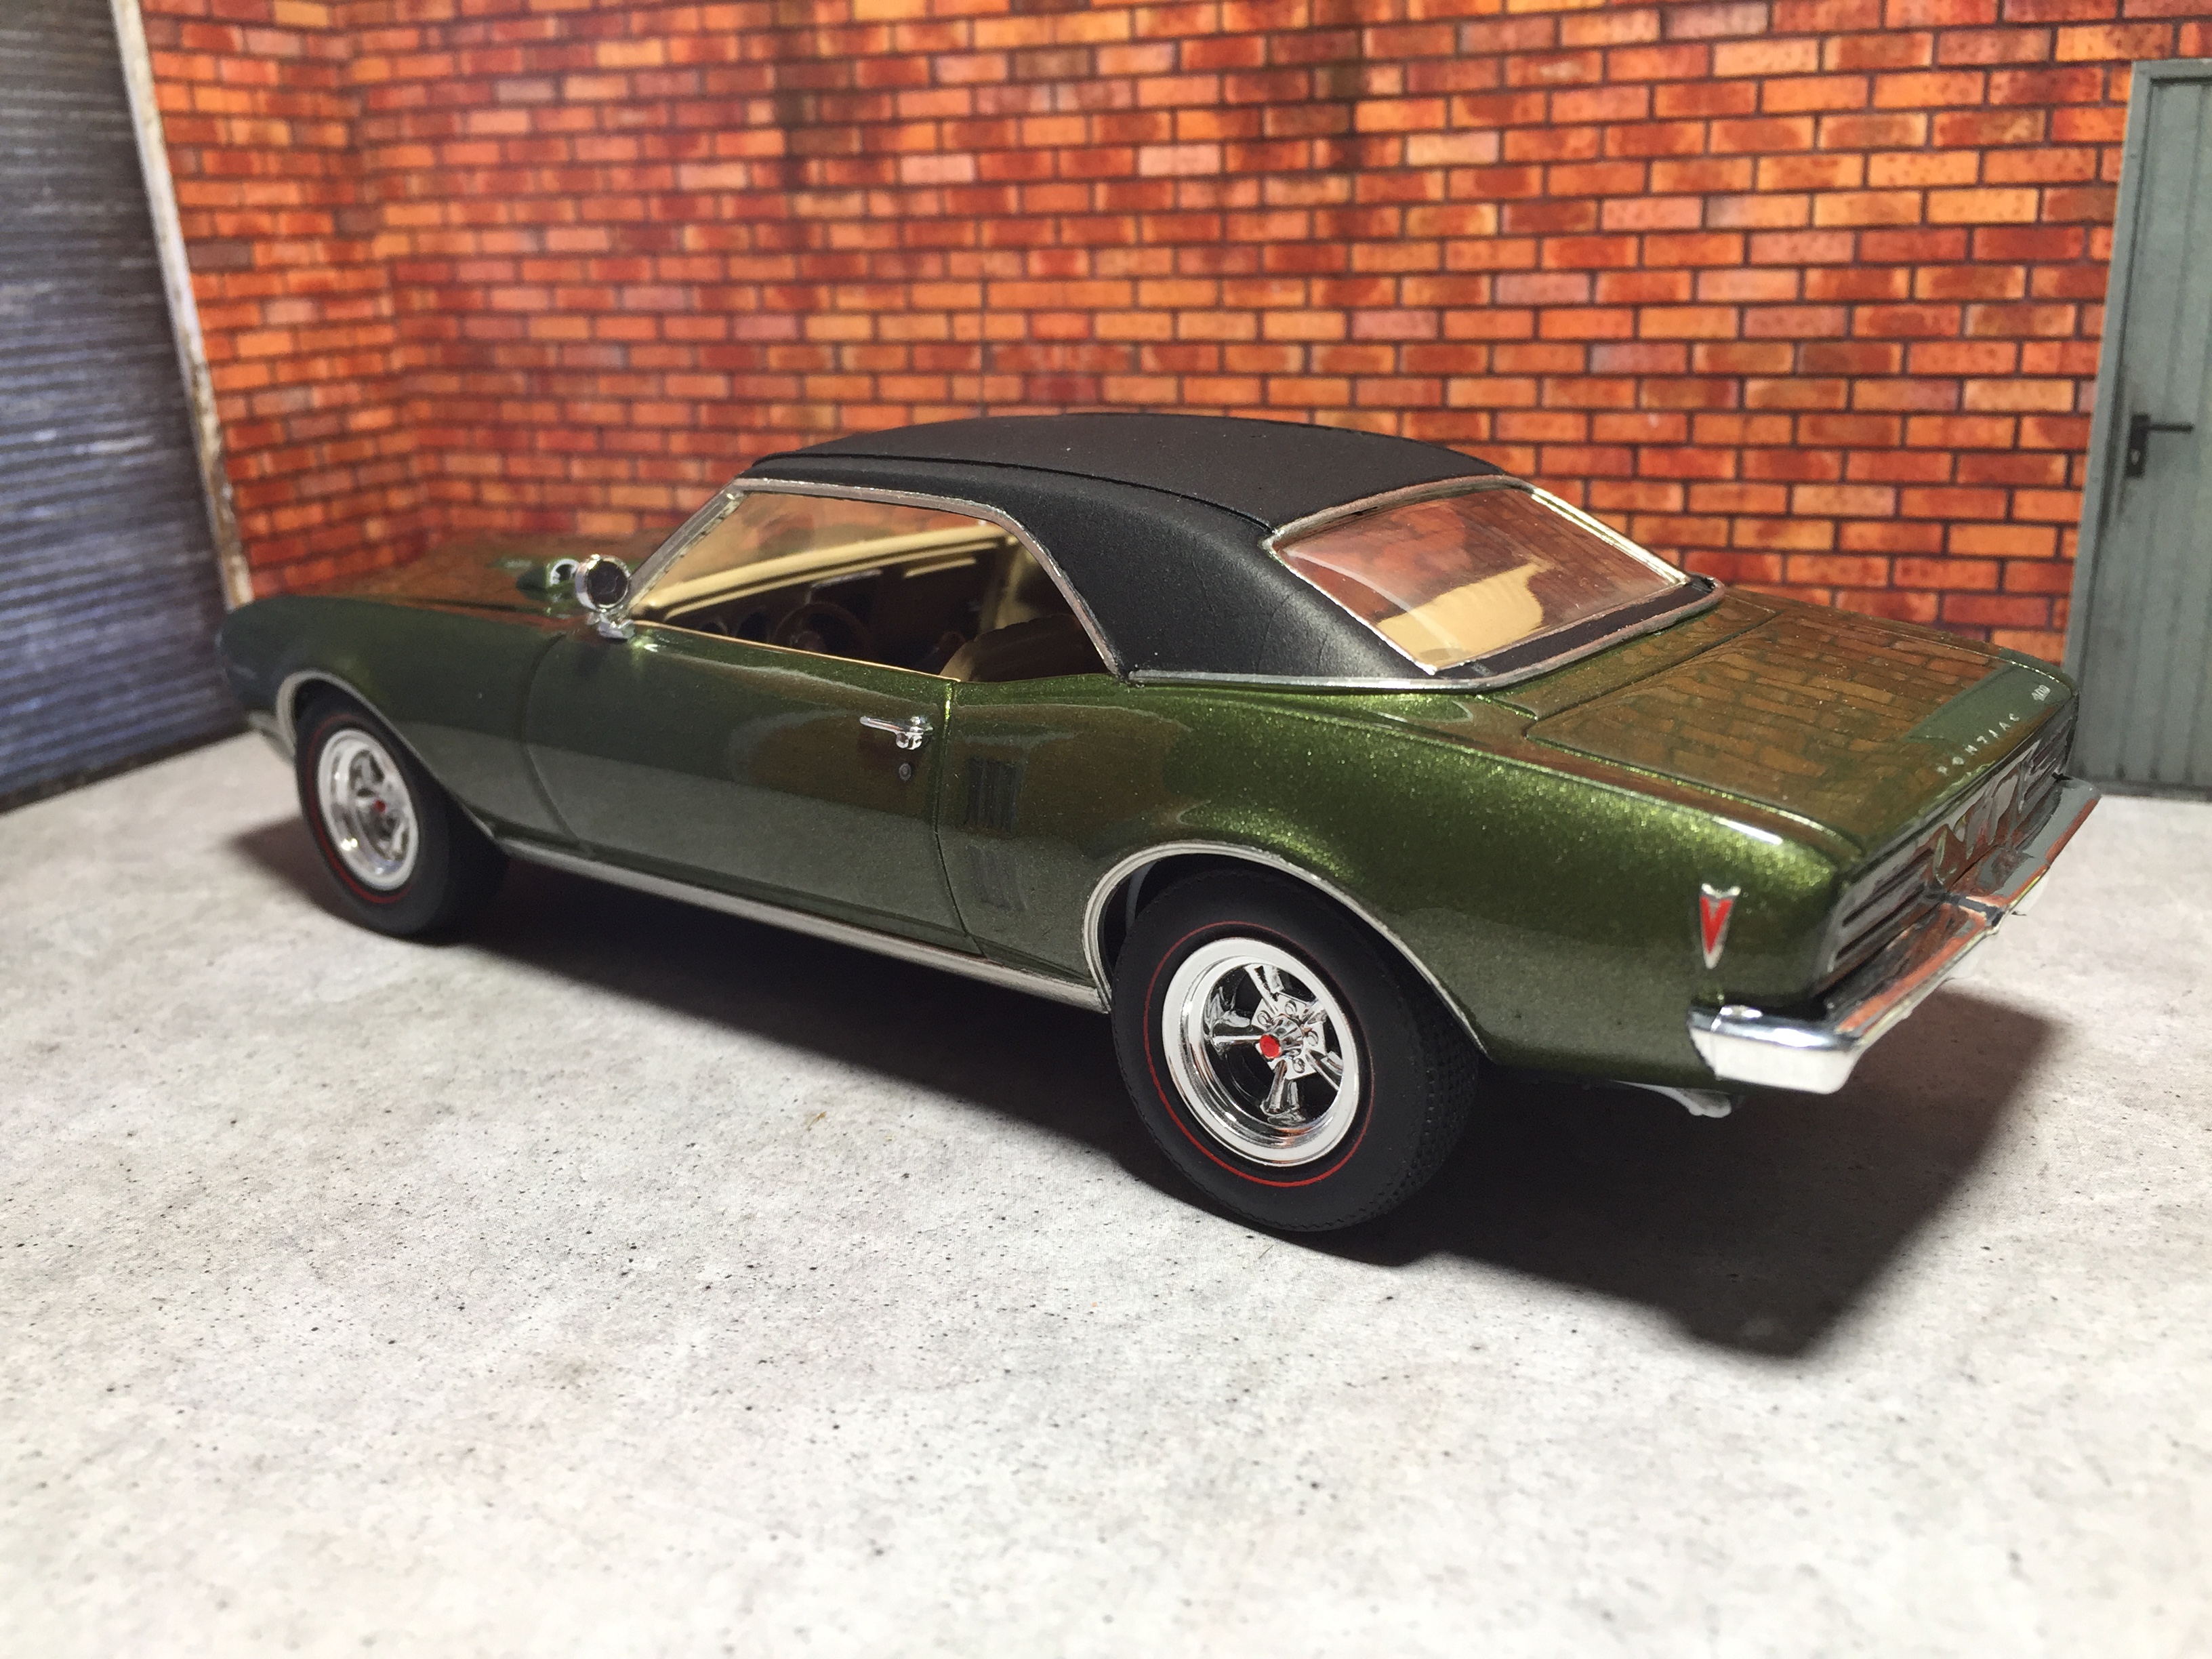
Hi folks, some weeks ago I got this old model when I visited the ROG factory sale. It has been used as a showcase model in toy stores back in the day and I thought it might be worth to do a resto on it. I have 2 new kits of that car so I limited the resto work to the body parts, wheels & tyres and interior. And... I wanted to do a vinyl top, for the first time. I chose to go for Verdoro Green which looks pretty nice in combo with a black vinyl top. Here we go: A word or two on the vinyl roof: I used a trick by Marcos Cruz which is applying spray glue PRIOR to the primer coat. That will create a nice surface structure for the vinyl top. The seams and additional chrome parts were made using Evergreen profiles which were sanded down. After all, I was pretty pleased with the results: EDIT: I wasn't quite happy with the images above. For one, they have been taken outside rather in a rush and some appear to be overexposed. Second, and more importantly, I wasn't happy with the way the headlights turned out. As I mentioned, this is a resto and the original headlights were so full of glue that I could not save them and decided to go for aftermarket parts. However, these are smaller and somewhat darker or dull, so I kinda missed the "sparkle" in the Firedbird's "eyes". That's why I decided to replace them with new headlights from a complete kit I own. I will have to find new ones for that kit, but for now I am much more satisfied with the result of this build. Enough said, here are the new images:
-
Thanks a lot for your kind feedback, Dann, Chris, Simon, Tom, Craig, Atin, Anders, Jürgen and Oddvar!
-
Great build of a rare model!
-
Thanks a lot, Bill, David and Andre! Btw, I noticed a little late that the Mustang is looking very dark on the images. It's probably due to the fact that I took outside photos at sundown and the remaining light did not show the "real" color. For that reason I'd like to post another photo which shows the actual metallic blue color. I took it before I started polishing.
-
The color combo looks promising... And that is one nice kit, have fun with it. I built mine with the custom wheels aswell, but left the body at "natural" ride height.
-
Serious 3D printing inquiry...
Tommy124 replied to Dann Tier's topic in General Automotive Talk (Trucks and Cars)
Yesss, that GT40 engine kit is looking superb... https://www.scaleproduction.de/product_info.php?language=de&info=p2336_1969-f-gt40-motor-bausatz.html -
Thanks Brian, Phil and Roberto! Thanks Doug. The wheels are 19" Volks Ray RT 37 as sold by Aoshima. They are available in silver and dark gold, I have the dark gold ones. It should be these: https://images.app.goo.gl/XtTKzSbXGjUh78p78 As regards the headlight prints, I have mailed them to you.
-
Looks stunning, really like it!