Misha
-
Posts
1,014 -
Joined
-
Last visited
Content Type
Profiles
Forums
Events
Gallery
Everything posted by Misha
-

Spray booth recommendations??
Misha replied to 2zwudz's topic in Model Building Questions and Answers
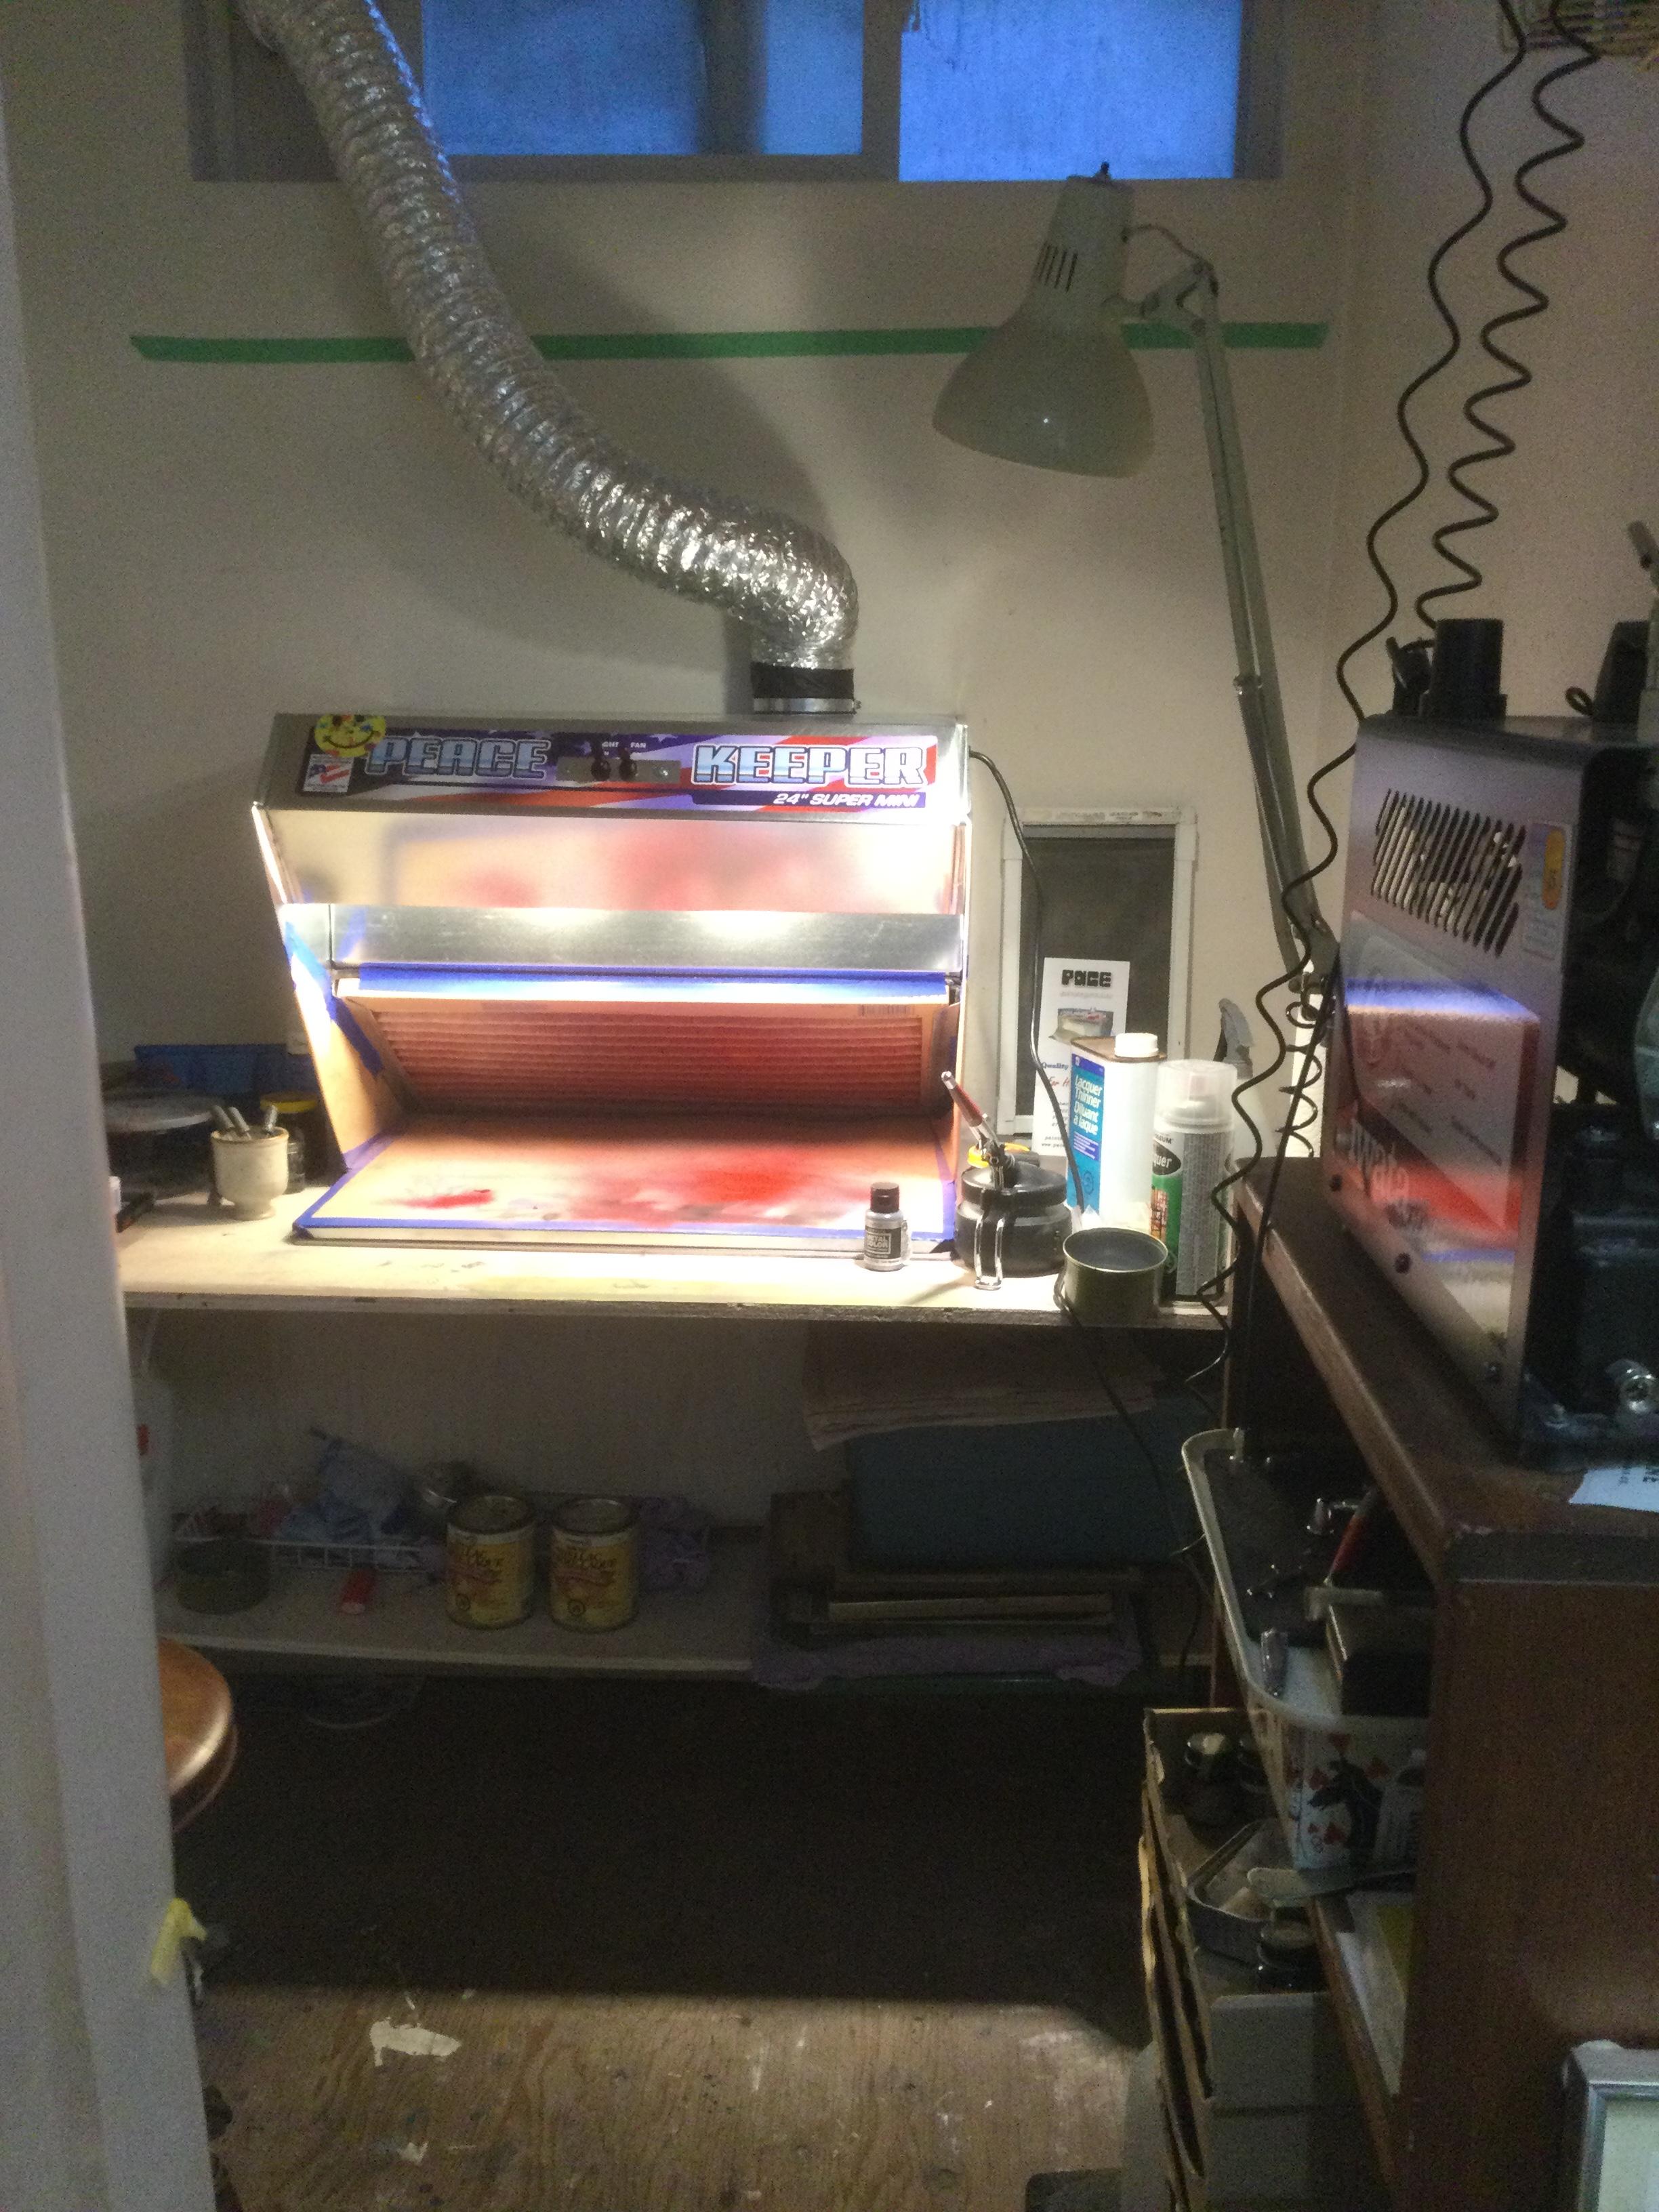
I’ve had my Pace booth since the summer and it has been great! It is fairly quiet, is very effective in evacuating fumes away from your work and you, and well built. Plus Bob Pace is a great guy to speak with over the phone. Spray booths vary greatly in design and quality... my only complaint is that I didn’t get one years ago. Cheers Misha
-
Server Upgrade Started
Misha replied to Dave Ambrose's topic in Model Cars Magazine News and Discussions
All good now... -
Server Upgrade Started
Misha replied to Dave Ambrose's topic in Model Cars Magazine News and Discussions
Not sure if anyone is experiencing frustratingly snail paced downloads, both for topics and then the photos... Cheers Misha -
Welcome aboard Bruce! Really like your concept of slipping the NASCAR chassis under a pickup that is 65 some years old. Looking forward to your and everyone’s builds. Cheers Misha
-
Server Upgrade Started
Misha replied to Dave Ambrose's topic in Model Cars Magazine News and Discussions
X3 -
That’s pretty trick looking Peter! Great use of materials, seeing in scale. Cheers Misha
-
The final finish/scheme will be the key to a successful run, blending in while still, when possible, being able to open it up! Seeing a rather non-descript old Camaro, the secretary model, at first and hopefully final glance will help. To achieve the “look” the plan is to paint the body in champagne gold with a white vinyl top and throwing in some chrome trim. The interior will appear with typical road trip necessities, such as a cooler. Being run in 2021 it won’t not be unusual to have a certain of tech aboard. The finish will appear worn, yet some what maintained. Flares! What stinkin’ flares.... Here are a couple of stance shots... Cheers Misha
-
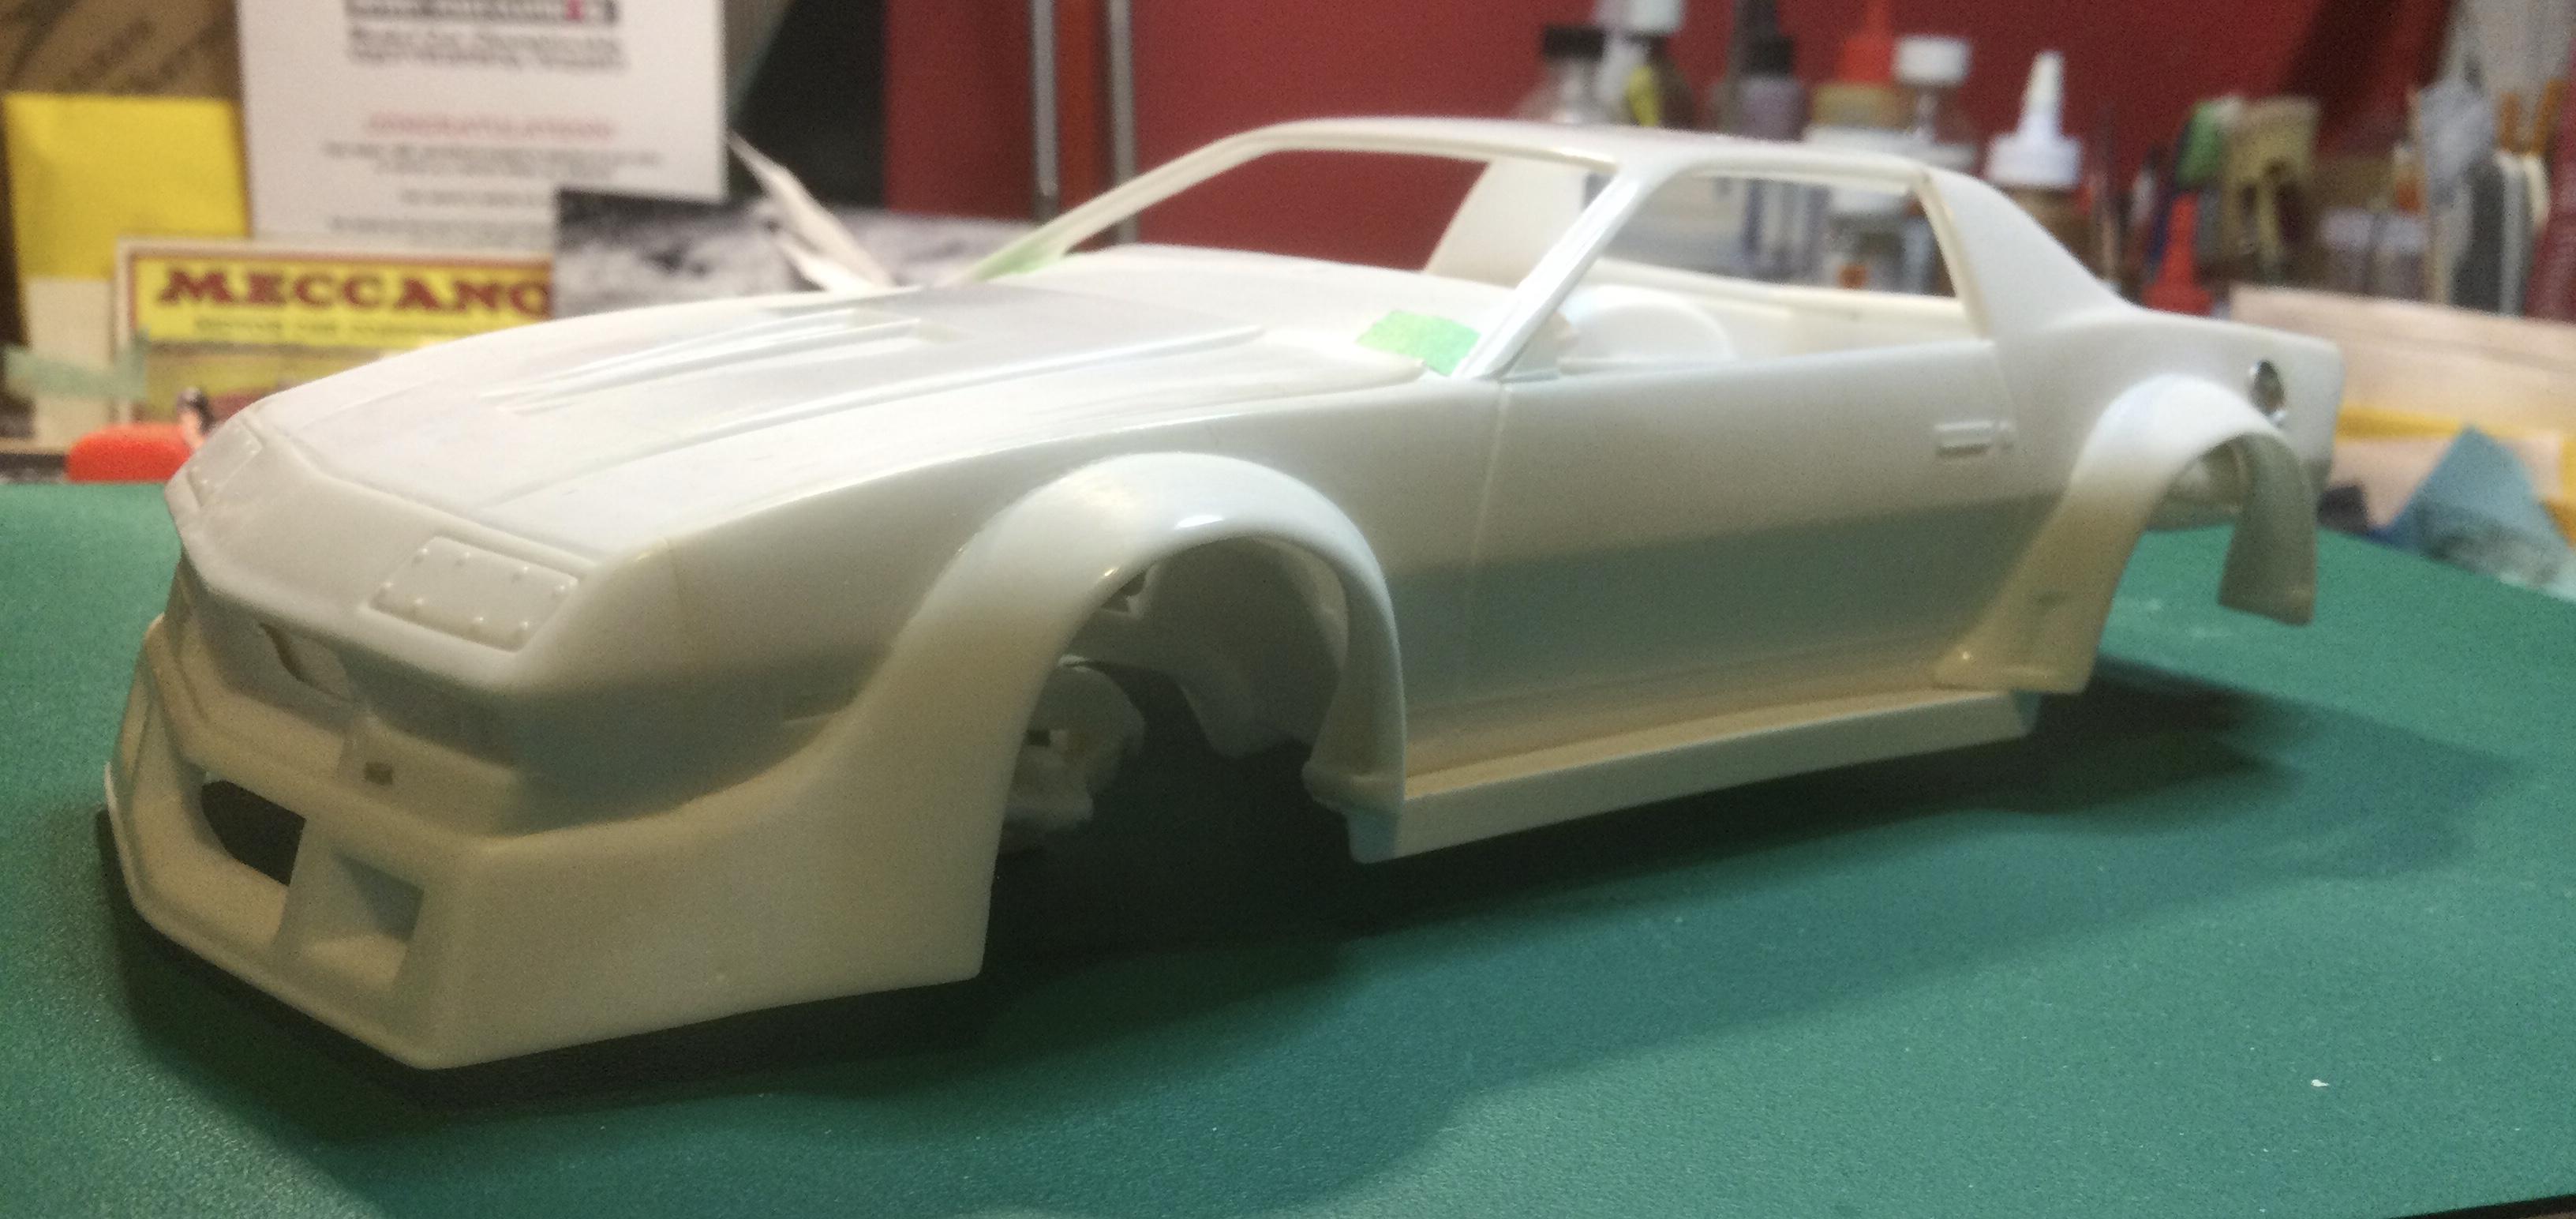
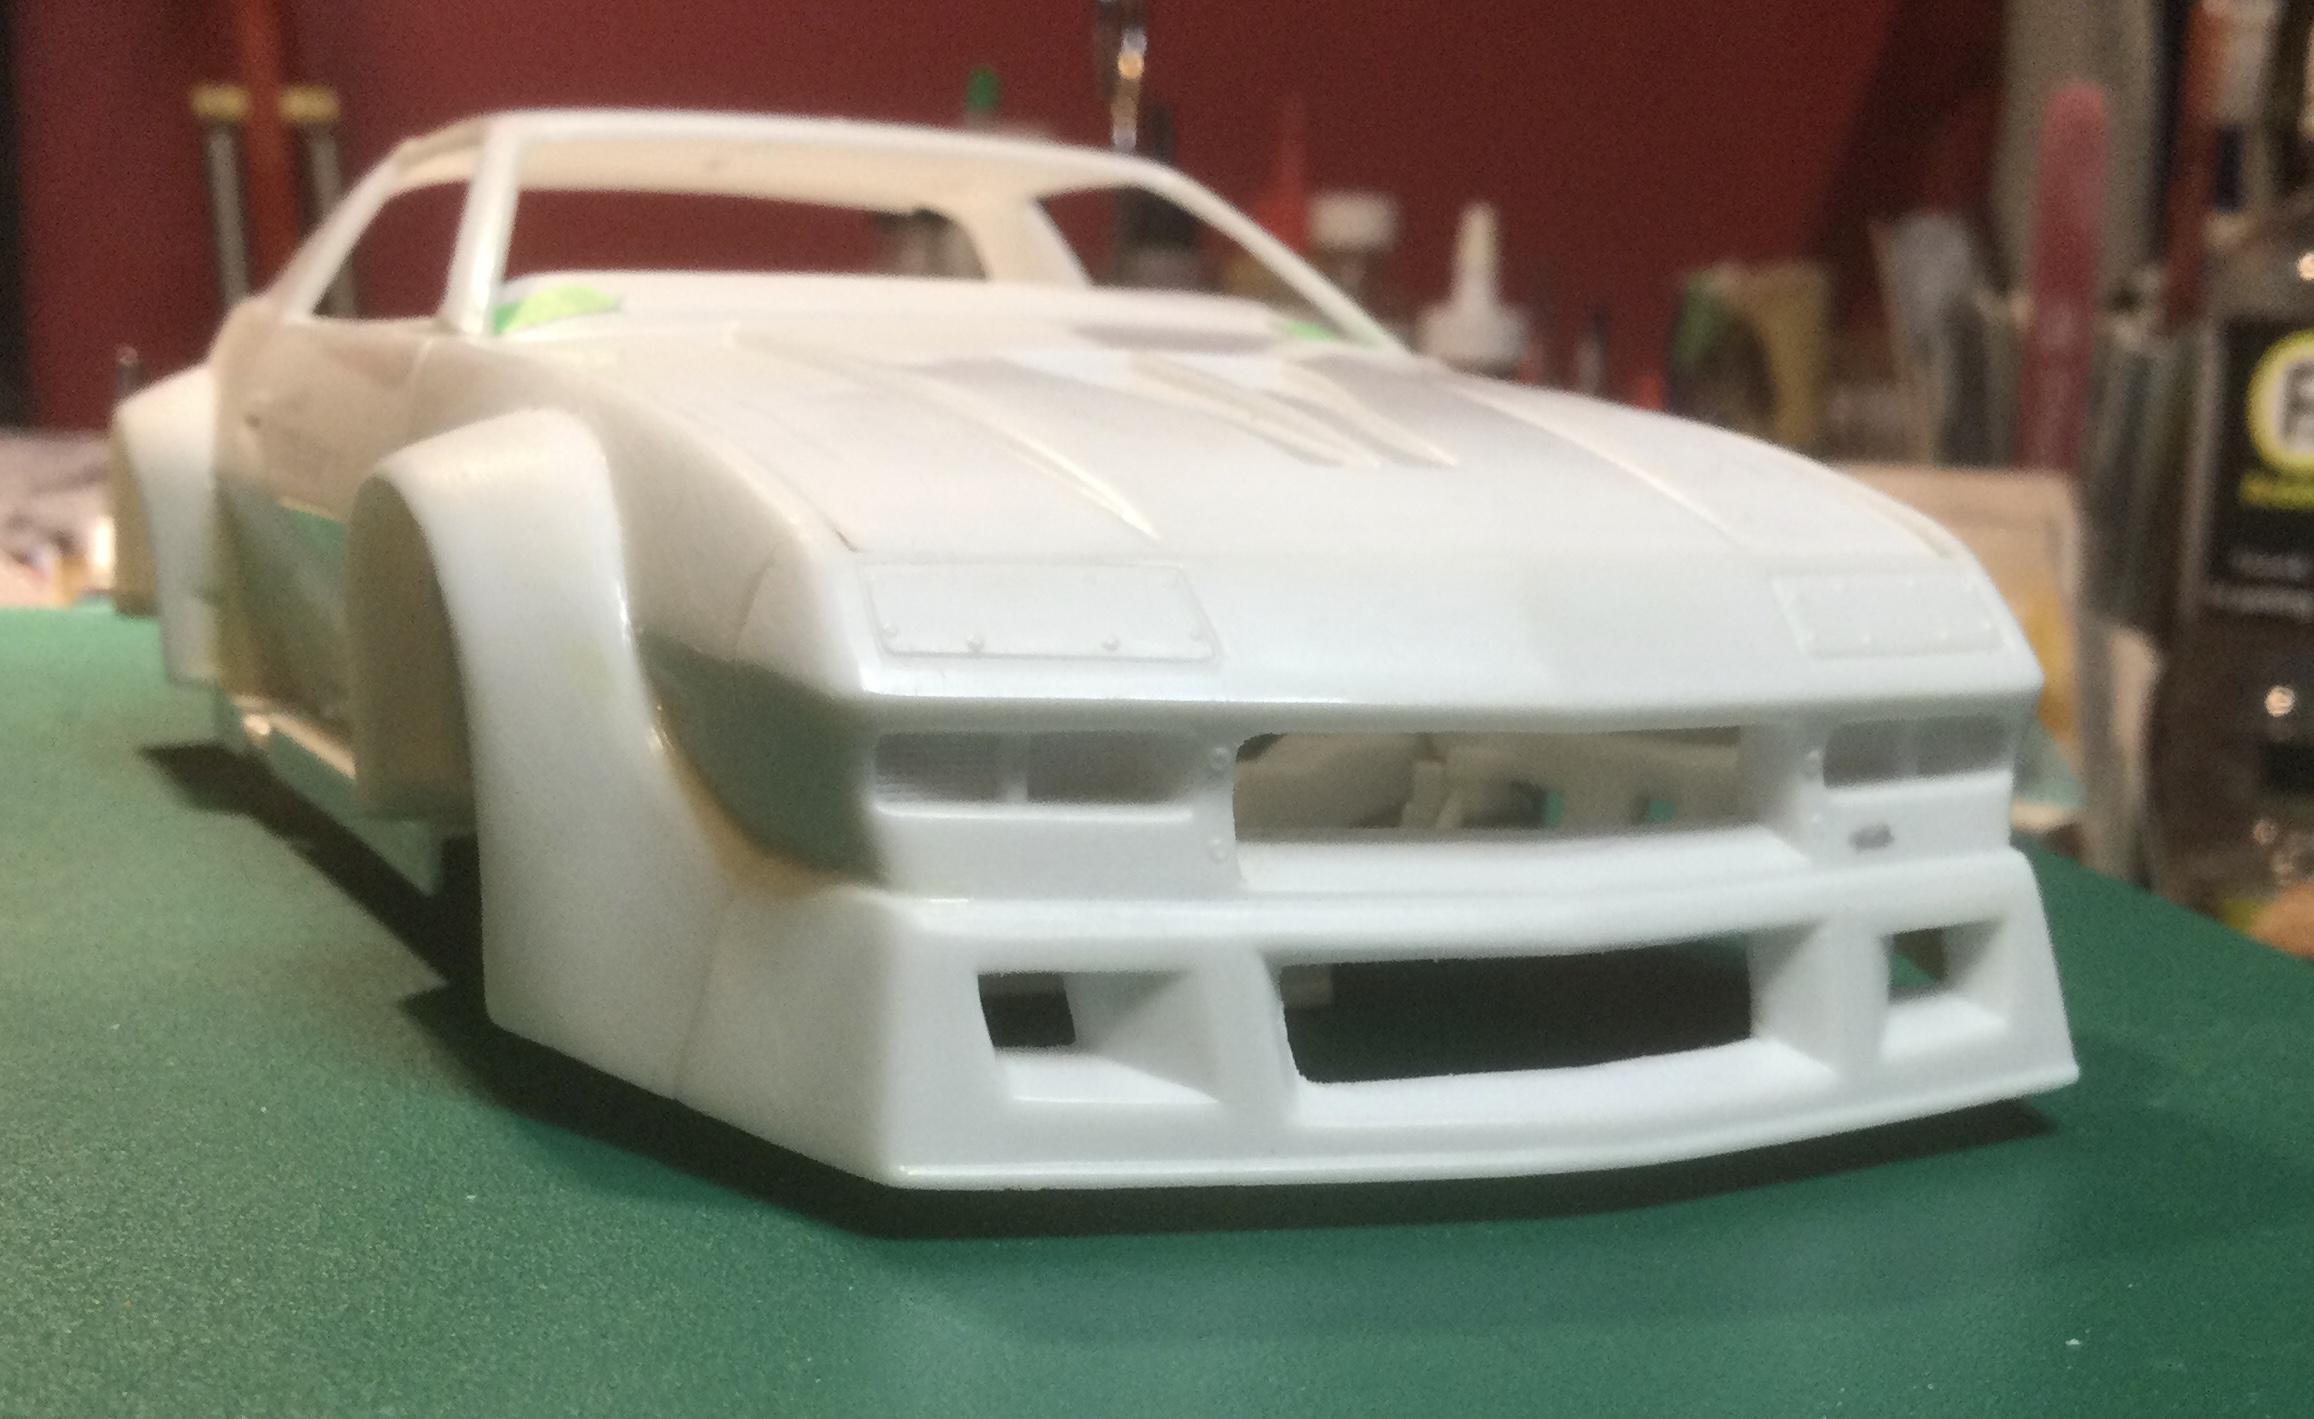
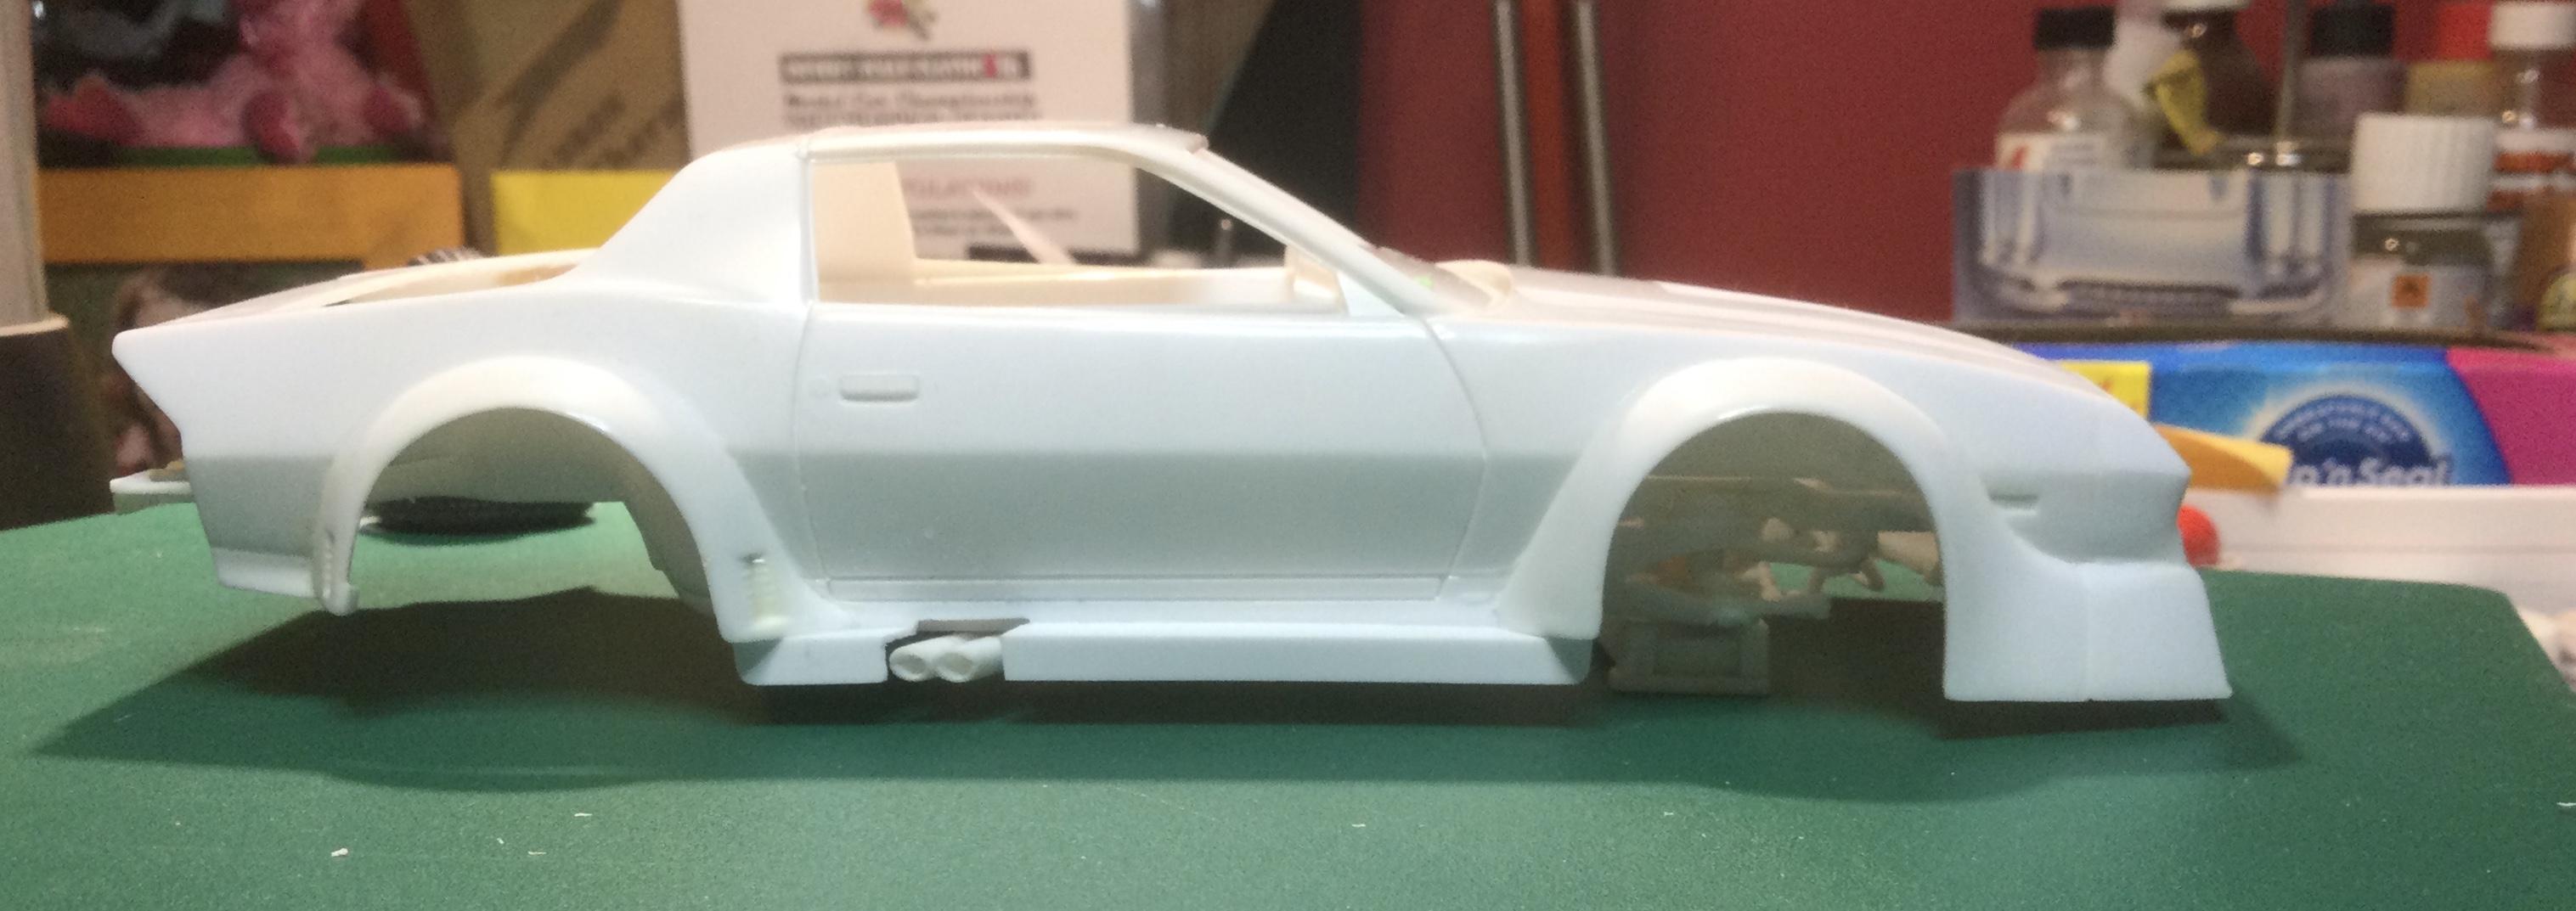
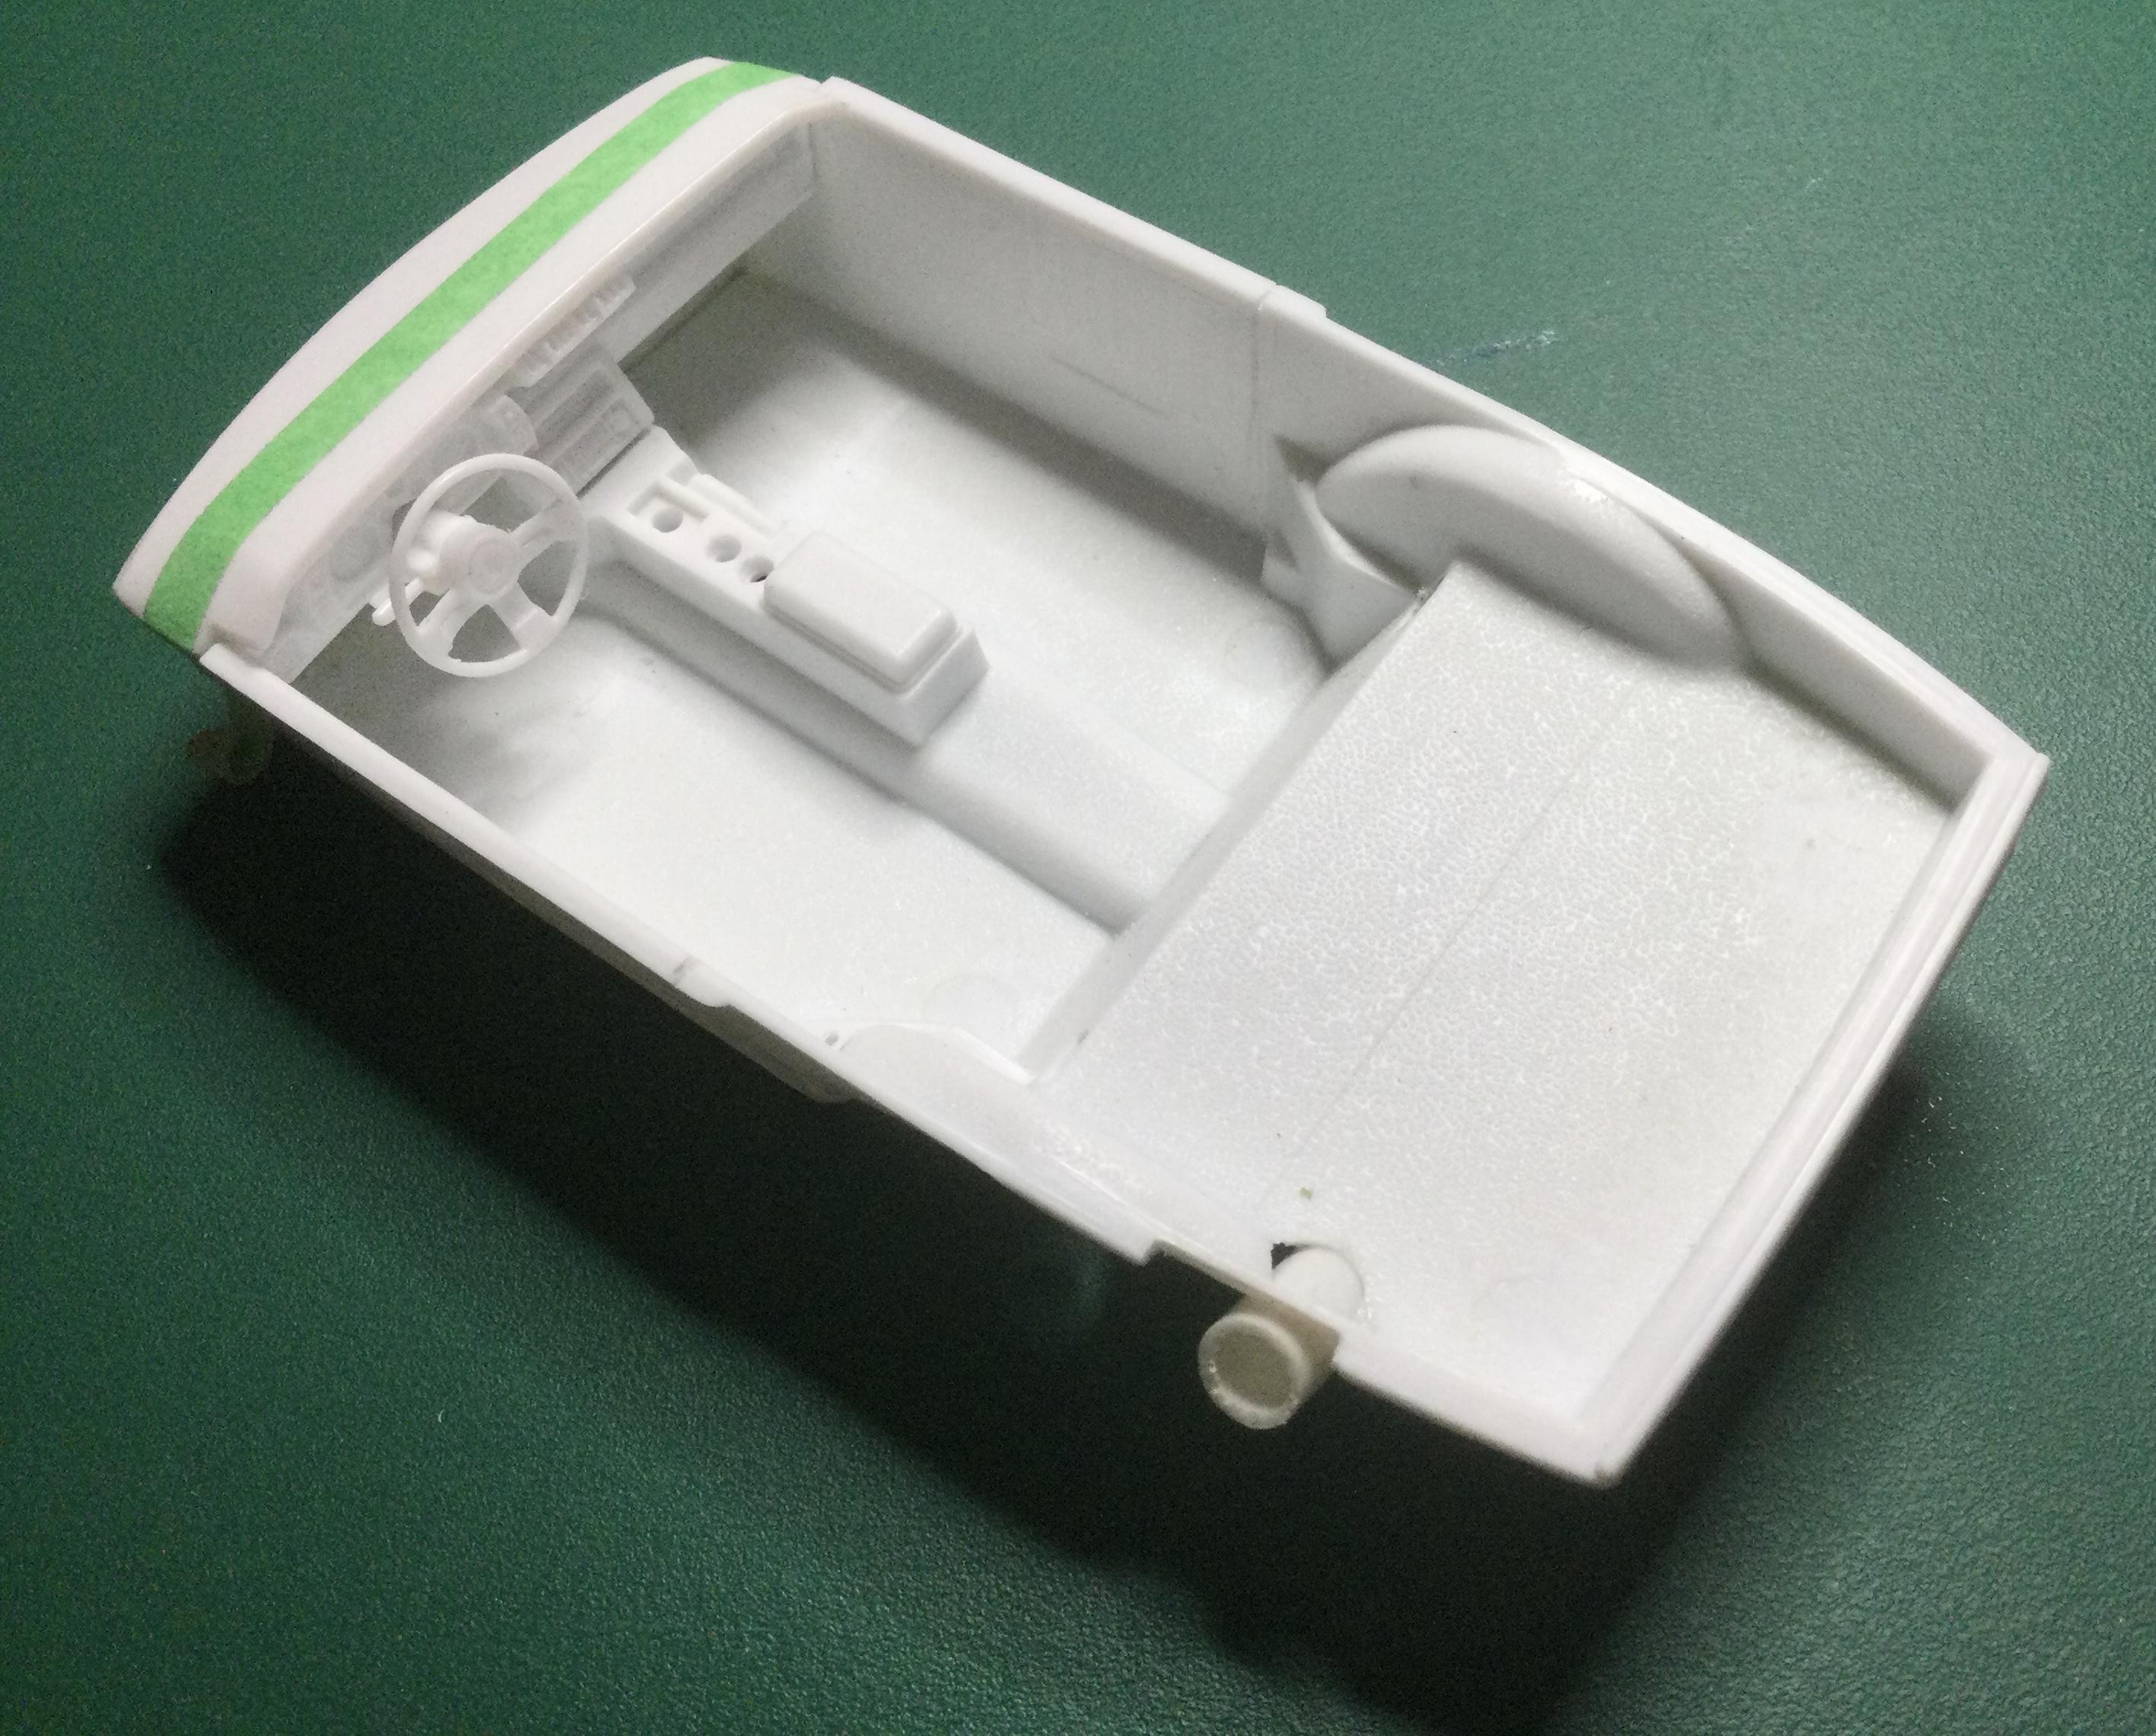
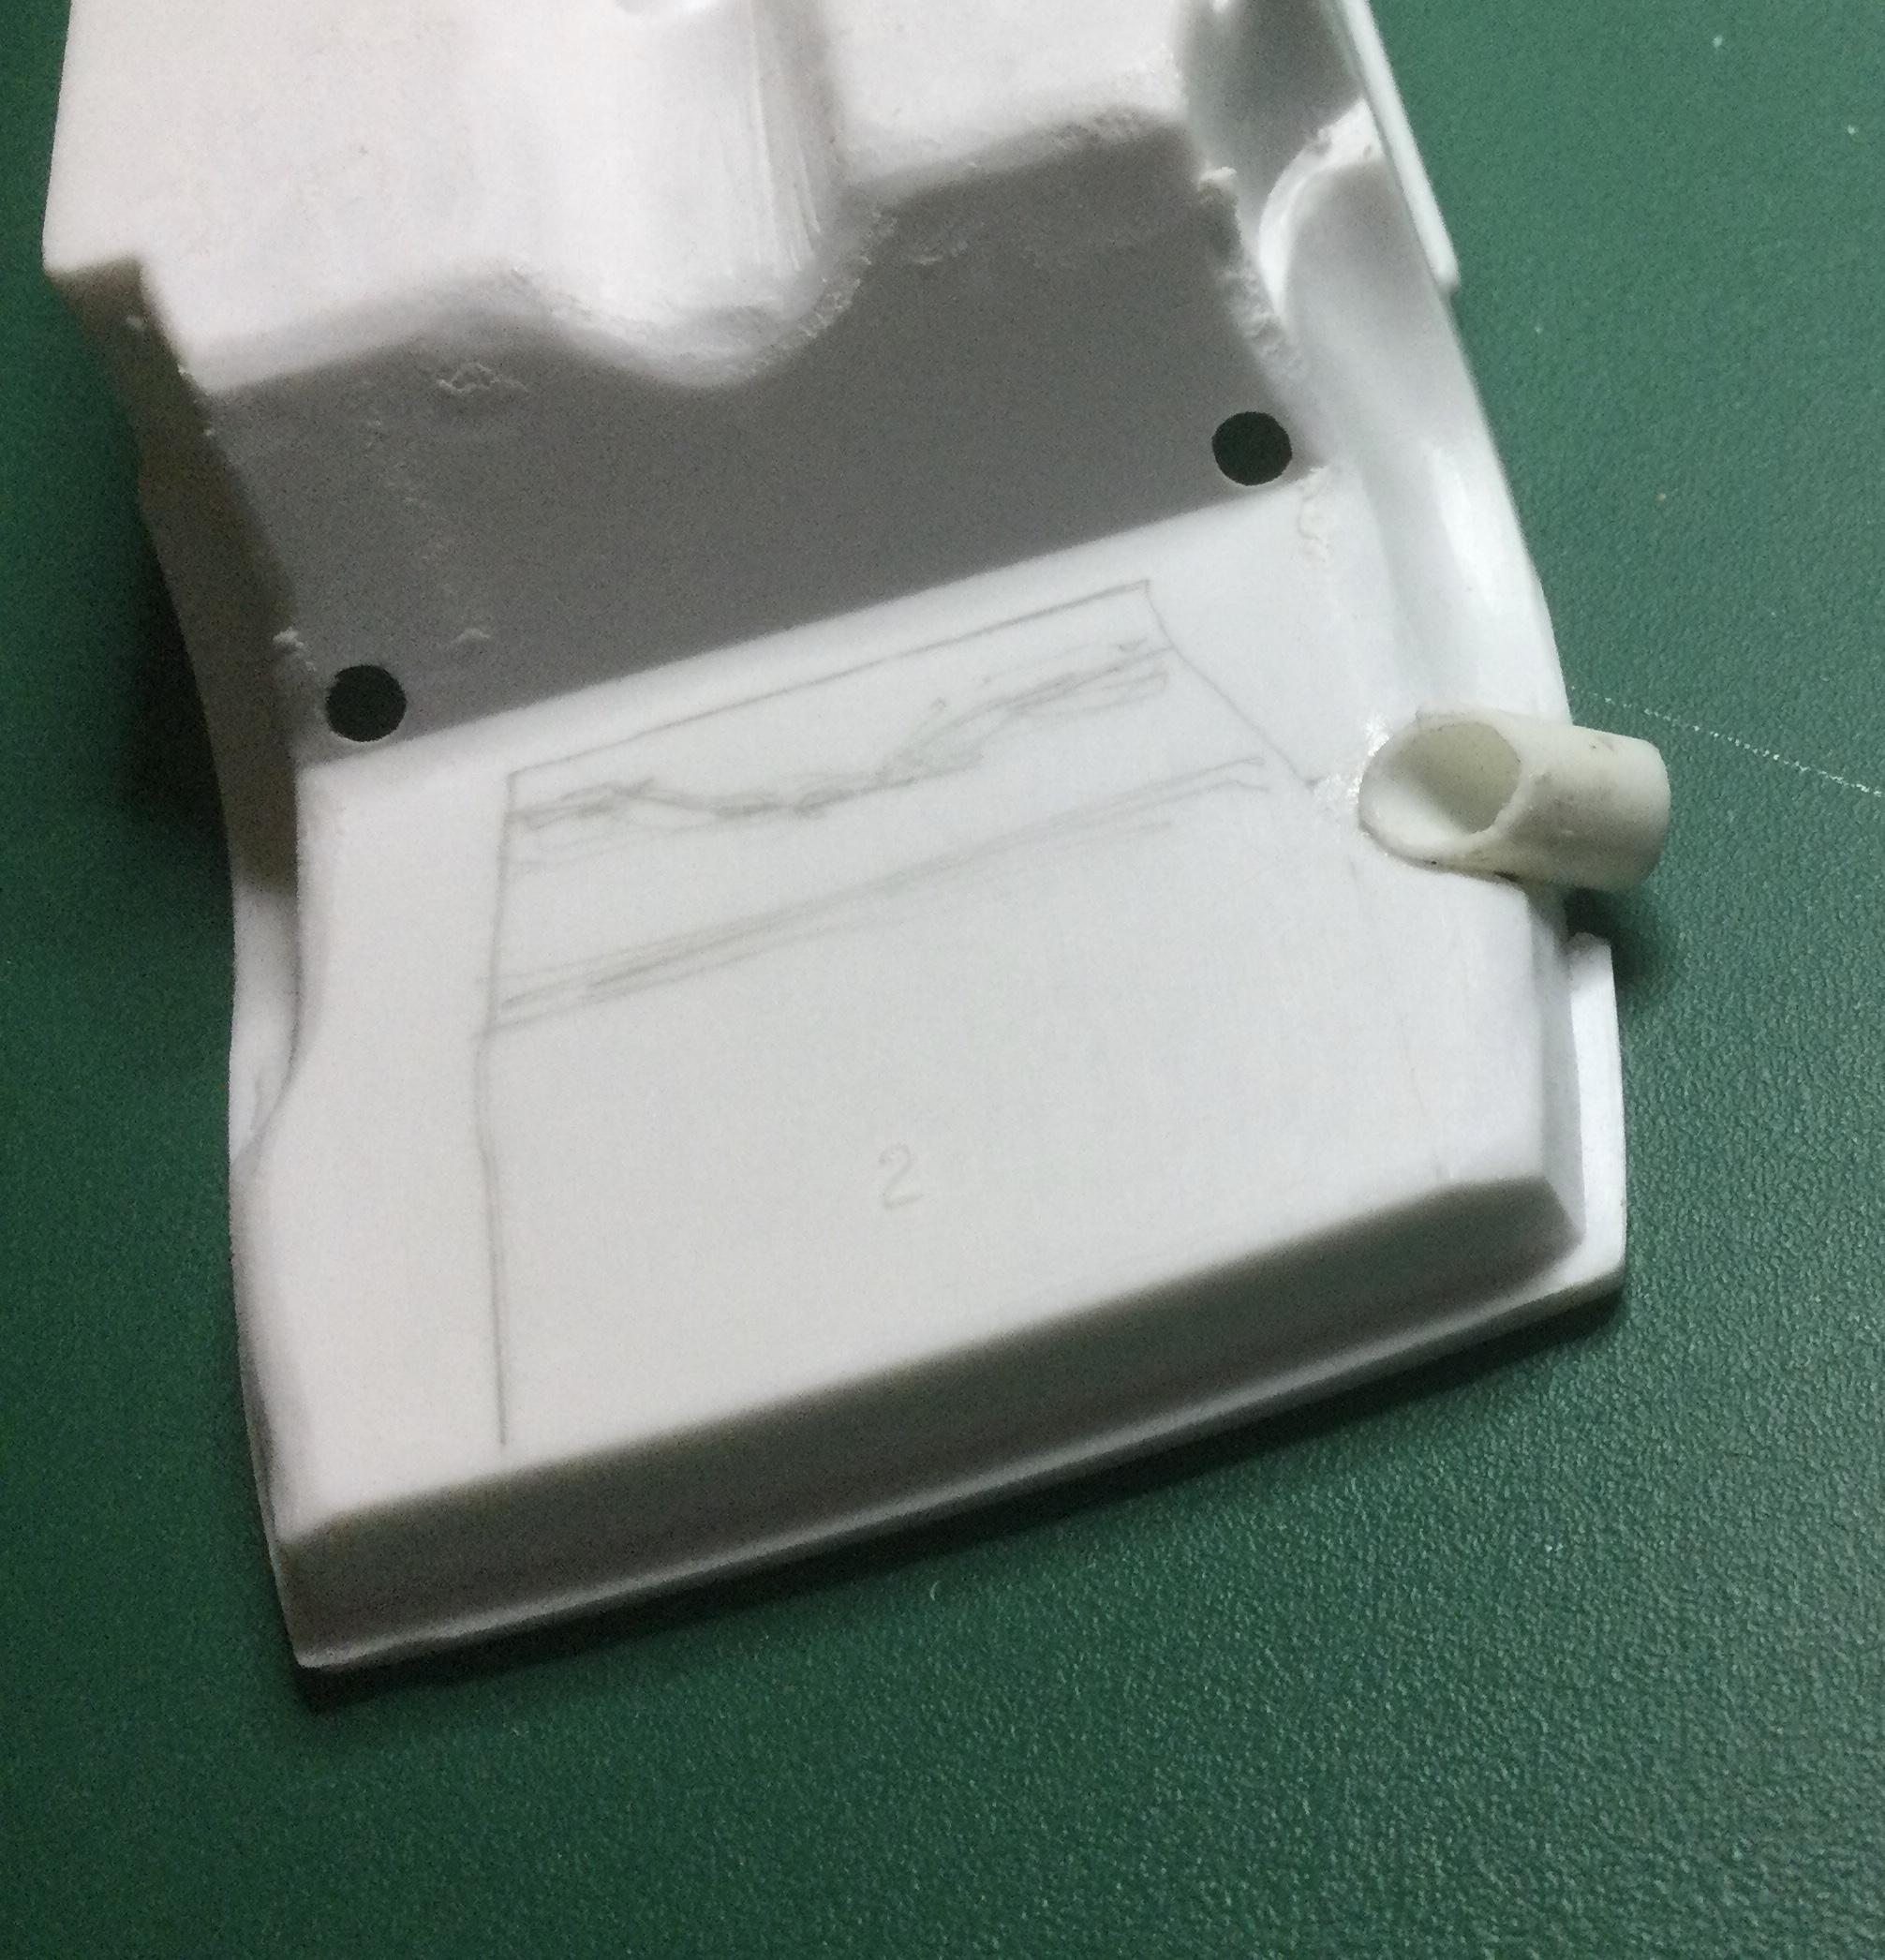
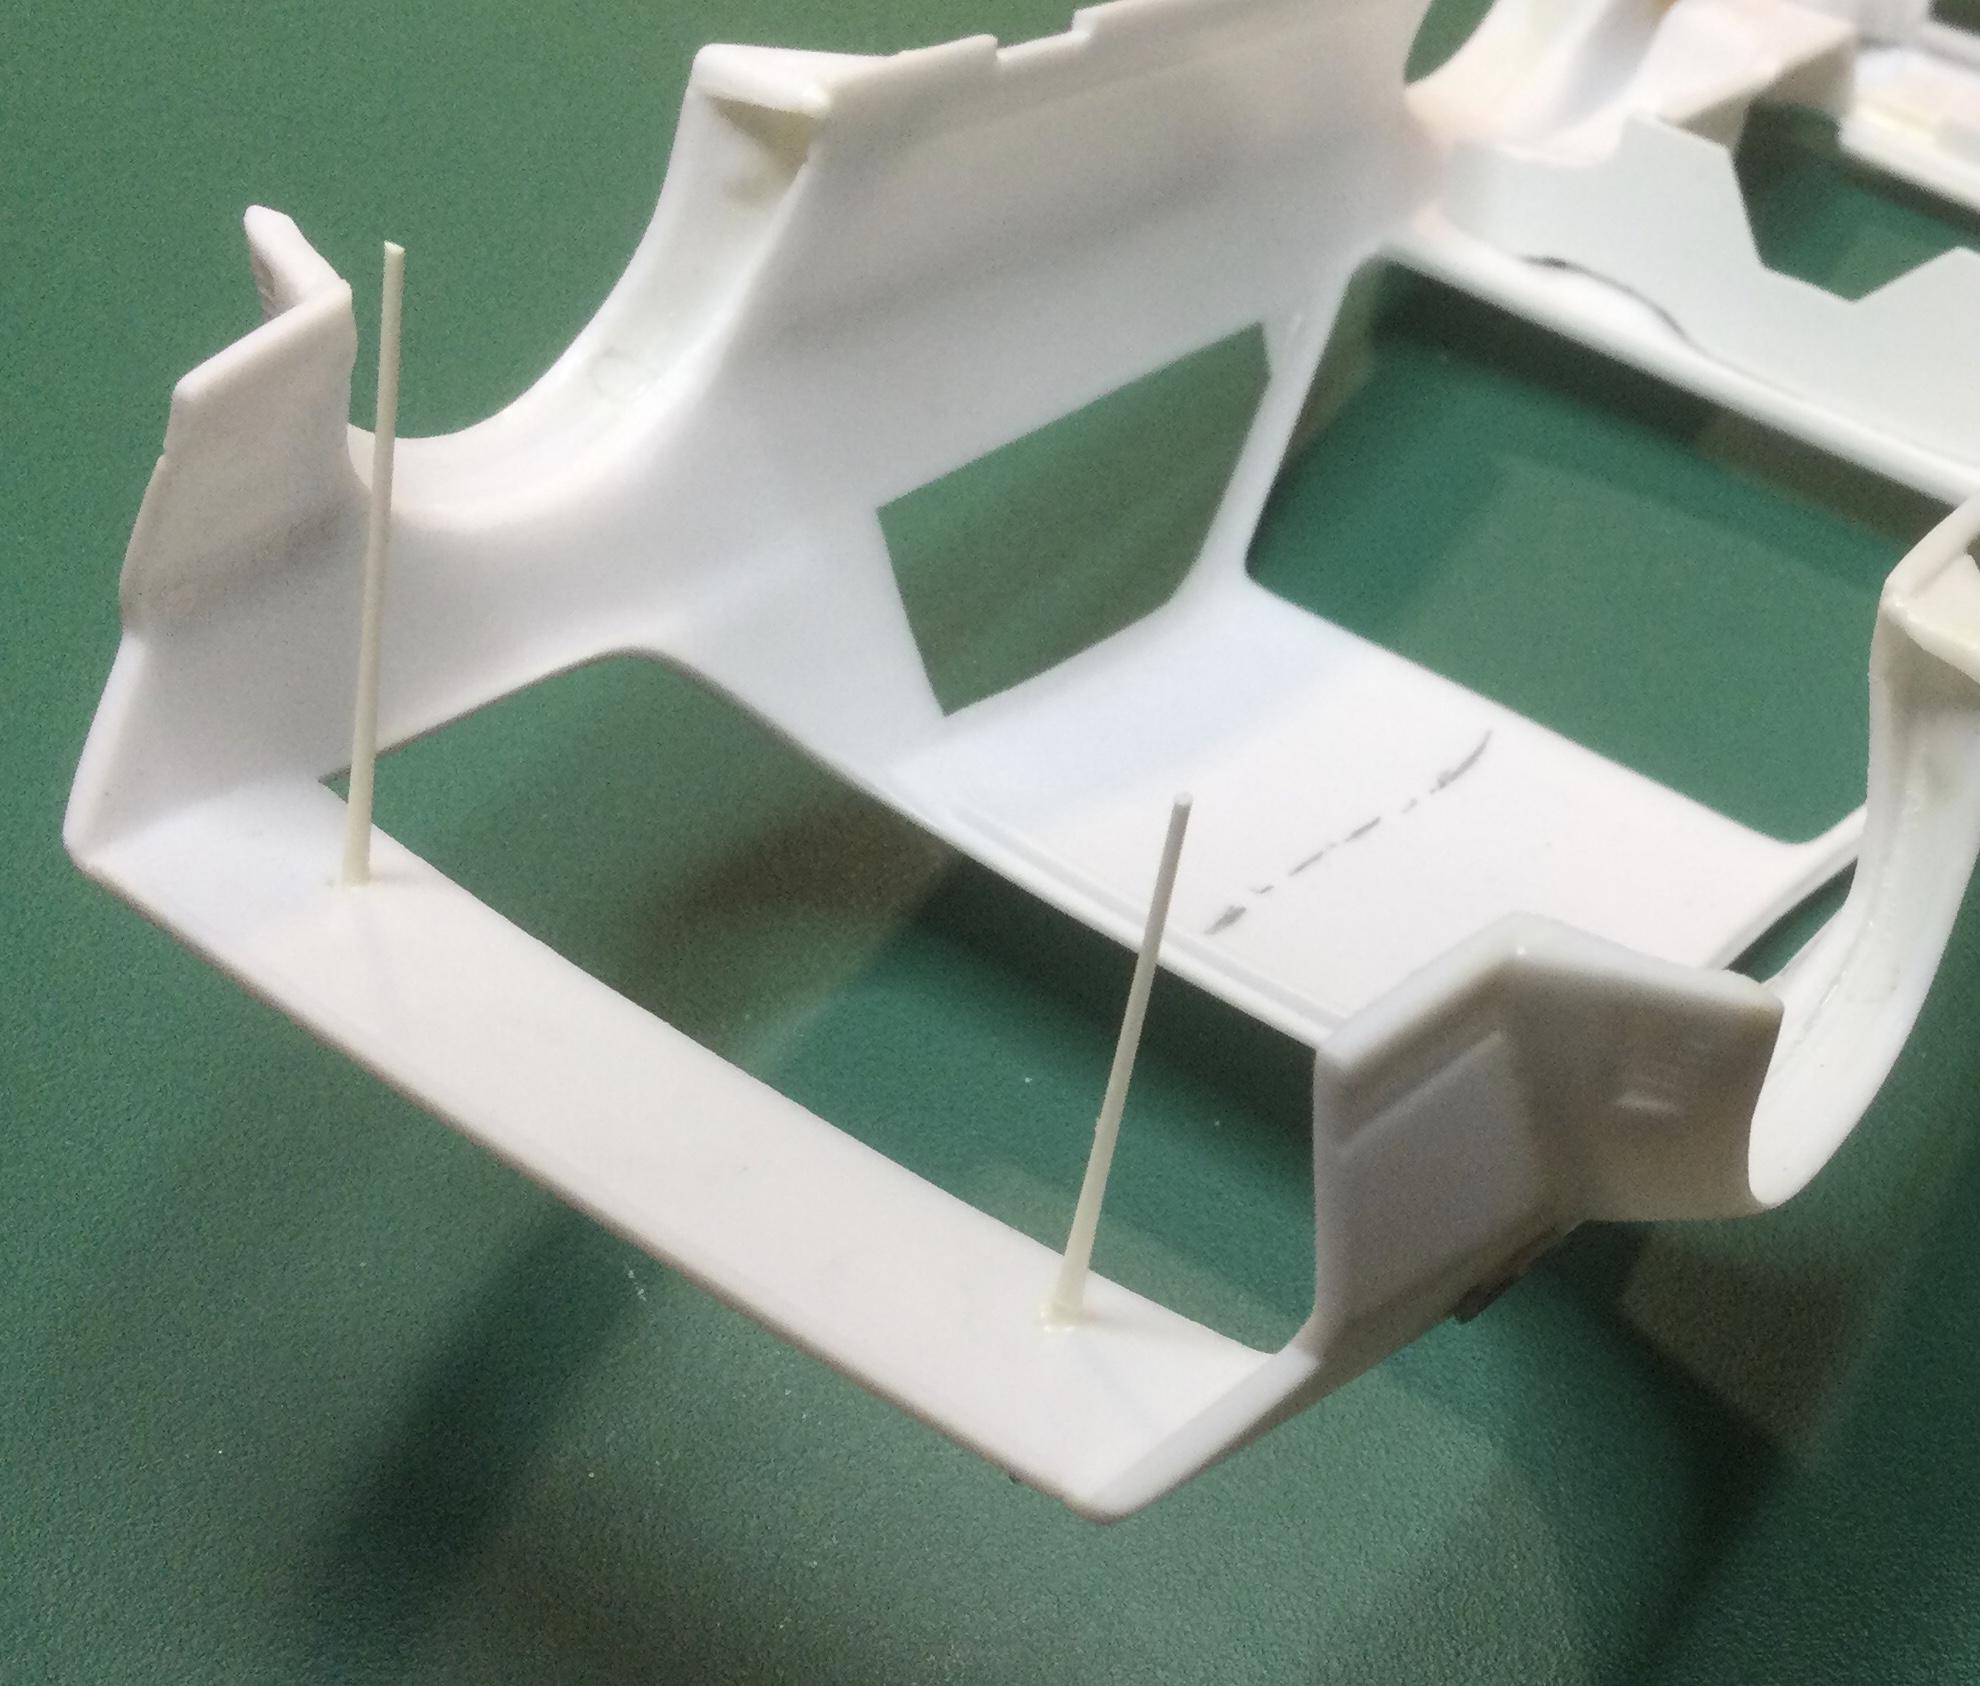
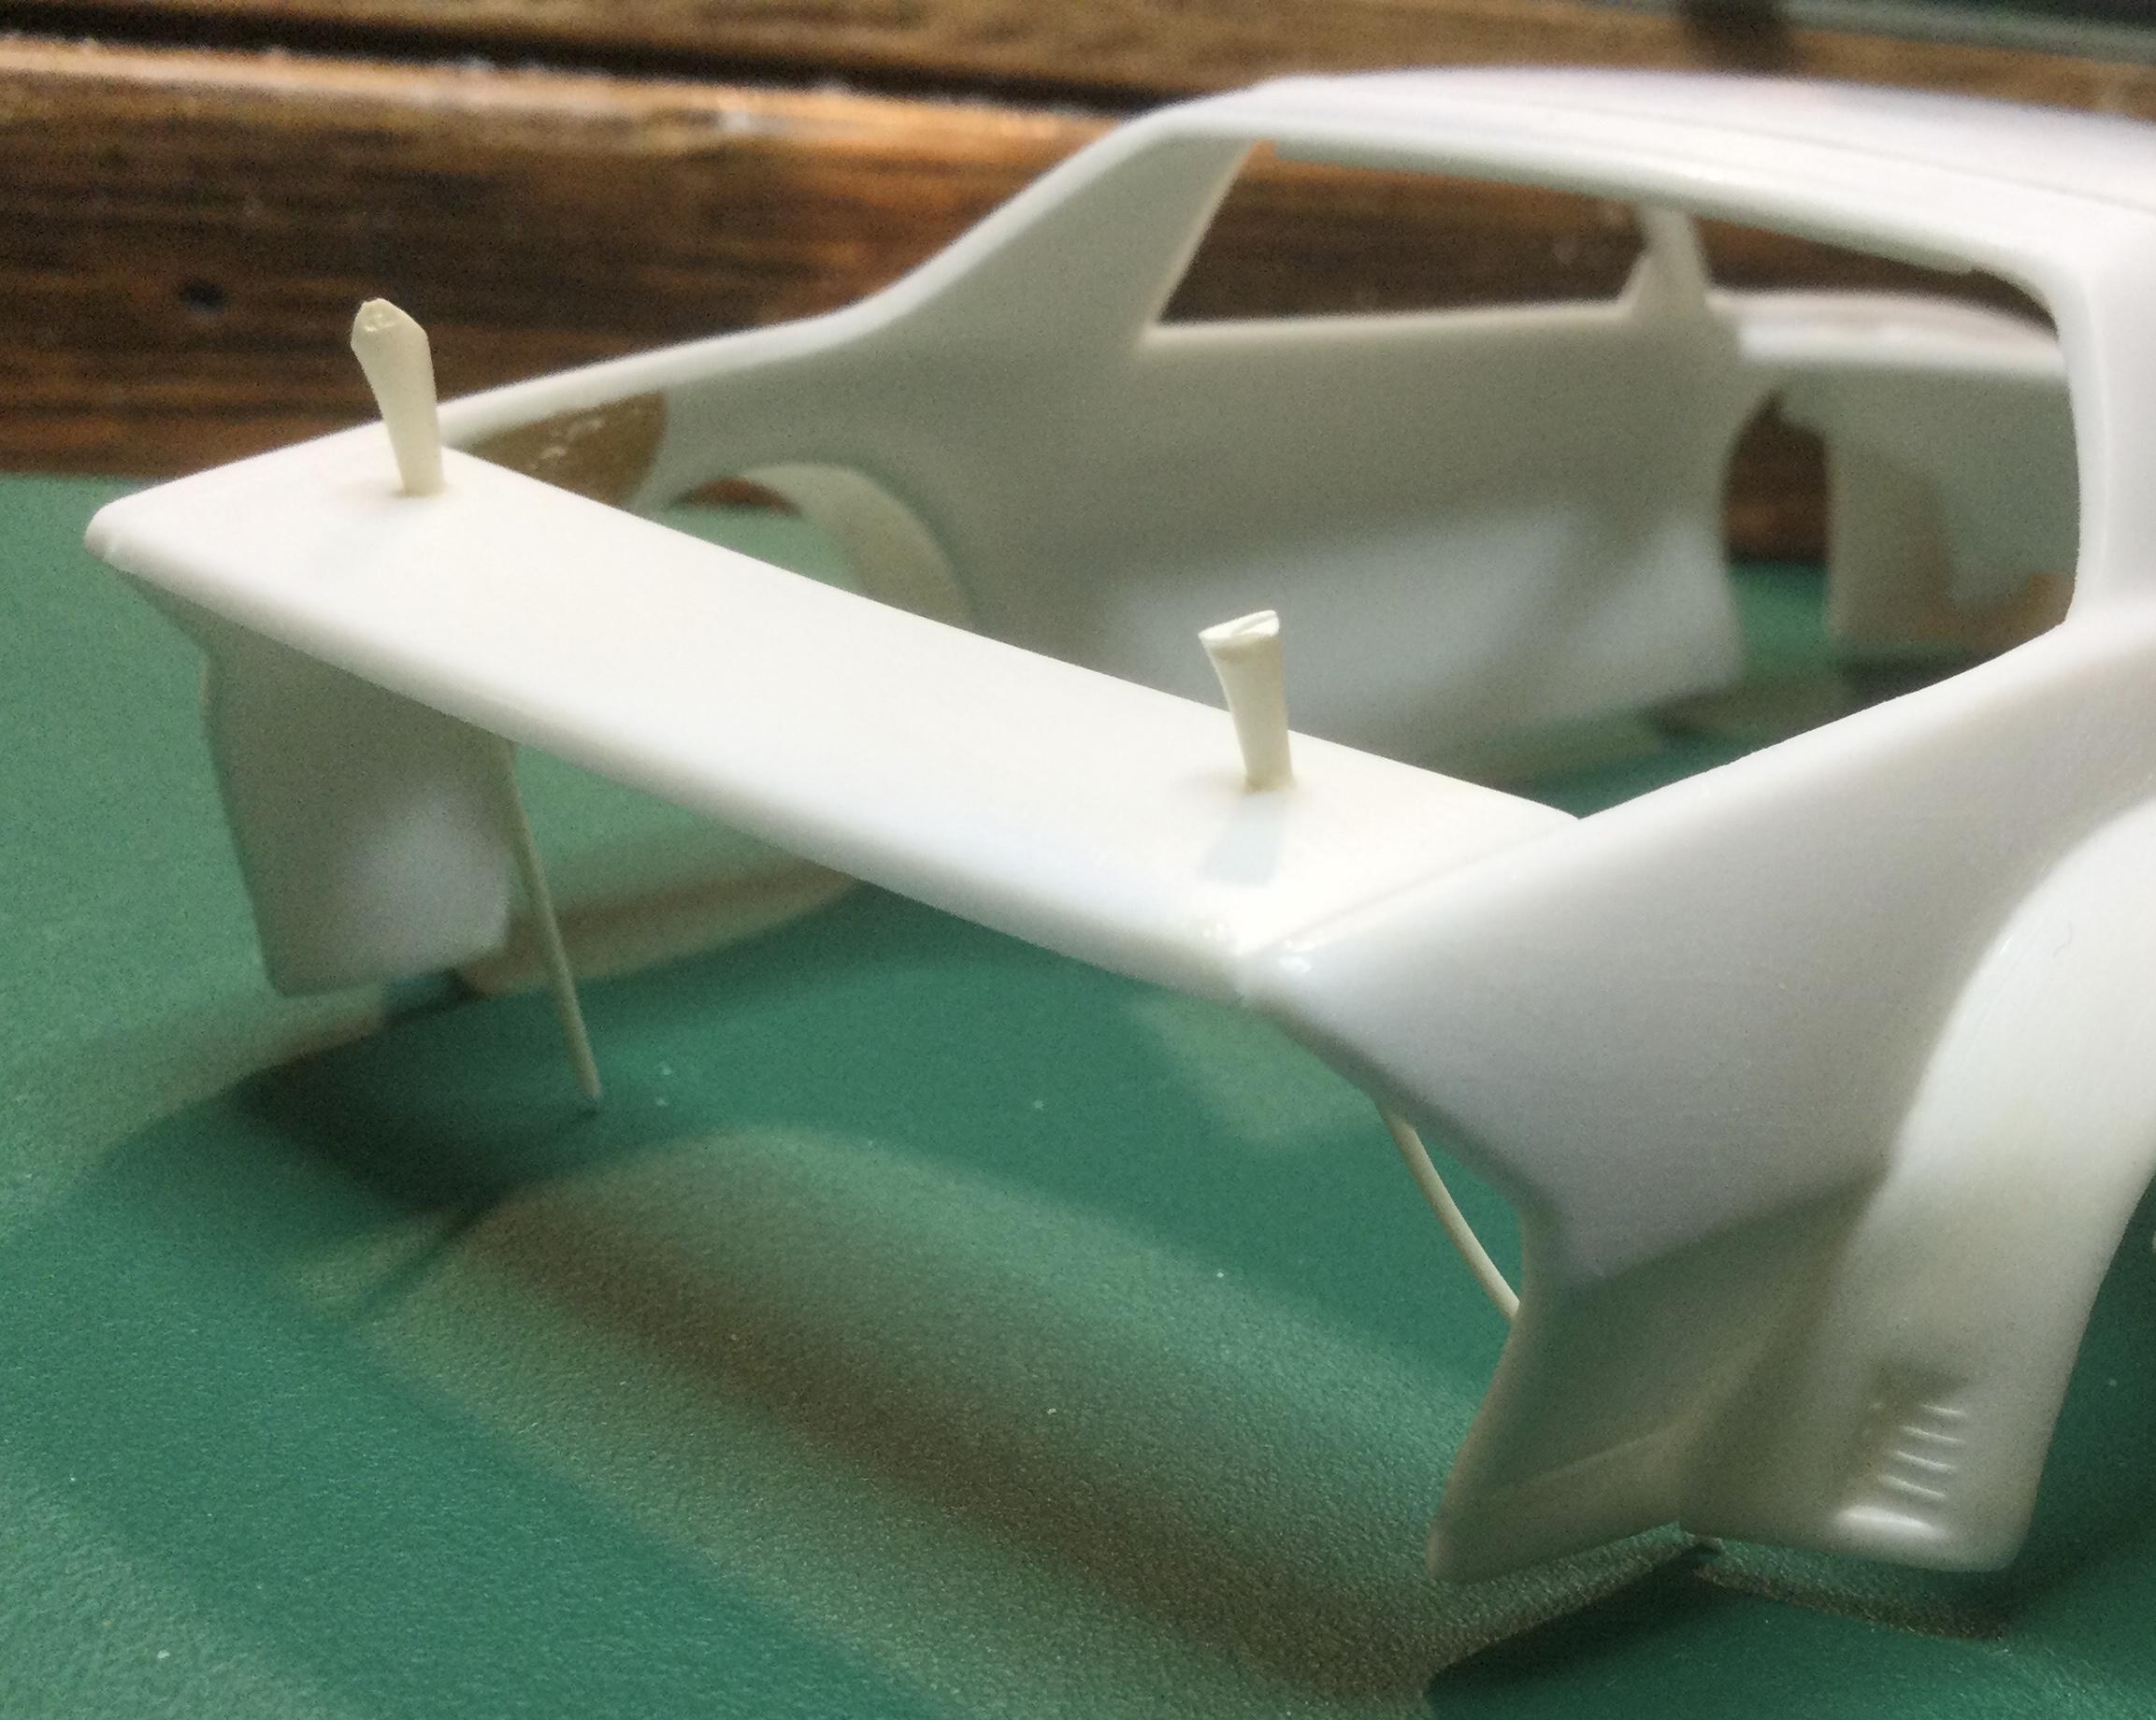
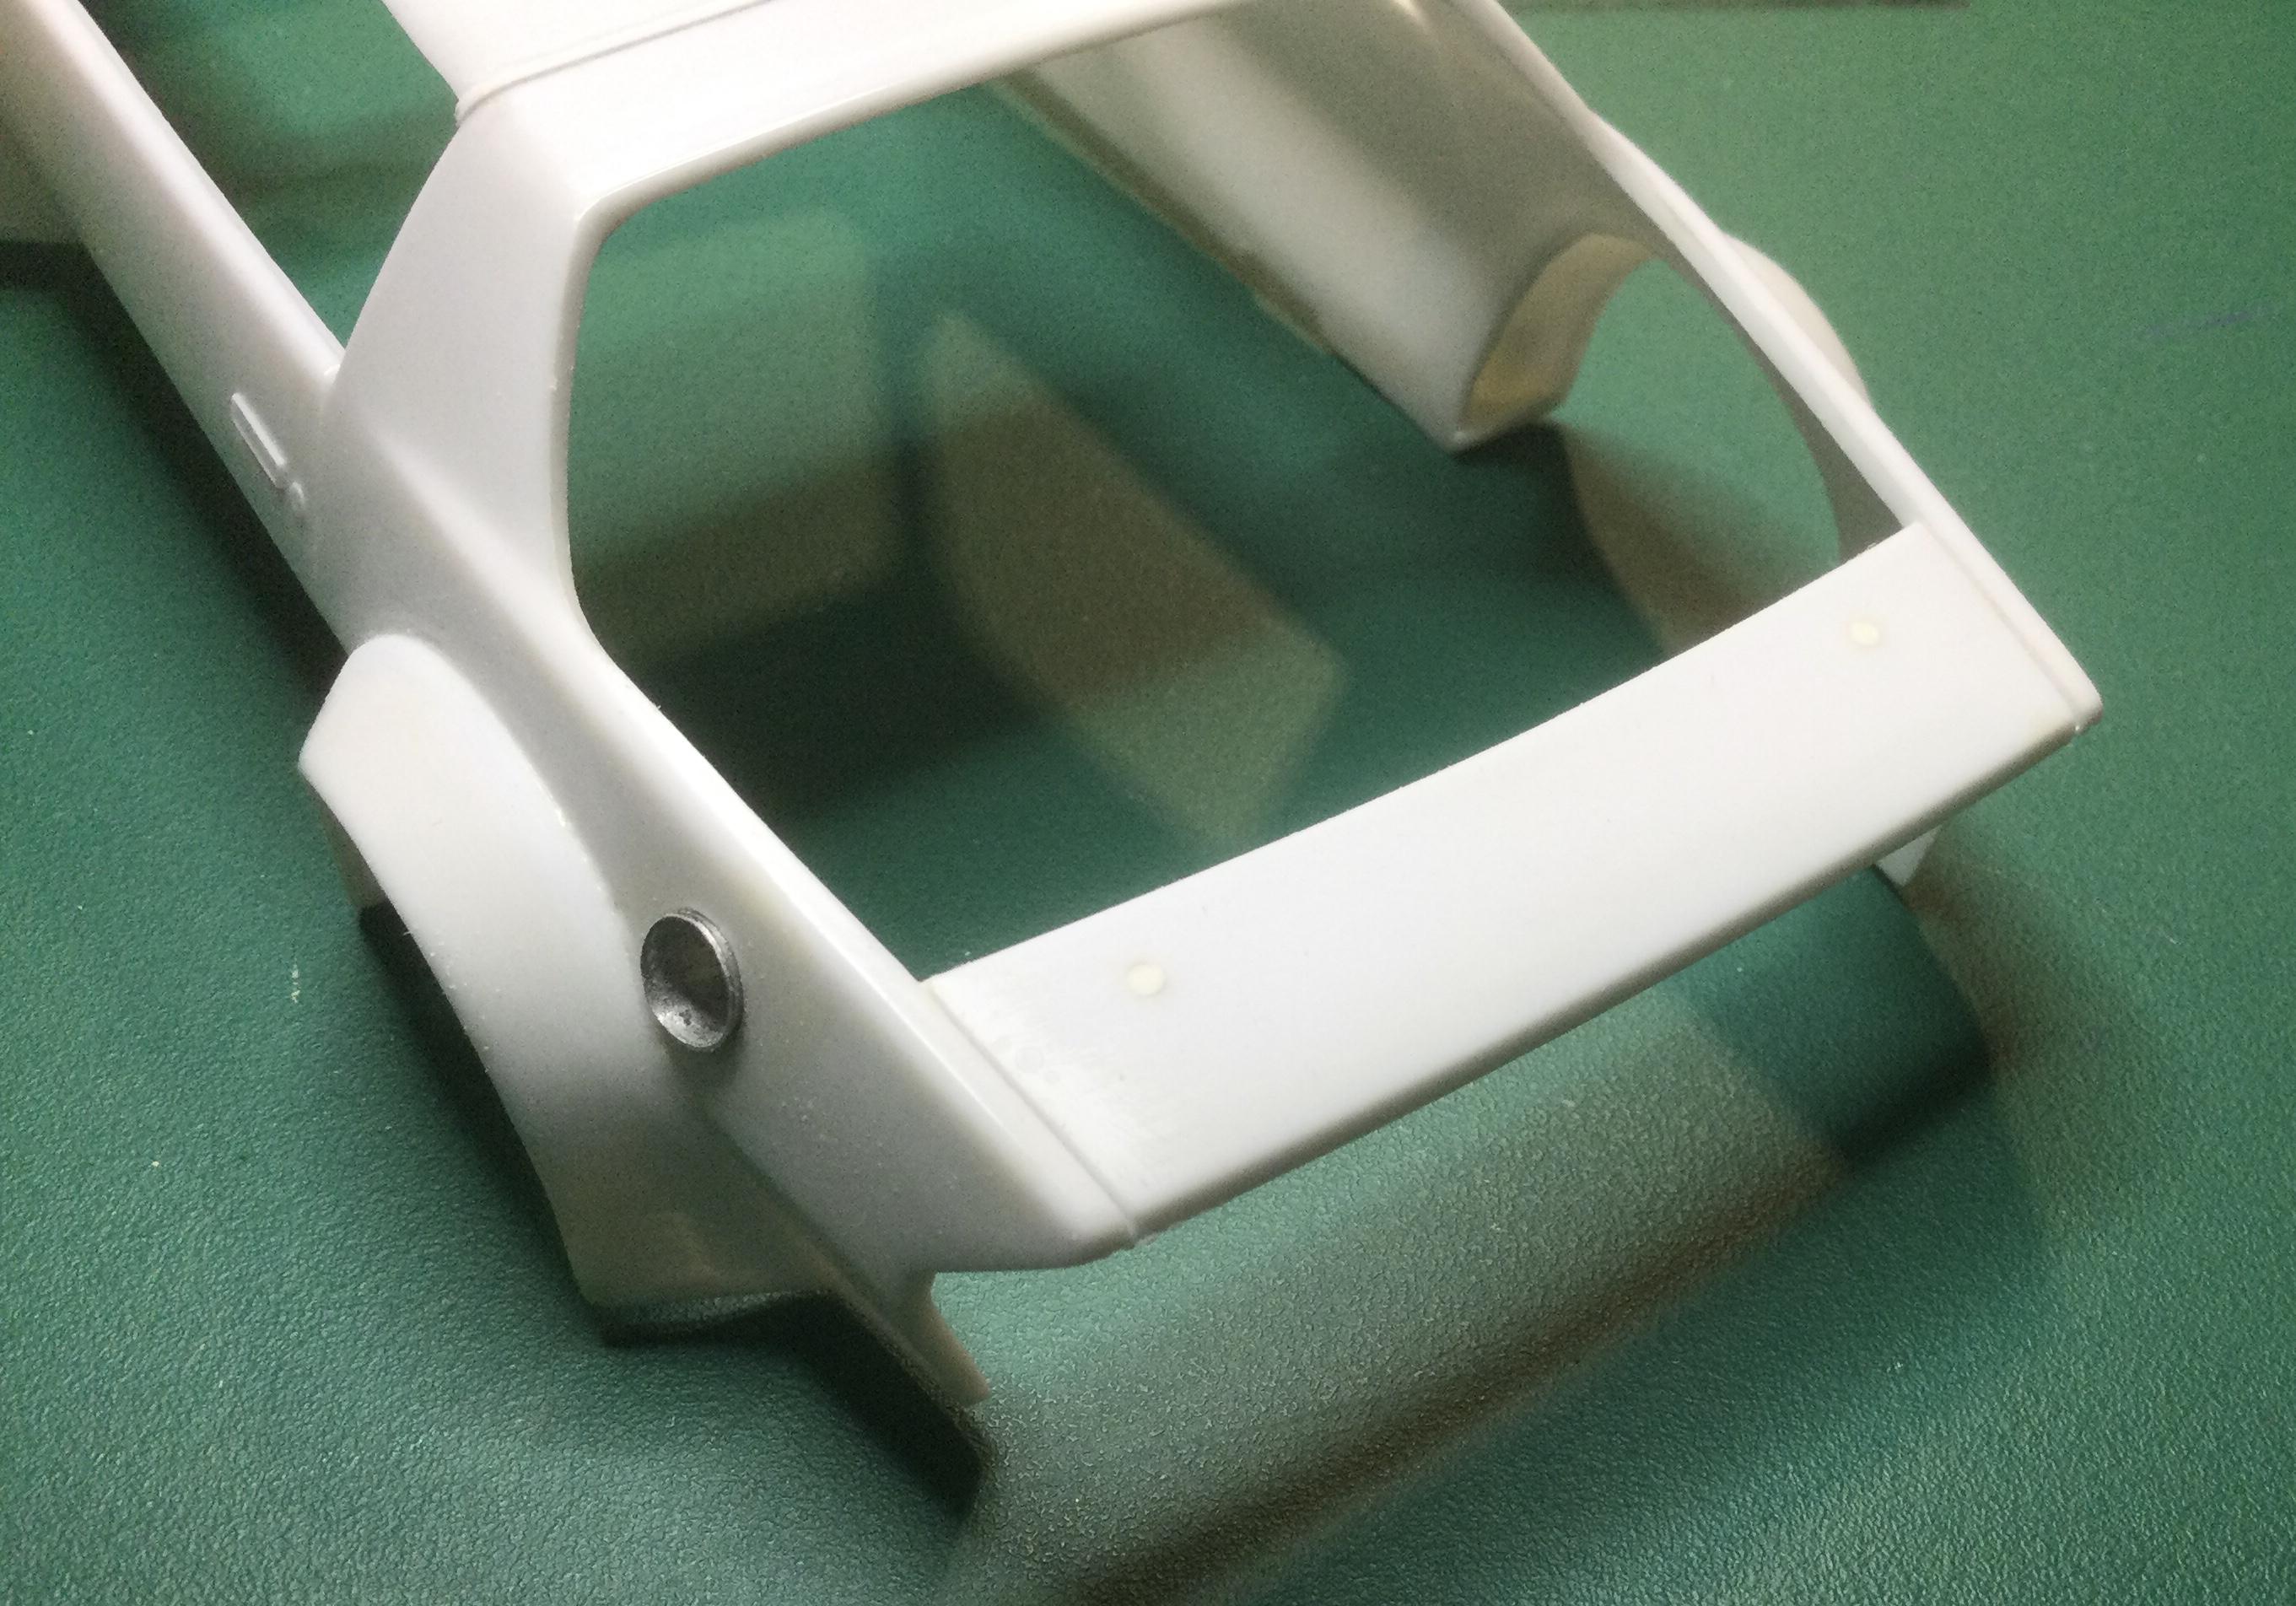
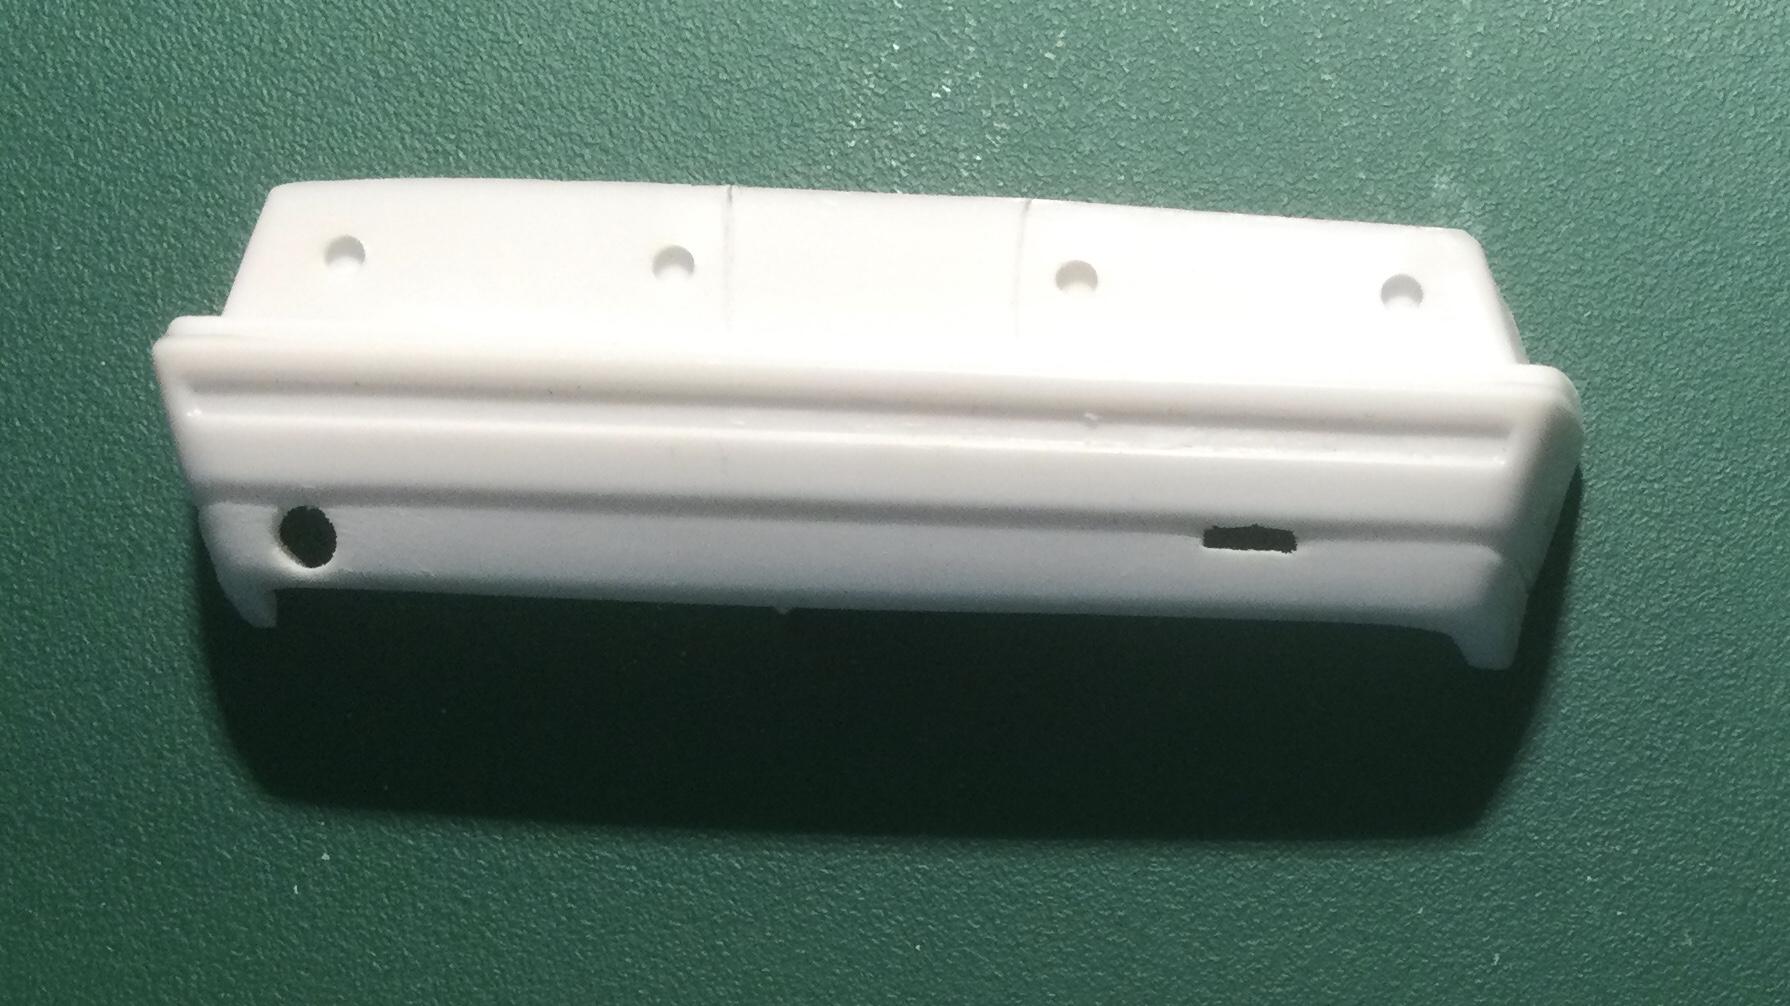
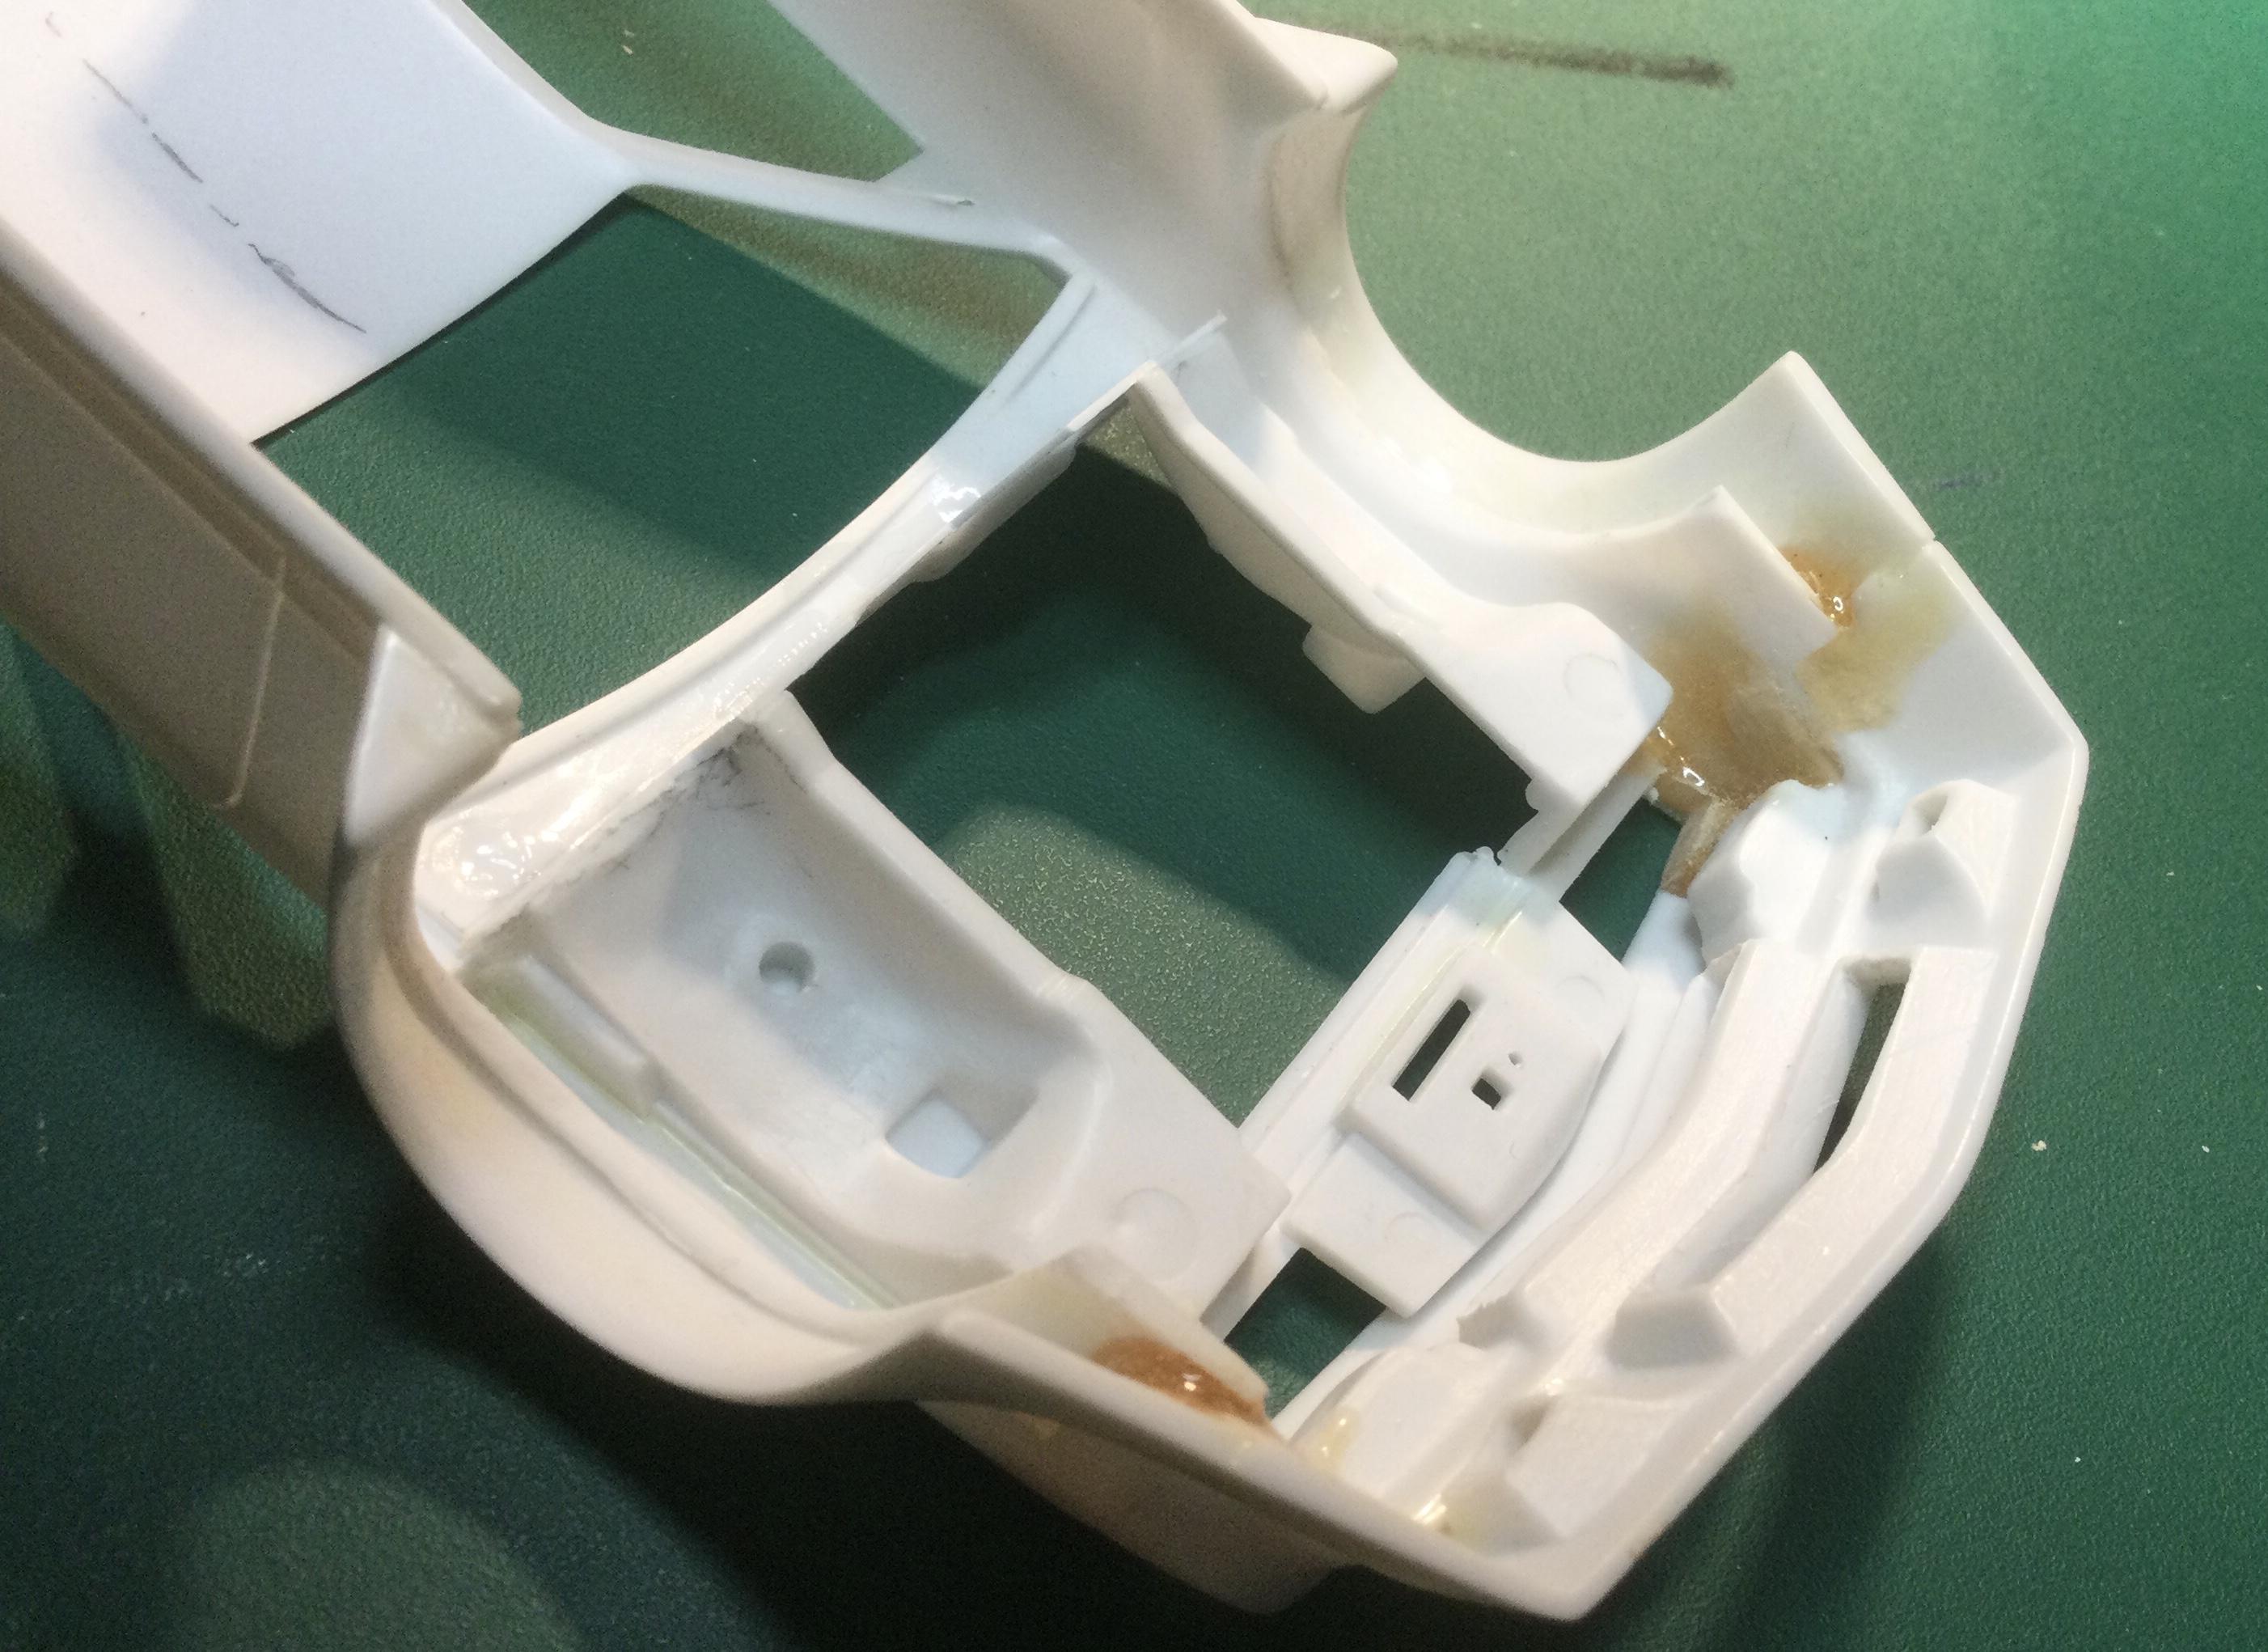
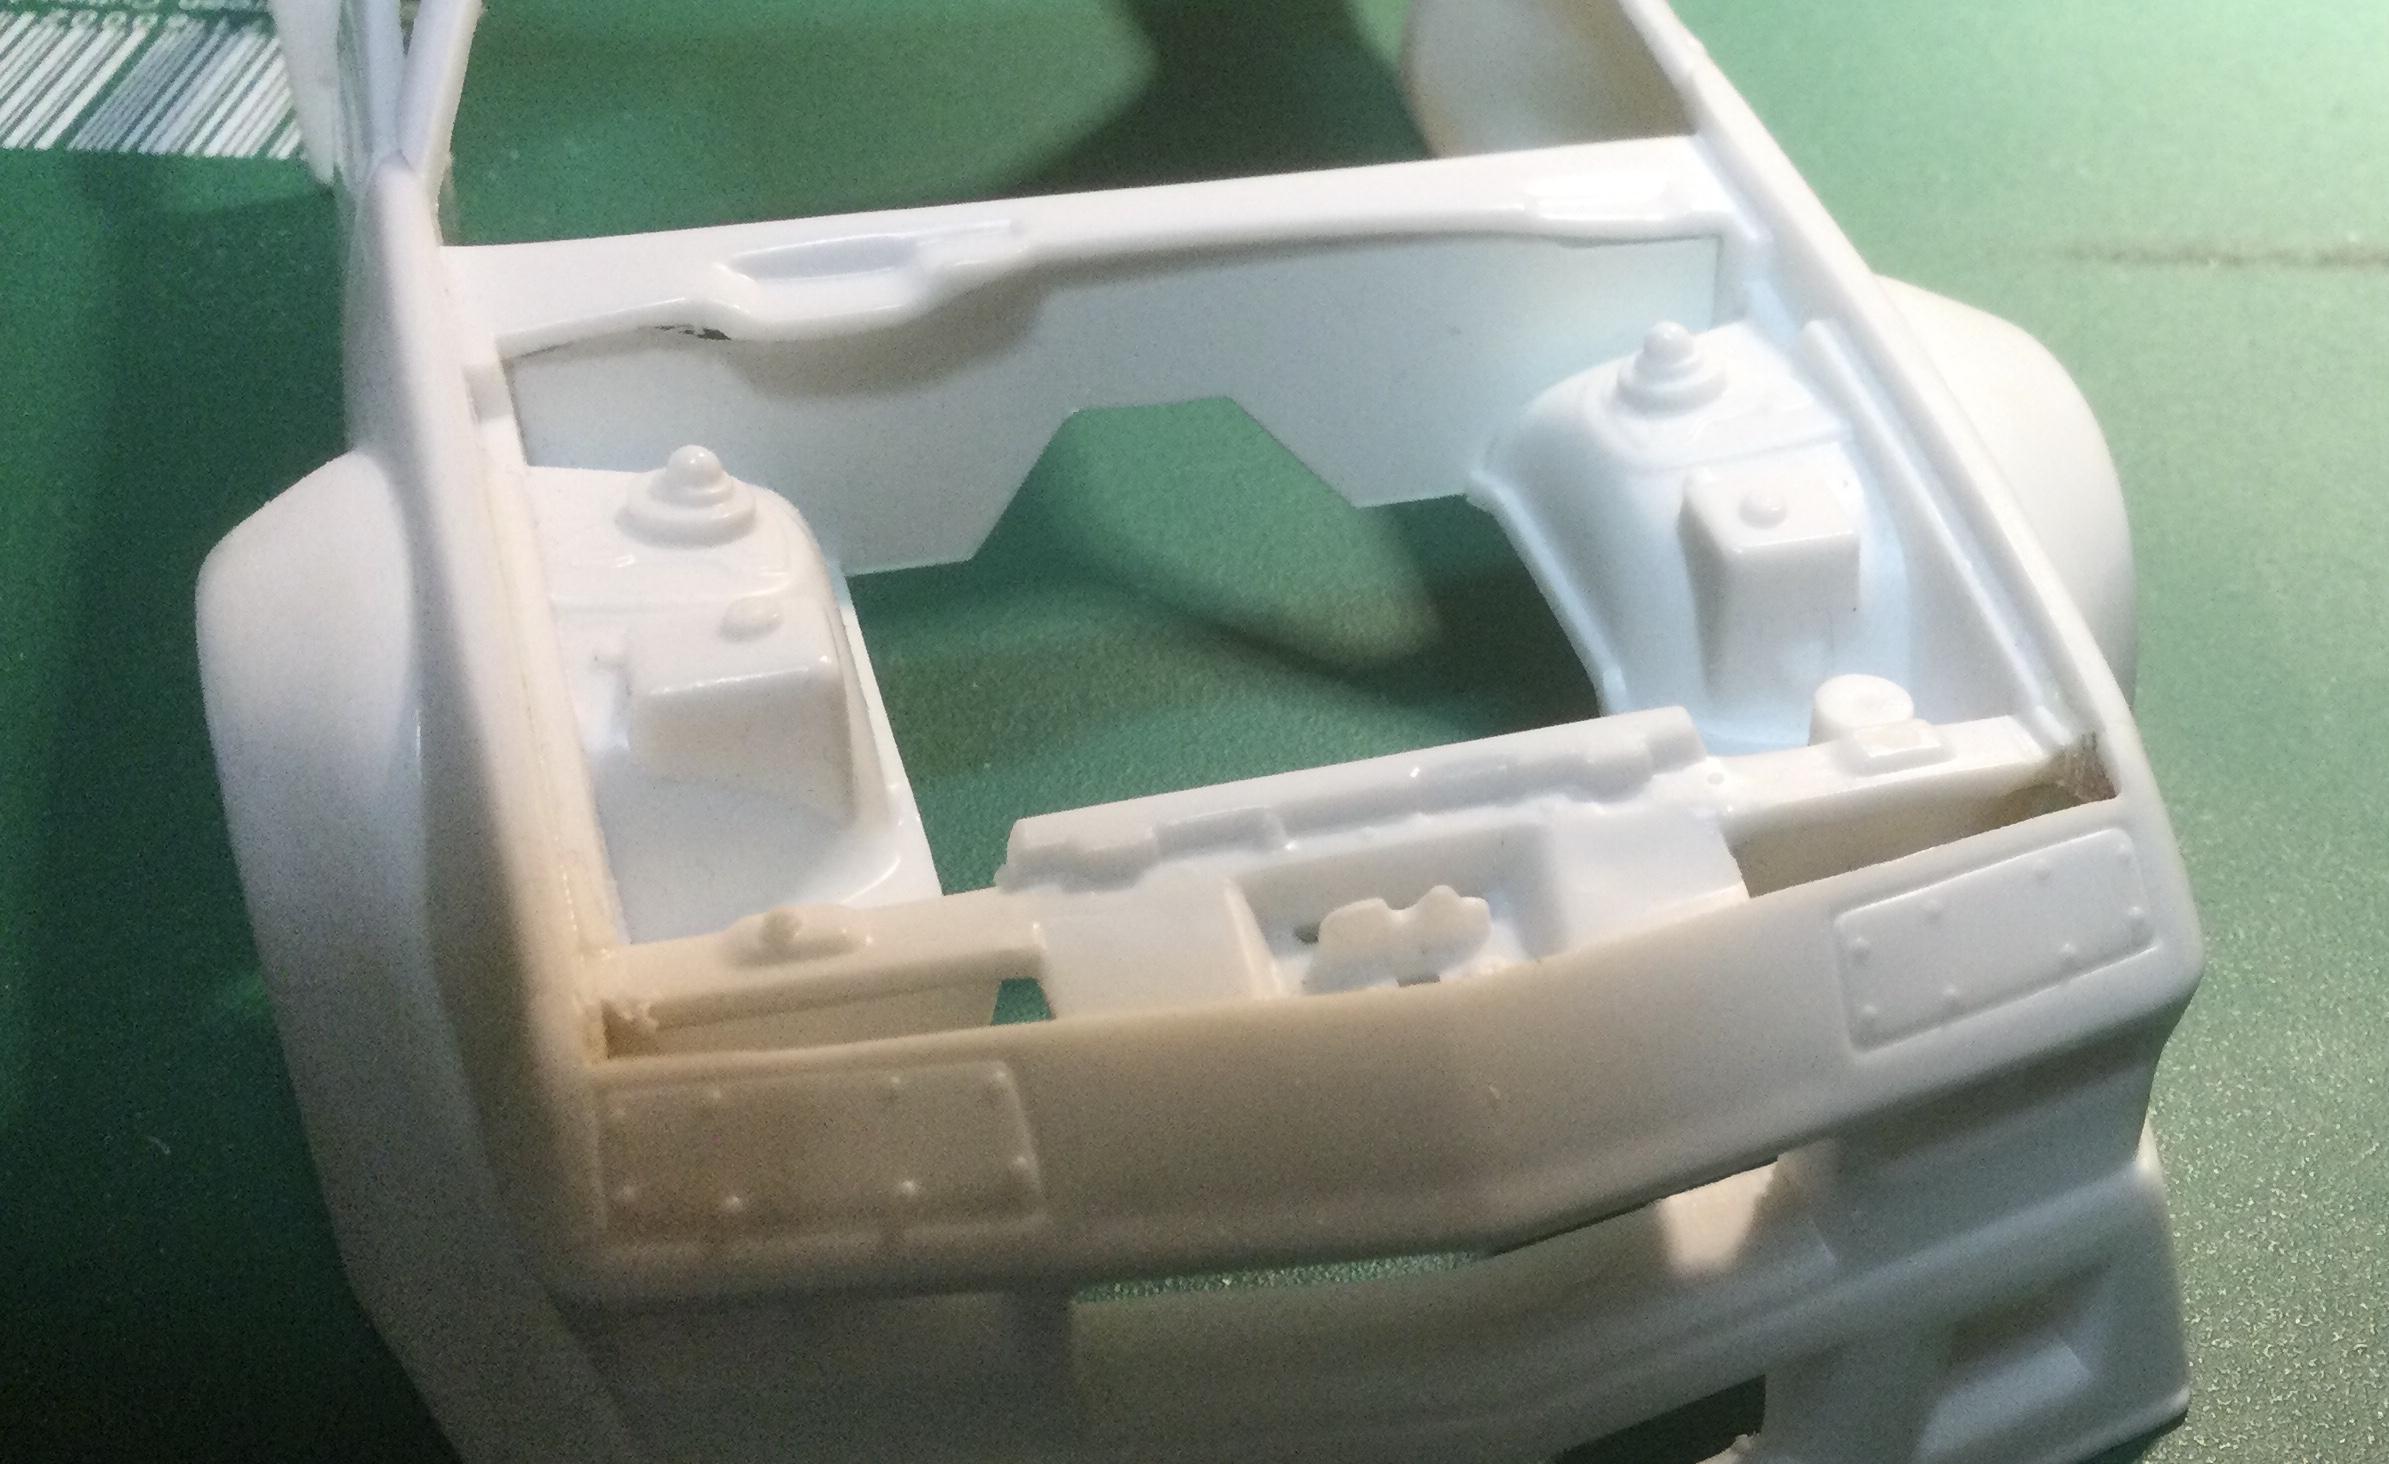
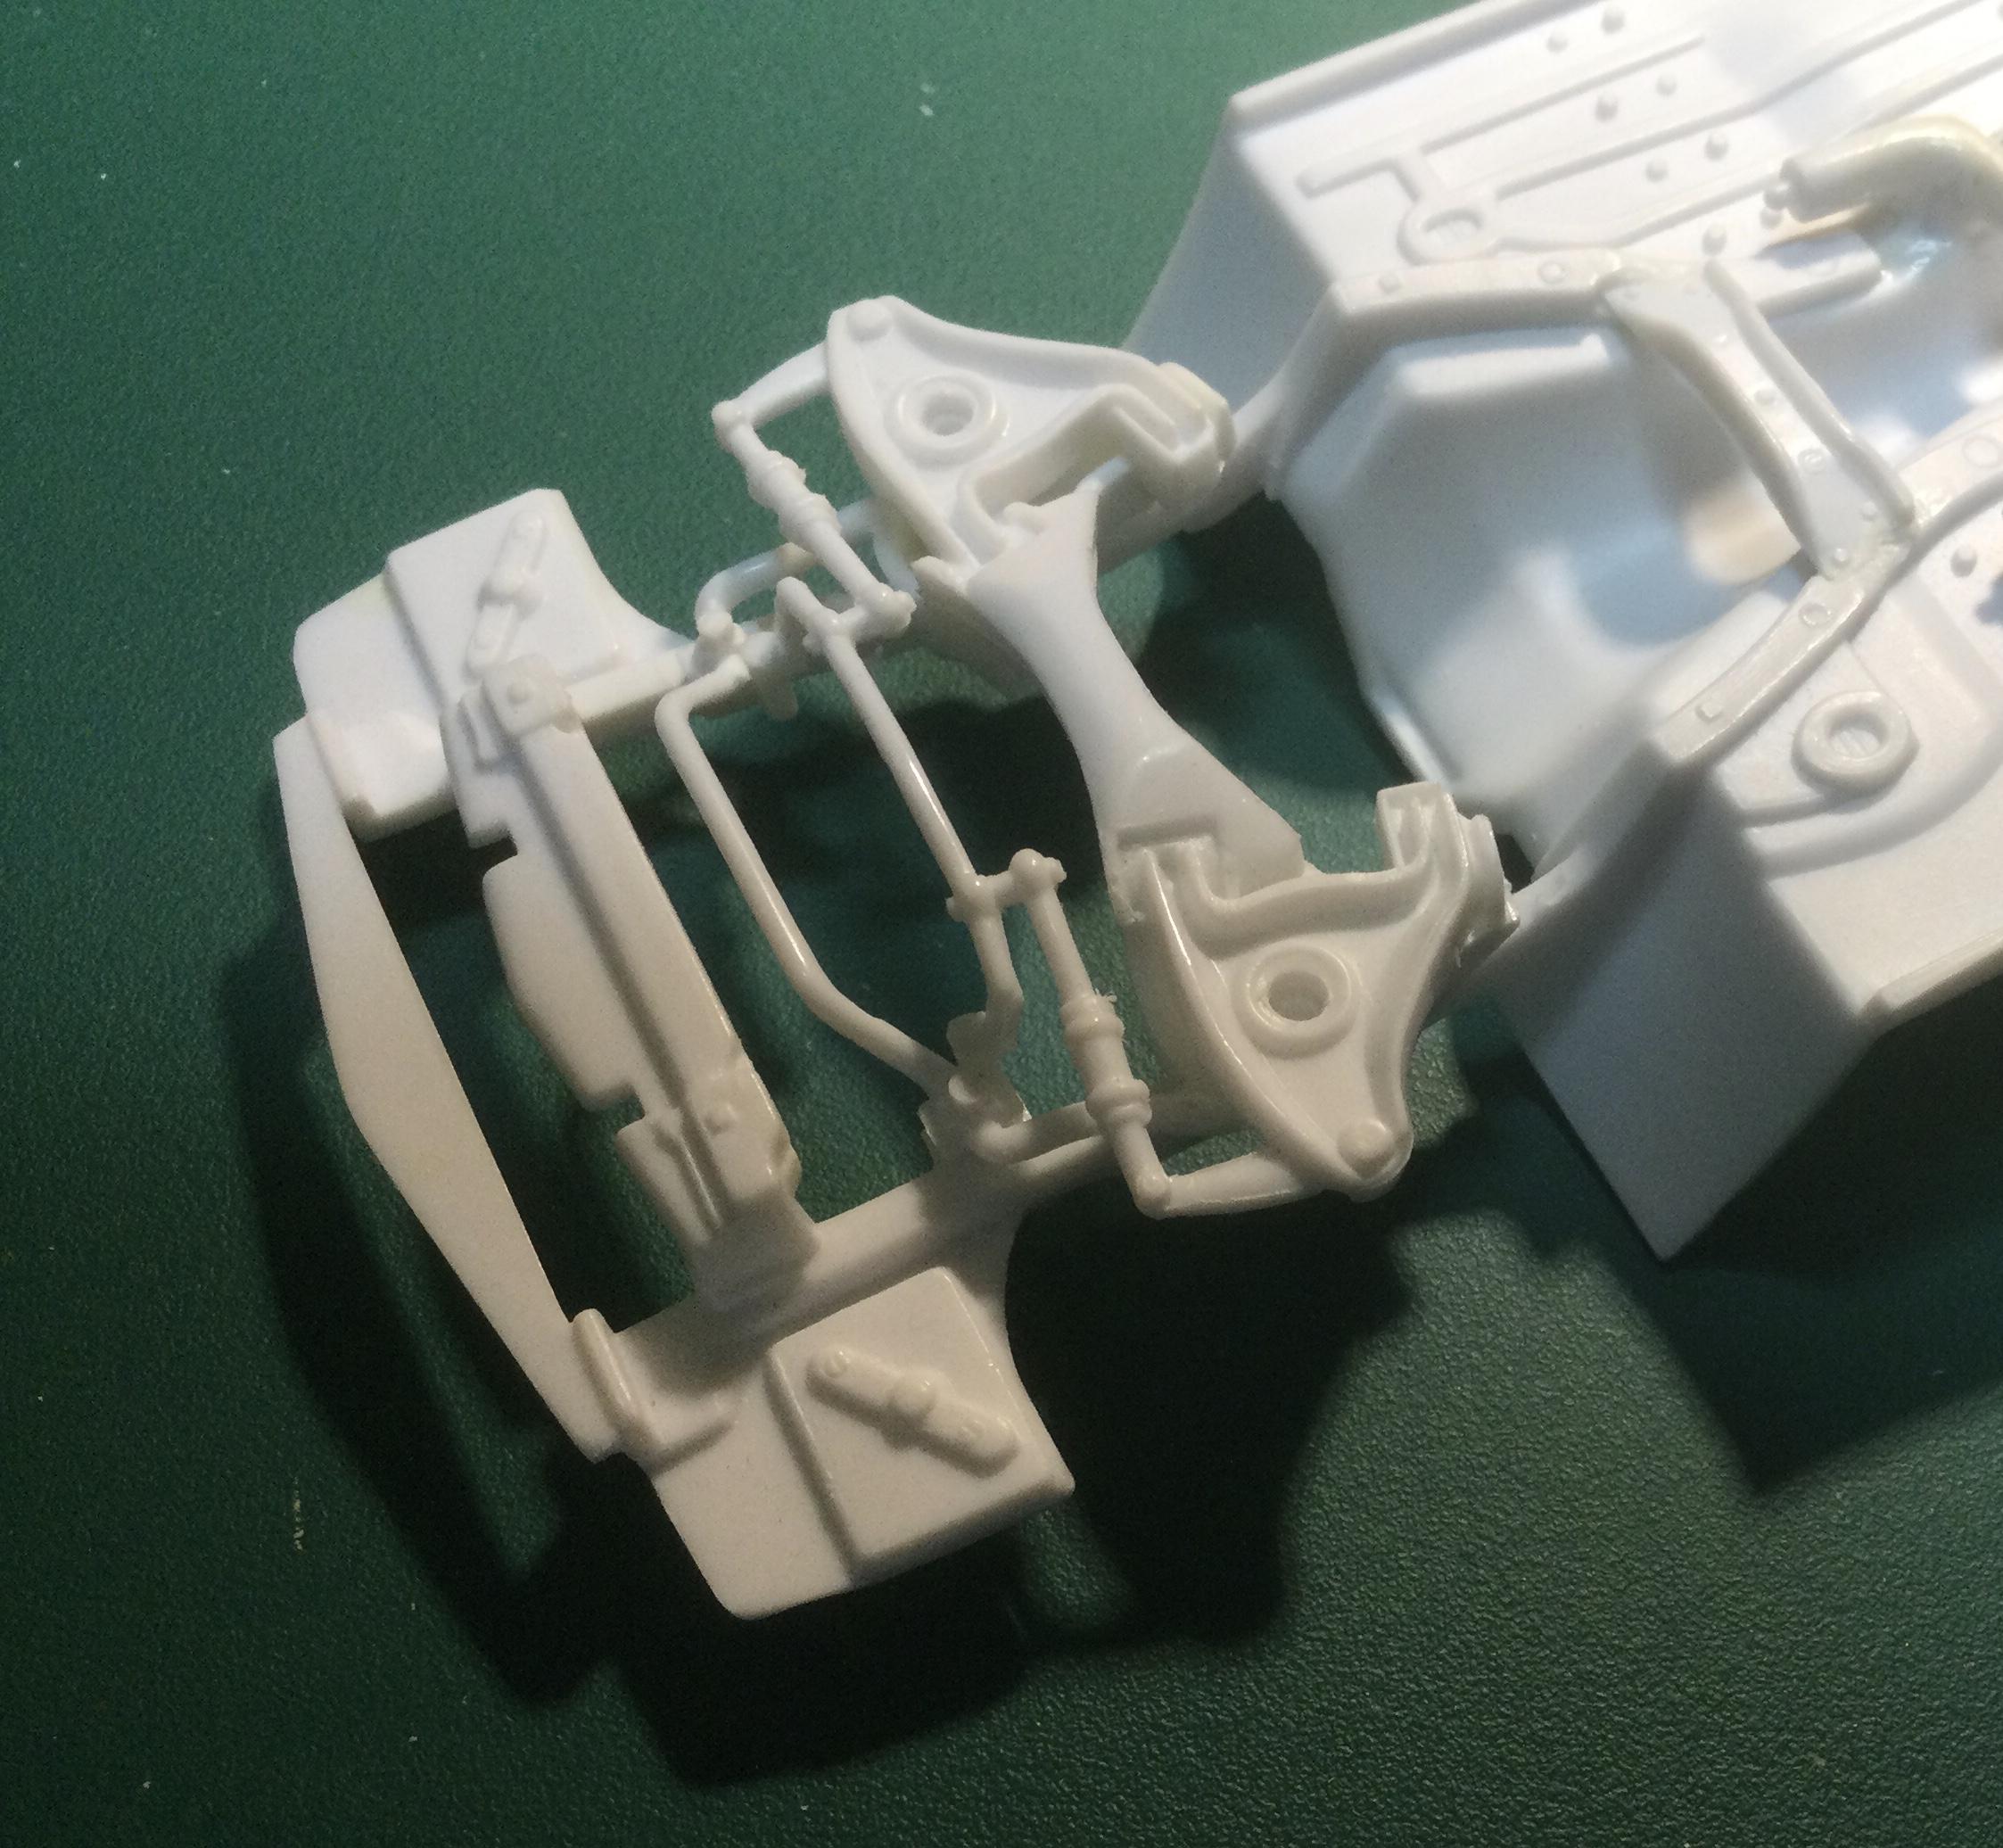
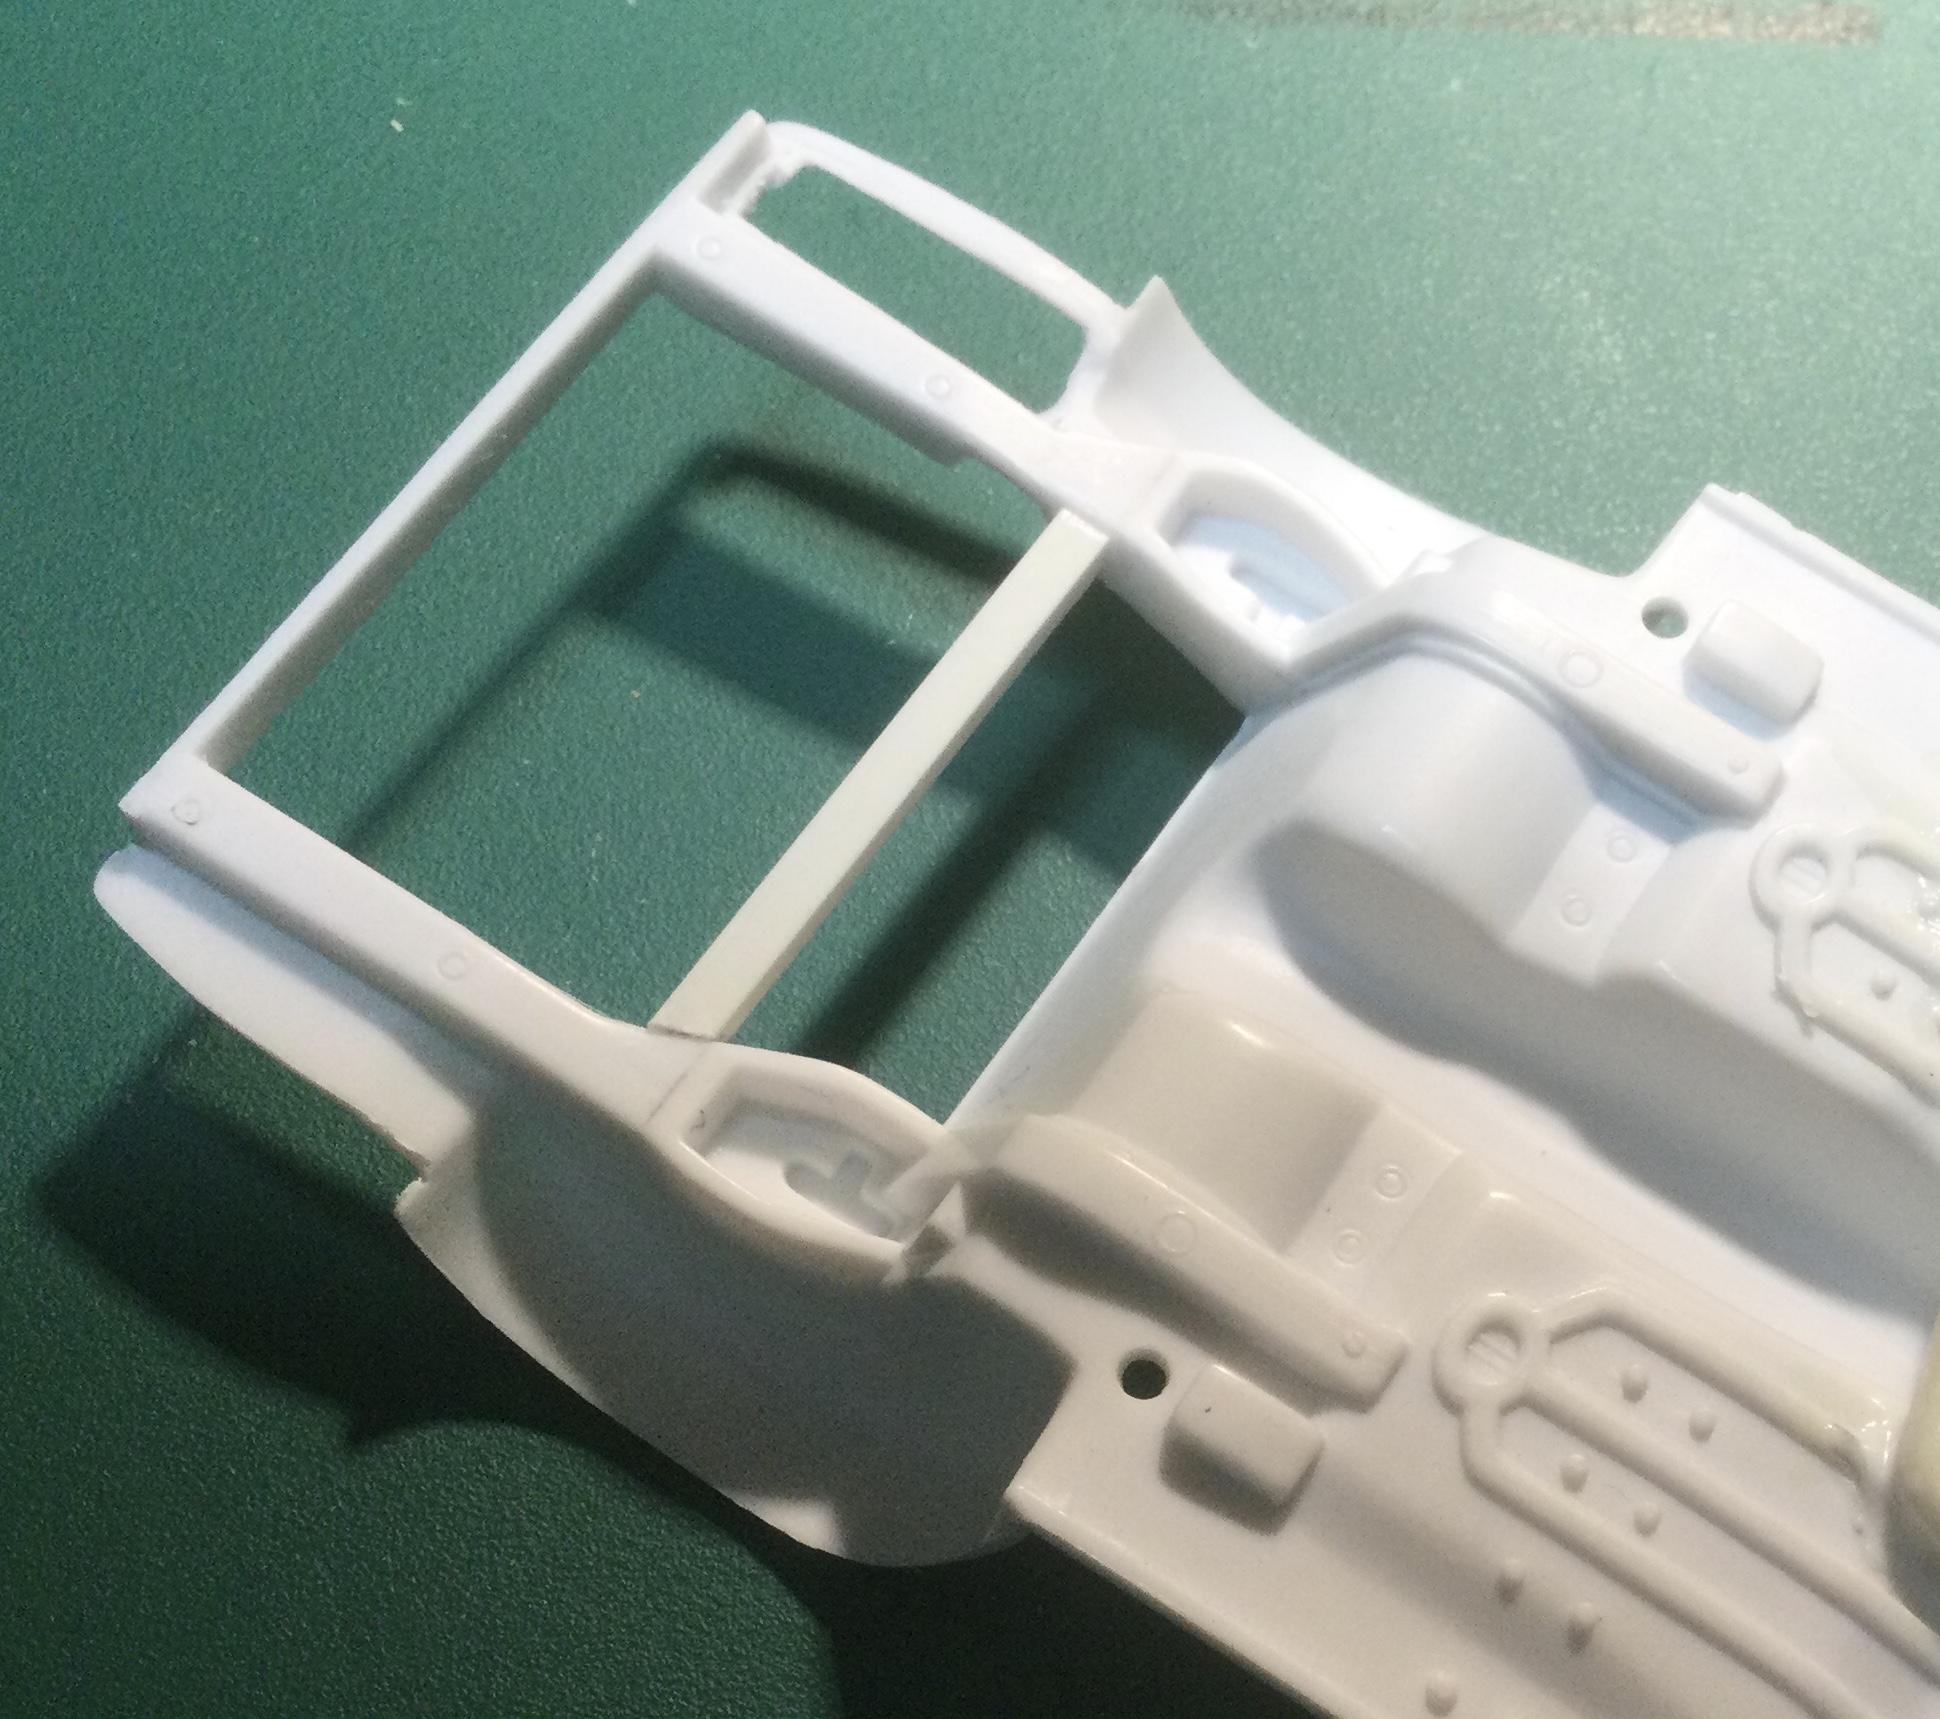
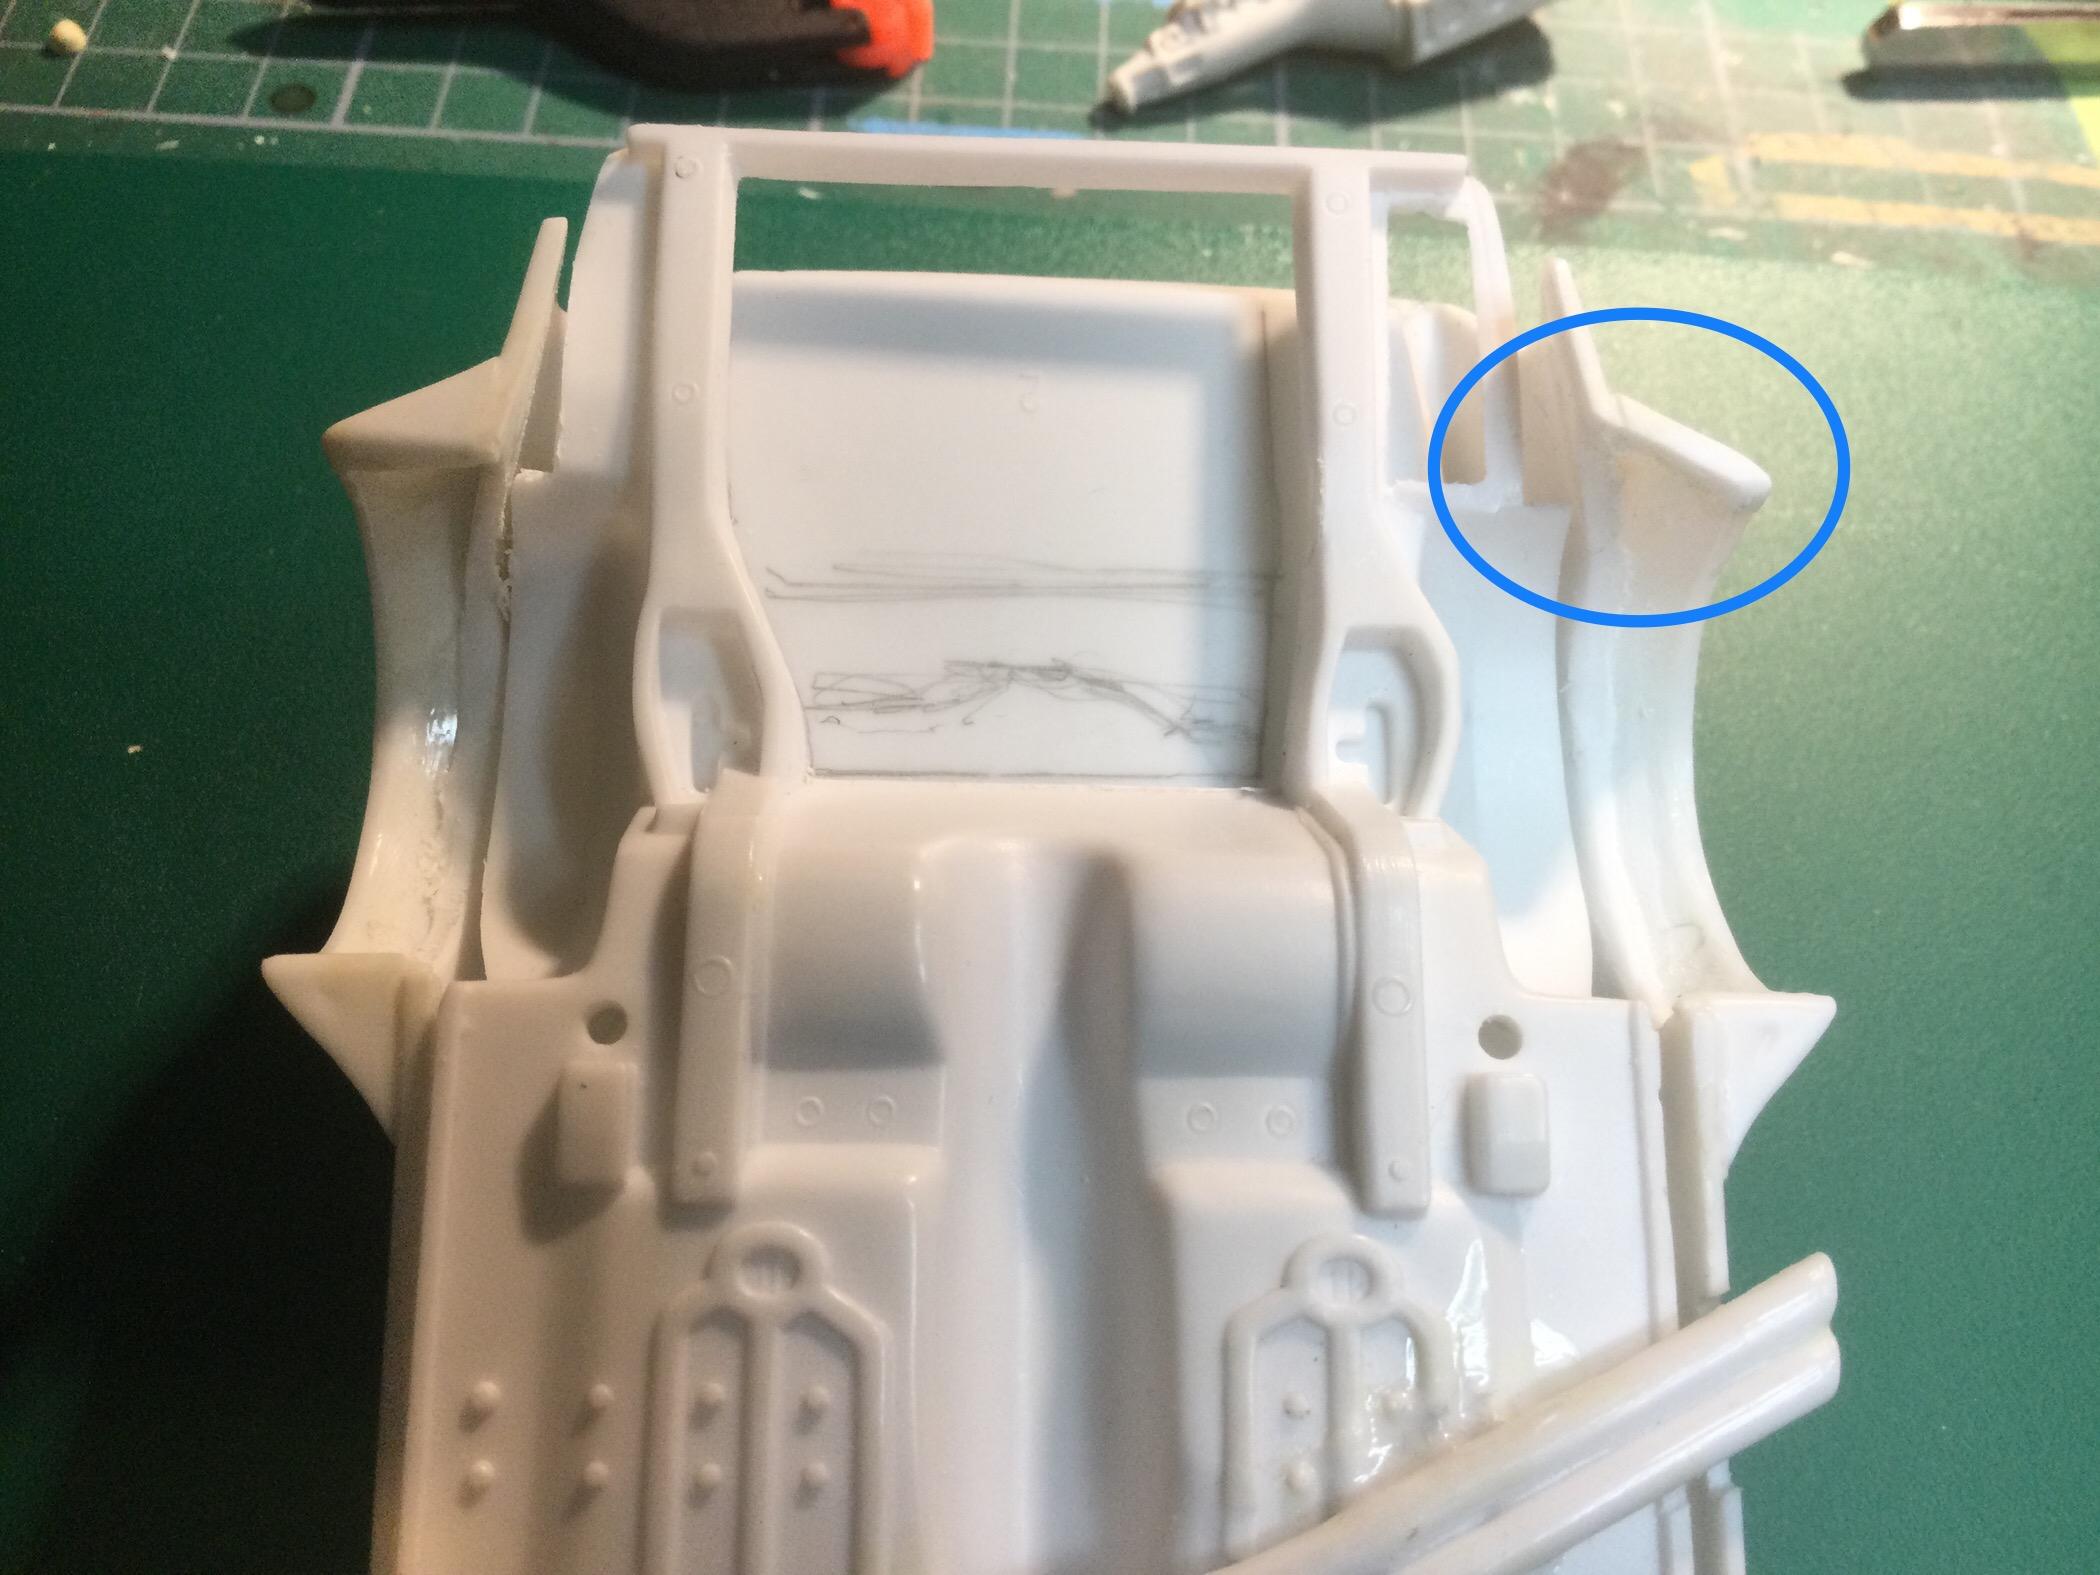
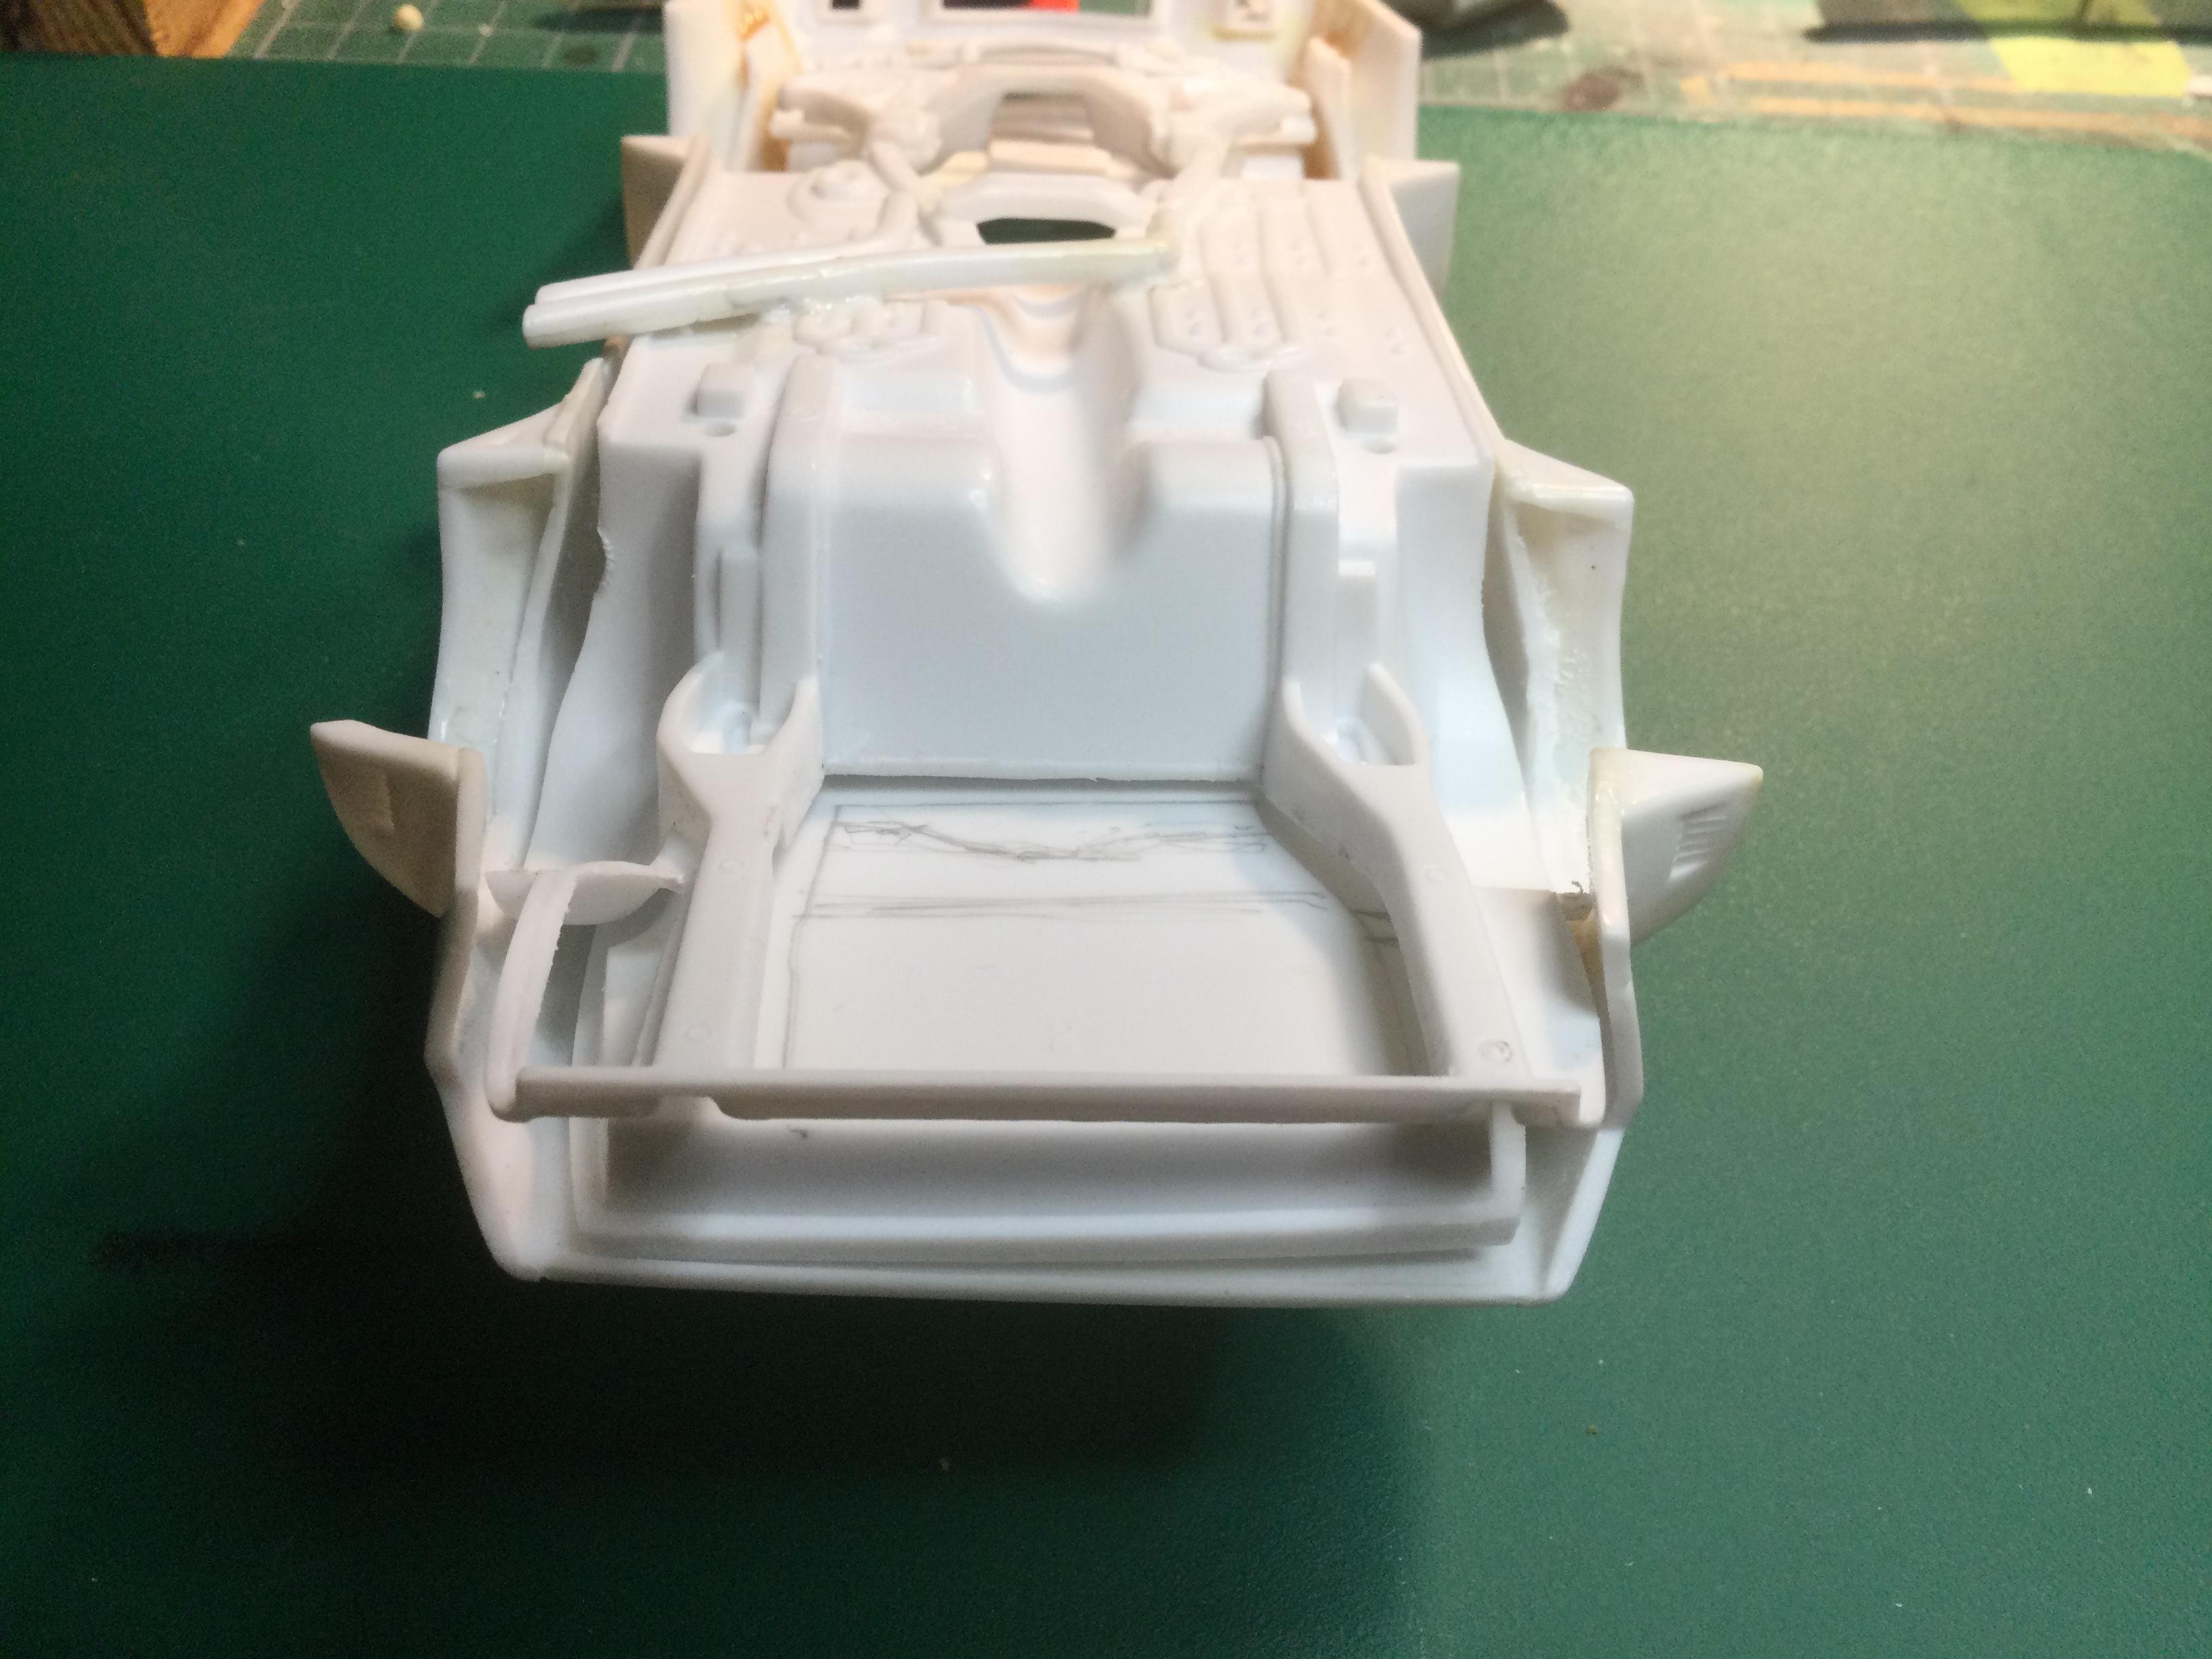
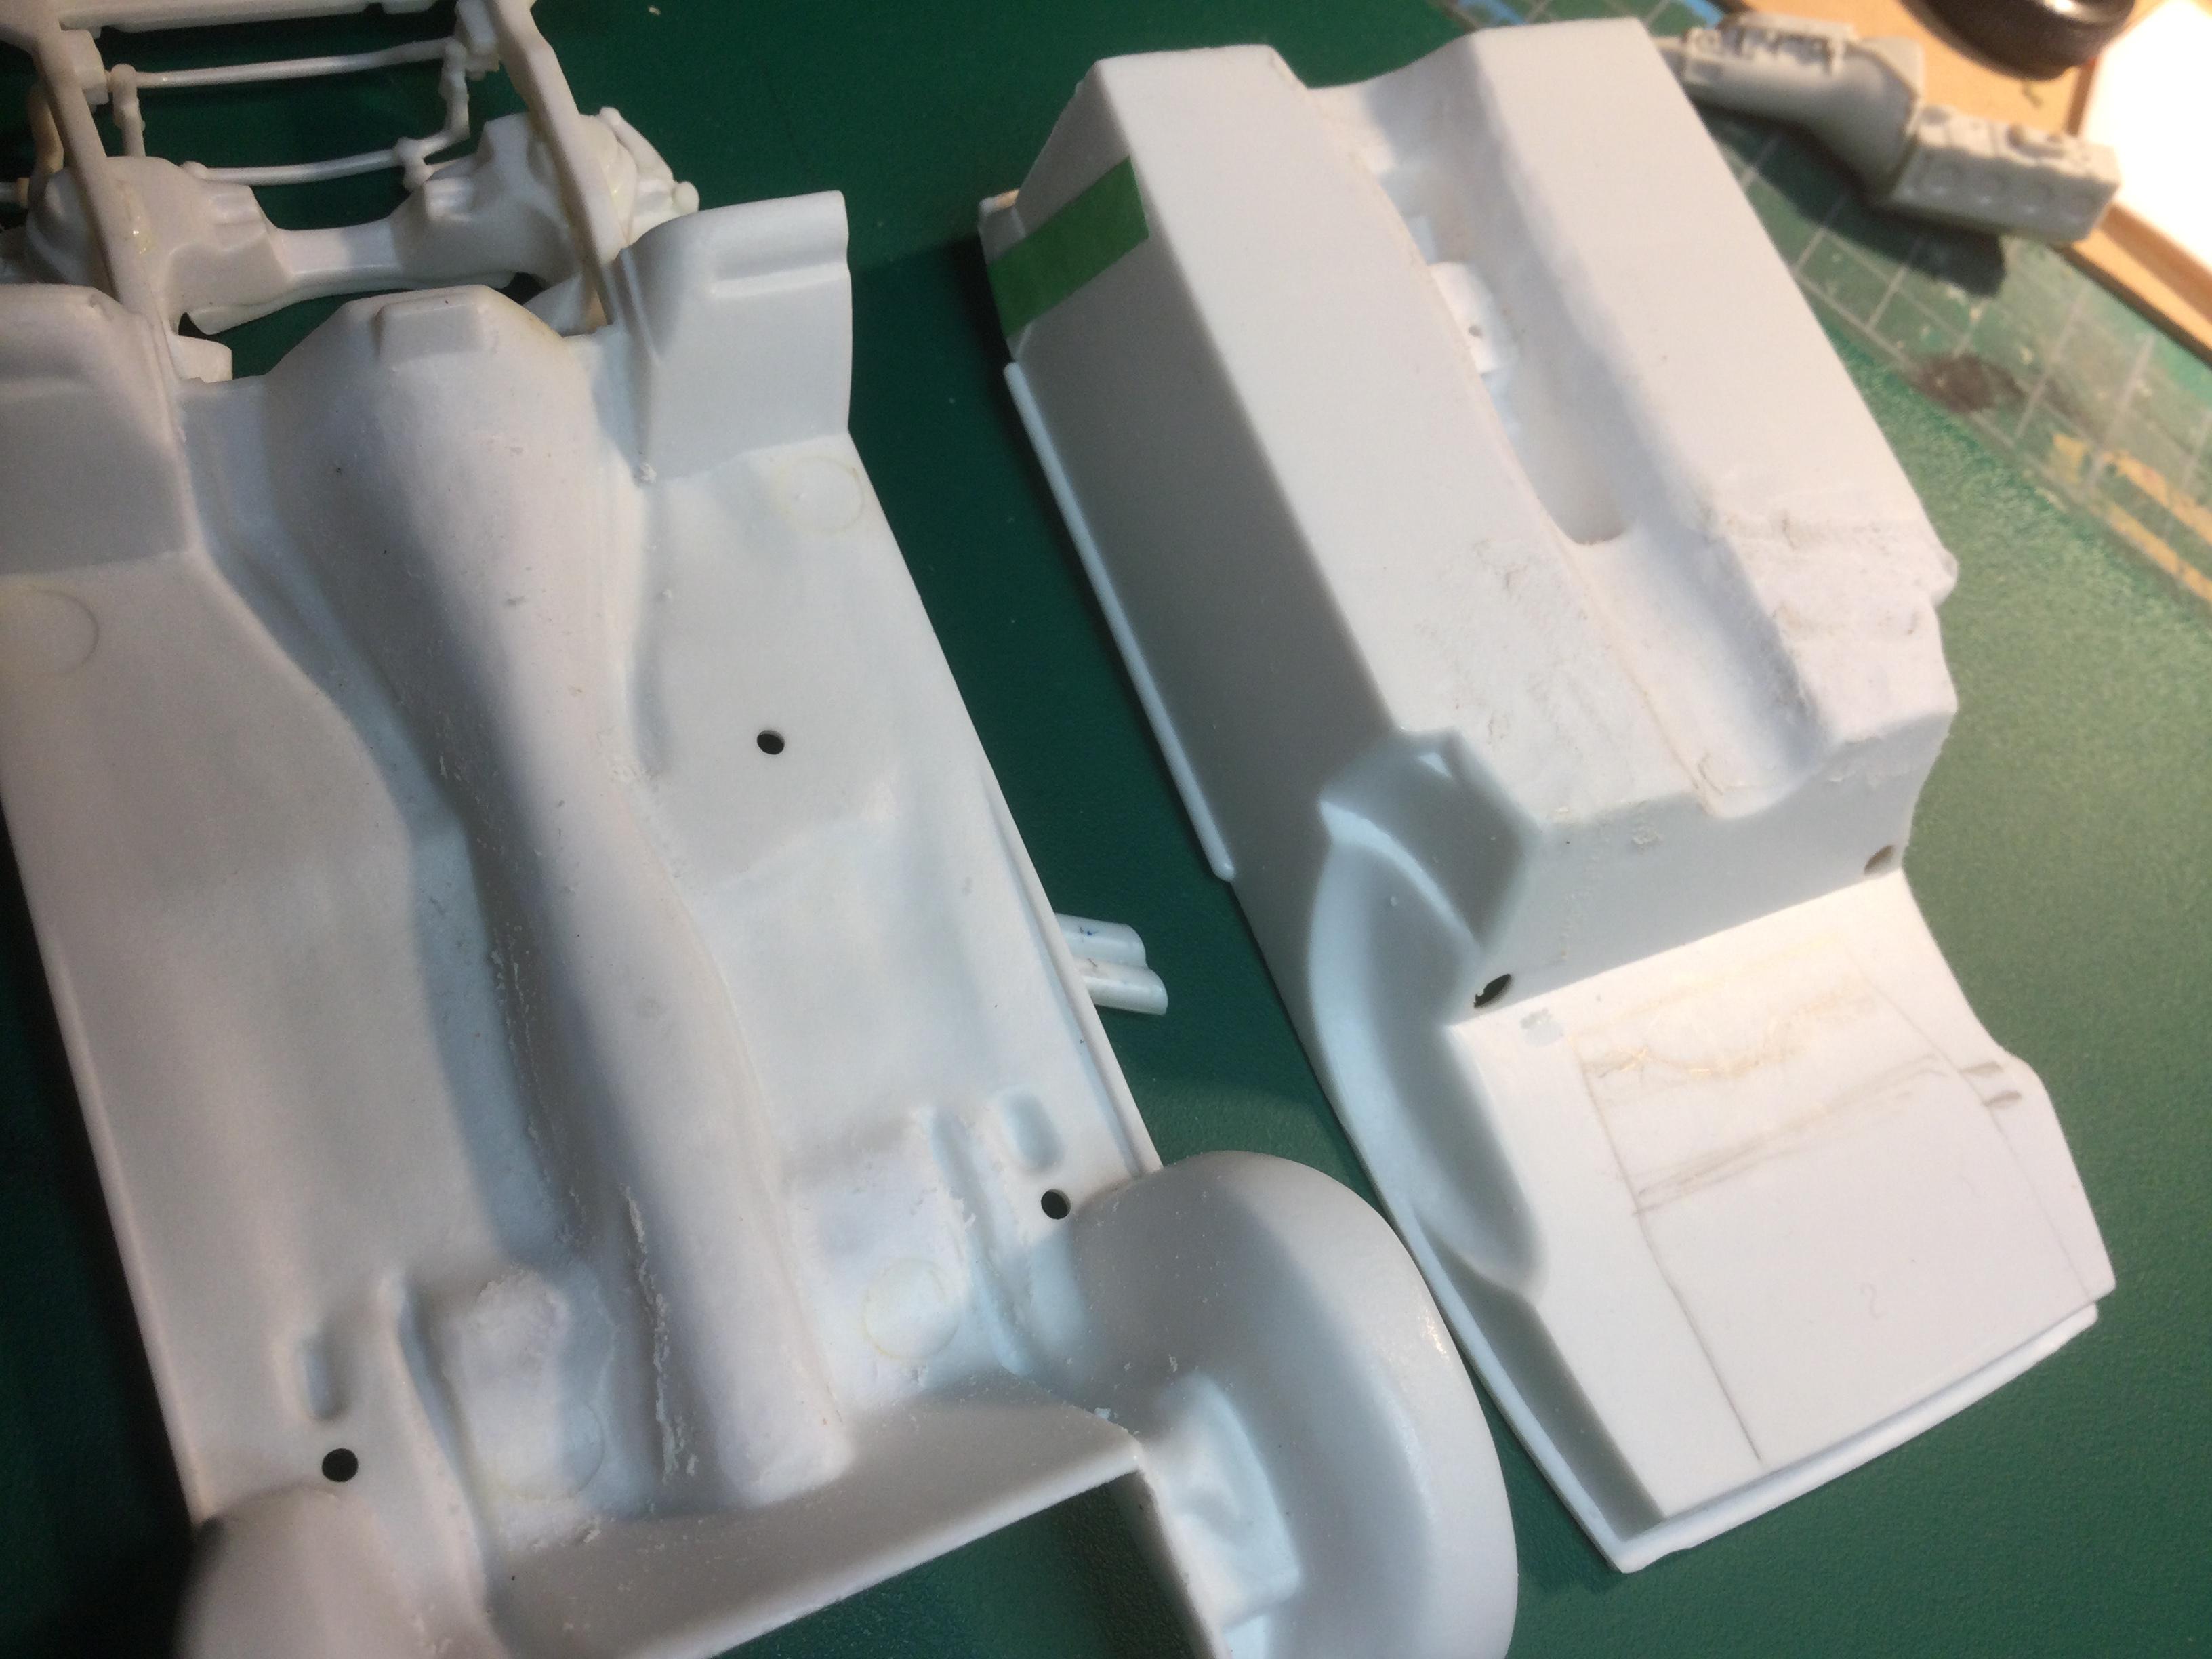
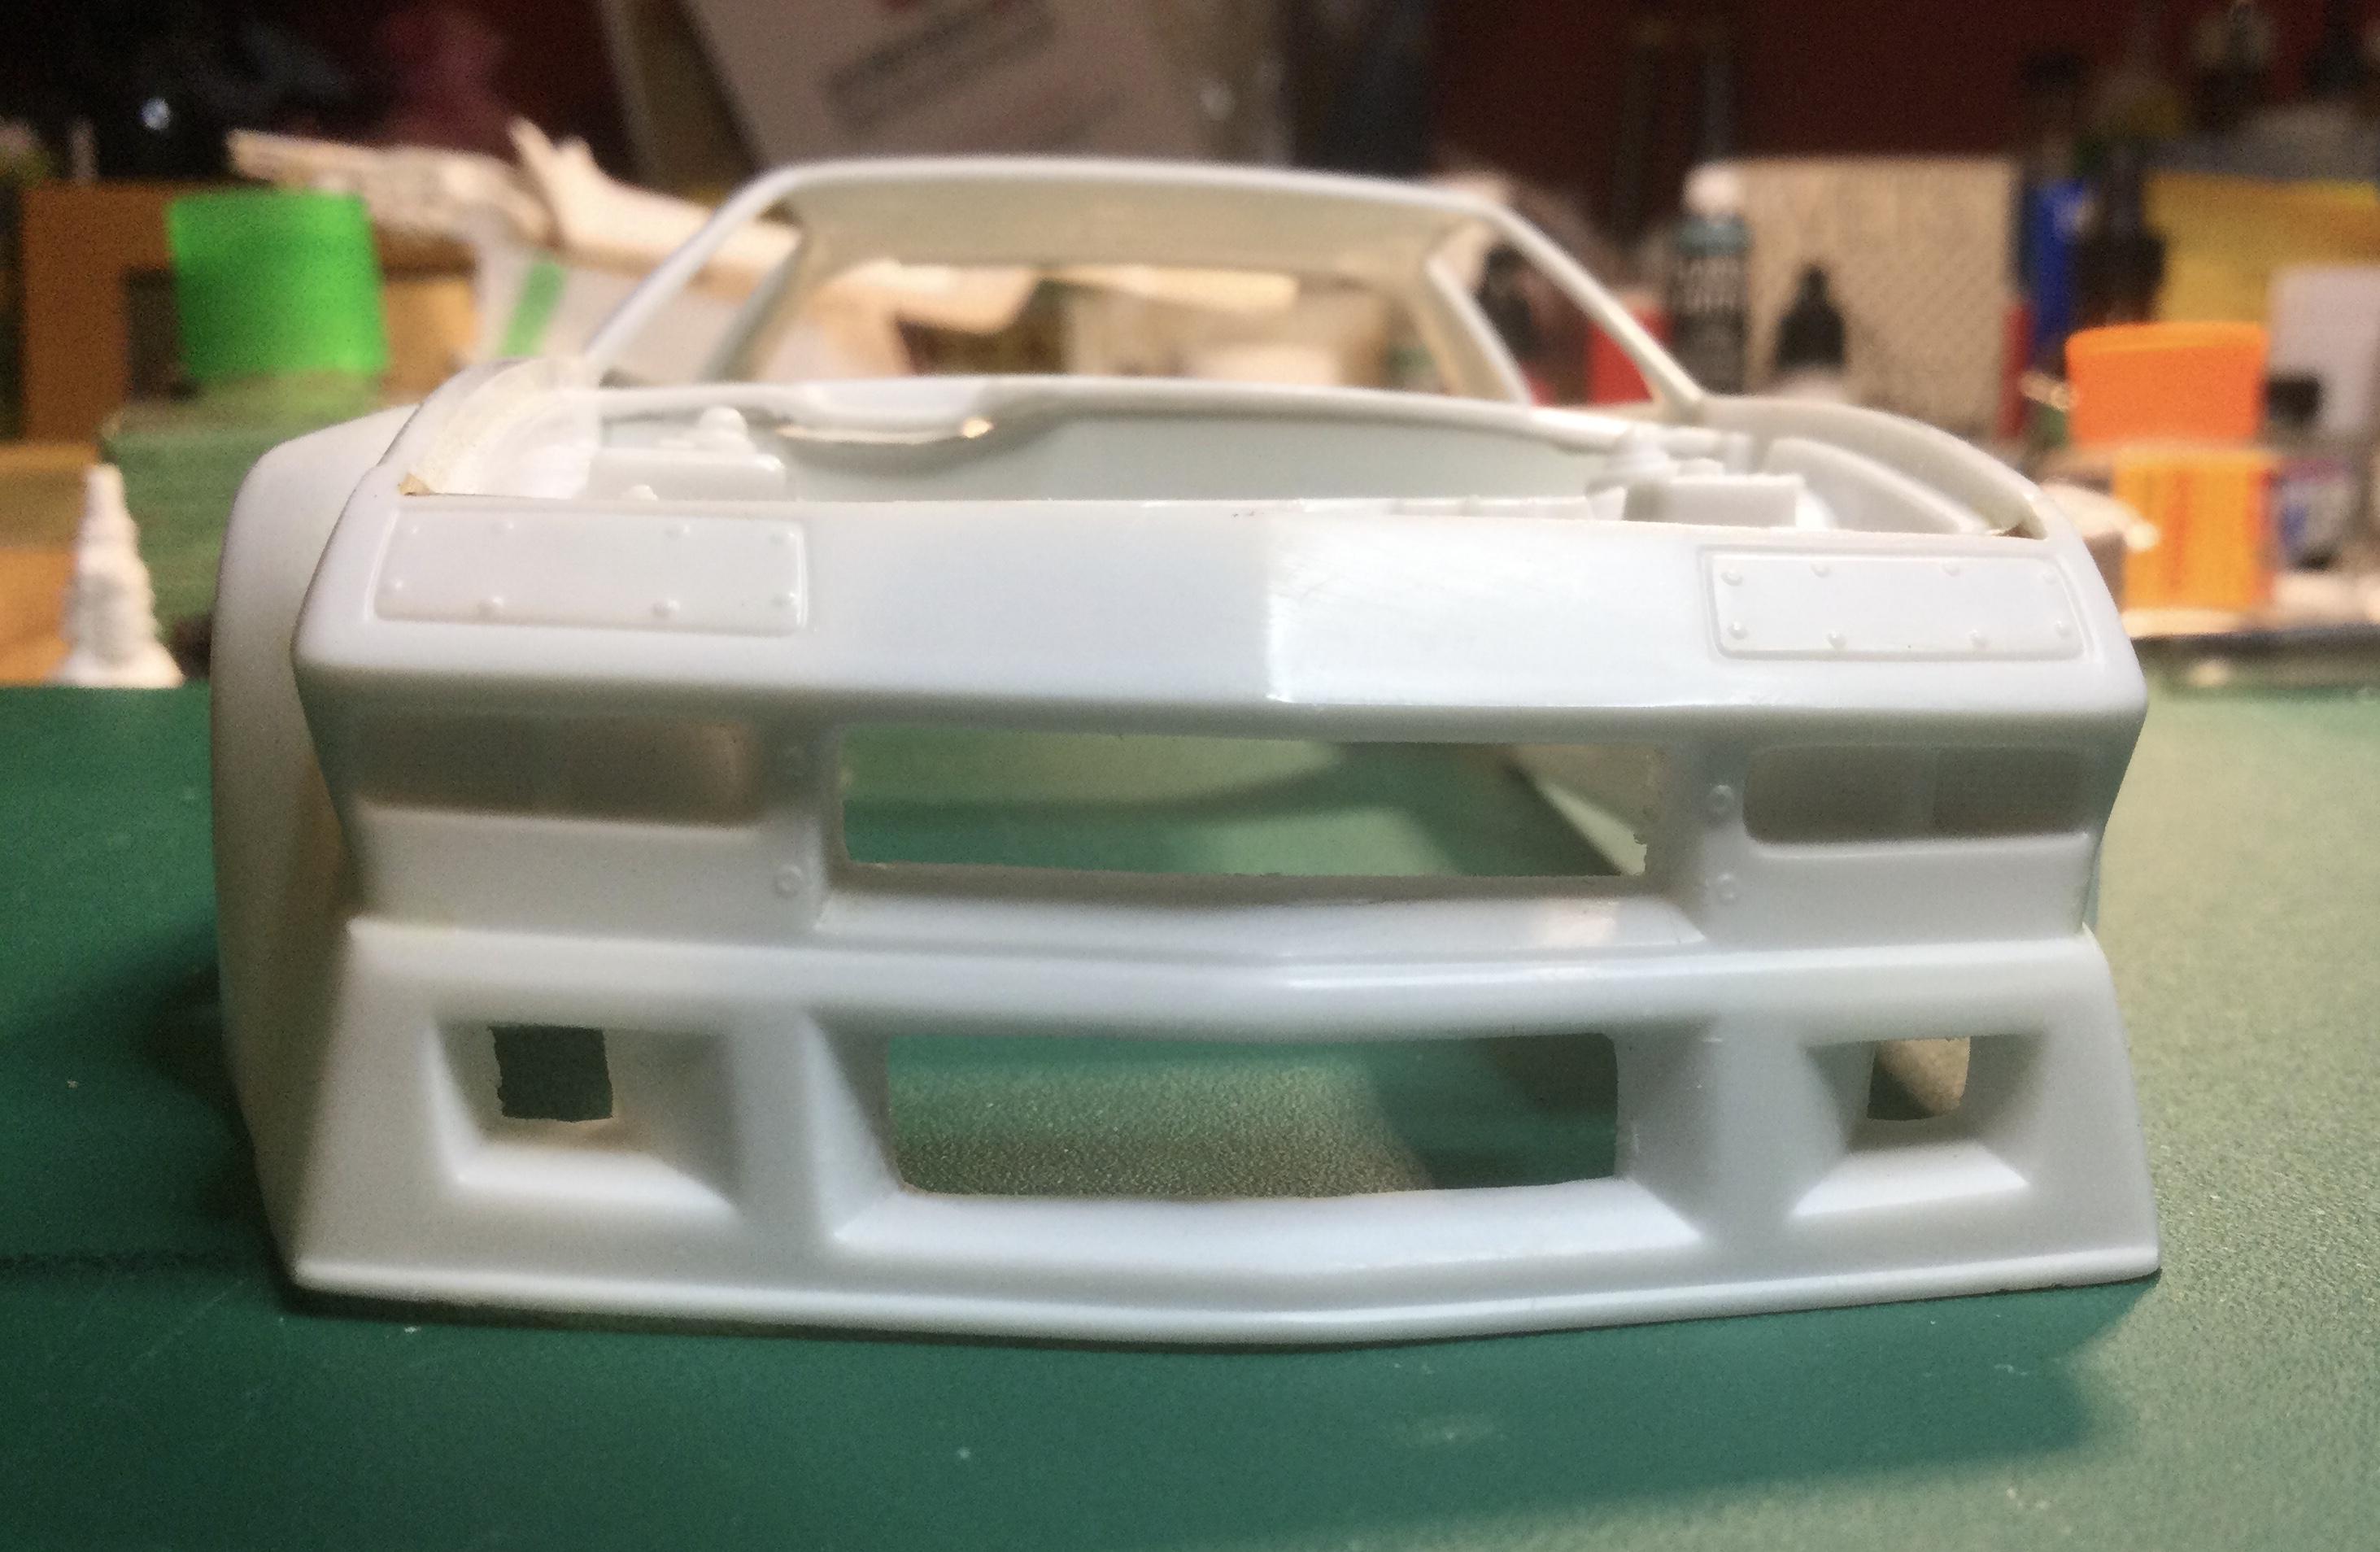
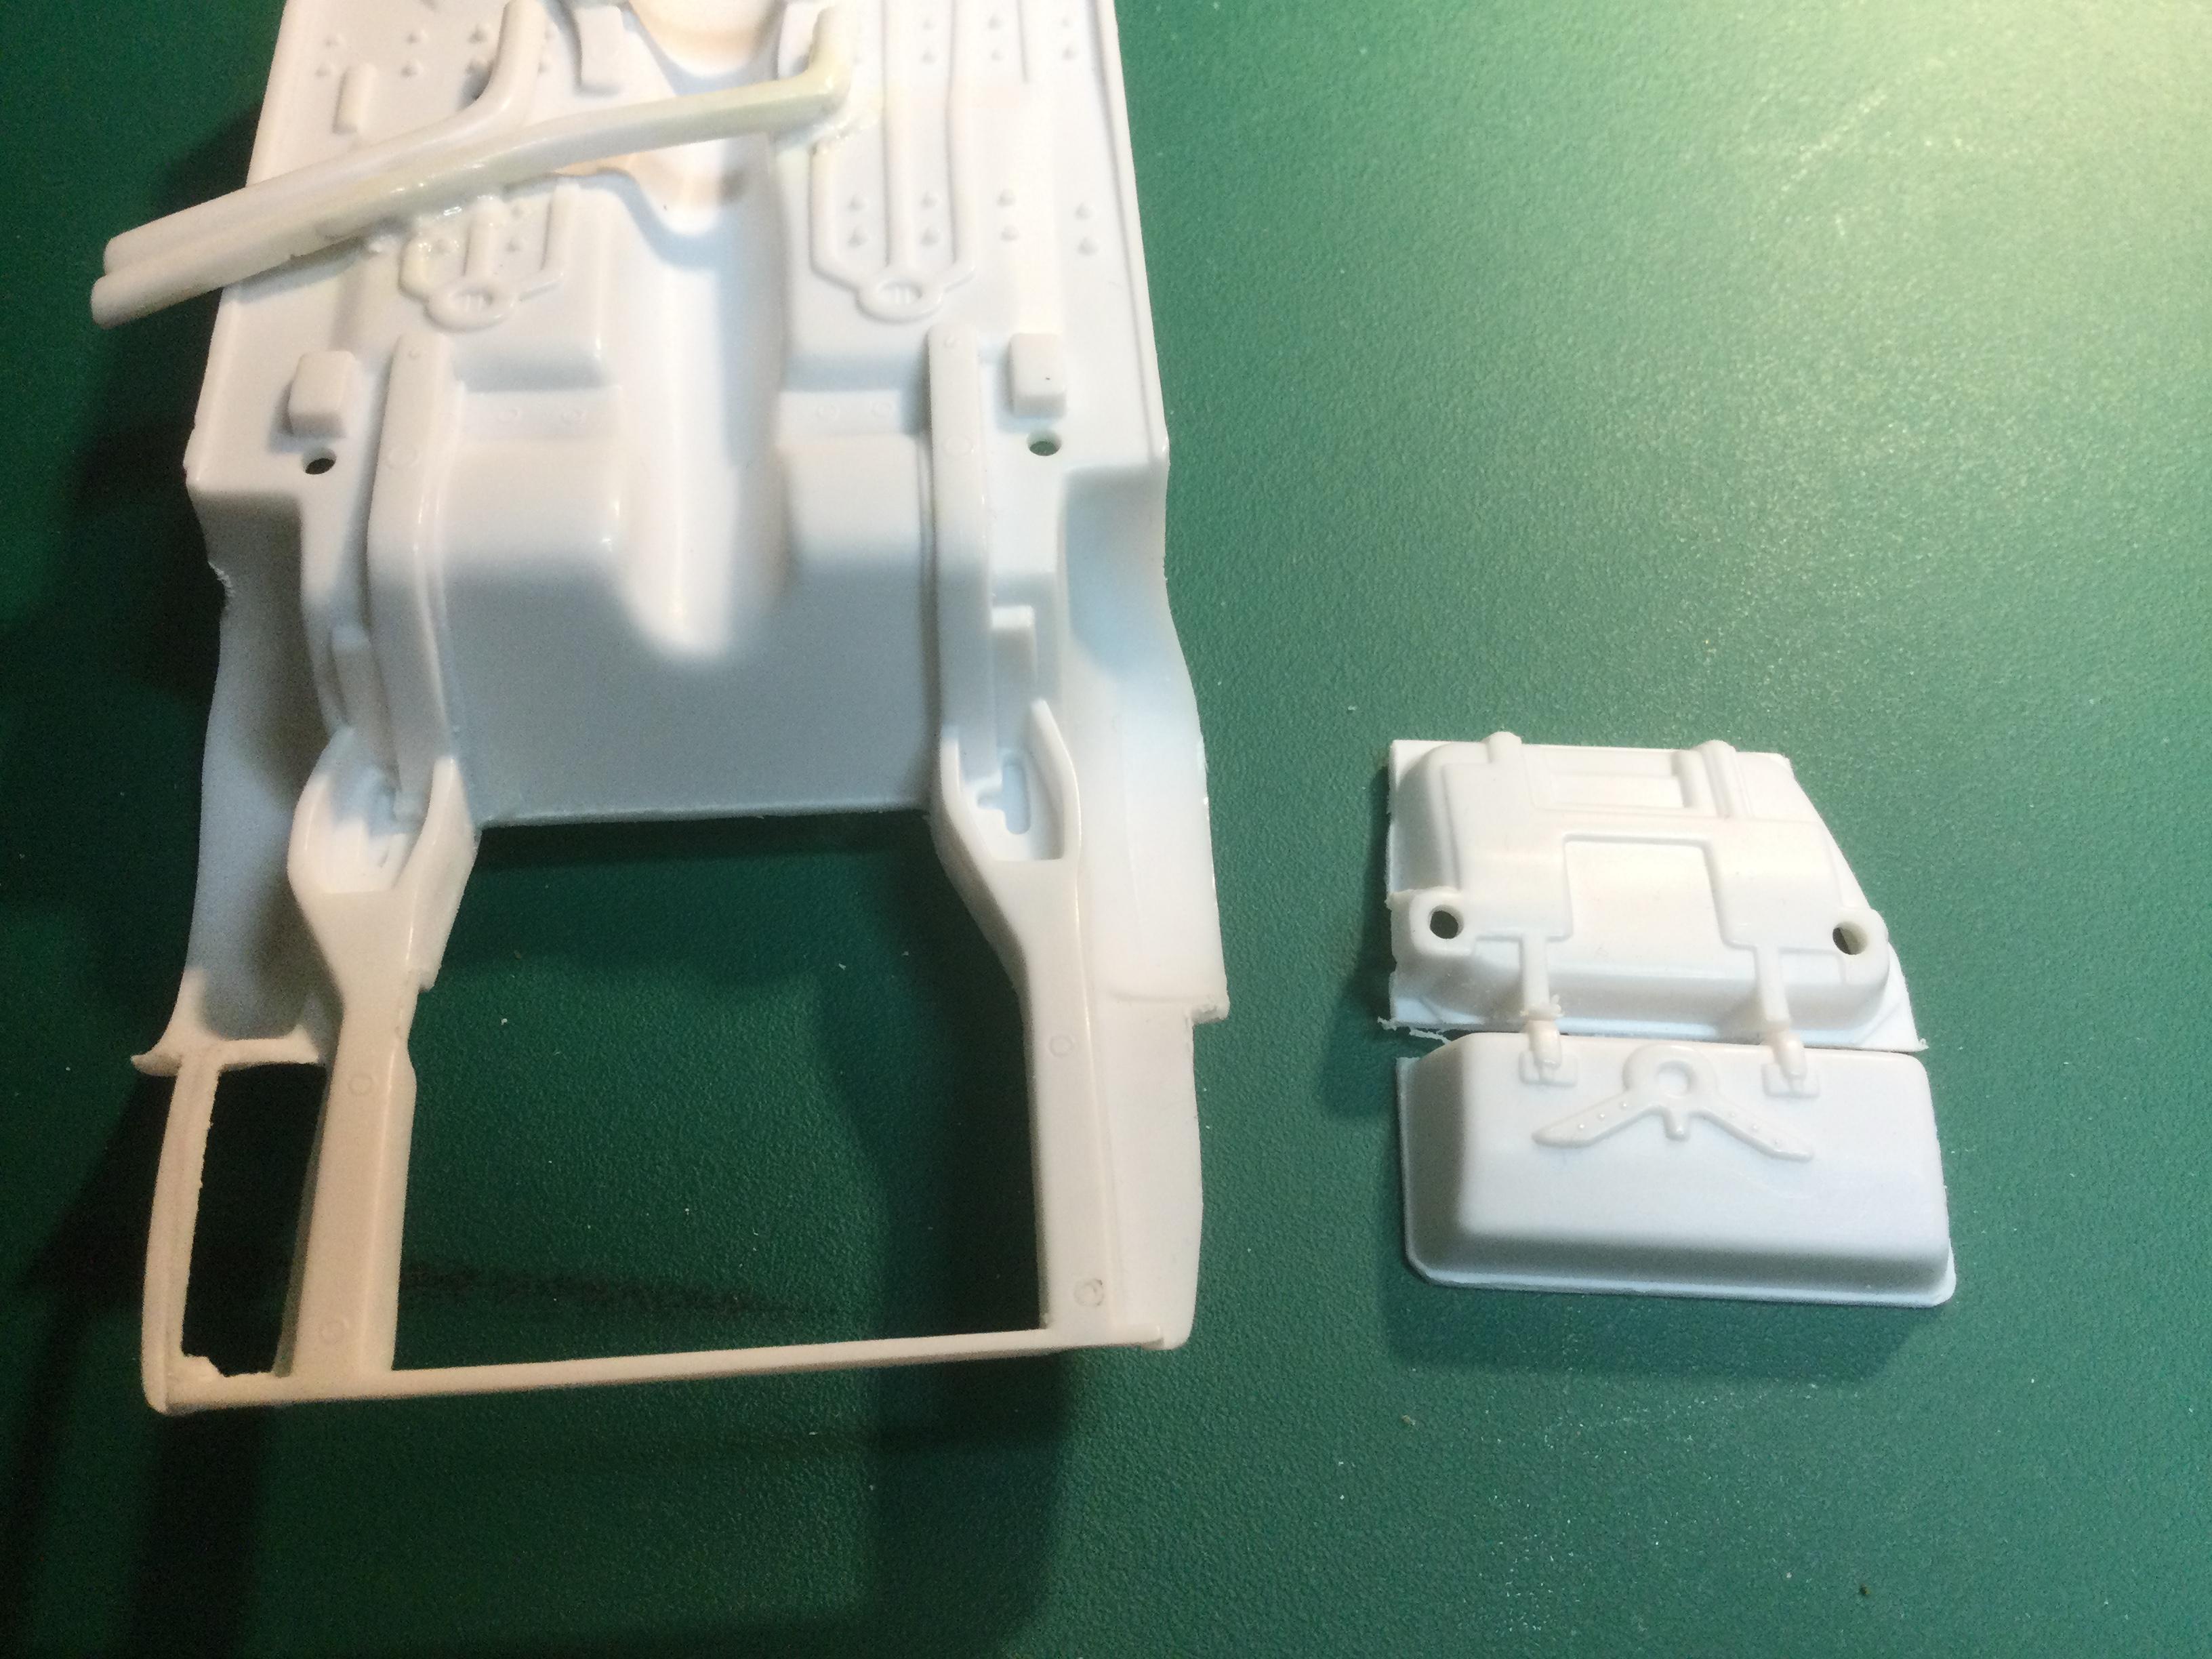
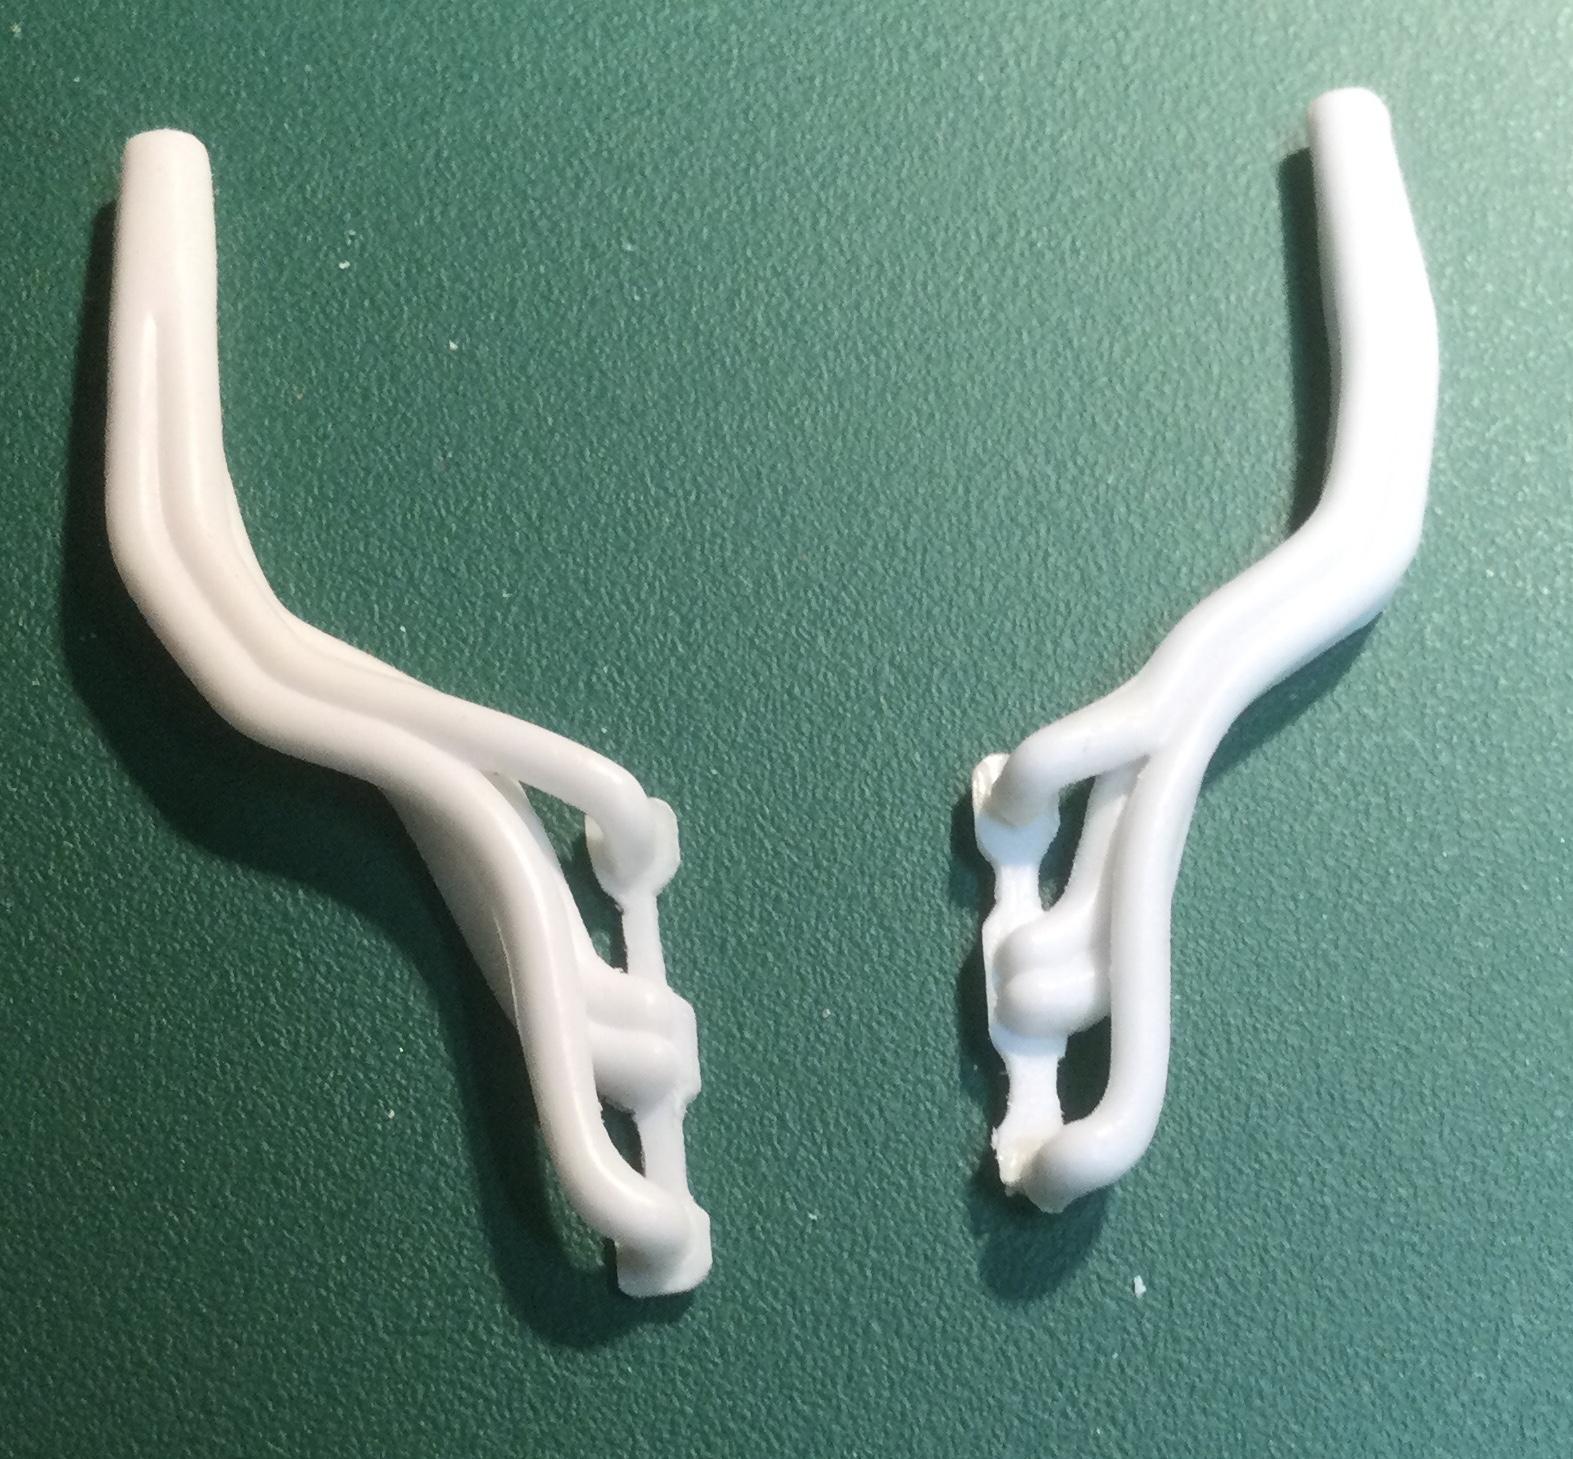
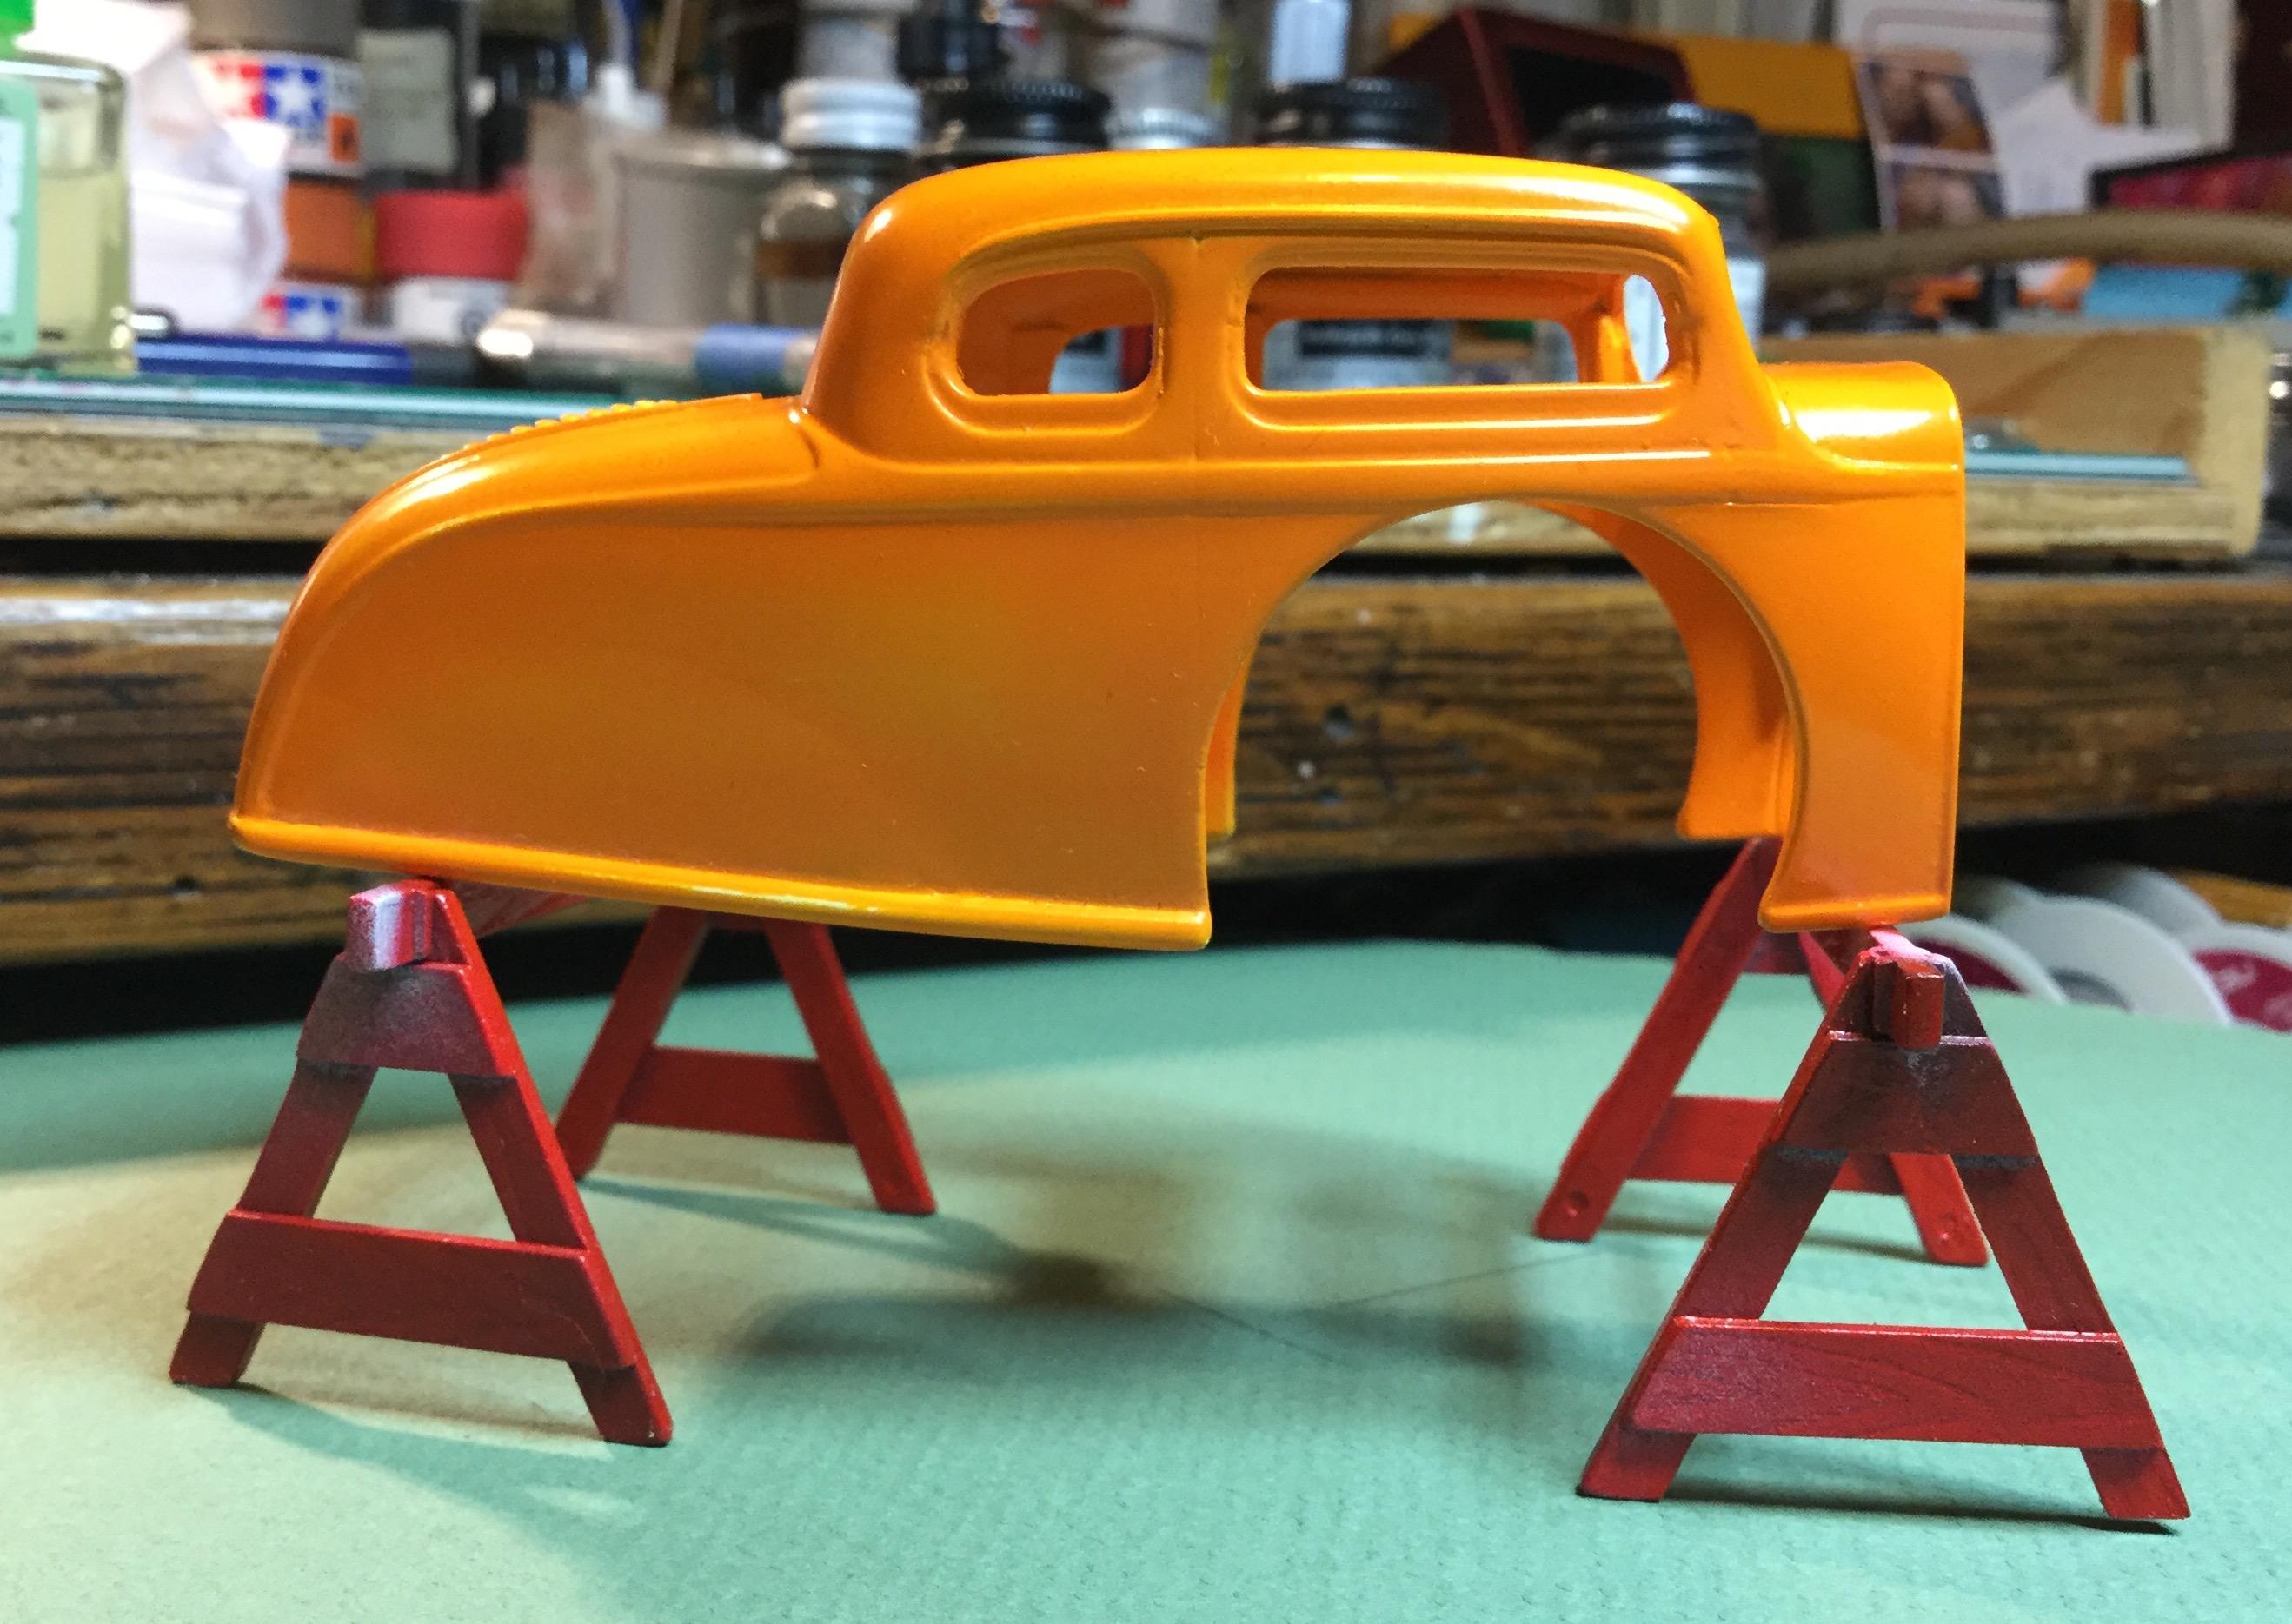
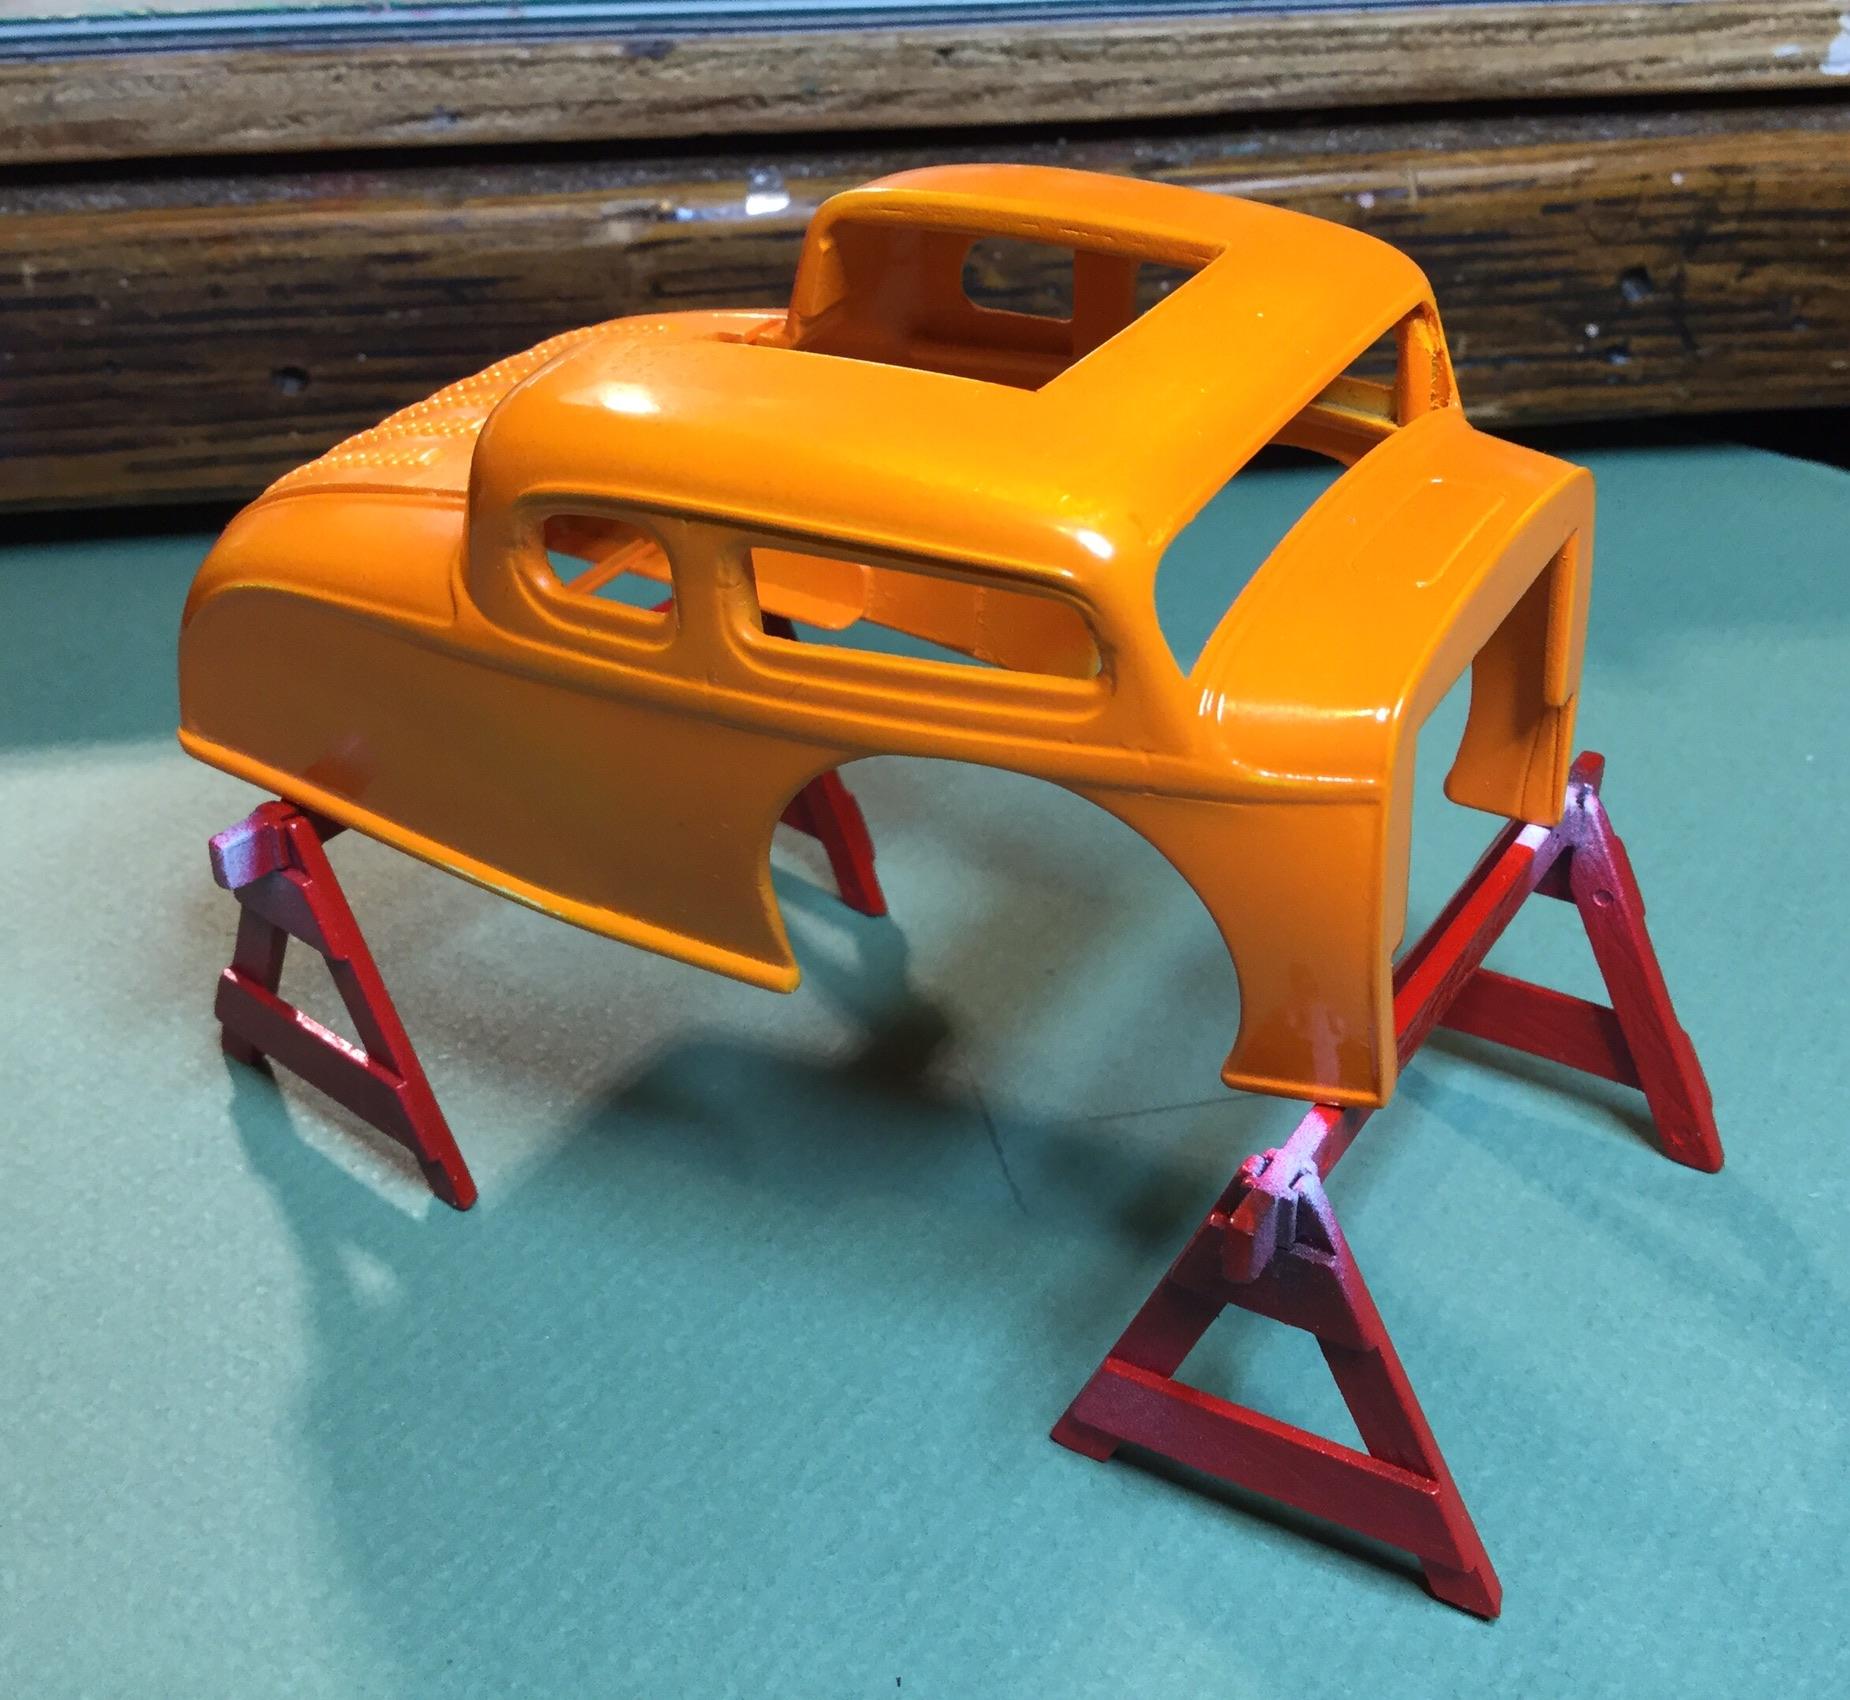
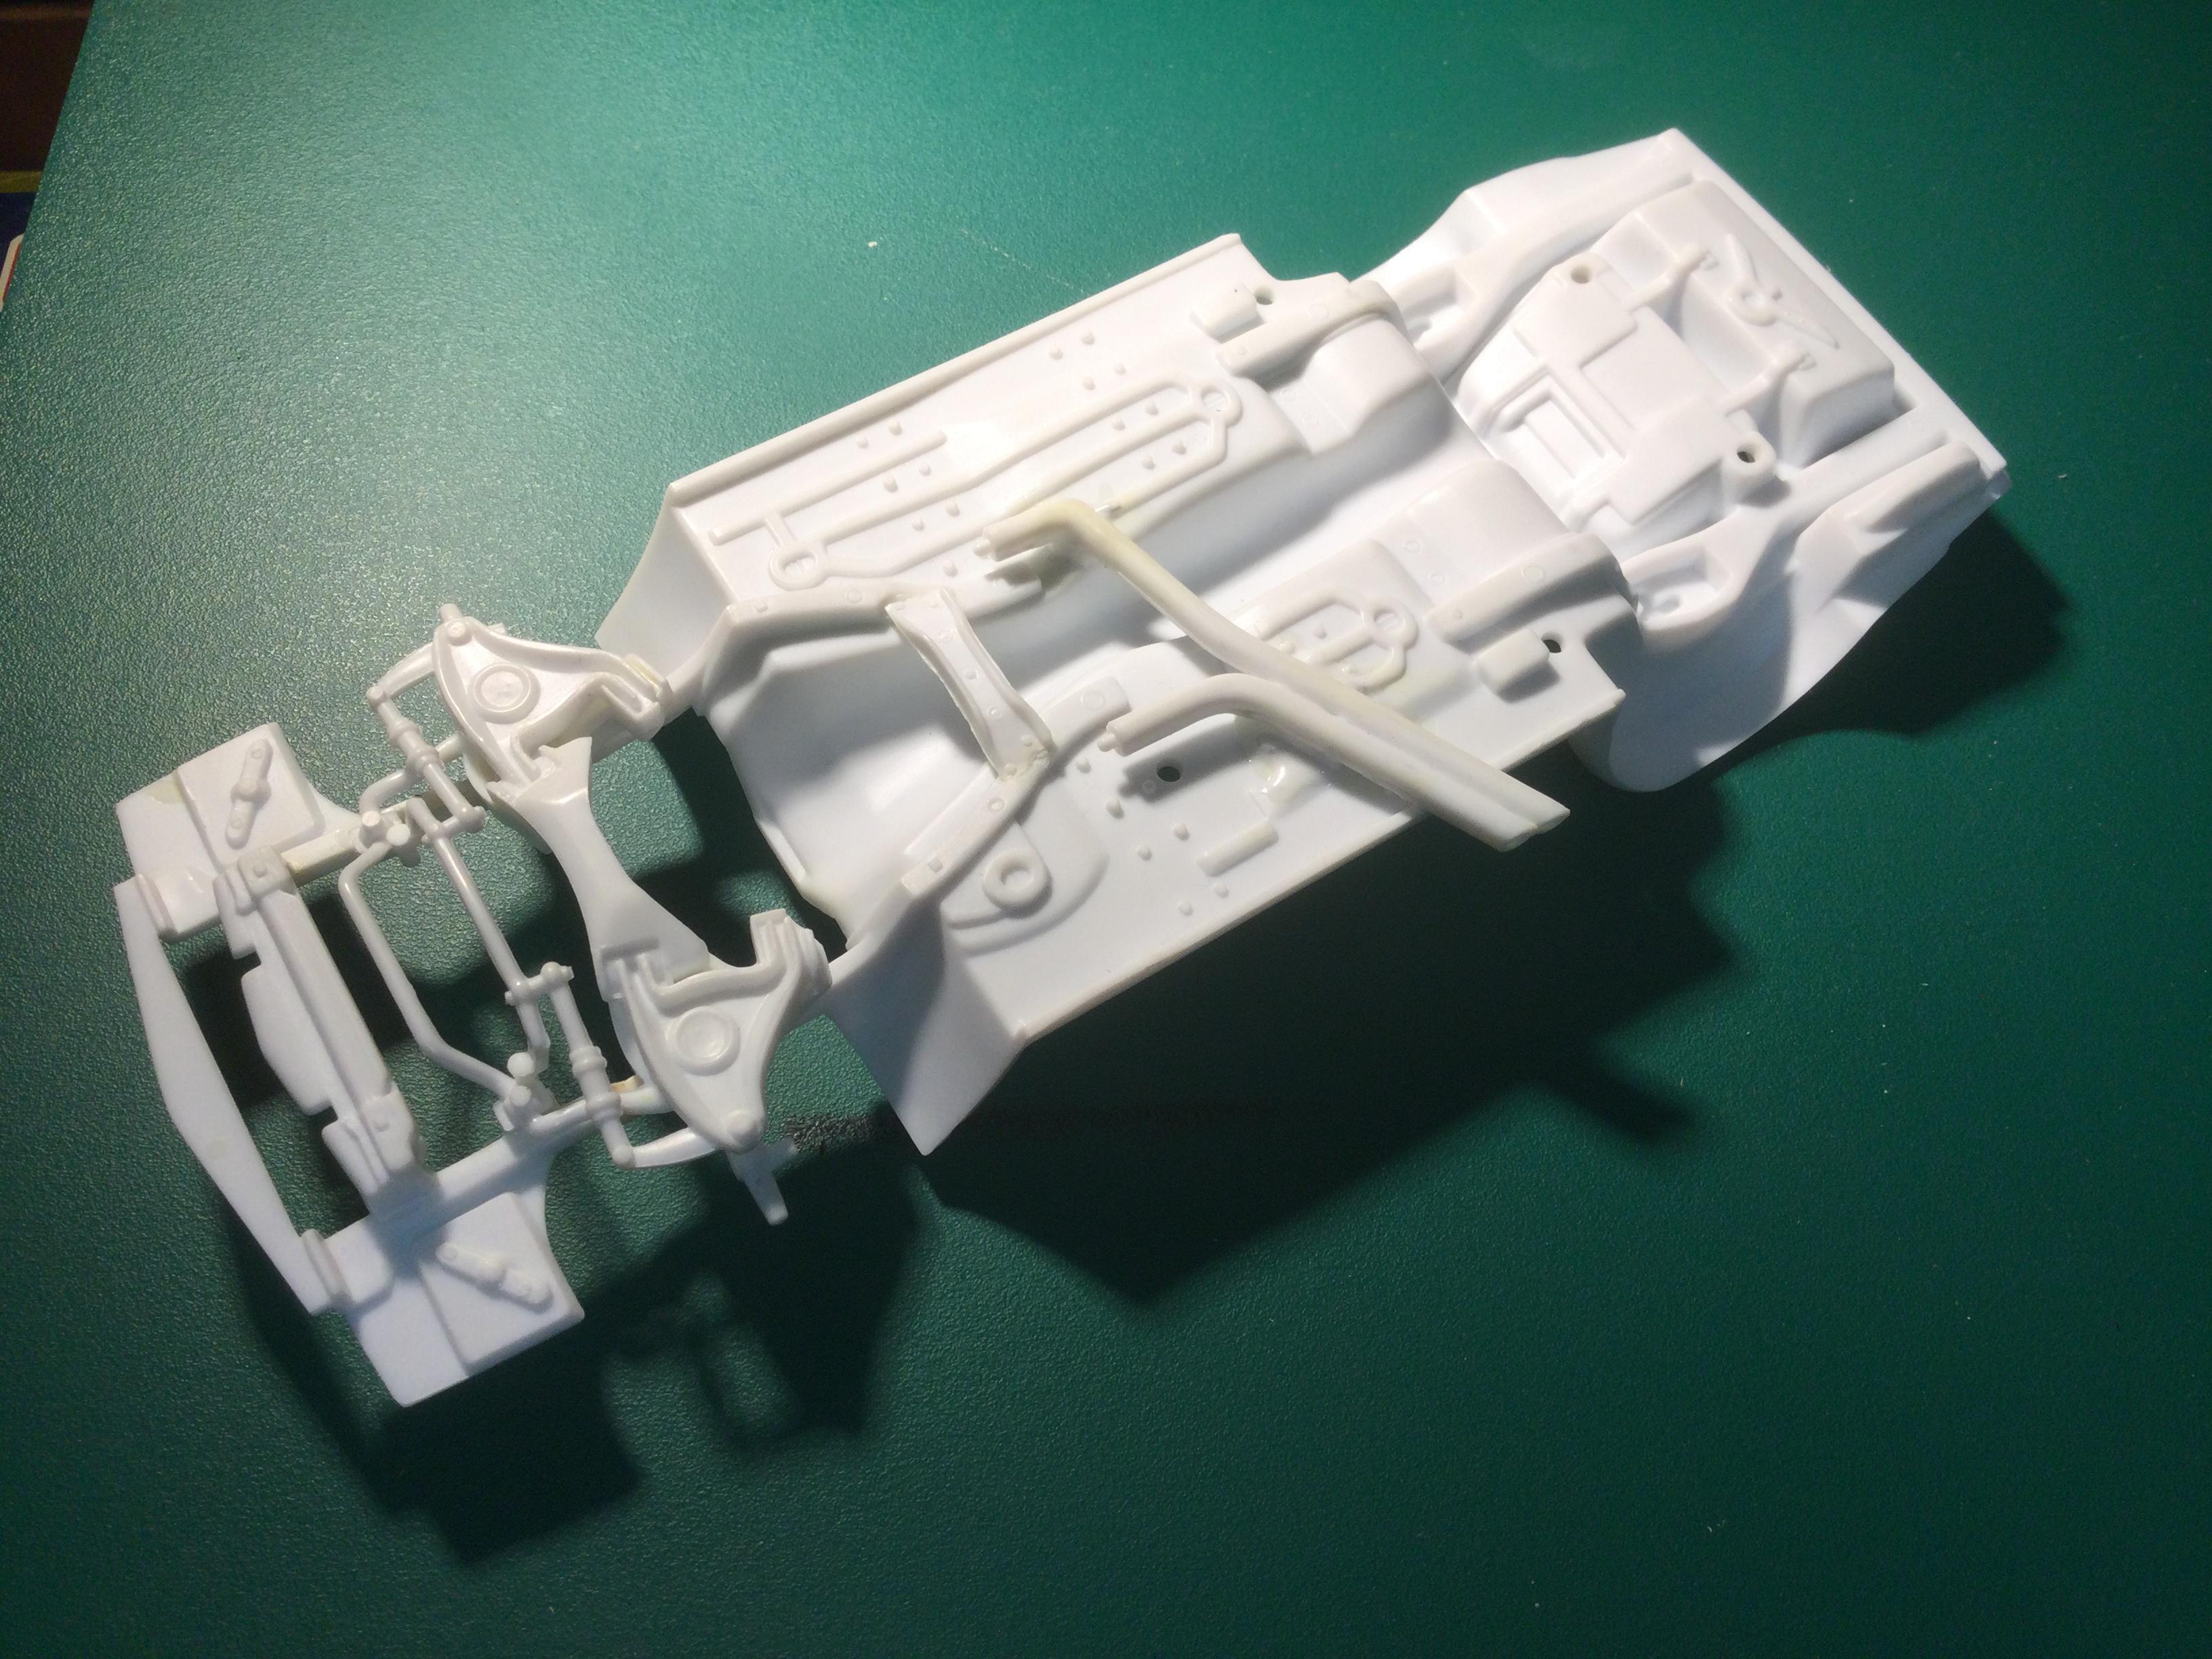
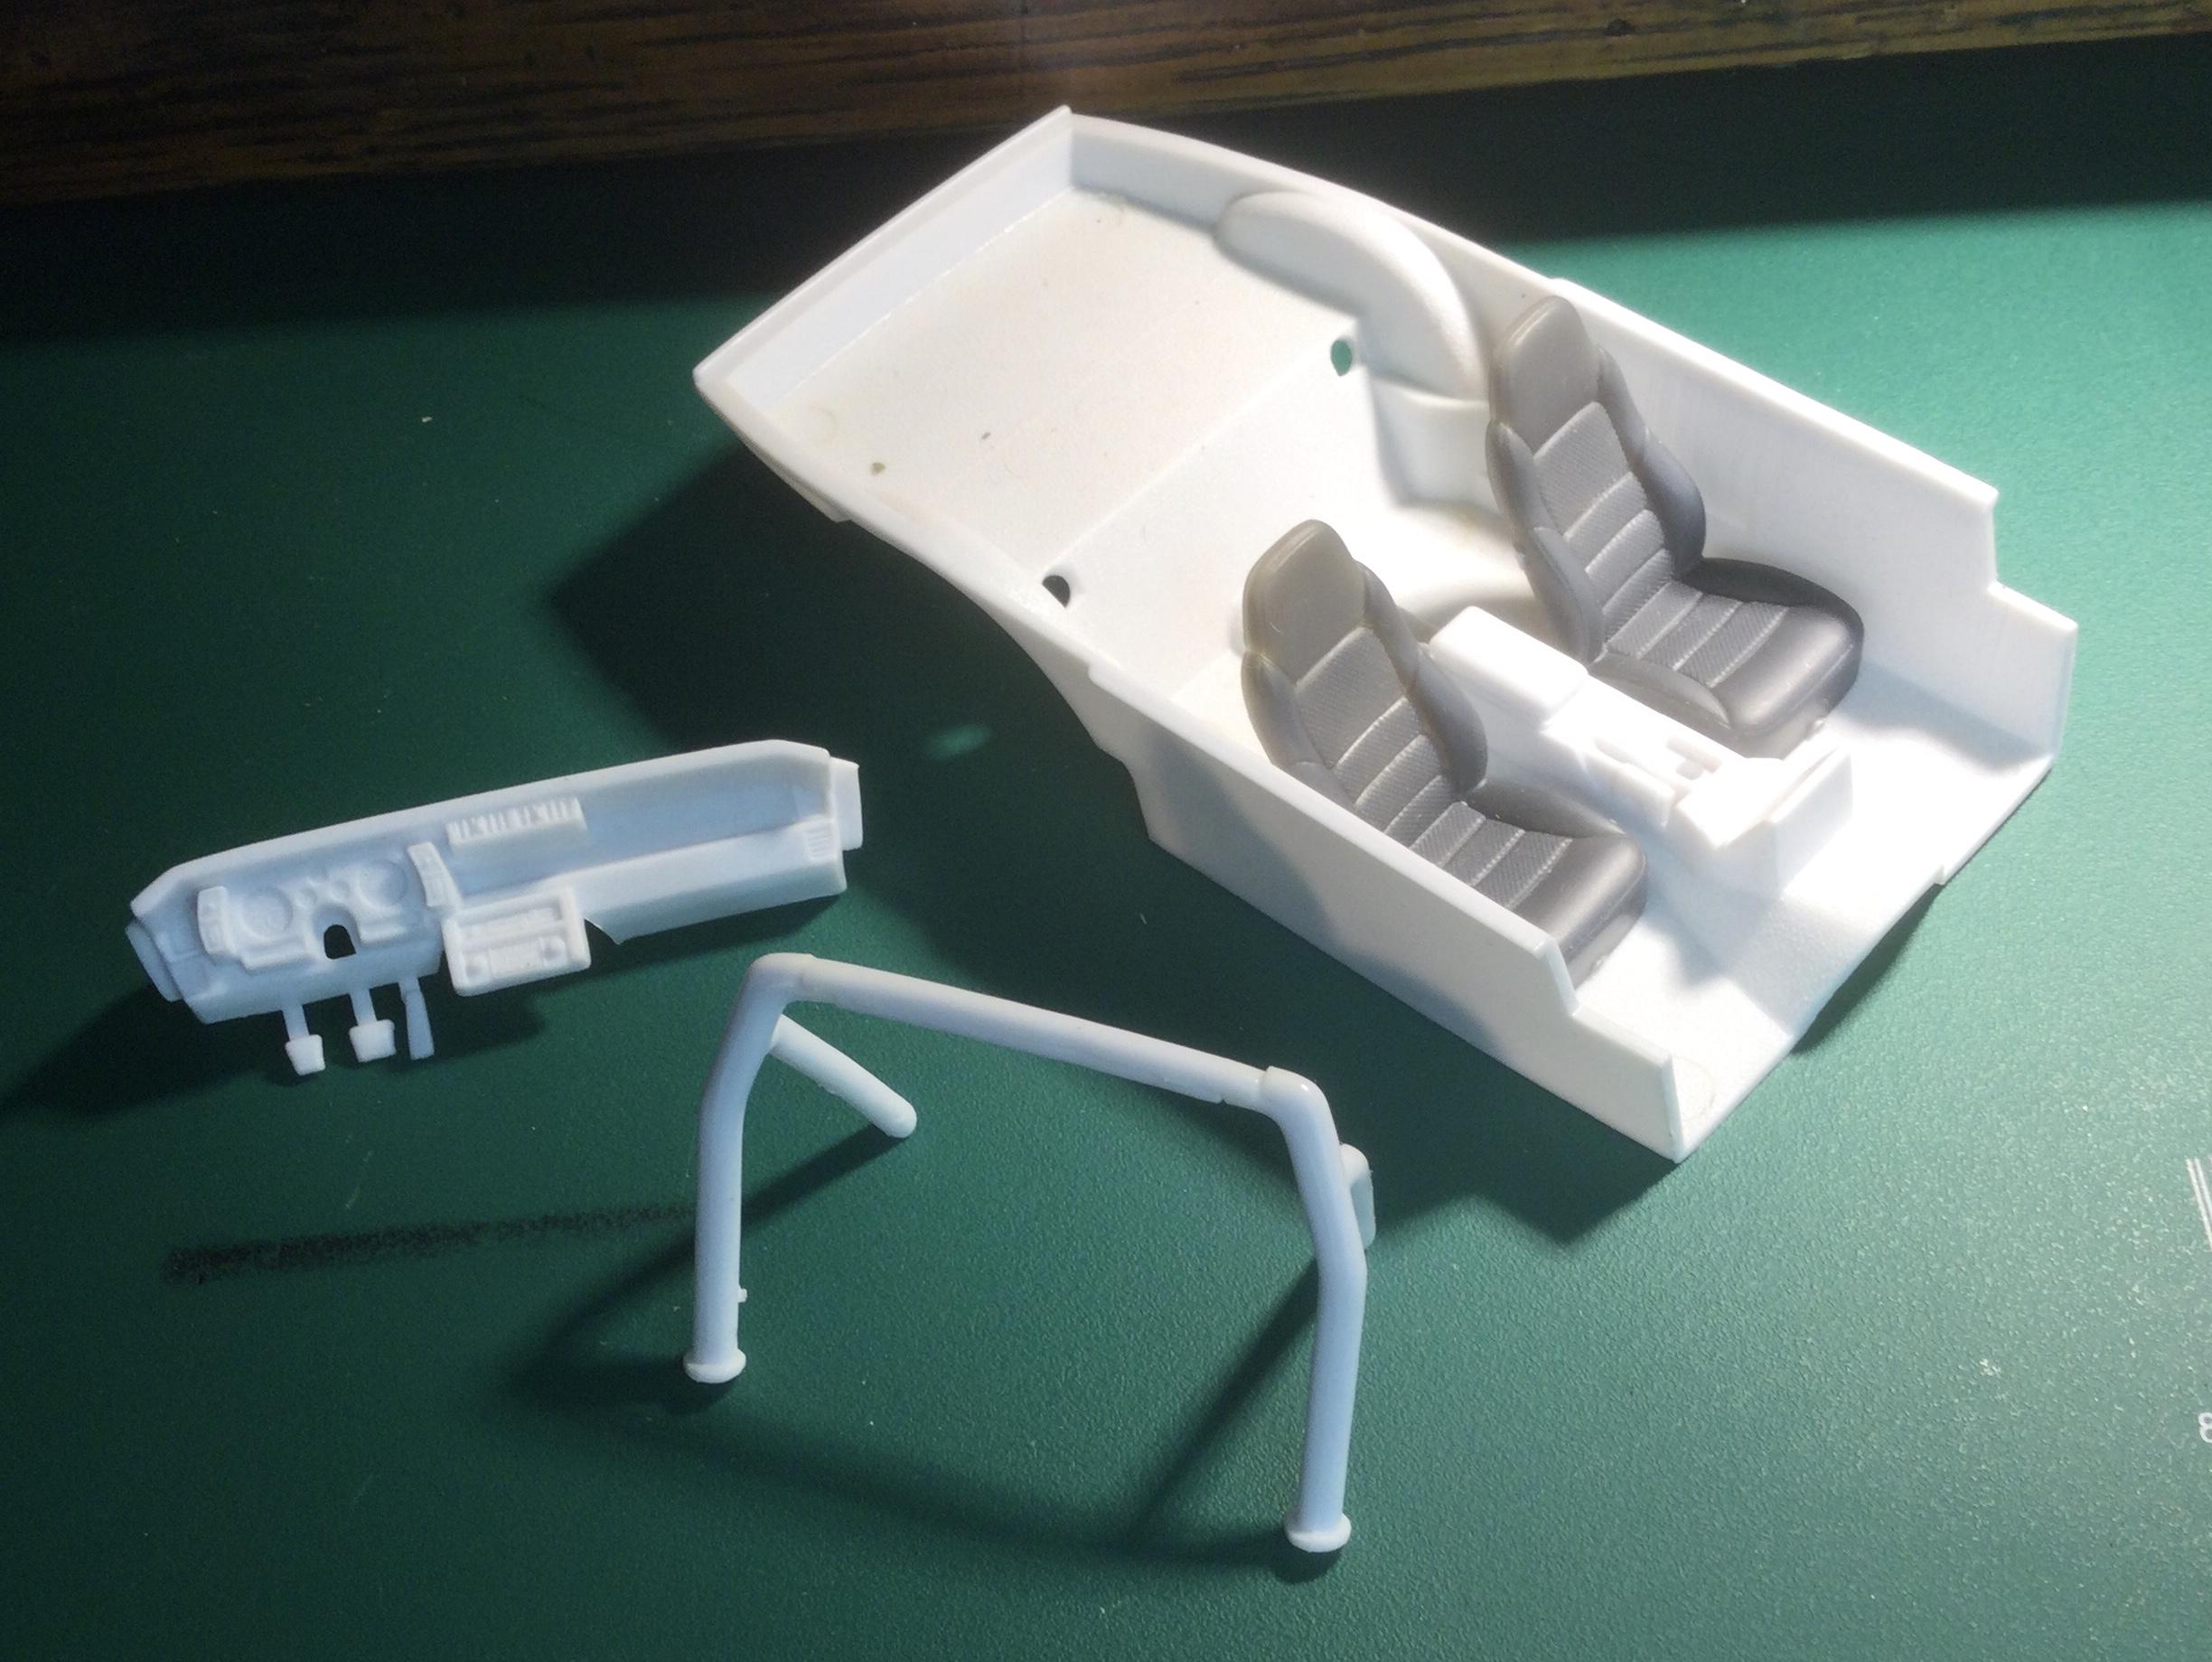
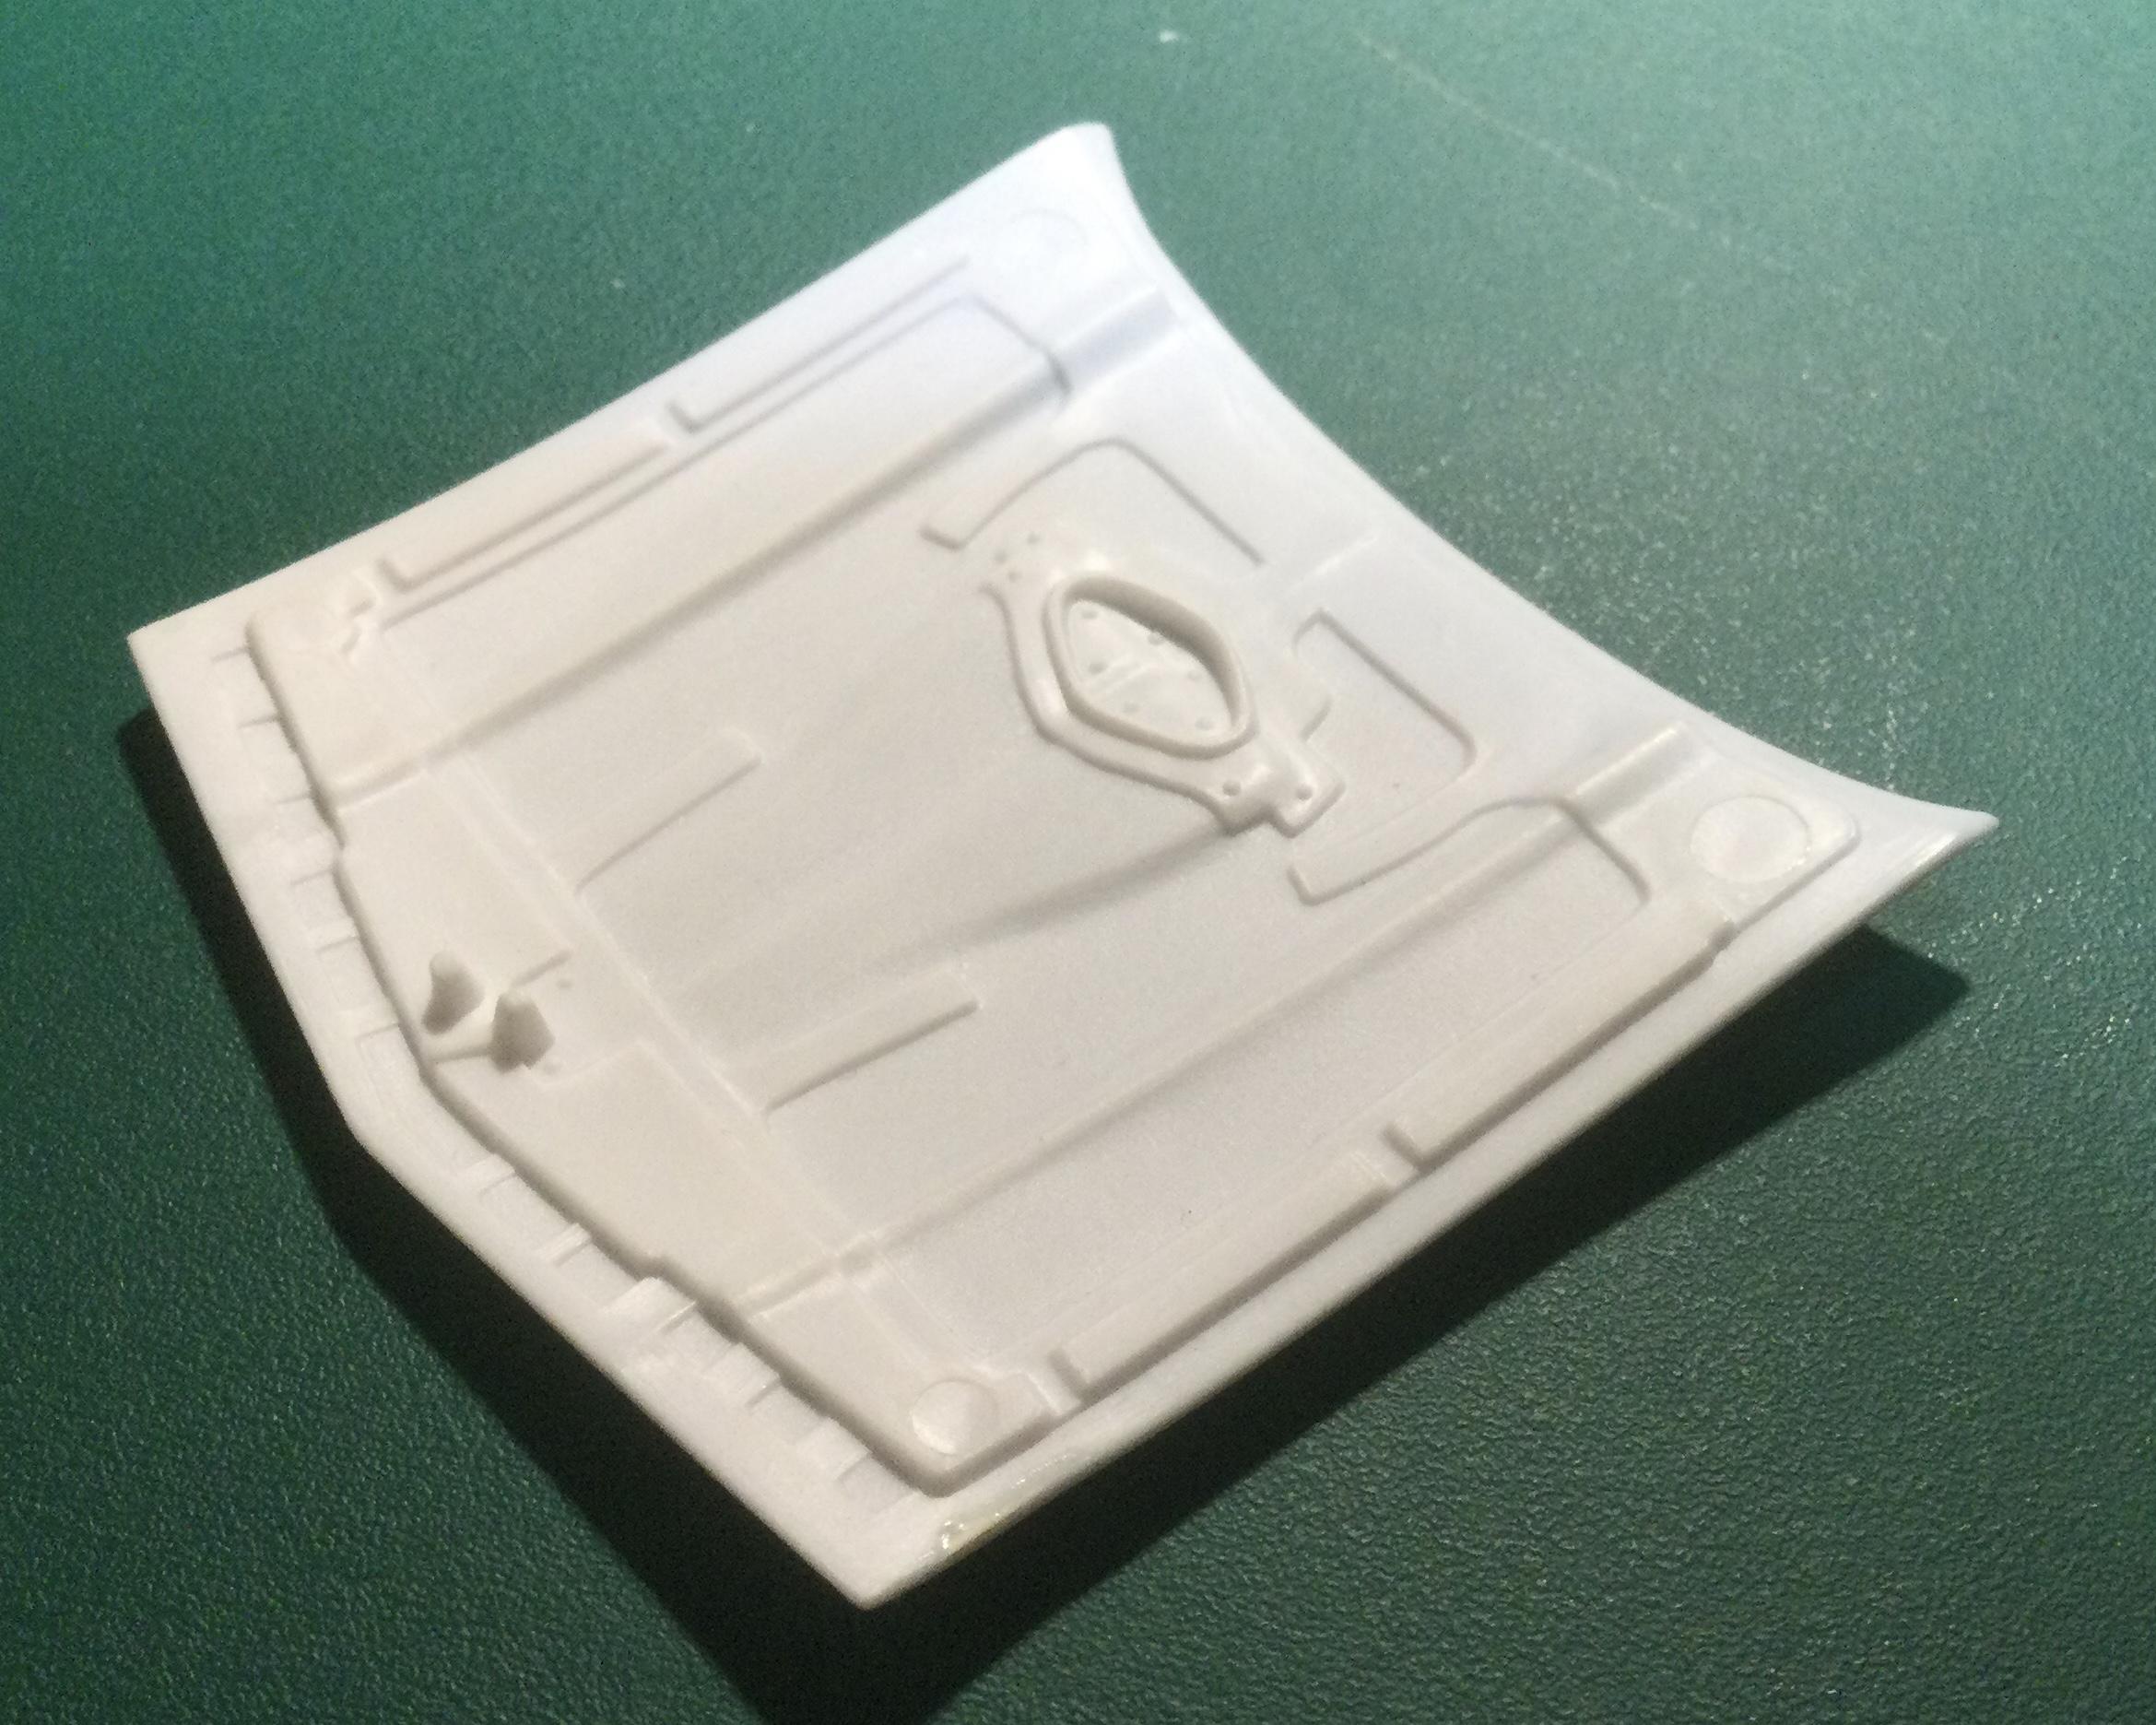
1983 Camaro Been progressing on this build with further alterations and improving the fit of the various components. The interior has been fitted with the fuel filler pipe connecting to the fuel tank, two cup holders in the console, and the start of the roll bar installation. While not as robust as a competition cage, the main aim of the roll bar will be to strengthen the chassis. Due to the installation of a larger fuel tank, the spare need to intrude into the interior with the resulting bulge on the rear deck. To add to the “ruse” the rear spoiler will not be used and as a result the two holes in the trunk required filling. I find using stretched sprue the perfect way to solve this. The taper of the sprue allows for a close fit and after applying the glue a gentle tug will seat the sprue into the hole, then trim and sand. A civilian exhaust opening and a tow ring slot were cut into the rear panel. With the trimming of the chassis it may be possible to fix the rear panel in place and have the chassis plate slip in. This would make painting the body an easier task. We shall see... Underneath I did some more clean up and trimming of the wheel wells to accommodate the tires within the flares. In addition the front suspension has been massaged by trimming the mold lines and adding bolt details to the parts. At the rear I added a cross piece between the coil spring hangers to reinforce the chassis at this point. Overall the build is progressing well. The previous builder’s efforts have created some problems with the excessive use of an epoxy to fit the flares. Epoxy has crept into the engine compartment interfering with the fit for the hood and chassis. The gas filler in the rear fender also required a fair amount of carving and filing for the interior, rear window and chassis to fit smoothly. The driveshaft tunnel has been thinned on both the chassis plate and the bottom of the interior tub so that the fit is stable. (Obviously not a Tamiya kit) Ahead is the construction of the roll bar, engine assembly and interior enhancements. Still a long way from applying primer to any parts. Thanks for looking and all comments and hints are welcome. Cheers Misha
-
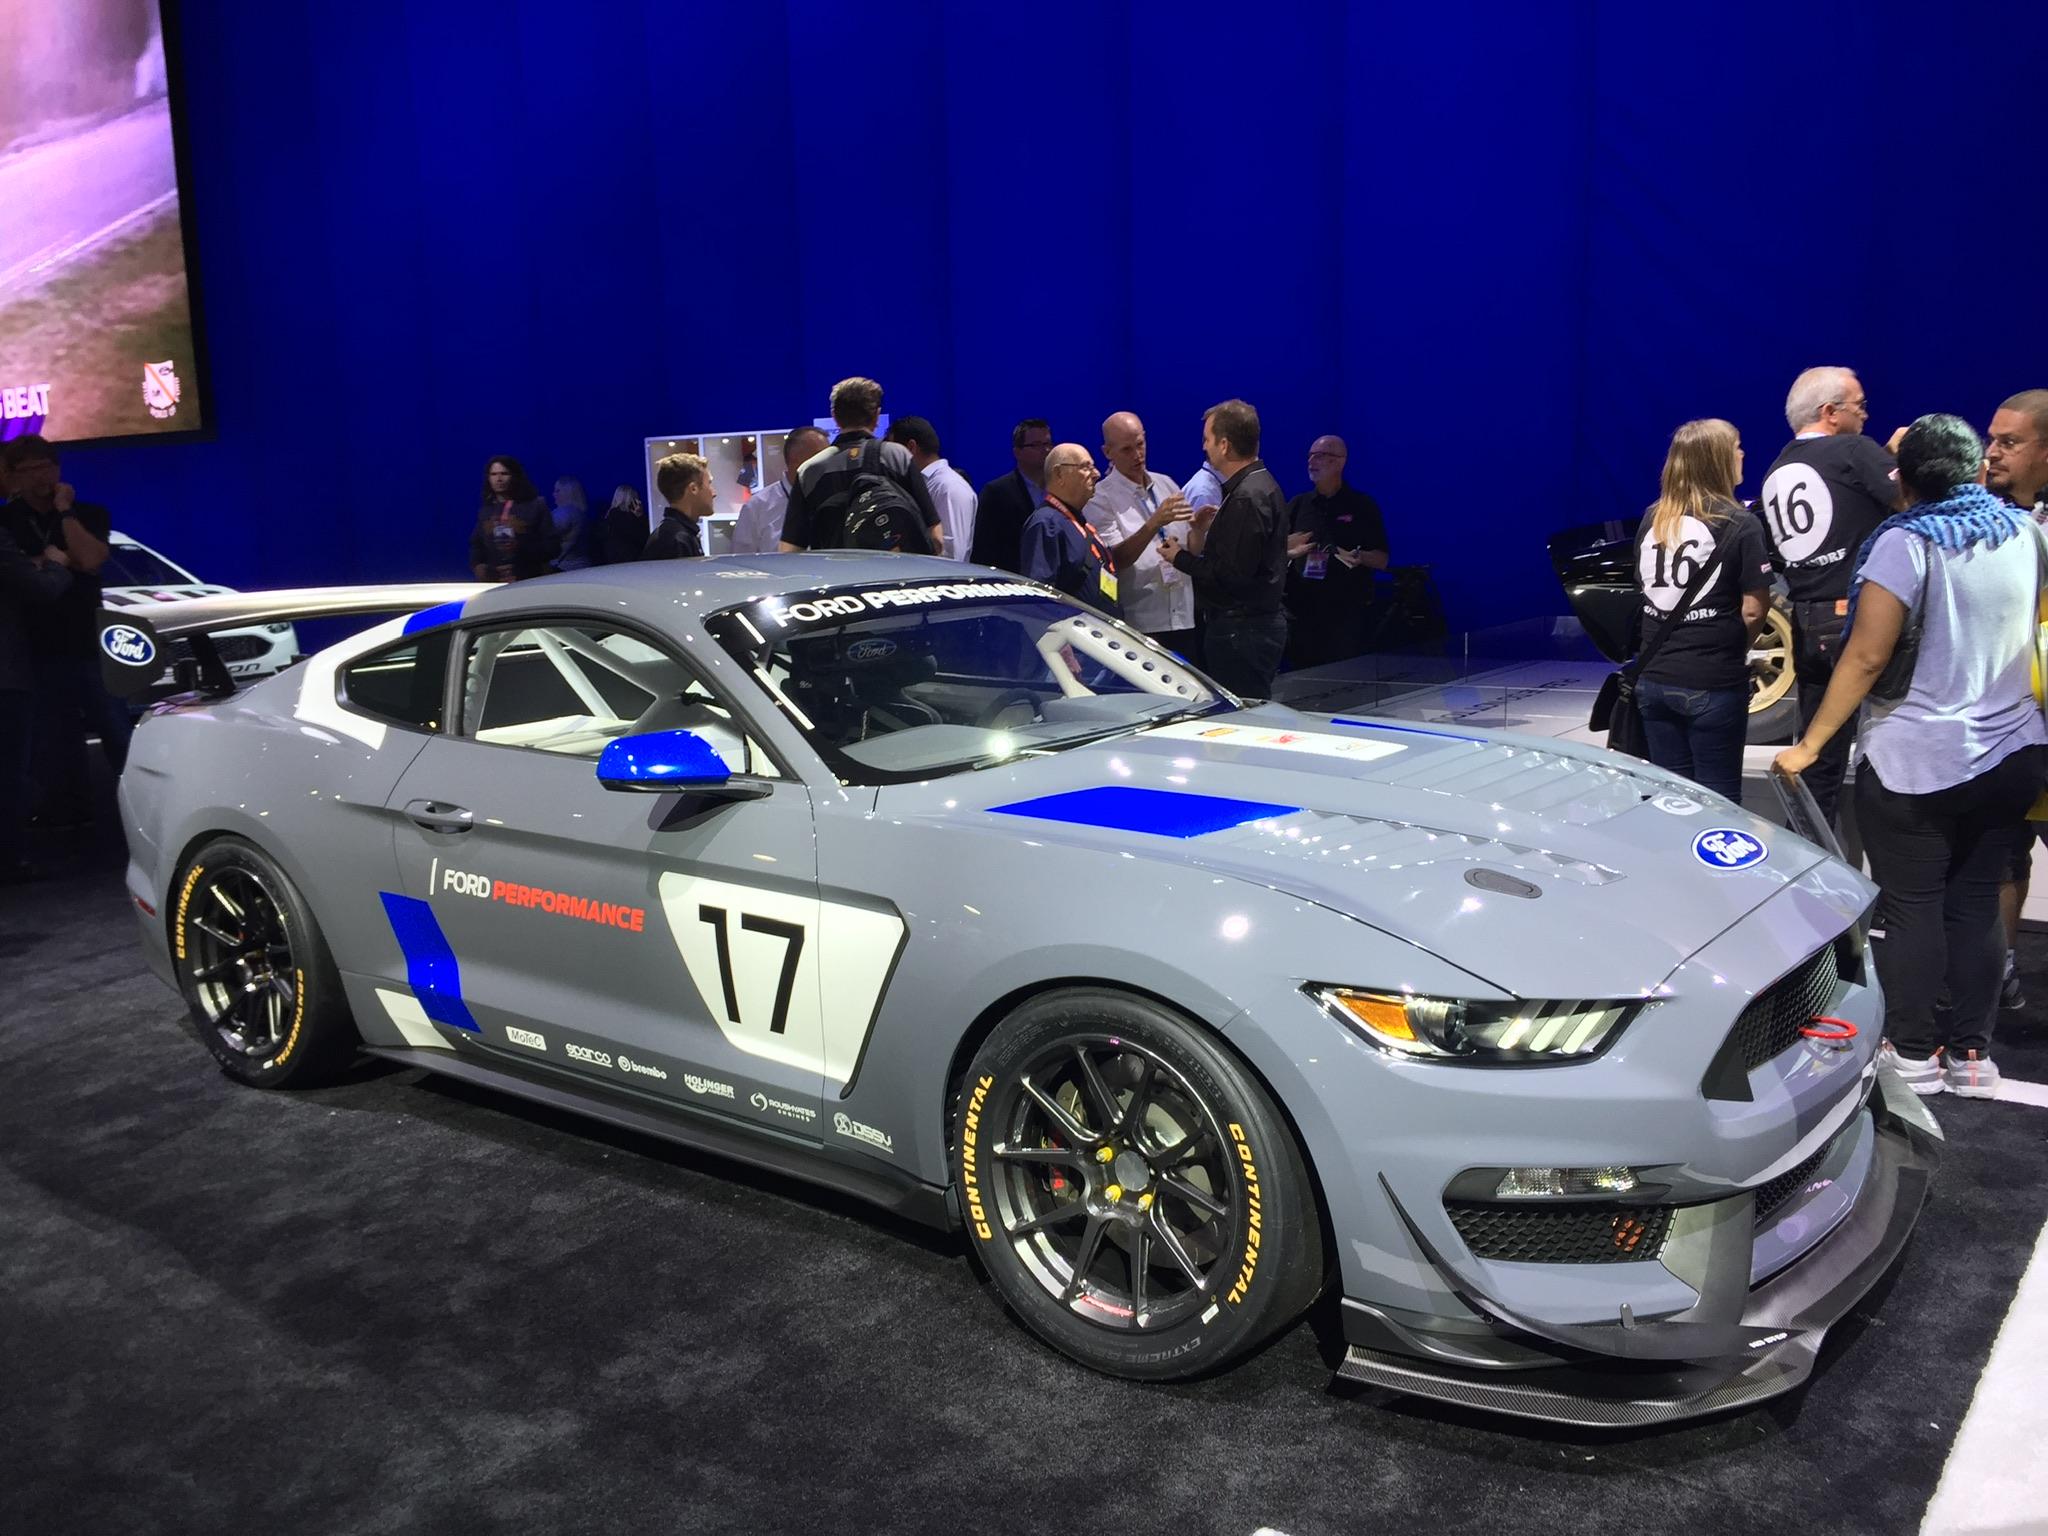
Great shots JP! The various schemes appearing on this Mustang are very exciting, especially compared to the debut model in grey at its unveiling. My main obstacle on beginning this kit is the interior detail, especially since the Tamiya instruction don’t call out the parts by name for the interior tub. Find it confusing and in the dark as to the plumbing and wiring of the components. A search on the web only brought past generations of Mustang racers... Any help on the interiors of these great cars would be most beneficial! Thanks & Cheers Misha
-
That’s a beautiful build of a classic kit Chris! The paint scheme is a real knock out, the chassis shot is a showpiece in itself. Excellent execution creating a piece of eye-candy, thanks for sharing it. Cheers Misha
-
Great News Dan! I’ll be participating again ?,just need to get to the workbench more often... Cheers and wishing you well, Misha
-
Not to worry Richard, there will be a single tailpipe coming out the back with a set of gates near the end of the headers to divert the exhaust either way. Hopefully the team will know when to switch from the open exhausts! Thanks for noticing this potential problem, cheers Misha
-
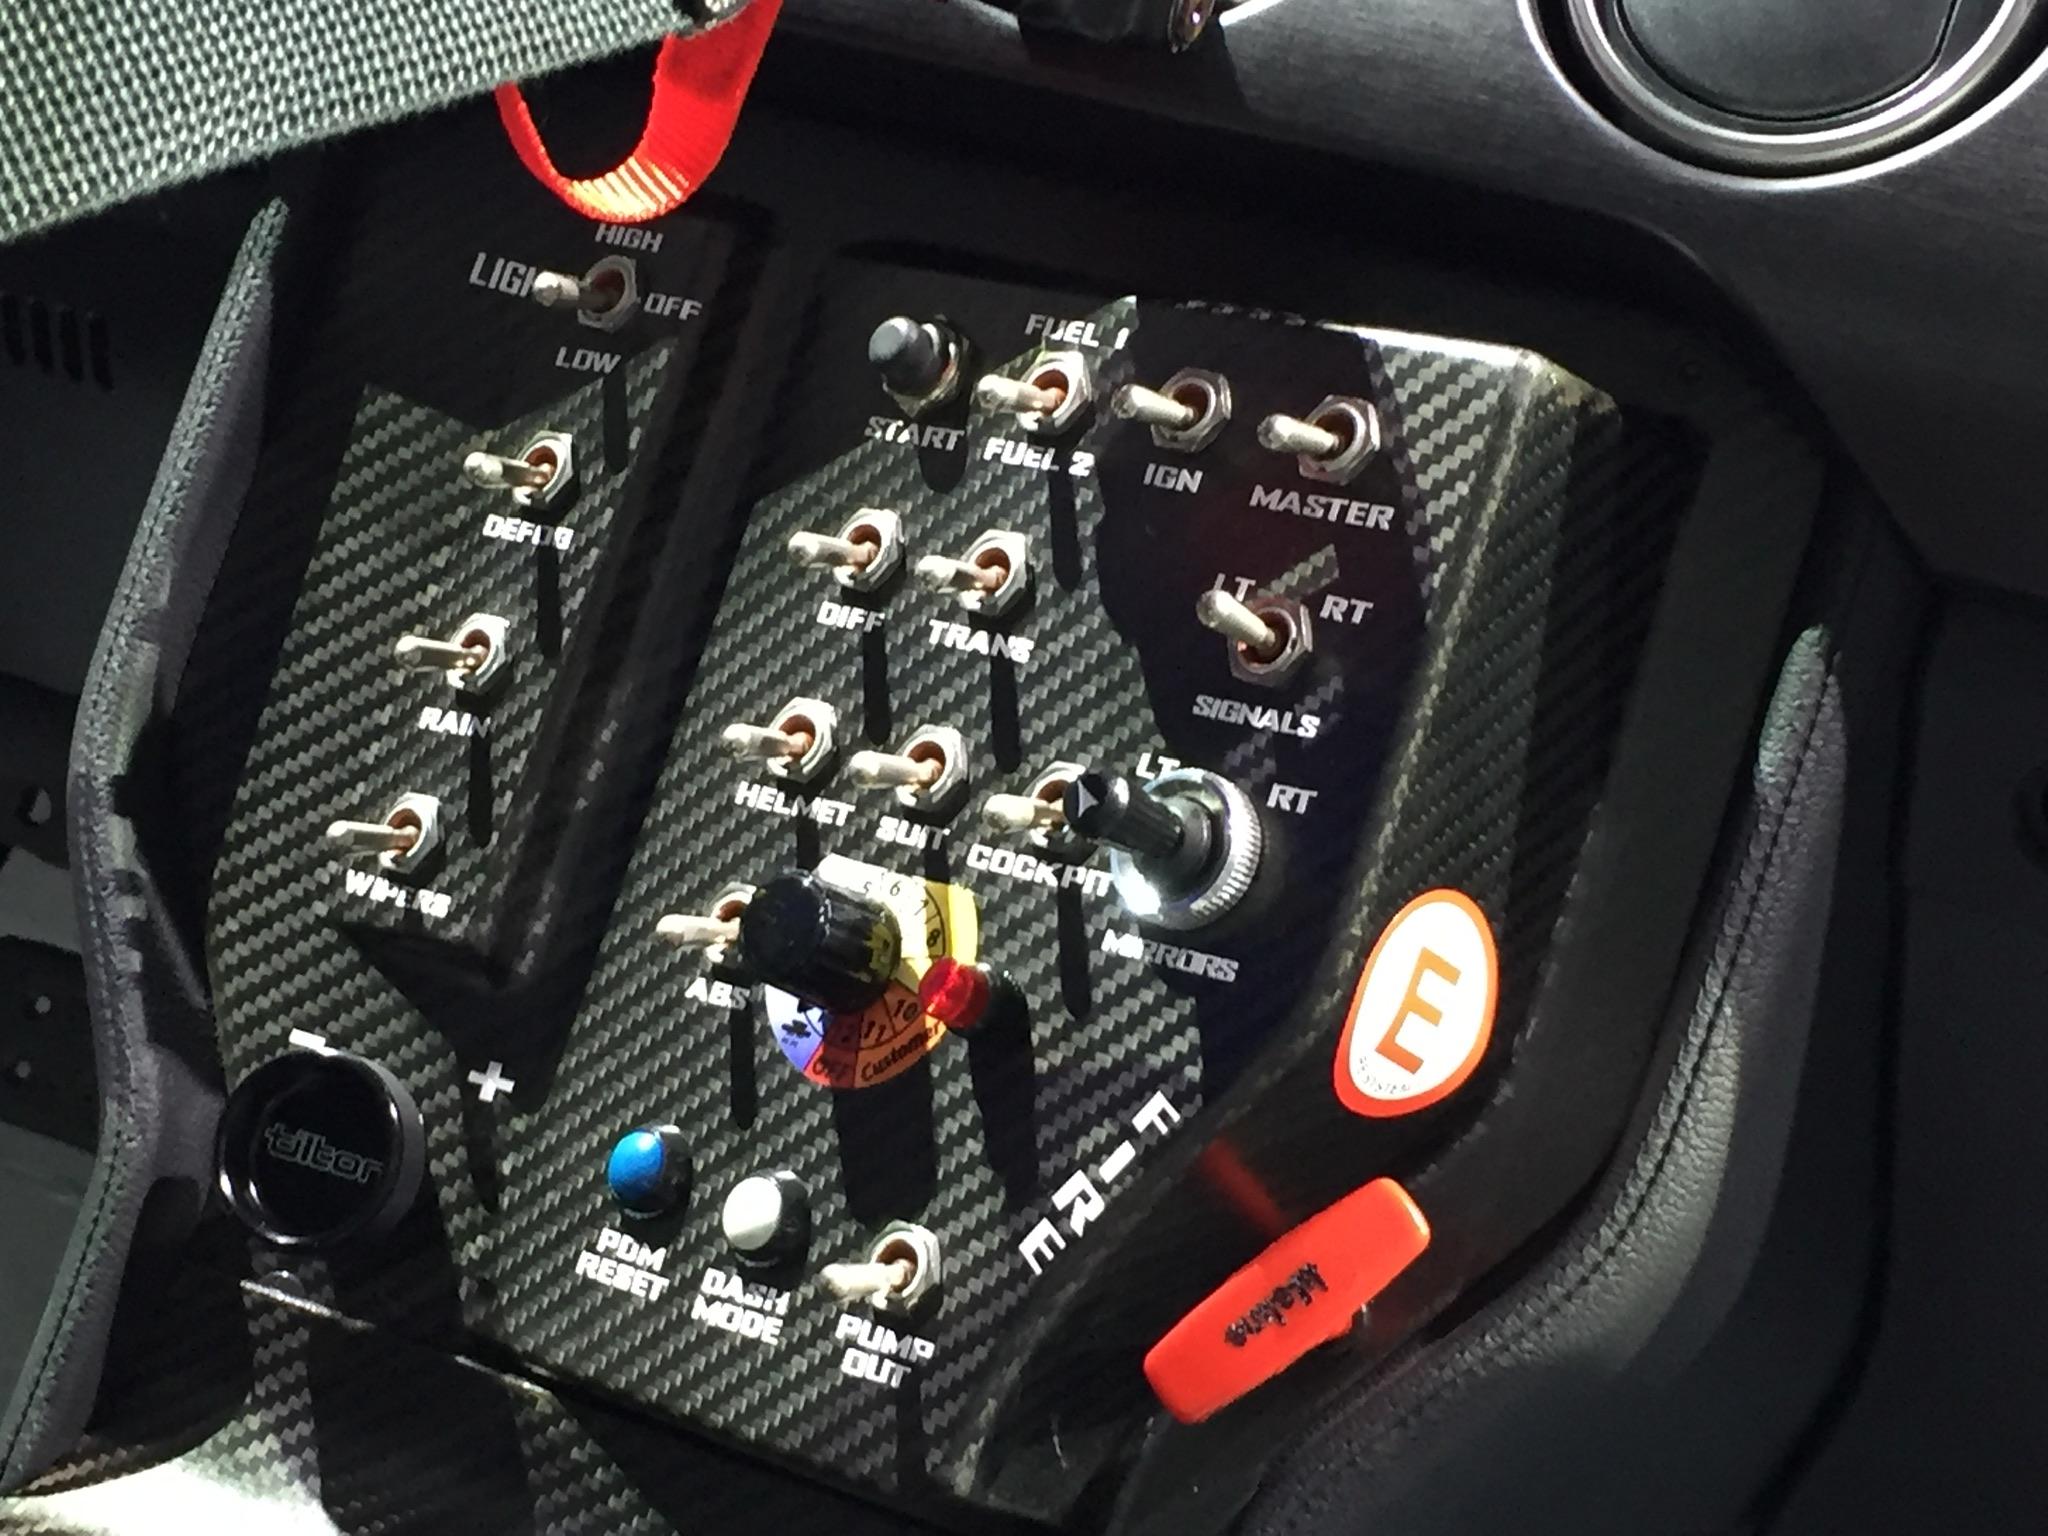
Been spending a bit of time at the workbench massaging the body, especially trimming the inside stock fenders to fit the extended wheel wells. Also opened up the two large openings for air and the two side inlets for brakes. Then positioning the BBC in the chassis to see check the fit of the kit headers and the rather large assortment of accessory belts and would they fit in the engine compartment. It’s a tight fit for sure! Also thinking about the sequence for assembly. Will position the long block then, after the body with inner fenders is on, I’ll position the water pump/front cover with the accesories. After which I’ll add the intake assembly. Not my usual sequence when the engine goes in as one piece. Keeping my ? fingers crossed! Note that even after doing the radius there was a need to provide further clearance for rear meats. Had quite a bit of work getting the headers prepped as they had to be sawn away from the kit engine, having been glued on by the previous owner. Trimmed around the header flanges making room for the plug wires. Had a look at the various references from above to the past actual Cannonballs, found it quite useful in planning for the current build. A lot of the mods dealt with the increased use of technology, most evident in the cockpit. Using parts box seats I enhanced the panel lines, especially on the side bolsters. For the driver’s position I tilted the seat back a few degrees for arms out driving. Both seats had to have a mounting structure to raise them for a better fit in the cockpit. Moving on to the chassis I removed the rear trunk well and gas tank in preparation for a longer range fuel tank making use of the open space and saving time by reducing the number of stops consumed at gas stations. Planning on fitting a differential cooler back there as well. Also needed to trim the rear chassis for it to fit with the rear tail-light panel in place as it is a poor fit as provided. Also needed to finesse the fit of the previous owner’s installation of a race style refuelling outlet allowing it to slide in with the interior. To help the fit of the interior tub I’ve been using the Dremel to smooth out the fit to the chassis plate, trial and error style! A small detail with providing clearance for the side pipes on the passenger side (to avoid notice at a traffic stop ?! That’s all for now, all comments, suggestions and hints are welcome, cheers Misha
-
If I recall correctly the stands are in the 34 Ford pick-up and the 36 Ford. Perhaps others as it was such a generic fit for the flathead motor. Cheers Misha
-
K&R Kustom+Rods '32 5ive Window Rolling Bones Chopped Coupe
Misha replied to Kit Karson's topic in WIP: Model Cars
Great tutorial Kit, the step by step photos along with the description makes it very clear. Also the need for thoughtful planning and proper technique is key to success. My one example is a long standing WIP of using a 5 window on the DD chassis, one day it’ll be complete. Cheers Misha
-
Great work Dave in achieving a beautiful box art build, very impressive and cleanly built jewel! Cheers Misha
-
Amazing save Rich! Seeing where you had to start from and to where you finished is impressive. Great colour combo. Cheers Misha
-
You’re right Mike, we need to get Bruce on board to complete the starting grid! Thanks for your offer of a body, yet this one isn’t too bad and it will work out quite well. Time to get busy! Cheers Misha
-
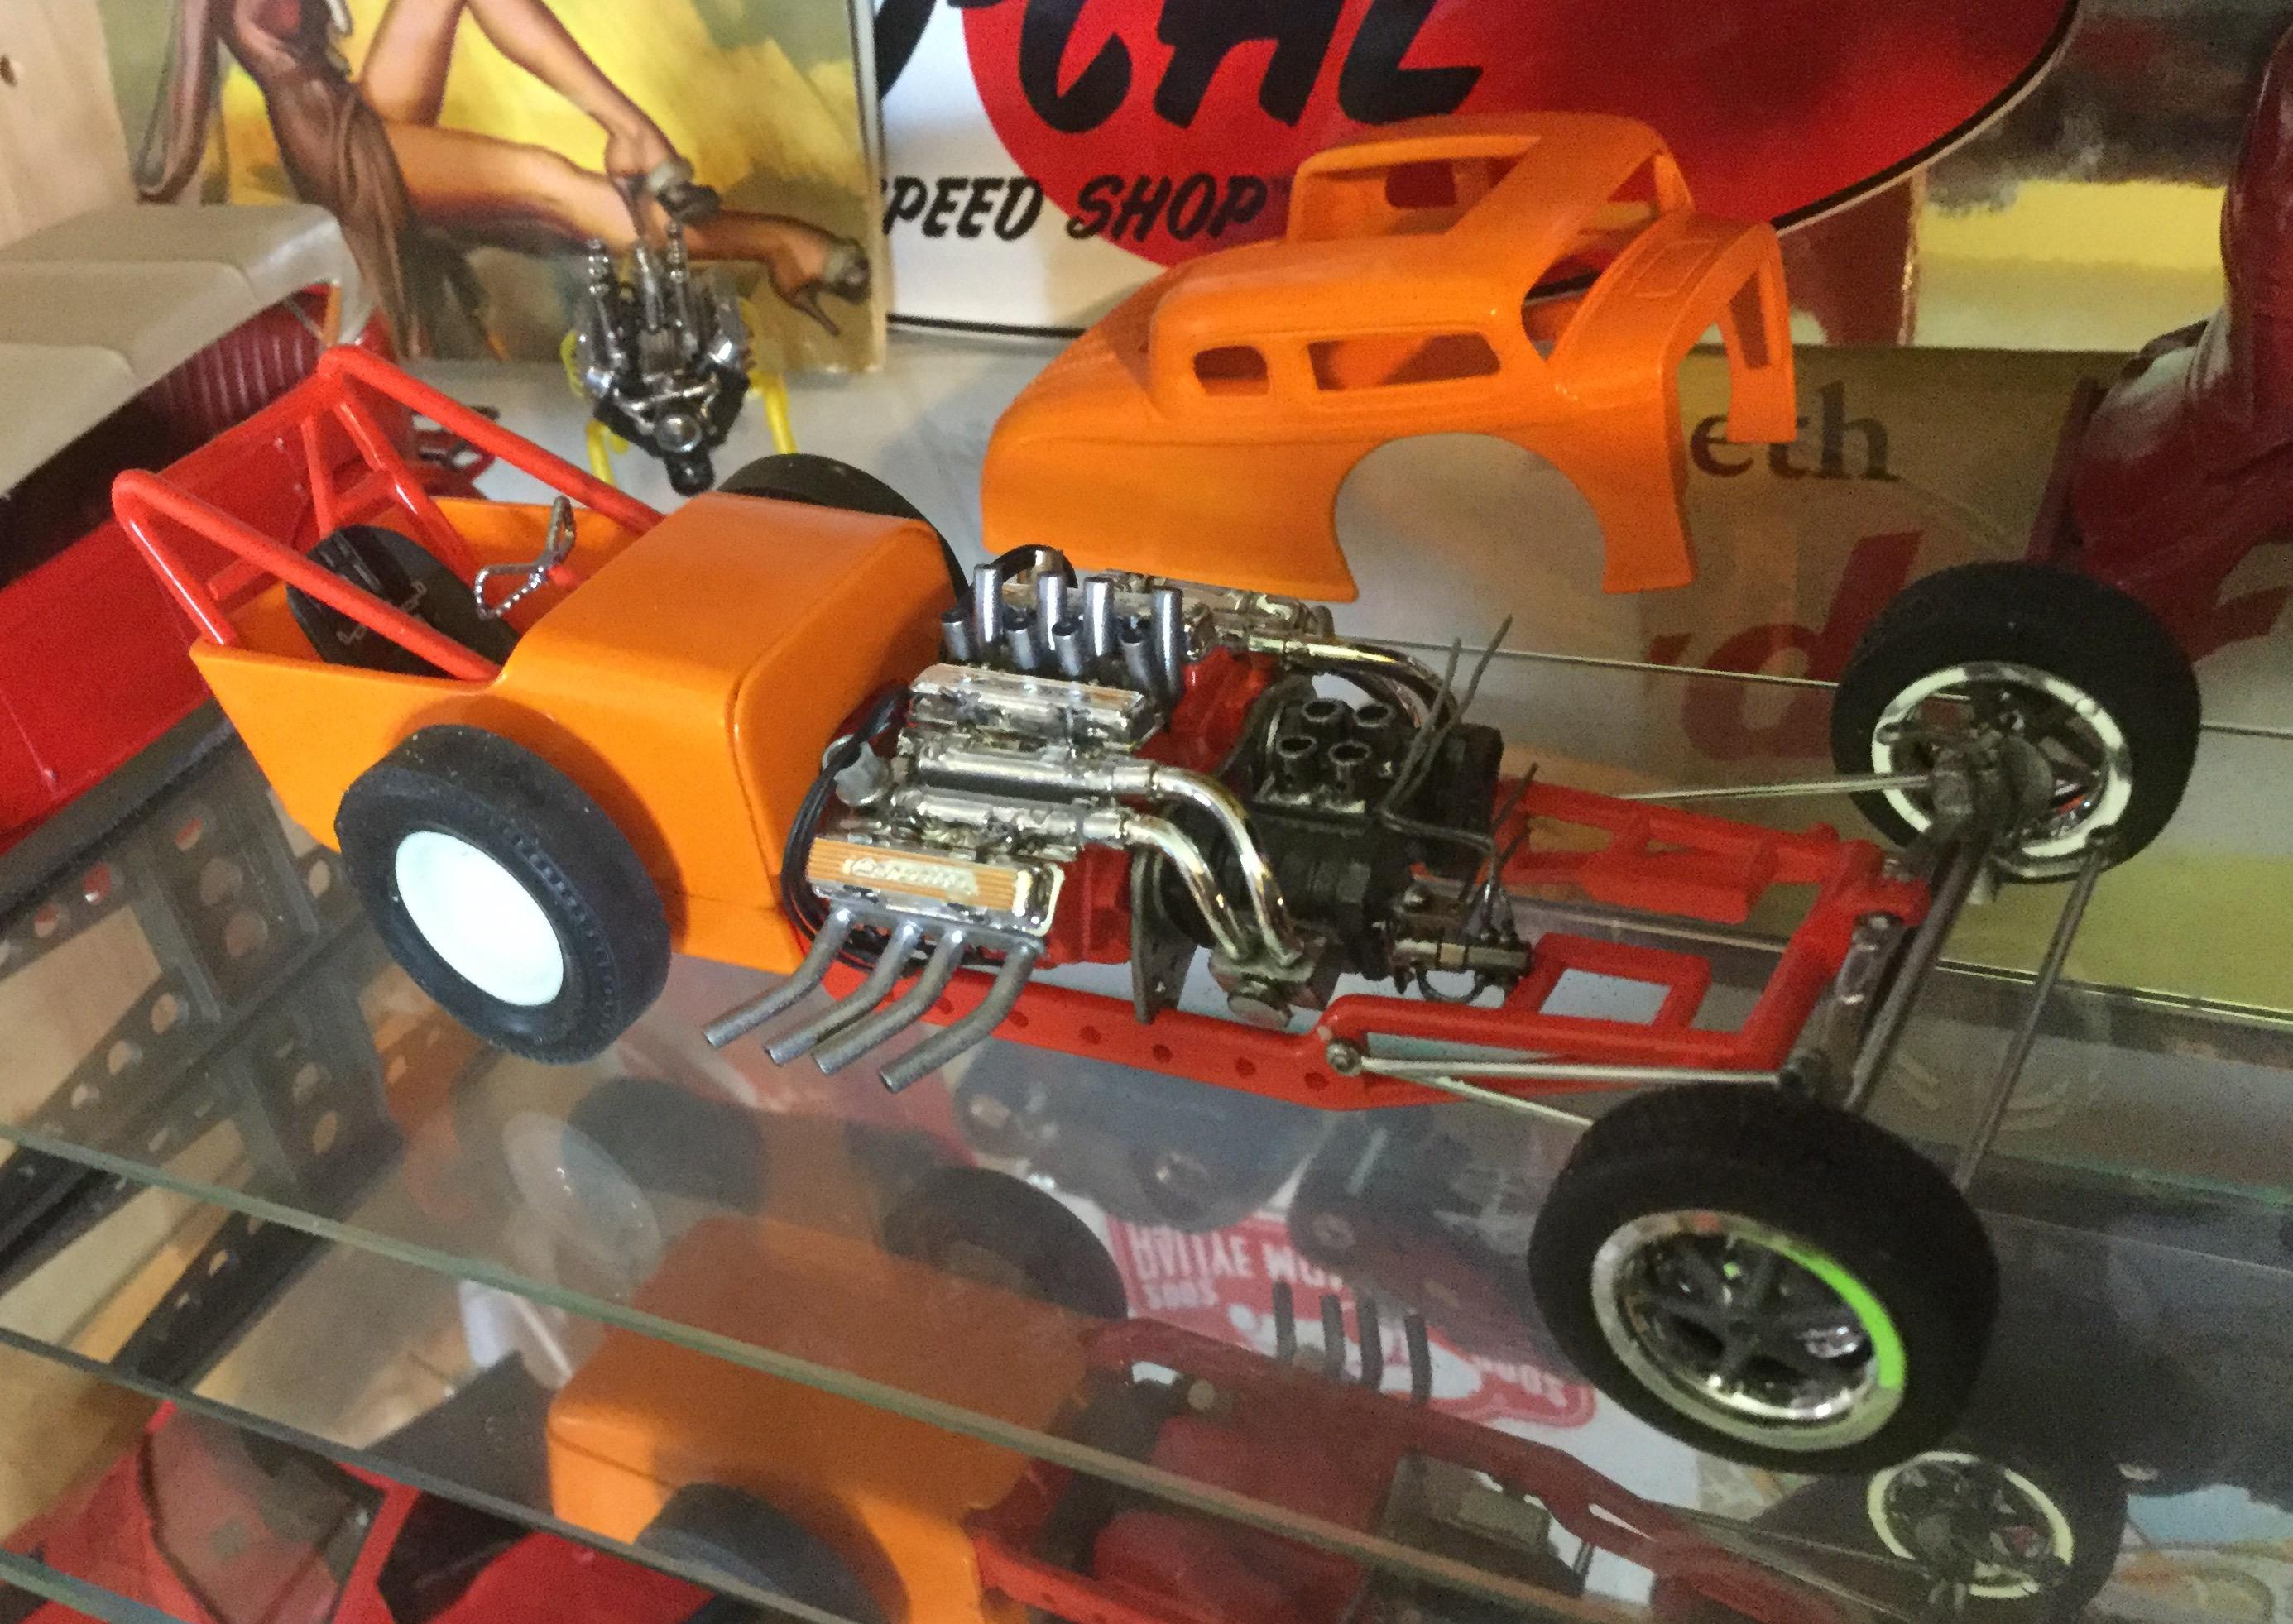
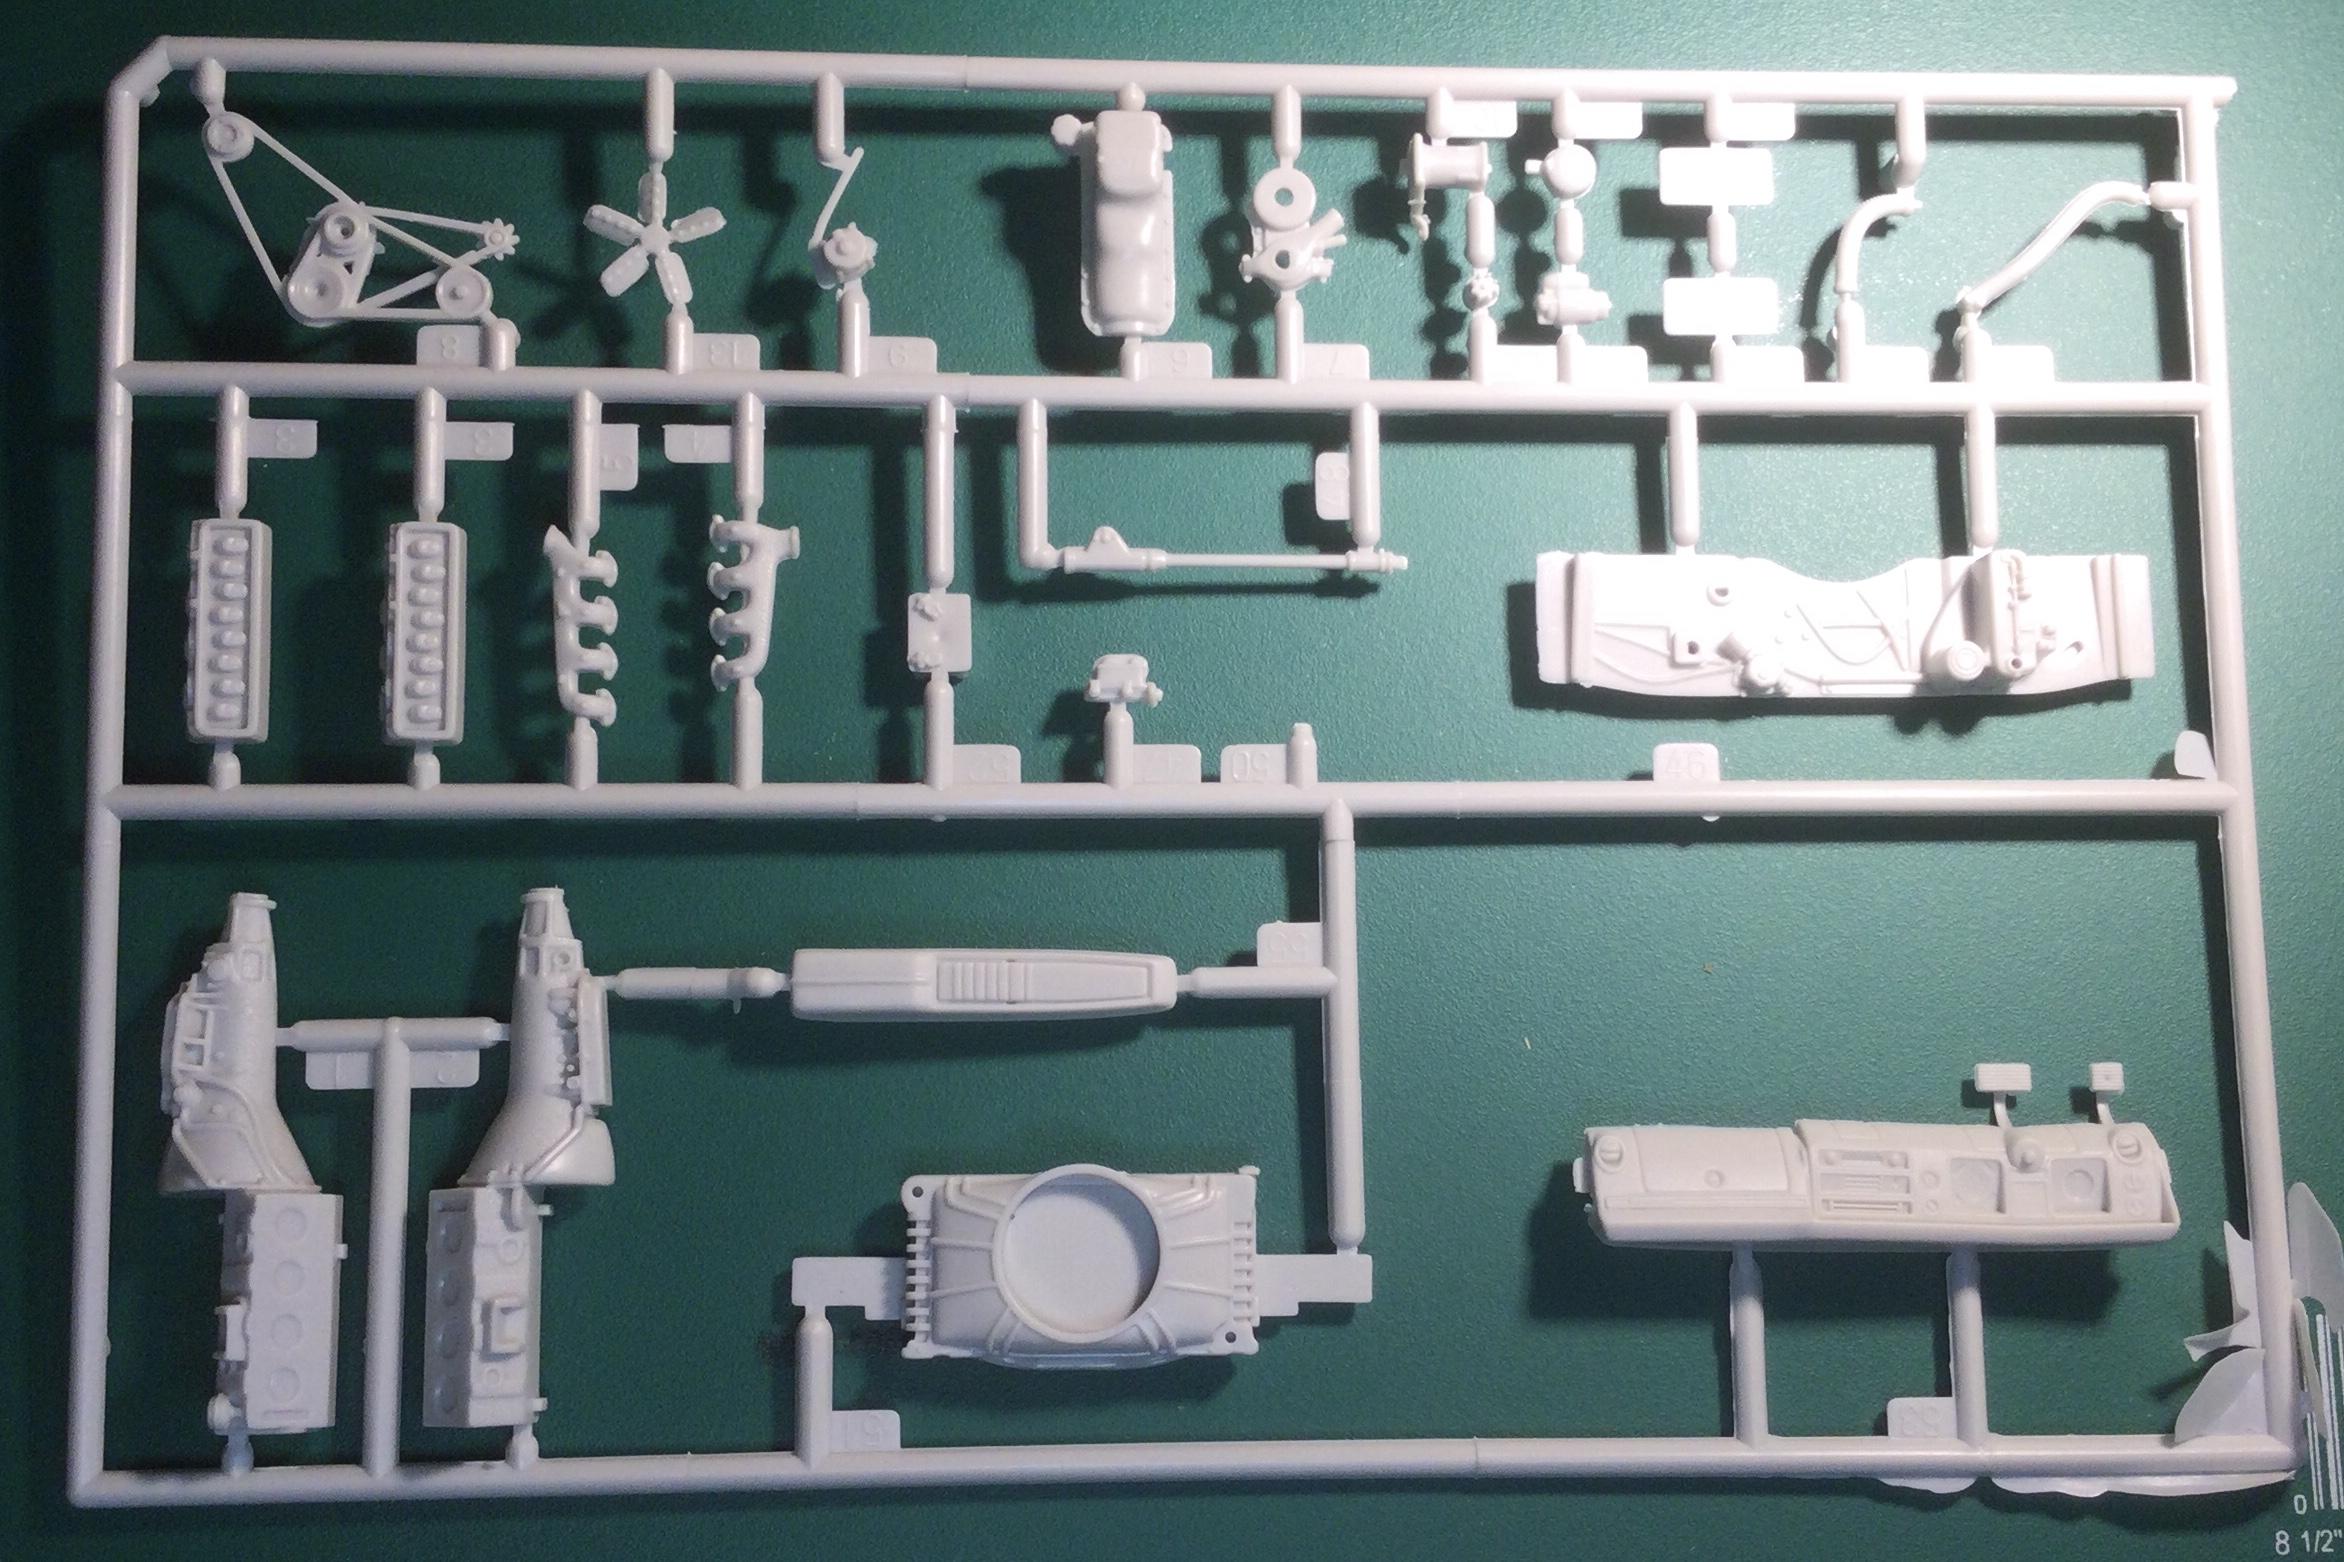
“the RUSE” CannonBall 2021 Very interesting theme, a competition car disguised, as much as possible, to look like any other vehicle on the inter-state. As such it would require modifications to bring it into line as a cross-country citizen-type adventure, facing a variety of driving conditions through the month of December. Well, I’m in for this (having bombed out last season...). My entry is based on the AMT #6540 “Curtis Carter” IMSA 1983 third-gen Camaro. My kit is short of being a a glue-bomb, as the previous owner only went so far as to only installing the fender flares, although with an over abundant amount of epoxy! I purchased the kit many years ago from a collection that was bought by a local Victoria hobby shop, Shaver’s; still in operation! It was on it’s second round of price reductions, selling for $5.99. At worst, it was a good parts box find having the cross-ram weber intake with carbs! The kit fits quite well within the this season’s “the Ruse...”requirements. It’s outward appearance requires a rather plain-jane Camaro that is nearly forty years old! A typical six-cylinder, single exhaust, faded metallic Champagne body with a white vinyl top to match. One does need to over look the flared wheels... Underneath will be a combination of Big Block Chevy engine kits based upon Tim Boyd’s recommendations. In this case the automatic tranny with the complete accessory arrangement ( p/s, alt., a/c) from the AMT 68 ElCo kit combined with the triple deuce intake & block from the R/M 67 Vette roadster, would make for a “shade-tree mechanic” fix it any where along the route, except for the triple deuces perhaps. This combination would ensure dependability and simplicity for a dash across America. There are a number of fixes to address in the previous work completed on this model. More of that as it’s encountered along the build. The nearly stock appearance of the kit’s underpinning, especially the engine bay with its stock strut/fender assembly rather than a tube style chassis again lends itself to this event which would require a certain amount of endurance and reliability over the run. To quell the ever present enforcement of highway regs the Camaro will be outfitted with the most up-to-date electronics (much like the AussieBall Blazer from a few years back). The rear deck behind the seats will be equipped to provide the necessities of 24 hour driving, emergency tools and equipment, plus camouflaged luggage to complete the look of tourists. Yet the Camaro, underneath its exterior will feature full comp features beginning with the Rat block fitted with aluminium heads and fed by the triple two barrels with fresh air ram induction. On the other end of business the custom headers connect to a set of pipes exiting on the passenger side for greater stealth. The pipes will connect via flaps controlled from the interior to a stock appearing single exhaust pipe when required. While a hot-rodded big block, the engine will also power a full range of accessories such as air conditioning, not normally found on comp vehicles. More to tell coming along... Cheers Misha
-
I’ve also used the Tamiya weathering kits D & C for heat and highlighting weathering effects. It allows for a subtle shading without the effort of running an airbrush. Although for larger scales than 1/25 I would choose the Tamiya transparent shades thru an airbrush. Cheers Misha
-
Great start on a classic build Phil! I’ve always had a soft spot for these Kustoms... amazing variety out there. I’m also amaz d at the difference it makes to have that mid-body character line straightened out; gonna do that on my Merc (it’s near the top of the list now). Eagerly awaiting your build. Cheers Misha
-
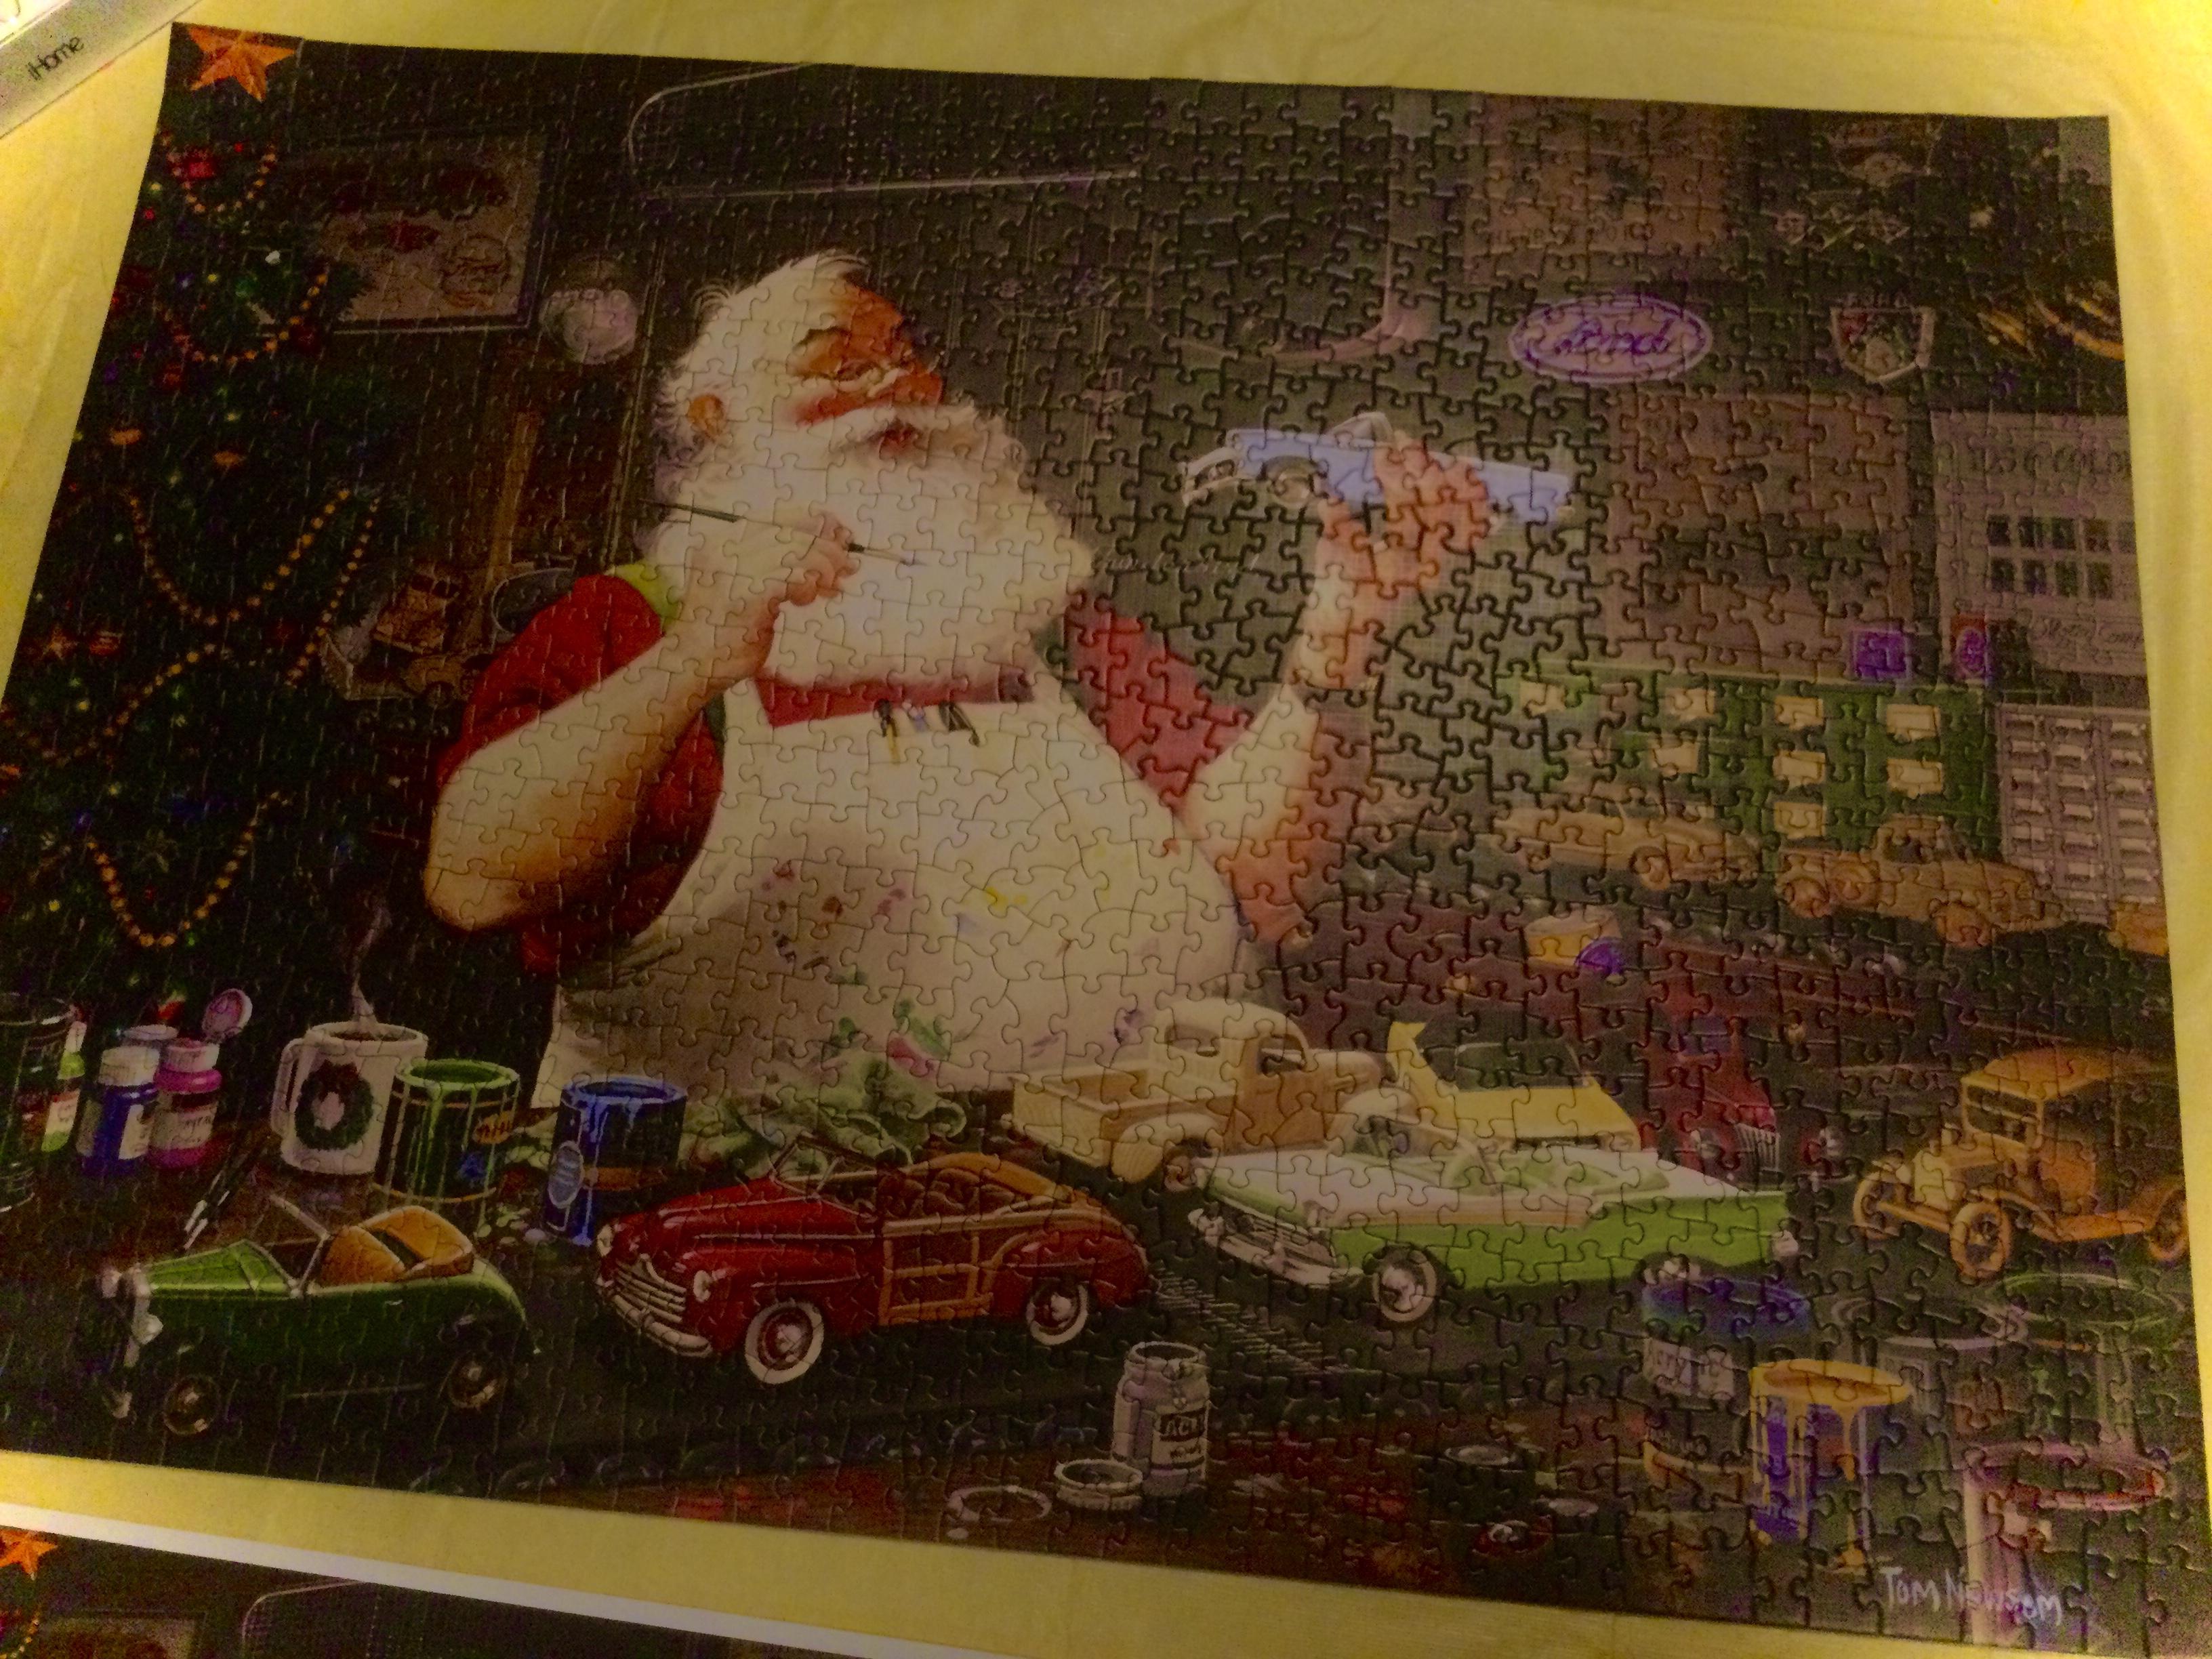
For Christmas I received a 1,000 piece puzzle of St. Nick busy in his shop on his hobby. A way to wind down after the holidays! Spent past three evenings working on it, an irresistible diversion. Cheers Misha, wishing all a good night.
-
Hi Steve, Have been following your build and enjoying the discussion relating to the body. I favour retaining the “Olds Curve” as it is such a signature line. It really makes it stand apart from the Elco and, as has been mentioned, it is more than changing front clips. This would have been a great option if GM had pursued it. Glad to see you retaining it. The discussion amongst members has great along with the photoshop options, really is a good tool. Your interior work to achieve a lowered or channeled look is very interesting to me. I’ve been concentrating on greater interior modifications and detail. Steven G. Has been a great inspiration with his interior detailing, especially his 442 and your work is carrying me even further with ideas churning in my mind. One of the great advantages of this forum is this type of discussion and input, rather than working solitarily. While club meetings have ended, I find the forum to be very valuable in avoiding the inherent loneliness that our world situation is experiencing. Looking forward to your build, cheers Misha
-
That really turned out to be a sweet ride TJ! Always a fan of Shoeboxes and that is a fine example, the colour worked out perfectly, stance is kool and the interior is a grand contrast. A beauty, ? congrats! Cheers Misha
-
GSL Common Kit: [revision] just another Model A Roadster
Misha replied to 89AKurt's topic in WIP: Model Cars
Now that’s a real sweet ride Kurt! Good thought to plan ahead, gives me ideas as I have never attended a GSL and 2022 may be the last one, so here’s my chance ?. I have always enjoyed the common kit theme and the Model A is a grand choice. Your choice would truly be unique and you’re just the one to pull it off. I’ll be following with baited breath! Cheers Misha