Misha
-
Posts
1,014 -
Joined
-
Last visited
Content Type
Profiles
Forums
Events
Gallery
Everything posted by Misha
-
Congrats Russ for taking the plunge and offering up a WIP with your 37 Ford! I had never realized what a cool chassis is under the Smoothster; give me all sorts of ideas. Looking forward to following your build all the way to final colour and assembly. Cheers Misha
-

GTM Ken Miles Willow Springs Cobra as in Ford vs Ferrari
Misha replied to Phildaupho's topic in Car Kit News & Reviews
That looks very sharp Phil! Another great piece of history, looking forward to your build. Cheers Misha -
1972 CHEVY C10(AMT)
Misha replied to yura1961's topic in Model Trucks: Pickups, Vans, SUVs, Light Commercial
Amazing work Yura! As others have said, the photos, the detailed execution of all the components such as the interior, engine and especially the headlights, are highlights of your build. The total look with the colour scheme results in a magnificent Chev C10. Bravo!!! Cheers Misha Koslovsky -
That's pretty Wild, Grant! Very cool body mods, especially incorporating the front grill. Plus the shadow paint on the panel sides. Congrats on a very imaginative and well built rail. Cheers Misha
-
That’s a great find Brandon! I came across this same kit, as well as the McLaren Elva from the same series. Mine had the decals missing so it is interesting to see that the sheet includes the Lola markings as well. AMT & Monogram did a fairly decent job of making the slot bodies into static kits back in the early sixties at a lower price than the full detail kits. We are fortunate to find these kits as they are the only examples around for most of them. Cheers Misha
-
Wow! What a great idea. I also use a set of barrister cabinets for my finished work, now I have some more work to do. Your case looks fabulous Grant, will you be expanding it to the other units? Cheers Misha
-
Liquidating entire collection of models and models supplies.
Misha replied to ewetwo's topic in The Off-Topic Lounge
I heartily agree with Tom! I’m sixty-nine and was fortunate to retire early which has allowed me to get back to model work much in the same way as it was as a kid; it was my main activity apart from school during those years. Now I enjoy my stash, have a wide array of tools, have a workbench room and a paint room. While I have health issues I am still able to carry on with building allowing me great satisfaction. When I do reach a time when I’m unable to do so… well, perhaps I’ll reduce the stash by offering it to fellow club members. I would rather the kits go to fellow modellers that I know and have shared good times with. I will hold onto certain unbuilt kits as I enjoy opening the box and browsing thru the sprues. Cheers Misha -
Gosh, it even went to the other coast and crossed the Canada -USA and onto Vancouver Island to land in the Cowichan Valley!!! Cheers Misha ?
-
Welcome to the Forum Steve! That is a stunning build showing great thought and execution. I’ll chime in with everyone asking for photos, especially the chassis and running gear. The body mods are sensational! Great to see another Canadian on board here; which part of the Great White North do you live in? Be looking forward to your other builds, cheers Misha
-
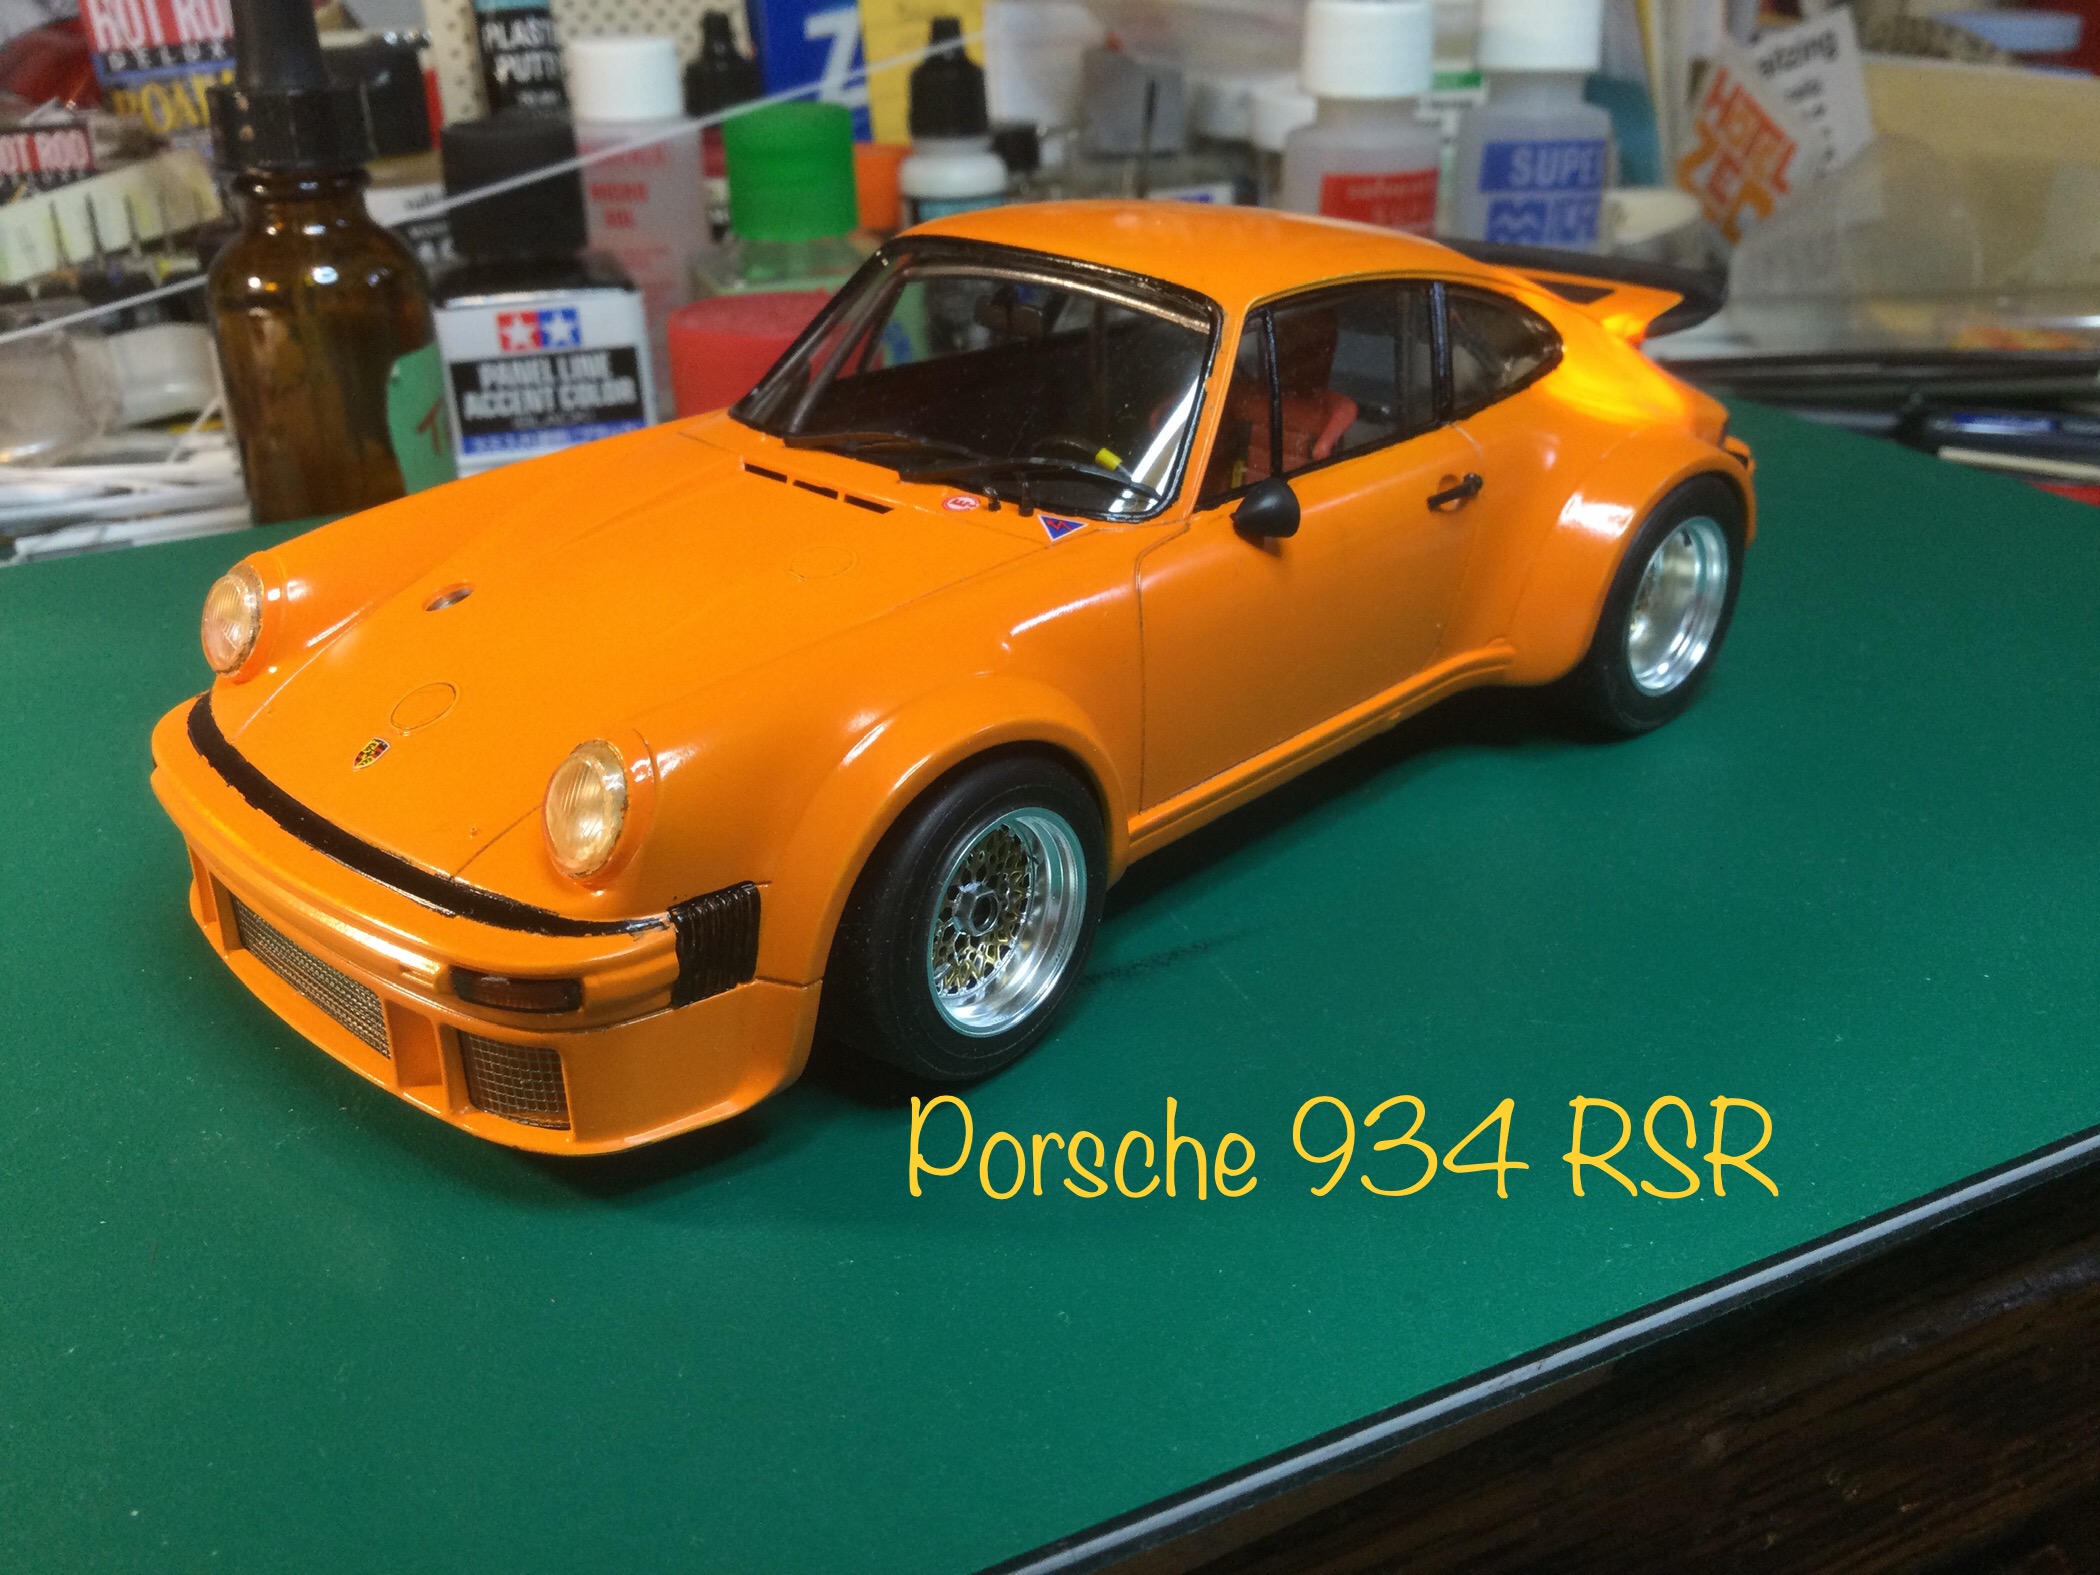
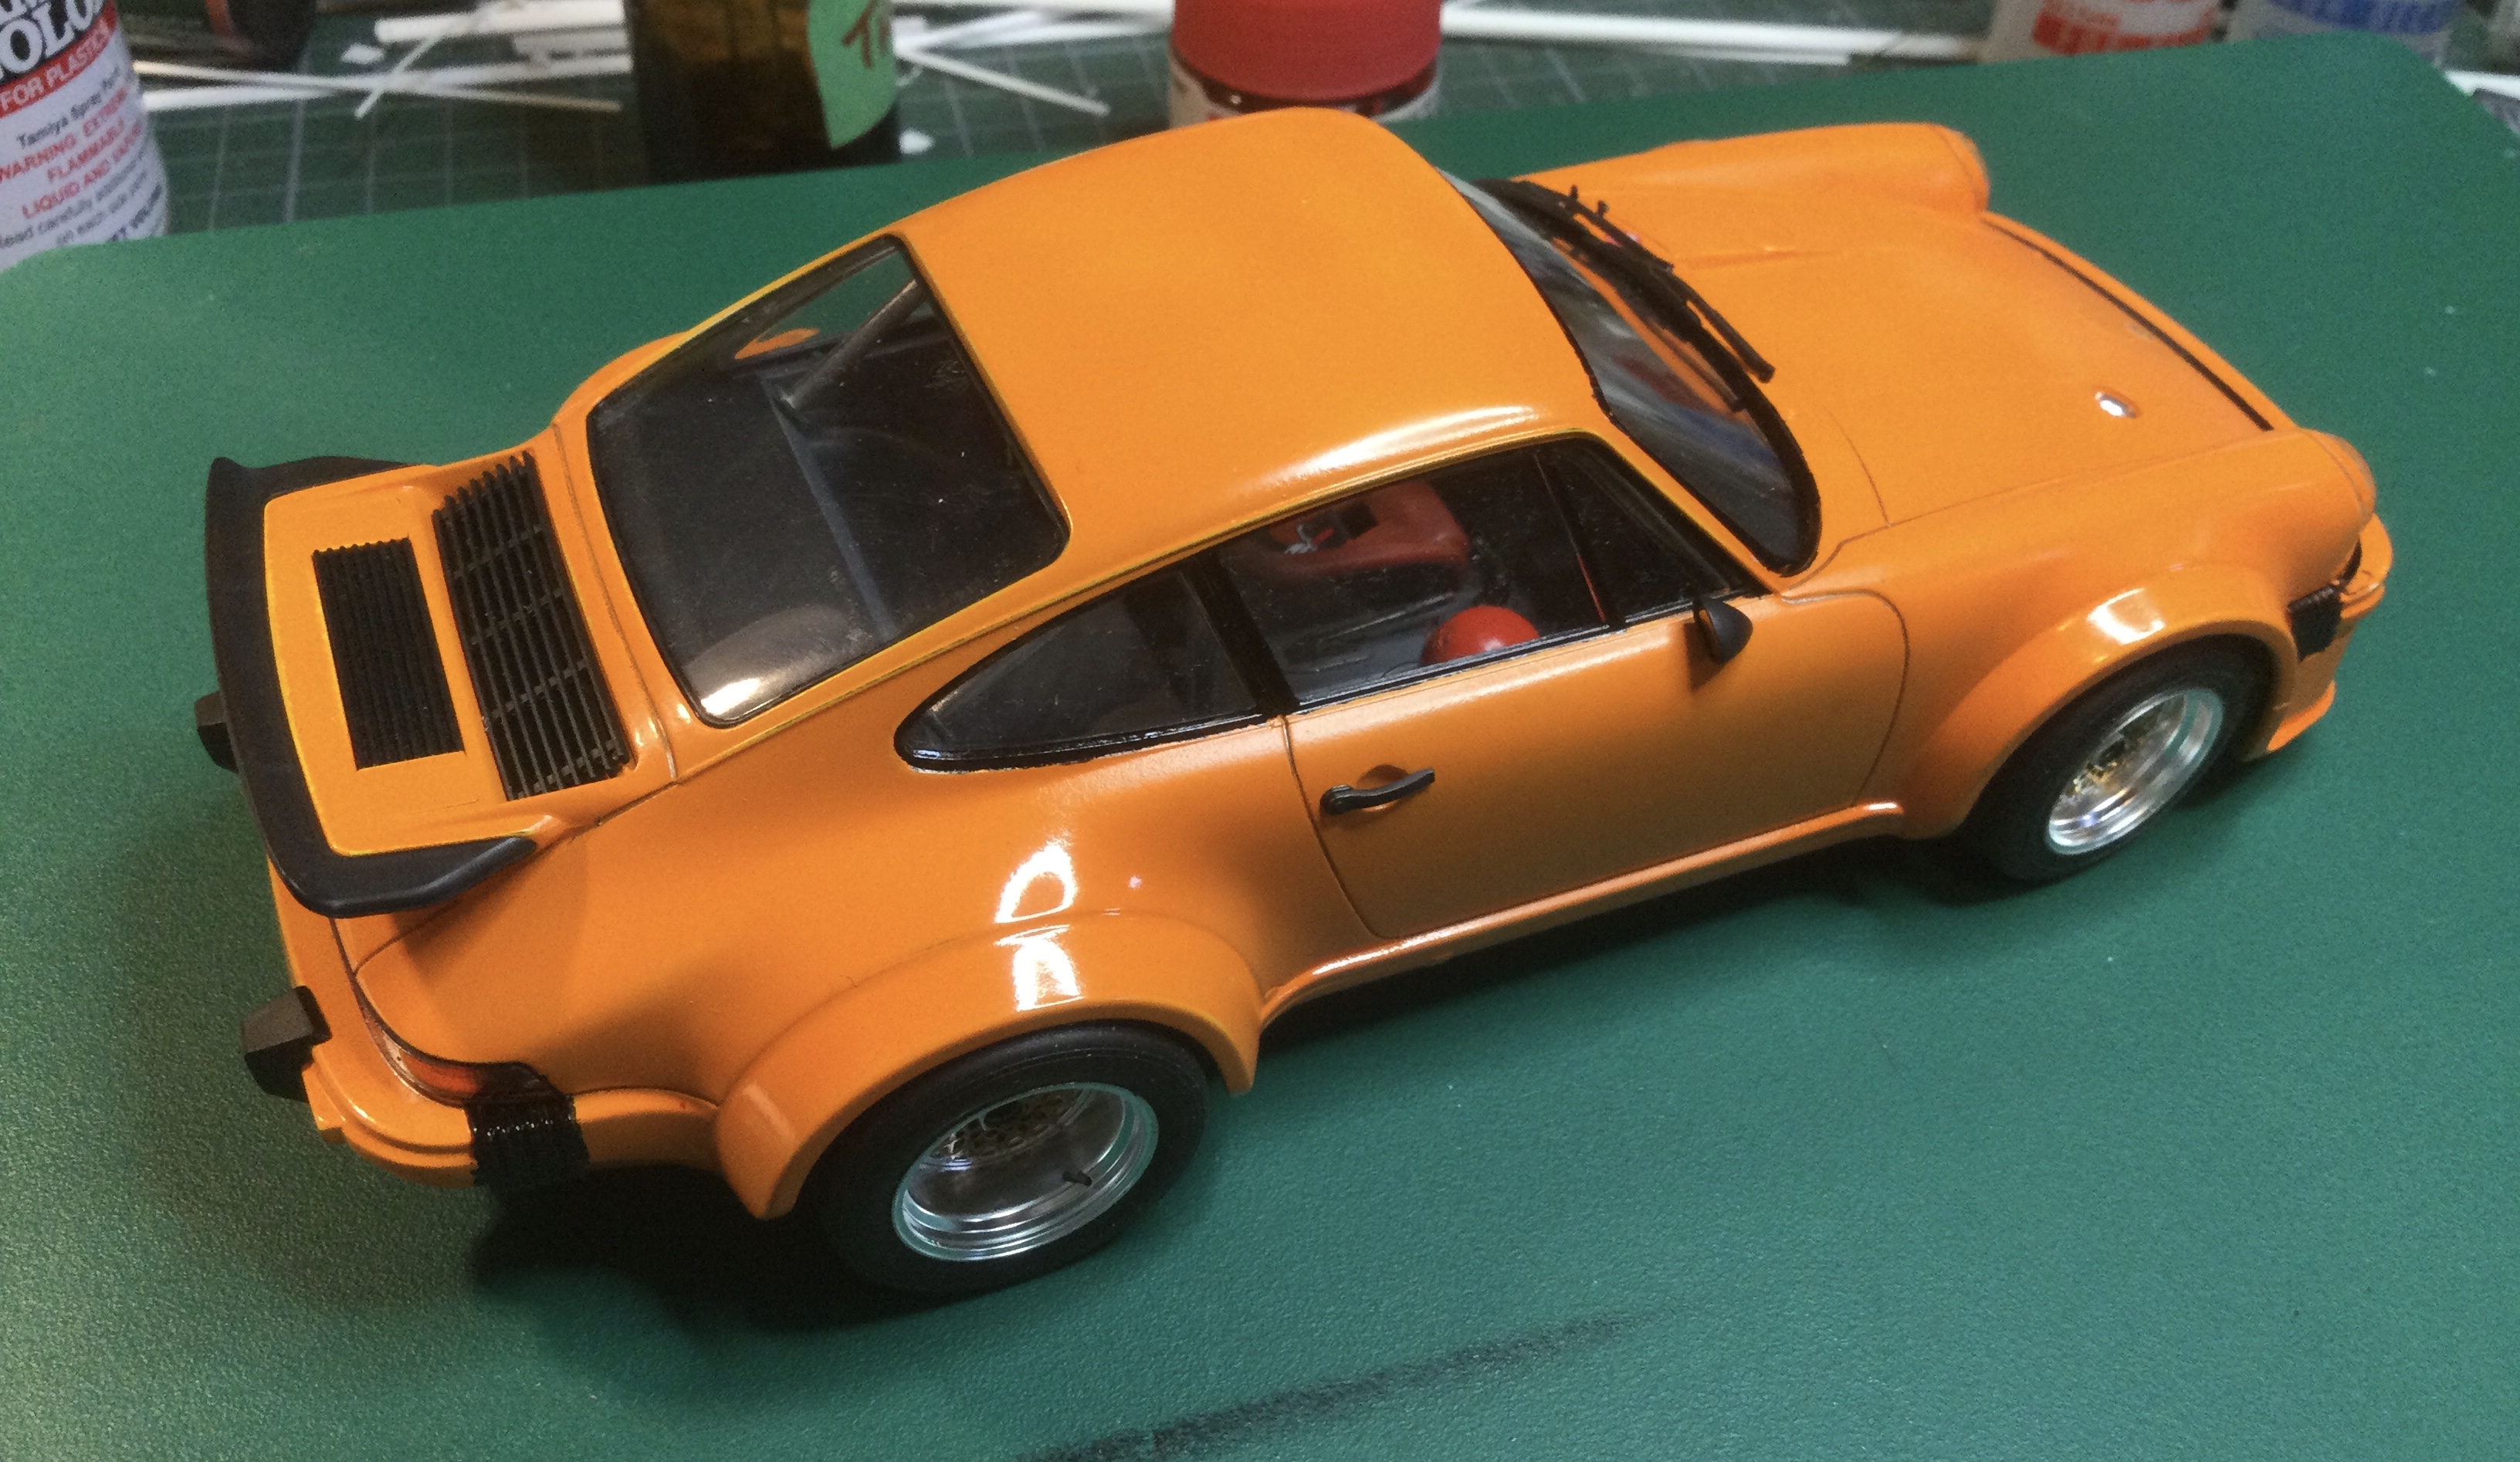
Finished a long stalled build thanks to a recent B.O.Y.D. thread. It’s the first completion from a large selection of Porsche kits in the stash. Learned a lot about body detail painting, especially the black trim, so hoping to accomplish a better finish by airbrushing rather than the ole brush method. Cheers Misha

-
Gecko British Army ATMP
Misha replied to PatW's topic in All The Rest: Motorcycles, Aviation, Military, Sci-Fi, Figures
Great conversion Patrick! Perfect for the West Coast out in my neck of the woods. I truly enjoy enjoy all your various builds and the imagination behind them, thanks for the ideas and inspiration. Cheers Misha -
Congrats Marcos on a beautiful build! The stunning colour combined with the perfect carbon fibre application really stands out with all the reflected light sparkles. Cheers Misha
-
Thanks Bill and Anthony for checking in on my progress. I enjoy scratch building as it allows for a great deal of imagination while being tempered by a sense of would it work on the 1:1 scale. When I was building 1:48 scale models of my theatre set designs the entire build was usually scratch built. One also trains the eye to see “in scale” various objects that would work in a model, for example the drinking straw. Cheers Misha
-
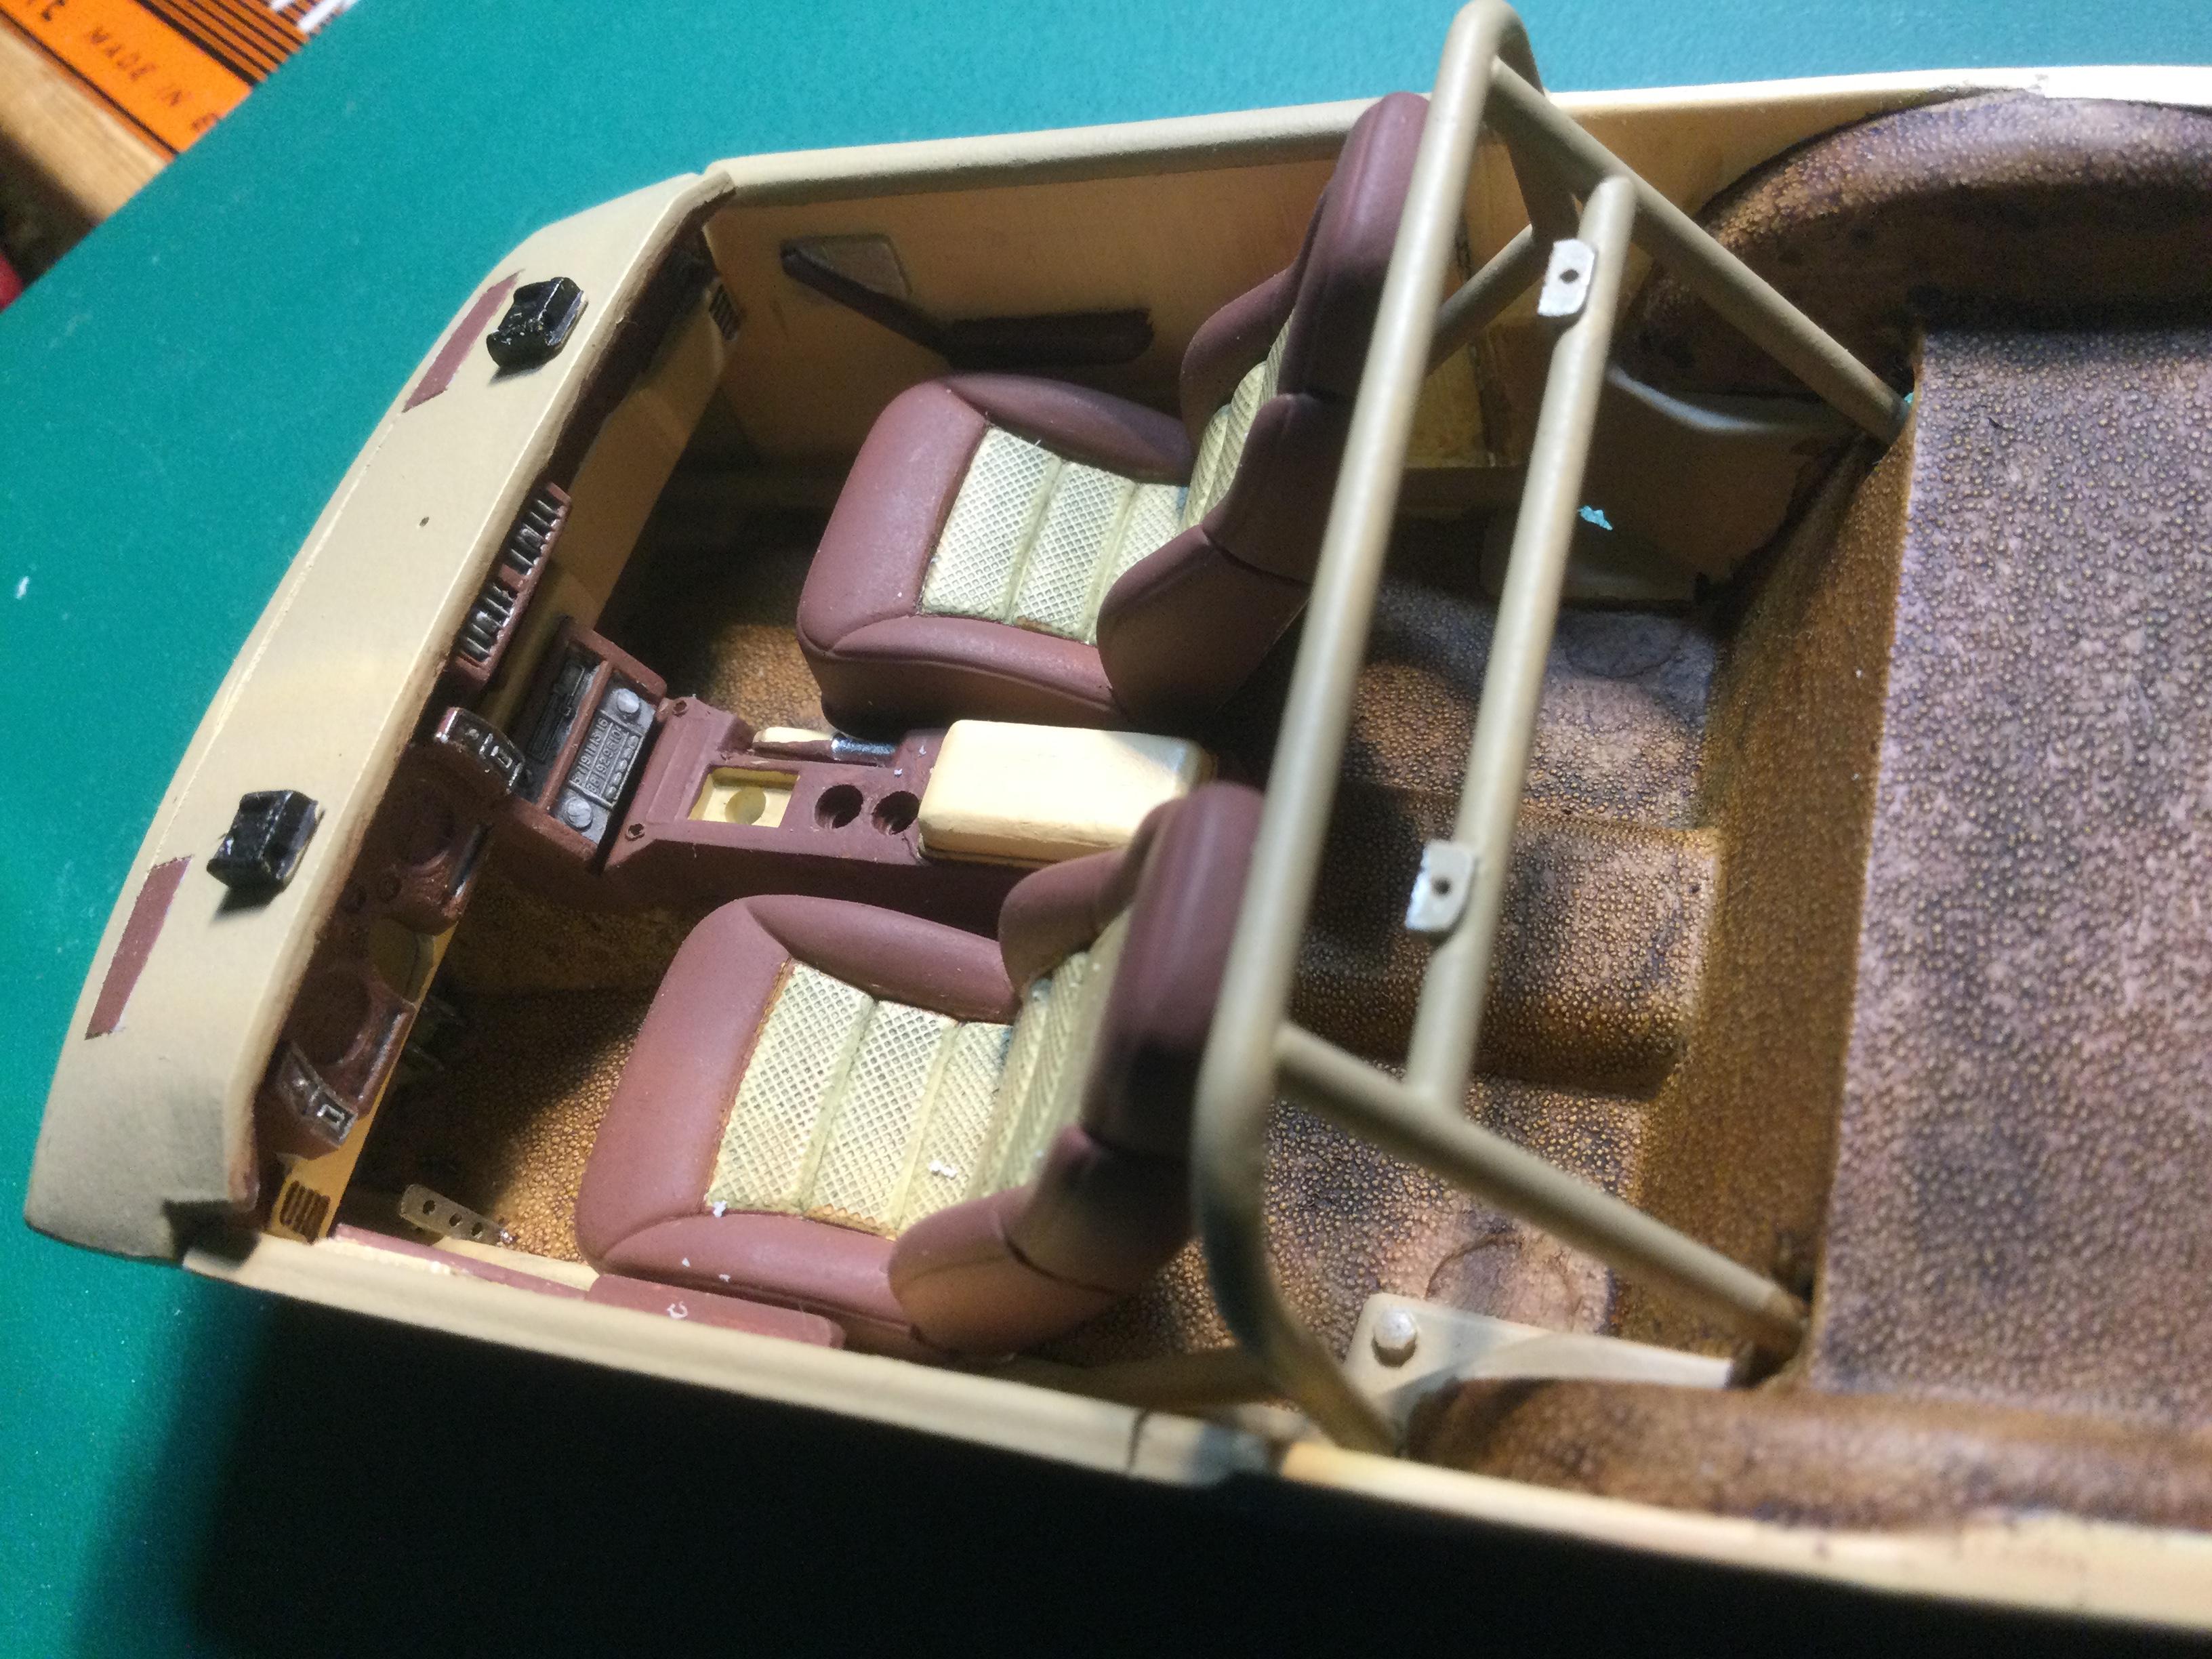
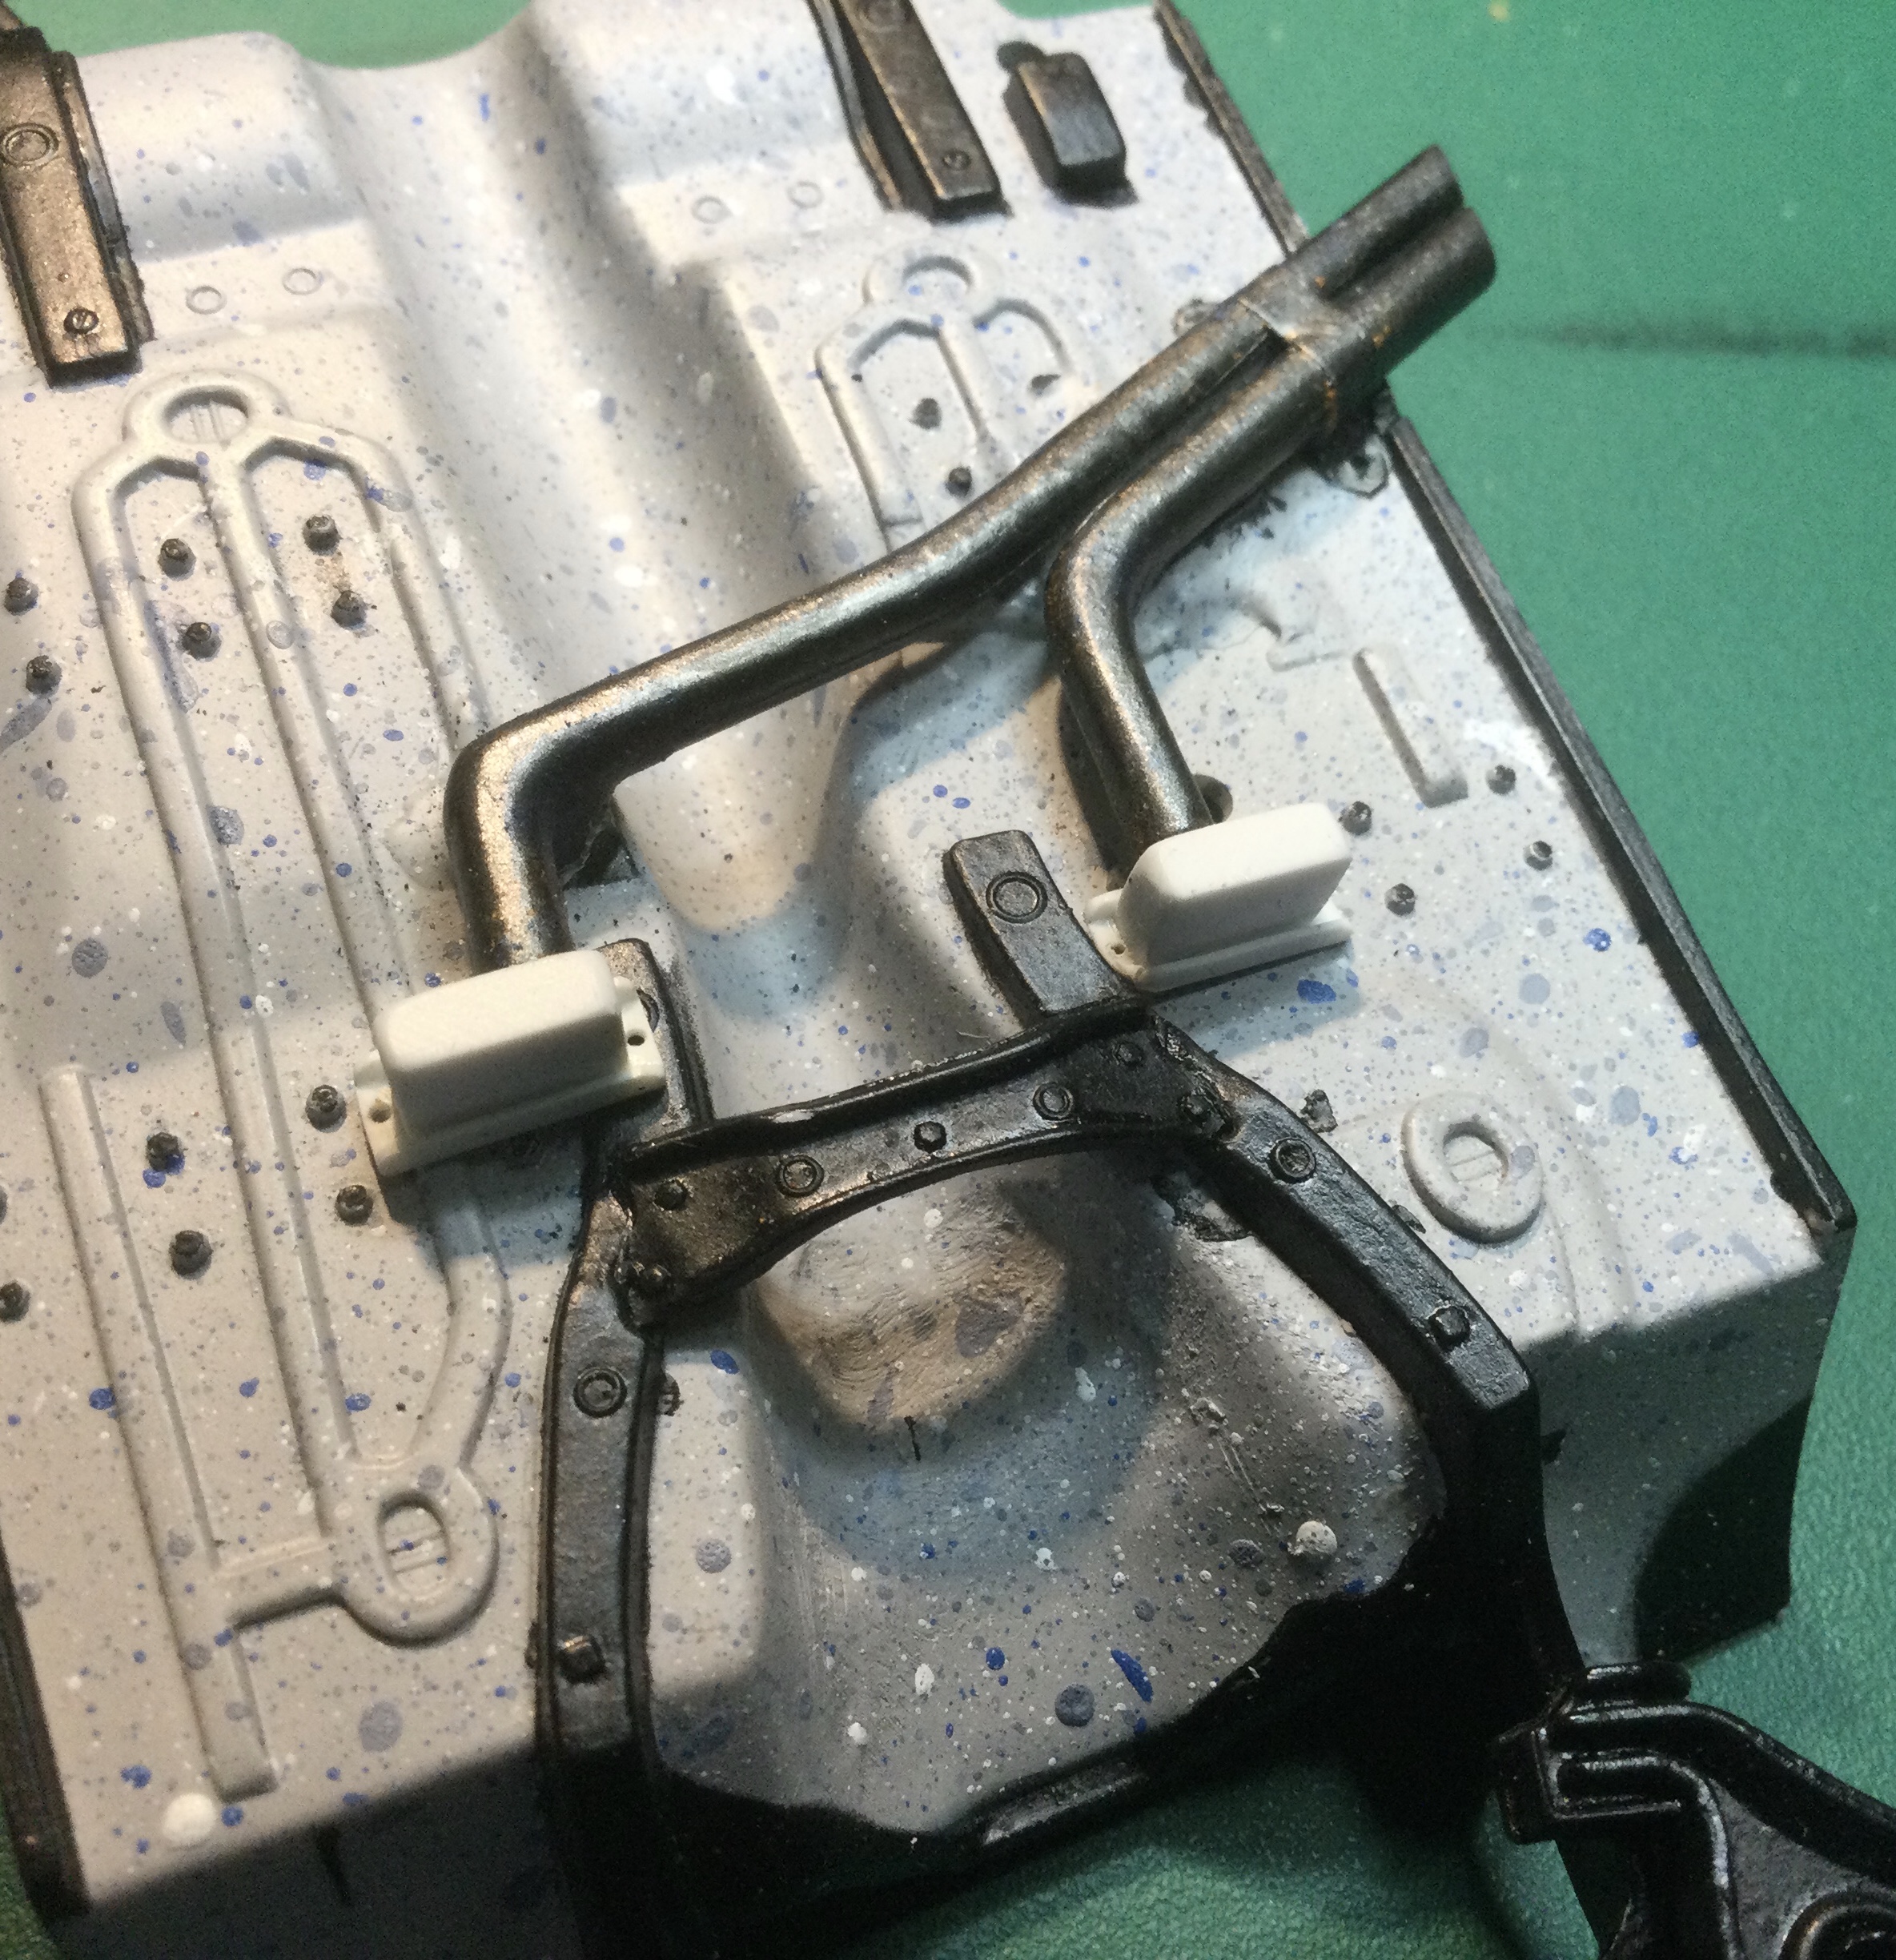
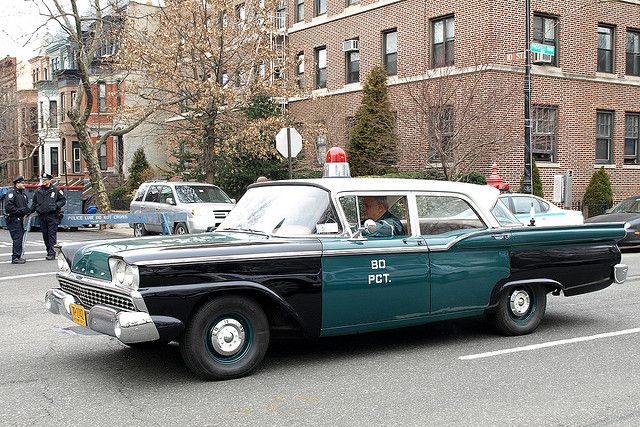
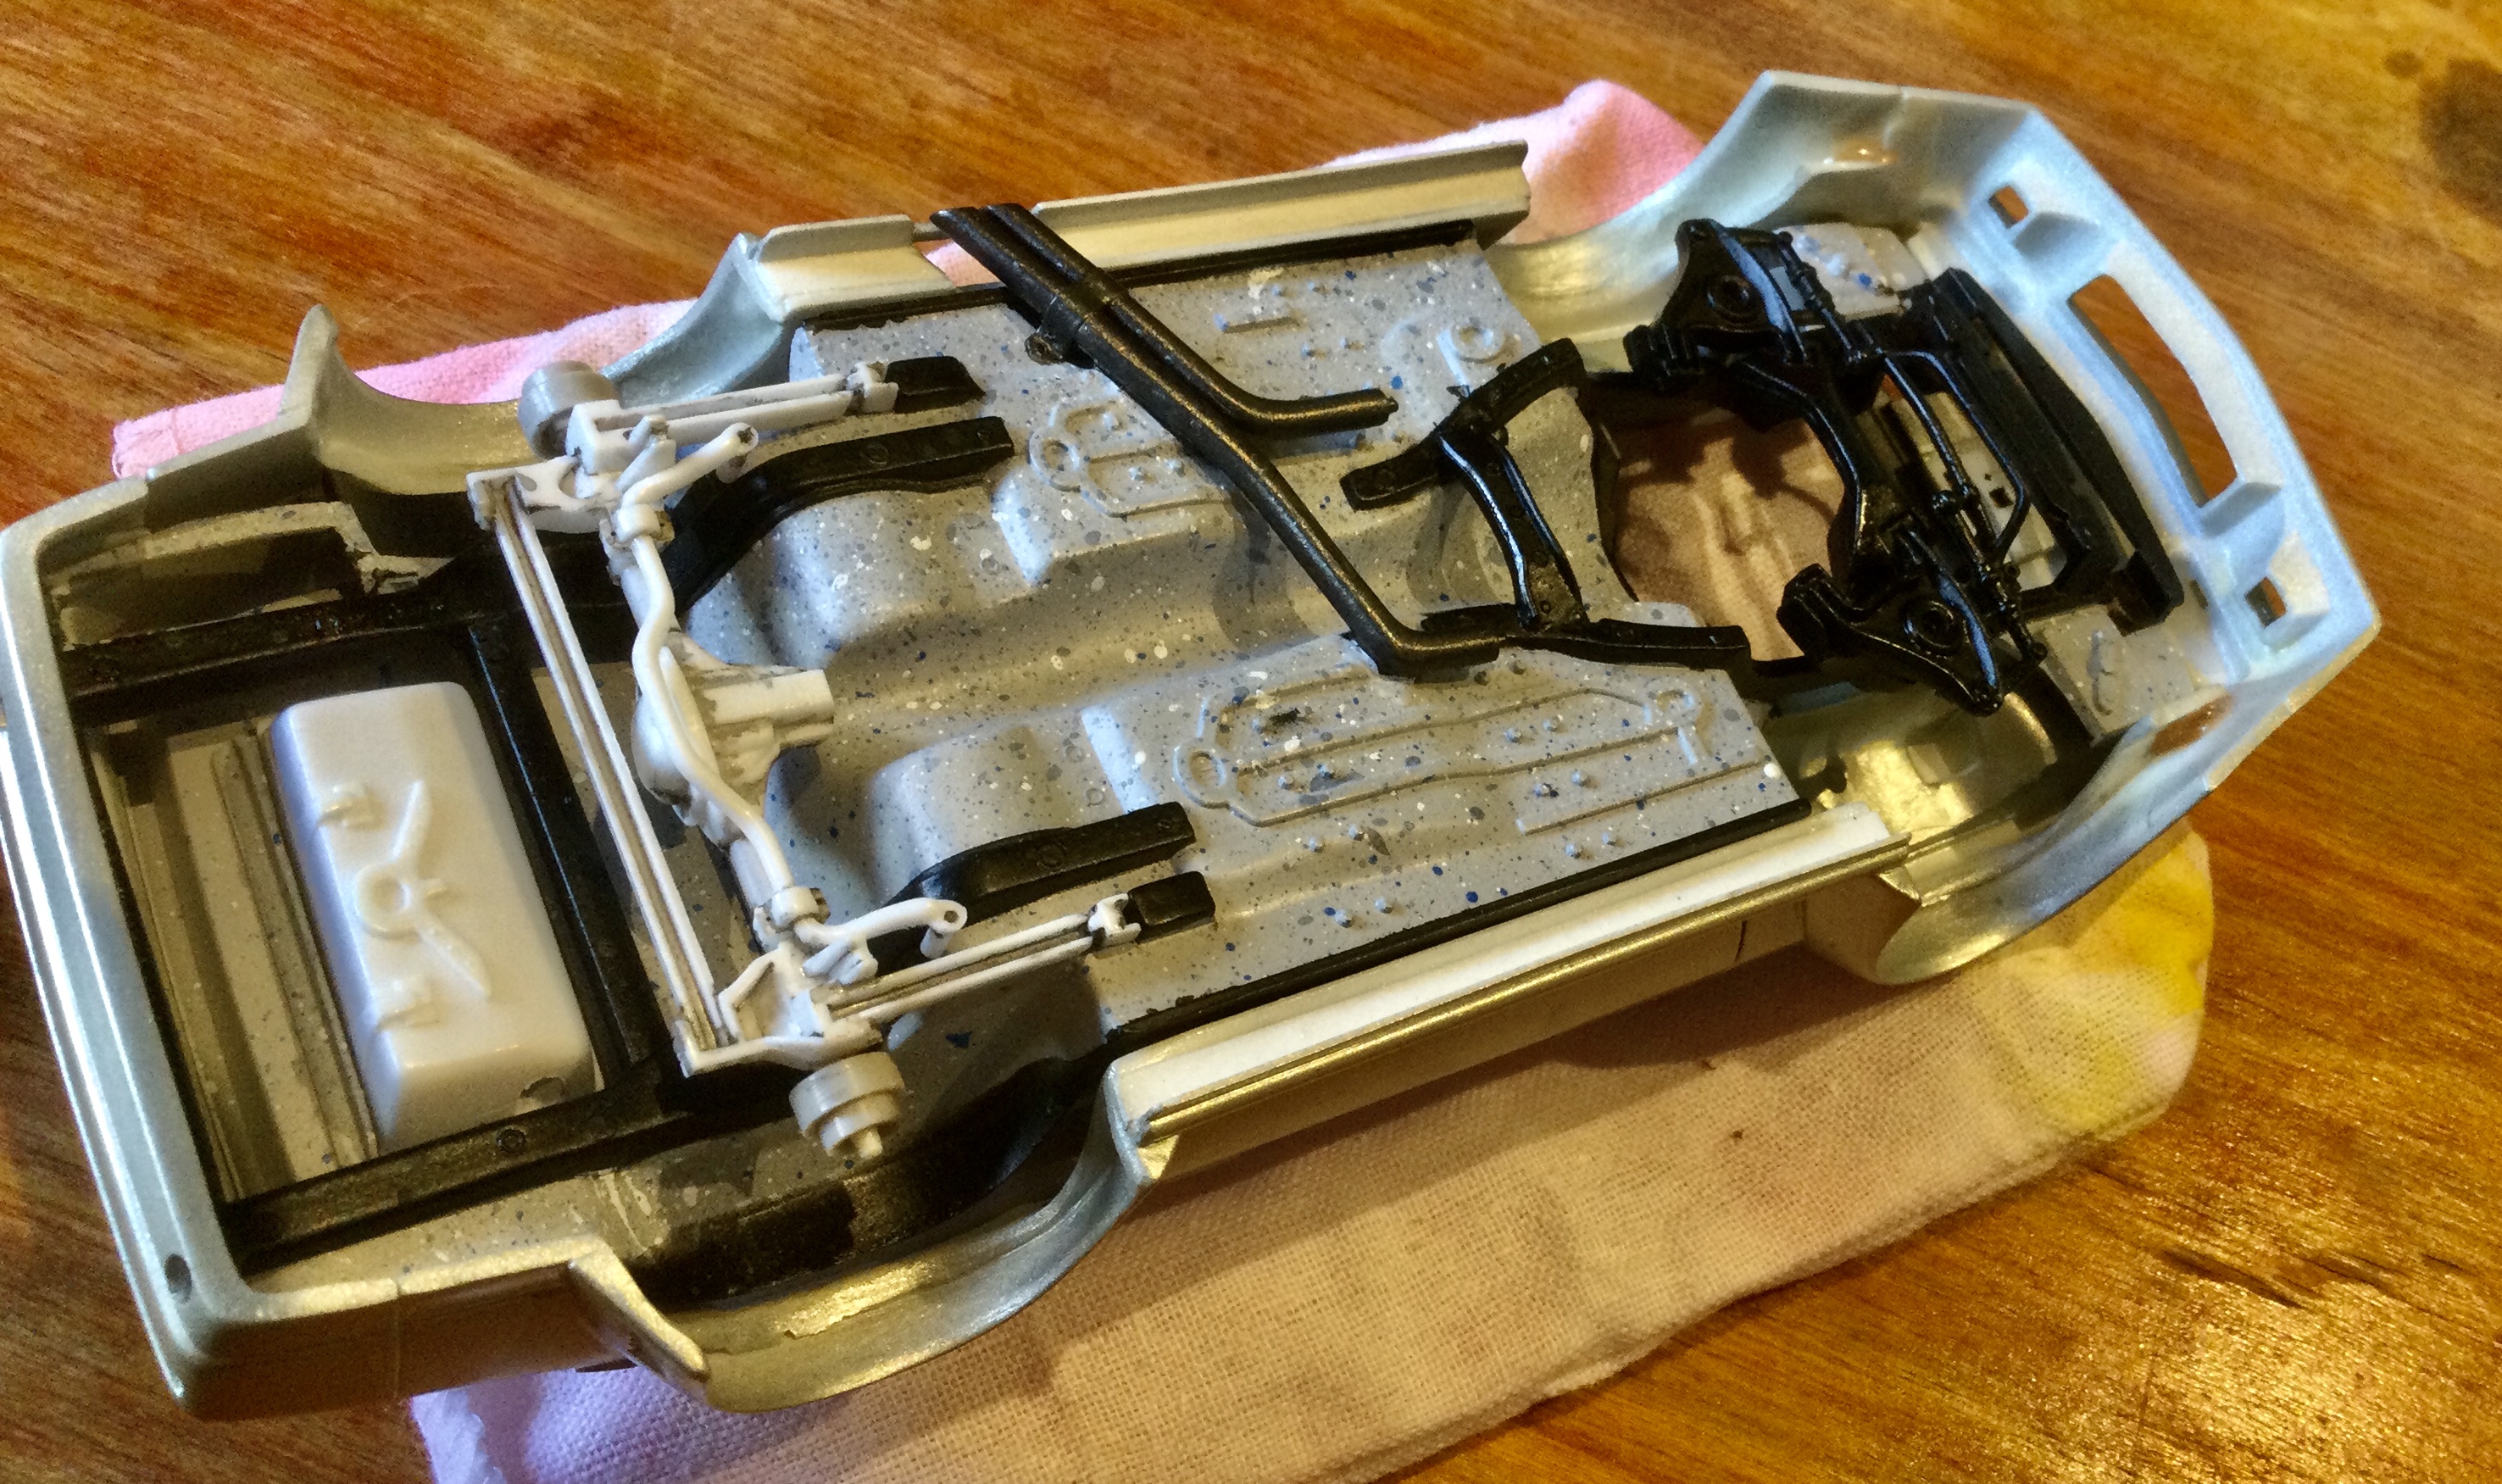
With the arrival of summer like weather my workbench time has been limited by my garden activities, yet I was able to spend a rainy weekend at work on the Camaro IMSA road racer. Most of the recent scratch building has focused on the front and rear belly pans. The larger front unit will house the engine oil cooler and brake cooling air ducts for the front discs. The rear pan will shield the civilian exhaust pipe and have an exit vent for the rear end oil cooler housed behind the rear passenger tire well. For the air ducting I’m using old plastic bendy drink straws that offer the right look and remain somewhat flexible and keeps its shape. The interior is progressing with detail painting and washes. Once the base is established the detail bits will be added to complete the “digital” cockpit. The sought after effect is to have the appearance of a road trip vehicle full of luggage and camping supplies to the casual observer, belying the actual evasive measures being employed. The various scratch built parts are being readied for primer coats followed bu detail painting. At the top, and going clock wise, is the stock steering column and wheel. The engine oil cooler was constructed using guitar string to represent the coils, it will be mounted into the lower grill opening. It is followed by a pair of fire extinguishers to be mounted behind the passenger seat. A headliner control console will harness most of the communications array on the roof. At the bottom are the dash components consisting of a digital driver’s display, the infra red radar screen for night vision, and an iPad for the copilot. The next section offers the Wink rear view mirror from a NASCAR kit with a forward video camera and the rear mount for the brake light which also houses the rear ward IR radar and video camera. The remaining two sections show the accelerator and brake pedals (running a Turbo 400 3L80 tranny) and the the foldable foot rest for the passenger compartment, and lastly the picnic cooler and fixture for it to sit on the driveshaft tunnel. The last item I worked on were the two gates for the exhaust to operate between civilian mode and wide open dual exhausts. They will be solenoid activated from the cockpit. That’s about it for now, until the next rainy days! Cheers Misha.
-
Cool shots and video Kurt! I know the feeling as we have also escaped into the wilds of Vancouver Island, tho’ with much different terrain with old growth forests and bubbling streams. Great to see the Blue Barge, has the Green one retired? Wishing you well, cheers Misha
-
Great execution of your paint scheme Lee. The scallops and fogged panels add greatly to the lines of this English import. Cheers Misha
-
1970 Ford Galaxie 500 reissue : I added Factory Reference Material
Misha replied to migace's topic in Car Kit News & Reviews
Looks like NYPD may be returning to the green/black scheme... Cheers Misha
-
Well done Chuck! Your chassis weathering is especially effective for a car of this age. Cheers Misha
-
That sounds serious Kurt... anything to add? Hope all is well with your family, Cheers Misha
-
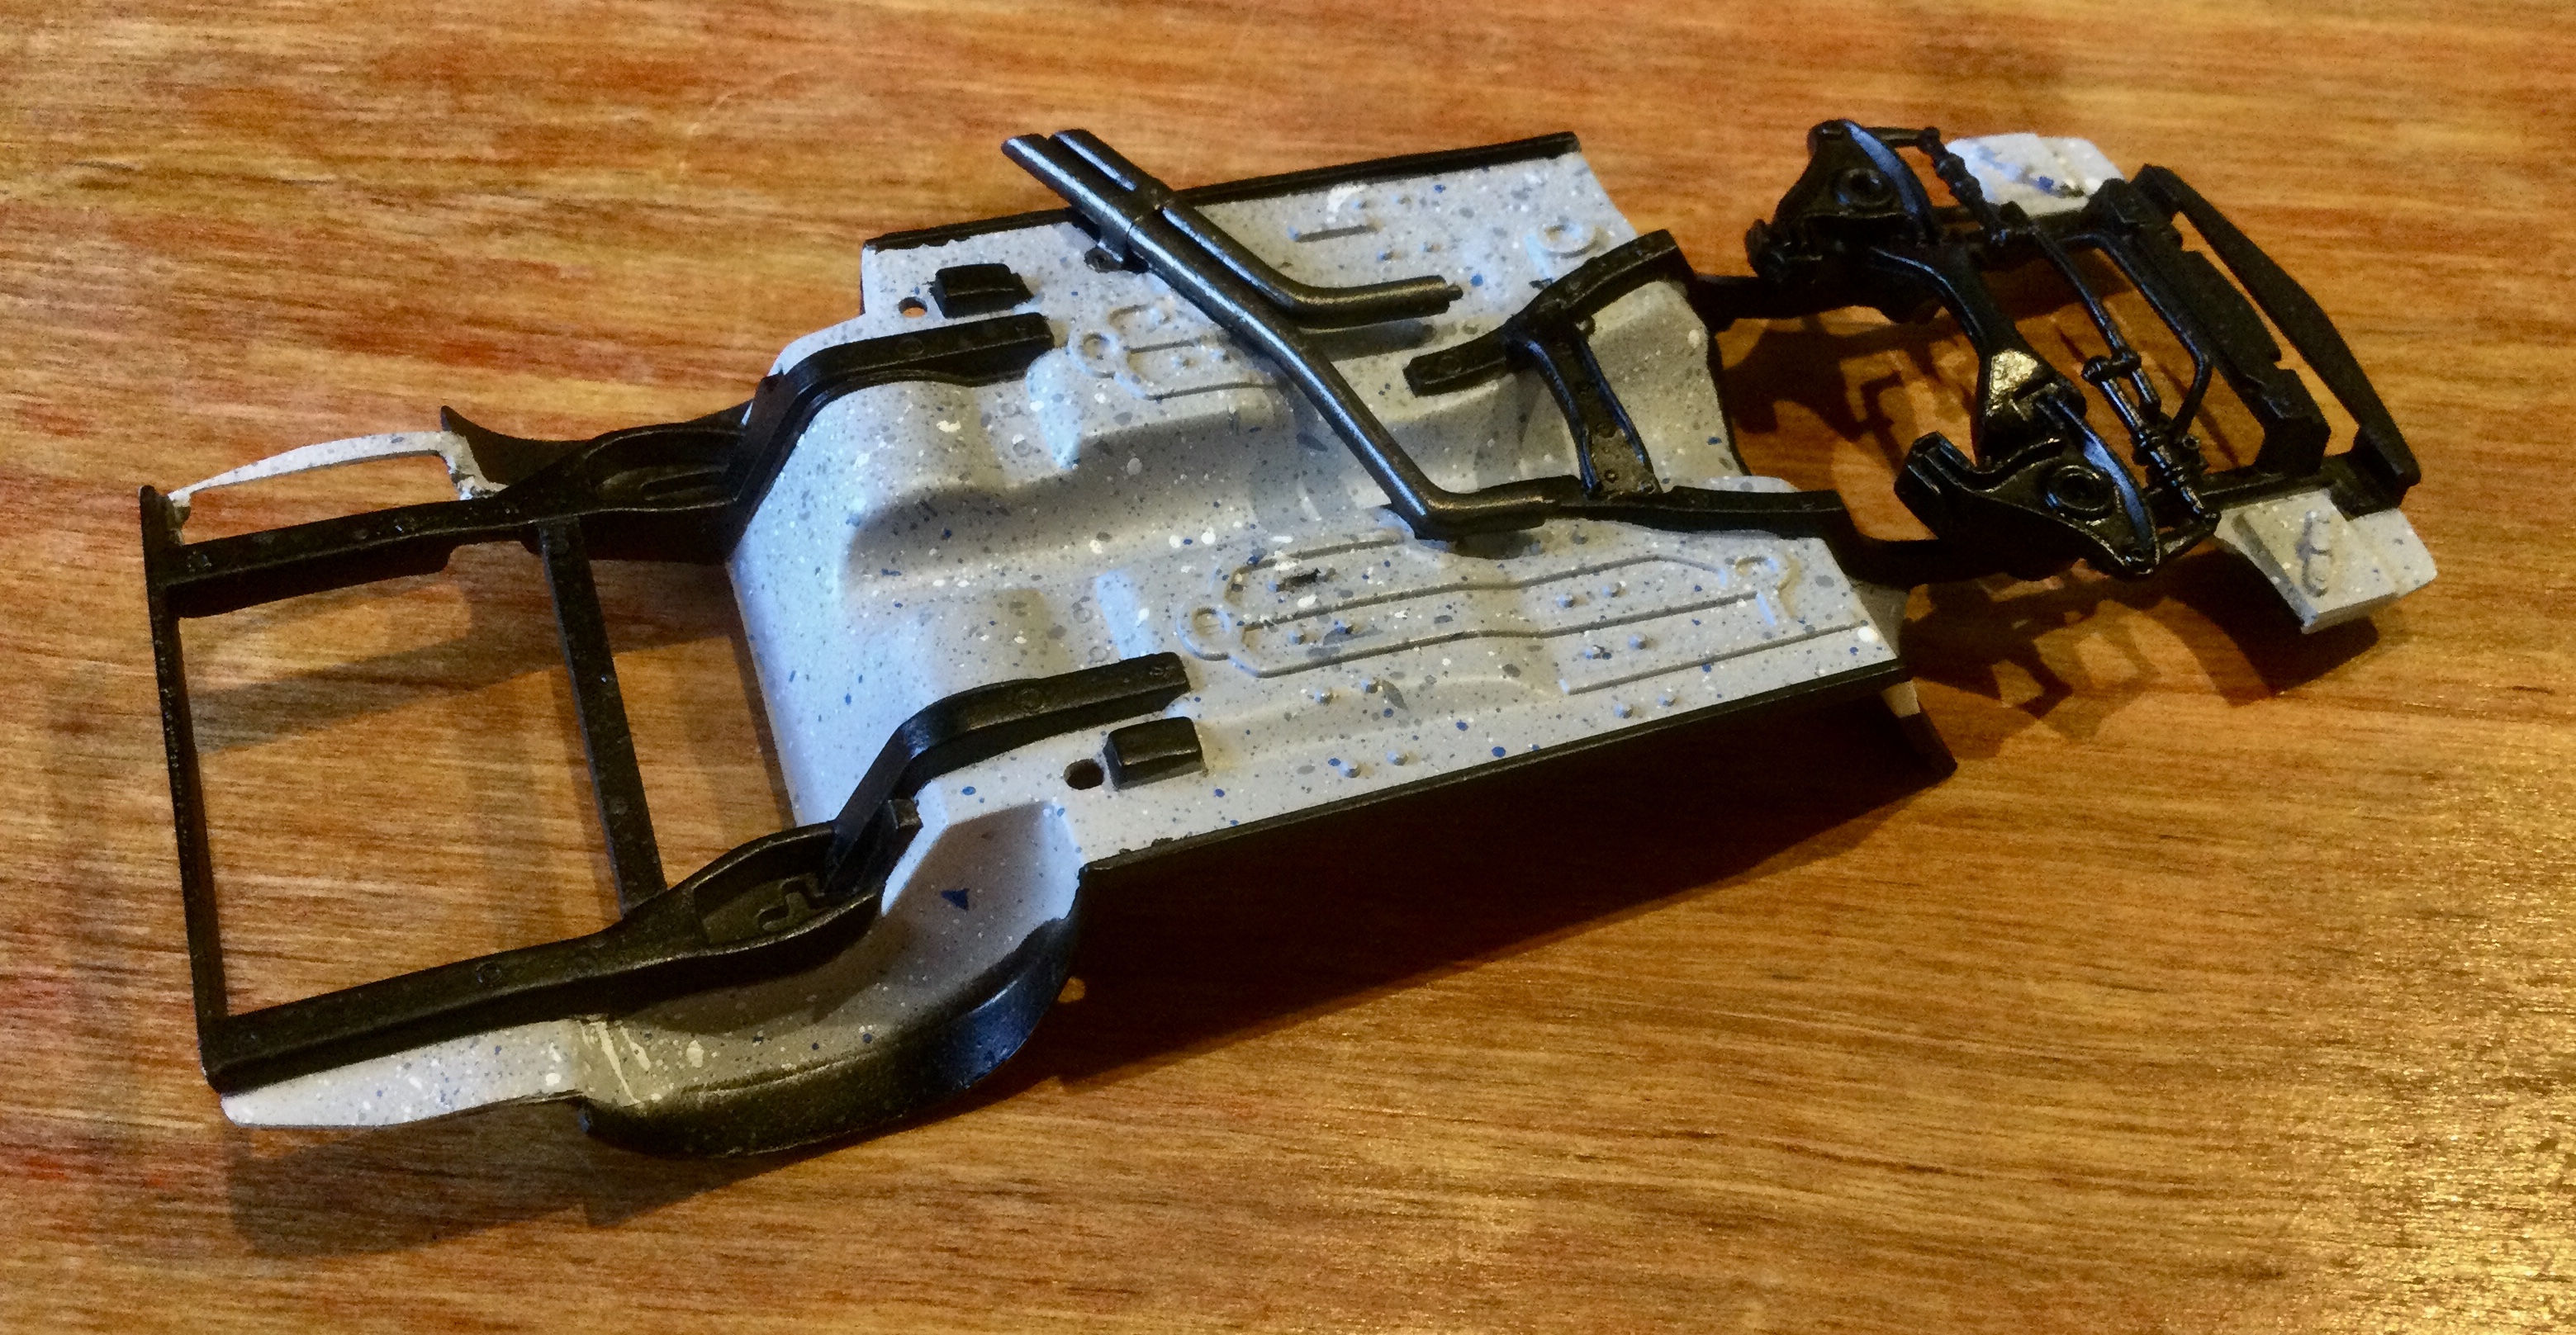
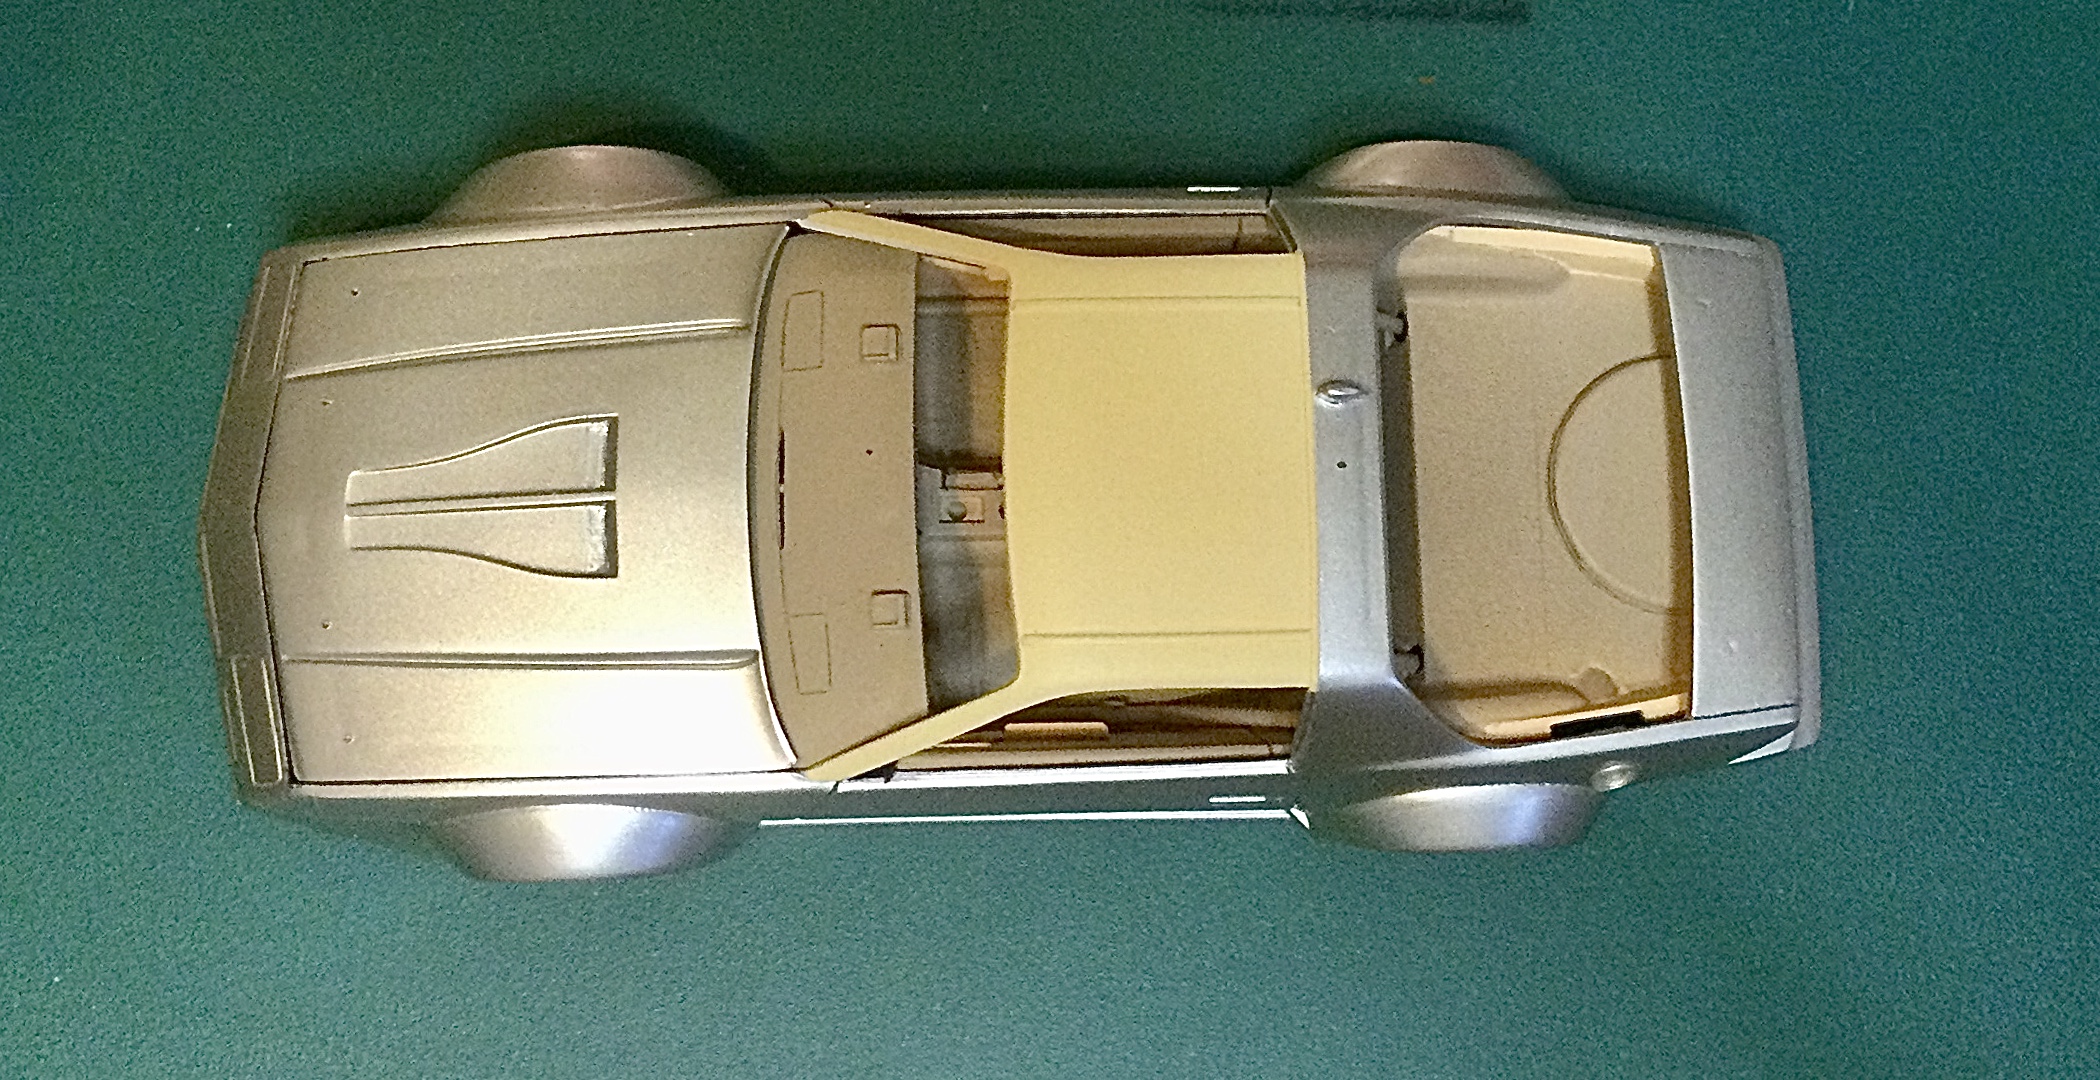
IMSA Camaro Update... It’s great to see all the builds progressing with such a variety of vehicles, yahoo! Been absent from the model bench with the summer like weather in the Cowichan Valley, yet did find time on the weekend to add more colour to the interior and chassis. Still a ton of parts to be primered though. Combining the interior with the body at this stage offers a coordinated colour scheme and lessens the starkness of the vinyl top against the body which I’m much happier with. Once more of the interior is done I’ll be moving to the L 71 motor and further chassis detail. The underside of the body still requires some paint detail, mainly with X18 in the wheel wells. Cheers Misha
-
Sweet ride Sam and a great save! Thanks for sharing your build, it was a terrific feat. Cheers Misha
-
Another great tutorial Allan! You shown a simple yet effective way to fade aways along the length of a body, the Fireball 500 being an excellent example for this technique. Also found your thread on rust treatments very informative and it has moved me a bit further to attempt such a finish as I have been a shiny finish modeller, being somewhat skittish to model a patina finish. Cheers Misha
-
Thanks for the great tutorial and for including photos to illustrate you work Allan. I’m an old dog learning new tricks, your tip to drill all the way thru the interior and chassis to help adjust the height of the roll bar assembly is a big help. Although when it comes to the interior glass, I would tend to trim off the excess runners, especially when the windshield and rear glass are connected to allow for a tighter fit between the top of the roll bar assembly and the roof. Always enjoy seeing jigs that are created for special tasks, thanks again Allan. Cheers Misha
-
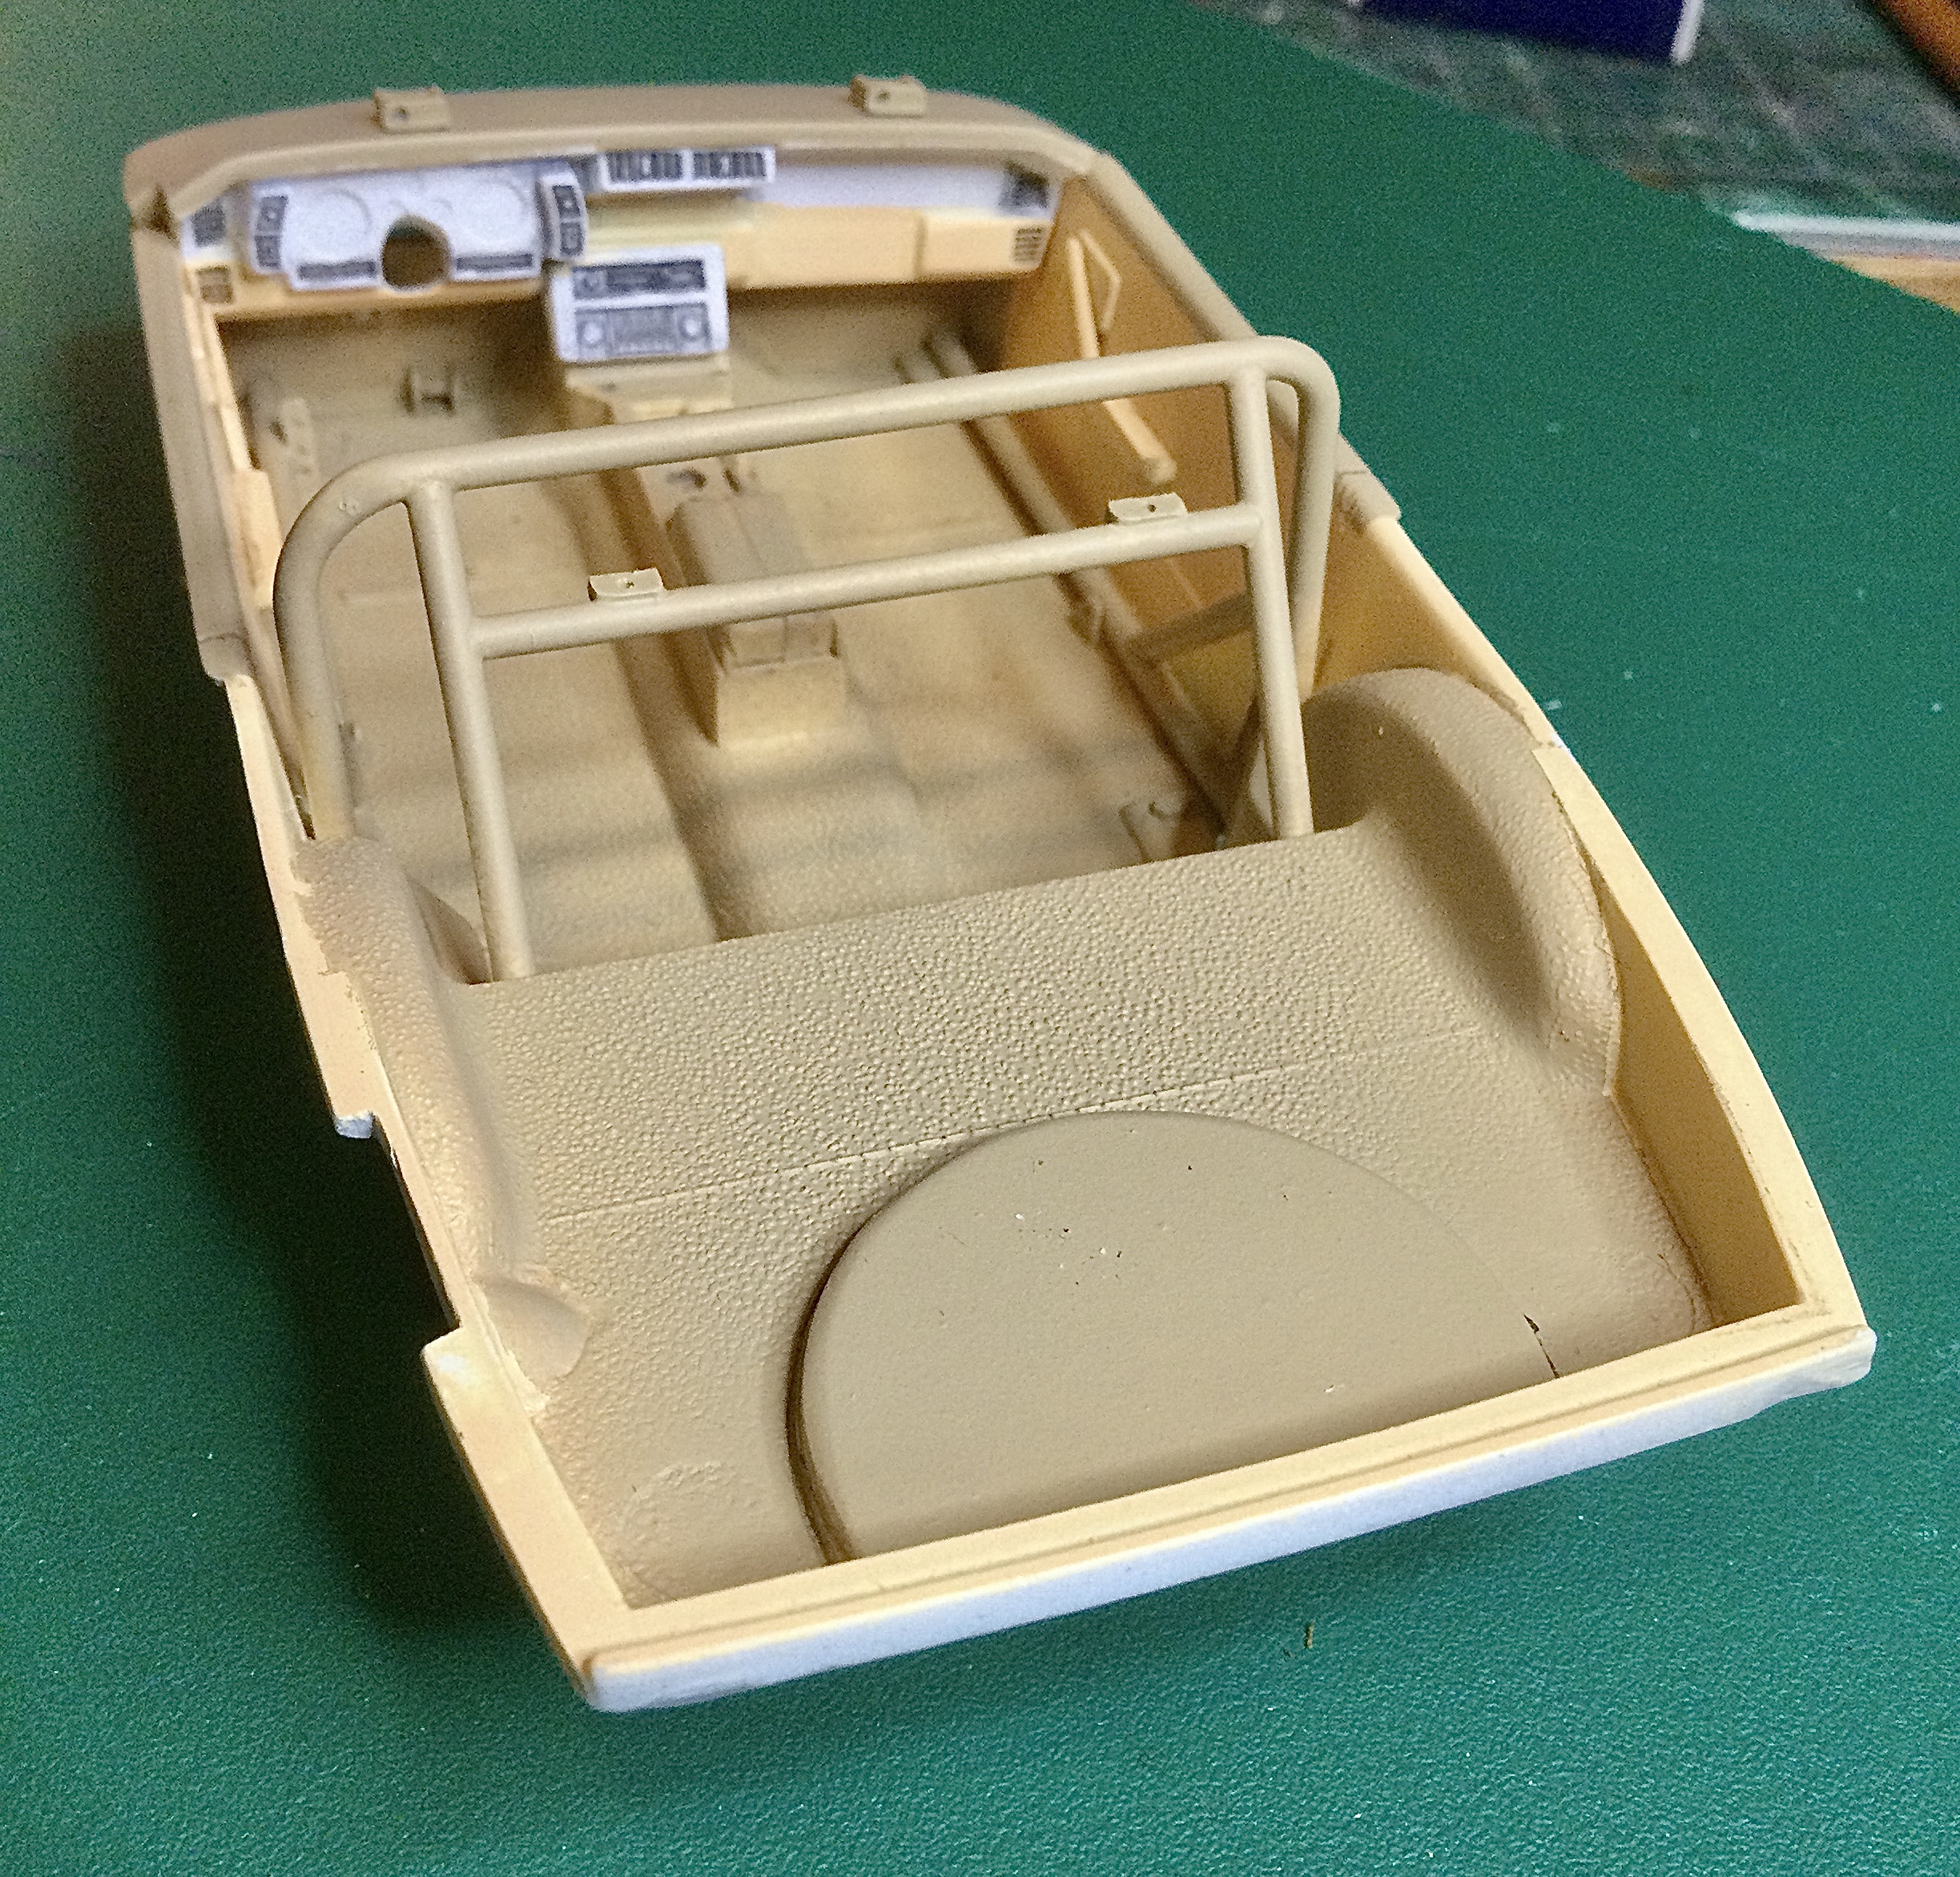
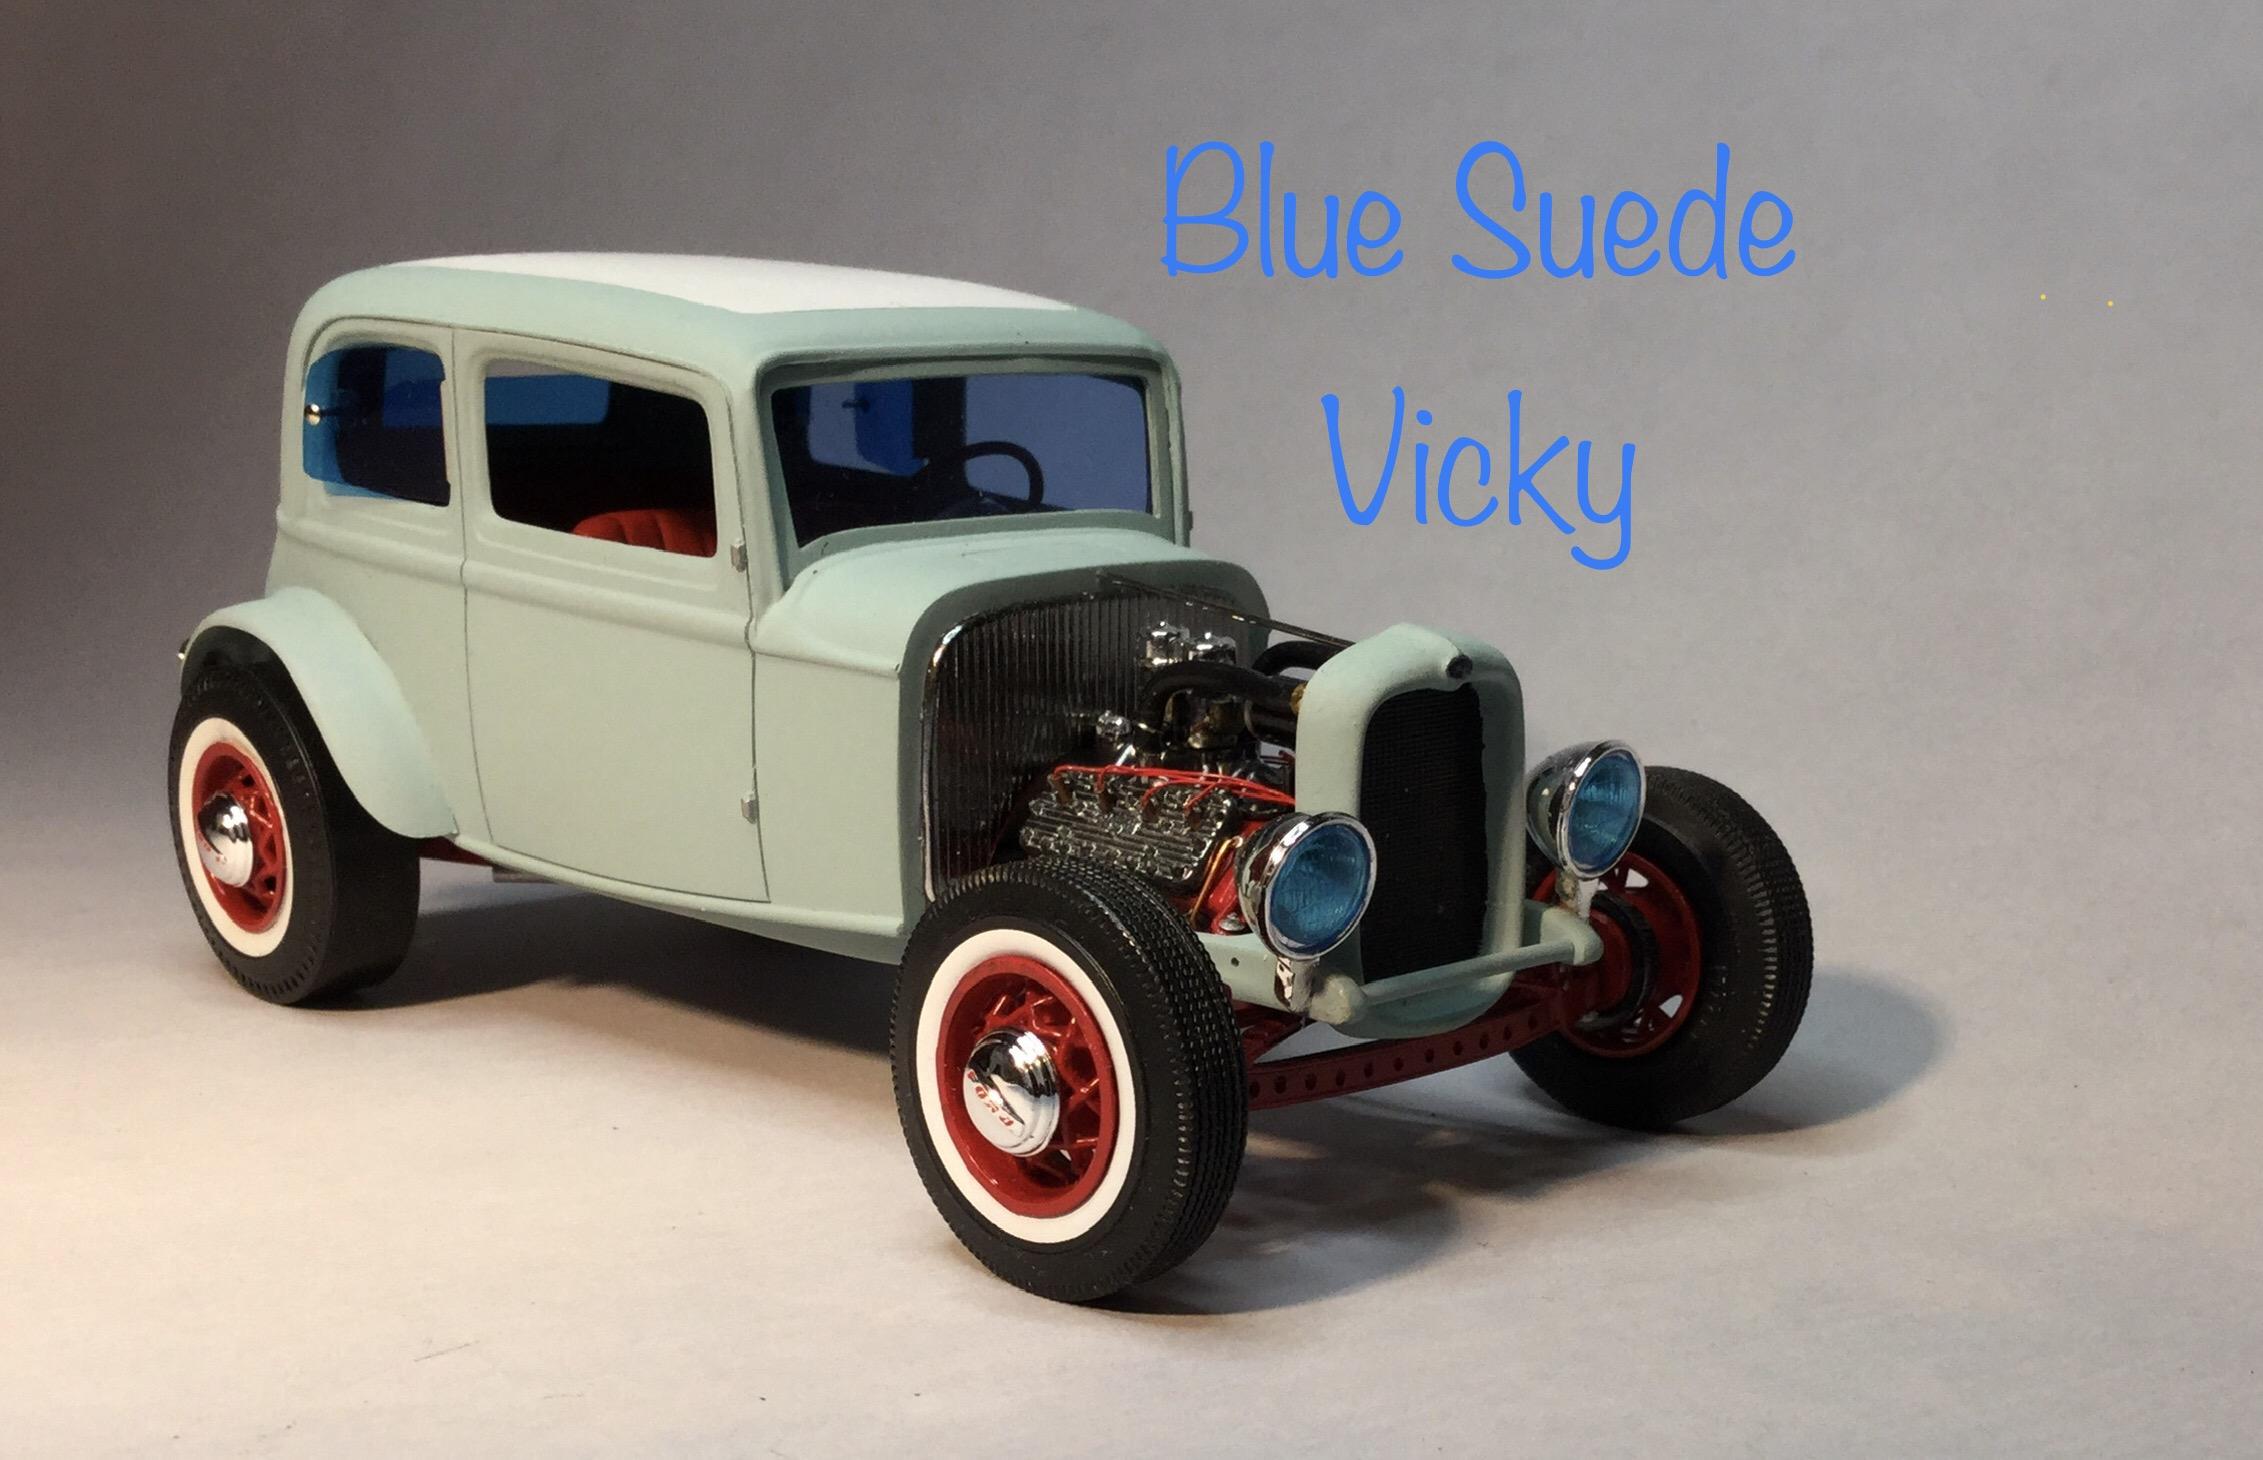
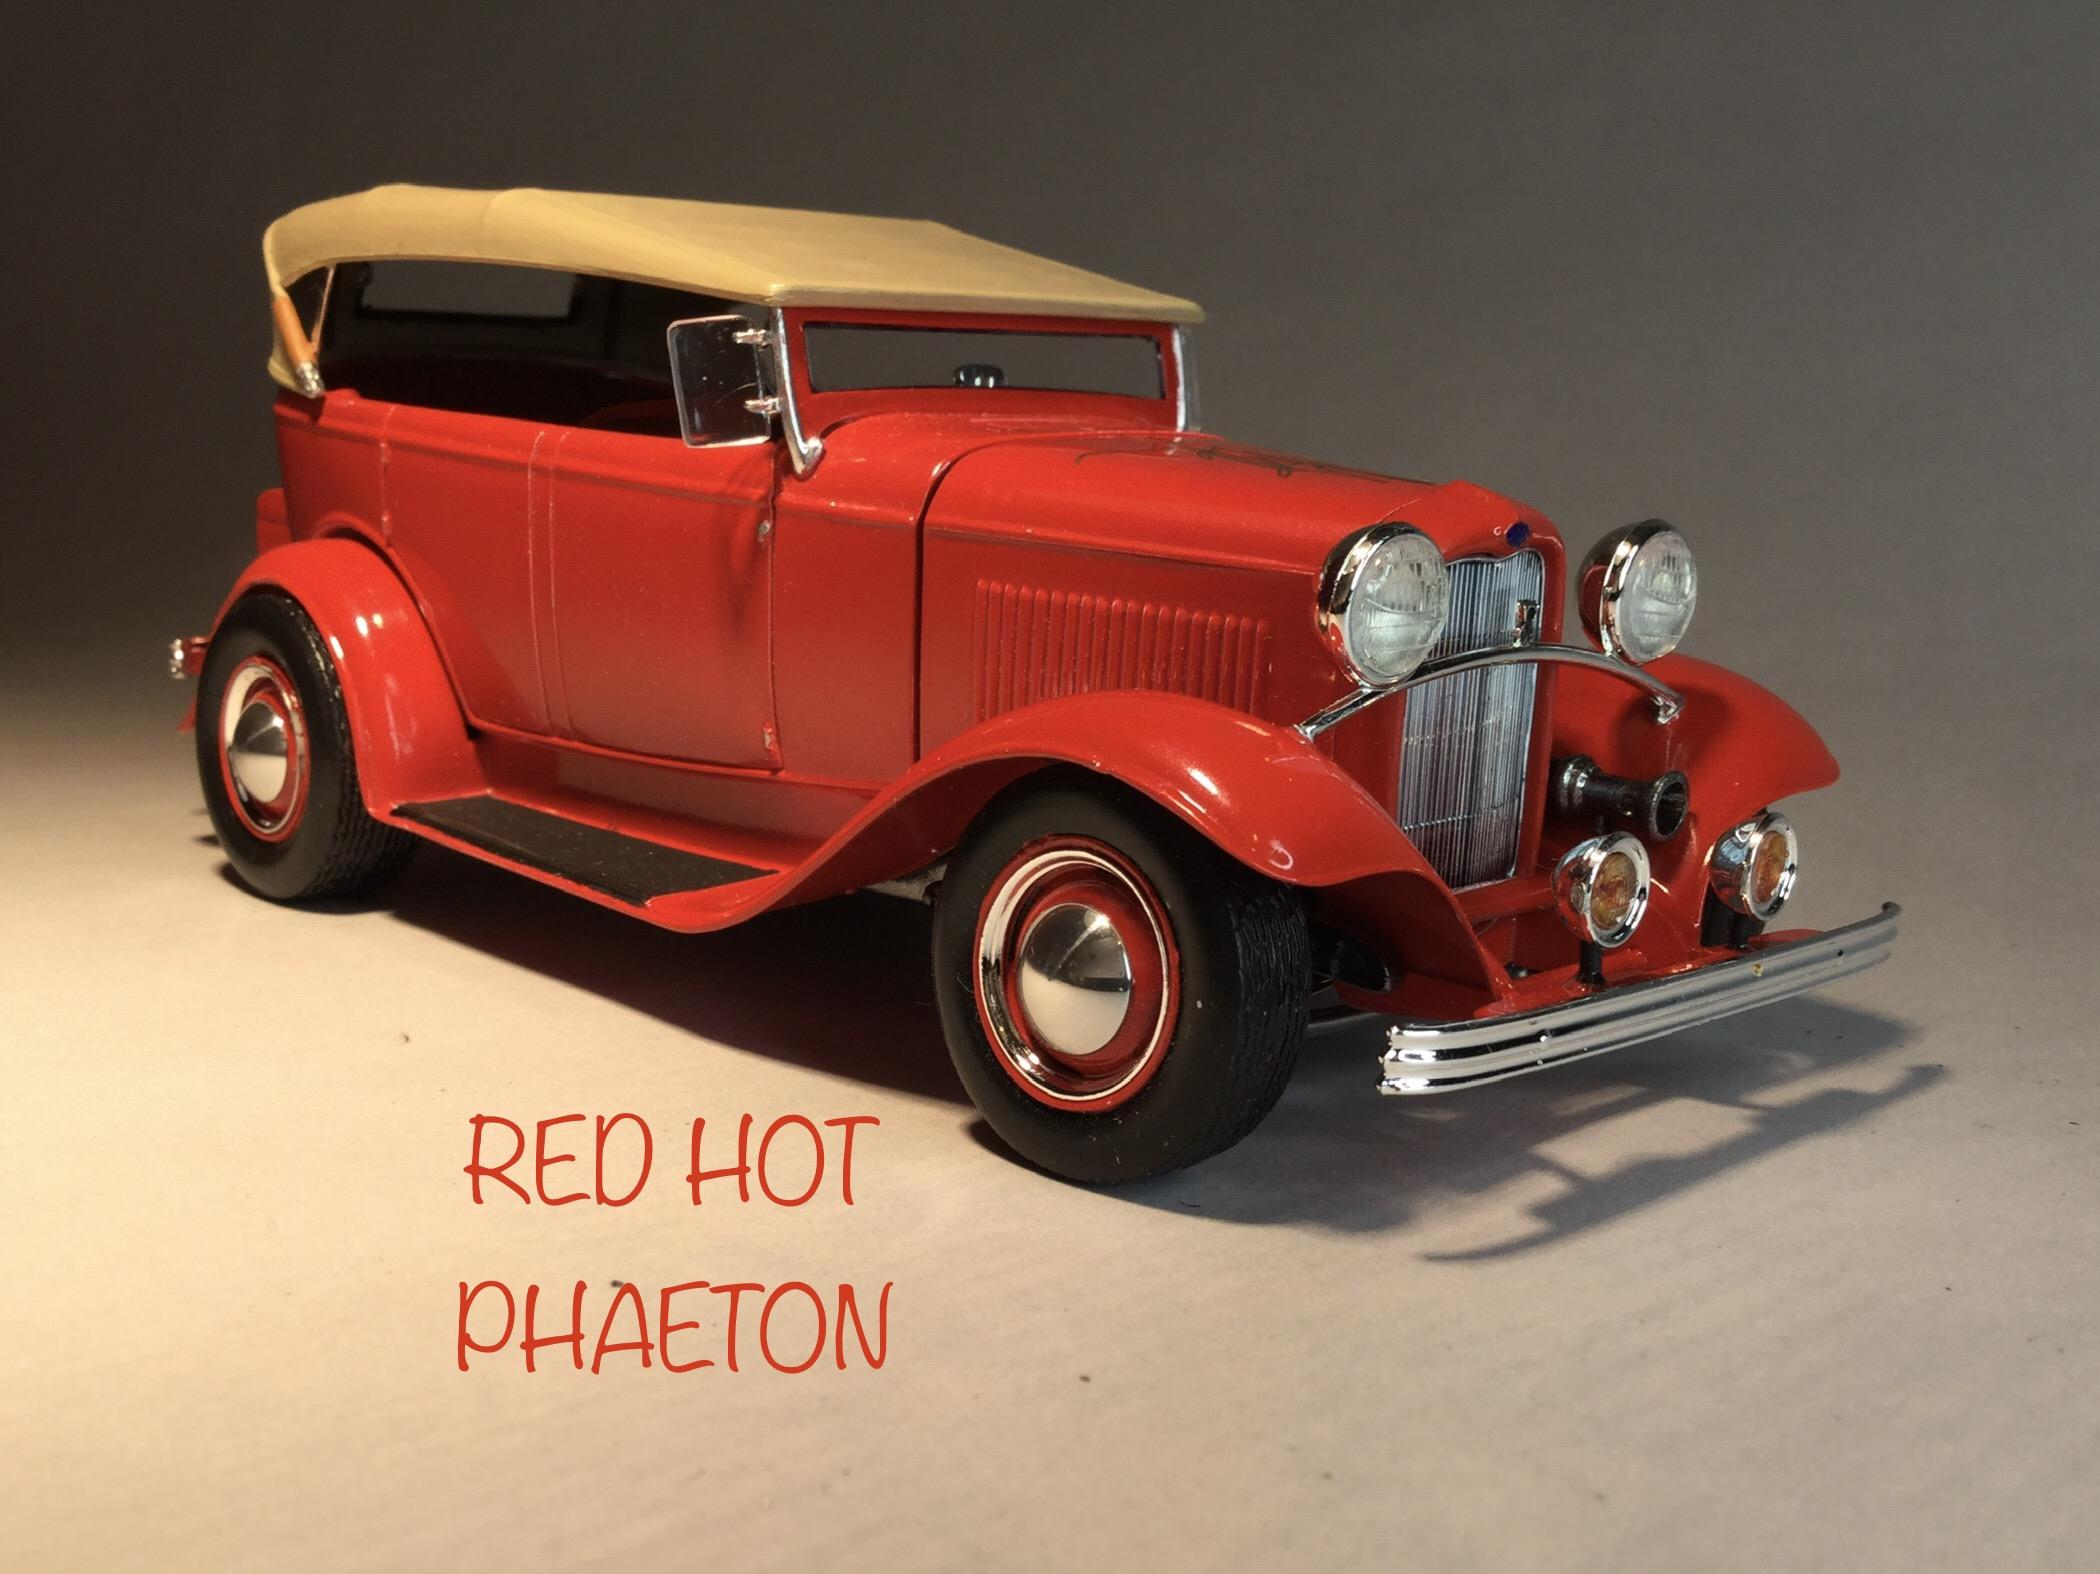
Thanks Rusty, here is the link to the WIP thread on the Phaeton, the Vicky WIP thread has already lost its photos. I haven’t posted Under Glass threads on either, so perhaps I’ll do that soon. Both Deuces were built for two separate Deuce Days in Victoria at which our club hosts a display of scale versions. Cheers Misha Sent from my iPad
-
My Triple Crown!