bill-e-boy
-
Posts
853 -
Joined
-
Last visited
Content Type
Profiles
Forums
Events
Gallery
Everything posted by bill-e-boy
-
Home office lighting
bill-e-boy replied to Joe Handley's topic in Model Building Questions and Answers
Get good lighting level to start with. LED strip lights are ideal - either 4' or 5'. To get the best lighting use 6000K color or higher. The 4000K lights are too red like incandescent lights and are poor for color matching. The strip lights can be used with the light track as there are usually connector blocks available. Talk with you electrician who should be able to help. I use 3x 4' single strip lights in my office which is about 12' wide and fairly narrow. I do not use this for modelling at this stage but I may do in the future so I set it up accordingly. I am a self employed electrician and I need an office for my paperwork As well as the above use task lighting with positional lighting as suggested above. I use a two in my modelling room, one with magnifying glass that is LED and the other a large unit with a 36W LED. My eyes aren't what they used to be -
Congrats Alan on a fantastic build Kit - Pete is making a good job on the paint Mine is waiting for the clear to harden and me to get back on track A quick mock up Alan - I agree with you on the influence that @tim boyd has had on kit-rodding over the years. I think we have all improved our game with his fine builds and methods of construction. A great mentor to have in our corner Cheers Bill

-
Ha Ha That why I love to primer my models first - to iron out the bugs And yup close up pix don't tell lies - actually a good tool as the eye sometimes misses SNAFU's like that
-
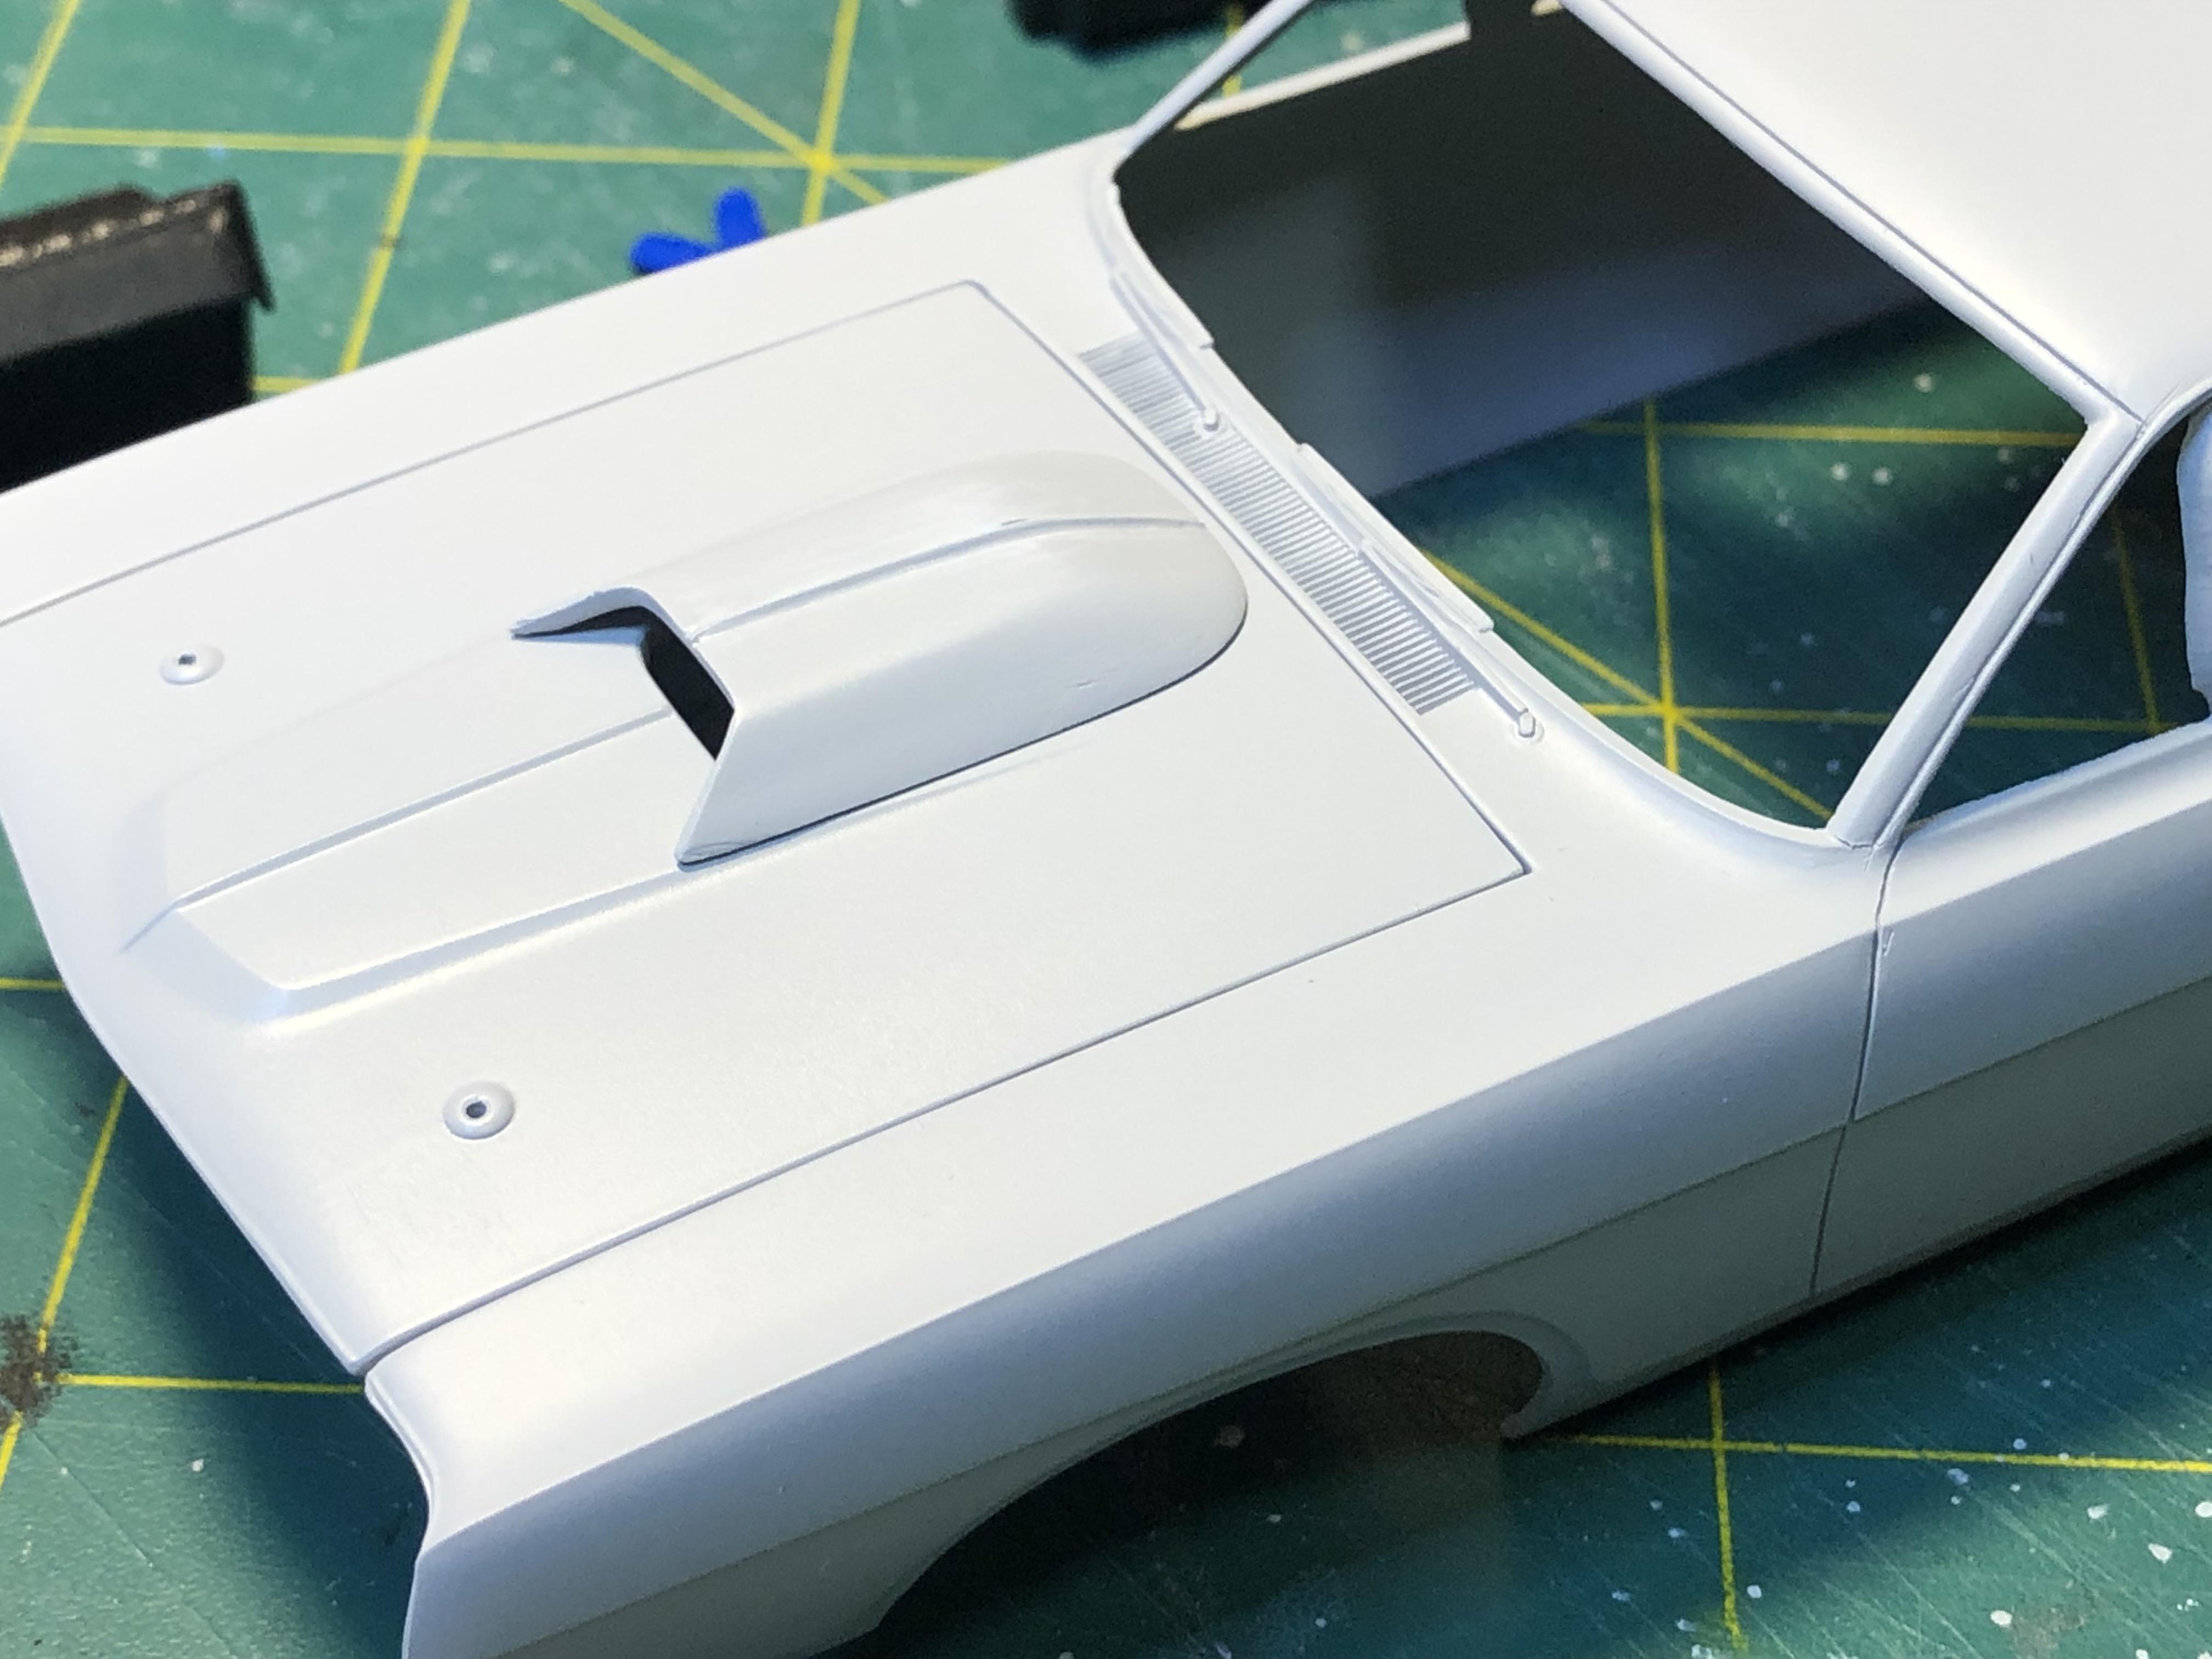
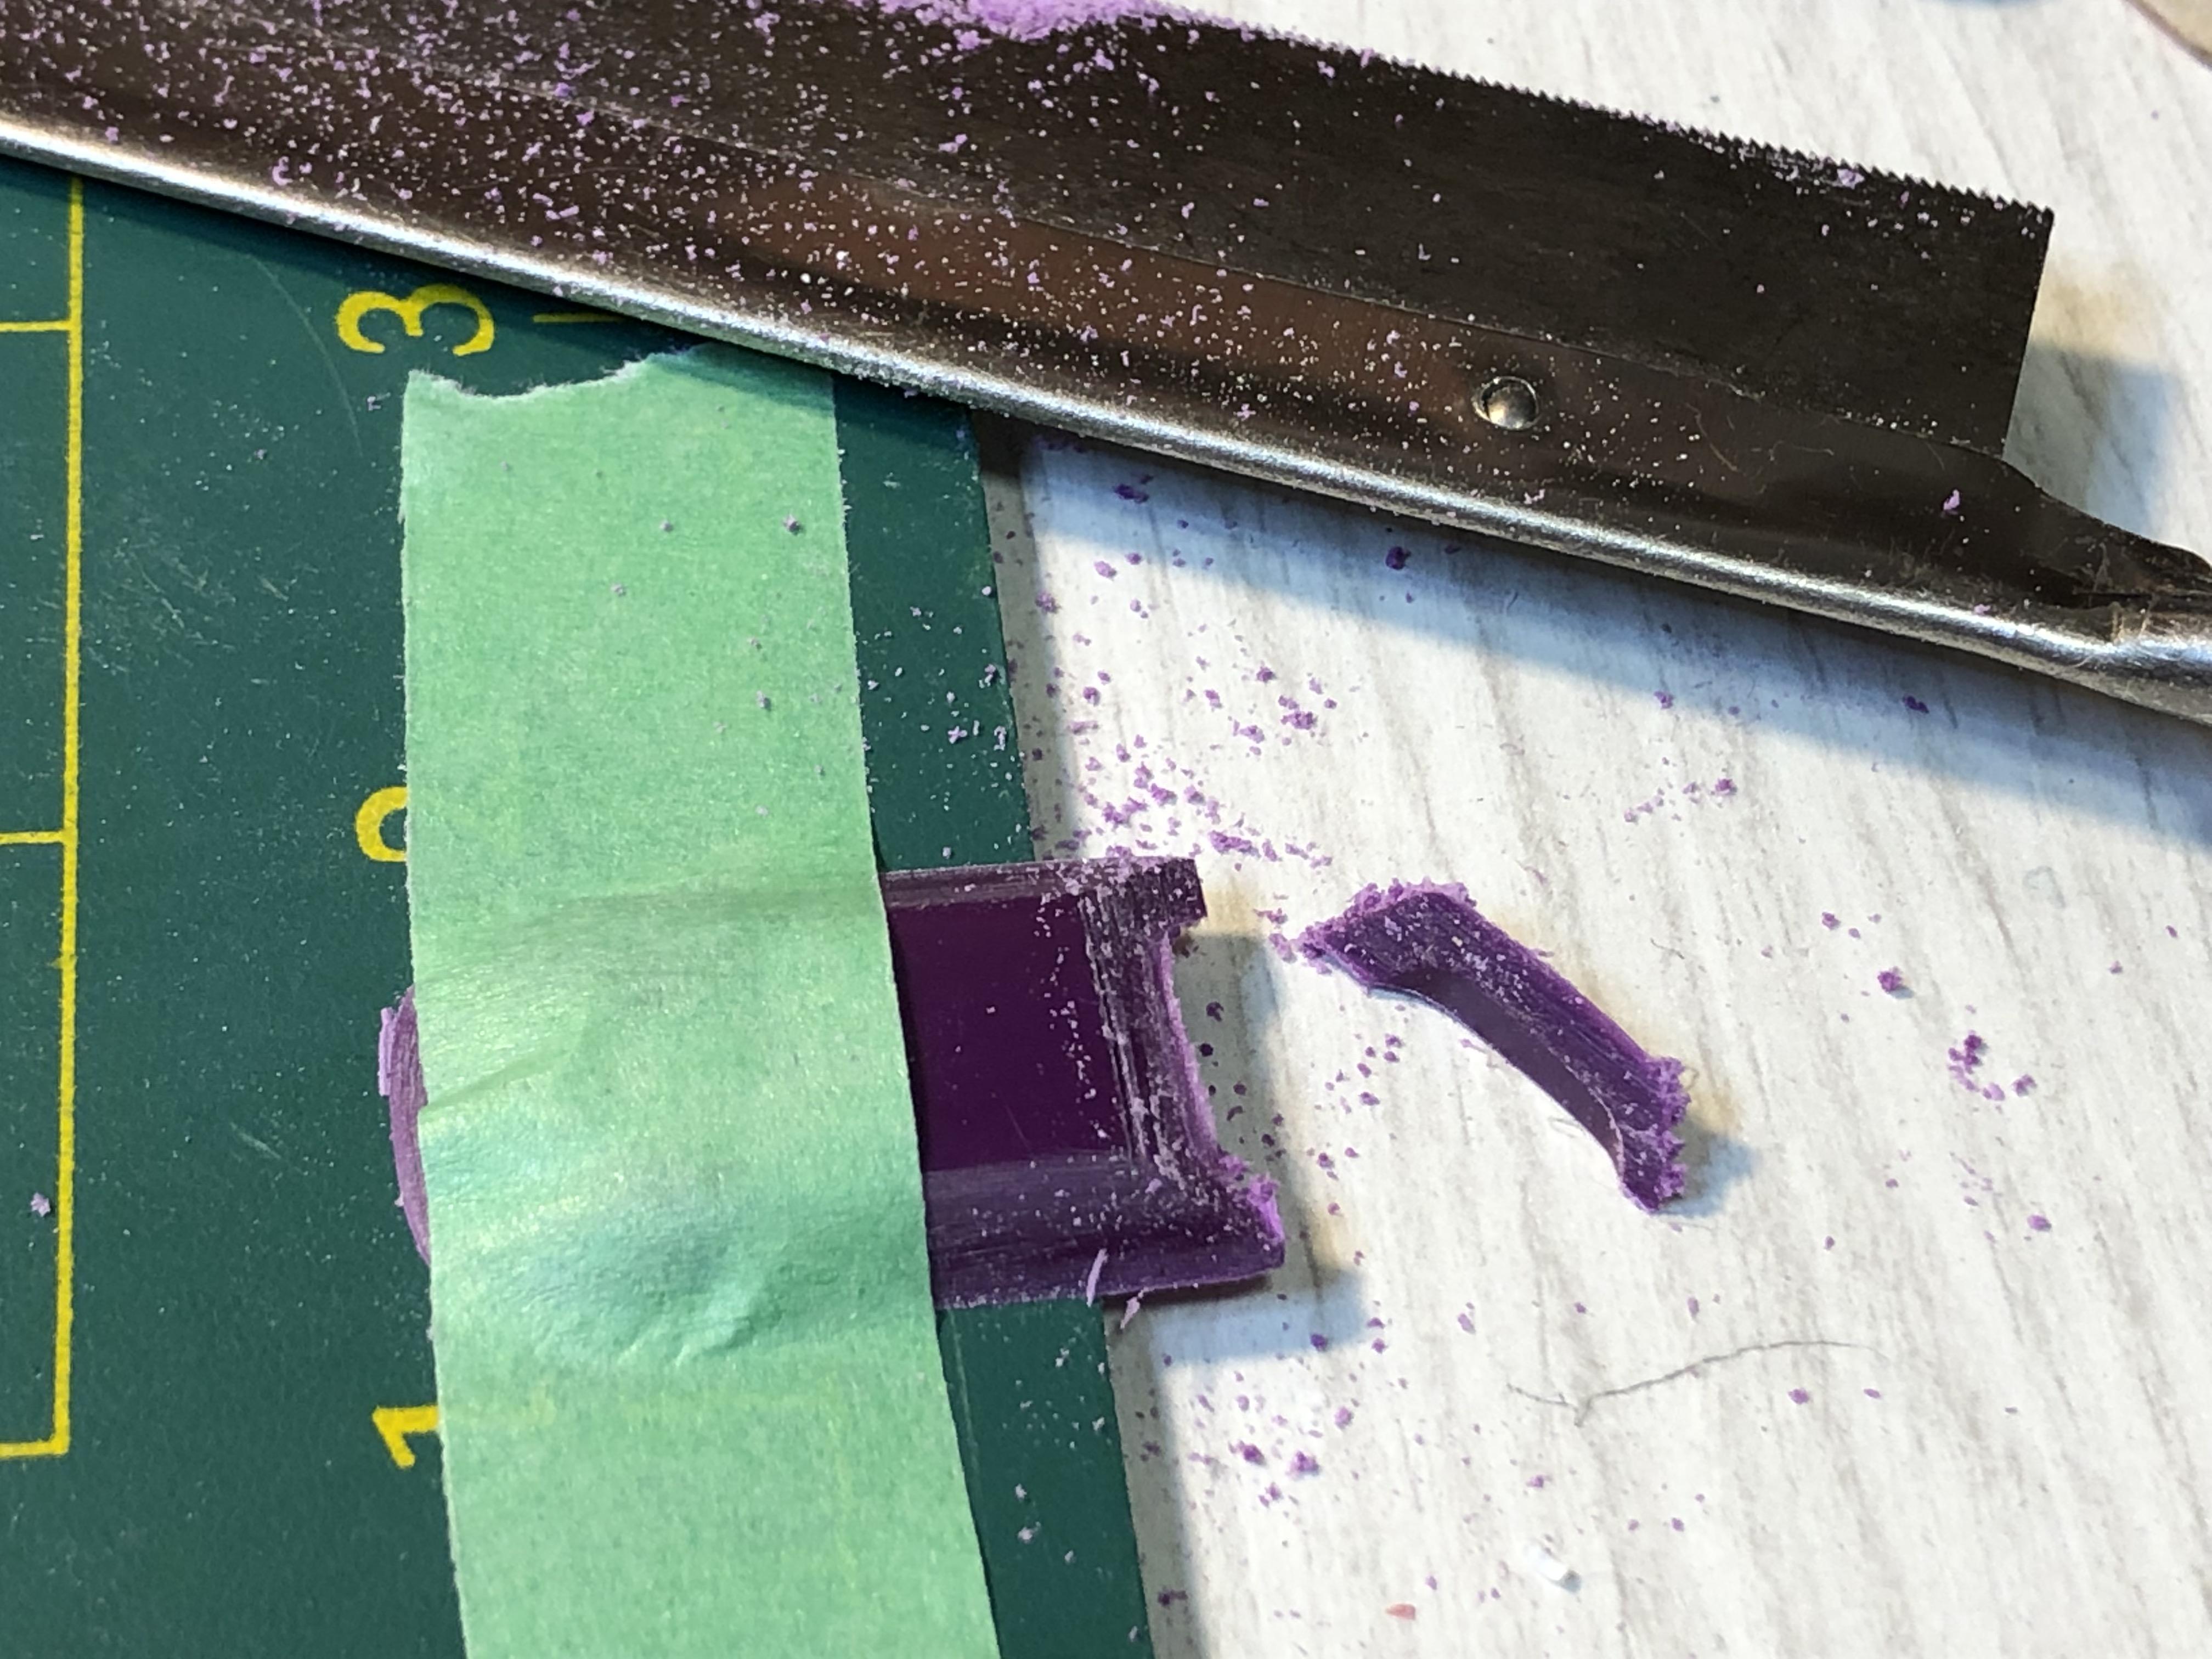
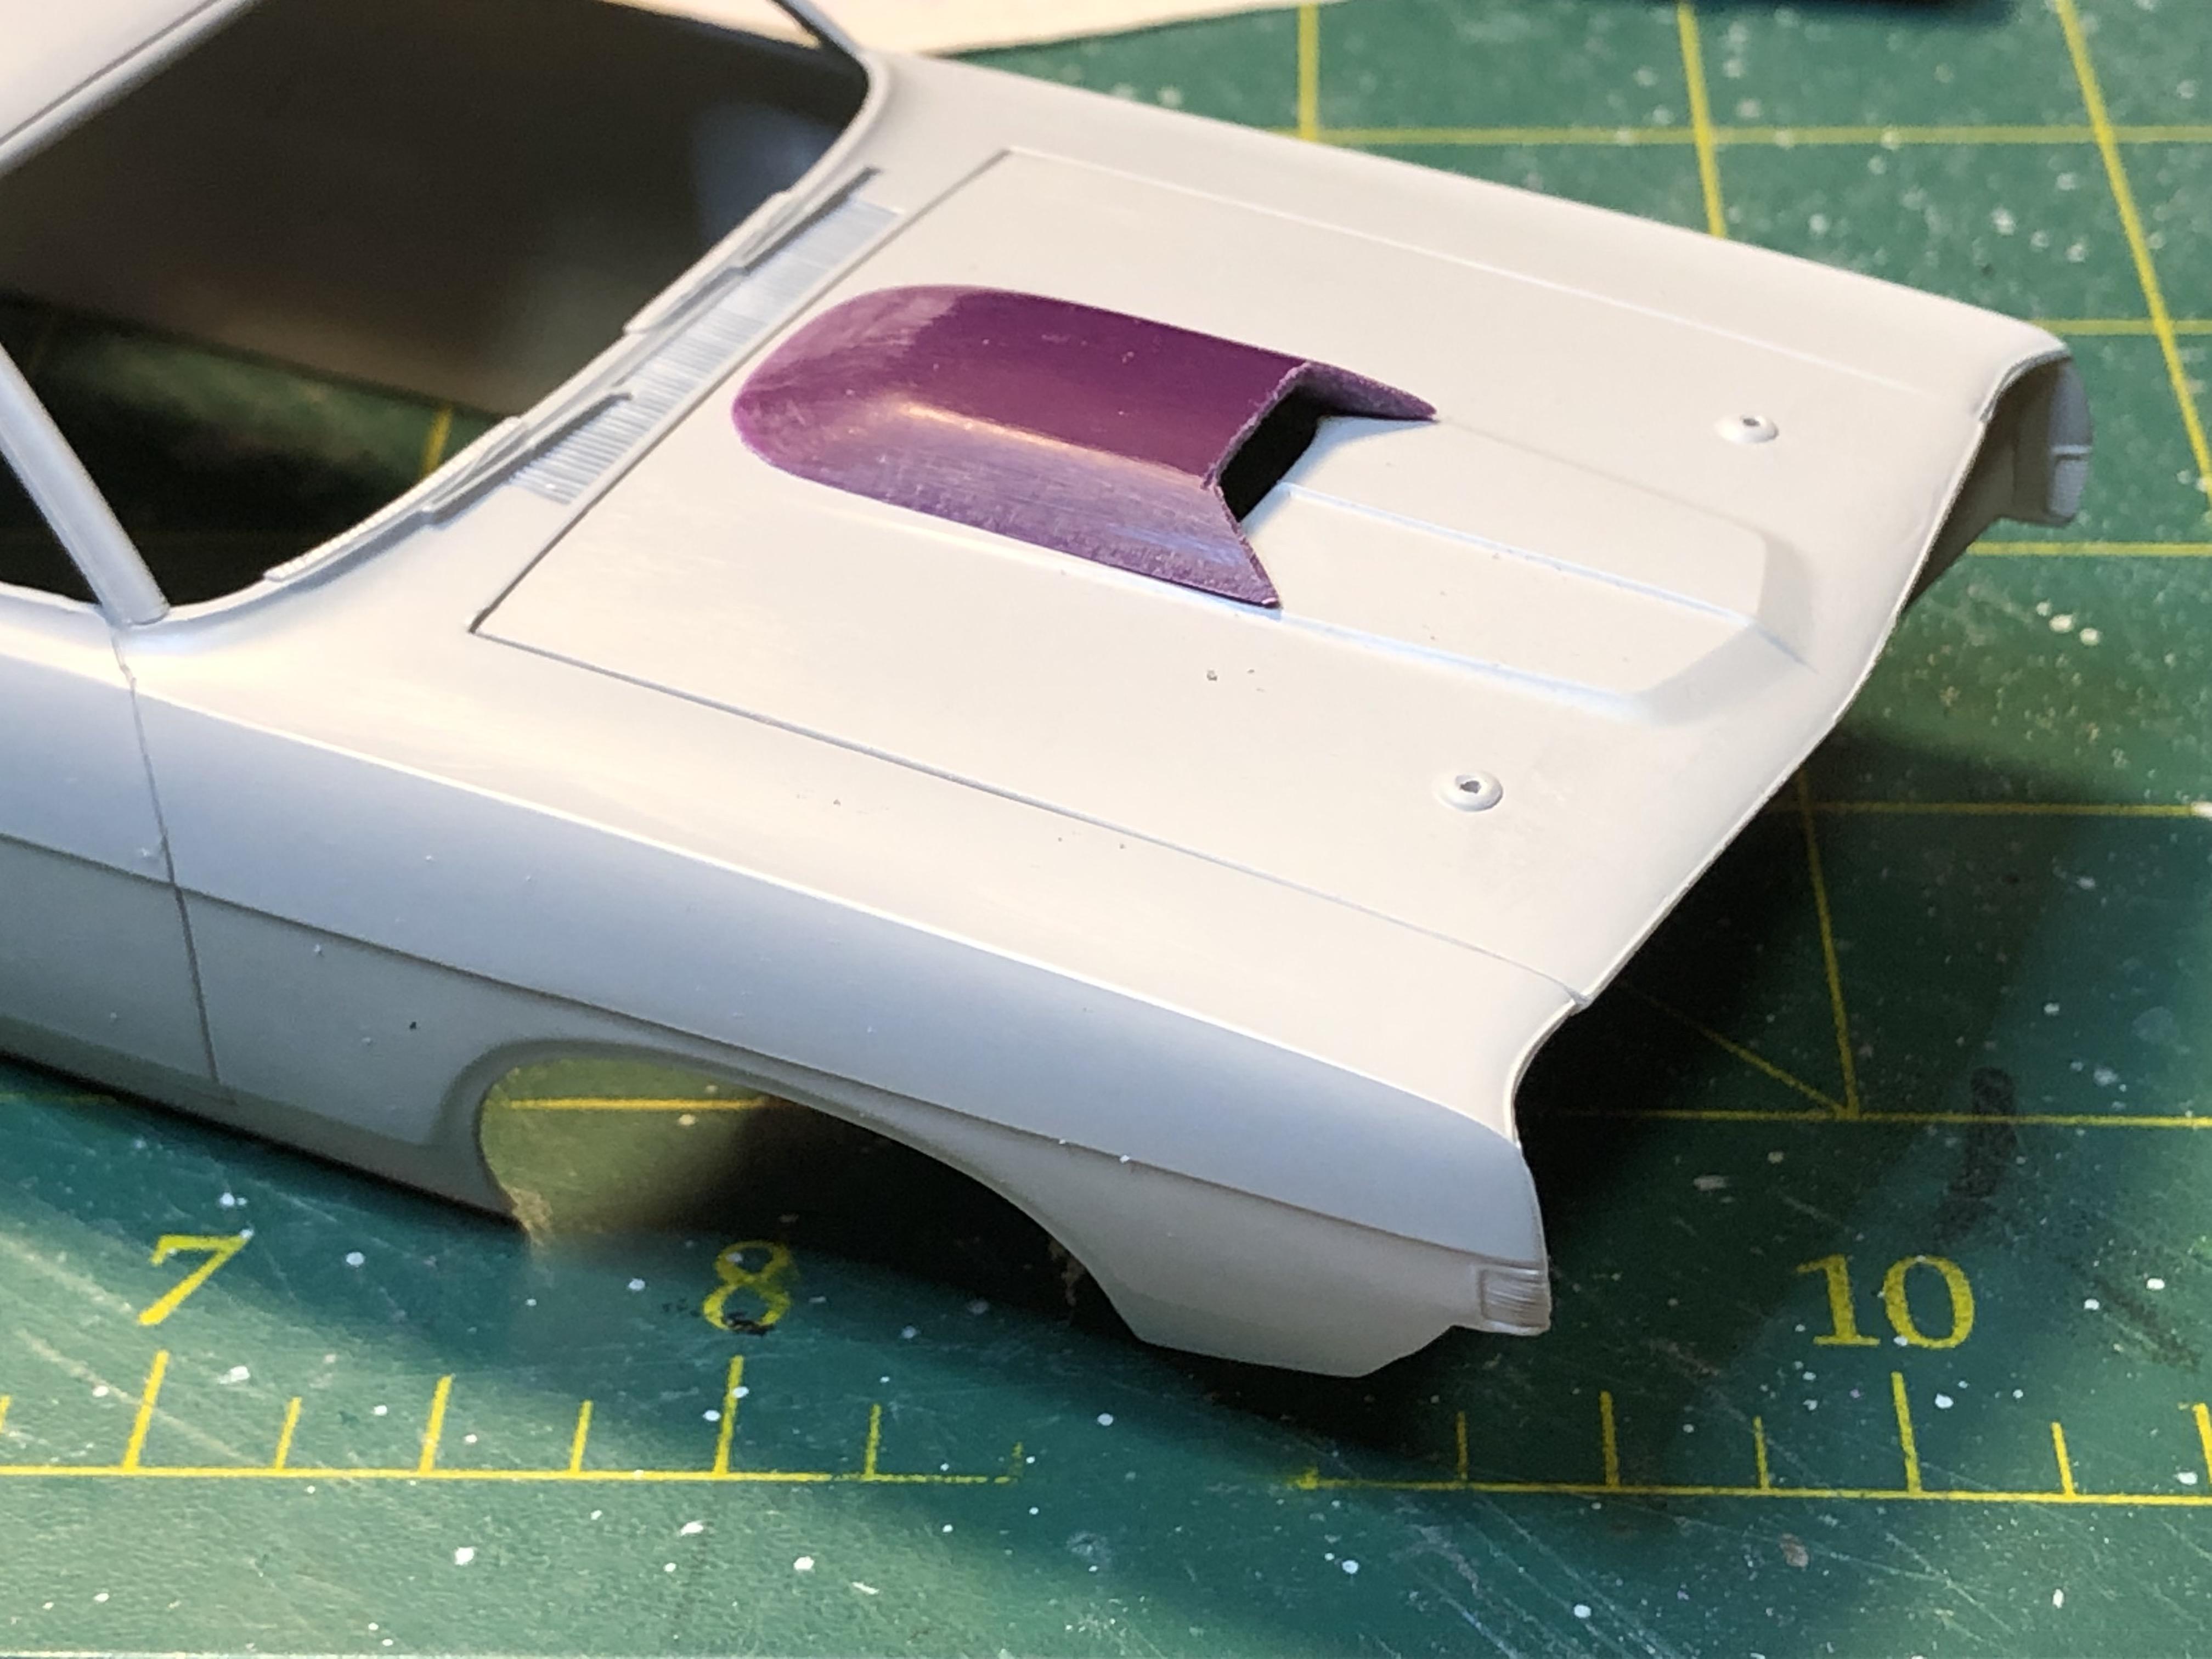
To replicate the hood ridge I ran my razor saw along the centre of the scoop to create a shallow groove. I then glued in some 0.25" round stock with a 50/50 mixture of super glue and liquid glue. I then used a file to shape the ridge. Unfortunately this left a groove on each side of the ridge a I filled that with a few layers of Tamiya "Liquid Surface Primer" neat from the jar. This works great as a spot putty. After some sanding it was ready for priming The body and hood needed some work after the first primer coat so this was fixed and re-sanded and then off to the spay booth for priming For primer I use Tamiya Liquid Surface Primer thinned with lacquer thinners. It leaves a nice smooth finish that can be sanded with 800 grit or finer paper More to come
-
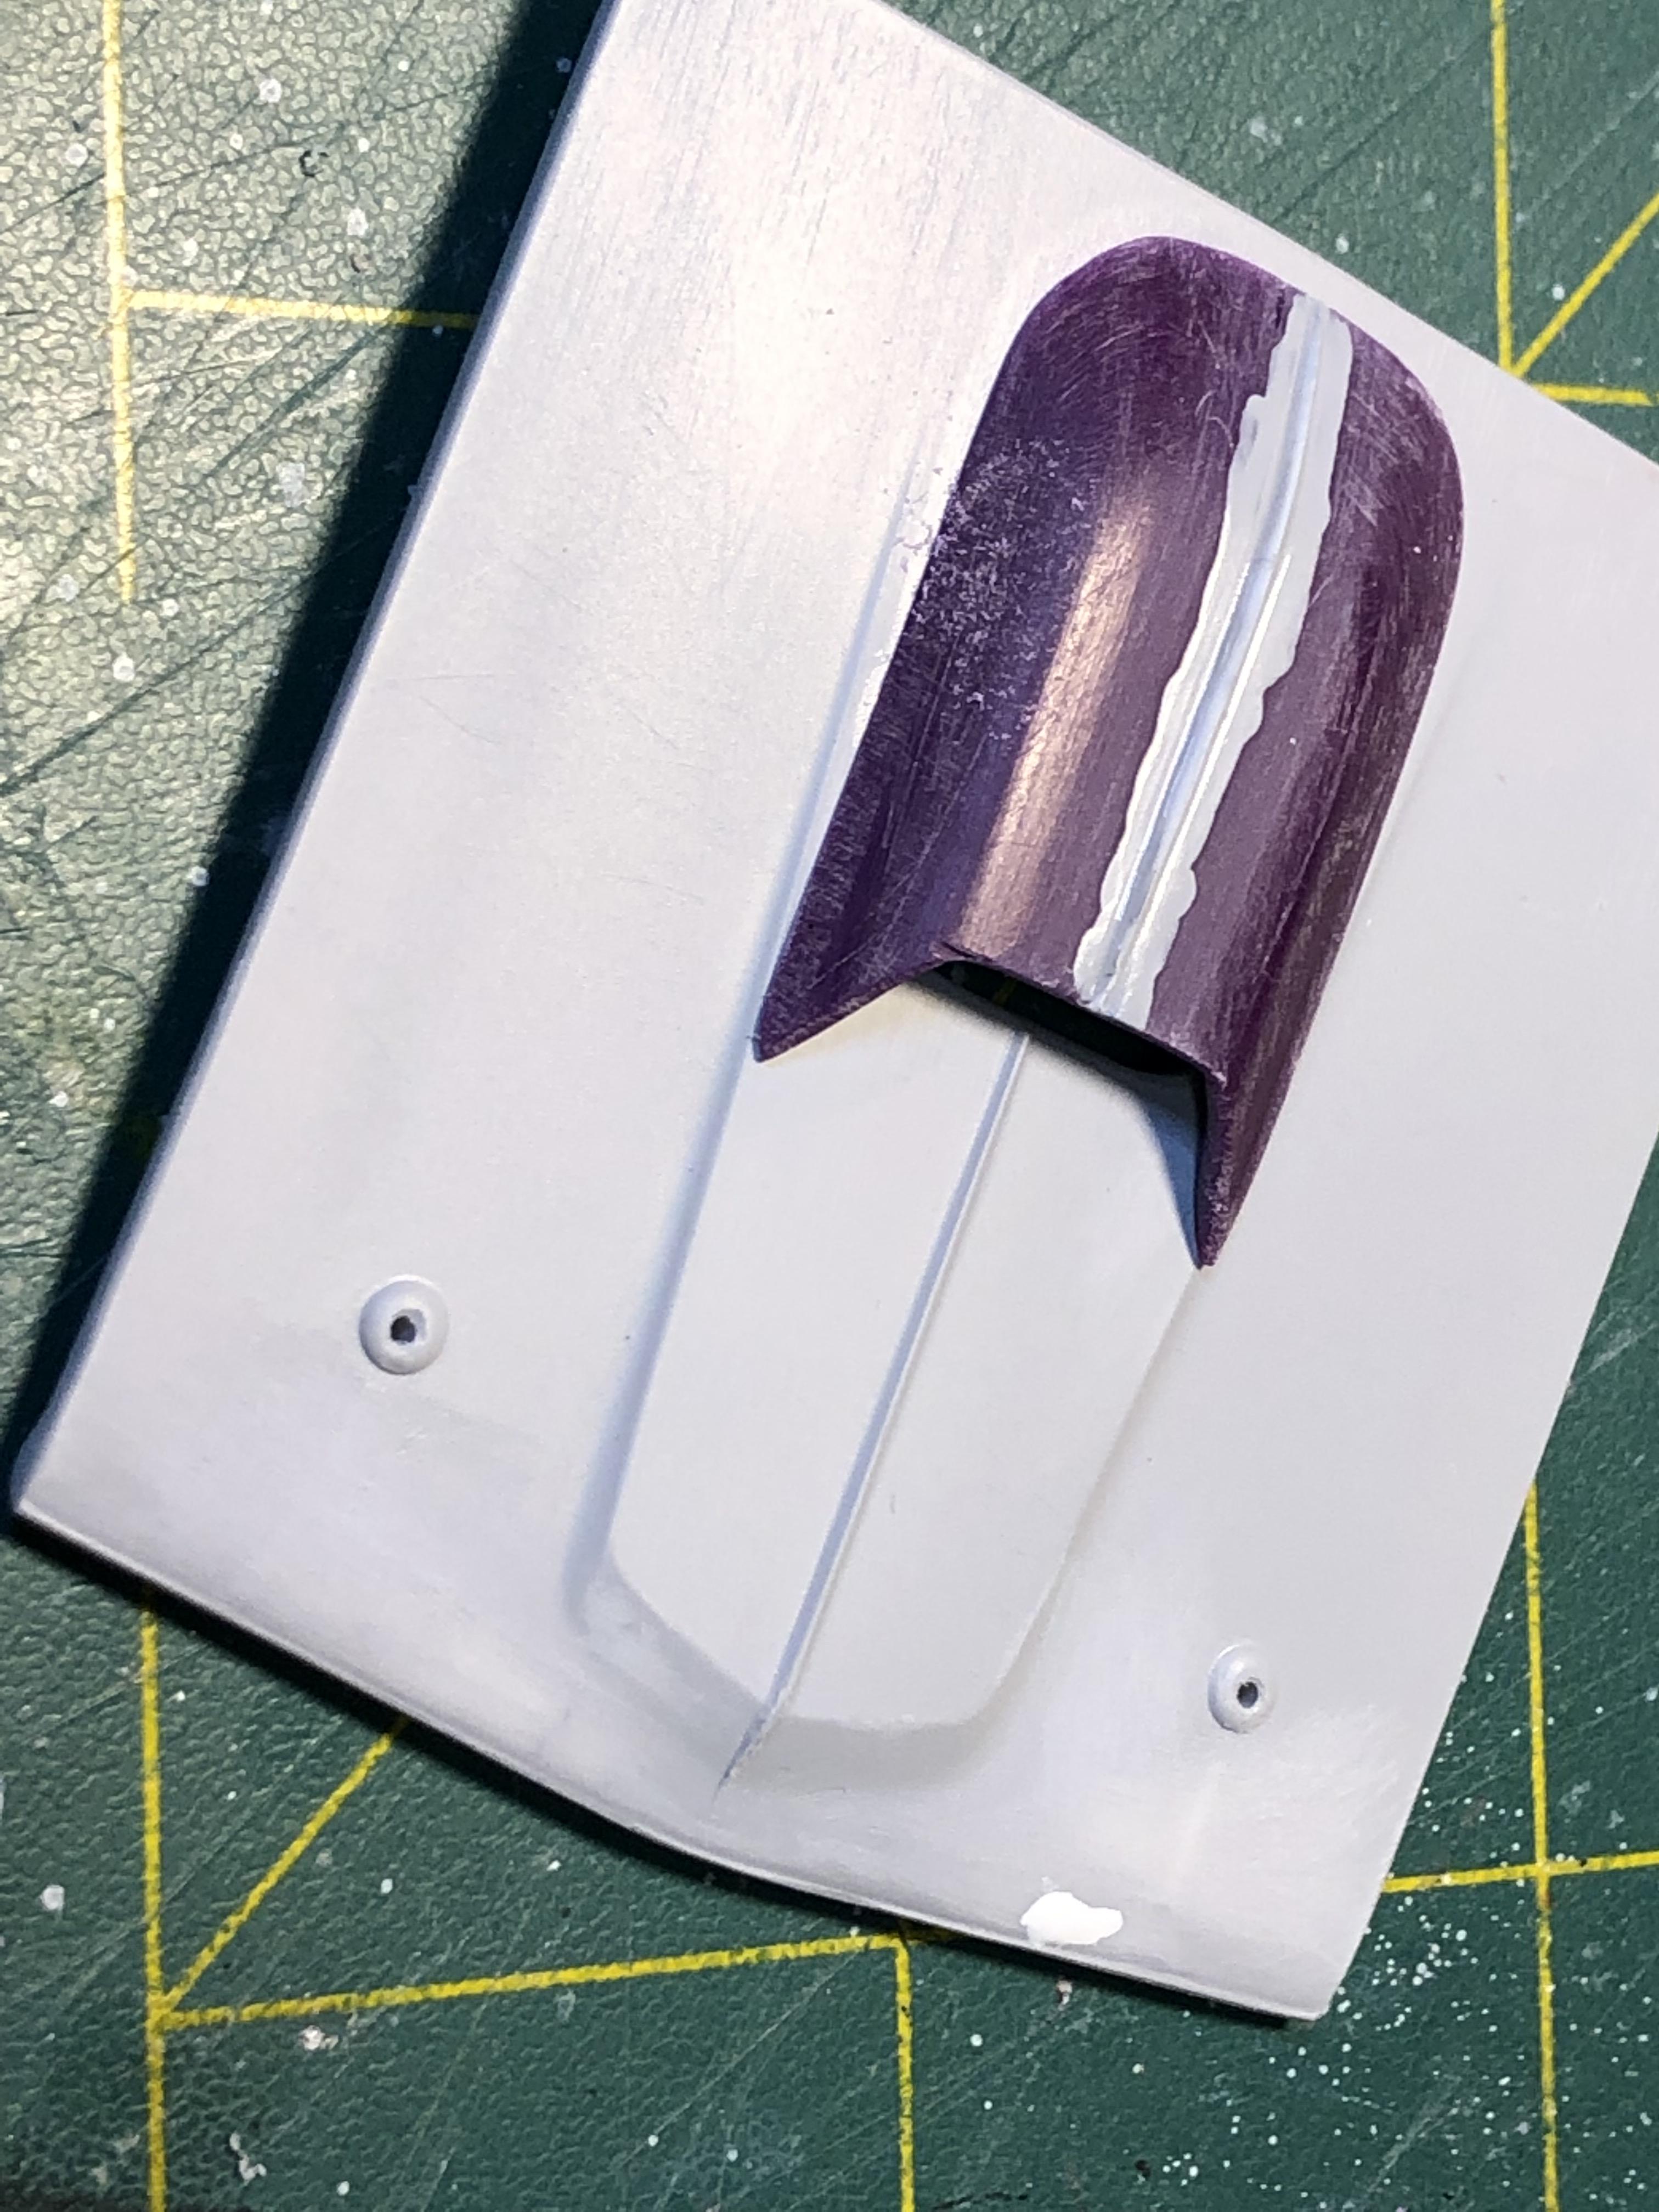
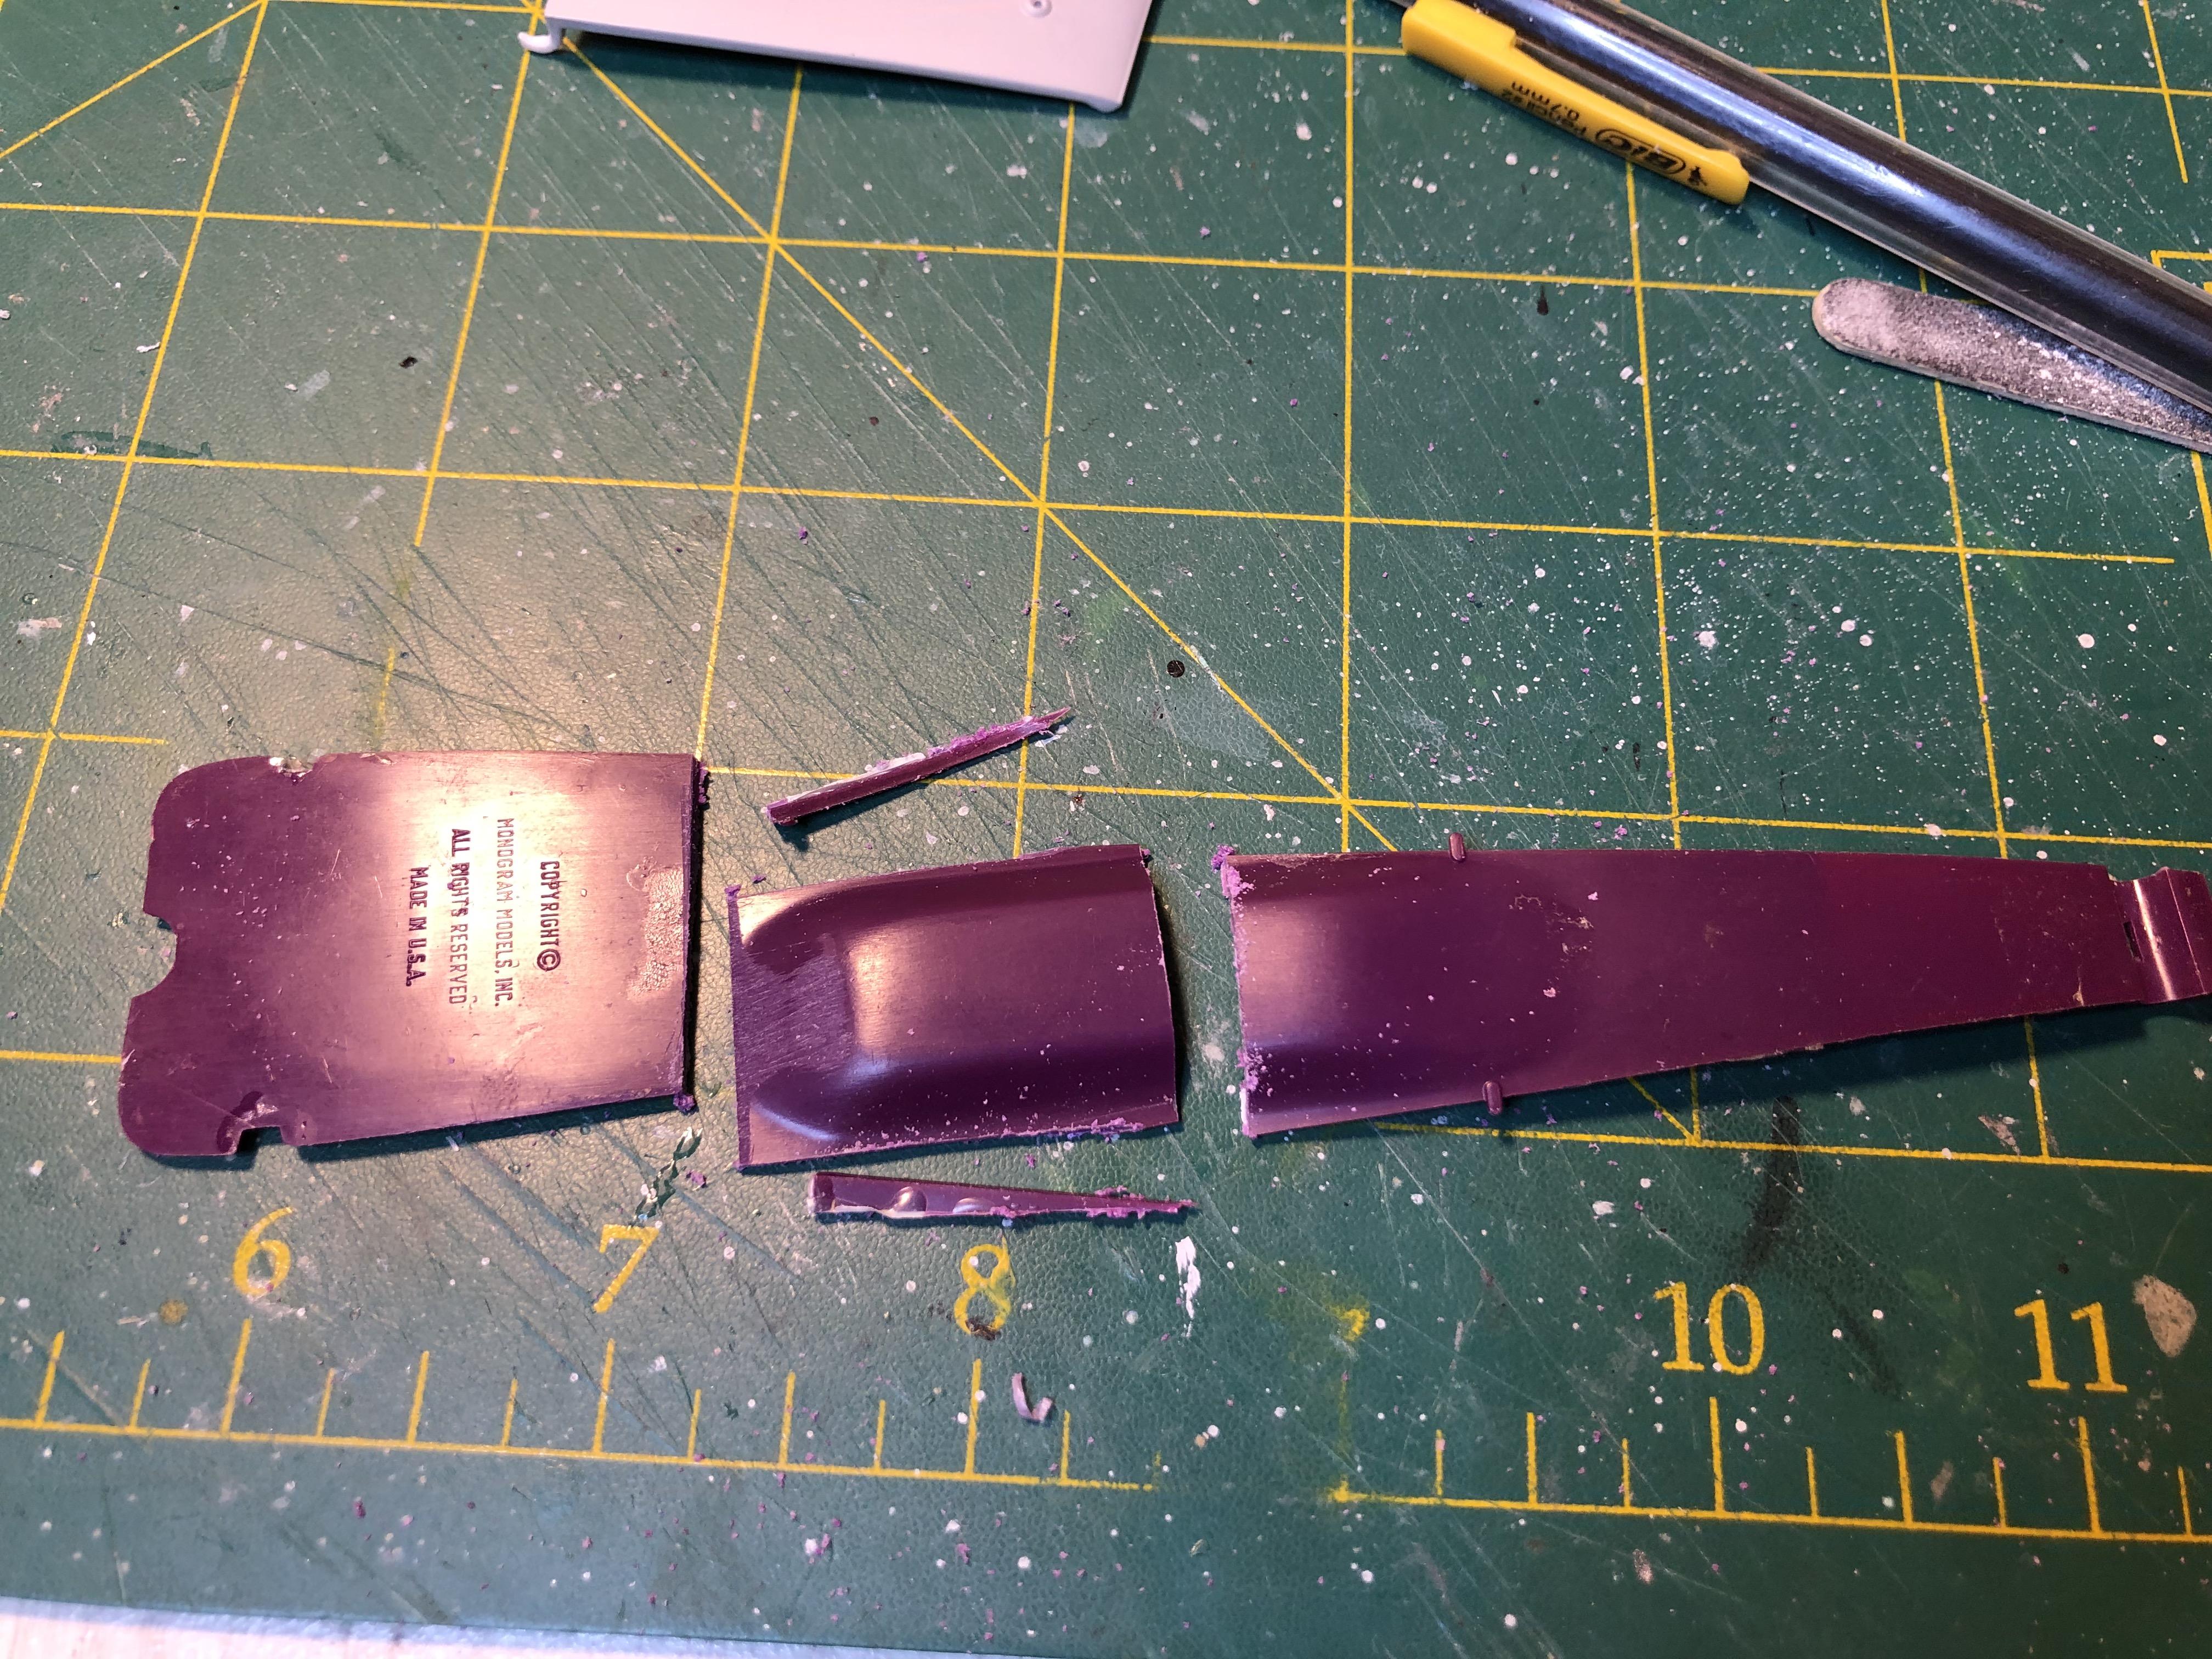
The instructions called for the hood to be opened up to fit the hi-rise intake and dual 4bbl's. Only thing I now cannot use the hood scoop - darn Oops hole too big So work round is to find a new scoop as I do not want a hole in the hood. Looked in my parts bin and found the belly pan from a wrecked Bad Medicine kit had promise I spent time cleaning up the base and cutting the front of the scoop to shape Ah! much more better The next on the list is to replicate the ridge that run along the hood on the top of the scoop More to come and thanks for looking
-
OOPS - moderator can you please move to WIP
-
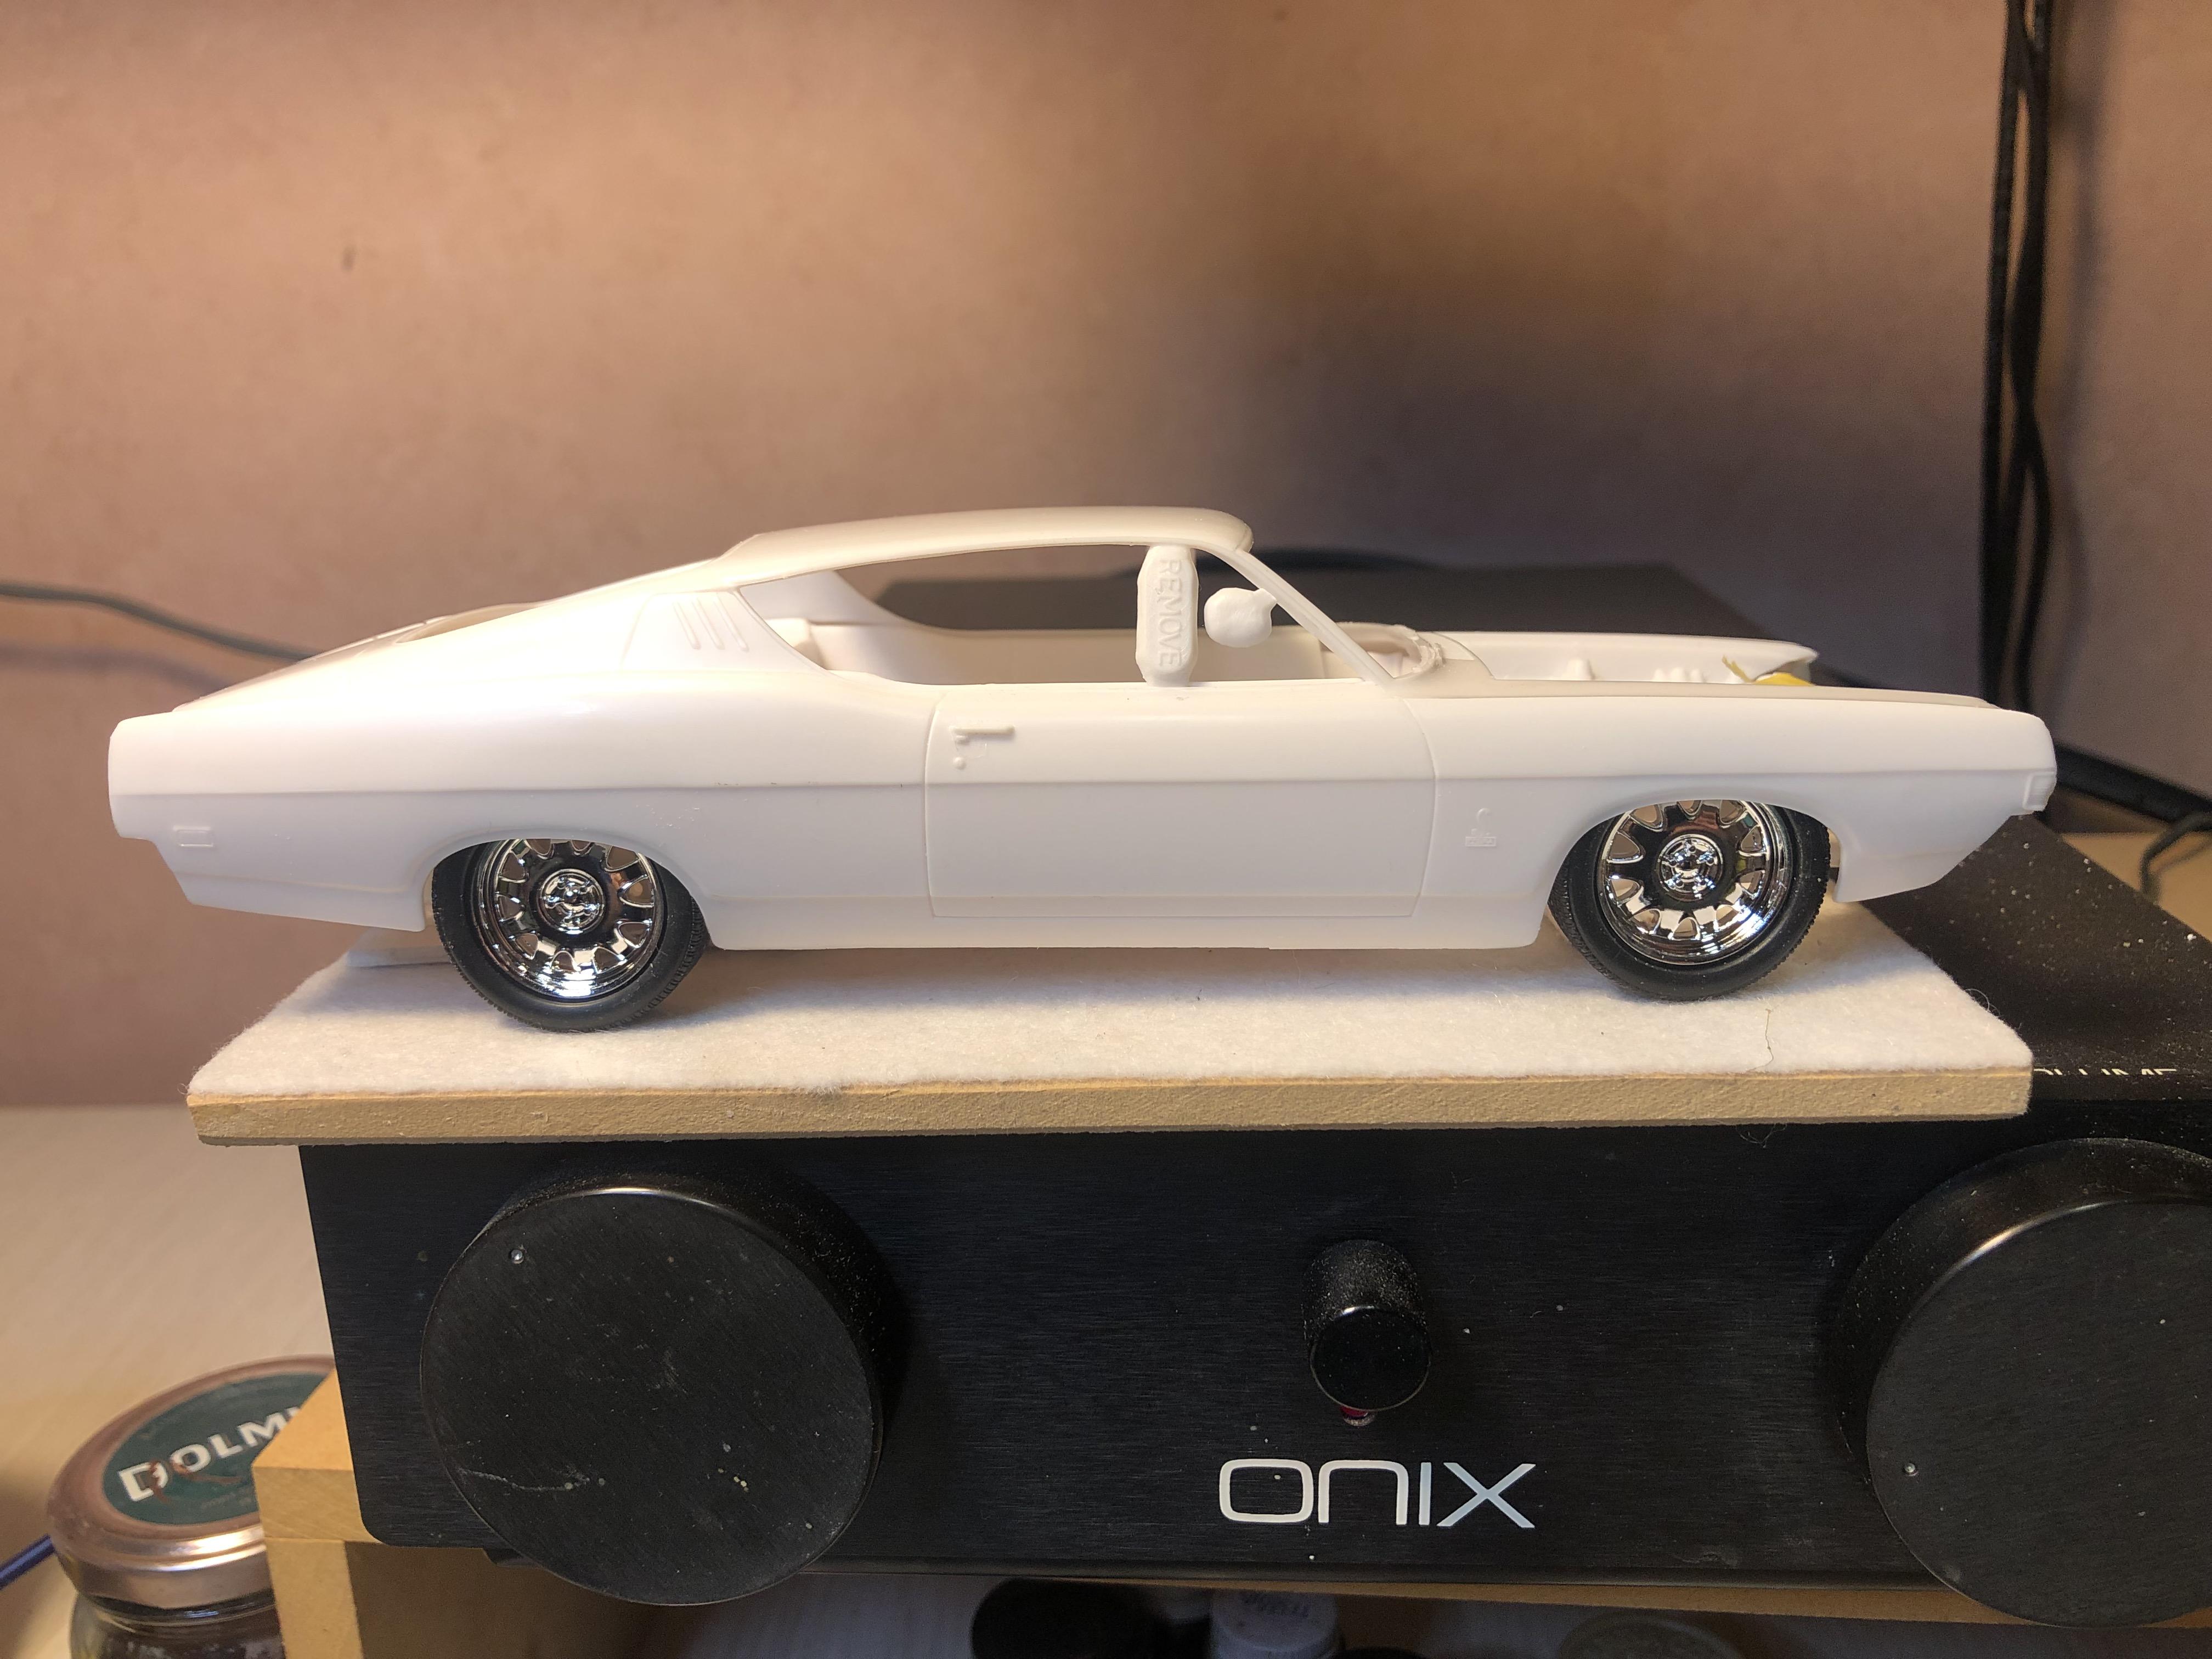
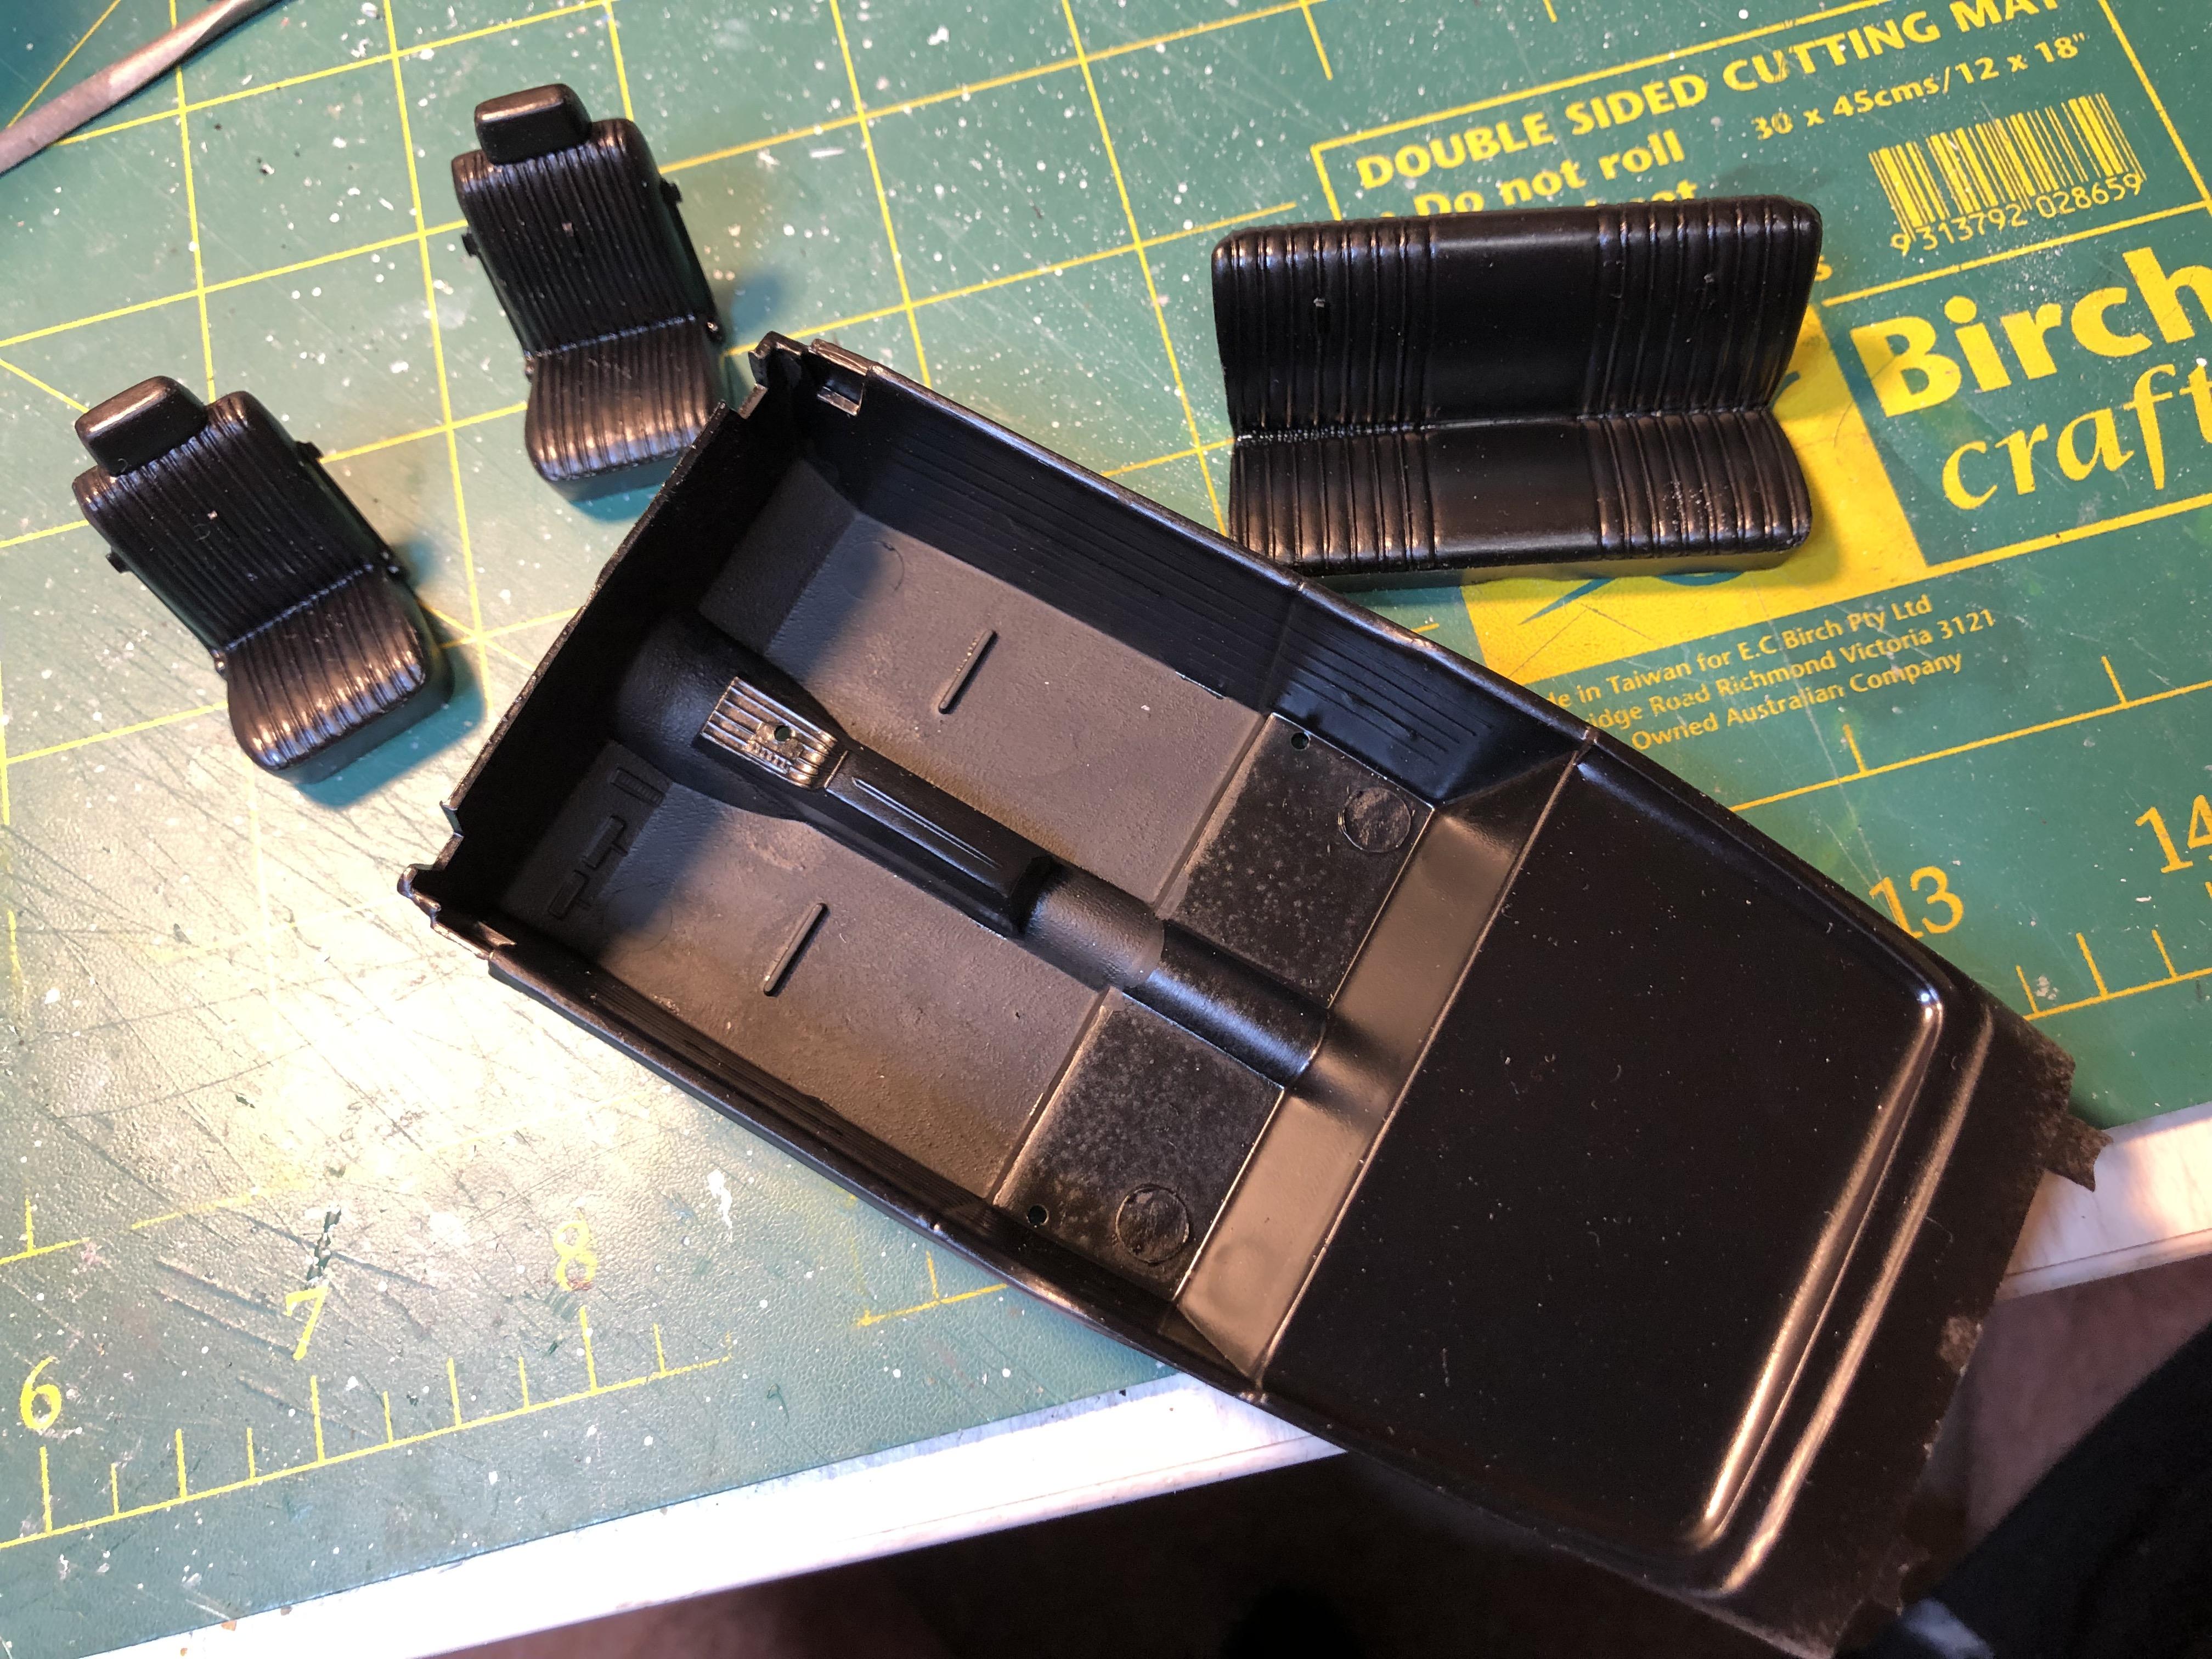
I was at a breakfast and coffee meet late last year and was smitten by this. A primo 69 Torino Cobra Jet in black on black I ordered this and it arrived just after Xmas The black car provided the inspiration and after digging through the parts box found these wheels so a mock just had to be done The theme of the build is to do it box stock with little or no additional fine detailing - a bit like a slam kit but with clear windows so the interior can be seen. To keep with the black theme I sprayed the interior with Tamiya SE black from a rattle can After using an airbrush for so long it was like throwing paint at he model out of a bucket. The result was good though. The carpet has been painted with Tamiya flat black acrylic While had the SE black out I did the chassis as well The engine is Tamiya medium blue lacquer shot with my airbrush Exhaust is painted with Testors steel Metaliser Next up is the body - I want to dechrome and de-badge so I had some work to do Thanks for looking
-
Plymouth Salt Flat Slammer
bill-e-boy replied to OldNYJim's topic in WIP: Other Racing: Road Racing, Land Speed Racers
Cool project. You have done a great job and kudos for mag coverage -
Building exhaust headers from copper
bill-e-boy replied to NOBLNG's topic in Tips, Tricks, and Tutorials
Thanks for the clarification Greg Copper is easy to solder and would make for easier handling. I have used plastic tube but you tend to use a bit and it is more time consuming and I feel a little wasteful. We pay a lot for Plastruct etc tube here in NZ as it is imported and there are a few ticket clicks on the way to the time we buy it Ally cant be soldered so that does not lend itself to header building. The same for solder. I will keep a look out for some suitable copper though as I like the concept -
Great pix. Looks like champagne gold is the go to colour this year Thanks for effort - it is great to see what is happening at the other side of the world
-
Building exhaust headers from copper
bill-e-boy replied to NOBLNG's topic in Tips, Tricks, and Tutorials
A question - as I am not from the USA the cable used here 14g - is that a single stranded wire - The problem is that all our cables are sized in metric and in mm cross section - 14AWG is the equivalent of 2.08mm2 We in NZ abandoned solid core cable in the early 80's as it was not very popular with us sparkies -
How to remove tape "residue"?
bill-e-boy replied to Safire6's topic in Model Building Questions and Answers
Is it tape residue or paint reaction to the tape. Colour sanding will most probably get rid of it. I had some reaction recently on some Humbrol clear. I sanded then shot some ore clear. Looks OK now. Sorry no pix -
You think the kit is tiny. I have owned 3 real Mini's over the years and they are tiny to work on in full scale I don't have any pix but the better of them was white with Minilite wheels like the blue car and a few other niceties but mostly stock. They were a fun car to drive especially on tight twisty roads I have the Tamiya kit so must put it together sometime
-
I sanded back the crazed paint on the guard and reprimed where it through to bare plastic, dusted on the colour and clear and now looking good again Now the long wait to let the paint harden. I have it in my hot box but being enamel it still takes ages to harden fully
-
Love the Desoto conversion, great job - I am partial to 56 Mopars as I have a real 56 Dodge Custom Royal Lancer in my garage. The Moebius 300 kits are great kits too and it looks like there are a lot of minds working overtime with conversions to other models in the range The NY St Regis is a nice looking car too
-
making coil springs, which wire?
bill-e-boy replied to fiatboy's topic in Model Building Questions and Answers
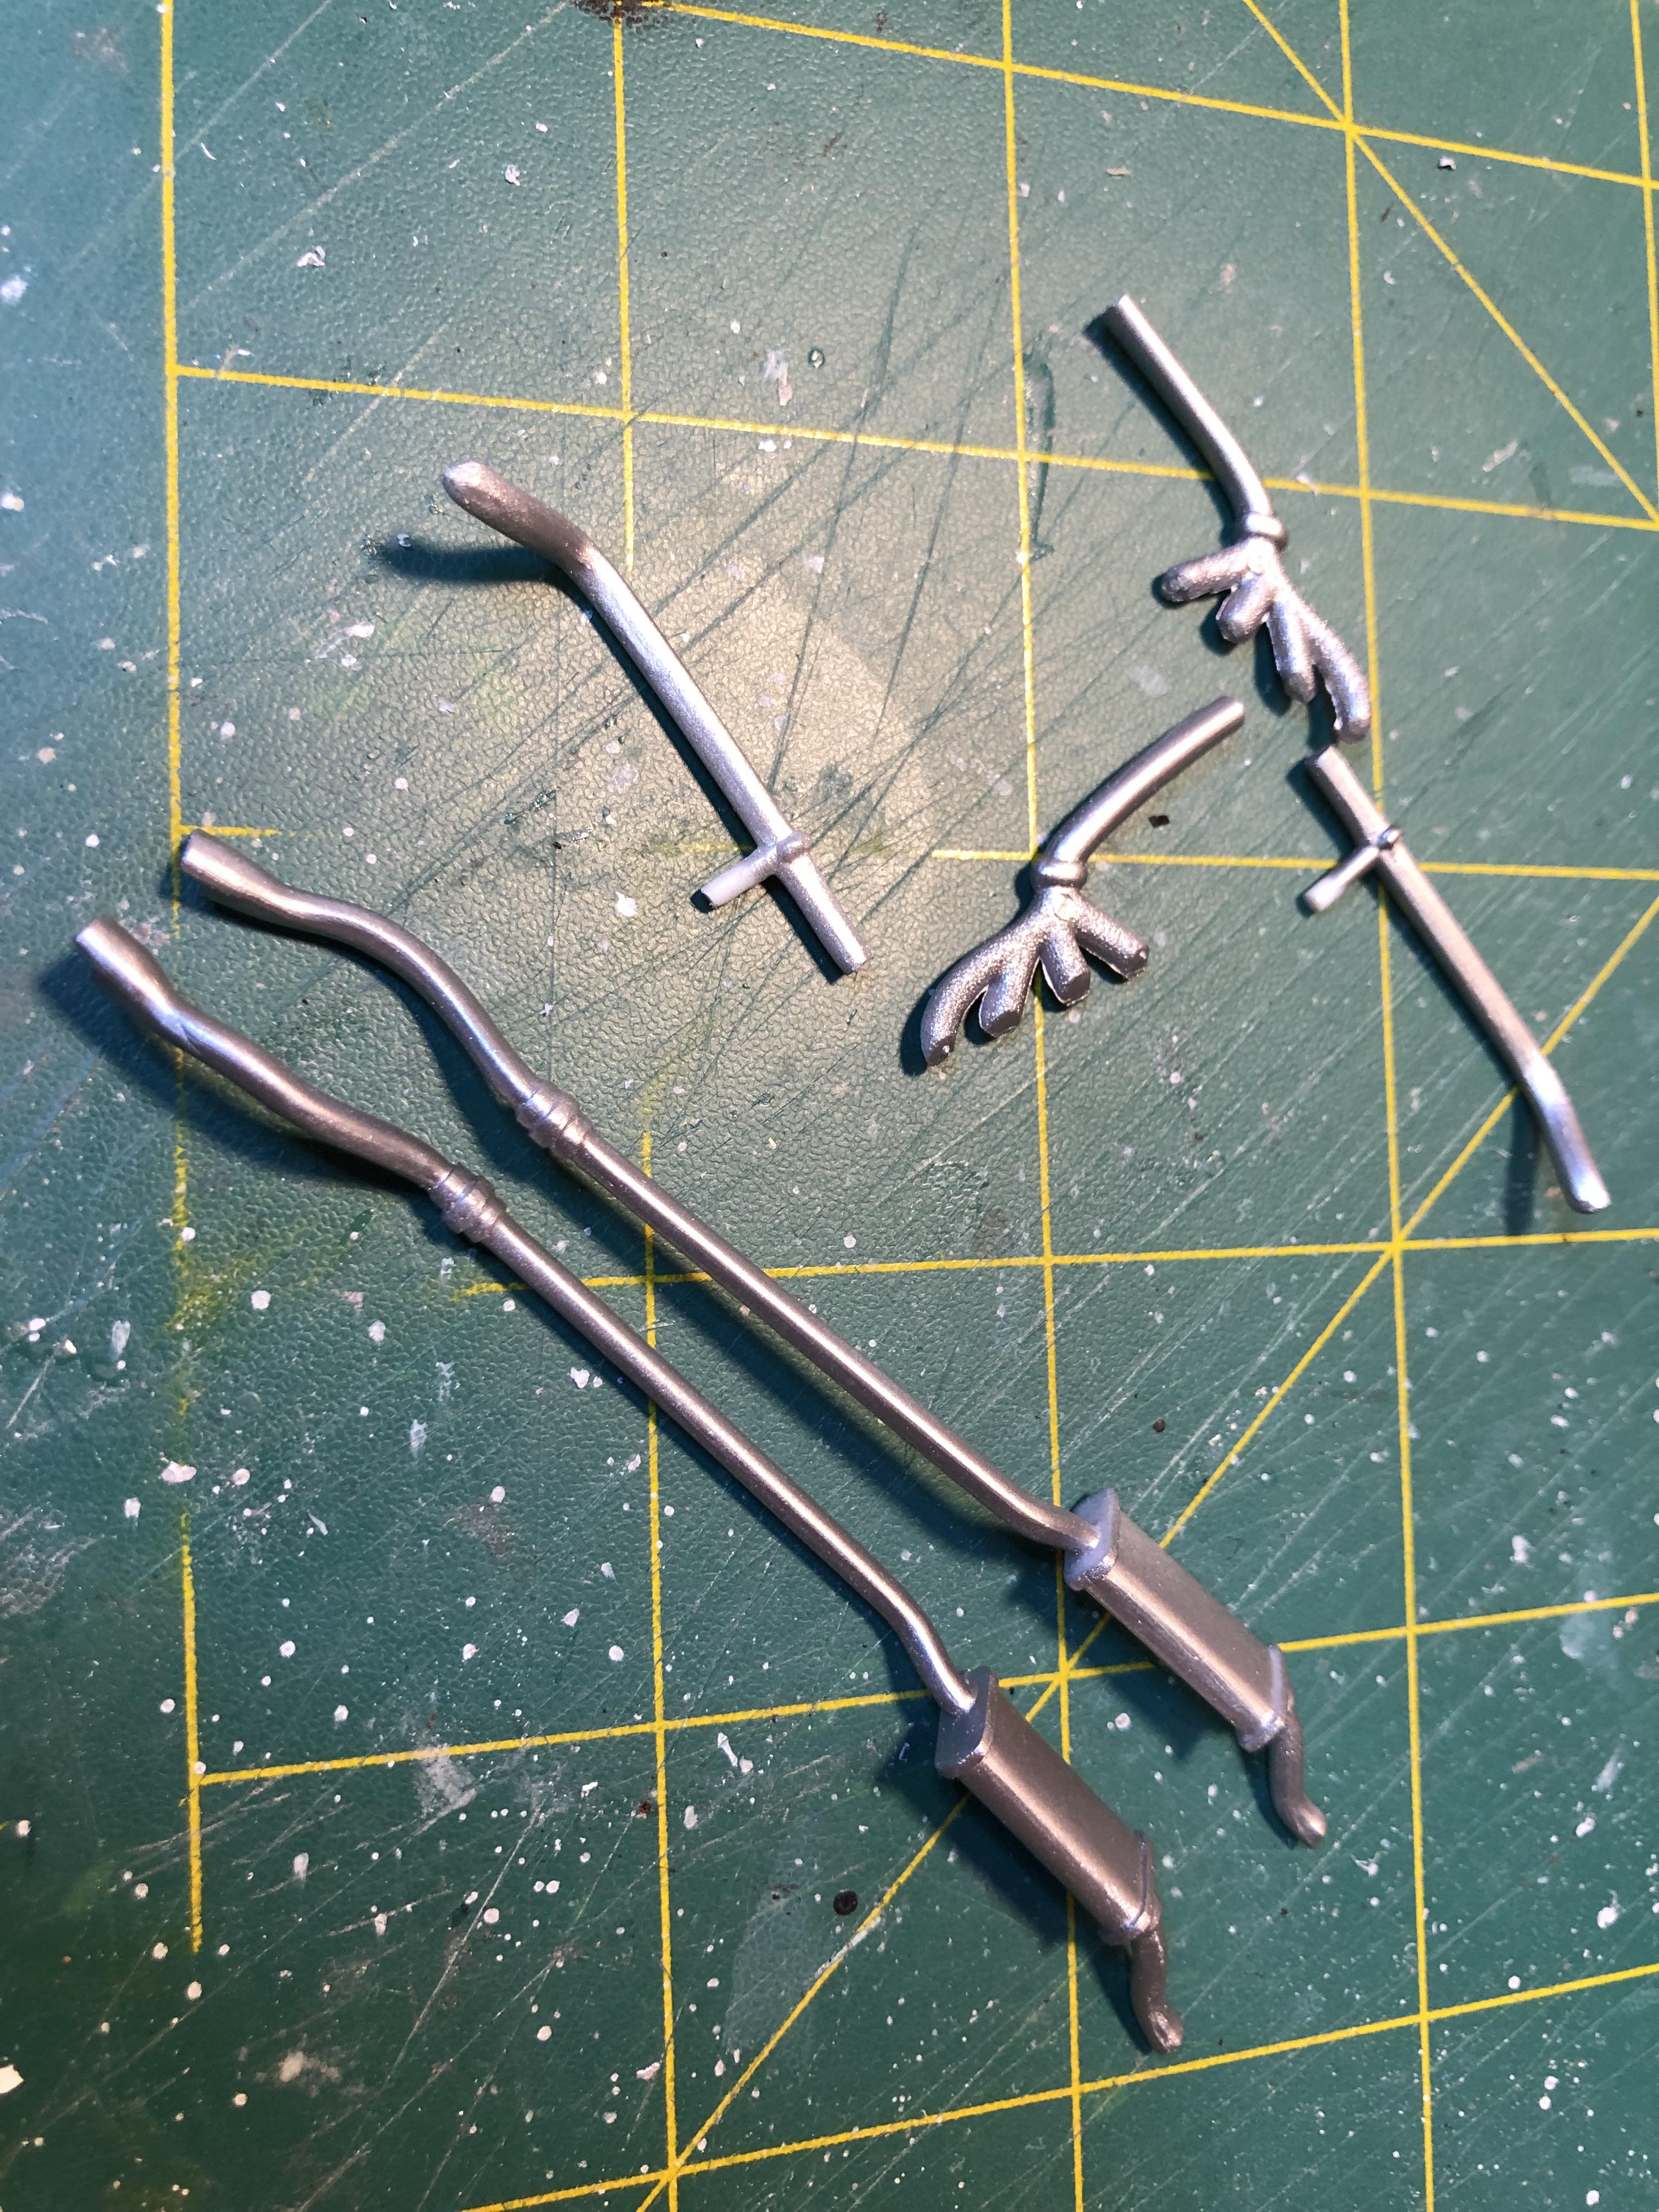
I use something similar to @NOBLNG that I got from a craft store. It is silver plated and soft I wrap it around a metal thread screw to get even spacing of the coils I also use coper wire strands from power cables as in pix
-
Finally got some colour on this sucker And clear coated. The base colour is a Testors enamel so I did not want to clear coat with a hot lacquer so got some Humbrol Ultra Clear. All went swimmingly but horror the front left guard crinkled. Not sure what caused this. The Tamiya under coat which is lacquer based had been left for about a month and the Testers Pacific Blue went on OK Some sort of reaction even after letting the Testors gas out for nearly a week. I have sanded the guard and spot primed and recoated with Pacific Blue. It's now serving time in the hot box and I will clear coat the guard over the weekend - fingers crossed Other than the guard the rest of the paint on the model is primo except it is fairly soft - need some wait time while it hardens Such is life - will spend time with a quick build while waiting for the paint to harden Thanks for looking
-
Who doesn't love a mock-up? Let's see yours!
bill-e-boy replied to Belairconvertable's topic in WIP: Model Cars
69 Torino CJ in the weeds with big inch wheels - plan is slammer style with dark grey metallic with black Cobra stripes
-
Congratulations to Steve Guthmiller
bill-e-boy replied to Khils's topic in General Automotive Talk (Trucks and Cars)
Kudos to the master As always an excellent built and a well earned accolade -
Not much progress as it is summer down this way and try to take some time off. Got away for a few days over Xmas and New Year and a lot of summer events in the weekends since. Covid lock down has stopped that now I attempted to drill the steering column for a shifter and indicator but the drill bits I have did not like drilling round material. I put in an order for micro drills with a larger shank. Set it all up in the Unimat Mill and drilled for the pin size I was using - perfect. I have ordered more of the micro drills Set up of the column with steering wheel attached and a quickie mock up in primer
-
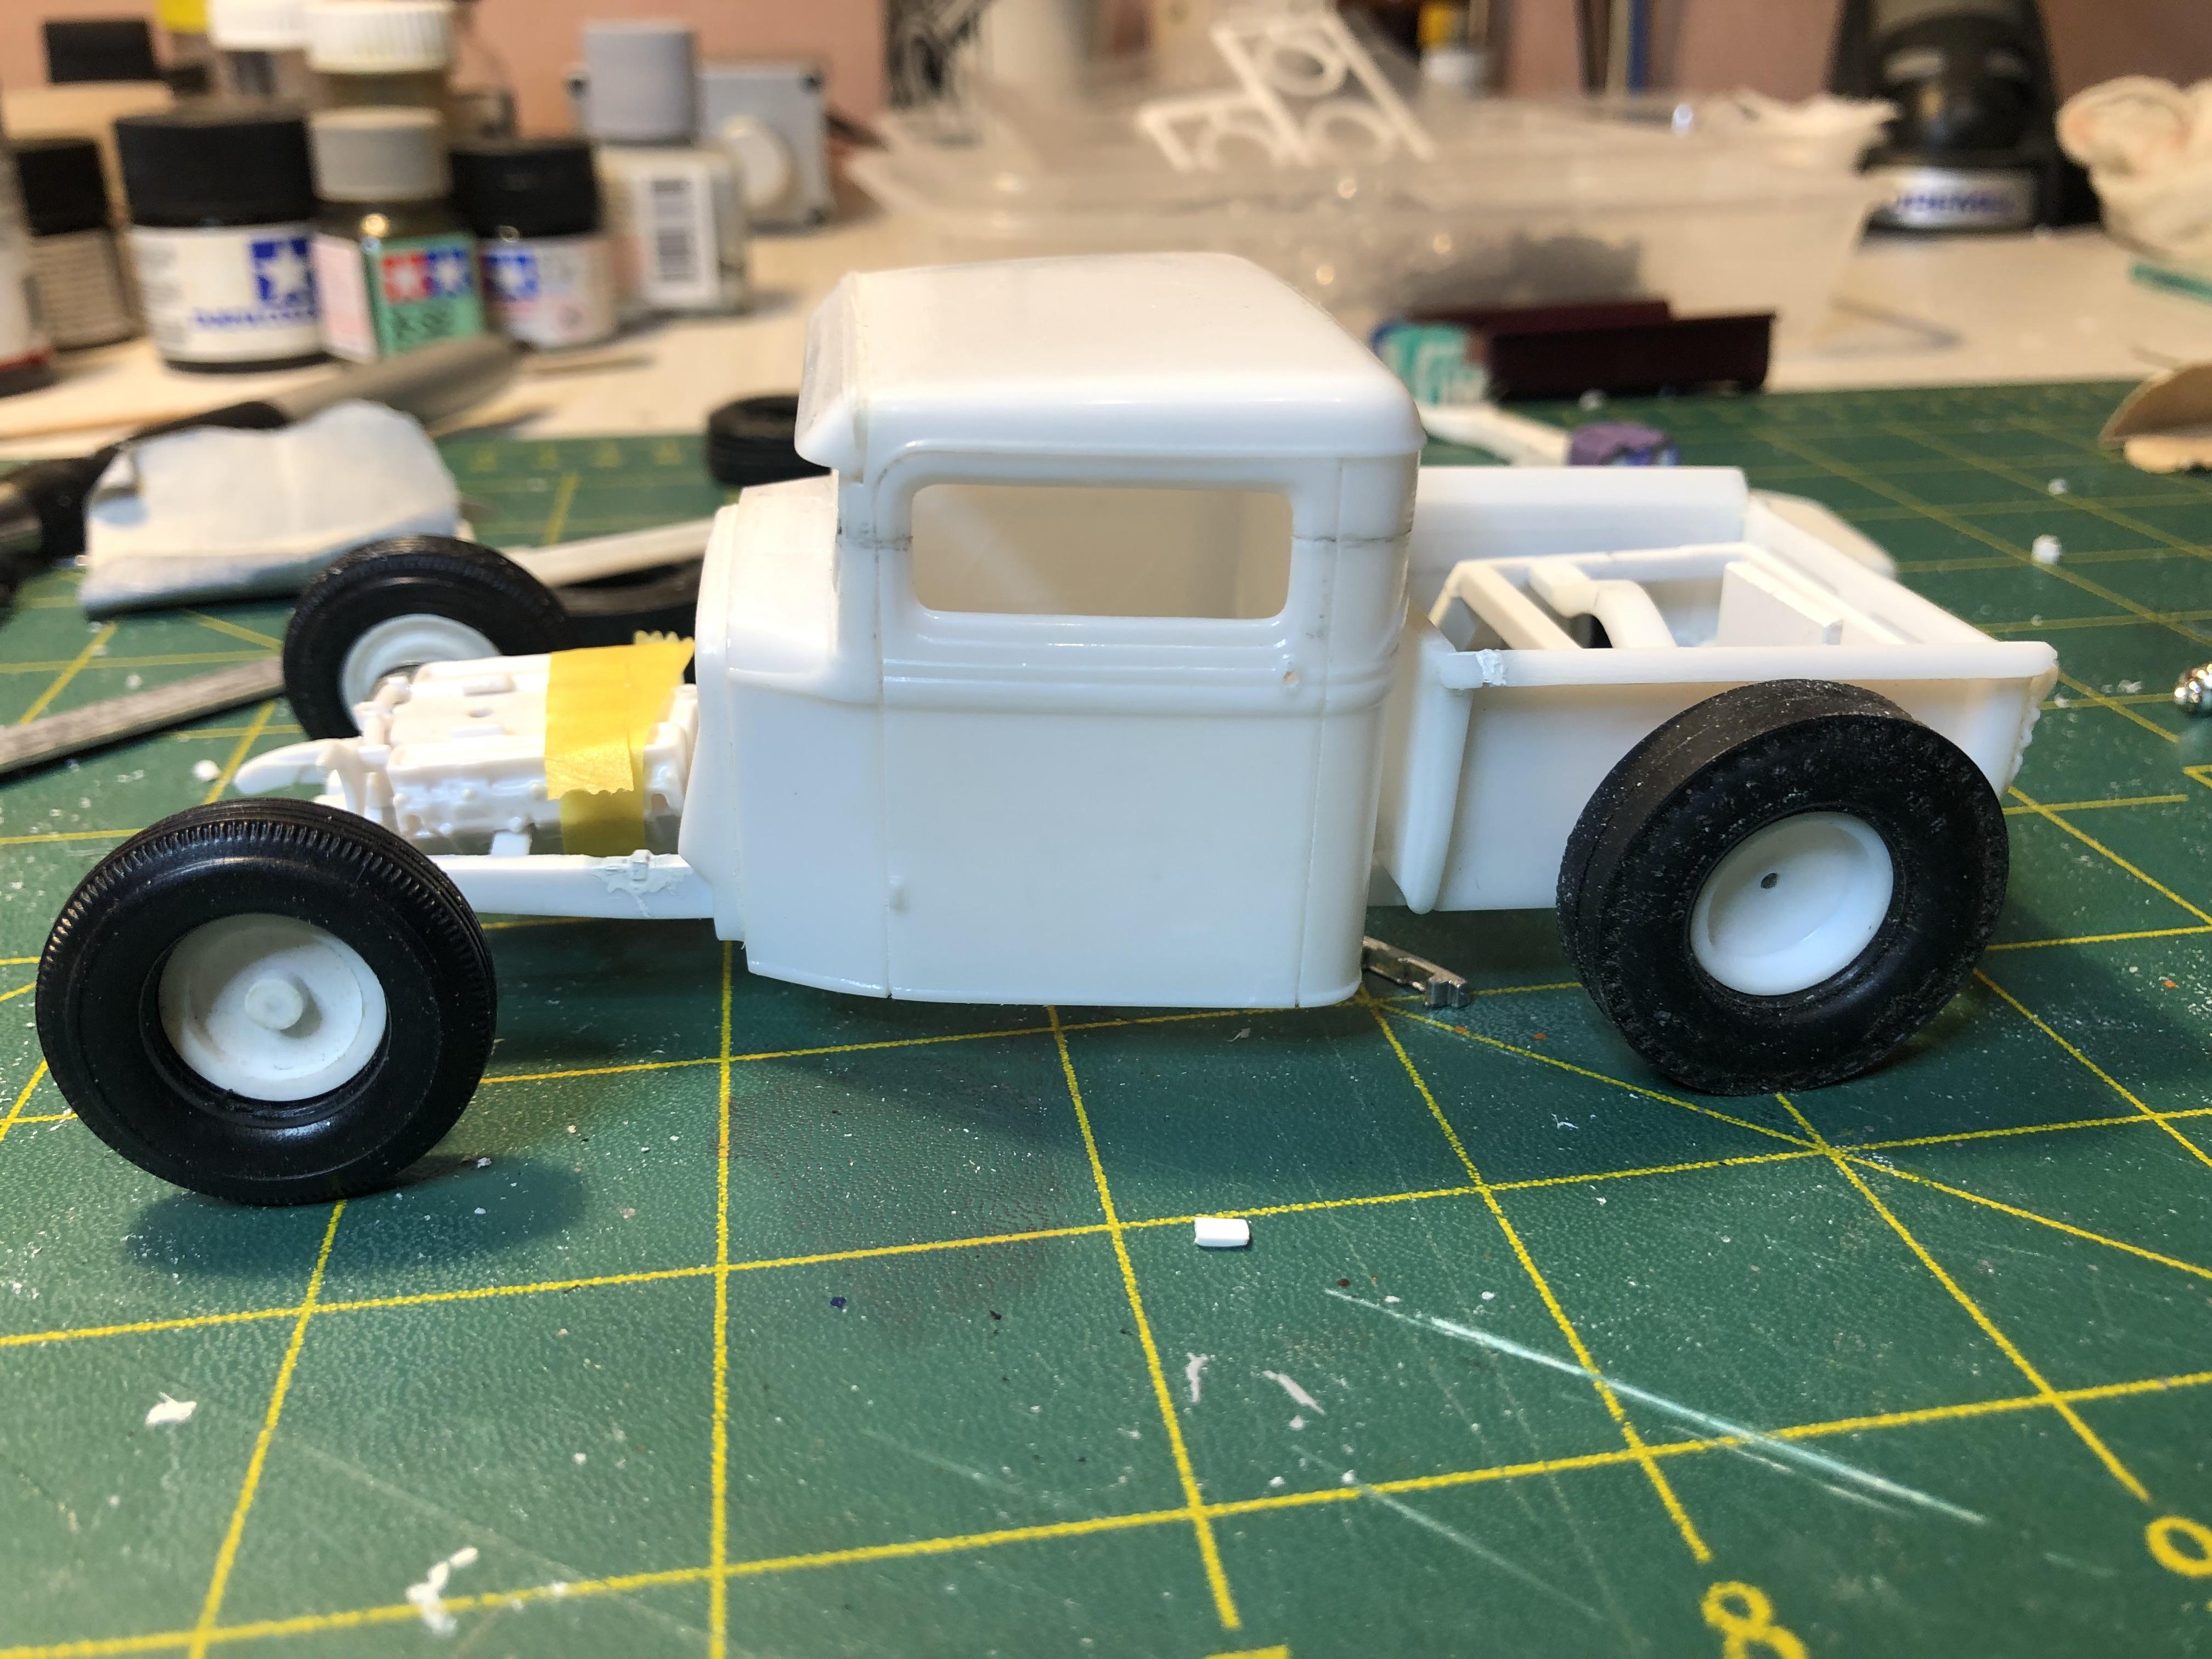
‘37 Ford Pickup chop and channel
bill-e-boy replied to NOBLNG's topic in Model Building Questions and Answers
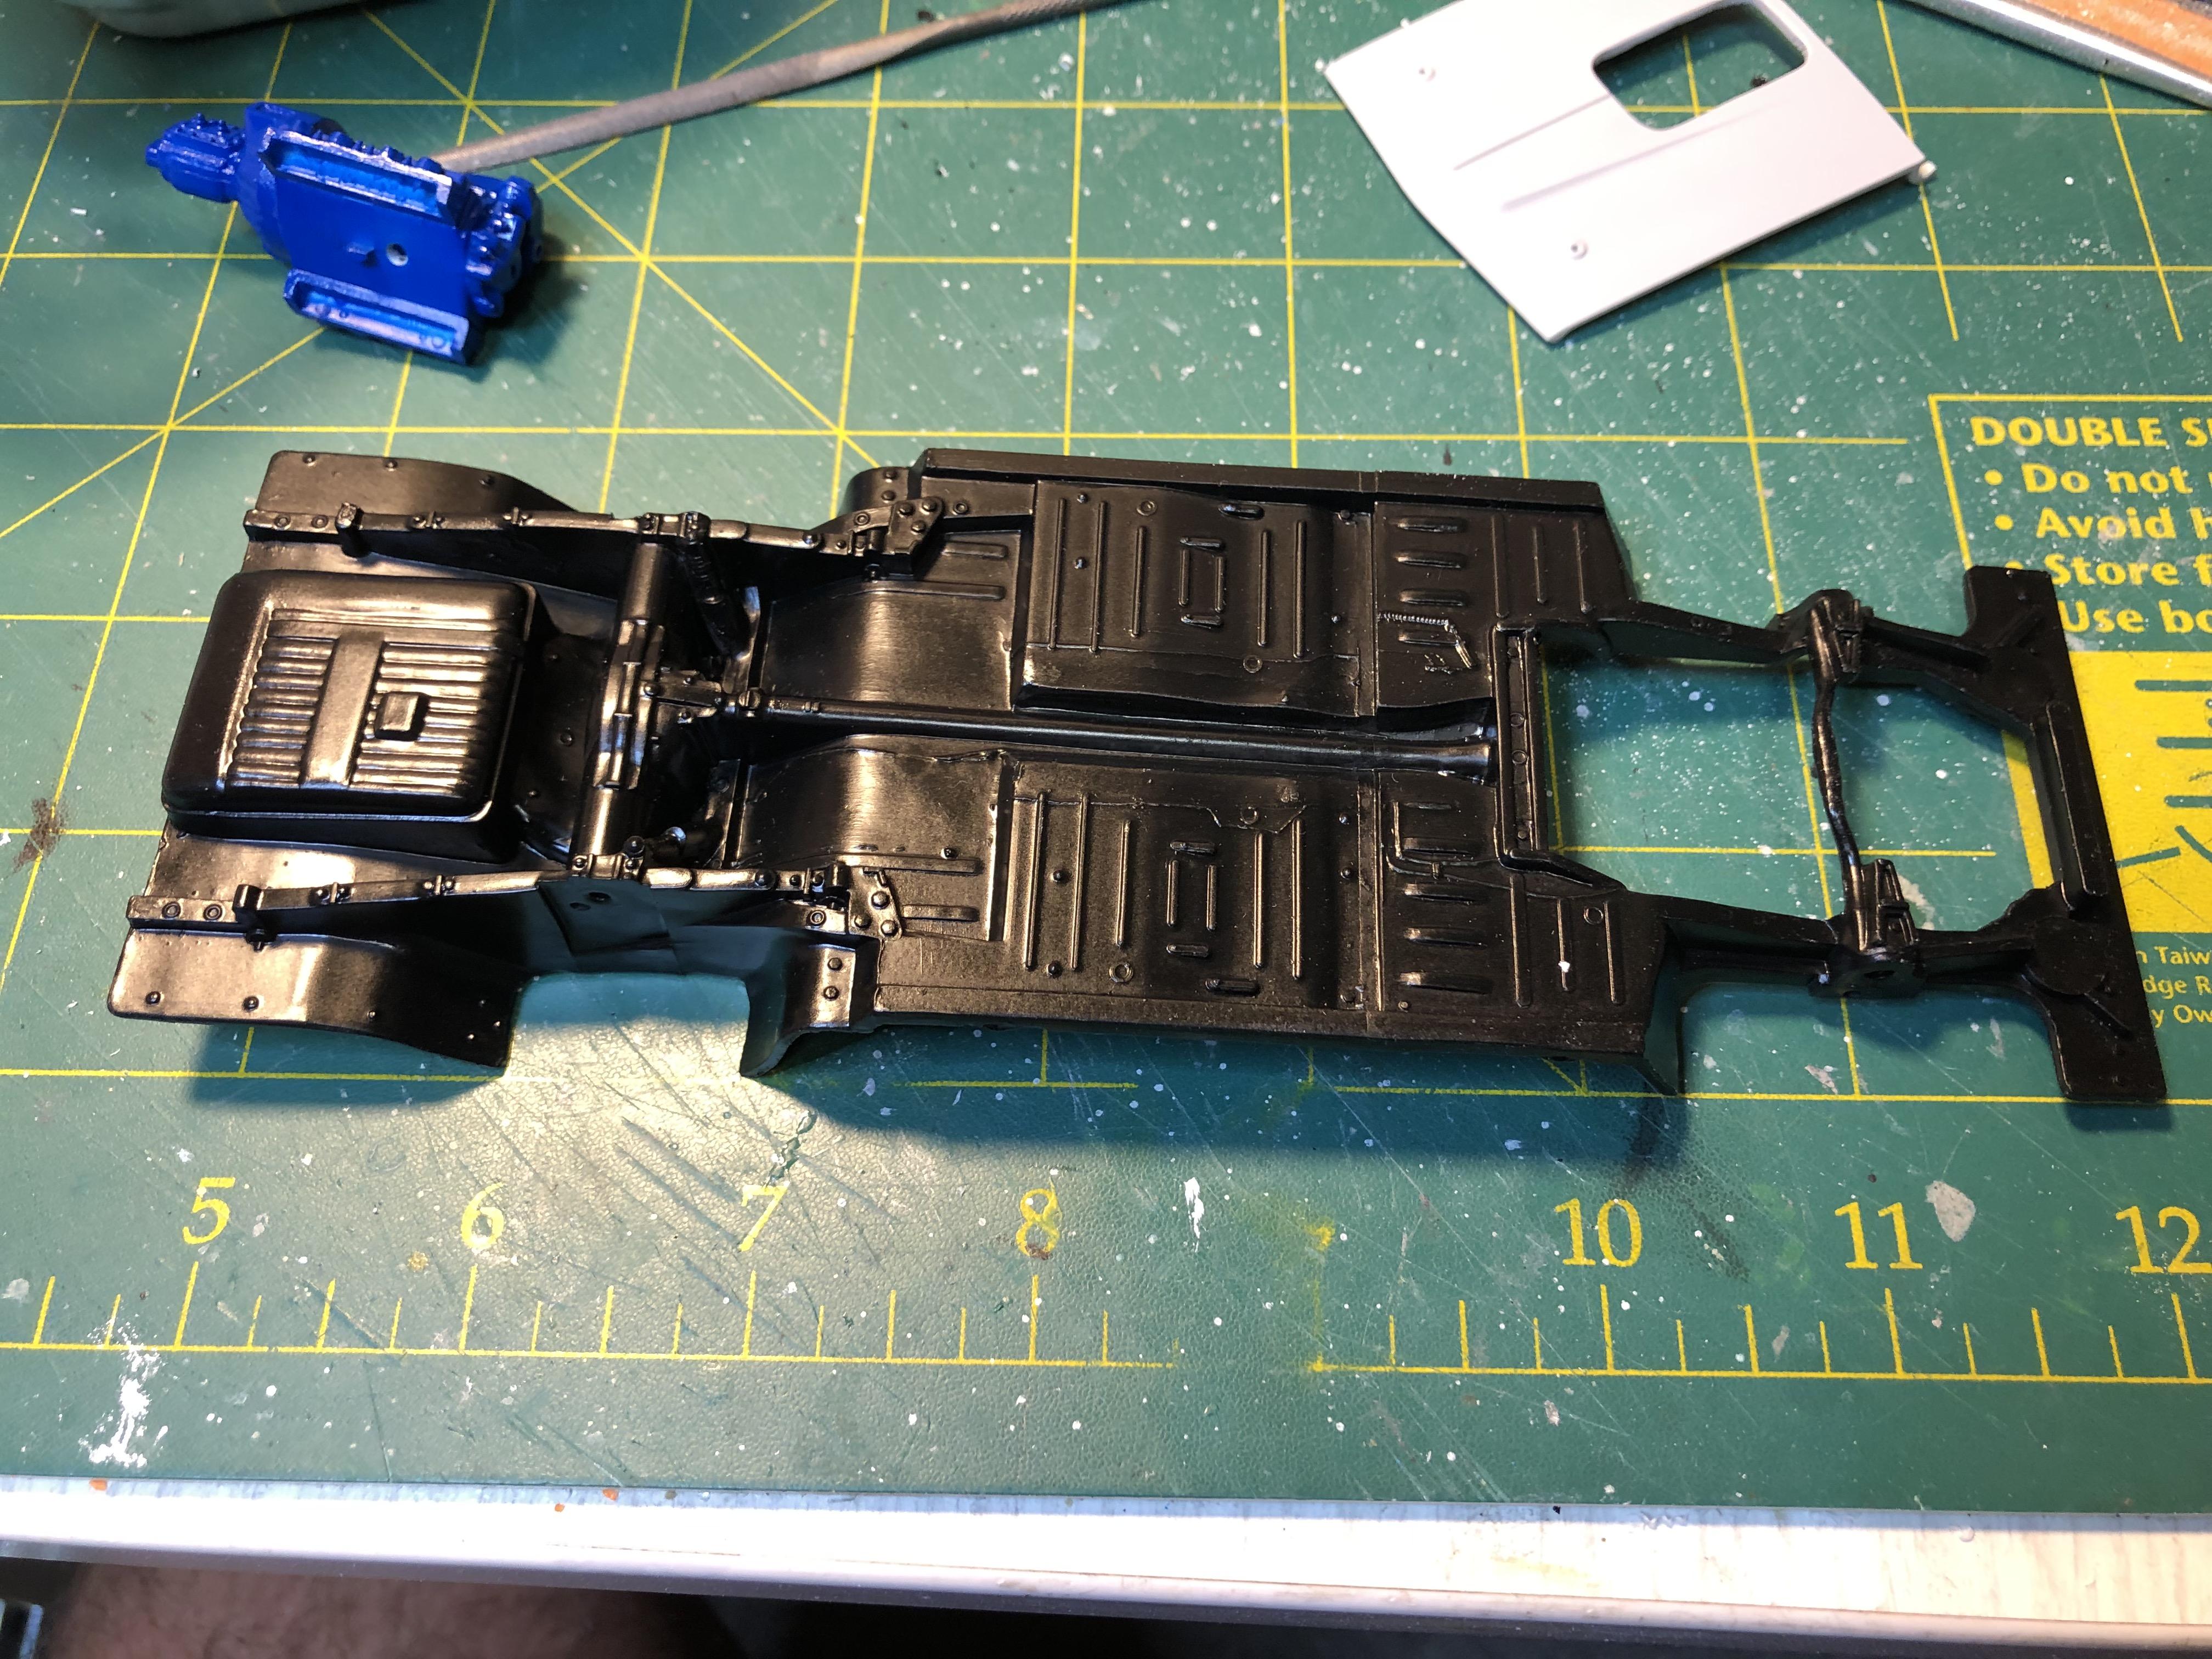
One of the methods on the real trucks and cars is to cut the centre of the x-frame and rebuild it with channels parallel alongside the transmission with a new trans mount -
Tamiya Primers, Liquid vs Aerosol
bill-e-boy replied to NOBLNG's topic in Model Building Questions and Answers
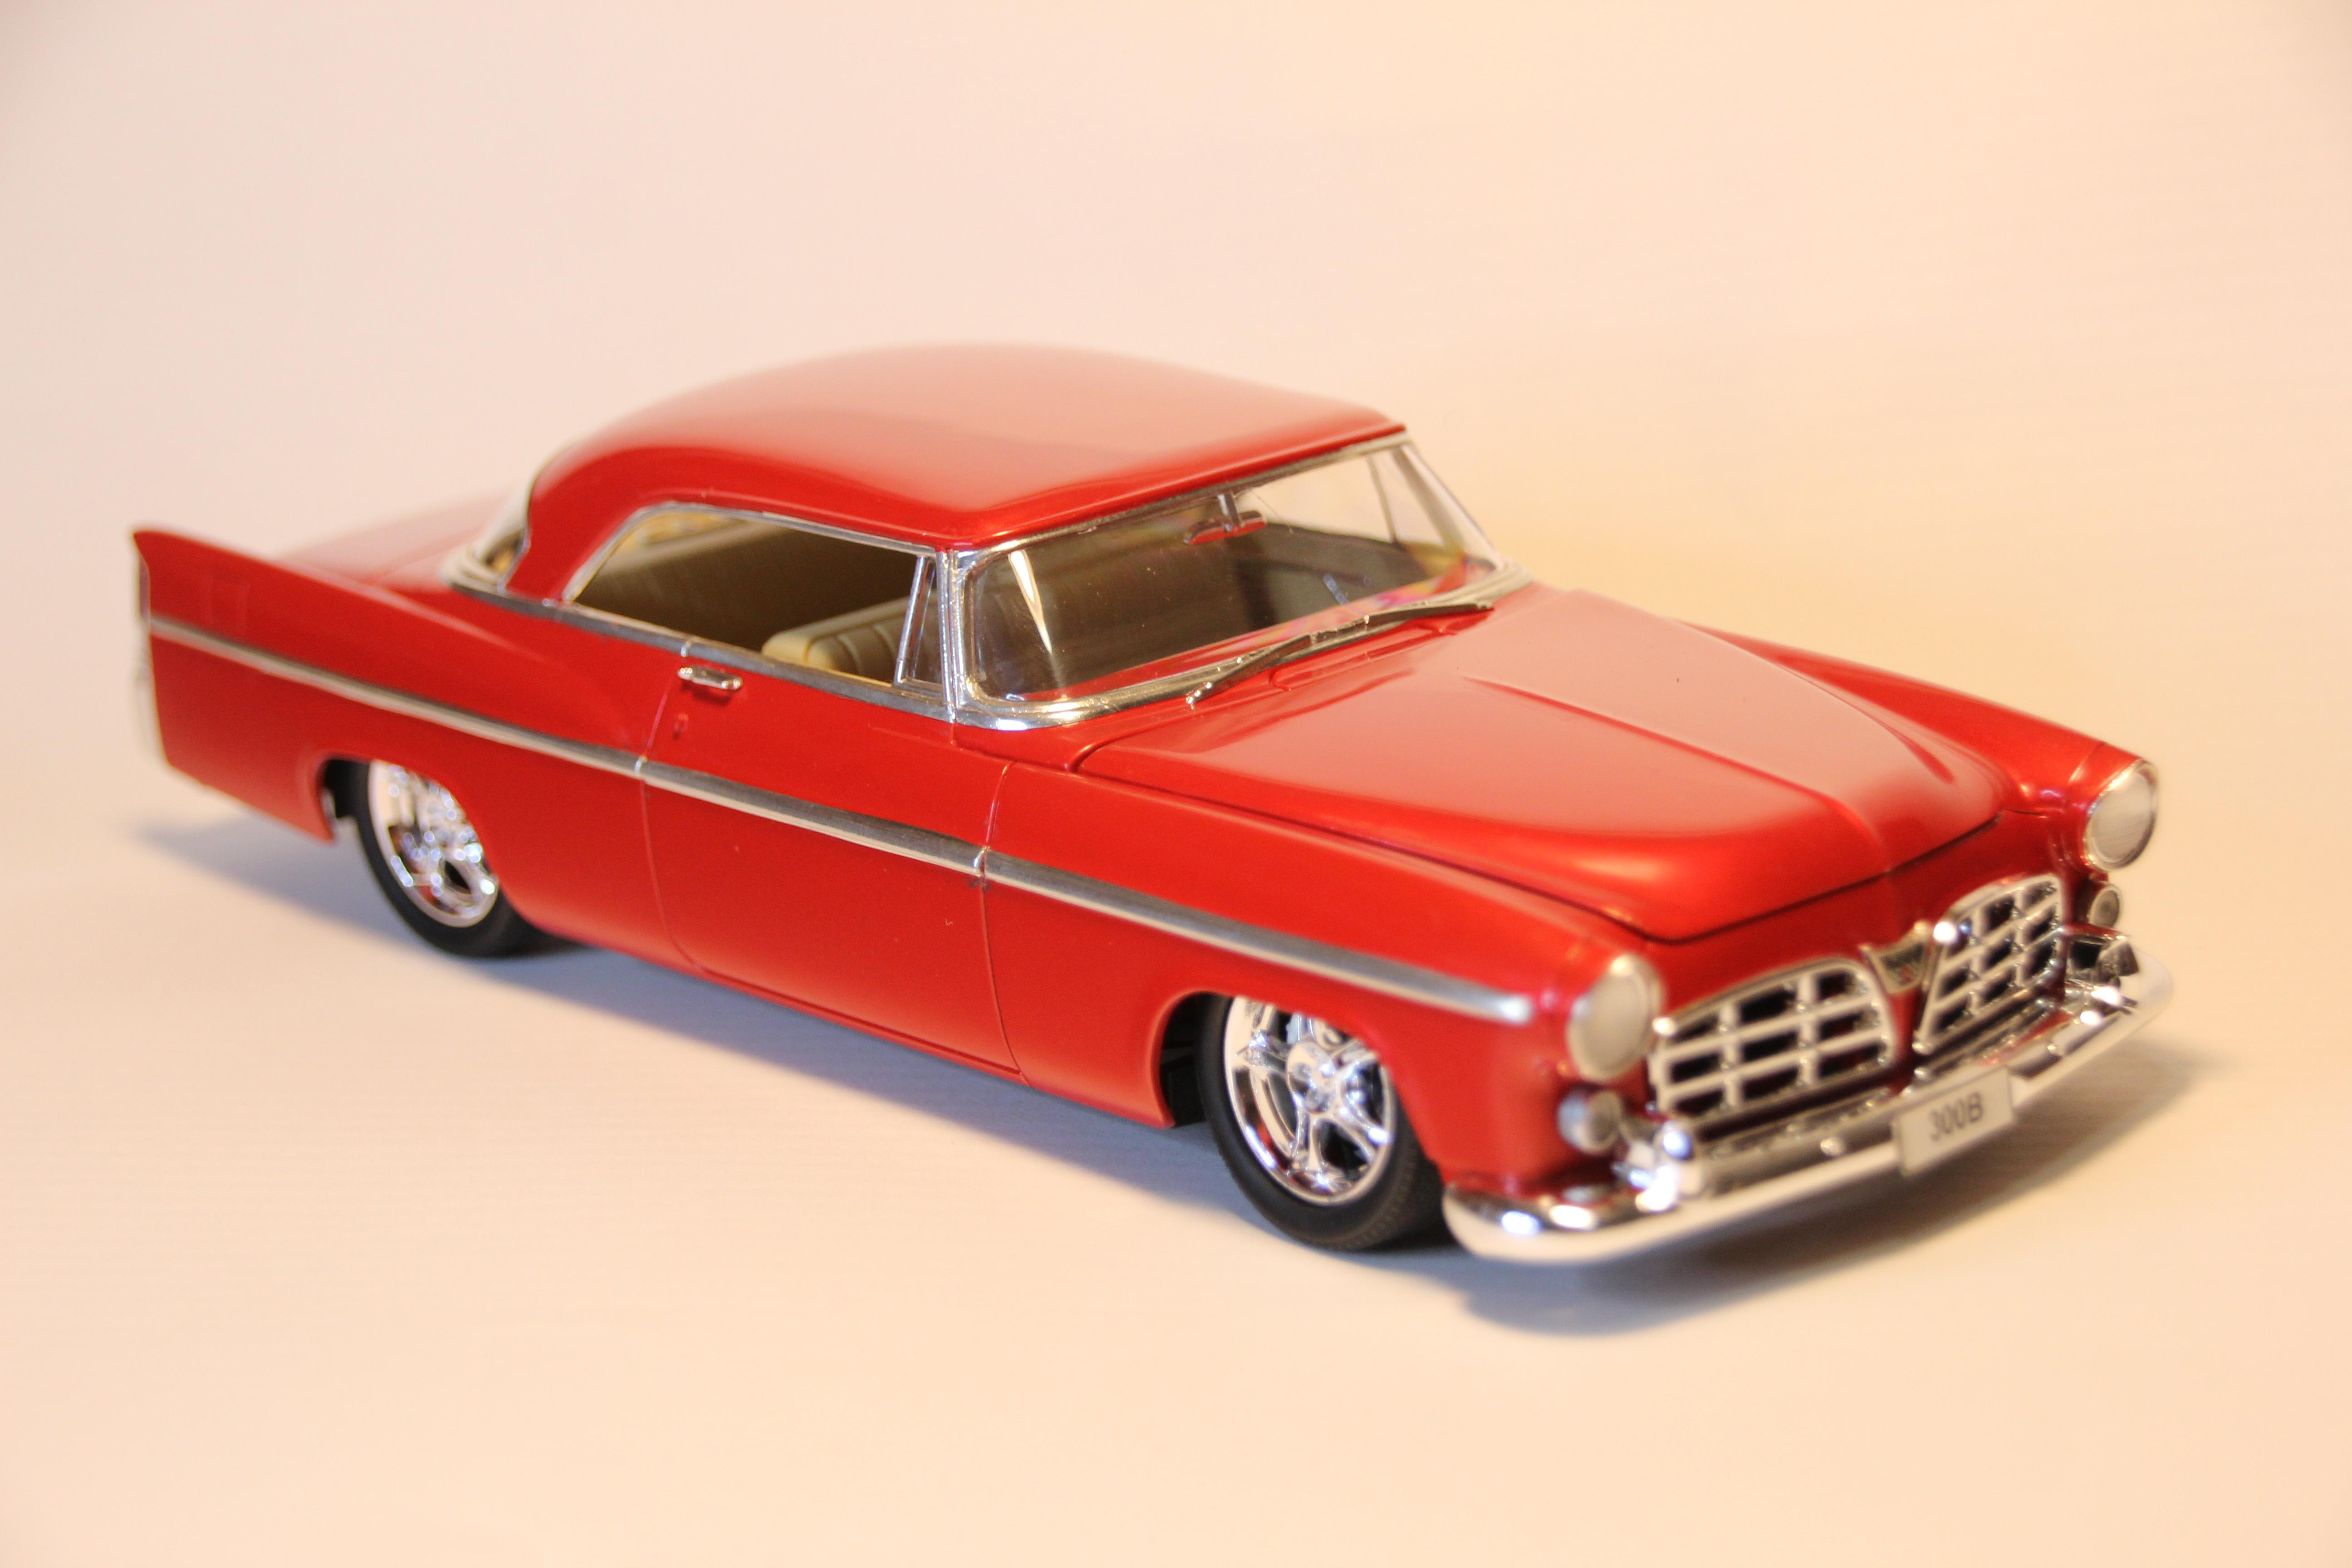
The Tamiya bottled primer is my go to primer. Just make sure it is well stirred before use - I use a Trumpeter battery powered stirrer Tamiya bottle primer is great as spot putty and sands well and does not fall apart when sanded. It looks to have a fine particle structure Tamiya bottle primer is also great as a primer when thinned and applied with an airbrush. I thin about 1 part primer and 2 parts lacquer thinners - general stuff like 3M thinners. I am to tight to pay mega bucks for a thimble full of Tamiya thinners. The airbrush primers sands well prior to top coating. The air brushed primer works with Tamiya bottle acrylics also thinned with lacquer thinners. It is perfect under their lacquer series of paints too. I have also used it under Testors enamels but ensure it has had a few days to gas out beforehand though. 300B below was painted with white primer and mica red all from bottles. Also clear coated with Tamiya lacquer clear and polished out Doesn't look too shiny in pix but it is
-
Who doesn't love a mock-up? Let's see yours!
bill-e-boy replied to Belairconvertable's topic in WIP: Model Cars
Chrysler 300B restomod Rat rod - a parts box build up
-
Who doesn't love a mock-up? Let's see yours!
bill-e-boy replied to Belairconvertable's topic in WIP: Model Cars
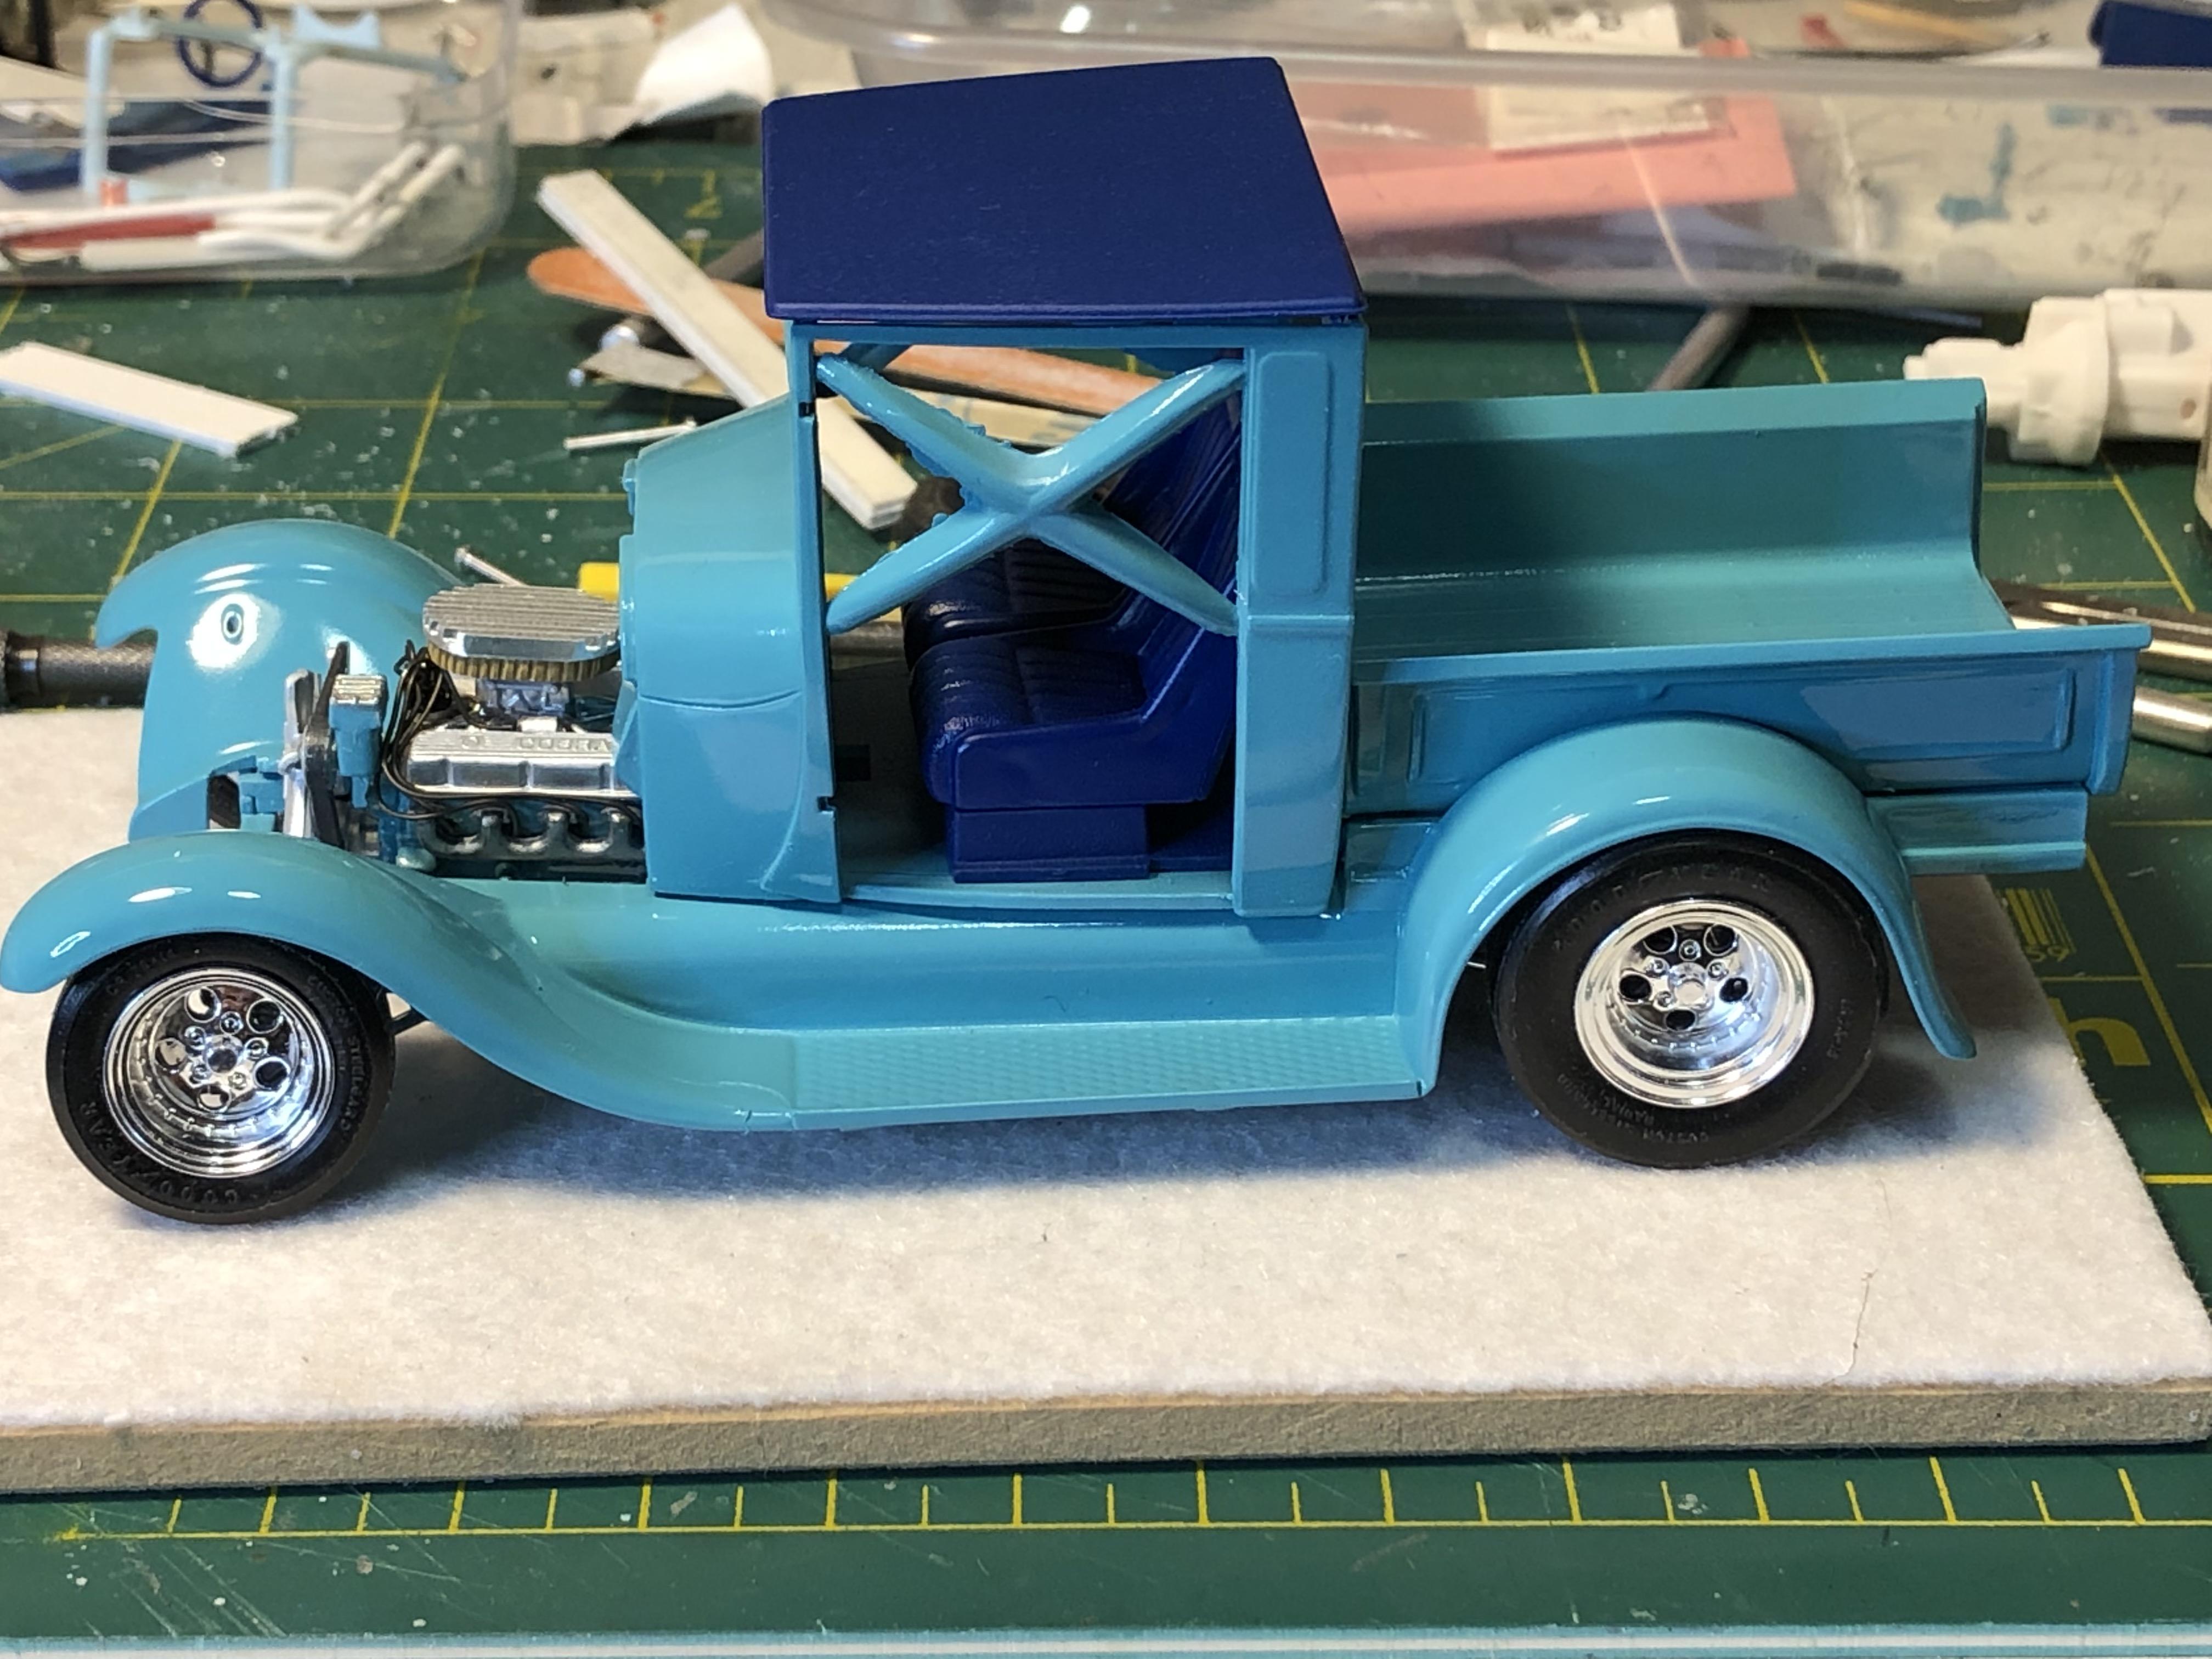
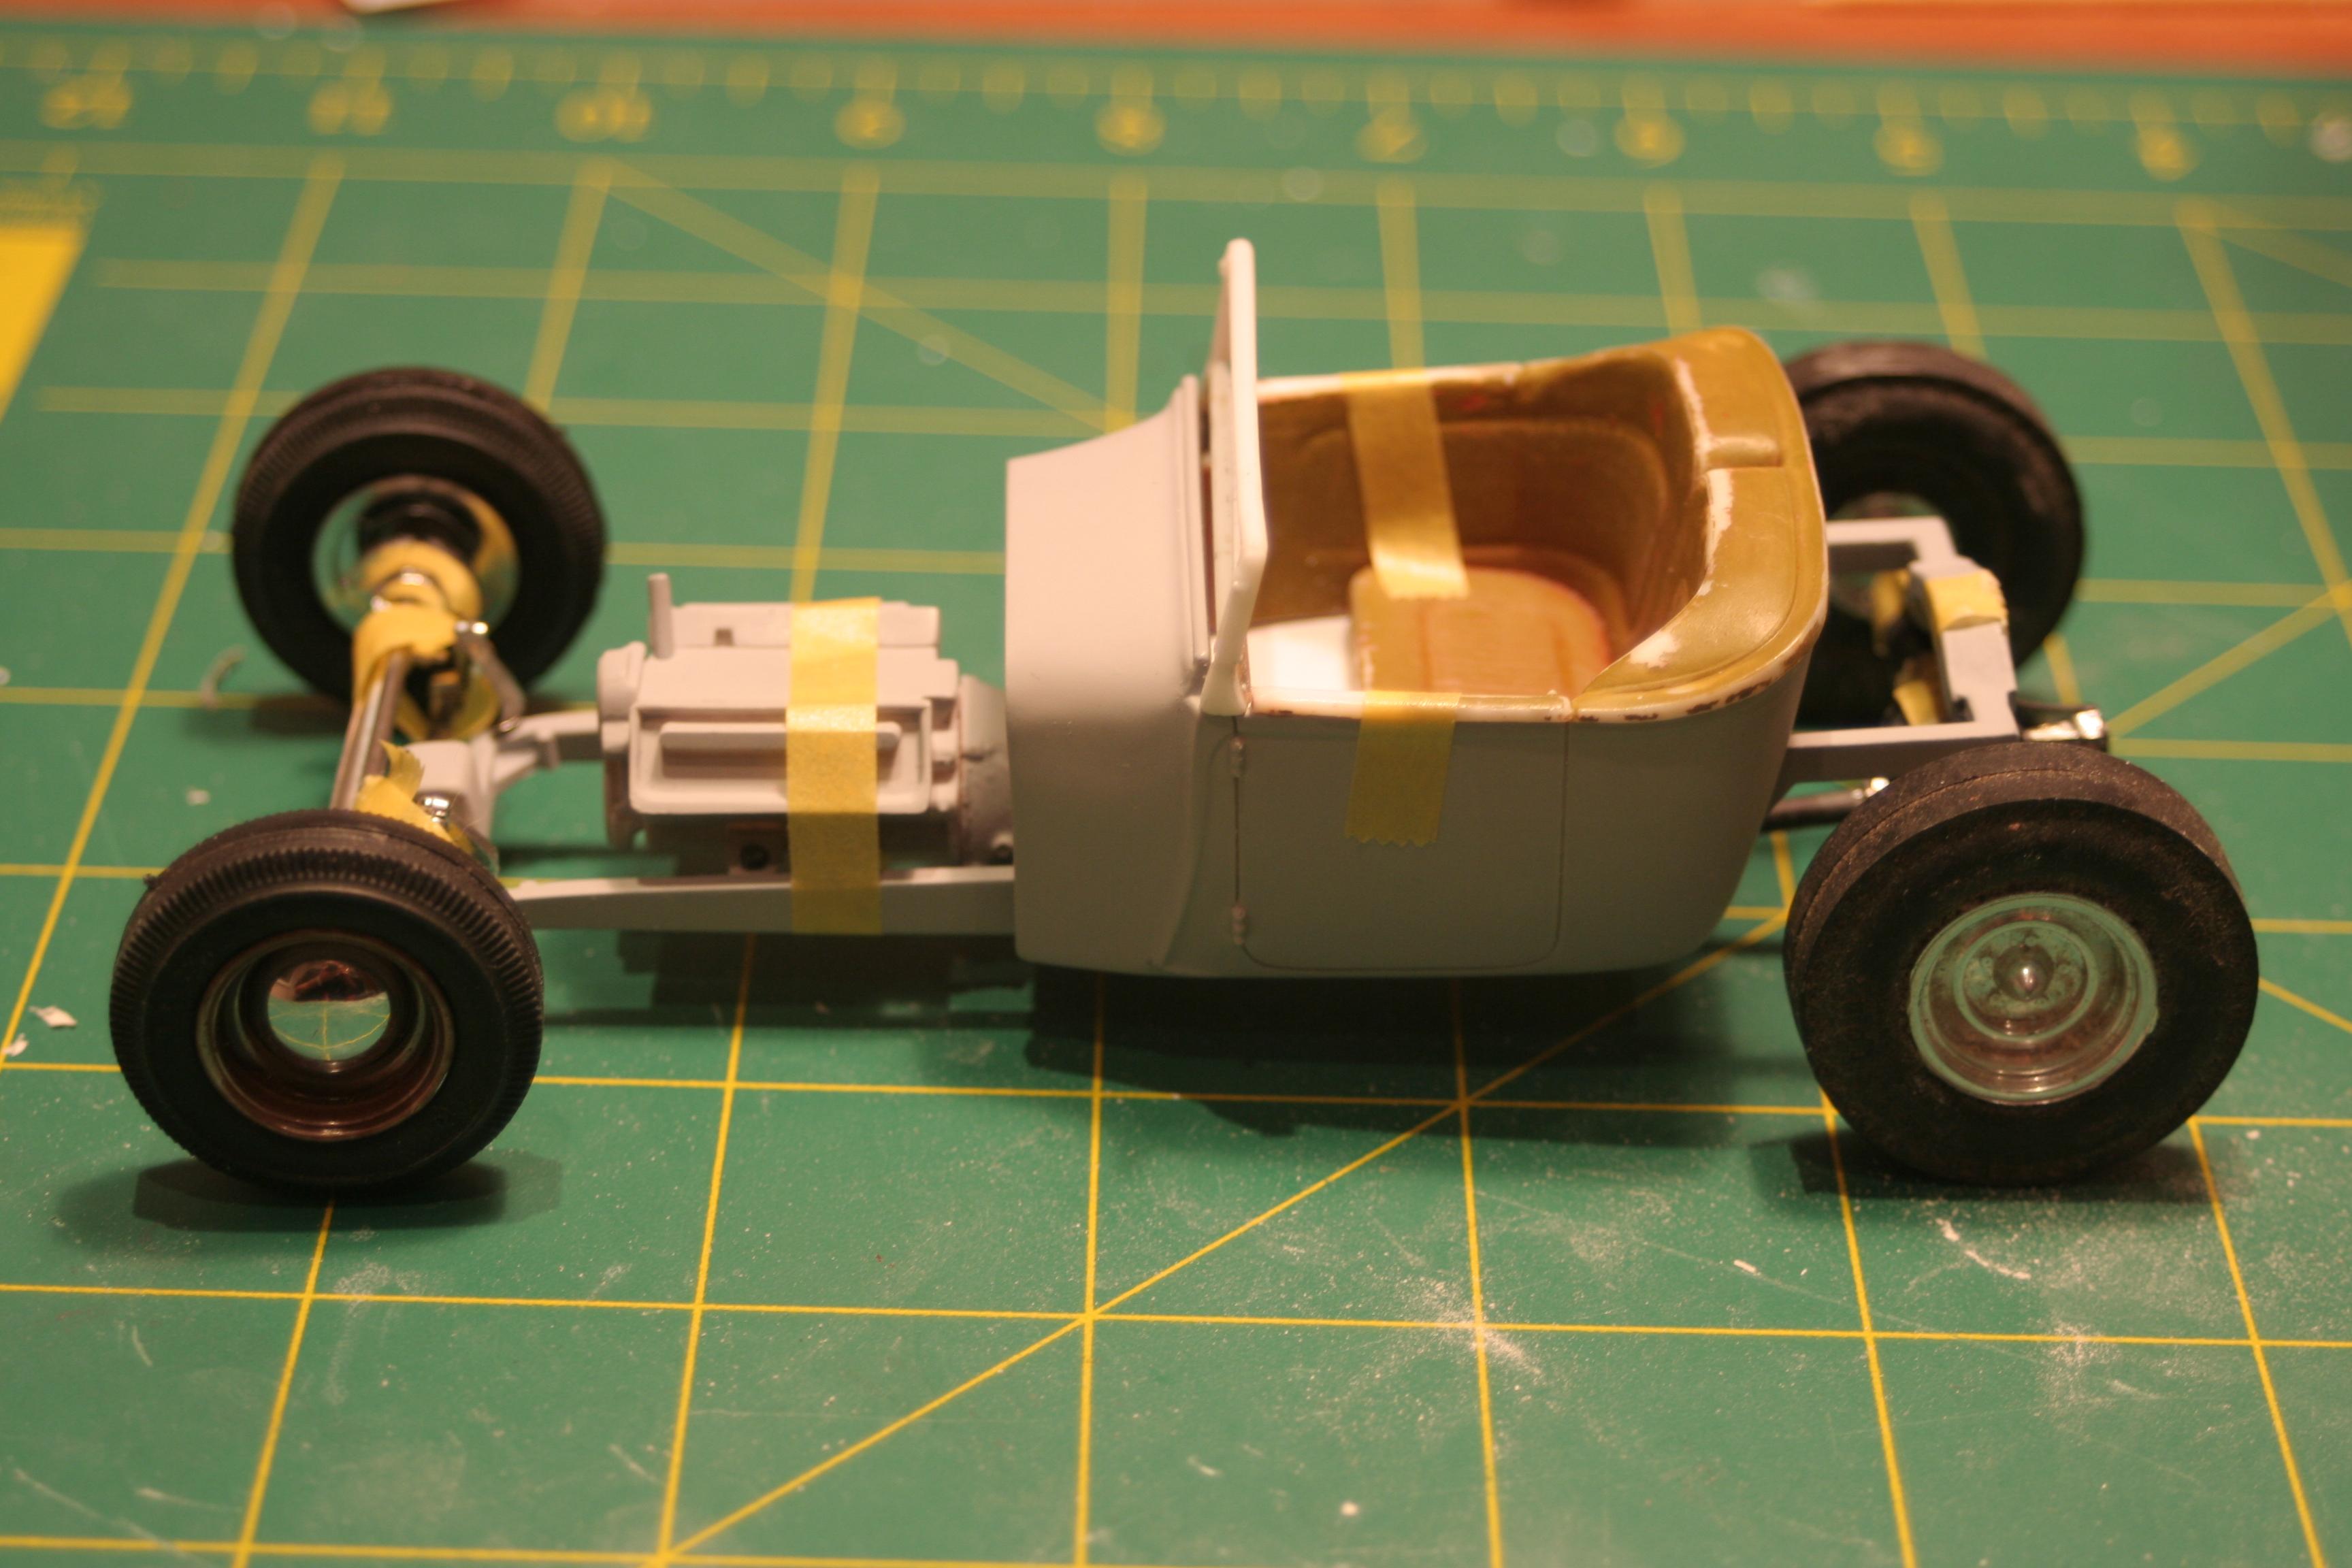
Got to get back onto this one Coz I have been spending time with this - only needs headers and some small details to finish And my @tim boyd tribute that is now in primer
-
Looking good - love the colour Rodney - looks lie some has been smoking in your coupe and dropped it. I think a lot of the distorted parts - especially the roadster windscreen frame - are a manufacturing issue. When plastic is moulded the dies close first then the plastic is injected, next is a cooling phase then the mould is opened and the parts ejected. If the cool down time is too short the plastic is still a bit soft and can distort out of the mould. Another issue is if the die is not being cooled correctly - a number of issues can cause this - can also cause distortion. In the case of the seat the shot time is too short and not enough plastic is injected into the mould. I too have a roadster with a bad screen - I have emailed Revell but have not heard back yet. Must be time to rattle their cage. I checked a first release and all of the parts are good so it would seem that the contract moulder that Revell are using has a poor QC regime in place Sorry to steal the tread but the more we raise the issue the more likely there will be changes Cheers Bill-e-boy