bill-e-boy
-
Posts
853 -
Joined
-
Last visited
Content Type
Profiles
Forums
Events
Gallery
Everything posted by bill-e-boy
-
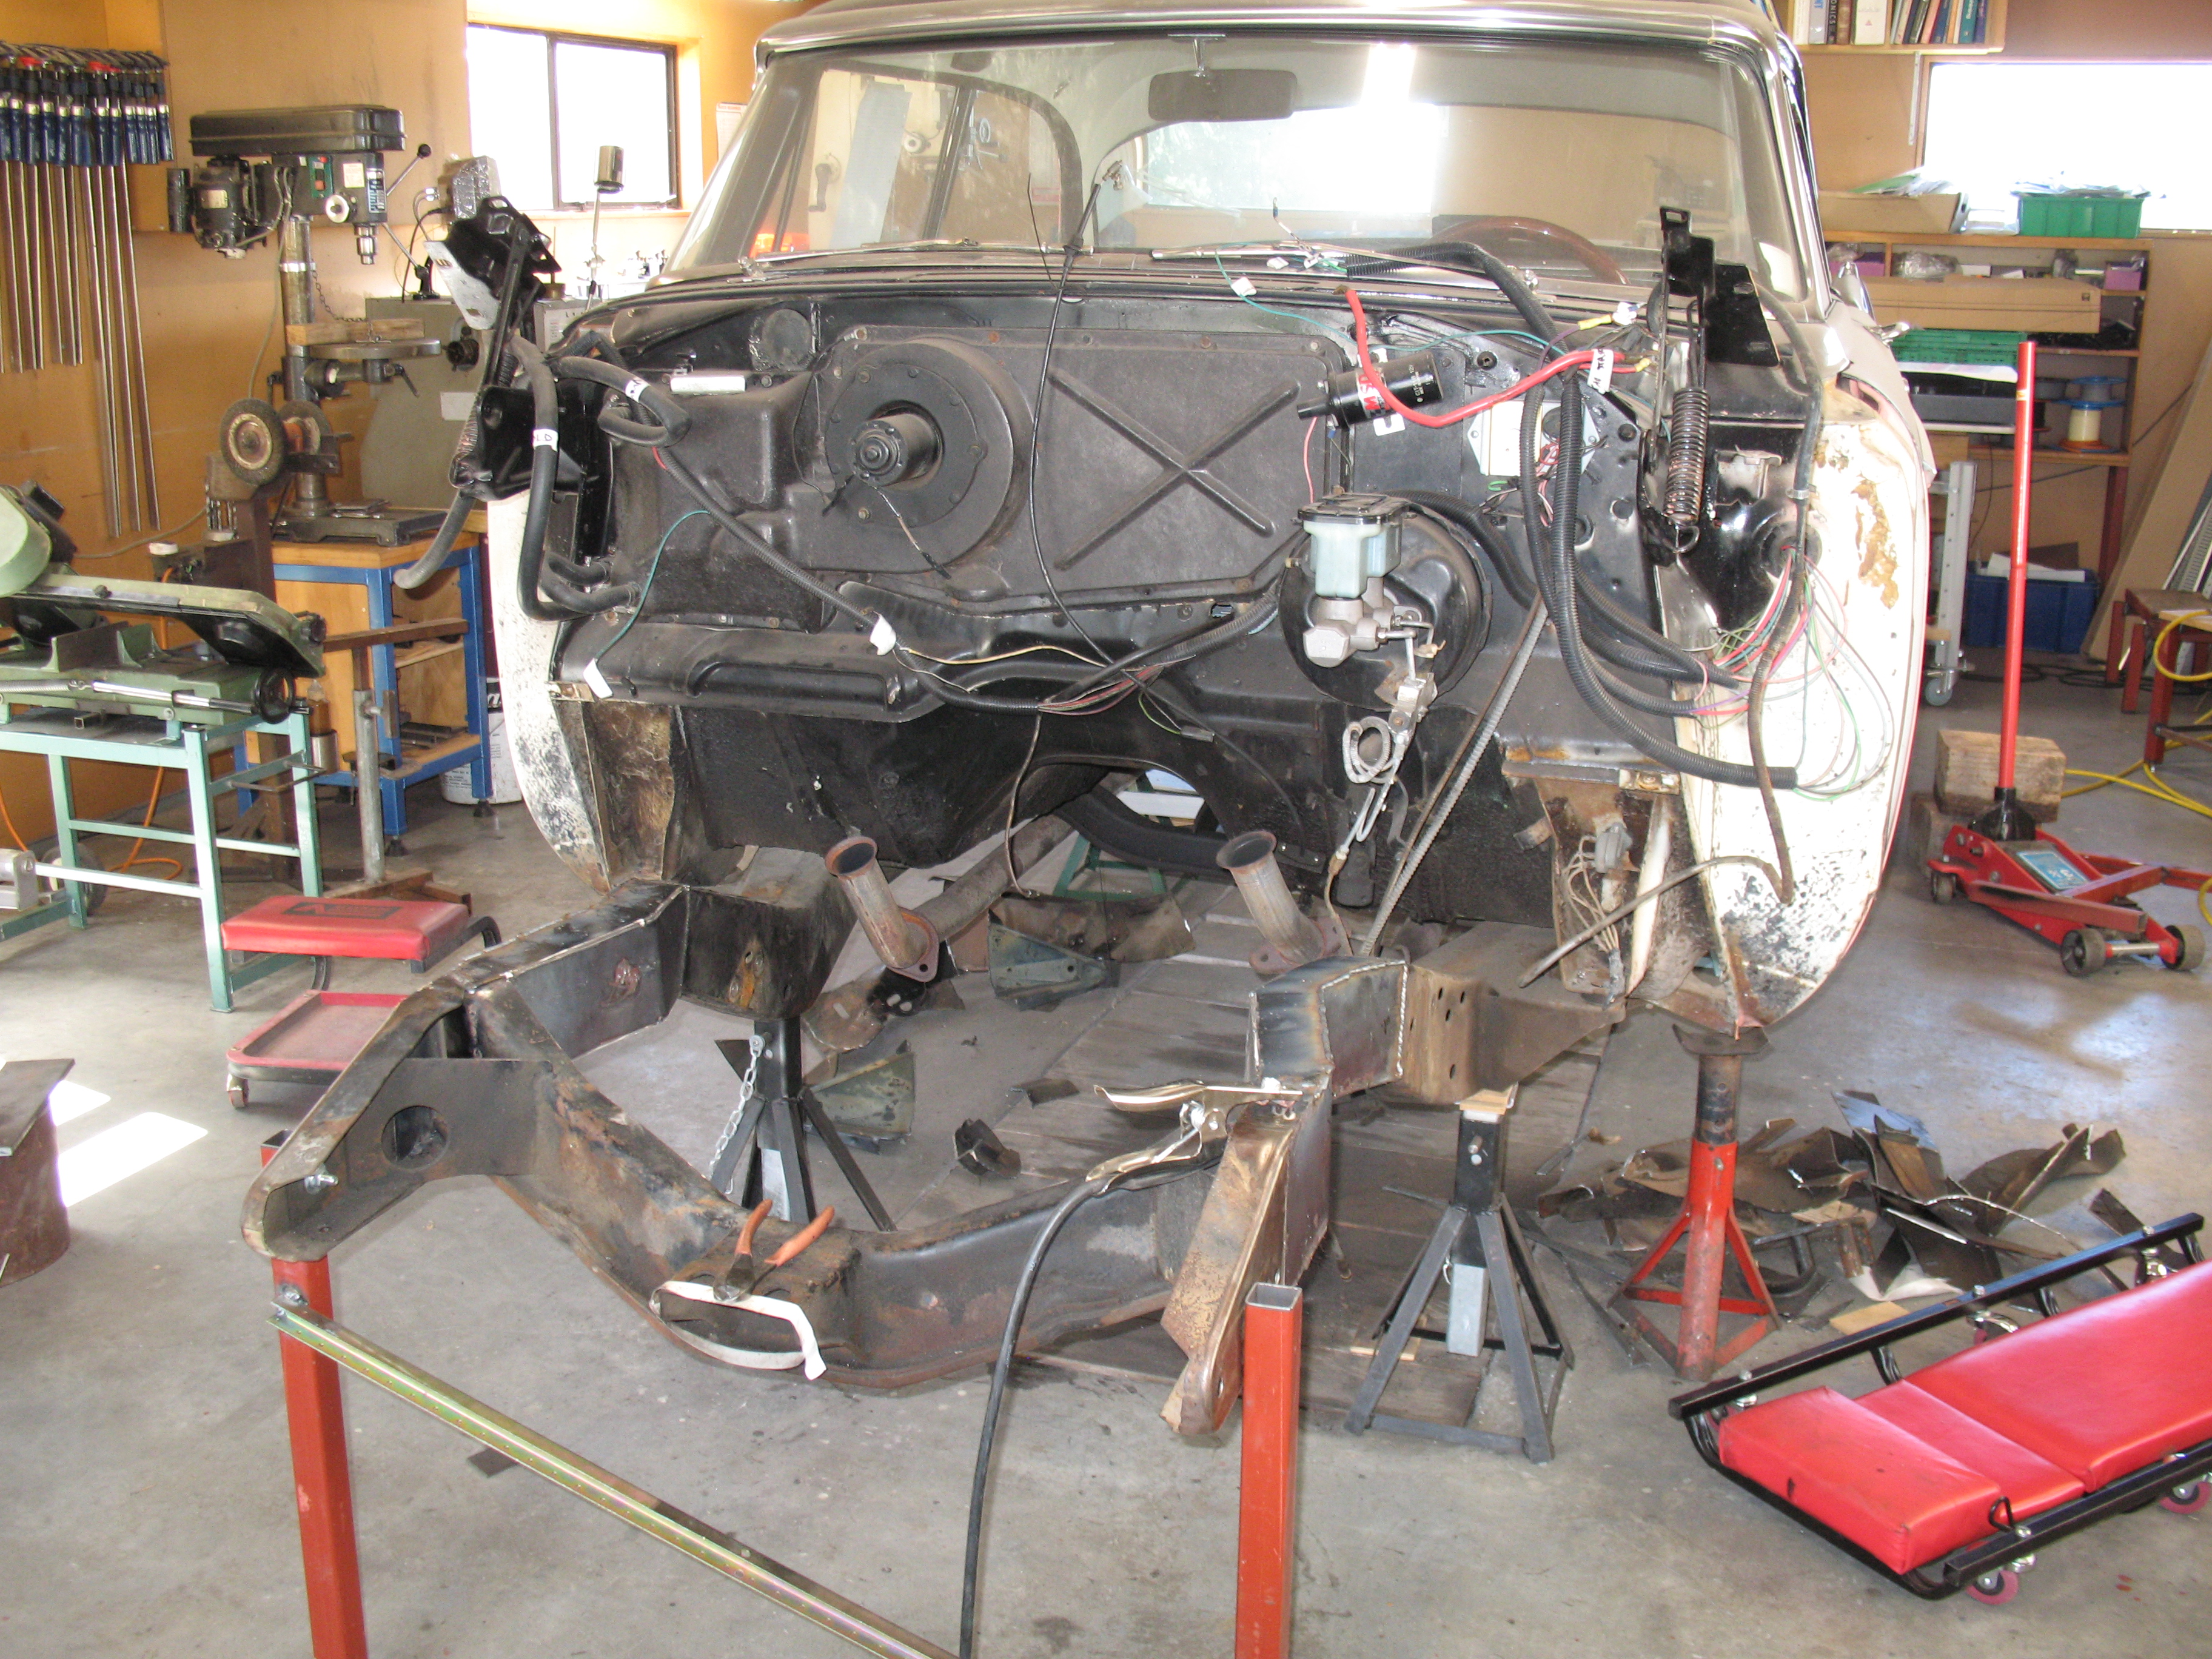
Here is a shot of the firewall. The brake booster is a Chebby item and the chassis at this point has been modified for the Jag XJ6 front end And a shot of drivers side chassis with motor in place - not original 315 Poly but an LA360

-
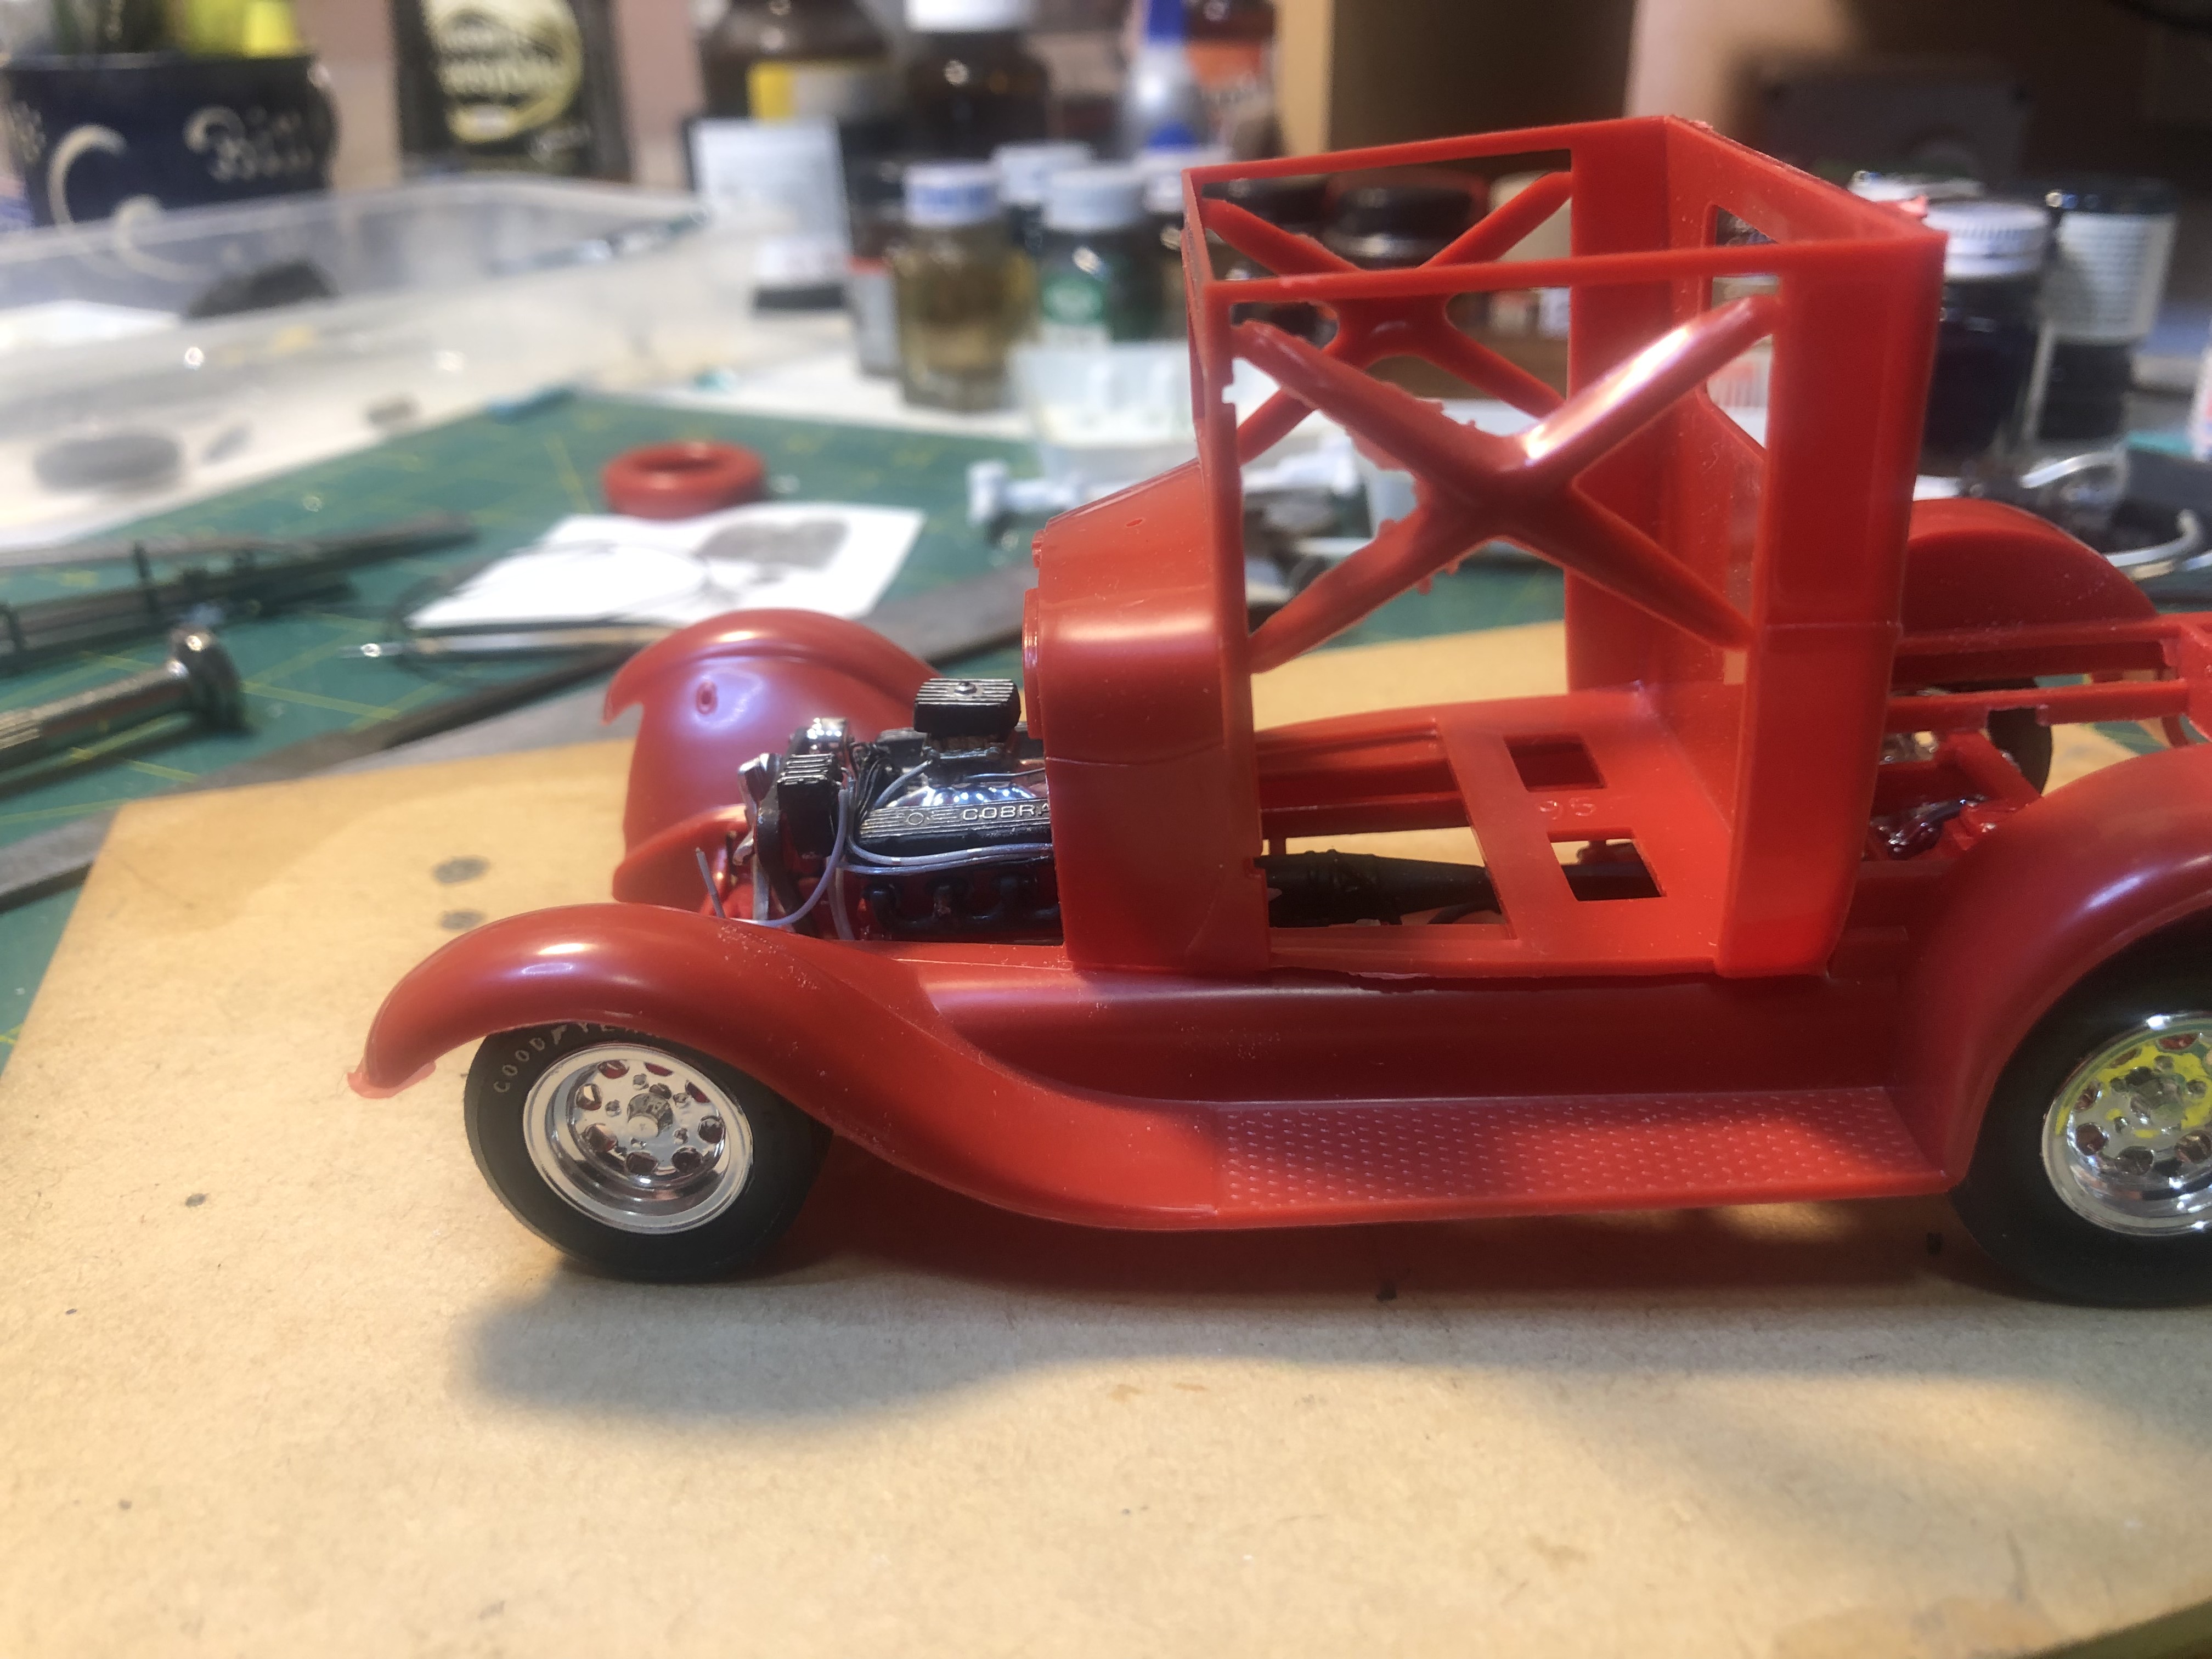
For my rendition I am looking at the Lil John Buttera T chassis. I pulled the chassis from under the 34 I built years ago - what a struggle. I seem to remember that it was a mission to get the body mated to the chassis when I built it originally. The idea is to eyeball the chassis under the guards to see what is needed. @tim boyddid one yonks ago as posted earlier in this thread The T chassis as removed The front end looks good but will need to be moved forward a little - needs work around the apron - I may take it out altogether. At the rear I have recessed the rear cross member into the A pickup bed rails but it needs more - about 4.5mm more. The wheel base will need to be extended too. This will be the first mod to the donor chassis - not the red one, a virgin one It could do with some taller tyres in the back so will start hunting out some. The 37 Cabrolet are wider but the same height. Any suggestions? The top suspension locator bars on the front end rub against the guards so some relieving will required. The fire wall will need to be recessed a tad to fit the motor in there. I am just glad that I have access to a built up chassis to see what I will need to change to get it together. Saves a truck load of time of change - test fit - change - test fit ...........
-
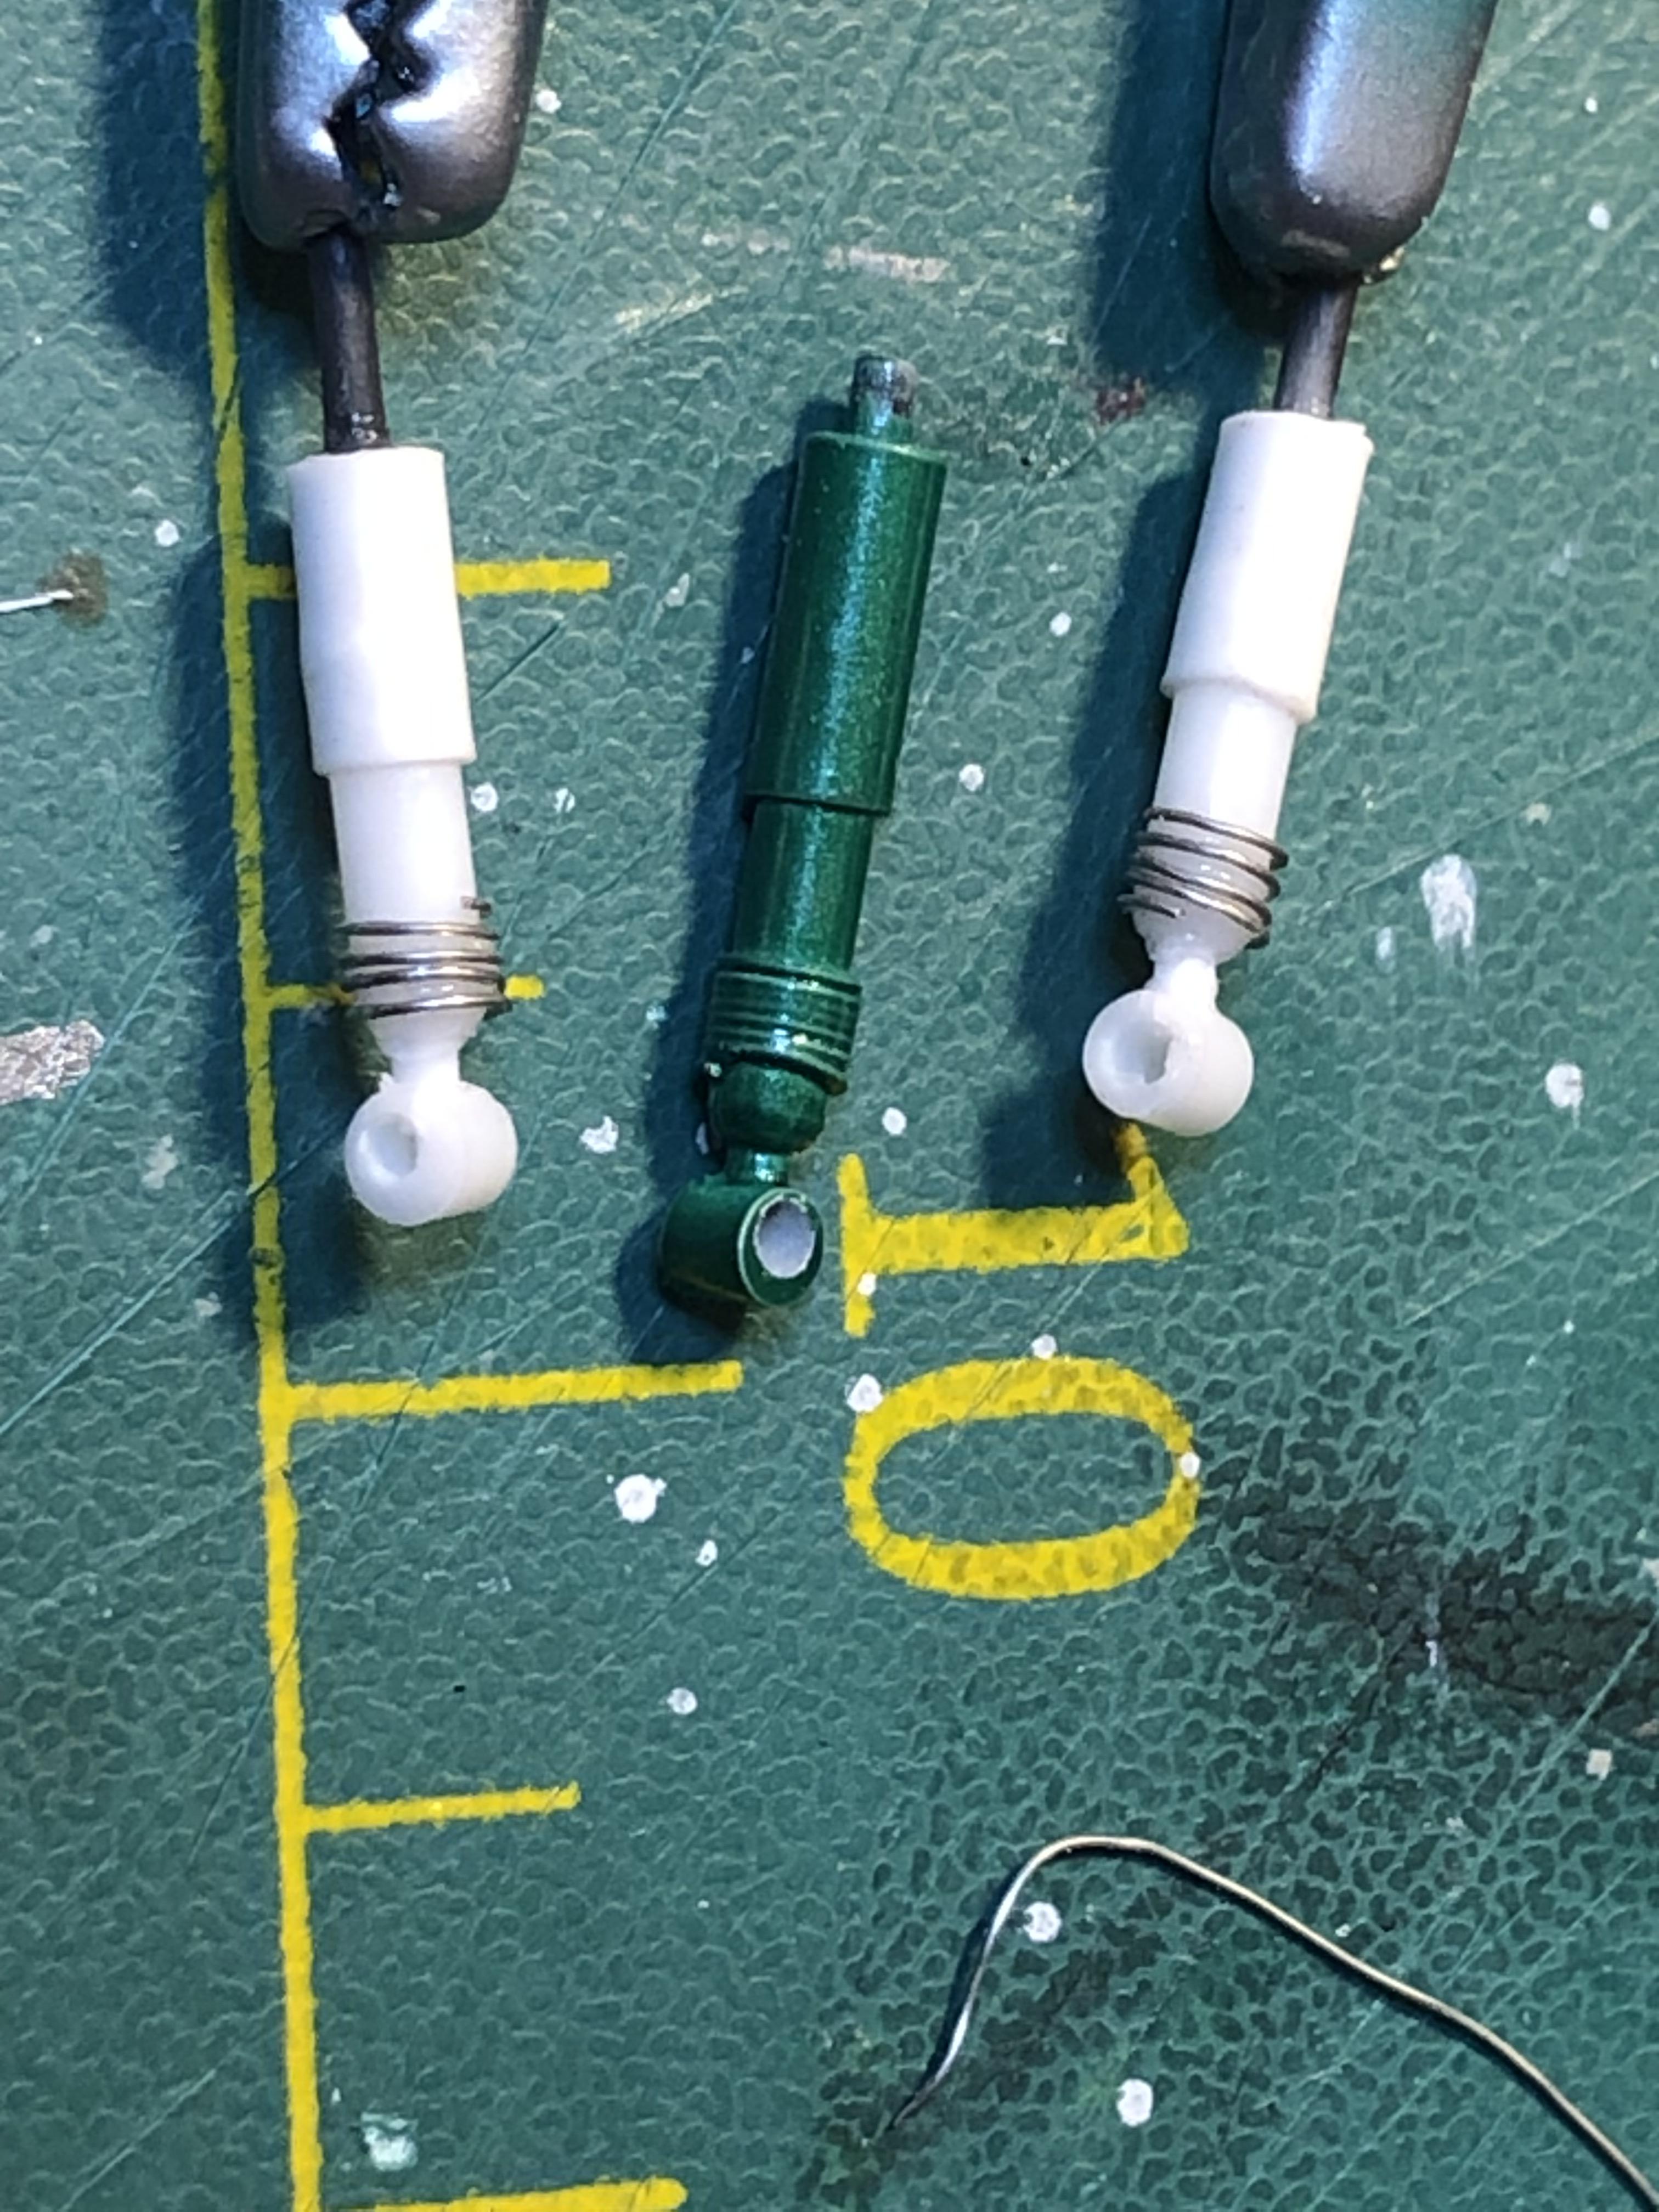
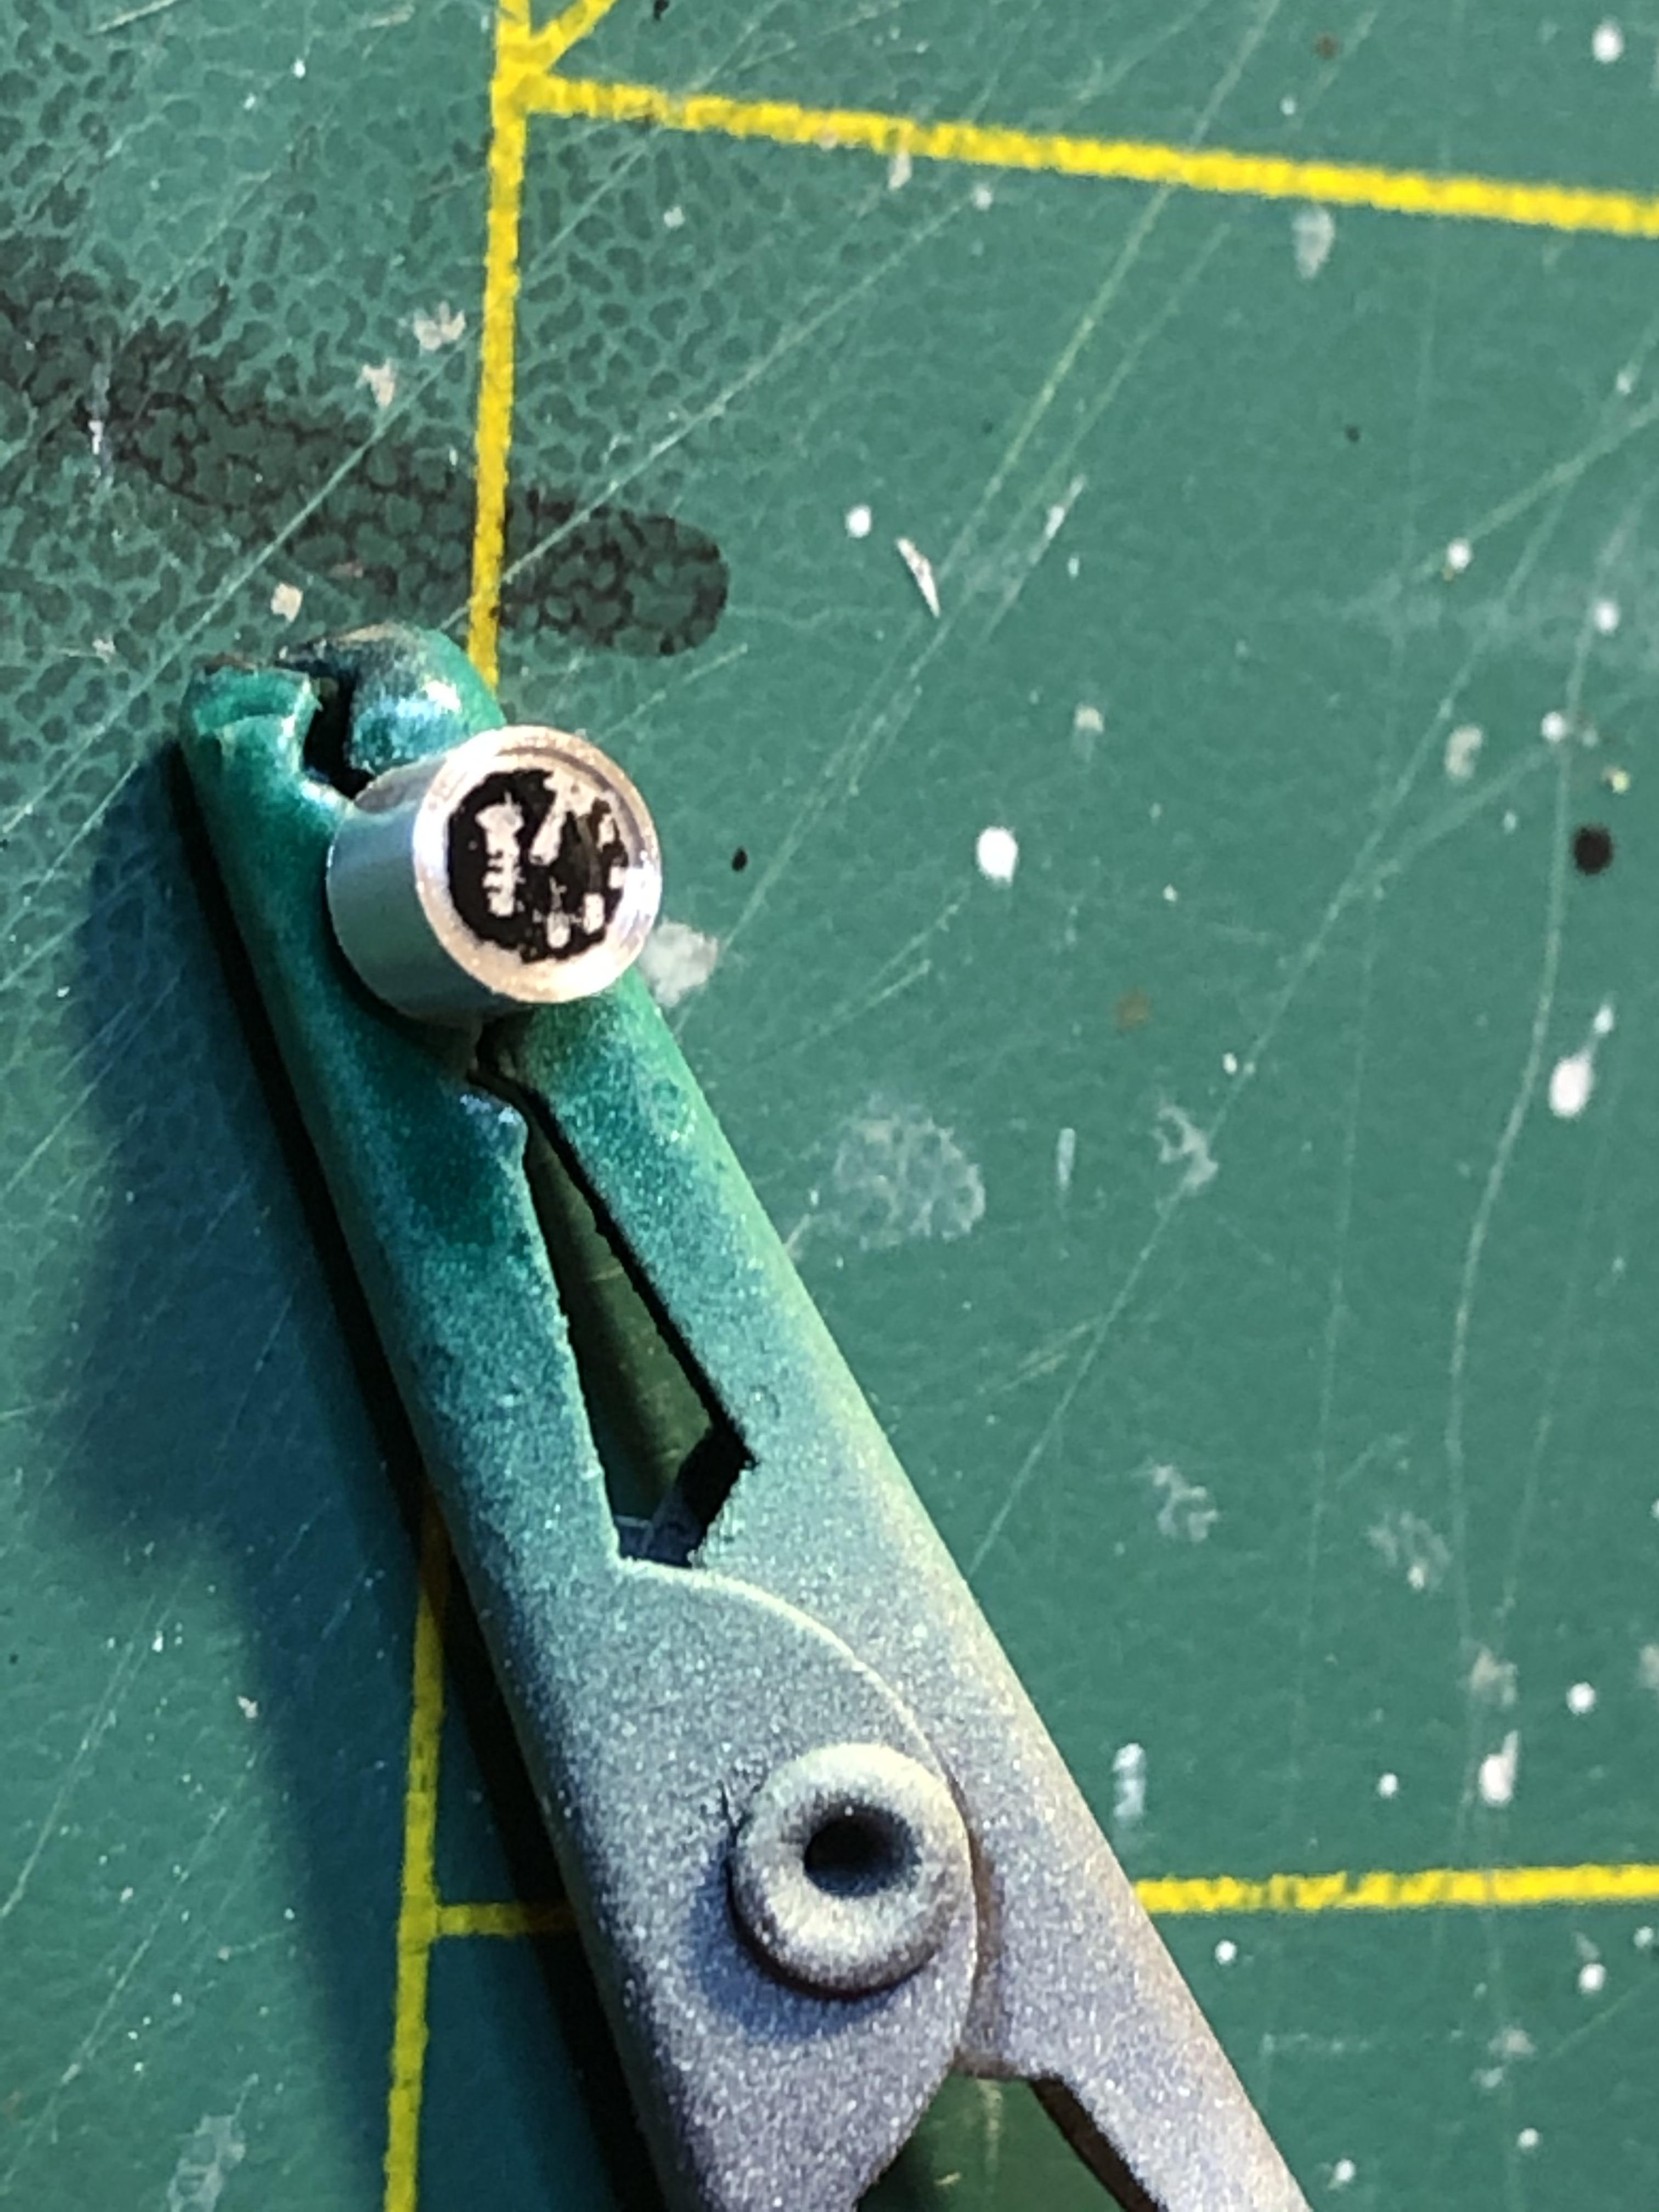
Thanks Zippi Still hammering away at small stuff. Found the front shocks were too long so made up some more from round and tube stock. Ribs are cores from some small electronics type wire I needed a tach to fit to the overhead console. Turned one up out of some ally bar on my lathe. Added a gauge face had printed up for the project and filled the front recess with 5min epoxy
-
I wondered how you chopped the A pillar. Looked through the Fotki link - Aha - I like it - I may use this method on my next 32 chop. Easier than stretching the turret and cutting a section from the A pillar and leaning it back
-
Cool hot rod. Stance, colour, engine choice spot on
-
Hi Alan Cool build of that old kit. Love the front end treatment and interior mods Should drop a 241 hemi from an AlaKart into it. You are way past the original banger modified theme and the 241 would fit in with a junkyard raid engine. You could always pass it off as a 315 as this was the largest of the Dodge hemi's I believe
-
This is awesome work
-
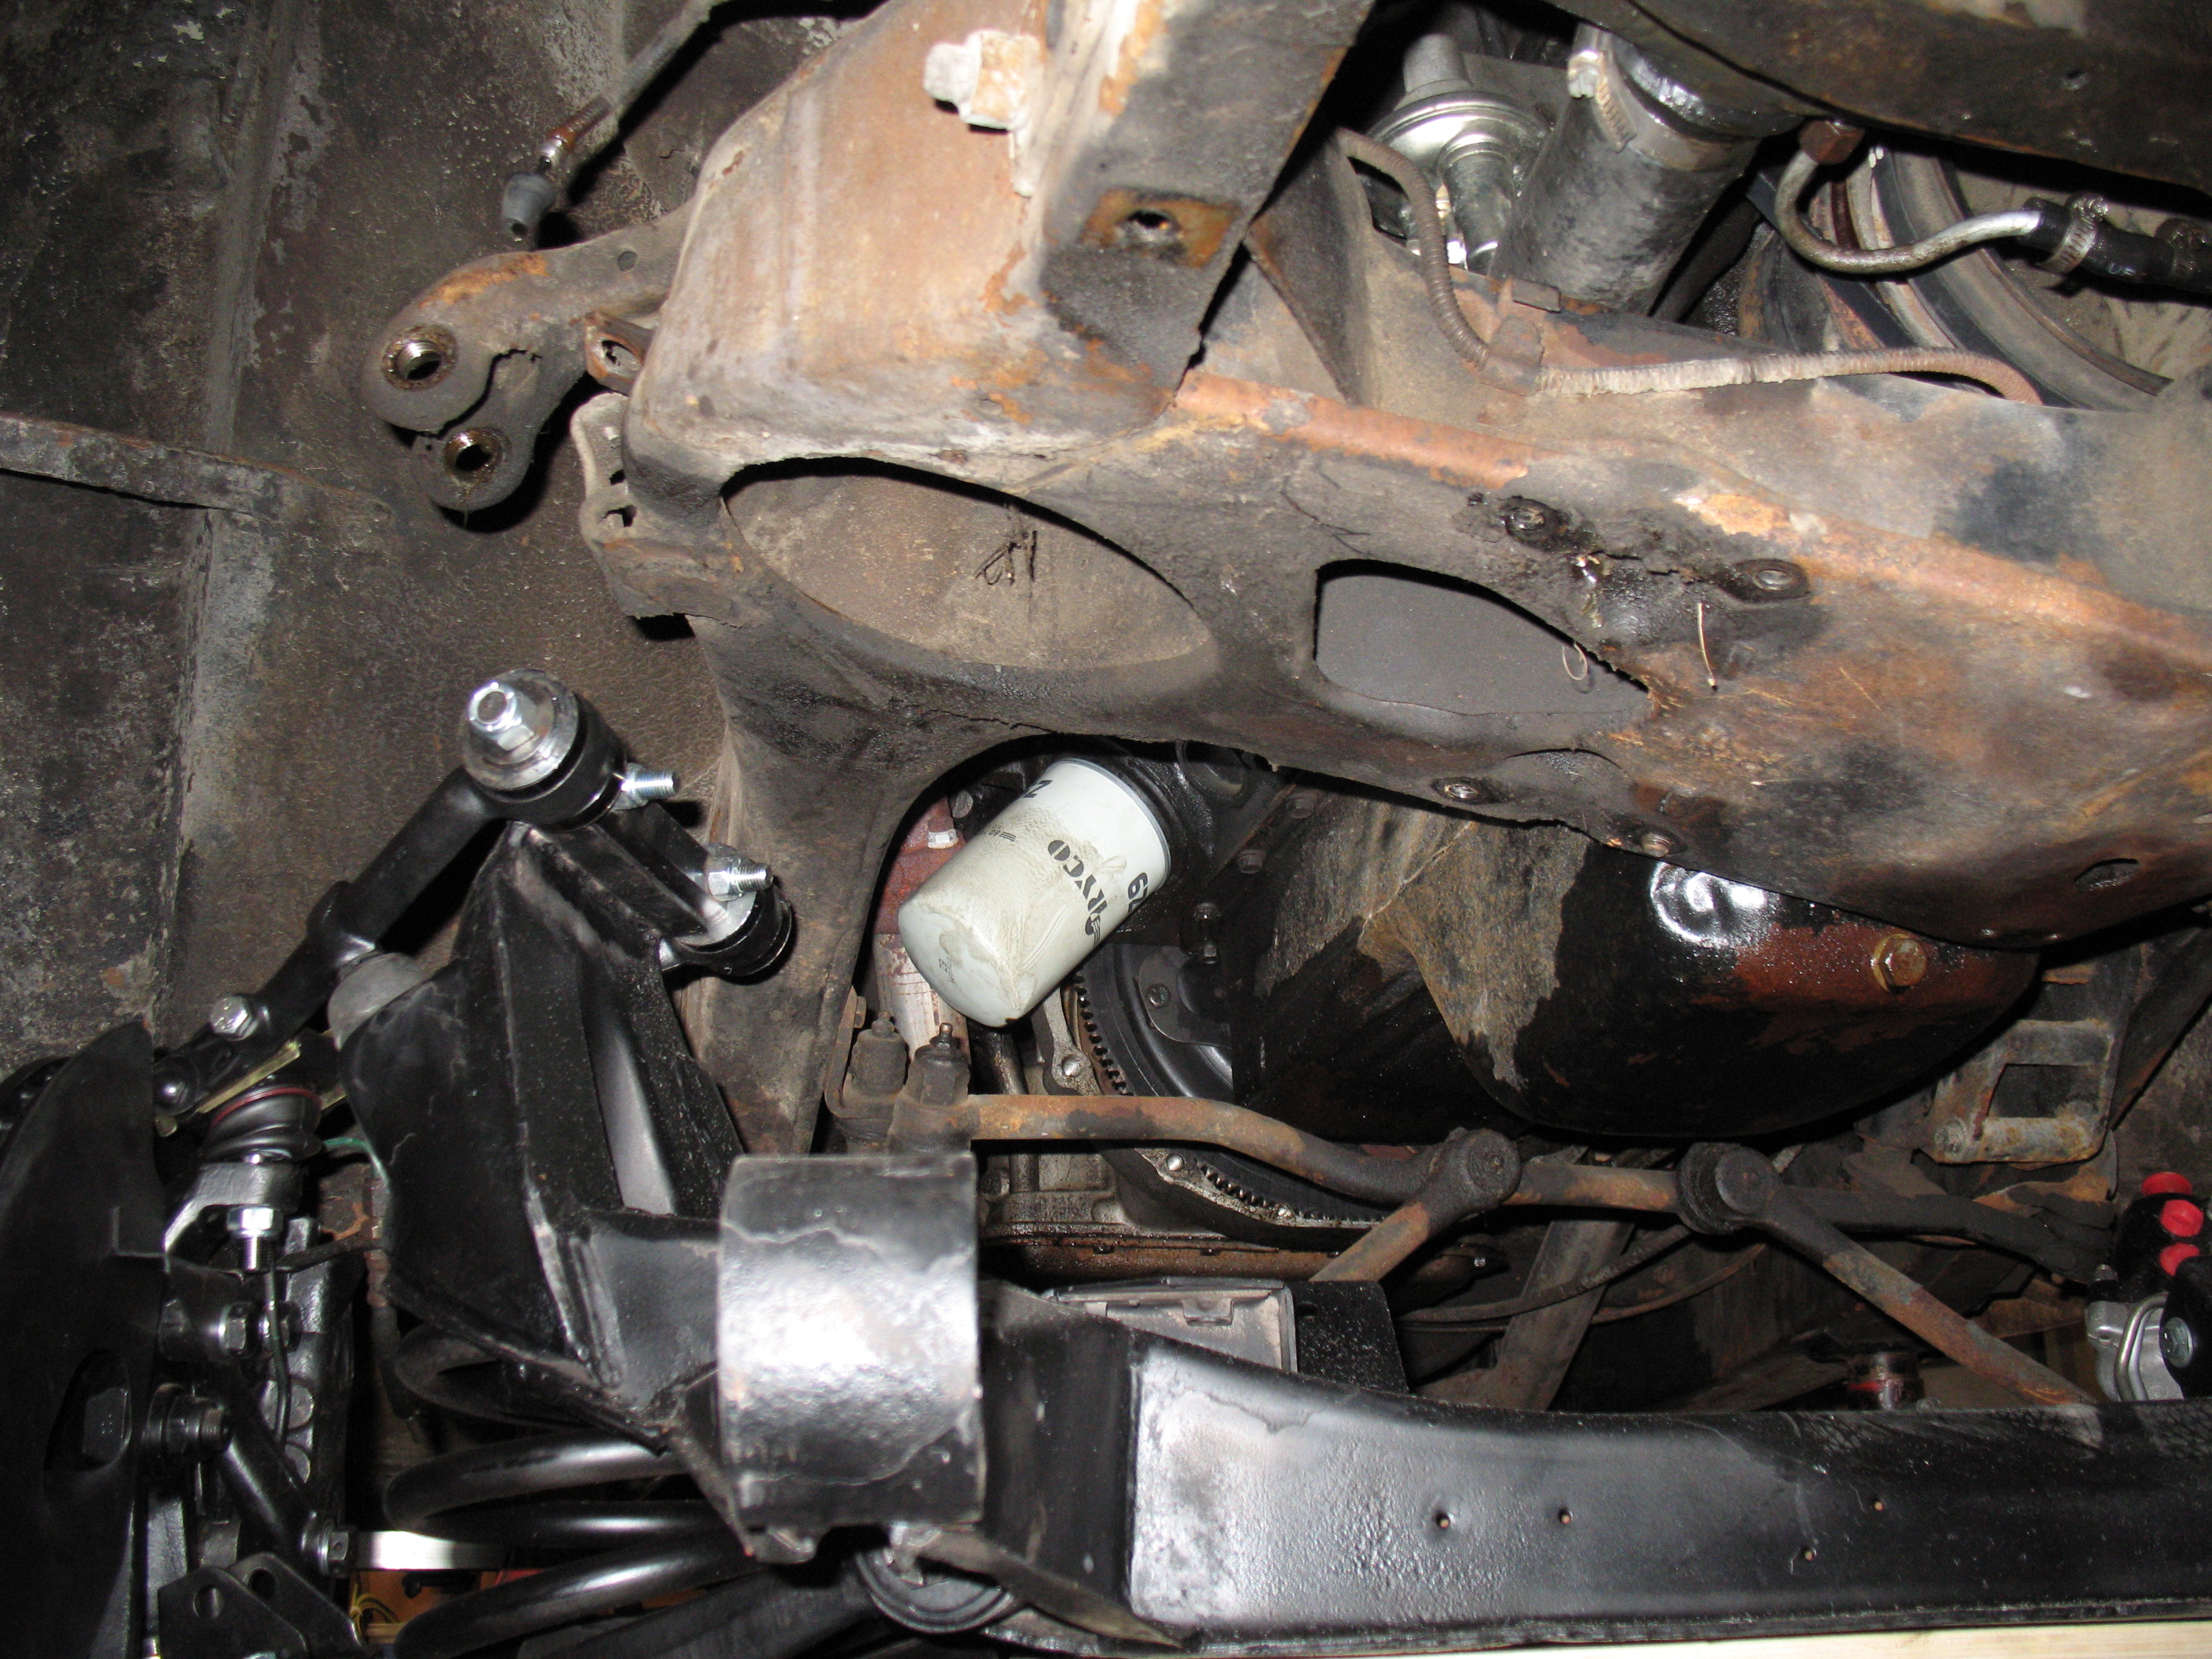
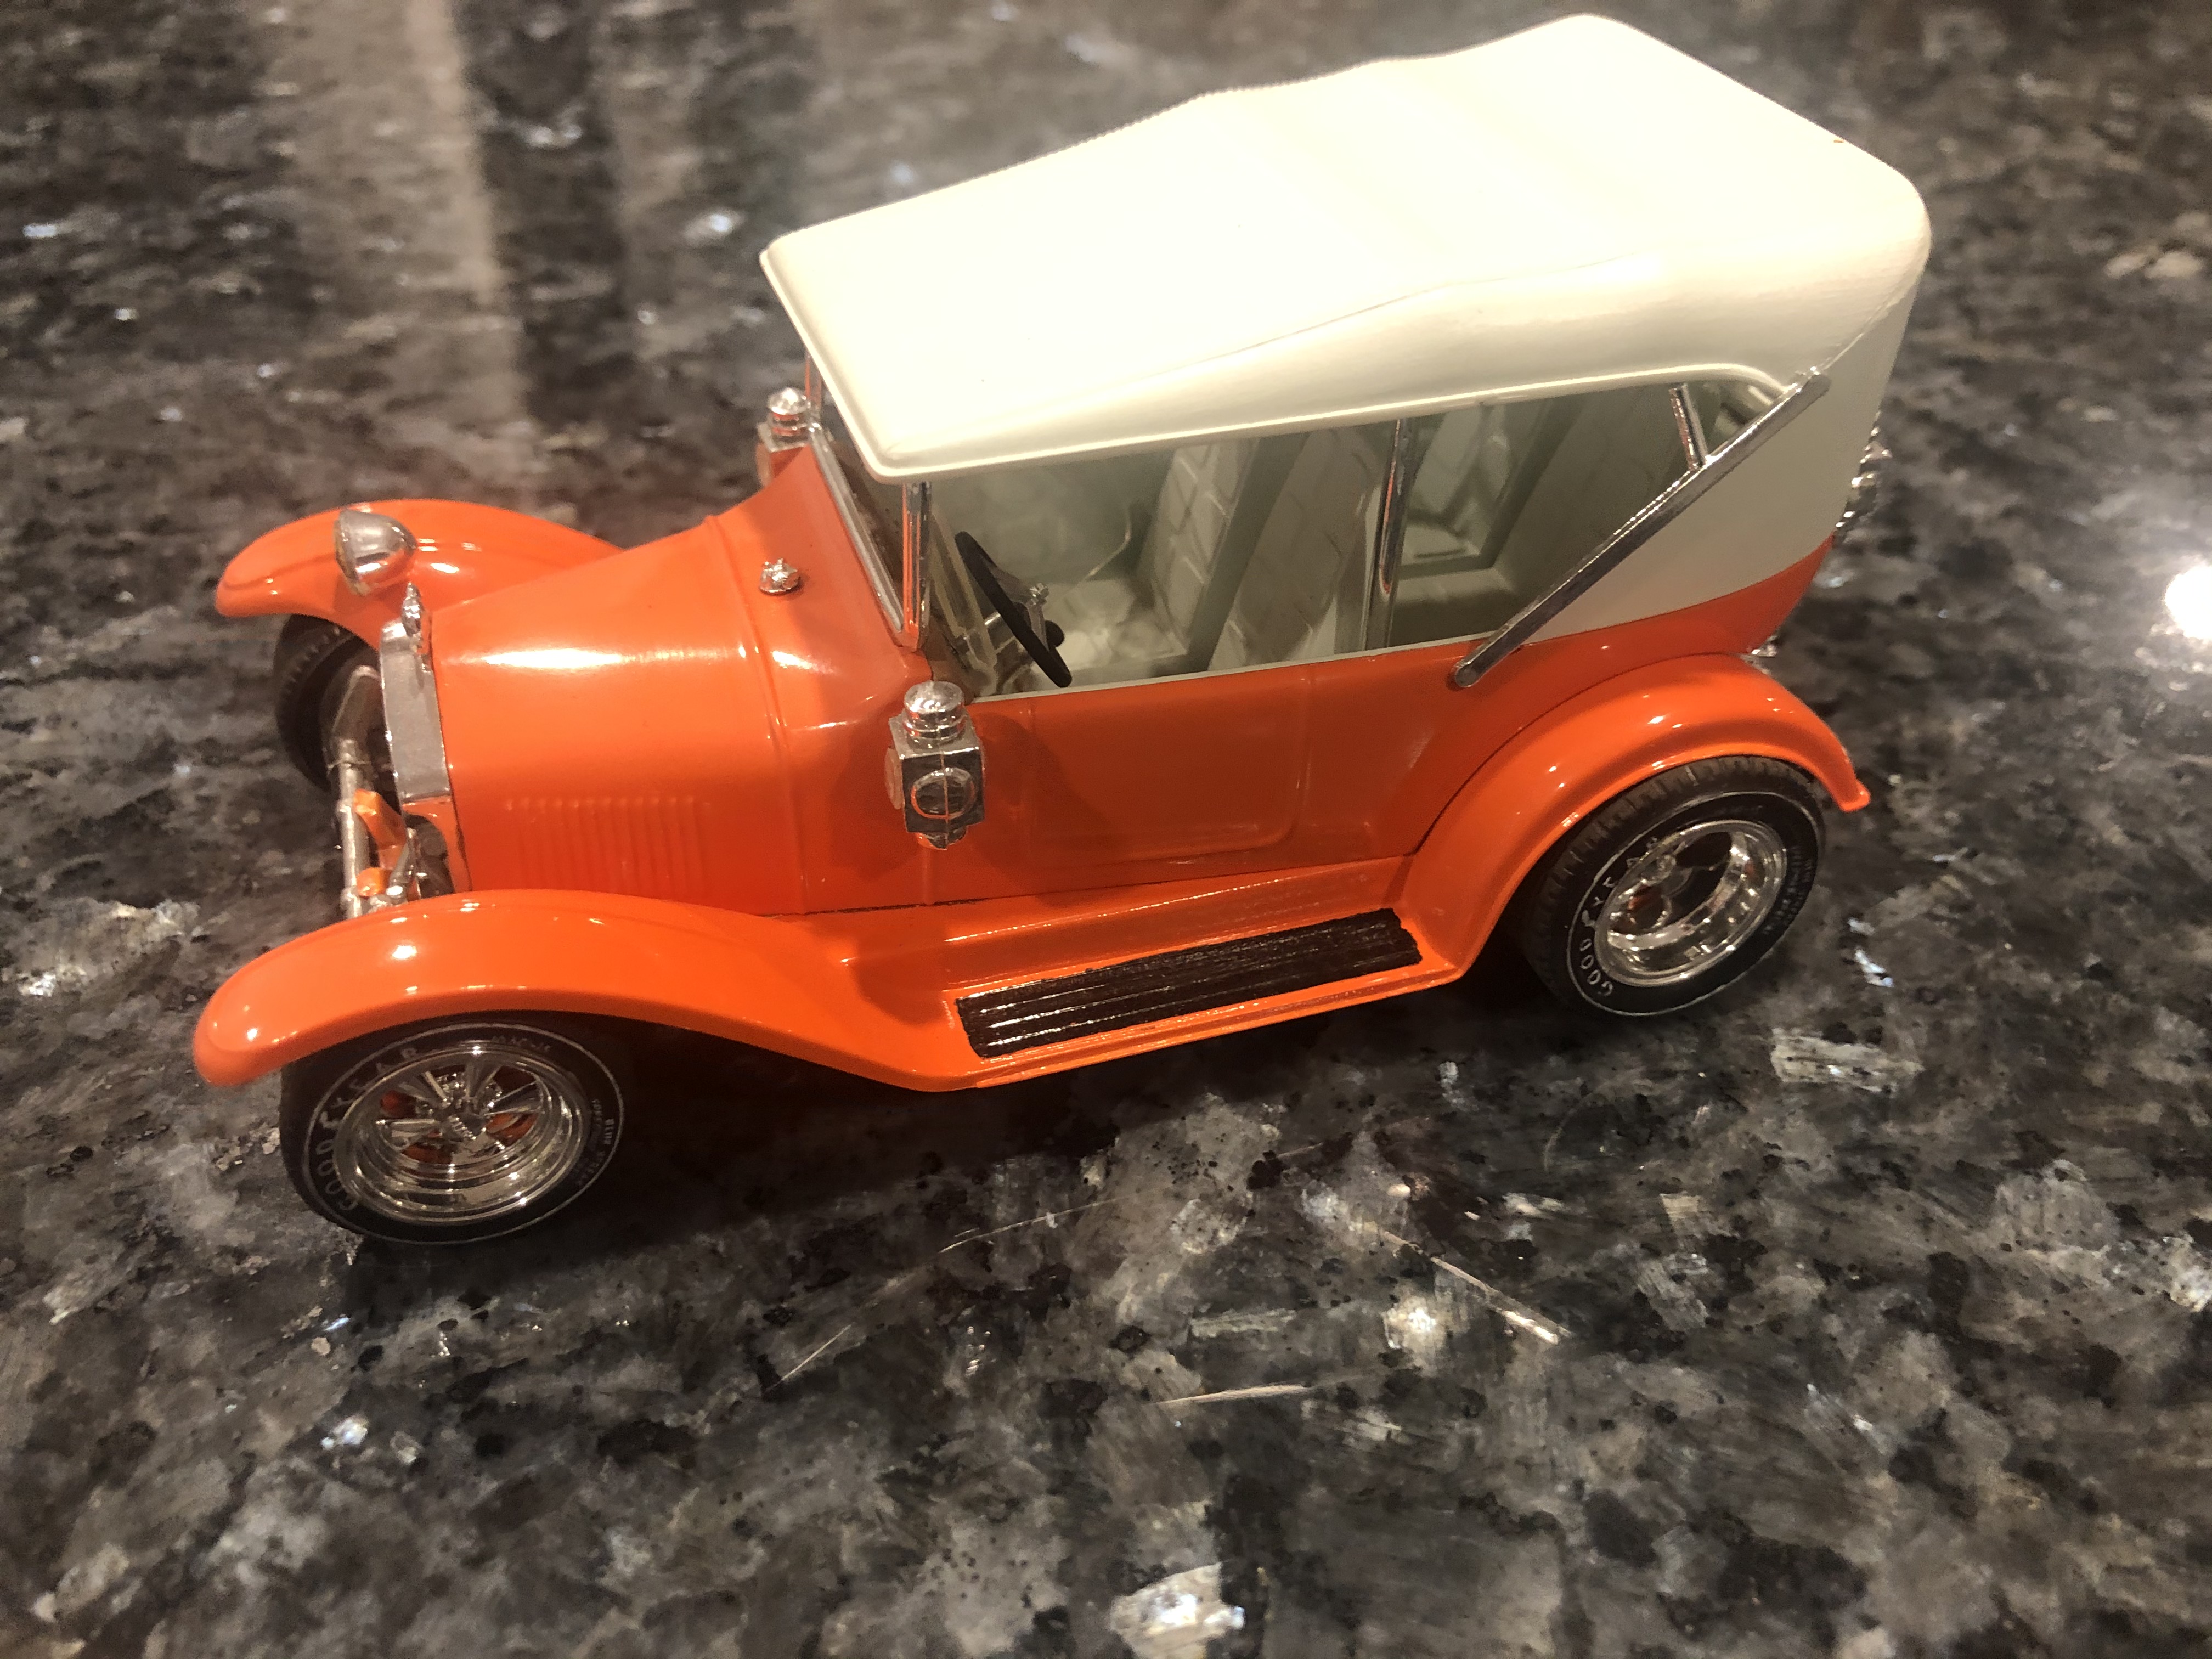
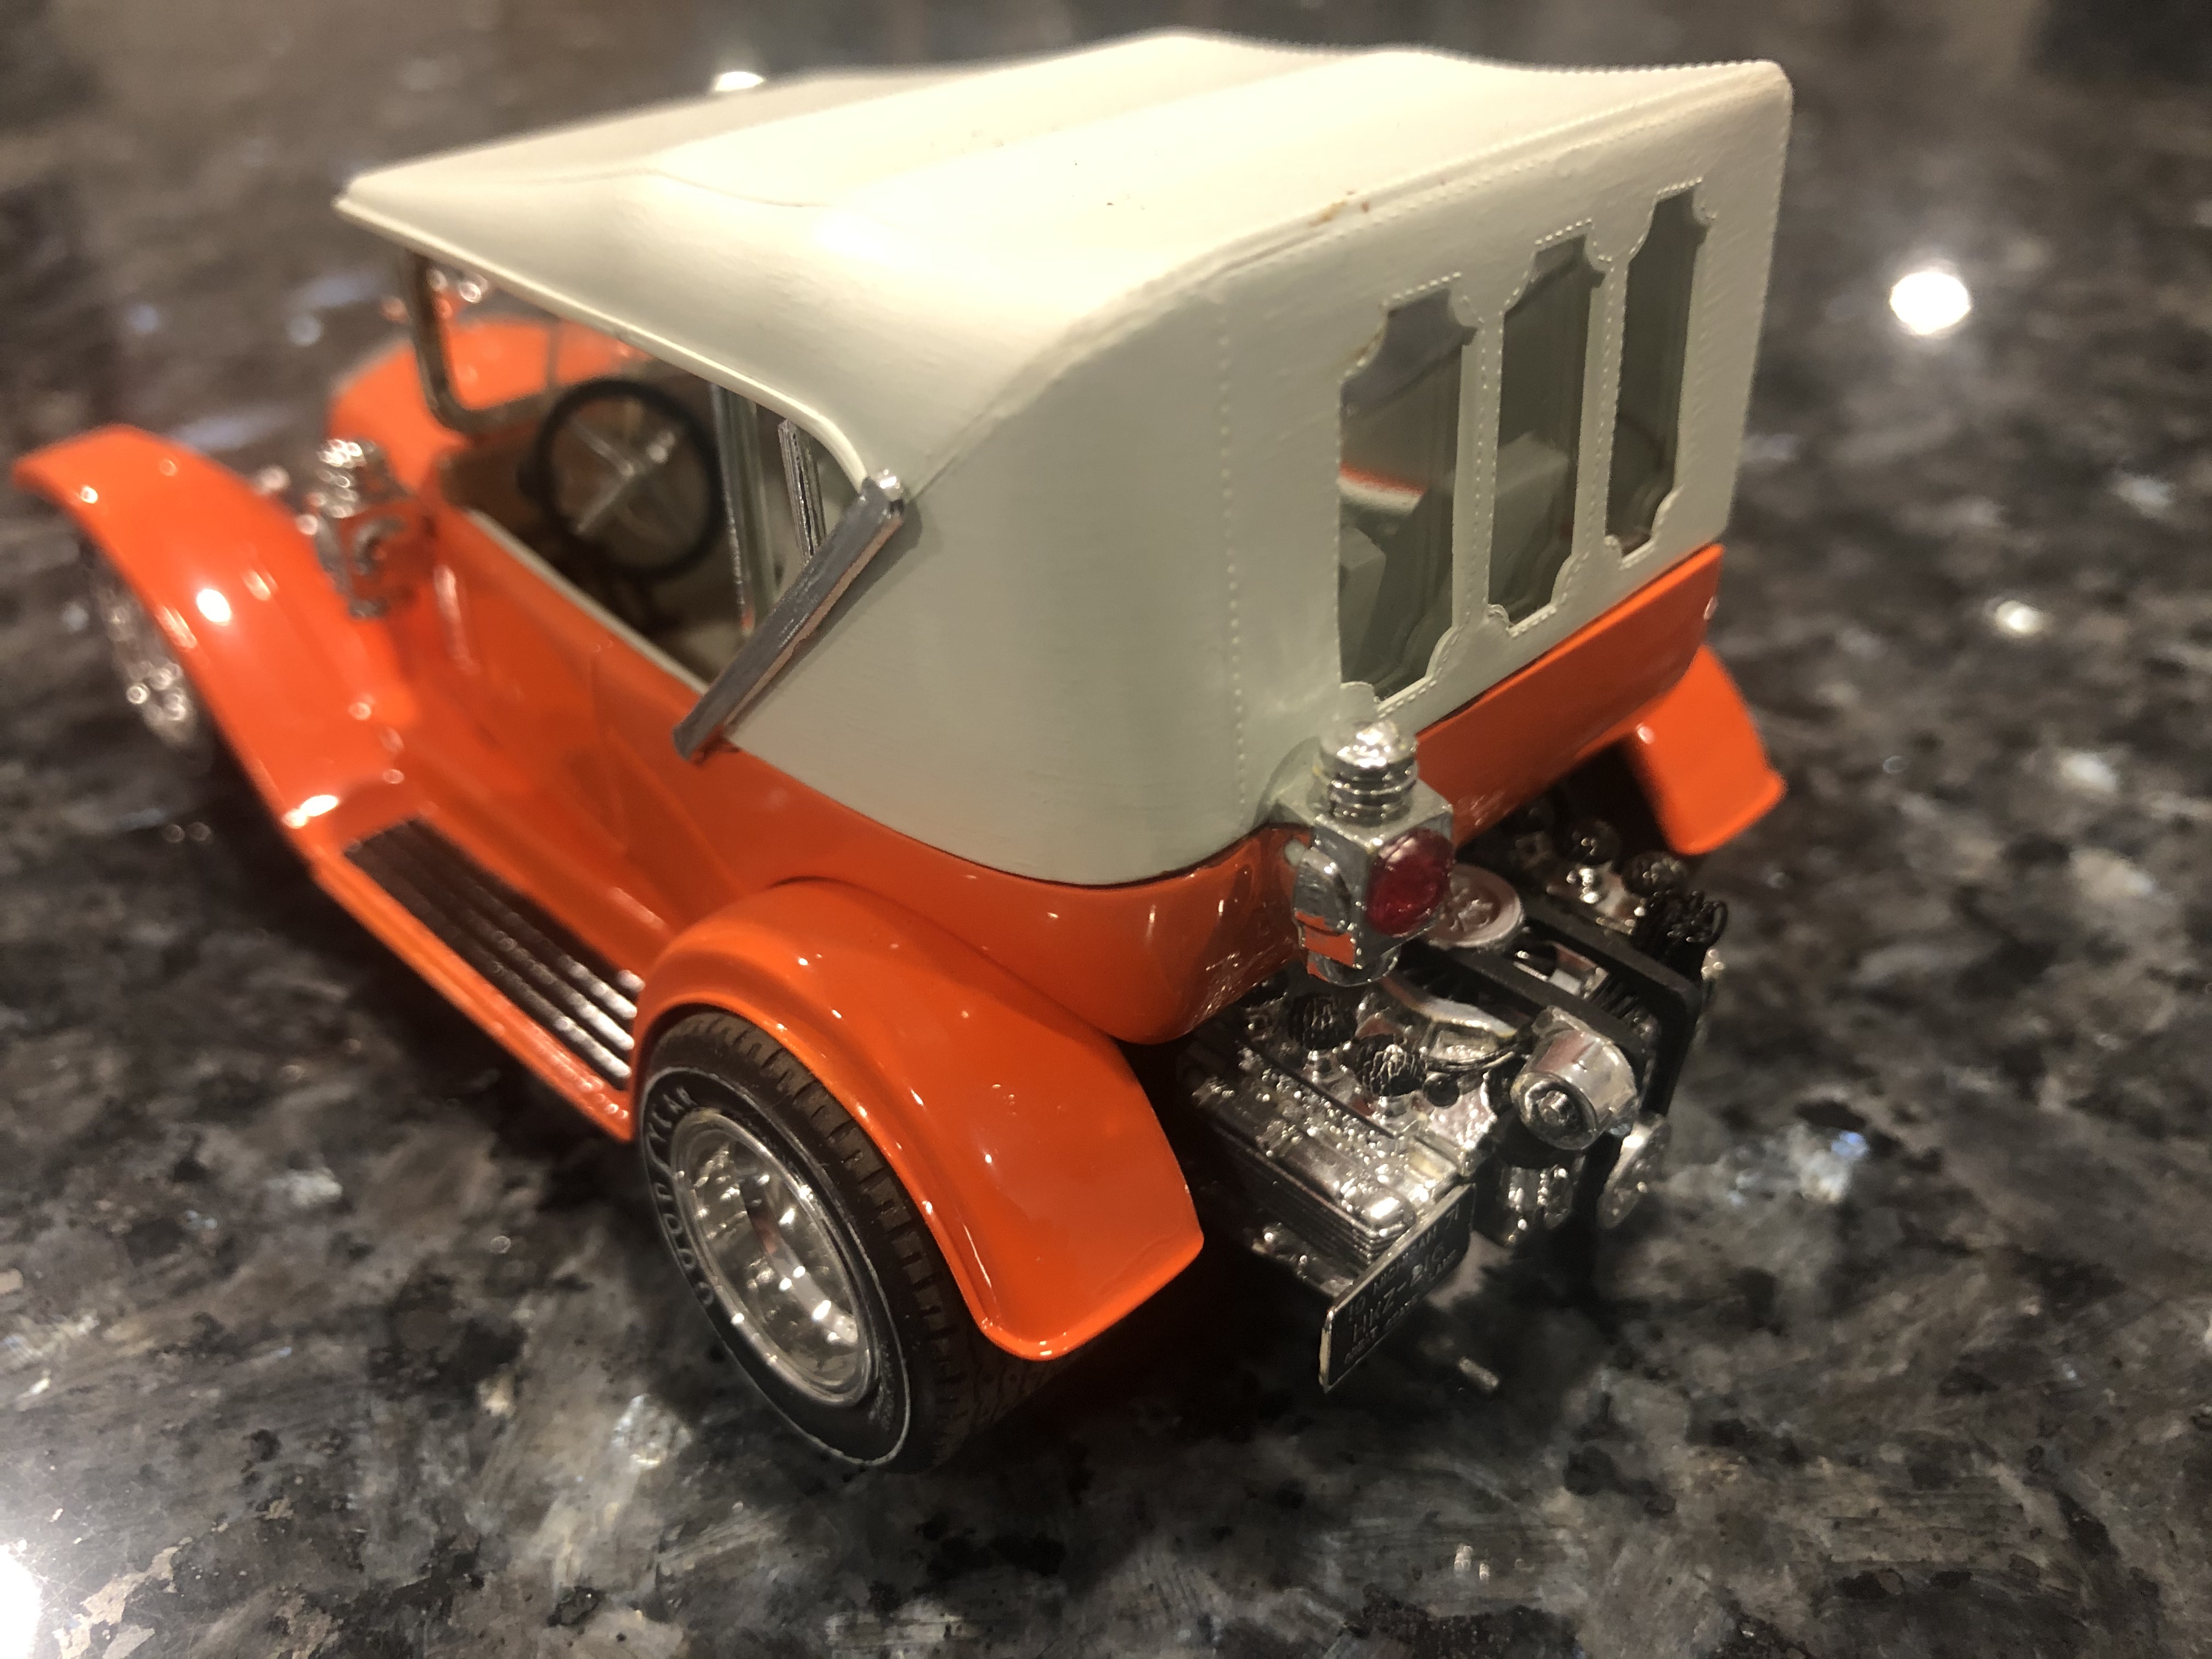
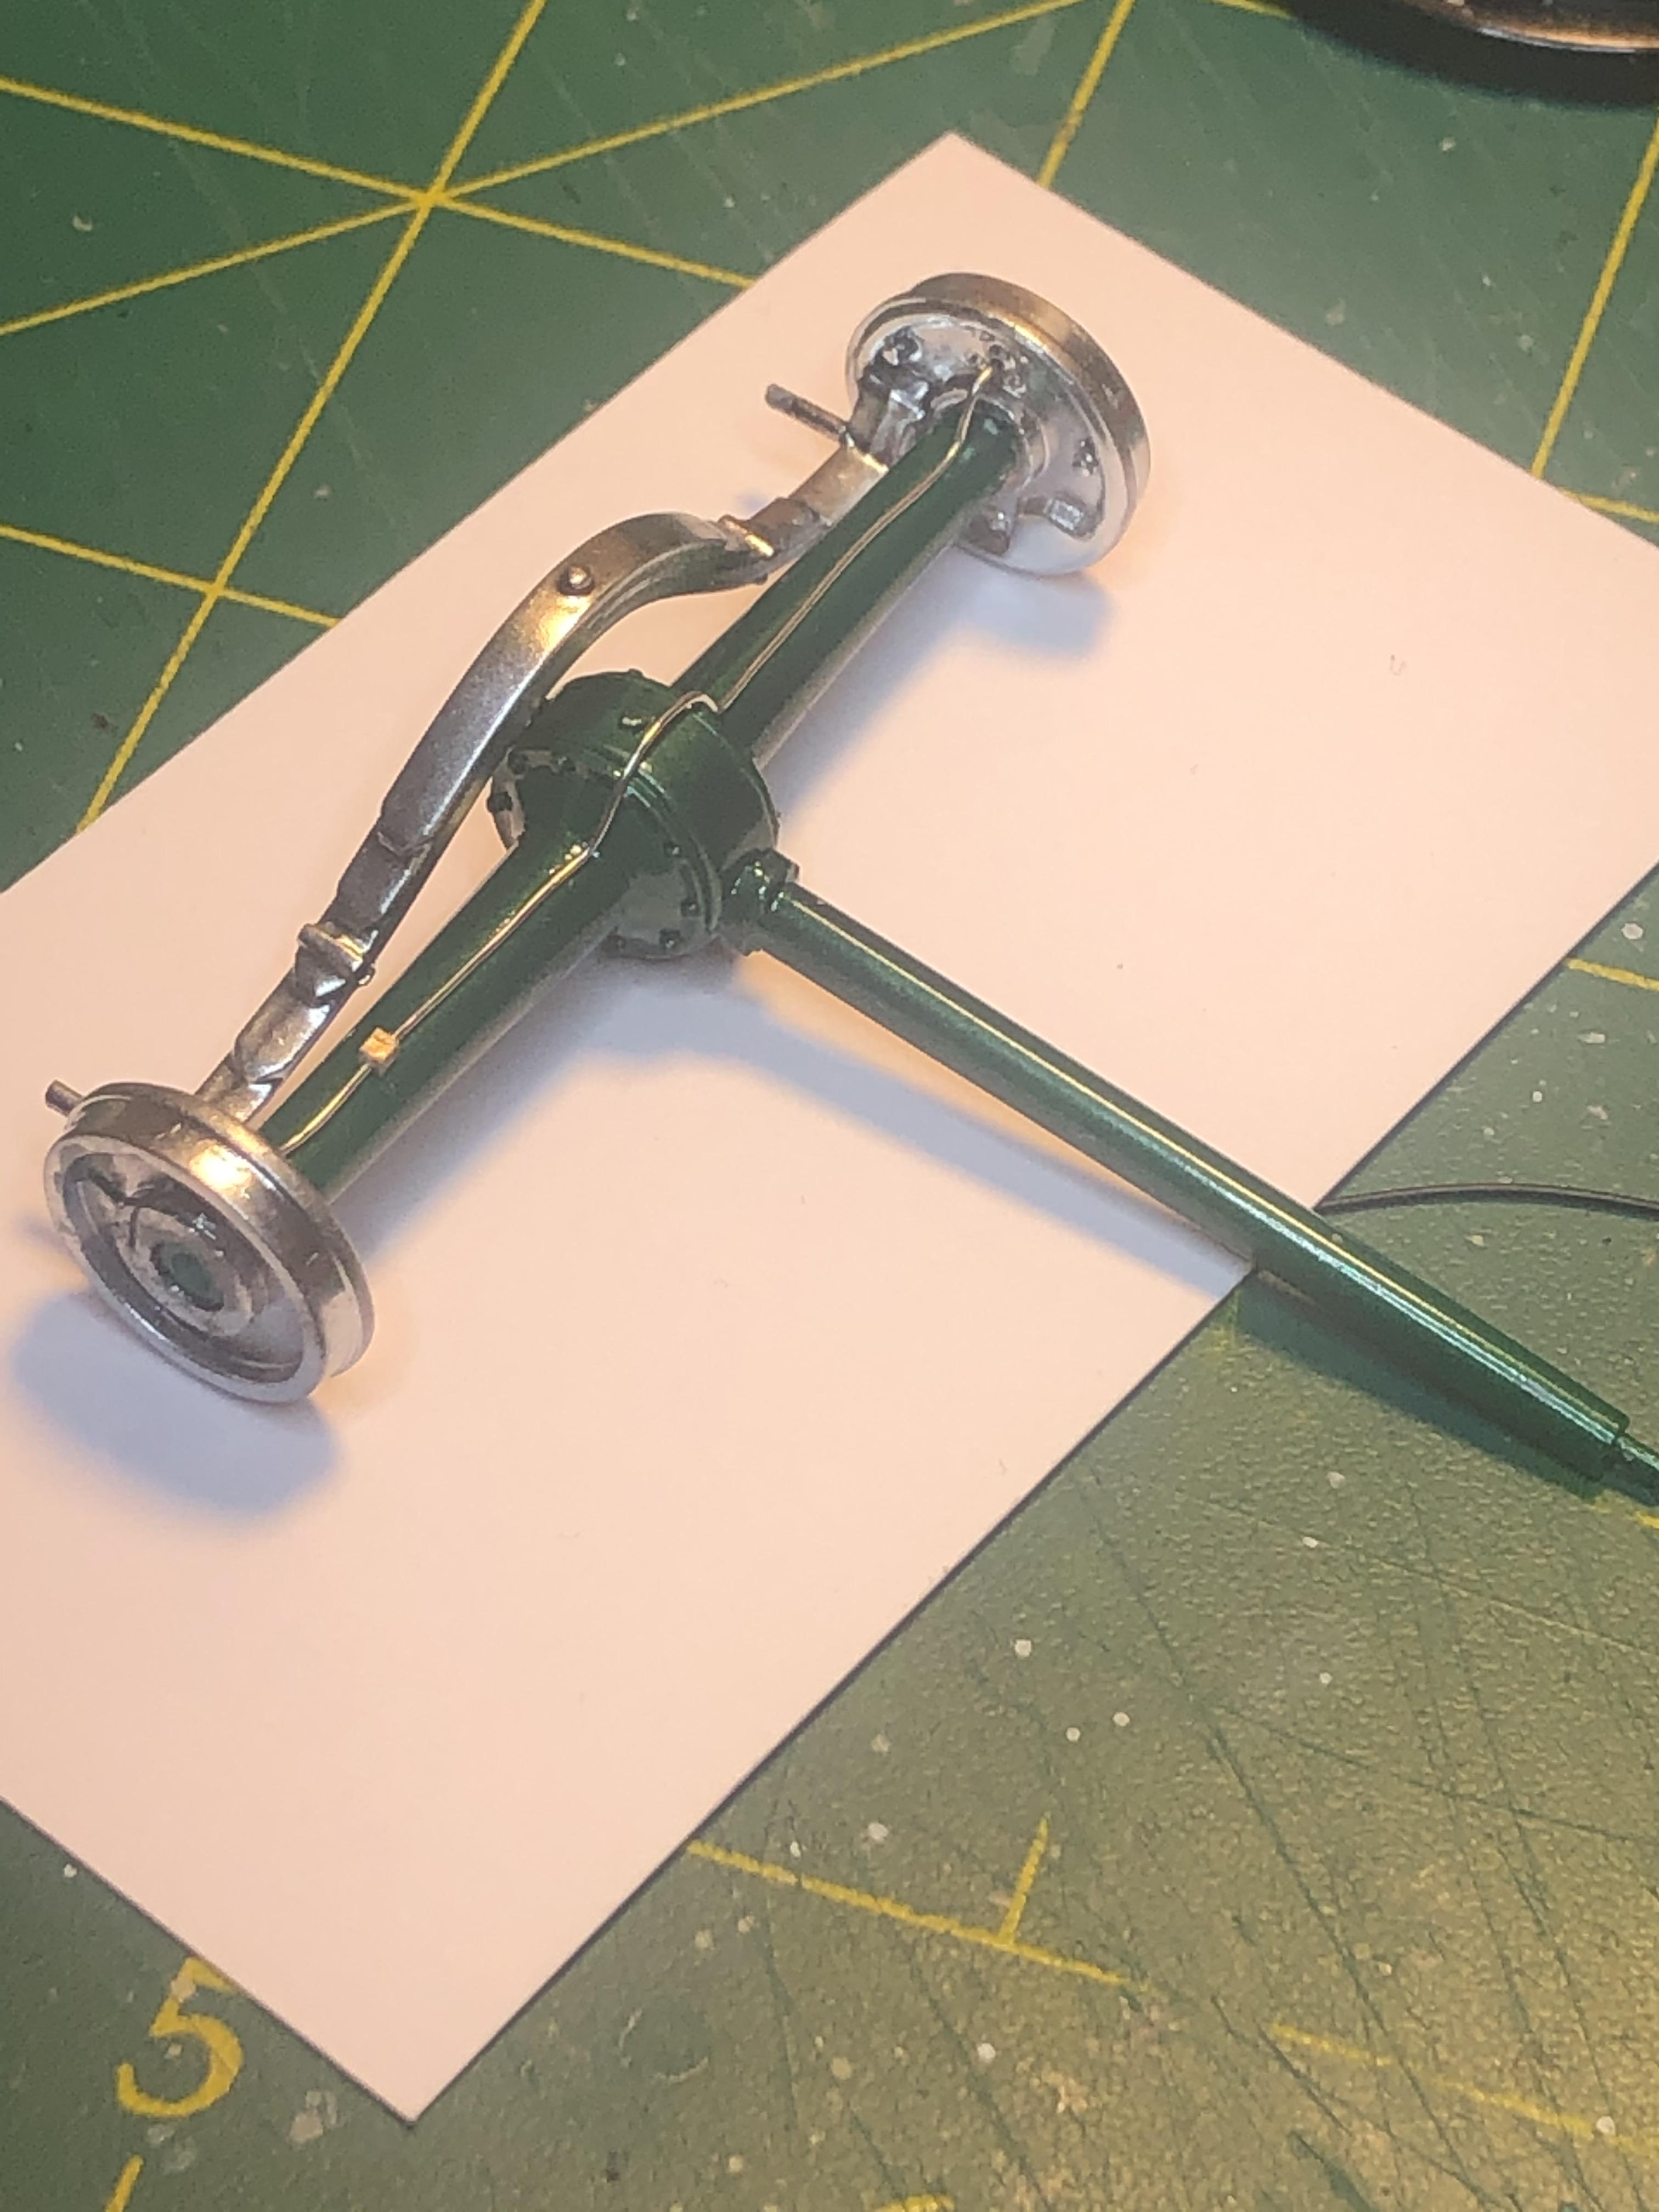
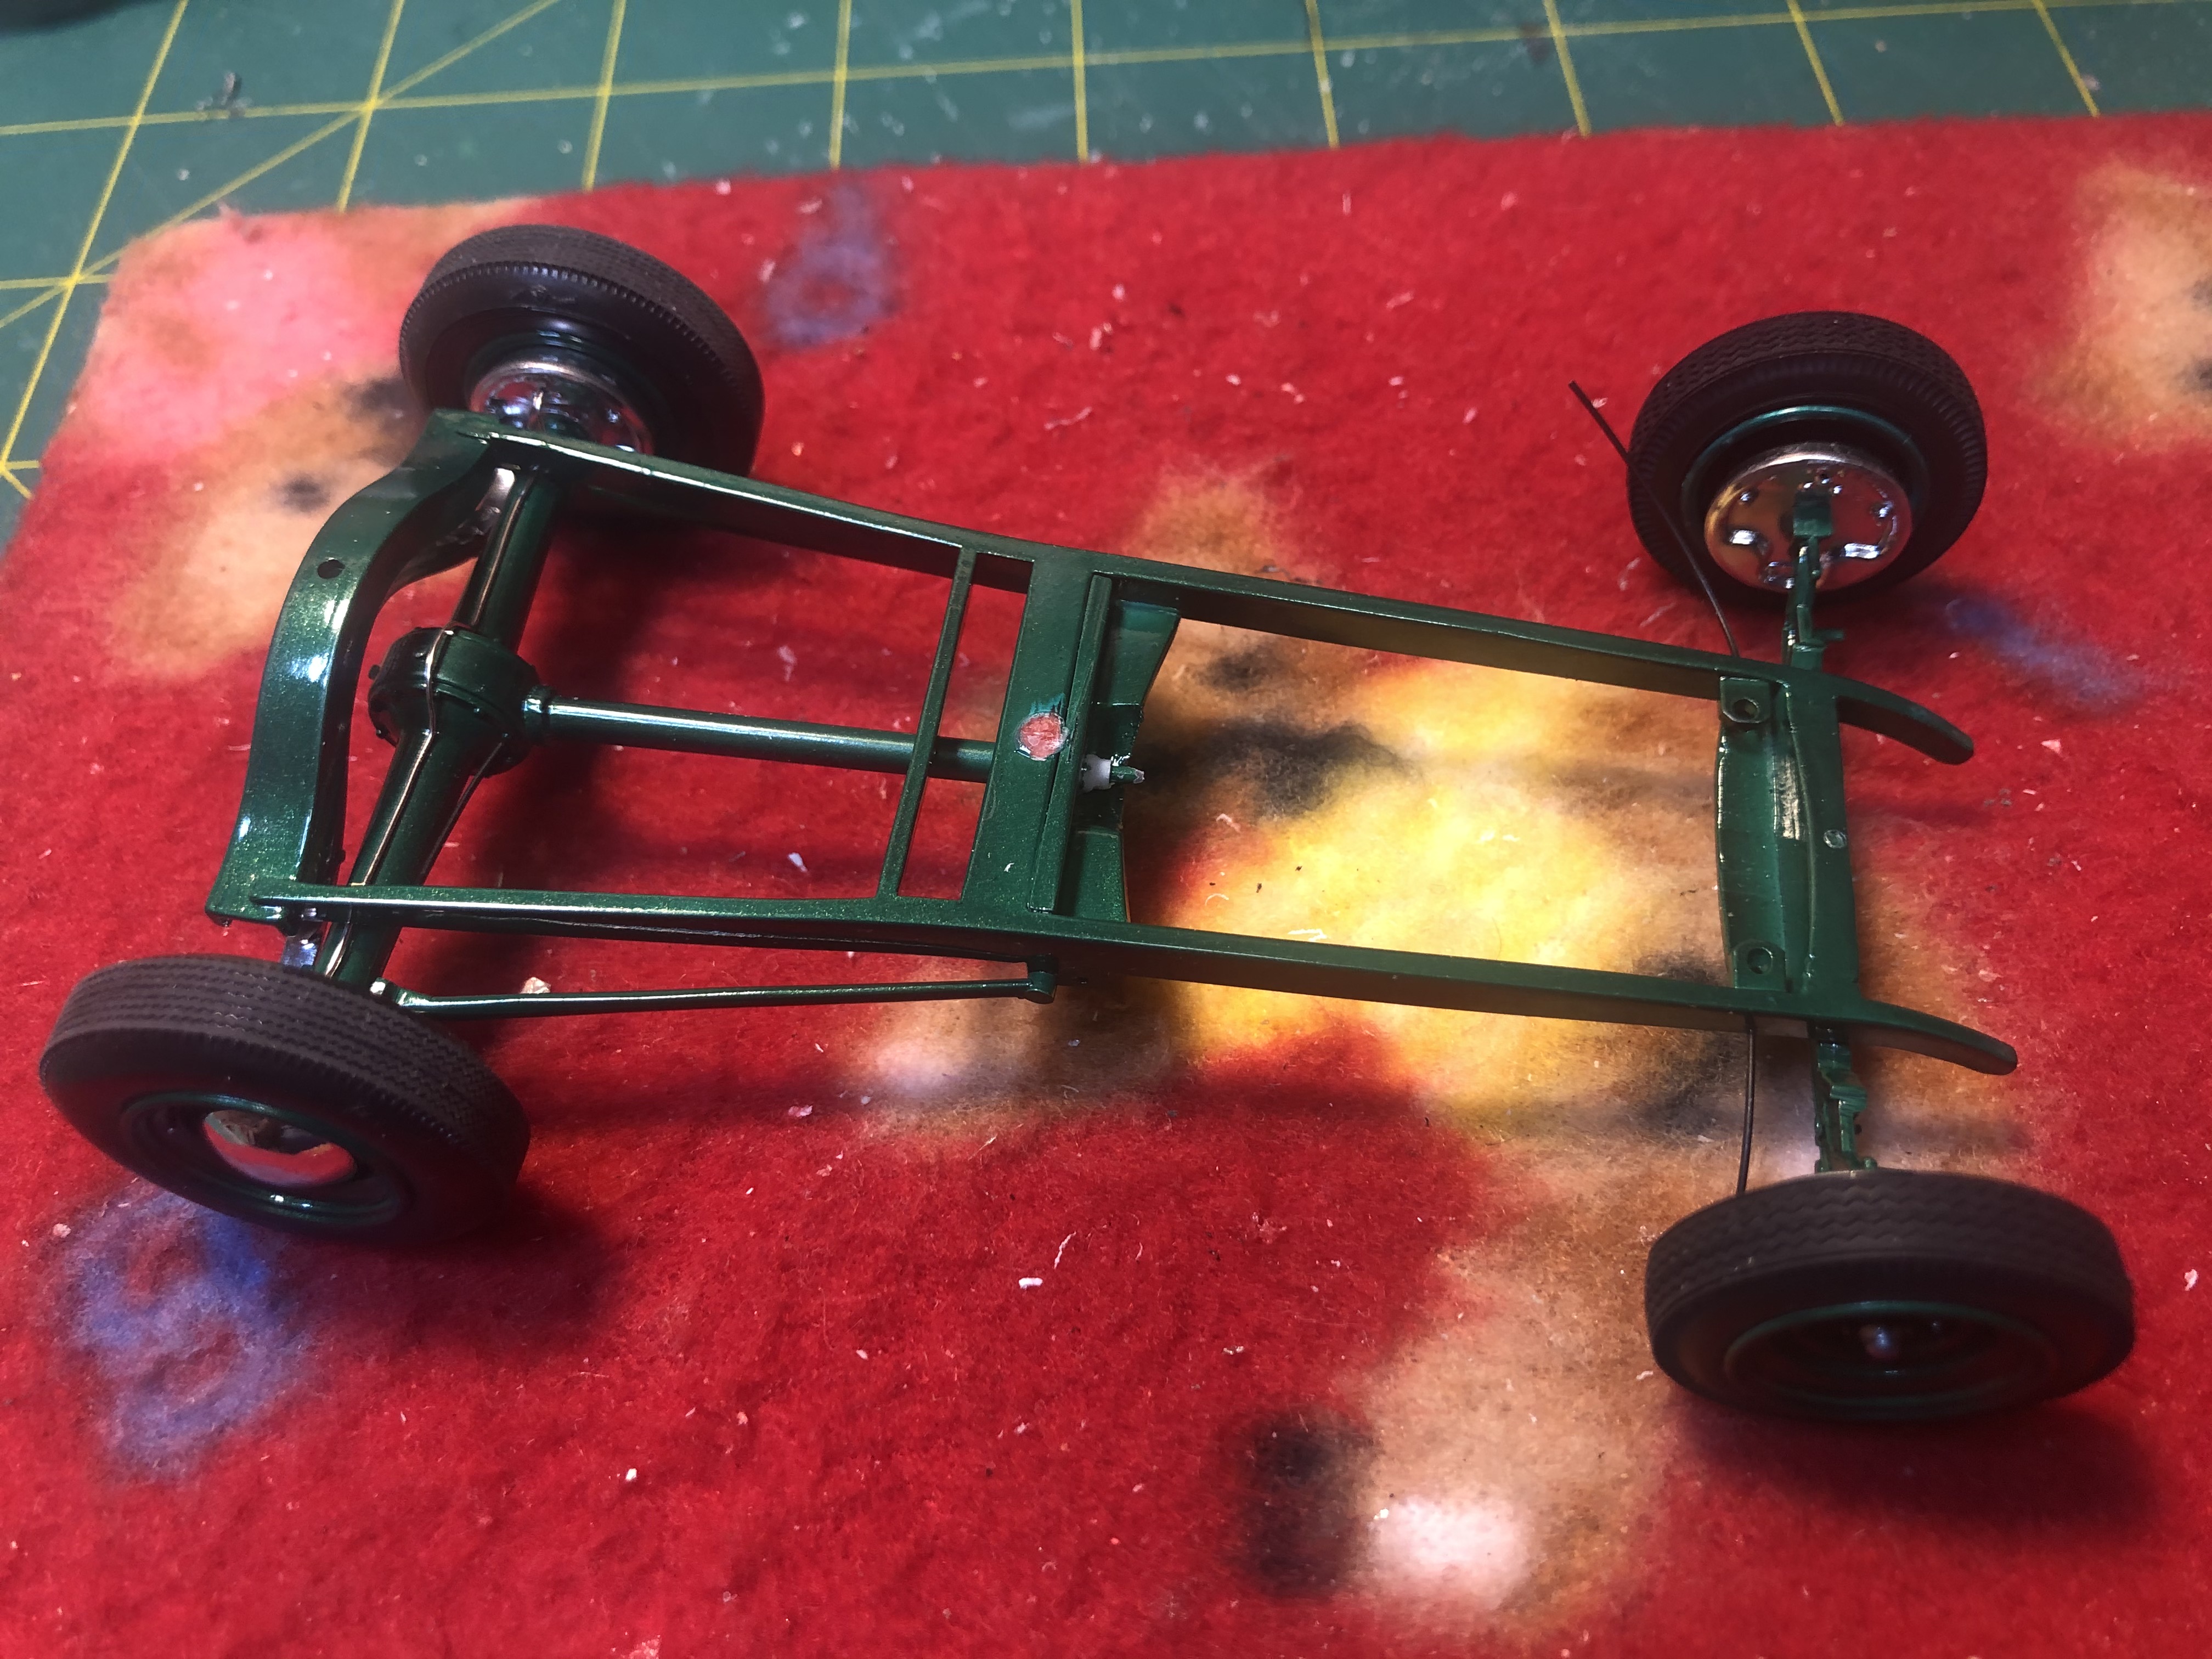
As an owner of a real deal 56 Dodge CRL coupe you have got the details very accurate. The 55 and 56 chassis were the same but the convertible has an X member for additional strength The front body mount is a U shaped piece welded to the front cross member and does not have a wedge shaped tunnel that carries on to the back of the cross member that is depicted in one of you renderings I have attached an image of that area and of the spring pocket area of the front cross member The front end shown under the Dodge chassis is a Jag XJ6 that I installed in place of the original - a long story that came about but it is on the road now and it is awesome
-
What a blast from the past. I built one way back when and it still looks OK. It builds up into a nice model. With the ravages of time I see the screen and motor need to be glued back in
-
A cool ride - nice colour too. I too have used the Ala Kart interior in a couple of my Model A builds and they have come out OK. The Ala Kart chrome windshield/dash combo fits too
-
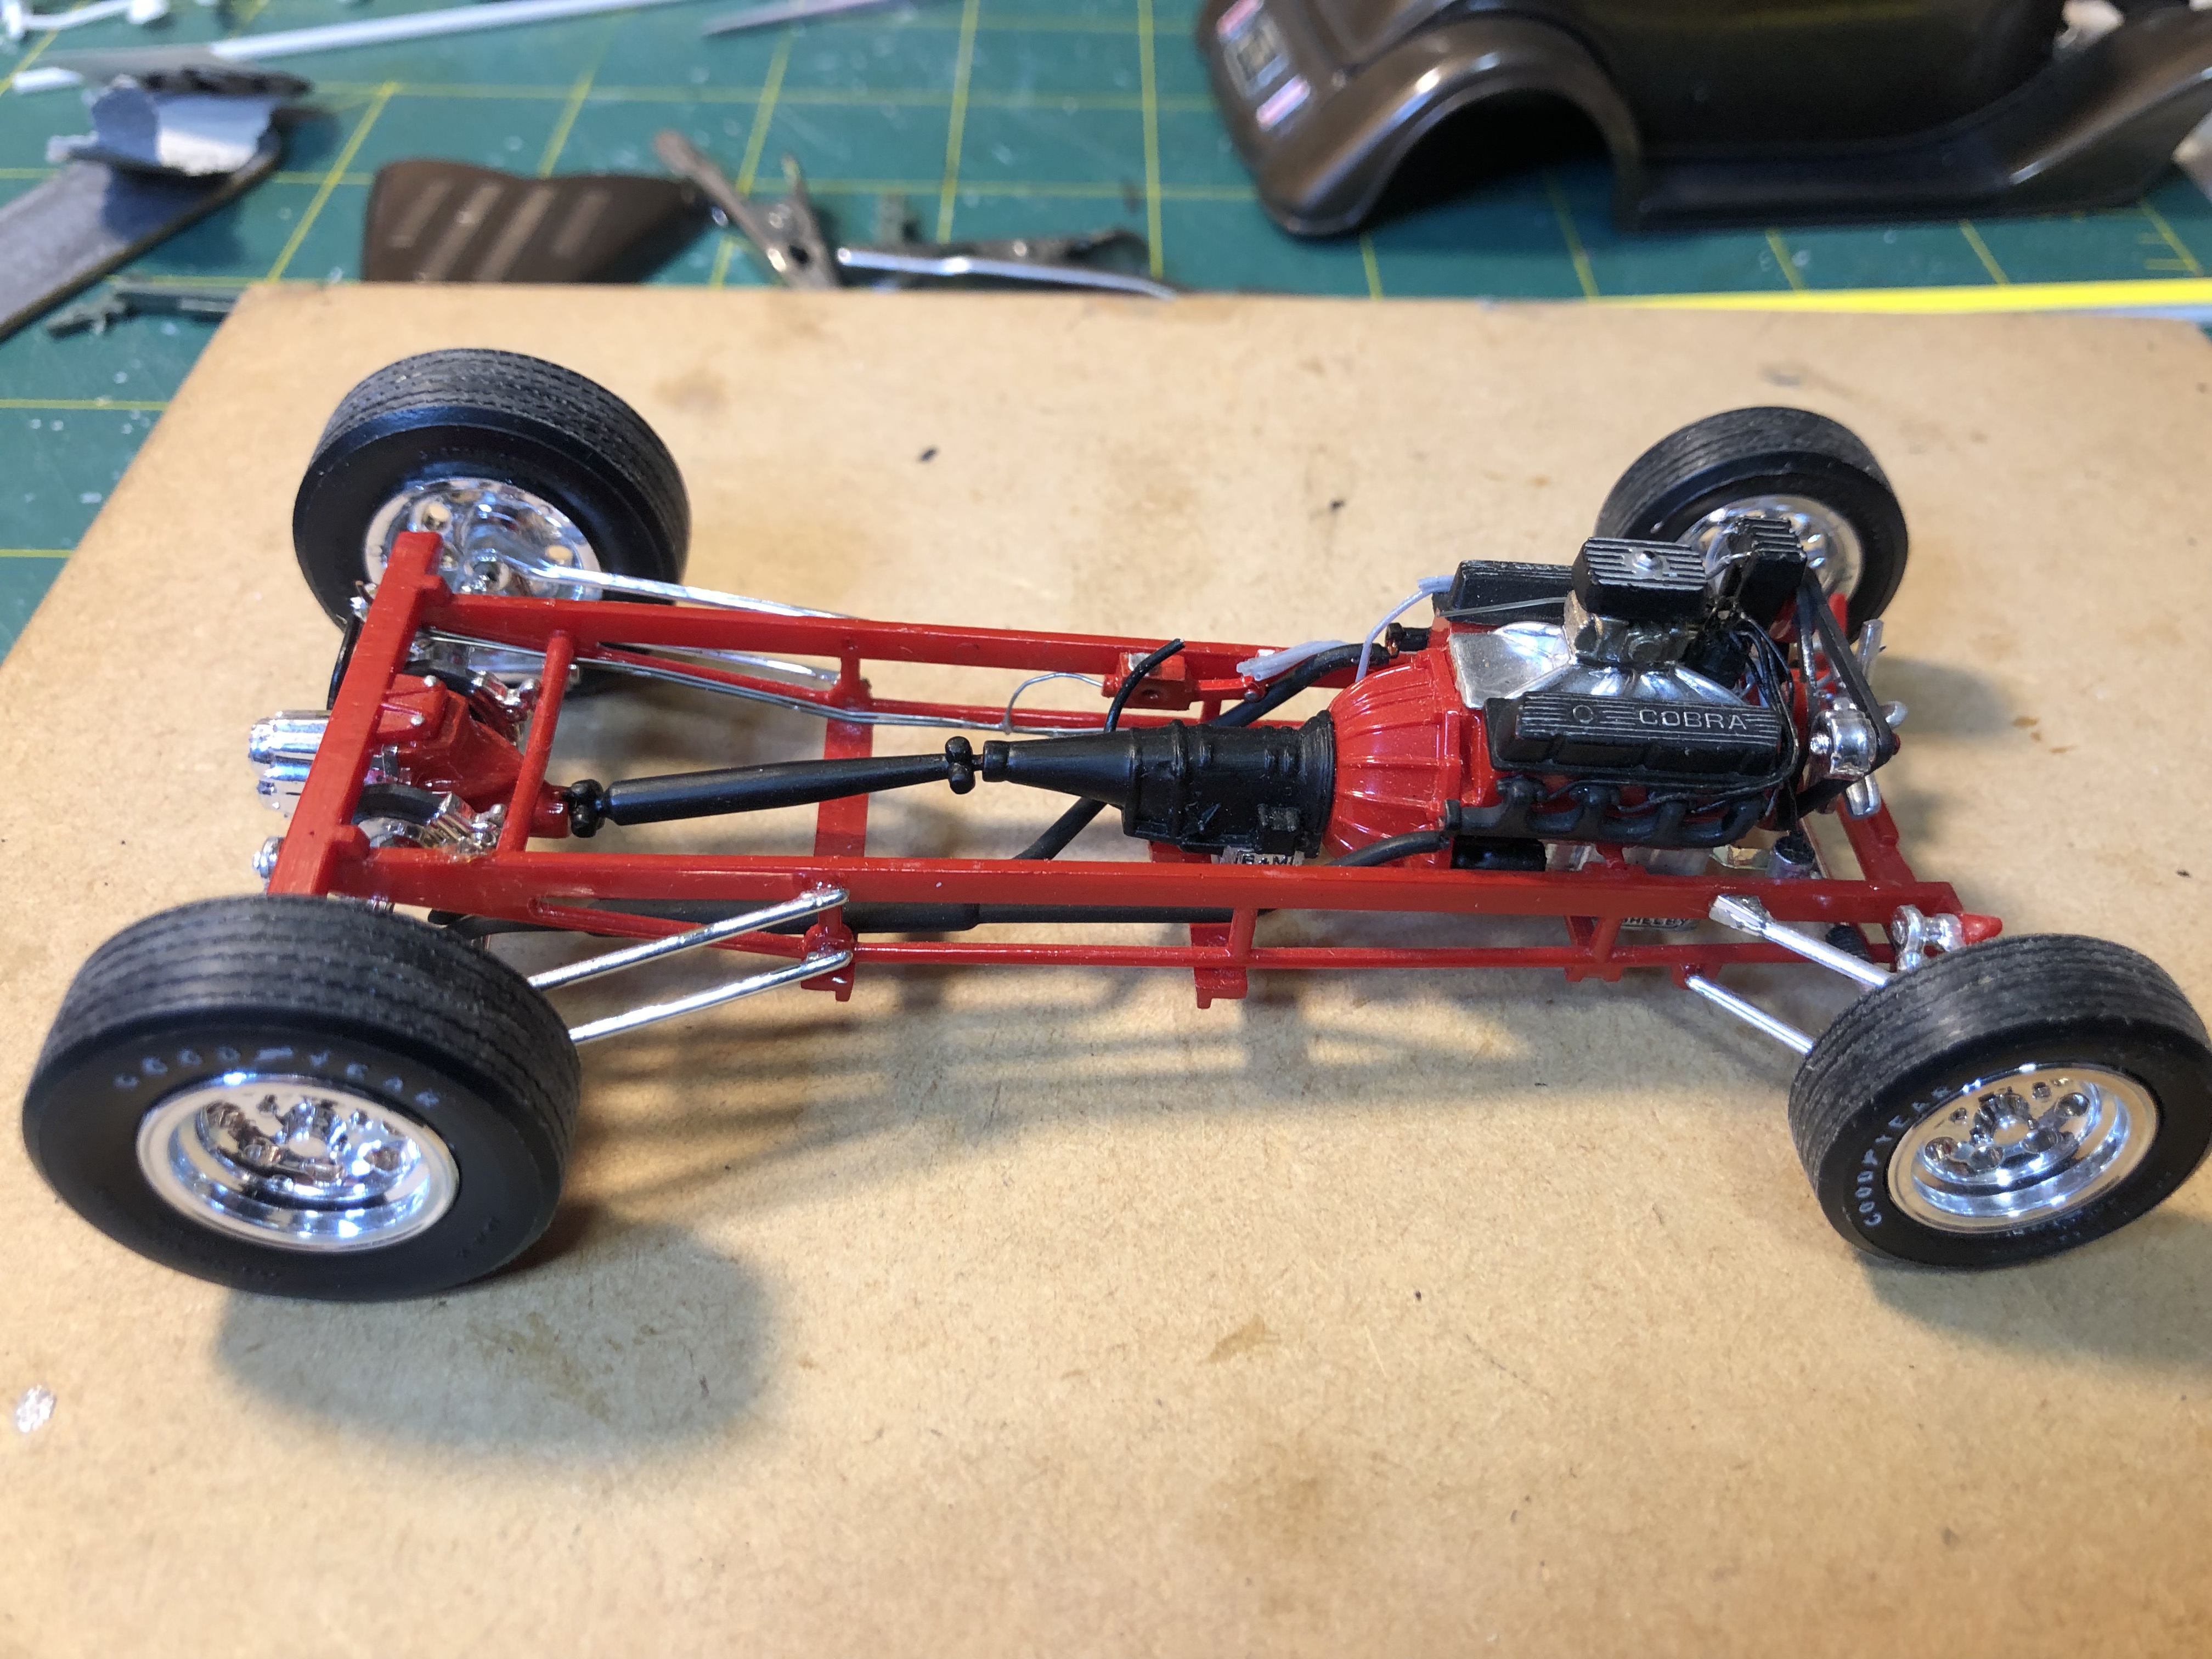
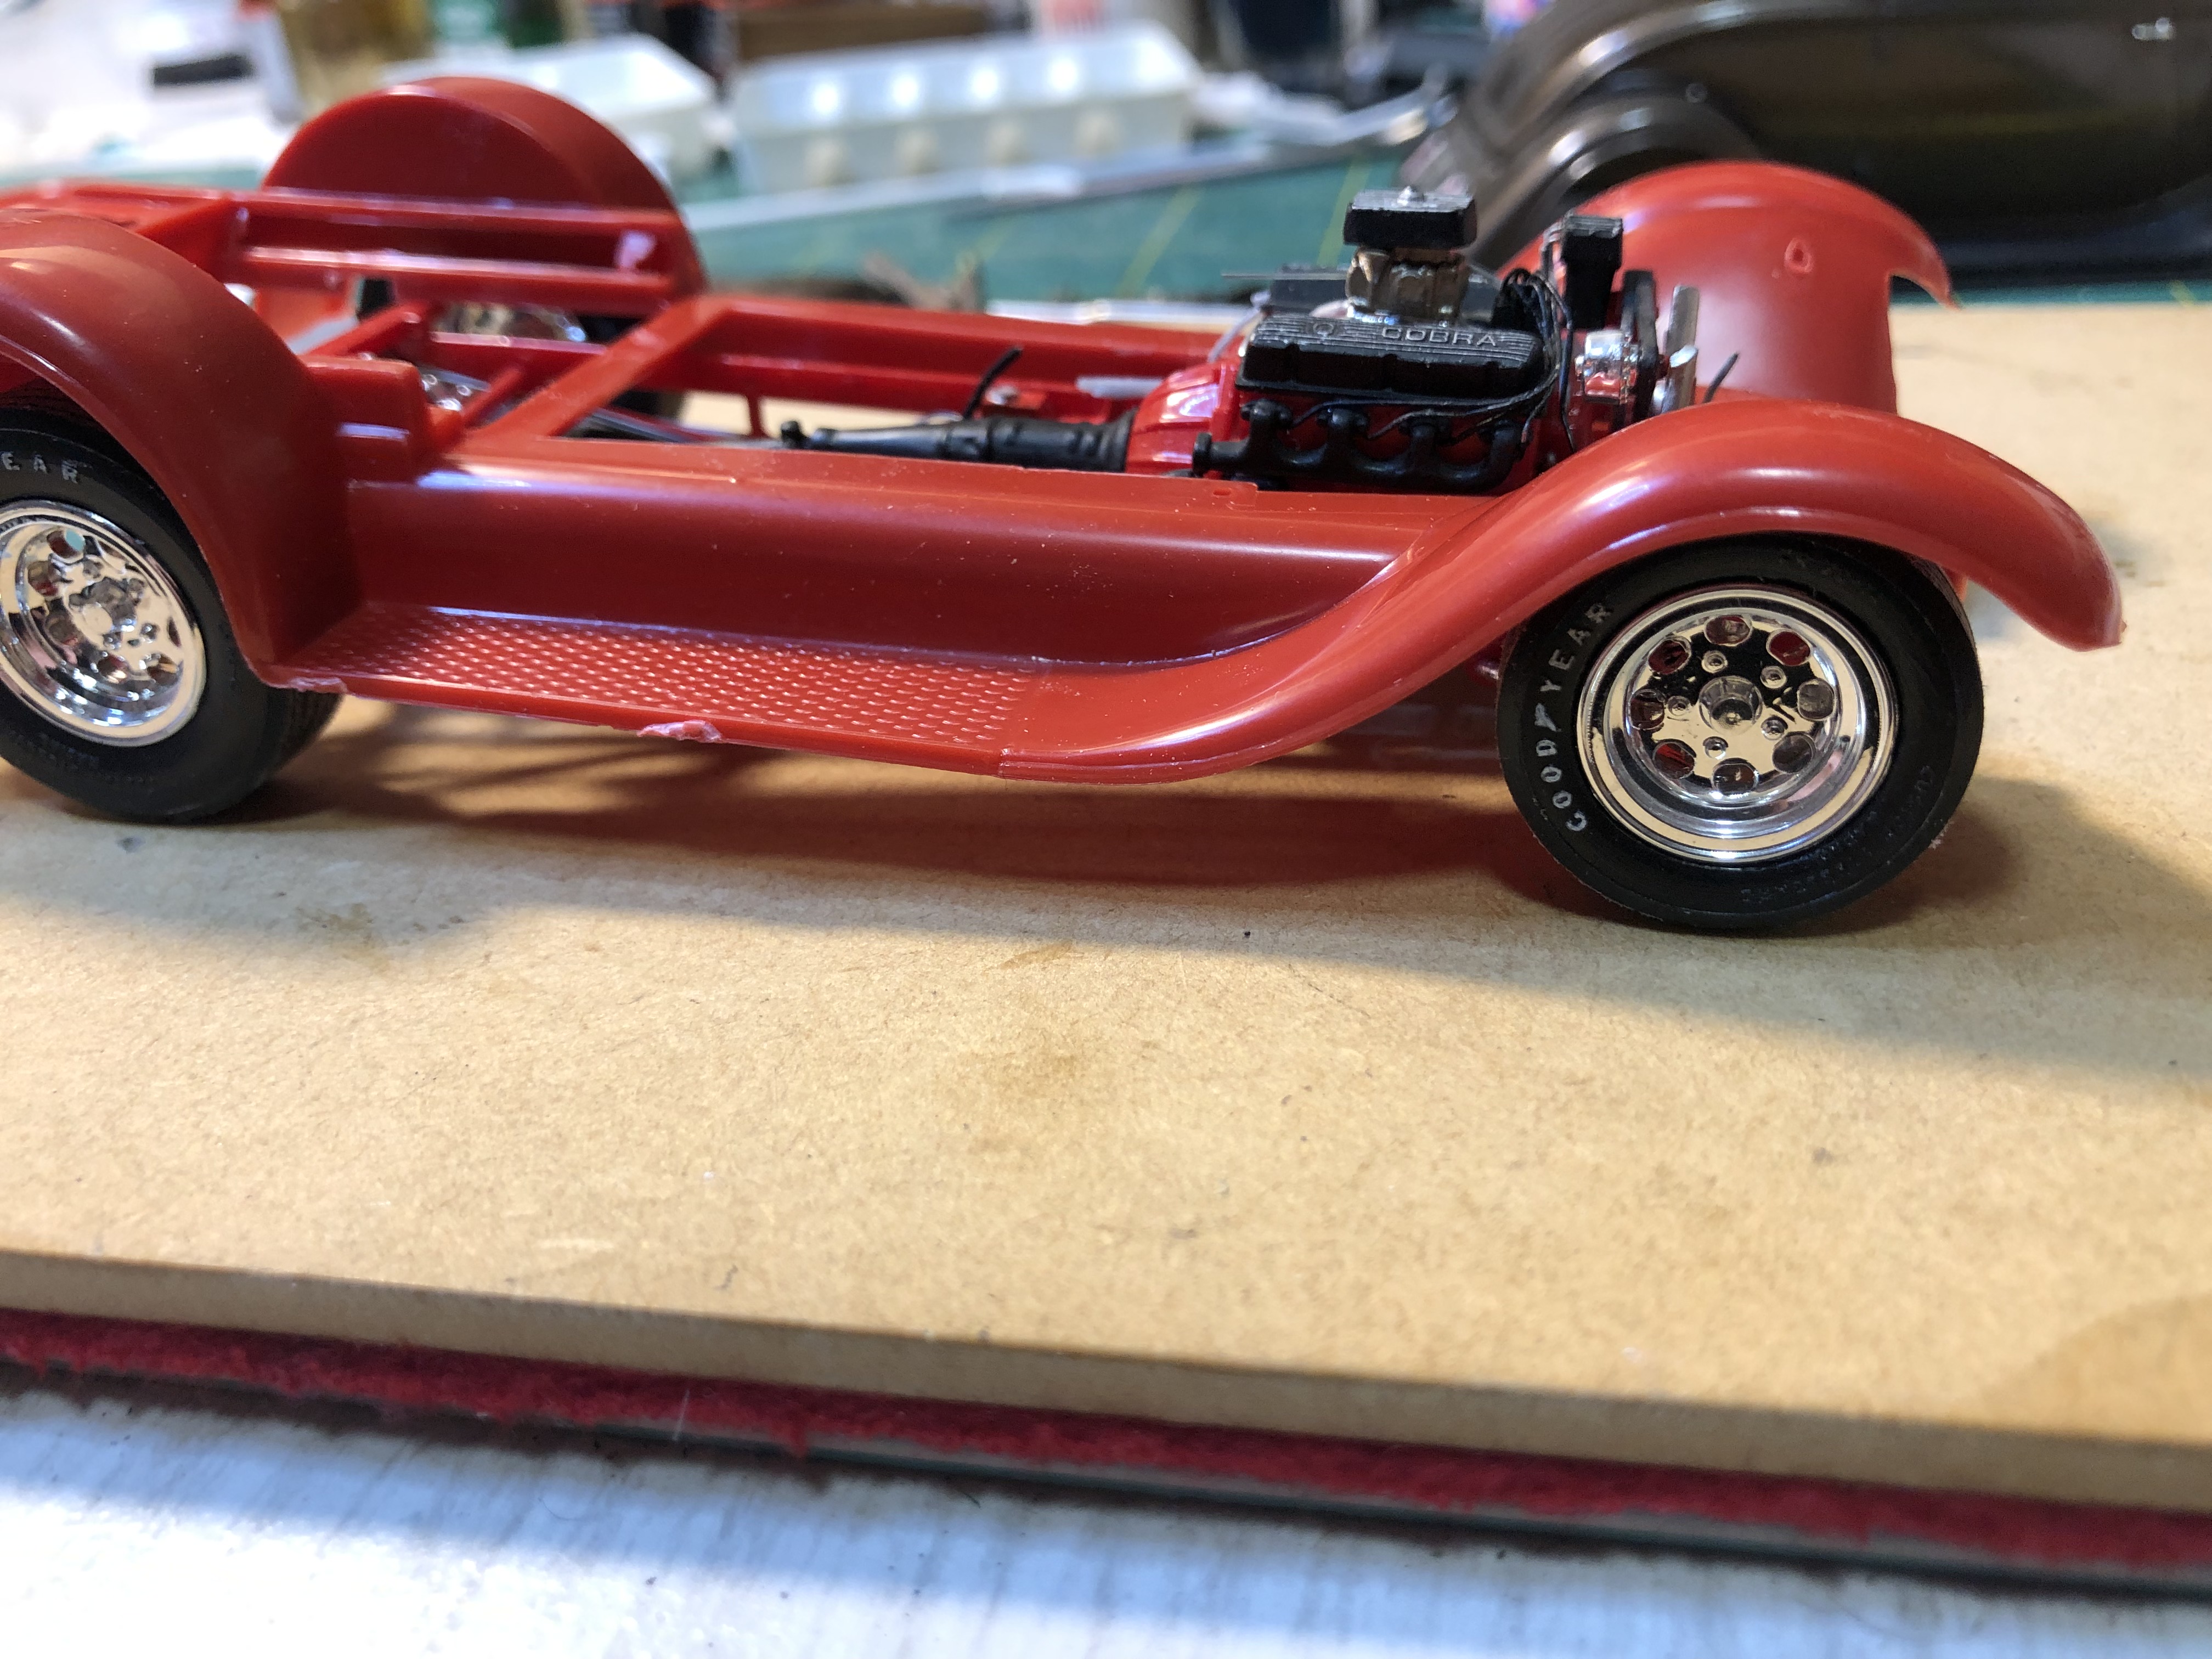
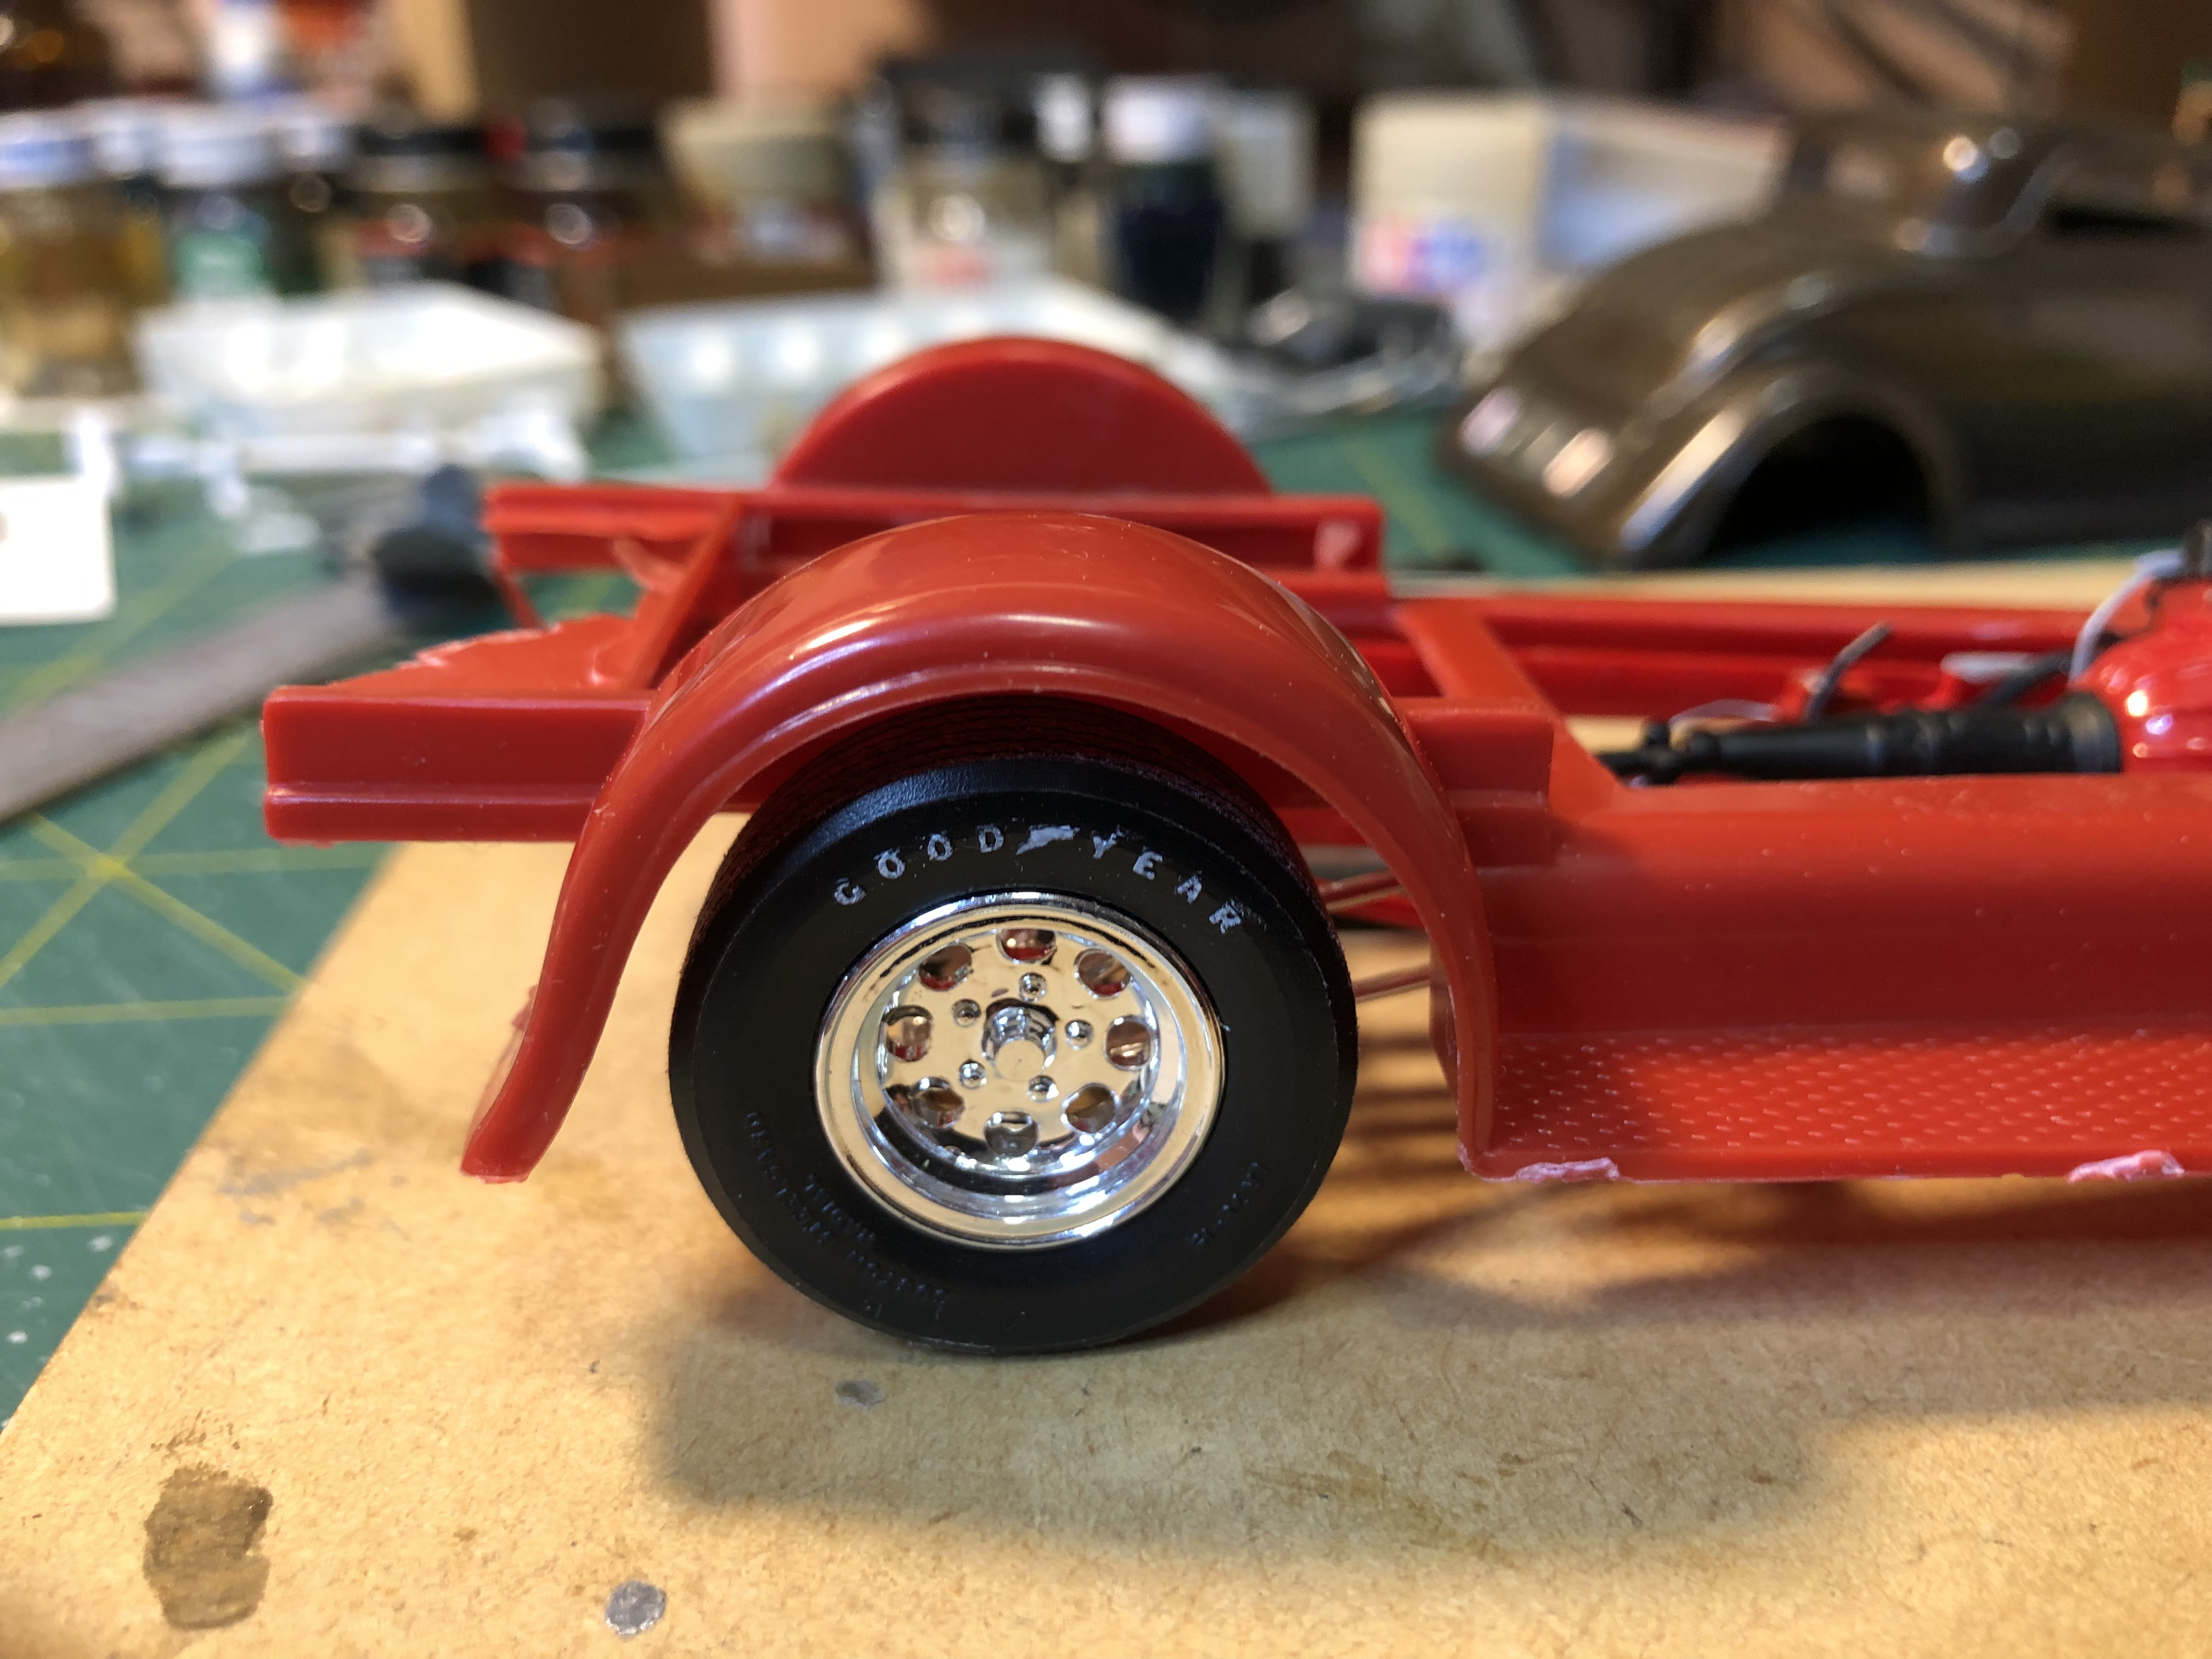
Thank Robert Been working on getting it up on wheels Brake lines, backing plates and spring on the rear end first off Next up attach rear radius rods and then move on to the front end. I am happy that it is all going together OK as I did some of the engineering 20 years ago All together ready for the next step - Install the motor - I needed to change the front mounts a little. This is done - just waiting for the paint to dry The wheels are on loose and to check all OK
-
Thanks Kit Things moving on A quick mock up
-
Hi Alan Nice conversion of the old Monogram 32. The other projects look interesting to The roadster without the reveal looks good. There were some earlier repro chassis builders did not build in the reveal in their frames so you can get away without the reveal.
-
A stunning build You know when you have it when it all looks like it came straight from the (kit) box. Very clean, stance spot on, choice of wheels, engine and interior all work together to give an excellent result. The expression "the sum of the parts is greater than the whole" springs to mind.
-
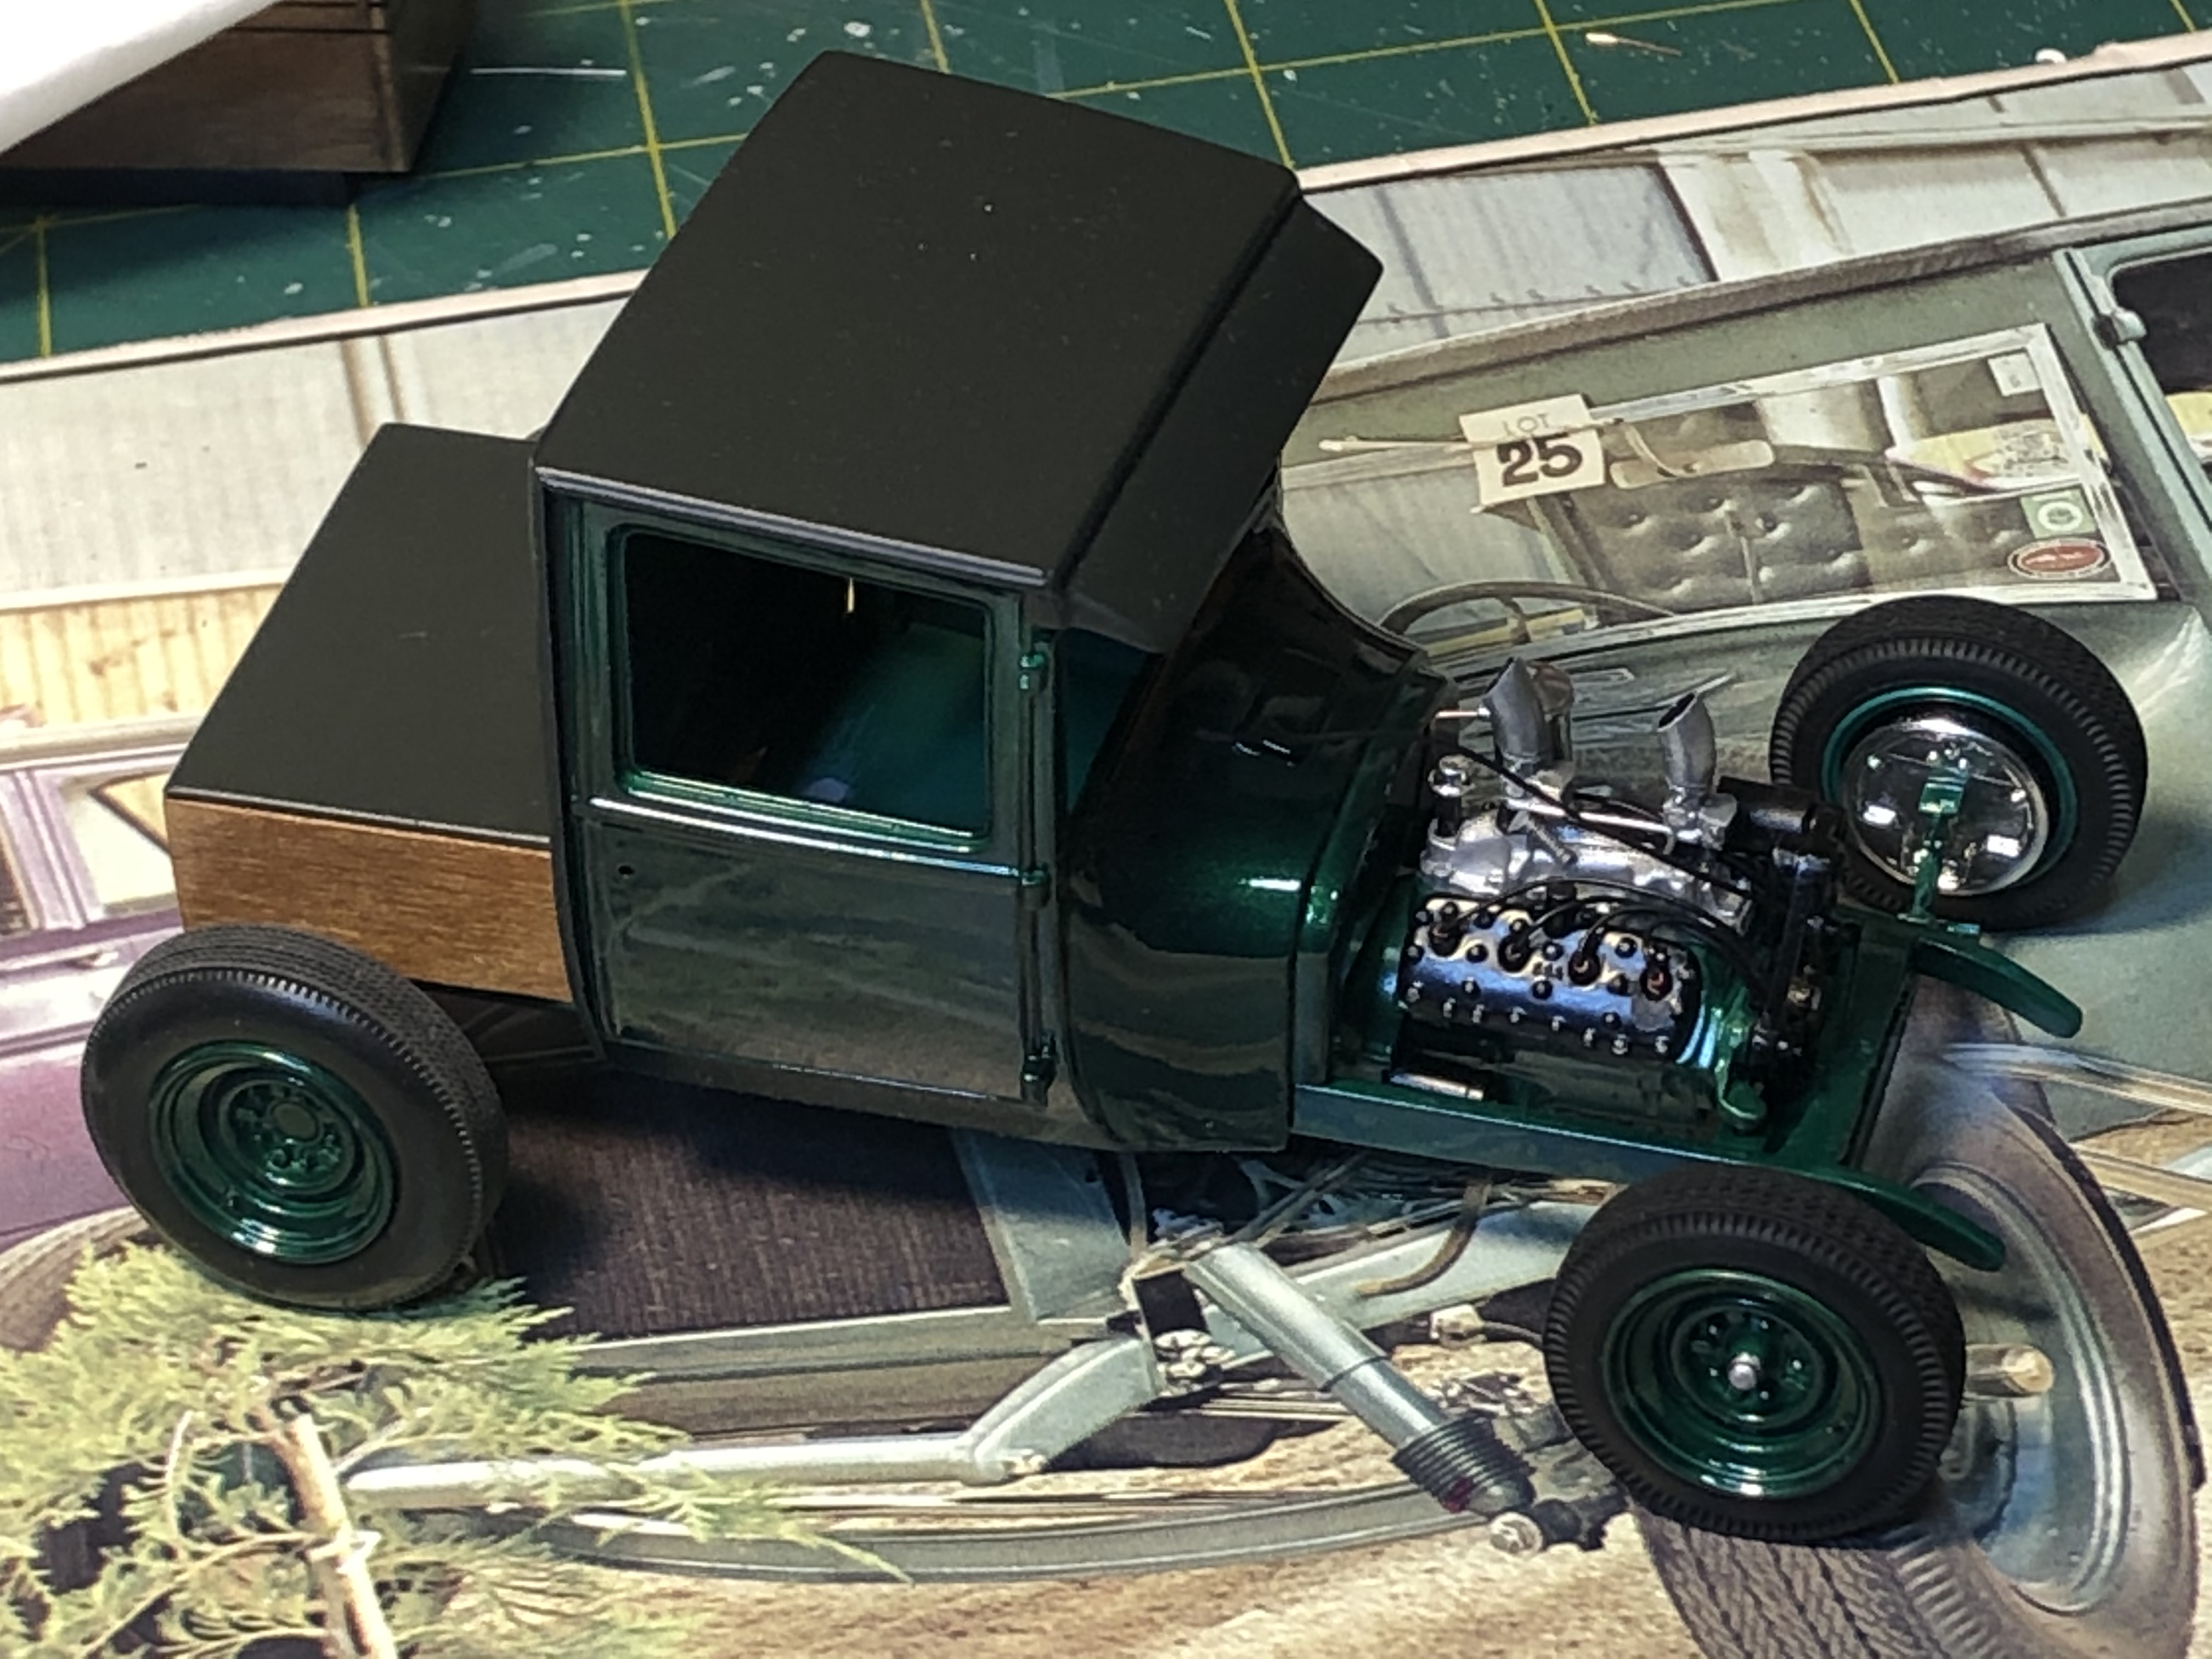
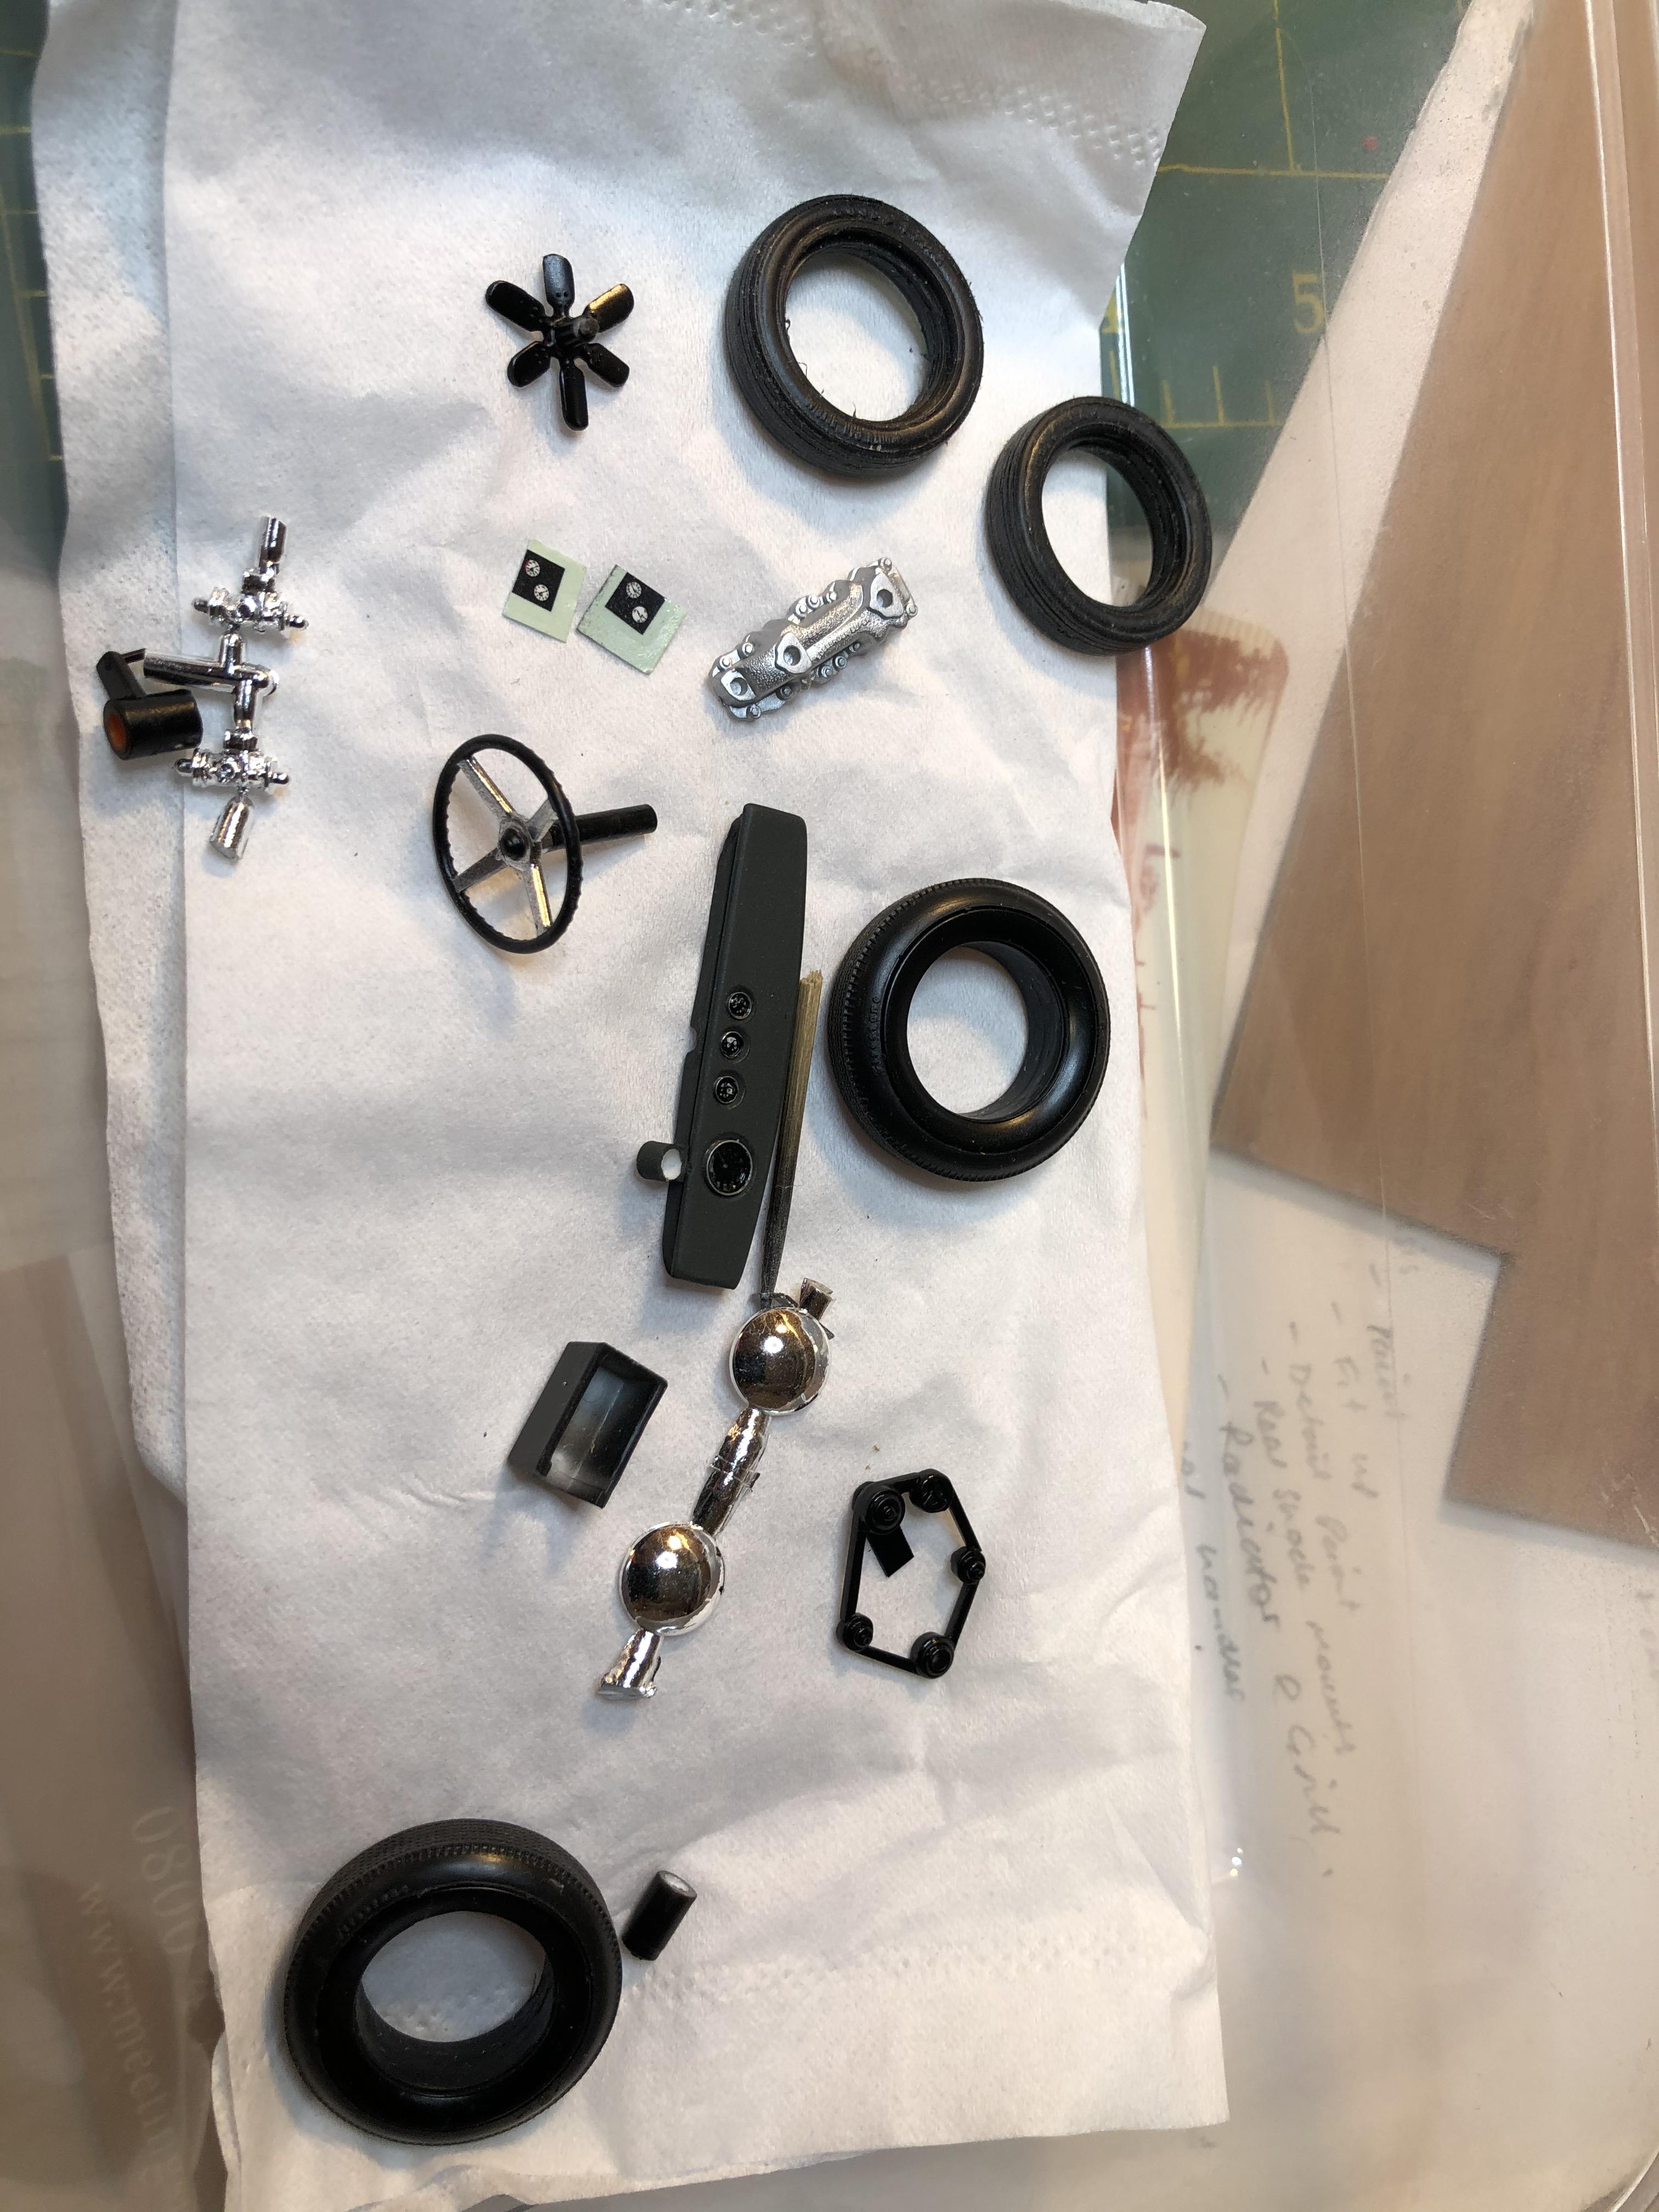
I have been working on getting more coats of green paint on all the parts that require it. The original paint was a bit thin so more green squirted on. Body and chassis clear coated too. It is like going down memory lane using Testors enamels again. Used to be my paint of choice Got more work done on the motor with assembly and detailing almost complete
-
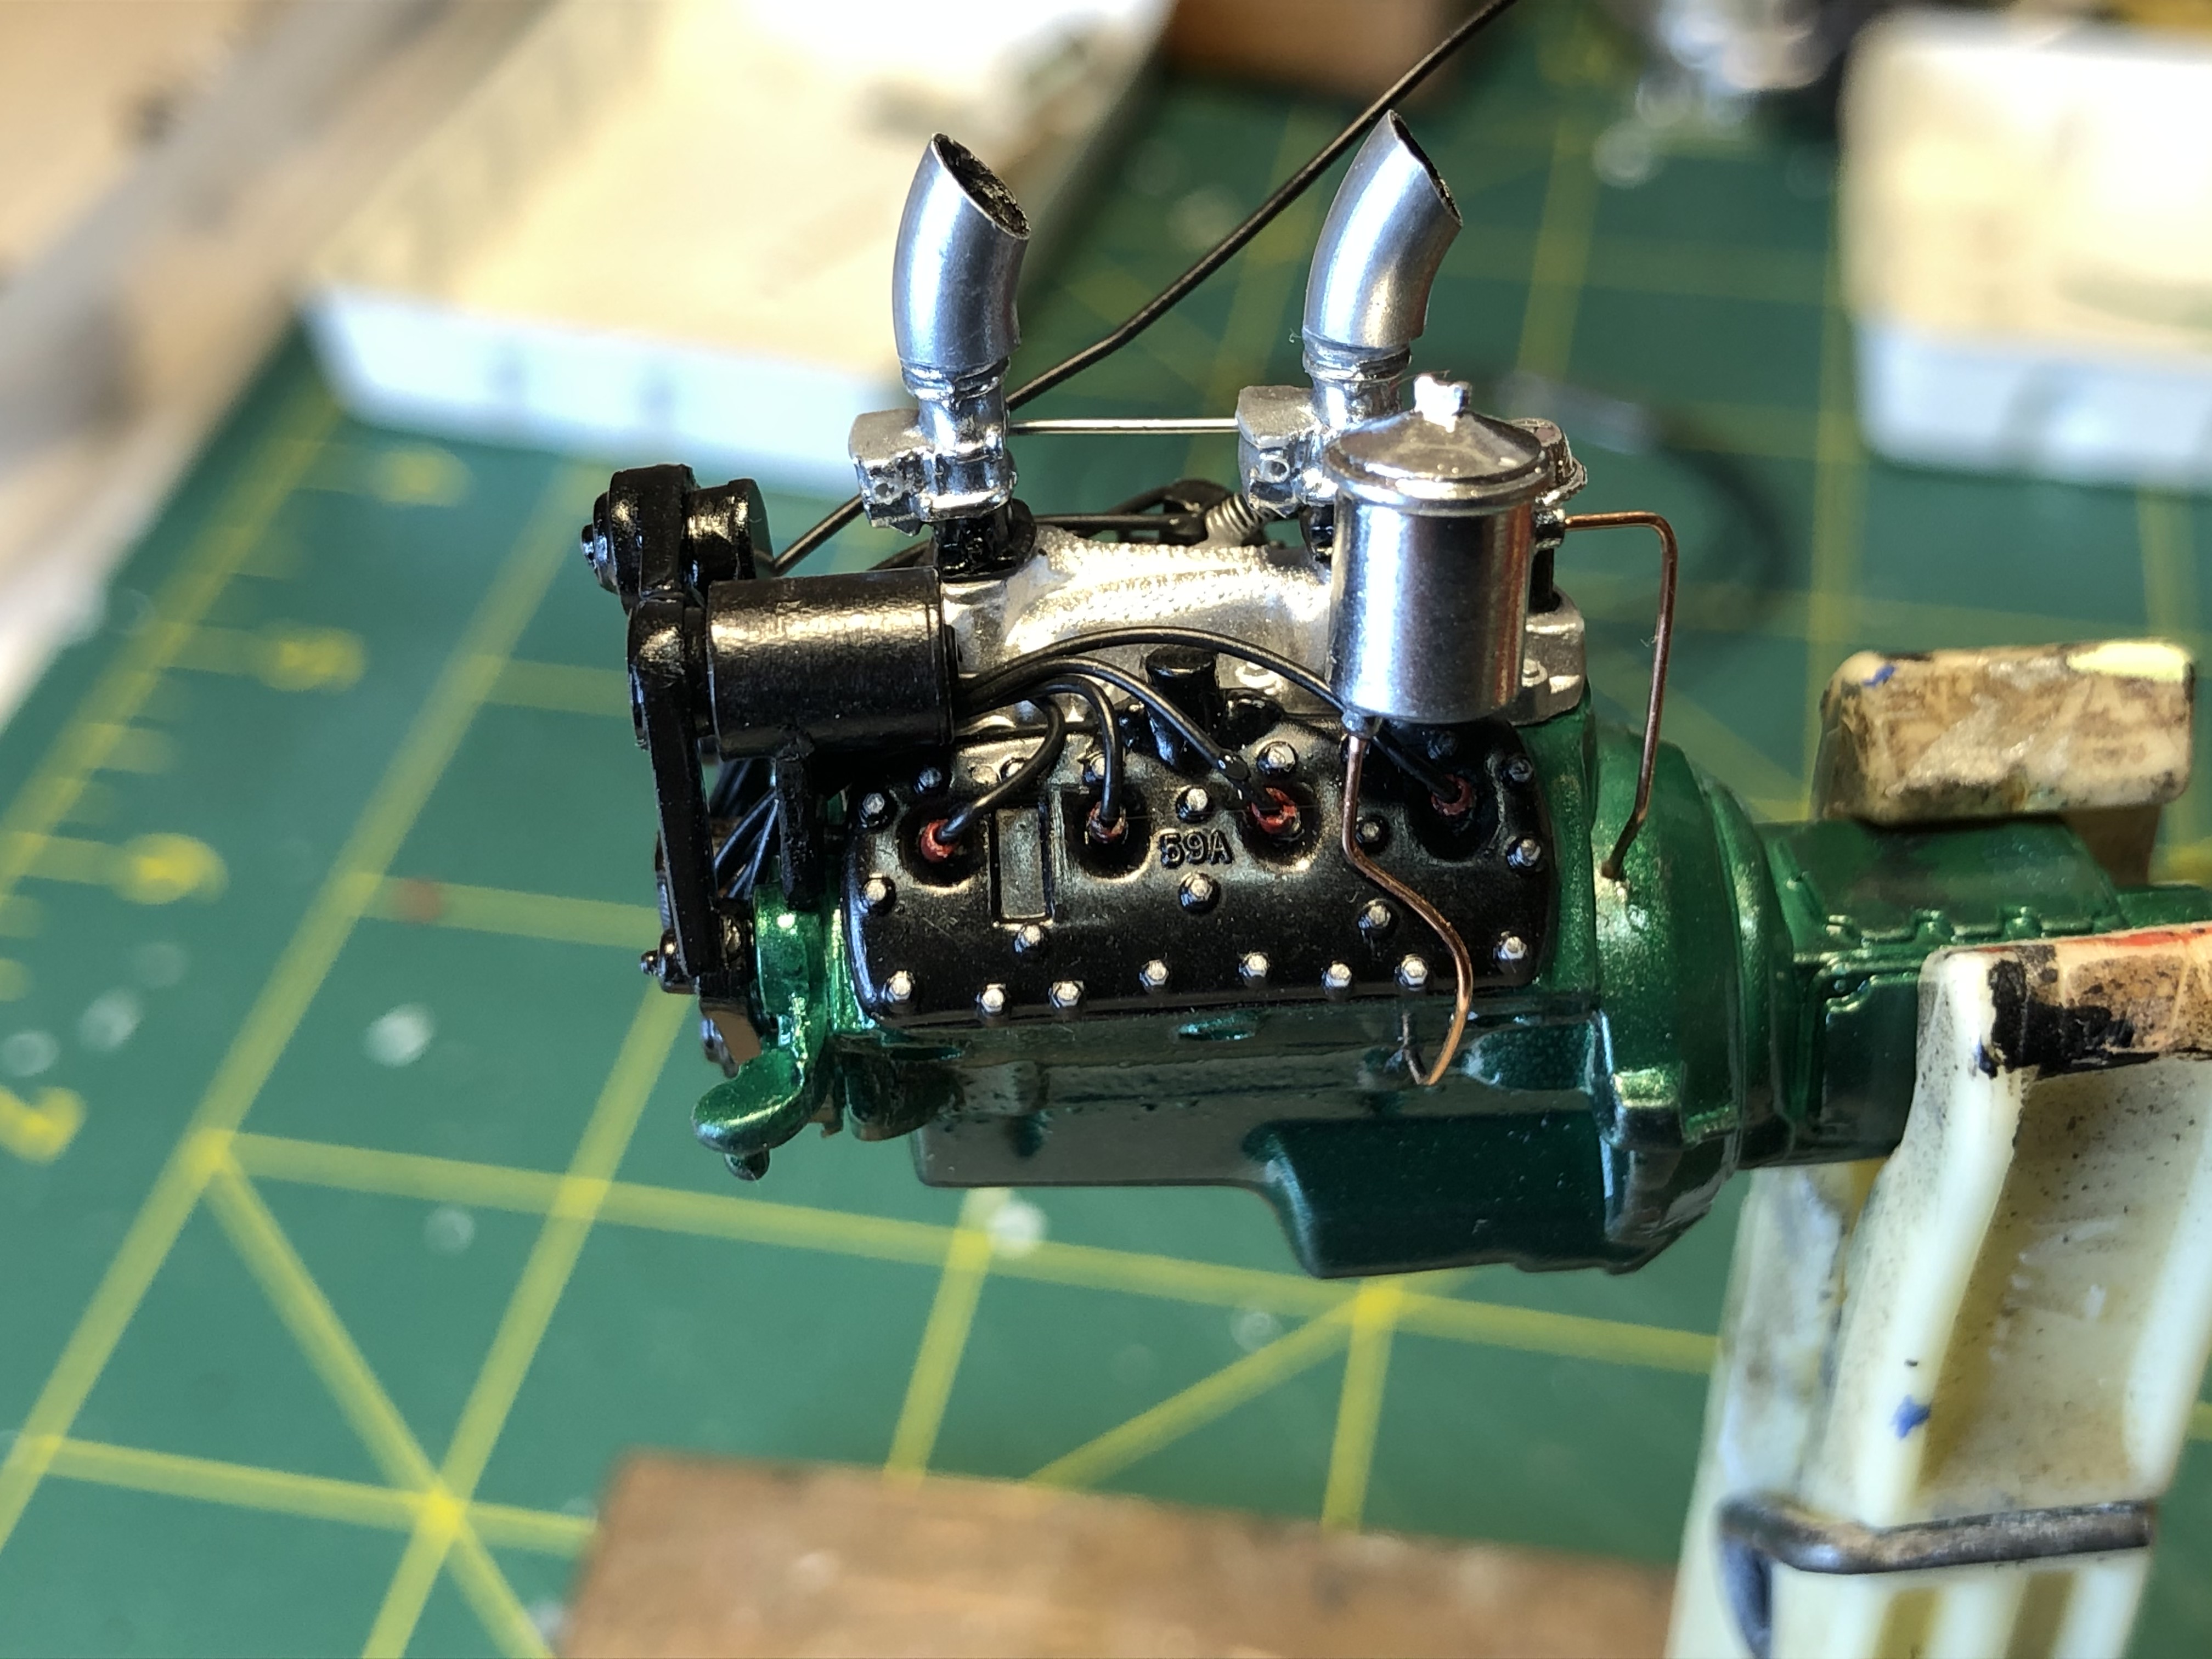
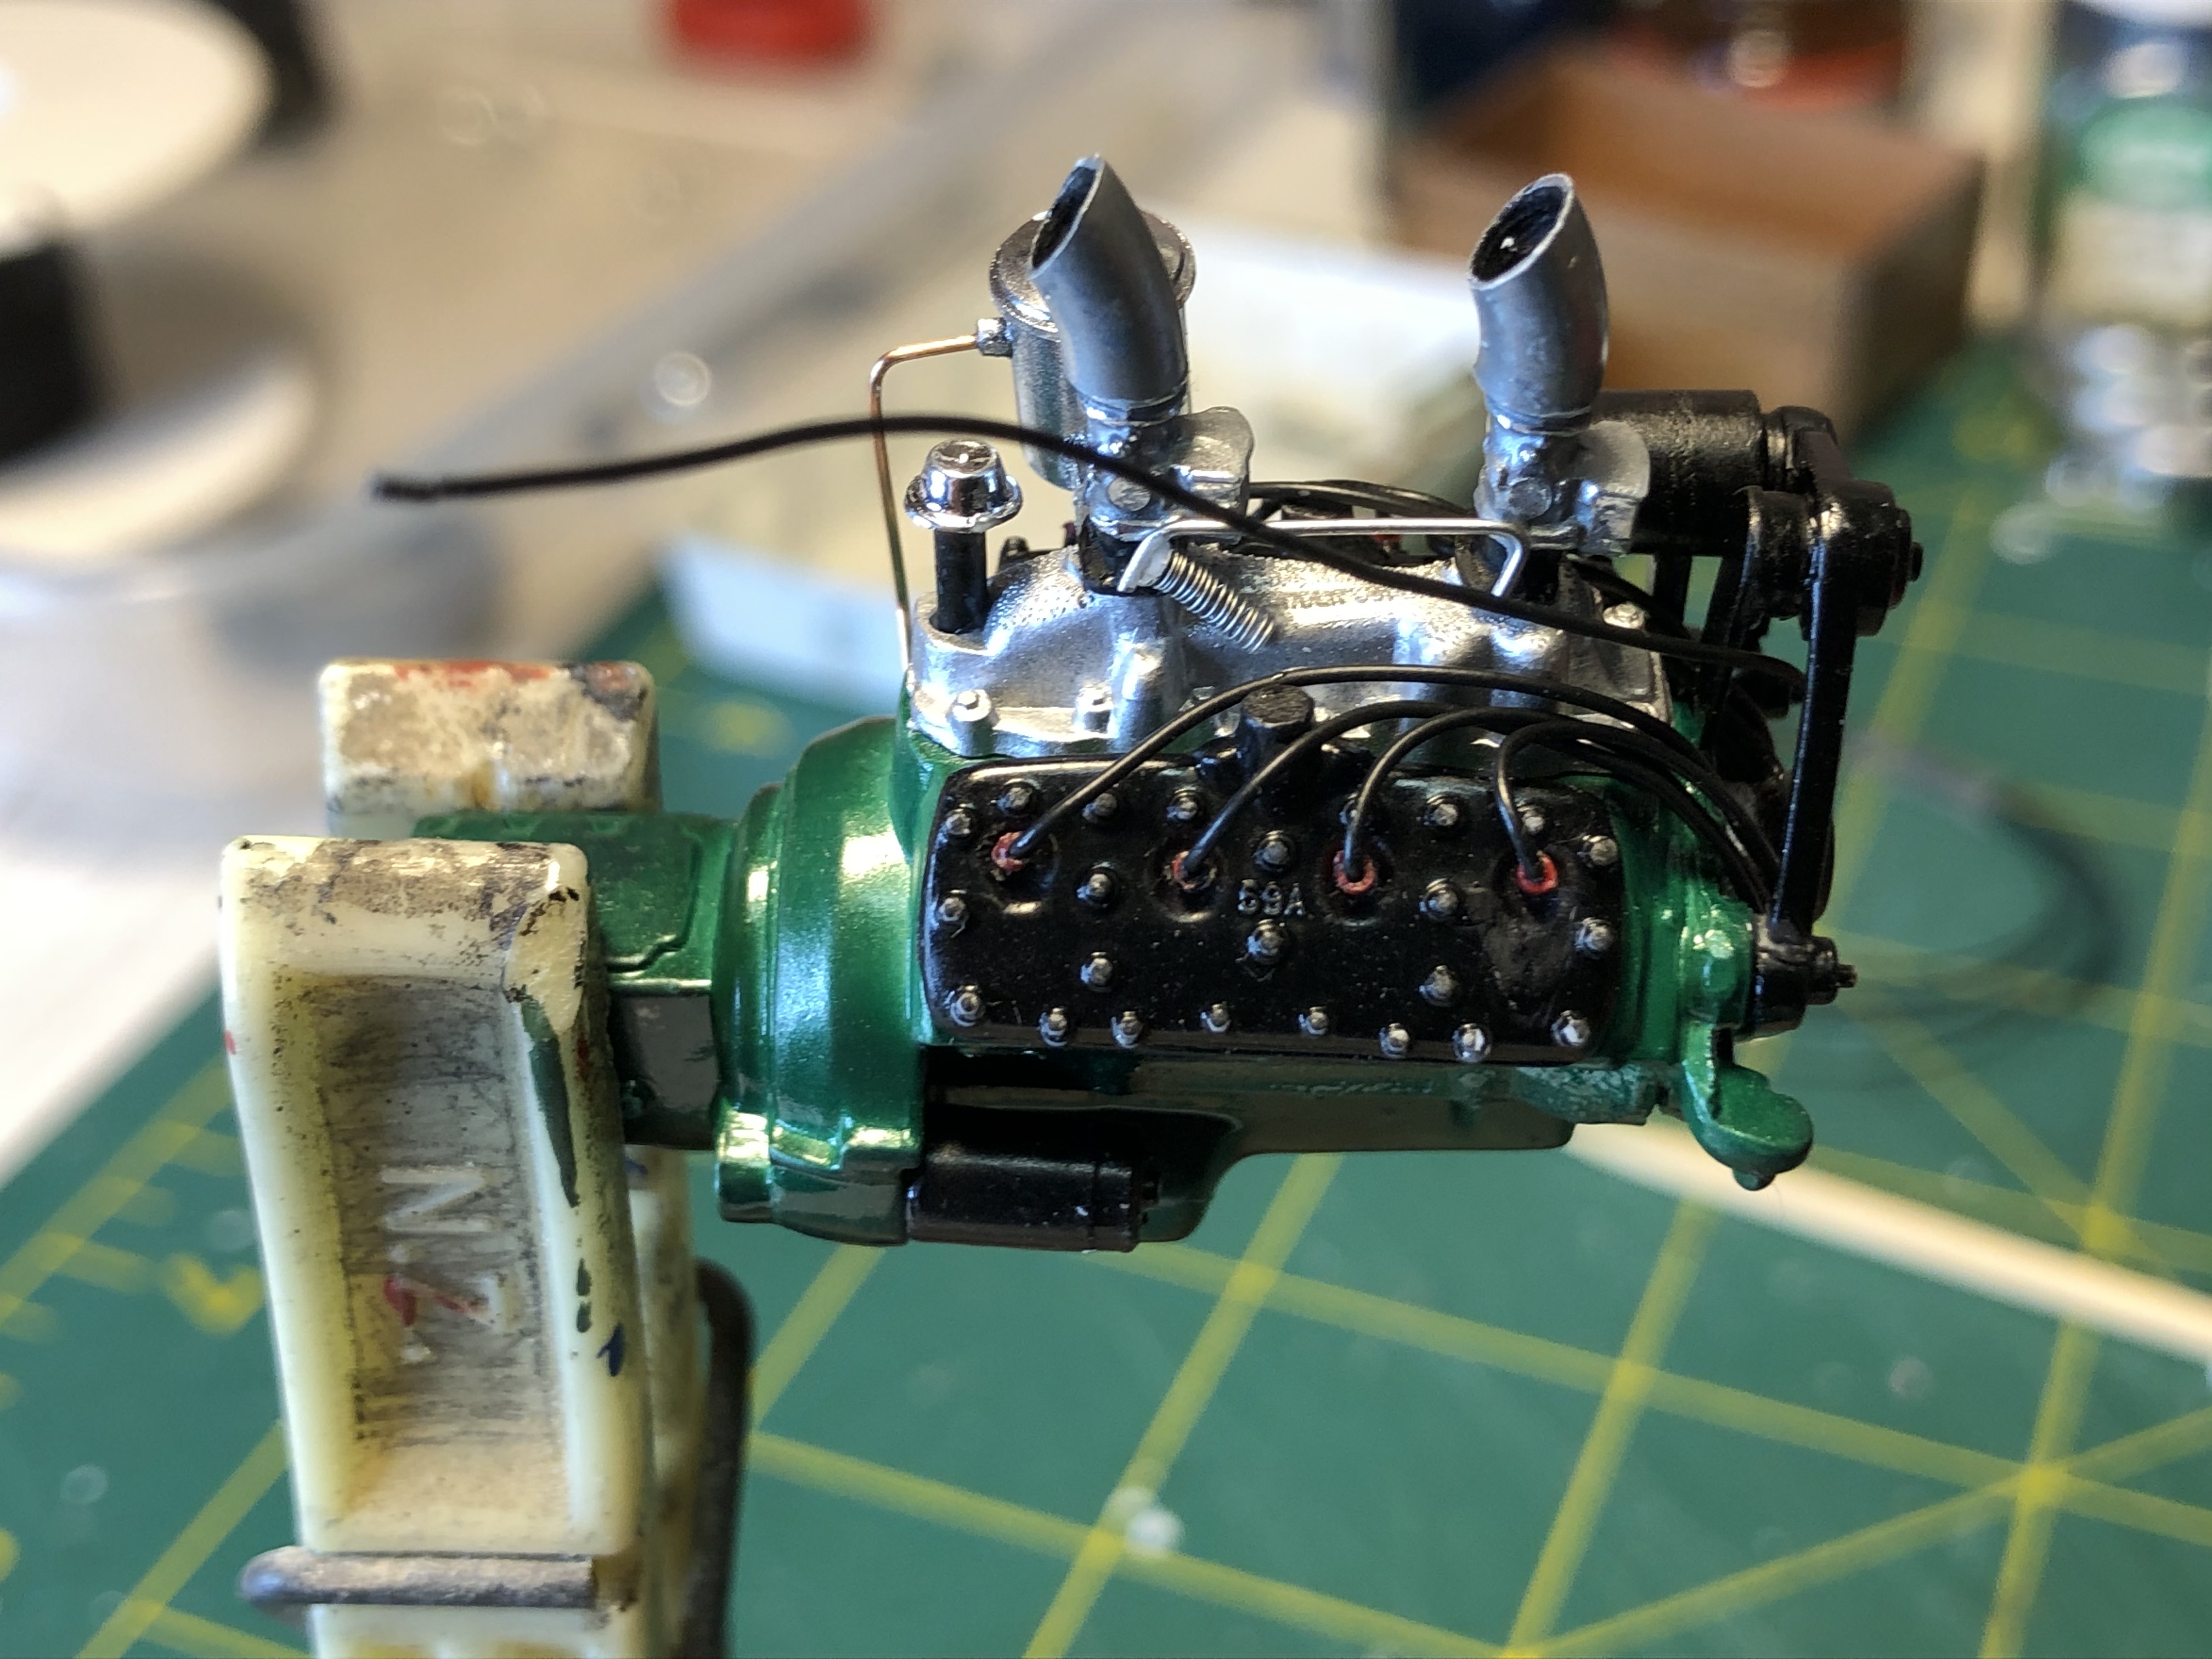
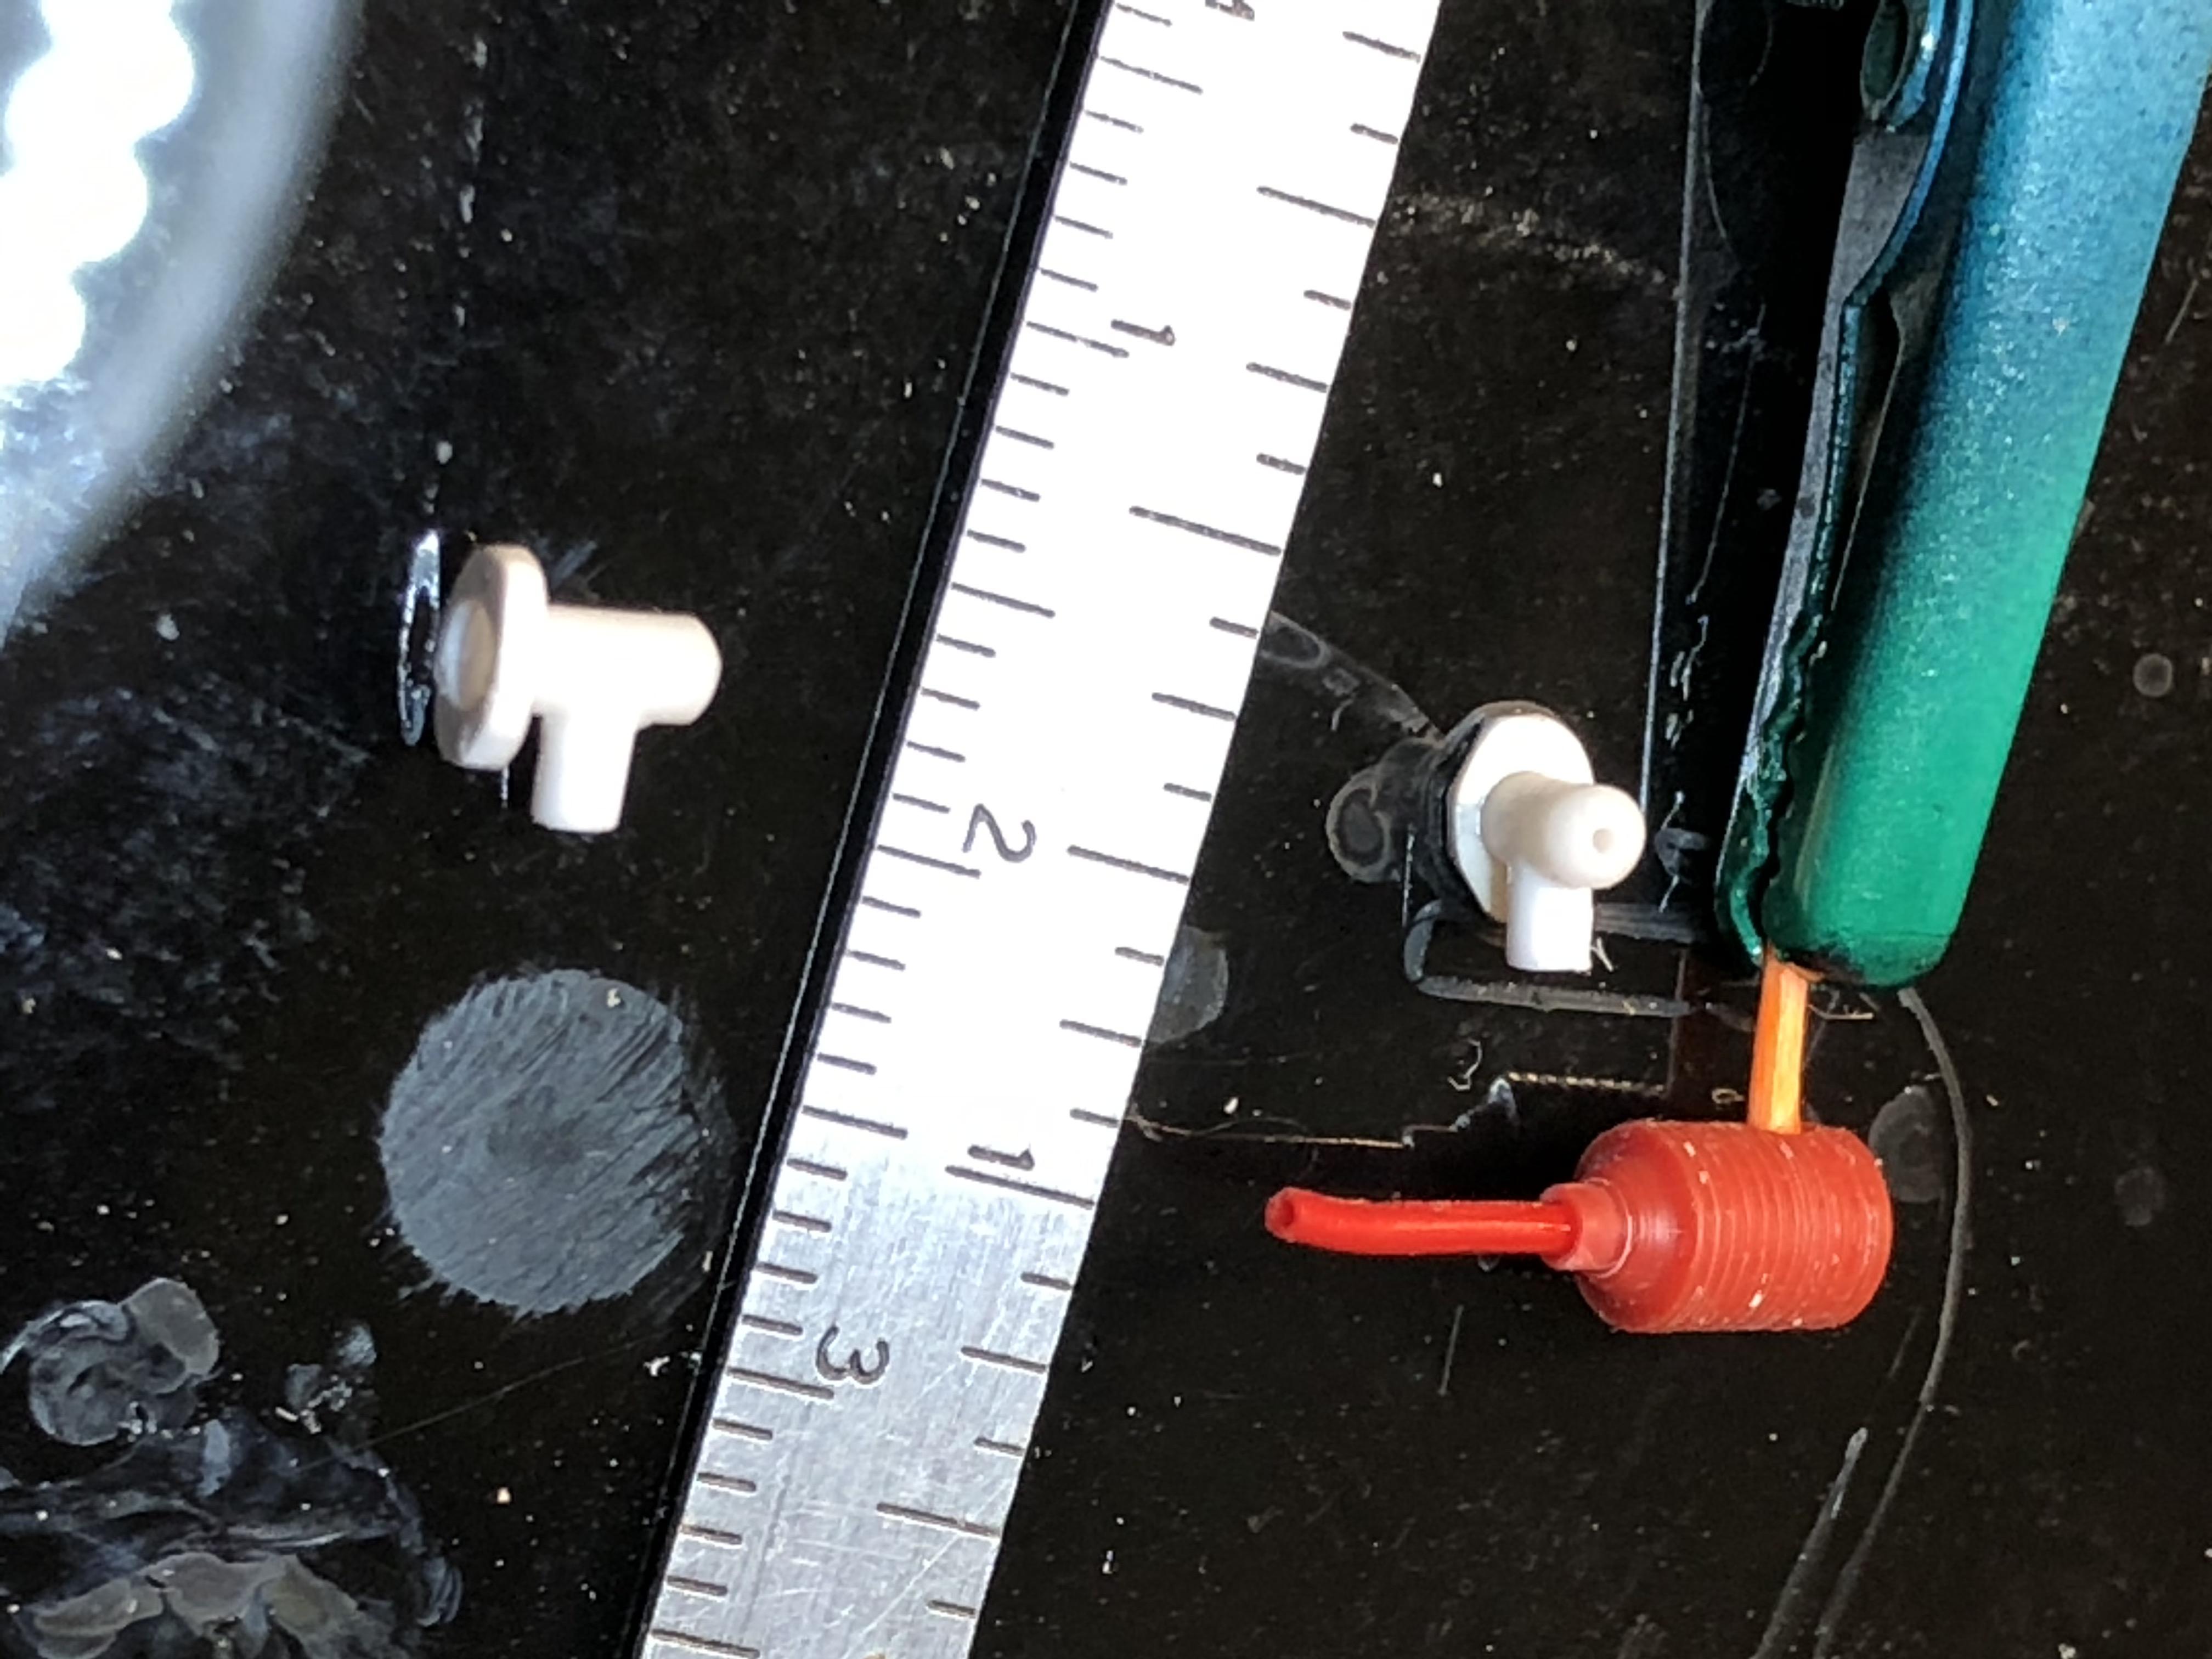
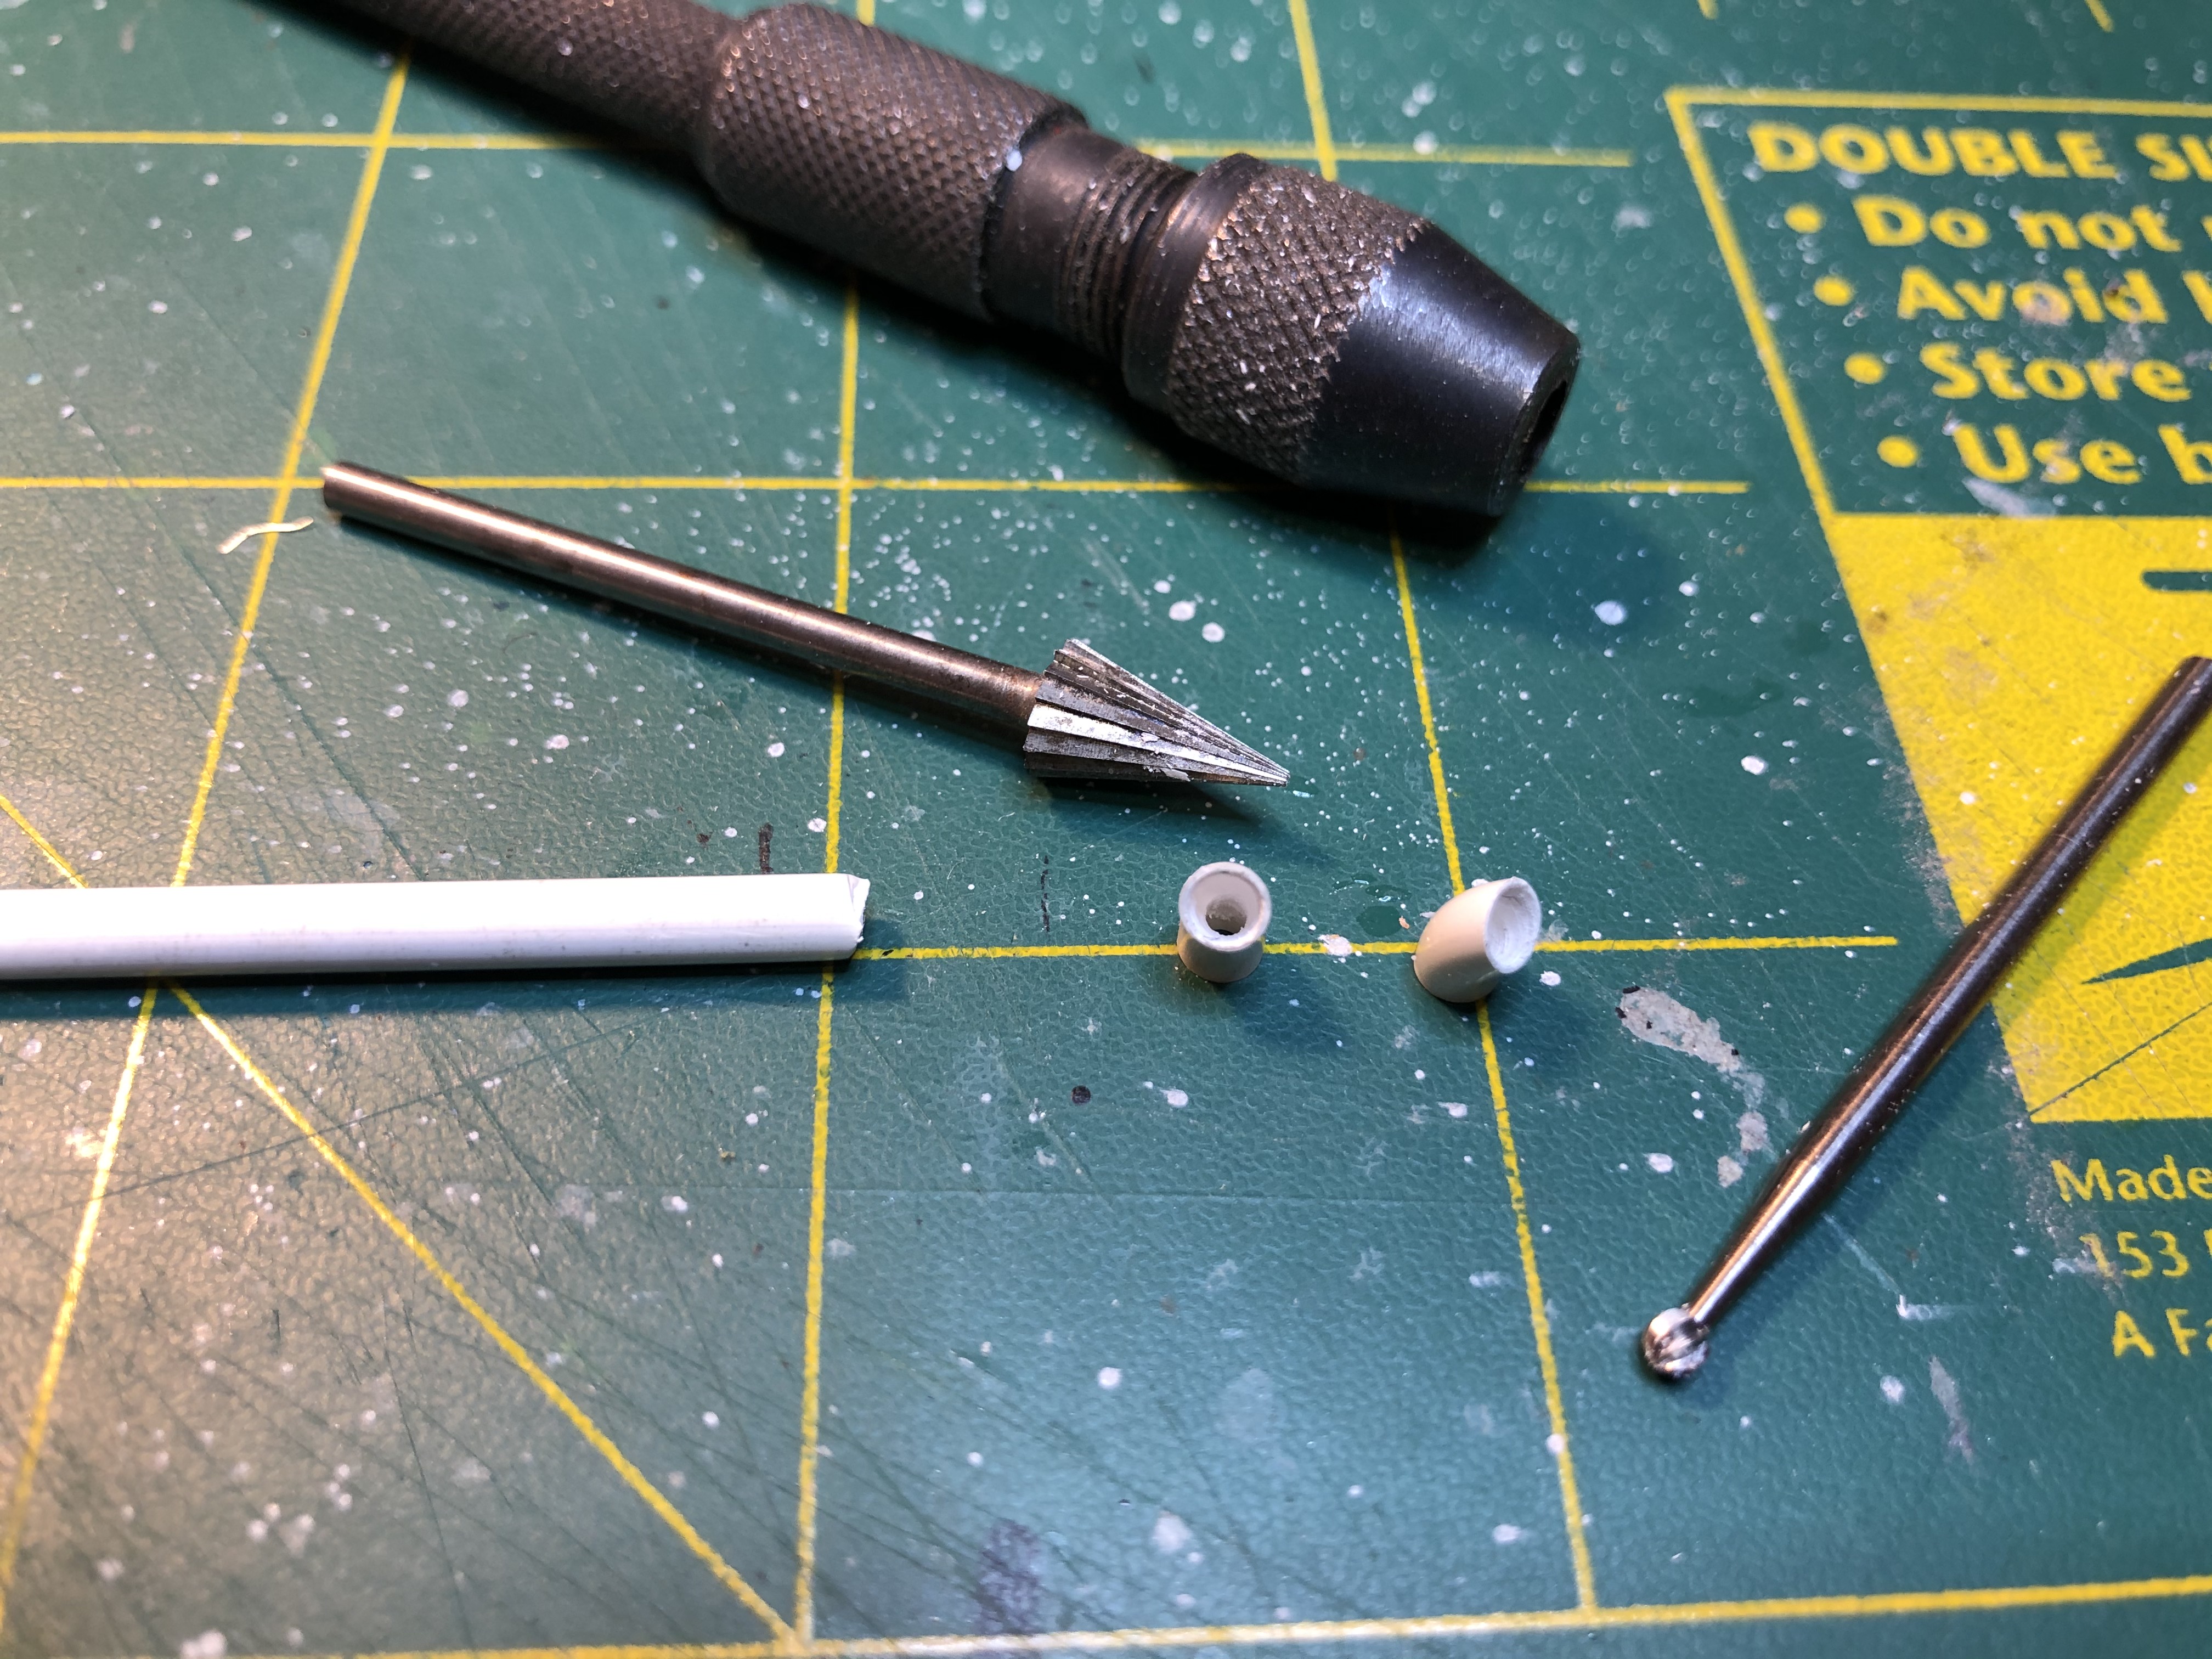
Fixed the bad spark plug boot. Have decided to leave red but with a black wash Been working on more scratchbuilt detail items I turned up a beehive coil and made some brake and clutch master cylinders from rod and plastic card. Need to get items to the paint booth but a few more items to get ready first. Wasted an evening looking for a fuel pump and oil breather and was about to scratch one up when I rechecked the pix I have to find that the fuel log is fed by a line that comes up from the chassis - looks like Royce may have used an electric pump next to the fuel tank -DOH!! Next on list is carbs and more engine detail
-
I like it
-
A nice looking rod Ismo. Particularly like the angle cut on the A pillar as it makes it look longer. I have been following the current 32 Roadster build that Aulis has on the HAMB -very talented builder
-
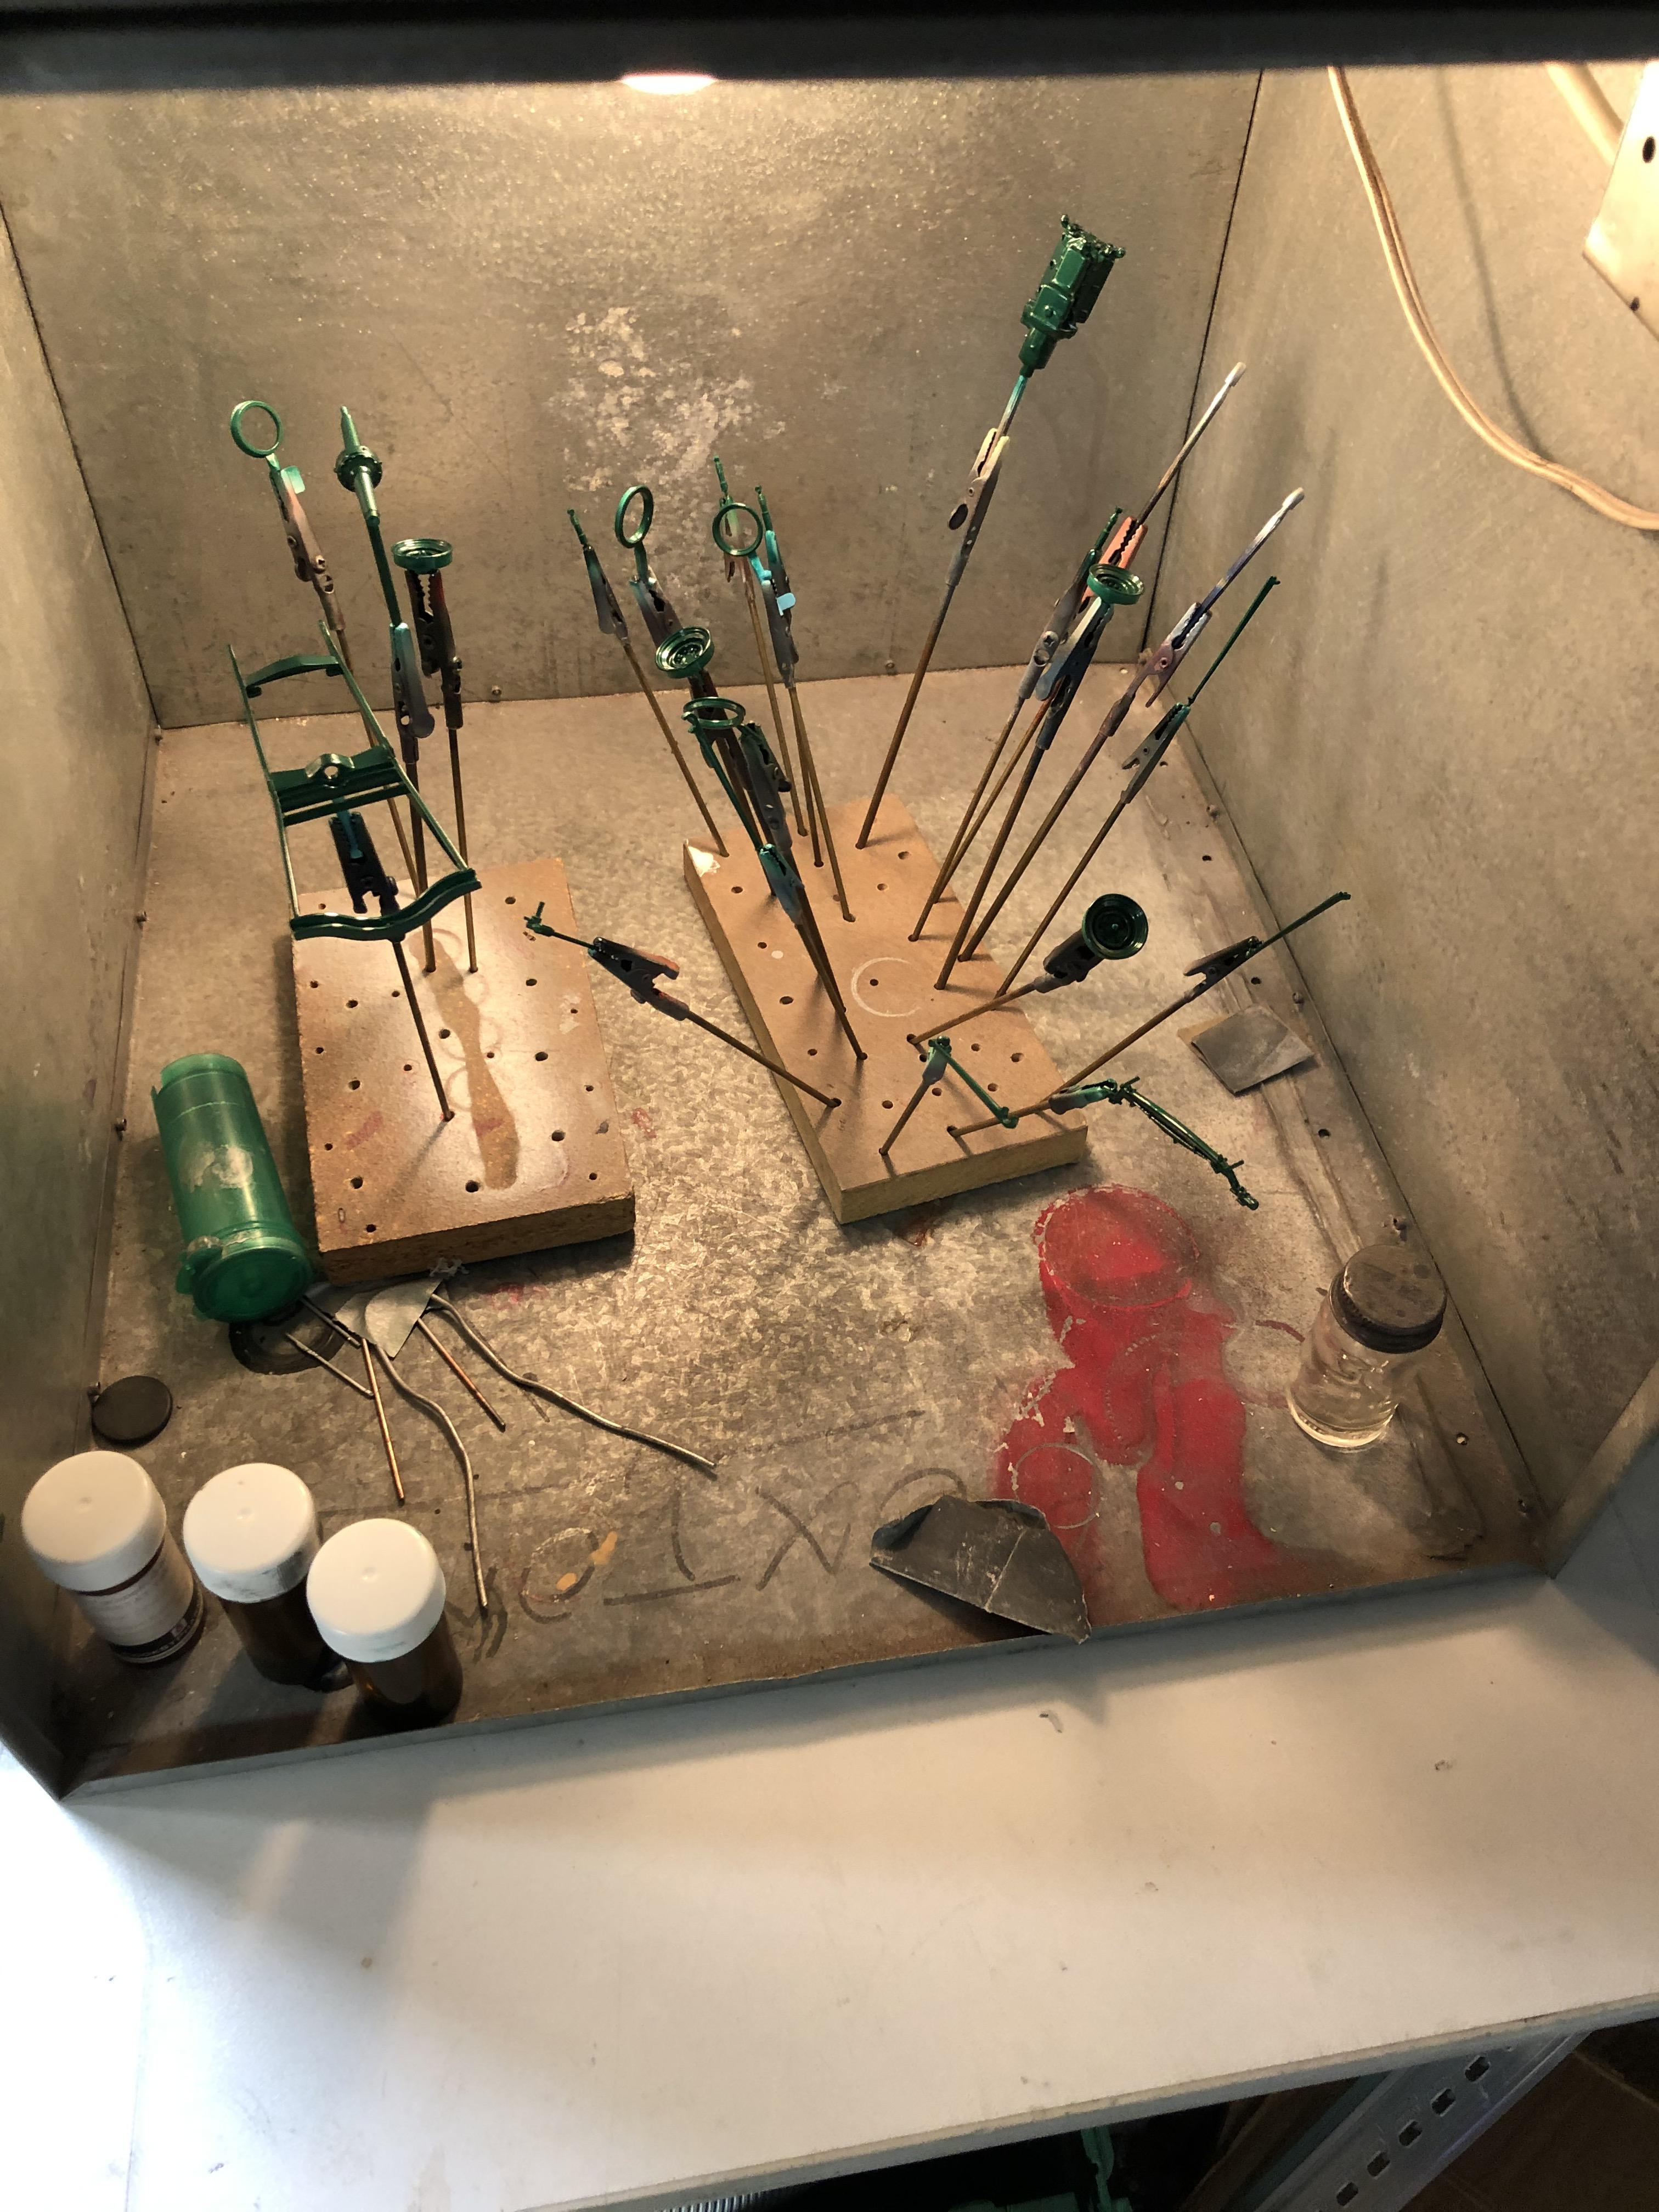
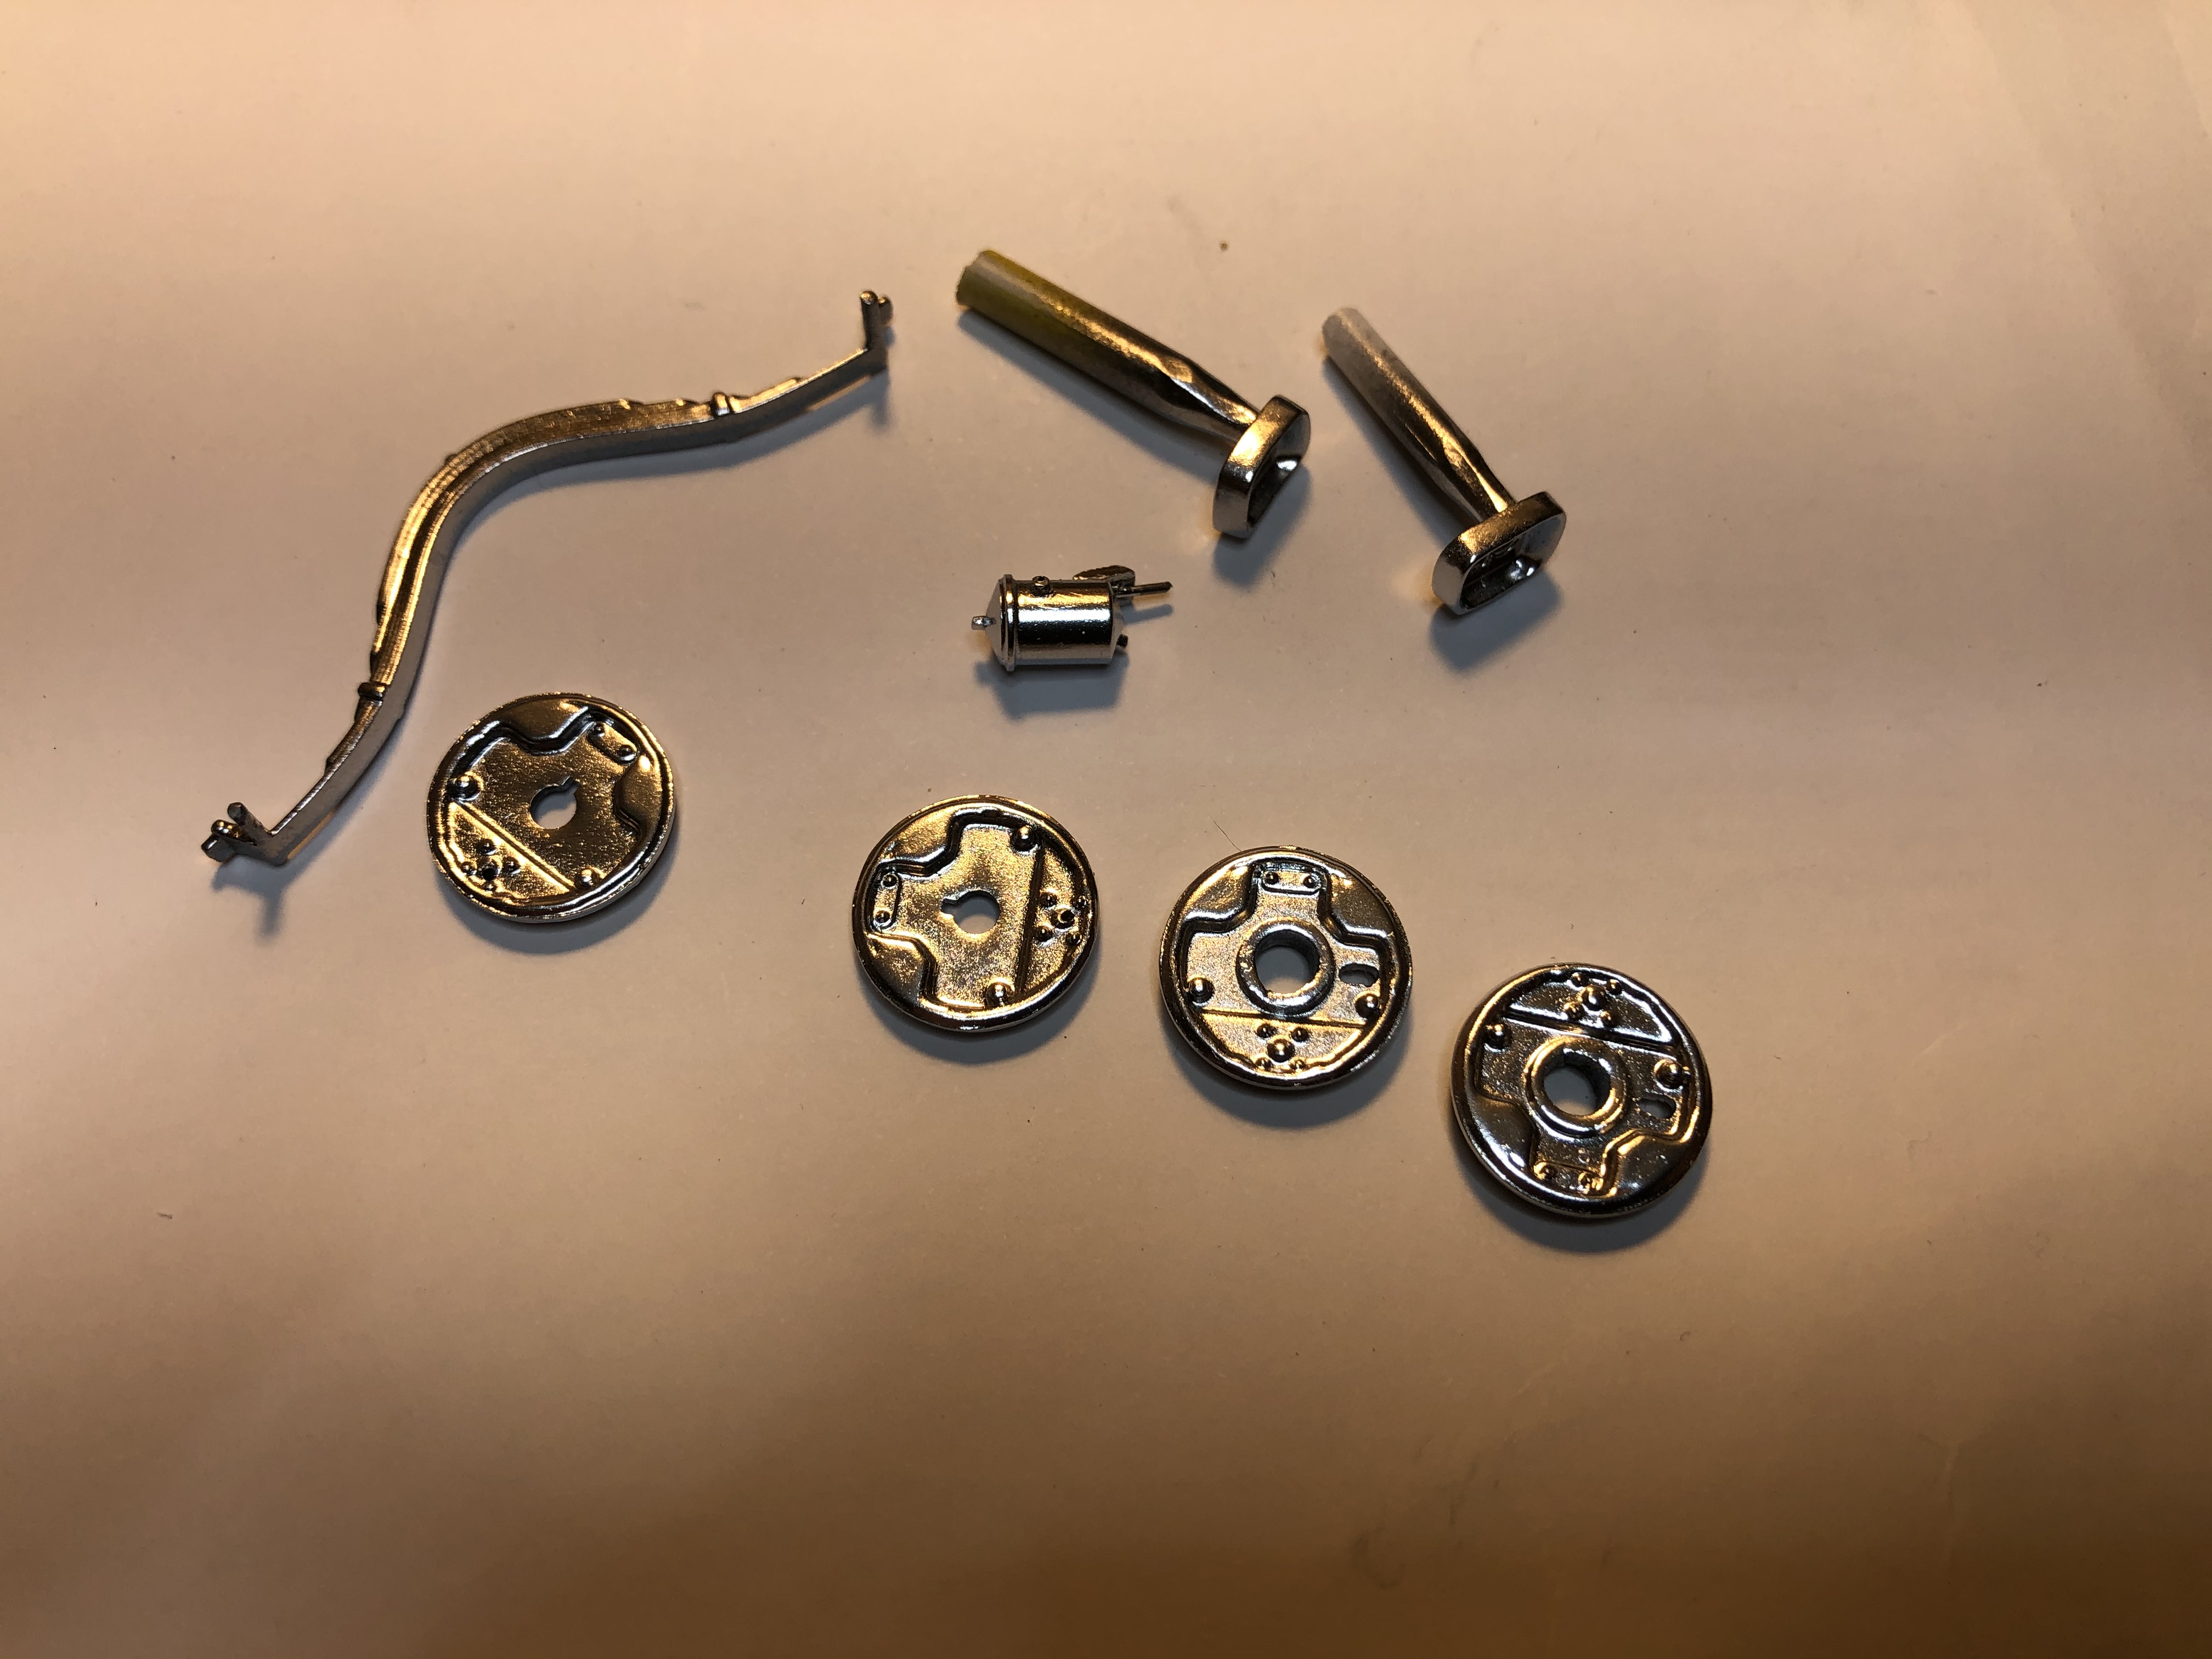
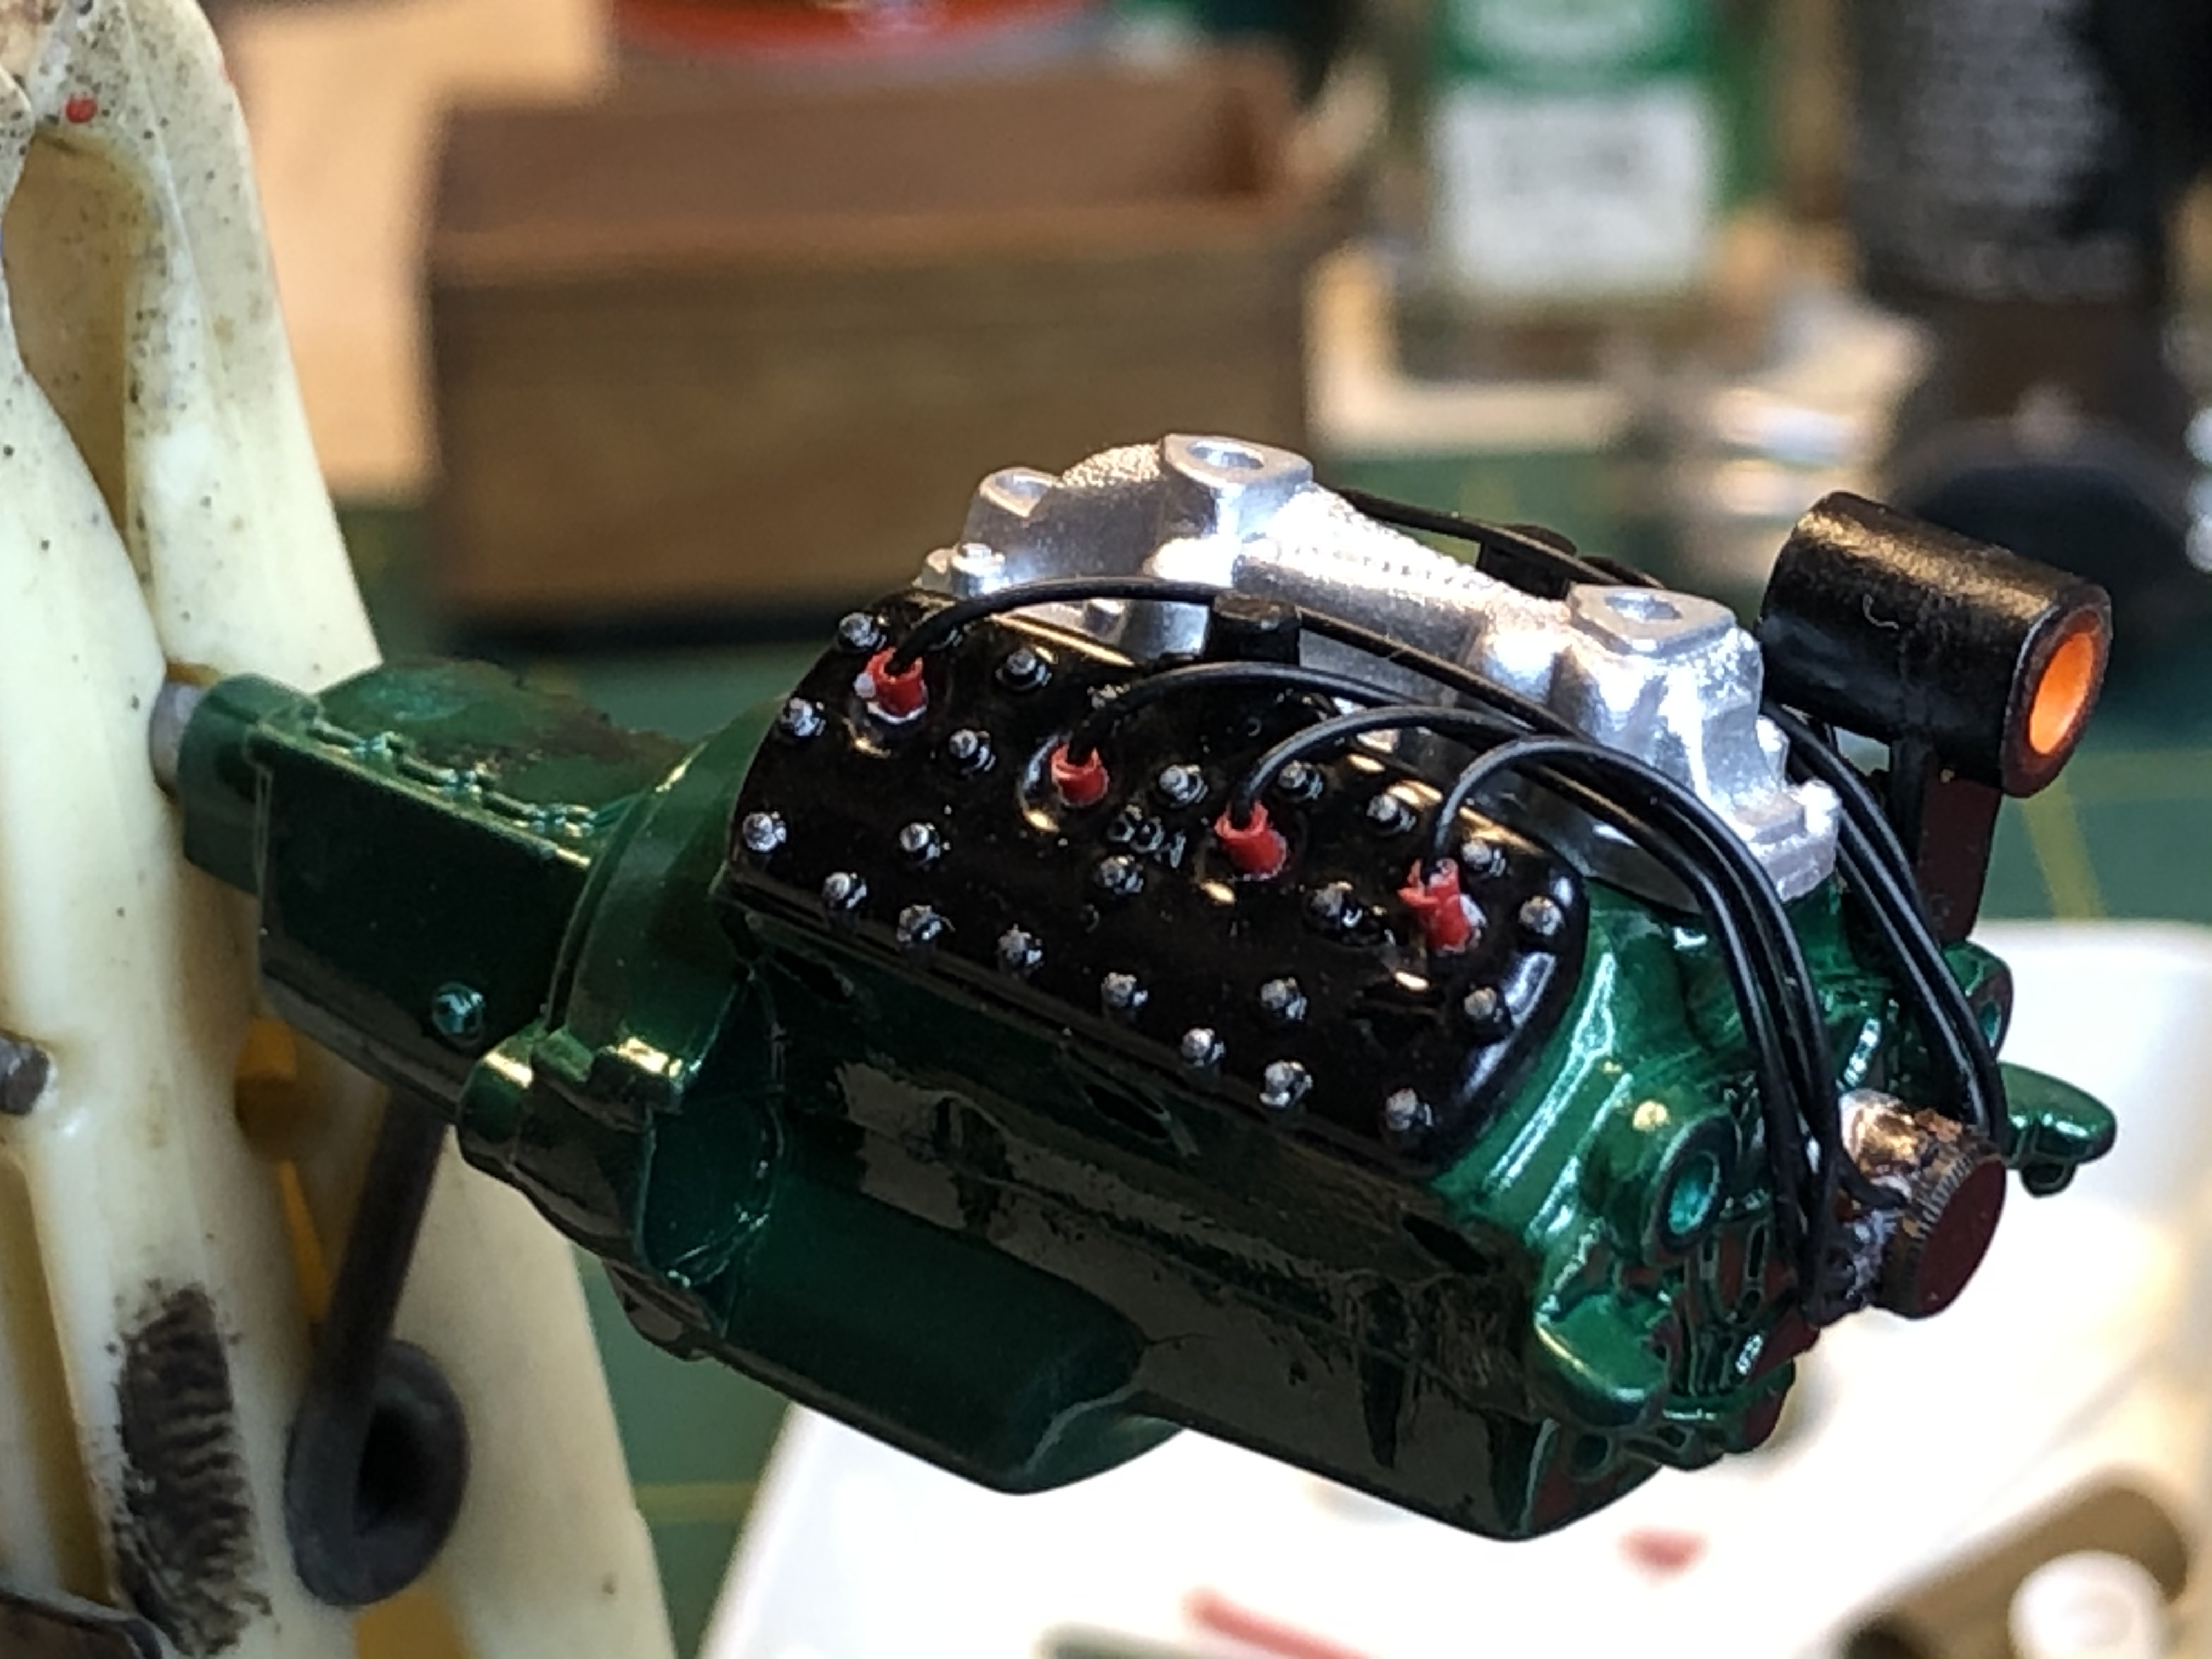
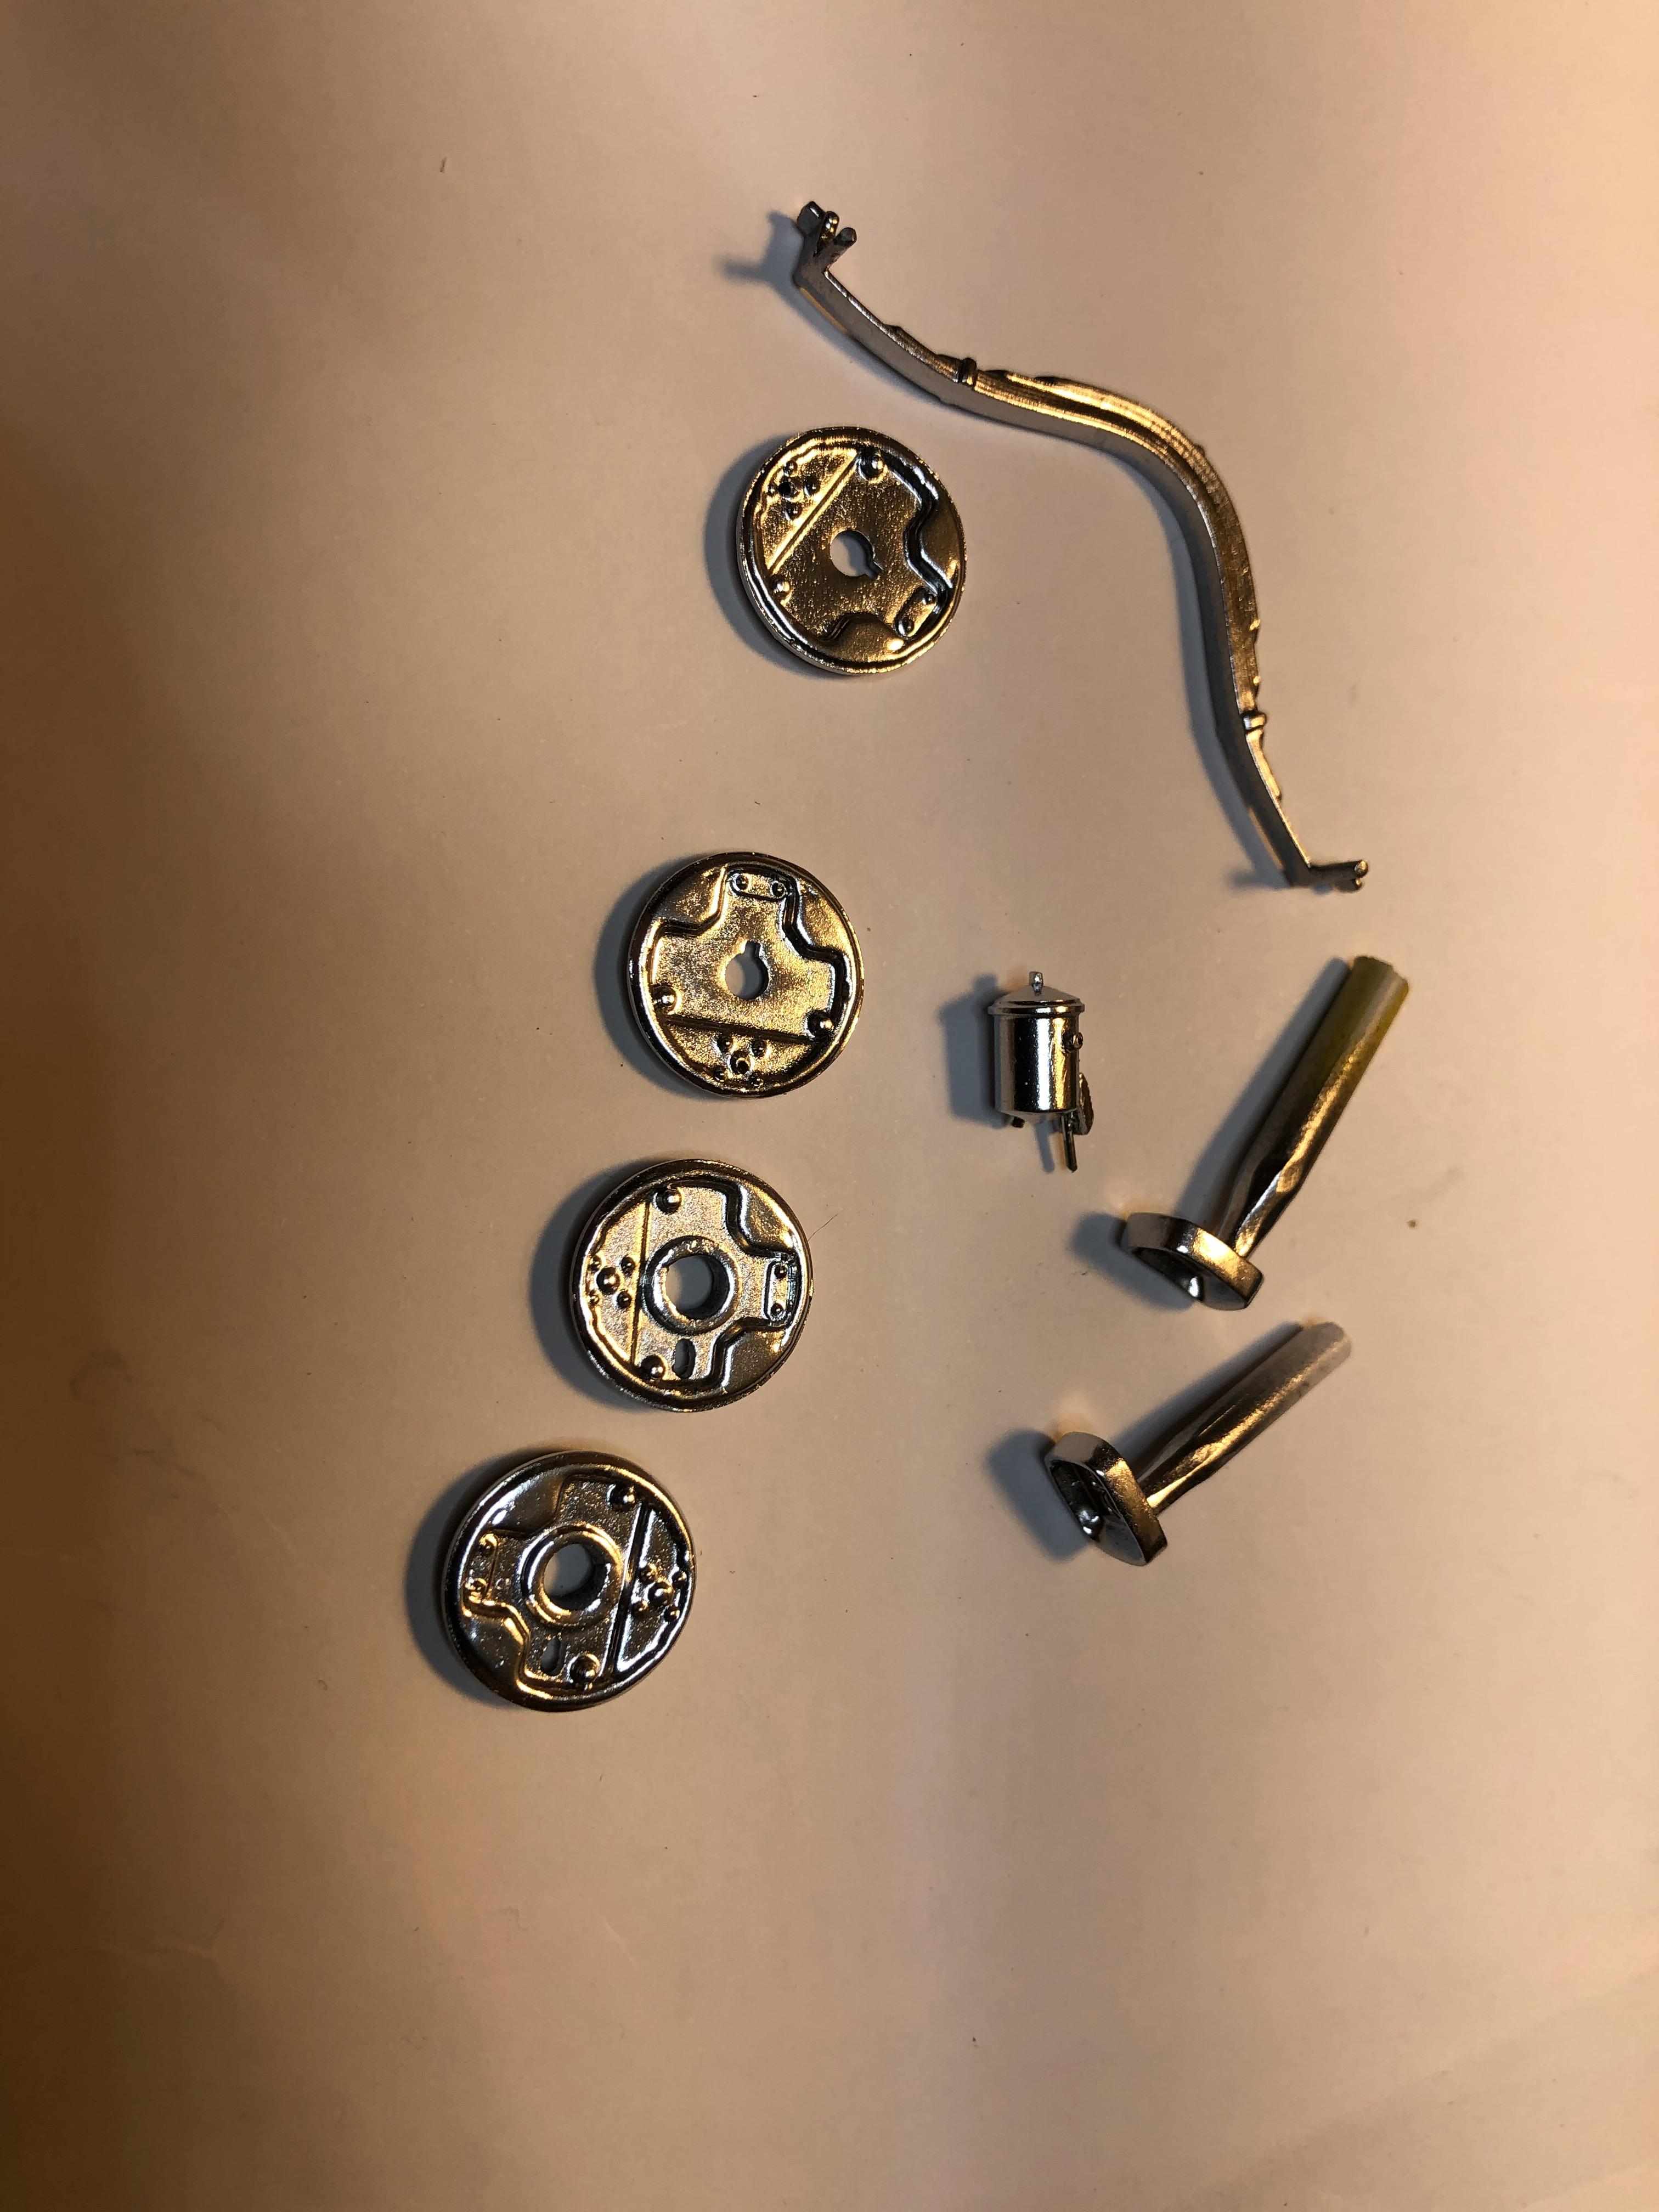
Working on more small stuff and getting paint on them A bunch of parts ready to come out of the hot box And chrome parts that were originally painted with Alclad and now overcoated with Molotow. The pix is a little dark but the finish on the parts is really good Got some time on the motor tonight. Now partly dressed Looks like I may have to redo one red sleeve. They are all yet to be painted black but left it red for the photo - black on black is very hard to photo A lot of parts have been or are about to be painted. The paint is Testors Jade Green in the little square jars - this was the original paint colour and I luckily found 3 jars in my stash. It is quite thick and needs to be thinned about 200% so goes a long way The next on the list is to paint the body again as there are a few areas that have not been covered properly More to come
-
A modeler friend who had a Unimat 3 replaced his with something similar a while back. Said it is a lot better as it has a lot more features like the ability to screw cut and has a proper chuck. He does serious modelling like scratch building a 1/32 of a Caterpillar D8 dozer and lots of steam stuff.
-
Custom wheel hoops made on Taig mini-lathe
bill-e-boy replied to Bills72sj's topic in Tips, Tricks, and Tutorials
Cool project and an excellent result I have a Unimat 3 which is about the same size and it certainly has added another dimension to my modelling. It has a drill/milling attachment that I have used on occasion as well -
Molotow Chrome thru airbrush
bill-e-boy replied to 1st 700 Quad's topic in Model Building Questions and Answers
Further to my post above I sprayed some Molotow a couple of nights ago and below is the result Thinned 100% with lacquer thinners and spent 24hrs in my hot box. The results are very good. most of these items had been painted with Alclad a long time ago and the finish was below what I was after so I reprayed with Molotow. The is one new part which is the flathead oil filter In real life they are not as dark as in the photo
-
Molotow Chrome thru airbrush
bill-e-boy replied to 1st 700 Quad's topic in Model Building Questions and Answers
I use 30ml refills sprayed my air brush. I do thin it up to 100% with lacquer thinners. I lay down a light but full coat then come back 20-30mins later with a fuller coat and it come out nice and shiny like chrome. I let it cure in my hot box for a day and do not touch it for at least a week as it seems to harden with age. I use lacquer thinners or brush and roller cleaner for clean up as well I gave up on Alclad as the finish is so variable and the difference between enough build up and too much is one coat. It is also quite dark as compared to Molotow -
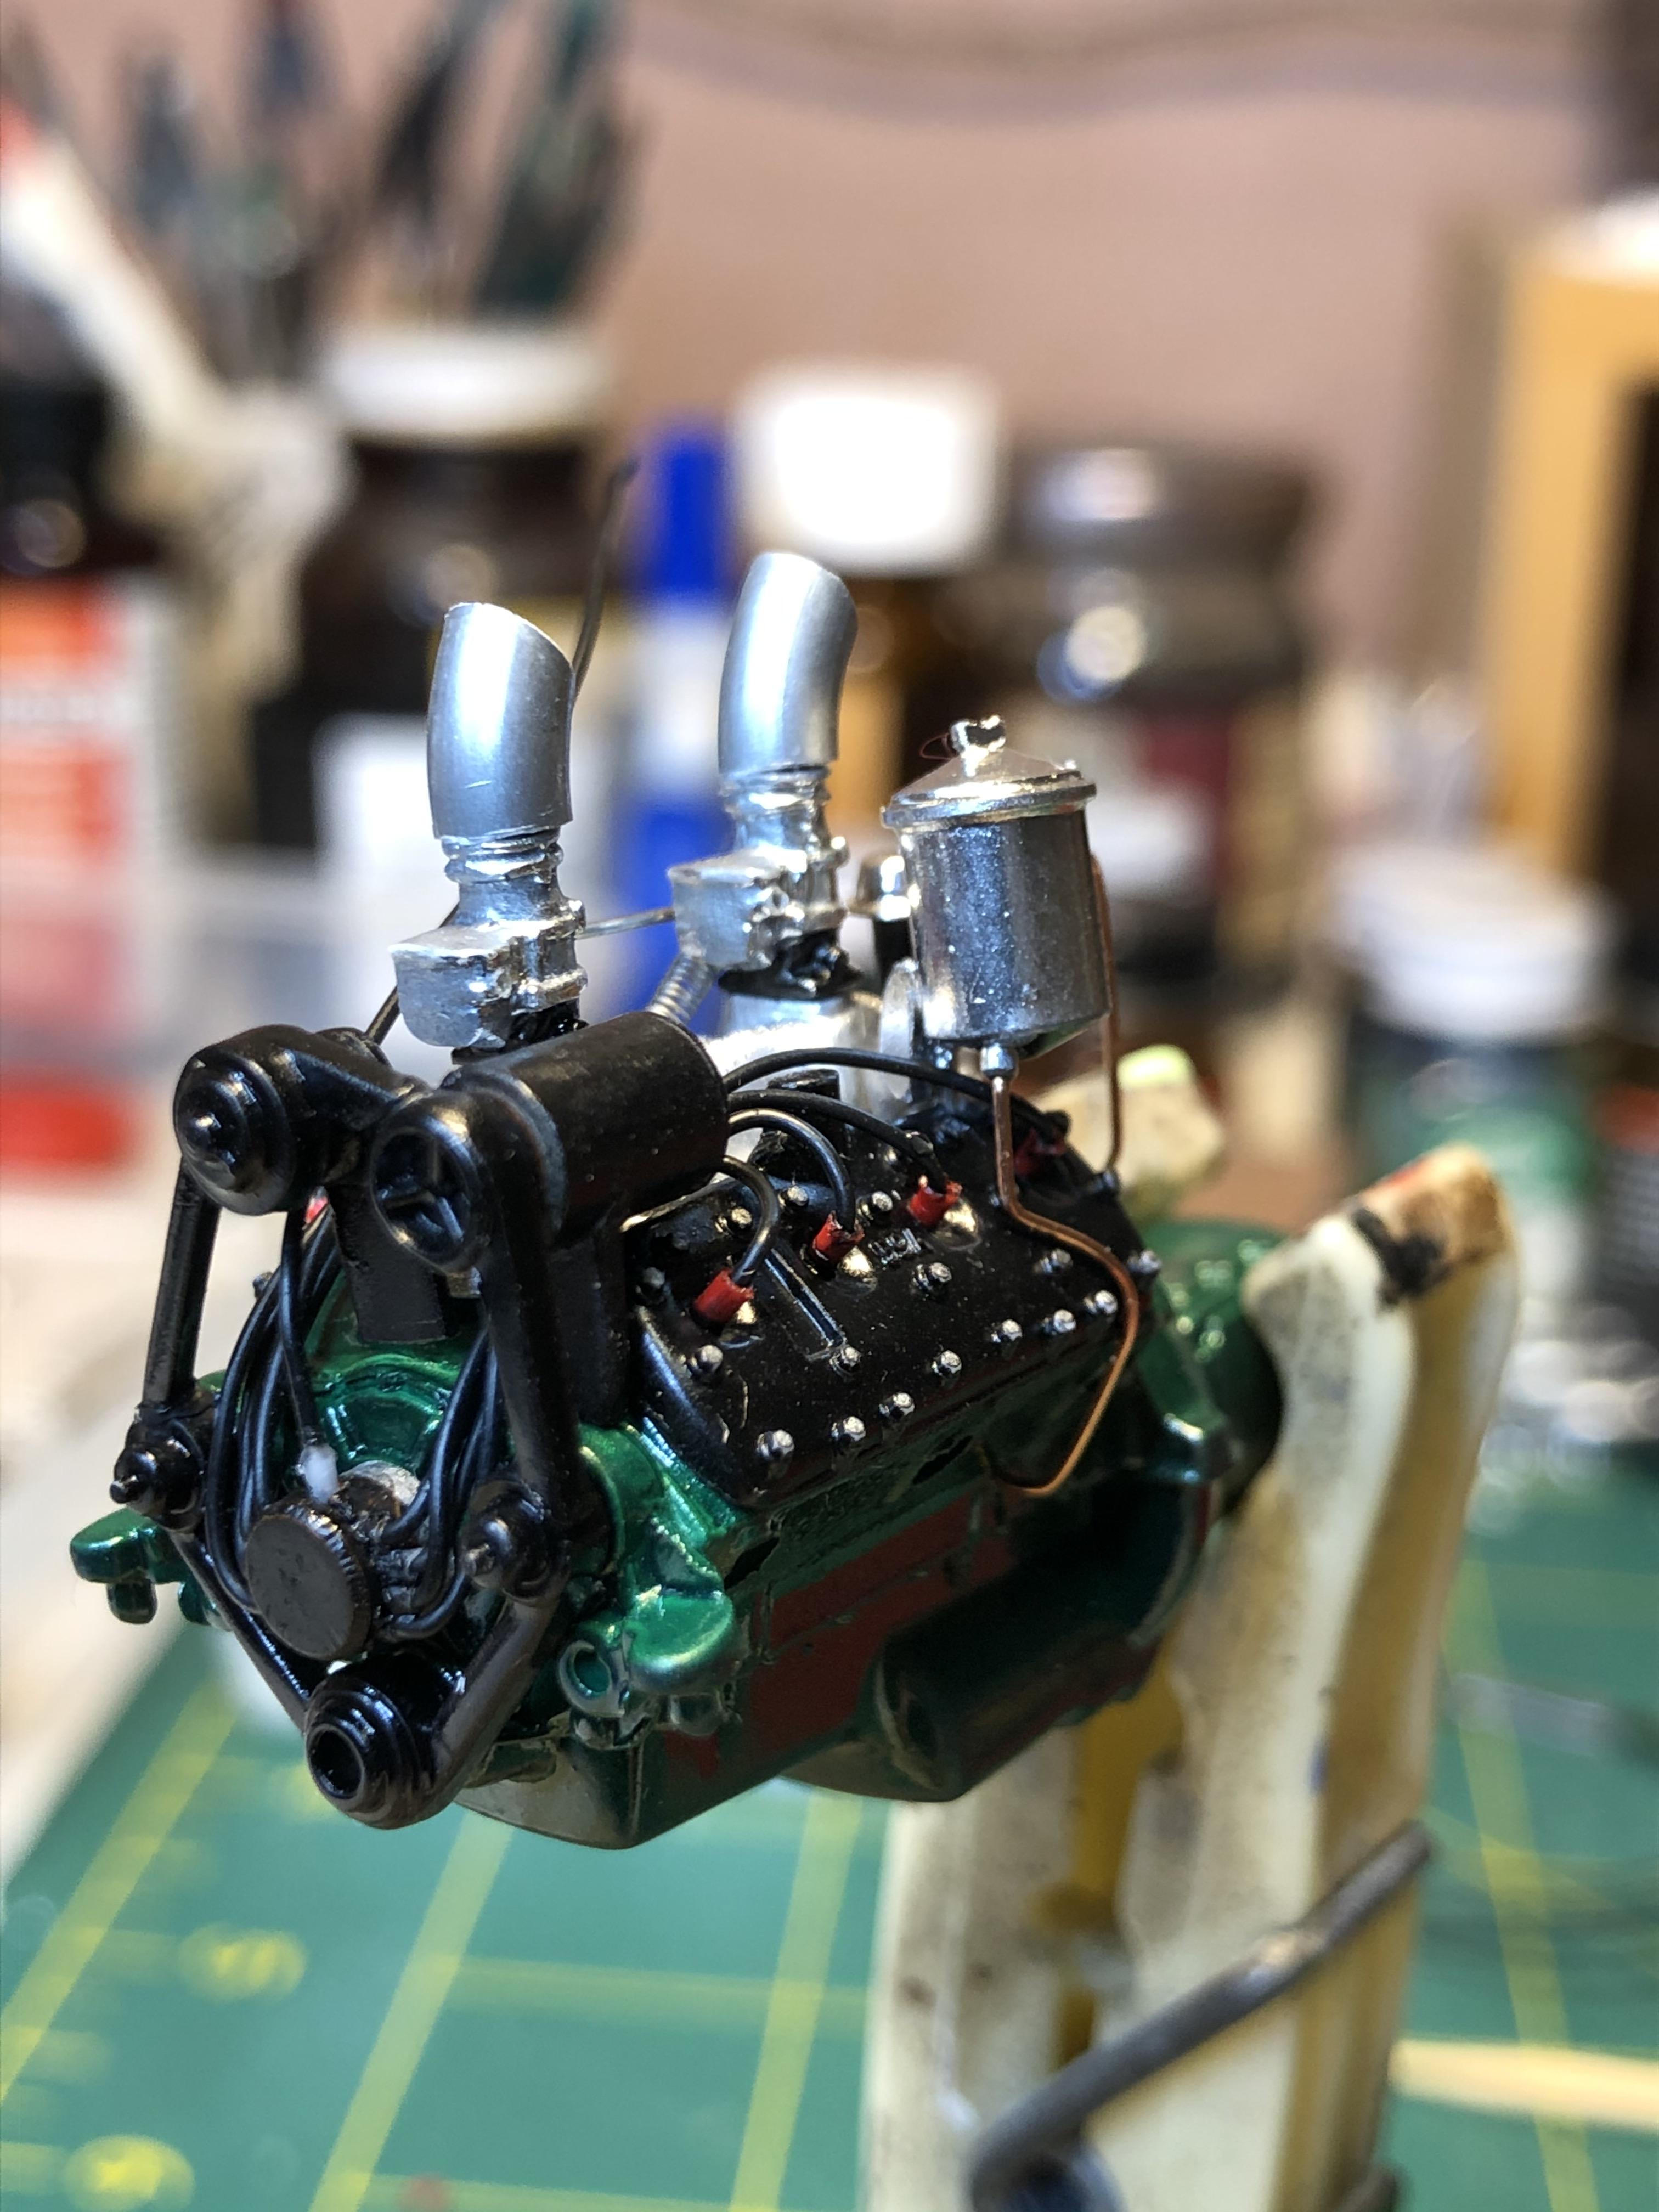
More work on the small things like carb air horns. Heat bent some plastic tube, cut to length on the inlet side and hand reamed out with Dremel cutters held in my big pin vice Dash board and seat from last time I worked on this - maybe 10 years ago. The seat pattern was scribed into a sanded down plain seat using guides for the corners and a straight edge for the straight parts Slowly getting all the small bits finished and painted More to come
-
Looking good guys I just noticed that the donor A pickup kit I am using for the Royce Fisher build has smoothy hood sides - takes a bit of work out of cleaning up the stock hood sides And some period wheels and graphics - I think I will forego the graphics