Plowboy
-
Posts
3,434 -
Joined
-
Last visited
Content Type
Profiles
Forums
Events
Gallery
Everything posted by Plowboy
-
Thanx Carl! I'd like to stick an LS engine in it. But, I haven't got one yet. I have another idea for the engine. It depends on what it looks like in the engine bay. I've always got the 389 to fall back on.
-
If you sanded the paint before you shot the clear, that's why it looks blotchy. Sanding disturbs the metallic particles in the paint and makes it look blotchy. Never sand a metallic before clear. Only solid colors can be sanded before clear.
-
Revell Lincoln LSC Pro Street reissue
Plowboy replied to Justin Porter's topic in Car Kit News & Reviews
In this case, I think getting rid of the lettering would've been an improvement. To me, it looks too big. It almost takes up half of the sidewall. -
Revell Lincoln LSC Pro Street reissue
Plowboy replied to Justin Porter's topic in Car Kit News & Reviews
I've never liked the rear tires that come in this kit, the Corvette, Beretta, J-2000 and the Thunderbird. They're a little too big and I don't like the sidewall detail on the perimeter. They almost look like a giant mud grip tire. I always switch them out with the AMT Mickey Thompsons. -
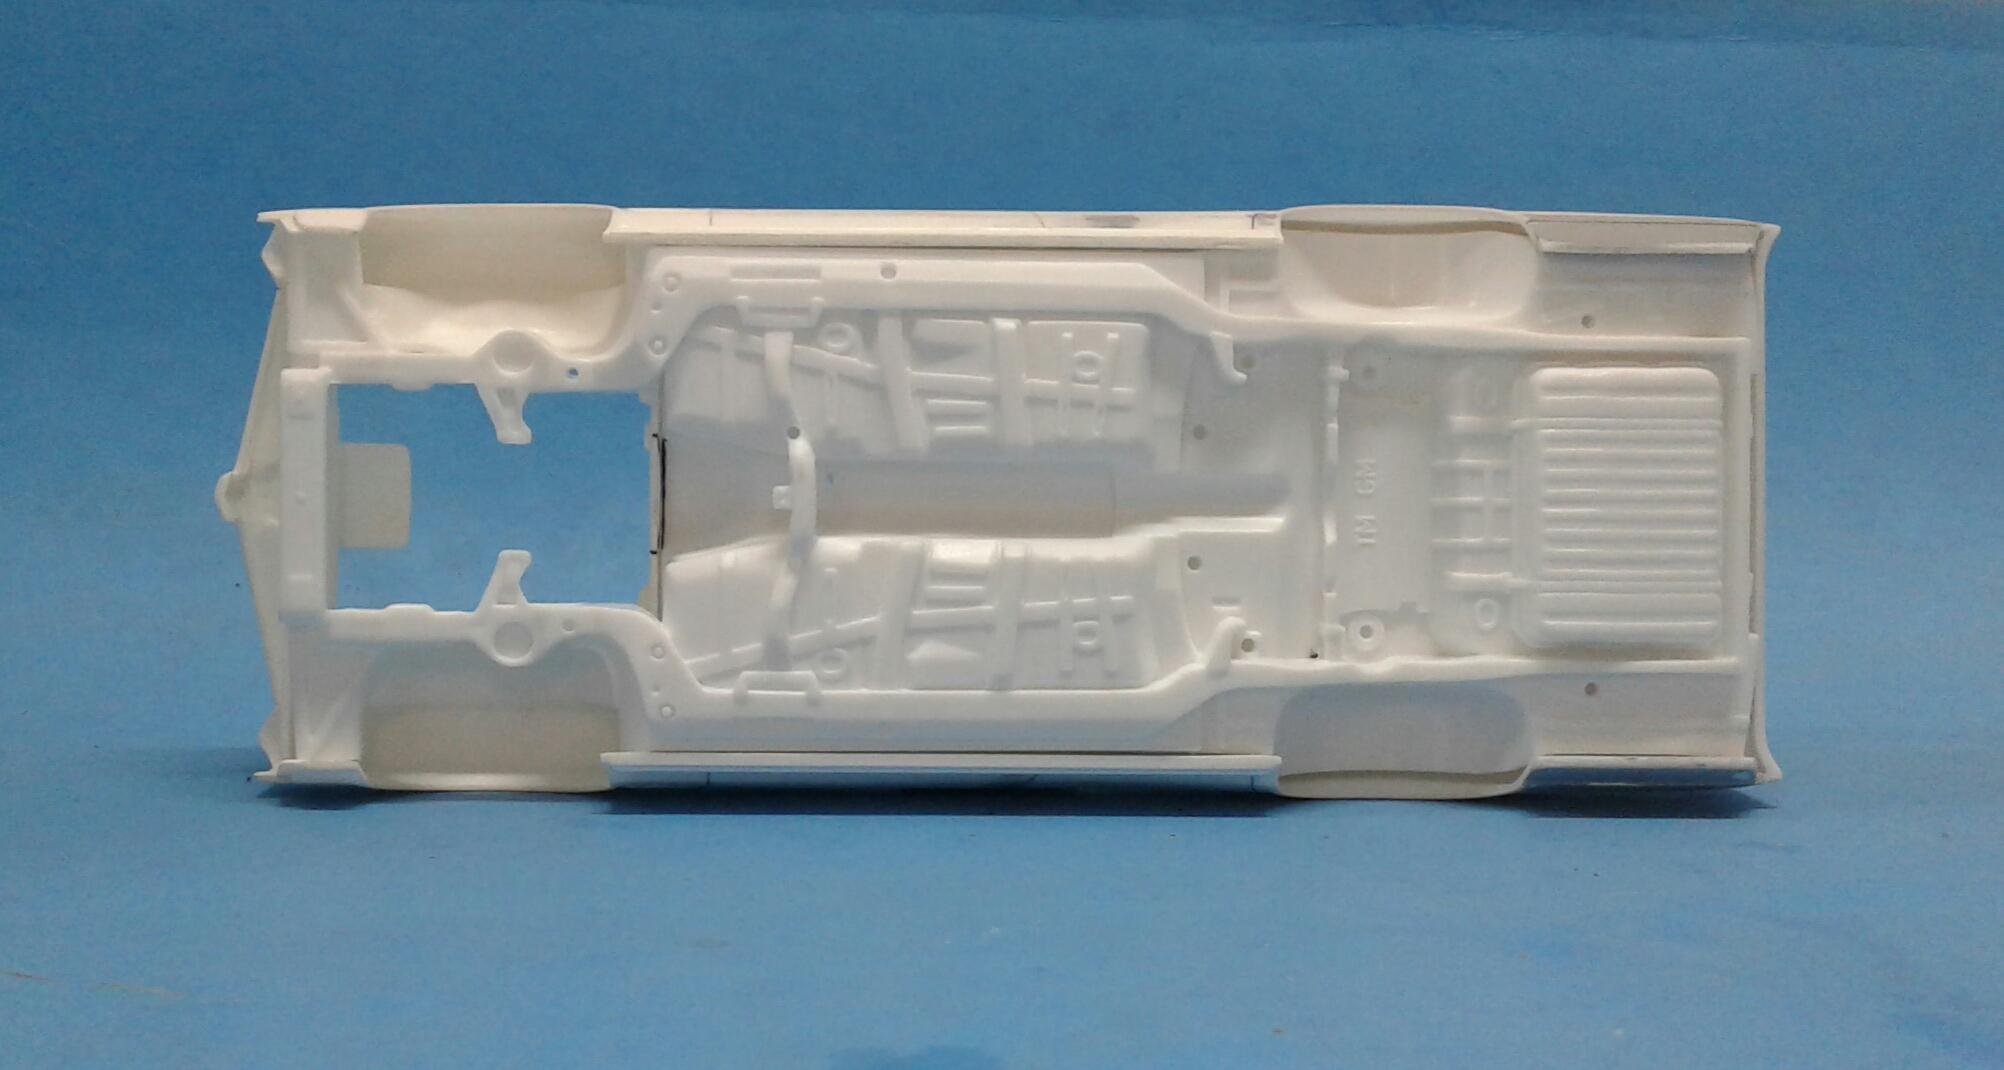
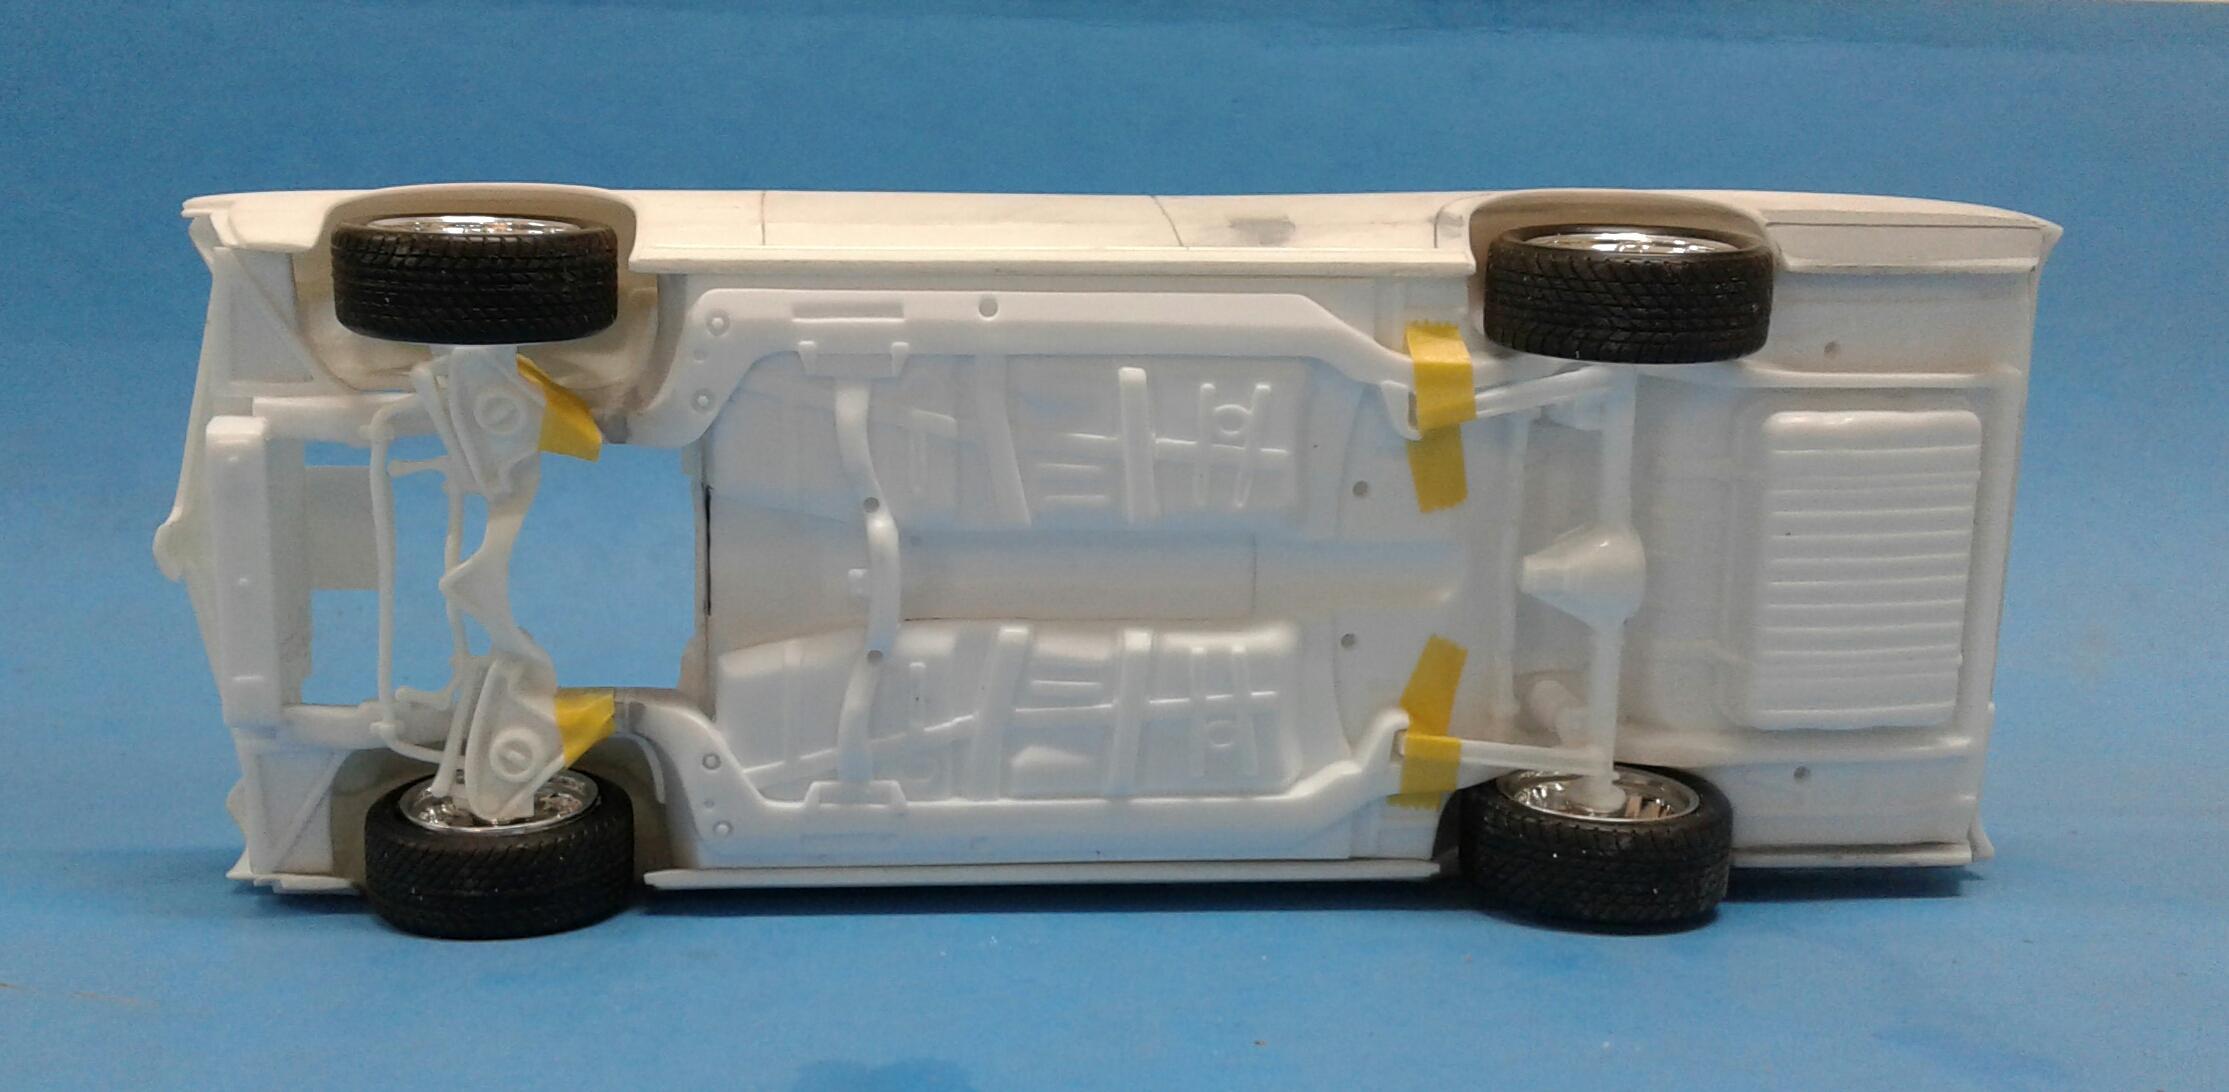
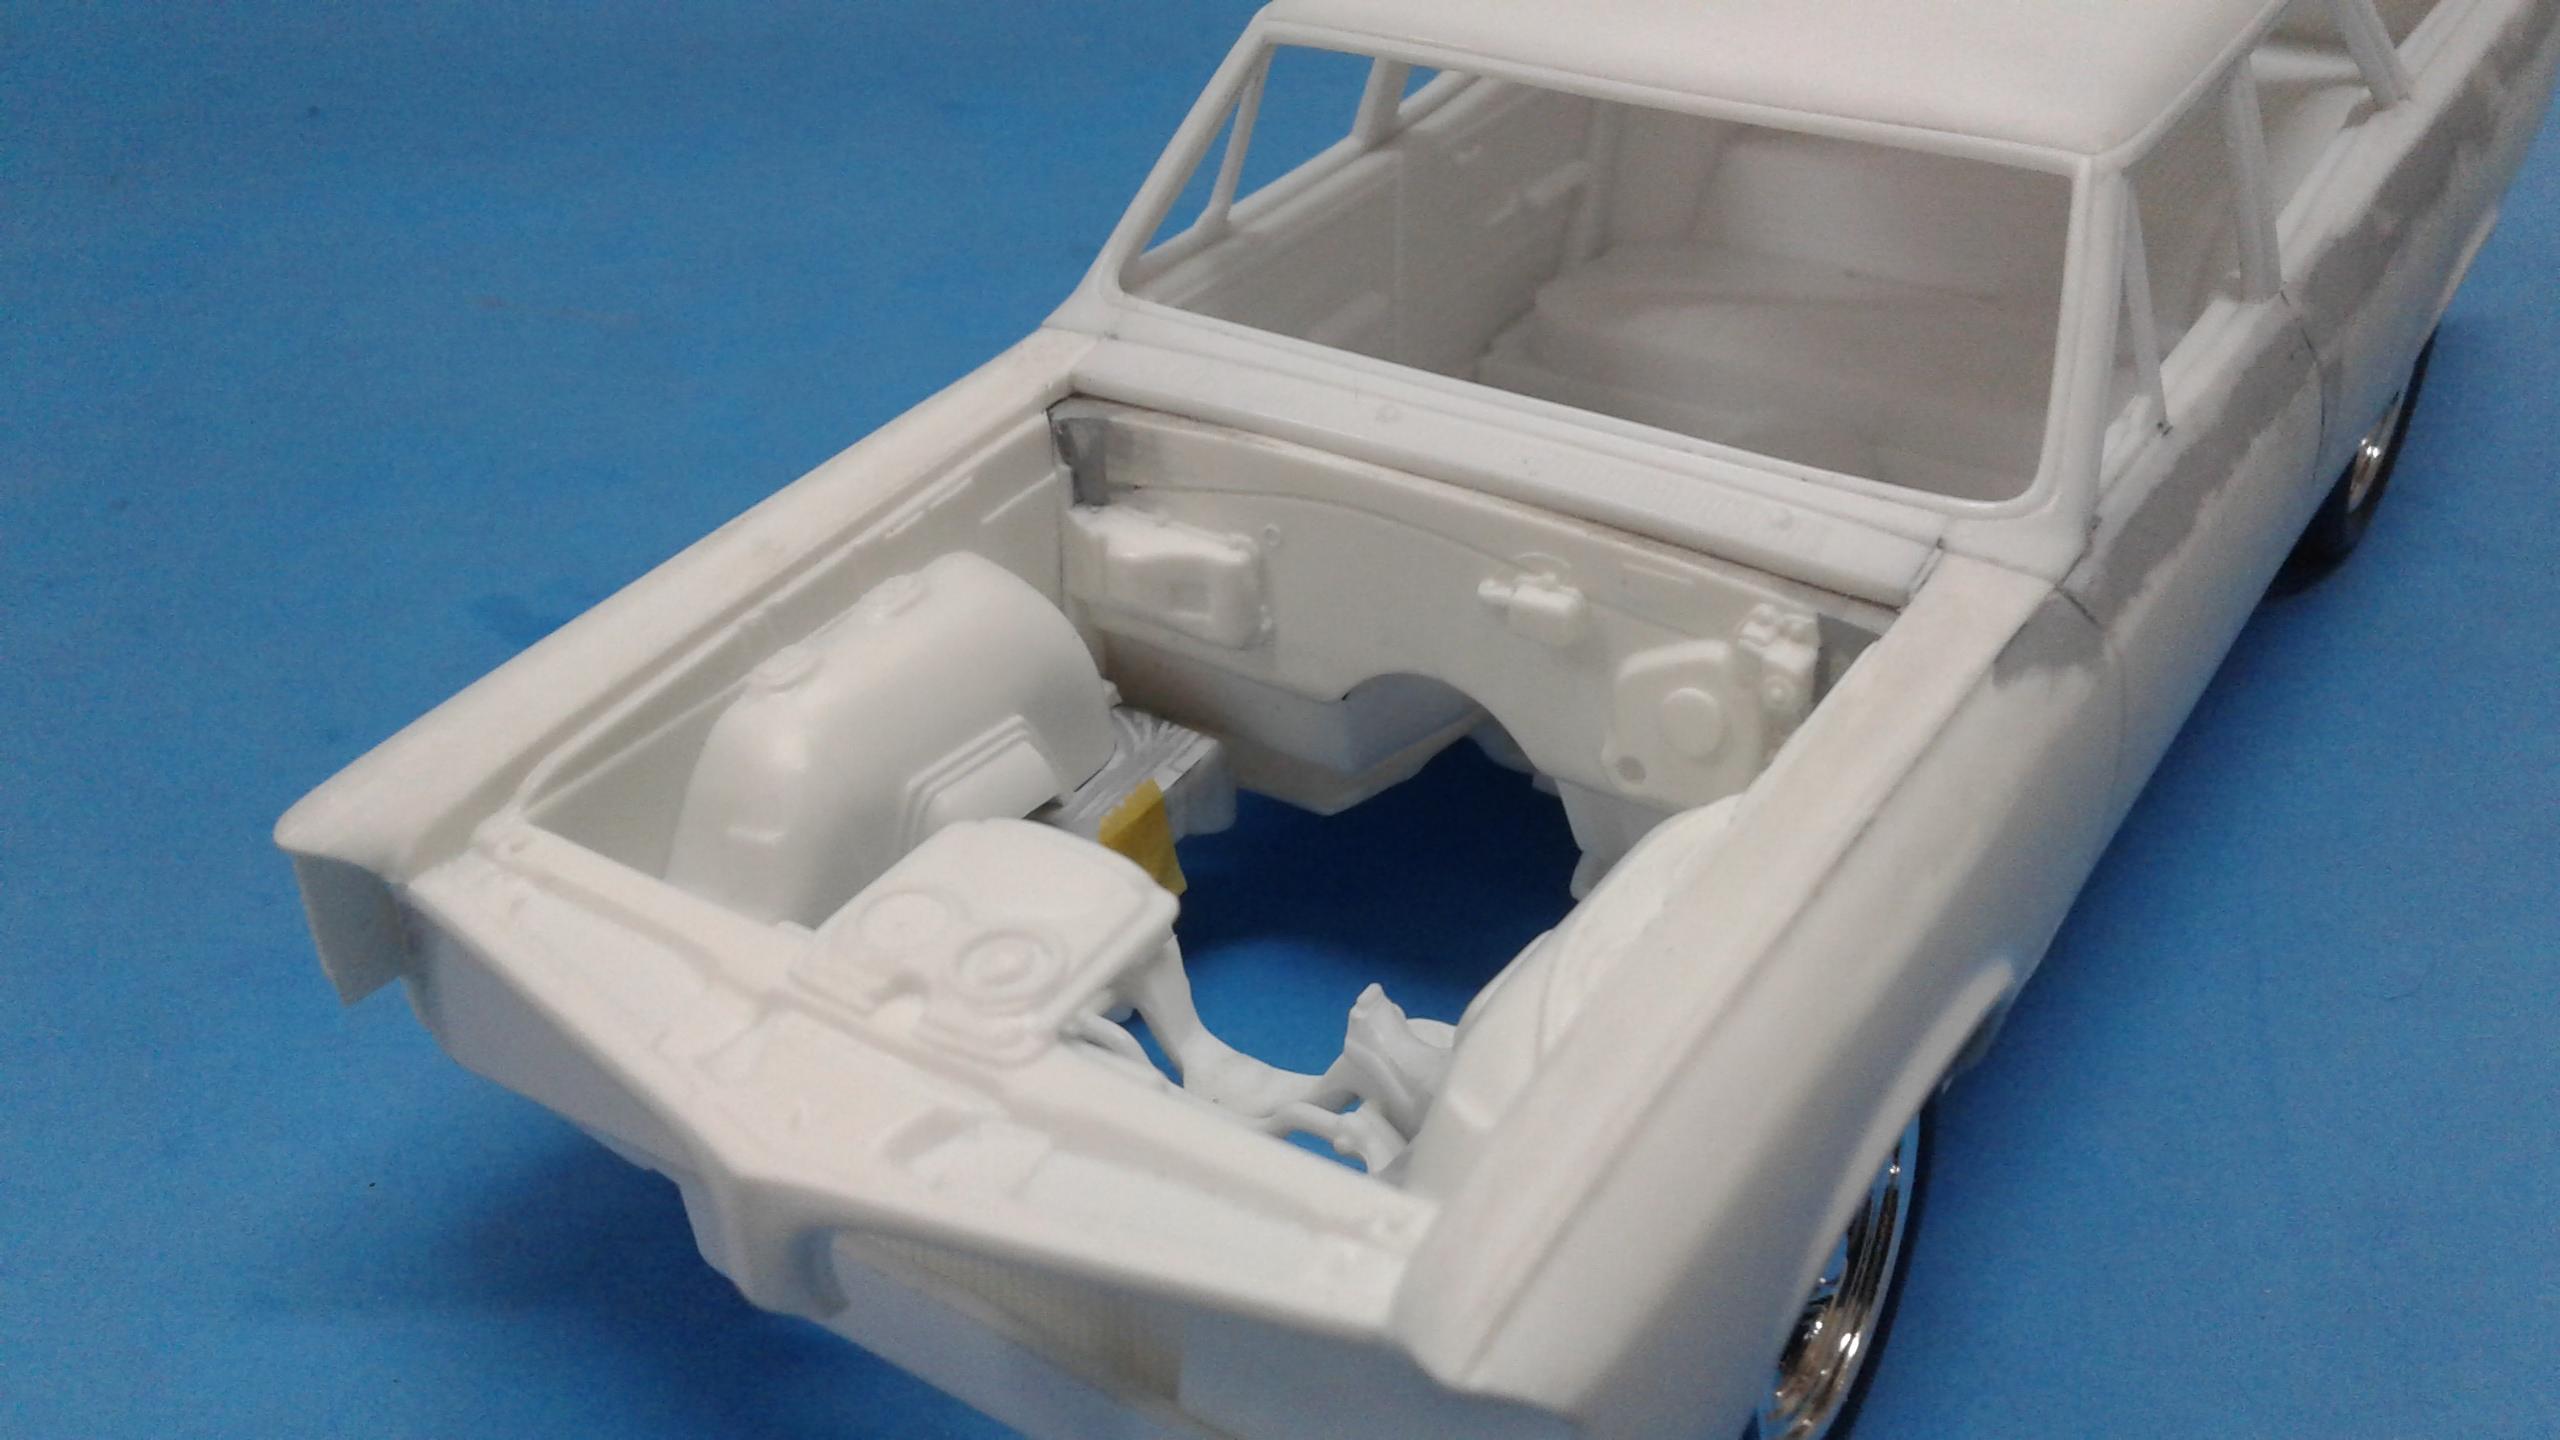
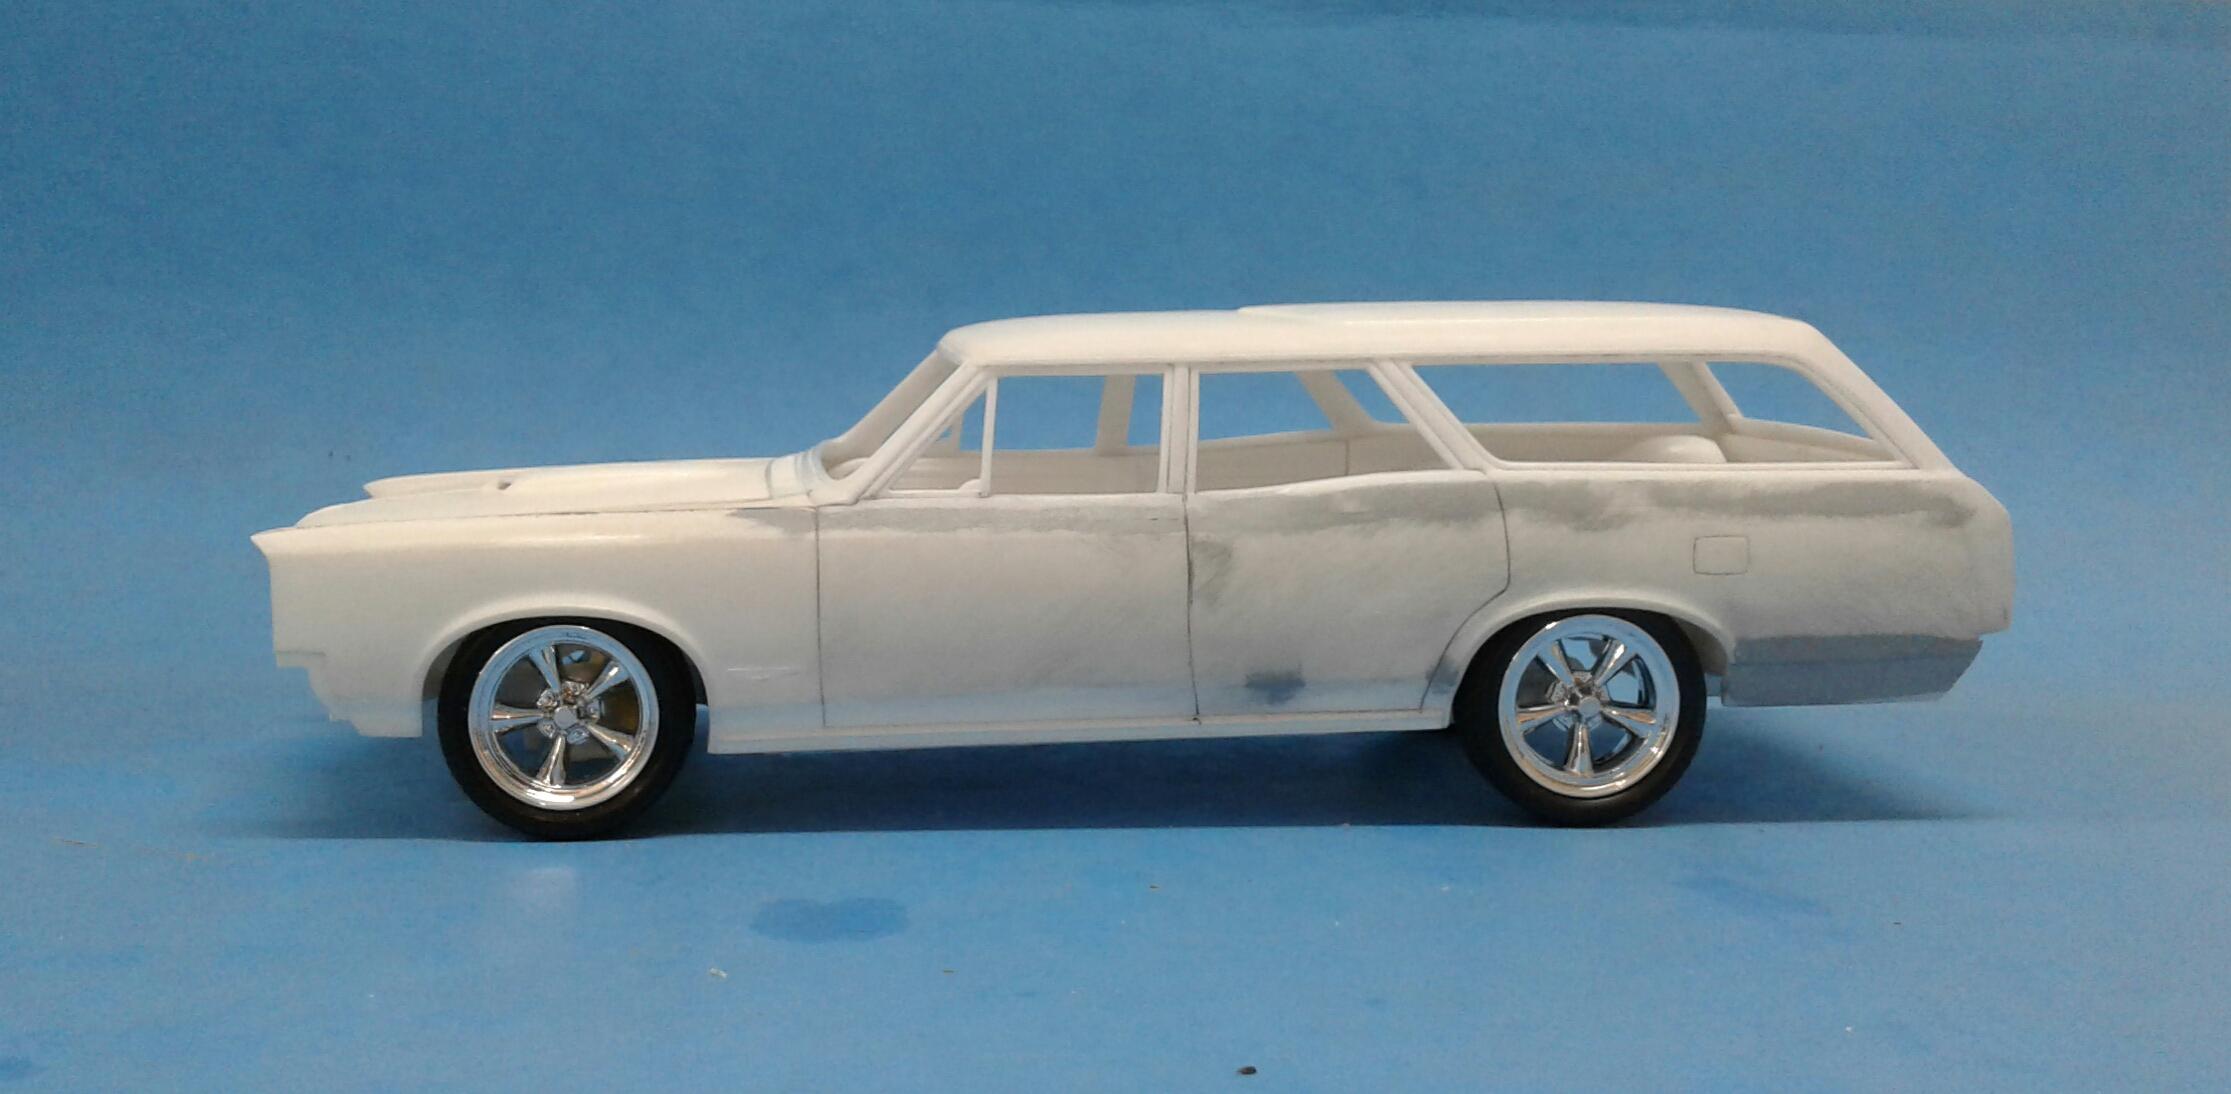
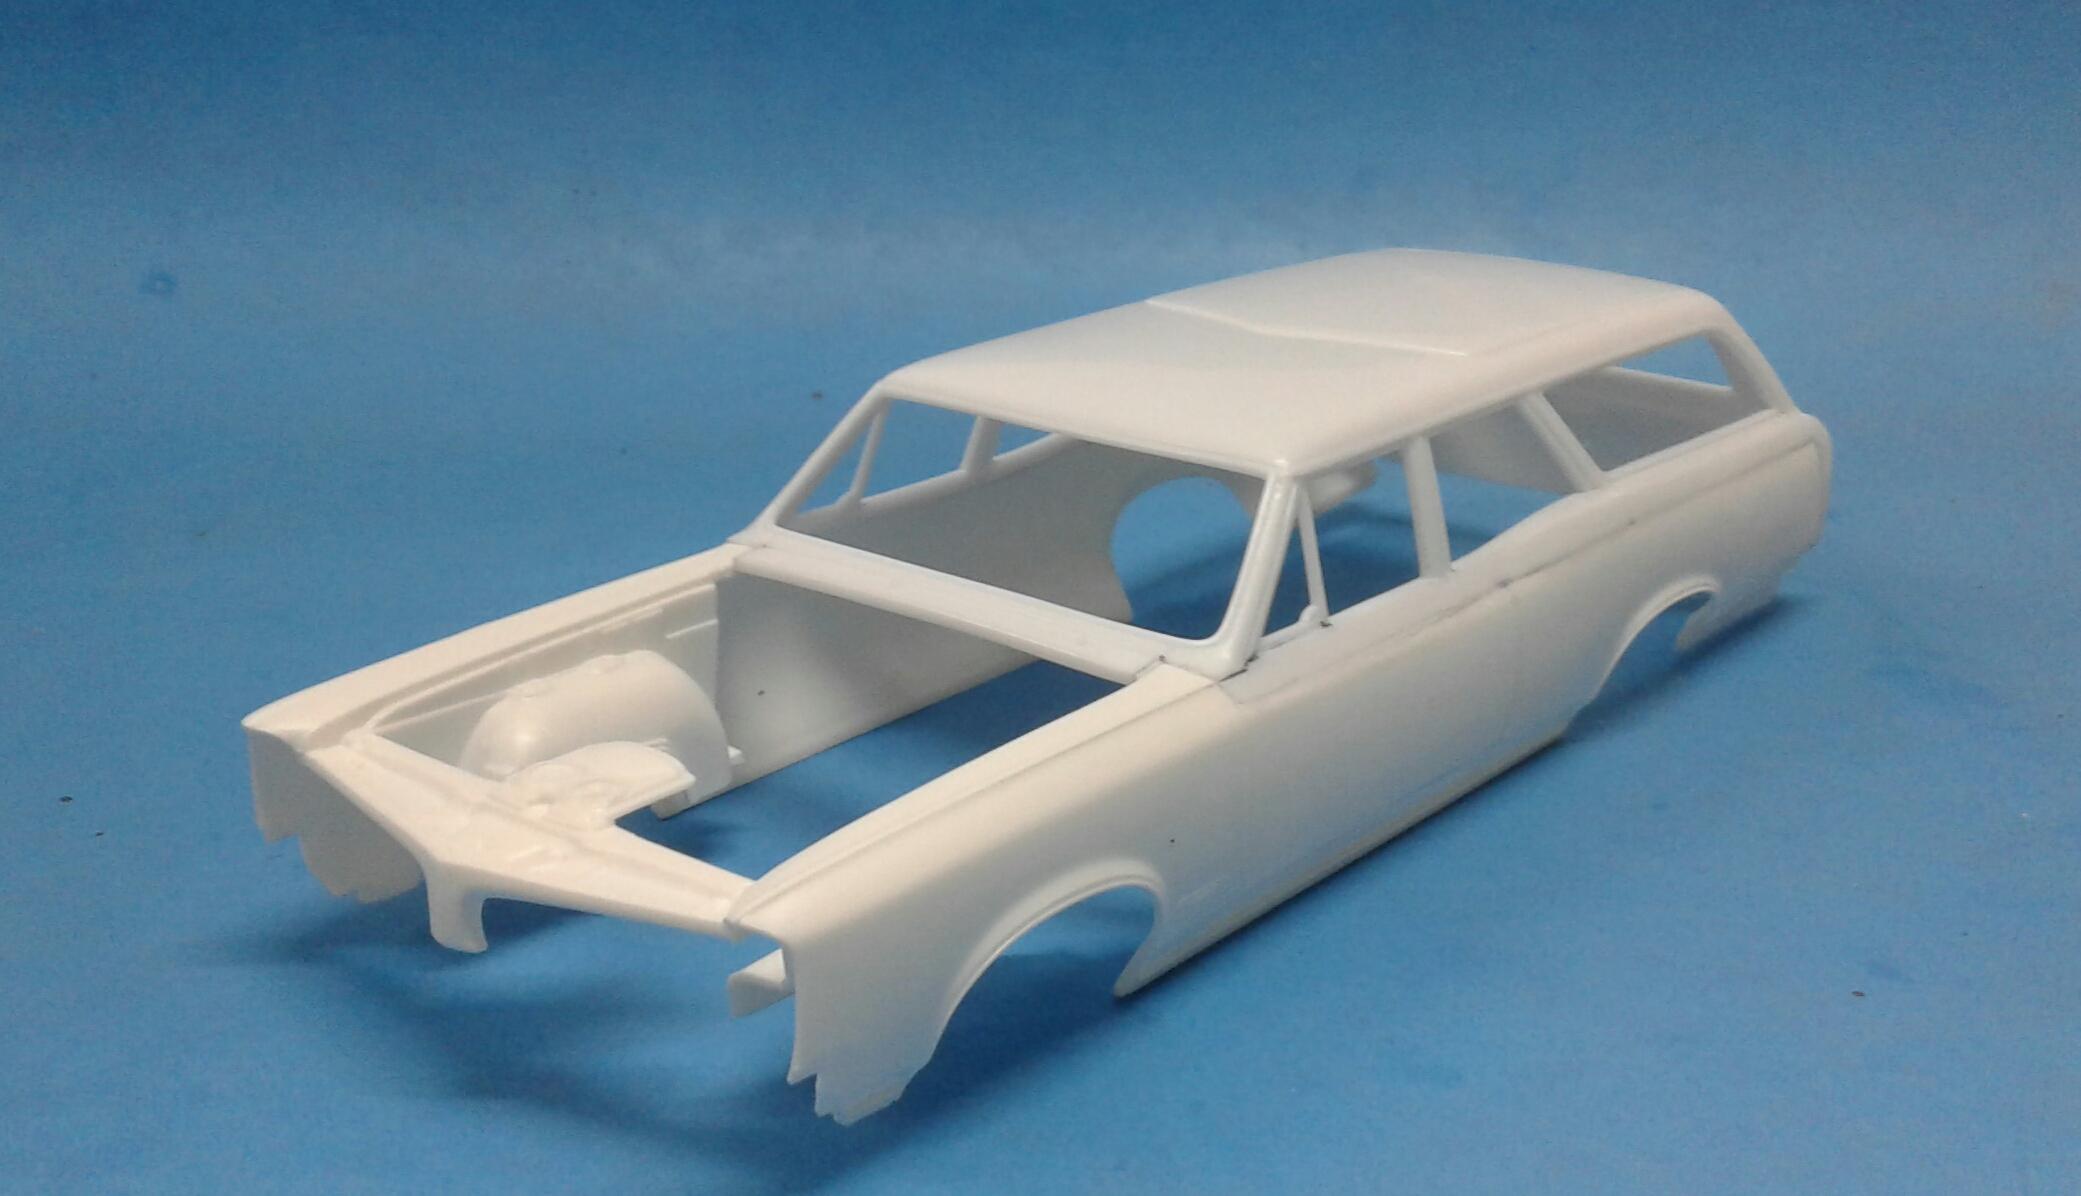
With the bodywork pretty much done, I've been doing a bit of fitment work with the interior and chassis. The interior is fitting well with the wagon door panels. Just gotta get the GTO dash fitted. The chassis fit easily with a little work. First thing I noticed was the location of the spring pockets. They look too far rearward. A test fit of of the front suspension proved it. This ain't gonna work! To fix it, I cut the frame just behind the A arms and added .080 to the length and glued it back together. I also had an issue with the rearend placement. The wheelwells are perfectly located. But, the rearend is too far forward in them. I had the same issue with the Revell El Camino. On it, I cut the pins away from the trailing arms and moved it back. That left a big gap between the pockets and training arm. This time, I cut the trailing arms loose and moved them forward the appropriate amount to get the rearend centered properly. I glued the firewall in and filled the big gaping holes for the hood hinges. I also trimmed it to fit the transmission tunnel on the interior. The big surprise was the radiator core support fit right in with no modifications. Time for a stance check! Yeah.....no, that ain't gonna work. I'm going to drop it three scale inches and check it again. I may have to switch to a set of Pegasus wheels to get it where I want it. If I can get it close to my first mockup, I'll be satisfied.

- 128 replies
-
- 10
-

-
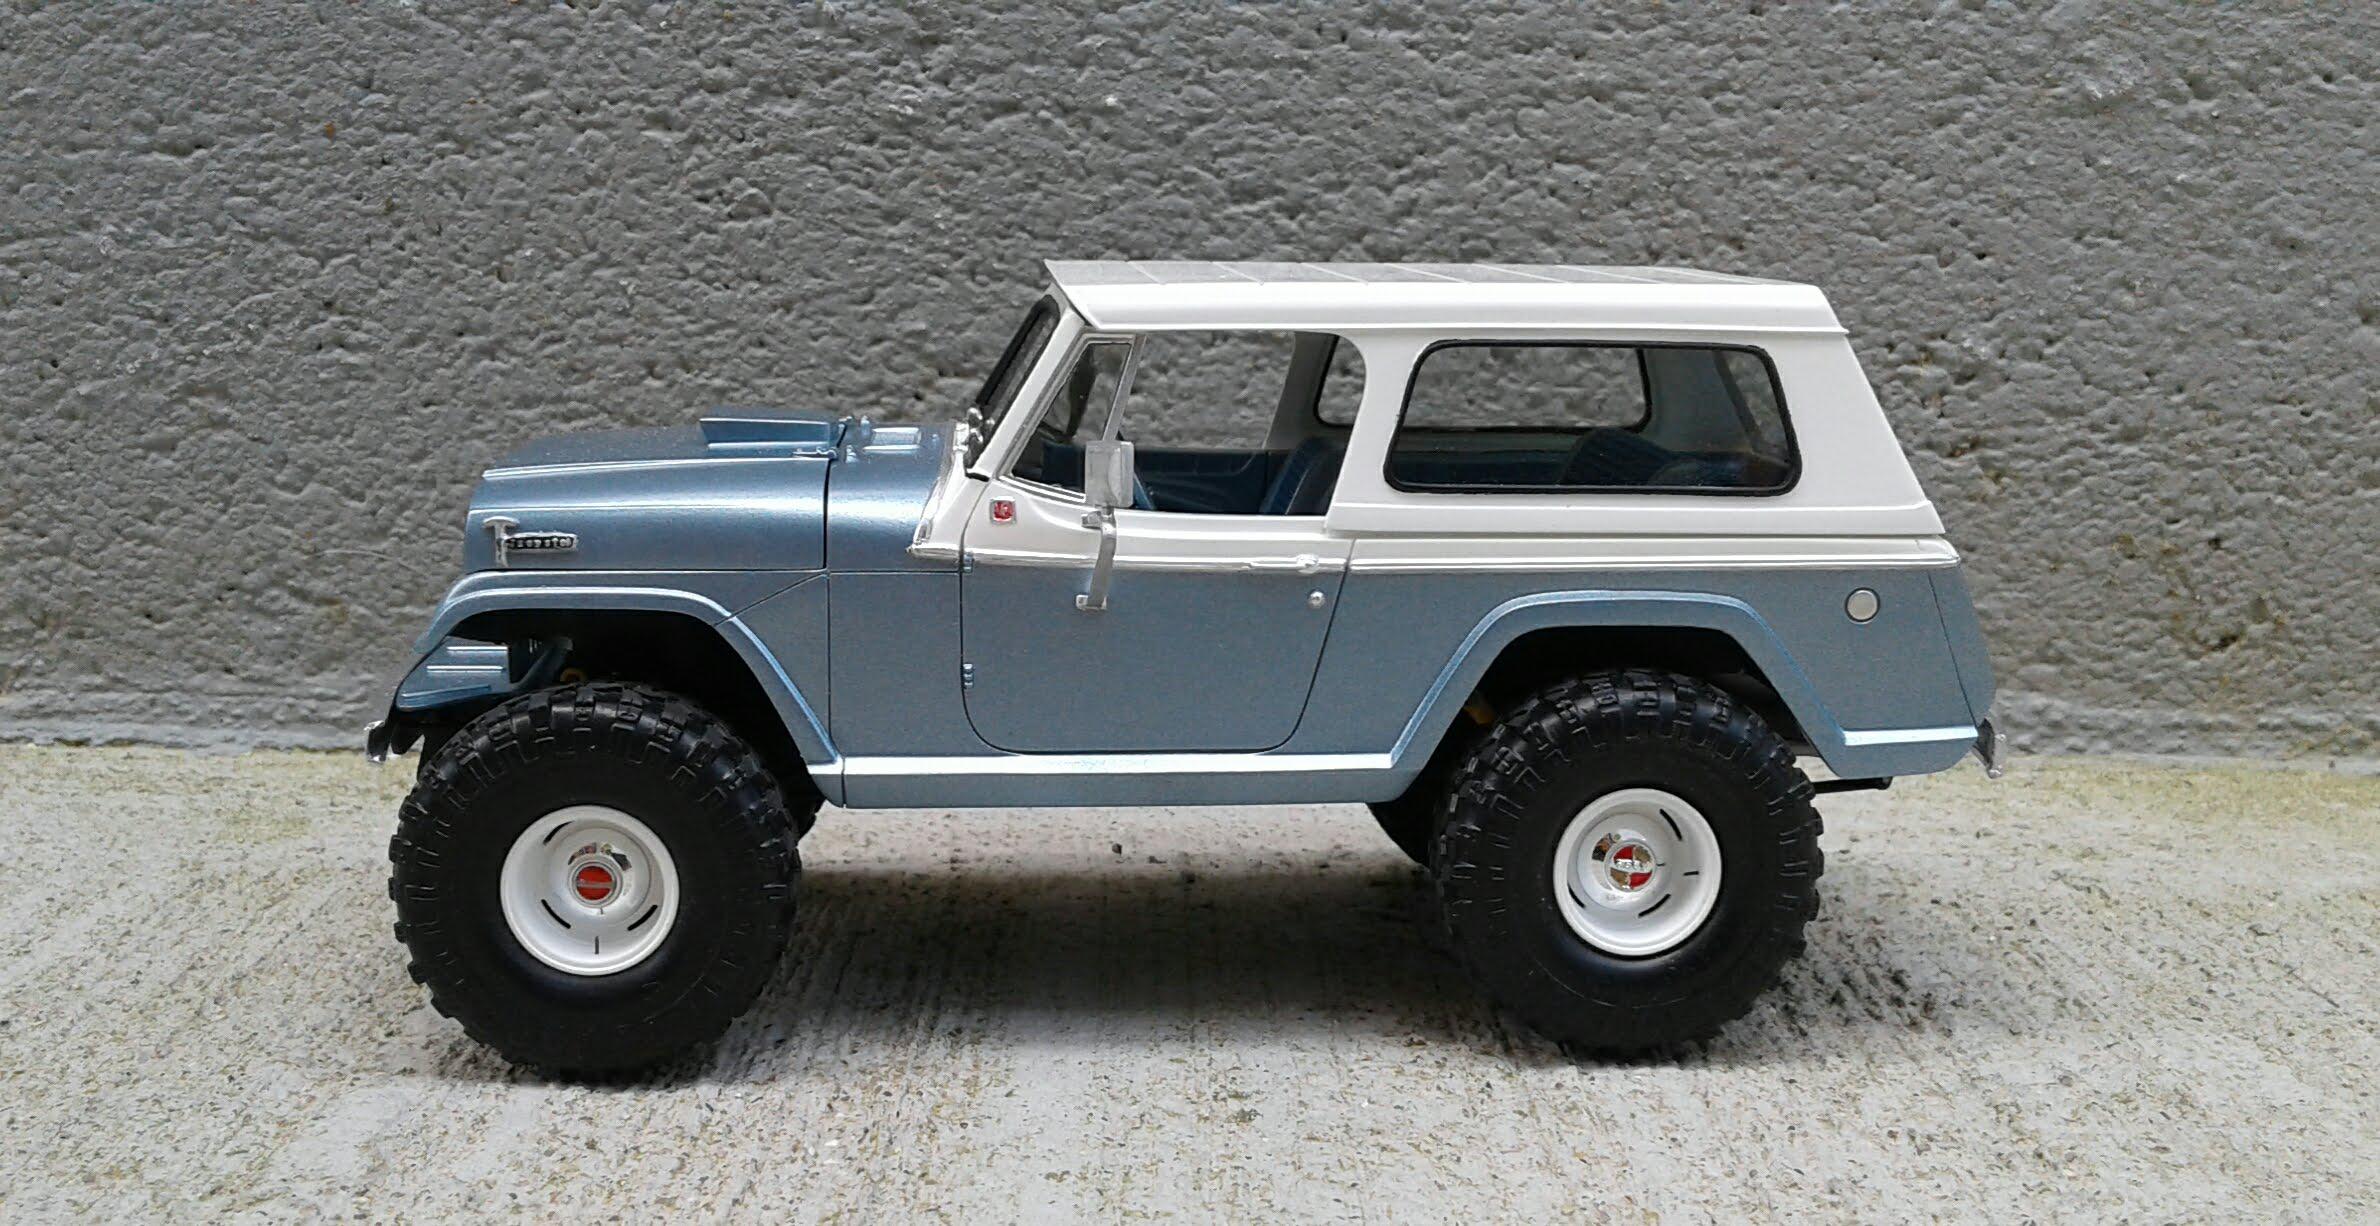
It depends on where the paint meets IMO. If it's solid roof and metallic body, it will look fine. I did it on this Nova wagon. This Jeepster is metallic and solid. The chrome strip helps with the break of the paints. As always, it depends on your preference.
-
MPC 1981 Chevy Stepside Pickup Sod Buster (1:25 SCALE)
Plowboy replied to av405's topic in Truck Kit News & Reviews
Round2 is best off to just issue the truck as is and allow the individual builder to add the extras they want rather than add them and make everyone pay for them. -
That is COOL! I've been wanting one of these for quite a while. But, they always go for more than I'm willing to pay.
-
Did '70 Road Runners have chrome around the side markers?
-
MPC 1981 Chevy Stepside Pickup Sod Buster (1:25 SCALE)
Plowboy replied to av405's topic in Truck Kit News & Reviews
I wish they would've added a bench seat. The bucket seats in this kit are horrible and you rarely, if ever, saw one of these trucks with bucket seats. MPC really had a hangup with bucket seats in their pickup kits. -
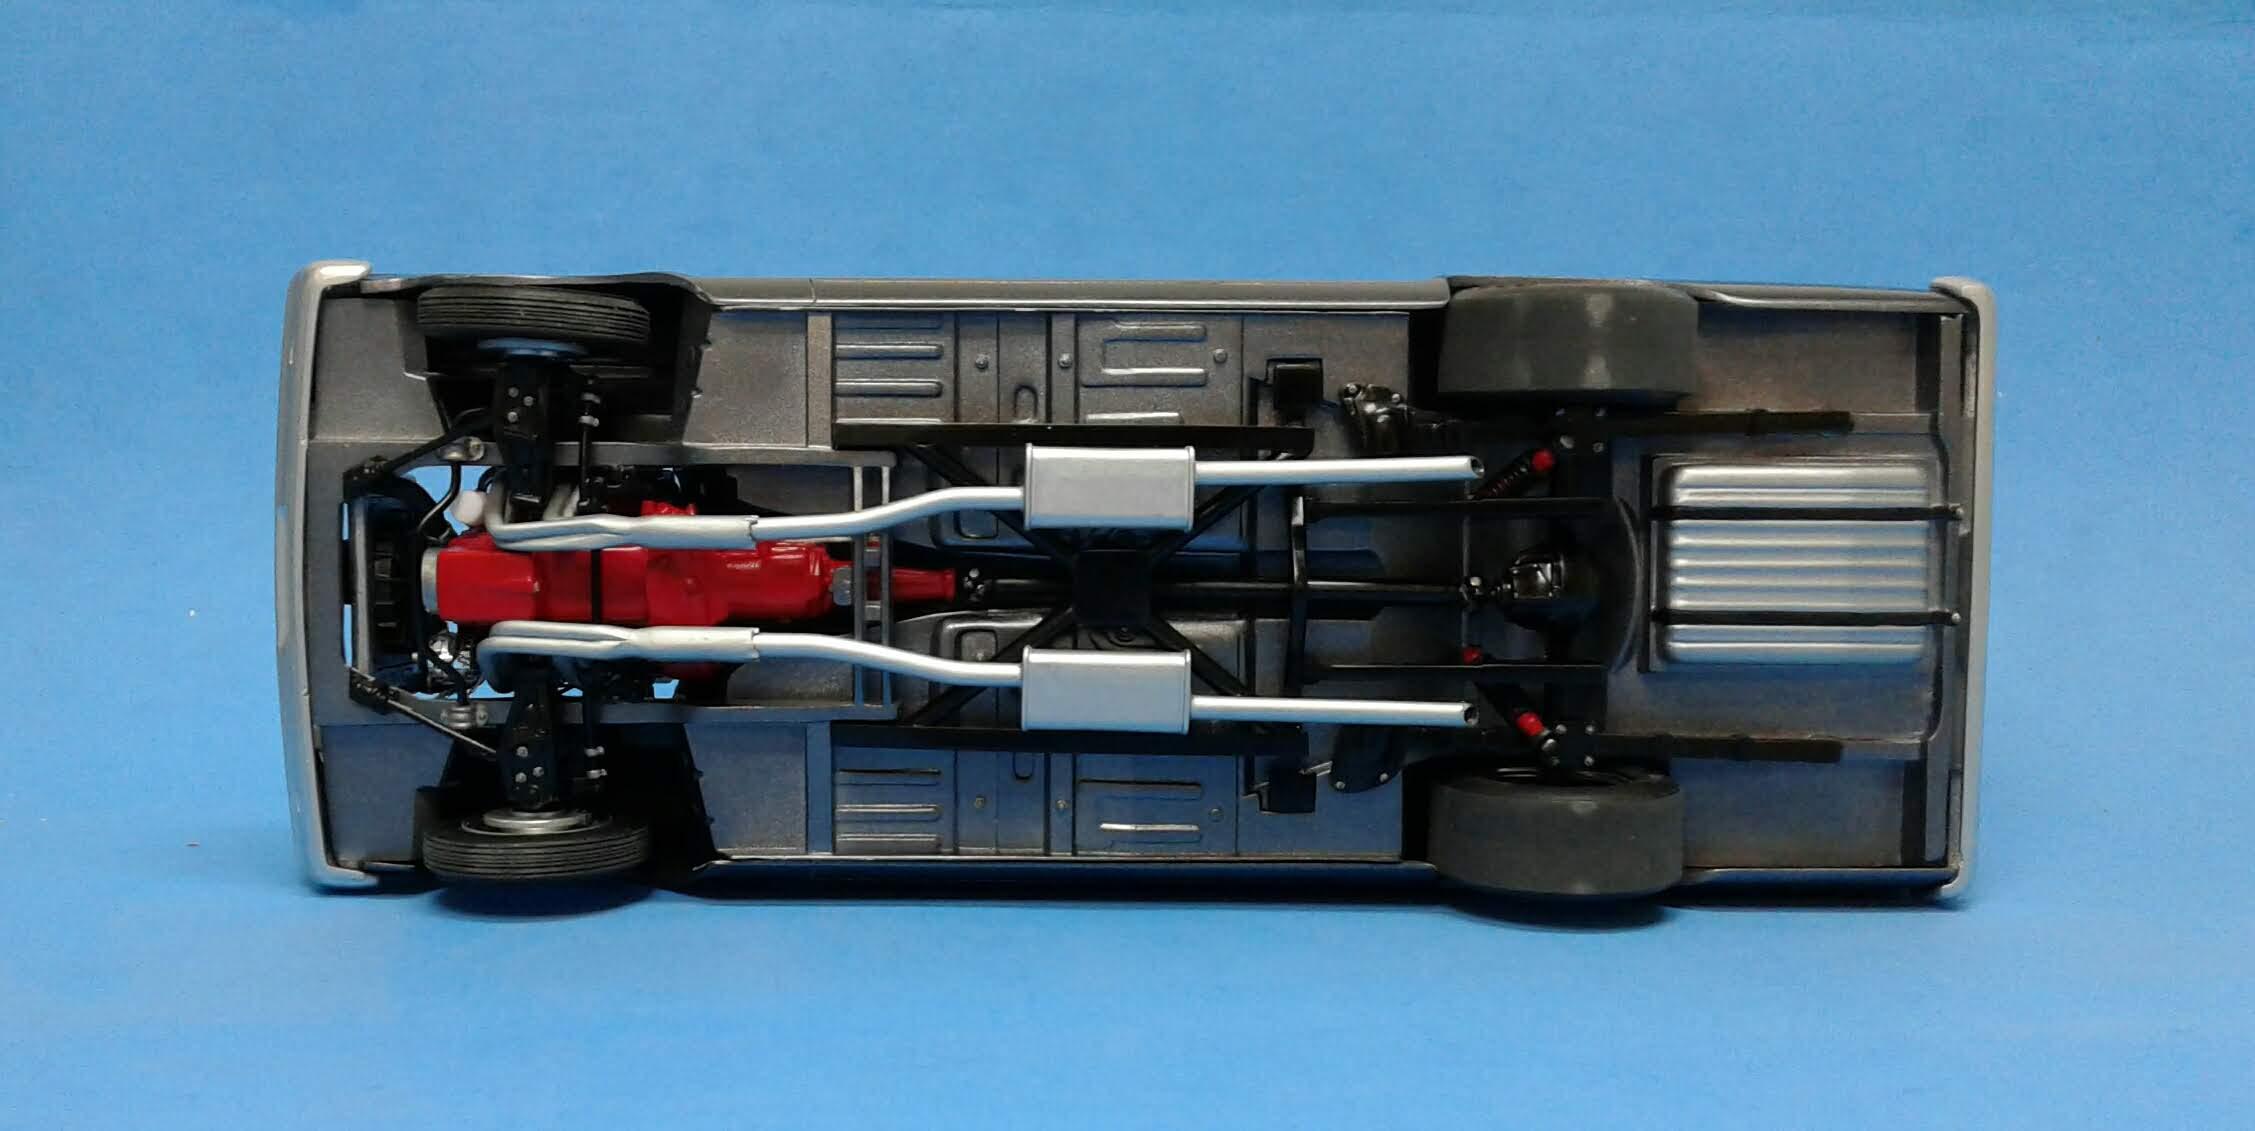
Tamiya TS-13 clear typically darkens most metallic paints to a degree. I painted a '63 Fairlane around three years ago with Gun Metal and it looked almost like Light Gun Metal out of the can. Like you, I was hoping it would be dark like the lid on the spray can. Three coats of TS-13 brought it right where it should be. This is what the chassis looks like with no clear. This is what the body looks like.
-
Who doesn't love a mock-up? Let's see yours!
Plowboy replied to Belairconvertable's topic in WIP: Model Cars
Here's one of my current project.
-
I've been piddling around with the interior and while the GTO door panels can be made to fit the wagon floorpan. They're too short in height. Plus, they would have to be modified a lot to represent a four door. And they still wouldn't be "correct" for a wagon. The wagon door panels fit perfect. They even match the body. So, now I'm thinking I'll use the wagon's interior and the GTO dash. Both interiors are technically wrong. But, only one fits right. Another idea I'm floating around is to use part of the pattern from the GTO's door panels and graft it into the wagon door panels. Again, it won't be correct. But, maybe a happy medium.
-
You'll have to check out my '58 Edsel Phantom and '57 Del Rio sometime. Also have a '96 SS wagon.
-
Thanx Larry! I hadn't thought of that kit. I was thinking of one from a '98 Firebird. The '04 GTO may be a little hard to come by.
-
It's not going to be accurate as it won't have the correct taillights. I'm going to use the Malibu taillights and modify them a little. Then there's the interior. I'm thinking about using the Malibu seats and the GTO door panels and dash. Haven't really looked at either. But, I want to try to keep it as simple as possible.
-
How is the six from the '50 Chevy pickup way too big? I used one in a '51 Chevy and it fit fine. If it's the length, you may have to put the radiator in front of the support.
-
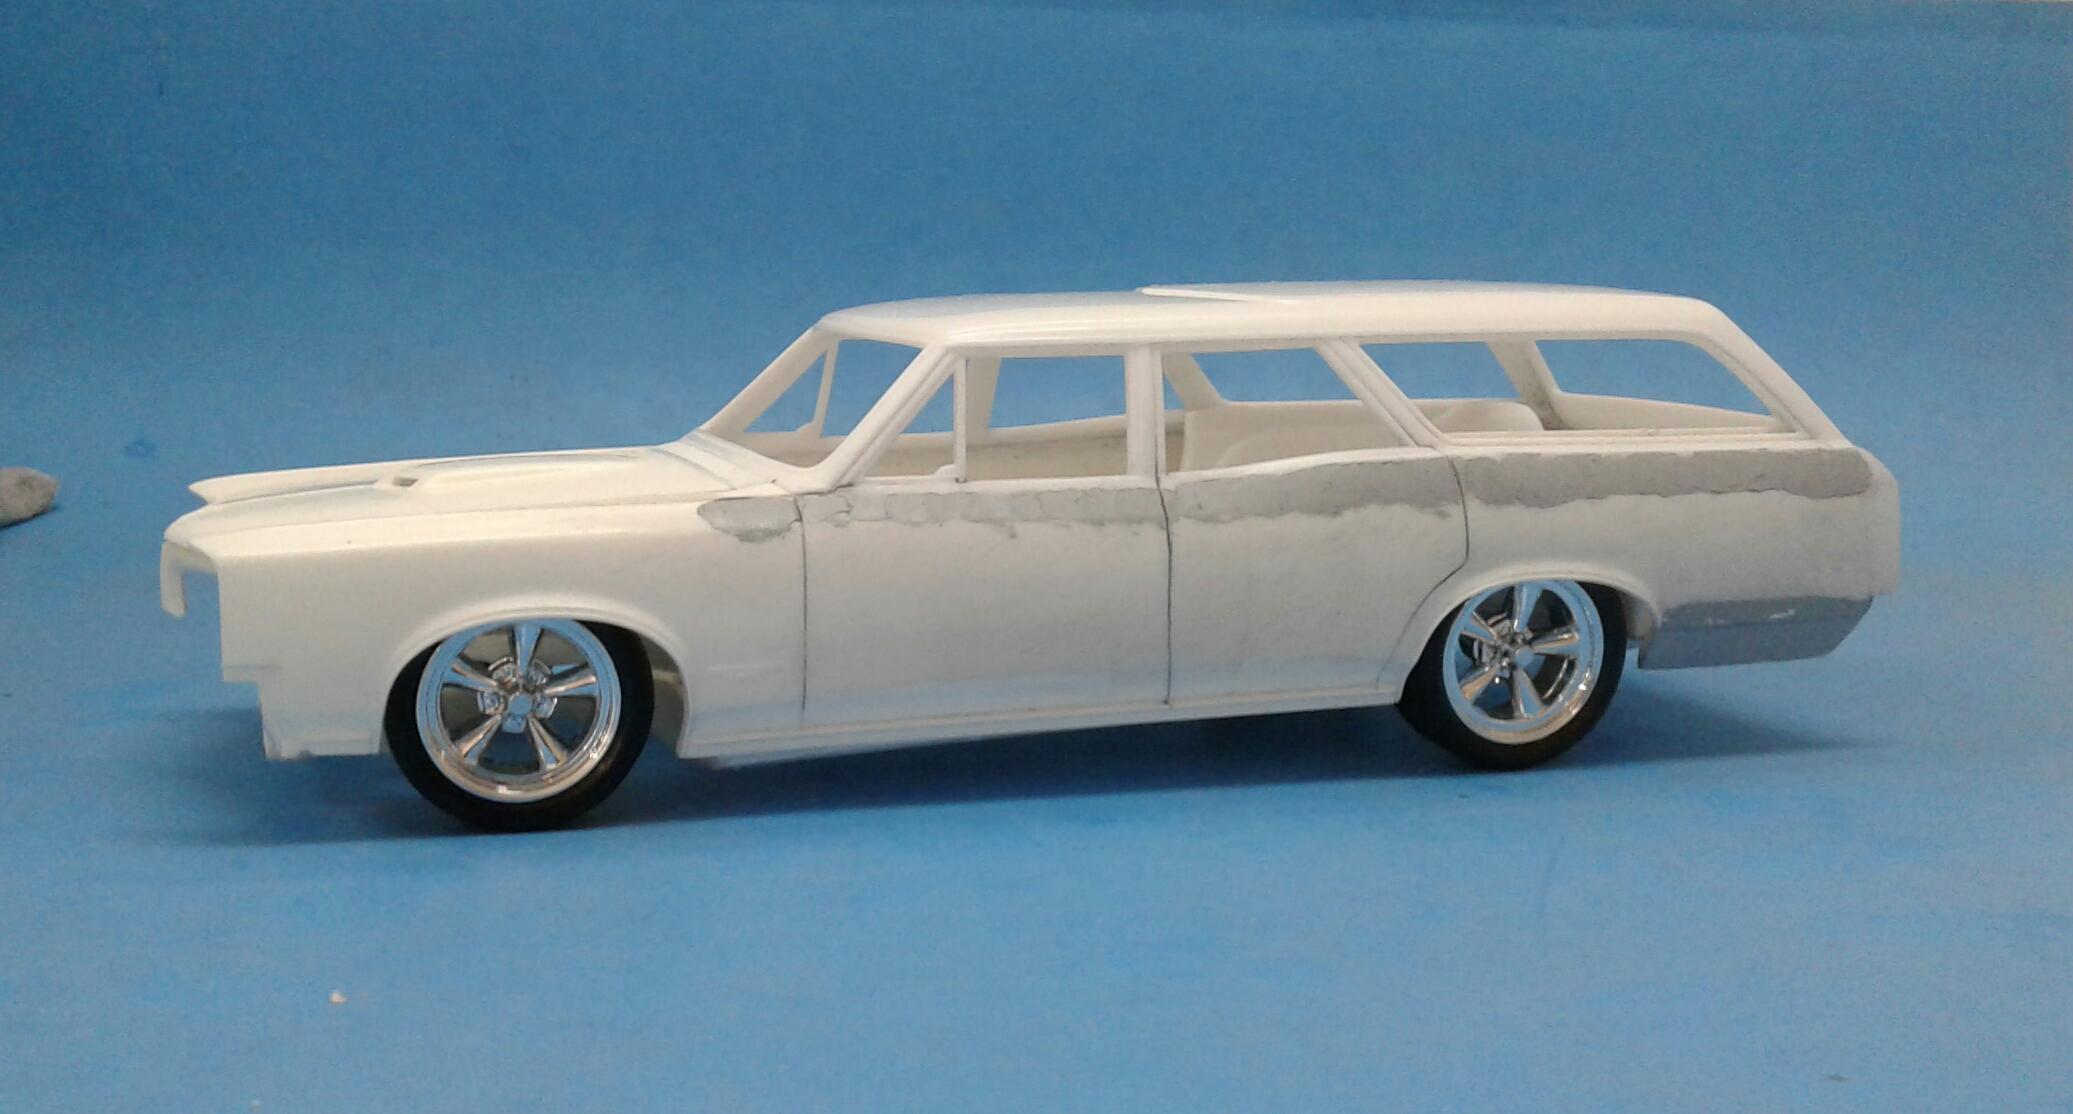
Thanx! I thought about that. But, I'm not sure how the GTO taillights would work with the tailgate. I still have the tail panel. So, it could be an option. I have the body in what I think will be the final coat of putty. Turns out, the wagon chassis fits pretty well to the GTO. All I had to do was cut away the inner wheel well loops and narrow the section at the rear to get it to drop in. Just looking at it, it looks like the interior may be a bit tricky to work out. The bottom of the rear seat is molded into the floorpan. I'm thinking I can use the entire GTO interior, cut away the package tray and graft the rear section of the wagon to it. Here's where I'm at now with it. First mockup! Pretty good progress to have started on it yesterday. I'm kinda thinking about ditching the 389 and sticking an LS engine in it. I've never done a model with an LS. I think it's time. I'm going to paint the spokes gray and see what they look like on it. Color wise, I'm thinking about a light green metallic with a matching interior. I'm going to play around with that GTO tail panel and see what it looks like.
-
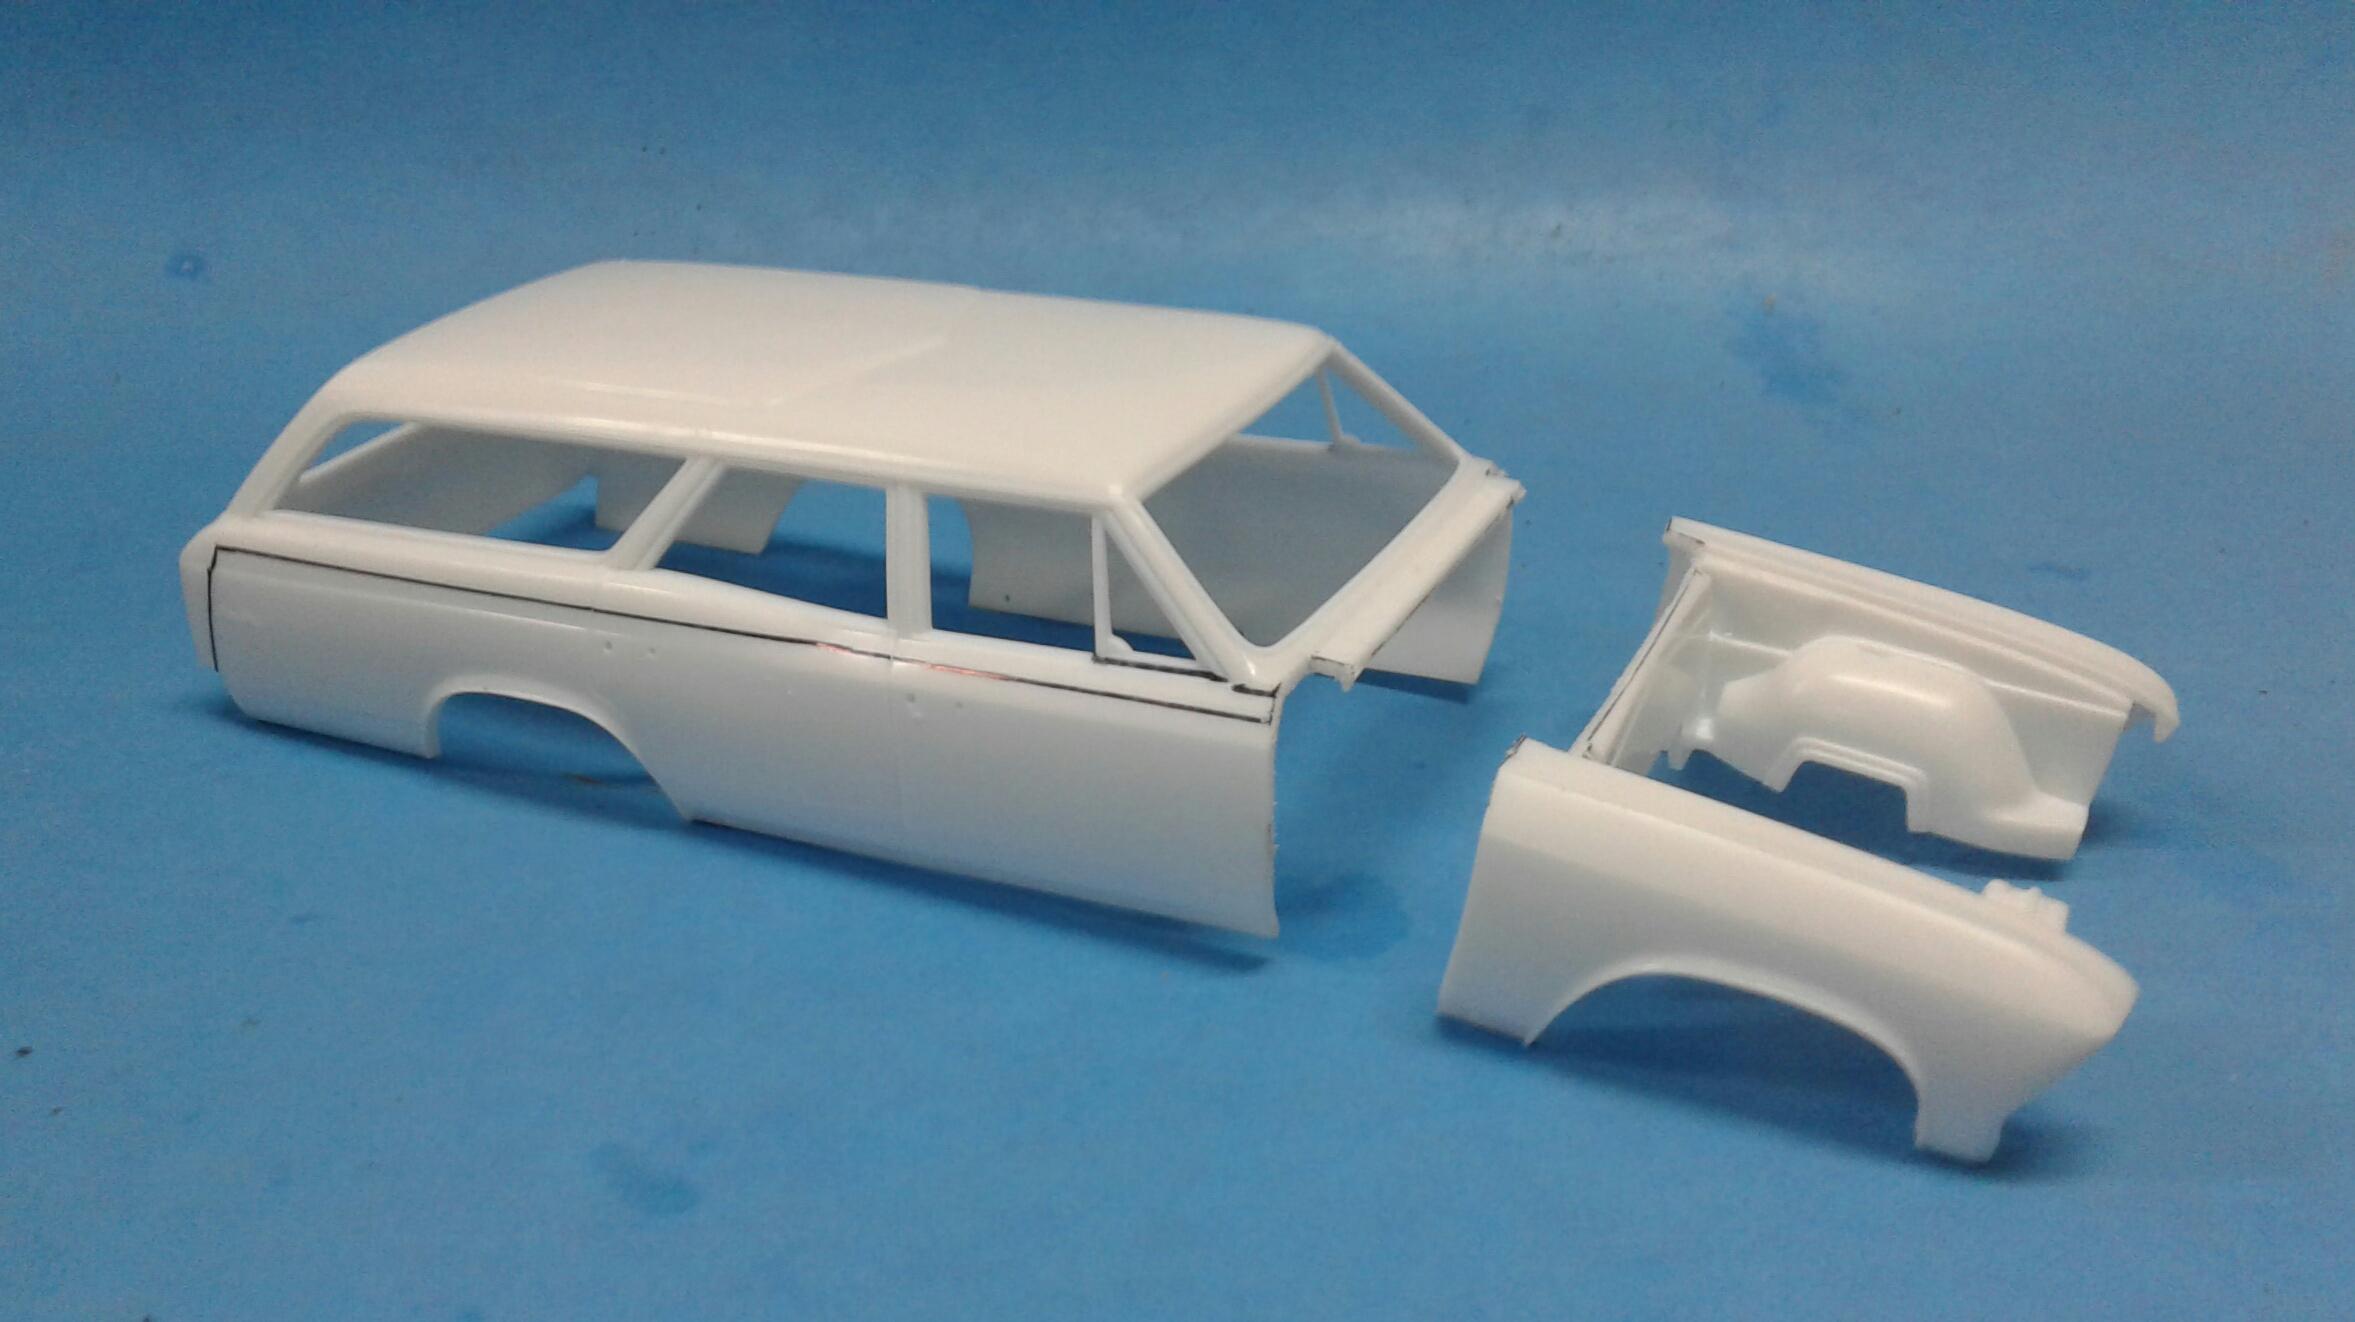
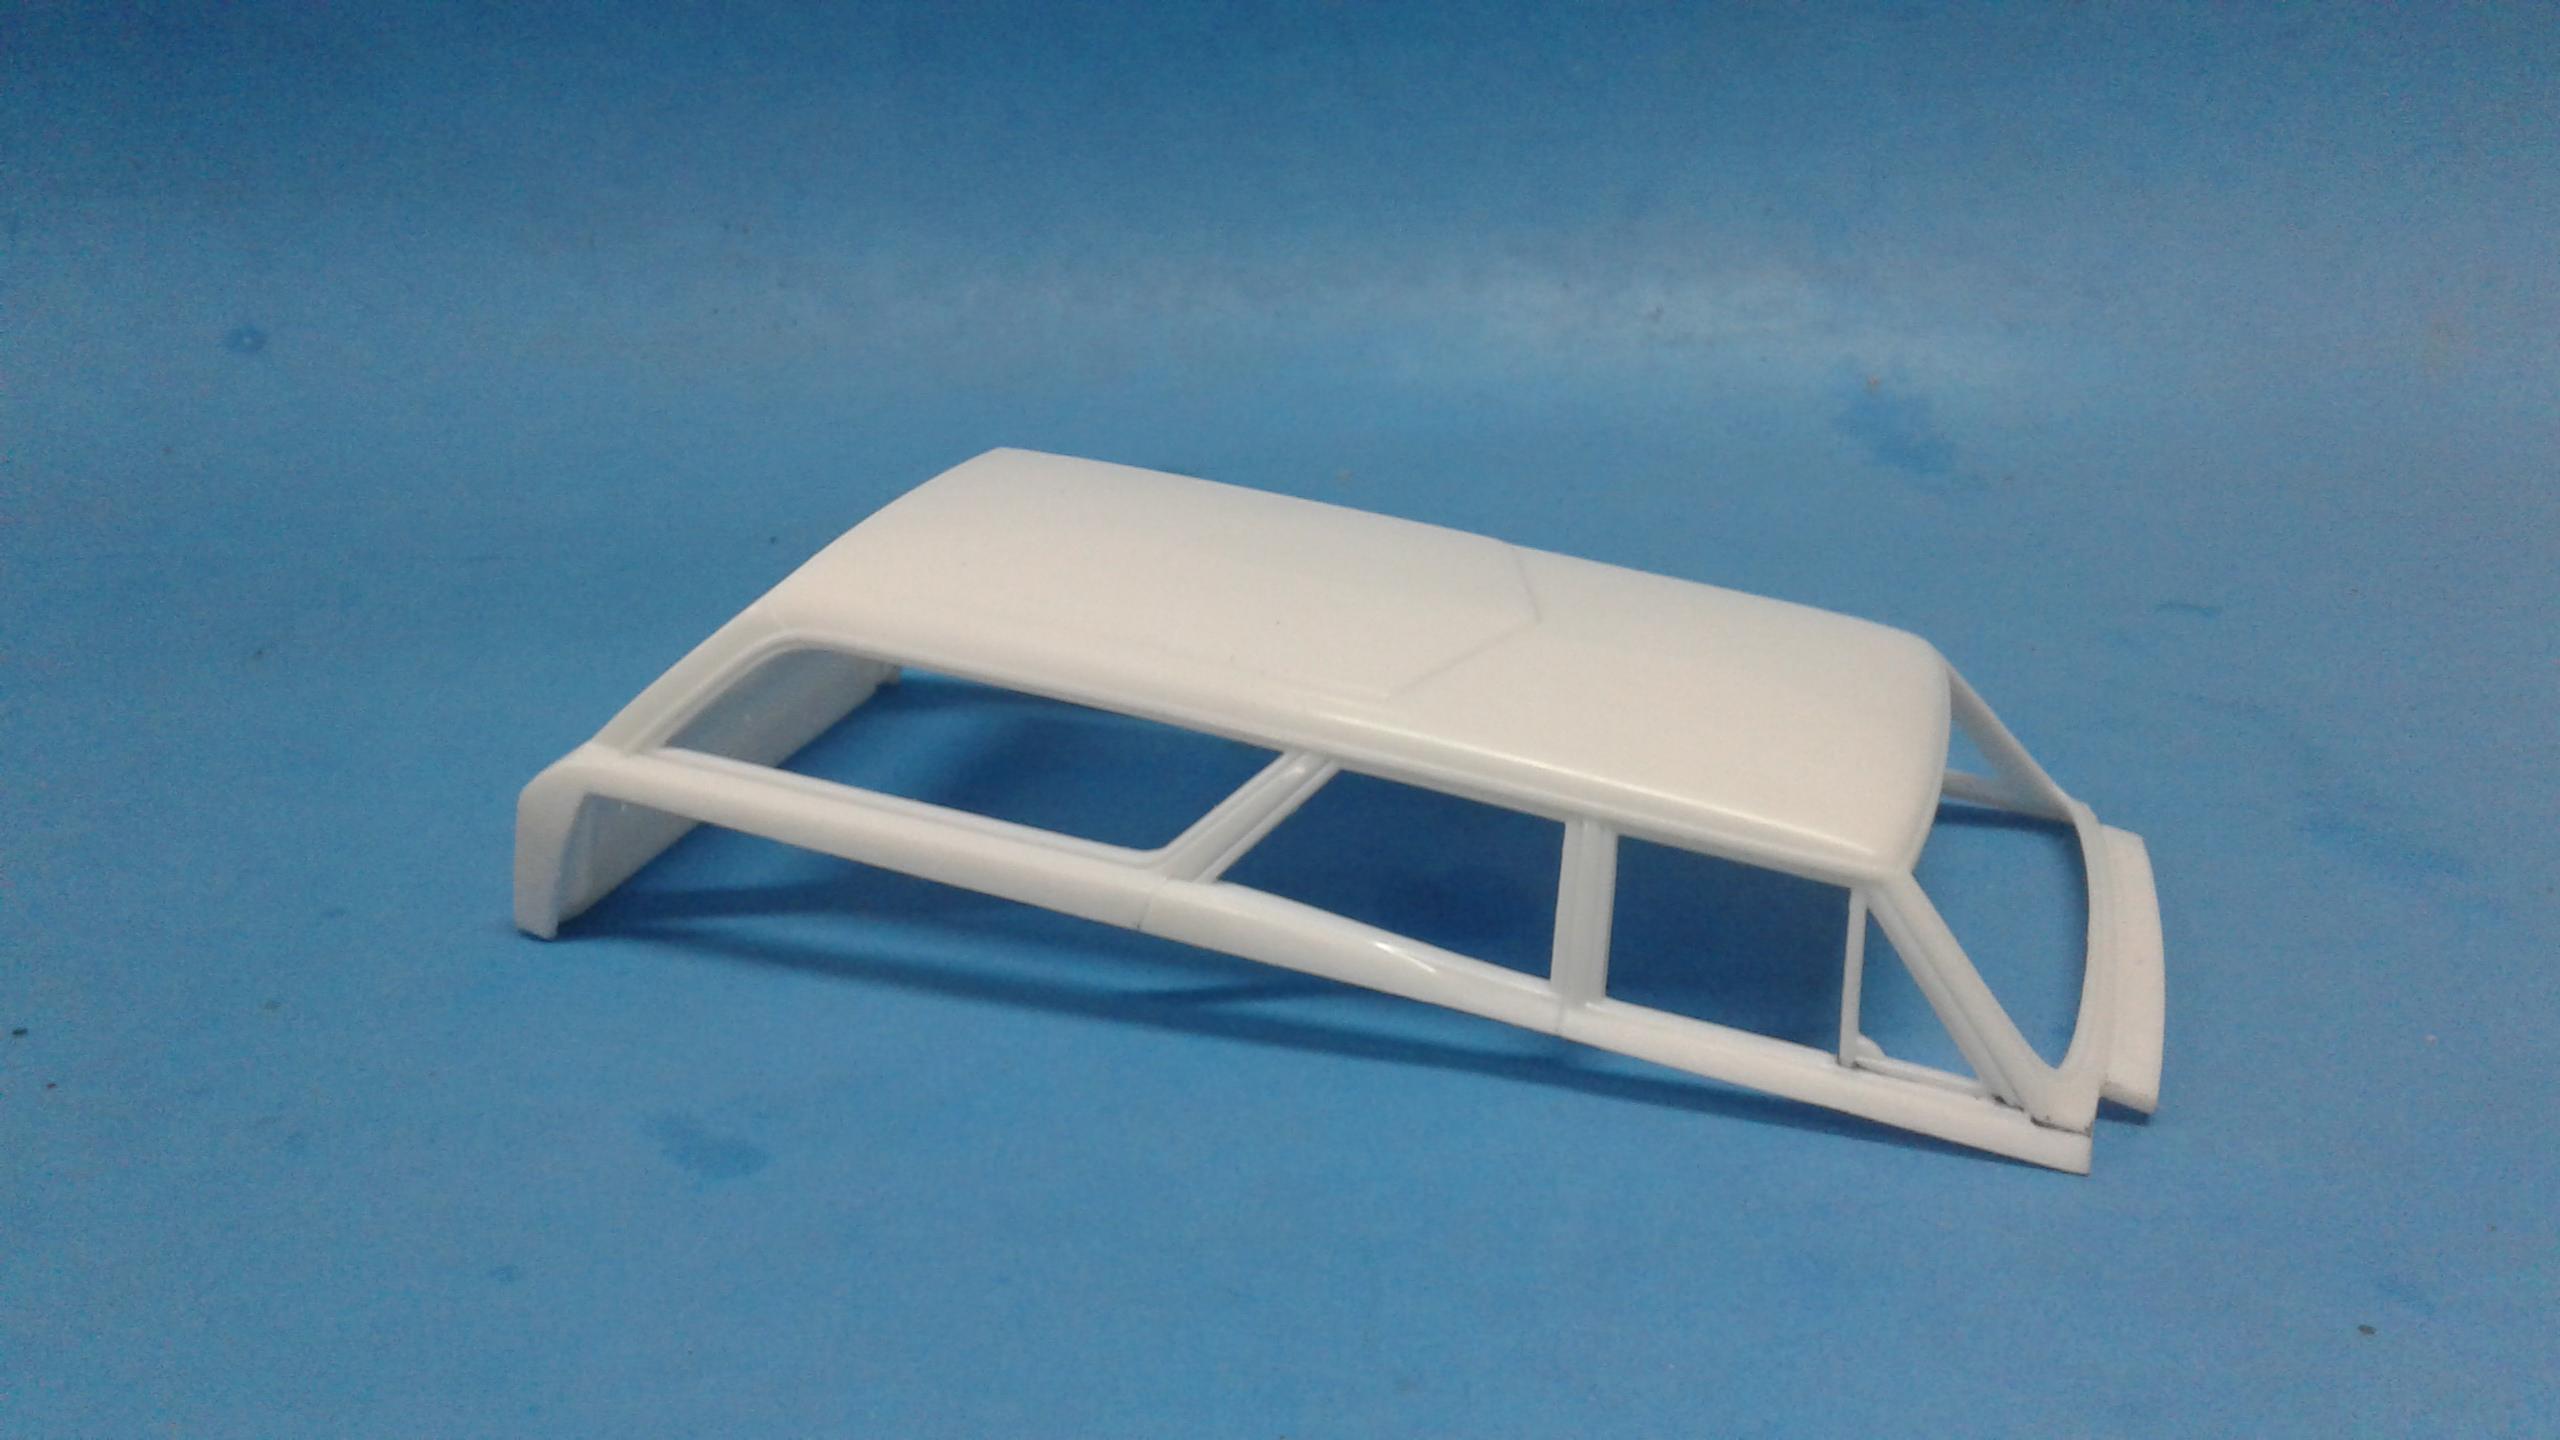
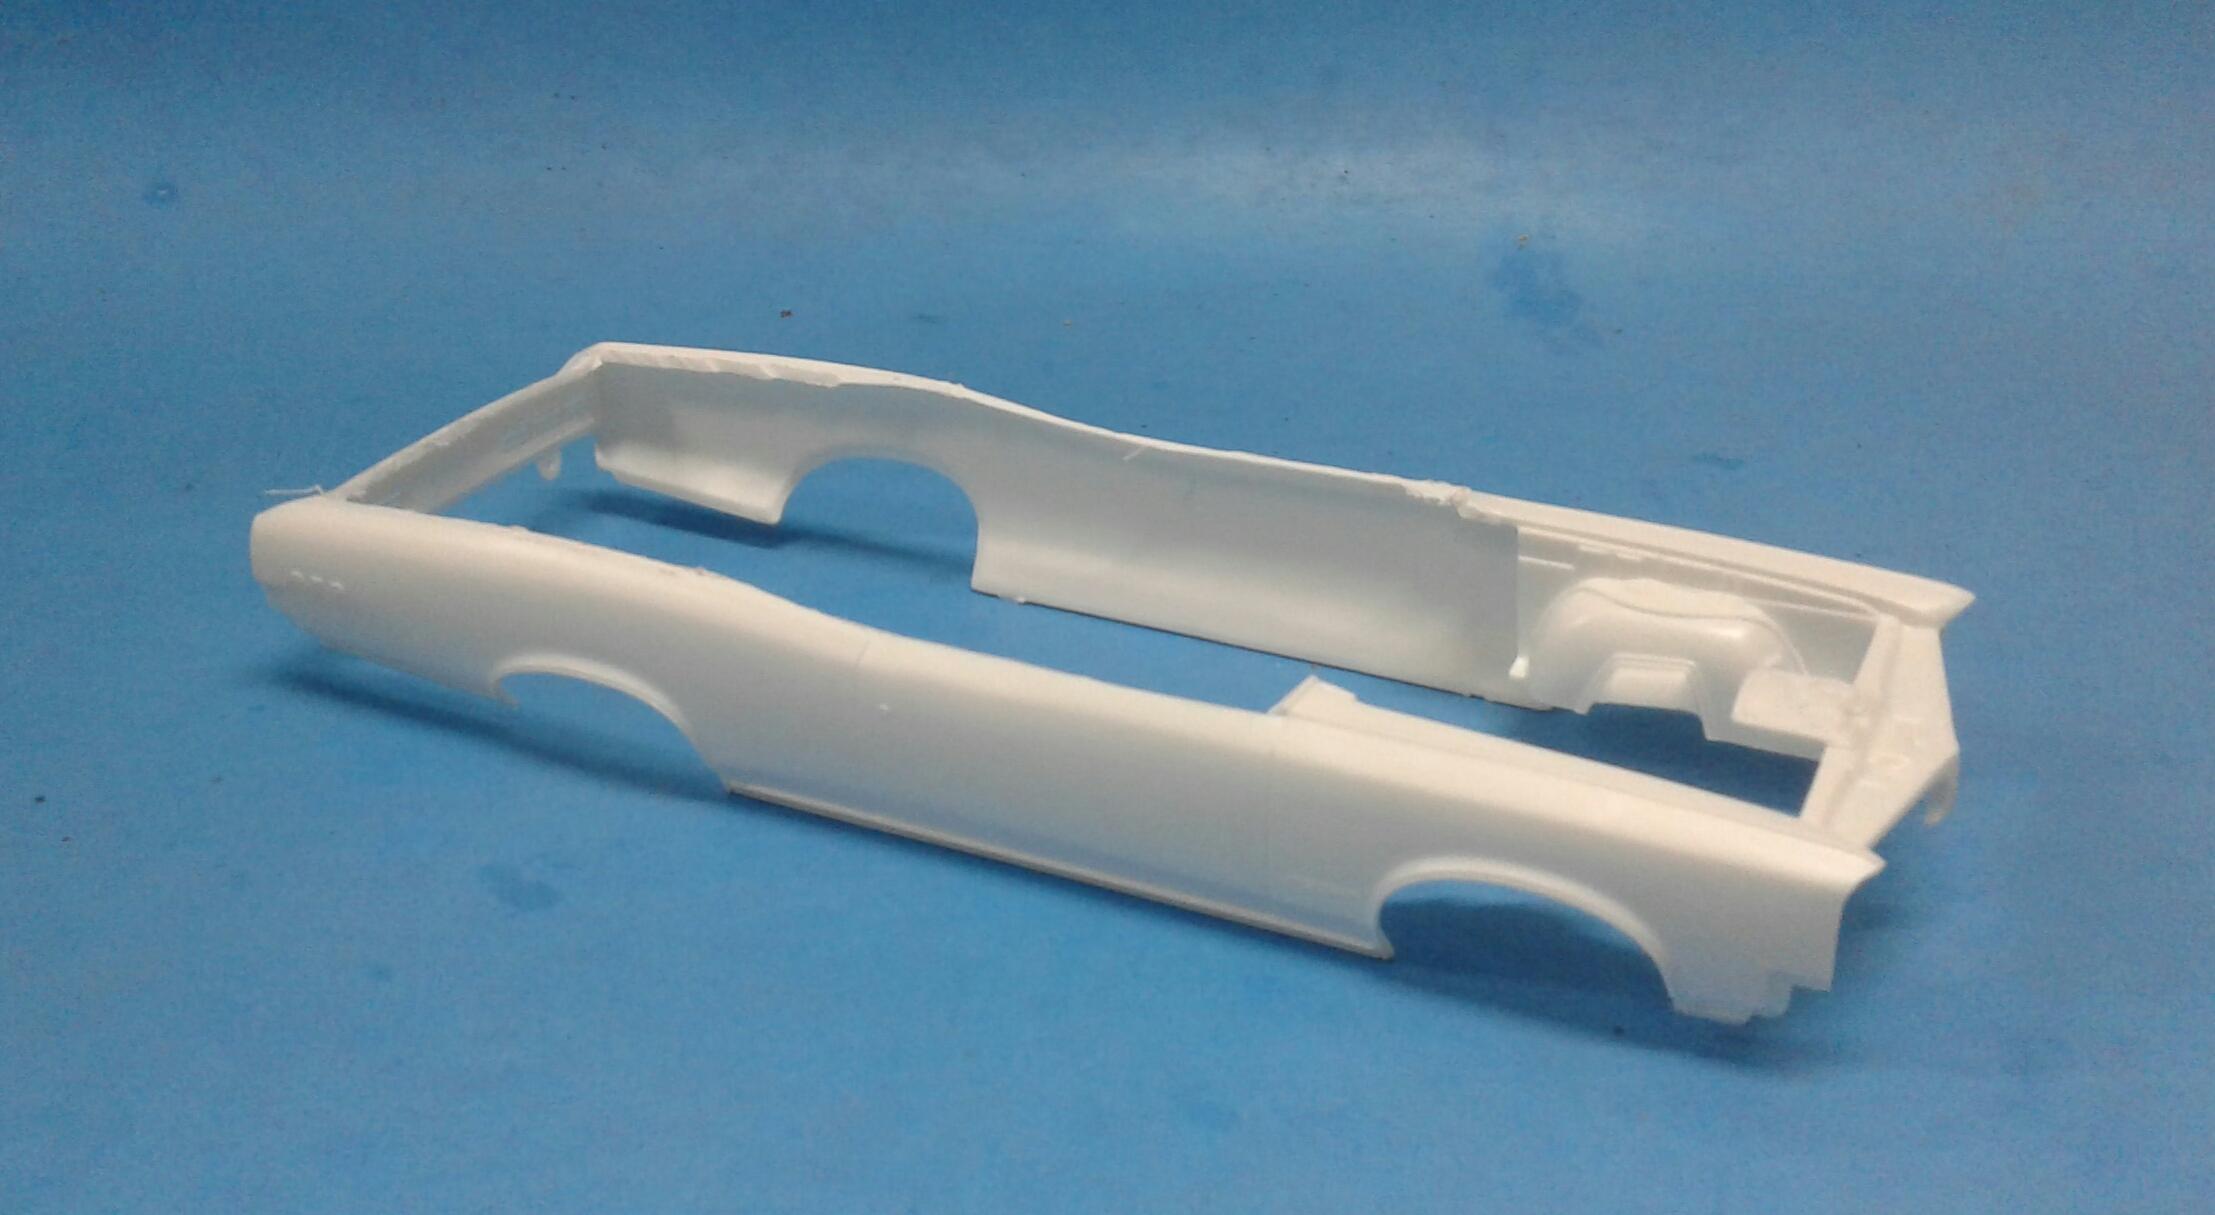
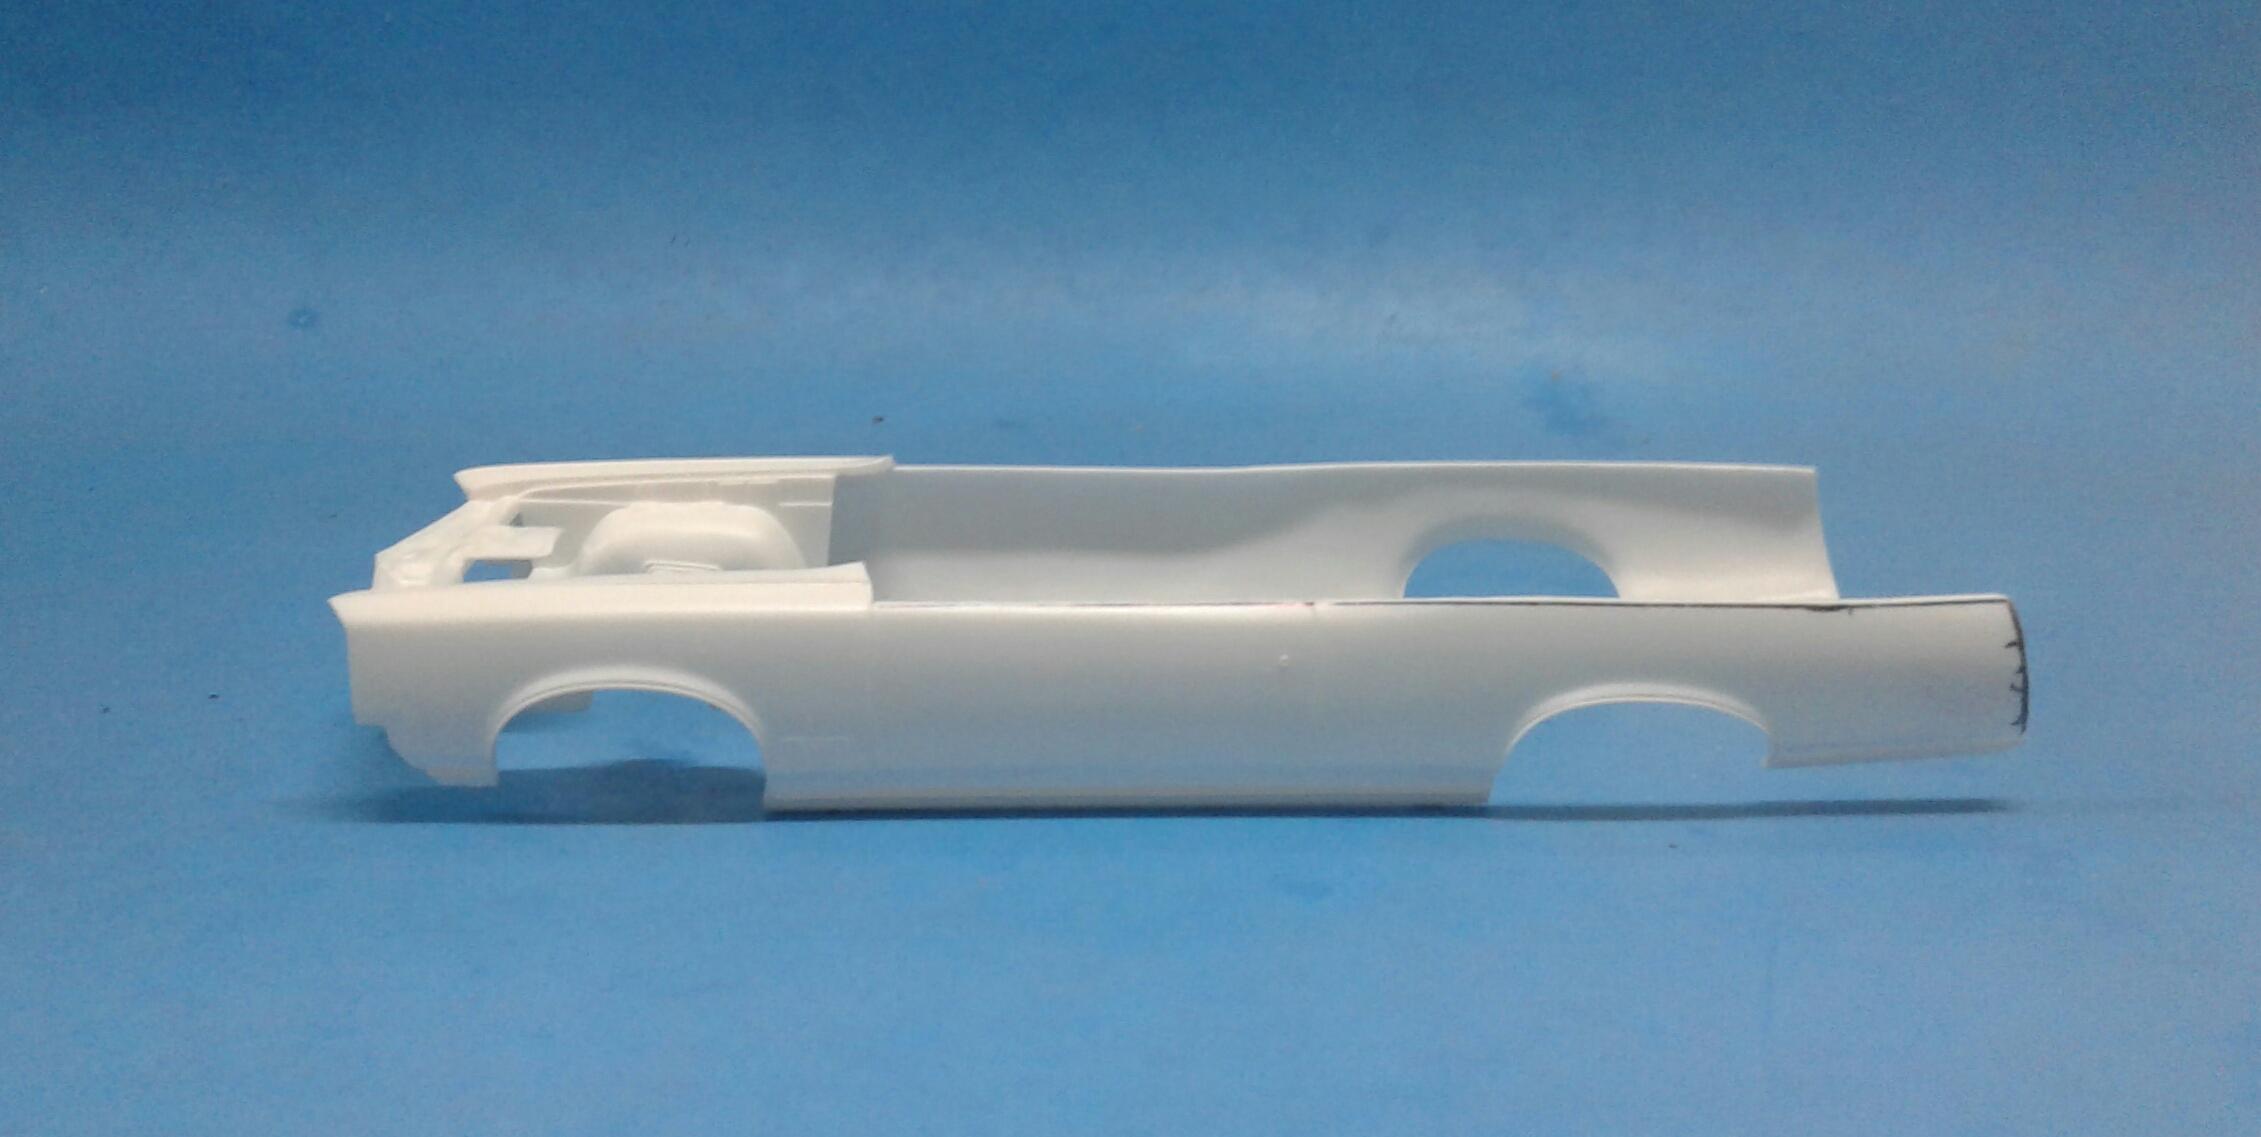
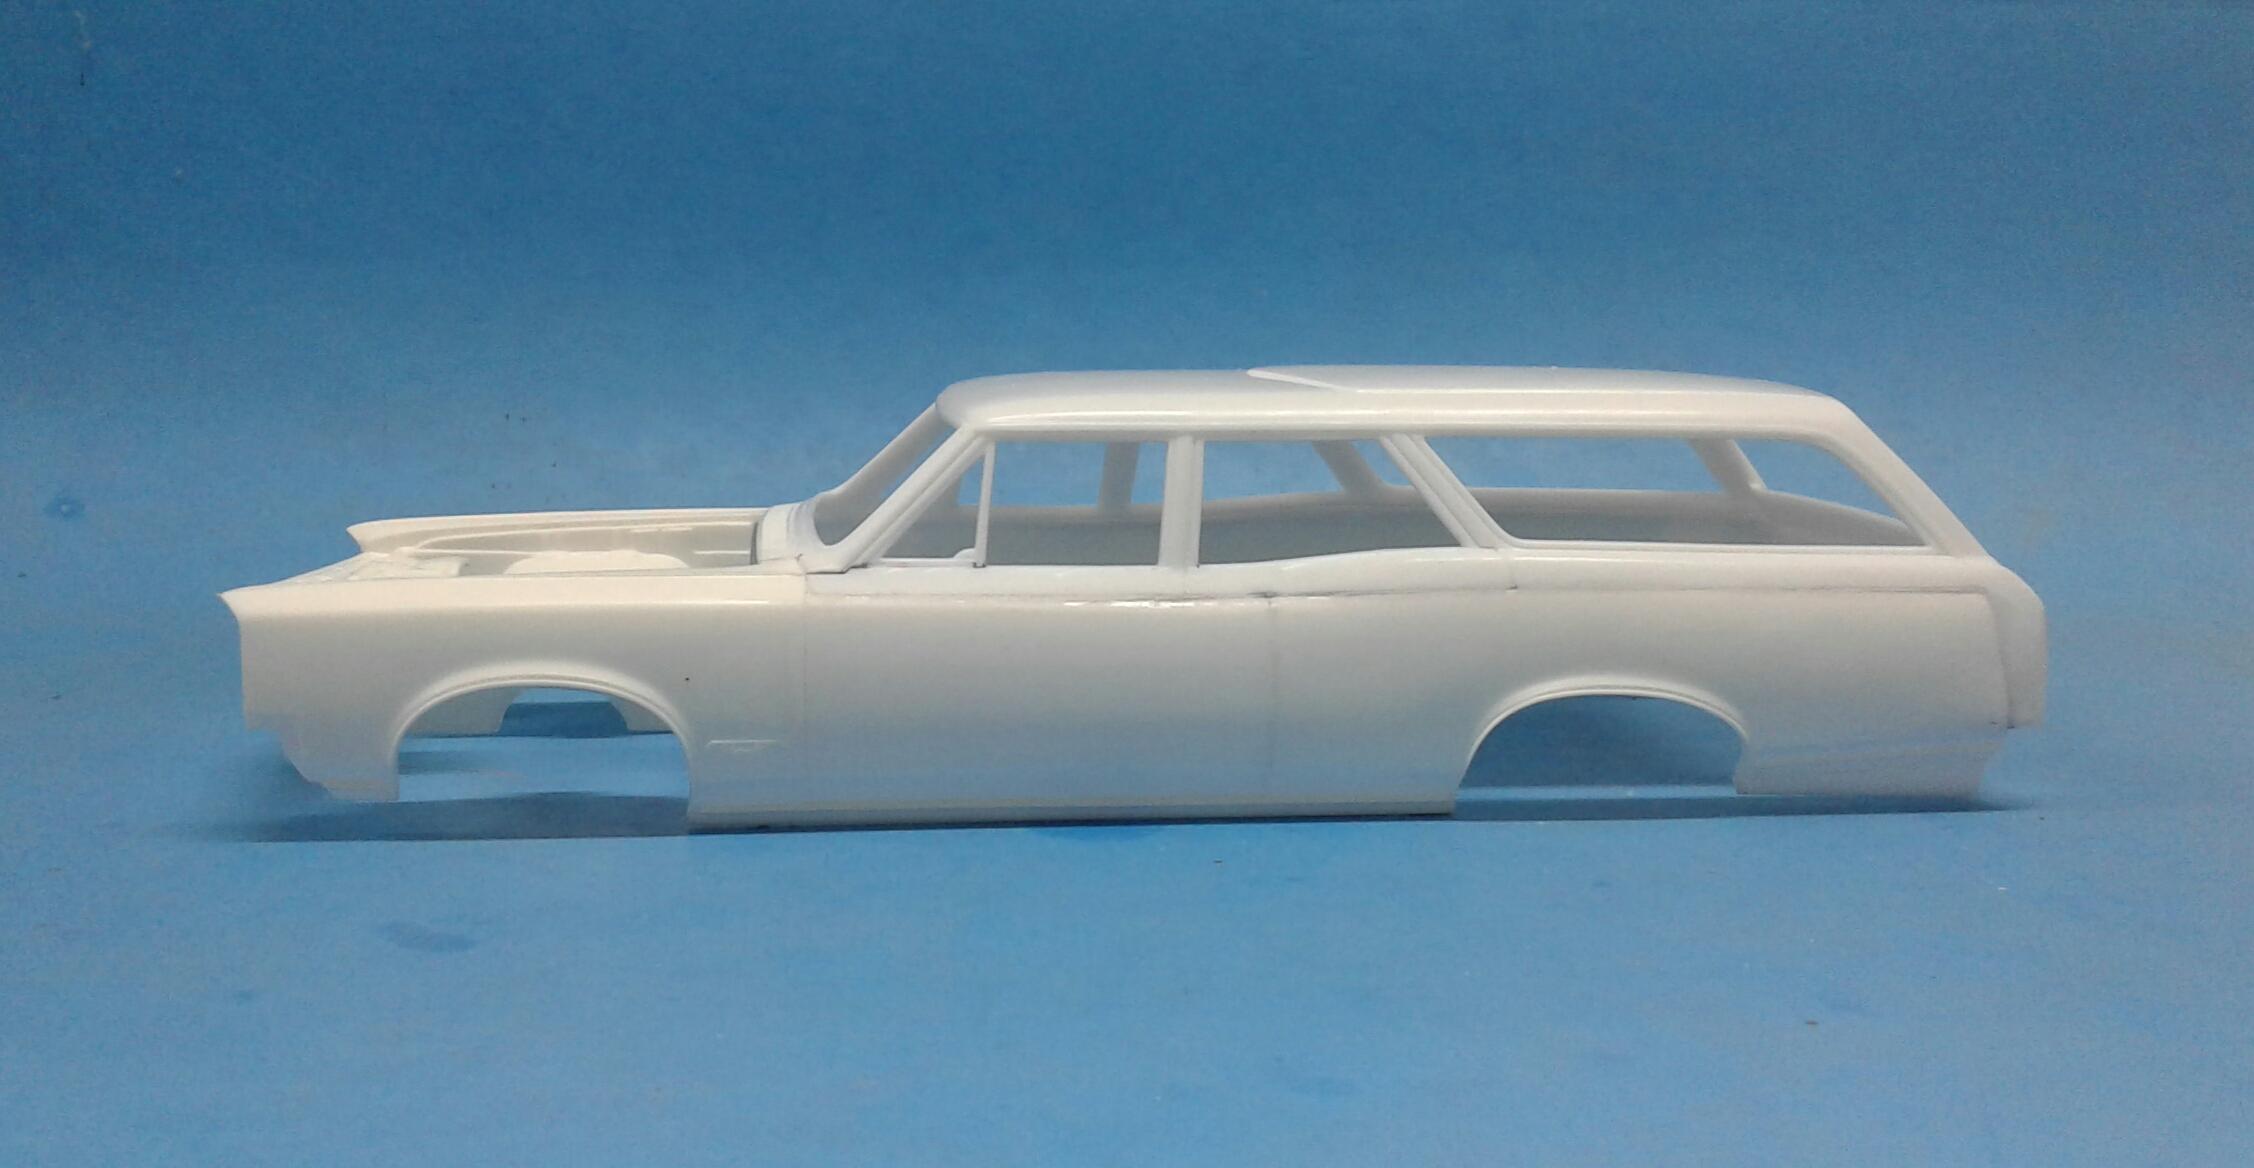
I've had this idea for a long time. But, never got around to it. With the boring stuff left on my Nova build, I thought it was time to do this one. Right now, I just want to get the body work done and allow it to cure out well while I'm finishing the Nova. For this model, I'll be using the Revell '66 GTO and '66 Malibu wagon. I started by marking my planned cuts. Then I cut off the front clip on the wagon. That may come in handy some day. Next step was to cut the roof off with a Dremel. Cut and filed to the line. Then the line is sanded away. Time to hack on the Goat! I cut the roof and trunk away back to the tail panel. I was hoping that I could leave the tail panel attached to hold the body together. But, that plan didn’t work out. I placed the roof section onto the body and marked the lines. Cleaned up and ready for the roof. All together now! I won't lie. It was a tough one to get together with the absence of the tail panel! I had to start by gluing the cowl to the the fenders first and then work my way to the rear. Besides being a pain to get together, it went together well. If I had it to do over, I think I would have left the cowl from the GTO. It would have made the body more stable. But, at the same time, it may have been a pain to get the bottom of the windshield area and the cowl together. Doesn't matter now anyway. I had to extend the bottom of the quarters behind the wheel opening. I also filled the recess in the tail gate. Lots of putty work and sanding ahead! I'm unsure which chassis I'll use. I would think the wagon's would be best. But, I don't know how well the 389 and GTO interior would fit it. I also don't know how the rear area of the wagon interior will fit the GTO chassis. Lot's of stuff to consider. I'll admit that I haven't looked at either one yet. I got plenty of time to mull it over. It's going to take a minute to get the body work done.
-
Really nice looking GTO Tom! That Toreador Red suits it perfect! My wife had a '98 Taurus that color.
-
AMT 1972 Chevrolet Pickup Steering Wheel
Plowboy replied to Jim B's topic in Model Building Questions and Answers
Yep, mine was mangled too. It's how they're packaging them right against the tree with the hood, bulkhead and tailgate on it. My steering column was tangled up in it. They used to cut them from the tree and stick them in a baggie by themselves. Guess they're not doing that anymore. -
From what I've seen of it, you can build the Badman or the street machine version. Like Lee, I want one to build the boxart version.
-
AMT 1972 Chevrolet Pickup Steering Wheel
Plowboy replied to Jim B's topic in Model Building Questions and Answers
I have one. But, I haven't checked the steering wheel. I'll check it and let you know. I recently repaired one that I had dropped on the floor unknowingly and then stepped on it. You'd be surprised at what can be fixed with a little patience and glue. -
I just ground it down until it was almost as thin as a razor saw. Then I finished with a metal file. I have it so that it's the same thickness from the point to the first eighth inch or so. What I like about it best is that it will cut both directions. I can push or pull. I have a photo of it somewhere. I'll try to find it or take a new one.
-
Twenty plus years ago, when I first started scribing panel lines, I used the backside of the number eleven blade. The issues I had using it was, A. it was prone to slip. B. it was prone to making the panel lines wide/wider. I later switched to using my razor saw. It worked much better. But, really tight rounded corners were a problem. Luckily, those were rare. I still use it to make new panel lines as it's easier for me to control. I now use a dental pick that I modified with a Dremel and files. It works excellent! No wandering, no slips, no wider lines and tight corners are no problem. It will follow even the faintest line. I can scribe so many more things with it than I could with any of the previous tools. I don't think I could have scribed the gas door on this Mercury with anything else.