Plowboy
-
Posts
3,434 -
Joined
-
Last visited
Content Type
Profiles
Forums
Events
Gallery
Everything posted by Plowboy
-
That's a sharp looking El Camino Tony! Really like the color combo! Are those wheels from a modern Camaro?
-
Definitely test fit the trunk! There is a bit of a fitment issue on this kit. It could be from how many times it's been issued and dependant on how old or new the kit is. Nothing major that can't be fixed easily though.
-
History of Monogram's Ford Pickups 1980-1991
Plowboy replied to Fabrux's topic in Truck Kit News & Reviews
Something I'm wondering is if this is going to be the 1/25 Revell Bronco or is it going to be the 1/24 Monogram Bronco? Revell now has both and they produced their 1/25th version with the Yamaha speed boat. I never did have the Revell Bronco. I wonder how the underhood detail is? Anyone have the Revell 1/25 Bronco? -
AMT 1967 Shelby GT-350 in Pearl Tangerine..."The Great Pumpkin"
Plowboy replied to Dragonhawk1066's topic in Model Cars
Sharp as a tack! Nice work Craig! -
Thanx Steve! So, the Sportside came before the SS 454 and the same year as the USA-1.
-
Can we see some scratchbuilt frames?
Plowboy replied to OldNYJim's topic in General Automotive Talk (Trucks and Cars)
This is the only one I've got photos of.
-
Take the interior and chassis back apart and glue the interior to the body. Then slide the rear of the chassis into the body first and work your way forward. You'll have to spread the body quite a bit up front. But, it will go in.
-
How is that possible when the SS 454 was issued in '91 and the monster truck was issued in '90? I have the second issue of the longbed that's dated '89, the original version of the USA-1 dated '90 and the SS 454 that's dated '91. Anyone have the Sportside kit to check the date on it? I was thinking it came after the SS 454. I had one. But, traded it away.
-
'65 Nova Pro Street Update 11/14/22 Completed Chassis Photo Pg. 5
Plowboy replied to Plowboy's topic in WIP: Model Cars
Thanx Tom! I stuck the door panels to the side of the floorpan and traced it with a marker. Then just cut to the marks. -
Moebius Chevy II Gasser windows question
Plowboy replied to TonyK's topic in Model Building Questions and Answers
It is a disappointment in so many areas. The way they did the B pillars is moronic! They're flush on the inside at the top while they bump out at the bottom. So, when you put the quarter glass in, if it rests on the B pillar, you're going to have a gap at the bottom! If you put the glass to the side of the B pillar, it will be almost flush with it at the bottom and recessed at the top! I wish that I would have paid closer attention to that detail. I would have cut the B pillars loose at the bottom and moved them out where they should be. Then the quarter glass would fit right and I would be able to also add the door glass. -
That would have been the long bed chassis. The short bed chassis should have remained untouched. It was used under the SS 454 and the stepside.
-
Revell Lincoln LSC Pro Street reissue
Plowboy replied to Justin Porter's topic in Car Kit News & Reviews
I'll never understand why Revell chose to stick that body on a pro street chassis. -
I know nothing about 2K Dusty. But, I don't see why it wouldn't because all you're doing is spot spraying paint and leveling it out with clear. The only issue I can think of is if spraying paint over the 2K could somehow cause a reaction. I've had that issue with other paints before. But, IIRC, I was mixing brands. It's never happened with Tamiya paints.
-
Moebius Chevy II Gasser windows question
Plowboy replied to TonyK's topic in Model Building Questions and Answers
I'm right at that stage with mine. I figure I'll just make my own. Especially since I added the frames back in that Moebius wiped out trying to hide the chopped roof. I doubt anything you got from them would fit any better than what you now have. -
'65 Nova Pro Street Update 11/14/22 Completed Chassis Photo Pg. 5
Plowboy replied to Plowboy's topic in WIP: Model Cars
I now have the interior completed. Turned out decent enough. The floorpan is from the '66. The door panels, dash and roll bar are from the '65. The seats are from a Revell Mustang Mach III. The console is from an Alternomad and the shifter is from the AMT '66 Fairlane.
-
Thanx! Yeah, it works on burn throughs. That's actually why I developed this method. I was tired of starting over because of small mishaps. This was the first model I tried it on. It had a couple of burn throughs that I had to fix. Burn throughs are also why I quit using the micro mesh pads and switched to Tamiya polishing compounds.
-
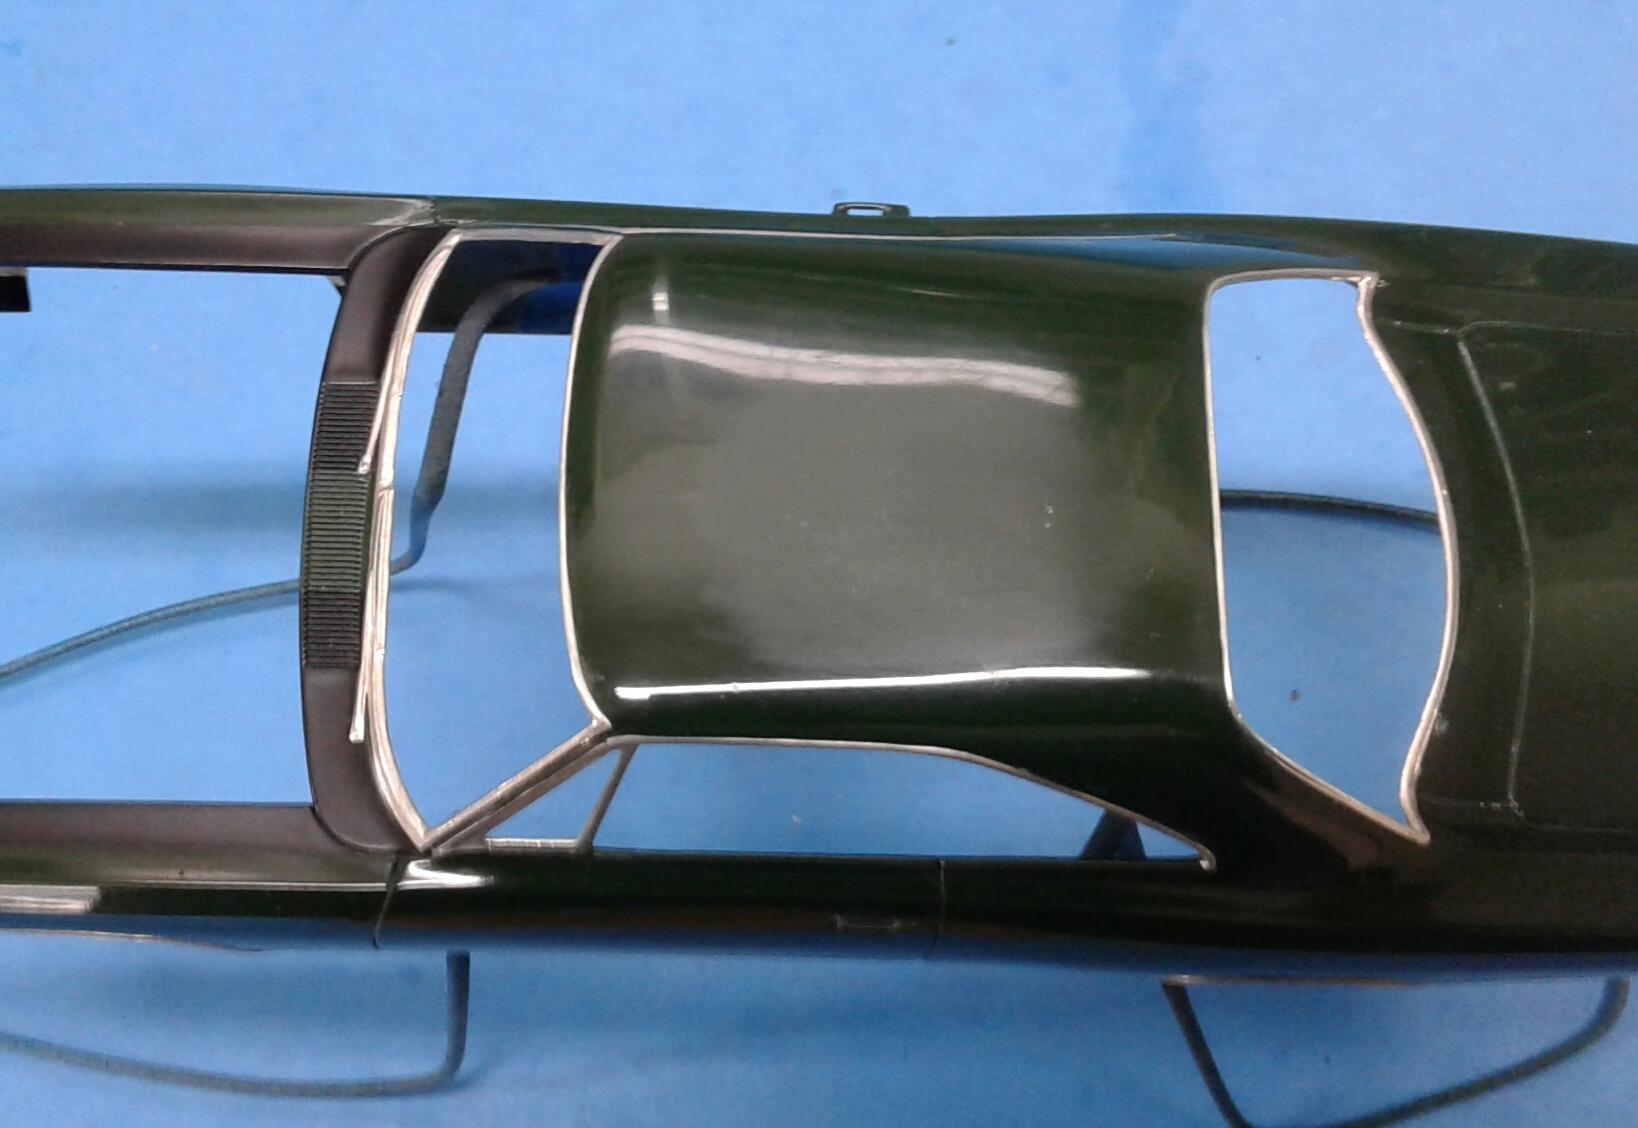
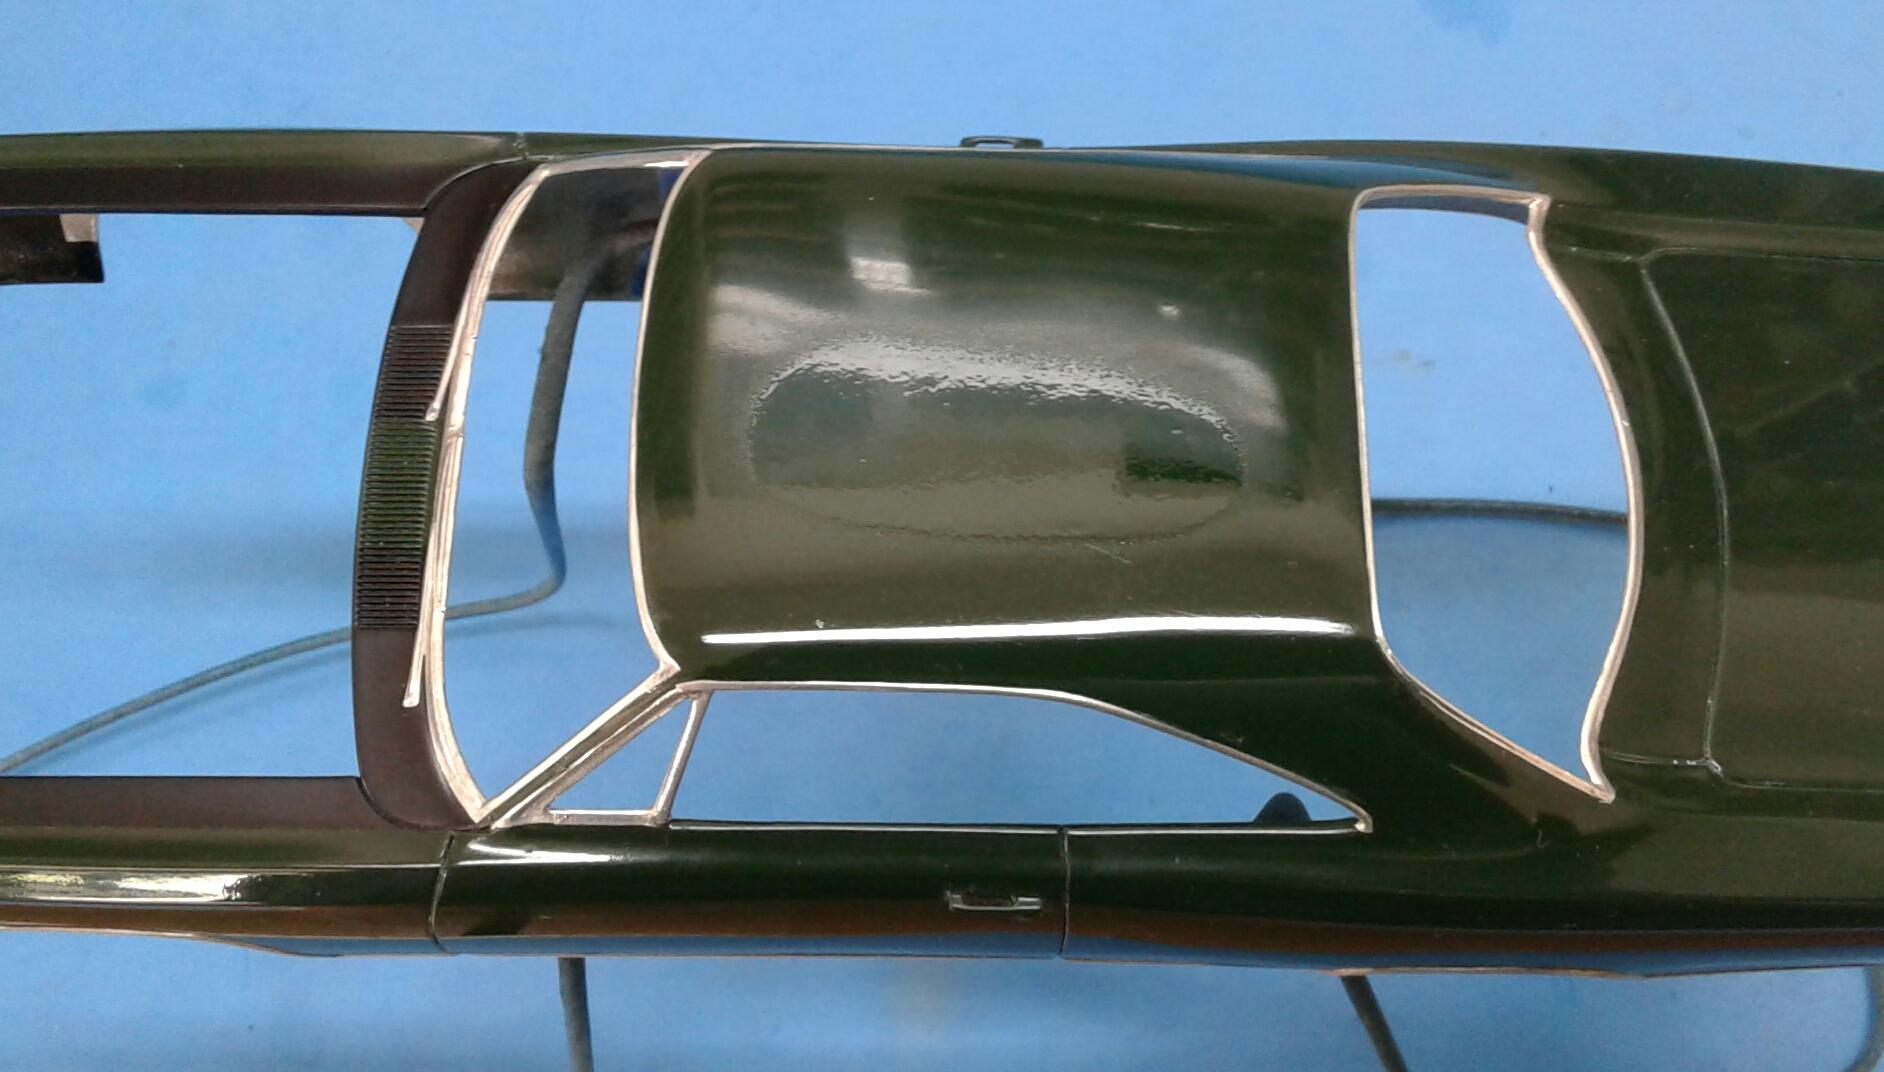
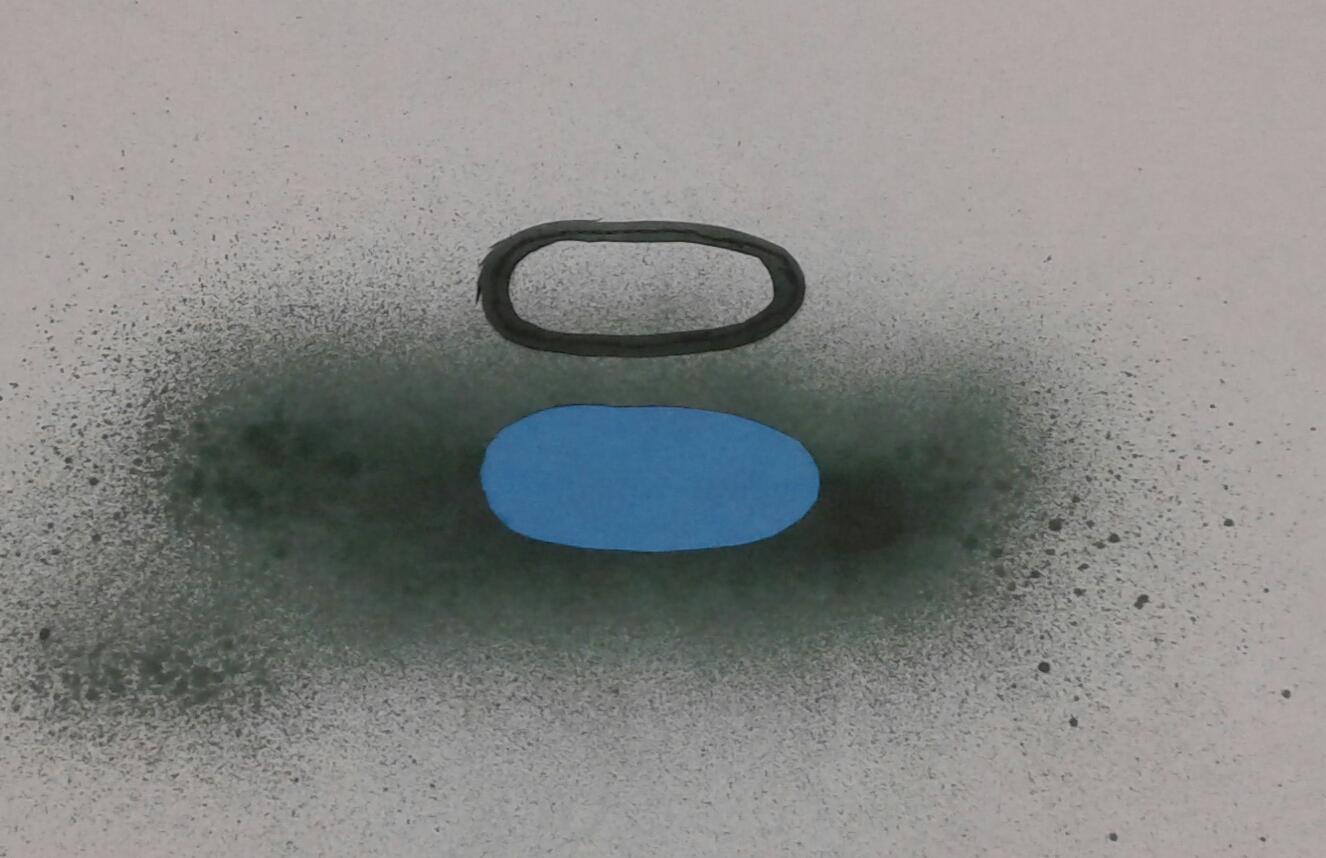
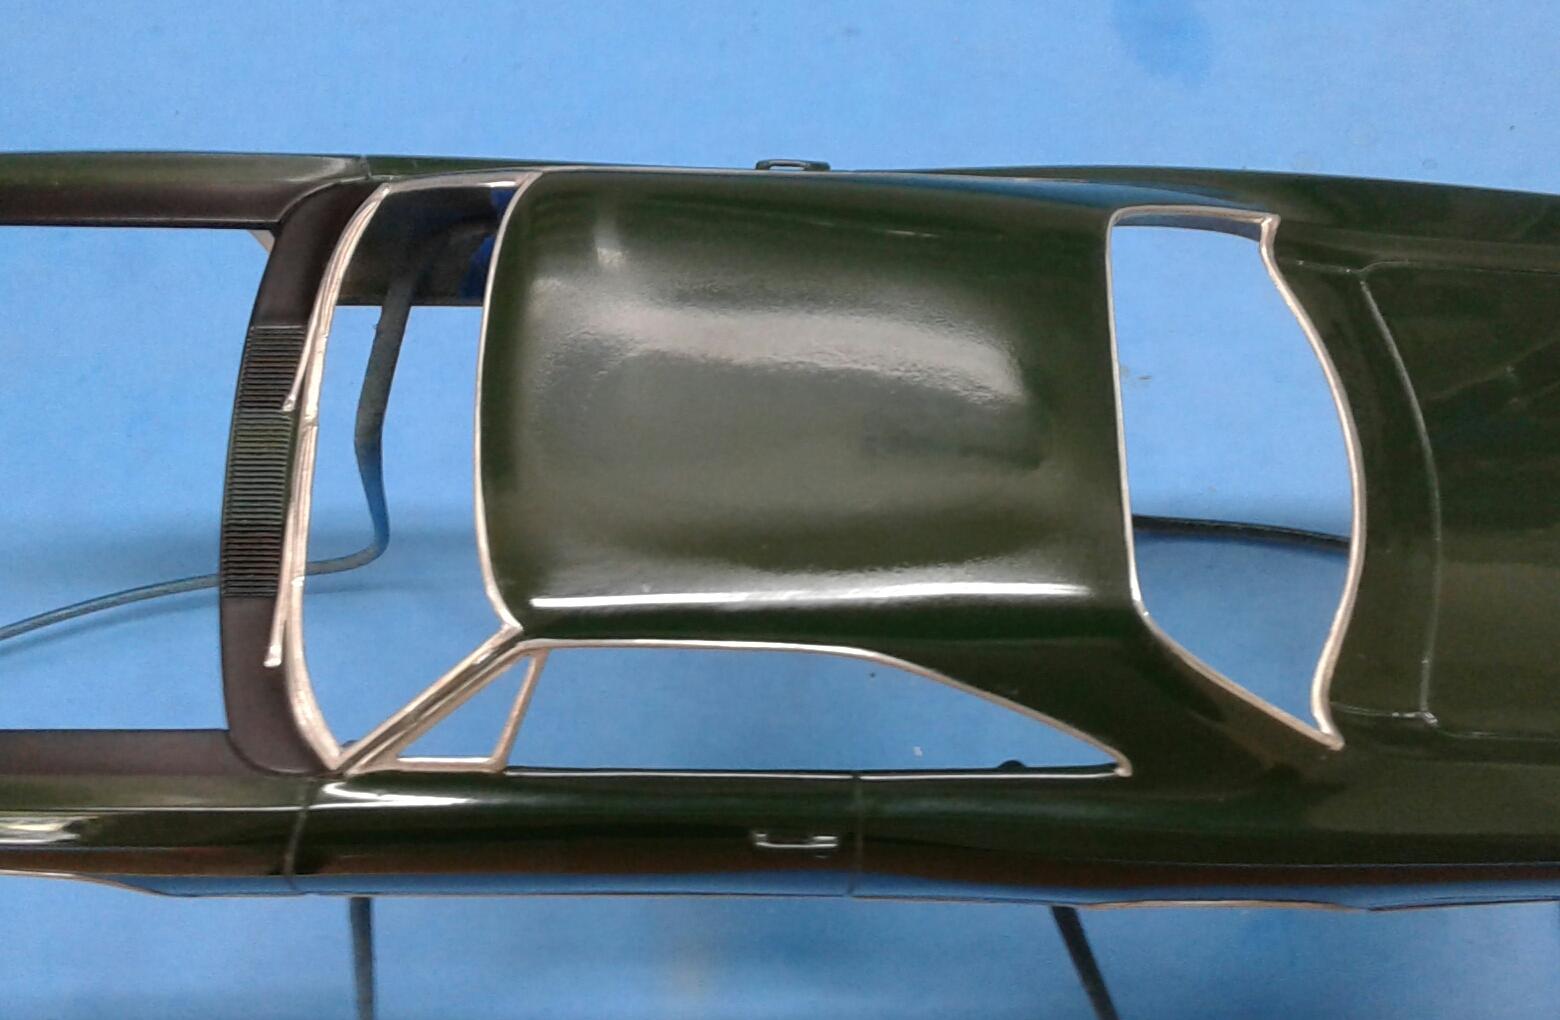
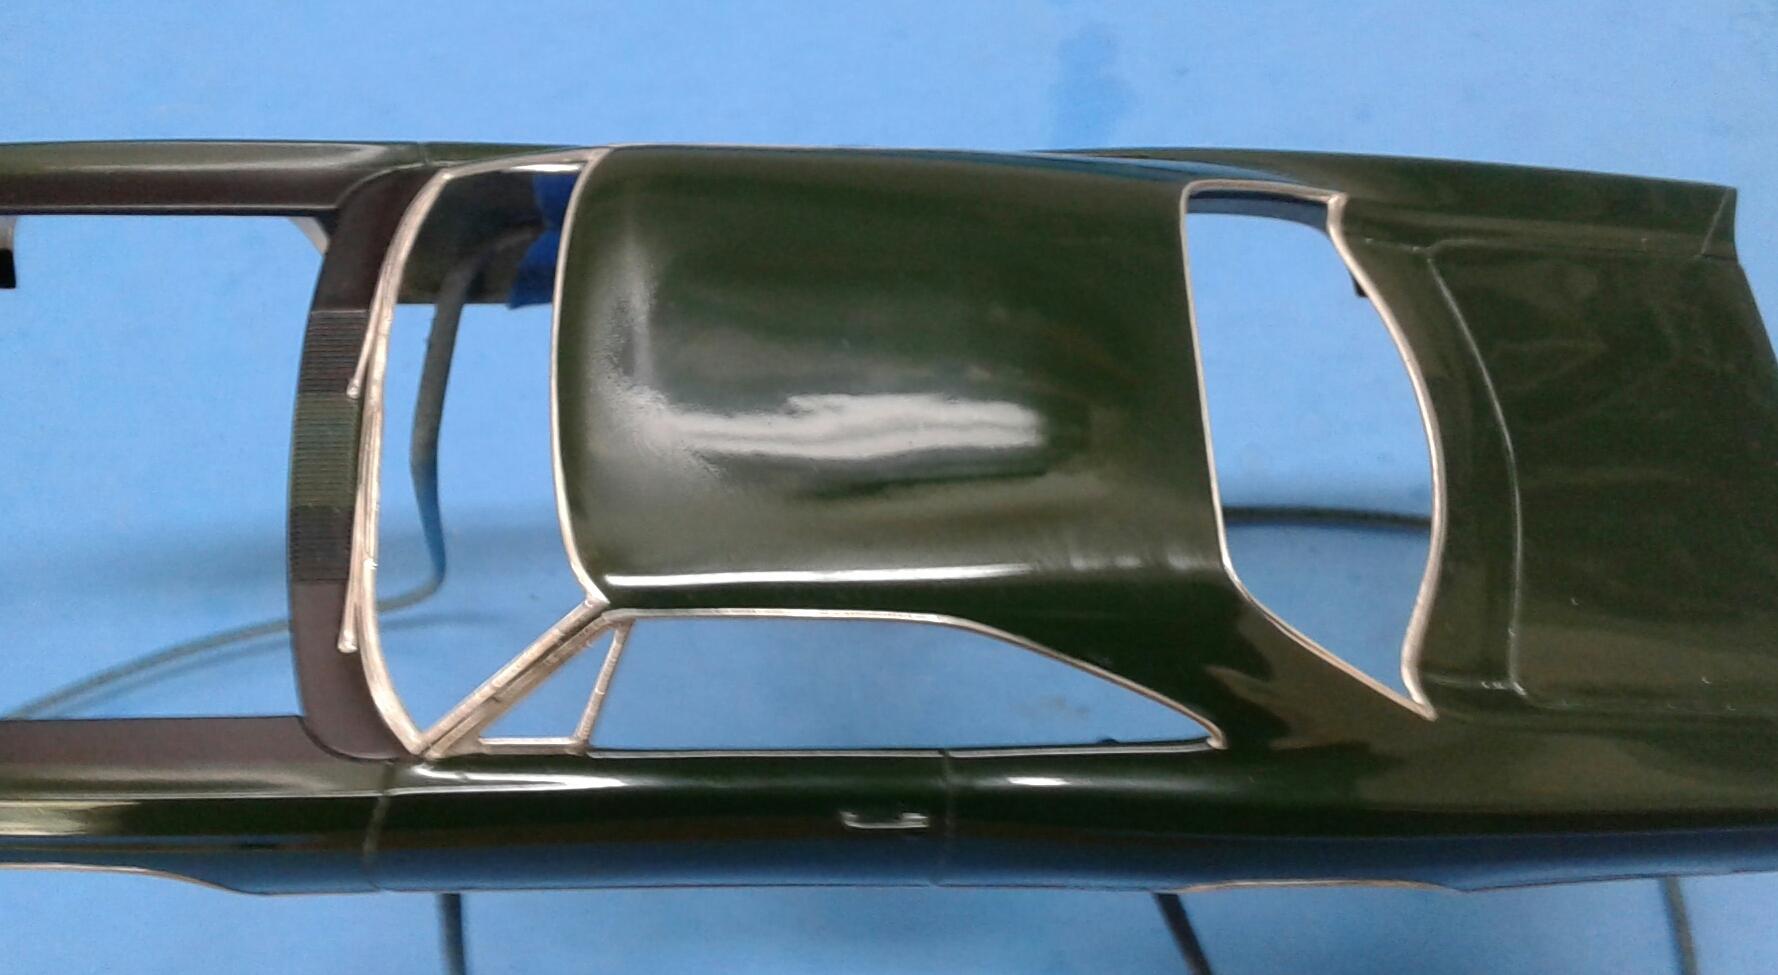
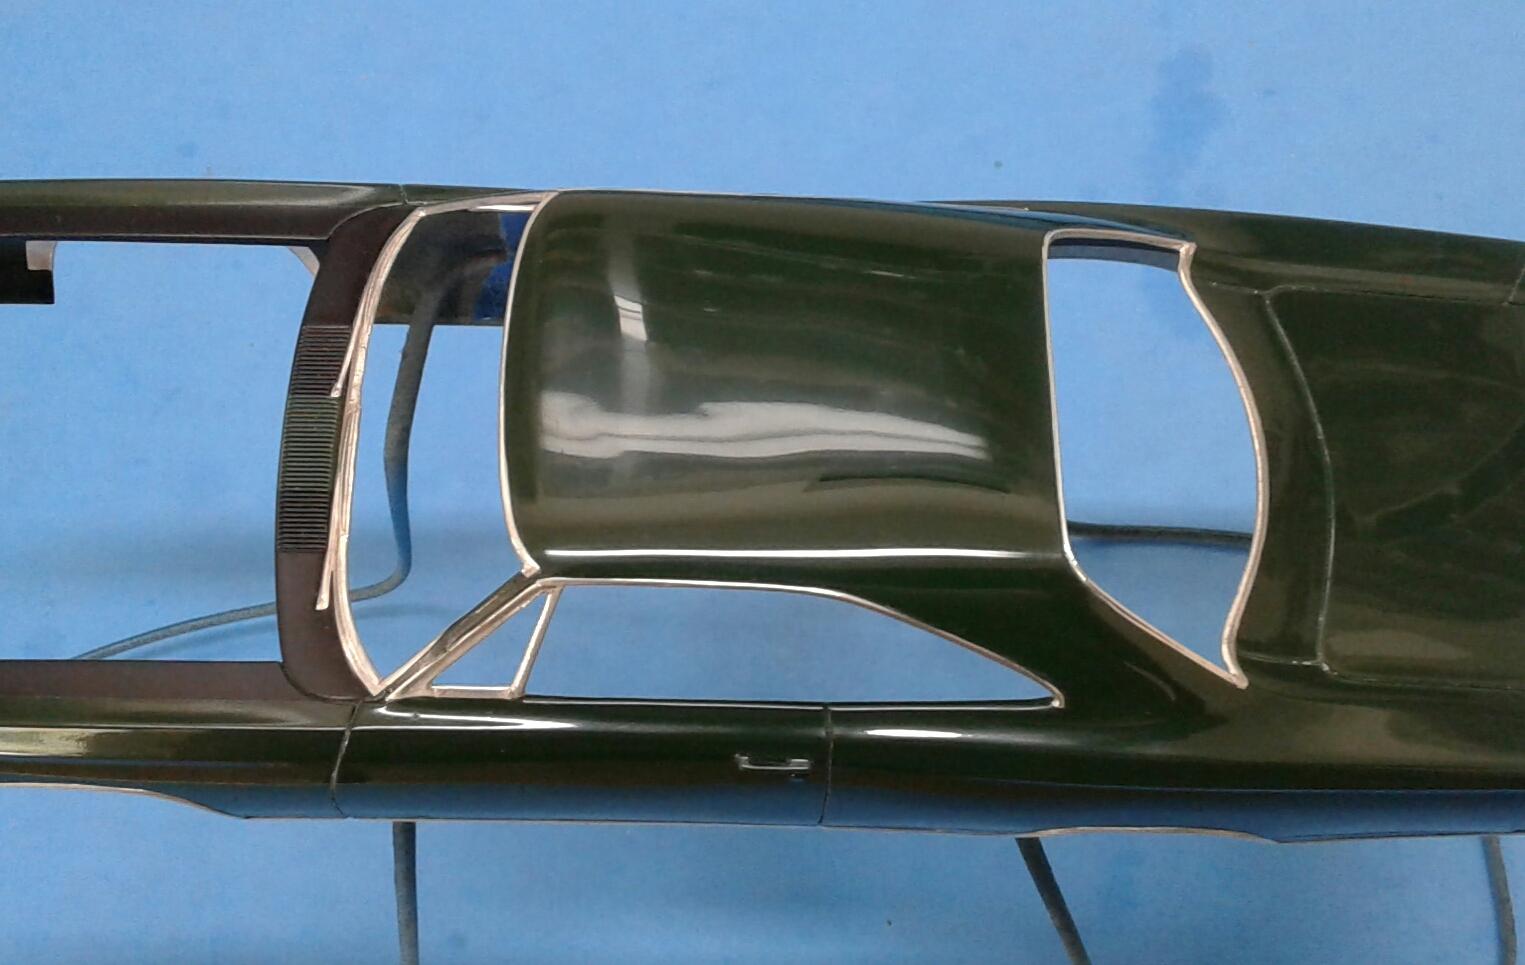
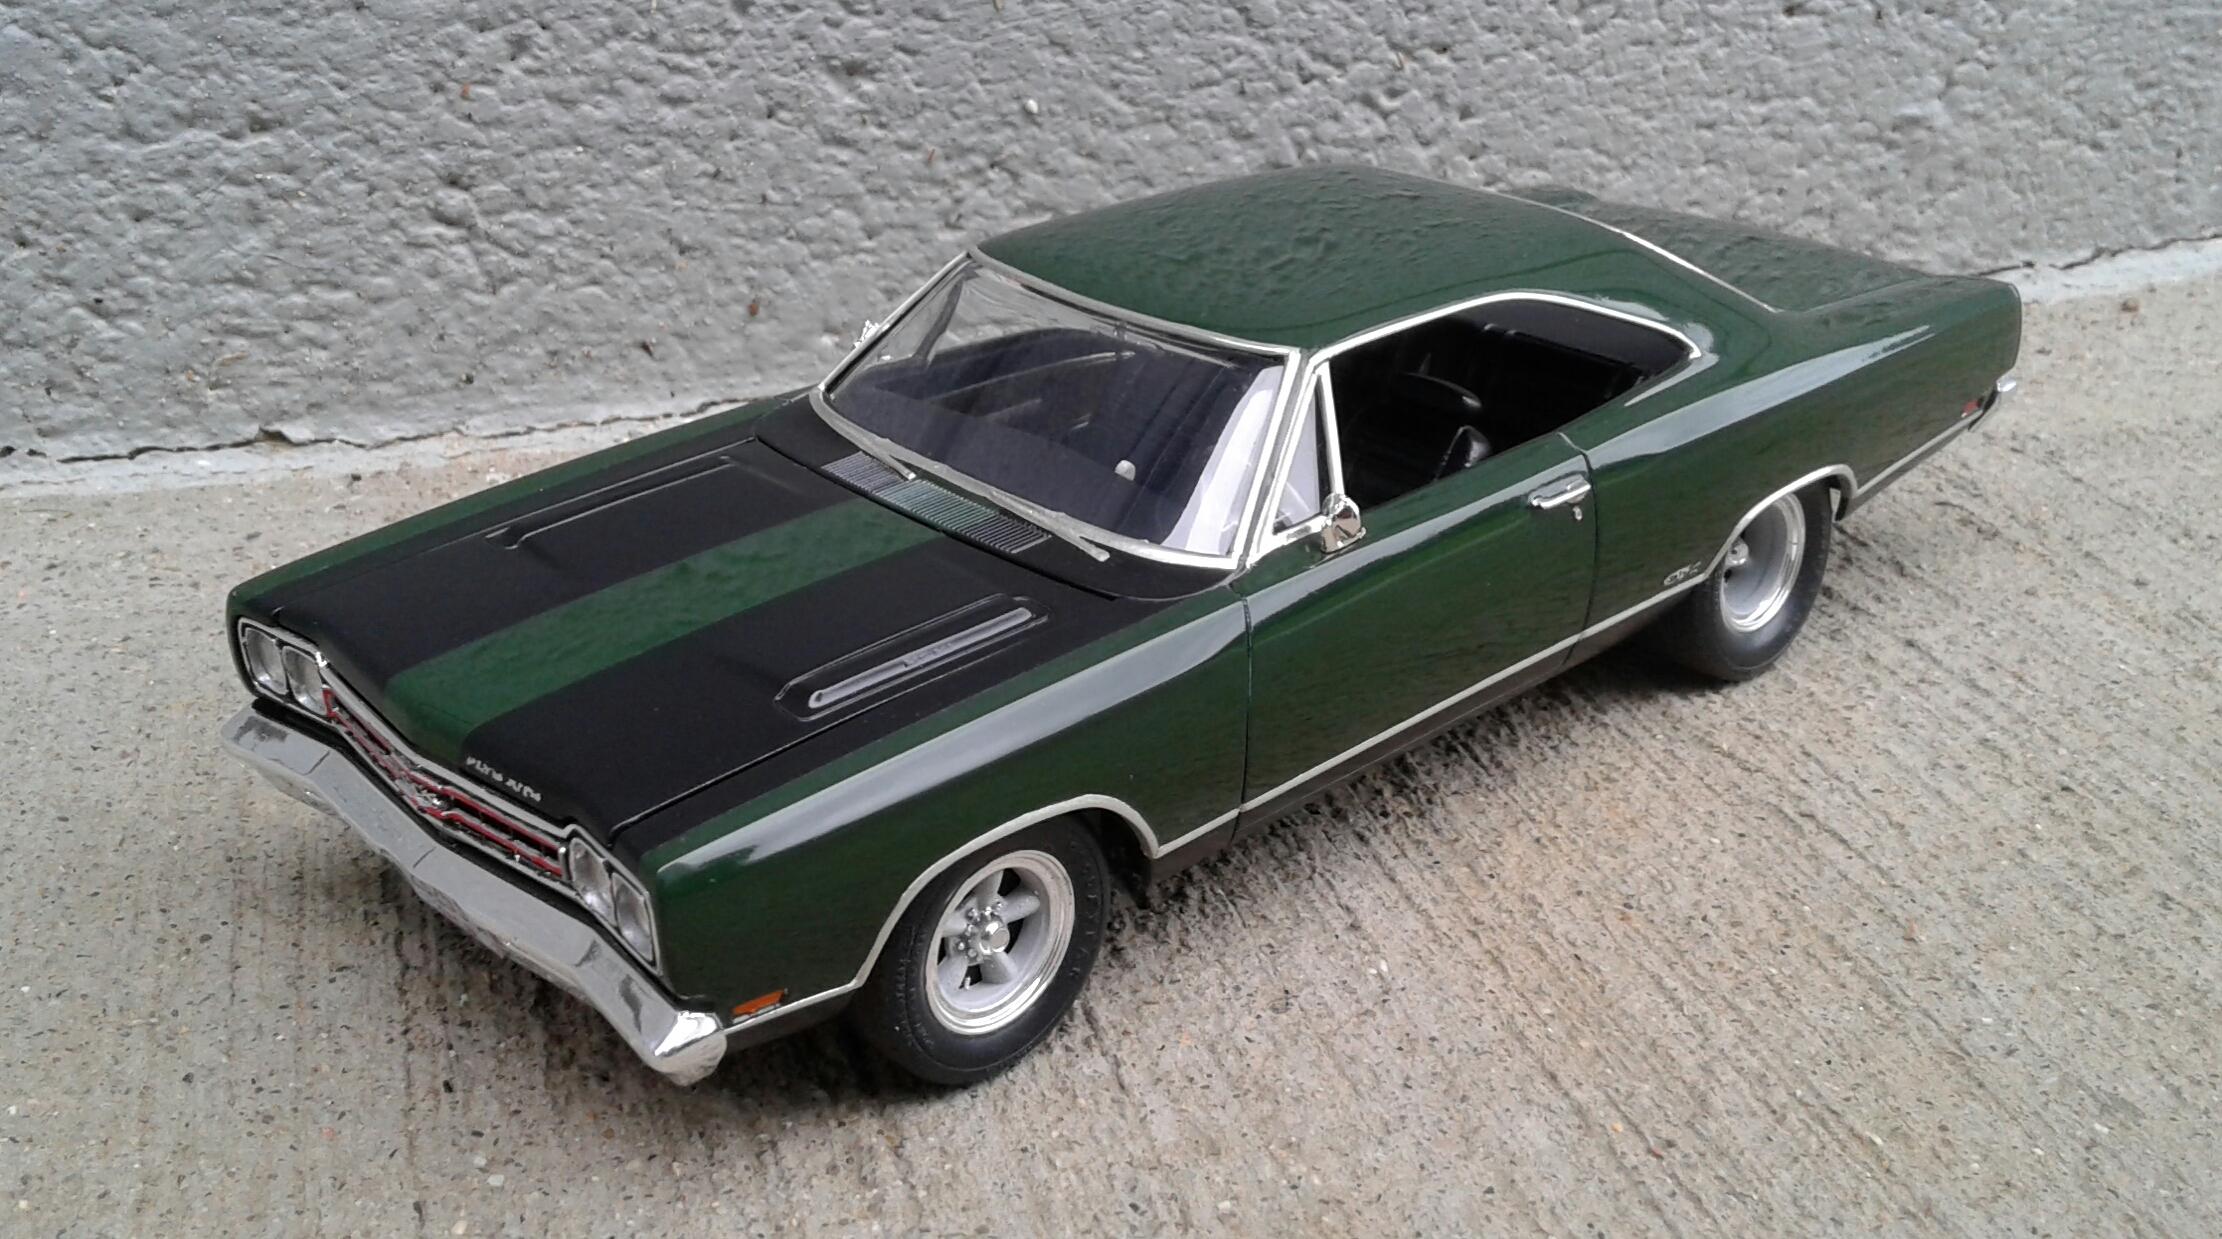
I think everyone that's built a model has, at one time, ruined a paint job. Whether it's a drop of glue, burn through or other. My latest goof was smearing what I thought was Tamiya Finish Compound, but was actually Tamiya White Putty, on the roof of my latest model. In my defense, both have white lids. But, I obviously didn't read the tube! I didn't get a photo as I was too busy trying to get it off. But, this is what it looked like after sanding it with 1000 grit. I've saved quite a few paint jobs with this method. But, this one was the ultimate test! I first take a piece of paper and roughly draw the size of the area I need to fix. In this instance, my drawing looked a little too large. So, I cut inside the lines. I then placed the body on my stand to free both hands. I take the paper, hold it a half an inch or so above the body. Then I do a quick shot of paint through the hole in the paper. In this instance, I had to shoot a little extra as there were a couple of small pits in the damaged area that needed to be filled. As you can see, the paint is a little thick around the edges. You won't get that with a quick shot of paint. This is an extreme example. Sand with 1000 grit. You can still see a hint of the edges. But, we're going to take care of that with clear. Next step is cut the hole in the paper larger. Shoot a coat of clear through it. Sand with 2000 grit. You can see that the edge of the paint is fading away. Shoot another coat of clear through the paper. This time, I moved the paper over towards the center slightly. Sand with 2000. Then 4000. Polish with Tamiya Course and Fine compounds. And I'm back to where I was! Ready for Tamiya Fine compound. Like it never happened! After Tamiya Fine Compound, there's no hint of the previous damage. I even took it out in the sun and couldn't see where I did the repair. So, next time you have a goof, give this a try before stripping and starting over. I've used this method on metallic and solid colors with great success. It sure has saved me a lot of time, materials and grief.
-
Moebius 1964 Nova SS - first detailed look inside the box...
Plowboy replied to tim boyd's topic in Car Kit News & Reviews
Now fix the undersized headlights. -
Very nice looking '32 Bob! Great work on the paint as well as the rest of it!
-
Help finding a vintage car model kit
Plowboy replied to Kickstand's topic in Model Building Questions and Answers
Ebay. -
Monogram Ford Ranger
Plowboy replied to Luc Janssens's topic in WIP: Model Trucks: Pickups, Vans, SUVs, Light Commercial
The red truck is an original issue and comes with the bed cover. Patrick stated that the kit didn’t come with the cover. So, I figured he was talking about the reissue. I don’t have one of those. This kit was last issued by Monogram as a High Roller. Maybe the cover was replaced with the roll bar? -
Monogram Ford Ranger
Plowboy replied to Luc Janssens's topic in WIP: Model Trucks: Pickups, Vans, SUVs, Light Commercial
It was in the original issue kit that Luc is building. So, the reissue doesn't have the bed cover? -
'65 Nova Pro Street Update 11/14/22 Completed Chassis Photo Pg. 5
Plowboy replied to Plowboy's topic in WIP: Model Cars
It's from the gasser kit. It's a little warped and low. But, it'll work. -
You could just use the whole chassis from a Monogram '70 Chevelle.
-
'65 Nova Pro Street Update 11/14/22 Completed Chassis Photo Pg. 5
Plowboy replied to Plowboy's topic in WIP: Model Cars
They came in a garage set from Fujimi. It has a lift and a bunch of other stuff with it. So far, the jack stands are all I've used.