Plowboy
-
Posts
3,434 -
Joined
-
Last visited
Content Type
Profiles
Forums
Events
Gallery
Everything posted by Plowboy
-
The '40 has .020 rod.
-
Thanx Trevor! One tip on roof swaps is use as much of the donor as possible. Time spent planning cuts is usually time saved correcting mistakes.
-
Thanx Rusty! I always try to make my modifications as simple as possible. It makes it much easier to put back together.
-
You could eliminate one step. Spray it with Gloss Black, apply the decals and then shoot it with Satin Clear. Tamiya Semi Gloss will give a flat or gloss paint a satin finish.
-
I'd rather not have to buy five sheets of it to try it out. But, I may give it a try when I run out of BMF. By that time, there may be some reviews on it.
-
AMT racer's wedge question
Plowboy replied to thatz4u's topic in Model Building Questions and Answers
Just a guess....but could they be for different ride heights? Maybe post a photo? -
I used Tamiya Extra Thin Cement.
-
I don't think you would need to. The reason I use rod is that it's more pronounced than the half round and easier for me to foil. I'm sure the half round would work fine. It may be a little tricky to foil though. The trim on this '39 is like a wider half round. It was a bit tricky for me to foil. I wish that I had removed and replaced it with. 020 rod. It's a bit too wide for my taste. I think it would have looked a lot better with smaller or even no trim.

-
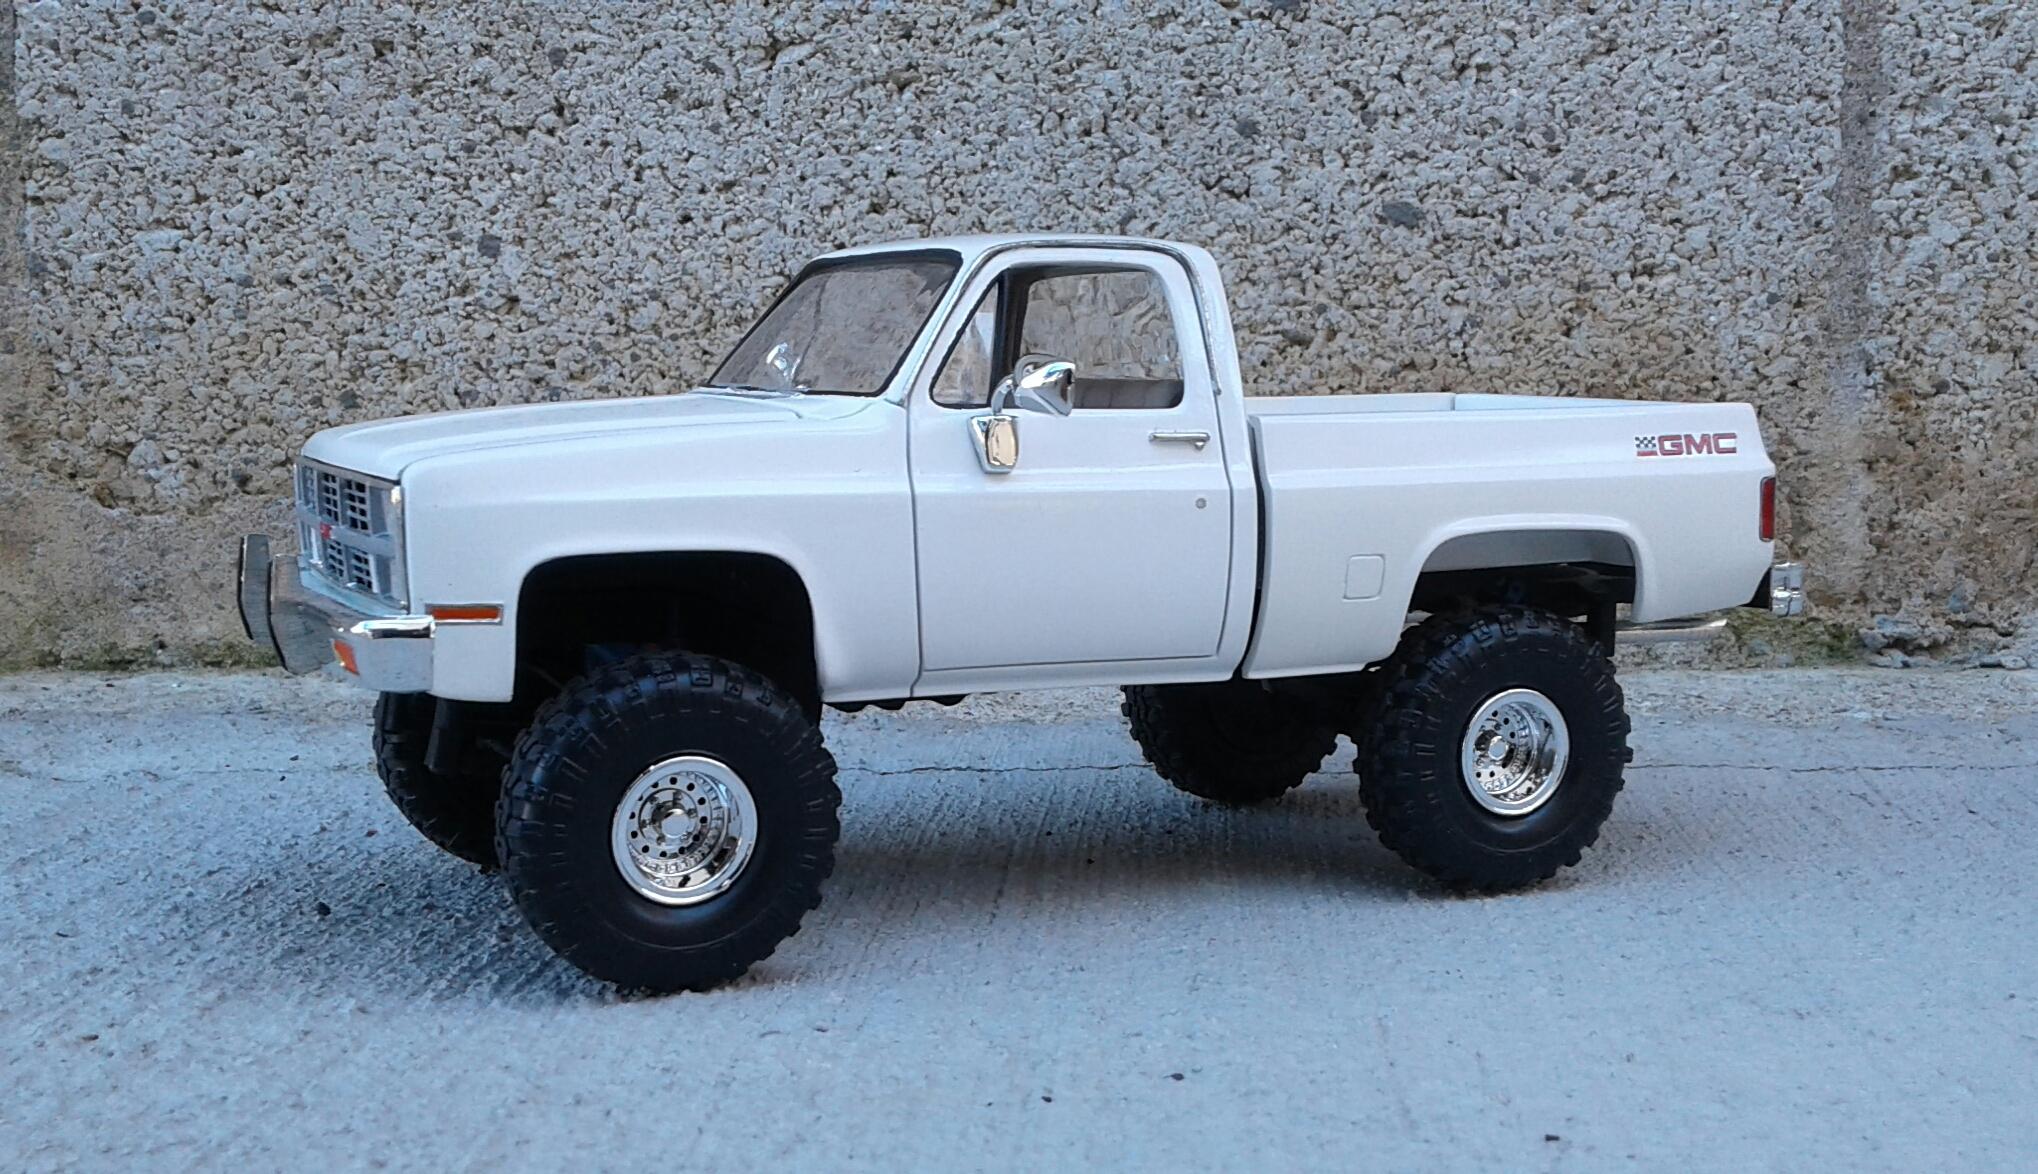
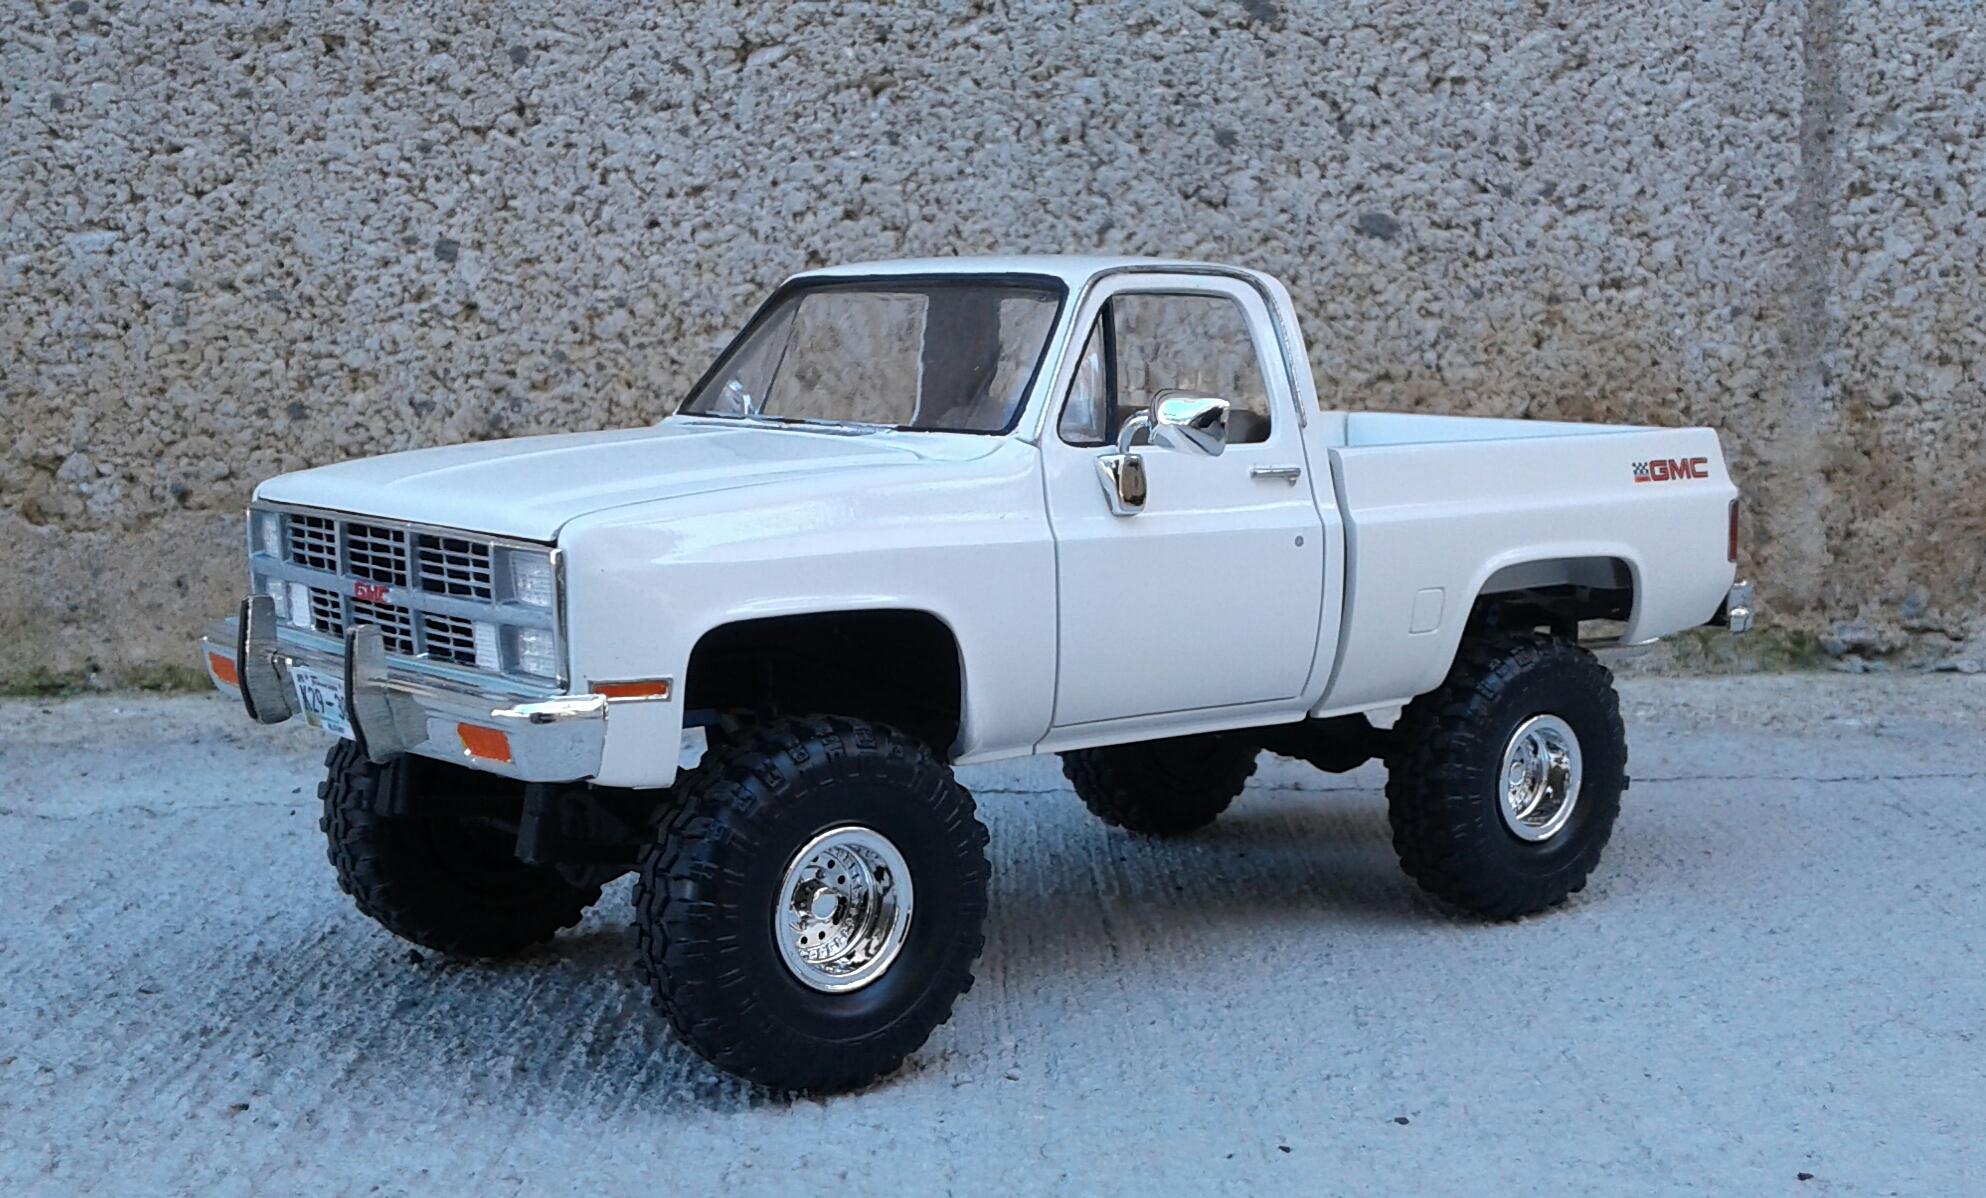
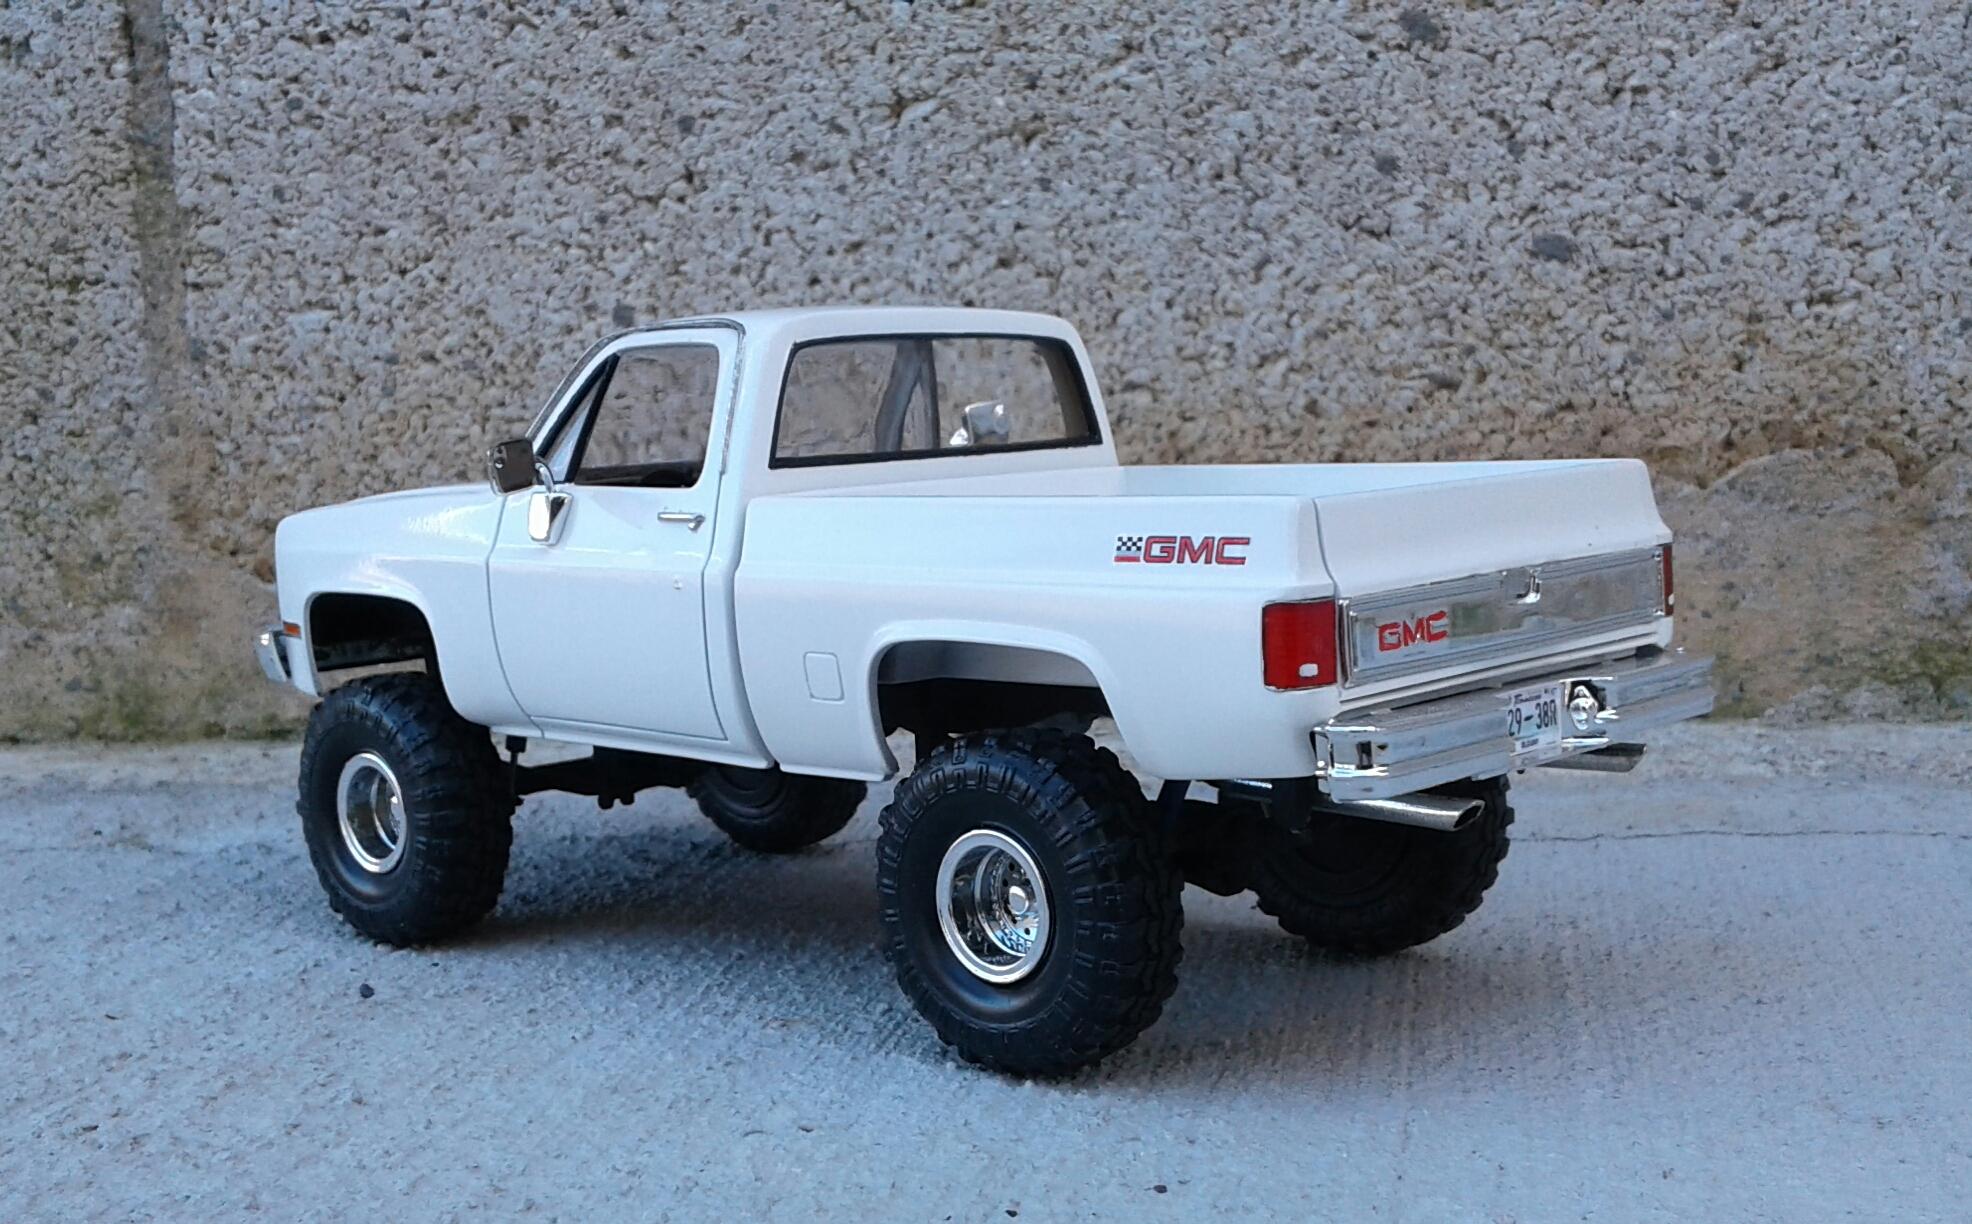
History of Monogram's Squarebody GM Pickups
Plowboy replied to Fabrux's topic in Truck Kit News & Reviews
At least it does have batteries. The Monogram '78 Camaro Z/28 has dual washer bottles of all things! I'm pretty sure that the '76 Chevy pickup also has dual batteries. -
What did you learn to drive in?
Plowboy replied to slusher's topic in General Automotive Talk (Trucks and Cars)
I learned to drive on a Massey Ferguson 135. I was ten. But, I was always big for my age. When I was twelve, I learned to drive on the road in Dad's '75 F-100. It was a 360 with a 3 speed on the column. No power brakes or steering. I also took my driver's test in it. Dad tried to talk me into taking Mom's car to take the test. It was a '73 Fury III and I loathed that car! It was green on green on green with a 318. I told him I would rather fail the test than drive that car! I passed no problem. This is a replica of the truck.
-
I didn't use any half round Mike. The drip rails were made from strips of .020 sheet. I cut them around 1.5 mms wide for easier handling, glue them on and then cut them down after they're dry. The trim on the body is .020 rod. After I glue it to the body, I wick crazy glue along both edges to fill in the backside.
-
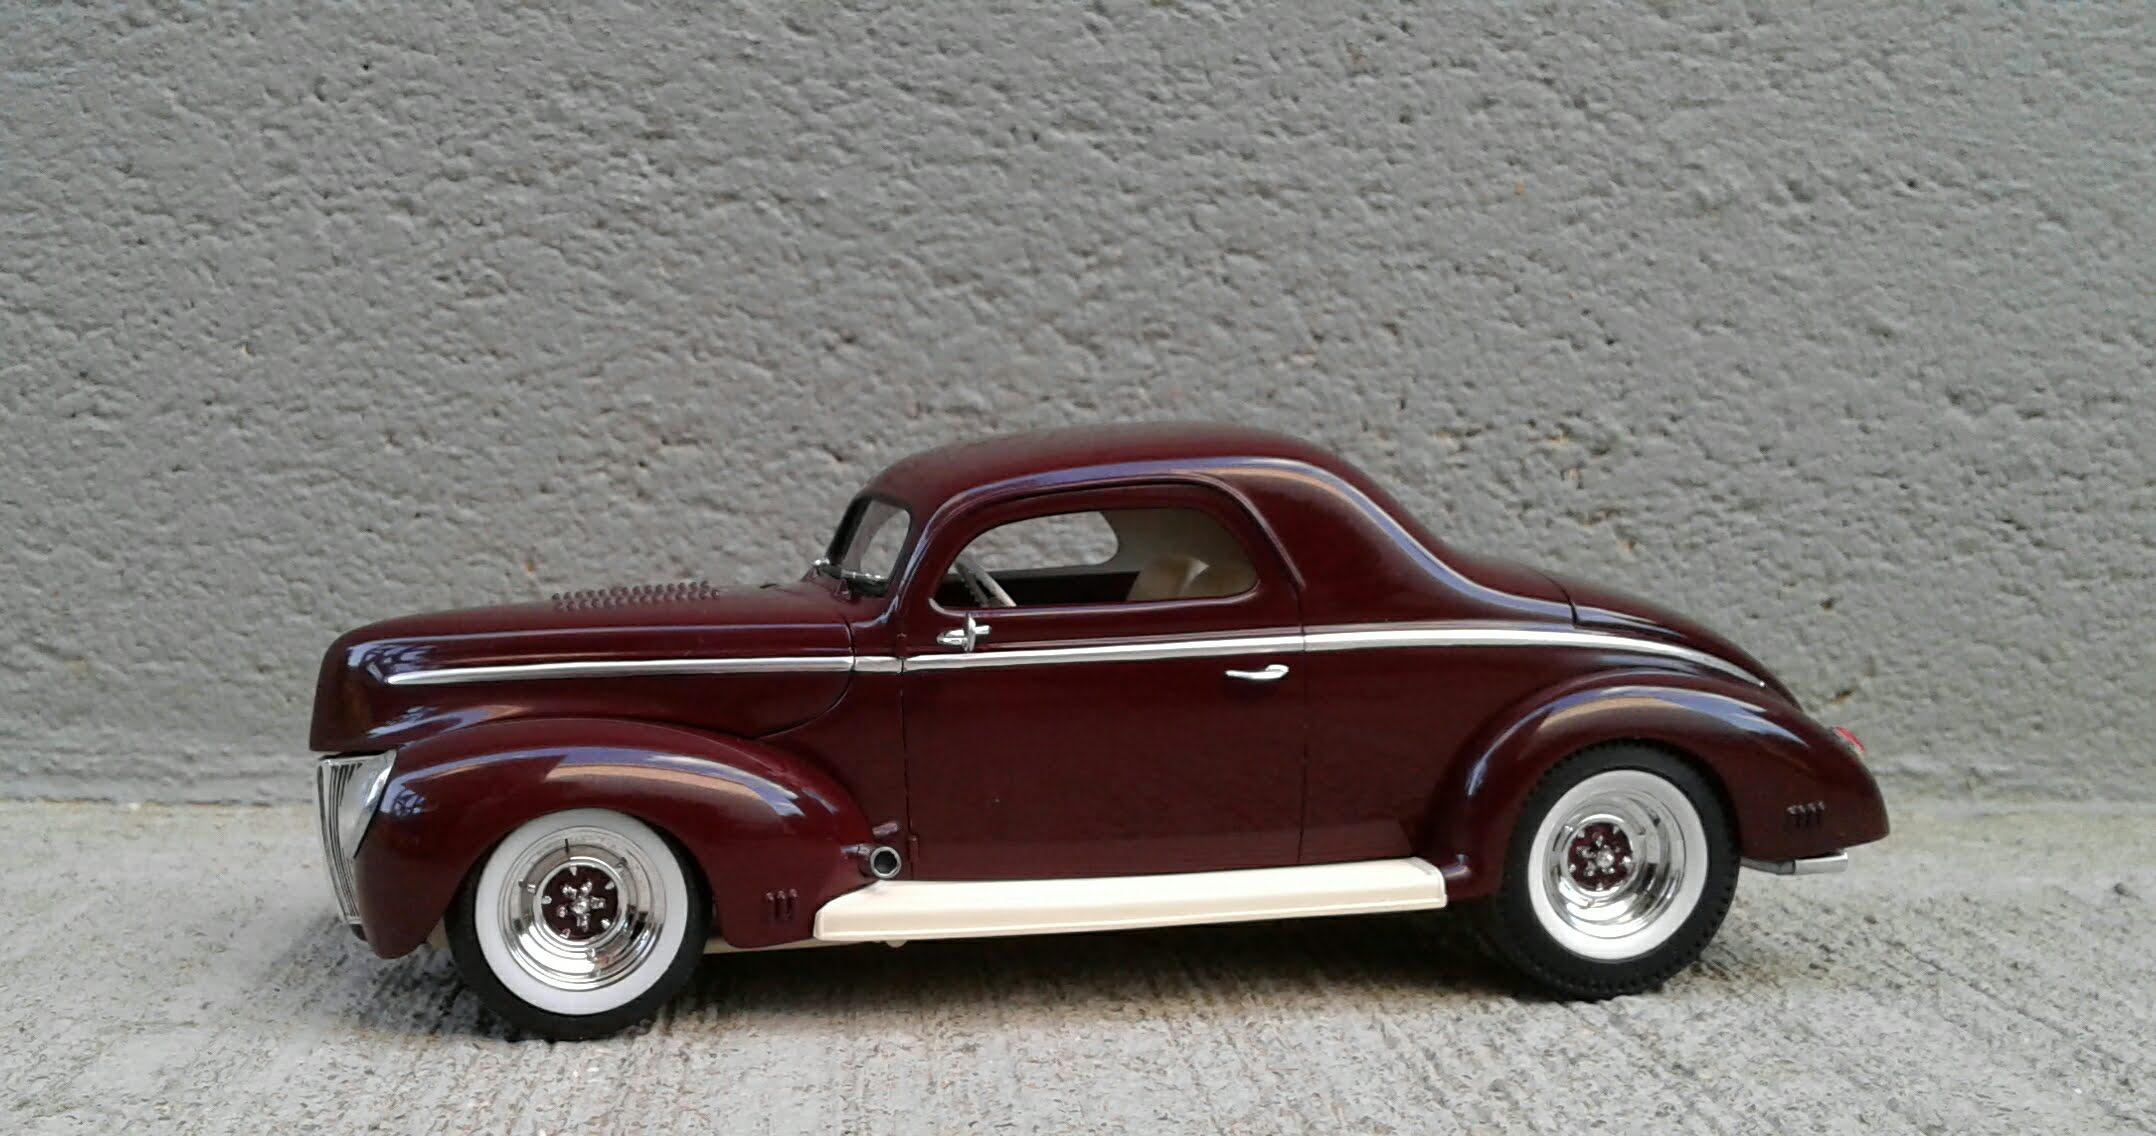
This is what we're starting with. The venerable AMT '40 Ford Sedan that's been around since '62. Not sure when this particular kit was issued. But, it's molded in a lovely brown. One thing I love about these old AMT kits is they can be mocked up in a matter of minutes. After studying the body for a bit, I decided where I wanted to make the cuts. Subject to change at any time as you'll see later. I first cut strips of Tamiya tape 3mms wide and placed them on the body where I wanted the cuts. Then marked the areas with a Sharpie marker. This is a cut that got changed (after I cut). My first thought was to just cut the top of the trunk lid off. But, it would have caused some issues. One was the backlight would be lower. Two was it would have caused me to have to lengthen the roof even more. Three, it just wouldn't look right with a stock height. While I made it work out, it's an unnecessary step. Time to cut it up! I first cut the roof away from the body following the underside of the drip rail and the top of the trunk. As you can see, I changed the cut on the A pillar. With the roof removed, I marked the new cuts at the backlight. I always try to make my cuts in an area that will make the least change to the window openings and the roof itself. I cut away the remaining door and window frames. Only cut at the lower marks on the frames! Leave the extra 3mms for now. I always cut inside the lines and sand away the marks after the cut. The ink from a Sharpie marker will bleed through primer and perhaps paint. One thing I've learned about top chops is however much the roof is lowered, that's usually how much it will need to be lengthened. I added 3mms to the length of the roof. While the roof was free, I sanded the inside smooth. It's a lot easier than doing it after it's glued back to the body. I also reworked the backlight opening. Instead of attempting to file and sand the lip back into it, I got it the shape it needed to be and added a piece of .020 to the inside to create the lip. An added bonus is the divider has more strength. I also added a strip where the roof and trunk will join. Test fit of the roof skin. As you can see, it fits quite well just resting on the body. It's ready to be glued permanent. Time to get the door and window frames back in! I cut away half of the door frame portion as they will need to be lengthened as well. I placed the window and partial door frame inside the body and marked them. This is the reason for leaving the extra 3mms on the frames mentioned earlier. As you can see, the mark on the C pillar has changed quite a bit from the original marks. The frames are now glued in and the filler pieces added to the door frames. I removed the drip rails during sanding as it's easier to me to remove and replace them than try to fill and sand around them. In this photo you can see the new lips on the backlight. There's also a substantial gap between the roof and the trunk. A strip of .010 will fix that easily. Since I was replacing the drip rail anyway, I decided to also replace the chrome trim on the body. It's barely there on the hood and would almost disappear after primer, paint and clear. The drip rails are replaced with a strip of .020 and the chrome trim was replaced with .020 rod. All sanded and ready for some Tamiya primer. In primer. Ready for your favorite color! Done! Any questions, just ask.
-
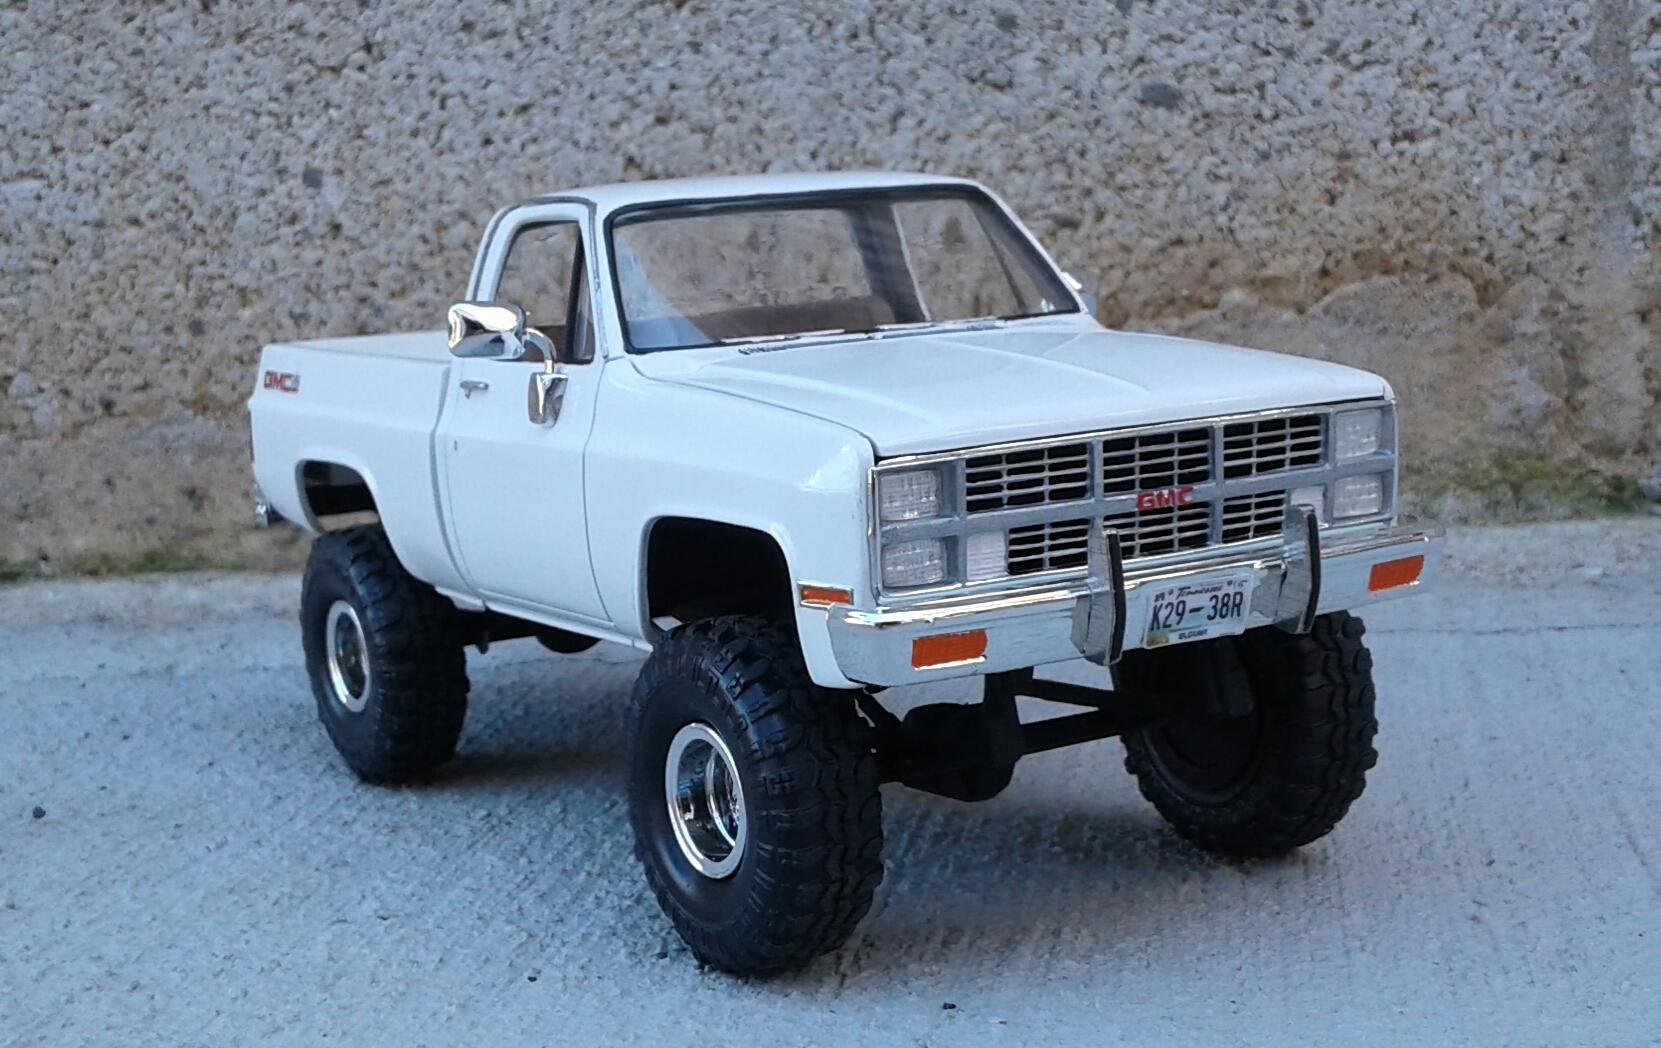
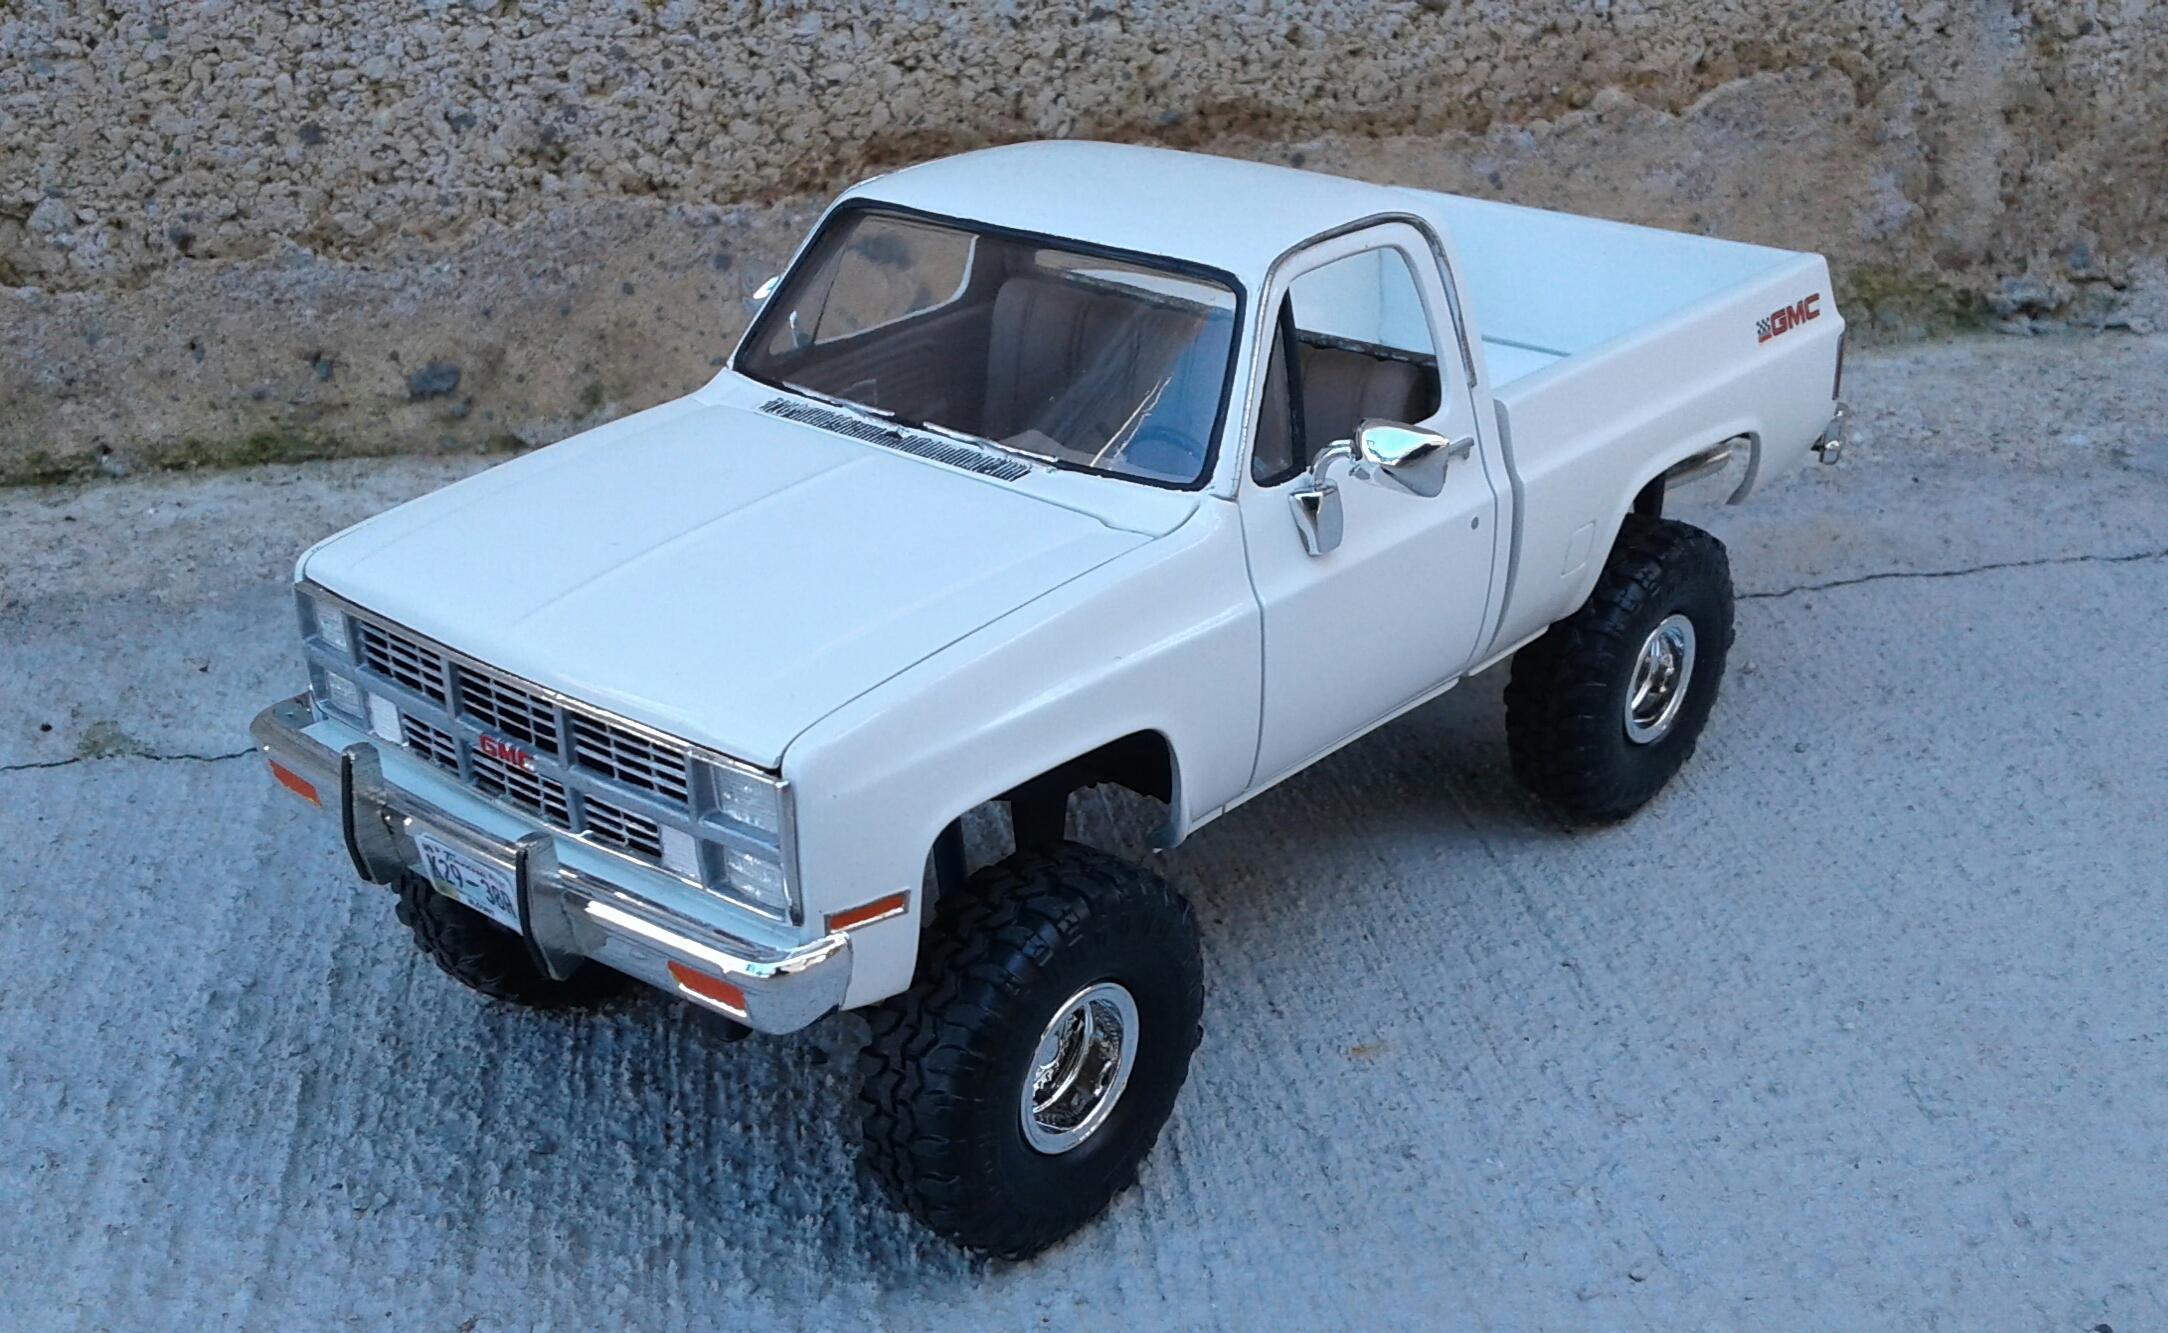
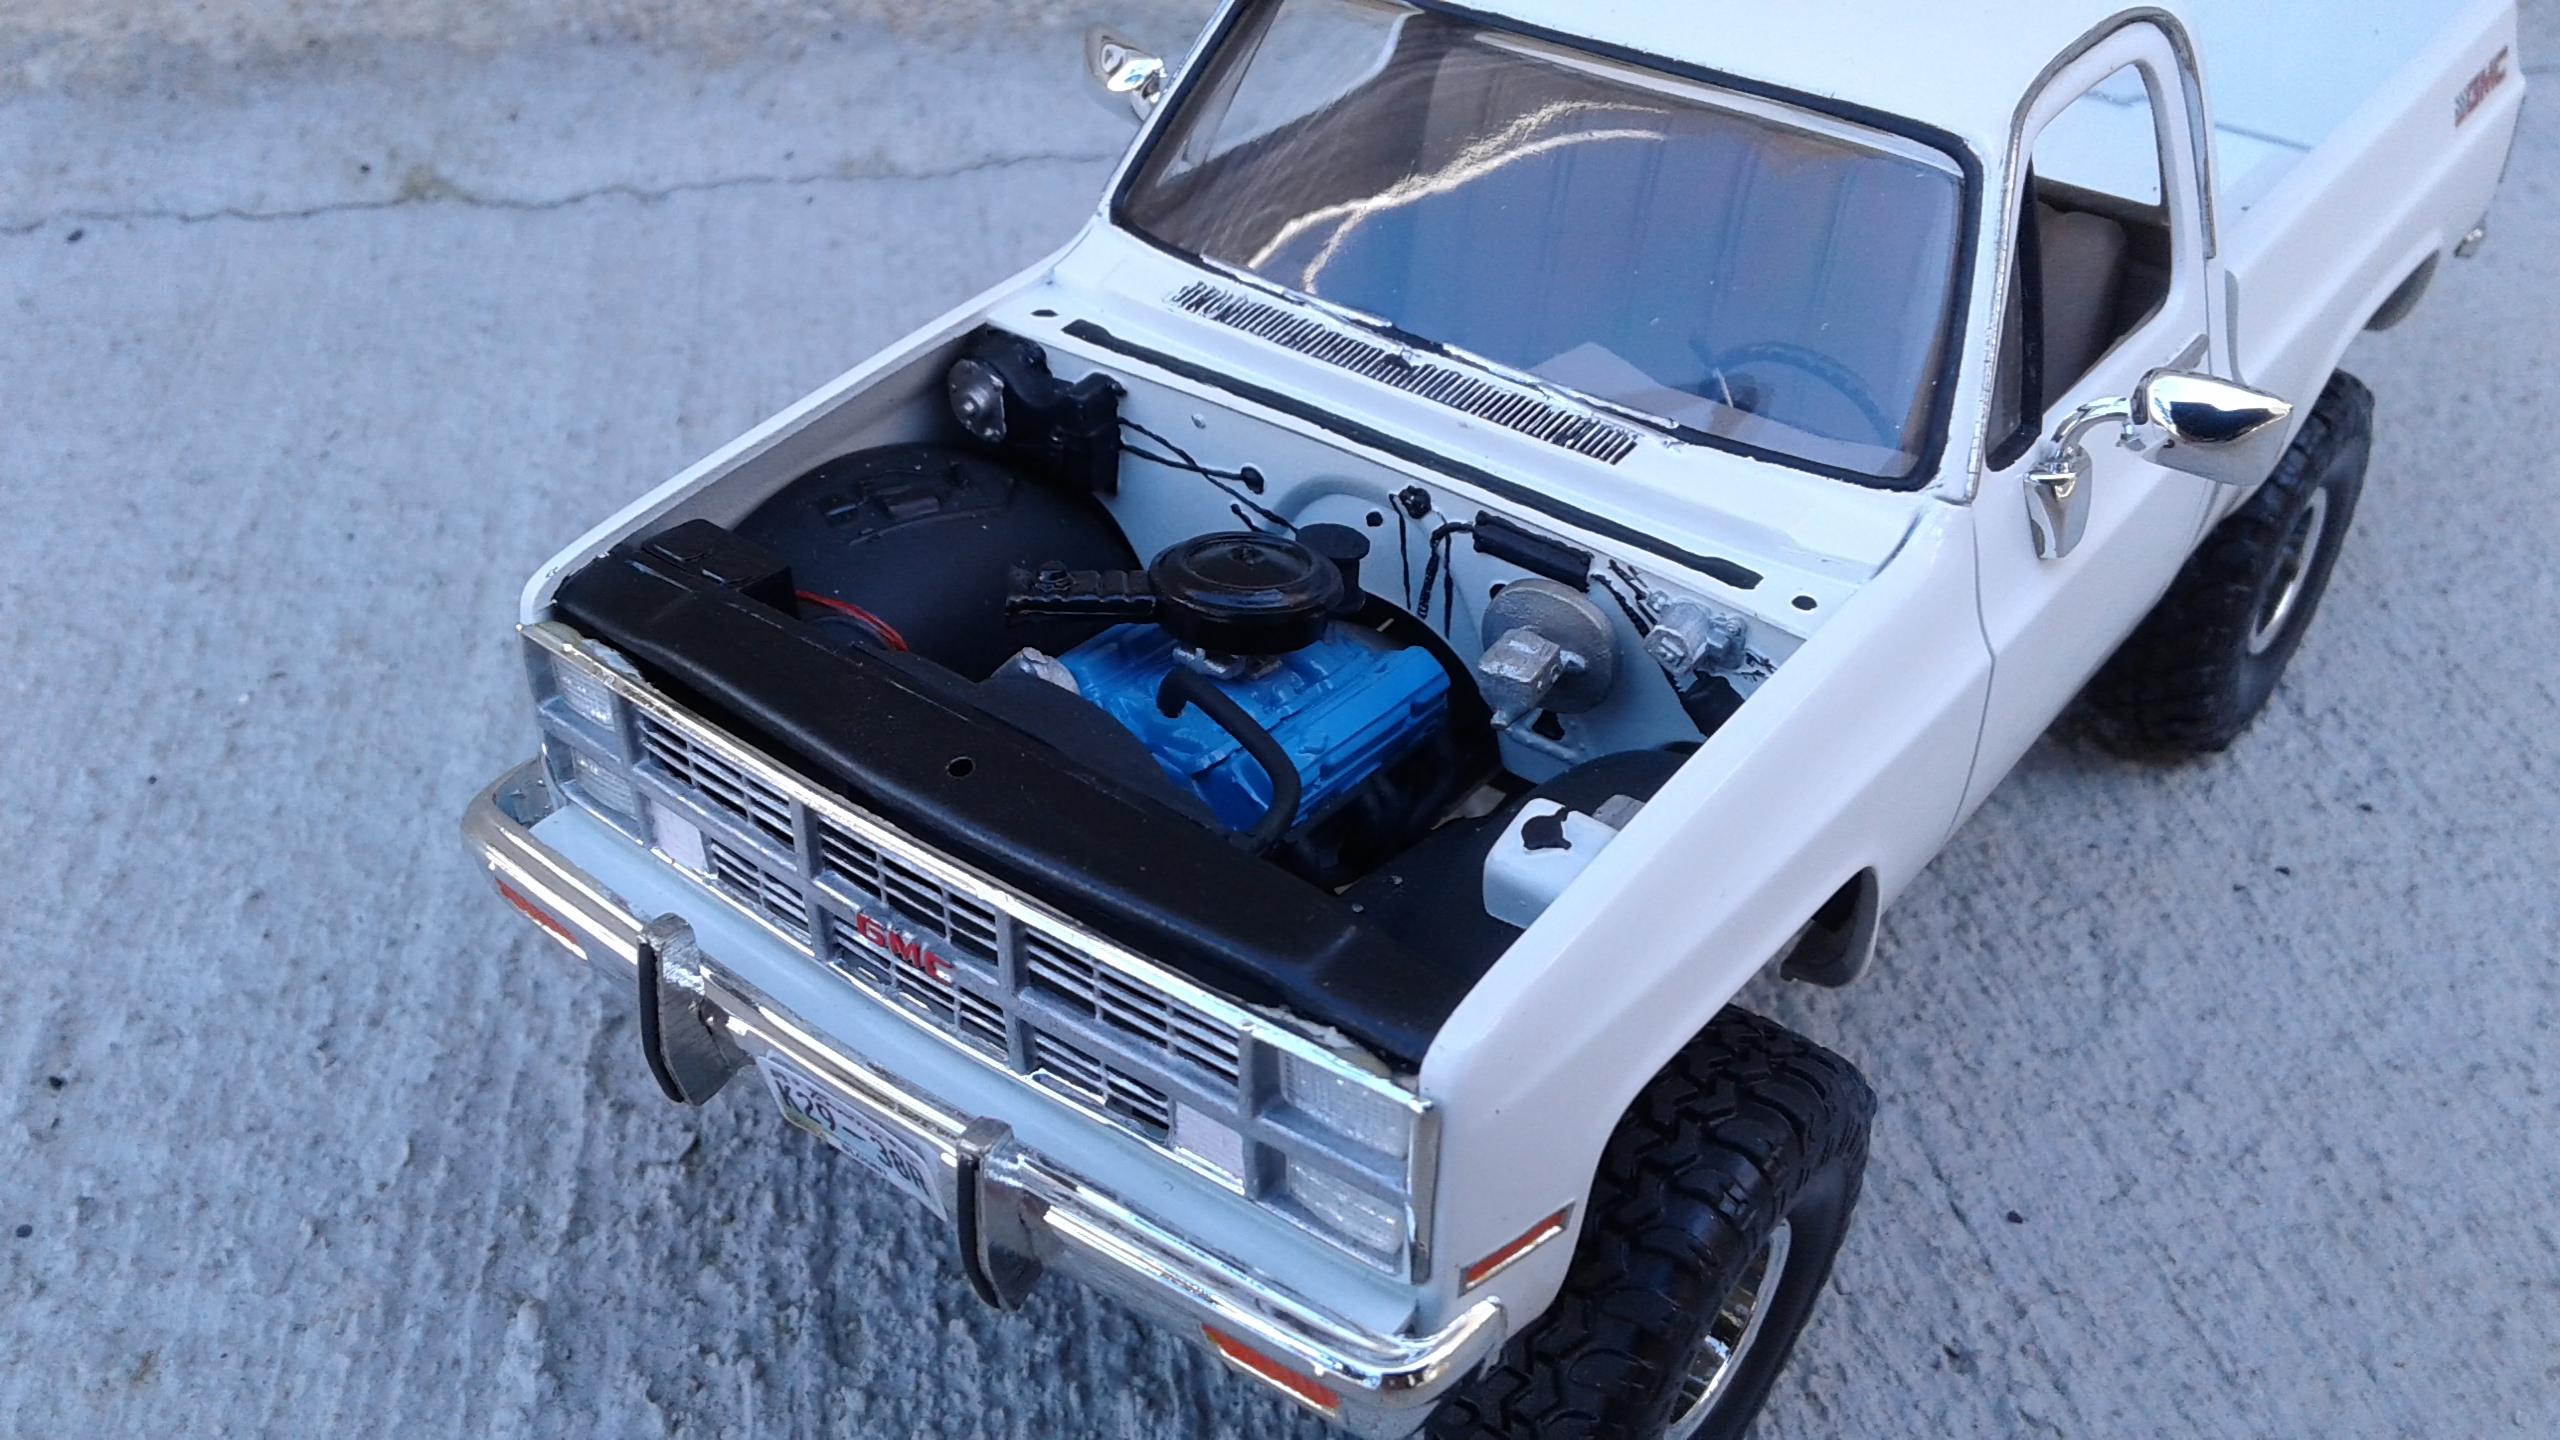
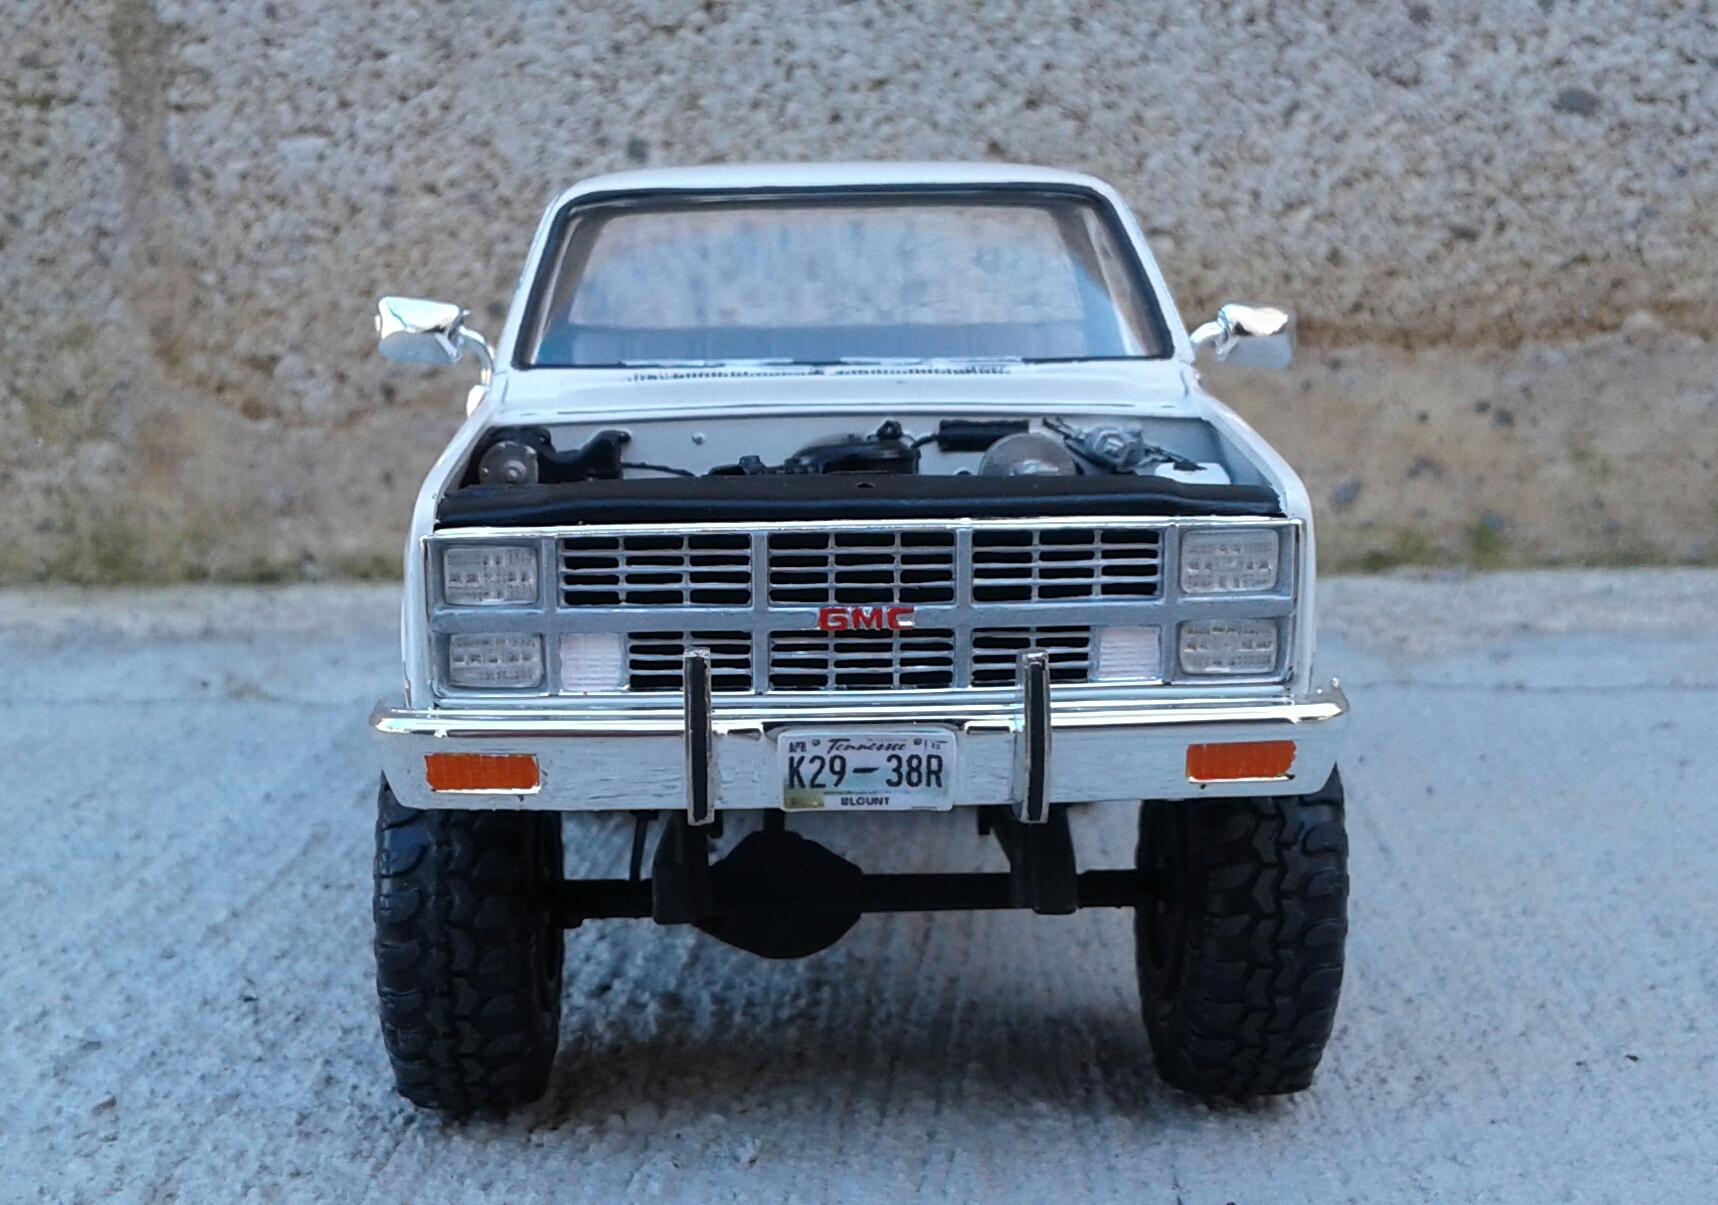
Yeah, I hated these trucks in the '80s. I worked in a local body shop and had to repair probably a dozen of them in the time I was there. Didn't take long to realize I had chosen the wrong career path!
-
What kind of clear coat does not turn yellow?
Plowboy replied to RT6PK's topic in Model Building Questions and Answers
No, it will not. This model was cleared with TS-13 over Pure White around 16 years ago.
-
Question about an AMT single axle trailer
Plowboy replied to VW93's topic in Model Building Questions and Answers
Would the last one be the same trailer that came in the Bronco/Cougar F/C set? -
I actually built this model several years ago. I first had a set of the 44" Ground Hawgs and the Outlaws from a Monogram F-150 High Roller on it. They fit OK. But, they were a bit too big. Later, I put these tires on it with the chrome spoke wheels from a Monogram F-250. I liked the wheels. But, they were five lugs. While rifling through an AMT Dodge D-50, I came across these wheels. They were just what I was looking for! Well, except for no hub detail on the front wheels. I can take care of that later. I didn’t do a great deal of work on it as I just wanted a simple build. I did fill in the lines on the bed and the extra gas door. When I first built it, I thought I had filled in the wrong one as the gas tank is on the passenger side on the chassis! I opened the grille and added drip rails as they were almost gone. Later, I learned that I had done them incorrectly. They shouldn't run down the A pillars as I have them. They should end at the top. I made a set of bumper guards for the front bumper to cover the holes. The bucket seats in this kit are horrible. So, I cut the bench seat away from a Monogram '76 Chevy and modified it to fit. I added a column shifter to the steering column. After those modifications, it was just paint and assemble. The interior was done with Testors Fabric Tan. The body got Tamiya Pure White with a coat of TS-13. Thanx for checking it out!
-
Who doesn't love a mock-up? Let's see yours!
Plowboy replied to Belairconvertable's topic in WIP: Model Cars
Thanx Mike! The Fairlane got a couple of changes from the mockup. I had to raise the frontend back up for header clearance and I changed the wheels and tires. I have a '64 that I hope to get back to someday. It's actually setting on the '63s chassis in this photo. It's going to be going on the Revell chassis when I get back on it.
-
Who doesn't love a mock-up? Let's see yours!
Plowboy replied to Belairconvertable's topic in WIP: Model Cars
A few more.
-
I always primer everything. It does make a difference.
-
AMT '53 Ford pick-up - speedo decal?
Plowboy replied to Jantrix's topic in Model Building Questions and Answers
Next time, foil or tape your instrument panel before primer and paint. Once done, you can paint it black and lightly sand the details to make them show. -
That is a really nice looking Cougar Steve! I really like the color on it! I also like how the top doesn’t have seams that would scale out to a half an inch thick. Where did you source the wheels?
-
Maybe the flakes were trapped in the clear? Was all of the chrome smooth?
-
'62 Ford Galaxie 500 Update! 12/23/22 Finally Done! Pic pg. 7
Plowboy replied to Plowboy's topic in WIP: Model Cars
I appreciate it Carl! I can sure use them! -
Well, you were right Steve! Ever since I saw your '41 Chevy, I wanted to do a flat red paint job! In a sea of super shiney paint jobs, this one will definitely stand out and draw people in! The wheels are on my full scale. I was thinking about trading up. But, with current prices on even a used truck, I decided to give my old truck a new look. It only has 79,000 miles on it. This is the wheels I bought. My truck is a similar color to the wheel center.
-
'62 Ford Galaxie 500 Update! 12/23/22 Finally Done! Pic pg. 7
Plowboy replied to Plowboy's topic in WIP: Model Cars
Thanx Steve! It's my poor lighting and photography. The wheels have a touch of shine. So, they reflect a little bit of light I guess.