Bills72sj
-
Posts
4,589 -
Joined
-
Last visited
Content Type
Profiles
Forums
Events
Gallery
Everything posted by Bills72sj
-
BLAH_BLAH_BLAH_BLAH! Those are SWEEET!!!!!
-
i love your work. Your choice of backgrounds and photography skills are top notch too.
-

Keystone Aluminum Model Miniatures
Bills72sj replied to SpreadAxle's topic in Truck Aftermarket / Resin / 3D Printed
Cool trailer(s). Reasonable prices. I simply have too many kits to build already. -
Project 1970 Monte Carlo Pro Street
Bills72sj replied to Superbird McMonte's topic in WIP: Model Cars
Hmmm. Pro street Monte. I'll be following. -
Rattle can suggestions
Bills72sj replied to ratherbefishin's topic in Model Building Questions and Answers
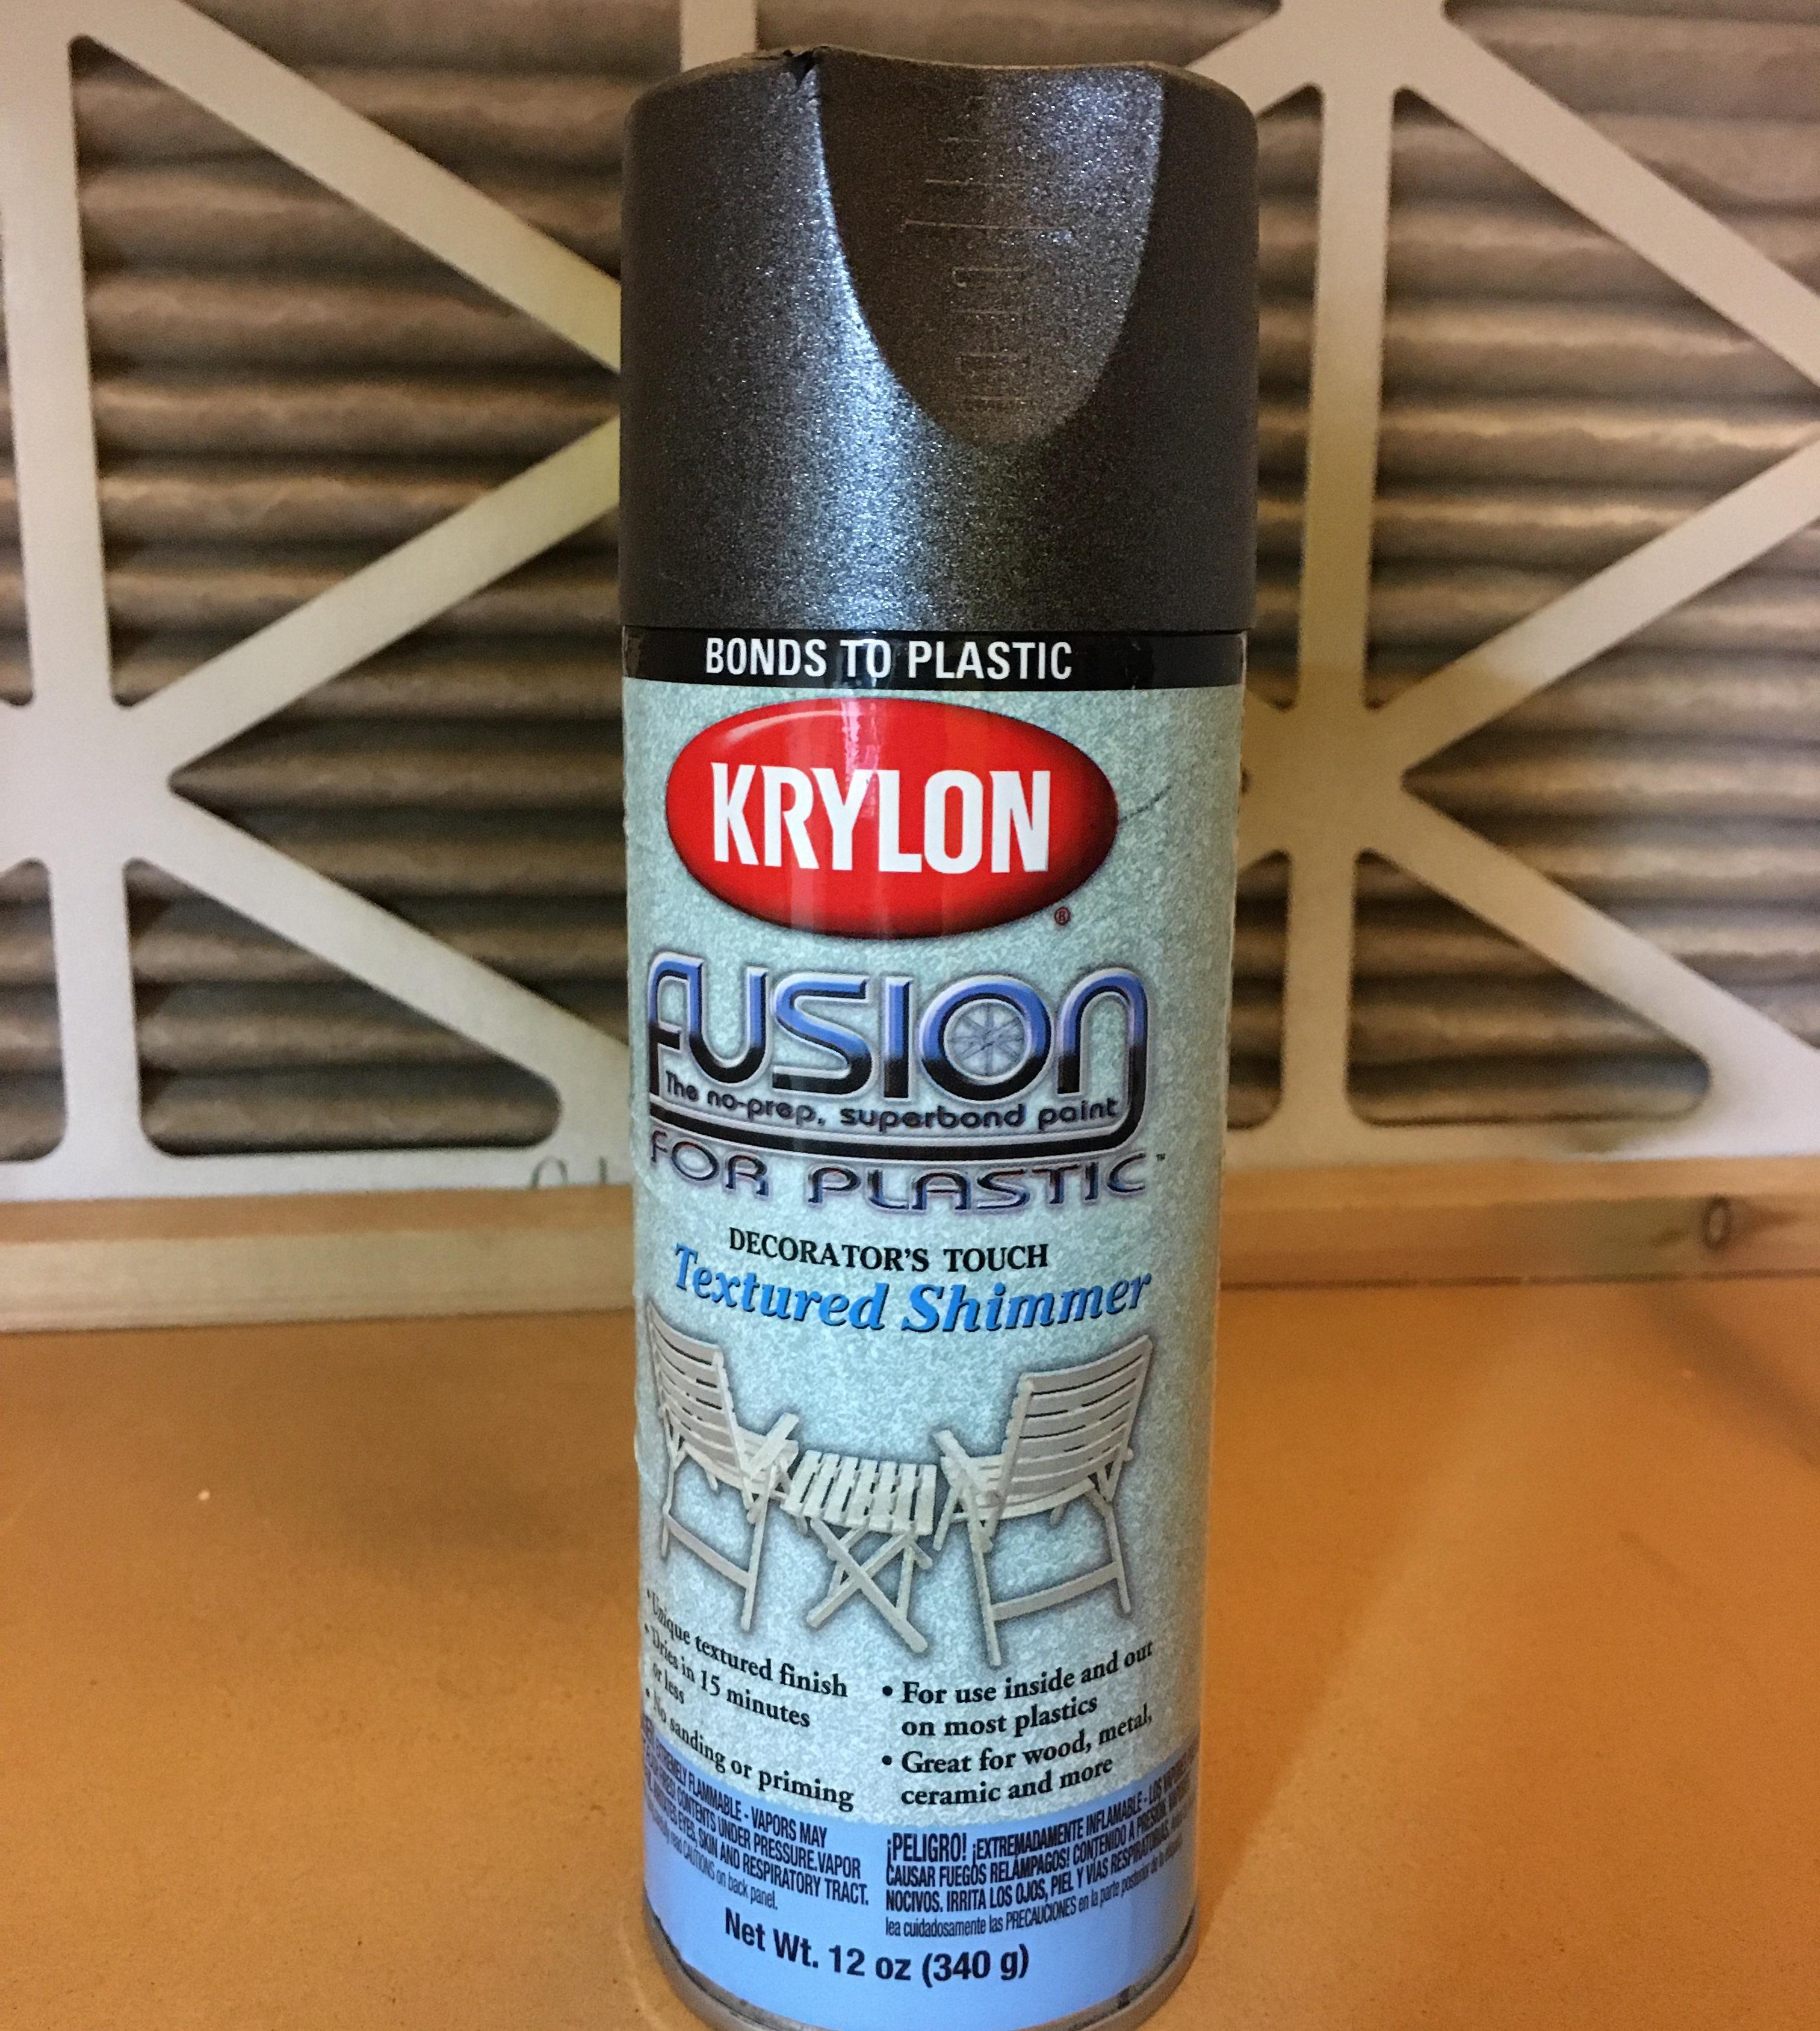
I am a fellow "Rattle can" modeler. In spite of building off and on for 50 years I am still a painting rookie. I have always sprayed Testors straight onto the plastic. I don't mind removing flashing but I have no patience for sanding and have basically never done putty. Doing a mist coat is a 50-50 proposition. There will be differing opinions on this but in my experience, it contributes to orange peel. I have often sprit and sprayed to 100% coverage on the first and often only coat. Have I had issues? Yes, transparent paints do not like this method. The paint will run away from any ridges leaving them the plastic color. With solid paints I often get away with it. Humidity is a key factor. If you want gloss, spray when the humidity is 40% or below. Higher humidity will make your glossy finish coat "blush" rendering it with a matte finish. Orange peel is present on most of my models due to spraying mostly enamels. I live with it. Though brushed on Future (acrylic) after decals and BMF but before the window glass will definitely improve the gloss. I have a bunch of Tamiya paints but have not sprayed very much of it. When hobby paints jumped way up in price, the economics of alternate sources of paints drove me to the Krylon and Duplicolor paints as you get much more for your money. Stay away from the Krylon "Fusion" paints. They are hot solvents and if you are not please with the results, the plastic will never be the same. If I plan on spraying a transparent color, It really needs a base coat. White paint or primer or sometimes metallic silver will improve your chances of a bright color. One of my failures is Testors Plum Crazy Purple. No primer, grey plastic and way too many coats made for a very dark purple result. NOT the beautiful medium metallic purple I was hoping for. Another near miss was Medium metallic red Duplicolor over Krylon white primer. The primer stuck to the plastic but the paint is marginally adhered to the primer. The color and finish came out beautiful but was very easily chipped off during final assembly. The only thing that saved it was multiple coats of Future. Now that I finally have a paint booth, I will eventually step up to getting an airbrush because the results the skilled modellers are getting is where I want to be. -
https://www.ebay.com/itm/MPC-1968-DODGE-CORONET-RT-FACTORY-SEALED-/193256708736?_trksid=p2047675.l2557&ssPageName=STRK%3AMEBIDX%3AIT&nma=true&si=PDMnvrW3ZtOqIxdJxpkkimc2b%2Fg%3D&orig_cvip=true&nordt=true&rt=nc
-
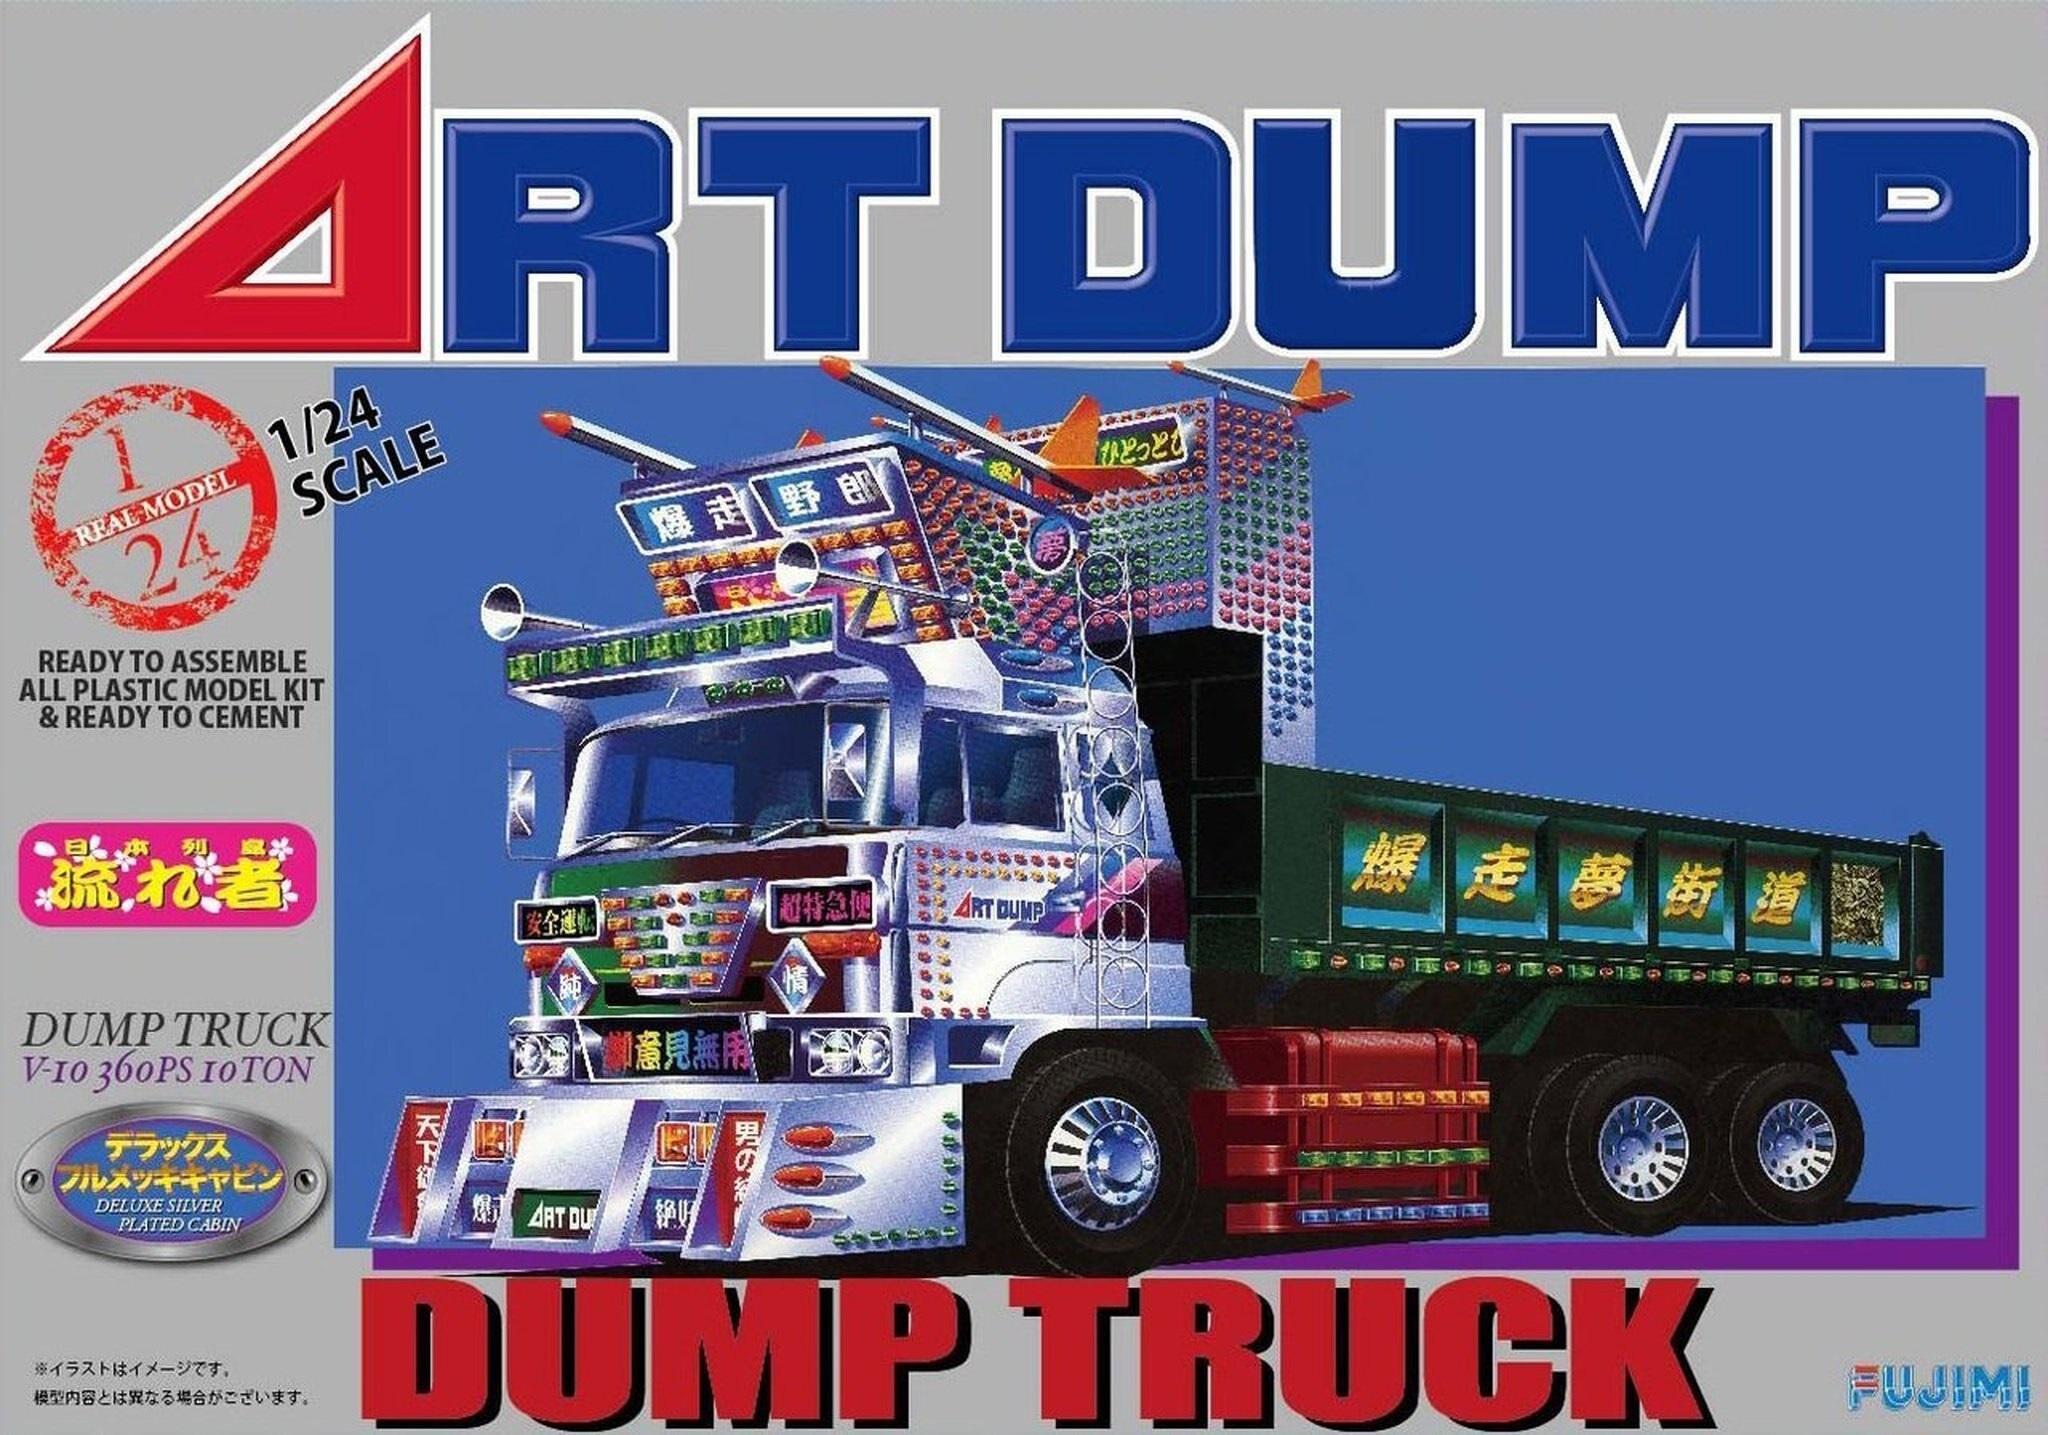
Art Dump Truck (Holy Cow!)
Bills72sj replied to Bills72sj's topic in General Automotive Talk (Trucks and Cars)
What! No RPG launchers!!!!! -
Made some progress today. I was looking at where the exhaust stacks attached to the frame and I am not liking their location. They block the (nearly useless) back windows and make placing a headache rack awkward. Also the mounting brackets seem awfully wimpy for the stacks (which also seem too tall). I fabricated some braces to move them both outboard to line up with the cab sides. The top pipes have lots of flash and do not really fit to the brackets. I happen to have just the perfect evergreen tubing to make hollow angle cut pipes at a slightly reduced length. I am reusing some of the cut off stack piping to fill in for the additional spread of the exhaust.

-
Thanks to a generous member here, I just received some front spindles which will permit me to continue with this build.
-
Nice work. (color too)
-
I have a little feedback if I may. You may wish to reconfigure the back wall/depth now that you are on a bigger platform. With a car in the bay, there should be enough room in front of the car for a mechanic and his tool box/test equipment. I also see you have painted the parking lot. May I suggest Krylon Fusion textured shimmer. It simulates scale asphalt pretty well. I used it on my trailer in an attempt to simulate non-skid.
-
Zip lock bags. I replace equipment parts at work every day. Every time I save the zip lock bag the part came in. I have a whole dresser drawer of empty bags of various sizes. I always stash small parts in them because our kitty is locked in my modeling room at night. She CANNOT be trusted. I am STILL missing the front axle to one of my Freightliners that I left on the bench.
-
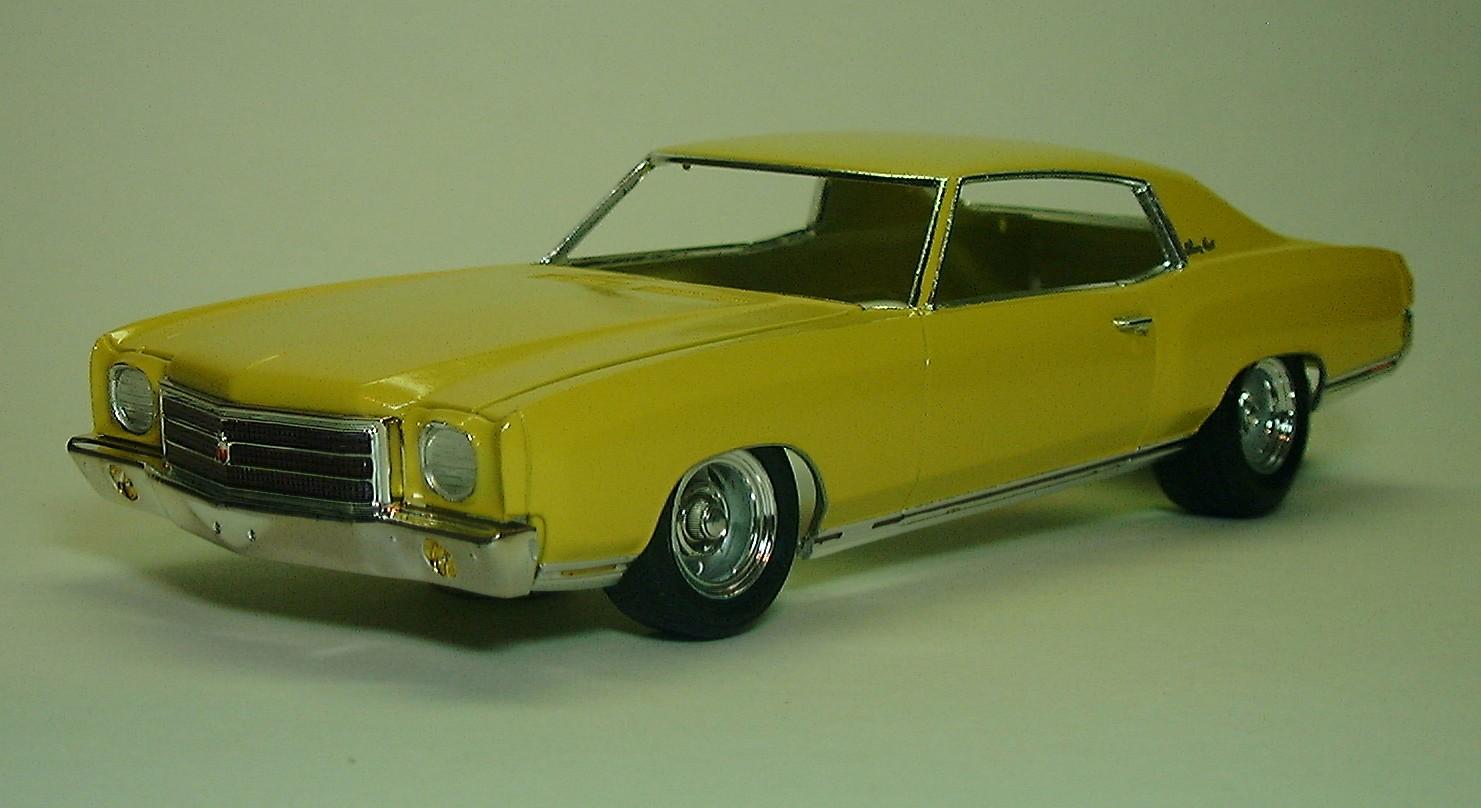
Man, I really like that car. It has stylish lines. Great job on the build.
-
Art Dump Truck (Holy Cow!)
Bills72sj replied to Bills72sj's topic in General Automotive Talk (Trucks and Cars)
I would never build one, but I saw it was SO over the top, I couldn't resist sharing with such a receptive audience lol. https://www.hlj.com/1-24-scale-dump-truck-art-dump-fuj01199 Unfortunately out of stock where I originally found it but... https://www.ebay.com/itm/153646673039 -
Autocar DK Triaxle Dump and Dump Trailer
Bills72sj replied to Warren D's topic in Model Trucks: Big Rigs and Heavy Equipment
Very nice. I like the color choices. -
Has any one built this?!?!
-
Thank you for the compliments.
-
I tried to make the durable. The bumpers were fully glues with Testors window maker which wicks into and bonds all the gaps. I clear coated the finished/decaled bodies with Future to help keep the decals from damage. I haven't seen them in awhile so I do not know how they have held up.
-
Thank you.
-
I will have to try that (carefully). BTW I have already used bits from the fire engine to make diamond plate tops on the battery boxes.
-
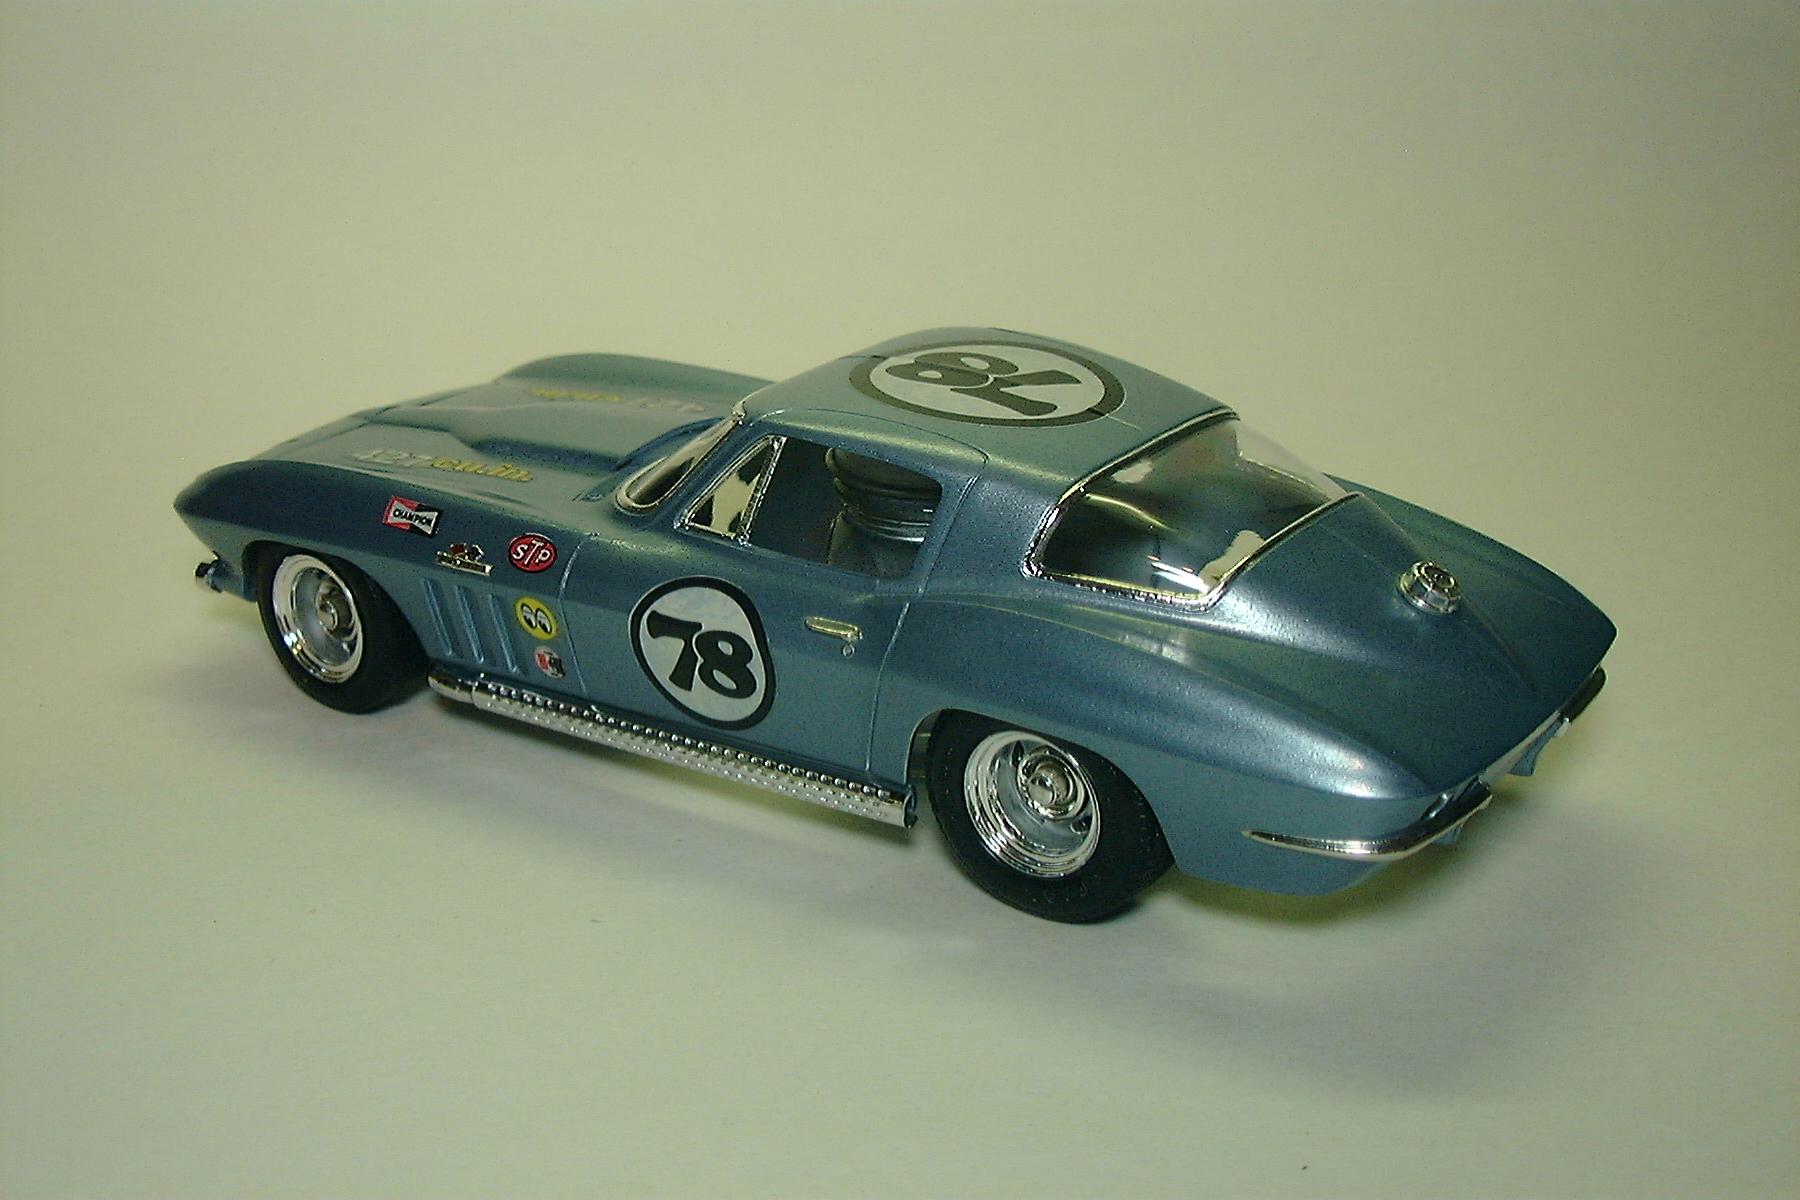
Below are some slot car bodies I made for a friend. He had a pretty good stash so we worked out a deal where I got a kit of MY choosing and he would select a kit for the body. I would detail out the body for him and get to keep all the rest of the kit for parts. The silver Super Bee turned out really nice. Note: the wheels shown were only for mock up pics.
-
A little more progress this week. The fuel tanks are hung. I started working on capping the battery boxes with diamond plate. I put one fender on to see how much space I have on the frame for accessories. I hope to spray some remaining chassis items Saturday. I may shoot the cab with another coat of underlying gold to seal down my masking. The hope is, when I shoot the black, I will not get bleed under. I have seen a lot of ideas for a headache rack but will likely have to wait until the cab is finalized on the frame.
-
Still more drama, the Purple Power I just bought does not seem to have the stripping power of the stuff I used years ago. So far it just turns red enamel into orange and the black spray paint (unknown type) is hardly even affected.
-
Thank you all for the compliments.
-
1969 Chevelle and tandem axle race car trailer.
Bills72sj replied to Bills72sj's topic in Model Cars
I agree. A simulated road would be more realistic than a wooden sawhorse. I'll have to make one.