Bills72sj
-
Posts
4,589 -
Joined
-
Last visited
Content Type
Profiles
Forums
Events
Gallery
Everything posted by Bills72sj
-
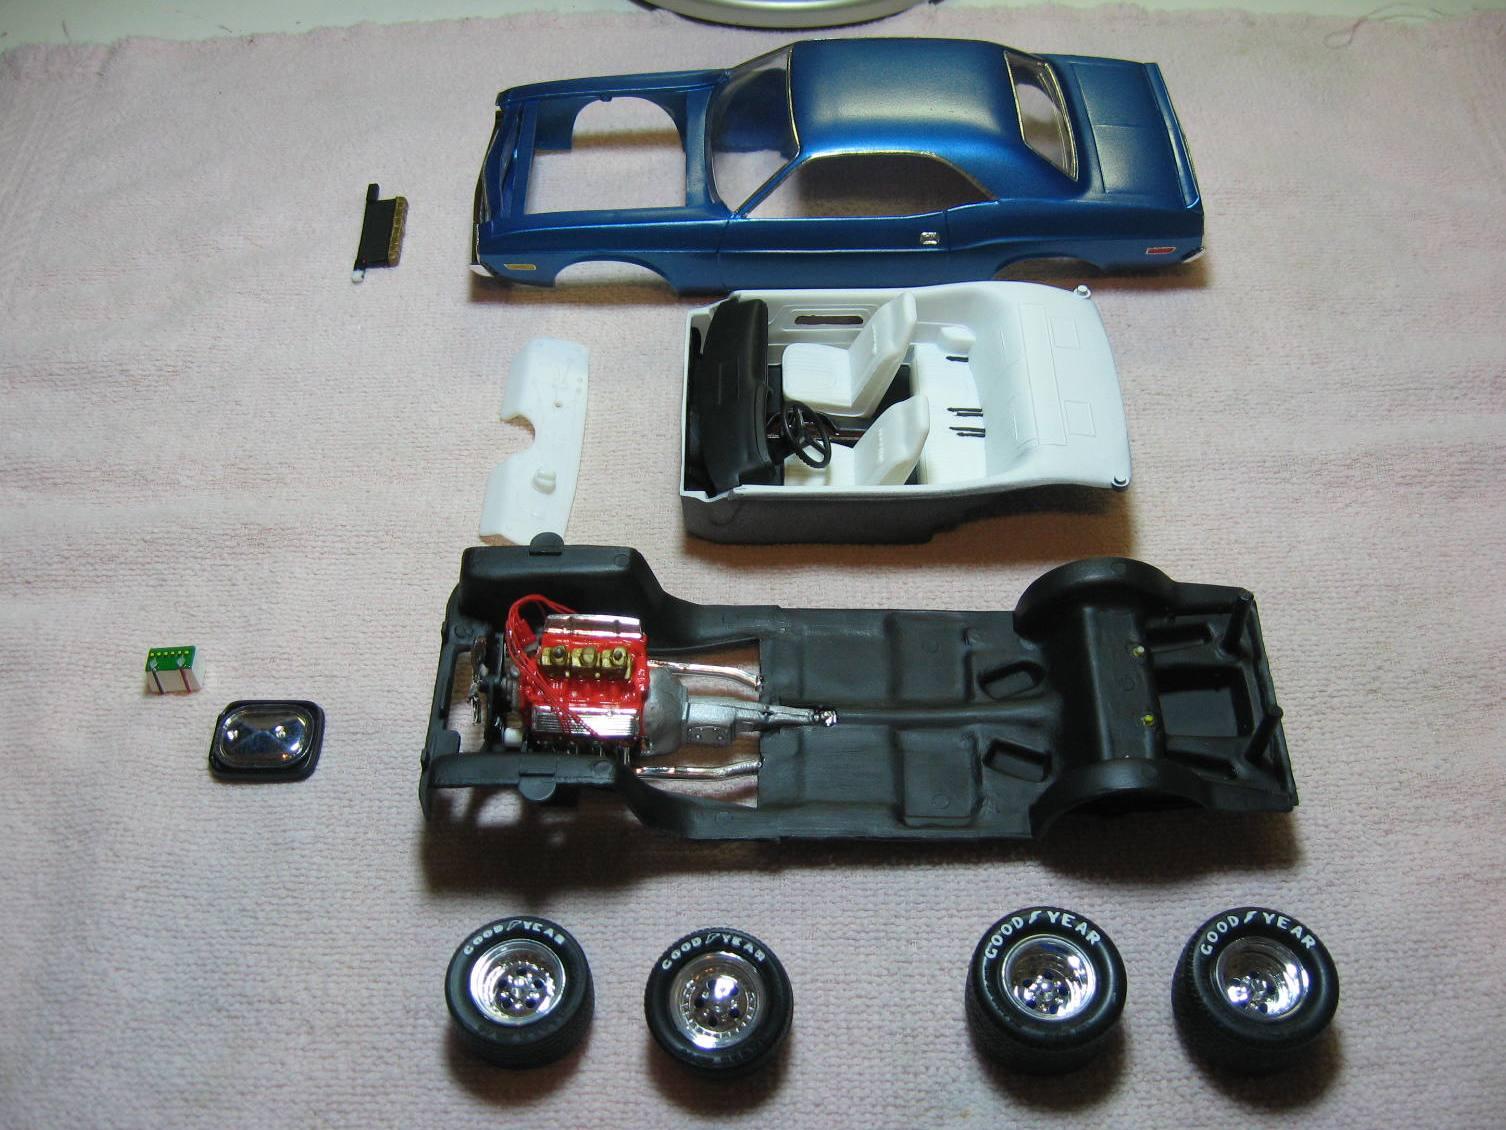
Thanks, the interior was a pain to test fit because it is NOT a tub. The dash, door panels and floor are all separate.
-
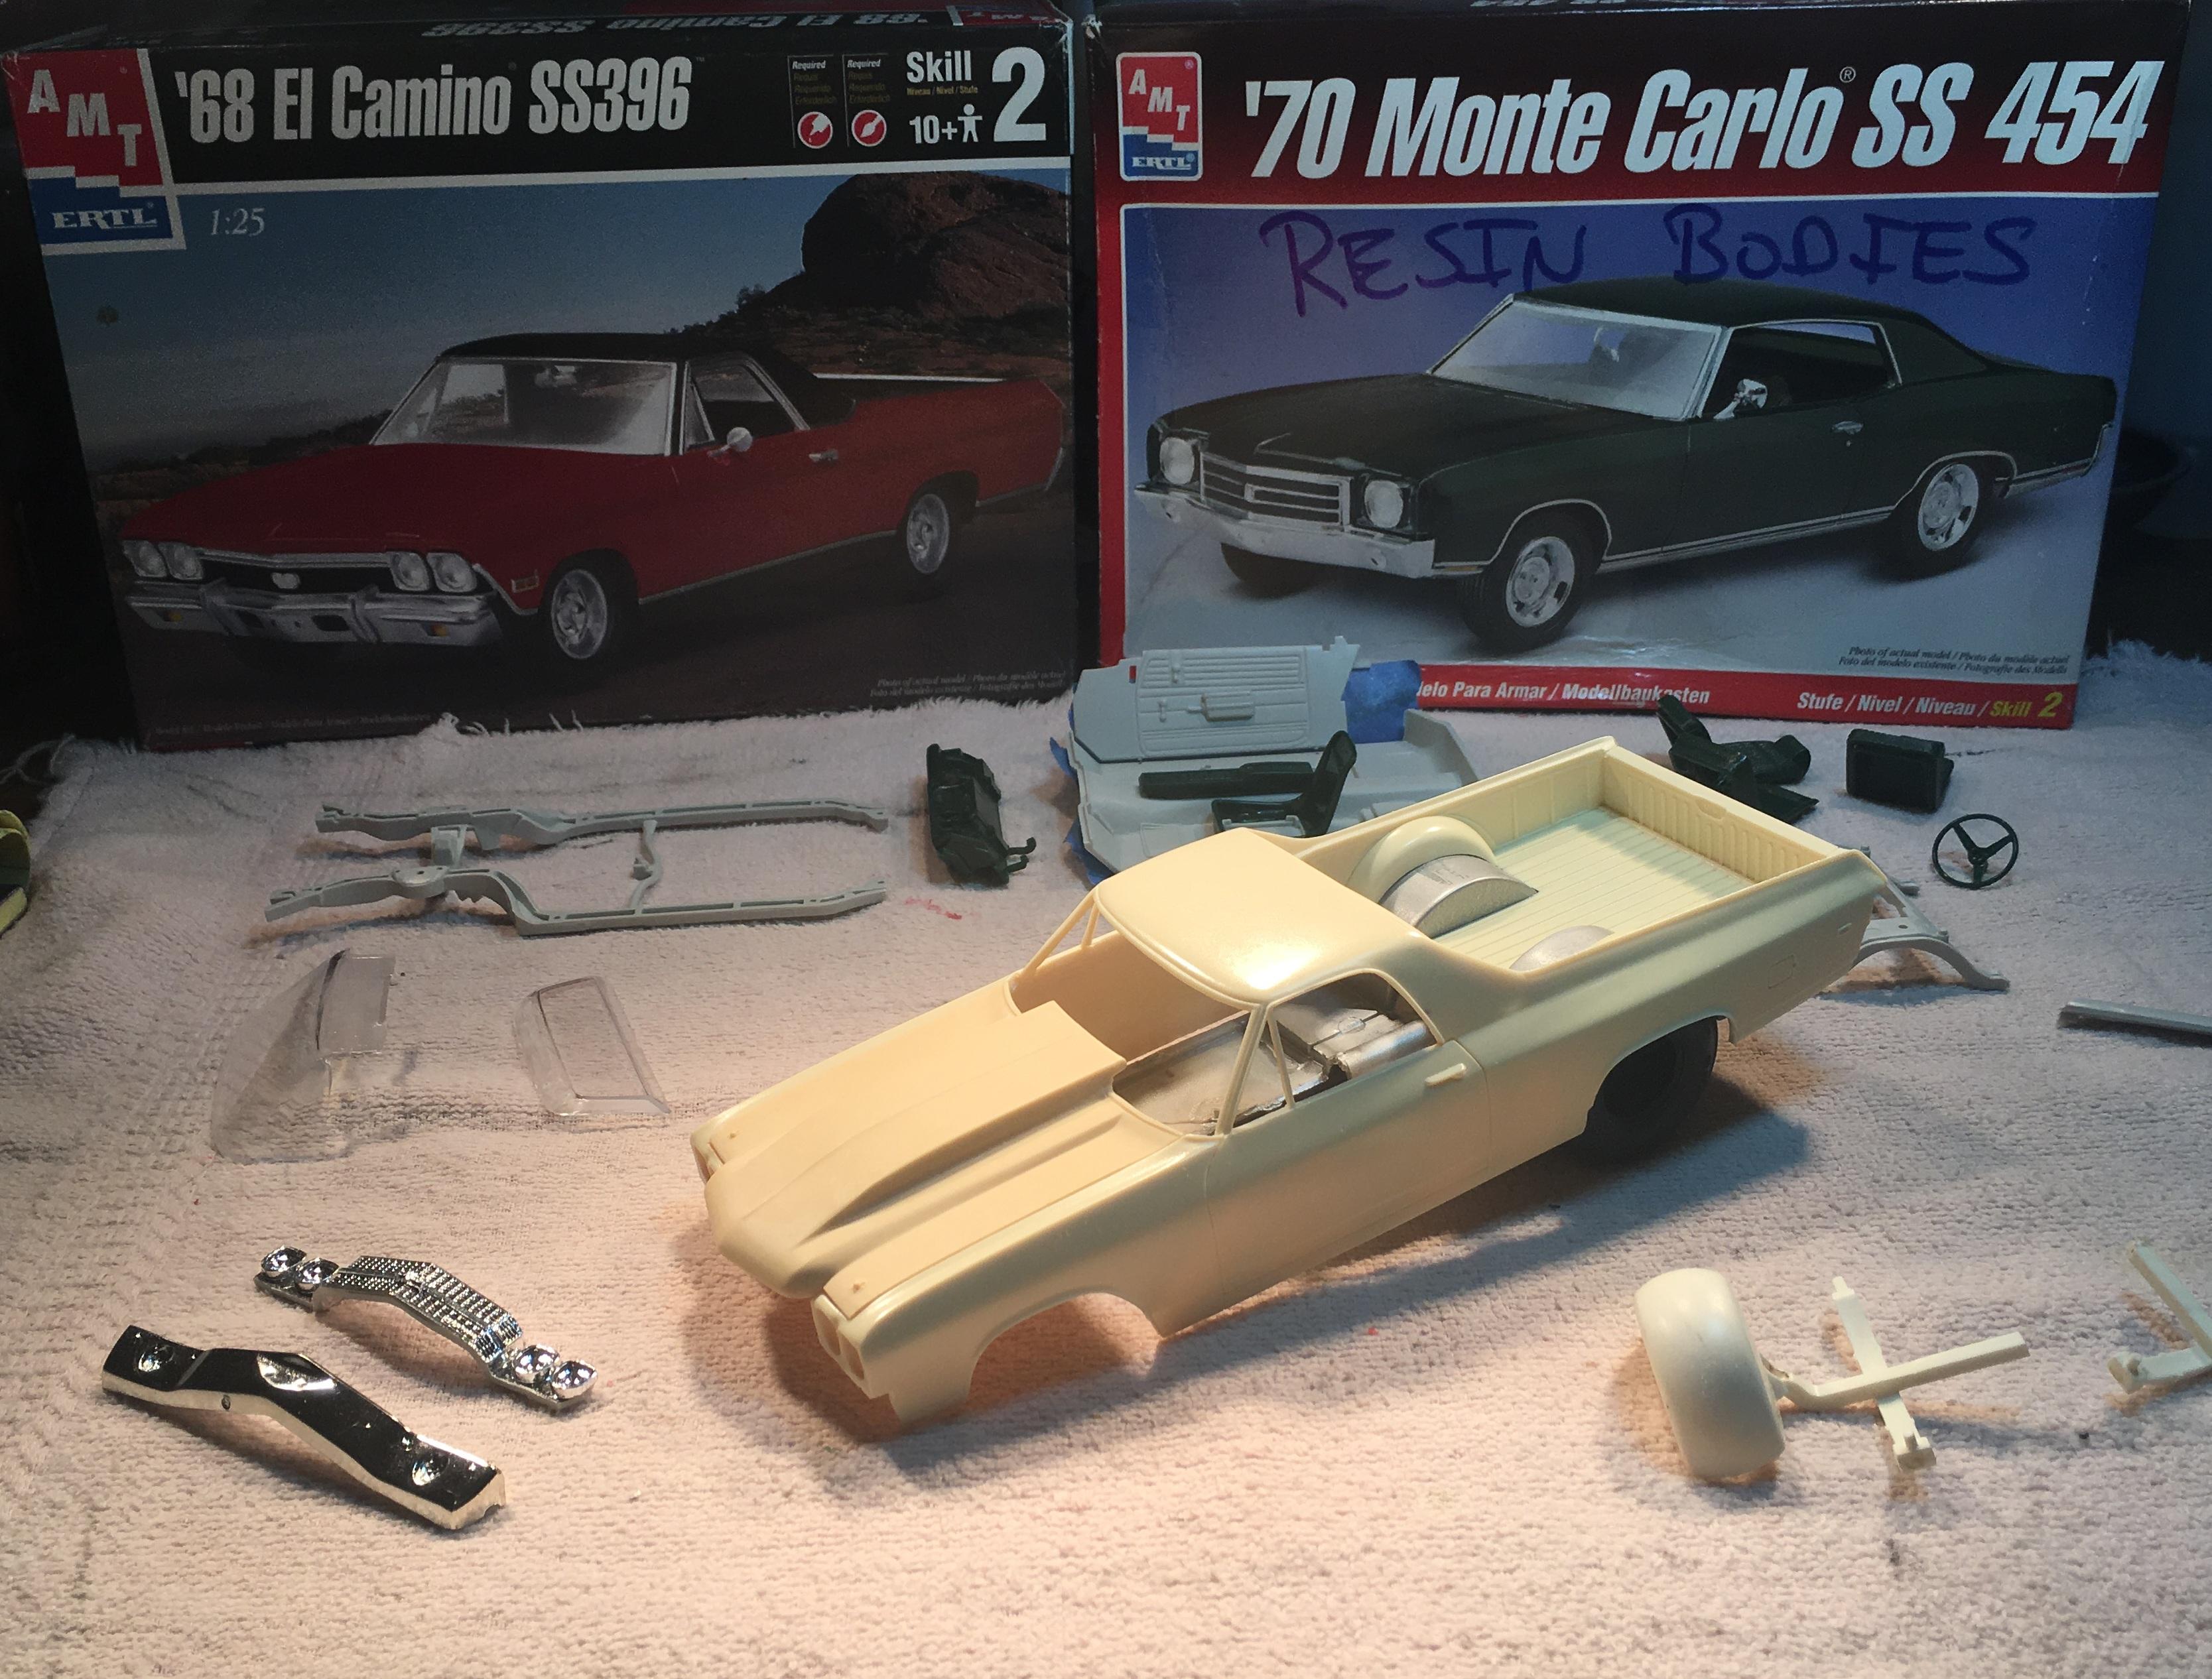
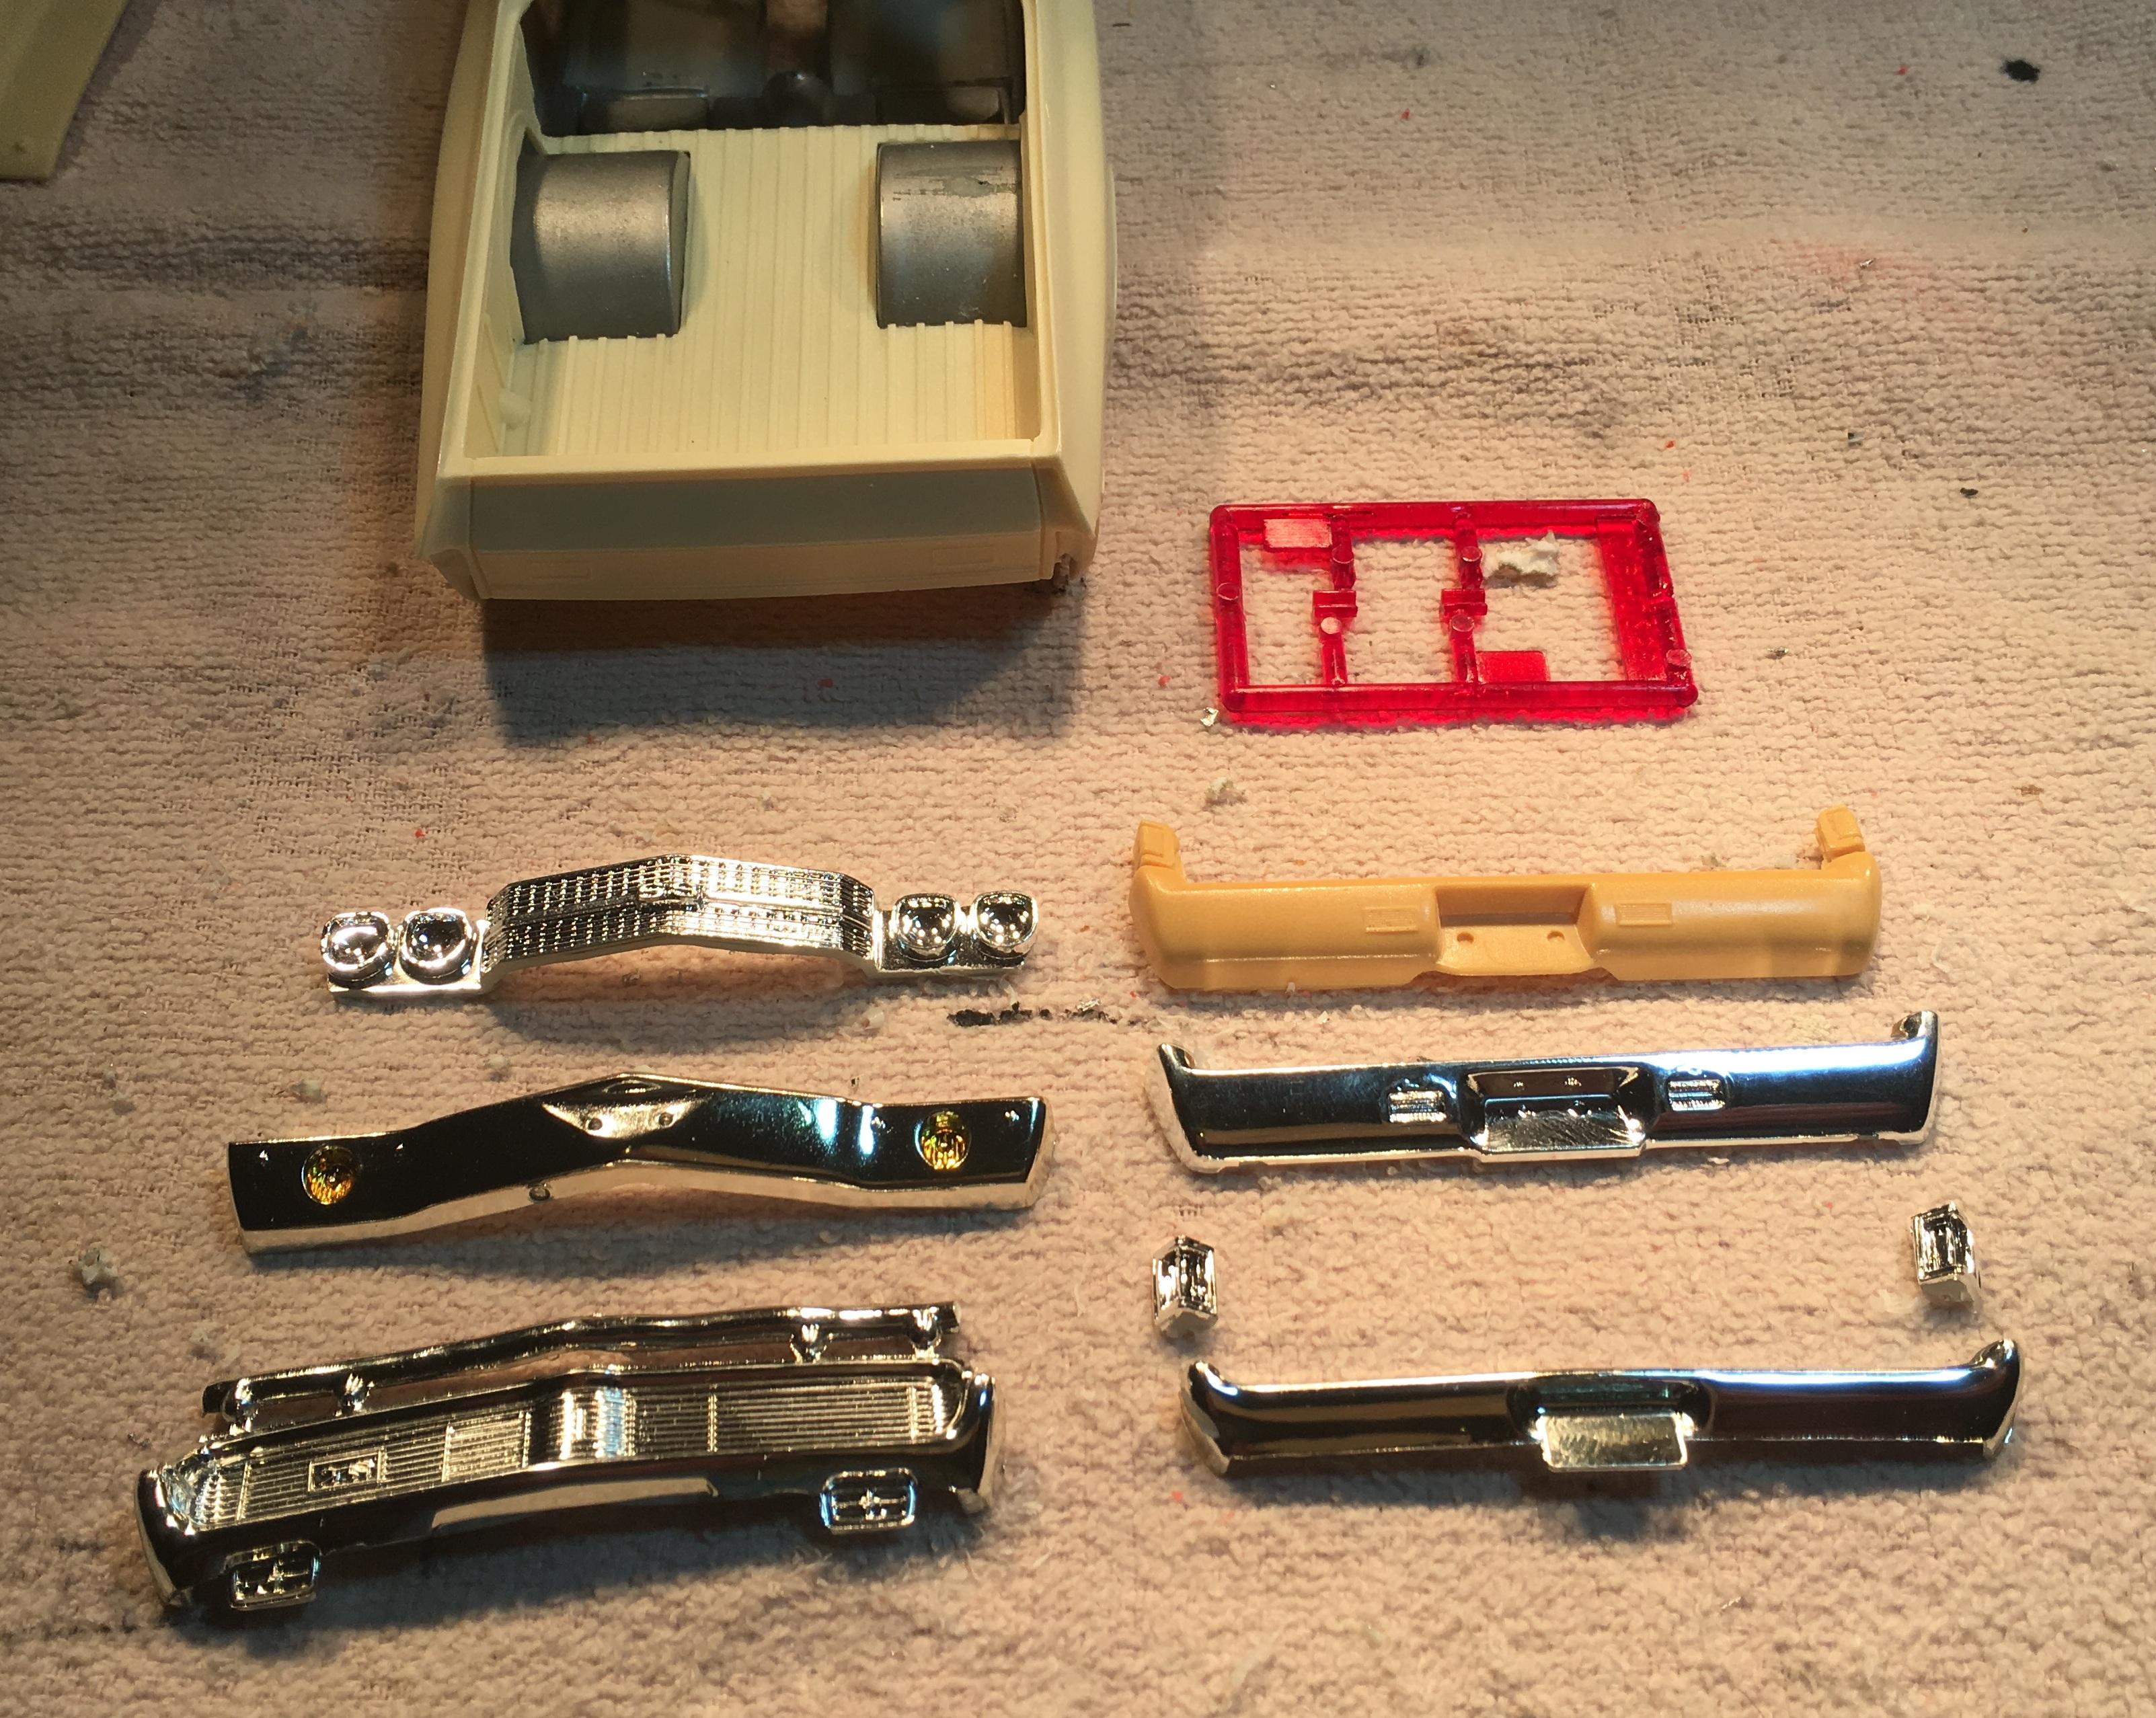
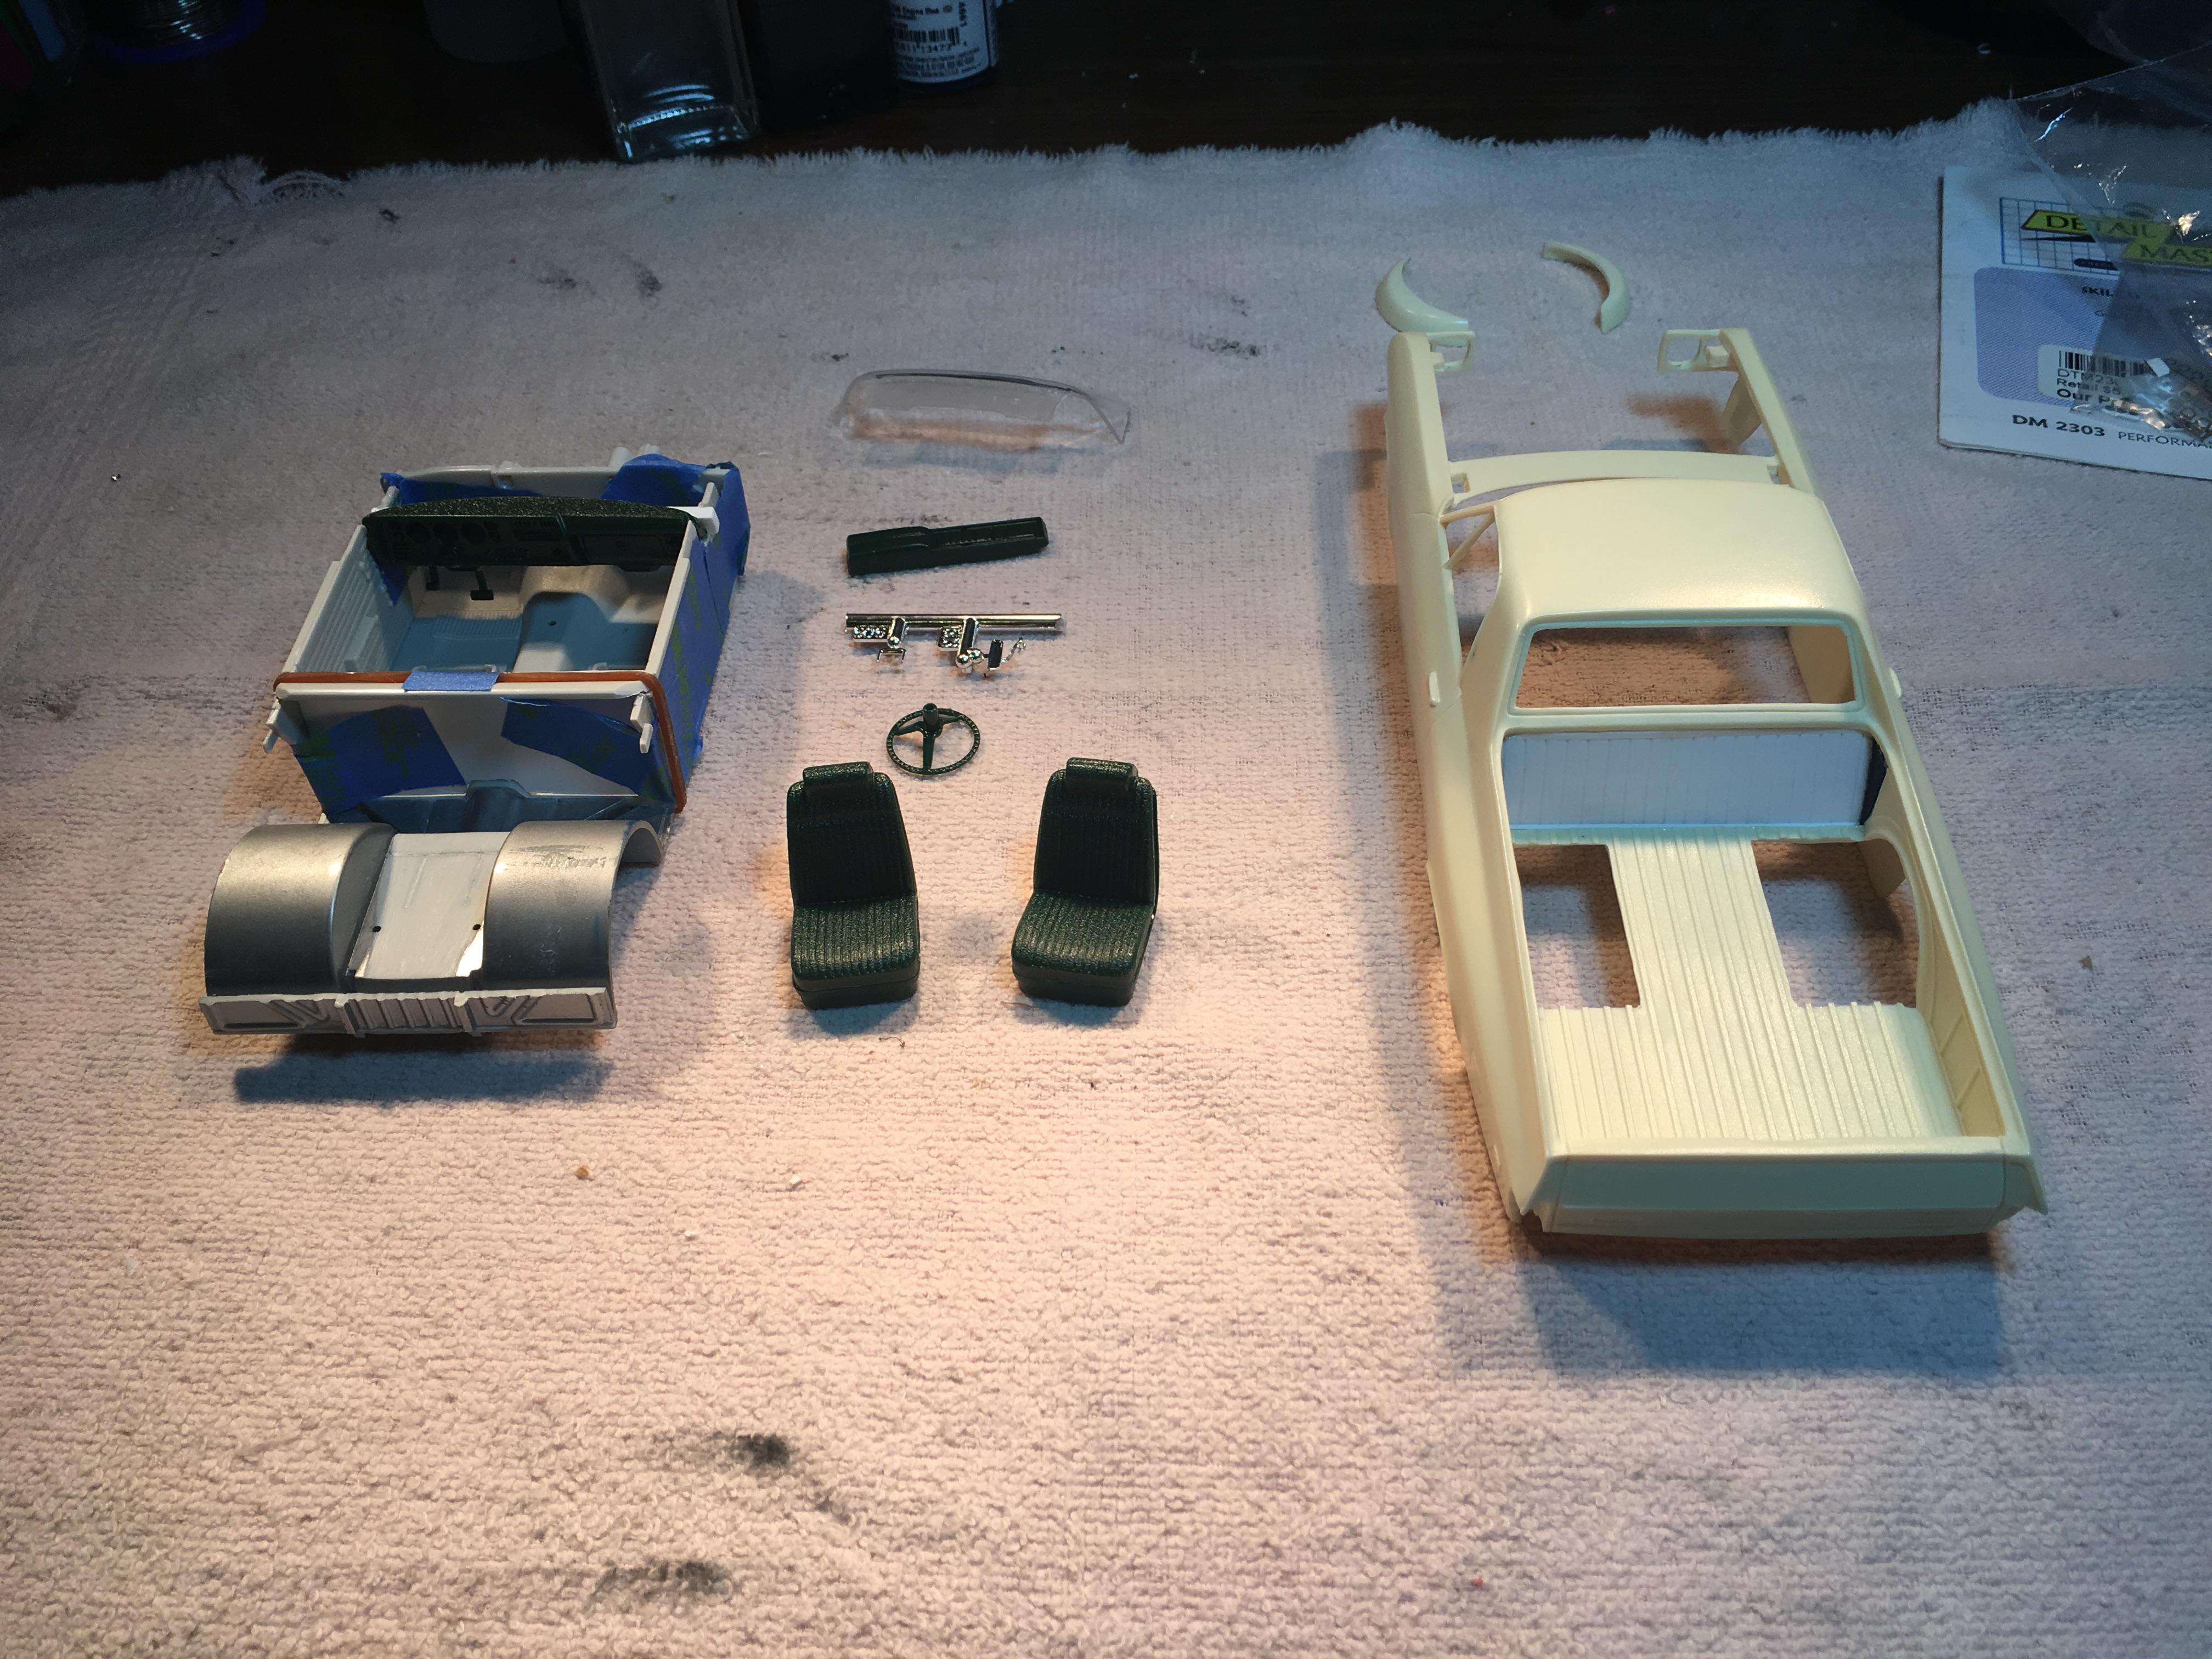
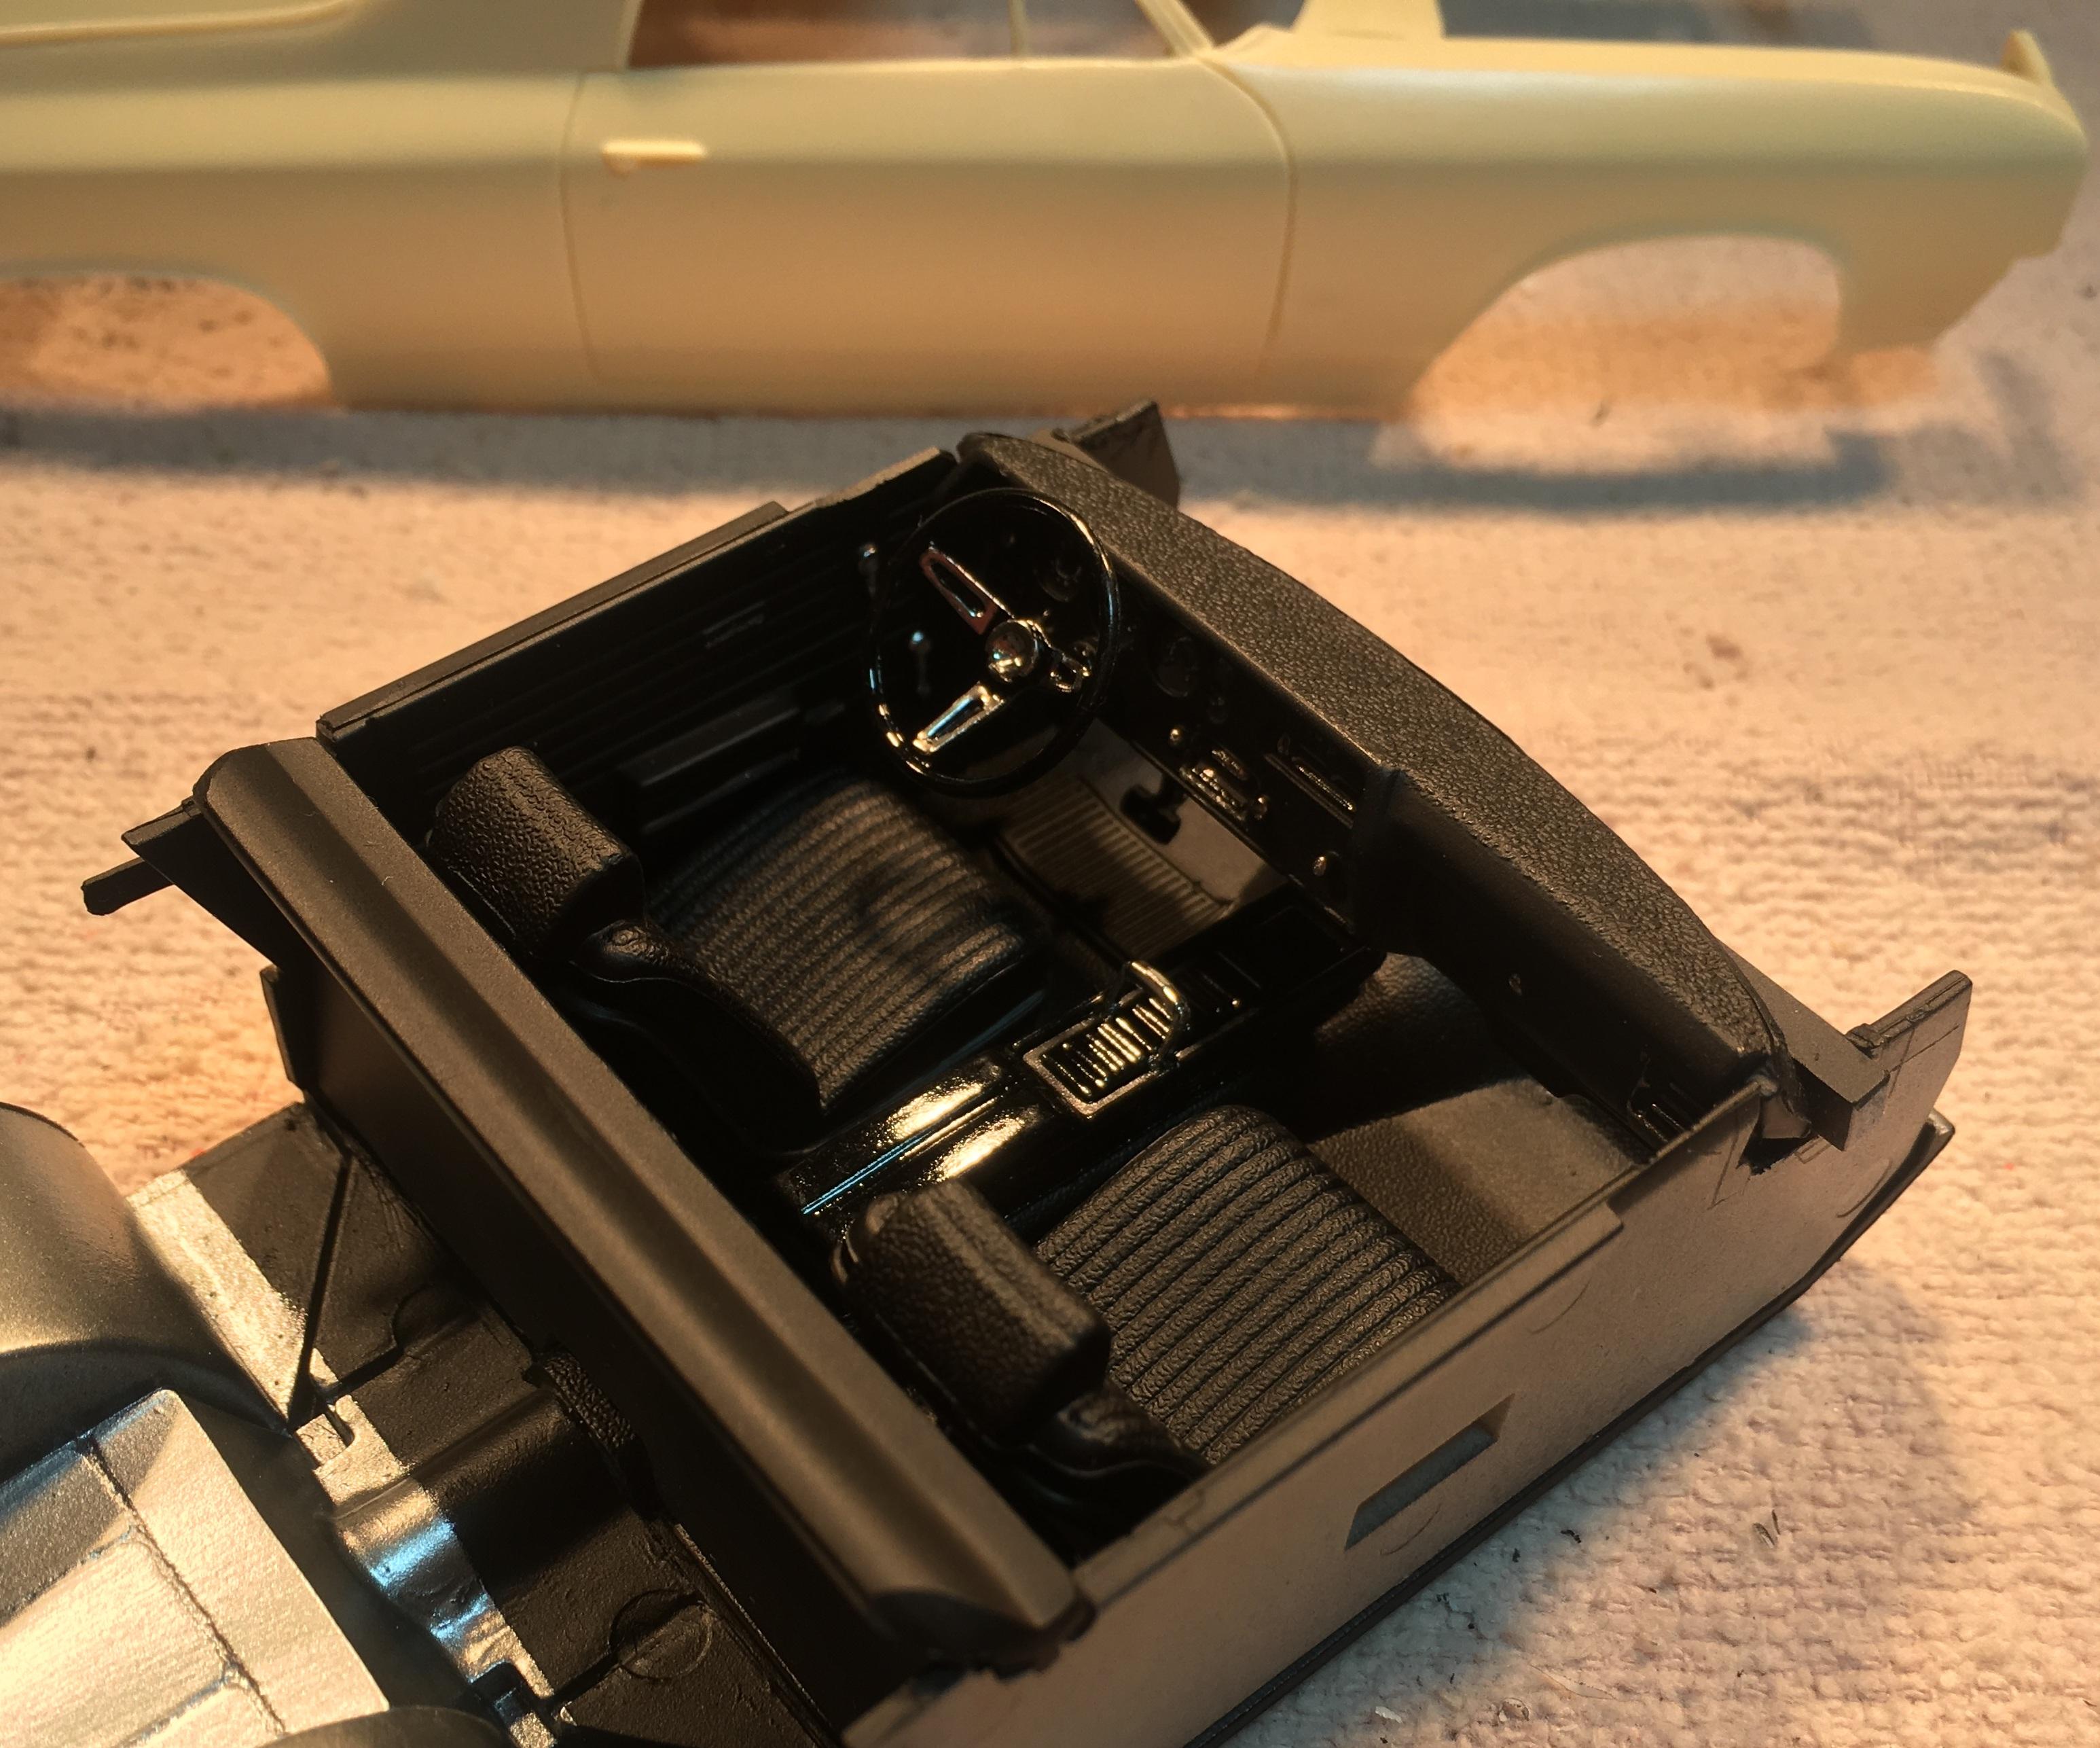
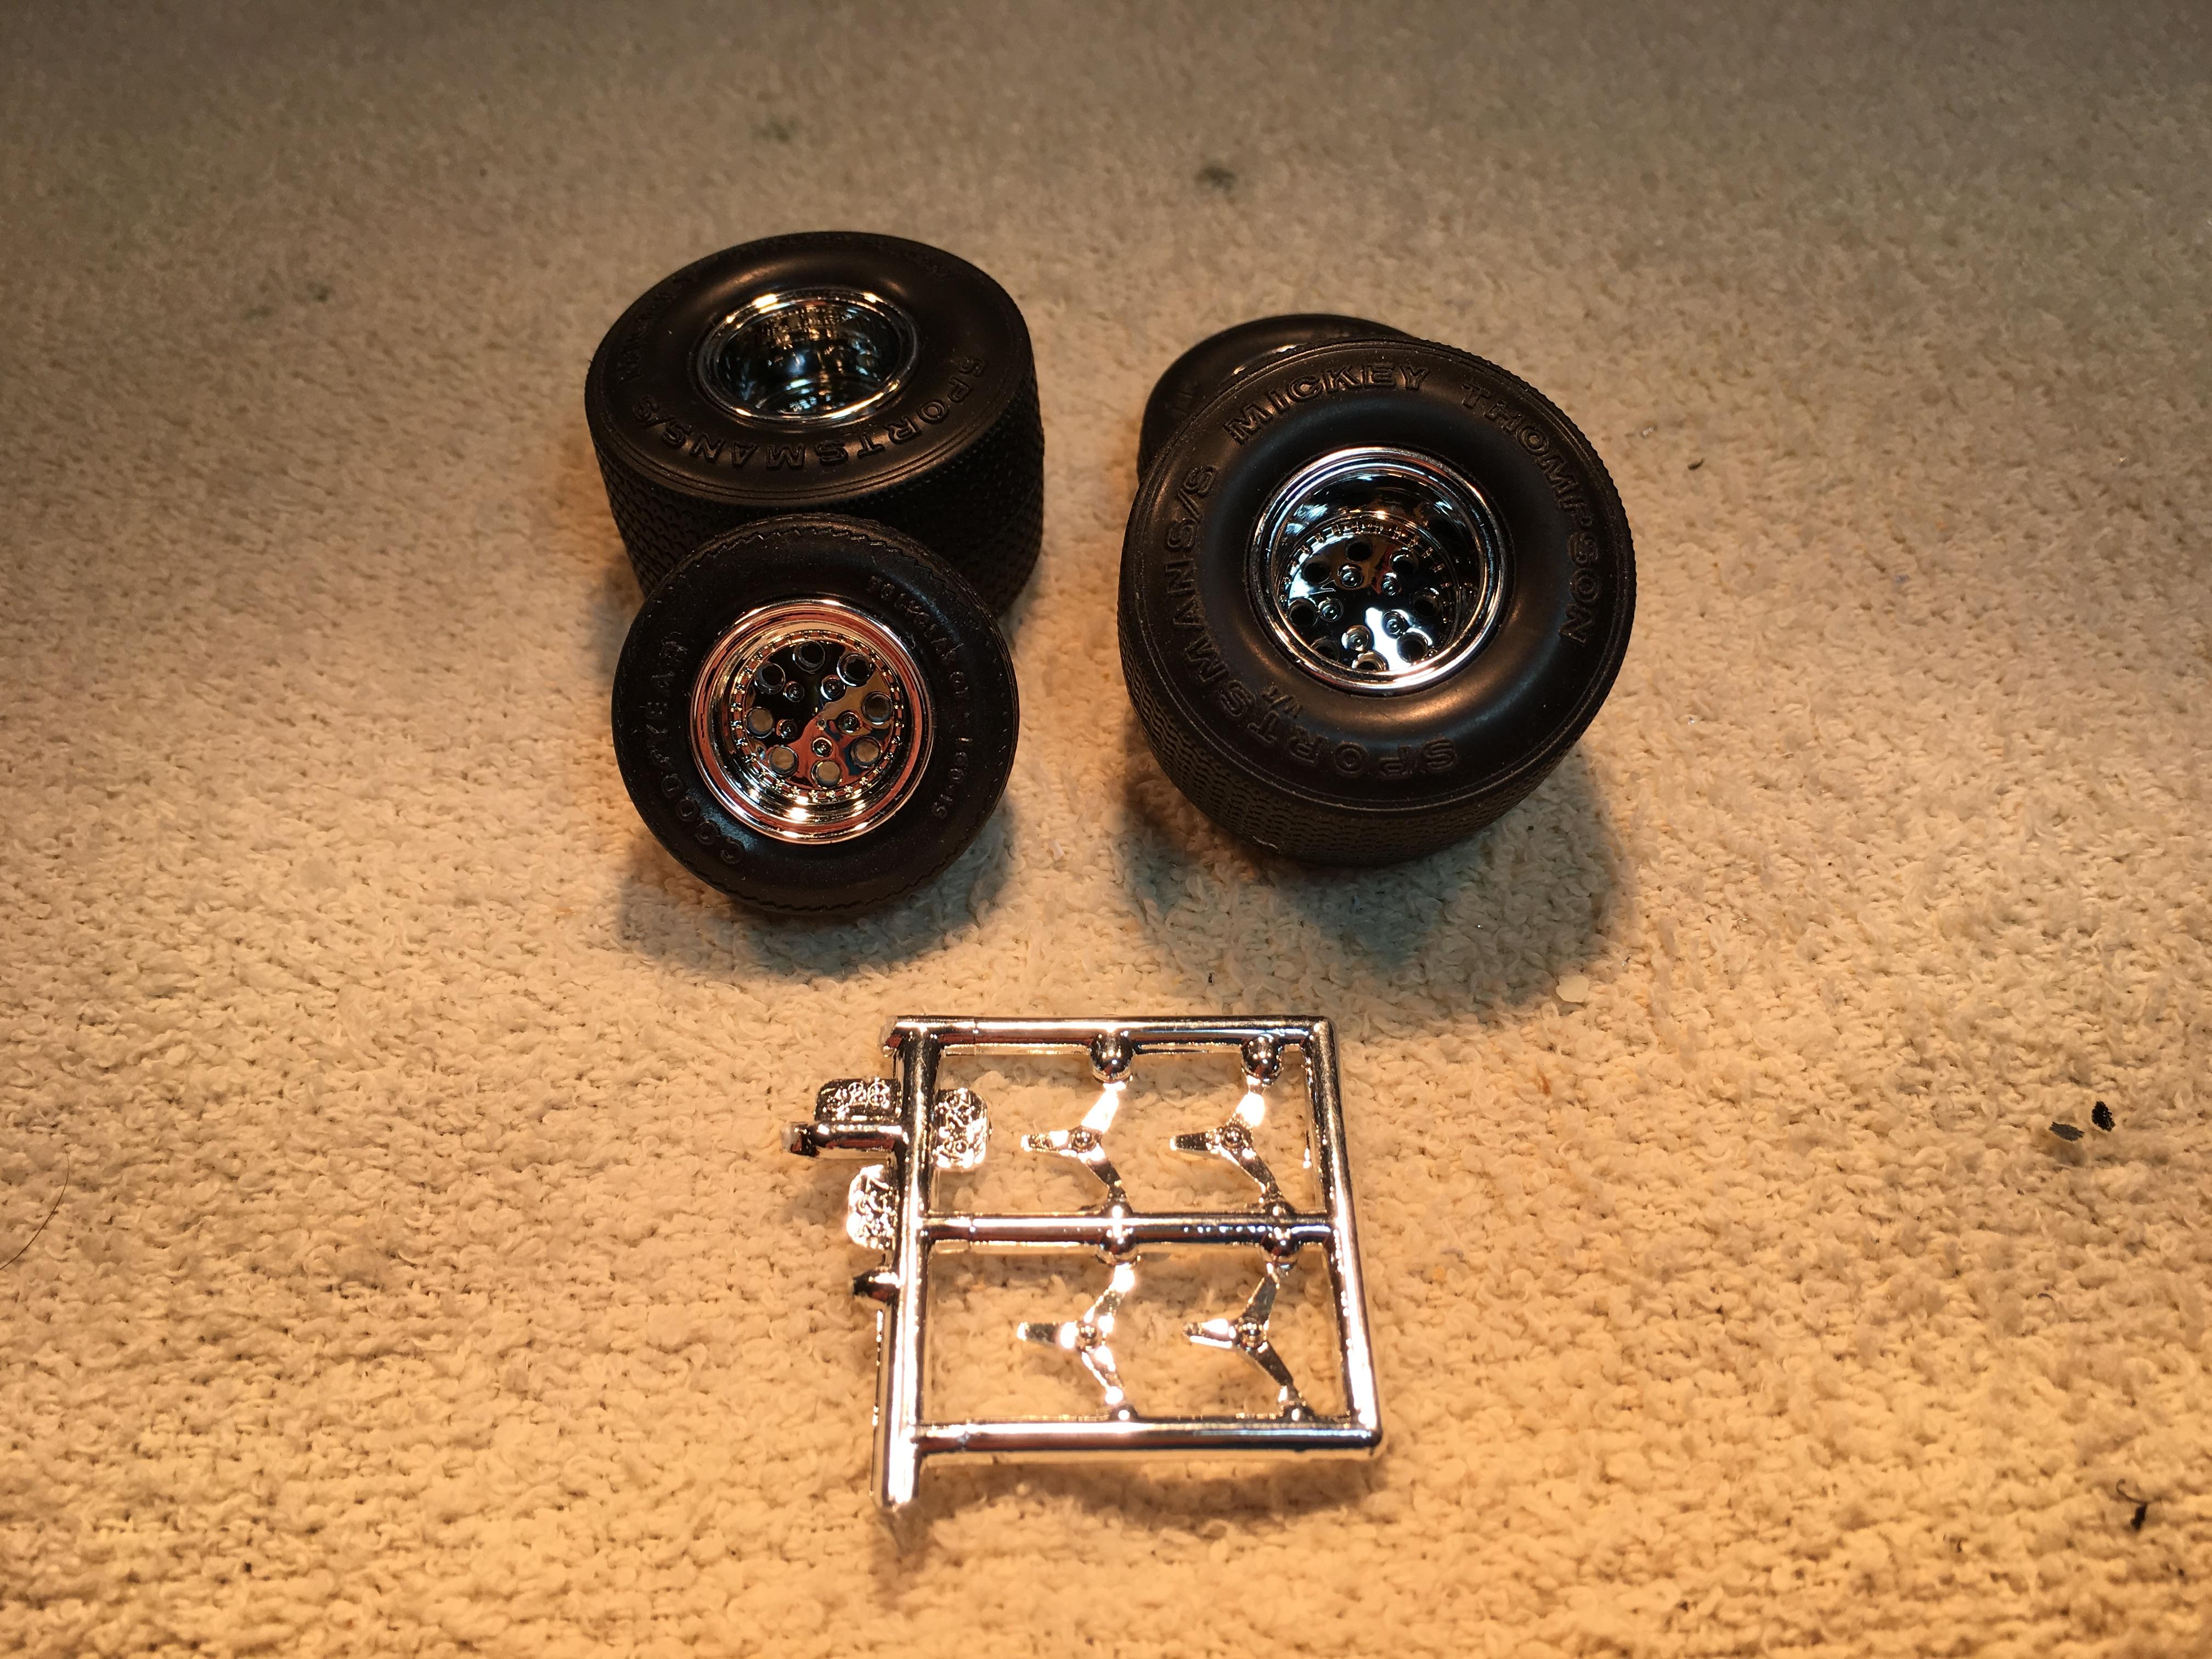
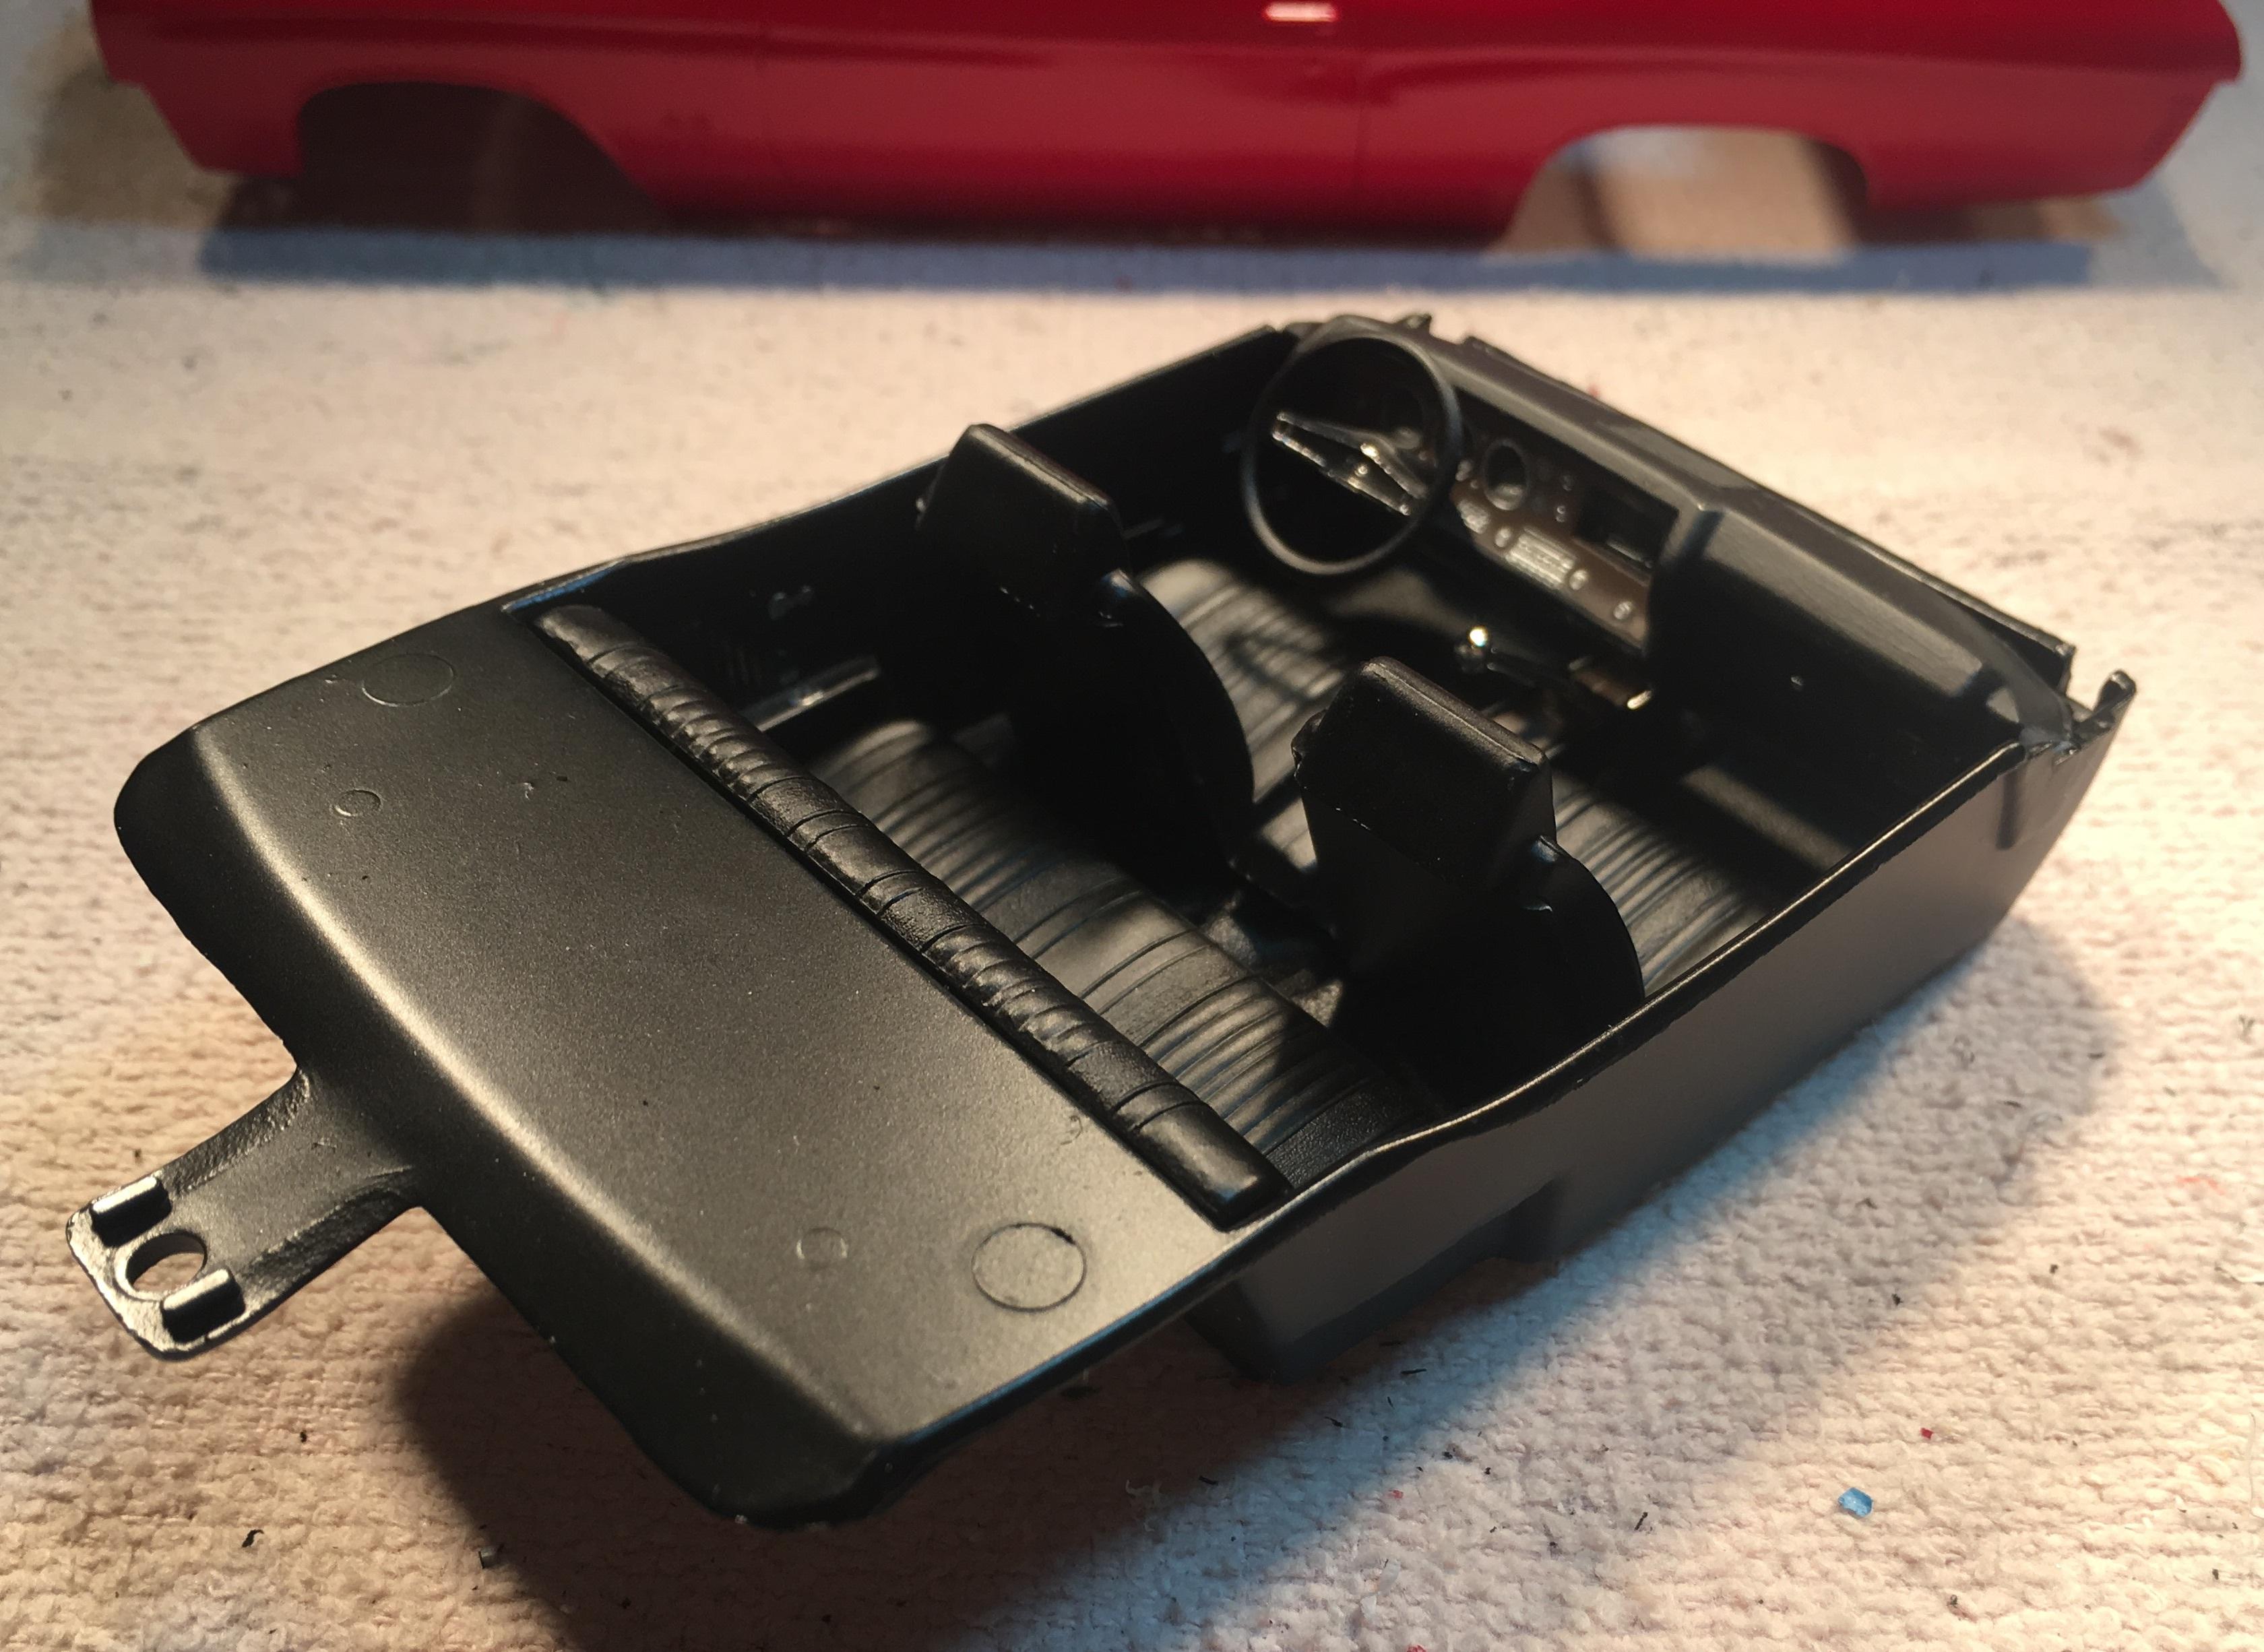
I am just now posting this mid build. 1970 El Camino body Jimmy Flintstone (resin). 1968 El Camino chassis, interior tub, windows, rear bumper and tail lights. 1970 Monte Carlo front bumper(correct for El Camino) engine, seats and dashboard. 1967 Pro Street Chevelle wheel tubs and Pro Street tires. 1970 Chevelle grille, head lights and SS stripes. Tandem trailer fenders used as inner fenders. The '68 El Camino interior floor pan has been trimmed and joined to the '67 wheel tubs. (1)After 2-3 days of fabricating (which isn't my strong suit), I have made the front of the bed from 5 pieces including chunks from a Laborghini Countach dashboard. (2)I also made the rear panel for the interior. The Jimmy Flinstone resin body comes with neither. The rest of the interior is going to be a mix of '68 El Camino and '70 Monte Carlo parts. I spent the 2 days trimming and fitting the interior such that it will be happy with the windows. I still have to make a filler panel between the cowl and the base of the windshield. Painted and mocked up the interior. Added touches with chrome Molotow pen. Selected the deep dish rims. I have a whole box of wheels but not very many for tires this wide. I drilled out all 32 holes in the rims to make them more realistic. I plan on dressing up the plain, smooth centers with some spinners from my parts box. Converted spare car trailer fenders into front inner fenders. Fabbed up some gap filler plates for the wheel tubs to the inside of the bed. I was almost done with the 2nd one when I broke it in half. GRRRRRR! I ran into a snag. It seems I no longer possess the two front '68 El Camino spindles for the suspension. No spindles = no front tires. I sent a PM to one member and he is going to send me a pair. WOO! HOO!

-
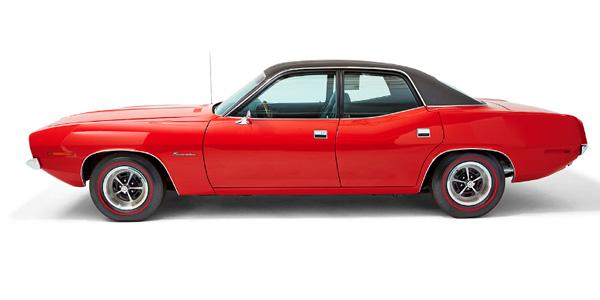
I saw the ambitious one someone made in 1:1. The roofline didn't appeal to me.
-
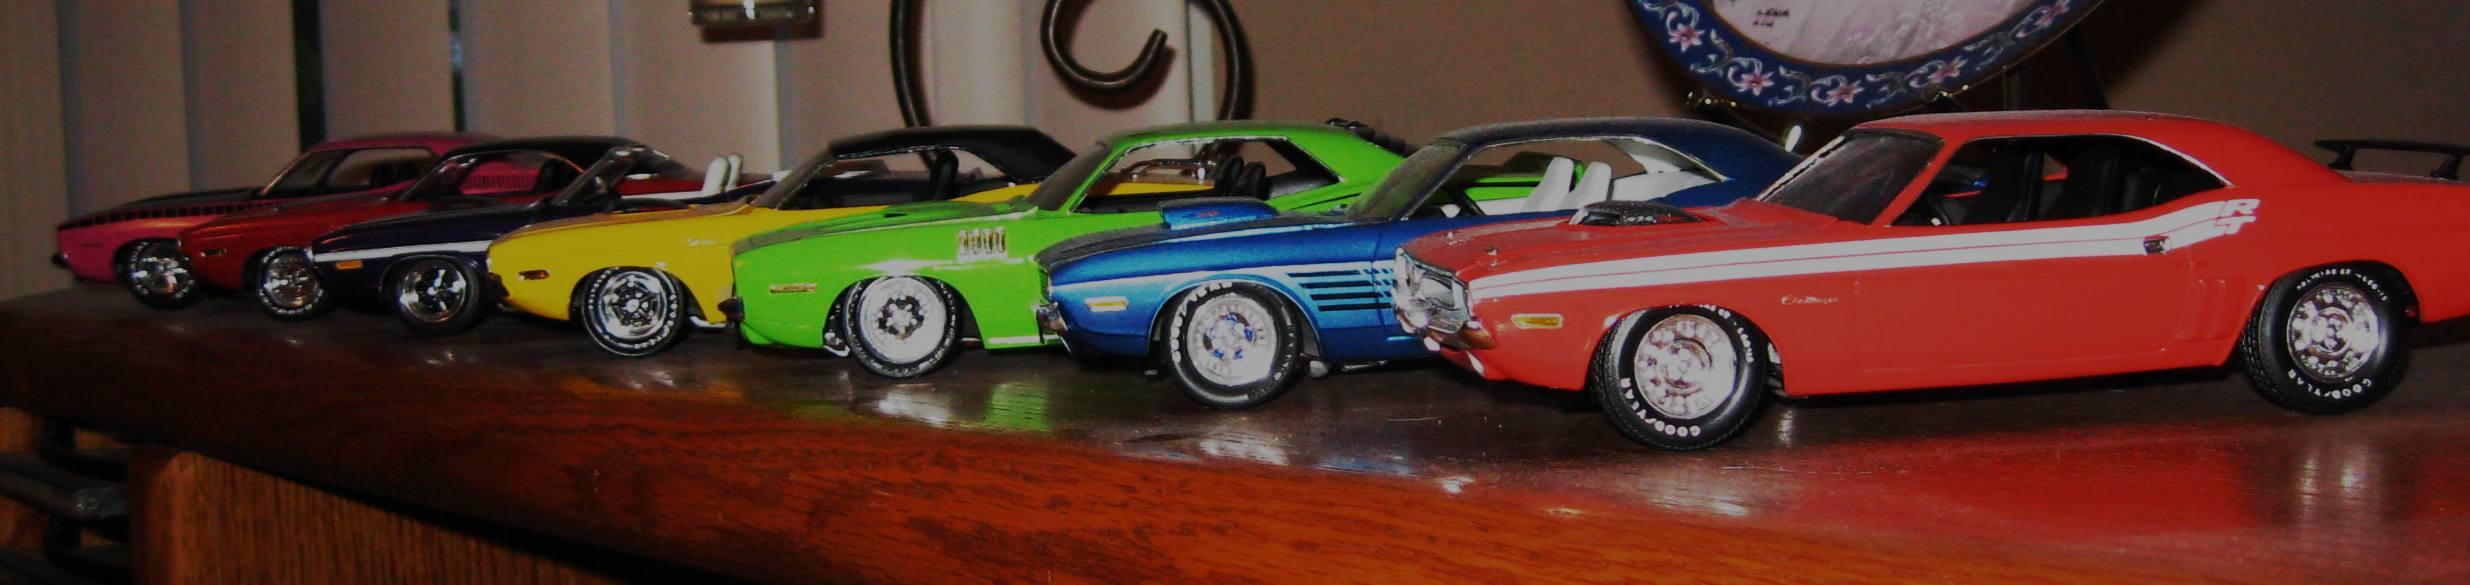
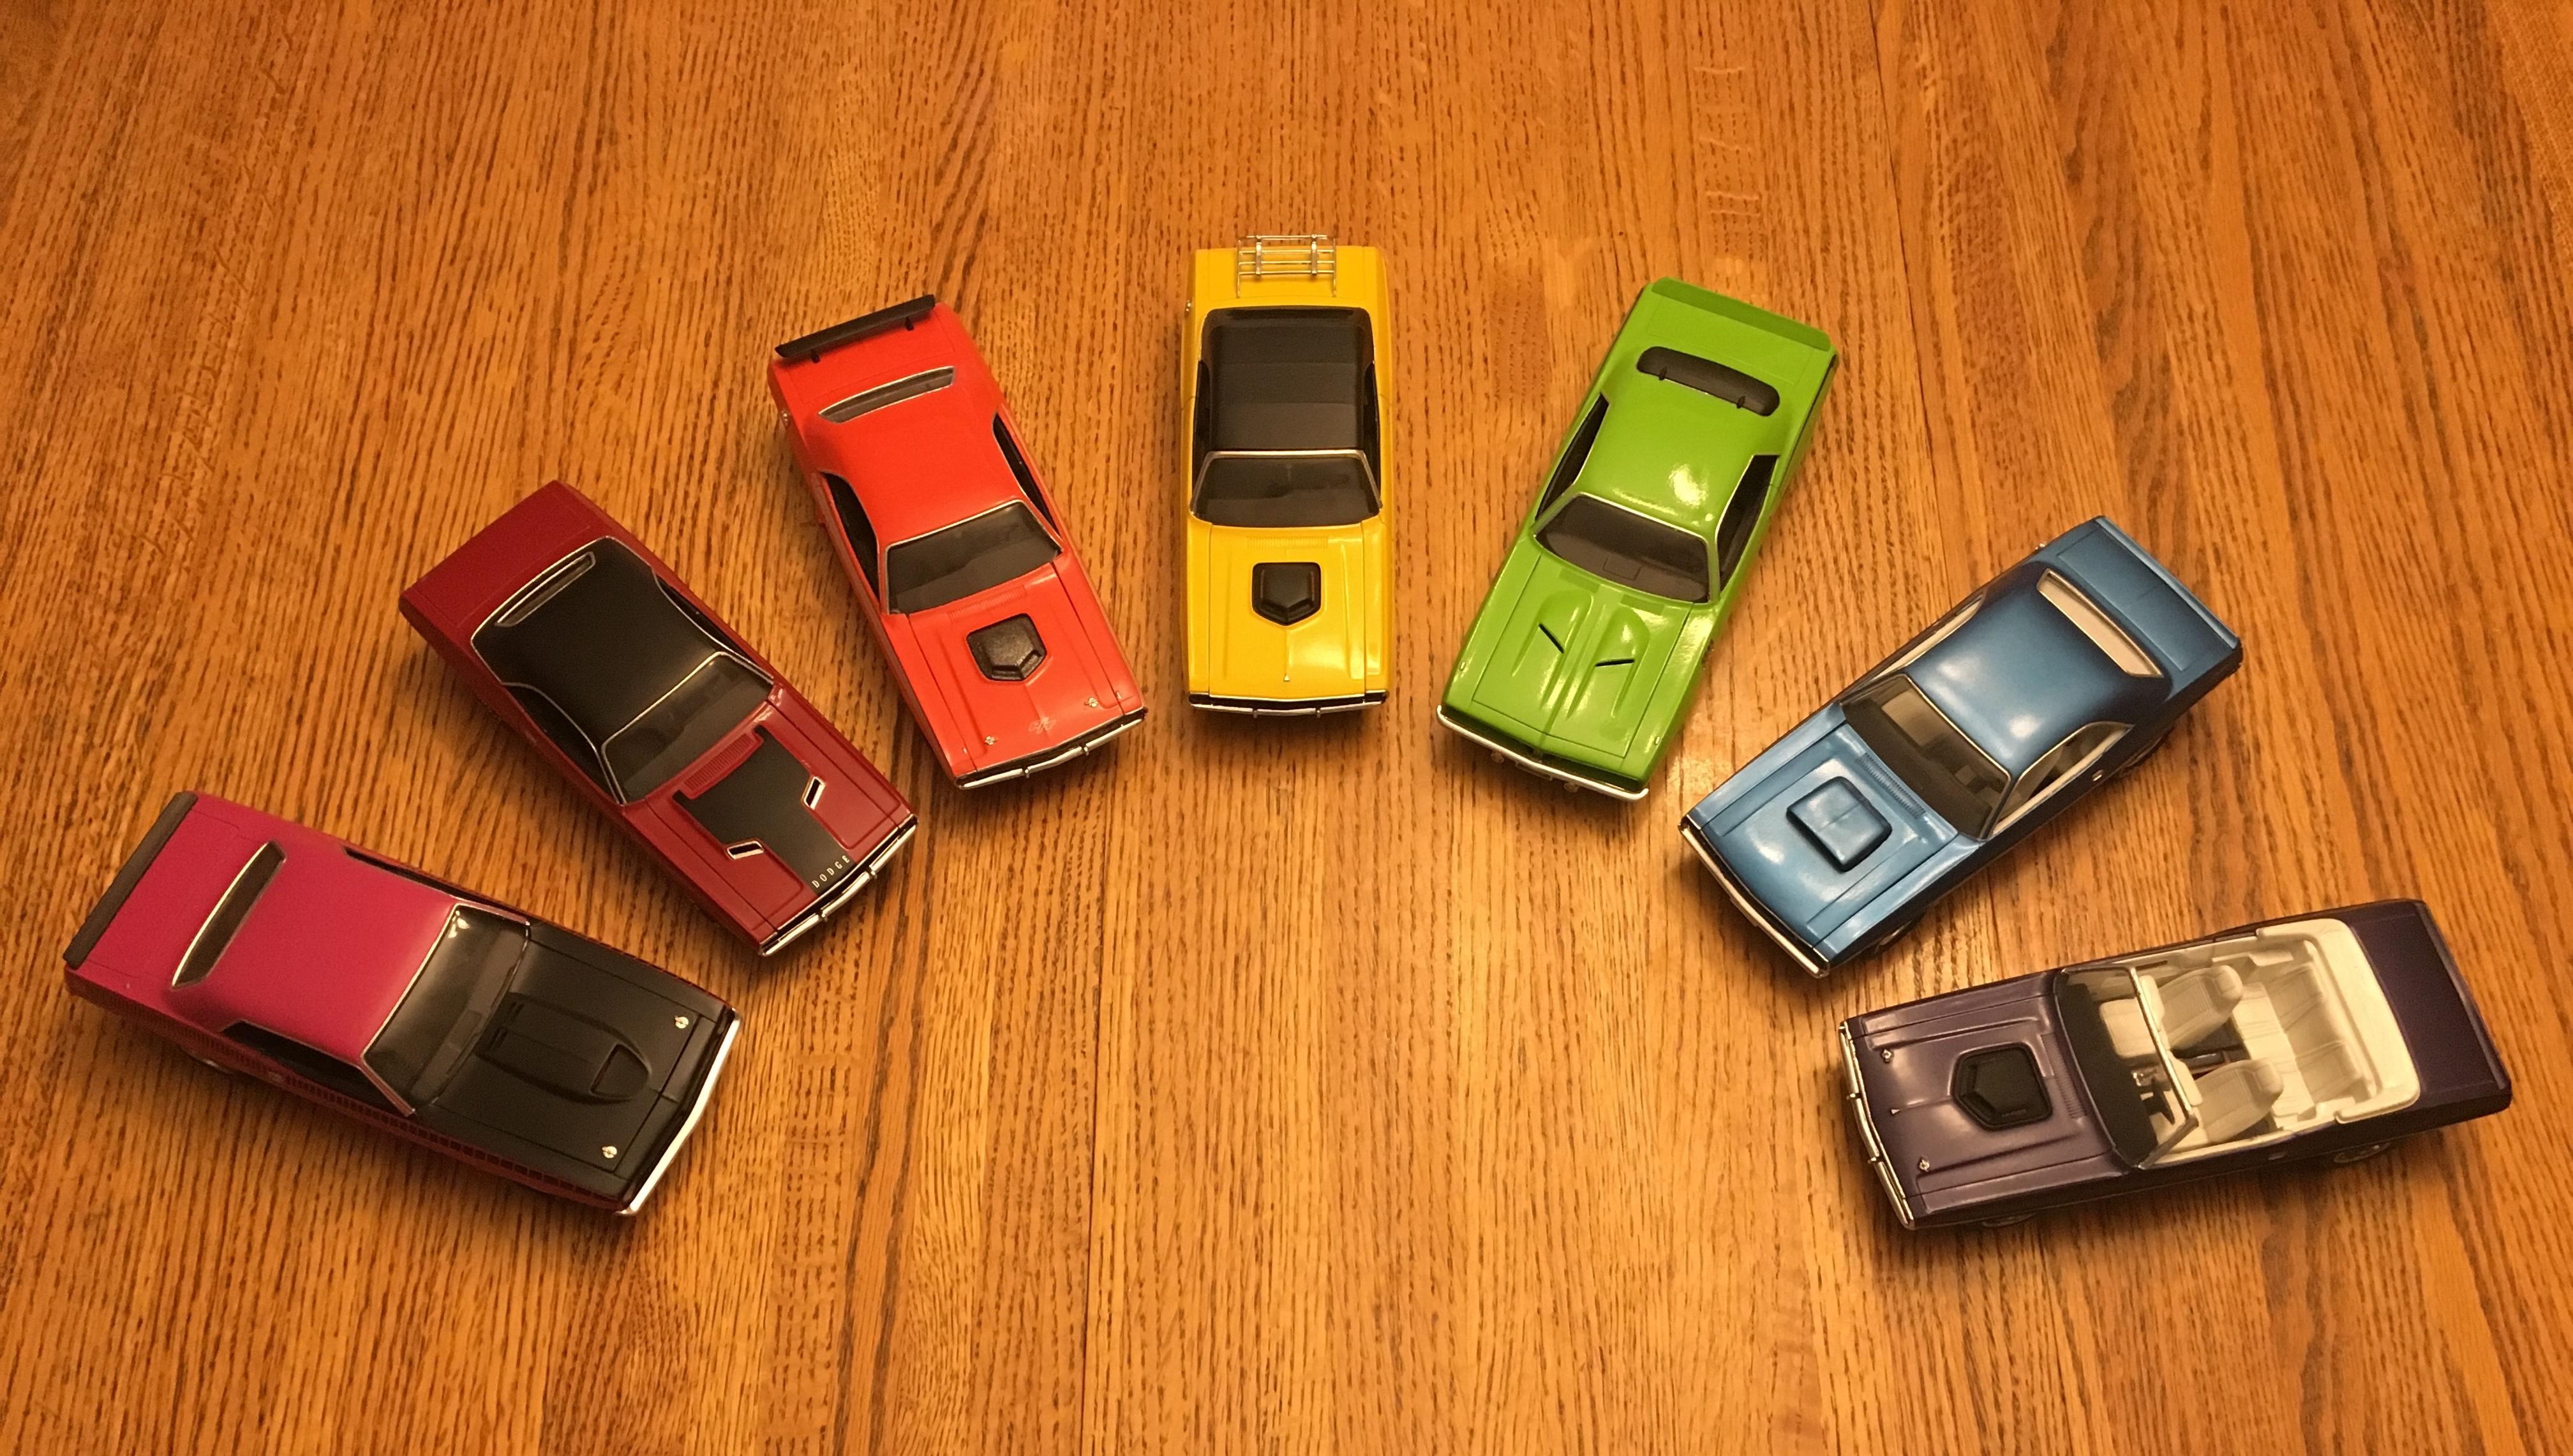
I built all of these Challengers, previously posted, in one batch. It allowed me to mix and match parts for the options desired on each. They were all painted in the same week. Having so many at once allowed me to build efficiently and gave freshly glued or painted parts time to dry before being handled again. Their completion resulted in a rainbow of E-bodies.
-
Beautiful! Great color and detailing,?
-
True. The kit let you down by not providing the requisite back up lamps in the rear valence. Nonetheless, awesome looking build. You did well on the body color around the hidden headlight windows.
-
I like it
-
very nice! That one has some crisp lines.
-

AMT White Western Star
Bills72sj replied to Spruslayer's topic in Model Trucks: Big Rigs and Heavy Equipment
Very very nice work. -
Very nice! Can I have it? It would save me from having to build one. lol
-
Thanks Sam, Though I just discovered the rebuildable Pete 352 I went home with does not have any instructions. If you have an extra set and/or scans that would be great.
-
Biggest pet peeves on builds.
Bills72sj replied to LL3 Model Worx's topic in General Automotive Talk (Trucks and Cars)
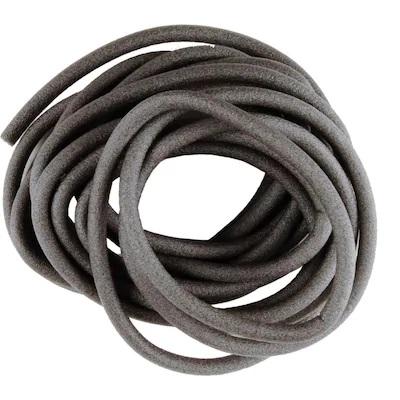
Ditto. For 1/24 and 1/25 big rigs, this is the solution. 3/8" window backer rod. 20 FT for $3.56 at Lowes. Just stuff a length of it in the tire before putting on the rim. Provides just the right amount of tension to keep the tire bead up against the rim lip.
-
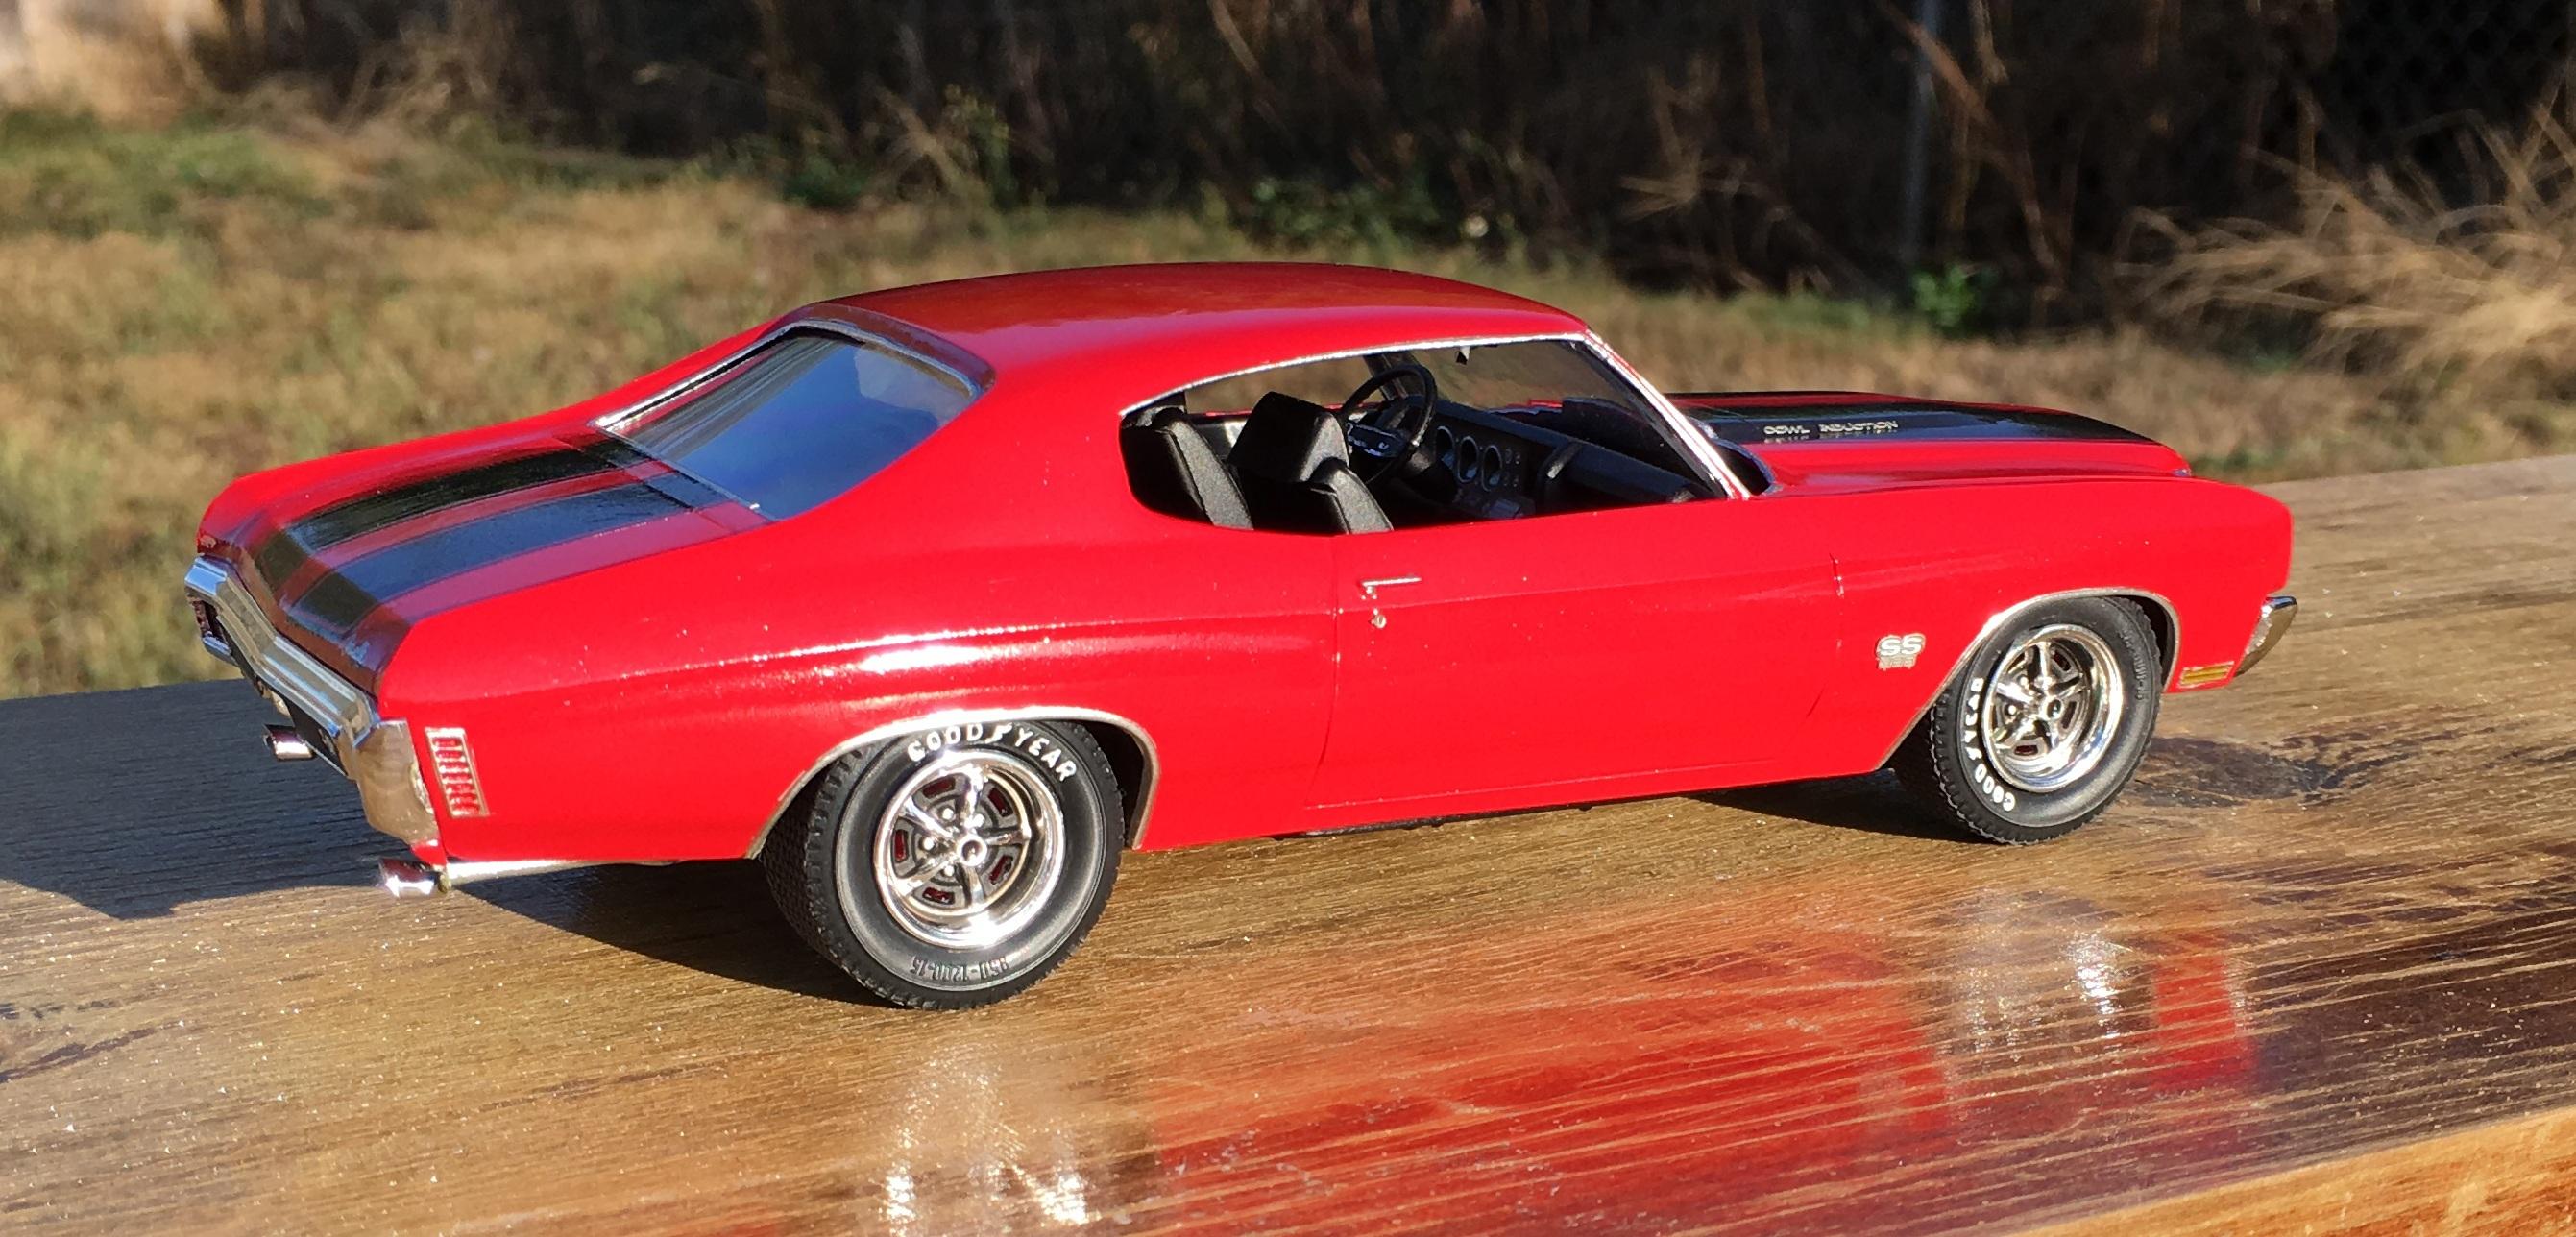
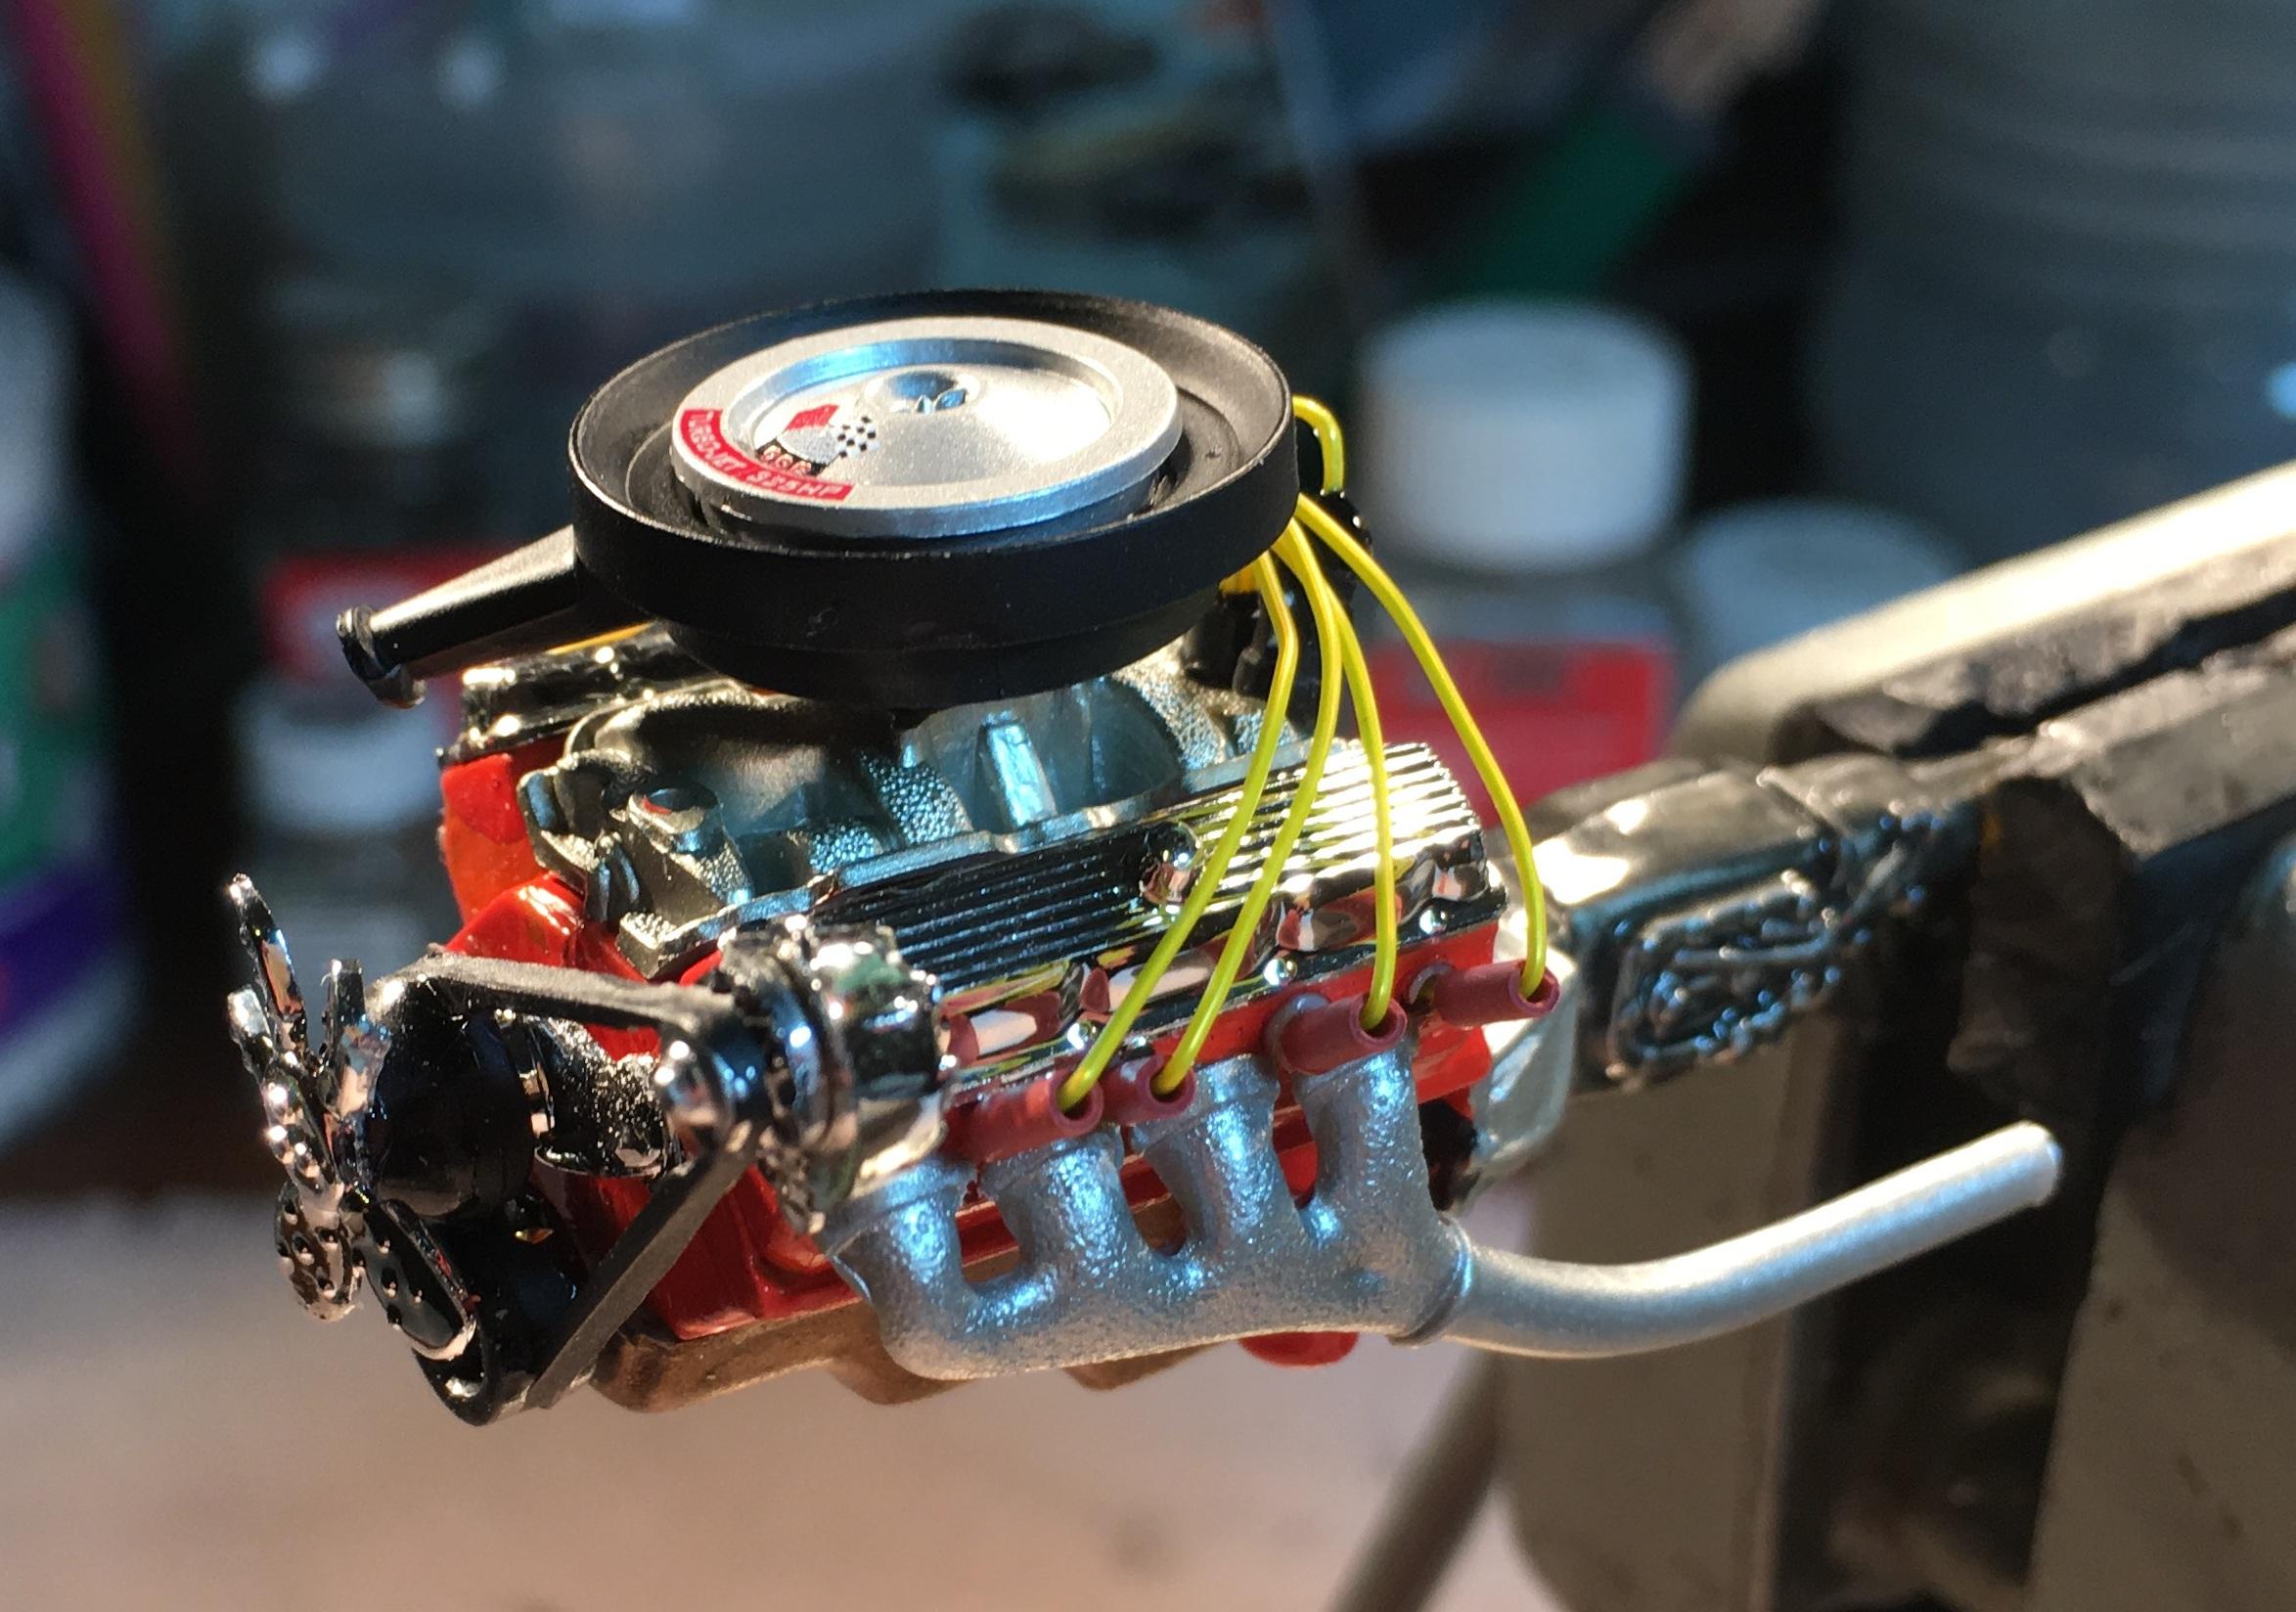
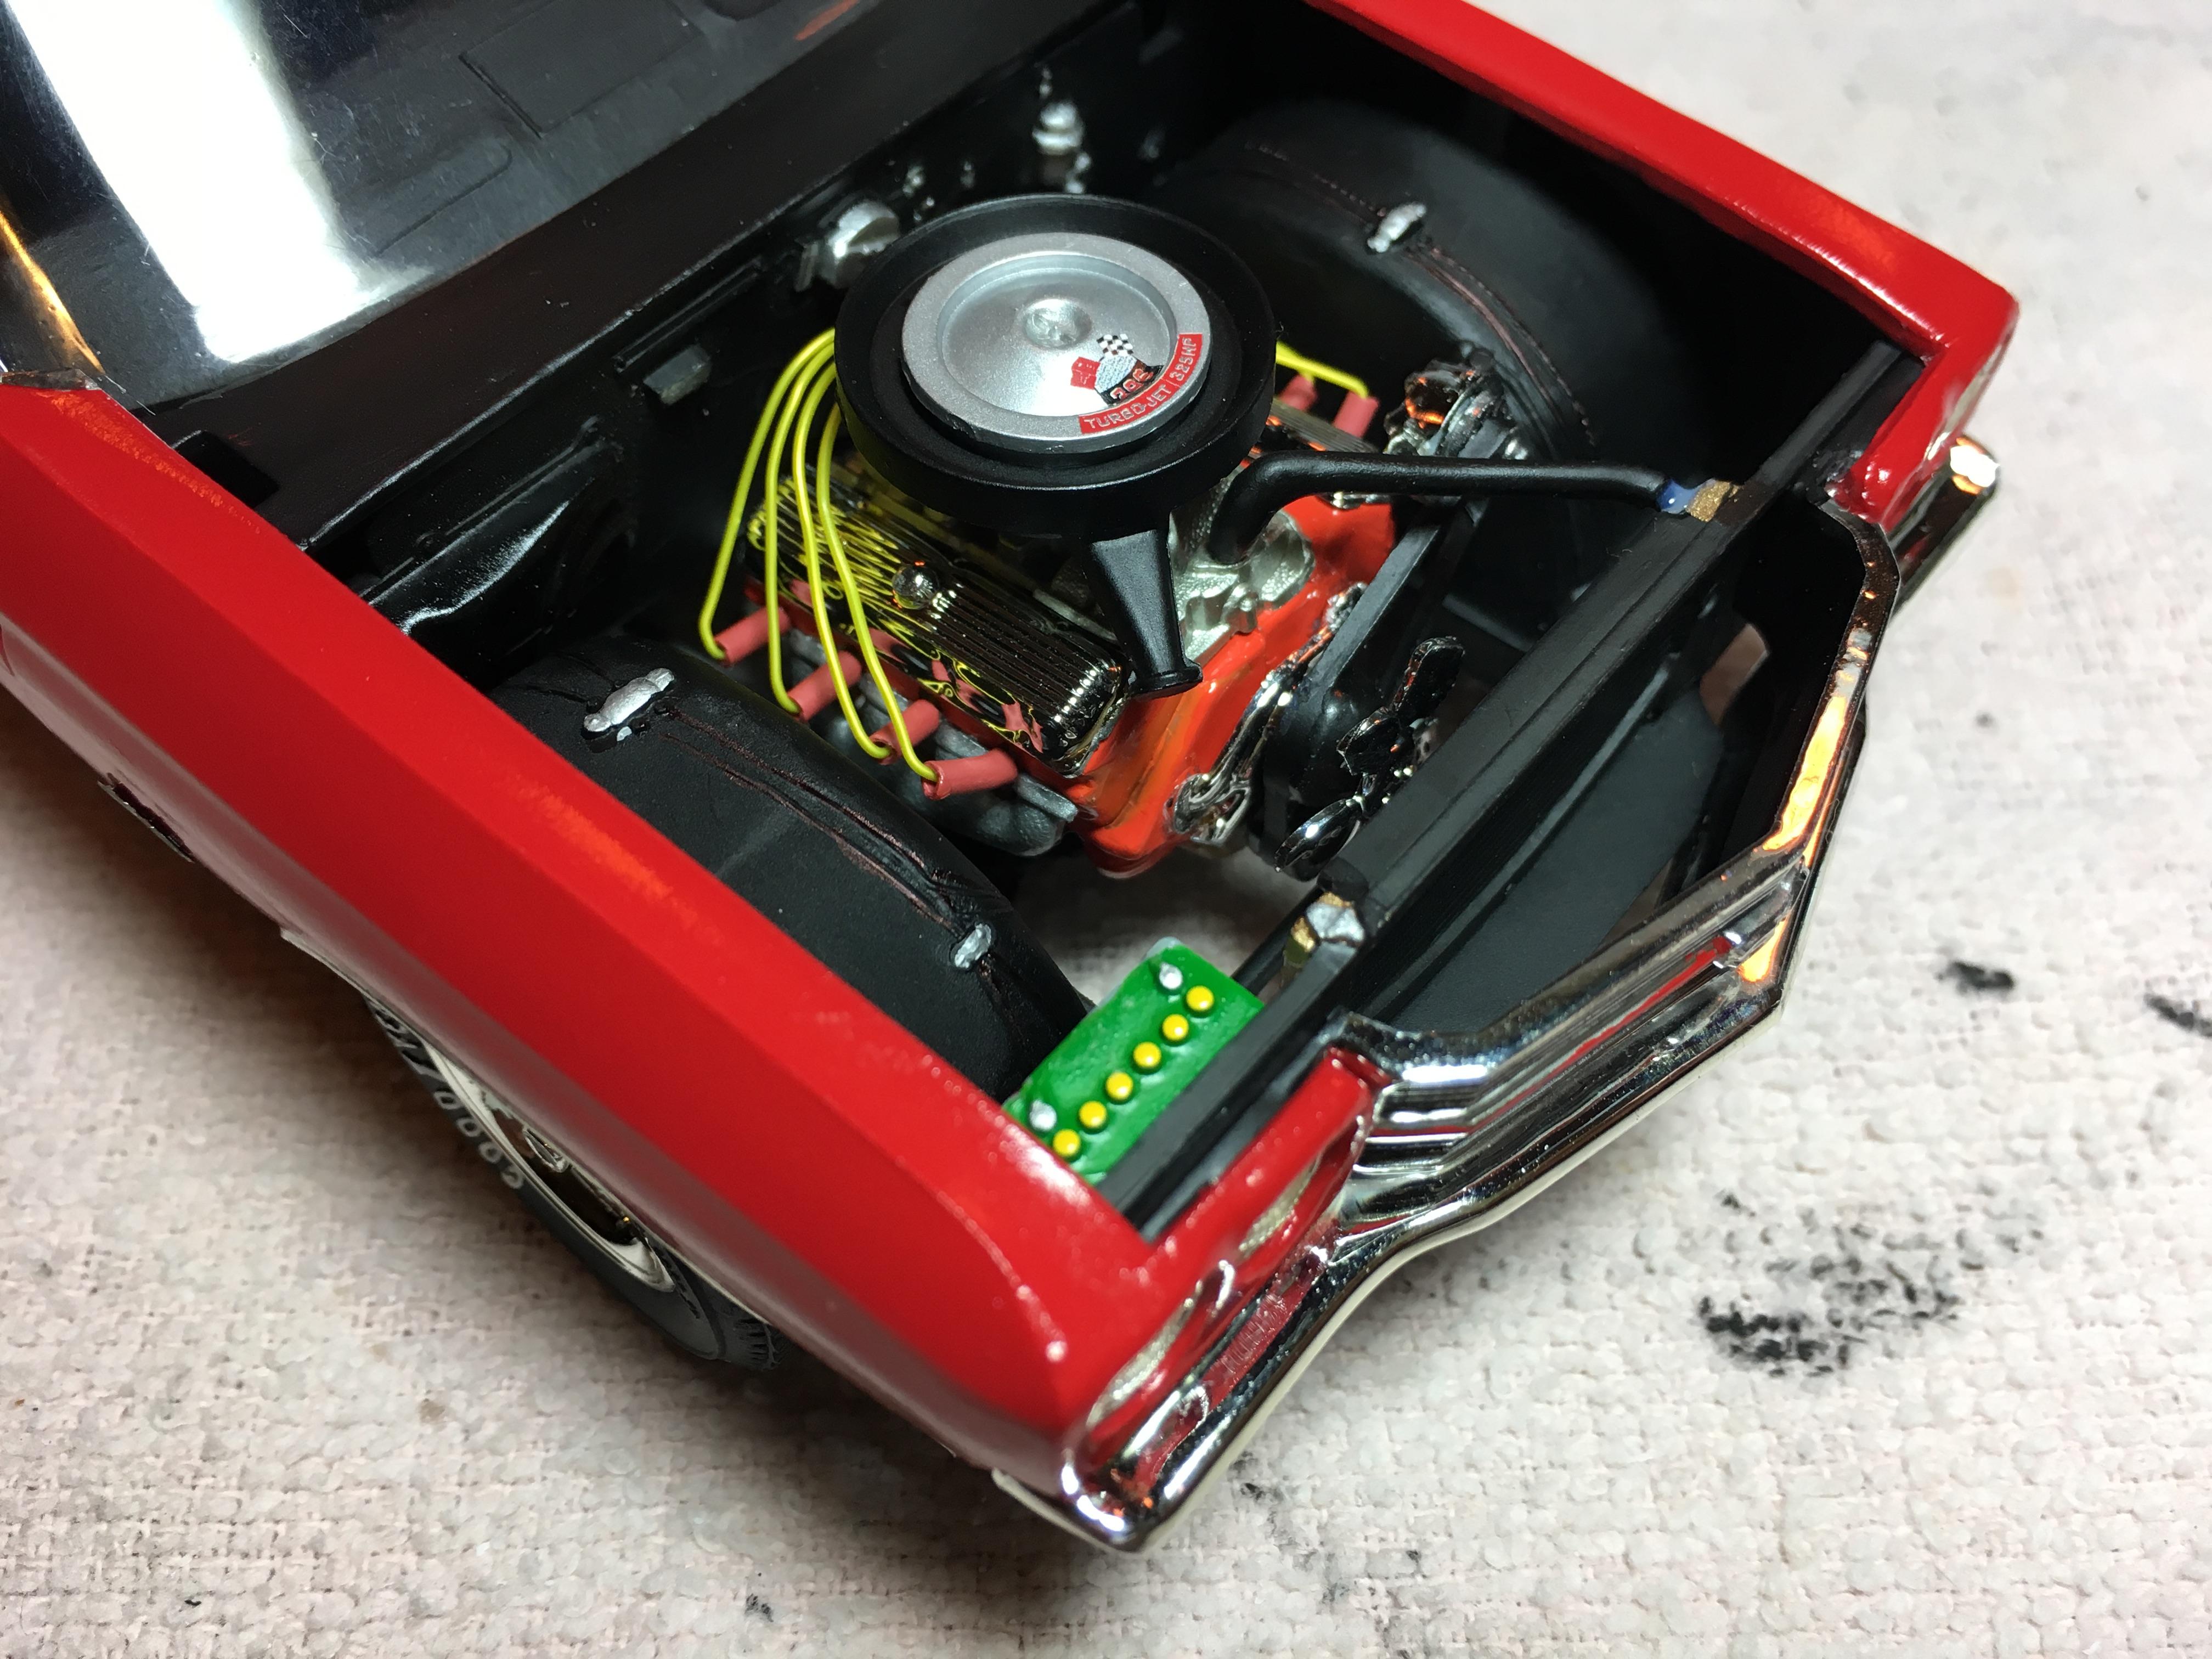
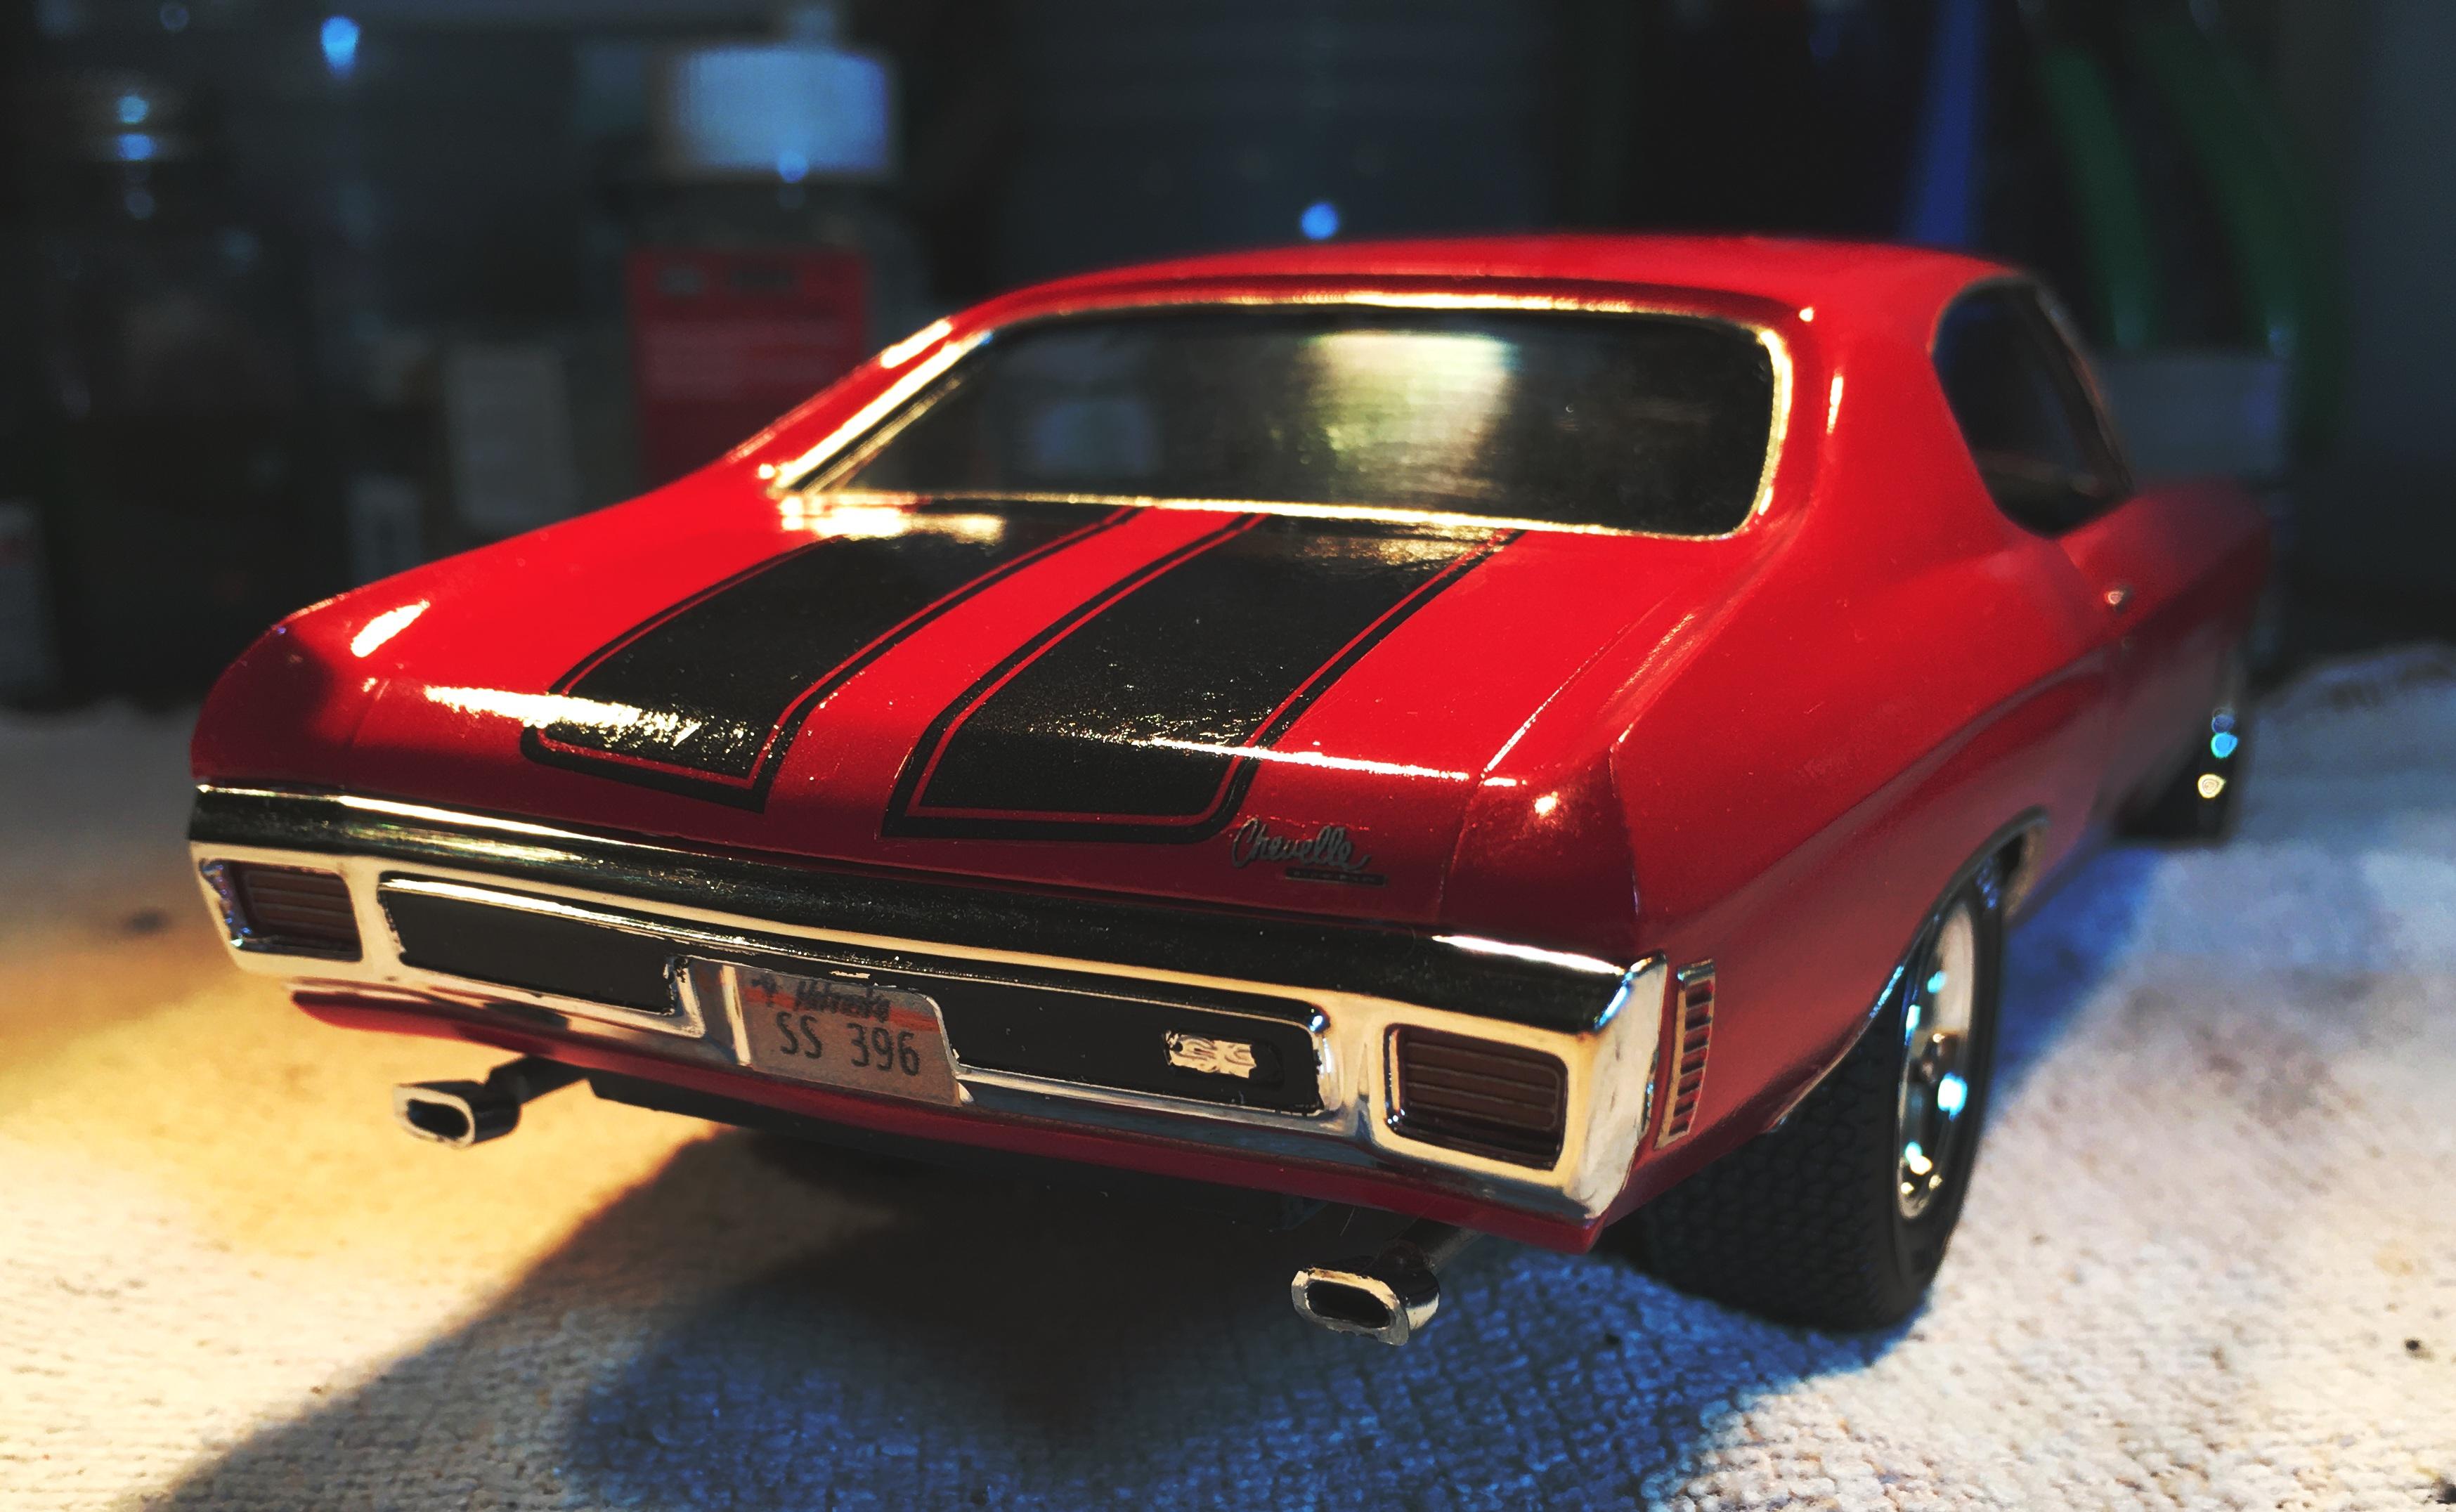
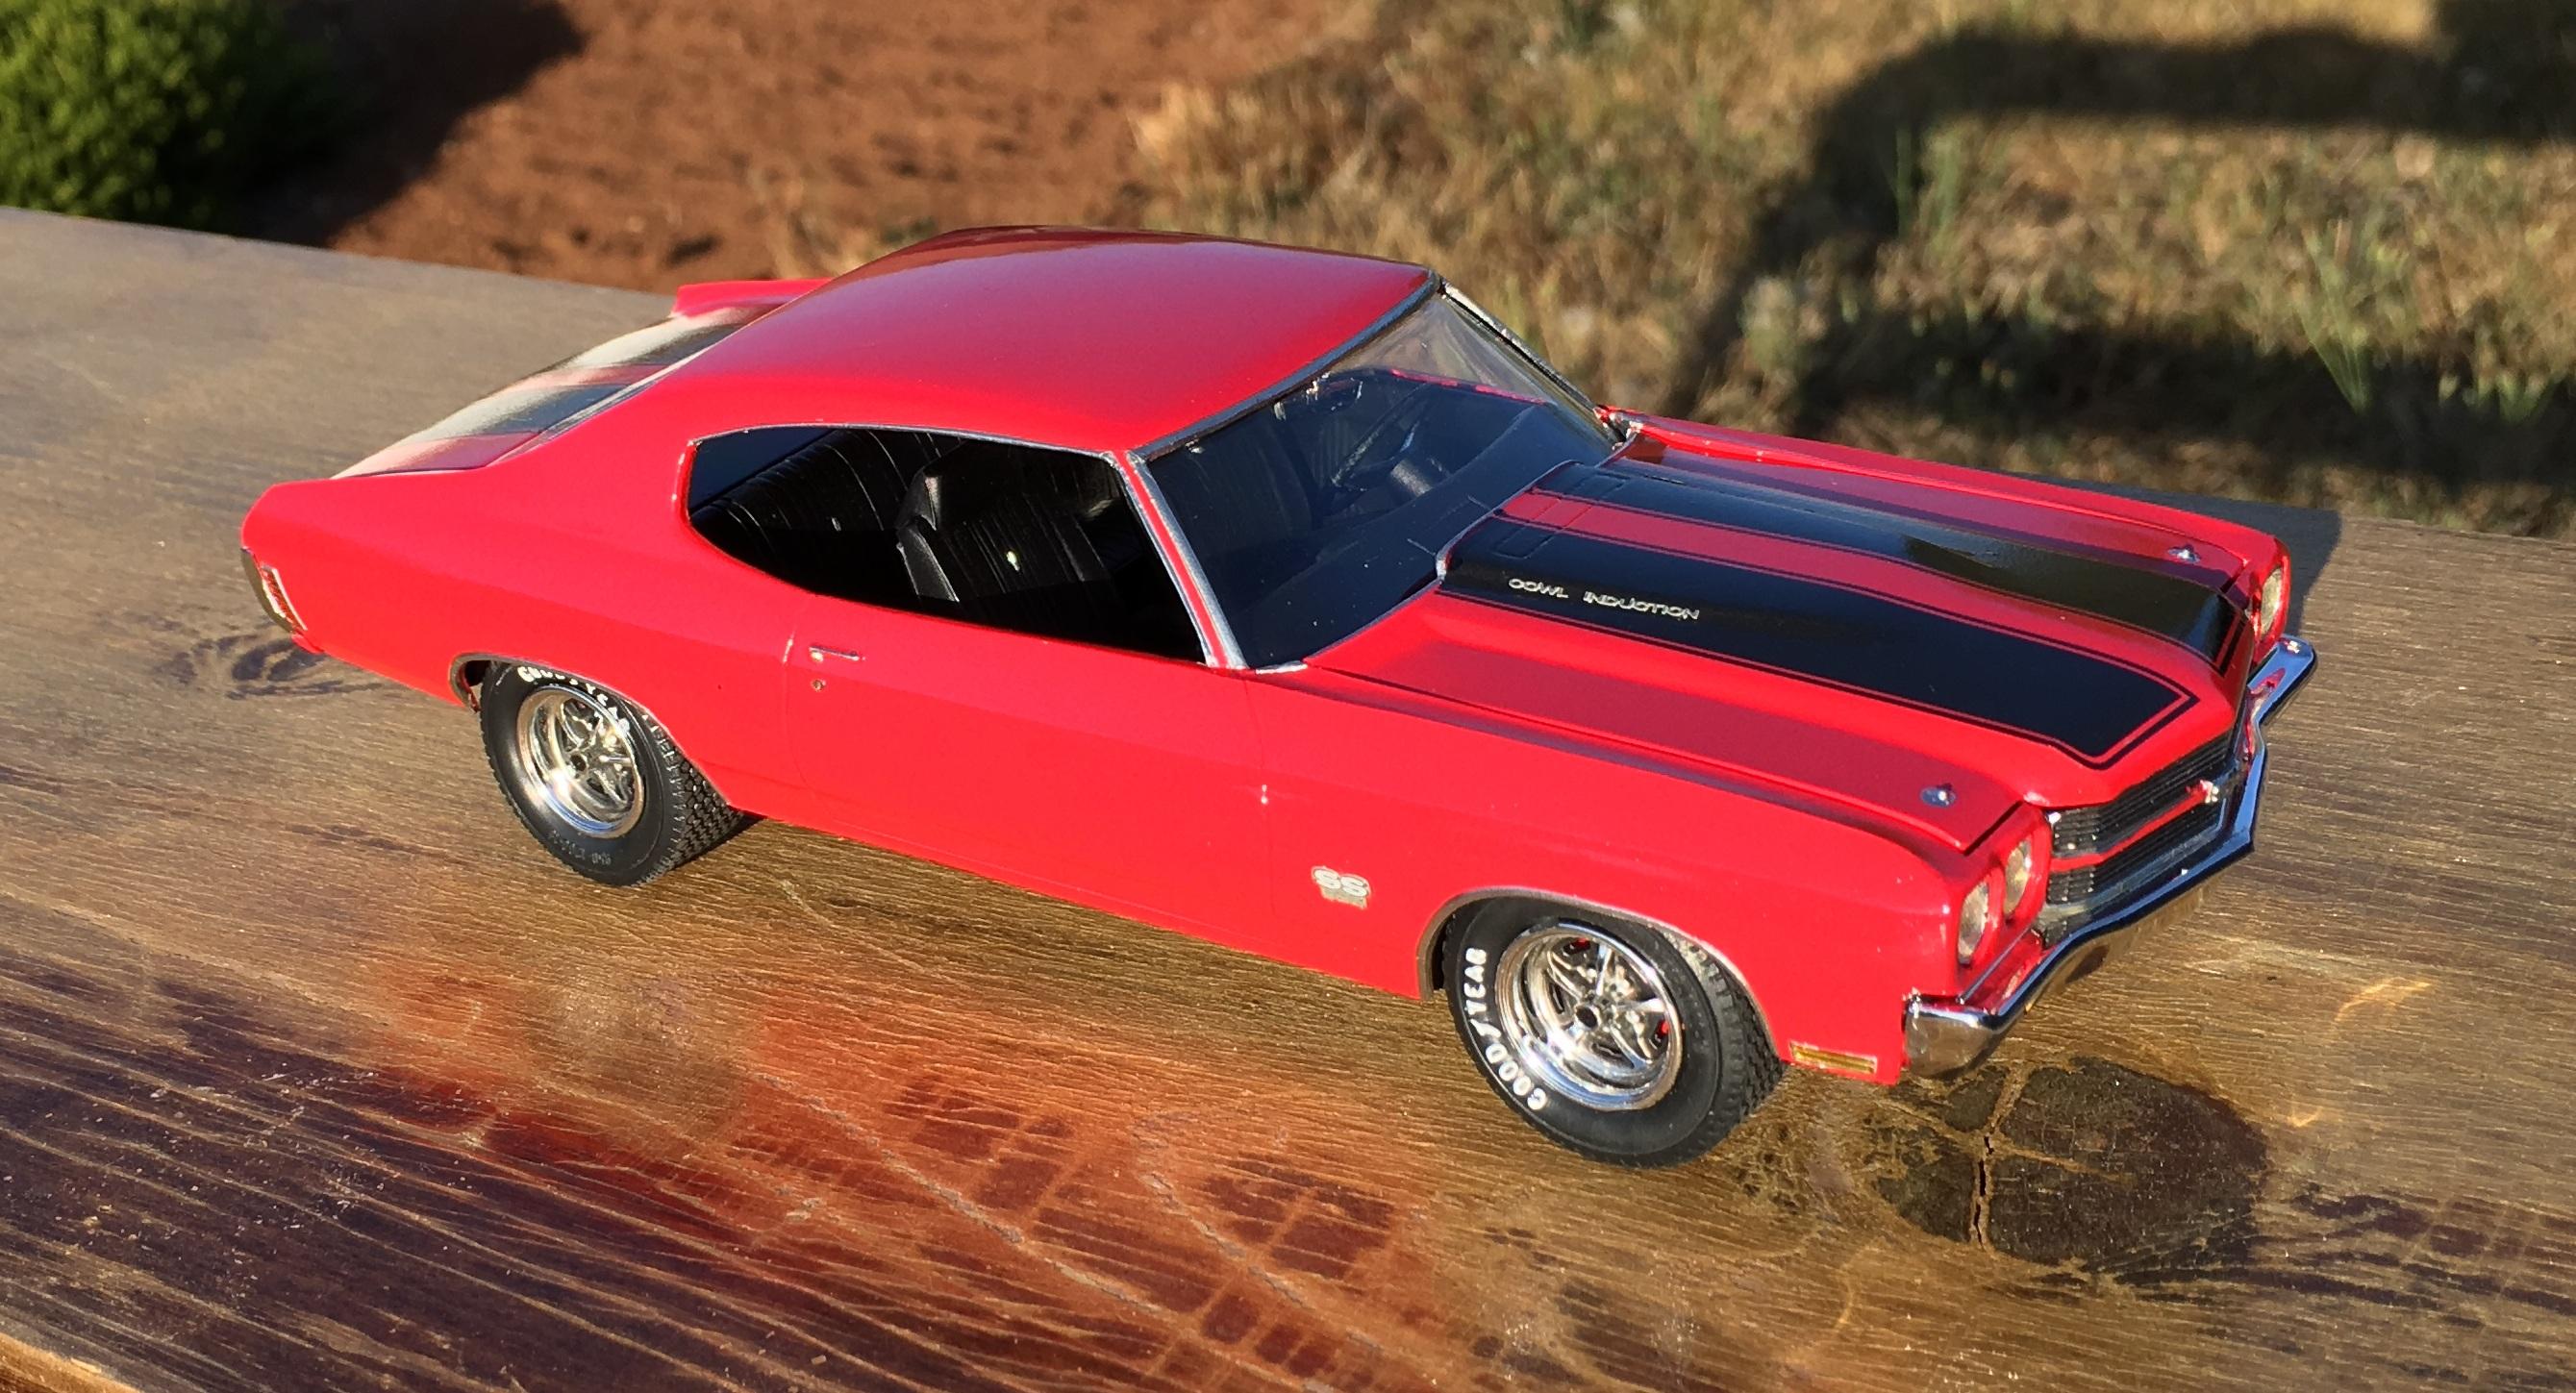
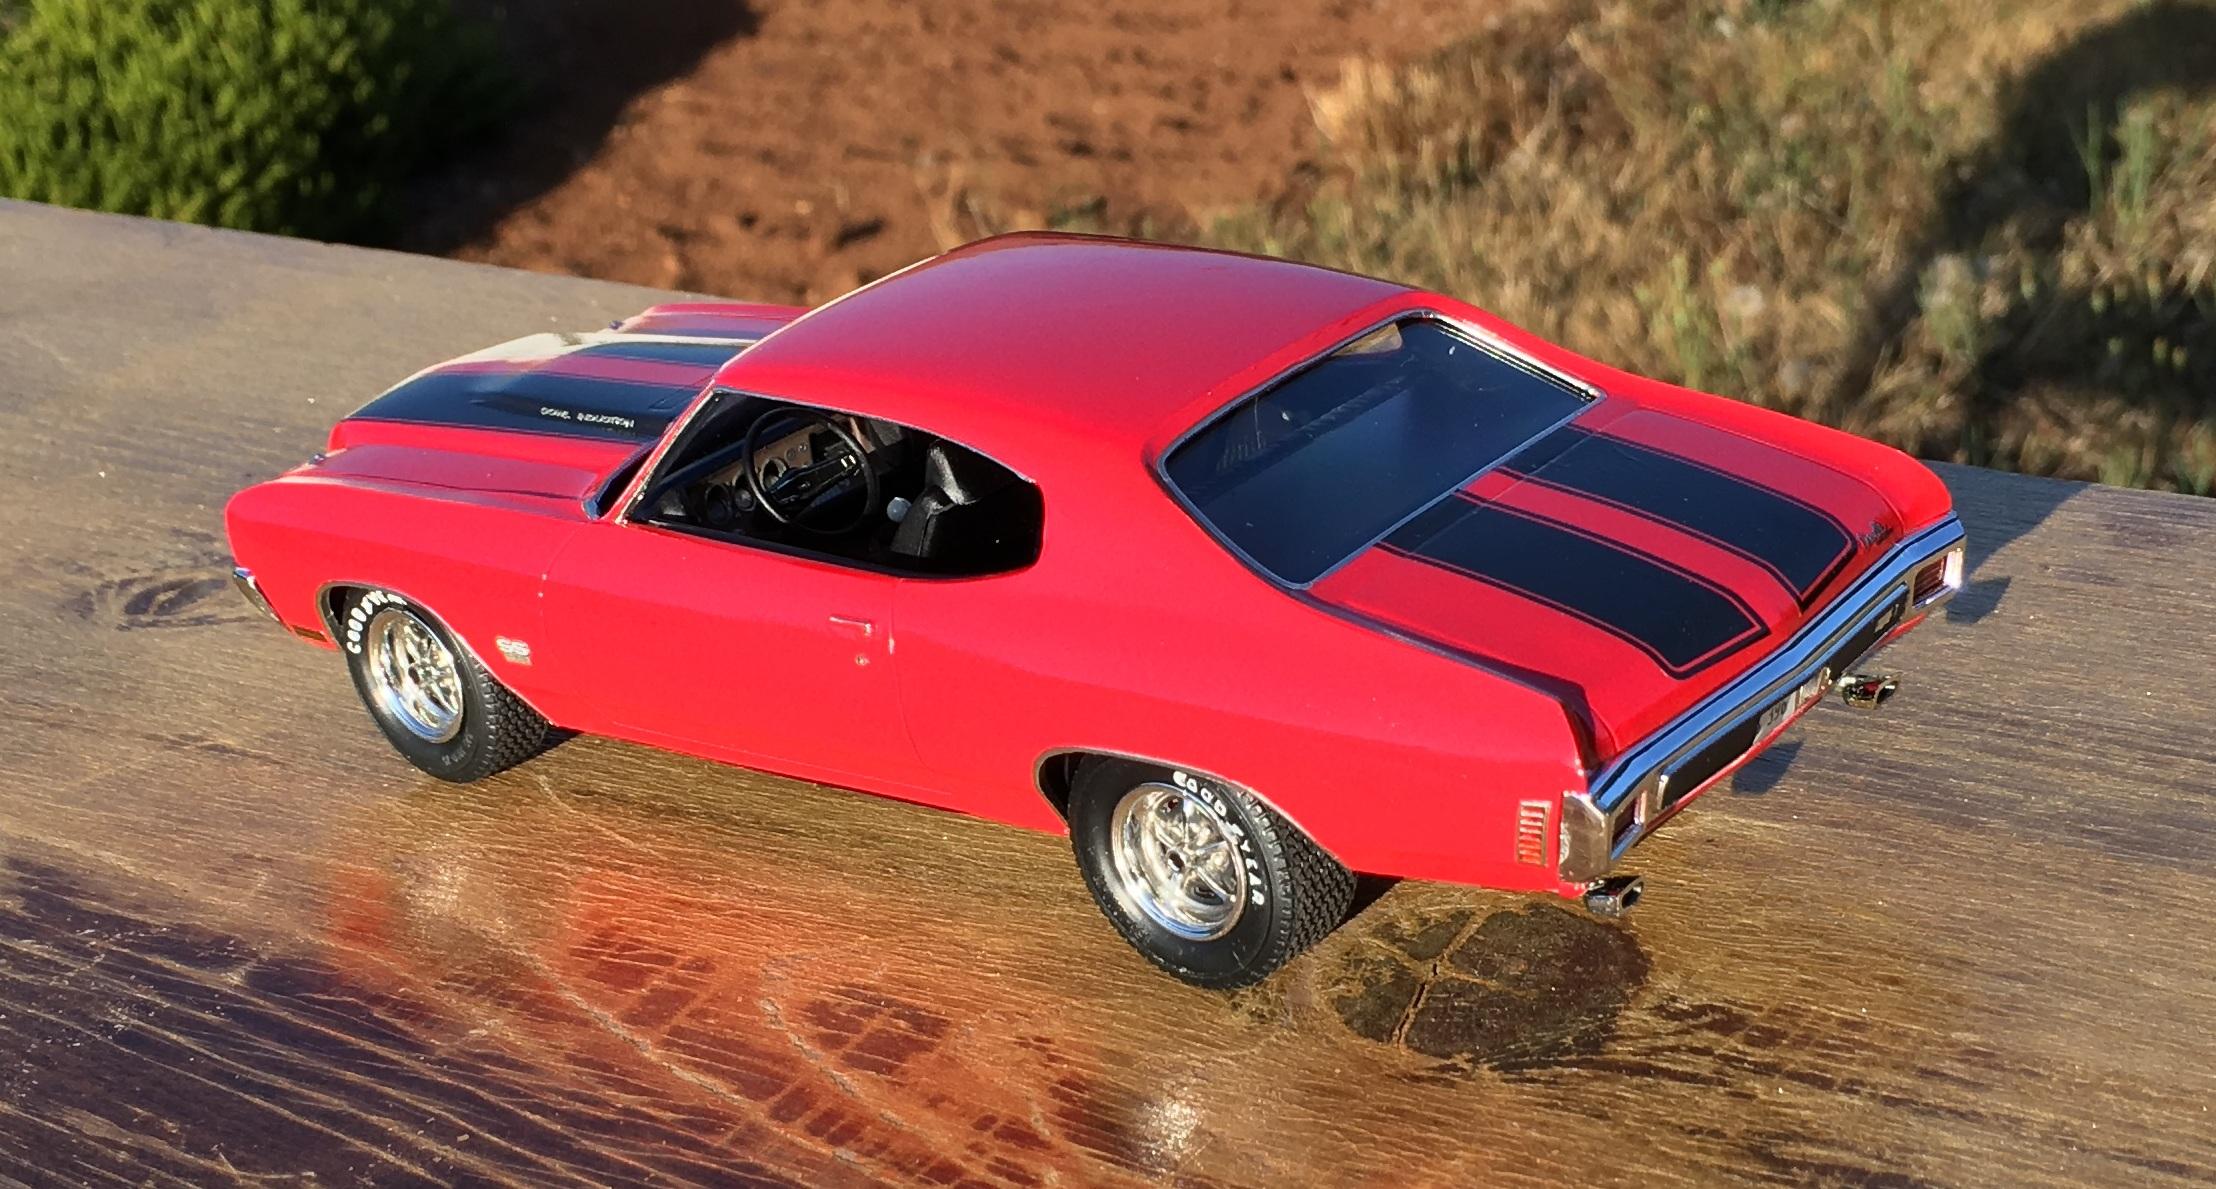
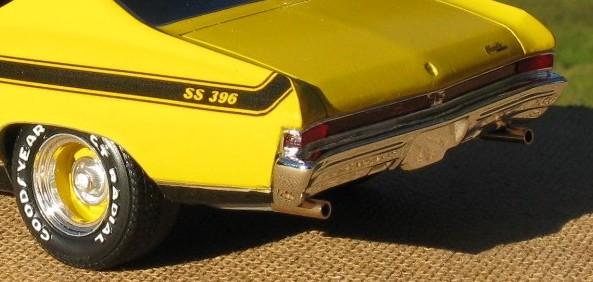
This model is an approximation of the real Chevelle my friend Mike M. had right after we graduated high school. It was a true SS 396 in red with black stripes, black interior and black vinyl top. It was a 4-speed and the engine was built up with Holley, Edelbrock and Hooker parts. The thing was bad fast too. We had to go WAY out to the country to look at it which helped as they only wanted $1000 for it. If it wasn't, it would have been snatched up long before we got there. This model is the closest to box stock as I have ever built. I did add some photo etch emblems. I am about 70% happy with the paint and 95% happy with all the details.
-
I agree. Stance is everything. Wheels are a personal choice. Some are more popular than others. The stockers were on for quite awhile. I just wanted to change it up a bit from my limited choices. Here is one I missed.
-
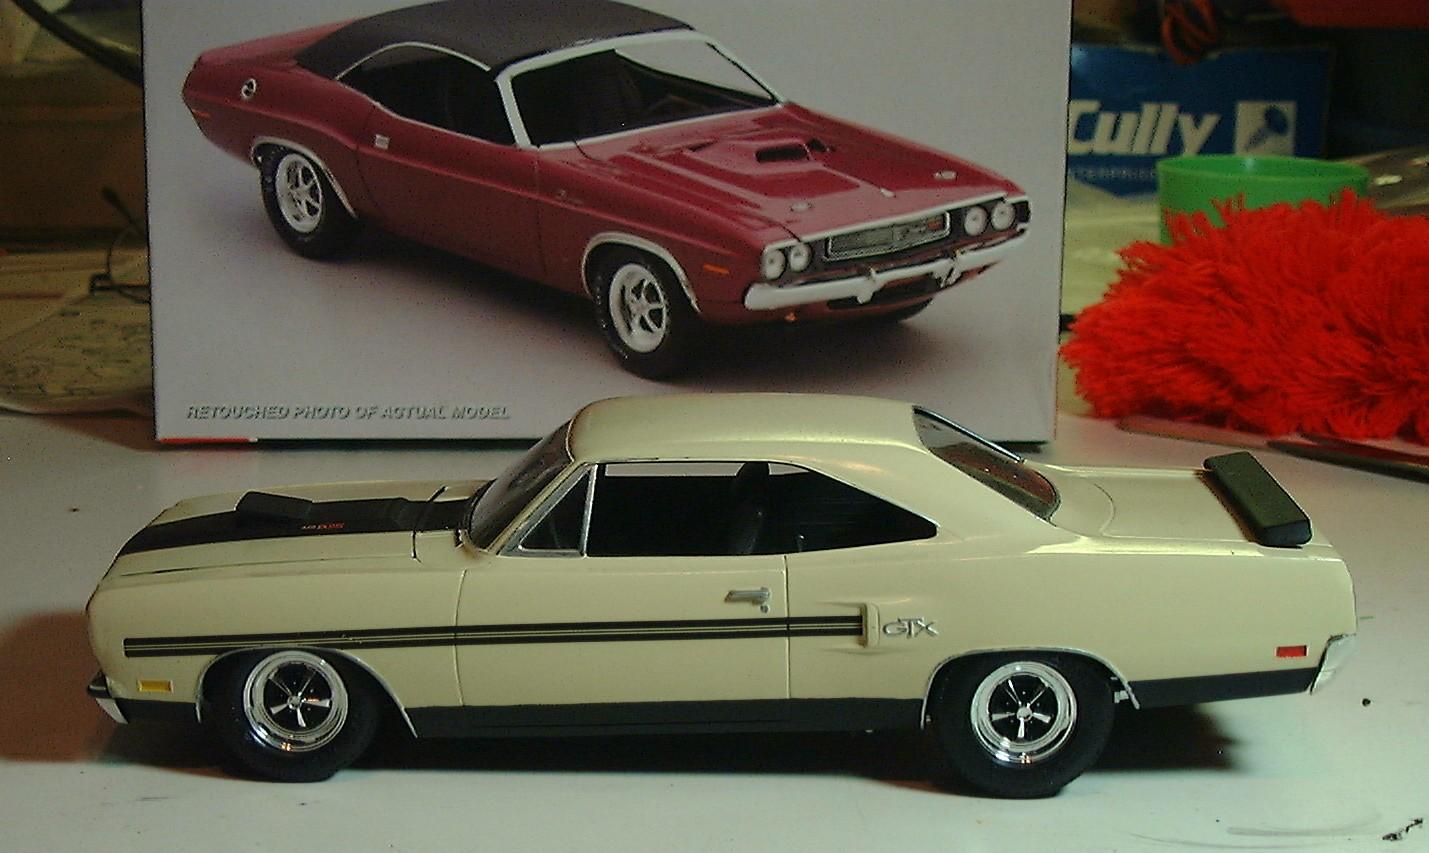
This Plymouth GTX was purchased and built mostly because the mags in the kit are the closest thing to my 1:1 1972 Grand Prix. I chose the cream color because I had seen one in a car show and thought it looked good. It was the first time I had used automotive (rattle can) paint. This is also the first model I got reference pics for in order to detail the tail panel and grille correctly. The black stripes were added later and are from Keith Marks. After some time, I upgraded the wheel and tire package to 19"ers from the Revell 67 GTX kit. To do so, I had to disassemble the model to open up the top of the rear wheel wells for tire clearance. I really need to take it outside for better pics.
-
1969 Chevelle and tandem axle race car trailer.
Bills72sj replied to Bills72sj's topic in Model Cars
I have no idea. It seems to have magically appeared in my stash long ago. -
Beautiful work. Your camera seems to struggle with the depth of field/focus.
-
Excellent work. The quality is inspiring.
-
Steel tubing thin wall hypodermic source?
Bills72sj replied to 89AKurt's topic in Model Building Questions and Answers
I found a pkg of RC aircraft crimping sleeves at my LHS. They work great
-
Biggest pet peeves on builds.
Bills72sj replied to LL3 Model Worx's topic in General Automotive Talk (Trucks and Cars)
I respectfully disagree. It seems it is YOUR goal to build realistic models. For many, that is admirable. I am a very detail oriented person nonetheless I build for the artfulness of the project. My available build time does not permit me the luxury of perfection even if I barely have the skills to obtain it. My goal is to simply have a case of colorful completed builds that I can admire from time to time. -
Biggest pet peeves on builds.
Bills72sj replied to LL3 Model Worx's topic in General Automotive Talk (Trucks and Cars)
I hear ya brother. My 30 year old enamels come back to life with thinner. I only have 1 bottle of accidental purchase acrylic and it is silver. (the jar was bigger) -
Bare metal Foiling recommendations
Bills72sj replied to drodg's topic in Tips, Tricks, and Tutorials
I agree. The only thing that tops a perfect application of BMF is a perfect paint job. I consider BMF one of my FAVORITE tasks. -
Minor update. Was going to paint the frame black, but my choice of paint refused to dry. Changed my mind and decided to go red. Started brush painting the red and found the coverage less than pleasing. Went to Wal*mart and picked up a new container and 2 gallons of purple power. Frame soaking.
-
You are correct. Trailer loading may be an issue too.
-
There is actually a story behind their purchase on the 1:1. My buddy was getting the car painted by his sister's baby daddy. We were in his dining room and he was looking through newspaper flyers from tire stores looking for wheels to choose. Solid disc Centerline wheels were popular during that time but were spendy. American Racing Wheels made knock offs that were similar in both with, and without round holes. He asked my opinion on which ones he should get. I looked at them and said get the holes for the front and get the solids for the rear. I argued it makes the rear look racy and the fronts brakes get cooling. He liked the idea so he bought them. 15x7 front and 15x8.5 rear. Like a piece of artwork, it compels you to move your eyes checking out front then back to determine the difference. He got a lot of compliments from his choice.