Steve H
-
Posts
2,535 -
Joined
-
Last visited
Content Type
Profiles
Forums
Events
Gallery
Everything posted by Steve H
-
I will definitely be watching this one Bill. Awesome subject, I really want one of those kits. Cheers, Steve
-

Amt 72 Jimmy...anyone tub it?
Steve H replied to Rbray47's topic in Model Building Questions and Answers
Hi Randy, I did one several years ago with the Blazer. I used a modified pro street Mopar chassis.
-
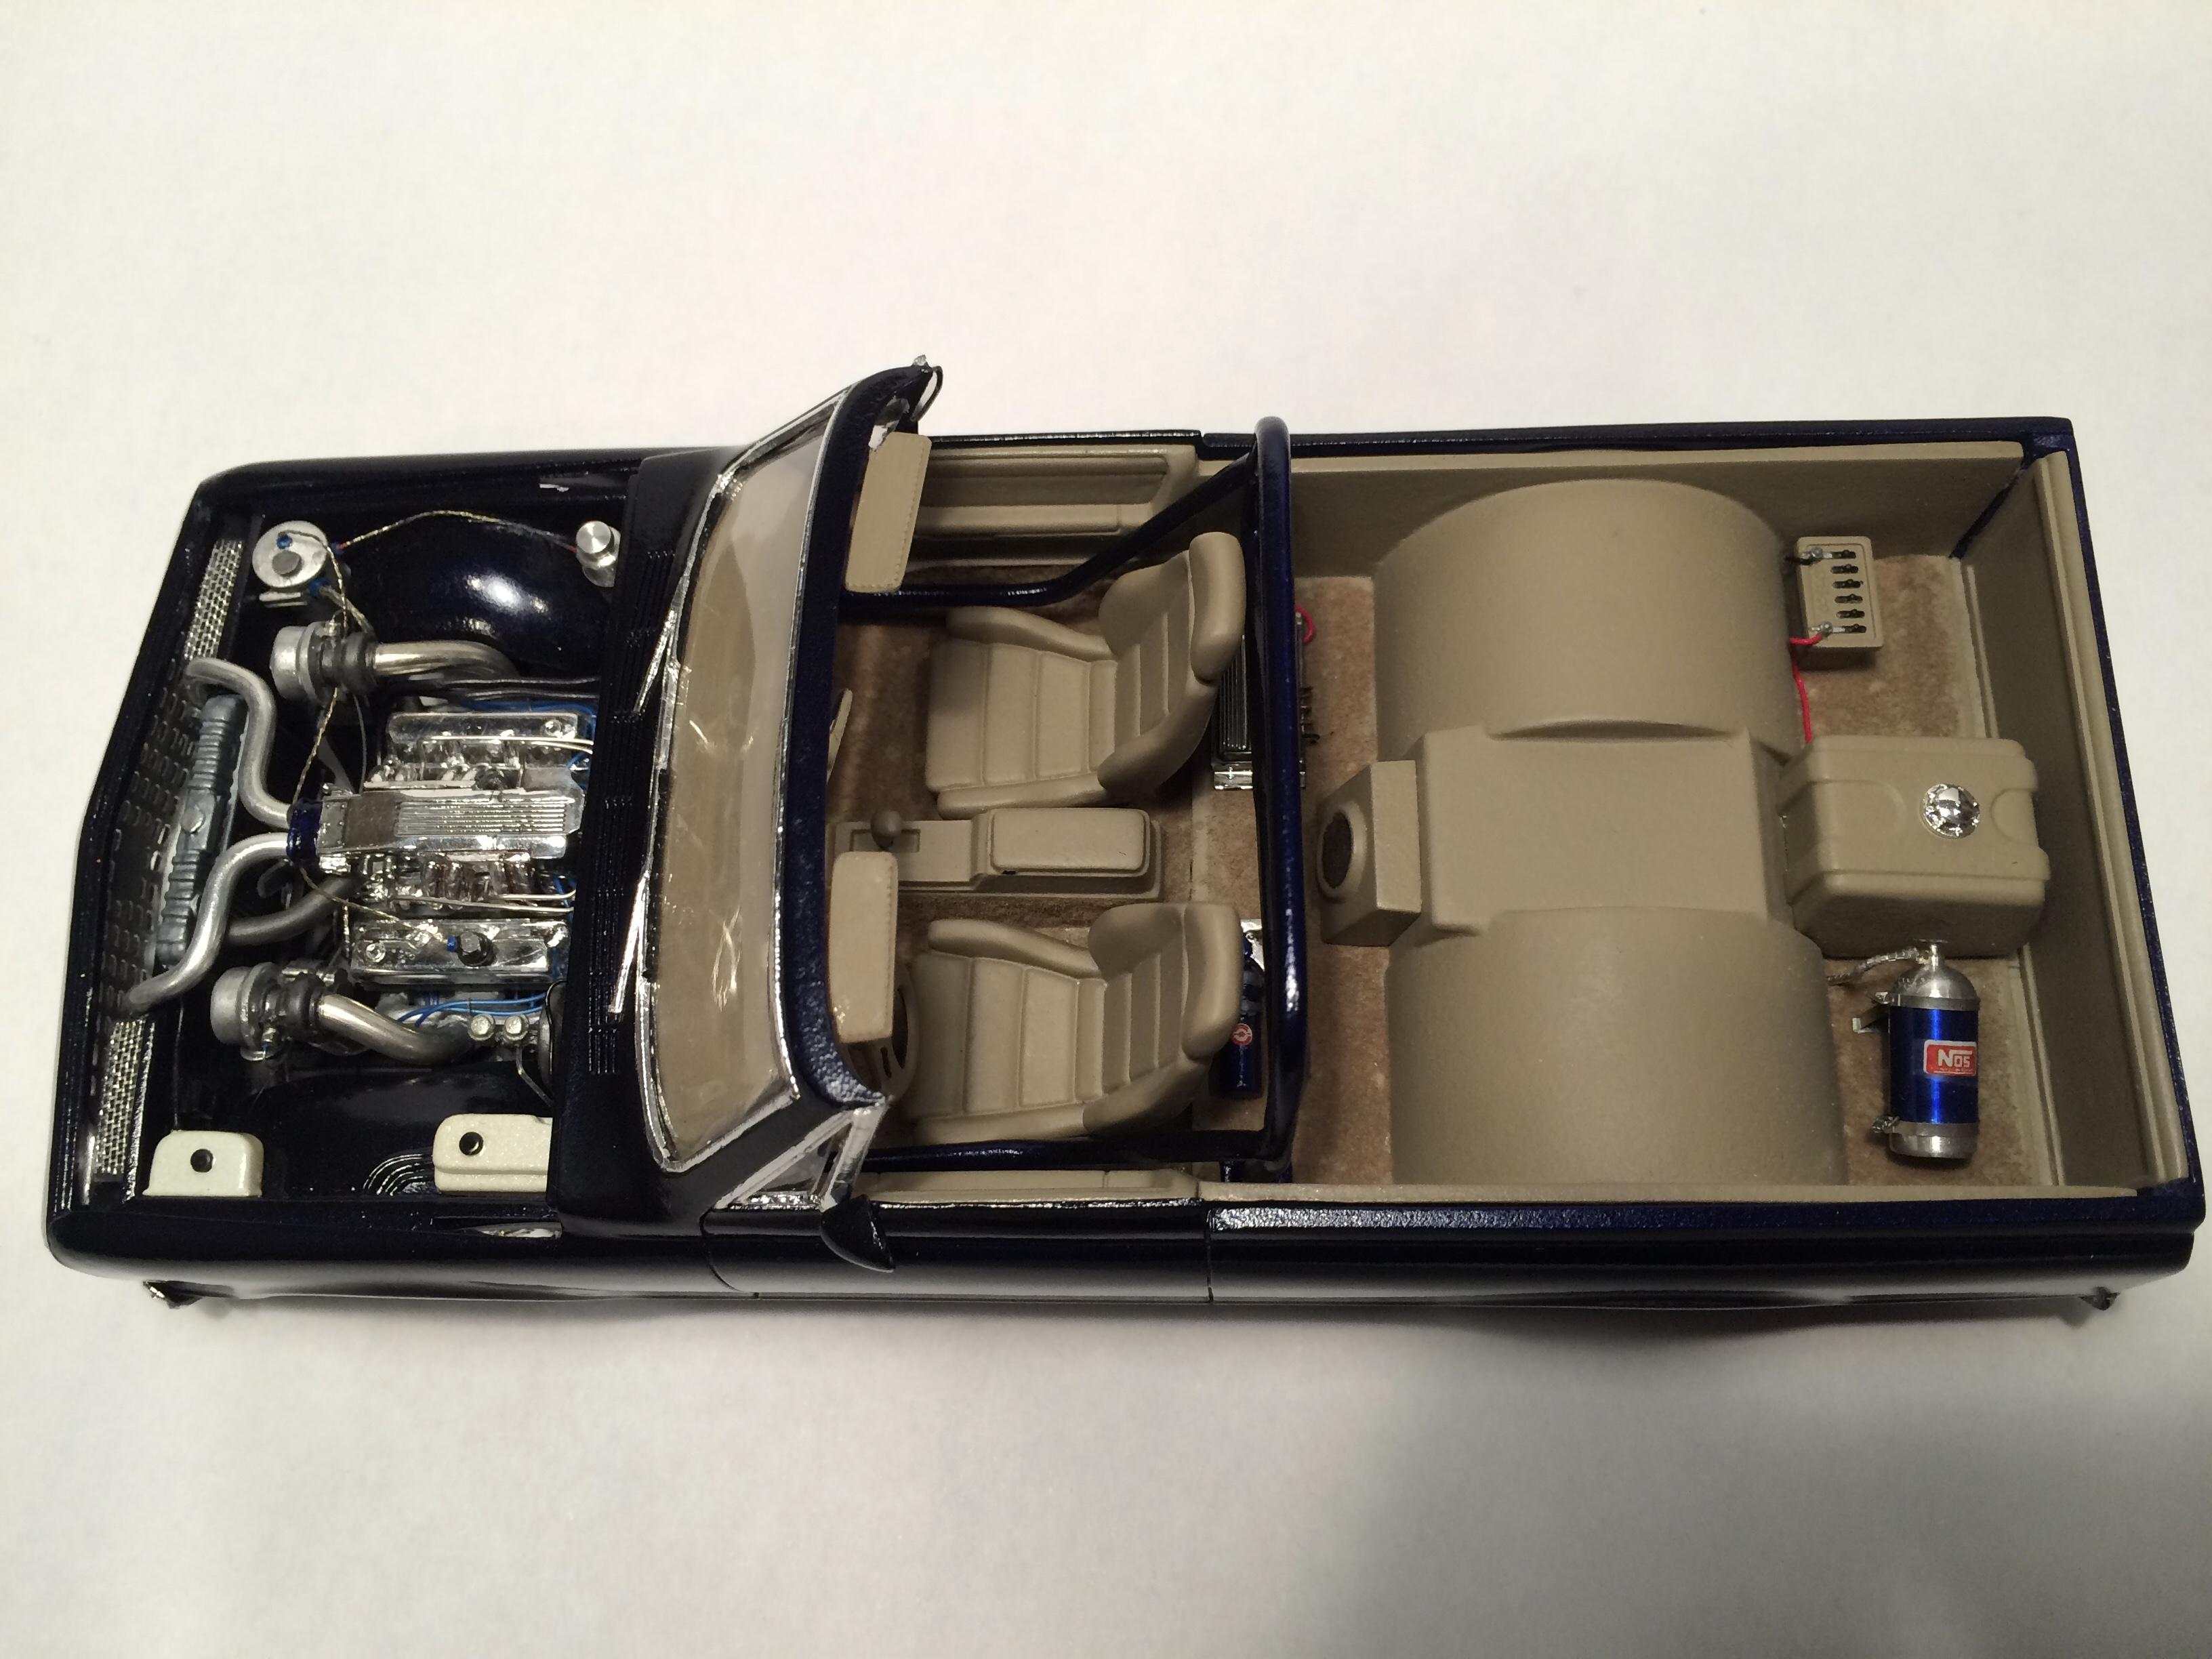
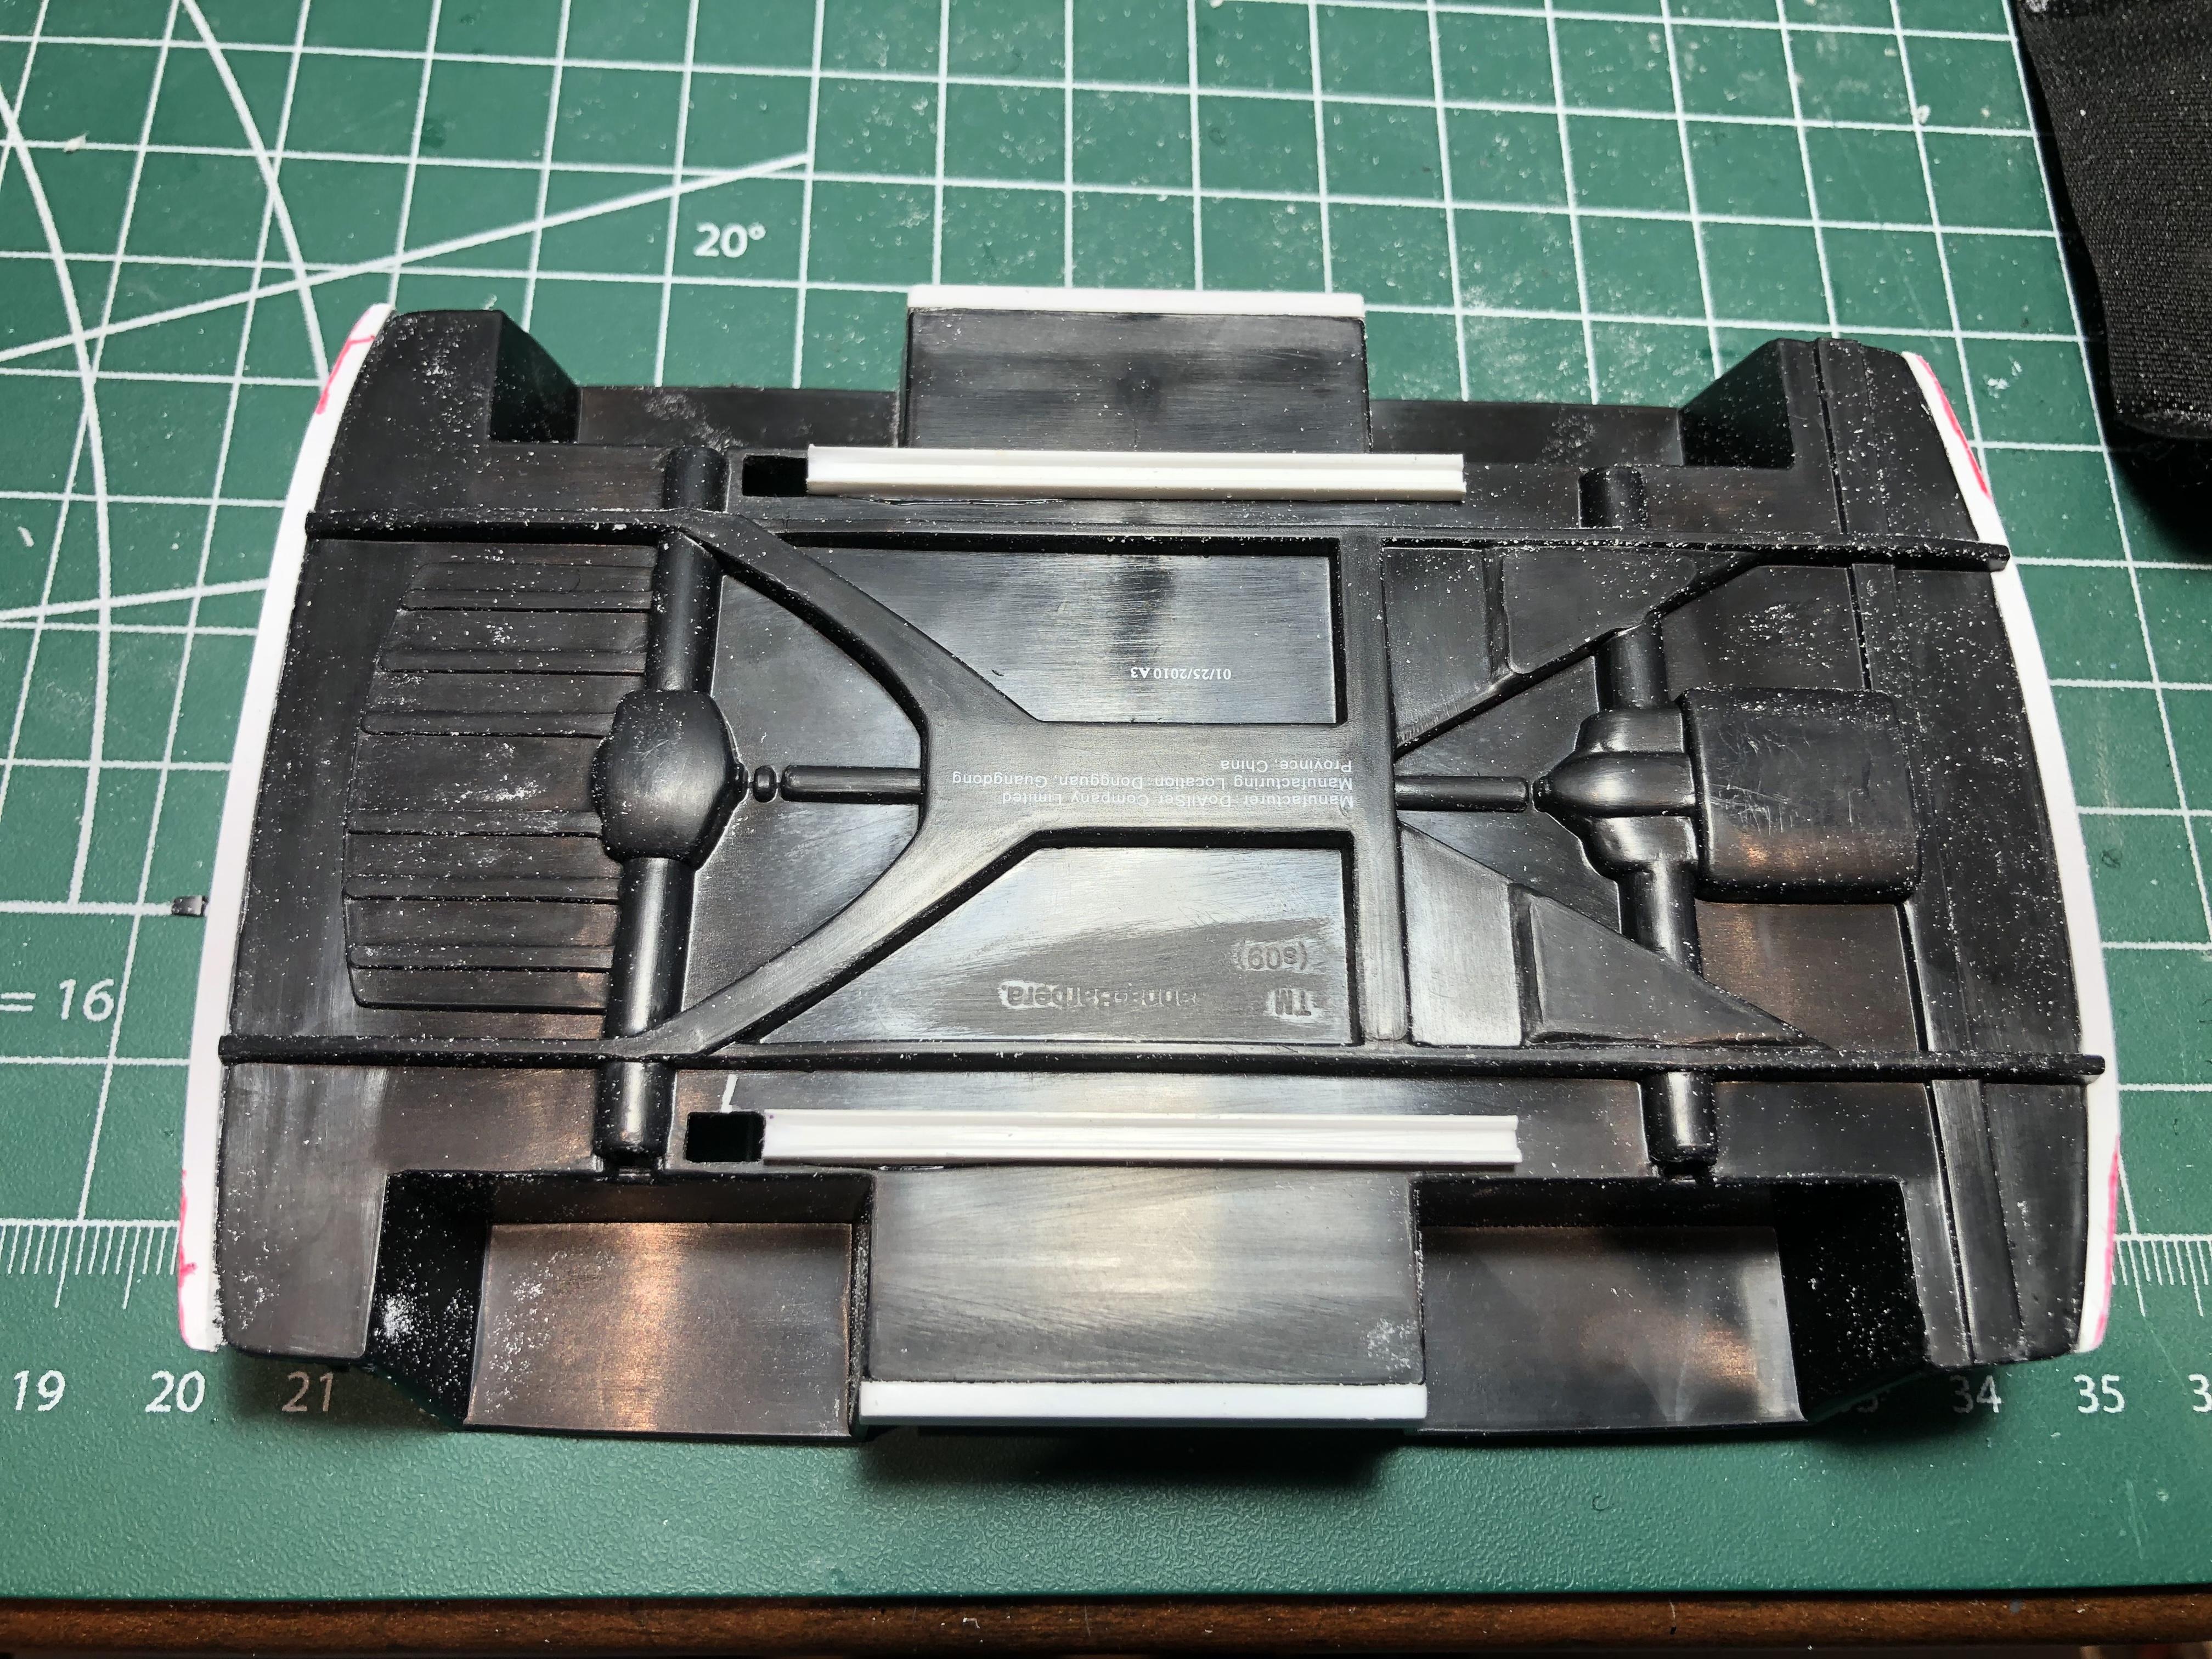
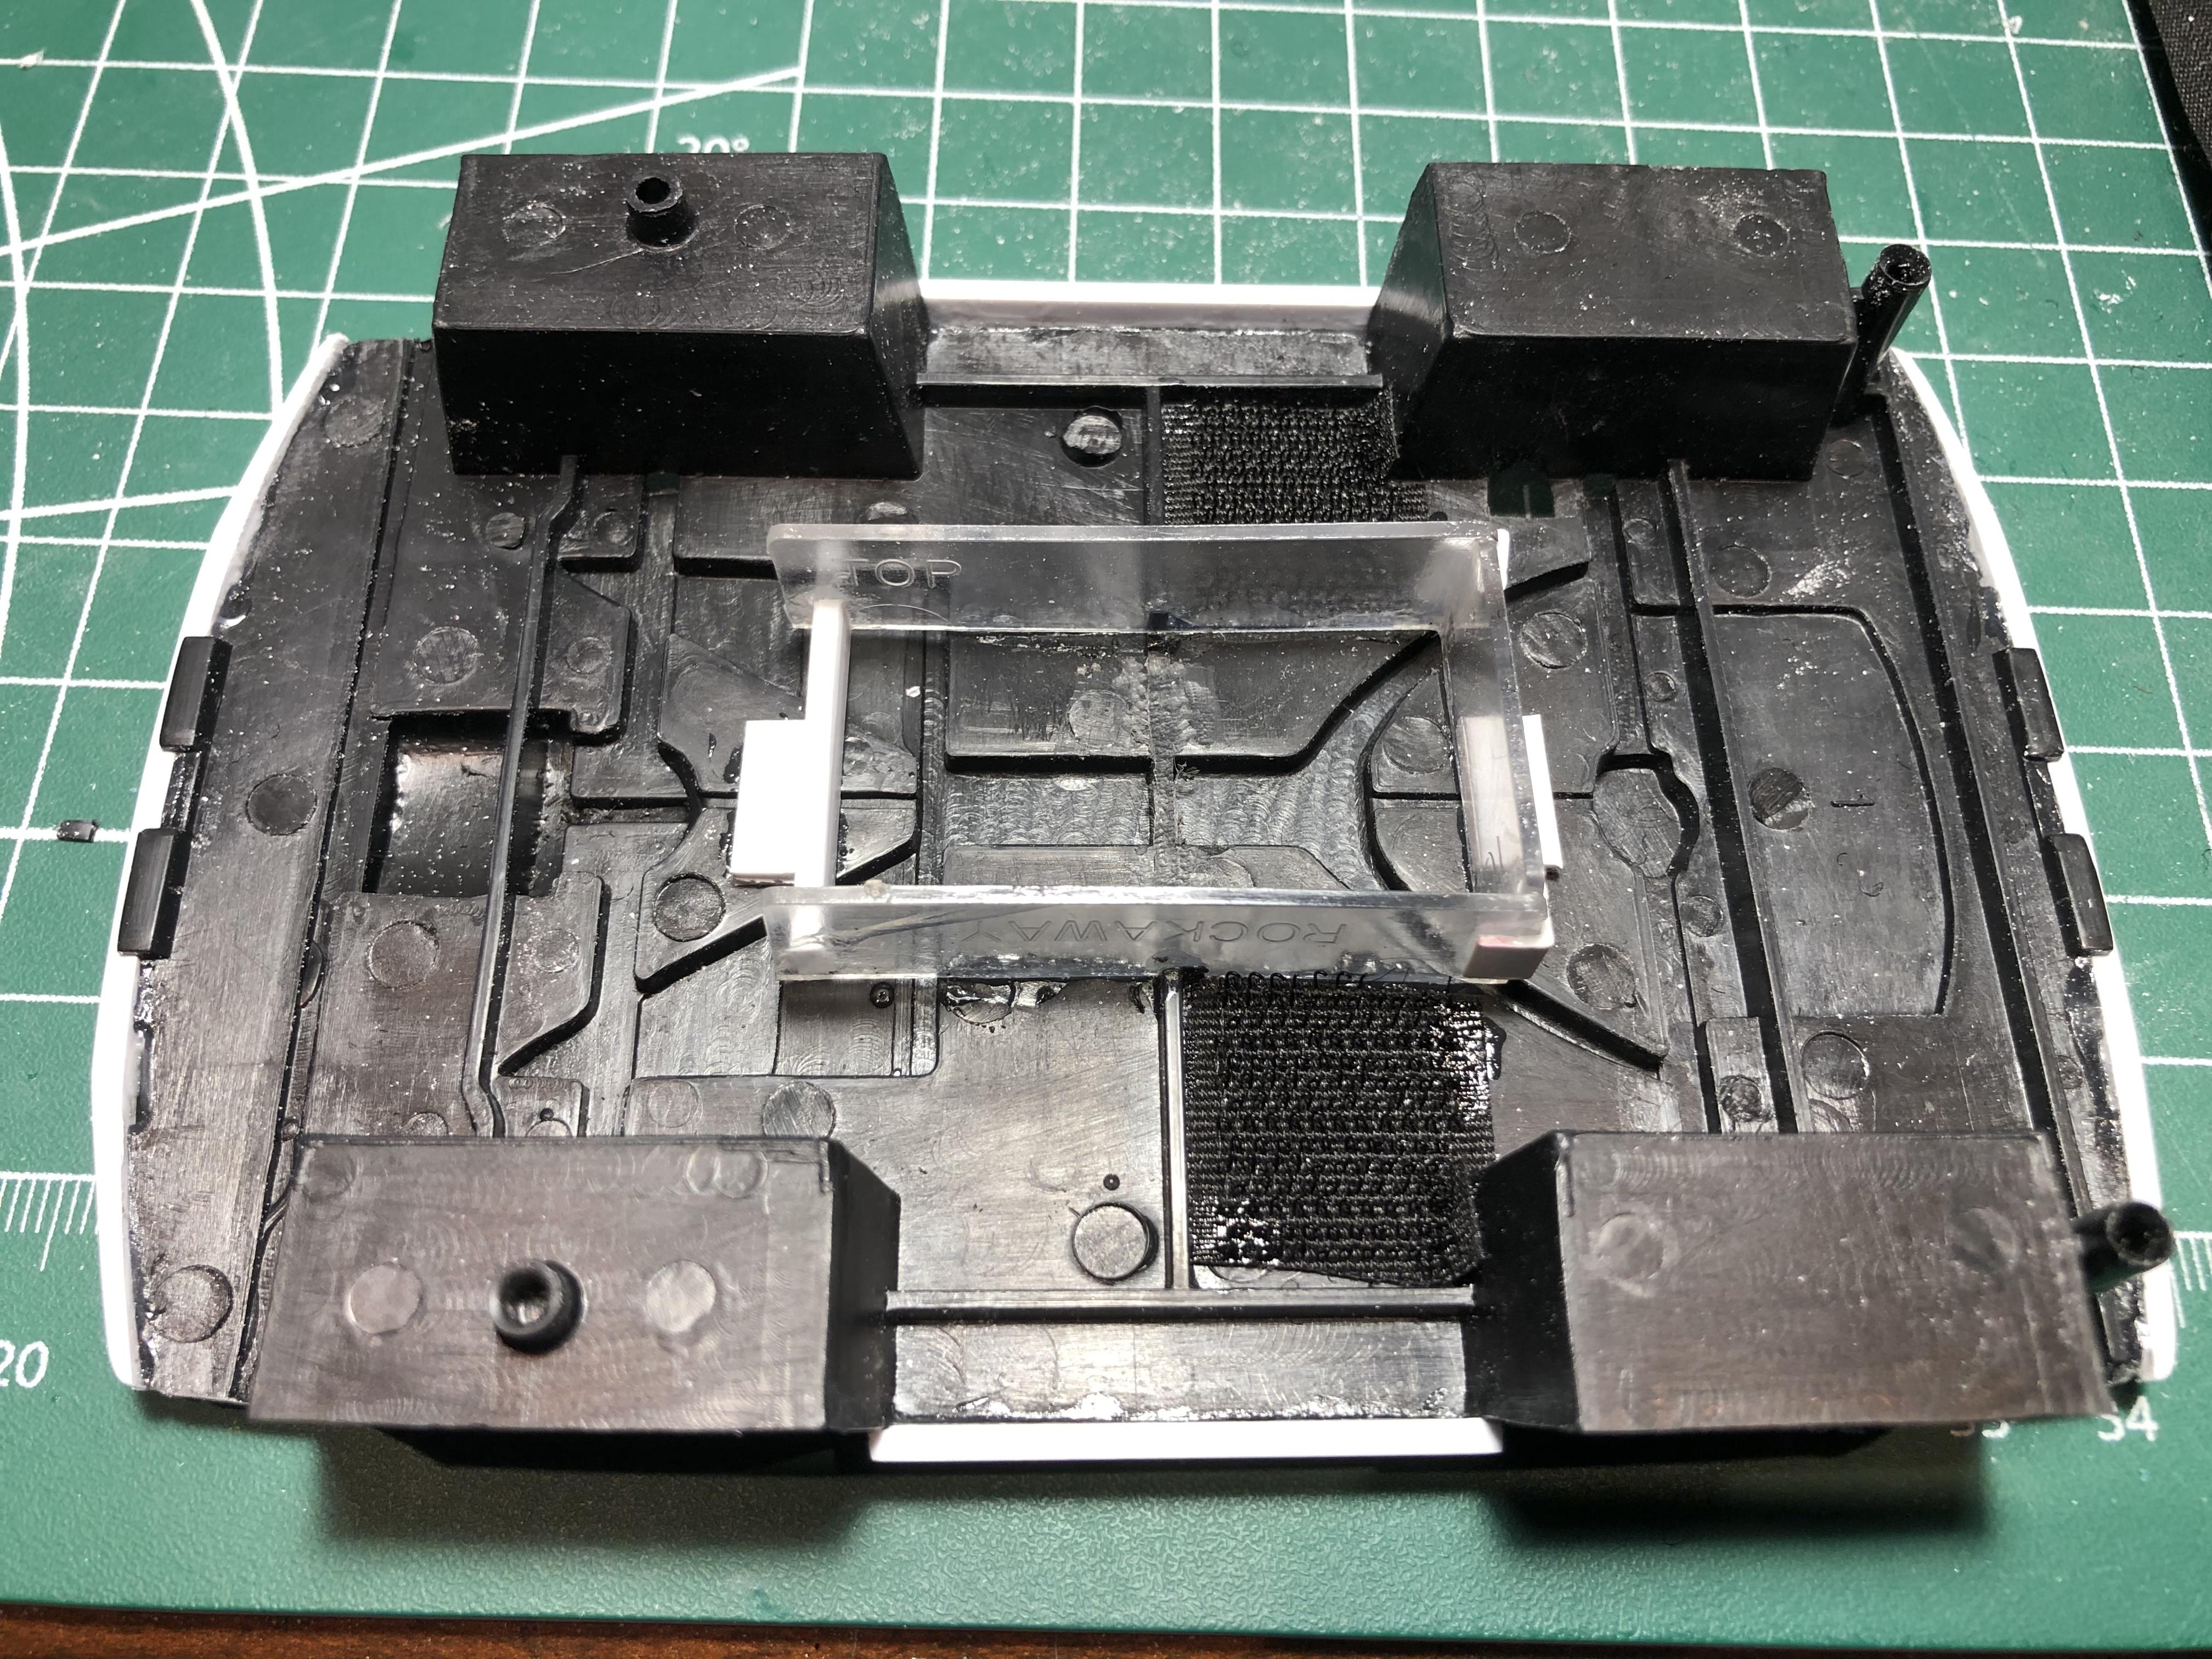
Well, I finally had a bit of bench time. I know, I said this was going to be quick… Here we go…. To get the ride height I want, (low), I’m tucking the chassis up in the body a bit. I needed to add some length and width to the chassis for a better fit. chassis painted, obviously I did not spend much time here… I spayed some of the Tamiya “lame flake” on the chassis, then a bit of brush painting. The 2 channels running between the front and rear axles with holes near the rear axle will make sense in a minute. On the top side of the chassis, I added a fairly crude, but functional battery holder complete with Velcro strap. So the channels on the underside have some BMF for reflectivity. The holes are for lights. The plan is to make some “tubes”. I’m not sure how many of you remember the neon tube trend from 20-25 years ago. The tubes gave an illusion of the car “floating. Evans Designs makes a product called side glow fibre optics. If anyone here has interest in doing lights on a car, or diorama, I highly recommend this company. I have no affiliation with them other than being a happy customer. Great products, website, service, and fast shipping. So after tinting a couple of lights with clear purple and attaching them to the tubes, you get this… Not the best photo, but hopefully you get the idea. They look pretty good!! I will have another update in a day or 2. As always, thanks for having a look and all comments welcome. More silliness to come!! Cheers, Steve
-
Oooooops! Sorry David, I have been off the board for a bit and missed your comment. As you know, I always appreciate hearing from you.
-
How Can Tail Lights Be Tinted?
Steve H replied to crowe-t's topic in Model Building Questions and Answers
Hi Michael, I would do the clear red inside, then back that with BMF, then Tamiya smoke on the outside. My experience is that the paint needs to be warm, and applied in thin coats. The benefit is that you can control how dark you want it. Just my 2 cents… Cheers, Steve -
Pro touring 70 1/2 Camaro (Dutchboys 2015 SEMA tribute)
Steve H replied to Steve H's topic in Model Cars
Thanks Adam, much appreciated sir. Hope to be able to share it with you in person some time soon! Hi Tom, thanks for the kind words. I love shiny paint, but once in a while I like to do a matte finish, they add some interest for sure. I thought it was interesting to have the 2 side by side to compare. As for the ‘67, it’s a bit of a combo. I used the Revell kit, but I didn’t like the custom tail light panel, so I used the AMT tail lights. There was a bit of massaging to get a perfect fit, but nothing complicated. It’s lowered about 6 scale inches. There is a thread here under glass if you want more details. Thanks for having a look. -
Hi Tom, thanks for the encouragement! We think alike, I really like to do these fun builds once in a while. I often try at least one new idea on the easy builds for possible use later on detailed builds. I have a done working headlights in the past, I have a new lighting idea to try on this one that I intend to do on a detailed build in the future. Haha !!! I saw this build. Stuart, this thing is awesome! It made me laugh when I saw it, Shaggy’s eyes tell the whole story. I actually considered doing a VERY similar build, but have decided to take an easier route. Thanks for sharing that Hi Sean, I had also considered a top chop. I agree it would look cool, and likely better, with a chop. There is a chance I will still do it, but…. I want to make sure it keeps the “cartoon” look, the chop might look too “normal?” I also want room for some graphics on the side, still playing with that. I very much appreciate the input. Thanks for the feedback guys, unfortunately I’ve had no bench time lately. I have a big project on the go at home, still about 3 weeks to go on that. Cheers, Steve
-
Looking great Bob! The low stance looks awesome, nice work on the shocks. I have “thought” about doing that many times, just need to actually try it, you have inspired me. Cheers, Steve
-
Who doesn't love a mock-up? Let's see yours!
Steve H replied to Belairconvertable's topic in WIP: Model Cars
So much great stuff here guys. Here’s a goofy one I’m working on now.
-
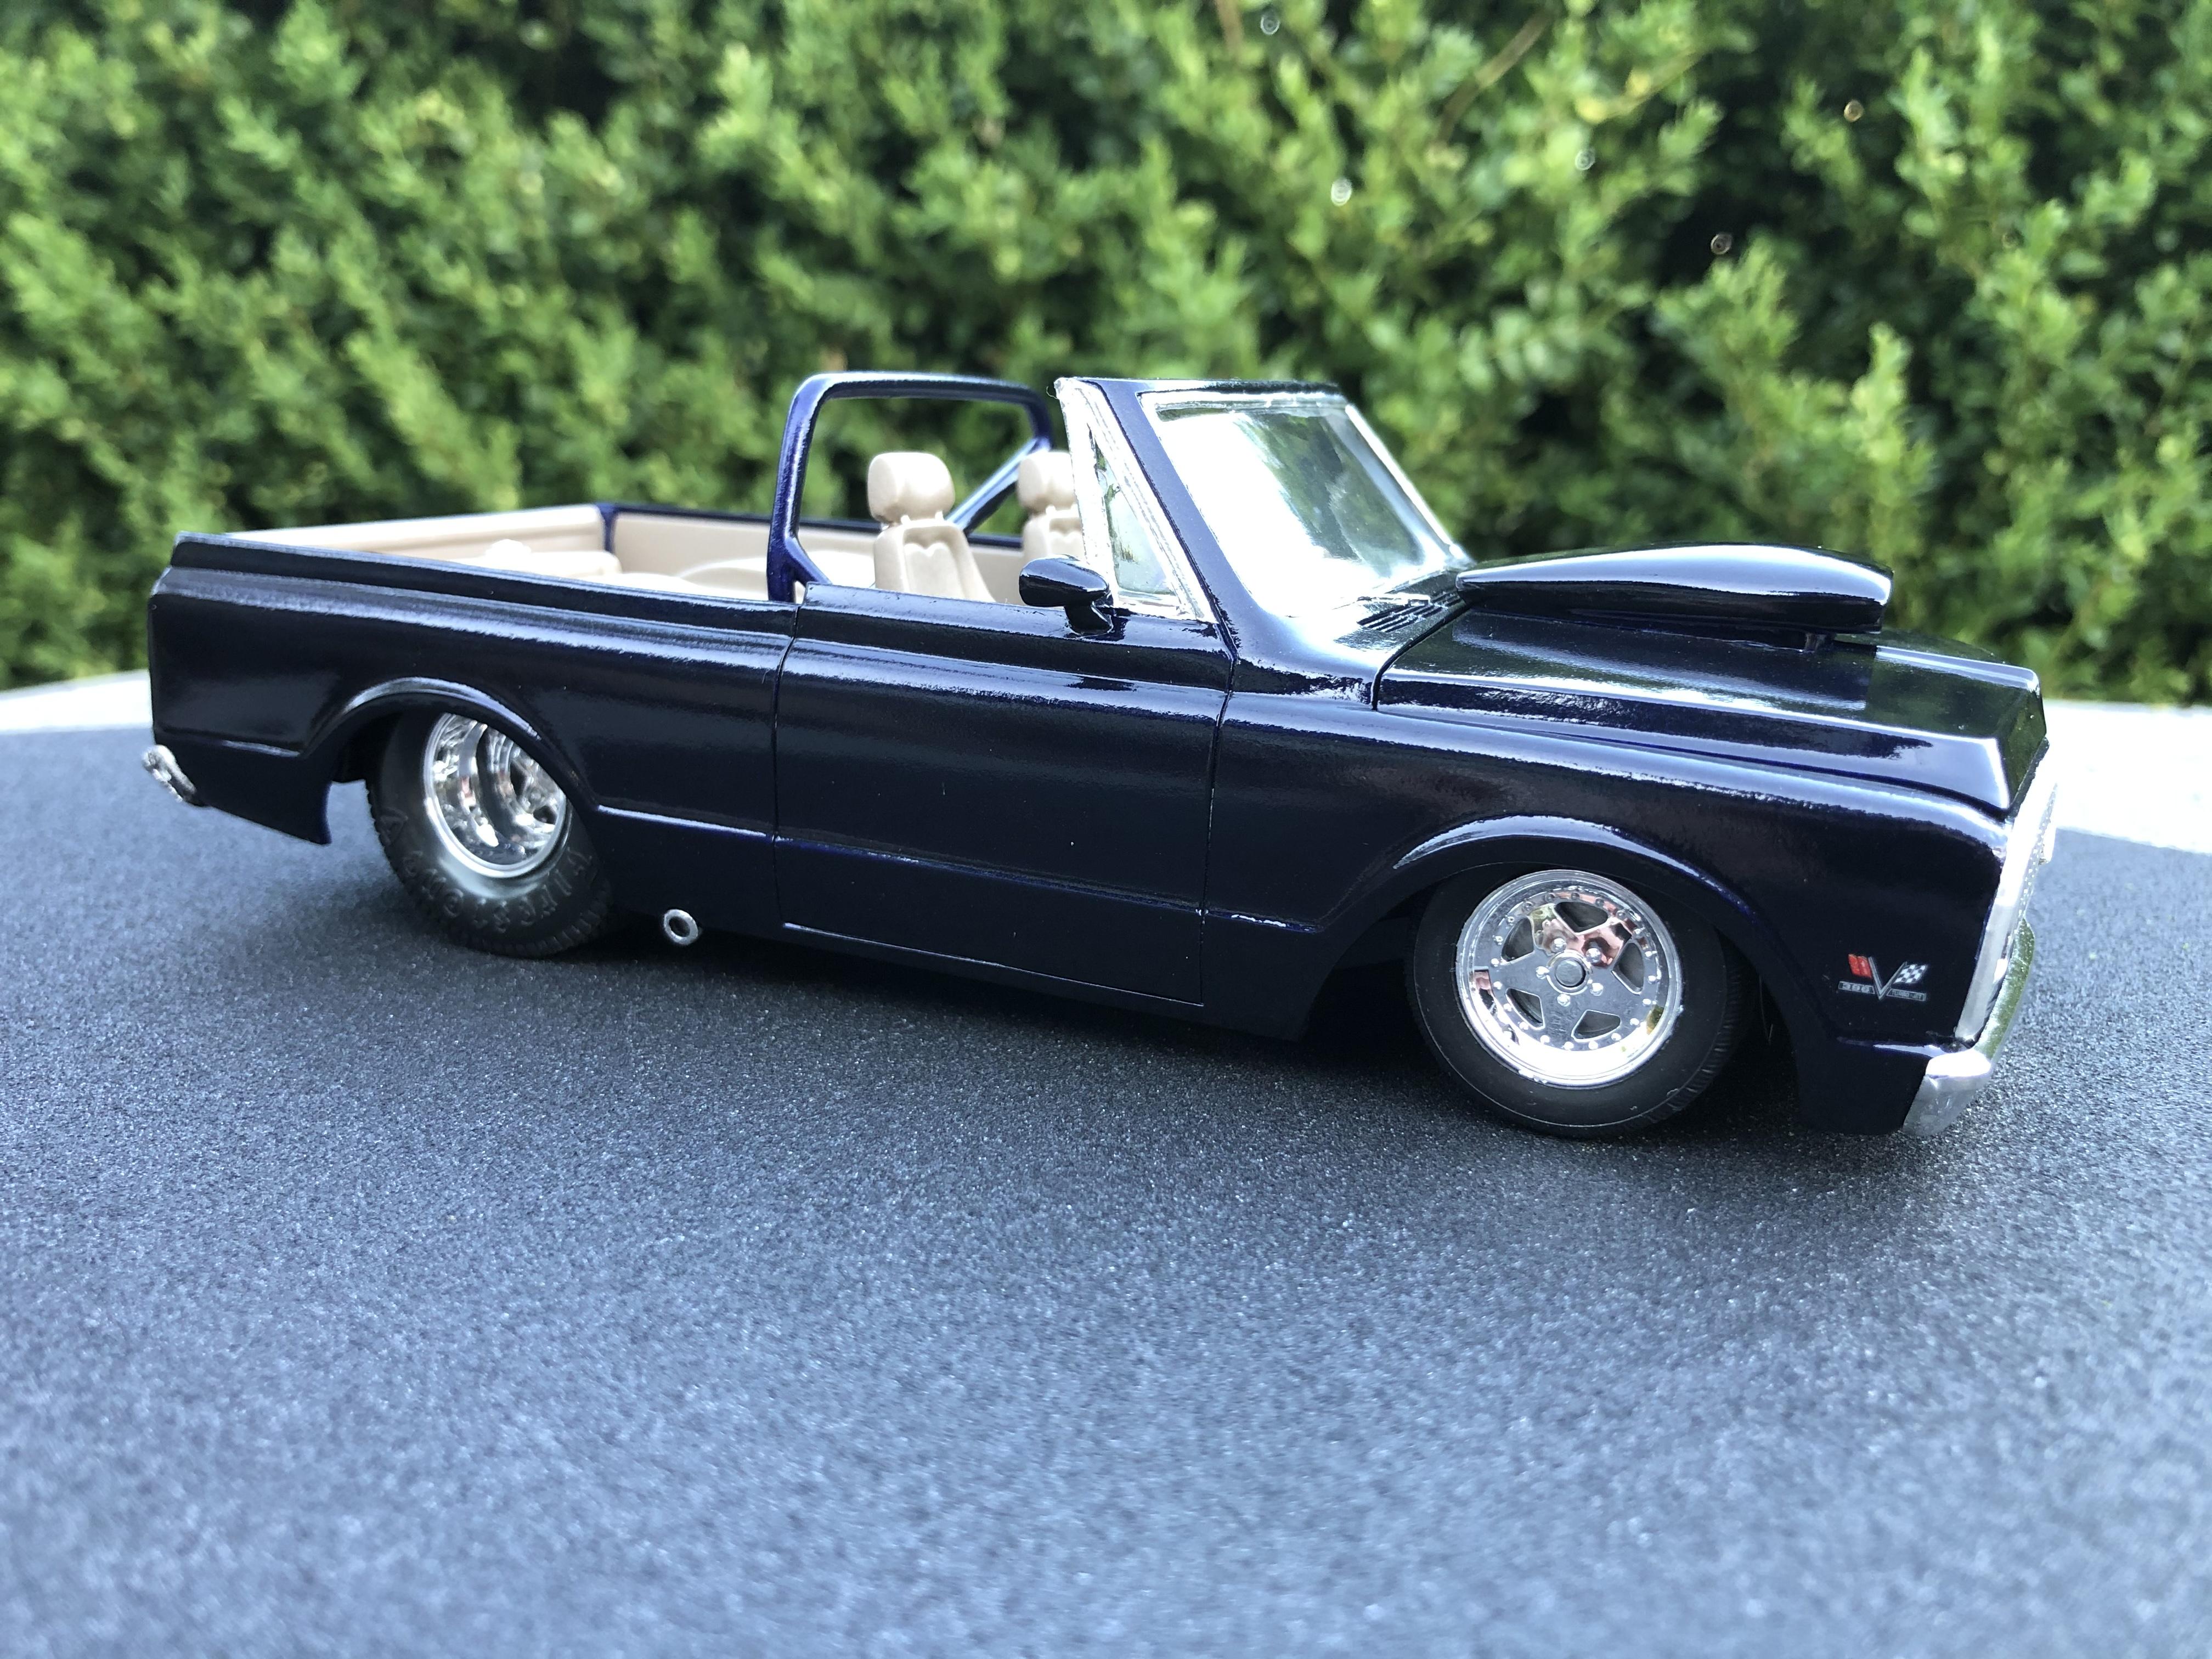
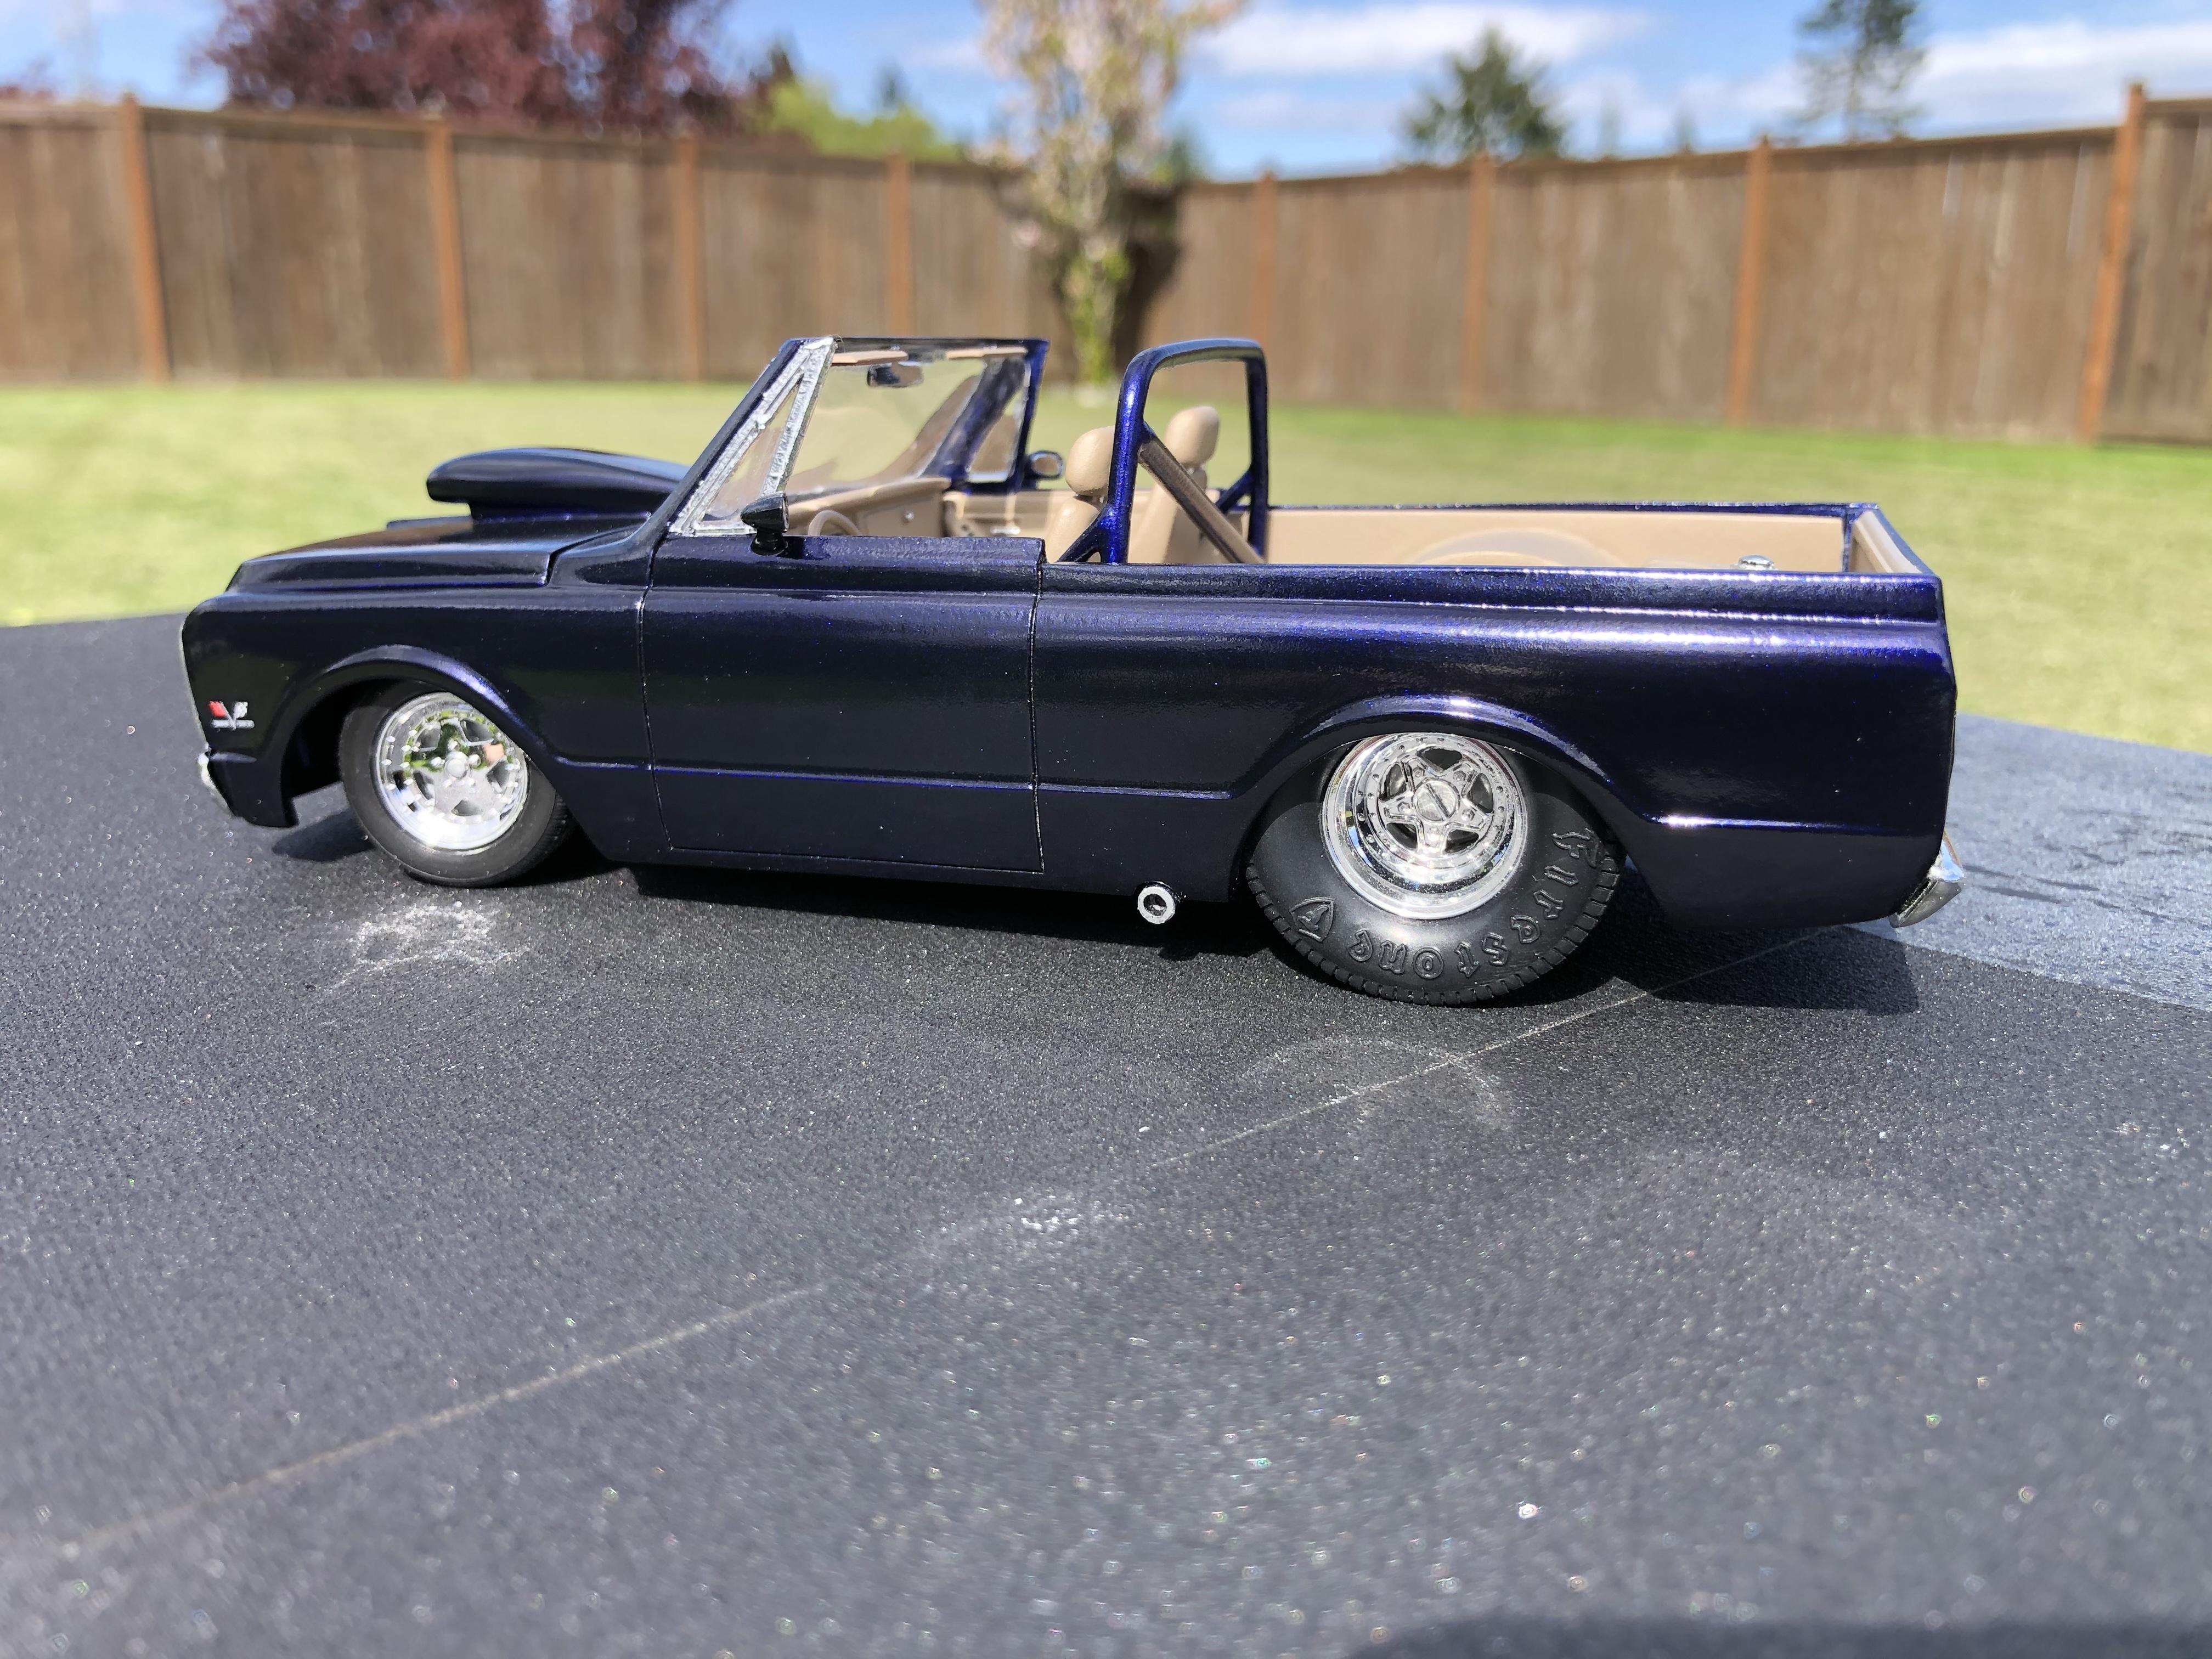
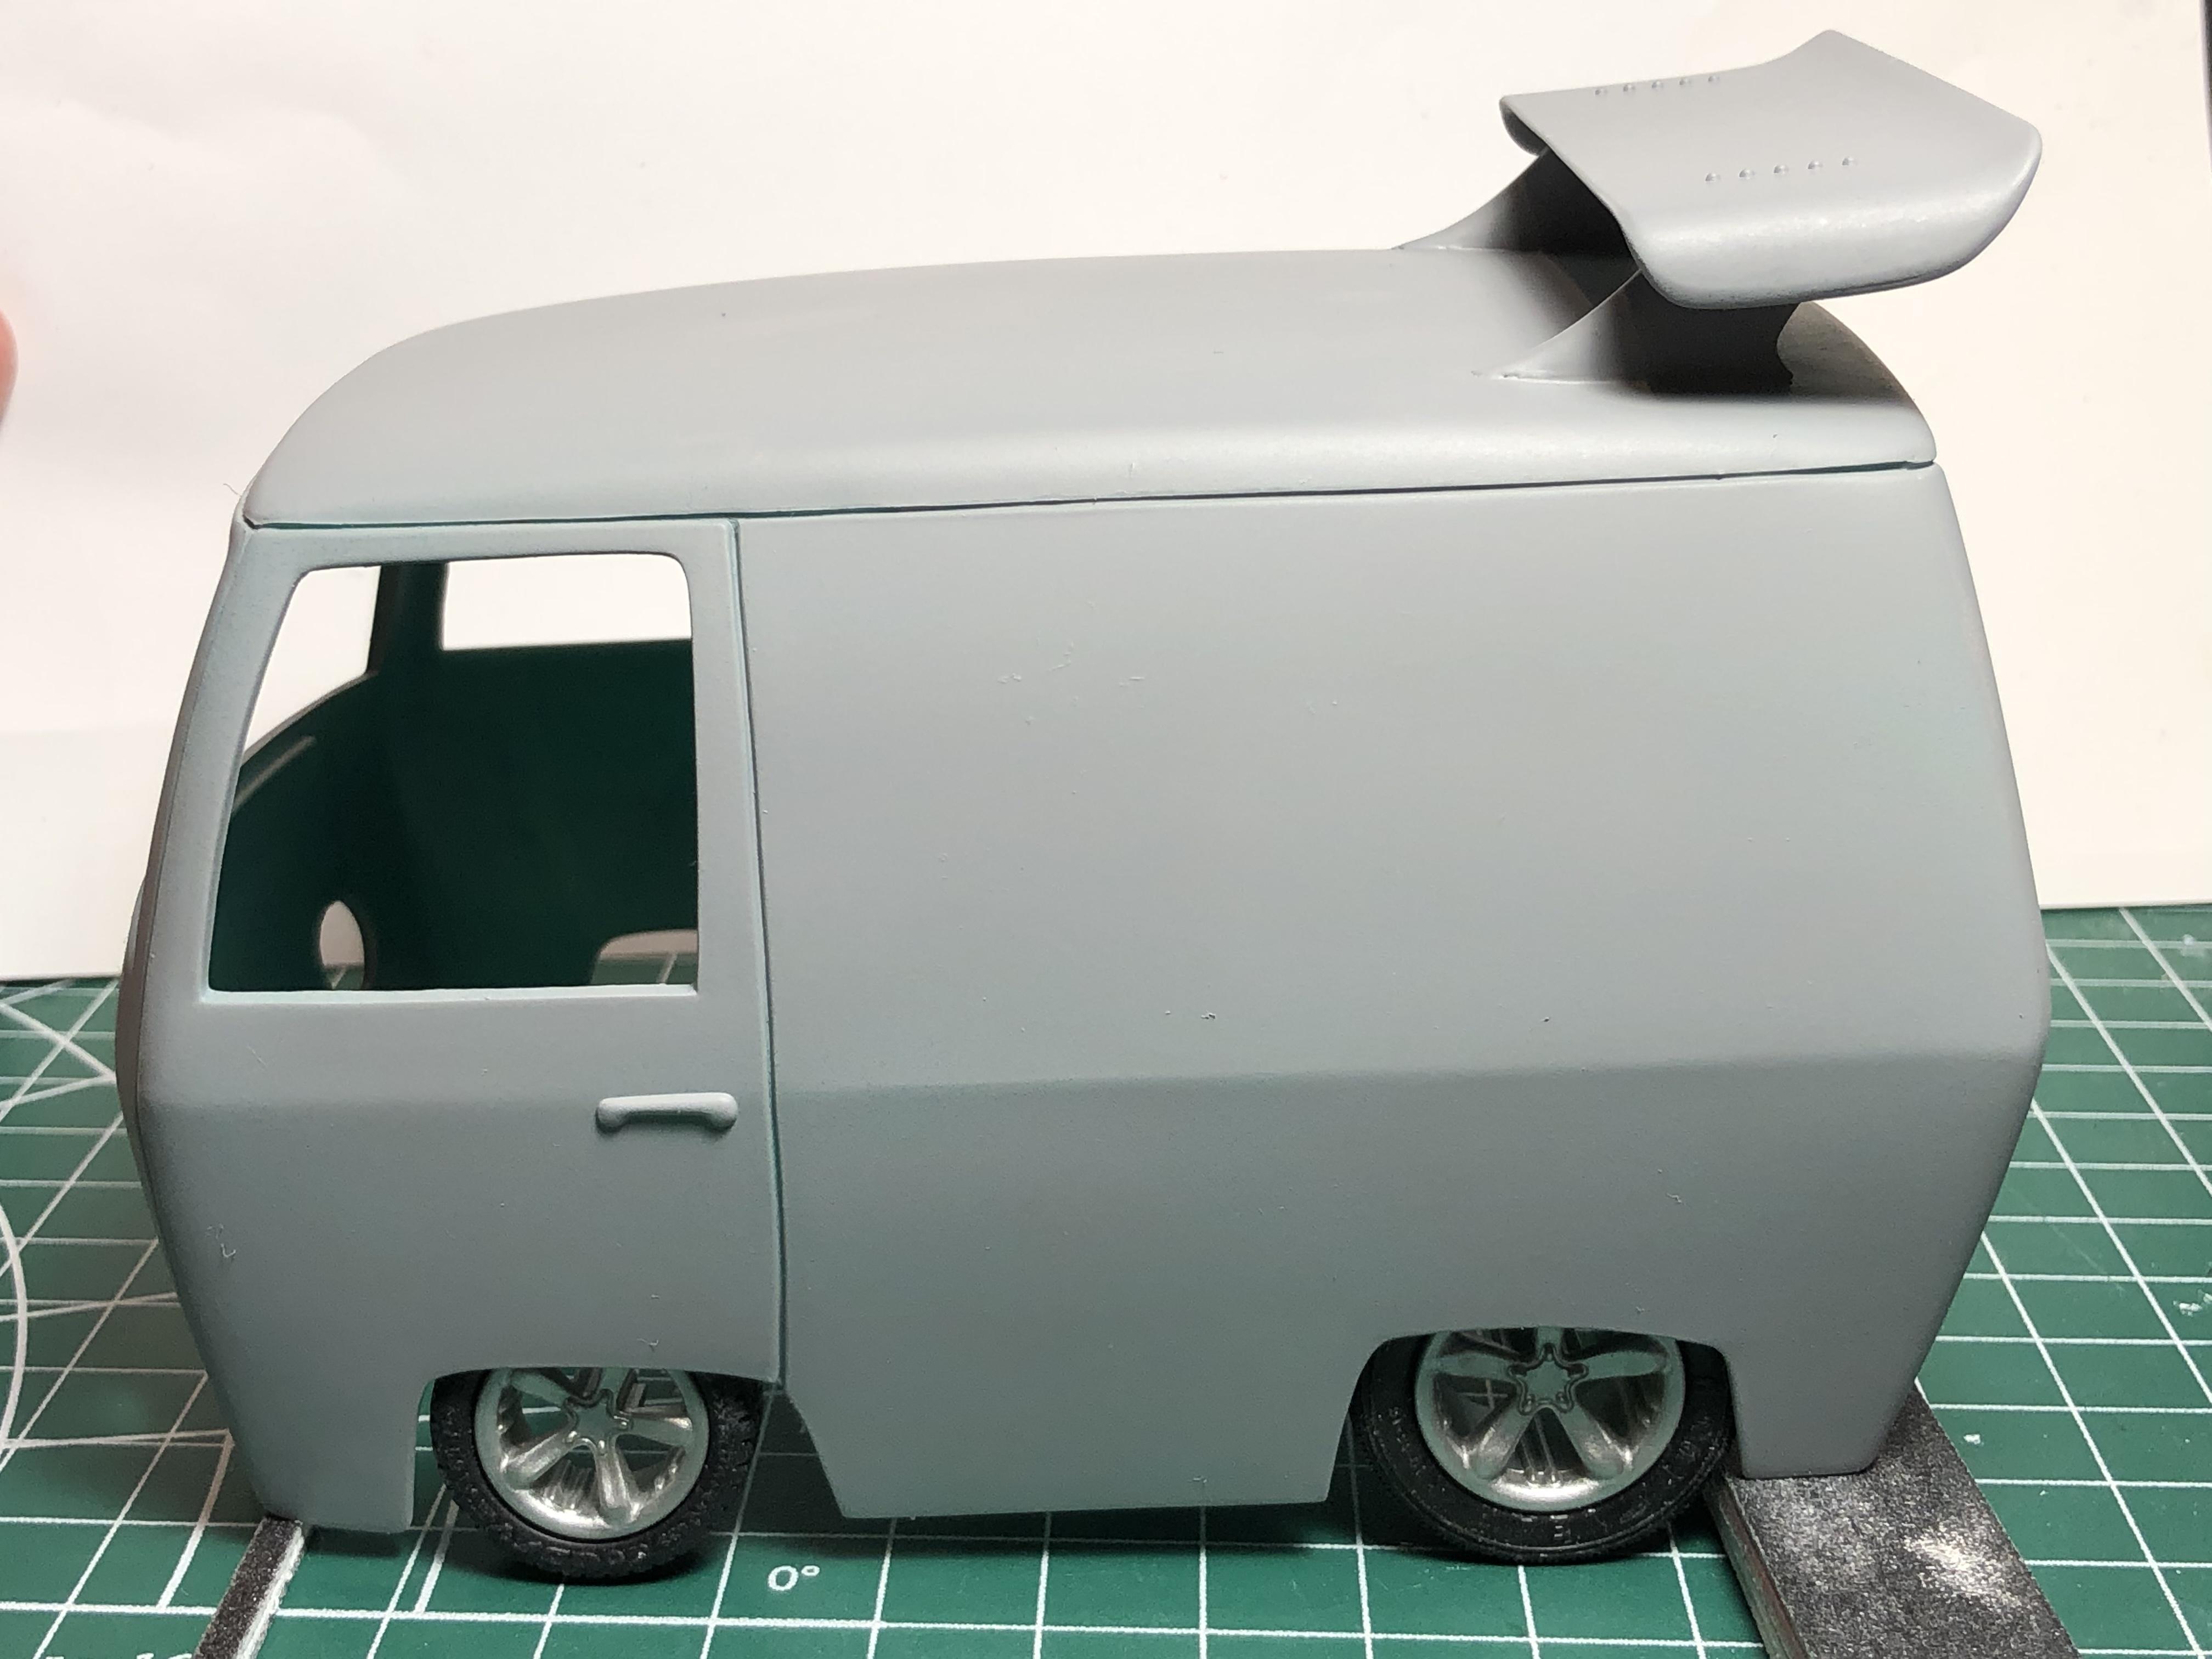
Hi all, still haven’t had much desk time. Just enough done to throw a quick mock up together. This will give you a flavour of where this is going. I had a fun dive into the parts bins and decal box the other night. Saving some of my finds for later. Added the wing from “fast buck” Colour will be Tamiya TS 24 purple, with Tamiya “lame flake” for some sparkle. I plan on going heavy with the lame flake to keep it “cartoony”. Found some fun graphics in the decal box, they are really old though. I’m hoping a coat of decal bonder will keep them from falling apart. I spent some time today messing around with what will be one of the key features of the build. No photos yet, I have some more to do before I share. Thanks for having a look.
-
Hi Paul, really enjoying this thread. I recently purchased an older issue of this kit. I’ve built two, one way back when it was first released more or less box stock, then in the late eighties I glued the flip nose closed, opened the hood, tubbed and pro streeted one. Not sure what I will do with the one I have, but your build will definitely serve as inspiration. Very nice work, and perfect colour! No offence, but it is somehow reassuring to see a builder as talented as yourself have some of those unforeseen issues. I kitbash a lot, and no matter how many test fits and mock-ups are done, sometimes I just get bit by something missed. Hopefully yours are easy fixes, you obviously have the talent. Thanks for sharing. Cheers, Steve
-
Hi John, these cars have beautiful lines in my opinion. Look forward to seeing your build progress. Cheers, Steve
-
Hi Claude! Your builds my friend, never disappoint. You are one of the most creative builders in the hobby. Incredible talent with a dash of humour. The king of mashups for sure. Thanks for sharing another masterpiece with us. I’m starting to get the build a VW bug… (ya, cheesey pun intended) I only built one VW many years ago, I think it was the “Rubber Ducky?” something like that. It’s long gone now. Your recent VW builds have me thinking tho. Cheers, Steve
-
Hi Claude! Ya… sometimes I just like to bring it down a notch. It will be fun for sure, I have a vision…. Hopefully, it will indeed make you smile, that would make me smile!! Hi Mark, sorry for the delayed reply, it’s been a busy stretch. Man, I look forward to seeing your take on this kit, a rusty barn find of the long lost mystery machine… bring it on! It would be cool to see the different takes on this kit, I’ve seen a few that I really liked. If anyone wants to join in here, it would be great. This will be a fairly quick build, I just need to actually get to my desk… I’m hoping for a small update tomorrow. I’ve had a few ideas pop into my head that might kick things up a notch. Thanks for checking in guys!
-
Pro touring 70 1/2 Camaro (Dutchboys 2015 SEMA tribute)
Steve H replied to Steve H's topic in Model Cars
Francis my friend, thanks so much for taking the time to comment. Your talent is an inspiration to us all, you set the bar REALLY high! I will never achieve the results you can, but people such as yourself inspire me to build better and cleaner. Thanks!! Thanks Craig. I fell in love with the 1:1 car the second I saw it. I hope I did it justice. Thank you Paul! I usually follow thru on projects. There has been one or two that got tucked away over the years, but generally if I start, I finish… Thanks for having a look. Thank you John. Hopefully the Dutchboys would agree. Thanks Mark. Hello Carl! As you know, I always enjoy hearing from you sir. Thanks for the kind words. Thanks Trevor! I wish the style and vision were mine. The Dutchboys really created a beautiful beast, hope I did it justice. I really appreciate the compliments, thanks for having a look. Thanks to everyone for your comments. Sorry for the late replies, it’s been a really busy couple of weeks. Truly appreciate you taking the time to have a look. Cheers, Steve -
Pro touring 70 1/2 Camaro (Dutchboys 2015 SEMA tribute)
Steve H replied to Steve H's topic in Model Cars
Hello Alan, much appreciated, thanks for the kind words. Hi Phil, not sure that my flares came out as good as yours, but overall I’m happy with it. I look forward to sharing it with you in person. Thank you Mario, I love your builds and appreciate you taking the time to look and comment. Your builds are very inspirational. Roger! Great to hear from you sir. Thanks for the kind words, it means a lot coming from you. As you know I’m a huge fan of your builds. Your paint choices are always amazing, so to have you compliment the finish truly means a lot to me. Cheers, Steve -
1963 Chevy Nova Wagon Street Rod FINISHED 3/20/22
Steve H replied to Dennis Lacy's topic in WIP: Model Cars
Verrrrrrrry nice…. Looking awesome Dennis. I’m still concerned about that pesky squirrel tho, keep him away from the speaker/amp wiring!! Seriously though, nice to see an update on this one, she’s going to be a beauty once complete. -
Hi Claude, having only been on the forum for a year and a half, I love it when these get bumped. Yet another beautiful mashup. You sir, are the king of mashups, always well thought out, and beautifully executed. Cheers, Steve
-
1972 Oldsmobile Indy Pace Car Convertable to Hardtop Conversion all pau
Steve H replied to Katsusauce's topic in Model Cars
Derek, this thing is spectacular from top to bottom, and inside out. I like the little hits of body colour throughout the build. Lots of great details, clean build and killer stance. Well done! Cheers, Steve -
Very nice build Tom. I LOVE this colour on these cars, perfect choice. I plan on doing a pro street version in the same colour later this year.
-
Pro touring 70 1/2 Camaro (Dutchboys 2015 SEMA tribute)
Steve H replied to Steve H's topic in Model Cars
Wow! Thanks Matthijs, that’s very high praise. Hi Nigel, thanks for the kind words. Glad you feel that it captures the look of the original too. Well Jim, it’s not “shiny”, but it is “shimmery”. Thanks for the compliment. Hey! It’s you again! Thanks so much Anton Thank you Bill !! I really appreciate all the feedback guys, thanks for taking the time to have a look and comment. -
Pro touring 70 1/2 Camaro (Dutchboys 2015 SEMA tribute)
Steve H replied to Steve H's topic in Model Cars
Hello Anton! Thanks for your encouragement along the way. Always nice to hear from you sir. Thank you Jeremy! Thanks Beamerman, I am quite pleased with the paint job. Hi Keith, thanks so much, I really appreciate it. Thanks Glenn! Hi David, as you know, I always enjoy hearing from you. It is quite surprising how the paint shimmers and catches the light. Thanks for your input on the WIP, and your kind words here. Hello Claude! Well….. you’re gonna have to dial down your expectations for the next build. Just started a WIP in the truck section yesterday. Let’s just say the bar will be MUCH lower for the next one. However… big plans after the Mystery Machine! Very much appreciated Misha! Hopefully we can get together soon. I look forward to showing it to you in person. I agree that the black looks awesome with the suede. The Dutchboys did an amazing job. -
Pro touring 70 1/2 Camaro (Dutchboys 2015 SEMA tribute)
Steve H replied to Steve H's topic in Model Cars
Thanks Ryan, I appreciate that. Thank you Chris Much appreciated Larry! Hi Oliver, thanks for the kind words. -
Thanks Andy, I’ll try to make it worth while. Hi Bob! Good to see you back sir. Some decent size rubber on the back for sure, not huge tho. I’ve got tires and wheels sorted out. I agree Ray. I like to do something totally goofy every once in a while. Hi Rick, I have had MANY ideas for this thing over the years. Haha!! I told you it would be a laugh. Just keep your expectations low, and you won’t be disappointed! Oh I would love to see your take on this Chris. I double dare you! Maybe this silliness will “inspire” you…nah…. likely not much inspirational will happen here. Should be fun tho. I gotta be honest guys, I wasn’t expecting ANY interest for this one. Thanks for having a look and commenting. I painted a bunch (12) spoons today, should have it narrowed down to 2-3 tomorrow.
-
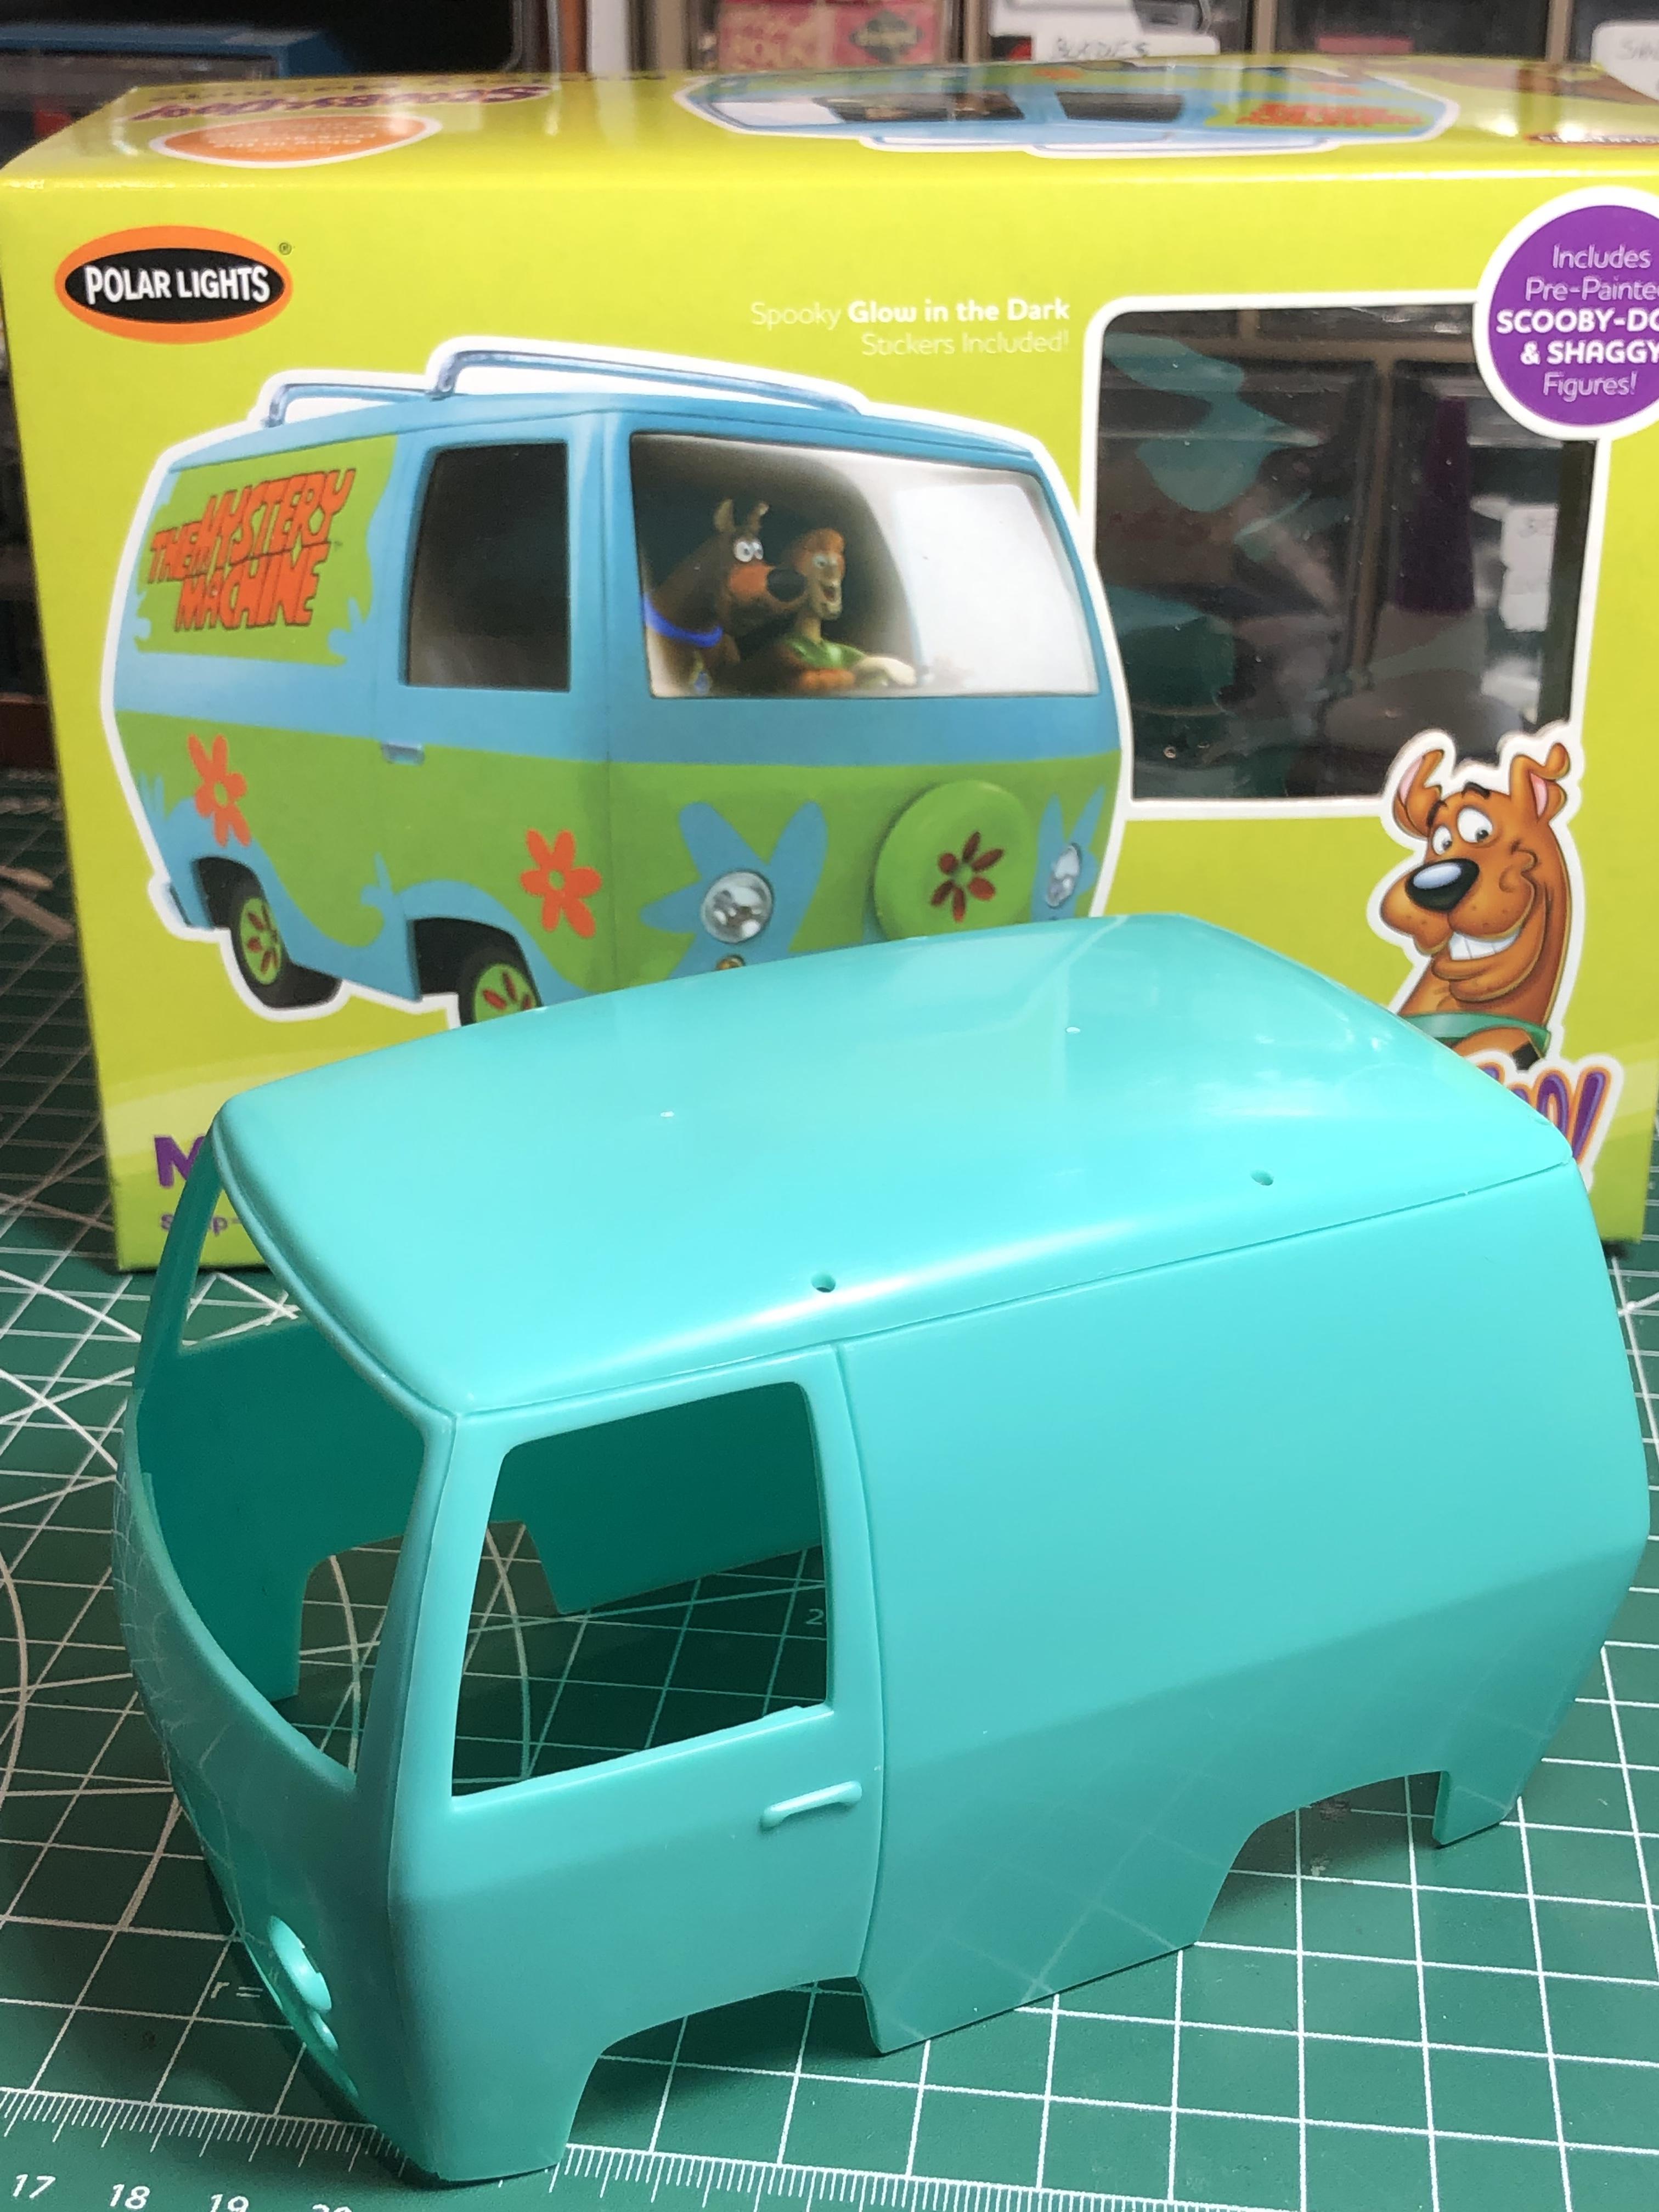
Ya…. this is gonna be quick. Keeping it REALLY simple on this one, but… it will be low!! I bought this many years ago to build with my daughter. We built a pink Hummer, but never got to Scooby and Shaggy’s ride. Time to remove it from the stash… The plan is to keep it very cartoony looking. Slammer, with no interior. I have a handful of paint ideas to spoon test for this one. I probably shouldn’t waste your time doing a WIP on this one… here goes anyway. As always comments are welcome…. not expecting many here tho!!!