Steve H
-
Posts
2,535 -
Joined
-
Last visited
Content Type
Profiles
Forums
Events
Gallery
Everything posted by Steve H
-

Mystery Machine…. with a twist.
Steve H replied to Steve H's topic in Model Trucks: Pickups, Vans, SUVs, Light Commercial
Thanks Chris! Hi Rusty, yay! That’s what I was hoping for, fun and grins. Thanks for having a look. Shag and Scoob are definitely too cool for school! Thanks Bill Thank you Peter. These types of builds are a great way to keep it fun. Hi Stuart, thanks for your comments. Yes! This kit has a ton of potential for having fun creating your own custom version. Thank you Bob!! I wish I could capture the rainbow effect of the lame flake better. Couldn’t resist adding the Peterbuilt, and Hemi decals. Glad this one caught your eye. Thank you Carl !! It’s silly, but it turned out as I hoped. Excellent! Smiles was the goal. Thanks for having a look David. Just want to thank you all for taking the time to comment here. Honestly, I wasn’t really thinking there would be much interest in this silly thing at all. Glad that it made a few of you smile. As I’ve said, these types of builds are good for keeping the hobby fun. Thought I would share a previous fun build Cheers, Steve
-
Mystery Machine…. with a twist.
Steve H replied to Steve H's topic in Model Trucks: Pickups, Vans, SUVs, Light Commercial
Thanks Hector, hard to photograph the lights, but they turned out as I hoped. Hi Bill !! Yes indeed, sometimes I like to do something silly/fun. These types of builds are always enjoyable for me. Hi Greg, definitely a fun one. Hi Jeremy, I did mention this would be a little different… Thanks for taking the time to comment guys, especially on this silly thing. Cheers, Steve -
Hi Luke. What the…. Look how high it is!!! Kidding aside, it’s looking really good. You definitely are the master of smoooooooth paint, those headers look fantastic! I’m following sir. Cheers, Steve
- 766 replies
-
- 1
-

-
- stalled builds
- quick builds
- (and 2 more)
-
CBR BMW M635CSi, Fujimi Entusiast in depth.
Steve H replied to Mattilacken's topic in WIP: Model Cars
Hello Anton !! I’ve been busy with home projects, so I’m trying to get caught up here. Progress looks great on this, and obviously I love the low stance. Very nice job on the wheels, those sleeves look perfect on them. The extra time spent on the inside of the fenders to move the wheels out was definitely time well spent. Cheers, Steve -
Hi Jim, nice build. That chop top looks great, and the orange paint is a perfect choice. Cheers, Steve
-
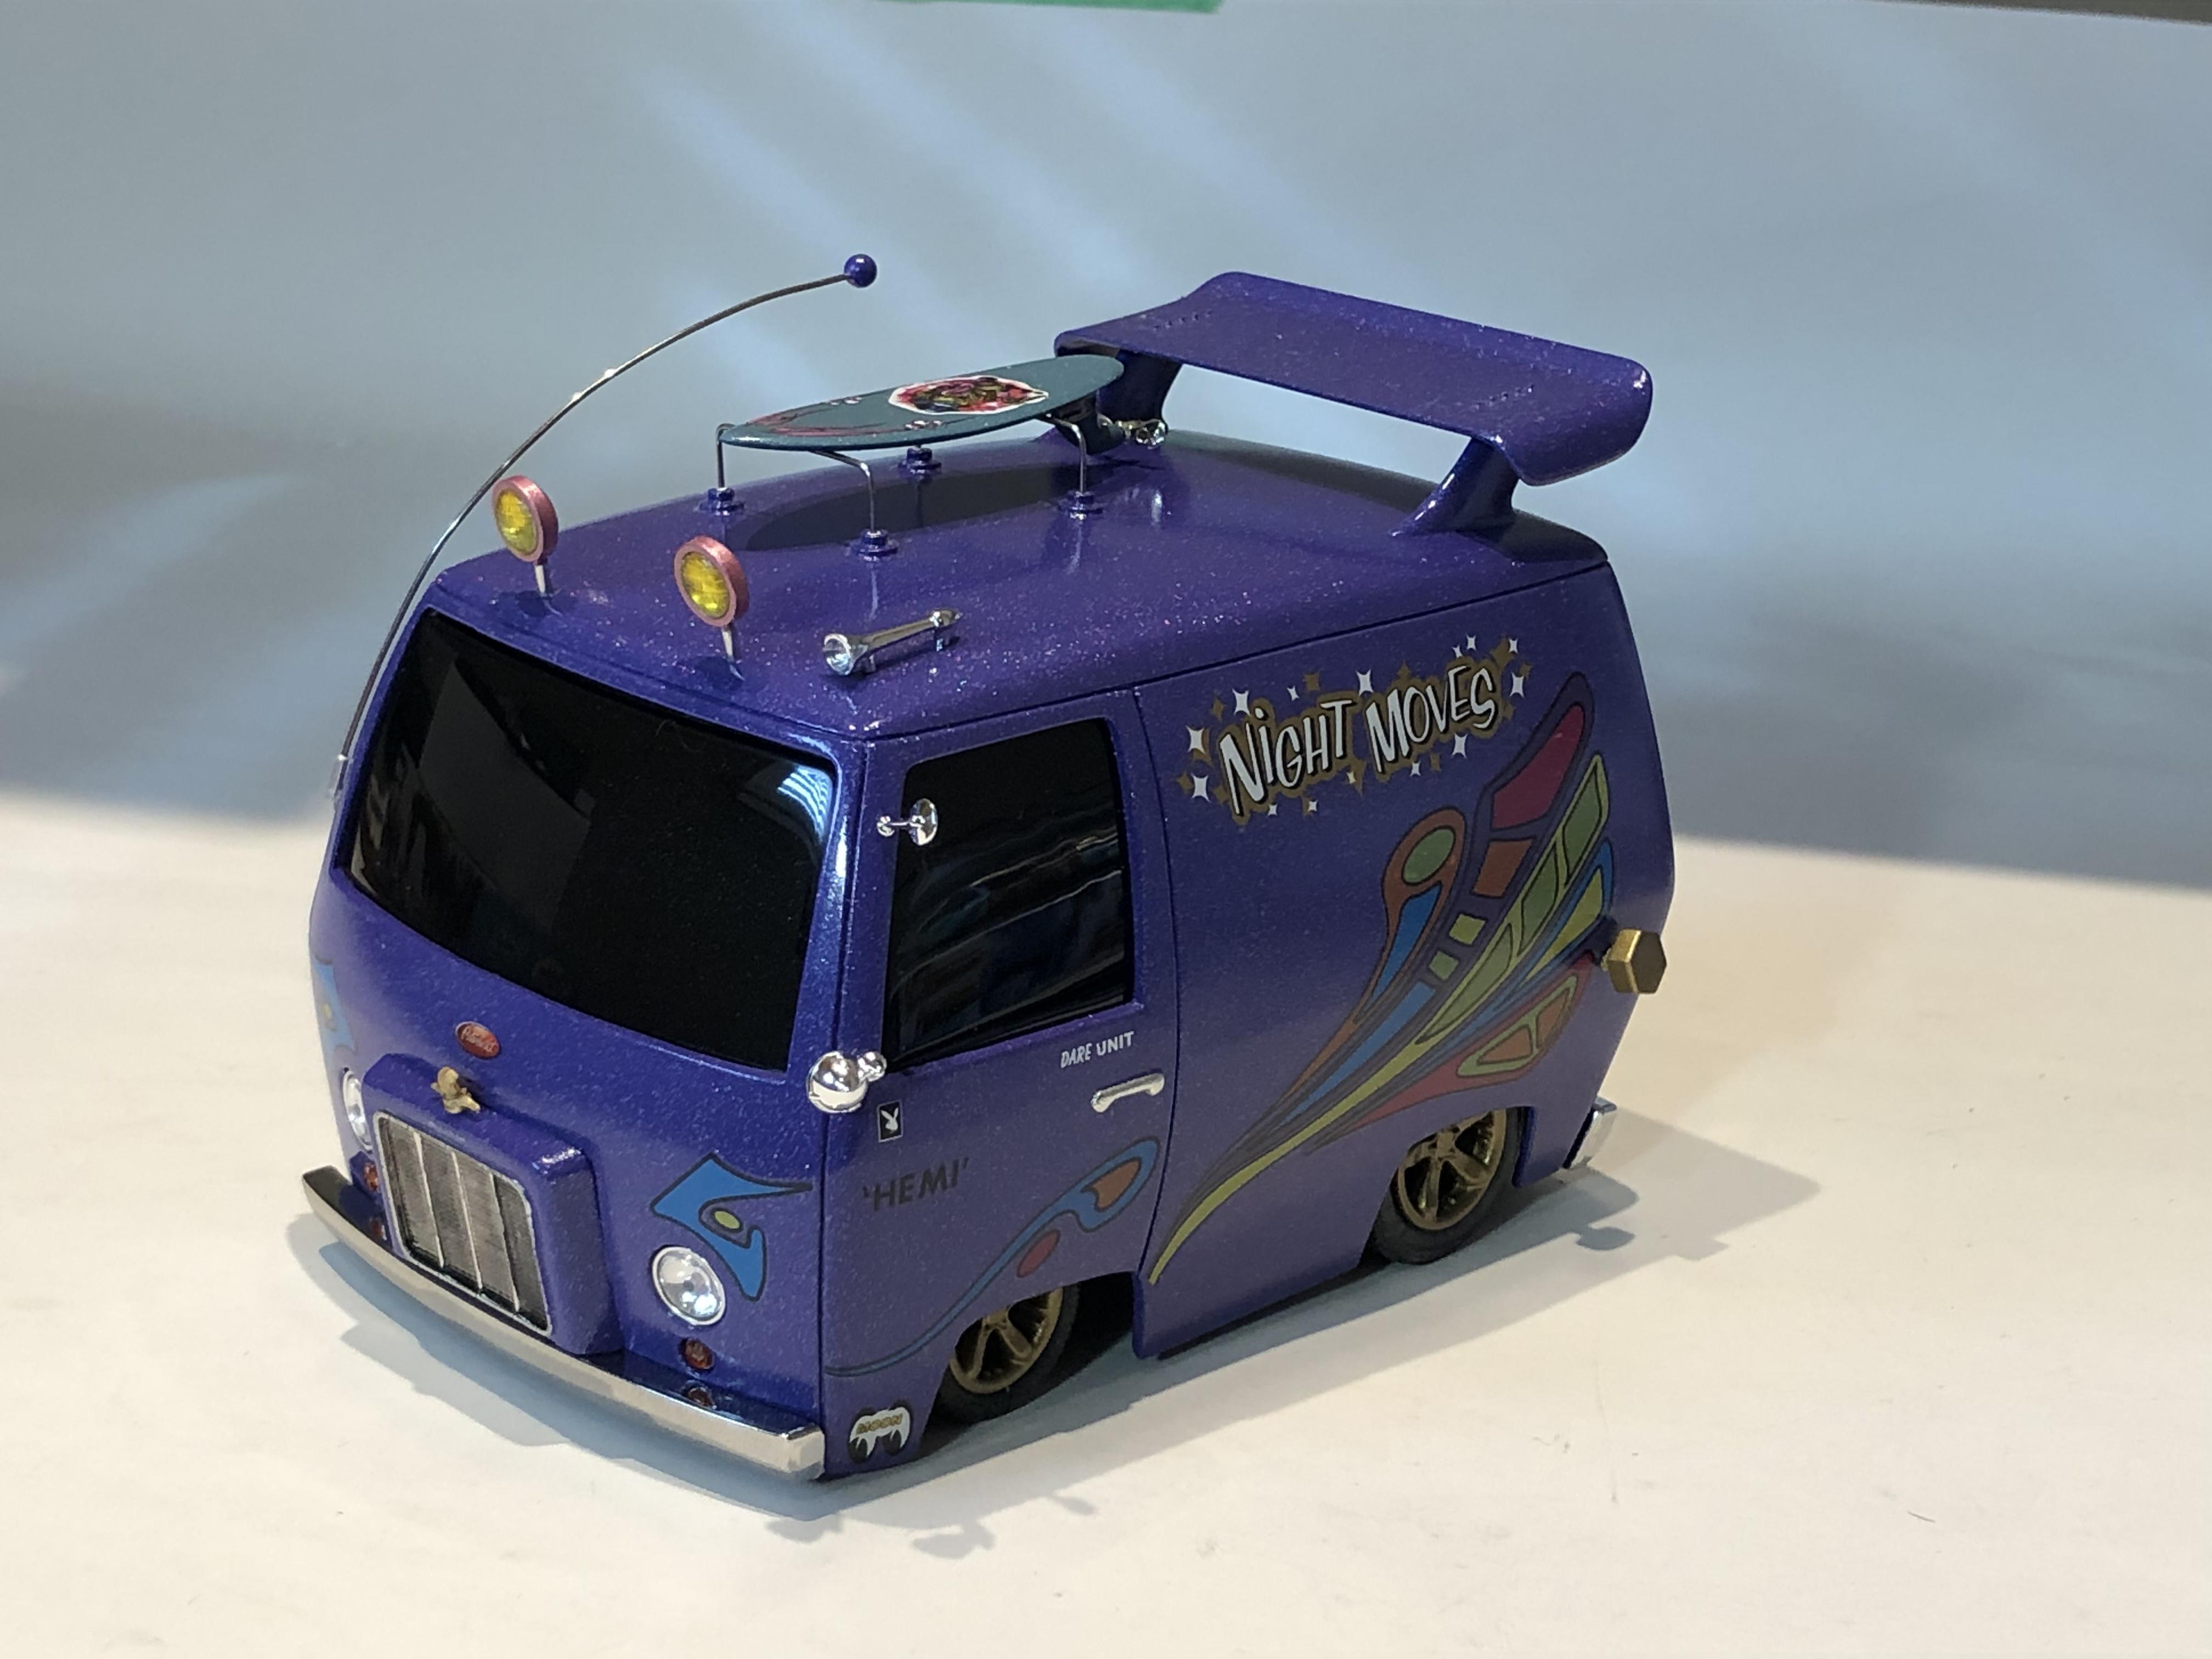
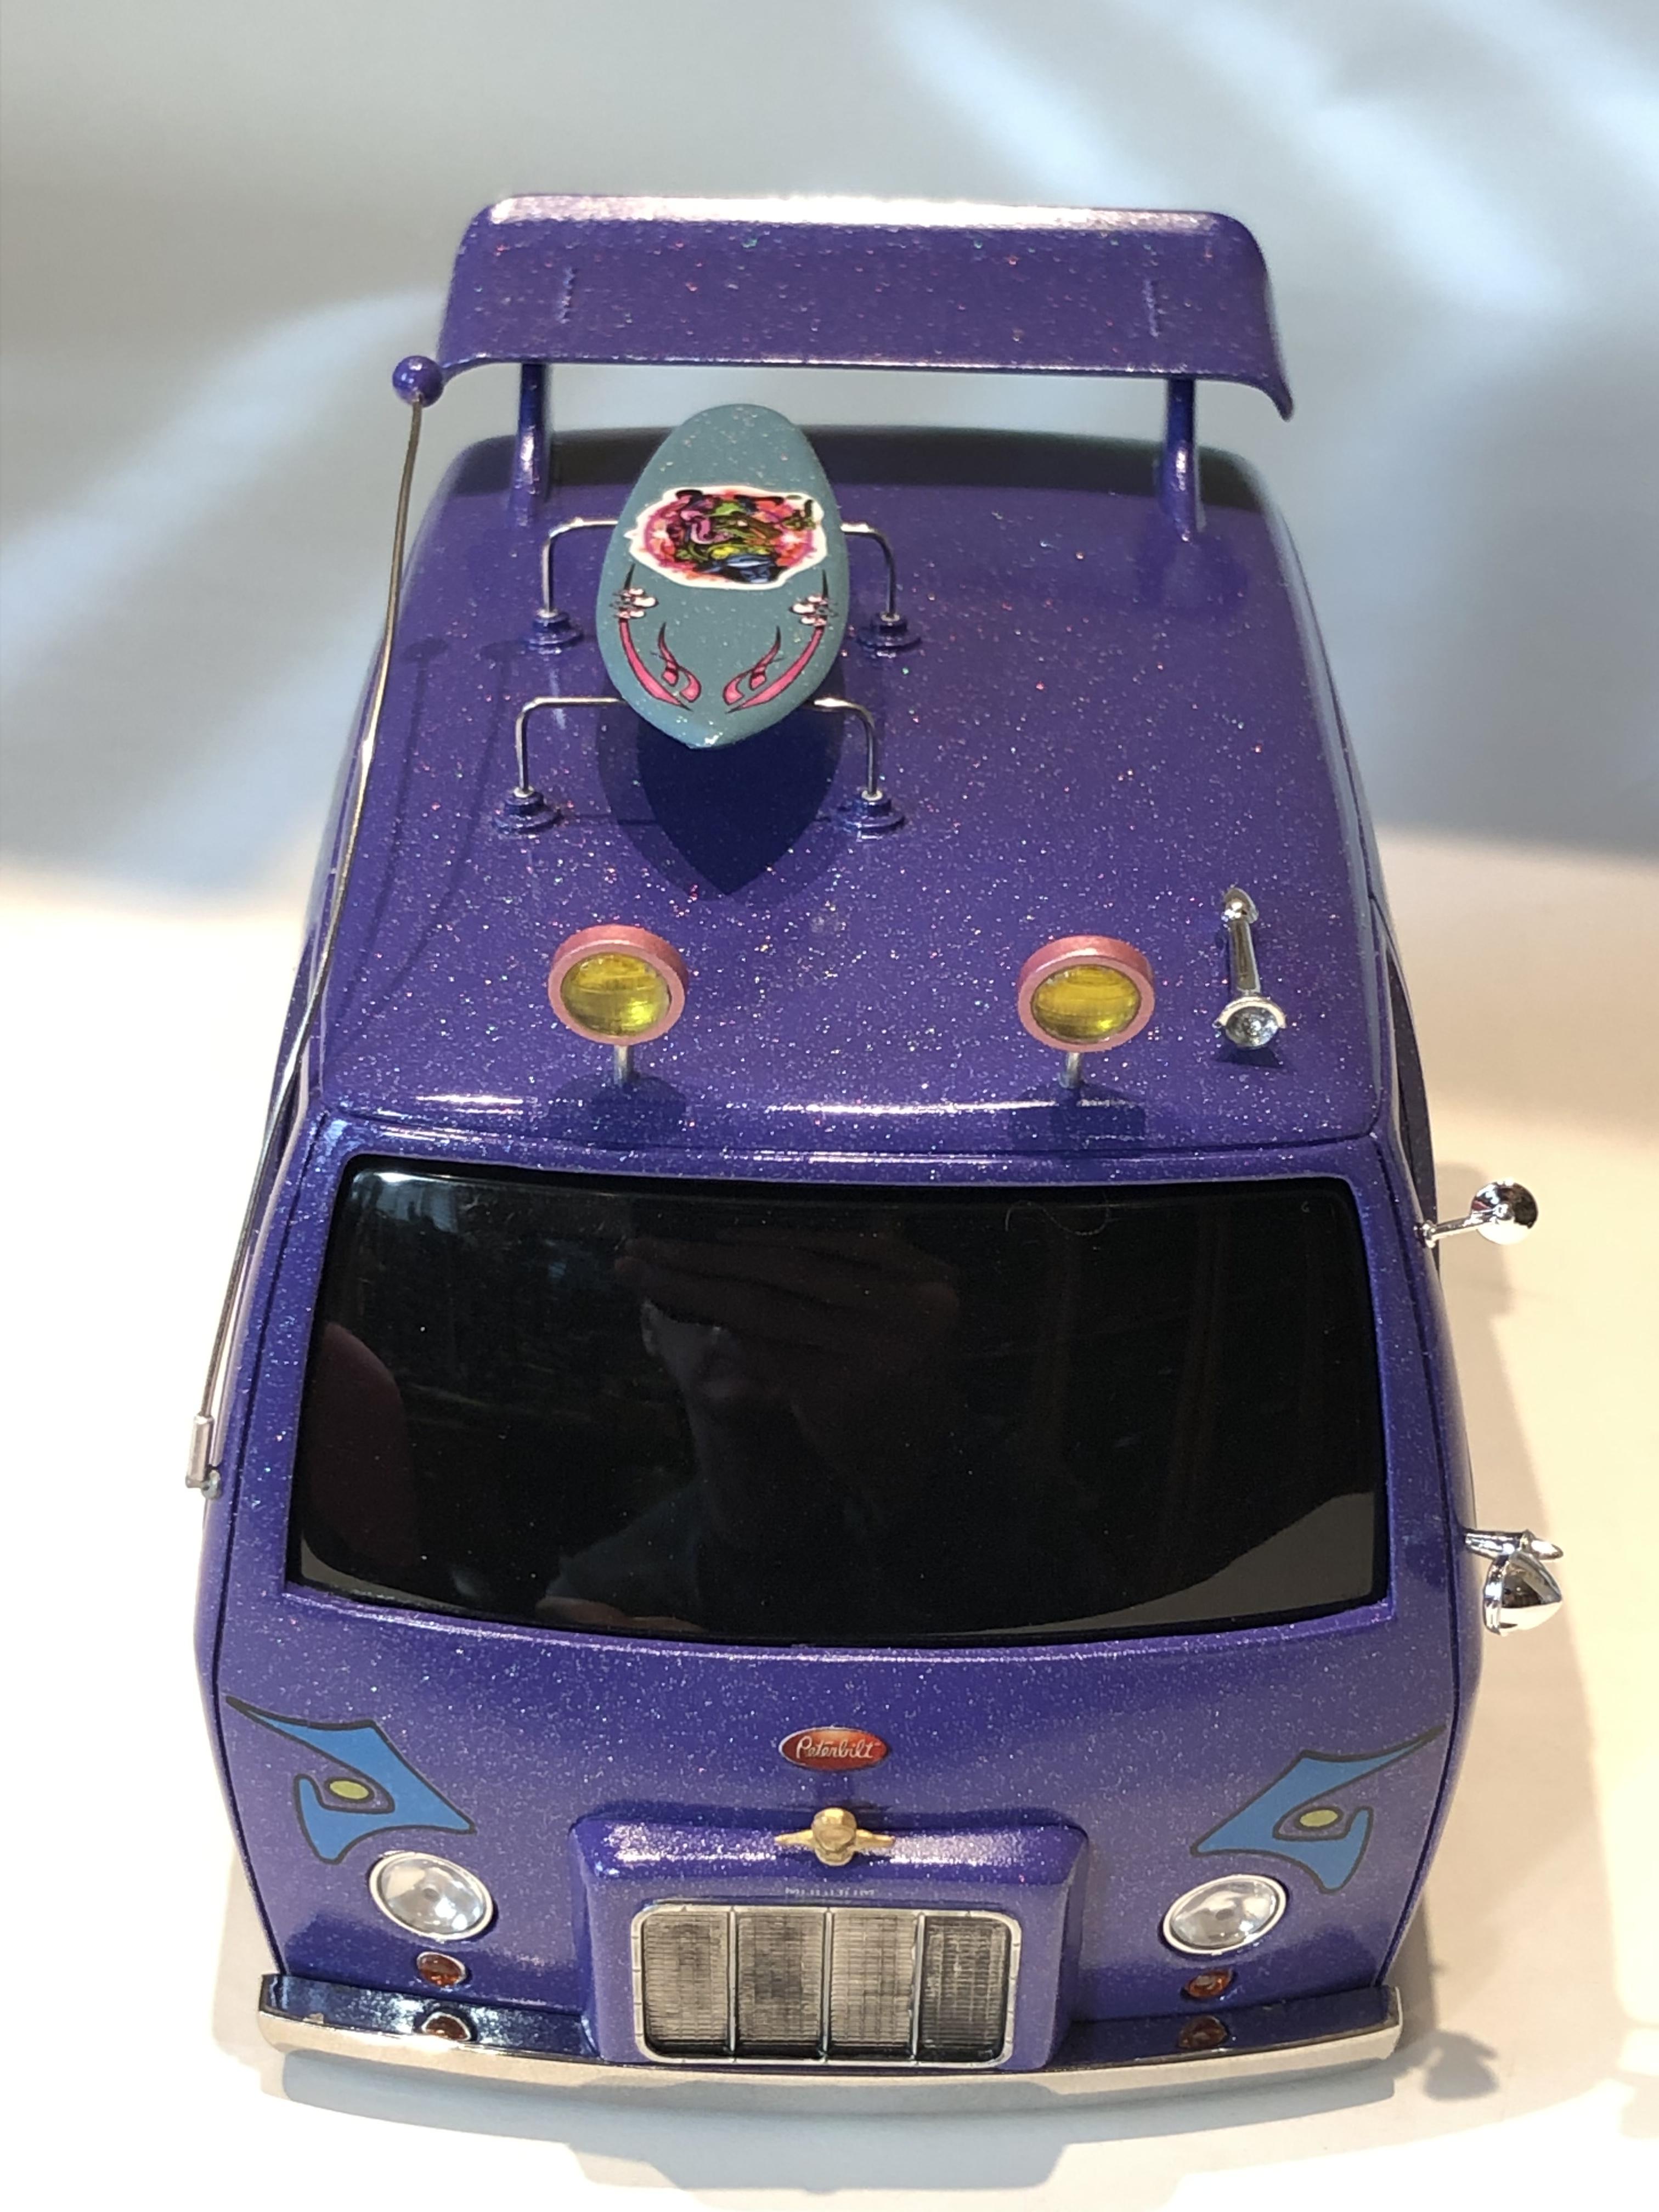
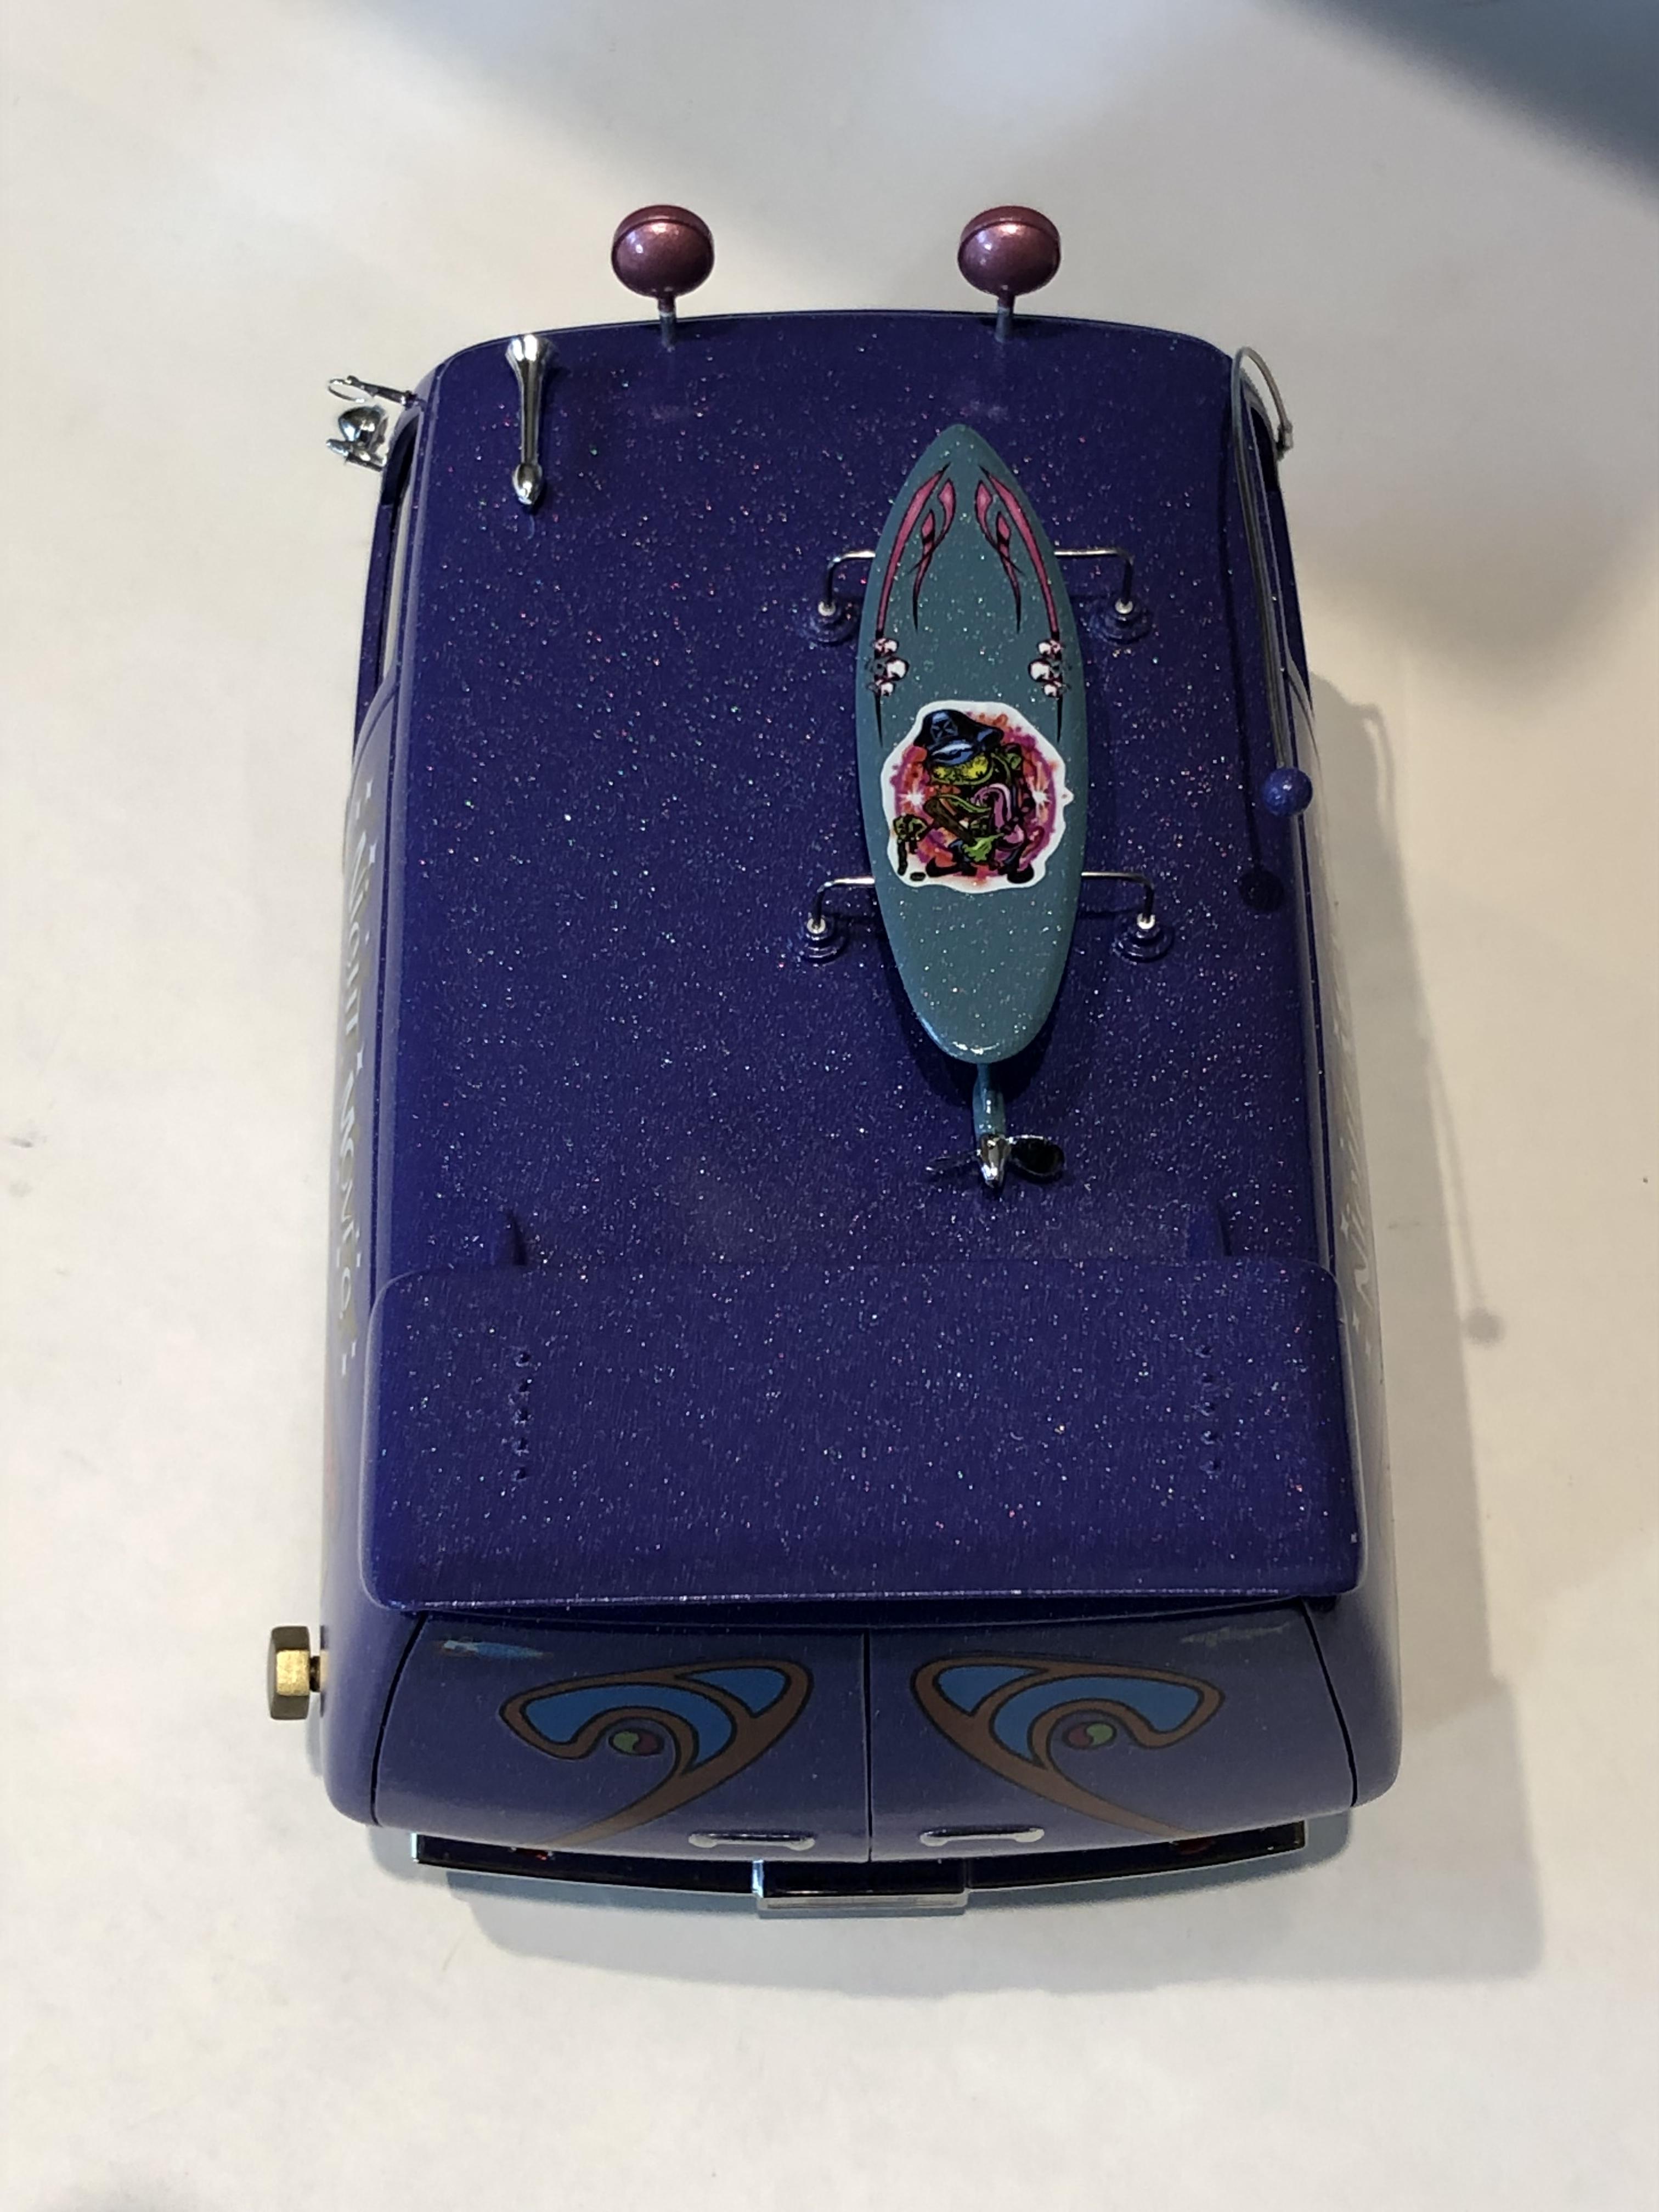
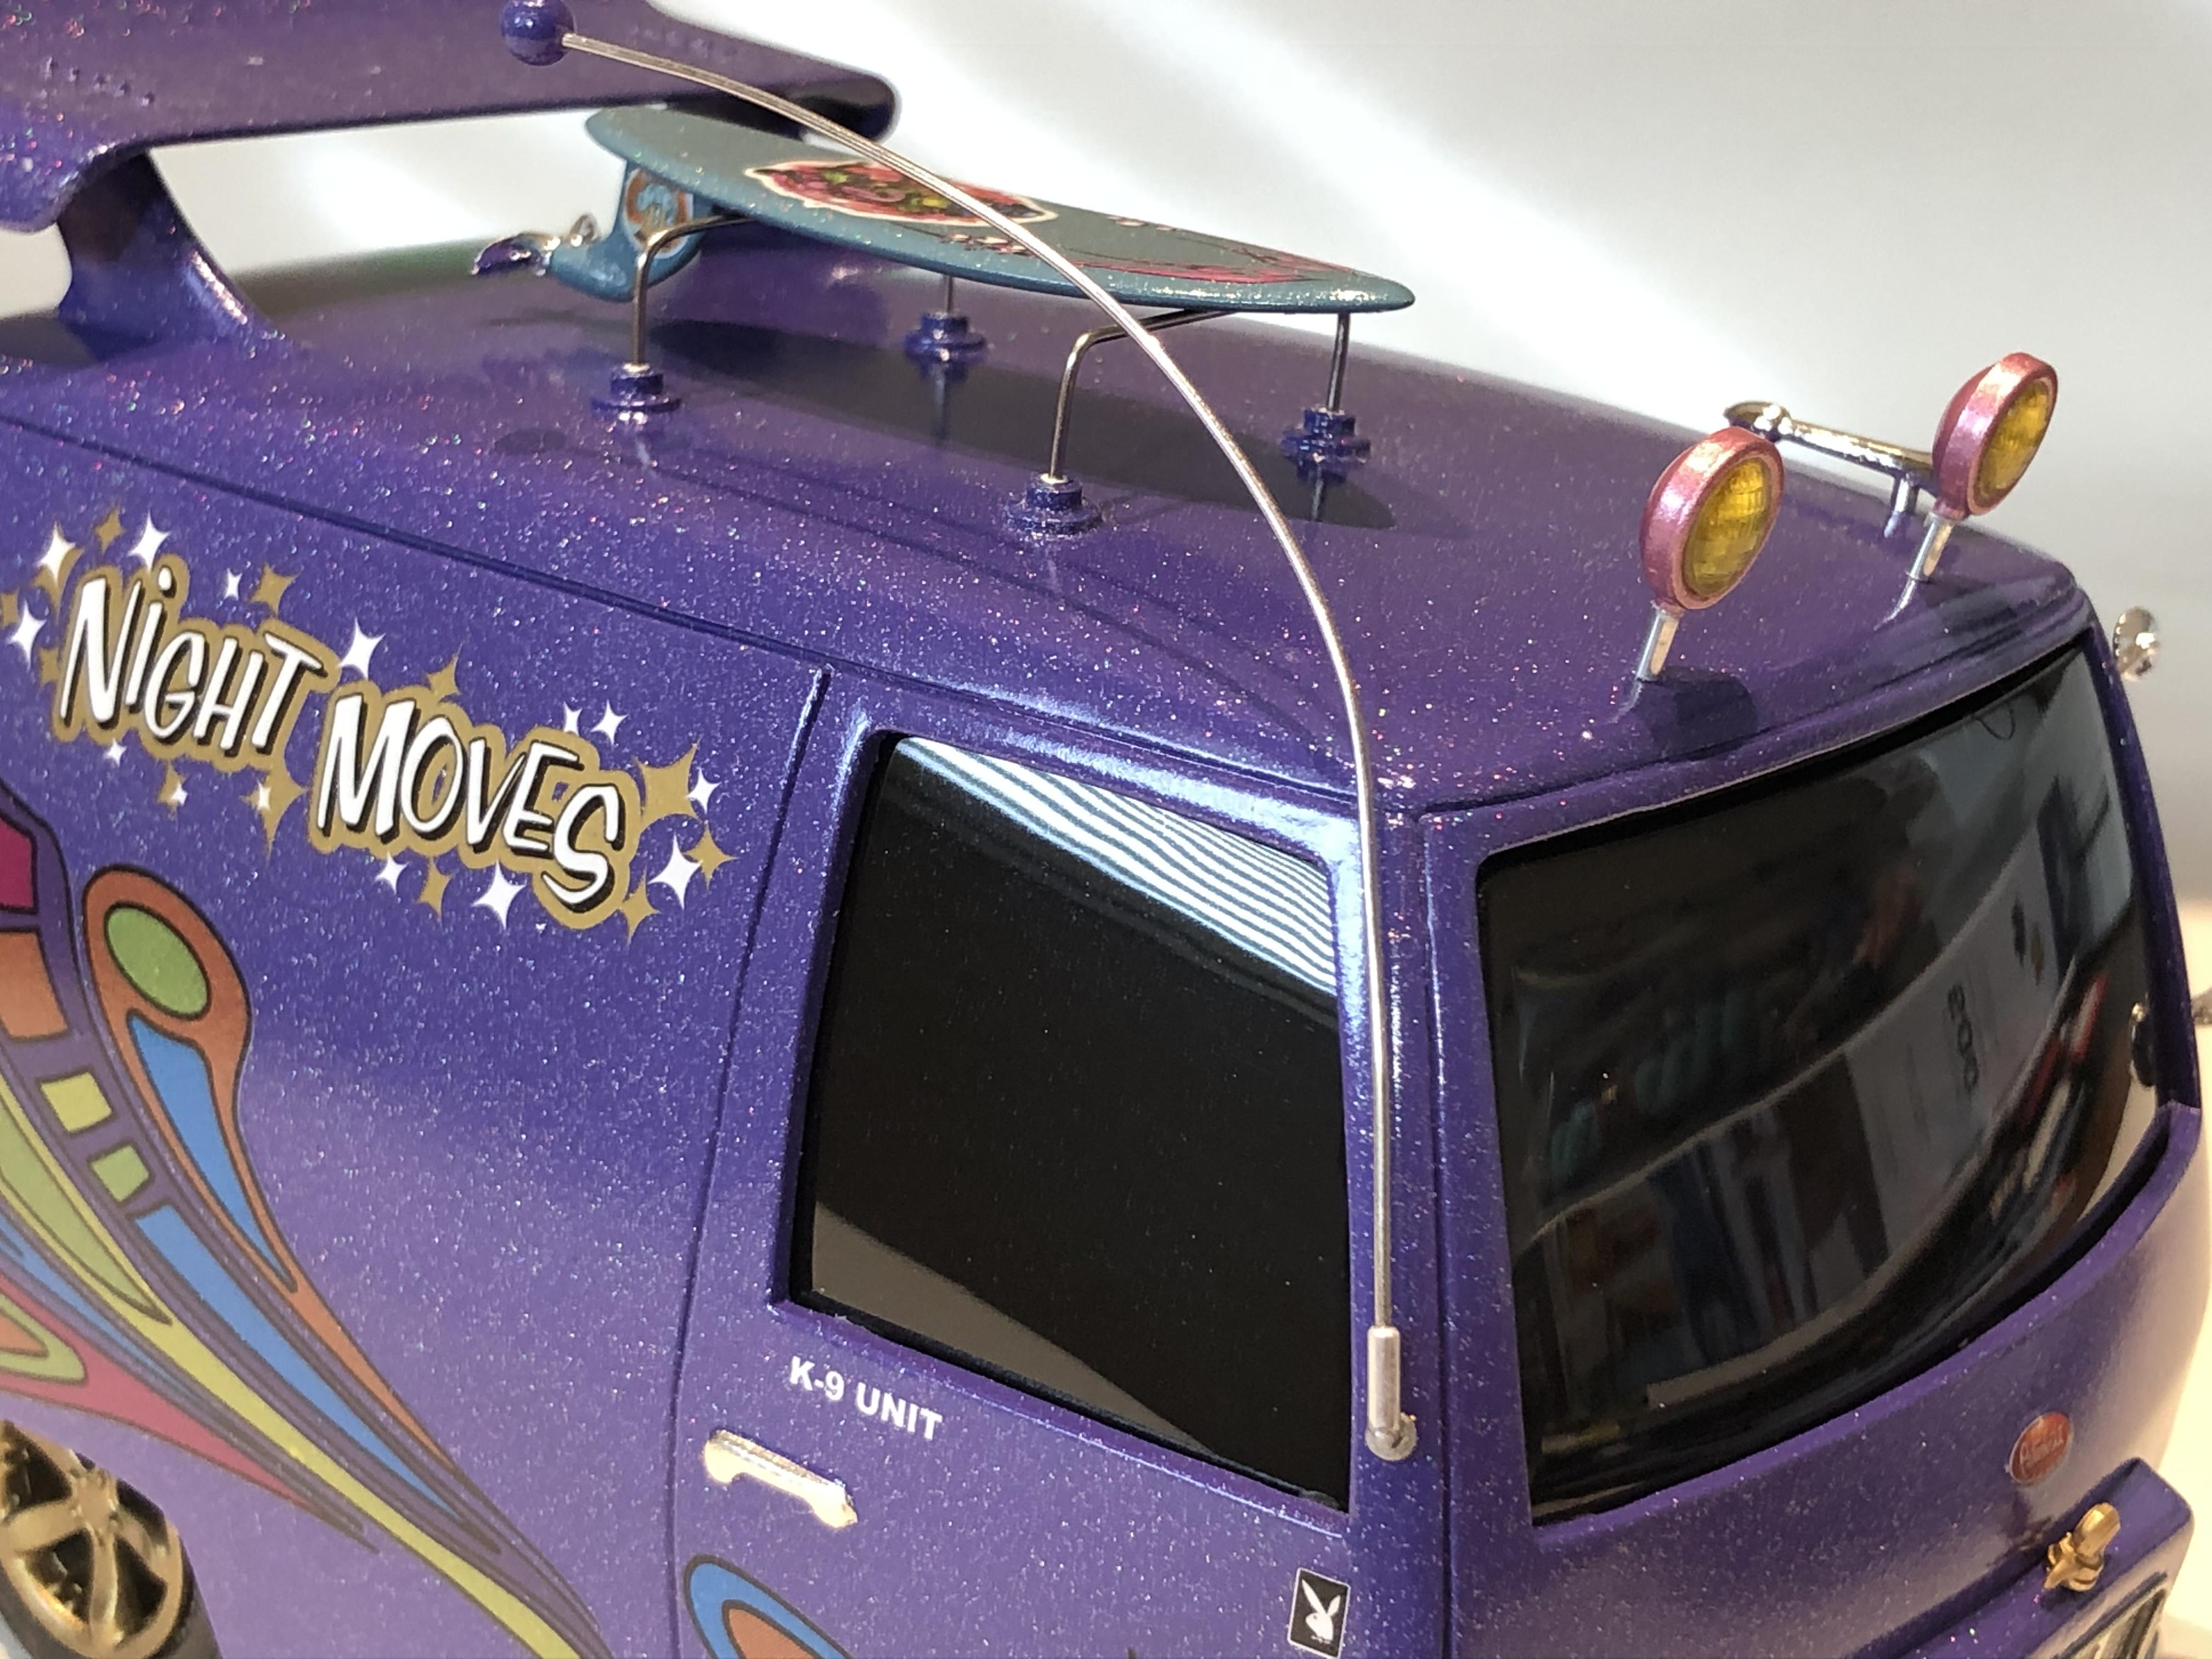
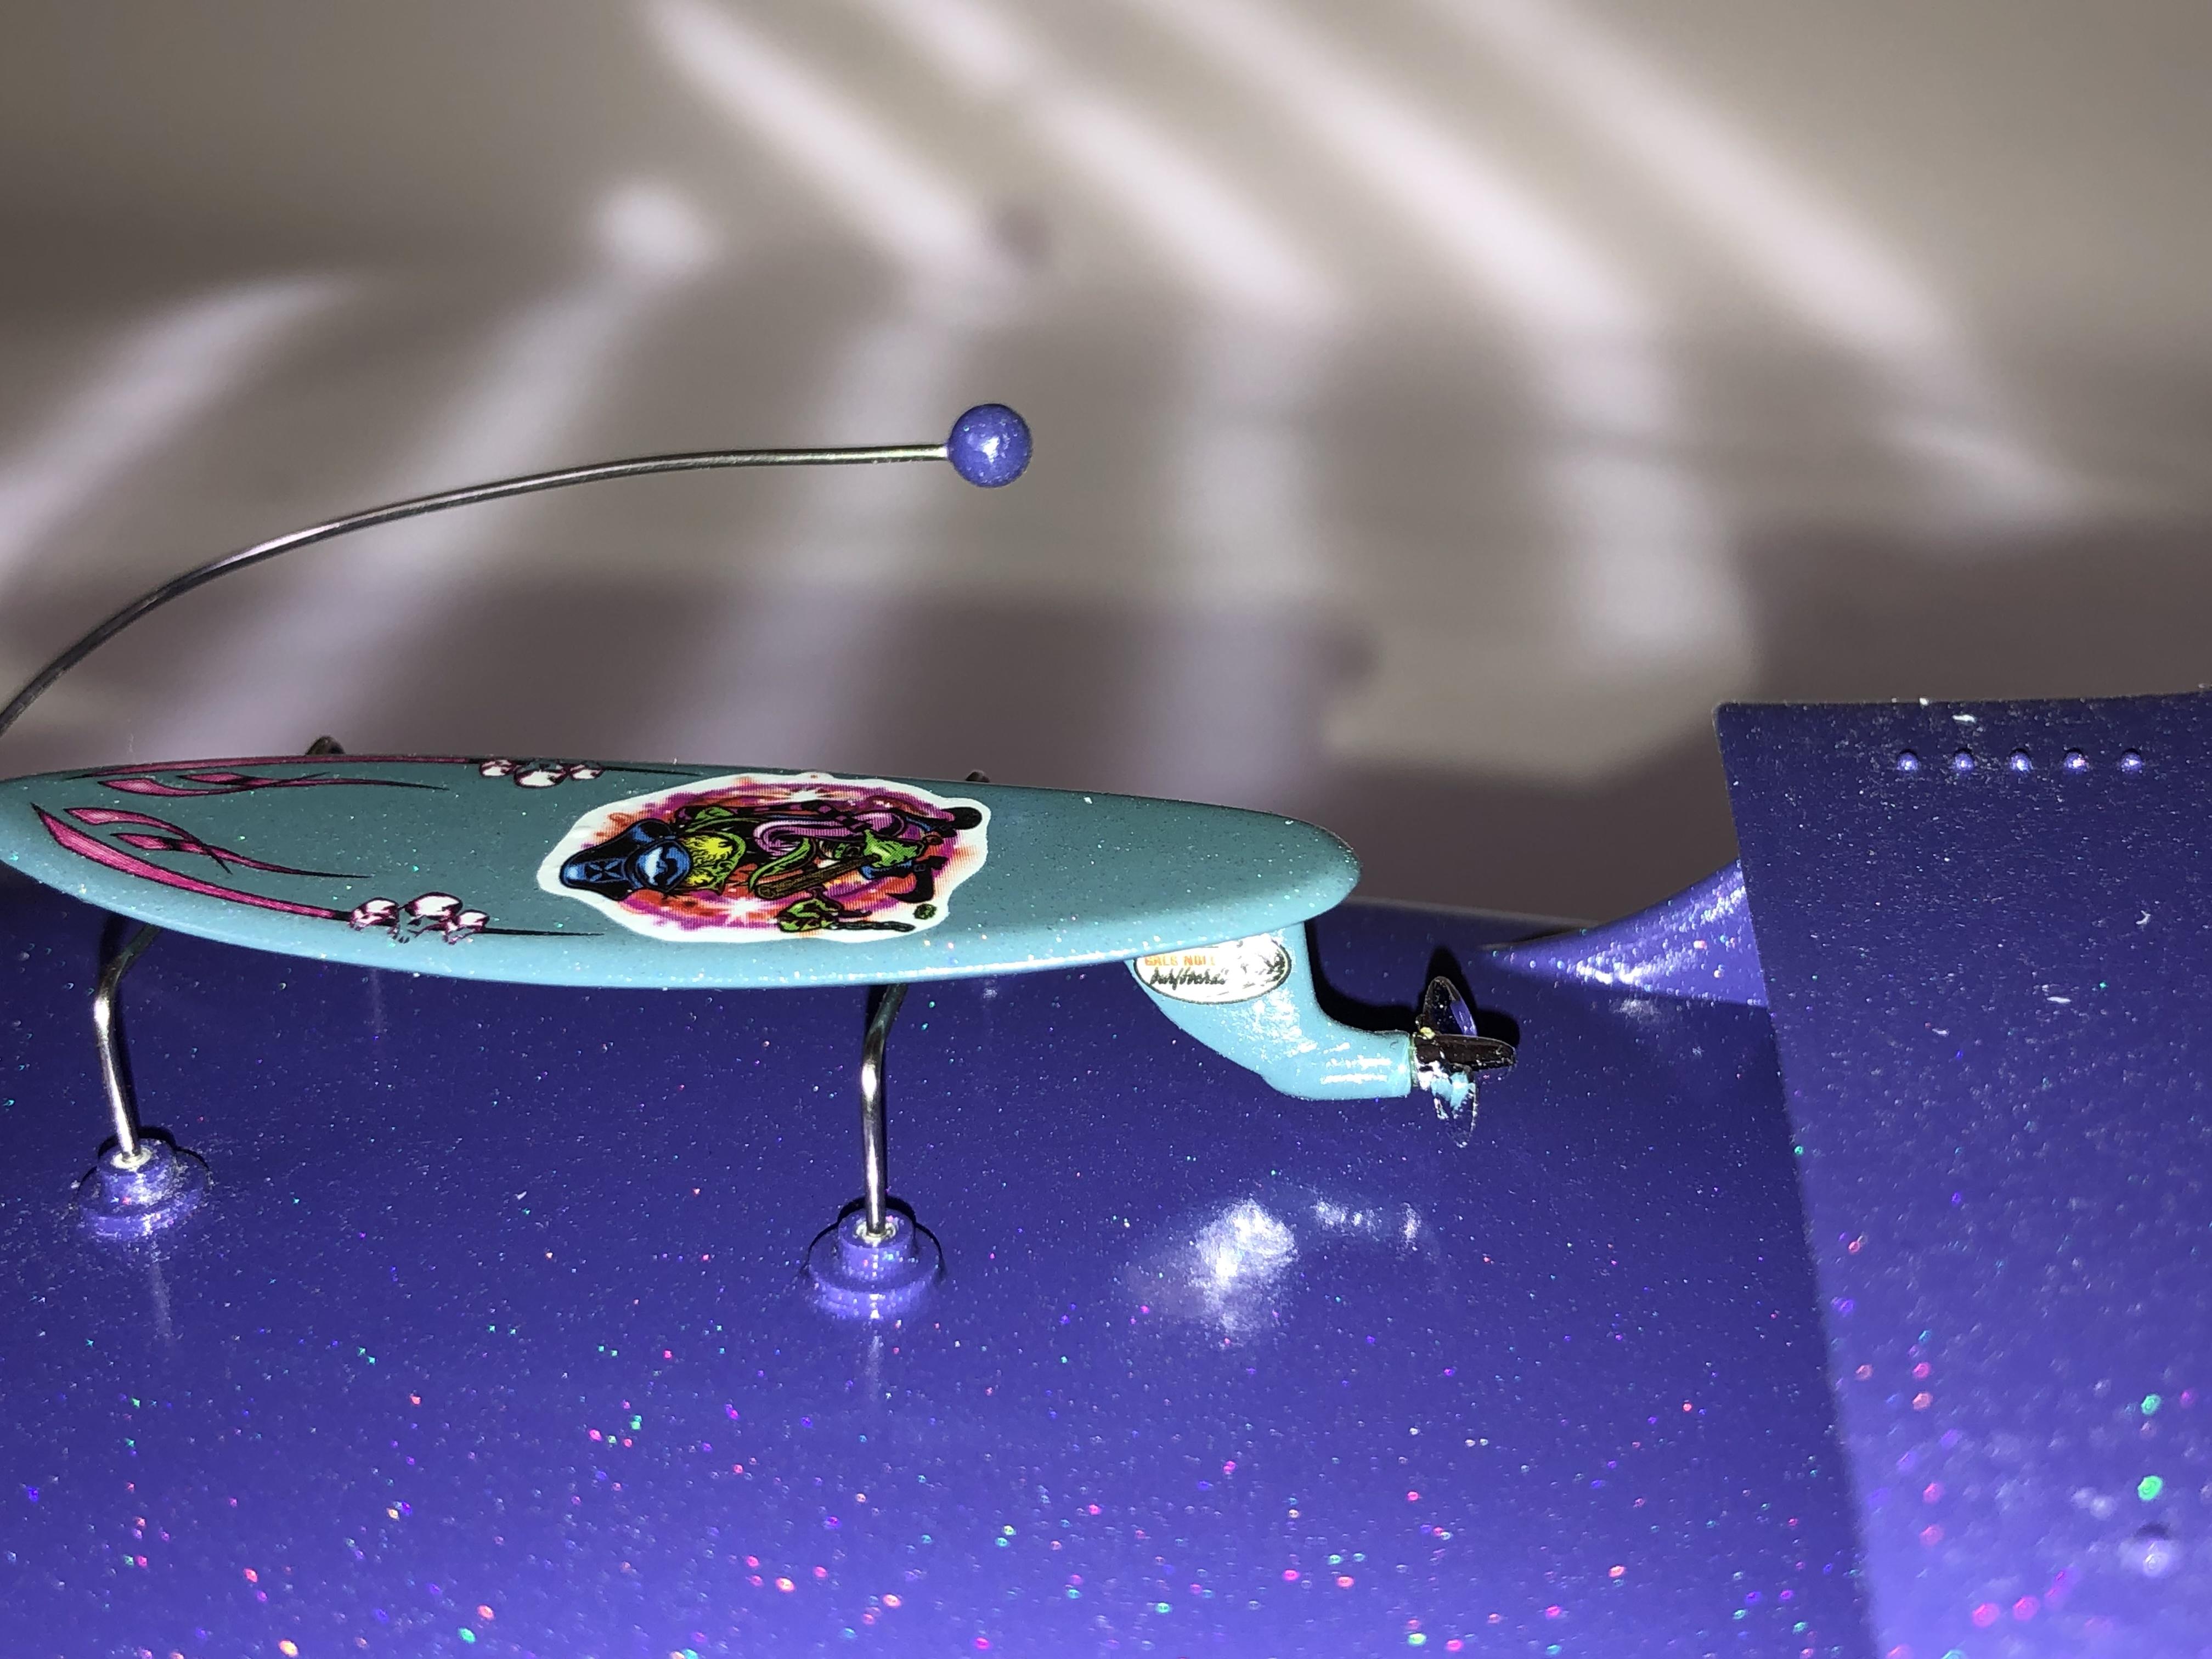
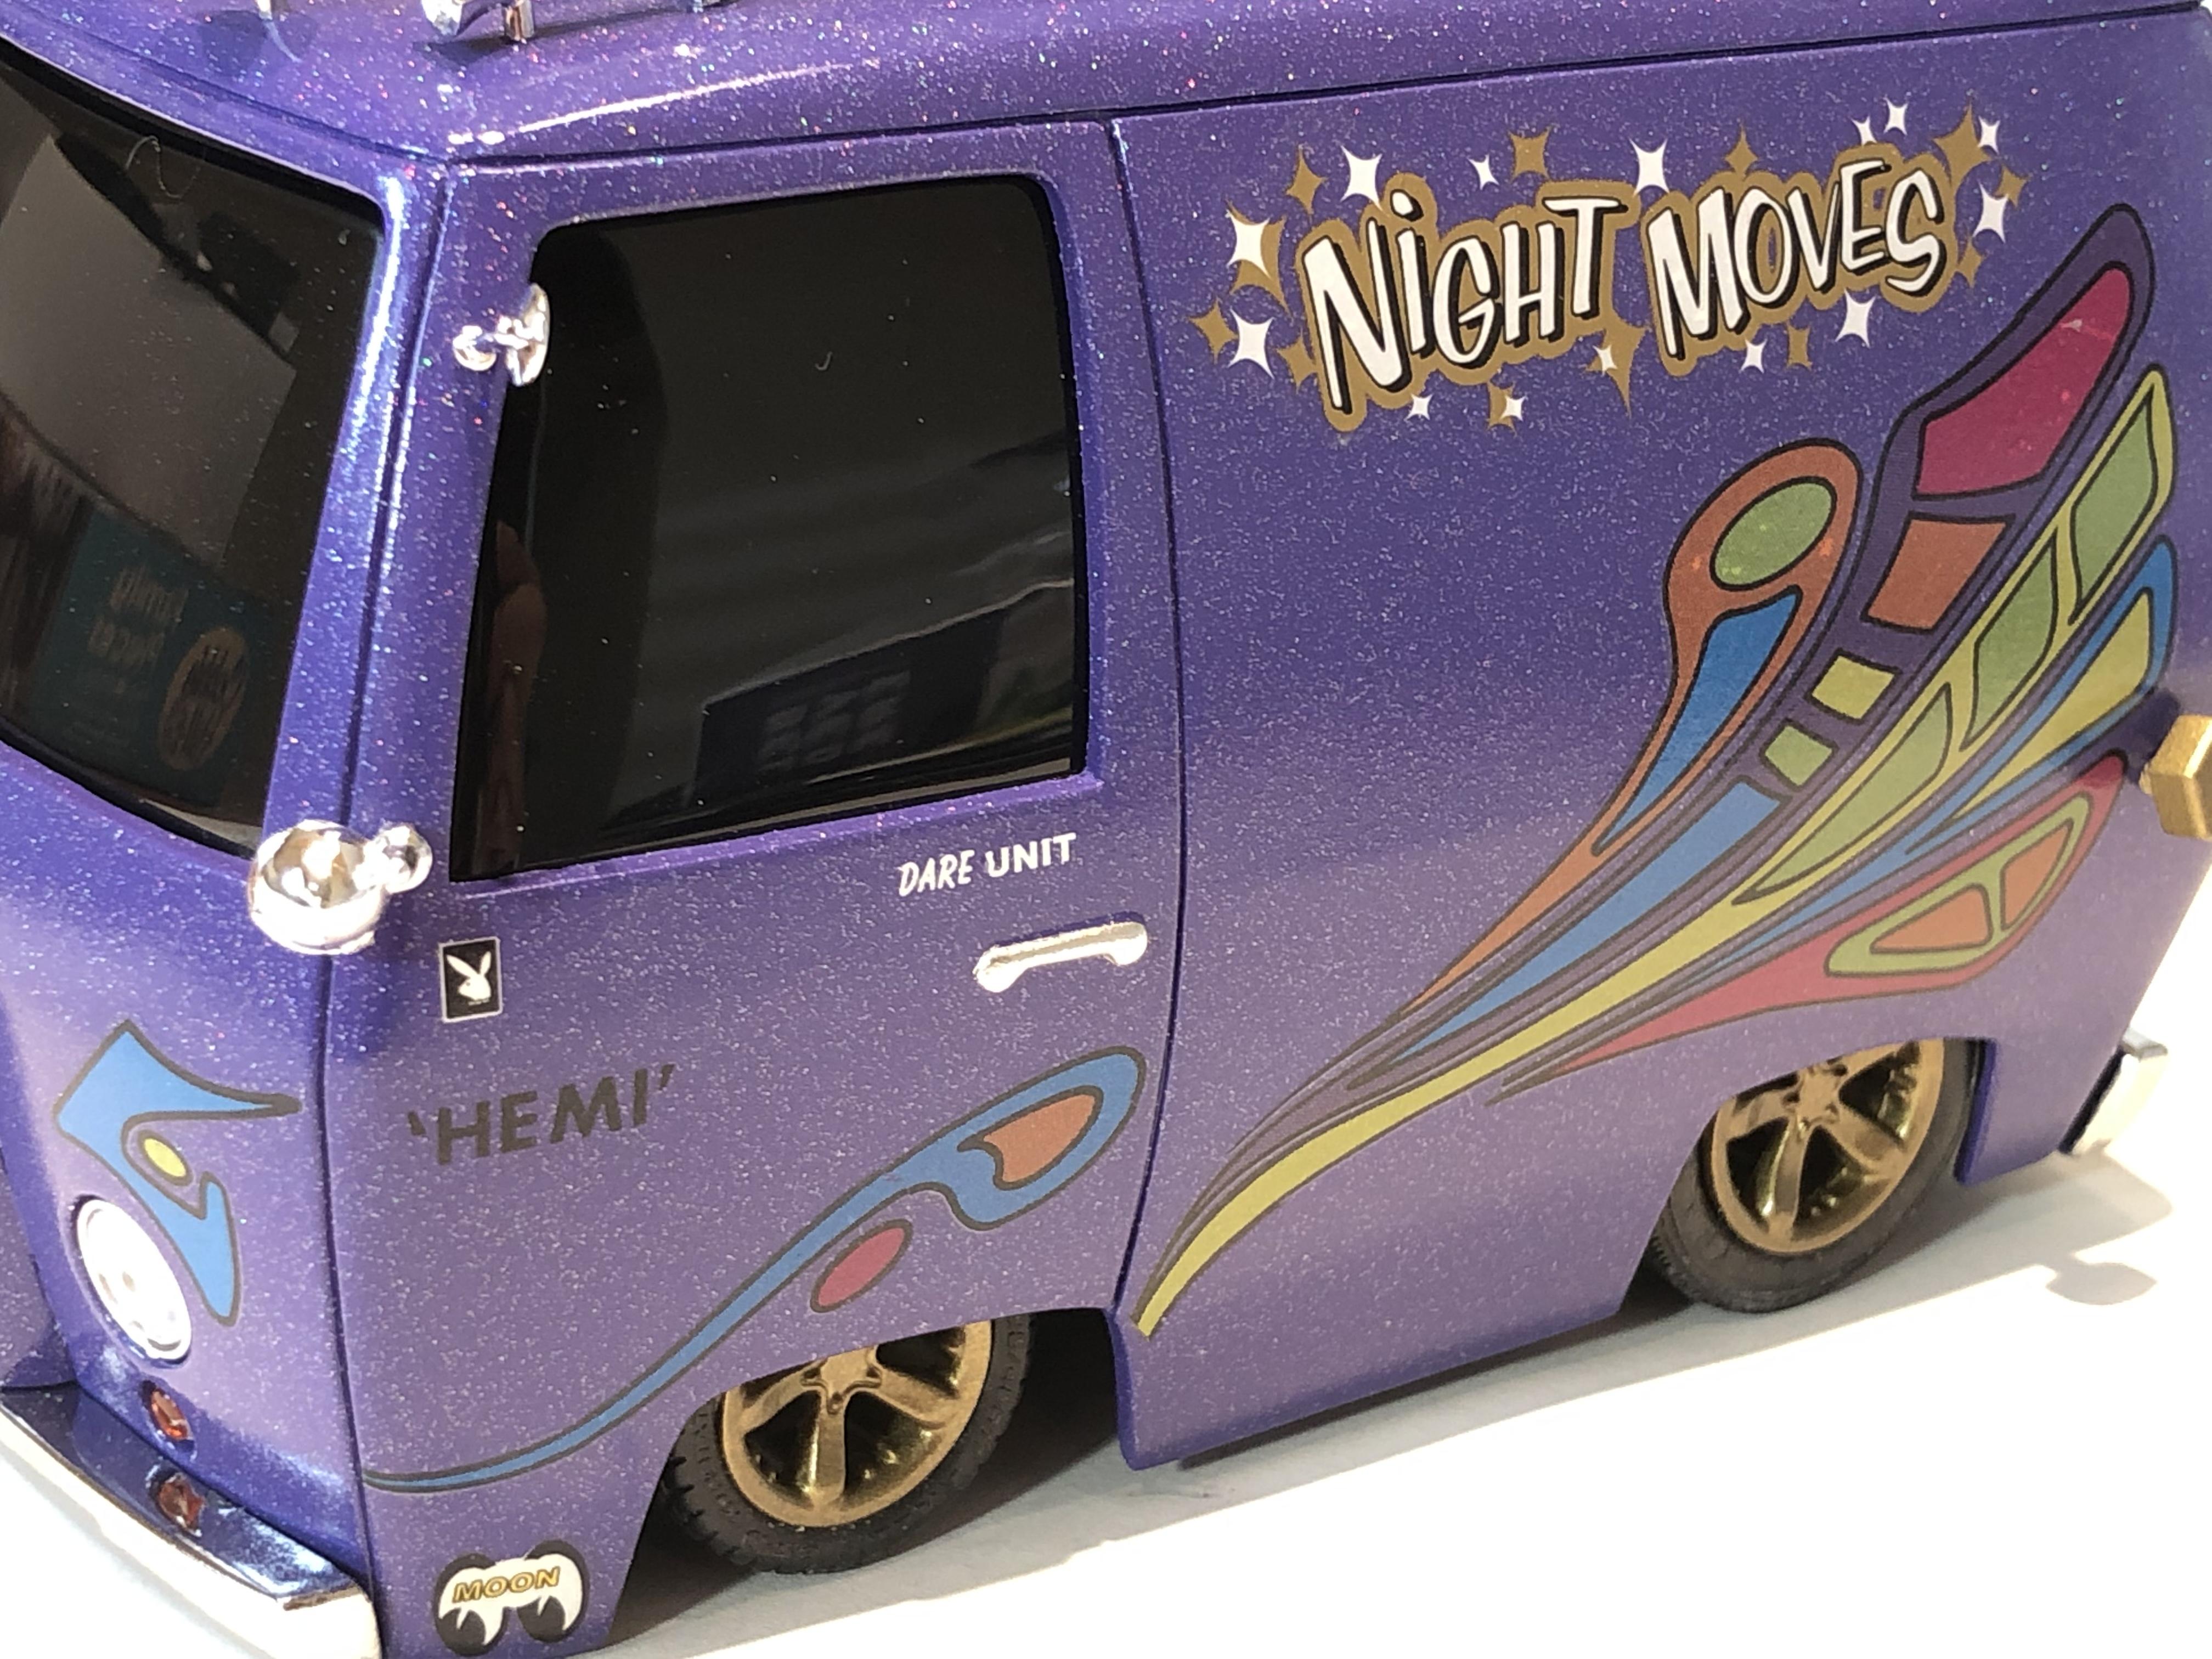
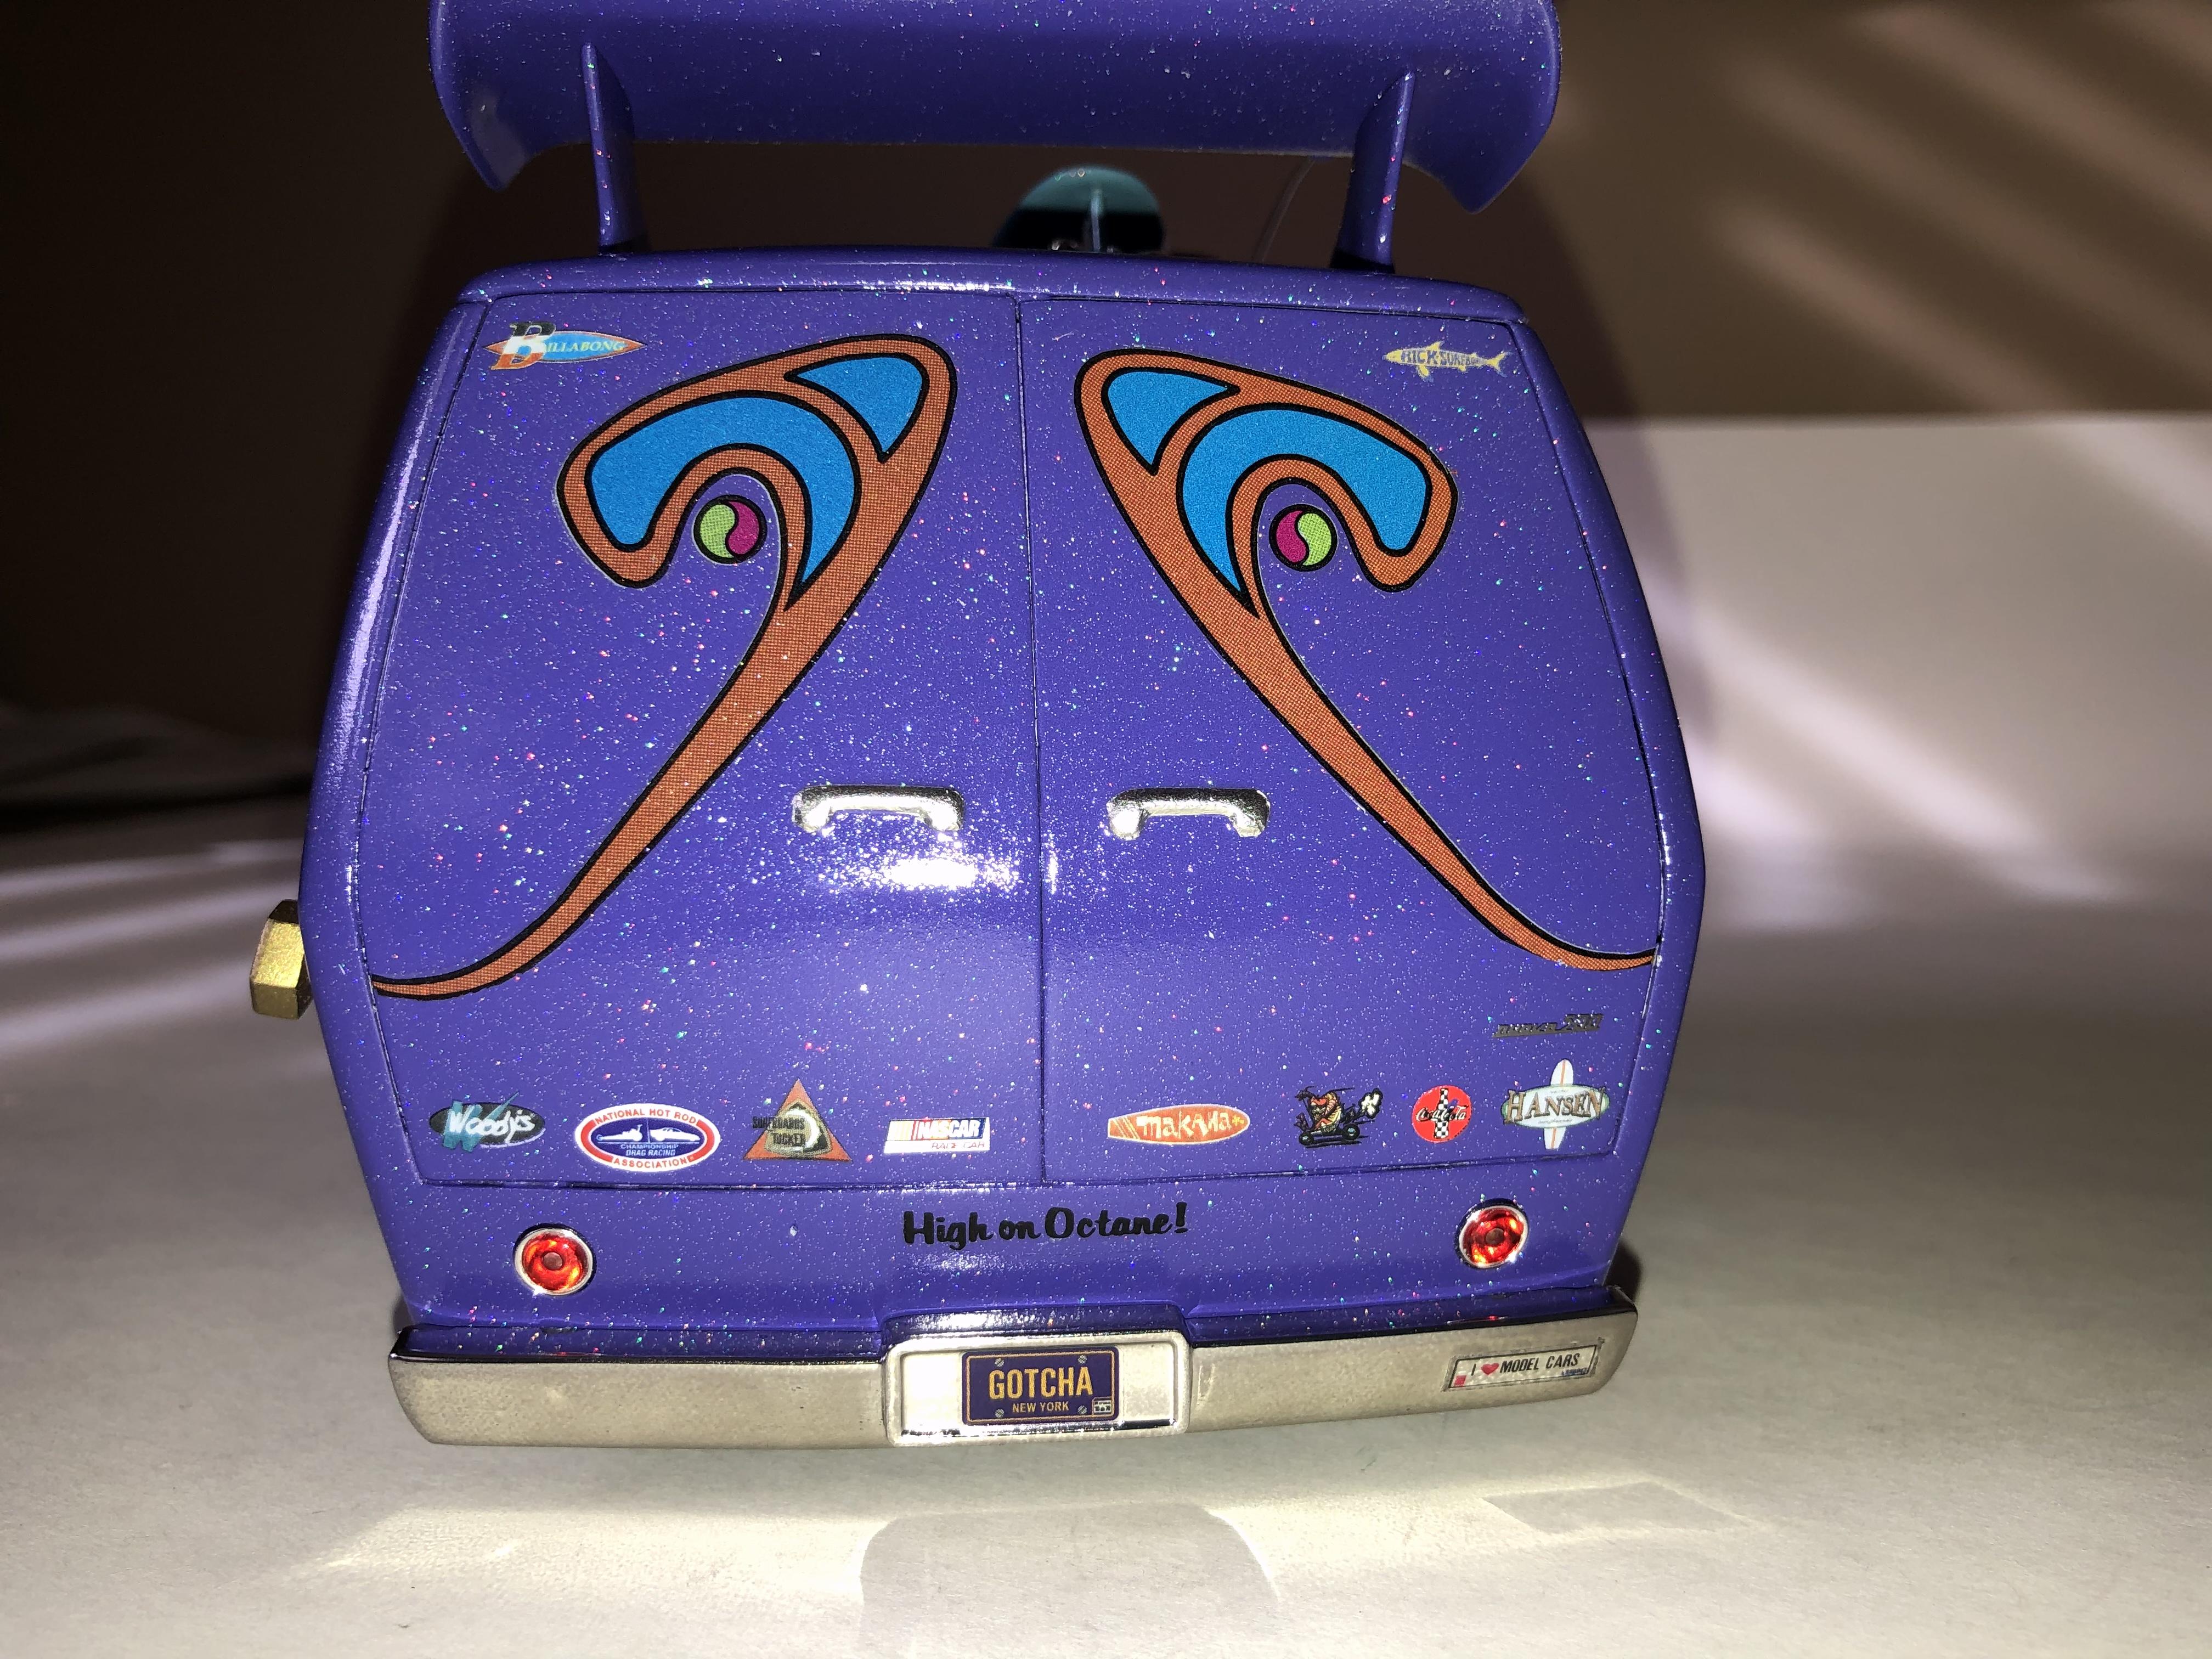
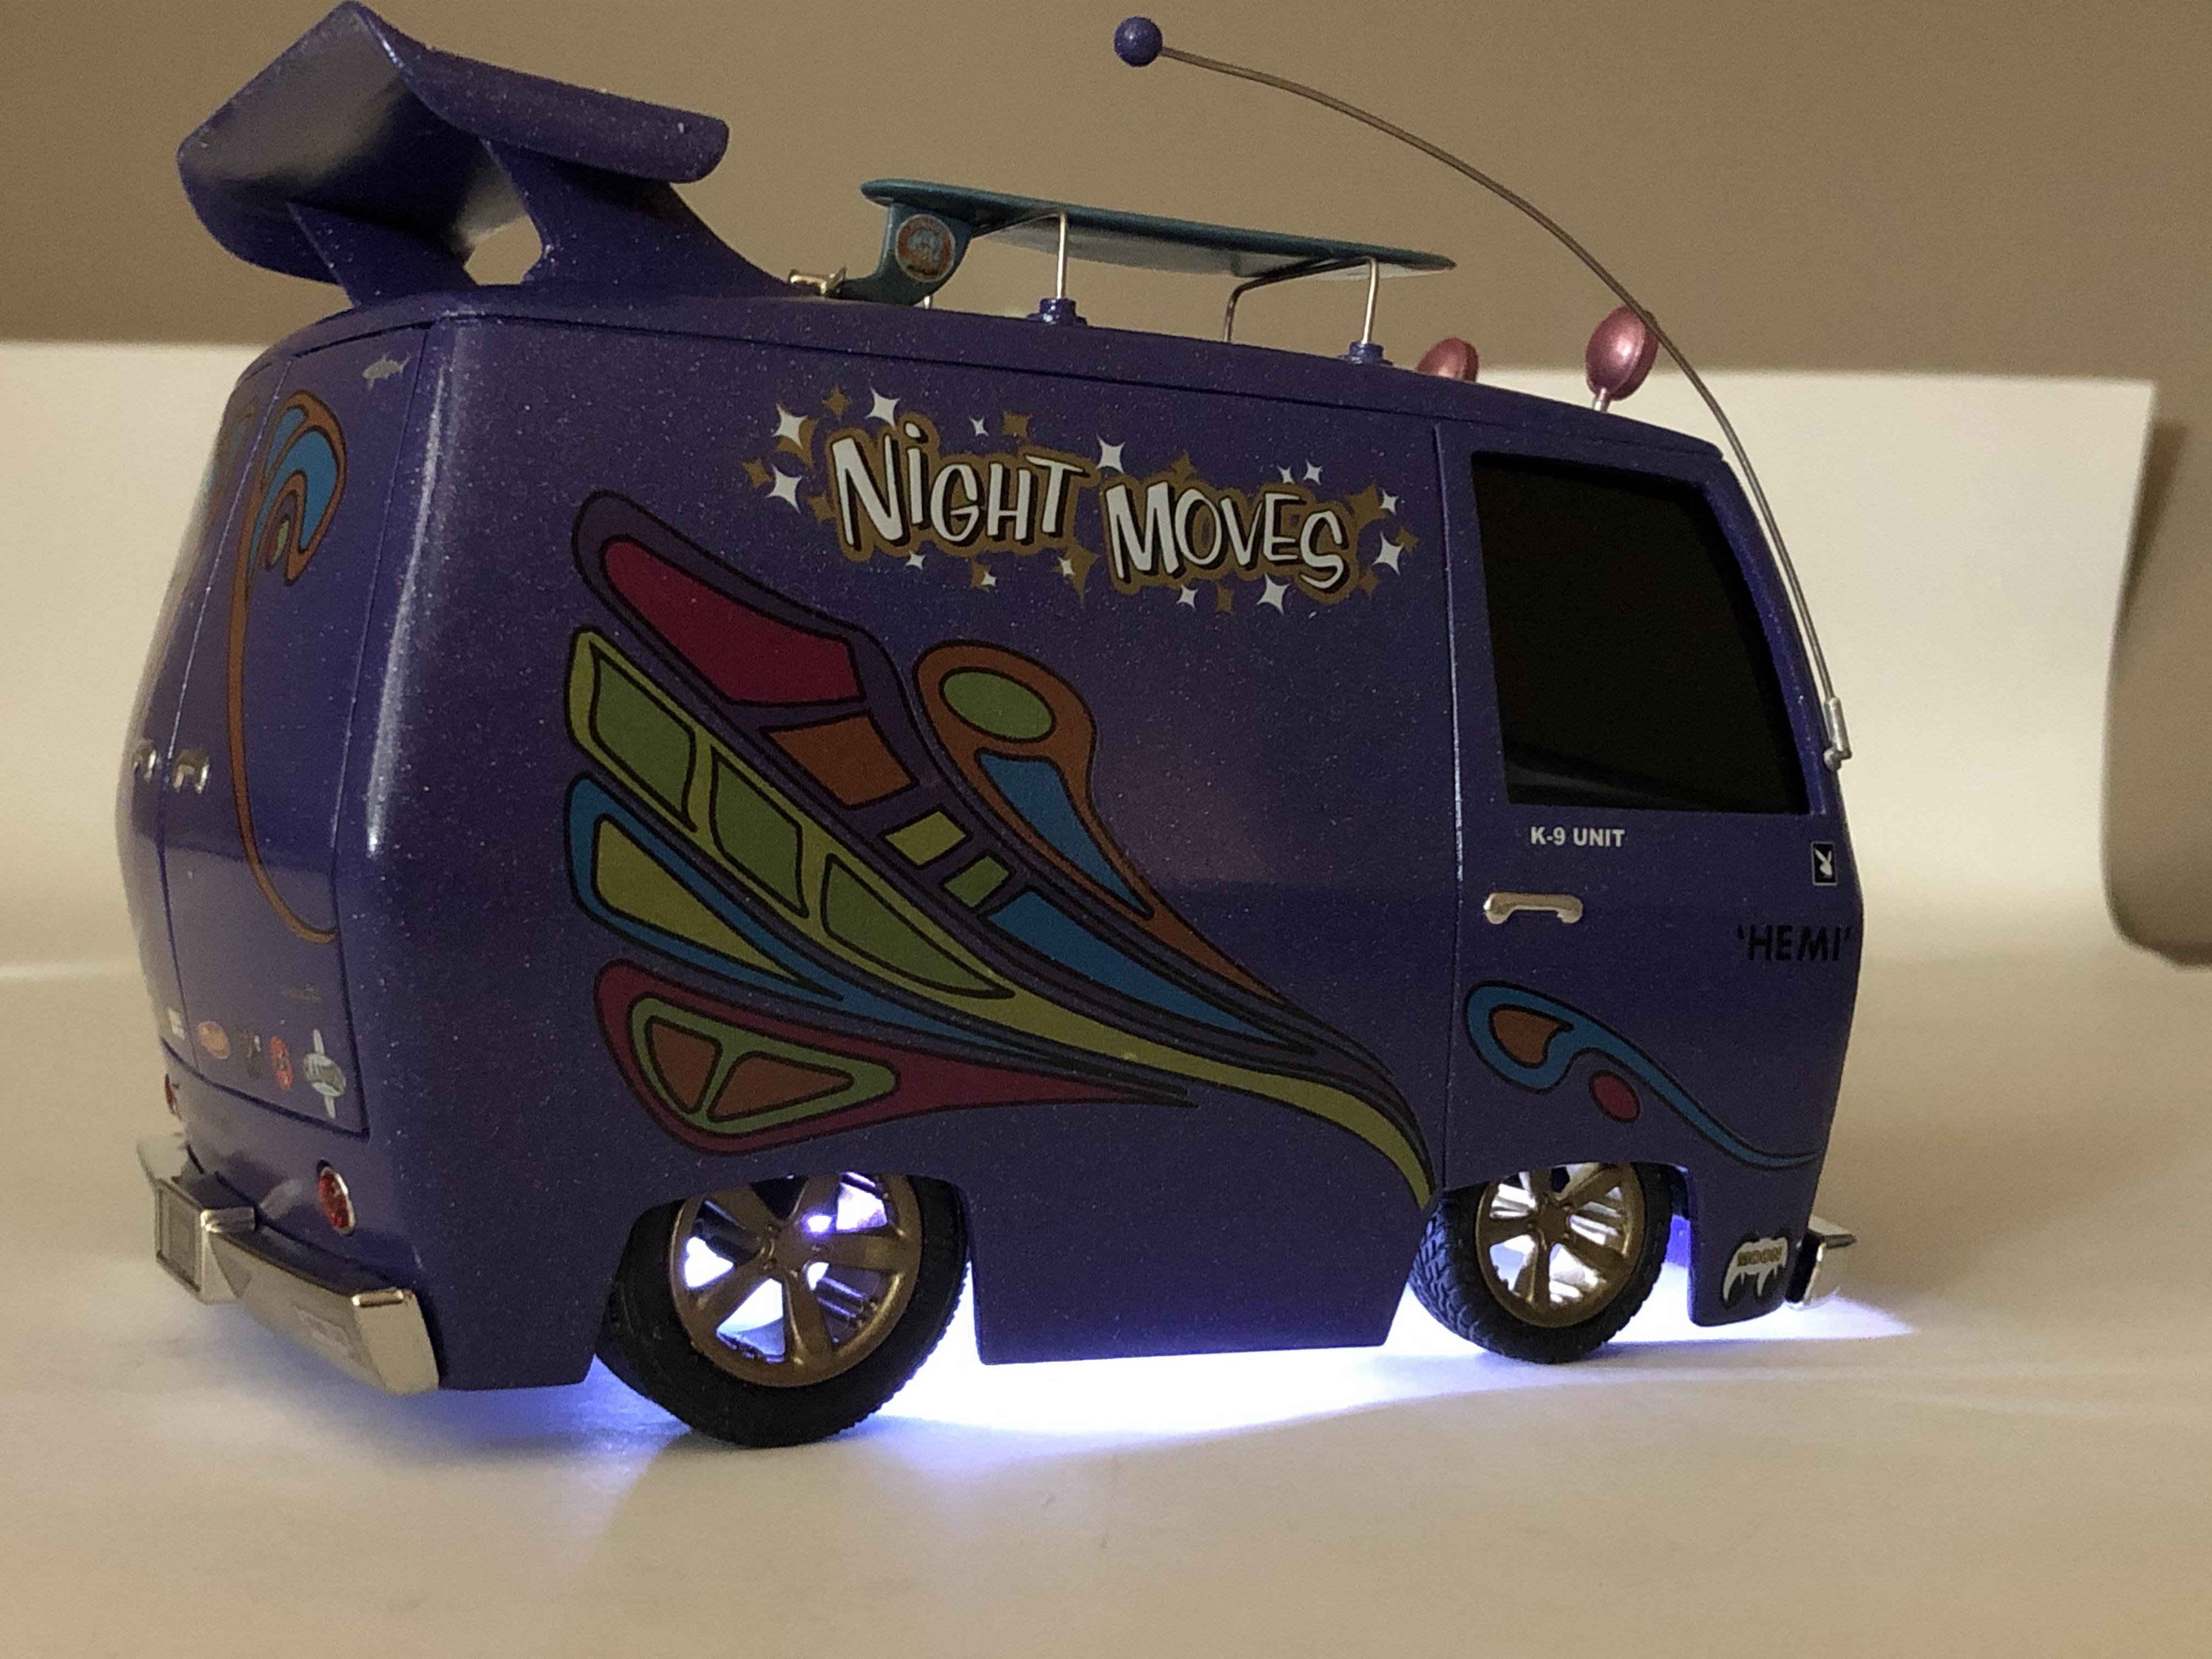
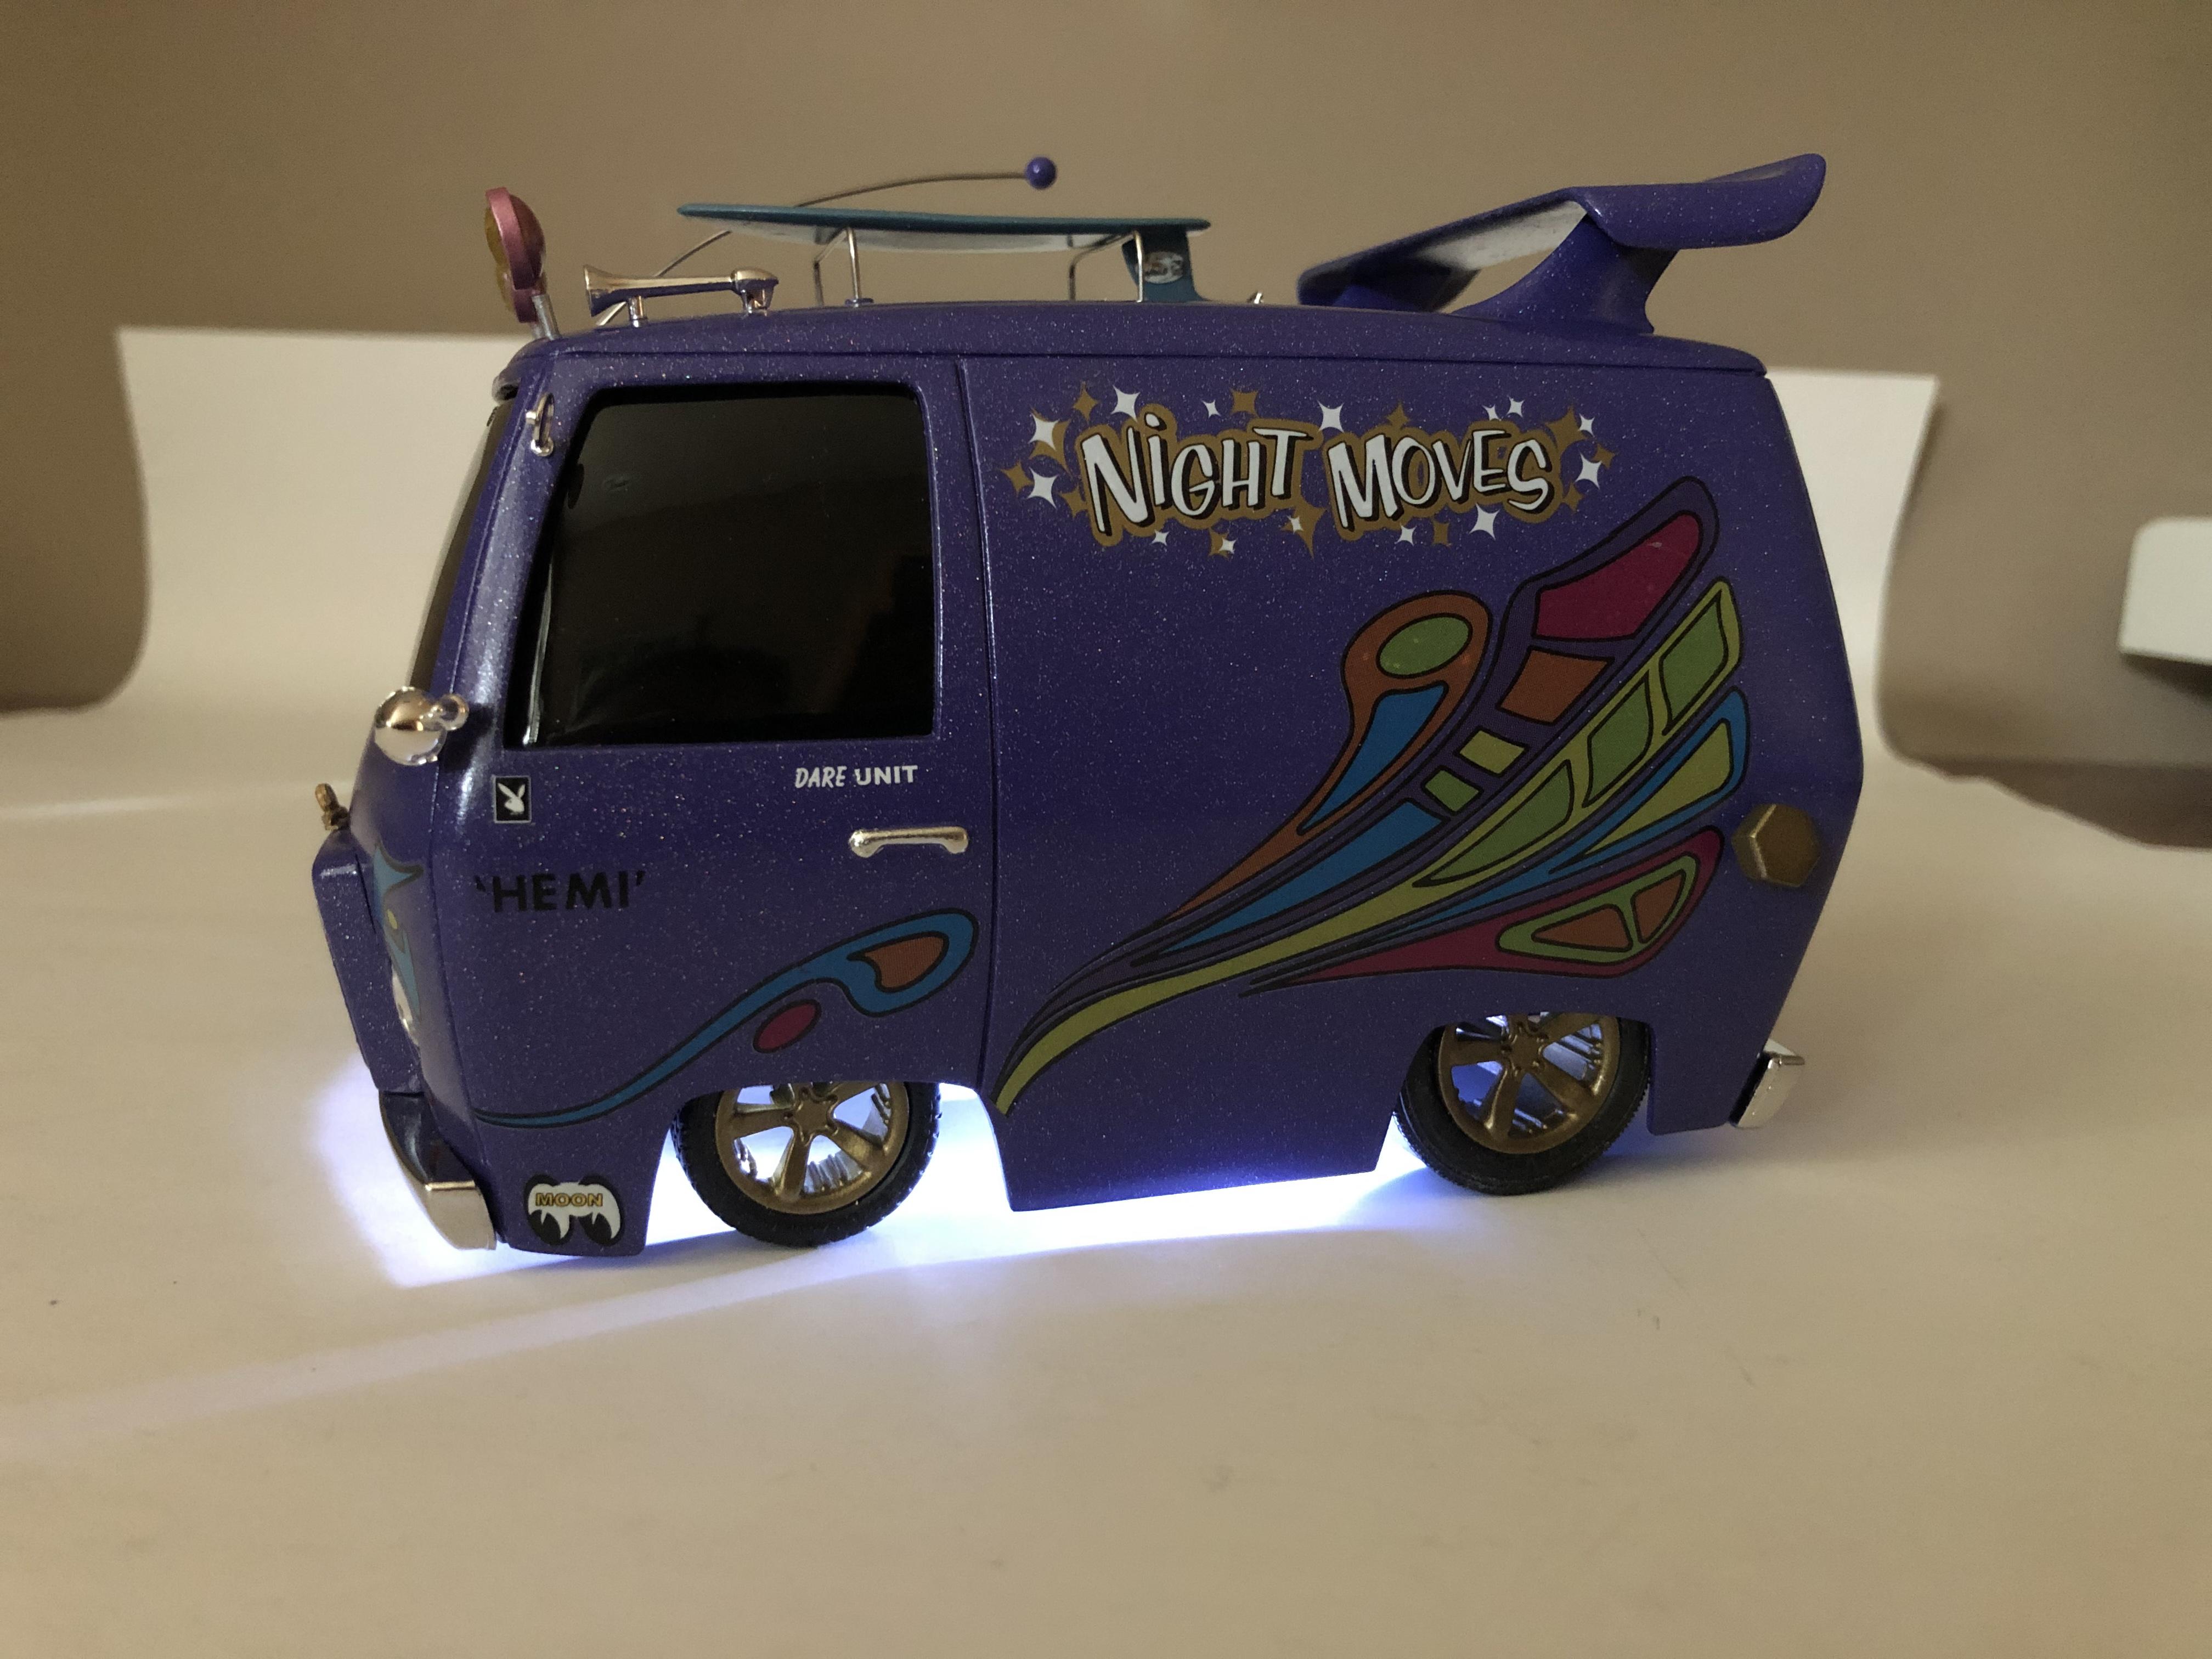
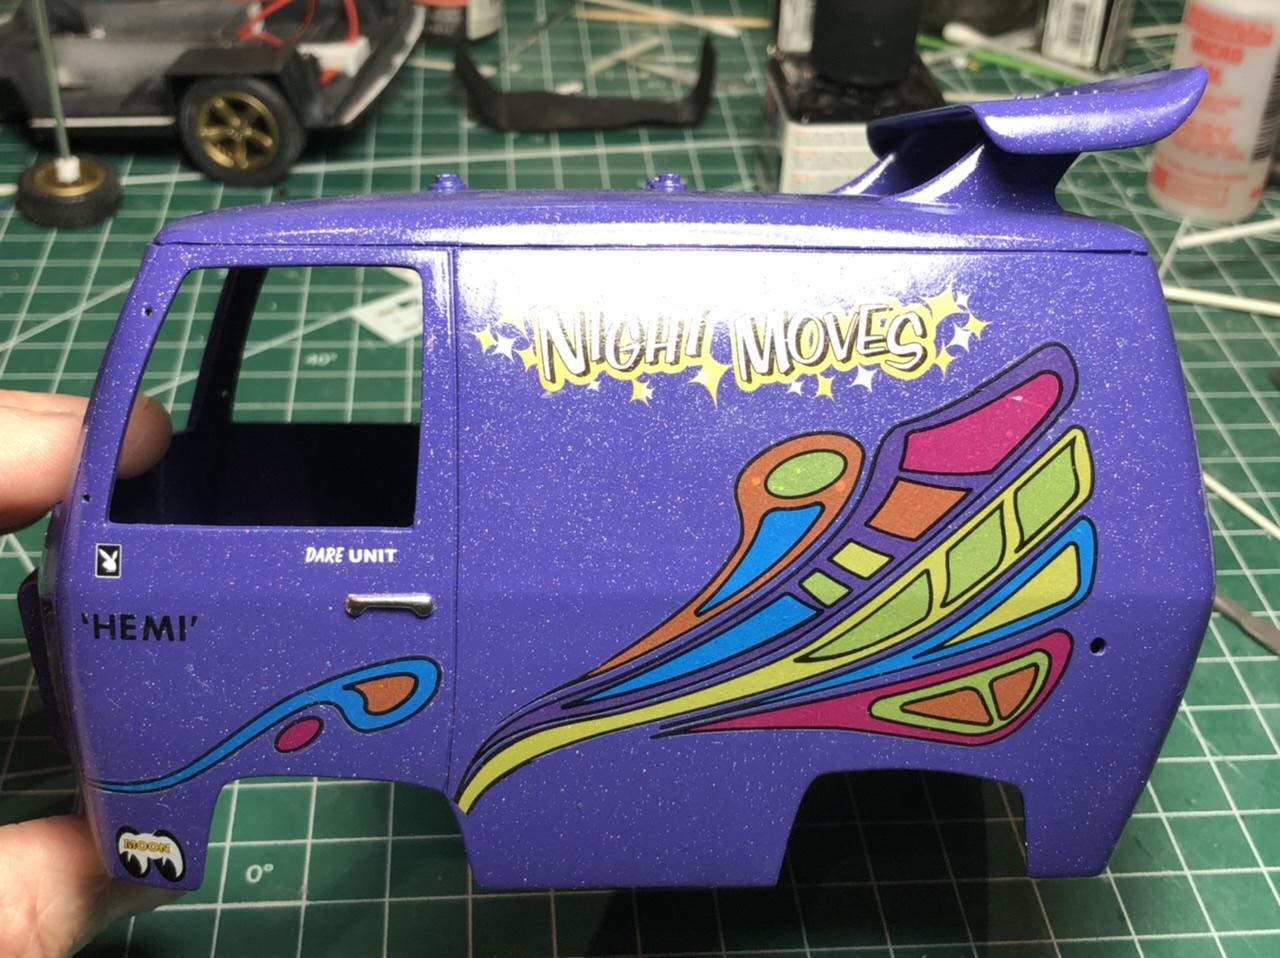
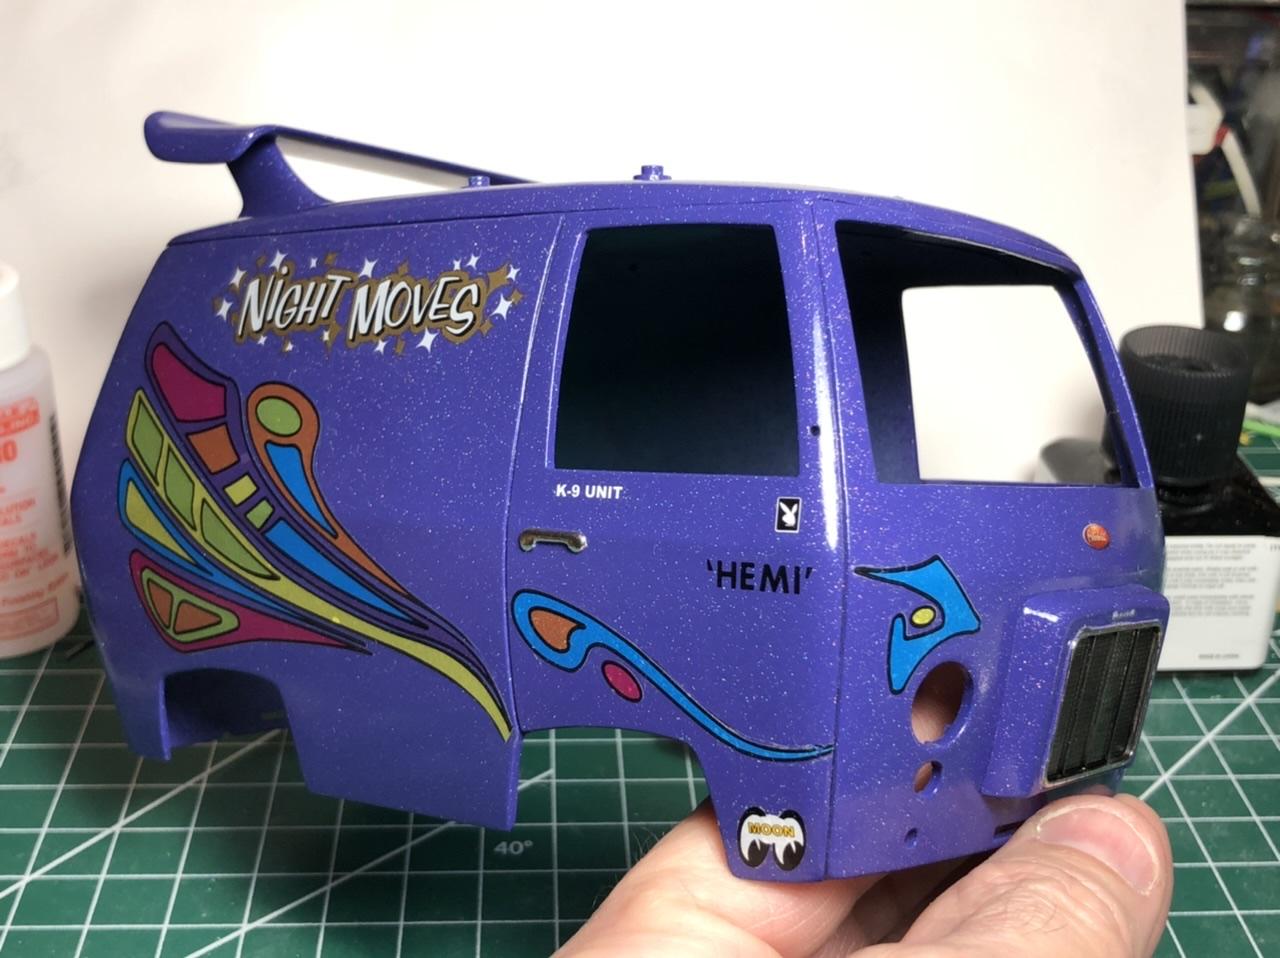
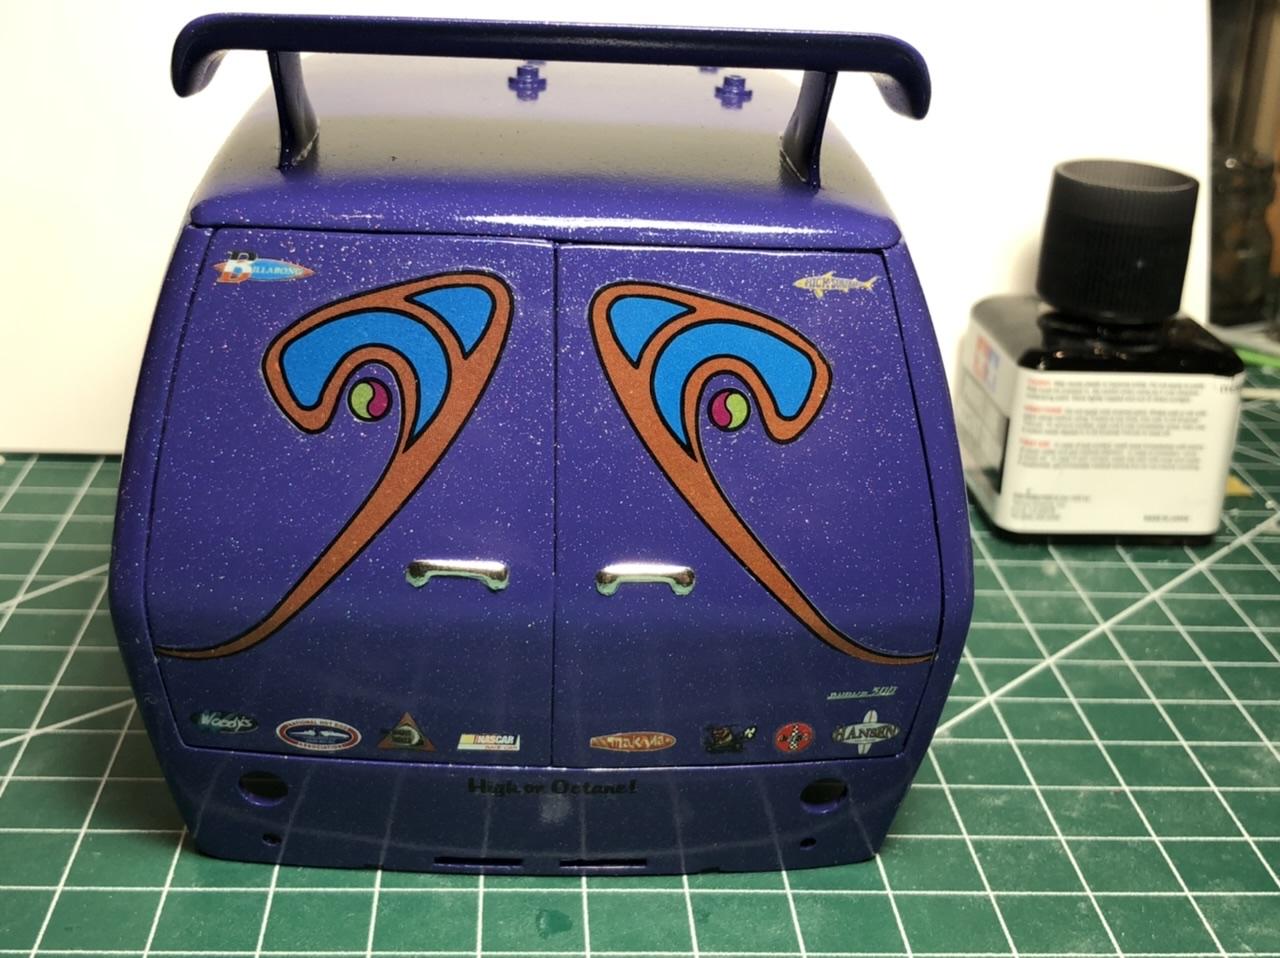
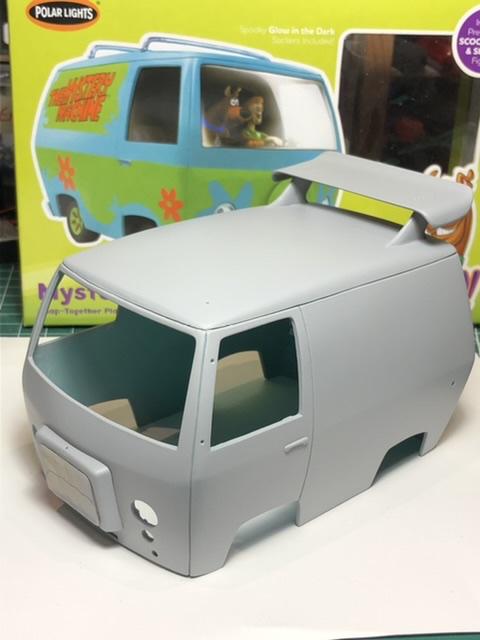
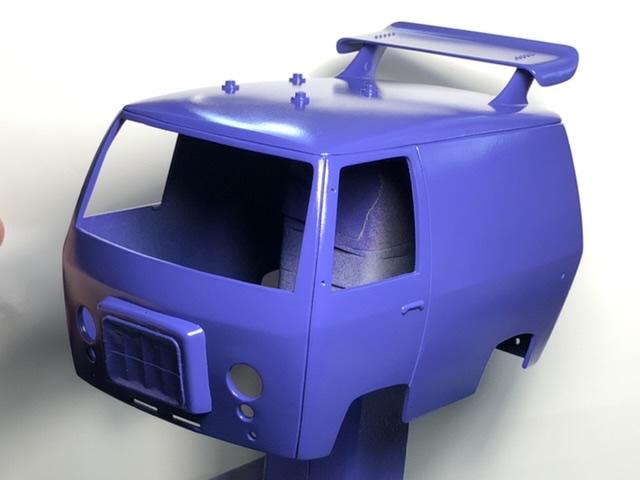
Hi folks, So, when I first bought the Mystery Machine kit, the intention was to build it with my daughter. Well… she’s about to turn 21, so that’s not happening. This has been taking up room in the stash for about 14ish years, so it was time to build it for something fun. The idea of the build was that Shaggy had bought the Mystery Machine from the gang and modified it a bit as a cruiser for him and Scoob. I had quite a bit of fun rummaging thru the parts bins and decal box finding “stuff” to put on it. I definitely wanted it to stay very “cartoon” looking as well. So…. I lowered it, added parts box wheels and tires, and the wing from “Jinx Express”. Other parts box items include, motorized surf board, air horn, rear view mirror, spot light, a styrene bolt for fuel cap, some salvaged 1/20 scale running lights, and a Peterbuilt grill. I also scratch built an antenna and roof rack. For fun, (and as experiment for possible future use), I also made some “tubes”. The trend from late 80’s, early 90’s ? of putting neon lights under your ride to give the illusion of the car floating. Evan’s Designs is fantastic site that sells all types of LED lights for hobby use. For the tubes, I used their “side glow” fibre optic and bulbs tinted with clear purple. The switch is mounted in the gas tank. Paint is Tamiya TS 24 purple, “lame flake”, pearl clear, and clear. Not sure why, but the multi colour flake does not show in photos, but it is very “glittery”. Enough rambling, here it is… And the best part…. TUBES!! you will notice that Scooby’s door has the K-9 unit decal, Shaggy has the Dare unit decal, also the license plate “gotcha” is a nod to the crime fighting duo. This was a fun, albeit ridiculous, build. Hope it put a smile on your face! Thanks for having a look, all comments welcome. Cheers, Steve
-
Thank you Ron!
-
Hi Phil!! I was not familiar with the 1:1 car until your build. It turned fantastic, and is definitely a worthy tribute to the original. Look forward to seeing it in person soon, and on the tables at Duece Days In Scale in July. Cheers, Steve
-
Ok guys. Just finished this up. I will try to get it under glass tonight or tomorrow. I decided to leave the paint as it was. Good enough for this build, she’s not a show stopper… It was actually a really fun project which made use of some parts box stuff, and cleared a spot in the stash. Teaser photos… I’ll get back to something a little more serious soon. Thanks for participating in this silliness, hope it puts a smile on your face. Cheers, Steve
-
Thanks Carl!
-
'65 Nova Pro Street Update 11/14/22 Completed Chassis Photo Pg. 5
Steve H replied to Plowboy's topic in WIP: Model Cars
Nice wheel choice Roger. Stance looks great too. -
Hi Tim, that means ALOT coming from you sir. Your talents are way beyond anything I will achieve. Builders like you and Francis inspire us all to improve our skills. Thanks for taking the time to comment, it’s much appreciated. Cheers, Steve
-
David! What a great build to get things going again. 62 Impalas hold a special place in my heart. My dad bought a ‘62 Impala brand new, 283 automatic, 2 door hardtop. It was a beautiful car. I built a replica of it for him just before he passed away. That yellow is fairly close to butternut yellow. As the others said, the interior looks perfect. Awesome to see you building again, look forward to seeing more. Cheers, Steve
-
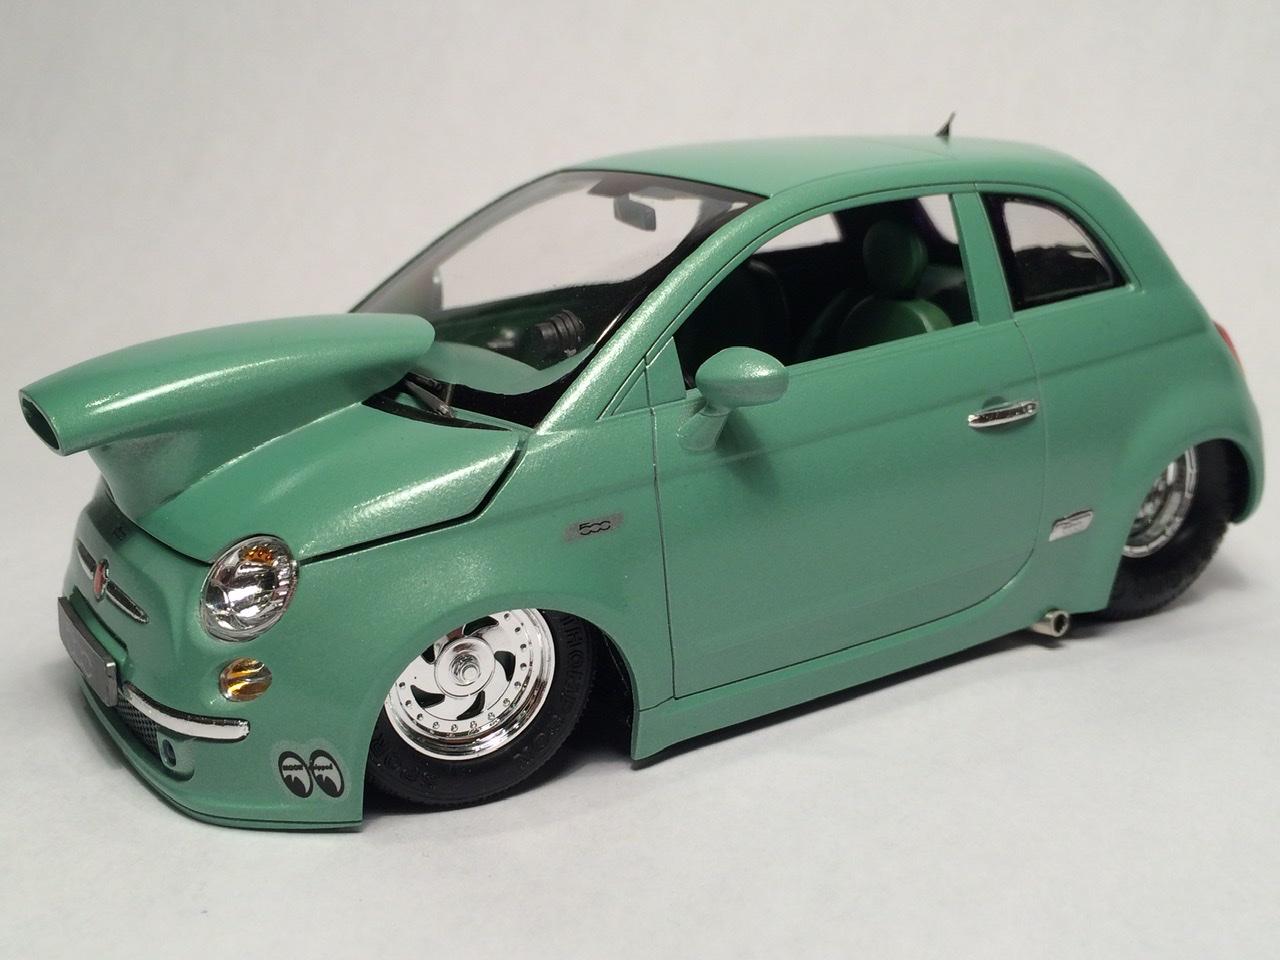
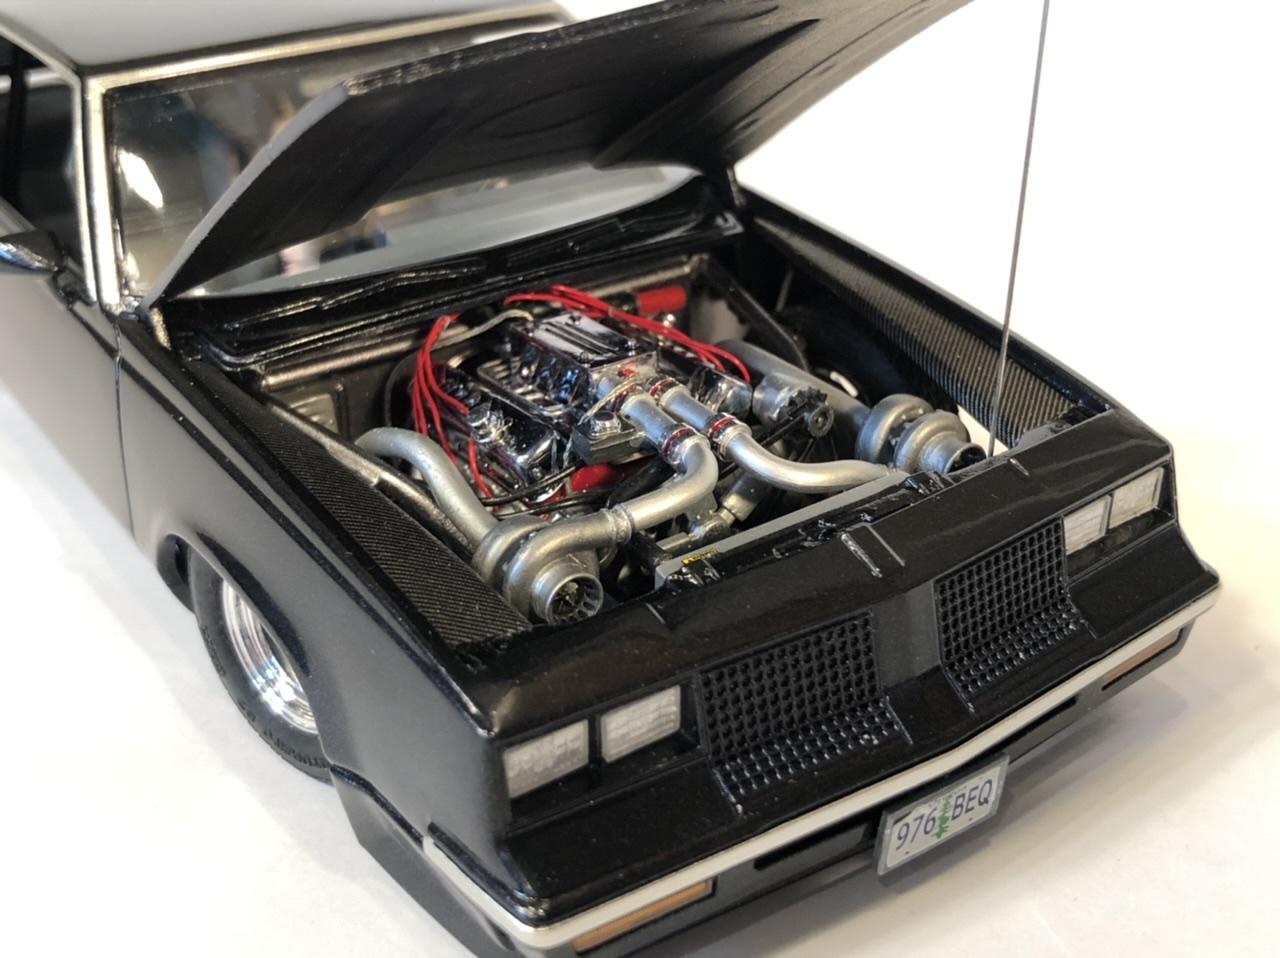
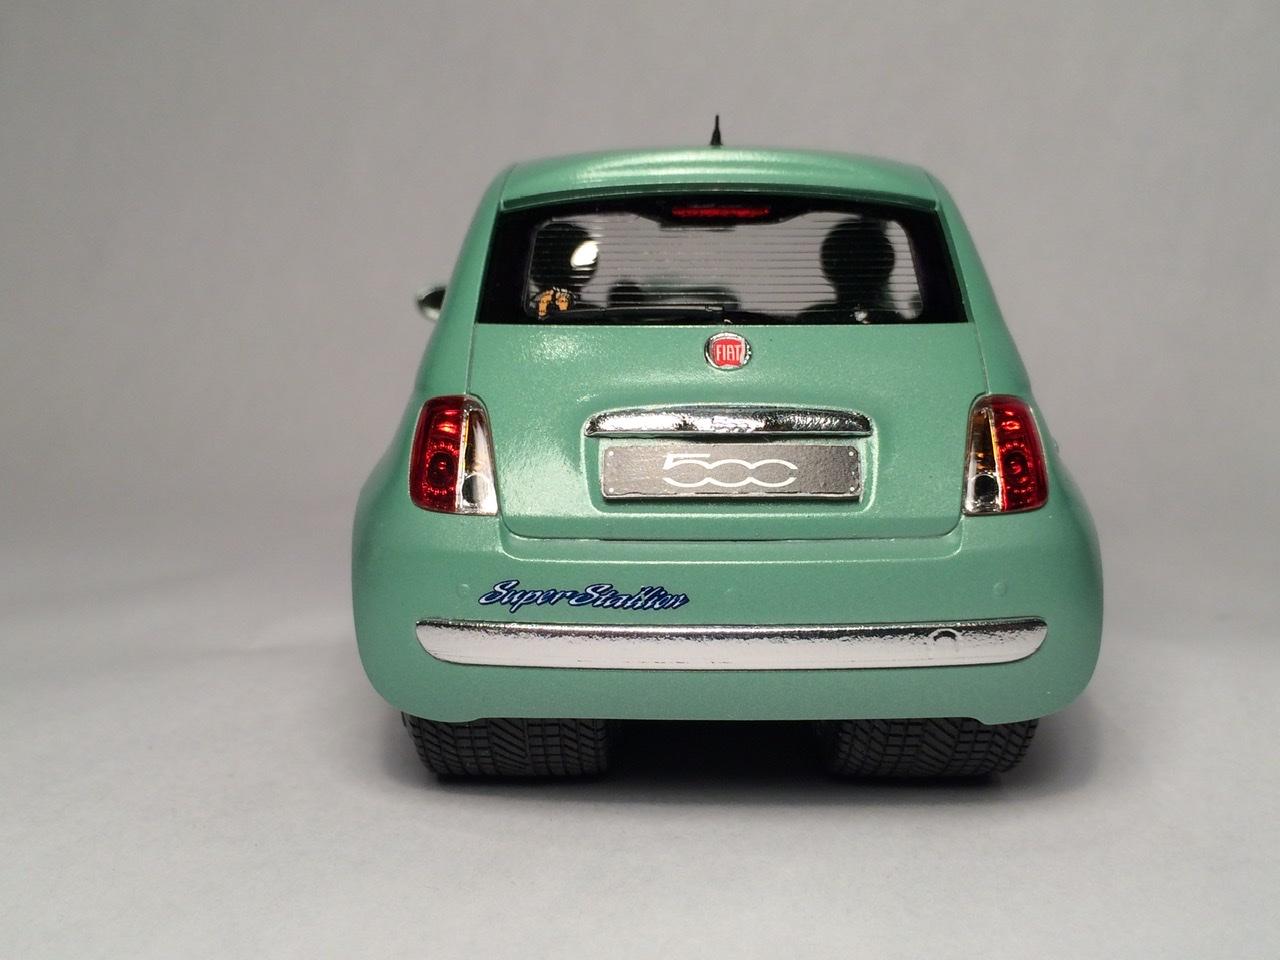
Thank you JC, much appreciated. It’s one of my favourite builds. Hi Michael, thanks for the kind words. The Fiat was a fun one to build, it has the V6 from a Buick and the blowers from the pro street Baretta. Hi Brad, thanks! I love all things tubbed. Thanks for taking the time to comment.
-
75 Chevy Street Van
Steve H replied to Leica007's topic in WIP: Model Trucks: Pickups, Vans, SUVs, Light Commercial
Hi Lei, lots of nice mods and details on this build. The sliding side door is brilliant! May I ask what you used for the front springs, they look perfect. It’s frustrating when you do several mock ups and everything fits, then “suddenly” at final assembly things don’t fit… it’s happened to me. Looks like things are in good hands here, you’ll have everything fit in place. Cheers, Steve -
Hi Claude! Well, another masterpiece. This build will look fantastic at our Duece Days in Scale show in Victoria on July 17th!! just sayin… Lots of eye candy here, but the flame tread tires and V12 really make it for me. Thanks for sharing sir! Cheers, Steve
-
AMT '67 Mustang Fastback-Now in Under Glass Section
Steve H replied to mustang1989's topic in WIP: Model Cars
Hi Joe! I’m trying to get caught up on all the awesomeness that I have missed. Beautiful work here my friend, fantastic attention to detail, VERY clean. That clear coat looks killer, smooth… This is going to be a real beauty when she’s all assembled. Cheers, Steve -
Well played on the chassis slicing and dicing Bill !! Take a bit from here…add a bit over there… voila!
-
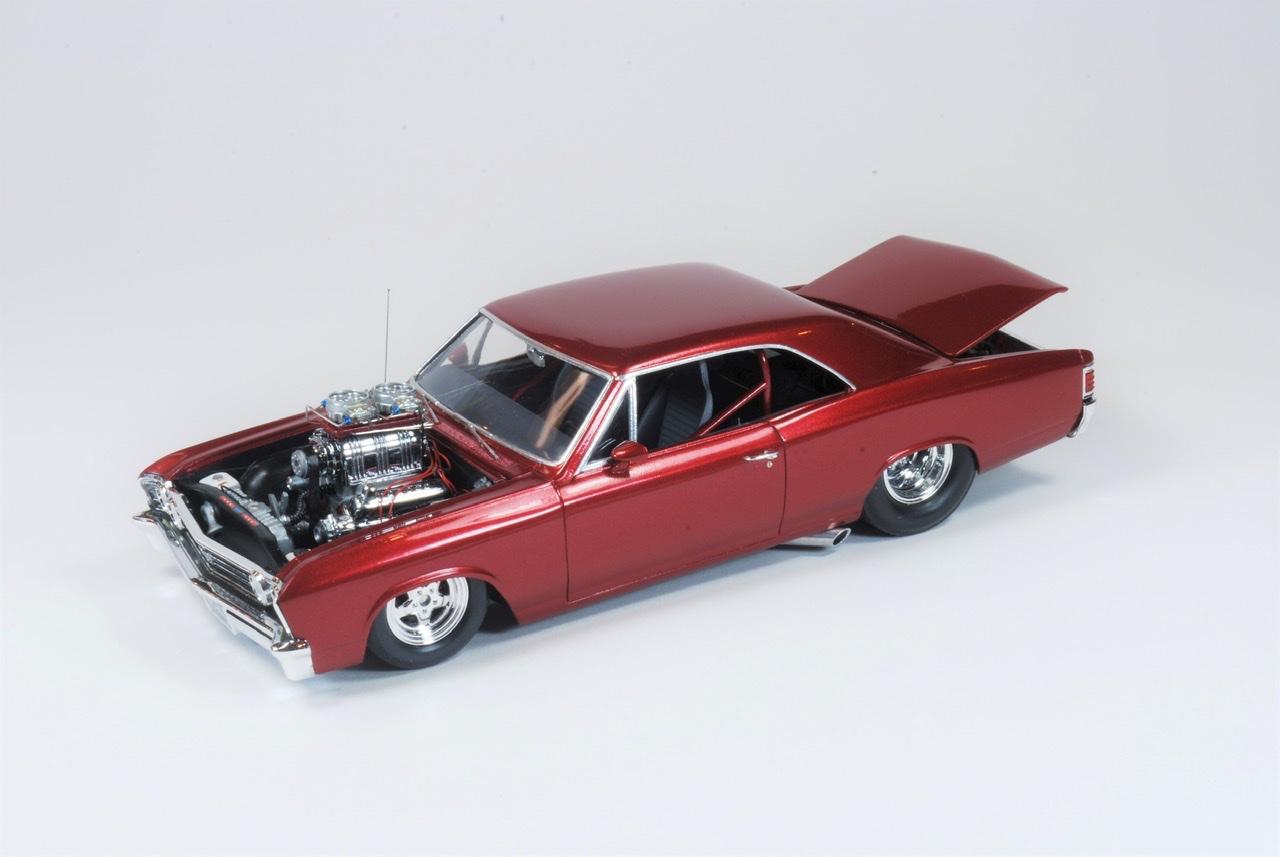
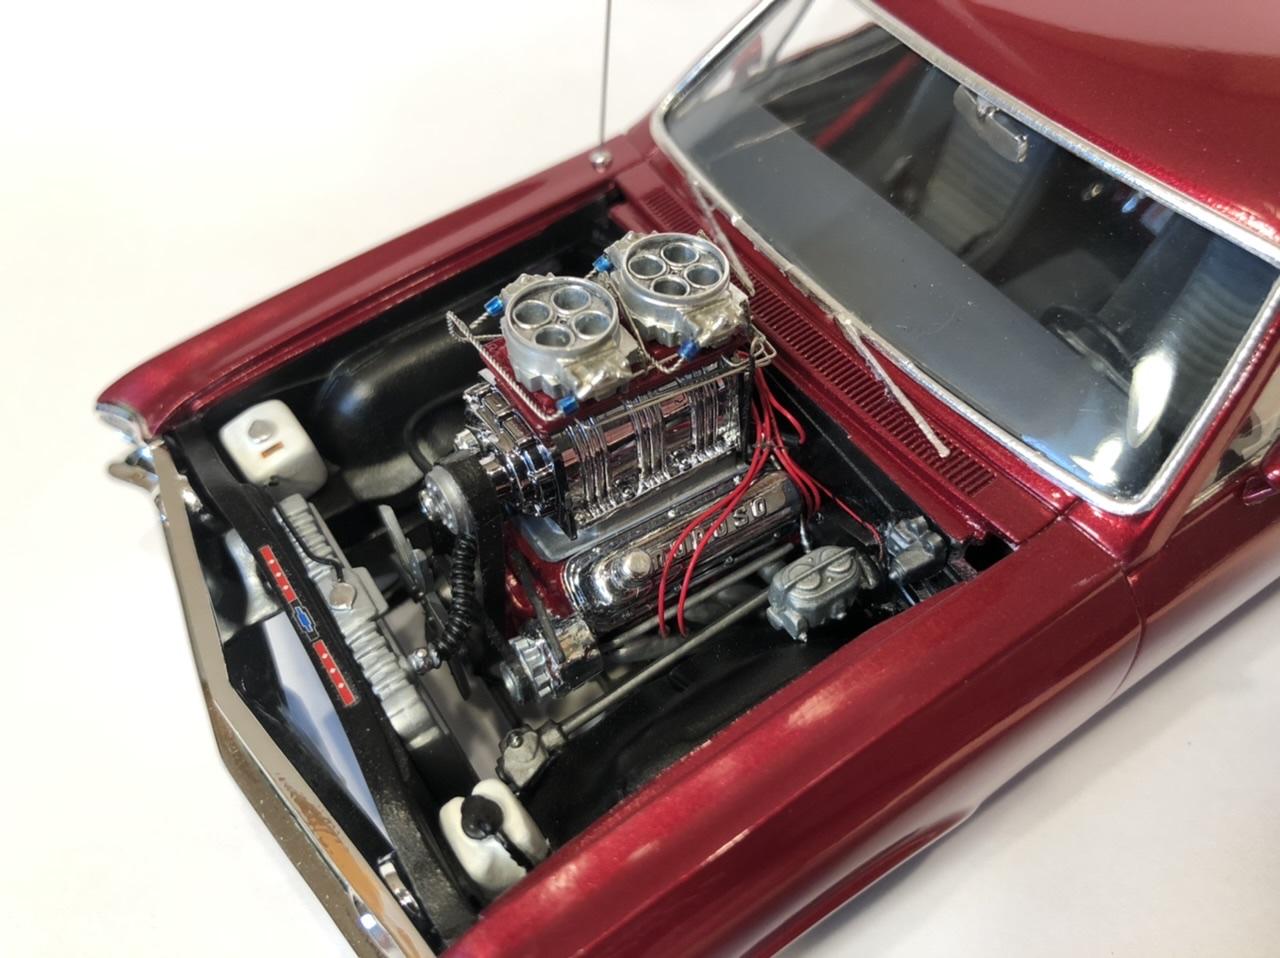
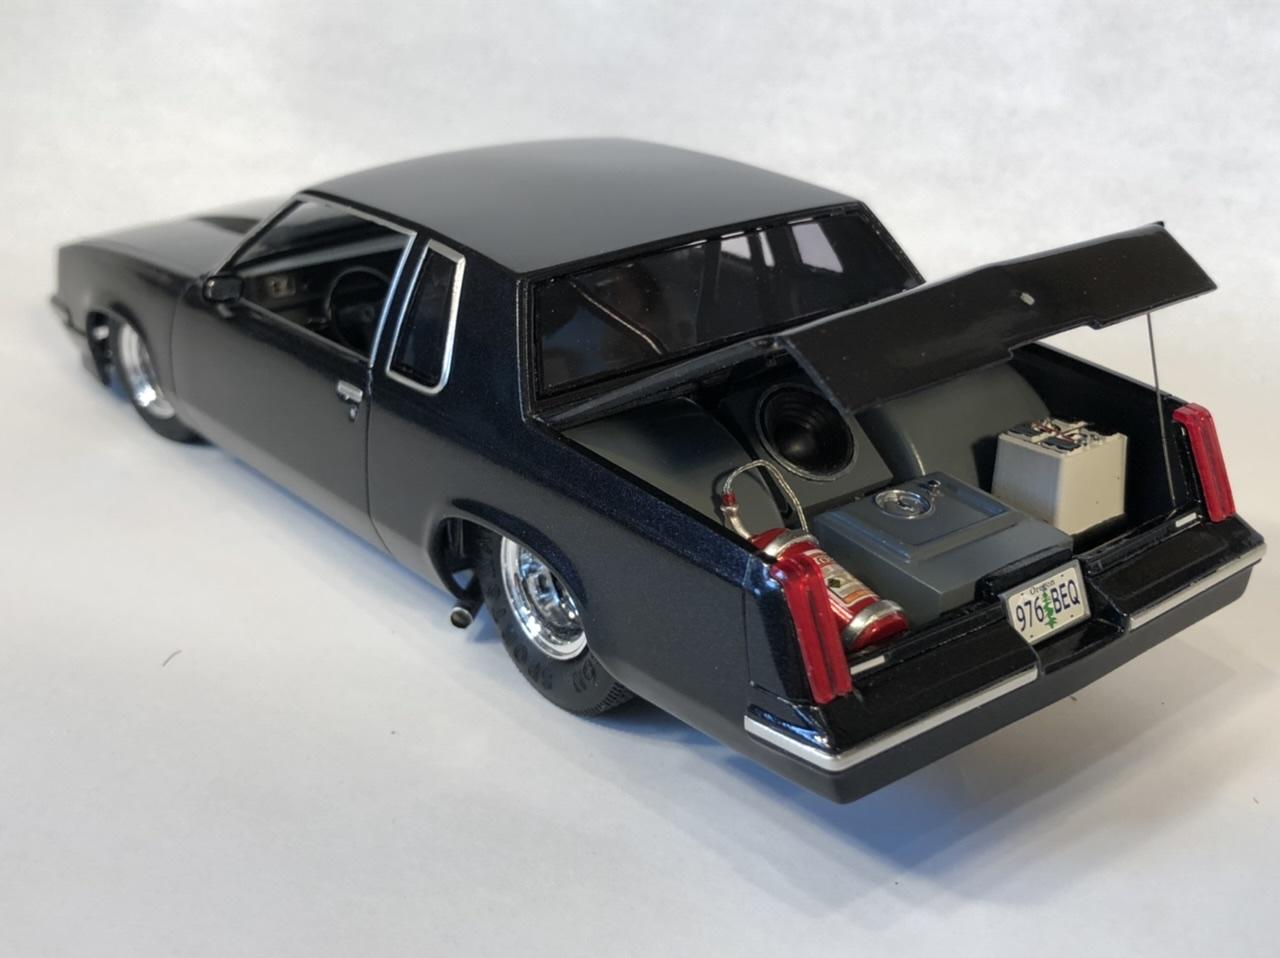
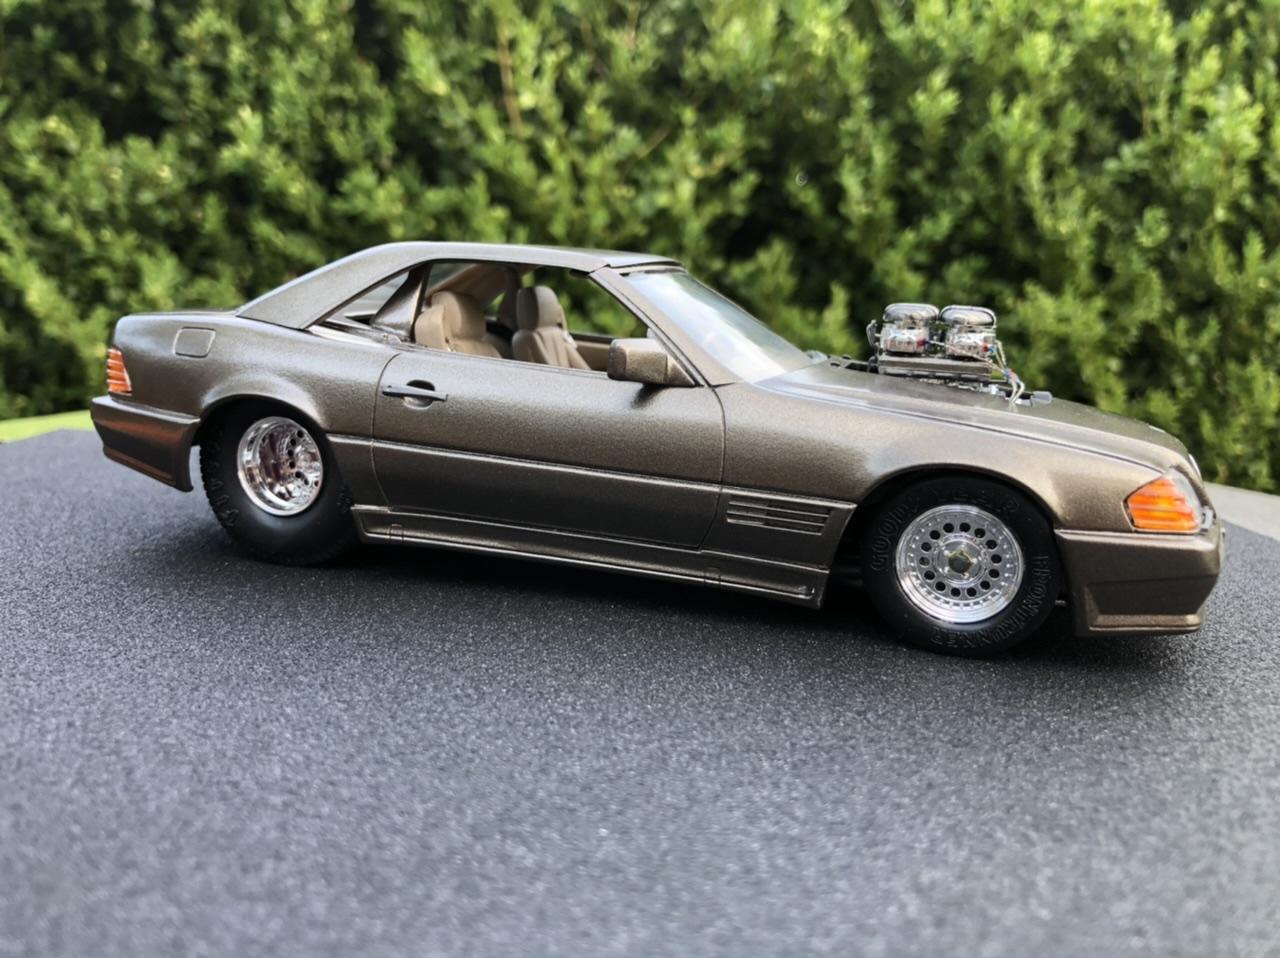
Lots of great builds here guys. Looks like some pro street builds are allowed, so I’ll share a couple of mine. 67 Chevelle Fiat 500… 83 Olds Mercedes 500SL
-
'65 Nova Pro Street Update 11/14/22 Completed Chassis Photo Pg. 5
Steve H replied to Plowboy's topic in WIP: Model Cars
Oh boy… this is going to be really good. Roger, this is right in my wheel house. I plan on tubbing the ‘64 when I get my hands on one. I will be watching with interest as I know you’ll knock this outta the park. Your colour combos never disappoint. Great to see another Plowboy WIP under way. Cheers, Steve -
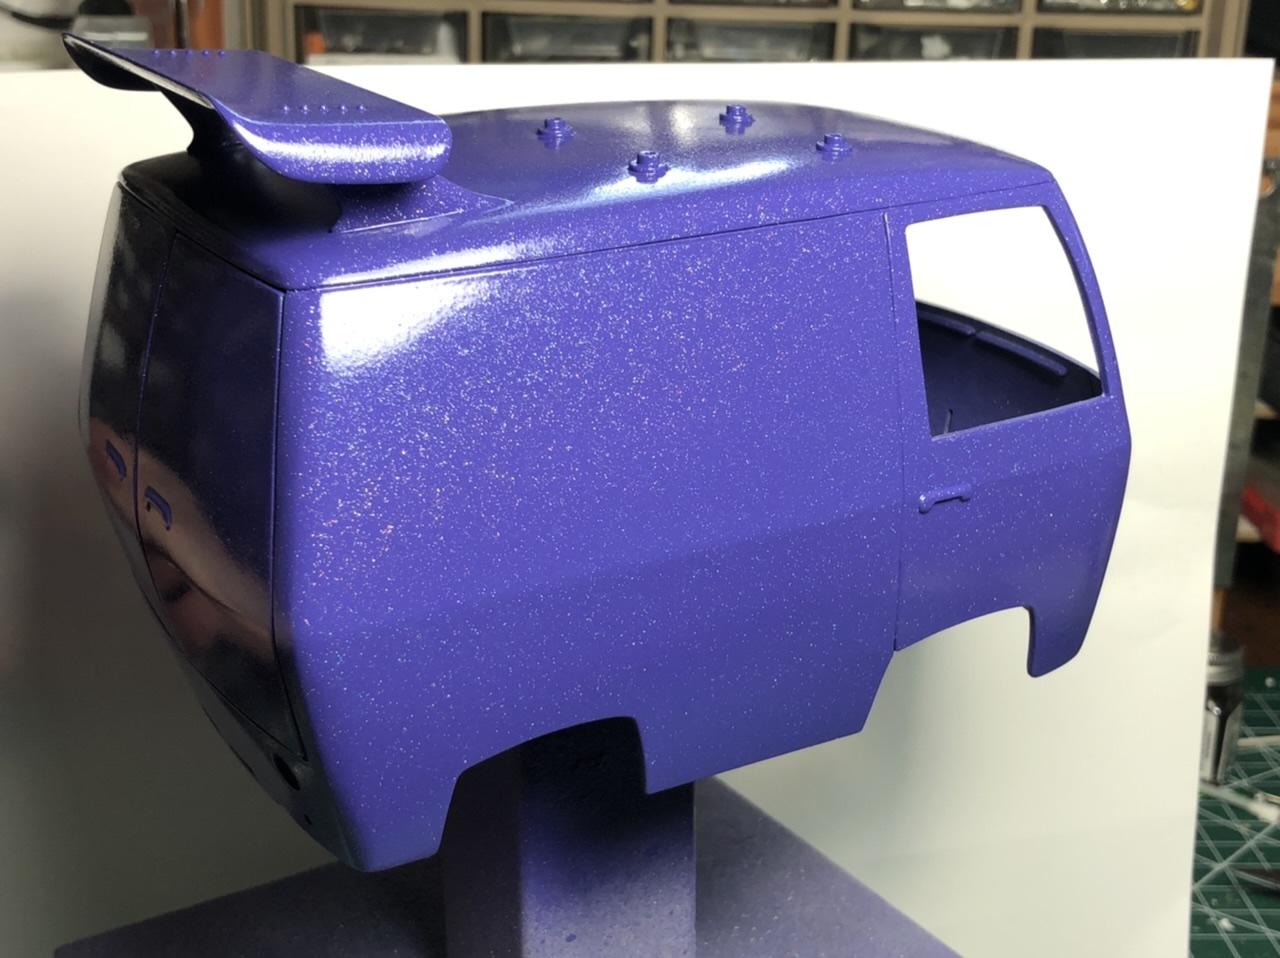
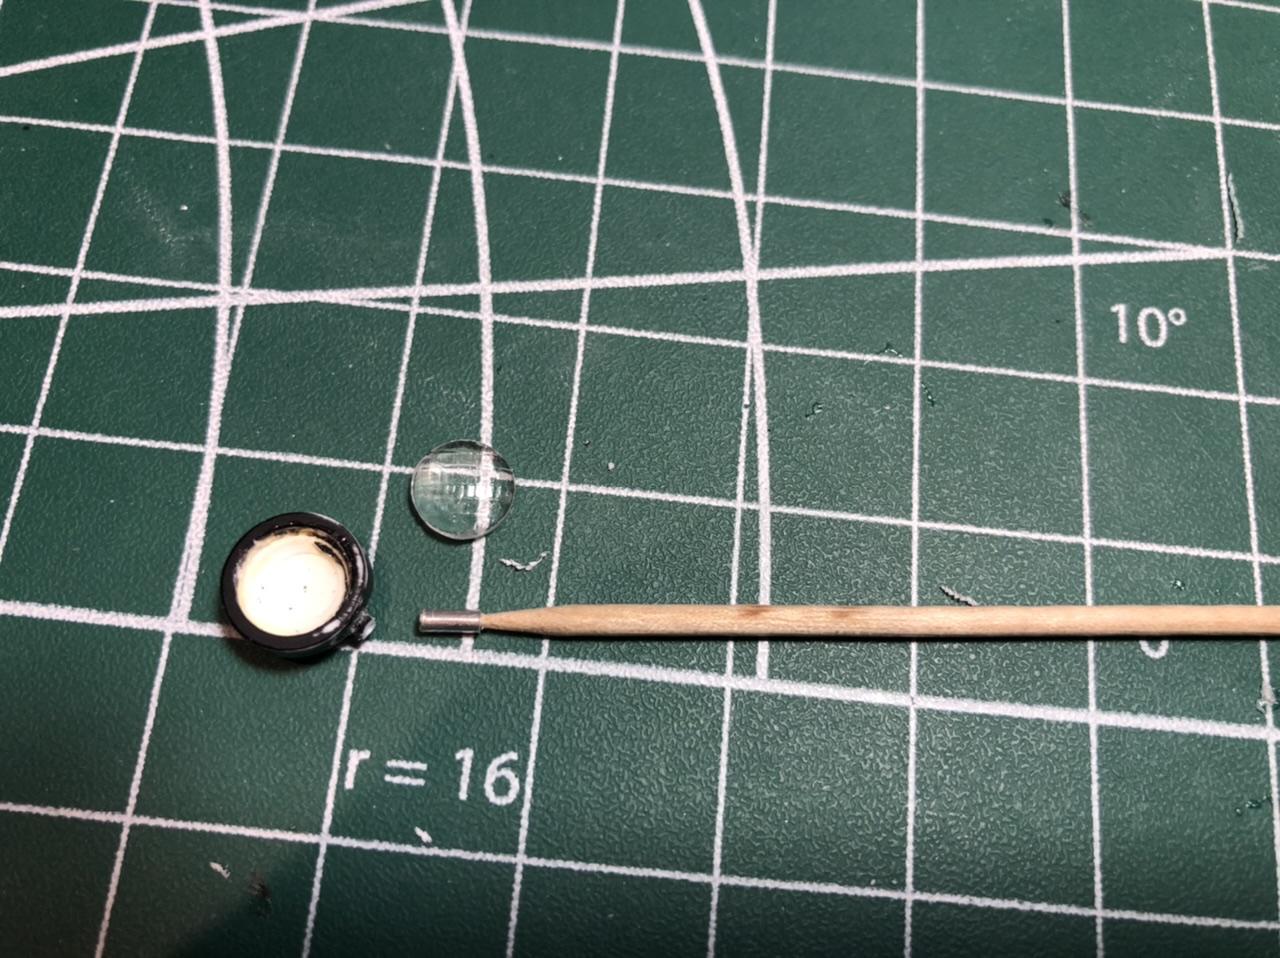
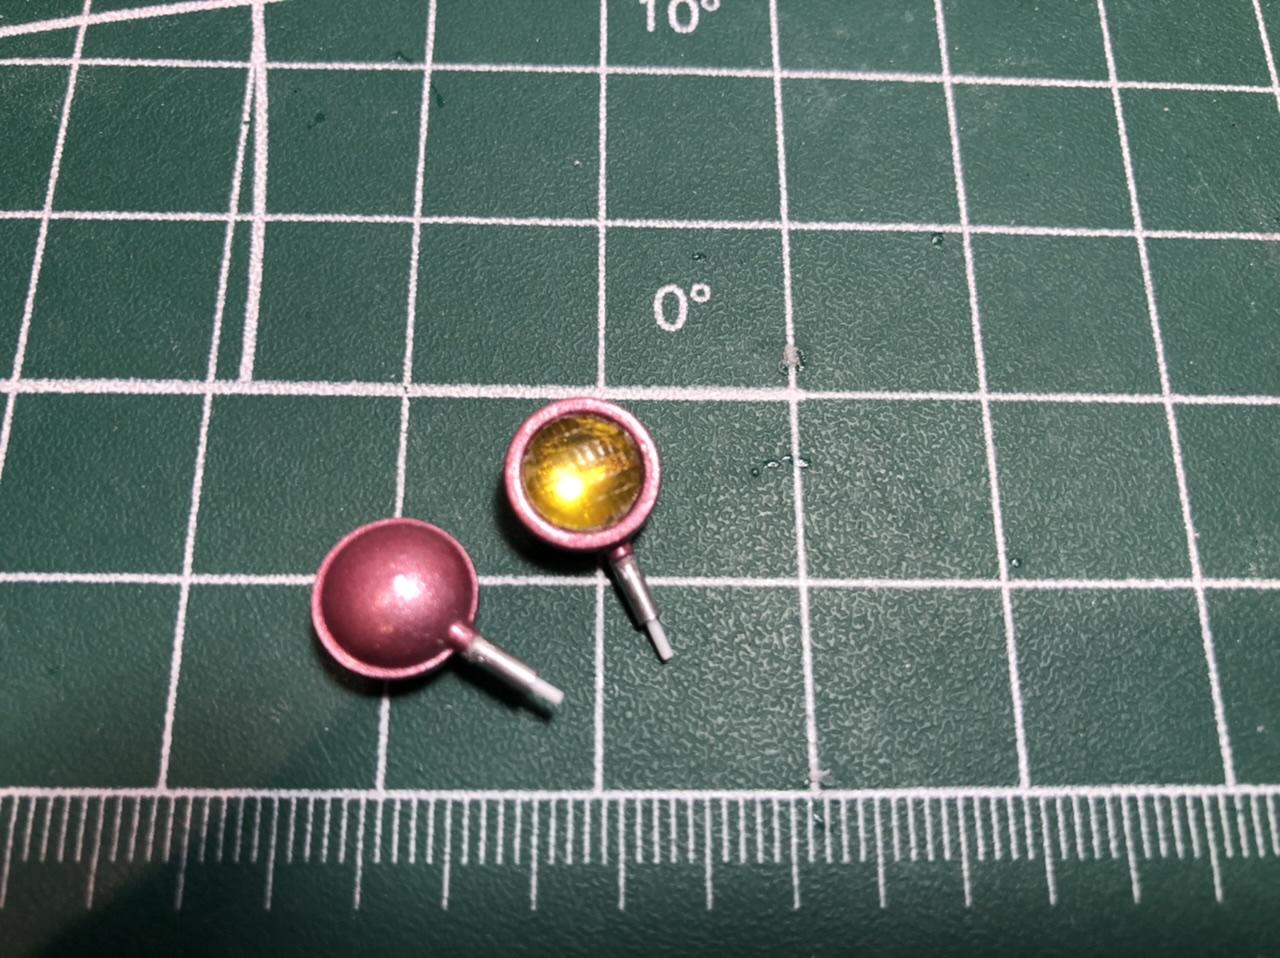
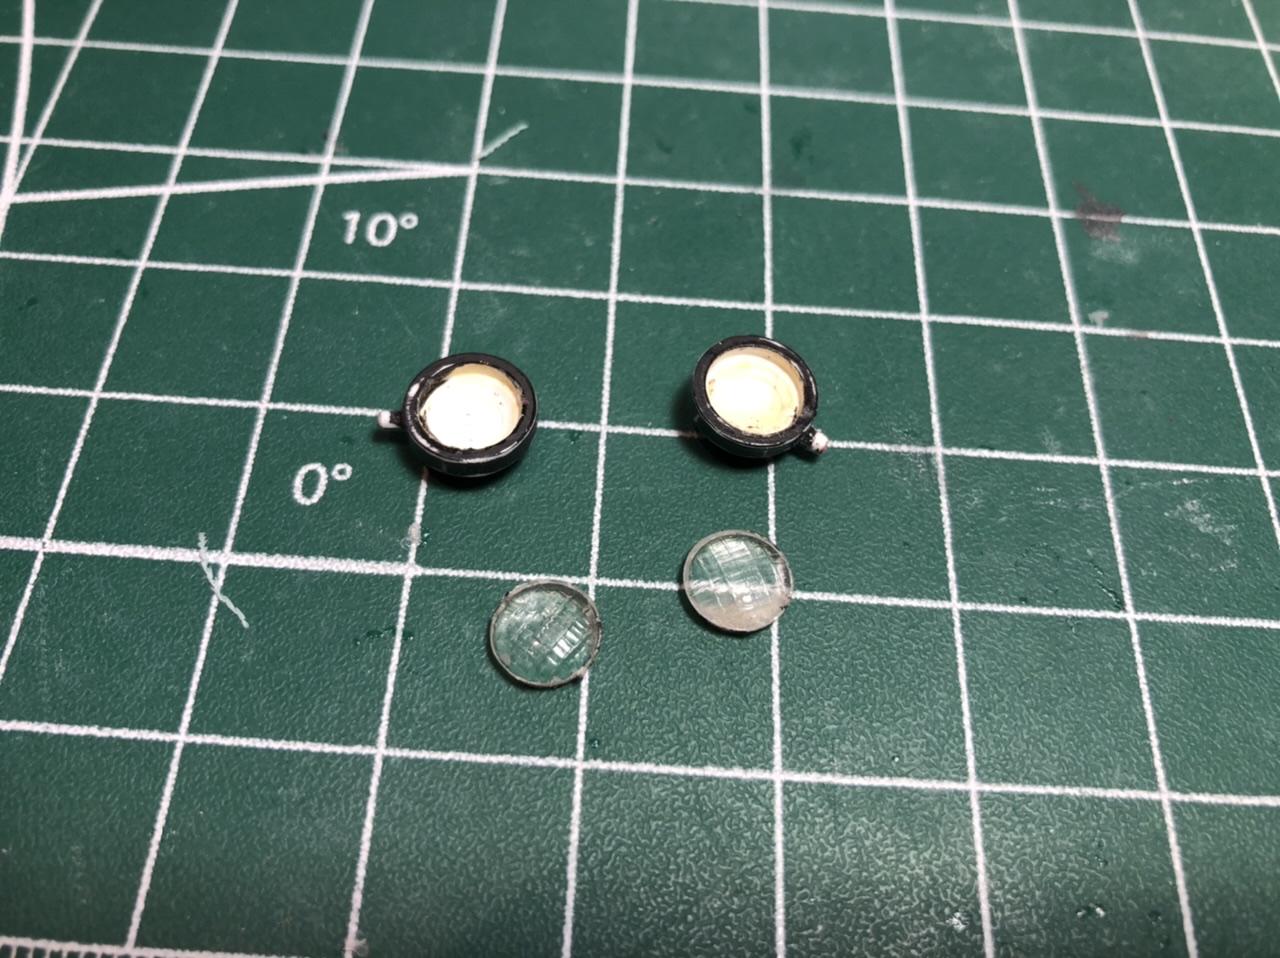
Ok…. Moving along. So with the Tamiya TS 24 purple dry, it was time for the Tamiya “lame flake” (I would call it speed boat metallic). The pictures don’t really capture the prism effect of the paint. There is a fairly dramatic rainbow sparkle to it. Maybe I’ll try a video when it’s done. The good news is the paint creates look I want, the bad news is the finish is like sandpaper due to the size of the flakes. After that it was time to start applying the decals. I had fun digging thru the decal box for this one. The multi coloured graphics are OLD, my guess is 35 years, just a guess tho. They were fragile, and there is a couple of places the decals came apart, but the decal binder seemed to hold them together fairly well. The roof rack will have a surf board, so I used a bunch of surf related decals. Scooby’s door has K-9 unit decals, Shaggy has Dare unit. The idea here was just to have some fun. After the decals “cured” I applied a mist coat of Mr Hobby clear, then 2 light coats of Tamiya pearl clear, then 2 medium coats of Mr Hobby clear. I was optimistic that after all that, the “sand paper” finish would be something I could polish. It’s still a bit “chunky”, ya… chunky. Not exactly what I wanted. So I’m on the fence, I could add another few coats of clear so I can shine it up, or just call it good. As I was doing my parts box dive for bits, I came across some old running lights (I think from the 1/20 scale Highjacker van). They were a bit rough, but definitely usable for this. The lenses came out in one piece, so I cleaned up the glue schmeeb on the back of the lenses. Sanded the styrene post off, then made longer posts from aluminum tube, they intentionally too long to keep things cartoon like. Paint is Tamiya pearl light red, molotow chrome reflector, Lenses got a coat of clear yellow on the back. That’s it for now. I must say, as this progressed I kept coming up with more ideas. I could have gone about 20 directions with this kit. It is refreshing sometimes to just play around and not take a build too serious. The license plate will pay homage to the crime fighting prowess of Scooby and Shaggy, along with the door decals. That got me thinking… man, I should have done a paddy wagon, then there was a thought about a Scooby snack truck… If you’ve got one these kits, bust it out and have fun with it. I hope this one puts a smile on your face. Thanks for looking, Cheers, Steve
-
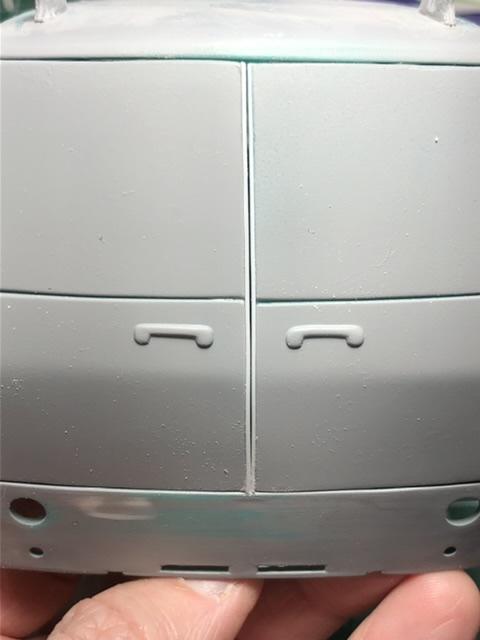
Initially the plan was to leave the back doors “hinged” as they came in the kit so I could access the battery. However, the doors were a fairly poor fit, so I decided to glue them shut. There was a large gap between the doors which I filled with styrene strips. The “belt line” in the middle of the doors did not line up, so that was filled after photo was taken. The front needed “something”, so after playing with several options, I decided on the Peterbuilt grill. This keeps with the cartoony look You may have noticed a bunch of holes in the body, here a few of the items to fill those. Airhorn from the parts bin was hollowed out for “realism” Here we have roof rack hoops made from wire, search light, ornament for grill, air horn, antennae made from wire with ball from a pin, the alligator clip is holding the base of the antennae which is some styrene rod and aluminum tube, the big “bolt” will be the gas cap. And here’s the Mystery Machine in purple. More soon…. Thanks for having a look!
-
Hi Carl ! I’ve been away from the forum for a bit, great to have you cheering me on here. HA!!! Tom, you took the words right out of Scoobs mouth! Shaggy has been messing with the Mystery Machine…. Thanks for taking the time to comment on this silliness.
-
Hi Dennis, this is fantastic stuff. Can’t wait to get my hands on those kits. Always lots of great ideas in your WIP’s, thanks for sharing. Nice to see some more 60’s builds too!! My 1:1 ‘67 Beaumont has the had the ballpean treatment on the headers… Cheers, Steve
-
Great looking build as usual Greg. The red black paint combo looks great. I agree with Trevor, the sheen on the seats looks just right. Cheers, Steve