OldNYJim
-
Posts
251 -
Joined
-
Last visited
Content Type
Profiles
Forums
Events
Gallery
Everything posted by OldNYJim
-
Add to that various conflicting information on the net and there's a lot to figure out!
-
The plot thickens! I've got a lot to learn about the Ford engine range, apparently...thanks for the expert insight Bill!
-
So, dumb question from a Ford engine dummy - are there big differences between, say, the 60s FE blocks and the much more modern ones like you’d find in the Revell Deuce and Mustang kits? I know the injection setups are very different obviously…but are these engines kind of like Small Block Chebbys where you could pretty easily backdate a much more modern engine to look really close to an earlier one? And do people do that in 1:1?
-
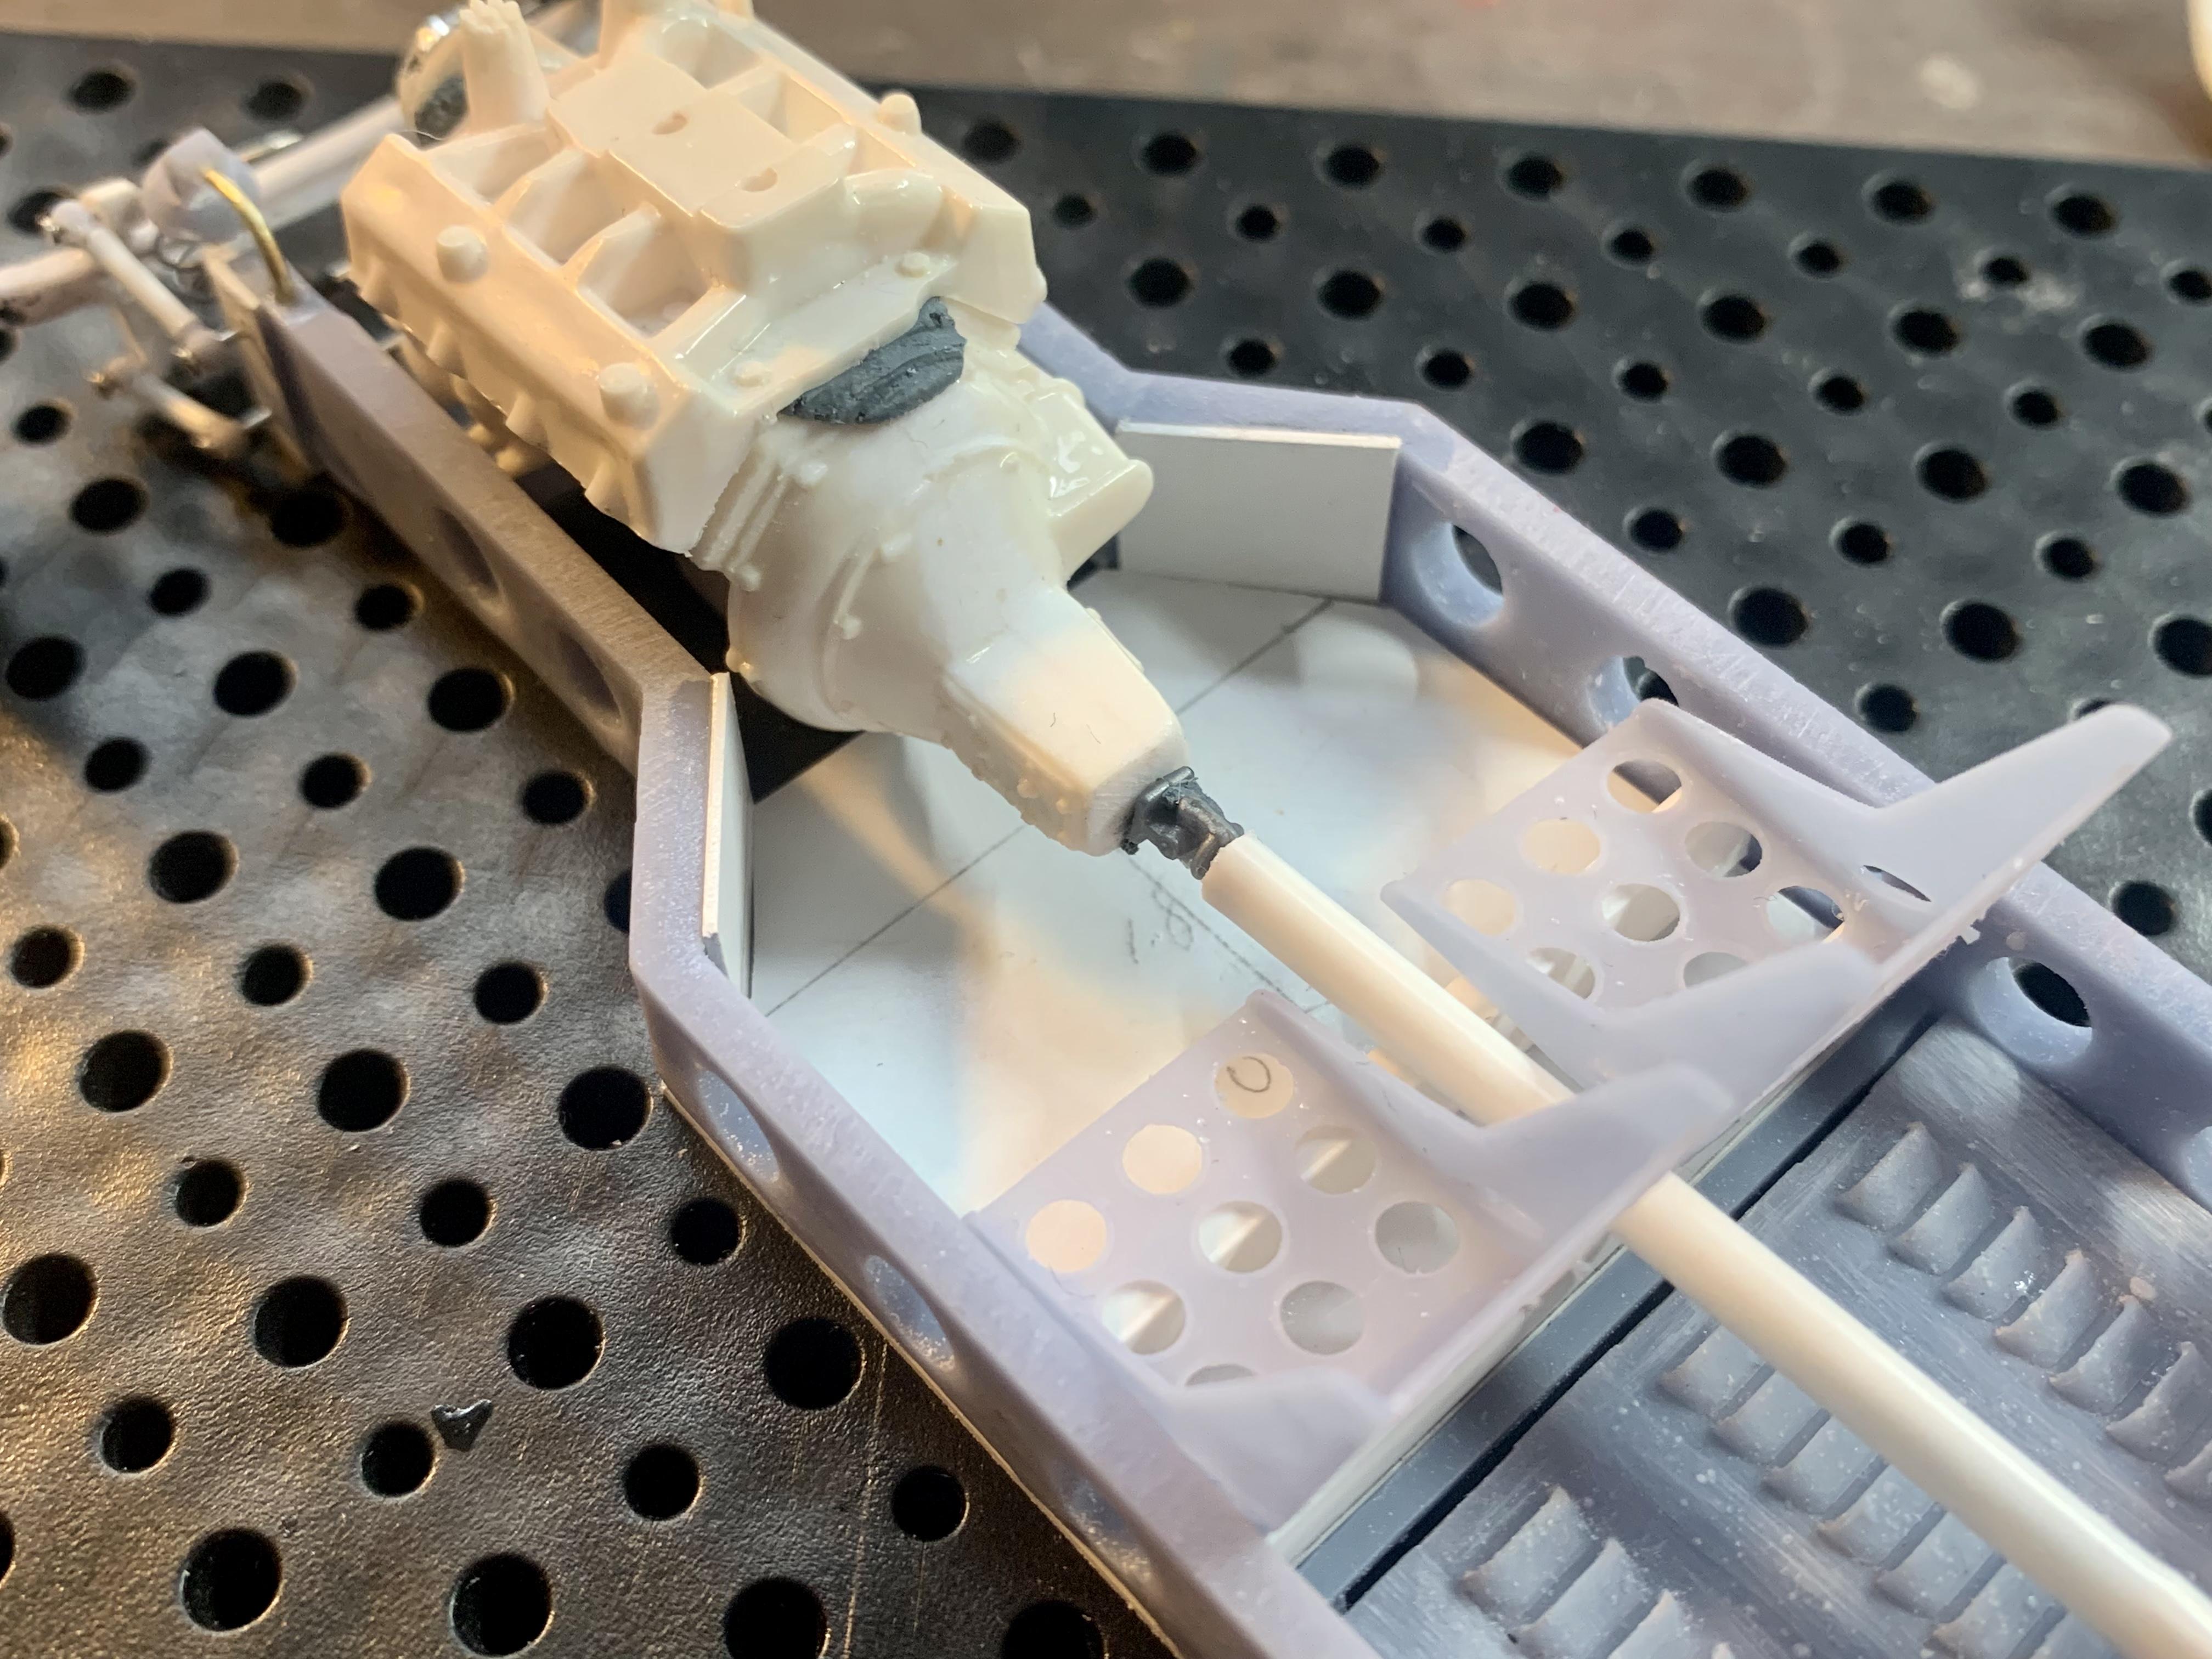
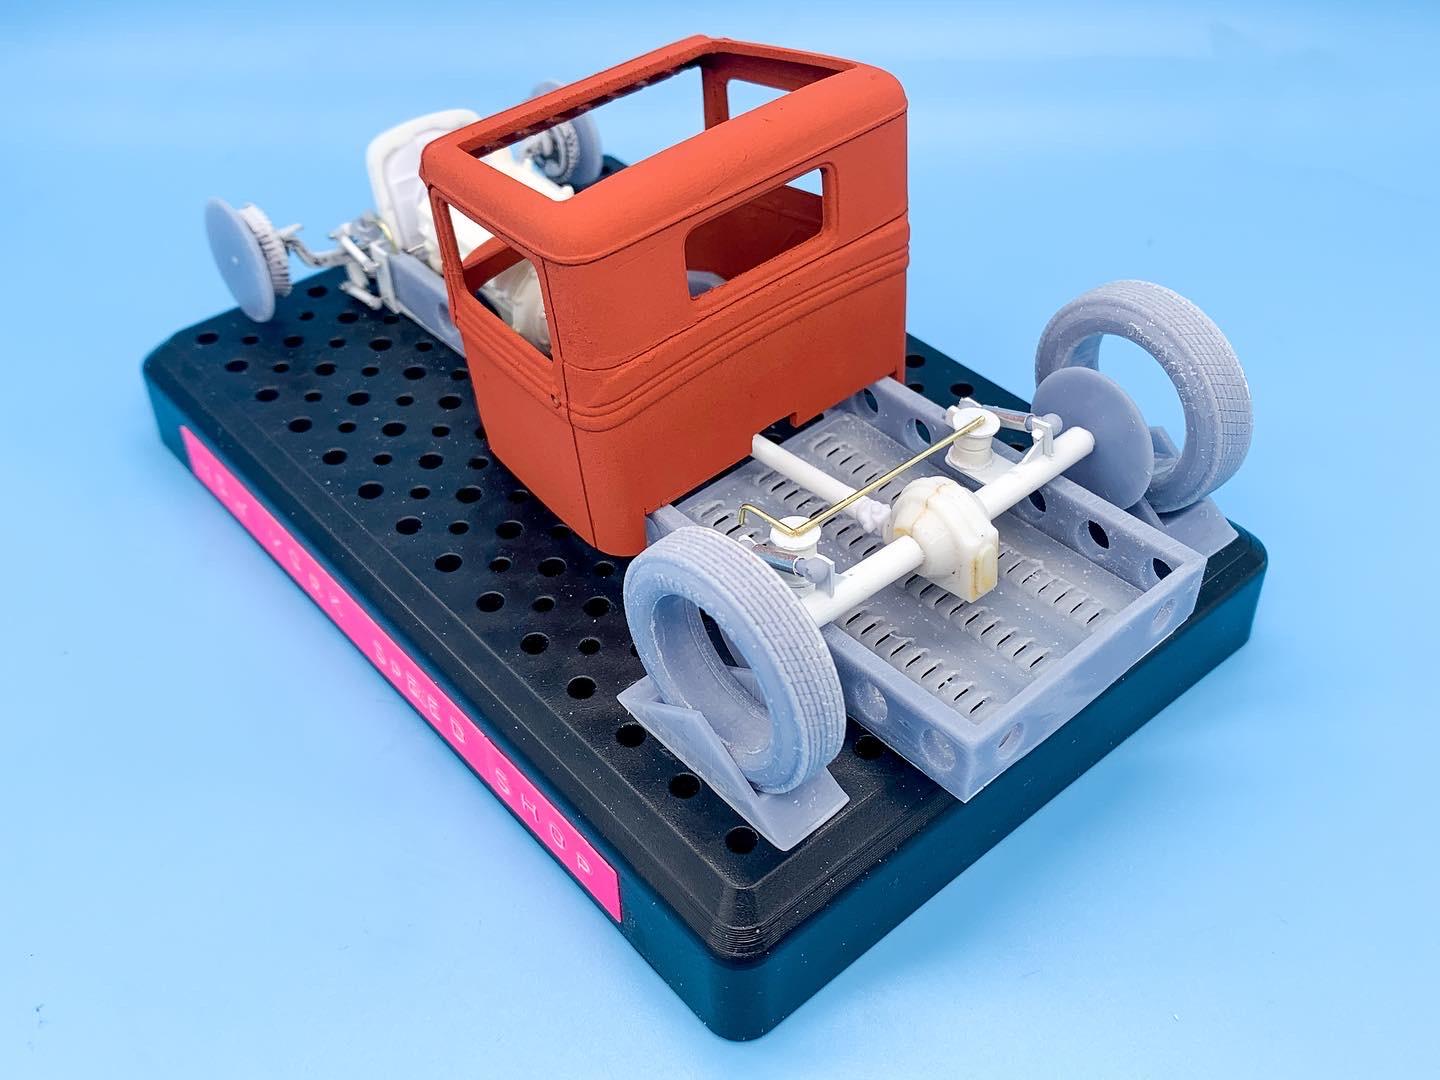
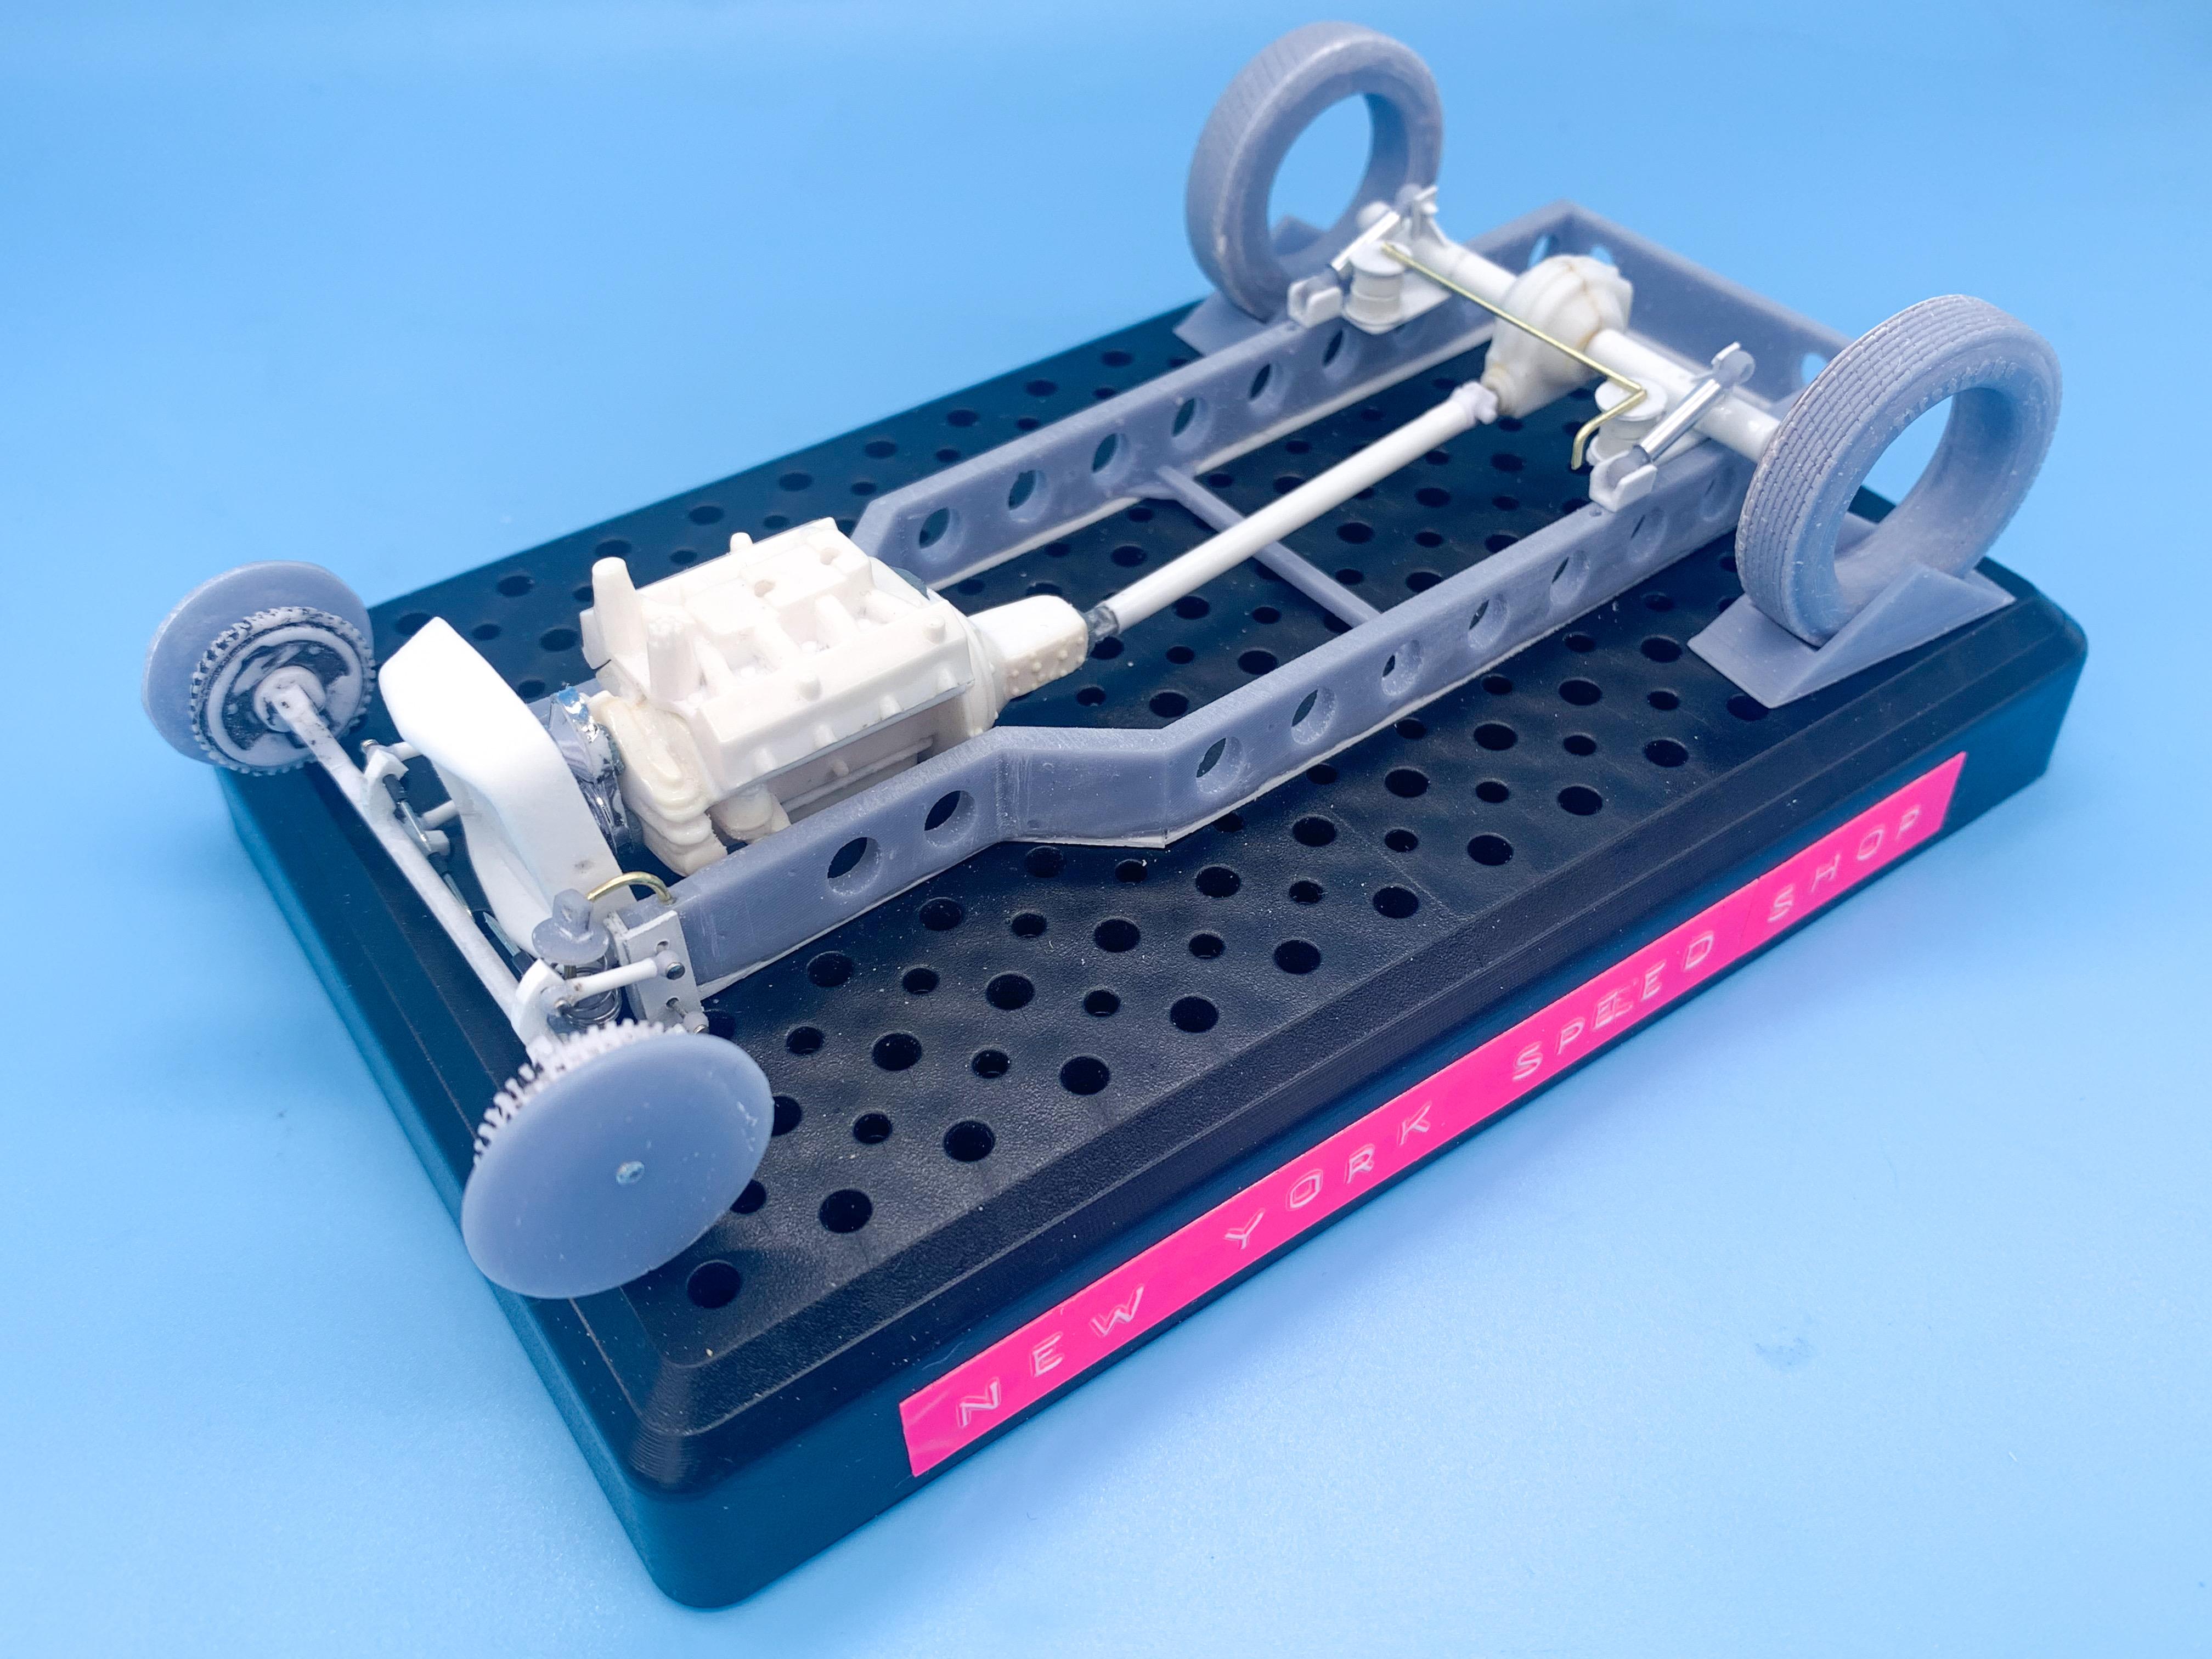
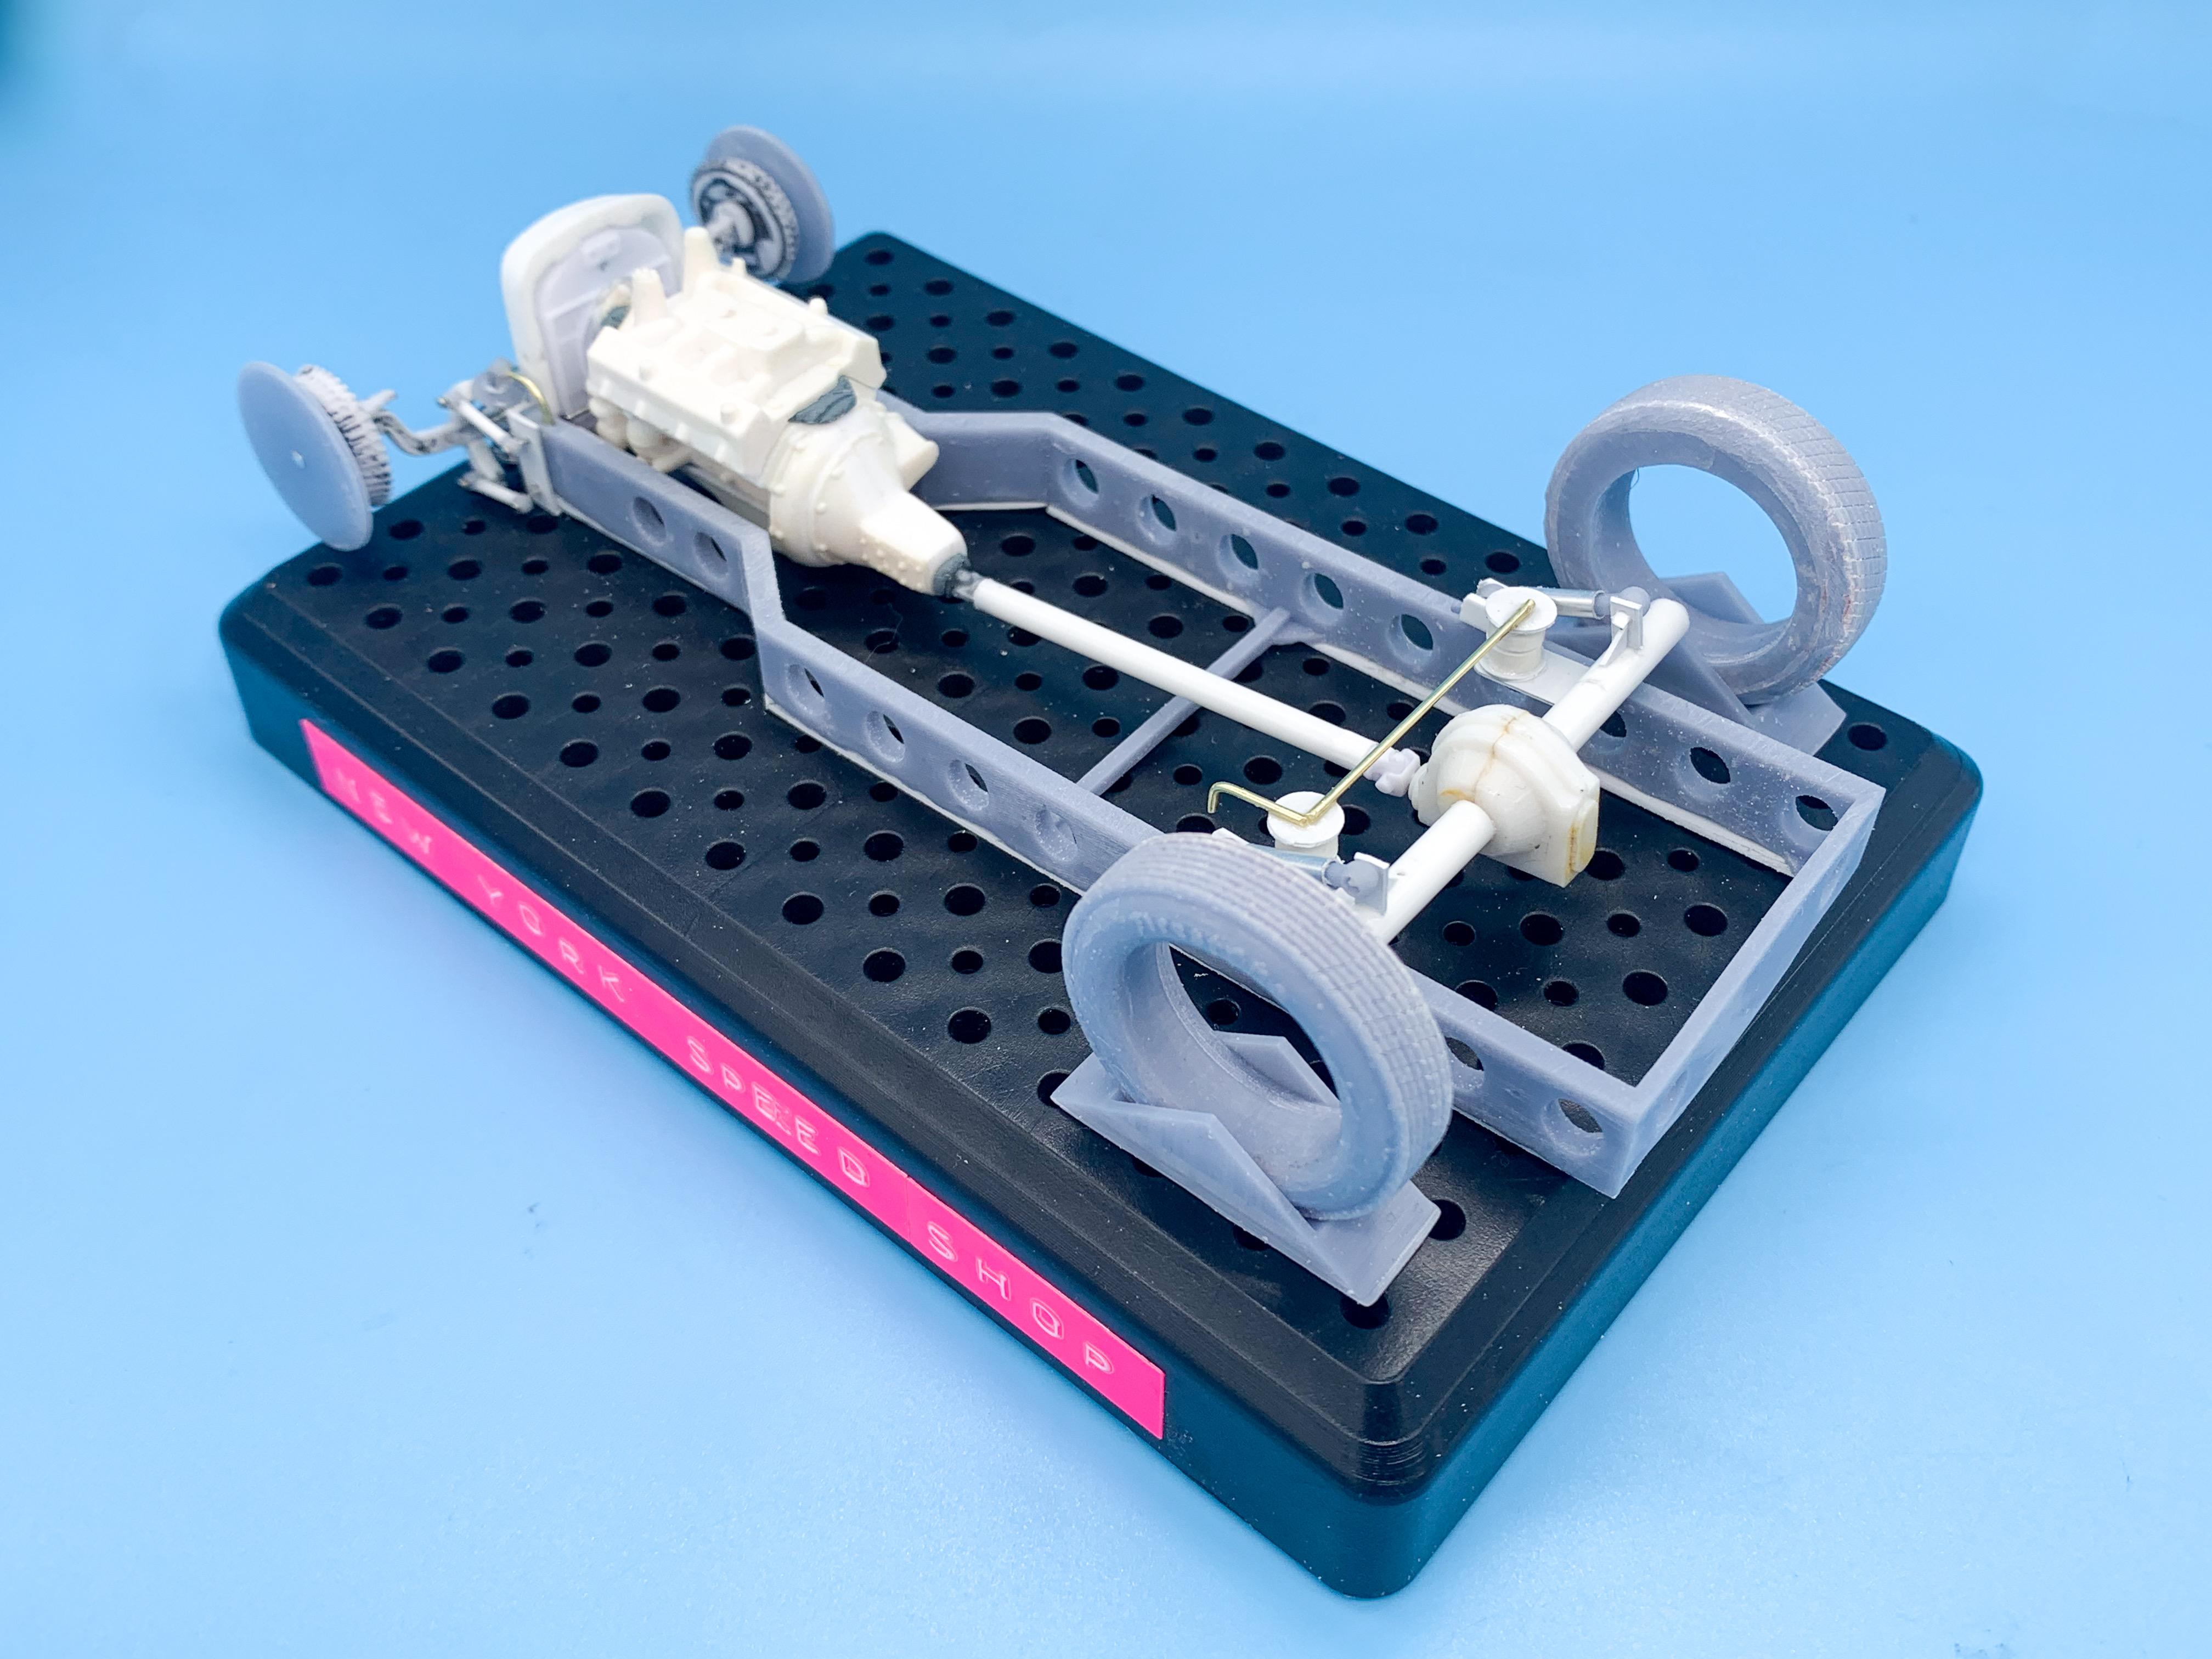
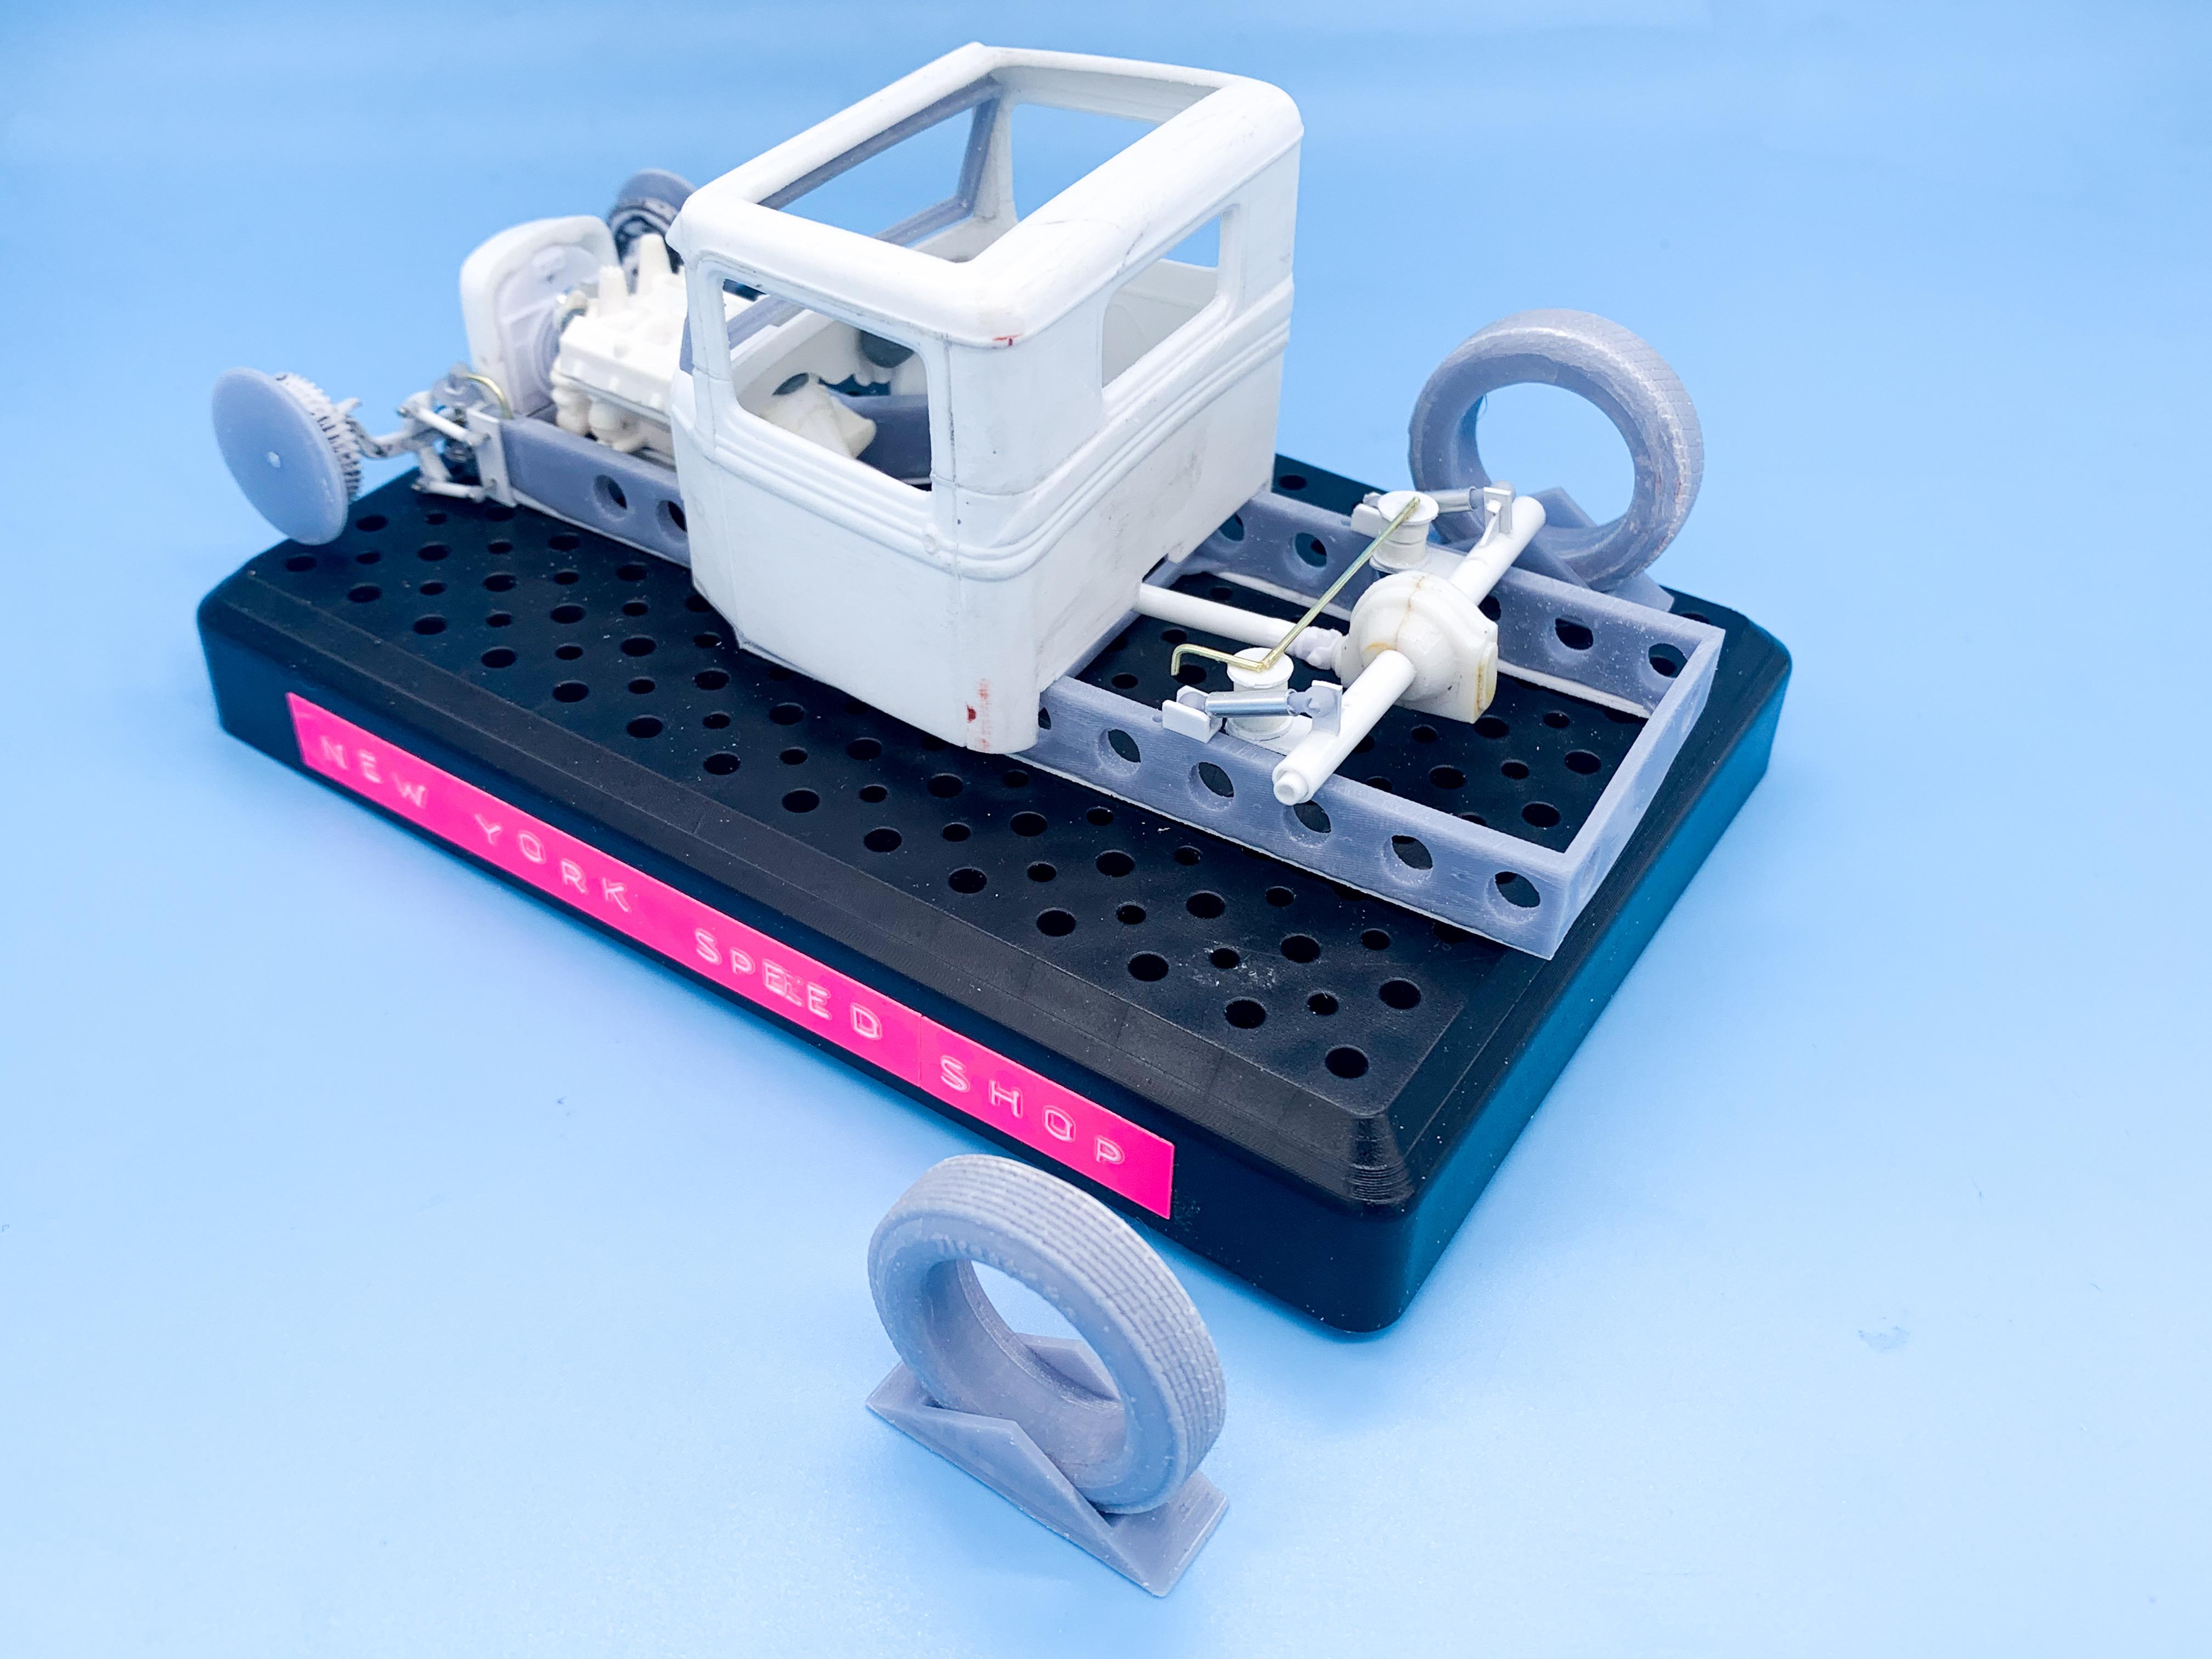
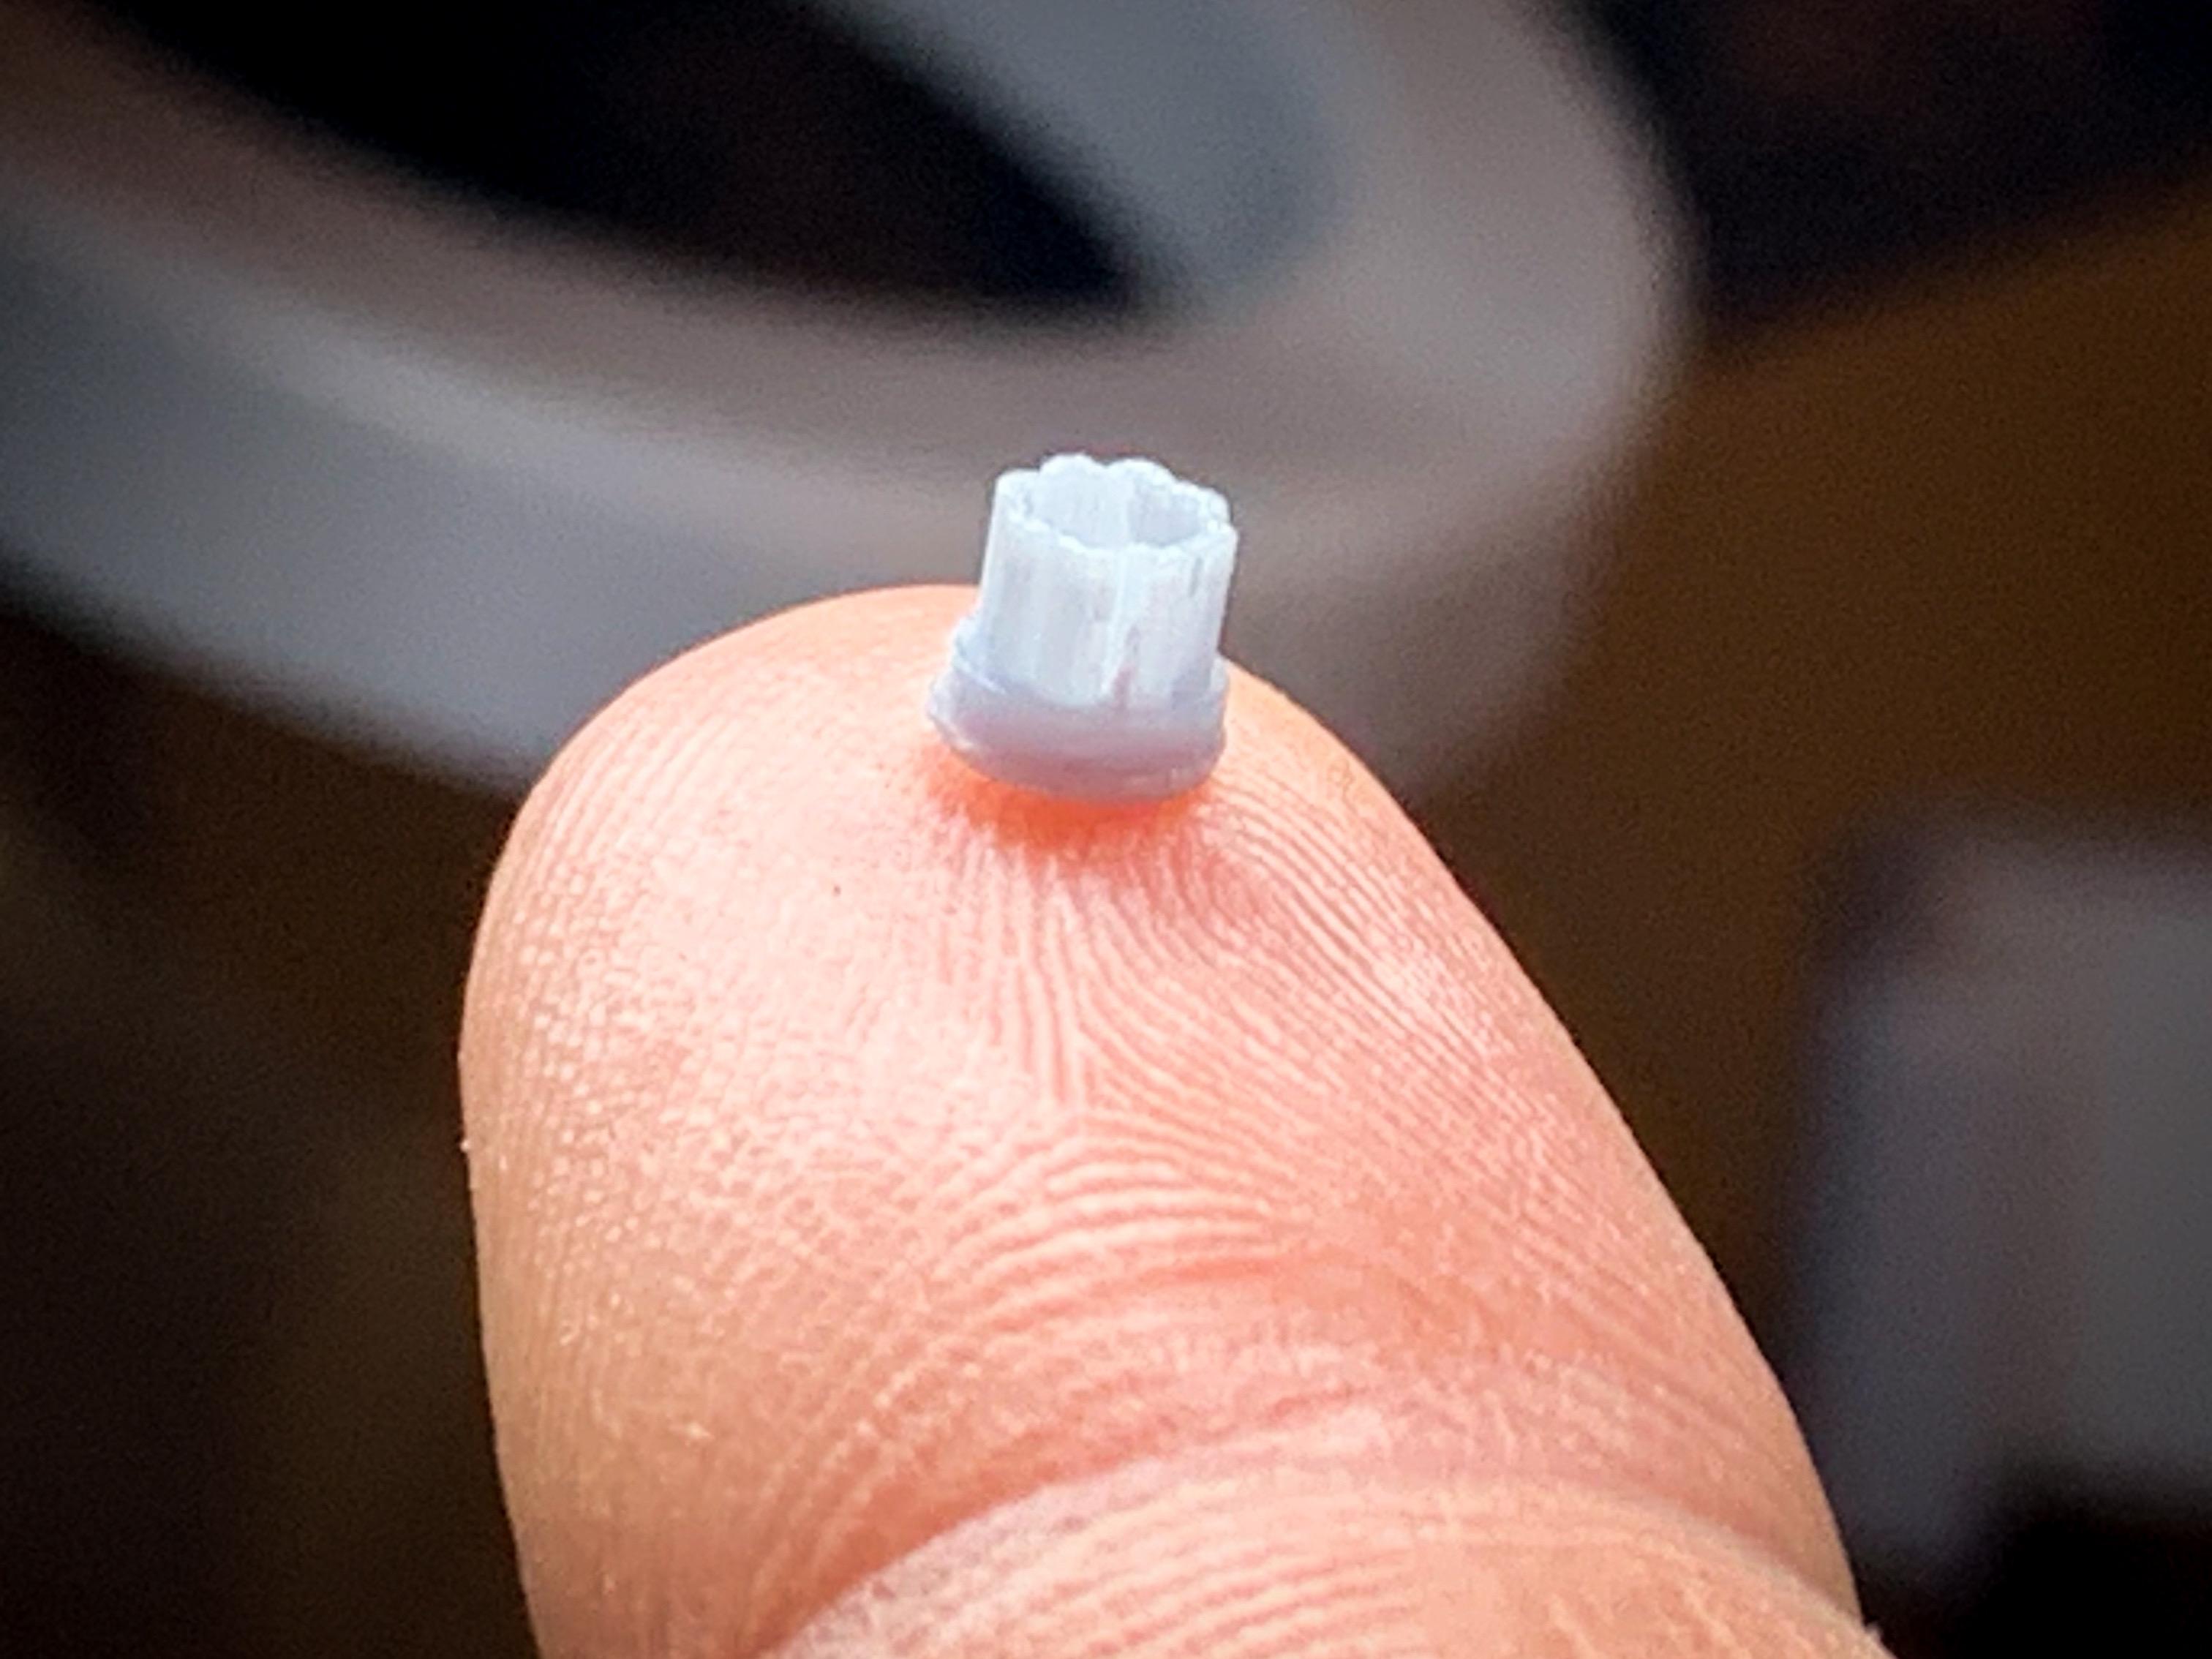
 So, a little more progress today after a snowstorm got me sent home from work… I really wanted to start work on the interior, but I’m not quite far along enough with the frame yet. Got a floor roughed in as a starting point… …and some risers made for those bomber seats… But I really need to figure out what I’m doing with the engine and trans first. I really want to use an FE block (the Mysterion that I’m referencing with the frame ran a couple of those and the kit comes with one so it seemed fitting) but this being such an old kit the detail isn’t the greatest. I was stumped on what that transmission was meant to be too, until @Dennis Lacy pointed me in the right direction; it’s meant to represent a Ford toploader three-speed but doesn’t look close enough to one that I could figure that out. A little 3D printing later and I’ve got something much more realistic to work with: Needs some work still, but a much better starting point. As for the block, I’m either going to have to pick up a kit with a better FE, or maybe try modifying a kit motor that I have already to backdate it to the right look. Is the Revell 32 Ford motor an FE, does anyone know? Got a tonne of those, but I’m not sure how close a 60s T-bird mill looks like a 90s Mustang mill. Need to do some more research! The more I add to this frame the crazier it looks - I love it so far! Thanks for looking - more soon!
-
Thanks Bob! Hope you’re doing well! Got a long way to go to learn this stuff…but it’s exciting! Thanks for the kind words! I hope, at some point, you consider selling your stuff - you have some BEAUTIFUL pieces that I’d love to try printing myself! But you’re right, like anything digital it’s way too easy to pirate them right now. Good insight - thank you!! I can actually design these with the right curve to make a trunk or a hood or anything I guess - or design those parts from scratch and just make the louvres part of it. It’s exciting that the idea worked though! Lots more fun to be had with THIS trick now I know it’s possible! I’m super pleased with mine! 3D printing has a steep learning curve and if I didn’t know 2D design it would be a lot more limiting (plus I took a course in 3D stuff specifically to help learn some of what I needed)…but the potential is HUGE with this stuff! There’s already multiple kits out there that you can download and print and have a ready-to-build full detail model kit printed the same day. Incredible! Thanks Bob! Here’s a link - might be worth contacting the guy to see if he’ll print and mail a set! https://cults3d.com/en/3d-model/various/hot-rod-dirt-racing-wheels-tires-w-spinner
-
Really glad to see this one back in-progress! It’s coming along GREAT!
-
STEVE SCOTT ,A.KA . [ UNCERTAIN T ]
OldNYJim replied to bpletcher55's topic in General Automotive Talk (Trucks and Cars)
Meh, I wasn't really upset or anything - just trying to hook the guy up with a way to make his goals happen. I've still got my two original Uncertain T's here, plus a 3d printed body for a third one at some point...I probably don't need to build more than three of the things anyway I did want to build one variation box-stock, do one much more detailed build and then another detailed build but with the candy red body that the car had at one point but past that I probably don't need any more of them in my collection unless I come up with REALLY good idea of something else to try. -
making coil springs, which wire?
OldNYJim replied to fiatboy's topic in Model Building Questions and Answers
Those even gaps were what impressed me - nice job! Thanks for sharing your process Greg! -
Very sad news, sorry to hear that. Where can I see some of his work? I’d love to see some pics of his projects
-
making coil springs, which wire?
OldNYJim replied to fiatboy's topic in Model Building Questions and Answers
Nice job on those! What’s your technique? Just wrap ‘em around a round thing? -
STEVE SCOTT ,A.KA . [ UNCERTAIN T ]
OldNYJim replied to bpletcher55's topic in General Automotive Talk (Trucks and Cars)
I had a 3D printed body made for an Uncertain T clone made four or five years ago. I sent him photos of the finished product and contact details of a person willing to reverse engineer the entire set of Monogram kit parts (or design new/improved parts to Steve’s specs) - he declined and told me he’d already looked into 3D printing and decided his way was better. What his way will end up being, who knows. ..(likely a bunch of pie-in-the-sky and empty promises is my guess, but I’d be delighted to be proved wrong). -
Was that the same video where they tell you to turn your pistons around and it changes the timing and you get extra horsepower FOR FREE?* *I know there are cases where that’s possible on certain engines - but I’m sure they’re few and far between.
-
Nice! That's good news - I'd been casually watching eBay for one of those at a sensible price. That's a fun kit!
-
They should've use gloss on the pistons so they slide smoother - would probably add 15 horsepower at LEAST!
-
Beautiful, inspiring work! Made me wanna build one just like it! Thank you for posting!
-
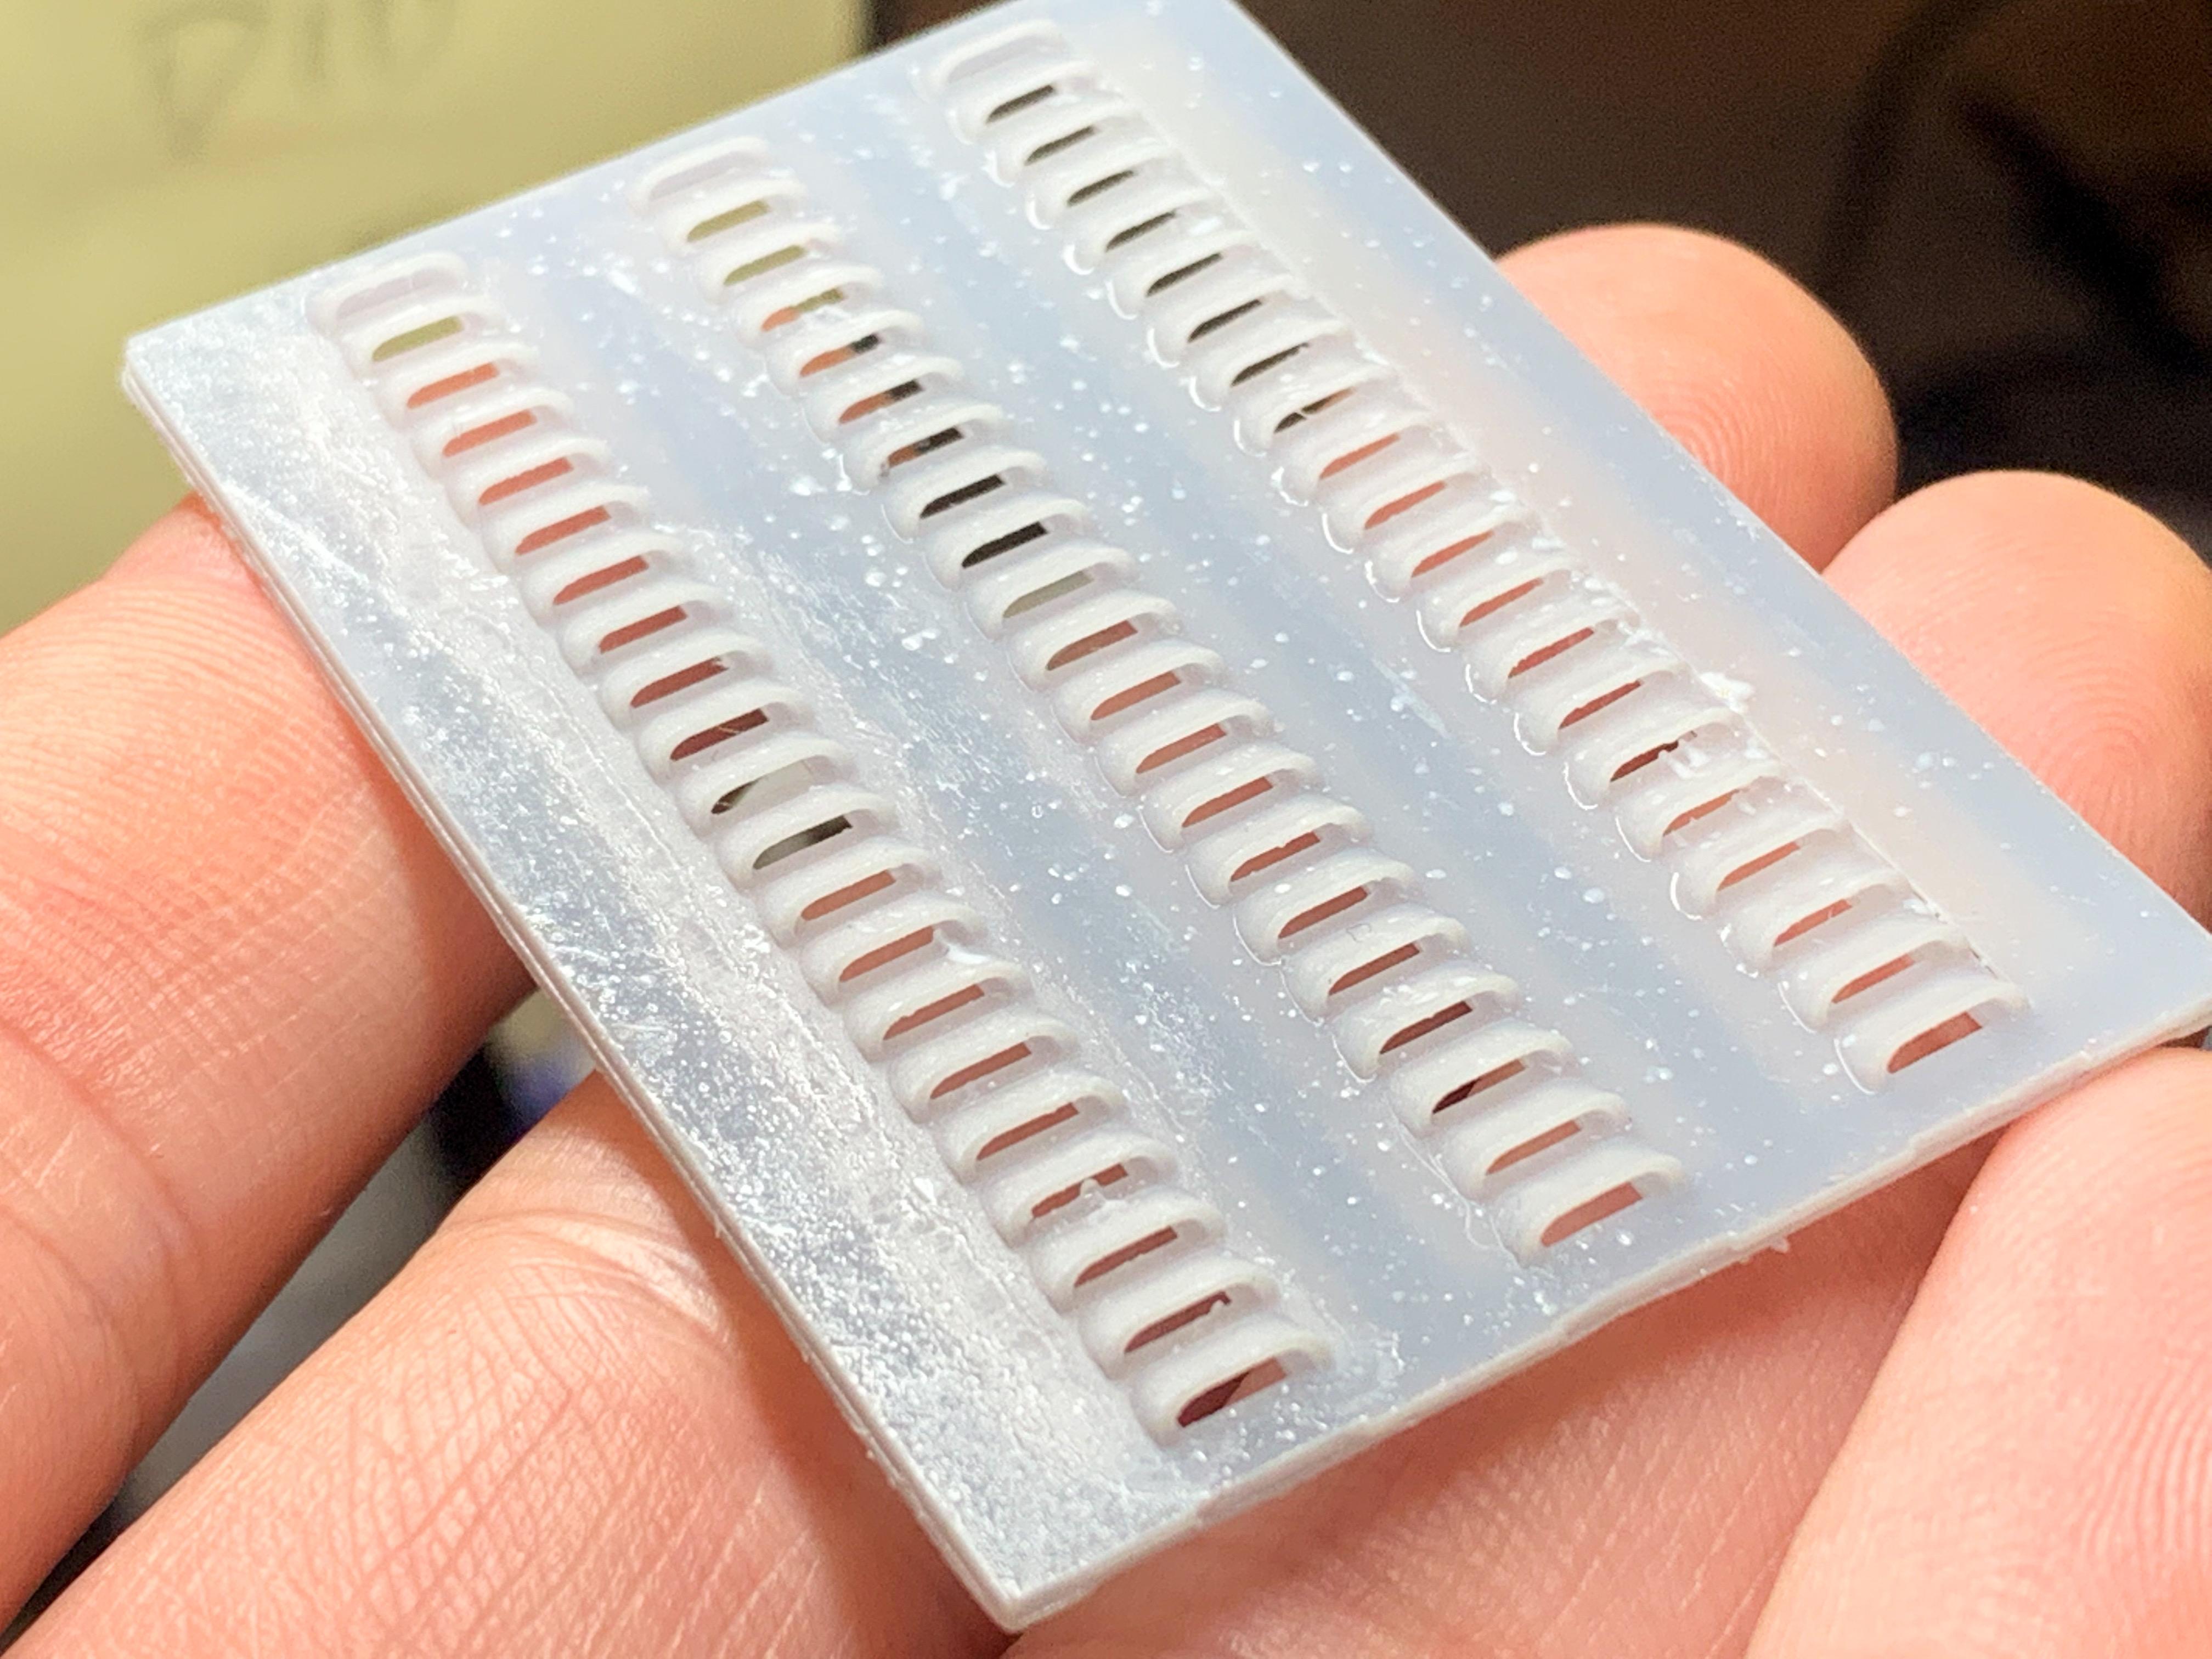
Good tip, thank you!! I’ll check those out! You know, I was stuck in my mind between doing a REALLY healthy chop, trying a subtle wedge chop, or doing a bunch of work for a chop that most people wouldn’t notice. I ended up going for the last option, but with the East-coast cutting-the-rotten-bottom-4-inches off the body thing instead ?. I was trying to think if a bubble-top would work on this, but decided it probably wouldn’t. Or something more swept-back maybe? So many build ideas - good thing my local HL never seems to go out of stock of these kits… Big tank coming up! There’s a bunch of space behind the rear axle, or above the driveshaft right behind the cab. Haven’t quite figured out the coolest idea yet… They’re probably not mine to sell, I’m afraid…the designers of most of these files sell them for a coupla three bucks for personal use but not resale. Wouldn’t be fair for them to spend dozens of hours designing them and then they only sell one ‘set’ (the file) for three bucks to whoever feels like printing a hundred of them. That said, there’s some great vendors like @IceMan Collections who are good at working out deals with these designers and they’re a GREAT looking part so I’m sure they’ll end up on eBay or somewhere at some point… Mini update seeing as I wrote War and Peace up there anyway already…I’d been working on how to print actual 3D louvres (complete with openings) for about 100 hot rod projects I’ve got in mind - finally got a set successfully printed after a few tries this evening: They’ll need some clean-up before paint but not too much…and it’s worth it to have those ACTUAL open louvres rather than just bumps. Super pleased with these! This particular test piece is also the bed floor for the truck - drops in just like this: They should actually be the other way around if there were cooling anything…but they’re just for looks and because I had the dumb idea to try and make them work… You’ll have to peek inside the bed to actually see them anyway once the bed sides are on, but I’m pleased! Thanks for looking - more soon!
-
How to Apply Super Thin CA Glue?
OldNYJim replied to afx's topic in Model Building Questions and Answers
I like these - they're pretty much single-use because the glue ruins the tip soon as it dries, but I like how neatly and cleanly you can apply glue with them: https://www.amazon.com/gp/product/B074KVWRVL/ref=ppx_yo_dt_b_asin_title_o05_s00?ie=UTF8&th=1 And, because I can't bring myself to throw anything useful away, I've been snipping the tip off and saving that useful-looking plastic for future scratchbuilding projects! -
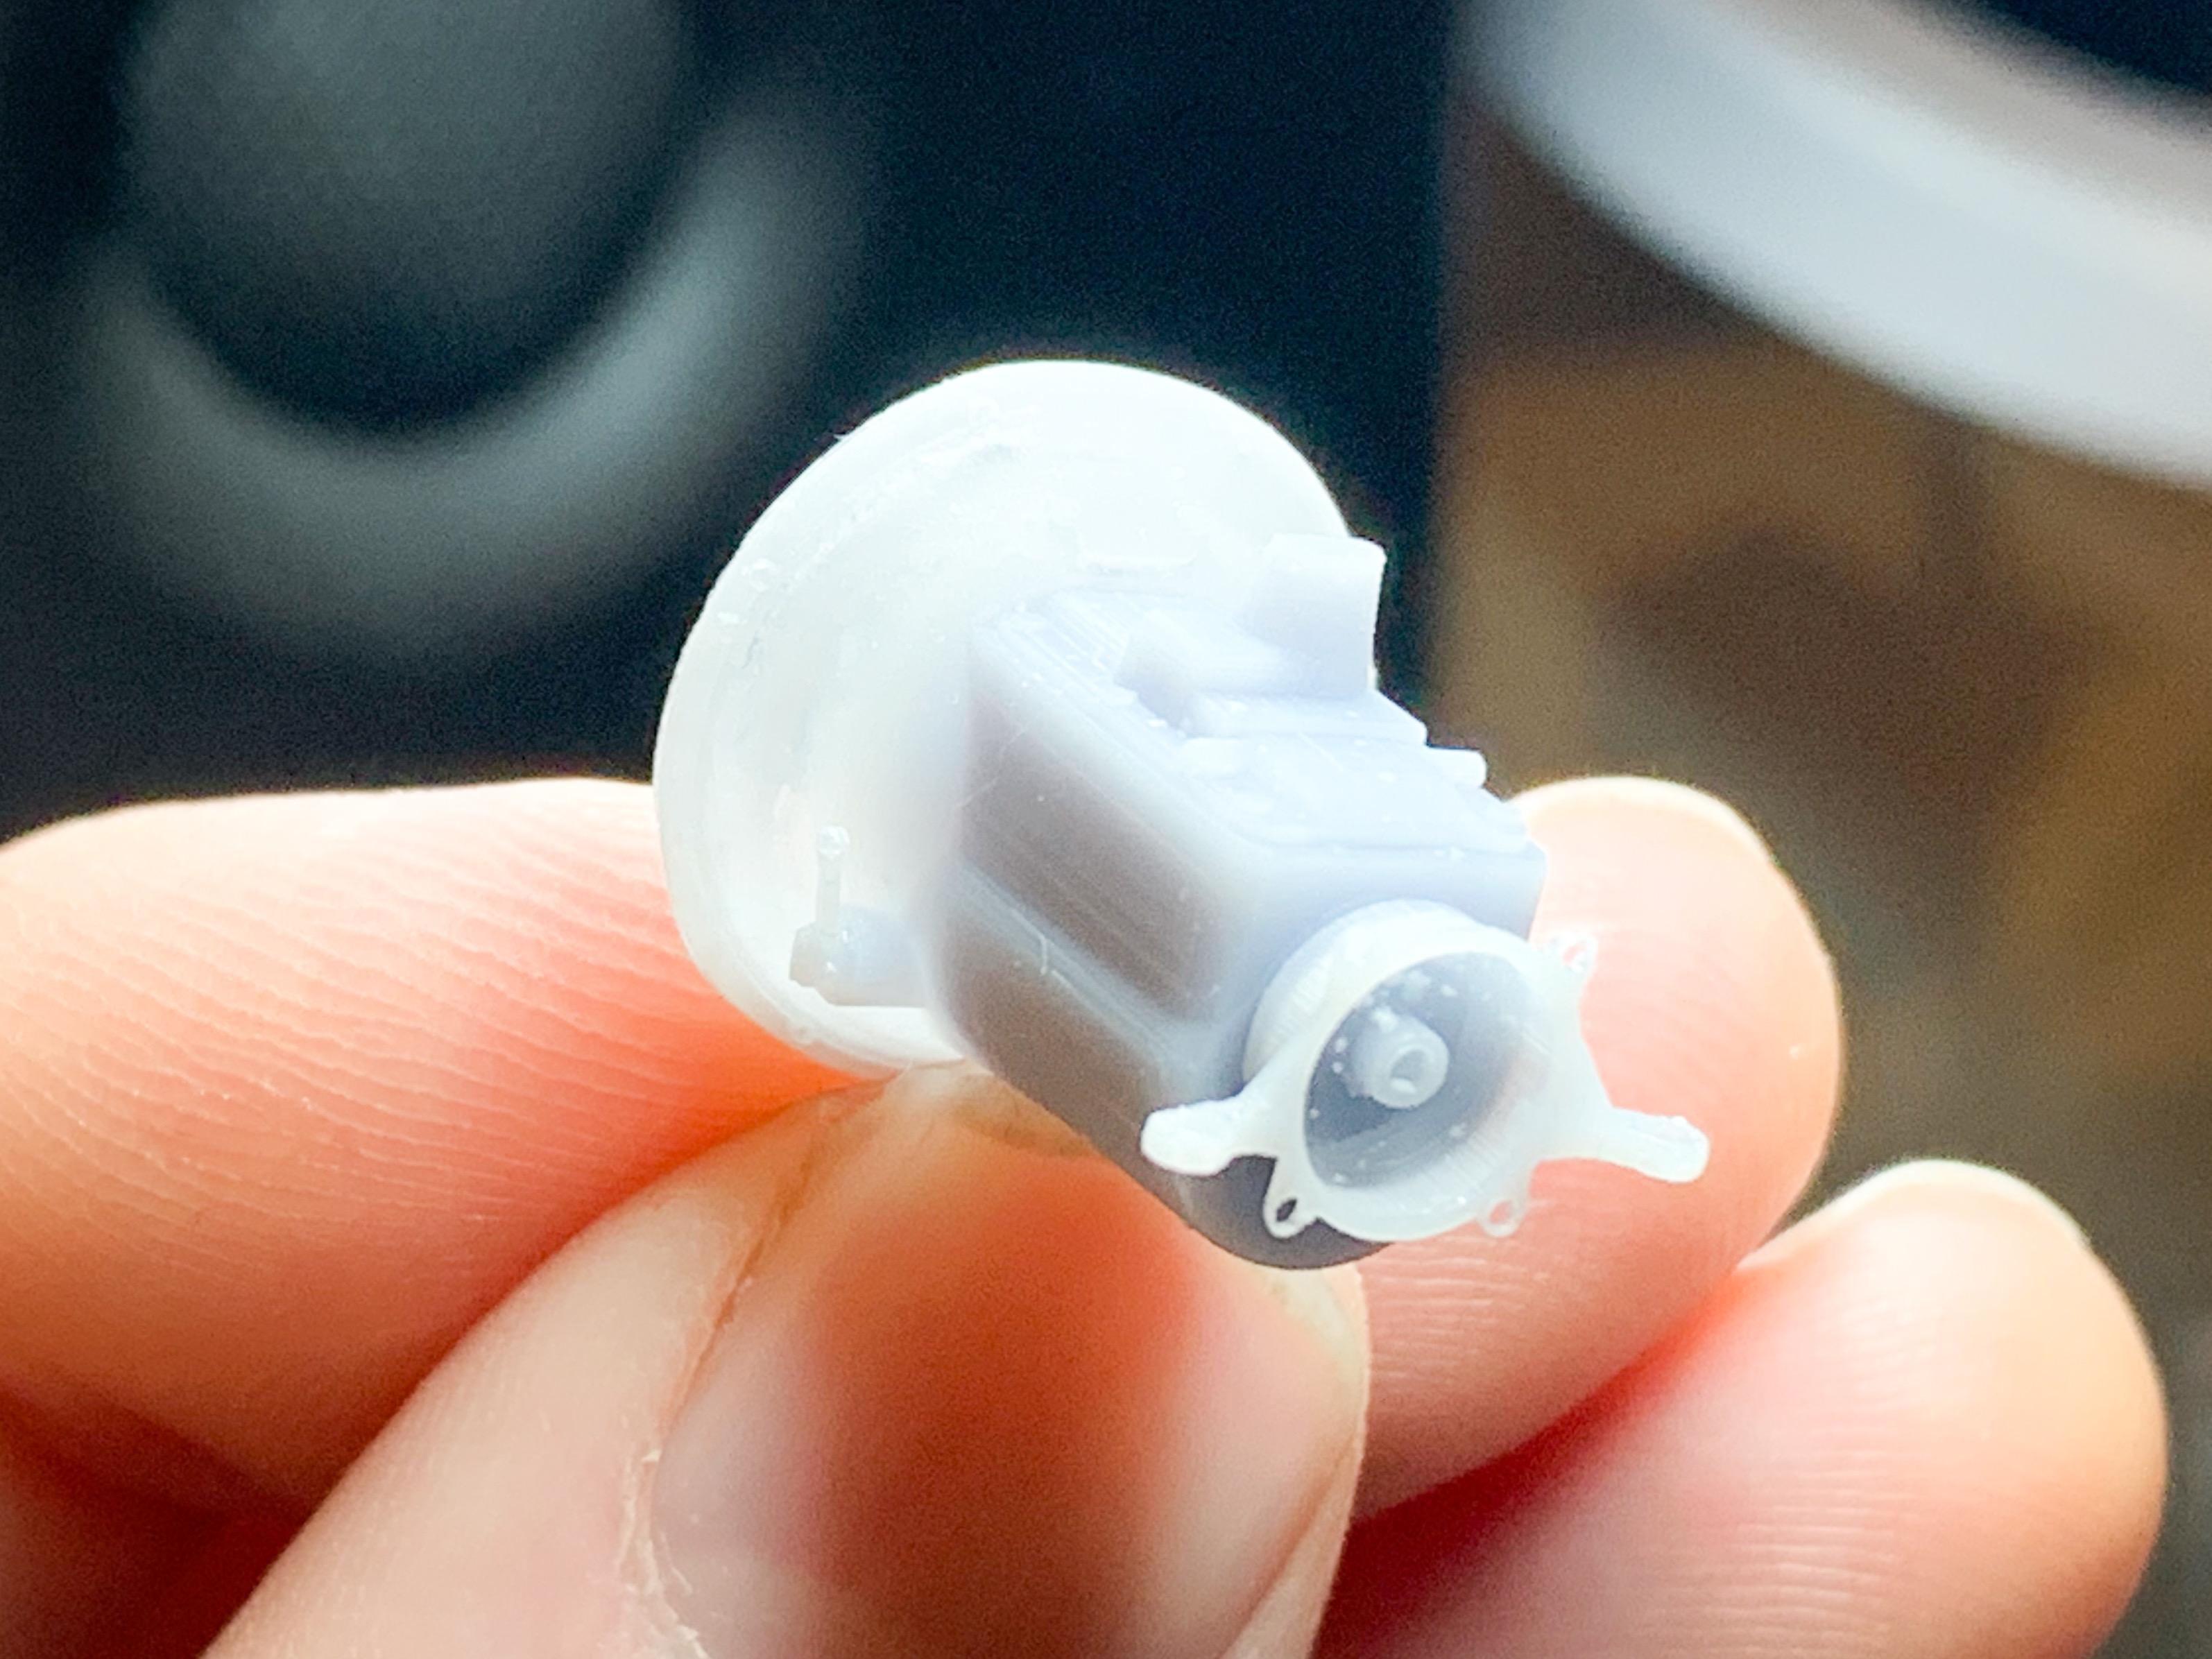
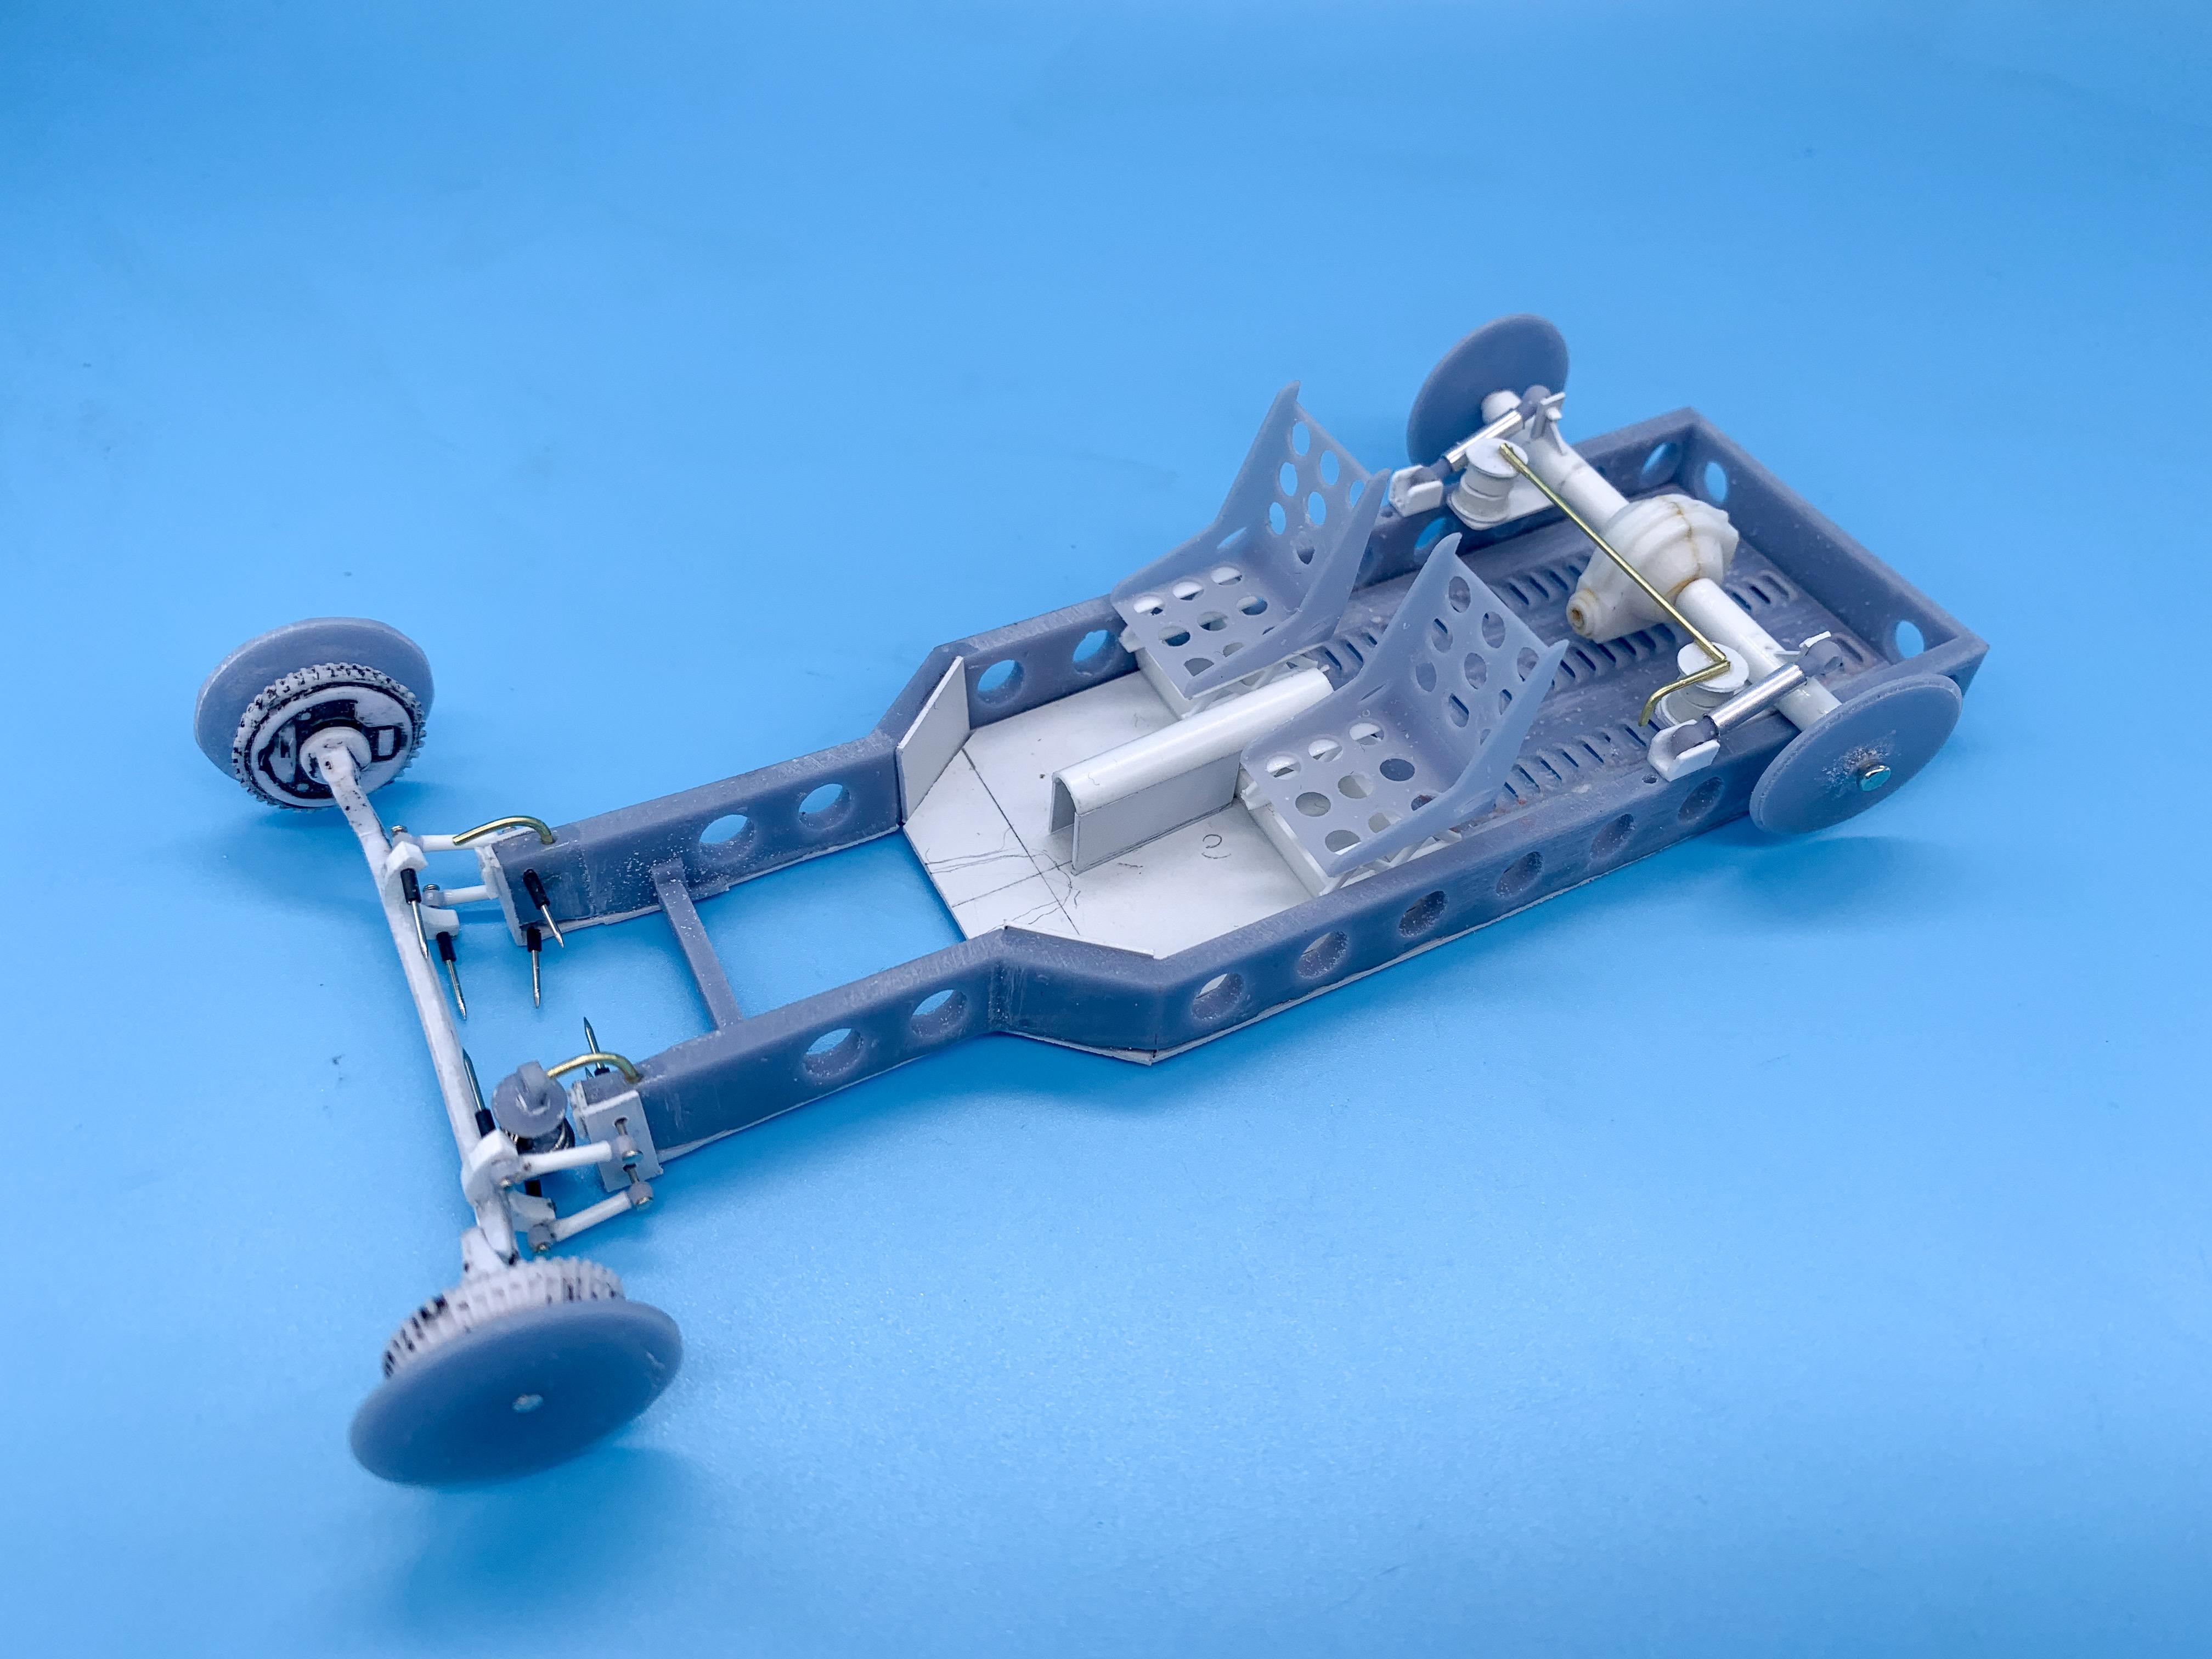
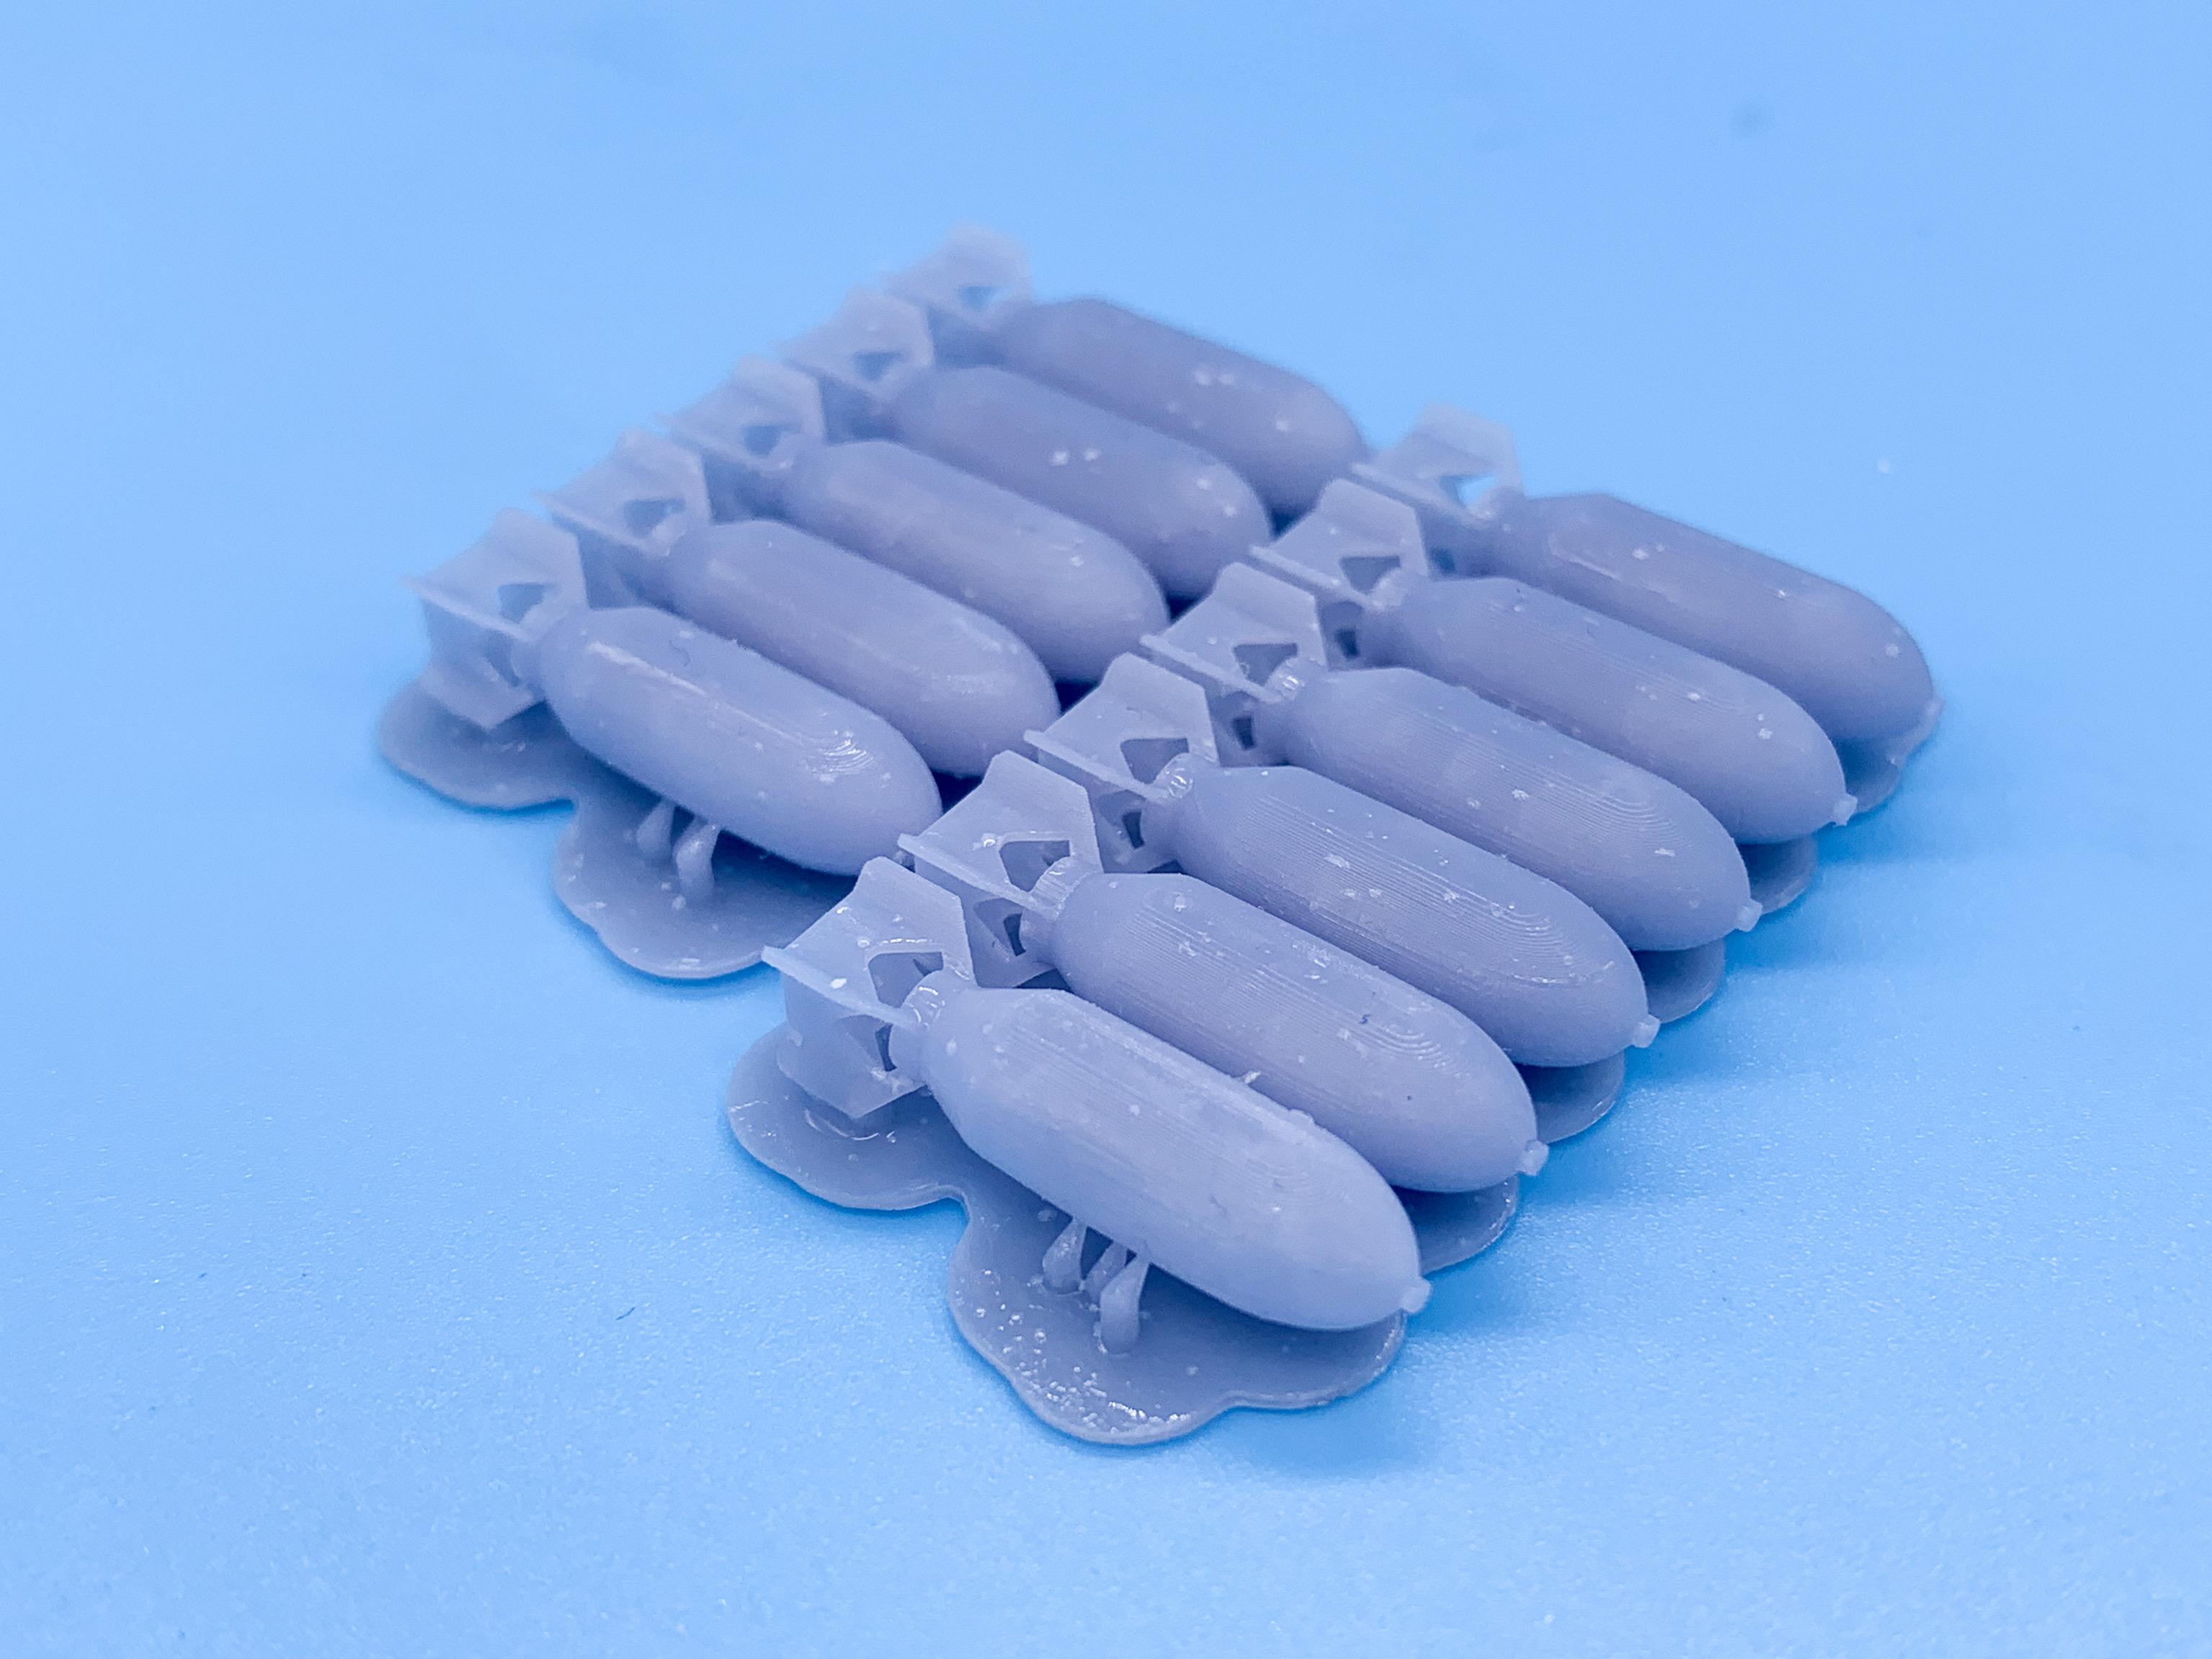
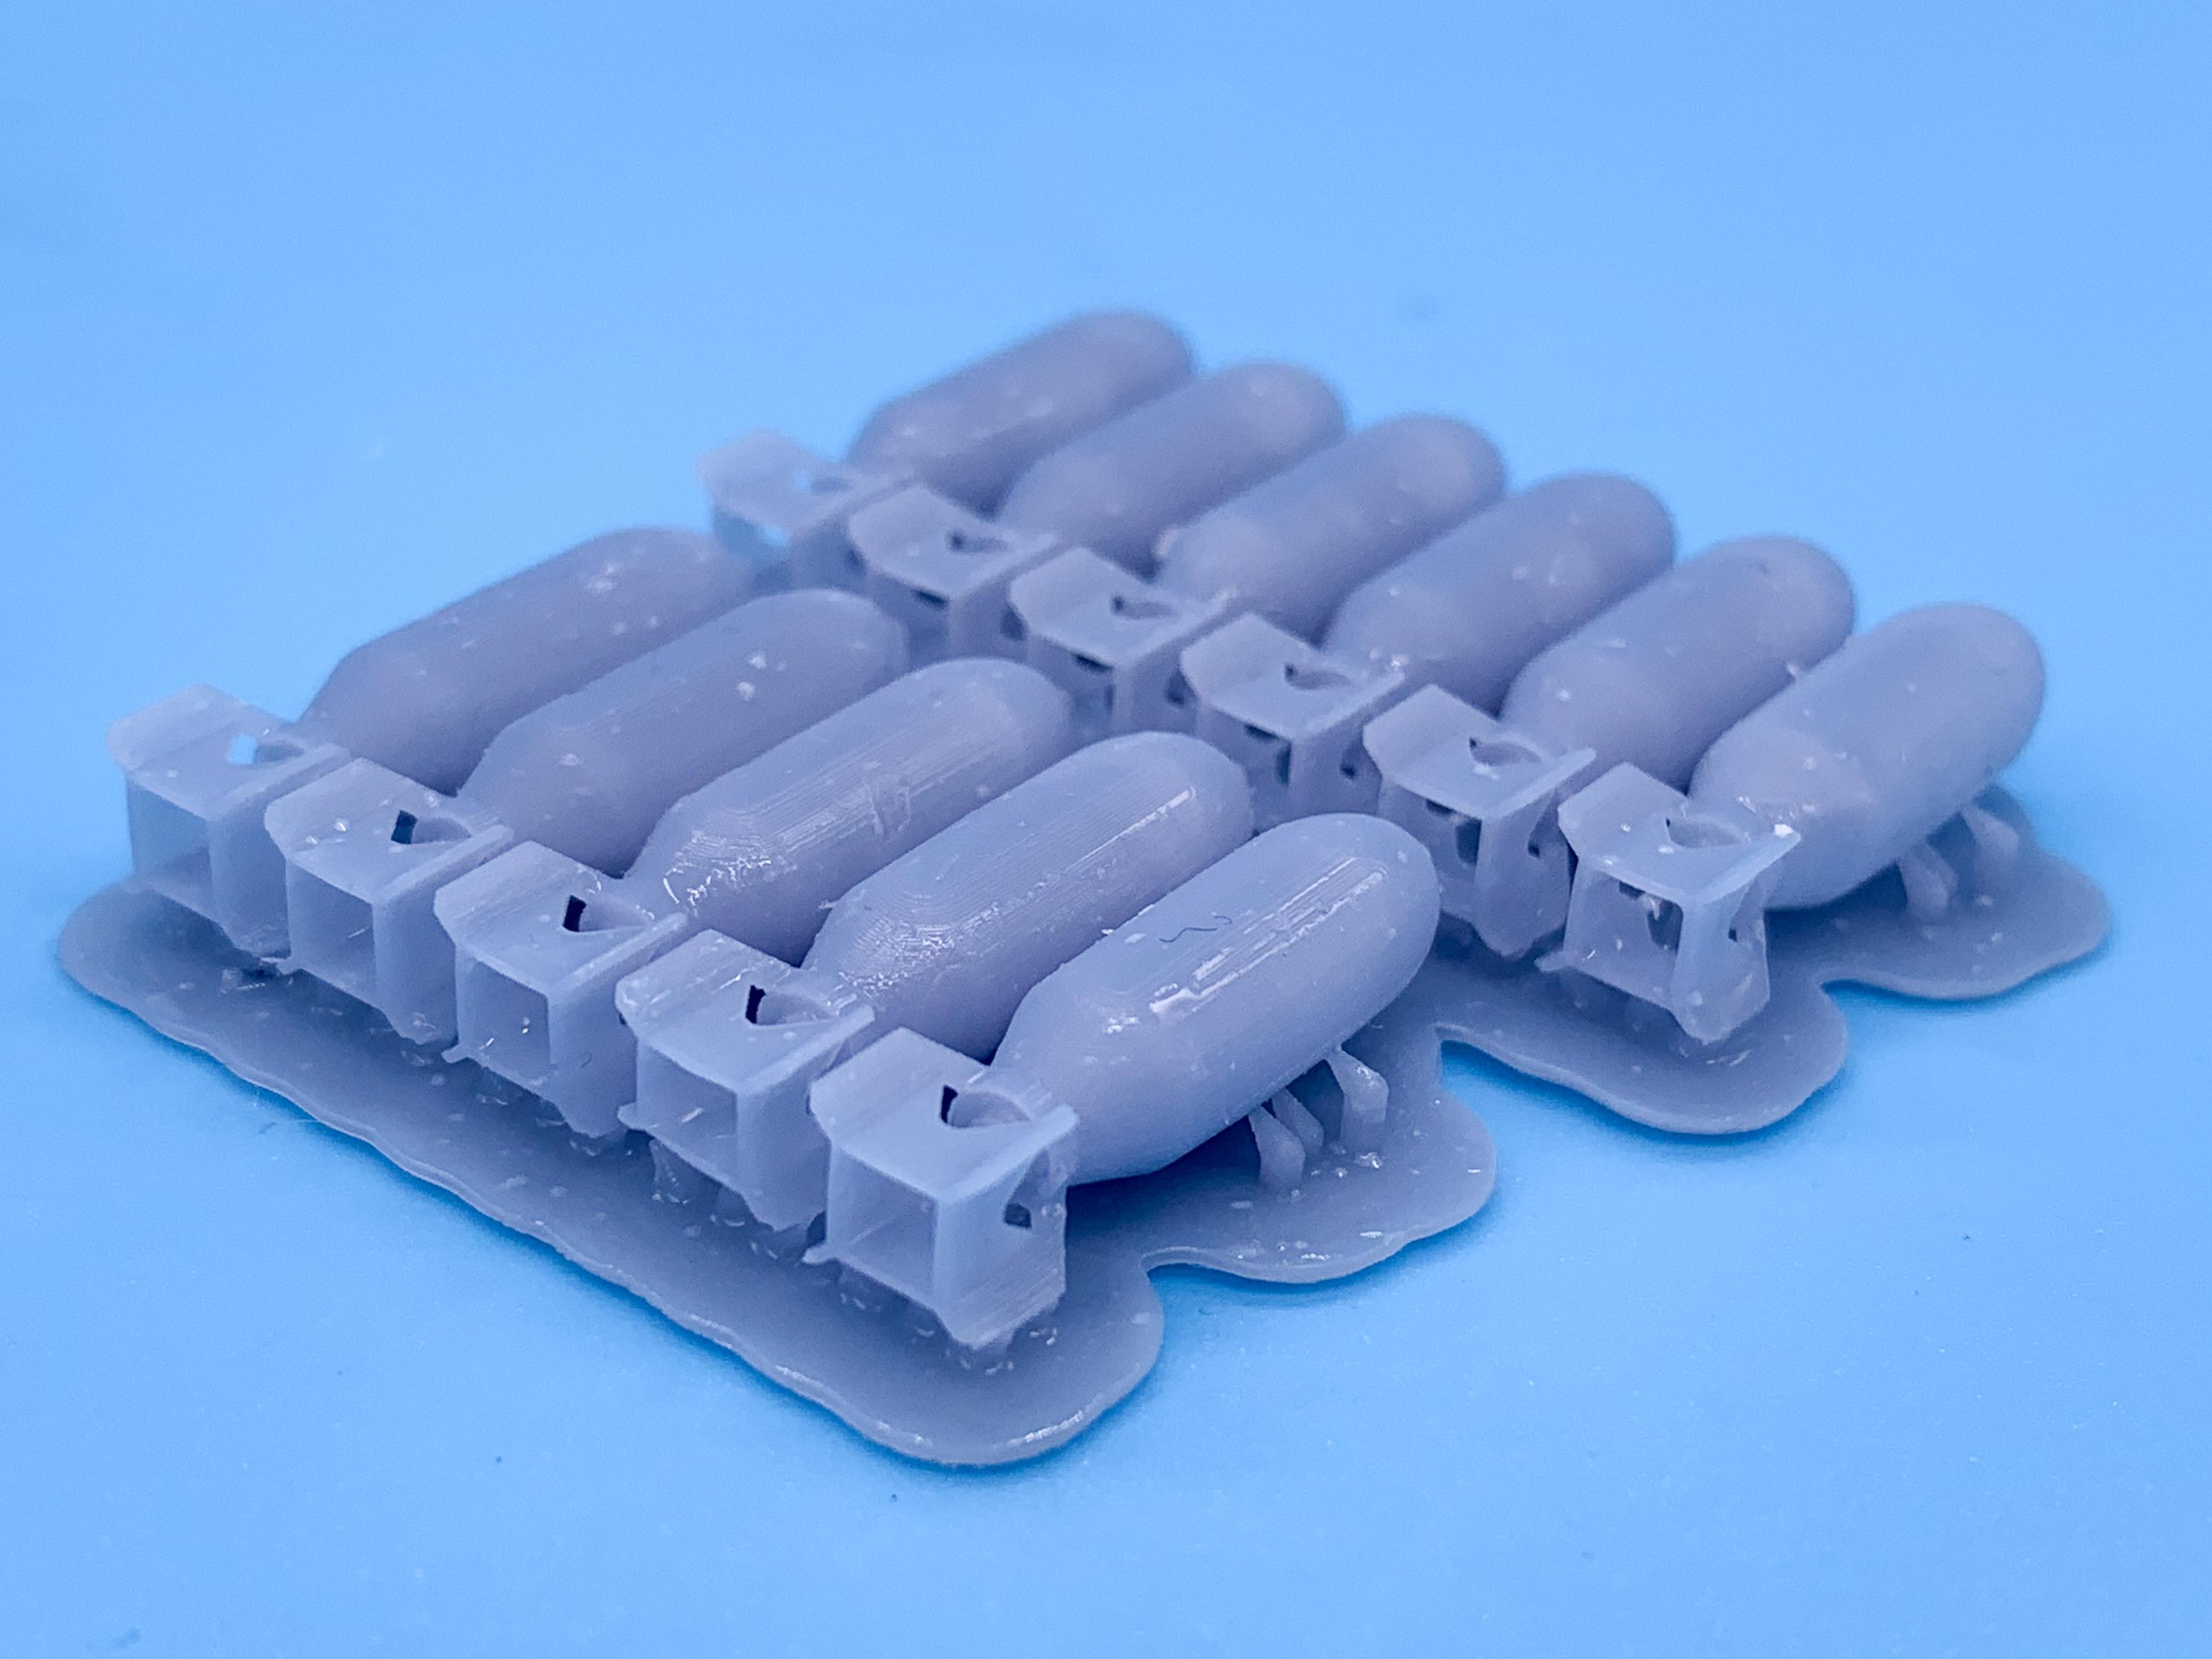
Thanks for all the nice comments everybody! @bisc63 - that’s kinda the plan, or at least have the body not TOTALLY covering those holes ? @Spex84 - tires are hard! It’s finding a spot for the supports without ruining the tread. I’m still experimenting tho… A little more progress this weekend… Got the front end mostly figured out (although need to make steering linkages) And, as you can see, got that weird funky Ed Roth rear suspension design mostly mocked up too; the Mysterion has a little air shock that looks like it damps and allows for variable rear ride height (maybe?) so I’ll machine a little part that’s similar for mine too, which will attach to that rod that’s just hanging out there in space right now: Not sure how well this setup would work in real life…good thing I won’t ever have to really drive it! I’d like to use an FE engine but the AMT kit parts aren’t amazing - but I do like that trans, whatever it is (any ideas anyone?). Considering slicing that off and mating it to a Revell Deuce FE instead and backdating that somewhat to look more like a 390 Thunderbird mill…but in the meantime, I’m trying to figure out a ‘pre-drilled’ printed distributor design that I can use instead of drilling out kit parts. Not quite there yet, but got a simpler design with a single hole to print ok at least: Still need to experiment with that some more. Also on my mind: gas tanks. I want something with a decent size, and something more interesting than just a fuel cell or a Moon tank…maybe something made out of a bomb? Printed these in 1:72 scale so they’re WAY too small, but the printer handled those little fins on the back just fine, which is reassuring… More soon, soon as I’ve figure out some more stuff! Thanks for looking!
-
I think he's a Star War
-
I haven't played with this stuff, but is it a case where you have to change the exposure time settings and whatnot to get it to print correctly? I'm guessing all these resins have slightly different specs and different working processes. I've found with the AnyCubic basic gray resin that doubling the exposure time on the first few layers (the rafts, the bottom of the supports etc) has helped a LOT in getting parts to actually stick to the plate nicely and print properly
-
I’ve used him too - picked up some nice artillery wheels. He has a bunch of nice stuff, ships fast, good to deal with ??
-
He’s pretty active on YouTube again right now - doing some cool stuff
-
What a beautiful build - I’d be proud if that was mine! Great job! Super clean, and the color is GREAT!
-
Hairspray weathering
OldNYJim replied to NWRMorpheus's topic in Model Building Questions and Answers
Your base layer of rust looks great! Artist’s pastels are a great addition to a weathered paintjob too, and I really like the Vallejo rust streak paint for patches like you can see on the front quarter of the 1:1 that you posted… This should be a cool project!